

A simple river scene, first time attempt with charcoal.

A simple river scene, first time attempt with charcoal.
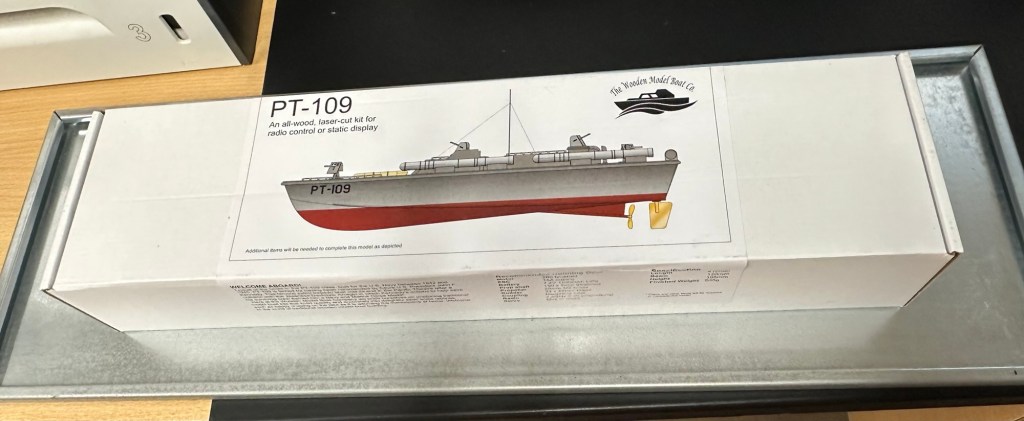
This years birthday, I’d hinted that I wanted to build an RC model boat from scratch, and that’s what I got. A good friend of my wife and I came up trumps and brought me this nice little wooden boat starter kit. I’m fairly experienced at building balsa gliders and planes from plans and have done quite a few. I’ve never ventured into boats though so this is a first for me. It all stems from going on holiday to Norfolk, where we normally stay in a place called Gorleston where there is a nice boating pond that two of my brother in laws sail prebuilt trawlers that they have brought, i’ve always said that I’d join them on one of our trips, jokingly saying I’d get a submarine or battleship to blow them out of the water. However i wouldn’t do that, and this is the first stage of venturing into the world of model boats. I’ve now just got to build it.

The boat that i have chosen is made by the wooden model boat company distributed in the Uk by JPerkins models. It is a PT109 torpedo boat modelled on the one that John F Kennedy sailed in, in the Pacific theatre after a collision with the Japanese Destroyer Amagiri in which Kennedy’s actions to help save his surviving crew earned him a Navy and Marine Corps Medal. I’m going to put my own touch on the paint scheme though and not go with the traditional all green or grey. I’m going to mix it up a little by highlighting and brightening up the look of the boat a bit.
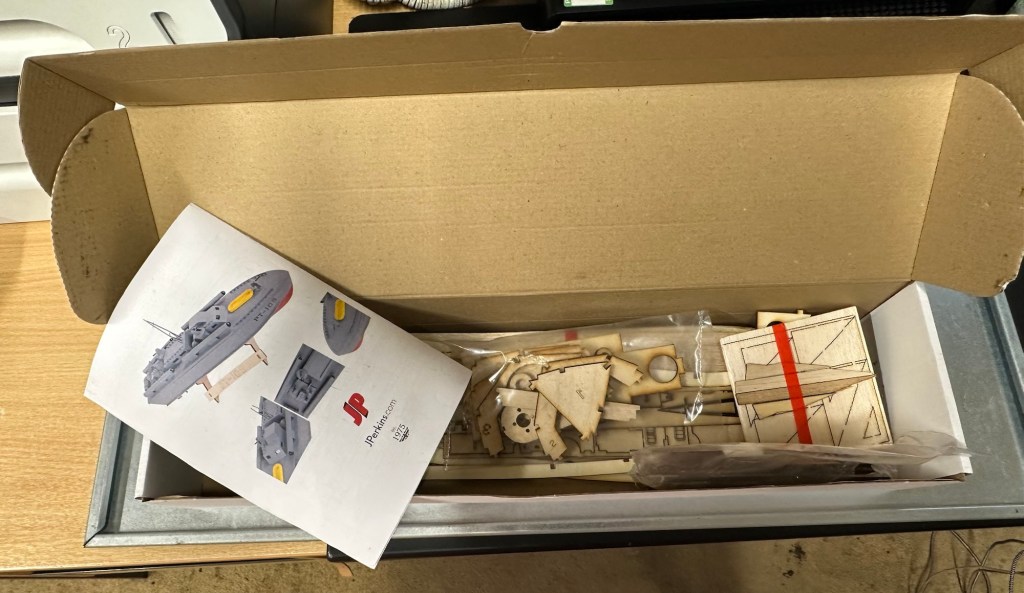


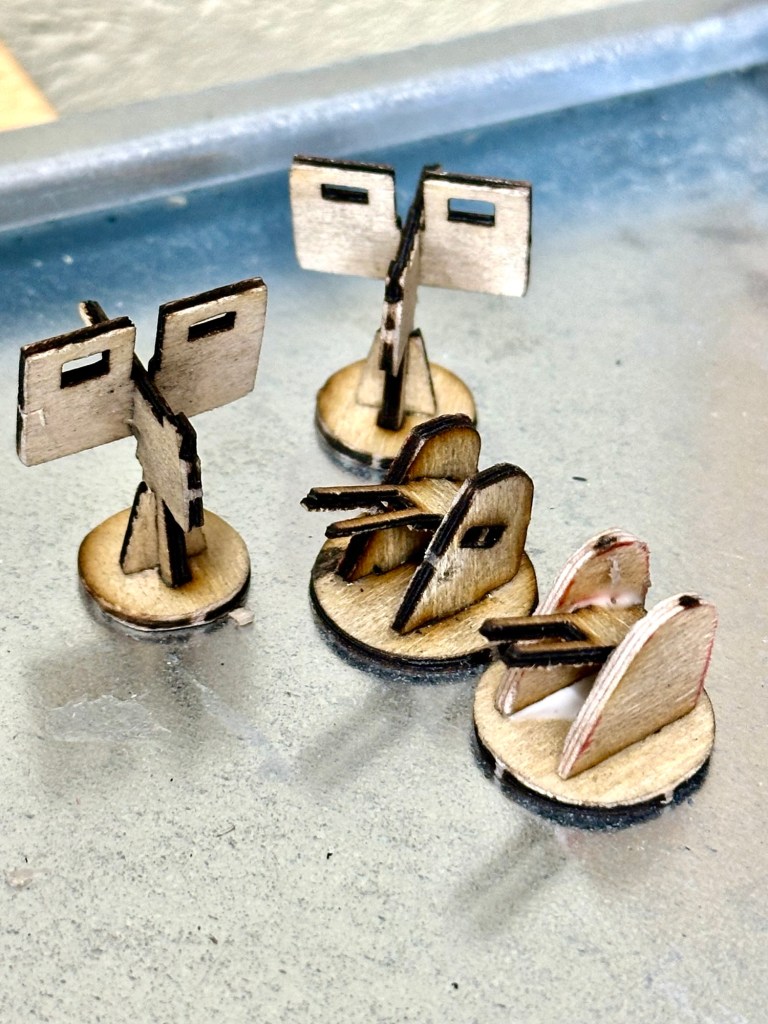
These kits have laser etched parts, its my first experience with them and my only gripe so far is that some of the parts are so small and delicate that this process cremates the object because of its small size. I have had to make some of my own parts for this kit as in some cases it’s just like trying to press out burnt wood from the etched parts. Not good in my honest opinion, and as this is a starter set it’s more than likely liable to put a beginner off of the hobby to be honest. Not everyone is able to easily replicate the missing/damaged parts.
Firstly you have to secure the deck frame to a flat surface using some double sided tape. This is so you can start building the hull frame and prevent warping. I use a small steel shelf for my base that can easily be moved around and stored between sessions.

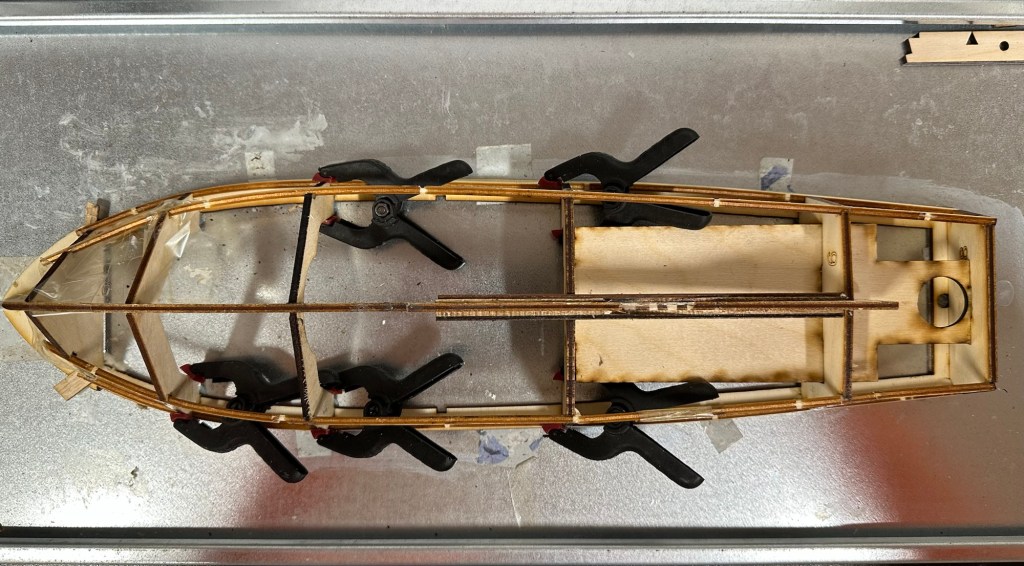
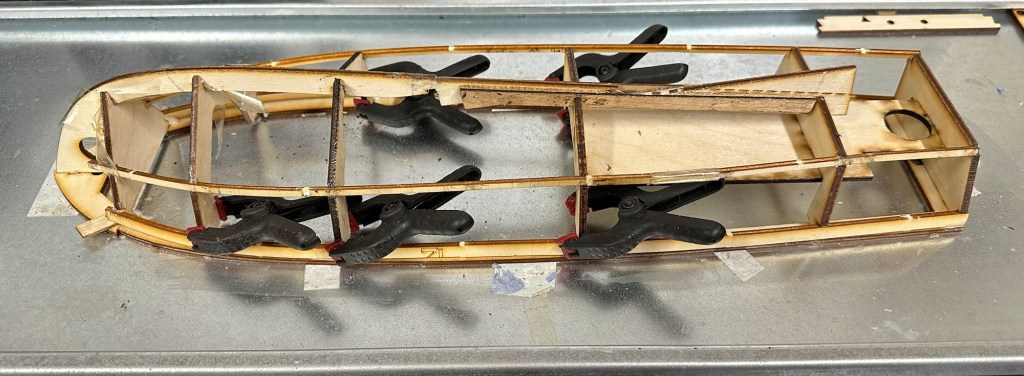
There is a lot of time between sessions where you just have to leave parts to dry, you can quite easily try to do so much and potentially ruin all the good work you have done. Patience really does have to be a big part of what you do in build these models, the old adage of measure twice, cut once needs to be used so mistakes are kept to a minimum. You can make tiny adjustments when in the finishing process but for the time being you need to adhere to instructions as much as possible. Check and double check and always dry fit prior to gluing in place.


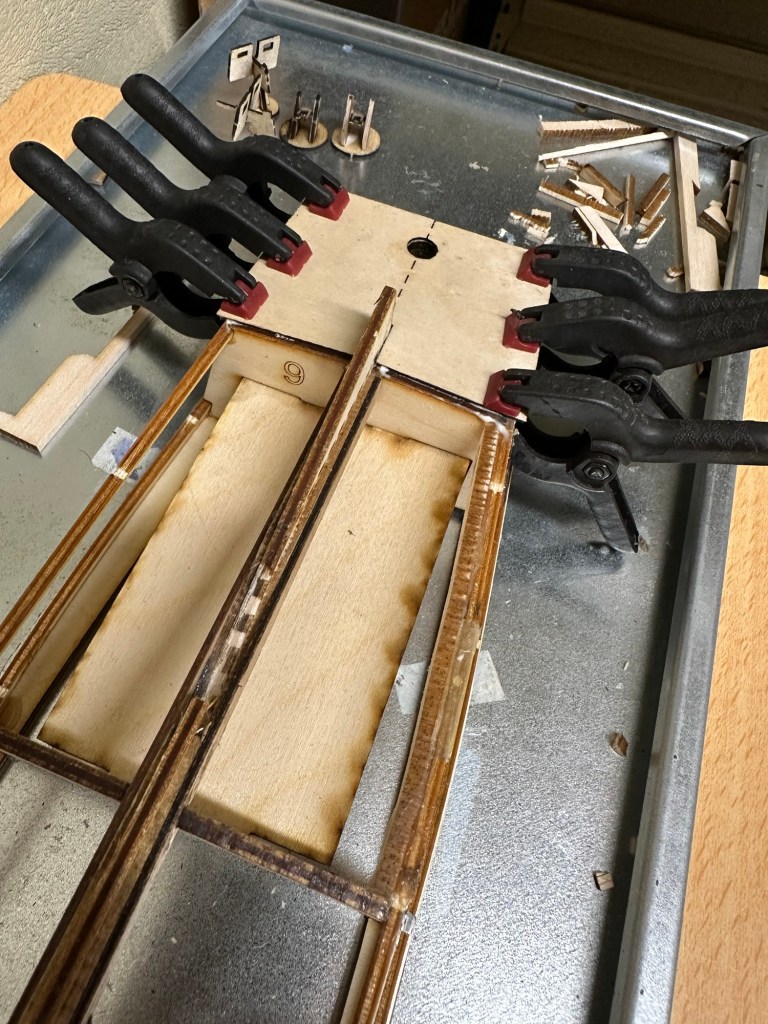
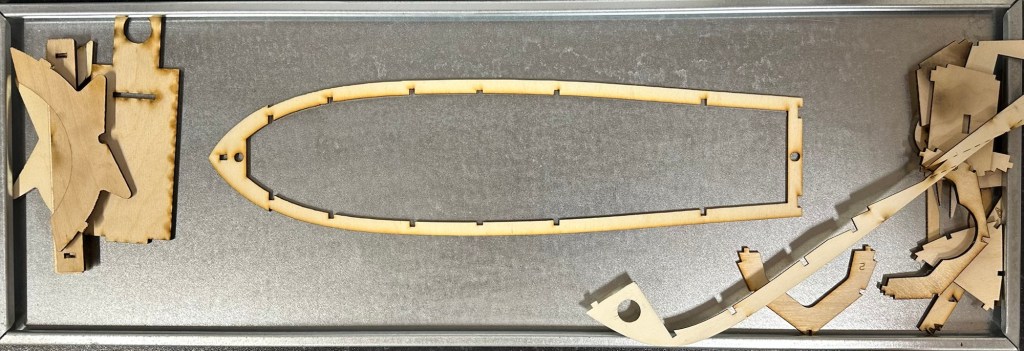
If you look at the picture below you will see how the laser etching burns really small parts. This doesn’t look good however they will look a lot better after they are sealed and painted, if I left all the parts like this the whole project would look as if it had been in a fire. I’ve had to build some of these parts from scratch as the kit itself had insufficient parts pre cut.
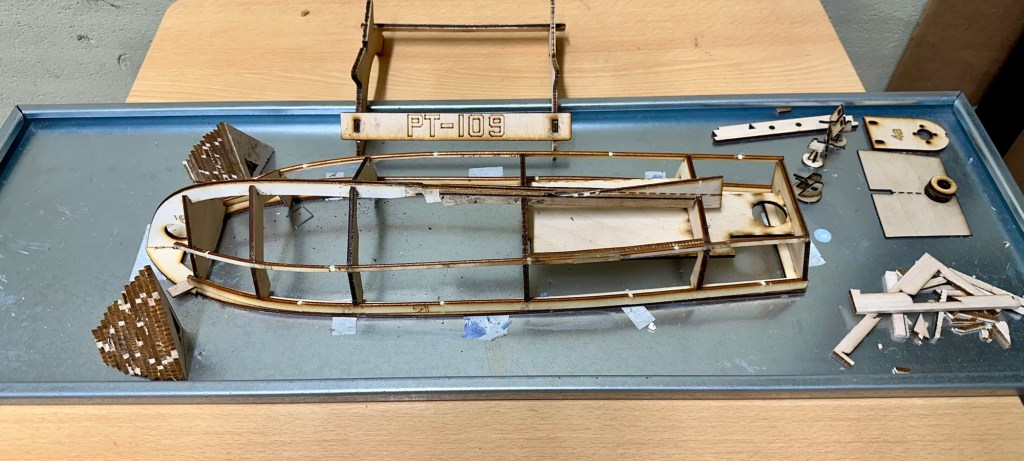
The hull framework is now complete, next stage is to get the outer skins on, the bow formers in place and then hand sand, fill and sand again until the whole hull is ready to be sealed. Again there are issues here with the kit as one of the hull skins is two times thicker than it should be, hence the amount of bending required to shape the hull is not achievable. I have brought this up with the supplier and within a few days I have had a new set of replacement hull skins sent free of charge. Their customer service has been superb and it is good to see that some companies do still try their utmost to keep their customers happy. I will now progress with completing the hull.

Below is a small video of the completed framework. It has probably taken about 8 hours in total to get to this stage (plus many more hours to allow glues to cure)
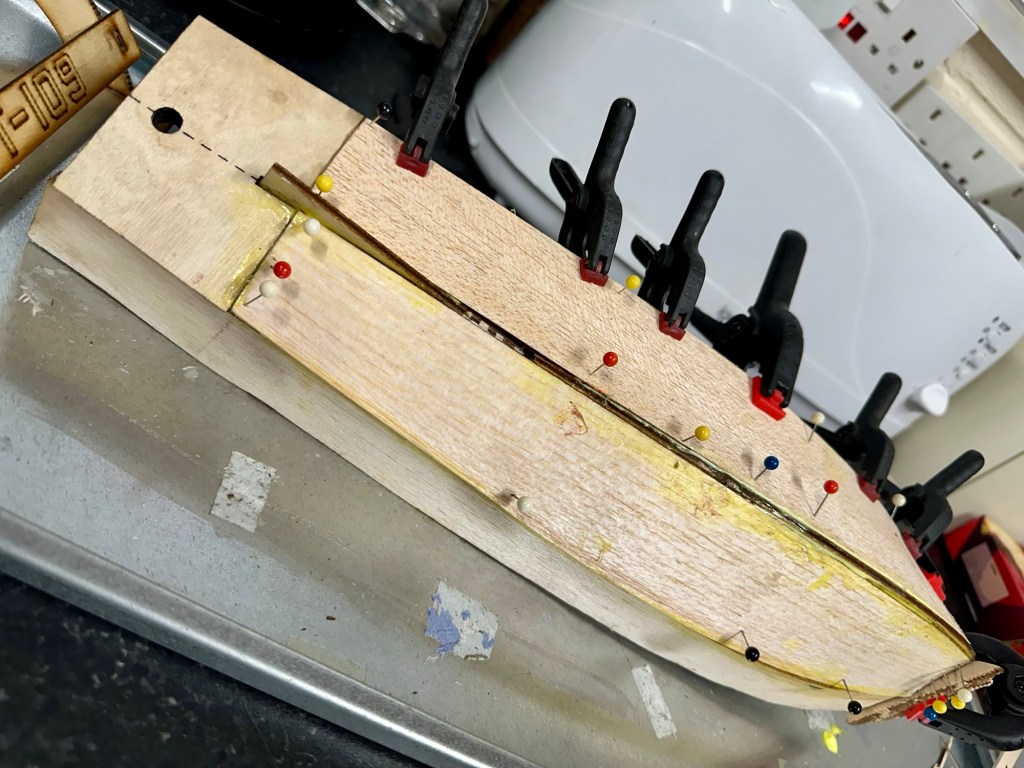
So tonight over a period of about 8 hrs I’ve managed to get the 4 balsa skins that form the hull into place. I’ve had to do a bit of re shaping and minor alterations, and the final bend of the skin would have bust it under the strain if I didn’t decide to wet it first. Wetting balsa allows the inside edge of the sheet to bend in, making these big bends in the hull shape possible. That as well as plenty of pins and clamps with epoxy resin ensures the skin stays where it is put. I left about an hour between each skin placement before moving on to the next one.


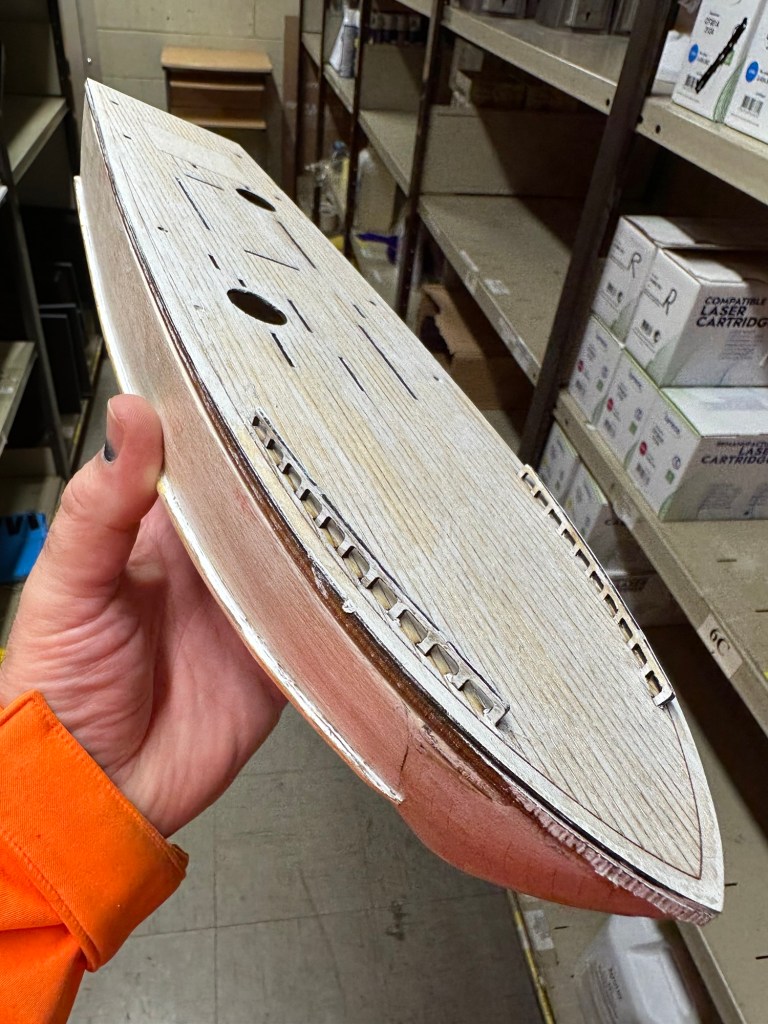
Here is the hull, assembled ready for sanding filling and all the other fun stuff required to make it look good and waterproof.
Tonight I have given the first heavy sanding with a course paper. This has really brought the hull up lovely. The former’s that were put in place have now been sanded to form a good bow profile. See photos below.


I now have to do a small bit of filling with balsa filler and then I will sand with a finer paper.

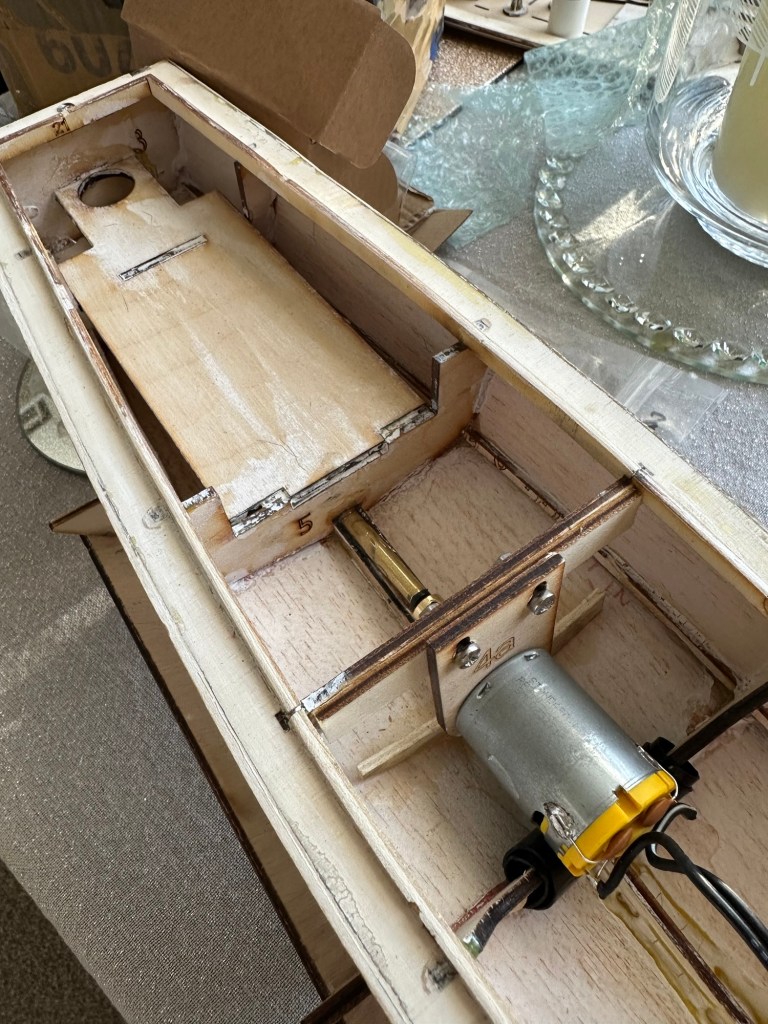
Once the final sanding has been done I can then look at sealing the exposed wood and then begin the waterproofing and painting. The installation of the radio gear will go in place towards the end of the build. In the meantime I just have to build the superstructure on to the top deck. This will require some small bits to be painted before being put into place.
I’ve built the superstructure and that has been set aside to cure. There will be a lot of sanding and painting needed. I have attached the deck now and all those items will attach to it, and i must say it’s looking quite good.


I’ve now detached the deck and gone around with some balsa filler and hopefully tomorrow once it’s dry I can give it a sand with some fine paper and then I can look at putting on a coat or three of sanding sealer.


I’ve tonight managed to get coats one and two of the sanding sealer applied with sanding after each coat with a fine sandpaper. The torpedo tubes have been assembled along with other items and we are now very close to getting the painting started. However first I will give a final sand to the structure to see if it is ready for the primer. If not it will mean applying some balsa filler and applying coat 3. There really is no rush. I need to now get the prop tube in place and permanently positioned prior to any painting. I am considering a number of different paint combinations at this stage, but they are changing on a daily basis. I wonder what colours I will go with?

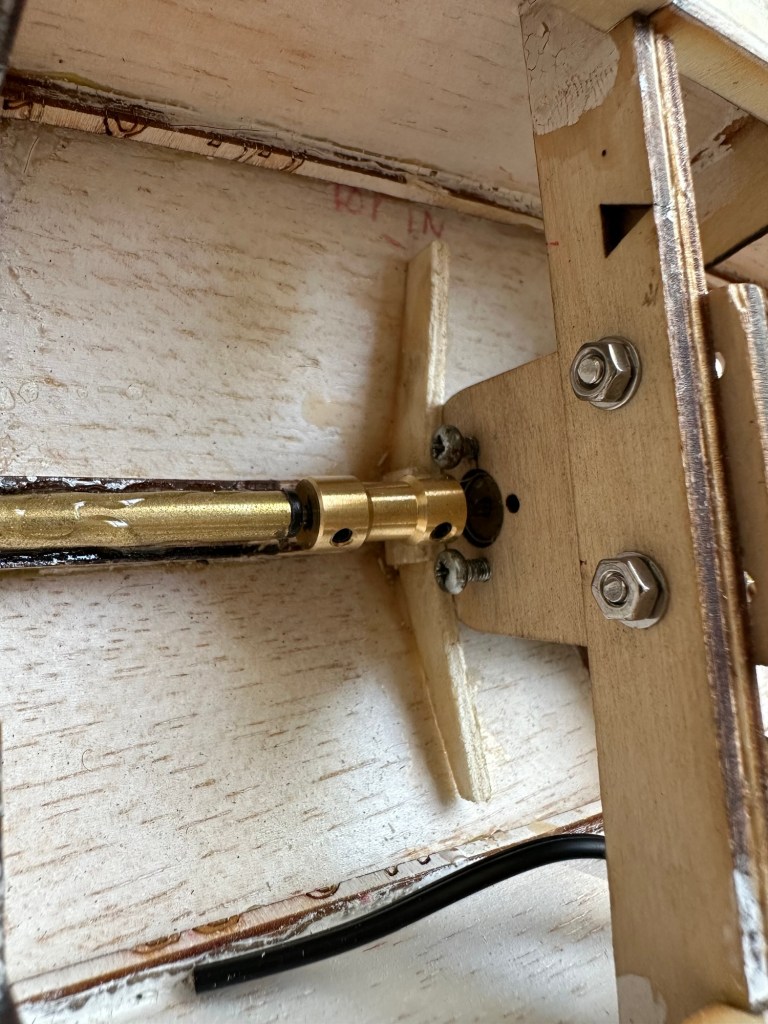
I’ve done the all the sanding and I’m now happy to commence the undercoat of the hull. I’ve fitted and removed the rudder and engine to test they fit ok, the boat is now bare and ready to paint. I’m going to individually paint the guns and superstructure before fixing to the deck. I might paint the deck with a dark varnish, I haven’t quite decided yet.
Part 2 of this post will cover the painting of the boat. Coming sometime in Feb 2025.
This last week I have been away at a lovely location in Norfolk enjoying a few days away with the family.
There was an activity taking place that was an introduction to pottery, and here they were going to teach a technique that has been around for millenniums – Pinch pottery. I did pottery at school and was ok with it but I never made anything to write home about.
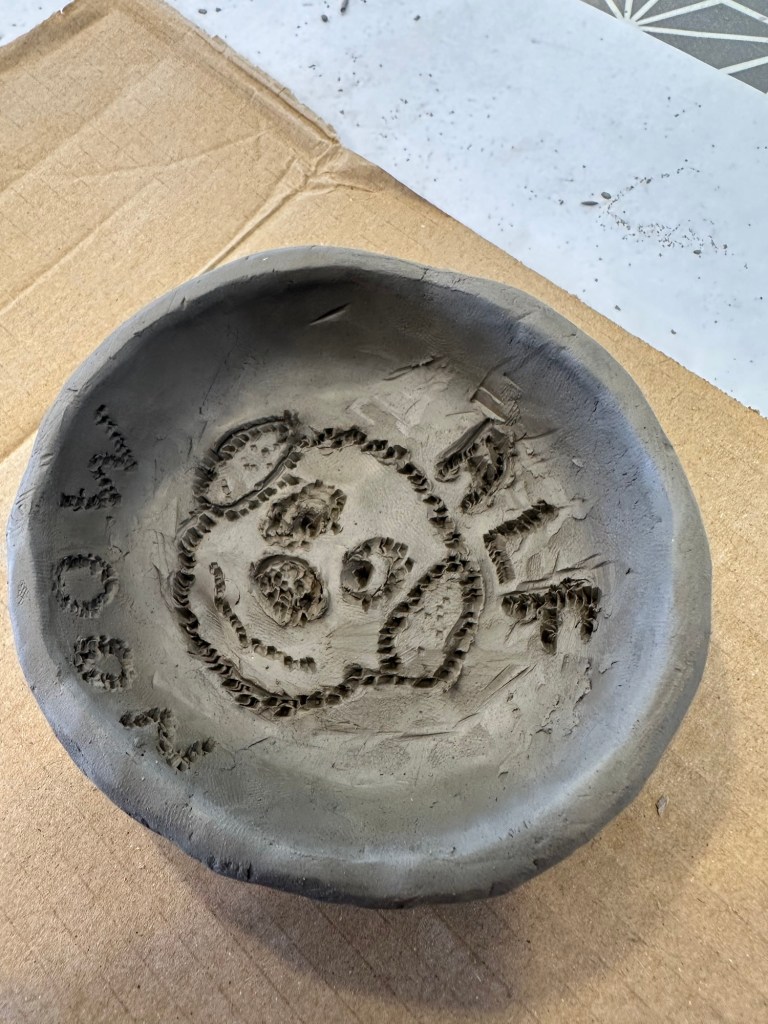
To be totally honest I had no idea as to what I was going to do, but everything I’m doing lately seems to be in memory of our little dog who passed away in August of this year. Still very raw, I think of him a lot, and I’ve made this little pot for him. Yep it’s crap but it’s my crap, it’s a reminder of good times for me, a cartoon representation of him and on the rear of it I’ve signed it and stated where I made it.
It’s my first attempt in about 45 yrs and everyone has to start somewhere. I doubt I will take it up as a hobby at home but I enjoyed it, and for a small period of time I was productive, something I have been lacking in of late. It was most therapeutic.


It’s now home, and in the next few weeks I will paint and seal it and hopefully have a nicely presented little keepsake. You can see the finished item here: Pinch Pottery Pt:2
I love trying new things, I loved doing this and who knows I may book a class and look at doing more in the future, just not at home. The missus would kill me 😂
In many ways and forms, no doubt about it, the Covid lockdown had people looking for other things to do for numerous reasons, for me it was to preserve my sanity.
I always enjoyed painting, however I was unsure of just what I wanted to use for subject matter, that’s when I looked for local painting groups in my area and stumbled across a lovely chap called Ray who offers tuition in the Bob Ross way of painting.
Ray states on his site that you can turn up at one of his classes and go home with a masterpiece and to be fair he’s not wrong, I have seen many attempts from his classes and all are of a very good standard.
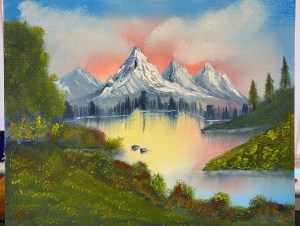
I enrolled on Tays “Golden glow” course in Jan 22 and the result is below, I’m happy with this to be fair. Not fantastic but hey it was my first attempt.


The pictures are in stages from start to completion. When I took this home the wife didn’t believe I’d painted it and even contacted Ray via Facebook to check with him… what a cheek 😂
I booked a second course “ Crimson tide” with Ray and the results are below, I wasn’t so pleased with this one but I know where I made the mistakes. That’s the point of learning you learn from your mistakes.
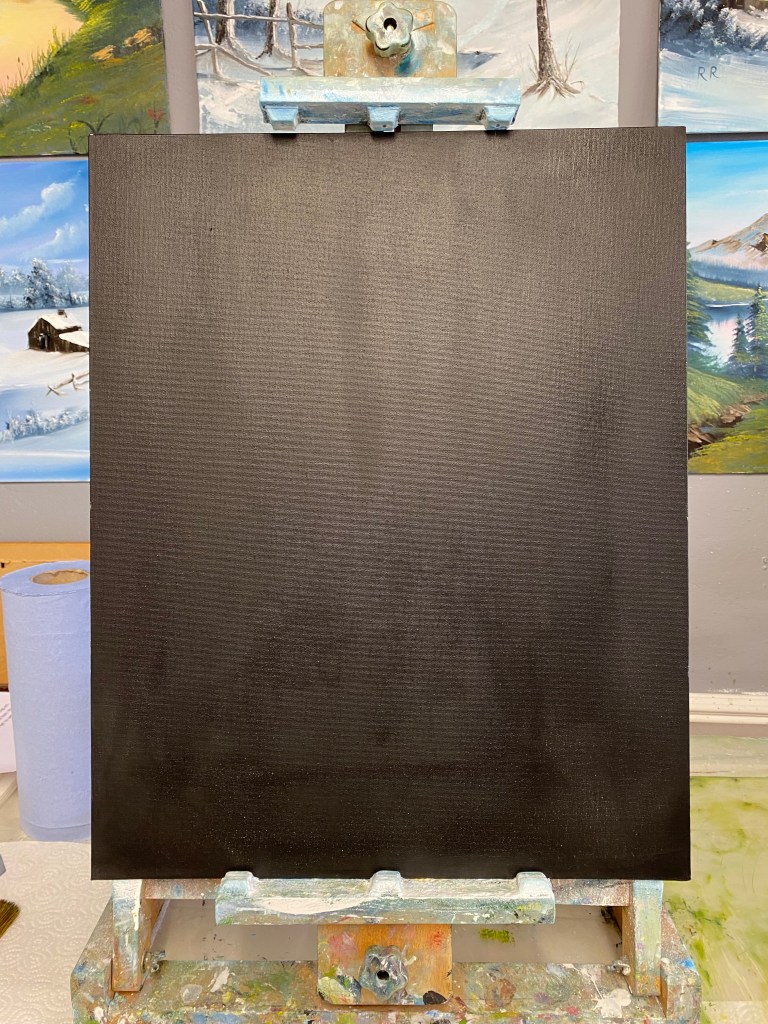


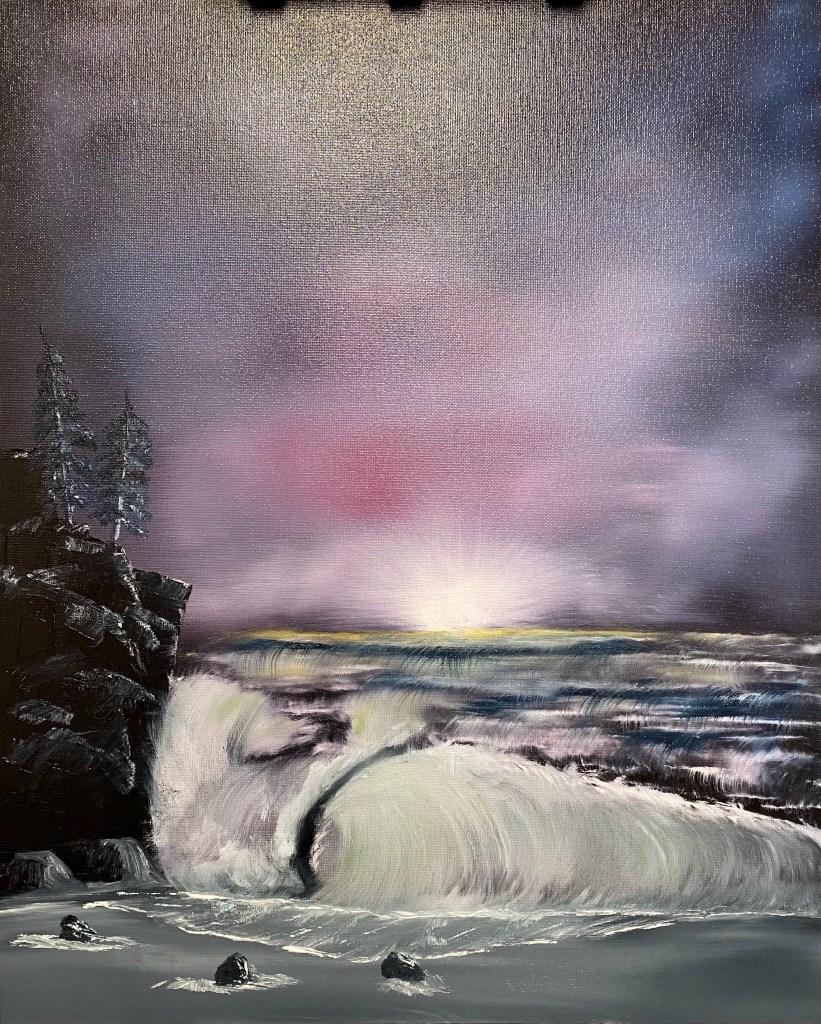
A session with Ray is about 6hrs and the peace and tranquility is fantastic, it’s quiet the tuition is second to none and doing your own thing is actively encouraged when adding your own touches to your painting. For me I have found the distraction I wanted and now book in a session with Ray when the world is starting to get on my nerves. I’m overdue a session and must get another one in soon….


You must be logged in to post a comment.