Today 16th June 2025 and this boat that I was gifted for my last Birthday back in Nov 2024, finally underwent proper trials on water, and thankfully after all the issues experienced during the building process it came through them with flying colours. There are a few little tweaks to do as a result of the maiden voyage, but this will only go towards making it a far better and less stressful task on future excursions. Boy was i nervy about today, what with all my family watching.
A nervous owner placing his boat on the lake…
And off we go…slowly
I only have the one battery for the boat so time was limited, and I probably managed about 15 minutes with it nutting about, before it stopped and had to be rescued by my Brother in laws boat that just happens to be a tug, a seaborne version of the RAC.
Luckily the seaborne version of the RAC were on hand
Anyway prior to that minor mishap the boat performed quite well, the motor is hellishly powerful and I thought it would go either of two ways. Either it would launch itself out of the water like a missile or it would go nose first into a deep dive towards the bottom of the lake. Luckily it did neither, however I did learn that turning at speed is liable to capsize the boat, so care needed to be taken when performing turns under power.
And she works…..
As usual I have learned a lot. It needs some minor tweaks such as a better centralisation of the radio gear in the hull, it needs some Baffles to be put in around the front deck where the hull and the superstructure join, to prevent water ingress at speed. The front does sit low in the water but at speed the contours on the hull do create lift, and this does work very well, so I am particularly happy with this.
A great day out, at the start of the holiday, and the fact I didn’t have to go wading to rescue a failed boat is also an added bonus. Really looking forward to showing the videos and pictures to the elderly friend who purchased this fantastic gift for me. They will be as pleased as punch, as they know about all the hard work and care that has gone into getting this project finished.
Thanks for following the journey with this project. As always it is very much appreciated.
How it looked in the last blog post prior to finishing
This post covers the finishing, that is the priming, painting and installation of the radio gear to complete the build of this wooden model boat.
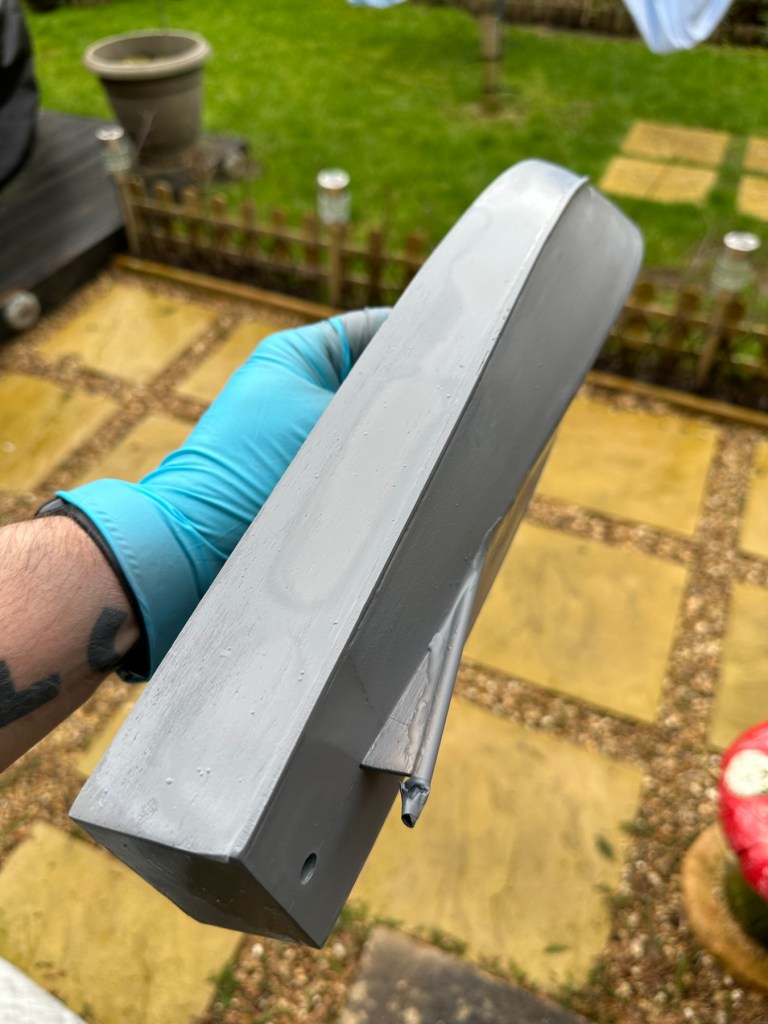
I have to give a couple of coats of high build primer to the hull and deck sections, and for this task I will be using Guild lane high build primer.
This will seal the already sand sealed wood and give it a good foundation for the final paint application. I will give a good initial coat, lightly sand and fill any imperfections and then give a final second coat prior to choosing the colour scheme I’d like for this boat.
Today I have given the first two coats of primer to the hull and deck, and I’ve primed all of the cabins and guns and torpedos in preparation of individually painting them. I need to do a light sand on the hull and I believe a third coat will then suffice.
All deck weapons primed and painted
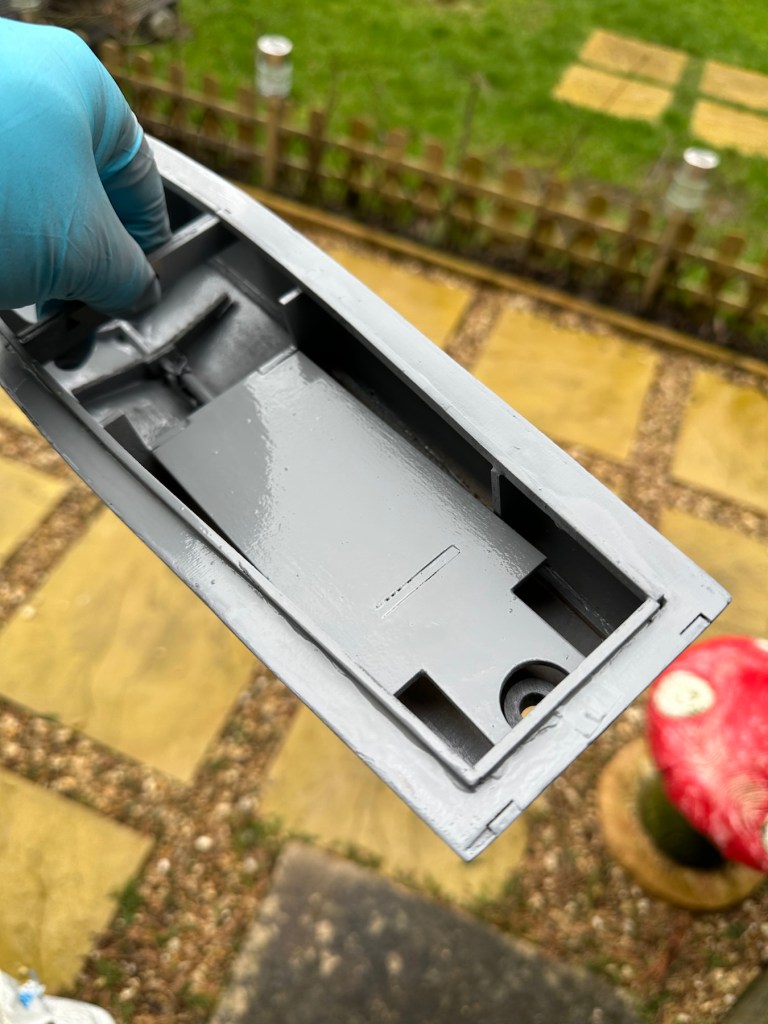
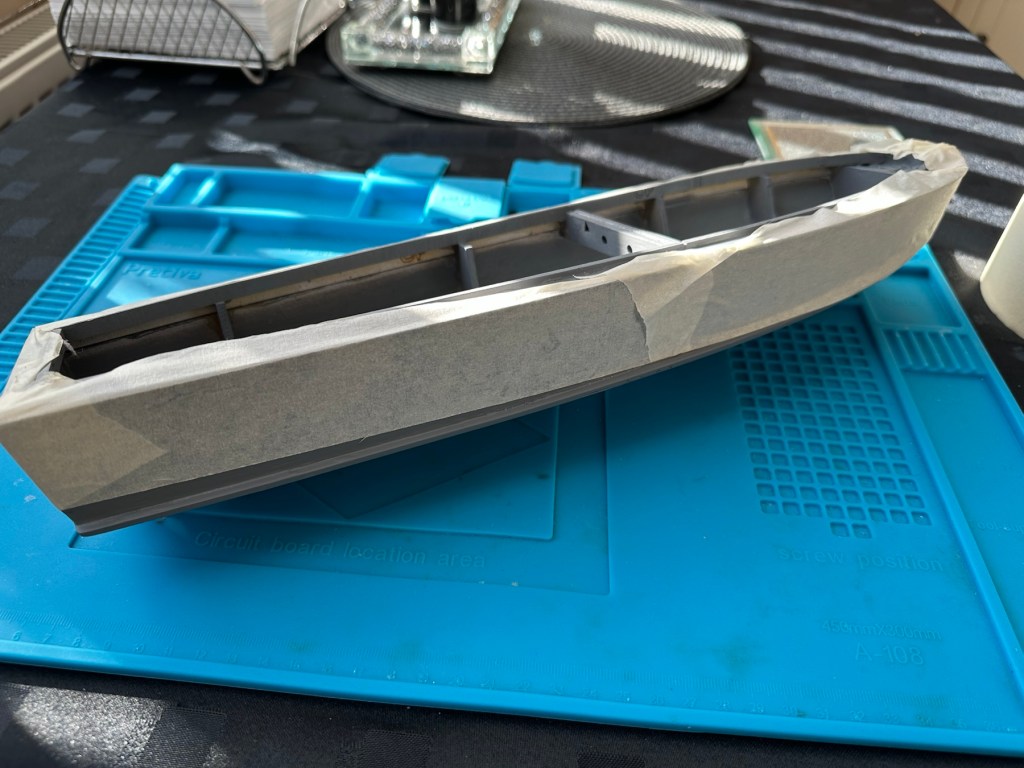
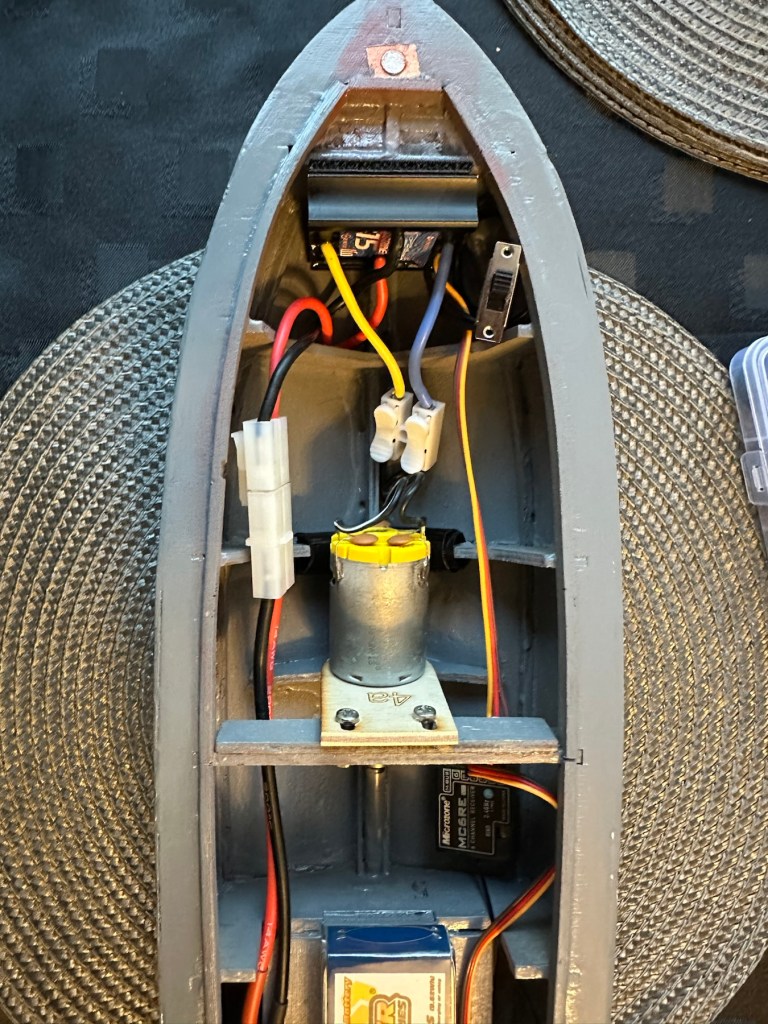
HullInner battery plateInside hull
I’ve given a light sanding to a couple of spots on the hull, I’ve filled a couple of tiny holes, sanded again then re sprayed the hull. I’m happy with how it looks at present. I’m not following a traditional paint scheme, so there will be no comparison to its original appearance. I’ve hand painted some of the deck fittings, put in the cabin windows and started to fix these items into place.
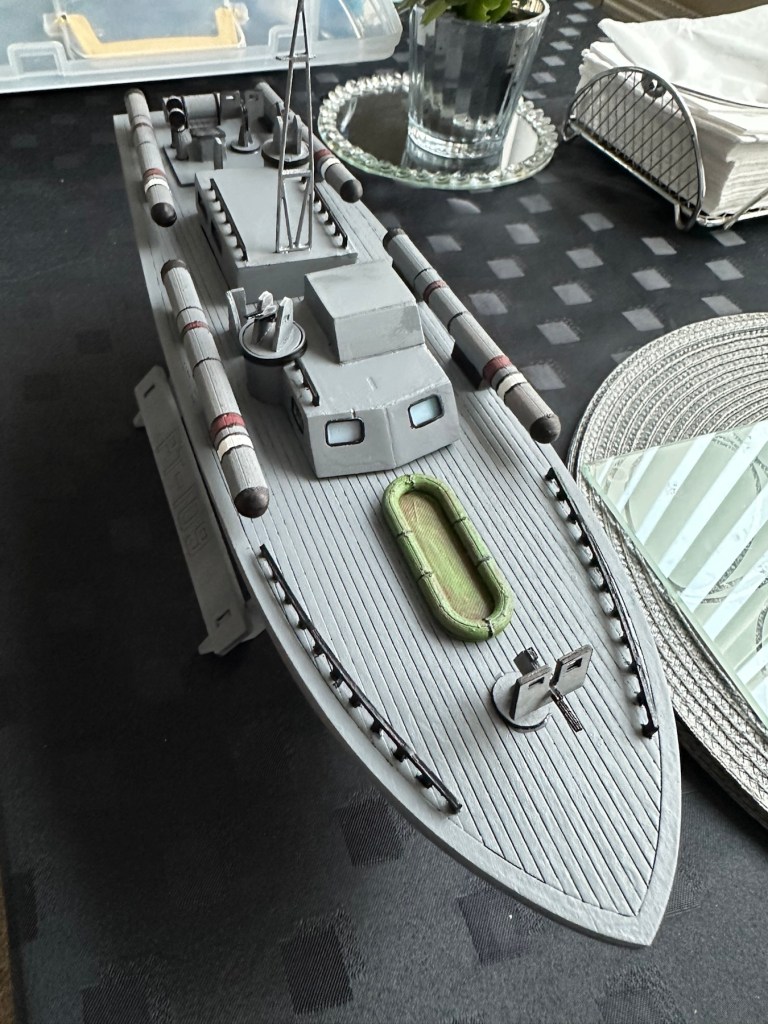
Hull painted deck fittings to be put in place. Deck dinghy painted and weathered Super structure addedDinghy placed Weaponry attached
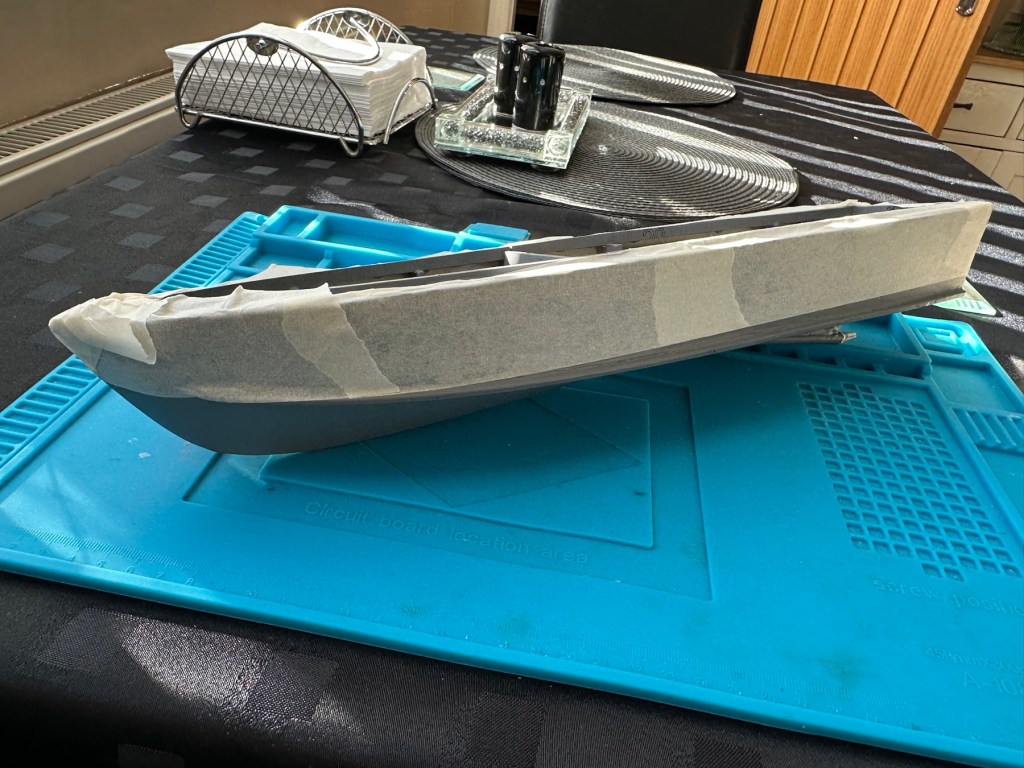
I’m just awaiting some red paint to finish the hull, then I can get some decals in place. Then I can seal it all to finish the exterior of the model and then I can concentrate on setting the motor and the internal electrical elements up. Next I have to mask the area of the hull that I will paint red, I’ll do this now before the paint arrives as it just has to be right first time. I don’t want to be touching up too much if I can help it.
Masking of the upper deck in preparation for a red belly
I’ve made a pair of support struts out of balsa that sit behind the aerial, I’ve changed this area completely as it was too delicate and would have been a nightmare to transport. I’ve built a modern style array for a radar, I know it’s not going with tradition but again it makes for easier transport and reduces the need for repairs on the go.
First coat with mask in place
I’ve done the first three coats of red paint for the waterline, I’m going to leave this 24hrs now before I peel back the masking to reveal what mess I have underneath. Fingers crossed on this 🤞
Masking tape all removed
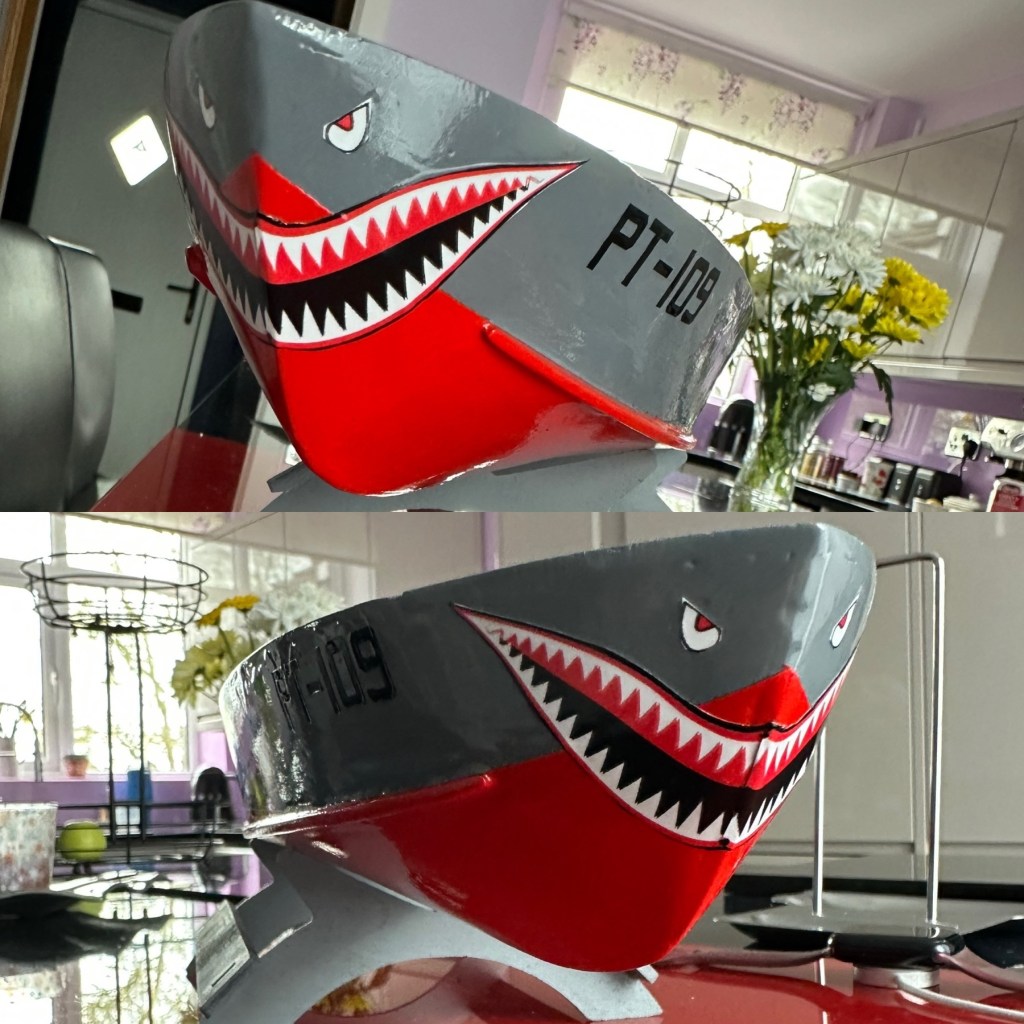
Fingers now uncrossed I’m really pleased with the outcome. The masking tape has been all removed and we now have a nice crisp line around where the red joins the grey. There’s some like marking up by the front end that believe it or not are finger nail marks when I was applying the mask. I’m not worried about this though as I have some sharks teeth decals coming that should cover this area. One of the little additions I wanted to make, to put my own mark on the build. Once all the decals are placed I will then give a final coat of a yacht varnish to seal all this work. I’m going to test a small area first as the last thing I want is for all this hard work to run into a gooey mess.
I have done the tests and commenced with coat one of the varnish. It looks gorgeous. Im probably going to do a further two light coats and that will be the hull complete. I haven’t put the decals on yet, I will probably do that prior to putting on the finishing coat.
All decals placedVarnished
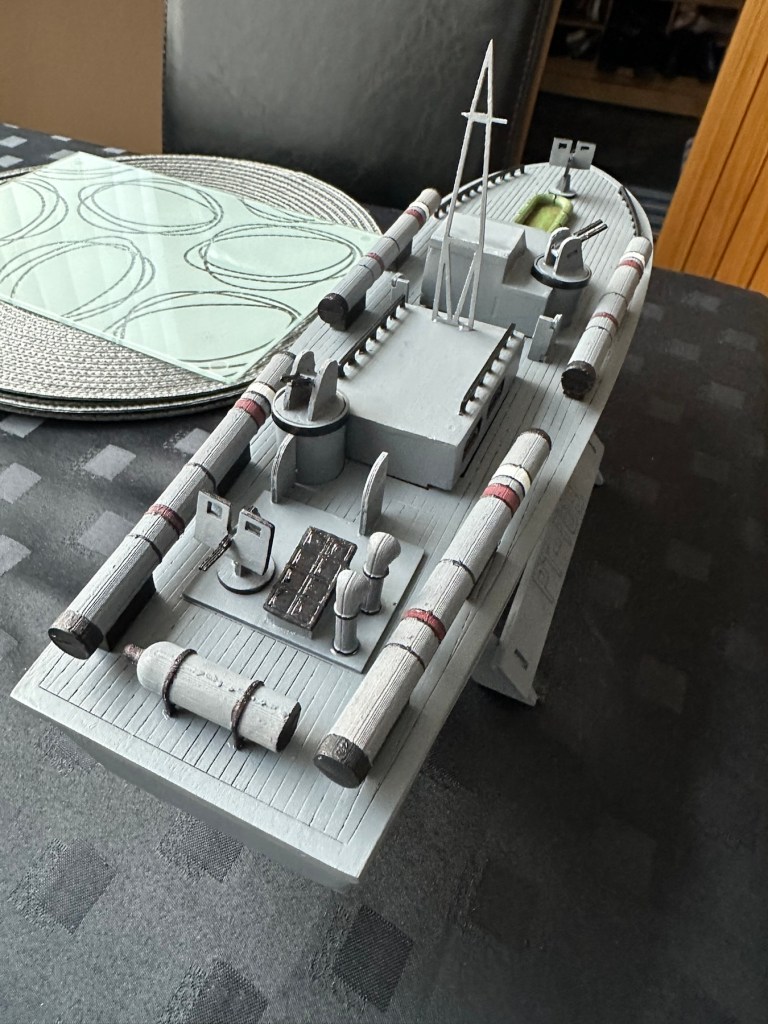
All decals applied and final varnish completed. I can now look at getting the rudder and electronics installed. I’m happy with how the whole hull area looks.
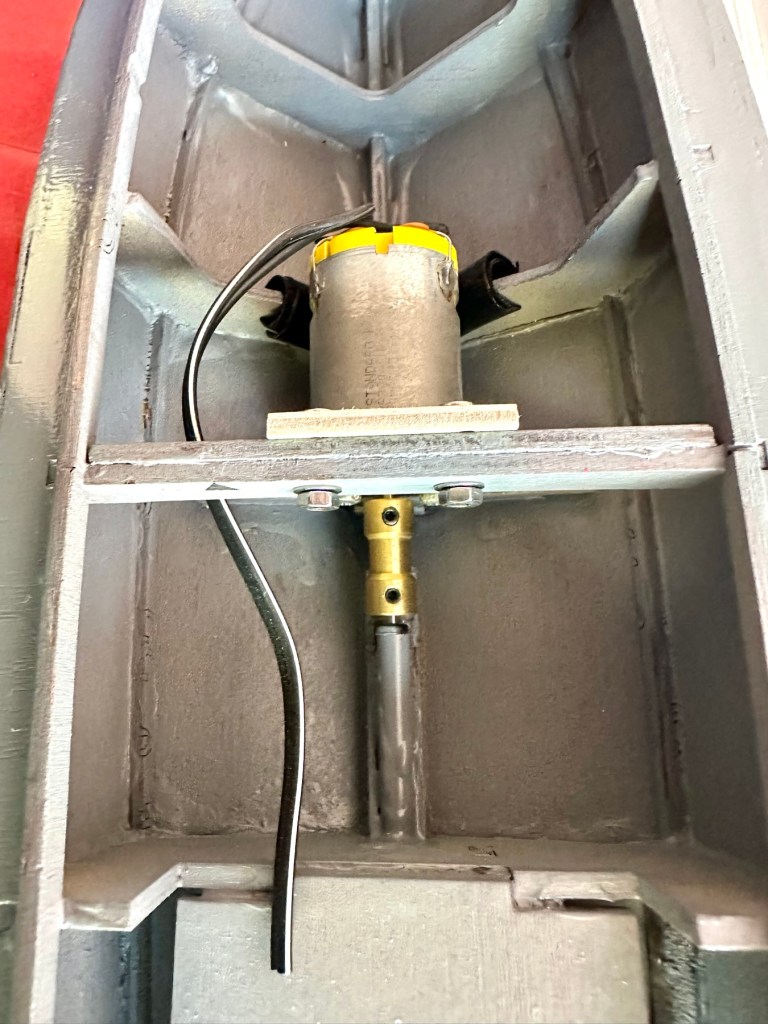
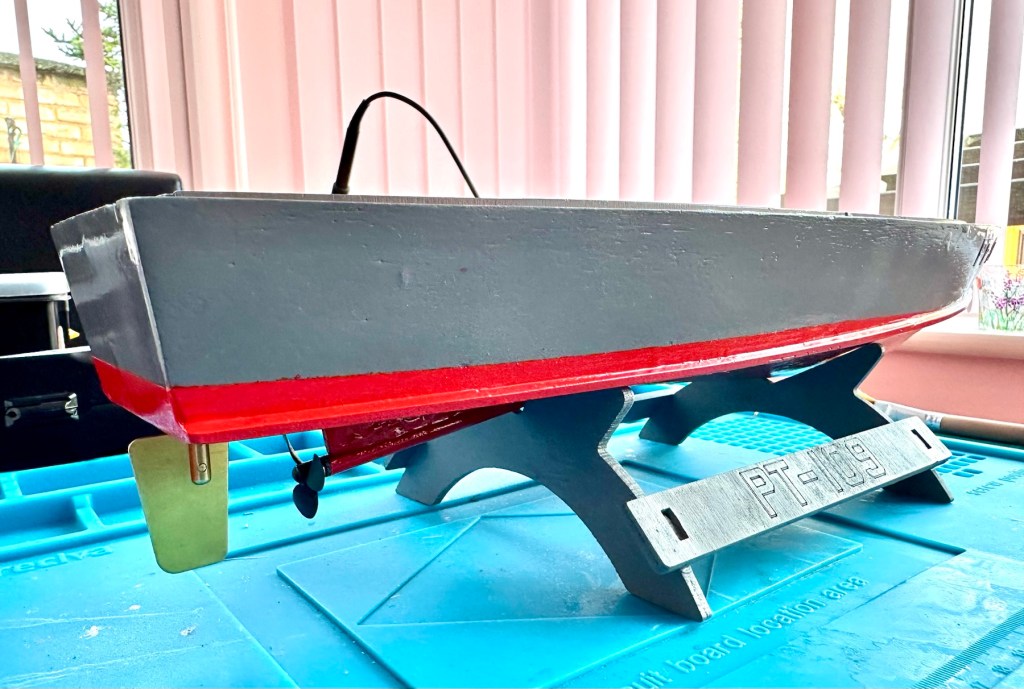
Motor, prop shaft and rudder now in placeLooking good on her stand with prop and rudder in place
All that is needed now is to place the battery, receiver and ESC in place. I have quite a strict time on this build and I must have it ready for “Lake” trials when we go to Norfolk in June.
I will also be borrowing my brother in laws pond for 30 mins or so to do a balance and water tightness test.
Let’s get the electrics installed.
Having never really done this before, I’m quite amazed by the amount of gear I have to fit into such a small area.
All this has to go in there….i need a bigger boat
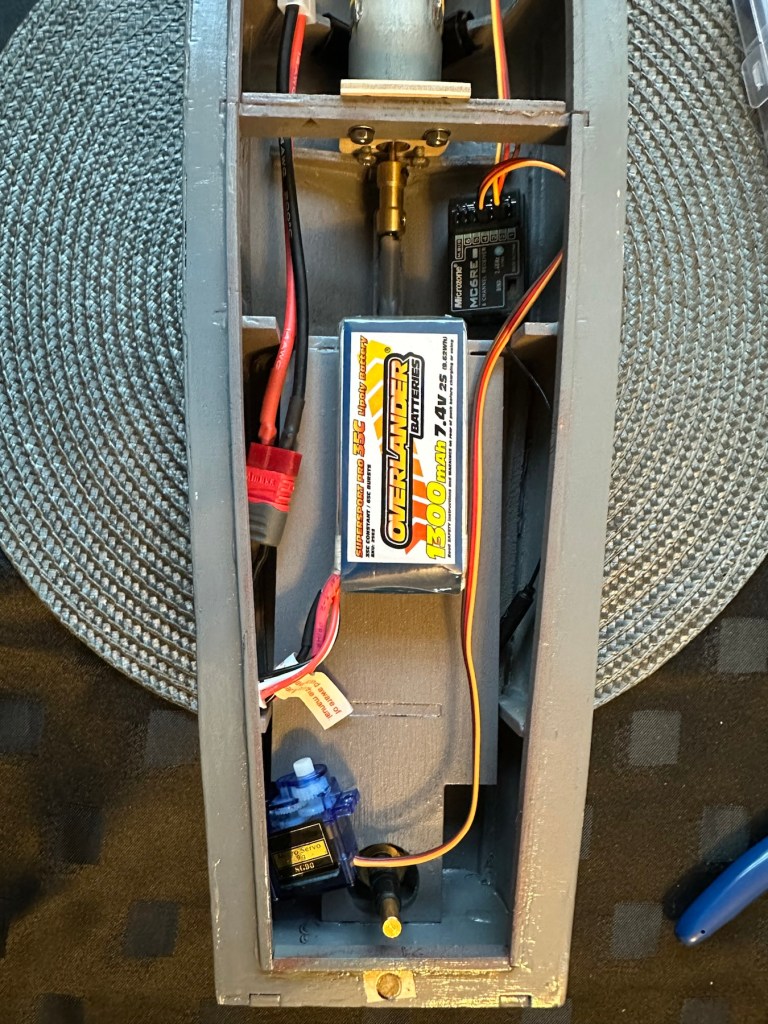
It’s in – just needs sorting
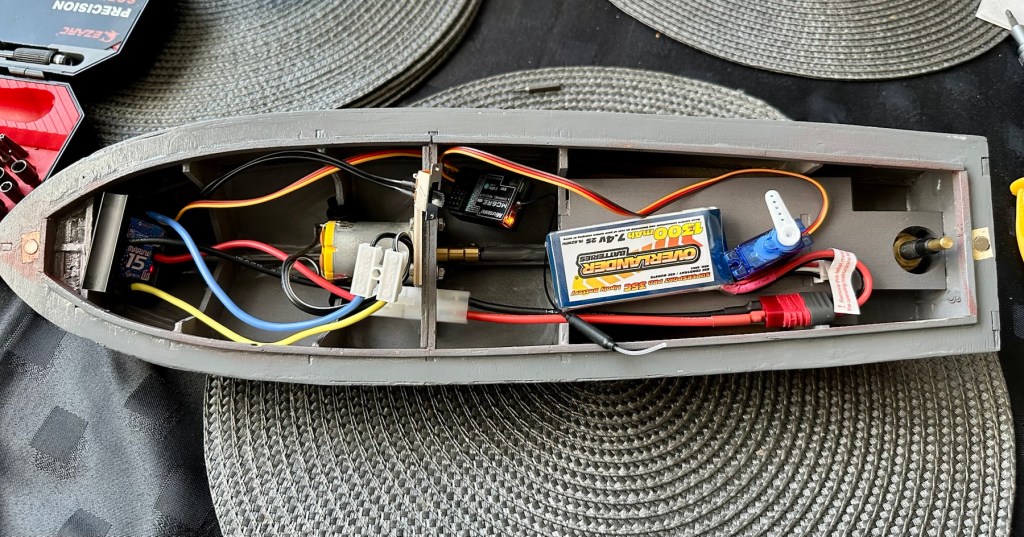
I’ve managed to put these items in-situ, in a rough position inside the hull. I need to shorten some cables, I need to somehow position the rudder servo, but I’m sure that will not be an issue. I’ve already tested the centre of balance and I’m happy with that. Later today I shall start to really tidy the layout by working from the front to the rear of the hull.
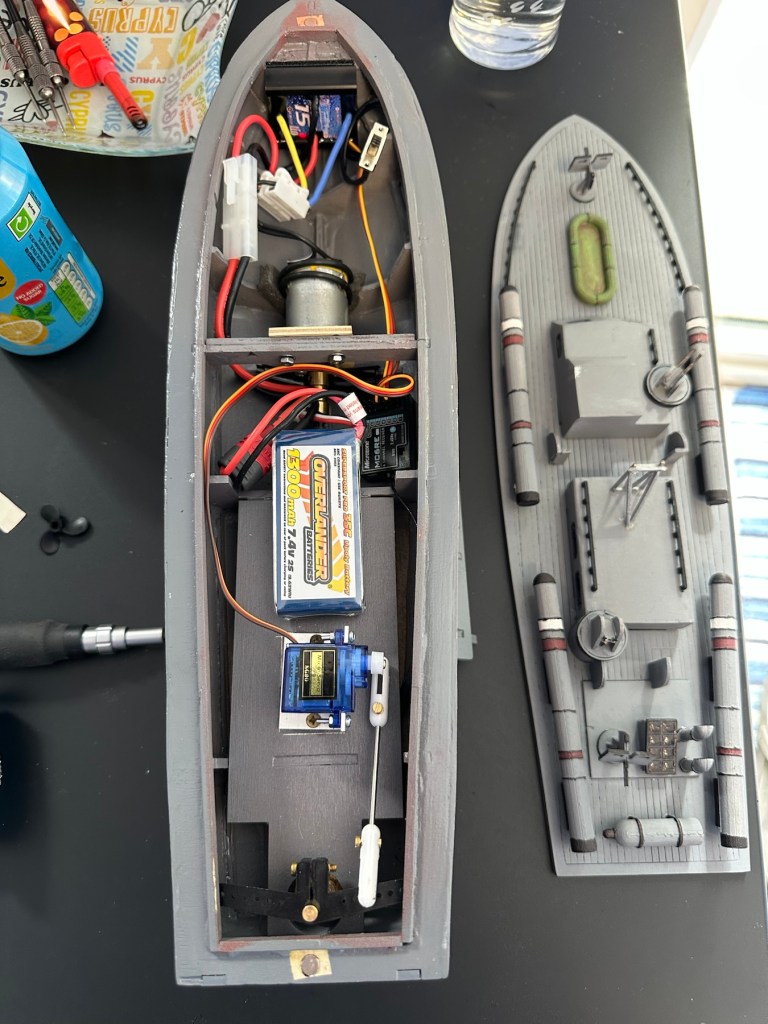
Front RearThank the Lord for Velcro tape. All complete apart from the rudder connection. I’m still working on that.
I’ve had to purchase a small bracket for the rudder servo along with a couple of connecting rods. Hopefully we can now complete the electrical connections within the hull and get the rudder operational, then I can get it water tested to check for leaks and balance.
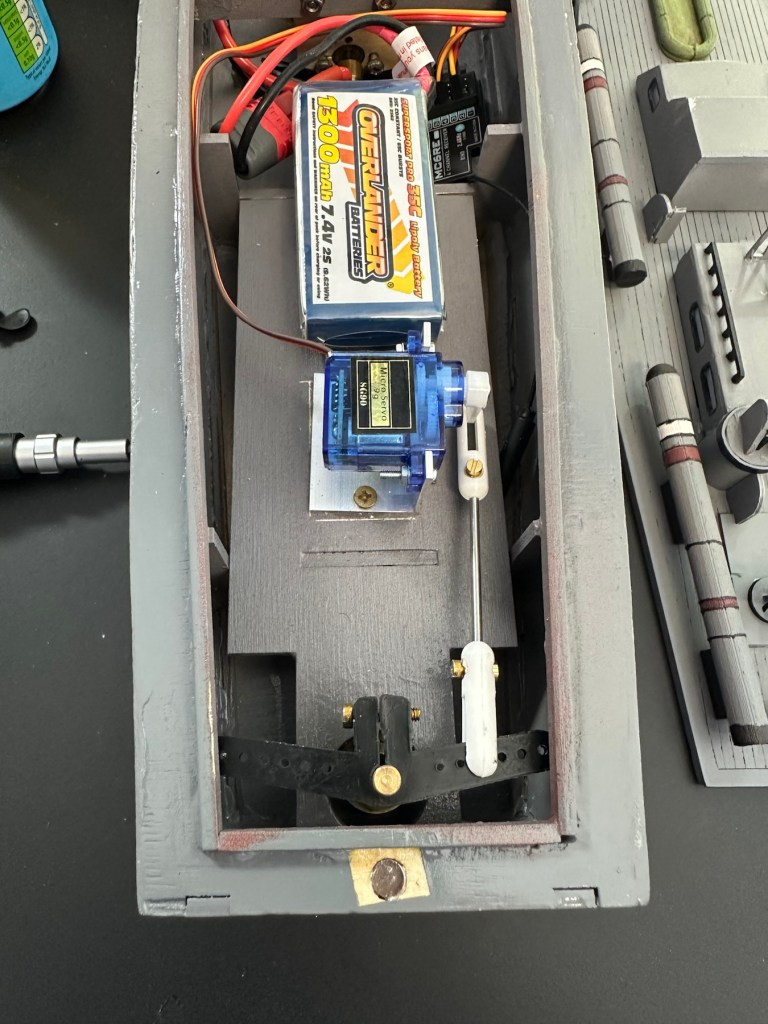
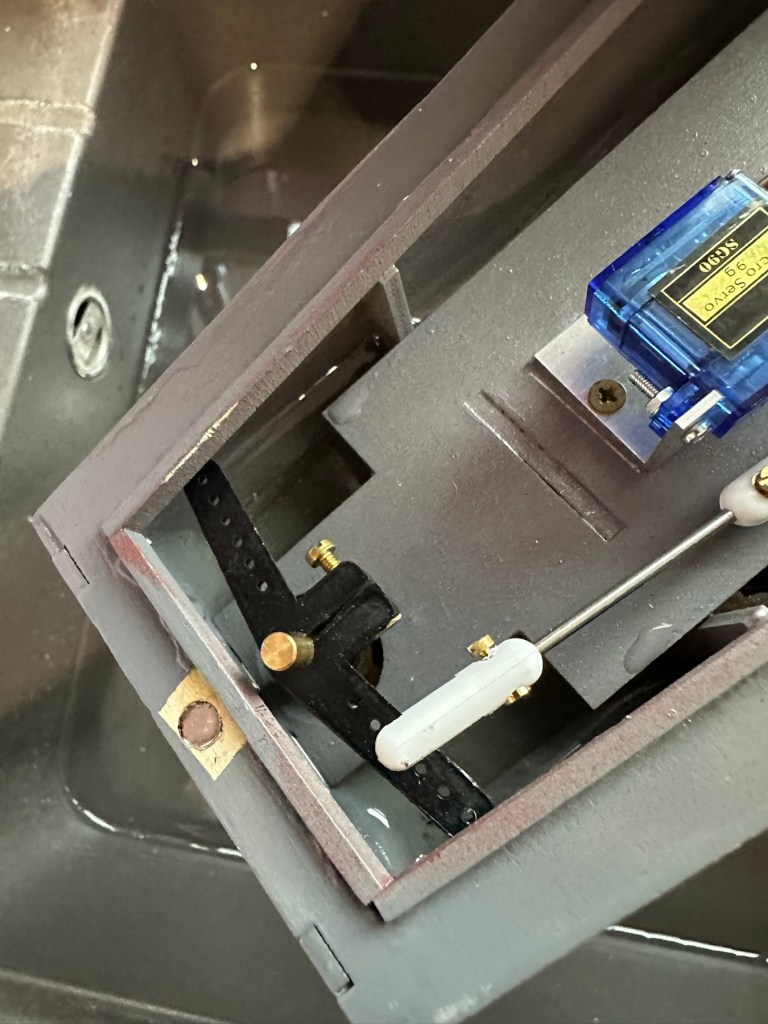
Rudder linkage in place, just needs shortening
Rudder linkage now adjusted and in place
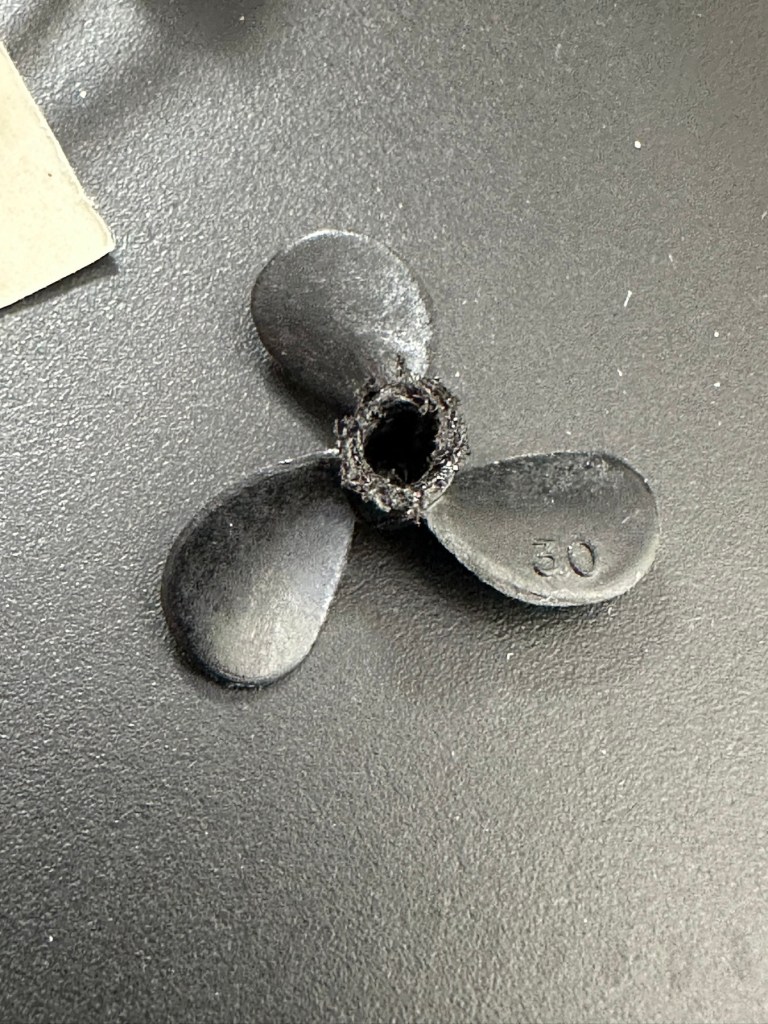
I’ve just had quite an annoying and inconvenient moment. The rudder linkage is all now in place and working fine, however the issue lies with the propeller shaft. I’ve rather foolishly connected it all up but left the propellor flush with the shaft end so when I put on full power to test, there was a burning smell as the propeller wizzed past my ear across the room and the shaft seized up. There was such a build up of friction between the propellor and shaft that the propeller melted and bent the 2mm prop shaft out of place. A stupid mistake, caused by my rushing to get this completed.
A melted propeller with the screw mechanism missing
A small video that shows the rudder mechanism working
I’ve now had to order a new prop shaft and propeller, hopefully these will arrive in the next few days and I can then get the build finished.
New prop shaft in place, and all electrics and functions are now operational with the motor purring away nicely. I’ve adjusted the distance from the prop to the shaft to reduce Friction and this appears to be working fine.
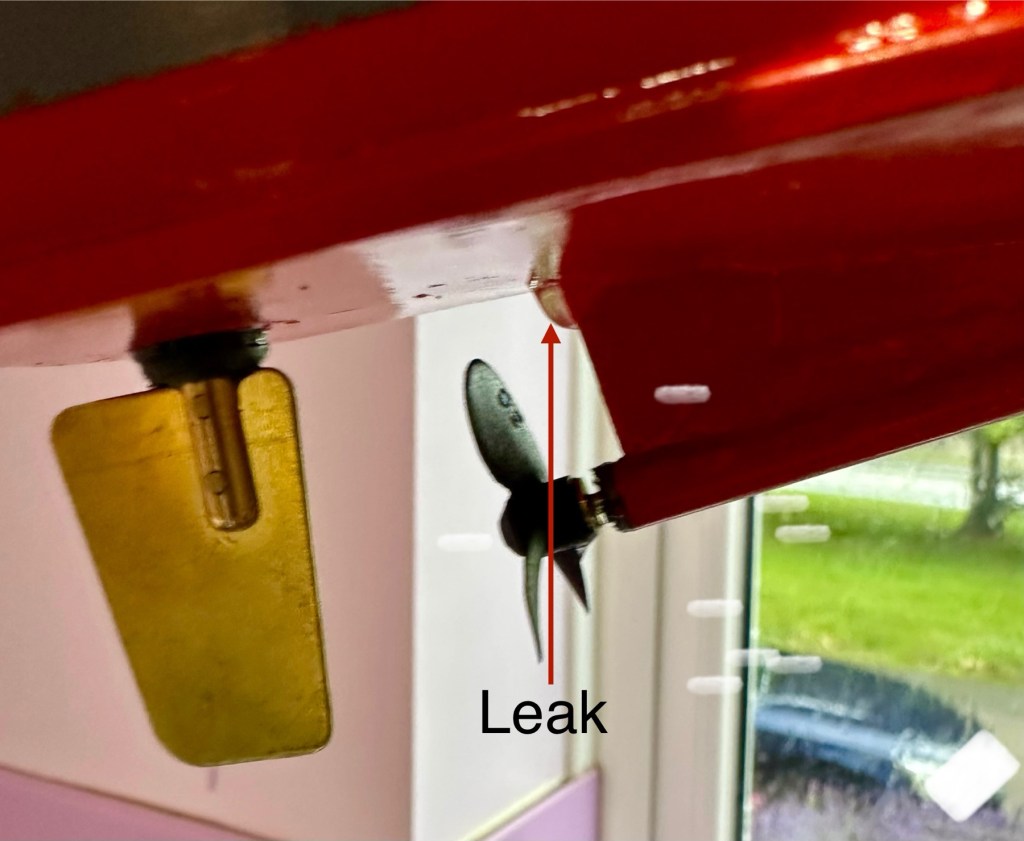
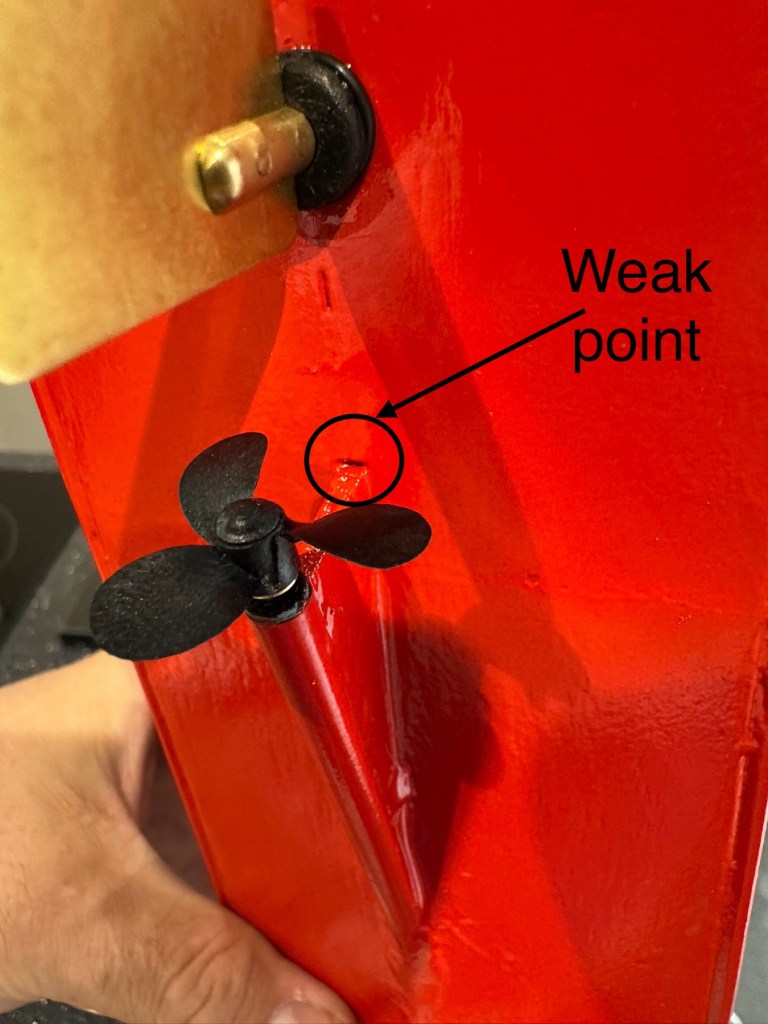
All functions working nicelyLeak can be seenWeak point found
Now to sit her in some water for leak test.
Floating nicely After 30 minutes we have water ingress
The leak test was going so well, all functions worked well and she was sitting nicely in the water.
Water test
The positive here, is that there is no leak in the front end there was no water present here. All the water was in the rear, however it was not entering via the rudder mechanism or the drive shaft.
I removed the hull from the water, tilted it in such a way for the water to gather at the rear, and dried the underside of the hull. After a few seconds you could see a drip starting to gather at the top of the mount that holds the drive shaft in place. I knew it must have been a slow leak as this took almost 30 minutes to build up, I’ve caught it just before it impeded on any of the electronics.
I’ve now emptied the hull of remaining water, it’s now drying off naturally and I have a plan in place to repair the issue once the hull has fully dried. I’m probably going to use some epoxy resin to seal around the whole drive shaft fin, and then I’ll paint and seal this part again. We will then repeat the trial.
Back in the water the following morning at 07:50 after being sealed with epoxy resin on the hull, let’s leave her alone bobbing around for 30 minutes to see what occurs. It’s not good news….again.
Timelapse over 15 minutes
As I’m impatient, I set up my camera in time lapse mode to see if I could pinpoint where the water was accessing. My suspicions were that the water was coming up the drive shaft however I’m quite pleased that the timelapse shows this is not the case. the water appears to be accessing again from the very base of the hull. This area was sanded to quite a thin tolerance so i suspect, that even with all the sealing, two coats of paint and a coat of varnish there must be tiny holes along the hull. The previous sealing I did cured the issue at the rear, it now appears that I will have to carry on with the resin coating or something similar, along the length of the hull. To make things entirely water tight I’m going to remove what I can internally and also seal inside the hull as well.
One good soaking of polyurethane varnish later…
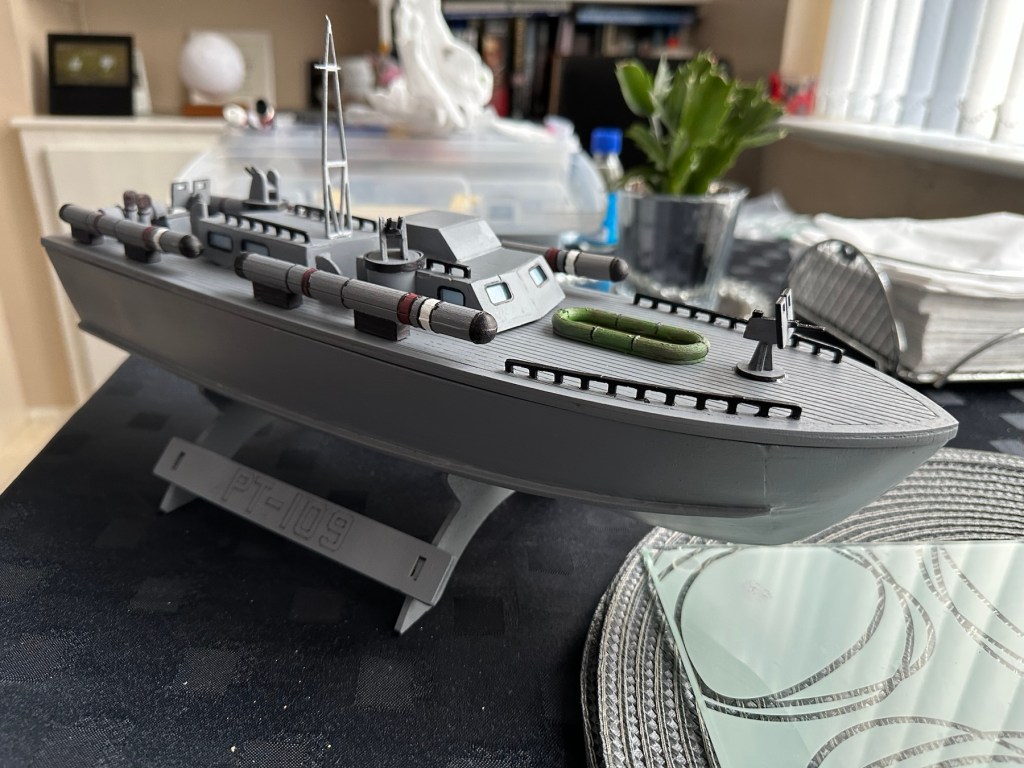
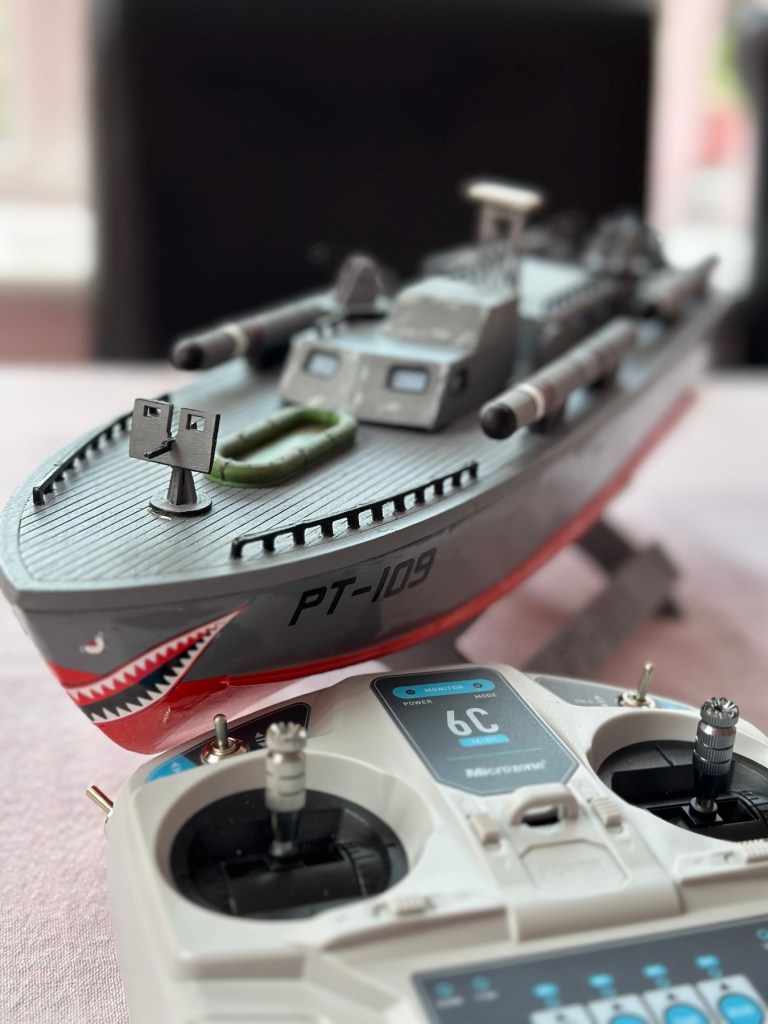
Three days after all this varnish has dried, I have done another float test and this one was with all equipment on board for an hour…and it was successful. We seem to be dry. I’m now putting the whole boat back together now ready for its maiden voyage at Gorleston boating lake in a weeks time.
Ready to go…
I will do a separate post regarding the maiden voyage and its outcome whether positive or negative shortly after.
Thanks for passing by, as always it’s very much appreciated.


You must be logged in to post a comment.