This kind of makes me laugh. I was talking to my nephew yesterday and we were talking about Antisocial media. He was quite proud to tell me he had 875 friends on Fakebook and was quite putout when I told him he was having a laugh. I asked him to name as many of these friends as he could in 30 seconds, and he could probably reel out about 10 or 12 max. And there is my point, people on social media are not friends and a positive impact on you, nine times out of ten they are there to have a nosey around your life or to try and big up their own lives by stating “Oh look at the friends I’ve got. They’re not friends get over it. They’re doing it for likes.
That’s me off his Christmas list now.
Myself I can count my true friends on my hands. In fact I only need the one hand, in fact I only need two fingers, it was three before August but a death put paid to that relationship.
Now it is two. My wife who I trust implicitly, what she has done for me is just unbelievable, without her I would have been long gone many years ago, she has saved my life. Literally.
Second is my buddy Dave, i probably hear from him twice a year but we are there for each other we would truly go into battle for each other, this bond is strong and its roots go back to our childhood.
Trust is the foundation of a good strong relationship, it is a back bone, break it and there is no more stability.
875 friends eh? They’d all run a mile if you ever needed them.
Jan 2021, Covid in full effect and I’ve been brought a new set or art stuff for the previous Christmas. Using pencil and pastels I attempt a picture of our dear late family member, Alfie, familiarly known throughout the family as “Alfie Moon”.
This was another iPad piece I did in 2023. I was experimenting with a new art app at the time and just produced this mess that I titled “Firework night”
Another iPad painting from 2012 when I must have been losing it. I just thought it would be good to do a play on words with “Sunspot” hence the Sun was drawn with a pimple on the surface.
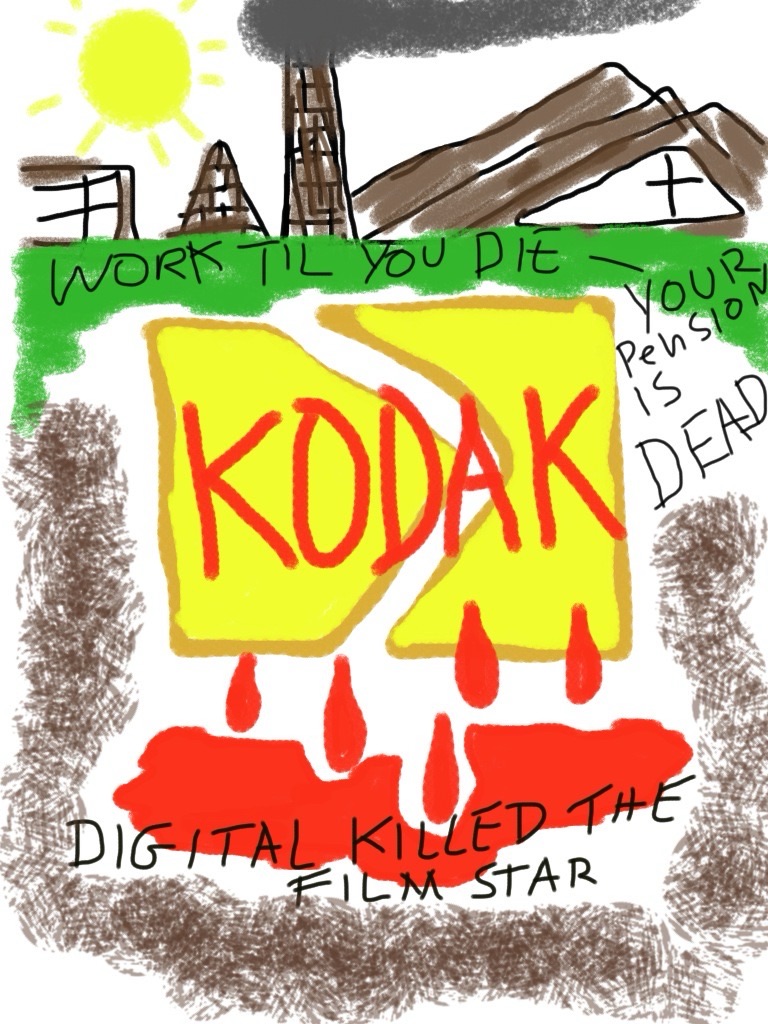
This picture was painted on an iPad. I did this one back in 2012, I’d just received notification that my pension pot with Kodak had almost halved due to them declaring bankruptcy and moving production back to the USA. Sod everyone else who worked for them worldwide.
We lost out big time and that’s why I had a rant in this obscure painting I did at the time.
I wrote a couple of weeks back about getting a strange invite to a six year olds birthday party. That six year old is a Cockapoo dog called Barney, the original post can be found here: Happy Woofday
Well todays the day, I’m working nights, but before I move off to work I’ve promised I’d pop around with the wife to have a bit of lunch and to give him a pat or two on the head, and tell him he’s a good boy.
Birthday boy, unimpressed by cake and all the fuss
Well, I must admit there was a good spread but after the overindulgences of the last week it was one party too much for me. Even Barney who’s been at most of our homes over the last week just looked as if he’d had enough of us all and just wanted some peace and quiet. I’m lucky as Im working nights, I’ve had the perfect excuse to slink off and find my our serenity in the offices at work.
We humans are a little crazy at times and I think even our animals sense this. That said, it doesn’t hurt to be a bit crazy, it makes the day go past a tad quicker, and to be honest anything that spreads a little happiness and produces smiles and laughter is not a bad thing.
You get to build your perfect space for reading and writing. What’s it like?
Illustration by Maurice Sendak in Open House for Butterflies by Ruth Krauss.
One of those questions that you give little thought to. However for me peace and quiet and tranquility reigns supreme.
Not just for reading a writing but for all my hobbies, all I ask for is some peace to be with my own thoughts and no rushing, peaceful all the way. I may also like to have a radio on, turned down low in the background just to hum along to,
Melton brook – Melton Mowbray
A little cottage with a separate annex by a slow babbling brook would be ideal. However I don’t think that is going to happen anytime soon, but one can dream can’t they? So in the ideal world it’s down to the river every time to seek inspiration and mental stability for me.
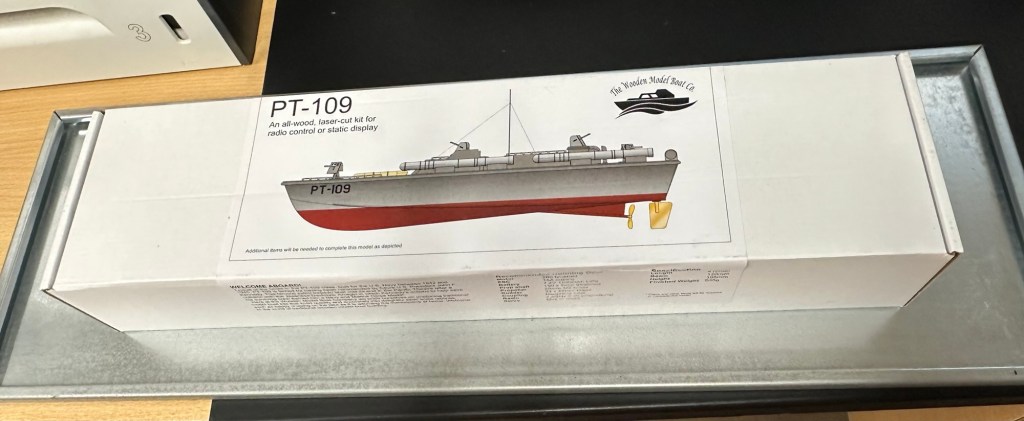
This years birthday, I’d hinted that I wanted to build an RC model boat from scratch, and that’s what I got. A good friend of my wife and I came up trumps and brought me this nice little wooden boat starter kit. I’m fairly experienced at building balsa gliders and planes from plans and have done quite a few. I’ve never ventured into boats though so this is a first for me. It all stems from going on holiday to Norfolk, where we normally stay in a place called Gorleston where there is a nice boating pond that two of my brother in laws sail prebuilt trawlers that they have brought, i’ve always said that I’d join them on one of our trips, jokingly saying I’d get a submarine or battleship to blow them out of the water. However i wouldn’t do that, and this is the first stage of venturing into the world of model boats. I’ve now just got to build it.
Boating pond at Gorleston
The boat that i have chosen is made by the wooden model boat company distributed in the Uk by JPerkins models. It is a PT109 torpedo boat modelled on the one that John F Kennedy sailed in, in the Pacific theatre after a collision with the Japanese Destroyer Amagiri in which Kennedy’s actions to help save his surviving crew earned him a Navy and Marine Corps Medal. I’m going to put my own touch on the paint scheme though and not go with the traditional all green or grey. I’m going to mix it up a little by highlighting and brightening up the look of the boat a bit.
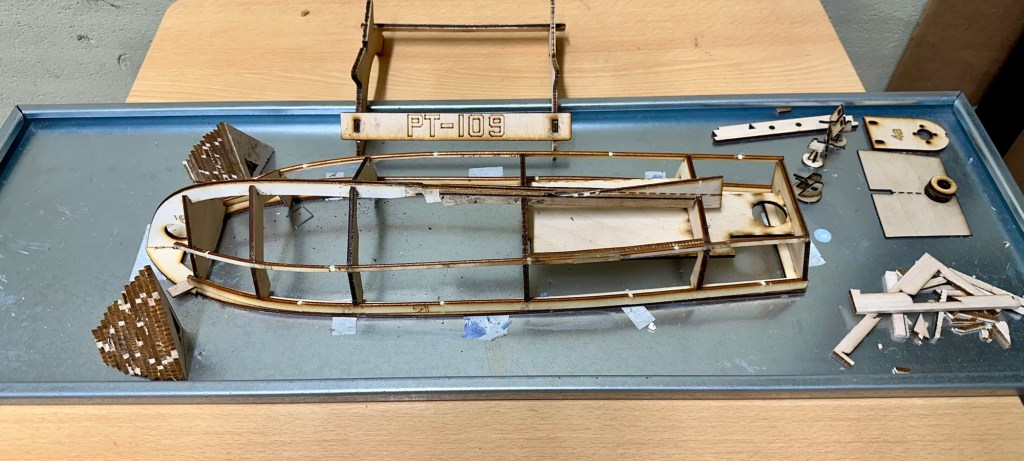
The boxed kit
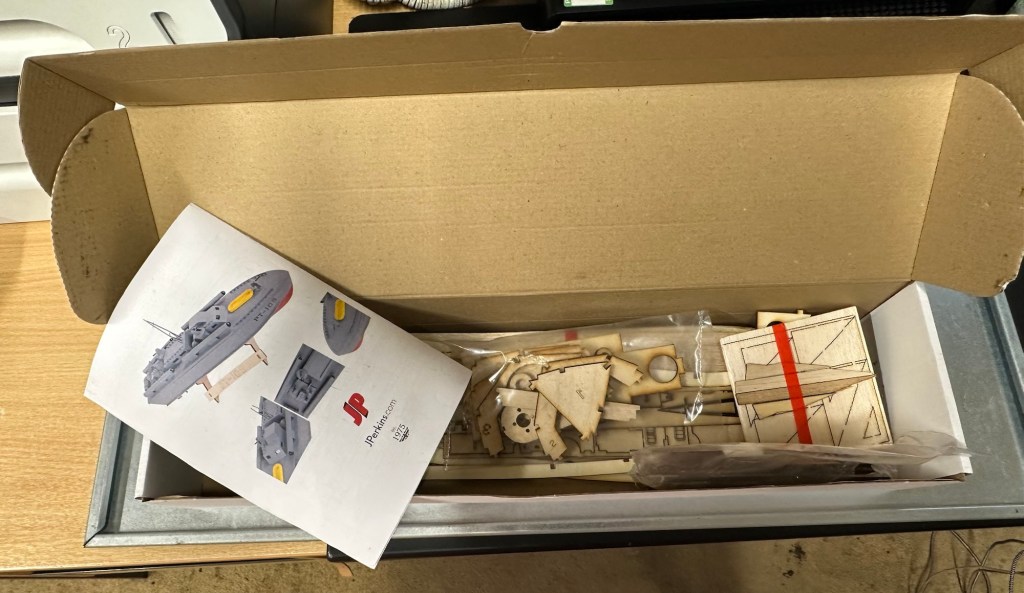
Bitsand pieces Instructions Inside the box
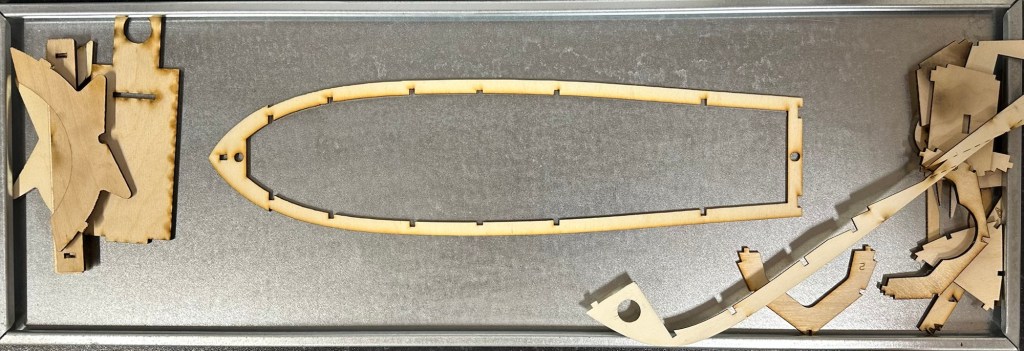
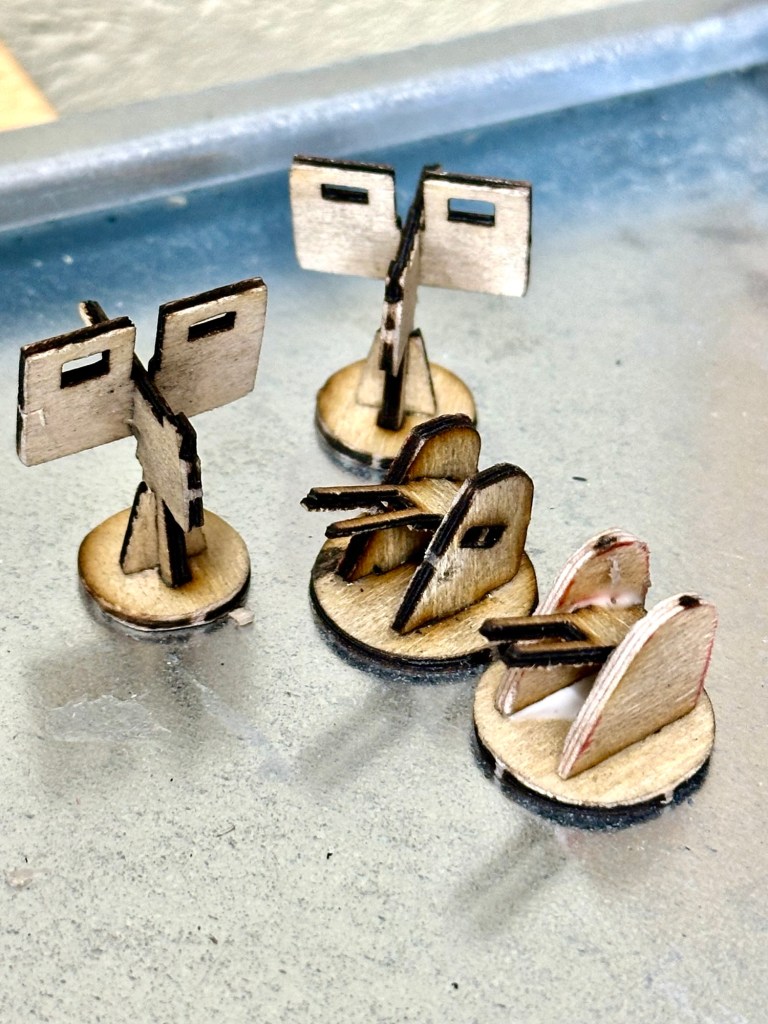
These kits have laser etched parts, its my first experience with them and my only gripe so far is that some of the parts are so small and delicate that this process cremates the object because of its small size. I have had to make some of my own parts for this kit as in some cases it’s just like trying to press out burnt wood from the etched parts. Not good in my honest opinion, and as this is a starter set it’s more than likely liable to put a beginner off of the hobby to be honest. Not everyone is able to easily replicate the missing/damaged parts.
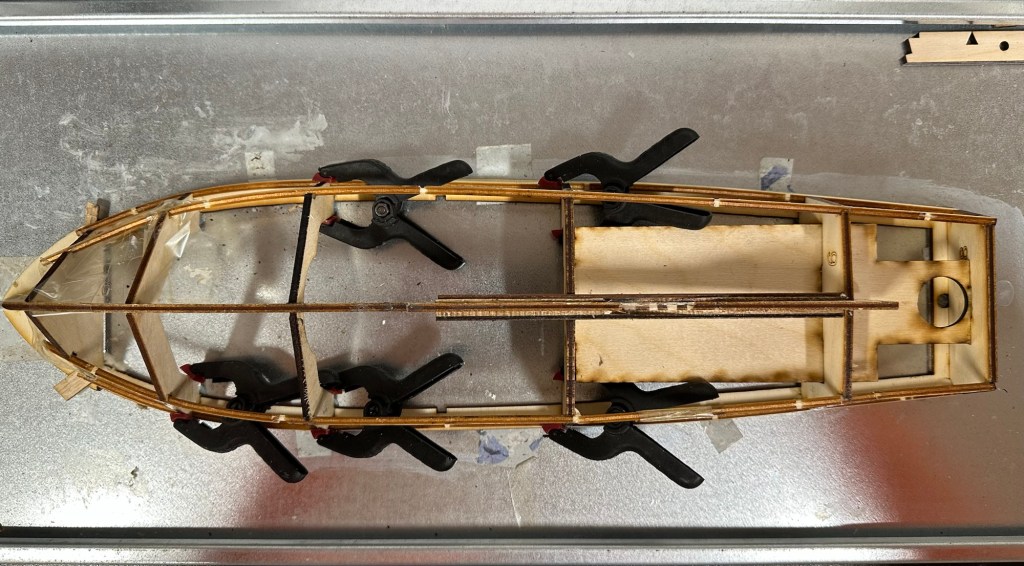
Firstly you have to secure the deck frame to a flat surface using some double sided tape. This is so you can start building the hull frame and prevent warping. I use a small steel shelf for my base that can easily be moved around and stored between sessions.
Secured to flat baseHull frameClamping strengtheners CuringMy shelf working space
There is a lot of time between sessions where you just have to leave parts to dry, you can quite easily try to do so much and potentially ruin all the good work you have done. Patience really does have to be a big part of what you do in build these models, the old adage of measure twice, cut once needs to be used so mistakes are kept to a minimum. You can make tiny adjustments when in the finishing process but for the time being you need to adhere to instructions as much as possible. Check and double check and always dry fit prior to gluing in place.
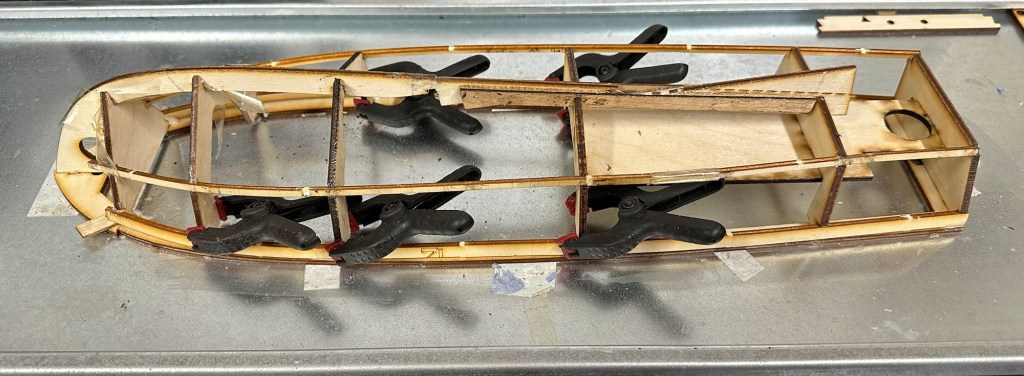
HullFormers to shape the bowRudder base in place
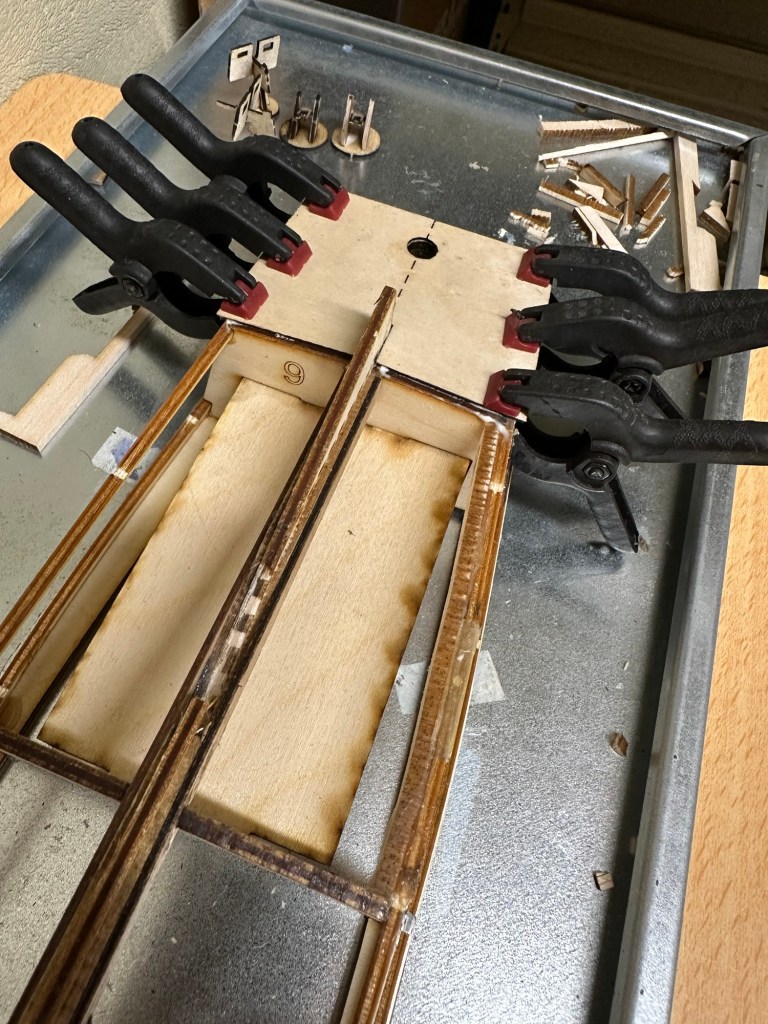
If you look at the picture below you will see how the laser etching burns really small parts. This doesn’t look good however they will look a lot better after they are sealed and painted, if I left all the parts like this the whole project would look as if it had been in a fire. I’ve had to build some of these parts from scratch as the kit itself had insufficient parts pre cut.
Burnt small parts…to be finished
The hull framework is now complete, next stage is to get the outer skins on, the bow formers in place and then hand sand, fill and sand again until the whole hull is ready to be sealed. Again there are issues here with the kit as one of the hull skins is two times thicker than it should be, hence the amount of bending required to shape the hull is not achievable. I have brought this up with the supplier and within a few days I have had a new set of replacement hull skins sent free of charge. Their customer service has been superb and it is good to see that some companies do still try their utmost to keep their customers happy. I will now progress with completing the hull.
These four boards form the outer skins. At 1.5mm they are very flexible. However you can see the second one from the left is twice as thick and not pliable enough. These were replaced by the supplier within a few days of notifying them of the issue.
Below is a small video of the completed framework. It has probably taken about 8 hours in total to get to this stage (plus many more hours to allow glues to cure)
The hull framework complete
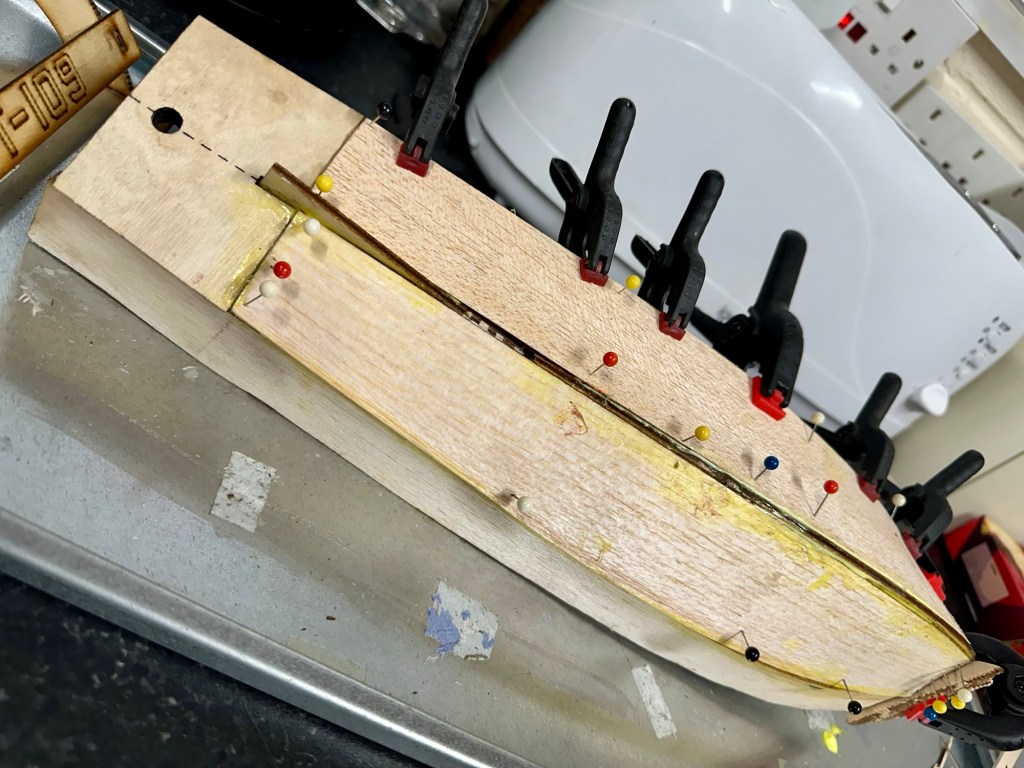
So tonight over a period of about 8 hrs I’ve managed to get the 4 balsa skins that form the hull into place. I’ve had to do a bit of re shaping and minor alterations, and the final bend of the skin would have bust it under the strain if I didn’t decide to wet it first. Wetting balsa allows the inside edge of the sheet to bend in, making these big bends in the hull shape possible. That as well as plenty of pins and clamps with epoxy resin ensures the skin stays where it is put. I left about an hour between each skin placement before moving on to the next one.
First skin Second skin Third and fourth skins in place, when dry I can commence light sanding and filling.
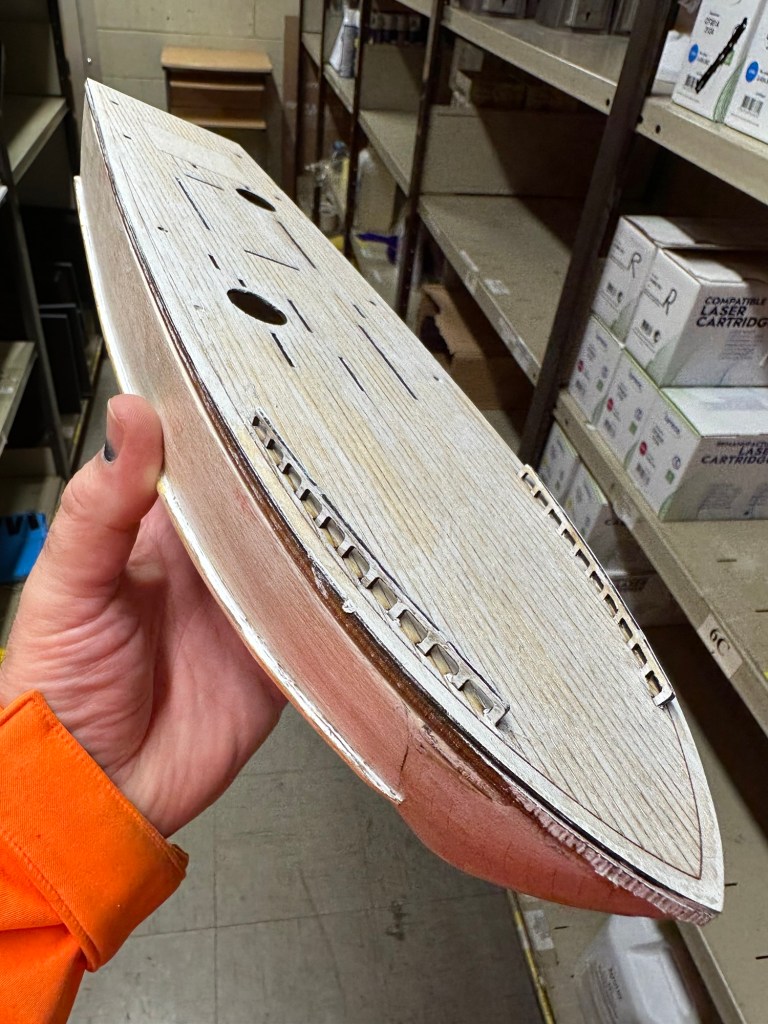
Here is the hull, assembled ready for sanding filling and all the other fun stuff required to make it look good and waterproof.
The hull ready for sanding, waterproofing and painting.
Tonight I have given the first heavy sanding with a course paper. This has really brought the hull up lovely. The former’s that were put in place have now been sanded to form a good bow profile. See photos below.
Before shaping After shaping
I now have to do a small bit of filling with balsa filler and then I will sand with a finer paper.
Looking more like a boat
Once the final sanding has been done I can then look at sealing the exposed wood and then begin the waterproofing and painting. The installation of the radio gear will go in place towards the end of the build. In the meantime I just have to build the superstructure on to the top deck. This will require some small bits to be painted before being put into place.
I’ve built the superstructure and that has been set aside to cure. There will be a lot of sanding and painting needed. I have attached the deck now and all those items will attach to it, and i must say it’s looking quite good.
Deck in placeHull structure now completeJust needs superstructure cabins adding once it has been sealed and painted.
I’ve now detached the deck and gone around with some balsa filler and hopefully tomorrow once it’s dry I can give it a sand with some fine paper and then I can look at putting on a coat or three of sanding sealer.
Sanding sealerTo be sandedAll superstructure sand sealed
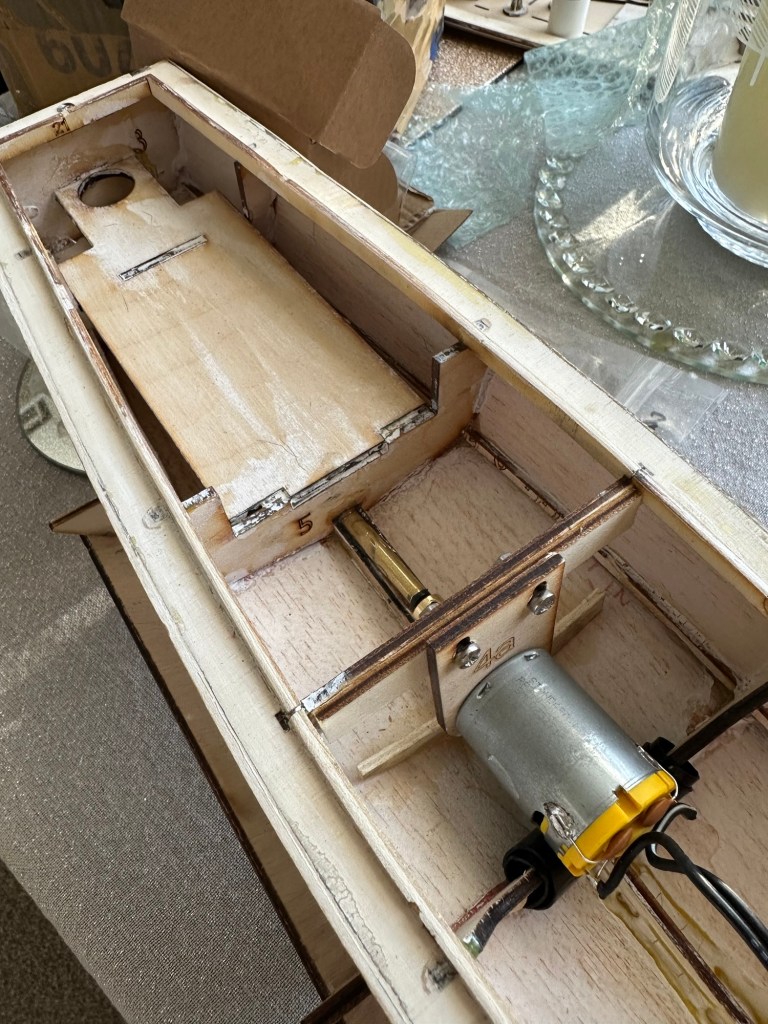
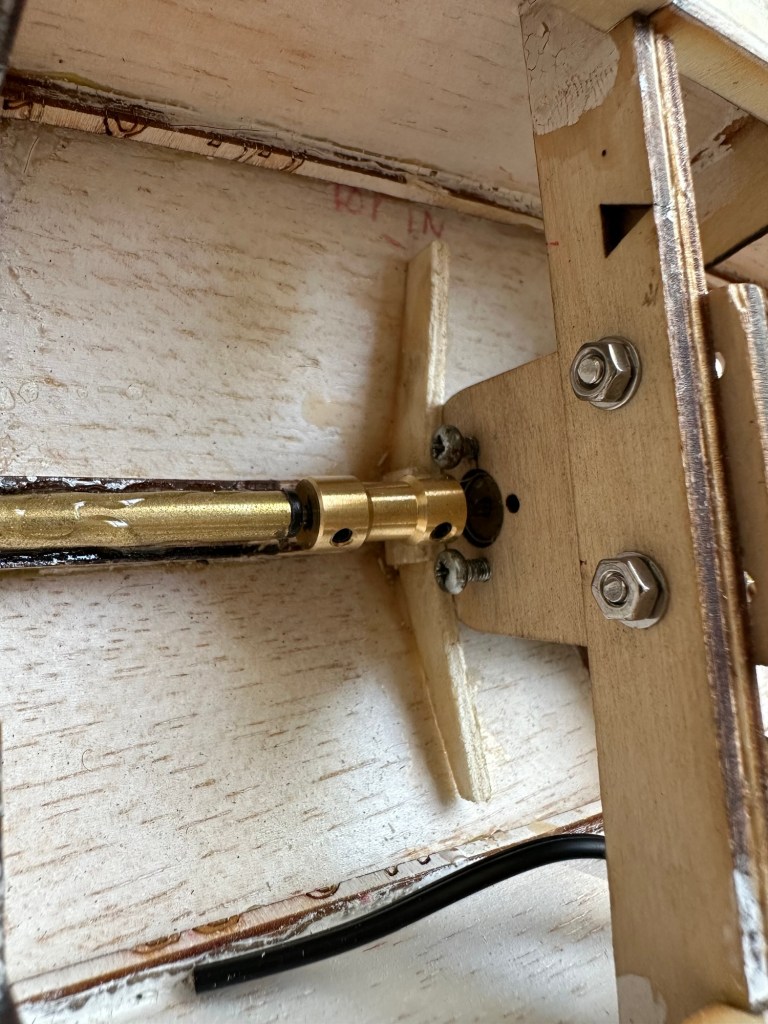
I’ve tonight managed to get coats one and two of the sanding sealer applied with sanding after each coat with a fine sandpaper. The torpedo tubes have been assembled along with other items and we are now very close to getting the painting started. However first I will give a final sand to the structure to see if it is ready for the primer. If not it will mean applying some balsa filler and applying coat 3. There really is no rush. I need to now get the prop tube in place and permanently positioned prior to any painting. I am considering a number of different paint combinations at this stage, but they are changing on a daily basis. I wonder what colours I will go with?
Rudder checks doneEngine in placeDrive connector in place
I’ve done the all the sanding and I’m now happy to commence the undercoat of the hull. I’ve fitted and removed the rudder and engine to test they fit ok, the boat is now bare and ready to paint. I’m going to individually paint the guns and superstructure before fixing to the deck. I might paint the deck with a dark varnish, I haven’t quite decided yet.
Part 2 of this post will cover the painting of the boat. Coming sometime in Feb 2025.


You must be logged in to post a comment.