I had to think about this question and just what has influenced me most in my lifetime.
Radio commenced a good few years prior to my appearance on this earth but it has been the most featured aspect personally within my life.
As a kid of the 60’s and 70’s we grew up with radio being a massive influence to us, all the celebs and stars we knew were probably radio DJ’s and pop stars and all we ever wanted was a small transistor radio of our own to walk around with constantly held to one of your ears. It preceded television that in the 60’s was still really in its infancy, and back then we only really had two television stations that only broadcast for parts of the day.
Radio was the go to medium. Pirate radio stations were popping up all over the place being constantly hounded by the BBC and the government until the BBC gradually softened and realised this was what the younger generation wanted, so all of a sudden we had pirate DJ’s appearing on national radio stations, however they were tightly controlled and governed.
The first item I ever remember repairing was a radio, given to me broken by a neighbour, I repaired it and they were so impressed they brought it back off me, how good was that? At this point my interest in radio was heightened and i realised I could make a living myself, if I wanted to learn. And learn I did.
That’s my personal reasoning for believing radio was the best invention, if you look at how it has affected all our lives, not just in creating a fantastic communication medium, then the effects are long ranging and global. Here’s just a few items that have radio to thank for their arrival into our everyday lives.
Television
Mobile phones
Satellite communications
GPS
Radar
Remote control
MRI scanners and many other medical applications
Data WiFi
And the good old internet probably would not have been born without radio waves to assist it.
These are just a few of the applications that have had their roots in old fashioned radio science. We really have to thank the founders, Heinrich Hertz who discovered radio waves in 1886, and Guglielmo Marconi who sent the first Morse code radio message over a short distance nine years later in 1895.
These two men changed the way the world developed from that point onwards in my eyes.
Radio was and still is, the most important invention throughout my life time.
What’s that then? I hear you ask. Well since I became a radio amateur (M0ESB) back in Feb 2003 anything regarding radio has fascinated me.
The Duga or – Russian woodpecker issue of the early 80s has always been an item of interest to me. It was allegedly constructed as a Russian over the horizon early warning system and was replaced in the late 80s when satellite systems took over the early warning mantle.
However it obtained notoriety by creating havoc on the airwaves worldwide for quite a considerable period of time.
This video by a fellow Amateur radio enthusiast M3HHY explains quite eloquently, in 11 minutes what the issue was. Some great photos of this absolutely massive antenna array can be seen in this video.
And whilst we are still here this is what Wikipedia has to say:
The duga system was extremely powerful, reaching over 10 MW, and emitted in the shortwave radiobands. It was given the nickname Russian Woodpecker by shortwave listeners for its emissions randomly appearing and sounding like sharp, repetitive tapping noises at a frequency of 10 Hz. The random frequency hops often disrupted legitimate broadcasts, amateur radio operations, oceanic, commercial, aviation communications, and utility transmissions, resulting in thousands of complaints from many countries worldwide.
Courtesy: Wikipedia
I hope you find this as fascinating and informative as I have. Radio remains to this day special to me. I’d sooner be listening to it in any form rather than watching a tv. In my eyes or should I say ears, it was the most significant invention ever made, if only Marconi knew back in the 1890s just how important this communication method would become he would have been blown away. It has helped to shape so much, our modern day world, and how we communicate with each other on a daily basis.
This years birthday, I’d hinted that I wanted to build an RC model boat from scratch, and that’s what I got. A good friend of my wife and I came up trumps and brought me this nice little wooden boat starter kit. I’m fairly experienced at building balsa gliders and planes from plans and have done quite a few. I’ve never ventured into boats though so this is a first for me. It all stems from going on holiday to Norfolk, where we normally stay in a place called Gorleston where there is a nice boating pond that two of my brother in laws sail prebuilt trawlers that they have brought, i’ve always said that I’d join them on one of our trips, jokingly saying I’d get a submarine or battleship to blow them out of the water. However i wouldn’t do that, and this is the first stage of venturing into the world of model boats. I’ve now just got to build it.
Boating pond at Gorleston
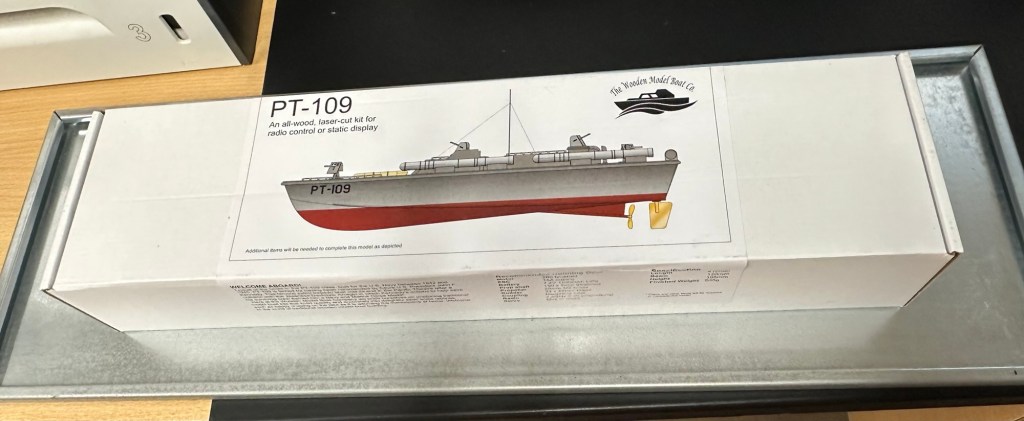
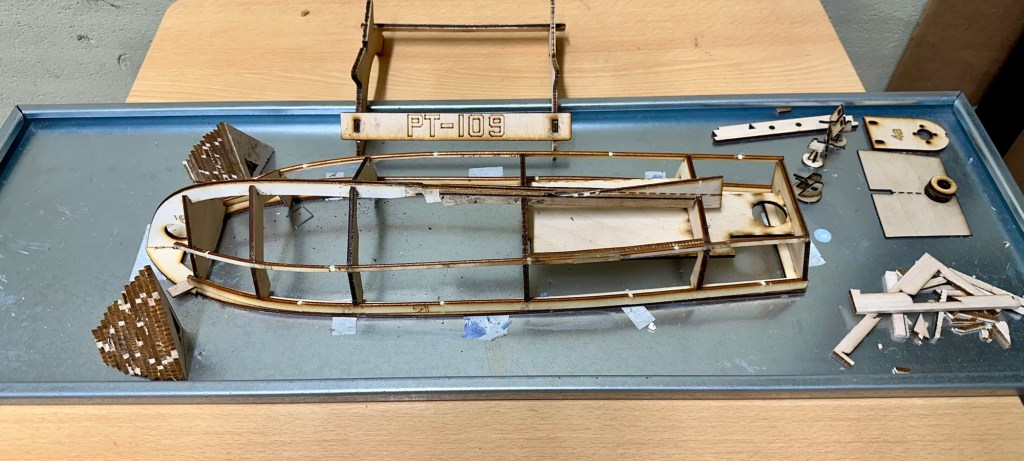
The boat that i have chosen is made by the wooden model boat company distributed in the Uk by JPerkins models. It is a PT109 torpedo boat modelled on the one that John F Kennedy sailed in, in the Pacific theatre after a collision with the Japanese Destroyer Amagiri in which Kennedy’s actions to help save his surviving crew earned him a Navy and Marine Corps Medal. I’m going to put my own touch on the paint scheme though and not go with the traditional all green or grey. I’m going to mix it up a little by highlighting and brightening up the look of the boat a bit.
The boxed kit
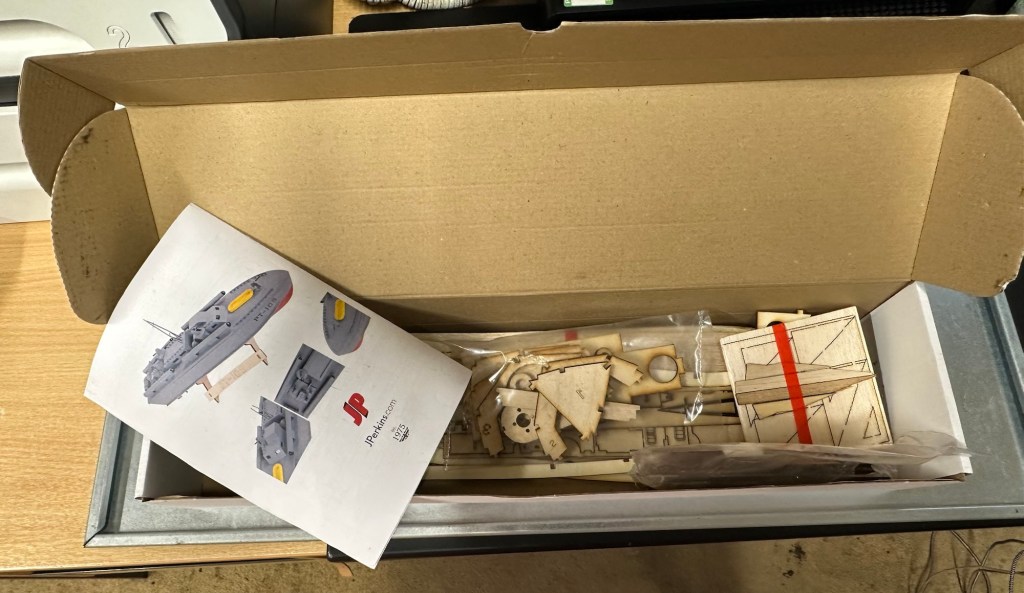
Bitsand pieces Instructions Inside the box
These kits have laser etched parts, its my first experience with them and my only gripe so far is that some of the parts are so small and delicate that this process cremates the object because of its small size. I have had to make some of my own parts for this kit as in some cases it’s just like trying to press out burnt wood from the etched parts. Not good in my honest opinion, and as this is a starter set it’s more than likely liable to put a beginner off of the hobby to be honest. Not everyone is able to easily replicate the missing/damaged parts.
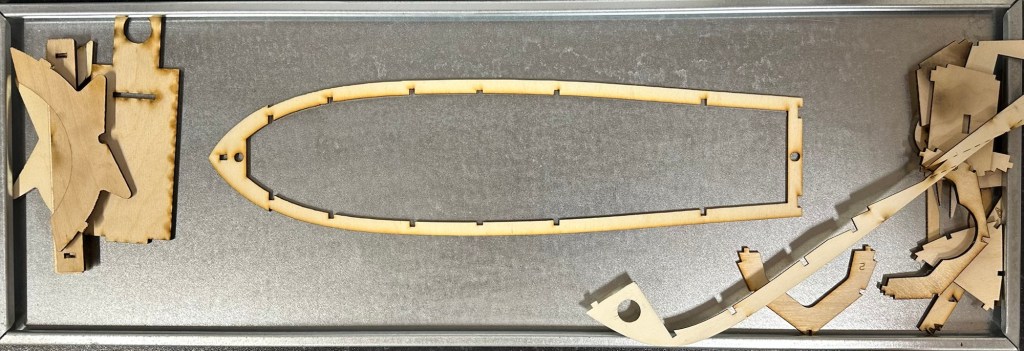
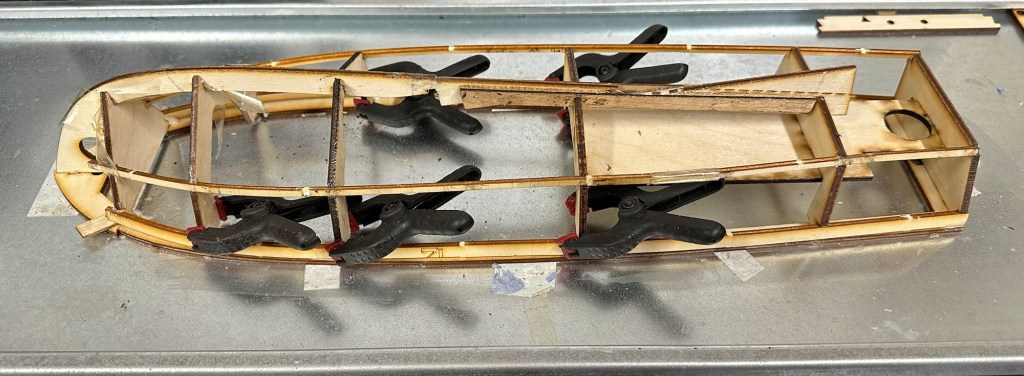
Firstly you have to secure the deck frame to a flat surface using some double sided tape. This is so you can start building the hull frame and prevent warping. I use a small steel shelf for my base that can easily be moved around and stored between sessions.
Secured to flat baseHull frameClamping strengtheners CuringMy shelf working space
There is a lot of time between sessions where you just have to leave parts to dry, you can quite easily try to do so much and potentially ruin all the good work you have done. Patience really does have to be a big part of what you do in build these models, the old adage of measure twice, cut once needs to be used so mistakes are kept to a minimum. You can make tiny adjustments when in the finishing process but for the time being you need to adhere to instructions as much as possible. Check and double check and always dry fit prior to gluing in place.
HullFormers to shape the bowRudder base in place
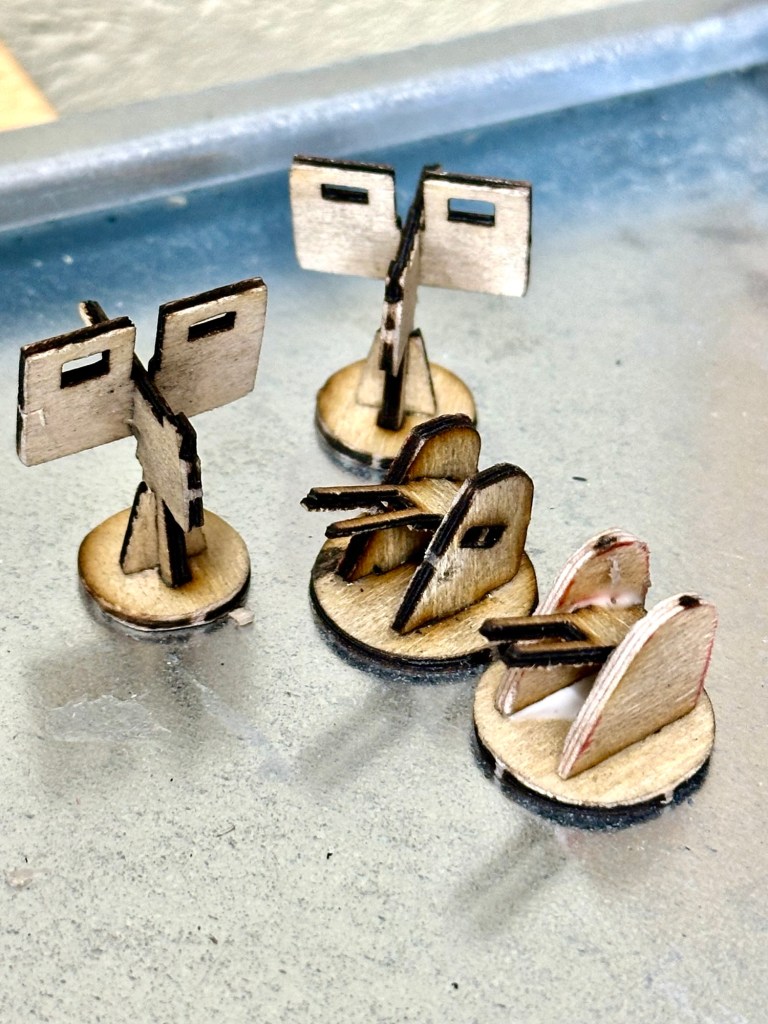
If you look at the picture below you will see how the laser etching burns really small parts. This doesn’t look good however they will look a lot better after they are sealed and painted, if I left all the parts like this the whole project would look as if it had been in a fire. I’ve had to build some of these parts from scratch as the kit itself had insufficient parts pre cut.
Burnt small parts…to be finished
The hull framework is now complete, next stage is to get the outer skins on, the bow formers in place and then hand sand, fill and sand again until the whole hull is ready to be sealed. Again there are issues here with the kit as one of the hull skins is two times thicker than it should be, hence the amount of bending required to shape the hull is not achievable. I have brought this up with the supplier and within a few days I have had a new set of replacement hull skins sent free of charge. Their customer service has been superb and it is good to see that some companies do still try their utmost to keep their customers happy. I will now progress with completing the hull.
These four boards form the outer skins. At 1.5mm they are very flexible. However you can see the second one from the left is twice as thick and not pliable enough. These were replaced by the supplier within a few days of notifying them of the issue.
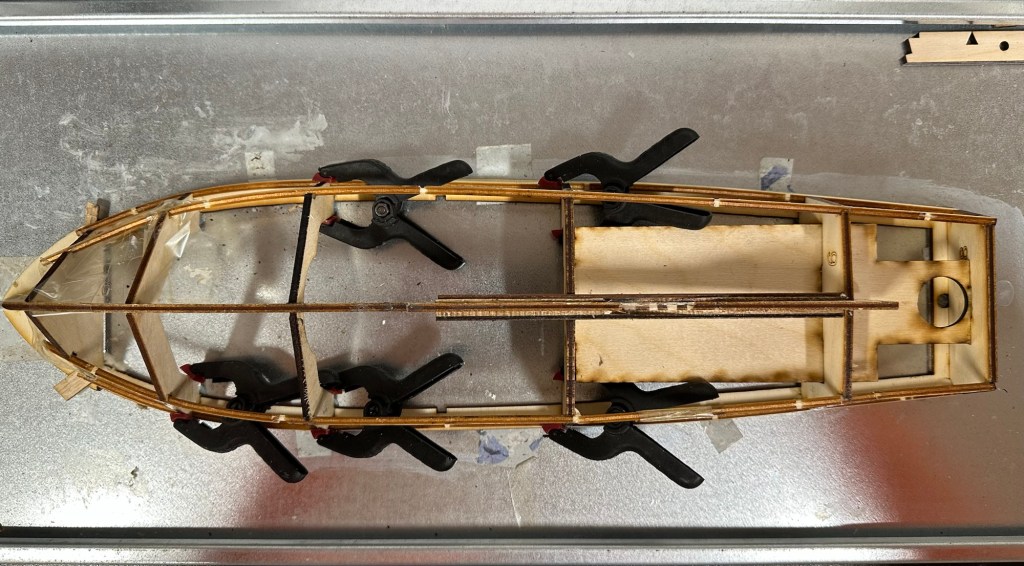
Below is a small video of the completed framework. It has probably taken about 8 hours in total to get to this stage (plus many more hours to allow glues to cure)
The hull framework complete
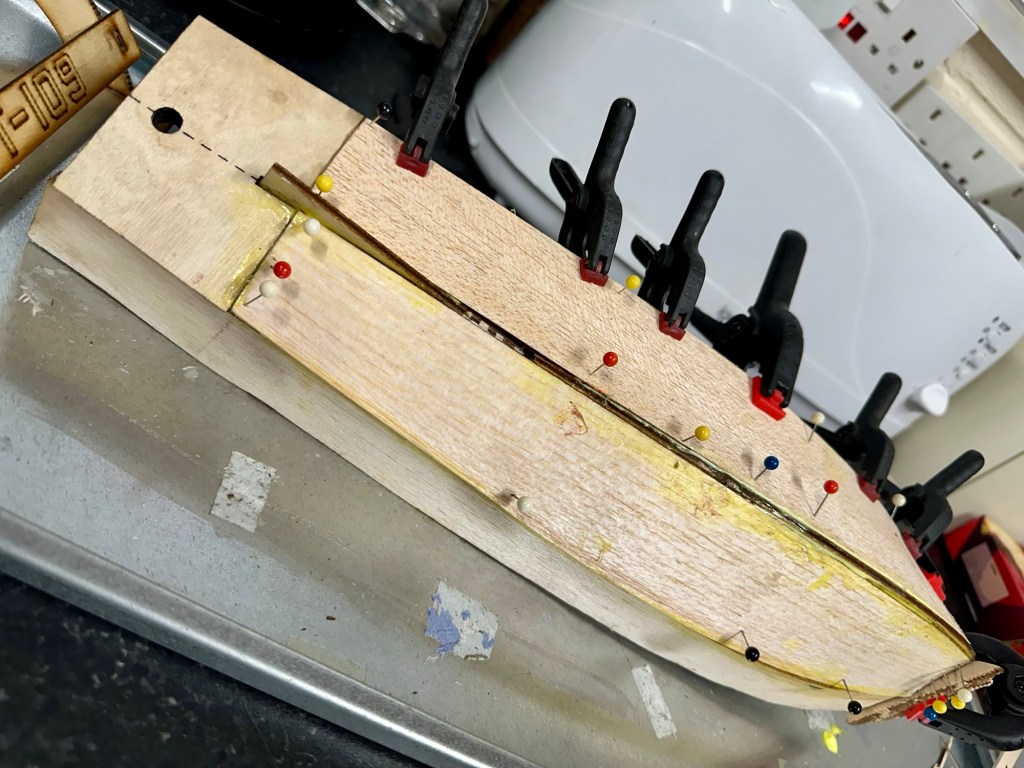
So tonight over a period of about 8 hrs I’ve managed to get the 4 balsa skins that form the hull into place. I’ve had to do a bit of re shaping and minor alterations, and the final bend of the skin would have bust it under the strain if I didn’t decide to wet it first. Wetting balsa allows the inside edge of the sheet to bend in, making these big bends in the hull shape possible. That as well as plenty of pins and clamps with epoxy resin ensures the skin stays where it is put. I left about an hour between each skin placement before moving on to the next one.
First skin Second skin Third and fourth skins in place, when dry I can commence light sanding and filling.
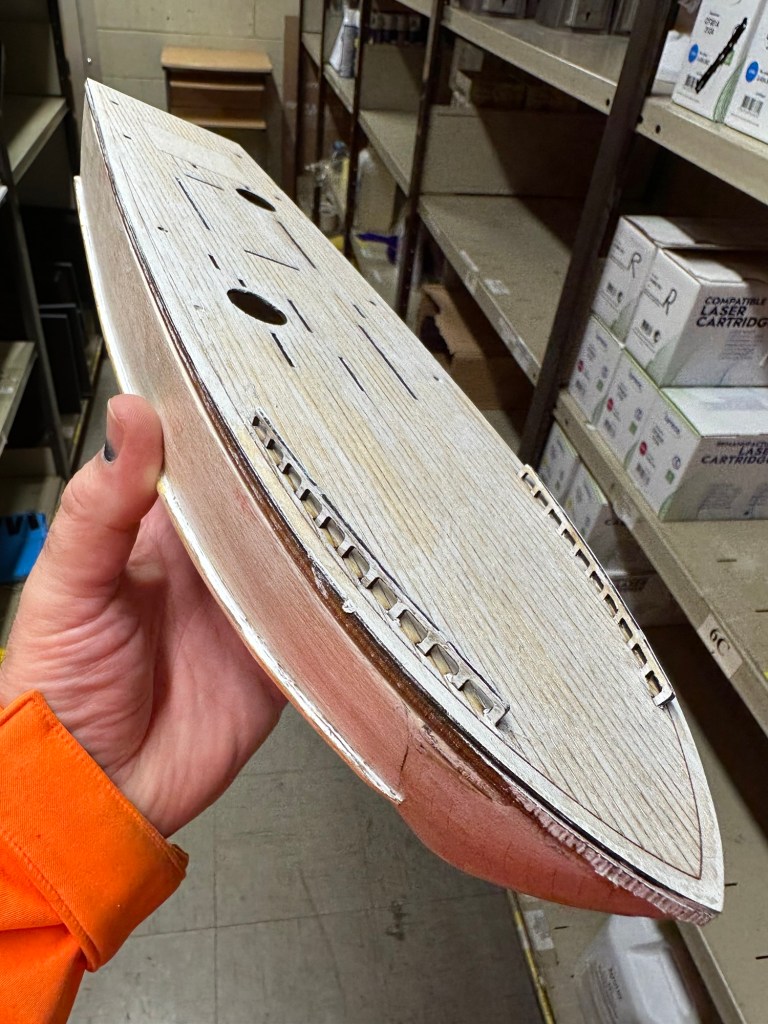
Here is the hull, assembled ready for sanding filling and all the other fun stuff required to make it look good and waterproof.
The hull ready for sanding, waterproofing and painting.
Tonight I have given the first heavy sanding with a course paper. This has really brought the hull up lovely. The former’s that were put in place have now been sanded to form a good bow profile. See photos below.
Before shaping After shaping
I now have to do a small bit of filling with balsa filler and then I will sand with a finer paper.
Looking more like a boat
Once the final sanding has been done I can then look at sealing the exposed wood and then begin the waterproofing and painting. The installation of the radio gear will go in place towards the end of the build. In the meantime I just have to build the superstructure on to the top deck. This will require some small bits to be painted before being put into place.
I’ve built the superstructure and that has been set aside to cure. There will be a lot of sanding and painting needed. I have attached the deck now and all those items will attach to it, and i must say it’s looking quite good.
Deck in placeHull structure now completeJust needs superstructure cabins adding once it has been sealed and painted.
I’ve now detached the deck and gone around with some balsa filler and hopefully tomorrow once it’s dry I can give it a sand with some fine paper and then I can look at putting on a coat or three of sanding sealer.
Sanding sealerTo be sandedAll superstructure sand sealed
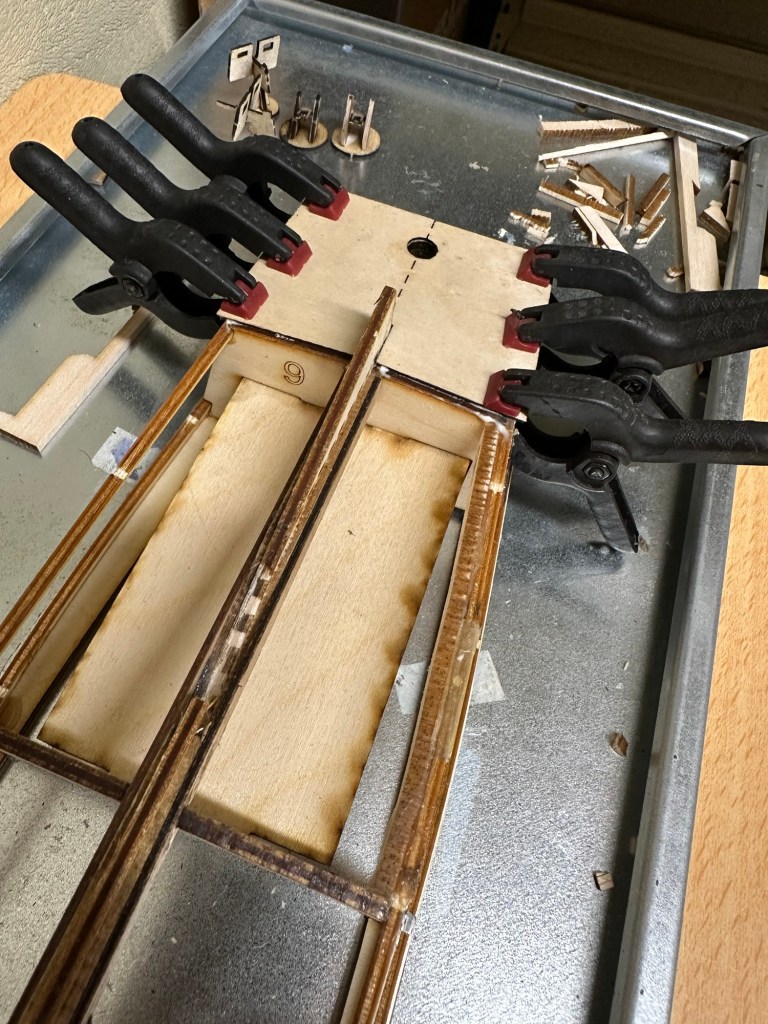
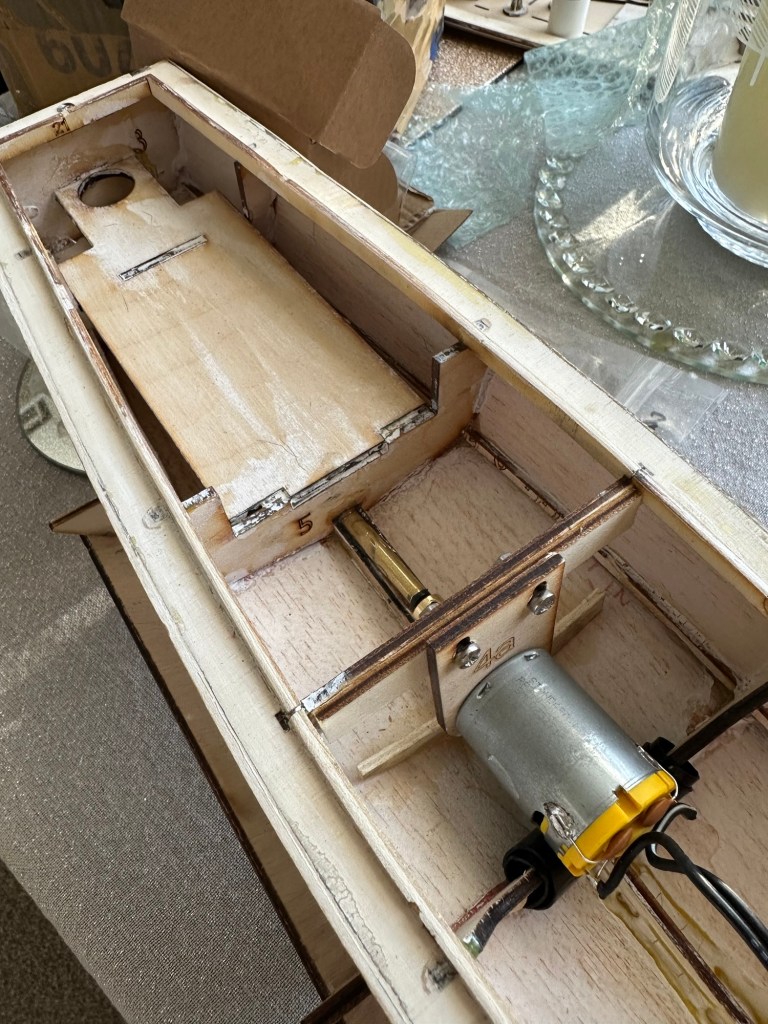
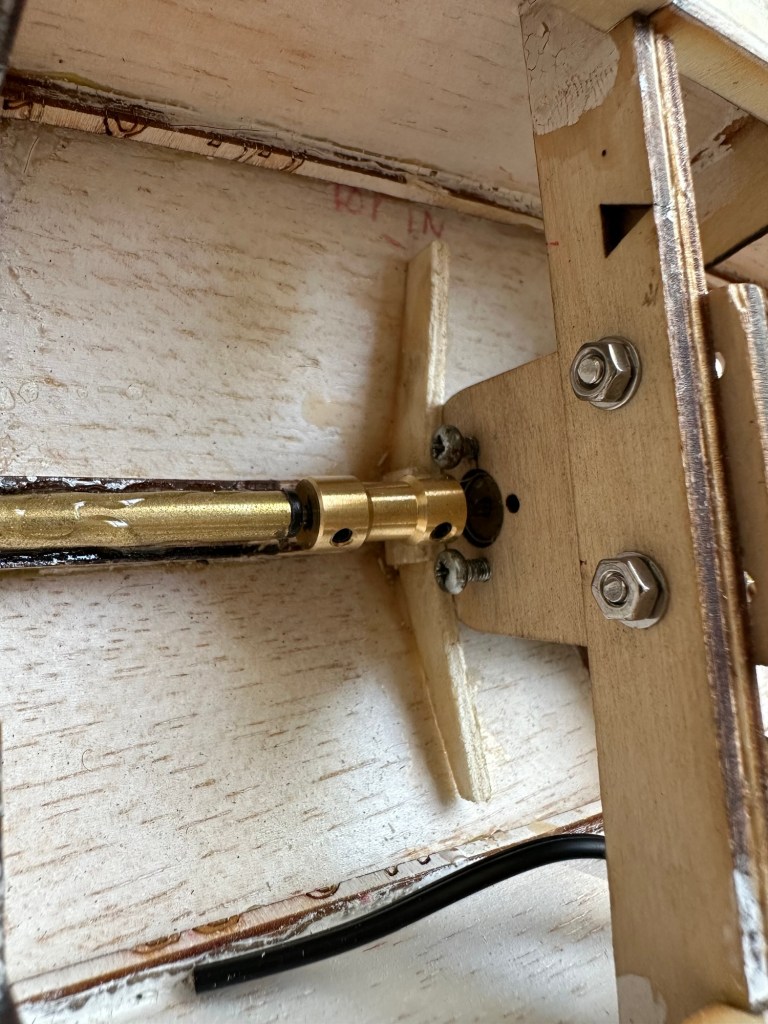
I’ve tonight managed to get coats one and two of the sanding sealer applied with sanding after each coat with a fine sandpaper. The torpedo tubes have been assembled along with other items and we are now very close to getting the painting started. However first I will give a final sand to the structure to see if it is ready for the primer. If not it will mean applying some balsa filler and applying coat 3. There really is no rush. I need to now get the prop tube in place and permanently positioned prior to any painting. I am considering a number of different paint combinations at this stage, but they are changing on a daily basis. I wonder what colours I will go with?
Rudder checks doneEngine in placeDrive connector in place
I’ve done the all the sanding and I’m now happy to commence the undercoat of the hull. I’ve fitted and removed the rudder and engine to test they fit ok, the boat is now bare and ready to paint. I’m going to individually paint the guns and superstructure before fixing to the deck. I might paint the deck with a dark varnish, I haven’t quite decided yet.
Part 2 of this post will cover the painting of the boat. Coming sometime in Feb 2025.
Interesting to read this. I passed my RAE exam back in December 2003. We didn’t have to master Morse code but I did take it on and even today I’m ok at deciphering it, if a tad slowly. I could transmit it at about 8 words a minute, and if I’d stuck at it I’m sure I’d have become better.
But like most things i just didn’t have the time available to further it. I do still like to put the radio on occasionally and listen to slow Morse on the amateur bands.
If you were in Tunisia in October, you might have caught some of the Morse Code championships this year. If you didn’t make it, you could catch the …
I was a product of the 60s and the only choice we had back in my childhood was 405 or 625 lines B/W Tv. Once turned on you had to give all the valves good time to warm up until a picture appeared, in truth you could probably go into the kitchen and make a snack before the ghosting even started to appear on the screen.
An old 405 lines tv
Back then we only had two channels, BBC and ATV, that was the forerunner of ITV.
No Adverts and only a few hours scheduling a day meant that you were more likely to see the test card transmission than any real TV program.
To be honest I probably listened more to my little transistor radio, or tranny as it was known then, nowadays I’d probably be pulled up by the PC brigade for even saying that.
We spent most of our days outside playing and exploring so TV never really factored into my formative years, I can’t really pinpoint specific programs I did watch however one really stuck in my mind as a funny moment. That used to be when we would watch a program called “Pot Black” it was a snooker program. However it was hard to determine colours of the balls on a black and white screen. It was funny when the commentators mentioned a coloured ball that they would refer to as “the grey looking one in the top corner” In fact they all had this colour as they were all just shades.
Aye, what with all your 1080, ultra HD 4K super duper vision you have now, you’ve never had it so good. But back in the day when it was a new technology it was truly ground breaking. I remember my old man saying “it’ll never take off”, how wrong was he?
Just a quick post, after having taken some time to think just how much electrical component’s have reduced in size in my lifetime.
What made you think this way? I hear you ask (or at least imagine that you ask.)
Well, today I had ten Audio amplifiers and fifty charging points delivered. Now, years ago I’d have probably had a large van deliver this little lot but today a small sized Jiffy bag came through my door containing all the above.
50 micro usb ports10 audio amplifiers
Ok the charging ports were micro usb ports and the audio amps were some small audio amps in an IC format needed for a current project I’m working on.
Amazing isn’t it just how far this technology has progressed. And shrunk in size.
Me and my wife both collect. She loves a certain brand of handbag, me, I collect cameras, photo postcards, radios, models, garden plants and ornaments and empty boxes.
Together we both collectively collect dust as we’d both rather be out making memories than doing boring household chores.
I love this little unit, it has a great radio reception probably better than a number of Sony Walkmans I have worked on to be honest. It has arrived in good cosmetic condition with only a few dinks and scratches commensurate with its 30 year plus age.
Radio works well
On opening up the unit it’s patently obvious that this is another drive belt issue, it’s saggy and breaks on removal. Luckily I have a replacement belt that I purchased earlier.
It’s another saggy worn belt issue
And that is basically it. No major dramas it’s as simple as replacing the belt.
Speed adjuster circled
A bit of light grease on the gears, a tweak of the speed adjustment and all sounds as it should.
I’ve used a calibration tape with a 3Khz sine wave, it’s tuned in pretty close to the tone and I’ve used a downloaded oscillator software package to check the matching. It’s not a professional setup but it’s fine for my requirements.
All working with a new belt
Sorry there is nothing else much to write but I have a good working unit that plays tapes well and all I can say is I’ve saved yet another easily repairable unit from landfill. I already have someone who wants to take this one off my hands so I hope it will have many more years of trouble free operation.


You must be logged in to post a comment.