Excellent sound quality on Blaupunkt DAB radio with built in speakers NOTE CD player mechanism is not working
(possibly an easy repair job)
Radio & remote OK.
RRP £99.00
EBay
I ended up paying the grand total £21:22 GBP for this item and that included postage. I may have got quite a good deal, however as usual I will have to await its arrival as you can’t always trust EBay listings. Hopefully the issue with the cd mechanism is a relatively easy fix 🤞
Blaupunkt Dab Cd radio
Looking forward to getting busy on this one, back to the end of the ever growing list of items to work on you go.
I’ve purchased the item below from EBay. Got a bit of a discount and ended up paying £7:18 GBP in total. I need a small radio for listening to the sports commentary at work and thought this would be a simple enough project for me.
Sony ICF-480L 3 Band Receiver FM MW LW Portable Radio FAULTY Sold as SPARES
The unit is FAULTY. It powers on but the sound quality is poor and the volume is NOT loud. There is NO mains adaptor included. Sold as SPARES.
EBay
Cosmetically it looks a little tatty but a good clean up and touch up with a Sharpie pen might see to that, maybe a new potentiometer or just some contact cleaner might sort the sound issue out.
Sony ICF-480L
Anyway I will await delivery and post an update of the condition and repairs I will need to carry out shortly. You can see the assessment and repair of this radio here: Sony ICF-480L 3 band radio assessment and repair
I’ve got a bit of a queue of repairs on cameras still to come as I’m awaiting parts / components for them. So keep an eye out for a flood of updates on previous posts over the coming weeks.
I could go into lengthy detail but I won’t bore you just yet. Below I have quoted the Wikipedia entry that explains things in a nutshell better than I ever could. I will however give a few details of attempts I have made and equipment I use for carrying out this mode of communication. I am currently building a new radio for this mode that I will cover in a later post.
WSPRnet map
WSPR (pronounced “whisper”) is an acronym for Weak Signal Propagation Reporter. It is a protocol, implemented in a computer program, used for weak-signalradiocommunication between amateurradio operators. The protocol was designed, and a program written initially, by Joe Taylor, K1JT. The software code is now open source and is developed by a small team. The program is designed for sending and receiving low-power transmissions to test propagation paths on the MF and HF bands. WSPR implements a protocol designed for probing potential propagation paths with low-power transmissions. Transmissions carry a station’s callsign, Maidenhead grid locator, and transmitter power in dBm. The program can decode signals with a signal-to-noise ratio as low as −28 dB in a 2500 Hz bandwidth. Stations with internet access can automatically upload their reception reports to a central database called WSPRnet, which includes a mapping facility.
Wikipedia
What fascinates me most about this mode of communication is that in recent weeks it has gained a new audience as a result of a television documentary. This documentary was regarding the search for the missing Malaysian airways flight MH370 that vanished from radar screens on the 8th March 2014. An investigator tracking its disappearance has been cross referencing WSPR signals in the area that the aircraft was last reported and he has apparently plotted the route taken by monitoring these signals as they were reflected or distorted by the aircraft’s footprint in this area, well beyond the planned flight path.
Wspr on the 80 Mtr bandWspr into Europe
My setup for testing propagation on a number of different bands is very portable as that’s normally the way I work when taking to the airwaves. I’m always moving around or working from different locations so it’s always good to be able to monitor conditions using a compact setup.
Wspr into Australia
I do also have an aerial system set up in my loft that cannot be seen, it’s kind of clandestine in that way it does not grab the unwanted attention of my neighbours. I specialise in low power communications and again this does not draw the attention of anyone living near by as disturbance and interference rarely occurs. The maximum power level I normally use is 10 watts, but more likely somewhere around the 5w QRP level. My WSPR setup operates between 200mW and 5mW of power. Extremely low power, there is probably more power in that sports watch sitting on your wrist than what I am transmitting.
My Portable setup
I have an inflatable aerial, yep that’s right inflatable! Perfect for mobile operation using QRP low power technology, It covers most of the high band frequencies and I mainly use it on the 20 Mtr band (14mhz) or the 40mtr band (7mhz) though other bands are also available. Fully inflated it stands about 6ft high and can be hung outside, inside or just perched in a corner somewhere.
Inflatable multiple HF band antenna
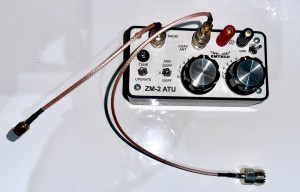
There is an antenna tuner , this is one I purchased from the States in a kit form and built myself. It’s called an Emtech ZM-2 Atu details can be found HERE
Emtech ZM-2 ATU
The actual transmitter sits in a small package not much bigger than a box of matches. This was purchased already built and is called a WSPRLITE classic. I am in the process of building a new transmitter and receiver combo that is also in a kit form, I don’t anticipate completing it any time soon as I just don’t have the time at the moment.
WSPR Lite transmitter
I have made a number of filters for the different bands (40mtr, 60mtr,80mtr and 160mtr) and these boards connect to the output of the transmitter to aid in obtaining a clean signal and to prevent deviation from the set frequency.
Band filters for WSPR operation
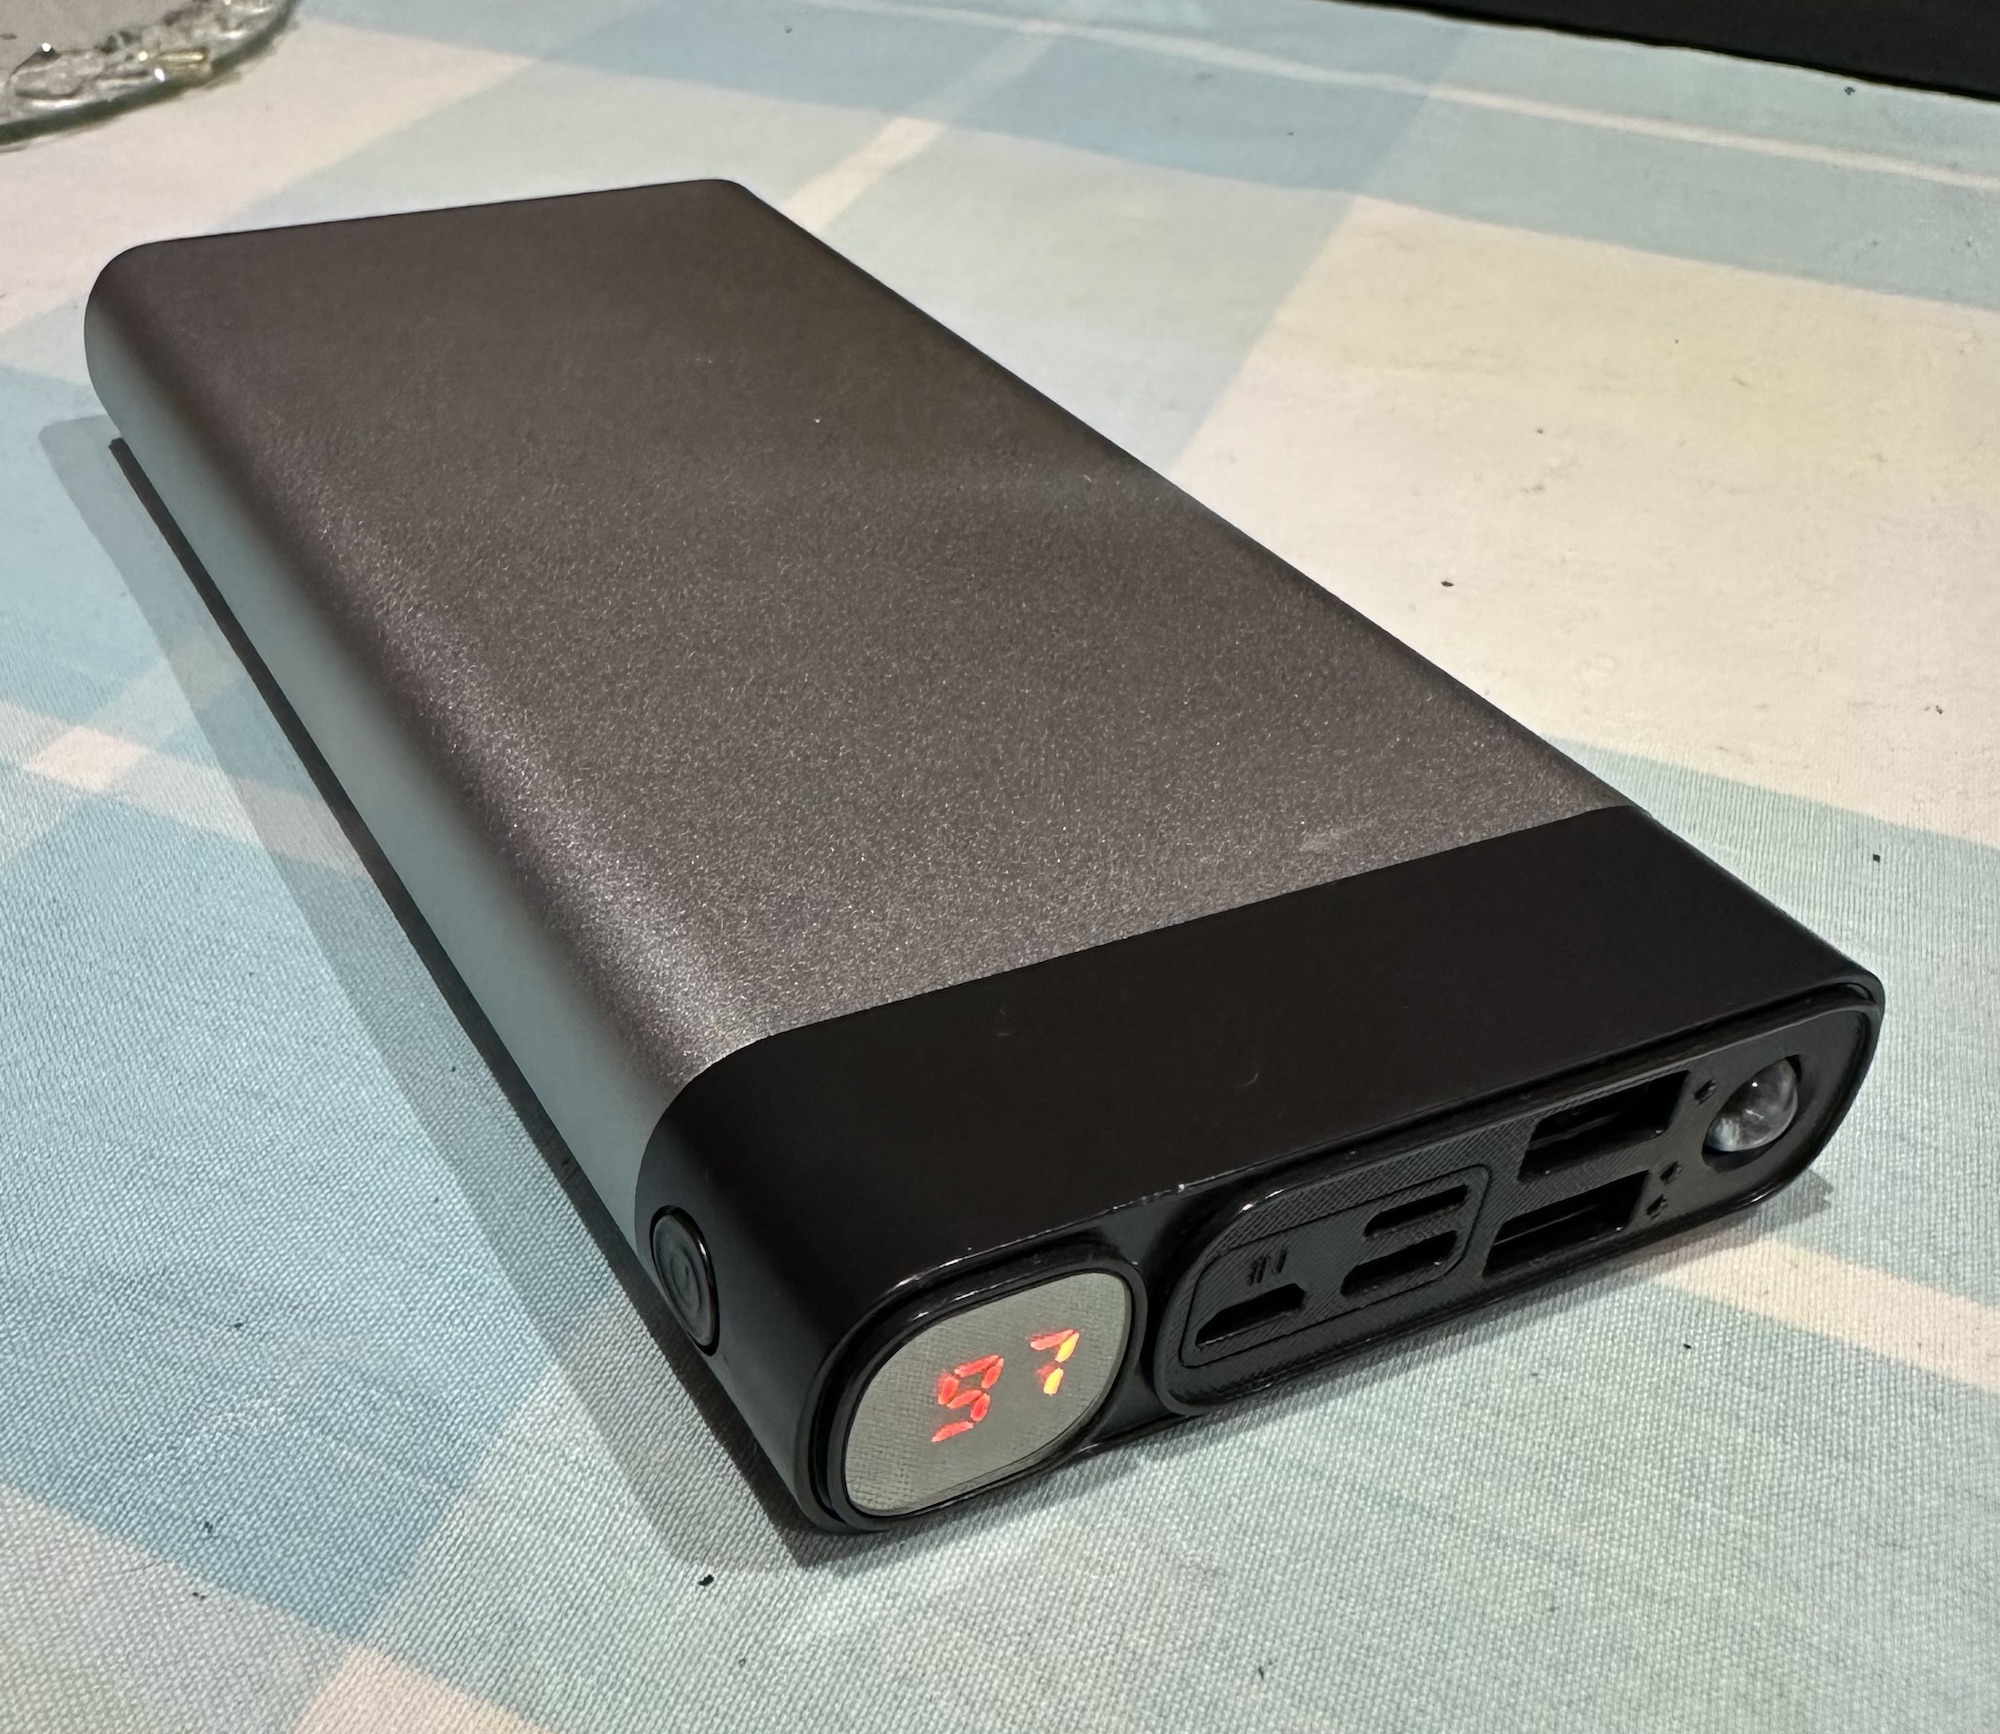
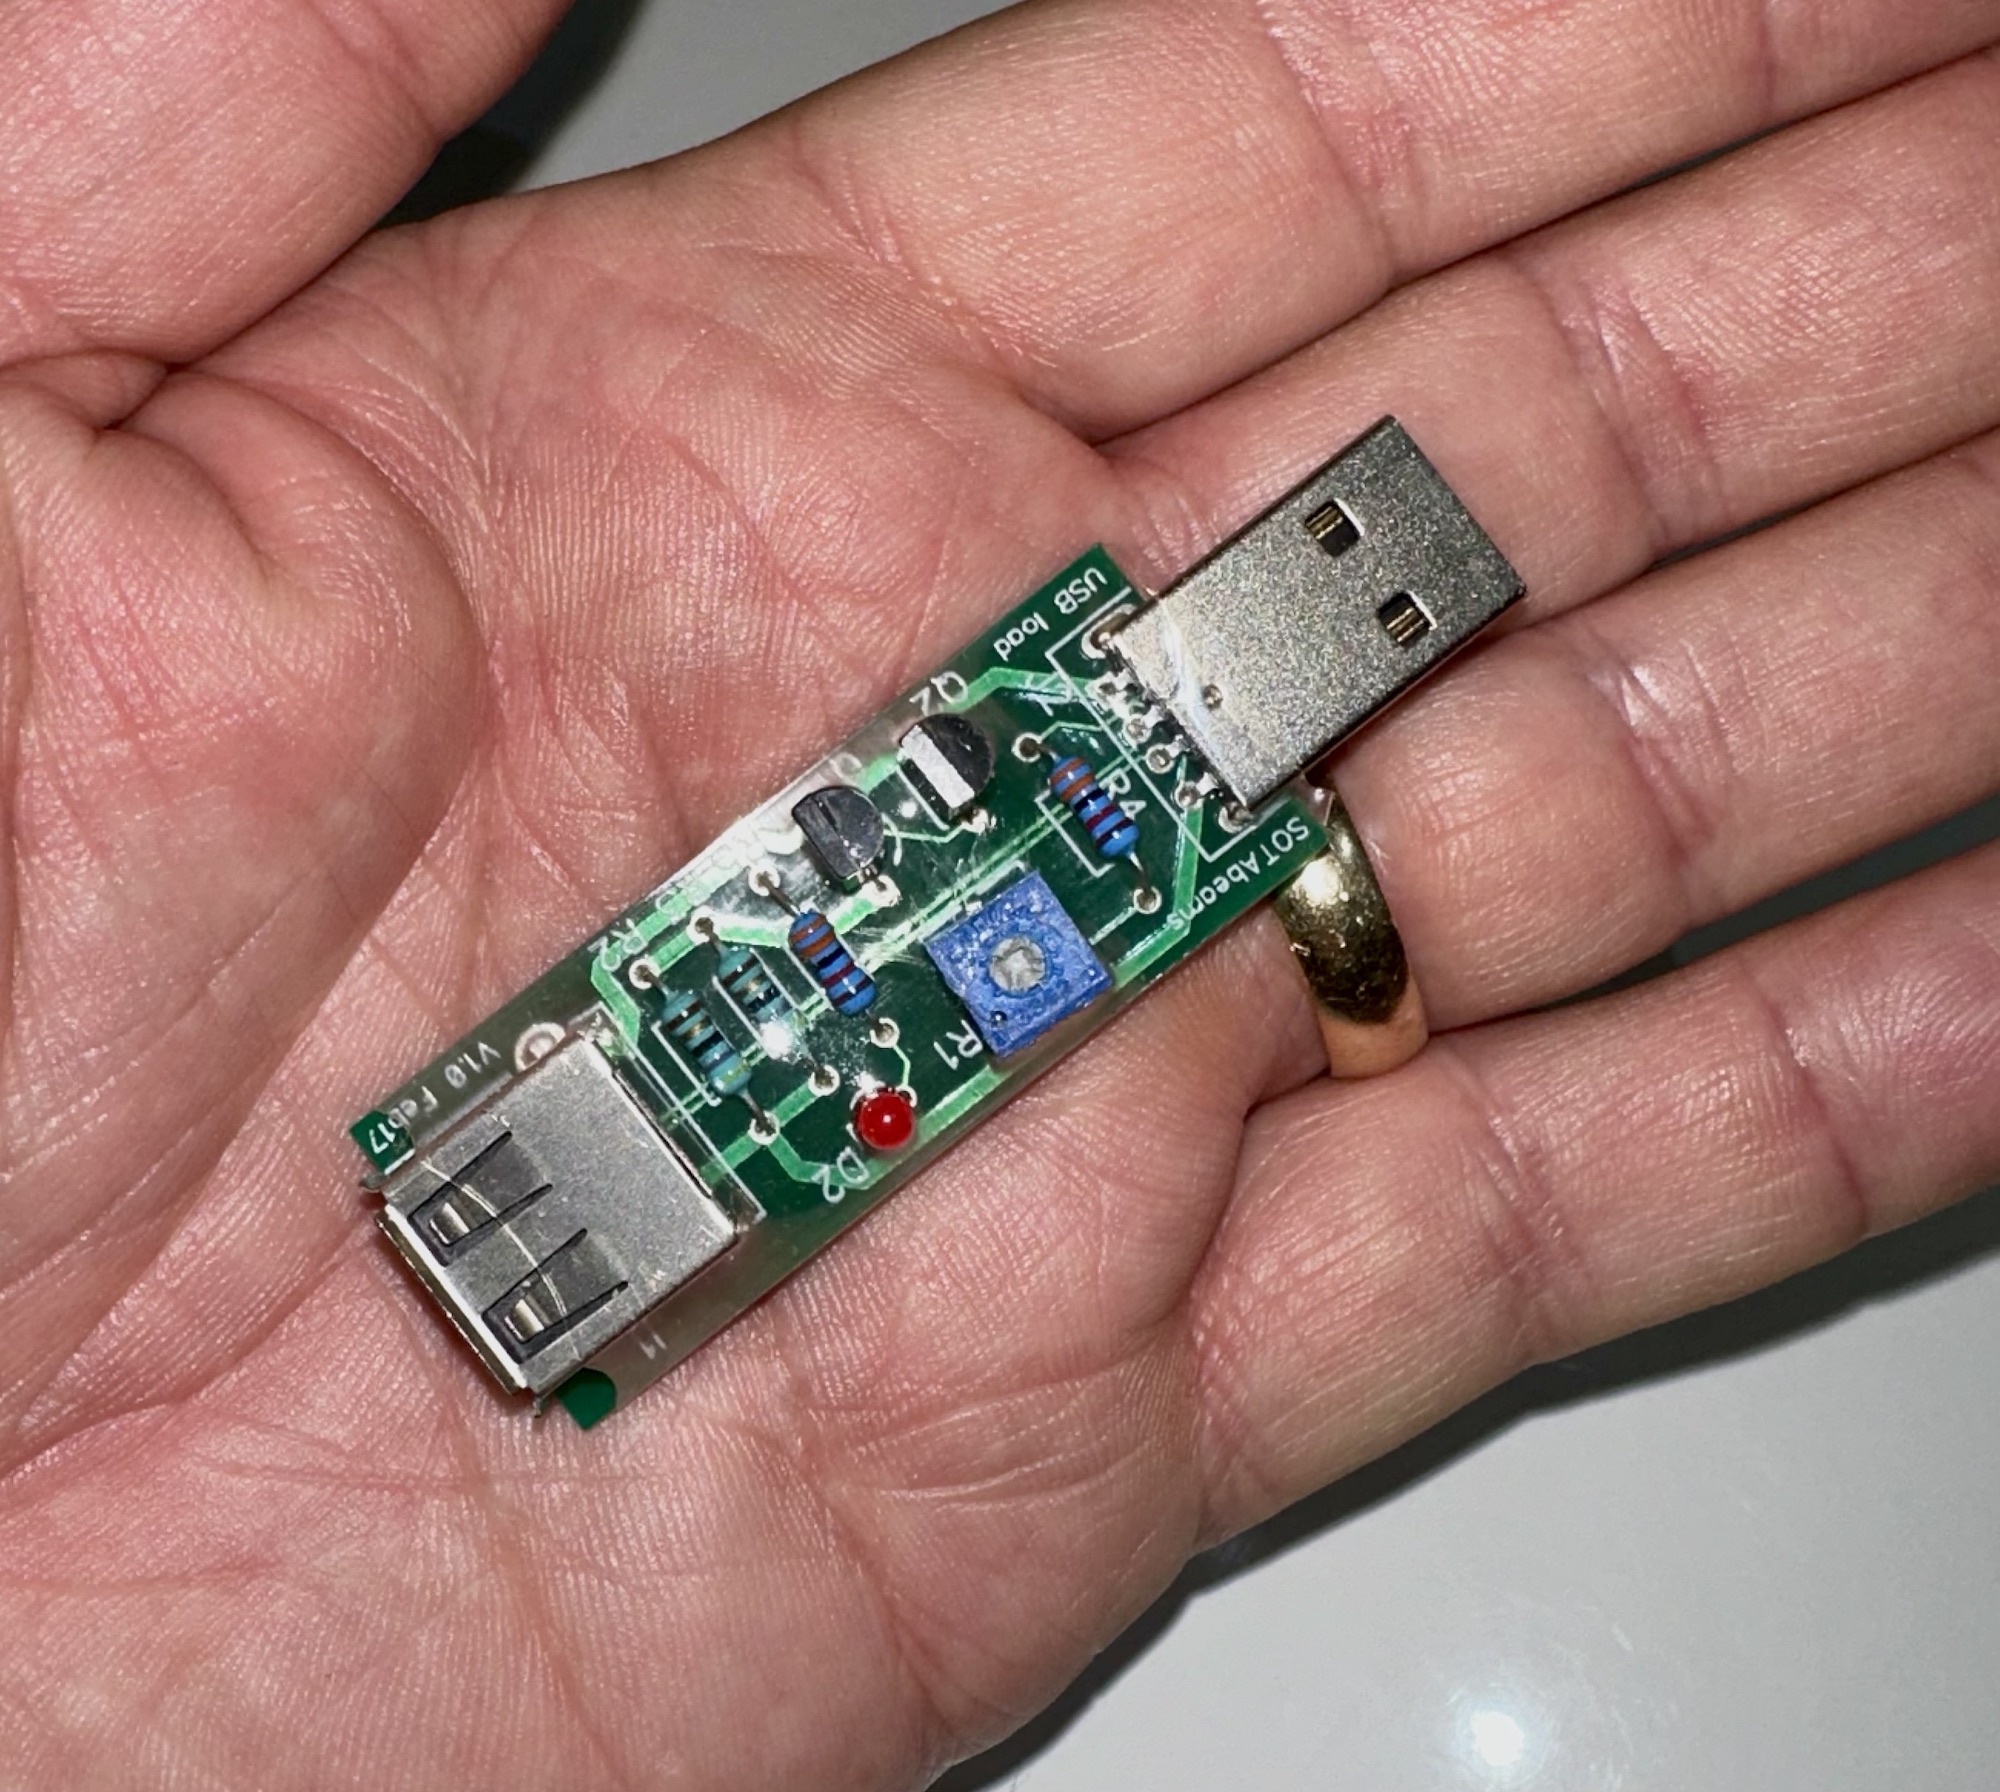
The power comes from a 3000 mAh 5v power bank. However the problem here is that the power draw from the WSPR unit is so small the power bank will some times close down, and for this reason I have had to build a small usb circuit that creates a minimal demand on the power bank keeping the power supply constant. With this power bank and the WSPR unit on its high setting I can easily get 16 hrs of continuous use. When I work on the lowest setting I can achieve 3 full days (72hrs) of use.
3000 mAh power bankThe circuit used to fool the power bank
And that’s about it, all this kit can fit in a small unobtrusive bag or box.
Operation
First and foremost the transmitter connects to a computer where you can access all the parameters of the unit and set it up how you want your operate, power, duration and frequency etc. The unit already has inbuilt filters for the 20mtr (14Mhz) band so you don’t need additional filters if that is your band of operation. Once the programming is done you can now set the system up in place as you want it. I sometimes use this from my loft to see just how well certain bands are working in certain directions at different times of the day.
The battery connects to the transmitter that in turn connects via the filter to the Antenna tuner unit. the antenna unit connects to the antenna.
Timing has to be precise when setting up, you set it to transmit at every 2 minute interval.
Once you are transmitting it’s worth leaving it be for about 30 minutes and then you can pop on to WSPRnet to check your signals. You can check what is being received and what strength of signal is getting through to your destination .
I use an app called WSPR watch that connects via the WSPRnet system so I can monitor my performance from absolutely anywhere just by using my mobile phone or iPad. How convenient is that? I can leave the unit unattended and monitor it remotely.
In summary the WSPR protocol uses a very weak signal to test atmospheric and solar cycle conditions to determine a viable route for a signal to reach a destination. if you were to listen in at the destination all you’d probably hear is white noise, however the decoding program is so accurate it can pick up a signal to noise ratio of as low as -28db.
Im leaving it there as I could ramble on for ages. If anyone for some strange reason wants to know more then please get in touch.
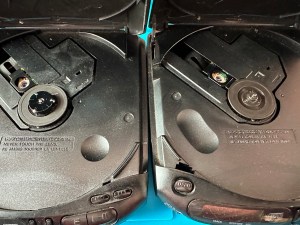
Double trouble here as I’ve purchased two of them.
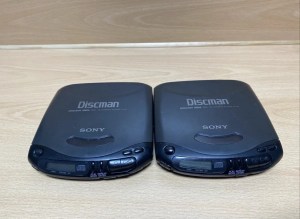
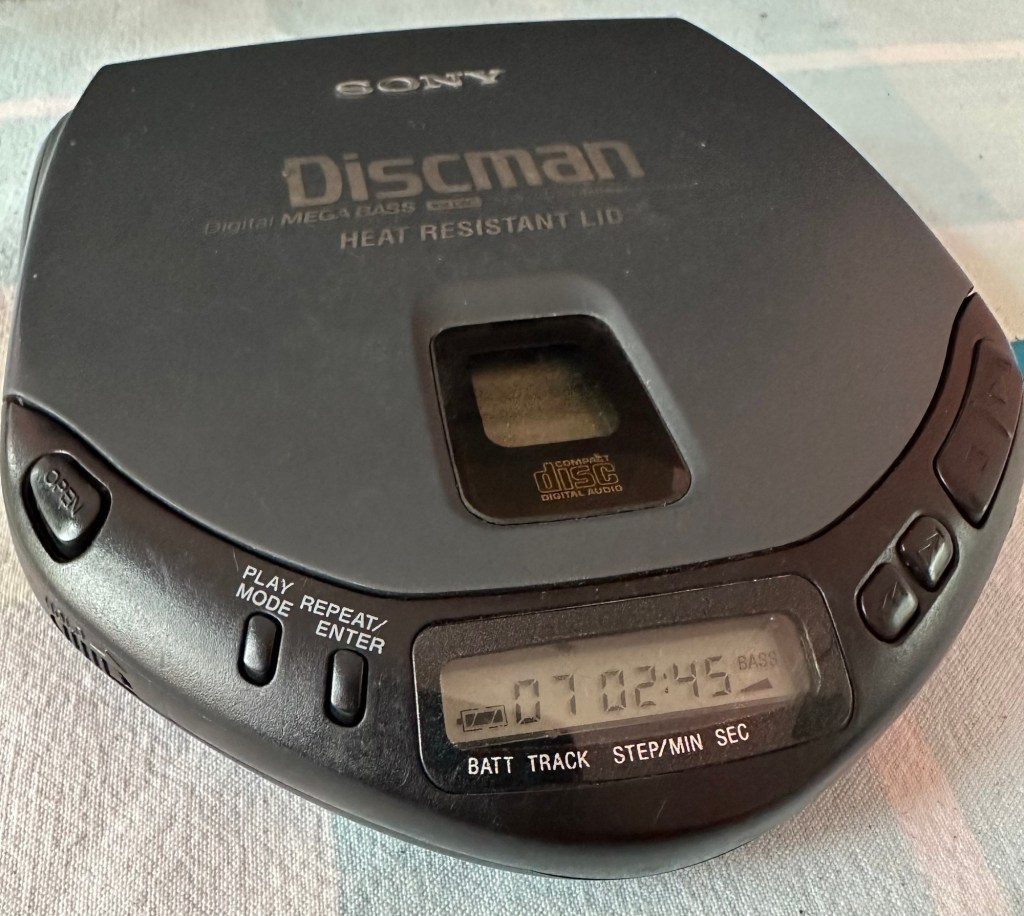
Sony Discman D-141 – double trouble
These variants are from 1994 just around the height of the capacitor plague problem. As I’ve already dealt with a D-121 version this week that was riddled with the issues and being only a year older, I’m not too hopeful that these two will be any different. They both have the same issue being that they turn off after about 10 seconds, this could be due to a number of issues, let’s get them unpacked and get an initial inspection done.
On initial inspection they both appear to be quite tidy considering they are 30 years old. One is missing a disc capstan however i do have a replacement from the old D-121 that was added to the spare parts box earlier this week.
Both start up, spin and then stop, sometimes showing a no disc error, sometimes not. The good news is there is no sign of corrosion on either unit.
Time to open them up….
One missing cd capstanCd capstan replaced
I used the old donor D-121 from earlier in the week to replace the missing capstan on one of the units.
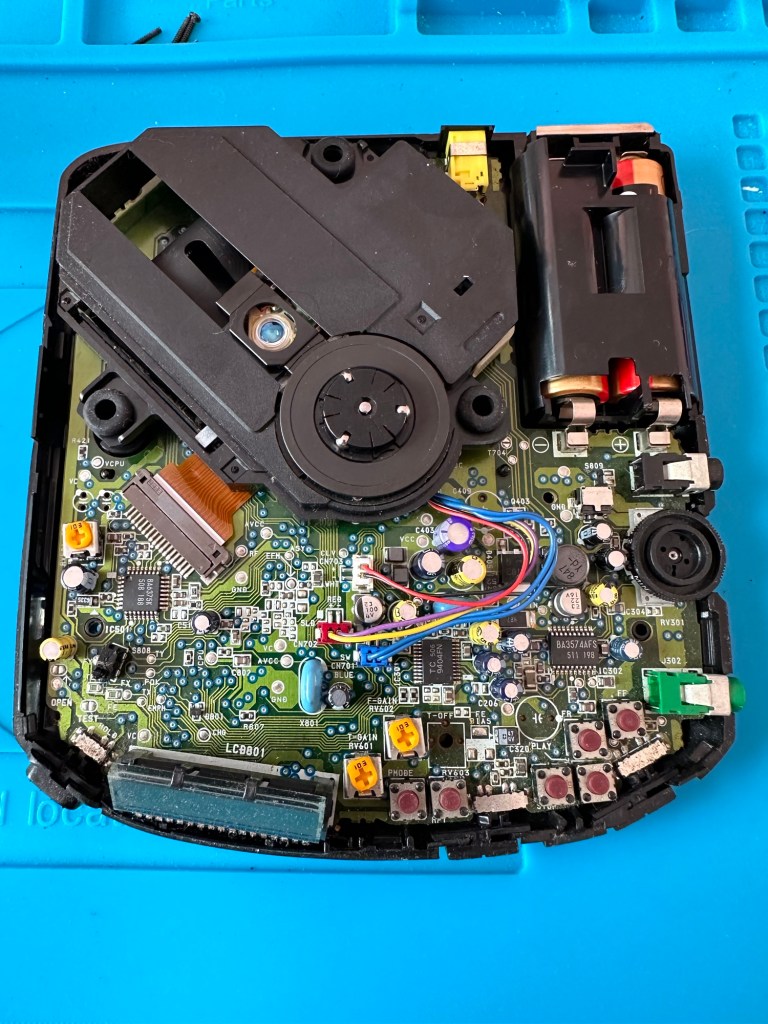
On opening of the cases the boards looked ok. No signs of corrosion or plague damage, this was a good sign and it was now time to look a little deeper.
Looking at the board
I did the standard clean of the lenses with IPA, I re greased the worm gears and rails but none of this alleviated the issue of the discs stopping just after start up. I did some continuity checks and component checks, all seemed ok. All buttons worked, all switches worked, something just wasn’t right. I decided to check the output of the laser adjustment pot and this was extremely low. I spent a good hour on the first unit and a similar time on the second trying to adjust the range up and down before realising that after 30 yrs both lasers seemed to be at fault. No adjustments improved the output.
Faulty laser assembly removed and replaced
I was facing the fact that I’d now have two more failed units to go with the D-121 earlier this week. Then I thought why not try the laser out of that failed unit?
It worked. The D-121 donor unit was compatible with the D-141 and after a few minutes adjusting the laser we were able to play an audio Cd.
We have life
This week I have looked at 4 faulty units and managed to get 2 fully working with a third one needing a replacement laser sled when one becomes available. I have one spare redundant unit that has been indispensable for the repair of the other units, in theory i potentially have 3 out of the four available.
All dressed up
I won’t be wasting anymore time on Discmans in the foreseeable future. They had their time and digital sound has obviously pushed this medium in to the dark distant past. The units are becoming life extinct and it’s like performing knee surgery on an elderly individual, you are improving their quality of life for the moment until the ravages of old age take over. Bit of a crude analogy I know, what I’m saying is steer clear of these as they are going to be trouble, people seem to think they are worth a fortune and are charging ridiculously high prices for something that just about works.
It’s been fun though and I have learned a lot from it so it can’t all be bad.
My latest purchase from EBay has arrived and god knows what is wrong with this one as the listing contained just one word “Untested”.
There is no one else to blame but me so let’s get this package open and have a look…here goes.
This unit is circa 1996, so there is a gap of 3 years between this and the D-121 that i recently attempted repair on that was badly affected by poor components. Hopefully technology has moved on slightly in those three years, and the plague of the past isn’t as prevalent in this unit.
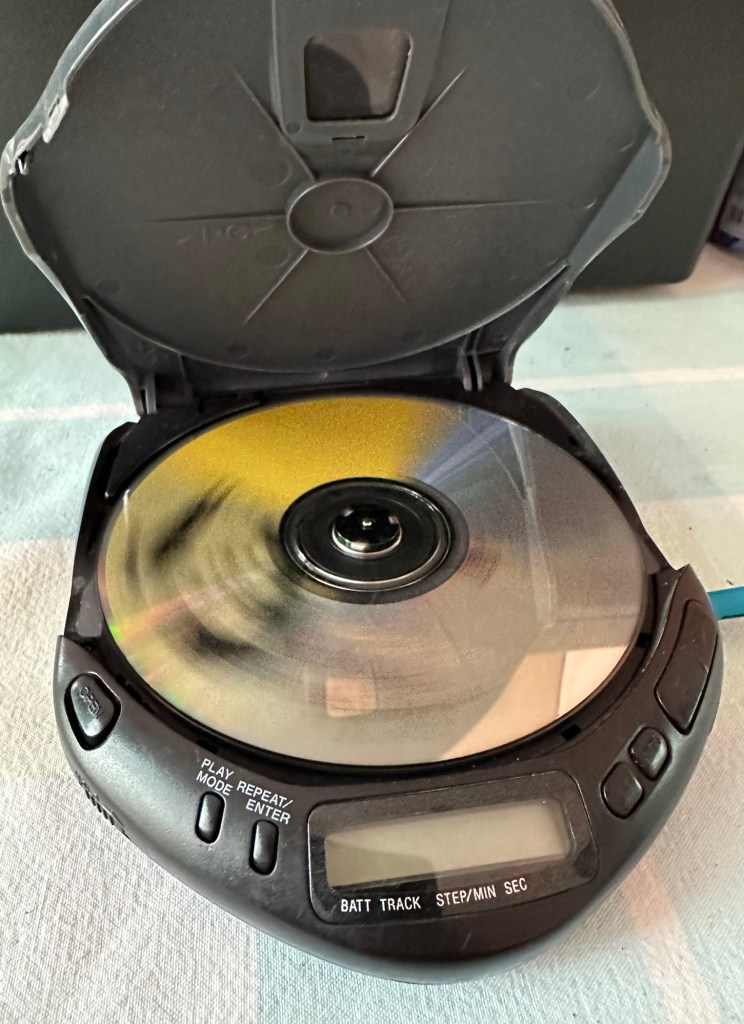
All powers up Spinning as it should
Well, once in your life you buy something that restores your faith in your fellow man, unfortunately EBay isn’t always that place and you have to take your chances when purchasing using that platform. Today is a good day. The package was minimal and I didn’t hold out much hope. The first thing I did was to open the tray, good it’s working👍
Next I held my breath and opened the battery compartment…. Excellent no corrosion 👍
Batteries inserted I chose an old Bryan Adams album, put the volume about mid way and turned it on.
IT WORKED 😳
Ok, if tapped it jumps, so I will give the lens a clean and will lubricate the worm gear and rail and see if that helps, if not I might test the laser output and make a tiny adjustment but I’ll avoid that if I can.
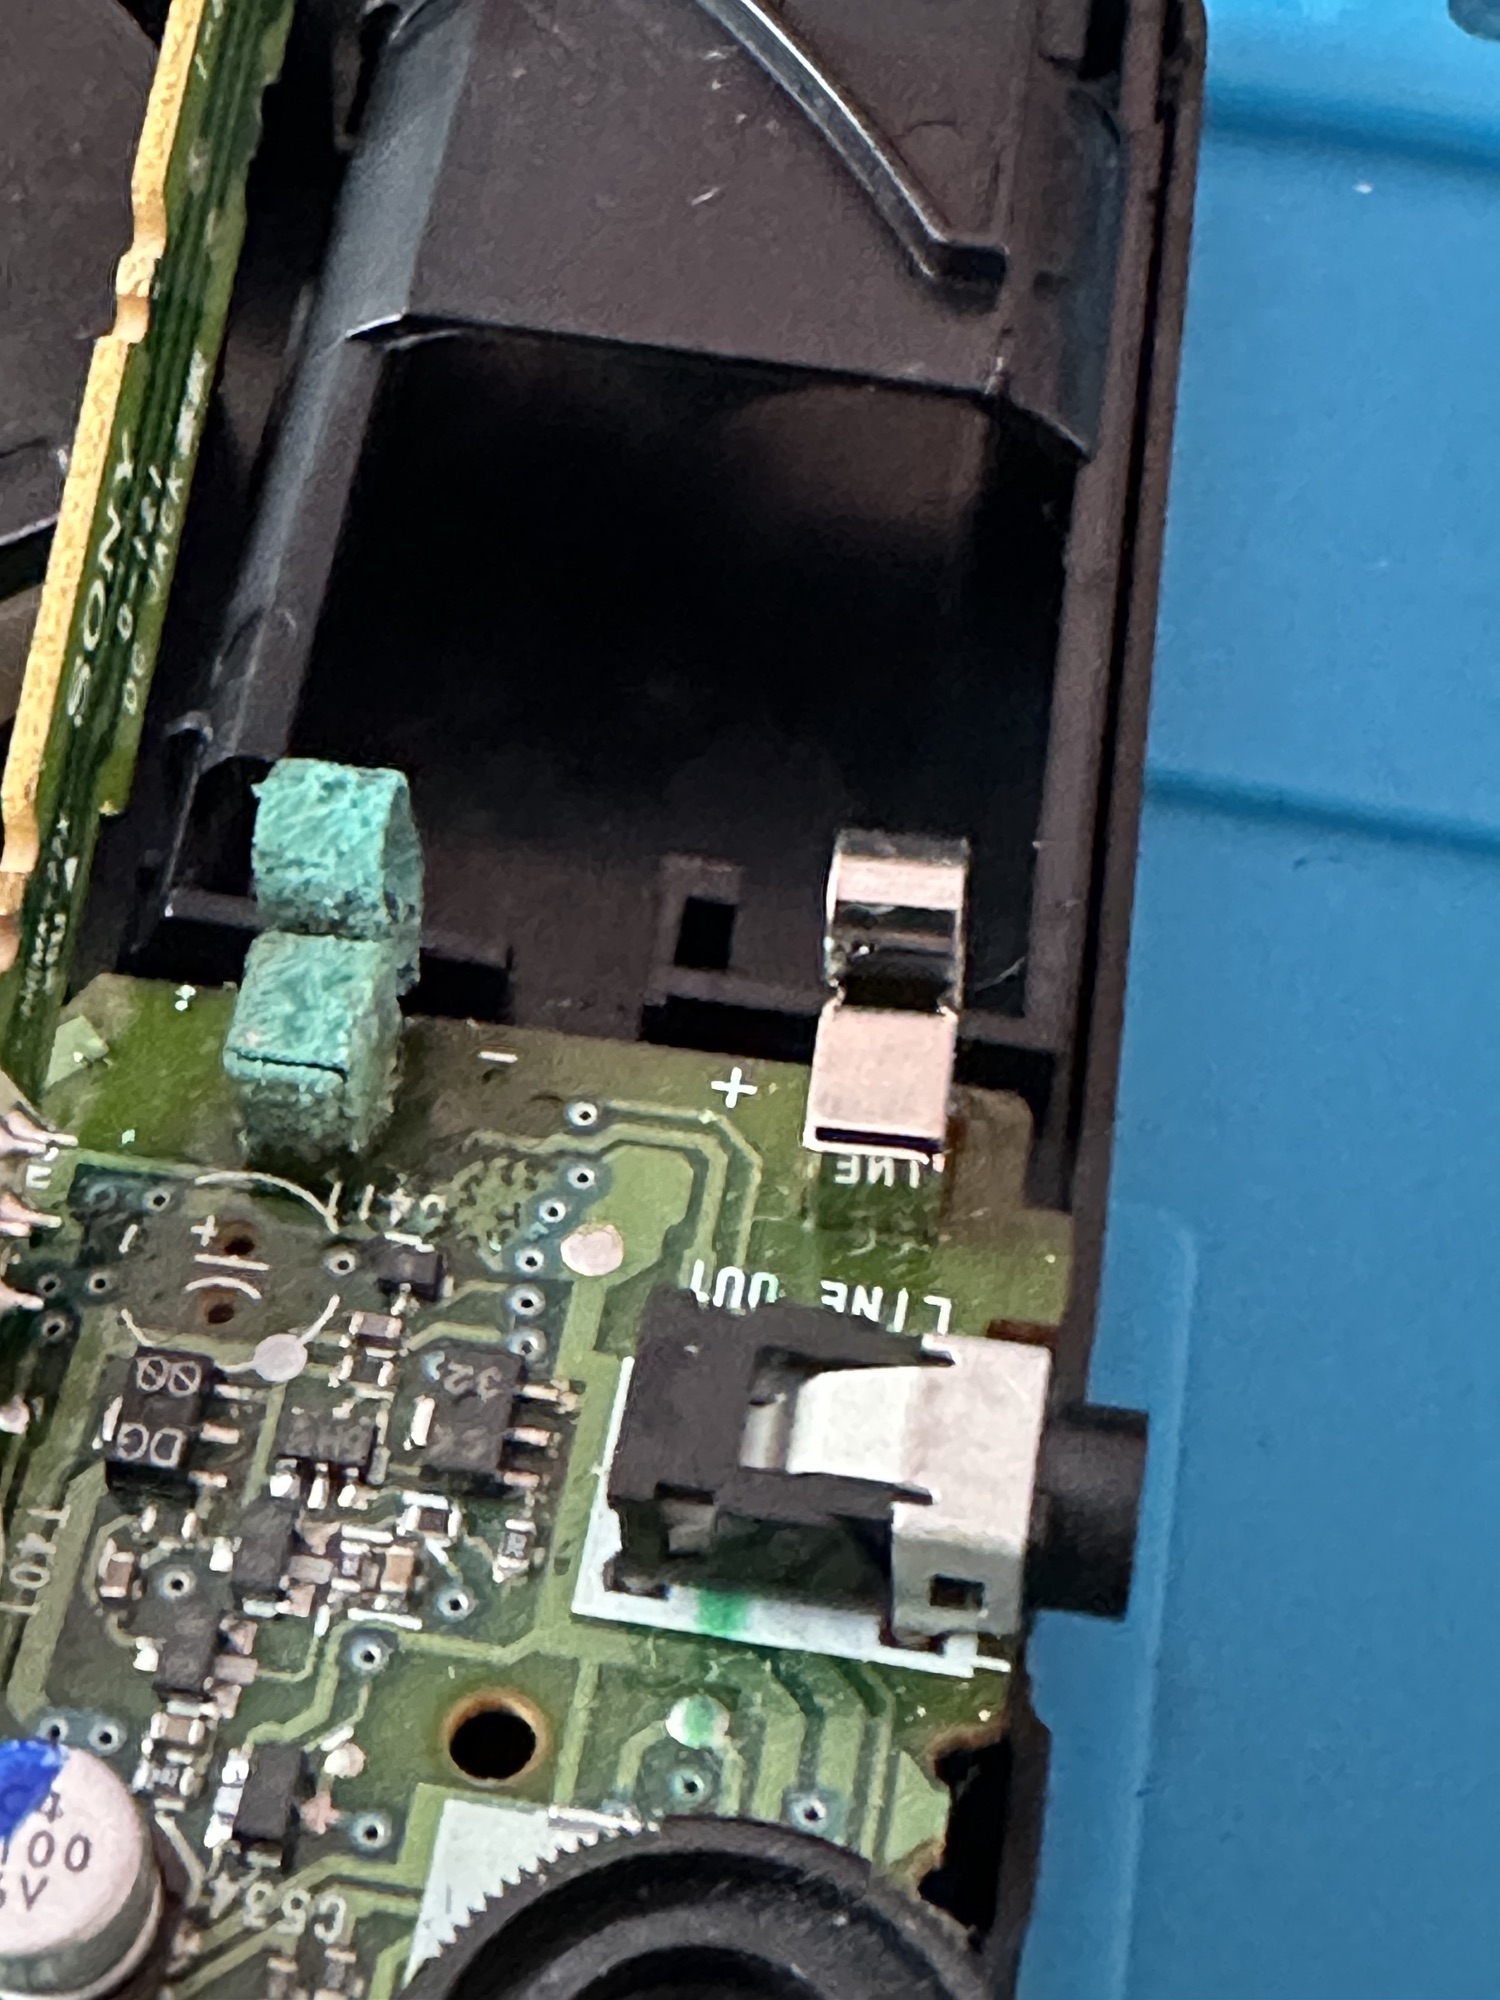
All buttons have been used, wiggled about and are working fine, all menus are displayed and basically it’s all working pretty much as it should be apart from some little adjustments. The shell is un damaged but a little tatty so a good clean up will assist here.
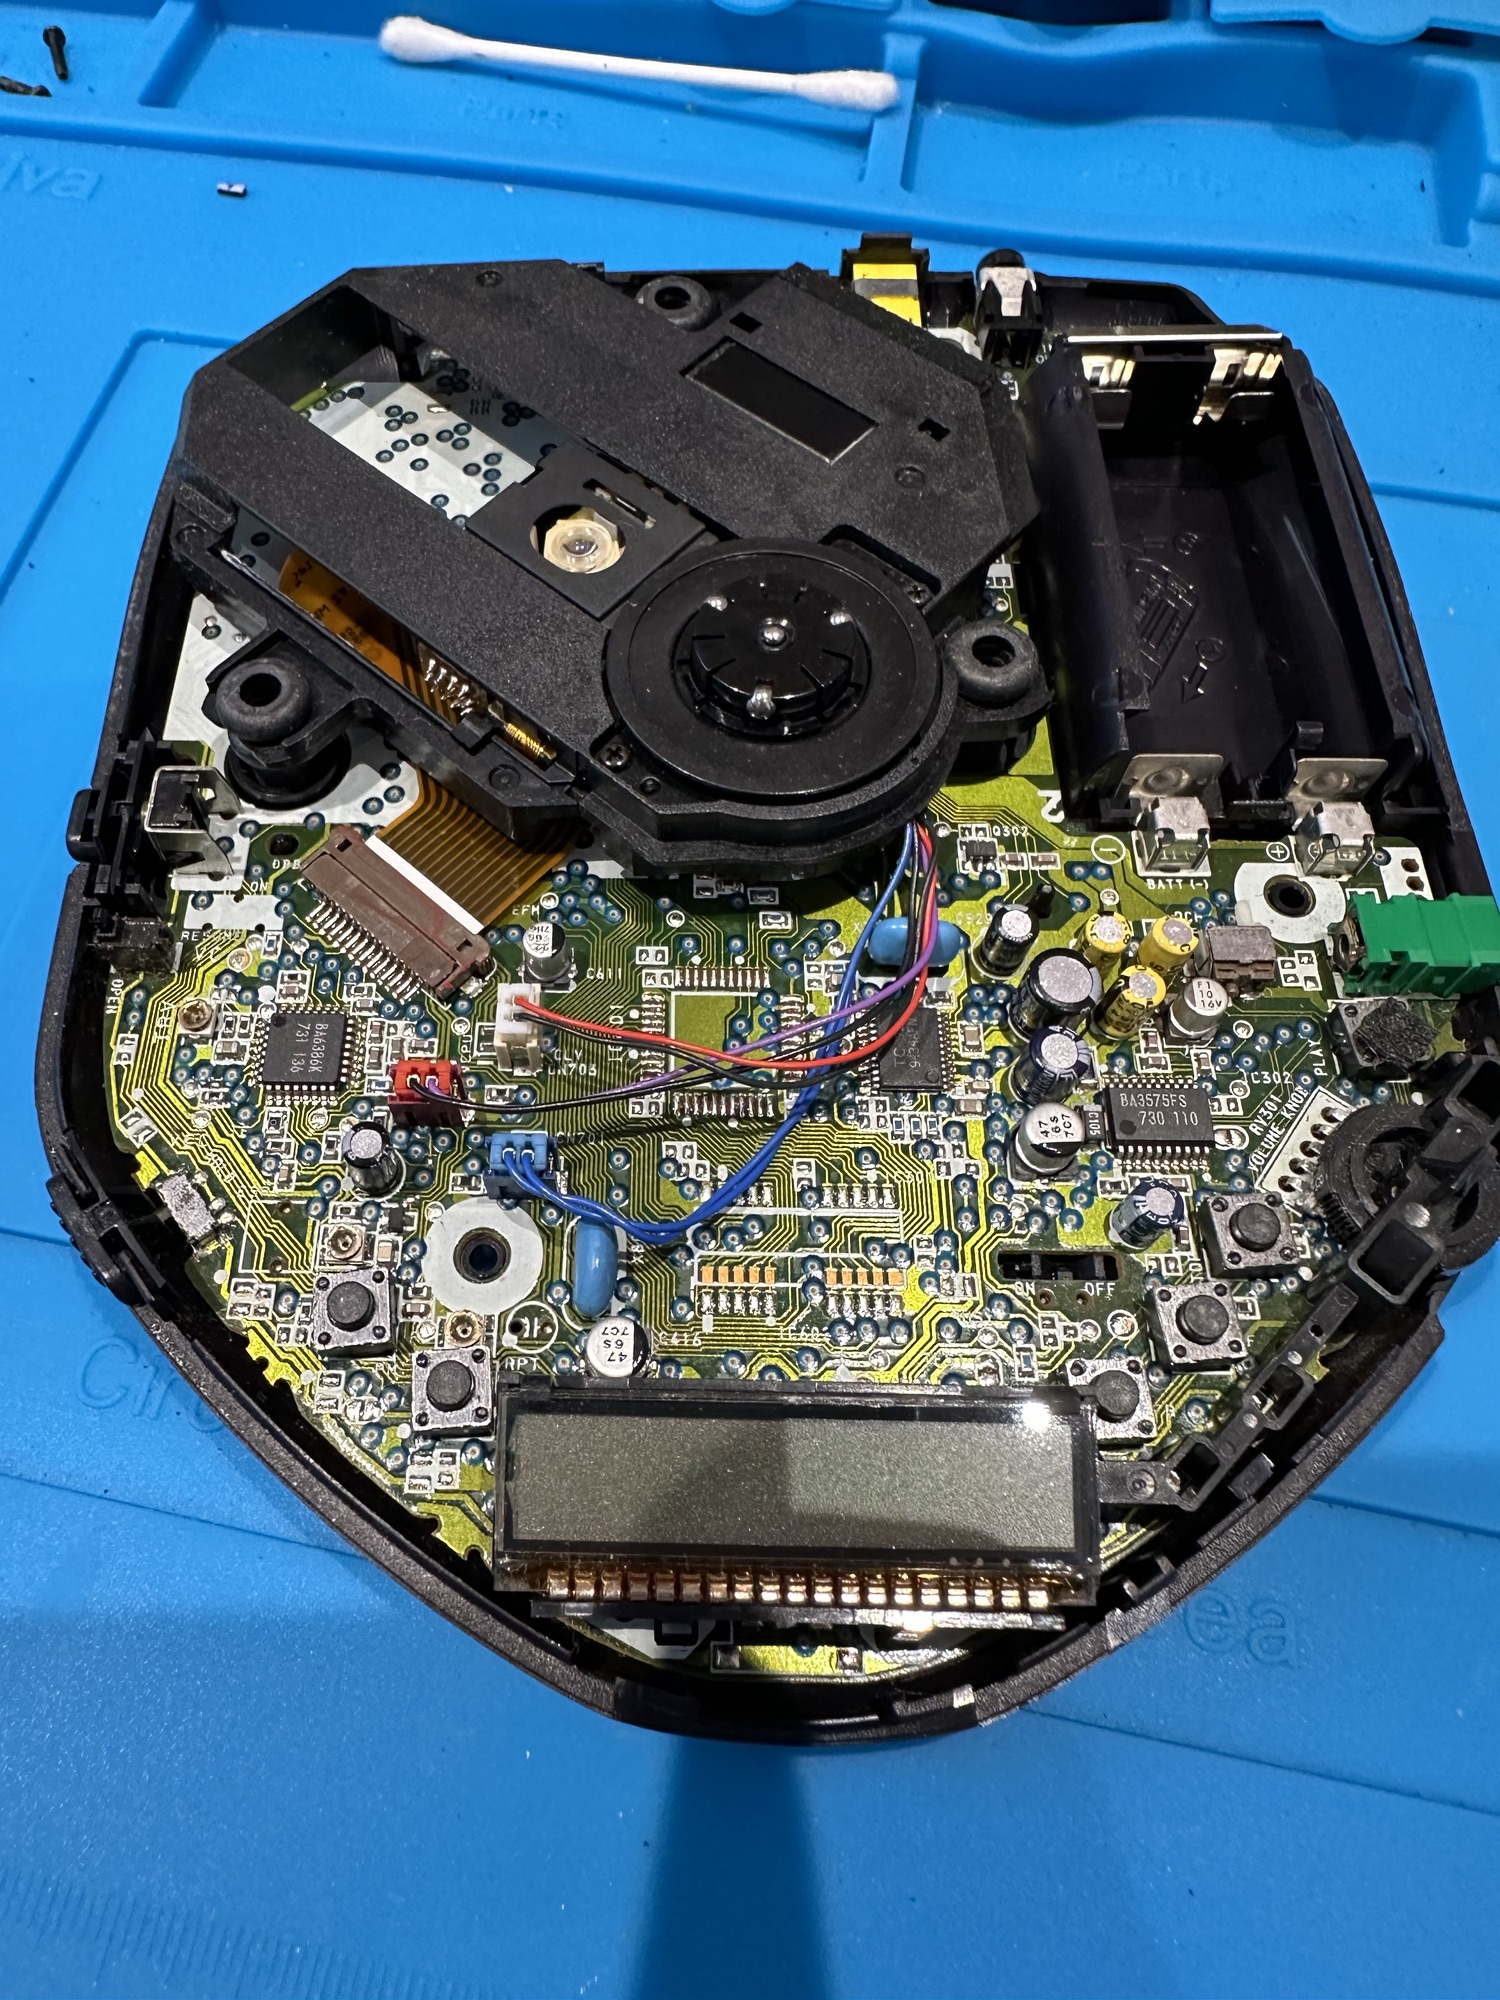
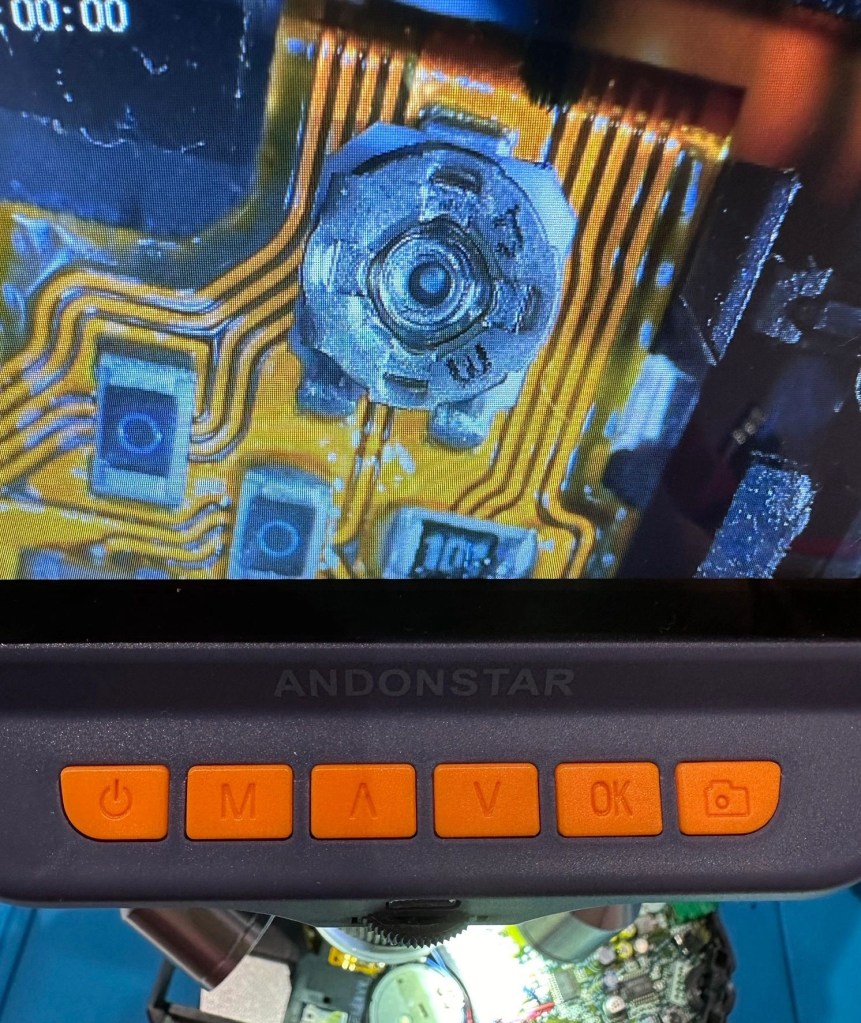
A lot less components this timeLaser pot under microscope Trimming the laser pot
When taken apart the thing that strikes you is the lack of capacitors compared to the last item I worked on that was only 3 years older. I put some fine lubricant on the worm gear and the laser guide rail and also cleaned the laser lens with some Isopropyl (IPA)
I made a slight adjustment on the laser strength by using the Multimeter to get measurements across the laser pot.
Cd in placeNice and clean
The reading was very low, to what it would have been when new so, I made an adjustment to the higher end of the recommended scale but the unit didn’t like it and refused to recognise any Cd, so I’ve reduced it back to what appears to be it’s operating maximum, after 28yrs I guess the laser is approaching the end of it’s useful life.
Testing the laser
The sound quality has really improved, the unit still skips if it is knocked or shaken but as I’m intending to use the unit on a table or other surface I’m not really that concerned. It’s not as if I’m going to go jogging with it, no chance. To be honest I don’t think the anti jog system that was introduced for this purpose really came in until about 2000.
Put back together, I’ve now cleaned and buffed up the exterior, this is a nice little example of one of the lower end Discman units, but I’ve enjoyed working on it and getting to know a little more about how it works and fits together. I can put this one to bed now as a successful restoration, it’s going in my locker at work for listening to my old Cd collection whilst I’m doing the tedious paperwork or a night shift.
Thanks for passing by, I have another Discman post coming soon.
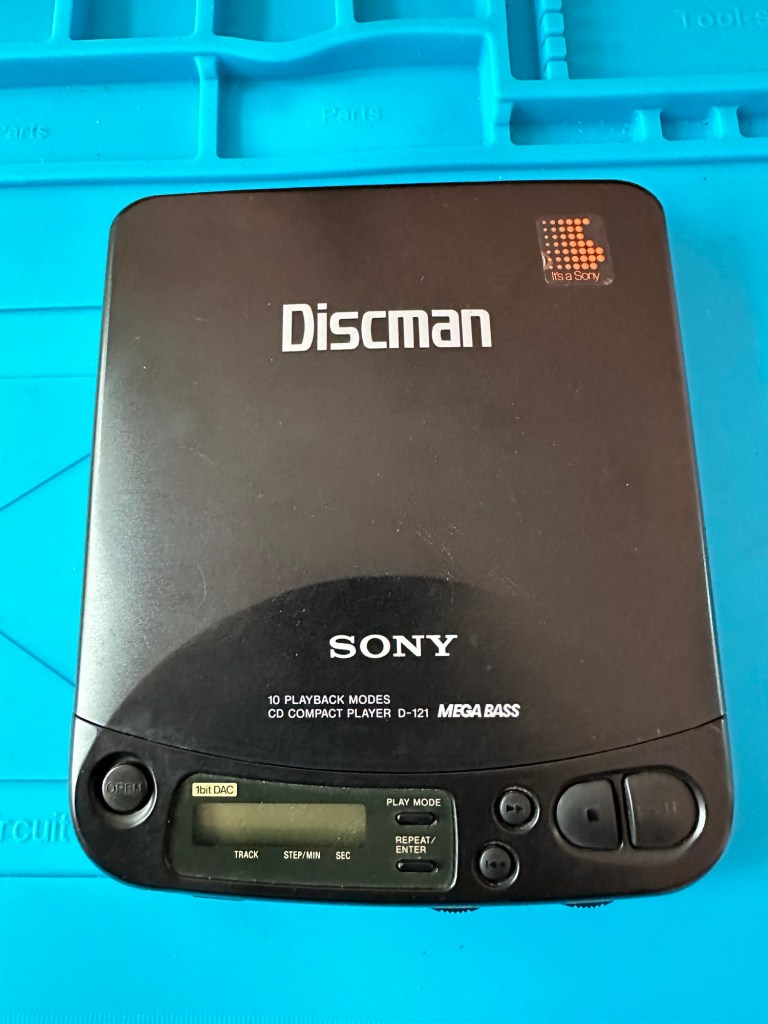
My recent purchase of a Sony Discman D-121 from EBay has arrived. Just as described it wasn’t really working so I decided to give it a once over to check condition.
Cosmetically sound
Cosmetically it’s in very good condition, open the battery compartment and it’s a different story, definite signs of corrosion and at this point I’m thinking the worst. I put two batteries in to check, the display comes on and shows some strange indication of “HI VOLTS” even though all I have are the two AA batteries in. Strange.
Corrosion on contactOn the board as well
I do manage to play one song but that’s it, any slight move and it skips and hops and shows a raft of other error messages that don’t Instil any confidence into me that this is going to have a good outcome. Then the CD drive motor breathes its last. That’s it….kaput.
Greasing the worm gearStrip down
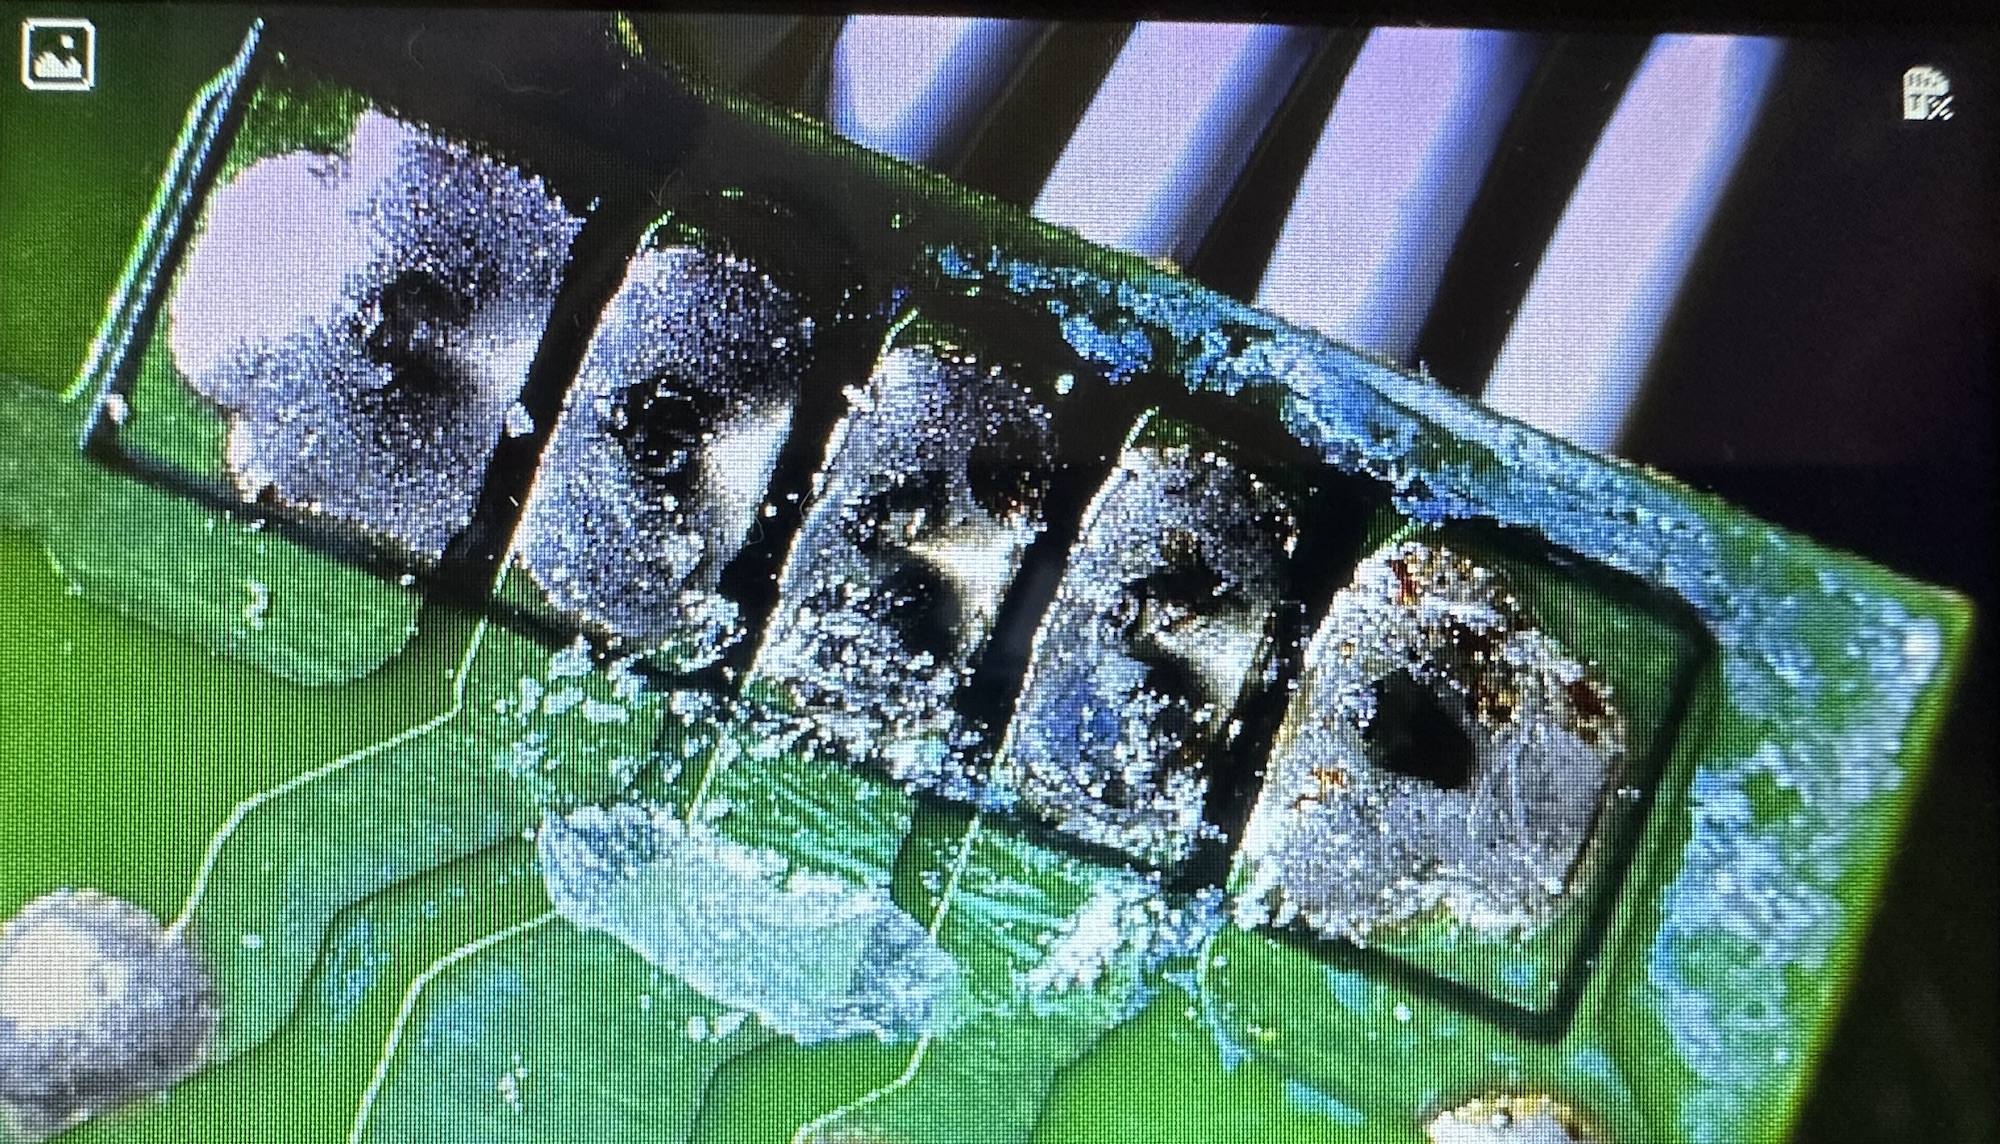
So I open up the unit, and put the circuit board under the microscope. The area around the corroded battery terminal has progressed on to the board and a couple of the circuit board tracks have been totally destroyed. A few components look to have issues and have some spurious test results. A check for continuity with the multimeter confirms that one track is dead and another is intermittent at the very least.
Under the microscope
I clean the offending section of the circuit board with IPA and this just confirms the issue, but at least it looks cleaner. If this had been the only issue I’d have happily soldered in a couple of thin wires to the undamaged track to ensure a reliable continuity.
Damaged tracksBad corrosion
A further look around the board, and there’s nothing blatantly obvious, but seeing this unit was produced in 1993 it’s now in its 31st year of use I also suspect the capacitors (of which there are many) may well be of that era of suspect capacitors I discussed on a previous post. Read here: Capacitor plague
The main drive motor is known to fail after time and a sure sign is if the CD jumps when moved off the horizontal, apparently this is due to bearings becoming misshapen due to use.
This unit therefore is beyond economical repair for me, and I’m not going to progress it any further. The good news is that I can use the unit for spares and as a number of these older units have interchangeable parts, I’m hopeful that as I have a few more units turning up later this week they may have a willing donor.
So the recycling goes on, and that’s always a good thing.
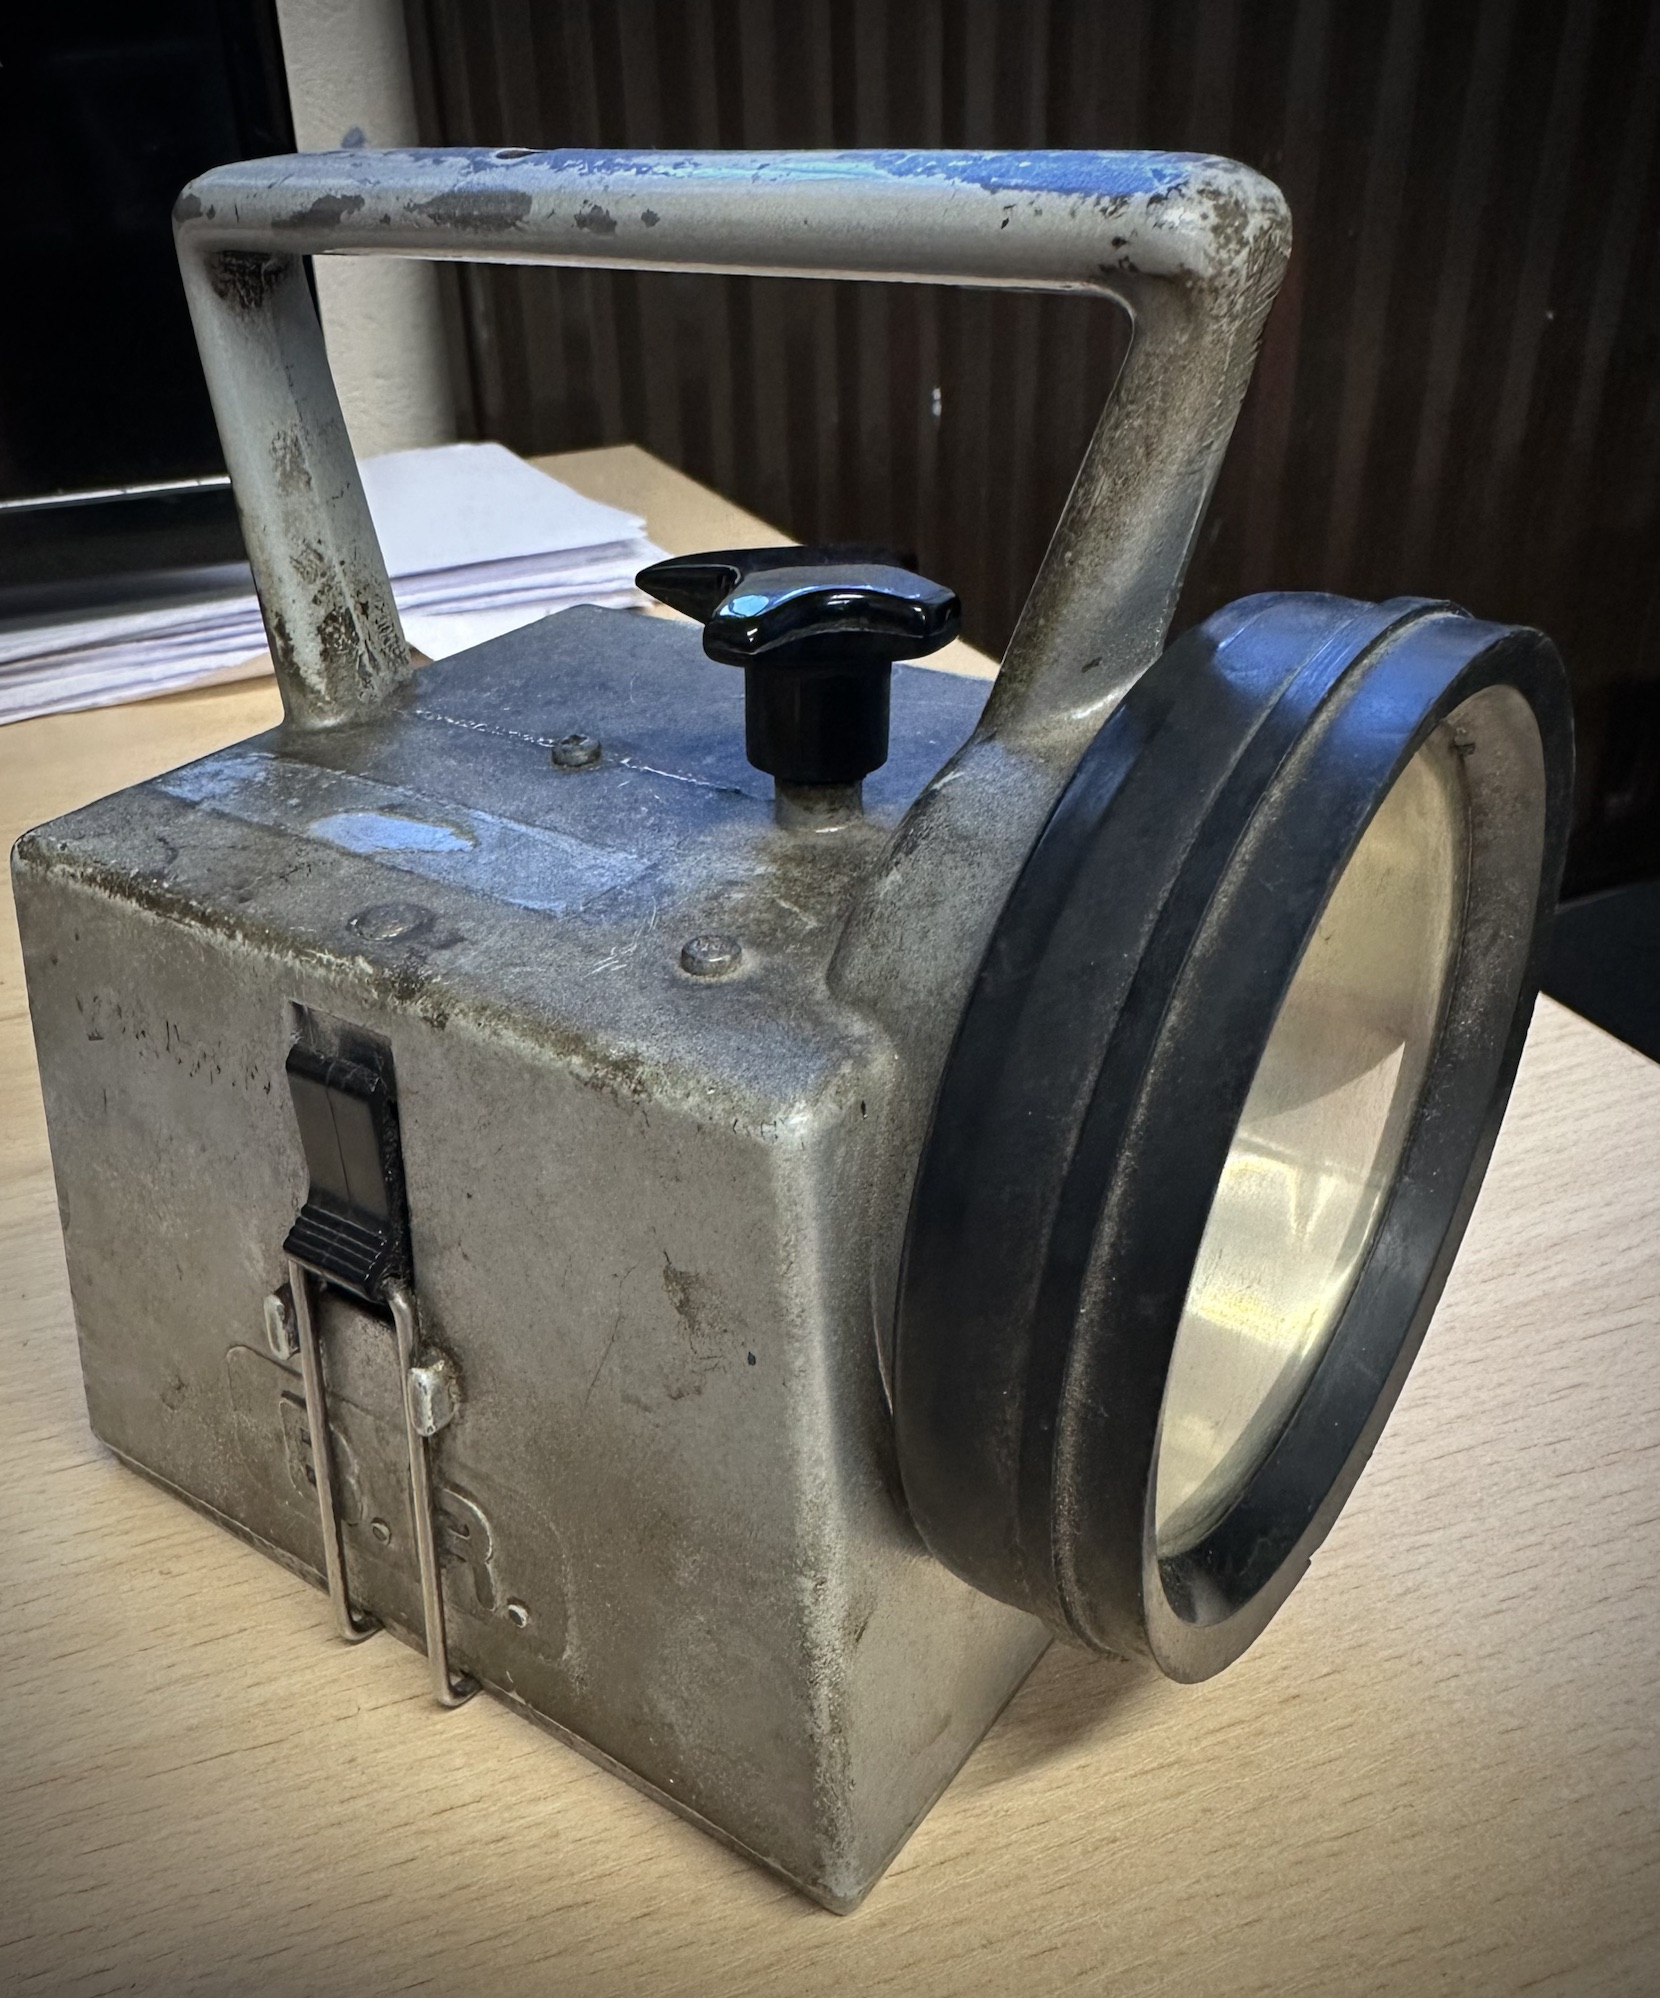
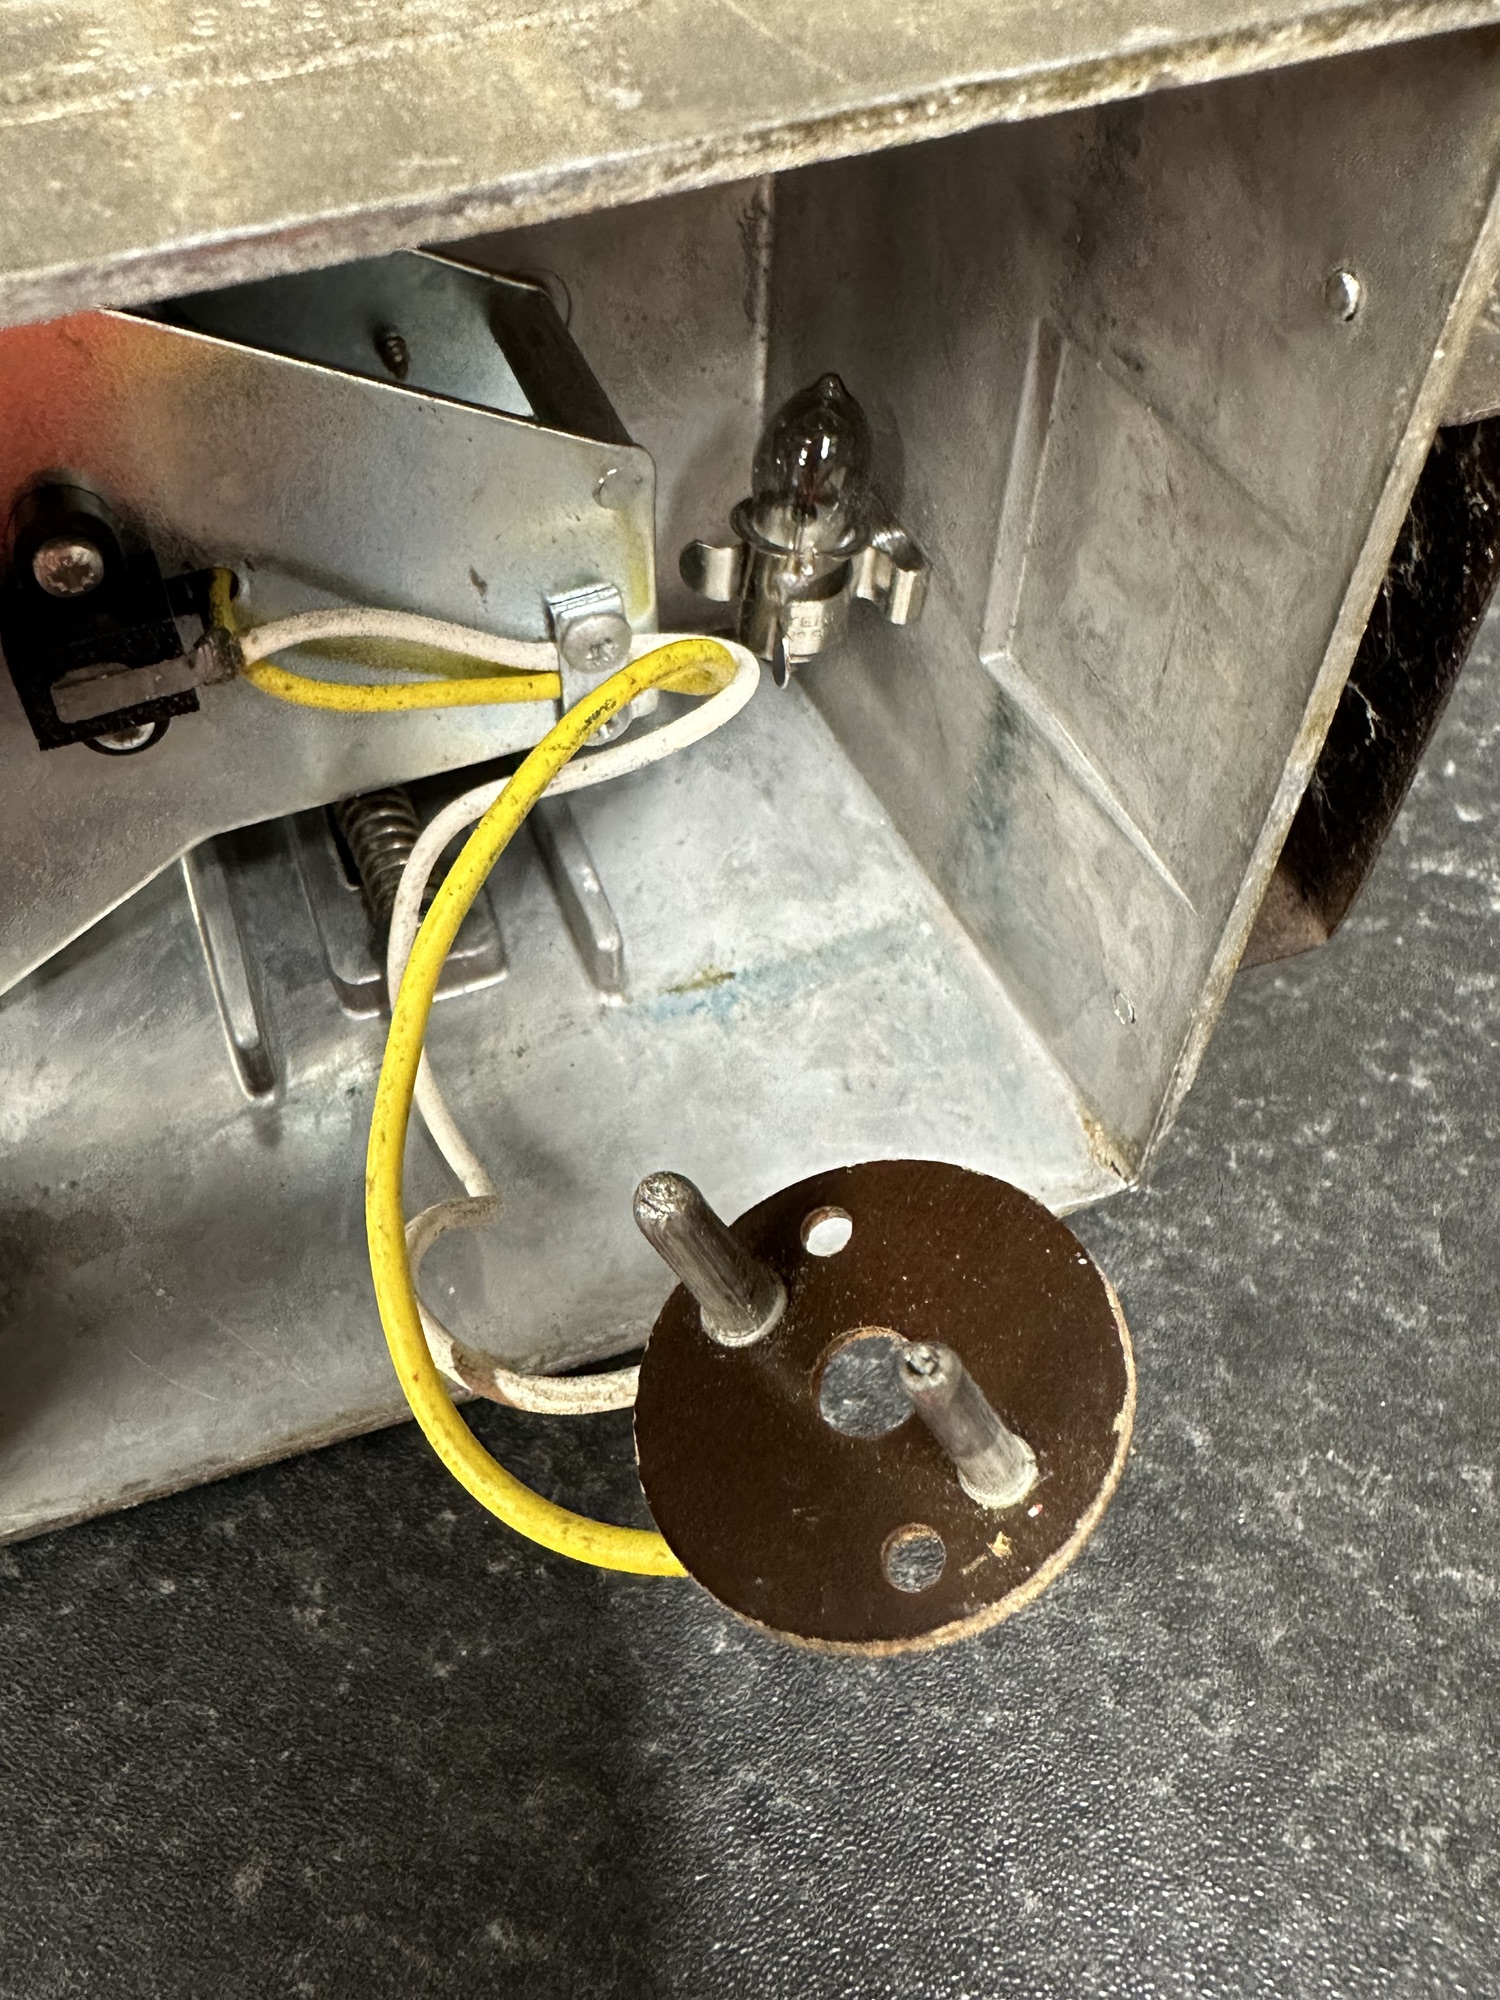
The Bardic lamp was introduced into the British railway system by the Bardic company of Southampton sometime around 1962. Just about everyone who has worked on the railway since then in a trackside role was given one as a personal issue.
Fast forward to today and new plastic LED lamps are being issued, however they don’t have the appeal of the old lamps, they break easy and the lens colours are not true Red, Green and Amber that they should be. The old style Bardic lamp is still in use many of which are still being used today. I still have the original one issued to me back in 1992.
This post is going to cover a basic power conversion for these lamps that will hopefully result in them being used for many more years.
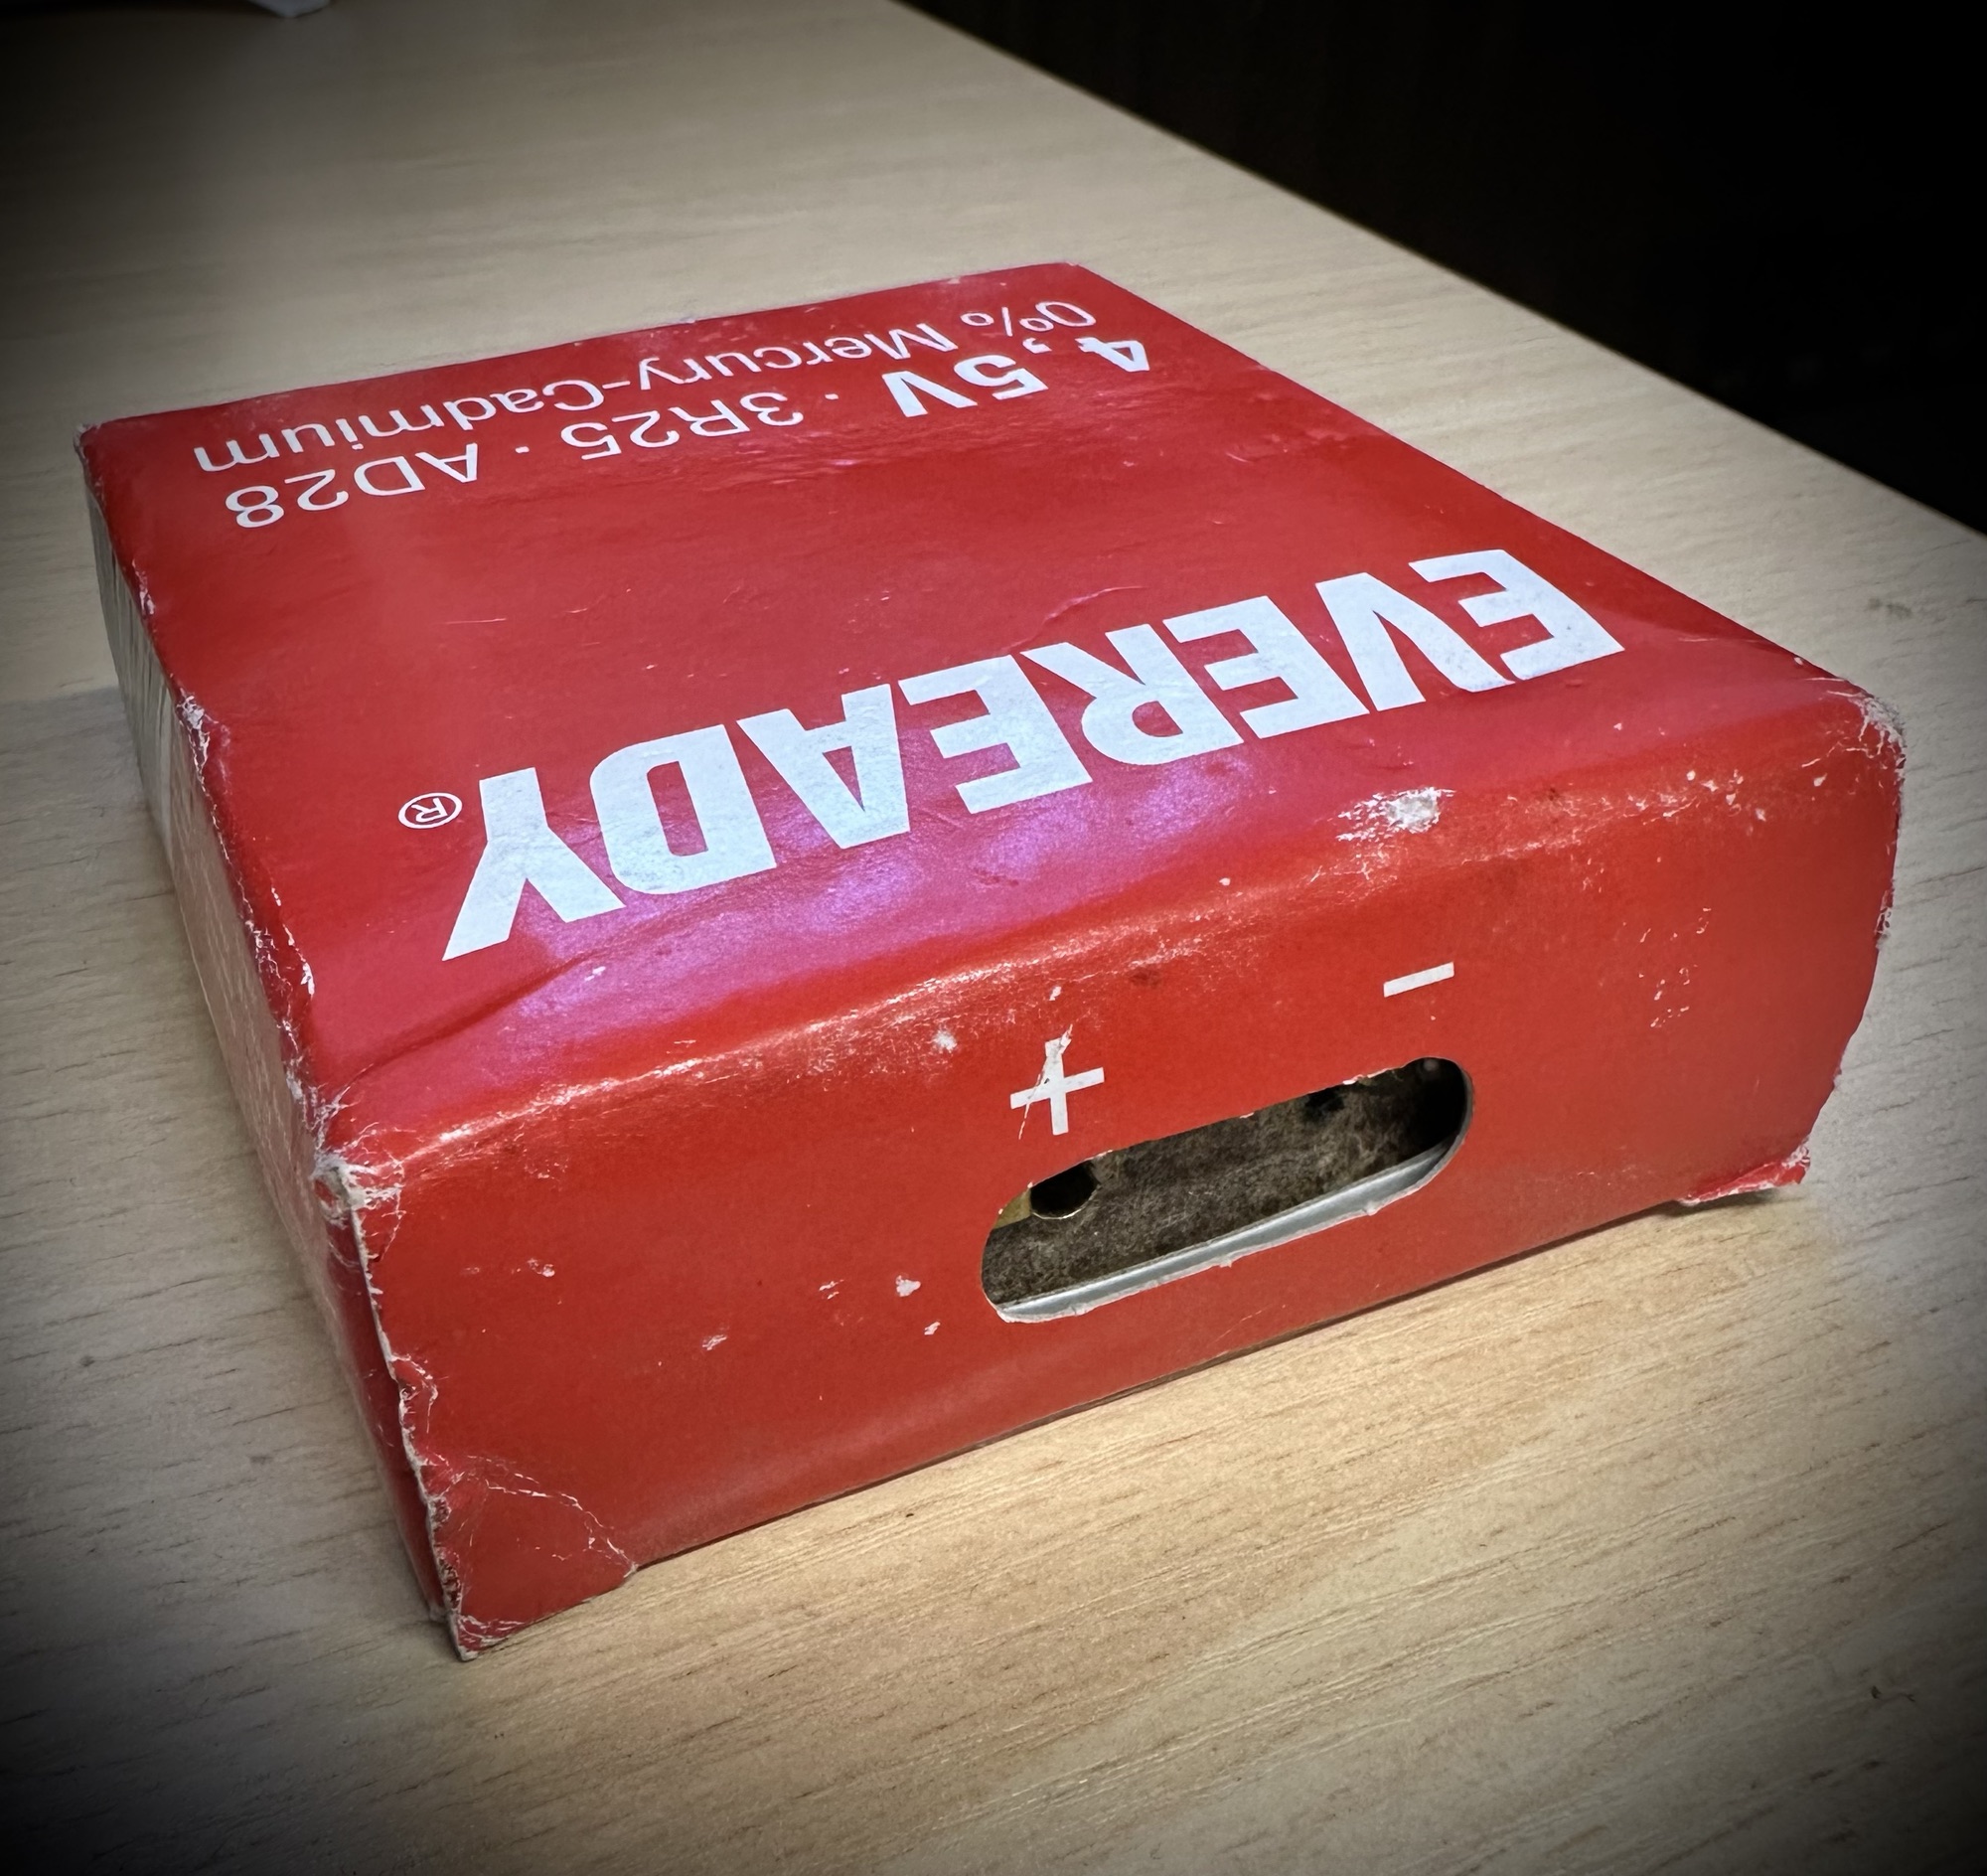
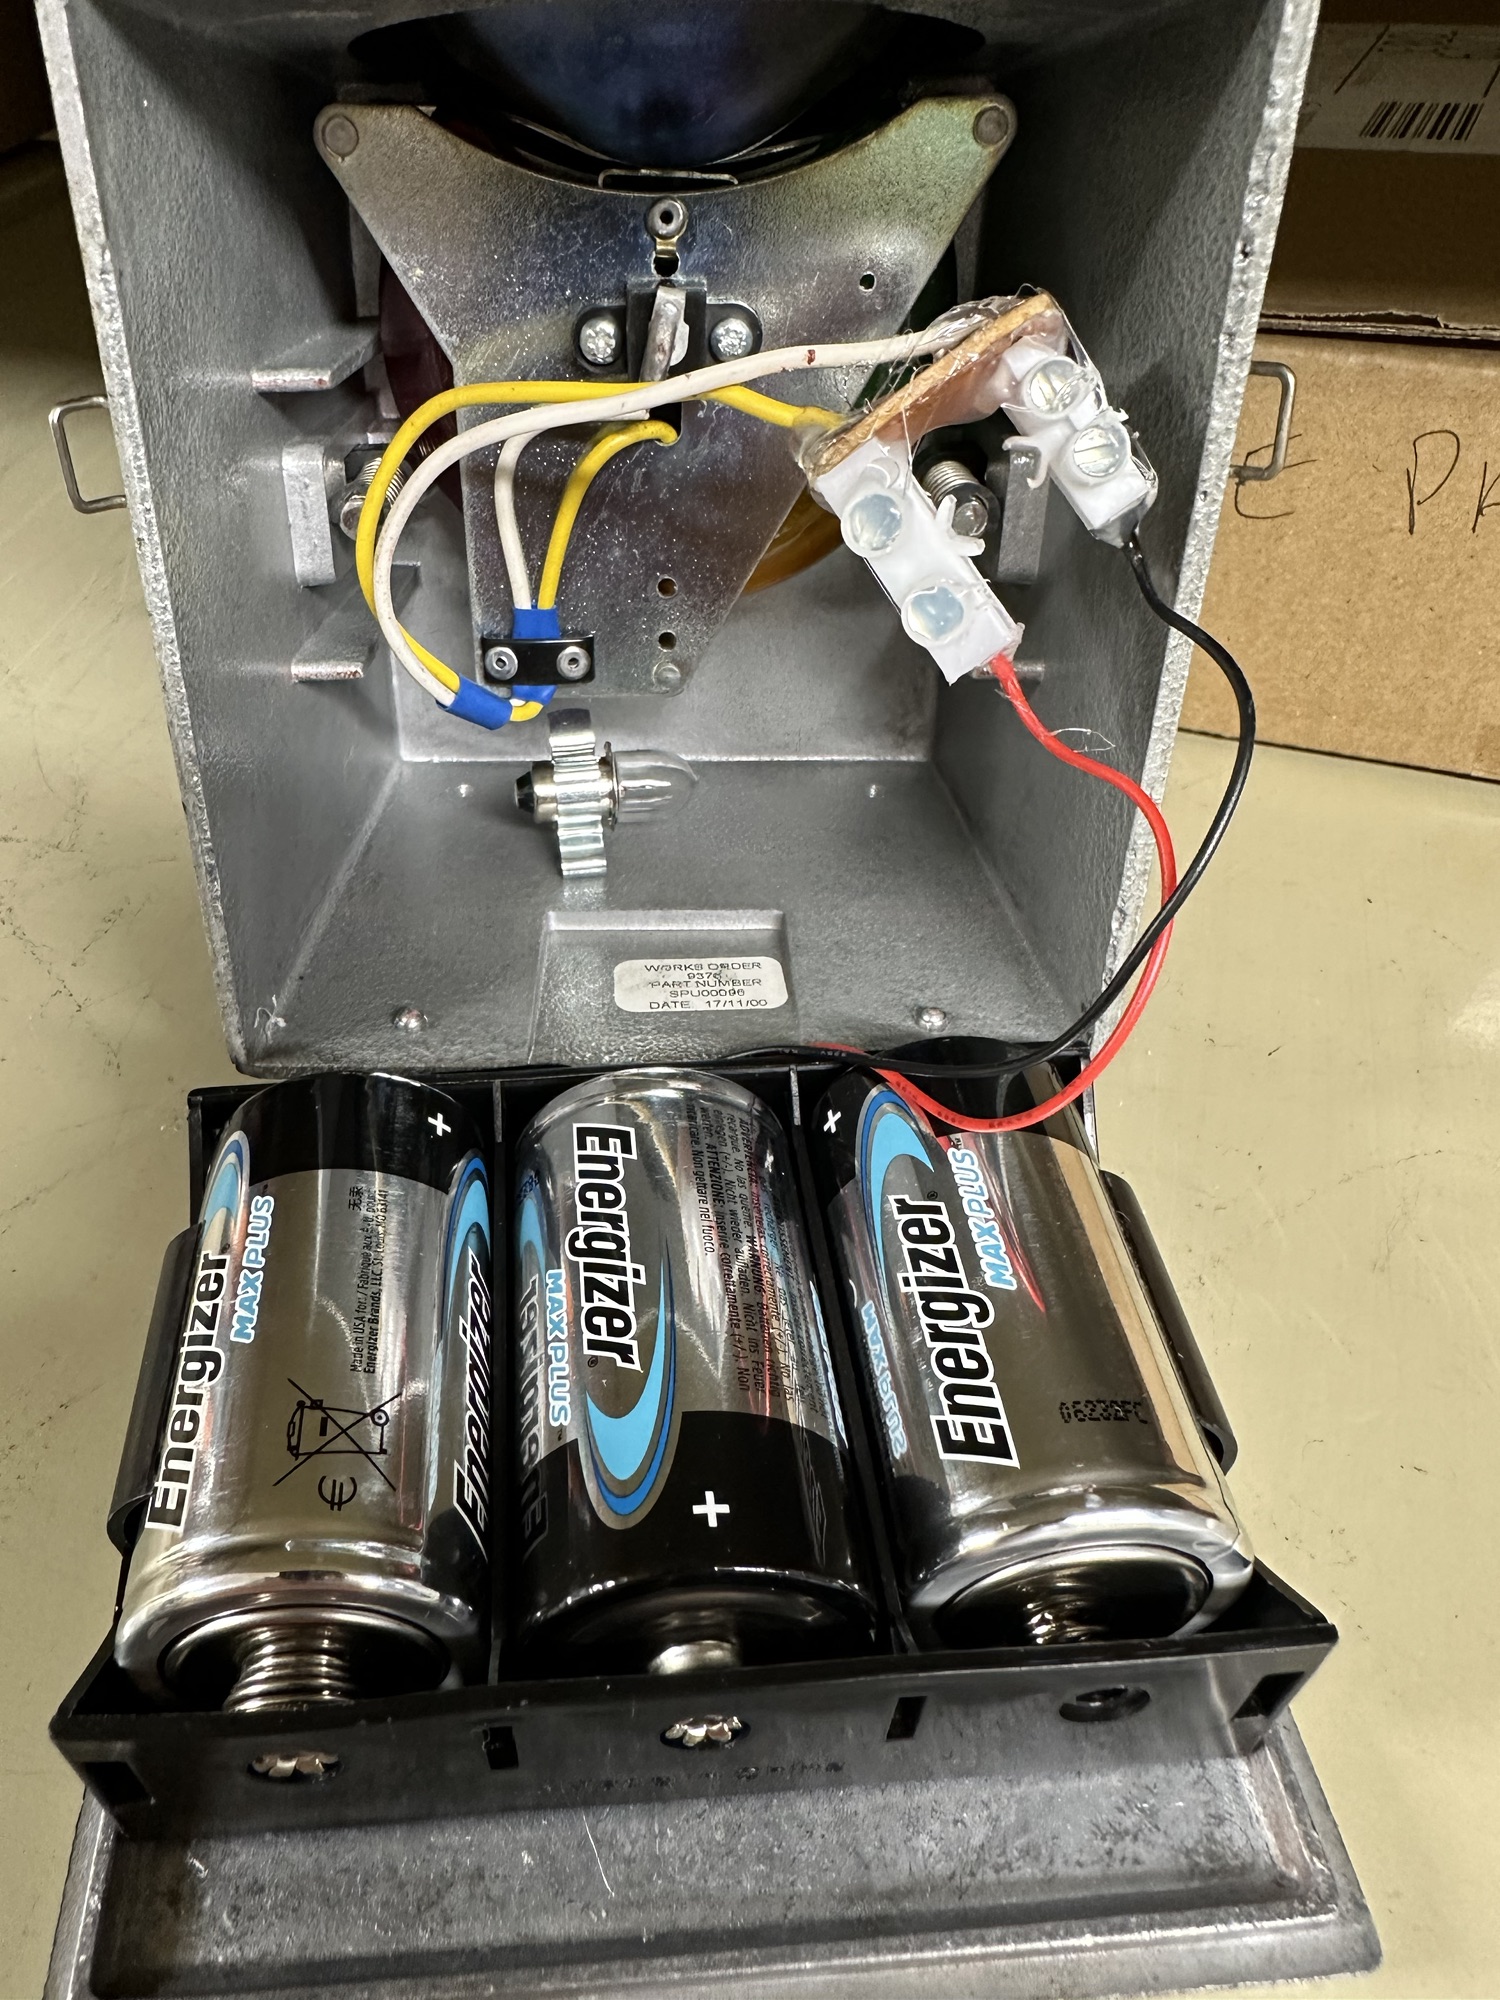
Bardic lampEver ready AD28 batteryTwo that I have recently converted at work
The fundamental issue with these lamps is that they use an old Mercury cadmium battery that accepts two pins that insert into the top of the cell. Even though these batteries used to be available for a reasonable amount of money, nowadays it is unethical to purchase these batteries due to their construction they have in theory been banned, so they are no longer manufactured. They can though still be purchased via the web at extremely inflated prices, however they can’t guarantee that they would still work – so you take your chances.
With this simple conversion we can extend the life of this unit and save it from being cast aside as waste. The conversion is very cheap, uses std “D” cell batteries and can be converted by anyone – even me. Kits to do this can be purchased for around £10 (GBP) on line, but this one should not cost more than £2 (GBP) even less if you have the parts as spares.
There are two ways of doing this conversion, the way the kit works is to use a couple of electrical “Choc bloc” adaptors to connect to the male pins of the AD28 connector (I’ve used that example on this page). The cheaper option is simply to have a 3 cell “D” type battery holder, cut the old AD28 connector off, solder the two wires together and use some heat shrink to cover the solder joints. Simple.
This really is a ten minute job that increases the lifespan by years.
Bardic lamp old AD28 connector Bardic lamp conversion
The conversion is completed with the D cell battery holder being stuck to the base with some hot glue. I’ve also put some on the chocolate bloc connectors for some extra strength and protection from the damp.
We recycle these batteries at work with a company that we have connections with, I also take spent batteries to the local supermarket that also recycles. The old AD28 batteries go to a specialist company for recycling/disposal.
Pretty basic and I now have a constant supply of these coming into us from our locations throughout the East Midlands awaiting conversion. We now do the basic simple conversion with our own stock and I think we have the conversion cost down to about £1.80 GBP per unit. A very cost effective simple conversion that will keep a 50+ year old lamp going for a few more years.
Anyone remember these? To say they were popular in my younger years is an understatement. Originally I had the Walkman (A cassette tape version) and I came to the Compact disc quite late in the 1990’s to be honest. Lately I’ve been looking at getting a Discman as I do still have an amount of discs at home and I like to listen to my old music whilst walking the dog. Yep I have my phone and Spotify so I guess I have access to pretty much everything there is out there but I just fancy trying a bit of retro and stepping back into my formative years.
Why not buy one that needs attention? I can kill two birds with one stone, get a repair on this site hopefully and the jobs a good one.
So off to EBay I trot and find this Sony Discman D121 that the seller agrees to sell to me for my offer of £10 GBP.
Sony Discman D121Sony Discman D121
I expect age related issues, as this particular model was produced sometime in the mid to late 90s. This one has an issue where the disc isn’t recognised and is intermittent. This range has a few known issues and to be honest I don’t think I will have too much trouble in getting this one going again (Famous last words 🤦♂️)
I’m expecting its arrival sometime in the coming week so I’ll come back to this post when it’s in my possession for an update on its condition.
Update: 9/3/24 23:11 – For some reason I’ve now purchased a damaged Discman D171 as well🤦♂️ I’m a glutton for punishment.
Sony Discman D171
Further update: 11/3/24 22:30 – Stop 🛑 🛑 just 🛑 😳
For some reason I’ve just brought another 2 faulty Discman. This time the D-141, two of them. That’s it I’ve got to stop now 😂 really I have to stop 🛑
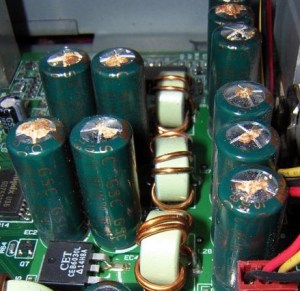
For many this is old news and pretty much everyone involved in electronics is aware of this problem that swept through the industry in the mid to late 2000s. Chances are you may have such a unit in your home that has either luckily survived the issue to still be working, or may well be not working and assigned to that part of the house (Normally the loft) where it left until the day you move premises and visit the local tip.
Those of us that number a great many who like to tinker and repair old machines and equipment from this era are still seeing the back end of this issue to this day, its fairly easy to deal with and those that especially work with old computer motherboards and graphics card notice issues the most, its an interesting back story and ill try to cover it as best as i can in this post.
What is a capacitor?
A capacitor is a device that stores electrical energy by accumulating electrical charges on two closely spaced surfaces that are insulated from each other. It is like a little battery but thats where the similarities end, as a capacitor distributes energy in short bursts rather than a battery that is distributing power linearly. Originally known as the condenser, the capacitor is used within a circuit to add capacitance to that circuit.
Capacitance is the ability of a component to store an electrical charge – (Simple version)
What was the issue?
The issue was with Electrolytic capacitors produced between 1999 and 2007
The origins of the issue was with the use of water based electrolytes developed during the late 90s. These capacitors using this type of electrolyte were found to be exceptional components when used in power supply circuits. The problem was that the water based caps produced aluminium oxide when reacting with the capacitor “Can” and that reaction was Hydrogen. The Hydrogen built up until the stamped vent on the top broke. Resulting in a failure within the circuit.
It was only in the mid 2000s when the plague really set in, some of these capacitors would have had hundreds of thousands of hours of use and even though they would have passed initial testing protocols they were doomed to fail, and that just so happened to be in the mid 2000s.
The Blame game
It was around this time with exceptional failure rates on certain items and claims being raised against major players in the electronics industry that deeper investigation took place.
Findings
The cause of the failures was due to a mis-copied formula, in 2001 a scientist working for a major corporation that made these type of capacitors stole a mis-copied formula for the capacitors electrolytes. He then took this faulty formula to another company. That same year the scientists staff where he previously was employed left that company, again with the stolen formula and started their own company in Taiwan producing immense amounts of faulty capacitor electrolytes.
No one was ever really brought to justice for the failures, no one company ever really came clean over the issue, the tech companies tended to absorb the cost of repairs and the end result was probably that the consumer paid in the long run…nothing changes there then!
When this started to occur, many individuals in the industry jumped on the band wagon to repair these items, many selling capacitor kits for certain brands to allow those who were willing, to make their own repairs.
Today the issue still occurs but it is not so prevalent, older circuitry does still throw up some classic blown capacitors and these are fairly simple to replace, some smell quite fishy as well, so sometimes a good sniff of a circuit board can alert you to a blown capacitor…very strange!
The radio has been received see here: Not just Dead….Fully dead and if I can’t get it going, I have at least brought a very tidy storage box.
What surprised me when first opening up this radio was the immense amount of boards and circuitry inside, I must admit I took a gulp at this and questioned my reasoning for purchasing the item. However it’s all a learning curve and I have to start somewhere, gone are the days of simple circuits on traditional radios (with big components).
Roberts blutune circuitry Roberts blutune power boardRoberts blutune circuitry
I arrived home from work and sat myself down in the conservatory surrounded by test devices for about 4 hrs until I totally overloaded my self with information, creating more questions than answers, i decided to give up for the day and further research the potential faults for this unit via other sources.
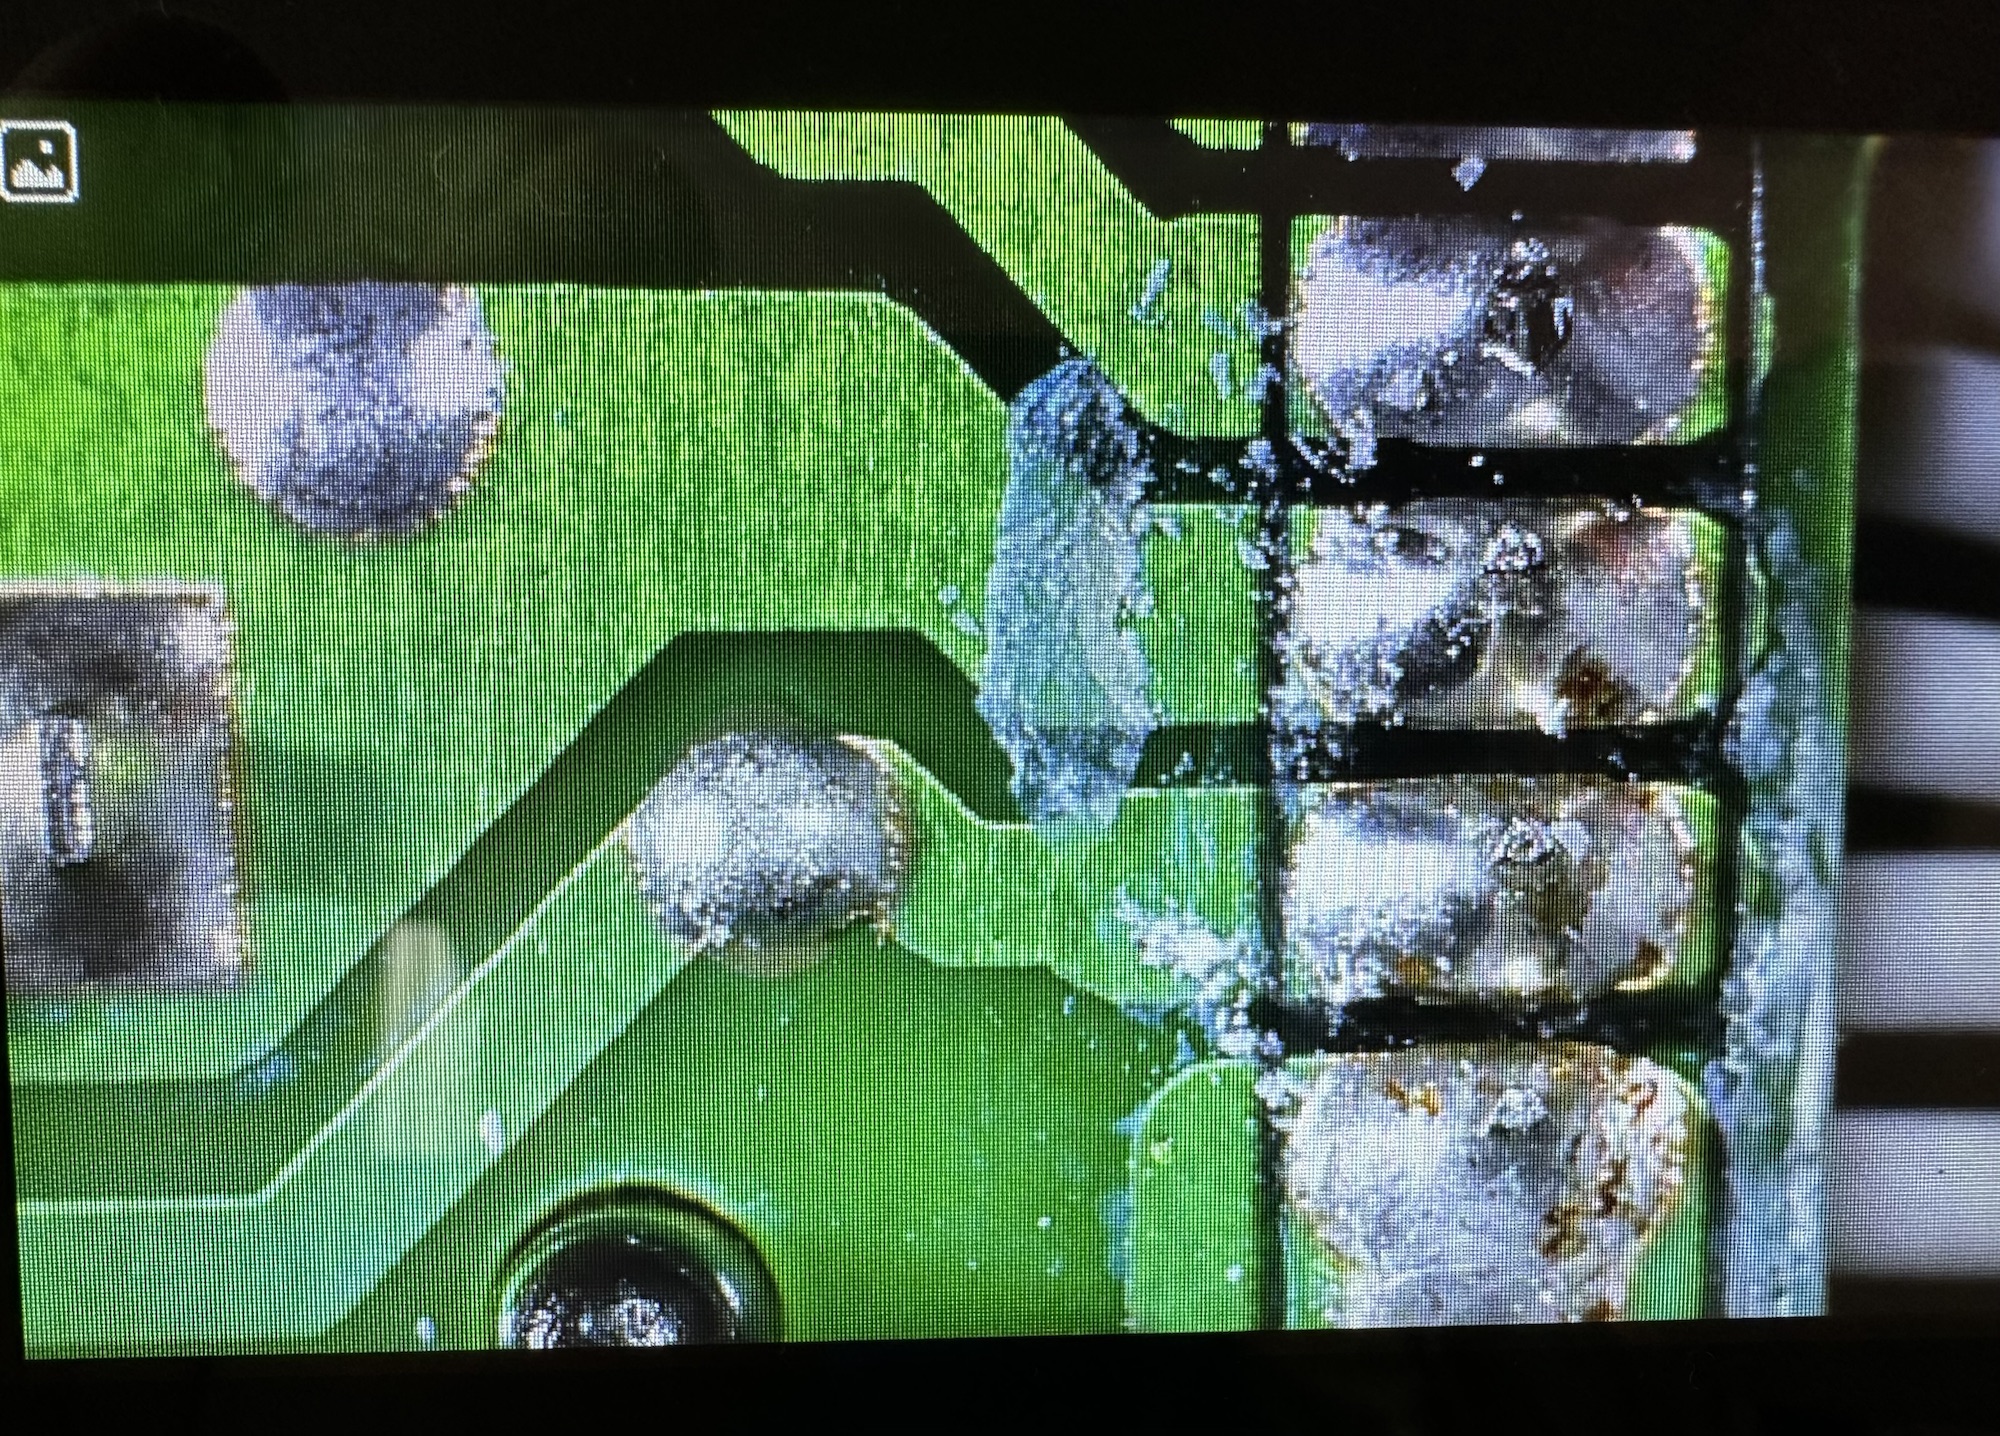
To me the power board seems fine, power is going where it should, there appears to be no short circuits or component damage however in places there does seem to be some signs of leakage so I may have some components that need replacing or maybe it’s just remnants of flux and stuff left behind after initial construction.
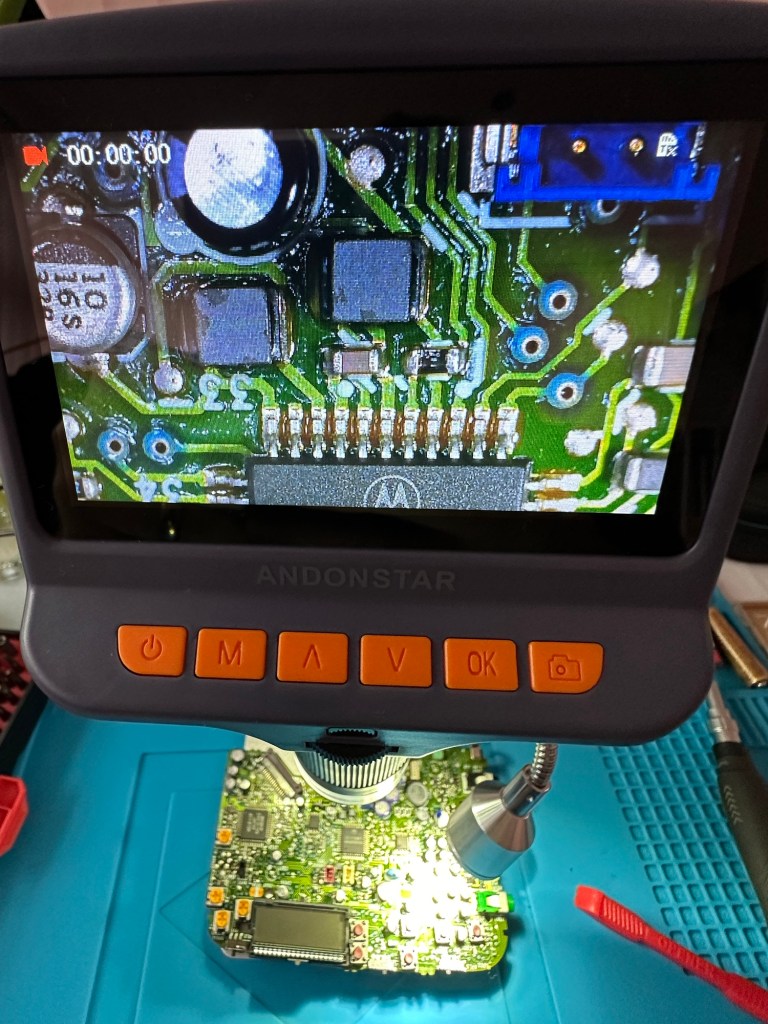
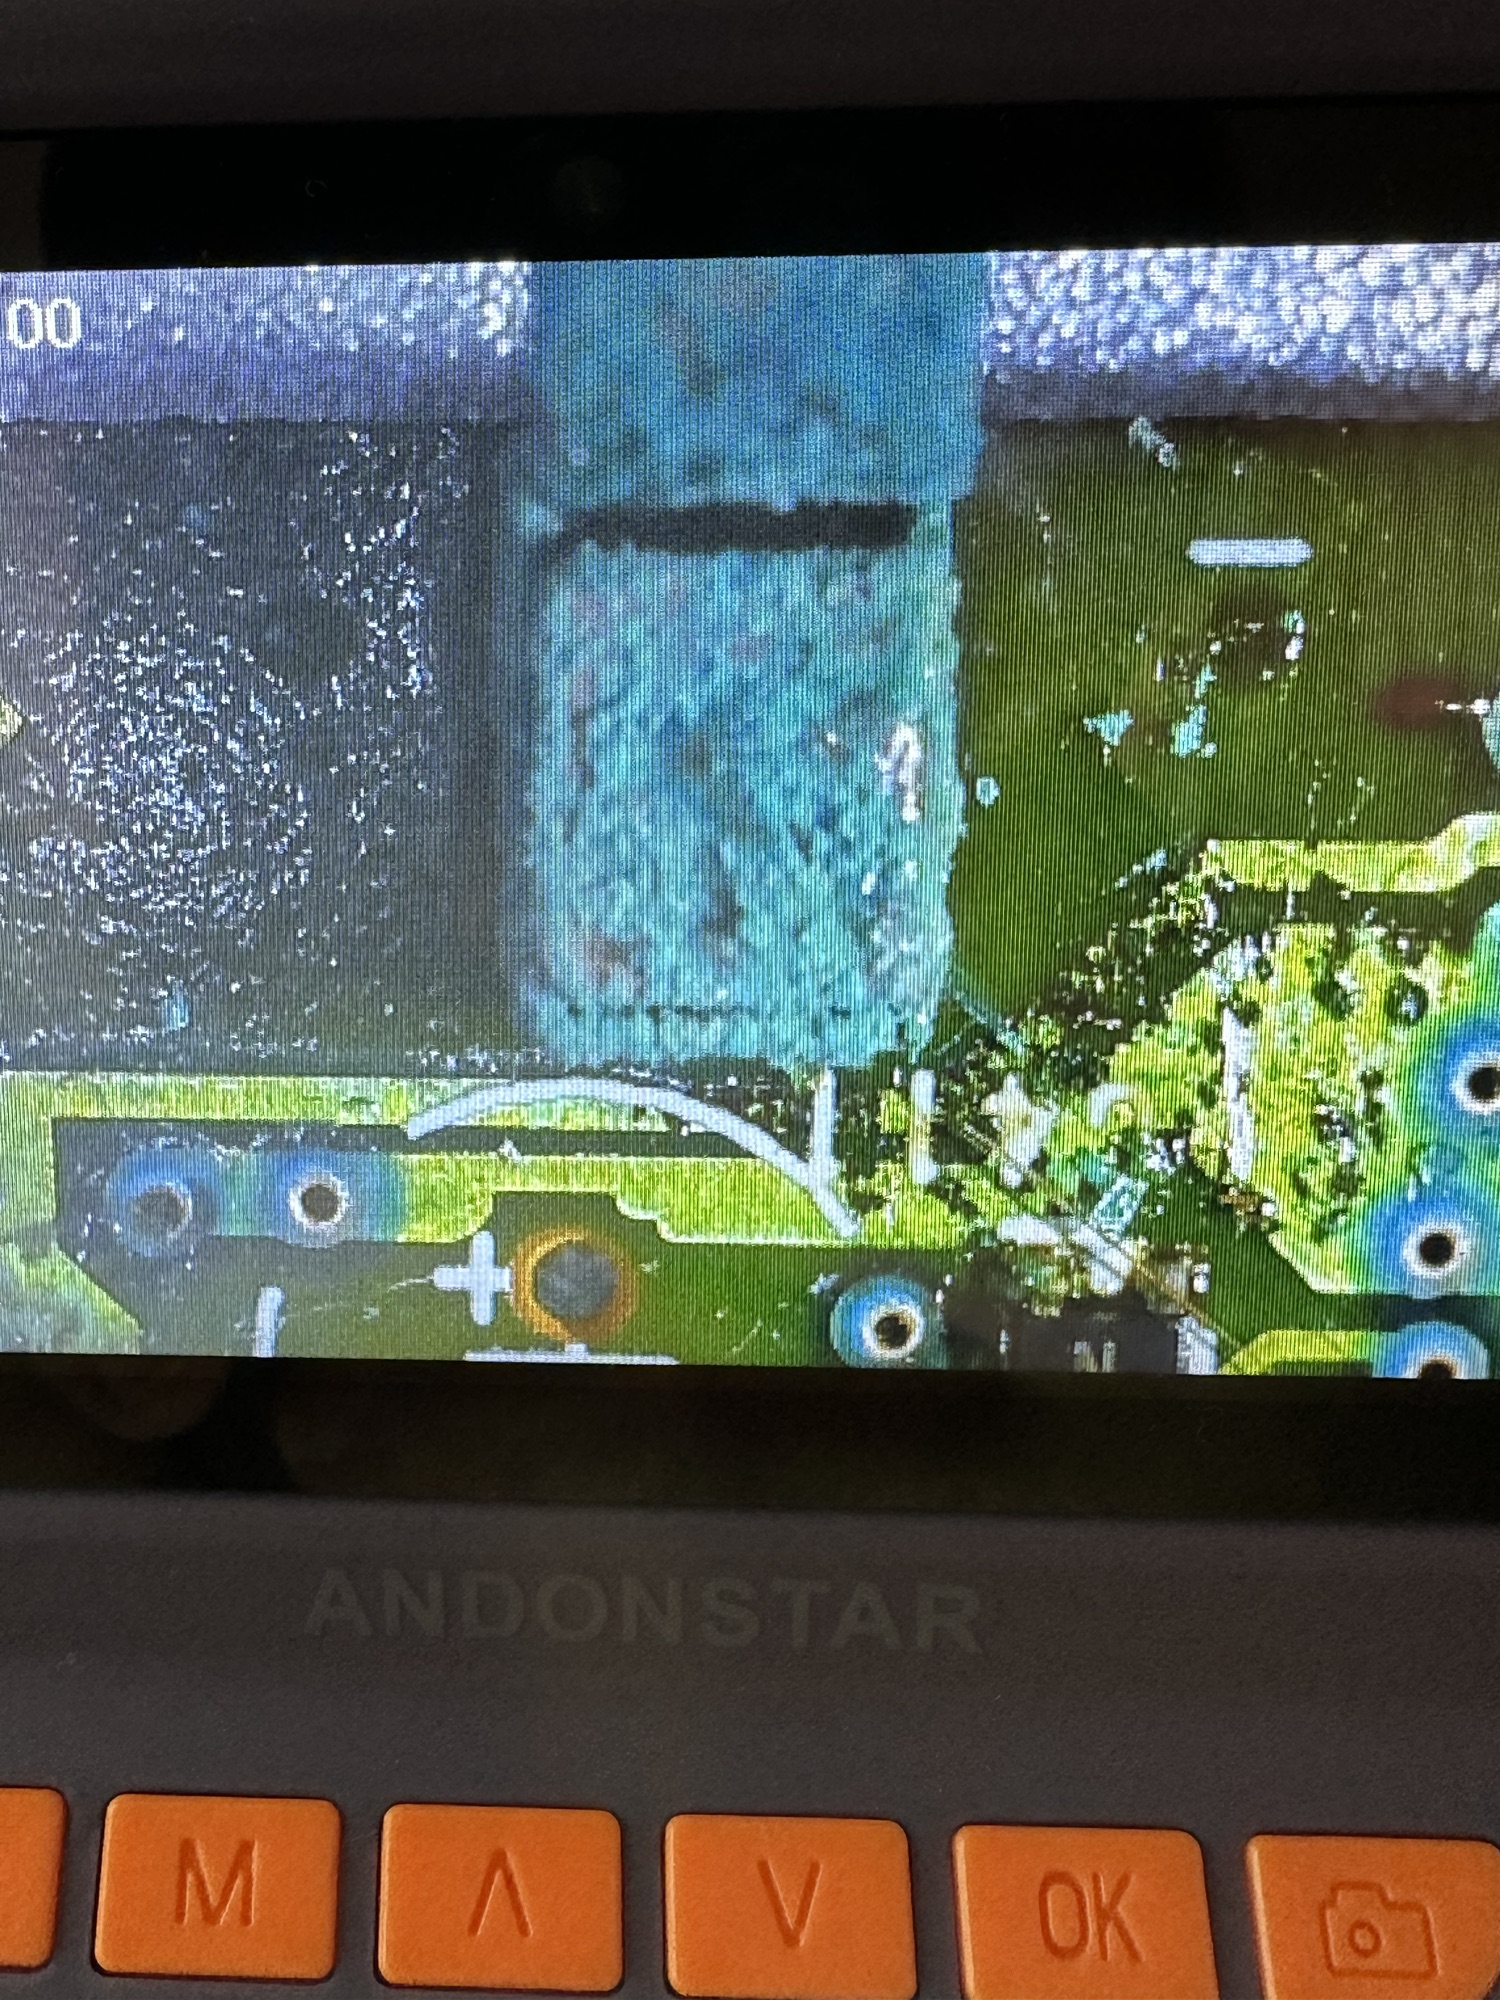
Blutune board under microscope Blutune board under microscope
None of this can be seen by the naked eye but it becomes apparent after being placed under my new toy an Andonstar microscope viewer. It’s at the entry end of the range but it is already becoming a game changer for me, due to my failing eyesight.
Andonstar AD106S
Copyright Andonstar
Further investigation appears to highlight an inherent issue with this range of radios when they just seem to stop working (probably why Roberts ceased production).
Generally the power board isn’t an issue, it all focuses around the display board where a controller to the screen has failed or the amplifier chip has failed, hooray I say! And then I find out both components are about the size of a grain of rice… Boo I say.
I have no experience at all in components this minuscule in size, but if I can’t get to the root cause and eliminate all other possibilities I will give it a go. In the meantime fault finding will go on between other jobs and this will continue to be a job in progress that will be revisited and updated as time goes by.
The plan short term is that I’m going to borrow a thermal camera and check if there are any hotspots under electrical load. You never know I might just find something.
I shall comeback to this project at a later date.
Thanks for passing by. Stay safe, be superb. You’re a star 🌟


You must be logged in to post a comment.