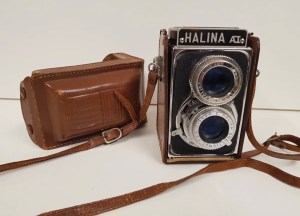
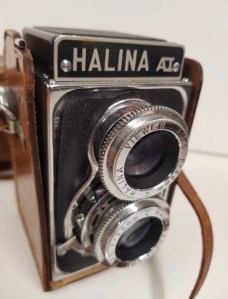
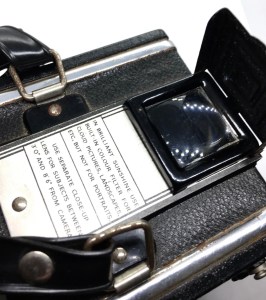
I’ve managed to obtain yet another old TLR camera, i paid a little more for this example as it was from a hospice so I’m not worried about the extra expense, as it is in a very good condition. I will just have to wait until it’s in my hands to know for sure. Originally made in Hong Kong by Haking, the A1 was one of their better produced cameras. Again very pleasing to the eye.
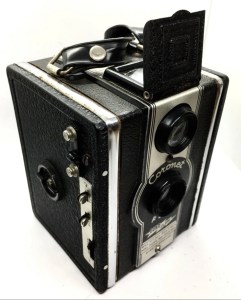
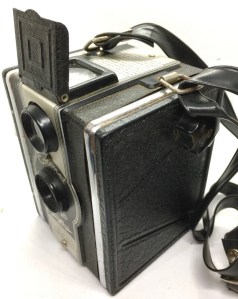
I’ve managed to obtain another old box type Pseudo TLR camera at a reasonable price in a very good condition, well, at least the pictures seem to indicate this, I’ll just have to wait until it’s in my hands to know for sure.
Here is some history on this camera, I will cite the reference at the end:
Introduced in 1950
Pseudo TLR
One speed rotary shutter +B
Use both 620 and 120 roll films
Flash sync
Built-in green filter
Body: metal
Coronet Box Cameras are medium format 120 & 620 film cameras made by Coronet in England.
Coronet was a British camera maker based in Birmingham. The company was formed in 1926 by F.W.Pettifer. It manufactured a variety of cheap box and folding cameras until 1967. After the war it worked together with the French company Tiranty to avoid French import restrictions. Several Coronet camera models were made in France, some with Boyer lenses, and some with instruction imprints in French. Coronet also had their own brands of film, including Corochrome.
The F-20 Coro-Flash by Coronet is a simple camera for 6×6 cm exposures, but one which offers a few twists on the usual box camera. First, its centered viewfinder window and (small) folding hood give it a certain faux-TLR styling. Secondly, it was designed (and proudly labeled) to accept either 120 or 620 film sizes. Finally, it offers flash sync, for example when using its namesake Coro Flash flashgun.
This camera was in such a good condition that no maintenance was required. In fact it went straight onto eBay and sold within 7 days. Was a lovey little camera and commanded a good resale price.
I have obtained some 1.5mm camera seal and have commenced the replacement of the old seal. First thing to do is measure the widths required for each of the 5 pieces needing replacement.
Measuring seal width Measuring seal width on doorMeasure all required seal widths
Easiest piece to seal is the larger segment at the hinge of the door. Setting this piece first allows you to get the start point’s correct for the longer more fiddly sections.
Door light seal replacement
When it comes to the longer runs there are two width measurements. For the seals on the back door they are approximately 2 mm wide and the ones on the camera itself are 1.5 mm wide. I have cut these myself and believe me they are awkward little buggers to get in place, I very much doubt you will do it first time (well done if you do) it’s taken me a number of attempts and to be honest I’m still not 100% happy with the results. The rear door is the second easiest piece to do as you can remove the film guard to give you some space to work.
Rear door with new light seal installed
The camera body is ultra awkward as the seal is so thin. I have put in two lengths and it’s stayed in place overnight but I may well redo it again at a later date. I will run a film through to see if it is sufficient as I suspect it may well be. My trouble is I’m just trying to be perfect but sometimes you just have to lower your expectations slightly. A couple of things I would recommend though:
Use an ultra sharp craft knife
Use a metal ruler
Wet the adhesive as you put it in place as it allows you some option to move it prior to sticking
Be patient, you will have to cut a number of strips
Be prepared to remove re clean and try again
Practice and don’t be downhearted if you fail
Try again
Practice makes perfect 👍
This is going to be a stock camera for me so there is no rush to move it on. Keep a camera spare for yourself to practice on as it will only improve your technique in the long run. This was my first attempt at seal replacement and I have learned a lot from this exercise. Come back to see the results of my test film on this camera.
What I noticed whilst inspecting this camera was that the light seals around the rear had decayed sufficiently to require replacement, and after approximately 50 yrs that seemed to be a reasonable assessment.
Quick video of the light seal removal
This page will cover the light seal removal, it is important that the camera is thoroughly cleaned and all debris removed as this will make mthe replacement of the new light seals so much easier and less cumbersome.
Items required:
Isopropyl or another sufficient cleaner
Cotton buds
Cocktail sticks or plastic modelling knifes
Compressed air can
Remove film plate – remember the correct orientation
Remove the film plate on the camera door as this assists when cleaning, easy to do, just be careful when removing to ensure you don’t bend the retaining springs, and ensure it goes back in the correct orientation so that the small hole in the top corresponds with the winder sprocket on the camera body.
Scraping out the old light seal
There are 5 seals on this camera. Two on the camera body one top and one bottom, the same again on the rear door and a final one where the door hinges on the camera. Lightly wet these with some isopropyl and let this seep in for a couple of minutes. Using a cocktail stick or a plastic modelling tool (not metal as you will scratch the frame) start to gently remove the old seal and remove any debris away from the camera. Take your time here as it is important to get each channel clean and debris free to ensure the refitting phase goes without issue. Now wet a cotton bud with the isopropyl and run this numerous times along each edge where you have removed the seal to ensure it is really clean.
Using a plastic tool to clear the old light seal
I would suggest you set a good hour aside to ensure you do this job correctly and completely, it really is that important to ensure you get good results.
Hinge door light seal- before and after cleaning
When the removal of all seals is complete I’d recommend that you clean again, yep I know it’s boring what I am saying but the cleaning really is that important. When it’s done, get the compressed air can and give a few well aimed blasts of air into the areas you have cleaned making sure you do not direct any debris towards the shutter, please keep this area sheltered or you can create other issues.
The debris left over after a good clean
Once you are happy with the clean up, shut the camera door and leave it alone until you begin to install the new light seal on another occasion. Then we will clean the camera yet again 🤦♂️
So the camera I recently ordered has been delivered and the assessment of the unit has begun. The original post claimed it wasn’t winding, I wasn’t concerned about this as nine times out of ten it’s purely because the batteries are not installed.
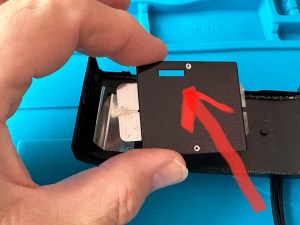
The original batteries that came with the unit back in the day were PX640 mercury batteries x2 . These are now outlawed for sale so we have to now look at alternatives to use, this may involve using a converter to achieve the results we require. I have decided to use these converters for this camera.
converters in place and batteries installed
On first inspection I was worried as there looked like some battery acid damage to the terminal on the left (see picture) however with a wipe with some alcohol on a cotton bud it appears to be only age as it cleaned up ok. With these cameras sometimes the damage goes beyond the terminals and requires new wires soldering within the body. I dodged a bullet on this occasion.
You have a choice of batteries now, you can use two LR44 batteries or 675 air batteries. Difference here is all to do with the working battery limits of the camera. It was designed to work at 2.8v with the old Mercury batteries, the LR44s give you 3v that has been noted on some chat groups to require you to make exposure changes as it can overexpose sometimes by one stop.
The other option is to use the 675 batteries that have a lower voltage total of 2.8v however as soon as these batteries are opened they start depleting and have a shorter shelf life as such ( they are meant for hearing aids) however they are much cheaper than the LR44s . The choice is yours, I have gone with the 675s.
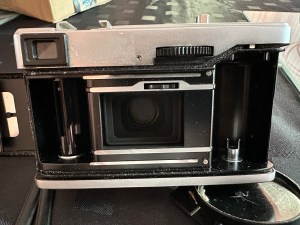
Batteries in place the shutter works well as does the winder and the shutter check light, excellent result as in theory the camera is working.
Camera works electrically
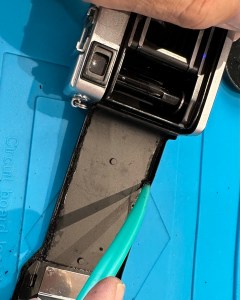
Cosmetically the camera needs a clean, the light seal around the film door is old and could do with replacing so I will do this in the coming weeks.
Light seal needs replacing
Overall I’m really pleased with this camera, I just now need to source some 35mm B&W film and put it to a test. I can then develop and scan this at home to see the results. But first I’m going to do the cleaning as stated earlier as well as replacing the light seals. It has also come with an Olympus pen lens cap that I may replace. I will also source a wrist strap to complete the look.
Hopefully this will be a nice little addition to my collection.
I have been after an original Olympus trip for a while now, however the prices are so volatile for them at the moment even the non working ones demand high prices, it’s crazy just how popular they are. So, I’ve had to settle for a camera that was sold alongside the “Trip” a 35 ECR.
Olympus 35 ECR
Asking for a reasonable price, this one flashed up on my phone and I purchased it immediately, I could end up regretting it but fingers crossed 🤞 it will not be too bad. If I’d left it a few minutes longer i believe it would have been snapped up.
I believe the main fault on this unit is a winder issue that is quite well documented on these cameras, and to be honest if that is the only issue then I should be able to rectify this and add it to my collection.
A good clean and assessment of the optics is the first and foremost action to take.
Another problem that sometimes raises its head on these units is with the two little batteries that originally powered the metering, they used to be mercury based 1.35v versions (PX640 x 2) and to add further pain to the problem, they can no longer be manufactured or legally purchased. There are alternatives but they are 1.5v and have been known to cause issues with the metering resulting in film exposure/rating issues, widely documented online. The best option is to purchase a battery convertor that allows you to use a more appropriate lower power pair of hearing aid batteries (Zinc Air 1.45v – 675 battery x 2), much friendlier in the long run as well as being a much cheaper option. However i will use this option only if there is the need to do so. I have a couple on standby if required.
Im really looking forward to running a black and white film through this camera, to develop it myself and see the results.
Come back and see what is found when the camera is assessed on its arrival.
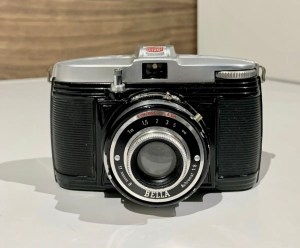
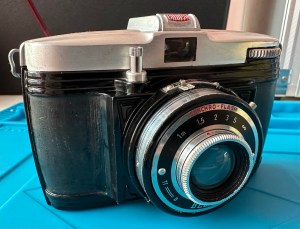
Since starting this blog this is the first camera I have actively obtained for the purpose of repair/refurbishment. I love this little camera, my thoughts are this is a Bella series 1 as later versions had the name on the body not in the hot shoe area as this one does. A low cost point and shoot of its time, I have had dealings with one in the past when I had to remove some film from one in a darkroom when the transport got stuck back in the early 1980s. Now this one is a nice tidy example of the model, and really needs little doing to it so my intention is to get it cleaned up, touch up the paintwork and maybe run a roll of film through it to check the mechanism, i may re cover the camera body, and will then put it in to storage for moving on at a later date.
These little cameras were the instamatics, or Olympus trips of their time, instead of using 35mm film (how they were designed to look) this particular model used 127 roll film that took 4×4 cm exposures, that format of film is still available today but as rare as rocking horse dung. They were made of what is called “pot metal” in theory just alloy based metal in its cheapest form.
I’ll explain what I intend to do with this camera below.
Inspection
Original condition
On inspection the top has some light marking and scuffing that I can attend to with some polishing and a touch of paint, the black covering I may replace and some of the black metalwork will need some retouching. The internals again are fairly good so will just be cleaned on this occasion. The mechanism works ok, I have maybe detected some dragging on it so I will inspect it closer and I will lubricate accordingly if required. I will dismantle down the whole body as much as possible and give it a thorough clean, after all I doubt it has been cleaned that much in its 50+ years of existence.
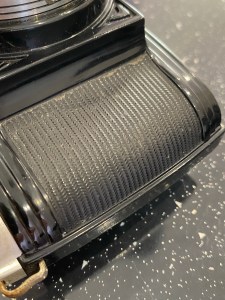
Chipped paintwork and old covering
In fact I’ve decided to go to town on this one and really mix it up. I’m going to replace the leather with a synthetic leather, cruelty free and vegan friendly. No animals suffered to make this product! and it’s bright coloured.
Here goes…
So to start I’ve pretty much dismantled the camera, the covering was a type of leather, I do know that if it was left on it would probably survive another 50 years as it was stuck to last. I had to scrape this off, sand it down and clean with a special solution to get the remaining adhesive and dirt off. I will need to produce templates to cut out the replacement covering as a result of this process.
The strip down
The plan now is to touch up, buff up, retouch the paintwork again and give a final Polish before I apply the new covering.
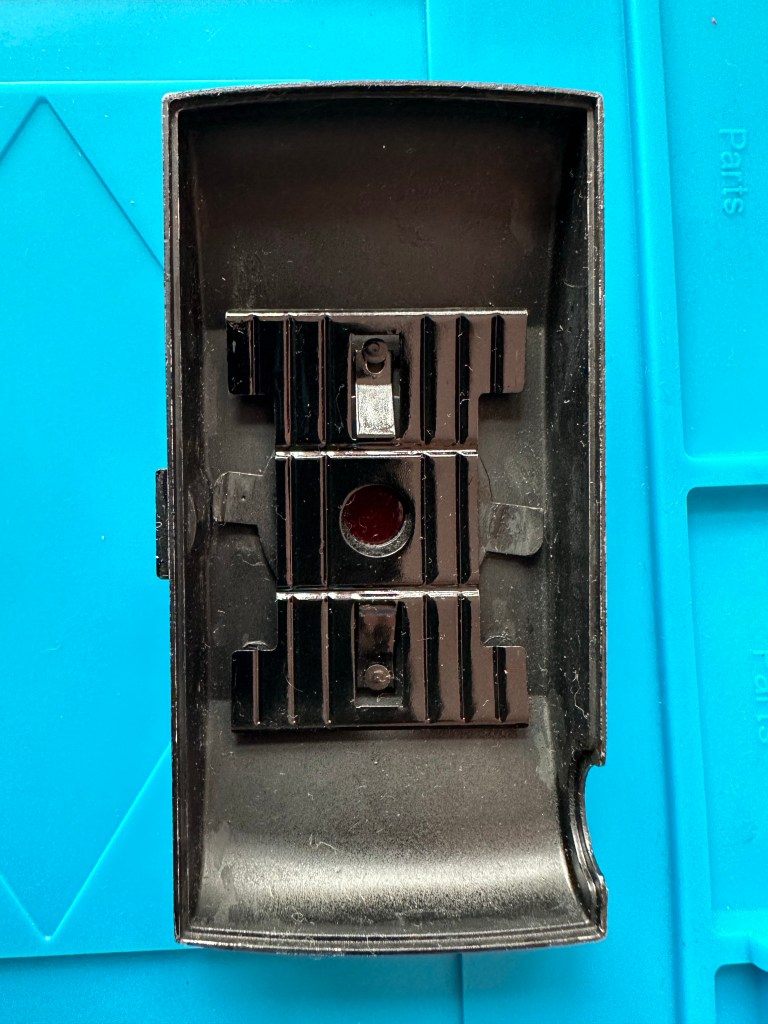
Undercoat with a Matt black prior to buff upFilm backing plate. Rust removed and repainted
I’ve now finished all the painting I want to do to this little camera, I have glossed buffed and painted again and the next stage is to apply some new synthetic leather when I’ve decided the one I will be using.
Awaiting the new synthetic leather body
So all I need to do now is take some templates in preparation for when the new synthetic leather arrives.
See my update when the new covering arrives.
Information regarding this camera
The Bella is a line of cheap but attractive and well-built 120, 127 roll filmand 35mm cameras made by Bilora in Germany. The Bellas went through several revisions over the life of the name. The bodies are alloy castings, with added leather-effect covering – in various colour combinations. Each is styled a little more like a 35mm camera than a roll film one. The back is removable for film loading, and most models have a large back catch. The 44 models make twelve 4x4cm images on 127 film; the 46 modelsmake 6x4cm frames on 127, and the 66 models take 6×6 photos on 120 film. The Bella 44-1 was also sold by Ansco, rebadged as the Ansco Lancer. Bilora also used the names Roxa, Bonita and Reporter for Bella variants. Manufacturer: Bilora, Germany Shutter: B, 1/50, 1/100s In production: 1953-1966
I’ve obtained three new (old) cameras this week to work on. And of the many thousands out there I think I have three lovely examples of good everyday cameras circa 1940-1965.
Halina Paulette, Braun Paxette and an Ensign Ful-Vue
Two of these cameras are 35mm and the Ensign is a 120 film camera. The Ensign needs a refurb and I will dedicate a page to the work that needs to be done on this unit. Fingers crossed the work on the other two cameras will be minimal, hopefully just a clean up however I will assess all cameras when they arrive.
Ensign Ful-Vue 120 film camera
I’ve never had any dealings with these cameras before so I’m kind of looking forward to putting some time in on them.
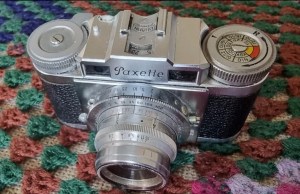
Halina PauletteBraun Paxette
I think the above two 35mm cameras are little beauties, they have so much character and show the magnificent design ideas of their time. I’m hoping to put film through all three of these cameras that I will develop and scan at home. Fingers crossed as I said earlier that there is not too much wrong with them all.
I’ll update the site with a blog and a small video for each one once work to restore them begins.
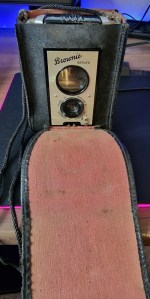
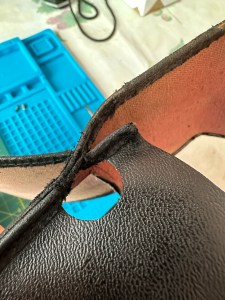
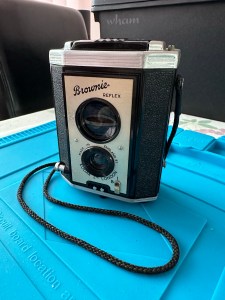
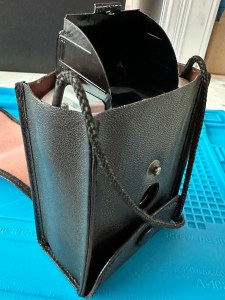
A cracking little example of a unit that was in production between 1946-60. The leather pouch is showing signs of age and wear and tear, it has a small split and needs sewing, seeing it’s age this is to only be expected. I shall attempt to clean the cloth with a light detergent solution to remove the dirt and will then treat the leather to make it supple again, the buttons can be retouched with some black paint.
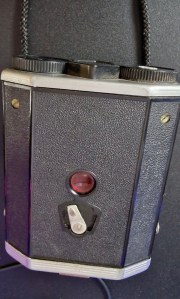
The unit itself just needs a clean inside and out, the hood needs a repaint, the mechanism seems to be good and both exposure settings are operating as they should. The exposure setting switch as well as the two synchro pins show signs of corrosion, I may need to buff these up or again source replacement parts. I may need to source a new strap. On close inspection it seems the mirror is damaged, looks like water damage on the underside but I won’t really know until I get it all dismantled.
Brownie reflex dismantled
Well today I have taken the unit apart, I’m really surprised just how clean the unit is inside after all these years, however there are a few issues. The hood is rusty and restricted in its movement, I have fixed this issue by smoothing out a few small bumps and freeing the spring mechanism with some camera oil, it works well now (see video below) however I still need to rub down and repaint. The lenses have been cleaned, the viewing prism has been cleaned and I am happy with these, the shutter works well so I won’t be touching this.
Brownie reflex mirror damage
The mirror that I mentioned earlier in this piece is not water damaged as first thought, it looks as if the original glue used to fix the mirror has damaged the backing hence the mark you can also see in the video.
Lens hood working and damaged mirror
To repair this I will be using a very thin piece of acrylic mirror that I will cut to size, I’ll show you how I have done this later in the report. The case is to be cleaned and a stitch repair is needed, some small touch ups are required but in general there is not an immense amount to do to get it back to how it used to look.
Lens hood: The lens hood is opened to look into the lens. It was quite pitted, rusted and chipped so I have buffed it down, cleaned it and repainted it. I’m pleased to say it’s a good finish and I’m pleased with it. Job done 👍
Lens hood before and after
Neck strap: this is the original strap or should I say cord. Severely frayed both ends this needed repair, one of the easier tasks to do. I’ve cut the ends off losing about 10cms of cord, the crimps are unusable however the two crimps where the screws attach to the body were salvageable and I rewound the cord back around these and secured this with a pair of pliers.
Cable neck strap pre fixing
Next I sewed the two pieces of cord together to make up for the loss of the original crimps, I then used two lengths of heat shrink tubing to further secure the cord and screw crimps.
Cord sewn, and then heat sealed
I think you’ll agree, nice simple repair, sympathetic to the original and will last a few years longer. Job done 👍
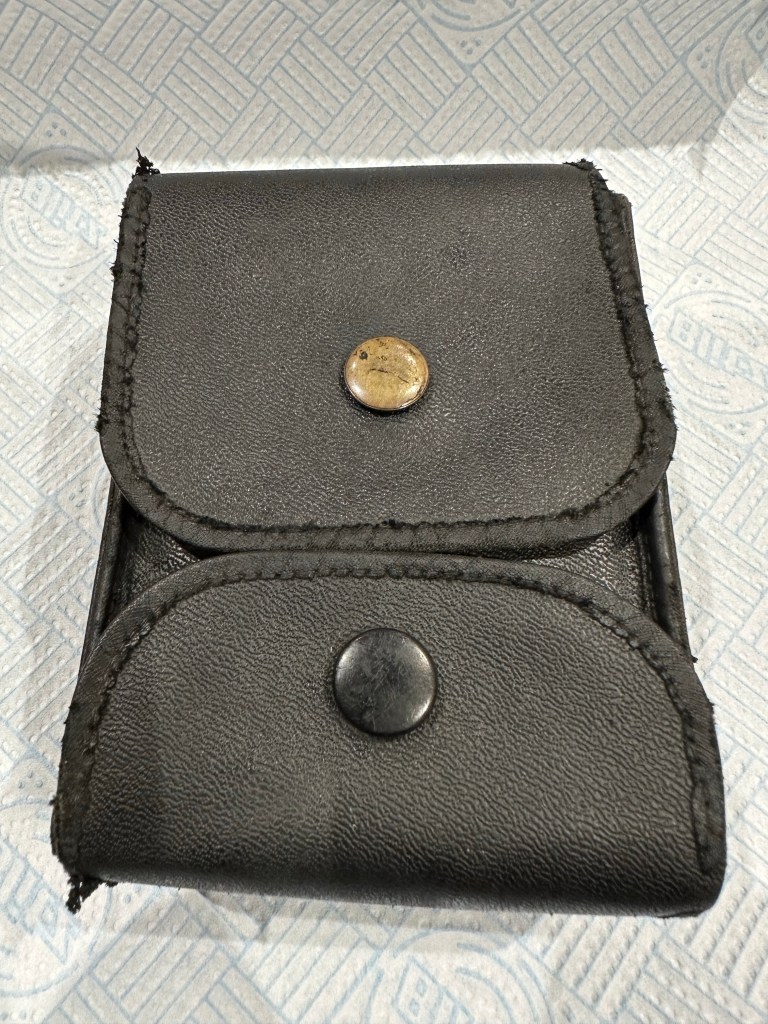
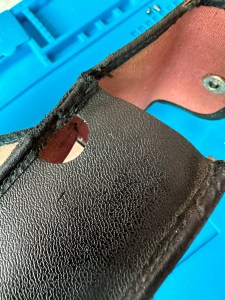
Camera case: in layman’s terms the word knackered should be used. As old as it is, it was quite dirty and the leather was tired and brittle. I’ve only used the suds off of hot water and tablet soap to clean the exterior and interior and this will do as it’s quite delicate anyway. If it doesn’t survive this treatment then I will dismantle the case and use it elsewhere. However the clean up was successful, I’ve now given it some treatment to moisturise it as such and it now looks completely renewed.
Before and after case cleanup
I will leave this overnight for the treatment to be absorbed I’ll then give the case a light buff up.
Leather repair complete. Leather stitching not my favourite pastime
Apart from a couple of stitches that needed putting in I’m happy with the case and will not attempt anything else with it. Job done👍
Mirror: Today the very thin acrylic mirror sheet arrived so I could cut out the new mirror I required to replace the damaged one. It’s exceptionally thin and I have glued it to the original mirror to cover the imperfection. I didn’t fancy seven years bad luck for damaging the mirror whilst trying to remove it.
Before and after mirror replacement
I was really pleased with the outcome here. This is a photo of the view through the new mirror
New mirror viewed through top of camera
I’ve cleaned the lenses as best as I can however the years have left them slightly pitted, no concerns with this though as the viewer is separate from the actual capture lens.
With this I am satisfied the camera has been sympathetically restored, it’s been reassembled packaged in an airtight bag with a silica desiccant sachet and put back into my personal collection
The completed project.
Time to put this little project to bed now. I’ve really enjoyed this one and I think these little old cameras will become my go to’s of the future. I’ve learned a lot and have learnt well from my mistakes along the way. Time to look for the next subject. So, for the last time on this project I get to say…..


You must be logged in to post a comment.