Imposter syndrome, also known as imposter phenomenon, is a psychological experience that causes people to doubt their skills, accomplishments, and intellect. It can manifest as a persistent feeling of self-doubt and fear of being exposed as a fraud. People with imposter syndrome may feel undeserving of their achievements .
Wikipedia
I’ve even removed the final part from this quote, “and the high praise that they receive” as it embarrasses me.
I’ve pretty much suffered this issue the whole of my adult life, I haven’t made that diagnosis, that was made by far better qualified persons than I, that I have seen over the years. I can manage it most of the time and then for some reason I have a rotten bad day, like yesterday when I totally withdraw and slink into a dark area where I do nothing but run myself down.
You’re useless, you’re crap, you’re no good, you have no purpose, you’re a failure, you’re an arse, you’re incompetent….. you name it, anything bad, I quite openly said it to myself yesterday. I don’t know why.
All the arty stuff I’ve done recently, I just went and binned, because in my eyes it’s crap. A child could have done better, why show it to other people. You’re useless. I’ve had such a brilliant, positive attitude of late that I don’t know where this came from. It’s just as if I’m punishing myself for feeling good.
It was a bad day, and unfortunately I’ve upset those closest to me and I’ve now got to start rebuilding bridges.
It takes me to some dark places at times and I’ve controlled it so well over the last year or two, I don’t know where it came from this time.
That’s the problem with these ailments. You think you’re got it sussed and then BANG 💥 it hits you right between the eyes… it’s back, and it’s overwhelming.
It’s the retracing my steps and rebuilding those bridges I hate. I’m lucky to have understanding people around me, but just how much more can they take?
If you like large scale modelling you really need to spend 30 minutes of your time watching this guy at work. His name is Parma, he is a Brazilian chap who has a channel dedicated to large scale modelling and the thing is, he does it all from a small room in his apartment that he has converted into a workshop. He wants to prove that you don’t need a massive work space to create these masterpieces.
I love model making but you look at guys like this and feel totally inadequate. He is a true master of his trade.
In my first foray into this art medium, i chose what were to be two of my first templates. That post can be found here: Faux stained glass painting. This post covers what I will be doing with the second template and a slightly different approach to what I hope to achieve.
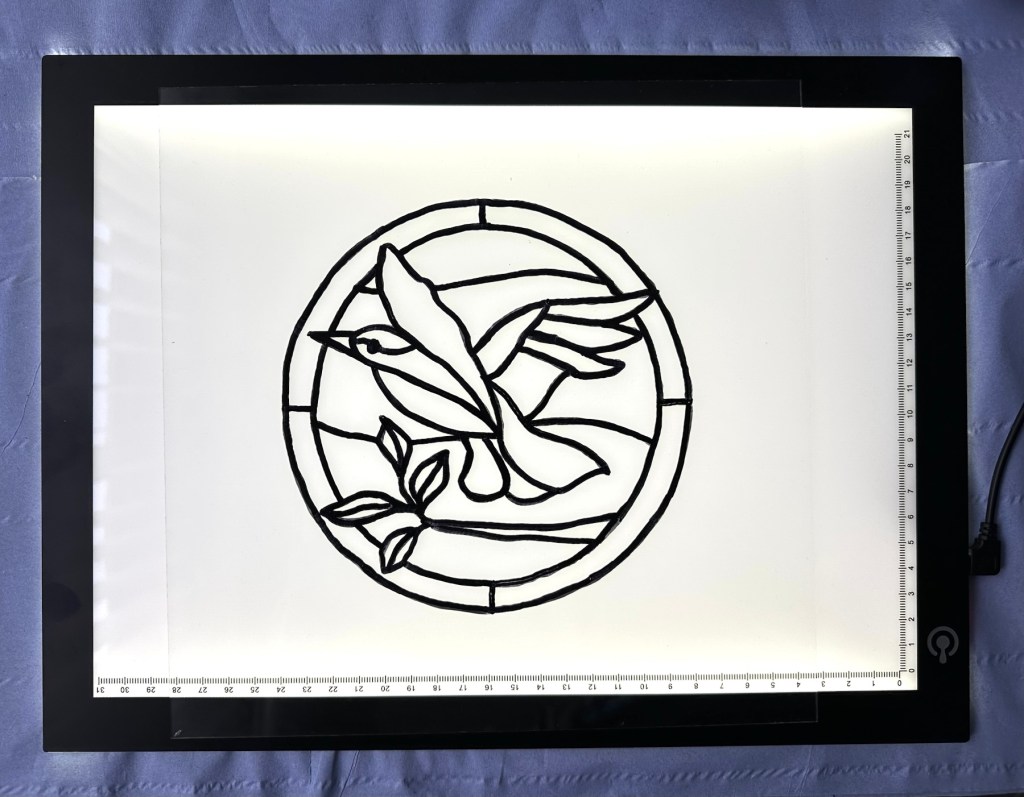
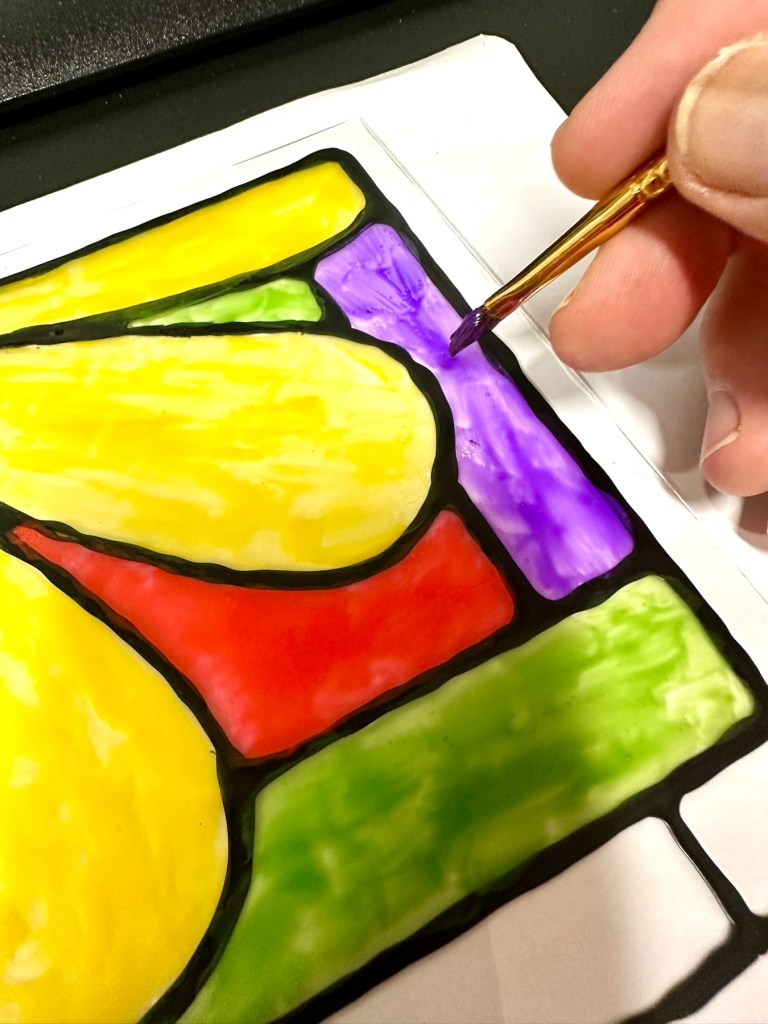
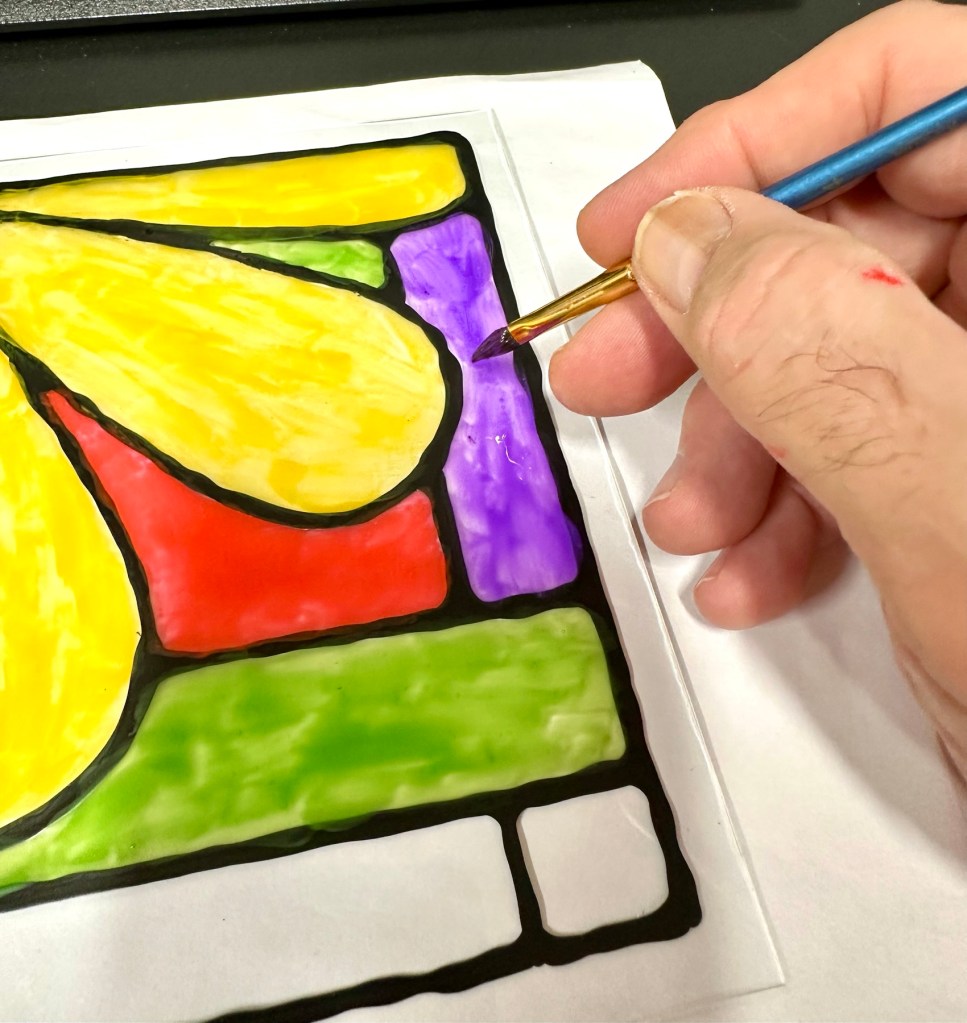
I have already traced an outline onto my glass and this time instead of using paint and glue for the lead effect I have used a Pentel permanent marker. I will do the painting on the opposite side of the outline as this will allow me to make amendments to either the outline or the paint without interfering with each other. Because the paint is mixed with glue this can easily be peeled off and re painted. The outline can be amended by using a cotton bud and some IPA. Making changes with the outline and the paint on the same side would require cleaning the whole glass and starting again from scratch. I want to avoid that, so that’s why I’m experimenting.
My second template, drawn with permanent marker
I’ve brought some new Acrylic paints, and will be using slightly more glue in the mix to try and achieve a slightly more translucent effect, to assist with the effect I’m trying to achieve.
As you can see I will be using a box frame for this piece. What I want to do in this example is to put some lights in the frame, but to ensure the light is not too harsh I want to put some opaque tissue immediately behind the glass to act as a diffuser. I’ll get around to this later in this post.
Let’s get painting.
Today i’m using a small light box under the glass so i can get a good idea of how the paint is going down. It also saves me from constantly having to lift the glass to the light to see how it is looking. The glass is very thin and the less it is handled the better.
My light box
Time to paint
Time to dry
When dry I just flip the glass over and go over the out lines once again, this time I’m going to add a small sting of lights into the box for display at night.
Mounted in a box frame. I have hot glued some lights into the inside of the frame
Box frame Better at night
I’m a tad unsure about the lights but I’ll have to wait until it’s dark before I make my mind up about this one. Been fun, I’ve enjoyed it but I’m sitting on the fence regarding the lights, but you never know what’s liable to happen unless you give it a try. I may try the foil trick on this one as I think it may be more effective.
My original three frames i purchased, to use as templates for this particular Art medium
3am in the morning and I’m wide awake. Damned annoying as I know what the cause is. It’s been an issue that has pestered me in excess of 30 years now and it’s called –
Shift work
Says it all
I’ve been working shifts in my job for about 35 years now and I still haven’t come across a way to get your body to adapt to all the changes that shift work burdens upon you, and number one in that list is insomnia.
Insomnia, also known as sleeplessness, is a sleep disorder where people have difficulty sleeping. They may have difficulty falling asleep, or staying asleep for as long as desired. Insomnia is typically followed by daytime sleepiness, low energy, and a depressed mood. It may result in an increased risk of accidents of all kinds as well as problems focusing and learning.
Wikipedia
As if you need it explaining to you. Now I don’t suffer from permanent insomniac conditions, mine is purely based around the segment that involves night shifts. My shifts cover 24hrs and are on a five week rolling cycle. They involve three main sets of shifts and those shifts are 0600-1400hrs, 1400-2200hrs or 2200-0600hrs and at weekends they are either 0600-1800 or 1800-0600.
I have just finished a run of 11 consecutive night shifts after one of my coworkers has been taken ill. And that’s the problem. I finished at 0600 yesterday morning and deliberately did not sleep beyond 11 am as I’m now having to swing back to daylight timings, as I now have the weekend off before transferring on to the early mornings shifts from Monday. I was suitably tired last night, in fact I was all day, but I resisted the urge to nod off as I wanted to try and fool my body clock in to getting back to normal habits. But my body clock doesn’t work like that and isn’t having it.
Over the years I have tried many ways to try and evolve my body clock to understand when moving from Night shifts to day shifts. I’ve tried not sleeping at all, but that results in irritation to all those around me, and a general malaise that is unproductive and non conducive to a friendly peaceful atmosphere. I’ve tried the couple of hours in bed routine but that again is problematic as you fall in to such a deep sleep, so quickly that whoever is tasked with waking you up undoubtedly gets both barrels and you don’t speak for the rest of the day getting labelled as a miserable old git. Or you can just go to bed and wake up when you feel fit to, as I did yesterday and here I am now, in a blacked out bedroom putting my thoughts into this post, quietly as my wife sleeps beside me.
I’m totally wide awake and ready to go. But I don’t want to go anywhere…just yet.
I know I will pay the price later today by feeling tired and tempted to take a nap, however I have to resist that temptation and try to get back to a normal sleeping pattern tonight.
I must apologise in advance to all those individuals who I will meet today who think “He’s a miserable old git.” If I’m nodding as we talk it’s not that I’m bored it’s just I’m lacking the one item you have probably had plenty of.
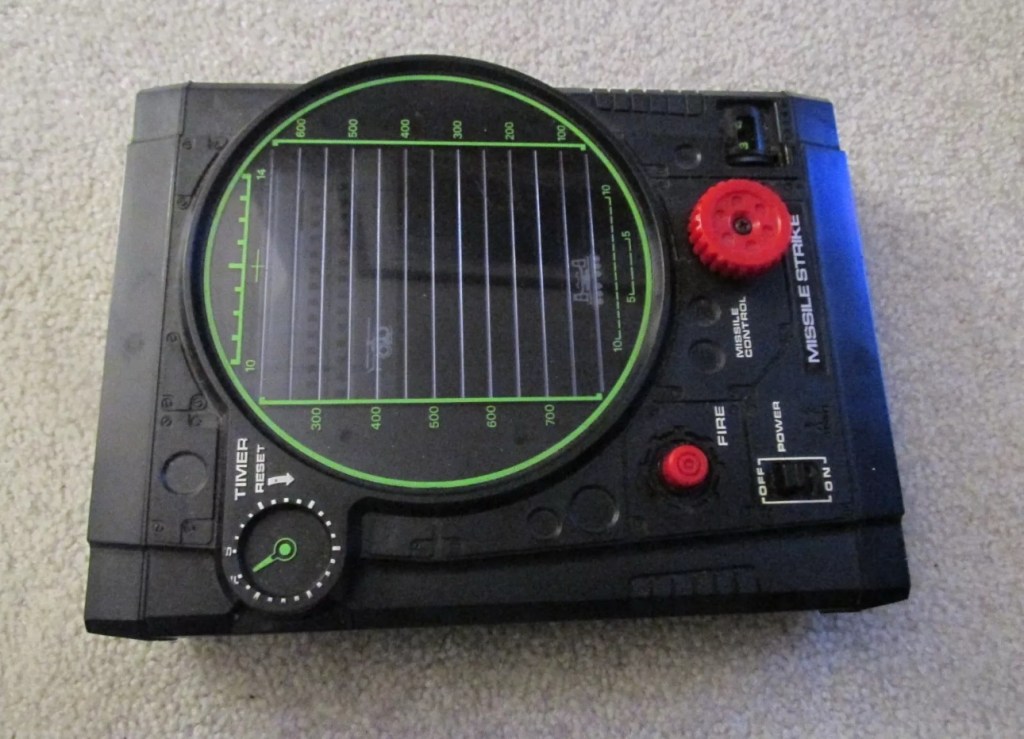
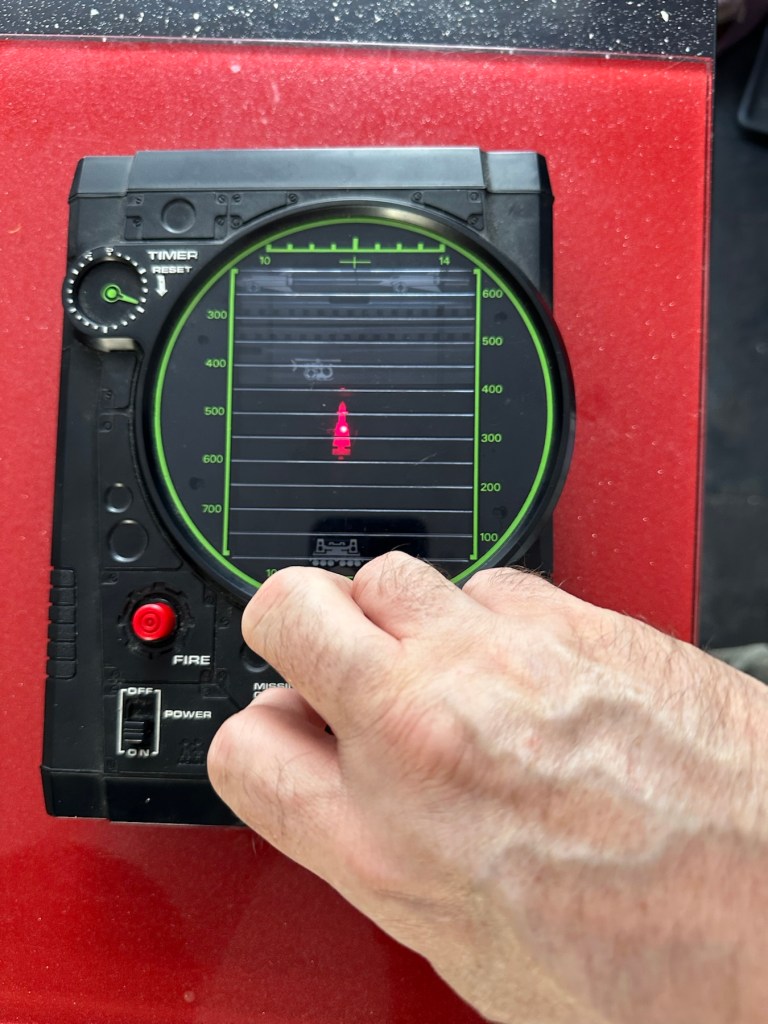
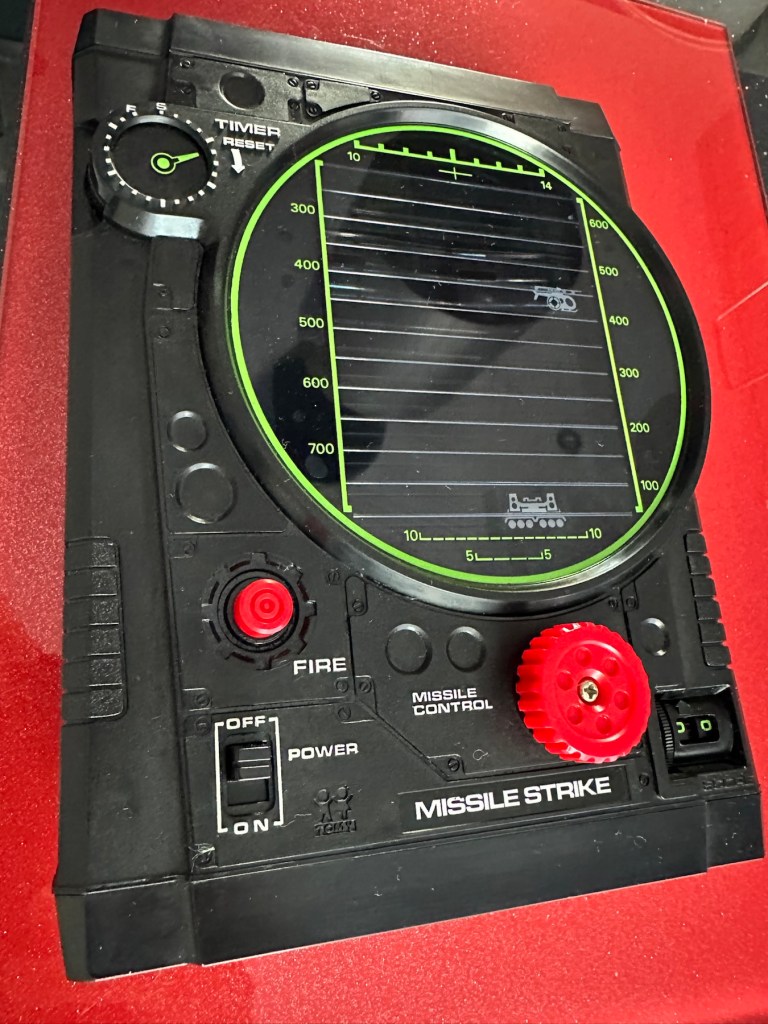
This is a nice example of a Tomy ‘Missile Strike’ electro/ mechanical handheld game. It was made circa 1979 and is battery operated. It appears clean for age and works, apart from the missile light not illuminating. Battery terminals very good. This is a nice genuine item that is shown as I found it. NOTE – NO BATTERIES ARE ENCLOSED. Nice example for any collector.
EBay
Missile strike
On first seeing the listing for this item, my thoughts are that it looks quite clean and tidy. The usual state of these units are quite tatty with scratched screens. This looks good, however pictures, especially from EBay can be greatly misleading so I’ll guess I will just have to be patient and wait.
This units only issue seems to be with the LED missile light, so hopefully it will be a quick fix. These units are currently selling between £52-£79GBP as per the picture below. I managed to secure my unit for a total including postage of £24GBP so I think I’ve done well in that aspect. I’m quite happy with this.
Current sale prices on EBay
A little history:
Tomy released Missile strike in 1979 in its international line of electro/mechanical handheld games. Known under different titles in other regions such as Terra-Hit (UK), Missile Strike (UK), and Space Attack (Japan). One of TOMY’s electro-mechanical handheld games, Missile strike is a Space Invaders-like shooter game, the units small motor winds strips of aircraft across the screen, which the player attempts to hit in order to earn points. There is a mechanical wind up timer that controls the action, and the purpose is to score as many hits on aircraft as possible with in the time it takes the winder to stop. The game includes one small, flashing LED light as the exploding missile.
So it’s another game that has reached its 46th year, and for the only issue to be its one light source, I think that’s acceptable. Let’s wait to see what arrives.
Assessment:
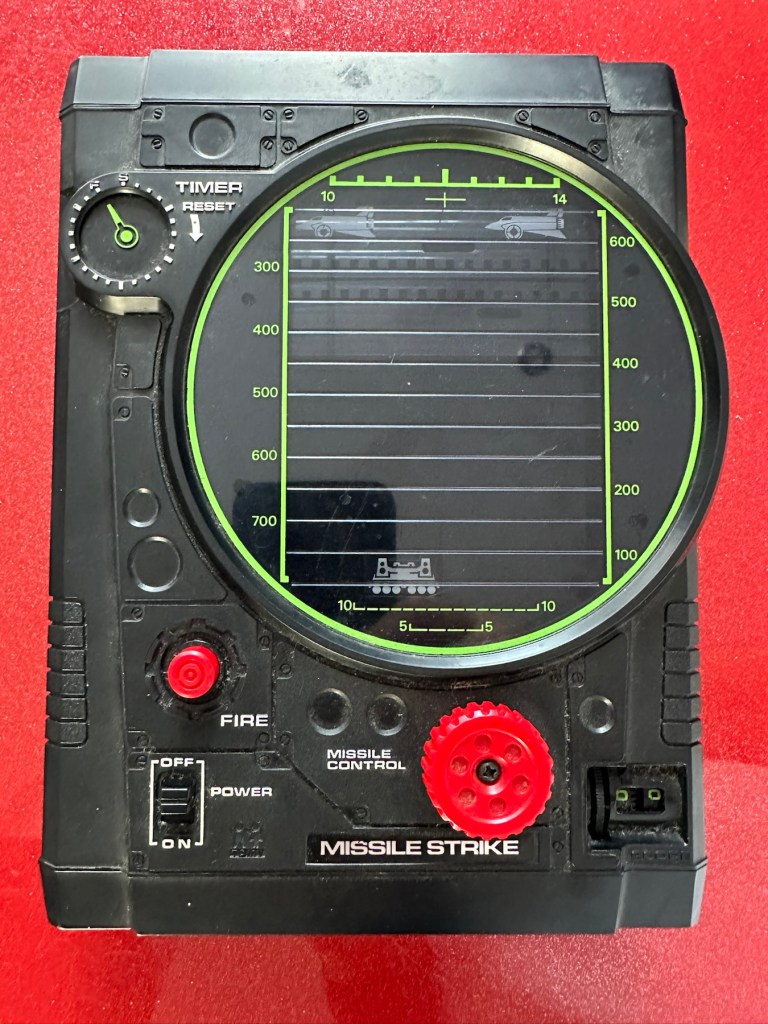
On arrival the first thing that hits you is that this is yet another filthy item. I seem to attract these kind of sales, so it will require a deep clean. Cosmetically the game is in good shape with no deep scarring and only minimal fine scratches on the screen lens commensurate with its 46 year old age.
Tidy cosmetically but filthy
It was sold as the missile light not working, this is partially right as it is an intermittent fault, I suspect this is down to dirty contacts.
Filthy, and counter not workingMissile light is intermittent
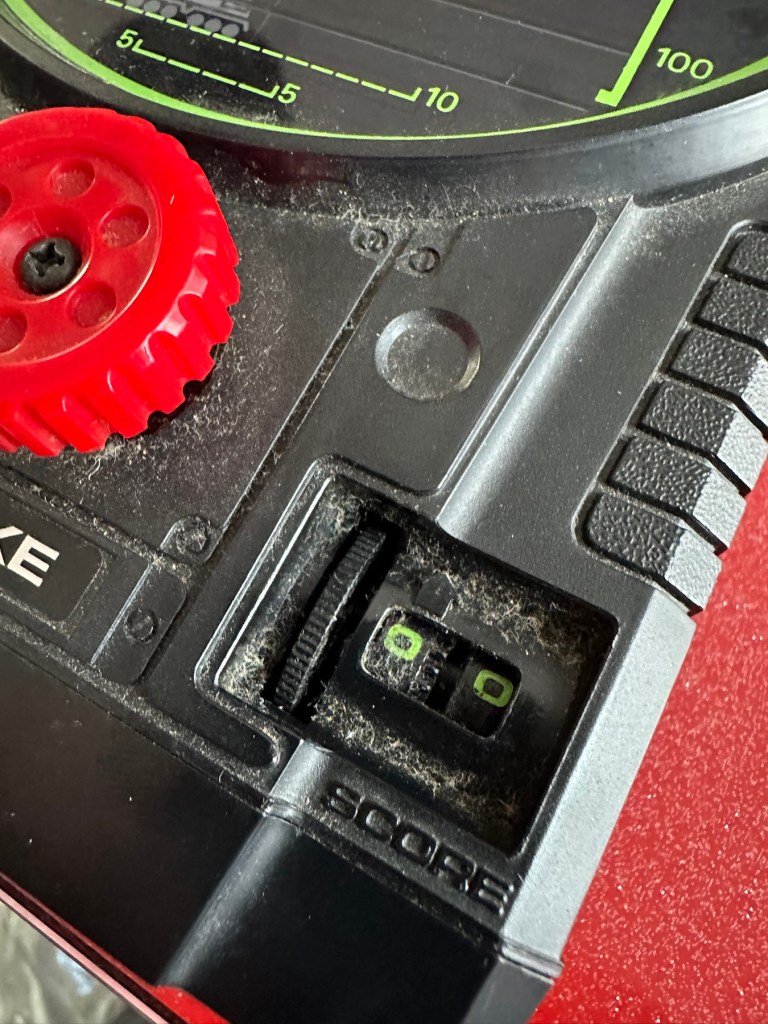
This game has two bands of film that run across the top of the screen displaying aircraft, the top band is intermittent and needs attention. The score counter will also need attention as it is not turning smoothly, again I suspect this to be as a result of the build up of dirt.
Repair:
First thing to do is dismantle the unit and to get some cleaning done. The small video below shows the issue with the top band aircraft not moving.
Film transport fault
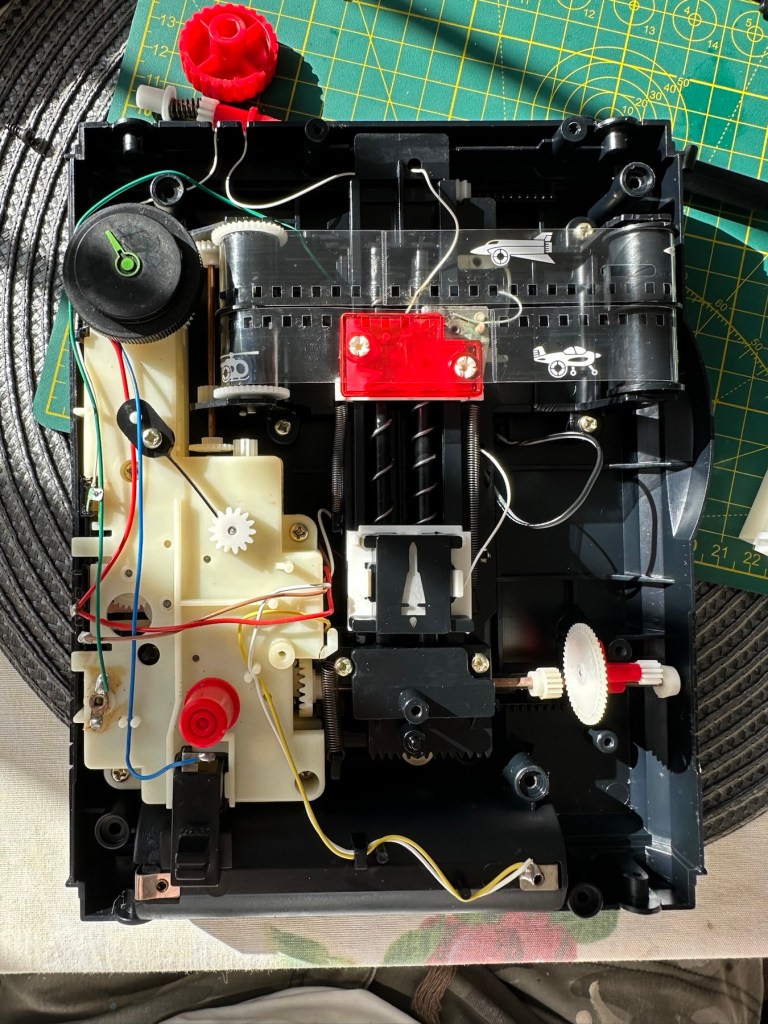
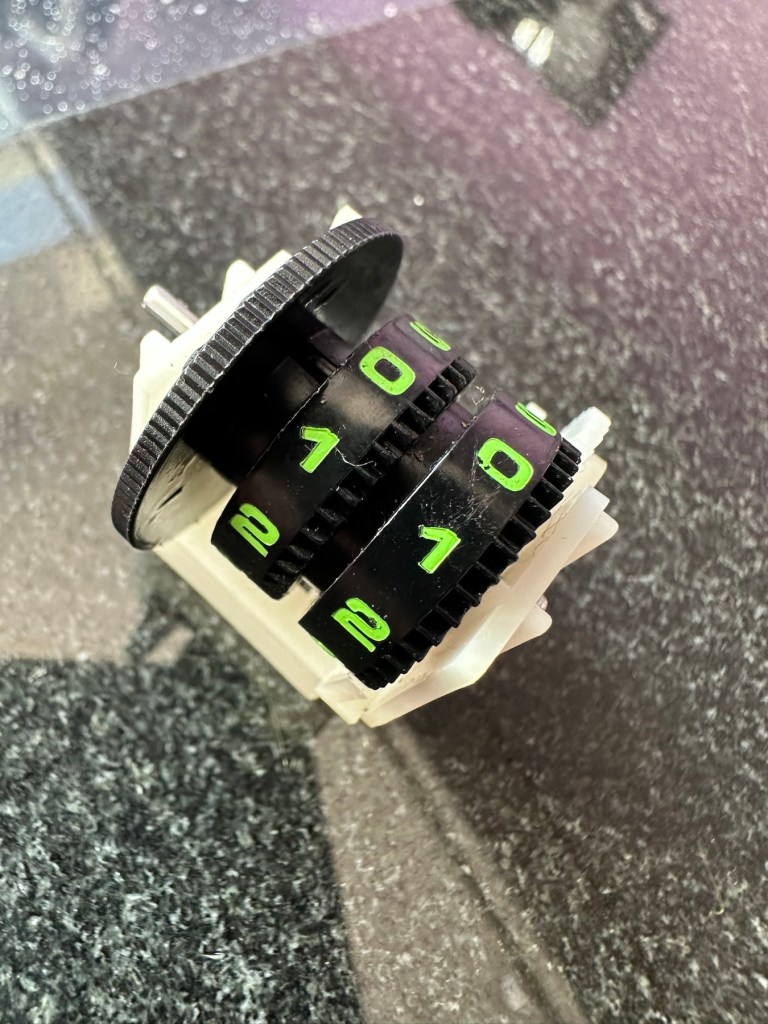
I’ve taken the counter out after removing the case and all exposed buttons and switches.
Dismantling
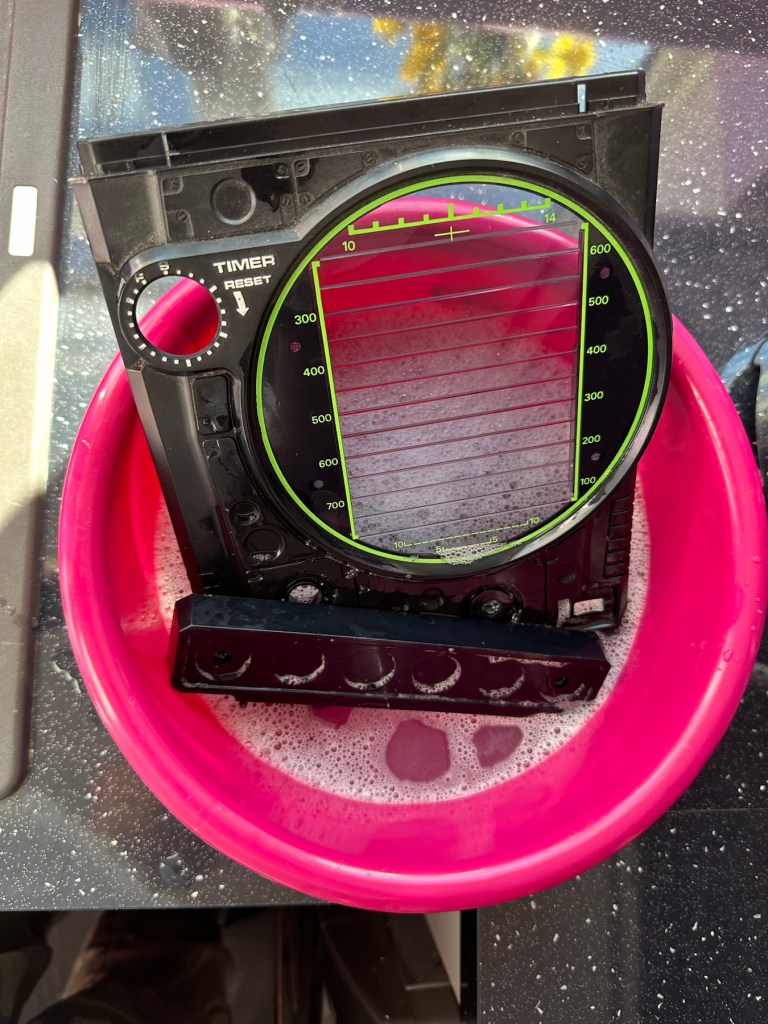
Off to the kitchen sink. let’s get these items washed.
To be cleaned Getting washedDrying down
Whilst I’m waiting for the washed items to dry I clean the counter mechanism of old dirt and fluff.
I’ve slightly greased the counter with silicon grease and it’s behaving well and doing what it should. This will go back in place when we do the final reassembly.
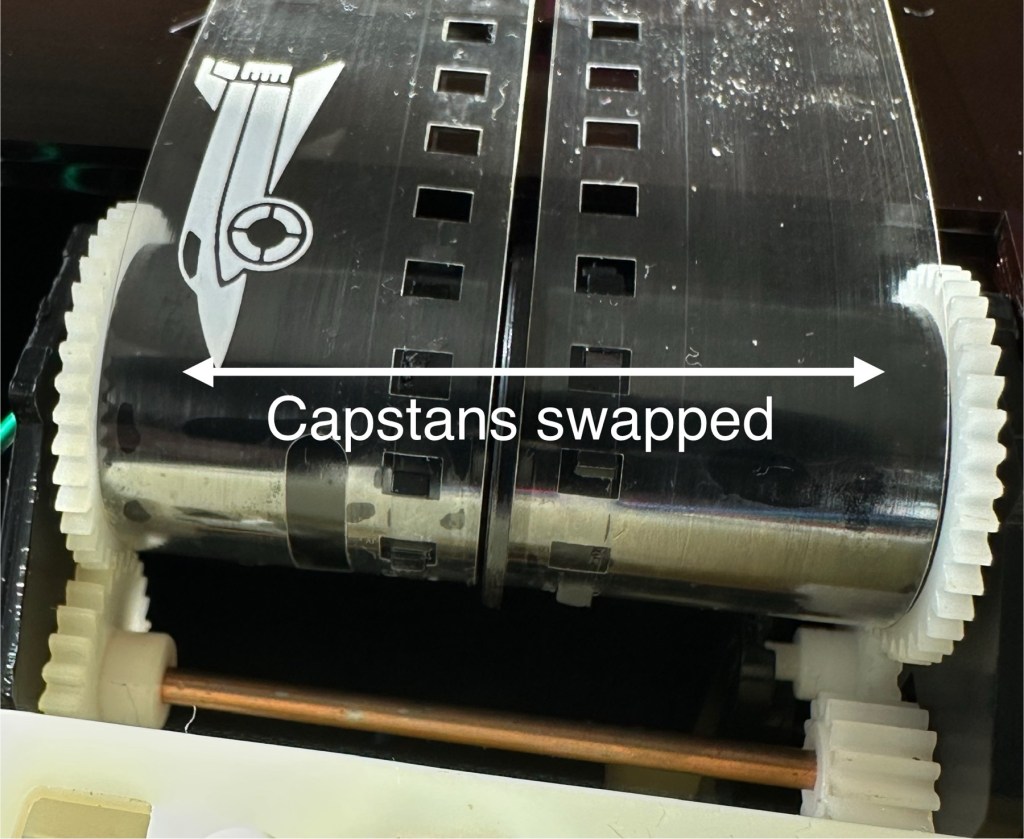
The issue with the film movement was a strange one. There was no way to tension the two capstans that the film roll over and there were no teeth missing off the capstans. One capstan pulls whilst the other pushes, all I’ve done is swap these around and the issue has disappeared. About as simple a fix as you can get.
Just swapped the capstans around
I’ve put a little before and after video here that shows the effect of swapping the capstans around.
How swapping capstans worked
The issue with the intermittent light was easy as expected. This is the only electrical piece on this game and it was down to contaminated battery contacts that just needed a bit of a clean with my grinding pen and a wipe over with IPA.
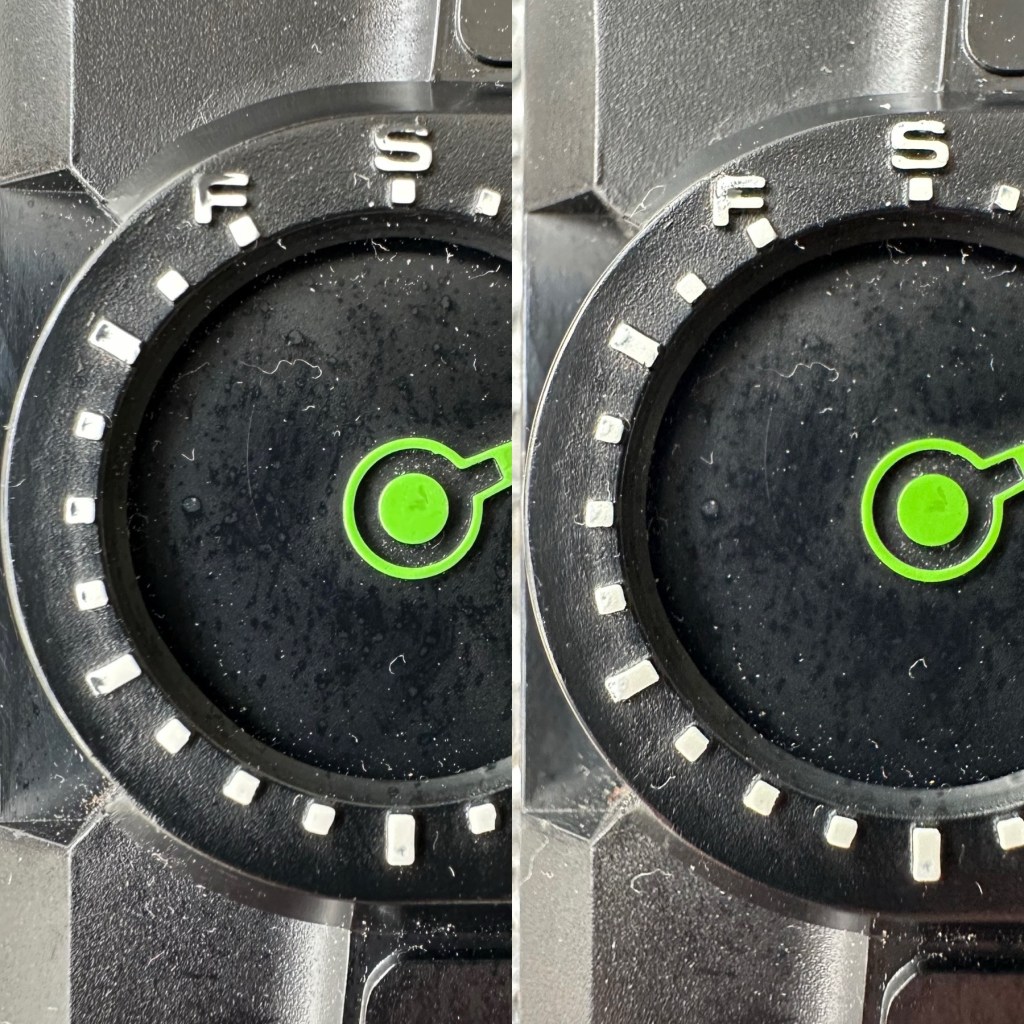
Final little touch was just to accentuate some of the old lettering by the timer. This was just with a white paint pen.
Before and after
Now we can reassemble and test again.
Result:
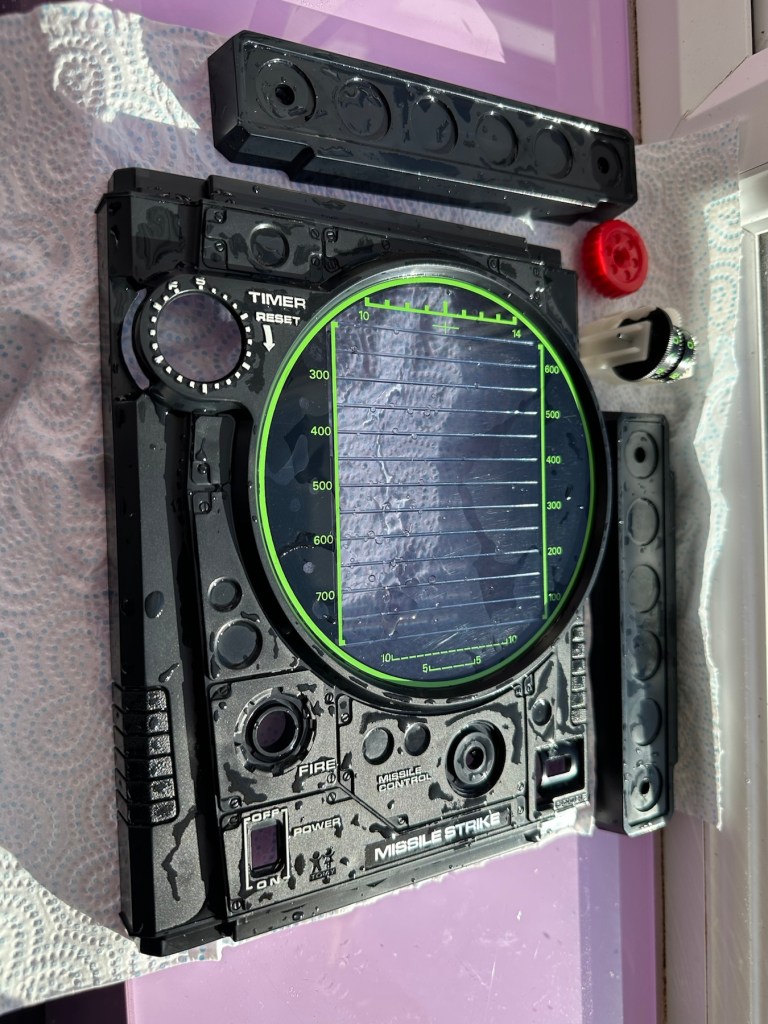
The game has been reassembled and tested and is now working fine. All intermittent issues have gone and it has now been polished and now looks superb.
I’ve attached this small video that shows the game working as it should, with no film slipping and lights and counter now working.
Working perfectly
It’s really pleased me this repair, as it’s another one of those mainly mechanical games. Dirt featured big time, and age issues have been overcome and the game given a new lease of life. Another one for my personal collection, it will go on now for many more years to come.
The best outcome that was possible, we have another superb seventies product that has been saved from the scrap heap.
Fair overall condition some cosmetic damage as expected for a 56 year old item
Very rare well worth restoration if you know how
EBay
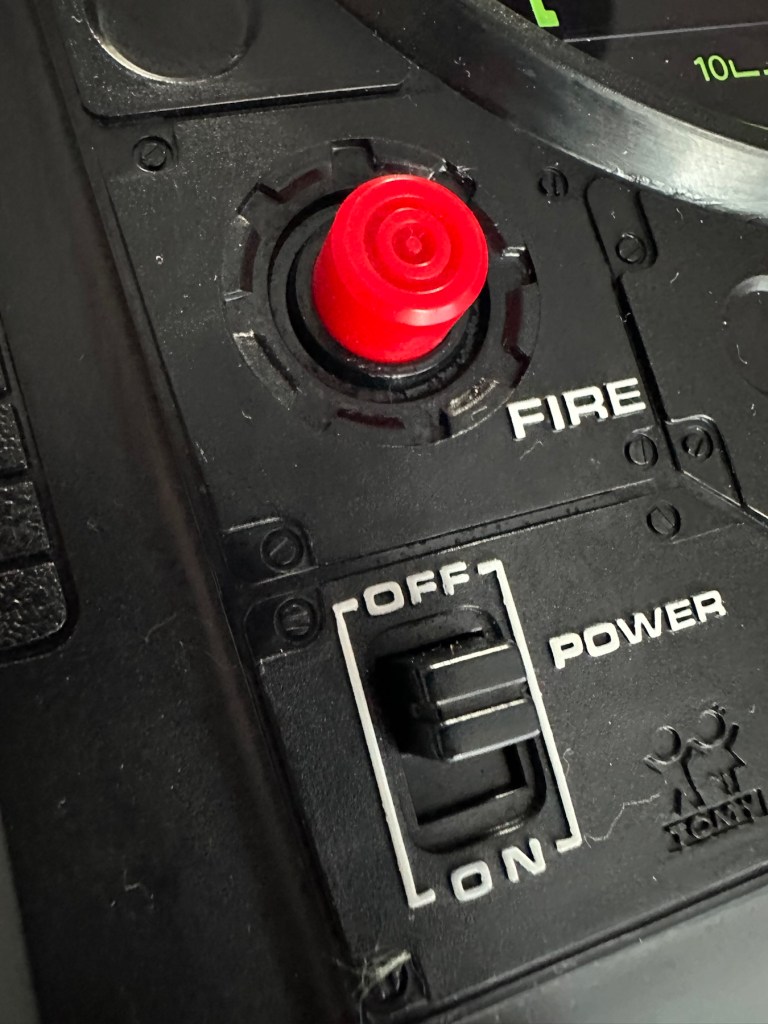
This guy sells retro games on EBay at exceptionally inflated, ridiculous prices. I suspect he doesn’t get involved with repair or renovation as he had this one advertised at over £30GBP but when I put in a cheeky bid for £12GBP he bit my hand off… I wasn’t expecting that! The usual mistakes in the listing such as stating it’s 56 years old when its actually 46, and stating it’s Very rare – it’s not, there were a few hundred thousand churned out and to be honest and they come up quite often on the sale sites. But I do agree it’s worth restoring and will pair up nicely with another retro football game from 1979 that i repaired a few months ago Bambino kick the goal football game. And what makes this unit even more appealing is that it is complete with both of its battery covers – now that is rare!
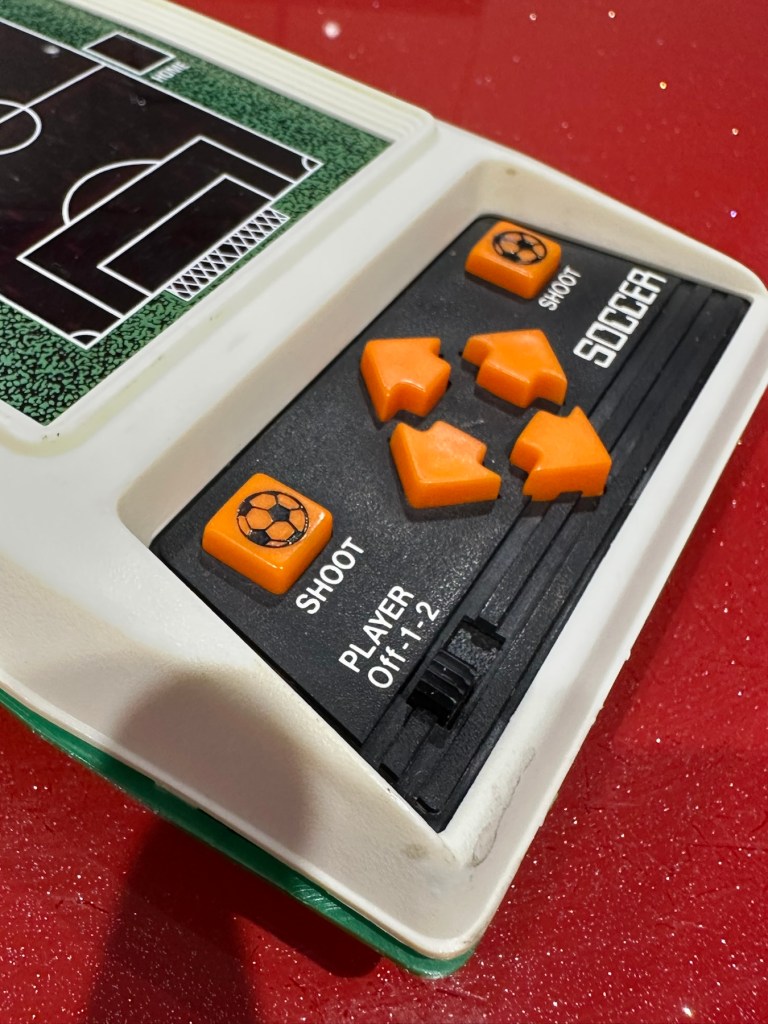
The game I have purchased Absolutely filthy
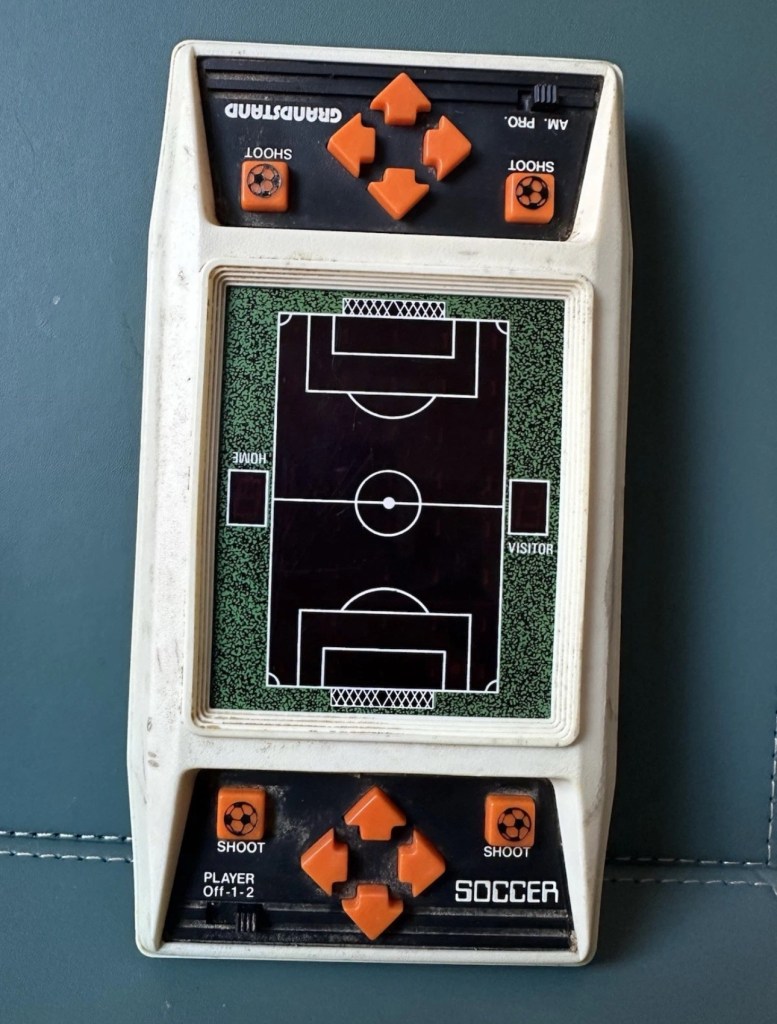
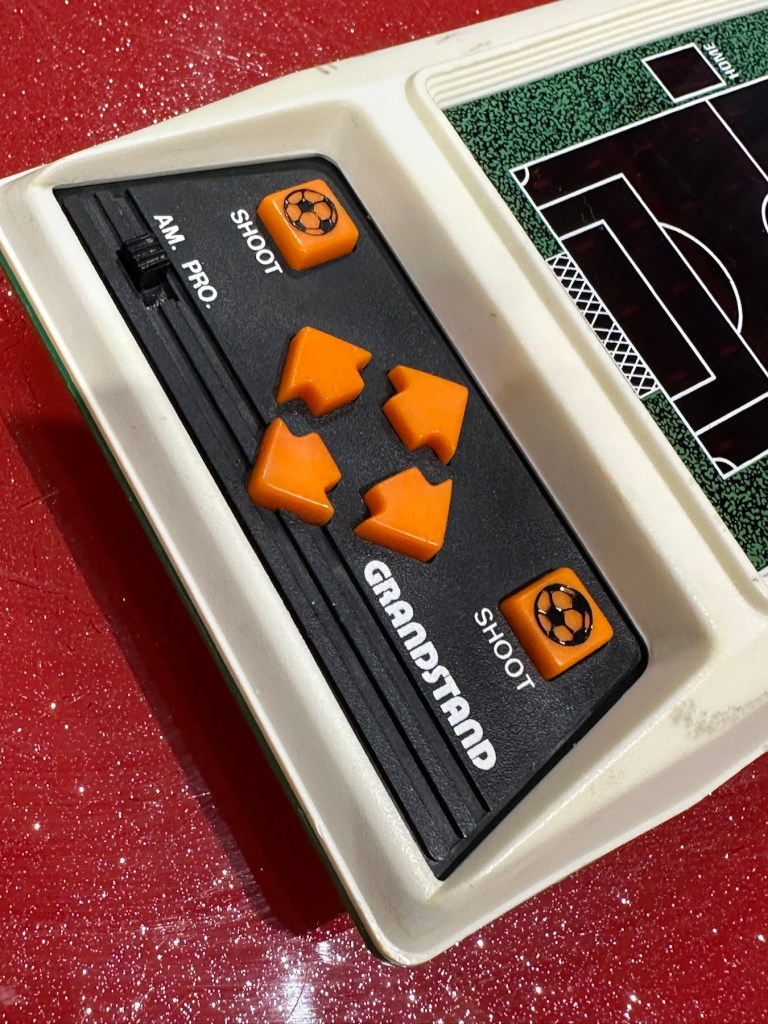
This game was made by Grandstand in 1979. Here’s the original advert that appeared on UK TV promoting the game back in the late 70’s.
European footballer of the year 1978/1979 Kevin Keegan – questionable late 70’s advert
This particular unit is listed as Not working, it looks filthy from what I can see, but having experience with these games in the past the biggest issue is age related problems such as old components, track decay and battery corrosion. No doubt the first thing I will do will be to dismantle it, give it a thorough inspection and then a good cleanup both inside and out. And then we can look at the issues around why it’s not operating.
Assessment:
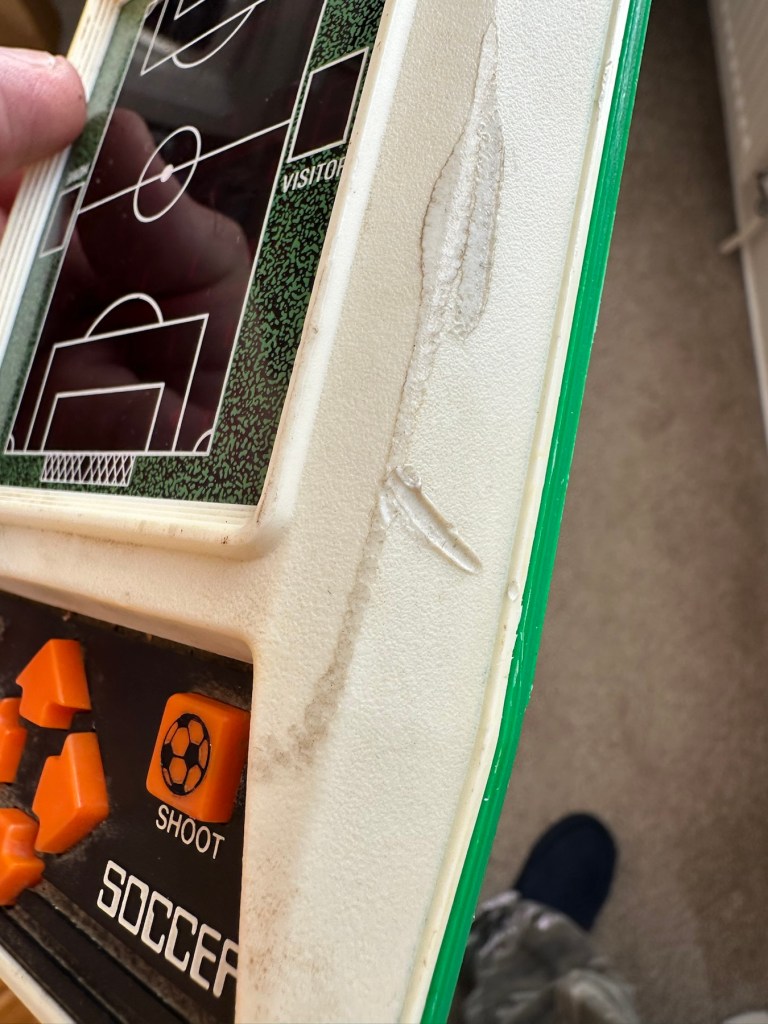
The unit has arrived today and it sure is filthy cosmetically. Like someone who has grown up throughout those 46 years it has its scars. It looks as if it has been placed against something hot, and shows a burn mark up one side.
How it looks on arrival
Caked in filth
Battle scars and burns
I have put batteries in and the good news is that there is life of sorts. By that I mean there is a distorted noise from the speaker and a flash of life on the screen and then it dies. Wiggle the start button and there are more flashes of life but that’s it. No other buttons seem to be working. I’m not tempting fate but this could be a case of the unit being just as filthy inside as well as out. But knowing my luck this will not be the case. Let’s have a look inside.
Repair:
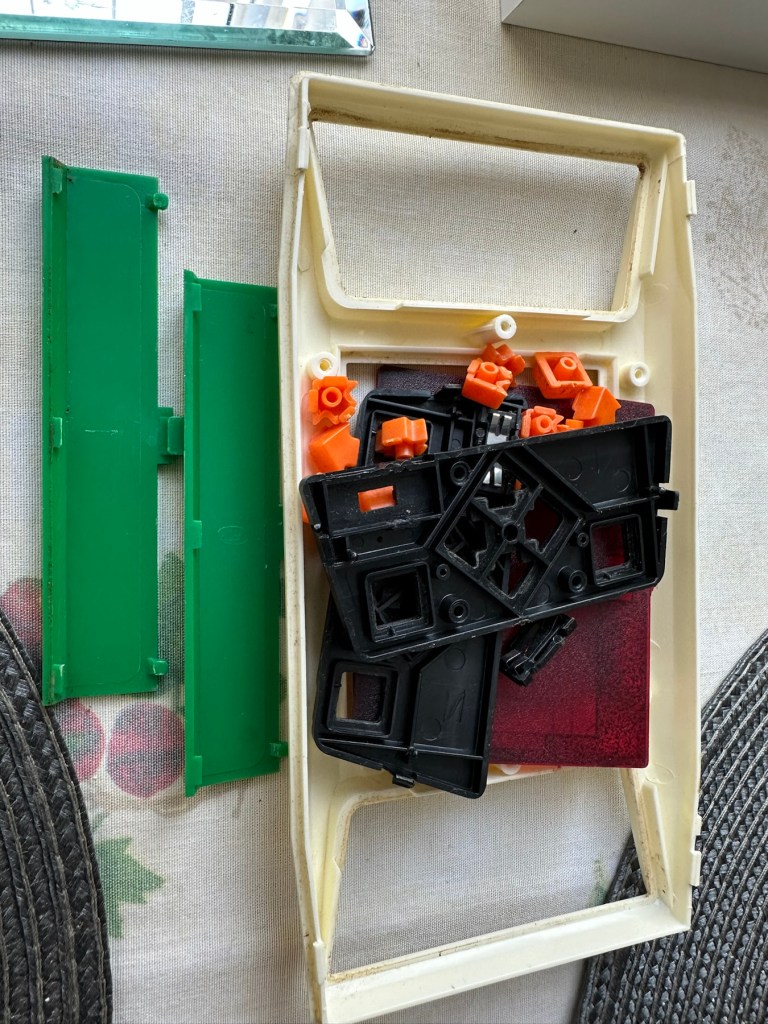
First of all we need to get the unit open, remove the circuit board and get the thing clean. So let’s do that.
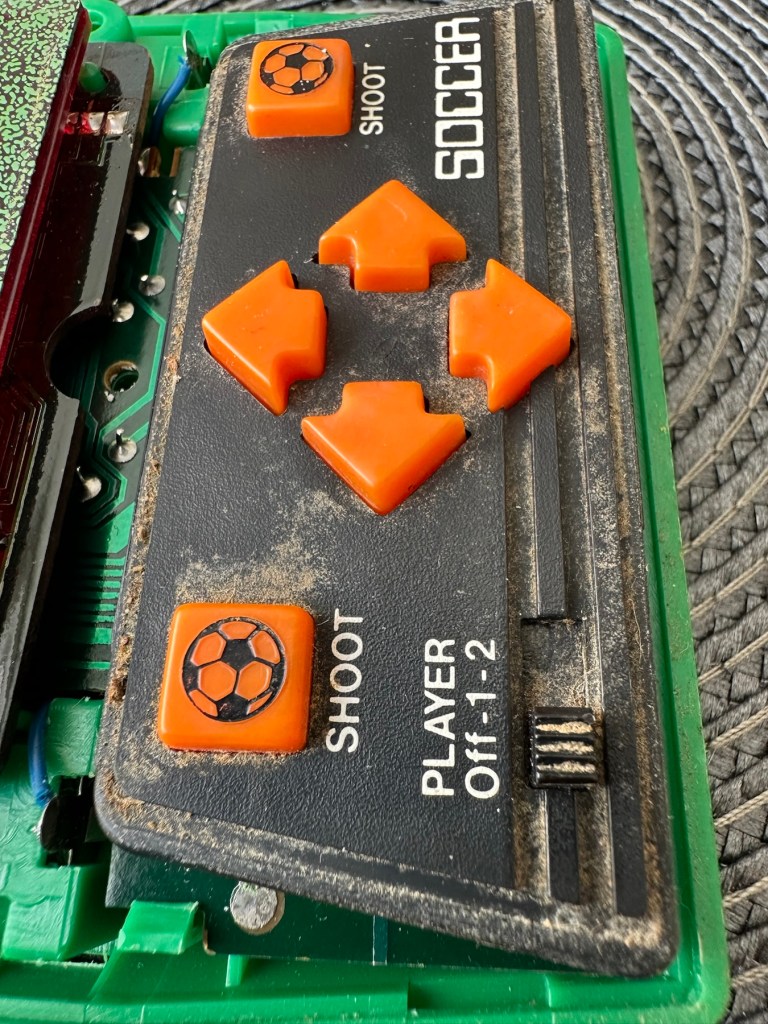
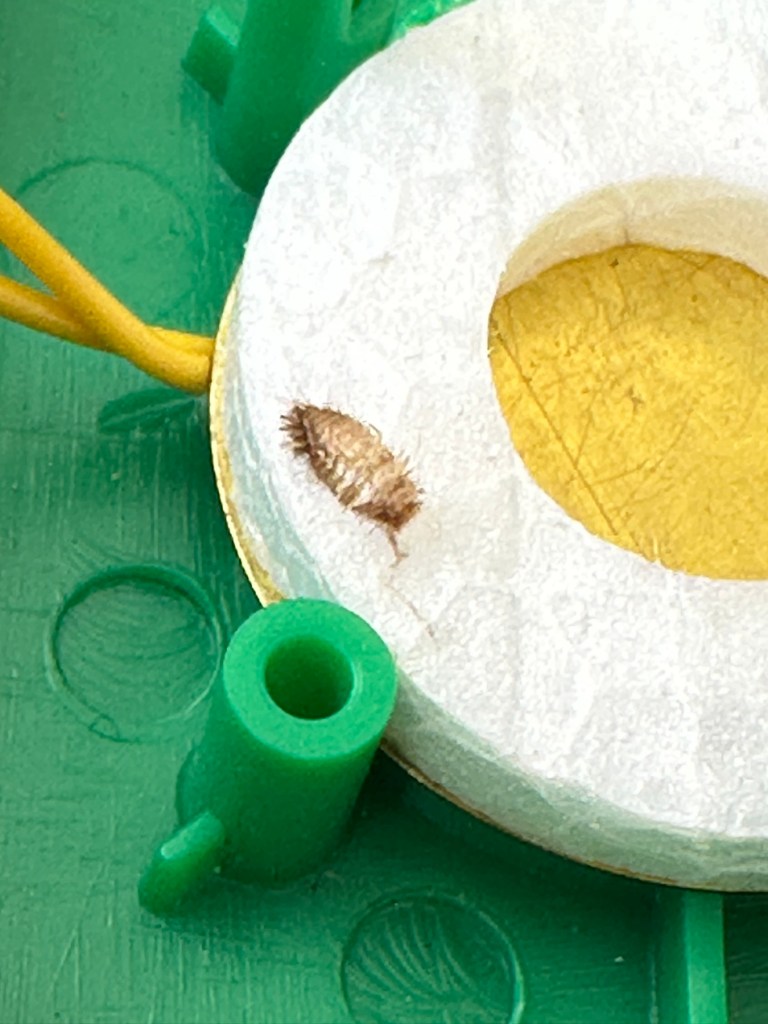
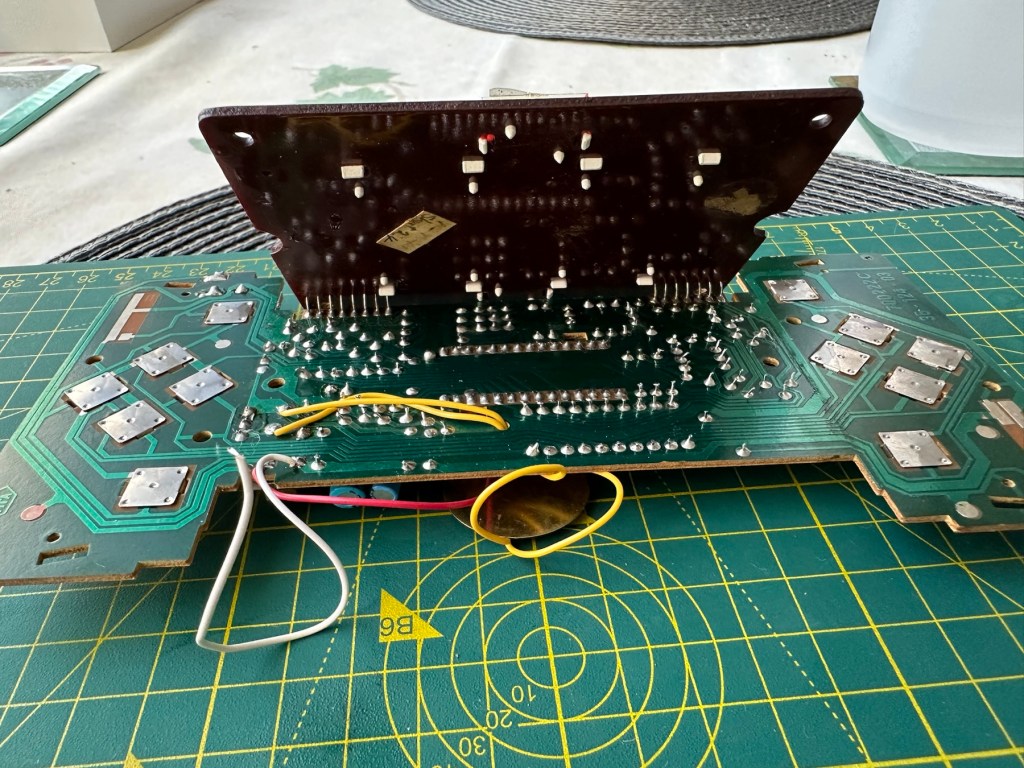
Utter filthCircuit board Push buttons to be cleaned, the rest is off to be washed. Even a dead bug inside 😧
As you can see in the pictures above, the inside hid a lot of accumulated dirt and grime, there were even dead bugs inside. Everything that could be washed was taken to the kitchen given a good soak, brush and rinse.
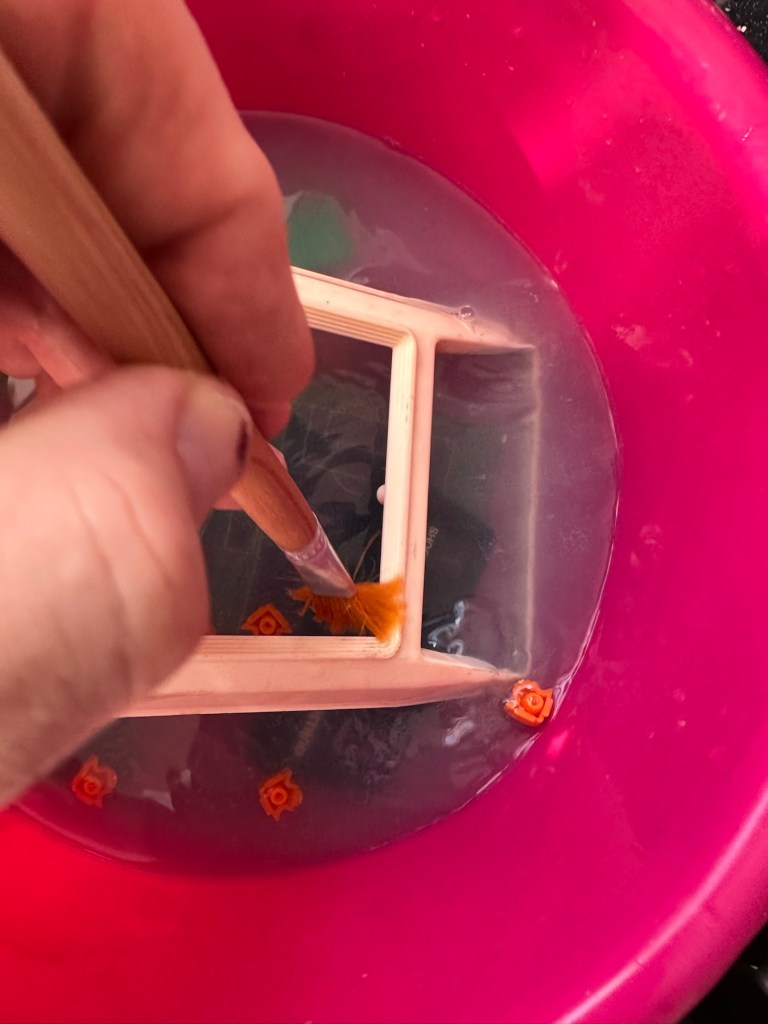
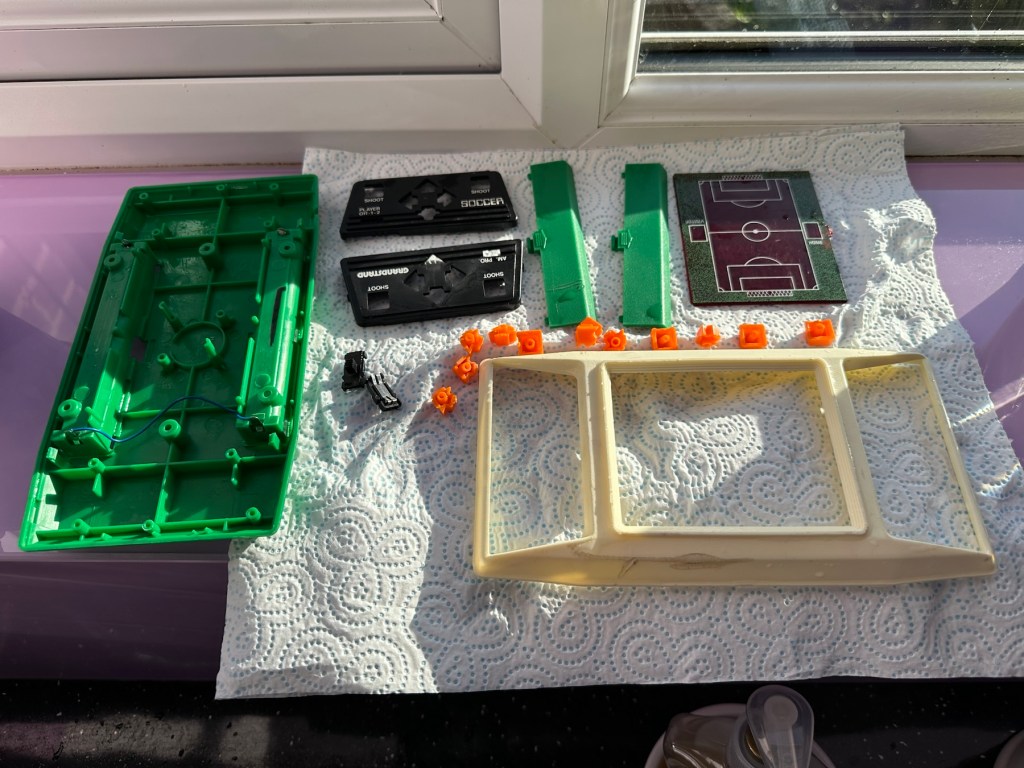
Off to the basinGood clean and scrubDrying on the window cill
Whilst I’m waiting for everything to dry my attention turns to the board. A quick inspection reveals that all tracks are in a fair condition and we don’t need to rescue anything there. The buttons on either end have been taken apart and all cleaned with IPA, I’ve also used the same method to clean the switches and the board and after checking continuity all contacts are working as they should.
Board before cleaningChecking tracksNote found under upper portion of main board
Now everything is clean, I resolder the battery contacts, check the buttons and all appears well, I attach my bench power supply, give it 6v, turn on the switch and we have life. No intermittent issues and a very loud sounding speaker. I turn this off and look at getting it all reassembled.
Unit now fully assembled, it is looking a whole lot healthier and apart from its burn scar is looking pretty good.
Where’s the dirt?TransformedLooking good
And when turned on it’s working just as well as it did back in 1979.
Result:
Sometimes these units just need some care and attention, and as I stated at the beginning all this really needed was a deep clean and service. Not a thing wrong with the electrical circuits apart from contamination on the contacts and switches.
All working. Job done
I’m now in possession of a lovely example of 70’s technology with slight battle scars. It’s had a tough life but now it has had a new lease of life and is good to go for many more years yet. It will take a place in my “Retirement home” collection of old discarded retro game units.
As always, it’s a win as we have prevented another unit being heaved into landfill.
Good condition and powers up but need to shake it to make ‘ball’ move.
Could be a spring tension has weakened or something
Box is very worn
EBay
Blip – 1977 LED Game
This purchase kind of excites me as it was a couple of years before games started to go truly digital. The year was 1977 some 48 yrs ago from the current time of writing. It was labelled as a digital game however that was a bit of a misnomer, it was more an electro mechanical game as the battery source in this unit had only one purpose, to power the LED light source. The main guts of the unit are mechanical being powered by a wind up motor that does the majority of the work. However the mechanics within this unit are superb and it’s worth a look under the cover just to revel in its construction.
These units were released at the time when pretty much the only video game available was the tennis game “Pong”. The TV game units produced at the time were selling for around £70GBP where as this unit was priced somewhere around the £8GBP mark. Hence, it was a cheap option for the children and didn’t need extra hardware such as a TV and a power supply. However, it wasn’t a match for the far superior “Pong”. It was in theory a totally different and far more frustrating game.
Want to give it a try? There is a really good true to life version available from the App Store to play on your phone. Believe me it will have you cussing as it’s not as easy as it looks. So realistic right down to the motor noise and light movement. It’s really addictive and annoying in equal measure.
The App for iPhone…it’s frustrating
This video below by Randi Rain shows a total refurbishment start to finish and is a great source of information regarding the breakdown and repair of this item.
Breakdown and restoration of a TOMY Blip
Some history:
Blip was designed by Hikoo Usami for the Tomy Kogyo Co., the patent being filed in 1976 and awarded on December 19, 1977.
Tomy marketed Blip in the U.S. starting in 1977. In Japan, Blip was marketed as World Tennis and differed from the U.S. game by having the words “World Tennis” emblazoned on the screen and replacing the 1, 2, and 3 on the screen with silhouettes of tennis players. The Blip name remained on the Japanese version. In France, the game was marketed by Meccatronic. The German version was called Blip-o-Matic, although the Blipname remained on the case.
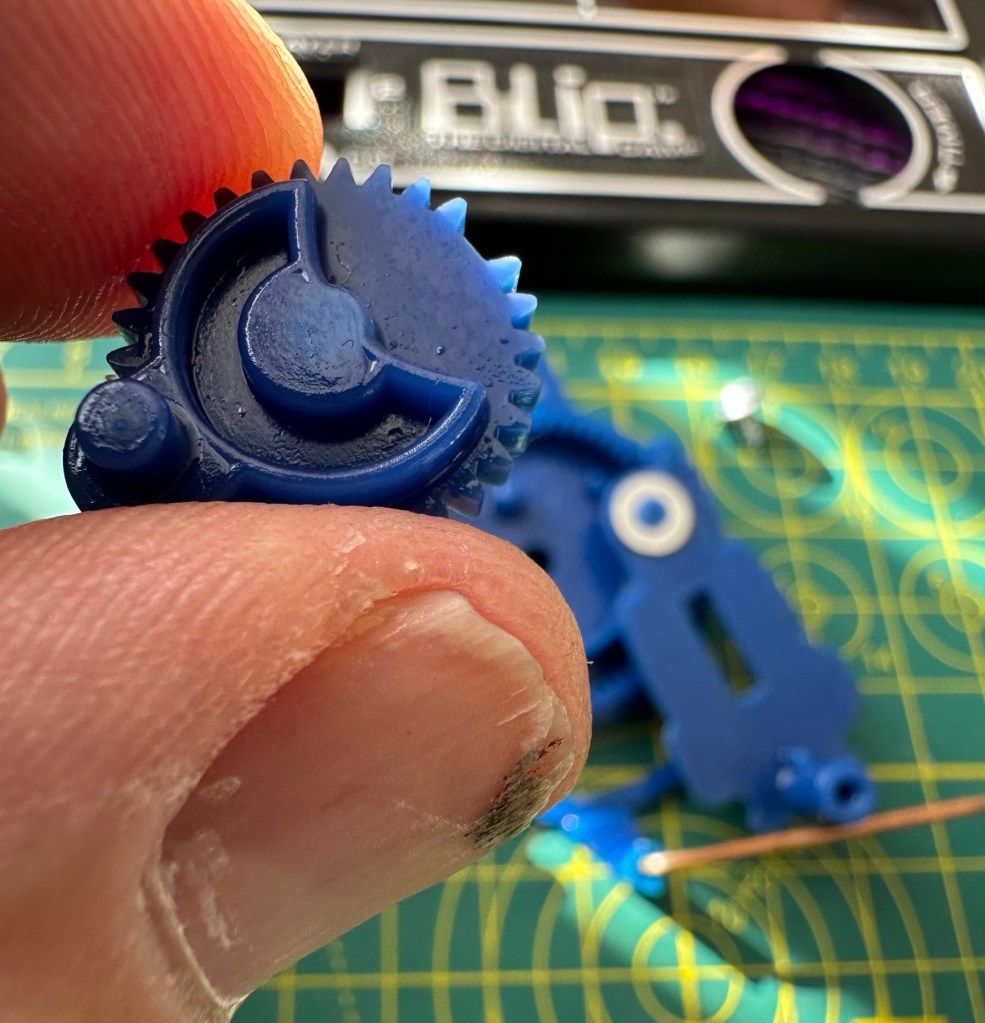
It is the timer which provides the motor function to the game. Upon the timer dial being turned, a spring is wound which then, via several gears, drives the arm upon which the LED light (the ball) is mounted. The movement repeats after the ball hits each player’s side 36 times, so it is possible to memorise the sequence of buttons to press.
Wikipedia
I’m really looking forward to receiving this unit and can’t wait to get it up and running again. I’ve been after one of these for quite a while.
For those who may be interested and who have a photographic memory this is the sequence that the movement repeats in its 36 movement cycle:
The unit is in good cosmetic condition considering it is 48yrs old. The box is tatty but usable and as always smells a bit musty (To be honest as expected). The mechanical condition is not as described and is a total non starter. It seems the winder may have even been overwound, I hope this is not the case. The “Ball” light does come on when batteries are put in but only intermittently and when pressure is applied in the battery area. However the contacts do look clean with no sign of battery leakage or corrosion. And I know someone has been in this unit prior to me as one of the four body securing screws is missing. God knows what I will find awaiting me within. The seller has been a little, how can I say it, inconsistent with the truth in his description of this unit.
But that’s why I buy these things. Let’s get inside and find out what is needed to get it back into being a working game.
My unit. And the ball light came on for a few seconds to allow me to take this picture. Then promptly died again.
Repair:
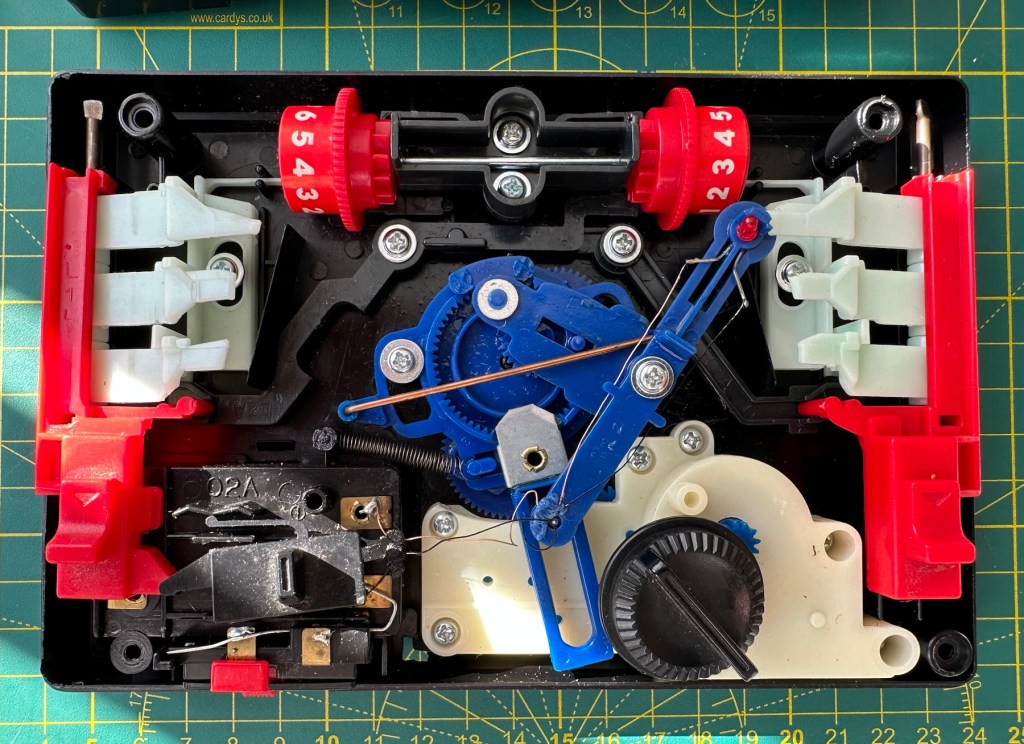
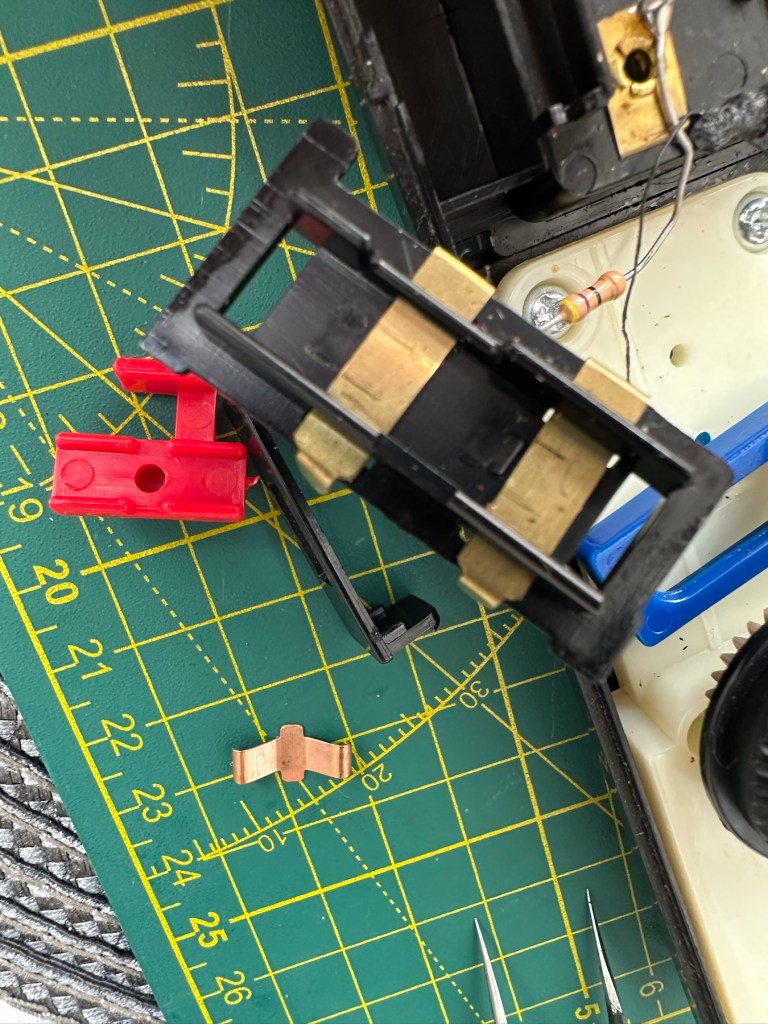
Open the case and this is what you are faced with.
Complex mechanical interior
If you remove the left and right control paddles you can get to see the mechanism running unhindered. However this one has an intermittent fault where the movement stops mid travel, there is something restricting its movement.
Something stopping movement
There is an inherent issue with these units where the gears have to be set up in exactly the right position or else it does not work. Similar to changing the timing belt on a car. This confirms to me that someone has been inside previously and messed with the gearing.
I also noticed a cog with a tooth missing, this was strange as to be honest it didn’t look as if there had ever been a tooth there in the first place!
Missing toothWas it ever missing?
Looking at its motion it transpires that this is another cog that just has to be in the perfect position and the “Missing tooth” corresponds with a flat post on the rear of the gear train. It’s missing for a purpose. This pleased me somewhat.
Calibration holes on the cogs correspond with holes in the shell base.
I put the cogs back in place paying special attention to their positioning and tried the unit once again. Here is the result.
Now a nice smooth movement
Next I’ve taken the light switch to pieces, I’ve cleaned all the contacts with IPA, reshaped the contact and put back together.
Switch dismantled, cleaned and reassembled
I’m pleased to say this did the job, the light works fine and there is no longer an intermittent fault. It’s all that was required.
I have reassembled the unit, given it a good clean and it looks pretty smart if I say so myself. It was already well oiled so there was no need to add more at this point. It is now fully working and will last a good few more years yet.
Now Working
Result:
A successful repair of a 48yr old toy game. I’m really pleased with my purchase and it’s another cracking example to add to my ever growing collection.
All clean and looking smart
Repairs on these games need approaching from a different point of view. The electronic content is minimal and mechanical workings are the order of the day. Look how it has all reversed in today’s gaming world, that’s advancement for you.
Really pleasing positive result here. Another one saved from landfill.
Thanks for passing by and reading this post. It’s always very much appreciated.
I’m new to this art medium, I don’t really know what I’m doing, but like everything I do on this site, I’m willing to give it a go, always willing to learn. So here we go.
I was watching a program on TV a week or so back and was watching a stained glass window being repaired. I was fascinated with the expertise and commitment these guys put into repairing these pieces of art. I thought to myself that this is something I would love to try but obviously I just don’t have the expertise, space or ability these guys have.
So I had a look around for simpler alternatives and that’s where I found out about Faux stained glass painting. It’s a whole lot easier, less expensive, and I have most of the tools required already.
I’ve attached a video of the technique that I’m interested in, this video has kind of sold the process to me.
I’m going to give this a go now, let’s get started.
My Subject:
I’ve chosen two simple potential templates that were free to download from the internet. As this is my first attempt I’ve chosen a couple of design templates that will be good for a first attempt at this type of art. I’ve chosen a bird and a simple flower.
The two templates I will be choosing from for my first attempt at this medium
What do I need?
Not a lot to be honest, below is the minimal requirements.
Craft PVA glue
Craft clear glue
Paints – I use acrylic, you can use pretty much whatever paint you have around.
An old cheap frame, with glass
Brushes, or sponge applicators, some tape and cleaning materials
And that’s basically all you need.
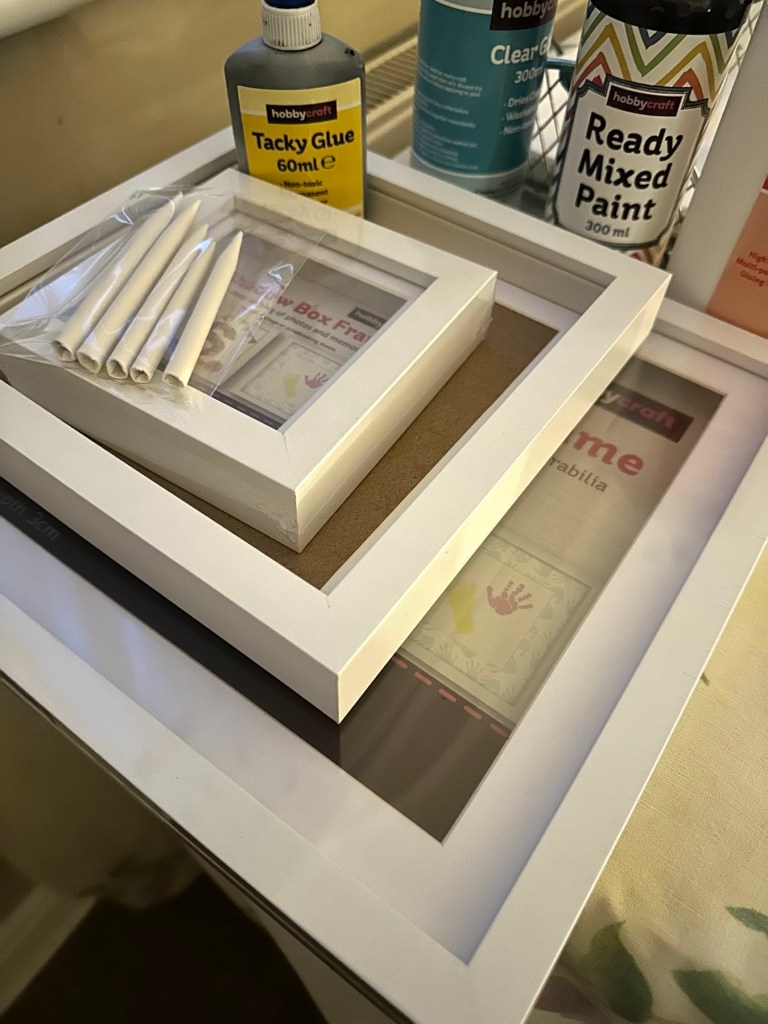
Ive been out and purchased some supplies including some shadow box frames that were on offer. These will be my guinea pigs for the purpose of this post.
Supplies
I’ve chosen the flower template for my first attempt as it is slightly less involved. I’ve mixed some black acrylic paint in with some PVA as this is what you use to form the black “Lead” type outline. I’ve done some samples on plain A4 paper to perfect the technique as it was coming out all blobby and runny, I think I’ve now perfected how much the nozzle needs opening and now I’m quite happy with the outcome.
Let’s go:
Next i tape the template to the rear of the frames glass, i then clean the front of the glass getting rid of finger prints and anything greasy that might stop the ink bonding to the glass.
Paint/glue applied a bit blobby
Using a steady hand you then just add the glue/paint to the top of the glass following the template underneath. Don’t worry too much if you get some blobs and bubbles, the bubbles can be burst by using a needle and the blobs can be dealt with when the solution dries, because the glue can be easily cut or peeled back. Don’t worry too much about little mistakes, just go with it. Don’t worry about making straight lines perfect as the irregularities just add to the authenticity of the piece. You don’t see perfect lines on old stained glass windows, so don’t worry. I use some small paper tortillons just to remove some small smudges and they work fine.
Glue and black paint mixUsing a Tortillon to clean it up a little
Now we just need to wait for the outline to dry and I’d suggest leaving this for a good eight hours or so.
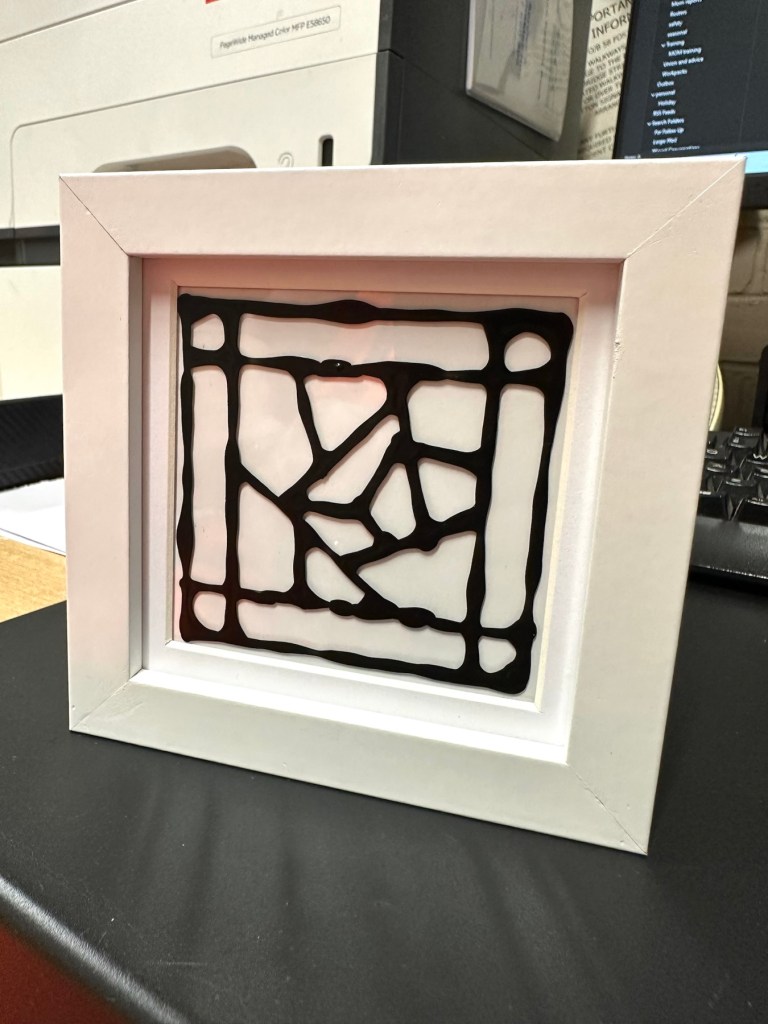
Whilst I’m waiting for this one to dry I’ve done another small one with just some random geometric shapes. I love the way this one has just spread out and gained a great scruffy edged look. Can’t wait to paint it.
Just the glass, and dried outlinePlaced in its frame to see how it might look.Second trial piece ready to paint
There are many ways to do this technique and the video at the top of the page gives yet another two ways to obtain this outcome. These are my first two attempts and I’m going to try the techniques in Emily Seilhamers videos at a later date. Meanwhile back to my two attempts.
For painting you need some clear school glue and whatever your preferred paints are. I’m using some acrylic paints as I have plenty of them around. Using a tiny spot of paint you then add some glue at a slightly greater ratio than the paint, the thinner it goes on the more translucent it will be, if thicker it will be more opaque. Don’t t worry about paint strokes, it will happen as you are painting with glue. The good thing is if you are not happy with the outcome you a can always use a craft knife and just peel the offending colour off. It’s easy.
Here I’m painting, probably a little to thickly, and I’d probably be better with some glass or enamel paint. Lesson learned.
The good thing is that this paint dries really quick and in a warm room it’s probably dry in just over one hour.
I’ve placed my two attempts in box frames. I’ve got one final thing I want to do before they are finished.
I’m quite happy with my first attempts, there are little mistakes and many things I have learned from trying this medium. I’m not going to make any changes to what I have done as I want to display them as battle scars. You know, a snapshot of what I did at the time and how I have learned from it. The next examples will be better, I have a third one of these box frames and that will incorporate all I have learned from doing these little prints. It will be just like a journey into Faux stained glass in three parts, and they will all be on display.
This project isn’t quite finished yet though, there is one other thing to do. The perfect place to display these items of course is right up against a window just the bare glass, allowing the sun to come through and show off all those lovely colours. However you can also display these pictures within frames and this finishing touch courtesy of Emily Seilhamer, completes that look.
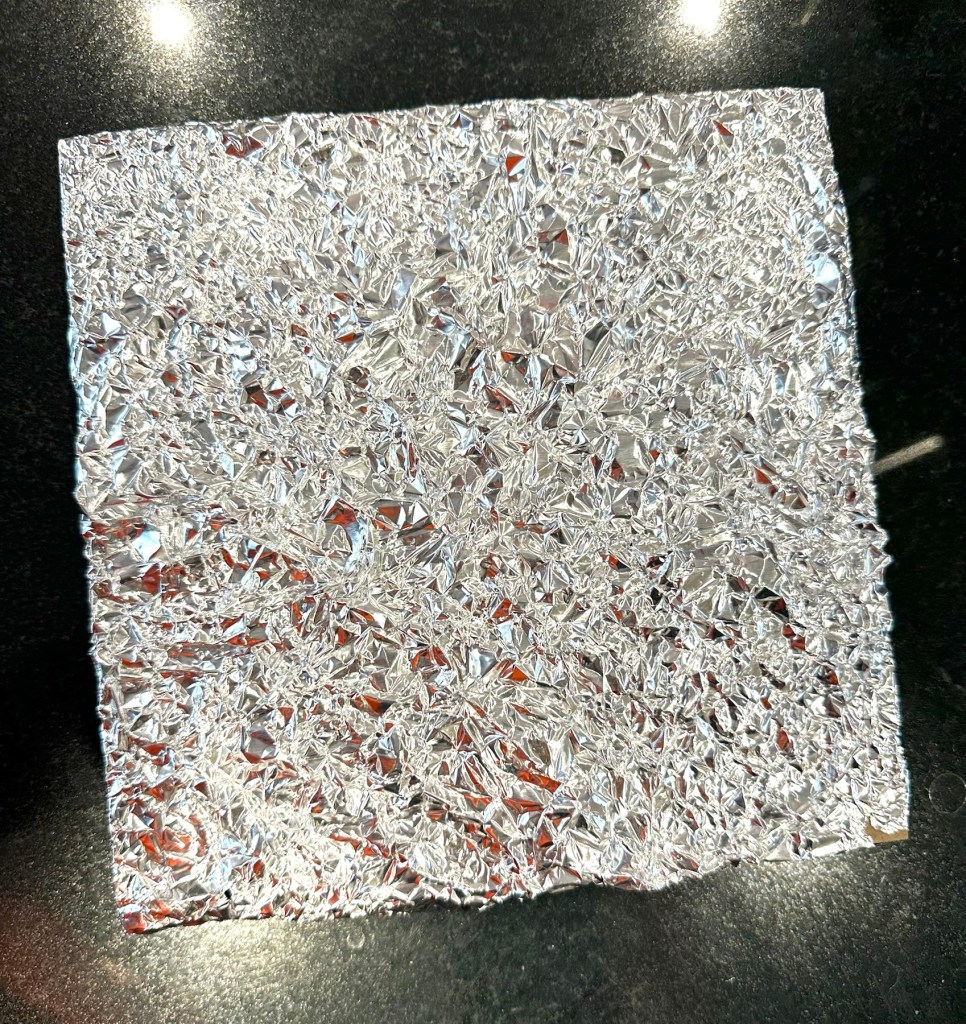
You just need some kitchen foil. Yes you heard correctly. Kitchen foil.
Cut a piece of foil just slightly bigger than the backing cover of your frame. Now scrunch it all up but not too tightly. Just move it around in your hands until it appears to have an even amount of creasing as this is to be come your light refracting layer.
Scrunched up tin foil
Attach this to the frame back and then secure it back in the frame against the glass you have painted, trim and tidy the foil using tape at the rear of the frame.
Now turn it over
Look at the difference with the foil effect
Attempt No:1Attempt No:2
See how that tin foil now reflects all the available light and makes your picture look totally different. The refraction appears to help cover up the brush strokes we discussed earlier, and you can now display your pictures in any area of the house, and any available light will be reflected on to and will enhance your pictures.
On the fire place
I hope you have enjoyed this post, as much as I have putting it together. Thanks as always for passing by. It’s always very much appreciated.
I work on the railway, in many aspects there has been a technological change especially in the development of new rolling stock and safety aspects.
However where I am in the East Midlands we still use an awful lot of Victorian technology, and yes you travel over it every day especially if you use the line that goes between Leicester and Peterborough via Melton Mowbray. Here we have signal boxes that still use Absolute block technology with the signallers using bell codes to communicate. The signalling is the Victorian semaphore signal type and the signal boxes all have large amounts of levers to pull using a wire and pulley system to activate the signals. Most of the boxes themselves are listed buildings and can’t be renovated in any way, yes some of them are getting on for 150 years old.
In my job I spend an awful lot of time on this line, I must admit it is very safe and quite reliable, however sometimes the system has issues that need attending and due to a lot of parts being widely unavailable due to the systems age, this is when the new technology gradually gets implemented. It’s taking time but as they say on the railway….
How often do you say “no” to things that would interfere with your goals?
Yes/No
To be honest my Mañana / Procrastination gene has gone into a higher gear in the last few years and I must admit I’m extremely indecisive as well. My goals, or the few I have had, have pretty much been achieved and I’m in a sort of “I don’t give a damn” cruise mode at the moment.
I don’t like saying no to anyone really, it’s just not me and I guess that’s probably why I find my place in society as one of those little worker ants rather than a high achiever. I could have done better, a common statement since school and throughout my adult years.
It kind of breaks me in two to use the word “No” and to be honest I can’t, hand on heart, say that the word has ever featured to as much as restrict my goals or accomplishments in life.
I’m ok, and I’m happy with my lot. Maybe I was just not brought up to say it. Maybe putting restrictions on demands and saying “Yes, but!” Draws a line in the sand instead, and that’s probably as close to the word “No” as I tend to get.


You must be logged in to post a comment.