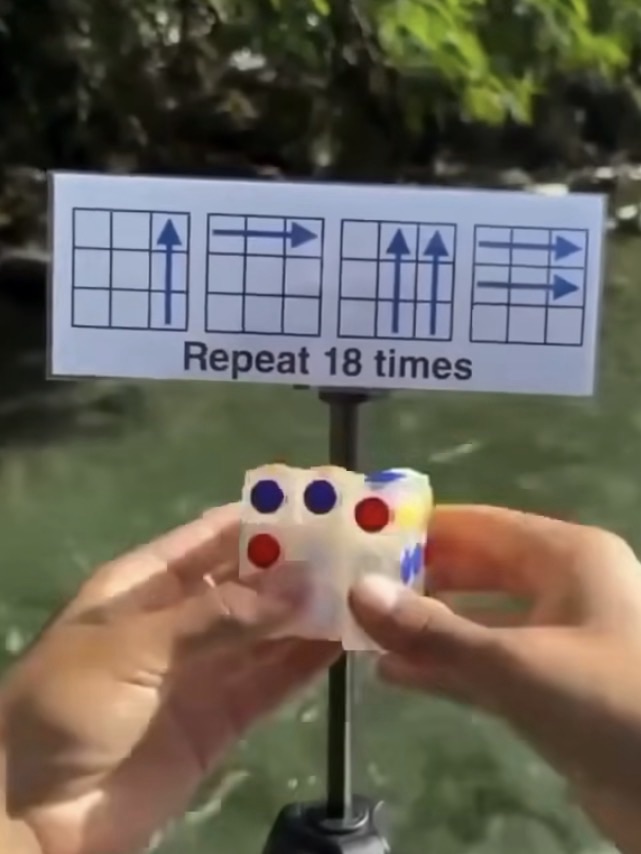
Apparently the puzzle can be completed in 18 moves. Well, can it?
I remember this fad coming into school the first time around. I never had one, never particularly wanted one either, probably as my attention span was never that concentrated and I’d probably have ended up throwing it at a wall.
However, as I get older my attention span has expanded slightly, but not to the point that I actually want one. But I have been triggered by a small video I’m seeing online apparently showing how to solve a Rubik’s cube in 18 moves!
But does it really work?
Courtesy of t’internet
If anyone out there actually has one I’d be interested to know your thoughts. Apparently if you repeat the moves shown in the photo above, eighteen times you will have the answer.
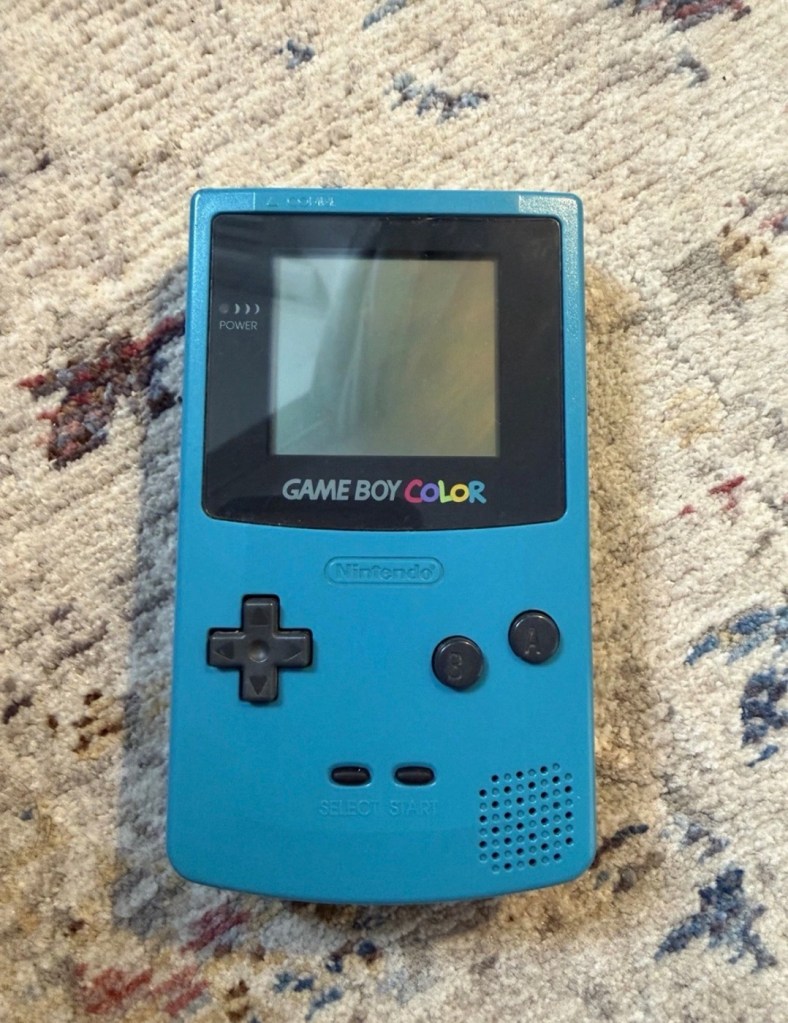
I’ve purchased a faulty Gameboy Color for my collection. It has no power, so let’s have a look and try to get it working again.
What the listing stated:
Very clean, but doesn’t turn on
EBay
Gameboy Color
Yep. It’s a Gameboy Colour to me, but as it was sold using the American spelling of “Color” then that’s what it will be addressed as, going forward.
I’ve been after a “Color” to add to my collection for a while now, but it had to fit my very strict quality requirements, in truth it just has to be faulty, and this particular example has met my conditions. I’ve paid £30.00GBP for this example and I’m happy with that, it’s a very fair price.
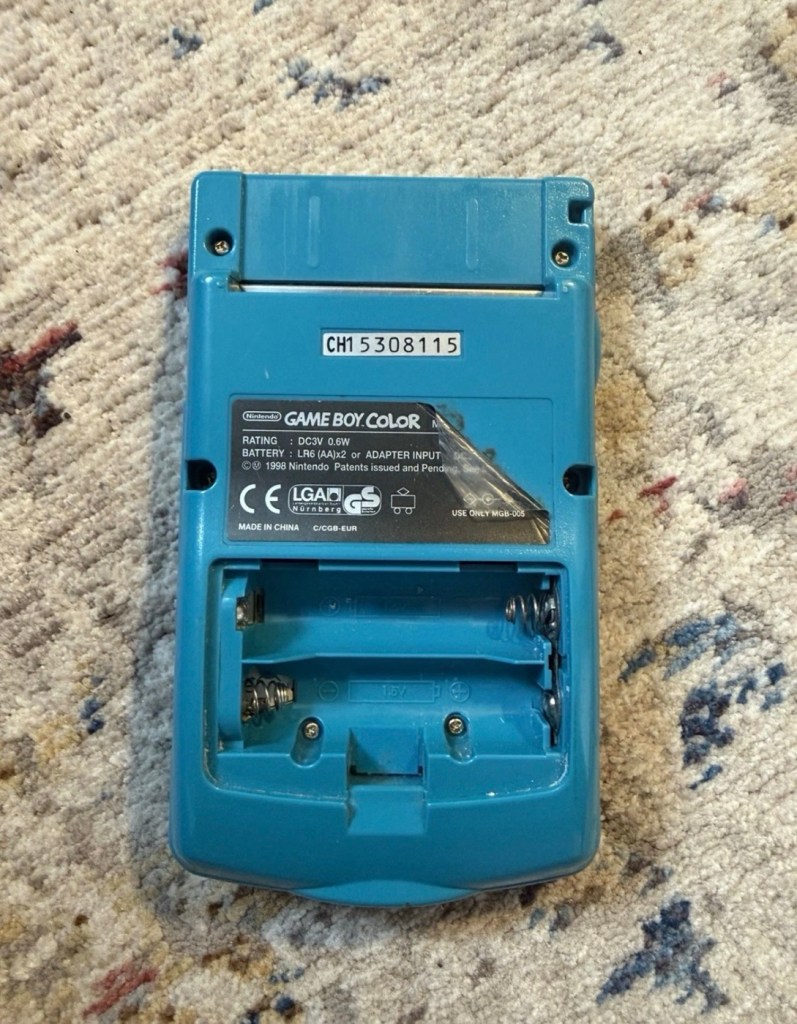
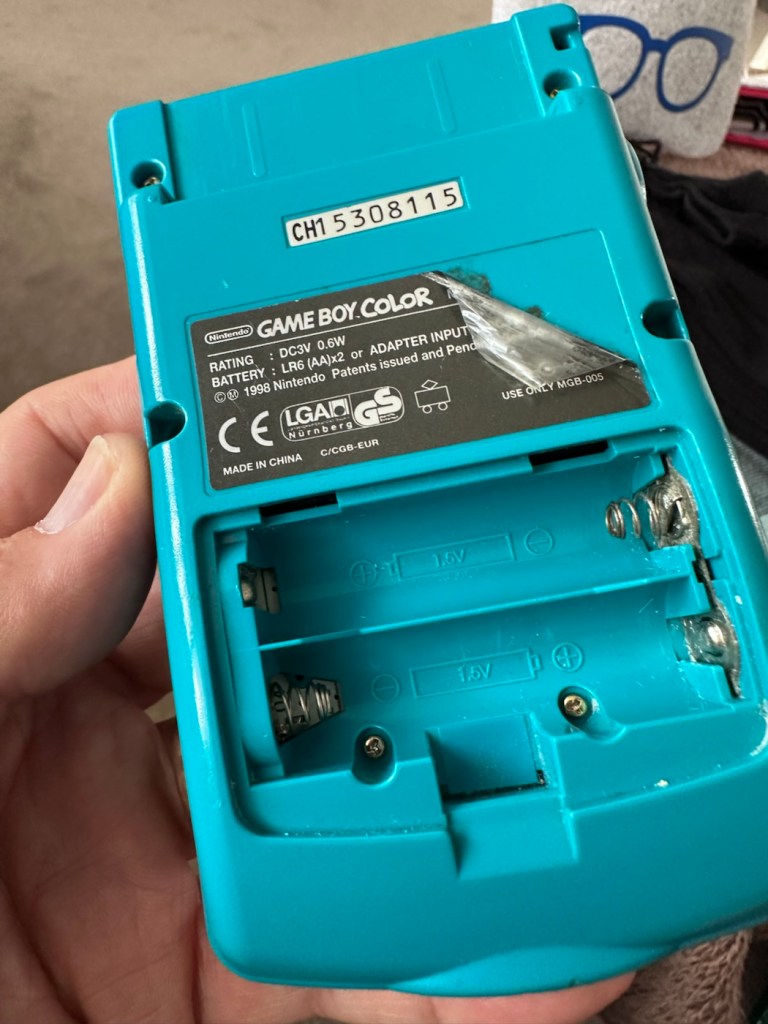
The good news seems to be that it is in a really good condition, it looks as if the battery door is missing, however they are freely available and this is not an issue should I require one.
These units are known to sustain power failures and the repairs are well documented. By now the unit is close to 30 years old and as time advances components start to fail, these include, but are not limited to:
Power switch failure: either a complete failure that requires replacement or quite simply a simple clean to remove years of tarnish and environmental gunk.
Fuse failure: there are two fuses F1&F2 that are known to fail, normally due to a short somewhere else on the circuit, but sometimes due to a power surge or incorrect addition of an incorrect power supply.
Via failure, small through the board connectors that are known to suffer with corrosion, requiring intervention with the addition of small wires to bypass the issue.
Capacitors – known to fail on a regular basis, it’s sometimes good housekeeping just to get these replaced as they are a contributing factor as to why other components such as the fuses also fail.
Worst case scenario: major corrosion or main board component failure.
We’ll cross these bridges when and if we need to.
Here’s a little info about the Gameboy Color console:
The Game Boy Color(abbreviated as CGB or GBC) is an 8-bit handheld game console developed by Nintendo. It was released in Japan on October 21, 1998, and in international markets the following month. Compared with the original Game Boy, the Game Boy Color features a color TFT screen instead of monochrome, a CPU running at up to twice the speed, and four times as much memory. It is backward compatible with games developed for its predecessor. The Game Boy Color was released during the fifth generation of video game consoles and competed with Bandai’s Japan-only WonderSwan, SNK’s Neo Geo Pocket Color, and Sega’s North America-only Genesis Nomad.
The handheld is slightly thicker, taller and has a smaller screen than its immediate predecessor, the Game Boy Pocket, but is significantly smaller than the original Game Boy. As with its predecessors, the Game Boy Color has a custom 8-bit processor made by Sharp. The American English spelling of the system’s name, Game Boy Color, remains consistent throughout the world.
Wikipedia
So, for now, let’s not speculate on its quality and issues until it arrives, when we can then carry out a proper assessment of the unit that has been received.
Assessment:
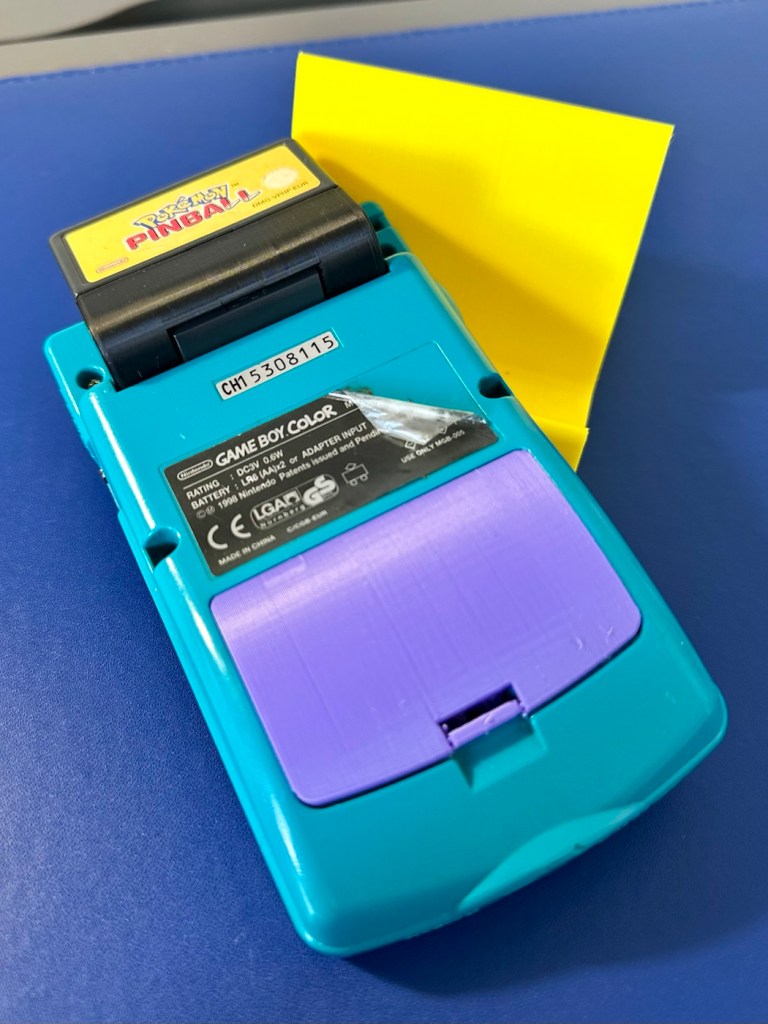
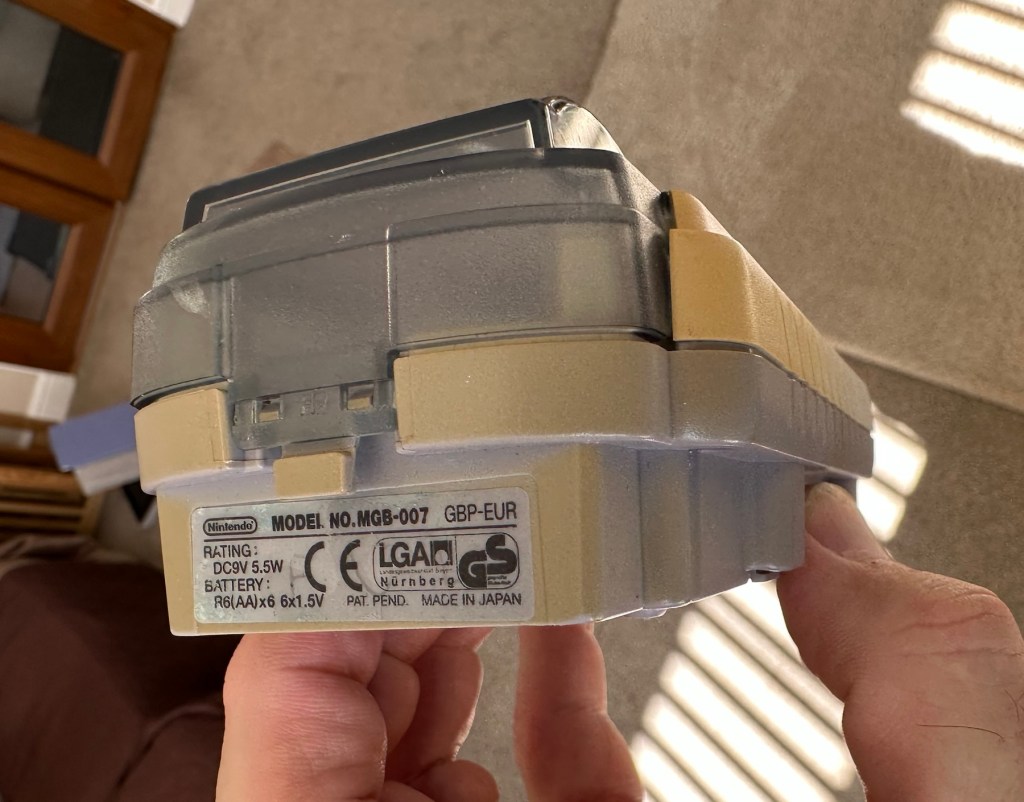
The package has arrived. The battery lid is missing as kind of expected, I will get a replacement sometime, but for the moment I’ll probably print one out on the 3D printer, it’ll be a totally different colour as I don’t have a “Teal” coloured filament to use. The product label on the rear is also damaged but I can easily get one of these as a replacement, however it’s not essential and will only be of cosmetic appeal.
Missing battery cover and old product label
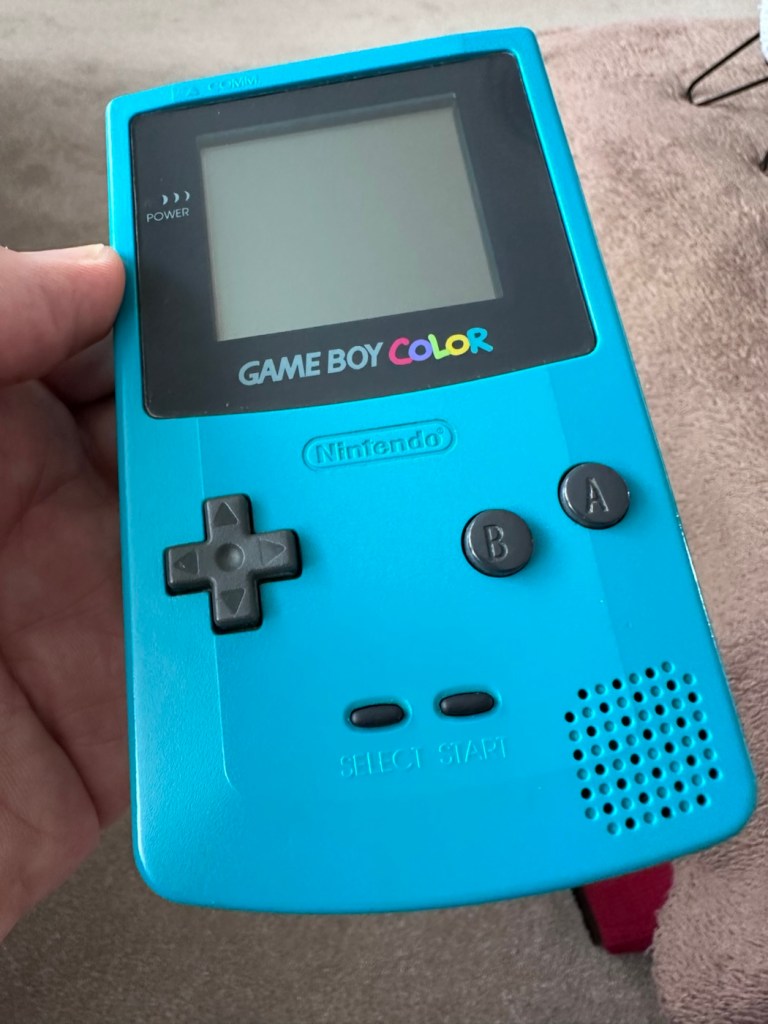
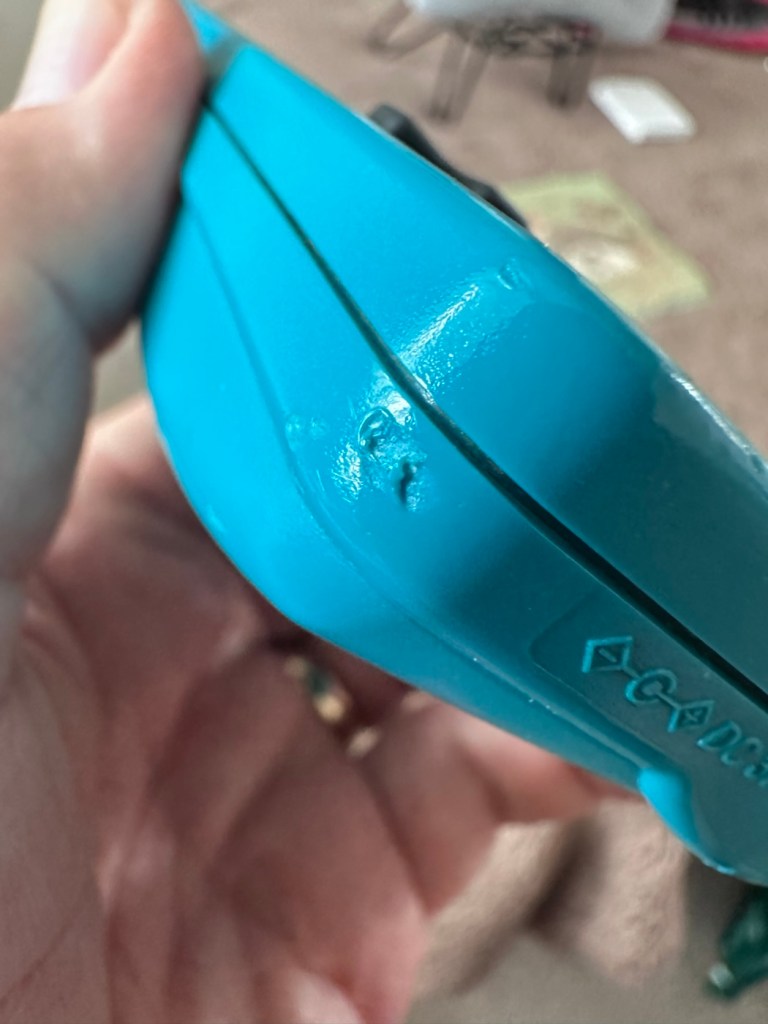
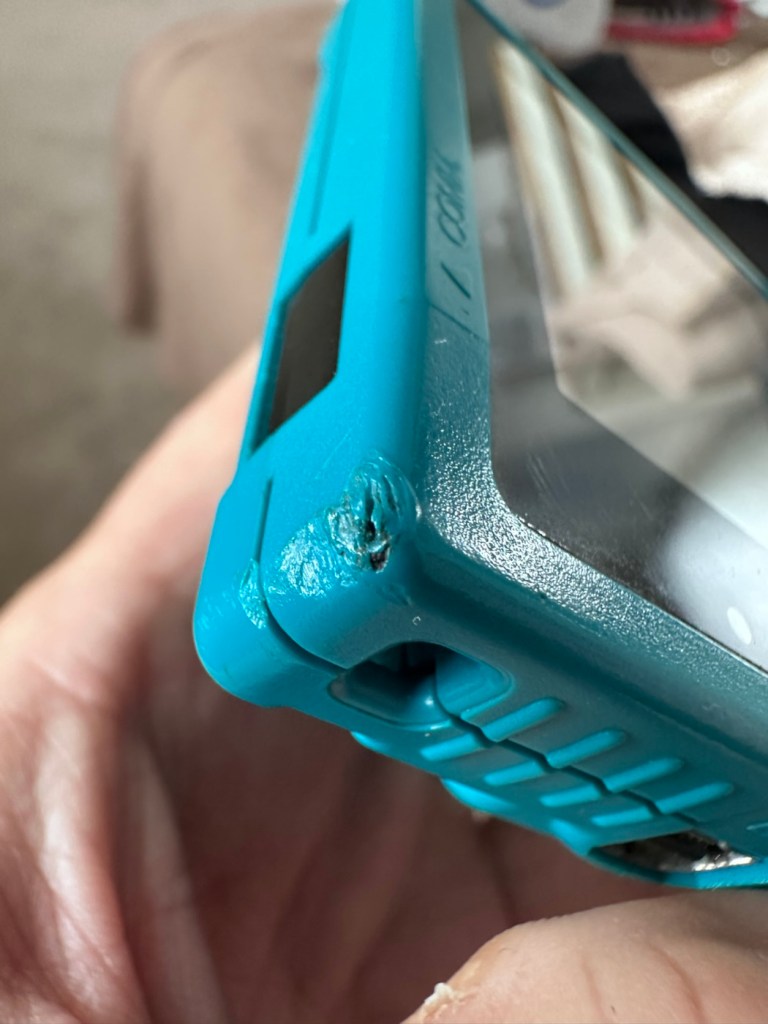
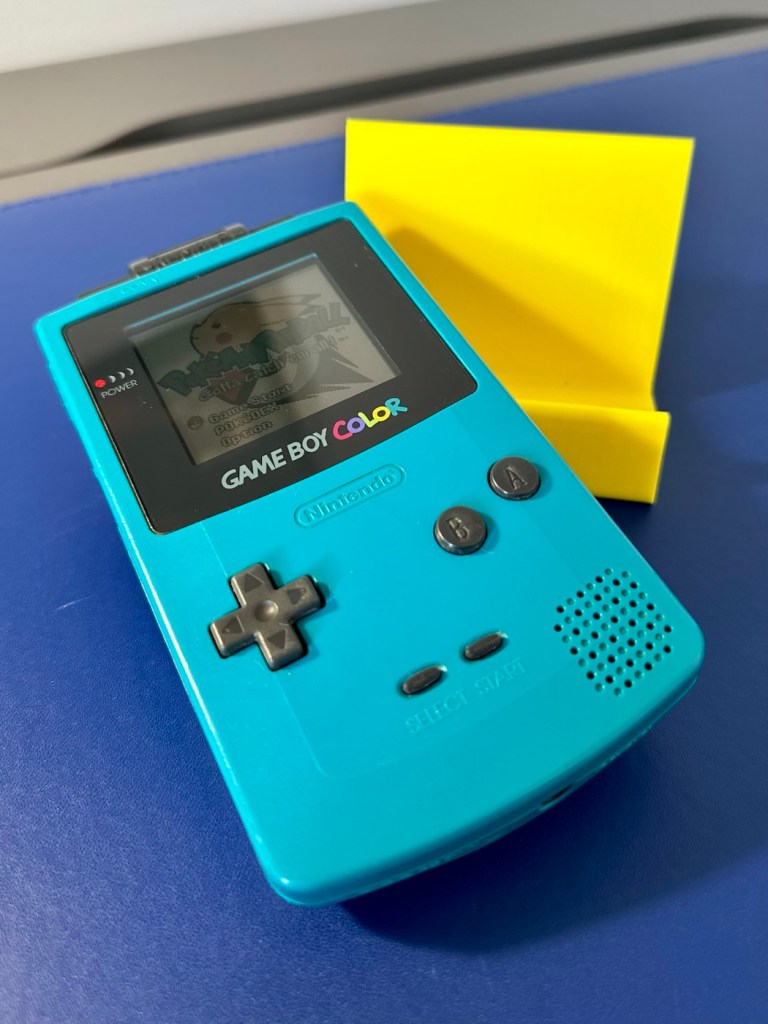
The front fascia is in a good condition with only a minor scratch on the screen, however there are a couple of dents and dinks on the body where it looks as if it’s been dropped or bashed at some point.
Front fascia is good
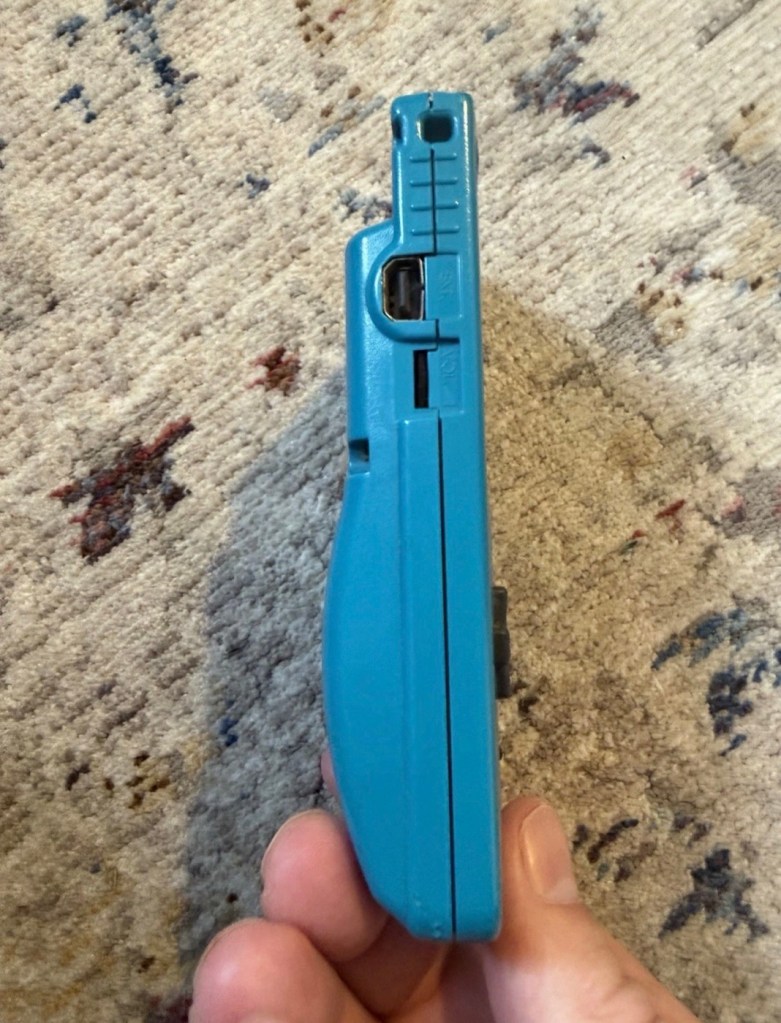
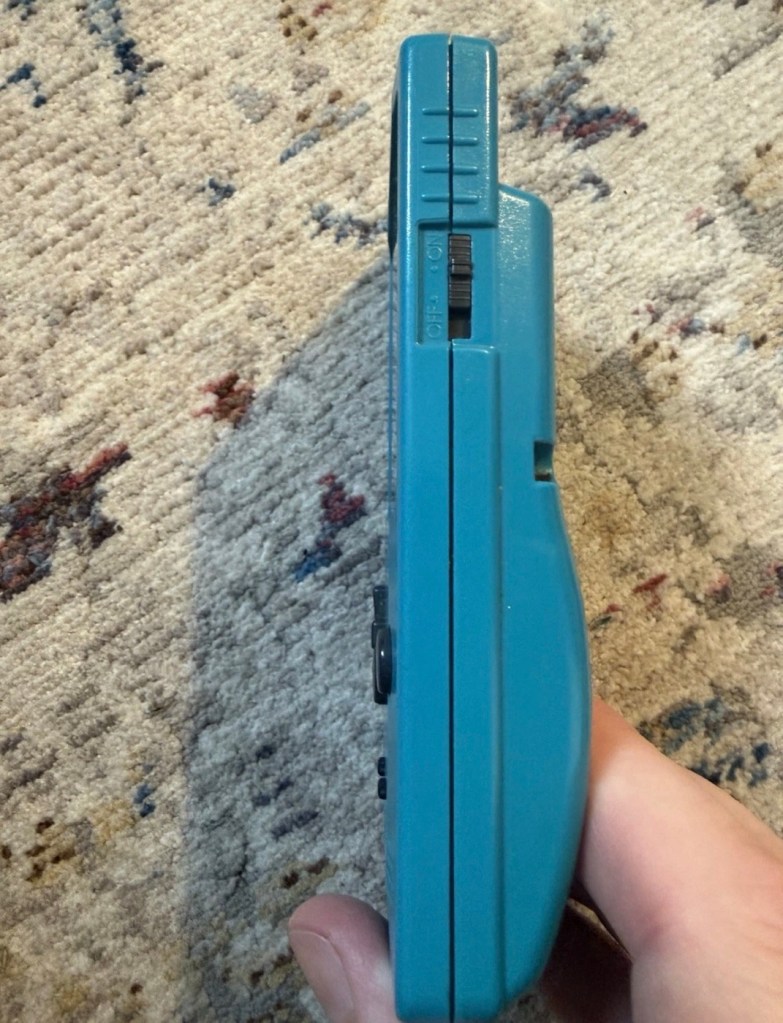
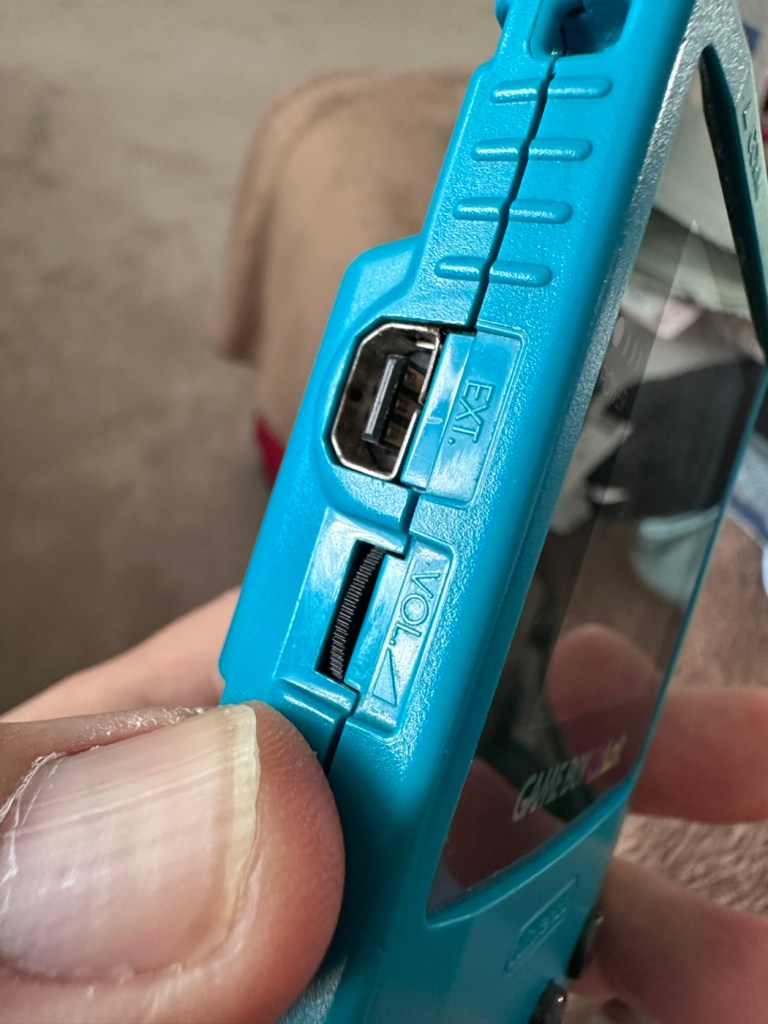
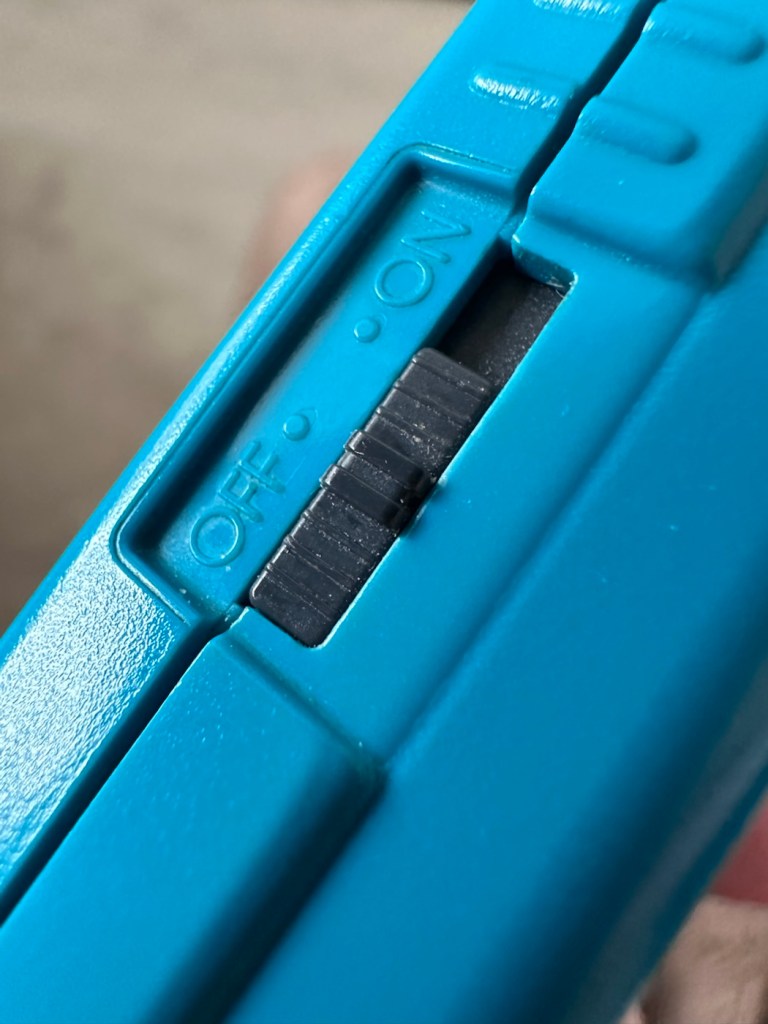
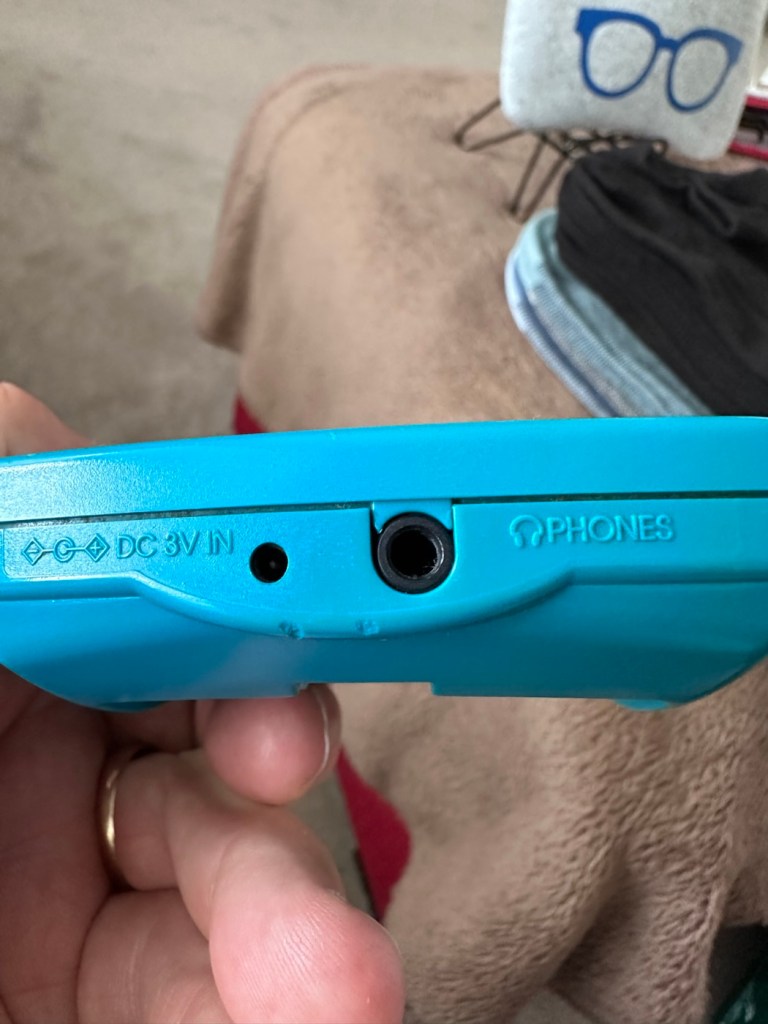
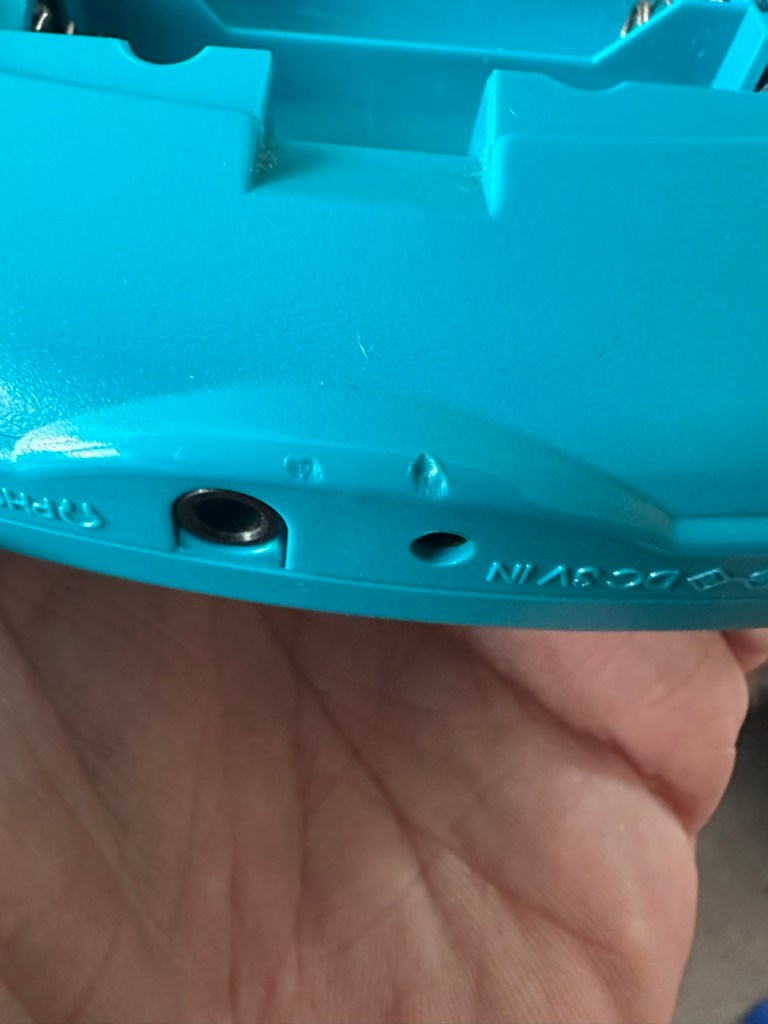
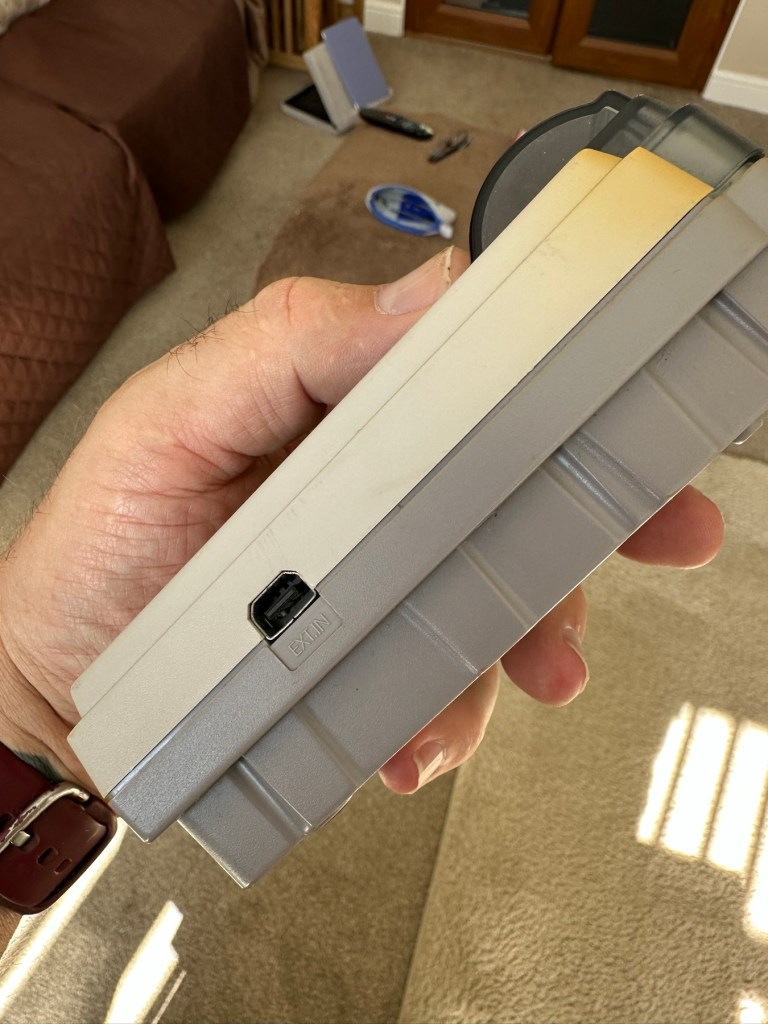
All ports, switches, buttons and sockets look ok and seem to be operating as such with no resistance or signs of stickiness.
All ports appear ok, there are a few dents and bashes visible
Again, the casing is in general fit to use, and in no way causes any issues with its operation when working. It is purely a cosmetic issue that i can address when the unit is finally working.
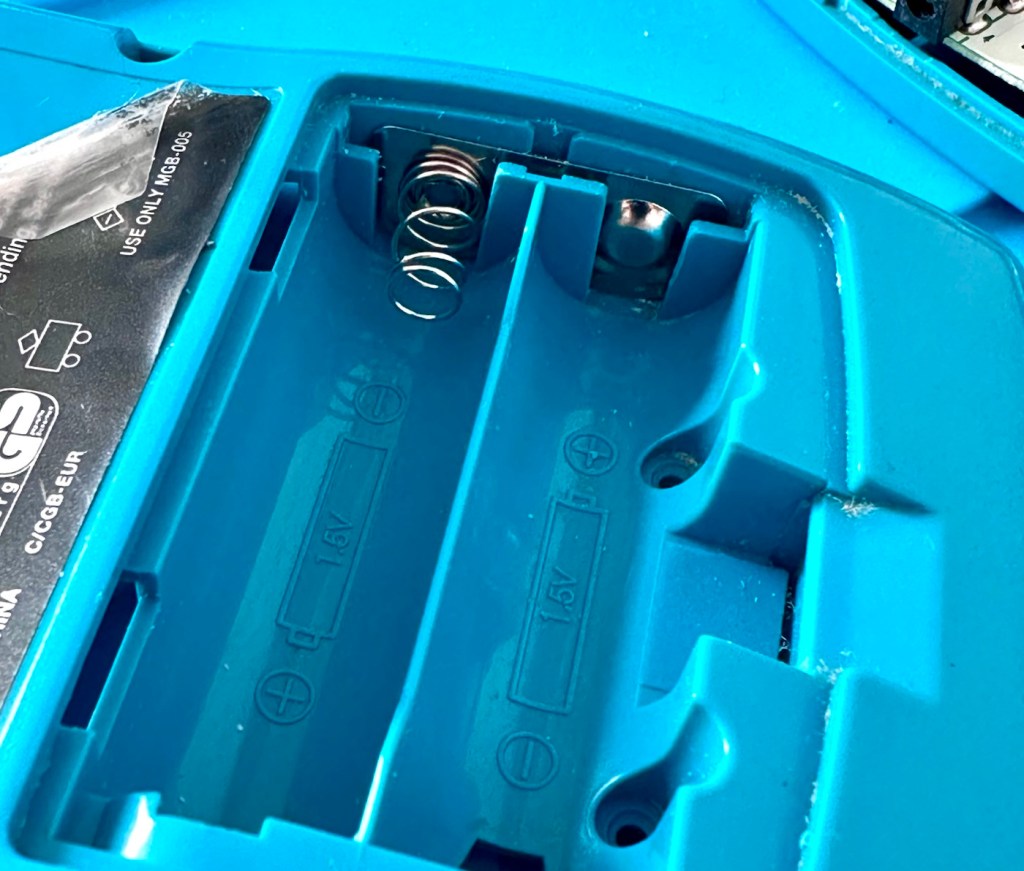
I have installed two AA size batteries, switched the unit on and it is most definitely dead. Repeatedly flicking the switch does nothing at all, so it is a situation where the unit will have to be opened up and further investigated. The assessment has not thrown up any other issues not already highlighted in the sales documentation, so in general I am quite happy with the outcome at this stage. let’s get inside and see what we can find.
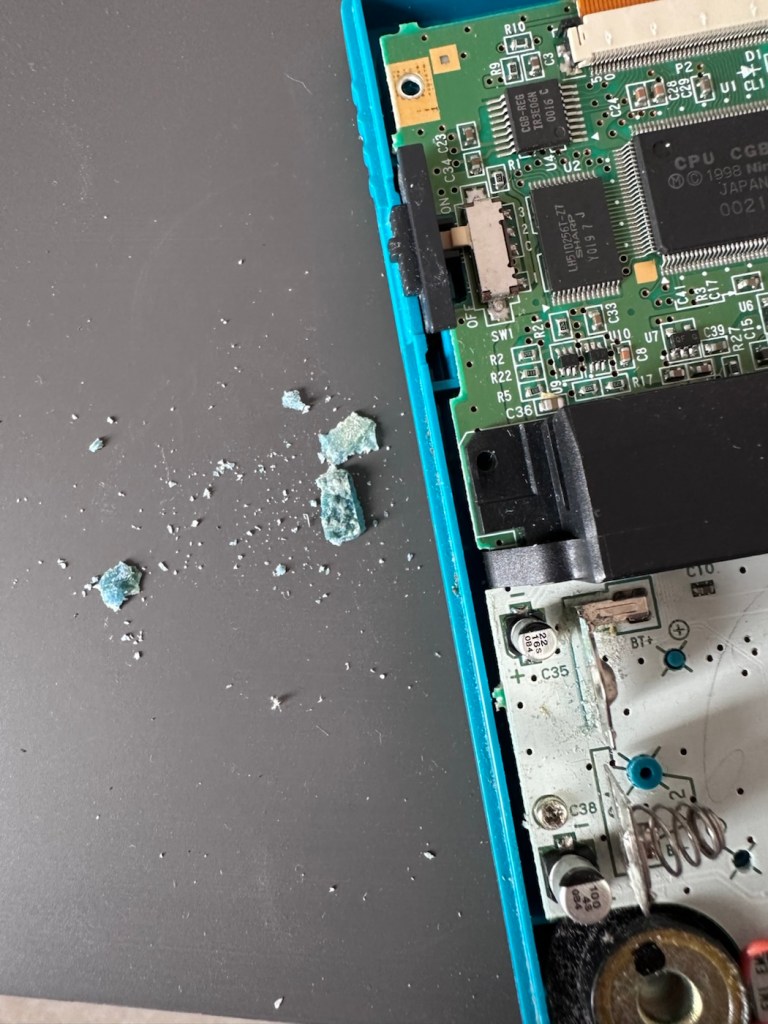
Oops. Wasn’t expecting that. I’ve removed the six “tri” screws and as soon as I’ve separated the two halves, an amount of what looks like battery corrosion “crap” has fallen out as well.
Oops – corrosion is present
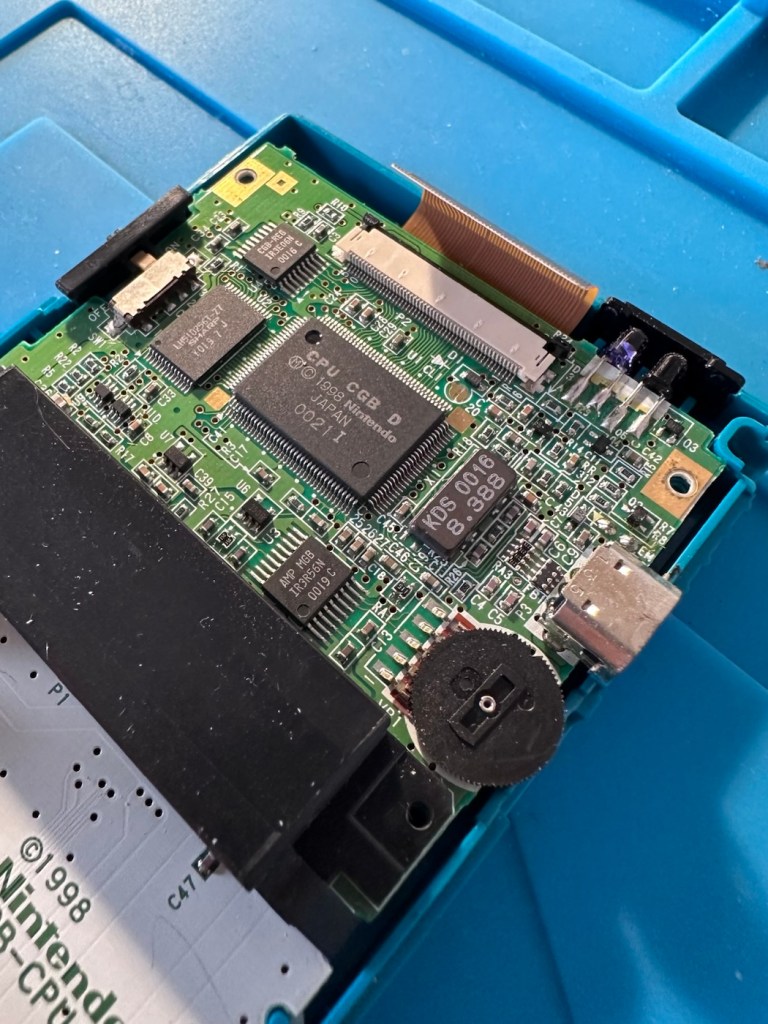
With the two halves separated, I then remove the screen ribbon cable, remove three more screws and the main board lifts out.
Screen ribbon cable removalInside upper part of the unit
There’s some good news here. The contamination looks as if it has been completely isolated to within the battery area, there is no sign of any damage to the Vias, or any other components on the main board.
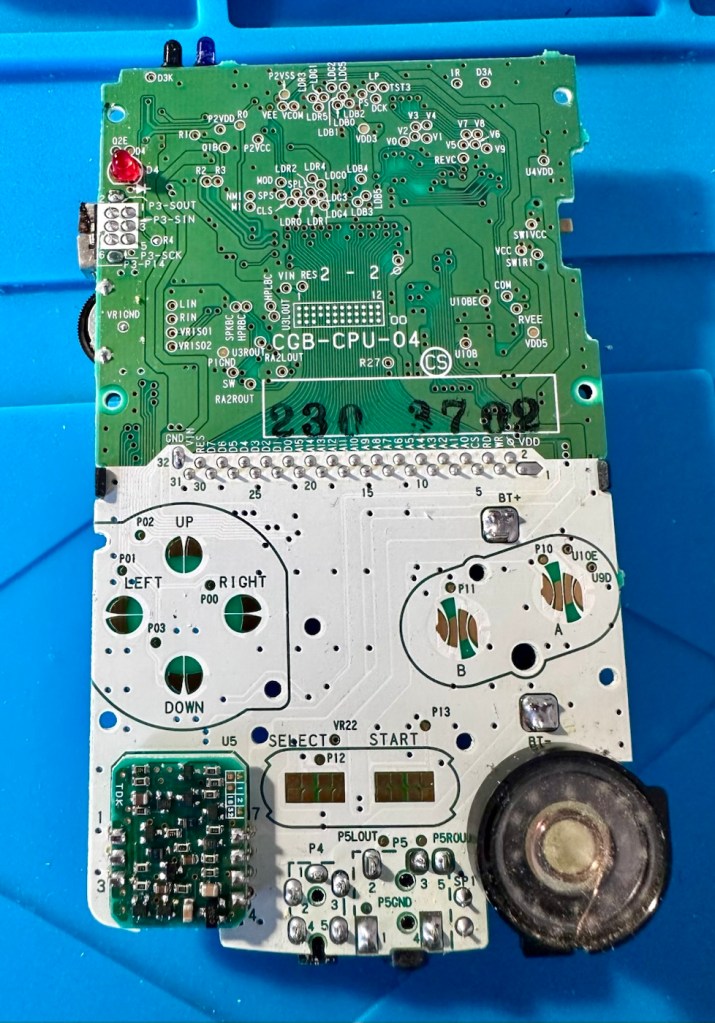
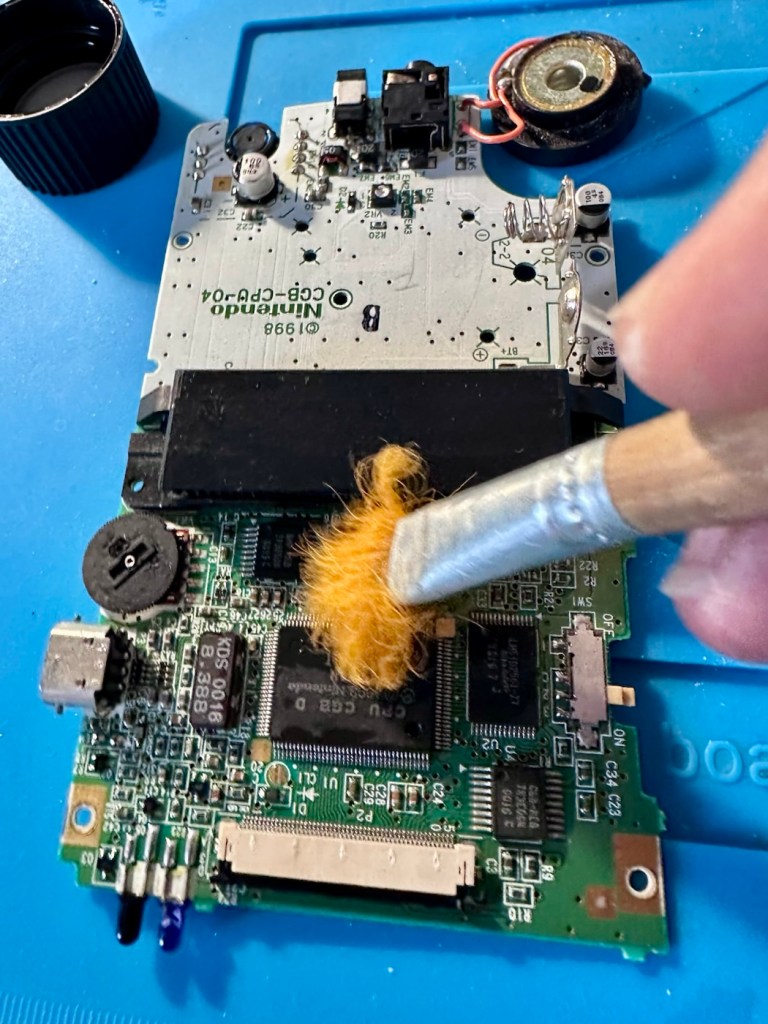
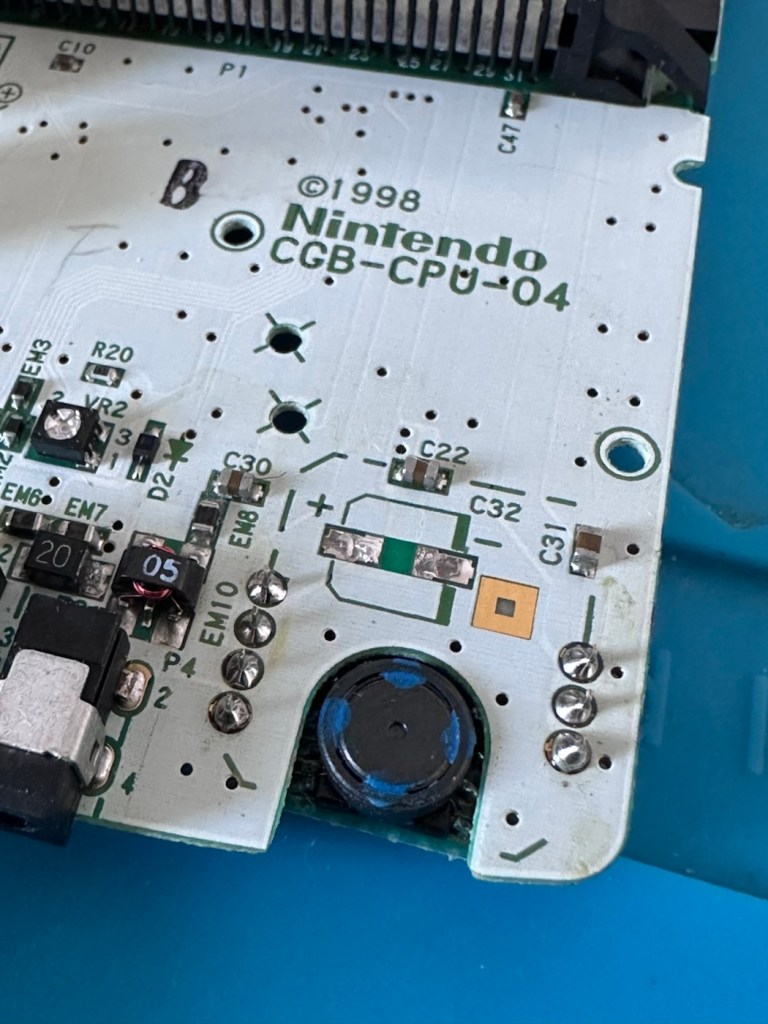
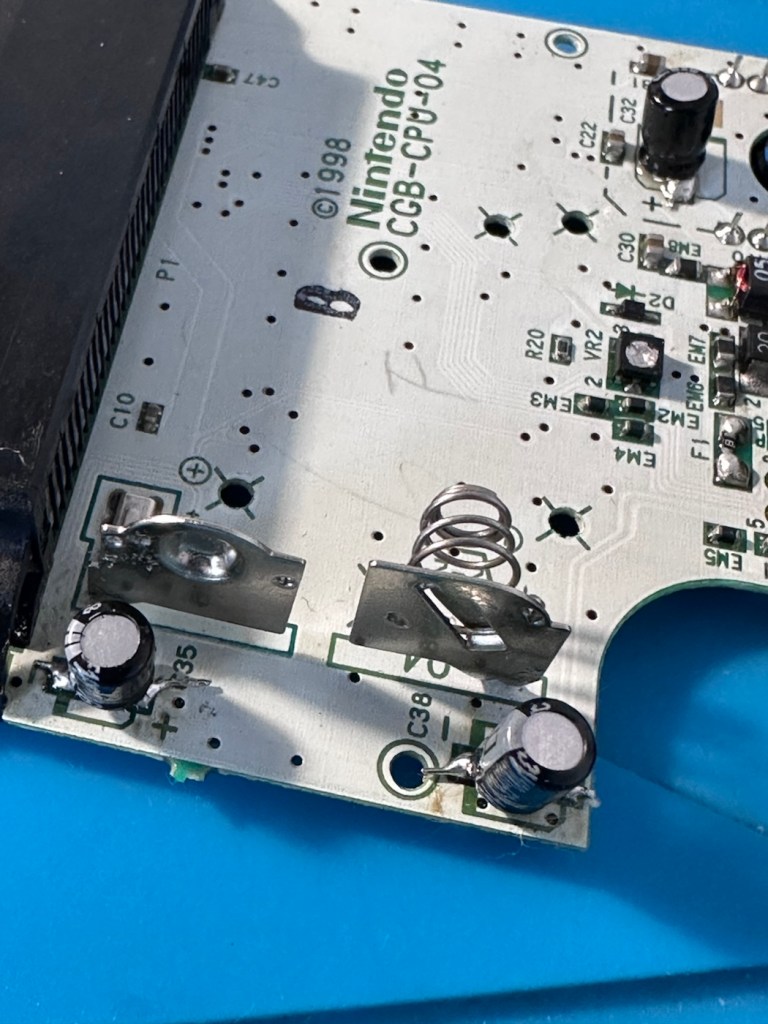
Main board on both sides, cleaned with IPA
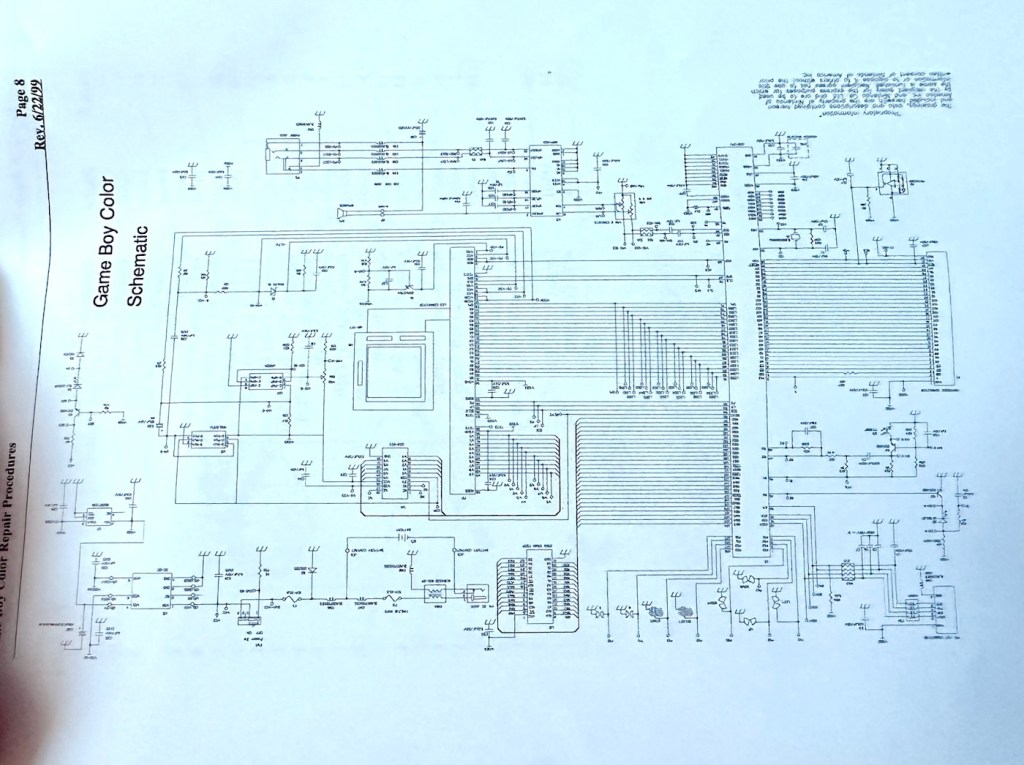
I have obtained the schematic diagram for this circuit board for checking continuity, and i’ve been able to confirm there are no issues with any contamination damaging any traces to the board. We’ve been very lucky here, dodged a bullet, to coin a phrase.
Schematic diagram
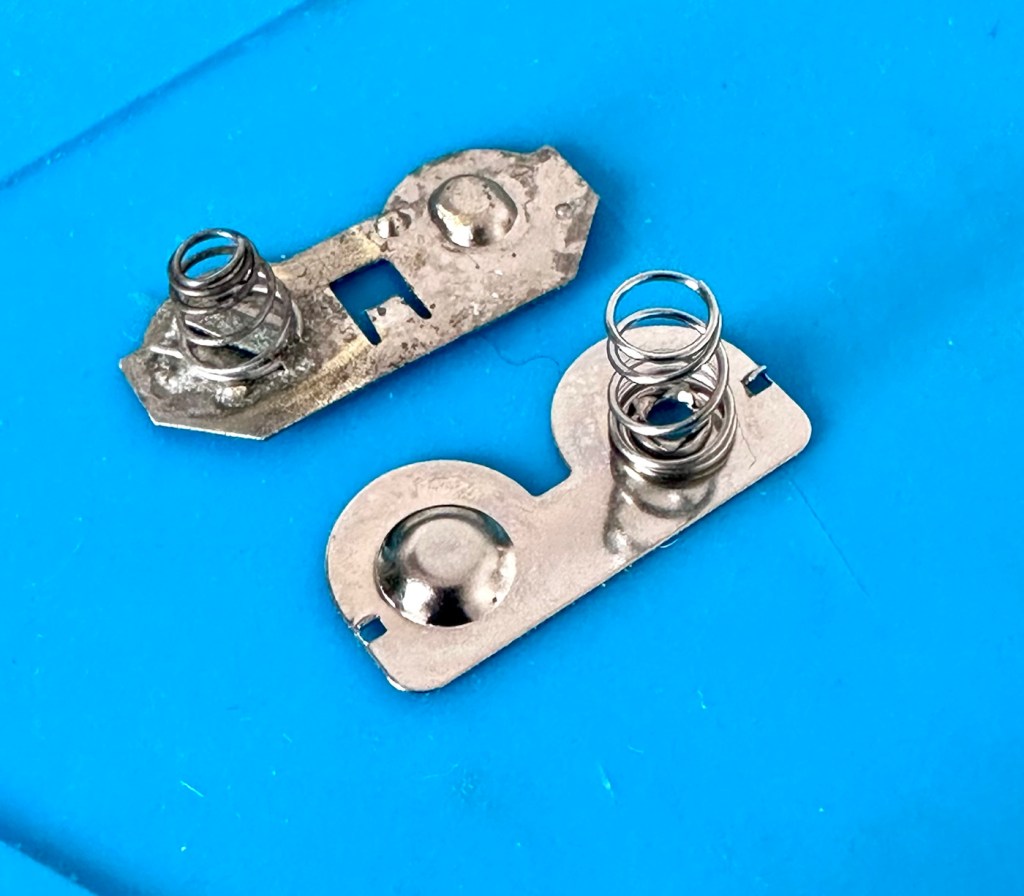
I have removed a set of battery contacts from the battery area, and replaced these with a new set that I have in my spares box. I could clean these, but it’s good to remove all items that were originally contaminated and very possibly contributory to the fault we have today.
Old and new contactsNew contacts in place
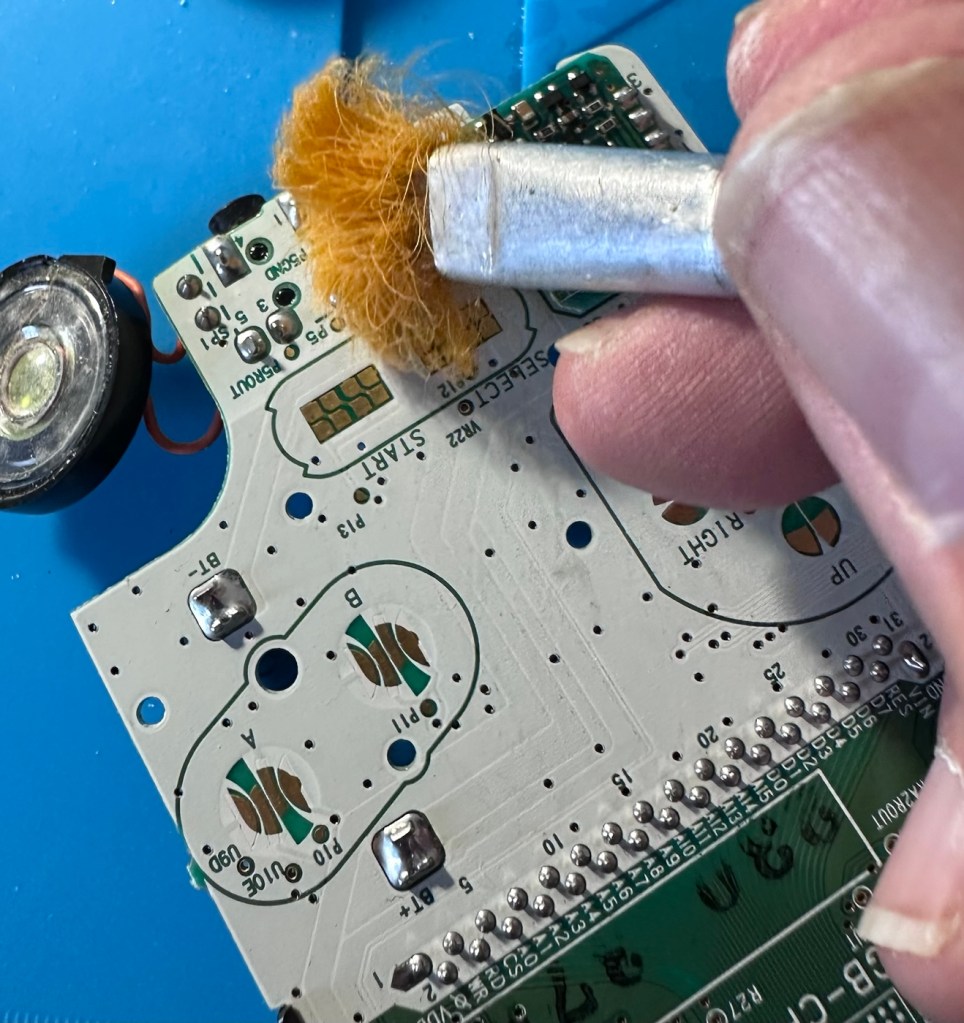
I have also cleaned the front and rear of the main board with IPA just to ensure that if there was any issues with contaminants on the board, they’ve now been removed.
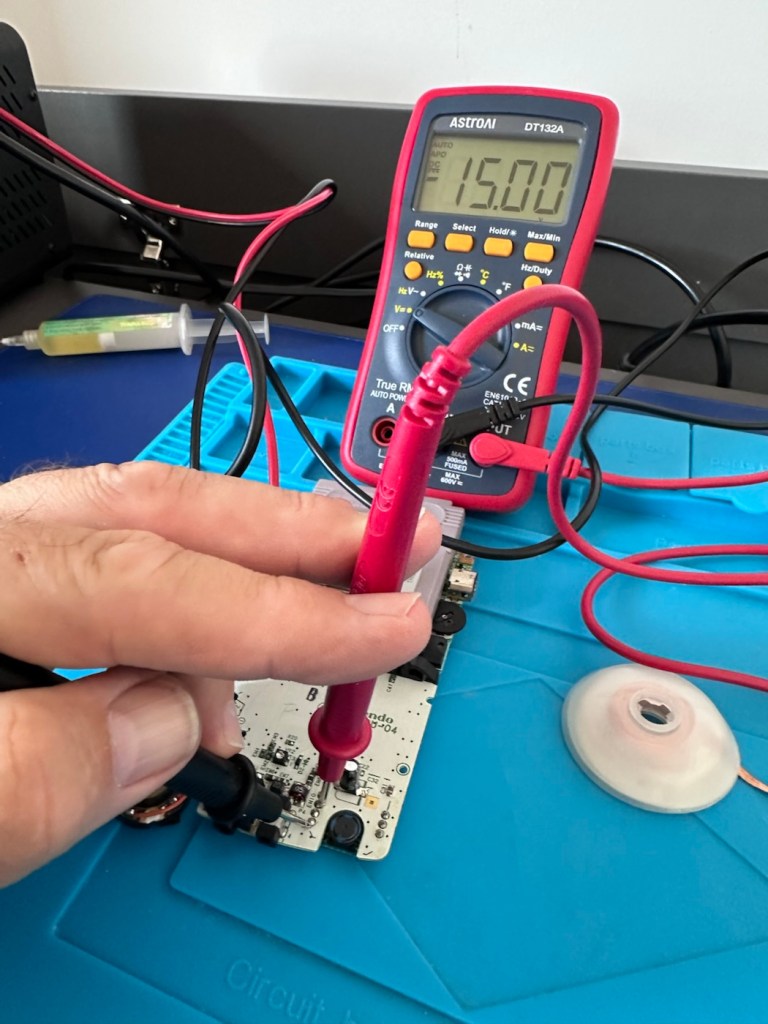
The switch has been tested electrically with a multimeter and this is working fine. The three capacitors have been looked over and seem to show no signs of wear or deterioration, they haven’t been properly tested though, so let’s now check fuses F1 & F2.
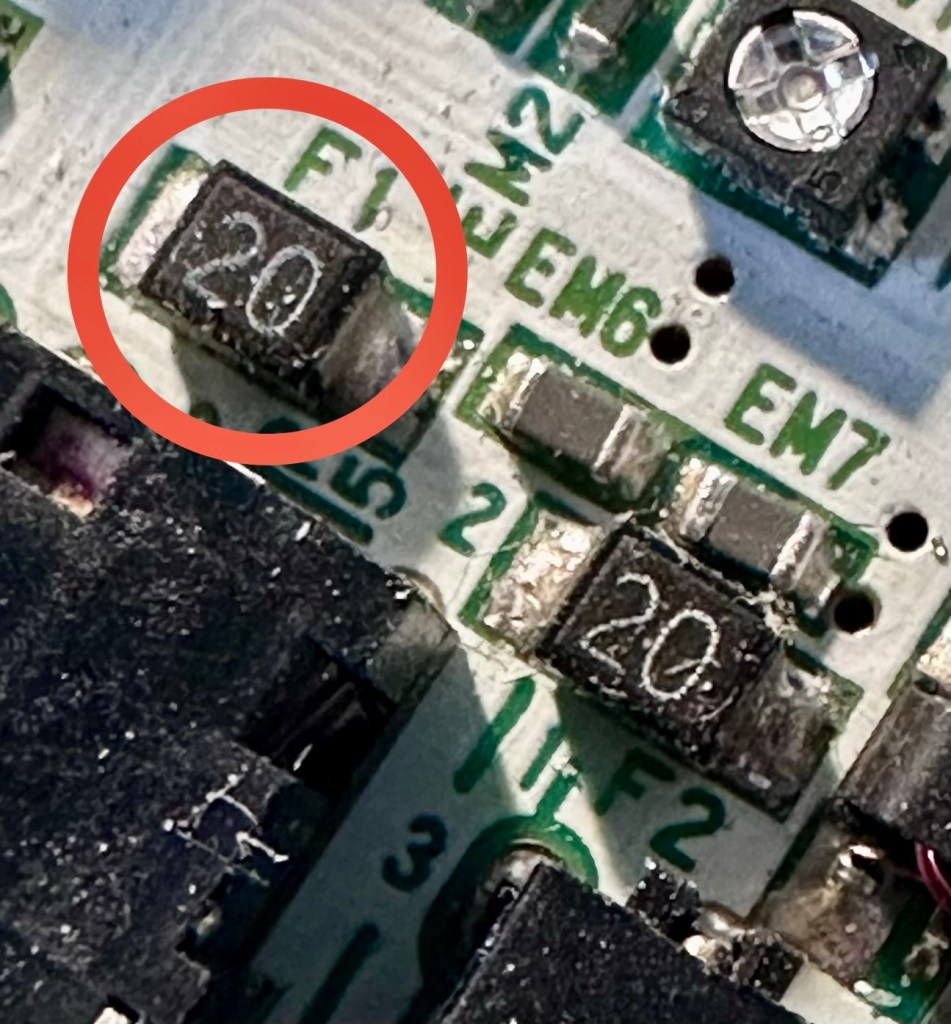
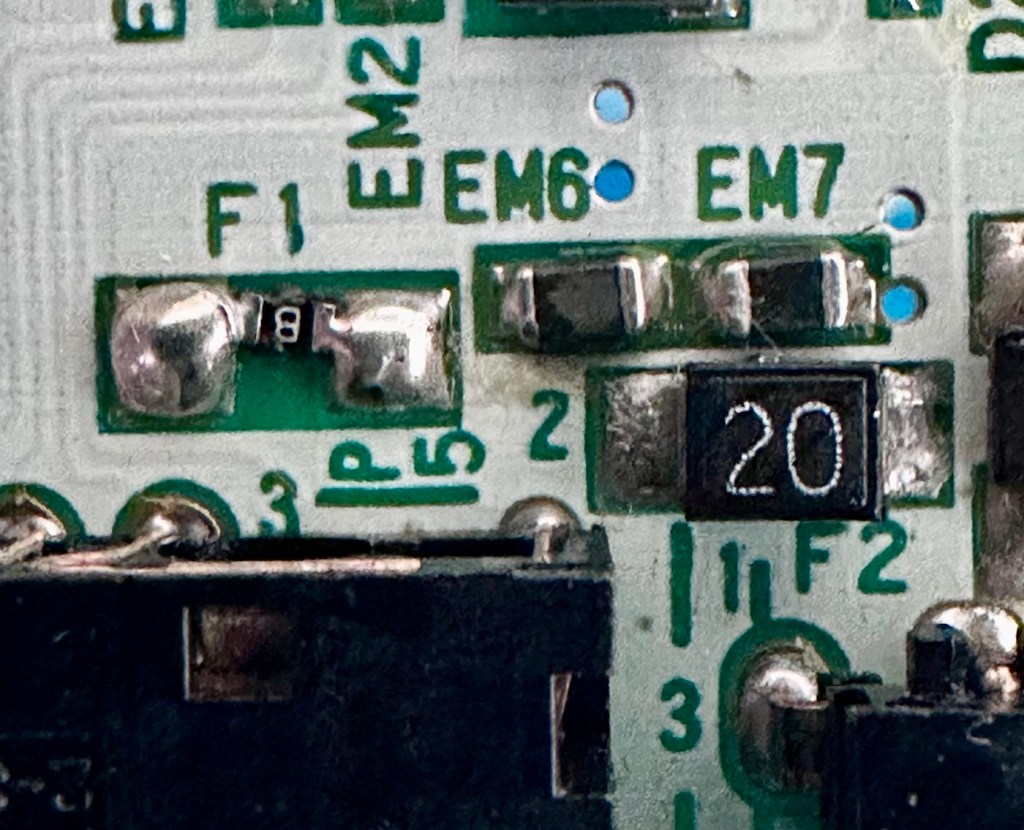
For reference: Fuse F2 protects the DC jack, whilst F1 protects the battery compartment. Using the continuity mode on the multimeter, a continuity through the fuse should present an audible buzz that let us know the fuse is complete and has not failed in any way.
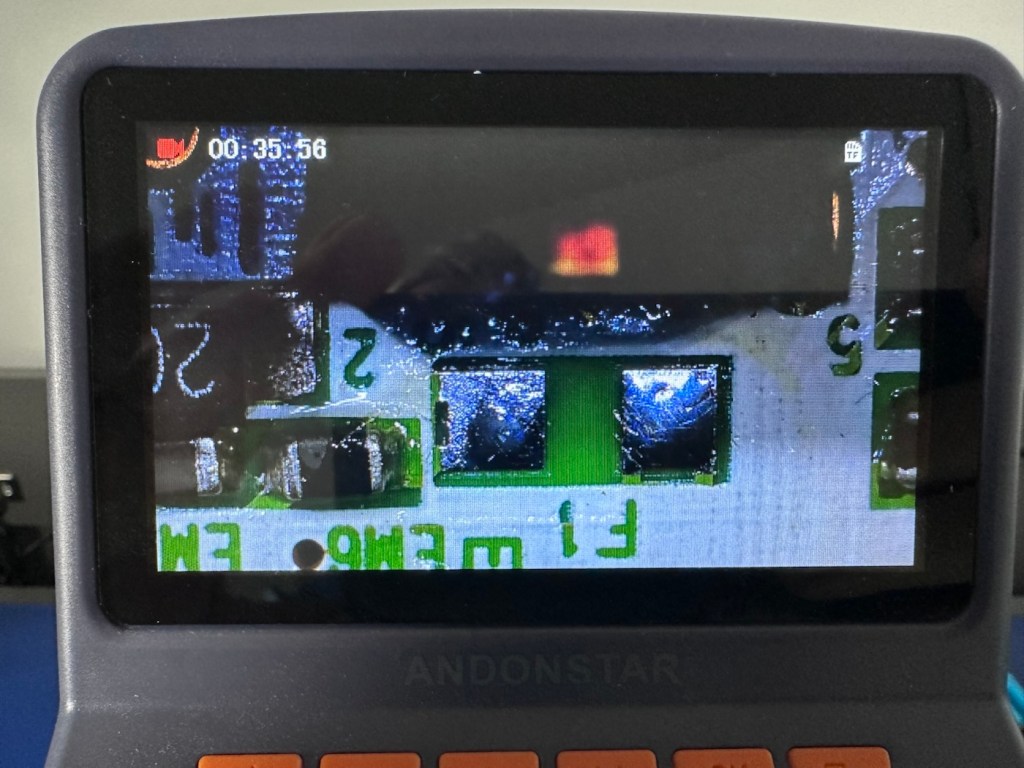
I start on F2 and get a healthy buzz that tells me F2 is working fine. However fuse F1 is a different story, there is no continuity and there is no sound, I check again and can confirm that this fuse has blown, maybe this is a result of the contamination that was in the battery area?
The two fuses, F1 is dead
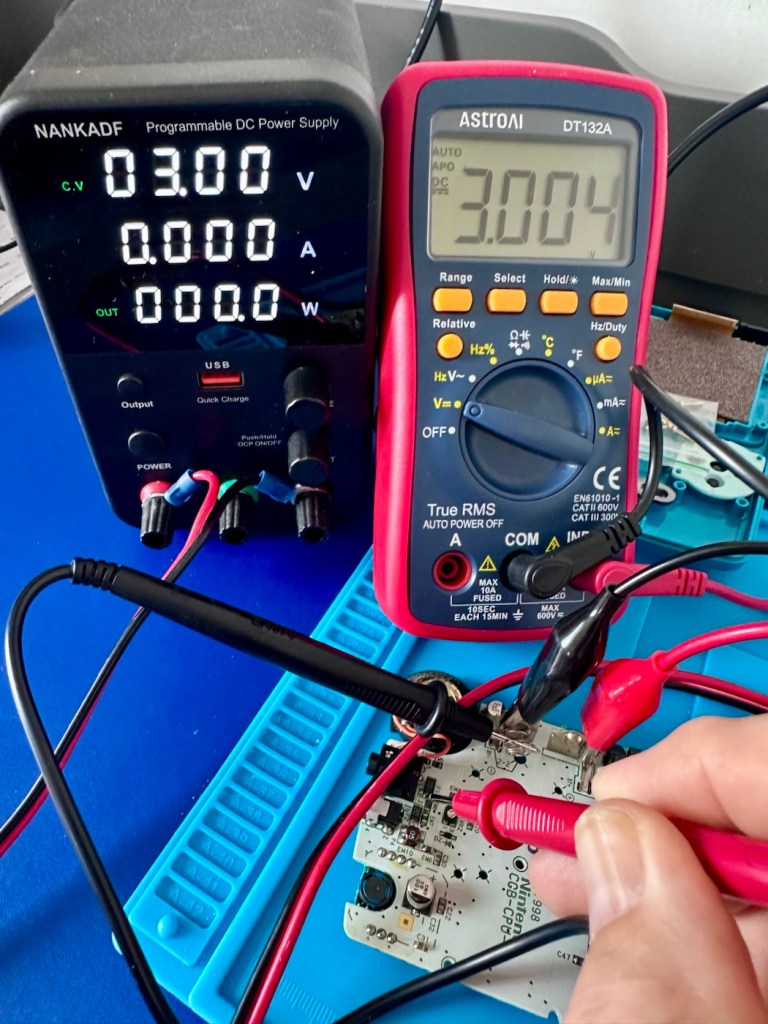
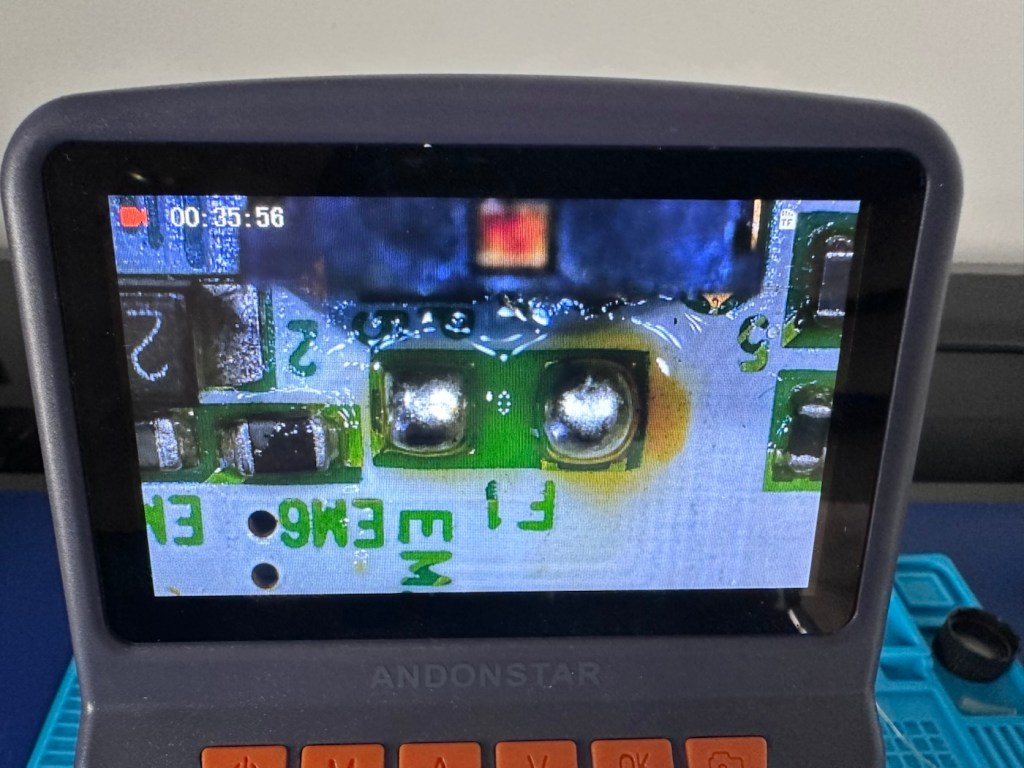
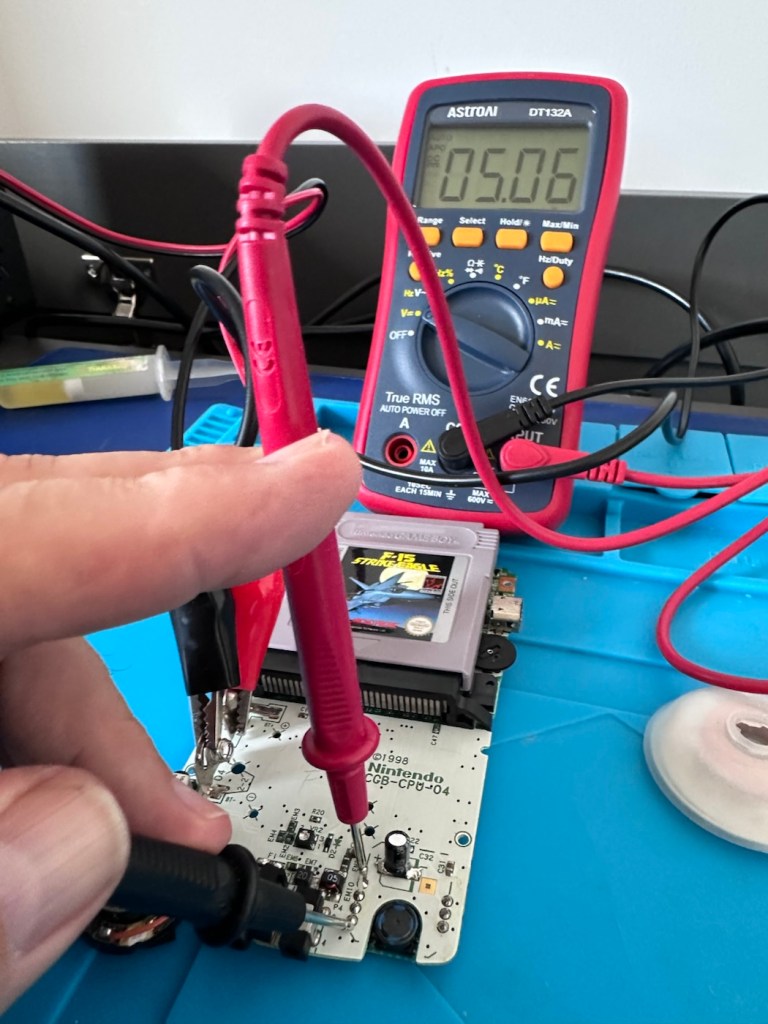
I’ve now attached the bench power supply supplying a 3v input to clarify the fault.
A 3v supply proves the fault
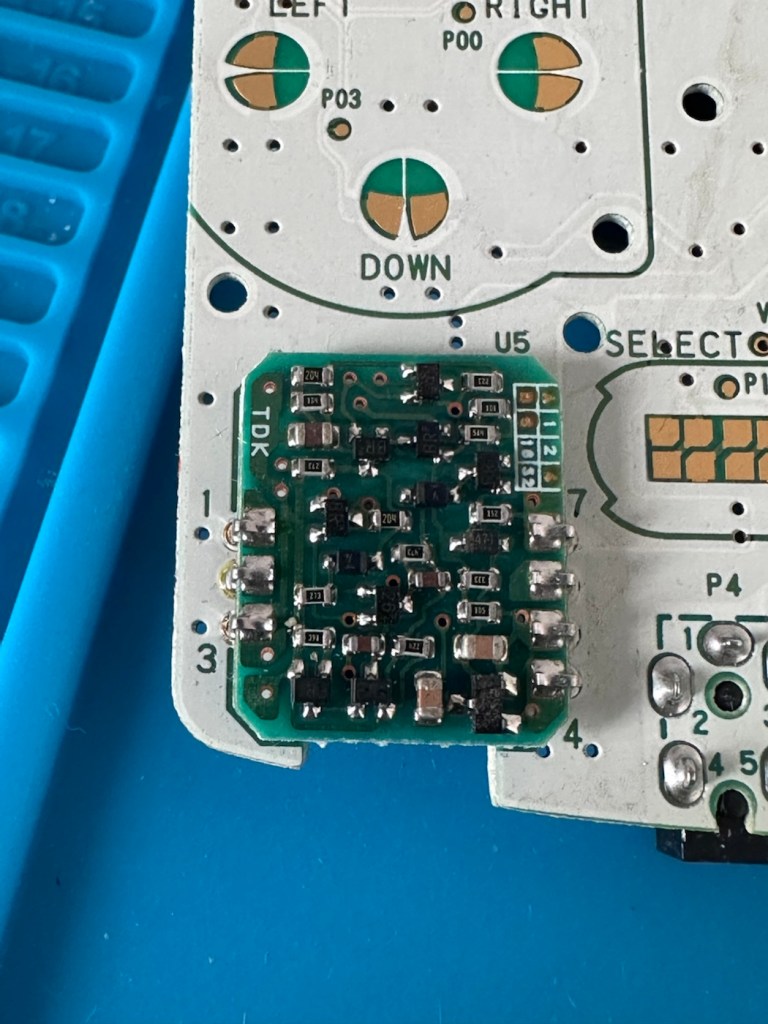
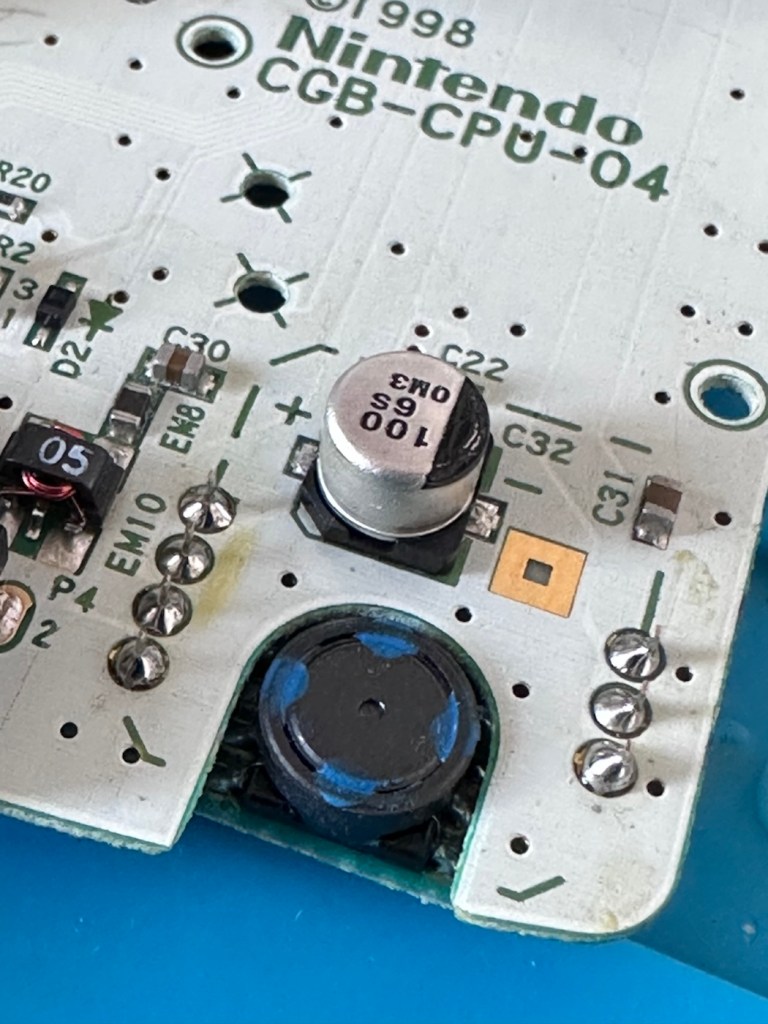
Fuse F2 has a 3v supply on each side, however our suspect fuse F1 only has a 3v supply on one side confirming that this fuse has blown. Once this fuse has been replaced I can check the voltage supplies on the remainder of the board, especially on the DC-DC regulator board, that supplies varying voltages from 3v – 13.6v required around the main board. On the main board the voltage regulator can be recognised as U5.
DC-DC voltage regulator U5
A quick check for short circuits doesn’t show anything of concern, maybe when the fuse is replaced it may well open up some other issues, the fuses I will be using are “resettable” fuses. These fuses seem to be the standard now for these units. Most resettable fuses—known as Polymeric Positive Temperature Coefficient (PPTC) or polyswitches—reset automatically and do not have a physical reset button. Once the underlying overcurrent or fault condition is removed, you simply disconnect the power source to allow the fuse to cool down, then you switch on again, if the same issue occurs, there is an obvious issue present that needs investigation, as stated above, once the faulty fuse is replaced I will be able to check other areas on the mainboard for correct voltages.
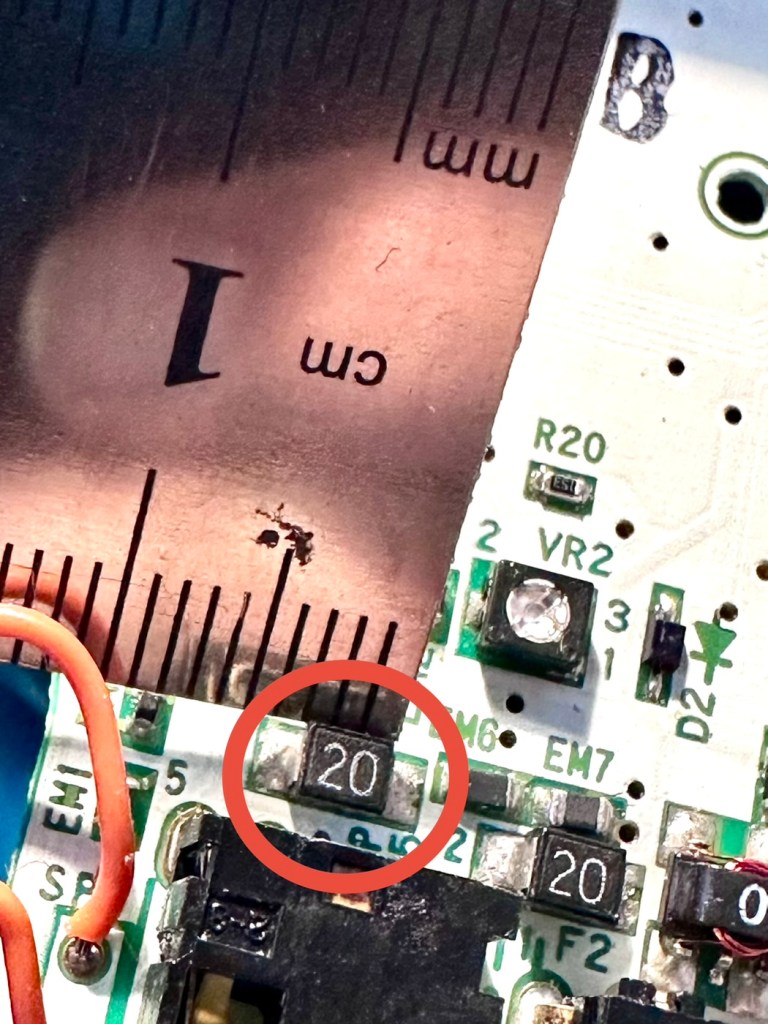
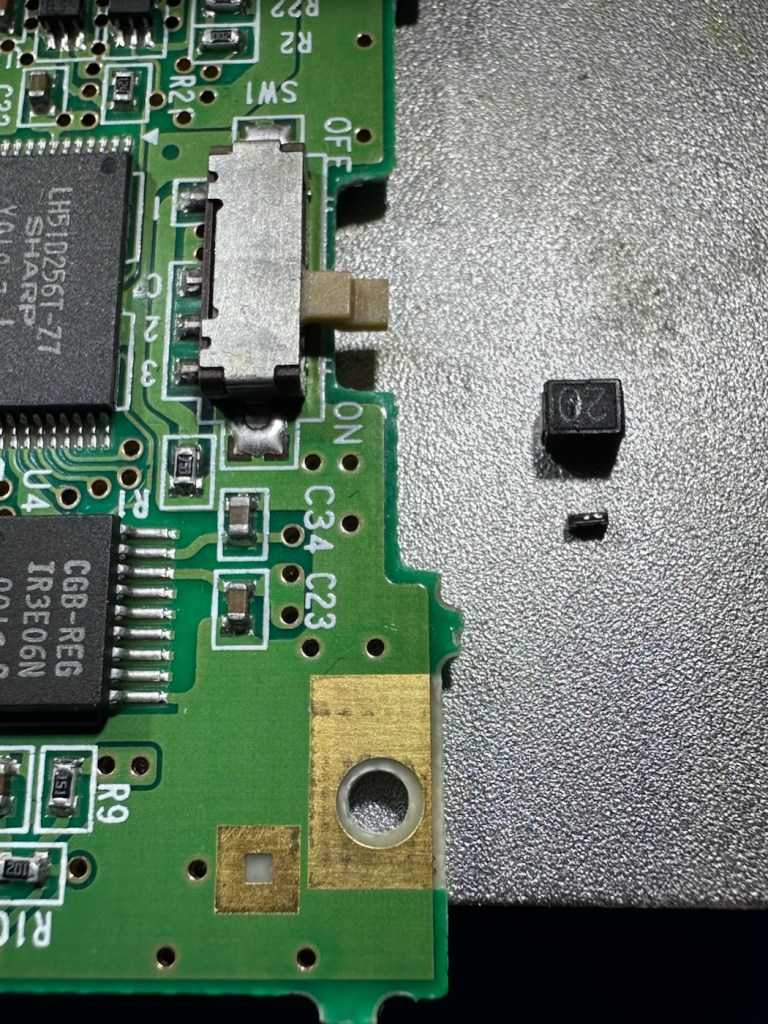
Just for information the fuse that needs replacing is approximately 4mm in width. You can see the scale in this picture taken alongside a ruler.
The tiny suspect fuse
Let’s get on with the repair.
Repair:
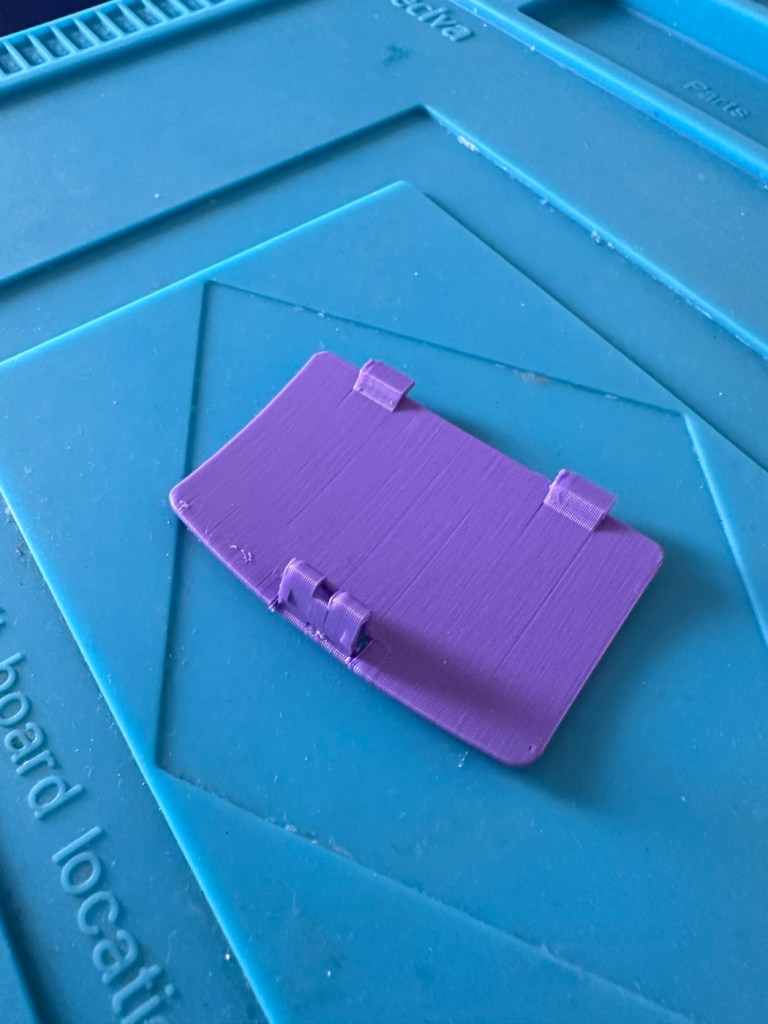
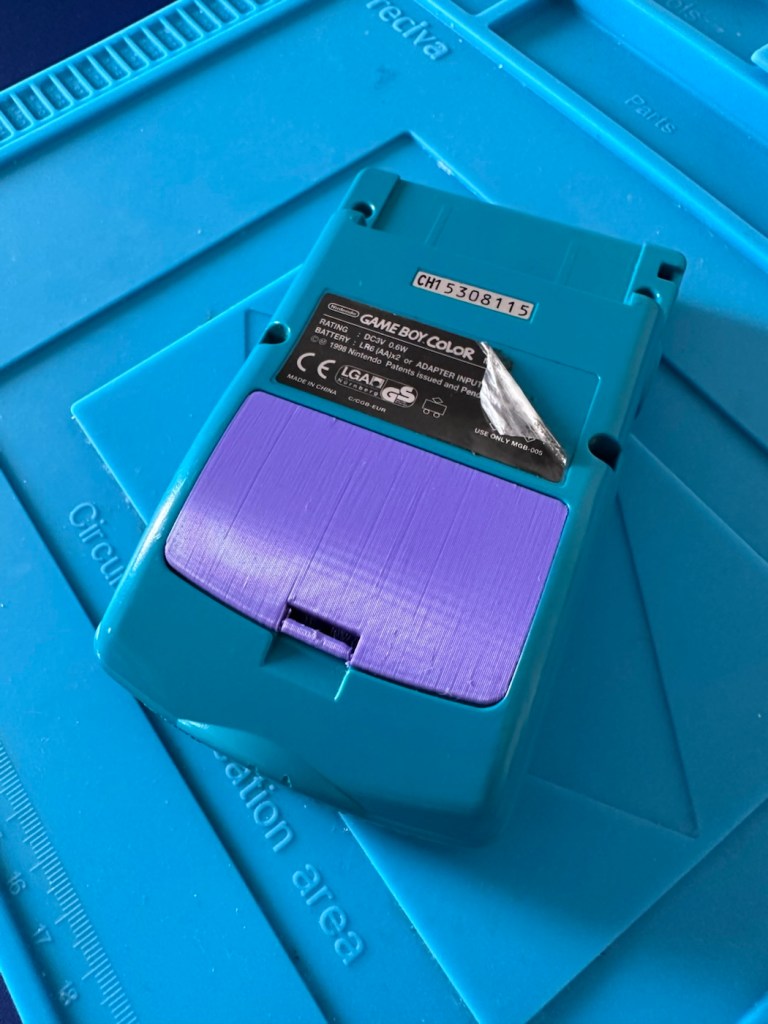
First off I’ve printed a replacement battery door cover. As stated earlier I don’t have any “Teal” filament so I’ve printed it out on a purple filament. For the purposes of practicality (holding the batteries in place) it will serve a purpose whilst carrying out the repairs.
The 3D printed cover in place
I have a replacement fuse, this work will now have to take place under the microscope as it’s just so tiny, think grain of rice size and you will understand just how small this component is, and it’s amazing that a component so tiny can completely shut down a unit such as this.
The supplied fuse is even smaller than the one on the board. If the original was 4mm then this one is probably around 1-2mm it really is minute. Here’s a comparison of them side by side on the microscope base.
Tiny and teeny tiny….
That said I’ve removed the old fuse, wicked away the old solder and applied some flux and a couple of new dabs of solder. Compared to these new fuses the solder looks massive, I can assure you it isn’t and is greatly magnified.
Pads cleanedTwo new blobs of solderNew fuse “B” compared to the size of its original counterpart “20”
With the bench power supply providing 3v I’m able to use the multimeter to confirm that the fuses are both working, however there is another issue and I suspect it is something I discussed earlier, but omitted to heed my own advice, about good housekeeping. I’ll come to that in a second.
Power is getting around on the 3v rail and is not an issue. However at the Dc converter I’m not getting the 5v or 13.6v rail, so there is another issue. The new fuse has dropped out again, and this is good as it proves it works. I let it cool for 30 seconds and it is back up and working and I’m able to continue tracing the fault. The big capacitor C32 that sits beside the DC-DC converter appears to be carrying a short, it is probably this that has caused the fuse to previously fail.
And my good advice was to change these capacitors for good housekeeping purposes…..and I didn’t.
Guess what I will be doing next?
There are three Capacitors on the main board and below you can see what their primary functions are:
C32 (Main Power / DC-DC Filter): 100µF, 6.3V (Filters the incoming voltage; if faulty, the system won’t boot or will repeatedly reset).
C35 (LCD Display Filter): 22µF, 16V (Stabilises the voltage to the liquid crystal screen; if faulty, it results in a dim or washed-out image).
C38 (Audio Amplifier / Sound): 100µF, 4V (Powers the speaker and headphone output; a failure here is the leading cause of whisper-quiet audio).
Ok. Fortunately I have plenty of capacitors in my spares box so I was able to replace the three capacitors with no issue.
Faulty power CapacitorCleaned and readyAll three Capacitors replaced
This done I then decided, prior to any reassembly to see if the power was now being distributed as it should, and I’m pleased to say it is. We have the full range of voltages now coming out of the DC-DC converter.
All expected voltages now present.
Now let’s get the unit reassembled, cleaned and then get some tasty pics taken👍
Result:
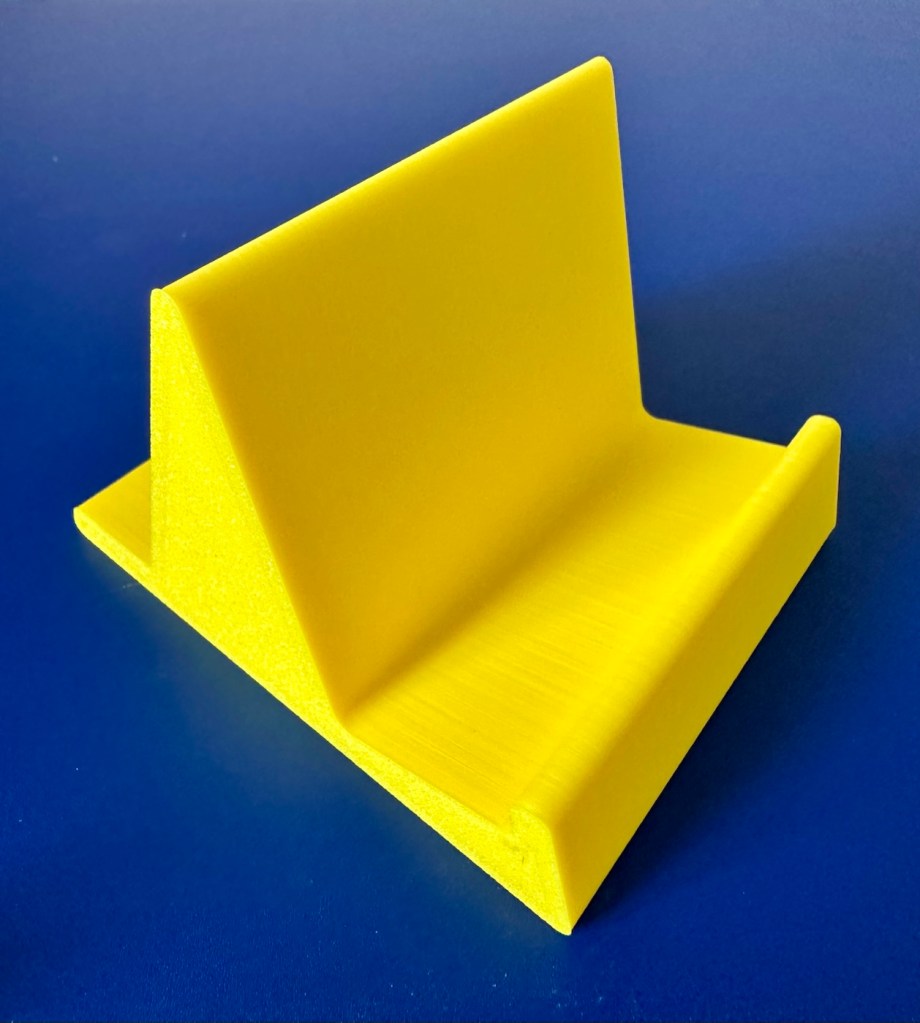
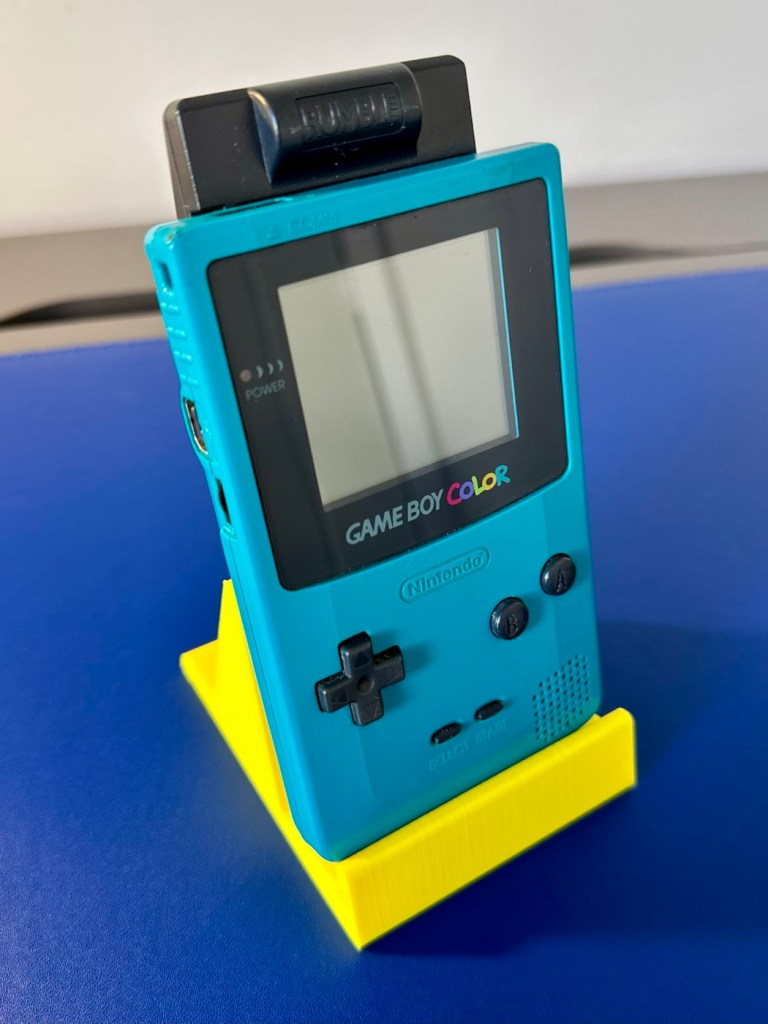
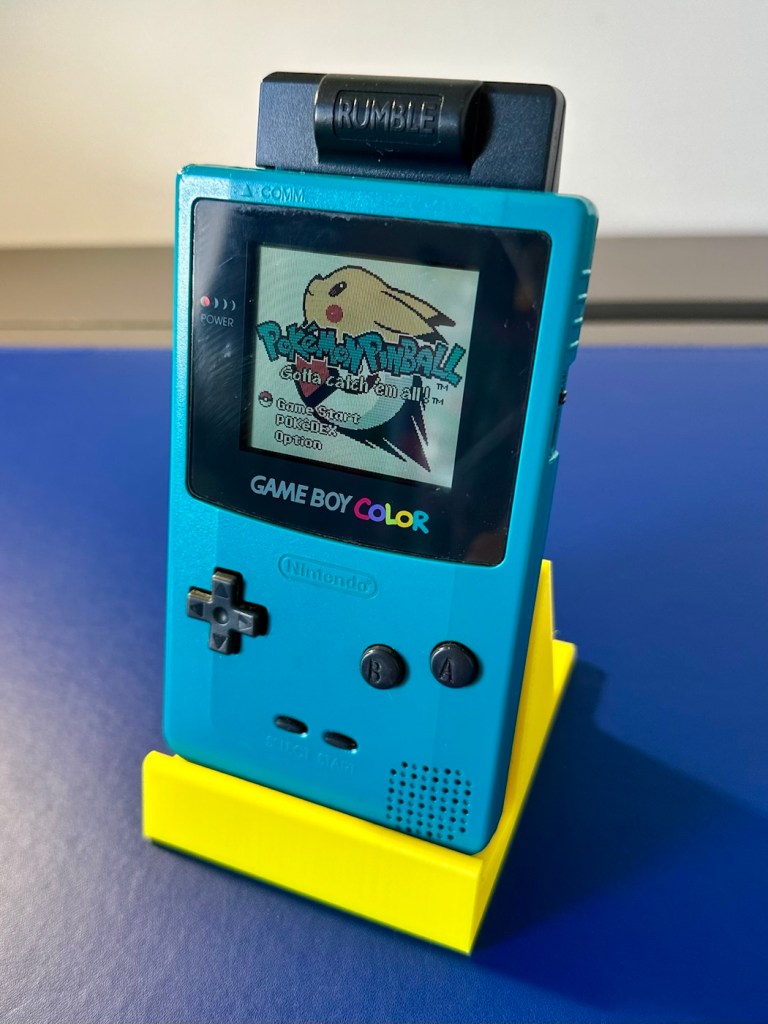
To finish it off and whilst the 3D printer was still warm, I’ve printed a simple brightly coloured yellow display stand to show it off on.
A new printed display stand
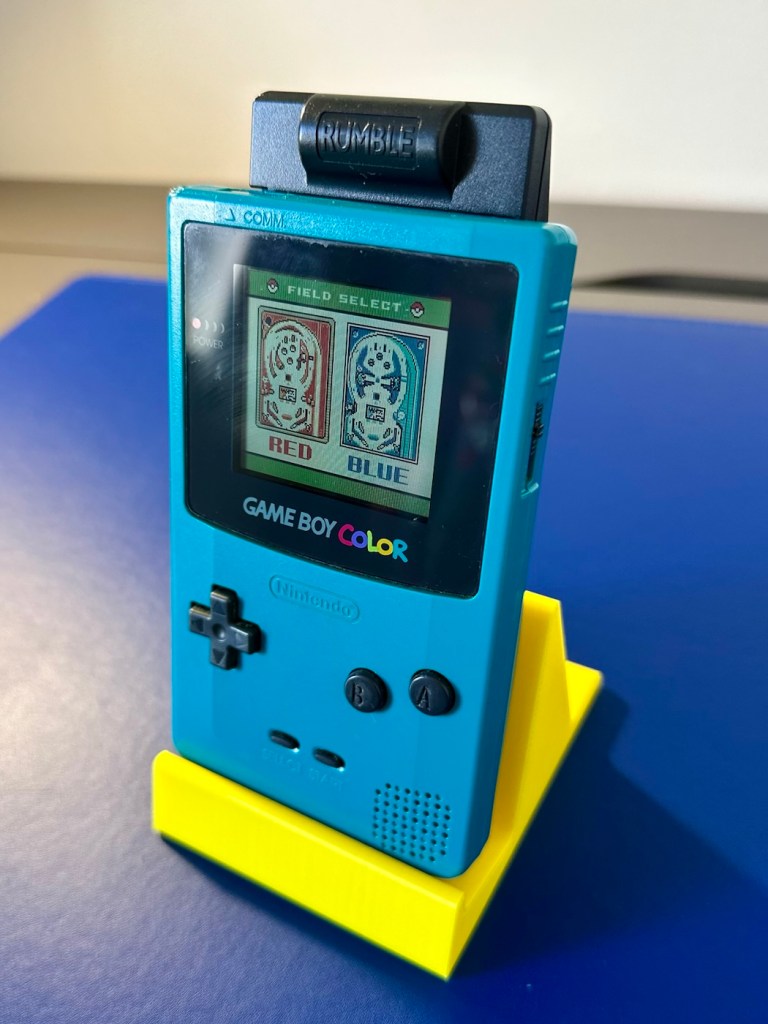
After a good clean the unit is now in a perfectly good working order. The fault appears to have been the faulty capacitors and battery contamination all probably combining to make the power fuse fail, a perfect storm if you like. The fuse and three capacitors have now been replaced to breathe new life into this game console. Cosmetically it’s still tatty and would probably benefit from a new outer shell and some labelling, however it works and to be honest that is all that really matters.
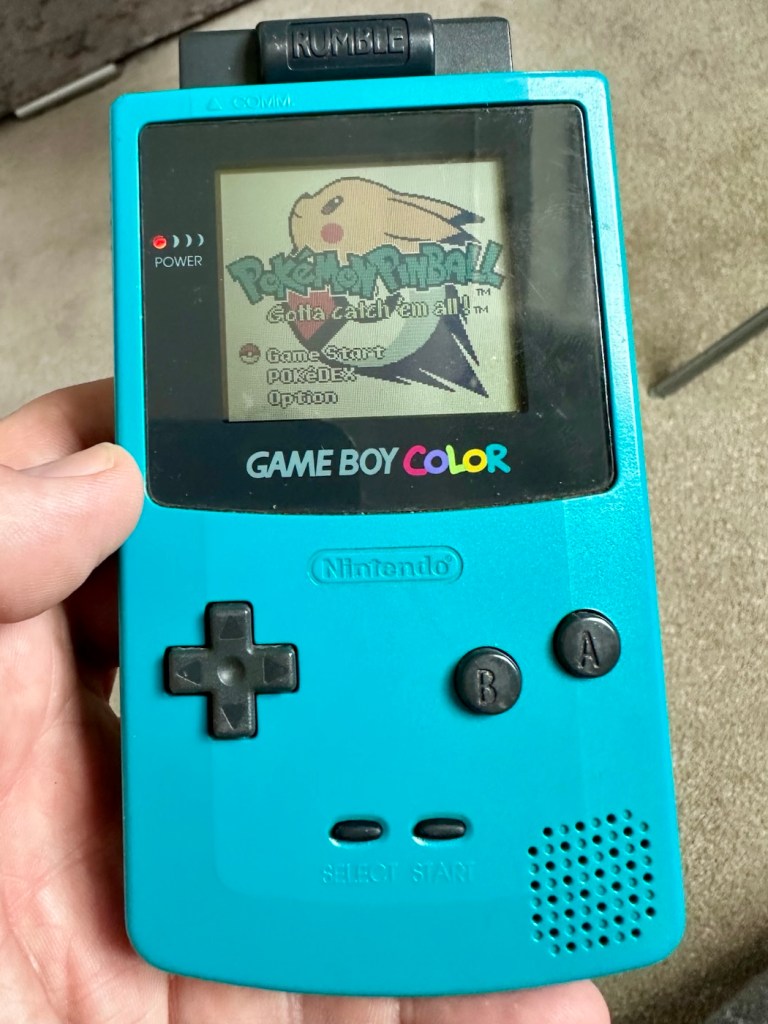
A small video showing the unit working Looks different but it works, it’s just a patchwork quilt of a project
I wonder how many of these items just get thrown away because they don’t work? This probably took me about three hours in total with diagnostics and repair. Another piece of retro history restored, now joining my original Gameboy classic as part of my collection.
It’s been a pleasing little project, enjoyable and educational and it’s always good to hear the familiar beeps when it springs back into action.
Another one saved from landfill.
Thanks for passing by, as always it’s very much appreciated.
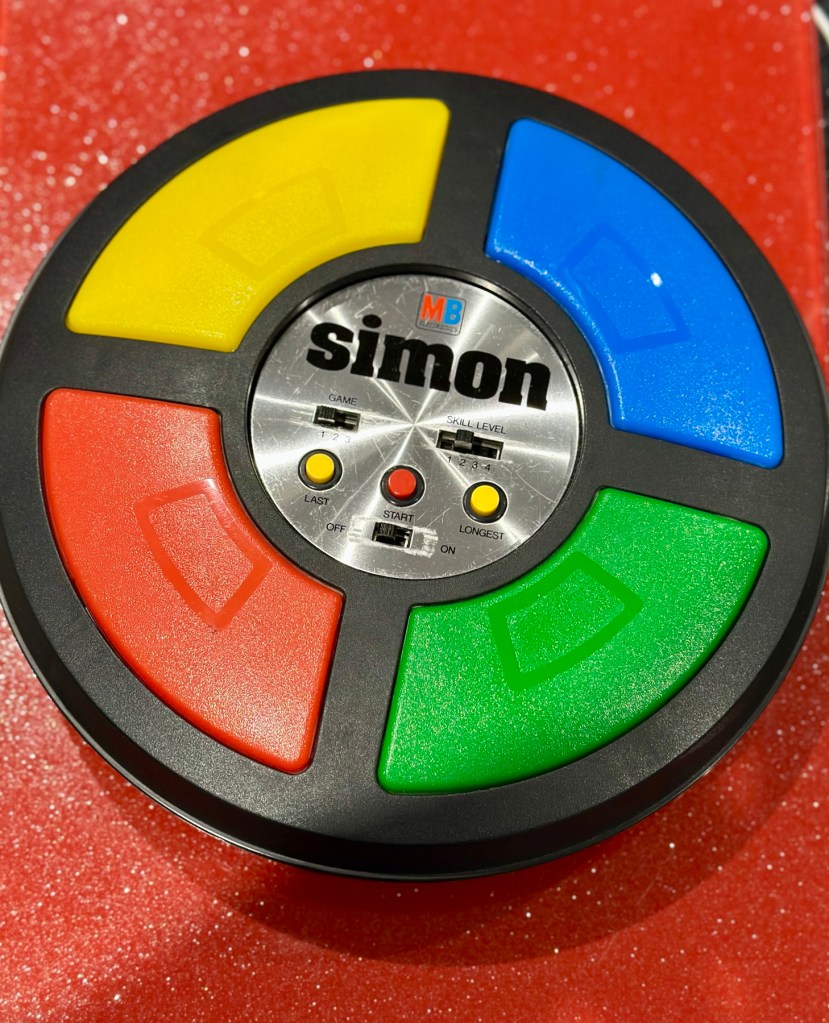
Remember this? Everyone had one around 1978 apart from me that is. Well, now I’ve got one, only 47 yrs late and it doesn’t work. But hey that’s what this site is all about, and that’s how I roll. Always late to the party, and even then you’ll probably find me in the kitchen 🥳
What the listing said:
Cosmetically in very good condition but does not work. Please see attached pictures to judge condition for yourself.
EBay
Another one with all battery covers! I’m shocked. And what’s that screwdriver there for?
The guy was after £17:00GBP and that included postage, but I put in a cheeky bid and managed to get it with postage for £9:80GBP. Anything under a tenner is good in my eyes.
Here’s some history:
Simon is an electronic game of short-term memory skill invented by Ralph H. Baer and Howard J. Morrison, working for toy design firm Marvin Glass and Associates, with software programming by Lenny Cope. The device creates a series of tones and lights and requires a user to repeat the sequence. If the user succeeds, the series becomes progressively longer and more complex. Once the user fails or the time limit runs out, the game is over. The original version was manufactured and distributed by Milton Bradley and later by Hasbro after it took over Milton Bradley. Much of the assembly language code was written by Charles Kapps, who taught computer science at Temple University and also wrote one of the first books on the theory of computer programming. Simon was launched in 1978 at Studio 54 in New York City and was an immediate success, becoming a pop culture symbol of the 1970s and 1980s.
Wikipedia
From what i can see in the pictures the item seems good, cosmetically. I may be able to see just a little contamination around the battery contacts but I can’t be sure. It worries me when i see a picture that shows a screwdriver alongside the item you are buying, it just screams at me that the seller has been in side and is not being truly honest about its issues. Let’s just wait until it arrives to do a full assessment. I’m genuinely excited about getting this working, as my age veers ever closer to the higher numbers. I need something to stimulate my mind, what’s left of it. 😂
Assessment:
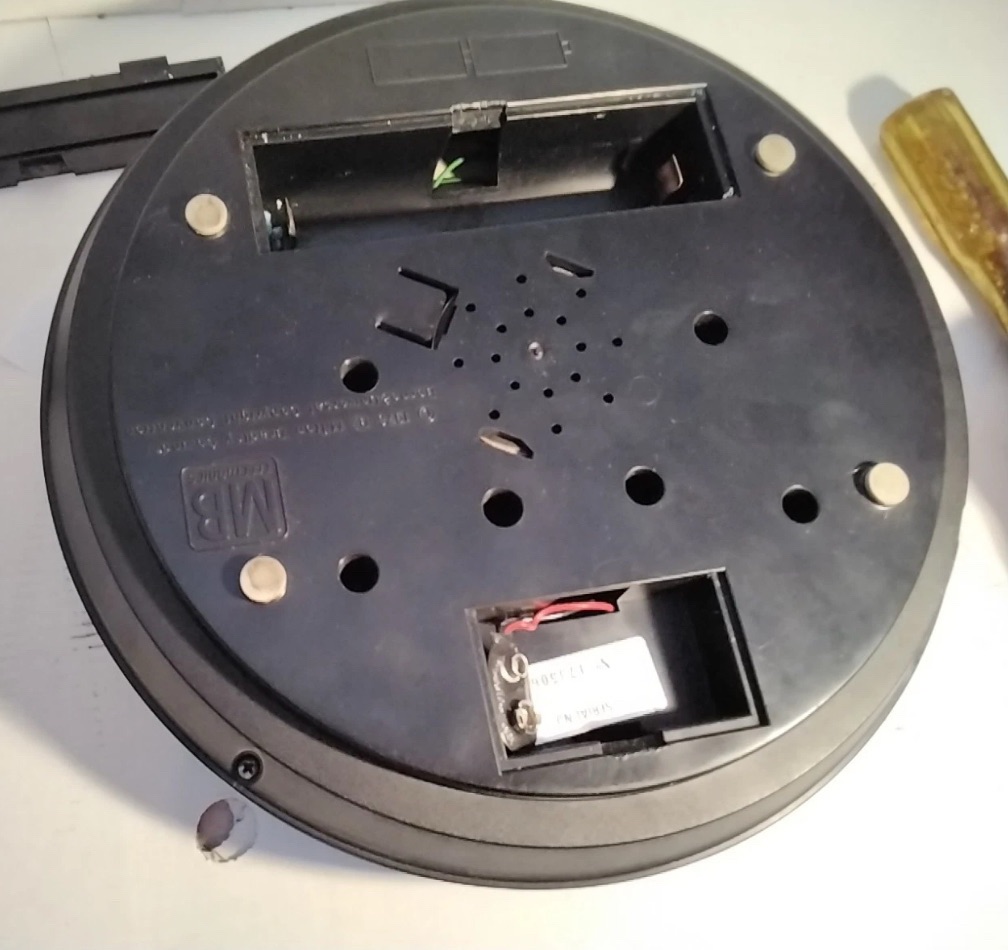
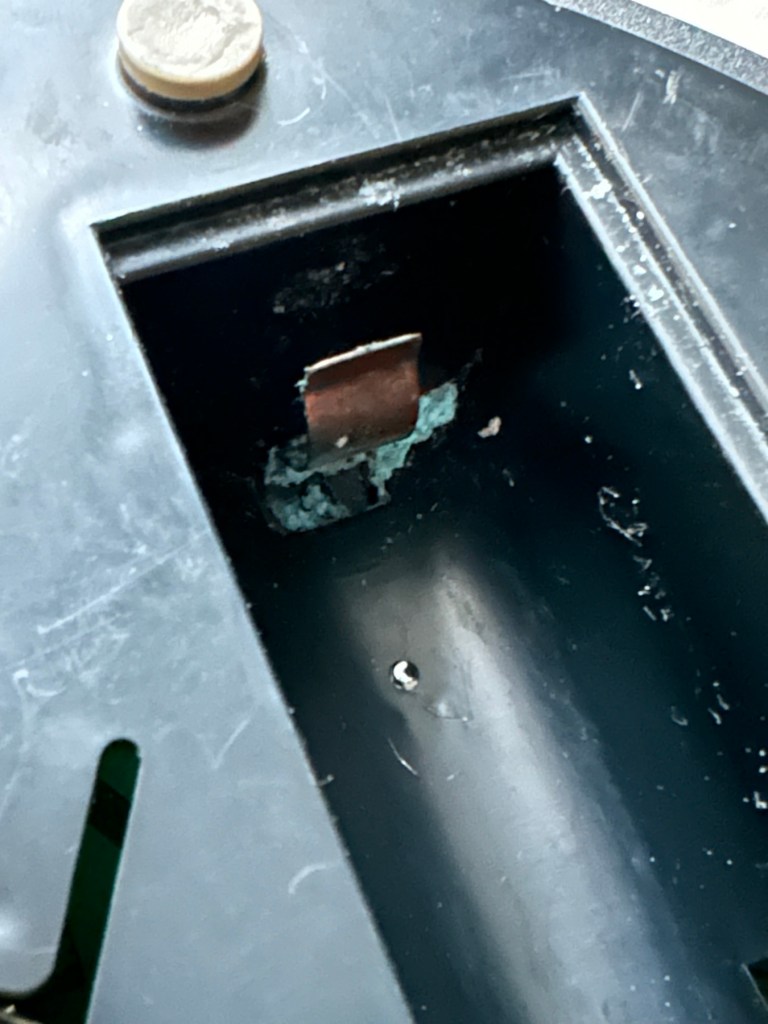
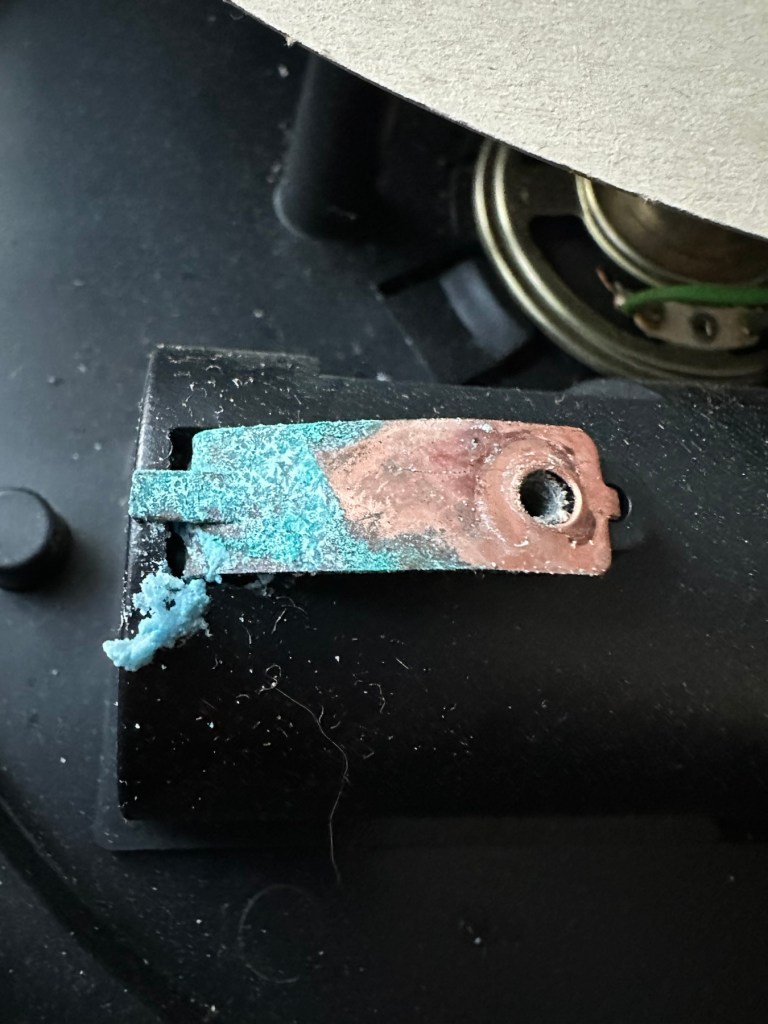
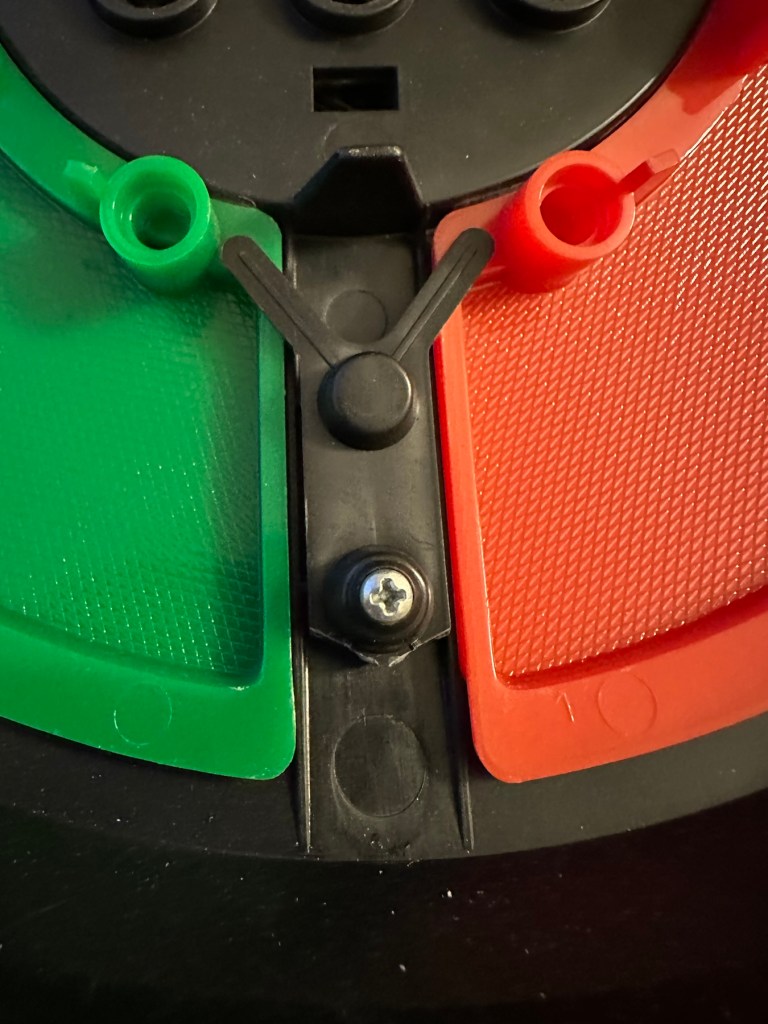
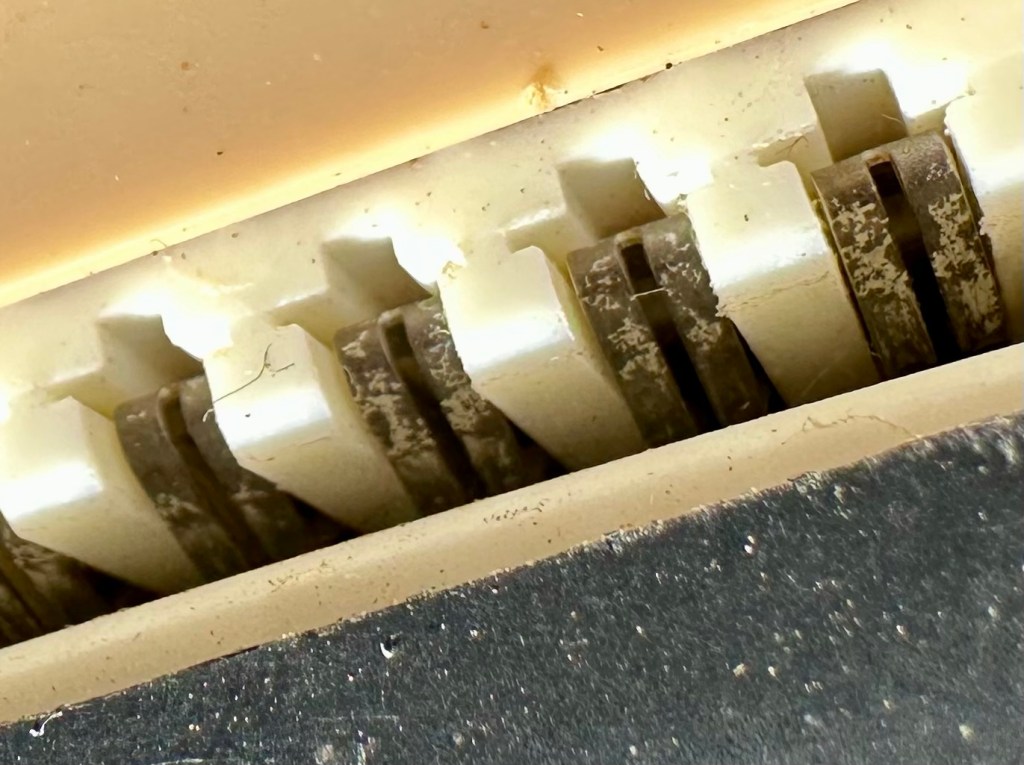
The unit has arrived and on first impressions looks clean and tidy cosmetically. The pads are not very responsive and the battery contacts are seriously corroded. The unit is a power hungry beast, taking two ”D” cell 1.5v batteries and one PP9 9v battery. The unit does not work with its batteries in place, and i’m not surprised really, and to round it all off two screws are missing from the case, and one screw mount is broken. All four plastic springs that sit under the coloured pads are broken, and just to clarify someone has already been in here and it doesn’t bode well. My previous concerns of a screwdriver being in the original photos have been confirmed. It’s been tampered with.
Broken screw mounts and contamination Bad contacts – contaminated Pads unresponsive due to broken plastic spring mounts
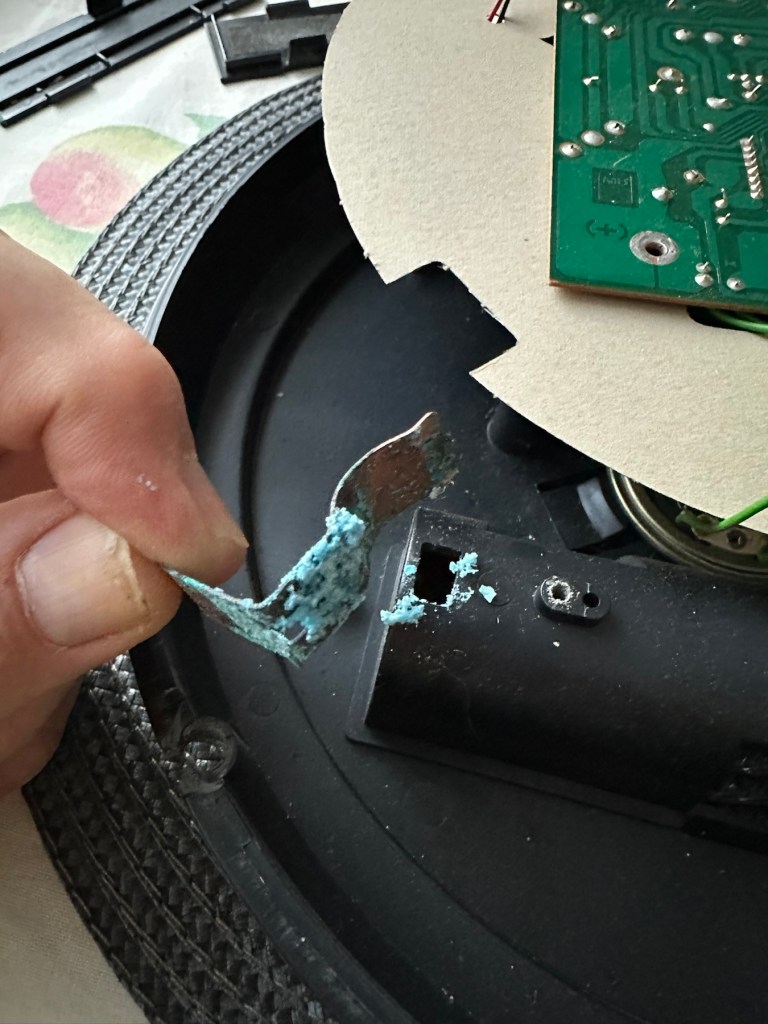
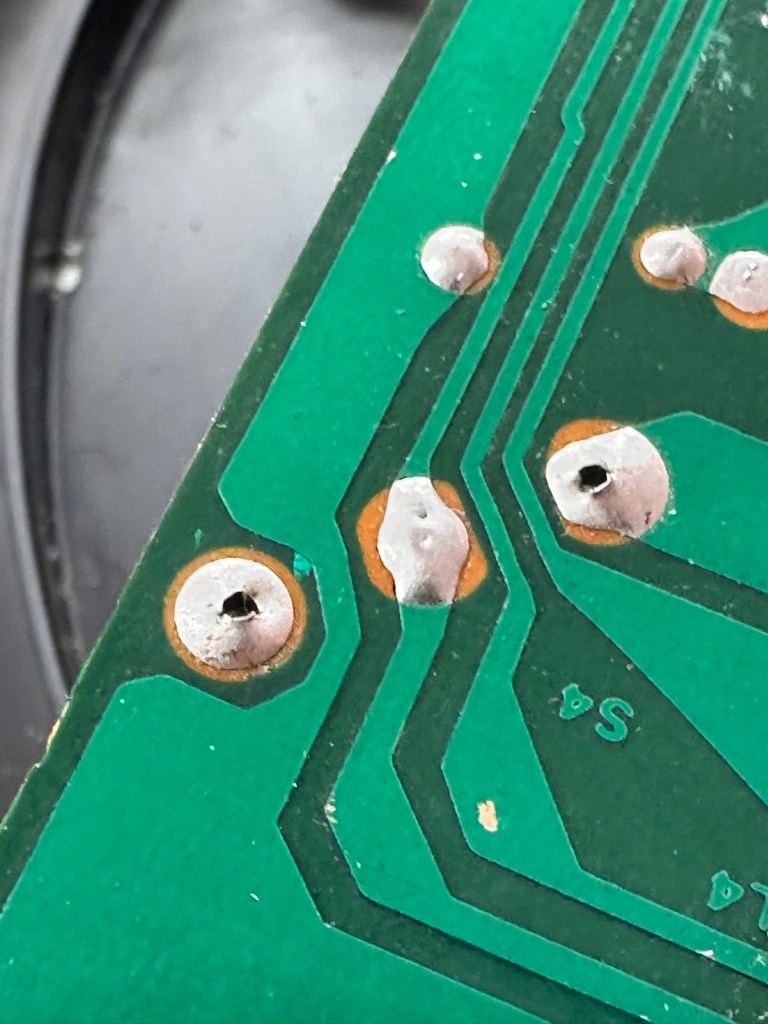
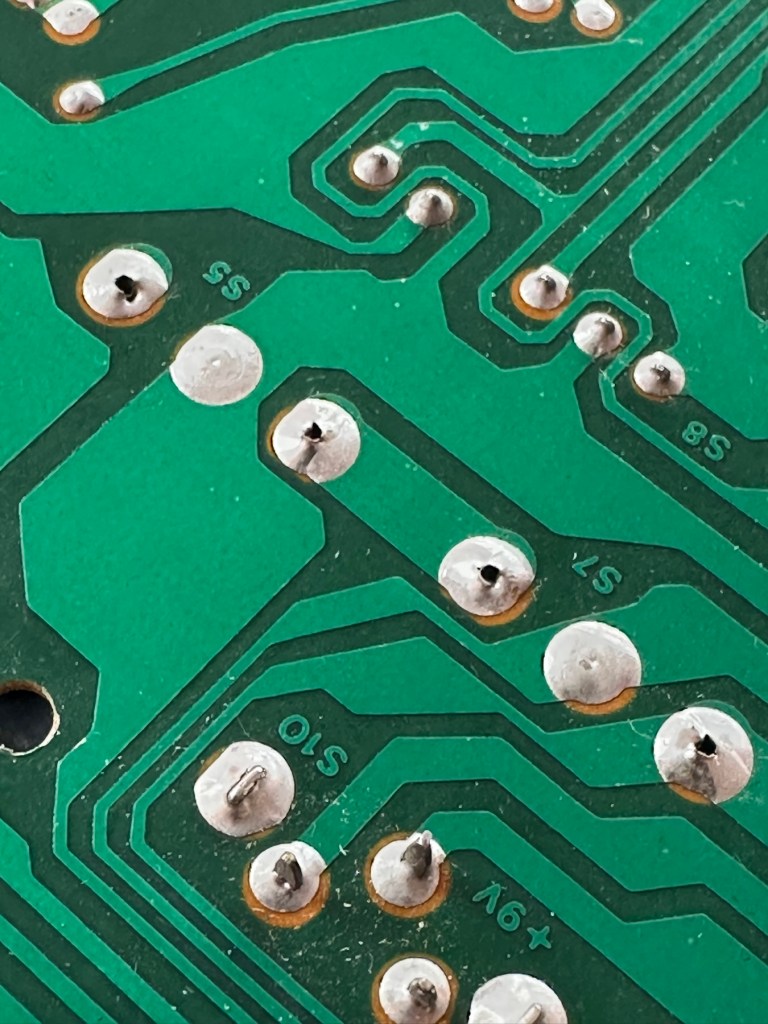
The board is a typical of many circuit boards from this era that were produced for MB. I had a similar circuit board on this item here: MB – Computer Battleship
Top of boardUnderneath the boardYou can see the board structure that is typical for this era. The contact points are indicated by the red arrow marks.
In the picture above you will see two arrowed points. These points are the power contacts that make contact with the two seriously corroded battery contacts you can also see above. No wonder there is no power getting to the board. I suspect this might be the cause of our electrical problem.
Repair:
First thing to do is to get those battery contacts cleaned, as well as having a good clean of the main board. This has now been done. I’ve repaired the broken screw post by simply using a rubber washer that has been sufficient for this repair.
Contacts before and after
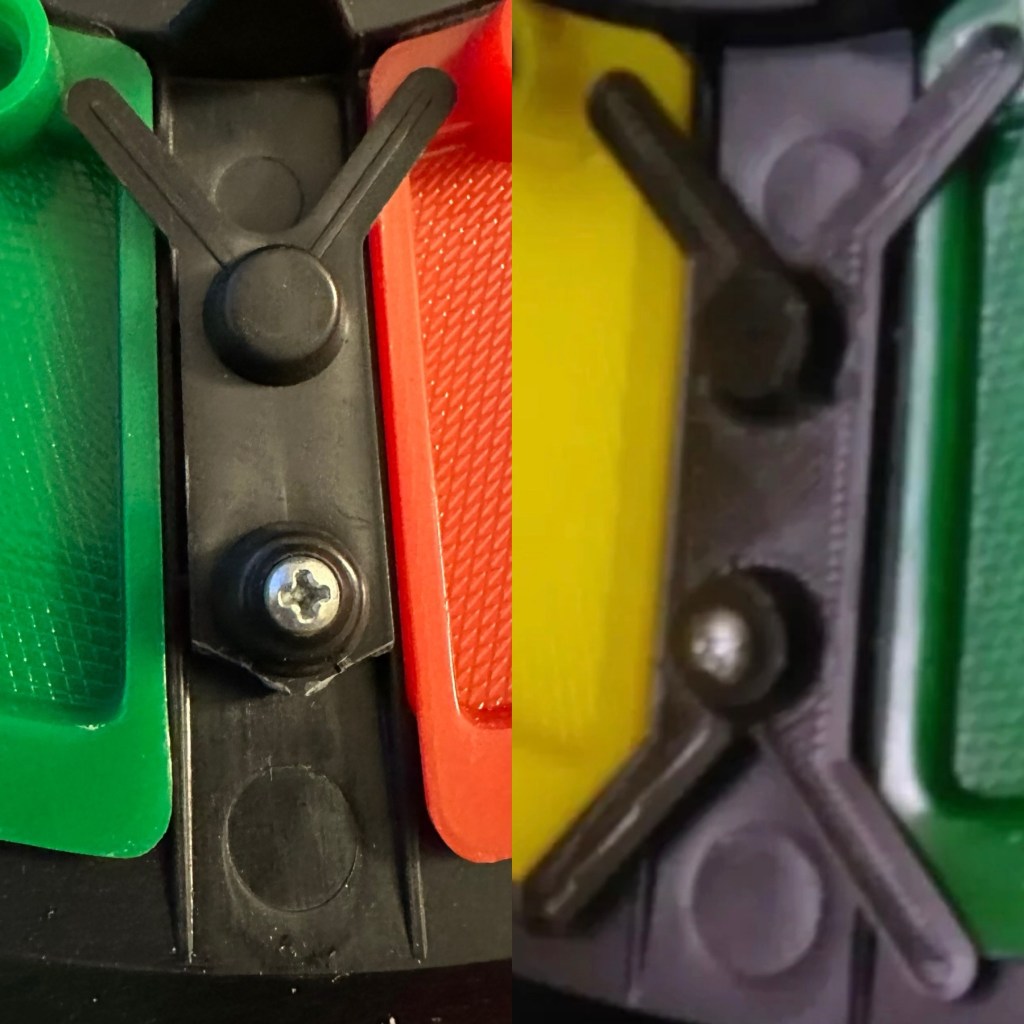
A friend of mine has kindly offered to print me off four of the “Double Y” springs to replace the ones that are already in place and broken. He owes me a favour or three and needs some subject matter to run through his new 3D printer so I’m very pleased to help him, as pending the outcome I may well buy one myself, as I have been threatening to do so for a while now. This should sort out the issue of the unresponsive pads, first found in the assessment of the item. He’s panicking that they might not be smooth and beautiful, I’ve told him not to worry as they are hidden inside anyway.
What I currently have on the left, what I’m expecting on the right
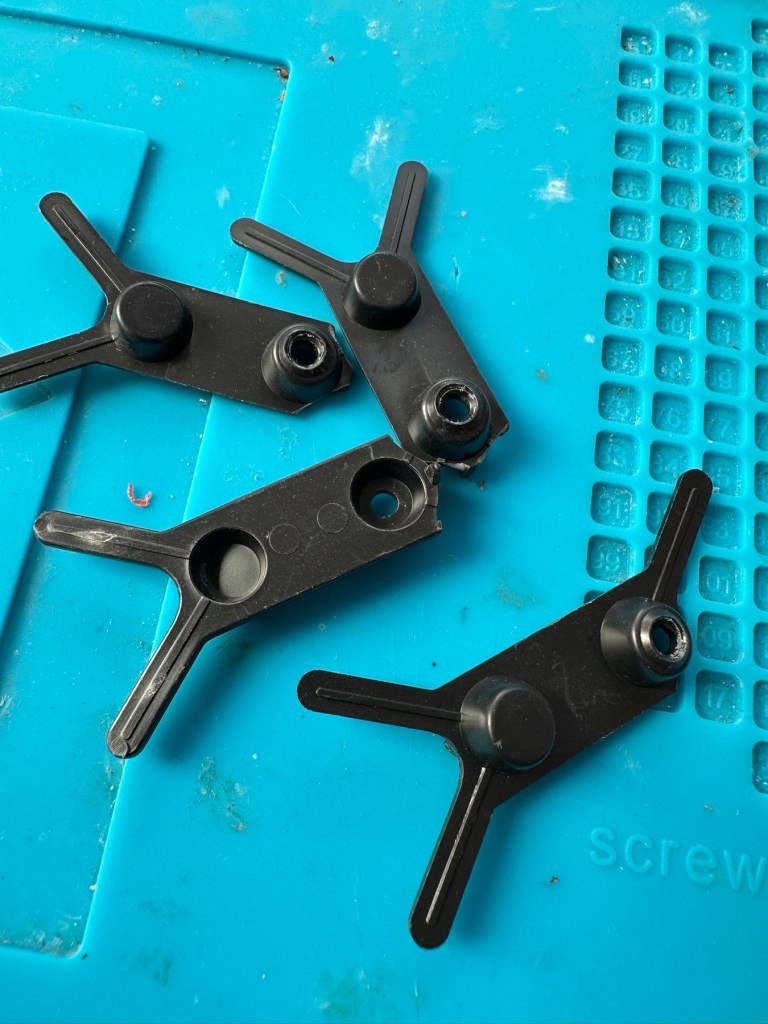
He’s just supplied me with five double “Y” pieces just in case one is damaged in some way. Let’s get these put in place to see the difference these make.
Out with the oldIn with the new
With the new springs in place the pads are working as they were originally designed to, now with some springiness in their operation. The battery contacts have now also been put back in place.
Cleaned contacts back in place
When assembled, the buttons are a little erratic and not always responsive so I decide to look into this further. A quick Look at the board shows that the solder contacts on the board for all of the button connections are worn, the solder has failed so I decide to reflow all these solder joints to improve the contacts. This appears to have worked as the unit when reassembled, now has uninterrupted operation. This is an age related issue. A simple fix.
Old solder joints that have failed and needed re-flowing
Result:
Another 47 year old saved from the scrap heap, it’s been an interesting and sometimes confusing repair and I thank my friend who stepped in to save the day by utilising his 3D printer to make some parts. Without his assistance this repair would not have been achievable.
Looking smart after a quick clean
It’s just another old piece of retro history to add to my ever growing collection and much to my wife’s dismay. Bless her.
Now working
Thanks for passing by, as always it’s very much appreciated.
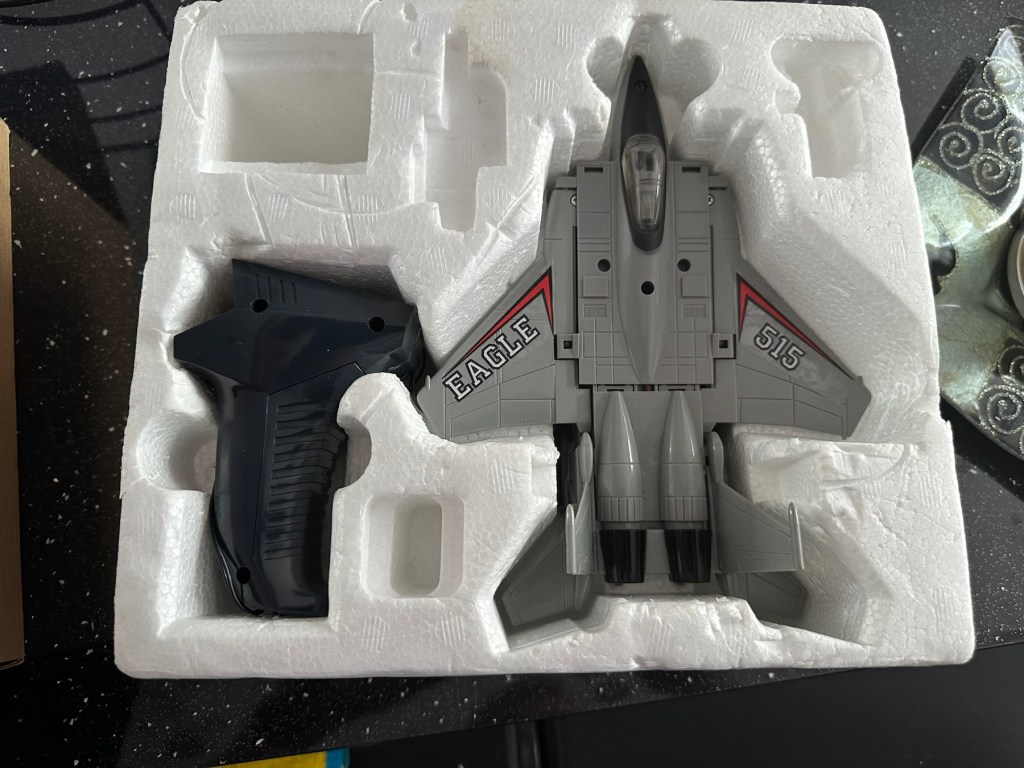
I arrived home from work last evening to find my nephew at home. He’d been looking around his mum and dad’s attic to find his old star wars toy collection he had from the 80s-90s. Whilst in the loft he found this old toy from 1985 by a company called Yonezawa being sold under the Grandstand branding, and it isn’t working. Here is where it passes over to uncle Dave.
Uncle Dave, it’s not working
There’s no real value to these toys as they were produced in massive quantities off the back of all the transformer type toys that were available at the time. There are some accessories missing from this one that are obtainable via the auction sites, he may well ask me to source these, but at the moment he just wants me to get it working to pass onto his boys. The video below shows just what it does….and that’s not a lot. But the one I have here is totally dead and needs reviving just like Frankenstein.
Deltatron what it should do
So here we go…
Assessment:
My overriding surprise is that this has been in a loft space for close to 30 yrs and does not have that expected damp mustiness that usually comes with such an item. I must say, my brother in laws loft space is an exception, it’s obviously free from excessive moisture, mind you it’s only about 40 yrs old so building standards had probably advanced somewhat from when ours was built about 90 yrs ago.
It’s in a good condition and all its parts are there minus a few little additions that originally came with the toy. But as I have stated earlier these parts can be obtained on line if required.
Right, let’s have a look at what is or isn’t happening here…
Repair:
When batteries are installed and the remote control is operated, all that happens is that a light comes on in the toy. The motion that is required is non existent.
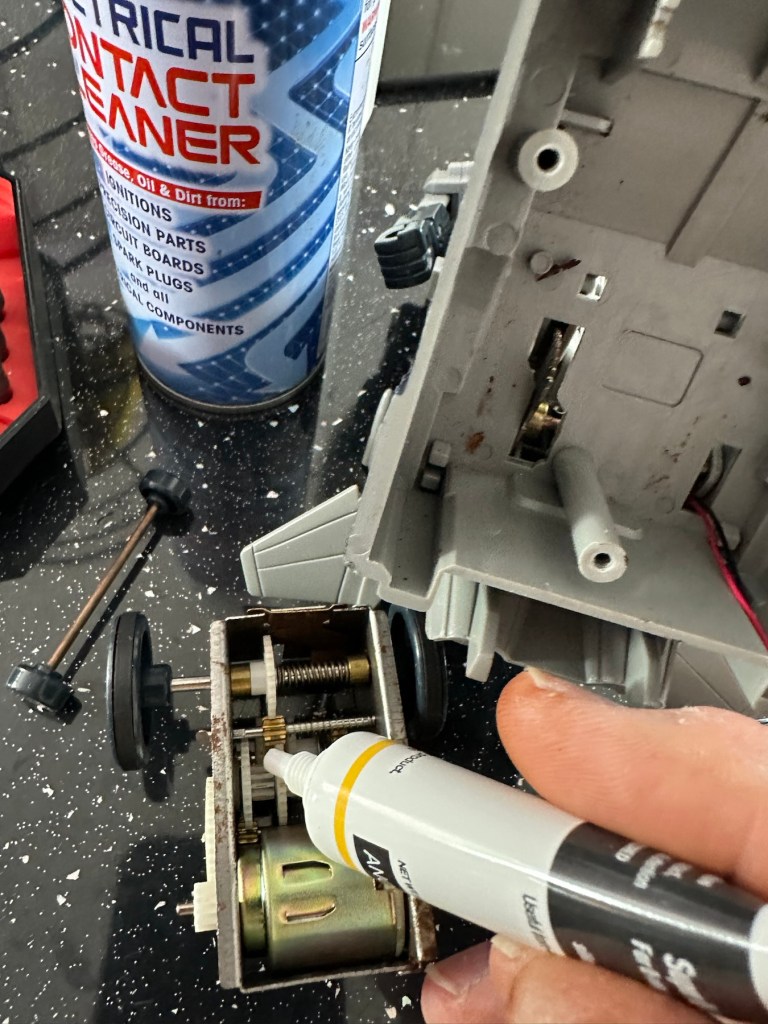
The motor unitMotor removed, there is a cog mechanism to move the unitThe motor unit removed
When examined closer you can see there is a lot of surface rust on the side of the motor where the contacts go into the unit.
Really rustyQuick clean later
The contacts were so rusty inside the motor unit that you’d get an intermittent running of the motor if you moved them. I’ve checked continuity and solder joints and they were fine. I’ve injected some contact cleaning spray into the motor and sat there manipulating the motor in both directions for about 5 minutes, this was sufficient to get the motor running freely once power was reapplied. The contacts were dirty and restricting the flow of power to the motor. I decided to use some IPA around the area to give it all a good clean and once again sprayed more contact cleaner through the motor.
Contact cleaner and silicone grease
Once I’d run the motor for a few minutes in both directions I then applied some silicone grease to the cogs and moving parts to allow a smoother operation. It’s worked. A nice simple fix.
Result:
It’s working and here’s a small video to prove it.
It’s now working
I’ve already handed it back and it’s a joy to see the smiles on my nephew and his dad’s face when they watched it working. Such a simple thing, bringing back treasured memories and laughs. Another old toy saved for another generation and best of all another item not going to a landfill.
Thanks for passing by, as always it is very much appreciated.
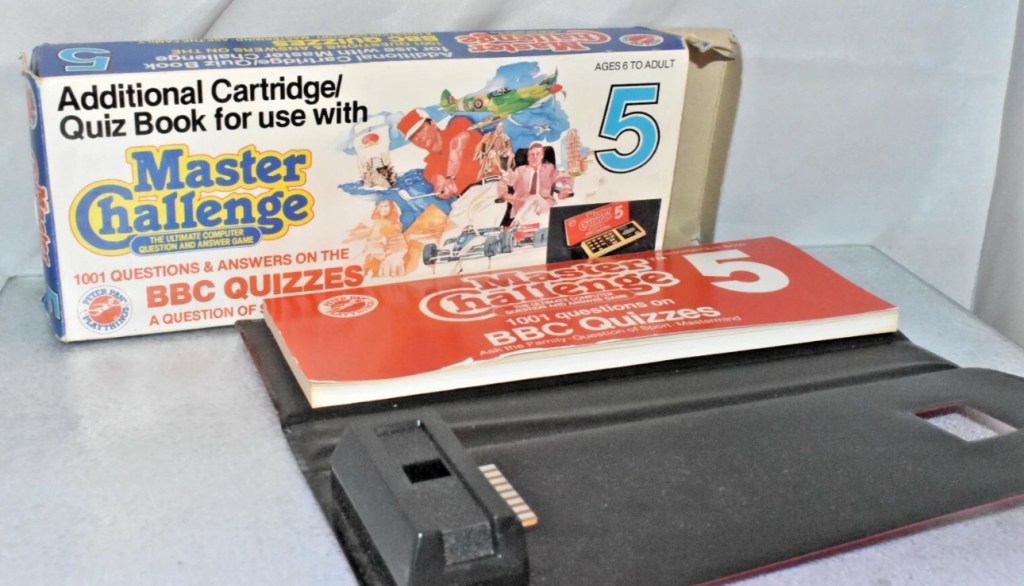
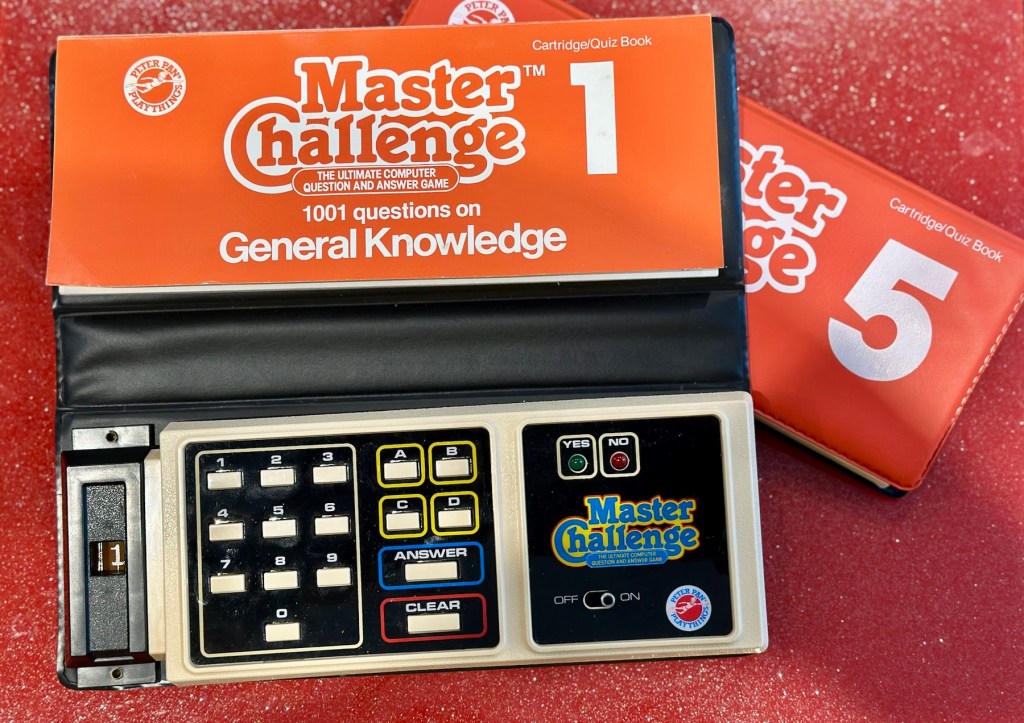
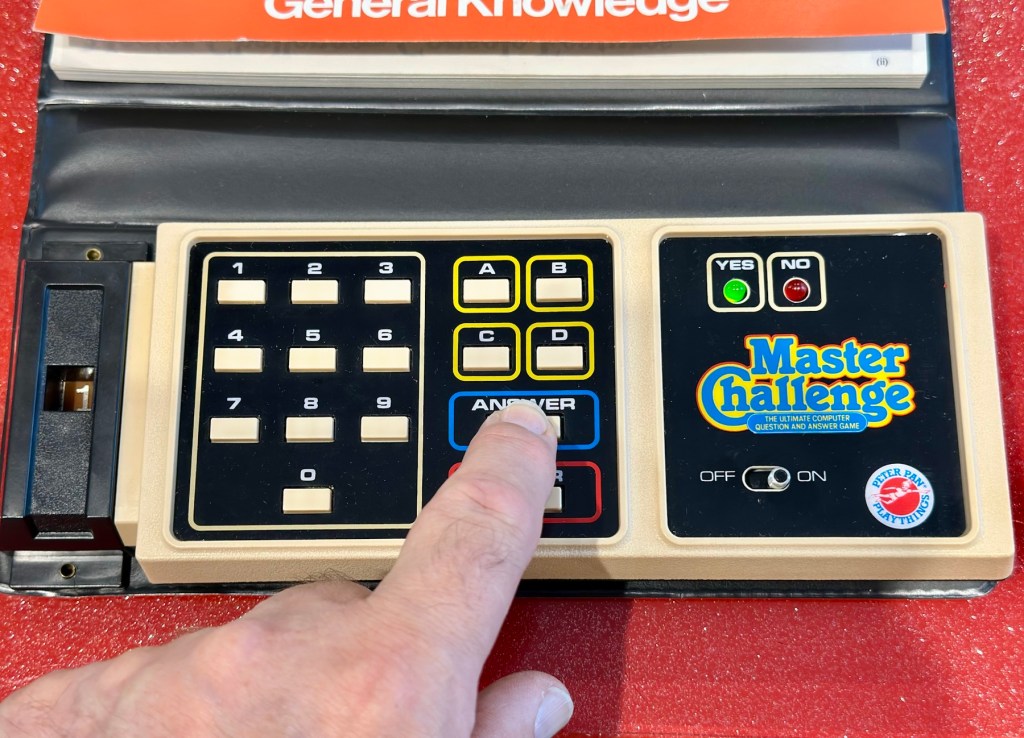
Embark on a journey down memory lane with the vintage Master Challenge Computer Electronic Quiz Game by Peter Pan. This handheld electronic game offers a test of knowledge and skill, making it a splendid addition to any game’s collection. Ideal for enthusiasts of retro gaming, it provides hours of entertainment as you tackle a variety of questions and challenges.
As a sought-after piece amongst collectors, this game is a testament to the era of classic toys and games. Whether you’re looking to complete your set of electronic games or seeking a unique gift for a vintage game aficionado, the Master Challenge game promises to be a talking point at any gathering.
This item is sold as spares and repairs as not working. Please send offers or ask any questions.
EBay
The seller here has obviously used the wonderful AI assistant to write this post as it is so false. The unit is incomplete, it is probably not sought after, as it was not that well received back in the day, and in its current state is probably only fit to be disposed of, also an important part of it is missing. However I’m not for disposing of items such as this and will endeavour to get it back into a working state, it’s just going to take a little time and patience.
I’m missing a fair bit, and it doesn’t work
What my unit looks like
What the unit should look like
Some history:
Peter Pan Playthings Ltd was a British toy company founded in 1963. It bought Salter Science and other assets from the receivers of Thomas Salter Ltd. In 1972 the company reported a £80,000 profit. The following year it was acquired by Berwick Timpo.
The company was sold on to Bluebird Toys in 1987, which continued to use the Peter Pan Playthings brand for several years.
Produced around 1980, the Master Challenge system was licensed from Coleco (Coleco’s Quiz Wiz system), this was released in the U.K. by Peter Pan Playthings. There were 30 different cartridges for Coleco’s version. The unit comes with a question book and the system is used to answer those questions. It is currently unknown how many cartridges were made for the UK version.
T’internet
So for some unknown reason I have purchased this 45yr old piece of retro nonsense because I just can’t keep my bidding finger still. That’ll teach me a lesson. I’ve paid the grand total including postage of £5:69GBP, and I think it is missing the most important part, the book of questions that go with the cartridge, usually attached to the binder that encompasses the unit. It’s also broken, so it needs fixing anyway, and I believe extra cartridges can be purchased, so if I can get it working, and I can obtain further cartridges then no problem. If I can’t, then there is a problem. The battery cover is also missing. I’m a fool, honestly I am.
Whereas the Coleco Wiz system had 30 different cartridges available I believe the Uk version only had the 6 as listed below:
1 – General knowledge
2 – World of sport
3 – Music
4 – The bible
5 – BBC quizzes
6 – BBCs Top of the form
And back in the 1980 these additional cartridges and quiz books could be purchased for £6:99 GBP and 50 pence postage! Quite pricey for the time.
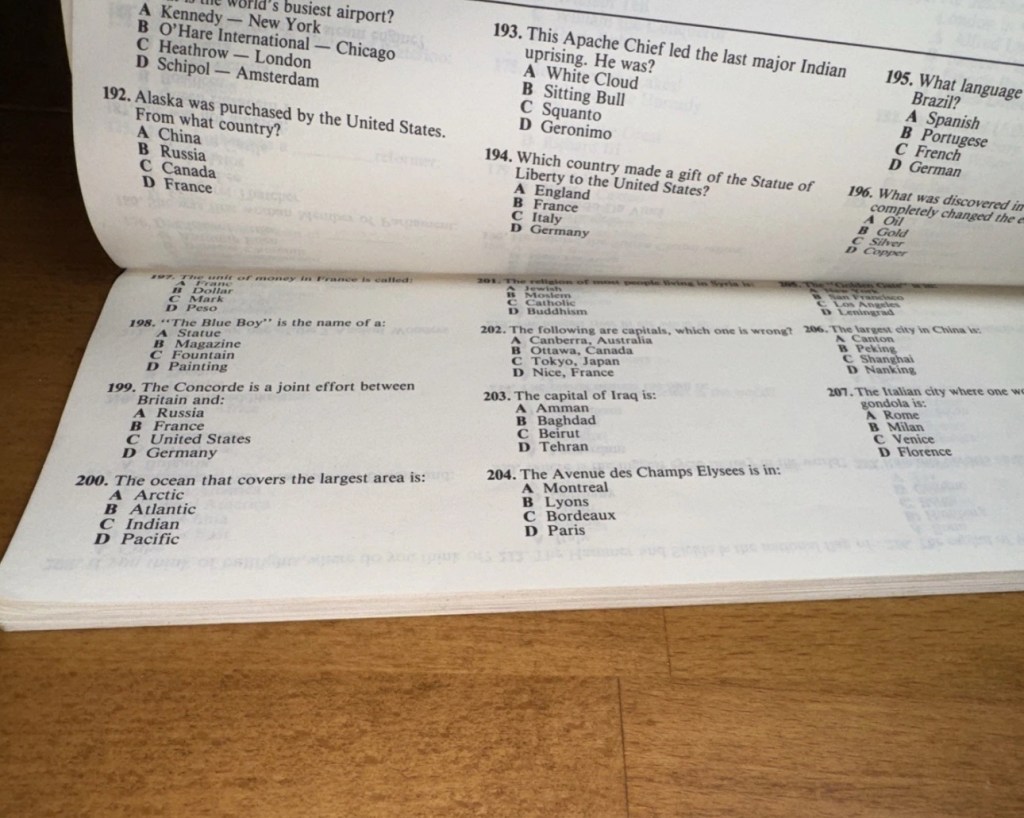
On this particular cartridge or what remains of it are the pre programmed answers to 1001 questions that I’m not in possession of. How novel. I have managed to find a photo on line that has some questions showing on it, these would have been in the original book that would normally be attached to the binder of this unit, so this should be sufficient to at least test the game in its current form.
Some questions to test the unit.
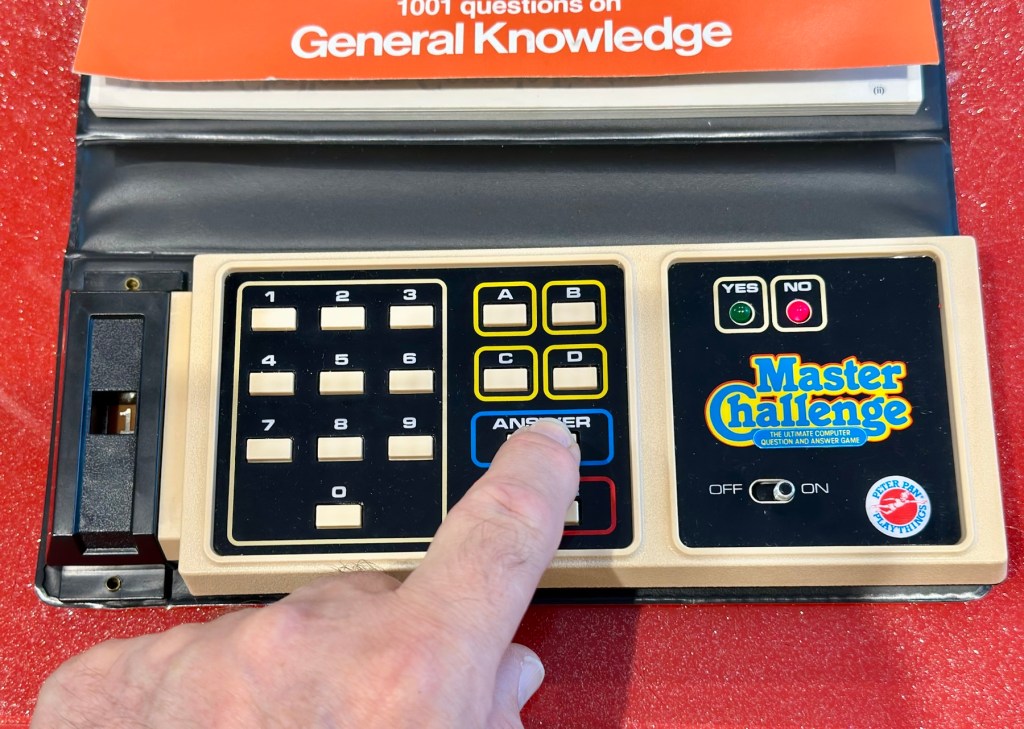
The game works in such a way that you choose a question from the book, you then use the unit to give your answers. If the answer is wrong you hear a corresponding low pitched sound and get a red light. If you are right you hear a high pitch sound and see a green light.
Score sheets in the back of the booklet
So basic in its operation, many thought it was totally pointless back in the day. However this was computerised technology in its earliest and most basic form and was at the dawn of a new era of personal entertainment. It deserves to be preserved.
To cover my apparent foolishness I have found another cartridge that I’m going to purchase to make this unit complete.
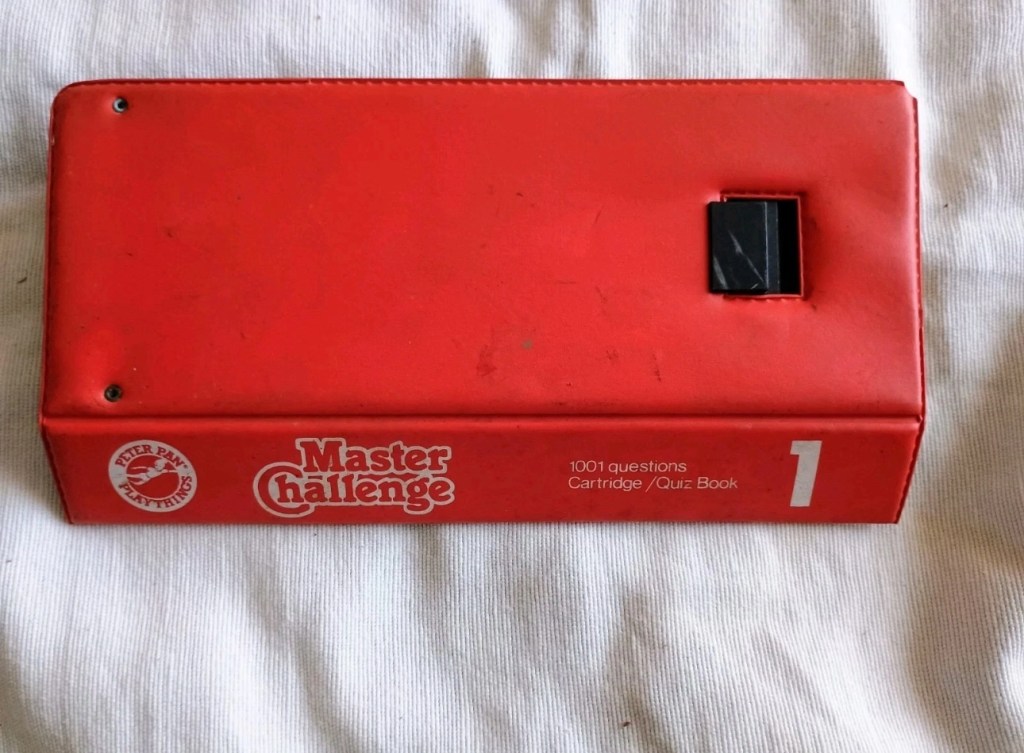
These plug in units come in a binder format with the brains of the game situated in an enclosed plastic block on the base of the binder, i suspect it is something along the lines of an integrated circuit. I can’t open this one as it is sealed, however when the old one arrives i will open it up as that one doesn’t have a quiz book with it. It will be good to see just what is inside. This little unit contains all the answers to the 1001 questions that are provided in the attached quiz book that slots into the top of the binder. The number inside the block indicates the quiz book reference.
Challenge quiz book and questions
The “Brains” and the quiz book reference number
The faulty computer unit I am awaiting, then slots into the binder and block by the pins you see in the photo above. The computer then simply has to decide whether your answer choices are right or wrong. And that’s the crux of the game in a nutshell.
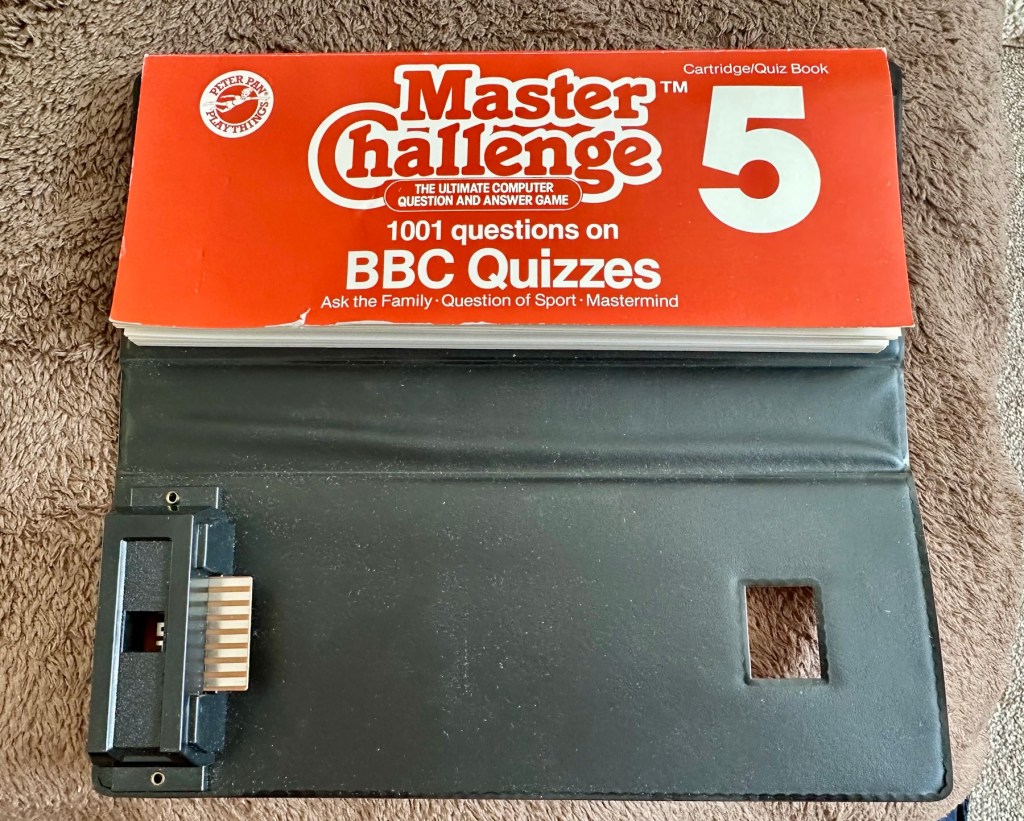
Whilst awaiting this broken units arrival, I’ve purchased the additional set of plug in questions seen in the pictures above. This is an additional 1001 questions set, based on all the old BBC quizzes. It’s complete with answer book and the complete surrounding binder. It has arrived ahead of the faulty unit and is in an exceptionally good condition considering its age. None of the mustiness you’d expect from an item that is 45 years old. It must have been stored with great consideration. It’s cost me more than the broken unit, this cost a total of £8:15GBP, so that makes a running total of £13:84. I do have another game cartridge on order that I picked up for another £7:83GBP but I’m quite happy with this. It will be a nice addition to the games box that comes out when the family or guests come around, and everyone loves an old retro style game. It will certainly be a talking point, that’s for sure.
My additional plug in cartridge
Assessment:
I’ve not even received the unit yet and I’m getting a bit ahead of myself wondering just what could be wrong with it. Its operation is so basic, think it could only be one of five things possibly be at fault.
Pins that read the cartridge are dirty/damaged
Contamination in the battery area
Loose wires
Faulty switch
Cold solder joints
I guess we will just have to await its arrival when we can make an accurate assessment.
The unit has arrived and it’s a tatty looking piece. Dirty, and only the remains of the binder that used to accompany it.
What has arrived
I’ve put in some batteries and there is very dead. There is the occasional buzz when the switch is slowly moved but nothing else. It could be a faulty switch, it could be the contacts. I’m going to have to open it up and get down to board level.
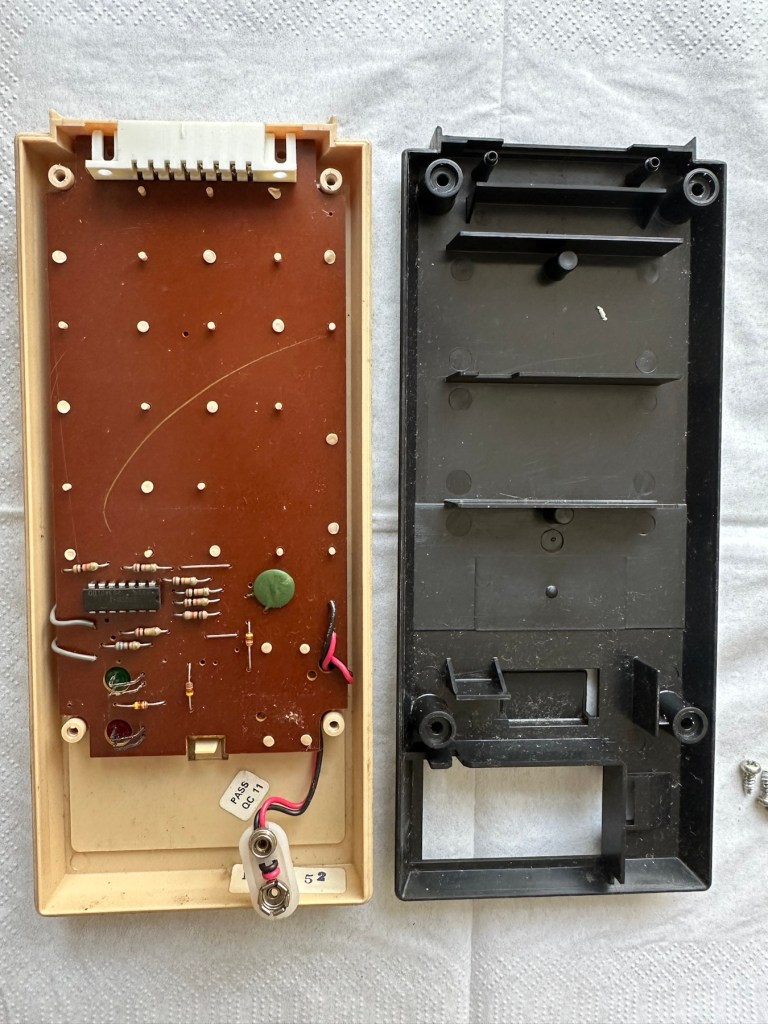
Inside – all posts welded
The problem here is that inside there are no screws attached to the inside support posts. The whole unit has been welded, all plastic posts have had heat applied to moulding the post tops. I’m going to have to break these off and try to re-weld them when we’ve got it all working again….if we can.
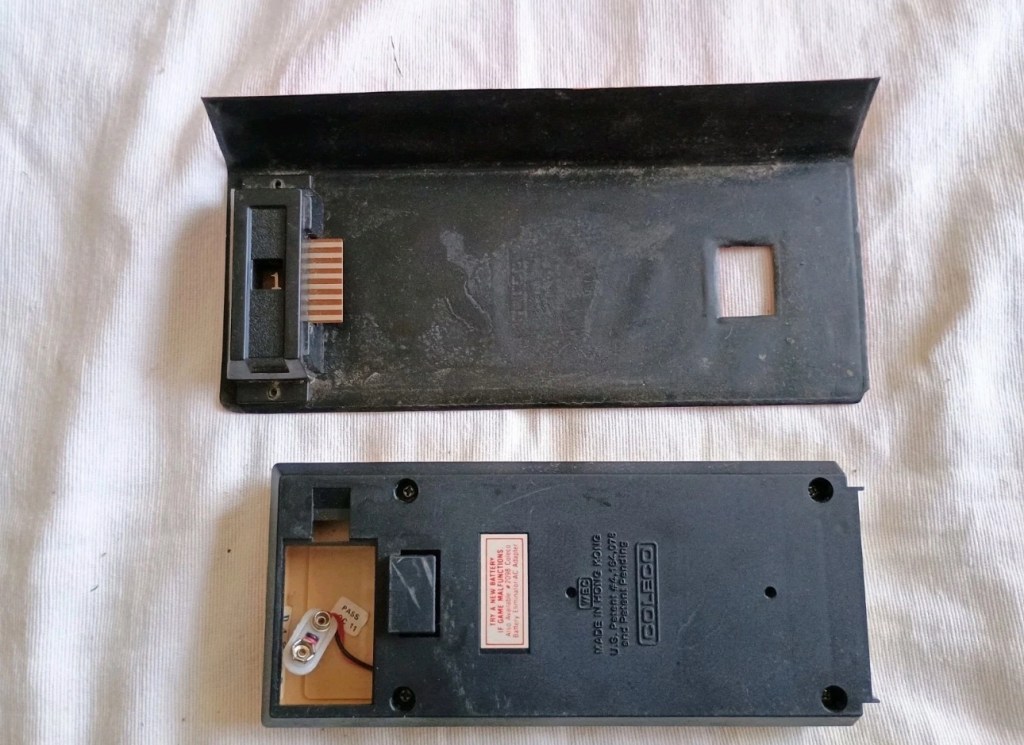
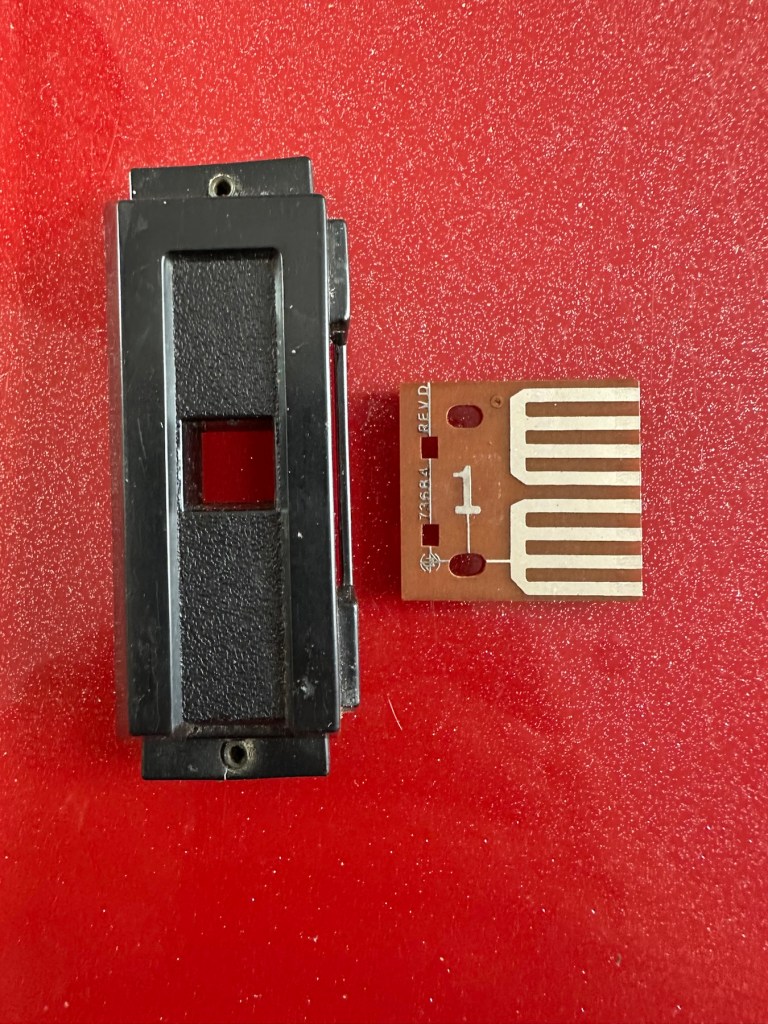
In the meantime I’m going to open up the the plug in module that’s attached to what is left of the old binder, i might as well sacrifice that piece as it’s of no use to me and it’s in the name of research.
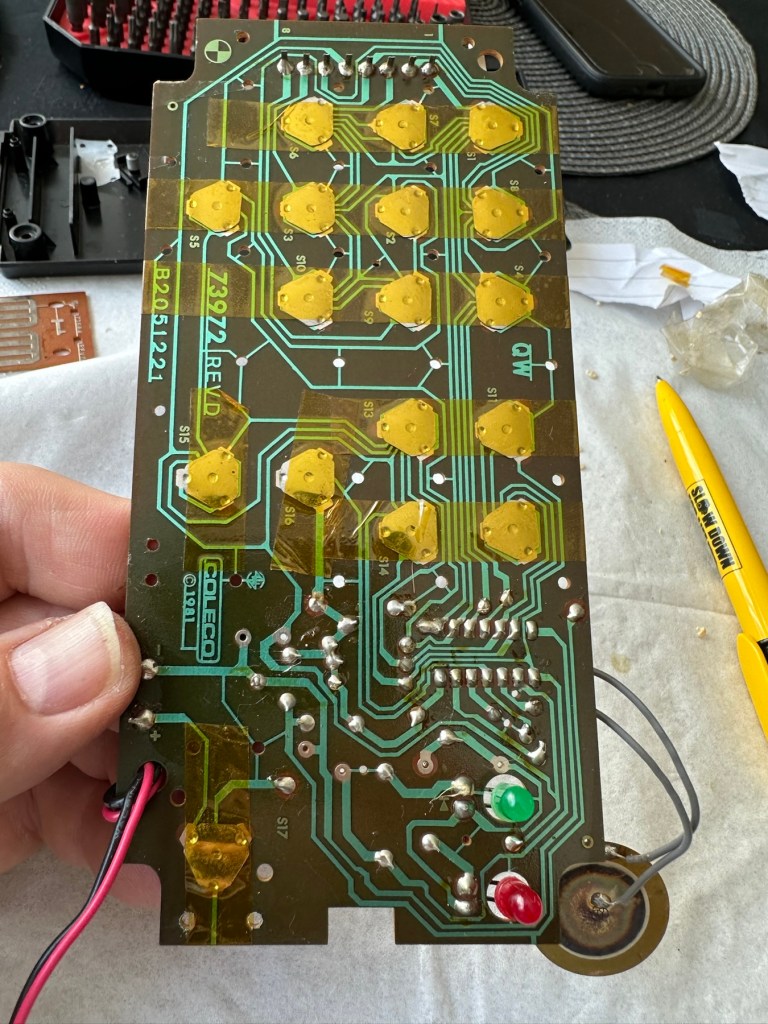
How the unopened board looksBoard removed front viewBoard removed rear view
Now I thought they’d be some kind of integrated circuit in here but there is not. It appears to be just a board with two sets of comb like traces that would appear to just short together in the unit. Makes you wonder if the questions in the book follow some simple kind of algorithm that the unit just adheres to. Maybe every so many questions, they all have the same answer, there must be some simple and basic way that the unit knows the preprogrammed answers. Maybe I’ll find out more when I look inside the actual “Computer” unit.
Repair:
Inside the unit there is not a great deal of components apart from a single IC a capacitor and a number of diodes and resistors.
I’ve used a very fine emery board I borrowed off of my wife (don’t tell her) to try to get in and clean these contacts, as I believe this is what is causing the issue.
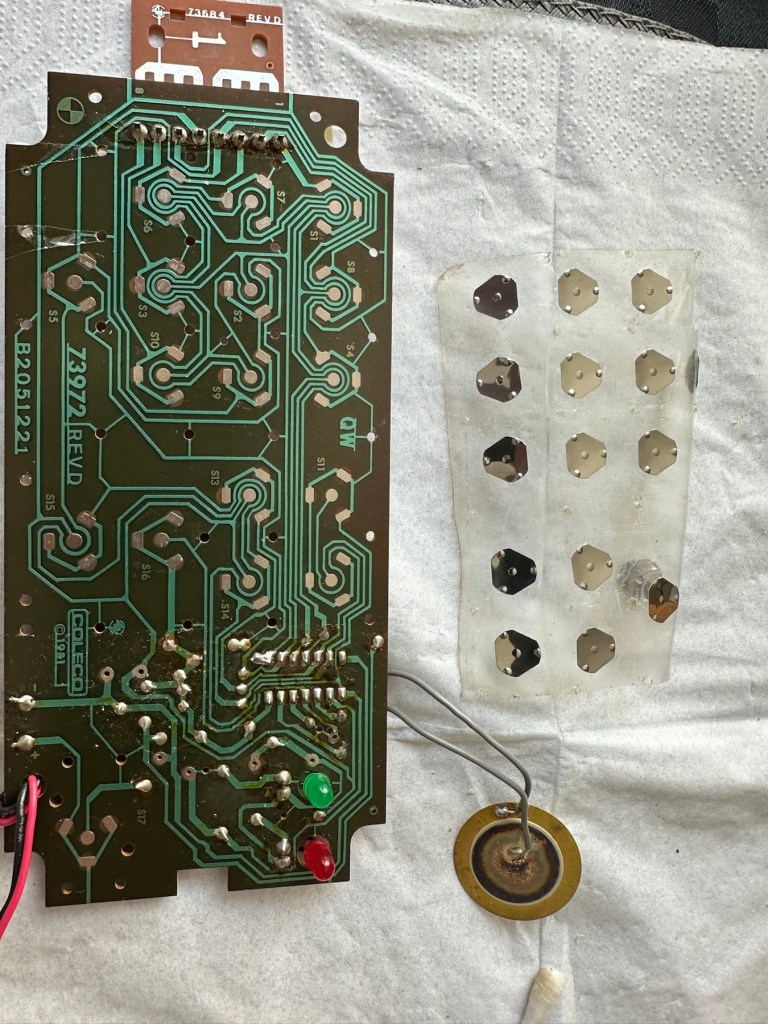
All buttons under a sheet of tape
All buttons are under a sheet of tape. I have removed this tape, cleaned all the contacts with IPA and repositioned them and re taped them using Kapton tape. They are a lot cleaner and are clicking nicely.
Button removalAll buttons removedAll cleaned and sealed down with Kapton tape
The contacts where the game cartridge is inserted are quite contaminated so these also have to be cleaned.
Contacts are contaminated
I’ve used an emery board to clean the contacts up on the unit, and when the cartridge is inserted we have a result. The first ten questions I have input have had correct answers only and no duplicates, so it really does really look as if the contacts were contaminated causing some kind of issue with the two parts of the game communicating.
Result:
It’s had a good clean both inside and out and a few of the old items inside replaced and given a new lease of life. The unit is now fully working and can be seen doing so in the little video below.
A little test example
I’ve since purchased a new binder for question set 1, so I now have that along with question set number 5. I’ll keep an eye on the auction sites to see if any of the other sets become available, and who knows I may try to get a full set. Now that would be quite rare I’d imagine.
A nice clean and working unit
I love digging around in these 80s units and just wonder at how basic the technology was back then, it’s just amazingly simple and so well put together. Anyway, this one is now working and good to go for a few more years yet. Saved from landfill we have another successful repair under the belt.
Thanks as usual for popping by. It’s most appreciated.
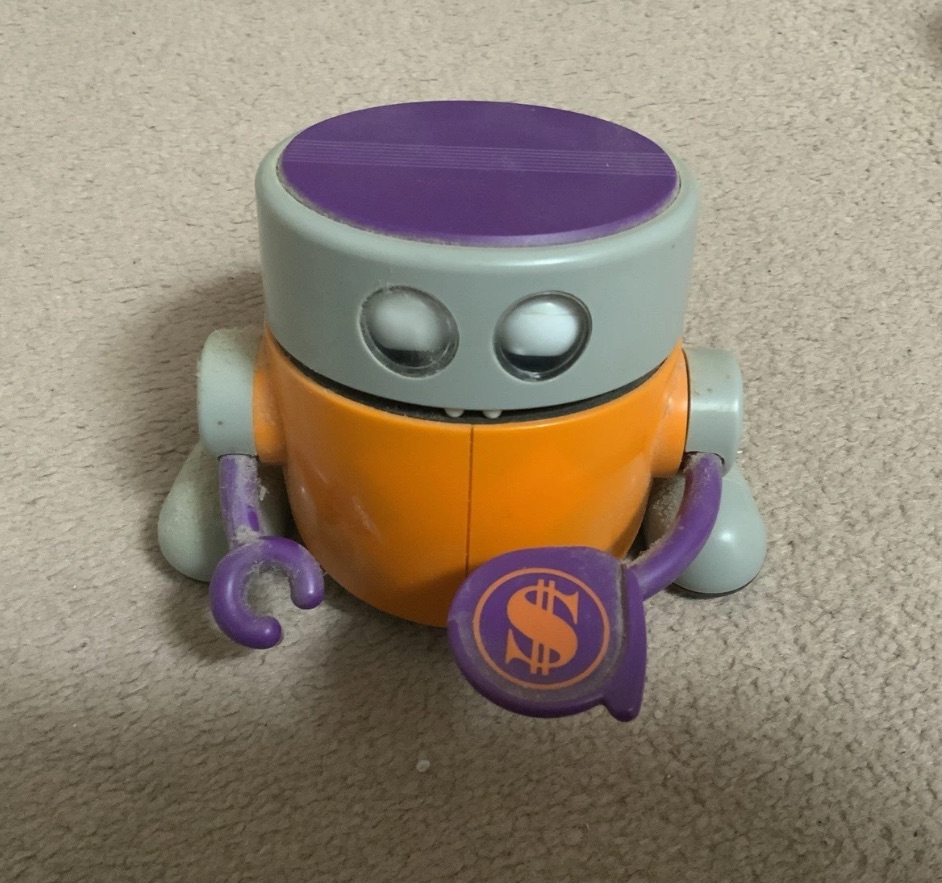
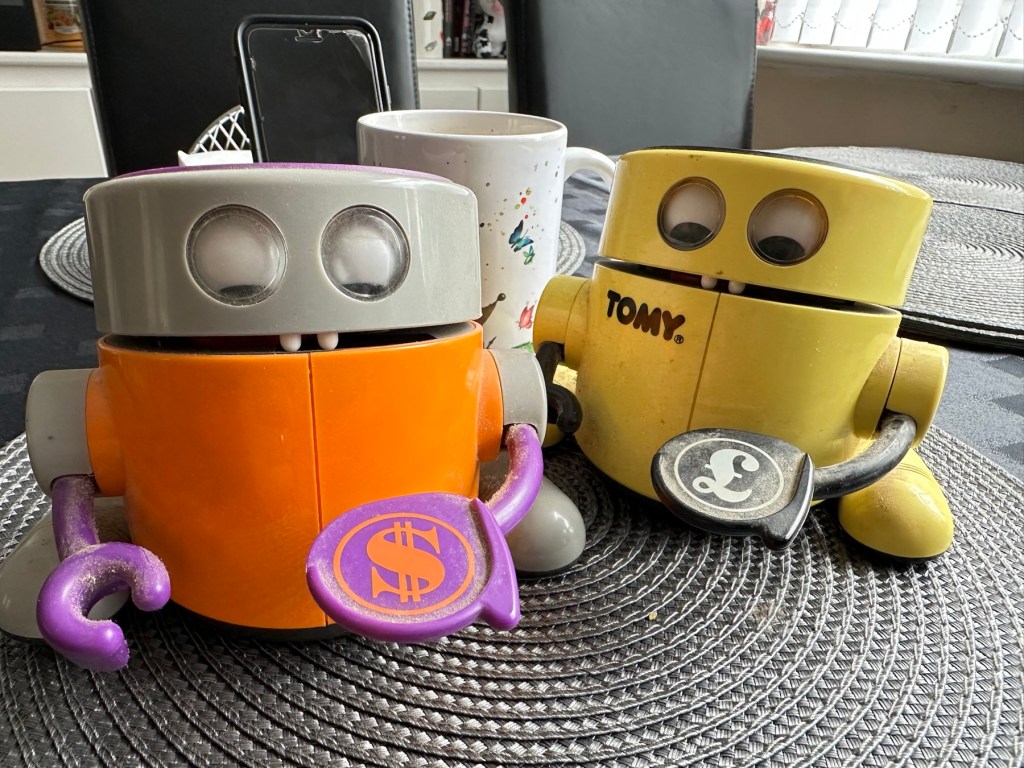
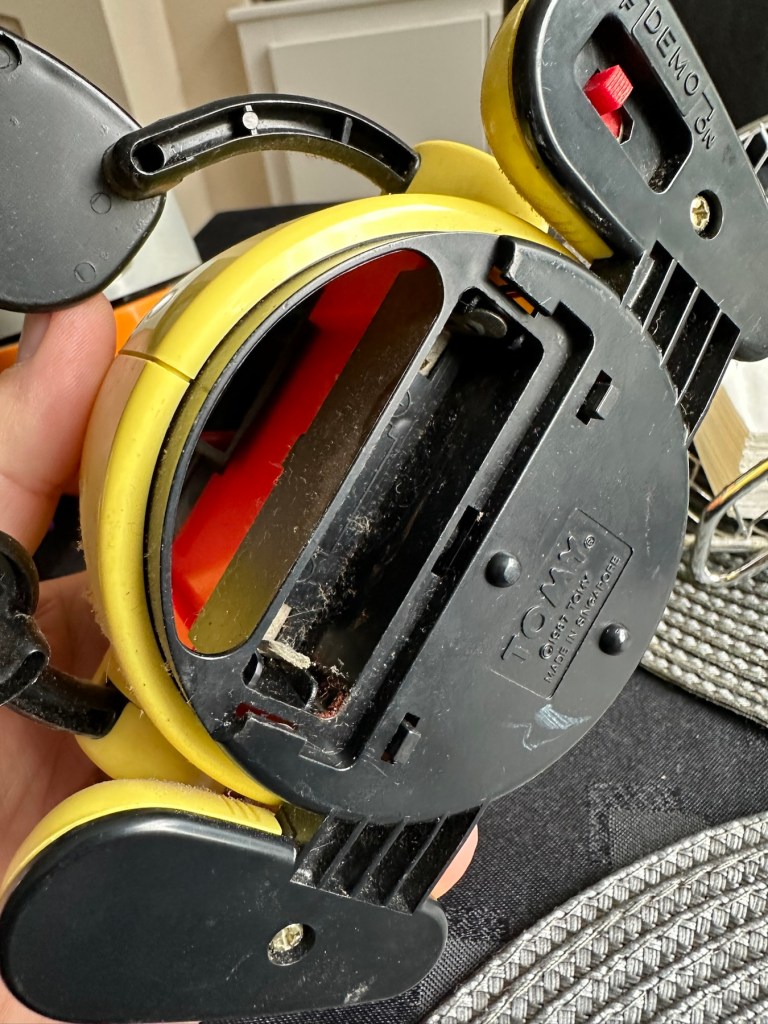
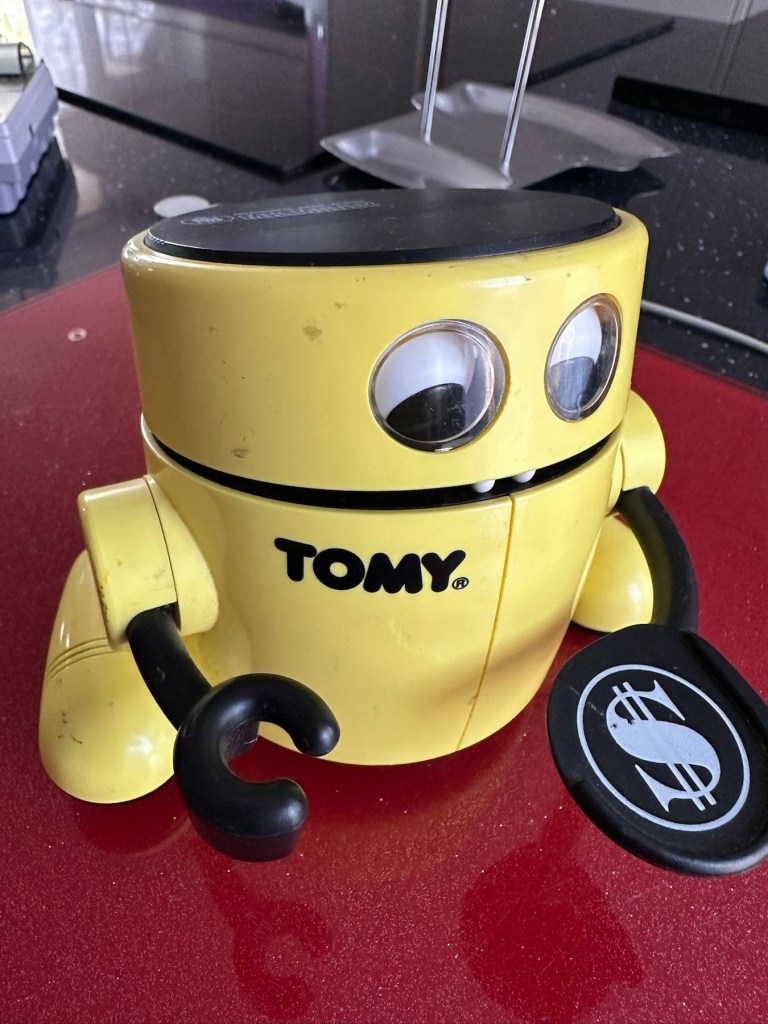
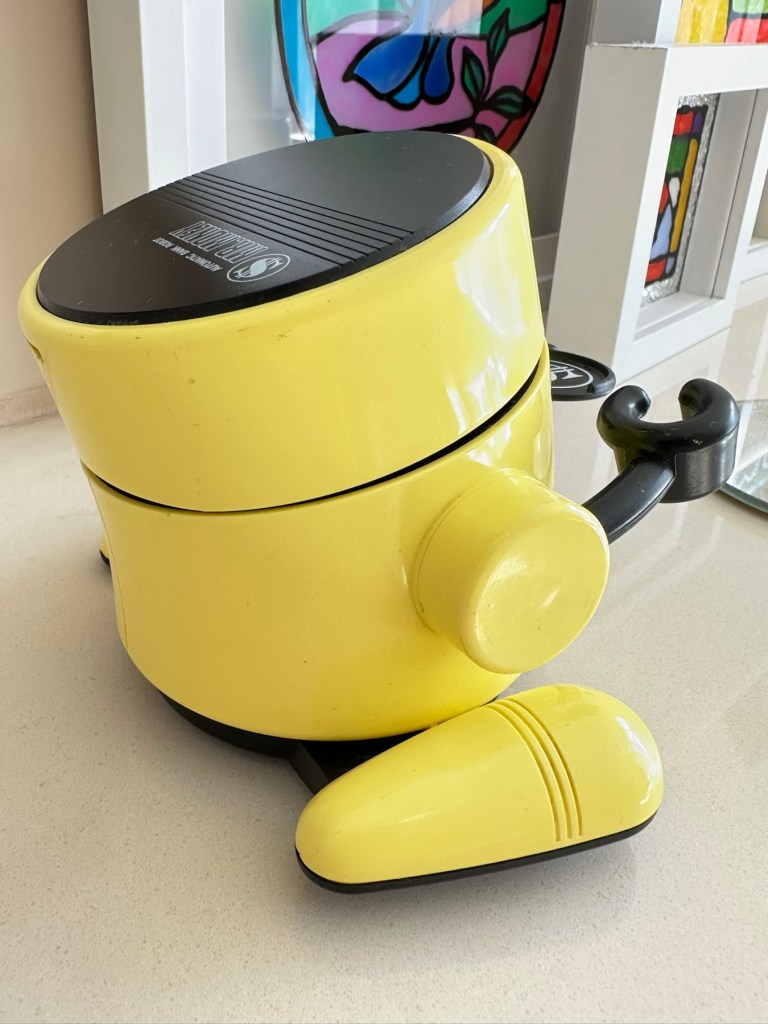
One yellow with pound coin on hand and one orange with a dollar on his hand.
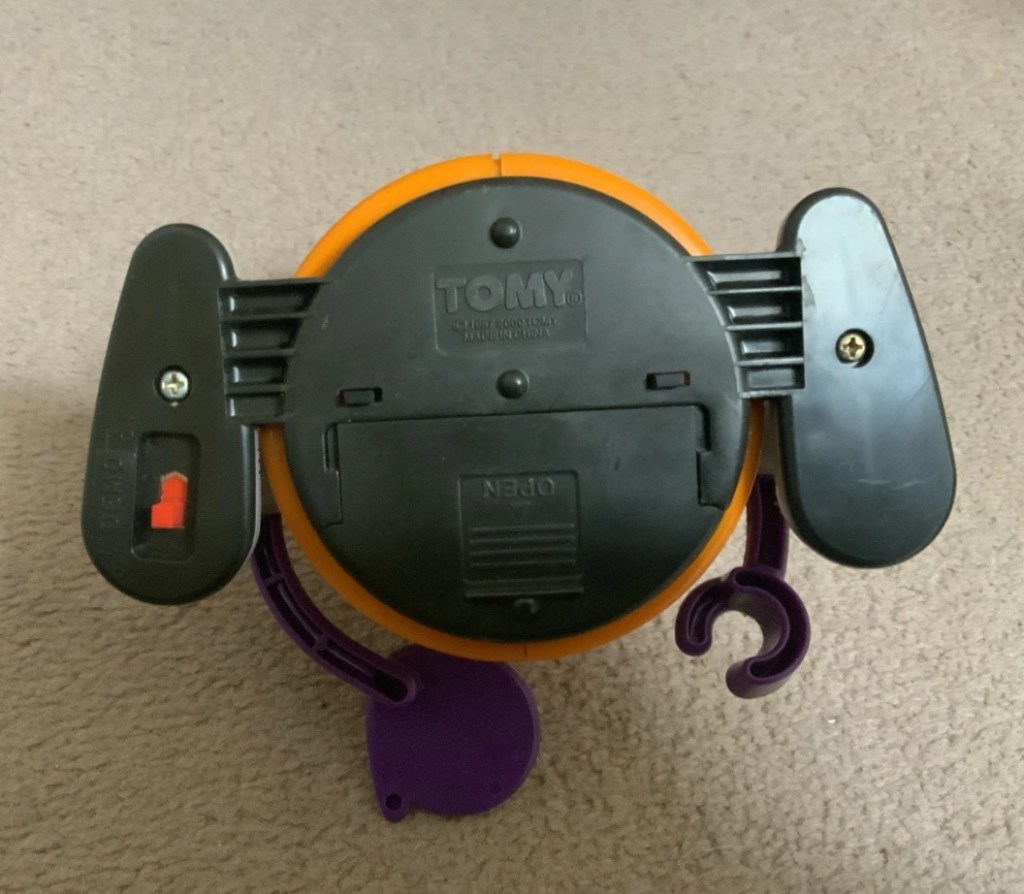
I don’t think either are working and the yellow one is missing the battery cover so selling as spares or repairs.
EBay
Two more heading home
Dirty boys – Missing battery cover
Those of you who follow this site will realise I purchased one of these a while back and did the repair here: Tomy – Mr.Money bank
I paid a total of £10:20GBP for the one in that repair post, and he is currently earning his keep at work collecting money for our local hospice charity – LOROS.
These two I have managed to get for a total of £19:26, so in theory these two are in the similarly price range as the other two. These were produced in 1987 to encourage children to save, with the element on a little bit of fun. These money boxes, when in a good, working condition do command a fair price. Just look at the screen grab of the latest prices being charged on the sale sites.
Latest prices
Both apparently, are not working and they do look quite disgustingly dirty, I’ve no idea what the actual faults are but I’d bet they centre around the switch area as that is a common issue. Add to that one of the battery covers is missing, and the price will rise by about another £5:86GBP as I get a new cover 3D printed, that will mean a total outlay of £25:14GBP or to be specific £12:57GBP per unit.
I more than likely will keep one of them and move the other one on. Let’s wait and see what arrives for us to begin the assessment.
Assessment:
Well, have a look at these two scruffy urchins that turned up today. Both in an absolutely filthy state, need a really good clean. It really surprises me that anyone can send such a filthy item through the post. Does it really take too long to just dust an item down with some furniture polish? Thankfully the wife wasn’t here when they arrived or else she wouldn’t have let them through the door 😂
That said they are as described. Everything is in place apart from the battery cover that I have already ordered as a new 3D print.
Two scruffy urchins
First thing to do is to clean them. They are filthyOne missing battery cover, a 3D replacement has been ordered
Setting a good example. My perfectly clean, and working example at the front
Apart from the above all seems fine. I have put a battery in each and turned them on, nothing happens. On the yellow example there is a little contamination on the battery contacts and when I move the battery I do get some motion but it sounds as if there is a sticking or broken gear inside. The orange example is totally dead but the contacts are clean. This could be the classic switch issue. So the order of the day is to get these both cleaned before dismantling just to keep any mess to a minimum, open them up, clean inside and check the gearings and then lubricate with some silicone grease. I’m hoping these will not be too labour intensive as I have been inside one of these before, and I’m more than aware of the issues of small parts falling out.
Repair:
First a clean with some polish.
A quick clean and they come up lovely
Cleaning done, they’ve come up lovely, I’ll give them a final clean at the end after we’ve attended to the internal issues. So let’s get on.
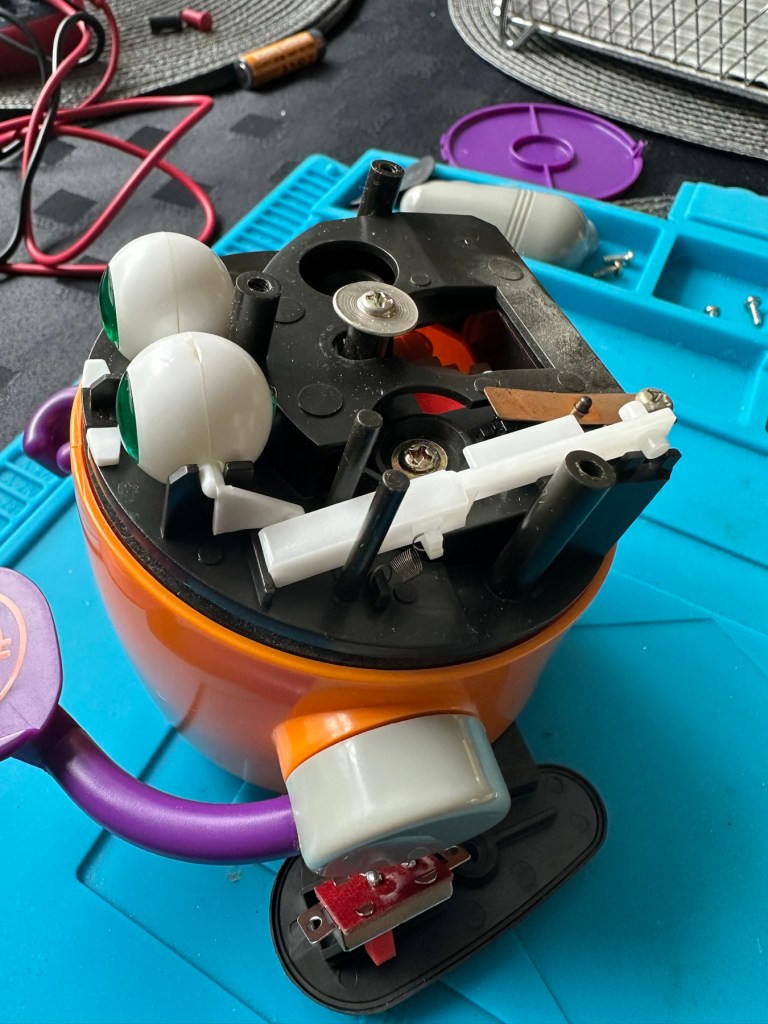
I’ve chosen the orange chap first, however my suspicions about the faulty switch are wrong. The switch tests fine and I then go a bit deeper into its soul 😂
Off with his head and down into the cogs and sprockets
I get down to the motor and the cogs and sprockets and realise the motion has ceased. A little silicon grease over all the moving parts and a little bit of teasing and the unit springs into life. I let it run for a few minutes and then reassemble, cleaning everything along the way. This unit is now working.
The second unit, the yellow one, was working sort of. So as I have done above, this one was also stripped down, cleaned along the way and also had all cogs and sprockets greased accordingly. It also is now working fine.
I have already purchased a 3D printed battery cover to replace the missing one, and this is now installed, so we now have two complete units. For what I’ve paid for 3D printed pieces over the last year, it would probably be worth investing in my very own 3D printer.
The new replacement, 3D printed battery cover
Result:
Well I now have three absolutely perfect working examples of this fun piece of 1980s technology. One is in use earning money for the local hospice.
The Orange one is going to be used by a work colleague to raise money for the British Heart Foundation.
Earning his keep
He is selling candles and I’m going to brand this one with a BHF logo to add some fun to his fundraising.
The three amigos
I have put together this little video regarding feeding time for these three . Enjoy!
Feeding time
The third unit will probably be sold on unless I can find someone else who can put it to good use.
Thanks for visiting, as you know it is always very much, appreciated.
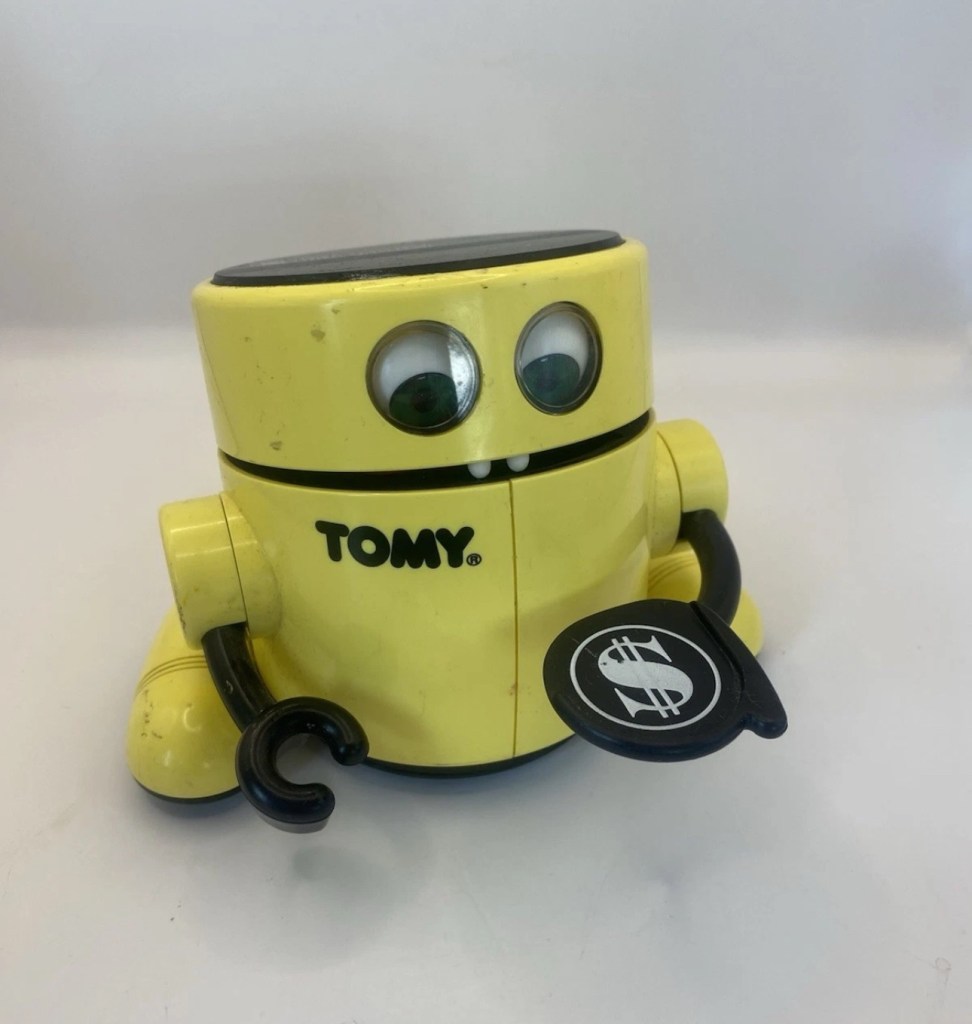
Now I don’t half buy some junk to fix, but this one struck a chord with me. Looking into its history I believe it’s a toy made to encourage children to save money from around 1987. So he’s currently around 38 yrs old.
Dirty, as per usual and a bit beaten up. Sounds just like me 😂Crazy prices
As you can see in the photo above, you could originally buy a set of these, incorporating Dollar, Pound or Euro stickers for the serving hand, the one i have made an offer on is the dollar one.
What appeals to me about this item is that I’ve been looking for a way at work to raise some money for the local LOROS hospice, and this might be a fun way to do it if I can get it working. I plan to brand it with the local hospice details and just thought it would be a fun way to use it. This is a fun object where you put a coin on its hand, its mouth opens, the eyes go up and the coin goes in the mouth. There is a munching motion and then the tongue licks its lips. Or at least it should do. This one I have ordered is having none of that and this is the challenge ahead. These units are notorious for having issues with the power switch, a simple fix if that is the case, but this is me…nothings ever that simple.
And as usual it’s dirty, has marks on it and needs a good clean.
As with everything retro (New antiques 🤦♂️) items are attracting some crazy prices, though I do think the general public are not as stupid as the sellers seem to believe they are, as all the above listings have yet to attract any bids. Now the one I have bid on is broken, and yes it has its battery cover. My current bid is £6.70GBP and I must now wait to see if it is a winning bid. With postage (Rip off as usual) the price will be £10.20GBP in total, so compared to the prices in the listings above it is an absolute bargain.
Good news – I have won the auction at this price. Nice.
Assessment:
Well, he’s arrived and just like Frankenstein he’s very dead. He needs an electrical kick start and that’s what we need to do. He’s obtained a lot of scuffs and marks but I think these will buff out. Cosmetically everything is there, even the battery cover and that pleases me immensely. With batteries in place there is not even the tiniest sign of life even if the on /off switch is operated many times. We need to get inside and take a look. Hopefully it’s not too big an issue.
He’s a little dirty, beaten up and scarred
And I’m just so happy he has a battery cover. Exceptionally rare and unexpected.
Repair:
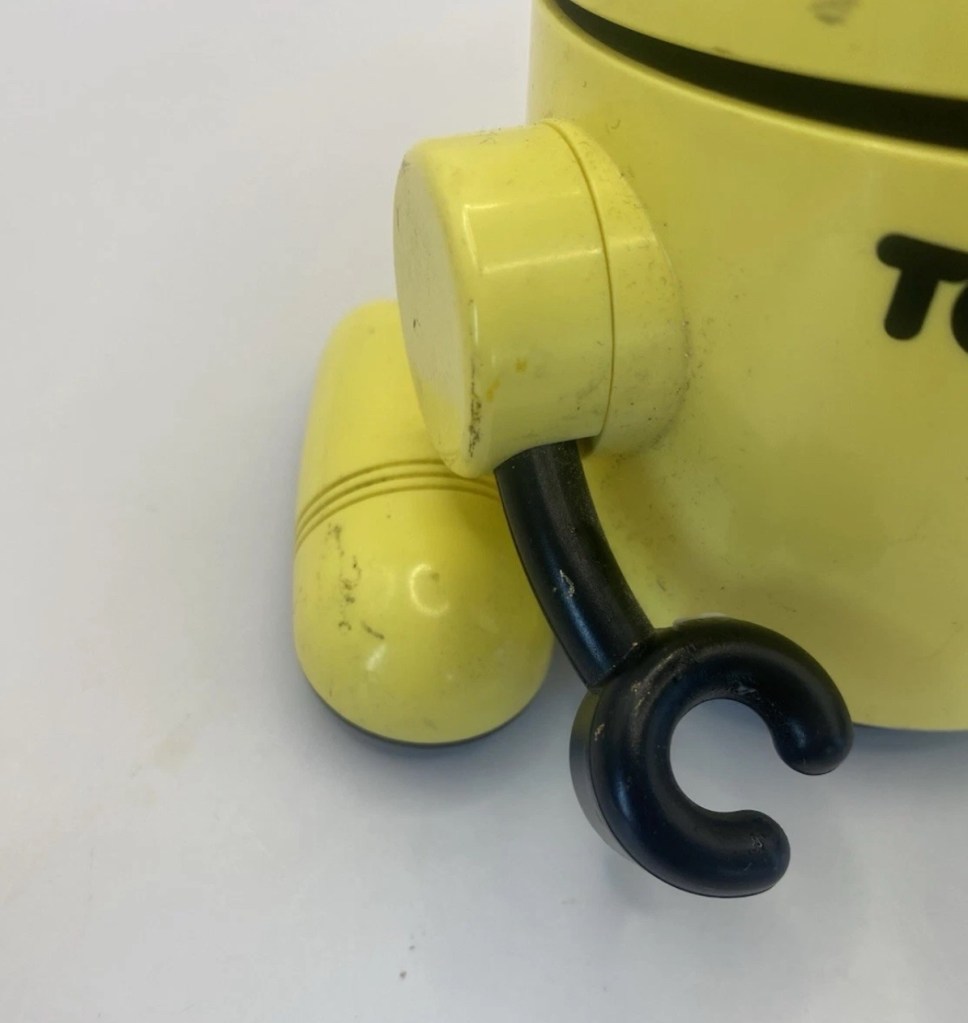
I’ve headed straight for the switch as this is where there is usually trouble and straight away there was a problem. There was no continuity at the switch when operated, so this was removed, opened, cleaned and the brass contacts ground and cleaned. The switch was then reassembled and tested and was all ok.
No continuity, so dismantled, cleaned thoroughly and reassembled
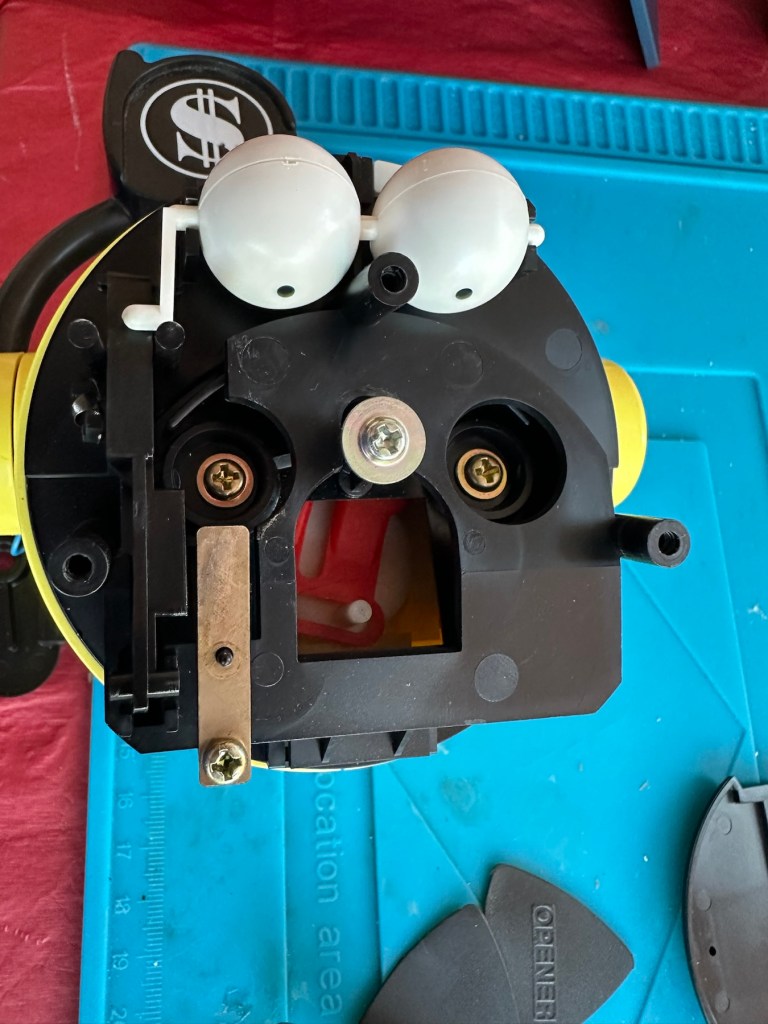
But this was not the problem. Damn it, I now have to take it apart and there is a lot of mechanical items within.
Gradually dismantling
Once dismantled I’ve had a good rummage around and have checked voltages around the electrical circuits until I found no voltage at the motor. The culprit was a small 3inch length of wire that had been crushed. This was replaced and the continuity was now restored to how it should be but still there was no life. I was confident that the electrical issues were no more so it must be a mechanical issue. There is a part of this unit that involves a tongue 👅 that pokes out. This was our issue. The cog and lever system had somehow been knocked out of sync, and once put back into its correct position the unit has now sprung into life. See the little video of this stage below:
We have life
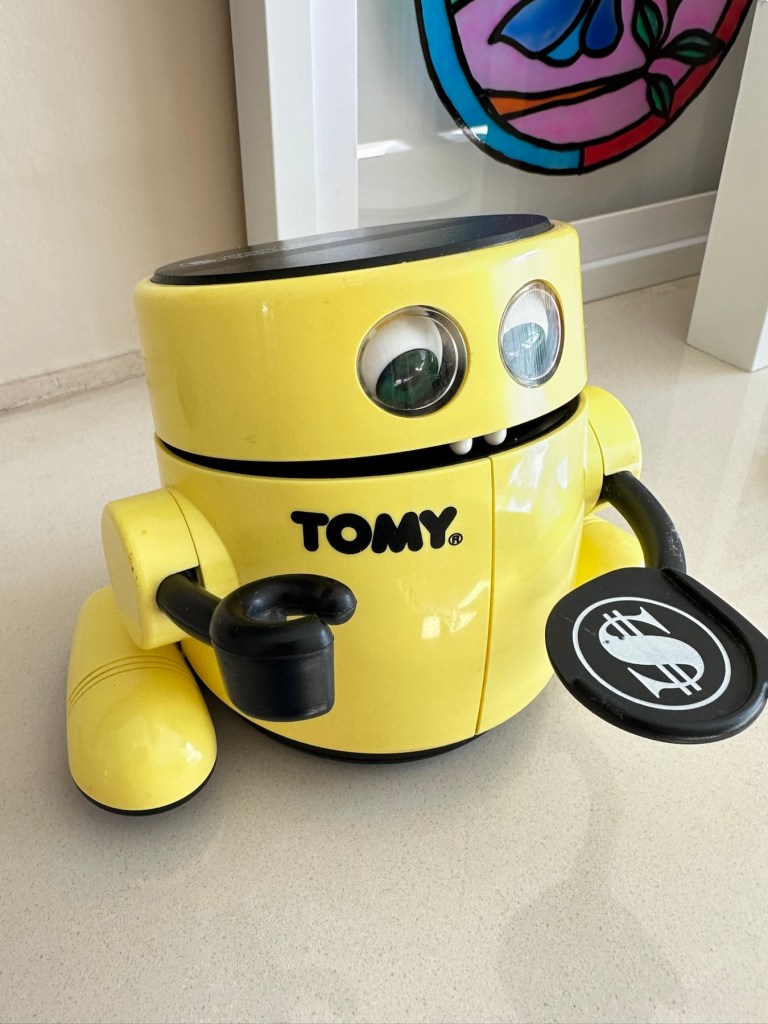
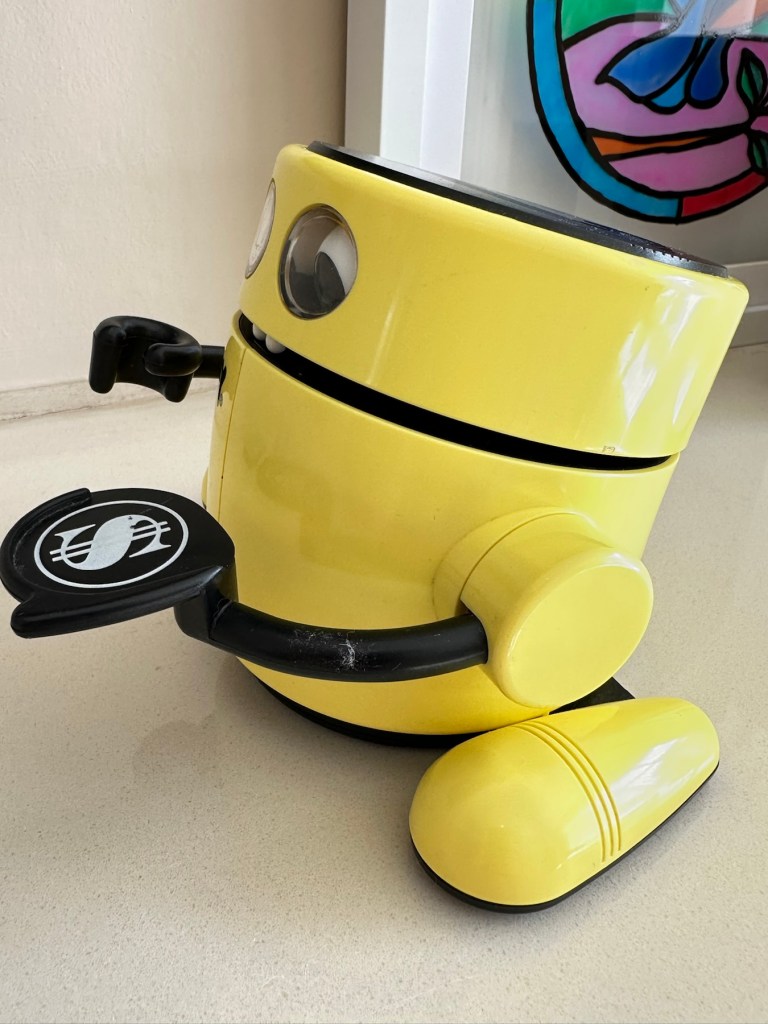
Happy with this I’m now going to review all the pictures that thankfully I’ve taken, and ensure it’s reassembled and cleaned as I go along. The marks and dirt have buffed out nicely and the unit is now extremely clean and looking as good as the day it was purchased. And it works:
Working perfectly
Result:
Here it is now in all its highly polished and clean glory
Looking Beautiful and handsome in its 38th year.
Thoroughly enjoyed this little project, I love the electro mechanical items from this period, they really get you thinking.
The local charity
This unit is now going to have a LOROS hospice logo placed on it to cover the Tomy one as discussed at the beginning of this post. We can then start to gather all that loose change in my work place to pass onto them. They need every penny we can raise. Every penny helps, especially in the current financial climate.
Thanks for passing by, as always it is very much appreciated.
I’m currently deep into a repair project that I will be posting about on here shortly. However the shell of this project has aged so badly it has earned the right to be my Guinea pig for my first attempt at Retrobrighting, it deserves a separate post of its own, so it’s getting one. I have explained what Retrobrighting is in a previous post: Retr0bright – What’s that then?
The unit is a recently purchased and damaged Nintendo Gameboy printer from around 1998, it isn’t working and looks right ugly. It needs some attention to its fascia and battery base, so let’s get on to it.
TopSideRearSideThe unit has not aged well and looks awful with this discolouration
I have taken the entire unit apart, separated the parts that need to be treated, removed all labels, and given the offending items a thorough wash in detergent before drying them off.
All stickers and other items removed. Shell thoroughly washed.
Next I’m just putting a 40 Volume 12% Peroxide cream solution into a small bowl, and I will then place the shells on a piece of cling film where I will liberally coat the offending items, using a brush, with the solution. When I’m happy with how this has gone, the treated surfaces will then be wrapped in cling film and placed in a sunny position for around 12hrs to allow the sun to do its thing. (UV lamps are sufficient if you have one available). I must reiterate it is important to wear protective gloves and eye protection when using this solution.
I’ve given a good coating of peroxide formula to all surfaces, but is it enough? I won’t know for at least a further 10-12 hrs, time will tell.
All wrapped and ready for some Sun ☀️
With the peroxide now applied, the fascia’s are now all wrapped in cling film and ready for 10-12 hrs or so of intense sunbathing. (Sounds just like me on one of our visits to Cyprus!). So let’s wait a while.
Patience
I’ve checked in and looked at the pieces outside, and after just 4hrs the results so far look amazing. I’m going to give it the full time though, so I’ll be back in around 6-8 hrs to check results. Hopefully we will have sufficient sunlight until then.
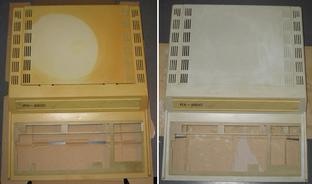
I’ve terminated the process at 9hrs as I have to go out and I’m impatient. Boy am I impressed at how it has turned out, it looks like a new shell.
Wow I’m impressed
Well I can honestly say that this treatment does work. I’m so impressed at the outcome, I just wish I’d attempted it earlier on some of my other products.
Before & After – Impressive improvement
Anything I’d do differently? I’d probably slap on a little more solution or maybe even reapply about half way through the process, the only reason for this is that there is the most minute tiny tinge of a yellowing on the side that had the heaviest contamination, possibly if I hadn’t been so impatient and left it for 3 more hours it would have been sorted, but then again it might not have! I do think a further application at the halfway point, especially when an item is so heavily stained as this unit was, would have done the job and made it look even more perfect.
Am I coming across as disappointed? Well I can assure you I am not. It’s my first attempt and I am so impressed. The total outlay for this process was £1:85GBP and that was just for the 75ml bottle of peroxide from a local supermarket, and I have enough left for another 3 applications, an absolute bargain. We only learn and improve from being persistent, and I’ve already learnt from what I have attempted today. And i am already a better, and more knowledgeable person than I was only a few hours earlier. You certainly can teach an old dog new tricks.
Edit: some 12hrs later I have decided to give a second treatment to see if this can improve on that slight yellowing I mentioned earlier. The results have greatly improved the look and there is now no visible sign of yellowing. I’d certainly recommend a second treatment for heavily stained items. It works, extremely well.
Watch out for my next post regarding the repair of this printer and its reconstruction: Nintendo Gameboy printer
It’s a process used to restore old Yellowed plastic back to its original state. Or at least it’s a way to try to. Read on and I’ll explain.
(Here is my understanding of the ABS plastic Yellowing process. There may be slight inaccuracies for which i apologise. Please do your own research on the subject. Further enquiries may be needed to satisfy your curious minds!)
Anyone who has any dealings with items built in the 80s/90s such as me will have come across an issue, especially related to anything built with ABS Plastic, and that would be the common phenomena of “Yellowing”.
If you own a game console or toy with white ABS there is the good chance that all or at least some of it will have turned a shade of yellow,
ABS plastic – otherwise technically known by its scientific name of “Acrylonitrile butadiene styrene” is a thermoplastic polymer. This means that it becomes pliable at an elevated temperature and solidifies on cooling. ABS was a flame retardant material that was regularly used as a casing for computers, gaming consoles and similar items just in case they were to overheat and catch fire. It was also used in Lego bricks for some reason, god knows how these were meant to catch fire though!
The yellowing issue lay with a chemical used in the manufacturing process called Bromine. When exposed to UV light or excessive heat this caused the photo oxidation of polymers within the chemical to break polymer chains causing the plastic to yellow and become brittle.
Come on then, tell us what retrobrighting is..
Retrobright or retr0brite as it is stylised by the guys who discovered the process, is an approach to removing yellowing from these ABS plastics, a kind of bleaching process if you like. The original recipe for Rerobright was discovered purely by chance by the CBM Museum at Wuppertal in Germany in March of 2008. I’m not going to go into the finite detail in this post, however you can read all about it here at the original Retr0brite project site: The Retr0brite Project.
The process can be a little hit and miss, however there are a lot of documented cases of it working very well. There is a downside that the yellowing can overtime return, as this process only really whitens the surface problem whilst those old polymers are still breaking down deep inside the plastic where this treatment doesn’t reach.
Before and after effects of this process. Pictures copyright The Retr0bight project
The process
I’m only going to touch on the process here, there are many other detailed explanations available on line, that explain the process far better than i could, here is one for example from the “How to Geek” site. How to clean old yellowed plastic on retro computers and game systems.
I will explain the process briefly below, but in no way do i accept responsibility for the way you approach the process. That is down to you entirely and i suggest you read up deeply on the subject prior to attempting this process. You have been warned!
What you need
The offending piece of plastic
Clingfilm
Paint brush or suitable application brush
Protective gloves
Eye protection
40 volume oxidising cream (Hydrogen peroxide, salon hairdresser strength.
Sunshine (Hard to find here in the UK) or a UV lamp
For starters make sure the item you want to brighten is clean. Make sure you have eye protection and gloves on as the peroxide can cause skin burns and the last place you want it is in your eyes, believe me.
Lay down some cling film. Place your subject matter on the clingfilm. Apply some cream onto the object you want to lighten and smear it around ensuring the whole item is covered in the peroxide solution, failure to do this can cause blushing and streaking. When you are happy that the subject matter is fully treated, cover the whole item in the clingfilm ensuring there are no holes where the solution can evaporate from.
Next place the item where the whitening can take place. Out in direct sunlight and leave it there for the entire day. Indoors a UV light lamp can also be used. The UV rays that originally caused the yellowing will now react with the Peroxide to reverse the process. This does take time though and in some cases where the yellowing is particularly bad a second or third treatment may be required.
Remove the clingfilm after a sufficient UV exposure and ensure the subject matter is washed thoroughly to remove all traces of the peroxide developer. Again, ensure you have gloves on until all traces of the chemical are removed.
Dry the subject matter or allow it to dry naturally. Hey presto! Job done. And thats basically it.
I’ve covered this subject, as it is something i will be attempting over the coming months. I will address the process in individual posts relative to the item i will be working on at the time.
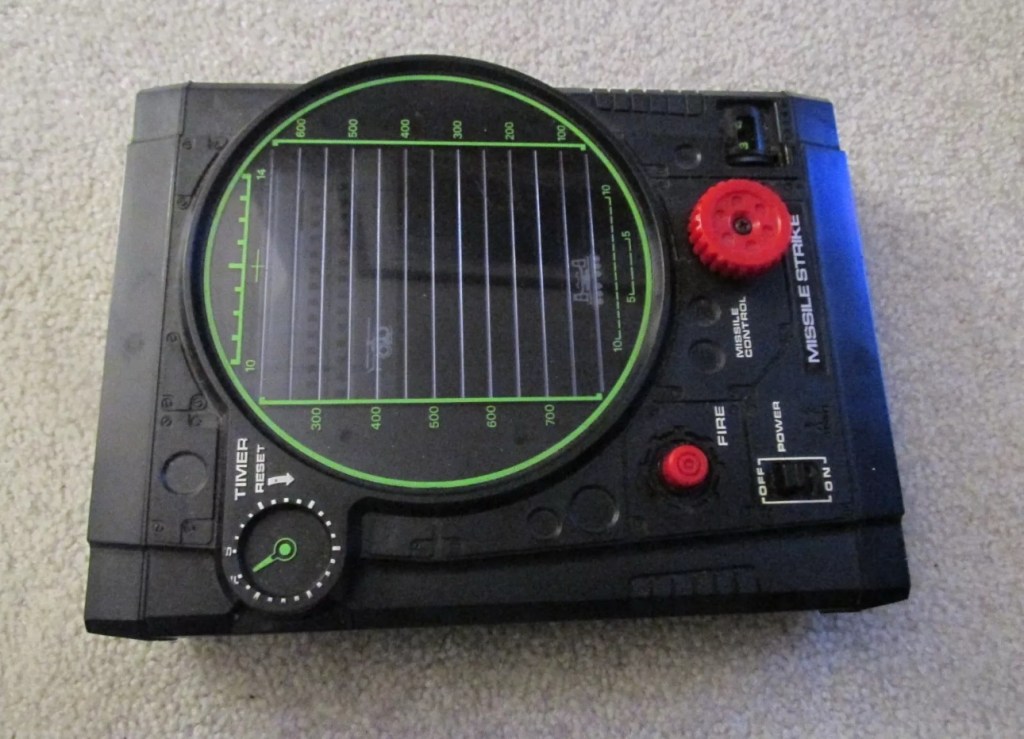
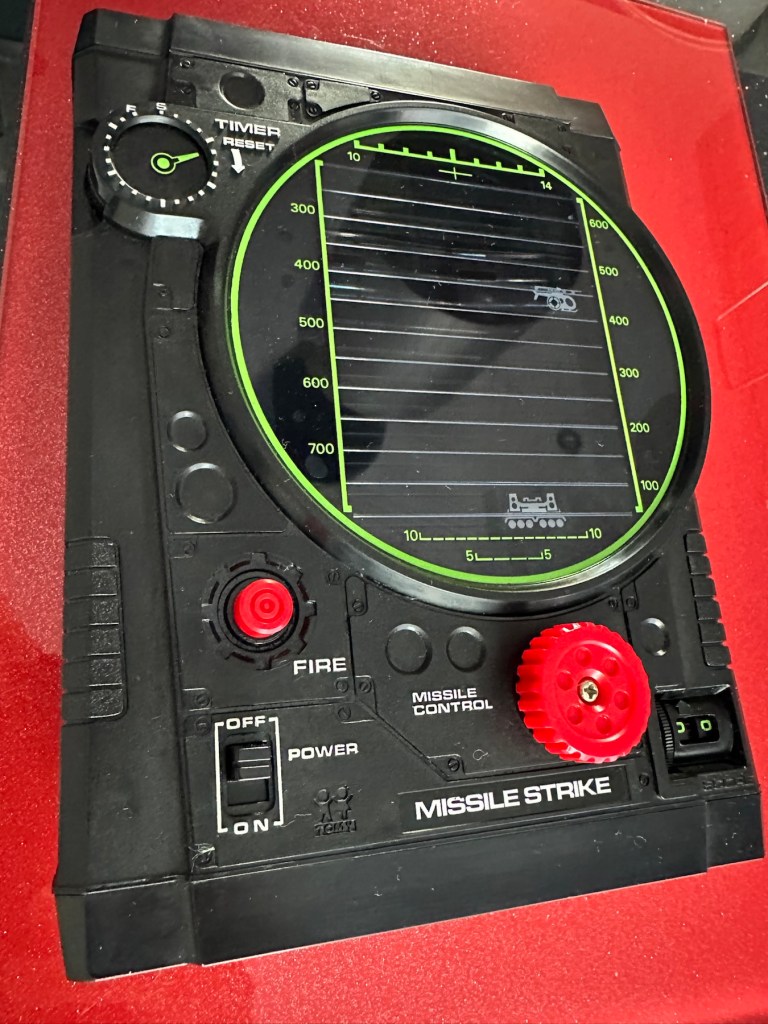
This is a nice example of a Tomy ‘Missile Strike’ electro/ mechanical handheld game. It was made circa 1979 and is battery operated. It appears clean for age and works, apart from the missile light not illuminating. Battery terminals very good. This is a nice genuine item that is shown as I found it. NOTE – NO BATTERIES ARE ENCLOSED. Nice example for any collector.
EBay
Missile strike
On first seeing the listing for this item, my thoughts are that it looks quite clean and tidy. The usual state of these units are quite tatty with scratched screens. This looks good, however pictures, especially from EBay can be greatly misleading so I’ll guess I will just have to be patient and wait.
This units only issue seems to be with the LED missile light, so hopefully it will be a quick fix. These units are currently selling between £52-£79GBP as per the picture below. I managed to secure my unit for a total including postage of £24GBP so I think I’ve done well in that aspect. I’m quite happy with this.
Current sale prices on EBay
A little history:
Tomy released Missile strike in 1979 in its international line of electro/mechanical handheld games. Known under different titles in other regions such as Terra-Hit (UK), Missile Strike (UK), and Space Attack (Japan). One of TOMY’s electro-mechanical handheld games, Missile strike is a Space Invaders-like shooter game, the units small motor winds strips of aircraft across the screen, which the player attempts to hit in order to earn points. There is a mechanical wind up timer that controls the action, and the purpose is to score as many hits on aircraft as possible with in the time it takes the winder to stop. The game includes one small, flashing LED light as the exploding missile.
So it’s another game that has reached its 46th year, and for the only issue to be its one light source, I think that’s acceptable. Let’s wait to see what arrives.
Assessment:
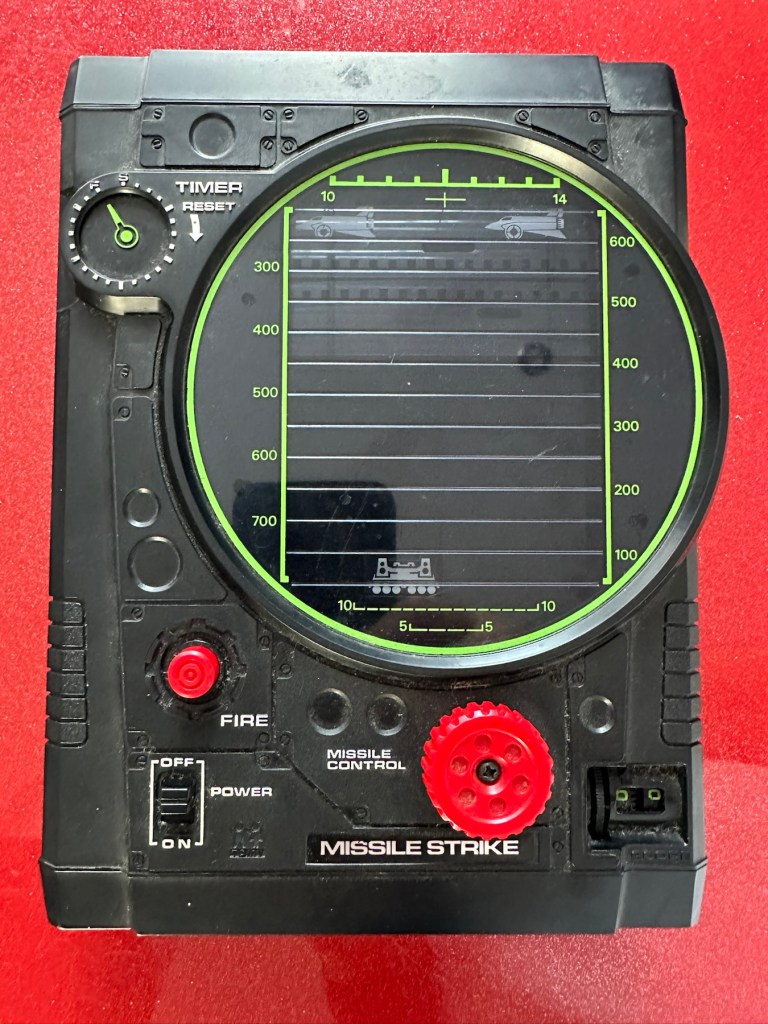
On arrival the first thing that hits you is that this is yet another filthy item. I seem to attract these kind of sales, so it will require a deep clean. Cosmetically the game is in good shape with no deep scarring and only minimal fine scratches on the screen lens commensurate with its 46 year old age.
Tidy cosmetically but filthy
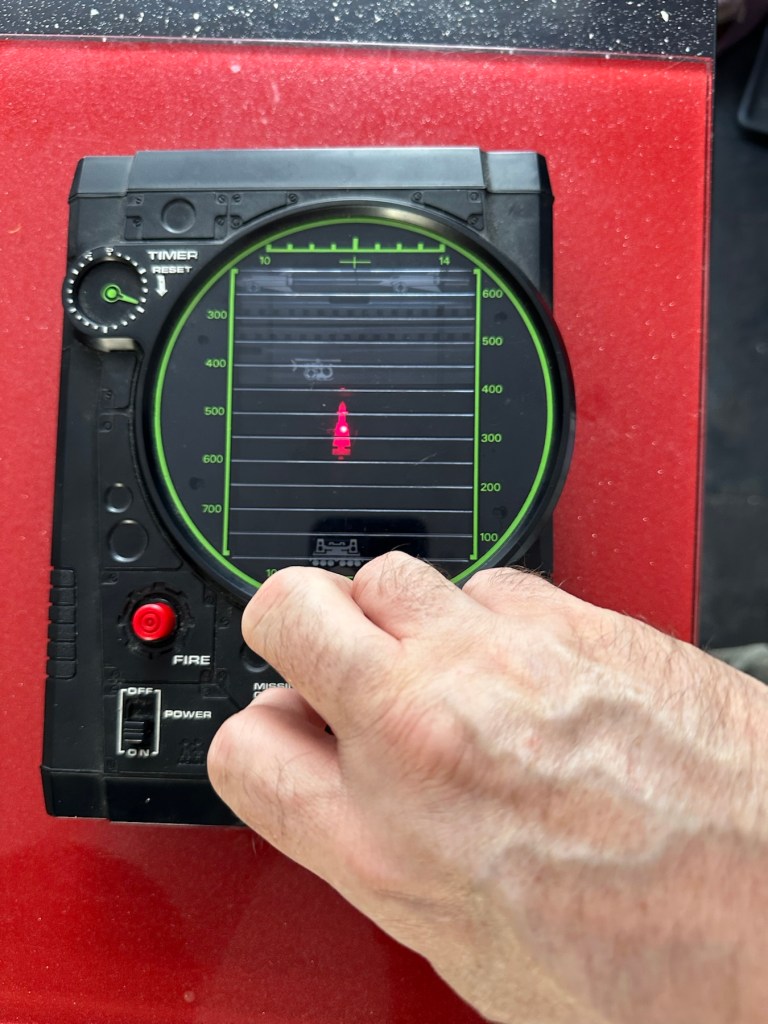
It was sold as the missile light not working, this is partially right as it is an intermittent fault, I suspect this is down to dirty contacts.
Filthy, and counter not workingMissile light is intermittent
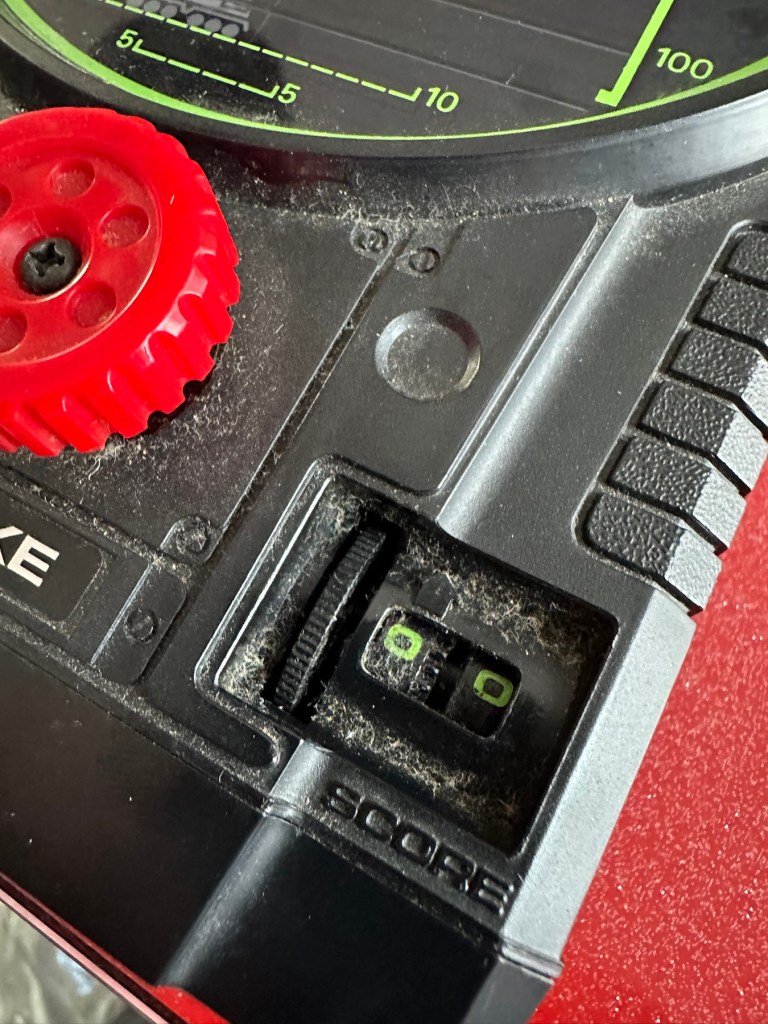
This game has two bands of film that run across the top of the screen displaying aircraft, the top band is intermittent and needs attention. The score counter will also need attention as it is not turning smoothly, again I suspect this to be as a result of the build up of dirt.
Repair:
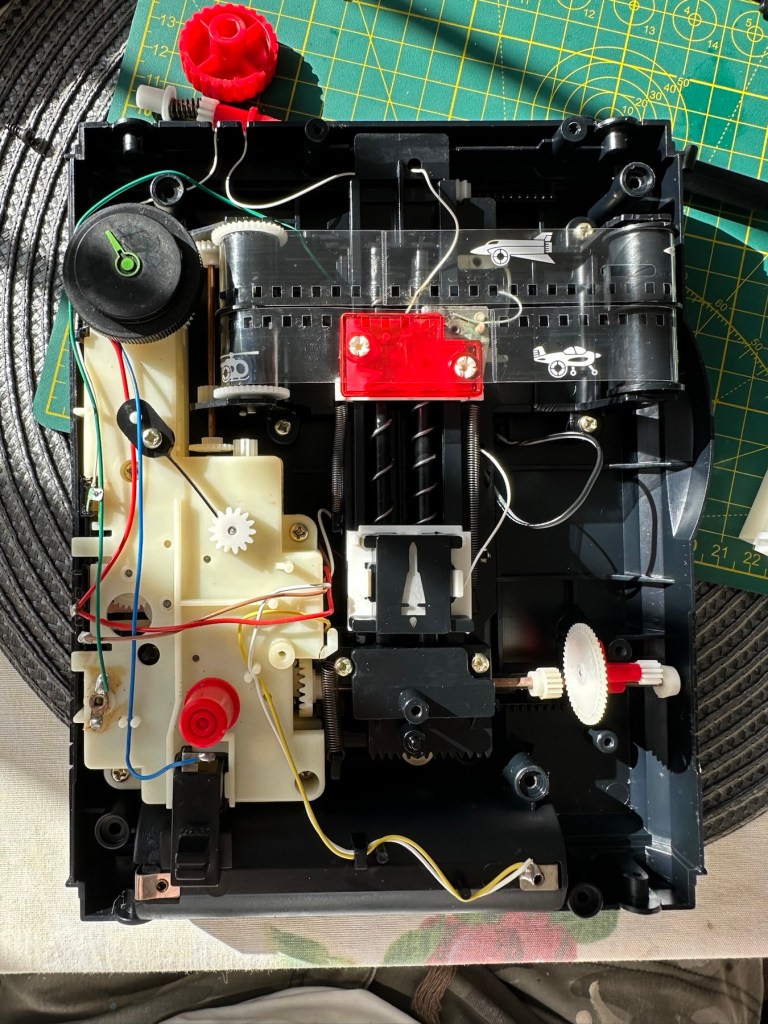
First thing to do is dismantle the unit and to get some cleaning done. The small video below shows the issue with the top band aircraft not moving.
Film transport fault
I’ve taken the counter out after removing the case and all exposed buttons and switches.
Dismantling
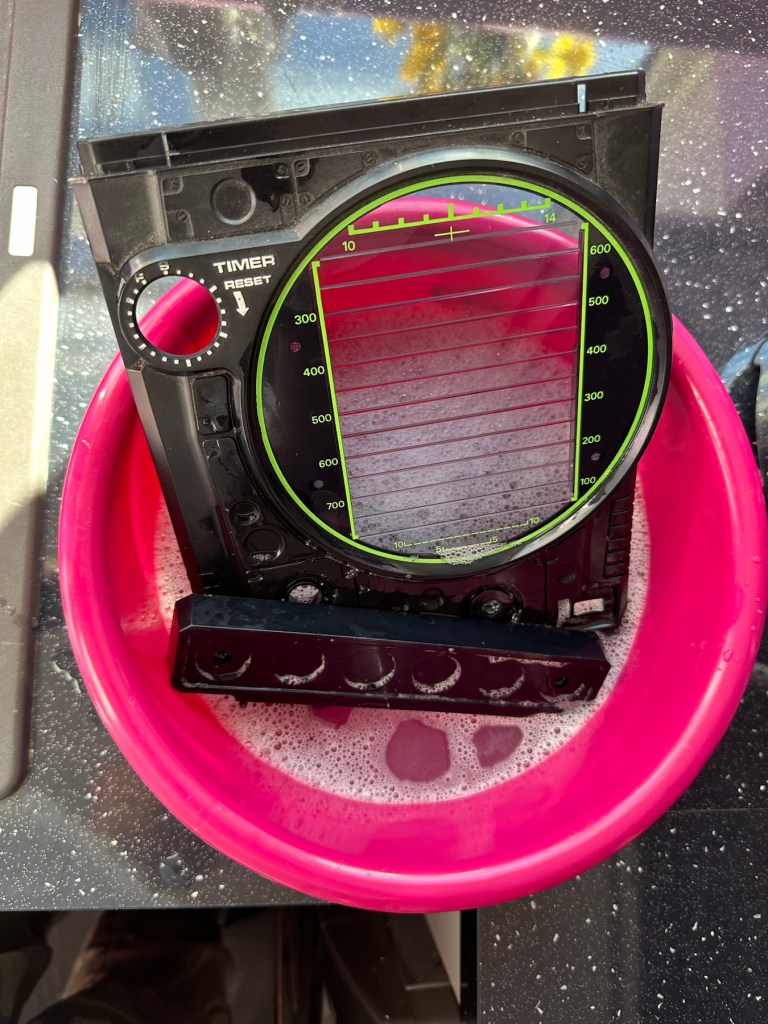
Off to the kitchen sink. let’s get these items washed.
To be cleaned Getting washedDrying down
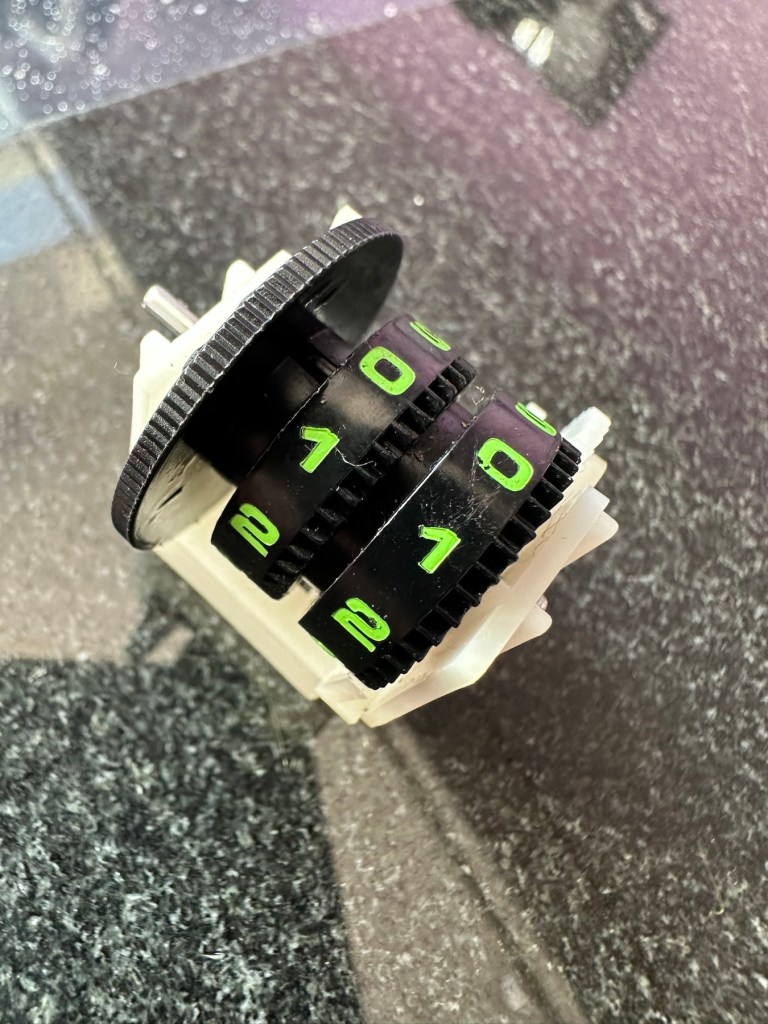
Whilst I’m waiting for the washed items to dry I clean the counter mechanism of old dirt and fluff.
I’ve slightly greased the counter with silicon grease and it’s behaving well and doing what it should. This will go back in place when we do the final reassembly.
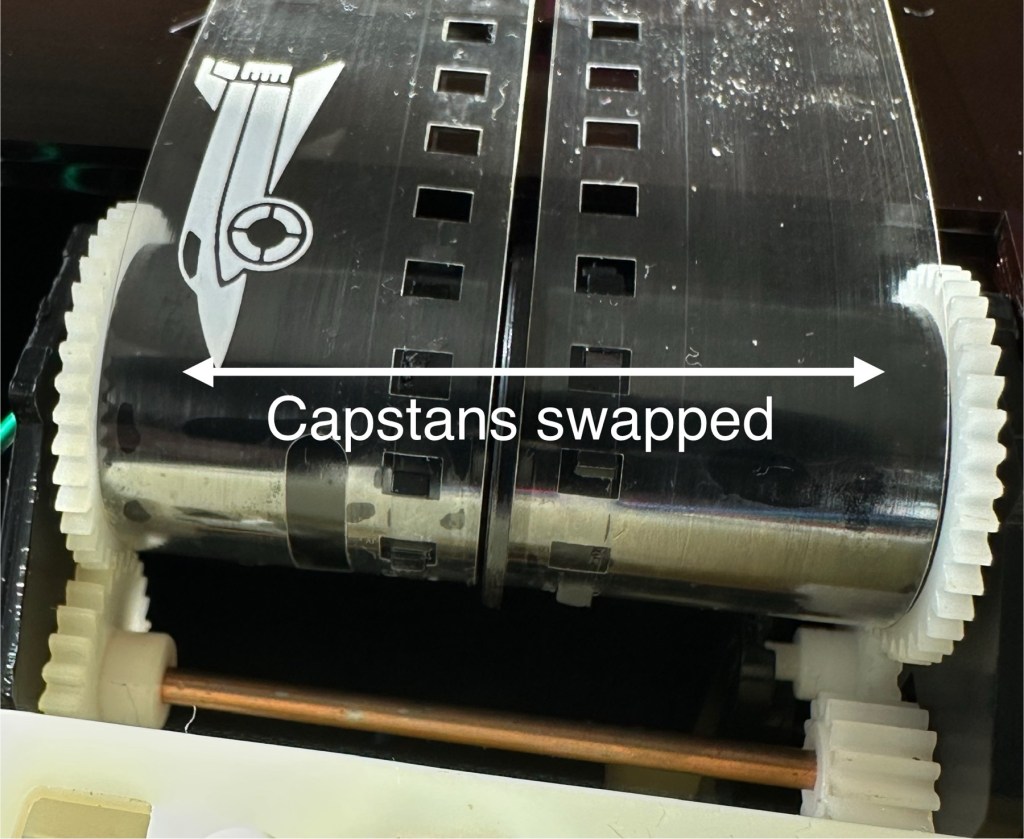
The issue with the film movement was a strange one. There was no way to tension the two capstans that the film roll over and there were no teeth missing off the capstans. One capstan pulls whilst the other pushes, all I’ve done is swap these around and the issue has disappeared. About as simple a fix as you can get.
Just swapped the capstans around
I’ve put a little before and after video here that shows the effect of swapping the capstans around.
How swapping capstans worked
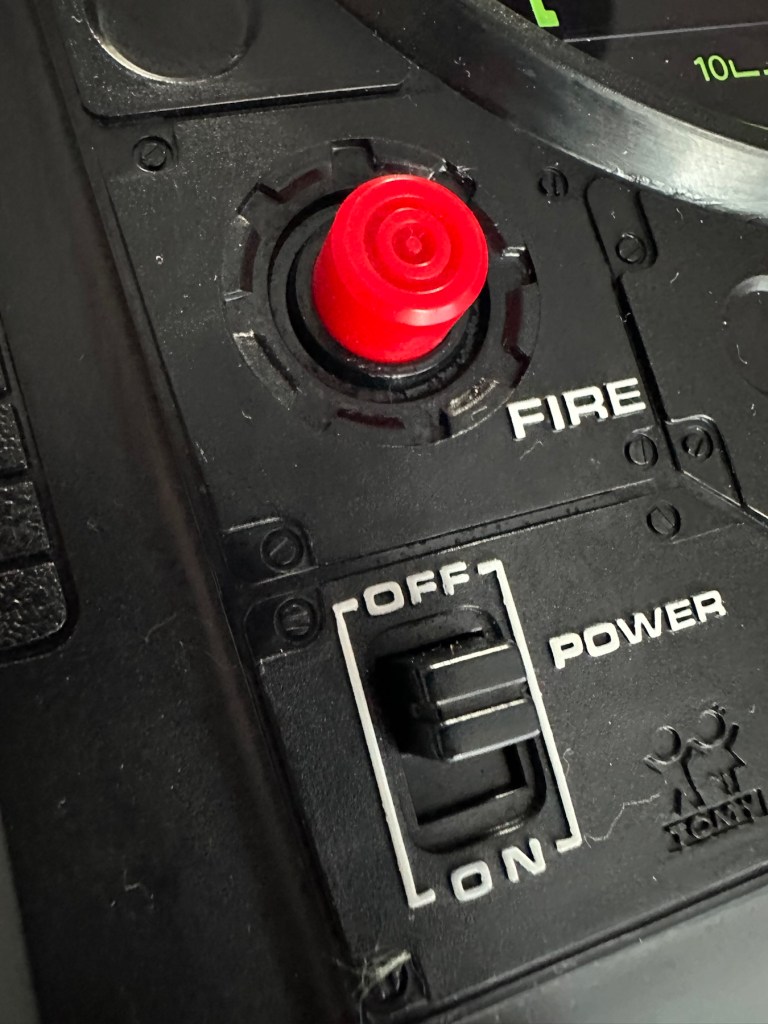
The issue with the intermittent light was easy as expected. This is the only electrical piece on this game and it was down to contaminated battery contacts that just needed a bit of a clean with my grinding pen and a wipe over with IPA.
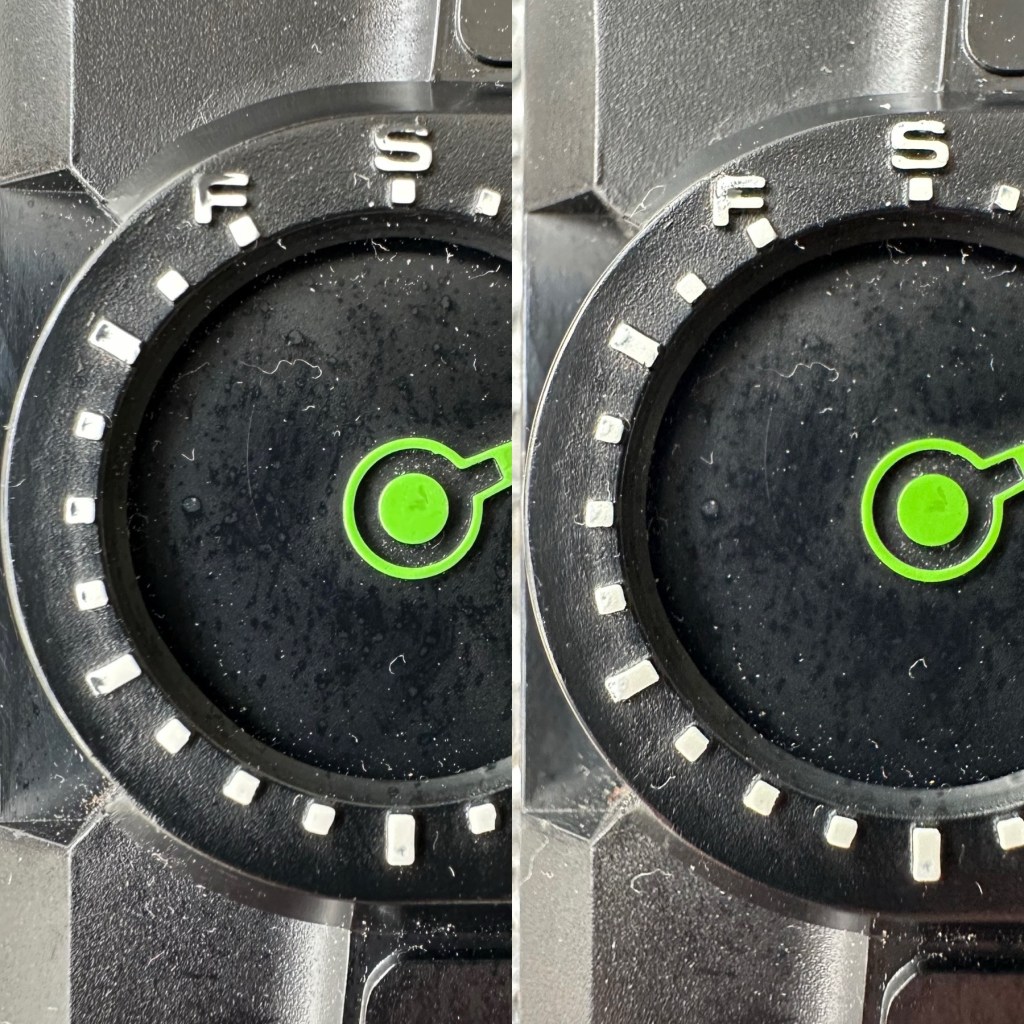
Final little touch was just to accentuate some of the old lettering by the timer. This was just with a white paint pen.
Before and after
Now we can reassemble and test again.
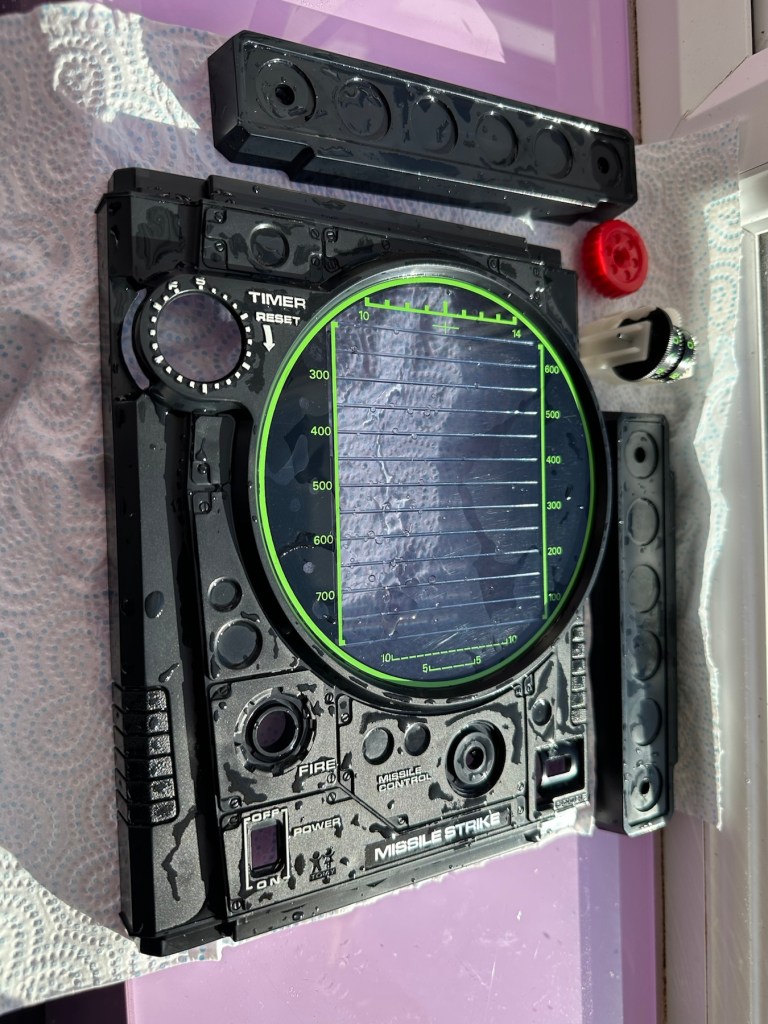
Result:
The game has been reassembled and tested and is now working fine. All intermittent issues have gone and it has now been polished and now looks superb.
I’ve attached this small video that shows the game working as it should, with no film slipping and lights and counter now working.
Working perfectly
It’s really pleased me this repair, as it’s another one of those mainly mechanical games. Dirt featured big time, and age issues have been overcome and the game given a new lease of life. Another one for my personal collection, it will go on now for many more years to come.
The best outcome that was possible, we have another superb seventies product that has been saved from the scrap heap.


You must be logged in to post a comment.