Photographic light sensors in older point and shoot cameras

A little explanation of the differences between the light sensors of two vintage point and shoot cameras produced 12 years apart

I’ve recently purchased two old point and shoot cameras as a lot. One was from 1960 and the other one was from 1972 only 12 years apart, but a world away in technology regarding light sensing ability and technology.

Yashica 35 ME & Ricoh Auto 35

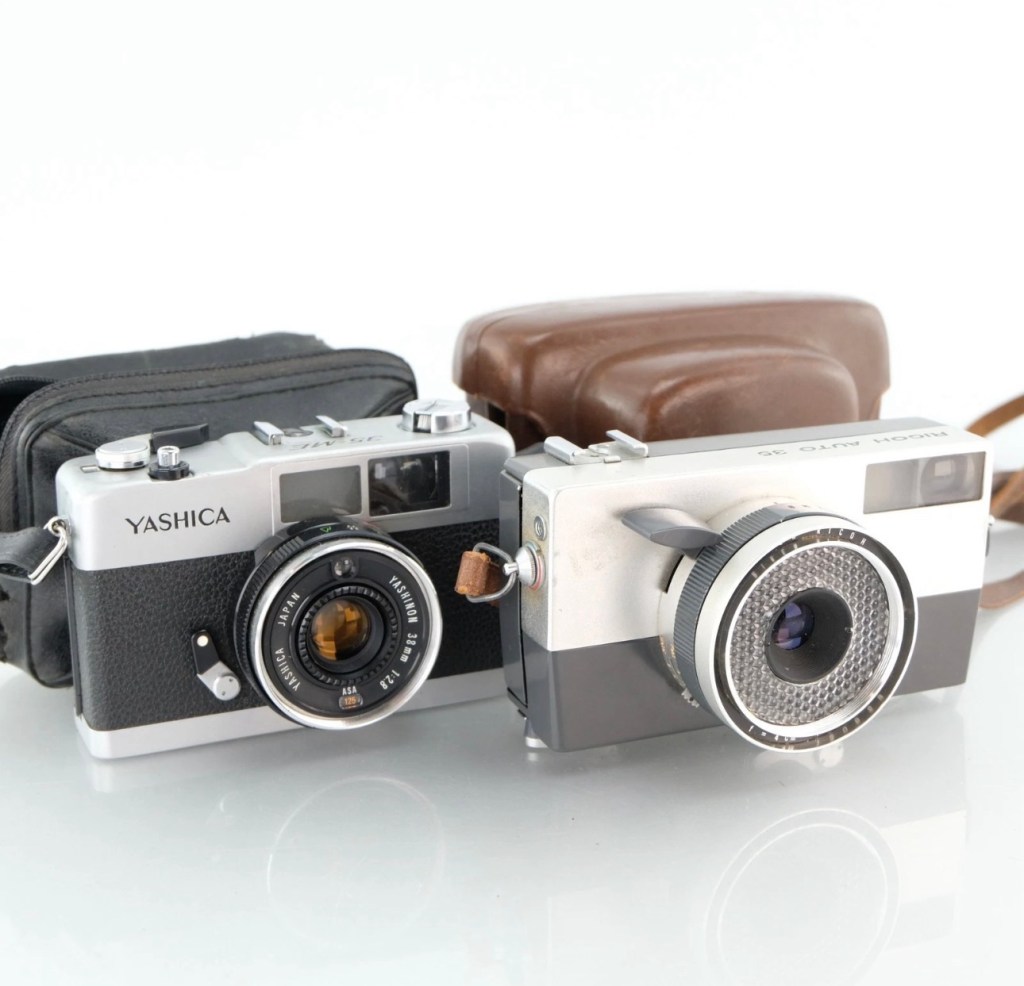
These two cameras only cost me £4:99 In total, they were sold as spare parts, and I suspect the issues could be around the light metering, as to be honest there isn’t a great deal else that could go wrong with them. Here’s a quick breakdown of the metering methods on each camera, followed by a more complex explanation around just what each method of metering involves.

Ricoh Auto 35 – Circa 1960

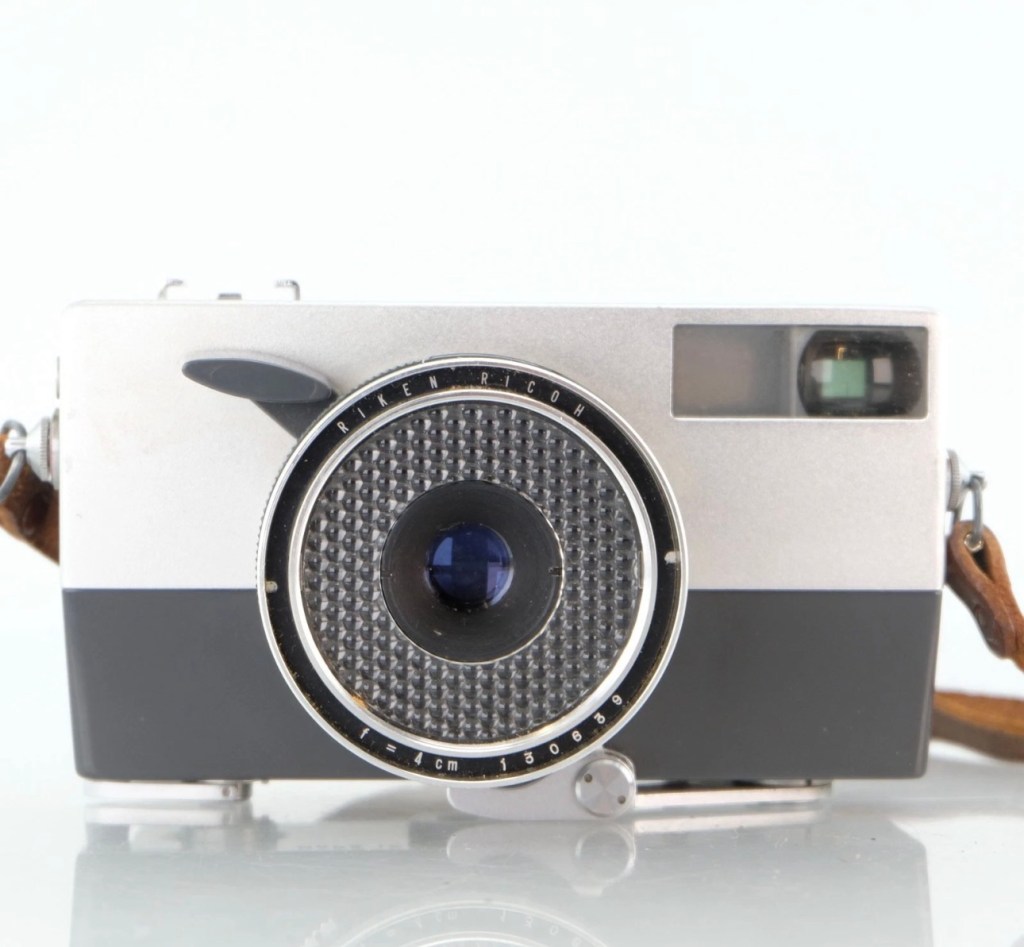
The older camera, the Ricoh, dates from 1960 and just by looking at it, you can see its light sensing system is built around the face of the lens barrel, it’s that glass honeycomb concoction that is so typical of a number of cameras and light meters of this period. Here is a post I previously made regarding Selenium light meters – (Sangamo Weston Master V light meter) The meters were known as selenium meters, there was no electrical components such as batteries, it was a little bit of scientific magic, here we go with a little explanation….

How the Selenium Cell Works in This Camera:

A selenium light cell operates on the photovoltaic effect (similar principle to modern solar panels):

The cell contains a thin layer of selenium coated onto a metal base. A very thin transparent conductive layer (often gold or another metal) is placed on top. When light hits the selenium, it generates a small electrical current. That current directly drives a tiny moving-coil meter needle.

The honeycomb ring is the selenium cell, light hitting it generates a small electrical current of approximately 0.5v. That current directly moves a needle inside the camera, the needle mechanically links to the exposure system. On the Auto 35, the meter is coupled to the shutter/aperture system, meaning that in “Auto” mode, it helps set exposure automatically. In manual mode, you match the indicator.

No battery is used — it is entirely self-powered by light.

Expected life span:

The Ricoh’s selenium cell is now about 60+ years old, so condition varies.

Typical selenium lifespan:

Originally: ~20–30 years

Many survive 40+ years

After 60 years: often weak or dead, this one probably is

Common Conditions Today:

✅ Still accurate (rare but possible)

⚠️ Works but underexposes 1–2 stops

❌ Needle barely moves or is dead

They usually fade gradually rather than fail suddenly.

So that gives an idea of how 1960s light metering works, and to be quite honest it probably means that as this camera is now over 60 years old the metering cell is long dead. It does not mean the camera is useless though, it can be used manually using a third party light meter or you can always use the “Sunny 16” rule.

Yashica 35 ME – Circa 1972

Now moving on 12 years to 1972 and the selenium meters have now gone only to be replaced by the CdS system- Cadmium Sulfide sensor, otherwise known as an electrical photocell. The sensor can be seen at the top of the lens ring, a little glass bubble. The downside with these sensors are that they contained Cadmium which is a toxin, replacements are no longer available so modern cameras use photo diodes instead. Here’s the explanation of CdS technology:

Unlike selenium (which generates electricity), CdS works by changing resistance:

In bright light → resistance drops

In dim light → resistance rises

The camera contains:

A CdS photoresistor, A battery, A small electronic circuit, A meter or automatic exposure mechanism

The battery sends current through the CdS cell.

Light changes the resistance, which changes the current.

That signal controls the exposure system, and a 1.3v battery cell is required to power the meter.

Why CdS Was an Improvement:

Compared to selenium cells, the CdS photocell was much better in low light, it was smaller, more accurate and required a battery that could be replaced to extend life whereas the selenium cell in time would naturally just die away.

CdS cells generally last a very long time — often decades — and usually outlast selenium meters.

Hopefully this gives an explanation regarding the two types of metering sensors that were present between the 60s and 70s. It is always worth considering when purchasing such cameras that the light meters may not, and will probably never work again, the camera itself is probably fine, you’ll just have to find other ways to ensure your lighting conditions are sufficient, and that really is no big issue, it’s easy and second nature to most camera users. As stated earlier just use the “Sunny 16” rule. Just enjoy your photography, experimentation is half the fun.

Reviews on these cameras will be following soon.

Thank you for passing by, it’s always appreciated.

Canon EOS 5D MK2 assessment and repair

Last Updated: 25/4/24

This will be a running repair with regular updates. There is quite a bit going on.

The bargain basement DSLR has arrived (See original blog post here: Canon EOS 5D Mk2) and I’ve been able to give it a quick once over. It’s not had an easy life and has taken some bangs and knocks. Other than that it’s about 16 years old and has had about 69000 actuations, I don’t think it looks too bad personally. I’ve spent a good hour just giving it a good clean up and it was filthy, all knobs and buttons are working fine, the shutter isn’t locked and when a lens is attached, manually it all focuses just fine and the screen looks clean. There is no evidence of damage to the curtain however I can’t test this further until the battery and charger arrives.

To be honest if I can get this working it will be going into my own personal collection. As long as I can get some nice results I’m not that worried about how it looks cosmetically. The body can be touched up or I can add a skin, we’ll see how it goes.

Update: 6/4/24

I’ve now received a couple of bits consisting of two new batteries and a charger as well as a new battery door cover. Once powered up all indications, buttons, sensors are working and TTL indications are displaying as they should.

All lenses are working and moving and focusing as they should. The real good news is that the shutter fires at all speeds and is not stuck, and the sensor cleaner appears to be working.

I’m really happy with what I have found so far, I need to get a CF card to check the original issues that were reported with the suspect sensor. If that is the only issue I will get one ordered and install that at a later date. I have cleared all settings and the firmware is up to date. I’ve downloaded a raft of Canon software so I will be able to test this all once I get that CF card that should be here in a few days.

23/4/24

The CF card adapter has arrived from China. I’ve purchased this type as this particular adapter allows an SD card to be utilised in CF form. I have ample SD cards in use all around so this makes sense for me, I have nothing apart from this camera that uses CF cards so for a relatively low outlay this is the best option for me.

CF SD adapter

Now I have Every thing in place to test the camera. I’m using basic settings and an old test lens so I’m not looking for any spectacular photos as that’s not going to happen here. I just want to see what’s going on.

What happens most of the time

When I’m taking a shot everything lights up ok. Indications are all good, the shutter fires but all I see is a pinkish screen as demonstrated in the small video above. However every now and again I do get a “proper” photo, usually only the one then you have to turn the camera off then on again to get another and that’s not always guaranteed. As you will see in the two photos below you can get one photo and then the next has a pink band appearing from above.

Whilst taking a random photo looking at our ceiling, I became aware of what looked like a water leak by the chimney stack. This gave me some concern but I needn’t have been worried as it appears in other photos and is more than likely an Abberation mark on the sensor. The two pictures below show that mark on the sensor in the same area.

Occasionally the pink line that appears at the top of the photo also takes on a pixelated test card look. The weird thing is that if you put the camera into video mode the image is clear with good sound and no playback issues. Strange 🤷‍♂️

It really is looking as if the issue is around the sensor that in this camera is a CMOS sensor. But before I make any decisions on what action I’m taking I’m exhausting all the obvious issues if I can. I have looked at several forums on line and there are a multitude of tasks I could try but it all seems to filter down to two in general. A full camera reset and a reinstall of the last issued firmware.

Now I have completed the full reset and on top of this I’m going to install a new CR1616 CMOS cell, as I just don’t know when this was last done.

Replacing the cmos battery

The CMOS deterioration rate is about 3% of the battery value per year, now if this camera was purchased around 2008 when they first came out then it dosen’t take a mathematical genius to work out that the cell could be sufficiently depleted. In fact I don’t know why I haven’t used the multi meter to test it🤦‍♂️

I’ll get on to that and will report back. It kind of makes sense seeing the sensor on this camera is a Cmos sensor. All tested, battery was at 2.3v, I have now replaced the battery but everything is still the same. I don’t know if updating the firmware will assist in any way, but I’m just following a procedure that most who have been in this position before have also done. it’s just a process of elimination before doing a full tear down of the camera. And if I can do anything to avoid that I certainly will.

I’ve finished all the testing and it is certainly looking like the Cmos sensor needs replacing. I’ve done all I can here, but I’m reluctant to order the new sensor from China as I’m not 100% confident of having the facilities or time to do the work required. Will I gain anything after the outlay? I very much doubt it. I’m going to move this camera on now with all my findings and hopefully I can find someone who will be able to take this project on to a successful completion.

I know parts wise I can make a good profit on the original outlay so maybe that is the route to take.

So I’ve failed on this renovation, but nothing is going to waste, it just needs to go to some who is somewhat more experienced with these type of upgrades than me. Hopefully I can gain some experience along the cheaper more available stock route.

I have learned some interesting things about this camera and it’s operating. So in many ways that’s a win, knowledge is everything.

Canon EOS 5D Mk2

The assessment and repair of this camera can be found here: Canon EOS 5D MK2 assessment and repair

As the listing stated:

Canon 5D Mark II DSLR Camera – Body Only – Spares or Repairs

We have tested this camera and found the following fault:

The camera powers up, however the sensor is damaged and images are recorded either blank or unusable, and so we are describing this item as FAULTY / SPARES / REPAIRS.

Shutter Count: 69,970

EBay
90% off. What have I brought?

I noticed this 5D on sale earlier for £109 Gbp. It’s from a supplier who has a good reputation who I have used before, however he suddenly drops the price by 90% and I snap his arm off for this. It has sensor issues and that’s at least a £70 price just for that part. Considering how much these cameras usually retail for it’s a price I could absorb…but I think something else must have come to light for him to change his pricing. The body is pretty beaten up, again I’m not too bothered with that, the usb port might be damaged by the looks of it and again that’s something I can sort.

I guess I’ll just have to await its imminent arrival. In any case for a total of £9.99 GBP I’ll make more from this just for spare parts.

See the assessment and repair blog post here: Canon EOS 5D MK2 assessment and repair