The workspace is starting to take shape. Normal service to resume soon. Maybe I can catch up with this backlog now.
I’d pretty much closed down my workspace, when we sold our old house back in August last year. Everything I used the most was pretty much moved into storage as we prepared to make the move to our new home. All I was left with was a few screwdrivers, so needless to say, content on this site dwindled, whilst purchasing continued, hence I currently have 29 posts, in draft, awaiting completion as I don’t have a suitable workspace or the equipment available at the moment to complete any of them. I even purchased a 3D printer in November of last year for my birthday, it has been in storage all this time, I have now brought it home and have now made my first 3D print, that post can be found here: My First 3D print attempt
Things are about to change.
We pretty much have every room in the house now up and running. We are settled now and the final boxes have been attended to within the house, and we are finally getting to the point where regular recycling visits to the tip to get rid of the old cardboard boxes are finally coming to an end.
The next stage in my wife’s own words are, “ we can now get Dave’s room sorted.” The words I’d been waiting for.
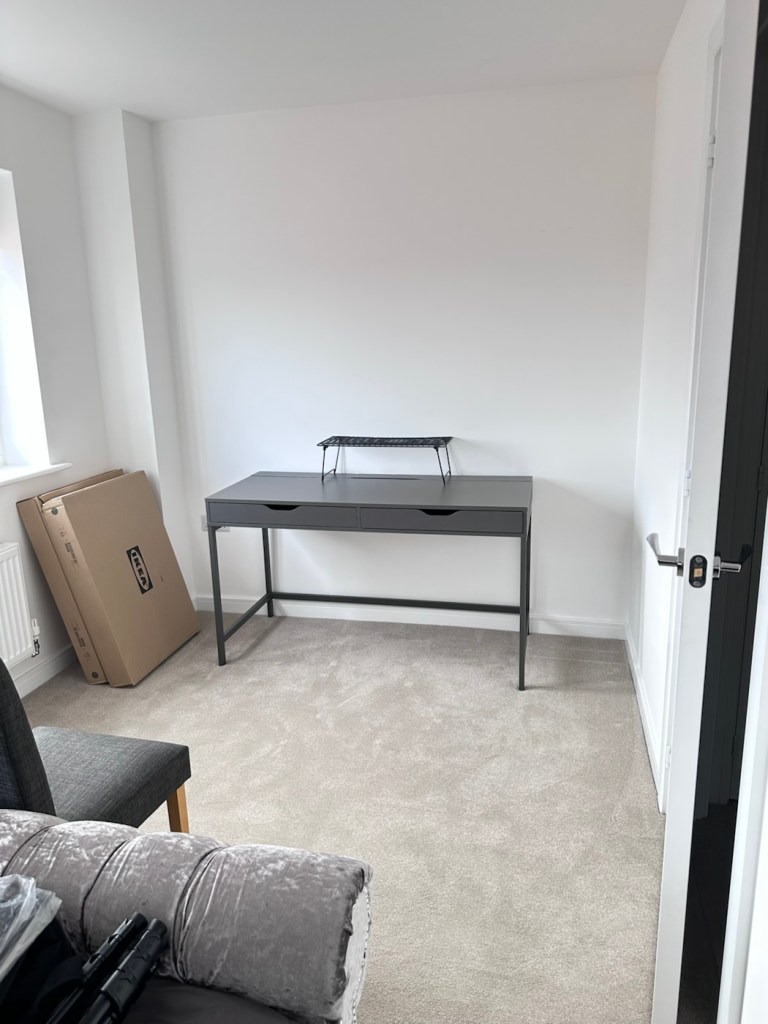
My workspace – a wall in a guest bedroom
I’m calling it my room but in theory it’s not a whole room. It’s part of the third bedroom where I am probably just occupying one wall at the end of a guest bedroom, it’s all I need, I have a Garage to do all the blokey stuff in, this space is purely to work upon all my cameras and other more delicate items of work.
Whilst visiting a certain Scandinavian furniture store i have purchased a basic setup for me to begin working on. The good thing about these furniture systems is that you can start with a basic layout and just expand upon it, and that’s the plan.
I have a desk and drawer system arriving today, and quite a bit of construction to do, once this is in place then I can start getting my gear from storage and get it back into place. It will be nice to have all my equipment in a permanent placement, without having to take it all apart and storing everything back in boxes after I have used it. I’m looking forward to this as to be honest, I’ve really missed it. However I have been pre occupied around the house and there has been an awful lot to keep me busy, there’s been no rest really, I must be very wicked 😂
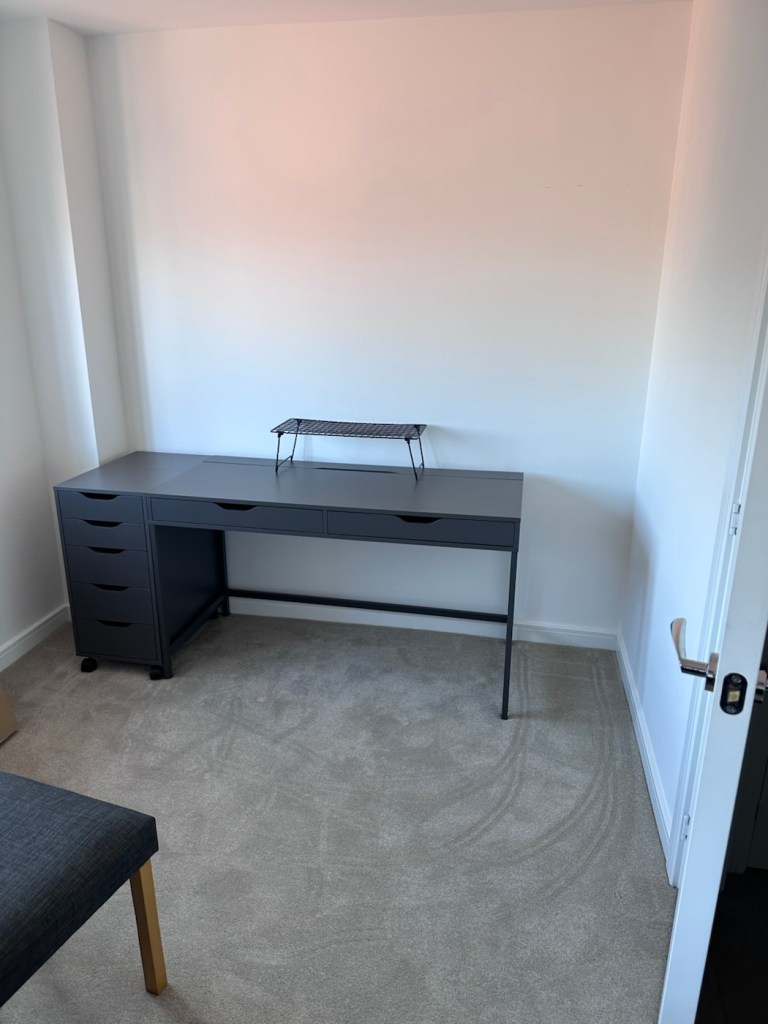
The workspace starting to come together
So as of 10th March, I’m quite pleased to say that my workspace is now ready to use. It’s still a way from being complete as I still have stock to bring from storage along with the last few tools and boxes of components. There are still shelves and storage to put in place, but at long last I can now sit down and finally start to play catch up with my ever expanding backlog.
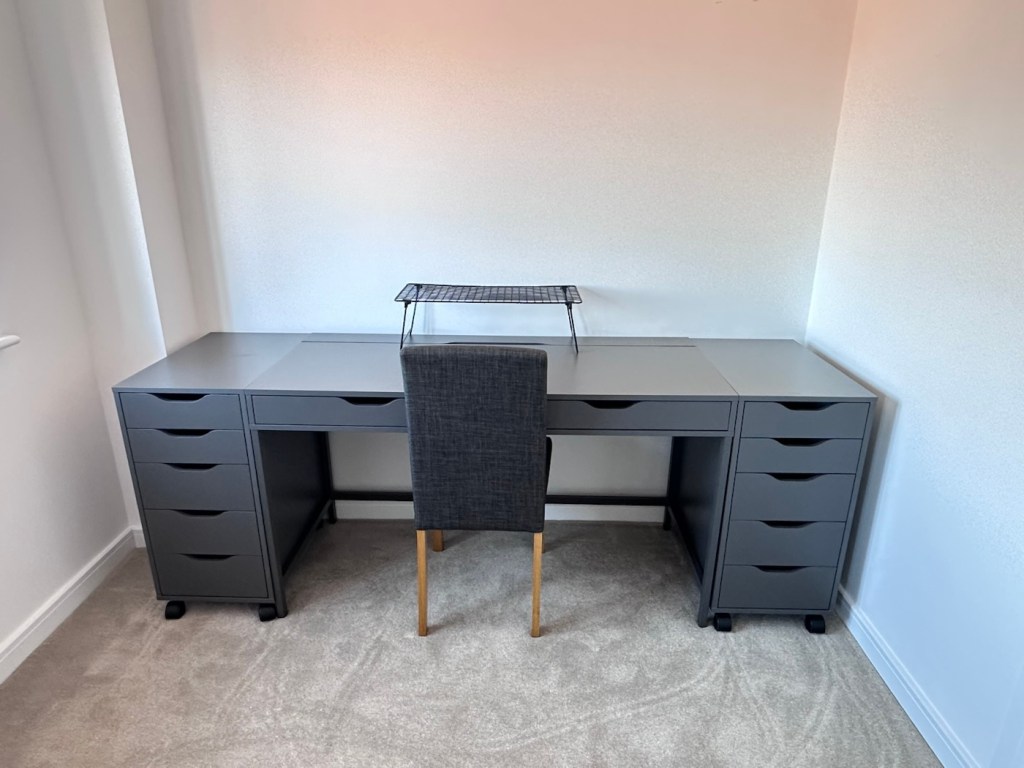
The workspace….liable to be moved about yet again
I must admit I’ve moved things about, and I’m probably liable to move things about again over the coming days and weeks, even months as I can’t quite decide how the setup should look. It’s probably going to be a few sessions of me not being able to find tools, parts and cameras that will help me decide just what, should be where. In the meantime, it’s good that a kind of normality has been restored, and I can now start to resume where I left off all those months ago.
I’ve had a 3D printer for 4 months now. I am now able to use it and today I have produced my first 3D printed item. A Poop bin. Yes you did read that correctly….
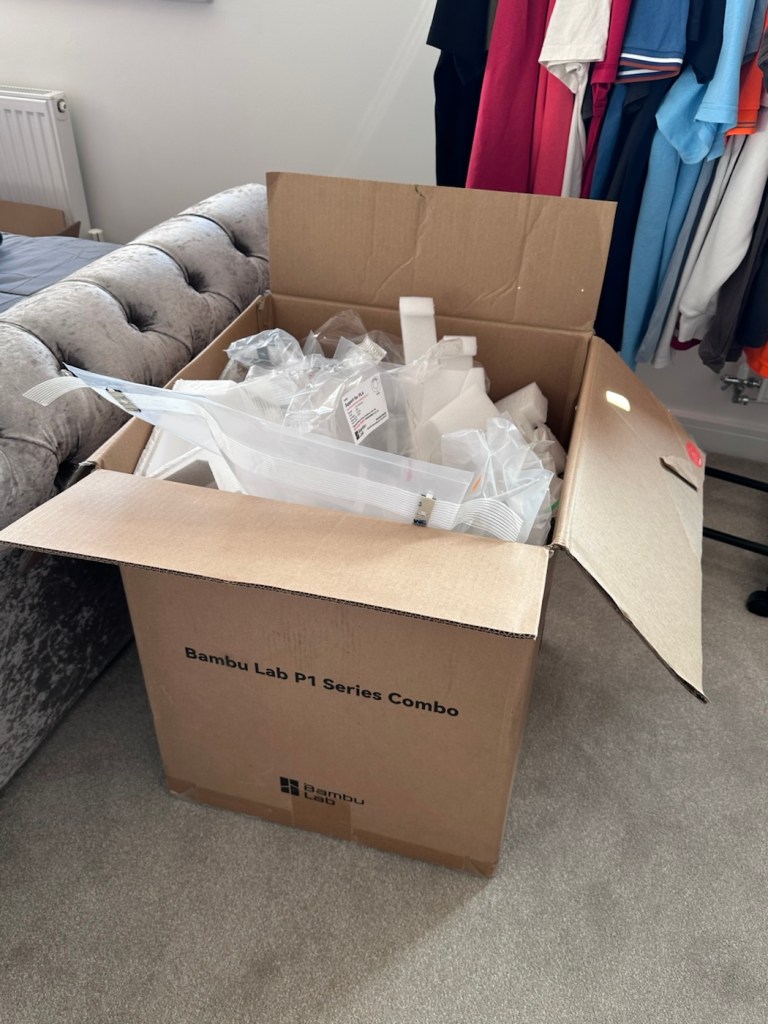
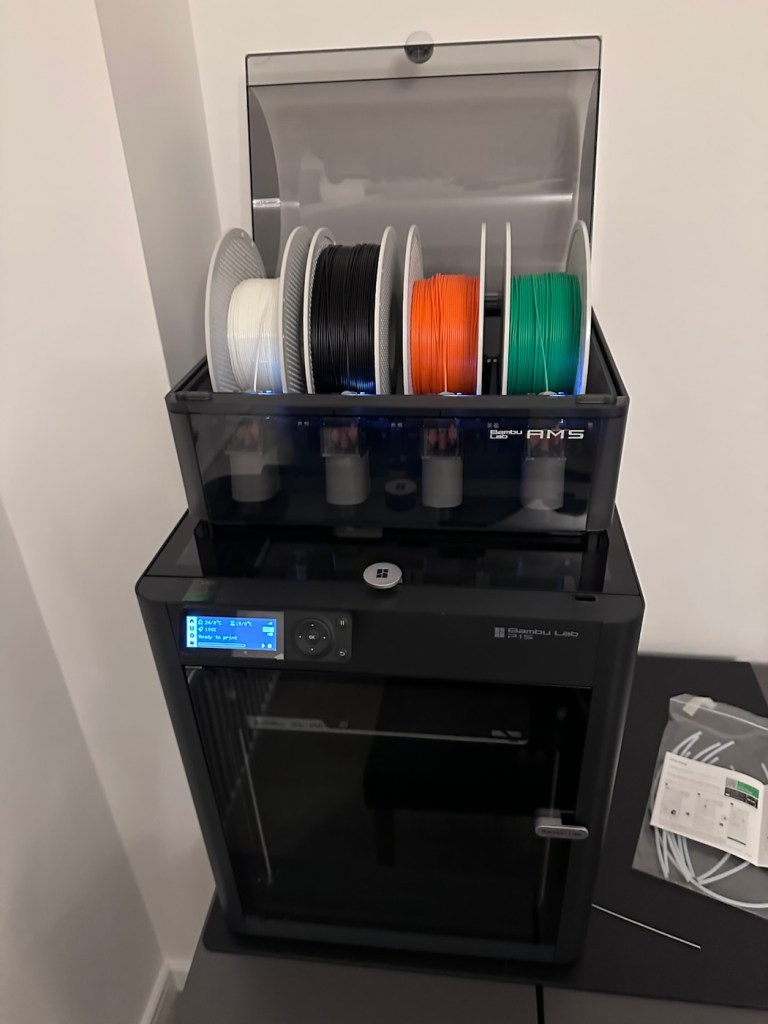
Those of you who watch this site with eager anticipation (I’m joking 🙃) may remember a post that I published in November of 2025, when as a result of all the money I received as gifts for my birthday, I went out and purchased myself a Bambu PS1 Combo 3d printer: I’ve taken a dive….
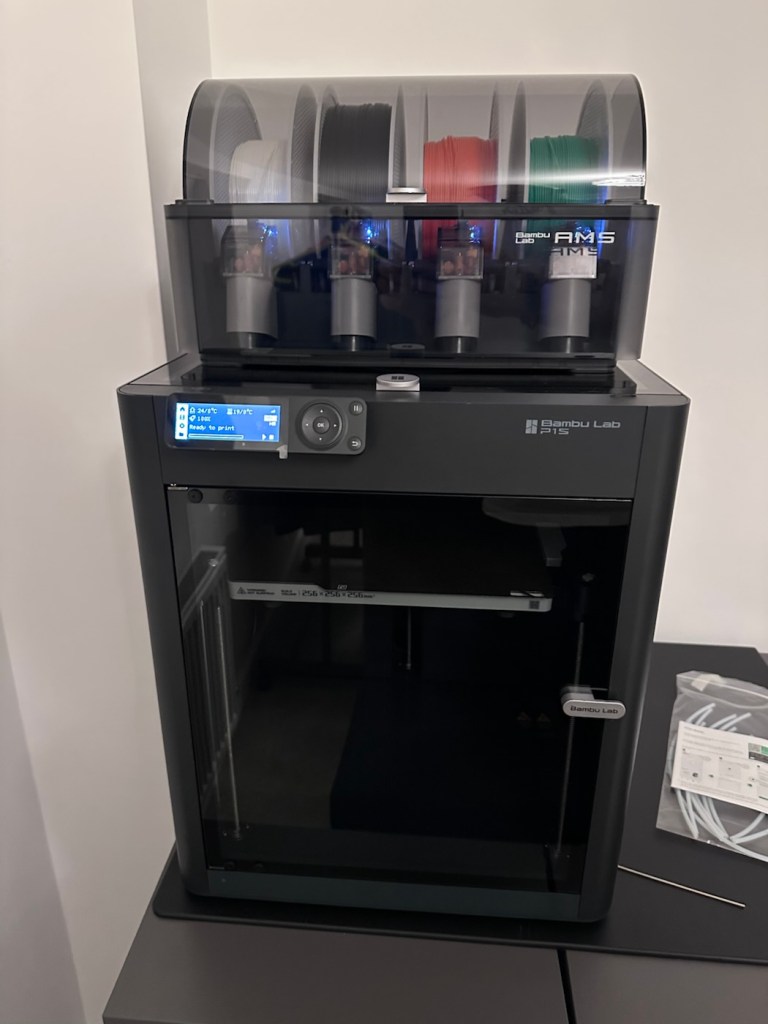
My Bambu PS1 Combo
I’ve not printed a single thing 3D in my life and to be quite honest I haven’t got a clue on what to do, but as usual I’m willing to learn. I’ve had a number of occasions over the past couple of years where I’ve needed an obsolete part for a project, I’ve had to go as far as Italy to get parts printed whereas with this equipment I could have done so my self, cogs and gearing are a regular item that I come across that I could also use this equipment to produce. See, it will serve a use to me once I have my workspace configured.
That time has arrived….
Now we are safely moved in to our new home, and all the important stuff has been attended to, attention has switched to getting my work area up and running, and I will shortly be uploading a post regarding the inside my work area.
However, this piece of equipment has been in storage since November, almost 4 months now and needed to be put into action as soon as possible. Seeing that the workbench was now in place it only seemed right that the printer was now unpacked.
It’s a big box, and has a lot of packaging
Even to do the unboxing there is a QR code to link you through to the process to follow, it is very informative as these printers are packaged so well, there are screws and supports to remove, put in place to stop sensitive parts being damaged or dislodged during transport.
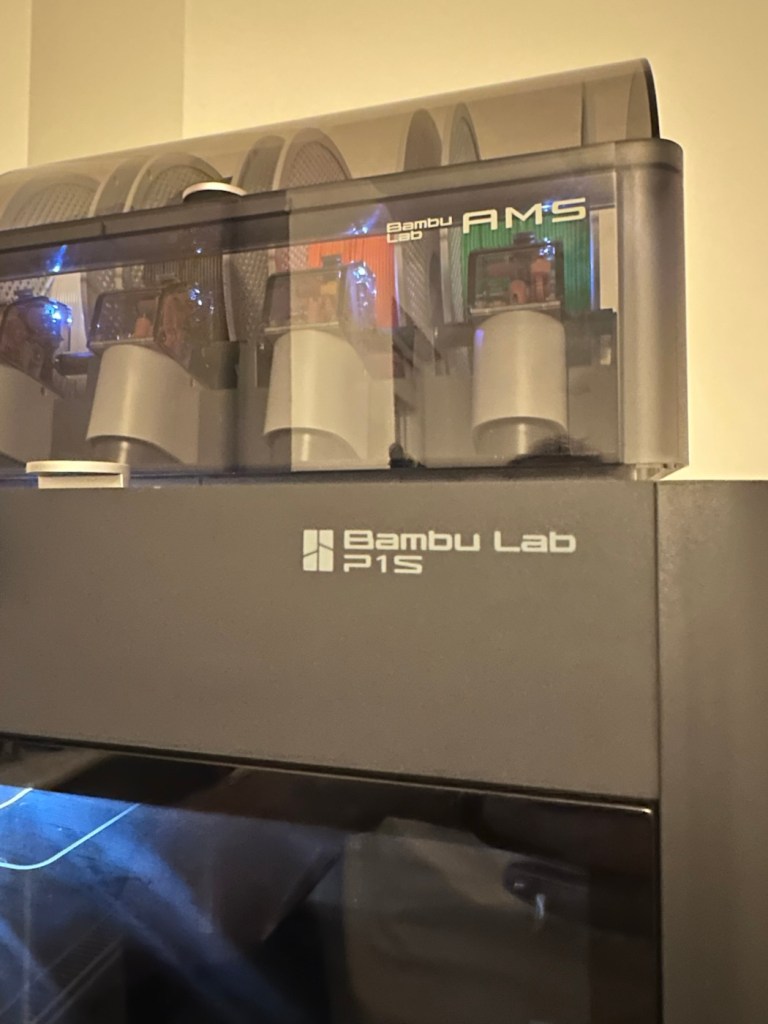
The AMS system installed on the top of the printer
When you follow this system of unpacking, you are also linked to an app called, “Bambu Handy” that really is the control system for your printer. Here you register, set up blue tooth and WiFi options and the app then becomes your monitoring and control for your printer. At the moment I’m sticking with just this app, once you are more experienced there are a number of more complex programs you can then use for design and editing purposes. For now I have found my level. I now install what is called the AMS system on top of the printer, it is an automated feed for using more than one coloured filament, the printer can move from one colour to the next automated, without interrupting the print process.
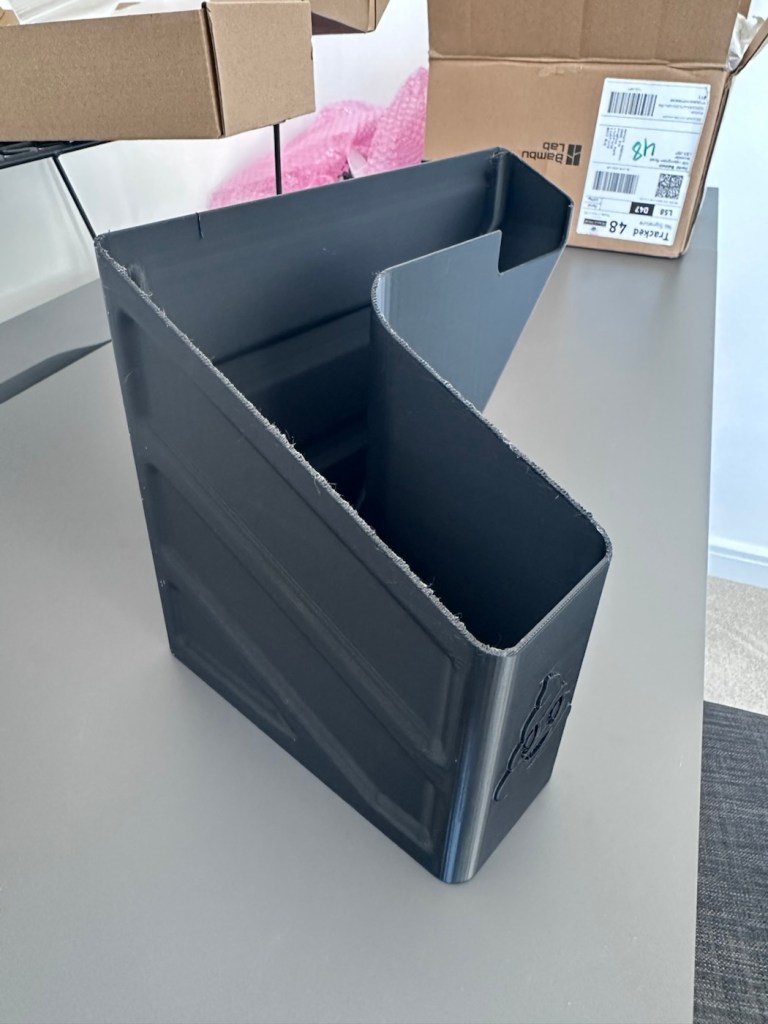
But that creates a little waste product….
And there is my first print project.
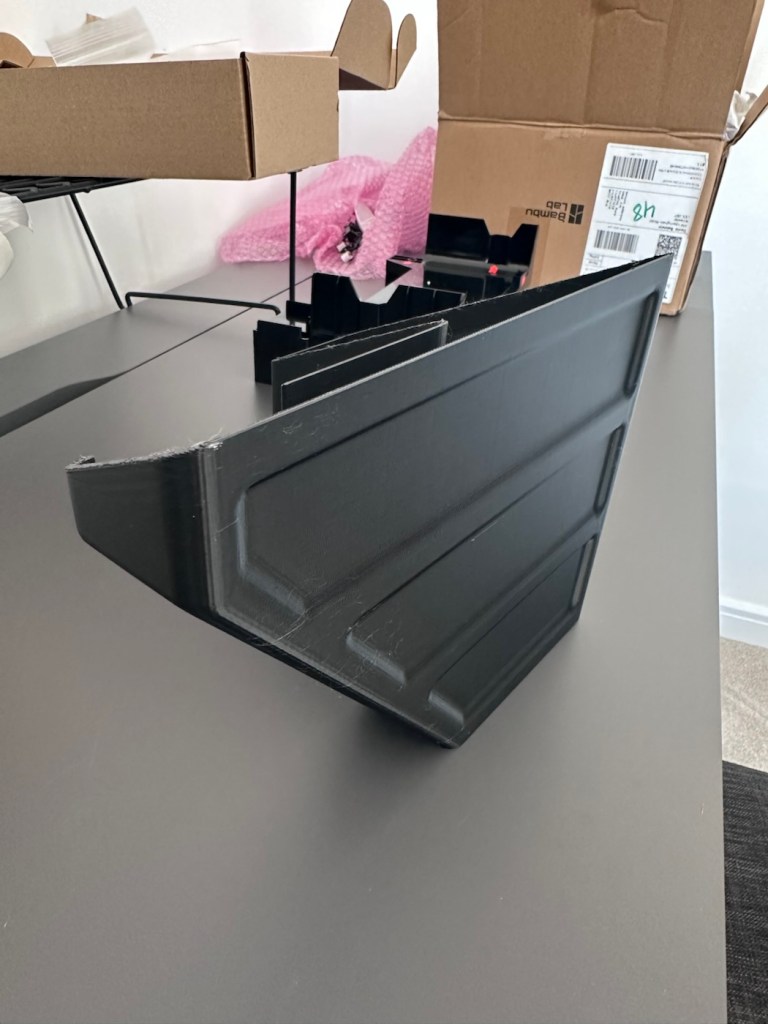
When the printer initially primes, or when it changes colour it will create a little waste as it clears the nozzle of one filament to use another. This waste then exits the rear of the printer onto the floor, or work bench depending on the positioning of your printer. For this reason people then install what is known as a “Poop bin” to collect such waste. Here is a draft picture of the one I will print for this printer.
A draft “Poop bin”
Now, this app fortunately comes with absolutely thousands of pre programmed prints covering all aspects of printing technology from home, toys, educational and everything in between. Fortunately, because “me” as the totally clueless, doesn’t have to learn basic CAD and slicing techniques, because some clever individual has already done that for me. And for that I am very grateful.
There are a number of tools and equipment you can print for these printer units, it’s as if they are self maintaining and developing. All very clever stuff.
But a “Poop bin” is a necessity if you don’t want to suffer the wrath of your other half by spewing out randomly produced plastic waste on to her nice new carpets. That is not conducive to a happy and peaceful existence 😂
So a “Poop bin” is my first ever 3D project….so here goes.
A simple selection on the app, of the item you require, a few settings get amended, the printer does some calibration checks and then the process starts, this particular print takes about 4.5 hrs to complete. Fortunately the system has an inbuilt camera so you can check progress or even get a timelapse at the end. You can basically shut the door, turn off the light and walk away, you can always check in, but sitting there just watching for 4.5 hours can get a tad boring, and is just like watching paint dry, so why not just walk away and do something more useful. I did just that, and went to assist the wife with some chores.
Here is the said timelapse of the print. 4.5 hrs in about 30 seconds. The dark periods are brief and were just me messing with the onboard light settings.
My 3D poop bin printing
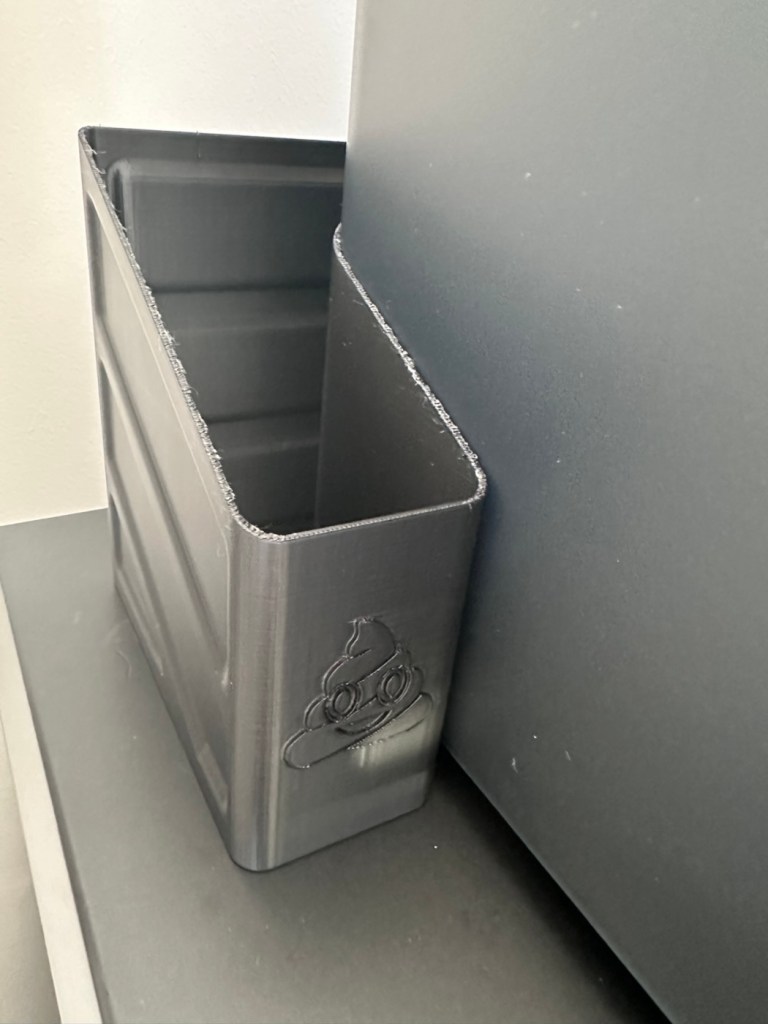
Here’s the actual finished article, and situated at the printer.
Printed item, and in place
So that’s it really. Still learning but quite happy with what’s been learned so far, the desk and everything needs some fine tuning and there is a lot of gear still to be added but we are now off to a flying start.
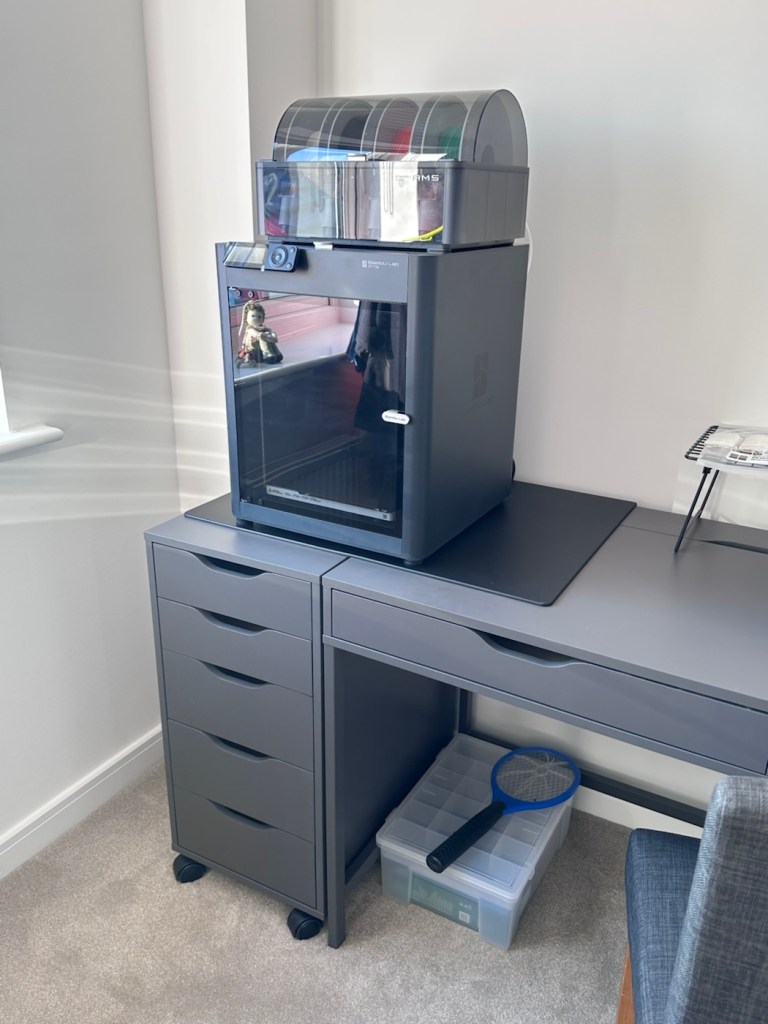
Current position with anti vibration feet now installed
One thing I did notice was that there was some vibration and noise, however I did get gifted some anti vibration feet with the package when I purchased the printer, I have now installed these so hopefully the next print will be a little bit more peaceful, not that it was particularly bad anyway.
And that concludes this post. Thanks for reading, it’s always appreciated and I hope this day finds you well and at peace.
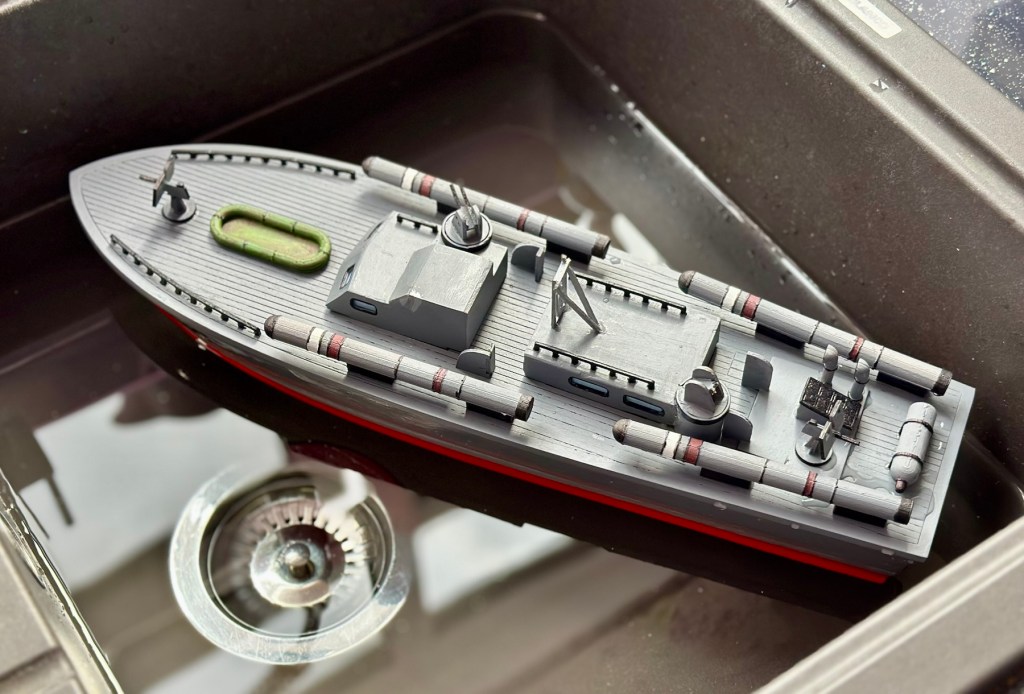
Today 16th June 2025 and this boat that I was gifted for my last Birthday back in Nov 2024, finally underwent proper trials on water, and thankfully after all the issues experienced during the building process it came through them with flying colours. There are a few little tweaks to do as a result of the maiden voyage, but this will only go towards making it a far better and less stressful task on future excursions. Boy was i nervy about today, what with all my family watching.
A nervous owner placing his boat on the lake…
And off we go…slowly
I only have the one battery for the boat so time was limited, and I probably managed about 15 minutes with it nutting about, before it stopped and had to be rescued by my Brother in laws boat that just happens to be a tug, a seaborne version of the RAC.
Luckily the seaborne version of the RAC were on hand
Anyway prior to that minor mishap the boat performed quite well, the motor is hellishly powerful and I thought it would go either of two ways. Either it would launch itself out of the water like a missile or it would go nose first into a deep dive towards the bottom of the lake. Luckily it did neither, however I did learn that turning at speed is liable to capsize the boat, so care needed to be taken when performing turns under power.
And she works…..
As usual I have learned a lot. It needs some minor tweaks such as a better centralisation of the radio gear in the hull, it needs some Baffles to be put in around the front deck where the hull and the superstructure join, to prevent water ingress at speed. The front does sit low in the water but at speed the contours on the hull do create lift, and this does work very well, so I am particularly happy with this.
A great day out, at the start of the holiday, and the fact I didn’t have to go wading to rescue a failed boat is also an added bonus. Really looking forward to showing the videos and pictures to the elderly friend who purchased this fantastic gift for me. They will be as pleased as punch, as they know about all the hard work and care that has gone into getting this project finished.
Thanks for following the journey with this project. As always it is very much appreciated.
I have just finished a run of night shifts, as we are heading out to the coast for a few days with 12 others from the wife’s side of her family. I’ve kind of been in that frame of mind for a few days when people get closer to a vacation or break away when they just slip into “Holiday mode” at work, you know that feeling when the not so important stuff gets shoved to one side in the hope that one of your colleagues will pick it up, when in fact it will probably still be waiting for you to complete on your return. Yep I’ve been in that frame of mind for a few days now. I need a break, no matter how brief.
It’s going to involve an early start tomorrow as we head out to the east coast, first stop Gorleston in Norfolk where us old farts in the family gather at the local boating pond for a break, before moving on to our destination further up the coast. Gorleston is a beautiful part of the UK with one of the finest beaches you will ever see, it just seems to go on forever.
Gorleston beach
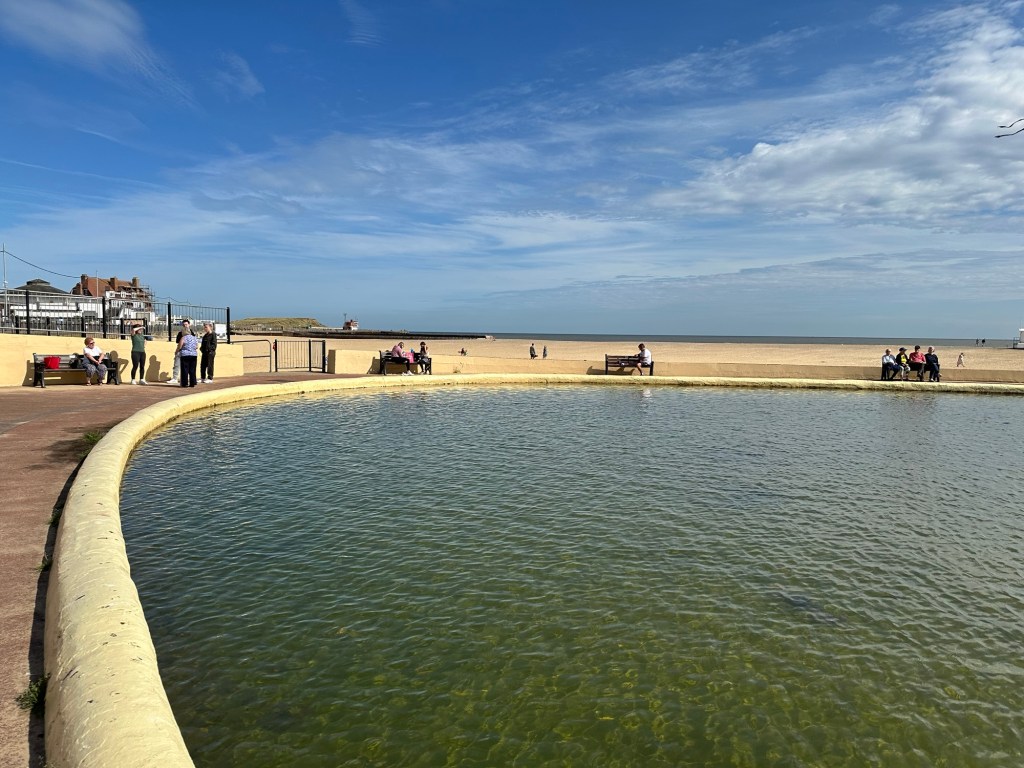
At Gorleston as I’ve previously mentioned, there is a very large boating pond. Here the older specimens of the clan take a break from driving to float their model boats. I’ve been watching them do this for years and have always threatened to build a model warship to jokingly blow them out of the water.
Gorleston boating lake
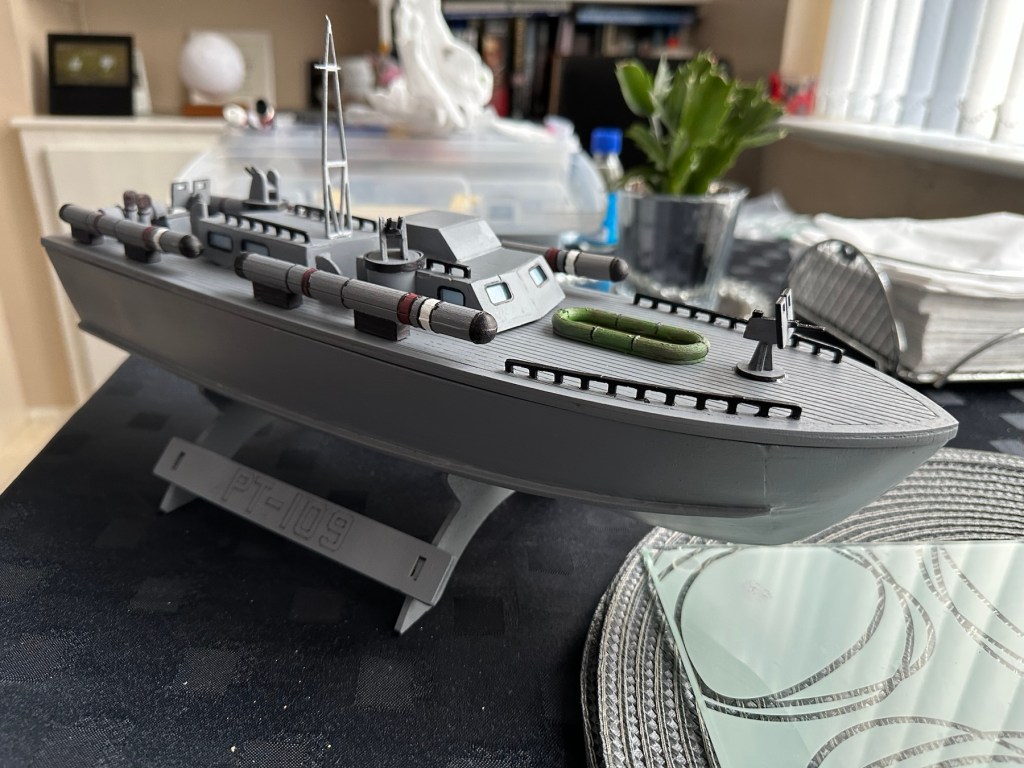
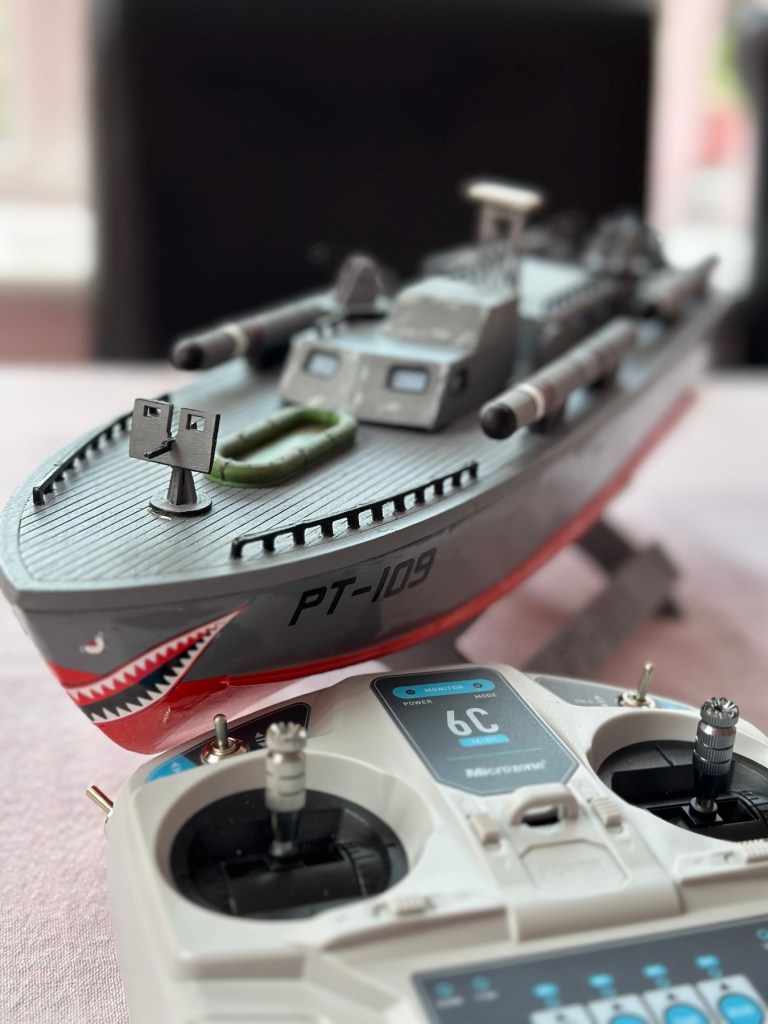
This year I have built a model boat, it is a torpedo boat, I know it floats but this will be its first true test of operation, it could go either way, it’s so damned fast that it could either just take off or dive into the depths of the lake. I hope it doesn’t though. You can read about the build of this boat in the two posts I created about its construction: PT109 wooden torpedo boat kit – construction and the last part: PT109 wooden torpedo boat kit – finishing. I hope to post a video of the actual “Sea trial” pending its maiden voyage or ritual sinking.
The boat
Anyway that’s tomorrow and to be totally honest I’m really looking forward to it.
Yesterday was a busy one, I rose fairly early considering I was working nights as there was a special event taking place. One of the younger members of the family, Jude who is only 14 was going to have his first flying lesson, purchased for him by his parents as a Christmas gift from last year. Luckily we have an airport close by that used to be a base for American forces back in the day, that was visited by Dwight D Eisenhower, and was also the home to a squadron of old Stirling bombers. Today it is a local aerodrome, but keeps the title of Leicester airport.
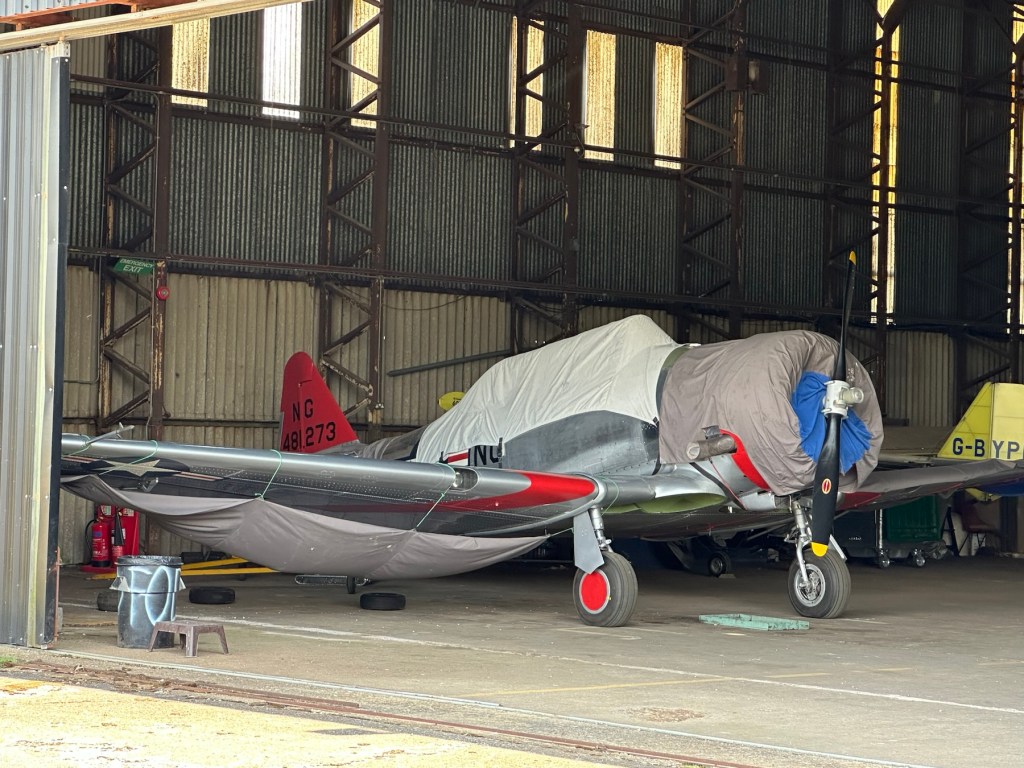
I love having a wander around old airports and in one hangar I found a beautiful old plane tucked away under tarpaulins, a MkIV Harvard built in 1952 for the Canadian Airforce but currently wearing the colours of the California ANG. Registered as G-CJWE (NG481273) known as “Dazzling Debs”.
Pic courtesy of Steve CoeSitting in a corner of the hangar
Jude was going to be heading off from Leicester up over Oakham and the Burleigh estate and Rutland water on a flight that was to be approximately 45 minutes in duration. His parents had paid for two passengers to accompany him, and I was asked if I’d like to be one of those passengers. I politely declined, as much as I love aircraft I’m not a good passenger and don’t really want to fly if there is not really the need to. This refusal worked out quite well as it now allowed both of his grandfathers to be those two accompanying passengers. How lovely is that, I never even got to meet either of my grandfathers, now Jude, has both of his grandfathers sitting proudly behind him.
A walk around with both Grandfathers “J” just about to get airborne
First flight ✈️
Needless to say, he created some lasting memories this day and was full of smiles on his return, in fact they all were. And to top it all it was a gorgeous day, with some cracking food and fun company.
Blog wise I’ve got the backlog down to ten posts in draft now, and by the end of next week that should be reduced by another couple as two older posts come to fruition. It’s been a busy week, no more estate agent tours as yet, we’ve requested a strict viewing criteria with them now, to deter the time wasters who most definitely have spare time in bucket loads.
Have a great weekend everyone, stay safe and try to stay happy.
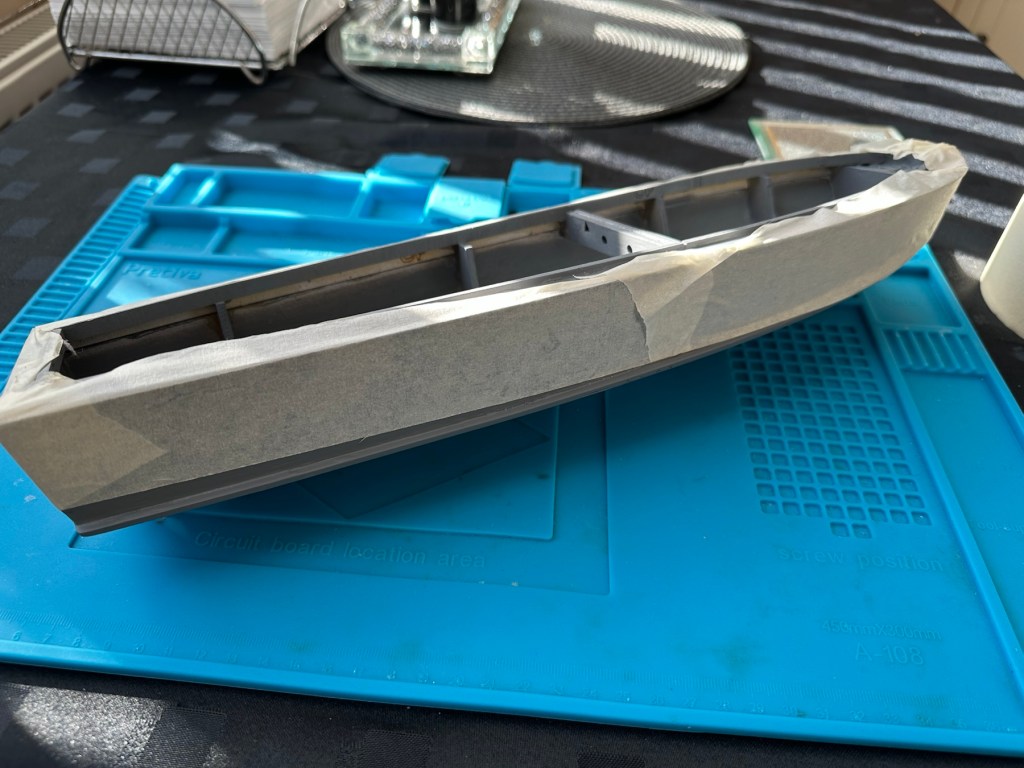
How it looked in the last blog post prior to finishing
This post covers the finishing, that is the priming, painting and installation of the radio gear to complete the build of this wooden model boat.
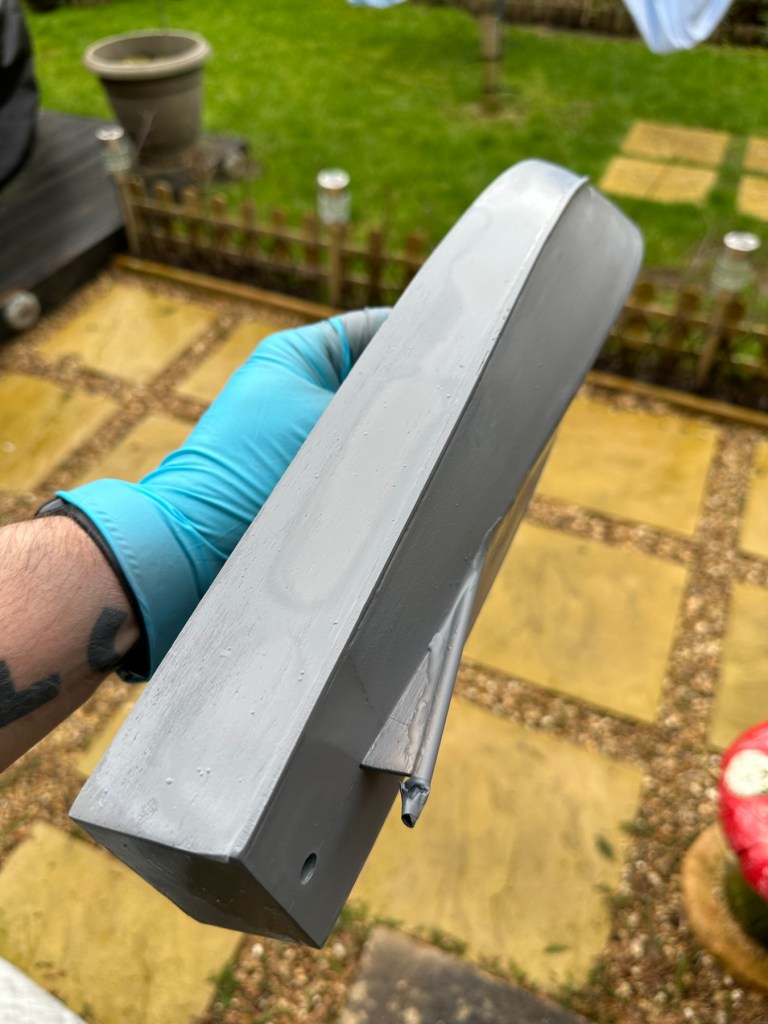
I have to give a couple of coats of high build primer to the hull and deck sections, and for this task I will be using Guild lane high build primer.
This will seal the already sand sealed wood and give it a good foundation for the final paint application. I will give a good initial coat, lightly sand and fill any imperfections and then give a final second coat prior to choosing the colour scheme I’d like for this boat.
Today I have given the first two coats of primer to the hull and deck, and I’ve primed all of the cabins and guns and torpedos in preparation of individually painting them. I need to do a light sand on the hull and I believe a third coat will then suffice.
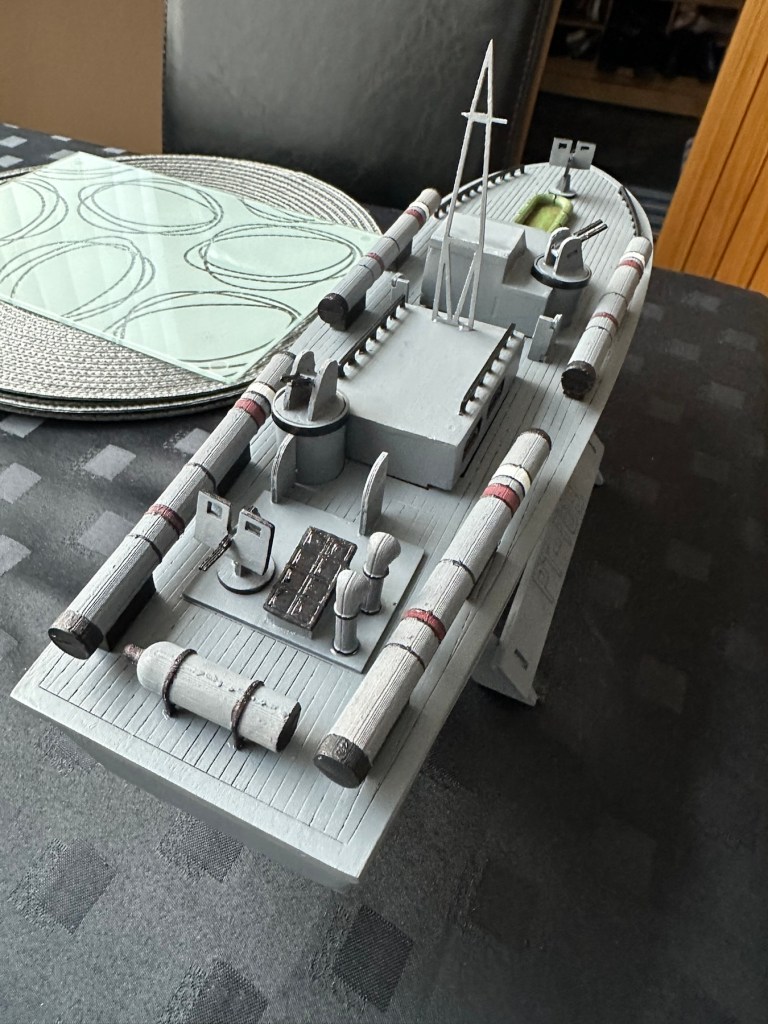
All deck weapons primed and painted
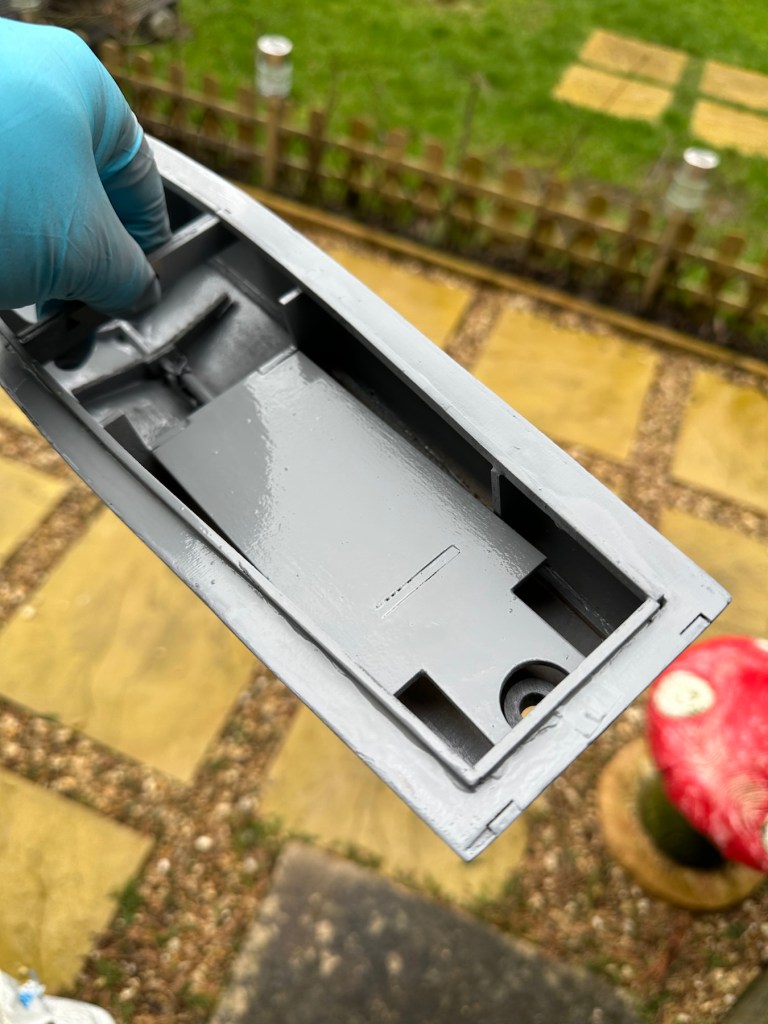
HullInner battery plateInside hull
I’ve given a light sanding to a couple of spots on the hull, I’ve filled a couple of tiny holes, sanded again then re sprayed the hull. I’m happy with how it looks at present. I’m not following a traditional paint scheme, so there will be no comparison to its original appearance. I’ve hand painted some of the deck fittings, put in the cabin windows and started to fix these items into place.
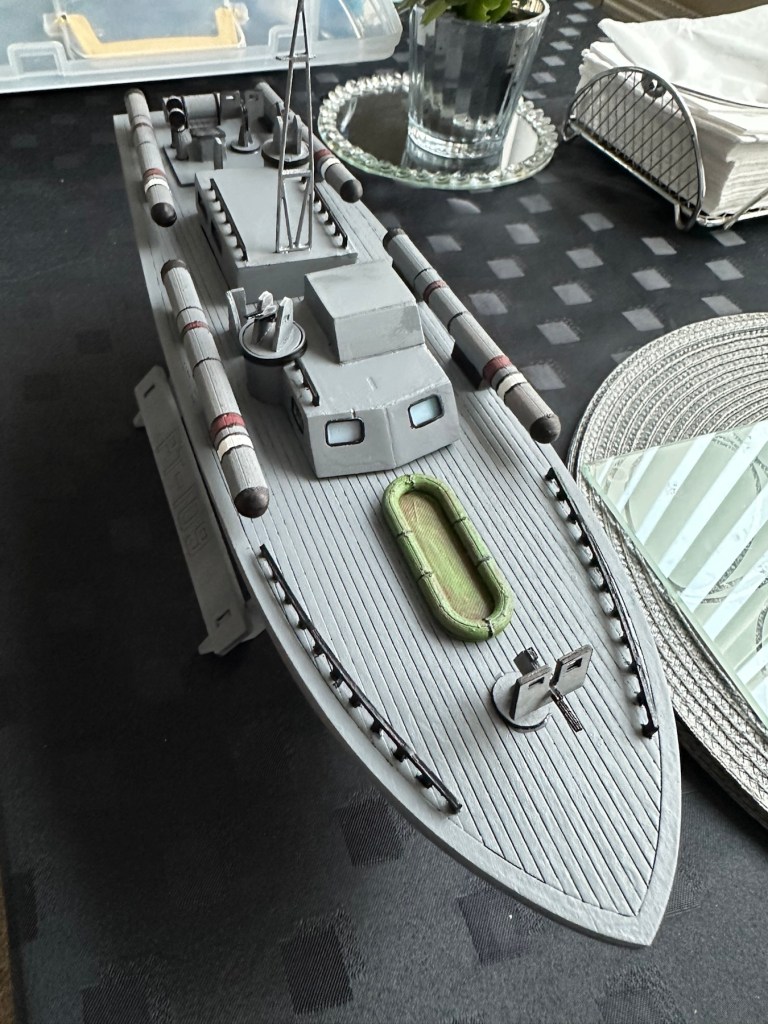
Hull painted deck fittings to be put in place. Deck dinghy painted and weathered Super structure addedDinghy placed Weaponry attached
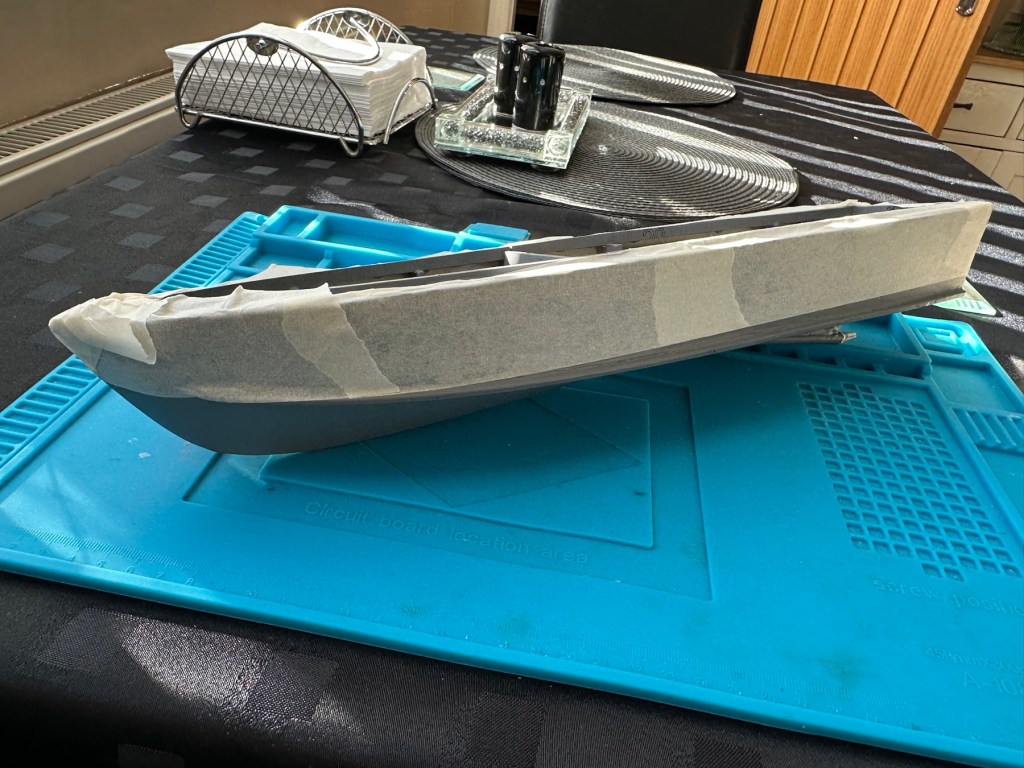
I’m just awaiting some red paint to finish the hull, then I can get some decals in place. Then I can seal it all to finish the exterior of the model and then I can concentrate on setting the motor and the internal electrical elements up. Next I have to mask the area of the hull that I will paint red, I’ll do this now before the paint arrives as it just has to be right first time. I don’t want to be touching up too much if I can help it.
Masking of the upper deck in preparation for a red belly
I’ve made a pair of support struts out of balsa that sit behind the aerial, I’ve changed this area completely as it was too delicate and would have been a nightmare to transport. I’ve built a modern style array for a radar, I know it’s not going with tradition but again it makes for easier transport and reduces the need for repairs on the go.
First coat with mask in place
I’ve done the first three coats of red paint for the waterline, I’m going to leave this 24hrs now before I peel back the masking to reveal what mess I have underneath. Fingers crossed on this 🤞
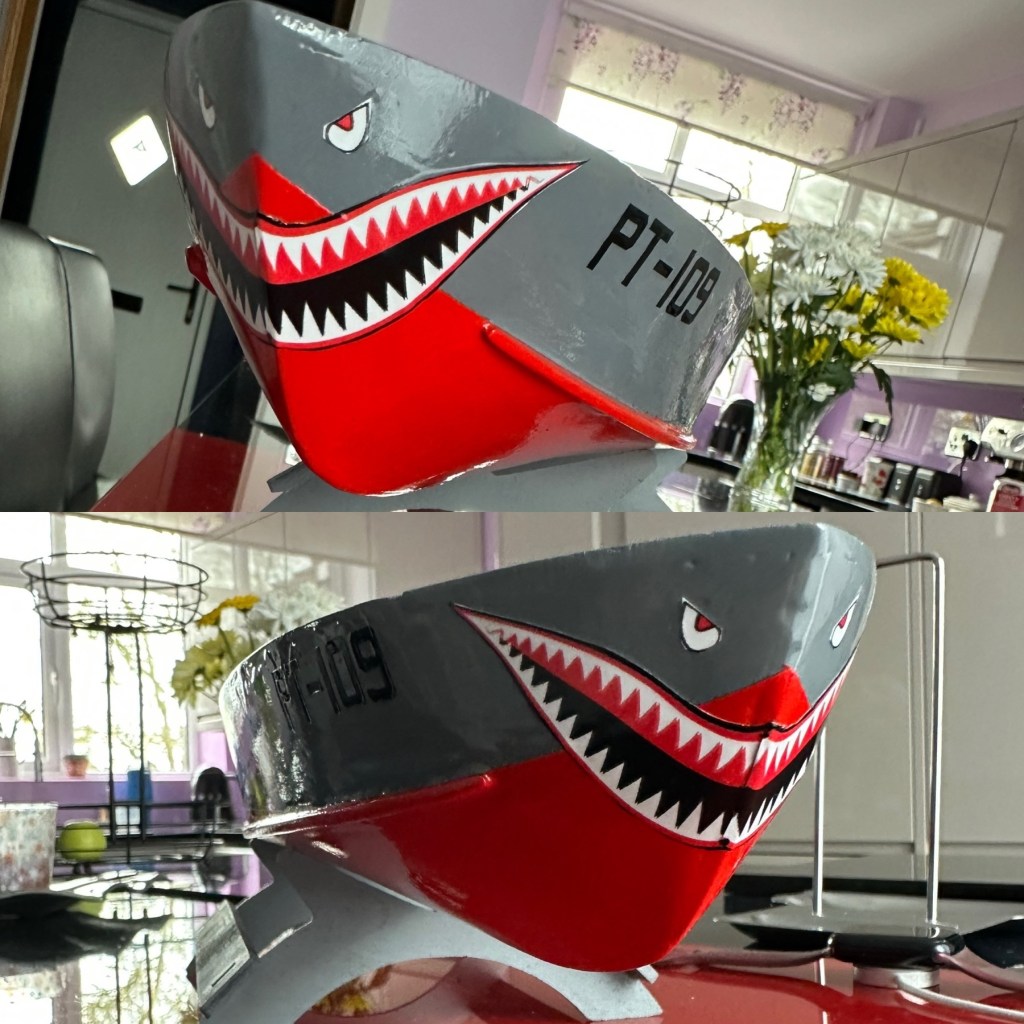
Masking tape all removed
Fingers now uncrossed I’m really pleased with the outcome. The masking tape has been all removed and we now have a nice crisp line around where the red joins the grey. There’s some like marking up by the front end that believe it or not are finger nail marks when I was applying the mask. I’m not worried about this though as I have some sharks teeth decals coming that should cover this area. One of the little additions I wanted to make, to put my own mark on the build. Once all the decals are placed I will then give a final coat of a yacht varnish to seal all this work. I’m going to test a small area first as the last thing I want is for all this hard work to run into a gooey mess.
I have done the tests and commenced with coat one of the varnish. It looks gorgeous. Im probably going to do a further two light coats and that will be the hull complete. I haven’t put the decals on yet, I will probably do that prior to putting on the finishing coat.
All decals placedVarnished
All decals applied and final varnish completed. I can now look at getting the rudder and electronics installed. I’m happy with how the whole hull area looks.
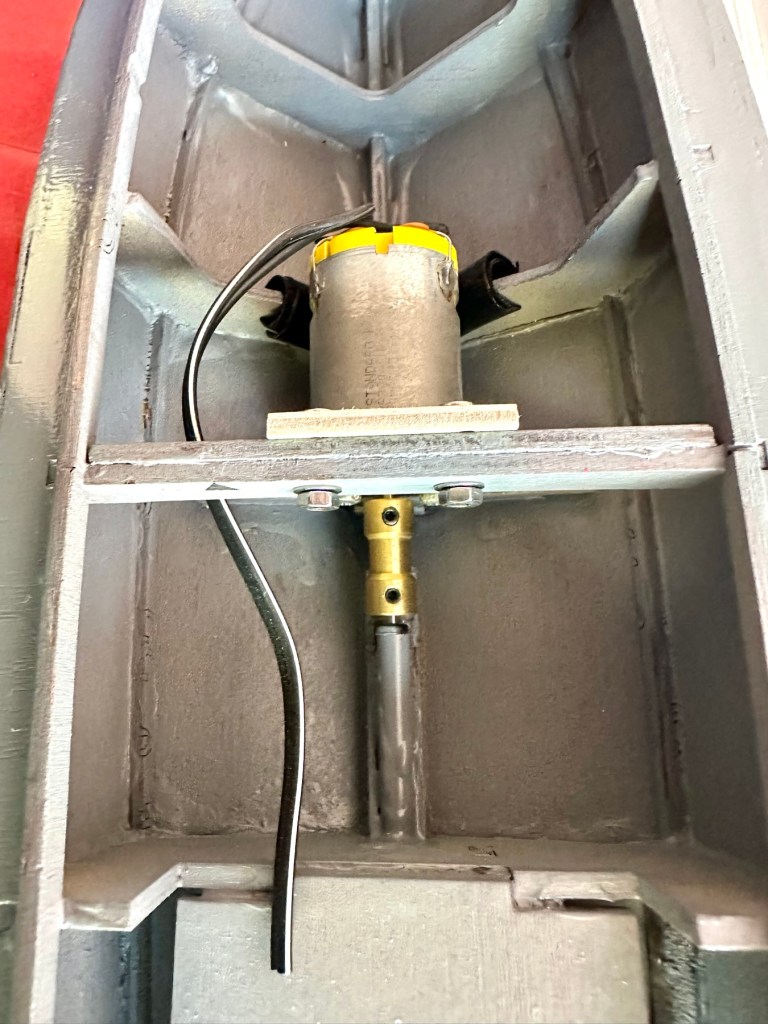
Motor, prop shaft and rudder now in placeLooking good on her stand with prop and rudder in place
All that is needed now is to place the battery, receiver and ESC in place. I have quite a strict time on this build and I must have it ready for “Lake” trials when we go to Norfolk in June.
I will also be borrowing my brother in laws pond for 30 mins or so to do a balance and water tightness test.
Let’s get the electrics installed.
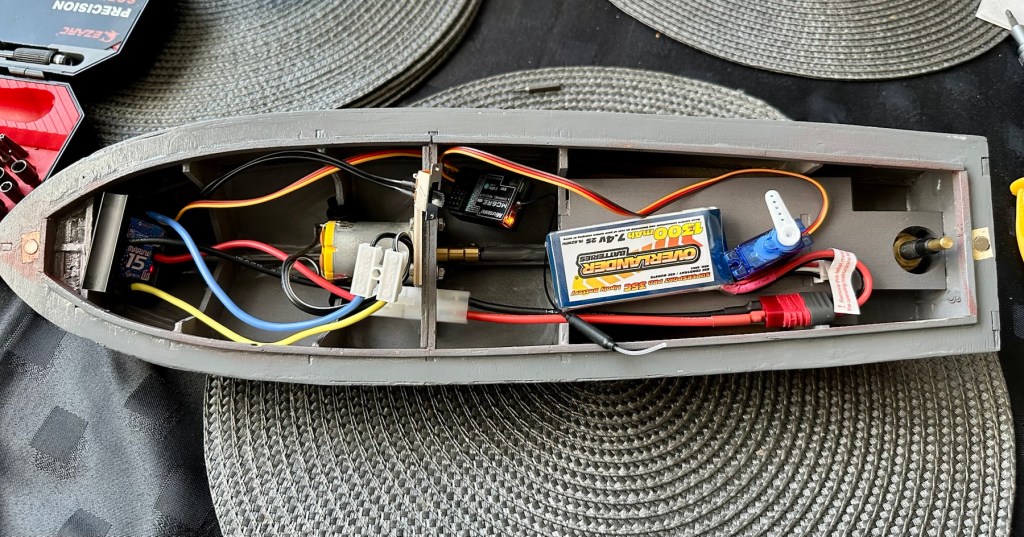
Having never really done this before, I’m quite amazed by the amount of gear I have to fit into such a small area.
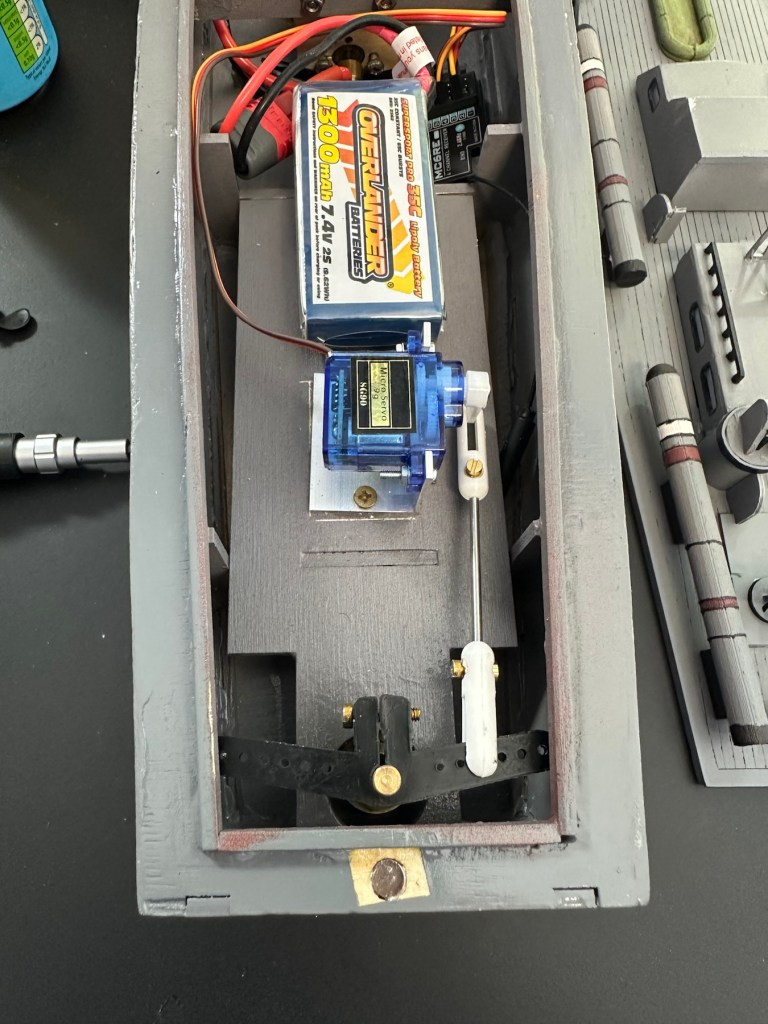
All this has to go in there….i need a bigger boat
It’s in – just needs sorting
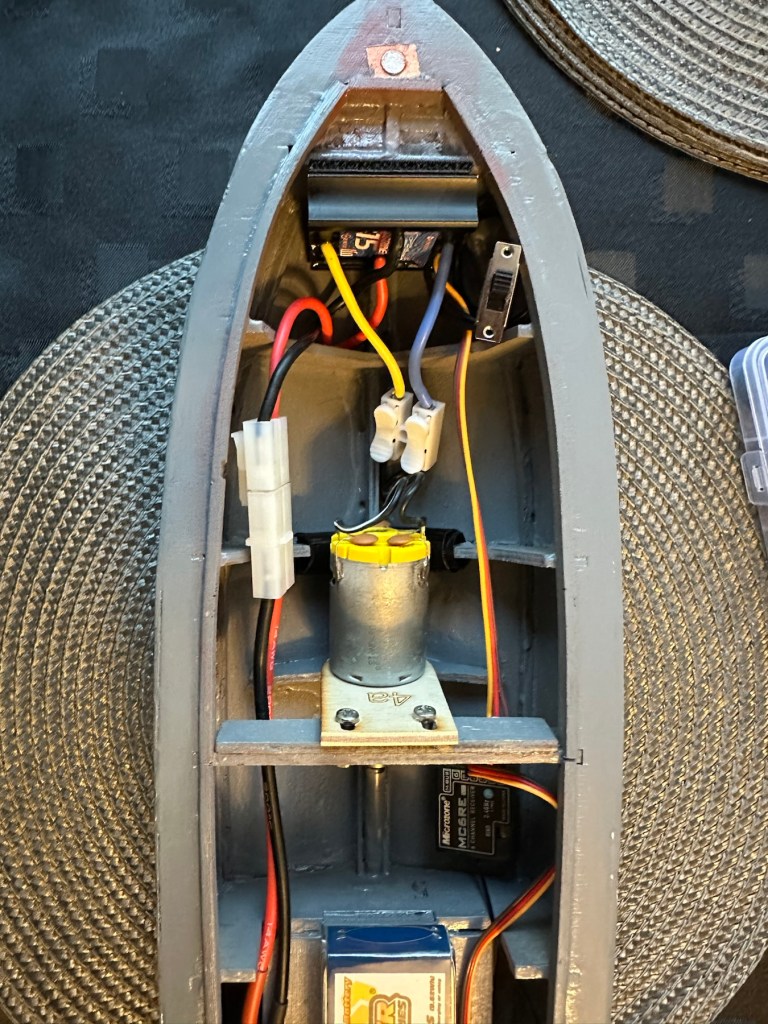
I’ve managed to put these items in-situ, in a rough position inside the hull. I need to shorten some cables, I need to somehow position the rudder servo, but I’m sure that will not be an issue. I’ve already tested the centre of balance and I’m happy with that. Later today I shall start to really tidy the layout by working from the front to the rear of the hull.
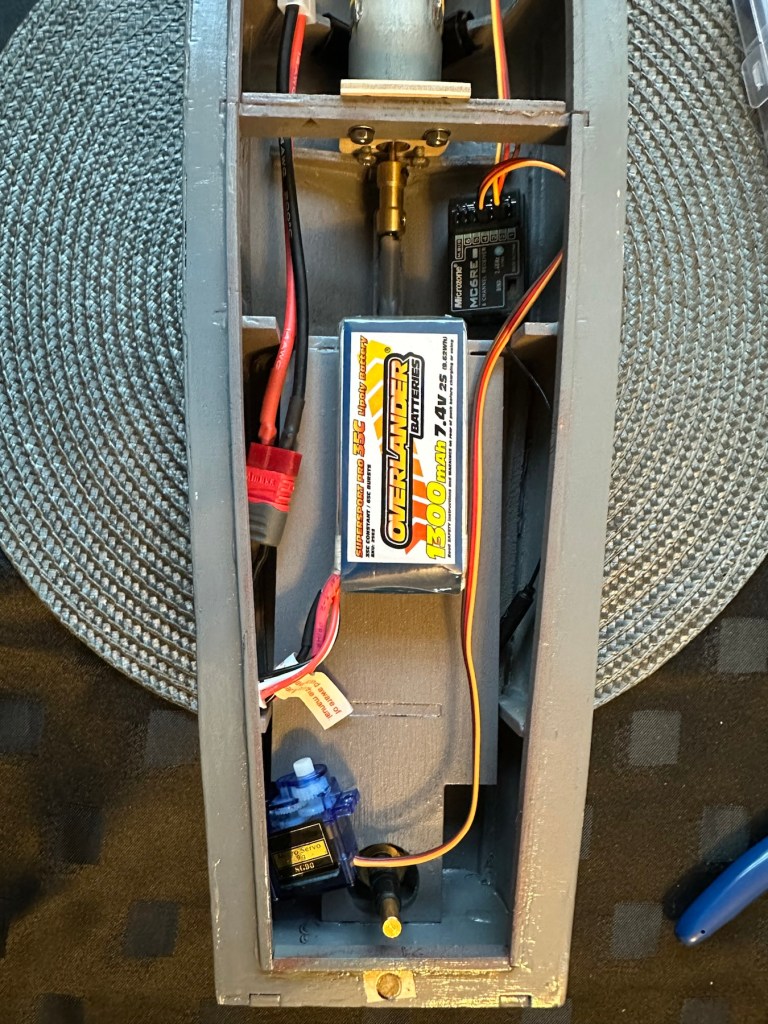
Front RearThank the Lord for Velcro tape. All complete apart from the rudder connection. I’m still working on that.
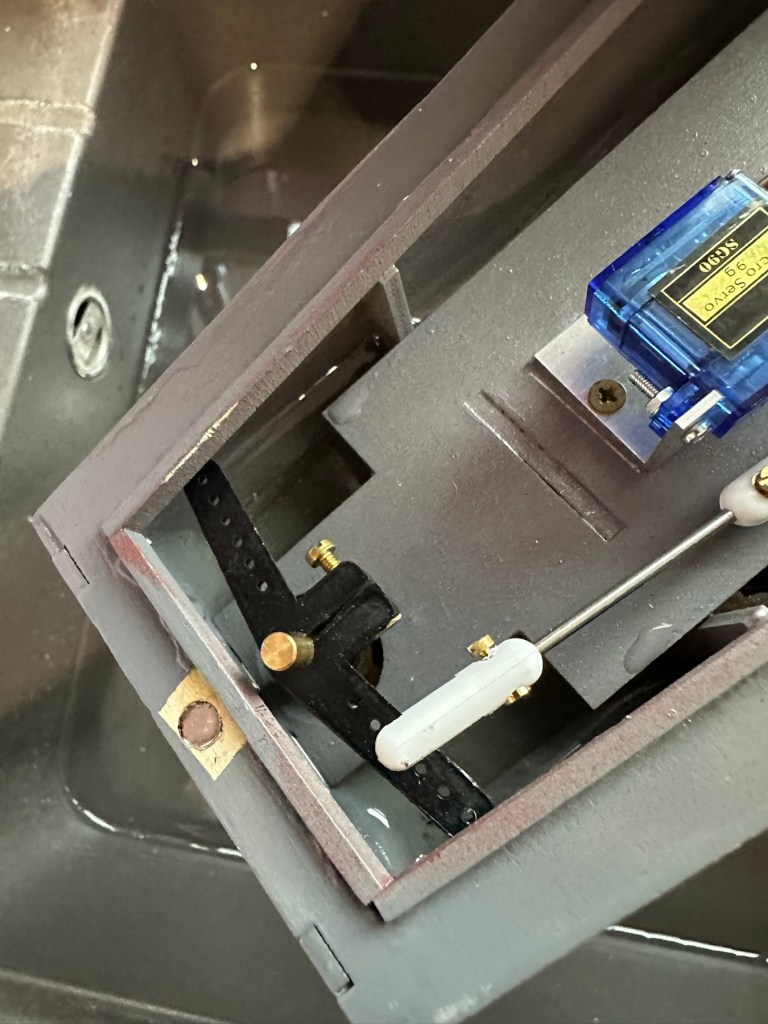
I’ve had to purchase a small bracket for the rudder servo along with a couple of connecting rods. Hopefully we can now complete the electrical connections within the hull and get the rudder operational, then I can get it water tested to check for leaks and balance.
Rudder linkage in place, just needs shortening
Rudder linkage now adjusted and in place
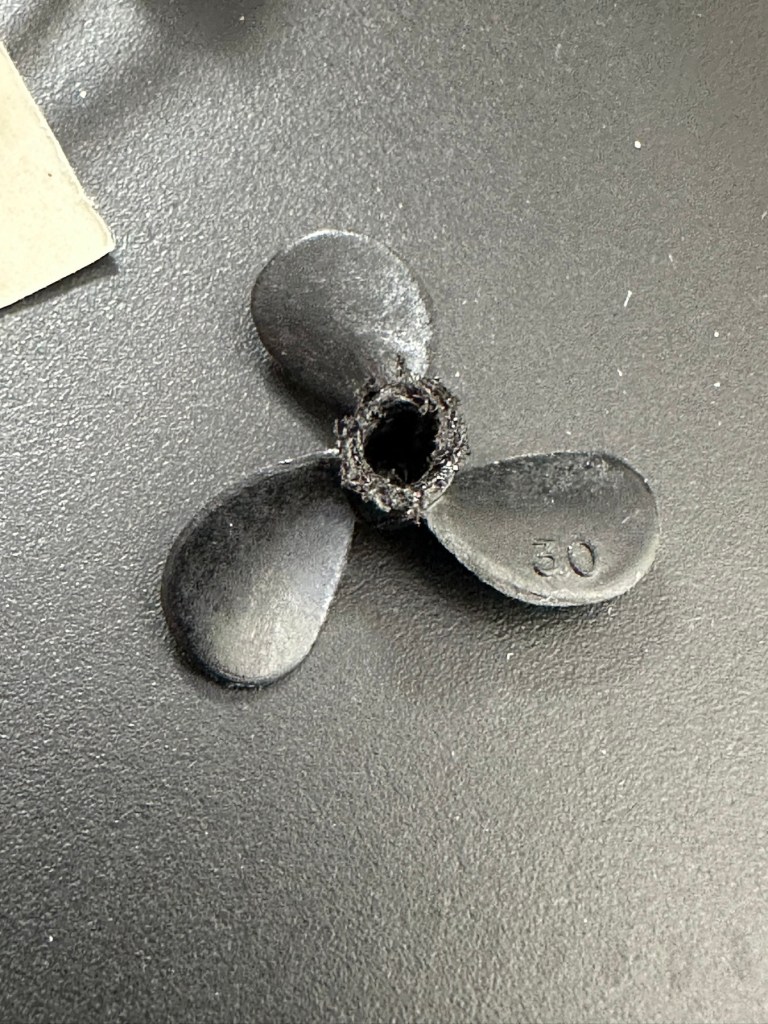
I’ve just had quite an annoying and inconvenient moment. The rudder linkage is all now in place and working fine, however the issue lies with the propeller shaft. I’ve rather foolishly connected it all up but left the propellor flush with the shaft end so when I put on full power to test, there was a burning smell as the propeller wizzed past my ear across the room and the shaft seized up. There was such a build up of friction between the propellor and shaft that the propeller melted and bent the 2mm prop shaft out of place. A stupid mistake, caused by my rushing to get this completed.
A melted propeller with the screw mechanism missing
A small video that shows the rudder mechanism working
I’ve now had to order a new prop shaft and propeller, hopefully these will arrive in the next few days and I can then get the build finished.
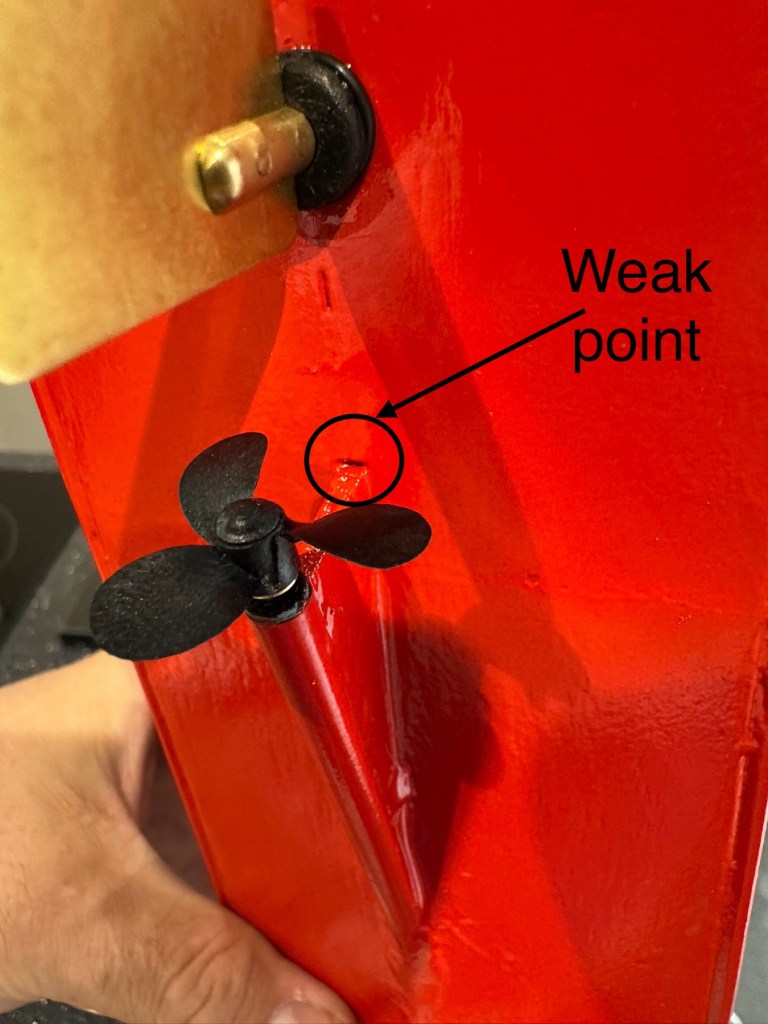
New prop shaft in place, and all electrics and functions are now operational with the motor purring away nicely. I’ve adjusted the distance from the prop to the shaft to reduce Friction and this appears to be working fine.
All functions working nicelyLeak can be seenWeak point found
Now to sit her in some water for leak test.
Floating nicely After 30 minutes we have water ingress
The leak test was going so well, all functions worked well and she was sitting nicely in the water.
Water test
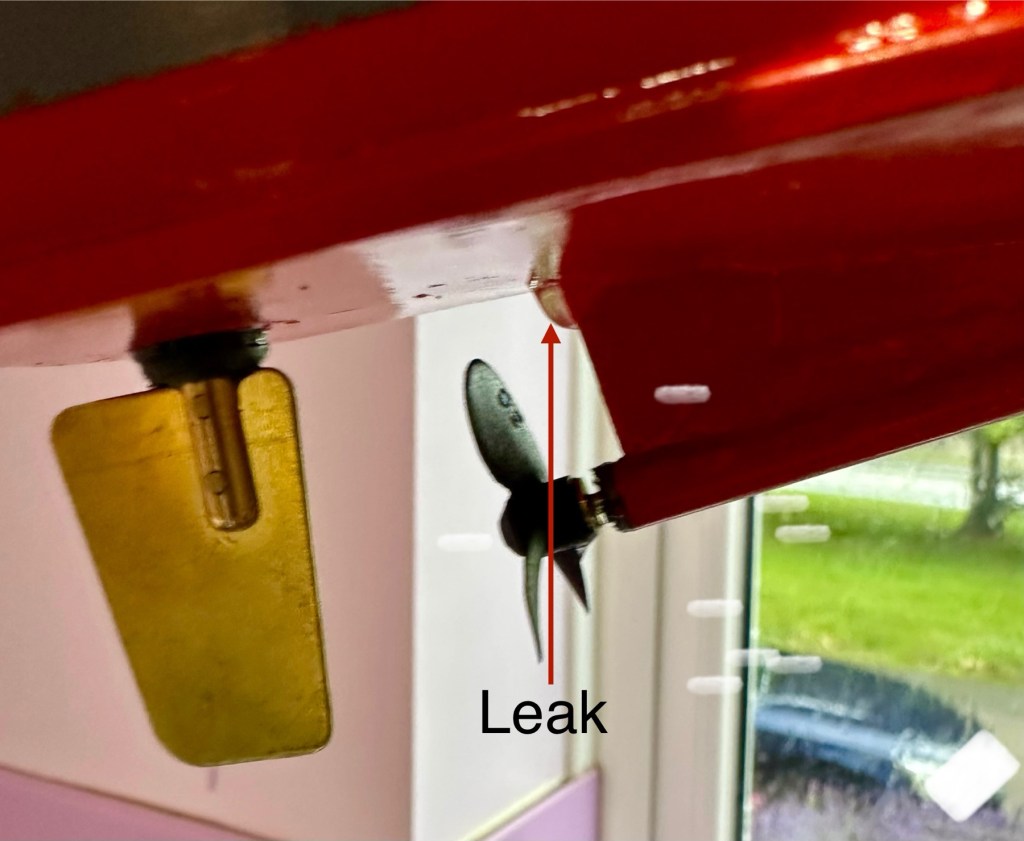
The positive here, is that there is no leak in the front end there was no water present here. All the water was in the rear, however it was not entering via the rudder mechanism or the drive shaft.
I removed the hull from the water, tilted it in such a way for the water to gather at the rear, and dried the underside of the hull. After a few seconds you could see a drip starting to gather at the top of the mount that holds the drive shaft in place. I knew it must have been a slow leak as this took almost 30 minutes to build up, I’ve caught it just before it impeded on any of the electronics.
I’ve now emptied the hull of remaining water, it’s now drying off naturally and I have a plan in place to repair the issue once the hull has fully dried. I’m probably going to use some epoxy resin to seal around the whole drive shaft fin, and then I’ll paint and seal this part again. We will then repeat the trial.
Back in the water the following morning at 07:50 after being sealed with epoxy resin on the hull, let’s leave her alone bobbing around for 30 minutes to see what occurs. It’s not good news….again.
Timelapse over 15 minutes
As I’m impatient, I set up my camera in time lapse mode to see if I could pinpoint where the water was accessing. My suspicions were that the water was coming up the drive shaft however I’m quite pleased that the timelapse shows this is not the case. the water appears to be accessing again from the very base of the hull. This area was sanded to quite a thin tolerance so i suspect, that even with all the sealing, two coats of paint and a coat of varnish there must be tiny holes along the hull. The previous sealing I did cured the issue at the rear, it now appears that I will have to carry on with the resin coating or something similar, along the length of the hull. To make things entirely water tight I’m going to remove what I can internally and also seal inside the hull as well.
One good soaking of polyurethane varnish later…
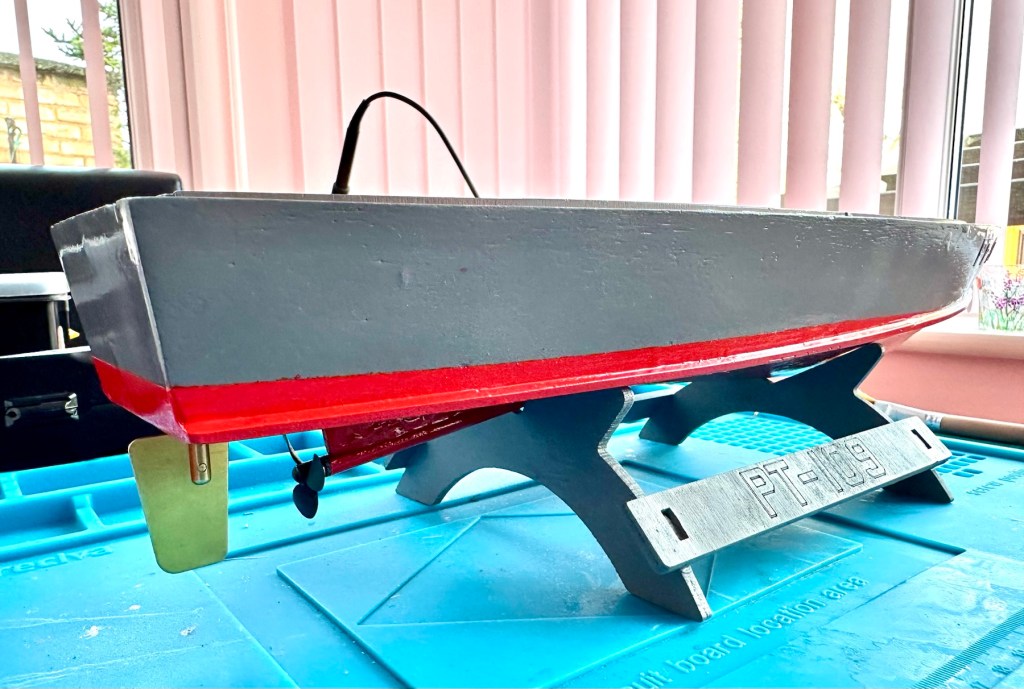
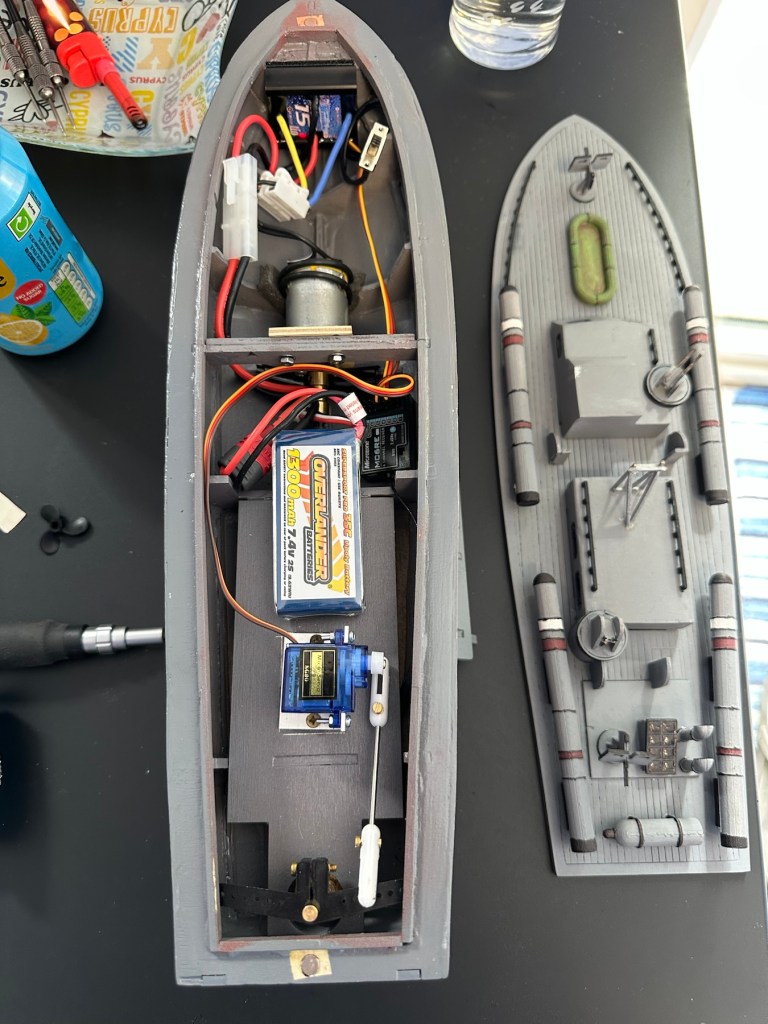
Three days after all this varnish has dried, I have done another float test and this one was with all equipment on board for an hour…and it was successful. We seem to be dry. I’m now putting the whole boat back together now ready for its maiden voyage at Gorleston boating lake in a weeks time.
Ready to go…
I will do a separate post regarding the maiden voyage and its outcome whether positive or negative shortly after.
Thanks for passing by, as always it’s very much appreciated.
If you like large scale modelling you really need to spend 30 minutes of your time watching this guy at work. His name is Parma, he is a Brazilian chap who has a channel dedicated to large scale modelling and the thing is, he does it all from a small room in his apartment that he has converted into a workshop. He wants to prove that you don’t need a massive work space to create these masterpieces.
I love model making but you look at guys like this and feel totally inadequate. He is a true master of his trade.
In my first foray into this art medium, i chose what were to be two of my first templates. That post can be found here: Faux stained glass painting. This post covers what I will be doing with the second template and a slightly different approach to what I hope to achieve.
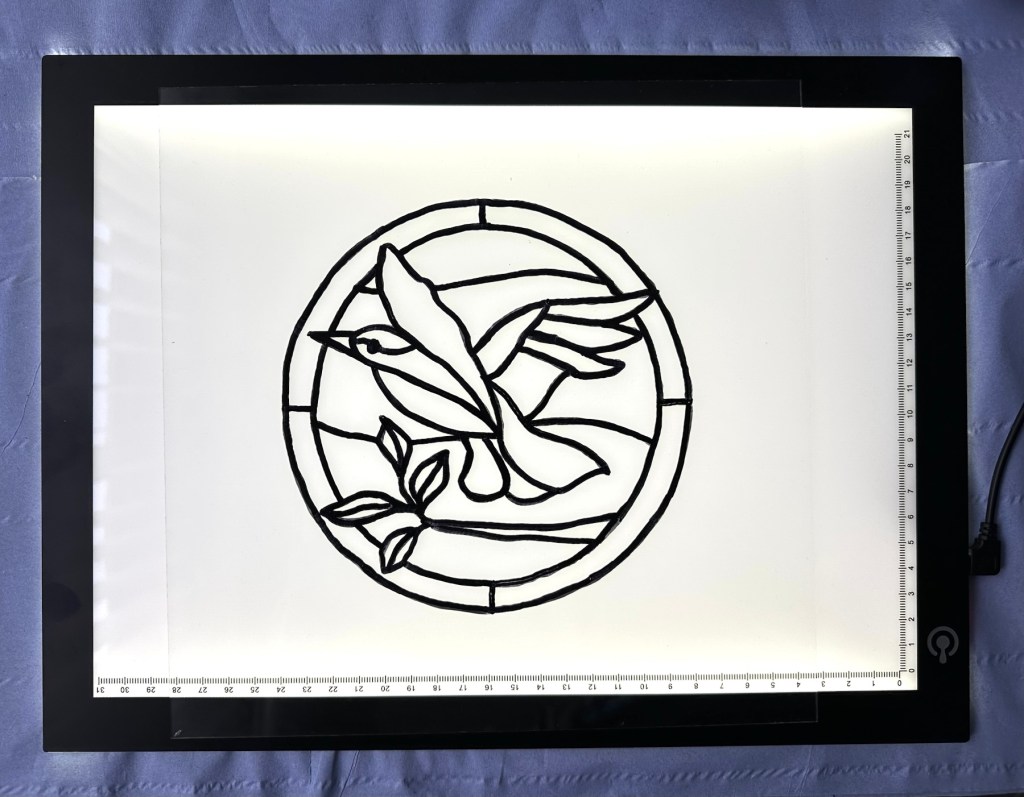
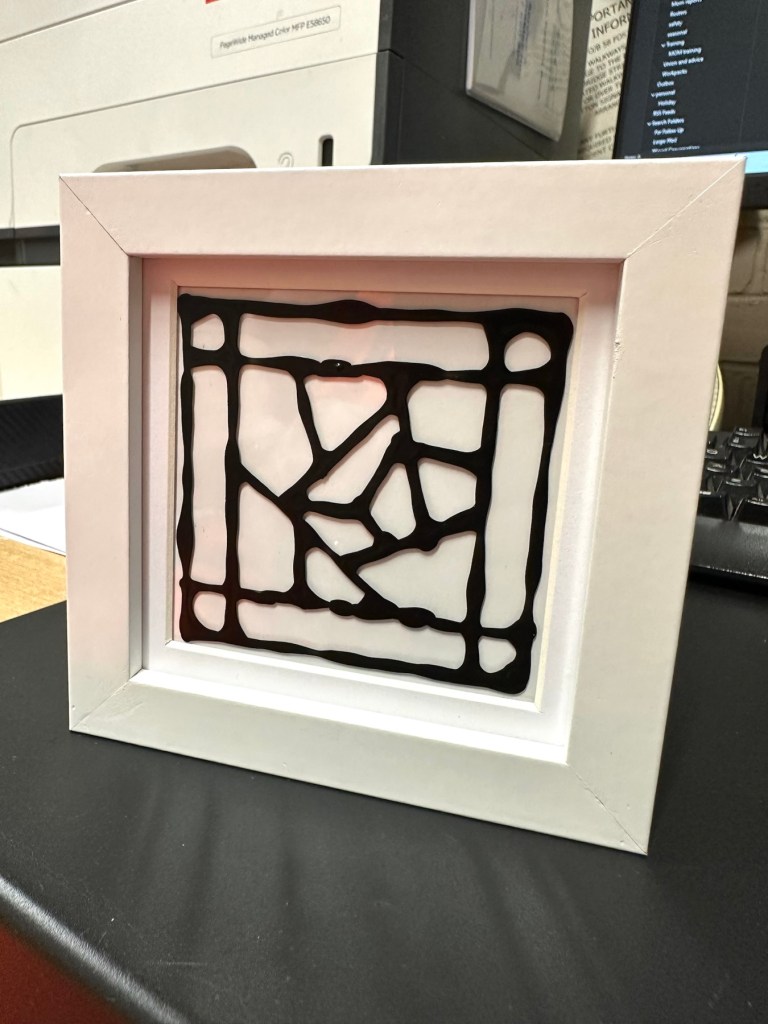
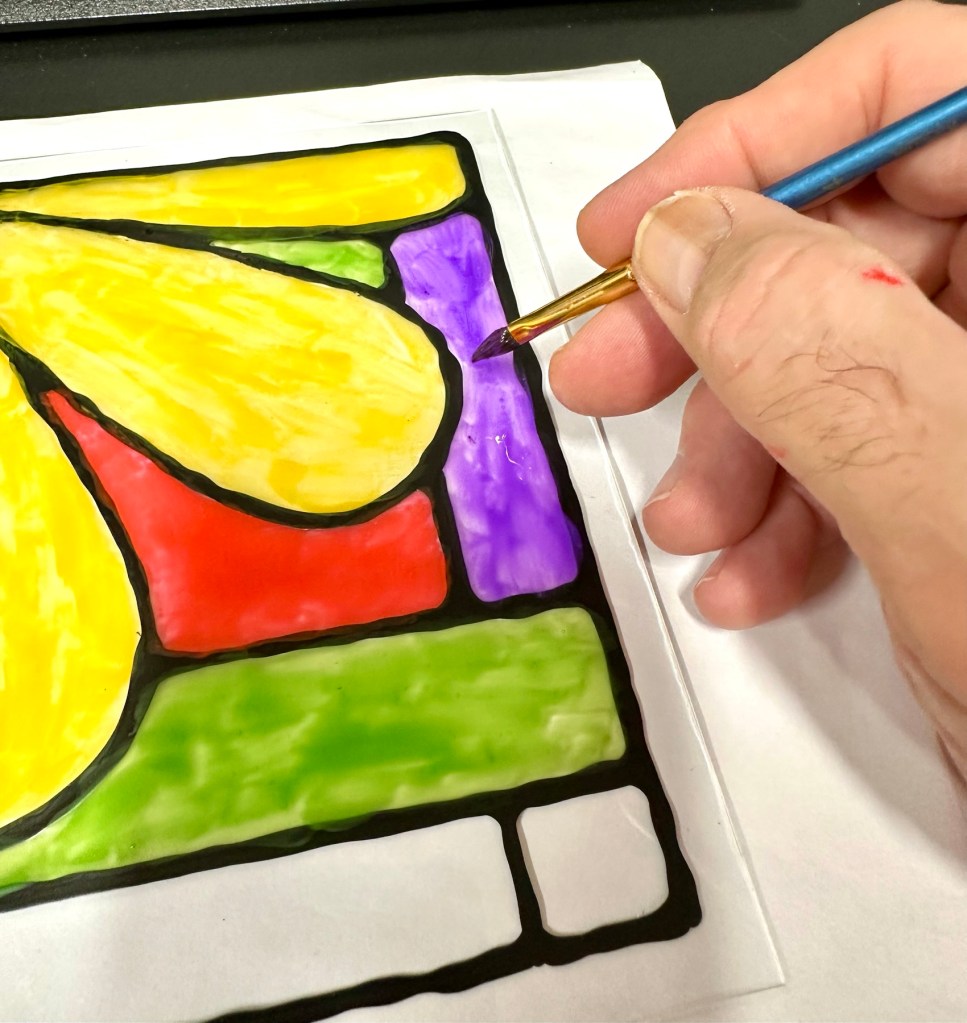
I have already traced an outline onto my glass and this time instead of using paint and glue for the lead effect I have used a Pentel permanent marker. I will do the painting on the opposite side of the outline as this will allow me to make amendments to either the outline or the paint without interfering with each other. Because the paint is mixed with glue this can easily be peeled off and re painted. The outline can be amended by using a cotton bud and some IPA. Making changes with the outline and the paint on the same side would require cleaning the whole glass and starting again from scratch. I want to avoid that, so that’s why I’m experimenting.
My second template, drawn with permanent marker
I’ve brought some new Acrylic paints, and will be using slightly more glue in the mix to try and achieve a slightly more translucent effect, to assist with the effect I’m trying to achieve.
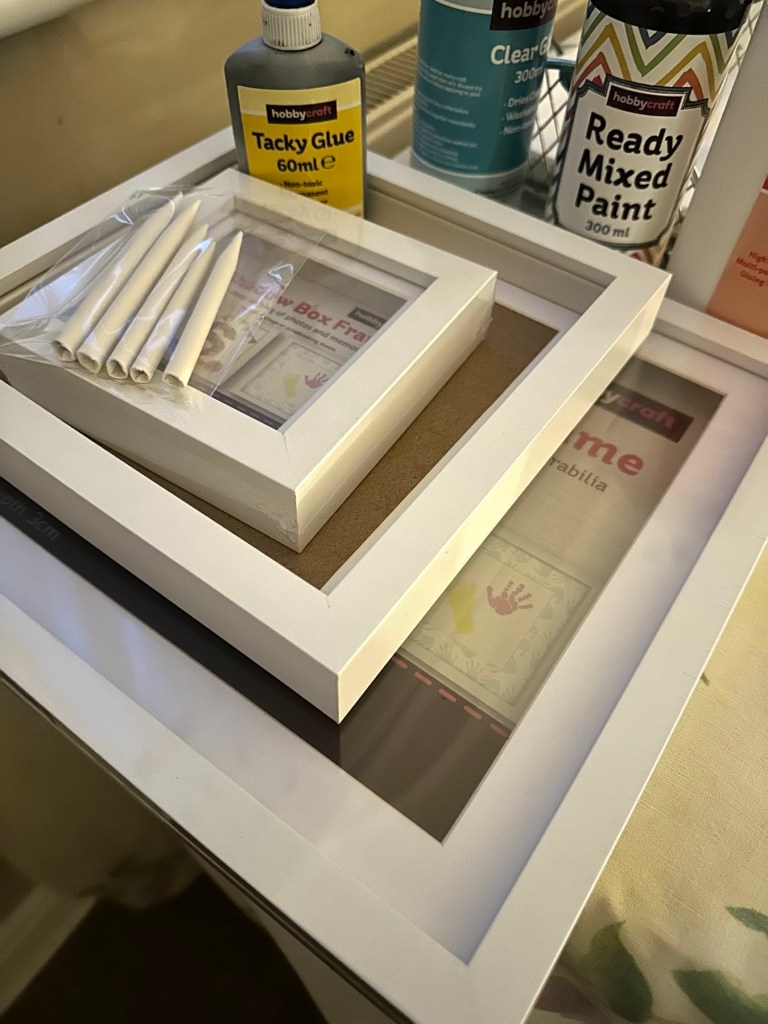
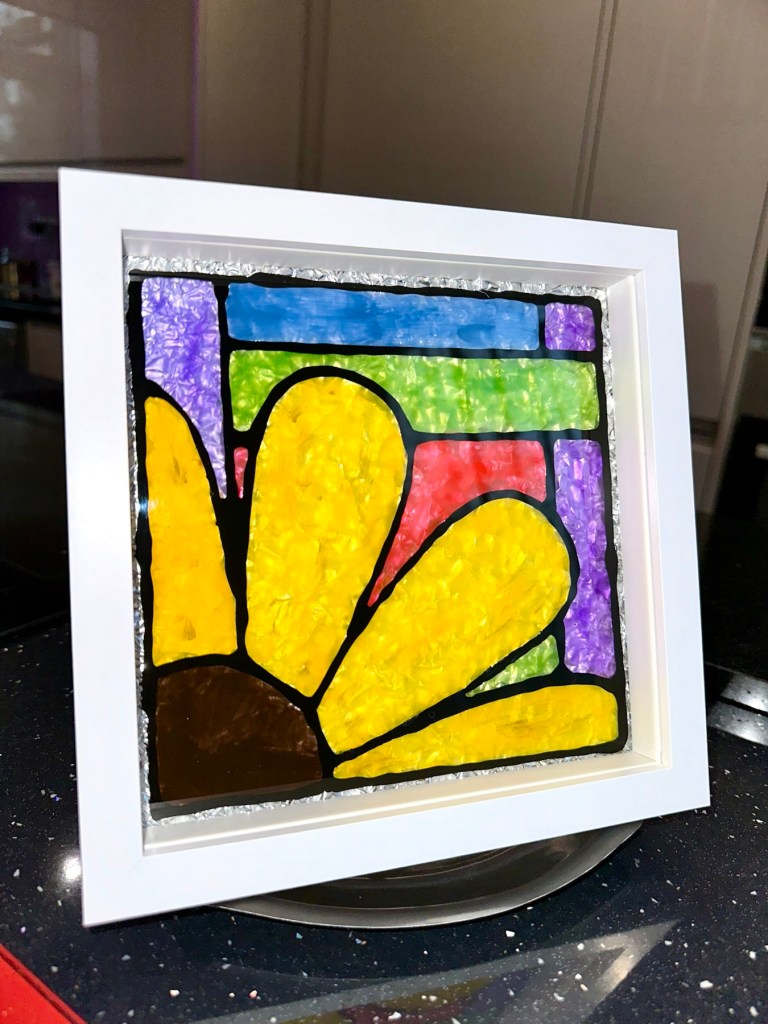
As you can see I will be using a box frame for this piece. What I want to do in this example is to put some lights in the frame, but to ensure the light is not too harsh I want to put some opaque tissue immediately behind the glass to act as a diffuser. I’ll get around to this later in this post.
Let’s get painting.
Today i’m using a small light box under the glass so i can get a good idea of how the paint is going down. It also saves me from constantly having to lift the glass to the light to see how it is looking. The glass is very thin and the less it is handled the better.
My light box
Time to paint
Time to dry
When dry I just flip the glass over and go over the out lines once again, this time I’m going to add a small sting of lights into the box for display at night.
Mounted in a box frame. I have hot glued some lights into the inside of the frame
Box frame Better at night
I’m a tad unsure about the lights but I’ll have to wait until it’s dark before I make my mind up about this one. Been fun, I’ve enjoyed it but I’m sitting on the fence regarding the lights, but you never know what’s liable to happen unless you give it a try. I may try the foil trick on this one as I think it may be more effective.
My original three frames i purchased, to use as templates for this particular Art medium
I’m new to this art medium, I don’t really know what I’m doing, but like everything I do on this site, I’m willing to give it a go, always willing to learn. So here we go.
I was watching a program on TV a week or so back and was watching a stained glass window being repaired. I was fascinated with the expertise and commitment these guys put into repairing these pieces of art. I thought to myself that this is something I would love to try but obviously I just don’t have the expertise, space or ability these guys have.
So I had a look around for simpler alternatives and that’s where I found out about Faux stained glass painting. It’s a whole lot easier, less expensive, and I have most of the tools required already.
I’ve attached a video of the technique that I’m interested in, this video has kind of sold the process to me.
I’m going to give this a go now, let’s get started.
My Subject:
I’ve chosen two simple potential templates that were free to download from the internet. As this is my first attempt I’ve chosen a couple of design templates that will be good for a first attempt at this type of art. I’ve chosen a bird and a simple flower.
The two templates I will be choosing from for my first attempt at this medium
What do I need?
Not a lot to be honest, below is the minimal requirements.
Craft PVA glue
Craft clear glue
Paints – I use acrylic, you can use pretty much whatever paint you have around.
An old cheap frame, with glass
Brushes, or sponge applicators, some tape and cleaning materials
And that’s basically all you need.
Ive been out and purchased some supplies including some shadow box frames that were on offer. These will be my guinea pigs for the purpose of this post.
Supplies
I’ve chosen the flower template for my first attempt as it is slightly less involved. I’ve mixed some black acrylic paint in with some PVA as this is what you use to form the black “Lead” type outline. I’ve done some samples on plain A4 paper to perfect the technique as it was coming out all blobby and runny, I think I’ve now perfected how much the nozzle needs opening and now I’m quite happy with the outcome.
Let’s go:
Next i tape the template to the rear of the frames glass, i then clean the front of the glass getting rid of finger prints and anything greasy that might stop the ink bonding to the glass.
Paint/glue applied a bit blobby
Using a steady hand you then just add the glue/paint to the top of the glass following the template underneath. Don’t worry too much if you get some blobs and bubbles, the bubbles can be burst by using a needle and the blobs can be dealt with when the solution dries, because the glue can be easily cut or peeled back. Don’t worry too much about little mistakes, just go with it. Don’t worry about making straight lines perfect as the irregularities just add to the authenticity of the piece. You don’t see perfect lines on old stained glass windows, so don’t worry. I use some small paper tortillons just to remove some small smudges and they work fine.
Glue and black paint mixUsing a Tortillon to clean it up a little
Now we just need to wait for the outline to dry and I’d suggest leaving this for a good eight hours or so.
Whilst I’m waiting for this one to dry I’ve done another small one with just some random geometric shapes. I love the way this one has just spread out and gained a great scruffy edged look. Can’t wait to paint it.
Just the glass, and dried outlinePlaced in its frame to see how it might look.Second trial piece ready to paint
There are many ways to do this technique and the video at the top of the page gives yet another two ways to obtain this outcome. These are my first two attempts and I’m going to try the techniques in Emily Seilhamers videos at a later date. Meanwhile back to my two attempts.
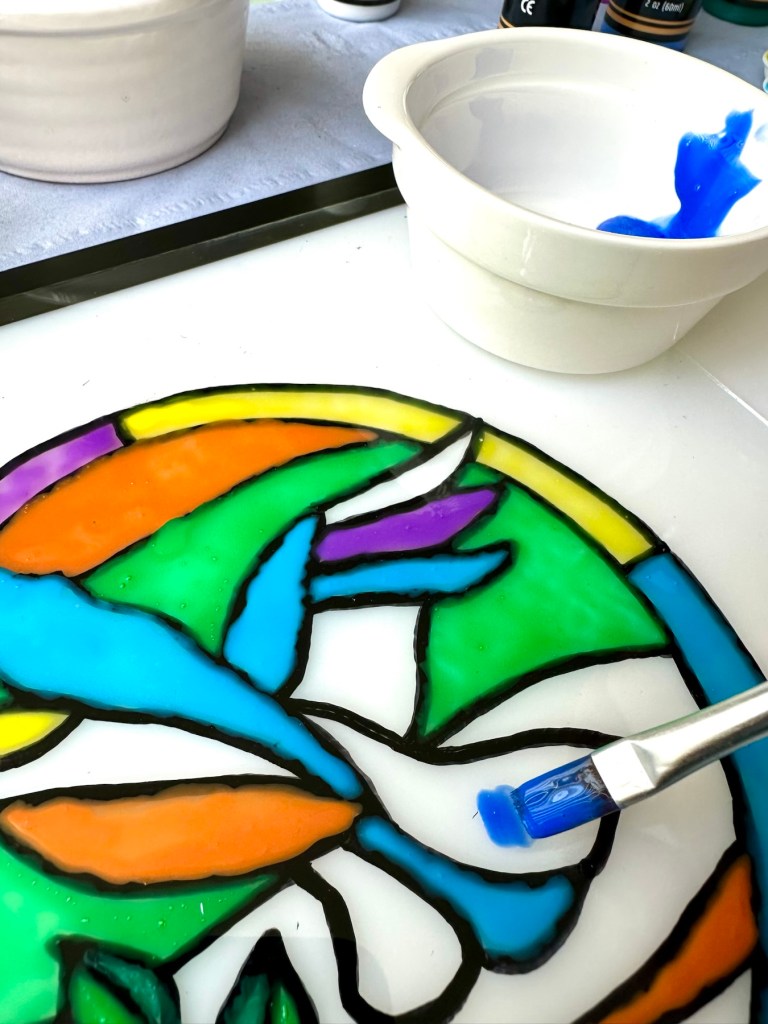
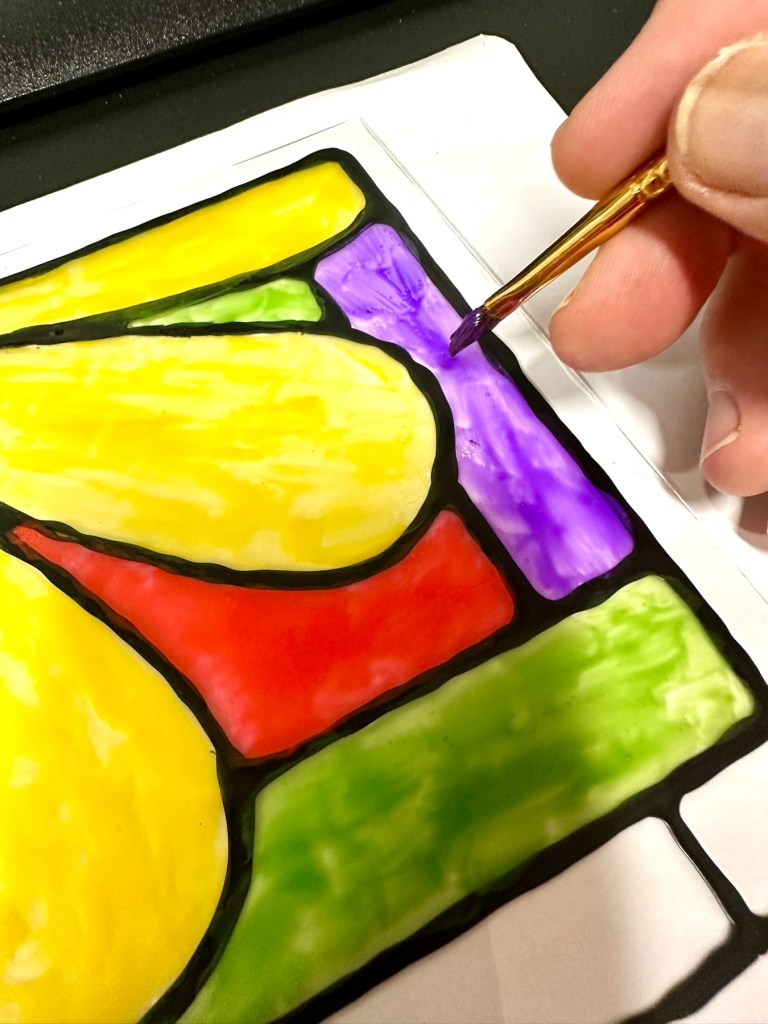
For painting you need some clear school glue and whatever your preferred paints are. I’m using some acrylic paints as I have plenty of them around. Using a tiny spot of paint you then add some glue at a slightly greater ratio than the paint, the thinner it goes on the more translucent it will be, if thicker it will be more opaque. Don’t t worry about paint strokes, it will happen as you are painting with glue. The good thing is if you are not happy with the outcome you a can always use a craft knife and just peel the offending colour off. It’s easy.
Here I’m painting, probably a little to thickly, and I’d probably be better with some glass or enamel paint. Lesson learned.
The good thing is that this paint dries really quick and in a warm room it’s probably dry in just over one hour.
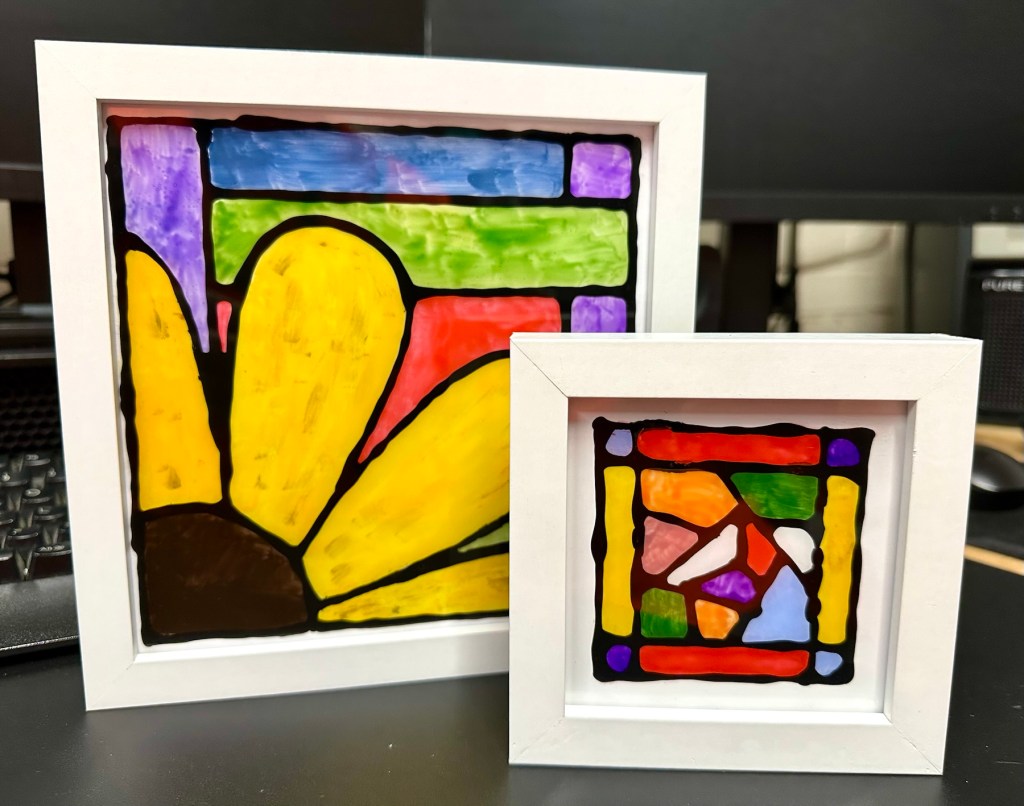
I’ve placed my two attempts in box frames. I’ve got one final thing I want to do before they are finished.
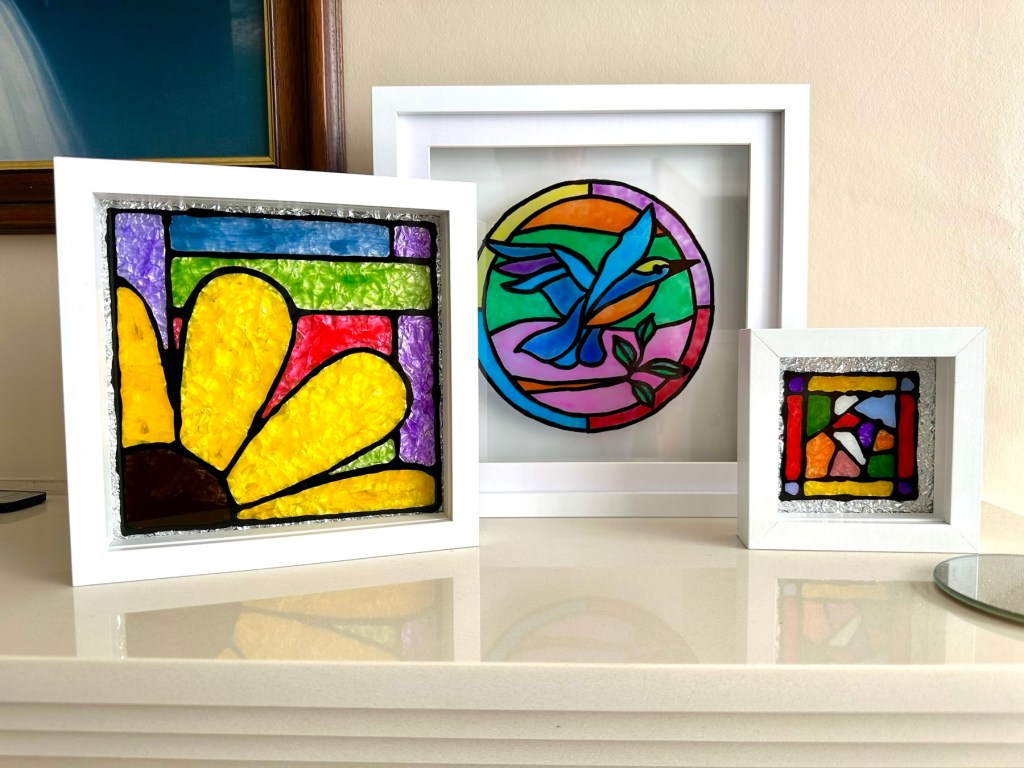
I’m quite happy with my first attempts, there are little mistakes and many things I have learned from trying this medium. I’m not going to make any changes to what I have done as I want to display them as battle scars. You know, a snapshot of what I did at the time and how I have learned from it. The next examples will be better, I have a third one of these box frames and that will incorporate all I have learned from doing these little prints. It will be just like a journey into Faux stained glass in three parts, and they will all be on display.
This project isn’t quite finished yet though, there is one other thing to do. The perfect place to display these items of course is right up against a window just the bare glass, allowing the sun to come through and show off all those lovely colours. However you can also display these pictures within frames and this finishing touch courtesy of Emily Seilhamer, completes that look.
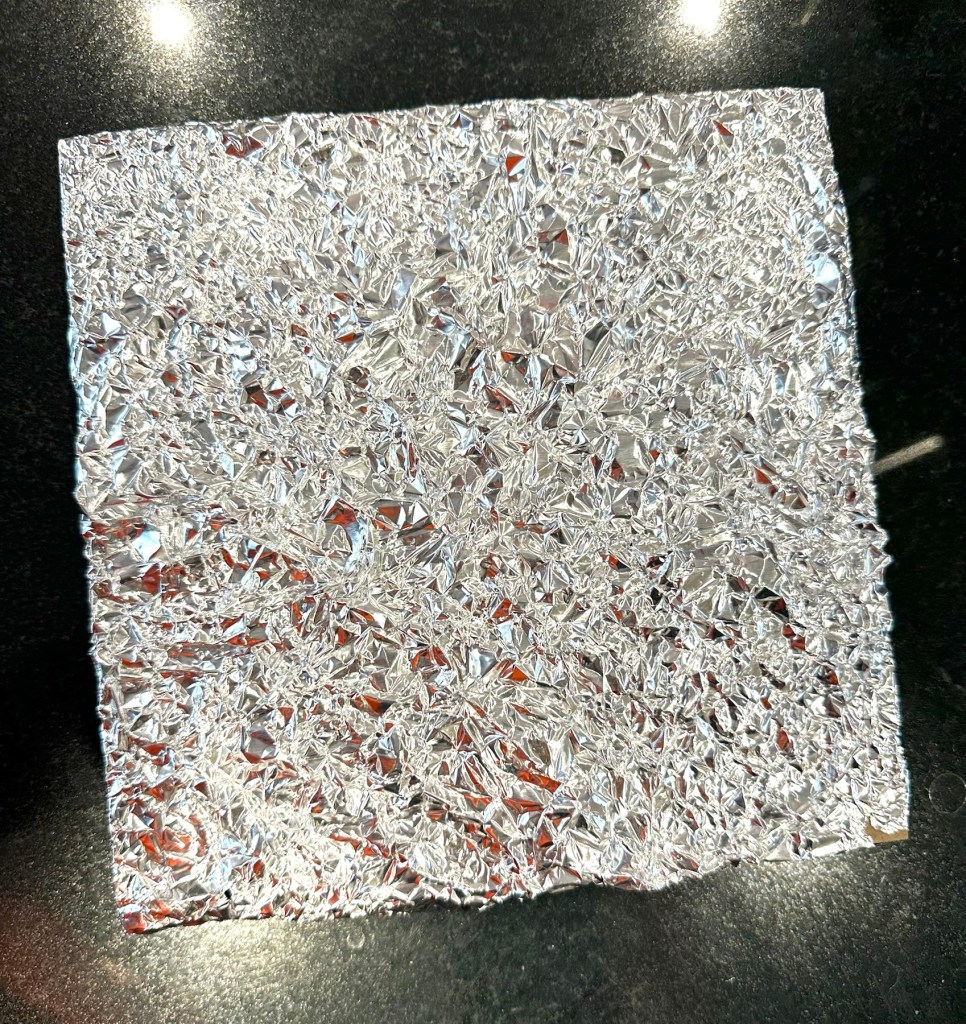
You just need some kitchen foil. Yes you heard correctly. Kitchen foil.
Cut a piece of foil just slightly bigger than the backing cover of your frame. Now scrunch it all up but not too tightly. Just move it around in your hands until it appears to have an even amount of creasing as this is to be come your light refracting layer.
Scrunched up tin foil
Attach this to the frame back and then secure it back in the frame against the glass you have painted, trim and tidy the foil using tape at the rear of the frame.
Now turn it over
Look at the difference with the foil effect
Attempt No:1Attempt No:2
See how that tin foil now reflects all the available light and makes your picture look totally different. The refraction appears to help cover up the brush strokes we discussed earlier, and you can now display your pictures in any area of the house, and any available light will be reflected on to and will enhance your pictures.
On the fire place
I hope you have enjoyed this post, as much as I have putting it together. Thanks as always for passing by. It’s always very much appreciated.
Another production on an iPad from my 2012 era. God knows what I was on at the time as I was doing some right old tripe. But hey ho, it’s done and it covers a particular time of my life so it has to go out there. Not just showing the good stuff (not that I do any good stuff….). I guess if I had a name such as Picasso or Banksy it would be worth an absolute fortune. But I don’t, and it’s not. Enjoy, laugh, critique, slap your forehead. At least it’s got a reaction 👍


You must be logged in to post a comment.