The initial report of the purchase stated the issue was solely with the tape playback and that every else works fine. Cosmetically it looks fine apart from a bit of cleaning that is needed in the battery compartment, touch wood there isn’t any battery corrosion.
New belt kit
I’ve kind of jumped the gun a bit here in ordering a set of new drive belts for the unit, the fact it is 33 years old now probably means it would be money well spent. ( I may order a stock of belts for any future projects that I partake in) The belts alone were £6.95GBP so that now takes the total for this project to around £26.00GBP in total, but I’m going to use this personally so I’m not too concerned. In good condition and in full working order I could still make a small profit on this so at this stage I’m not too concerned.
The unit arrived on the 29th April. It is in a very good cosmetic state and all the lettering on the buttons is intact, a few small scratches and battle scars as expected but overall very good.
Radio and all button functions work fine, when you push any of the cassette buttons you can hear the motor run so no issues there. Let’s get this package dismantled.
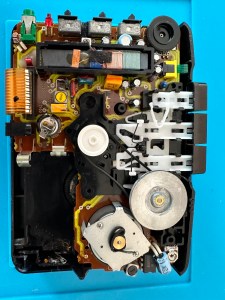
Once inside the most obvious issue is that the belts have turned to mush.
Broken rotted beltsWhat’s left of the old belts
I remove what’s left of the old belts, give a good clean to the cams and reinstall new belts that I have purchased earlier. A little bit of grease to the moving parts and cogs and all moving smoothly. As I’m doing this I notice a problem that I was not expecting, there seems to be a damaged cog, see the video below:
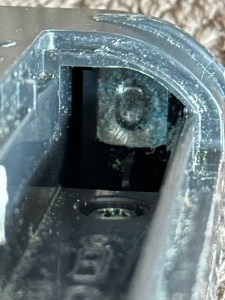
Damaged cog
Well, that’s a bummer as I’m going to have to obtain a donor for a new cog on the fast forwarding capstan, I’m hoping they are all pretty much standard so I will keep an eye out for a cheap option to repair. Whilst checking the system out it becomes apparent that this cog is specific to the fast forward operation so as long as I don’t use this then it should all be ok…shouldn’t it?
New belts installed
In theory yes, however every now and then when in play mode there is a slight dip in quality so I’m not going to chance damage to a tape.
Conclusion: it’s fixed, sort of. I’m looking for a donor cog that will fully fix the issue, the radio is fine, tapes can be played it’s just that I don’t really want to damage any until this issue is sorted. It’s a shame as it really was just those rotten belts that needed replacing. I’m pleased with what has been accomplished, yet again another 30+ year old electronic item has been saved from landfill. That’s a result.
The radio was received earlier today. Cosmetically it is a bit tatty, batteries were placed into it and apart from a quick flash from the power light when it was switched on there was no sign of life. So the original description was false as it stated that it powered up with a very low volume. Oh well, not to worry, it now gives us something else to look at.
Tatty appearance
Looking in the battery compartment there looks to be corrosion, this seems to be a common problem with items I’m buying at the moment. The screws have all been tampered with so I suspect others have been inside this radio prior to my purchase, this could be interesting to see what’s already been tampered with or attempted.
Tatty appearance, non workingCorrosion….again
I’ve had the unit open and the first thing that comes to light is the utter filth inside. The speaker is thick with god knows what and the board and switches are also covered in the same filth. Before I do anything I’m going to get this cleaned up.
Filthy circuit boardDirt from speakerCorrosion
I’ve used IPA on the board and cover and on the (thankfully small) corrosion on the positive battery pole and this has cleaned up nice. I’ve used contact cleaner on all the switches and dials and these have also come up ok.
Speaker before cleanSpeaker after clean
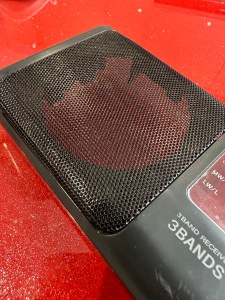
The speaker grill, I have tidied up and used permanent marker to get rid of the marks on this item. This has tidied it up really nicely.
Tatty appearance Grill after polish and touch up
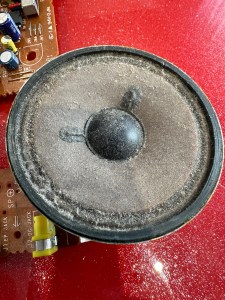
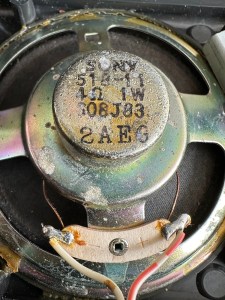
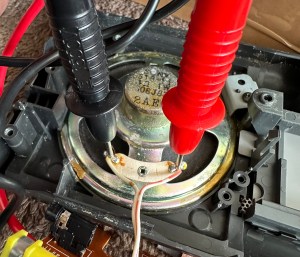
On the speaker I just used a dry cotton bud to wipe it over but I have my suspicions with this speaker, it looks quite worn and earlier reports on the lack and consistency of sound points to this being a potential issue with this unit. There are no clicks and pops when turning the unit on, there is a power and tuning light. Just no sound.
Speaker defective Multimeter to check speaker
The speaker is a 4 ohm 1w speaker, I’ve used a multimeter to check its operation and it’s showing as dead, not registering at all, it should be looking at indicating something within its 4 ohm range. I’ve double checked it by putting a battery across the terminals and there are no pops or clicks so this confirms things. I now need to source a new speaker.
Trying to source this speaker in the uk is a tad problematic. There are items available but I’m not paying out two to three times the value of the whole unit. I’m going to try some thrift shops to see if there are any suitable donor units available if not I’ll have to purchase a few of them from China, and that will still be cheaper than purchasing here in the UK, crazy isn’t it? But it’s a long wait….
I did manage to get one from the Uk. Paid about £5.18GBP and it should be here in a couple of days. The annoying thing is that the postage is almost the same cost as the actual speaker and that only cost £2.69GBP. Annoying though that is, it has to be done if we want to get this fixed.
New speaker Speaker placed
I couldn’t get a 1w 4 ohm speaker only a 1w 8 ohm speaker, this will be fine as at this level of use it will not affect output at all.
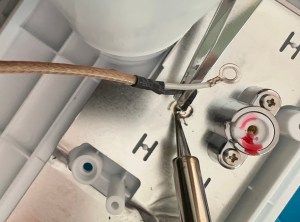
A small bit of desoldering, removal of the speaker clamp and the speaker comes away after a little persuasion. I take the opportunity to clean the board and all the battery contacts with some cleaner, and all corrosion marks and debris are now a thing of the past.
Corrosion cleaned
I put some contact adhesive on the speaker grill and put the new speaker in place, clamp is attached and I now solder the speaker wires back in place.
All screws back in place, new batteries in the rear and battery hat hatch closed, the unit looks good.
But does it work?
Radio works – have a listen
You betcha! Have a listen to the short video above to hear it as it should be.
I’m very pleased with this little project. Simple repair in the end but in my eyes it’s another item that isn’t going to landfill. And that’s a win for me, as it’s a nice little radio and I’m going to get some good use out of this.
Just purchased this item, here is what the listing said:
Radio works fine but the cassette is poor at playing tapes as the sound quality is really slow.
EBay
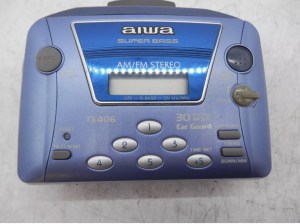
Aiwa HS-TX406
Yet another Cassette player circa 1990. Again possibly another one that needs its drive belt renewing, so in that case I’ll order one in. This one cost the grand total of £9.95GBP.
This link takes you to Radio museum.org where you see the technical detail of this unit : Aiwa HS-TX406
I have today received this item that I recently purchased on EBay, the original blog post can be found here: Blaupunkt Dab CD radio
Blaupunkt CD Radio
Did you know that Blaupunkt translates as Blue point or Blue dot from German to English? This relates to the blue dot that quality control used to paint on their headphones that were being produced. In fact all their products now have that blue dot as part of the logo on all of their range.
I think I mentioned that this might be an easy repair, it’s probably not going to be anything too technical, but it will need a bit of deconstructing to get to where I need to be, due to the way this item is assembled.
The unit is cosmetically sound, radio in both FM and DAB works perfectly, Bluetooth and USB also work perfectly, in fact the whole unit works perfectly apart from two obvious issues.
The CD was reported as an issue however the actual fault wasn’t clear. It appears that when the unit is turned on the cd drawer opens no matter what mode the set is in. You can close the door and it opens again about 10 seconds later. It won’t stay shut and it dosen’t recognise any media.
CD drawer opens constantly
The second and what is an unlisted issue is that the unit has inherited a knocking from inside that I suspect has probably occurred in transit. On opening the unit one of the speakers has broken loose as a securing catch on the speaker grill has broken. I will need to fix this, it’s really nothing major.
Who’s knocking?Broken speaker bracket
To get to the front of the unit you first have to go in through the back. When the back panel is removed you have to unsolder the aerial to be able to get into the box and unscrew the front unit, this then allows you to extricate everything through the front of the unit.
Aerial wire removal
Reading about similar issues on line it appears there could be a number of issues here from loose belts, dry drivetrains, loose cogs, sensors needing cleaning, lasers needing cleaning right through to total replacement of the cd unit. I will wait and see what presents itself when I can spend some time on this in the next couple of days. It really is a nice little unit and it would be good to get it back working fully.
The mains circuit contains a big capacitor that needs bleeding before I get anywhere near it. This is done and work begins.
Speaker post fixOld cd stuck in driveHighly charged capacitor being bled
I’ve fixed the broken speaker securing clip by using some Araldite 2 part adhesive and a small clamp. I’ve left this for a few hours until it set hard. It’s now back in position and doing the job it was designed to do. Both speakers are now secure.
I found out why the Cd drawer kept opening. There was a previously installed and damaged disc sitting under the carriage. As soon as that was removed the Opening/Closing scenario is no more.
I reassembled the unit and it all appeared to go well until….no disc error 🤦♂️
Sort one issue and another arises
Damn, I checked the drives they’re ok, I’ve cleaned the lens and reassembled yet again. Same issue.
Laser diode adjusterLaser diode check
I’ve opened it up yet again and checked the output power of the Laser and that is at .03 ohms. Small adjustments on the diode show no improvement in either direction so it is looking as if the damage is within the laser itself. I don’t hold out much hope of getting the cd working as it’s not really a replaceable unit as it wasn’t designed that way. So unless I can find some way of getting around this issue I might just have to accept that the unit will just be used in Dab, FM, USB and Bluetooth modes.
I’ve just purchased this item from EBay. Here’s the listing:
This is being sold as spares as sounds like the belt has gone so don’t play tape has some battery leaking marks but radio plays fine.
Please study the pictures as this makes up some of the description thanks for looking and please check out our other great bargains 👍
Ebay
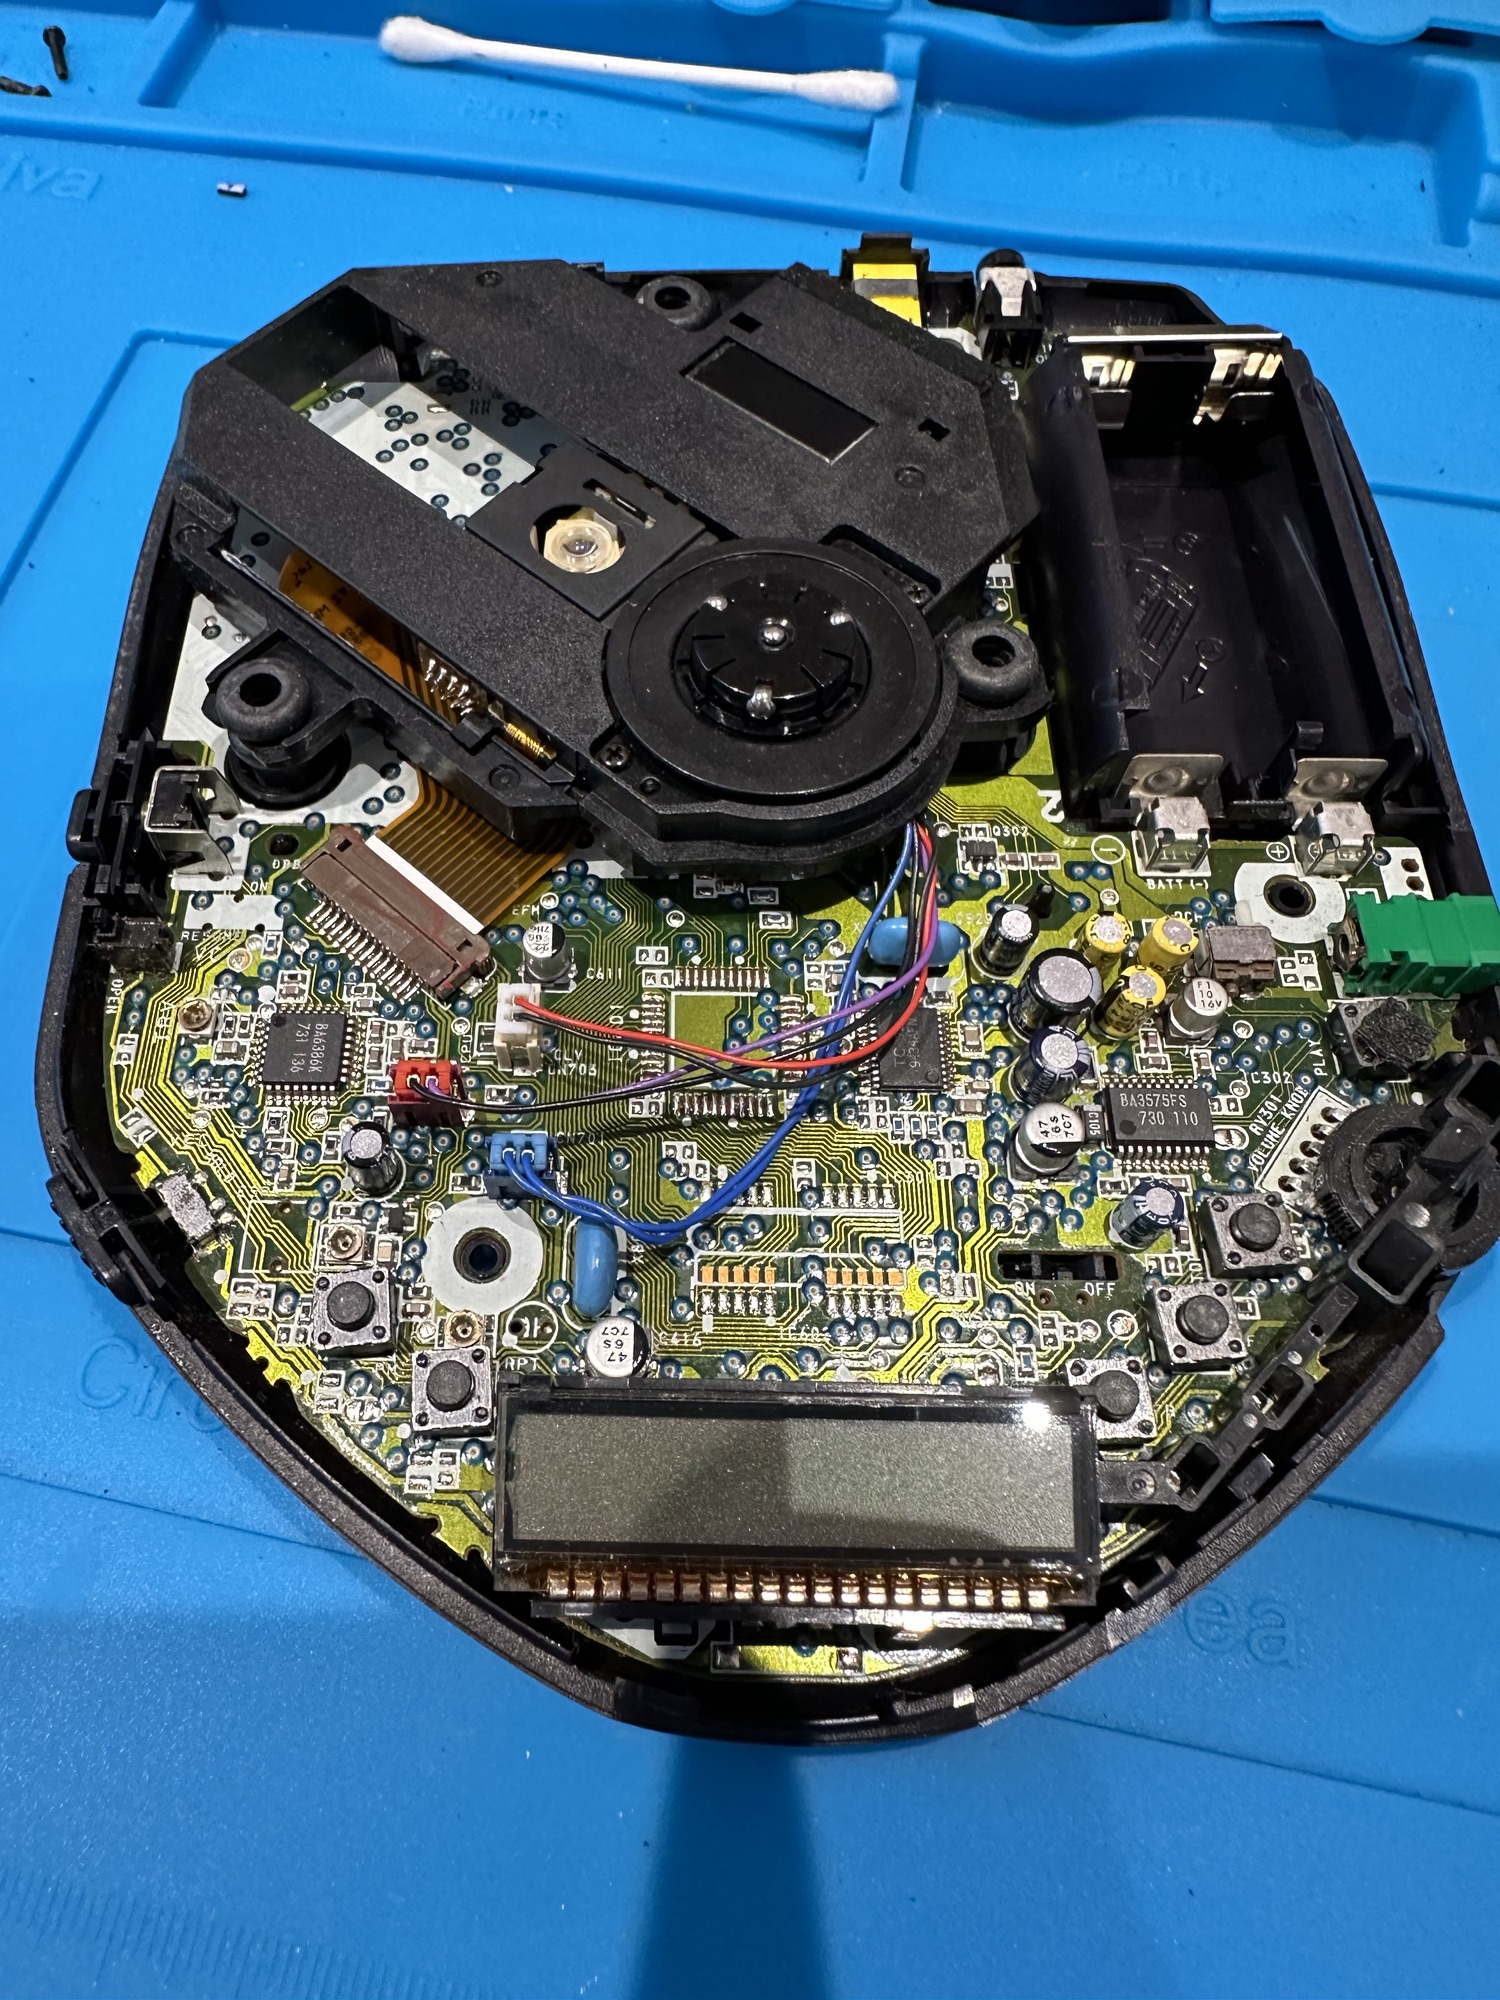
Sony Walkman
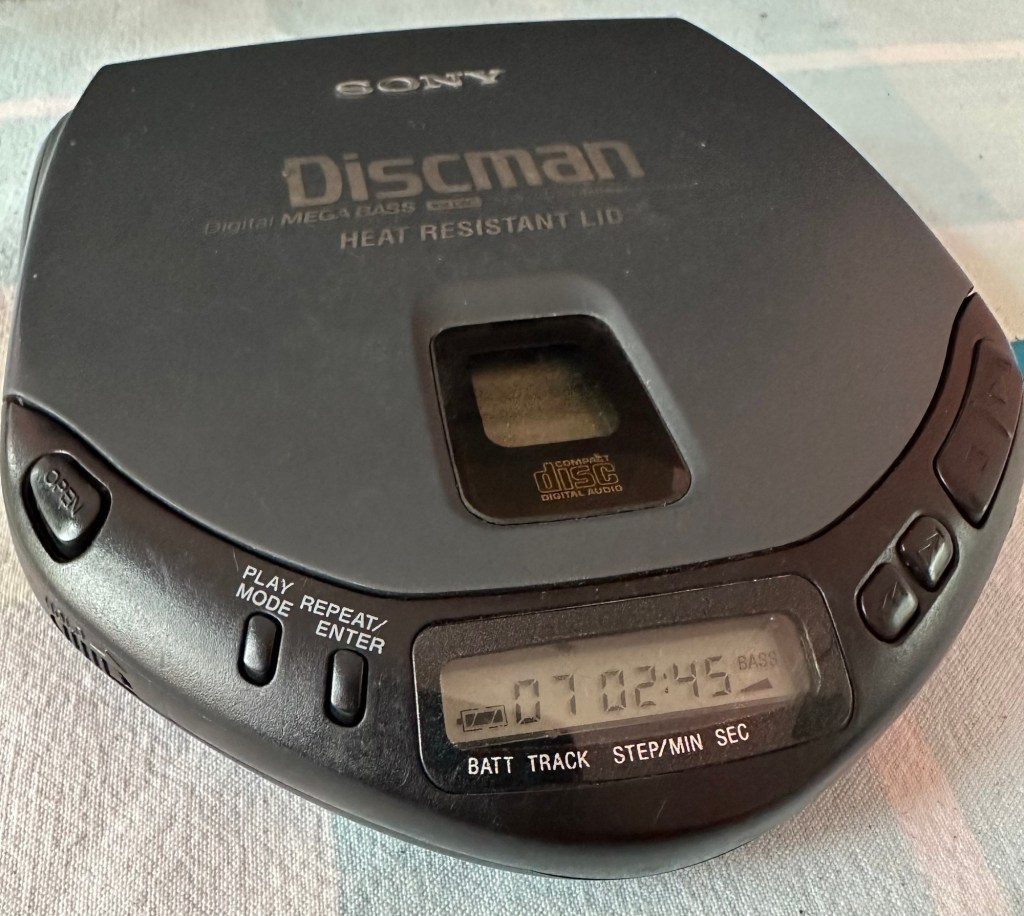
Just a sucker for a bit of retro me. I’ve worked on the discman, blog post here: Sony Discman D-121 Pt:2 as well as on a few others spread over this site.
This one dates between 1991-93 as these were the years that these particular units were manufactured between. I knocked the price down a bit but ended up paying about £18GBP in total.
It looks to be in good cosmetic condition with light usage as you can still see all the numbers on the rubber pads quite clearly. For a unit that’s potentially into its 33rd year that’s no mean feat. Anyway we will just have to await its arrival and not get too excited.
I preferred the tape Walkmans to be honest and I’m hoping this one will be a simple fix so I can play all those old REM tapes I have sitting in the cabinet at home. But it probably won’t be a simple fix. And it has corrosion , how quaint!
Excellent sound quality on Blaupunkt DAB radio with built in speakers NOTE CD player mechanism is not working
(possibly an easy repair job)
Radio & remote OK.
RRP £99.00
EBay
I ended up paying the grand total £21:22 GBP for this item and that included postage. I may have got quite a good deal, however as usual I will have to await its arrival as you can’t always trust EBay listings. Hopefully the issue with the cd mechanism is a relatively easy fix 🤞
Blaupunkt Dab Cd radio
Looking forward to getting busy on this one, back to the end of the ever growing list of items to work on you go.
I’ve purchased the item below from EBay. Got a bit of a discount and ended up paying £7:18 GBP in total. I need a small radio for listening to the sports commentary at work and thought this would be a simple enough project for me.
Sony ICF-480L 3 Band Receiver FM MW LW Portable Radio FAULTY Sold as SPARES
The unit is FAULTY. It powers on but the sound quality is poor and the volume is NOT loud. There is NO mains adaptor included. Sold as SPARES.
EBay
Cosmetically it looks a little tatty but a good clean up and touch up with a Sharpie pen might see to that, maybe a new potentiometer or just some contact cleaner might sort the sound issue out.
Sony ICF-480L
Anyway I will await delivery and post an update of the condition and repairs I will need to carry out shortly. You can see the assessment and repair of this radio here: Sony ICF-480L 3 band radio assessment and repair
I’ve got a bit of a queue of repairs on cameras still to come as I’m awaiting parts / components for them. So keep an eye out for a flood of updates on previous posts over the coming weeks.
I could go into lengthy detail but I won’t bore you just yet. Below I have quoted the Wikipedia entry that explains things in a nutshell better than I ever could. I will however give a few details of attempts I have made and equipment I use for carrying out this mode of communication. I am currently building a new radio for this mode that I will cover in a later post.
WSPRnet map
WSPR (pronounced “whisper”) is an acronym for Weak Signal Propagation Reporter. It is a protocol, implemented in a computer program, used for weak-signalradiocommunication between amateurradio operators. The protocol was designed, and a program written initially, by Joe Taylor, K1JT. The software code is now open source and is developed by a small team. The program is designed for sending and receiving low-power transmissions to test propagation paths on the MF and HF bands. WSPR implements a protocol designed for probing potential propagation paths with low-power transmissions. Transmissions carry a station’s callsign, Maidenhead grid locator, and transmitter power in dBm. The program can decode signals with a signal-to-noise ratio as low as −28 dB in a 2500 Hz bandwidth. Stations with internet access can automatically upload their reception reports to a central database called WSPRnet, which includes a mapping facility.
Wikipedia
What fascinates me most about this mode of communication is that in recent weeks it has gained a new audience as a result of a television documentary. This documentary was regarding the search for the missing Malaysian airways flight MH370 that vanished from radar screens on the 8th March 2014. An investigator tracking its disappearance has been cross referencing WSPR signals in the area that the aircraft was last reported and he has apparently plotted the route taken by monitoring these signals as they were reflected or distorted by the aircraft’s footprint in this area, well beyond the planned flight path.
Wspr on the 80 Mtr bandWspr into Europe
My setup for testing propagation on a number of different bands is very portable as that’s normally the way I work when taking to the airwaves. I’m always moving around or working from different locations so it’s always good to be able to monitor conditions using a compact setup.
Wspr into Australia
I do also have an aerial system set up in my loft that cannot be seen, it’s kind of clandestine in that way it does not grab the unwanted attention of my neighbours. I specialise in low power communications and again this does not draw the attention of anyone living near by as disturbance and interference rarely occurs. The maximum power level I normally use is 10 watts, but more likely somewhere around the 5w QRP level. My WSPR setup operates between 200mW and 5mW of power. Extremely low power, there is probably more power in that sports watch sitting on your wrist than what I am transmitting.
My Portable setup
I have an inflatable aerial, yep that’s right inflatable! Perfect for mobile operation using QRP low power technology, It covers most of the high band frequencies and I mainly use it on the 20 Mtr band (14mhz) or the 40mtr band (7mhz) though other bands are also available. Fully inflated it stands about 6ft high and can be hung outside, inside or just perched in a corner somewhere.
Inflatable multiple HF band antenna
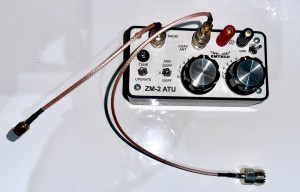
There is an antenna tuner , this is one I purchased from the States in a kit form and built myself. It’s called an Emtech ZM-2 Atu details can be found HERE
Emtech ZM-2 ATU
The actual transmitter sits in a small package not much bigger than a box of matches. This was purchased already built and is called a WSPRLITE classic. I am in the process of building a new transmitter and receiver combo that is also in a kit form, I don’t anticipate completing it any time soon as I just don’t have the time at the moment.
WSPR Lite transmitter
I have made a number of filters for the different bands (40mtr, 60mtr,80mtr and 160mtr) and these boards connect to the output of the transmitter to aid in obtaining a clean signal and to prevent deviation from the set frequency.
Band filters for WSPR operation
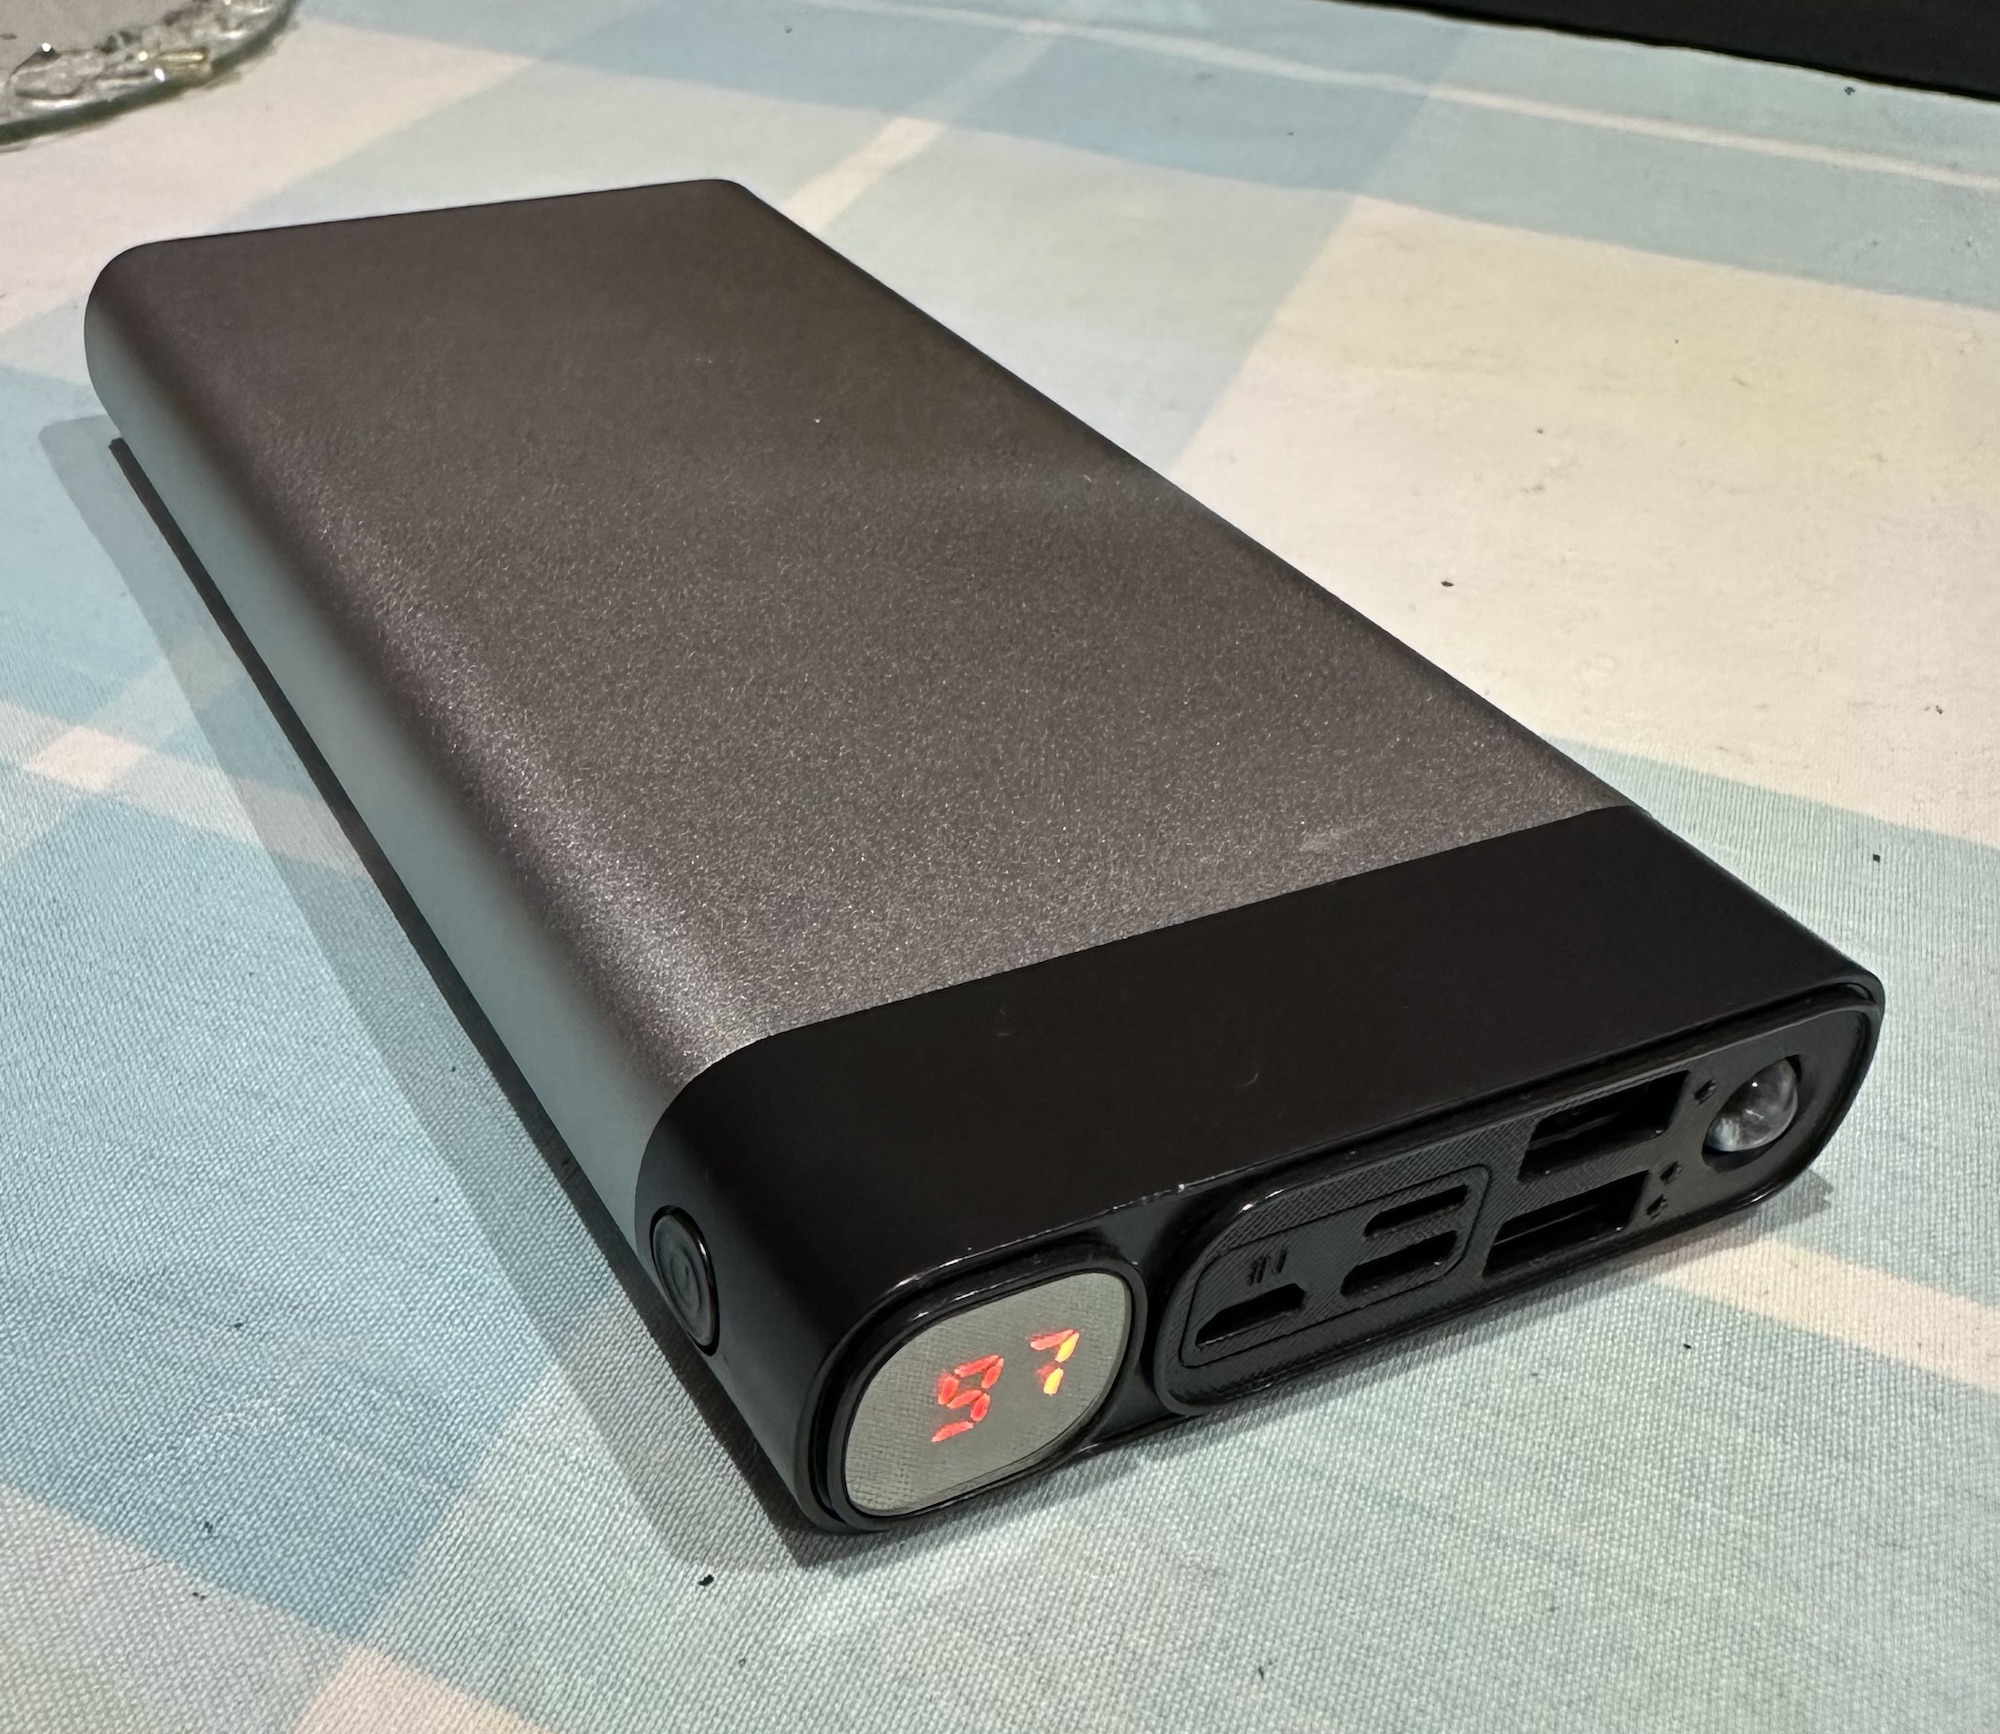
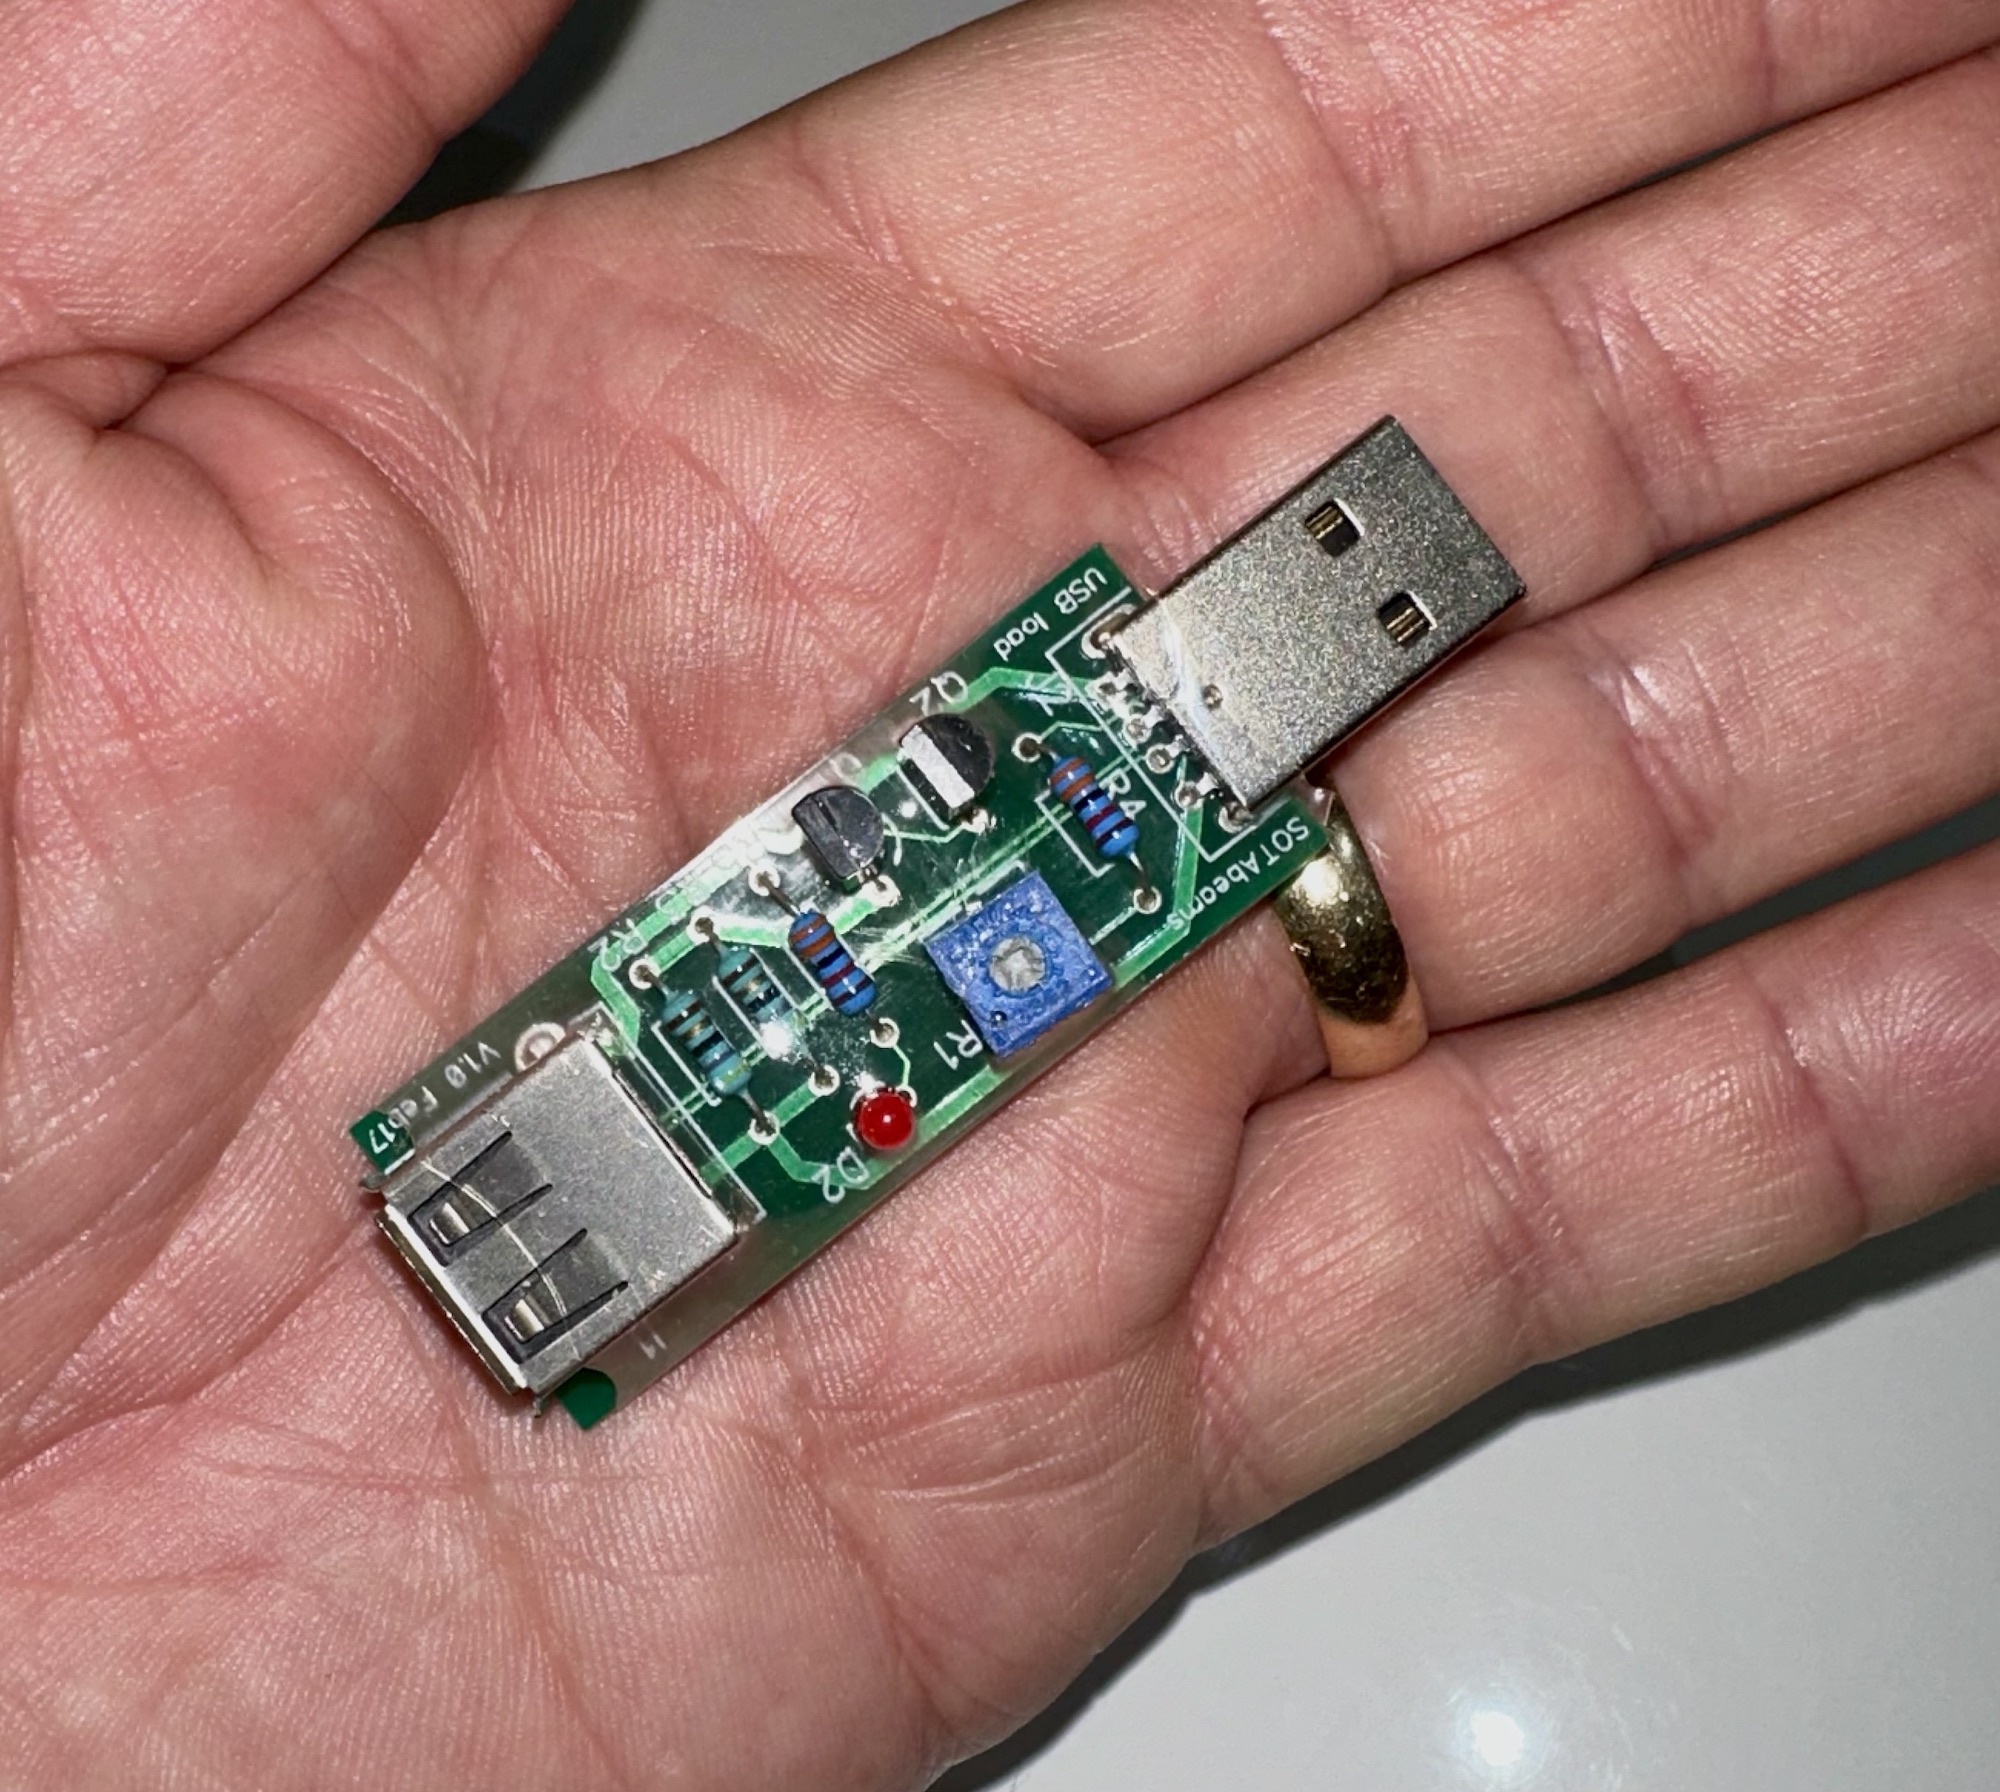
The power comes from a 3000 mAh 5v power bank. However the problem here is that the power draw from the WSPR unit is so small the power bank will some times close down, and for this reason I have had to build a small usb circuit that creates a minimal demand on the power bank keeping the power supply constant. With this power bank and the WSPR unit on its high setting I can easily get 16 hrs of continuous use. When I work on the lowest setting I can achieve 3 full days (72hrs) of use.
3000 mAh power bankThe circuit used to fool the power bank
And that’s about it, all this kit can fit in a small unobtrusive bag or box.
Operation
First and foremost the transmitter connects to a computer where you can access all the parameters of the unit and set it up how you want your operate, power, duration and frequency etc. The unit already has inbuilt filters for the 20mtr (14Mhz) band so you don’t need additional filters if that is your band of operation. Once the programming is done you can now set the system up in place as you want it. I sometimes use this from my loft to see just how well certain bands are working in certain directions at different times of the day.
The battery connects to the transmitter that in turn connects via the filter to the Antenna tuner unit. the antenna unit connects to the antenna.
Timing has to be precise when setting up, you set it to transmit at every 2 minute interval.
Once you are transmitting it’s worth leaving it be for about 30 minutes and then you can pop on to WSPRnet to check your signals. You can check what is being received and what strength of signal is getting through to your destination .
I use an app called WSPR watch that connects via the WSPRnet system so I can monitor my performance from absolutely anywhere just by using my mobile phone or iPad. How convenient is that? I can leave the unit unattended and monitor it remotely.
In summary the WSPR protocol uses a very weak signal to test atmospheric and solar cycle conditions to determine a viable route for a signal to reach a destination. if you were to listen in at the destination all you’d probably hear is white noise, however the decoding program is so accurate it can pick up a signal to noise ratio of as low as -28db.
Im leaving it there as I could ramble on for ages. If anyone for some strange reason wants to know more then please get in touch.
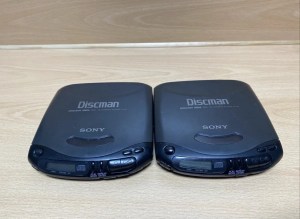
Double trouble here as I’ve purchased two of them.
Sony Discman D-141 – double trouble
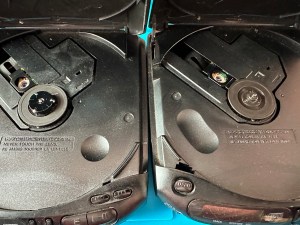
These variants are from 1994 just around the height of the capacitor plague problem. As I’ve already dealt with a D-121 version this week that was riddled with the issues and being only a year older, I’m not too hopeful that these two will be any different. They both have the same issue being that they turn off after about 10 seconds, this could be due to a number of issues, let’s get them unpacked and get an initial inspection done.
On initial inspection they both appear to be quite tidy considering they are 30 years old. One is missing a disc capstan however i do have a replacement from the old D-121 that was added to the spare parts box earlier this week.
Both start up, spin and then stop, sometimes showing a no disc error, sometimes not. The good news is there is no sign of corrosion on either unit.
Time to open them up….
One missing cd capstanCd capstan replaced
I used the old donor D-121 from earlier in the week to replace the missing capstan on one of the units.
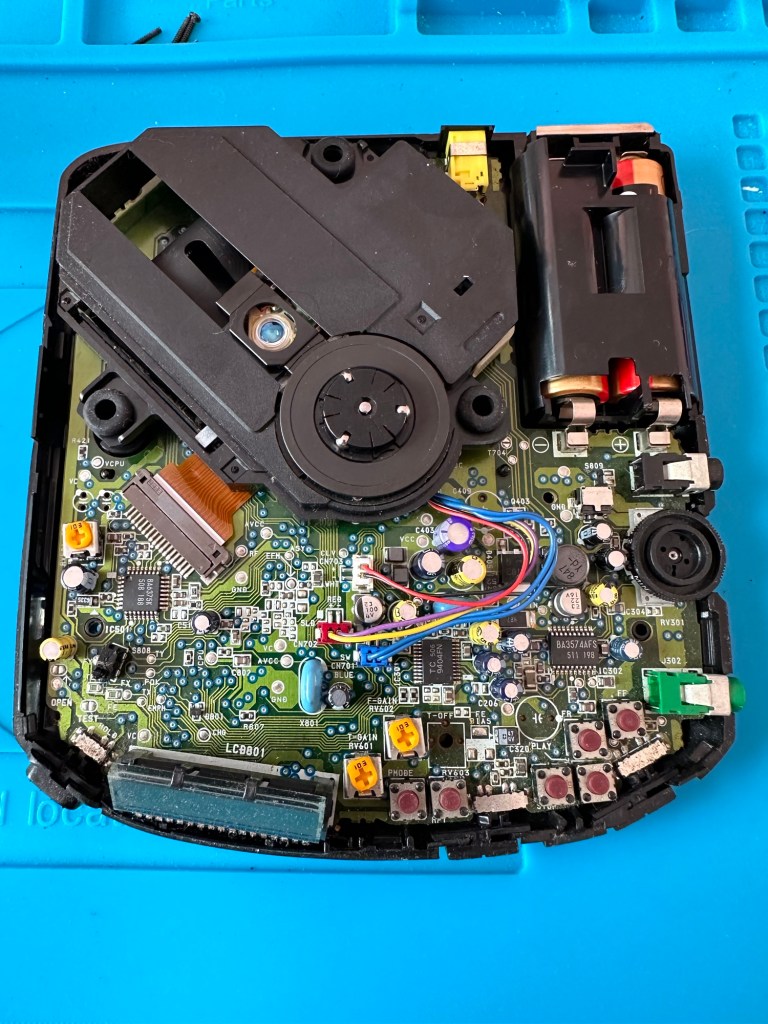
On opening of the cases the boards looked ok. No signs of corrosion or plague damage, this was a good sign and it was now time to look a little deeper.
Looking at the board
I did the standard clean of the lenses with IPA, I re greased the worm gears and rails but none of this alleviated the issue of the discs stopping just after start up. I did some continuity checks and component checks, all seemed ok. All buttons worked, all switches worked, something just wasn’t right. I decided to check the output of the laser adjustment pot and this was extremely low. I spent a good hour on the first unit and a similar time on the second trying to adjust the range up and down before realising that after 30 yrs both lasers seemed to be at fault. No adjustments improved the output.
Faulty laser assembly removed and replaced
I was facing the fact that I’d now have two more failed units to go with the D-121 earlier this week. Then I thought why not try the laser out of that failed unit?
It worked. The D-121 donor unit was compatible with the D-141 and after a few minutes adjusting the laser we were able to play an audio Cd.
We have life
This week I have looked at 4 faulty units and managed to get 2 fully working with a third one needing a replacement laser sled when one becomes available. I have one spare redundant unit that has been indispensable for the repair of the other units, in theory i potentially have 3 out of the four available.
All dressed up
I won’t be wasting anymore time on Discmans in the foreseeable future. They had their time and digital sound has obviously pushed this medium in to the dark distant past. The units are becoming life extinct and it’s like performing knee surgery on an elderly individual, you are improving their quality of life for the moment until the ravages of old age take over. Bit of a crude analogy I know, what I’m saying is steer clear of these as they are going to be trouble, people seem to think they are worth a fortune and are charging ridiculously high prices for something that just about works.
It’s been fun though and I have learned a lot from it so it can’t all be bad.
My latest purchase from EBay has arrived and god knows what is wrong with this one as the listing contained just one word “Untested”.
There is no one else to blame but me so let’s get this package open and have a look…here goes.
This unit is circa 1996, so there is a gap of 3 years between this and the D-121 that i recently attempted repair on that was badly affected by poor components. Hopefully technology has moved on slightly in those three years, and the plague of the past isn’t as prevalent in this unit.
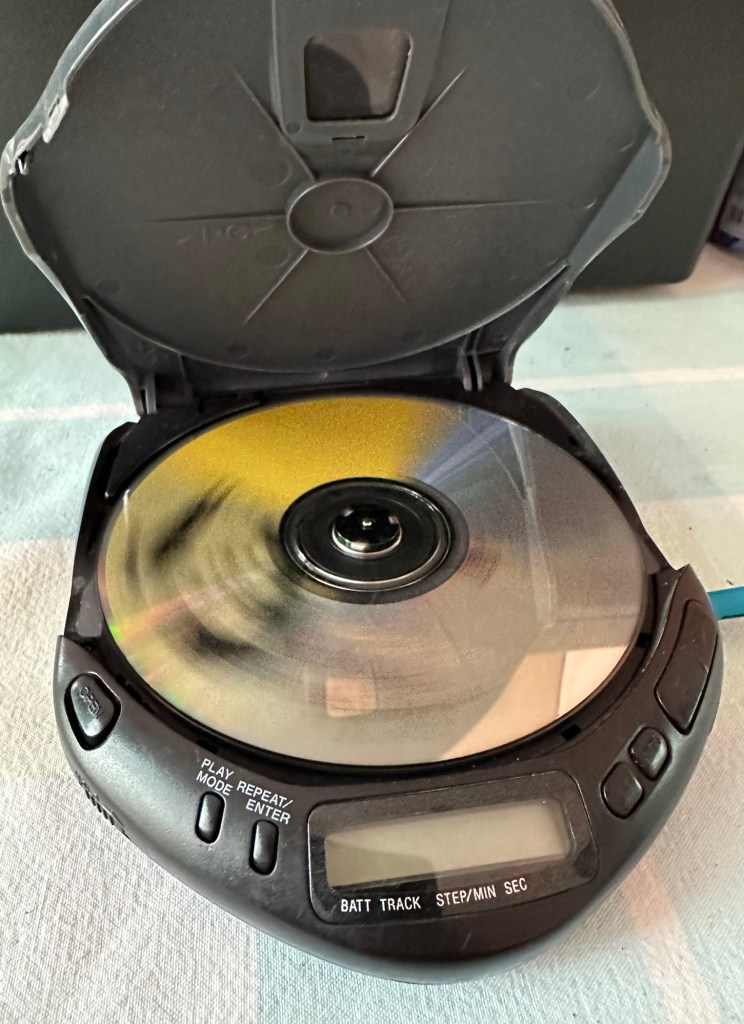
All powers up Spinning as it should
Well, once in your life you buy something that restores your faith in your fellow man, unfortunately EBay isn’t always that place and you have to take your chances when purchasing using that platform. Today is a good day. The package was minimal and I didn’t hold out much hope. The first thing I did was to open the tray, good it’s working👍
Next I held my breath and opened the battery compartment…. Excellent no corrosion 👍
Batteries inserted I chose an old Bryan Adams album, put the volume about mid way and turned it on.
IT WORKED 😳
Ok, if tapped it jumps, so I will give the lens a clean and will lubricate the worm gear and rail and see if that helps, if not I might test the laser output and make a tiny adjustment but I’ll avoid that if I can.
All buttons have been used, wiggled about and are working fine, all menus are displayed and basically it’s all working pretty much as it should be apart from some little adjustments. The shell is un damaged but a little tatty so a good clean up will assist here.
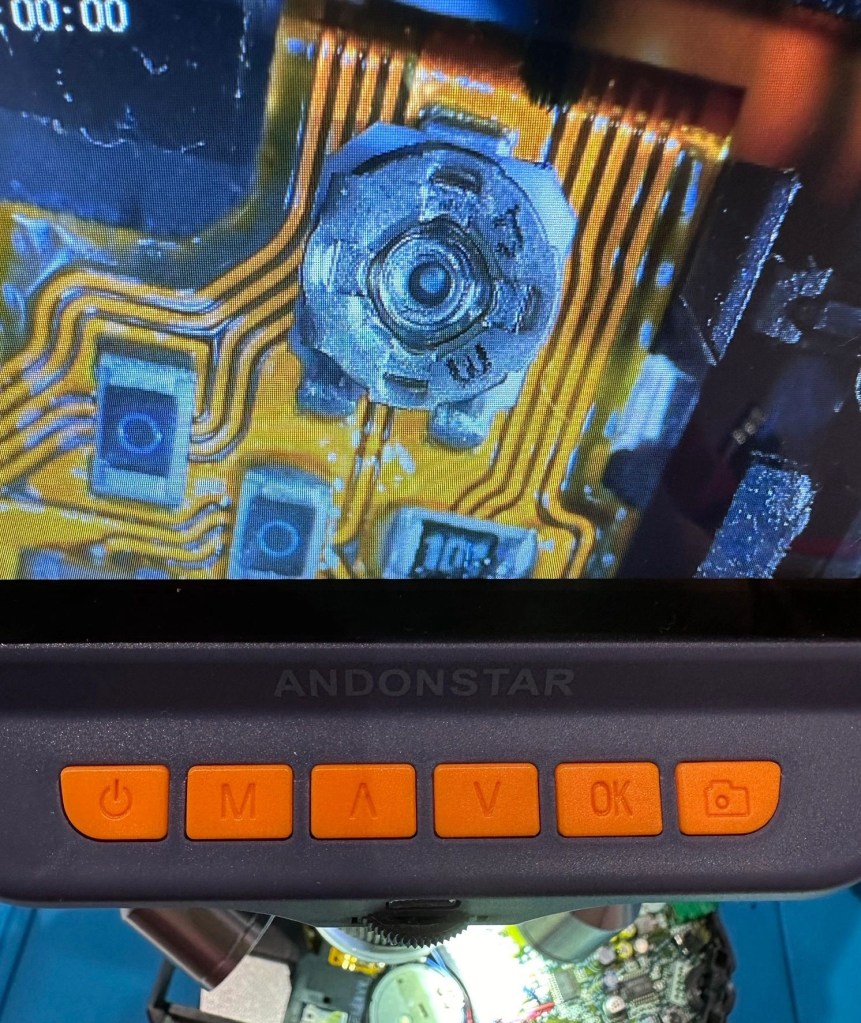
A lot less components this timeLaser pot under microscope Trimming the laser pot
When taken apart the thing that strikes you is the lack of capacitors compared to the last item I worked on that was only 3 years older. I put some fine lubricant on the worm gear and the laser guide rail and also cleaned the laser lens with some Isopropyl (IPA)
I made a slight adjustment on the laser strength by using the Multimeter to get measurements across the laser pot.
Cd in placeNice and clean
The reading was very low, to what it would have been when new so, I made an adjustment to the higher end of the recommended scale but the unit didn’t like it and refused to recognise any Cd, so I’ve reduced it back to what appears to be it’s operating maximum, after 28yrs I guess the laser is approaching the end of it’s useful life.
Testing the laser
The sound quality has really improved, the unit still skips if it is knocked or shaken but as I’m intending to use the unit on a table or other surface I’m not really that concerned. It’s not as if I’m going to go jogging with it, no chance. To be honest I don’t think the anti jog system that was introduced for this purpose really came in until about 2000.
Put back together, I’ve now cleaned and buffed up the exterior, this is a nice little example of one of the lower end Discman units, but I’ve enjoyed working on it and getting to know a little more about how it works and fits together. I can put this one to bed now as a successful restoration, it’s going in my locker at work for listening to my old Cd collection whilst I’m doing the tedious paperwork or a night shift.
Thanks for passing by, I have another Discman post coming soon.


You must be logged in to post a comment.