Sinclair Cambridge Memory Calculator

What the listing stated:

This auction is for a used cased Sinclair Cambridge Memory pocket calculator and original case. The item is in very good cosmetic condition as is the case which still has its instruction sheet. The item is powered with 4 x AAA batteries (not supplied) and does work although 1 of the digits is faulty and does not display (see pictures) plus the number 5 digit is not working. Please refer to the pictures and description provided before bidding.

EBay

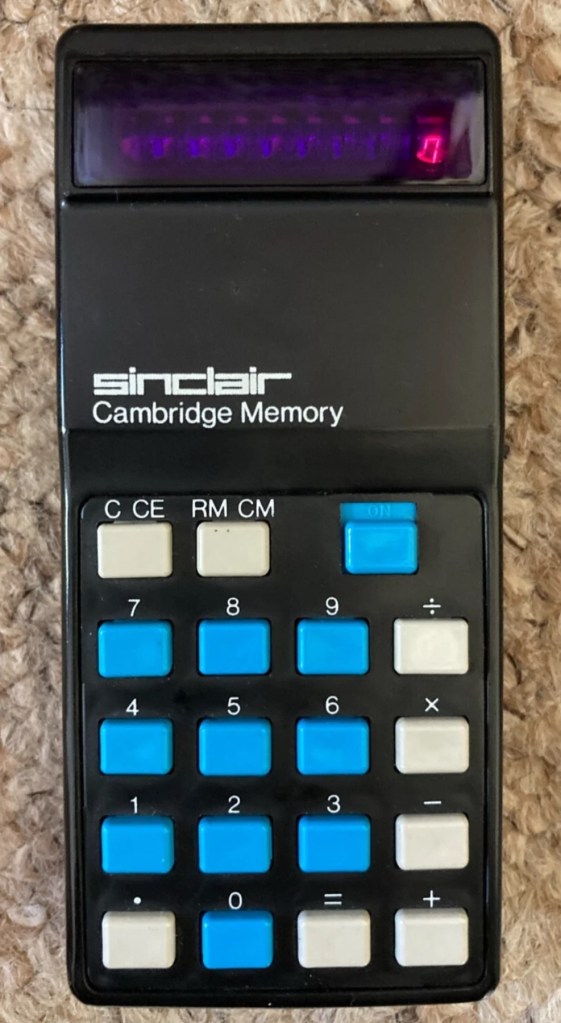
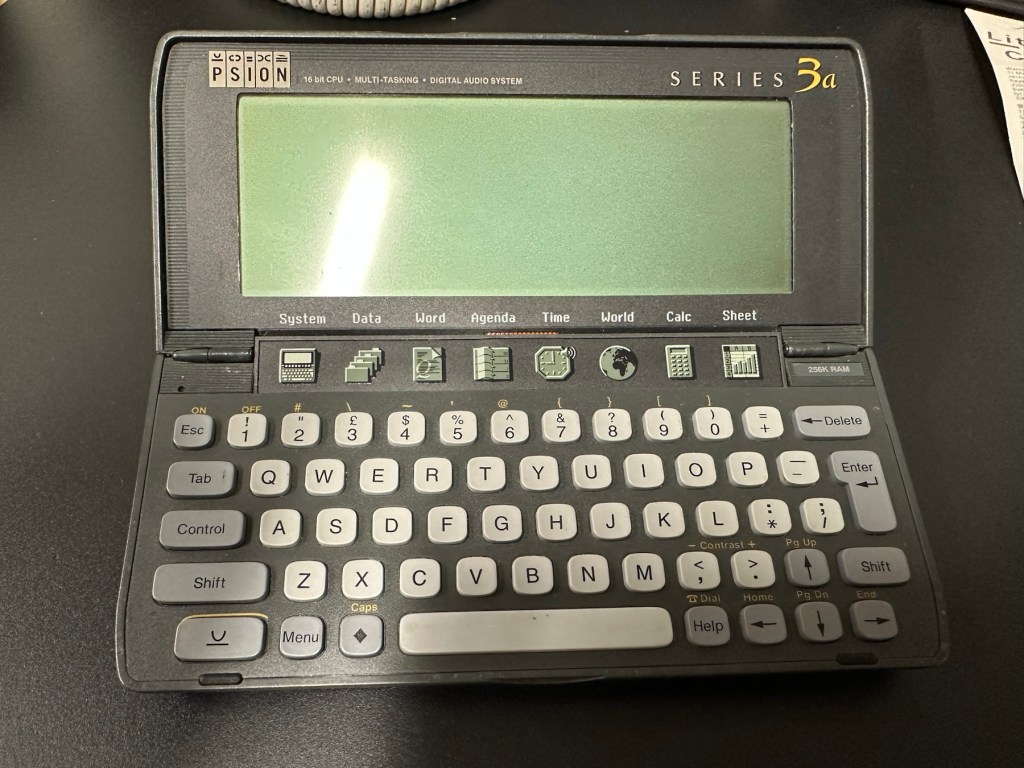
So it does work, but it doesn’t? This calculator is a model one memory calculator, that dates from around July 1973, ( Actually May 1975 see photos below) and is one of the earliest available mass produced electronic calculators available in the UK at the time. And it was produced in collaboration with a guy called (Sir) Clive Sinclair, who in the following decade would become synonymous with tech development in the UK. It retailed at £29:95GBP, and given the rate of inflation, its cost today in 2025 would be a staggering £463GBP. Wow!

Courtesy of Vintagecalculators.com

I love collecting old calculators, I couldn’t afford one back in the day when they arrived on the scene as I was only a child and probably only on about 20 pence a week pocket money, and savings and investments were not even known to me at this period of my life. The thought of saving that precious 20p a week for the next 150 weeks wouldn’t have even remotely crossed my mind. What no sweeties?

But I can buy them now, so no big issue!

So this one has become available, and I’ve been tracking it for a week or so, there were nine other people watching but I secured it for a total including postage of £14:49GBP, and I’m happy with that, it’s a piece of retro history for a very good price. Even if it remains faulty, or should I say working but not working?

This unit obviously has its problems, the button number 5 doesn’t work and one of the led digits is also not functioning. Hopefully I can get these issues sorted and soon have the calculator back up and working as it should. That would be nice. I’m looking forward to this little project.

Assessment:

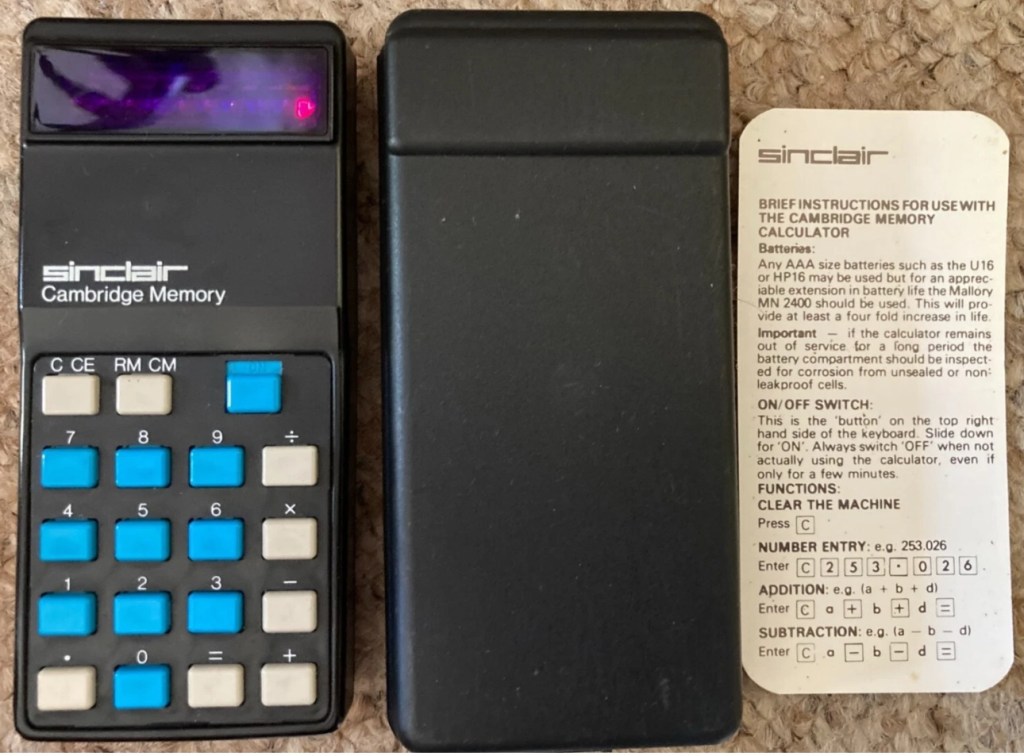
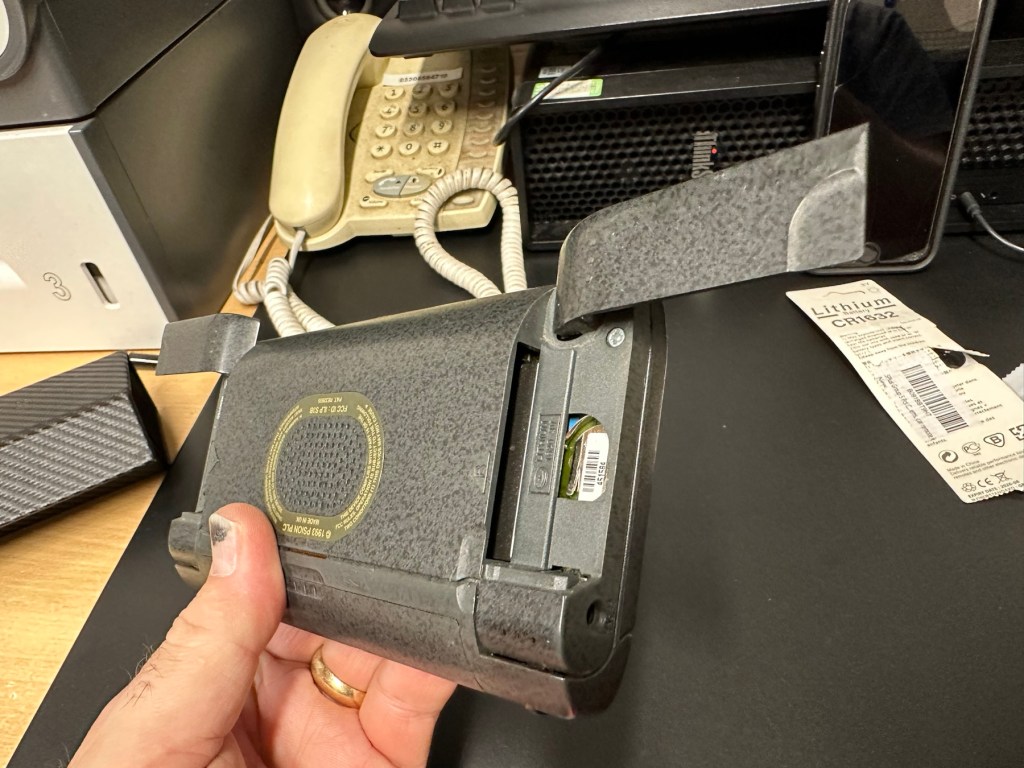
It’s arrived and it’s a lot smaller than I anticipated. It has a separate hard protective case, which is a nice touch and a small info sheet on its operation. Cosmetically it’s in a good condition with just minor signs that are age related. There are no gouges or scars so it has been treated well, though it’s not pristine.

Batteries go in ok but, I believe old style AAA batteries were a little wider than those used today and would sit a bit more snuggly in the battery compartment. As you can see there is a little wriggle room here, and springs at both ends need adjusting to help prevent this. I may have to use some spacers so the batteries sit tighter in place.

Gaps between batteries – means movement

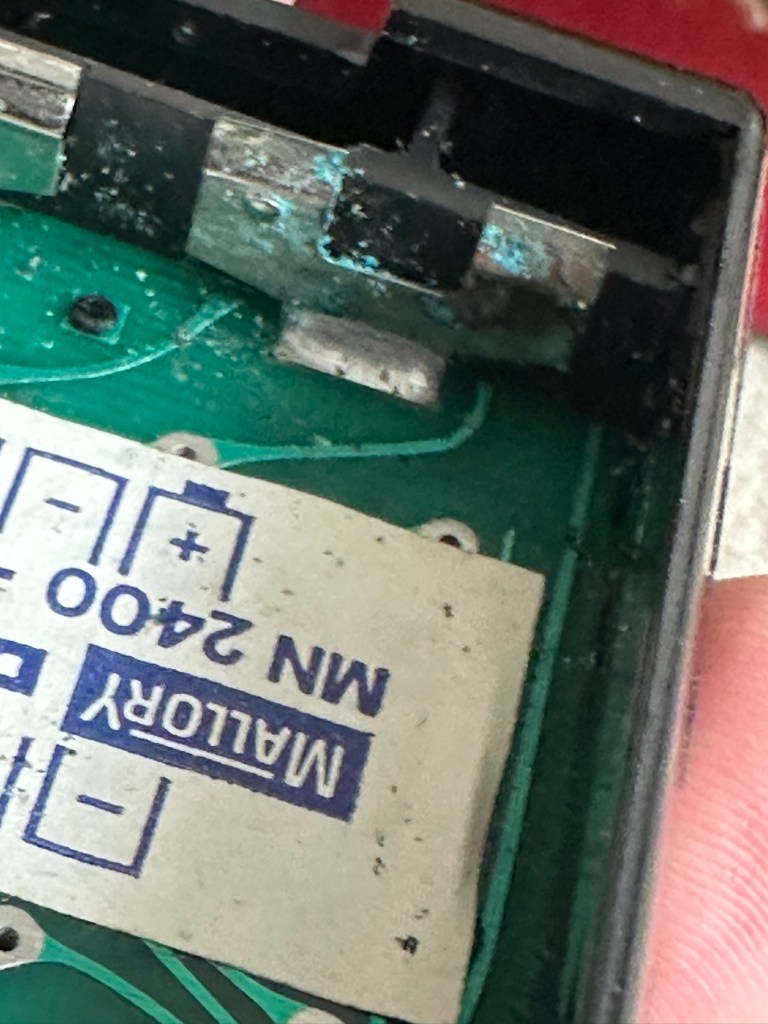
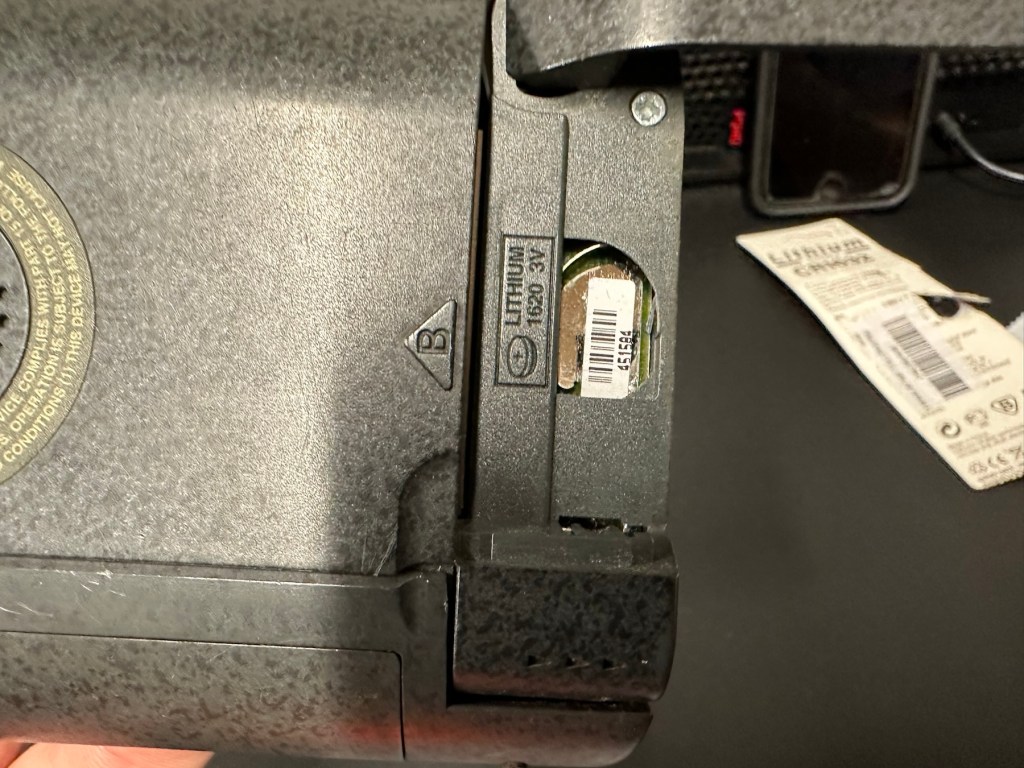
The switch is a bit temperamental and can be seen quite plainly from the battery compartment. It looks strangely out of place with no batteries in place.

It is such a basic design solely relying on tension of a small metal plate to short across the connection points. Should be a simple enough issue to sort.

There is a little battery contamination on one of the battery contacts, again this shouldn’t be too much of an issue and should clean up ok with some IPA.

Some battery contamination

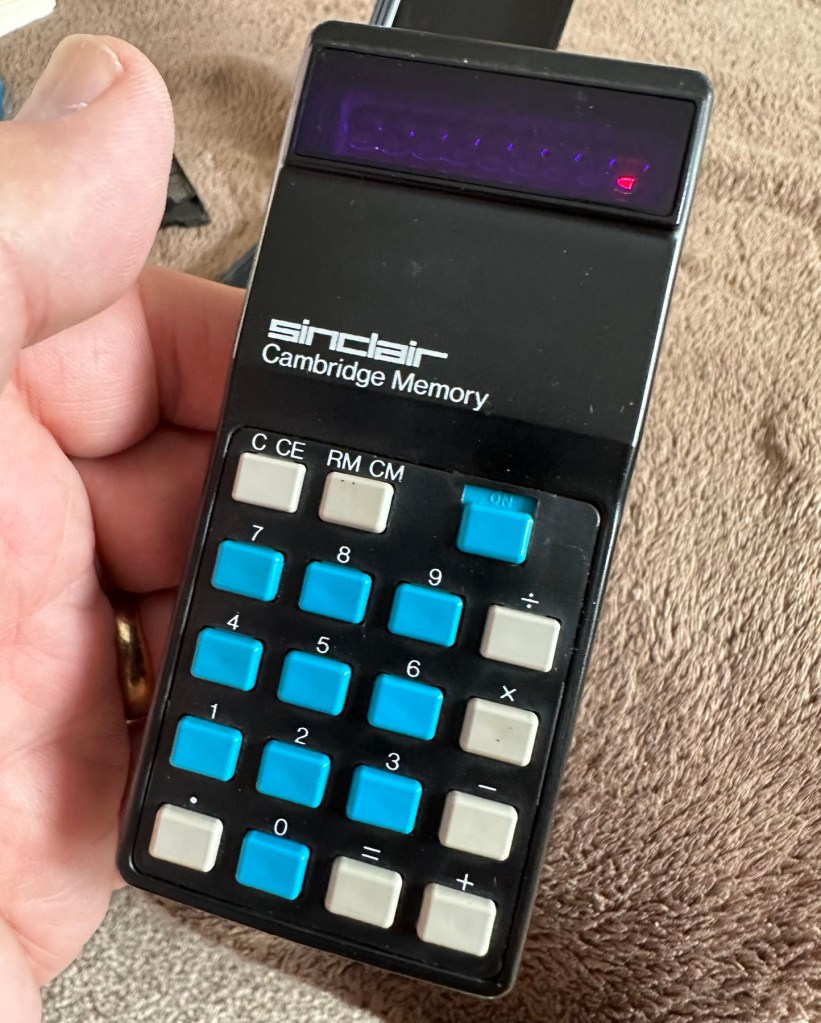
It was originally reported that there was one unresponsive button this being the number “5”, there is also another unresponsive button, the multiplication “X” button. There is also one LED indicator, the 4th one in from the left hand side that is not operating. Add to this the issue with the On/Off switch and the contamination, and the original faults reported in the original sales pitch have now doubled. I just wish people would spend more time going over the issues and then give actual accurate feedback as to what the real faults are, it would make for a far more pleasant buying experience. Rant over.

There doesn’t seem to be a single screw holding the body together, I just hope it isn’t all heat welded.

Let’s try to get inside.

Repair:

Well it cracked open quite nicely with no issues with just a plastic flat prise tool. The main board just sat comfortably in the unit, secure, and not a screw in sight. Strange as time moves on some of the games units I come across have best part of fifty of the little blighters to remove before you get anywhere. sometimes the old way is good.

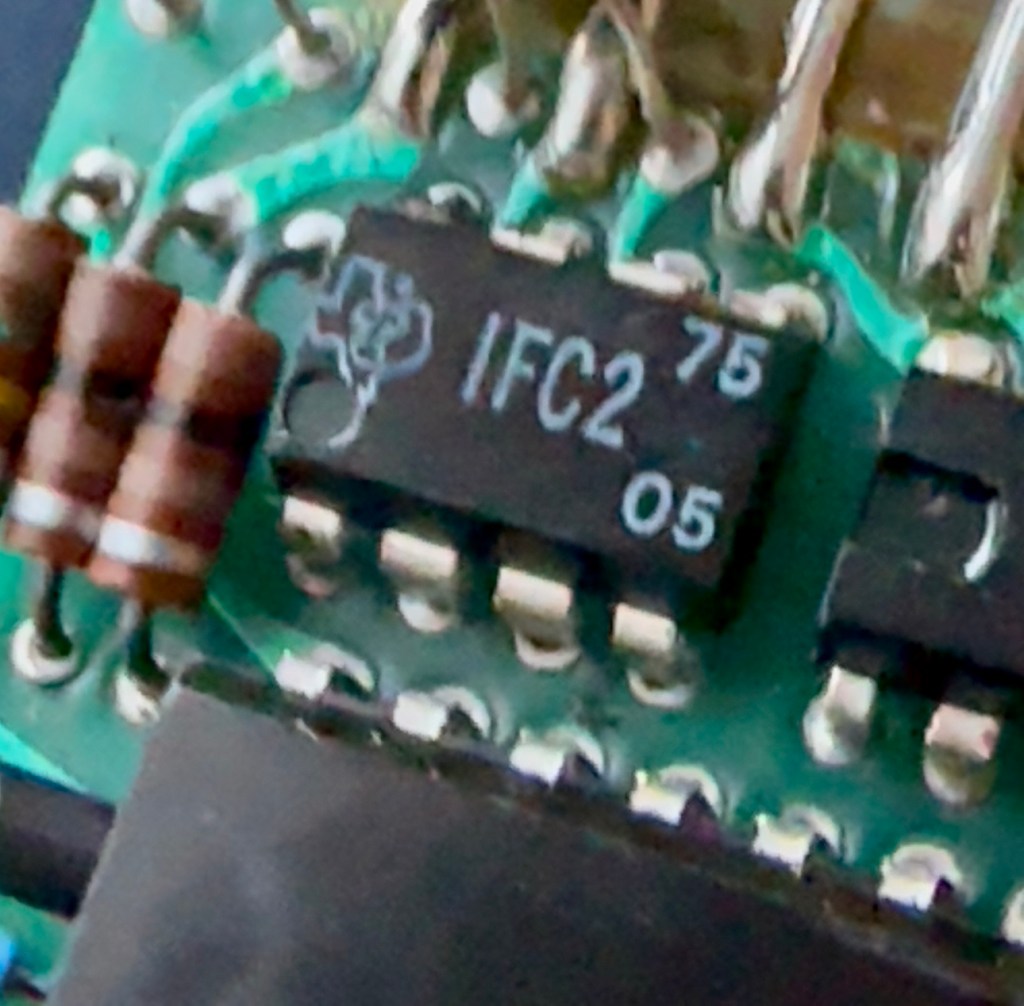
The dismantling of the keyboard is a little complex and you have to take time and make sure you know how it’s going to go back together, it’s just a bit fiddly. The board is quite straightforward and as soon as I see some of the IC’s it dates the unit perfectly. The chips are dated May 1975, and that is about 18 months younger than what I originally thought, it’s quite informative to get inside and learn occasionally and this is just as good as having a birth certificate presented to you. All good stuff.

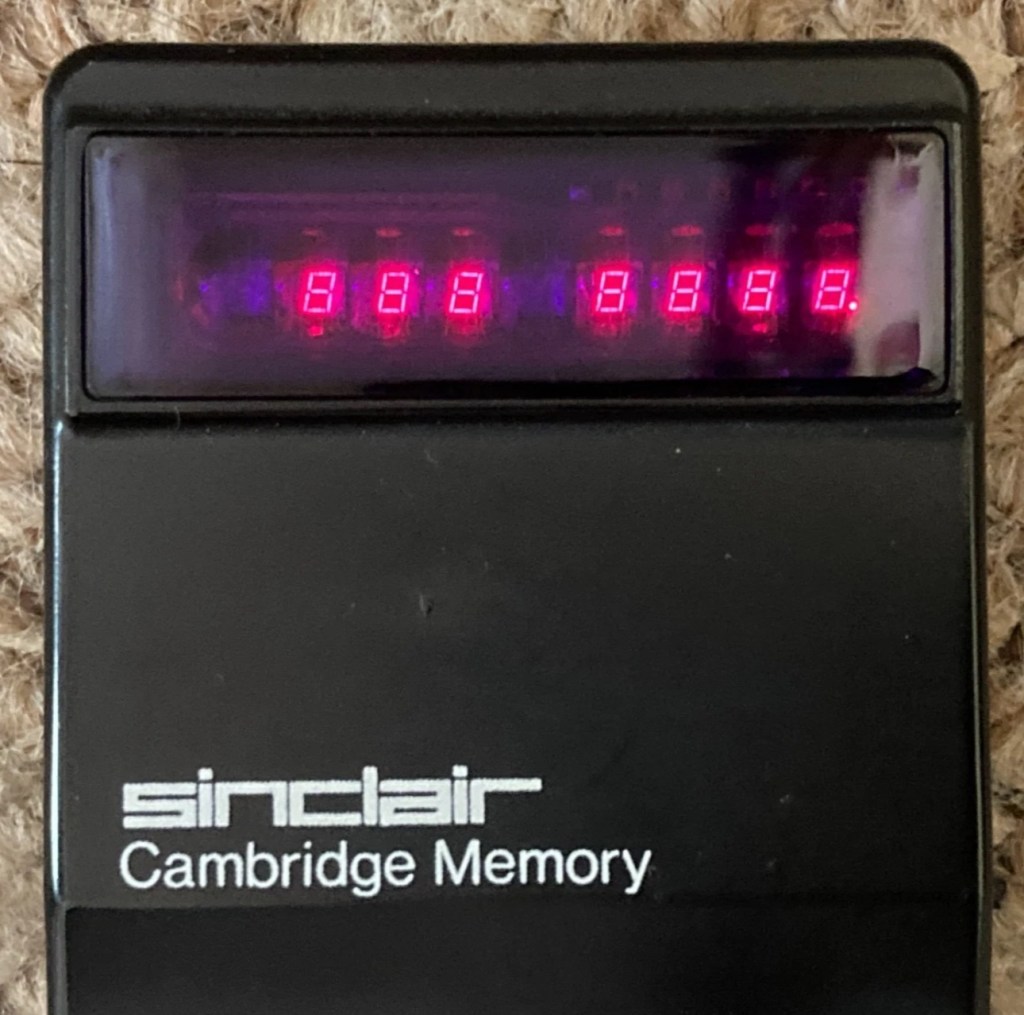
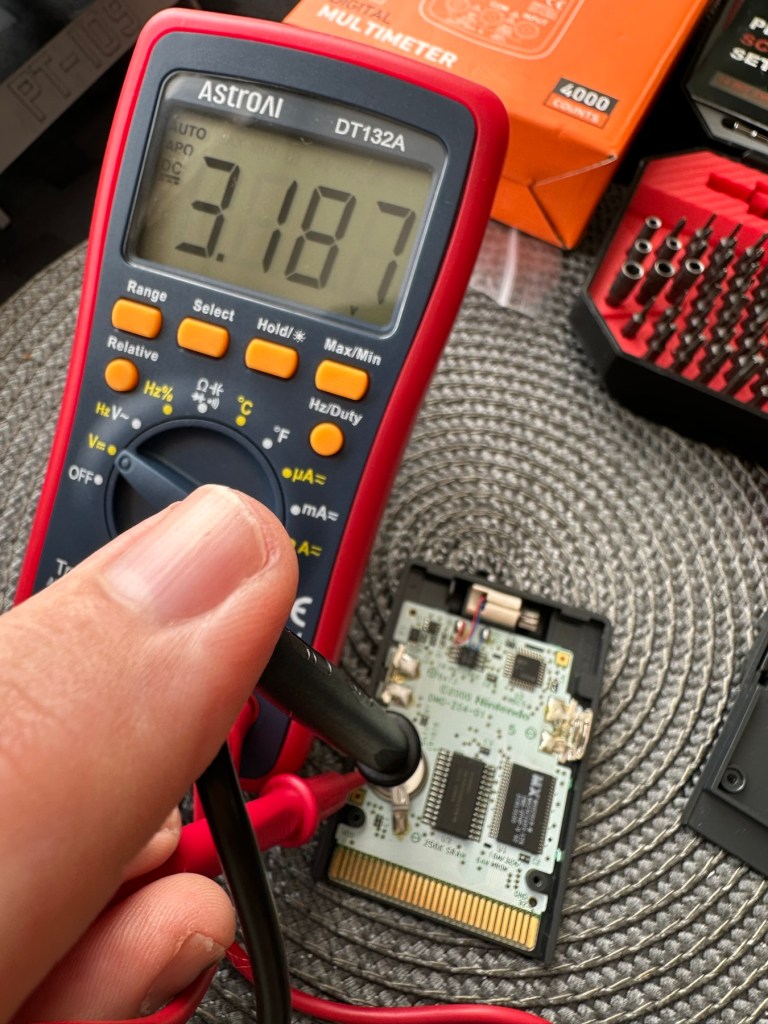
I’ve proved that there isn’t a problem with the missing digit on the display as using my multimeter in diode mode I am able to prove that this LED is working fine.

LED working

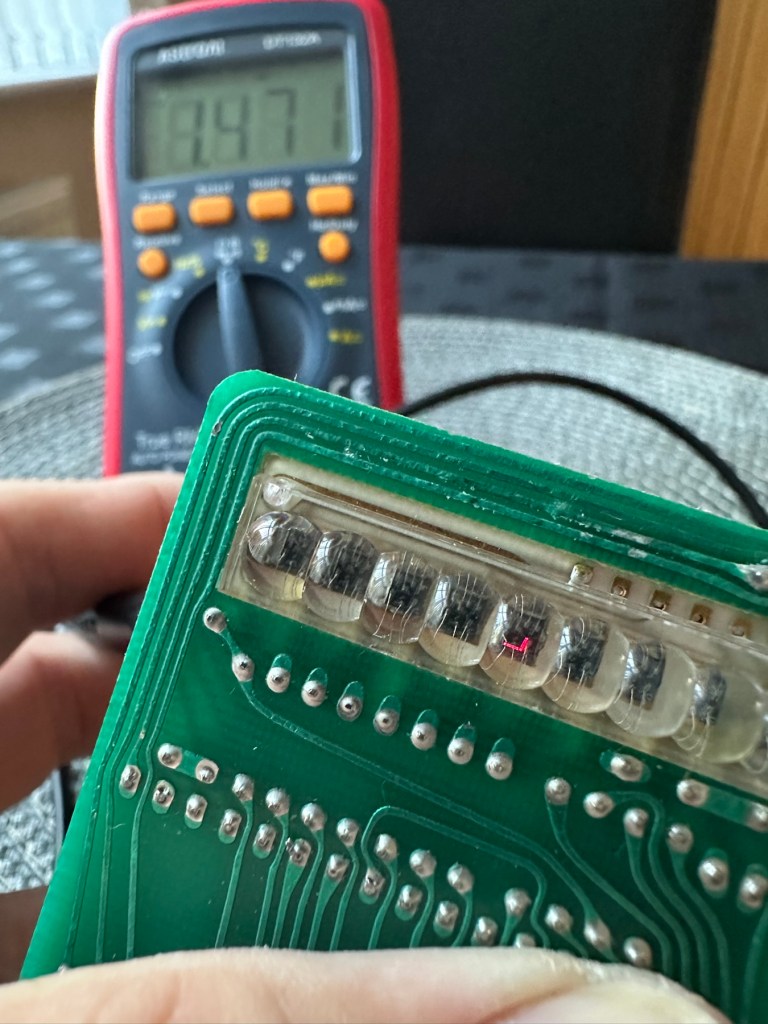
The picture shows just one part of the display range on this particular digit, I can assure you all other sections of the display are also working.

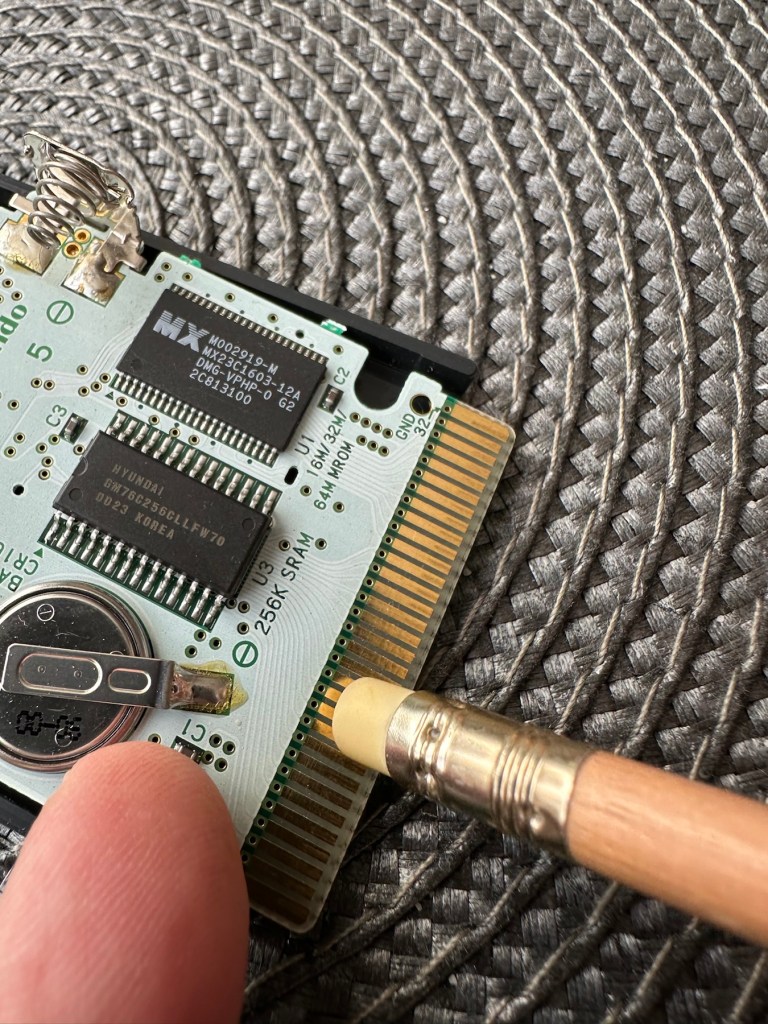
Regarding the case with the buttons not working. I have checked this out for continuity and both digits go through the same portion of the main IC and there doesn’t appear to be any broken traces. It’s a strange one but I have also found some really poor solder joints that are either cold joints or just poorly soldered from the start, there are a couple of resistors that need re soldering. It may be nothing at all, but it needs attention, a full reflow wouldn’t go amiss or take too much time.

Faulty resistor joint

I’ve reflowed the entire board due to there being a few cold solder joints.

Full reflow completed

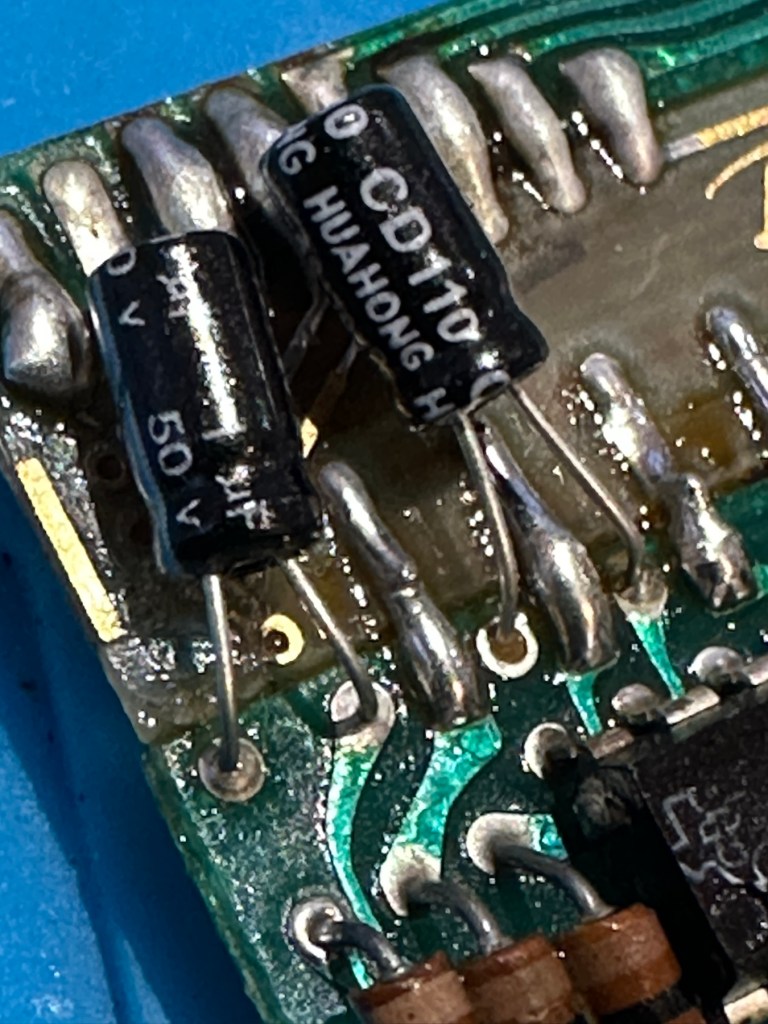
On top of this I have taken off two old capacitors and tested them out of circuit, and both were out of their operable range of +/- 10%. As a result of this I have replaced the offending components with comparable new ones.

Even with all these extra tasks being undertaken there is absolutely no change in the way it operates. Nothing has gotten worse, the faults that were originally there still remain. I have done some research on line and carried out some further tests and checked expected voltages, most are within range except one that appears to be less than its expected value. After testing everything on this board, every component I can only surmise that one of the three chips has failed, I suspect very much that this, the main chip, a CZL550 integrated circuit. Otherwise known as “Calculator on a chip” is the one that is at fault.

A CZL550 chip

To be quite honest these chips are fairly rare and command a price far in excess of what I paid for the original unit, and I don’t really want to do that. I think I’ll wait around to see if I can secure another faulty unit to complete this repair, so in the meantime, and until I can secure such a unit I will put this repair on hold.

Result:

Well, it’s not what I wanted but sometimes you just can’t win with some of these old projects. In no way am I walking away from it, it’s just that the parts are so difficult to get hold of that you really do have to just wait until a sufficiently faulty one comes up for sale. And that could be days, it could be weeks or months. So for now i admit defeat, but it will not be going to trash. It will remain in my ever expanding “To do” box, for me to pick up on at a later date. And when I am in a position to move this project on, I’ll pick it up in a continuation of this post.

Many thanks for passing by. It’s always appreciated.

Forced E-Waste PCs and the Case of Windows 11’s Trusted Platform

I thought this was a very good post from the guys at Hackaday. Most of us who use the Windows platform will have probably come across this issue in the last year or so. Being told your perfectly good computer is not up to running Windows 11 when in fact it is probably more than capable.

Is it no wonder people are moving over to “The dark side” (Linux) in droves….

Until the release of Windows 11, the upgrade proposition for Windows operating systems was rather straightforward: you considered whether the current…

Forced E-Waste PCs and the Case of Windows 11’s Trusted Platform

Nintendo Game Boy Pokémon pinball game

What the listing stated:

You will receive what you see in the photos, please look at the photos as this is part of my description to show you what you would be receiving. Please note the game comes up with the main Game Boy & Nintendo screen & then won’t go any further, as you can see👀in the photo. 

Any questions please feel free to ask. 

EBay

Hopefully this will be a simple repair, but who knows it might just be a little more technical.

This game is built for the game boy colour console and is an original Nintendo product, it is the Pokémon pinball game. I’ve purchased something I never normally buy and usually detest buying, an item with the battery cover missing. Damn it, there is a fortune waiting to be made by anyone who owns a decent 3D printer, with the amount of missing battery covers that are waiting to be reproduced out there. Edit: ( Just looked on line and it seems the gaming community are already on the case, loads of options available, great to see) Anyway I’ve brought this unit as it can either be kept to await a suitable battery cover or passed straight on. Edit#2: I have, in anticipation of its arrival already ordered a suitable 3D replacement cover from a UK company. It was probably the best priced and best looking print to be honest, some of the others looked a little rough and postage was excessive to say the least. These guys at Cool spot gaming were the best in my opinion.

Released in Japan in 1999 this game made it to European shores in 2000.

These games came with a rumble pack at the top of the cartridge that simulates the vibrations of a normal pinball machine, and I believe this is what the single cell AAA battery is for. And as it is a black cartridge this indicates it can be used on the GameBoy colour and original versions. I have purchased this for about half the price that a good working one with battery cover sells for, now that I’ve had to pay for a 3D replacement battery cover I now move into the higher end price of the cartridge valuation, however I do have a few pounds worth of wriggle room should I decide to sell, considering most of the ones on sale at the moment are missing the battery cover and commanding horrendously high prices. I’m comfortable with that. That said it will go into my personal GameBoy collection anyway. Let’s get it working.

Here’s a link to the actual 3D print program for the battery cover on Thingiverse, if you should ever wish to print one yourself. I have absolutely no idea about 3D printing so this is just like brain surgery to me: 3D print program

Assessment

A nice tidy little package has arrived clean, battery cover missing as stated and exterior looks nice and clean. Original label is intact.

Repair:

New 3D battery cover has arrived and this fits perfectly, no issues here.

I’ve placed the unit into my GameBoy to check what occurs, and just as posted it does not progress beyond the Nintendo start up screen. I’ve opened the cartridge to do some basic checks and cleaning, the cartridge contacts have been cleaned using an eraser and some IPA, but in all honesty they were already pretty clean. I’ve checked the onboard battery and this is healthy at 3v as it should be. Cleaning competed, I recheck the game and the results are the same.

Next I’m going to reflow the joints on the ROM chip on the right hand side of the board, the one that has the letters MX on it. These pins or the ones on the RAM chip directly beside it are well known for having bad contacts and often need reflowing/tacking down. It’s something that seems to occur over a period of time on these game cartridges, just plain bad contacts.

ROM chip on the right with the RAM chip on the left, both are notorious for developing loose contacts

All items on the board have been reflowed using hot air, with extra attention being paid to the two chips described in the picture above. I removed the battery prior to doing this as the last thing you want is exploding batteries. With the battery back in place and the game now reassembled it’s now time to test.

And it works including the rumble pack feature.

I can only presume the hot air reflow has fixed an issue with joint continuity on one of these chips as expected. Excellent, another item has been saved from the bin and can now be added to my collection.

Another little project to put to bed, there always seems to be an issue with these games after a good number of years where the solder joints just become unstable. I don’t know if it was the solder quality they used all those years ago or the heavy use and abuse the games endured during their hey day. At least we can fix them and ensure they are still good to go and enjoy for a few more years yet.

Thanks for passing by.

Amstrad Notepad NC100

What the listing said:

Amstrad Notepad NC100+ Vinyl Case 

Not working not powering on, the vinyl case has some marks and scratches.

EBay

I’ve been after one of these for a little while, I’ve just been awaiting one at a good price and this one became available, post included at £30GBP, they retailed for £199Gbp back in 1992. It says it is not working but that’s good in my eyes as it makes these posts more appealing, as it gives me something to repair. I don’t know what the issue is off hand as the post didn’t state that, but I do know these items have suffered with capacitor problems over time, but that is not necessarily the case here. We will just have to wait until we do the assessment on its arrival. And as it comes from around the early 90s it fits right in with my modus operandi. And this little cutie dates from 1992.

Here’s a little history behind this unit courtesy of Wikipedia:

The Amstrad NC100 Notepad is an A4-size, portable Z80-based notebook computer, released by Amstrad in July 1992. It featured 64 KB of RAM, 256KB of Rom, the Protextword processor, various organiser-like facilities (diary, address book and time manager), a simple calculator, and a version of the BBC BASIC interpreter. The computer’s design, evocative of the TRS-80 Model 100, features a screen with 80 character columns by eight rows, and not backlit, but this let the NC100 run for up to 20 hours on four standard AA cellbatteries. There was an RS-232serial port, a parallel port for connecting a printer, and a PC card socket, by means of which the computer’s memory could be expanded up to 1 MB.

Assessment

The unit has arrived and cosmetically it is in very good condition apart from the peeling plastic screen cover. A little bit of dust and grime, all keys in good order and no dinks or dents. the vinyl bag is a little tatty but that’s not a problem, it’s obviously done it’s job over the years due to the good condition of the unit.

So down to testing. First thing I’ve done is check the power supply is giving a 6.5 v output and this is ok.

Power supply doing what it should.

Secondly I’ve put 4 AA batteries in place and turned the unit on but then it abruptly stops, displaying a lithium battery issue.

Lithium battery warning

The lithium battery is an old CMOS type battery, a CR2032 coin battery. This is the battery that keeps the info in the system when you turn it off. I thought I’d run this through the multimeter and was surprised with the voltage I saw, the battery seemed fine to me at 2.8v, so I replaced it with a new one measuring 3.4v. And the issue came up again…..head scratching time!

Looking on line it seems there is an issue with the lithium cell battery contacts on these units when they are being resurrected to modern day usage, time has not been good to them. The coin contacts have now been cleaned and slightly bent to ensure a better contact and hey presto it’s operational with no further issues.

Battery contacts needed cleaning and repositioning

The main AA battery contacts are fine and the external supply is doing what it should. Now let’s look at sorting that screen issue.

Quite simply there were two options, use a bit of heat to try and stick the plastic down, but I decided against this as it would not lay flat, it had too many kinks in it. So the only other option was to remove it and this is what I did, it peeled off with no issues. In time I will see if I can get a suitable replacement but to be honest it isn’t really required as I’m not going to be using it that often.

Let’s get that screen cover off

I’ve tried every function and keystroke of the board and all is good there are no issues and I now have a perfectly acceptable unit for my collection. It looks like i have had a second win against the “Untested” brigade who sell on EBay. This was the simplest of repairs and the issues are readily available to research on line. There is no excuse for not looking into the issues, when a good unit like this can now sell for up to three times the amount that I paid for it.

Your loss my win. Another one kept from landfill.

I’ve given the unit a good polish and I think you’ll agree that the project has come up good.

Now to just go and read the user manual on line to see if I’ve missed anything. Thanks for passing by, as always it’s most appreciated.

Psion organiser series 3a

What the listing stated:

It fires up and turns on, then get a black screen. Every time I press a key on the keyboard it makes a beeping sound, so it is registering something.

EBay

From a distance, and in my opinion, the fault could be a simple one such as adjusting the contrast by using the Psion key and either of the <> keys. This was often an issue when first turning on the Psion II, you had to turn the contrast wheel. However it could be a terminal one requiring a donor unit. In layman’s terms it could be knackered, (to coin a phrase). But hey, what do I know 🤦‍♂️

Psion 3a – Faulty

Fingers crossed 🤞 as usual.

I have a what looks like a nice tidy little unit here obtained for a very reasonable price £17:69Gbp including postage. These units retailed between £179-£249 when they first appeared back in 1993. However, there is only the one picture in the advert so the rear, sides and hinges could be wrecked. “Caveat emptor” as they say. It does have a problem that will need some investigation. It runs off of two AA batteries and a CR1620 coin battery as a backup, and these will be the first items to be changed, I’ll also check the voltage of that coin battery and replace that if necessary. This is an early version with 256KB of internal Ram. 3a versions from 1995 either had 1Mb or 2Mb of ram. You can also use an external power supply if required, but the batteries in these units have an excellent long life span, so external power is rarely necessary. I’m looking forward to this project. I’ll make a more detailed analysis when the unit arrives shortly.

The Psion Series 3 range of personal digital assistants were made by Psion PLC. The four main variants are the Psion Series 3 (1991), the Psion Series 3a (1993), the Psion Series 3c (1996), and the Psion Series 3mx (1998), all sized 165 by 85 by 22 millimetres (6.50 in × 3.35 in × 0.87 in). Further, a Psion Series 3a variant with factory installed software for the Russian language was called a Psion Series 3aR, and Acorn Computers sold renamed versions of the Psion Series 3 and 3a marketed as the Acorn Pocket Book and Acorn Pocket Book II.

Wikipedia

A little history:

This particular unit dates from 1993 and was the next in the series of Psion organisers that succeeded the extremely successful Series 2 models. It was a massive step forward in design as the whole PDA market was kicking in big time in the early to mid nineties. More info regarding the series 3 organisers can be found here: Psion series 3

And the strange fact for today is this:

Manufacture of Psion 3s was discontinued in 1998 shortly after the launch of the Psion Series 5 (a Psion Series 4 does not exist, due to Psion’s concern of Tetraphobia in their Asian markets)

Wikipedia

What is Tetraphobia?

The fear of the number four: Tetraphobia is mainly suffered in China, Vietnam, Korea, Japan, because the word for the number four is similar to the word for death in their languages. Tetraphobia results in many people avoiding referring to 4 in phone numbers and so on.

Cambridge dictionary

There you go, question answered and that was why there was no Psion 4.

Onwards…

What has arrived, and what’s the diagnosis?

The unit has arrived and despite my suspicions it is in an excellent cosmetic condition. Just some very light signs of usage, needs a light clean, all hinges are in place and solid. Everything is as it was all those years ago and all the warranty labels are in place, this unit has never been opened.

I placed the new AA batteries in and it came up with the black screen as the seller had stated. Using the contrast adjustment at this stage had no effect but the buttons were sounding so something was happening. Whilst looking in the memory card doors I could see one glaring issue, there was no backup CR1620 battery, so I dropped one in place . When I started the unit up again the screen went from black to clear, over a few seconds and then I operated the contrast buttons, and hey presto it worked. Watch this little video to see what happens.

We have life

I can only surmise that not having the correct batteries in for god knows how long, and then livening up the circuitry must just be like giving Frankenstein a fresh transfusion of blood. “It’s alive!” Well, that’s all I can think it would be.

I’ve run every function on the unit and it all works fine apart from the voice recorder function that seems to have a lot of feedback on the recording. I suspect this might be as I’m using the already full internal memory. It’s not a real problem, I’m just going to have to read up on it, as I could be doing it all wrong. (I have since done a hard reset and deleted old files from the system and this has cured the feedback issue, the voice recorder works fine). However it would still probably work better using an additional drive in the unit, and not the low internal memory.

Just as you could on the Psion II you can write your own programs using OPL language. And it is a lot easier on this unit as you have a full Qwerty keyboard and a much bigger display. There are more applications on this unit than the series II, including word, spreadsheets, DTMF dialler, calculator and others that can be purchased as plug in additions.

I’m really happy with this, if the seller would have just taken a little time to run the unit and have some patience he’d have realised there really is nothing wrong with this unit. Big negative for him, big bonus for me. He could have charged more than double the price for this item, or more, considering current prices on the selling platforms.

Another strange thing i have noticed is that when I’ve left it overnight and started it up the following day it takes a minute or so for the screen icons to appear, just like putting on an old valve radio. So it maybe that a repair is necessary, I’ll have to ask around and see if any else has had this issue.

Valve powered Psion3A

Edit: A few days later and I’ve looked into this a little more. For some unknown reason, probably my rank stupidity, I’ve checked the coin battery and I’ve installed a CR2032 instead of the required CR1620 and have tonight corrected this and installed the CR1620 coin battery. I don’t know if, or why this would have an effect, but after putting the correct battery in place the unit started up in a couple of seconds even after sitting unused for at least a couple of days, instead of the usual 2 minutes as per the video. I can only think it must be something more related to the capacity rather than the size, unless for some reason the contacts were not sitting true. (There is a slight difference of 4mm in width) I remain puzzled as I thought the battery was just for backup purposes, maybe it does perform more as a computer CMOS battery does, but I’m pleased it’s now operating as it should. I can now stop monitoring the sale sites for units to use as spares.

Sometimes your suspicions pay off, and on this occasion I was spot on. EBay untested items can swing either way and most of the time the sellers use it as an easy get out for not accepting any responsibility. But this time I win, and that makes me happy as I have a very good item for my retro collection.

Thanks for passing by.

Old iPad To New Screen

This is a great blog from Hackaday that shows how old iPads that are no longer usable can have their screens used as standalone monitors. Since Apple are openly criticised for their throw away culture it’s a reasonable way of keeping these old units out of landfill, and saving you some money as well. I love the example of using an old screen as an additional screen for an iMac.

Turning surplus LCD panels into stand-alone monitors with the help of a driver board is an established hack, and a search of eBay or AliExpress will …

Old iPad To New Screen

Basically, It’s BASIC

And here we are after 40yrs still getting a lot of satisfaction out of pushing Basic to its limits.

Good post here, and very informative.

The BASIC language may be considered old-hat here in 2025, and the days when a computer came as a matter of course with a BASIC interpreter are far …

Basically, It’s BASIC

Sinclair ZX81

Write about your first computer.

Now this is a prompt that excites me as it is a nod in the direction of all that i really like, retro.

I started my first full time job in about 1982. The ZX81 came out in 1981, and I used my first months pay to purchase one, it cost around £70Gbp if my memory serves me well.

Sinclair ZX81

My first real surprise when I opened it was that it wouldn’t do a thing unless you actually programmed it, I really hadn’t done my homework and what followed was a crash course in BASIC programming to get it to do something, but I loved it.

Looking back the best thing about this product was that it got you learning stuff, and I have no doubt that items such as this started many people off on the road of computer technology employment, computing was now available at a good price to everyone, and we youngsters really took to this unit en mass as 1.5 million units were sold prior to it being discontinued two years later in 1984.

I moved on fairly quickly to the Vic20, Spectrum, Amstrad CPC464 and then the traditional home computer and as they say the rest is history. They were fantastic times back in the early days, and I cherish them immensely. In fact I’ve never fallen out of love with this technology and I will soon write a more in depth piece about the ZX81 as I am looking at purchasing another one for my retro collection.

Have a wonderful weekend.