Grandstand Convertors Deltatron

What you say?

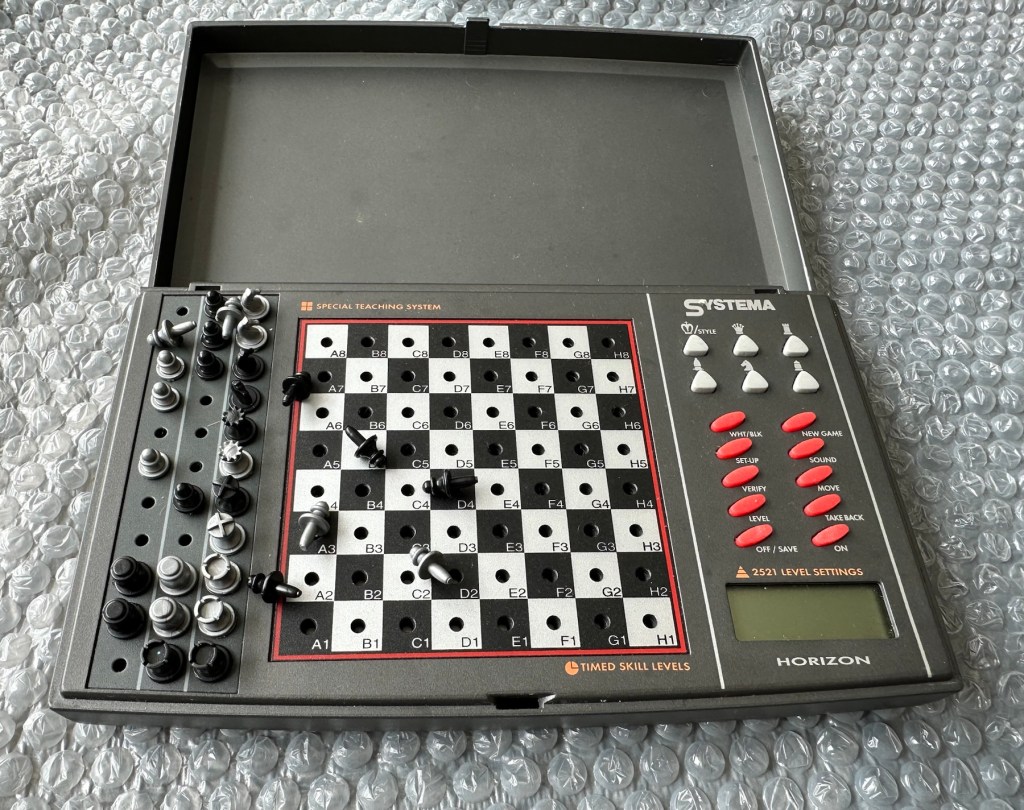
I arrived home from work last evening to find my nephew at home. He’d been looking around his mum and dad’s attic to find his old star wars toy collection he had from the 80s-90s. Whilst in the loft he found this old toy from 1985 by a company called Yonezawa being sold under the Grandstand branding, and it isn’t working. Here is where it passes over to uncle Dave.

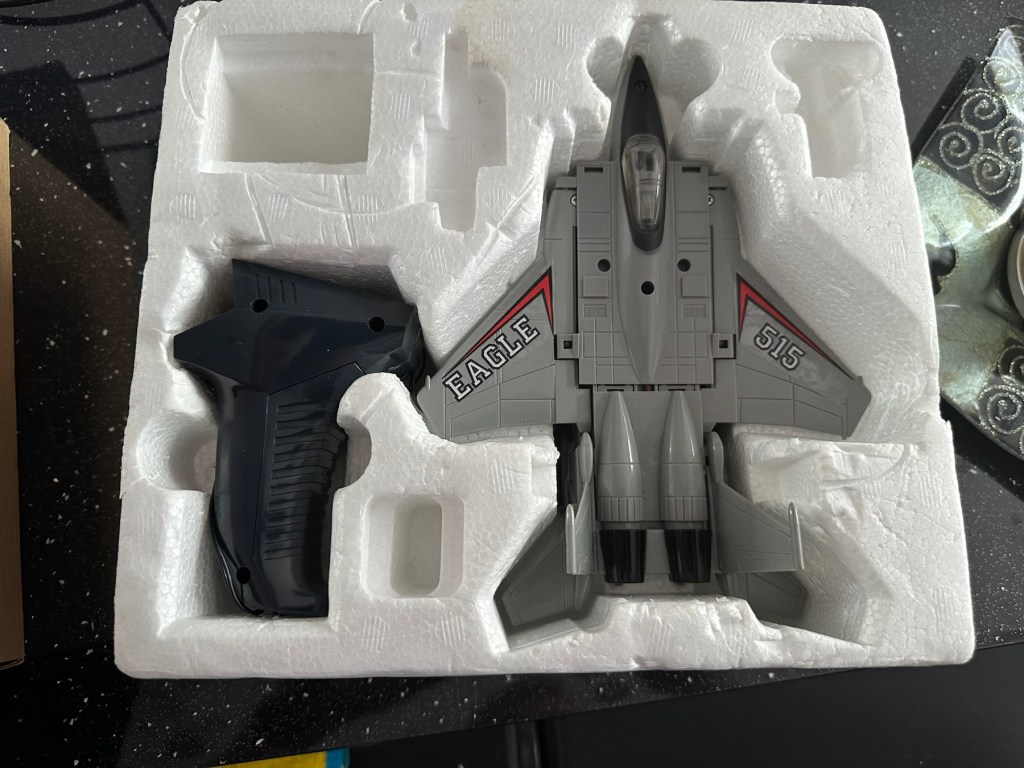
There’s no real value to these toys as they were produced in massive quantities off the back of all the transformer type toys that were available at the time. There are some accessories missing from this one that are obtainable via the auction sites, he may well ask me to source these, but at the moment he just wants me to get it working to pass onto his boys. The video below shows just what it does….and that’s not a lot. But the one I have here is totally dead and needs reviving just like Frankenstein.

Deltatron what it should do

So here we go…

Assessment:

My overriding surprise is that this has been in a loft space for close to 30 yrs and does not have that expected damp mustiness that usually comes with such an item. I must say, my brother in laws loft space is an exception, it’s obviously free from excessive moisture, mind you it’s only about 40 yrs old so building standards had probably advanced somewhat from when ours was built about 90 yrs ago.

It’s in a good condition and all its parts are there minus a few little additions that originally came with the toy. But as I have stated earlier these parts can be obtained on line if required.

Right, let’s have a look at what is or isn’t happening here…

Repair:

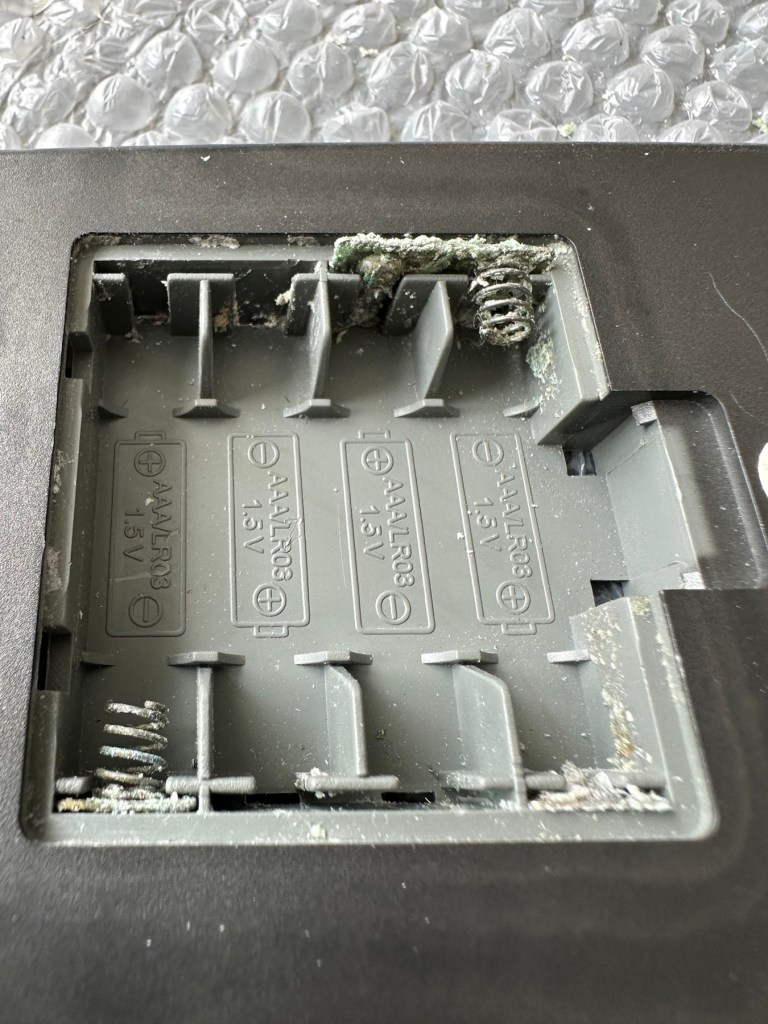
When batteries are installed and the remote control is operated, all that happens is that a light comes on in the toy. The motion that is required is non existent.

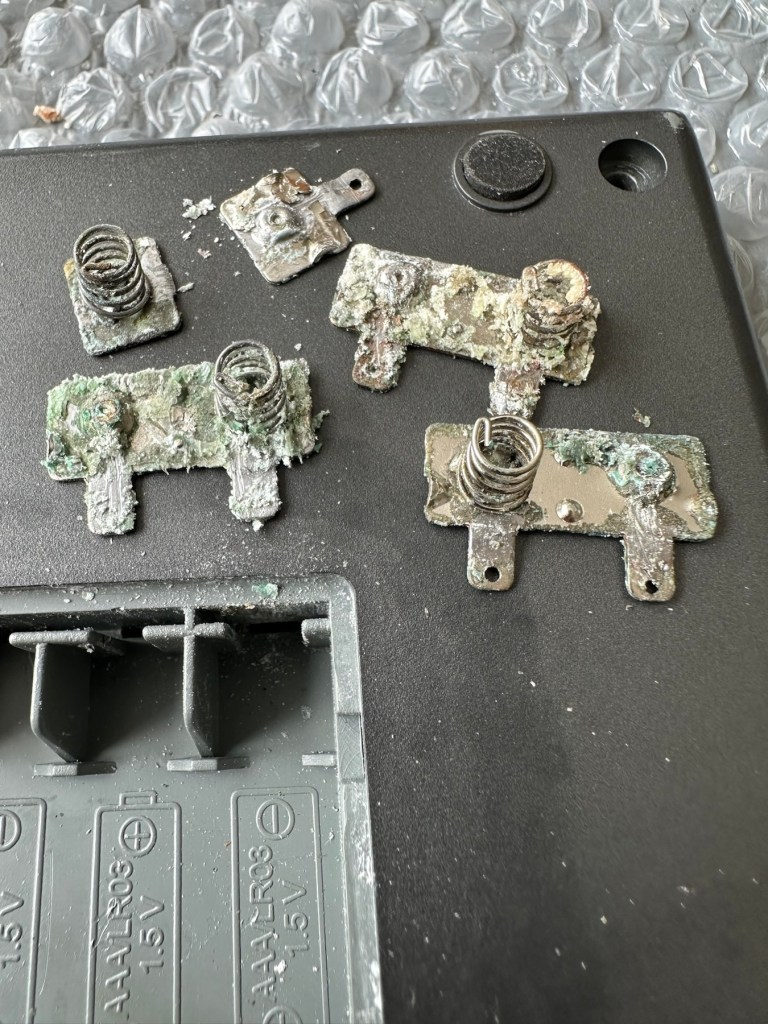
When examined closer you can see there is a lot of surface rust on the side of the motor where the contacts go into the unit.

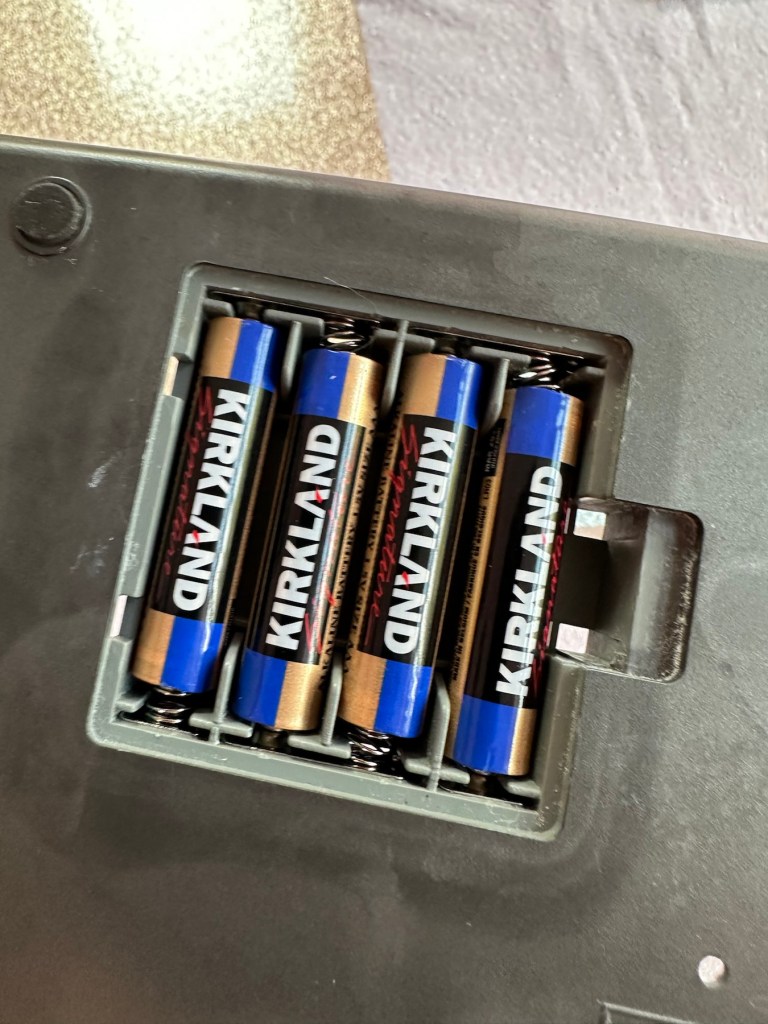
The contacts were so rusty inside the motor unit that you’d get an intermittent running of the motor if you moved them. I’ve checked continuity and solder joints and they were fine. I’ve injected some contact cleaning spray into the motor and sat there manipulating the motor in both directions for about 5 minutes, this was sufficient to get the motor running freely once power was reapplied. The contacts were dirty and restricting the flow of power to the motor. I decided to use some IPA around the area to give it all a good clean and once again sprayed more contact cleaner through the motor.

Contact cleaner and silicone grease

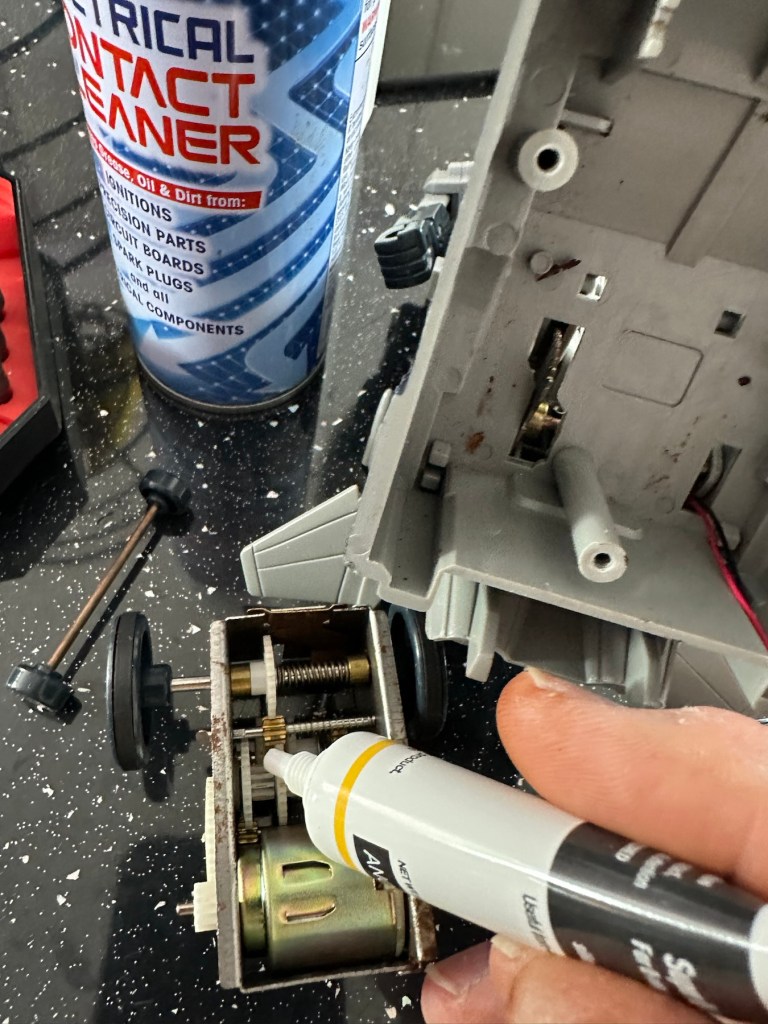
Once I’d run the motor for a few minutes in both directions I then applied some silicone grease to the cogs and moving parts to allow a smoother operation. It’s worked. A nice simple fix.

Result:

It’s working and here’s a small video to prove it.

It’s now working

I’ve already handed it back and it’s a joy to see the smiles on my nephew and his dad’s face when they watched it working. Such a simple thing, bringing back treasured memories and laughs. Another old toy saved for another generation and best of all another item not going to a landfill.

Thanks for passing by, as always it is very much appreciated.

Systema/Krypton – Horizon computerised travel chess set

What the listing stated:

The item has previously been owned before and unfortunately the batteries were left inside to corrode. When tested the computer part does not work.The pieces are a complete set for playing without the computer. Please see photos.

EBay

The unit looks clean cosmetically, and all the pieces are present. The computer side is not working probably as a result of the corrosion that is present in the battery compartment.

So I’ve paid a grand total of £11:49GBP for this unit which is probably slightly above its value. However it was from the St.Helena Hospice in Colchester, so I do not have an issue with this. In fact if I can get it working it will be donated straight back to a hospice I support here in Leicester – LOROS hospice. So all around, everyone benefits. I don’t play chess so it will not be used by me, I believe this unit was originally released circa 1996, so it is roughly 29 years old.

A really simple video, regarding how this unit works

Not much in the form of instructions online, however I have managed to get hold of some pictures of a quick start guide that should suffice for the moment. I’ll try and get full instructions from somewhere. In the meantime, the video above shows how easy it is to setup and use.

Let’s wait for its arrival to make an assessment.

Assessment:

The item has arrived and cosmetically it’s not too bad. There is some writing ink on the lid, and some staining on the base. but nothing that a good clean wouldn’t see to.

Open the battery compartment and all contacts are in serious need of a good clean or replacement. Battery corrosion is bad. All playing pieces are included and that’s always a bonus. I do believe that the issue here is purely to do with the acid corrosion, as when tested with a multimeter there is no continuity through the contacts. If the corrosion hasn’t gone too deep this should not be too much of a problematic repair.

Repair:

Now inside of the unit we can see the extent of the corrosion and thankfully it hasn’t reached the circuit board as the battery compartment sits just to the side of it.

I’ve disconnected the wires from the battery compartment so i can it take it away and concentrate on removing the contacts and cleaning them, or completely replacing them.

The contacts are in such a poor state and so far beyond recovery that I have decided to replace them all. I need two single and three double AAA size contacts. Luckily I do have plenty of these in my current stock.

Prior to fitting the new contacts I will give the entire battery compartment a good clean with some IPA to remove the residual contamination. I will then dry the unit and just use some furniture polish to buff it all up and make sure it’s as clean as the day it left the factory. Once this is done the new battery contacts can be put in place. I can then re-solder the two internal battery wires back into place.

Contacts checked to see power is a available

New AAA battery contacts in place I just put in the batteries, to confirm continuity with the multimeter. A good 6.4v indicates this part of the repair is good and that the contacts are all working.

Next I’ve decided to replace the two wires from the battery compartment to the circuit board, as the wires, especially the negative one appears very brittle, probably a combination of age and the battery acid contamination.

Two new power wires

I’ve tidied the wire run up by using some Kapton tape to secure it to the shell so there is no chance of a wire pinch.

Before closing the shell up, I use some hot glue to put the speaker back into place.

A bit of hot glue to secure

Now we can get the last four screws in place to secure everything together.

Then switch on…does it work? You betcha, it does everything that it’s meant to, and even though I don’t really know how to play, I do manage to challenge the computer for a good ten minutes. It’s been a great test run and even though I’m not that clued up it is working how it should and is now back in a perfect working order. I’ve created this little video below.

It’s working

Now just a little spit and polish and we can bring this repair to a close.

Result:

It’s polished up well apart from a bit of age staining on the rear, this makes no difference as it’s only the hidden part of the case and every game related part of the unit looks fantastic and it works just fine.

Really pleased with this especially as it’s going straight to our local hospice for them to sell on. It was brought from a hospice, and is going back to another, what better way to generate funds for them. I can’t play chess so this unit is wasted on me. Might as well pass it on to someone who’d appreciate it whilst giving some much needed financial support to a most worthy cause.

Another one saved from landfill. Win win all around.

Thanks for passing by and reading this post. It’s always very much appreciated.

Amstrad Notepad NC100

What the listing said:

Amstrad Notepad NC100+ Vinyl Case 

Not working not powering on, the vinyl case has some marks and scratches.

EBay

I’ve been after one of these for a little while, I’ve just been awaiting one at a good price and this one became available, post included at £30GBP, they retailed for £199Gbp back in 1992. It says it is not working but that’s good in my eyes as it makes these posts more appealing, as it gives me something to repair. I don’t know what the issue is off hand as the post didn’t state that, but I do know these items have suffered with capacitor problems over time, but that is not necessarily the case here. We will just have to wait until we do the assessment on its arrival. And as it comes from around the early 90s it fits right in with my modus operandi. And this little cutie dates from 1992.

Here’s a little history behind this unit courtesy of Wikipedia:

The Amstrad NC100 Notepad is an A4-size, portable Z80-based notebook computer, released by Amstrad in July 1992. It featured 64 KB of RAM, 256KB of Rom, the Protextword processor, various organiser-like facilities (diary, address book and time manager), a simple calculator, and a version of the BBC BASIC interpreter. The computer’s design, evocative of the TRS-80 Model 100, features a screen with 80 character columns by eight rows, and not backlit, but this let the NC100 run for up to 20 hours on four standard AA cellbatteries. There was an RS-232serial port, a parallel port for connecting a printer, and a PC card socket, by means of which the computer’s memory could be expanded up to 1 MB.

Assessment

The unit has arrived and cosmetically it is in very good condition apart from the peeling plastic screen cover. A little bit of dust and grime, all keys in good order and no dinks or dents. the vinyl bag is a little tatty but that’s not a problem, it’s obviously done it’s job over the years due to the good condition of the unit.

So down to testing. First thing I’ve done is check the power supply is giving a 6.5 v output and this is ok.

Power supply doing what it should.

Secondly I’ve put 4 AA batteries in place and turned the unit on but then it abruptly stops, displaying a lithium battery issue.

Lithium battery warning

The lithium battery is an old CMOS type battery, a CR2032 coin battery. This is the battery that keeps the info in the system when you turn it off. I thought I’d run this through the multimeter and was surprised with the voltage I saw, the battery seemed fine to me at 2.8v, so I replaced it with a new one measuring 3.4v. And the issue came up again…..head scratching time!

Looking on line it seems there is an issue with the lithium cell battery contacts on these units when they are being resurrected to modern day usage, time has not been good to them. The coin contacts have now been cleaned and slightly bent to ensure a better contact and hey presto it’s operational with no further issues.

Battery contacts needed cleaning and repositioning

The main AA battery contacts are fine and the external supply is doing what it should. Now let’s look at sorting that screen issue.

Quite simply there were two options, use a bit of heat to try and stick the plastic down, but I decided against this as it would not lay flat, it had too many kinks in it. So the only other option was to remove it and this is what I did, it peeled off with no issues. In time I will see if I can get a suitable replacement but to be honest it isn’t really required as I’m not going to be using it that often.

Let’s get that screen cover off

I’ve tried every function and keystroke of the board and all is good there are no issues and I now have a perfectly acceptable unit for my collection. It looks like i have had a second win against the “Untested” brigade who sell on EBay. This was the simplest of repairs and the issues are readily available to research on line. There is no excuse for not looking into the issues, when a good unit like this can now sell for up to three times the amount that I paid for it.

Your loss my win. Another one kept from landfill.

I’ve given the unit a good polish and I think you’ll agree that the project has come up good.

Now to just go and read the user manual on line to see if I’ve missed anything. Thanks for passing by, as always it’s most appreciated.