Nintendo Gameboy color console

I’ve purchased a faulty Gameboy Color for my collection. It has no power, so let’s have a look and try to get it working again.

What the listing stated:

Very clean, but doesn’t turn on

EBay

Yep. It’s a Gameboy Colour to me, but as it was sold using the American spelling of “Color” then that’s what it will be addressed as, going forward.

I’ve been after a “Color” to add to my collection for a while now, but it had to fit my very strict quality requirements, in truth it just has to be faulty, and this particular example has met my conditions. I’ve paid £30.00GBP for this example and I’m happy with that, it’s a very fair price.

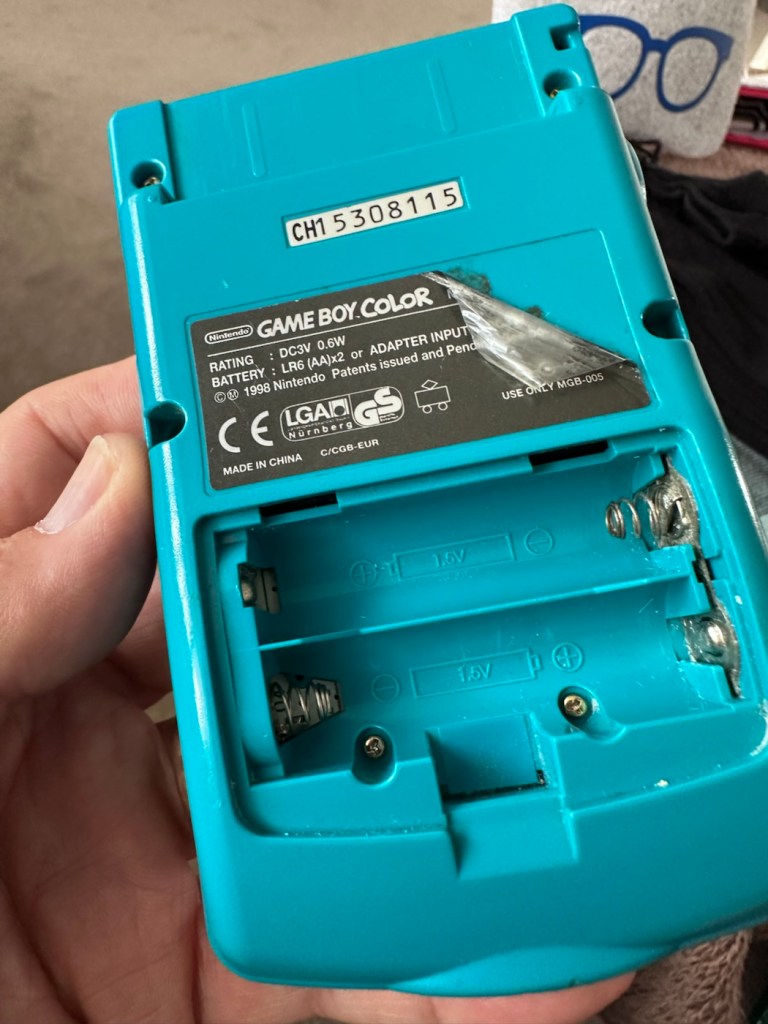
The good news seems to be that it is in a really good condition, it looks as if the battery door is missing, however they are freely available and this is not an issue should I require one.

These units are known to sustain power failures and the repairs are well documented. By now the unit is close to 30 years old and as time advances components start to fail, these include, but are not limited to:

  • Power switch failure: either a complete failure that requires replacement or quite simply a simple clean to remove years of tarnish and environmental gunk.
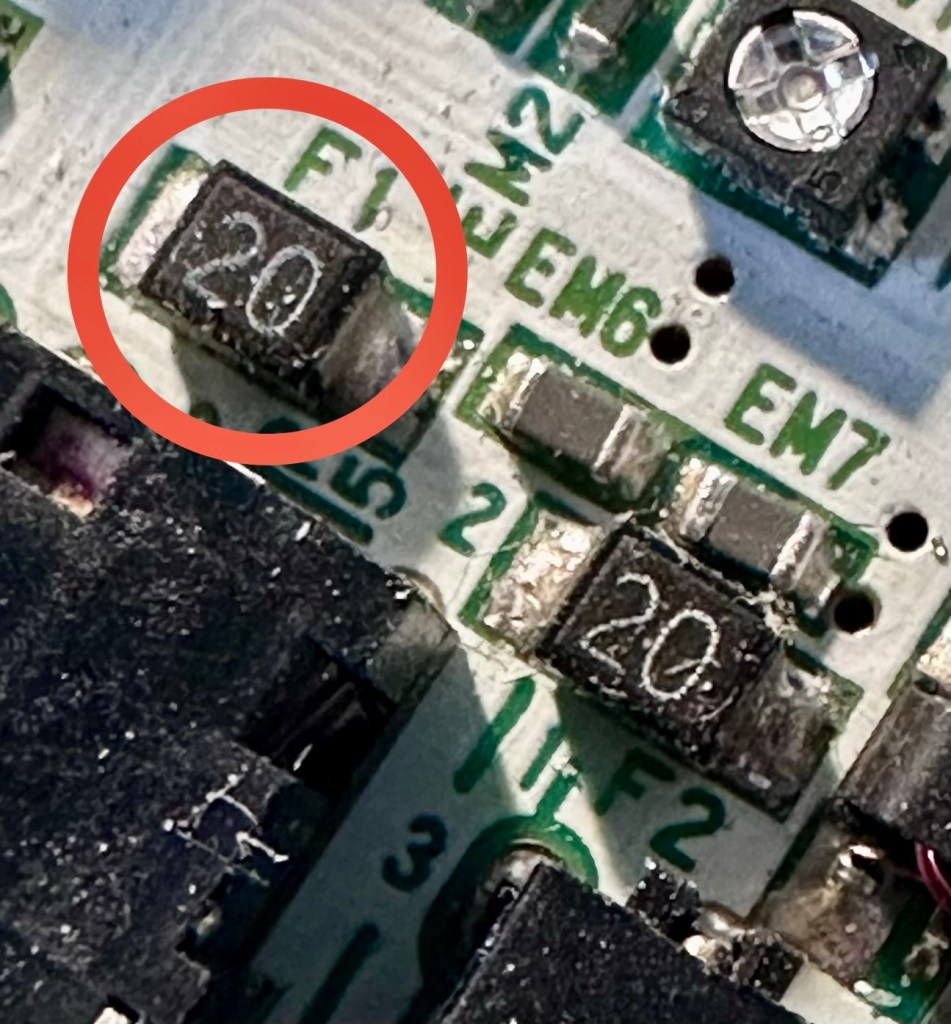
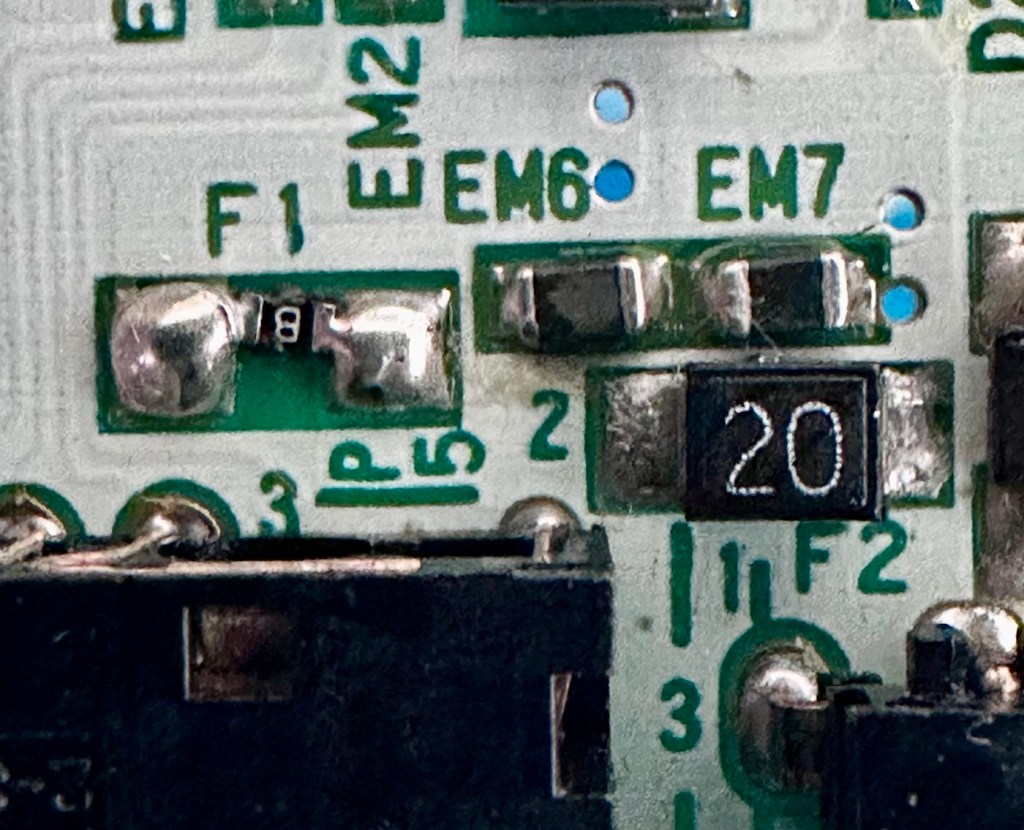
  • Fuse failure: there are two fuses F1&F2 that are known to fail, normally due to a short somewhere else on the circuit, but sometimes due to a power surge or incorrect addition of an incorrect power supply.
  • Via failure, small through the board connectors that are known to suffer with corrosion, requiring intervention with the addition of small wires to bypass the issue.
  • Capacitors – known to fail on a regular basis, it’s sometimes good housekeeping just to get these replaced as they are a contributing factor as to why other components such as the fuses also fail.
  • Worst case scenario: major corrosion or main board component failure.

We’ll cross these bridges when and if we need to.

Here’s a little info about the Gameboy Color console:

The Game Boy Color (abbreviated as CGB or GBC) is an 8-bit handheld game console developed by Nintendo. It was released in Japan on October 21, 1998, and in international markets the following month. Compared with the original Game Boy, the Game Boy Color features a color TFT screen instead of monochrome, a CPU running at up to twice the speed, and four times as much memory. It is backward compatible with games developed for its predecessor. The Game Boy Color was released during the fifth generation of video game consoles and competed with Bandai’s Japan-only WonderSwan, SNK’s Neo Geo Pocket Color, and Sega’s North America-only Genesis Nomad.

The handheld is slightly thicker, taller and has a smaller screen than its immediate predecessor, the Game Boy Pocket, but is significantly smaller than the original Game Boy. As with its predecessors, the Game Boy Color has a custom 8-bit processor made by Sharp. The American English spelling of the system’s name, Game Boy Color, remains consistent throughout the world.

Wikipedia

So, for now, let’s not speculate on its quality and issues until it arrives, when we can then carry out a proper assessment of the unit that has been received.

Assessment:

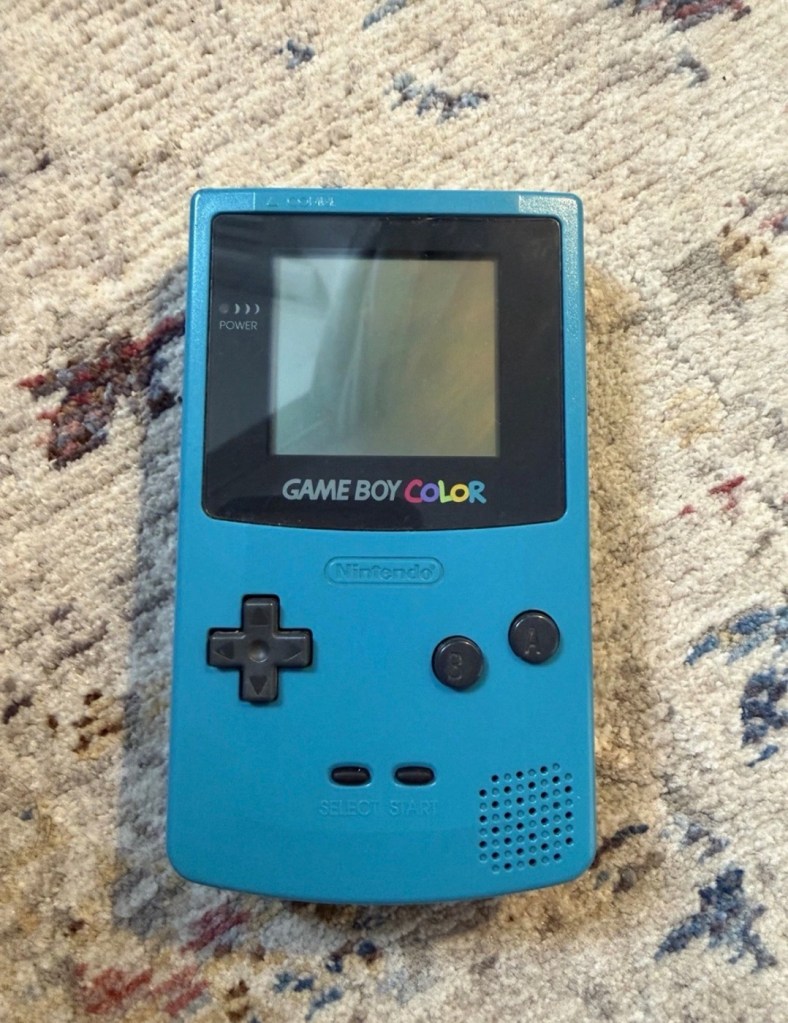
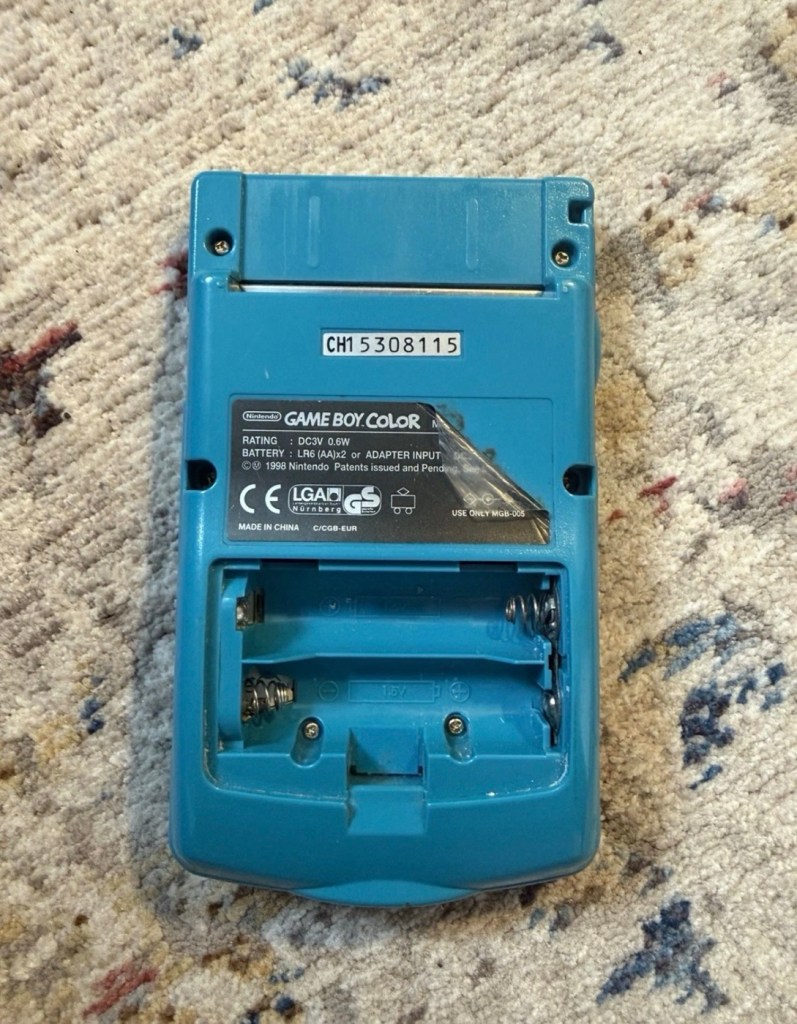
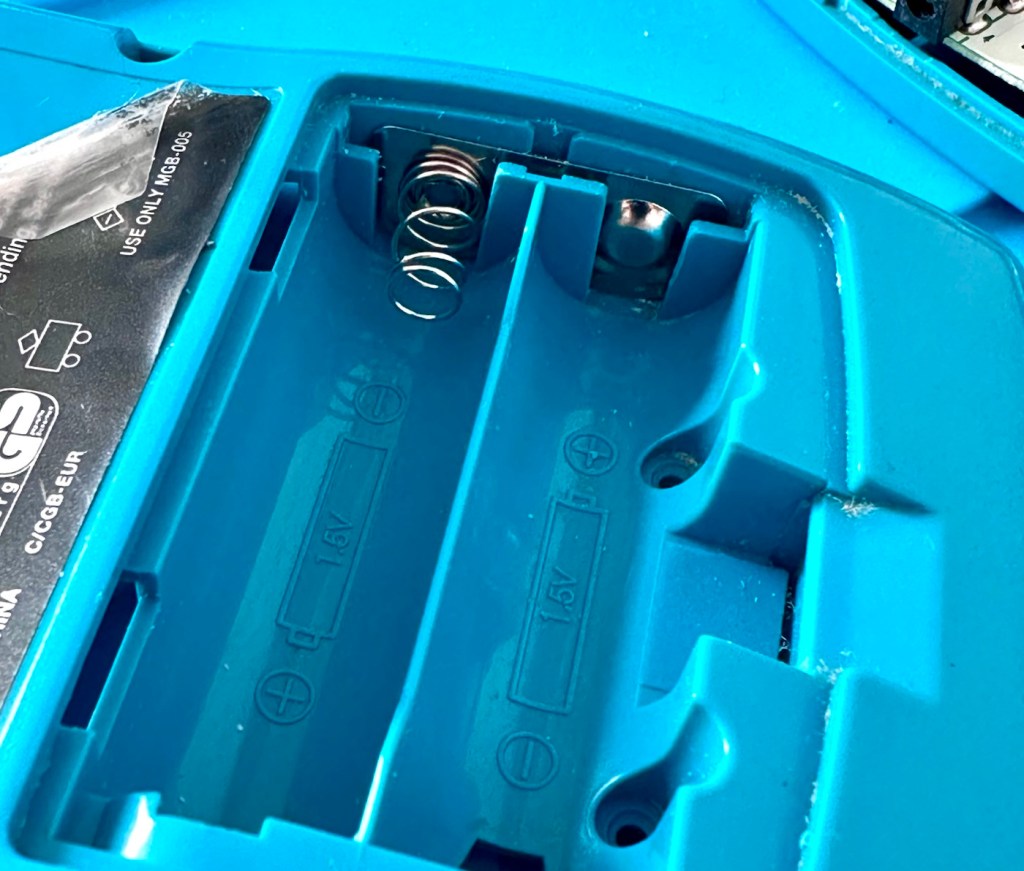
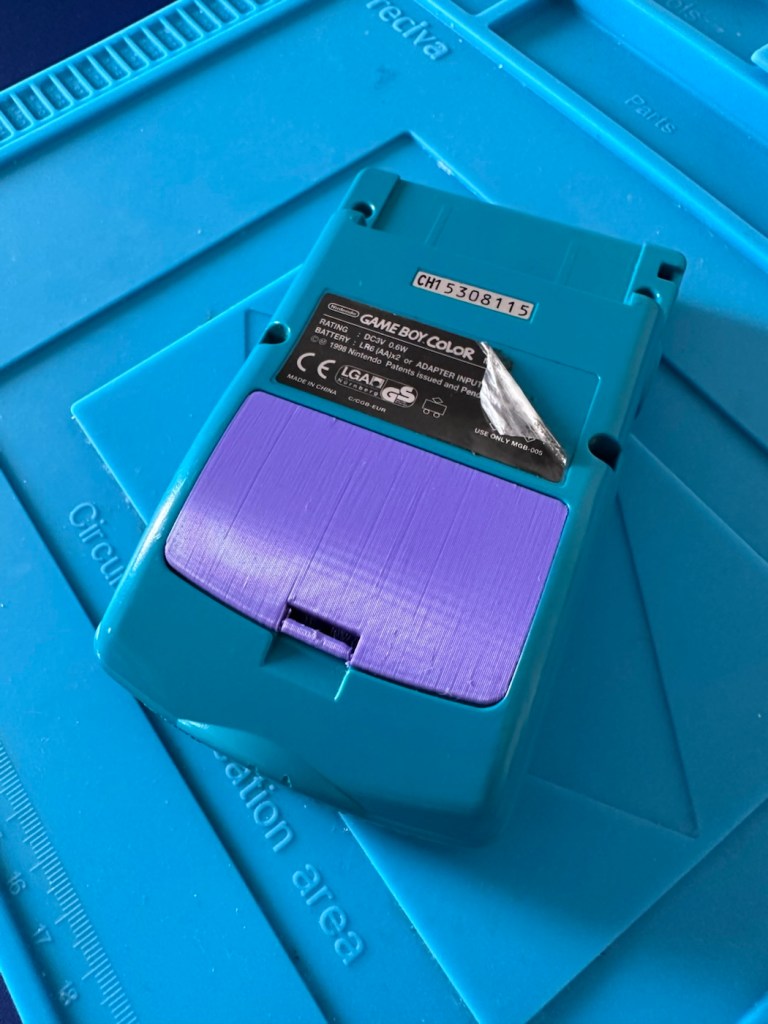
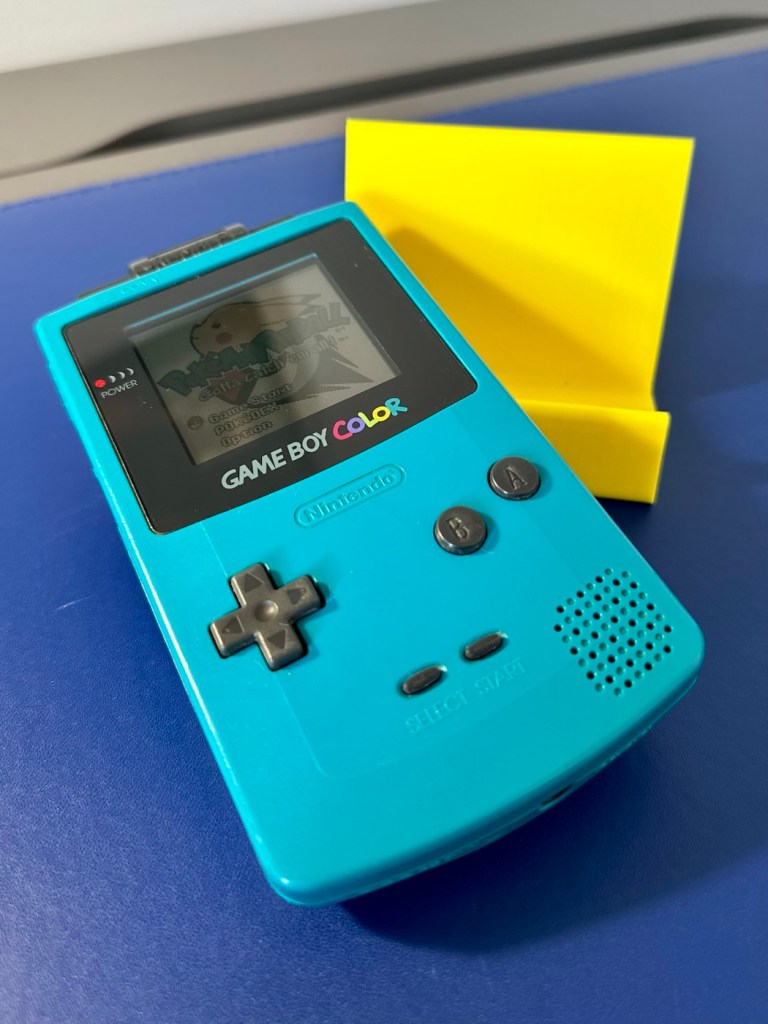
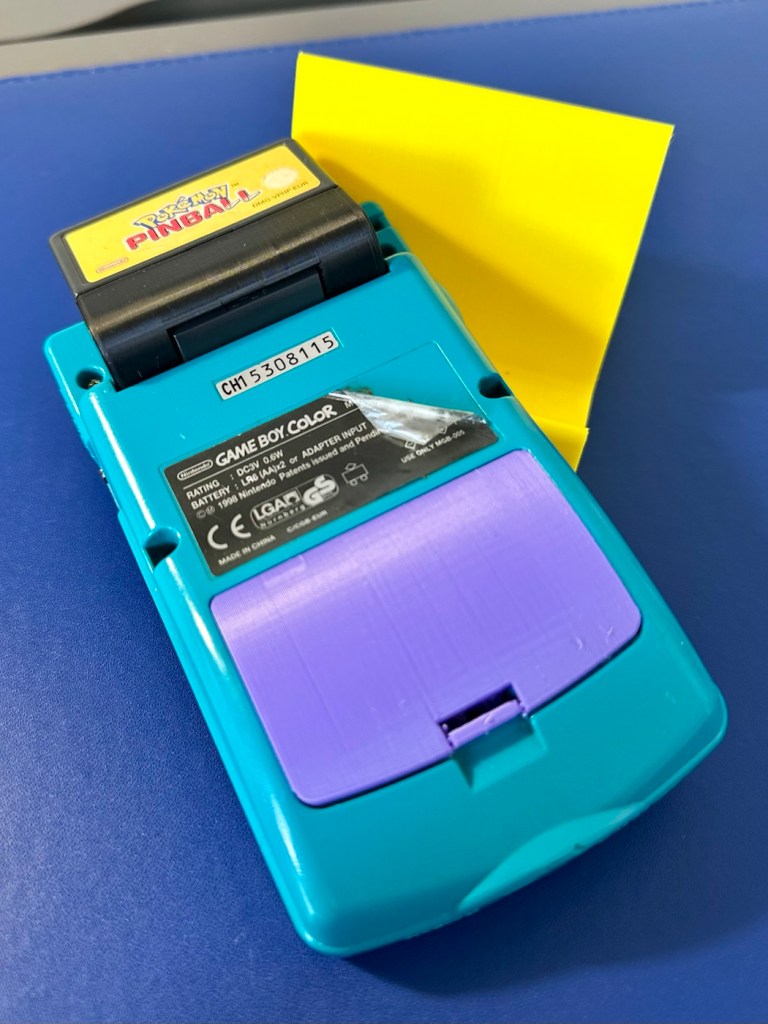
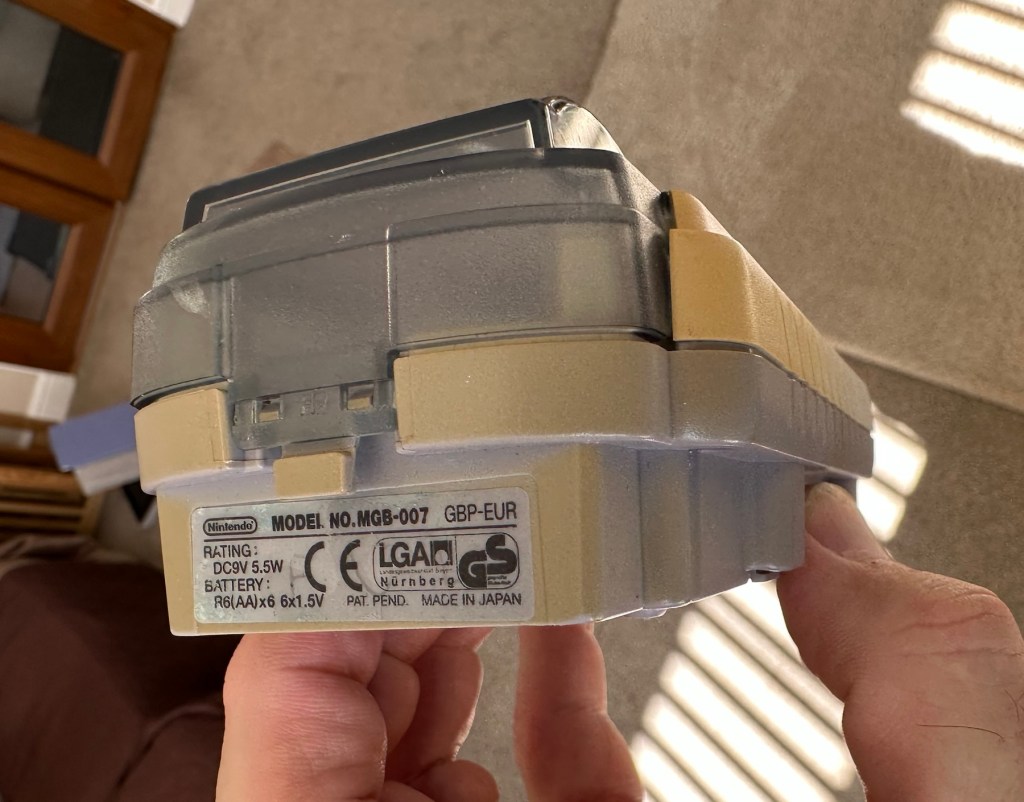
The package has arrived. The battery lid is missing as kind of expected, I will get a replacement sometime, but for the moment I’ll probably print one out on the 3D printer, it’ll be a totally different colour as I don’t have a “Teal” coloured filament to use. The product label on the rear is also damaged but I can easily get one of these as a replacement, however it’s not essential and will only be of cosmetic appeal.

Missing battery cover and old product label

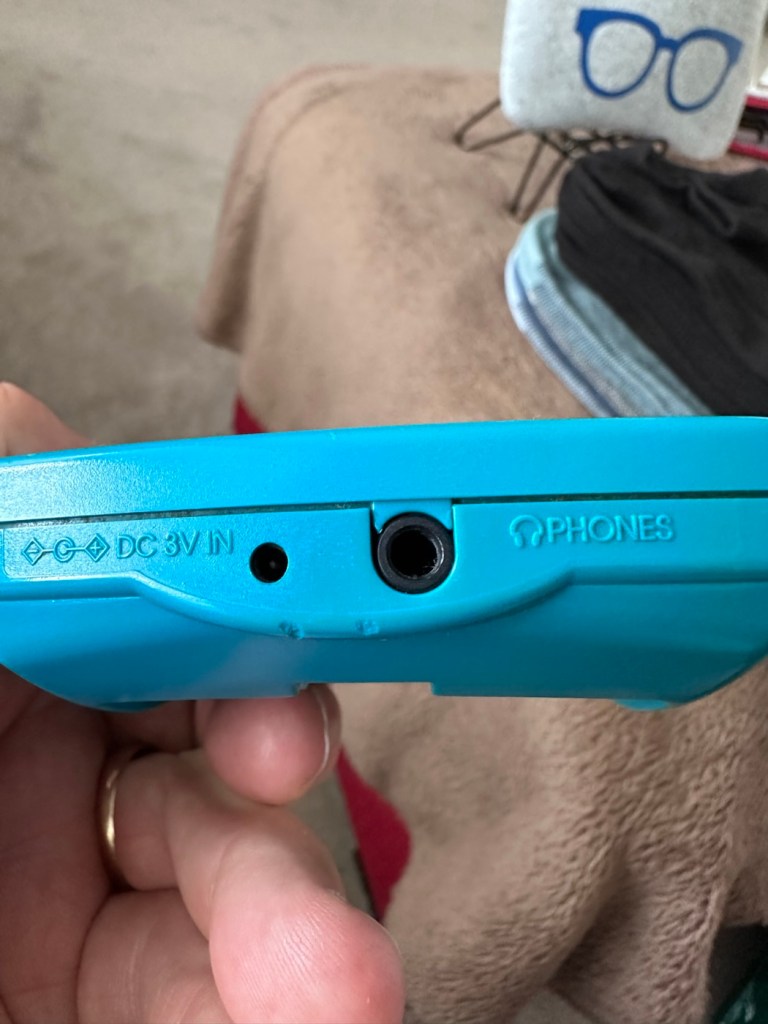
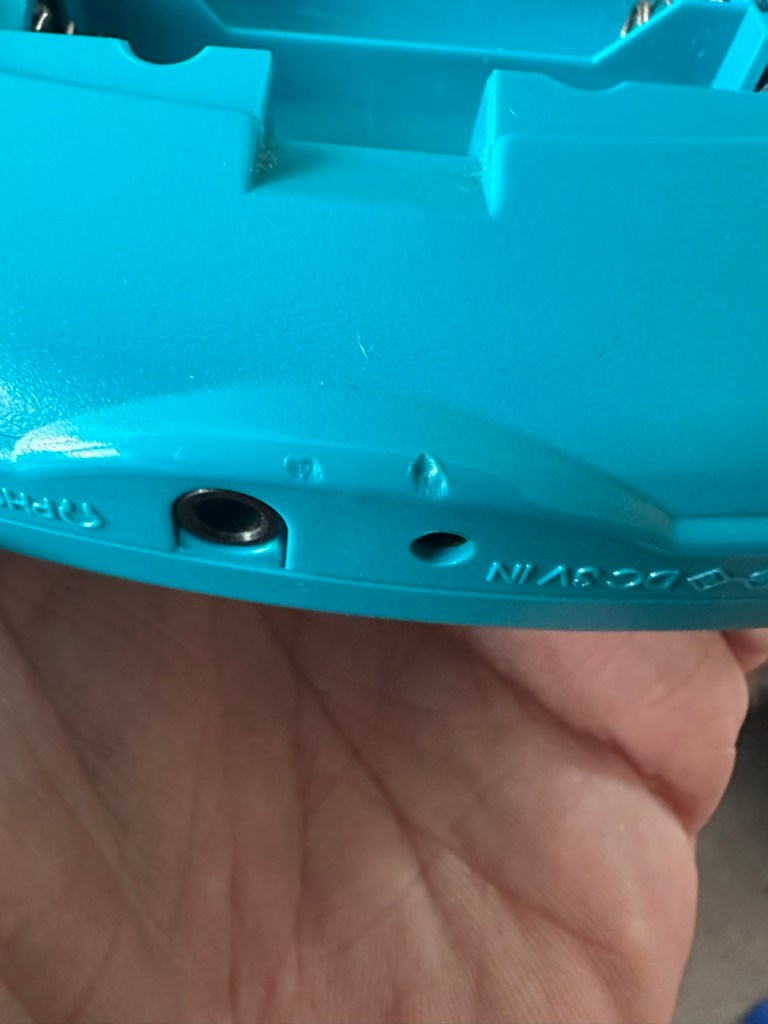
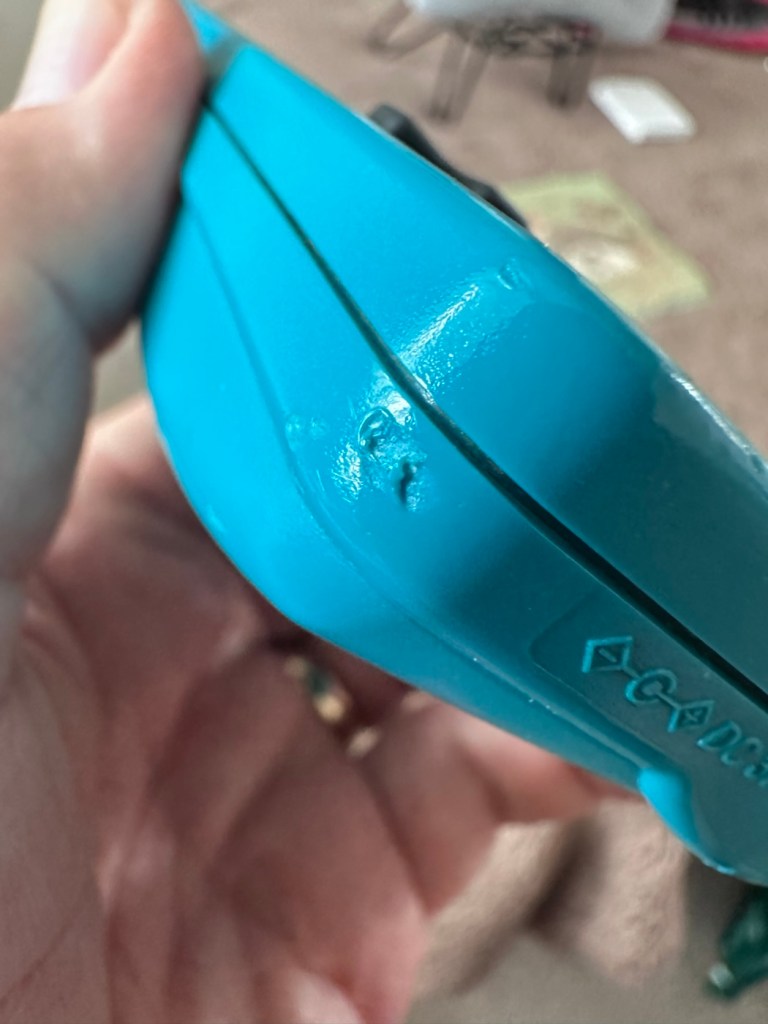
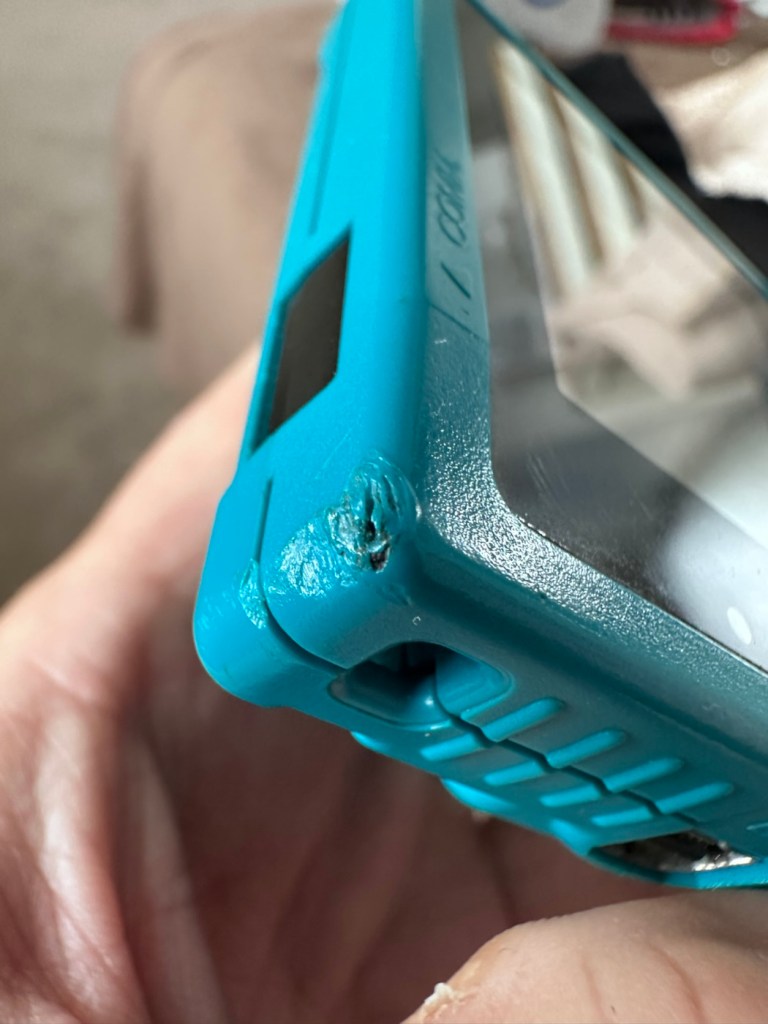
The front fascia is in a good condition with only a minor scratch on the screen, however there are a couple of dents and dinks on the body where it looks as if it’s been dropped or bashed at some point.

Front fascia is good

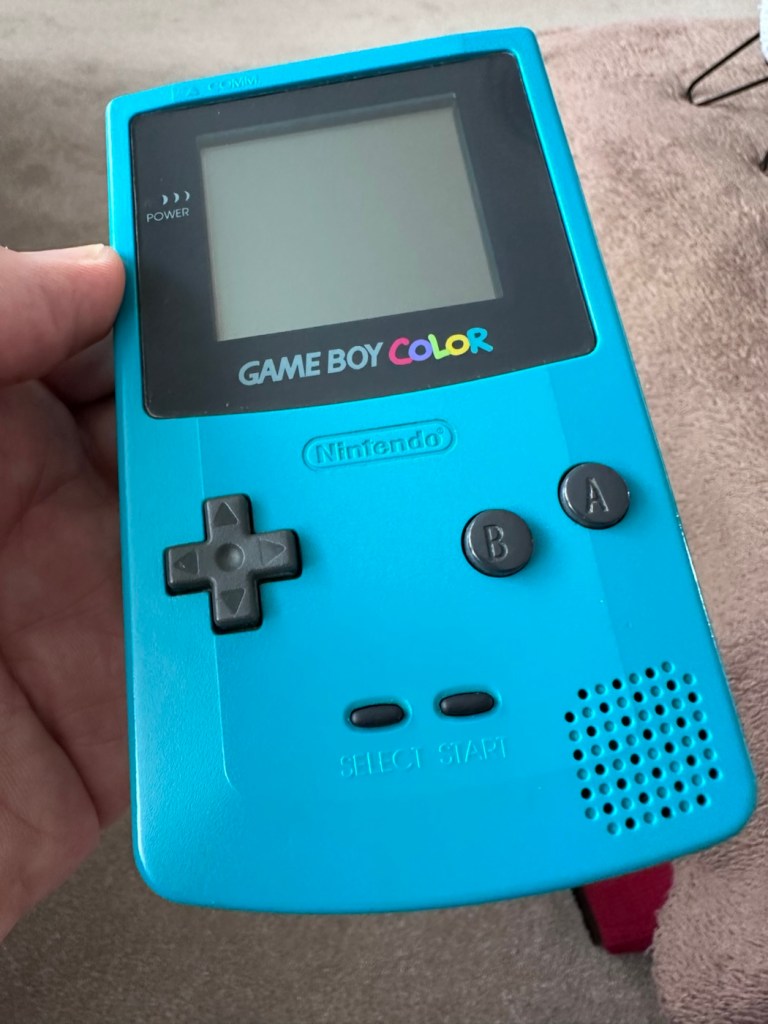
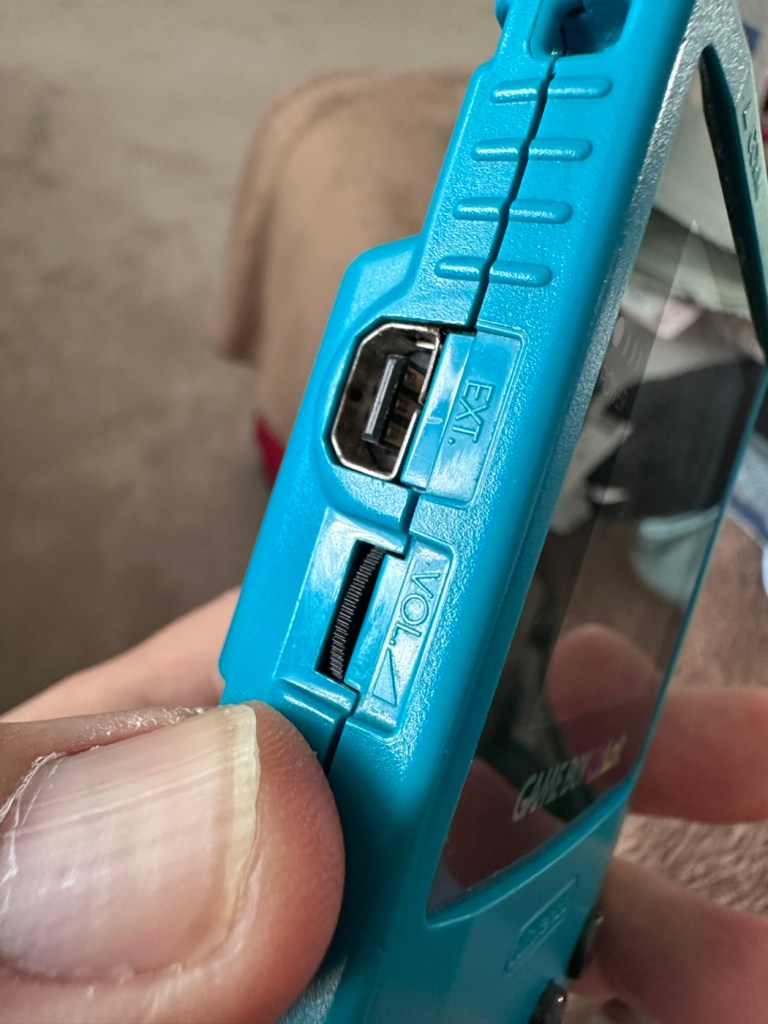
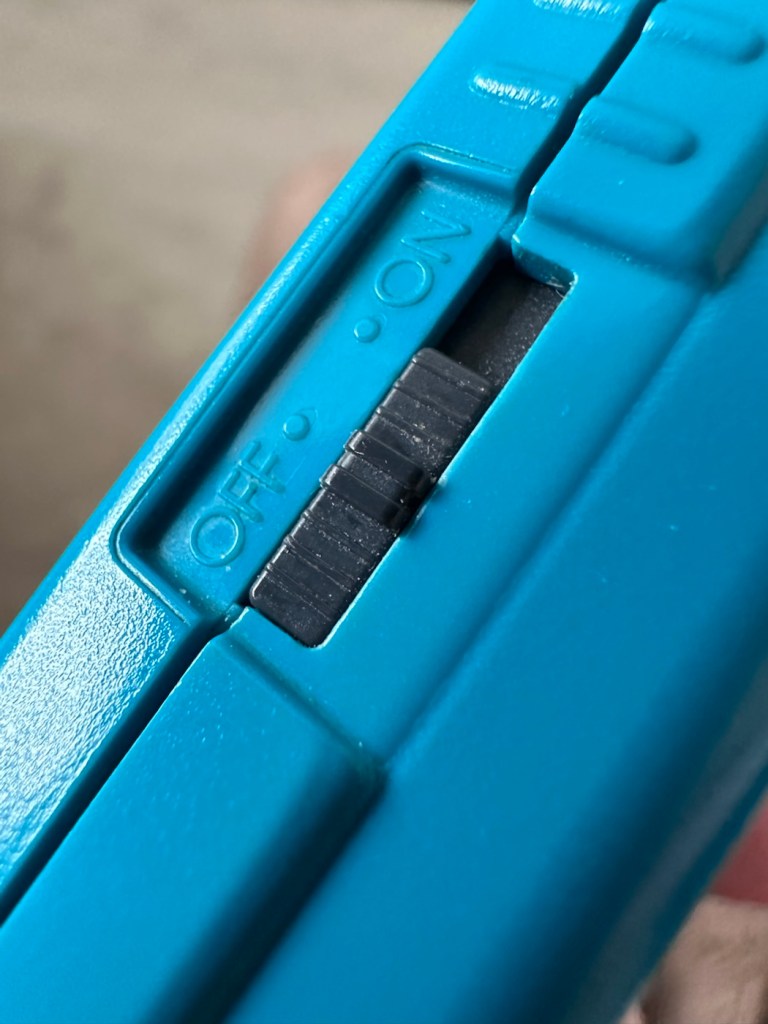
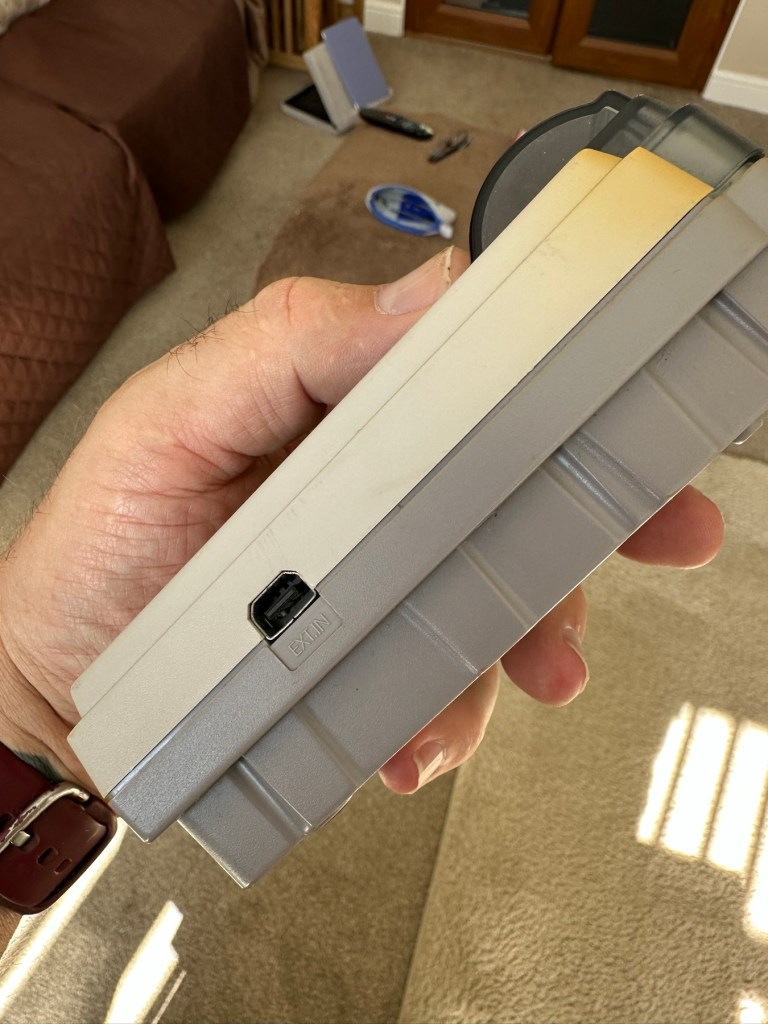
All ports, switches, buttons and sockets look ok and seem to be operating as such with no resistance or signs of stickiness.

Again, the casing is in general fit to use, and in no way causes any issues with its operation when working. It is purely a cosmetic issue that i can address when the unit is finally working.

I have installed two AA size batteries, switched the unit on and it is most definitely dead. Repeatedly flicking the switch does nothing at all, so it is a situation where the unit will have to be opened up and further investigated. The assessment has not thrown up any other issues not already highlighted in the sales documentation, so in general I am quite happy with the outcome at this stage. let’s get inside and see what we can find.

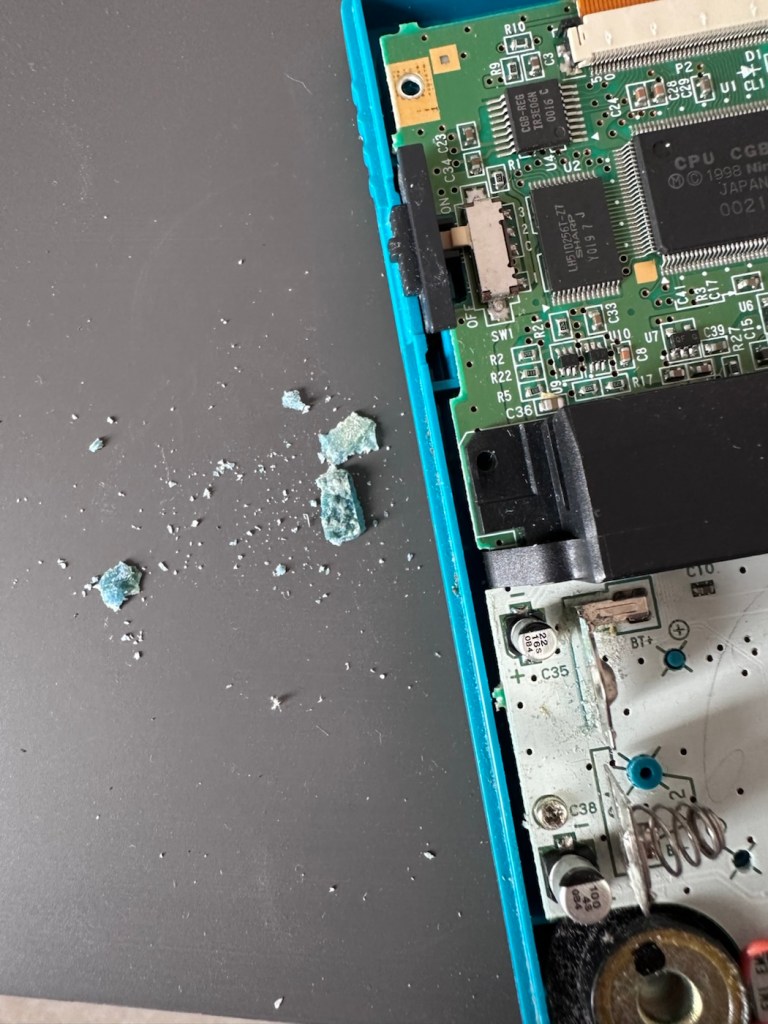
Oops. Wasn’t expecting that. I’ve removed the six “tri” screws and as soon as I’ve separated the two halves, an amount of what looks like battery corrosion “crap” has fallen out as well.

Oops – corrosion is present

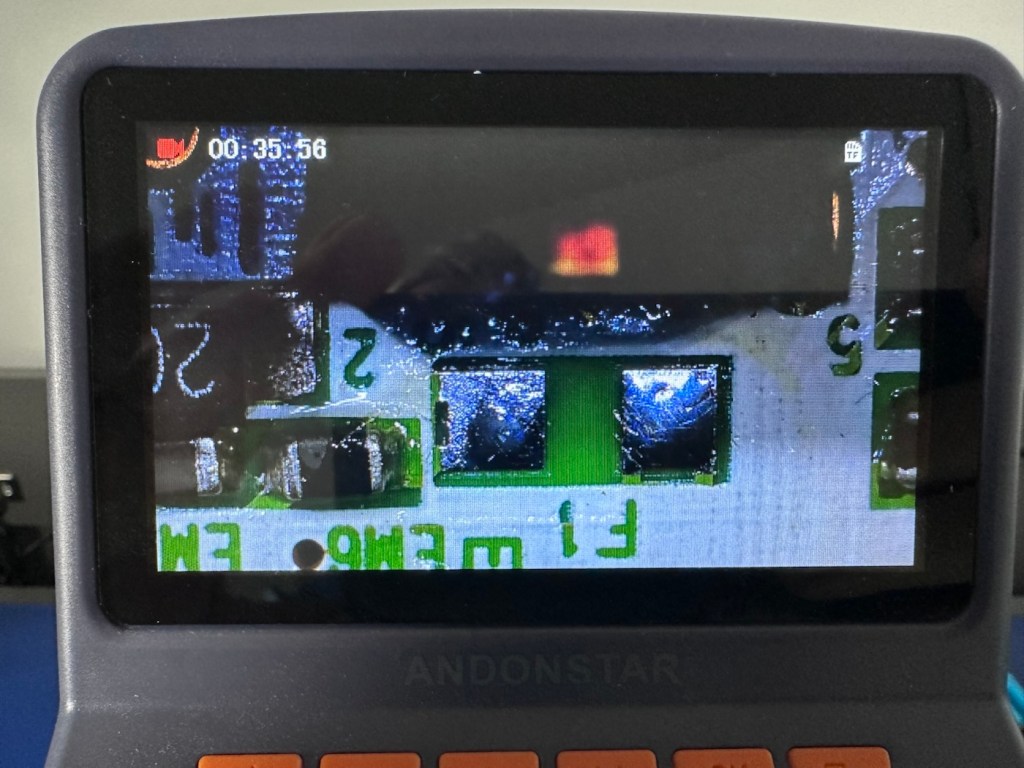
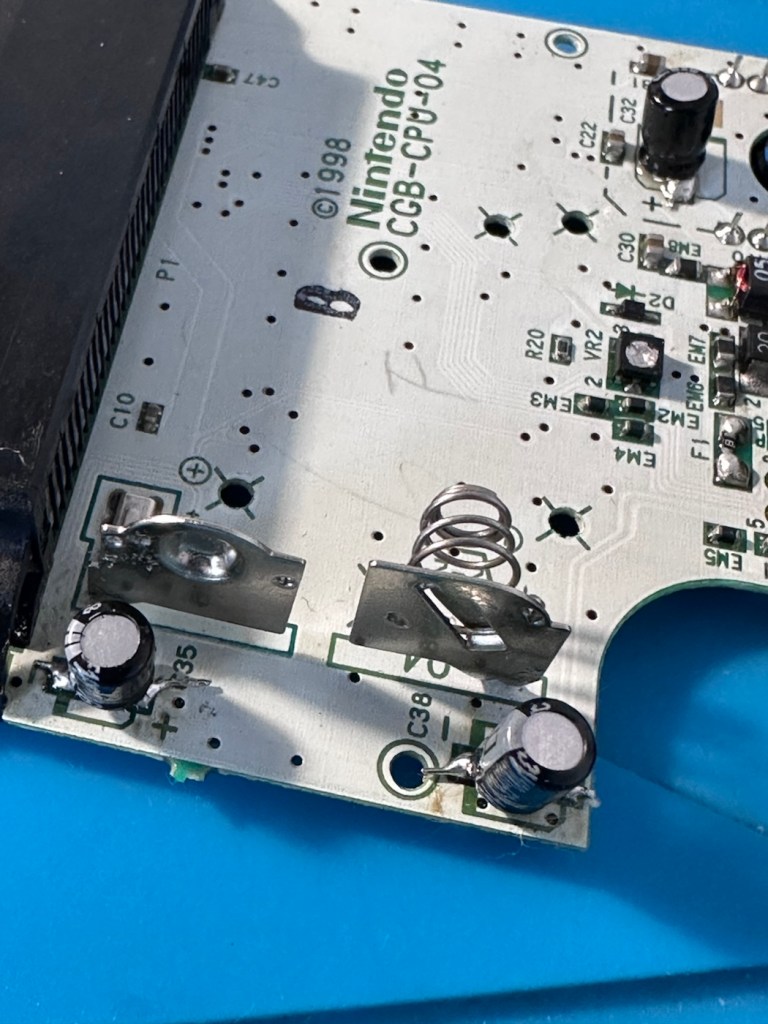
With the two halves separated, I then remove the screen ribbon cable, remove three more screws and the main board lifts out.

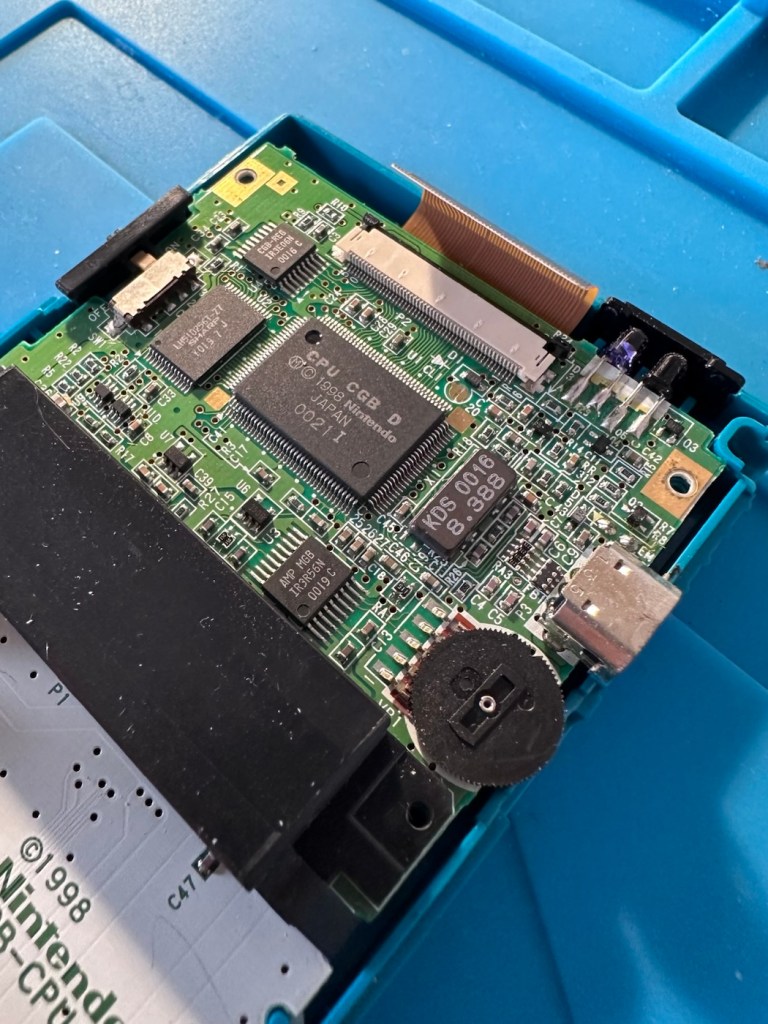
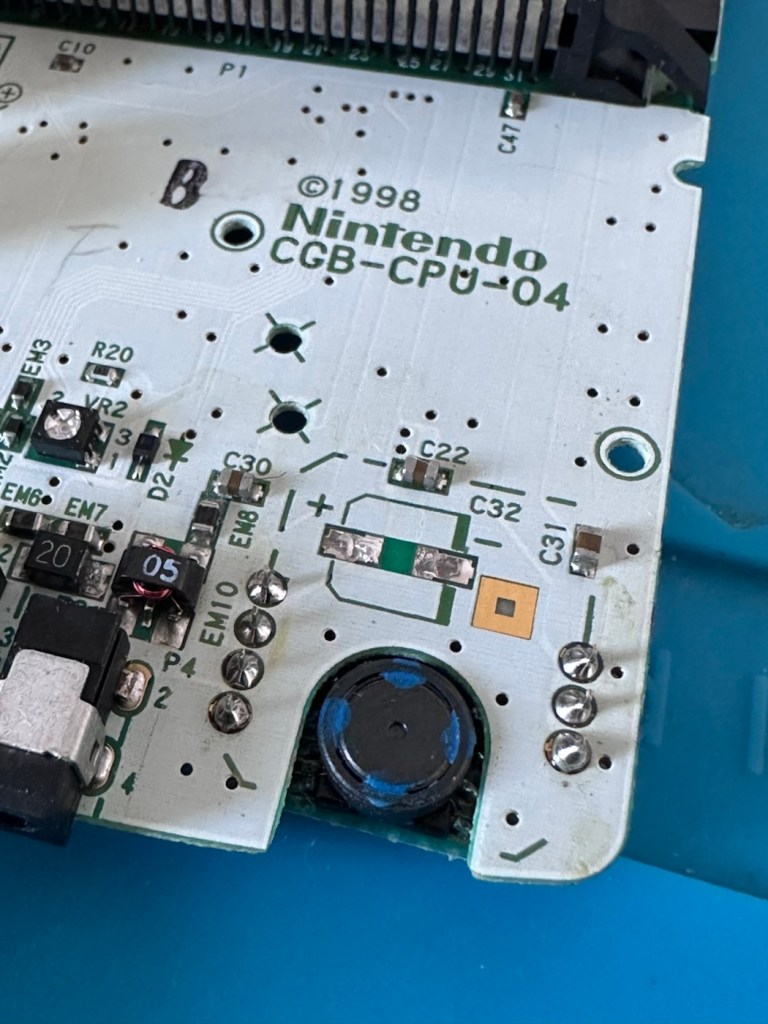
There’s some good news here. The contamination looks as if it has been completely isolated to within the battery area, there is no sign of any damage to the Vias, or any other components on the main board.

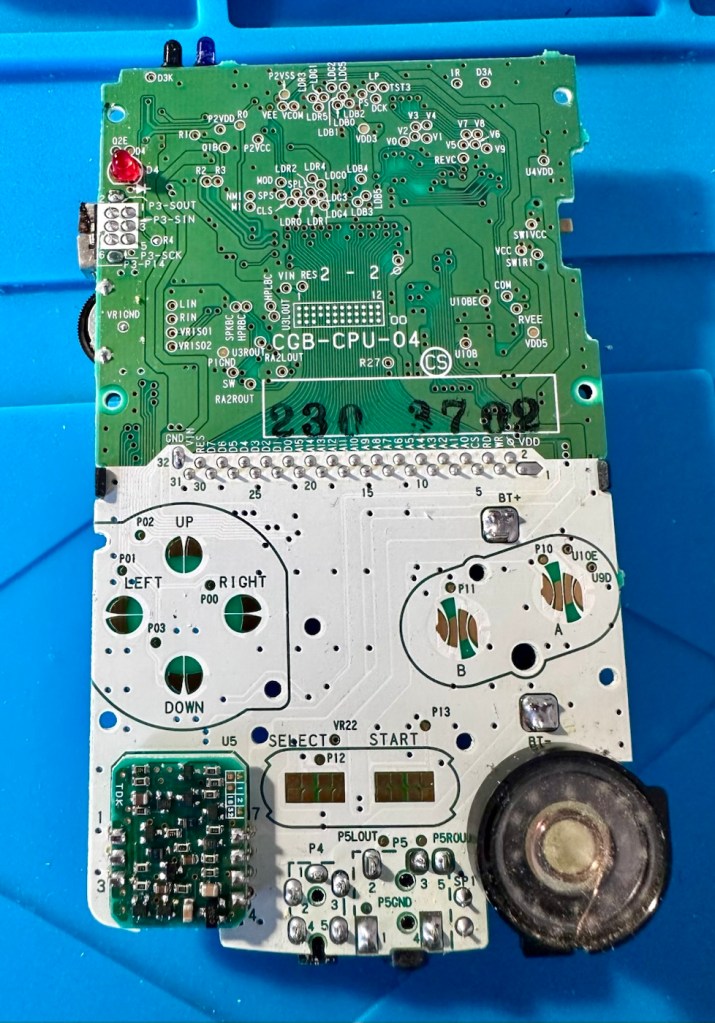
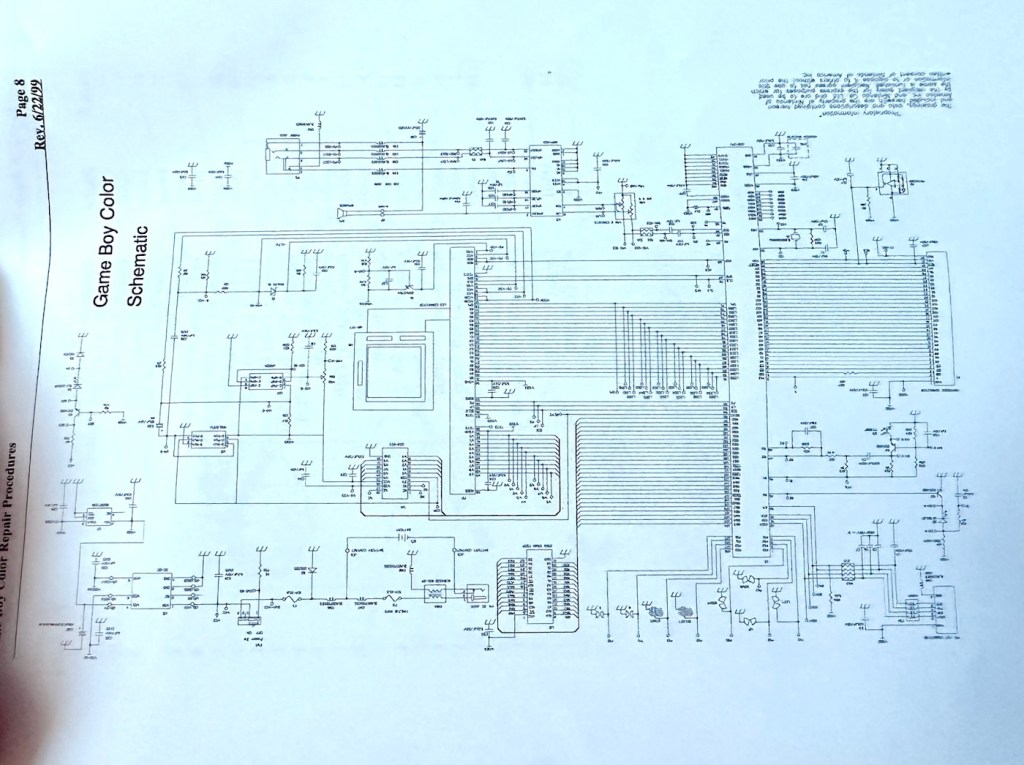
I have obtained the schematic diagram for this circuit board for checking continuity, and i’ve been able to confirm there are no issues with any contamination damaging any traces to the board. We’ve been very lucky here, dodged a bullet, to coin a phrase.

Schematic diagram

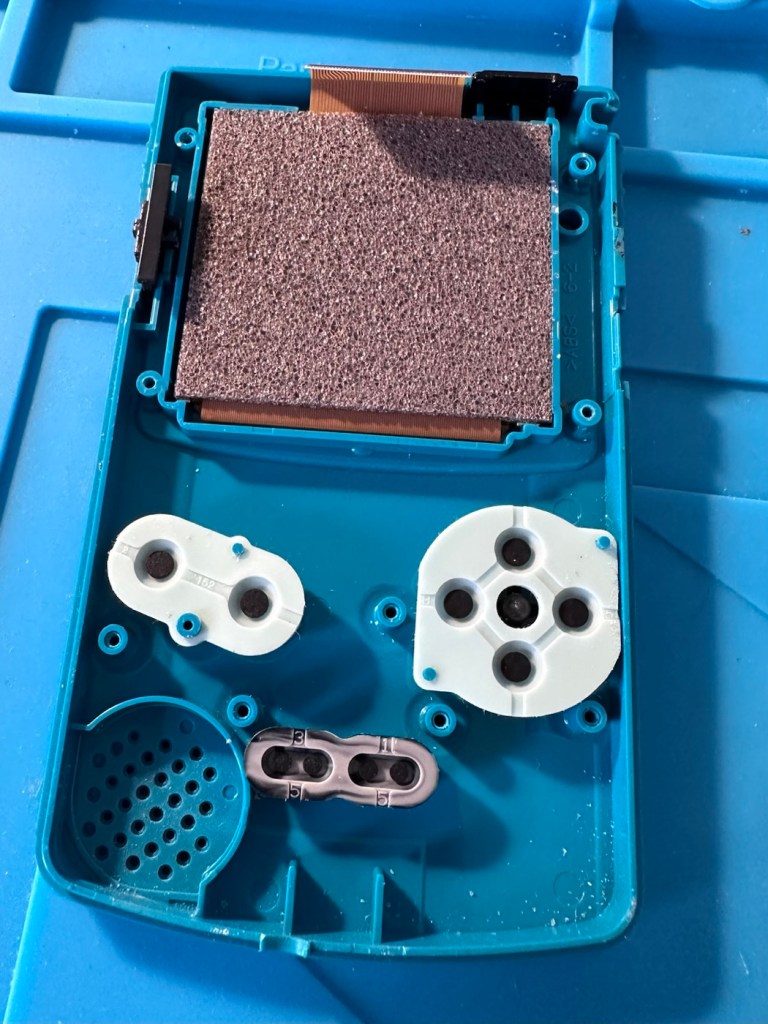
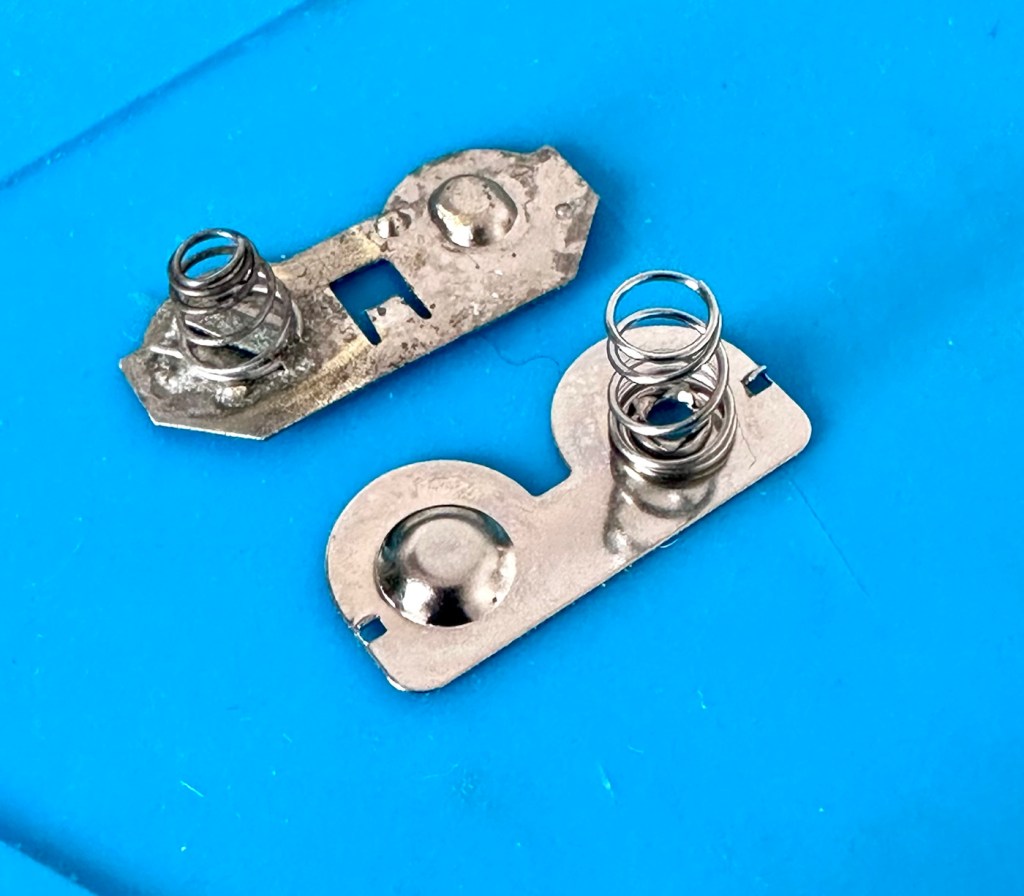
I have removed a set of battery contacts from the battery area, and replaced these with a new set that I have in my spares box. I could clean these, but it’s good to remove all items that were originally contaminated and very possibly contributory to the fault we have today.

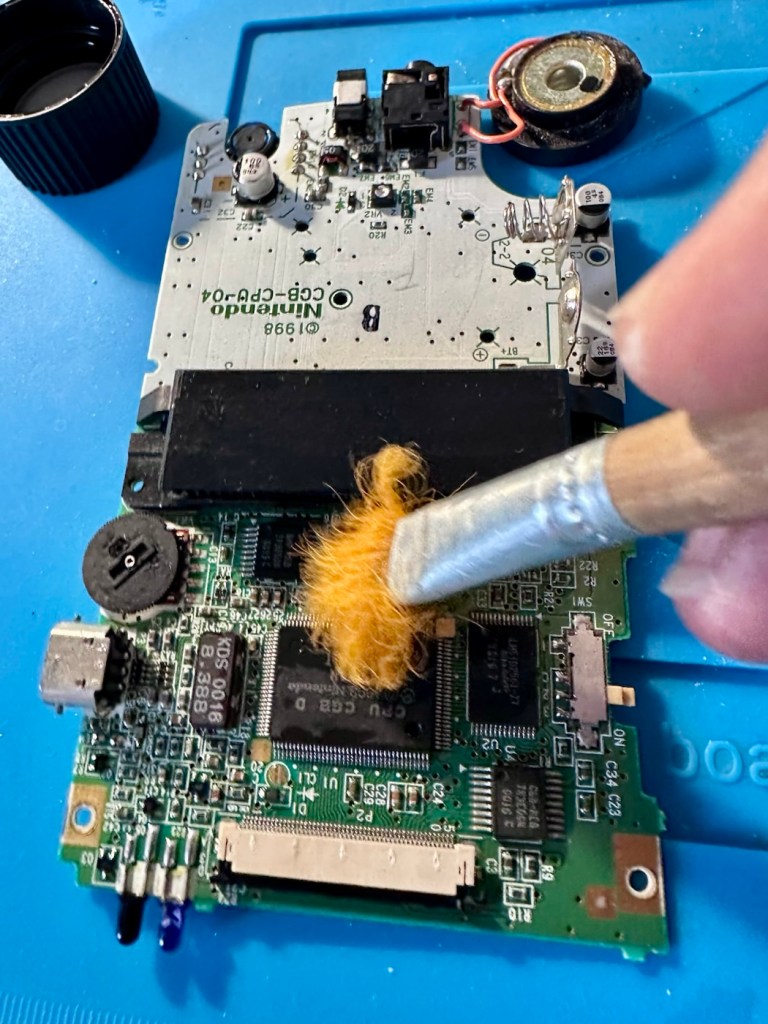
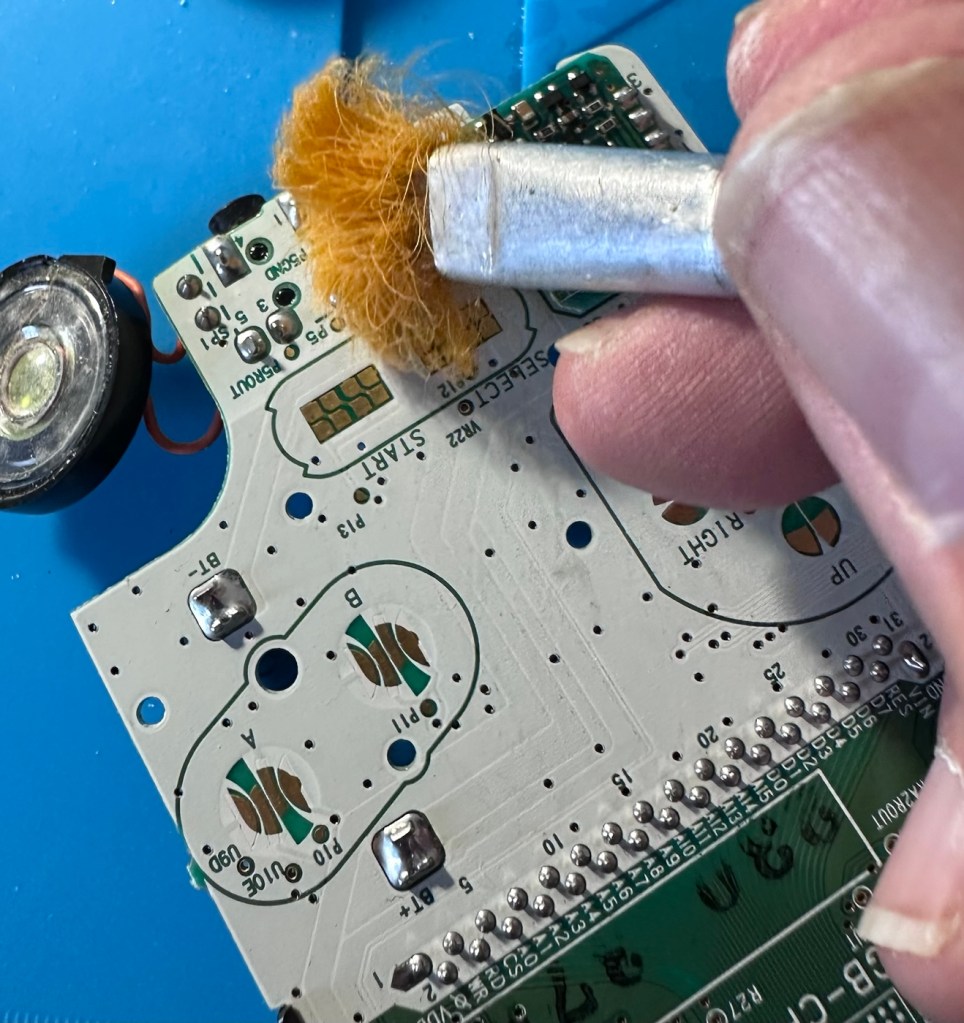
I have also cleaned the front and rear of the main board with IPA just to ensure that if there was any issues with contaminants on the board, they’ve now been removed.

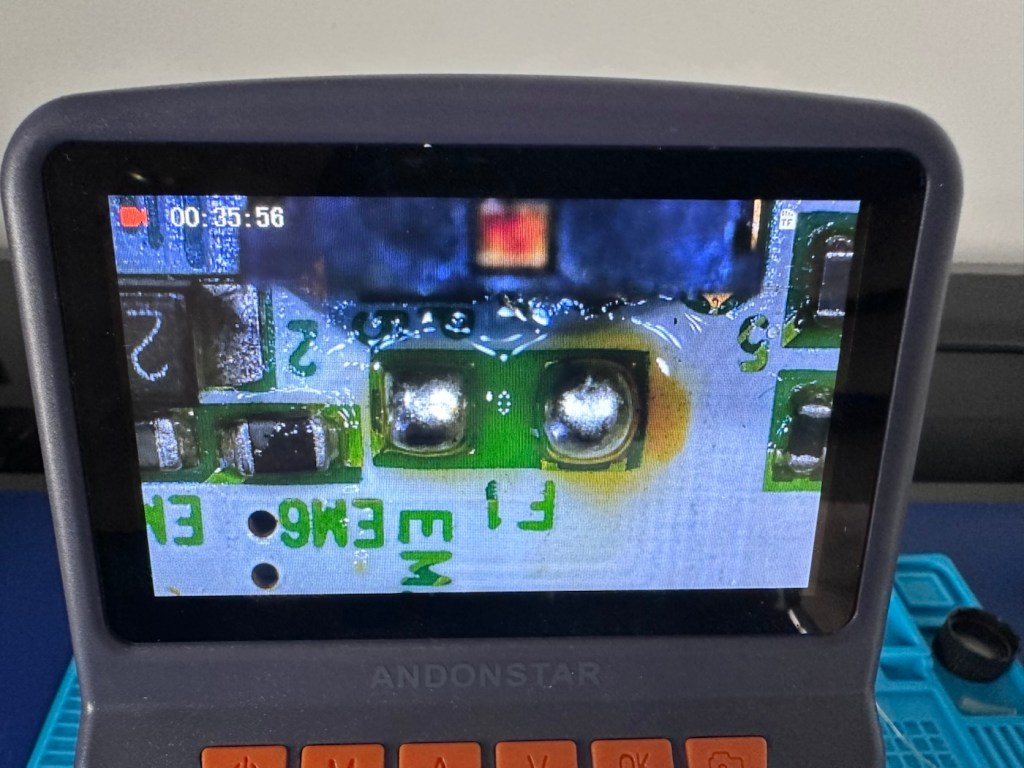
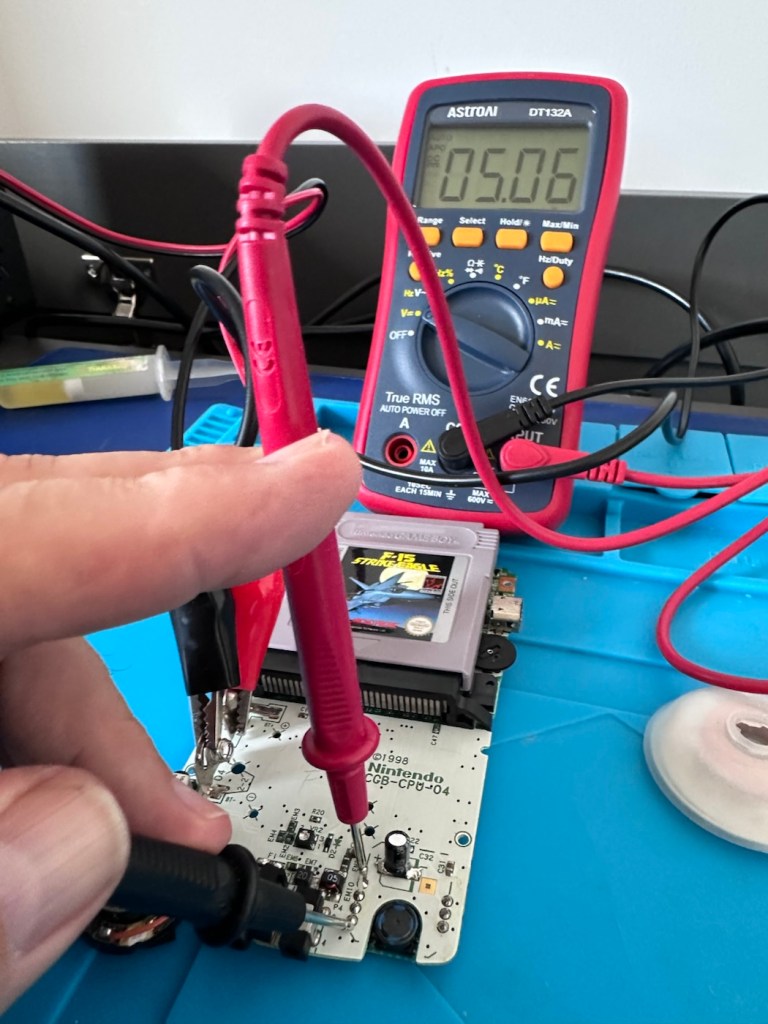
The switch has been tested electrically with a multimeter and this is working fine. The three capacitors have been looked over and seem to show no signs of wear or deterioration, they haven’t been properly tested though, so let’s now check fuses F1 & F2.

For reference: Fuse F2 protects the DC jack, whilst F1 protects the battery compartment. Using the continuity mode on the multimeter, a continuity through the fuse should present an audible buzz that let us know the fuse is complete and has not failed in any way.

I start on F2 and get a healthy buzz that tells me F2 is working fine. However fuse F1 is a different story, there is no continuity and there is no sound, I check again and can confirm that this fuse has blown, maybe this is a result of the contamination that was in the battery area?

The two fuses, F1 is dead

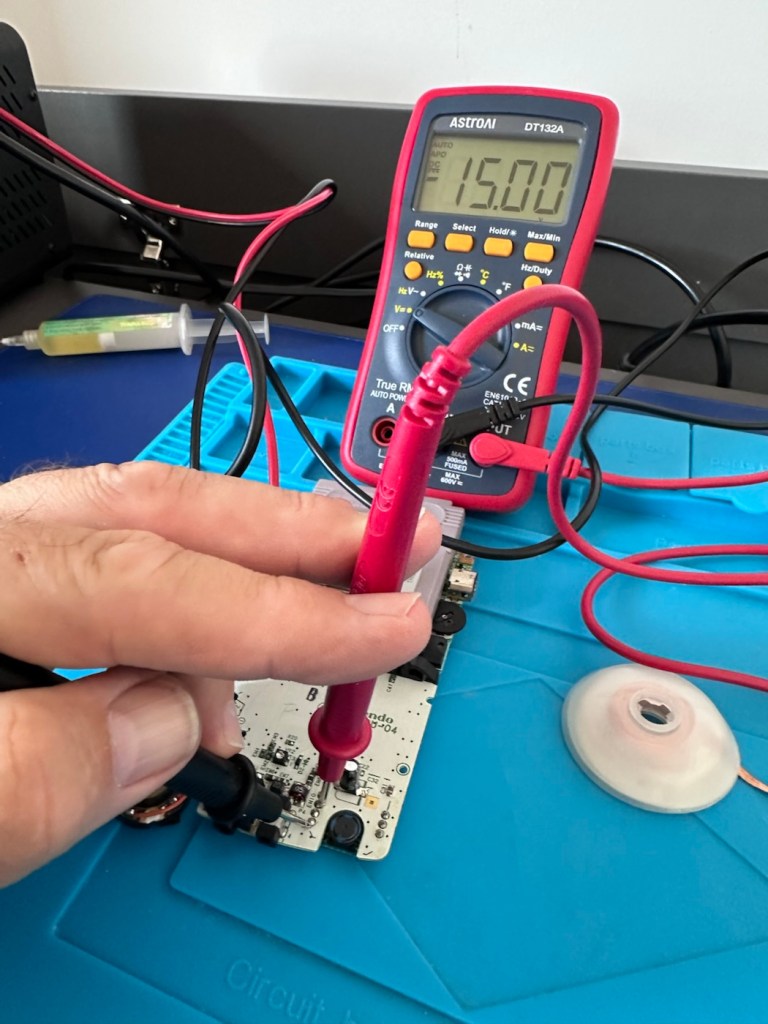
I’ve now attached the bench power supply supplying a 3v input to clarify the fault.

A 3v supply proves the fault

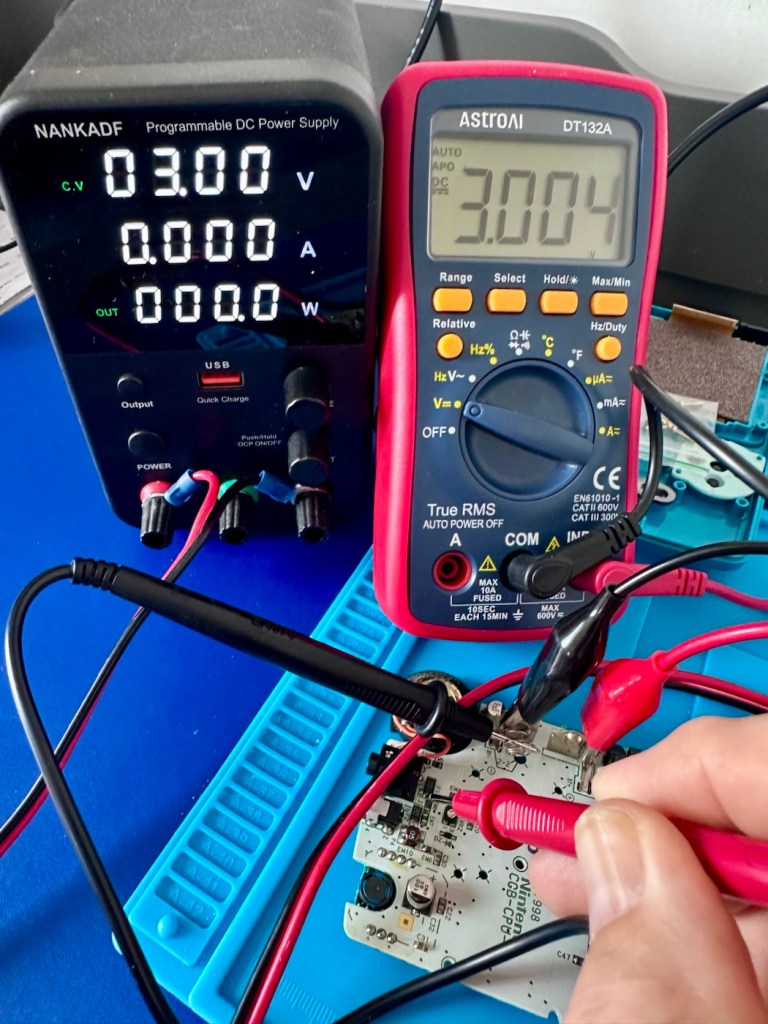
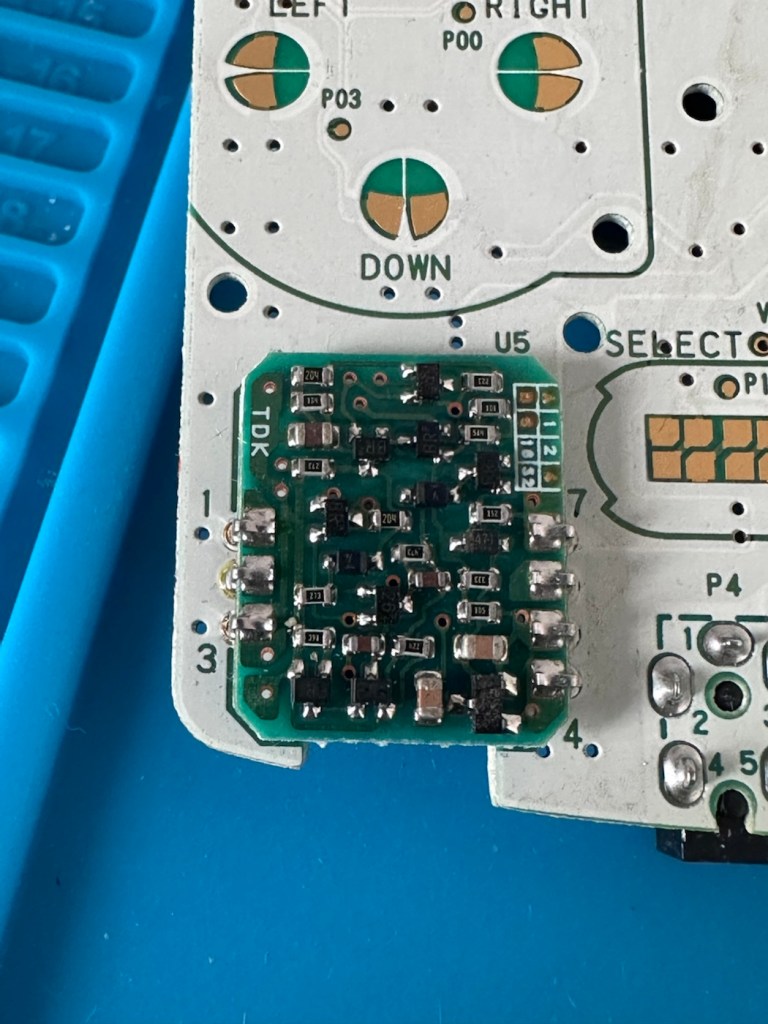
Fuse F2 has a 3v supply on each side, however our suspect fuse F1 only has a 3v supply on one side confirming that this fuse has blown. Once this fuse has been replaced I can check the voltage supplies on the remainder of the board, especially on the DC-DC regulator board, that supplies varying voltages from 3v – 13.6v required around the main board. On the main board the voltage regulator can be recognised as U5.

DC-DC voltage regulator U5

A quick check for short circuits doesn’t show anything of concern, maybe when the fuse is replaced it may well open up some other issues, the fuses I will be using are “resettable” fuses. These fuses seem to be the standard now for these units. Most resettable fuses—known as Polymeric Positive Temperature Coefficient (PPTC) or polyswitches—reset automatically and do not have a physical reset button. Once the underlying overcurrent or fault condition is removed, you simply disconnect the power source to allow the fuse to cool down, then you switch on again, if the same issue occurs, there is an obvious issue present that needs investigation, as stated above, once the faulty fuse is replaced I will be able to check other areas on the mainboard for correct voltages.

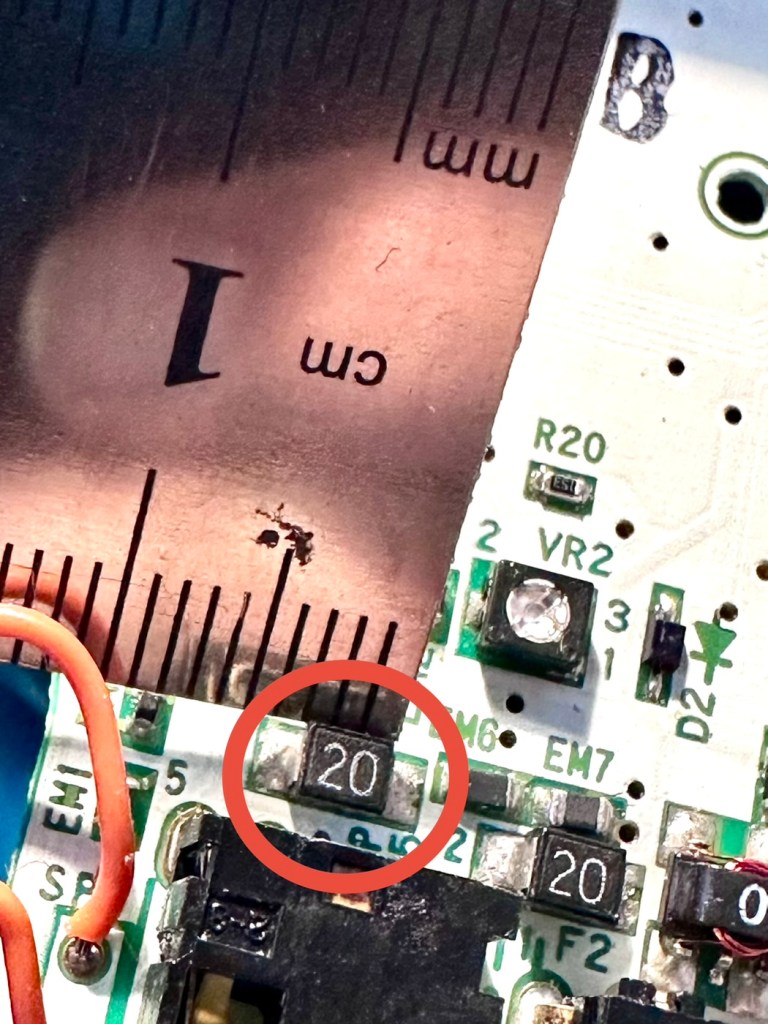
Just for information the fuse that needs replacing is approximately 4mm in width. You can see the scale in this picture taken alongside a ruler.

The tiny suspect fuse

Let’s get on with the repair.

Repair:

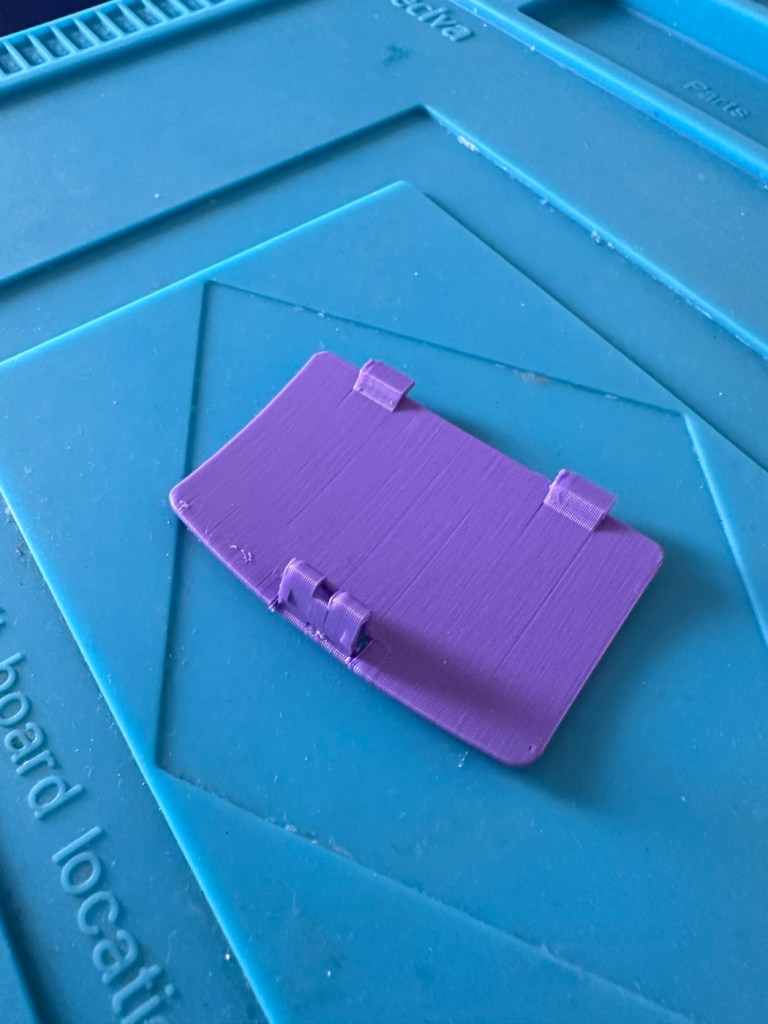
First off I’ve printed a replacement battery door cover. As stated earlier I don’t have any “Teal” filament so I’ve printed it out on a purple filament. For the purposes of practicality (holding the batteries in place) it will serve a purpose whilst carrying out the repairs.

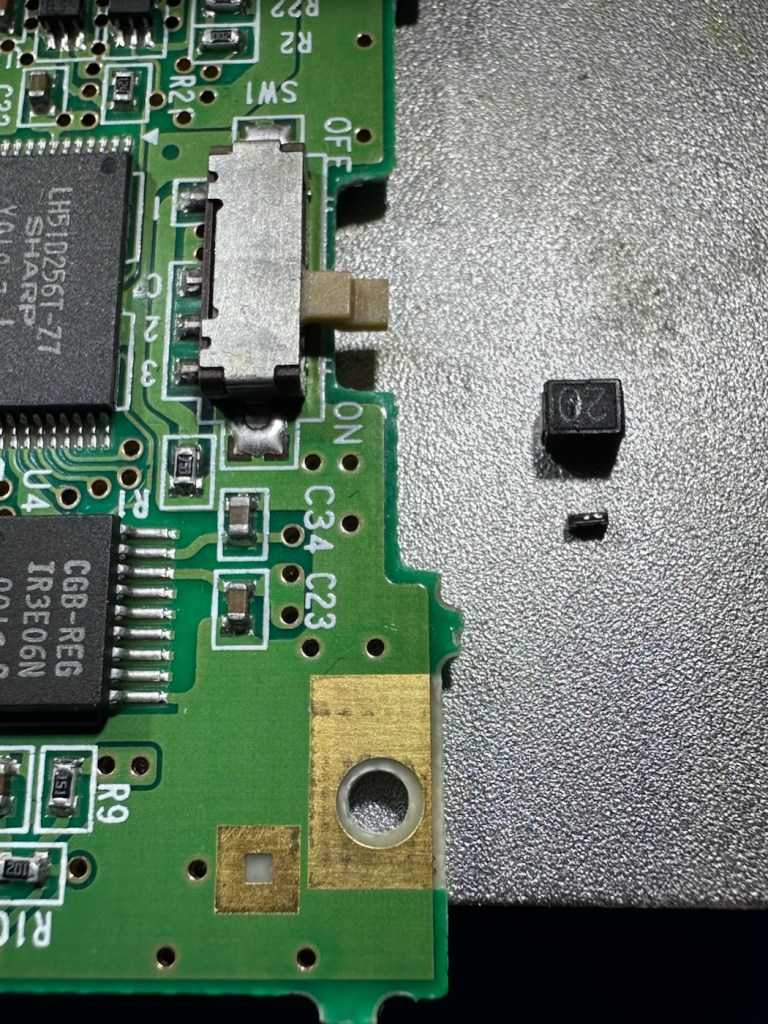
I have a replacement fuse, this work will now have to take place under the microscope as it’s just so tiny, think grain of rice size and you will understand just how small this component is, and it’s amazing that a component so tiny can completely shut down a unit such as this.

The supplied fuse is even smaller than the one on the board. If the original was 4mm then this one is probably around 1-2mm it really is minute. Here’s a comparison of them side by side on the microscope base.

Tiny and teeny tiny….

That said I’ve removed the old fuse, wicked away the old solder and applied some flux and a couple of new dabs of solder. Compared to these new fuses the solder looks massive, I can assure you it isn’t and is greatly magnified.

With the bench power supply providing 3v I’m able to use the multimeter to confirm that the fuses are both working, however there is another issue and I suspect it is something I discussed earlier, but omitted to heed my own advice, about good housekeeping. I’ll come to that in a second.

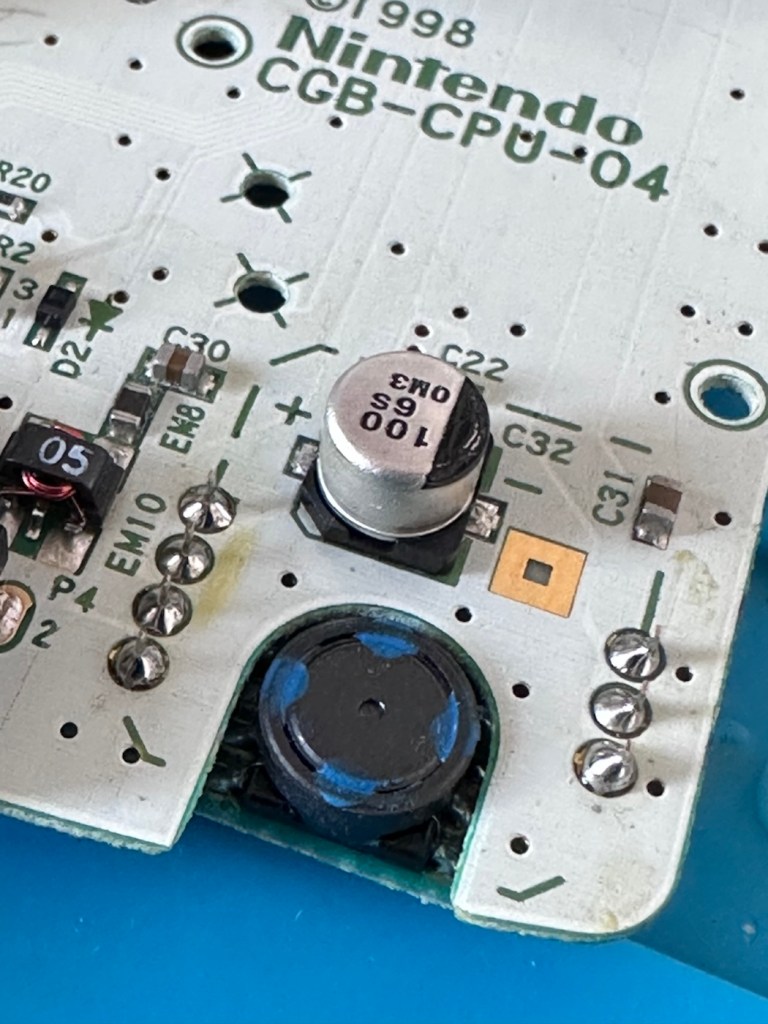
Power is getting around on the 3v rail and is not an issue. However at the Dc converter I’m not getting the 5v or 13.6v rail, so there is another issue. The new fuse has dropped out again, and this is good as it proves it works. I let it cool for 30 seconds and it is back up and working and I’m able to continue tracing the fault. The big capacitor C32 that sits beside the DC-DC converter appears to be carrying a short, it is probably this that has caused the fuse to previously fail.

And my good advice was to change these capacitors for good housekeeping purposes…..and I didn’t.

Guess what I will be doing next?

There are three Capacitors on the main board and below you can see what their primary functions are:

  • C32 (Main Power / DC-DC Filter)100µF, 6.3V (Filters the incoming voltage; if faulty, the system won’t boot or will repeatedly reset).
  • C35 (LCD Display Filter)22µF, 16V (Stabilises the voltage to the liquid crystal screen; if faulty, it results in a dim or washed-out image).
  • C38 (Audio Amplifier / Sound)100µF, 4V (Powers the speaker and headphone output; a failure here is the leading cause of whisper-quiet audio).

Ok. Fortunately I have plenty of capacitors in my spares box so I was able to replace the three capacitors with no issue.

This done I then decided, prior to any reassembly to see if the power was now being distributed as it should, and I’m pleased to say it is. We have the full range of voltages now coming out of the DC-DC converter.

Now let’s get the unit reassembled, cleaned and then get some tasty pics taken👍

Result:

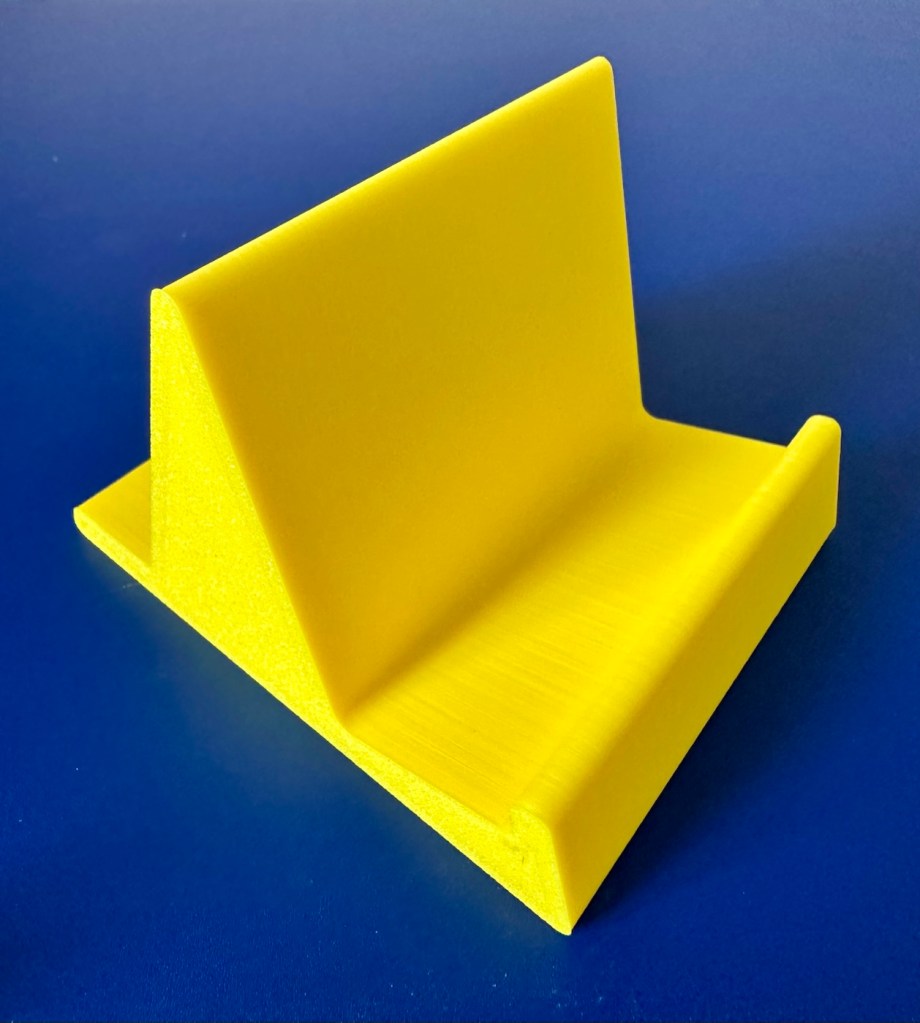
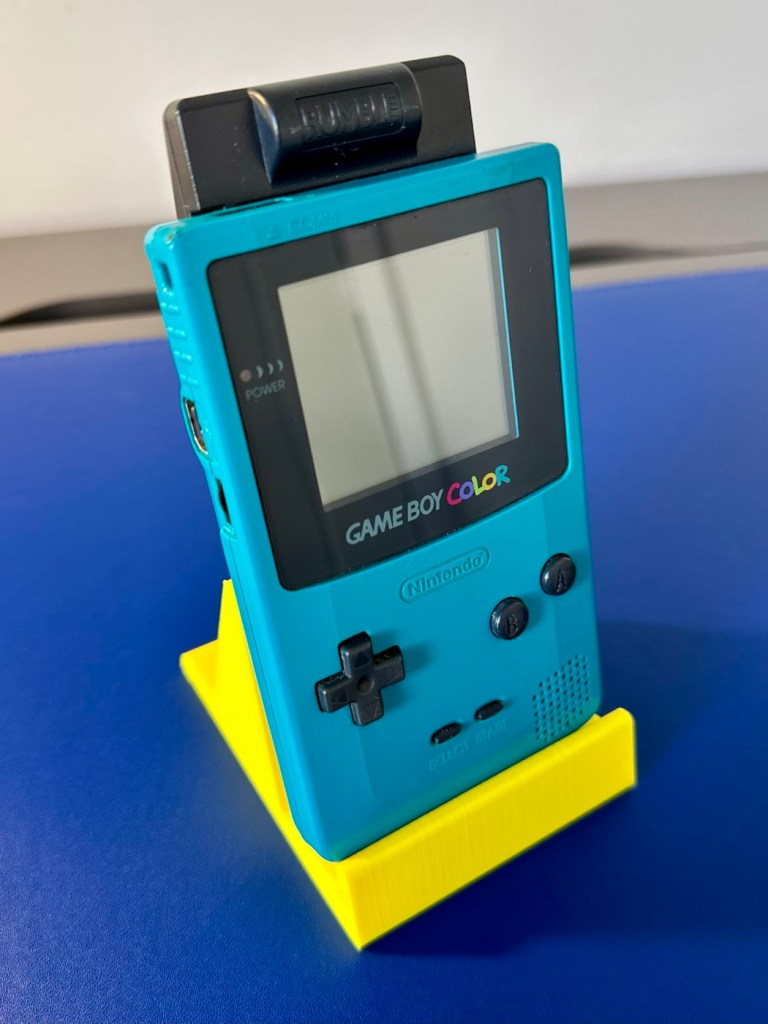
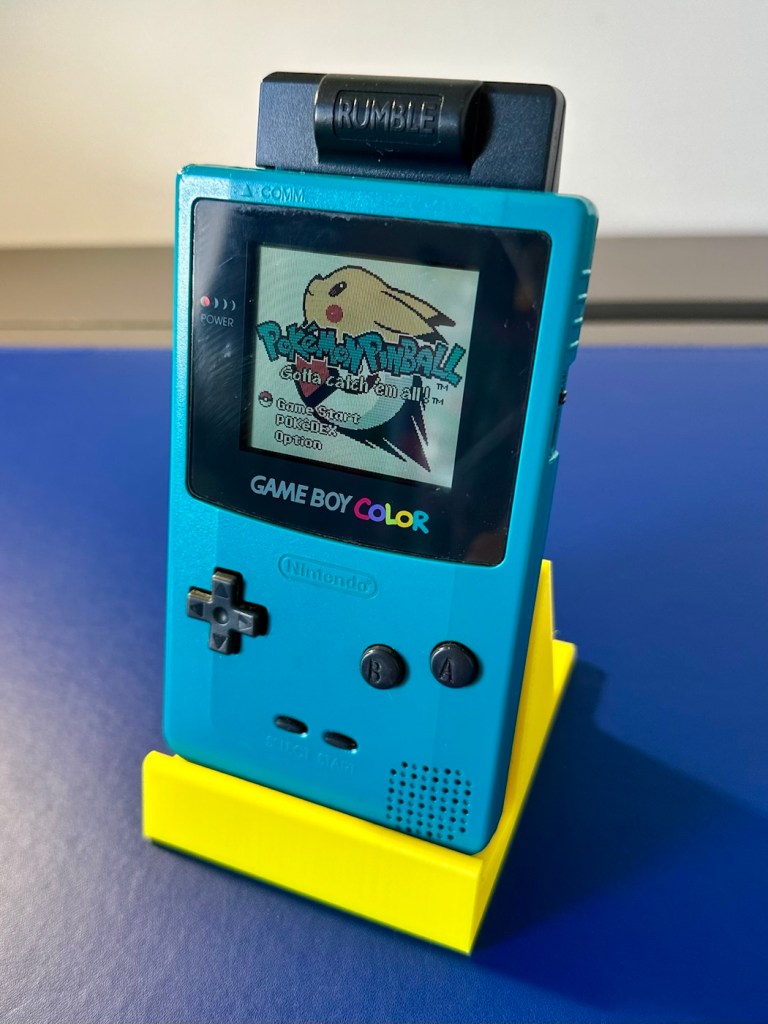
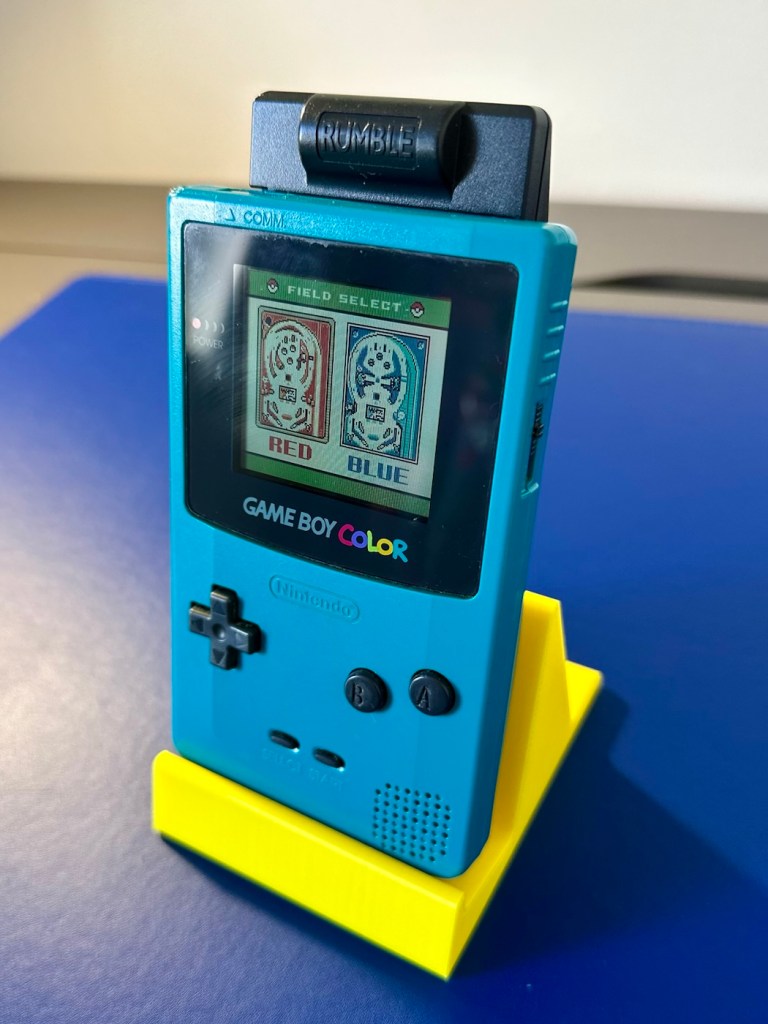
To finish it off and whilst the 3D printer was still warm, I’ve printed a simple brightly coloured yellow display stand to show it off on.

A new printed display stand

After a good clean the unit is now in a perfectly good working order. The fault appears to have been the faulty capacitors and battery contamination all probably combining to make the power fuse fail, a perfect storm if you like. The fuse and three capacitors have now been replaced to breathe new life into this game console. Cosmetically it’s still tatty and would probably benefit from a new outer shell and some labelling, however it works and to be honest that is all that really matters.

A small video showing the unit working

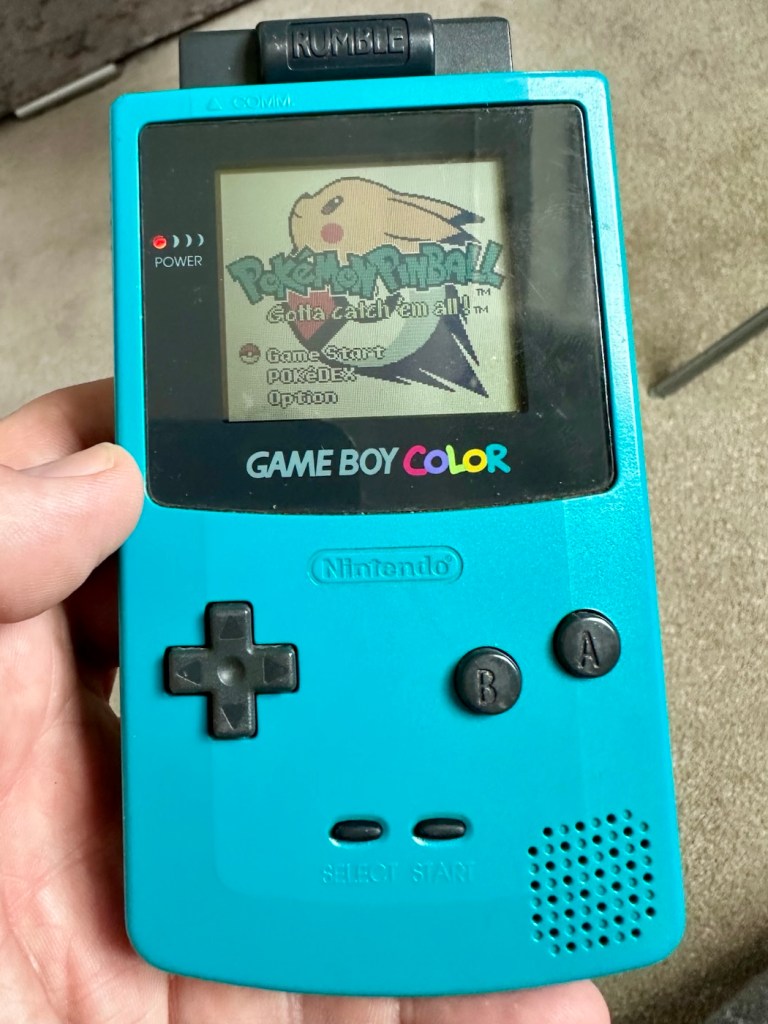
I wonder how many of these items just get thrown away because they don’t work? This probably took me about three hours in total with diagnostics and repair. Another piece of retro history restored, now joining my original Gameboy classic as part of my collection.

It’s been a pleasing little project, enjoyable and educational and it’s always good to hear the familiar beeps when it springs back into action.

Another one saved from landfill.

Thanks for passing by, as always it’s very much appreciated.

PS5 DualSense controllers

When the youngsters of the clan, drop surprise repairs on you at family gatherings.

It’s great when one of the youngsters of the clan come up to you at a family gathering and greet you thus, “Oi, uncle Dave, have a look at this for us will you?” and then they just disappear into the crowd as I’m now holding a couple of items I’ve never been exposed to before, in this instance a pair of Playstation 5 Dual sense controllers. (I had to google to find out what they were!)

Here you go “Uncle Dave”

Apparently they don’t work, or are having difficulties, and it’s now down to me to find out what’s wrong.

Now I’m not a gamer in the true sense of the word. I like, and have repaired and own a good few hand held devices that have been featured within these blog pages, but I do not own a console, I never have. However I’m lucky in that I know a few people who do have these consoles, who I can go to and test how they are behaving, but the good thing is that these controllers can also be tested without a games console and just require a computer with a USB port, and I do have one of them, a clever move by the manufacturer me thinks.

First thing I did here was to plug them in to a USB supply to charge the onboard battery. Each one has a 3.7v rechargeable battery that should give between 6-12 hrs of activity depending on how vigorously the unit is being used. When charging it glows on and off orange until it is charged and then the glowing just stops. Both these units took about 2.5 hrs to fully charge, and they seem to both be holding a good charge seeing one of them, the black version has not been used for some time.

Let’s get them connected up to a PC.

A simple good quality USB cable is the communication method between the controller and the PC. Next, you go to the address: https://dualshock-tools.github.io and here is where you will be doing those checks on the controller that sits in your hand. Seeing I don’t really know what’s wrong with the controllers I have been trusted with, I think this is the best place for me to start my investigation as the site does do some good, and thorough testing.

I have two controllers to check so I start by plugging in the Black controller, clicking connect on the screen gets access into the memory of your controller and all the firmware detail and build date is displayed in front of you. Cool!

Just under where this information is displayed we enter the first series of tests, a bank of 8 basic function tests that check all bells and whistles (as such) are operating as they should. This Black controller passed all these tests with flying colours.

All 8 checks passed

The checks are thus:

  • USB controller: here the connection is tested a simple pass or fail
  • Buttons: all buttons have to be continually pressed until they turn green on the screen, a simple pass or fail
  • Adaptive trigger: the system puts a resistance on the two triggers representing various triggers on guns and switches experienced in various games, if there is suitable resistance here the result is a pass.
  • Haptic Vibration: this tests the vibration motors in the controller, if it’s working then it’s a pass
  • Lights: all lights on the controller are cycled through displaying the whole range. Simple pass or fail
  • Speaker: a tone is played through the built in speaker, a simple pass or fail.
  • Headphone jack: a simple test of the plugin headphone jack – pass or fail
  • Microphone: a simple test by blowing in the on board microphone checks if it’s working, a simple pass or fail.

And as stated the first controller, the black one has passed all of these tests. Impressive. The next tests are all centred around the two thumb pads, their return to centre position and their all around circular motion and their calibration.

The left pad was showing slightly off centre and I was able to make some minor adjustments via the program interface to correct this issue. The good news was that it is not a constant stick drift, and the mechanism does not require replacement, it is easily adjusted. With settings saved, disconnect the controller, reinstall it and re check the calibration and it should all be good. And it was. With minor adjustments made to this controller I am pleased to say it is working as it should, it is now repaired and will be heading back to its owner.

Now onto the second item, the white controller. I put this controller through the exact same testing protocol as the first one, all was going well until we got to the buttons section where this one failed. The down button on the left hand side of the controller is unresponsive, you can see this in the photos below

Failed test in the button section
Failed button highlighted on Controller and screen

All other tests on this controller were fine. Again there was a little drift on the sticks that I was able to adjust and they are now both as central as they can be, operating well through their whole range. I will go through the repair and retesting of this pad in the section below the YouTube video that I have highlighted below.

A while ago, if your game pad was playing up, there wasn’t really a great deal you could do apart from replace the thumb controllers if you were experiencing issues such as a little stick drift (when a controller is moving on its own accord). A bad case of stick drift would require you to change the controller mechanism. However, some very intelligent people within the gaming community have put together a number of packages to test your game controllers, but the one mentioned in the video below has been a game changer as such, as it also allows adjustments to be made and saved and thus extending the life span of the components within, thus reducing the need to replace and dispose of those components prematurely. Have a look, it explains the testing protocols and checks them against other programs.

The whole testing procedure checked and compared with other testing programs

Repair and retest

It’s a simple enough activity to get inside of the controller, some clips, and four screws get you inside the package, getting beyond this though to the controller buttons where we need to be is a little bit more in depth. So here we go…

I’ve dismantled the controller as I said I would, initially the process requires four screws removing, after you first gently prise off the black decorative plastic surround as in the pictures below.

When you remove these screws the next task is to gently prise the two shells apart that then reveal the base of the controller

Shell successfully removed

At this point the battery needs to be removed and that is a simple plug disconnection, the battery plate has a single screw in it that needs removing. Before you remove the battery plate there are four ribbon cables that need removing, if you don’t do these then you will probably tear them and need to replace them. Believe me, I have done this in the past and ruined the tiny microphone ribbon at the very front. It’s not expensive to repair, just an unnecessary expense. Don’t rush it. Another 3 screws removed and we can now take off the top cover and get to where we need to be.

Top removed exposing fault pad area to the left

As soon as the top was removed I could see the potential issue with the controller direction pads. The pads are a rubber base with a carbon pad that makes contact with the circuit board below. Sometimes a simple clean of these pads can be sufficient to regain a connection between the two, but in this case it was plain to see that the pads on both sides were both well worn and to be honest they both required replacement.

Normally a good clean with IPA will work

As stated I did give a clean to all contact points with a solution of IPA, reassembled and tested again with no change in performance, the fault remained. I will now need to purchase a new pad assembly and replace the film circuit board below them. Fortunately these are freely available and will cost no more than £6:60GBP to replace. And considering a new controller would cost at least £60:00GBP it’s worth the small investment to restore it.

I now just have to wait to receive these items and get them installed.

The items arrived just as in the photos above, and following the previous instructions to dismantle the unit, I have removed the old conductive film sheet and replaced this with the new one. I have also removed the silicone pads with the carbon inserts and these have also been replaced.

Now all I have to do once I have connected the ribbon cables is to get the outer shell back on the controller. Once this is done, I can log in and start the testing process once again, connect the controller to it and then commence a full test of its functionality.

And as you can see in the above photographs, this has been a successful outcome. Where the left hand side lower button had failed, the new conductive film has addressed the issue and this handset now has full functionality and is working as it should be.

Next I’m just going to do a re-calibration, to check that the sticks haven’t drifted in anyway. If we are in a good position, we can then class this repair as successful and then it can then be passed back to my nephew to carry on shooting aliens, and he can then continue his mission to save the world.

Result:

Two controllers have now been serviced and are both working well and within tolerance. They are about to be returned their owner so he can get them back into use, killing aliens and saving the world from a zombie apocalypse (or whatever he does with them)

Not having a lot of experience prior to receiving these two controllers, I was a little doubtful about where to start and what to check. However after reading up on them, and their operation, I was able to pick up a lot of advice and information regarding their manufacture and serviceability. I like to think that I’m well clued up on these items now as I can disassemble one in minutes, replace parts and reassemble without having any screws or parts left over ( Always a good sign 👍)

And to round things off I have now been given one of his friends controllers to repair as well, so I must be doing something right!

Thanks for passing by, as always it’s always very much appreciated.

First attempt at Retrobrighting

I’m currently deep into a repair project that I will be posting about on here shortly. However the shell of this project has aged so badly it has earned the right to be my Guinea pig for my first attempt at Retrobrighting, it deserves a separate post of its own, so it’s getting one. I have explained what Retrobrighting is in a previous post: Retr0bright – What’s that then?

The unit is a recently purchased and damaged Nintendo Gameboy printer from around 1998, it isn’t working and looks right ugly. It needs some attention to its fascia and battery base, so let’s get on to it.

I have taken the entire unit apart, separated the parts that need to be treated, removed all labels, and given the offending items a thorough wash in detergent before drying them off.

All stickers and other items removed. Shell thoroughly washed.

Next I’m just putting a 40 Volume 12% Peroxide cream solution into a small bowl, and I will then place the shells on a piece of cling film where I will liberally coat the offending items, using a brush, with the solution. When I’m happy with how this has gone, the treated surfaces will then be wrapped in cling film and placed in a sunny position for around 12hrs to allow the sun to do its thing. (UV lamps are sufficient if you have one available). I must reiterate it is important to wear protective gloves and eye protection when using this solution.

I’ve given a good coating of peroxide formula to all surfaces, but is it enough? I won’t know for at least a further 10-12 hrs, time will tell.

All wrapped and ready for some Sun ☀️

With the peroxide now applied, the fascia’s are now all wrapped in cling film and ready for 10-12 hrs or so of intense sunbathing. (Sounds just like me on one of our visits to Cyprus!). So let’s wait a while.

Patience

I’ve checked in and looked at the pieces outside, and after just 4hrs the results so far look amazing. I’m going to give it the full time though, so I’ll be back in around 6-8 hrs to check results. Hopefully we will have sufficient sunlight until then.

I’ve terminated the process at 9hrs as I have to go out and I’m impatient. Boy am I impressed at how it has turned out, it looks like a new shell.

Wow I’m impressed

Well I can honestly say that this treatment does work. I’m so impressed at the outcome, I just wish I’d attempted it earlier on some of my other products.

Before & After – Impressive improvement

Anything I’d do differently? I’d probably slap on a little more solution or maybe even reapply about half way through the process, the only reason for this is that there is the most minute tiny tinge of a yellowing on the side that had the heaviest contamination, possibly if I hadn’t been so impatient and left it for 3 more hours it would have been sorted, but then again it might not have! I do think a further application at the halfway point, especially when an item is so heavily stained as this unit was, would have done the job and made it look even more perfect.

Am I coming across as disappointed? Well I can assure you I am not. It’s my first attempt and I am so impressed. The total outlay for this process was £1:85GBP and that was just for the 75ml bottle of peroxide from a local supermarket, and I have enough left for another 3 applications, an absolute bargain. We only learn and improve from being persistent, and I’ve already learnt from what I have attempted today. And i am already a better, and more knowledgeable person than I was only a few hours earlier. You certainly can teach an old dog new tricks.

Edit: some 12hrs later I have decided to give a second treatment to see if this can improve on that slight yellowing I mentioned earlier. The results have greatly improved the look and there is now no visible sign of yellowing. I’d certainly recommend a second treatment for heavily stained items. It works, extremely well.

Watch out for my next post regarding the repair of this printer and its reconstruction: Nintendo Gameboy printer

Thanks for passing by. Always appreciated

A gaming device in a tin. How quaint…

Being one of those from the Ham radio community there was always a fascination with putting a Morse code transmitter into a disused Altoids tin (Other tins are available). Here and now though we have a gaming device that can fit in the same tin. Worth visiting Git hub via the link to see the actual boards and the plans for making this a kit version. I’ve signed up, let’s wait and see what happens.