The clock features a swinging pendulum and is a great addition to any music memorabilia collection. However, please note that the clock mechanism is currently faulty and may require repair or replacement.
It’s been a while since I’ve been tempted to fix something totally outside my comfort zone, so here it is a novelty “Elvis Presley” Rock & Roll clock. I quite fancy learning how to repair clocks, perhaps this is the best place to start with nothing too complex.
Boxed Need to get those legs swinging
From what I can gather the clock is a fairly std mechanism with a separate mech that operates the pendulum “legs”. I know the wife won’t entertain this in the house, however my elder sister is a massive Elvis fan so I may even shove it in her general direction… if I can fix it.
No assumptions as to what is going to arrive at the moment as you never know what you will end up with from auction sites, so let’s just await the mail man’s knock on the door.
All good on arrival, as expected
The clock has arrived and apart from having to just straighten the hands, a battery has been put in and the clock is ticking well and keeping good time. However Elvis isn’t shaking his hips as he should be even with a separate battery in place so there is an obvious issue there.
No hip shaking Elvis?
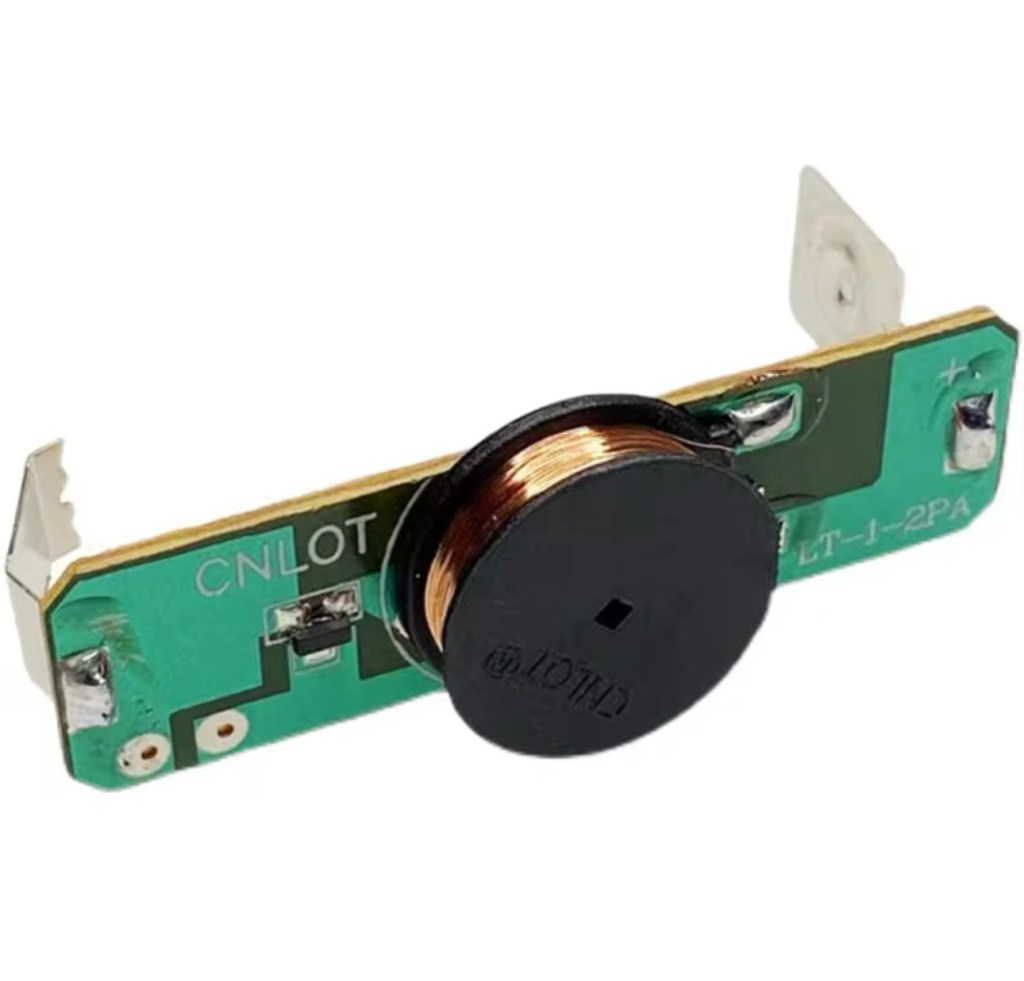
Well the issue is a bit of a pain in the ass one. The pendulum effect comes from a small electromagnet that opposes a magnet on the pendulum, hence when working the pendulum continuously swings. However this one has two of the wires from the coil broken. These wires are just about the width of a hair and had to be coaxed back into place using my microscope. I’ve tacked the wires back into place and the clock is currently working.
Electro magnet
However, apparently these wires are known to break even if a butterfly farts in the vicinity of them, they don’t hold up to repair that well, so I’m going to order a new electromagnet replacement. Cheap as chips.
Elvis shaking those hips
So I’m happy a fix has been possible, I’ll just wait for the replacement magnet until I move it on to my sister. In the meantime the wife has to put up with it shaking its stuff in the conservatory.
Edit: New magnet 🧲 has arrived, Elvis really going for it now and shaking his booty like a mad man 😂
Shaking like a mad man.
Now he’s off to my sister. can’t stand that much activity around me.
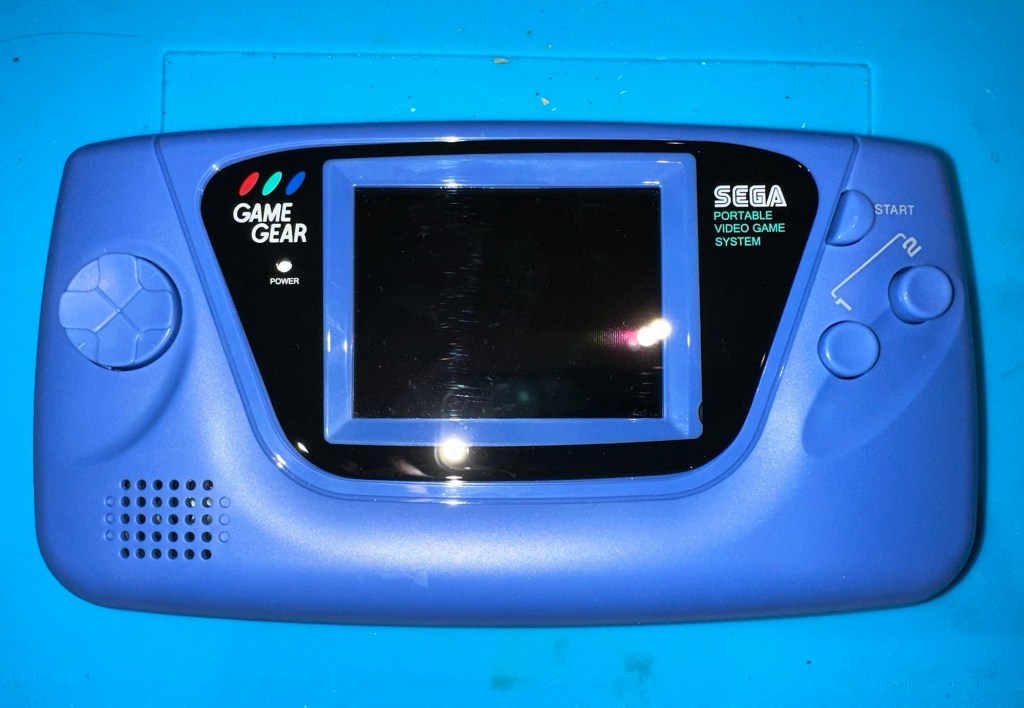
You may wish to refer to this post: Sega game gear 2110-50 where I purchased a non working Sega Game gear and brought it back to life.
The (I thought it was repaired) Game gear
I’m now ready to do some modifications on this unit, and I will save the replaced items for use on later projects.
Pretty much every Game Gear that was ever produced (and that is approximately 10.6 million units) has suffered with the dreaded (Capacitor plague) that I have discussed in an older post. The first job that is recommended to be carried out when purchasing an old Game Gear is to replace the old capacitors, it’s quite an easy task and nine times out of ten will remedy any issues that you have and allow you to continue gaming for years to come.
However there are other issues.
The screen is an old tube powered system that is exceptionally power hungry, you can replace this with much superior LCD versions, I’m withholding from doing this at the moment as I want to get as much use out of the old screen, and to be honest my unit doesn’t require replacement just yet, there’s still life in the old girl. I’m sure that this will be a future project though.
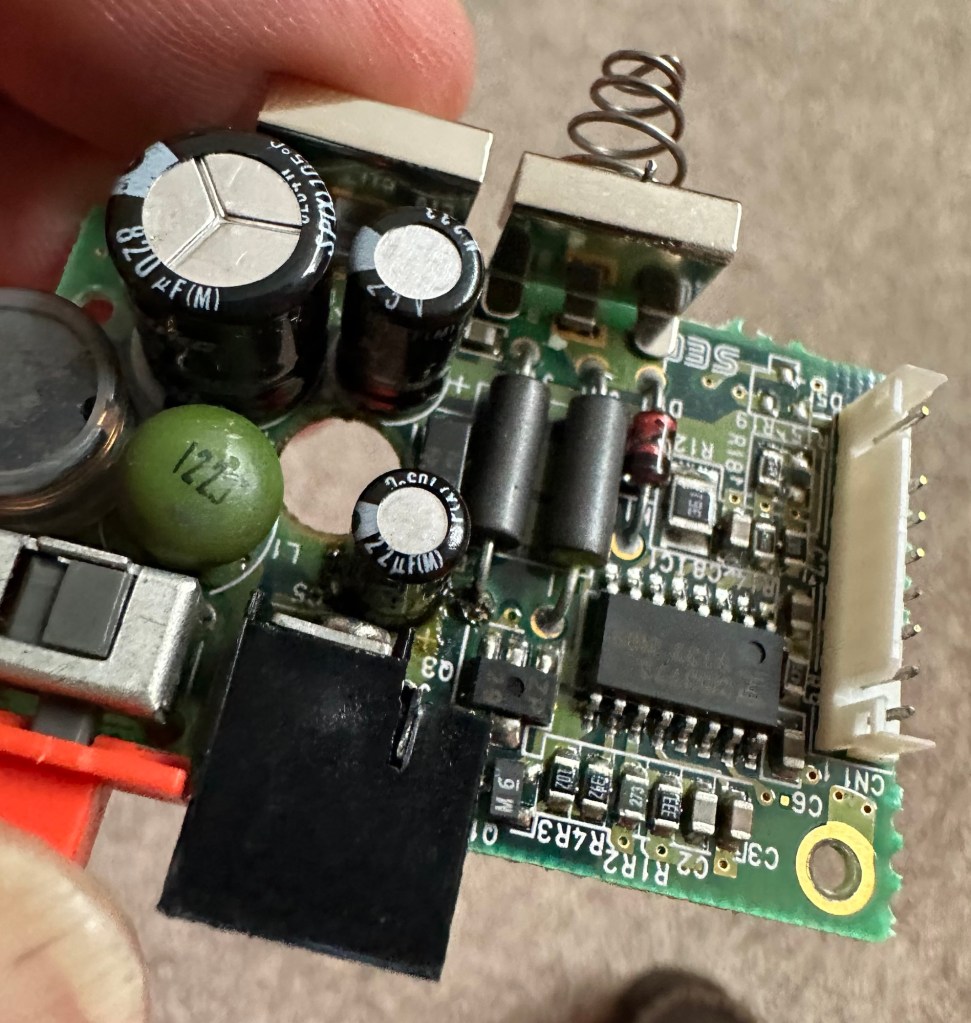
Occasionally after doing the capacitor replacement on the power board, other components such as a small IC and three transistors that control voltages across the system, start to misbehave causing the unit to switch off after just a few seconds. This is currently occurring with mine and I am intending to replace these components to see if this sorts out my issue. I have also ordered a replacement power board from China that is a fraction of the cost of a European one, it may work, it may not but if the change out of components dosen’t work at least I’ll have an alternative option.
There are a few checks we can do prior to replacement of these components on the power board that will confirm the various voltages required by the system. It’s best that these tests are done prior to diving in head first to replace them. You could be just wasting time. You may need a new power board or maybe even consider converting to a rechargeable battery system. It’s all doable.
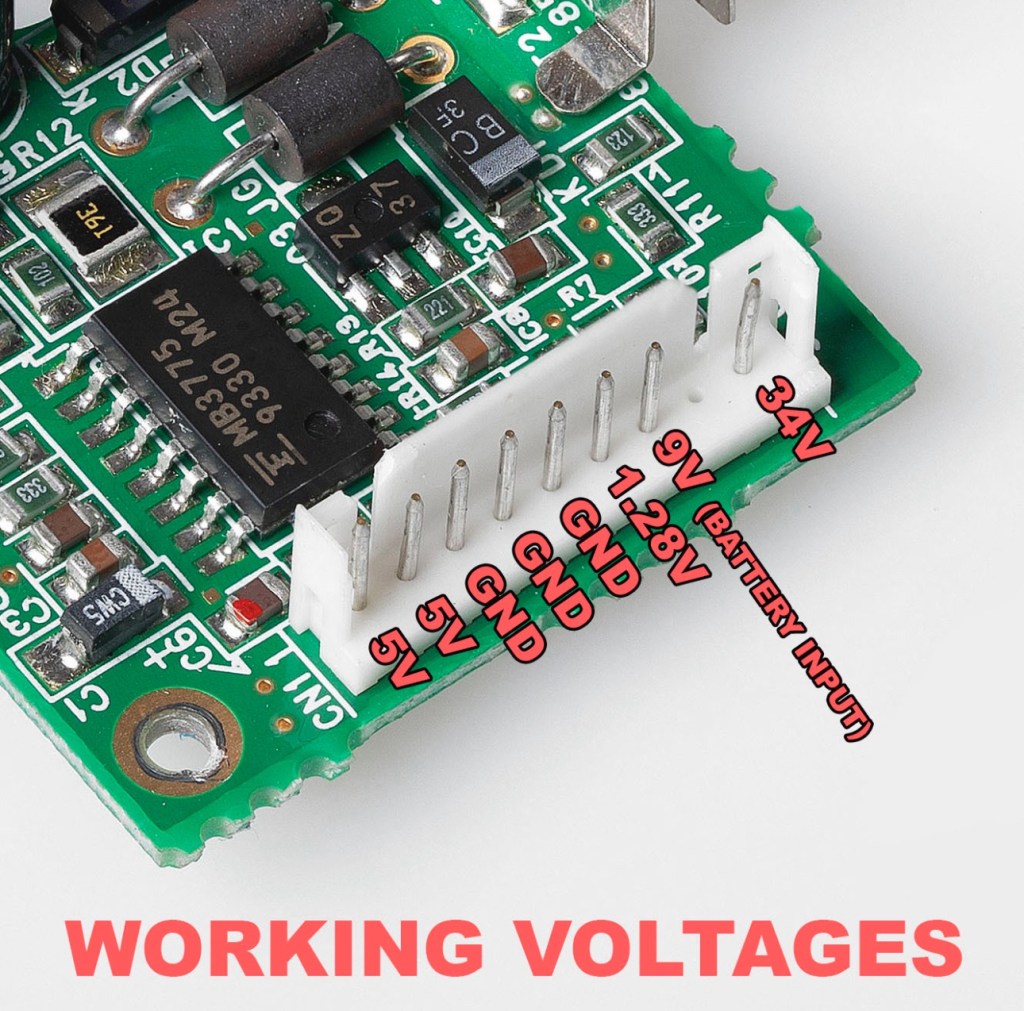
Expected voltages – photo courtesy Retrosix
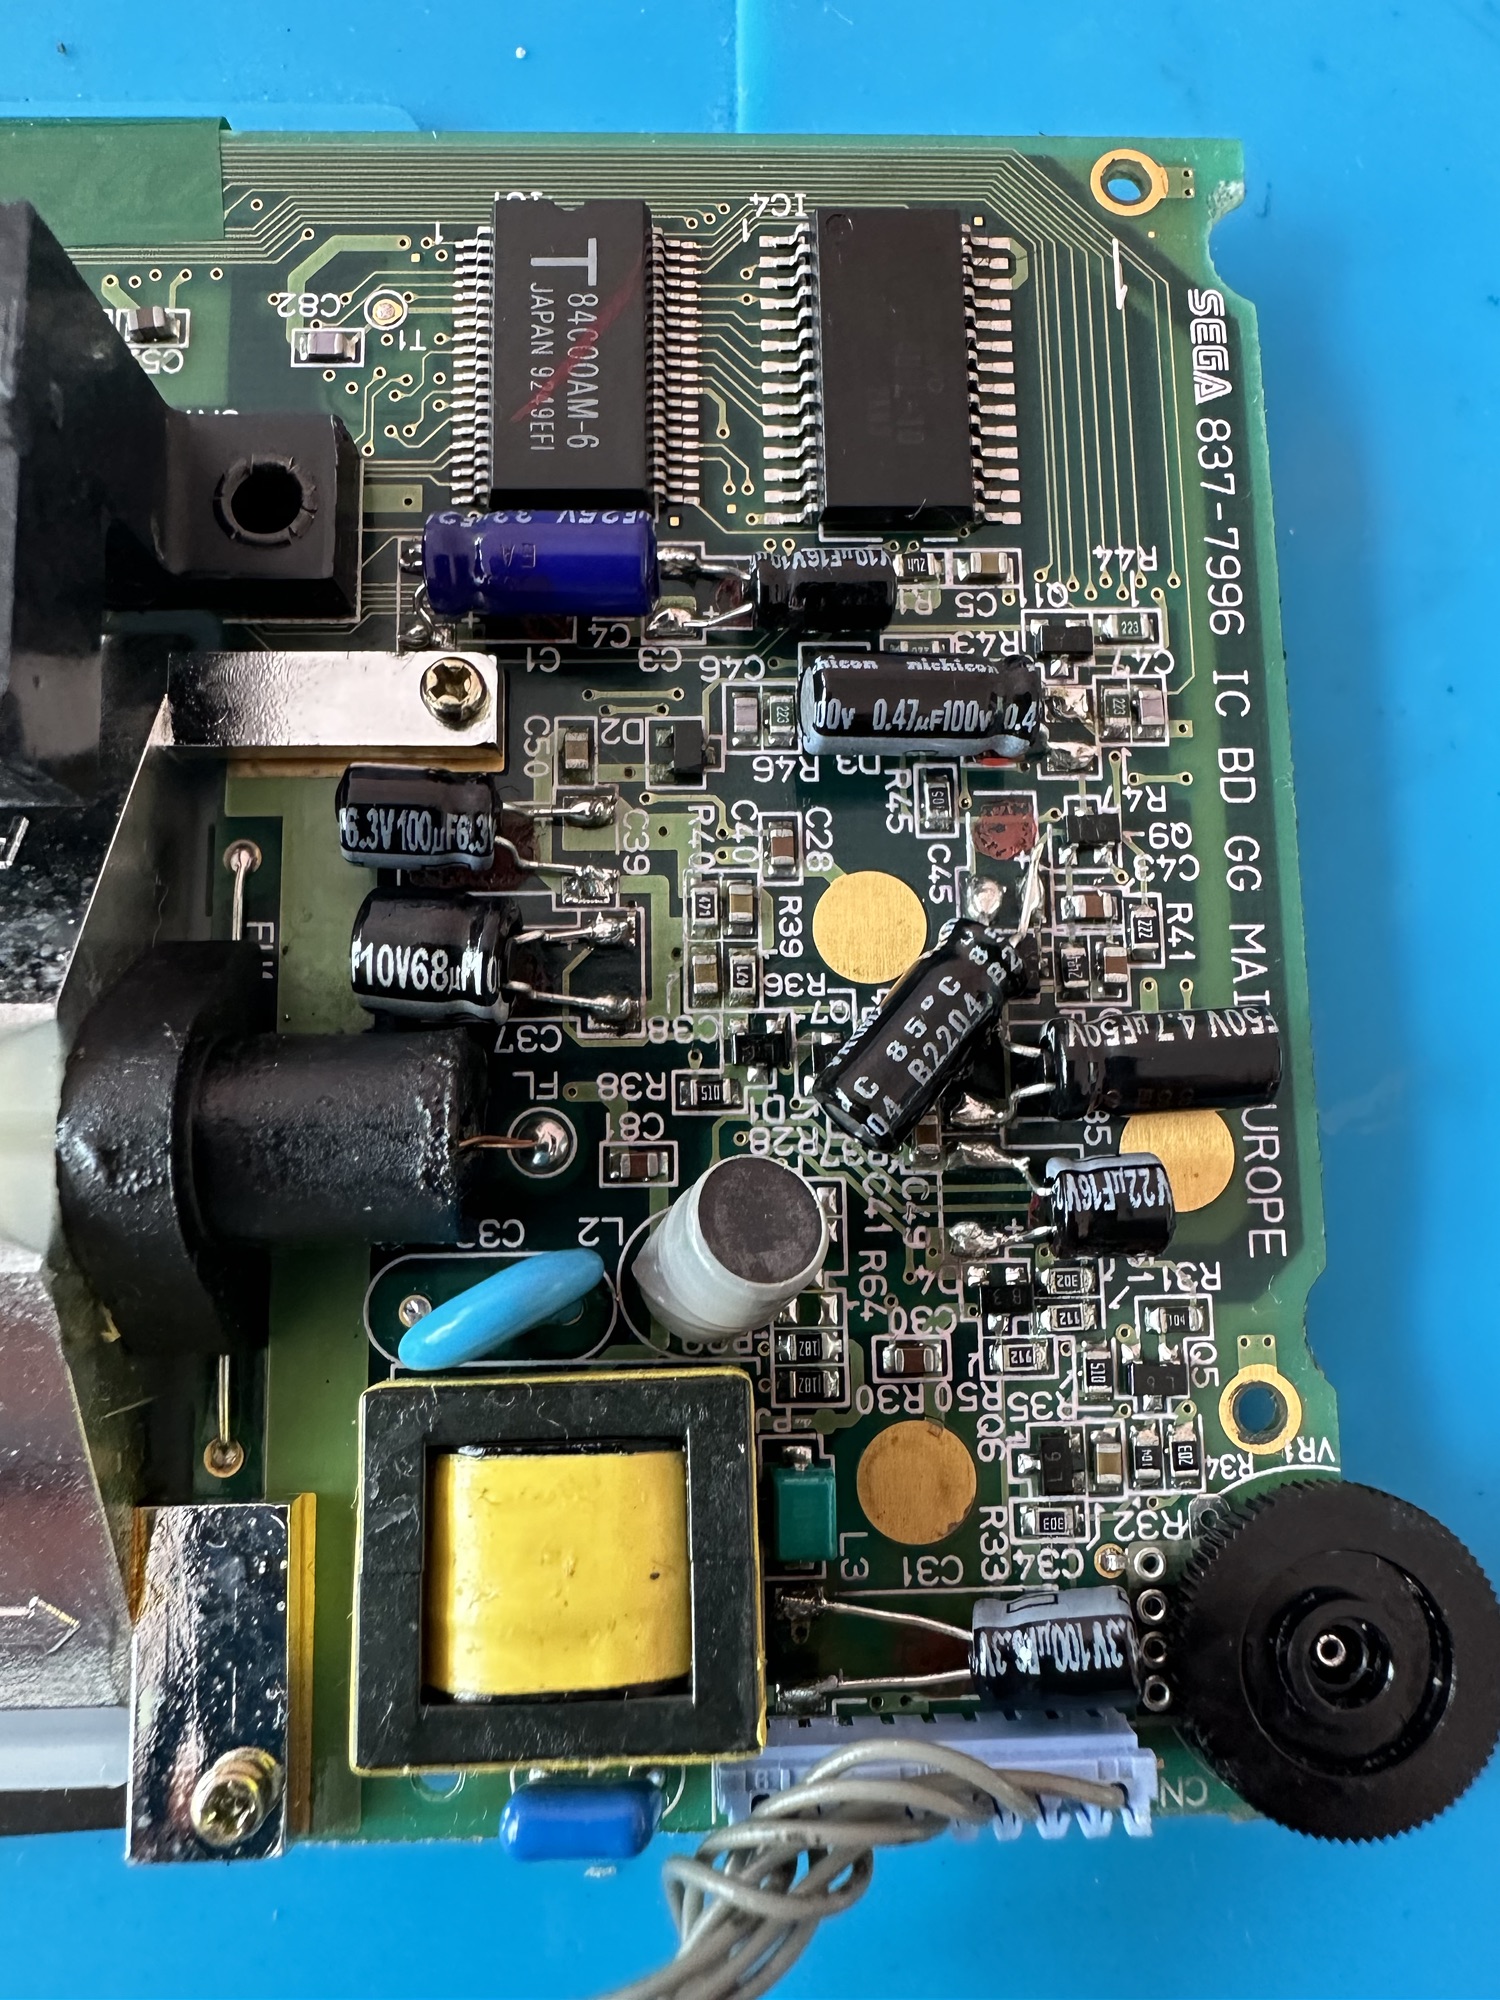
Here are the results from my test of voltages on the power board, I’ve injected 9v via a bench power supply to the battery contacts on the board:
At the 34v pin I had 0v
At the 9v pin I had 8.9v
At the 1.28v pin I had 1.28v
The three ground pins read as ground
At the two 5v pins I had 0v
So as a result I obviously have an issue with the 5v rail and the 34v rail, I believe the 5v rail is the one that affects the boot sequence and the 34v is not an issue at the start up, however, it’s there for a reason and this simple test proves there is an issue. I will therefore only change the IC and three transistors as the capacitors were changed when I did a full recap.
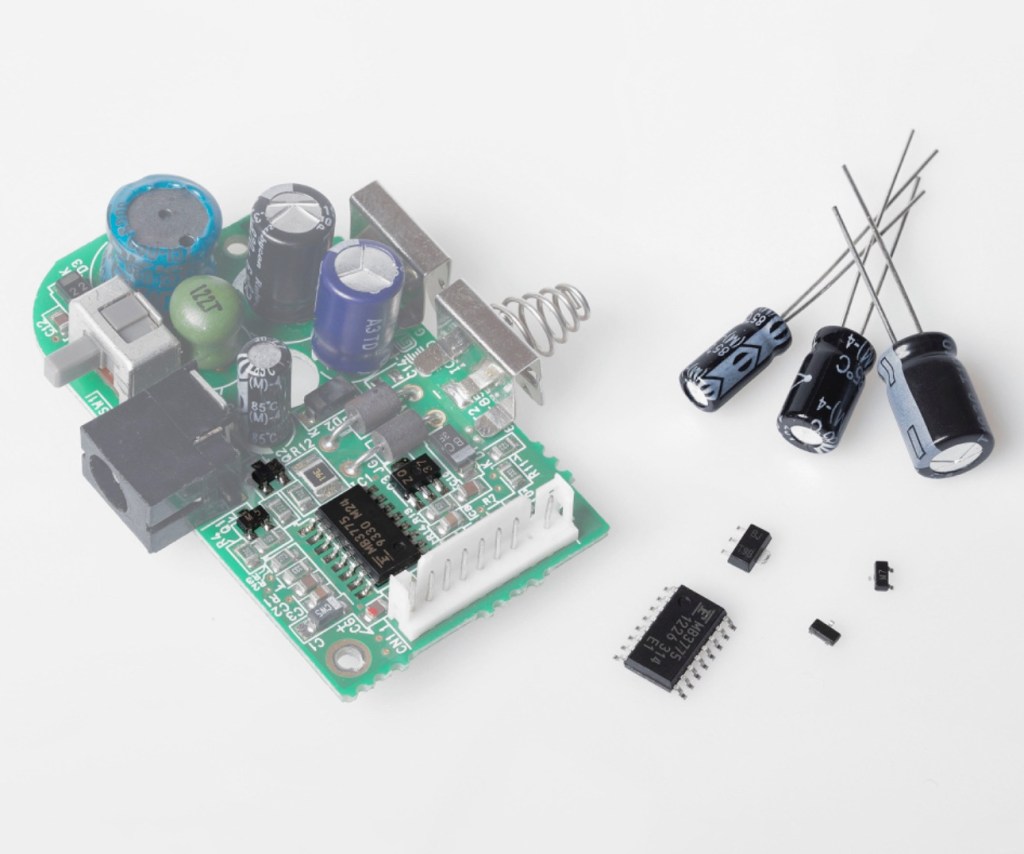
Advertised shellWhat actually arrived Clean Amp duo soundPower board components Three of the above Photos courtesy of Retrosix
For my modifications I am getting a new clean amp duo audio board with dual speakers instead of the single mono one that is standard. This is an upgrade on the original, extremely efficient and with better sound processing.
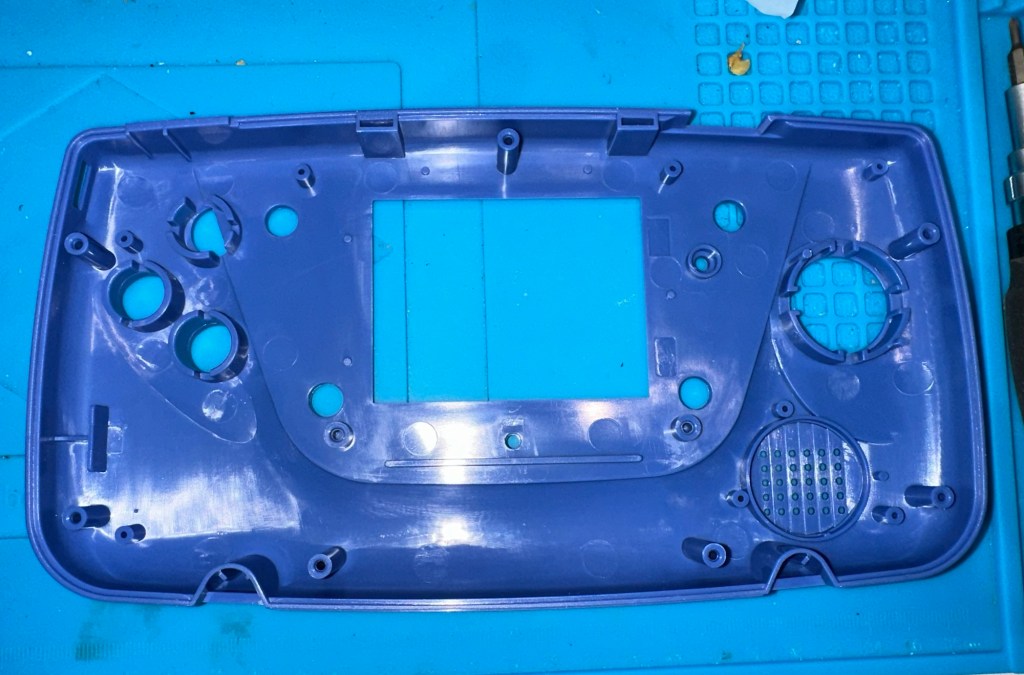
I am also replacing the shell with a new Blue case and glass to replace the scuffed old screen, this shell also has dual speaker outlets to compliment the audio board replacement. The shell is already prepped to accept a rechargeable battery system should I decide to install it at a later date.
I shall be getting these upgrades from Retrosix who specialise in supplies and modifications for gaming consoles.
All the items have now arrived and the first thing I’m going to do is sort out the replacement IC and transistors on the power board. The rest is fairly straightforward. However they have sent me the wrong shell, a single speaker one instead of a dual speaker one, so I’ve now got to await a replacement, annoying!
Scratch that, they are saying that they never did have any duo speaker ones even though they were advertising them on their site ( as per picture above..) and after a protracted discussion with the supplier / owner i’ve come to the conclusion that he might think he is a wizard at modding and designing circuitry but is totally and utterly inept at customer service, he wouldn’t know good service if it bit him in the ass. Hey ho on we go, it is what it is.
If you choose to use them in the future then just be aware. They have an uncanny knack of trying to pin their inadequacies and mistakes on you, the customer. Caveat Emptor – as they say.
So now the sound will be original mono, but hopefully improved. I have a spare speaker and mount as a result and I can use the new clean amp duo board in a mono configuration. Should I get a duo speaker shell sometime in the future I can always do a swap out.
Blank shellNew speaker and buttonsBlank shell and new speaker and buttons
Today I’ve taken the empty new shell and installed the new audio card and speaker, as well as the new buttons and silicon pads. I’ve then installed the main board minus the power board that still needs the new components.
New board and old boardMain board installedAudio and power boards connected
I’ve also installed the new front lens on the unit and I must say it looks nice.
New front lens on unit
Let’s get to the difficult bit, replacing the components on the power board. I’m not joking when saying that some of these items are not much bigger than a grain of rice. I suspect a lot of bad language will be used here, as this is a new level of soldering for me. I’ve never replaced anything so small before. If I balls it up I’ll just have to await my cheap Chinese power board.
Ok, the power board from Ali Express got here really quick, to be honest even before I could set some time aside to change the components on the old board, so therefore I’ve decided to try this new board as a straight swap.
I will keep the the components and the old board to use at a later date.
First though I have used the bench power supply to test it is ok, and it’s a big tick on all voltages as per the test I did on the old board. All voltages are stable and consistent, so I have secured the board in place and put the required batteries inside. Works perfectly.
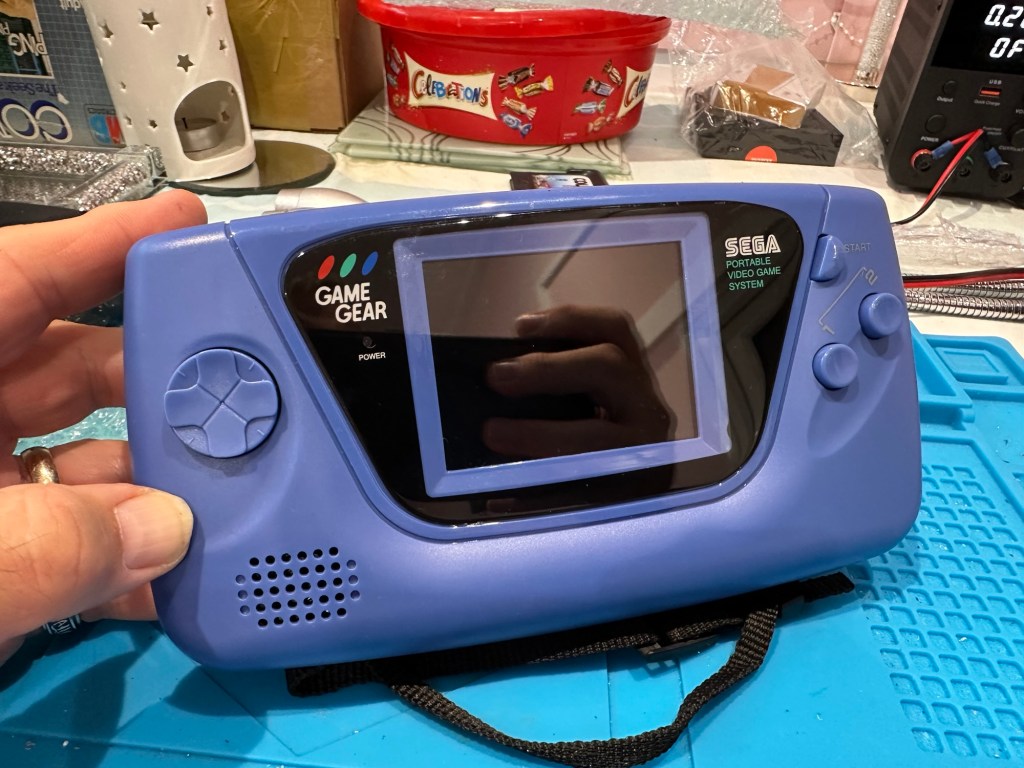
Back together, awaiting the big switch on
Working perfectly
I now have a perfectly good looking updated Game gear that I am exceptionally pleased with. The sound system is a good upgrade, it has a really loud volume (adjustable) and is crisp. The powerboard from China at a total cost of £10.80 is an absolute bargain, and works perfectly with good stable voltages. The case is good, fits well and the lens is clean easy to install and scratch free, the whole thing looks brand new.
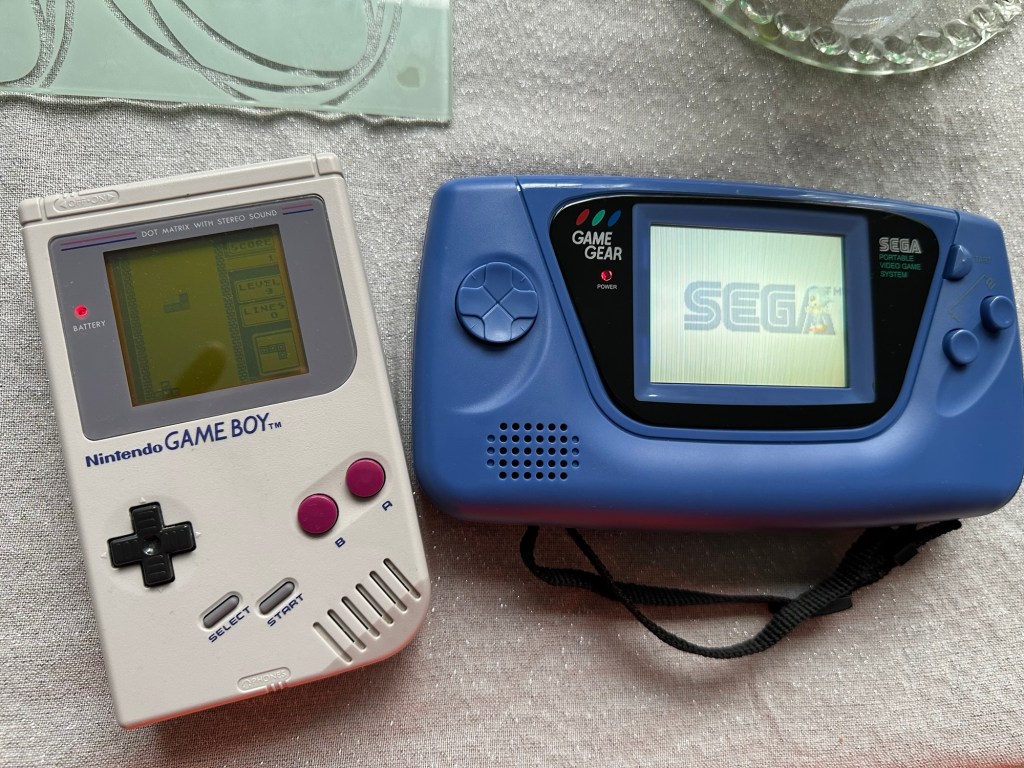
Two old rebuilds, rejuvenated
I now have two perfectly good looking and working examples of 90’s retro rivalry in perfect working condition. The plan is to display these in the house, on a custom made display. I’ve really enjoyed working on this little project and I’m made up with the outcome.
The only things left to be done would be to change the power supplies to rechargeable and to change the screens to new IPS/LCD screens, but I don’t think I’m going to do that on these two, I’m keeping them original or as close as possible to original, I want to keep these as they are, to cherish in this condition for as long as I can.
FAULTY no power, NOT WORKING for Spare Parts or Repair.
TEST NOTES: Does not power up, no further testing, unable to check any functions. Battery leakage with corrosion in and around battery compartment.
Ebay
The unitYes…there is corrosion
Another low priced item that I fancy getting working. And as is standard with me it has corrosion. This item is from 2003, it is a self contained game arcade system that plugs into the tv. It has five games installed including classics such as Galaxian and PAC Man, so compared to some items I’ve purchased of late, at 21 years old this one is a relative baby.
Well, we now await its arrival where we can give it a good look over and assessment. Hurry along now delivery person…..
It’s arrived.
It’s in pretty much perfect condition, all stickers are in place and it hasn’t been previously opened.
I’ve put in 4 new batteries, and damn it. It powers on. It’s working.
It switches on
I’ve plugged it into the back of a television and it also plays.
Damn, it works
Yes there is a little corrosion on the battery springs but I’ve seen a lot worse. I’ll give these a little clean just so I can say I’ve done something.
It’s quite rare these days to get a bargain off of EBay, and for the seller to be truthful in his description, in fact he’s been exceptionally honest, just writing it off without testing. A big bonus to me.
As the saying goes, if it ain’t broken, don’t try to fix it.
Makes a boring post though, sorry about that. A bargain, yes, and another one kept from the tip and will be used at home in the garden pub, the wife will love this as she’s a big Pac-Man fan.
And that was it. Faulty. What’s faulty? I’ll not know until it arrives as i didn’t ask. Foolish perhaps, but I was looking for a challenge and something I could later mod. I think I’ve found it.
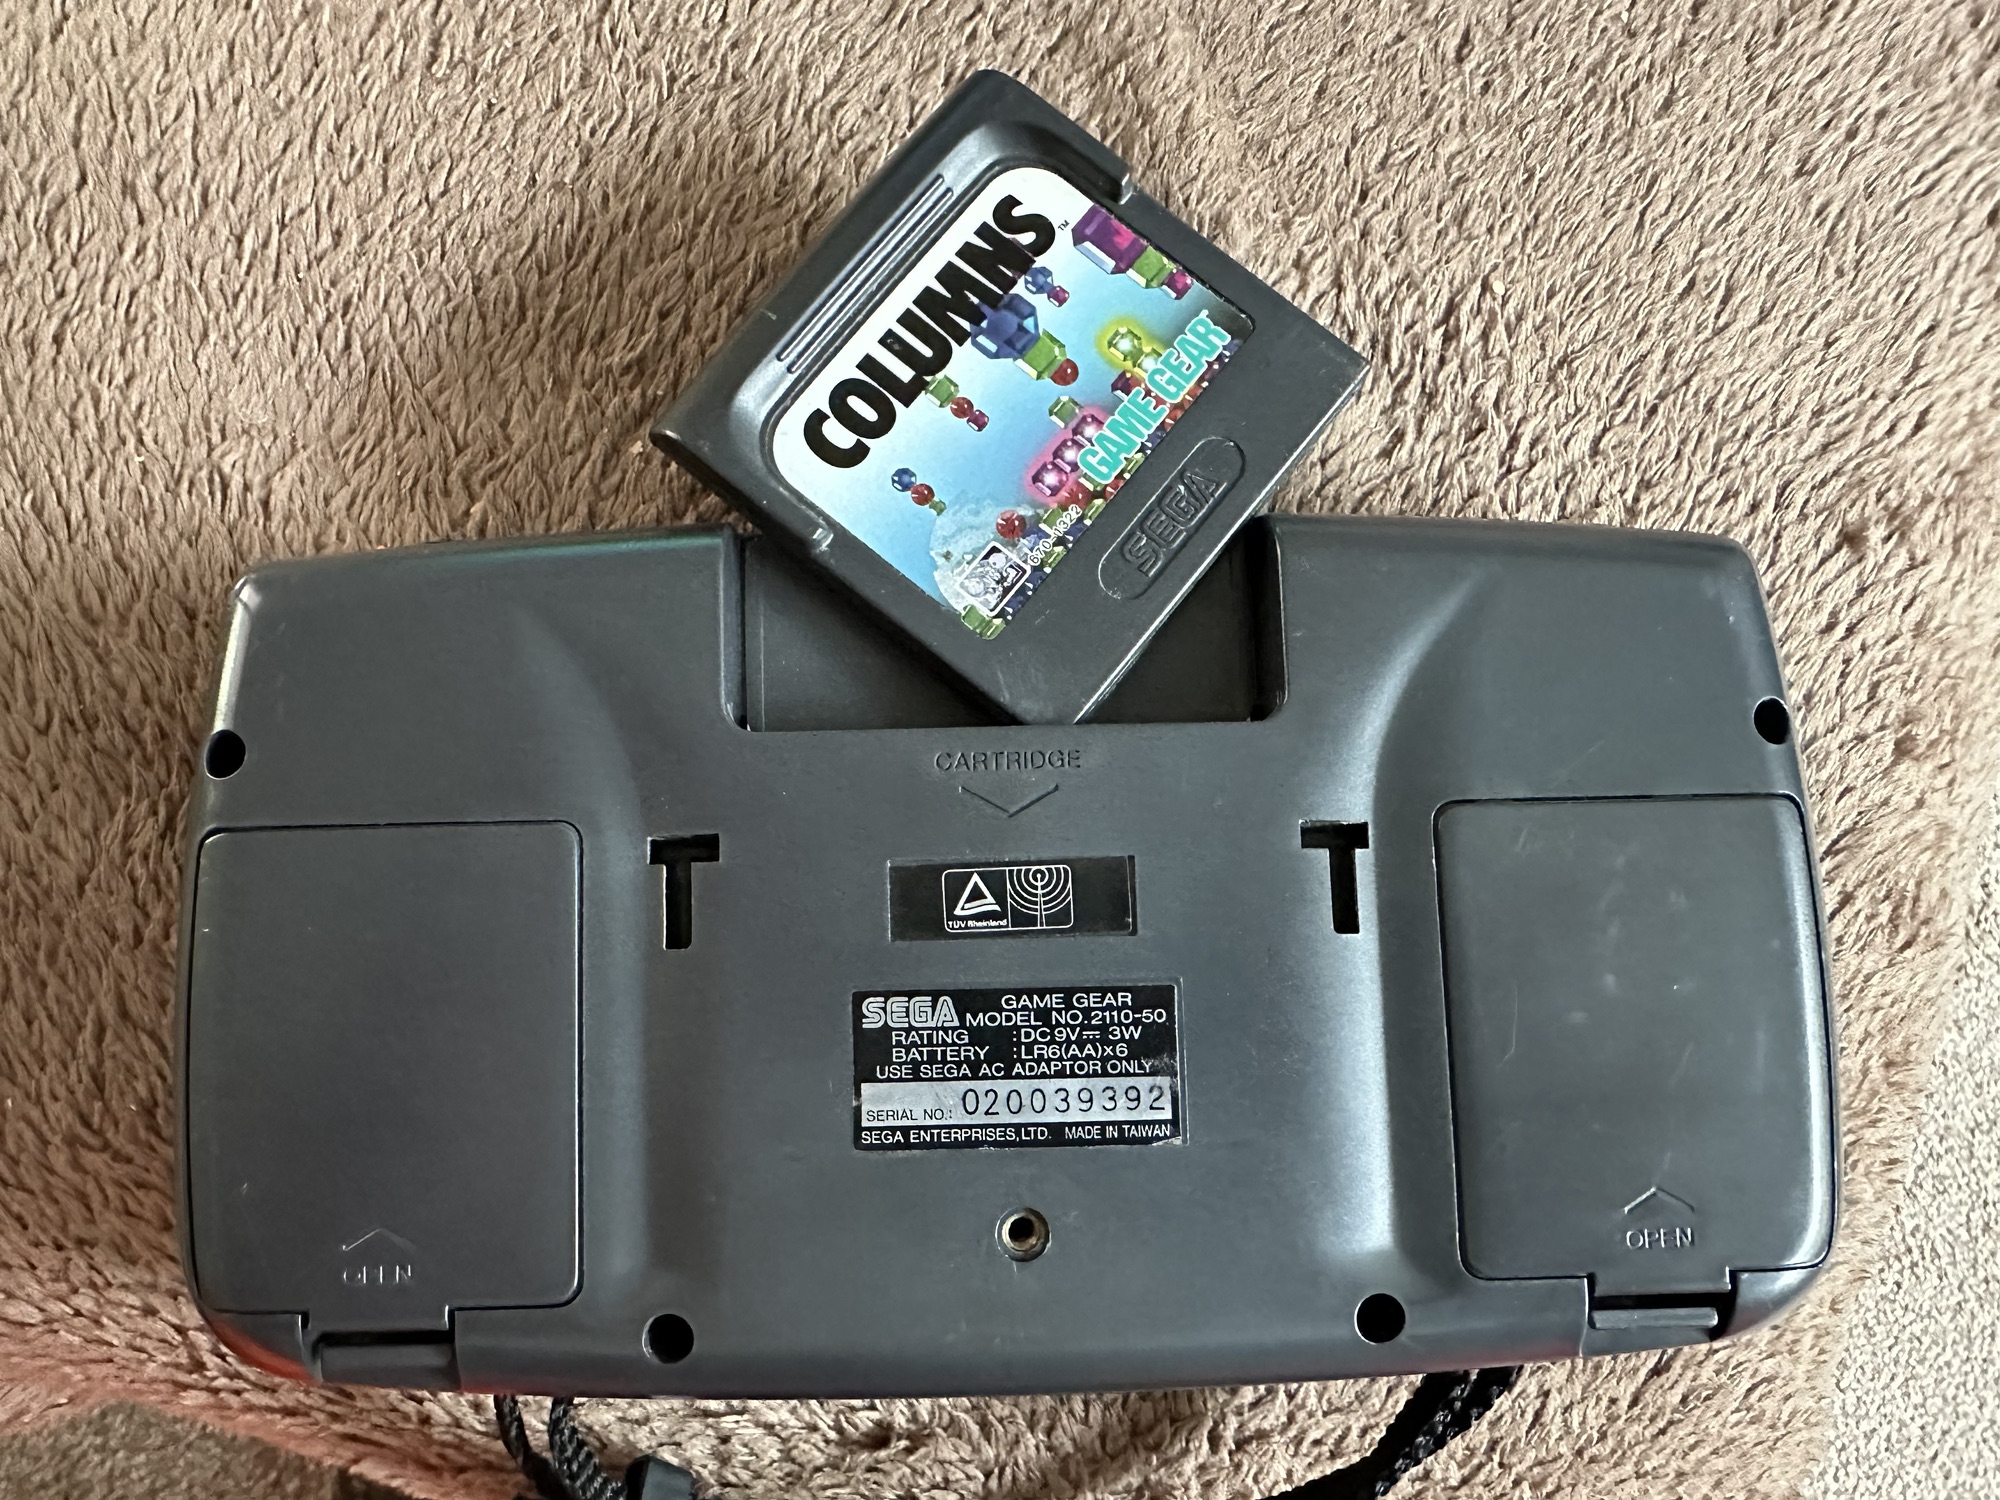
Sega GG frontSega GG rear
I must admit I was looking for a cheap way into a retro gaming repair and I believe this was it. Most damaged game gear units seem to be averaging around the £42GBP price but I managed to get this 2110-50 version at a lower price of £28GBP (and I may have got a game with it, let’s see what arrives!). However I don’t know what the heck is wrong with it but I suspect it’s the usual issue that has plagued these 90s retro units since their inception where the capacitors fail catastrophically.
There is probably not a single one of these units out there that has not suffered this issue or is certainly guaranteed to do so sometime in the not too distant future. Imagine how many of these units have just been discarded as junk considering that 10.62 Million units were sold up to and including its discontinuation date in April 1997….scary!
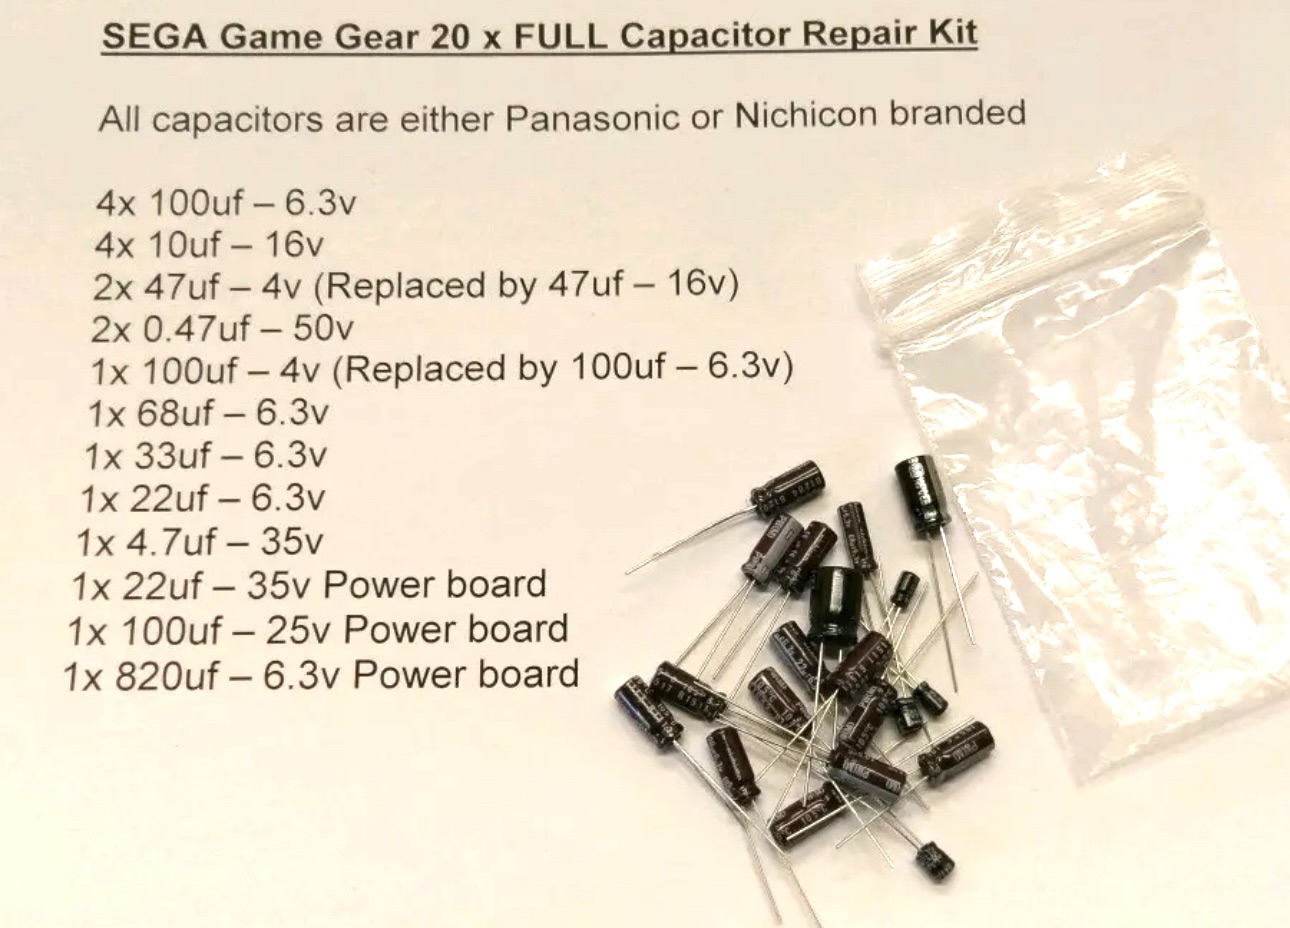
The first recommendation from anyone in the know is to change the caps before they start popping and corroding everything. I have a set of replacement caps ready in anticipation.
Full GG Cap replacement GG Cap replacement list
My hope is that this unit has not yet reached that corrosion stage….fingers crossed 🤞
Hurry along now Mr.Postman….
Both Game gear and replacement Caps have arrived. And I’m really happy as there is a game in the unit as well “Columns” Sega’s answer to Nintendos Tetris. A nice bonus.
Just minor scratches on lens areaBonus game received…NiceNice and clean
The unit turns on, there is no sound, and only a very feint green glow when the unit is held at an angle. It’s looking very much like it is the old Capacitor problem.
No sound. Powers on.Turns on and green glow
The unit is in surprisingly good order with scuffs and minor scratches as you expect from a game that’s around 30yrs old. The lens scuffs aren’t an issue as a new lens is relatively cheap. But that isn’t the problem as it stands. Let’s get it working and I can worry about that later in the repair process.
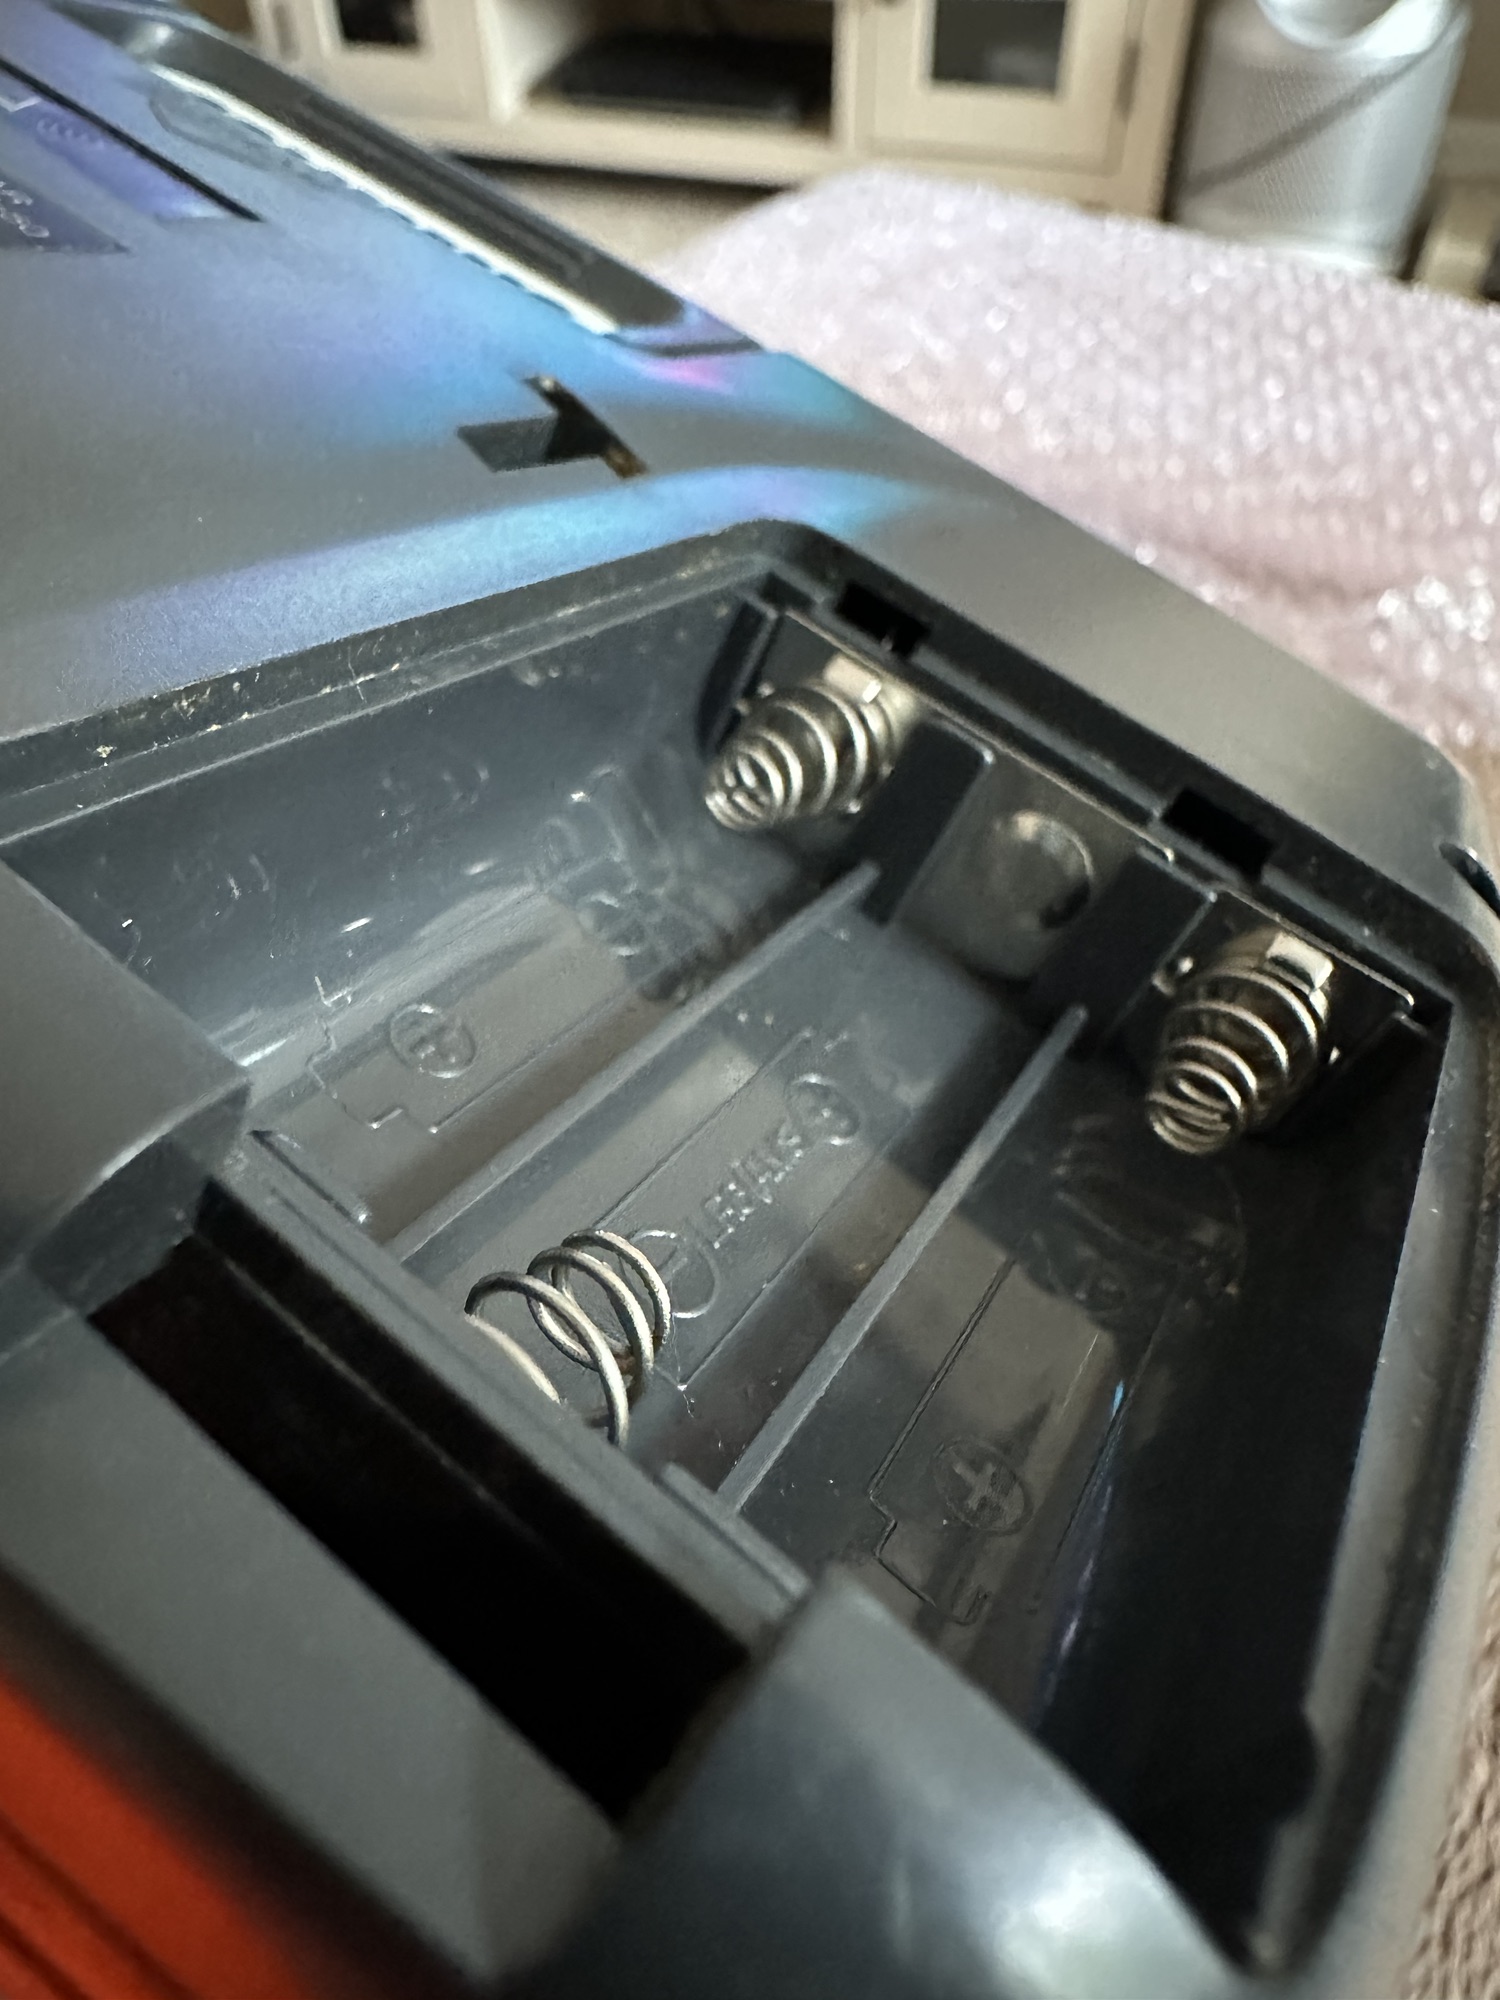
Clean battery compartment Another clean compartment
There are no signs of any corrosion in the battery compartments and this pleases me. I only hope that when the unit is opened there are no obvious signs of corrosion on the boards.
Wish me luck, I’m going in….
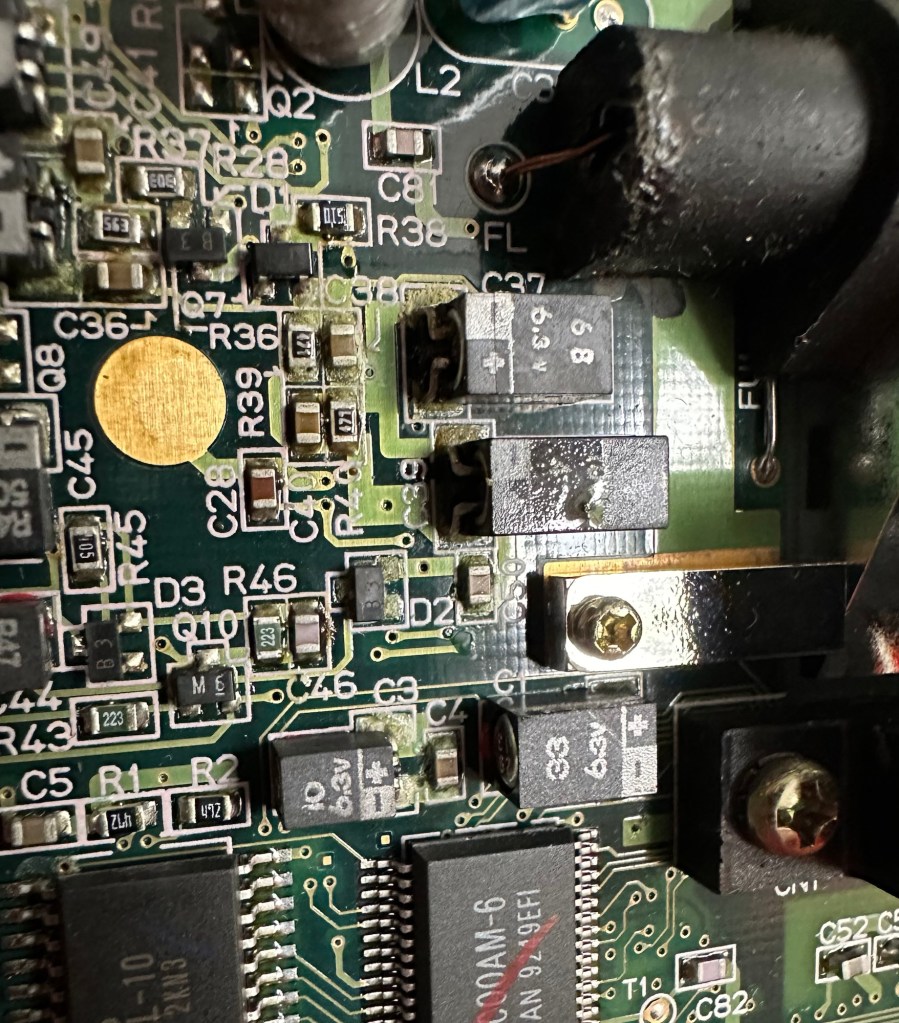
Overall I’m happy with the condition inside, no bad corrosion, however it’s noticeable that a few capacitors have leaked. The worst seems to be C39 on the main board, it’s easy to see the residue.
Main board Capacitor C39 leaking
This unit separates into three boards. An audio board, a power board and the main board. This is a twin asic board, I have removed the audio and power boards as these are the first and possibly the easiest for me to be working on.
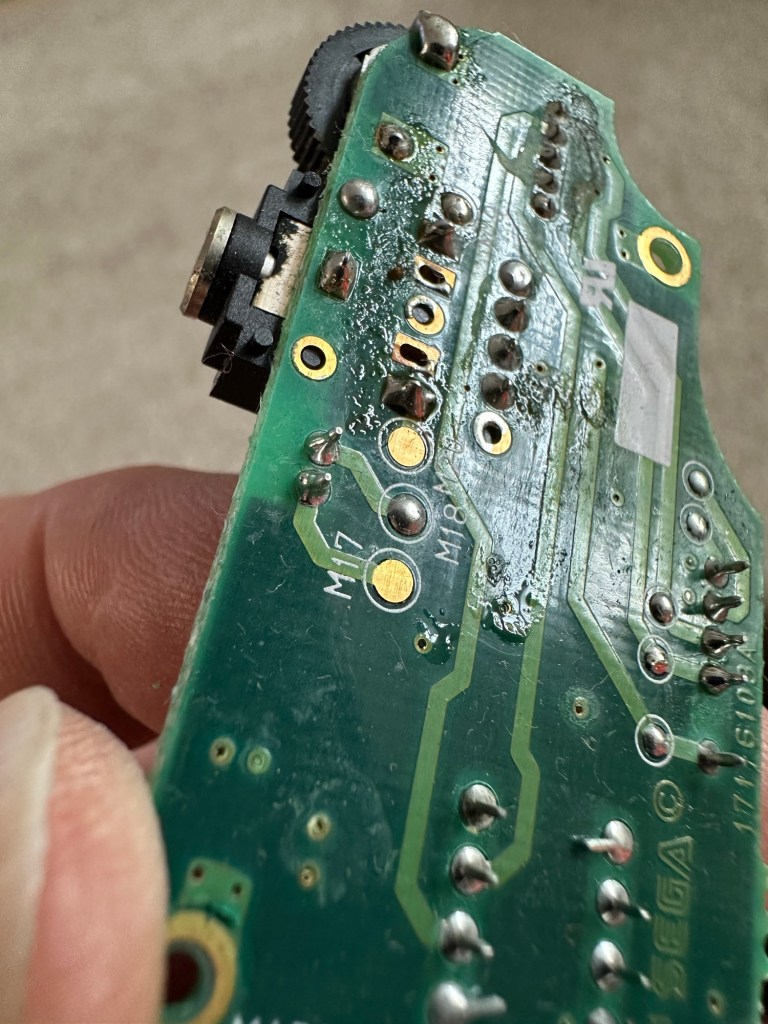
The audio board has 5 capacitors that require replacing, I can see some leakage on the rear of board but not in the area of the capacitors. I suspect that this is factory flux though I could be wrong. When I remove the caps I’ll clean all the pads and use IPA to clean so this should sort that issue out.
Audio board Leakage or Flux
The power board only has three Capacitors that require changing, however it’s clear to see here that C5 has been leaking.
Powerboard C5 leakage
Let’s get on with the removal and replacement of these 8 components. The other 11 are on the main board.
Well that didn’t go too bad. A few minor position changes due to the capacitor types being a different size on the board compared to the 1990s version.
Old caps and newAudio board cap replacementAudio board now clean
It was obvious that there had been leakage on these two boards due to the fishy smell that arose when the soldering iron was used. That said, the old capacitors came off without too much problem. I used solder braid to remove the old solder and then gave a good clean of the board with IPA prior to re tinning the pads prior to putting the caps back in place.
I knew there wasn’t a big issue with the power board as this was sort of working prior to this project. This was the easiest board to solder as it had through the board components, pretty much a straight swap but for better components.
Power board with new capsPower board clean
The audio board was different as I had to reposition these pots so the case could close properly and the shielding could go back into place with no issues. Again I used the same process of unsoldering, cleaning thoroughly and then tinning the pads.
These two boards are now complete. As a test I thought I’d reassemble the unit and see if there was any improvement. Power came on and the red led lit, this was a good sign that there was power and I’d not messed anything up. Secondly there was sound, we didn’t have that before so this is a definite improvement on what we originally had. Volume works with just a couple of occasional crackles so I may have to use some more contact cleaner here.
We have sound
So far, so good. No real improvement to the picture even though you can see something is trying to come through. That said I’m hoping the replacement of the caps on the main board will help this. So with no further a do, let’s get the main board finished.
Just got home from work, now time to get these last 11 caps done. All the old ones removed, all the pads wicked to remove the old solder and what a stink of old fish, these capacitors had definitely died.
All old caps removedOld caps removed and area cleaned
All cleaned with some IPA to rid of all the debris and then fluxed and tinned the pads ready for the new capacitors to go into place, I’ve got this off to a tee now and these went on a lot quicker, easier and tidier than the last lot. I’m a lot more competent now, and feel more confident with this process.
New caps going into placeLast two new caps go into place
Had a little trouble getting it all back together, a couple of the new caps had to be tweaked slightly as they were in the way of a screw post, the earth shield was also causing issues and shorting the system, again a bit of captain tape helped shield an exposed component. All this done I put the strap back on and loaded up the batteries. Switched on and red light, all looking good…
All working
Very happy with the fix, that was my first Cap replacement and I’m happy with my first attempt. Again you learn from these attempts and the reluctance I initially experienced was just nerves. I’d be more than happy to do more of these fixes, maybe using the modern surface mount components next time.
ColumnsYou did it
Another one saved from landfill, I wonder how many of the 10.6 million more that were made of these have suffered that very fate. Scary.
Anyway, I’m looking at using this unit to do some mods, so this is going to be my test bed for other projects.
We have tried a few batteries but the unit does not power up so beig sold for spares.
EBay
I obtained this for a very reasonable price considering the amounts being charged these days for similar battery operated 1970’s items.
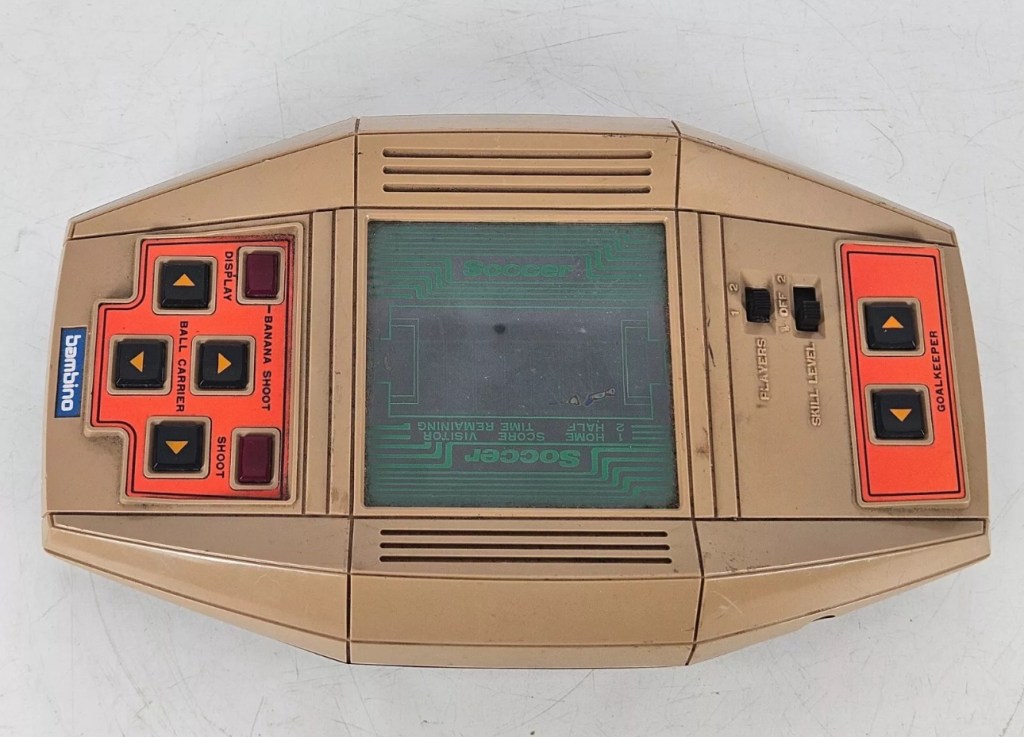
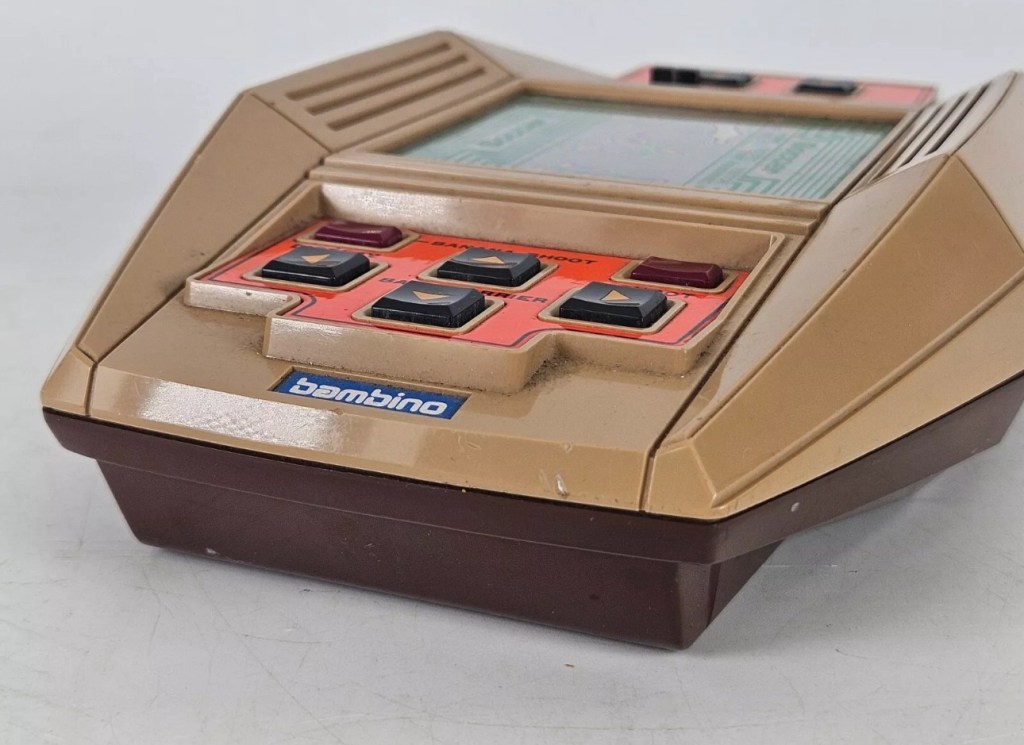
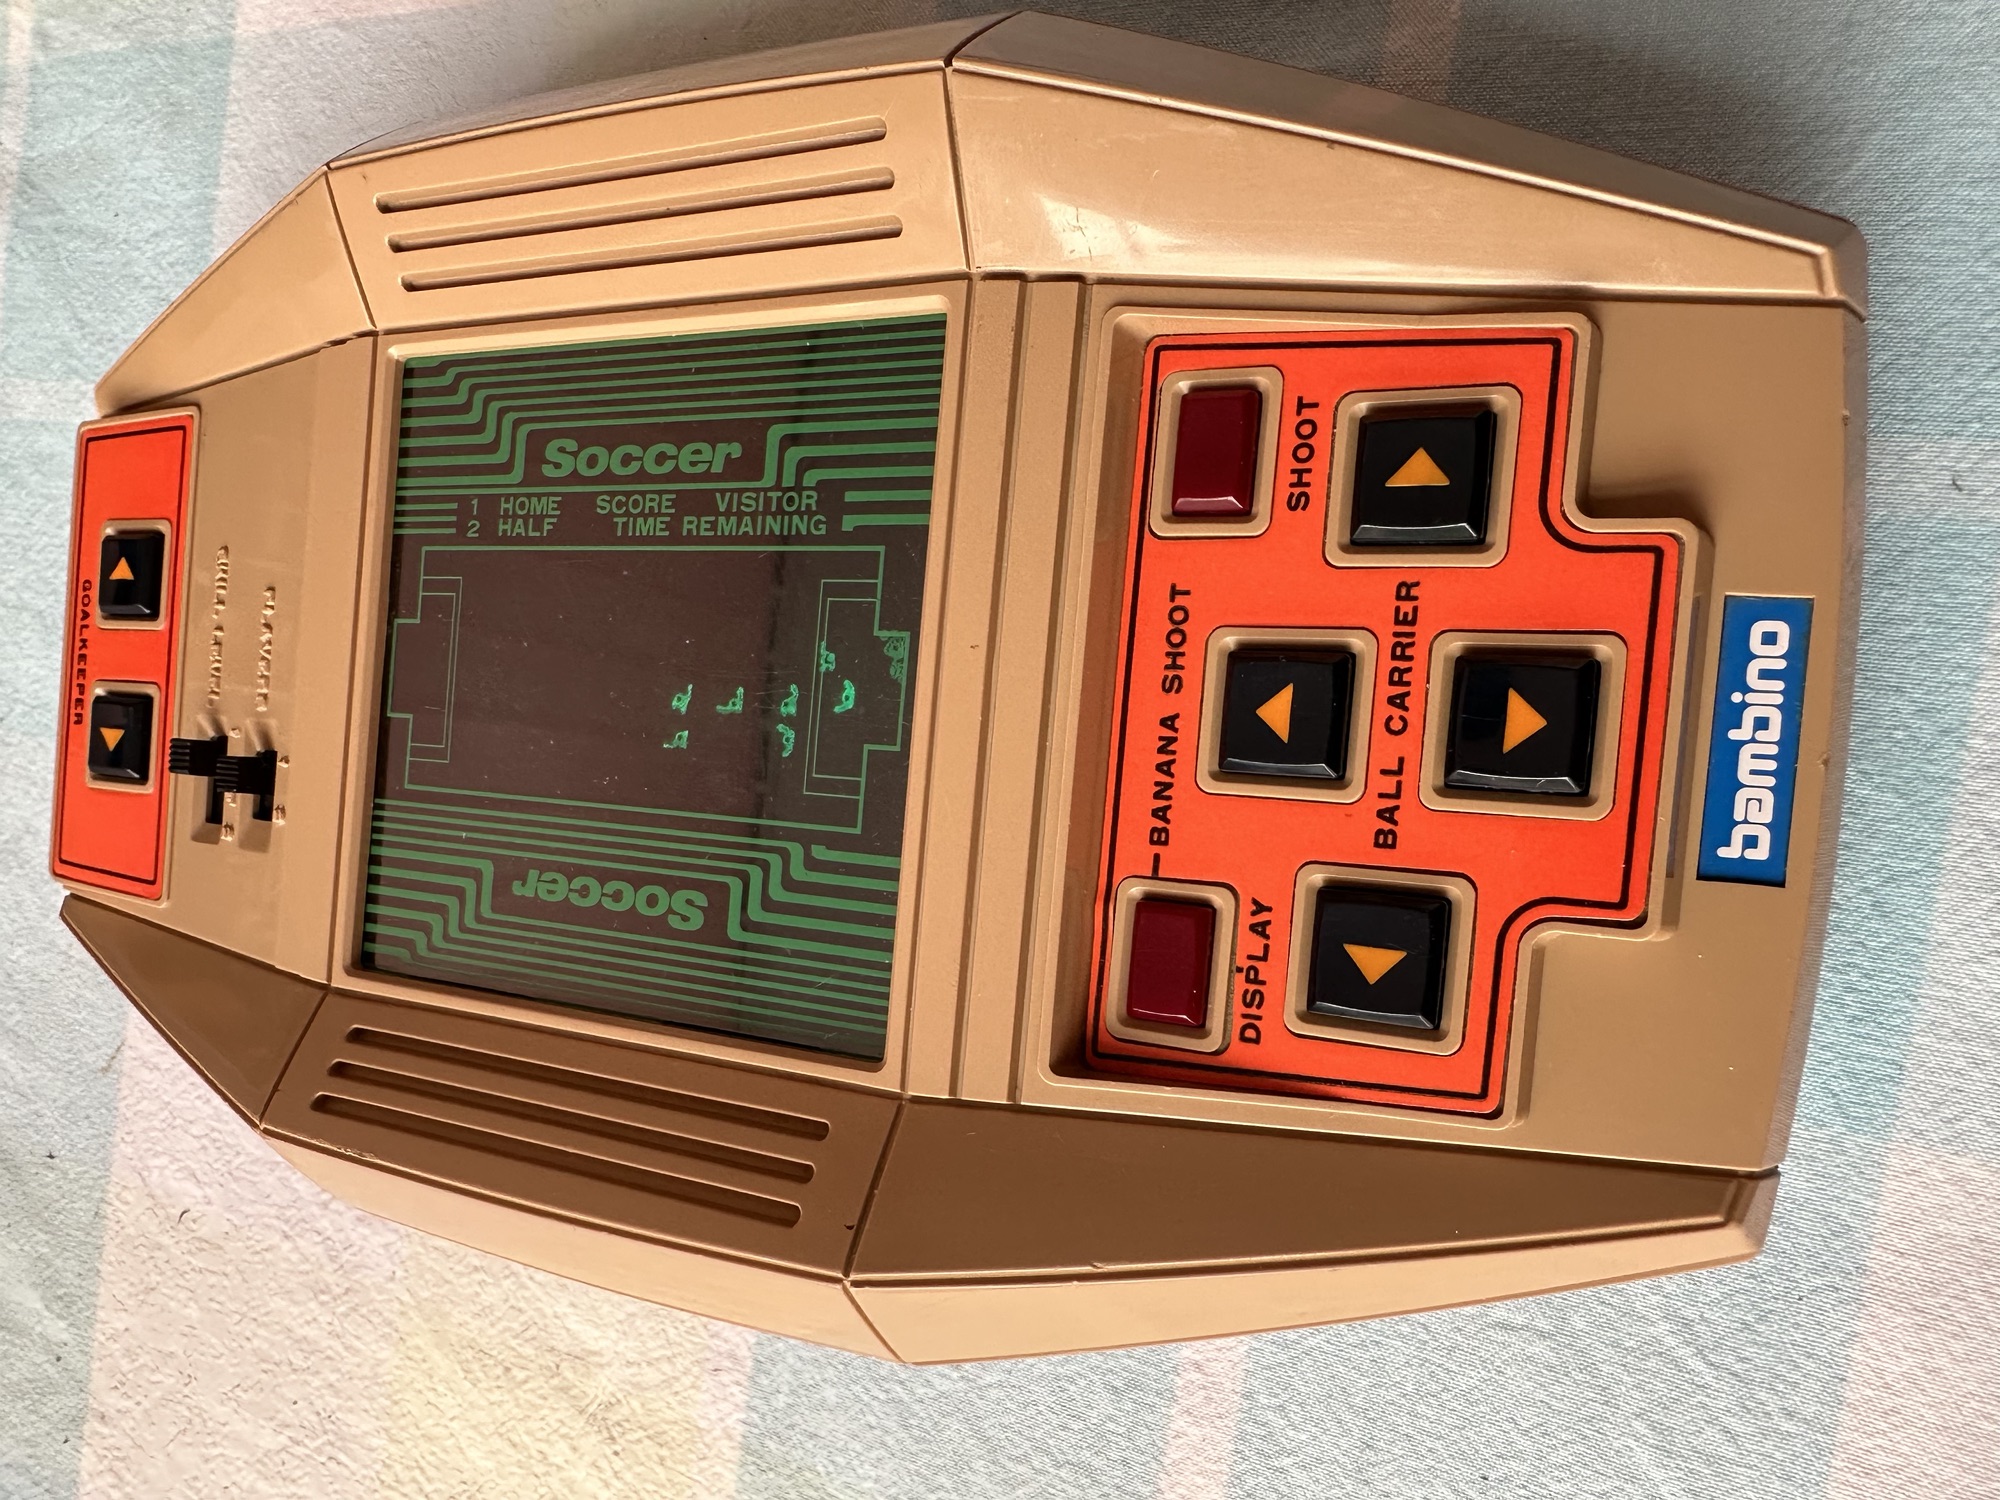
Bambino gameLooks tidyNo Corrosion Bambino Kick the goal soccer game
This unit was assembled in 1979. From initial pictures a few things are pleasing. It looks fairly tidy, the battery cover is supplied, there appears to be no corrosion and the labels appear intact. However actual delivery and when it appears in my own hands may prove otherwise so I’ll await its arrival to give a final judgement.
Well the item has arrived and considering it’s 45 years old it appears to have had a good life. A few small knocks and scars, no more than what you would expect….lets get some batteries in and see what occurs.
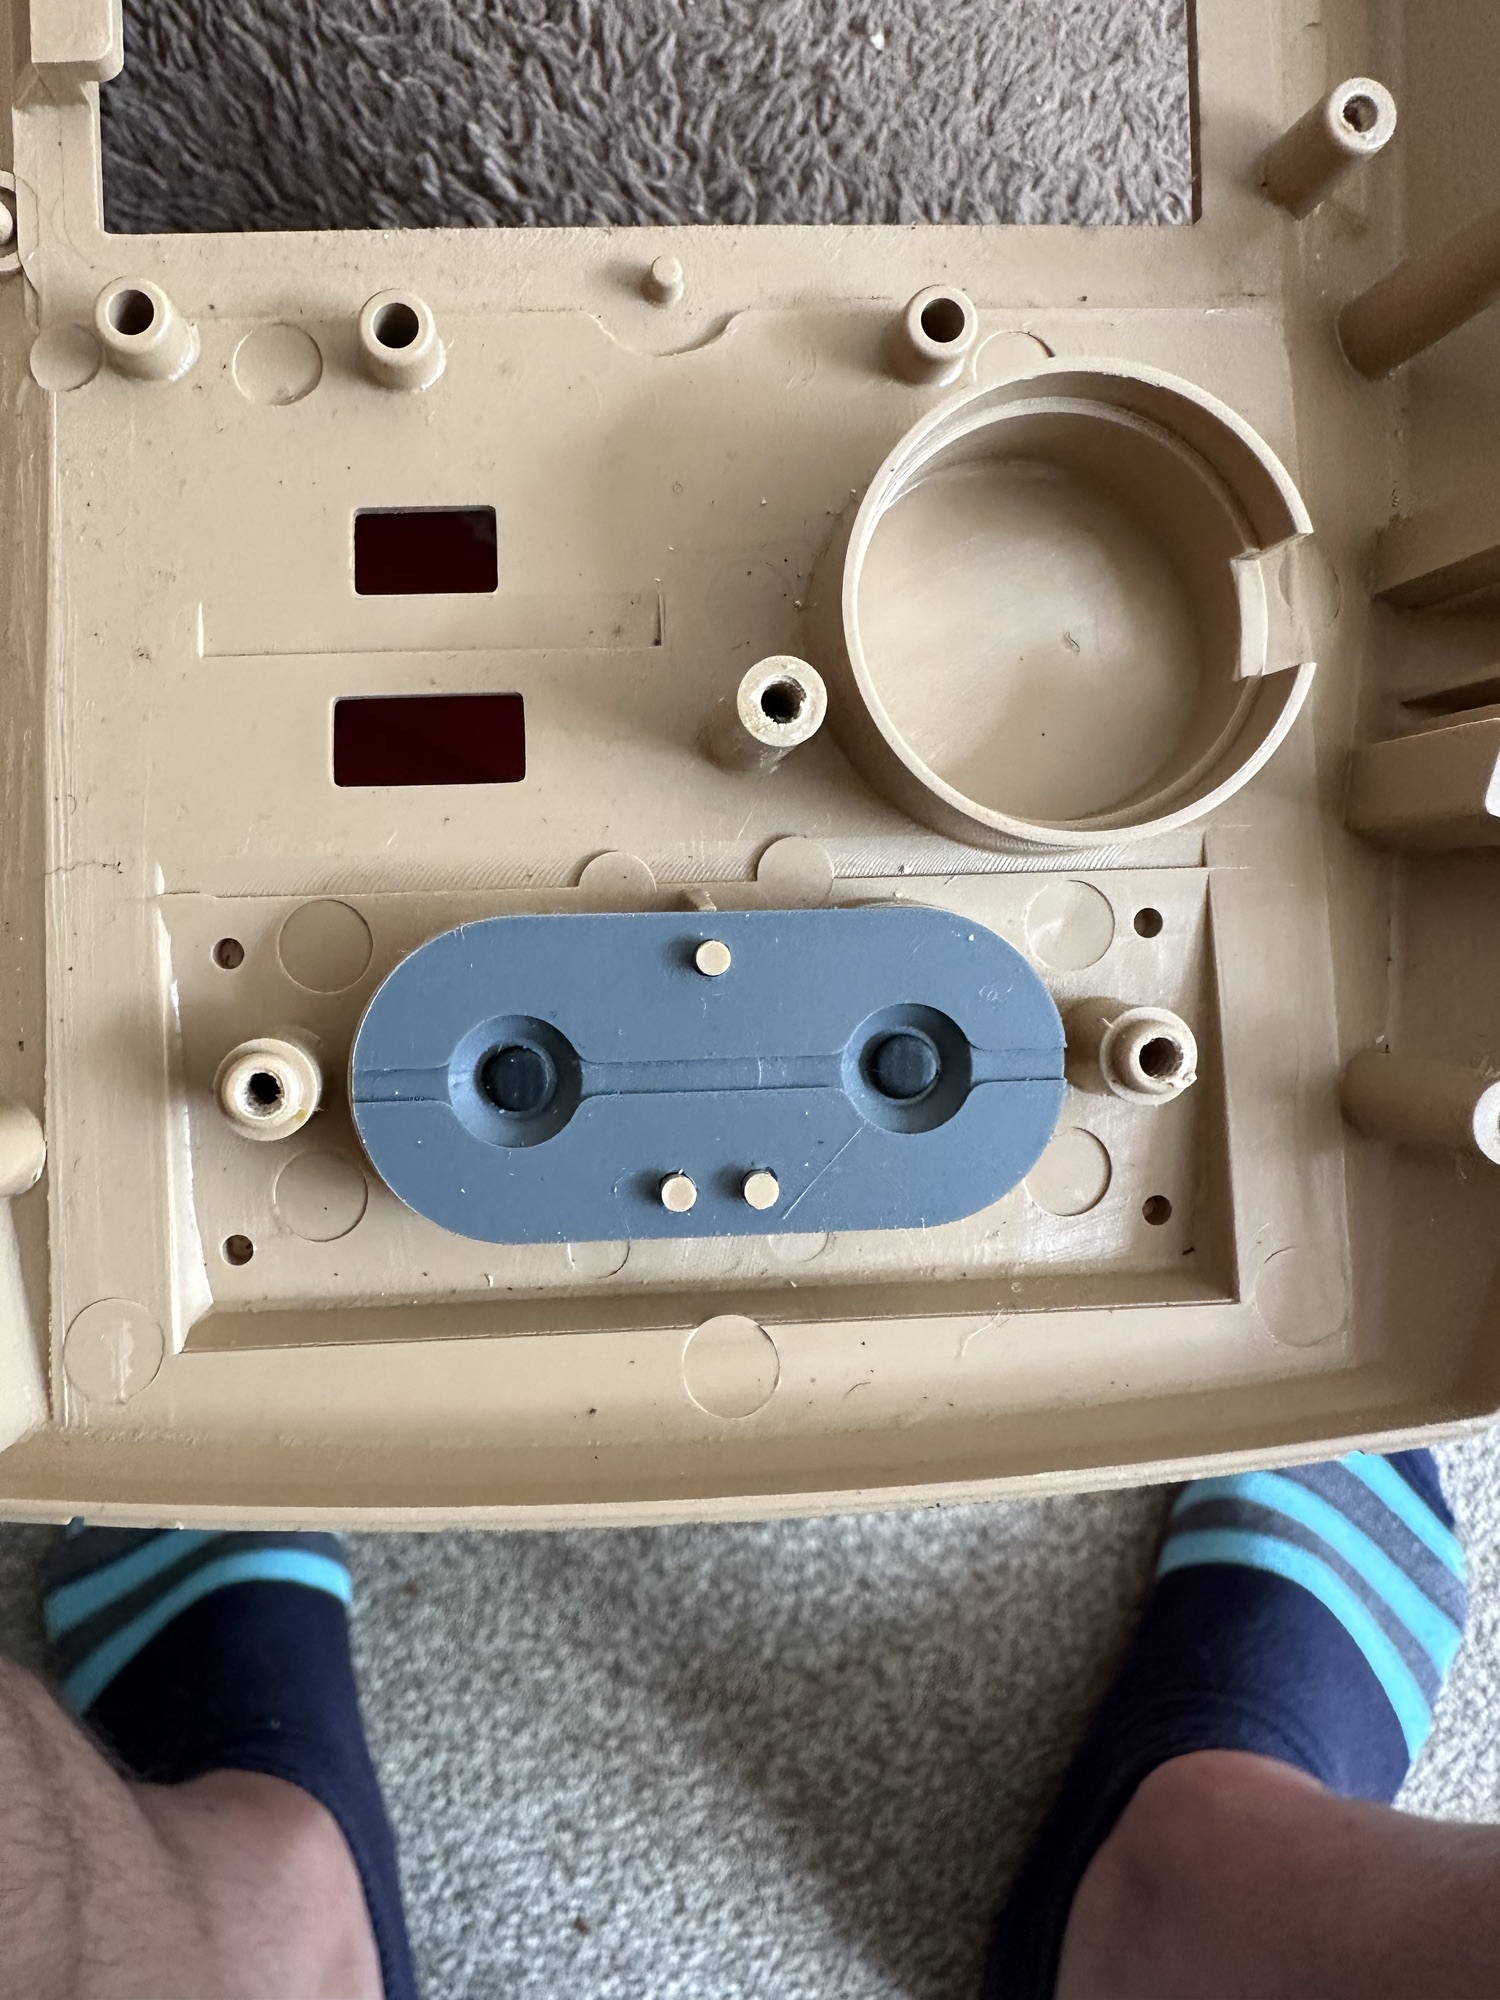
A few cold solder joints needed re flowing45 years old and clean as a whistleGame pads all to cleanButtons to clean
Inside is amazing, no LED screen just a tube that looks like an old Cathode Ray tube that you’d have on a TV. (Actually known as a Vacuum fluorescent display) Thank god this isn’t damaged as it would be game over. Wiggling a few contacts and I can hear the speaker crackling, closer inspection shows some cold solder joints so I quickly reflow these and it all springs into life. Excellent.
Lovely old display- more like a cathode tube
I’ve decided to take it all apart and give the parts a good deep wash in some soapy water.
Bath time Drying off
I’ve cleaned the two switches with a contact cleaner, I’ve cleaned the screen membrane and all buttons and their attached membranes as well.
Looks stunningAssembled and workingNice and clean
The whole shell has also been cleaned in all the nooks and crannies, and it looks superb.
Before and after
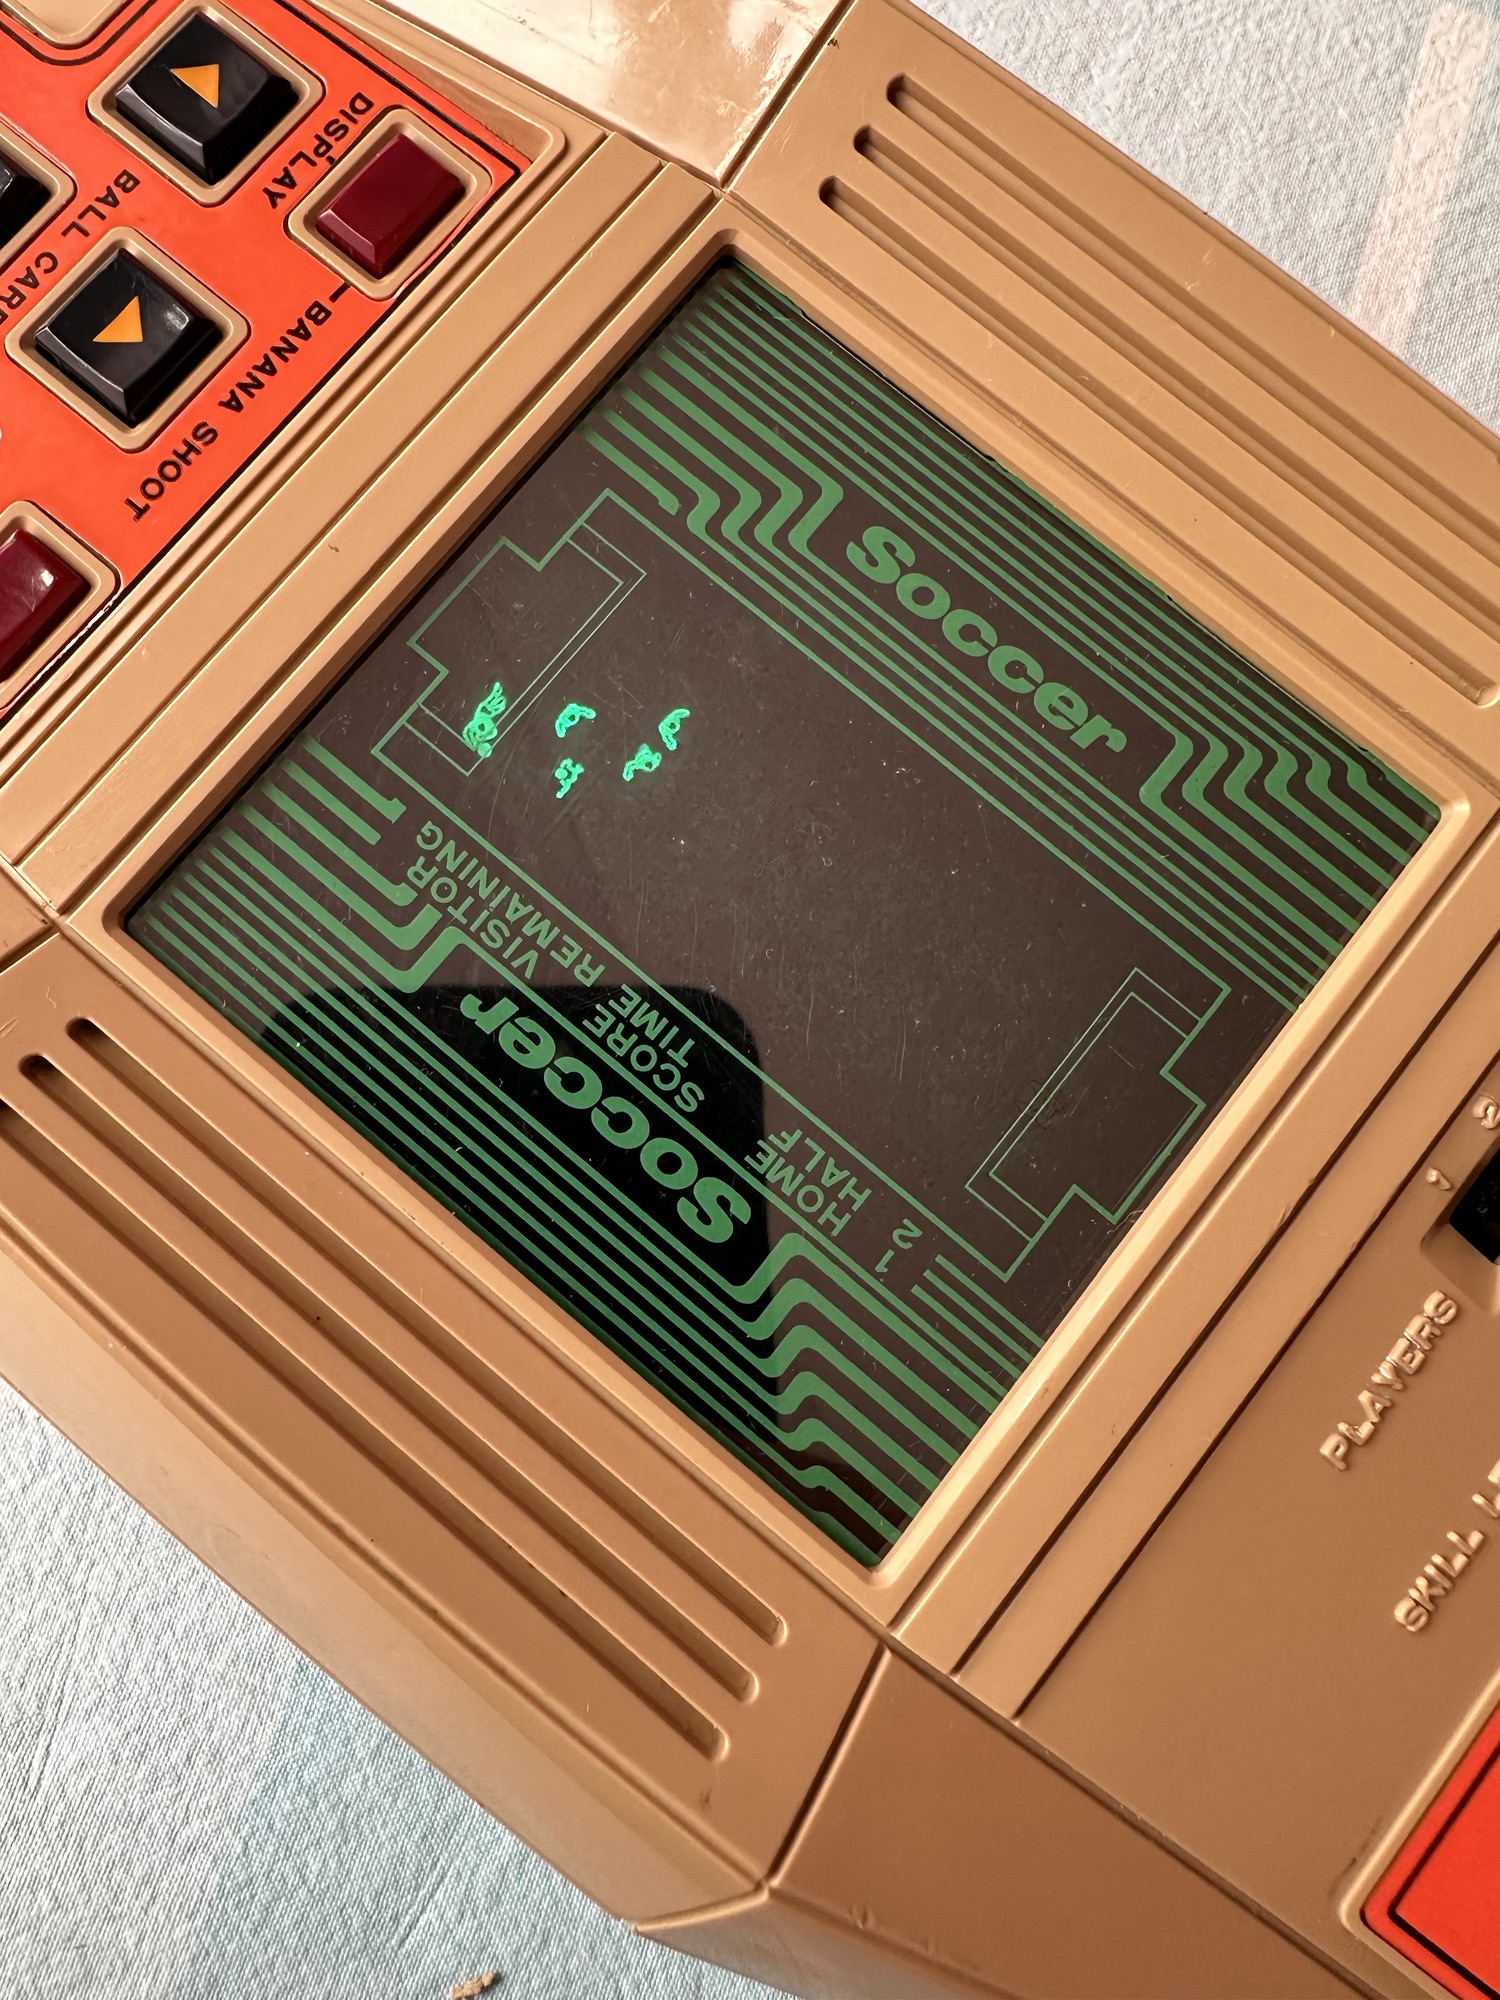
Now assembled it is in full working order, everything works as it should and the display is bright. The batteries are a tight fit but that’s not so much of an issue. Once you get into the game it’s quite addictive as single player mode is a right challenge as the computer is a great goal keeper 😂
Just can’t score – computers goal keeper is too good
Again it’s been quite a simple fix but an enjoyable one. It’s always good to see something that is about to be disposed of brought back to life and saved from the landfill. I paid a total price of £12.71GBP for this unit, and items of a far worse condition are currently selling in excess of £40GBP on EBay. However this is going into our games box in the garden pub for use by the family, especially the kids who I hope will appreciate the height of technology we had in the 70s.
VINTAGE COMPUTER BATTLESHIP MB ELECTRONICS GAME FOR SPARES / REPAIRS APPEARS TO BE COMPLETE BUT THE GAME IS NOT WORKING WHEN TESTED WITH BATTERIES HENCE BEING SOLD FOR SPARES / REPAIRS
Ebay
And here’s some info around it:
In 1977, Milton Bradley released a computerized Electronic Battleship, a pioneering microprocessor-based toy, capable of generating various sounds. Electronic Battleship was designed by Dennis Wyman and Bing McCoy.
Wikipedia
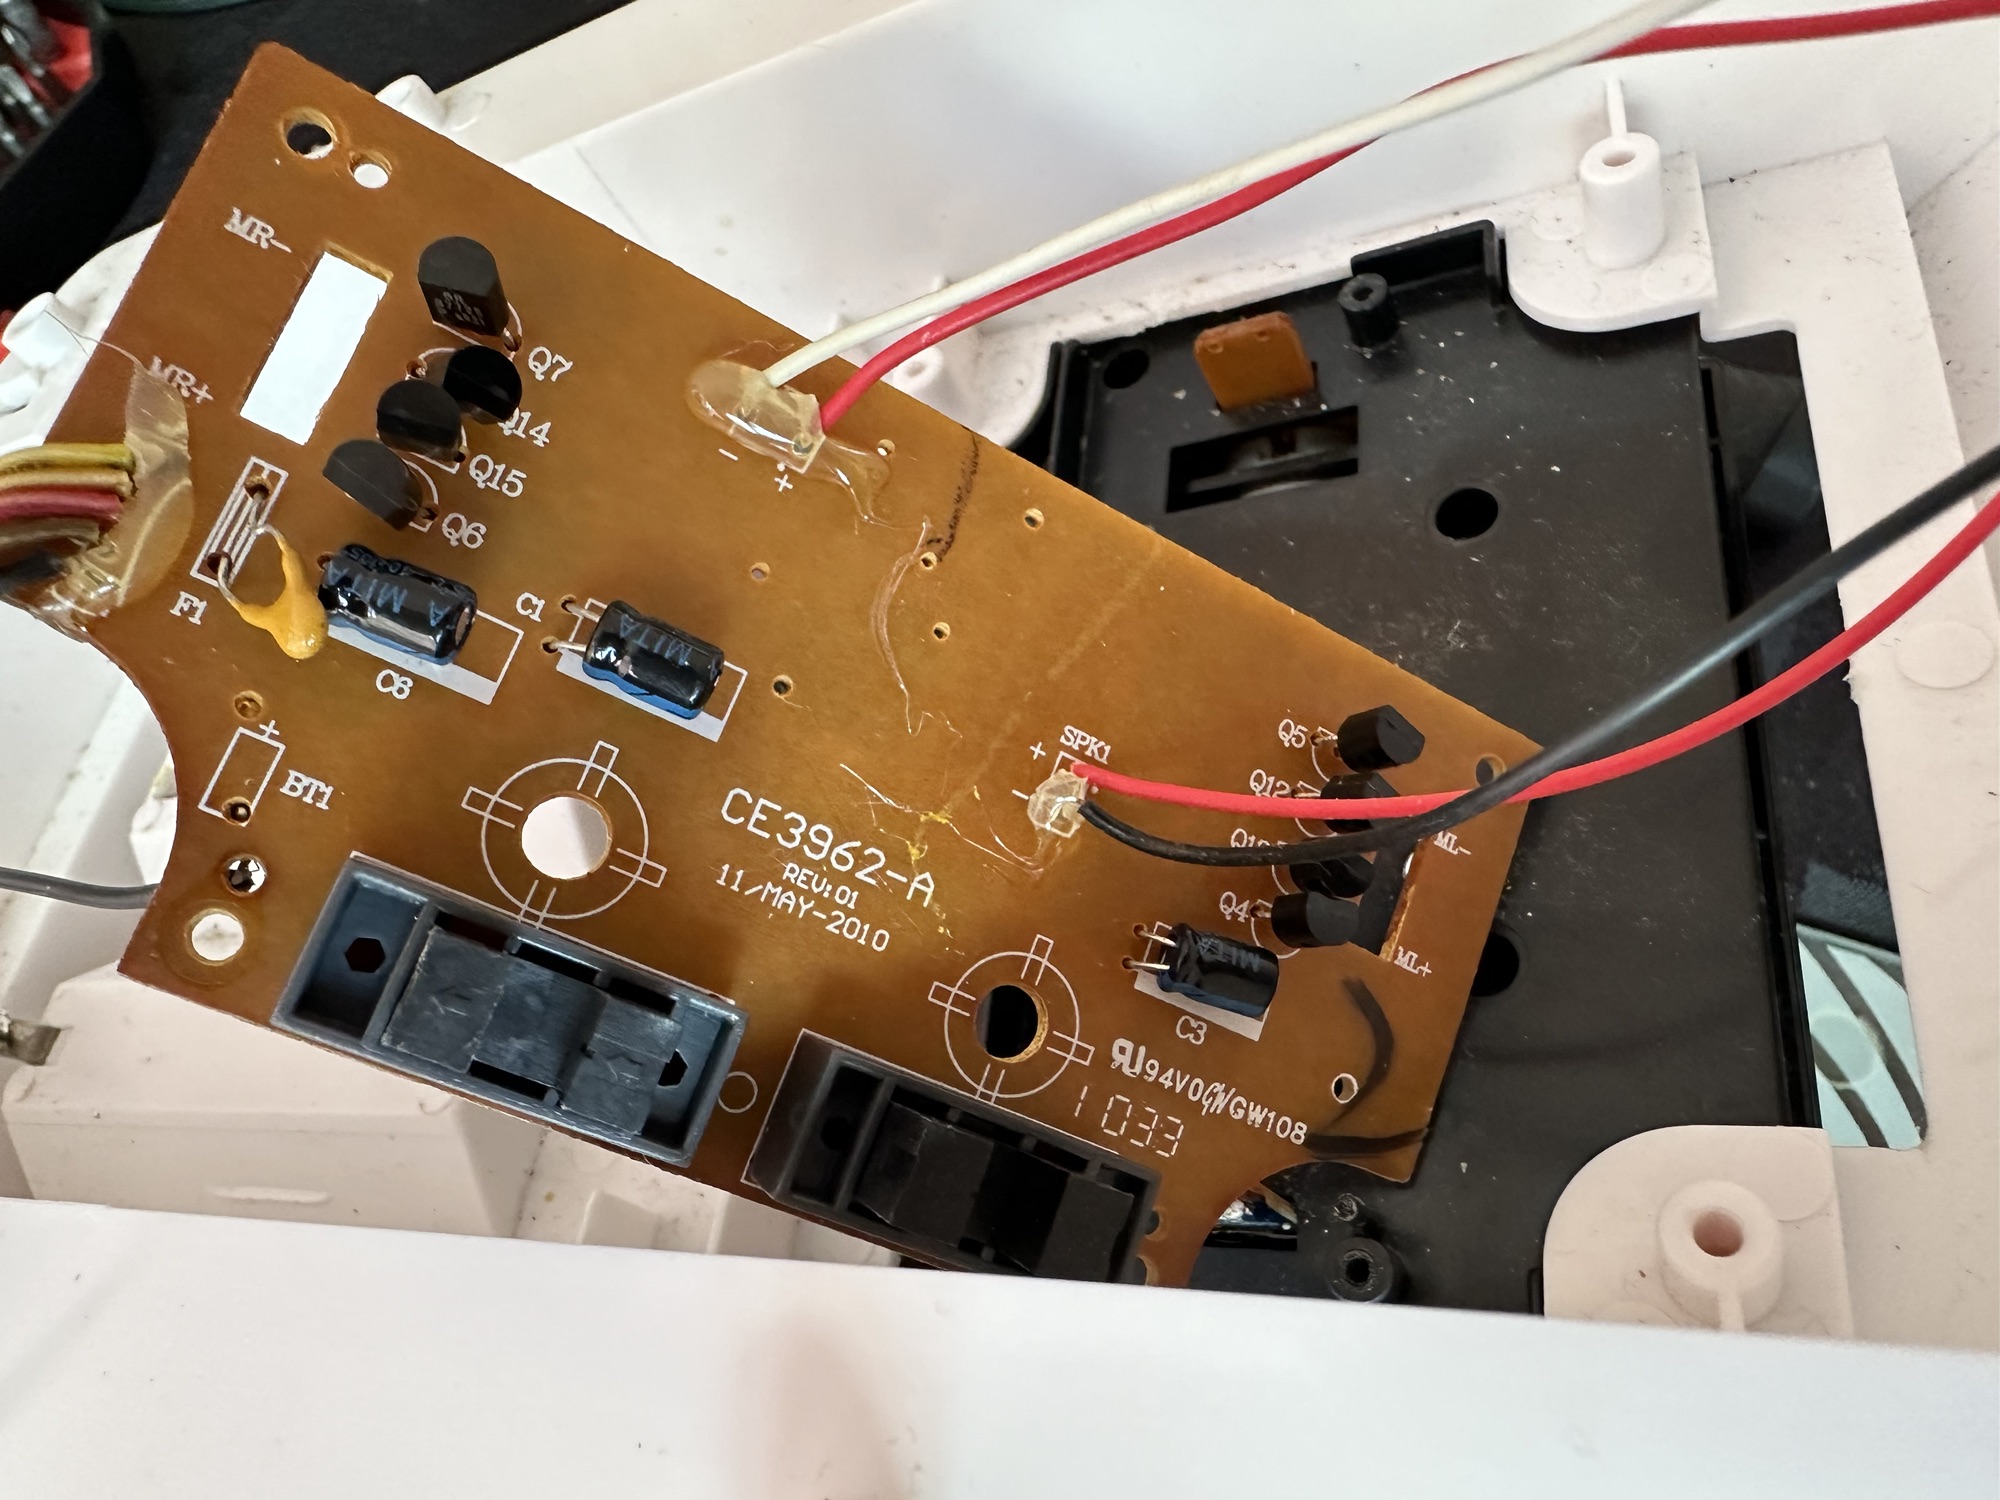
Now this is another toy from my childhood that I had envy over. This game is the one that coined the phrase, “ You sank my Battleship” as seen on many TV ads towards the end of the 70s. This time my nephew was brought one of these games for his birthday back in the late 70s when I was about 12 years old. I’ll be able to give a more accurate date of the unit when I get to see the main board inside. I suspect I’m looking at something around the 1979 timeline. Man this toy was the bees knees, again early computer technology at its finest. Here I am approaching the sixth decade of my life and I’m having another menopausal moment just as I did in this post a few months back: Big Trak CE3962 restoration
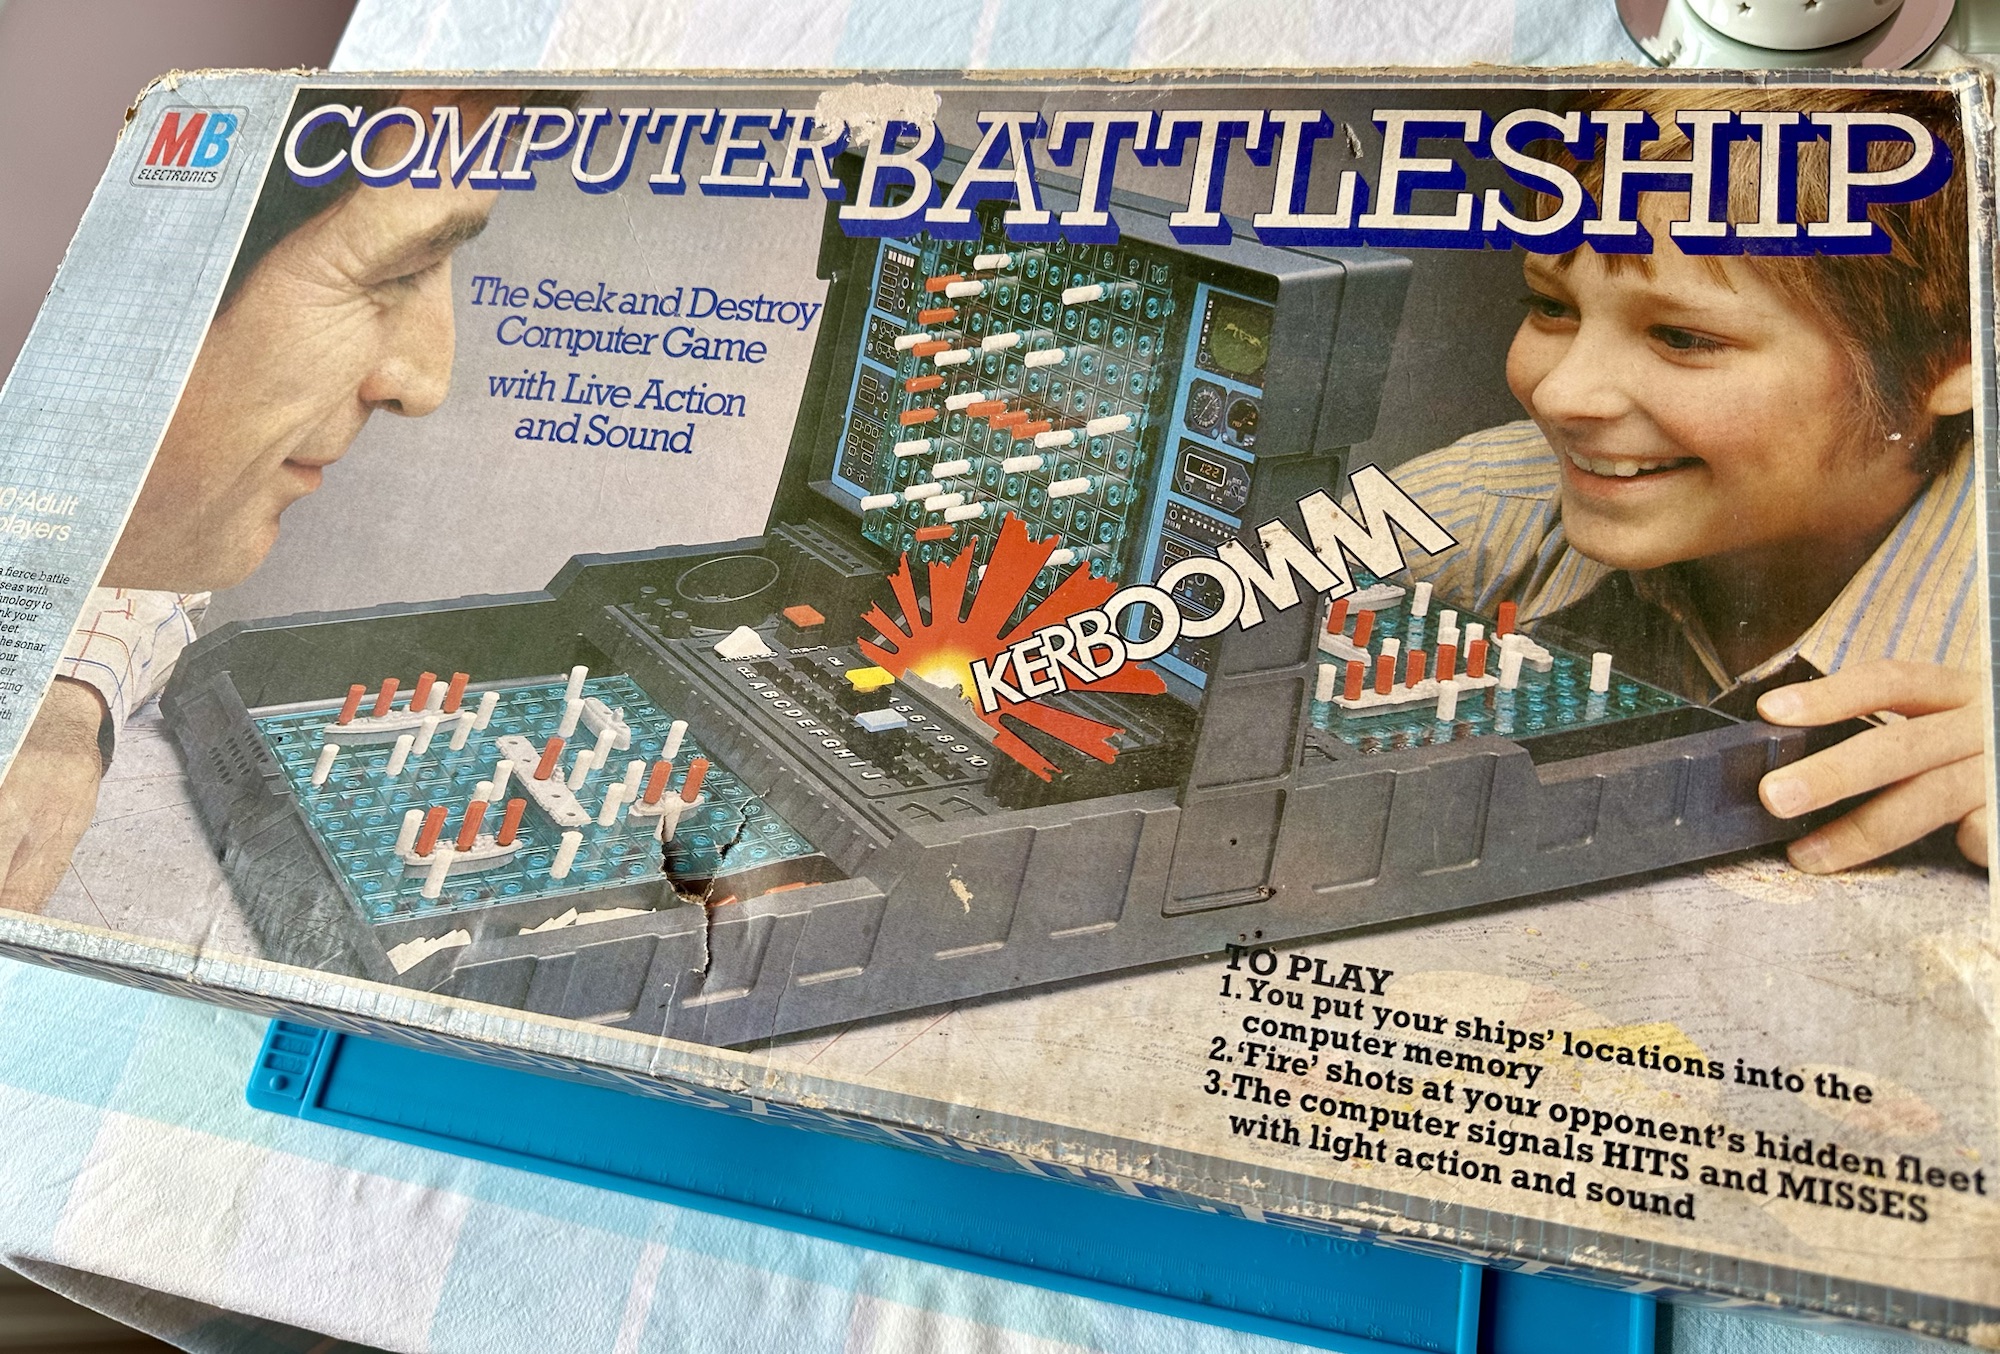
Computer Battleship
This is going to go in the games box in our garden pub / Man cave. I’m confident I’m going to get it working. I’m not too bothered if there are any small parts missing as there seems to be plenty of spare parts available online.
Let’s have a look at what has turned up.
Original boxOriginal packaging
Well I’m impressed. This game is in its original box with original packaging and is in pristine condition. It comes with the original instruction manual and all parts listed in the contents section are there. In fact there are more of the red and white pegs than required so to be honest it looks as if I have bagged a bargain here.
I’ve paid a grand total of £19:96 GBP for this game and that includes the postage, by far the best price that was on offer for any similar advertised games that I could see at the moment of purchase. Considering this game is now somewhere between 45-47 years old, a bargain you might say, if I can get it working.
I’m thinking that all the capacitors on this board as a matter of good practice should be removed and replaced. Let’s face it they are almost the same age as me, could fail at anytime (if they haven’t already) and are as cheap as chips so what’s the point of just replacing a singular one when there are only two of them on the board. I think I will do this, test them all and report back.
I know that this unit is a 70s creation but it is interesting to get some facts on capacitors and problems that they have caused over the years, especially during the 90s and early 2000s. See this old post on capacitor plague: Capacitor plague
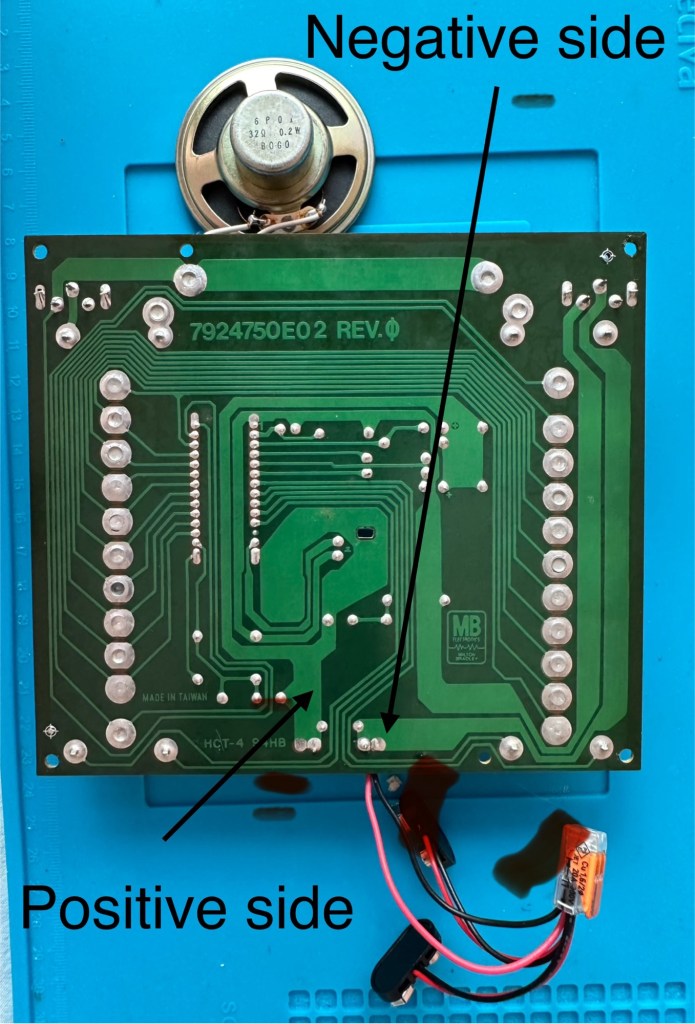
Board removed One side of board
I have removed the board and there seems to have been some pre work done where all the wires are relayed through a connector block. This was a dangerous situation as the work that had been done diverted both negative and positive leads through this dodgy connector to the negative side of the board, causing a short that caused the batteries to heat up to a point where I thought they were going to explode as they were so hot. You may as well of just connected the two batteries together…childish mistake. I was testing for voltages and was suspicious that I was getting no readings, just as well I went straight to the battery when I did. Lesson learned for me.
Bad wiring
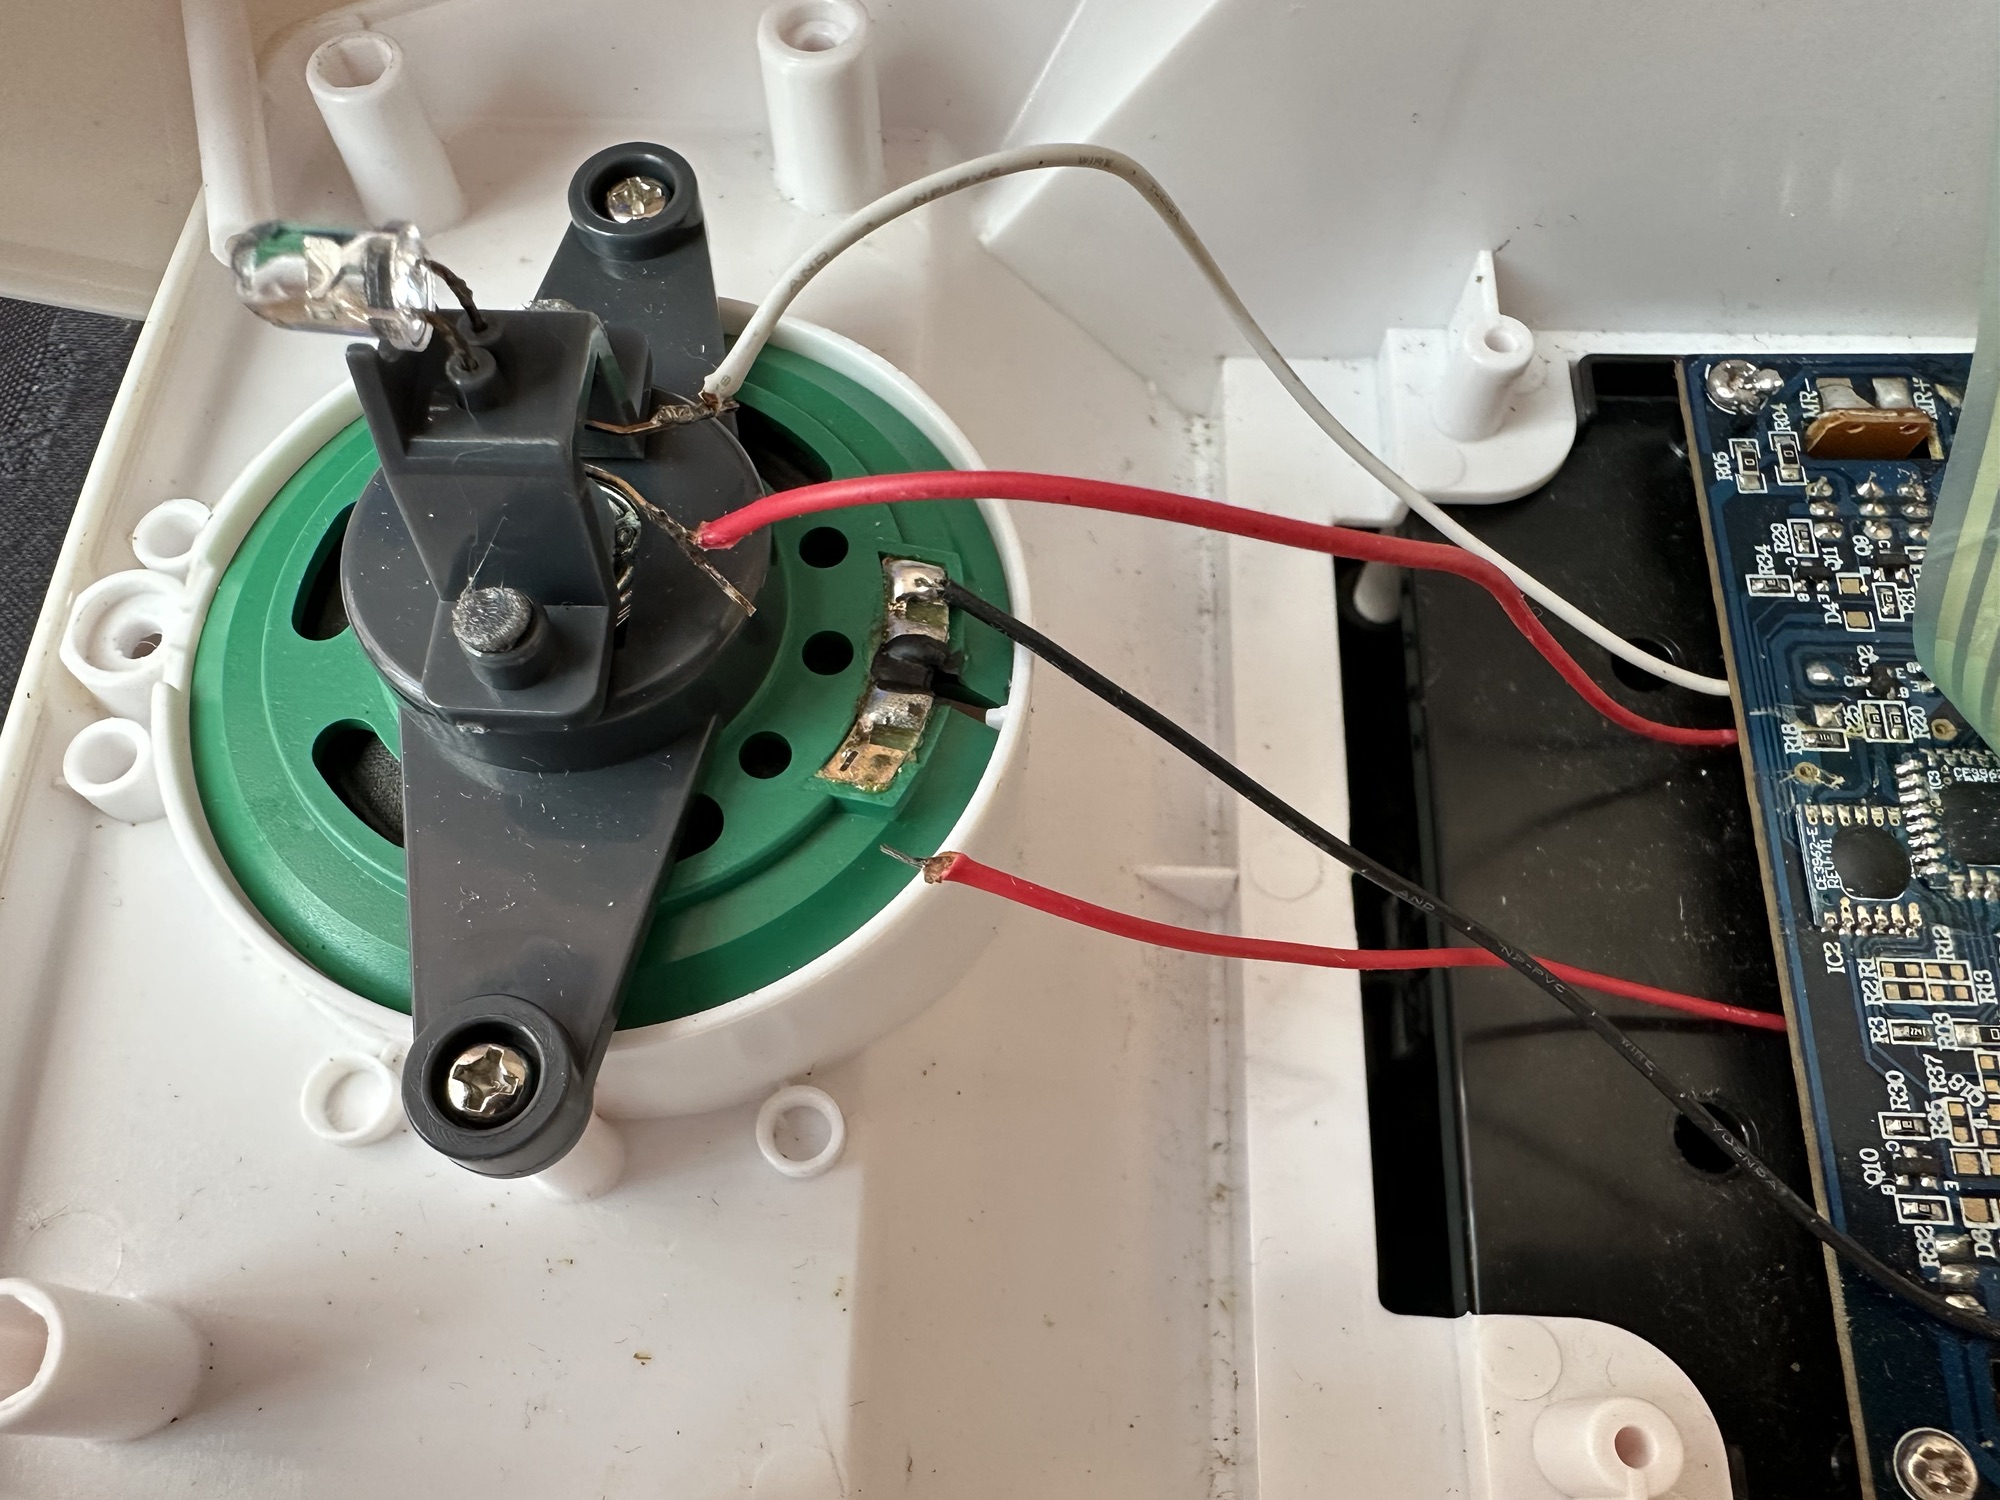
I have checked the speaker is working, this is a 32ohm speaker and it was indicating 31ohm so there were no issues there. I have removed the two capacitors and checked them and they are both within tolerance, hence I will leave these in place.
Speaker is fine
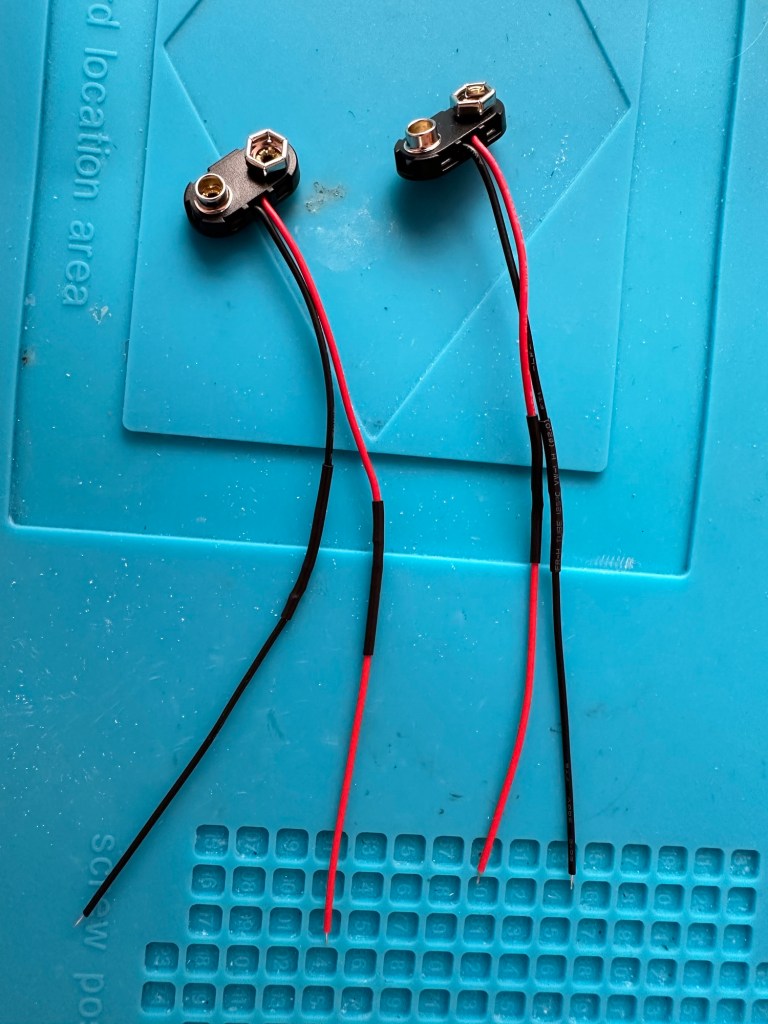
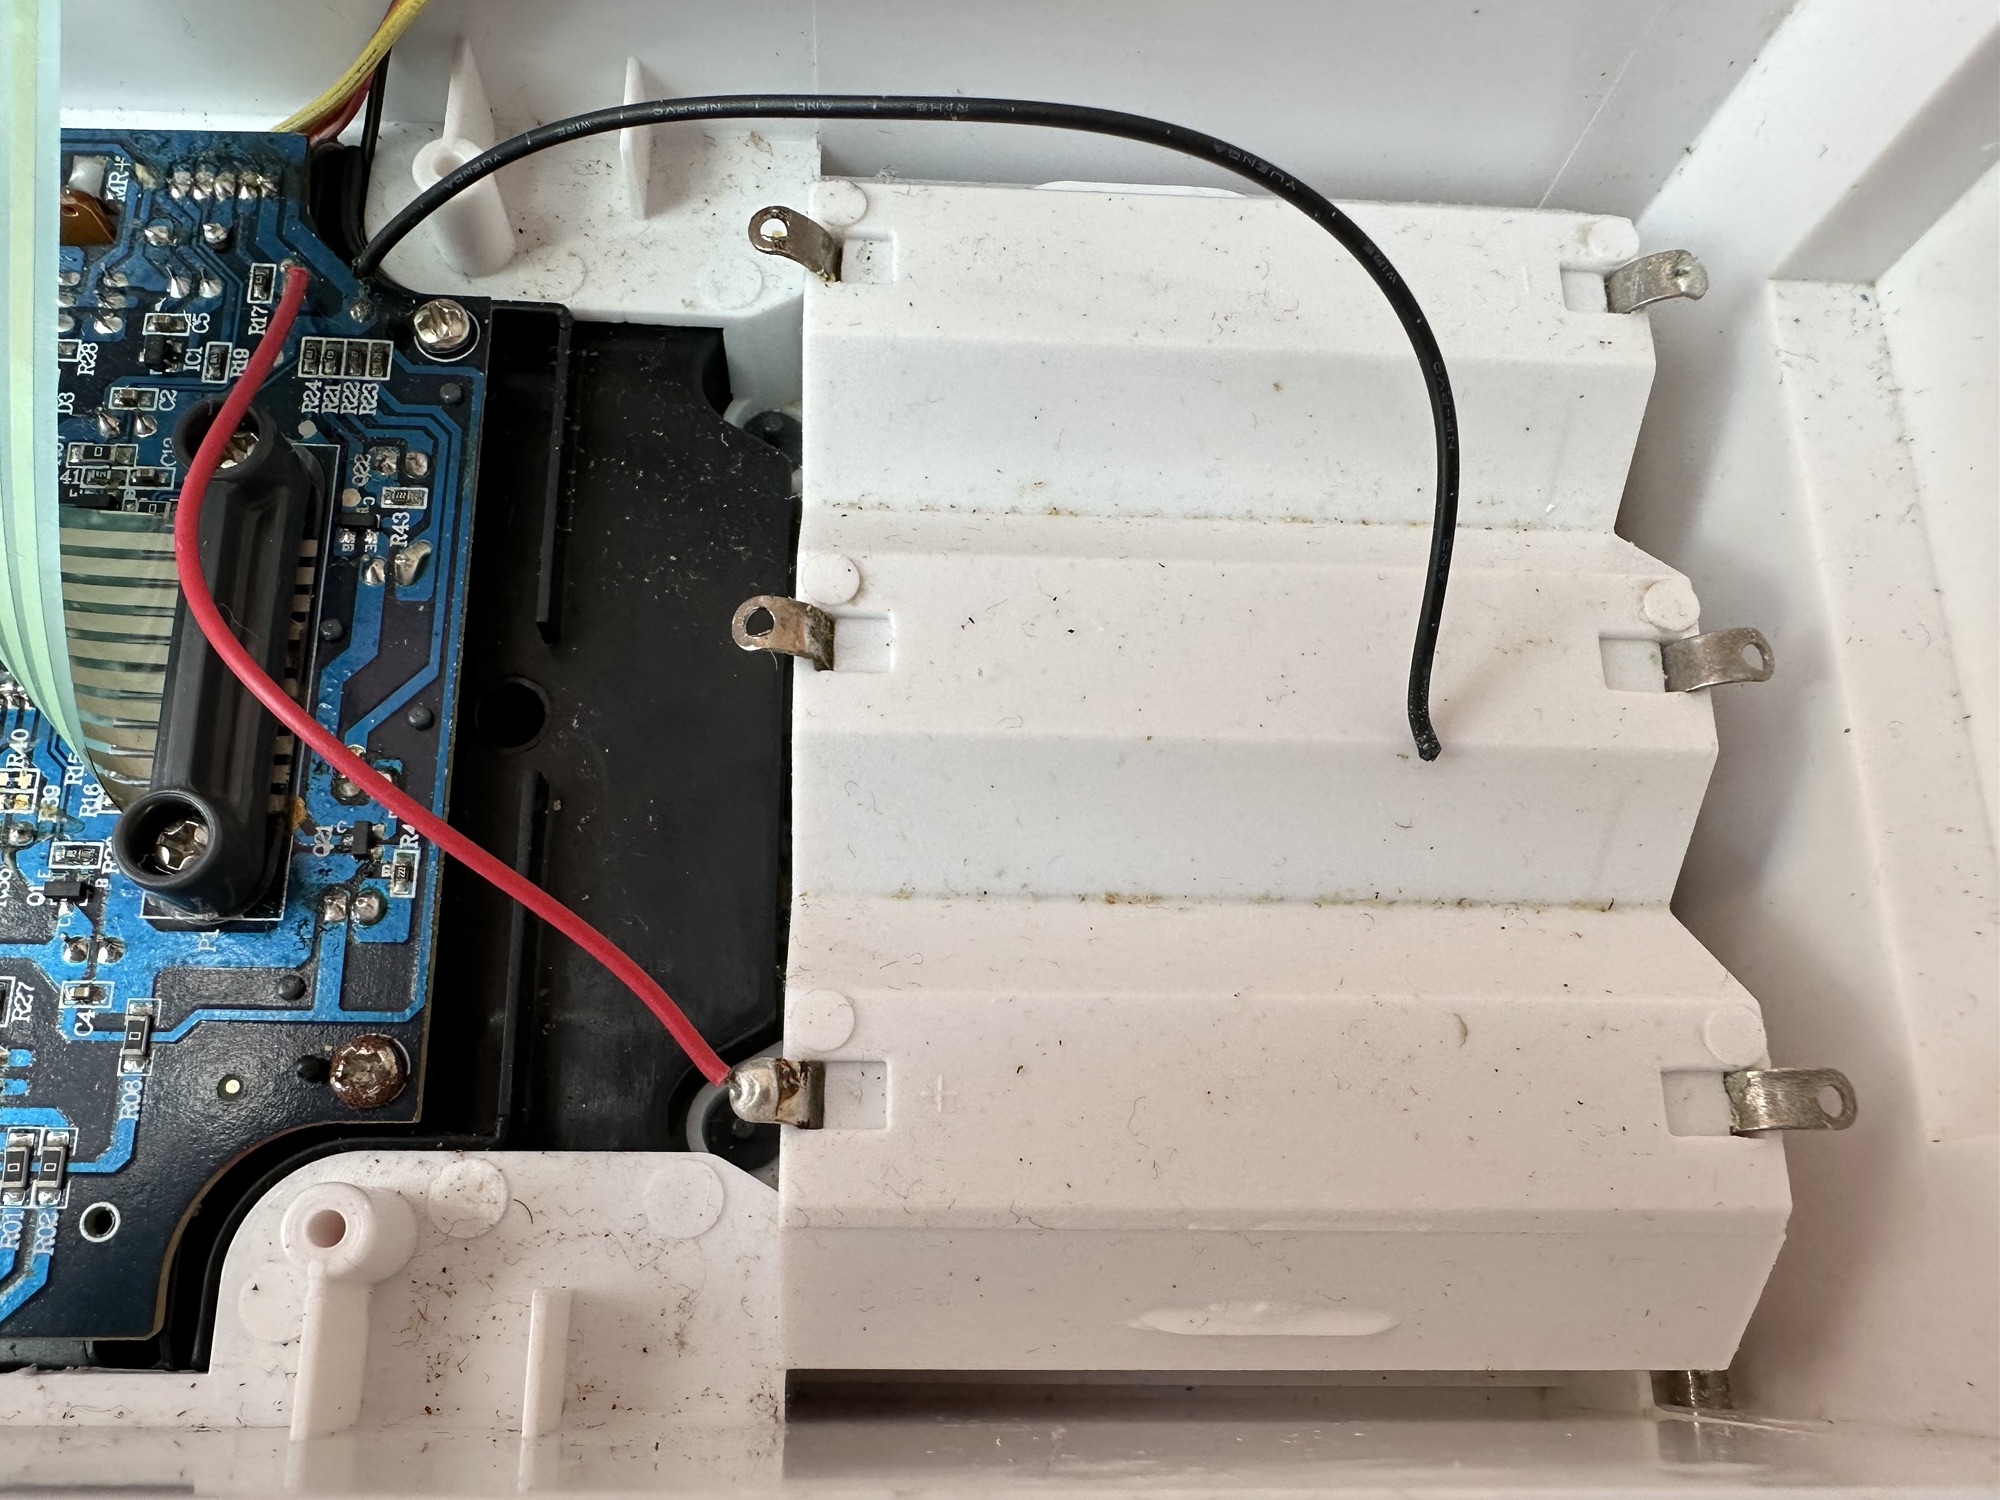
The batteries are separately wired on this board. The two negative wires go to the negative side and the positive wires go to the positive side, straight forward wiring, I don’t know why the previous clown wired it as he did. These four wires now soldered in place with new leads and connections allow me to attach the batteries and check voltages, all is good and reading as it should.
New leads made
I clean all the switches with contact cleaner, I clean the board with IPA and clean all the contacts. A good suction and polish of the frame and all is good.
I can confirm the board indicates that this unit is week 24 of 1979 as per the writing on the main board. That puts this particular unit at 45 years old. Will it work.
Hell yeah it does!
Main switch into the on position and the annoying sonar sound kicks in, my dog leaves the room as it’s annoying him, to me I have just been transported back to my childhood. It’s brilliant.
I collar the wife into a game, I have to teach her how to program it and it works perfectly. Every sound is there, it’s noisy repetitive and computer programming at its absolute most basic level. And it’s mine.
Computer Battleship – It works
It’s going down our garden pub to be used by the youngsters and adults alike. I think the kids will love it due to its primitive technology. They’ll learn from it.
Another piece of my past saved from landfill, and it will be put to good use. Just don’t trust any mods or fixes done by others, don’t inherit a fire risk. Check check check.
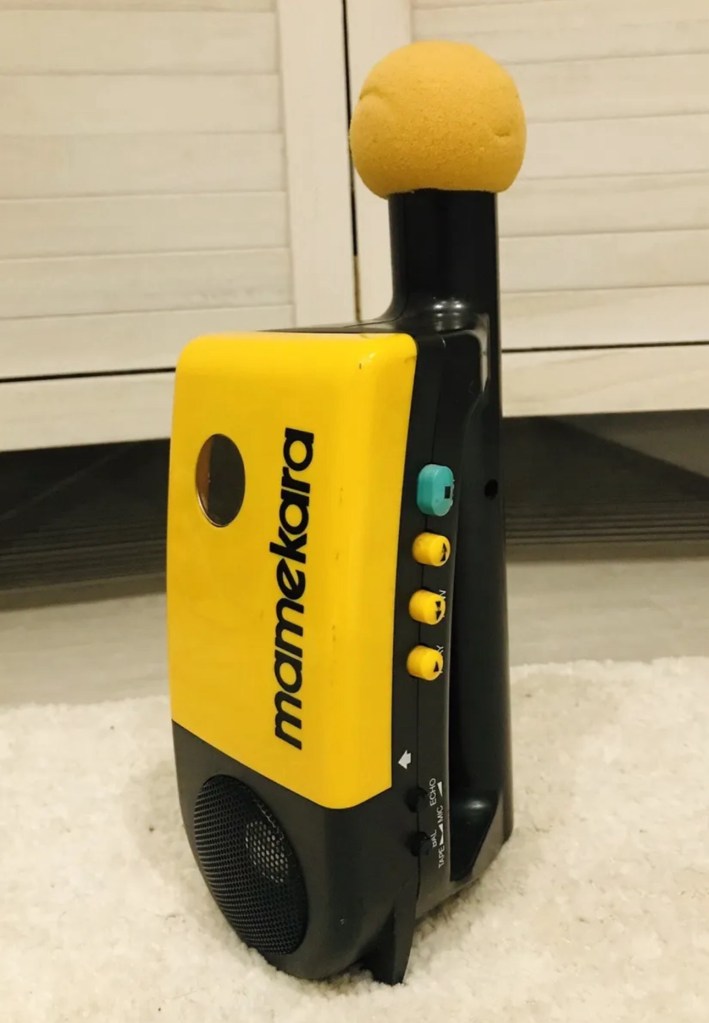
This is a handy karaoke cassette player released by Epson over 30 years ago in Japan. The item it self does not function. Recommended for retro collectors
Ebay
Mamekara Karaoke machine
This video sums it up, apologies to those with sensitive hearing:
The pub singer
Anyway, enough of the frivolities, let’s see what’s wrong and try to fix it.
On initial examination, everything seems to be there, no damage to the shell. Four AA batteries inserted and I do hear some feedback from the mic.
Four AA batteries
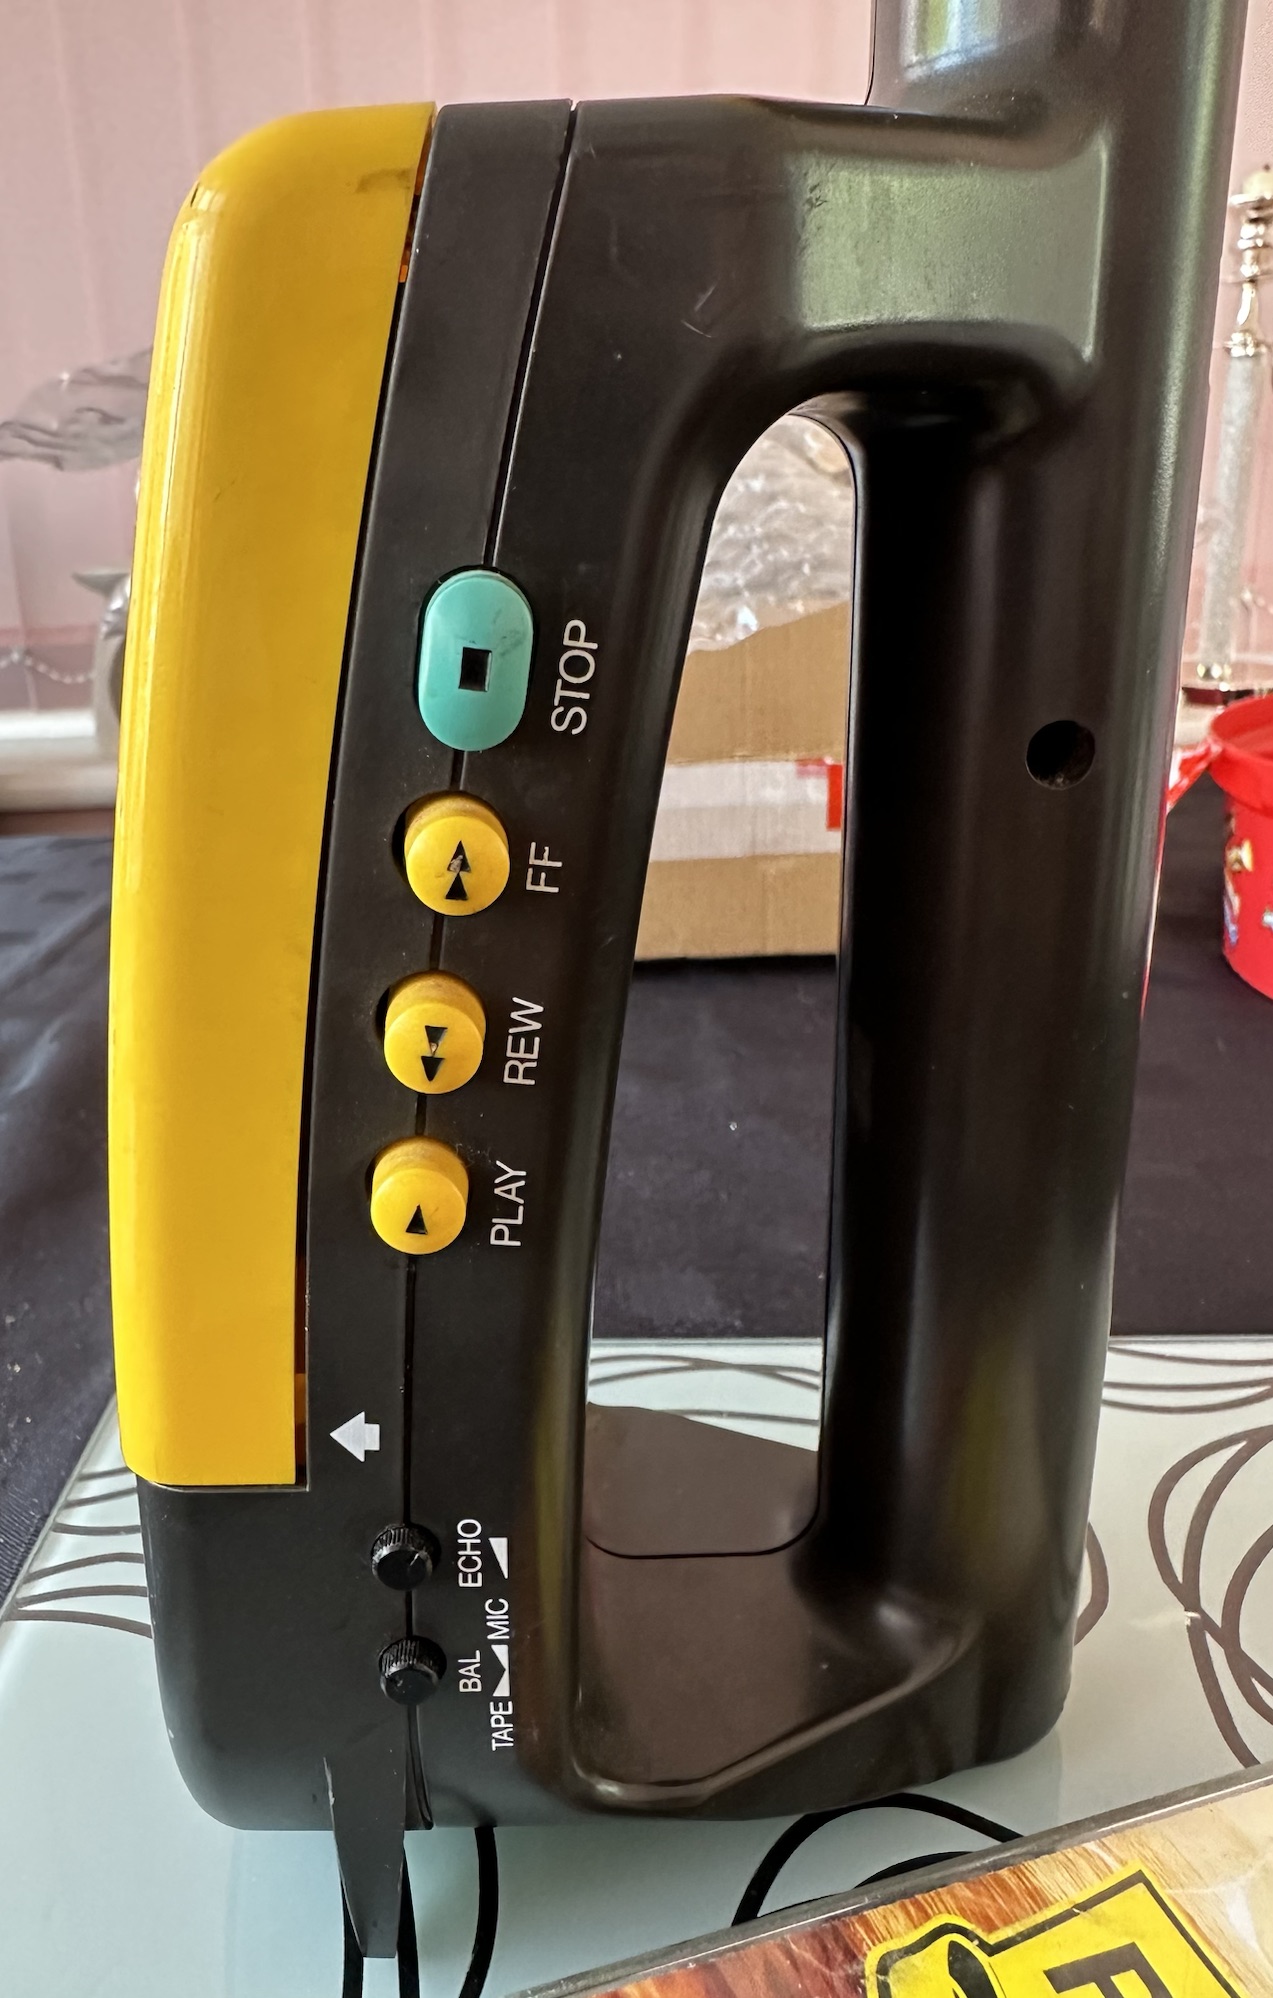
There are some volume controls that control the tape sound versus mic sound, there is also a speech on and off switch along with a balance control, these seem to work intermittently and I suspect they might just need contacts cleaning.
All works but needs contacts cleaning More controls that need cleaning
The tape seems to sort of work but the play button does not stay on, the recorded sound is slow. Echo and balance buttons also seem to work but again probably need contacts cleaning. I suspect the belt of the cassette needs replacing and the tape heads will need cleaning.
Cassette runs slow
Good news is that for once there is no corrosion on the battery contacts.
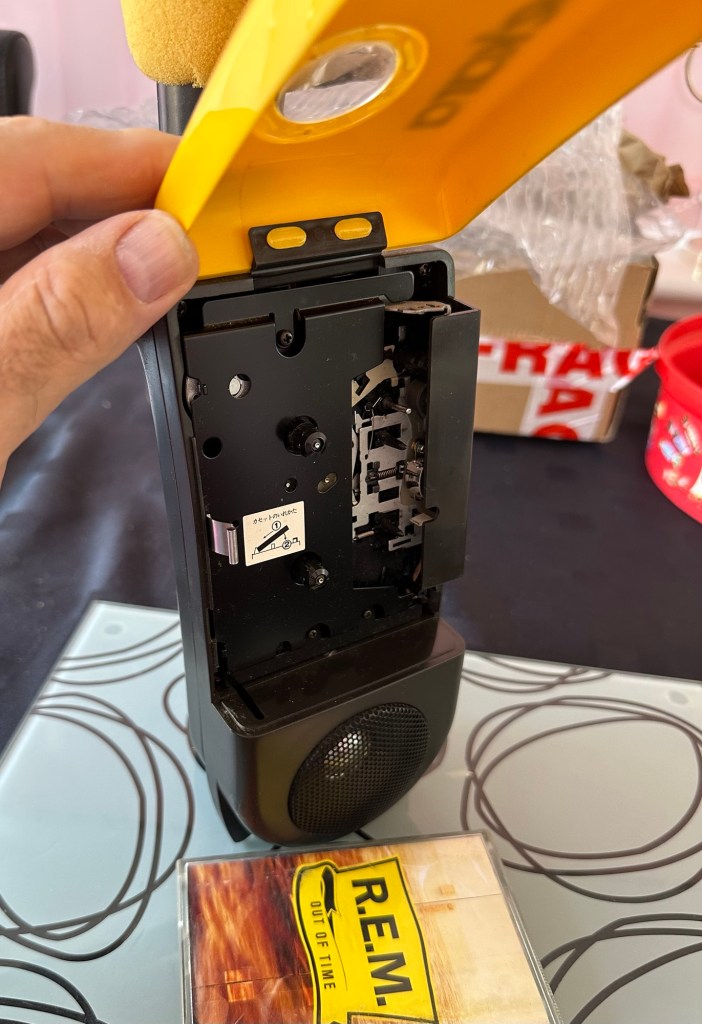
I will now have to open the unit up to observe closer.
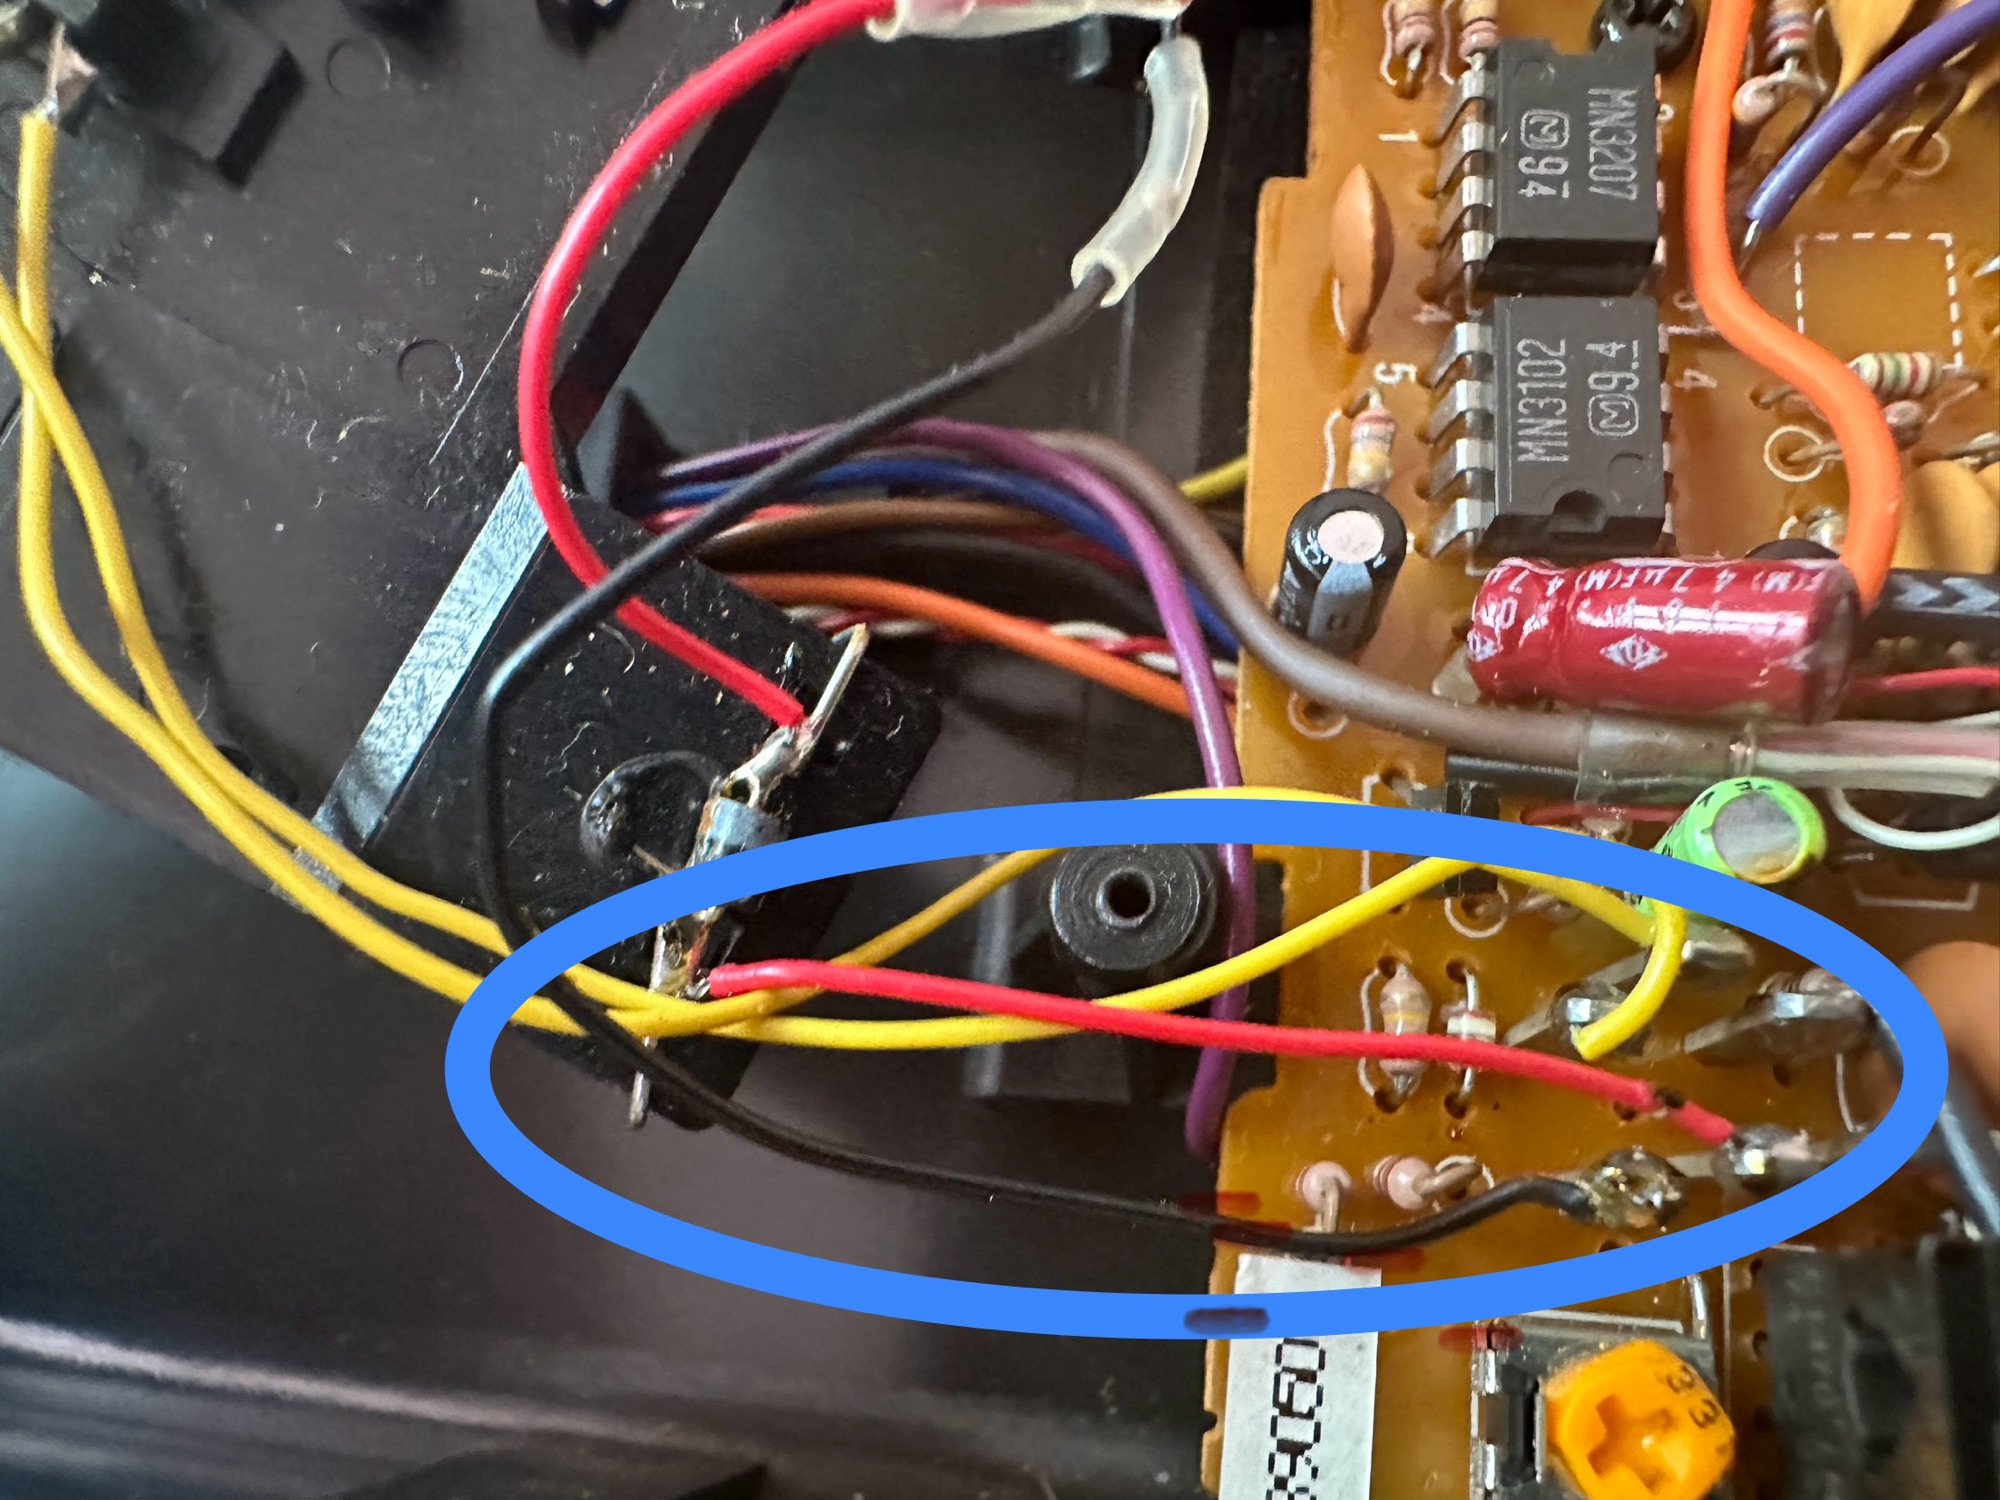
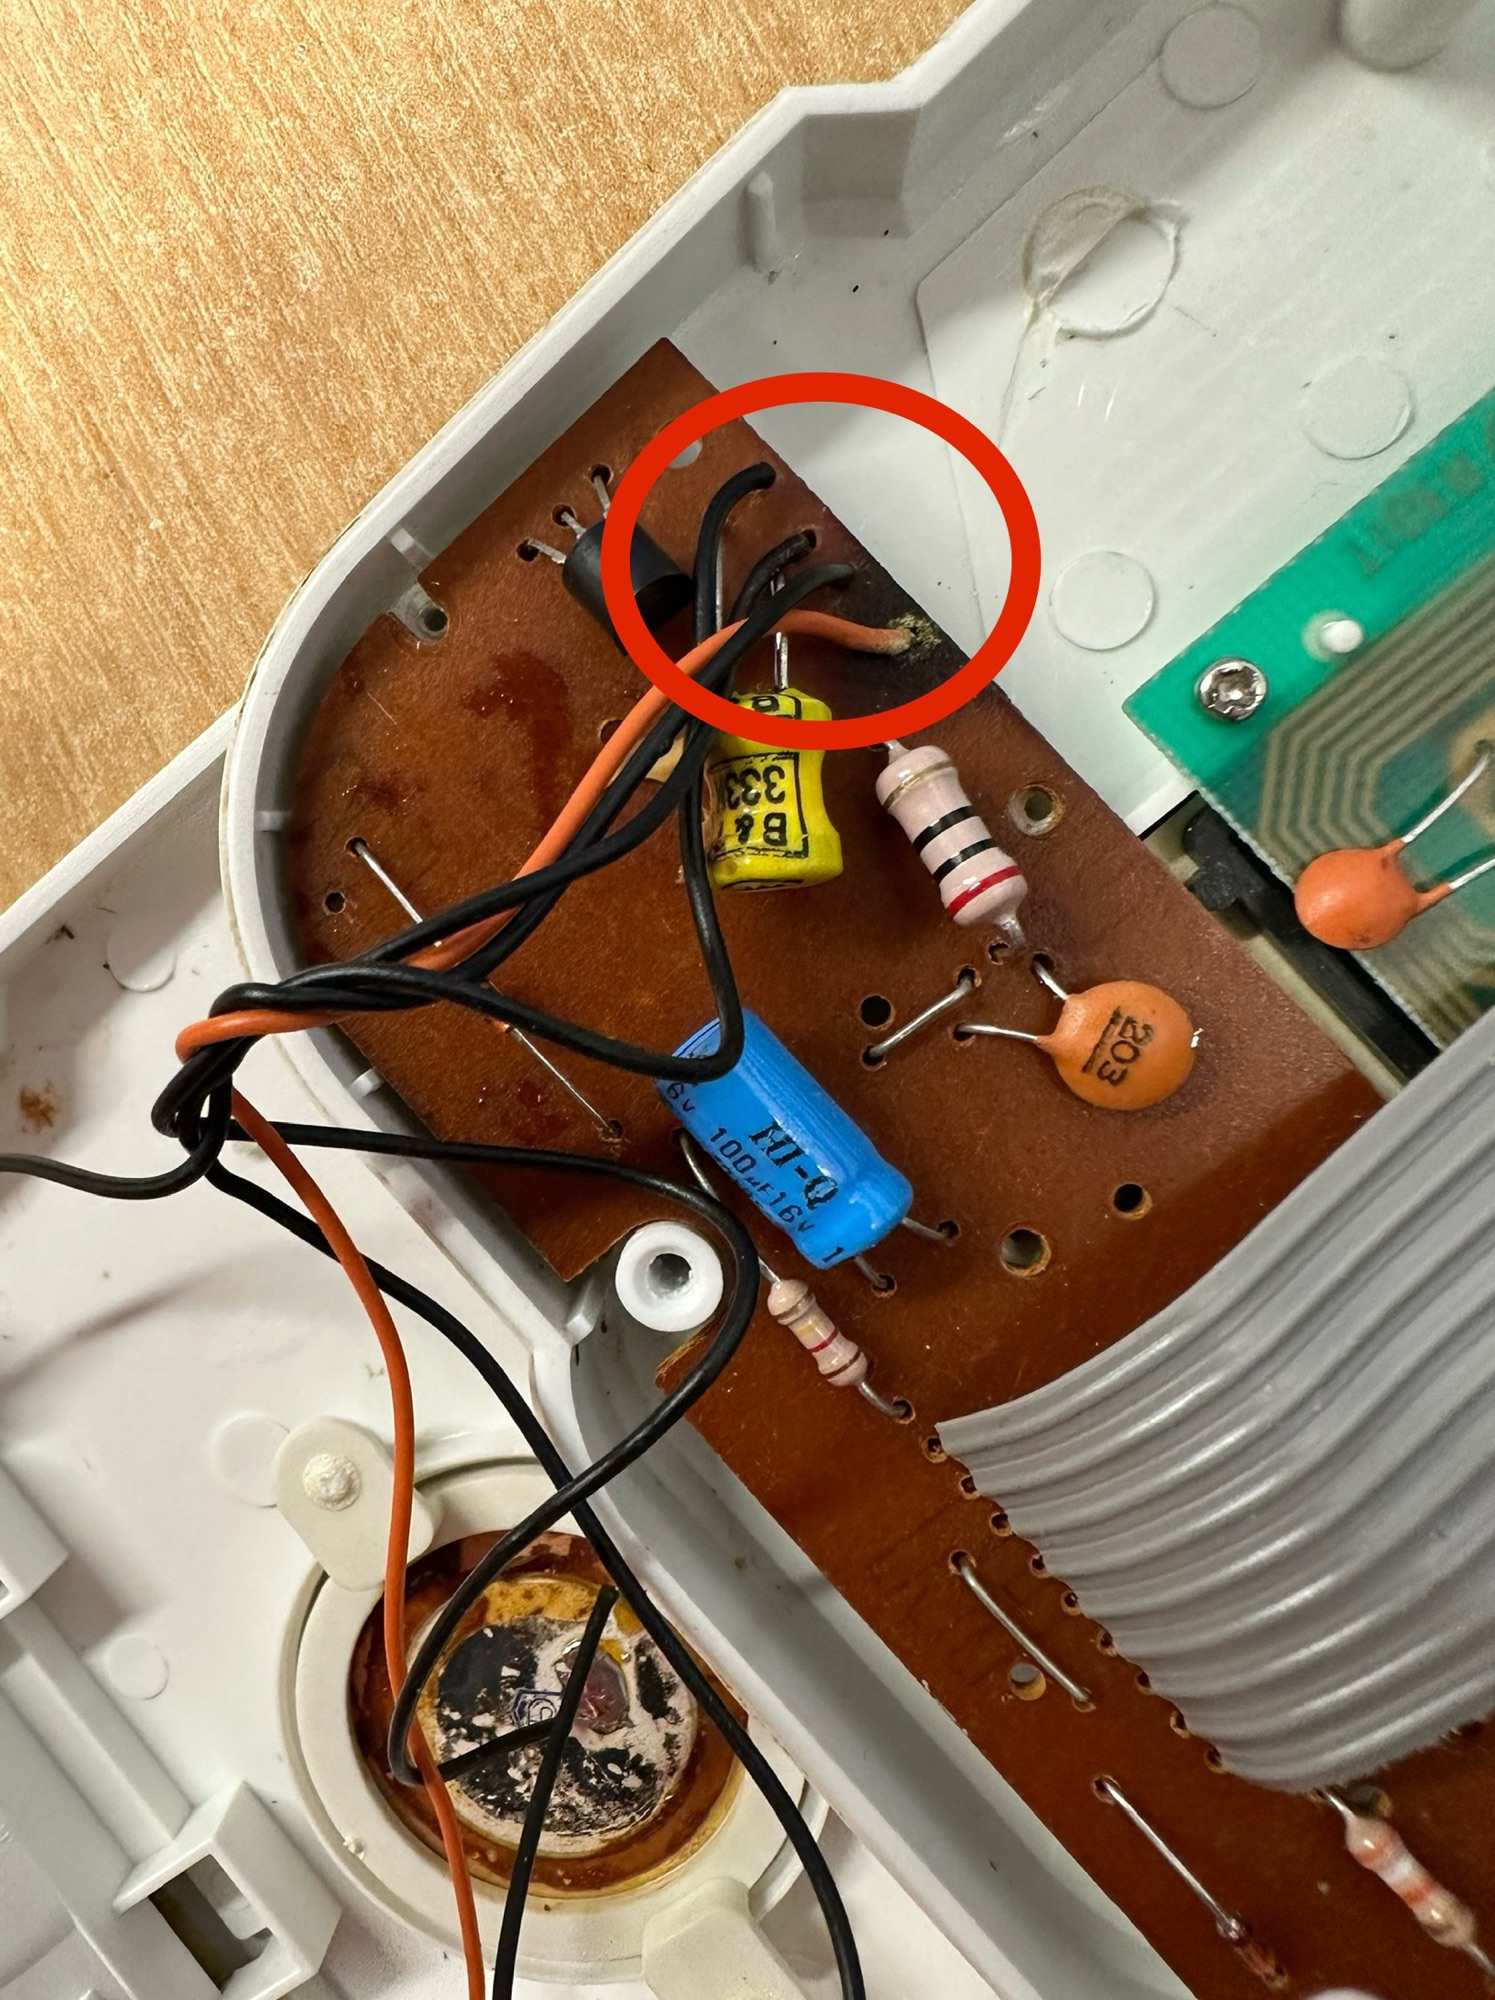
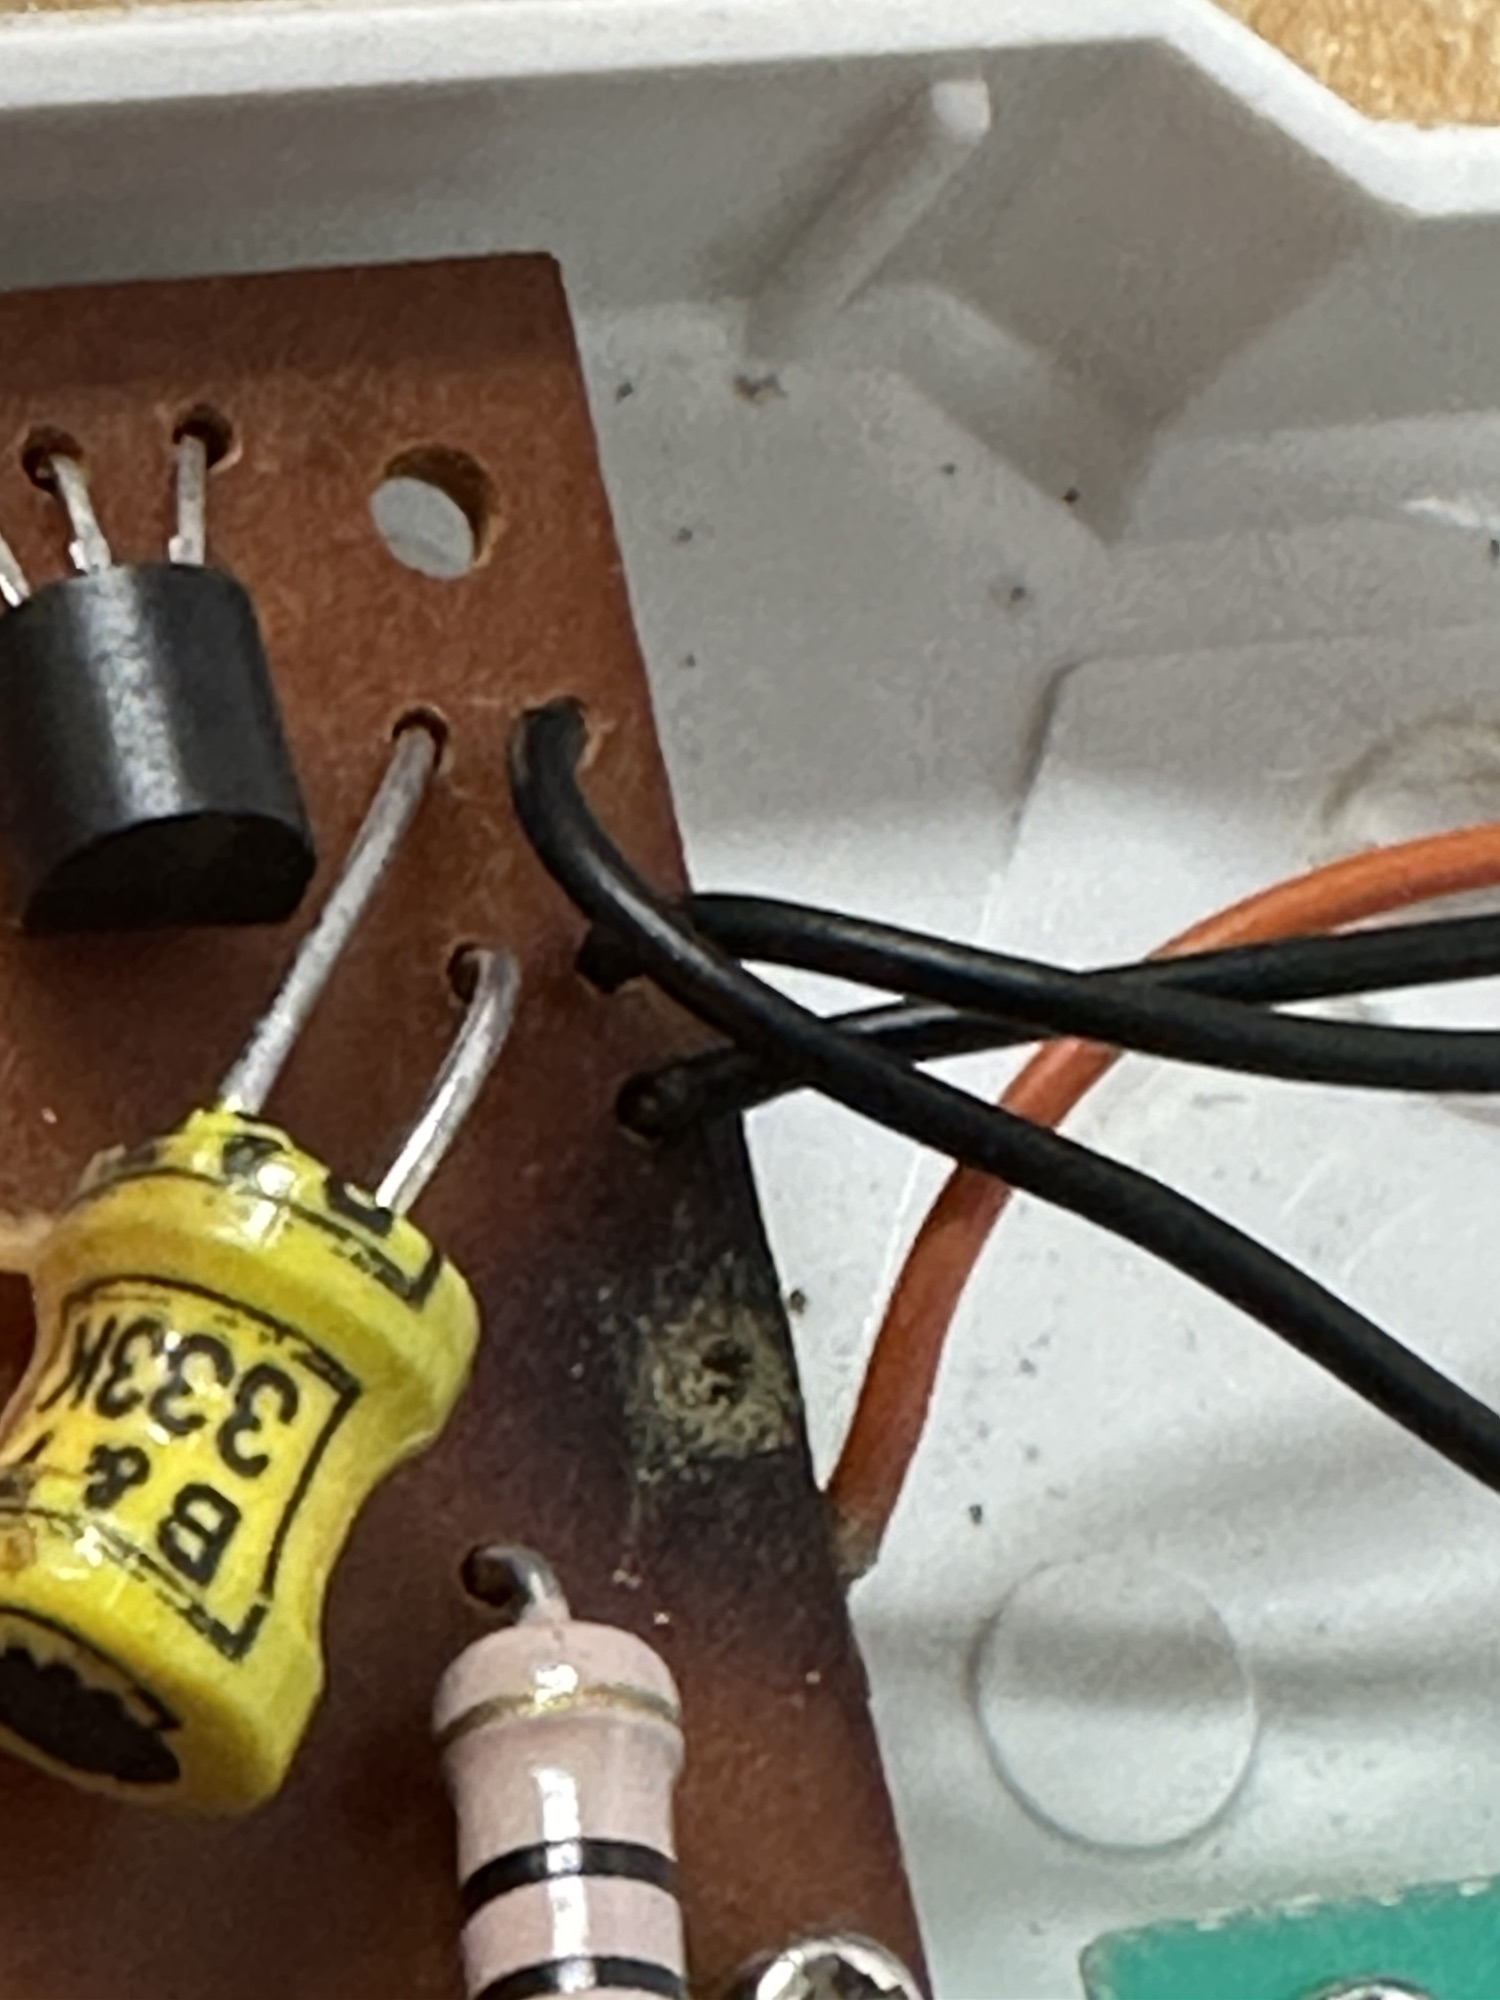
Once inside there are a couple of issues that show straight away. The two drive belts are very loose and will require replacing, luckily I have a bag full of these that should do the job. There is also a wire detached that controls the motor, this will need re attaching at both ends.
Two loose drive beltsThe red wire inside the circle needed re soldering Little red wire in place
I’ve reattached the wire and replaced the two drive belts. I’ve checked the board and found what looks like a burnt capacitor, but checks confirm there is no issue. Looks like the component has a small burn on it as a result of an earlier soldering attempt, probably during manufacture.
The main issue is that the play button will not engage. I spent a good 30 minutes scratching my head here until I spent some time clicking the buttons that worked and the stop button. There is a catch on the rear of the tape head that should click into the sliding stop mechanism when depressed, this was not quite making the full range of travel. A pair of pinch nose pliers and a slight adjustment of about 1mm ensured we were now working. I was worried I might over stress this catch, however it was made of steel and I had nothing to worry about. See the video below:
Loose belts and non engaging play button
There was nothing wrong with any of the volume controls or switches, so I used some contact cleaning spray and vigorously operated them for a minute or so each. This worked just fine.
I then reassembled the unit, put in some batteries and hey presto, good loud clean sound. I put a tape in and it played just fine, probably better than some of the Walkmans I’ve fixed lately.
Excuse the pub singing
I’ve put a little video up above of me singing into it, I haven’t played a tape due to copyright issues that might occur. I’ve sent the video to the family of me singing with a tape and they are suitably bemused, the unit now sits in our garden pub awaiting more customers, once I get a few Karaoke tapes to use.
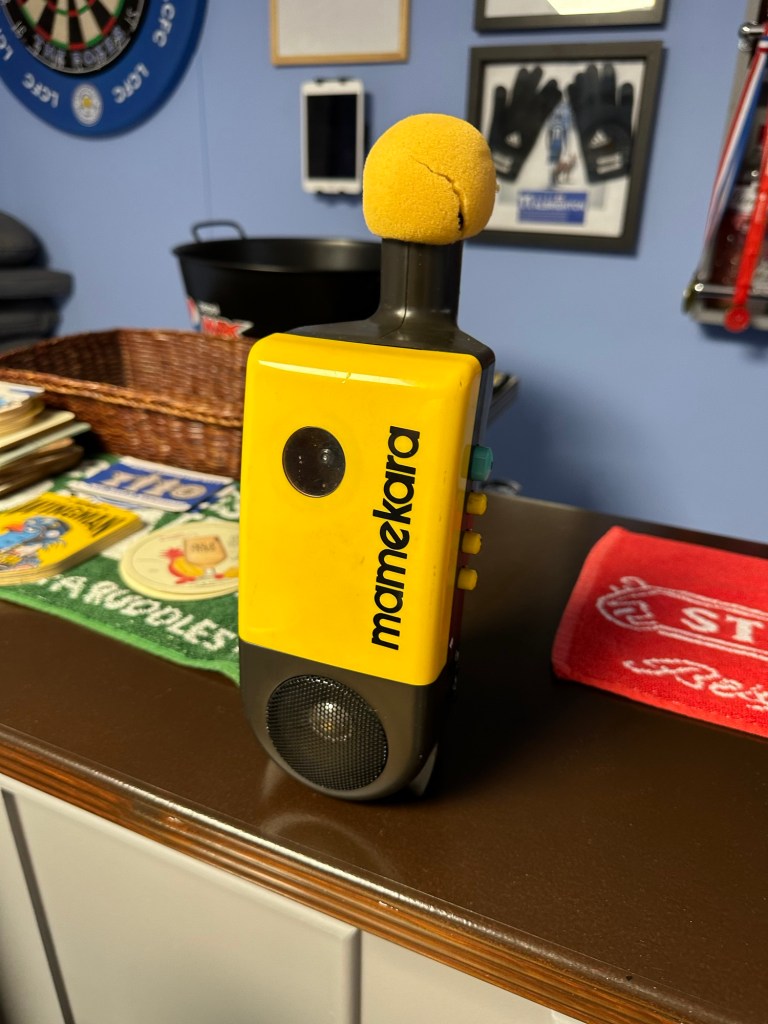
Fully working in our garden pub.
The only thing I’m going to do is replace the foam mic cover, I’ve managed to source one and that should be here shortly. I’ve also found some cheap old Karaoke tapes that I’ll store in the pub for the families entertainment.
I’ve really enjoyed this little project, and once again I’ve salvaged another item that was broken from the 90s and saved it from landfill. It lives on.
Console is sold as nonworking, shows no sign of life. Item is in good physical condition but there is a lot of corrosion in the battery compartment
Ebay
I’ve decide to look into what seems to be the “New Antique” sector of retro gaming. The prices being commanded for 1980s/90s old school gaming is crazy with many small handheld items that would have cost a couple of pounds being sold into the hundreds. Absolutely nuts!
Sonic – Tiger console
My decision making process on this was simple. I love hedgehogs, we have plenty of hedgehog visitors to our garden, so what better game than “Sonic the Hedgehog?”
Anyway, at the cheaper end I managed to bag this for £9 GBP. If I get it working, those units are selling between £20 – £45 so I should at least get my original outlay back, pending on what work needs doing.
So here we go….
Well, it’s arrived and cosmetically it looks fine.
Looks good cosmetically
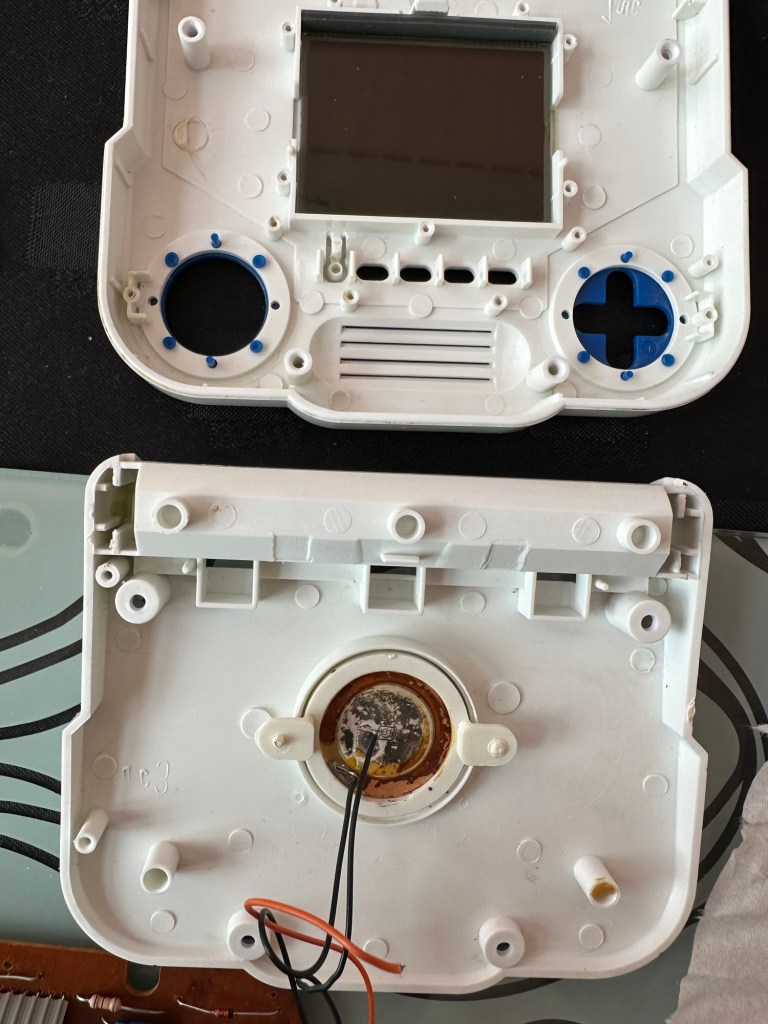
Now I opened the battery compartment and could see no corrosion, on opening further I noticed some of the screws had been threaded so I guess someone has been in here before me. And I was right. The corrosion can be quite clearly seen on opening the unit.
Bad corrosion and detached wireCleaned, broken but going to repair
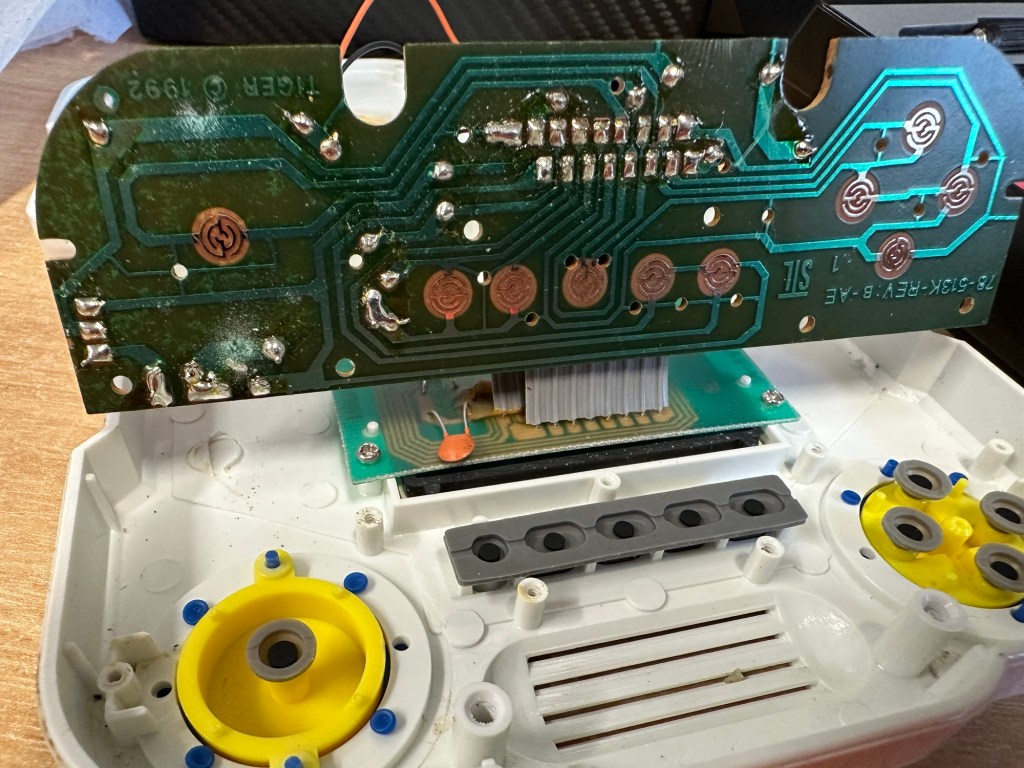
Where the corrosion is on the negative terminal, a wire is also disconnected, hooray I thought, an easy fix. Hold on tiger, it’s not that simple. it appears the corrosion has leaked down the wire to where the negative wire joins the circuit board, in fact all four wires at this point are holding on by threads of wire. These will need re soldering.
This game appears to be from 1992 according to the stamp on the main board.
Loose wires circled Corrosion
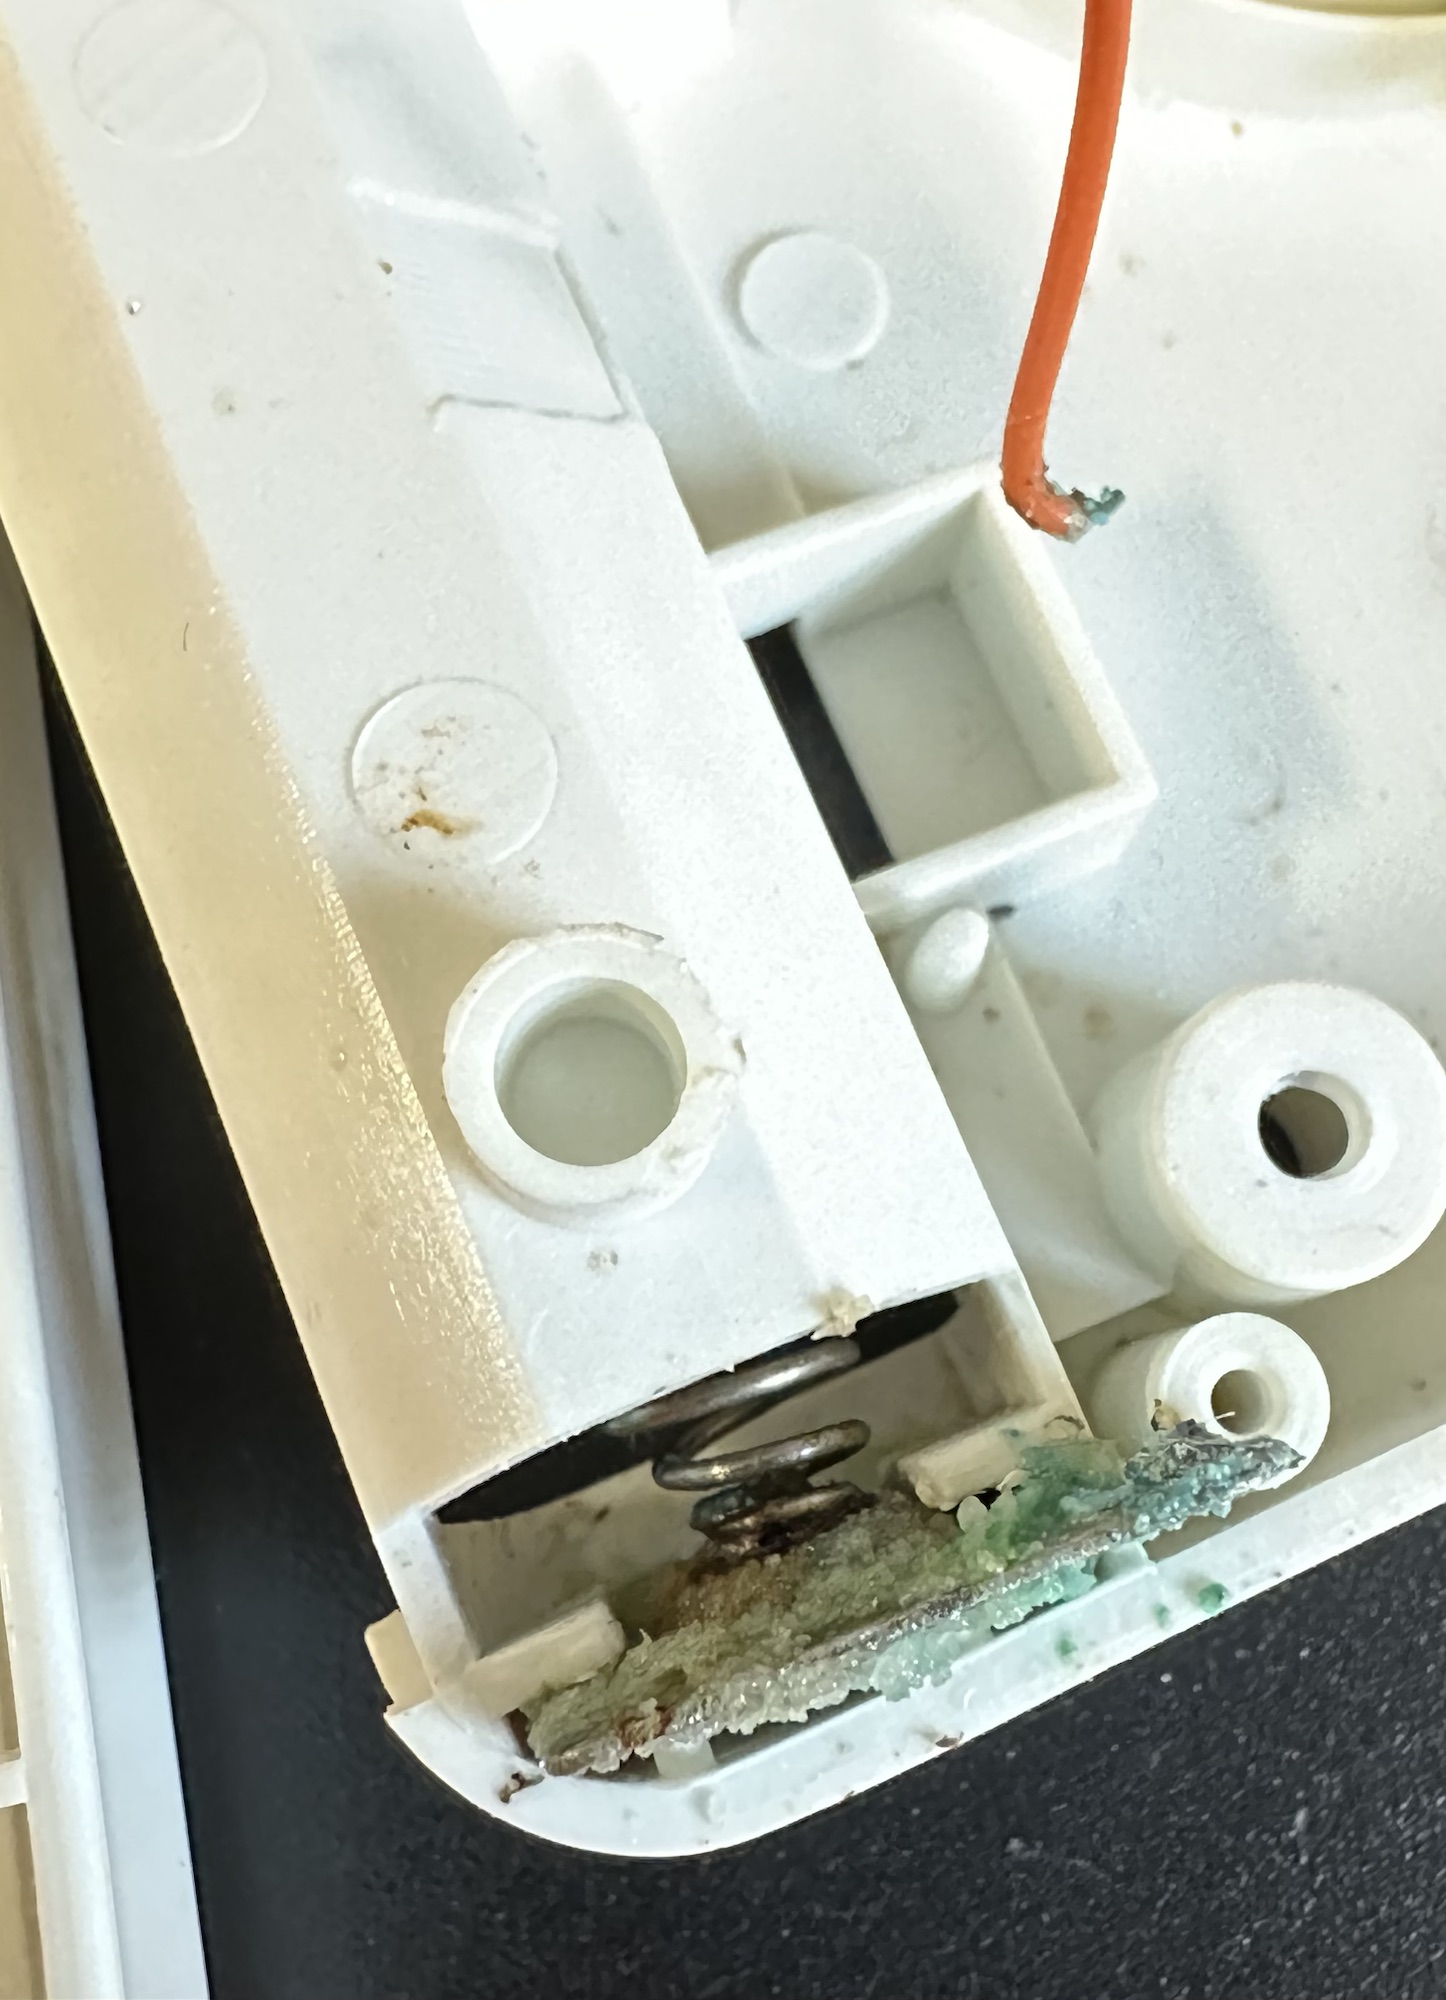
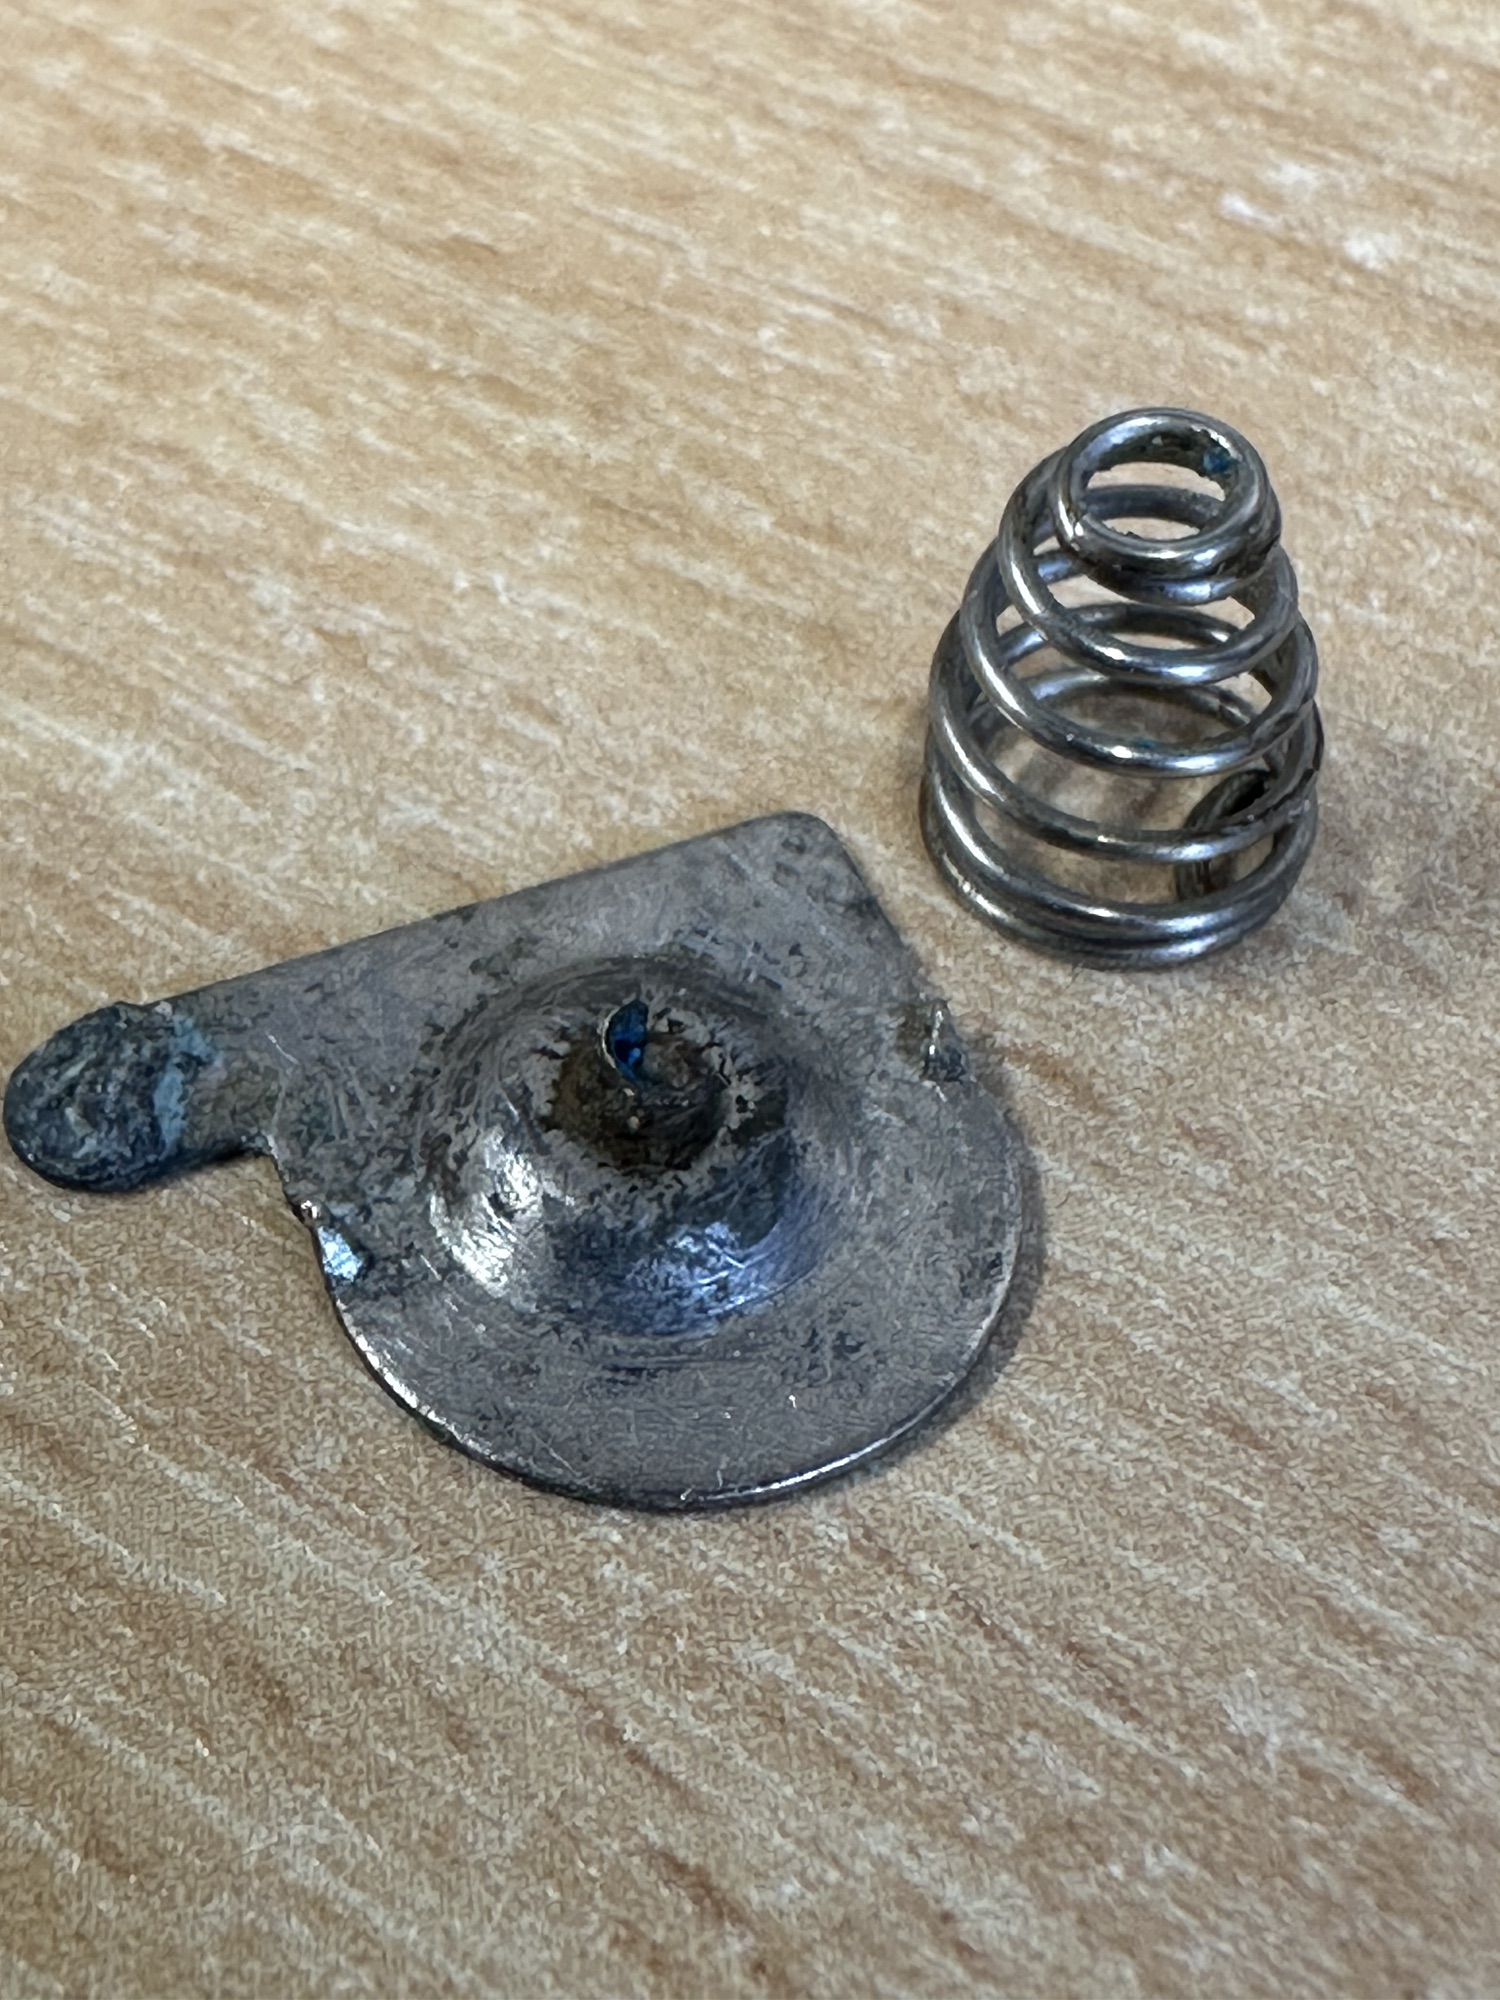
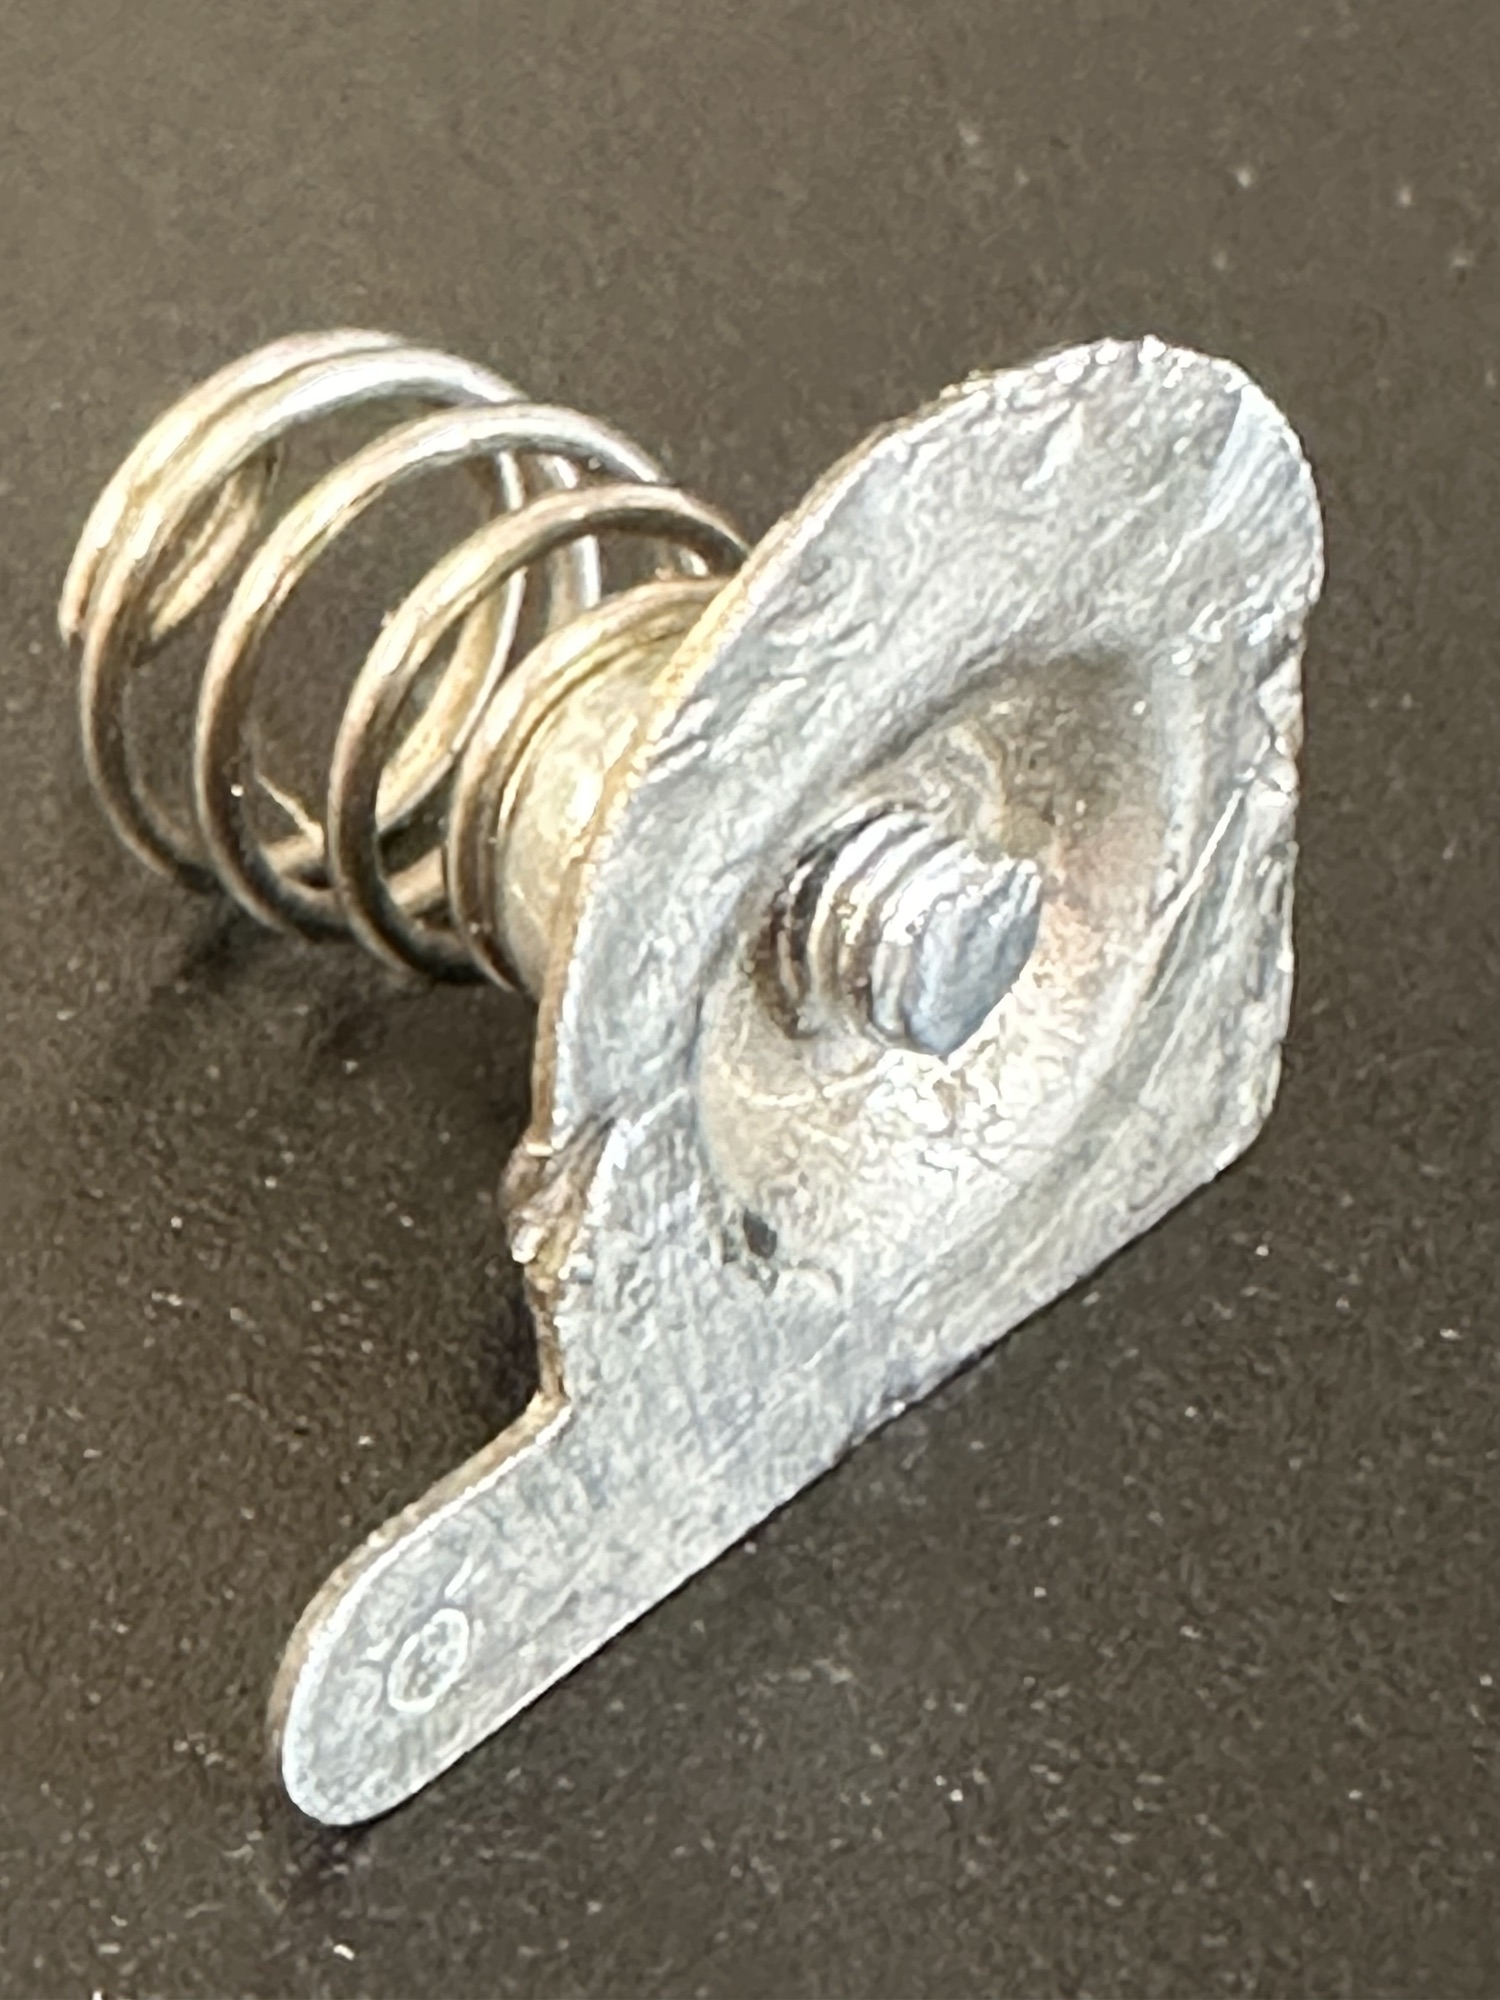
The negative terminal connector is broken, i have some replacements on order but I’m going to repair this one.
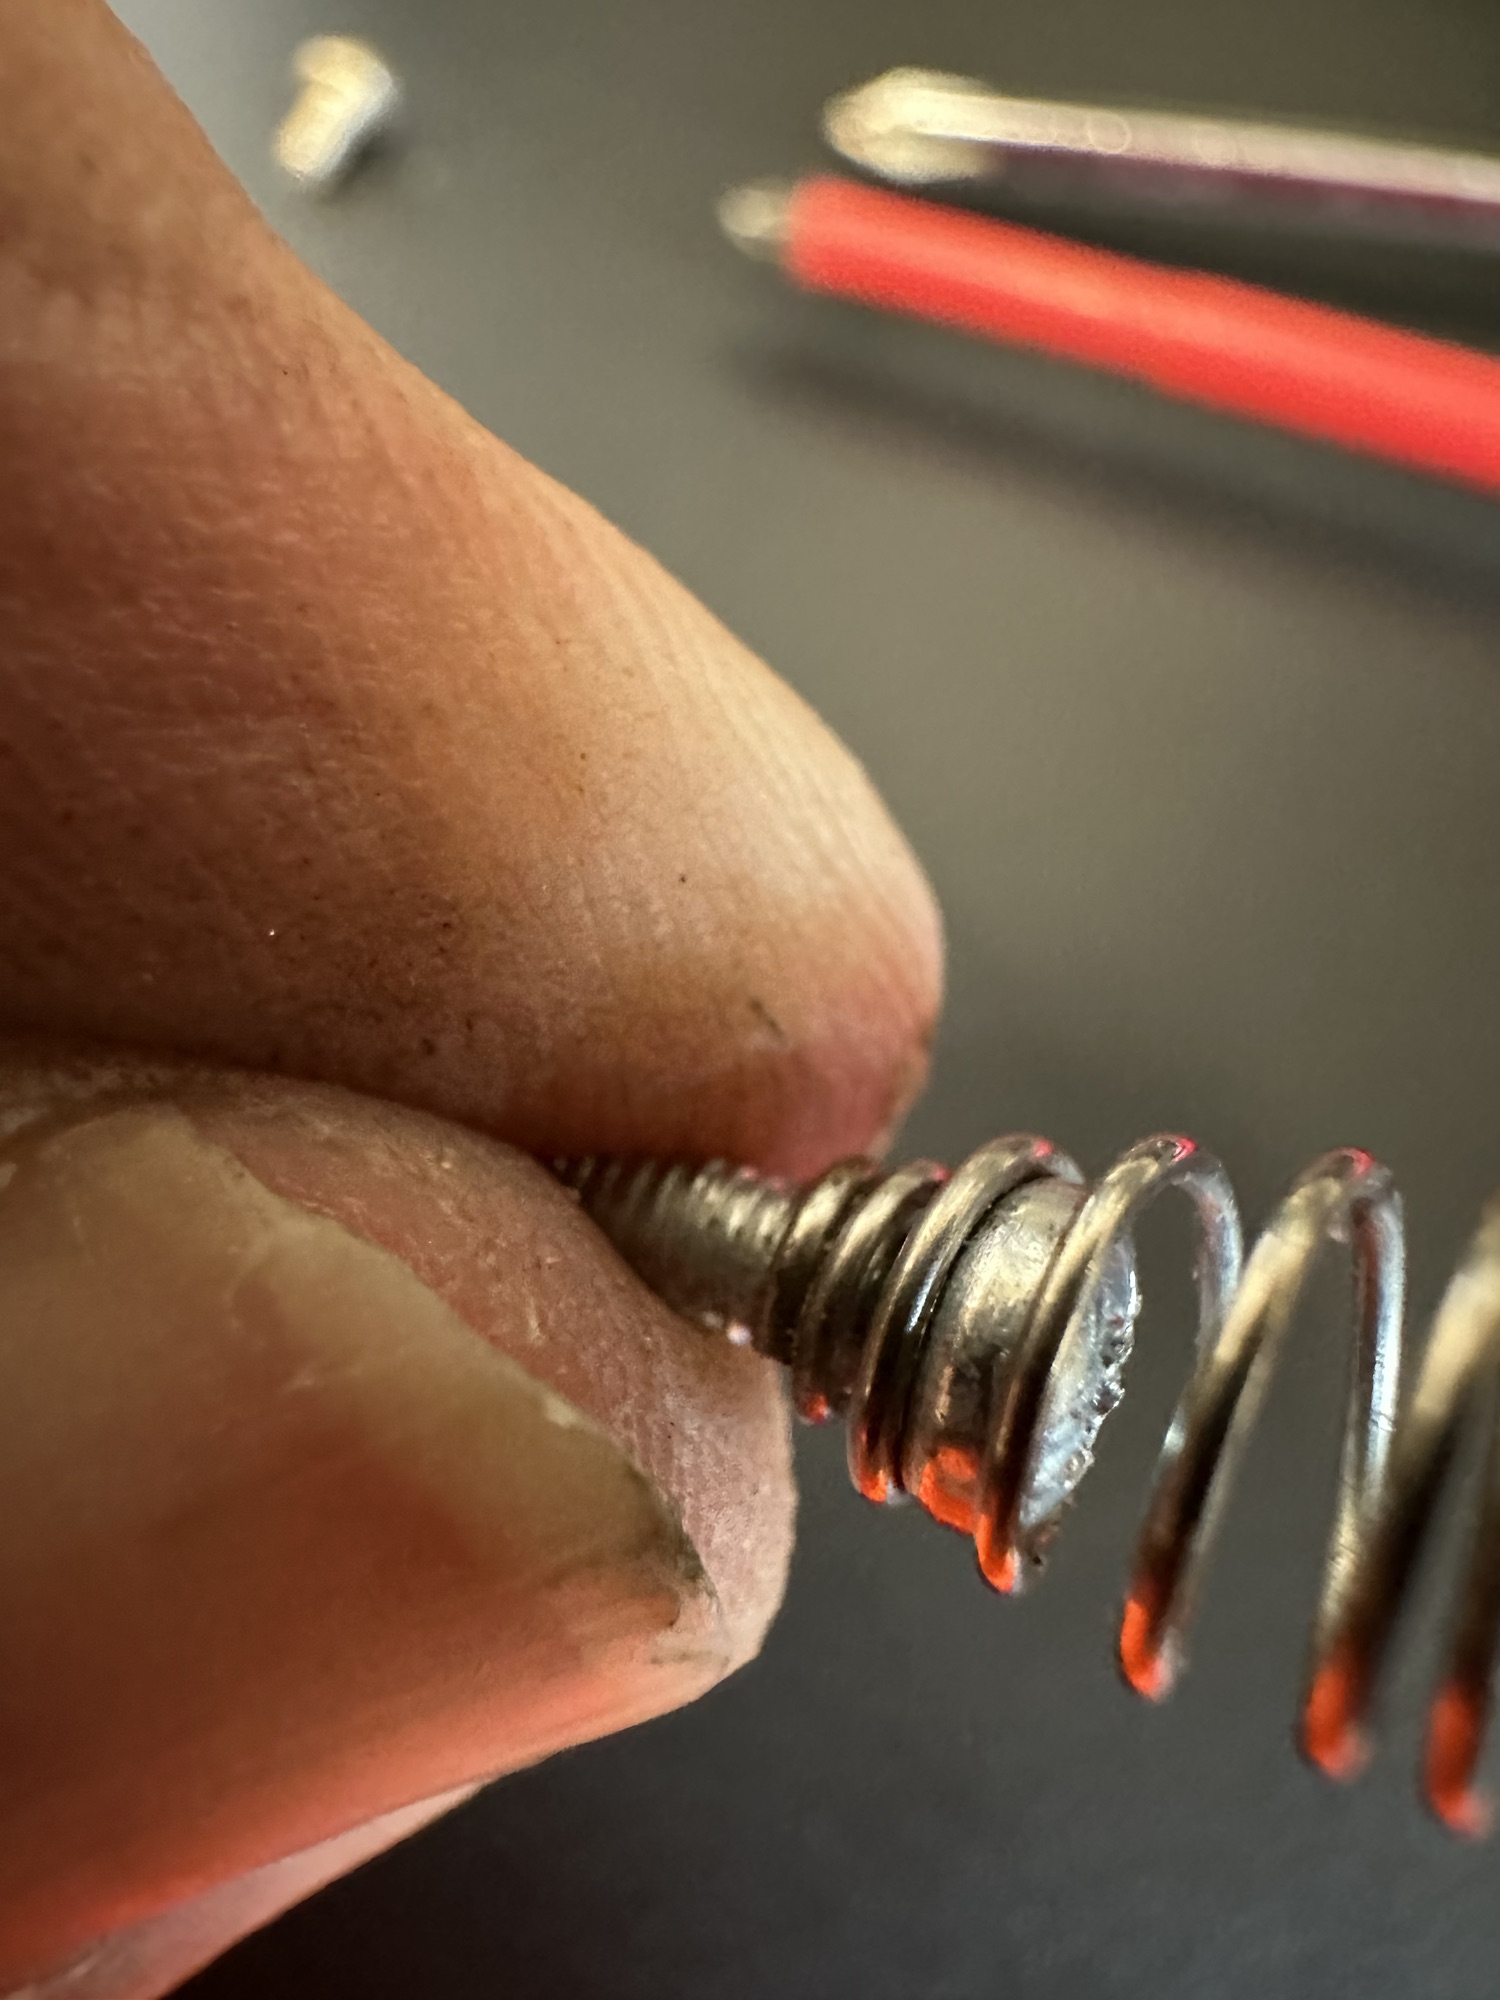
I’ve taken the corroded rivet out that held the spring. I’ve found a small screw and have used this to connect to the plate. I’ve cleaned the whole lot with wire wool and have cut off the excess screw and filed it all down. It now looks as good as new and no cost involved. I will finish it off with a dab of solder on the back to ensure good contact is maintained.
Rivet removedFirst a screwNow to cut off the excessFiled down All polished and good to go
Peering underneath at the board it all looks ok, needing just a good clean with IPA. However, I’m not really going to be able to confirm this until I’ve re soldered and checked continuity from the batteries.
Signs of light corrosion under board
There could be some damaged tracks, again I’ll know that when all the basic setup and tests have been done. There is also a possibility the speaker could be damaged as the corrosion has reached there. I’ll test with the multimeter in the meantime. That all checked out ok and the speaker is fine.
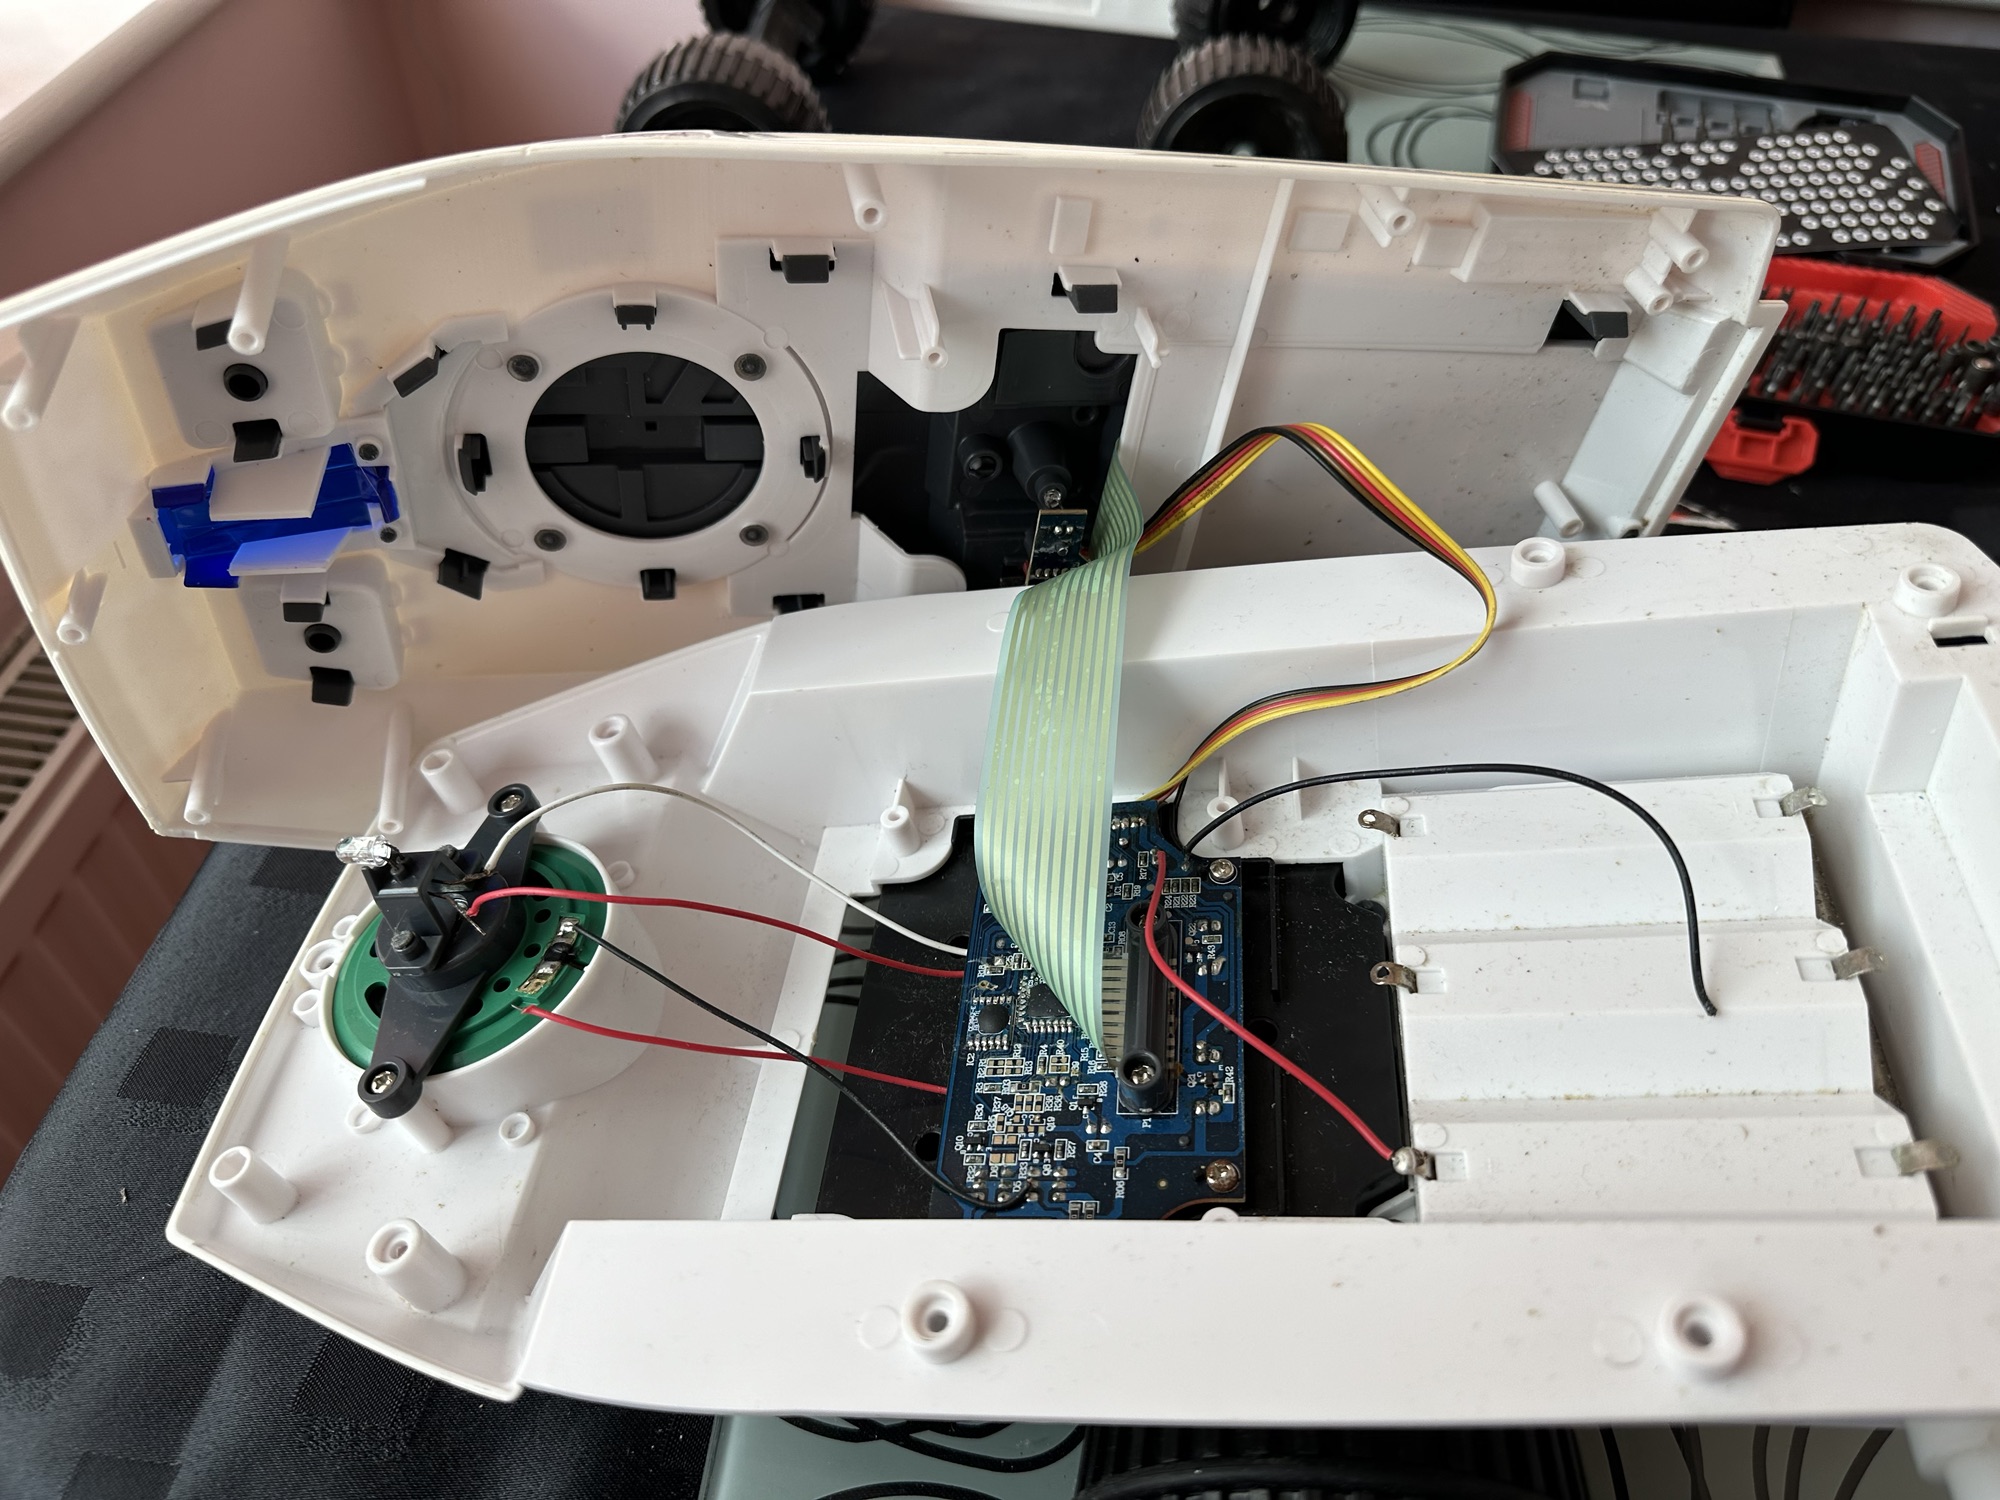
I’ve given a good overall clean with some IPA and the entire unit inside and out looks as good as new.
Cleaned shellCleaned board
I’ve replaced both the power cables from the battery unit as one had fallen off and the negative one had looked as if it had been crushed. I was changing so it made no odds to change the other.
New power cables
I ran some checks with the multimeter and everything is fine, all tracks are good and it looks as if the corrosion was localised, this unit has dodged a bullet.
Batteries in and it’s now working well, see this video short:
When you don’t know what you’re doing
However, as I’m not a gamer I have absolutely no idea what I’m doing, it makes a lot of noise and appears to work but god knows what I do. It certainly does a lot more than it did when I received it.
Here I purchased the toy I most wanted back in my teenage years. Unfortunately I wasn’t available to get the original MB version produced in 1979 so I had to settle for the latter “improved” version made by Zeon Ltd that was made in 2010.
It’s arrived and to be honest dosen’t look too shabby, needs a bit of a clean up and maybe some new transfers applying but we’ll get to that at another time, for now we need to try and get the machine up and running.
I’ve eventually managed to get the lid off. This unit was built to ensure that it was difficult to get into so repairs couldn’t be carried out. Some of the screws are buried under fascia dressings, and if you aren’t careful you could end up snapping some of the body shell.
Big trak body shellBig trak circuit boardDetached speaker wireDetached battery wireBig trak wheels removed
With the two halves of the body shell detached it’s obvious there are some detached wires. One was a battery wire, one was a speaker wire. Oh if this was the issue wouldn’t it be great? But it wasn’t. I soldered these wires back into place, put the three D types in place and it was still dead.
I’ve now desoldered all connections from the circuit board to assist in carrying out checks for continuity and tracing voltage. I can also check the board under the microscope. I may change all the capacitors for SMD ones.
I started checking continuity and tracing voltages and was doing really well until I got to a large section of the main board where everything seemed dead and unresponsive. What the heck was going on here? And then I noticed the wire had detached from the positive probe of my multimeter thus ending any further testing for today. I need to order some new probes. Well, I’ve ordered some nice new probes and croc clip connectors as well, so as soon as they arrive I’ll get back on with the testing. They arrived and were damaged on arrival, so back to the drawing board.
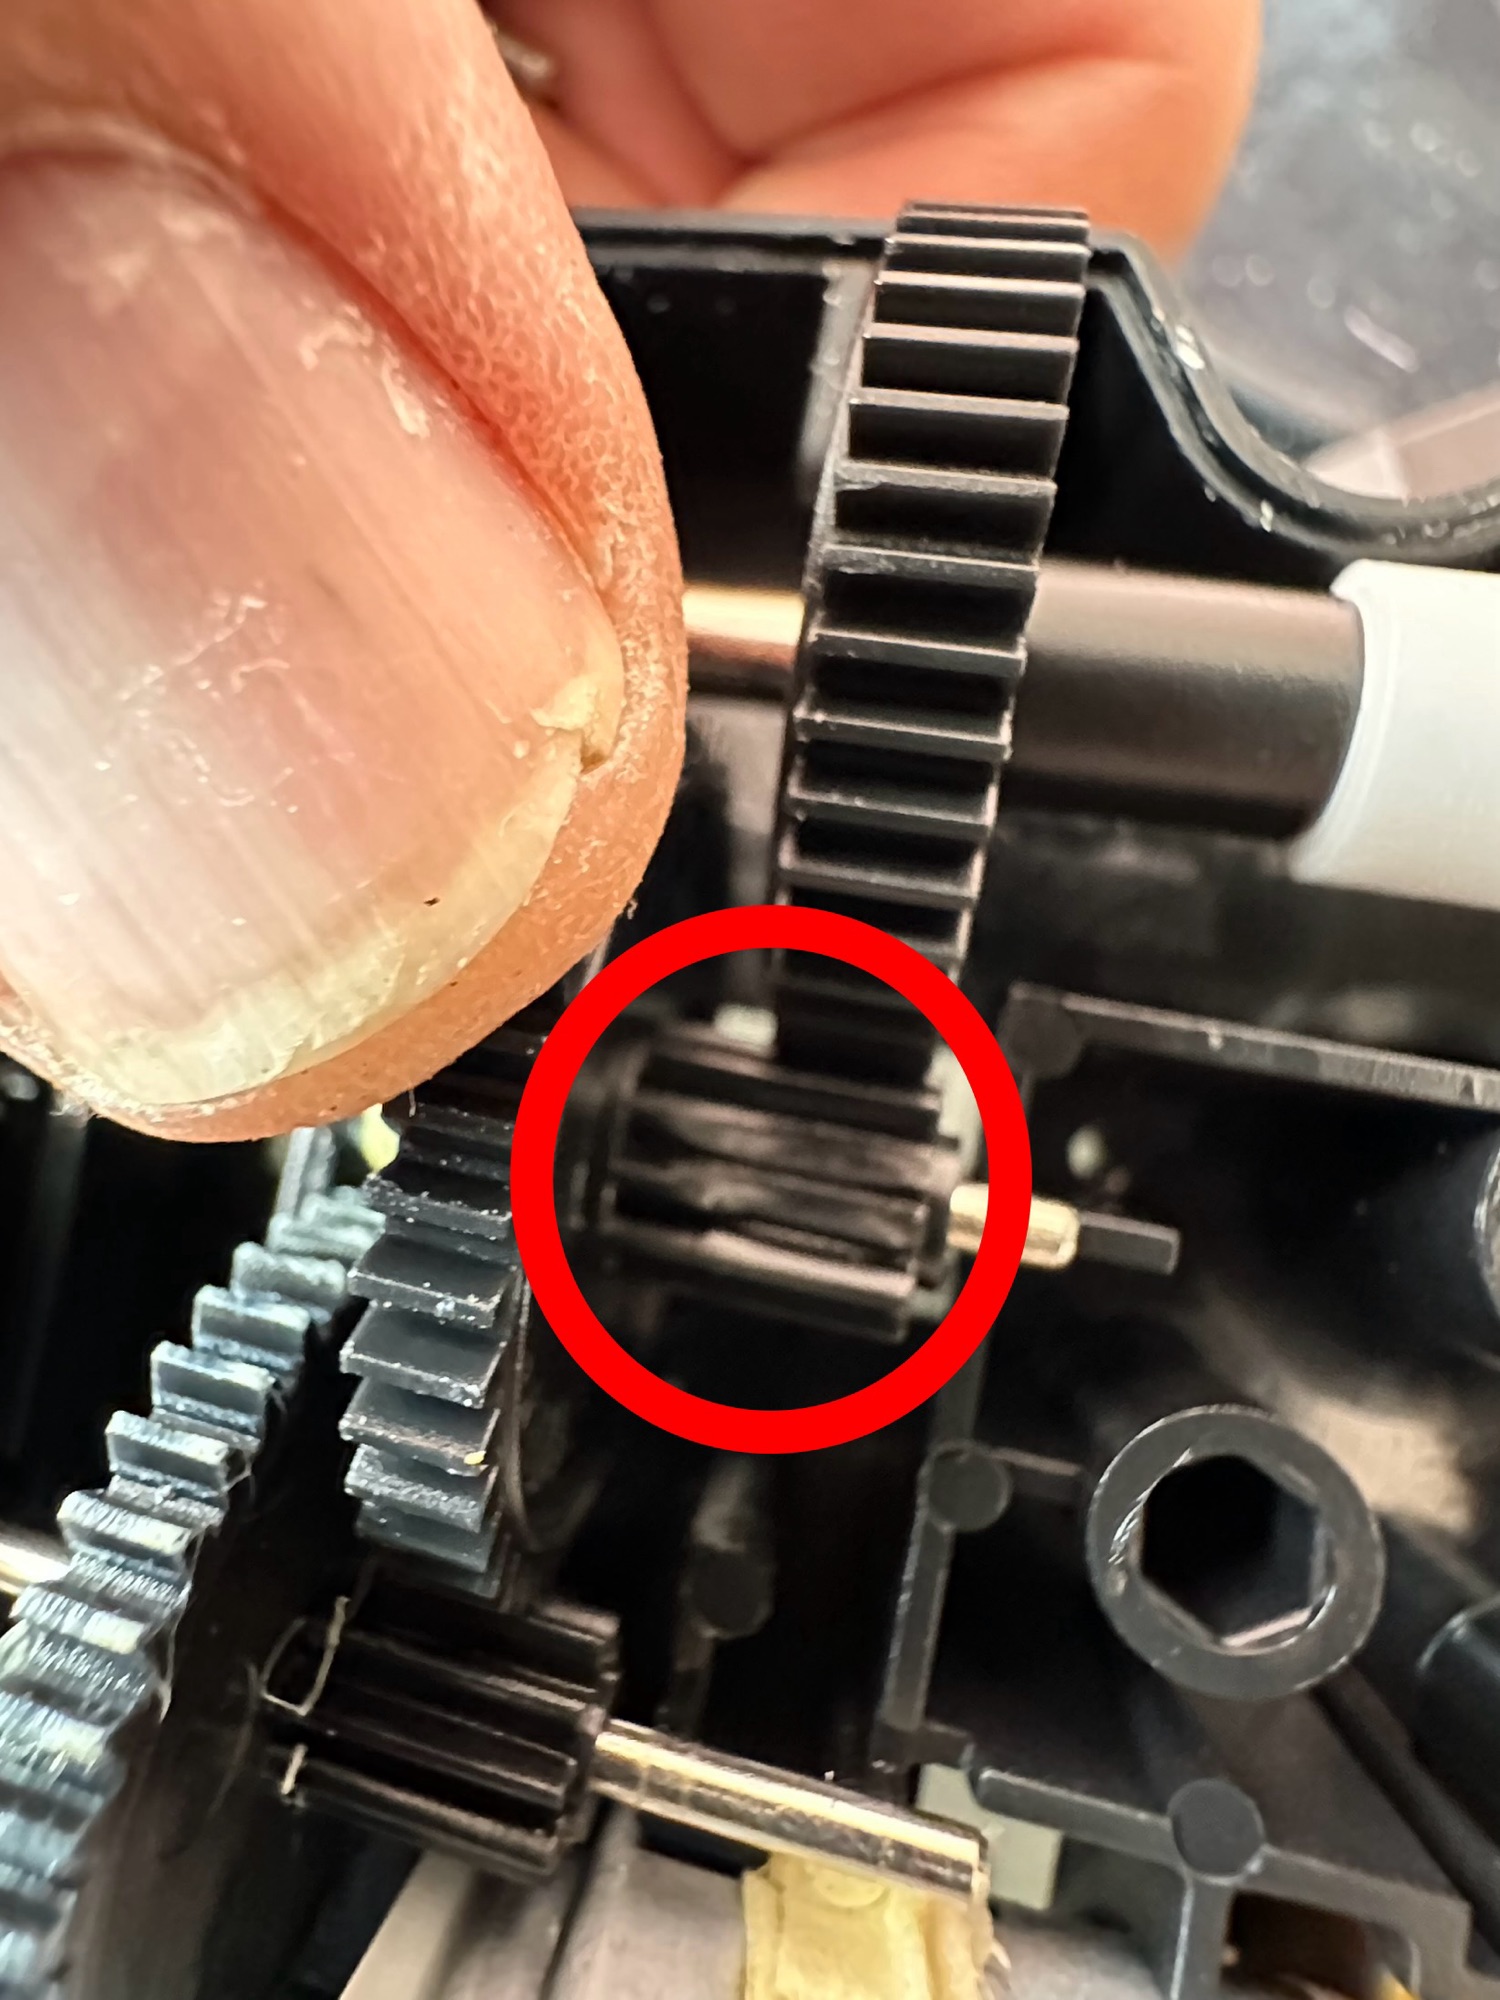
Big trak worn cogsBig trak worn cogs
I took the drive train to pieces and here it became apparent that a number of the cogs are damaged. I believe there is also some issues with the motion detector but I can’t confirm that until I get some power into the motors. I can’t find spare cogs online so I have ordered myself a second damaged unit to use as salvage. To be honest this new unit has all the transfers in place so I will probably use that shell and the guts of my original unit to form one complete Big Trak.
New donor Big Trak – better than my original one
The donor unit has arrived and boy I’m impressed. It’s in far better condition than my original one, so as expected this one will become the working unit and my original one will be come the donor. Any parts left over will be sold on as spares or even used on another damaged one if I can source it.
My new Bigtrak
If you look at the video above you will see the new Big Trak going through the motions. However the one thing it dosen’t do is turn. Could be a wheel sensor issue who knows. Good thing is that the cogs haven’t broken as the drive wheels are both solid and not free wheeling.
There are only two real issues with the donor here. Firstly it will not do the turn command and secondly, one of the drive wheels is damaged. Luckily I have a spare wheel so this was swapped over, some decals were missing but I coaxed these off my old truck with a hot air gun and reapplied them with no issues.
Missing decalsDecals applied
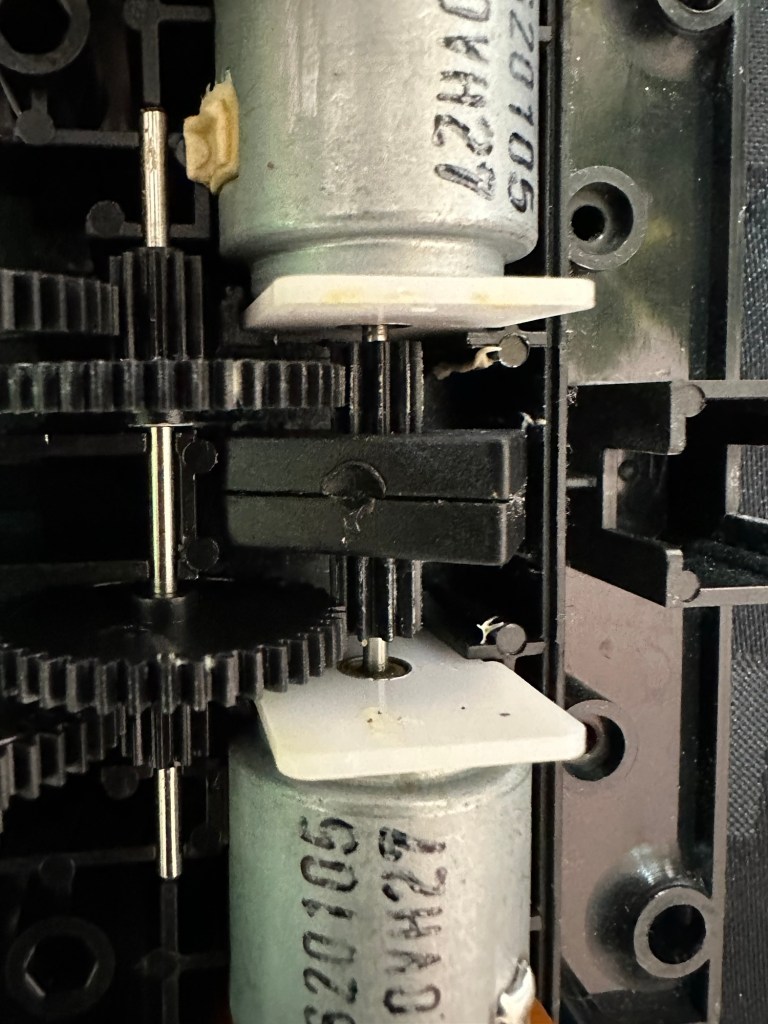
Looking into the drive issue meant opening the gear box. In here we have two magnetic independent gear controls that should have a gap between them, these two were stuck together thus rendering independent motor operations of the turning control useless.
Magnetic sensors joinedMagnetic sensors as they should be
I removed the two motors and repositioned them and the cogs holding the magnetic gear, this gave a gap of about 3mm that now allows the wheels to turn in opposite directions allowing the unit to turn.
Now the Magnetic sensors are adjusted….it turns
Whilst in this gear box I was able to confirm the issue with my old gear box and it really is all down to two damaged drive cogs that I need to obtain. I’m pleased with that as I could now get two good working units for just a small outlay once I can source some cogs. I will have to repair the wheel I removed to replace the one on my new unit however I have an idea how I’m going to remedy this and again it’s a low cost option. But that’s a job for another day.
2:18 of rebuild magic
So if you look at the video above, it’s the full fix that I posted on YouTube. Really pleased with this fix, again I’ve learned quite a bit about these units and I’m going to have immense fun programming it. My wife dosen’t understand my excitement over this toy, but all my old buddies and colleagues understand it as they grew up in the same era. Maybe it’s the male menopause, reliving the past and all that.
But hey, it keeps me occupied and out of mischief so who should worry about that
This one is going on my shelf so when the kids visit I can show them the joys of basic programming we experienced back in the day.
There is a form of amateur radio comms that I enjoy and that is slow scan television. Here’s a basic explanation:
A literal term for SSTV is narrowband television. Analog broadcast television requires at least 6 MHz wide channels, because it transmits 25 or 30 picture frames per second (see ITU analog broadcast standards), but SSTV usually only takes up to a maximum of 3 kHz of bandwidth. It is a much slower method of still picture transmission, usually taking from about eight seconds to a couple of minutes, depending on the mode used, to transmit one image frame.
Since SSTV systems operate on voicefrequencies, amateurs use it on shortwave (also known as HF by amateurradio operators), VHF and UHF radio.
Wikipedia
In this Instance below I used a digital transceiver and was pointing the aerial in the general direction of the International space station as it passed overhead on a specific date, when the Russian section of the ISS was transmitting slow scan television pictures as it passed over. I used my iPhone to decode the signal and to produce the pictures, using an app I had installed earlier. This was all part of a day celebrating the anniversary of Sputnik, the world’s first man made transmitting satellite.
My setup was totally mobile and so basic that I just about managed to get partial scans via this technique, see the two pictures below. I was literally sitting in the front seat of my car.
The picture I received from the ISS and my radio
Even though my pictures were not perfect I was still able to supply proof that I received the transmission and as a result was issued with the certificate below from ARISS – Amateur radio on the International Space Station, find out more about ARISS Here: ARISS
ARISS certificate
There are many of these types of events that occur all year round where you can experiment with all types of equipment to make contact with distant radio stations. This is the spirit of amateur radio.


You must be logged in to post a comment.