Psion organiser series 3a

What the listing stated:

It fires up and turns on, then get a black screen. Every time I press a key on the keyboard it makes a beeping sound, so it is registering something.

EBay

From a distance, and in my opinion, the fault could be a simple one such as adjusting the contrast by using the Psion key and either of the <> keys. This was often an issue when first turning on the Psion II, you had to turn the contrast wheel. However it could be a terminal one requiring a donor unit. In layman’s terms it could be knackered, (to coin a phrase). But hey, what do I know 🤦‍♂️

Psion 3a – Faulty

Fingers crossed 🤞 as usual.

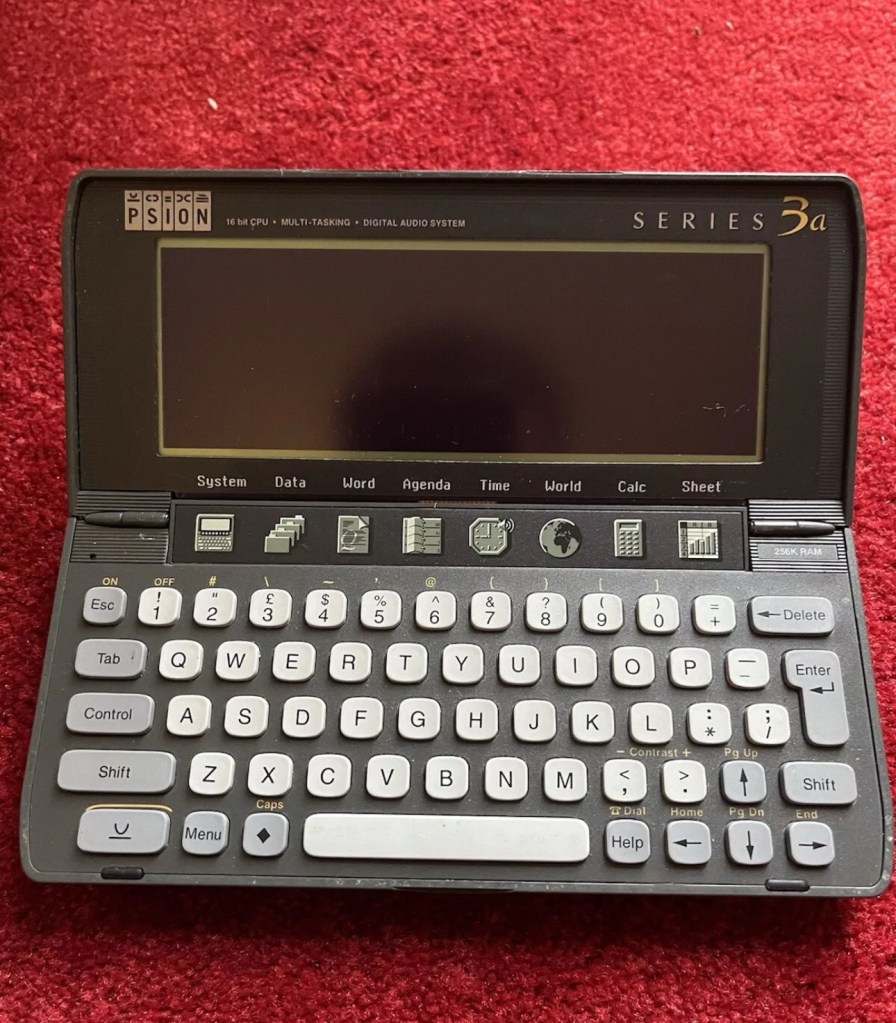
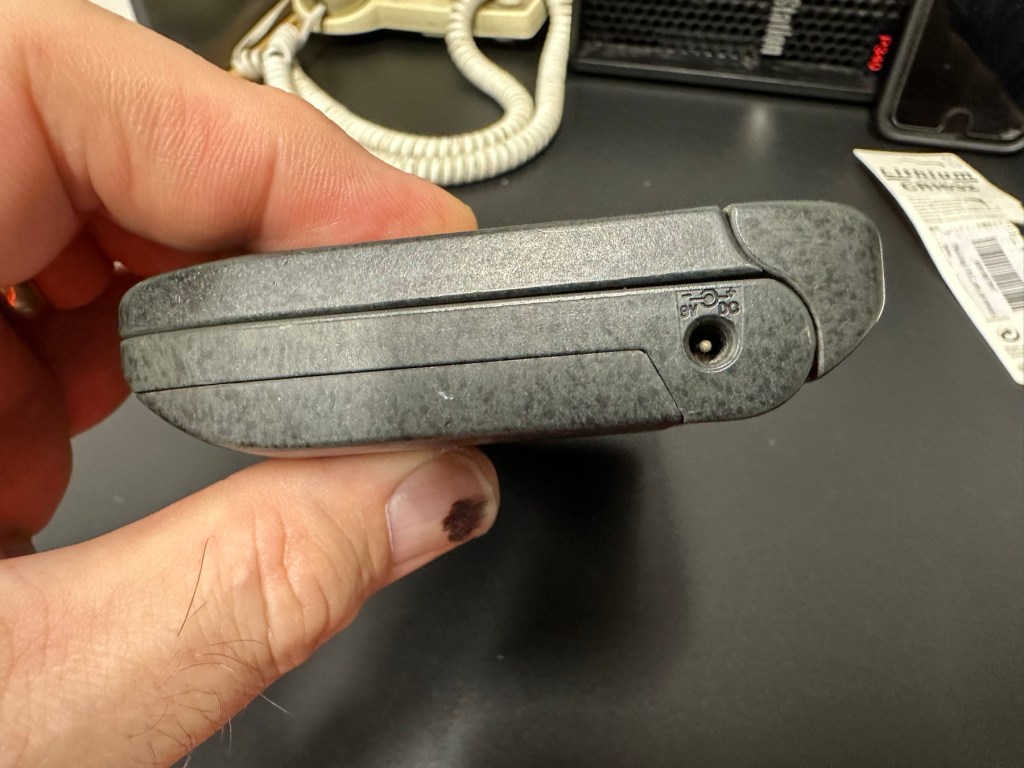
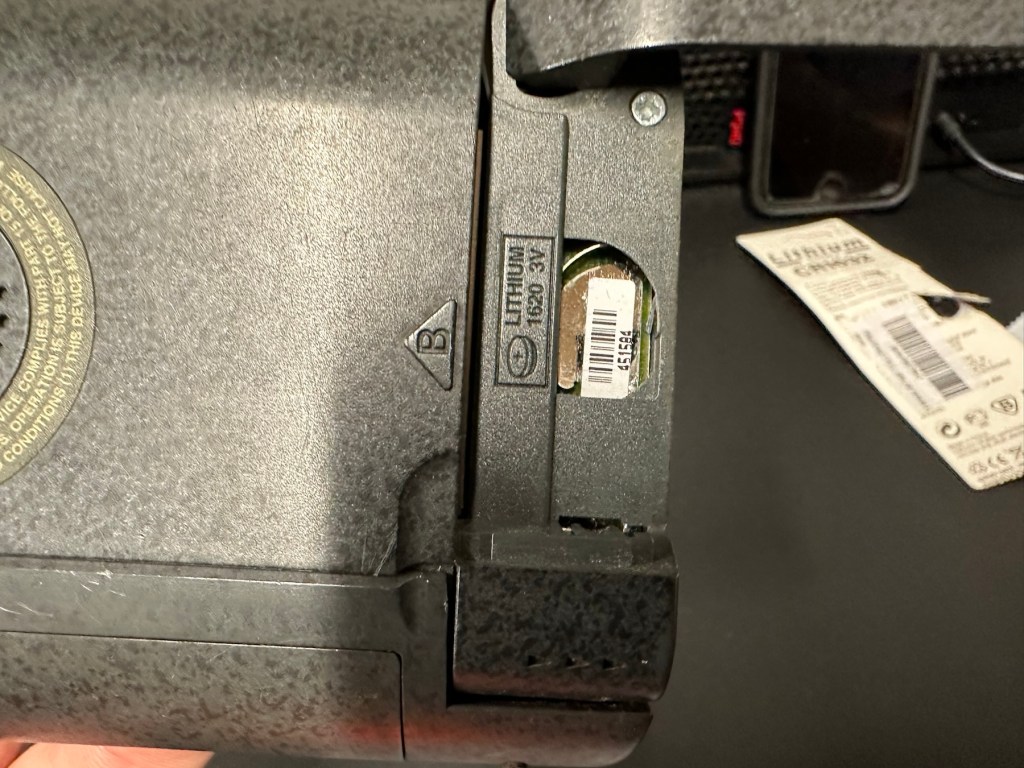
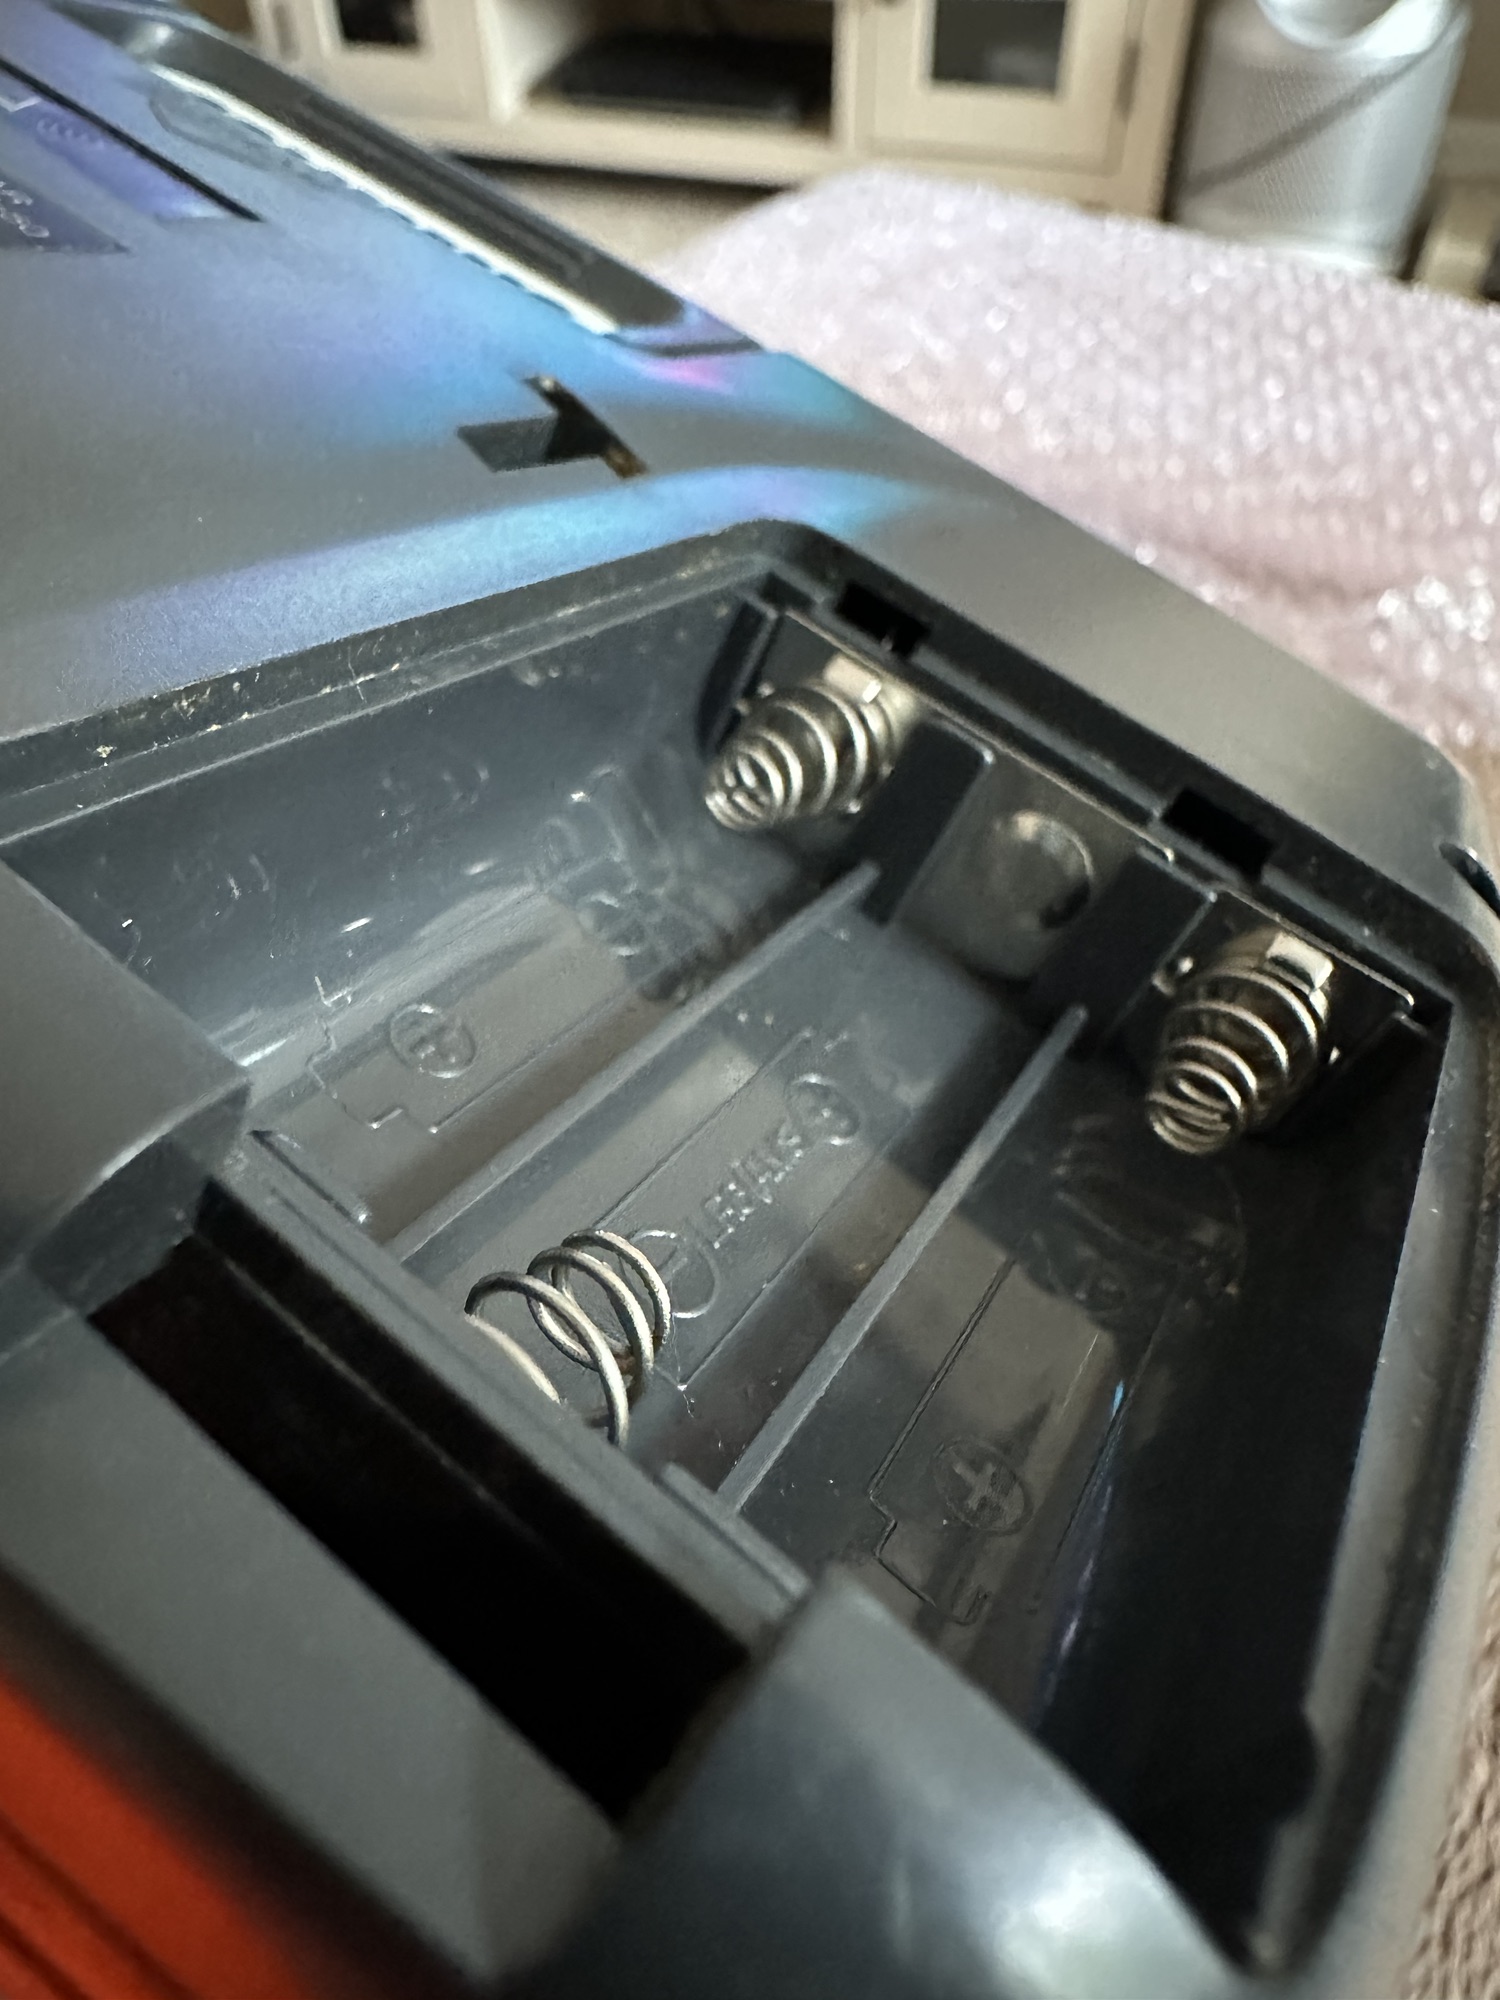
I have a what looks like a nice tidy little unit here obtained for a very reasonable price £17:69Gbp including postage. These units retailed between £179-£249 when they first appeared back in 1993. However, there is only the one picture in the advert so the rear, sides and hinges could be wrecked. “Caveat emptor” as they say. It does have a problem that will need some investigation. It runs off of two AA batteries and a CR1620 coin battery as a backup, and these will be the first items to be changed, I’ll also check the voltage of that coin battery and replace that if necessary. This is an early version with 256KB of internal Ram. 3a versions from 1995 either had 1Mb or 2Mb of ram. You can also use an external power supply if required, but the batteries in these units have an excellent long life span, so external power is rarely necessary. I’m looking forward to this project. I’ll make a more detailed analysis when the unit arrives shortly.

The Psion Series 3 range of personal digital assistants were made by Psion PLC. The four main variants are the Psion Series 3 (1991), the Psion Series 3a (1993), the Psion Series 3c (1996), and the Psion Series 3mx (1998), all sized 165 by 85 by 22 millimetres (6.50 in × 3.35 in × 0.87 in). Further, a Psion Series 3a variant with factory installed software for the Russian language was called a Psion Series 3aR, and Acorn Computers sold renamed versions of the Psion Series 3 and 3a marketed as the Acorn Pocket Book and Acorn Pocket Book II.

Wikipedia

A little history:

This particular unit dates from 1993 and was the next in the series of Psion organisers that succeeded the extremely successful Series 2 models. It was a massive step forward in design as the whole PDA market was kicking in big time in the early to mid nineties. More info regarding the series 3 organisers can be found here: Psion series 3

And the strange fact for today is this:

Manufacture of Psion 3s was discontinued in 1998 shortly after the launch of the Psion Series 5 (a Psion Series 4 does not exist, due to Psion’s concern of Tetraphobia in their Asian markets)

Wikipedia

What is Tetraphobia?

The fear of the number four: Tetraphobia is mainly suffered in China, Vietnam, Korea, Japan, because the word for the number four is similar to the word for death in their languages. Tetraphobia results in many people avoiding referring to 4 in phone numbers and so on.

Cambridge dictionary

There you go, question answered and that was why there was no Psion 4.

Onwards…

What has arrived, and what’s the diagnosis?

The unit has arrived and despite my suspicions it is in an excellent cosmetic condition. Just some very light signs of usage, needs a light clean, all hinges are in place and solid. Everything is as it was all those years ago and all the warranty labels are in place, this unit has never been opened.

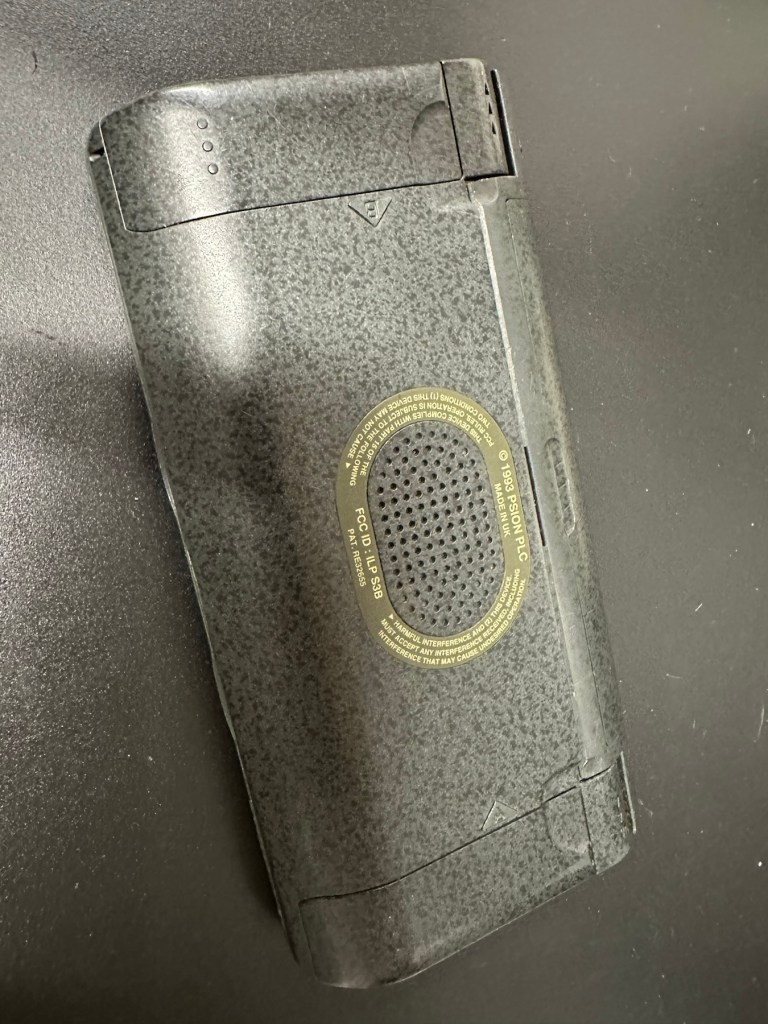
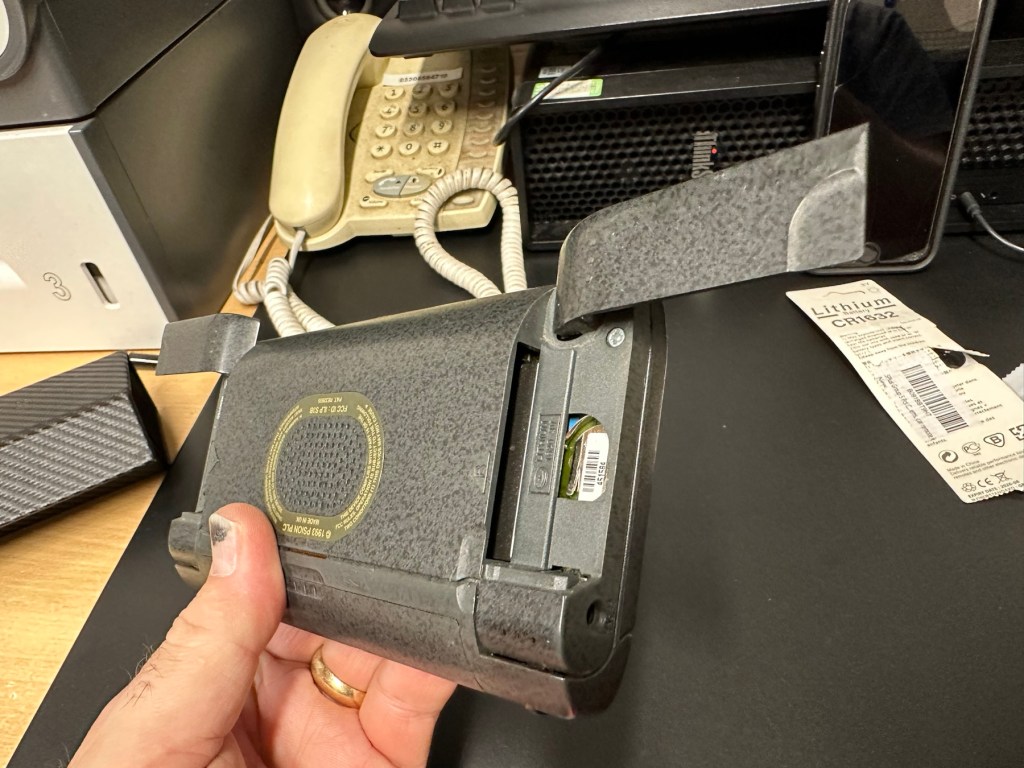
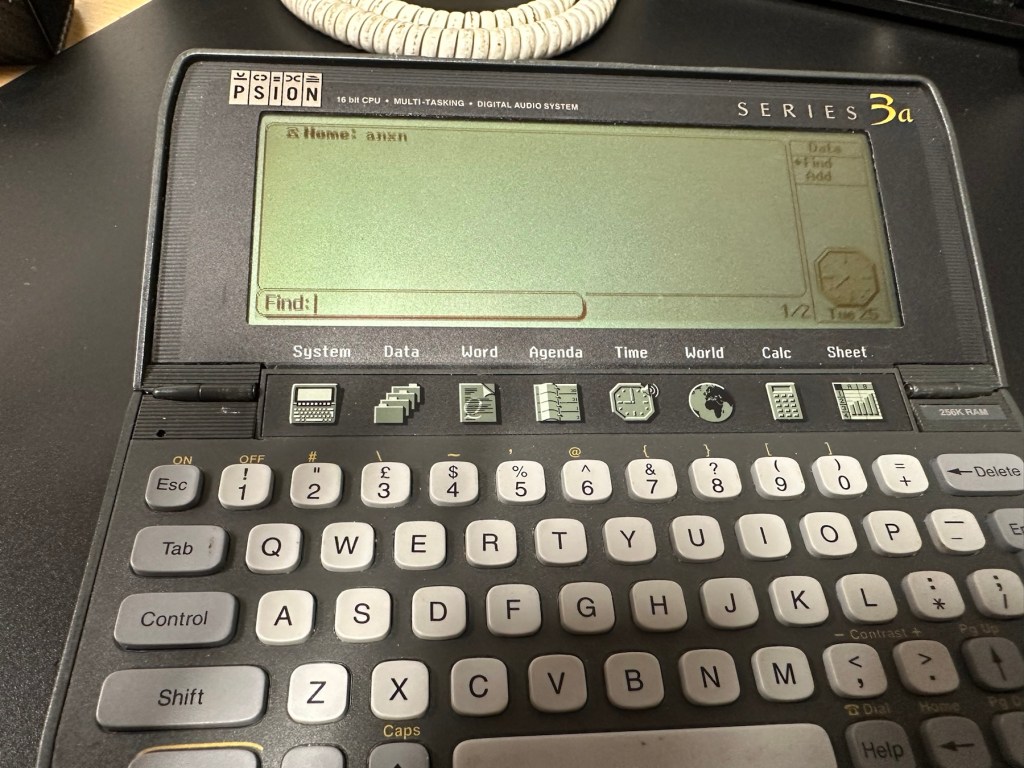
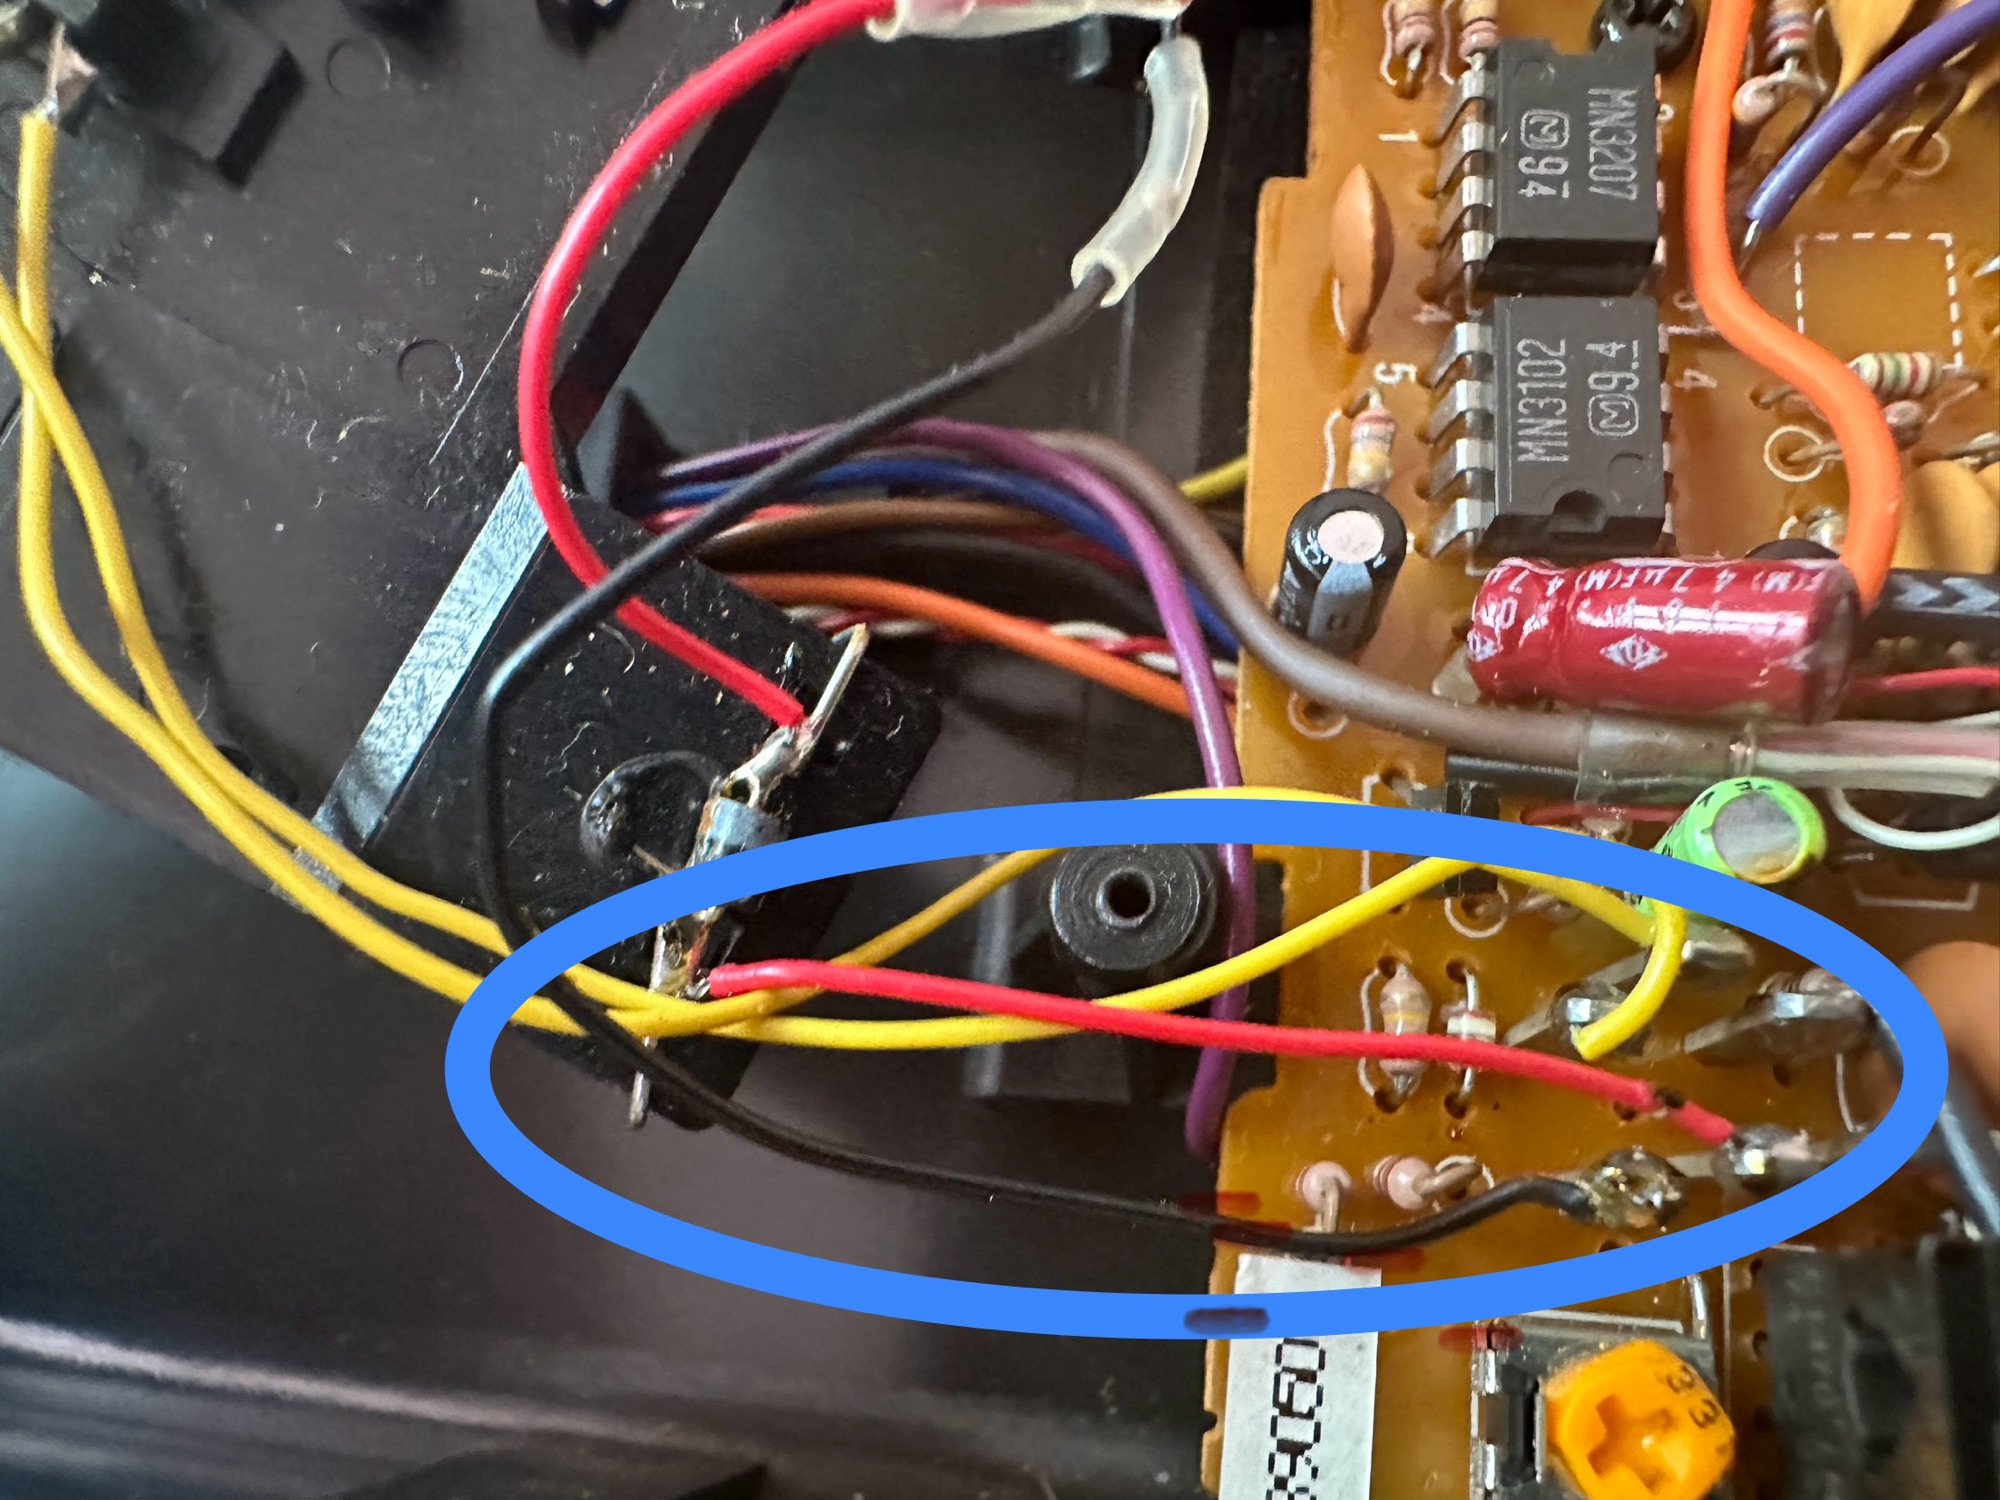
I placed the new AA batteries in and it came up with the black screen as the seller had stated. Using the contrast adjustment at this stage had no effect but the buttons were sounding so something was happening. Whilst looking in the memory card doors I could see one glaring issue, there was no backup CR1620 battery, so I dropped one in place . When I started the unit up again the screen went from black to clear, over a few seconds and then I operated the contrast buttons, and hey presto it worked. Watch this little video to see what happens.

We have life

I can only surmise that not having the correct batteries in for god knows how long, and then livening up the circuitry must just be like giving Frankenstein a fresh transfusion of blood. “It’s alive!” Well, that’s all I can think it would be.

I’ve run every function on the unit and it all works fine apart from the voice recorder function that seems to have a lot of feedback on the recording. I suspect this might be as I’m using the already full internal memory. It’s not a real problem, I’m just going to have to read up on it, as I could be doing it all wrong. (I have since done a hard reset and deleted old files from the system and this has cured the feedback issue, the voice recorder works fine). However it would still probably work better using an additional drive in the unit, and not the low internal memory.

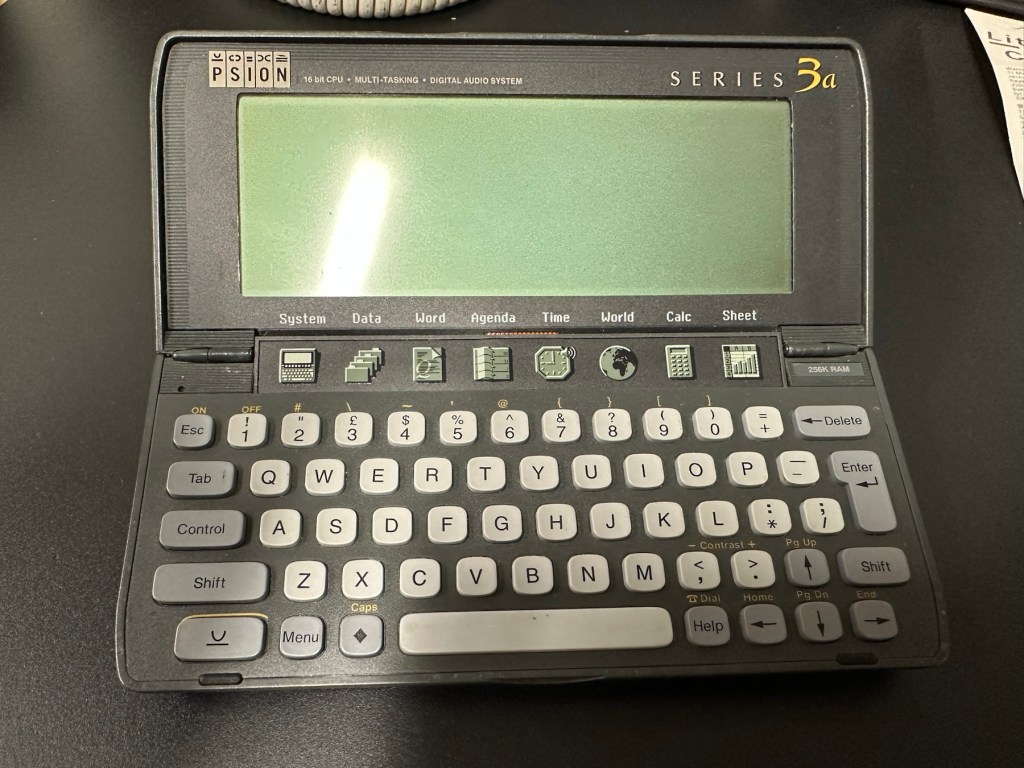
Just as you could on the Psion II you can write your own programs using OPL language. And it is a lot easier on this unit as you have a full Qwerty keyboard and a much bigger display. There are more applications on this unit than the series II, including word, spreadsheets, DTMF dialler, calculator and others that can be purchased as plug in additions.

I’m really happy with this, if the seller would have just taken a little time to run the unit and have some patience he’d have realised there really is nothing wrong with this unit. Big negative for him, big bonus for me. He could have charged more than double the price for this item, or more, considering current prices on the selling platforms.

Another strange thing i have noticed is that when I’ve left it overnight and started it up the following day it takes a minute or so for the screen icons to appear, just like putting on an old valve radio. So it maybe that a repair is necessary, I’ll have to ask around and see if any else has had this issue.

Valve powered Psion3A

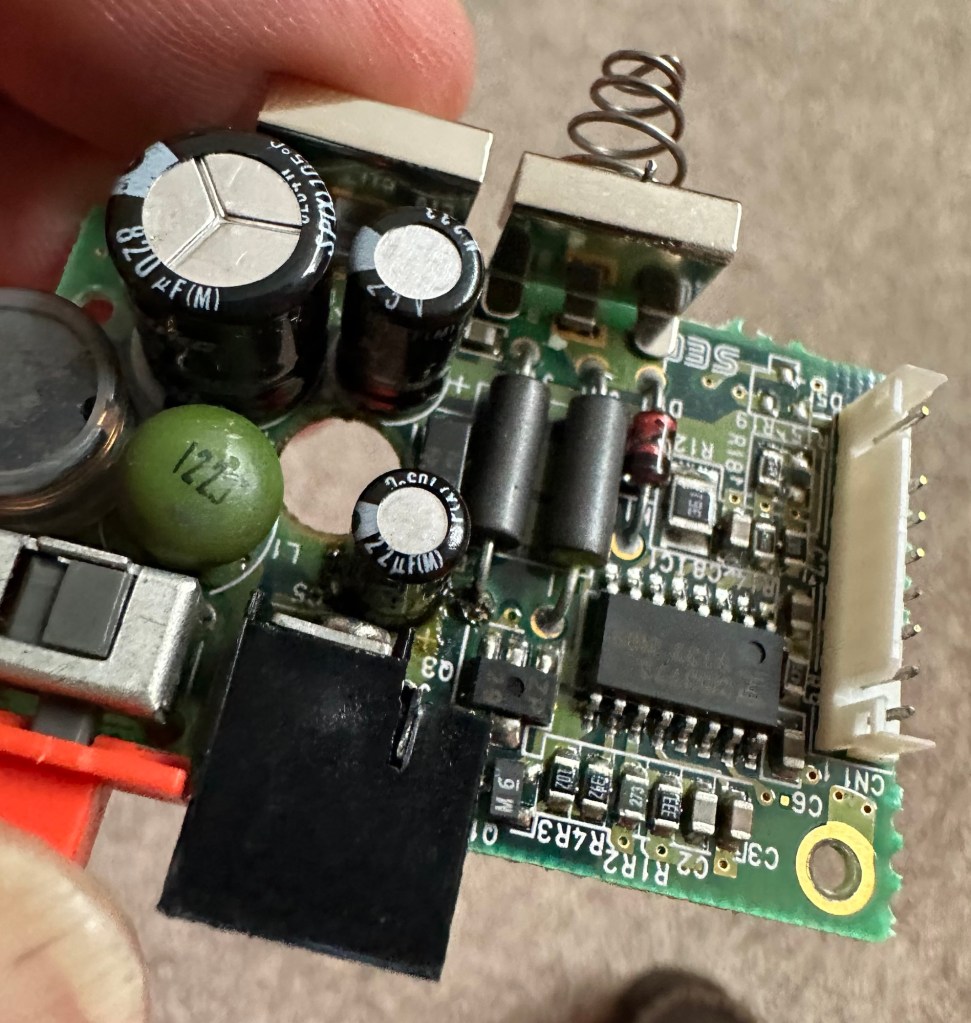
Edit: A few days later and I’ve looked into this a little more. For some unknown reason, probably my rank stupidity, I’ve checked the coin battery and I’ve installed a CR2032 instead of the required CR1620 and have tonight corrected this and installed the CR1620 coin battery. I don’t know if, or why this would have an effect, but after putting the correct battery in place the unit started up in a couple of seconds even after sitting unused for at least a couple of days, instead of the usual 2 minutes as per the video. I can only think it must be something more related to the capacity rather than the size, unless for some reason the contacts were not sitting true. (There is a slight difference of 4mm in width) I remain puzzled as I thought the battery was just for backup purposes, maybe it does perform more as a computer CMOS battery does, but I’m pleased it’s now operating as it should. I can now stop monitoring the sale sites for units to use as spares.

Sometimes your suspicions pay off, and on this occasion I was spot on. EBay untested items can swing either way and most of the time the sellers use it as an easy get out for not accepting any responsibility. But this time I win, and that makes me happy as I have a very good item for my retro collection.

Thanks for passing by.

Samsung SQ3000 electronic typewriter – assessment & repair

This is the follow up to a recently obtained electronic typewriter that was purchased in January 2025, the initial post can be found here: Samsung SQ3000 electronic typewriter.

Samsung SQ3000 electronic typewriter

The following post will deal with the assessment on its arrival and what I am going to try to do, to get it back working again, as close as possible to its original state.

I’ve downloaded an instruction I manual, I’ve had to download one for a Smith Corona Wordsmith 200, it is in theory the exact same unit, just under a different manufacturers branding.

Assessment

It’s arrived and apart from a little age yellowing it looks ok. There is a PAT testing sticker that says it was last electrically tested back in 1998 and is due a retest in 1999. This corresponds with my date estimate of mid 90s.

I will retest and renew the safety checks when I’m finished working on it. I have noticed that the paper bail/release rail is broken on the left hand side so I will have to add that to the repairs, this shouldn’t be a major concern.

Before I took the roller out to get to the paper bail I did start the machine up. Everything went as expected and when I tried to type I was getting some weird reactions to the keys I was pushing. All kinds of characters were appearing.

Before

I checked the daisy wheel and there was a click. It wasn’t sitting right. I reset the machine using the two reset buttons and the machine then went through its reset programme, pretty much the same effect as turning it off and on again. (Not much changes in the way of tech there then)

After

Well that’s worked fine, I have tried every combination on the keyboard including the erase function and this is now fully working. It really was quite simple. My next job is to try and fix this paper bail.

Paper bail removed for fixing

There is quite a bit of dust and dirt inside that needs removing. And whilst I’m at it I will lightly re grease the areas that need it. Let’s be honest it’s not been done in the last 30yrs so now is as good a time as any. Inside will get a light hoovering and a bit of a tart up, I’m not going to go mad. I will clean the outside and all knobs and buttons and try to get rid of some of the yellowing, but to be honest as long as it’s clean I’m not too worried about age marks.

The keyboard has lost a few of its letters. I will remove what is left of some of them and use some keyboard decals to replace the missing ones. This will be one of the last jobs I do.

Well that’s the assessment done and apart from a few small issues and requiring some basic maintenance I don’t think we have an immense amount of work to carry out. We know it now works. Let’s hope I don’t cause any further carnage whilst working on it.

Let’s get to work.

Repair

Right it’s straight onto the paper bail to try and fix the snapped end. Firstly I’m just going to use some superglue to get it in place. When this is dry I’m going to create two “Doublers”, place one either side of the damaged part and glue these in place to create a stronger repair and to add some stability to this area.

I’ve got some black semi rigid plastic. I’ve created a small template from a tracing that I did of the good right hand side of the bail.

I now have two doublers cut from the plastic that I will use as explained above.

Two doublers

It doesn’t matter that they are not perfectly shaped, however they both fit perfectly well into the profile of the bail arm, and this portion of the arm is hidden in the typewriter housing anyway, so the part will not be visible, but it will now be strong.

The Doublers have been put in place using a quick set epoxy resin, I will leave this to dry for a good few hours before I tidy it up, with a light clean, and then I will try to get it back in place.

Bail arm repaired, installed and working.

Now that’s done i’ve gone inside and there were a nice couple of spider webs around the transformer that are now history. I’ve secured the cable in the rear of the unit that never had any tension restraint, so that there will be no issues, should anyone now give a good yank on the cable lead. This is a safety addition I have made that was never on the original unit.

Cable restraint screwed to base to prevent strain on internal wires in and around the transformer bay.

I have also tightened all screws and checked the wiring and this all seems ok. Plug and fuse have been checked and all is looking good. I’ll carry out a PAT test once I’ve finished the clean up.

I’ve cleaned the main roller with alcohol, and removed all the old grease and dirt from the platten adjuster switch and the roller advance knob. I have removed the platten plate as well as the six mini rollers that are here. I’ve cleaned them all and re assembled/installed them.

I have cleaned the daisy wheel as well as in and around the printing head unit.

Inside the unit I have given a good hoover as well as a light clean and again removed more old grease. I have given the exterior plastic a preliminary polish, this has removed some of the yellowing and made it look “cleaner” I am not going to worry too much about the yellowing as it isn’t that bad, and I don’t really want to venture into carrying out a “Retrobrite” on this unit. It would take too long and there would be no benefit for this project.

I’ve now added very small amounts of a watch lubricant to those areas that i have previously cleaned and removed the old grease from.

The unit has been reassembled and I’m pleased to say it is still working fine. It’s running smoothly and all aspects of the unit seem to be working just fine. To be honest it seems to be printing clearer to me.

Daisy wheel and print quality is perfect

I don’t know how long the print cartridge has been installed but I suspect it may have been a few years back. It’s almost finished, and I do have a replacement on order. I’m sure a fresh cartridge will make the print stand out even more.

Next I’m going to have a go at replacing some, or even all of the keyboard letters. It all depends how it looks when I start replacing them. I’m going to gently rub off the lettering that is left and clean the keys using a 95% pure Isopropyl alcohol solution (IPA).

All damaged and missing key decals removed in preparation for replacement new decals. Others may have to be removed dependant on how the new ones look when in place.

These are the replacement key decals I will be attempting to use.

Qwerty keyboard decals

I’ve replaced the damaged key decals. The ones I’ve used are a lot brighter than the original ones and really accentuate the yellowing. I’m not troubled by this as it keeps its “Old” look. I would have to scrape and wipe for hours to remove all the other keys and to be honest it would look just like someone had gone abroad to have a bright white set of dodgy veneers installed, it would look quite out of place, and in your face. Just like a Cheshire Cat smile.

New veneers anyone?

It serves a purpose and just allows the unit to be usable again.

The final product:

Fortunately a lot of the equipment and parts I have used, I was already in possession of, so there are no additional costs for this project. Below you can view the total costings for this project as they currently stand:

  • Purchase inc postage £13.14
  • Cable restraint £0.25
  • Keyboard decals £1.25
  • Total cost of project £14.64

Again I have managed to save a fantastic 90s retro item from landfill for very little cost, and that is a fantastic result. It has years of use left in it, as long as the consumables remain available, and of that I am confident that they will be available, for at least the next few years. The unit is clean, I’ve just carried out an electrical PAT test and it is electrically sound.

Believe it or not I’m going to go back in time and will write some traditional typewritten letters to friends and family. I’m looking forward to doing that and it will certainly surprise them, it will be totally unexpected.

When all that is done, i will donate this unit to our local LOROS Hospice shop so they can sell it on and raise much needed funds. They deserve it. Edit: This was done in March 2025 at their shop in Hamilton Leicester. I hope it gets them a good price.

Watch the brief video for the final words on this restoration. All 13 seconds of it.

And that’s it folks..

Thanks for passing by.

Rinse and repeat..

What is your favorite animal?

Just like a record on repeat or just like a commercial radio station, or even like a moon orbiting a planet WP starts repeating its daily prompts, you could almost set a clock to it as it has such amazing regularity. This particular prompt was last listed on 23rd November 2024, not that long ago.

So unlike WP I will save the bother of re writing my answer, and just post links to the relevant blogs below. If you are busy and don’t have the time the simple answer is: Dogs are my domesticated favourite whilst Hedgehogs are my wild favourite. There, I’ve saved you some time and gotten myself some brownie points with you.

For anyone interested in hanging around here are some links to previous blog posts including that one for the same question in November last year.

The humble Hedgehog

My World

Is there a cure for a broken heart 💔

These are just three of many posts on the subject. The last one really sums up how I feel after the loss of a wonderful family member. The struggle goes on.

Peace

Sega Game gear – game cartridges

What the listing stated:

Untested

EBay

Yep that’s it. The good old EBay untested. Anyone who buys from here knows that this can mean anything from working to totally wrecked, or even should have been binned because a good portion of it is missing.

But I try to remain positive… some people call it stupid.

Cheap, probably broken

Here I have purchased two of the same games for the grand total of £1.49 GBP. About 75 of your finest British pennies each. My suspicions are such as the guy who posted is selling a couple of “tested” game cartridges (the same game) for a considerably higher price. I just don’t understand how he couldn’t test these two. I suspect they are knackered to coin a phrase.

Anyway, let’s await the mailman.

I’ll apologise in advance for how easy this fix was. They arrived and both game cartridges looked ok. I then loaded them into the unit and one worked and one didn’t.

Both Cartridges tested

I decided to just clean the contacts on both cartridges with a bit of IPA and hey presto. Two working game cartridges for next to no cost.

2nd cartridge up and working

So again, I apologies for the simplistic fix, I was hoping I would at least be opening the cartridge and doing a bit of trace repair, but sometimes that is all it takes. I’ll keep one, and the other i will move on with another unit that I’m currently repairing.

But most importantly they are not off to landfill. Result.

Rock & Roll clock

Here’s what the listing stated:

The clock features a swinging pendulum and is a great addition to any music memorabilia collection. However, please note that the clock mechanism is currently faulty and may require repair or replacement.

It’s been a while since I’ve been tempted to fix something totally outside my comfort zone, so here it is a novelty “Elvis Presley” Rock & Roll clock. I quite fancy learning how to repair clocks, perhaps this is the best place to start with nothing too complex.

From what I can gather the clock is a fairly std mechanism with a separate mech that operates the pendulum “legs”. I know the wife won’t entertain this in the house, however my elder sister is a massive Elvis fan so I may even shove it in her general direction… if I can fix it.

No assumptions as to what is going to arrive at the moment as you never know what you will end up with from auction sites, so let’s just await the mail man’s knock on the door.

All good on arrival, as expected

The clock has arrived and apart from having to just straighten the hands, a battery has been put in and the clock is ticking well and keeping good time. However Elvis isn’t shaking his hips as he should be even with a separate battery in place so there is an obvious issue there.

No hip shaking Elvis?

Well the issue is a bit of a pain in the ass one. The pendulum effect comes from a small electromagnet that opposes a magnet on the pendulum, hence when working the pendulum continuously swings. However this one has two of the wires from the coil broken. These wires are just about the width of a hair and had to be coaxed back into place using my microscope. I’ve tacked the wires back into place and the clock is currently working.

Electro magnet

However, apparently these wires are known to break even if a butterfly farts in the vicinity of them, they don’t hold up to repair that well, so I’m going to order a new electromagnet replacement. Cheap as chips.

Elvis shaking those hips

So I’m happy a fix has been possible, I’ll just wait for the replacement magnet until I move it on to my sister. In the meantime the wife has to put up with it shaking its stuff in the conservatory.

Edit: New magnet 🧲 has arrived, Elvis really going for it now and shaking his booty like a mad man 😂

Shaking like a mad man.

Now he’s off to my sister. can’t stand that much activity around me.

Another item saved from landfill. Result.

Happy days 👍

Modified Sega game gear 2110-50

You may wish to refer to this post: Sega game gear 2110-50 where I purchased a non working Sega Game gear and brought it back to life.

The (I thought it was repaired) Game gear

I’m now ready to do some modifications on this unit, and I will save the replaced items for use on later projects.

Pretty much every Game Gear that was ever produced (and that is approximately 10.6 million units) has suffered with the dreaded (Capacitor plague) that I have discussed in an older post. The first job that is recommended to be carried out when purchasing an old Game Gear is to replace the old capacitors, it’s quite an easy task and nine times out of ten will remedy any issues that you have and allow you to continue gaming for years to come.

However there are other issues.

The screen is an old tube powered system that is exceptionally power hungry, you can replace this with much superior LCD versions, I’m withholding from doing this at the moment as I want to get as much use out of the old screen, and to be honest my unit doesn’t require replacement just yet, there’s still life in the old girl. I’m sure that this will be a future project though.

Occasionally after doing the capacitor replacement on the power board, other components such as a small IC and three transistors that control voltages across the system, start to misbehave causing the unit to switch off after just a few seconds. This is currently occurring with mine and I am intending to replace these components to see if this sorts out my issue. I have also ordered a replacement power board from China that is a fraction of the cost of a European one, it may work, it may not but if the change out of components dosen’t work at least I’ll have an alternative option.

There are a few checks we can do prior to replacement of these components on the power board that will confirm the various voltages required by the system. It’s best that these tests are done prior to diving in head first to replace them. You could be just wasting time. You may need a new power board or maybe even consider converting to a rechargeable battery system. It’s all doable.

Expected voltages – photo courtesy Retrosix

Here are the results from my test of voltages on the power board, I’ve injected 9v via a bench power supply to the battery contacts on the board:

  • At the 34v pin I had 0v
  • At the 9v pin I had 8.9v
  • At the 1.28v pin I had 1.28v
  • The three ground pins read as ground
  • At the two 5v pins I had 0v

So as a result I obviously have an issue with the 5v rail and the 34v rail, I believe the 5v rail is the one that affects the boot sequence and the 34v is not an issue at the start up, however, it’s there for a reason and this simple test proves there is an issue. I will therefore only change the IC and three transistors as the capacitors were changed when I did a full recap.

For my modifications I am getting a new clean amp duo audio board with dual speakers instead of the single mono one that is standard. This is an upgrade on the original, extremely efficient and with better sound processing.

I am also replacing the shell with a new Blue case and glass to replace the scuffed old screen, this shell also has dual speaker outlets to compliment the audio board replacement. The shell is already prepped to accept a rechargeable battery system should I decide to install it at a later date.

I shall be getting these upgrades from Retrosix who specialise in supplies and modifications for gaming consoles.

All the items have now arrived and the first thing I’m going to do is sort out the replacement IC and transistors on the power board. The rest is fairly straightforward. However they have sent me the wrong shell, a single speaker one instead of a dual speaker one, so I’ve now got to await a replacement, annoying!

Scratch that, they are saying that they never did have any duo speaker ones even though they were advertising them on their site ( as per picture above..) and after a protracted discussion with the supplier / owner i’ve come to the conclusion that he might think he is a wizard at modding and designing circuitry but is totally and utterly inept at customer service, he wouldn’t know good service if it bit him in the ass. Hey ho on we go, it is what it is.

If you choose to use them in the future then just be aware. They have an uncanny knack of trying to pin their inadequacies and mistakes on you, the customer. Caveat Emptor – as they say.

So now the sound will be original mono, but hopefully improved. I have a spare speaker and mount as a result and I can use the new clean amp duo board in a mono configuration. Should I get a duo speaker shell sometime in the future I can always do a swap out.

Today I’ve taken the empty new shell and installed the new audio card and speaker, as well as the new buttons and silicon pads. I’ve then installed the main board minus the power board that still needs the new components.

I’ve also installed the new front lens on the unit and I must say it looks nice.

New front lens on unit

Let’s get to the difficult bit, replacing the components on the power board. I’m not joking when saying that some of these items are not much bigger than a grain of rice. I suspect a lot of bad language will be used here, as this is a new level of soldering for me. I’ve never replaced anything so small before. If I balls it up I’ll just have to await my cheap Chinese power board.

Ok, the power board from Ali Express got here really quick, to be honest even before I could set some time aside to change the components on the old board, so therefore I’ve decided to try this new board as a straight swap.

I will keep the the components and the old board to use at a later date.

First though I have used the bench power supply to test it is ok, and it’s a big tick on all voltages as per the test I did on the old board. All voltages are stable and consistent, so I have secured the board in place and put the required batteries inside. Works perfectly.

Back together, awaiting the big switch on
Working perfectly

I now have a perfectly good looking updated Game gear that I am exceptionally pleased with. The sound system is a good upgrade, it has a really loud volume (adjustable) and is crisp. The powerboard from China at a total cost of £10.80 is an absolute bargain, and works perfectly with good stable voltages. The case is good, fits well and the lens is clean easy to install and scratch free, the whole thing looks brand new.

Two old rebuilds, rejuvenated

I now have two perfectly good looking and working examples of 90’s retro rivalry in perfect working condition. The plan is to display these in the house, on a custom made display. I’ve really enjoyed working on this little project and I’m made up with the outcome.

The only things left to be done would be to change the power supplies to rechargeable and to change the screens to new IPS/LCD screens, but I don’t think I’m going to do that on these two, I’m keeping them original or as close as possible to original, I want to keep these as they are, to cherish in this condition for as long as I can.

I love them. And they are fantastic.

Alfie’s ready to come home…

That was the call we’ve just had from the vets. A lovely and quite melancholy call to be honest, just as if he’s had a minor procedure and he has awoken and is now ready to come home.

Reality is a little more stark. We are now heading down to collect our little fellah after he has been cremated.

Our beautiful lad has come home

We didn’t know what to expect to be honest, do we take a bag? Is he in a polythene bag? My wife was upset as she’d taken the call as I had been on nights and was in bed. I had this overwhelming feeling yesterday that he’d be coming home today, so in a way when I awoke I wasn’t surprised, strange isn’t it?

We needn’t have fretted, it was all so professional. He’s in a lovely woodland scene tube, we didn’t want a sealed casket as we wanted his ashes to go with ours in the end, please don’t judge us, it’s what we want and you will never understand just what this little character meant to us.

We also have a certificate of individual cremation, with lovely words, we have a lovely little picture frame memento with his paw print, we now have to pick a picture from the thousands we have of him, no easy task and I suspect we will have words about this. The vets have taken a cutting of his fur and put it in a small phial, lovely touch. We have two beautiful cards with his paw print on, and I will be using one of these to get a permanent tattoo on my arm with his pet name as he was known to many in the family- “Alfie Moon”.

The feeling in the house at the moment is nice, all the doubt we had has now gone, and we are so happy with the professional service we have experienced.

We can now move on to the healing stage, as he is now home. It’s so weird that the immense feeling of grief has lifted and a modicum of calmness and happiness has returned, it needed to as it had been missing for some time now.

Our lad is home, where he deserves to be. And he will be with us forever more.

Welcome home son ❤️

Namco arcade classics tv plug and play games joystick

Here’s what the listing stated:

FAULTY no power, NOT WORKING for Spare Parts or Repair. 

TEST NOTES: Does not power up, no further testing, unable to check any functions. Battery leakage with corrosion in and around battery compartment.

Ebay

Another low priced item that I fancy getting working. And as is standard with me it has corrosion. This item is from 2003, it is a self contained game arcade system that plugs into the tv. It has five games installed including classics such as Galaxian and PAC Man, so compared to some items I’ve purchased of late, at 21 years old this one is a relative baby.

Well, we now await its arrival where we can give it a good look over and assessment. Hurry along now delivery person…..

It’s arrived.

It’s in pretty much perfect condition, all stickers are in place and it hasn’t been previously opened.

I’ve put in 4 new batteries, and damn it. It powers on. It’s working.

It switches on

I’ve plugged it into the back of a television and it also plays.

Damn, it works

Yes there is a little corrosion on the battery springs but I’ve seen a lot worse. I’ll give these a little clean just so I can say I’ve done something.

It’s quite rare these days to get a bargain off of EBay, and for the seller to be truthful in his description, in fact he’s been exceptionally honest, just writing it off without testing. A big bonus to me.

As the saying goes, if it ain’t broken, don’t try to fix it.

Makes a boring post though, sorry about that. A bargain, yes, and another one kept from the tip and will be used at home in the garden pub, the wife will love this as she’s a big Pac-Man fan.

Result!

Sega game gear 2110-50

What the listing stated:

SEGA GAME GEAR Console FAULTY

Ebay

And that was it. Faulty. What’s faulty? I’ll not know until it arrives as i didn’t ask. Foolish perhaps, but I was looking for a challenge and something I could later mod. I think I’ve found it.

I must admit I was looking for a cheap way into a retro gaming repair and I believe this was it. Most damaged game gear units seem to be averaging around the £42GBP price but I managed to get this 2110-50 version at a lower price of £28GBP (and I may have got a game with it, let’s see what arrives!). However I don’t know what the heck is wrong with it but I suspect it’s the usual issue that has plagued these 90s retro units since their inception where the capacitors fail catastrophically.

There is probably not a single one of these units out there that has not suffered this issue or is certainly guaranteed to do so sometime in the not too distant future. Imagine how many of these units have just been discarded as junk considering that 10.62 Million units were sold up to and including its discontinuation date in April 1997….scary!

The first recommendation from anyone in the know is to change the caps before they start popping and corroding everything. I have a set of replacement caps ready in anticipation.

My hope is that this unit has not yet reached that corrosion stage….fingers crossed 🤞

Hurry along now Mr.Postman….

Both Game gear and replacement Caps have arrived. And I’m really happy as there is a game in the unit as well “Columns” Sega’s answer to Nintendos Tetris. A nice bonus.

The unit turns on, there is no sound, and only a very feint green glow when the unit is held at an angle. It’s looking very much like it is the old Capacitor problem.

The unit is in surprisingly good order with scuffs and minor scratches as you expect from a game that’s around 30yrs old. The lens scuffs aren’t an issue as a new lens is relatively cheap. But that isn’t the problem as it stands. Let’s get it working and I can worry about that later in the repair process.

There are no signs of any corrosion in the battery compartments and this pleases me. I only hope that when the unit is opened there are no obvious signs of corrosion on the boards.

Wish me luck, I’m going in….

Overall I’m happy with the condition inside, no bad corrosion, however it’s noticeable that a few capacitors have leaked. The worst seems to be C39 on the main board, it’s easy to see the residue.

Main board Capacitor C39 leaking

This unit separates into three boards. An audio board, a power board and the main board. This is a twin asic board, I have removed the audio and power boards as these are the first and possibly the easiest for me to be working on.

The audio board has 5 capacitors that require replacing, I can see some leakage on the rear of board but not in the area of the capacitors. I suspect that this is factory flux though I could be wrong. When I remove the caps I’ll clean all the pads and use IPA to clean so this should sort that issue out.

Audio board Leakage or Flux

The power board only has three Capacitors that require changing, however it’s clear to see here that C5 has been leaking.

Powerboard C5 leakage

Let’s get on with the removal and replacement of these 8 components. The other 11 are on the main board.

Well that didn’t go too bad. A few minor position changes due to the capacitor types being a different size on the board compared to the 1990s version.

It was obvious that there had been leakage on these two boards due to the fishy smell that arose when the soldering iron was used. That said, the old capacitors came off without too much problem. I used solder braid to remove the old solder and then gave a good clean of the board with IPA prior to re tinning the pads prior to putting the caps back in place.

I knew there wasn’t a big issue with the power board as this was sort of working prior to this project. This was the easiest board to solder as it had through the board components, pretty much a straight swap but for better components.

The audio board was different as I had to reposition these pots so the case could close properly and the shielding could go back into place with no issues. Again I used the same process of unsoldering, cleaning thoroughly and then tinning the pads.

These two boards are now complete. As a test I thought I’d reassemble the unit and see if there was any improvement. Power came on and the red led lit, this was a good sign that there was power and I’d not messed anything up. Secondly there was sound, we didn’t have that before so this is a definite improvement on what we originally had. Volume works with just a couple of occasional crackles so I may have to use some more contact cleaner here.

We have sound

So far, so good. No real improvement to the picture even though you can see something is trying to come through. That said I’m hoping the replacement of the caps on the main board will help this. So with no further a do, let’s get the main board finished.

Just got home from work, now time to get these last 11 caps done. All the old ones removed, all the pads wicked to remove the old solder and what a stink of old fish, these capacitors had definitely died.

All cleaned with some IPA to rid of all the debris and then fluxed and tinned the pads ready for the new capacitors to go into place, I’ve got this off to a tee now and these went on a lot quicker, easier and tidier than the last lot. I’m a lot more competent now, and feel more confident with this process.

Had a little trouble getting it all back together, a couple of the new caps had to be tweaked slightly as they were in the way of a screw post, the earth shield was also causing issues and shorting the system, again a bit of captain tape helped shield an exposed component. All this done I put the strap back on and loaded up the batteries. Switched on and red light, all looking good…

All working

Very happy with the fix, that was my first Cap replacement and I’m happy with my first attempt. Again you learn from these attempts and the reluctance I initially experienced was just nerves. I’d be more than happy to do more of these fixes, maybe using the modern surface mount components next time.

Another one saved from landfill, I wonder how many of the 10.6 million more that were made of these have suffered that very fate. Scary.

Anyway, I’m looking at using this unit to do some mods, so this is going to be my test bed for other projects.

Simple fix, great outcome, I’m happy.

Mamekara Karaoke machine

What the listing stated:

This is a handy karaoke cassette player released by Epson over 30 years ago in Japan. The item it self does not function. Recommended for retro collectors

Ebay

Mamekara Karaoke machine

This video sums it up, apologies to those with sensitive hearing:

The pub singer

Anyway, enough of the frivolities, let’s see what’s wrong and try to fix it.

On initial examination, everything seems to be there, no damage to the shell. Four AA batteries inserted and I do hear some feedback from the mic.

Four AA batteries

There are some volume controls that control the tape sound versus mic sound, there is also a speech on and off switch along with a balance control, these seem to work intermittently and I suspect they might just need contacts cleaning.

The tape seems to sort of work but the play button does not stay on, the recorded sound is slow. Echo and balance buttons also seem to work but again probably need contacts cleaning. I suspect the belt of the cassette needs replacing and the tape heads will need cleaning.

Cassette runs slow

Good news is that for once there is no corrosion on the battery contacts.

I will now have to open the unit up to observe closer.

Once inside there are a couple of issues that show straight away. The two drive belts are very loose and will require replacing, luckily I have a bag full of these that should do the job. There is also a wire detached that controls the motor, this will need re attaching at both ends.

I’ve reattached the wire and replaced the two drive belts. I’ve checked the board and found what looks like a burnt capacitor, but checks confirm there is no issue. Looks like the component has a small burn on it as a result of an earlier soldering attempt, probably during manufacture.

The main issue is that the play button will not engage. I spent a good 30 minutes scratching my head here until I spent some time clicking the buttons that worked and the stop button. There is a catch on the rear of the tape head that should click into the sliding stop mechanism when depressed, this was not quite making the full range of travel. A pair of pinch nose pliers and a slight adjustment of about 1mm ensured we were now working. I was worried I might over stress this catch, however it was made of steel and I had nothing to worry about. See the video below:

Loose belts and non engaging play button

There was nothing wrong with any of the volume controls or switches, so I used some contact cleaning spray and vigorously operated them for a minute or so each. This worked just fine.

I then reassembled the unit, put in some batteries and hey presto, good loud clean sound. I put a tape in and it played just fine, probably better than some of the Walkmans I’ve fixed lately.

Excuse the pub singing

I’ve put a little video up above of me singing into it, I haven’t played a tape due to copyright issues that might occur. I’ve sent the video to the family of me singing with a tape and they are suitably bemused, the unit now sits in our garden pub awaiting more customers, once I get a few Karaoke tapes to use.

Fully working in our garden pub.

The only thing I’m going to do is replace the foam mic cover, I’ve managed to source one and that should be here shortly. I’ve also found some cheap old Karaoke tapes that I’ll store in the pub for the families entertainment.

I’ve really enjoyed this little project, and once again I’ve salvaged another item that was broken from the 90s and saved it from landfill. It lives on.

Good job 👍