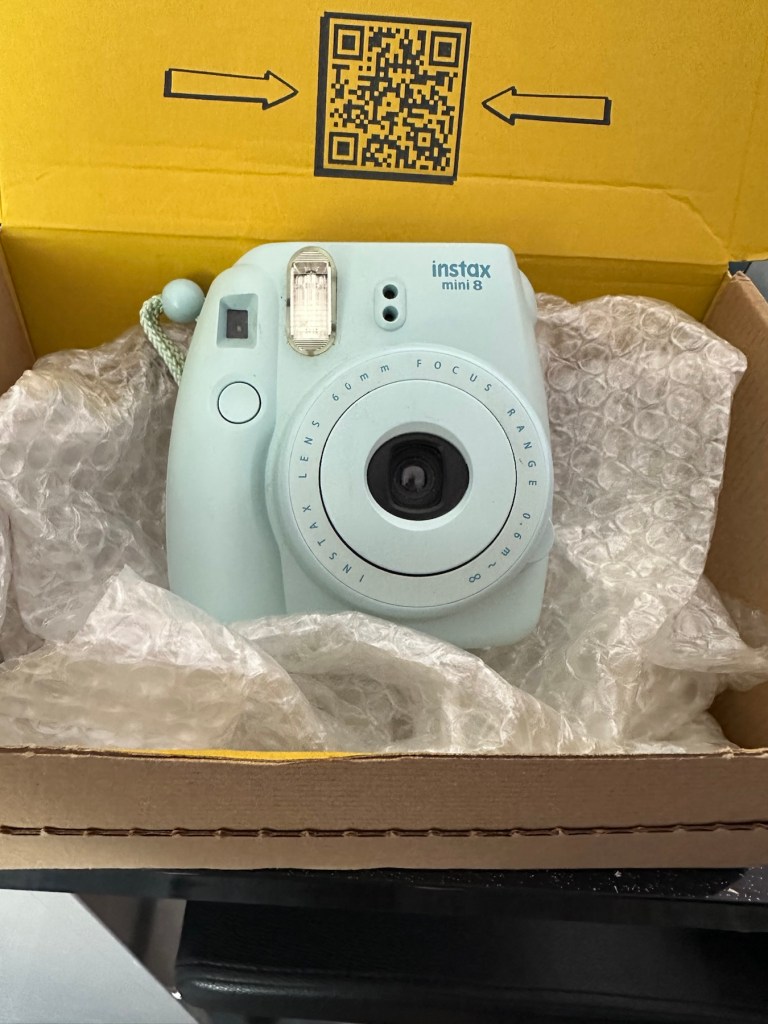
Yes another one. Anyone that reads what I post will realise that these little cameras have really become popular with the youngsters within our family. I recently posted about a family get together: The garden gathering and in this post I stated that a young member of the family liked these cameras so much, that she went out and purchased a damaged one and asked if I could fix it for her. How could I turn down such an offer?
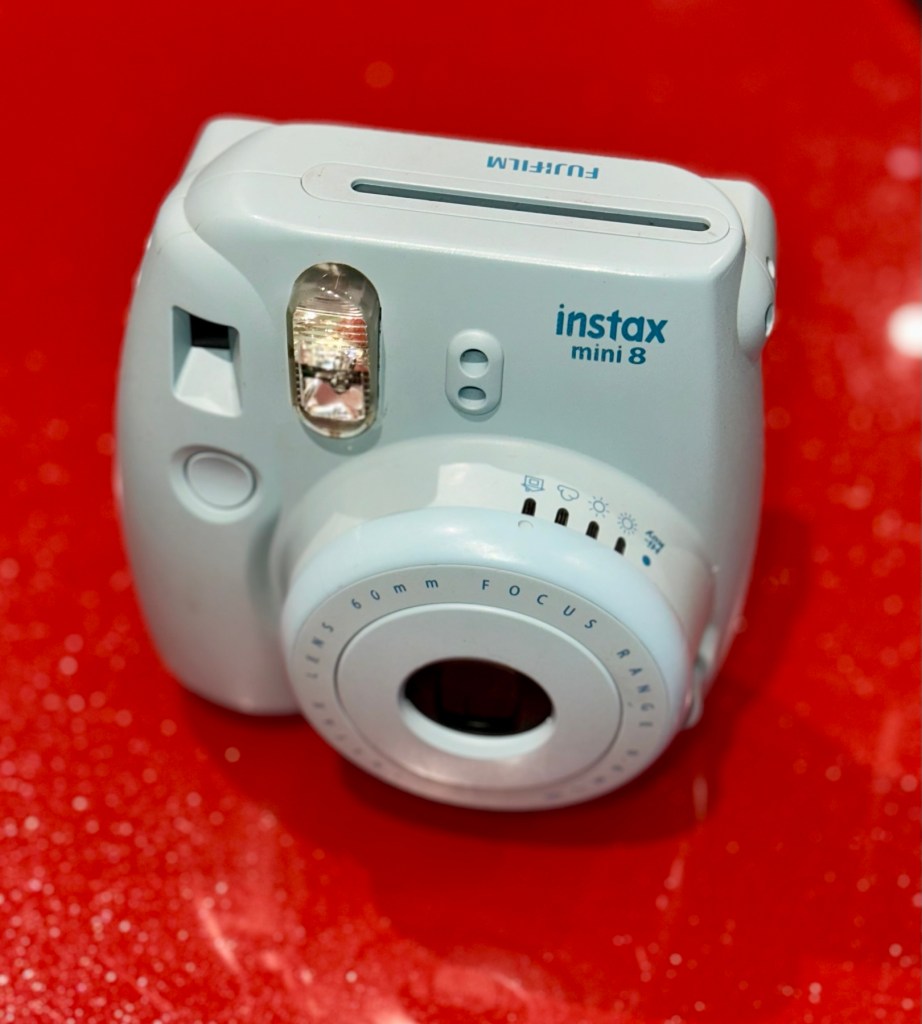
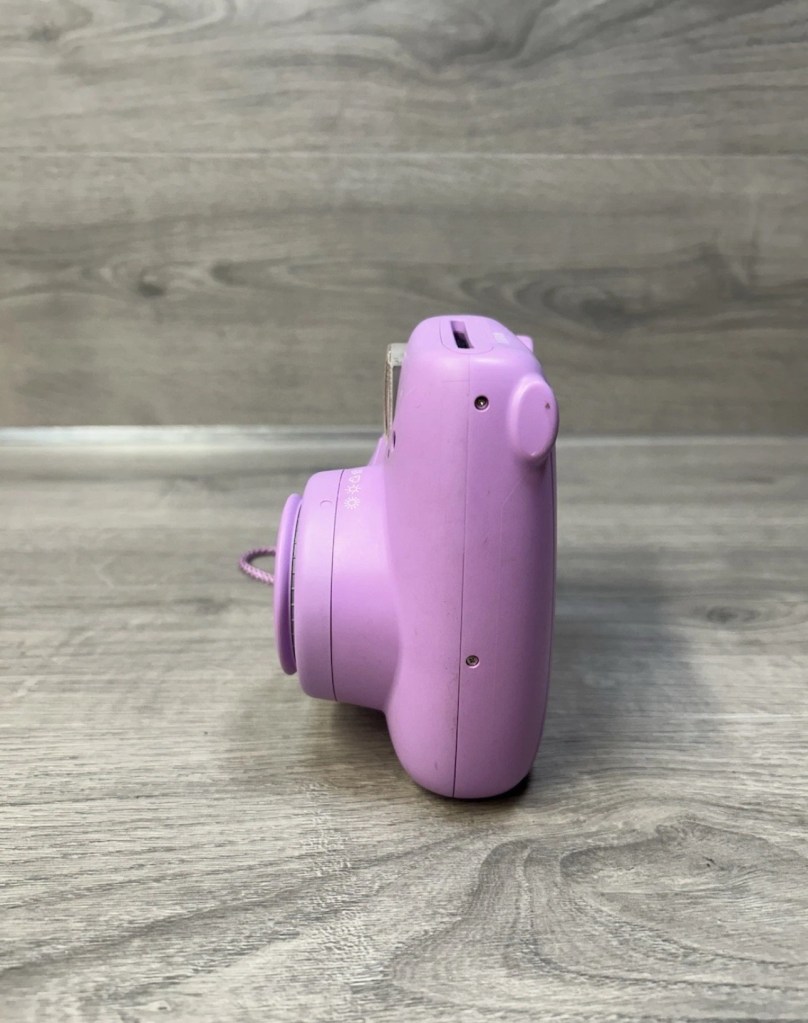
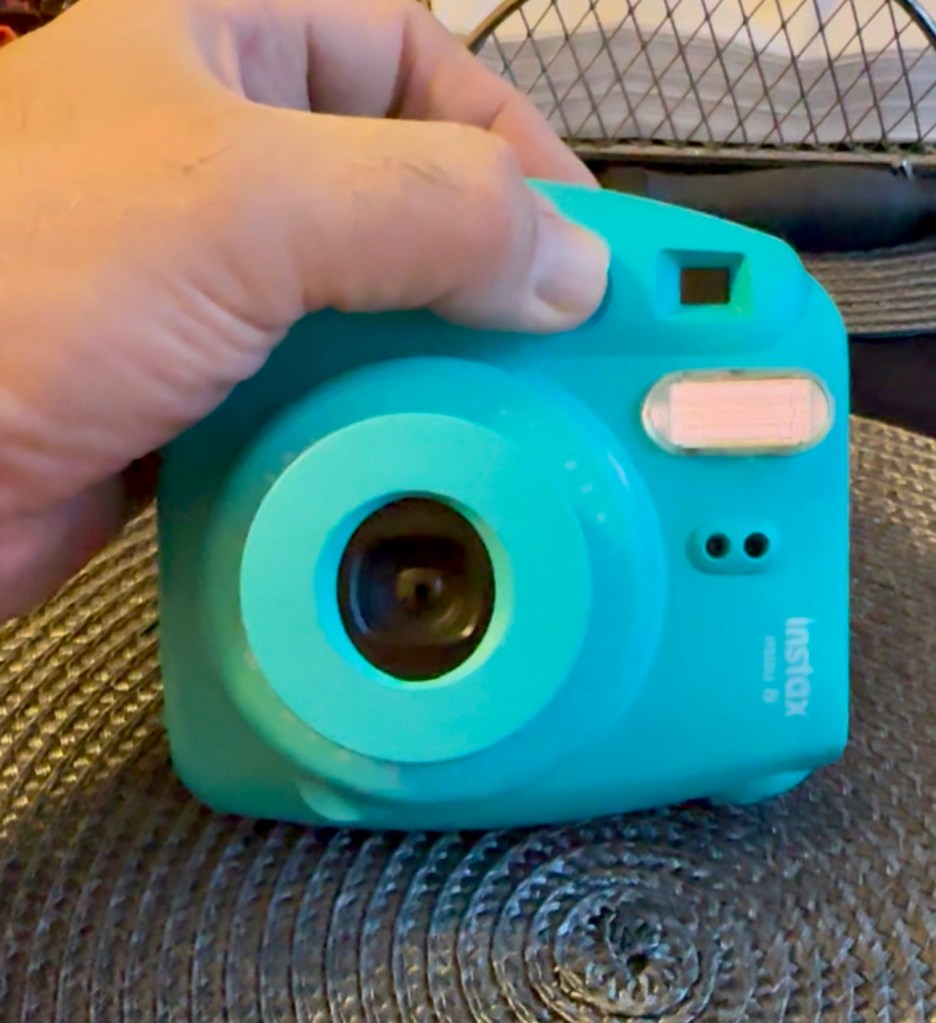
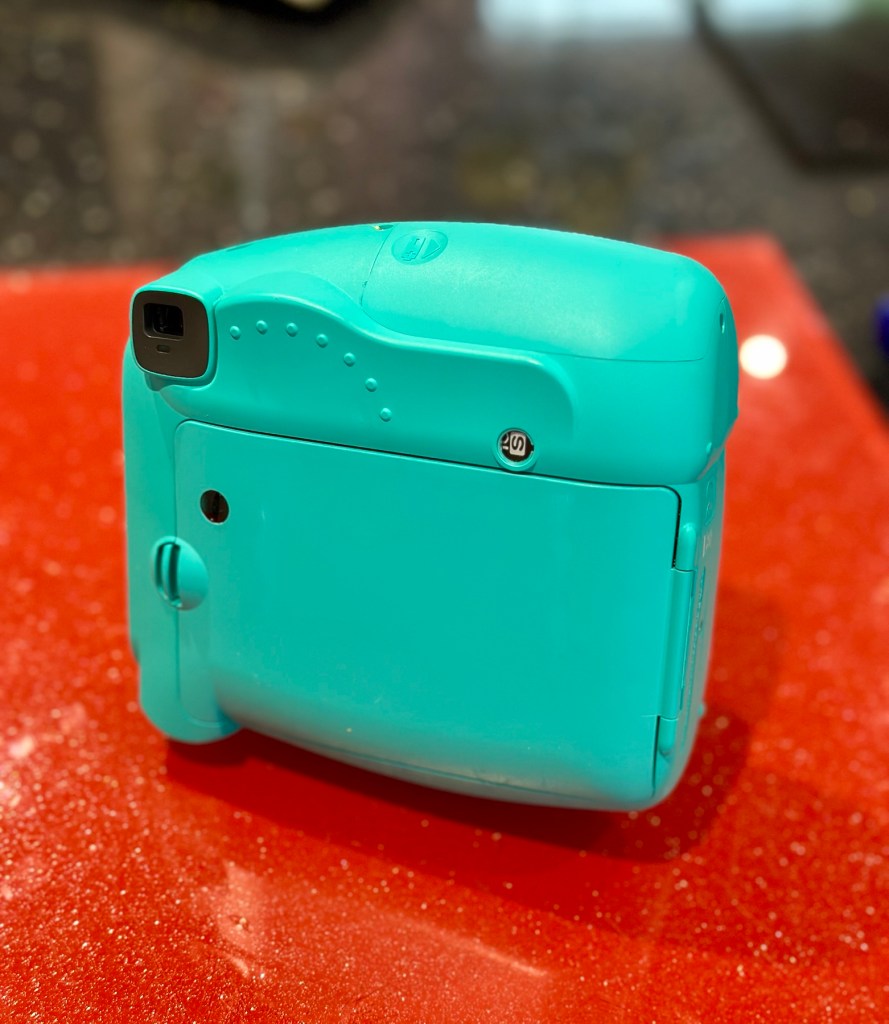
Another Instax mini 8 and that Iris should be closed
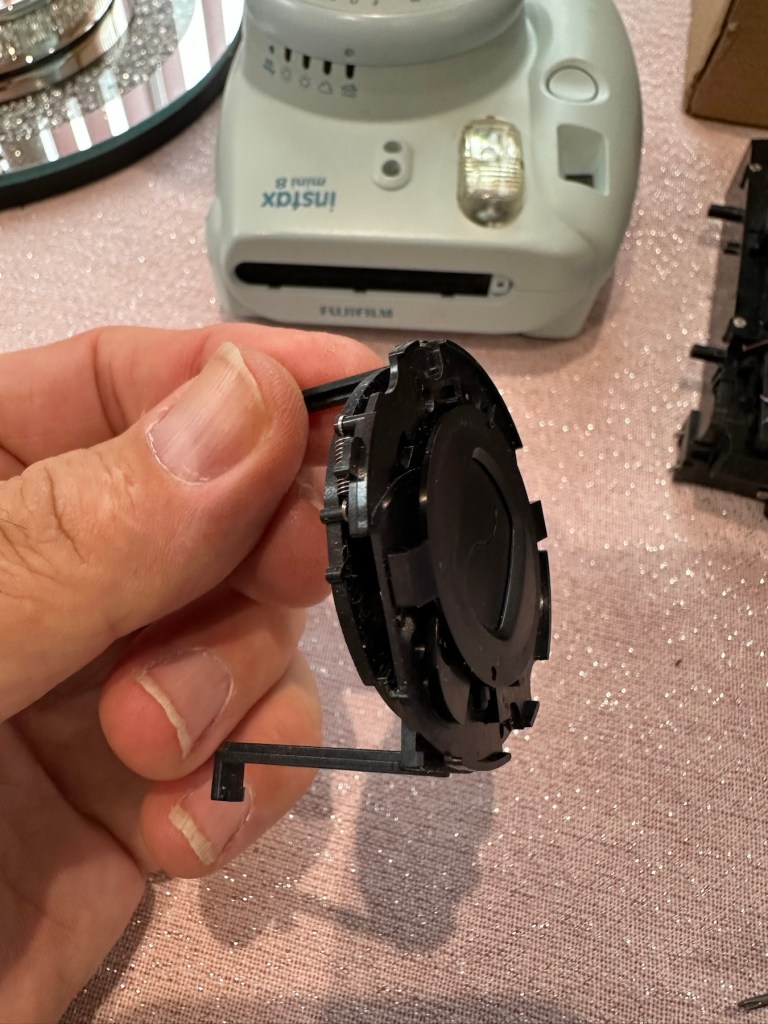
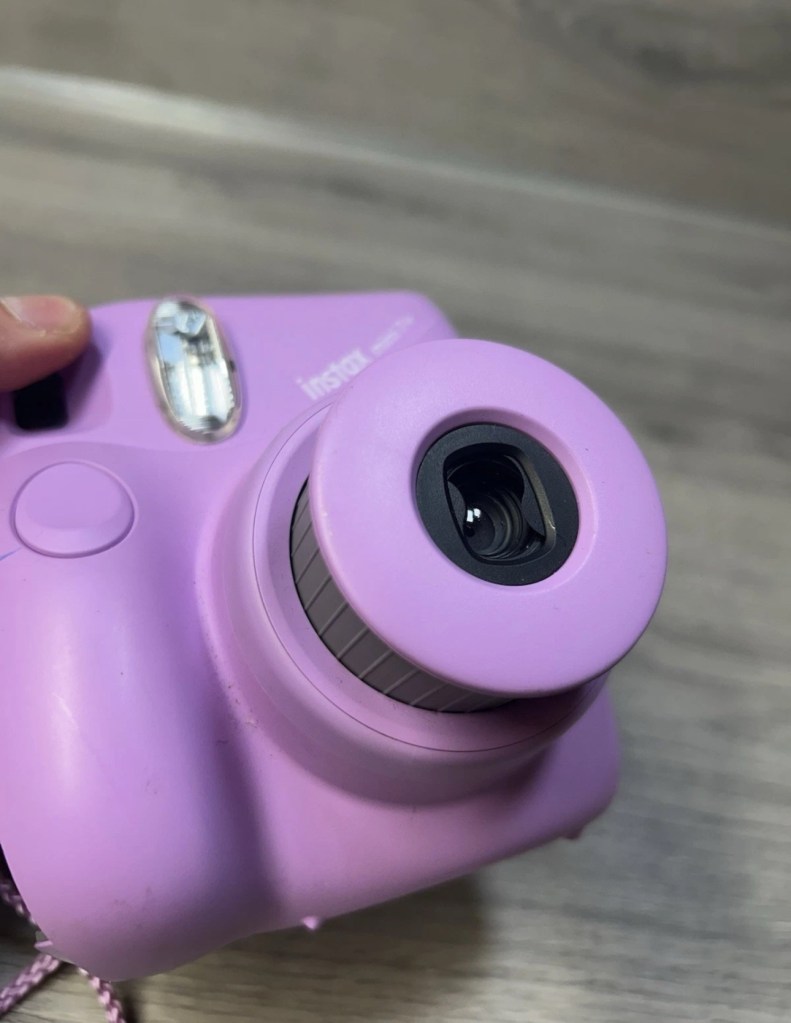
And here it is. Needs a little clean and immediately I can see an issue, what I’ve noticed is that the little iris lens protectors that close when the lens is retracted are missing, or not operating and opening properly. Everything else seems to be doing what it should, motor, film transport system etc, however the initial issue reported with this camera was that it’s exposure was sometimes hit and miss, it most definitely all related to the lens issue. A good clean wouldn’t go amiss with some extra attention paid to the light sensor area.
Anyway, enough chat, let’s crack on.
Assessment:
A nice tidy camera, needs a little clean, flash fires, film transport mechanism inside is working and the motor runs. It gives the impression that it is working fine, however….
Here’s a reminder from the young family member who made the purchase, regarding its issues:
I’ve just remembered, I think the advert said something about the photos coming out dark no matter what setting it is on! x
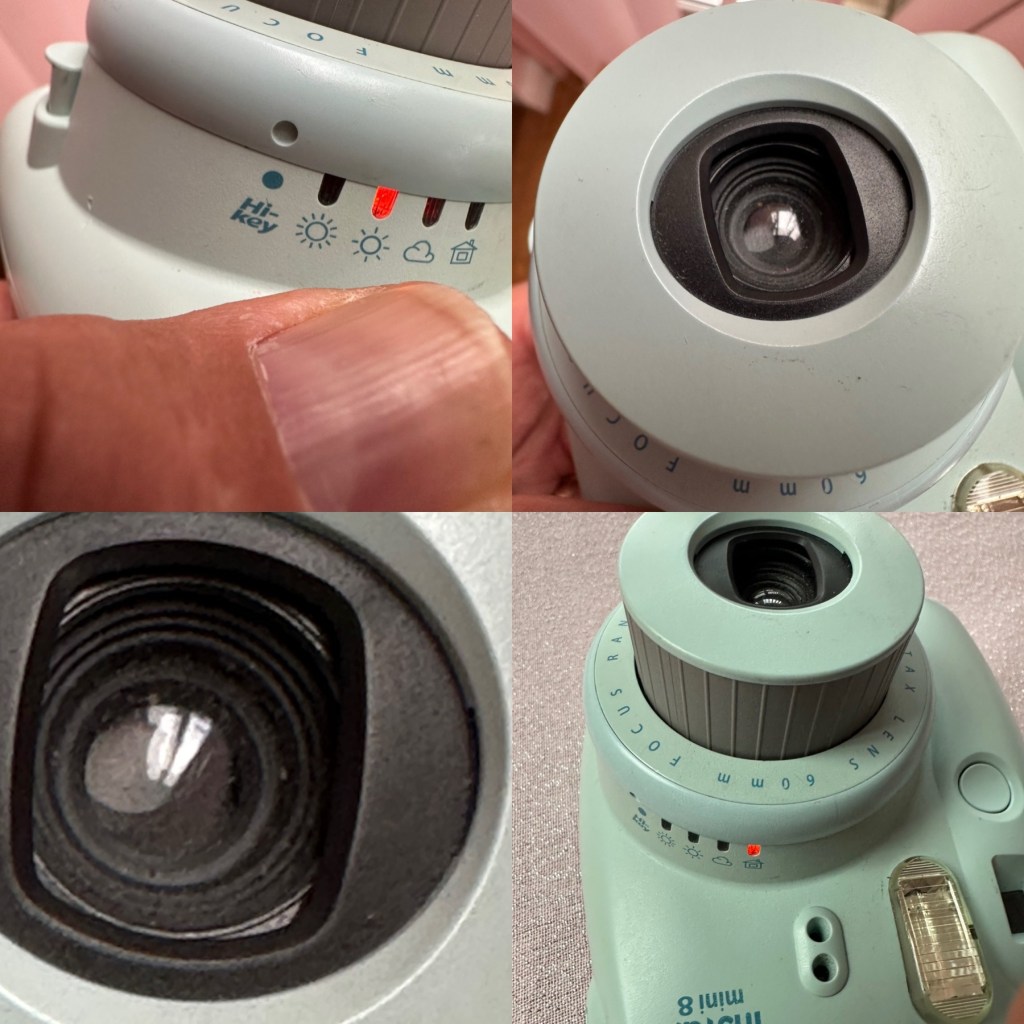
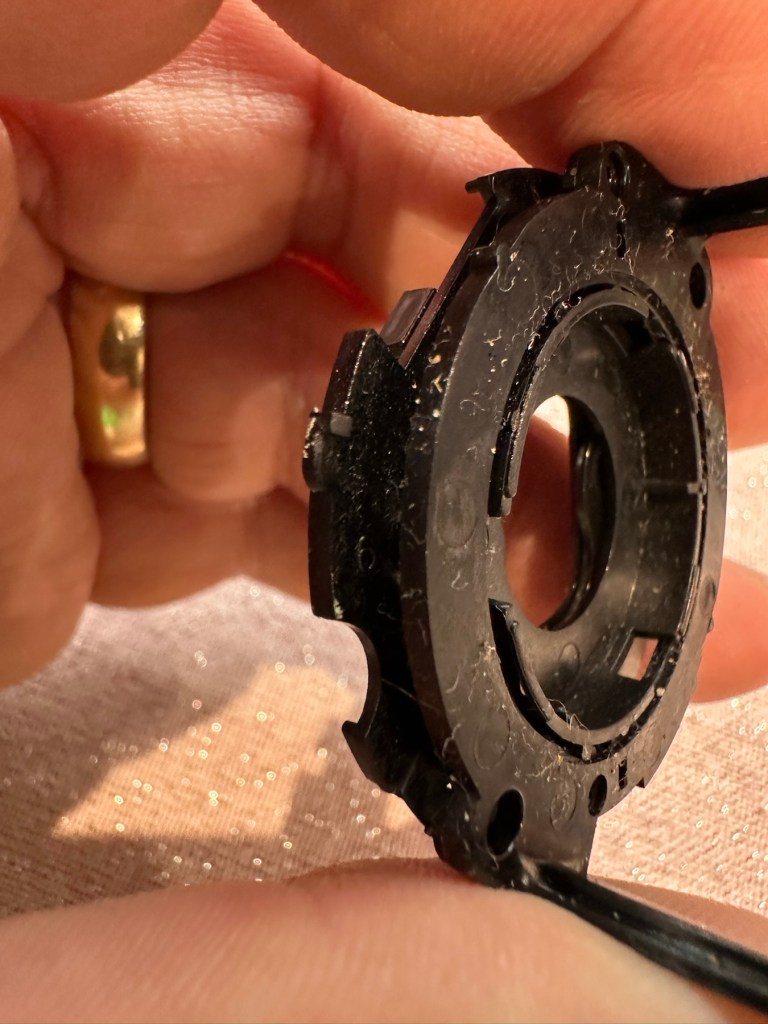
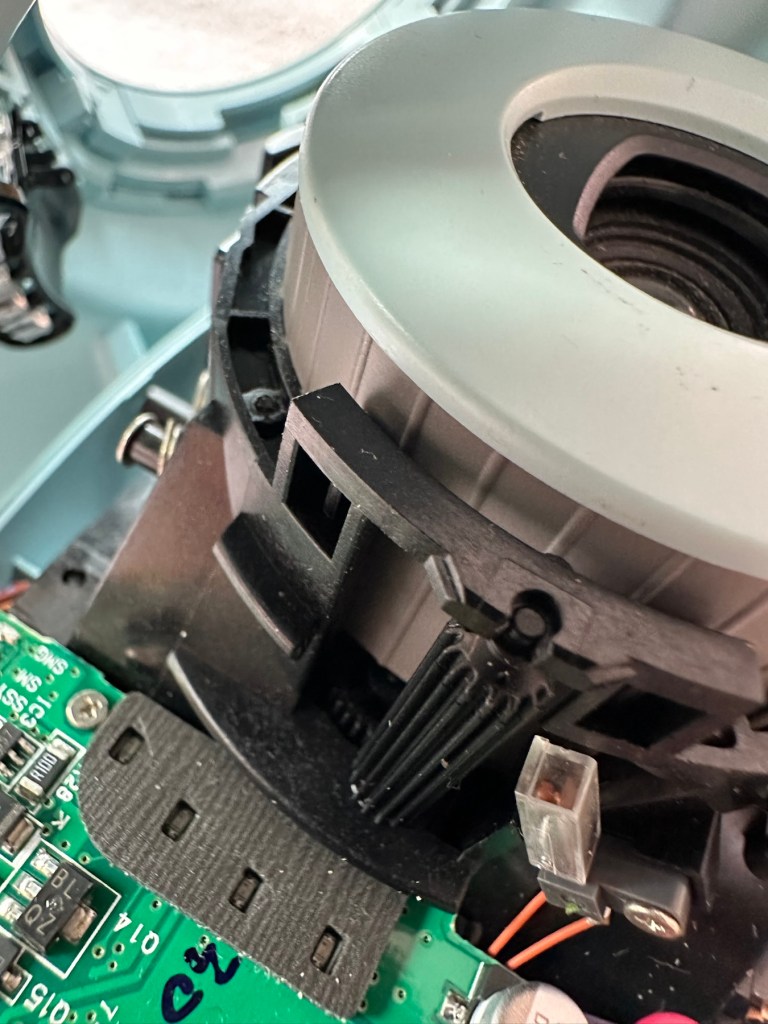
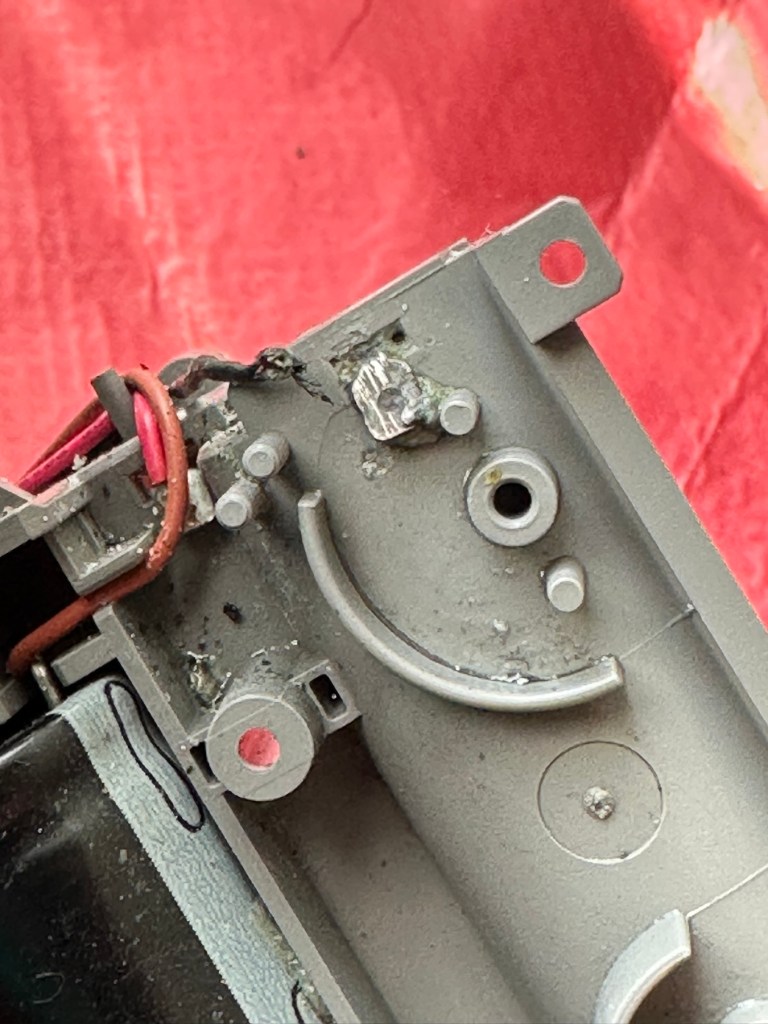
I’d already noticed the little iris mechanism on the front of the lens didn’t open and close when the camera was turned on, so I was going to be looking in this area anyway. But when I looked a little closer and moved the aperture ring on the side of the lens, the relative apertures in the lens were only moving to roughly the half way point, off centre, hence there was no corresponding fully positioned aperture, and in relation to the lighting situation that was presented, they were stuck and blocking the incoming light. In a nutshell there was not a sufficient sized aperture “hole” for any light to get through, resulting in the exposure issue stated above. This needs adjusting. You can see what I mean in the photo below. The lens aperture leaf does not sit central in the lens.
Incorrect aperture settings and positioning in the lens
Apart from the highlighted problems above, i don’t believe there are any other underlying issues. So I’m going to concentrate on the front of the camera solely in the lens turret area.
Let’s get on with the repair.
Repair:
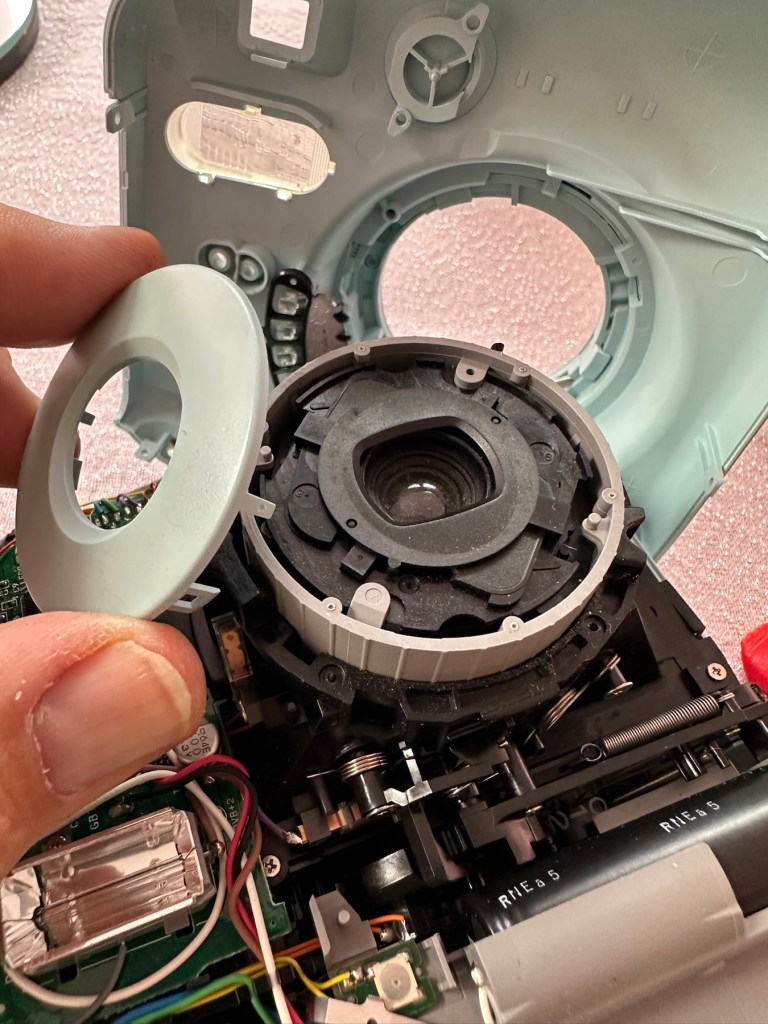
The iris issue is within the lens turret so this will need to be dismantled to access the iris.
Lens top cover removed exposing the iris mechanism below
It was a bit of a head scratcher this one, as I spent a lot of time just staring at the mechanism trying to figure out how it worked. When the iris lids were manually manipulated to the closed position when the turret was retracted all was fine. When the turret was opened up the iris lens did the same, but then if you again retracted the lens the iris remained open exposing the lens. I was thinking it must be missing a spring somewhere and I was about to be proved right.
I found a replacement iris turret in my spares box for instax cameras
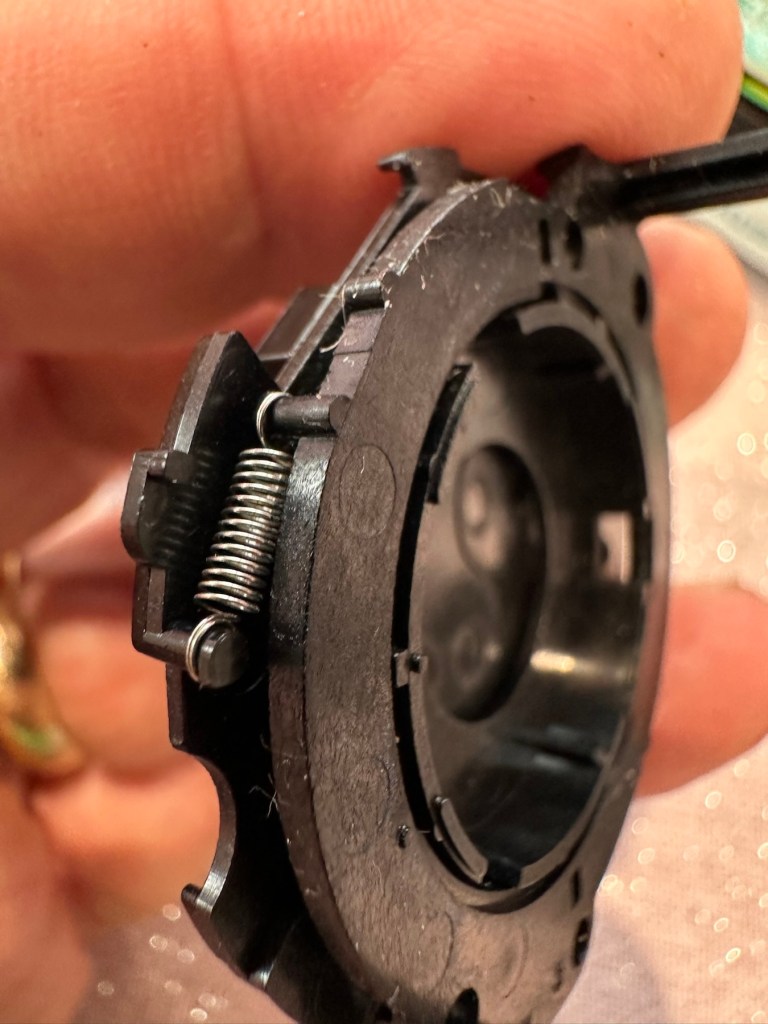
I found a replacement iris mount that fits within the lens turret. I had this in a spare box and used this as a reference to compare to the old non operating one. Here is where it was confirmed that there was a spring missing and this is why the iris was not operating.
Spring missingSpring in place The old iris mechanism compared to the working one
I replaced the old mechanism with the new one and this was installed back in the camera, this now works fine. I have however found a suitable spring for the old iris so I do now have another spare ready should another be needed in the future.
Iris mechanism installed and now working
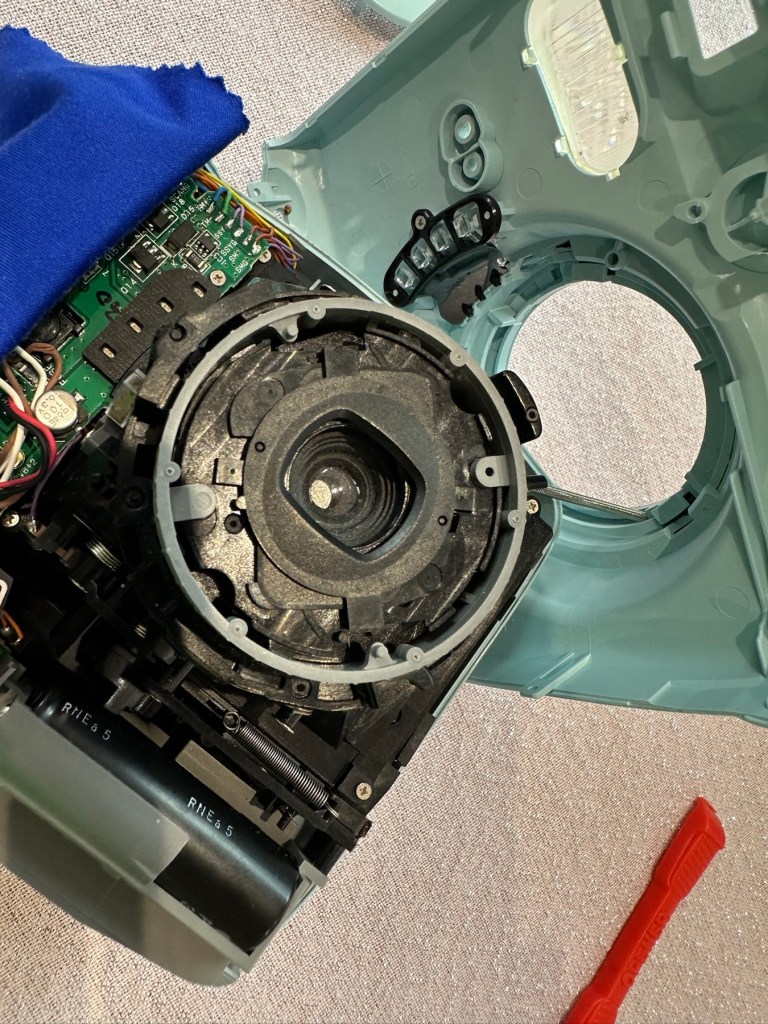
The issue with the aperture positioning has been sorted by ensuring that the aperture ring is correctly positioned in relation to the cog mechanism in the lens turret area. It’s a bit like sorting out the timing belt in a car, it just has to be in the right position to achieve the correct aperture settings.
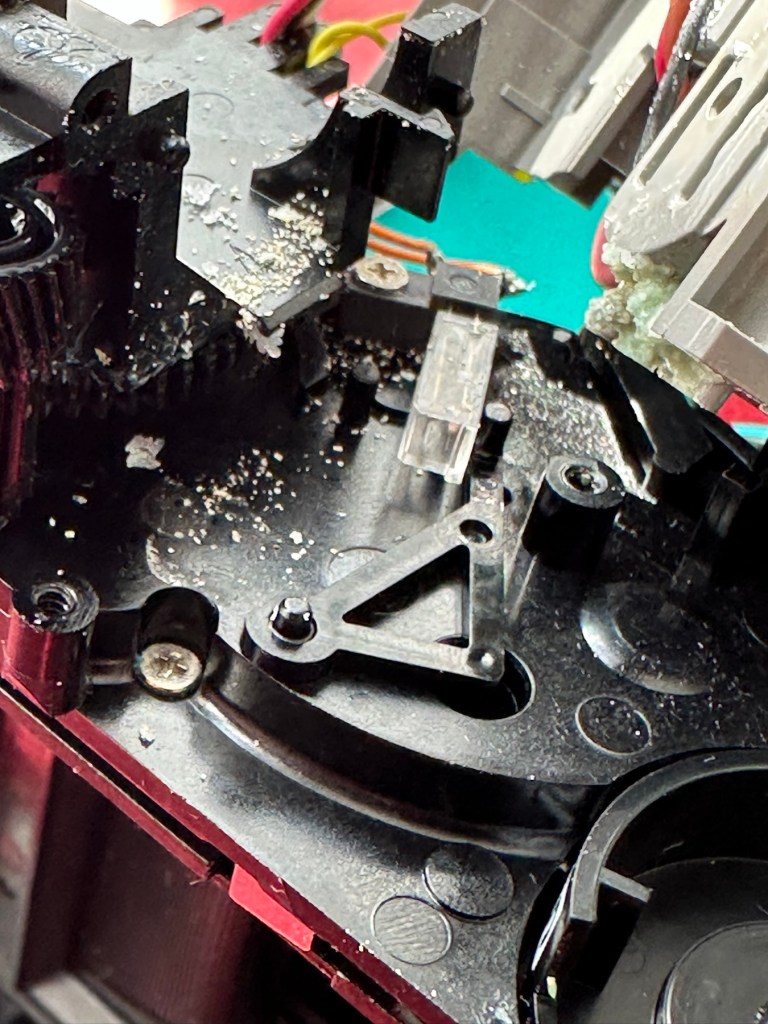
Springs and levers everywhere, and the “Timing” cog on the right that is in the turret area
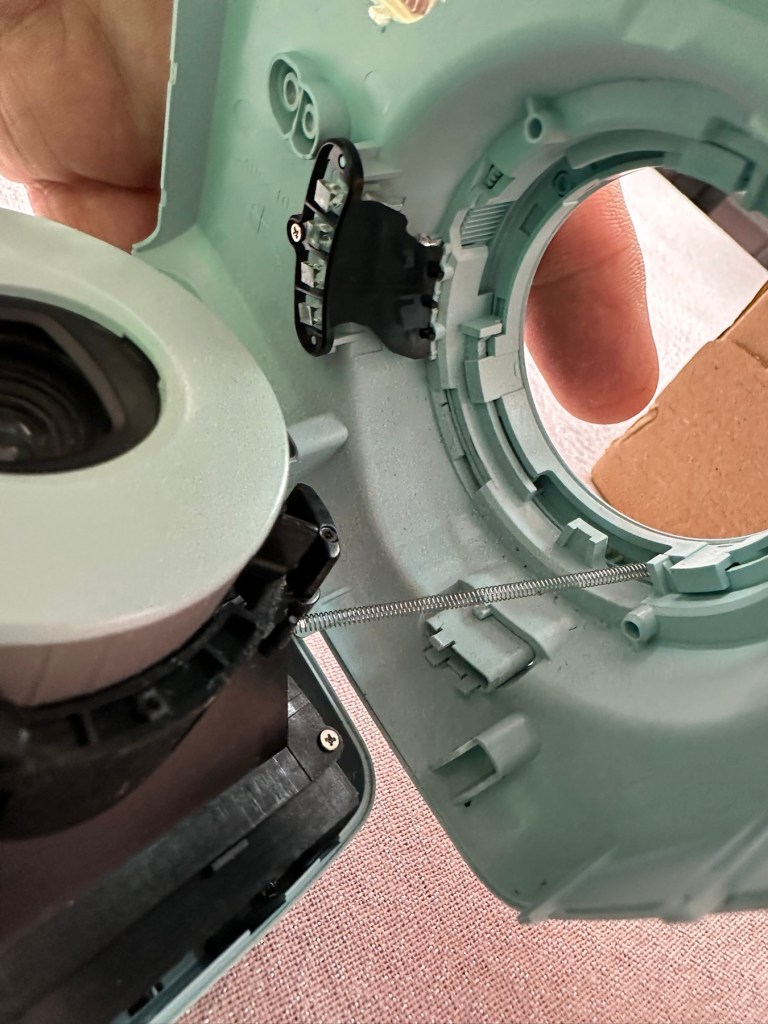
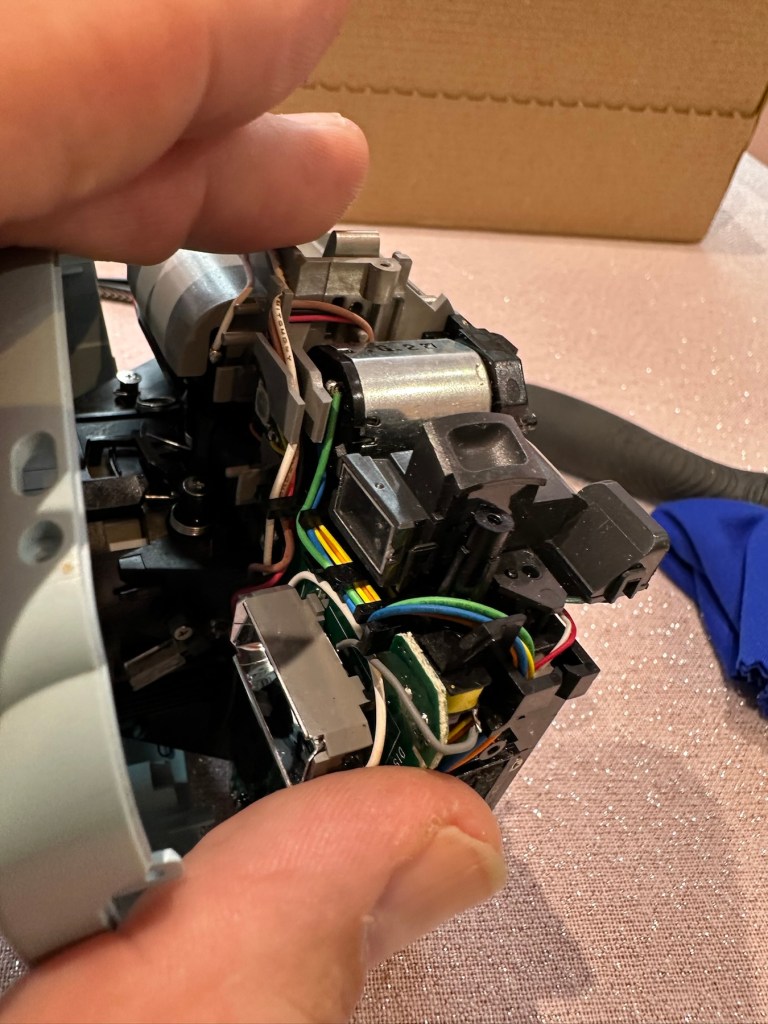
This sorted, the last thing to do was to give the viewfinder a little clean. You have to be very careful here as the viewfinder is connected to the camera “ready to shoot” indicating light, and there are very fine wires all around this area. Be just a bit too clumsy here and you’d have a difficult soldering project to also add to the original problems. Anyway, no such issues today, the viewfinder was un clipped and prisms and glass cleaned and reassembled. All looking good.
Viewfinder and lots of little wires
I’m now happy that all the issues have been attended to and I’m just going to reassemble the camera ready for a quick clean. Luckily all the screws that came out went back in with none leftover. Result!
Result:
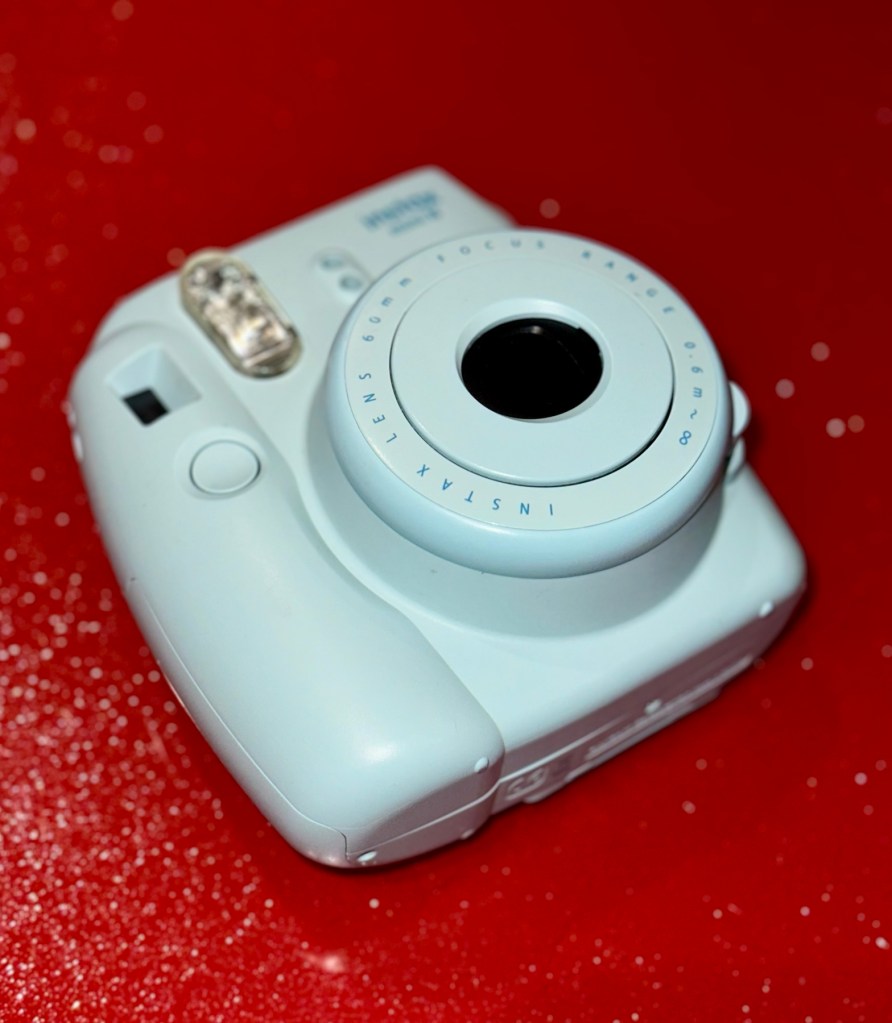
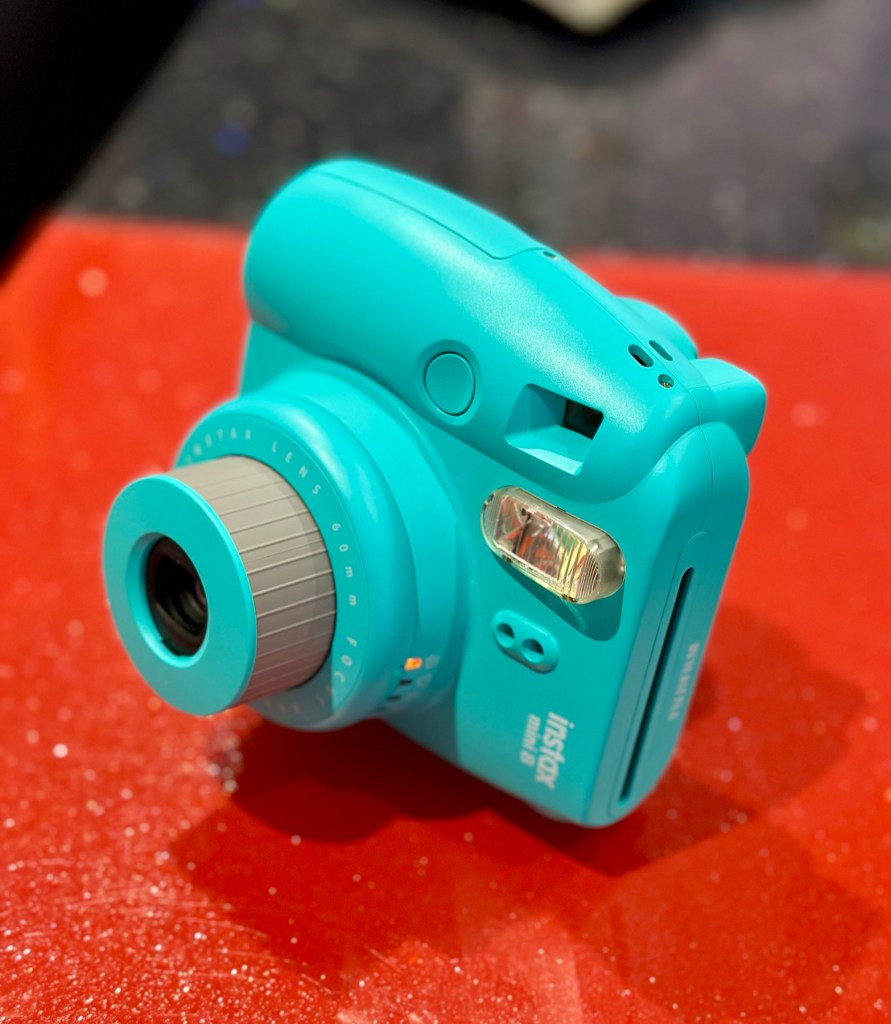
We now have a nice little unit, all aperture settings are working as they should and the lens iris is operating as it was always supposed to do. The viewfinder has also been cleaned and it’s now a nice clear unobstructed view. It just works.
All cleaned and now working, a lovely little camera
I’m guessing this camera will be coming away with the owner on a family holiday that we are all about to embark on shortly. I’m hoping to run some film through this soon but I am ultra confident it will work as all the issues have now been addressed.
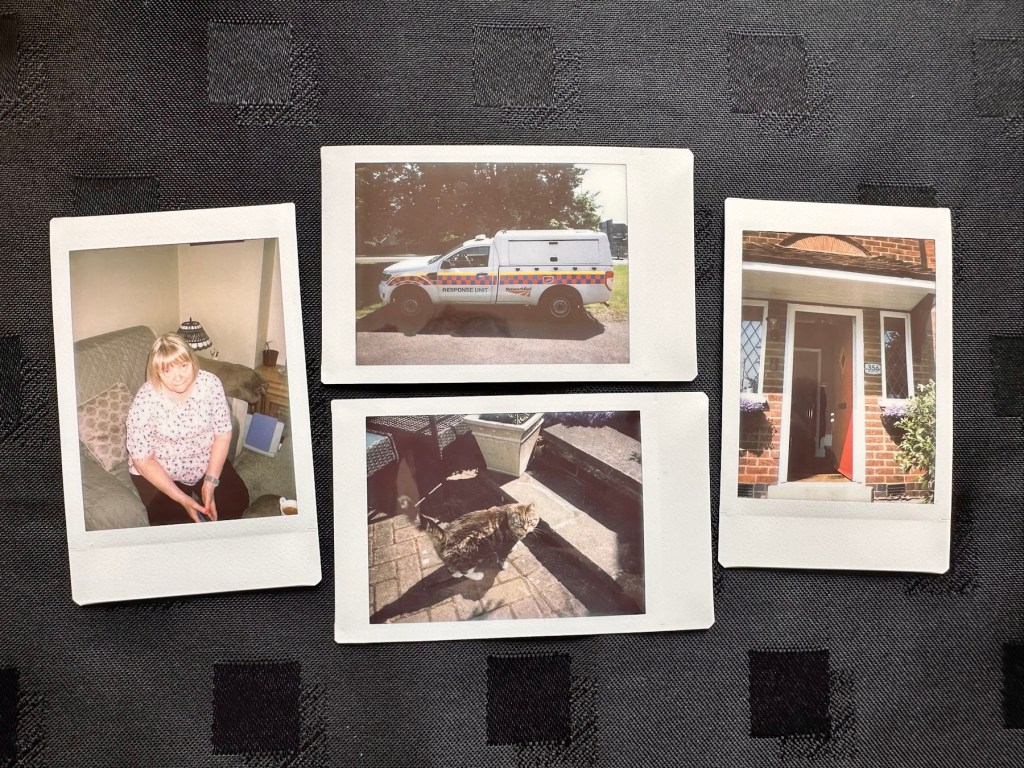
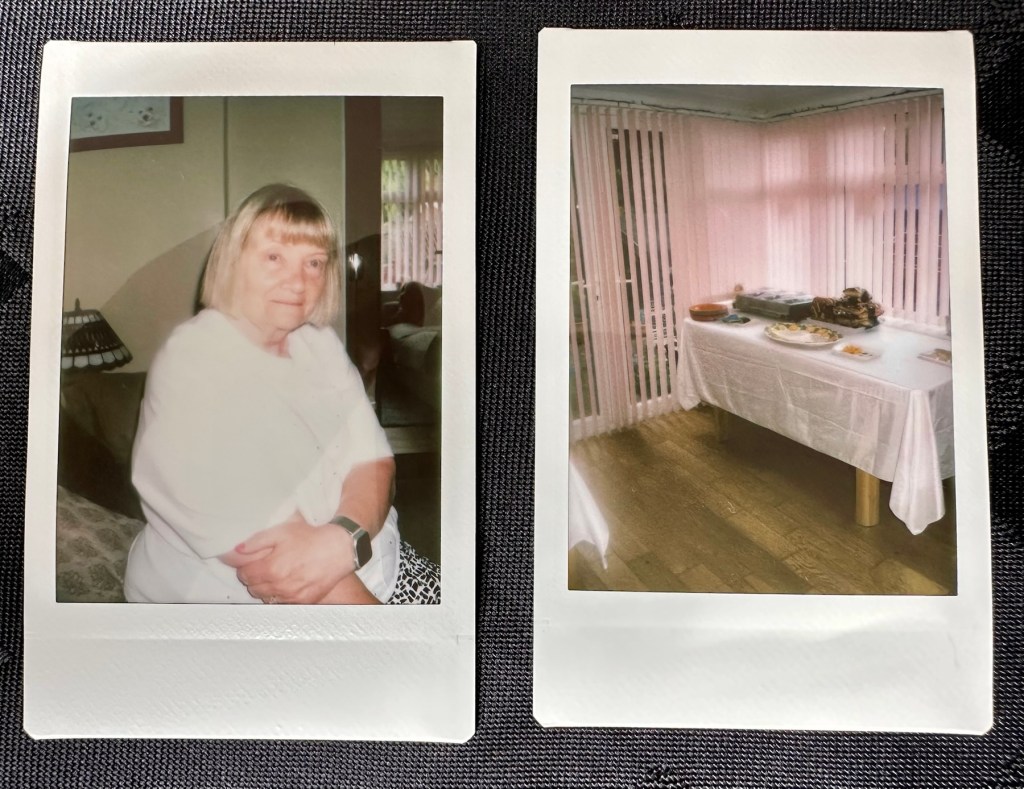
I’ve just got some film and rattled off 4 quick shots, one of them indoors. Exposures are fine so I’m happy this is a perfectly good working camera.
4 quickly produced shots
I’m sure there will be one younger member of the family who will be very happy with her new camera. And may she have many years of capturing good times and fantastic memories. This is what these little cameras are made for after all.
Thanks for passing by, it’s always very much appreciated.
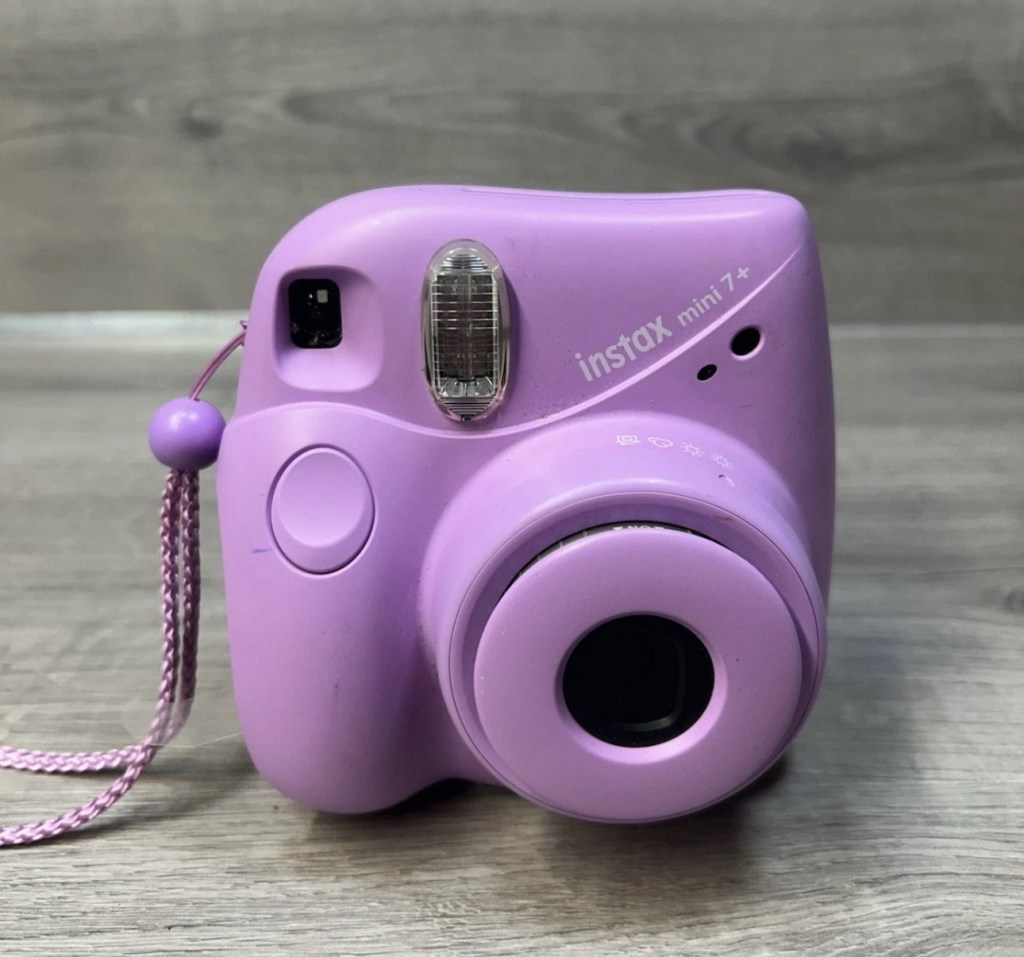
Fujifilm Instax Mini 7+ Instant Film Camera Not Working Spare/Parts. When batteries are inserted into the machine, lots of clicking noises can be heard from the battery compartment. The camera button functions do not work and therefore I am selling this as spares and repairs.
EBay
I enjoyed my last repair on one of these cameras so much that I just had to buy another. You can read about that repair and the issues I encountered here: Instax Mini 8
Nice example. And no battery contamination
Here’s a little about this camera:
With its LED-indicating exposure meter manual exposure controls and automatic flash adjustments the MINI 7+ produces well-lit pocket-sized photographs. Easily shoot in-focus snapshots using the 0.37x real image viewfinder with target spot controls and a 60mm lens with a selfie mirror for in-frame portraits. With a shooting range of 23.6 and beyond the MINI 7+ is ideal for close-up portraits and close environments.
T’internet
I believe this camera was released around 2020 so it’s not that old. This particular unit is also missing the battery cover which is a bit of a pain in the Ass, however cheap replacements are available but not matching the cameras colour. Am I bothered? Of course I’m not, as long as it works I’ll be happy. I could even paint it up, that might be interesting.
This unit has cost me the grand total of £8:69GBP my Mini 8 project cost me £11:45GBP so I’m very happy with this price. The value may rise slightly as I will have to purchase a new battery cover.
Anyway, let’s wait for its arrival.
Assessment:
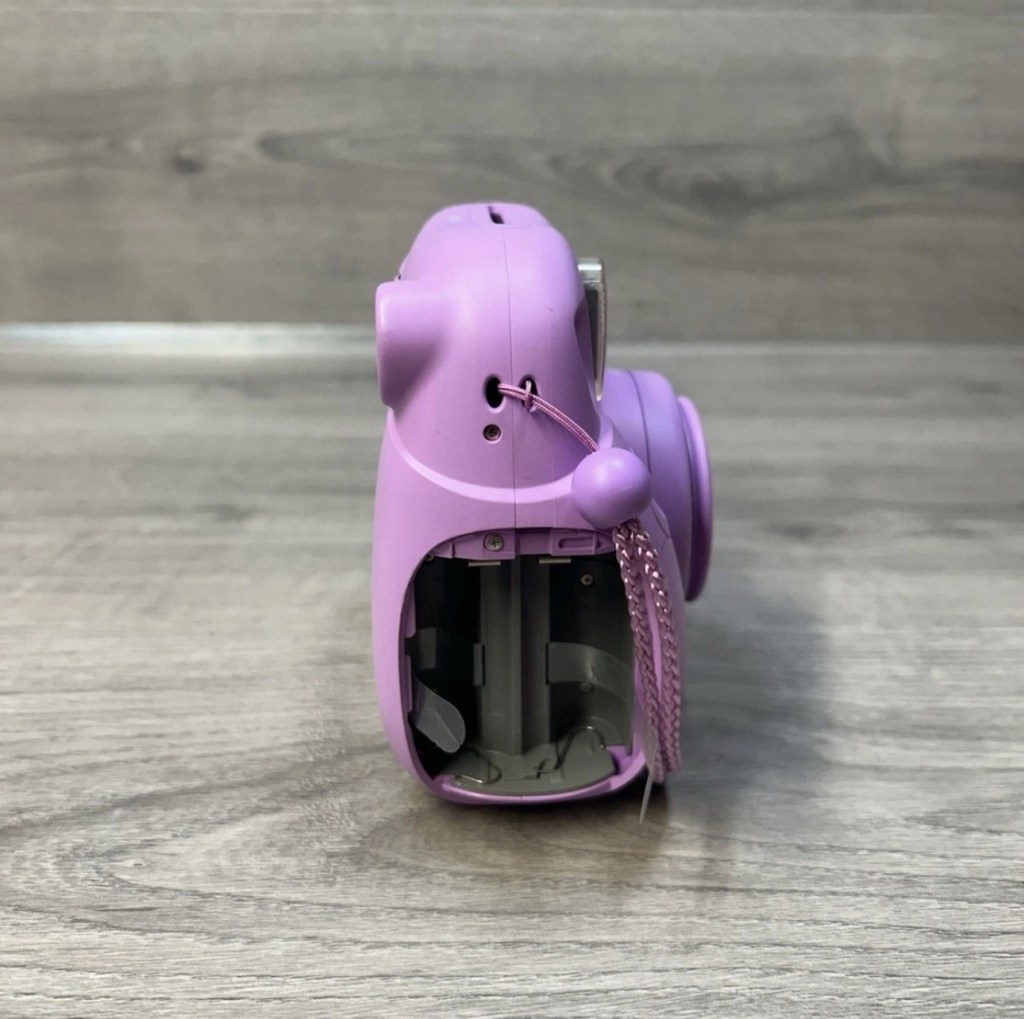
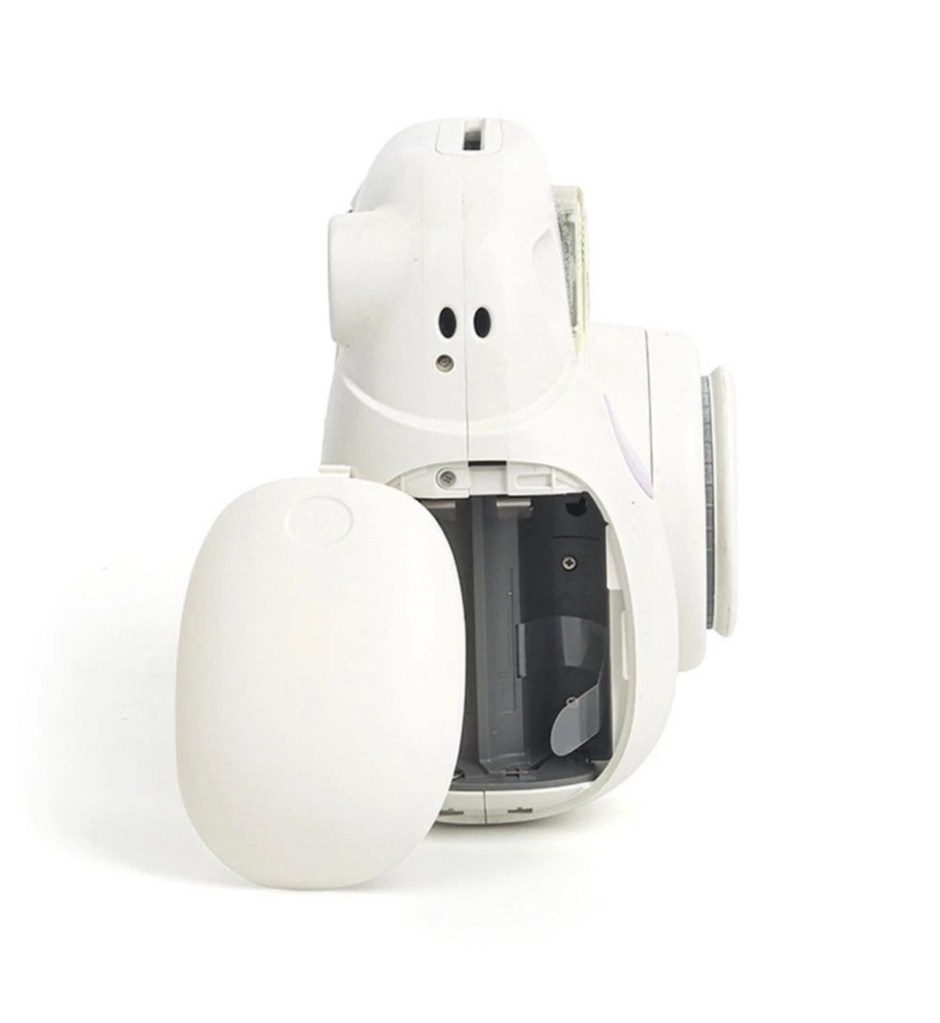
The camera has arrived and it is in good overall cosmetic condition. A bit of dirt on the back near the film counter, but this should clean off ok. There is a gaping hole where the battery cover should be, a pain yes, but I can always source a new one from somewhere.
Generally clean
The good news is that there is no contamination on the battery contacts, they are absolutely fine. When batteries are inserted the transport runs, but it runs too long, and then a red light shows at the end of it’s movement, and no buttons work, in theory it’s dead at this point.
A little movement of the camera and you can tell that something is rattling around inside, so something has definitely come loose or broken from within.
Let’s get it open and have a look.
Repair:
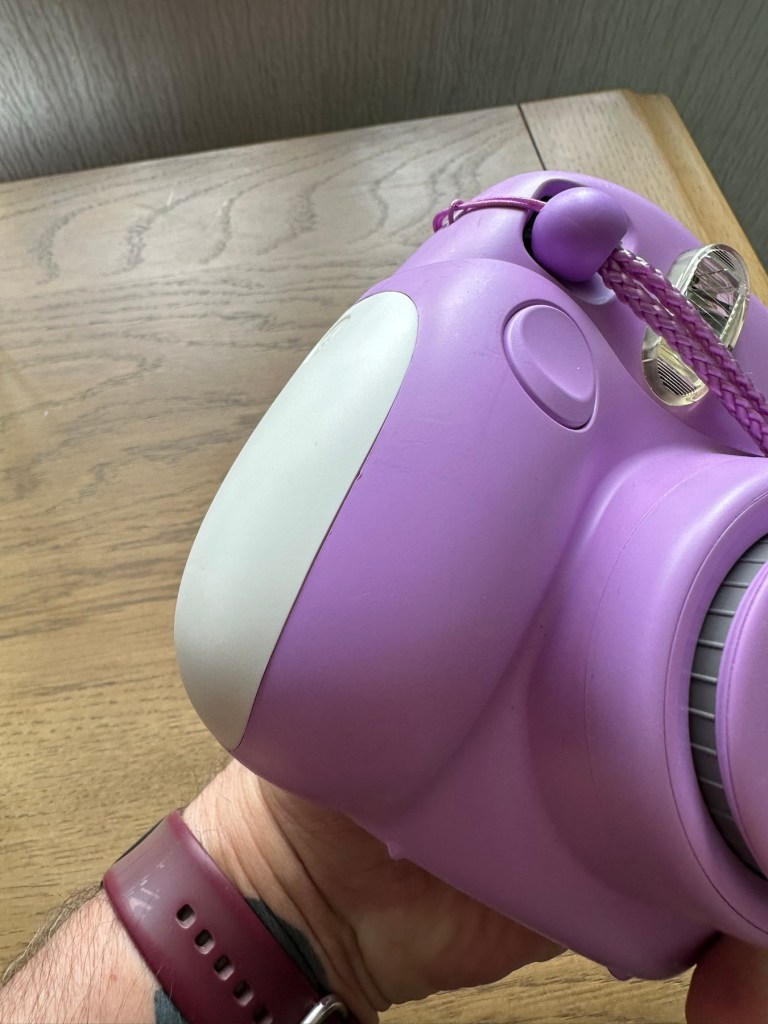
I’ve sourced a replacement battery cover however it’s in China and I’m probably not going to see it any time soon, maybe not even until next month. I’m not going to order just yet until I know if this unit is repairable. But as soon as I get an inkling that it might be repairable I’ll order it.
The replacement cover. It’s white. My camera is purple. Time to get creative.
Next I’m going to open the camera up to see what the source of the ratting sound is.
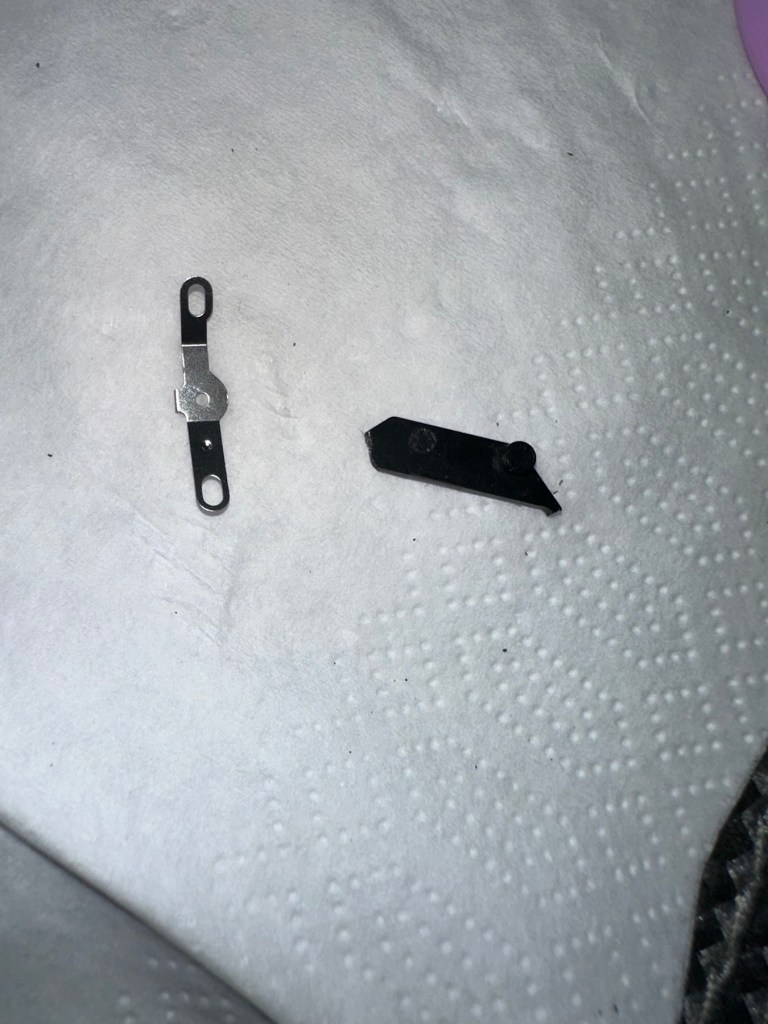
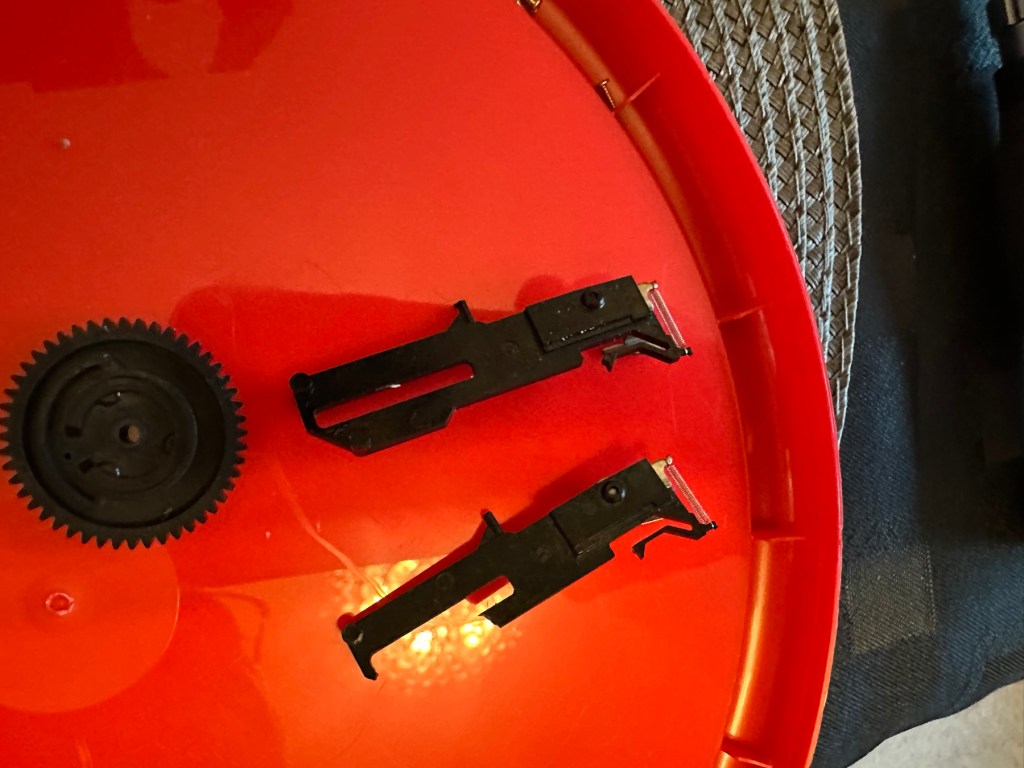
These are the items that are rattling inside once I have opened up.
The rattling suspects
One of the items i recognise is the spring that comes from the operating button, the other part is broken off of something, i will have to look through the mechanism of a donor camera i have to see if i can find a part that matches. And I’ve found it. It appears to be a film transport mechanism buried deep in the workings that had broken and become jammed.
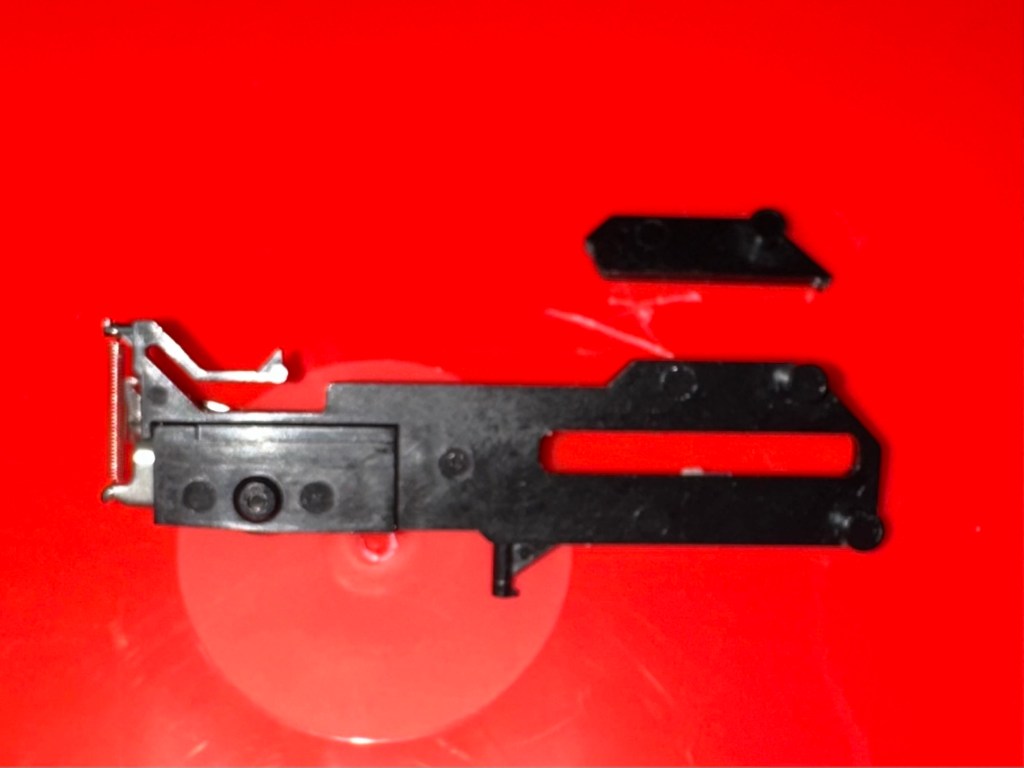
Top, the broken piece and below the replacement partTop the replacement part, and below the found broken part
The part is a right pain in the ass to replace, as it has to be in the absolute perfect position within all the cogs, and there is no reference to how the cogs sit. You have to reassemble most of the camera to test, then open it up again to make fine adjustments.
Capacitor sits underneath this battery housingThe replacement part sits under this cog housing on the top right.
So far I have done this about four times, and I still have to open it and do it again. Once again I’ve managed to twice make contact with the flash charging circuit giving myself a right quick electric wallop.
A nice impression of the two flash test probe points I seem to keep touching
I have learned my lesson though and am now employing capacitor discharge probes every time i remove the batteries, as I say in the website intro pages, don’t do as I do. I’m an idiot. These capacitors maintain about 300v to power the flash, believe me it’s a very quick jolt, but it’s a painful one. You certainly know it has happened, be safe, don’t be like me.
Capacitor discharge probes – use them!
I’m holding back on ordering the battery cover at this moment until I can confirm that the cogs and transport system are working in harmony with each other.
On my sixth attempt at lining up the cogs and transport system I believe I have it set correctly. I’ve compared the transport with another similar camera and it duplicates its workings perfectly. It operates well and there are no fault lights showing. The movement is free and unobstructed. I’m happy that the camera is now repaired so I will now go ahead and order the battery cover. The cover has cost a total of £3:12GBP including postage and that puts the total cost of this project up to £11:81GBP compared to my previous project cost for the Instax 8 of £11:45GBP, so I’m pleased with that, as costs are very similar. Oh, and I best get some more film to test it out as well. It isn’t classed as working in my eyes until I see some photographic proof.
Result:
This is my second repair of a camera in the Instax range and the most challenging to date. It’s been great to work on and as usual I have learned a lot about how these cameras work inside. I’m glad I had an old camera to call on for spares as that has proved invaluable in this case. In the past I think I just would have given up on a full repair and junked the camera as many people seem to do, however these cameras are very repairable, desired by the younger folk, and worth designating some time to as they can be saved. There are a lot of non working examples available out there at a fraction of the cost you’d pay for a new working unit. (Money to be made in my own personal point of view)
The unit has polished up very well and looks lovely.
And it works….
And it works just fine
Pictures as expected
I’m so pleased with this camera, it’s taken a lot of time and head scratching but we got there in the end, and it is as good as new. I’m still awaiting the battery cover, and we have guests coming around today so I’m going to use this for some random photos. Just got to make sure I don’t let the batteries fall out. Once again we’ve saved another unit from landfill and that is the big win here.
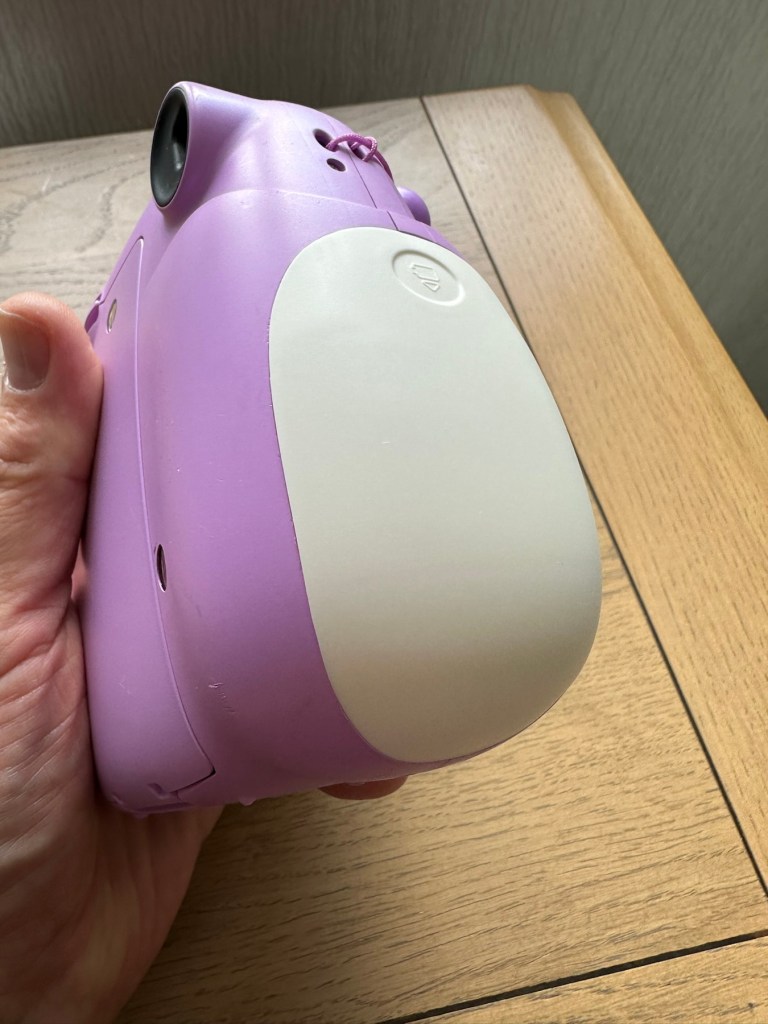
Three weeks later the battery cover has arrived from China. Perfect fit.
Camera complete
Many thanks to my lovely missus for allowing me to take photos. Rare because she hates having photos taken.
Thanks for passing by, as always it is very much appreciated.
Fujifilm Instax Mini 8 Instant Camera Teal Blue Spares & Repairs
Please see photos for condition this will be the item you will be receiving.
The camera will not turn on.
Thank you for looking!
EBay
It’s about time I started to get back to repairing some cameras, I have a mountain of them to get through but they can wait a little longer. These little Fuji units are really popular with the younger generation, and in my view anything that gets youngsters interested in, and involved with photography is a good move. We have some youngsters in our clan, and I have this earmarked for one of them if I can get it working. We had some conversations during our family gathering over Easter, and the subject of photography, and this particular member of our family came out. Seeing this auction today, I acted and purchased as this is a perfect little starter unit for her. My total outlay for this unit was £11:45GBP and considering the current costs are around £30-£40GBP for a working example, this is not too bad an initial outlay.
The Instax Mini 8
Here’s some history on these cameras:
Instax is a brand of instant still cameras and instant films marketed by Fujifilm.
The first camera and accompanying film, the Instax Mini 10 and Instax Mini film, were released on November 10, 1998. The “Wide” film and first accompanying camera were released the following year. The Instax Square film and accompanying camera were released in 2017.
The formats of Instax film give an image size of 46 mm × 62 mm (1.8 in × 2.4 in) for the Mini, 99 mm× 62 mm (3.9 in × 2.4 in) for the Wide and 62 mm× 62 mm (2.4 in × 2.4 in) for the Square. The Instax colour film is available in Mini, Wide, and Square formats and the black and white Instax Monochrome is available in Mini and Wide formats.
Wikipedia
For anyone that was around in the 70s, these cameras are an extension of and an advancement of the then Polaroid instant photography system. Nearly every household back then had access to Polaroid cameras. If you look back at any photo album or collection from that time, you will invariably find some Polaroid photos stored within that collection.
Here is a typically over enthusiastic review produced by a very pleasant chap when it came out about 8 years ago. Sums up in a few minutes just what it can do, and just how easy it is to use.
A very enthusiastic review
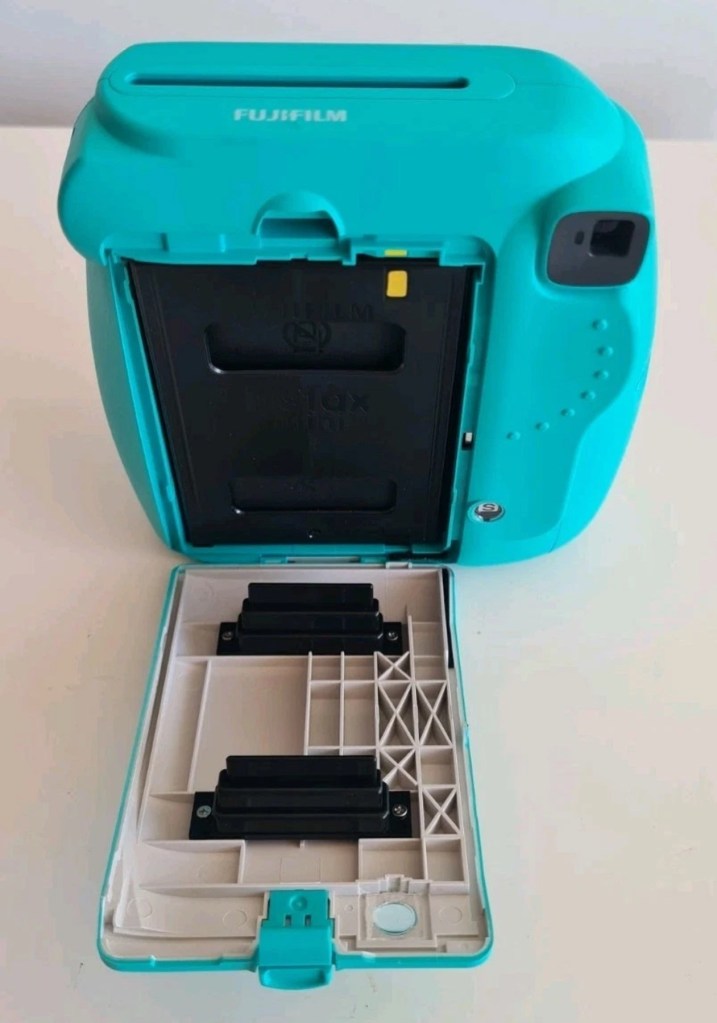
This unit looks to be in quite a nice condition but as always we will never truly know until it has arrived and can be assessed, never forget, this is EBay that we are purchasing from 😂
Battery compartment…suspicious!
Something looks suspicious in the battery compartment. There seems to be contacts missing, they might be fine I just don’t know. They just don’t look right to me. There may well be some minor signs of corrosion as well. Who knows, I’ll just have to wait until the unit arrives. So let’s just be patient until then.
Come on Mr.Postman!
Assessment:
I’ve downloaded the instructions and they consist of just half of one sheet of A4. To be honest they are about as basic as are needed I guess, but in technical quality they are about as much use as an ashtray on a motorbike! And those contacts I mentioned above, look just as they were from the factory. What a strange design.
On arrival the camera appears to be in a really good cosmetic condition, there is even an old film cartridge still inside that I suspect is well fogged by now. However this will be of use if I can get it working, as it will prove if the film transport works.
The battery connectors are exactly as they were when the unit was assembled, so my earlier suspicions have come to nothing. However there are small indications of battery leakage on the outside that are always concerning, because they can always hide a greater issue occurring inside the camera. When batteries are put in place the unit is totally dead, just as advertised.
Cosmetically tidyBatteries – no powerContacts show evidence of light contaminationlight contamination in evidence
So no more to it, I have to open the unit up and see what I can find inside. Before doing that though I have connected a bench power supply to the contacts and there was still no draw on the power at all. It is definitely dead.
Repair:
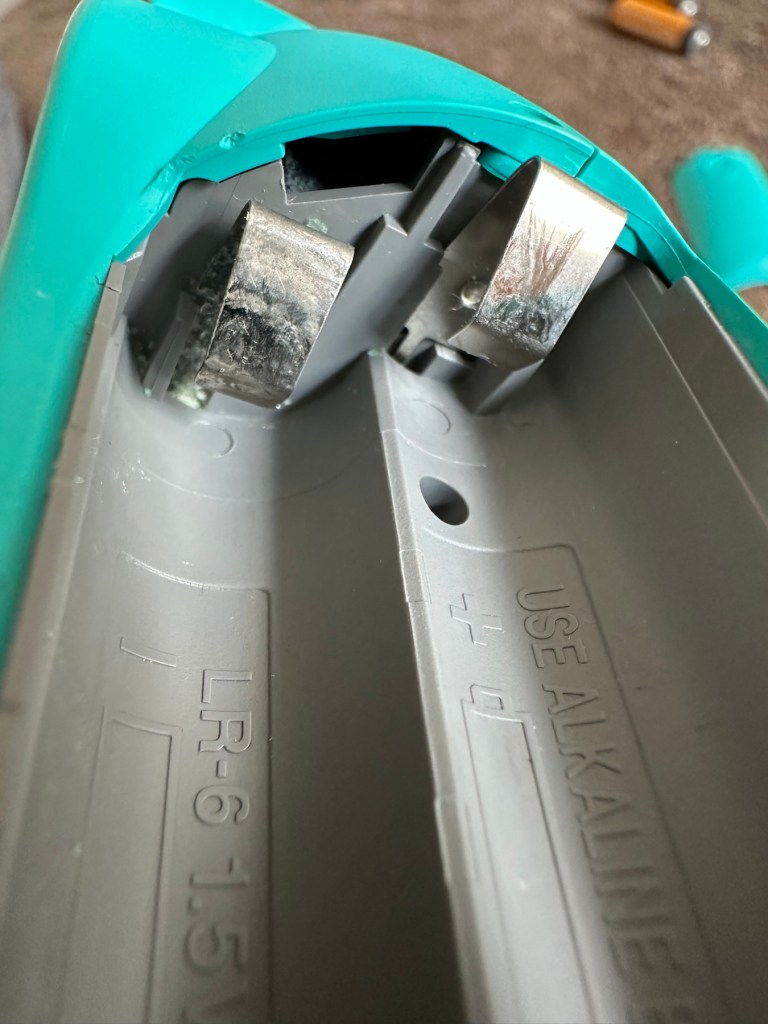
On opening. Oh my word. What the heck is that? I have never seen contamination around a battery terminal like that before, the battery contacts have been totally consumed.
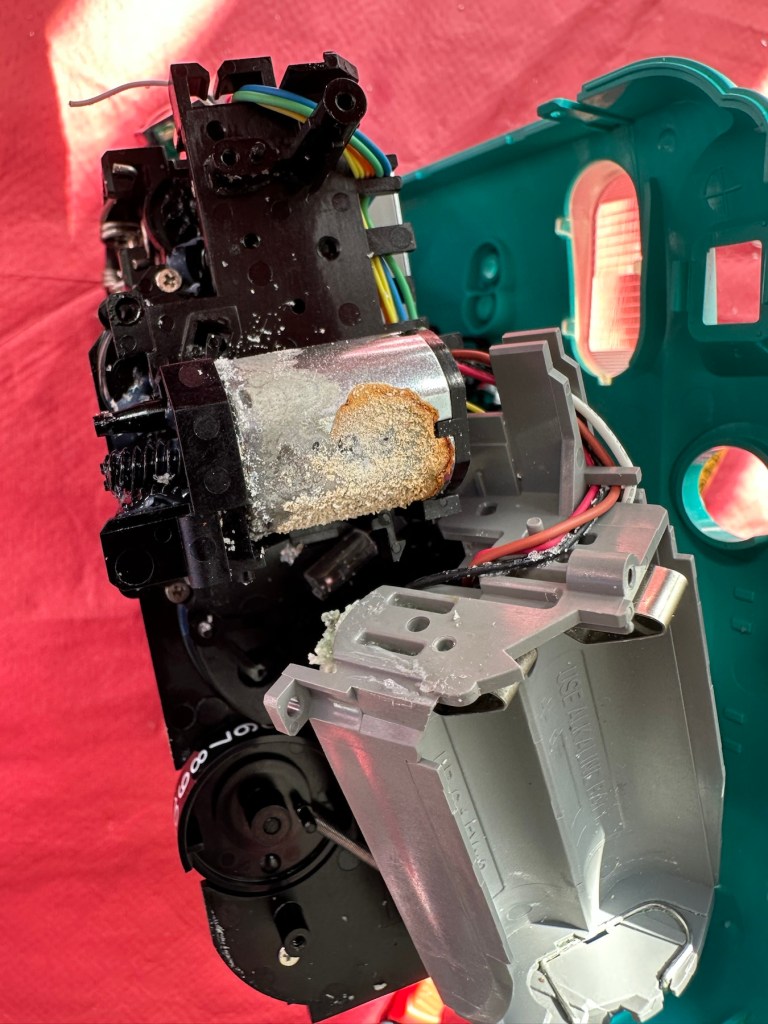
Under that crystallised mess is what is left of a battery terminal, and that thing that looks like a biscuit on the left is the main motor. Totally crusted up
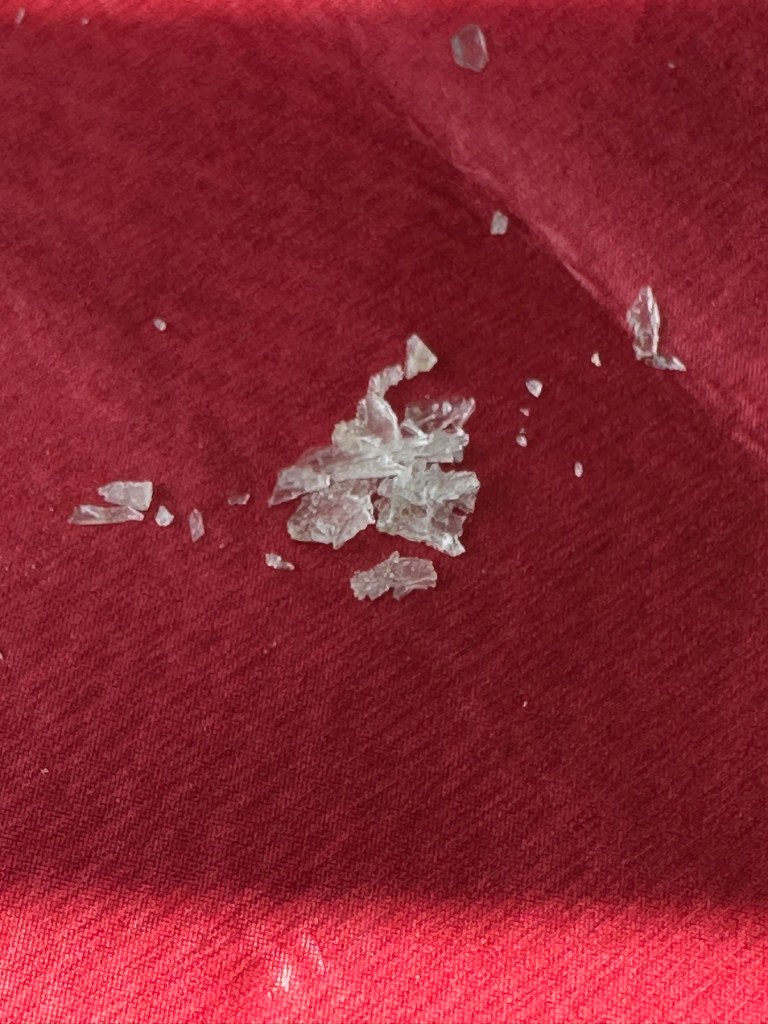
I could hear some rattling around inside the case and thought something had worked itself loose. No. It was what looked like broken glass, but it wasn’t, it was crystals of contamination, this camera has more stalagmites than Wookey Hole! The motor was badly contaminated and every part of the working mechanism had signs of this contamination, it was everywhere.
Contamination crystalsMotor contamination
First things first, the issue with the power supply is purely at the point of that big mass of battery contamination on the battery terminal, there is no continuity here and this needs removing and attending to.
What was under that crust of contamination All cleaned and ground down ready for re soldering
Using a combination of alcohol to break down the contamination, and a grinding pen, the offending crust was eventually removed. It had eaten through the wire at the battery terminal and was being held in place by the mass of crust that has built up around it. I was able to cut back the wire and re solder the terminal to make it good. There was contamination everywhere and this all had to be removed, if left in place it would cause more problems in the future. It had to be eliminated completely.
Contamination everywhere, what a mess
I removed the motor, and used a contact cleaner to free up its motion, I constantly turned it back and forth for about 15 minutes and I could gradually feel it freeing up. A wire had broken off from the led light on the viewfinder, this was soldered back into place and we were now ready to test. I put the batteries in and flipped the switch. I could hear the flash capacitor charging and all lights came on, I switched the unit off and began preparing to re assemble the unit, not before accidentally touching the flash circuit and taking a quick 300v shock in the hand. It’s a big capacitor as all flash units usually are. I’m an idiot, it was a school boy error. And I had a capacitor discharge unit sitting right beside me. Fool!
Ok. I’ve stopped cursing myself and the reassembly continues, and I manage to complete this with no further issues.
It seems to be working.
I’ve loaded in that old cartridge it came with and can confirm that it was all fogged film. However it has proved that the film transport system and flash are working as you can see in the video above. I’m now going to have to source some fresh film for a true test. Before that I’m going to open up the unit again and give it a good blast with compressed air and a final check to make sure I’ve got all of that contamination. It’s just the OCD coming out in me.
That said, the flash has now ceased working even though I can hear the capacitor charging up. I suspect the flash bulb has failed, so I need to get back inside anyway. Oh well, here we go again!
Like the idiot I am, I realise I have not been using sufficiently powerful batteries and the flash capacitor and flash unit are both in fine working order. I’m just going to make a small adjustment on the shutter opening switch though, and also the power contacts connected to the lens internal focus ring.
I’ve removed an unnecessary small spring from the aperture ring on the left, and I found some more of the crystal type of contamination on the circuit board near to the flash capacitor.
I’ve removed an unnecessary spring that was on the aperture ring, it was causing the aperture ring to sit in an opposing position to the light indicator on the side. The two of them have to match to ensure the correct exposure. The spring was pulling down on the ring, and moving it to a lower position on the indicator. Thus causing an exposure issue. I’ve removed it, it is not needed and is now working better. I have also cleaned the circuit board as I found another small patch of crystallised contamination. It’s now cleaner than when it departed the factory.
The lens aperture ring, and indicator
And here we have a picture where I’ve captured the flash unit working.
Flash captured working
Now all back fully assembled I’m confident that the camera unit is in as good a condition as it could be. Fully serviced, clean and operational just as it should be. The next real test will be when I get some film inside of it to carry out some realtime tests. I’m hoping I’ll have the film within the next day or two.
Result:
I dont know why but I really love this little camera. I’ve enjoyed the challenge, the issues thrown up by it, and have gained immense satisfaction in getting it back into a working order. I don’t know if it’s the size or just the pure simplicity of having a picture to hand that is fully developed in about 15mins. The excitement of watching a picture form in front of your very eyes and even the fun factor is incredible. It’s what is needed in photography today, a step back to the 70s world of Polaroid, it’s true that back then they really knew they were on to something big, but I bet they didn’t think that it would now be having such a resurgence with the younger generation 50 years later. Instant memories preserved right in front of your eyes. The Japanese photographic industry, are so up there with modern photographic trends and demands. If only some of the now defunct big players such as Kodak who I used to work for, had gleaned such future insight, things may have been very different.
This unit as was stated earlier, is promised to a younger member of the family and that is where it will be going. I think I’m probably going to buy another damaged one to fix for myself, because I just love these little packages of fun and instant memories.
My film arrives within the next 24hrs and I’m really looking forward to getting some pictures taken.
Now all polished and cleaned and looking splendid.
Sparkling, clean and pristine (Inside and Out)
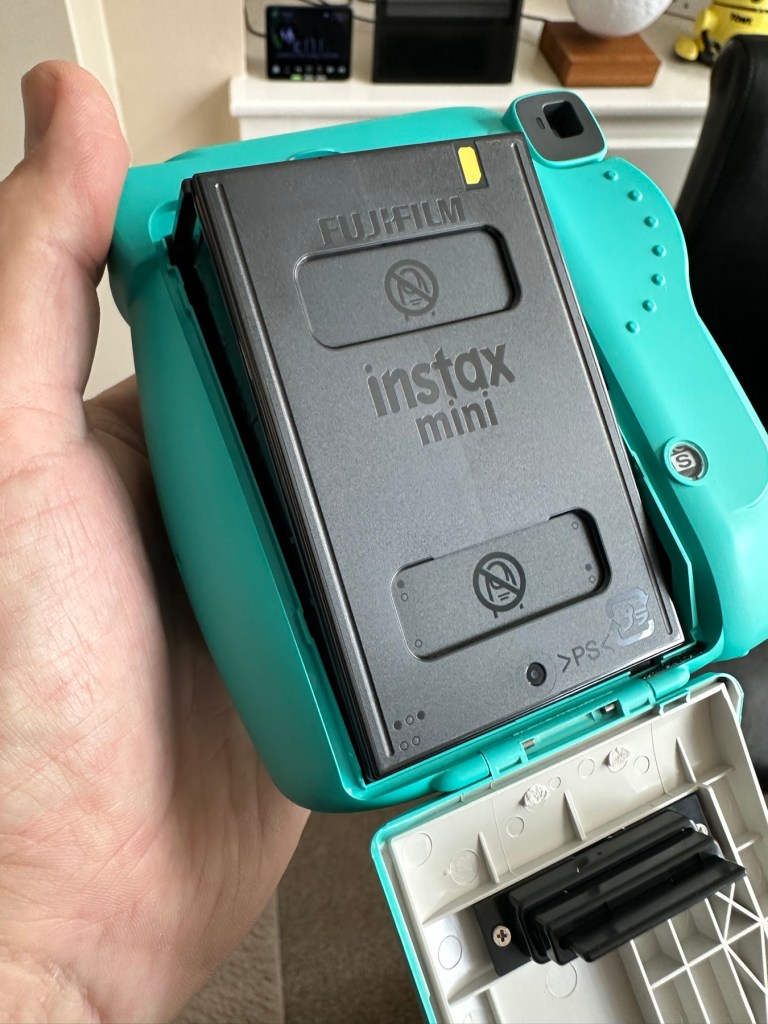
The film is here and I’ve put in new batteries and tested the unit prior to putting the film in. Anyway, film installed let’s take the first picture that will remove the cover off the film cartridge within.
Cartridge inFilm cover out
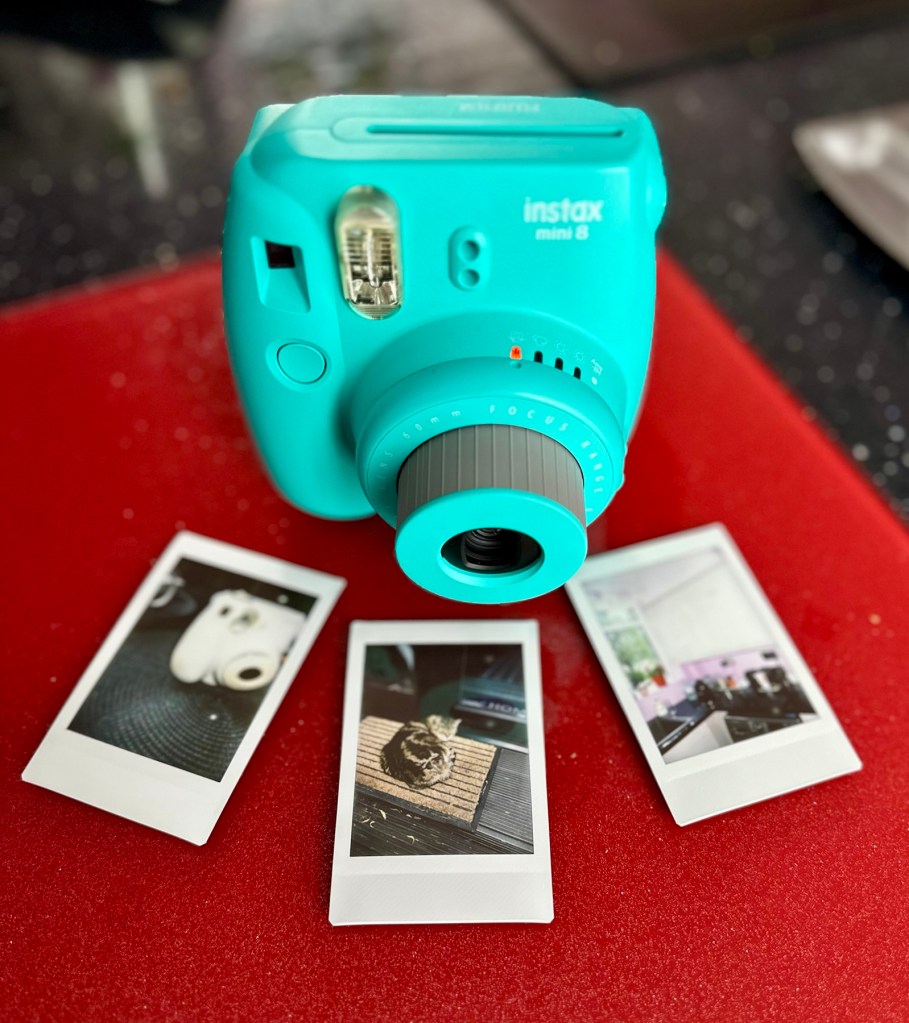
Now to find some subjects without wasting too much film. Picture one was of another Instax camera i am working on, bit close to be honest but there is at least an image, the camera is working. Second one is in the corner of the kitchen this comes out well. Third one is of the feral cat “Tabs” who owns our garden. She wasn’t too happy that I’d disturbed her sleep but that said it was a good photo.
First three trial photos
Overall I’m exceptionally pleased with the results. Closer examinations shows some repeating white spots up the right side of the photos, no big deal but this probably points to some contamination on the film roller. I can’t clean this now without fogging the remaining film, so I’m happy to leave this until this cartridge has been used. I’m happy that this is the only minor issue after all the other problems this camera had.
Working perfectly and looking great
Been a great little project that I have thoroughly enjoyed working on. These little units are great fun and the little lady that is going to get this camera is going to have a great time with it.
Another one of mass manufacturings victims, revived, and repaired and now facing a much longer and rosier future. Another one successfully kept from landfill. A winner in every sense of the word.
Many thanks for passing by, as always it is very much appreciated.
To build a usable, basic issue, medium format camera (Bronica SQ-A) from damaged items and spare parts, for as little outlay as possible and shoot one black and white, and one colour roll of film as proof of its successful completion.
Getting started:
Building a camera from damaged parts is no easy task when the name happens to be a high end brand and any parts that are available, are being snapped up by others to service their own stock or to break up for sellable parts. I’m going to keep a running total to try and build this as cheaply as possible, and to keep track of this total I’m going to use my trusty Psion Organiser II LZ from 1989 to keep a tally.
How the project currently looks.
Fourth purchases:
Now we have the bulk of the camera, we just need those annoying little bits to finish off. I’m calling them annoying, because if I was just to pay out for the 5 or 6 little finishing touches I need they would cost more than the total amount I have paid so far for the camera itself. I would be paying a premium for items that will in the end have no effect on the result I require to complete this project, that being two properly exposed rolls of film.
So here we go.
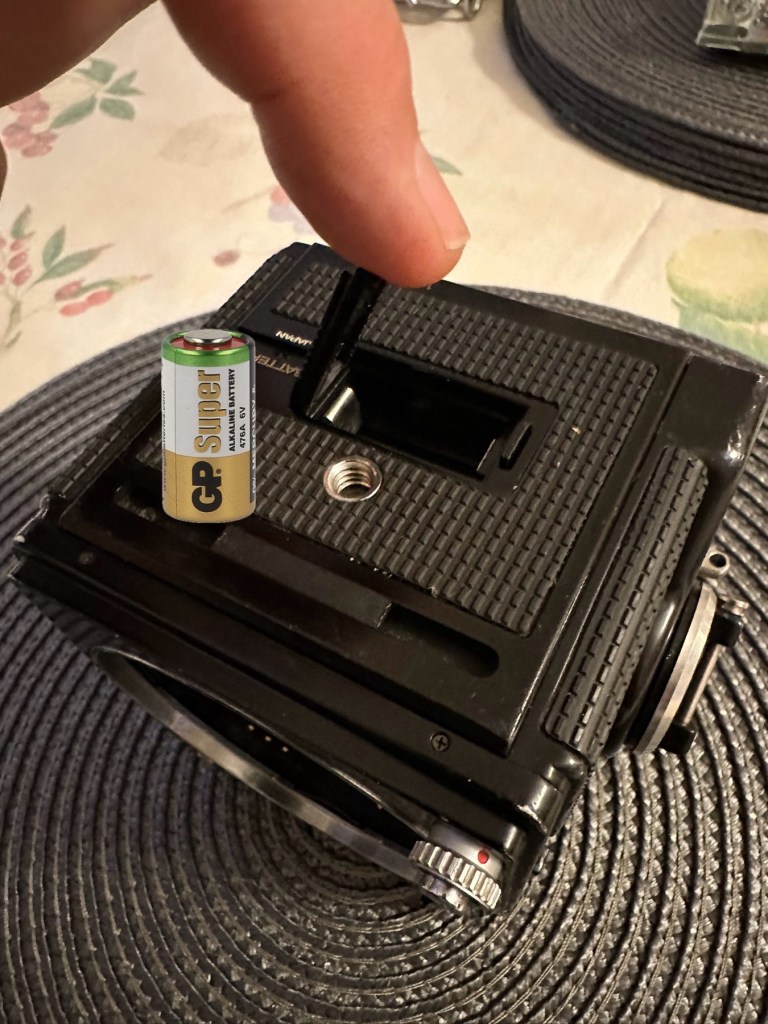
Battery:
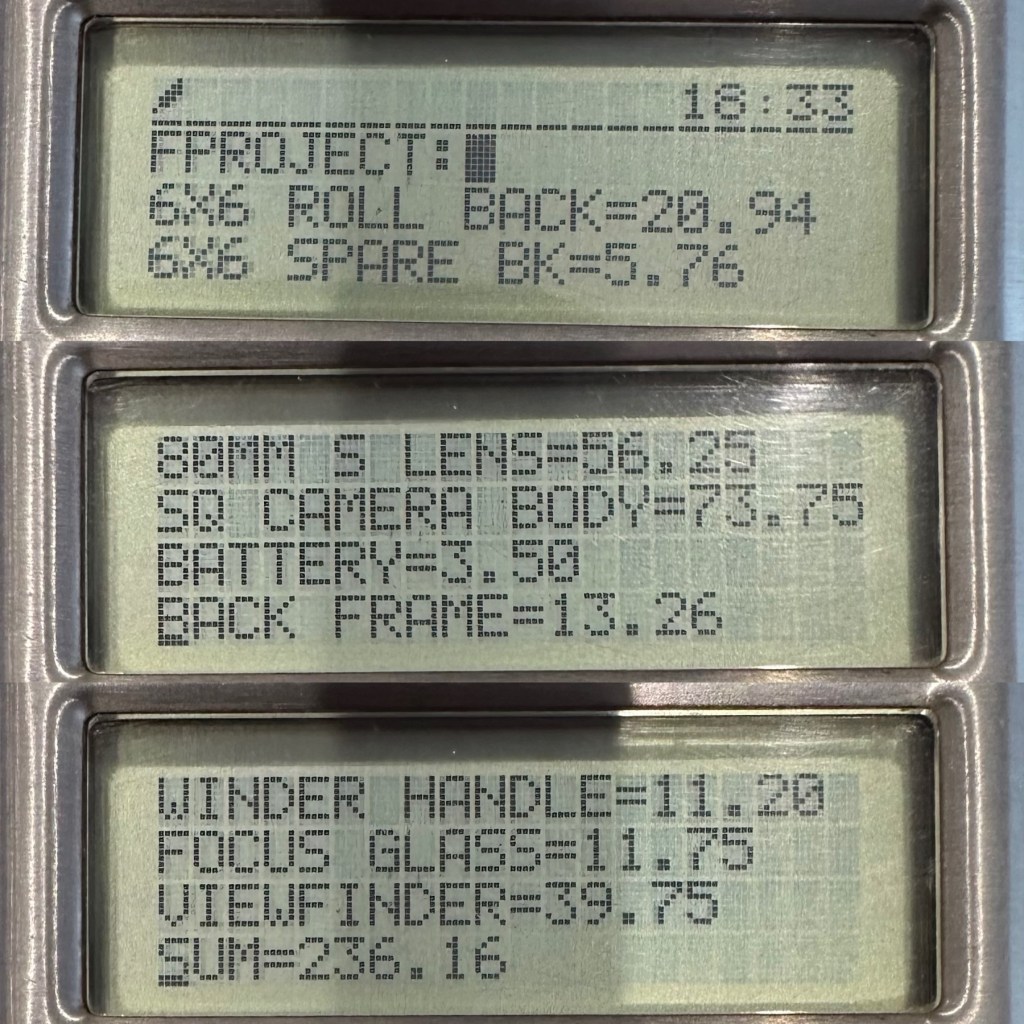
Probably the cheapest item you will buy for this camera. The camera requires a single 6v alkaline battery and is quite important. Without it the mechanical shutter still works but at only 1/500 second. To obtain all the other available shutter speeds you need the battery to work the system electronically. This has cost me only £3:50GBP. After testing I can confirm that the battery works fine and all shutter speeds are as expected. Perfect.
Winding handle/Crank:
For some reason sellers always remove the crank prior to selling. That’s because the original Bronica crank is currently being sold at between £70-£80GBP and it really isn’t worth it. Everyone is after a quick buck and some people are willing to pay it. I’m not however, and my handle here is a special strength 3D printed version that I have paid the grand total of £11:20GBP for. It will need a couple of small “O” rings just to pad the handle on the spindle as it’s a tiny bit narrower than the original over priced one. It’s more than capable for the job in hand though, looks absolutely fine and has saved me around £65:00GBP of money.
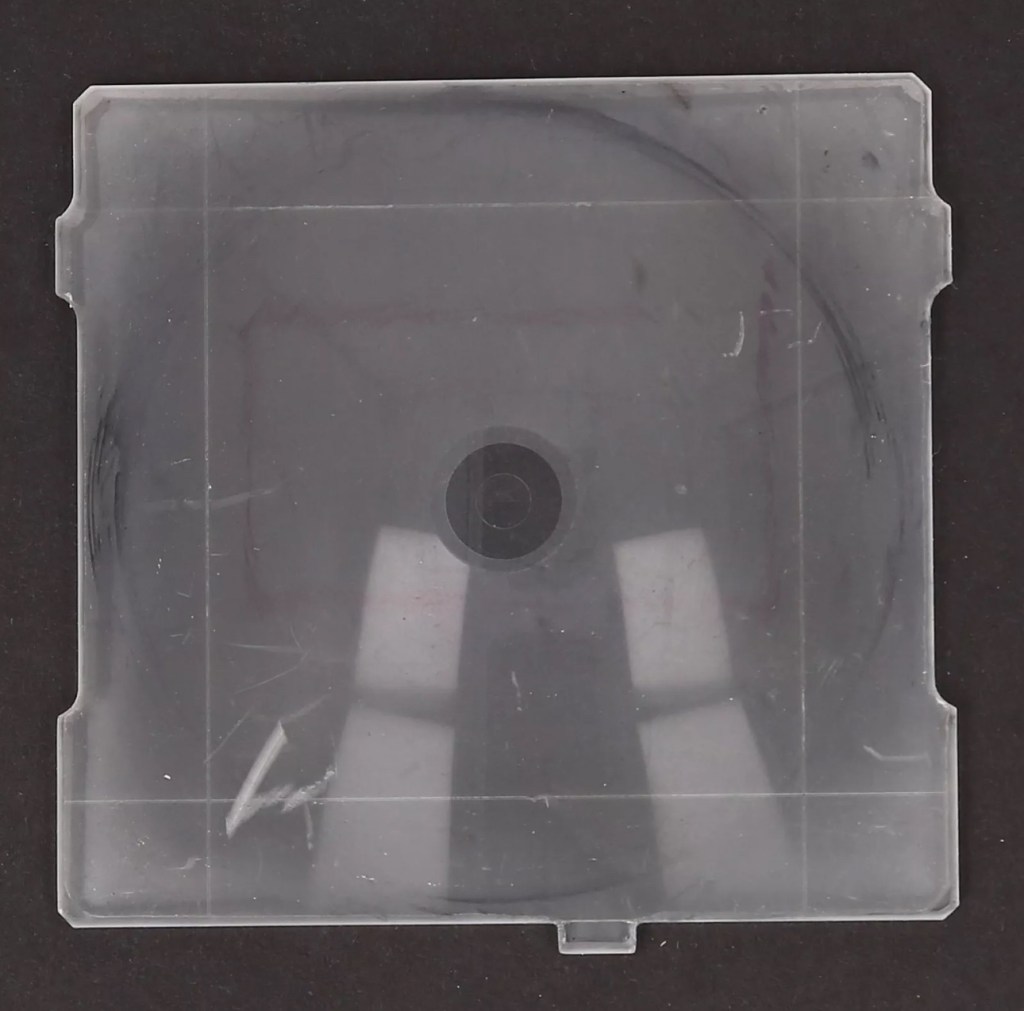
The focussing glass:
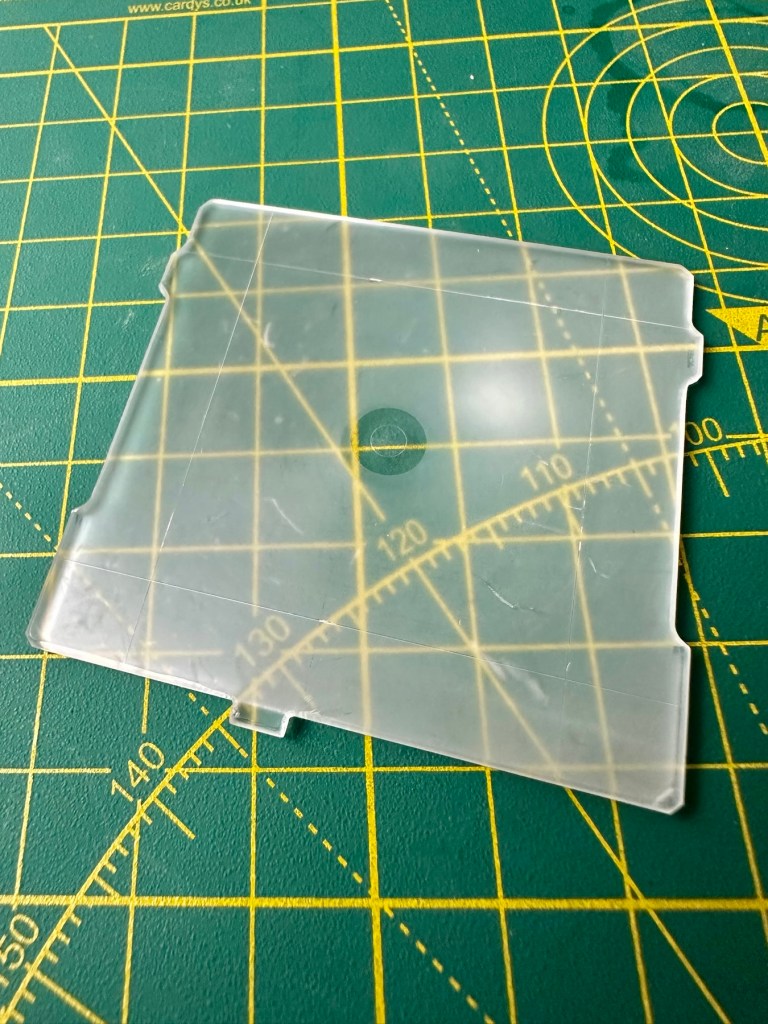
This is another item that the sellers withold for individual sale. I wonder why? Yes a standard focussing glass is going to set you back anything up to £150:00GBP and again it’s not worth it. However my one is a “damaged” one in that it has handling and pen marks on it. It looks as if some has sadistically drawn their own frame on the glass, the fool! I’m hoping this will clean up a bit but as long as I can see the focussed image I’m not all that fussed. I only paid £11:75GBP for this so yet again a further saving of around £140:00. See, savings can be made, if you are happy to make the trade for a lower quality item.
Camera aperture covers:
Not really essential at this point, but to be honest you need to protect the fragile equipment you now have so it is really worth investing. I’m not purchasing these just yet, that’s a later purchase, I have a lens cover and hood cover now, so that is all I really need to start the real testing.
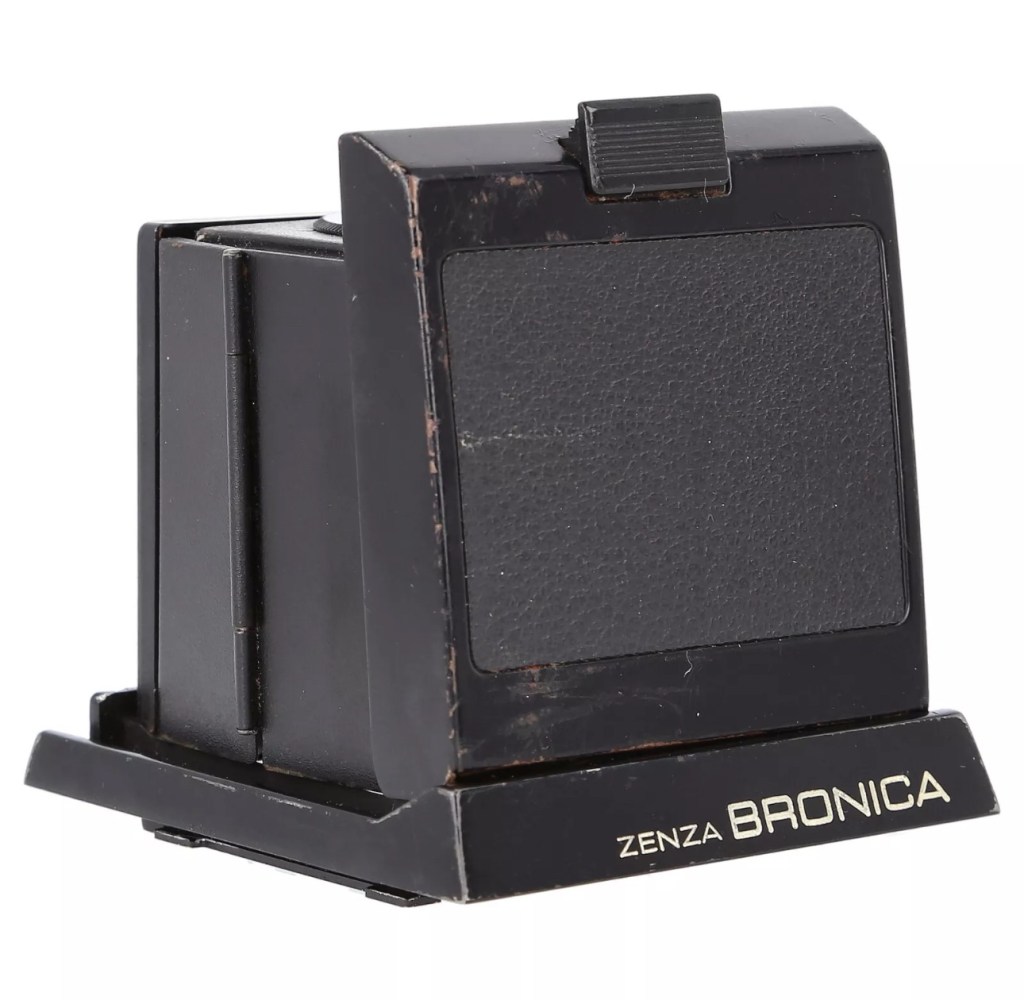
Waist level viewfinder:
Now this is a real bone of contention for me. Individually it is probably the most overpriced single item you could buy. It’s basically just a flip up hood that acts as a cover for the focussing glass, that affords a bit of light protection, as has been common on old twin lens cameras over the last century. But because the sellers again sell these as “additional items” they control the price and at an average of £150:00GBP (Recent eBay sales data) again the consumer is being ripped off. I’m currently monitoring some damaged ones for repair on the sale sites.
And as of the 4th May 2025 I am now the proud owner of one of these items. I’ve paid a total including postage of £39:75GBP and that’s a very fair price. I’ve been searching the sale sites for quite a time before coming across this one. There is one caveat though, it has some slight damage, but that’s what this site is all about and it ties in nicely with the Frankenstein aspect of this post.
Assessment:
I’m going to be very brief with the assessment, as you will see this project is made from a selection of parts that at time of purchase all had their own faults. Each part that has required repair has been highlighted in the relevant posts associated with this series. Links to those posts can be found in the link supplied in the first paragraph of this post. There are five parts in total. I’m generally pleased that the parts I have obtained have combined to make a very nice “Frankenstein” camera from a brand of camera that is becoming increasingly expensive as an “Antiquity”. Not that it was ever a cheap option for a camera in the first instance. Let’s move on to cover some repairs that have occurred for some of the pieces covered in this particular post.
Repairs:
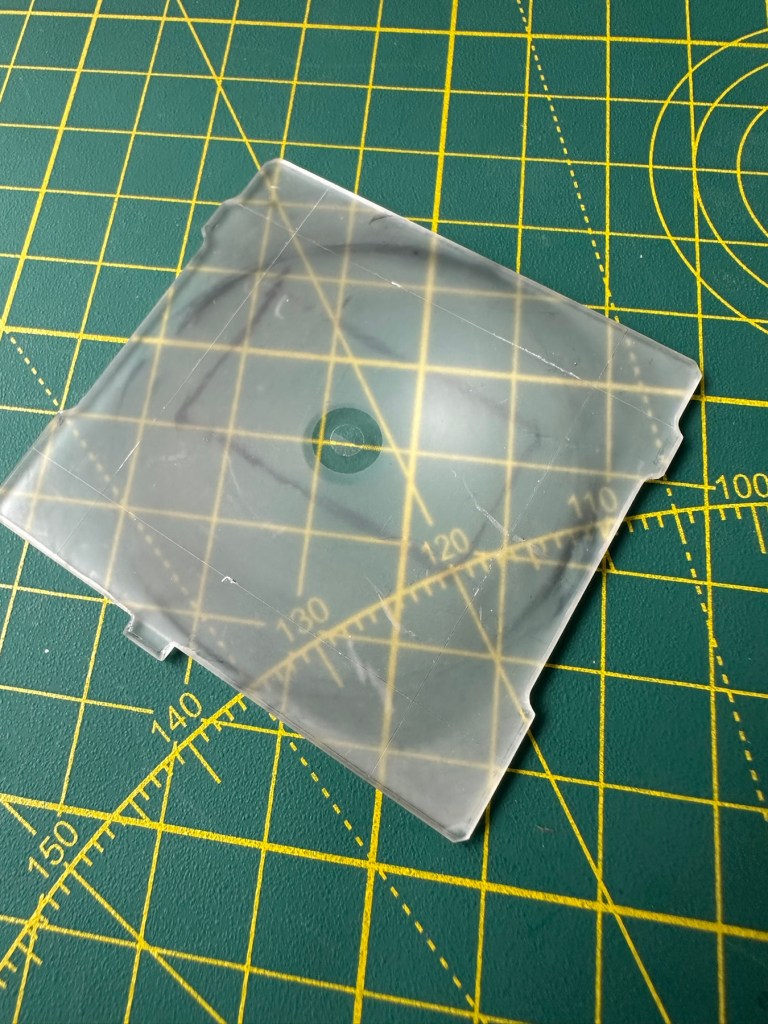
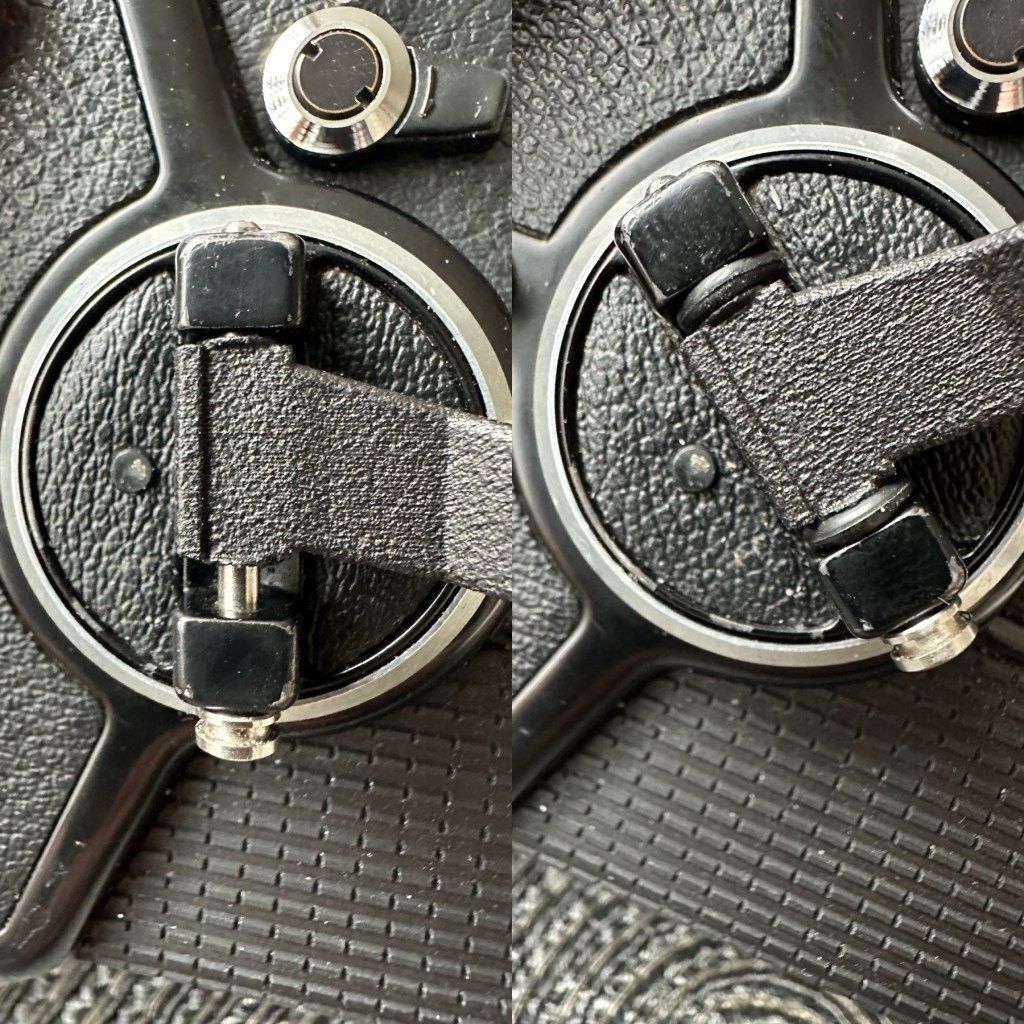
The focussing glass as you will see above was in quite a poor state on its arrival. This one had some scars and it looks as if someone has used pen to draw their own frame in the glass, to be quite fair it was in quite a state, but it was purchased for a really low price and i believe it can be made to look a lot better. Listen to anyone who is,”in the know” and you will always be told to not handle these screens. A load of tosh, I’ve been handling these ground plane glass screens for years and sometimes you just need to get hands on and this is one of those cases. Yes, if it’s in a pristine condition then cotton gloves would be the order of the day, but this example bypassed pristine conditions many years ago.
Before: How the glass was received with scratches and ingrained ink
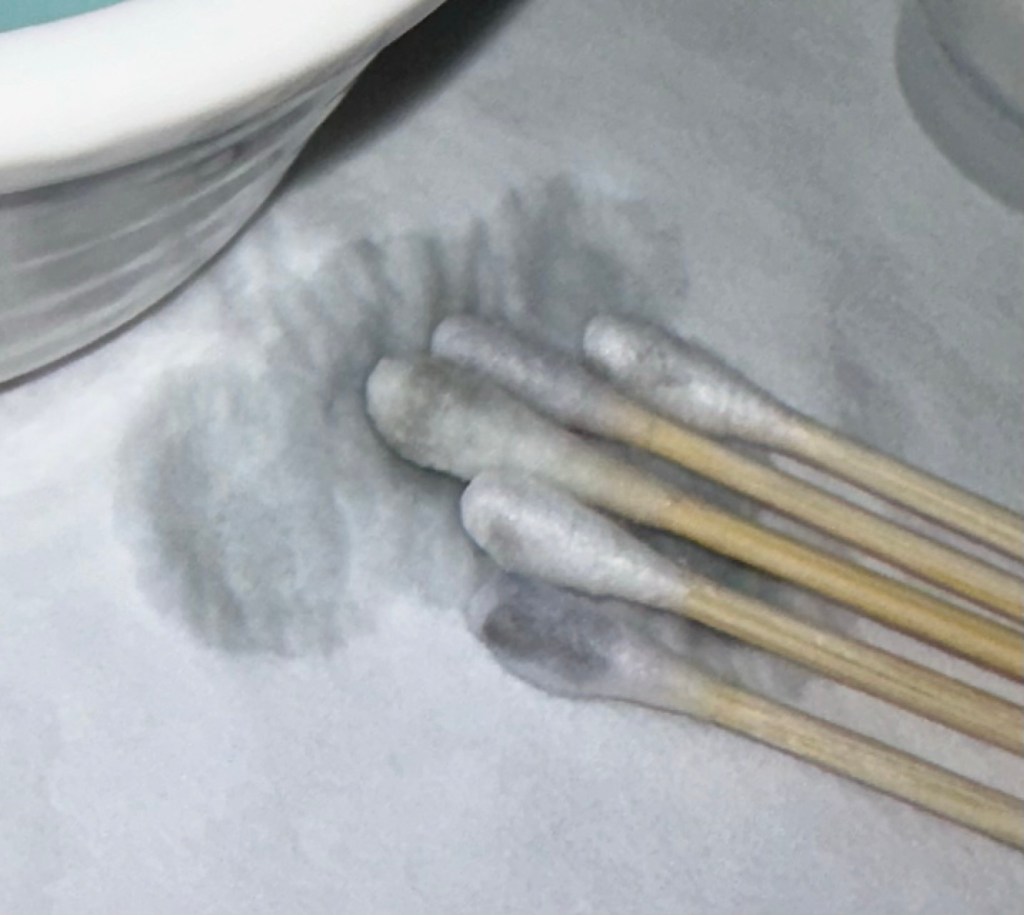
I started off with a good clean using IPA and cotton buds, I used about six cotton buds in this process using a new one every time the cotton was overrun with dirt.
Dirt from the IPA clean
Once the IPA clean had been done I then soaked the glass in a detergent solution and then again used cotton buds to get the solution into the scratched areas of the glass.
Detergent bath
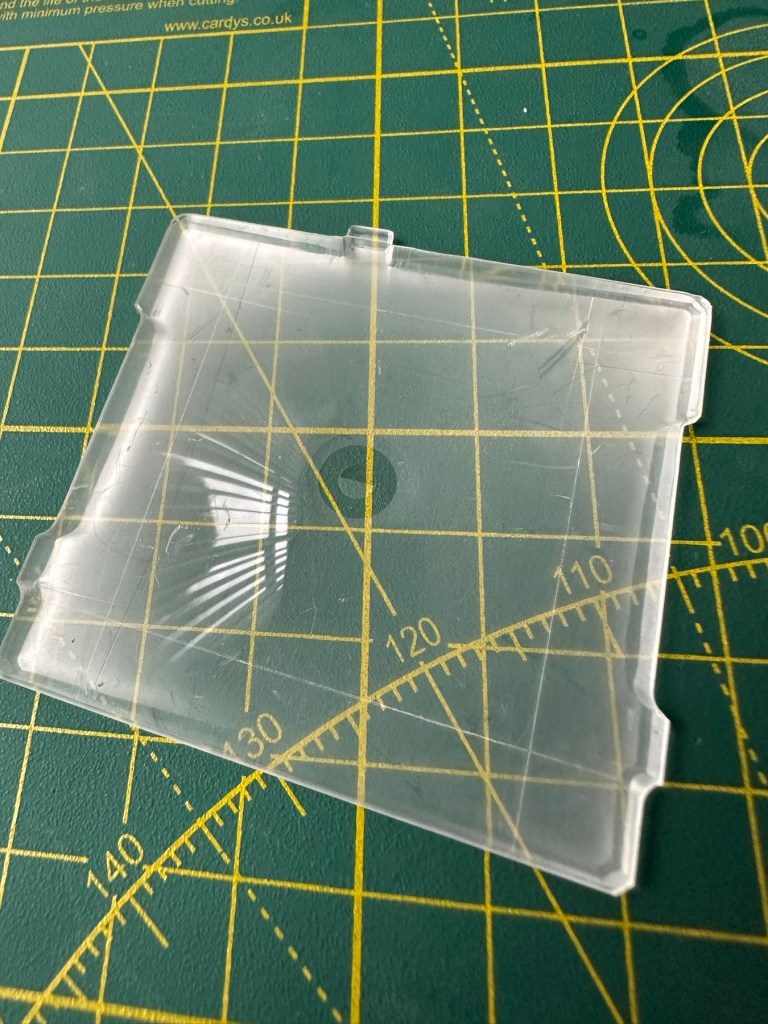
I’ve finished the clean with a rinse of hot water to remove all the solutions, and left the glass to dry on some paper roll. A light polish with a lint free cloth finishes the job.
After: all ink and dirt removed, only deep scratch remains but does not cause any issue with use
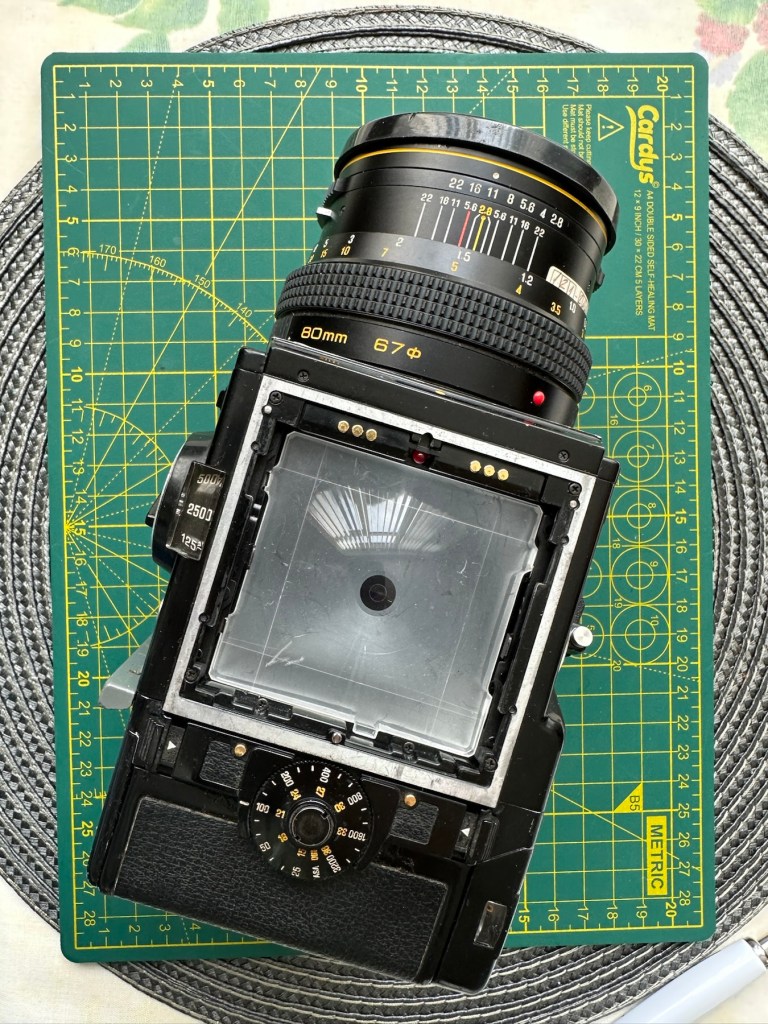
And this is how it all looks in the camera.
All looking fine in position in the camera
I’m extremely happy with the outcome with the glass, it does its job and works really well. With no distractions on the screen apart from a couple of scratches this item has been transformed. Just a little TLC and patience was all that was required.
The Winding handle crank doesn’t really have any issues, it just needs some aesthetic teasing. This crank was 3D printed for the ETRS version of the camera and as such the actual base of the crank shaft is slightly slimmer than that of the SQ model here. It works fine. I’m just being a bit of an OCD freak and want it to look better.
Before and after. “O” rings in place in the winder
Not a problem though as I only have to pack out about 4mm of space and I have just the thing to use. Two perfectly fitting minuscule “O”rings. Job done, let’s move on.
The Waist level viewfinder has one particular issue in that the folding action is slightly affected by an issue with the spring. Again it is fully usable and does not cause any issues operating wise, it is purely an aesthetic issue that I will get around to sorting once the camera has been tested.
Age related wear and tearThe spring “issue”My waist level finder just showing signs of age
This is one of those parts that has signs of age with small signs of wear and tear, however that adds to it’s character and shows it was once a very much loved item that saw some good usage.
I think, we are now ready to get the entire unit assembled and ready for the testing phase of this build.
Total Outlay:
So just how much has this little project actually cost? Over to my trusty Psion Organiser 2 LZ for a final update.
Running total of £236.16 GBP
So the total cost of this project is £236.16GBP and I’m very pleased with that considering that sales for fully working similar cameras command prices similar to those seen in the picture below.
Recent sale prices
So taking this evidence into consideration, the route I have taken of building from damaged stock has saved me between £100-£350GBP. And as it is now a fully operational camera, I could probably command a price that would make a quite nice profit. But I’m not selling. This stays in my collection.
Outcome:
I want to take some pictures with both colour and Black and white film, to prove this camera is capable of this function considering it was constructed with broken or discarded parts.
Now complete, I have restored a beautiful piece of camera history
I will post some sample photos of the tests, and will also produce a couple of galleries to link to within this site. First I will try my luck with the Black and white film, as I have one here currently, though out of date it should suffice as it has been kept refrigerated during my ownership. I also have the chemicals and ability to develop film at home, so this should not be an altogether time consuming process.
This has been a satisfying build making a working piece of camera history entirely with damaged and alternative parts logged throughout all of these posts.
Look out for part 5 of this project that will cover the final testing and the results gained from these tests. Hopefully we will have some good photos and will then be able to wrap this project up.
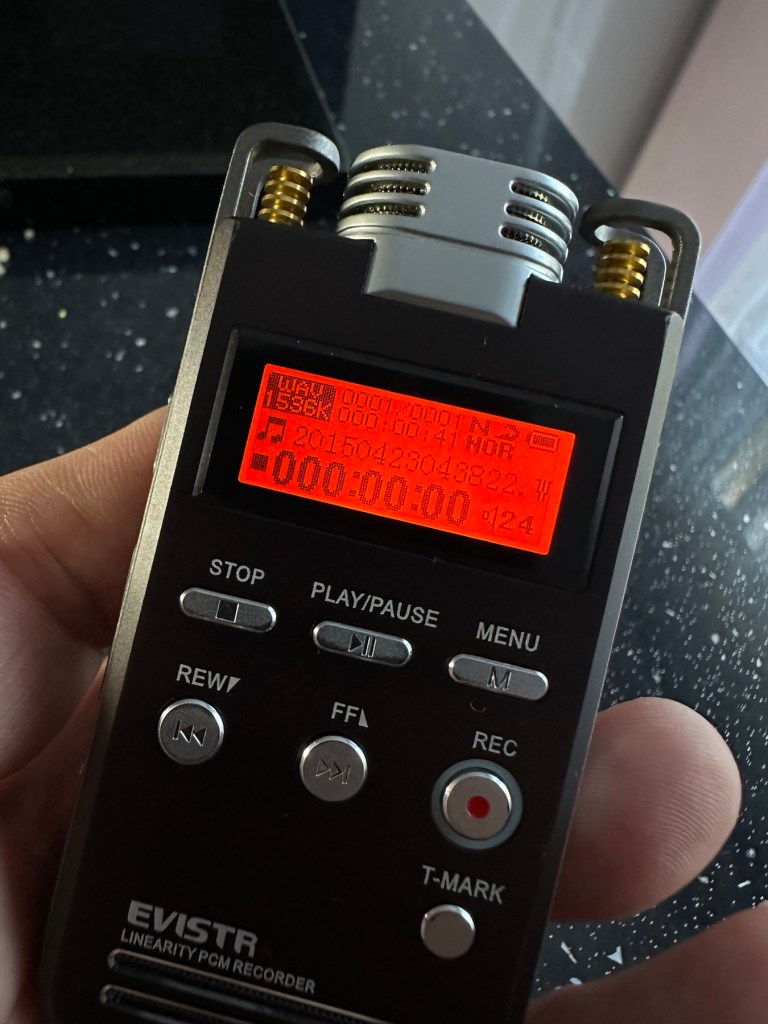
Evistr L53 voice recorder – not working, parts only
EBay
It’s not working
I just wish the listings would be more specific, it’s not working because, (Fill blank spaces) you get my drift eh?
The unit looks good physically and cosmetically, and seems to have been well looked after, we just don’t know exactly what’s wrong with it. I’ll do some digging around and see if there are any generic problems, and I’ll also dig out some instructions just in case. It’s another one of those purchases where the cost of the item £2:24GBP has been out weighed by the postage, £2:45GBP however a total outlay of £4:69GBP isn’t all that bad in reality.
Why would you pay more for a used one?
Current prices are in the £30-40GBP bracket. why you’d pay more for a used item confuses me, but then I’m usually easily confused.
I’ve downloaded some instructions, so we can hit the road running with some basic idea of how it works.
Let’s wait for it to arrive and then we can do an assessment.
Assessment:
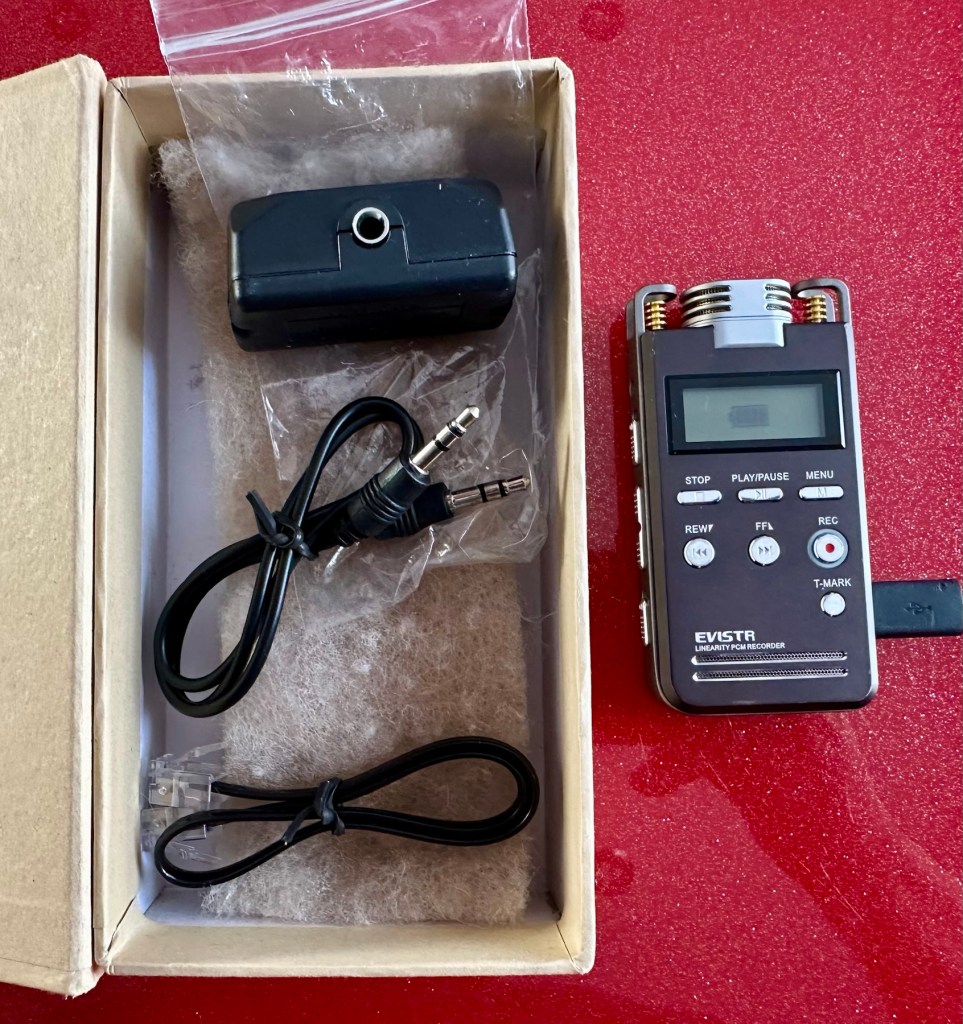
Well, the box you see in the picture above, was just wrapped in some white A4 paper and put in the post. By the time it’s reached me the wrapping was split and the box hanging out. We are off to a flying start. It’s not the original box as that is for a 16GB version and this is an 8GB version, again no problem but probably used by the seller to beef up the offer.
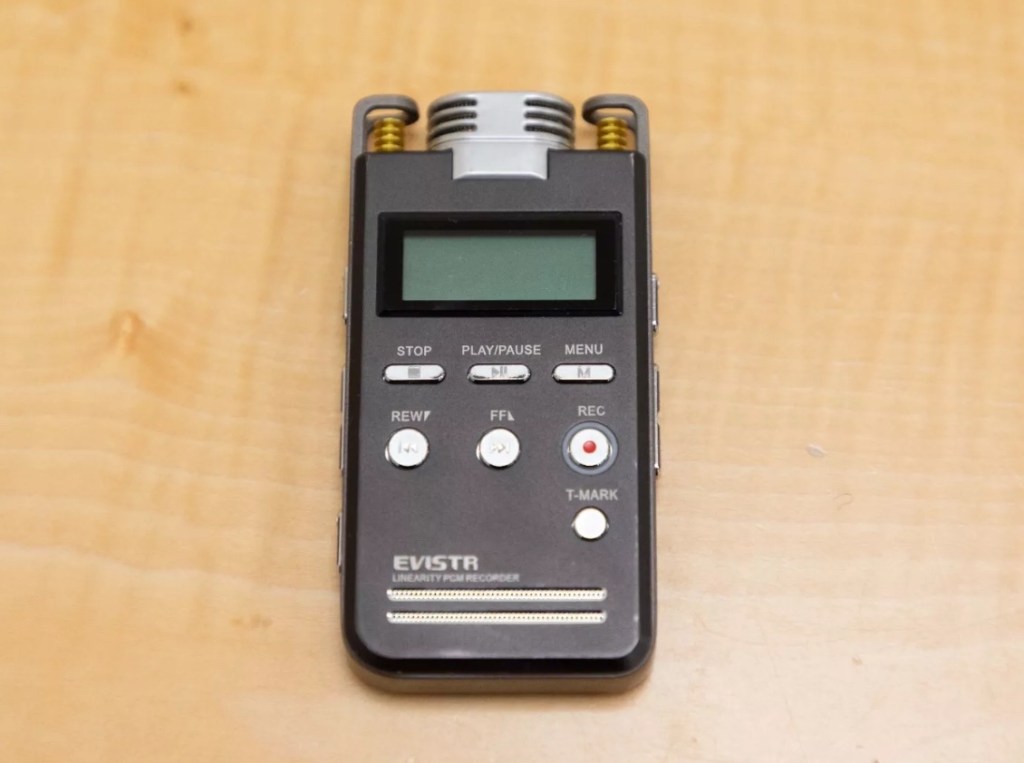
The unit itself is quite smart looking, clean and generally free from any heavy marks with only light scuffs that you would expect after a few years of use.
It came with an audio connector, and some other bits that allow you to connect it to a phone system to record conversations.
The package as it arrivedOn charge
The unit is dead and didn’t come with a micro usb charging cable, however again not a problem as I have plenty of these laying around. I’ve checked the charging port and I’m pleased to say it is in a good state and has no damage. So the first thing to do is to get some charge into the unit as the battery has probably been sitting dormant for quite a while. It was totally dead on arrival.
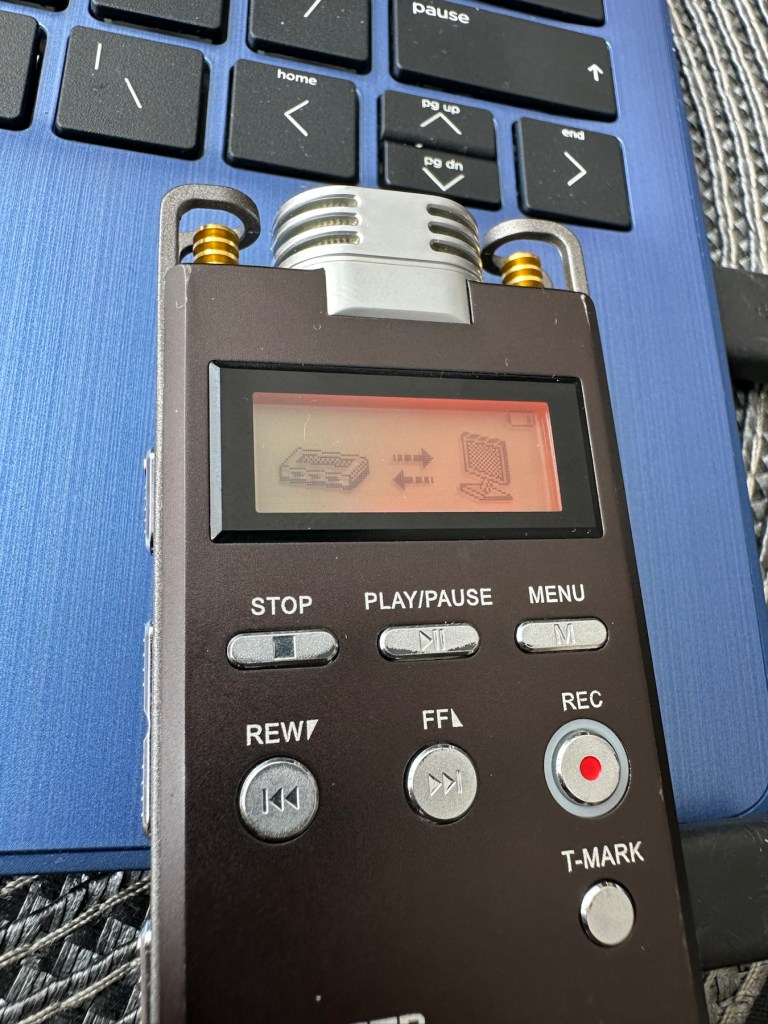
After a while I have turned it on to see if the charge is being taken and was greeted by this message, not one that I was expecting or one that I really wanted to see to be honest.
Disk Error
Disk Error. My immediate thought is that this is no longer recoverable, however, looking at known faults on their own site I might be able to recover the disk by using a Windows computer to access the disk. I’ll look at that option in the repair section of this post.
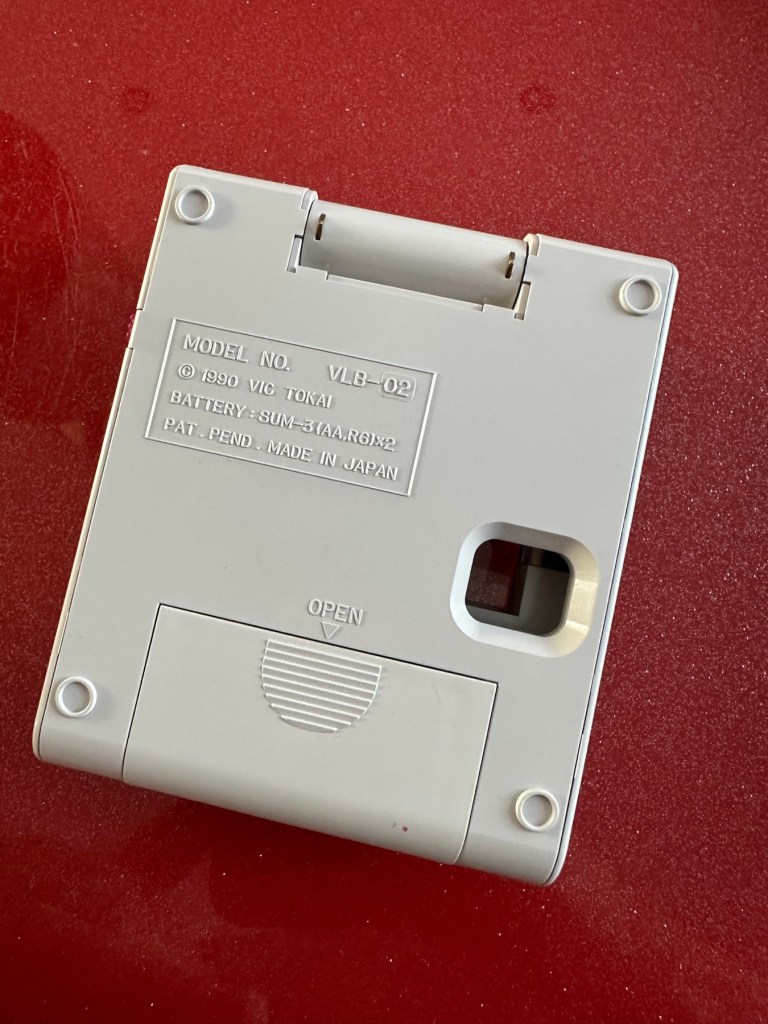
Security seal intact
One thing I’m happy with is that the security tag on the back that covers the screw that allows access within, is still intact. I’m confident no one has yet accessed this unit internally. One less thing to worry about.
So realistically it’s a nice neat package in a very good cosmetic condition. It’s only problem that I can see at this very moment is the “Disk Error” issue.
Repair:
So let’s get this unit plugged in and see what we can do. It is really the only issue we have with this unit.
On my computer we have issues though. It’s a windows 11 machine and when plugged in, all the right sounds are made however nothing is recognised. Apparently the drivers for this unit are not supported on this windows system. It can’t see the drive. Damn that’s a problem.
My system Does all the right stuff but unrecognised
Ok. I’ve had my thinking head on and just had a brainstorm. My brother in law over the road is notorious for not updating stuff. I called him and asked if he’d brought his new computer yet that he keeps threatening to buy and he says, “No, I haven’t Dave“. “Excellent” i tell him, get it warmed up as I’m coming over to use it.
I arrive at his house and he is curious as to what I want to do, I’m always going on at him to update and make his old computer safer, I keep telling him to upgrade it, and here I am asking to use it!
It’s a Windows 10 machine, slow is an understatement but he only uses it for casual browsing to be honest. I plug the cable in and then the recorder, I get a battery charging symbol and that is it. Hmmm.
Another brainstorm, I realise I’m using a charger only USB to micro usb cable instead of a data capable one. Another quick run back to my property and I take back a selection of cables. One of them worked, the drive was recognised and I was able to format the drive but I did it as Fat32. It worked to wipe the drive but I could not get the drive to boot up again without still showing a Disk Error message.
Disappointed I came home, I wasn’t giving up though. I dug out some other data cables from one of my old radio boxes and put it to my computer again, the drive didn’t show on the windows 11 system but it did something to allow me to be able to access the settings via the menu on the unit. I was able to go into settings and format the unit just as it should be via the units firmware.
No Voice recordsHere we go, persistence pays off
After the format it indicated there were no voice records available, this was something I hadn’t seen before, we were finally getting somewhere.
It works, just have a look at the video below
All working
There are a lot of settings to play with in the unit. However the recording quality is superb if I say so myself, it’s so clear and balanced. The unit is now fully restored and working just perfectly. Add to that the fact that is cosmetically beautiful we now have a perfectly usable unit.
Result:
Working as well as the day it was purchased, this is probably the best £4:69GBP I have ever spent. A lovely unit, looks good, fits in the pocket nicely and has years of use ahead of it.
A cracking little device
I’ve really enjoyed this little project, it’s been a right challenge and I was determined not to give up on it. I was glad that I persisted and got it working again.
I wonder how many of these units, or those very similar to it have just been thrown to waste, when they were in fact very repairable. Well this one has been saved, and will be usable for many more years to come yet. (And I now know how to fix it, if it ever does break again😂)
Thanks for passing by. Always very much appreciated.
Straight to the point. I think it doesn’t work. 🤷♂️
The original Light Boy
My original Light boy, for the Nintendo Game boy
Ive got a Game boy, I love it. However the biggest issue has always been as soon as it goes dark you’re stuffed. As the screen was never back lit you either had to tape a torch to your head or sit under a bright light. The Nintendo Light Boy went a little way to eliminating the need for the torch by incorporating a light and a magnifier within a unit that connected to the console.
This one doesn’t work though, which is good for this blog. I paid a good price of £14:95GBP considering original ones like this are selling between £40-£90GBP. There are cheaper alternatives, but hey, why?
Shouldn’t be the hardest fix I’ve ever attempted, but it will be a great addition to my Game Boy collection.
Assessment:
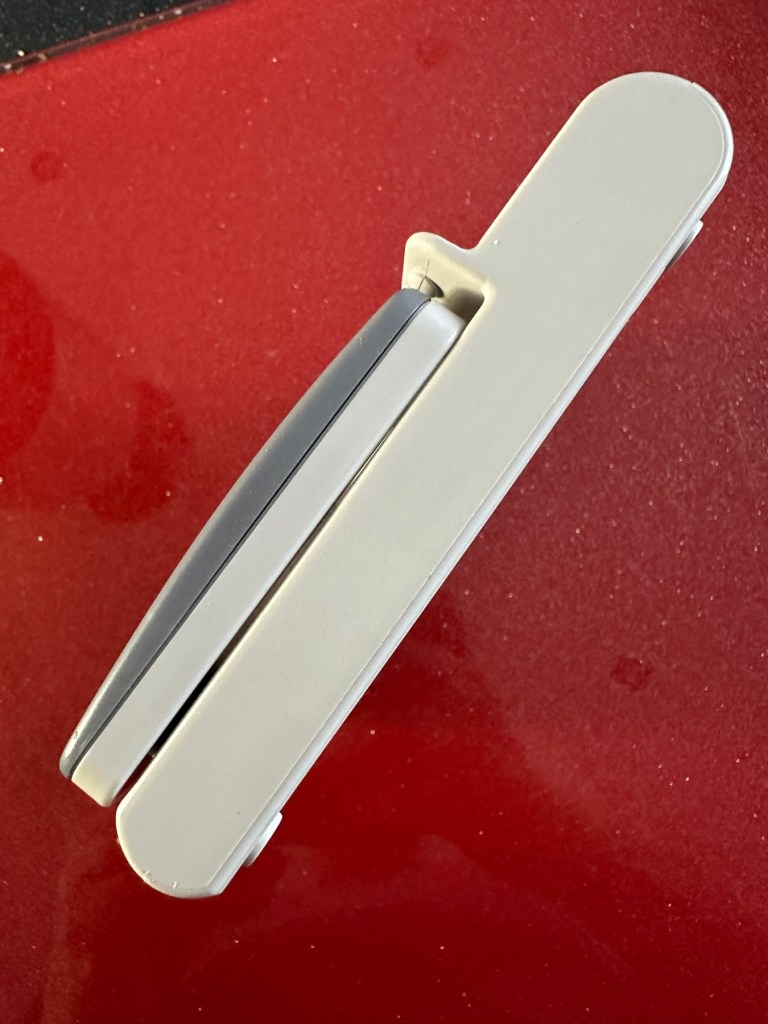
The unit has arrived and is in a very good cosmetic condition with only a few slight scuffs and marks that should polish out. Two AA batteries have been put in and switched on and true to the description in the sale, it doesn’t illuminate. Glass lens is in good condition and the screen folds as it should.
Looks tidy, just light not workingSome small marks. Nothing too bad or permanent
Repair:
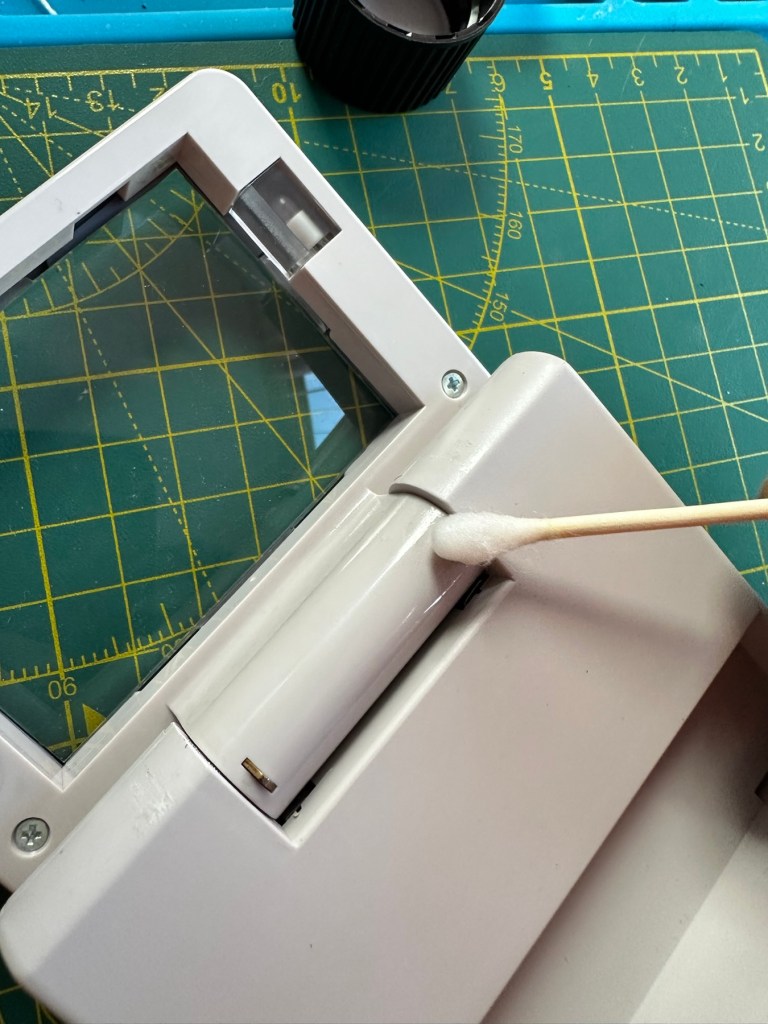
This is a really simple circuit to be honest. Two batteries, two lights and a switch. That’s about it. The screen pivots and on here there are two teeth that make a contact with two small plates on the main unit when the screen is at 90 degrees to the console. When the switch is on, the lights should illuminate at this angle, and when closed contact will be lost and the lights extinguish.
Teeth on the screen hingeTeeth connection with plate turning on lights.
When I put batteries in there was a very dim intermittent flicker, aha I thought, dirty contacts and they sure were.
I cleaned the switch and the contacts using some IPA and removed a fair amount of old dirt from the contacts. The switch was operated 30 or 40 times to really get to anything that was deep in the switch, and this worked.
A good clean with IPA was all that was needed.
Batteries back in and unit at the correct angle, switch to the on position, and hey presto we have a constant uninterrupted supply of light.
We have light. It’s working.
The little marks and scuffs on the shell were all removed with a little cleaning solution. This item is now in a perfect state of repair and looking right handsome!
Result:
This is undoubtedly the easiest repair I have had yet but I’m not complaining. It always amazes me about the sellers on these platforms. I purchased this as spares and repairs damaged, when there was absolutely nothing wrong with it, well at least it only required a tiny bit of maintenance. They could have done this themselves and easily have charged a price at least three times what I paid for this unit. Fools 😂
All assembledWorking as intendedAll assembled, cleaned and working
Anyway their loss is my gain as they say, I now have a perfectly good item in perfect working order and now looking as good as new. And all it needed was a clean and some TLC.
Sometimes it all goes so well. Today is one of those days.
Thanks for passing by. It is always most appreciated.
To build a usable, basic issue, medium format camera (Bronica SQ/SQ-A) from damaged items and spare parts, for as little outlay as possible and shoot one black and white, and one colour roll of film as proof of its successful completion.
Getting started:
Building a camera from damaged parts is no easy task when the name happens to be a high end brand and any parts that are available, are being snapped up by others to service their own stock or to break up for sellable parts. I’m going to keep a running total to try and build this as cheaply as possible, and to keep track of this total I’m going to use my trusty Psion Organiser II LZ from 1989 to keep a tally.
First purchase:
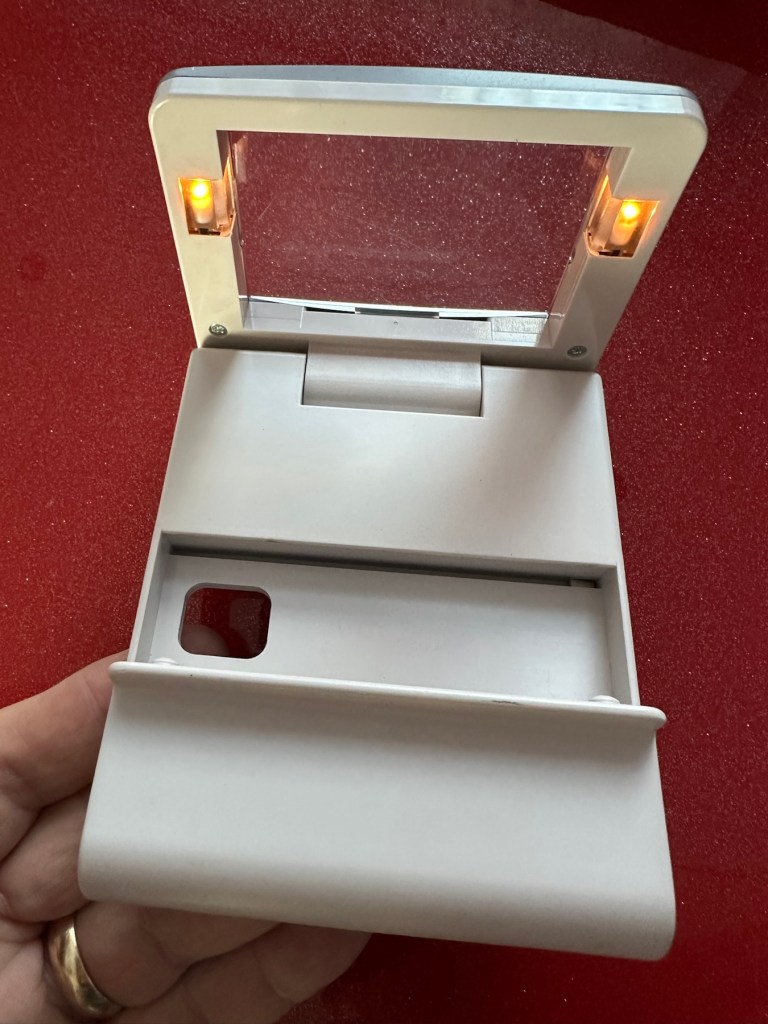
The first purchase has been made and it is for a 6×6 120 roll film back unit with dark slide. I think I’ve paid quite a good price for this item. This is the back piece that fits on the rear of the camera. Here is what the listing stated:
ZENZA BRONICA SQ 6X6 120 ROLL FILM BACK WITH DARK SLIDE Signs of wear, untested. Uk Buyers Only Please
EBay
First purchase, the film back.
And the total paid including all postage is £20:94GBP. Let’s now start the running total in the Psion II LZ.
Running total
All I can really check at the moment is cosmetic condition and this looks a little beat up, however I don’t really care how it looks externally, as long as it’s light tight, that is all that matters and I won’t even be able to check that until later on in the build. Cosmetically I will attend to it, if I feel so inclined at the end of the project, for now it’s ability to be light tight will be my major concern.
Assessment:
The unit has arrived and yes it has seen use, but not in a few years I suspect. The old smell hit me the second the package was opened, it’s kind of a reminiscent pong from the past, however I’ve got to see beyond this.
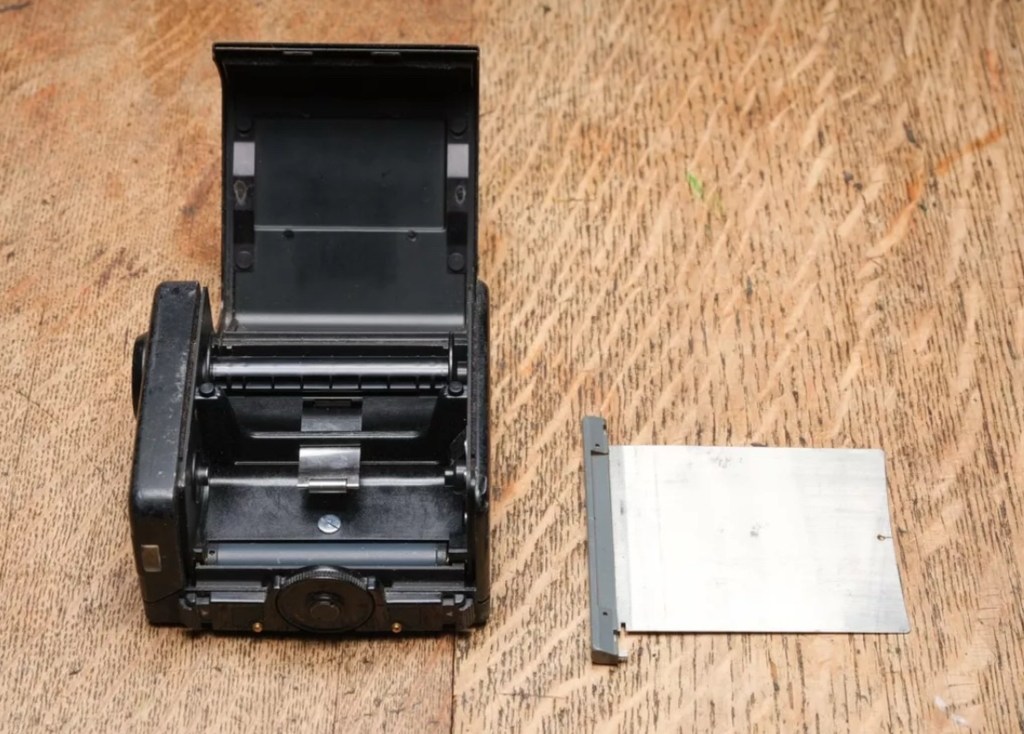
The light slide seems fine, however the surrounding frame has been bashed and a small bit of frame has gone missing. There is also a screw missing and I suspect the area that is missing the screw may well have been glued down. there are some slight rust spots on the exterior framework, however everything inside appears to be fine apart from some light seals that will probably need replacing. The rollers inside are grubby so a good overall clean is in order.
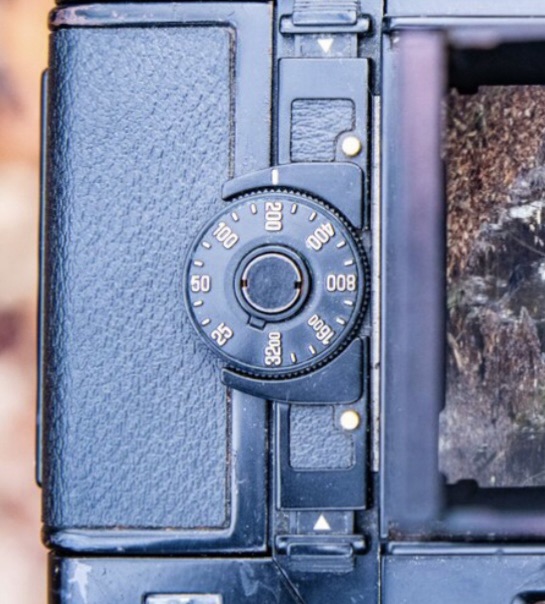
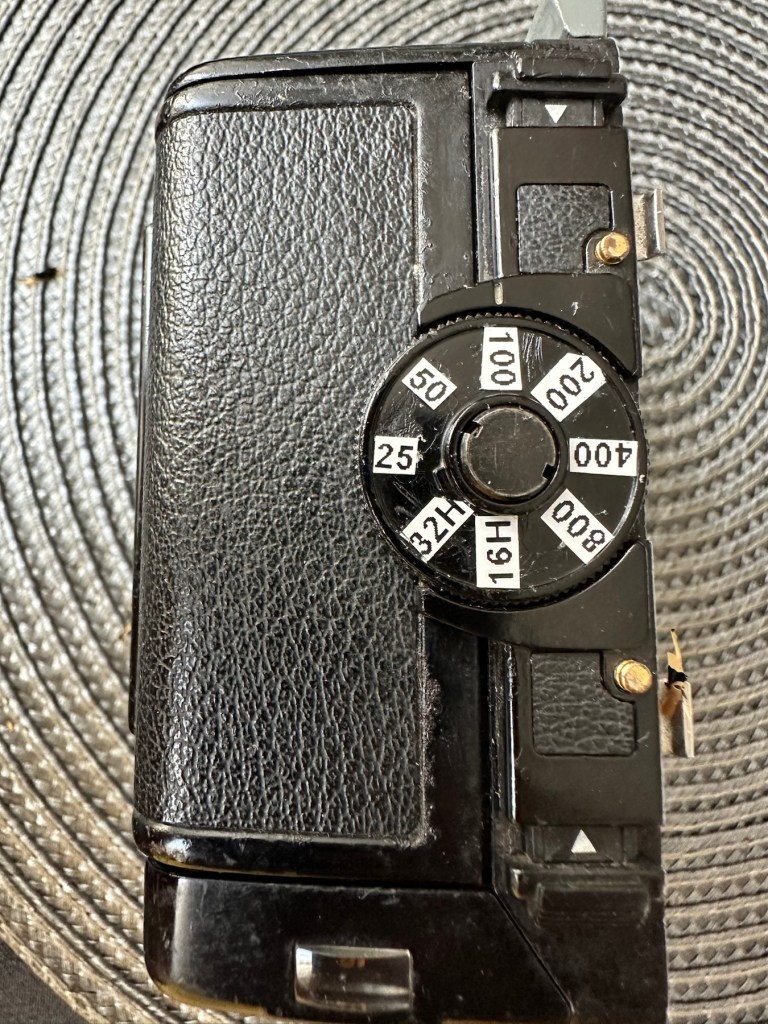
Annoyingly the ASA markings on the dial atop of the roll holder are missing. I will make something basic up to remedy this issue. Again it’s an exterior issue and I’m not too fussed at the moment.
Yes there is some work required, but there is no rush. And thankfully I don’t see anything that really scares me about it. I won’t really know how it stands mechanically until I find a suitable body to attach it to. I have that to look forward to in a future post.
Repairs:
The ASA dial. Simple solution here, until one becomes available sometime in the distant future, is to use some very small dymo labels I have printed. I will cut these down to size and put them in place where they should be on the dial. Quick and temporary solution a’la Frankenstein. No need to over manufacture things, this will do fine.
Size 9 dymo labelsHow it should lookHow mine currently looksAfter I’ve added some ASA numbers- temporarily
The old asa wheel has been cleaned to remove the original glue, and temporary stickers have now been applied. This completes this fix for the ASA dial, for now.
Two items to make one good unit
Edit: I’ve managed to obtain a damaged roll back for a grand total of £5:76GBP, absolute bargain and it also has a working ASA dial. So I’m hoping I’ll be able to use this donor to help in the repair of this item. I’ve used a combination of parts from this and the earlier roll back and I’m happy I have a good working unit. We now have a proper ASA dial off of the spare unit transplanted onto the old unit.
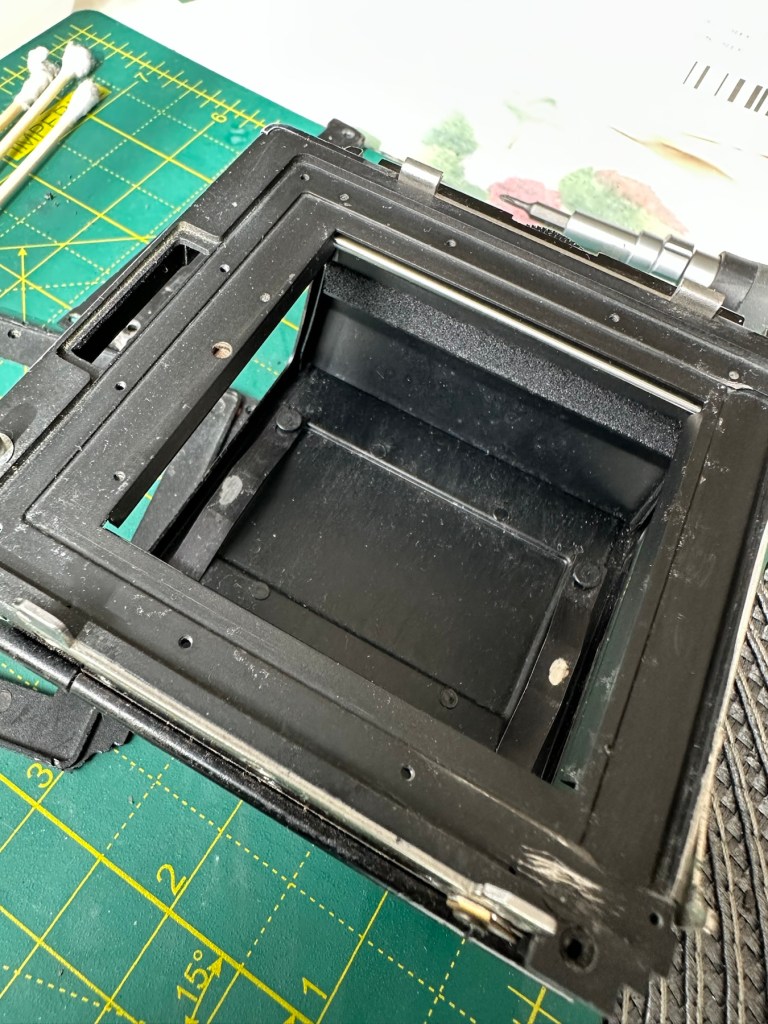
Front frame:
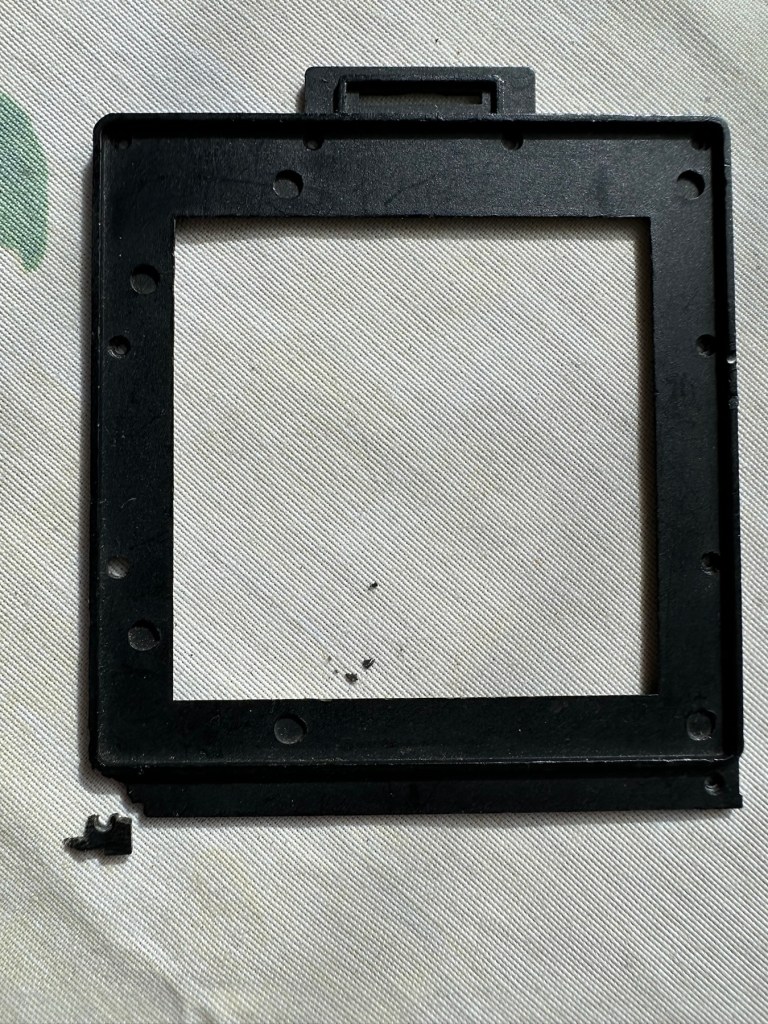
I’m taking this off to give the whole area underneath it a good clean. There are some film guides under this frame that are contaminated and that could cause a scratch on the film, I’m going to clean this whole area under the frame and will then reassemble. The cartridge slide is in a good condition and has just required a polish. Apparently this front frame is prone to breaking and the screw holes splitting, as it gets quite brittle. This has happened to this unit, and I’ve found a guy that 3D print’s replacement front frames and I have ordered one of these to ensure that the whole frame is secure and light tight, as currently one corner can be lifted and this could cause a fogging issue. At a cost include postage of £12:75GBP it’s a small price to pay seeing the only way to get one nowadays is by purchasing a donor unit at cost far exceeding what I have paid here.
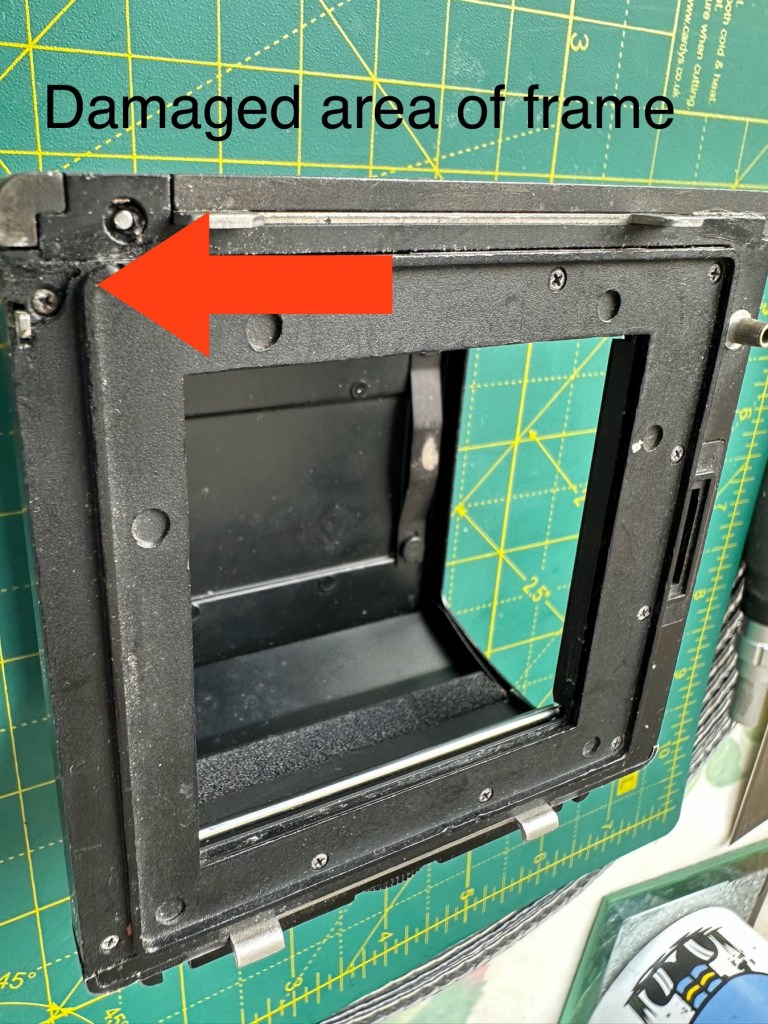
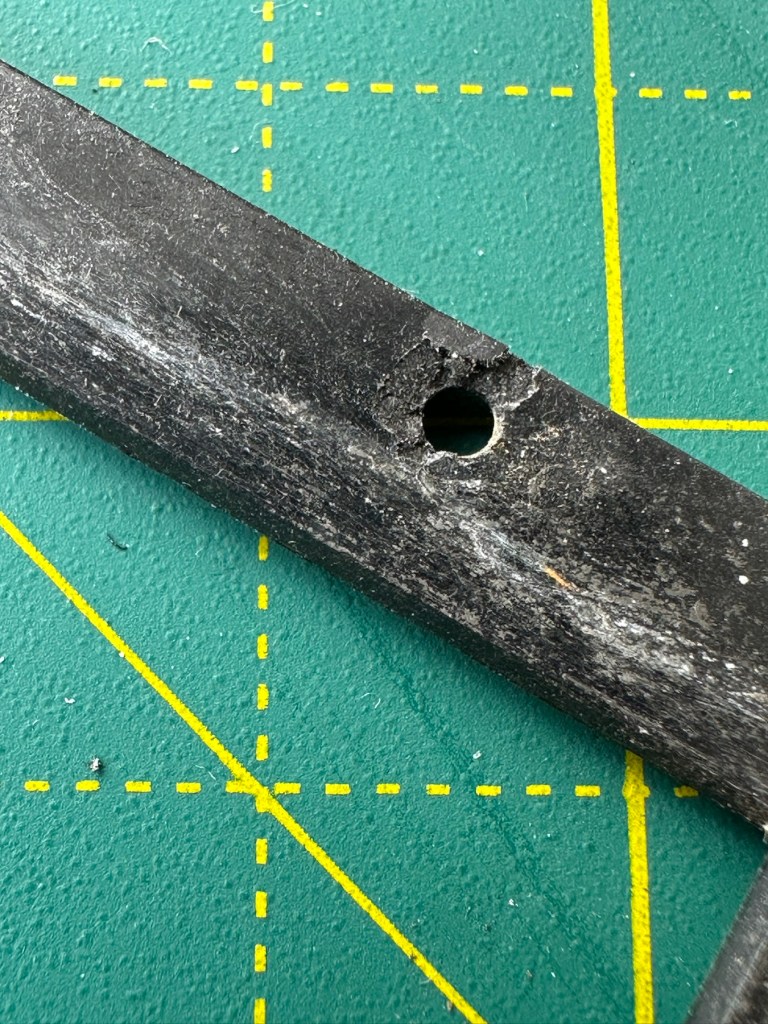
The new frame, will be blackThe old frame with broken corner and damaged screw holesDamaged area of frame in situ on the roll back
There are a couple of screws missing of which I have plenty of spares so these will be simply replaced. I’m happy now that this portion of the camera is in a good condition and will soon be ready to be put to use.
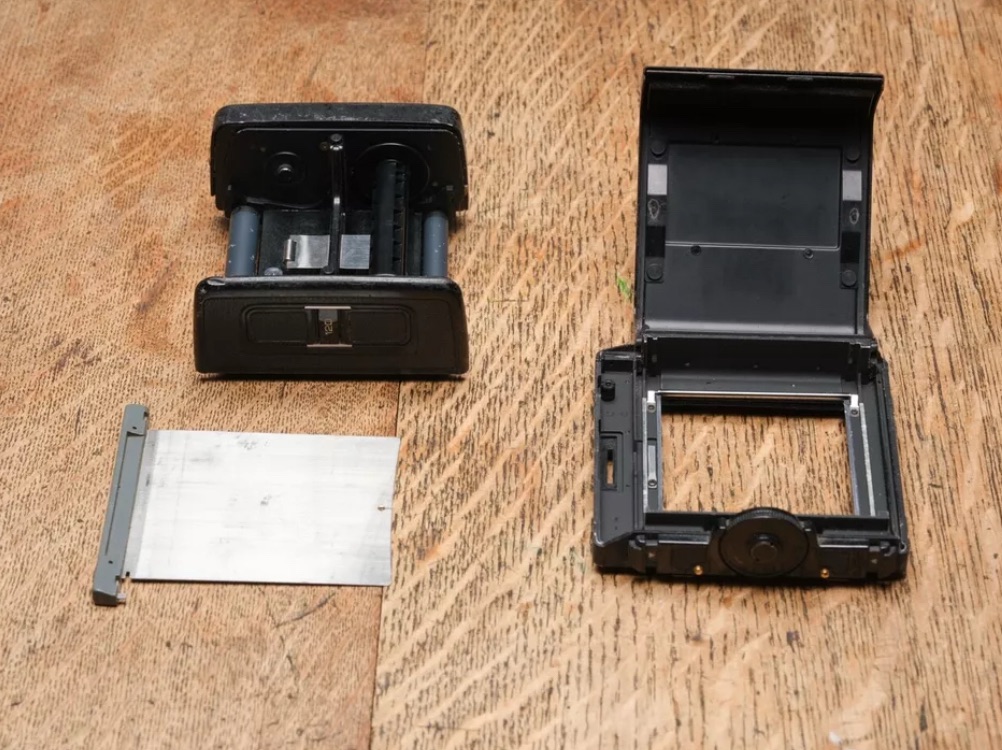
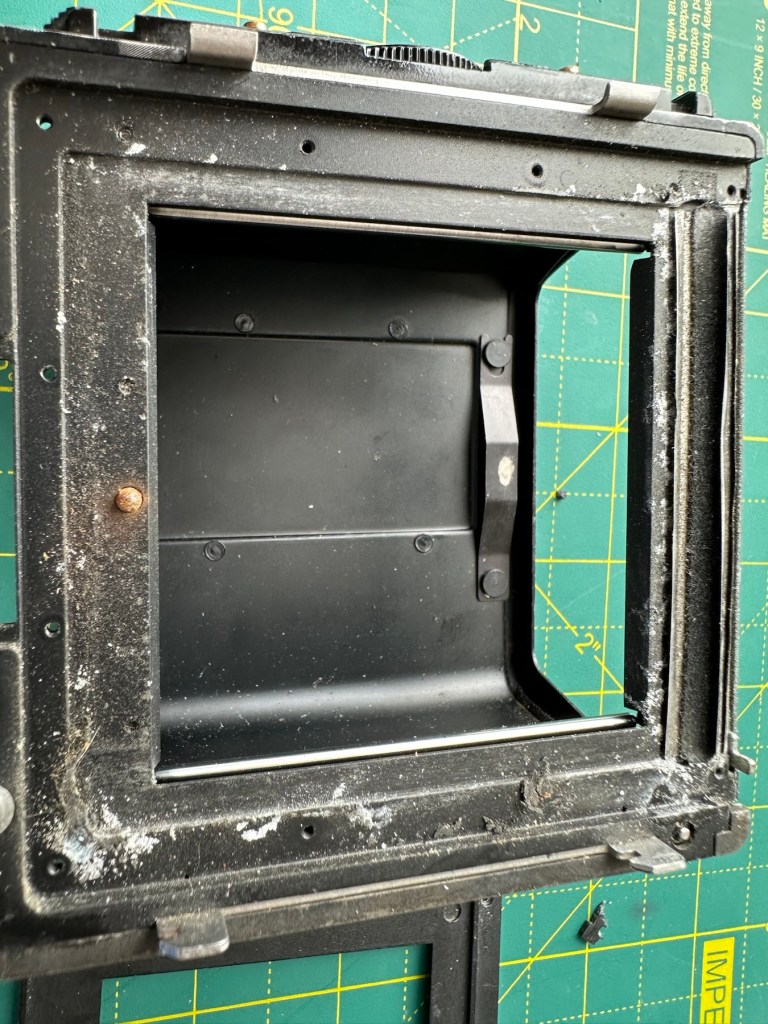
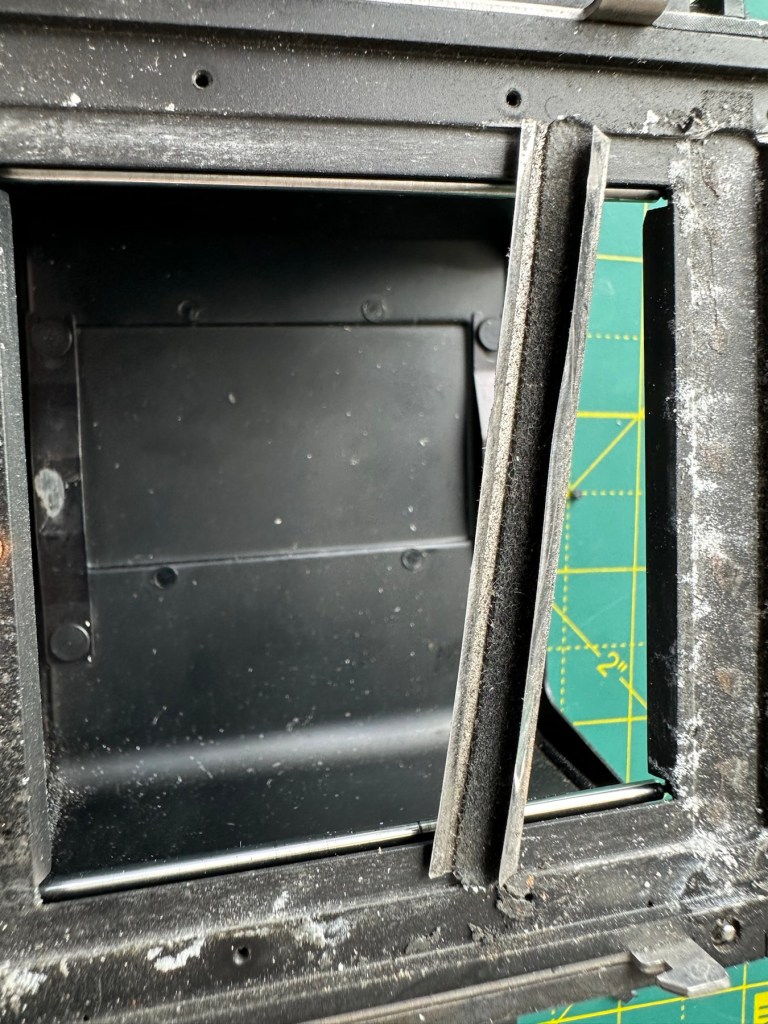
Before AfterDirty seals Damaged frameworkRemoval of the frame presented years of debris and filth that needed cleaning as well as a requirement for some replacement parts
There was a lot of contamination under the plate when it was removed, I was quite amazed just how bad it was. This has since been cleaned prior to the new frame and seals being put back into place. When everything is re assembled there will be another clean, I will also be using compressed air to finally clear any remaining debris from the roll back. Edit: the 3D printed frame has arrived and to be totally truthful it’s not much good. The part where the slide goes in is not usable and I’m not confident this will be as light tight as first thought.
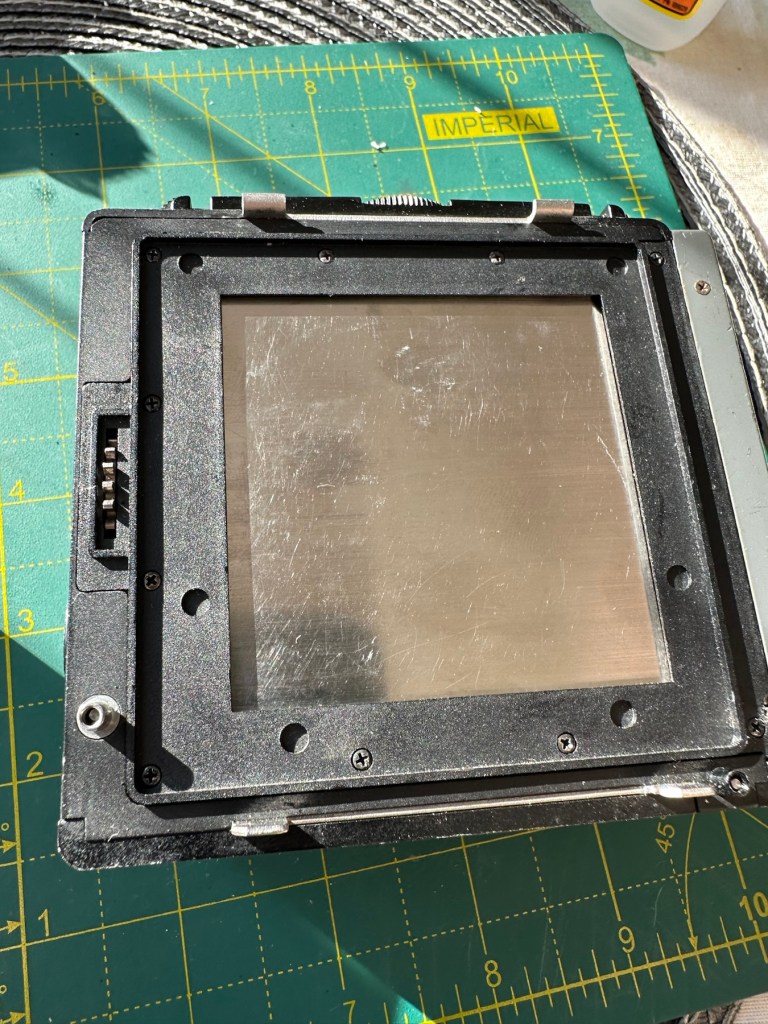
Good front frame from the donor spare unit
However the spare unit I purchased has a good front frame that just needed a tiny bit of adjustment to work, I’m now confident the roll unit will work as it should.
Light seals:
To be honest there are only two immediate areas of concern that I can see. All other light seals seem to be sufficient. I already have plenty of light seals material from where I fix other cameras so this should be simple enough to replace.
New and old light seals replaced
There were only two pieces that needed replacing, these were both on the roll film back. All other light seals were fine.
Rust spots:
These are purely external and there are no issues inside the cartridge. However I may just give them a very fine rub down and a quick spray with a black gloss to just make them look better. Then again I may not, and then I’ll attend to the cosmetics once I have completed the project. Edit: I’ve decided to leave this for the moment and will attend to this sometime in the future as it is not affecting anything at this stage.
Film cartridge:
Again this has just been cleaned and some contamination has been removed from all rollers and guides within. I have adjusted the back plate pressure pad for the film and also given this a good clean to remove any contaminants. I’m happy the internal cartridge is in a good condition and only requires a light clean. This cartridge is superior to the one I have obtained as a spare so this will be the one i work with. I have replaced all the exterior screws to replace the original ones as they were all a little crusty and contaminated.
New screws. I will touch the heads up with black dye
The whole roll section has been cleaned with tack cloths and compressed air to ensure all contaminants have been removed.
I’m going to store the whole roll film back, in a sealed plastic bag with some Silica gel packs to try and remedy the mustiness that I mentioned at the beginning of this post, though I must admit after all the cleaning and replacement of parts, the issue has reduced immensely. Some exposure to sunlight on a window seal usually helps immensely. That’s where it’s sitting for the moment. It’ll go in the bag with some silica gel, during the more inclement weather.
Outcome:
This part has been the most demanding part of this project so far. I’ve looked into the possibility of using 3D made parts, but I must admit defeat here. The items are about 80% ok, there are holes missing that should be there and as it’s a two piece fix you are then introducing glues, and potentially increasing the chances of light accessing the one area you want dark. Maybe in time they may perfect it. I was exceptionally lucky to obtain a spares unit for literally one pence. Yes one whole pence. It cost £5:75 to post making a total of £5:76GBP, but in many aspects some of its parts were far superior to what I already had. I am happy that this part of the build is now complete.
All good to go. Please keep an eye on the other blog posts that are coming regarding this project.
I like to think we are quite a laid back household, easy going and fairly stress free. We have our routines and the best one of the day is the two cups of tea in the morning before considering doing anything.
But today at around 6am, a big dark cloud began to form above the house. The mood went dark and not a word was spoken, silence hung in the air.
I’d been down to make cuppa number one, i opened the caddy and a horror washed over my face and through my entire soul. How shall I break the news to my wife who is currently in a slumber, should I even wake her at all?
Only one teabag! Oh the shame and horror!
There is only one teabag 😧
We’ve both been quite ill lately and I guess the normally large supply we have in the house has dwindled as a result of not participating in much shopping.
I had a dilemma. Should I make myself one? Should I share a tea bag (Oh the horror) or should I just take her one and then break the routine and go and source more?
I went with the latter. I grabbed some breakfast and a glass of water, and then decided to go for a fairly protracted walk to get some tea. Yes I have the car and could have been a lot more expedient, however I will walk wherever I can, so i decided to skip routine and go for the walk. After first giving the last tea bag to the wife, because that’s the kind of guy I am 😉
We have tea… we can all rest nowA little 3.3 mile walk logged
Anyway, a pleasant 3.3 mile walk later and the cloud has dispersed from the house, the sun is shining and the birds are singing (you get the picture) and normality has resumed and routine has now been restored.
It’s funny how something such as tea can structure your day and how dependent you become on routine. Only when it’s broken do you realise how reliant you are on it.
Now for my two morning cuppas, nothing more is being done until this has been accomplished.
To build a usable, basic issue, medium format camera (Bronica SQ-A) from damaged items and spare parts, for as little outlay as possible and shoot one black and white, and one colour roll of film as proof of its successful completion.
Getting started:
Building a camera from damaged parts is no easy task when the name happens to be a high end brand and any parts that are available, are being snapped up by others to service their own stock or to break up for sellable parts. I’m going to keep a running total to try and build this as cheaply as possible, and to keep track of this total I’m going to use my trusty Psion Organiser II LZ from 1989 to keep a tally.
This may be a strange situation where Pt:2 and Pt:3 of this project gets published before Pt:1, quite simply Pt:1, the film back. needs a fair bit of work still doing to it.
Third purchase:
And the third purchase is for an SQ body. This appears to be well used, but appears to be in a working condition. Here’s what the listing stated:
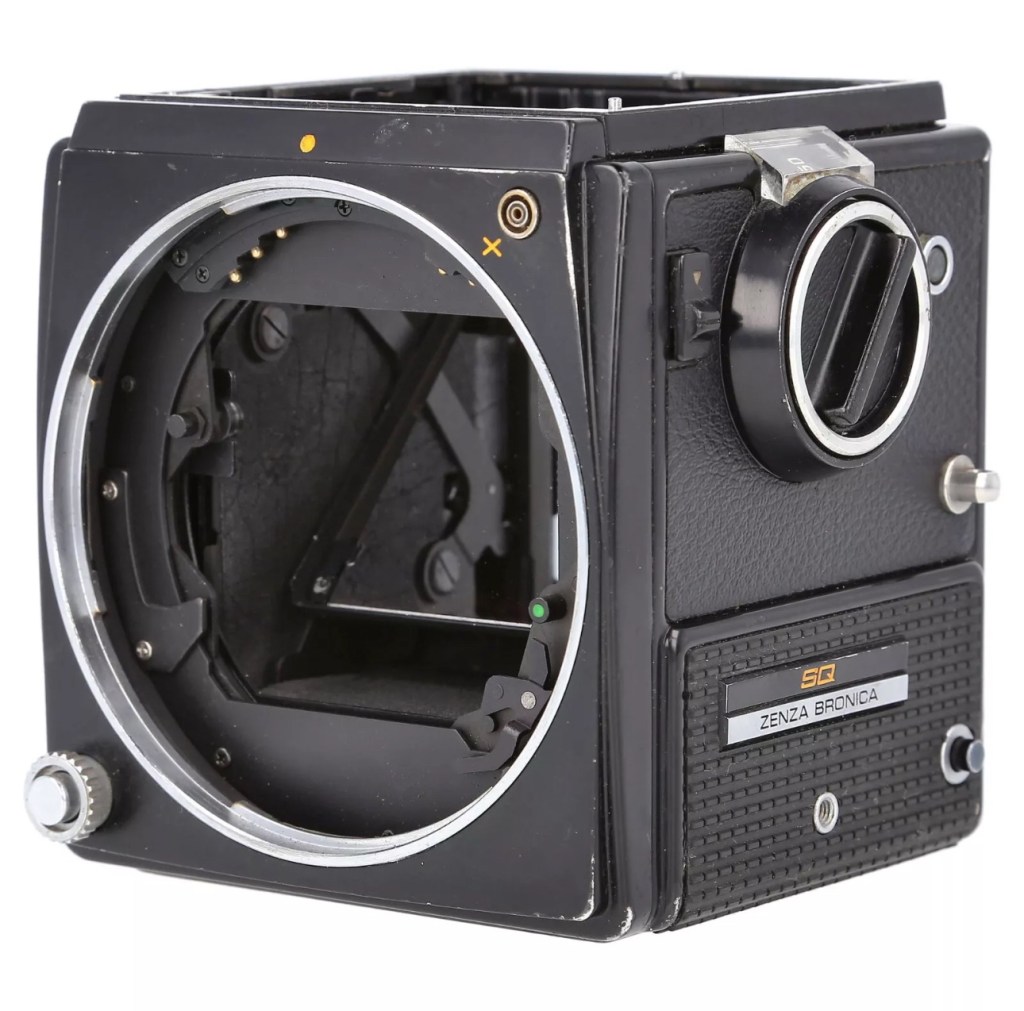
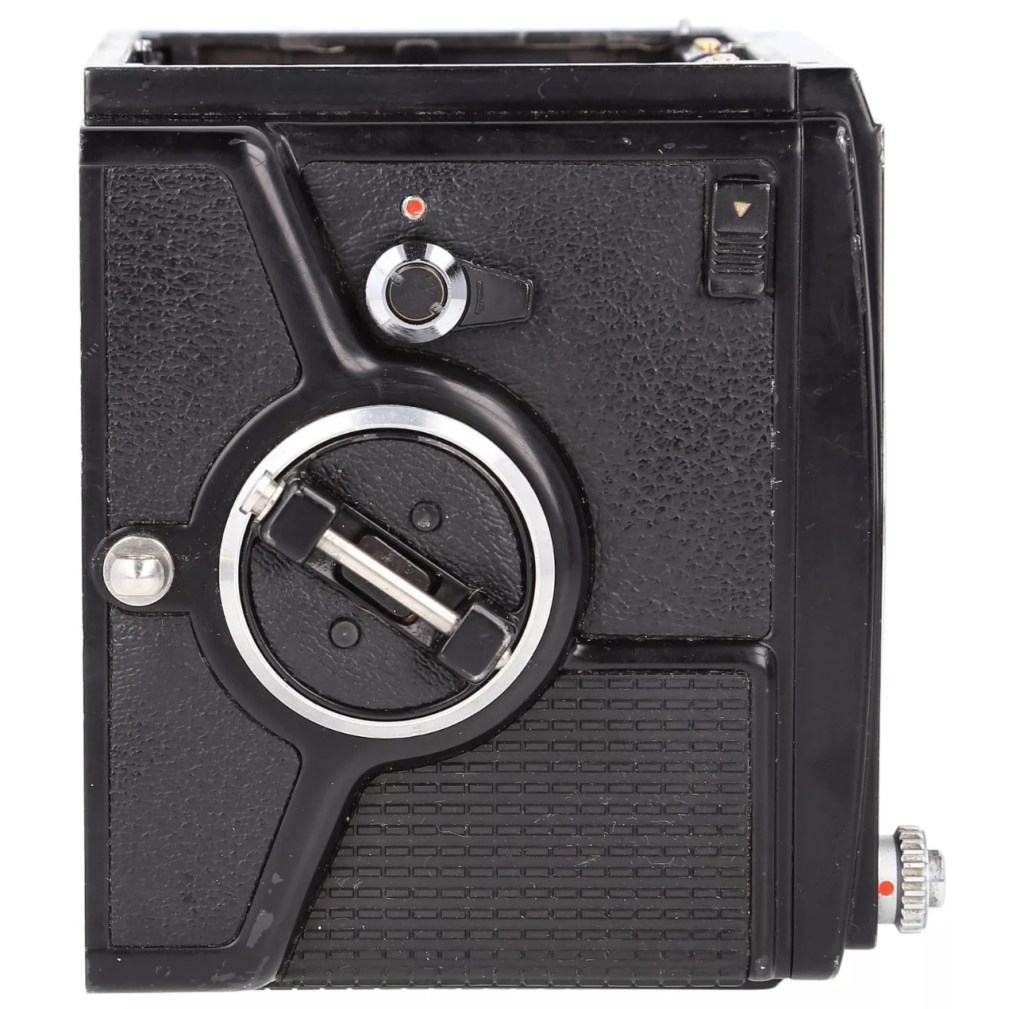
Zenza Bronica SQ Body Only / Medium Format 6×6 Camera
Condition:
Used but still in good usable condition with usual signs of use – see photos for details please. Fully tested and in perfect working order. Supplied with: Camera body as pictured.
EBay
Now I’m happy with this purchase as well. Not quite the SQ-A I wanted but to be honest the only difference is mirror lock up and metering that I don’t really need so I can live with that, we all managed prior to the metering being done for us, I’m sure we will all survive now . (Oh how we have been pandered over the years)
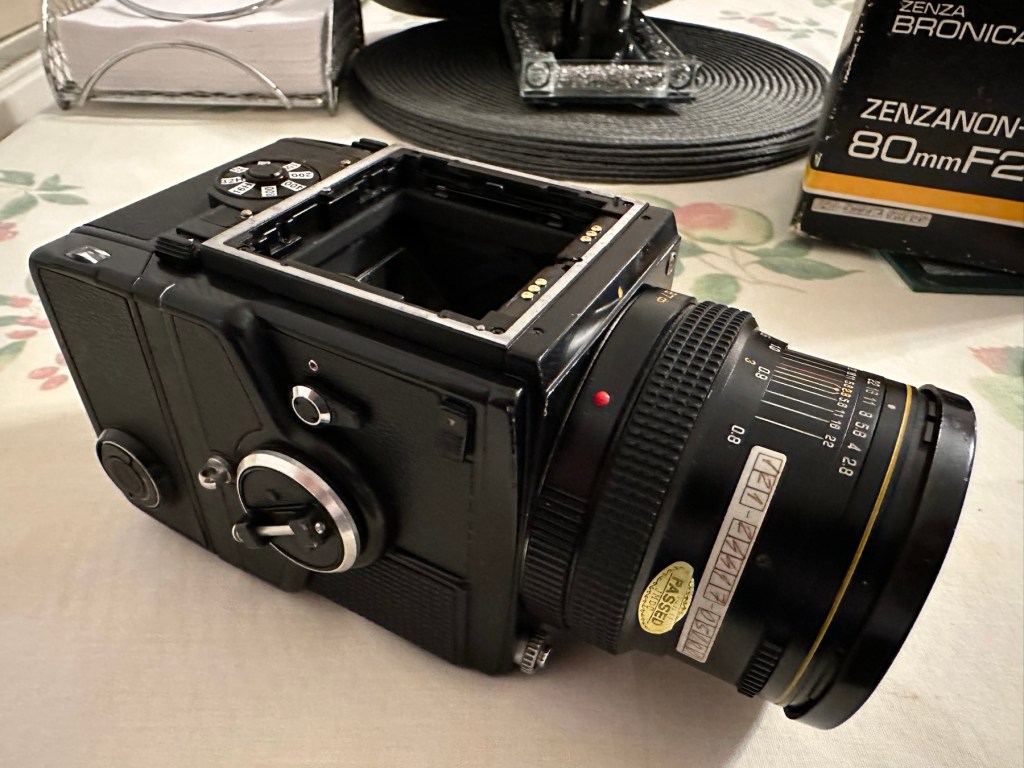
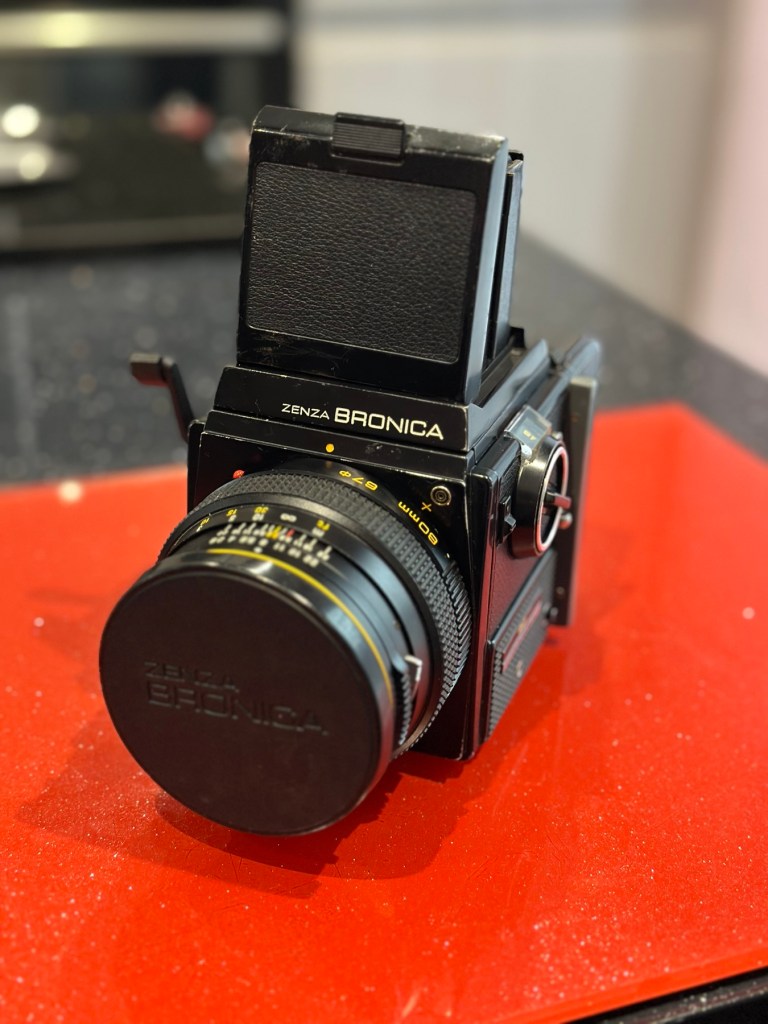
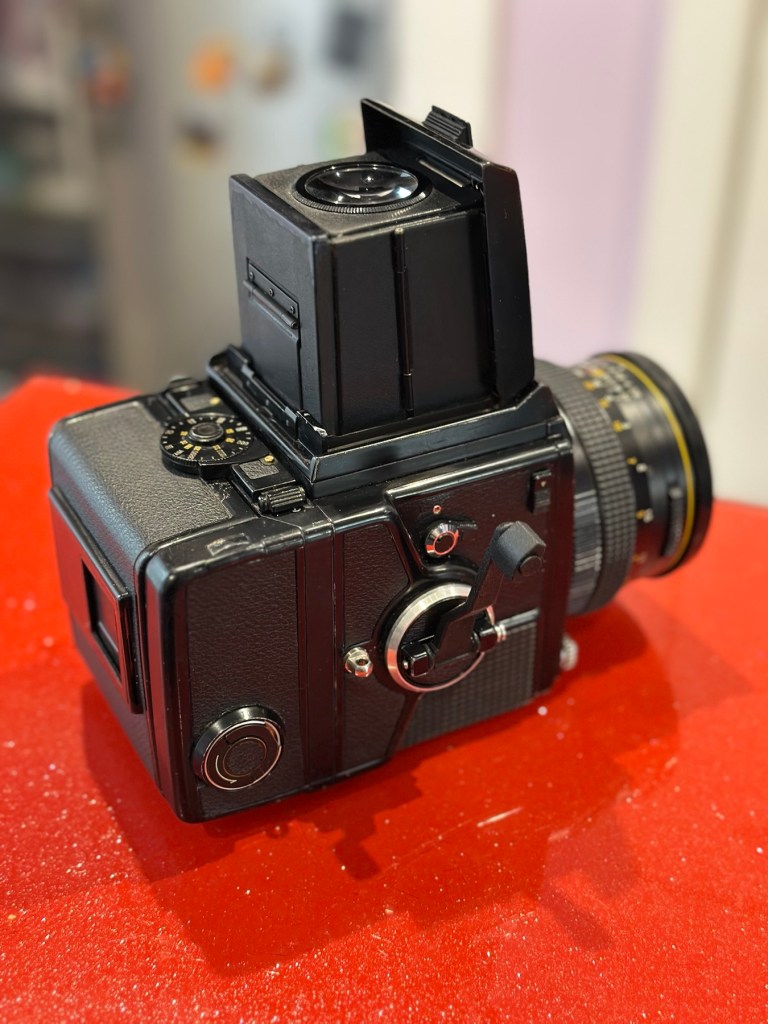
The Bronica SQ body I have purchased
I’ve paid the grand total if £73:75GBP for this body including the postage. There are some bits I will require to complete the body, namely a focus screen and waist level finder that could be a bit pricey, and a winder for the body. Now, the winders are pathetically expensive at around £60 for a bit of plastic. I know a guy who 3D prints a good alternative for a fraction of the price. And that will be the route that I take.
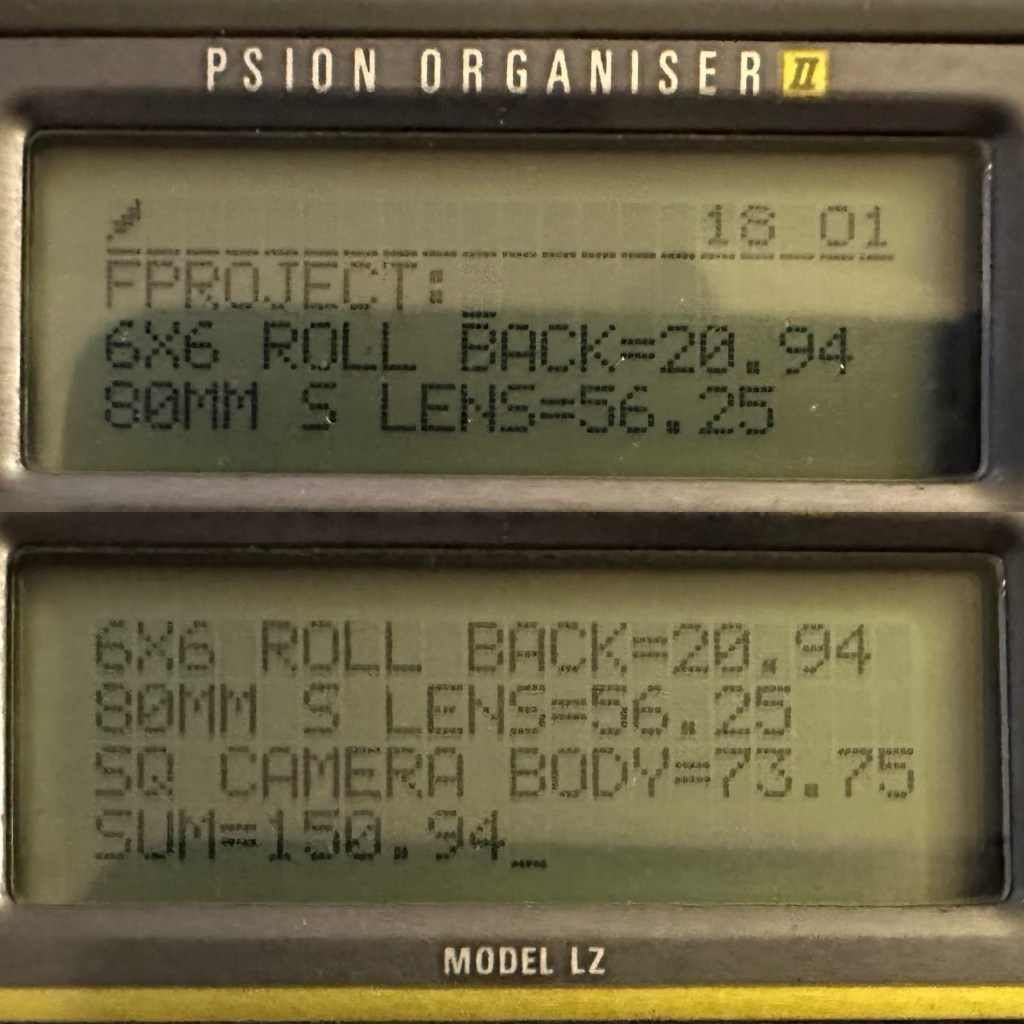
So over to my trusty old Psion II LZ for the running total for these first three items.
Current running total
So the total for these three items comes in at a total of £150:94GBP, and in Bronica terms this is extremely reasonable!
Assessment:
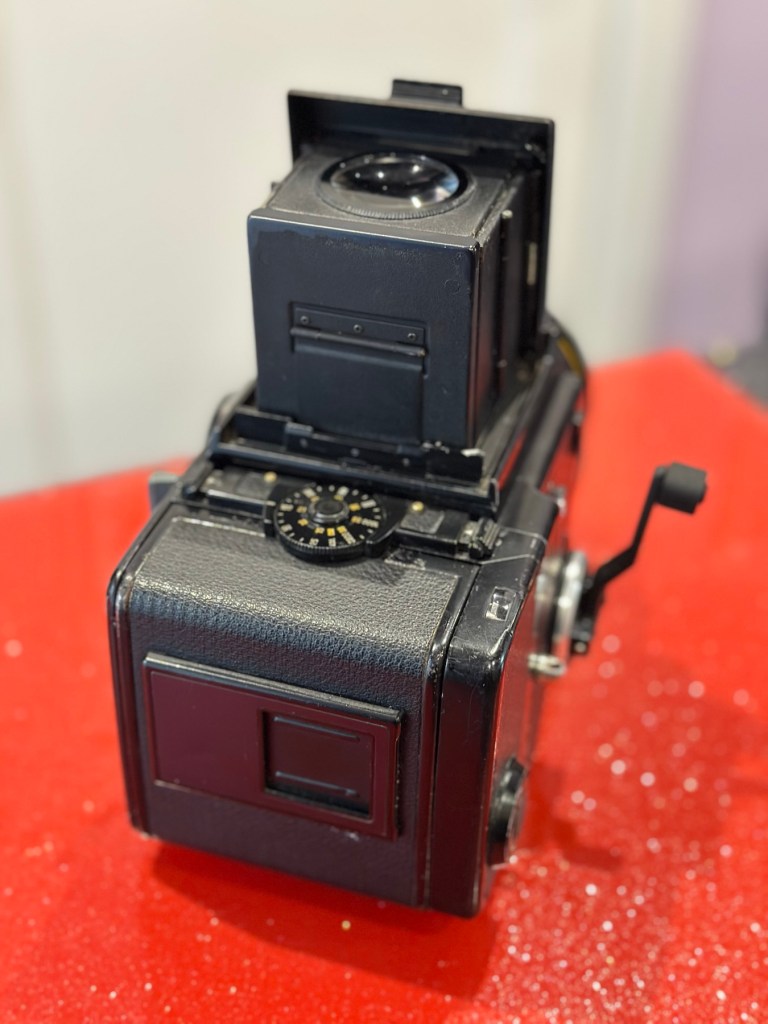
The parcel has arrived and yet again I’m really happy with this purchase. Very well packaged, a very faint age related mustiness that I guess should only be expected on an item that is now 45 years old. It seems to work just fine. I have connected the lens and that seems to be working ok, I just need to verify the shutter speeds are all correct. There is no battery in the base and this needs replacing as this is what controls the shutter speeds. Without the battery the mechanical shutter works, but only at a speed of 1/500 of a second. (Edit: the battery has arrived and after testing i can confirm that all speeds are operating as expected). The film back fits fine but I still have some work to do on that before I can say that this part is working ok. Overall I’m satisfied with what I have for the price I have paid.
No batteryNo winder A selection of covers for the sides, top and bottom are required
Repairs:
Not so much repairs but additions that are required, such as a crank winder arm and a focus screen, a new battery and a selection of covers to protect the central unit in transport. All horrendously over priced and i will deal with these items in Pt:4 of this project.
Outcome:
Current situation, looking good, smelling old. Not me, the camera 😂
We are almost there. The lens is fine, the main body is fine and just needs some final testing. The film cartridge is the item that needs the most attention and this will hopefully be finished when I have the new front plate that is being 3D printed. The next instalment will be just a tidy up with all the little bits I need to complete the build. These small pieces in Bronica terms are so bloody expensive, or should I say extortionate, can be obtained at a fraction of the cost elsewhere, you just need to shop around, if you are happy to have a non named spare part as a stand in. I’m happy with that as these parts have absolutely no effect on how the camera performs, and what we want to achieve at the end of this project, that being a well exposed two rolls of negatives that will produce a number of well presented photographs.
All good to go. Please keep an eye on the other blog posts that are coming regarding this project.
To build a usable, basic issue, medium format camera (Bronica SQ-A) from damaged items and spare parts, for as little outlay as possible and shoot one black and white, and one colour roll of film as proof of its successful completion.
Getting started:
Building a camera from damaged parts is no easy task when the name happens to be a high end brand and any parts that are available, are being snapped up by others to service their own stock or to break up for sellable parts. I’m going to keep a running total to try and build this as cheaply as possible, and to keep track of this total I’m going to use my trusty Psion Organiser II LZ from 1989 to keep a tally.
This may be a strange situation where Pt:2 and Pt:3 of this project gets published before Pt:1, quite simply Pt:1 needs a fair bit of work still doing to it.
Second purchase:
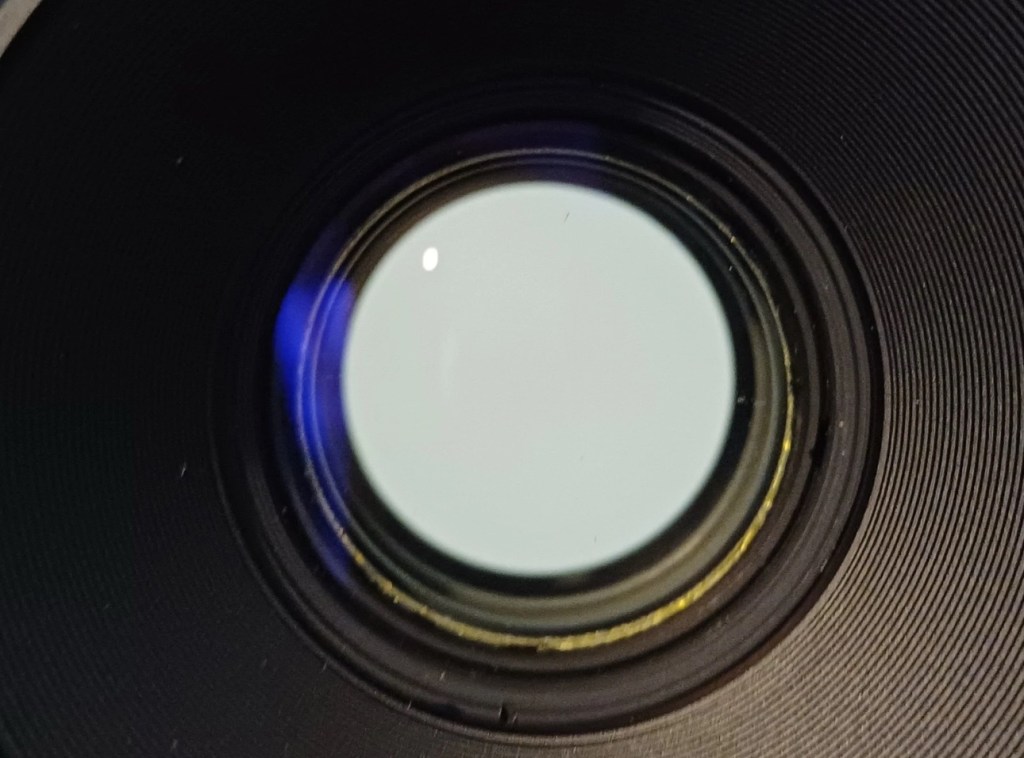
The lens. Probably the most important purchase of this project. Looking for a “cheap” lens is normally not the thing to do when exploring lenses as you do really get what you pay for. You want good clarity? You need a good lens. However this lens came on offer and what sold it to me was that there were no scratches and fungus in the lens, and that was music to my ears. It is a duplicate of a lens the owner already has and was surplus to his requirements. He has also supplied recent proof of photos taken on this lens and i believe he has sold me a little diamond to be honest. Everything about it seems good. There is nothing really to do to it, so no maintenance apart from maybe a light external clean and that will be it until everything else comes together.
Here is what the listing stated:
This is the S version of the 80mm lens and although there’s a slight difference in the lens design on the PS version, I’ve compared the two and couldn’t see any real difference other than a slightly more modern colour rendering. The T mode is also working without issue. This lens has been my main user lens and has never let me down. Glass is clear of fungus, haze and scratches. Aperture and shutter blades are snappy and clear of any oil. Shutter speeds are accurate and the lens produces just delightful images and is massively underrated. I’ve included several shots taken recently with this lens mounted on an SQ-A as per the examples. Focusing is smooth, apertures have a nice smooth click and the lens focuses just fine all the way through the range. I will include the origin box as well as the front and rear lens cap with the lens
EBay
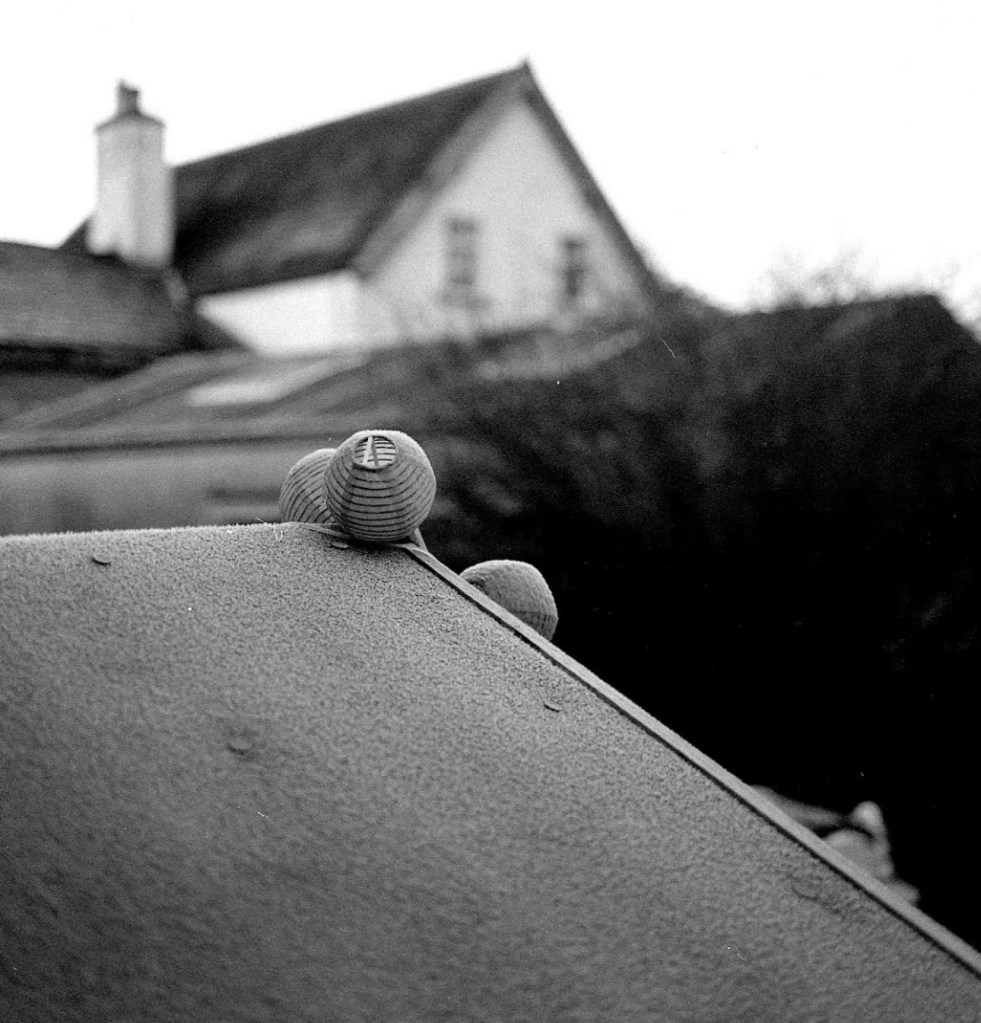
Lens and box Front of lens no fungusRear of lens no fungusTwo pictures shot on the sellers SQ-A with this lens (pics: pooface76)
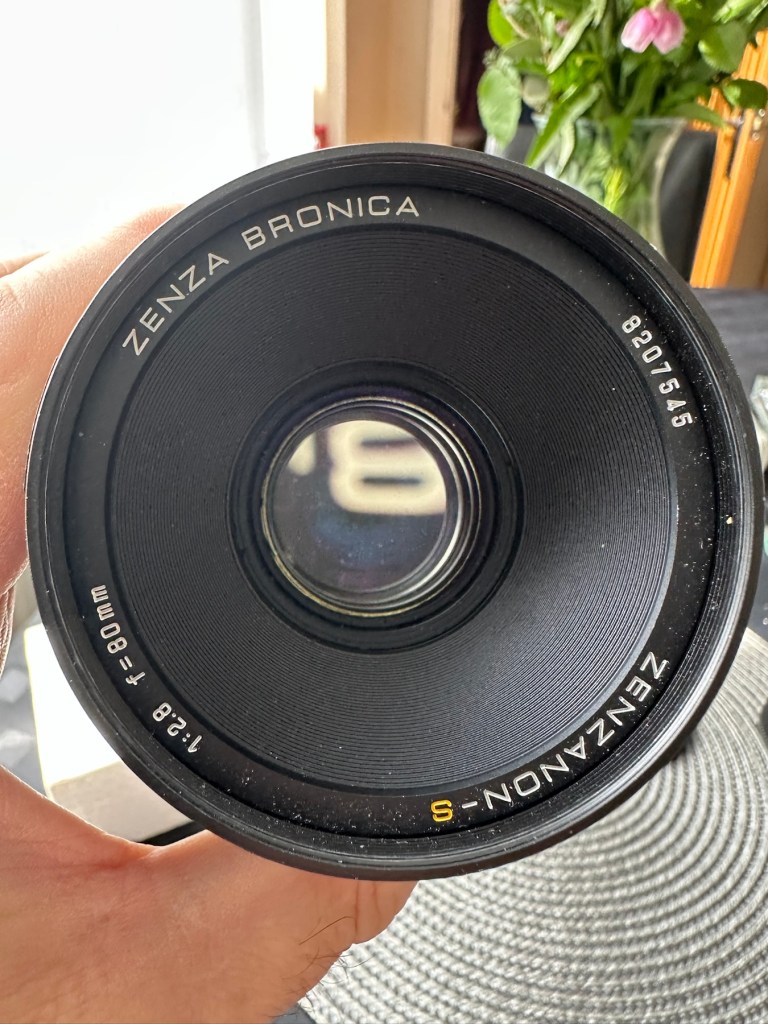
I’ve paid the total cost including postage of £56:25GBP and I think that this is an absolute bargain for what I am getting. It’s an 80mm f2:8 Zenzanon-S lens in its box with two end caps. I’m really pleased with this purchase and there is not a lot else I can say.
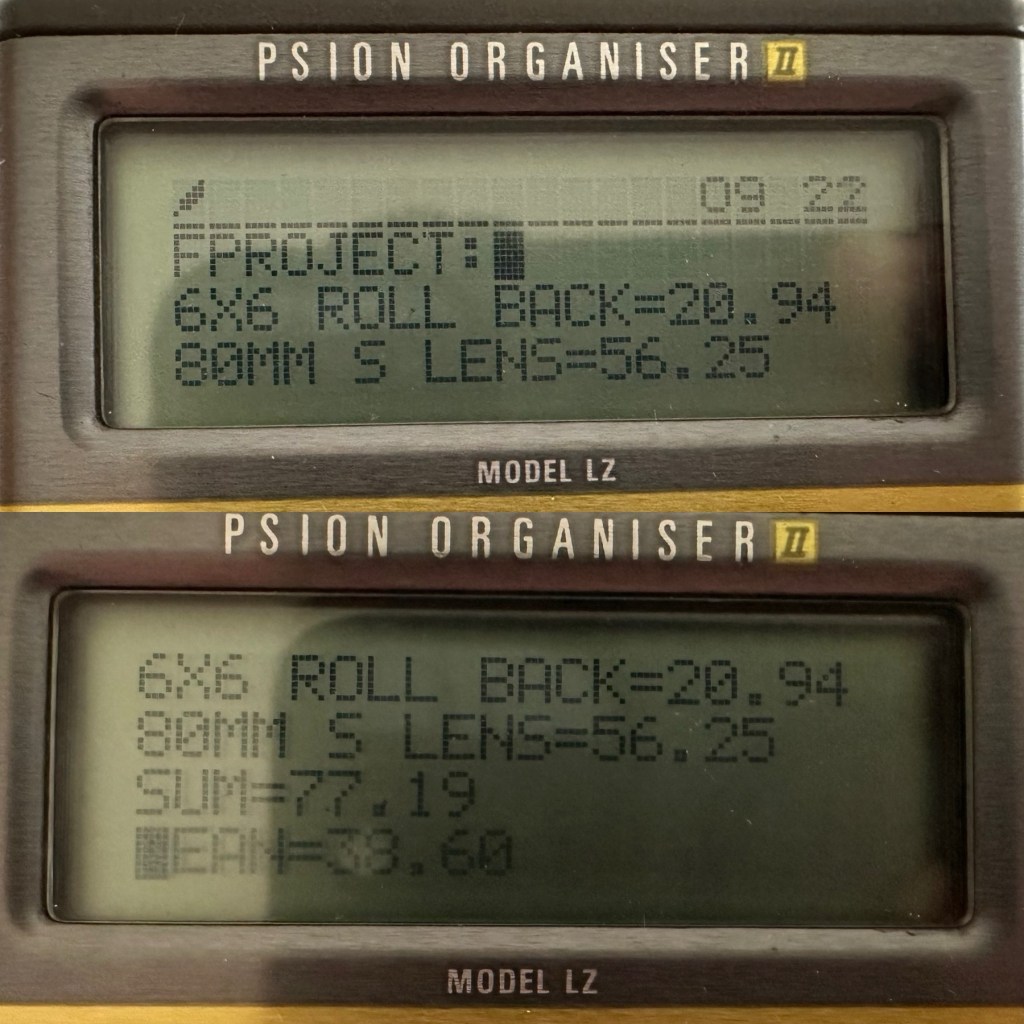
So here we have the scores after two purchases, the 120 roll film back and this lens. Over to my old mate the Psion II LZ for the running total.
Running total
So the total for two items currently sits at a comfy total of £77:19GBP so far, with an average per item price of £38:60GBP. And in Bronica terms that is quite reasonable!
Assessment:
The lens has arrived and to be honest it has surpassed anything I could ask for, for the price I have paid. For this project it is in perfect condition with nothing required regarding any repairs. It’s good to go.
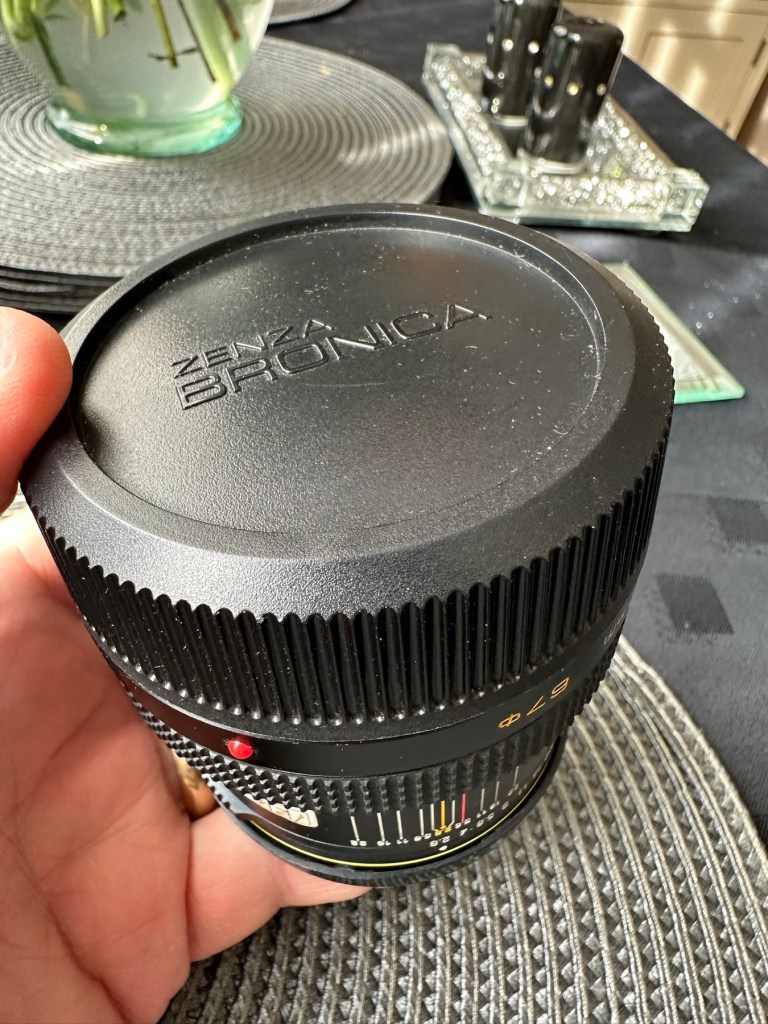
Boxed Original insertsBoth end caps
And out of the box the lens is lovely and clear. Just a few bits of dust but that is nothing at all.
Original end capNice and clear No fungus
Repairs:
None: I know this is boring on a repair front, but for this project it is the perfect result.
Outcome:
All good to go. Please keep an eye on the other blog posts that are coming regarding this project.


You must be logged in to post a comment.