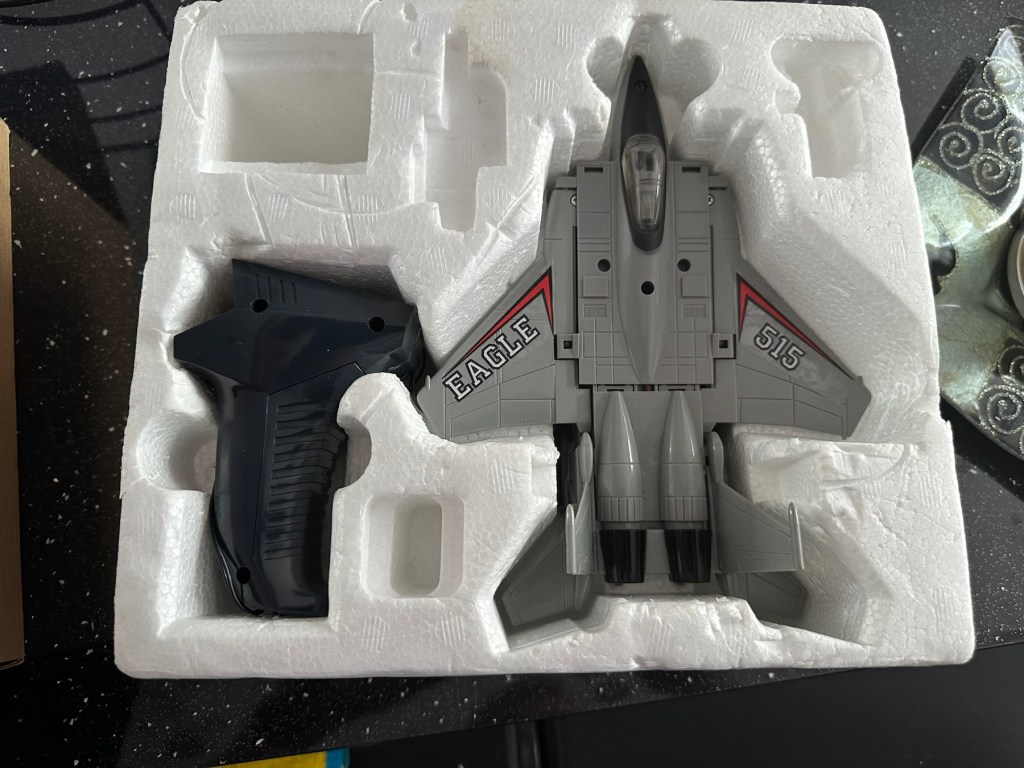
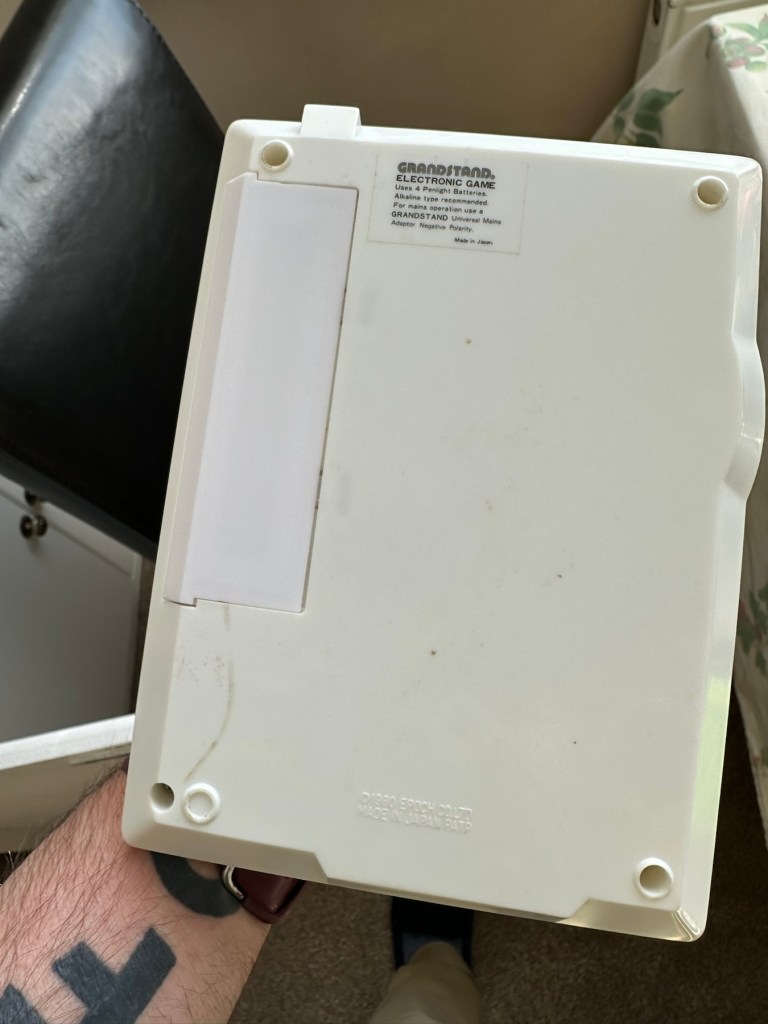
I arrived home from work last evening to find my nephew at home. He’d been looking around his mum and dad’s attic to find his old star wars toy collection he had from the 80s-90s. Whilst in the loft he found this old toy from 1985 by a company called Yonezawa being sold under the Grandstand branding, and it isn’t working. Here is where it passes over to uncle Dave.
Uncle Dave, it’s not working
There’s no real value to these toys as they were produced in massive quantities off the back of all the transformer type toys that were available at the time. There are some accessories missing from this one that are obtainable via the auction sites, he may well ask me to source these, but at the moment he just wants me to get it working to pass onto his boys. The video below shows just what it does….and that’s not a lot. But the one I have here is totally dead and needs reviving just like Frankenstein.
Deltatron what it should do
So here we go…
Assessment:
My overriding surprise is that this has been in a loft space for close to 30 yrs and does not have that expected damp mustiness that usually comes with such an item. I must say, my brother in laws loft space is an exception, it’s obviously free from excessive moisture, mind you it’s only about 40 yrs old so building standards had probably advanced somewhat from when ours was built about 90 yrs ago.
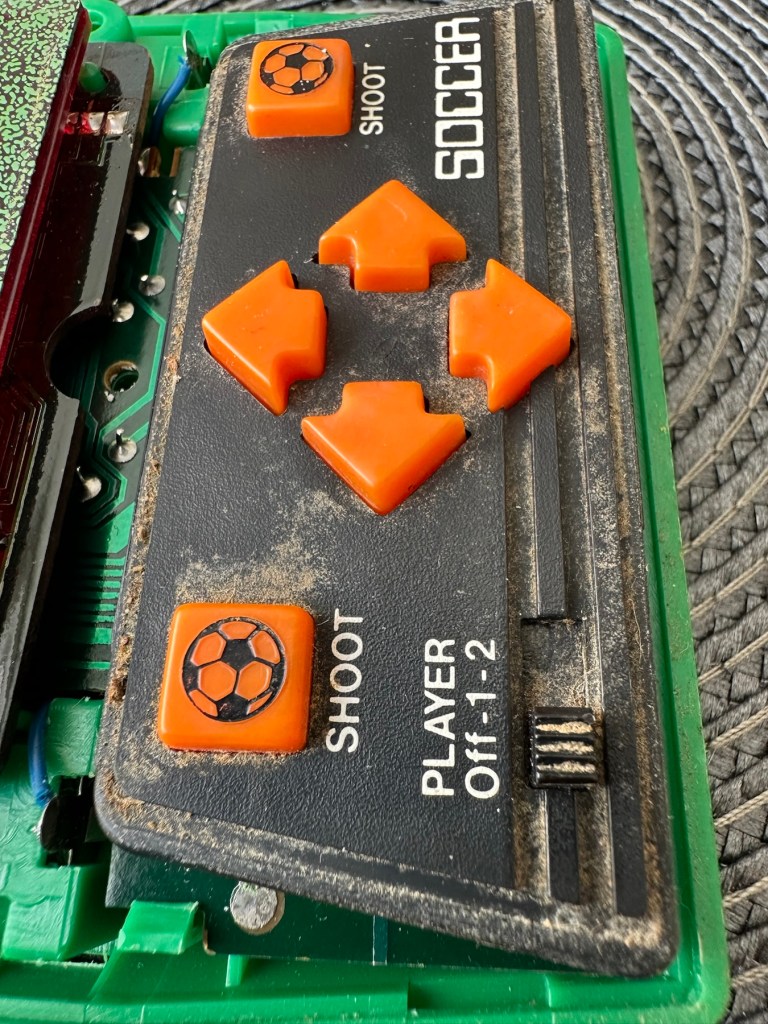
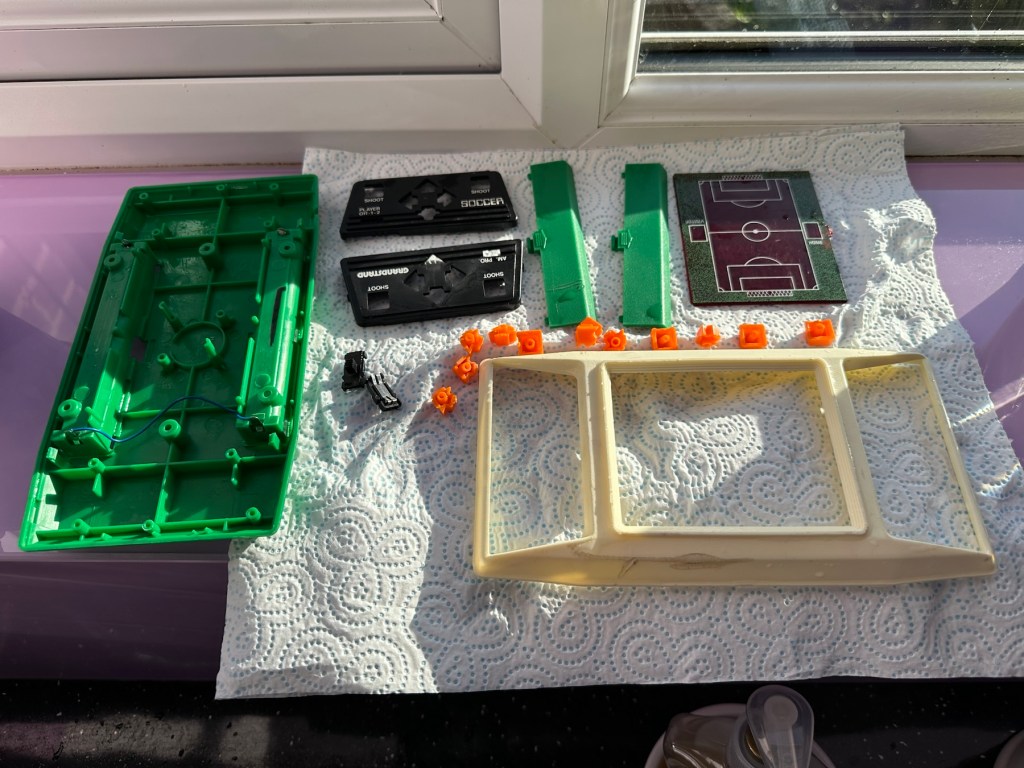
It’s in a good condition and all its parts are there minus a few little additions that originally came with the toy. But as I have stated earlier these parts can be obtained on line if required.
Right, let’s have a look at what is or isn’t happening here…
Repair:
When batteries are installed and the remote control is operated, all that happens is that a light comes on in the toy. The motion that is required is non existent.
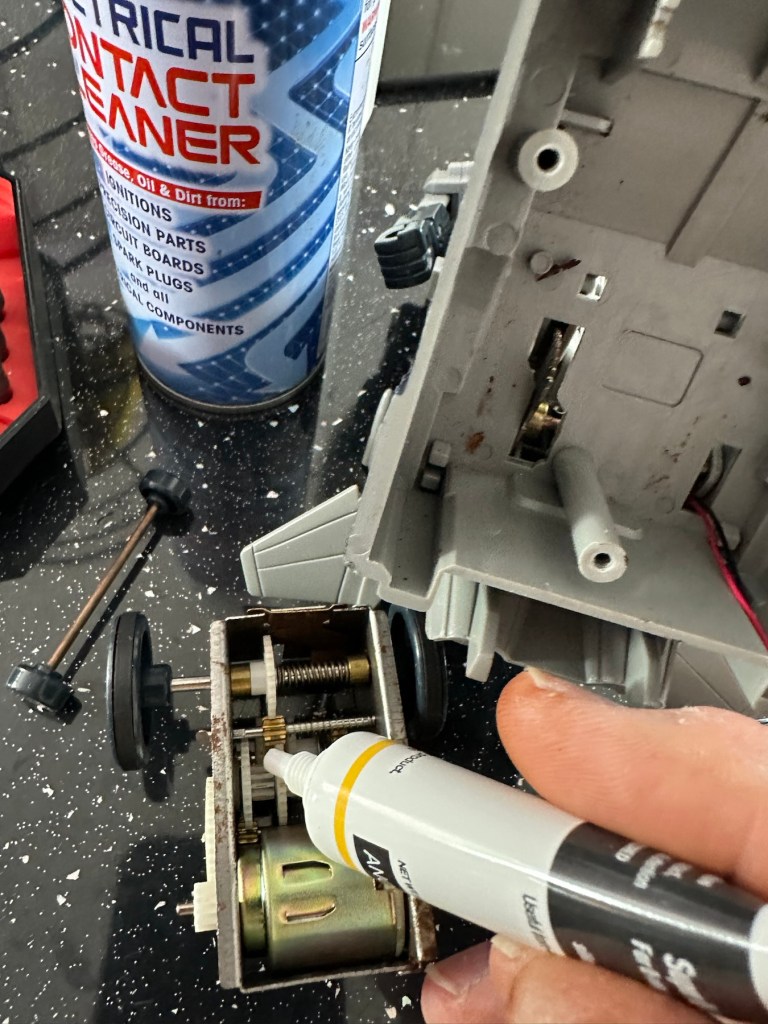
The motor unitMotor removed, there is a cog mechanism to move the unitThe motor unit removed
When examined closer you can see there is a lot of surface rust on the side of the motor where the contacts go into the unit.
Really rustyQuick clean later
The contacts were so rusty inside the motor unit that you’d get an intermittent running of the motor if you moved them. I’ve checked continuity and solder joints and they were fine. I’ve injected some contact cleaning spray into the motor and sat there manipulating the motor in both directions for about 5 minutes, this was sufficient to get the motor running freely once power was reapplied. The contacts were dirty and restricting the flow of power to the motor. I decided to use some IPA around the area to give it all a good clean and once again sprayed more contact cleaner through the motor.
Contact cleaner and silicone grease
Once I’d run the motor for a few minutes in both directions I then applied some silicone grease to the cogs and moving parts to allow a smoother operation. It’s worked. A nice simple fix.
Result:
It’s working and here’s a small video to prove it.
It’s now working
I’ve already handed it back and it’s a joy to see the smiles on my nephew and his dad’s face when they watched it working. Such a simple thing, bringing back treasured memories and laughs. Another old toy saved for another generation and best of all another item not going to a landfill.
Thanks for passing by, as always it is very much appreciated.
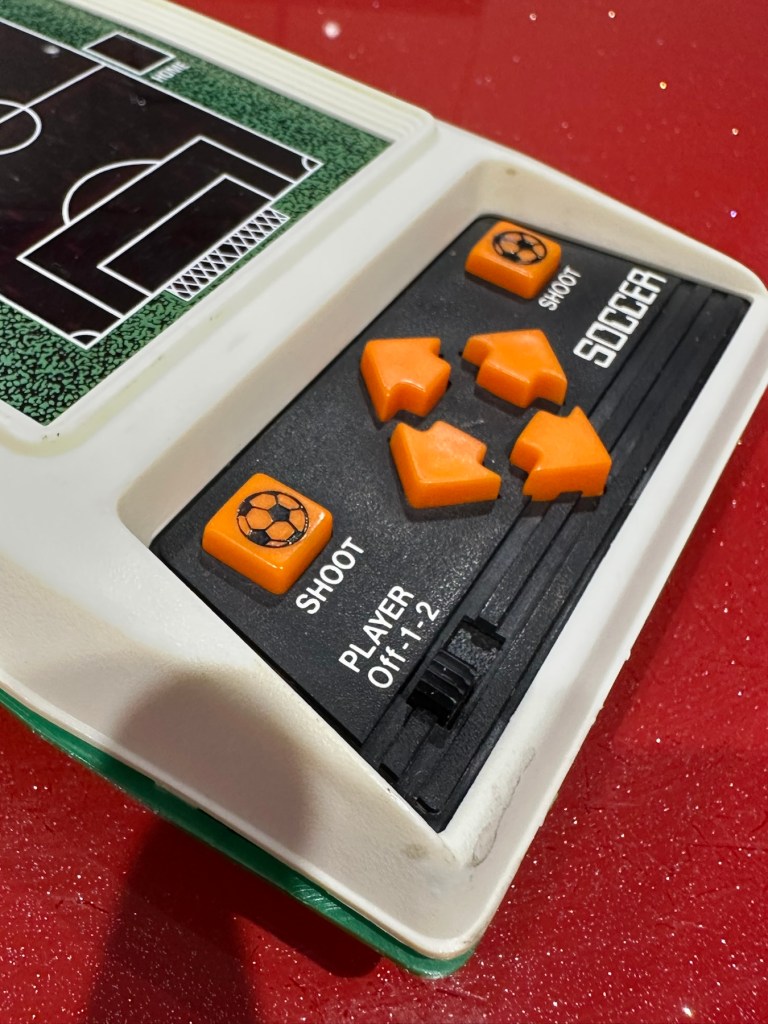
Fair overall condition some cosmetic damage as expected for a 56 year old item
Very rare well worth restoration if you know how
EBay
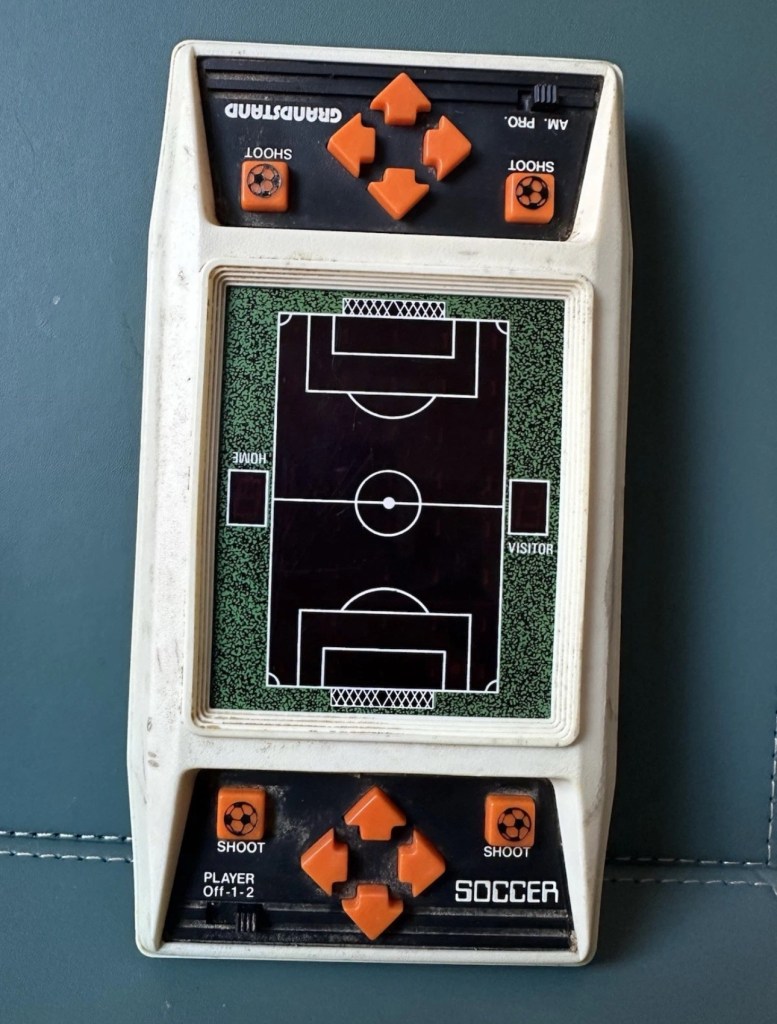
This guy sells retro games on EBay at exceptionally inflated, ridiculous prices. I suspect he doesn’t get involved with repair or renovation as he had this one advertised at over £30GBP but when I put in a cheeky bid for £12GBP he bit my hand off… I wasn’t expecting that! The usual mistakes in the listing such as stating it’s 56 years old when its actually 46, and stating it’s Very rare – it’s not, there were a few hundred thousand churned out and to be honest and they come up quite often on the sale sites. But I do agree it’s worth restoring and will pair up nicely with another retro football game from 1979 that i repaired a few months ago Bambino kick the goal football game. And what makes this unit even more appealing is that it is complete with both of its battery covers – now that is rare!
The game I have purchased Absolutely filthy
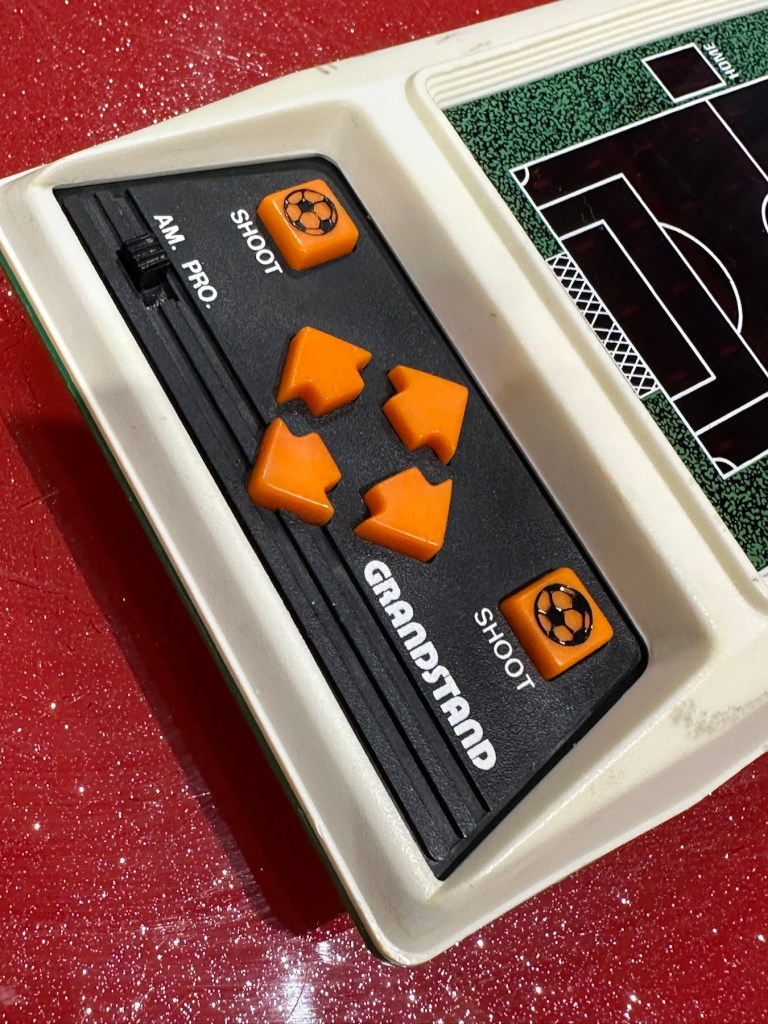
This game was made by Grandstand in 1979. Here’s the original advert that appeared on UK TV promoting the game back in the late 70’s.
European footballer of the year 1978/1979 Kevin Keegan – questionable late 70’s advert
This particular unit is listed as Not working, it looks filthy from what I can see, but having experience with these games in the past the biggest issue is age related problems such as old components, track decay and battery corrosion. No doubt the first thing I will do will be to dismantle it, give it a thorough inspection and then a good cleanup both inside and out. And then we can look at the issues around why it’s not operating.
Assessment:
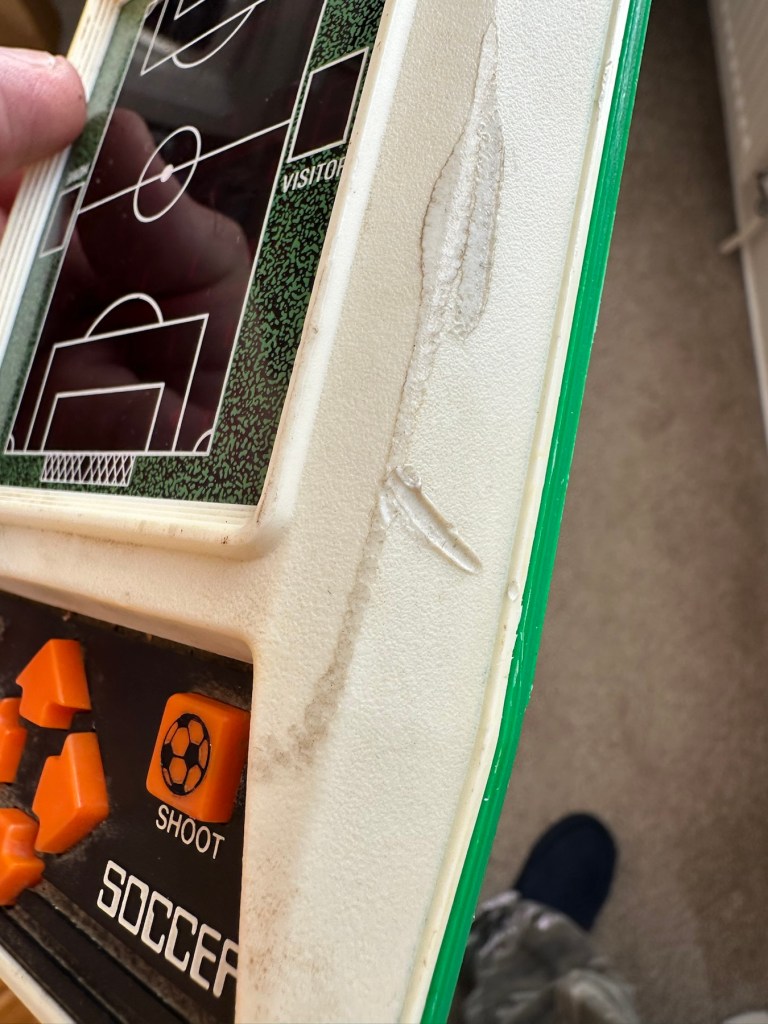
The unit has arrived today and it sure is filthy cosmetically. Like someone who has grown up throughout those 46 years it has its scars. It looks as if it has been placed against something hot, and shows a burn mark up one side.
How it looks on arrival
Caked in filth
Battle scars and burns
I have put batteries in and the good news is that there is life of sorts. By that I mean there is a distorted noise from the speaker and a flash of life on the screen and then it dies. Wiggle the start button and there are more flashes of life but that’s it. No other buttons seem to be working. I’m not tempting fate but this could be a case of the unit being just as filthy inside as well as out. But knowing my luck this will not be the case. Let’s have a look inside.
Repair:
First of all we need to get the unit open, remove the circuit board and get the thing clean. So let’s do that.
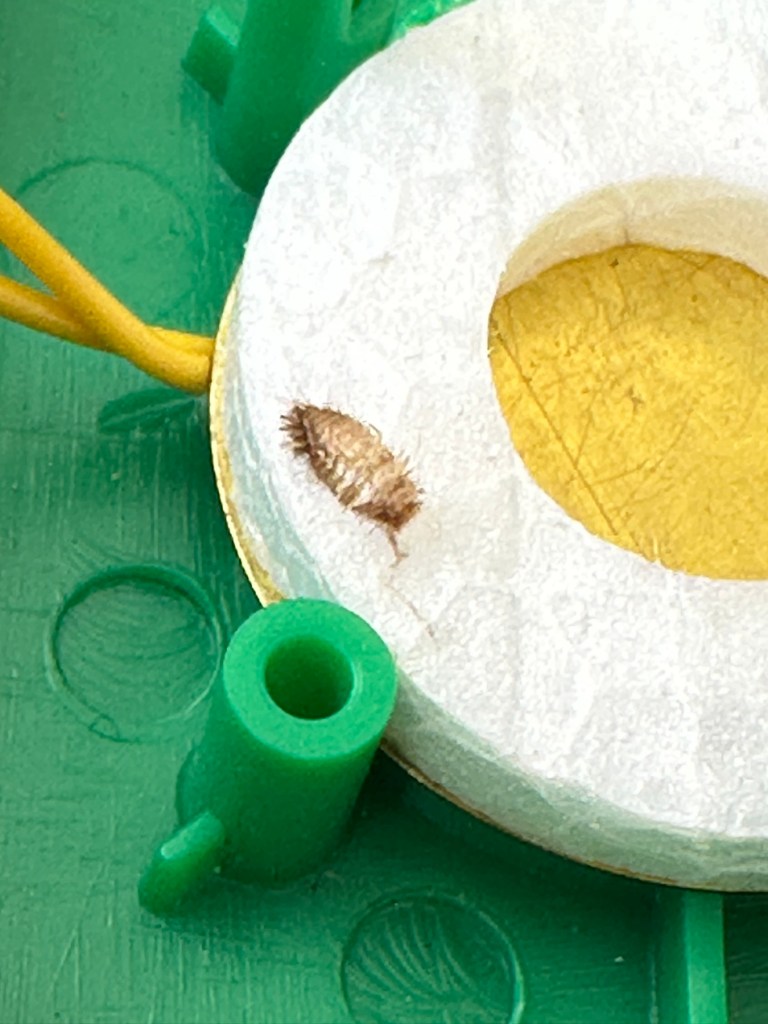
Utter filthCircuit board Push buttons to be cleaned, the rest is off to be washed. Even a dead bug inside 😧
As you can see in the pictures above, the inside hid a lot of accumulated dirt and grime, there were even dead bugs inside. Everything that could be washed was taken to the kitchen given a good soak, brush and rinse.
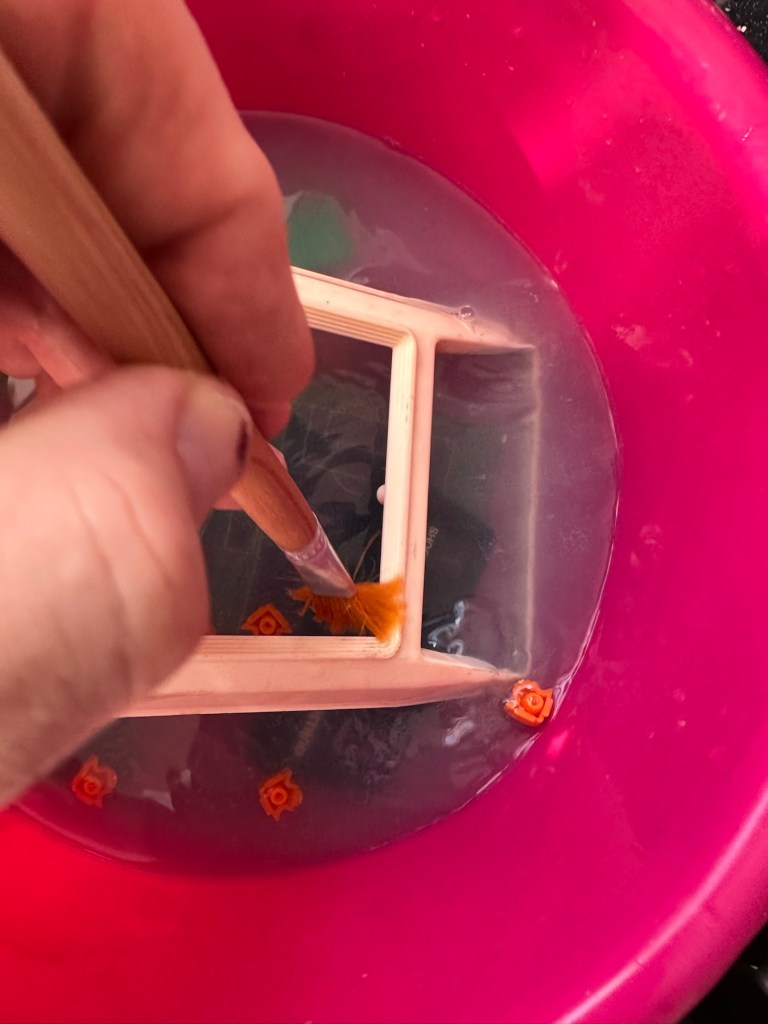
Off to the basinGood clean and scrubDrying on the window cill
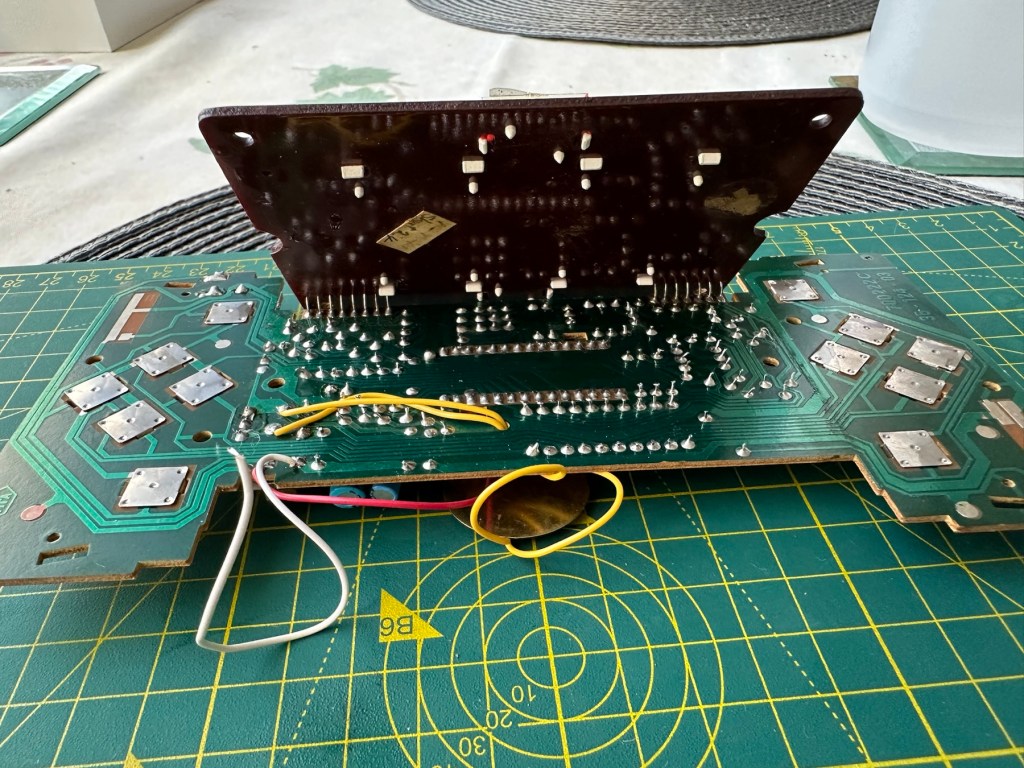
Whilst I’m waiting for everything to dry my attention turns to the board. A quick inspection reveals that all tracks are in a fair condition and we don’t need to rescue anything there. The buttons on either end have been taken apart and all cleaned with IPA, I’ve also used the same method to clean the switches and the board and after checking continuity all contacts are working as they should.
Board before cleaningChecking tracksNote found under upper portion of main board
Now everything is clean, I resolder the battery contacts, check the buttons and all appears well, I attach my bench power supply, give it 6v, turn on the switch and we have life. No intermittent issues and a very loud sounding speaker. I turn this off and look at getting it all reassembled.
Unit now fully assembled, it is looking a whole lot healthier and apart from its burn scar is looking pretty good.
Where’s the dirt?TransformedLooking good
And when turned on it’s working just as well as it did back in 1979.
Result:
Sometimes these units just need some care and attention, and as I stated at the beginning all this really needed was a deep clean and service. Not a thing wrong with the electrical circuits apart from contamination on the contacts and switches.
All working. Job done
I’m now in possession of a lovely example of 70’s technology with slight battle scars. It’s had a tough life but now it has had a new lease of life and is good to go for many more years yet. It will take a place in my “Retirement home” collection of old discarded retro game units.
As always, it’s a win as we have prevented another unit being heaved into landfill.
Can’t get to turn on unfortunately. No battery cover. Any questions please ask
EBay
Dirty unit No battery cover
I know, there is no battery cover, however I have already sourced a seller of one if needed. This item looks quite dirty so a good soak might be the order of the day to get started. I’ll wait for its arrival before I jump to order any other bits for it.
Now as I’ve said in the past these units fall into that crazy price category on the selling platforms as the “New Antiques” of today. For an item that was low cost, somewhere between £25-40GBP when it came on the market, they can certainly command a wide range of crazy prices, here is an example of price ranges from today:
The massive range in prices for these units
This one I purchased today only came up for sale about 3 hrs ago and I thought it would have been snapped up by now, it hadn’t so I didn’t hang around any longer and purchased it for a total of £16:38GBP including its delivery. I’m not going to get too smug yet, as for all I know I may have just purchased an empty shell. Let’s wait until it arrives.
Here’s a little history of this unit:
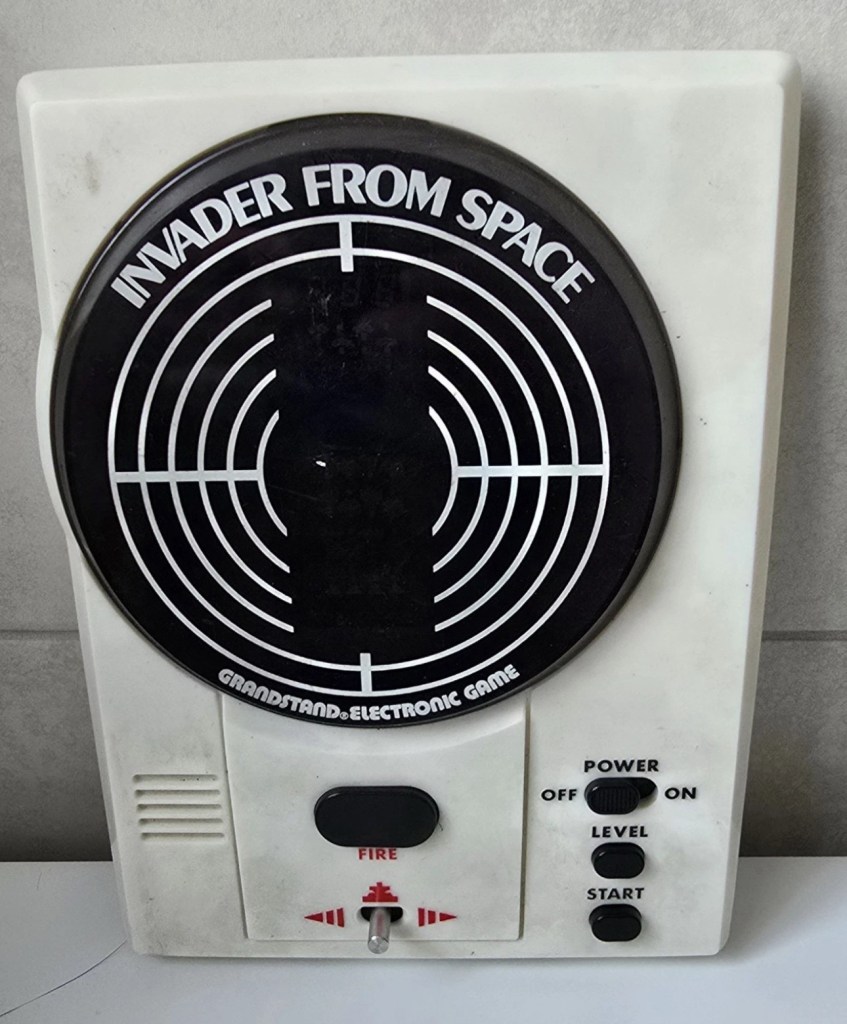
Grandstand “Invader from Space” is a tabletop LED game dating back 45 years to 1980. Four ‘AA’ batteries power the unit or, alternatively, the Grandstand 5.5V@300mA power adapter (or an equivalent power pack) sold separately. The game, licensed to Grandstand, is a copy of Epoch’s “Invader from Space”
The company initially behind the “Grandstand” label was Adam Imports Ltd., (from 1980 Adam Leisure Group Ltd. and by 1983 Adam Leisure Group PLC) founded in 1973 by Chris Rycroft and Les Kenyon of Harrogate, UK. The company initially started as a mail order company and was the single largest supplier of calculators in the UK by 1974. By August 1978, George Bassett had acquired a 75% holding in the capital of Adam Imports for £750,000 cash, plus 60p in the pound of profits before tax in excess of £500,000 for year to December 31, 1978. Adam Imports was re-acquired from George Bassett by Chris Rycroft in 1980. It chiefly imported electronic products from other manufacturers such as VTech, Epoch, Tomy & Entex, selling them in the UK re-branded under the Grandstand name.
Wikipedia and others
So that’s the history
There is a good link to a similar repair on YouTube from a guy I follow named Stez Stix Fix, it’s very much worth a look and he has a great if not sometimes crazy way of diagnosing and repairing items. A cool guy though.
The Grandstand invaders from space game
Anyway back to my own purchase.
Assessment:
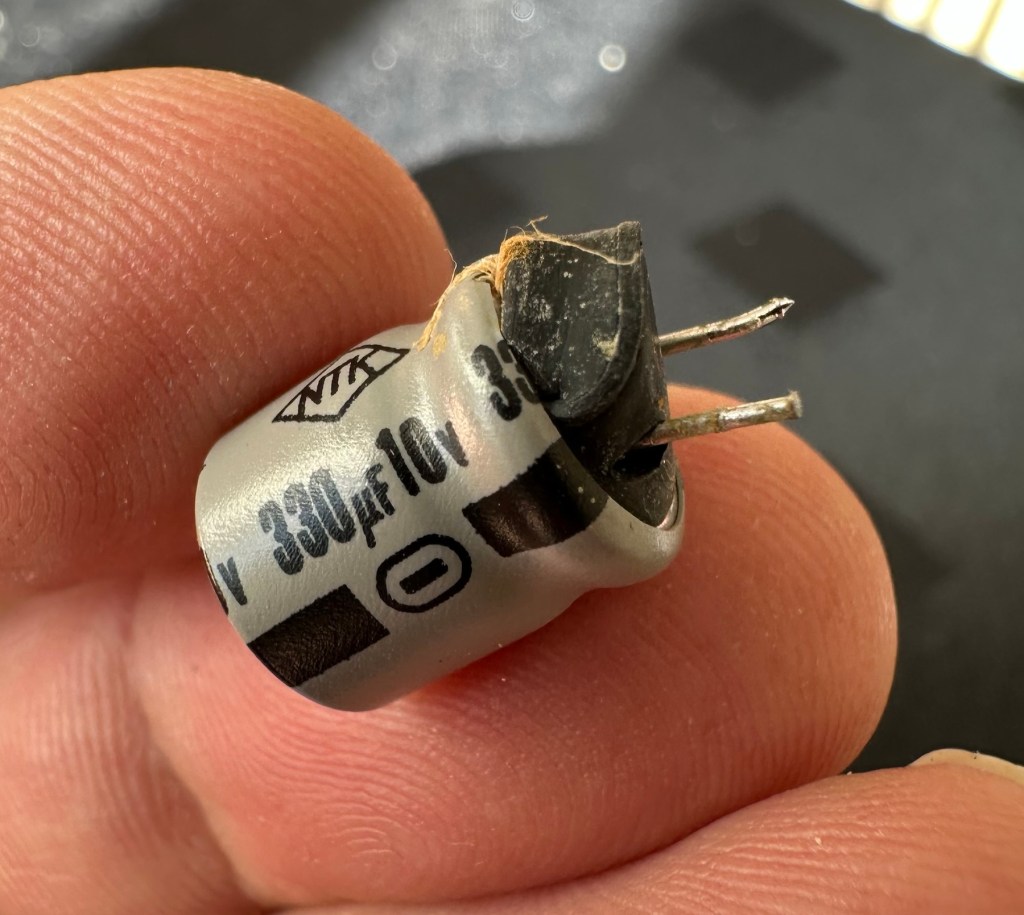
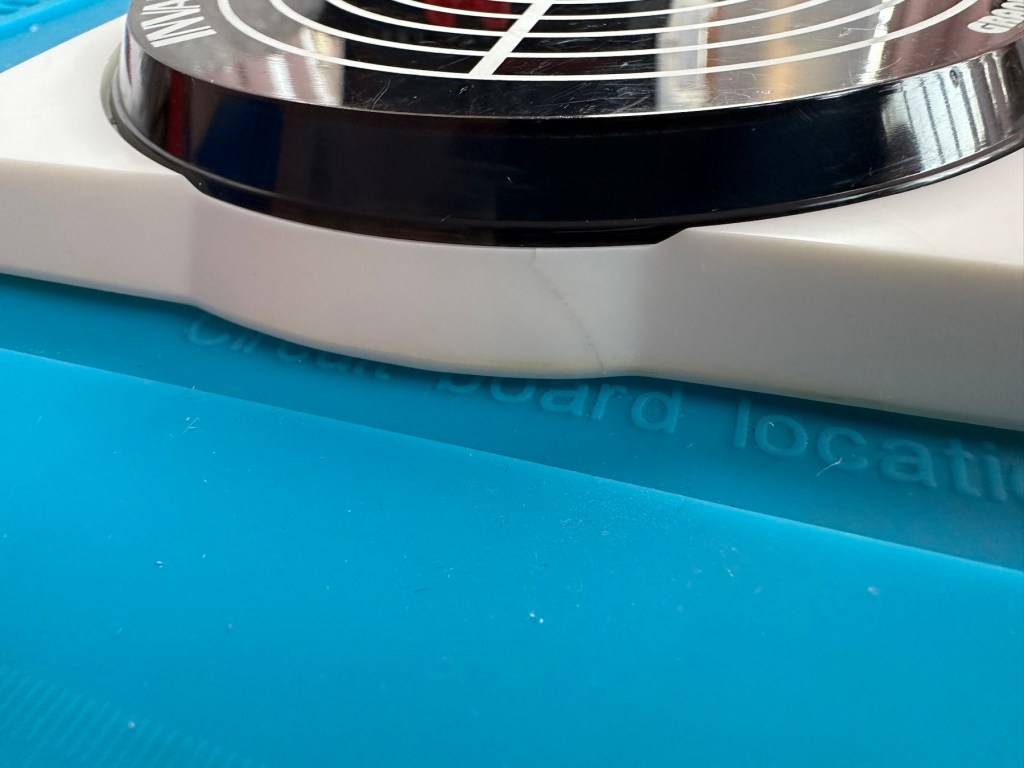
I must admit the unit doesn’t look as dirty as in the original pictures. The battery cover is missing and there is a crack in the side and a deep scar at the bottom, this won’t be too much of an issue if I can weld it all back together. I will still give it a good soak to clean it all up though. I’ve put four batteries in place, and the unit is definitely dead. There are no loose wires, voltages are getting around the board according to the multimeter and nothing is getting hot. There appears to be no short circuits, and then I notice this, capacitor CO7, slight bulge on top and what looks like leakage from the bottom. We have a candidate as to why this unit is not working.
CO7 looking unhealthy to me, you can see the component to the left that looks like it’s covered in a fur ball. The result of the old capacitor “coughing”
I’ll whip this out and see what we have but I suspect this old capacitor has failed and is causing an issue, heres hoping I have a suitable replacement.
Repair:
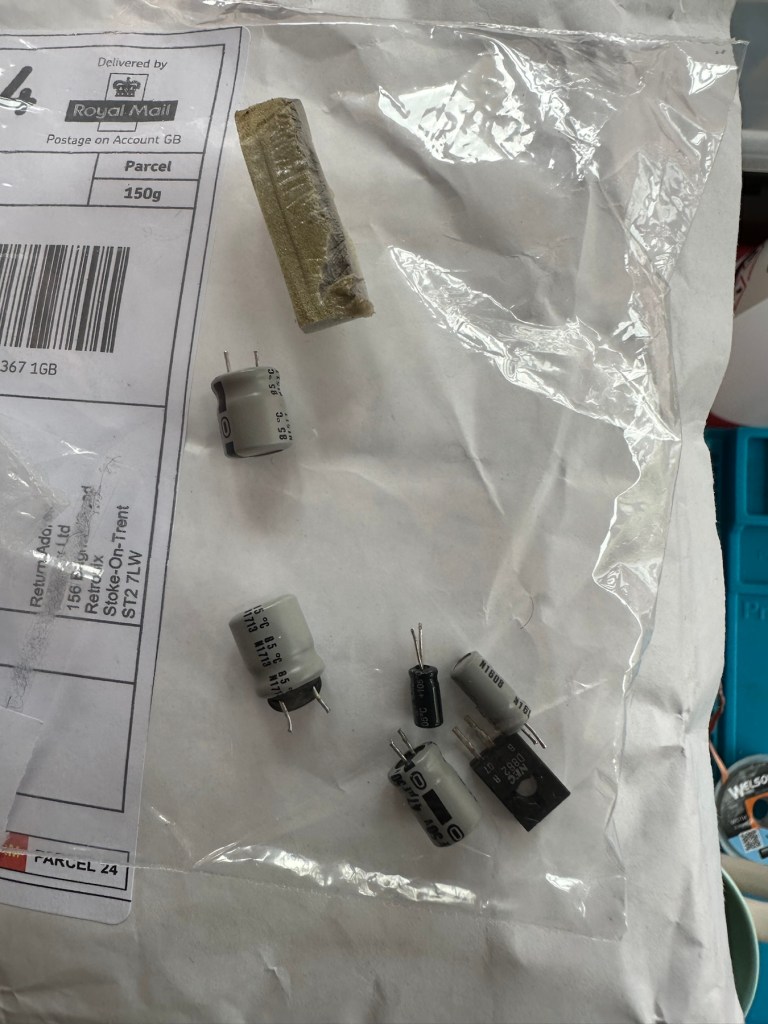
This little beast is a 330uf 10v electrolytic capacitor. I have none available so have had to purchase a pack of ten. These should be here in the next few days. There are three other old electrolytic capacitors that I will also change whilst I’m in there, as these are all likely to fail at some point soon. These components are now all around 45 years old, it’s a wise move to change them out.
One very dead capacitor removed.
I’ve ordered a 3D printed battery cover to replace the one that is missing. This should be here in a couple of weeks.
Whilst waiting I have cleaned the inside and outside of the casing as best I can. I still have a piece of broken surround to repair, however this is just a simple glue and a little bit of support job.
Case inside and out cleaned
Broken surround repaired
The surround that was broken has been repaired and secured with some nylon soaked in a superglue compound inside the casing. It’s rock solid. Outside the break is hardly noticeable. The break is secure and much stronger now.
New capacitor here
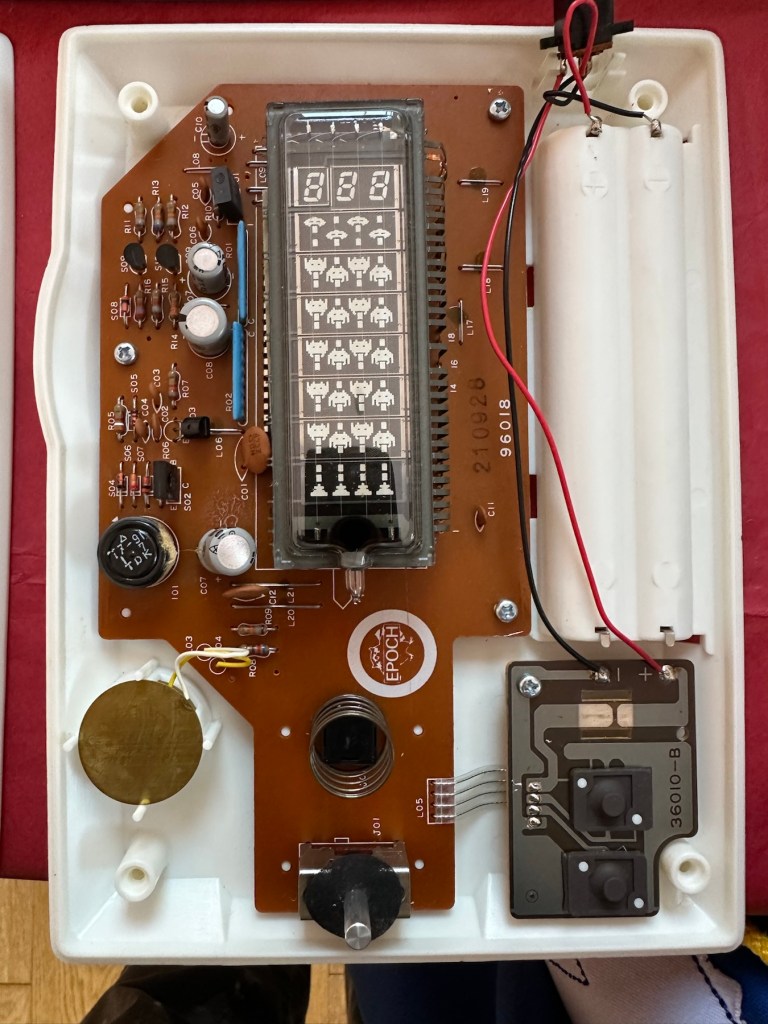
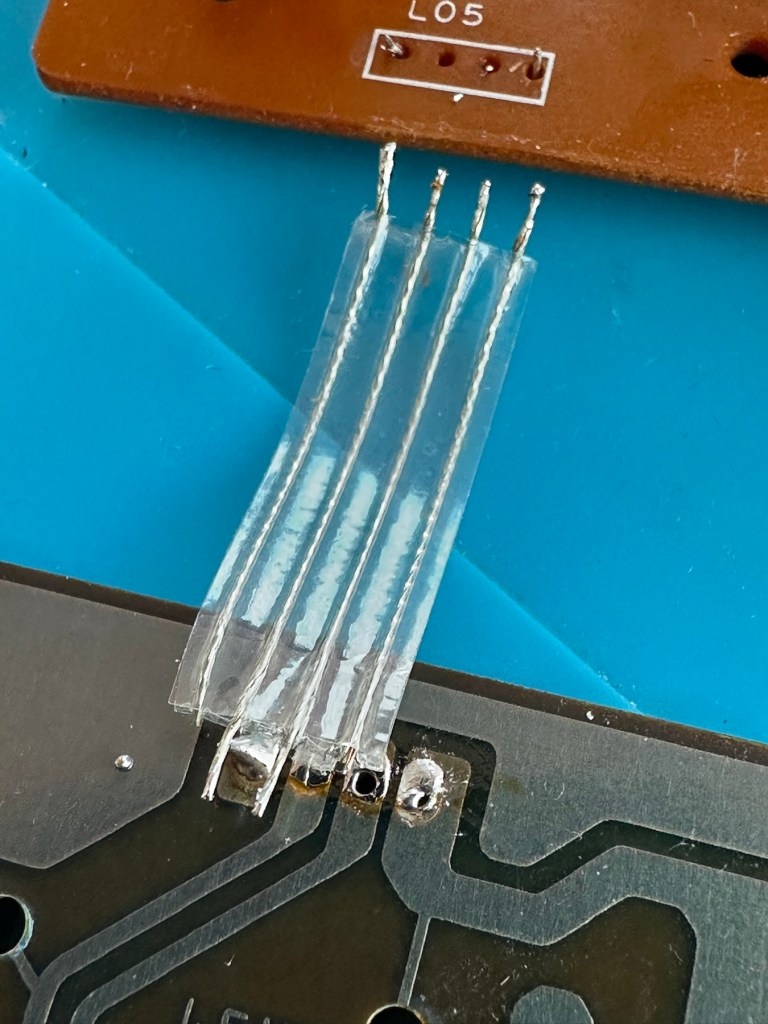
I’ve replaced all the offending capacitors and the unit remains dead. I’ve reflowed most of the board as there were some dry solder joints. I’ve also rewired the bridge from the control panel to the main board as one of the wires here had broken.
Bridge required resoldering
After using the multimeter to check some traces and components it’s now pointing to this component (a power transistor D882) being the cause of this catastrophic breakdown as its readings are all over the place. I suspect this item has overheated, the capacitor has blown and then it’s just died itself. I’m probably wrong, but I know what I mean. Probably just a catastrophic chain of events that all contributed to the units demise.
D882 transistor – power regulator
And as usual I have none available so will have to send for some new ones. The new components have arrived and the new power transistor has taken its place on the board. Now reassembled I place some new batteries in and the unit comes to life. It was the power transistor at fault, I should have really checked here first after seeing that damaged capacitor at the beginning.
All old components removed and replaced in this unit
Not to worry though as it’s had a good overhaul and has been totally recapped as a precaution. I’ve used some conformal coating on a few tracks that had some copper exposed after a good clean, to ensure they don’t deteriorate any further.
It has life
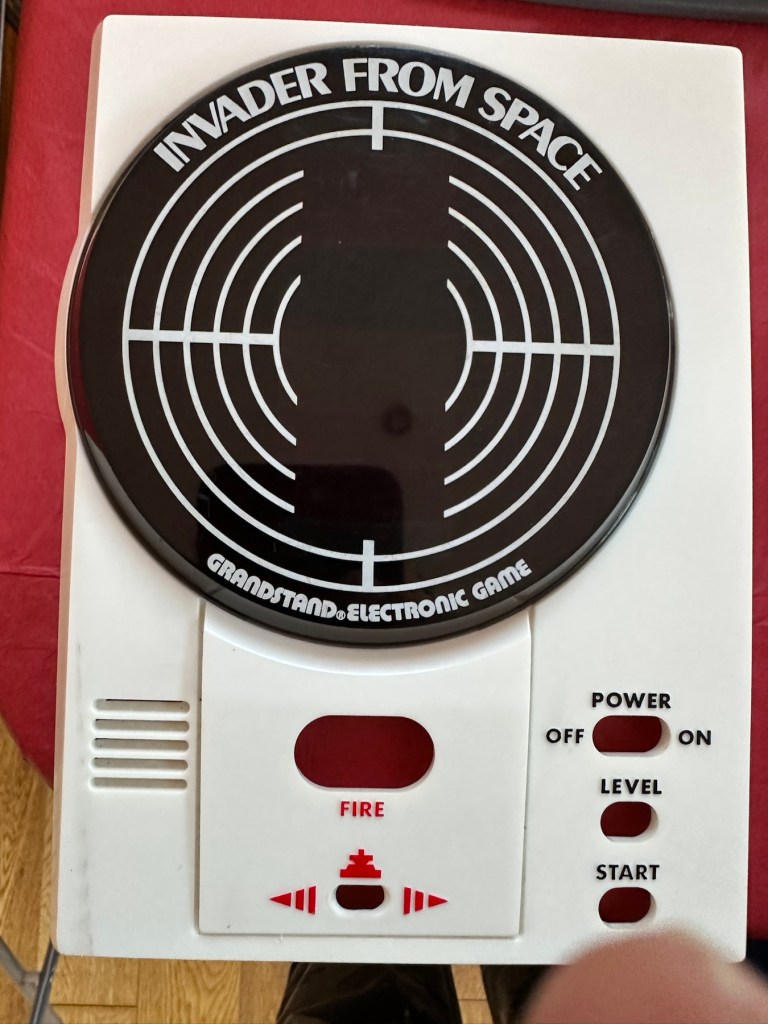
The unit is looking really good and these items were traditionally very loud and this certainly is. It’s working well just as it should do and I’m exceptionally happy with this repair. I’m still awaiting the battery cover that I have had 3D printed and this should be here in the next week to complete the fix.
No scoreHere we go3D printed cover arrived. Minor adjustments needed but in all a good purchase
So with that I will bring this build to a conclusion. It has been a fun project, I’ve learned a number of things about this circuit board and gained valuable knowledge.
But best of all we have rescued another item and saved it from landfill.


You must be logged in to post a comment.