Samsung SQ3000 electronic typewriter – assessment & repair

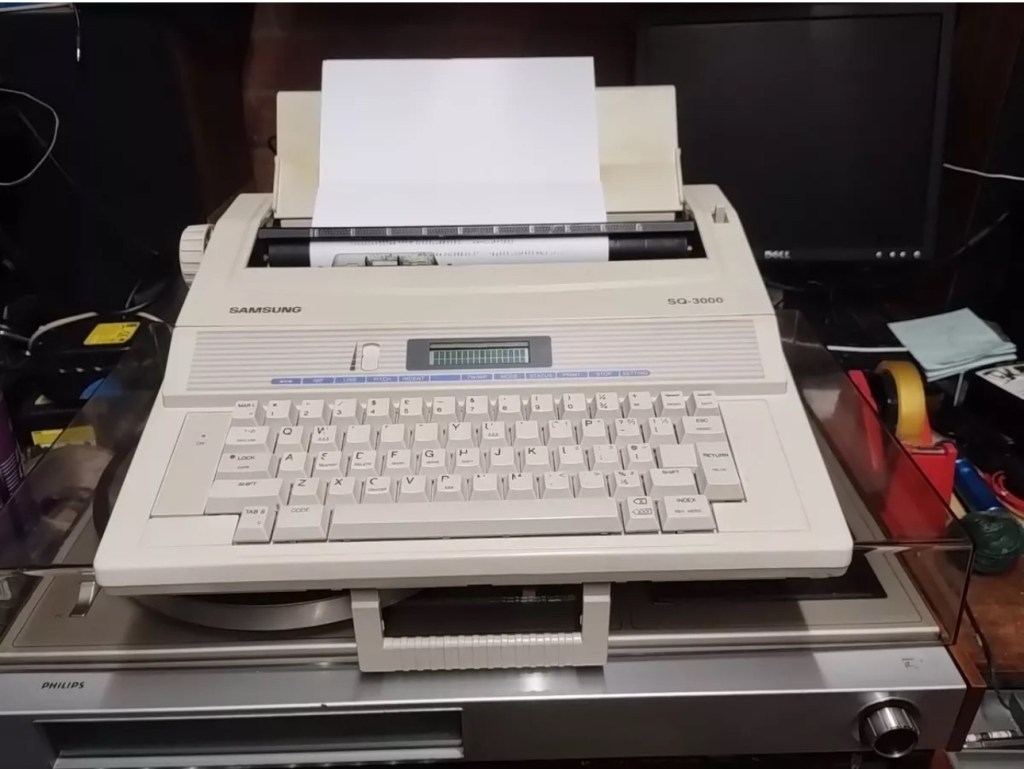
This is the follow up to a recently obtained electronic typewriter that was purchased in January 2025, the initial post can be found here: Samsung SQ3000 electronic typewriter.

Samsung SQ3000 electronic typewriter

The following post will deal with the assessment on its arrival and what I am going to try to do, to get it back working again, as close as possible to its original state.

I’ve downloaded an instruction I manual, I’ve had to download one for a Smith Corona Wordsmith 200, it is in theory the exact same unit, just under a different manufacturers branding.
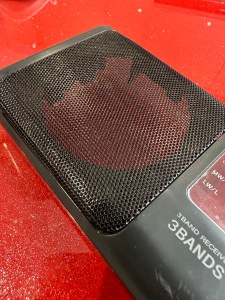
Assessment

It’s arrived and apart from a little age yellowing it looks ok. There is a PAT testing sticker that says it was last electrically tested back in 1998 and is due a retest in 1999. This corresponds with my date estimate of mid 90s.

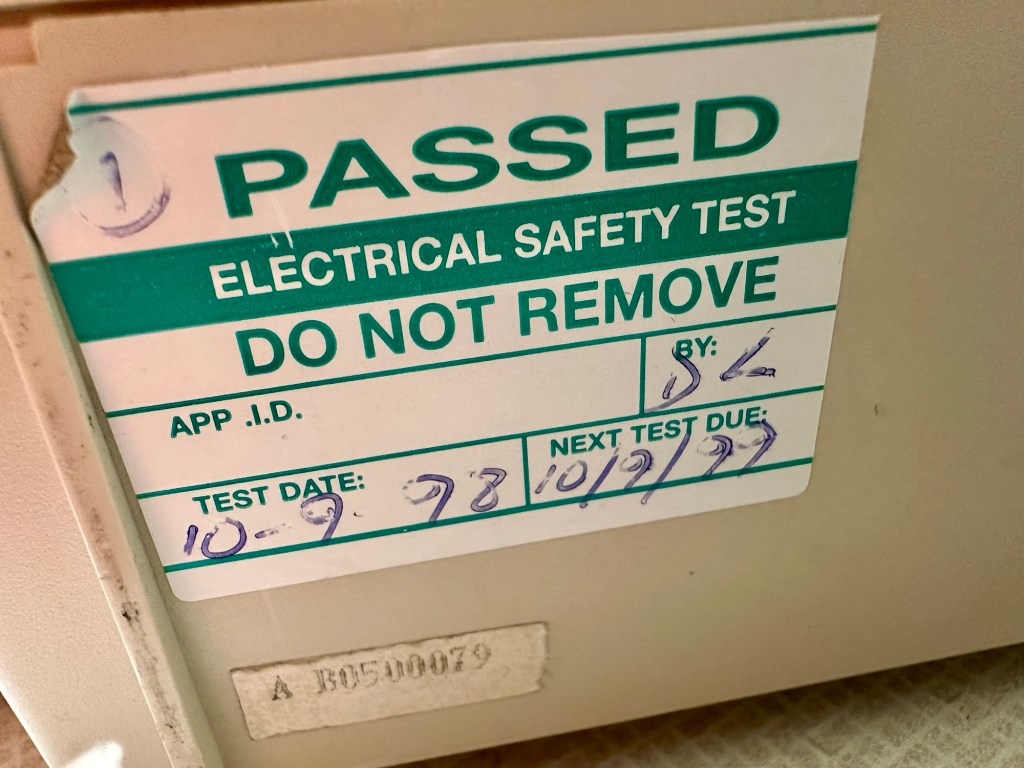
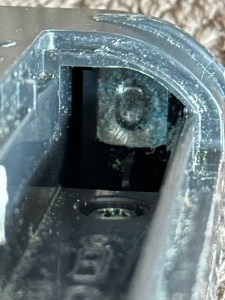
I will retest and renew the safety checks when I’m finished working on it. I have noticed that the paper bail/release rail is broken on the left hand side so I will have to add that to the repairs, this shouldn’t be a major concern.

Before I took the roller out to get to the paper bail I did start the machine up. Everything went as expected and when I tried to type I was getting some weird reactions to the keys I was pushing. All kinds of characters were appearing.

Before

I checked the daisy wheel and there was a click. It wasn’t sitting right. I reset the machine using the two reset buttons and the machine then went through its reset programme, pretty much the same effect as turning it off and on again. (Not much changes in the way of tech there then)

After

Well that’s worked fine, I have tried every combination on the keyboard including the erase function and this is now fully working. It really was quite simple. My next job is to try and fix this paper bail.

Paper bail removed for fixing

There is quite a bit of dust and dirt inside that needs removing. And whilst I’m at it I will lightly re grease the areas that need it. Let’s be honest it’s not been done in the last 30yrs so now is as good a time as any. Inside will get a light hoovering and a bit of a tart up, I’m not going to go mad. I will clean the outside and all knobs and buttons and try to get rid of some of the yellowing, but to be honest as long as it’s clean I’m not too worried about age marks.

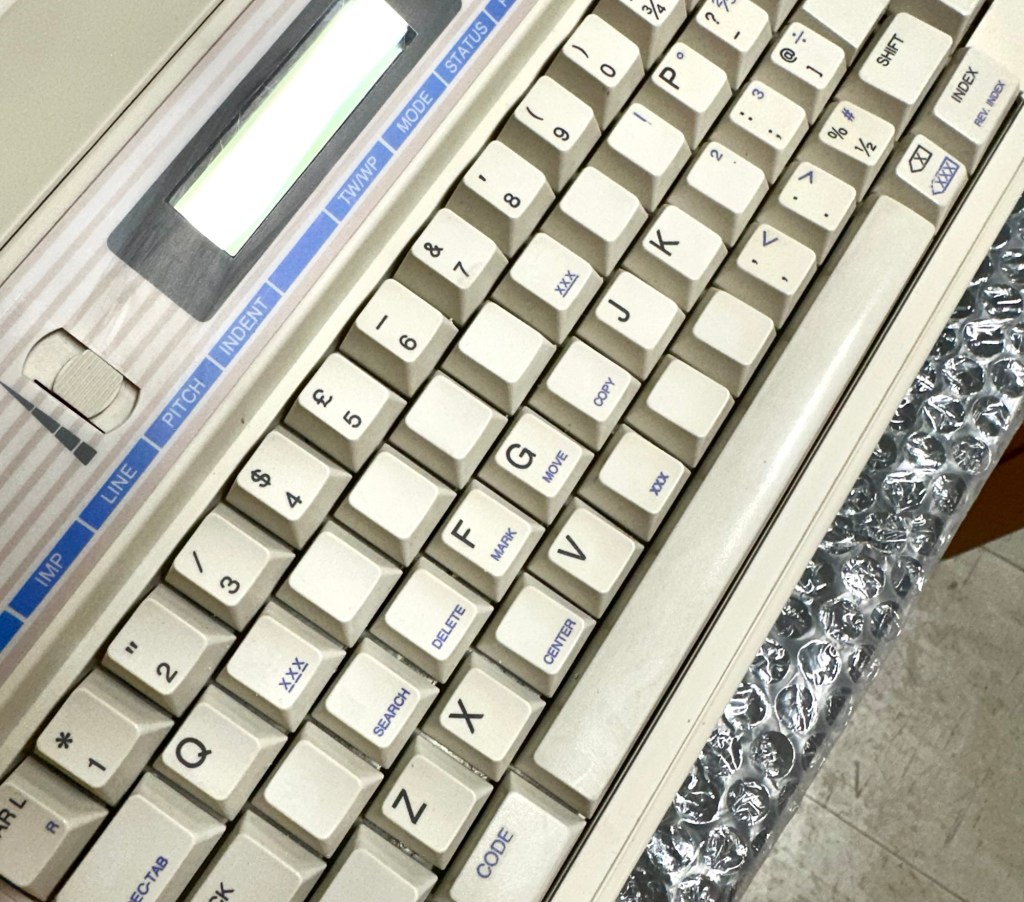
The keyboard has lost a few of its letters. I will remove what is left of some of them and use some keyboard decals to replace the missing ones. This will be one of the last jobs I do.

Well that’s the assessment done and apart from a few small issues and requiring some basic maintenance I don’t think we have an immense amount of work to carry out. We know it now works. Let’s hope I don’t cause any further carnage whilst working on it.

Let’s get to work.

Repair

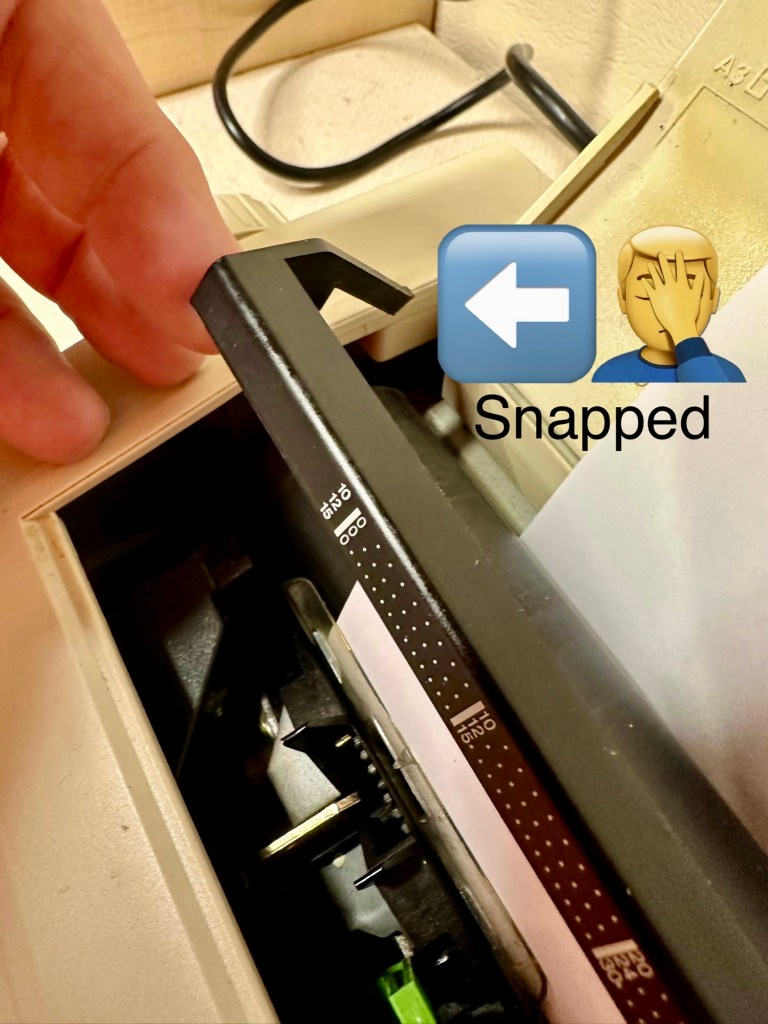
Right it’s straight onto the paper bail to try and fix the snapped end. Firstly I’m just going to use some superglue to get it in place. When this is dry I’m going to create two “Doublers”, place one either side of the damaged part and glue these in place to create a stronger repair and to add some stability to this area.

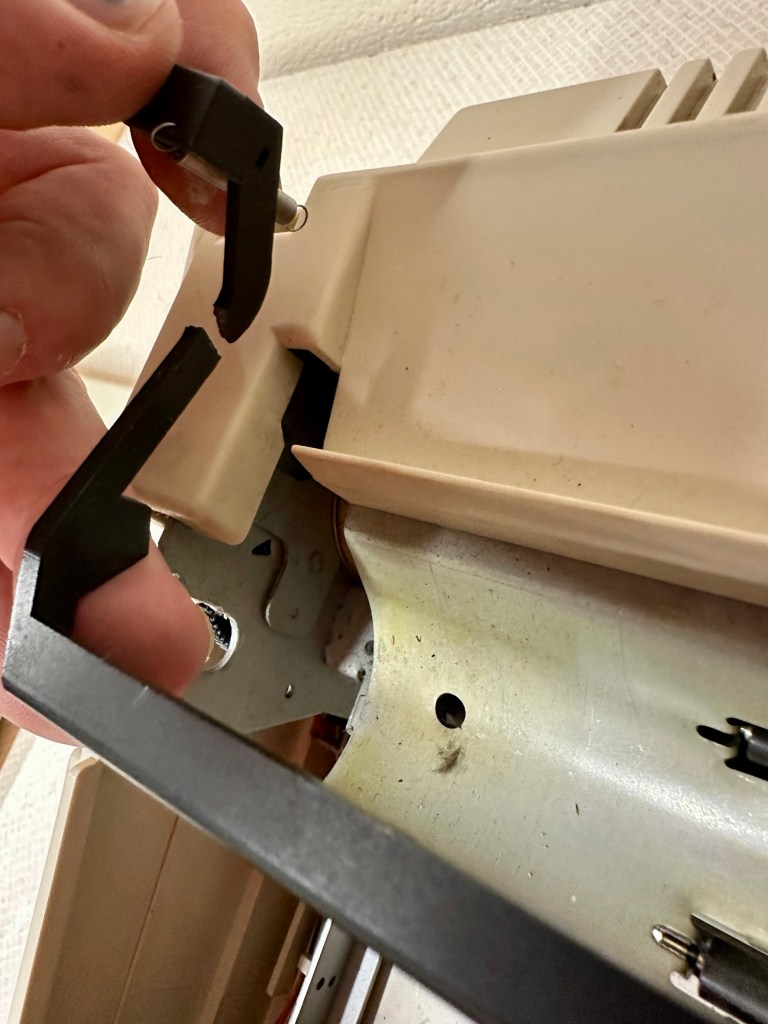
I’ve got some black semi rigid plastic. I’ve created a small template from a tracing that I did of the good right hand side of the bail.

I now have two doublers cut from the plastic that I will use as explained above.

Two doublers

It doesn’t matter that they are not perfectly shaped, however they both fit perfectly well into the profile of the bail arm, and this portion of the arm is hidden in the typewriter housing anyway, so the part will not be visible, but it will now be strong.

The Doublers have been put in place using a quick set epoxy resin, I will leave this to dry for a good few hours before I tidy it up, with a light clean, and then I will try to get it back in place.

Bail arm repaired, installed and working.

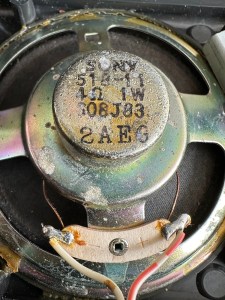
Now that’s done i’ve gone inside and there were a nice couple of spider webs around the transformer that are now history. I’ve secured the cable in the rear of the unit that never had any tension restraint, so that there will be no issues, should anyone now give a good yank on the cable lead. This is a safety addition I have made that was never on the original unit.

Cable restraint screwed to base to prevent strain on internal wires in and around the transformer bay.

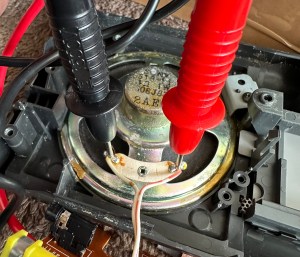
I have also tightened all screws and checked the wiring and this all seems ok. Plug and fuse have been checked and all is looking good. I’ll carry out a PAT test once I’ve finished the clean up.

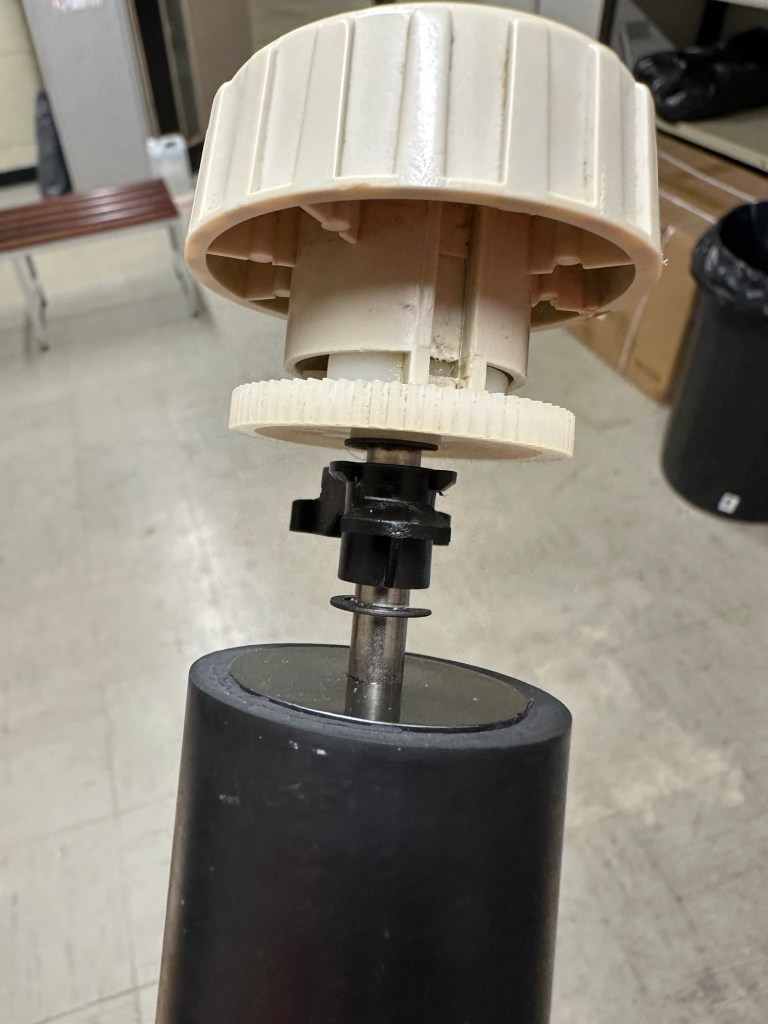
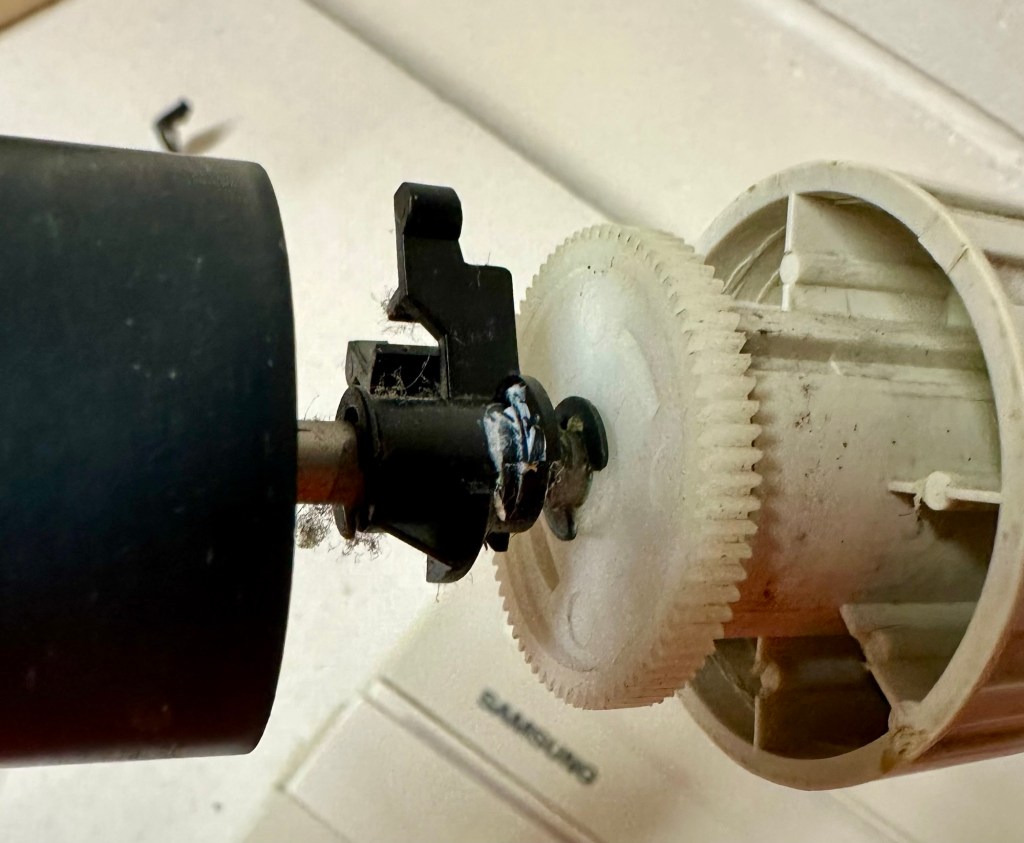
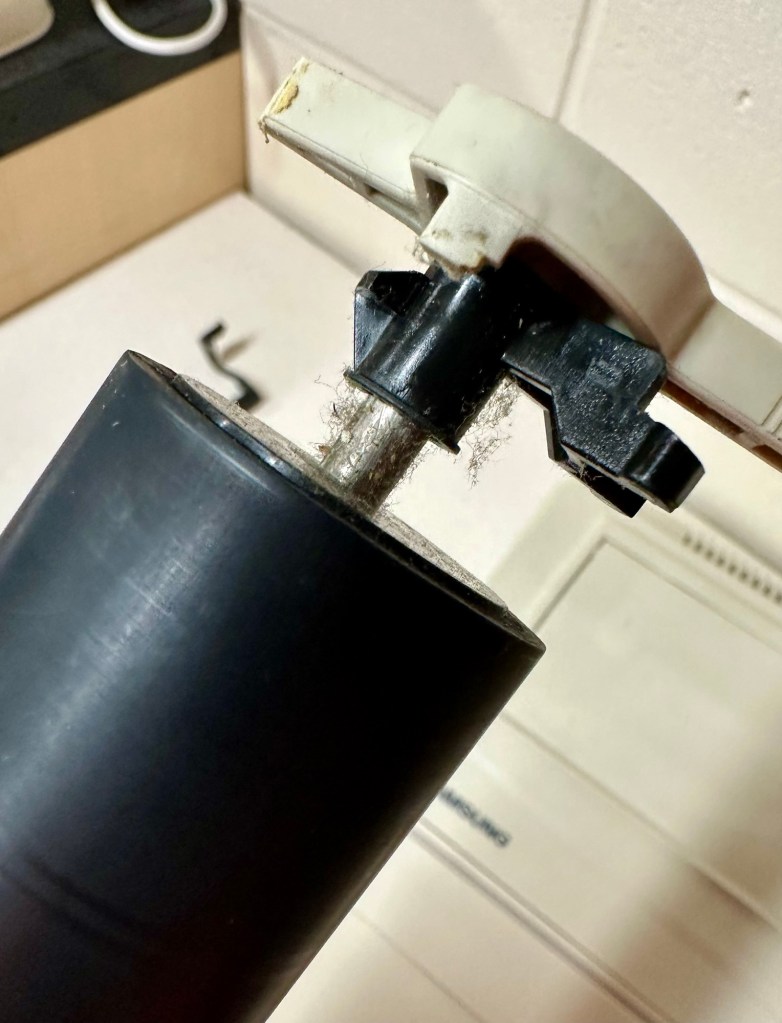
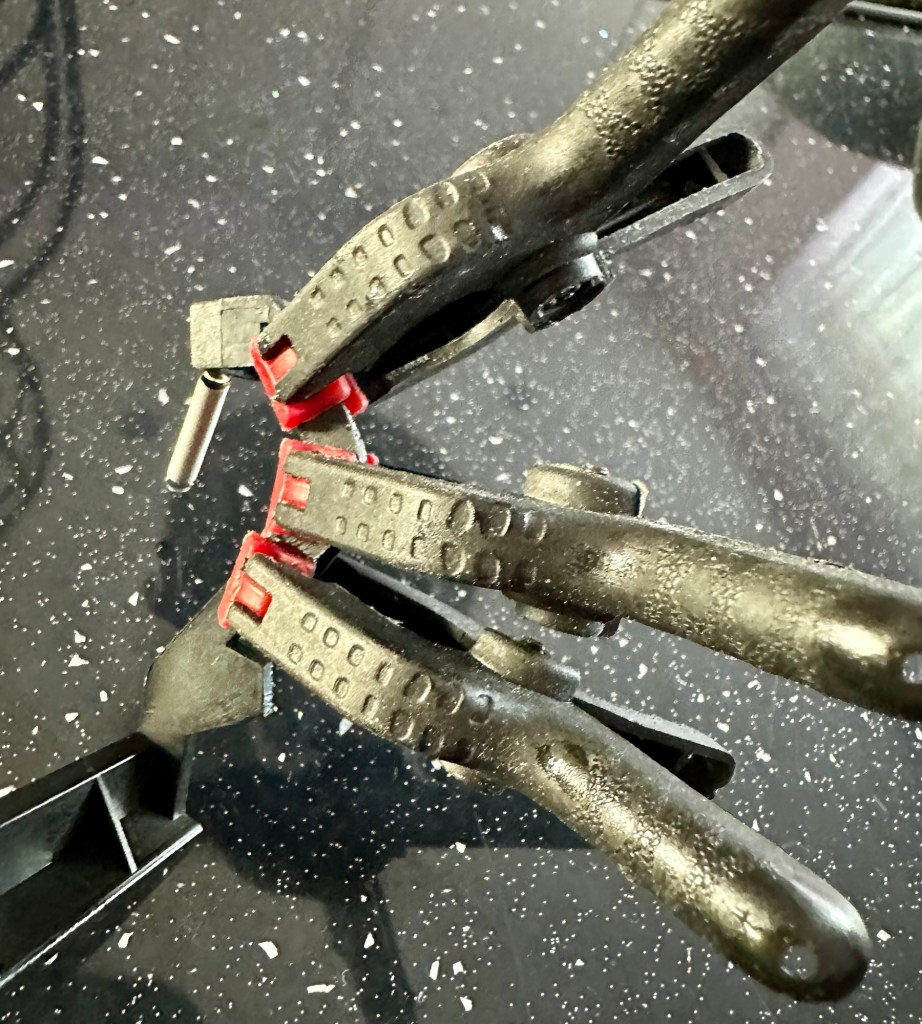
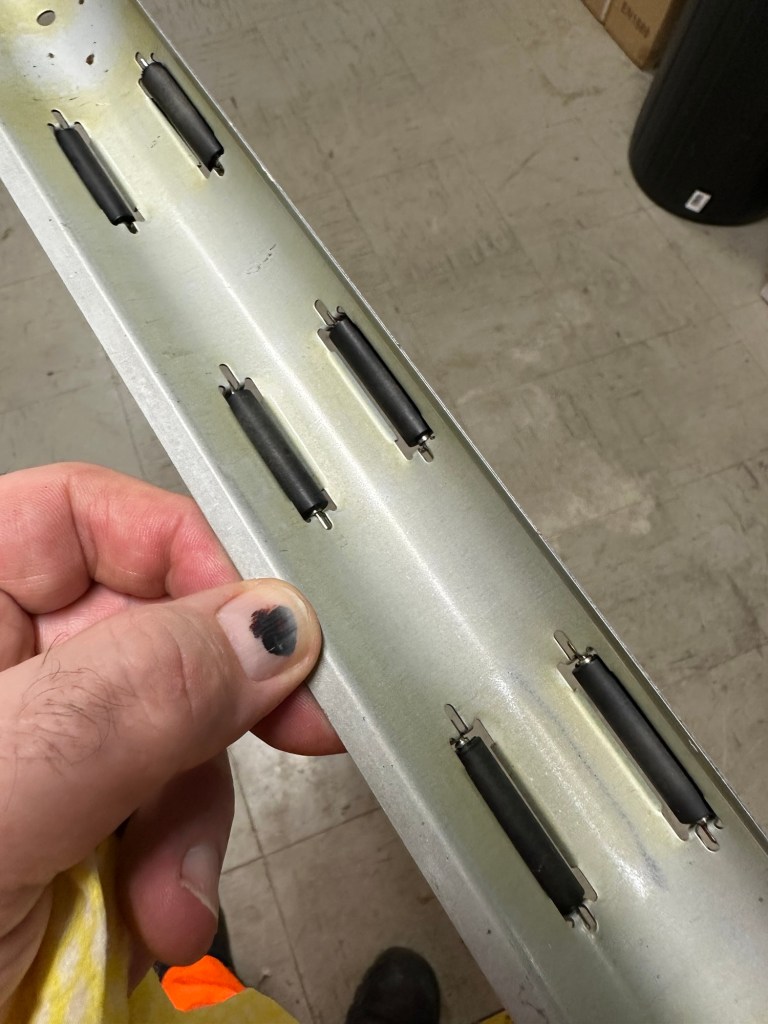
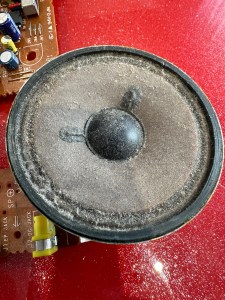
I’ve cleaned the main roller with alcohol, and removed all the old grease and dirt from the platten adjuster switch and the roller advance knob. I have removed the platten plate as well as the six mini rollers that are here. I’ve cleaned them all and re assembled/installed them.

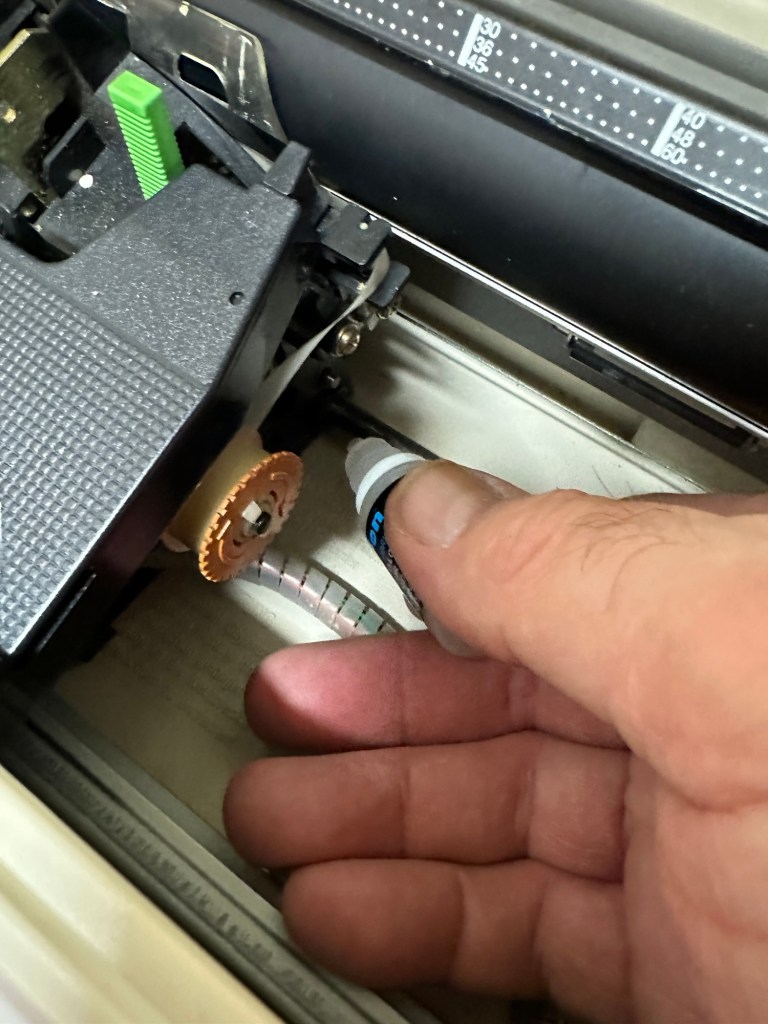
I have cleaned the daisy wheel as well as in and around the printing head unit.

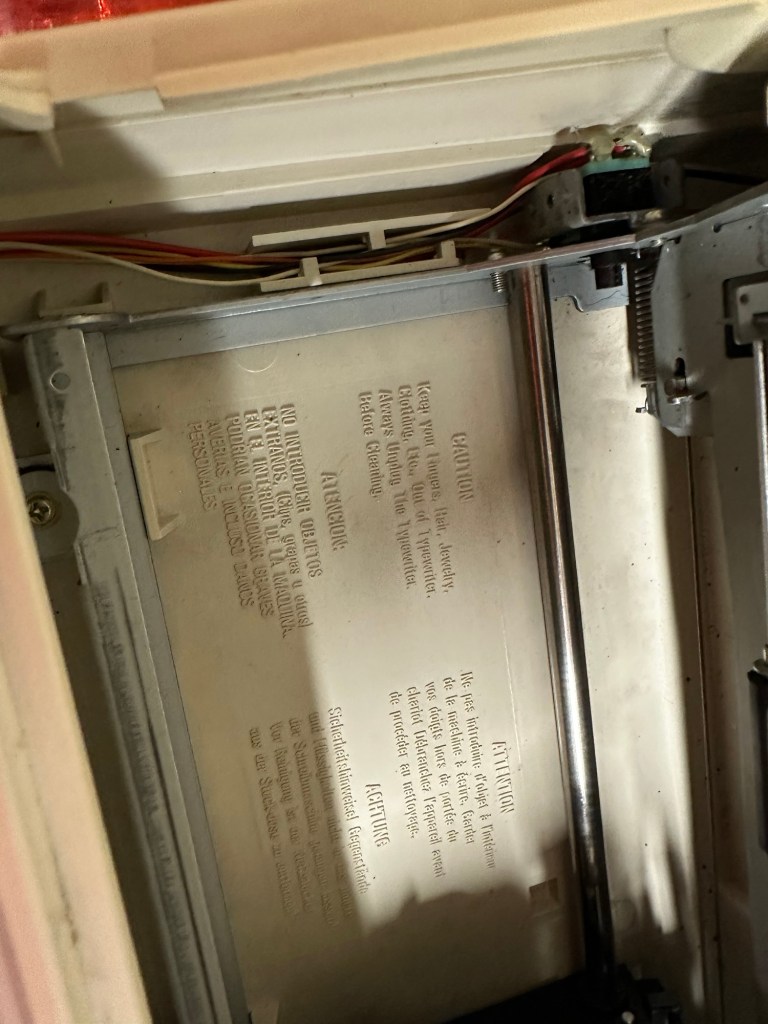
Inside the unit I have given a good hoover as well as a light clean and again removed more old grease. I have given the exterior plastic a preliminary polish, this has removed some of the yellowing and made it look “cleaner” I am not going to worry too much about the yellowing as it isn’t that bad, and I don’t really want to venture into carrying out a “Retrobrite” on this unit. It would take too long and there would be no benefit for this project.

I’ve now added very small amounts of a watch lubricant to those areas that i have previously cleaned and removed the old grease from.

The unit has been reassembled and I’m pleased to say it is still working fine. It’s running smoothly and all aspects of the unit seem to be working just fine. To be honest it seems to be printing clearer to me.

Daisy wheel and print quality is perfect

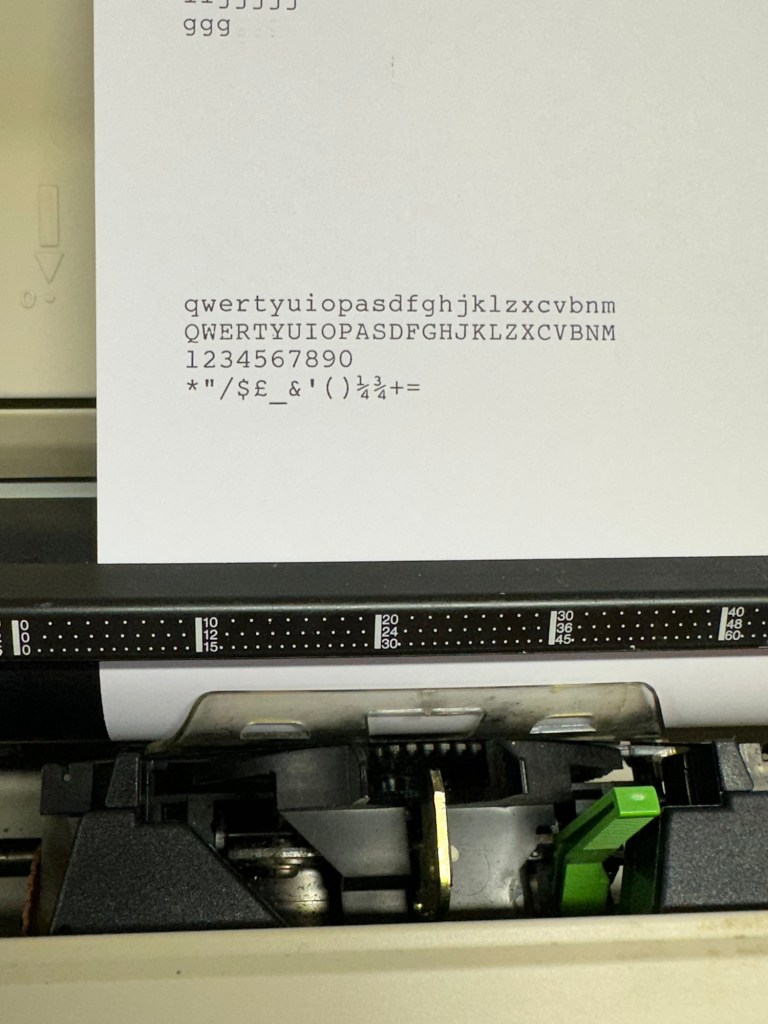
I don’t know how long the print cartridge has been installed but I suspect it may have been a few years back. It’s almost finished, and I do have a replacement on order. I’m sure a fresh cartridge will make the print stand out even more.

Next I’m going to have a go at replacing some, or even all of the keyboard letters. It all depends how it looks when I start replacing them. I’m going to gently rub off the lettering that is left and clean the keys using a 95% pure Isopropyl alcohol solution (IPA).

All damaged and missing key decals removed in preparation for replacement new decals. Others may have to be removed dependant on how the new ones look when in place.

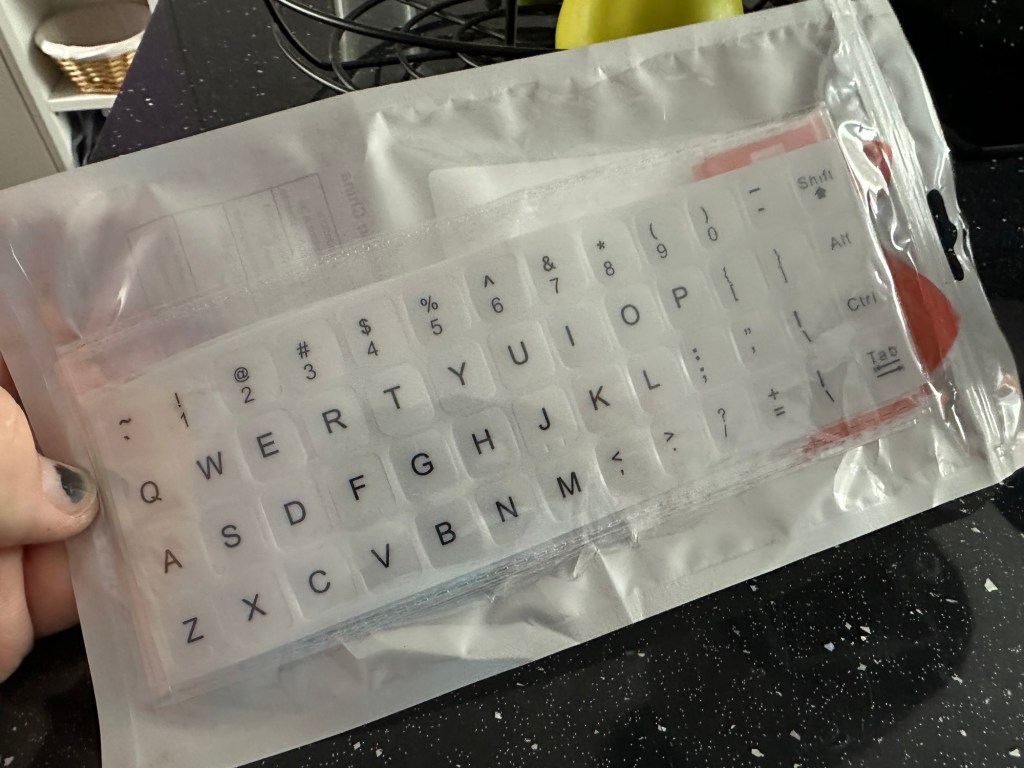
These are the replacement key decals I will be attempting to use.

Qwerty keyboard decals

I’ve replaced the damaged key decals. The ones I’ve used are a lot brighter than the original ones and really accentuate the yellowing. I’m not troubled by this as it keeps its “Old” look. I would have to scrape and wipe for hours to remove all the other keys and to be honest it would look just like someone had gone abroad to have a bright white set of dodgy veneers installed, it would look quite out of place, and in your face. Just like a Cheshire Cat smile.

New veneers anyone?

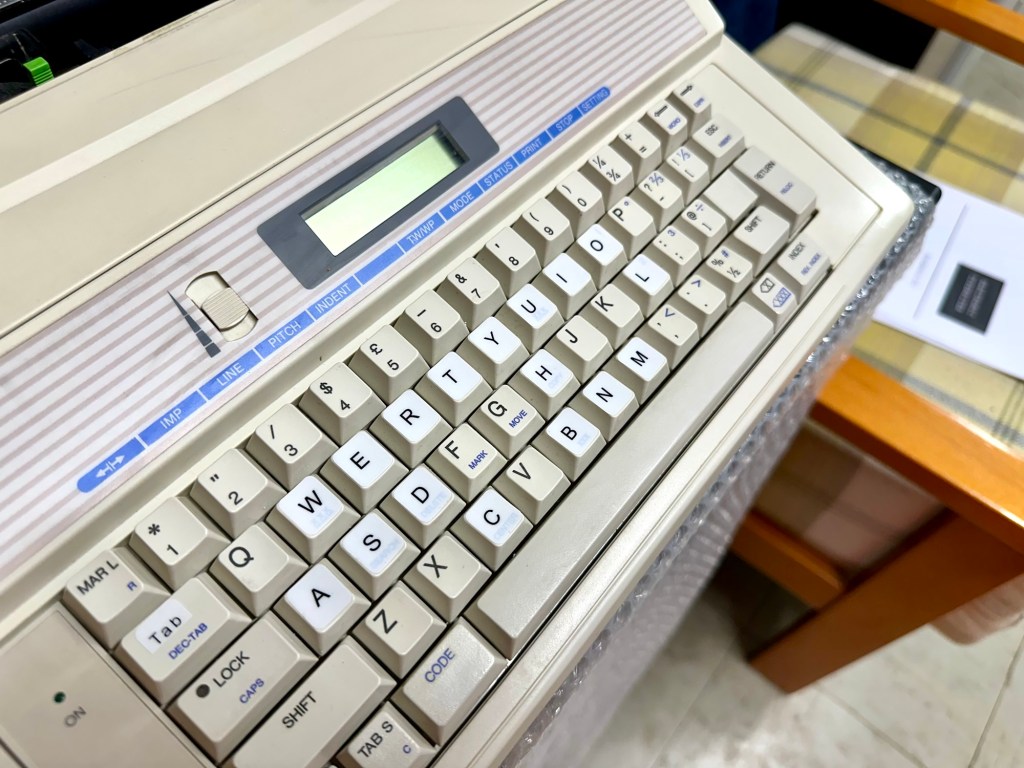
It serves a purpose and just allows the unit to be usable again.
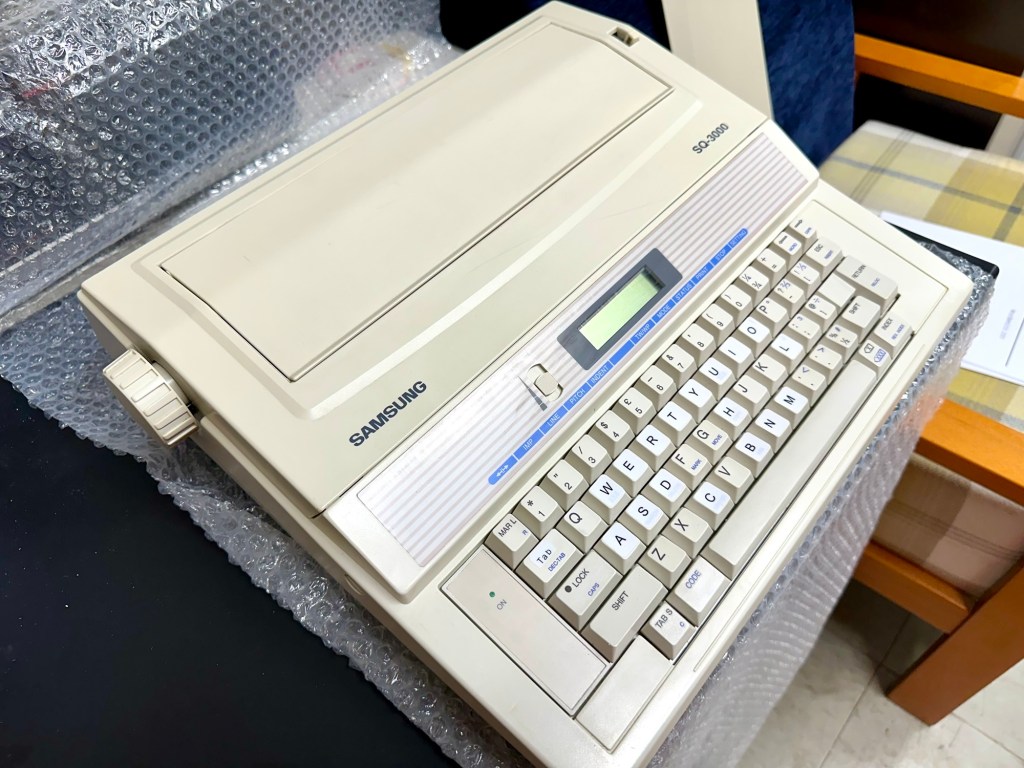
The final product:

Fortunately a lot of the equipment and parts I have used, I was already in possession of, so there are no additional costs for this project. Below you can view the total costings for this project as they currently stand:

  • Purchase inc postage £13.14
  • Cable restraint £0.25
  • Keyboard decals £1.25
  • Total cost of project £14.64

Again I have managed to save a fantastic 90s retro item from landfill for very little cost, and that is a fantastic result. It has years of use left in it, as long as the consumables remain available, and of that I am confident that they will be available, for at least the next few years. The unit is clean, I’ve just carried out an electrical PAT test and it is electrically sound.

Believe it or not I’m going to go back in time and will write some traditional typewritten letters to friends and family. I’m looking forward to doing that and it will certainly surprise them, it will be totally unexpected.

When all that is done, i will donate this unit to our local LOROS Hospice shop so they can sell it on and raise much needed funds. They deserve it. Edit: This was done in March 2025 at their shop in Hamilton Leicester. I hope it gets them a good price.

Watch the brief video for the final words on this restoration. All 13 seconds of it.

And that’s it folks..

Thanks for passing by.

Sega Game gear – game cartridges

What the listing stated:

Untested

EBay

Yep that’s it. The good old EBay untested. Anyone who buys from here knows that this can mean anything from working to totally wrecked, or even should have been binned because a good portion of it is missing.

But I try to remain positive… some people call it stupid.

Cheap, probably broken

Here I have purchased two of the same games for the grand total of £1.49 GBP. About 75 of your finest British pennies each. My suspicions are such as the guy who posted is selling a couple of “tested” game cartridges (the same game) for a considerably higher price. I just don’t understand how he couldn’t test these two. I suspect they are knackered to coin a phrase.

Anyway, let’s await the mailman.

I’ll apologise in advance for how easy this fix was. They arrived and both game cartridges looked ok. I then loaded them into the unit and one worked and one didn’t.

Both Cartridges tested

I decided to just clean the contacts on both cartridges with a bit of IPA and hey presto. Two working game cartridges for next to no cost.

2nd cartridge up and working

So again, I apologies for the simplistic fix, I was hoping I would at least be opening the cartridge and doing a bit of trace repair, but sometimes that is all it takes. I’ll keep one, and the other i will move on with another unit that I’m currently repairing.

But most importantly they are not off to landfill. Result.

Rock & Roll clock

Here’s what the listing stated:

The clock features a swinging pendulum and is a great addition to any music memorabilia collection. However, please note that the clock mechanism is currently faulty and may require repair or replacement.

It’s been a while since I’ve been tempted to fix something totally outside my comfort zone, so here it is a novelty “Elvis Presley” Rock & Roll clock. I quite fancy learning how to repair clocks, perhaps this is the best place to start with nothing too complex.

From what I can gather the clock is a fairly std mechanism with a separate mech that operates the pendulum “legs”. I know the wife won’t entertain this in the house, however my elder sister is a massive Elvis fan so I may even shove it in her general direction… if I can fix it.

No assumptions as to what is going to arrive at the moment as you never know what you will end up with from auction sites, so let’s just await the mail man’s knock on the door.

All good on arrival, as expected

The clock has arrived and apart from having to just straighten the hands, a battery has been put in and the clock is ticking well and keeping good time. However Elvis isn’t shaking his hips as he should be even with a separate battery in place so there is an obvious issue there.

No hip shaking Elvis?

Well the issue is a bit of a pain in the ass one. The pendulum effect comes from a small electromagnet that opposes a magnet on the pendulum, hence when working the pendulum continuously swings. However this one has two of the wires from the coil broken. These wires are just about the width of a hair and had to be coaxed back into place using my microscope. I’ve tacked the wires back into place and the clock is currently working.

Electro magnet

However, apparently these wires are known to break even if a butterfly farts in the vicinity of them, they don’t hold up to repair that well, so I’m going to order a new electromagnet replacement. Cheap as chips.

Elvis shaking those hips

So I’m happy a fix has been possible, I’ll just wait for the replacement magnet until I move it on to my sister. In the meantime the wife has to put up with it shaking its stuff in the conservatory.

Edit: New magnet 🧲 has arrived, Elvis really going for it now and shaking his booty like a mad man 😂

Shaking like a mad man.

Now he’s off to my sister. can’t stand that much activity around me.

Another item saved from landfill. Result.

Happy days 👍

Vintage Photographic manuals

I’ve just obtained a bunch of photo manuals for cameras and related photography items from the last 40 years or so. Close to 80 of them.

Now I know these aren’t repairable items keeping in harmony with this site, however they are popular, and I just happen to have a few of these cameras available. What I’m thinking is that these manuals would be a nice little addition when I sell on said cameras to the unsuspecting world. It’s just that little bit extra that just could swing a sale.

The ones I have left I can just sell on as they seem to attract a reasonable price on line. Either way, I’m keeping them out of landfill and that is one of the purposes of this site.

I may even be able to make some kind of collage back drop with them or use some old photos as an alternative skin on one of my old cameras. Something arty-farty you know.

Listing them all online is going to take an age. Maybe I could ask the wife to assist in this matter. Now that will cost me a handbag at least.

Sony ICF-480L 3 band radio assessment and repair

I originally posted regarding the purchase of this item in this blog post Sony ICF-480L 3 band radio

The radio was received earlier today. Cosmetically it is a bit tatty, batteries were placed into it and apart from a quick flash from the power light when it was switched on there was no sign of life. So the original description was false as it stated that it powered up with a very low volume. Oh well, not to worry, it now gives us something else to look at.

Tatty appearance

Looking in the battery compartment there looks to be corrosion, this seems to be a common problem with items I’m buying at the moment. The screws have all been tampered with so I suspect others have been inside this radio prior to my purchase, this could be interesting to see what’s already been tampered with or attempted.

I’ve had the unit open and the first thing that comes to light is the utter filth inside. The speaker is thick with god knows what and the board and switches are also covered in the same filth. Before I do anything I’m going to get this cleaned up.

I’ve used IPA on the board and cover and on the (thankfully small) corrosion on the positive battery pole and this has cleaned up nice. I’ve used contact cleaner on all the switches and dials and these have also come up ok.

The speaker grill, I have tidied up and used permanent marker to get rid of the marks on this item. This has tidied it up really nicely.

On the speaker I just used a dry cotton bud to wipe it over but I have my suspicions with this speaker, it looks quite worn and earlier reports on the lack and consistency of sound points to this being a potential issue with this unit. There are no clicks and pops when turning the unit on, there is a power and tuning light. Just no sound.

The speaker is a 4 ohm 1w speaker, I’ve used a multimeter to check its operation and it’s showing as dead, not registering at all, it should be looking at indicating something within its 4 ohm range. I’ve double checked it by putting a battery across the terminals and there are no pops or clicks so this confirms things. I now need to source a new speaker.

Trying to source this speaker in the uk is a tad problematic. There are items available but I’m not paying out two to three times the value of the whole unit. I’m going to try some thrift shops to see if there are any suitable donor units available if not I’ll have to purchase a few of them from China, and that will still be cheaper than purchasing here in the UK, crazy isn’t it? But it’s a long wait….

I did manage to get one from the Uk. Paid about £5.18GBP and it should be here in a couple of days. The annoying thing is that the postage is almost the same cost as the actual speaker and that only cost £2.69GBP. Annoying though that is, it has to be done if we want to get this fixed.

I couldn’t get a 1w 4 ohm speaker only a 1w 8 ohm speaker, this will be fine as at this level of use it will not affect output at all.

A small bit of desoldering, removal of the speaker clamp and the speaker comes away after a little persuasion. I take the opportunity to clean the board and all the battery contacts with some cleaner, and all corrosion marks and debris are now a thing of the past.

Corrosion cleaned

I put some contact adhesive on the speaker grill and put the new speaker in place, clamp is attached and I now solder the speaker wires back in place.

All screws back in place, new batteries in the rear and battery hat hatch closed, the unit looks good.

But does it work?

Radio works – have a listen

You betcha! Have a listen to the short video above to hear it as it should be.

I’m very pleased with this little project. Simple repair in the end but in my eyes it’s another item that isn’t going to landfill. And that’s a win for me, as it’s a nice little radio and I’m going to get some good use out of this.

Jobs a good ‘un 👍