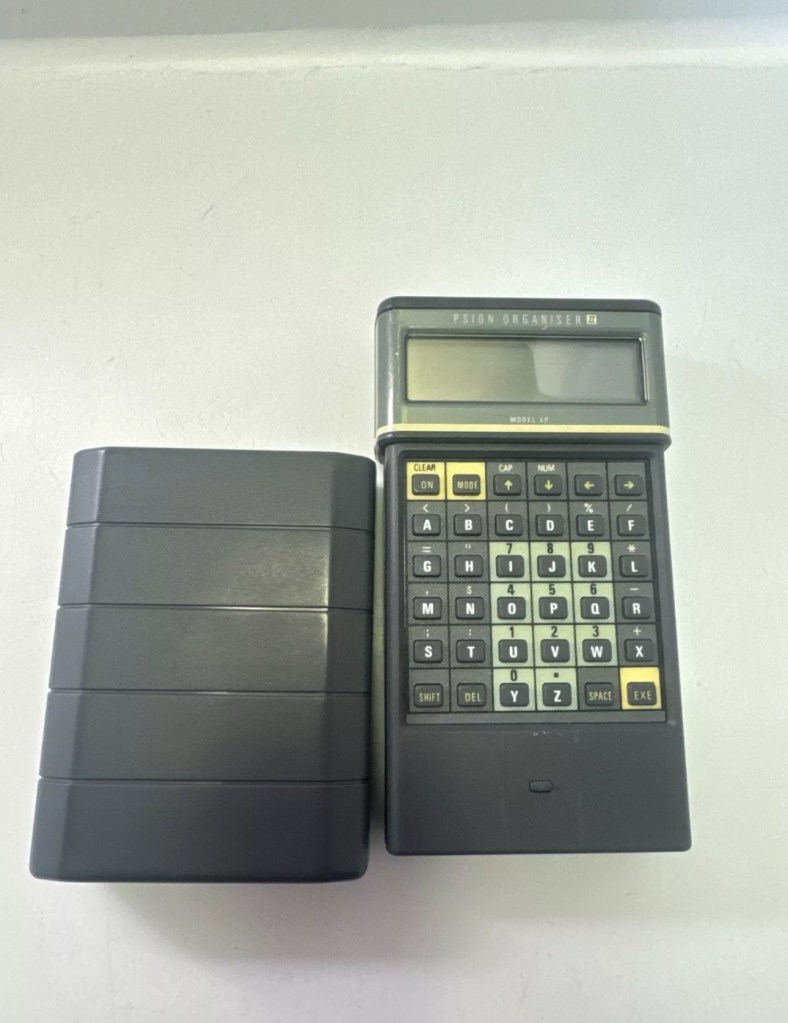
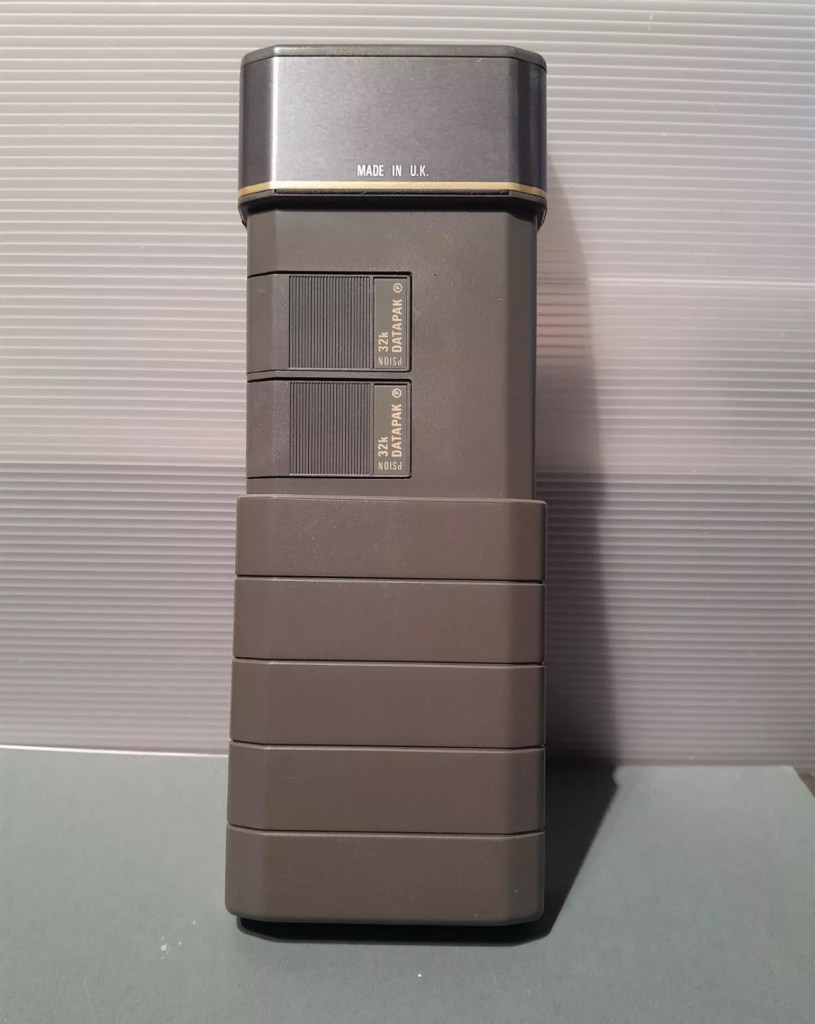
I’m so impressed with these Psion organisers from the 80s that I’ve now decided to go ahead and try to obtain some good examples of all the MkII models. I’ve recently posted about my CM version here: Psion organiser II CM but today I have obtained the next model from 1986 the XP version. You can find out more about the Psions I own on the main menu in the margin of this site.
With plastic caddy Out of caddy A couple of programs thrown inGood condition
80’s tech in 2021
Above is a good video, using the XP in 2021
I’ve paid less than £20Gbp all in for this item and I think it’s a bargain personally. I’ve also obtained two programs that I’ll either keep or move on. There are some slight marks on the bezel but nothing too bad. I may be able to replace these parts with donations from some damaged sets I’m looking at. That’s a medium term plan, so there really is no urgency here. Let’s just make sure it’s running as well as it should do first.
I will be using these units to further learn the OPL programming language that they use.
As with the earlier CM model this unit also had the Y2K issue so I will have to run the TIMEINST program to ensure it updates the calendar accordingly.
The differences between these two units are very slight and it is basically around the available memory. Comparisons below.
The Cm – year 1986- Ram 8Kb- Rom 32Kb- Max datapack 64Kb
The XP – year 1986- Ram 16Kb- Rom 32Kb- Max datapack 2048Kb
CPU speed, clock speed and display are both exactly the same. It really is just an improvement in memory availability. Hence Spreadsheet programs could run with less of an issue on the XP units but not so on the CM units.
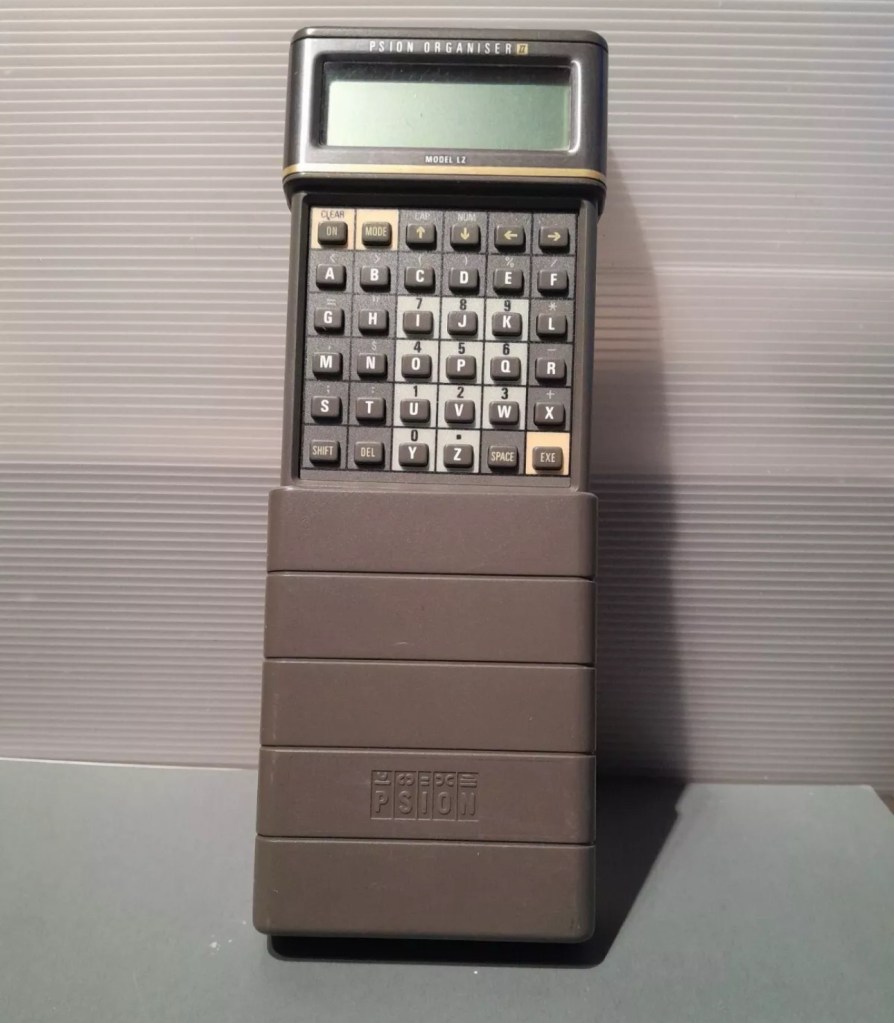
The Psion Organiser II XP model has a 6303 microprocessor with two-line LCD, two slots for memory cartridges and a connector for expansion. The keyboard is calculator-like with the keys arranged alphabetically, not in the Qwerty keyboard style. There is no off key the so the machine was switched off by a menu command. The case is also styled like a calculator, but it has a handy slide-on cover to keep the keyboard safe when the machine is not in use.
I’ve been totally bitten by this coding bug for these Psion organisers. They use a code called OPL, Open Programming Language that is loosely related to the BASIC programming Language. This allows the consumer to write programs or to make amendments to the way their personal organisers can operate and carry out commands. It’s an amazing bit of kit, but as usual I am about 40 years late for the party, however there is still a big community out there who have created some amazing programs and routines, and fortunately they are all willing to share their skills. The language seemed to phase out into retirement sometime around 2010.
One of those people is the guy in the video below called Huw. He has a channel on YouTube called Handheld computing and he has made a series of six episodes teaching those who want to know, how to program in OPL. He also has a lot of retro based videos on his channel.
Huw – he’s very good 👍
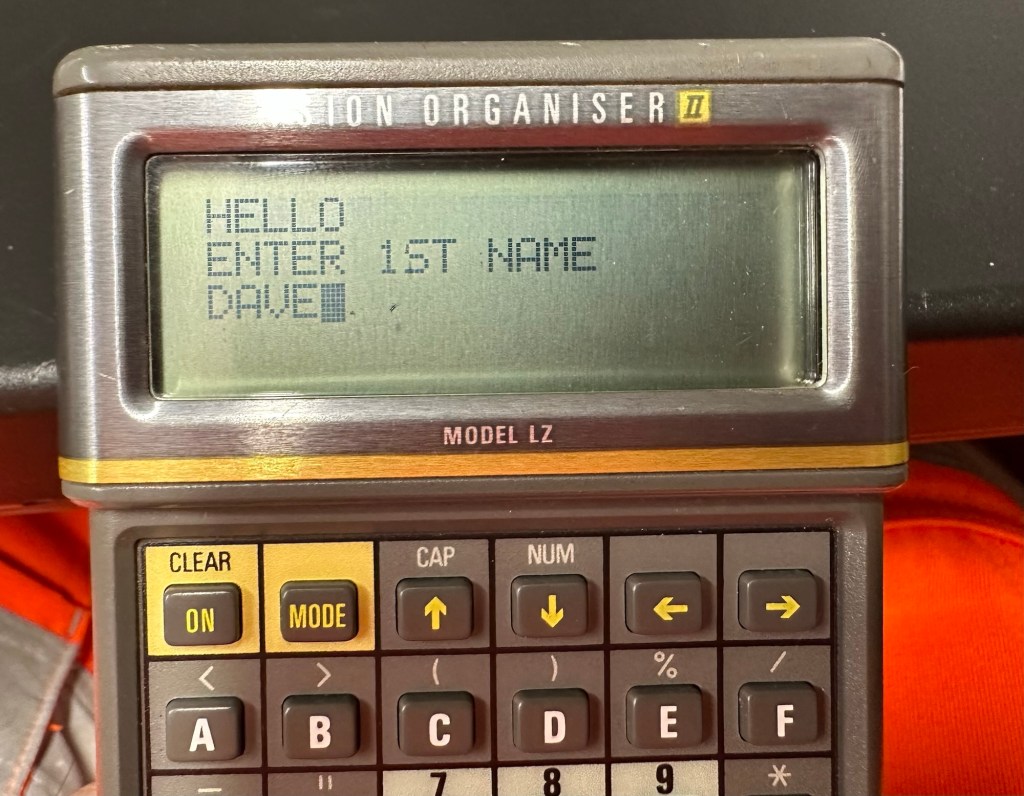
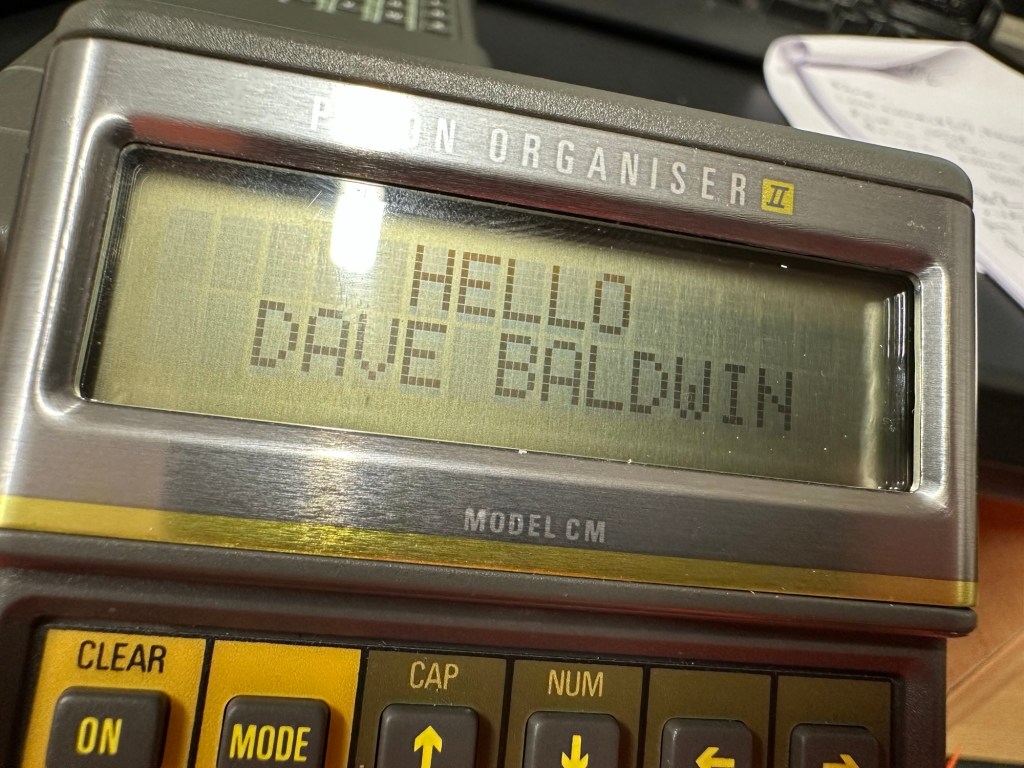
This is only episode one, and using Huw’s teaching I have already produced my first thirteen line routine to carry out a simple command that asks you to input your first name, and then second name and then it presents that to you, in the centre of the organisers screen. A simple and basic operation that gets you to appreciate the requirements and individual inputs that are needed, to get such a string of information to present itself on a screen in a structured way.
My rough scribblings in a scruffy shorthand
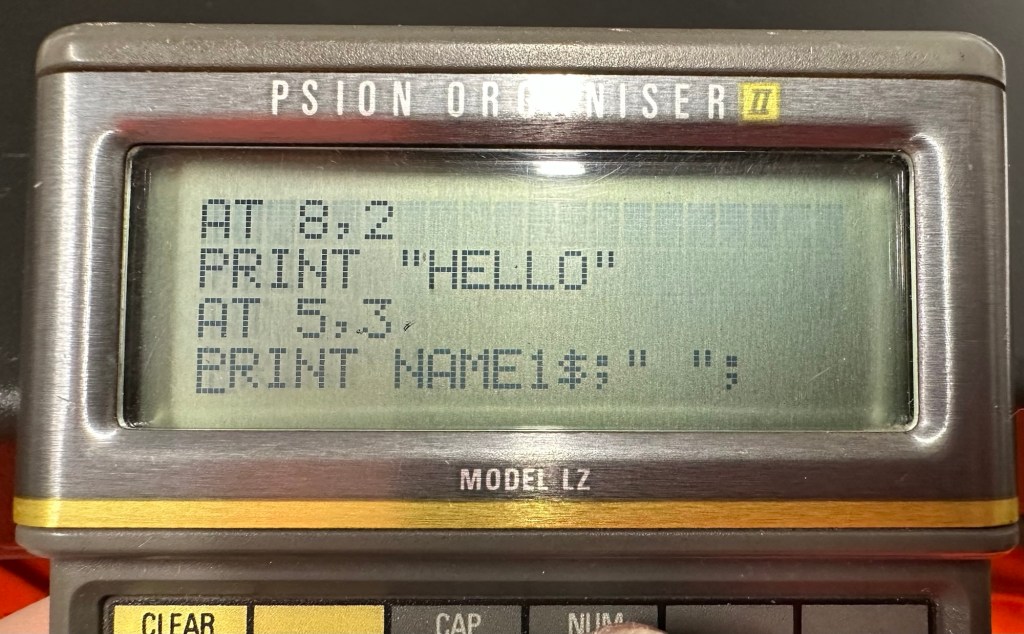
In my notes above I’ve added a couple of new lines to reposition the presentation of the text on my screen. And as I used the 4 line LZ model, this required a different set of coordinates from the two line CM model that I have also used.
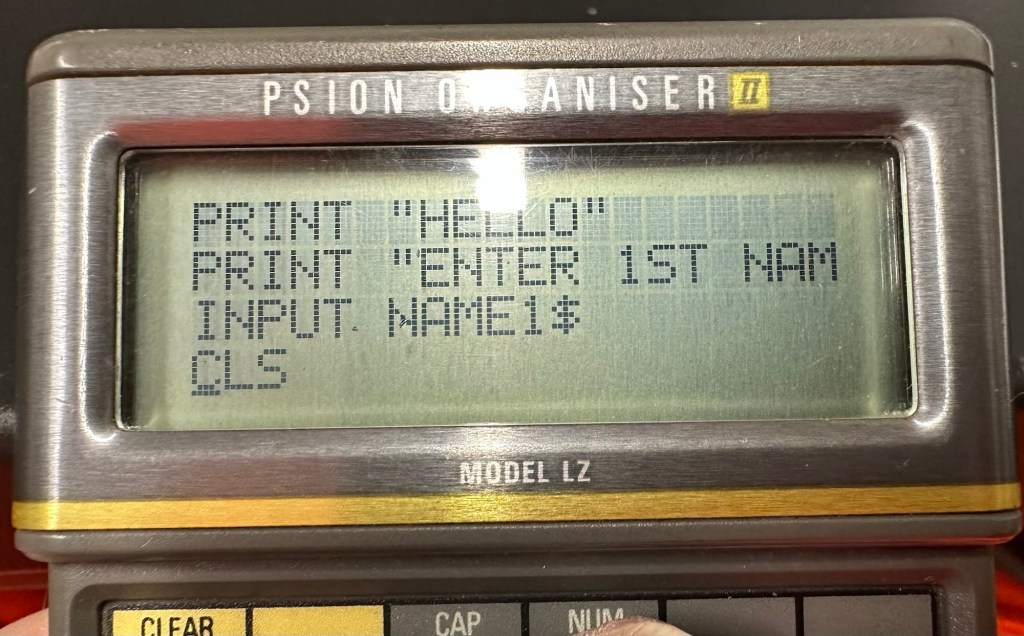
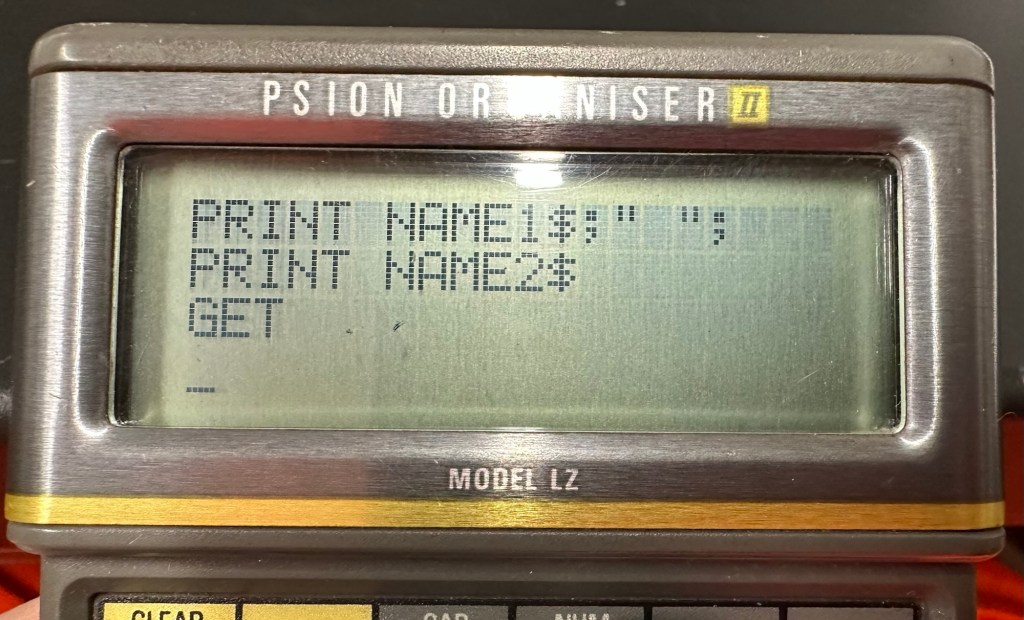
When using the techniques in the video I did notice that there were mistakes, as when I entered the information into the organiser it was coming back with a “Bad declaration” error. So I knew something was wrong. After a while of searching through the program I realised two of the string routines were presented wrong with the “$” dollar sign positioned wrong in the text. A quick change of position and the program translated fine and now runs well on both machines. Below is a tidy version of the code:
NAME:
LOCAL NAME1$(10),NAME2$(10)
PRINT “HELLO”
PRINT “ENTER 1ST NAME”
CLS
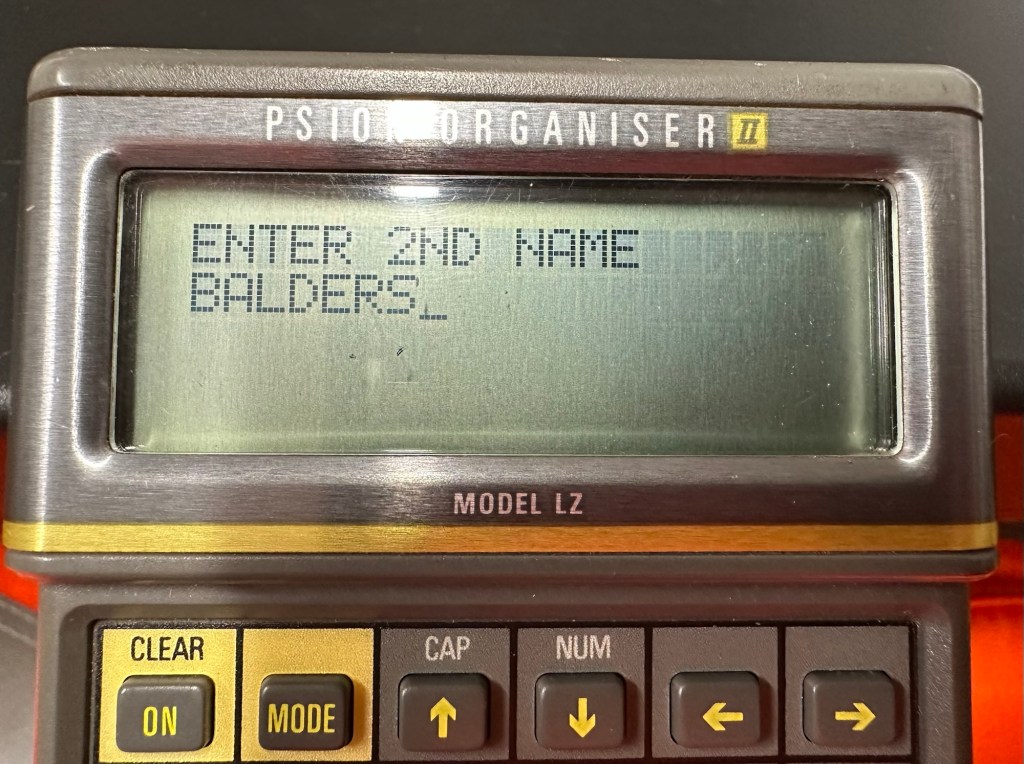
PRINT “ENTER 2ND NAME”
INPUT NAME2$
CLS
AT 8,2
PRINT “HELLO”
AT 5,3
PRINT NAME1$;” “;
PRINT NAME2$;” “;
GET
I apologise if there are any glaring mistakes or mis types that the more trained eye may witness, however it’s only day one for me so I’m quite pleased.
Below are a load of pictures of the code being input into the organisers
Screen shots of different stages of the input into the OPL system. You can see these routines in the code presented either on my rough sheet or the typed version above.
And below is the results as they appear on either the 4 line screen or the two line screen, dependent on what unit you are programming.
Enter 1st nameEnter second nameHello Dave – 4 line version Hello Dave – 2 line version
And that’s it for my first session really, seems a lot of work for such a simple routine. However I have learned a lot in just one session and I have thoroughly enjoyed it. Im quite looking forward to Huw’s next five lessons, hence I will report back further as my learning and abilities hopefully improve.
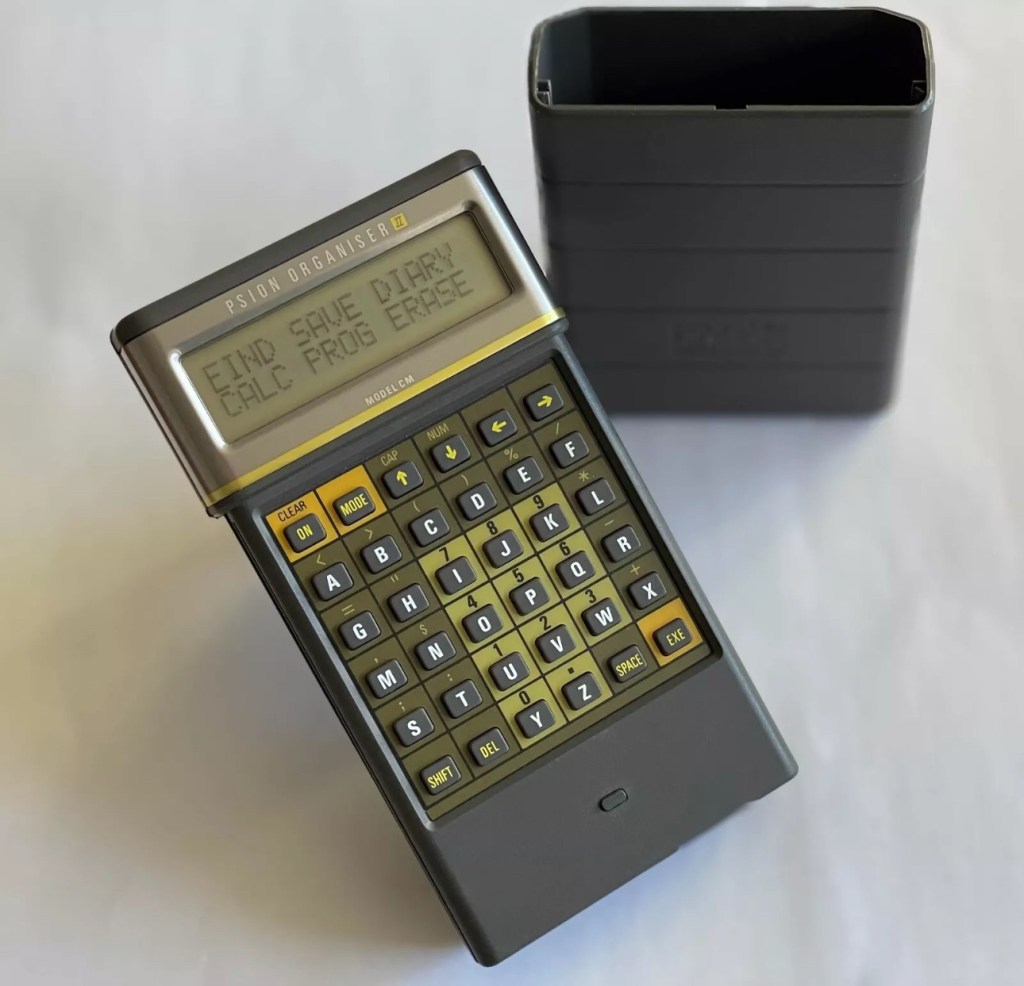
I am now in possession of my third Psion organiser II. You can view any of my posts on them by viewing the menus listings of this site. This one is the LZ version and is a great clean example. This one cost me a little more than the other two £30Gbp all in. However we have progressed in technology and it is now 1989, this unit has grown up considerably since its siblings were produced three years earlier.
4 line Screen2x 32Kb DatapaksNow has a 4 line display compared to the earlier 2 line ones.
These units have a four line display compared to the earlier two line displays of the older versions. The screen size is larger on the LZ, it is 4 lines of 20 characters compared to the earlier two line screens that were 2 lines of 16 characters. 
My current organisers marked with an asterisk to the left this one has a “Massive” 32Kb of ram and 64Kb of rom. Oh how times have progressed
Here is a great review of the capabilities of this unit.
Psion LZ review
Unlike the previous versions I have, this particular unit does not suffer with the Y2K issue.
Below I have included a section from the operating manual for this unit.
The Psion Organiser II Models LZ and LZ64 come with a powerful set of utilities including:
A database which allows you to store items of information and retrieve them again instantly.
A diary to keep track of personal appointments.
Alarms to remind you of your diary entries, or to use as an alarm clock.
A sophisticated calculator, for simple or complex calculations involving mathematical functions.
A clock, with a stopwatch and timer.
Notepads with calculation, for information such as things- to-do or expenses lists.
International time and dialling codes.
A month-at-a-view calendar.
Password protection.
A multi-file database.
A choice of European languages.
The Organiser also has its own built-in programming language called OPL. The language is designed to exploit all the machine’s facilities to the full and to let you tailor the Organiser to your own specific needs.
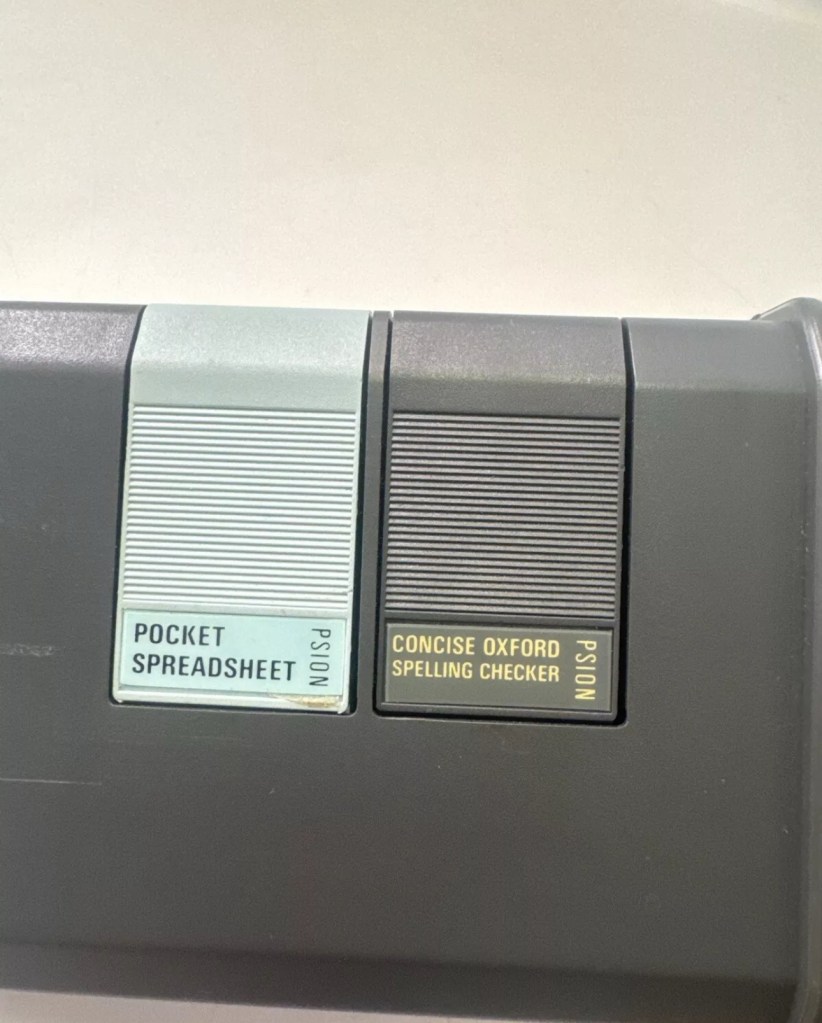
The Organiser has an internal memory and two external devices which are the equivalent of disc drives on a desk-top computer. Each one can hold a Datapak for you to store information on, or a program pack containing a program such as the Pocket Spreadsheet.
The internal memory of the Model LZ holds around 32000 characters and that of the LZ64 around 64000 characters. In addition, one or more Datapaks can boost the storage capacity considerably – by up to 128000 characters per Datapak.
Courtesy of Psion PLC1989
I’m going to use all the organisers I currently own to look into learning the OPL operating language that all these units use. I have already programmed in a couple of basic routines that just perform actions such as a clock routine that shows up when you turn the unit on – see picture below.
Simple clock routine.
This simple routine consists of no more than about six lines of code, it really is simple but allows you to adapt it to just how you want it, there are a number of options you can use to incorporate it into other routines or have it just running on its own as I have here.The routine above stops whenever you press any button. Simple.
That was the appeal of PDA units such as these in the 80’s in that you could develop and write programs that you wanted that suited you and your requirements. I like this as it takes me back to the days when I purchased my first computer the ZX81 back in the early 80’s when you had to learn BASIC programming just to get it working.
I know I’m probably 40 years behind everyone else and the whole programming scene has moved on in leaps and bounds to a point where it is super technical and advanced, however I love the slow pace and infancy of it all. And I’m not doing anyone any harm, so I’ll just plod on at my pace. It keeps me occupied, and I’m constantly learning. And at my time of life that is no bad thing.
I did my Morse test back in 2003 just after I passed my City and Guilds 765 RAE exam in Amateur radio. It wasn’t a compulsory requirement as it was in the States at that time, but I chose to go with it. I wasn’t the fastest in the world but I enjoyed using it to be able to partake in my favourite part of the hobby, low power QRP operations.
As morse uses such a small bandwidth, distant operations using very low power below 5 watts are very achievable. Wspr transmissions operate in even smaller power ranges, however that’s a whole different story.
So what’s the Psion organiser got to do with Morse?
When you set out trying to master Morse you look at loads of techniques and ways to make your journey that much easier. There are Morse trainers, there are even Morse decoders and encoders that basically allow you to “Cheat”, but what’s the point of that as you’re not going to learn anything that way.
The Morse Datapak Psion Organiser II LZ
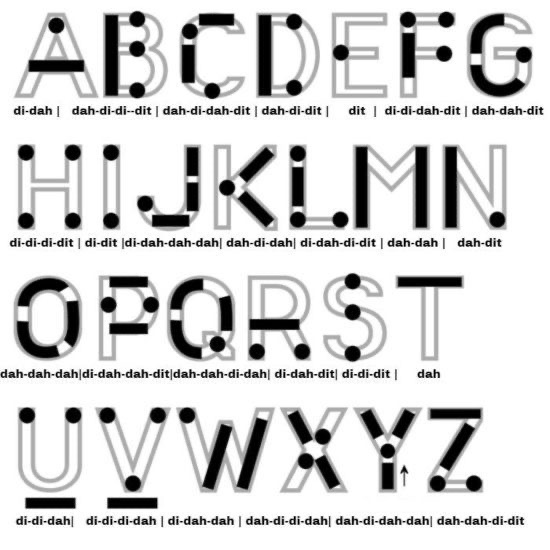
I used a technique called the visual mode technique that allows you to learn Morse by associating the dots and dashes with the actual shape of the letter and number. It works well when translating to paper, however Morse is a sound mode and it is better to use sound association, that will always work the best. I have this on a book mark to this day, as well as having it as screensaver at work. It worked for me. That’s where the Psion also had a part to play in my education.
Visual mode technique
I have a pre loaded data pack that runs perfectly on this old 1980’s machine. I used a very similar program back in the day, but not this actual one (See pictures above). The program and files are extracted and copied from the Interair Airnav pack and i have uploaded a small video below to show it whilst working.
“Peace”
With this program every digit you press on the keyboard is repeated back to you in Morse code. It’s a fantastic way to keep yourself on the ball. There are a few minor errors but the numbers and letters are pretty much spot on. It’s a great way to learn the shape of a word by sounds, and that’s a big part of Morse code, where you use phonics or the sound and shape of a string of dots and dashes to learn particular words or formations of groups of words. I’m probably making it sound more difficult than it actually is, and I apologise for that as it really doesn’t have to be. Each person finds their favourite way to learn, and this worked just fine for me all the way back in the early 2000’s about 22 years ago.
Have a great day and peace to you all or should that be :
I have a Psion organiser II Cm from around 1986, a lovely blast from the past piece of technology that for a period of time, put the UK ahead of the world in electronic storage and retrieval technology. For an item that is thirty nine years old it was way ahead of its nearest rivals in both looks and capabilities. Let’s be honest the biggest selling data retrieval system prior to this coming along would have been the good old fashioned Filofax. It really was a game changer.
My personal Psion organiser II CM
My personal organiser is in good condition. I’ve had it for about a year now. It has no known faults so I’ve not done this post to show a repair, I have created this post to highlight, just like us all, that the older we get the more care we have to take of ourselves, the same goes for this machine. There is a whole online community still committed to this equipment and the amount of knowledge available to anyone looking at getting one of these items is absolutely immense. Just look here: Psion Organiser II forum
My organiser is a CM version. It has a memory of 8 KB. Data packs can be added, mine has a 16 and a 32k pack so I have a whopping 48k of available additional memory. Extra storage is available between 16-128k again dependant on the limits of your unit.
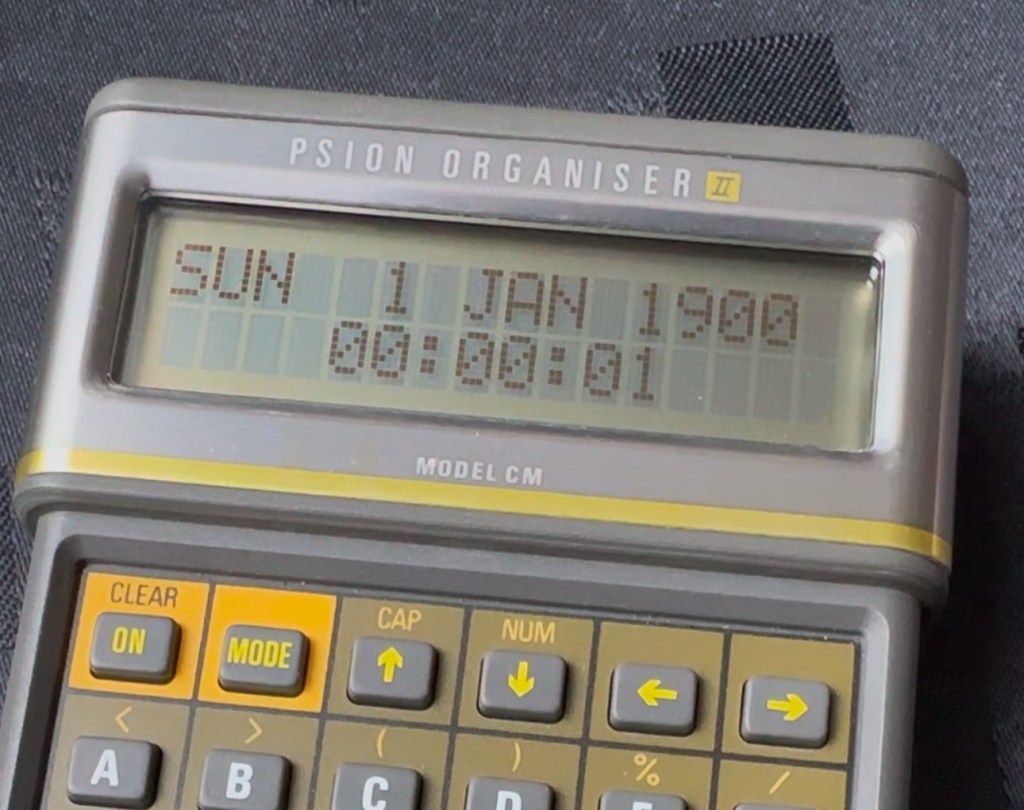
This version, the CM was a victim of the Y2K bug that you will be more than aware of, if you are of a certain age and possessed a computer on the run up to the year 2000. Panic reigned supreme around this time, the world was about to end. It was a crazy time. For some it was just that, plain crazy and nothing noteworthy occurred, for others they will say it was a whole different story. However it wasn’t all that bad as we are all still here today. That said some units were rendered useless as their date ranges didn’t exceed beyond the year 1999, and that is where this particular model of the Psion organiser slots in to place.
It has that very issue as does the XP version, later editions such as the LZ did not have the issue.
I’ve created a very small video here that replicates exactly what occurred when midnight on the 31st December 1999 finally arrived.
My Psion, replicating the Y2K bug
In a nutshell it resorted back to the year 1900. Some computers freaked out, others that had been attended to had fixes deployed that added extra years to the internal data streams. And we can also do that with this unit today.
All we have to do is visit the site of Jaap Scherphuis who has provided the download to enable users to now extend the date range by another 84 years to 2083. My time on this planet will be done by then so I’m not that worried about what happens beyond this time period. I have quoted exactly what this little fix achieves, below.
When it is installed the main menu item TIME is redirected to the memory resident routine. This routine is identical to the normal one in ROM, except that it adds 84 to the year, making the range of the available years 1984 to 2083 instead of 1900 to 1999. This new range is chosen because these years have the same weekdays.
Jaap Scherphuis
To achieve this fix there are three ways that it can be achieved, either as a direct entry set of commands via a serial cable link to the top of the unit via a computer, direct entry via the unit programming mode, or by using a programmed data pack. I do not have the link, and I possess “Sausage fingers“ so I don’t trust myself to type the detail in correctly, so I will be using the latter option, i am cheating with one of these.
Info and Y2K fix pack
A vendor used to sell these on eBay. They are data packs that contain the very Y2K patch I need, as well as a few other little nuggets of interest all on a preloaded pack. There is an aside to this particular fix. As it is stored in the local memory, should the battery die, or be taken out to be replaced you will lose this fix and it will need to be reinstalled. With Psion, any hard data you wish to keep, has to be saved to one of the data packs, if you don’t you will simply lose your data, no auto save ability here.
So if the battery does die or get removed, with this pack it can be quickly restored to normal use in a couple of minutes with no need to involve other computers or peripherals.
Before fix installed Y2K issue remains
No Y2K issue now
I have now installed the new TIMEINST routine that adds the extra years into the the units memory and it is now usable for the next 78 years (For someone, not me though, as I won’t be around!)
So this is my Psion up and running. I don’t claim to know much about the technical side but I’m learning. If I can assist anyone in any way, whether that is by directing you to someone who knows, or by taking you through what I have done here, then please make contact. I will assist you however I can.
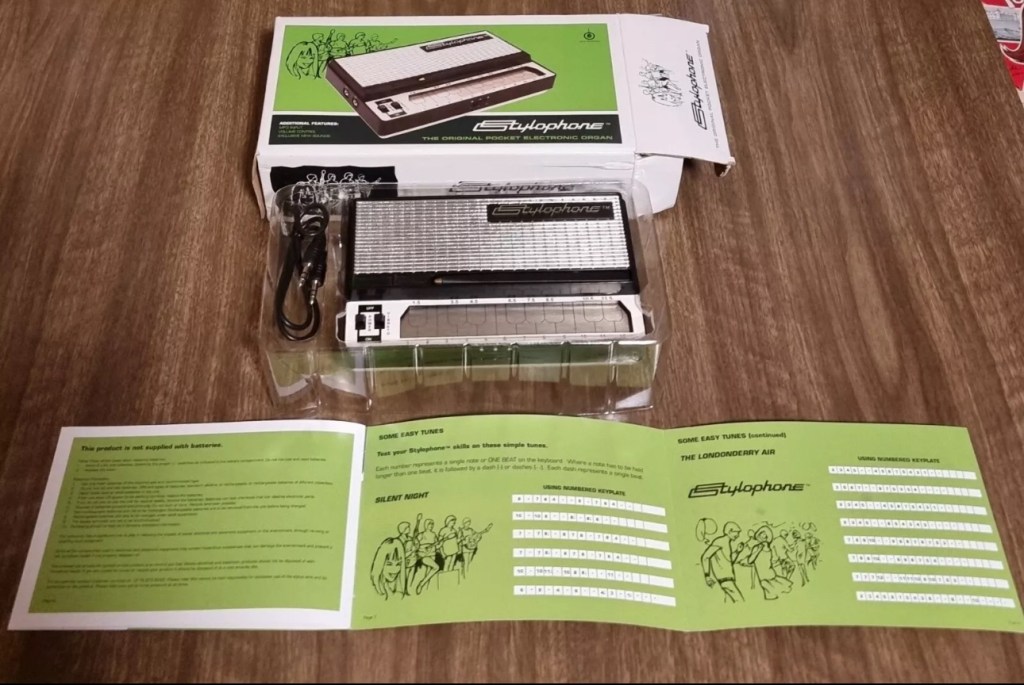
Earlier in January I posted that I’d brought this retro pocket organ from EBay. Stylophone pocket organ It has now arrived and wow, it is in near perfect condition, the seller did not lie when stating it hadn’t been used since 2008. It is almost mint.
Mint condition
Anyway not being a person to disappoint anyone, I did promise that I’d video myself learning to play the unit. I wanted to prove that anyone can play these “Toys” that were hugely popular over the last 40 years. You lucky people. Here’s the video below.
Now this is a prompt that excites me as it is a nod in the direction of all that i really like, retro.
I started my first full time job in about 1982. The ZX81 came out in 1981, and I used my first months pay to purchase one, it cost around £70Gbp if my memory serves me well.
Sinclair ZX81
My first real surprise when I opened it was that it wouldn’t do a thing unless you actually programmed it, I really hadn’t done my homework and what followed was a crash course in BASIC programming to get it to do something, but I loved it.
Looking back the best thing about this product was that it got you learning stuff, and I have no doubt that items such as this started many people off on the road of computer technology employment, computing was now available at a good price to everyone, and we youngsters really took to this unit en mass as 1.5 million units were sold prior to it being discontinued two years later in 1984.
I moved on fairly quickly to the Vic20, Spectrum, Amstrad CPC464 and then the traditional home computer and as they say the rest is history. They were fantastic times back in the early days, and I cherish them immensely. In fact I’ve never fallen out of love with this technology and I will soon write a more in depth piece about the ZX81 as I am looking at purchasing another one for my retro collection.
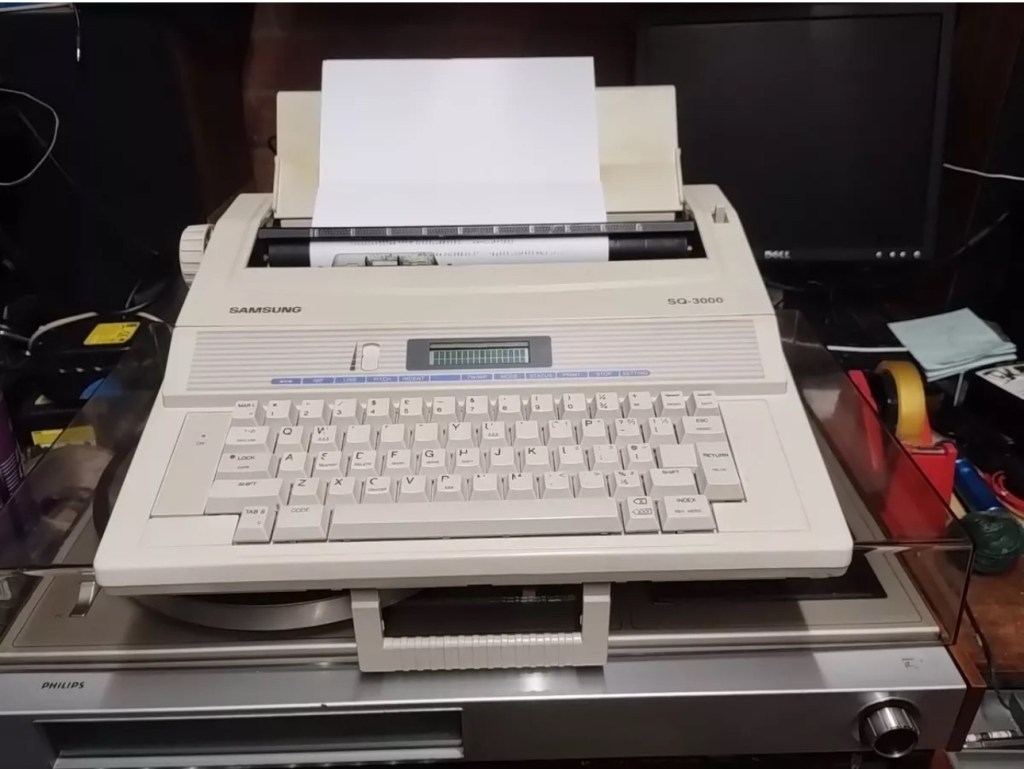
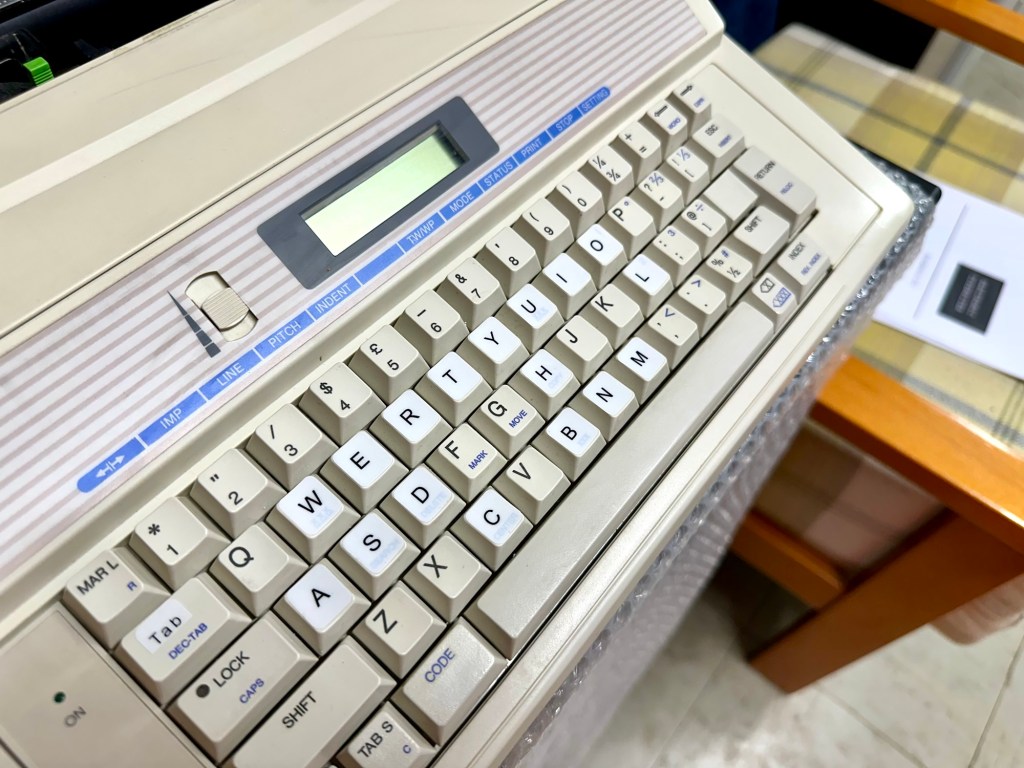
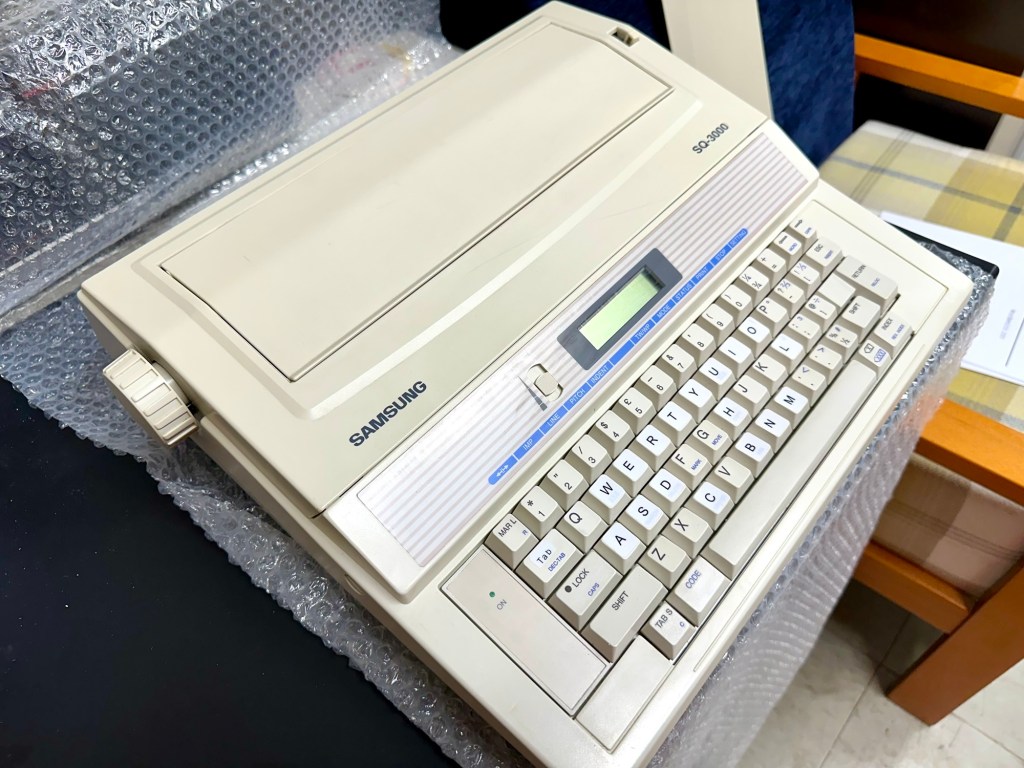
This is the follow up to a recently obtained electronic typewriter that was purchased in January 2025, the initial post can be found here: Samsung SQ3000 electronic typewriter.
Samsung SQ3000 electronic typewriter
The following post will deal with the assessment on its arrival and what I am going to try to do, to get it back working again, as close as possible to its original state.
I’ve downloaded an instruction I manual, I’ve had to download one for a Smith Corona Wordsmith 200, it is in theory the exact same unit, just under a different manufacturers branding.
Assessment
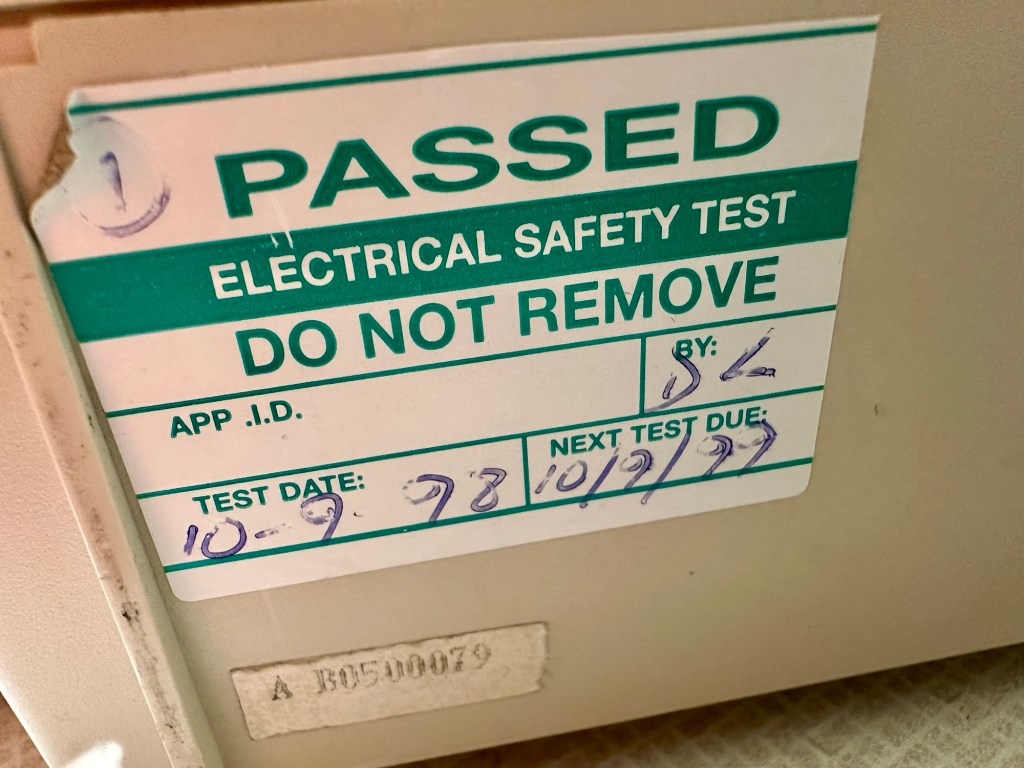
It’s arrived and apart from a little age yellowing it looks ok. There is a PAT testing sticker that says it was last electrically tested back in 1998 and is due a retest in 1999. This corresponds with my date estimate of mid 90s.
Yellowing Pat test date
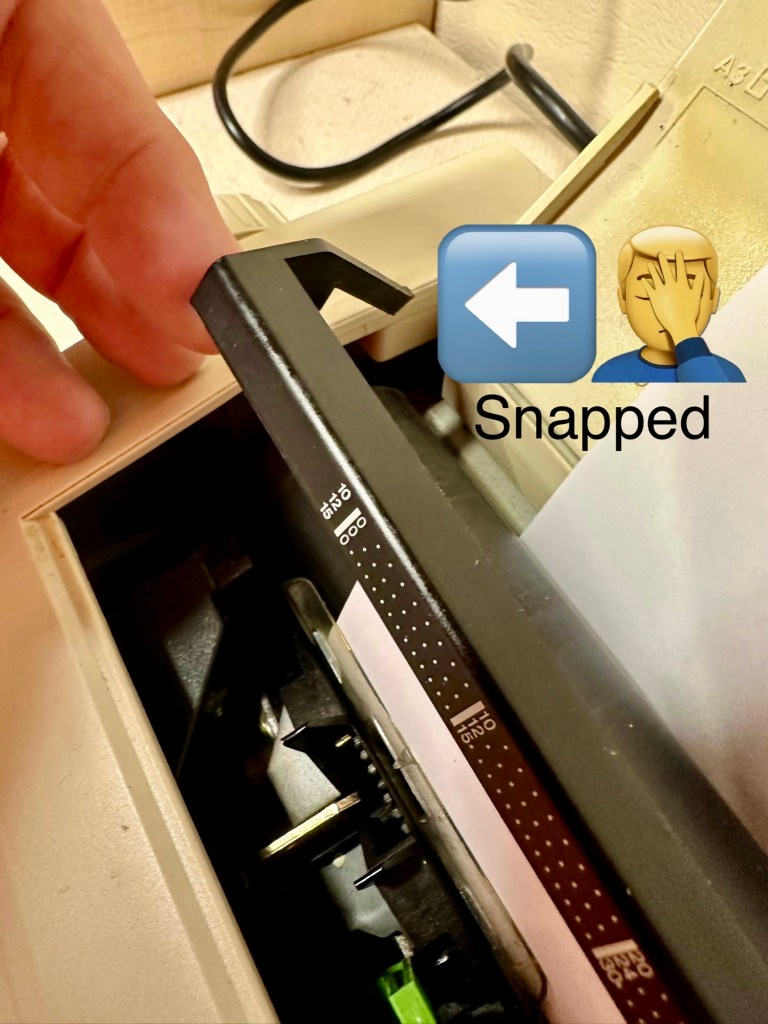
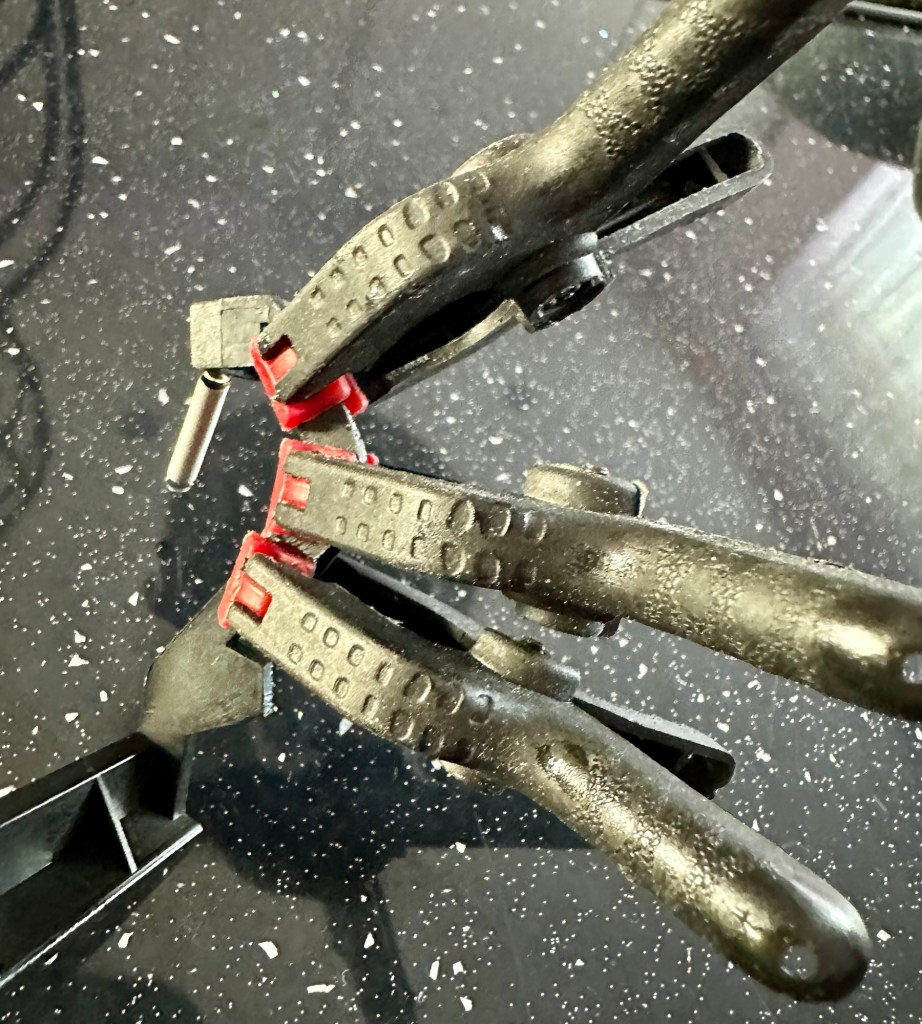
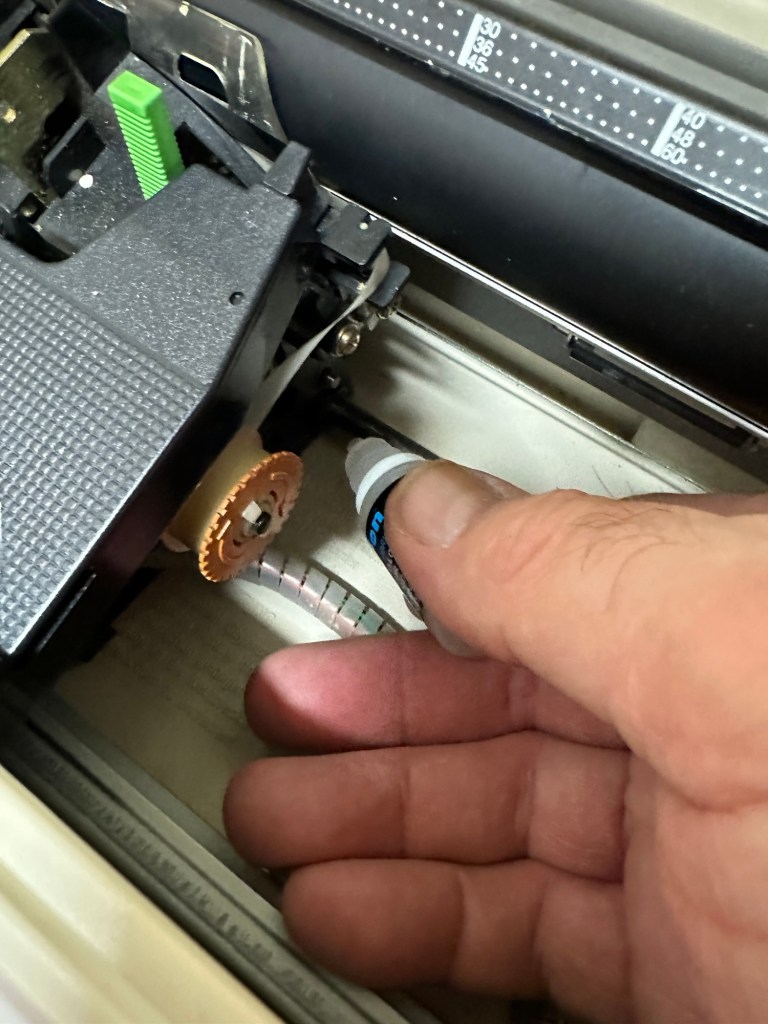
I will retest and renew the safety checks when I’m finished working on it. I have noticed that the paper bail/release rail is broken on the left hand side so I will have to add that to the repairs, this shouldn’t be a major concern.
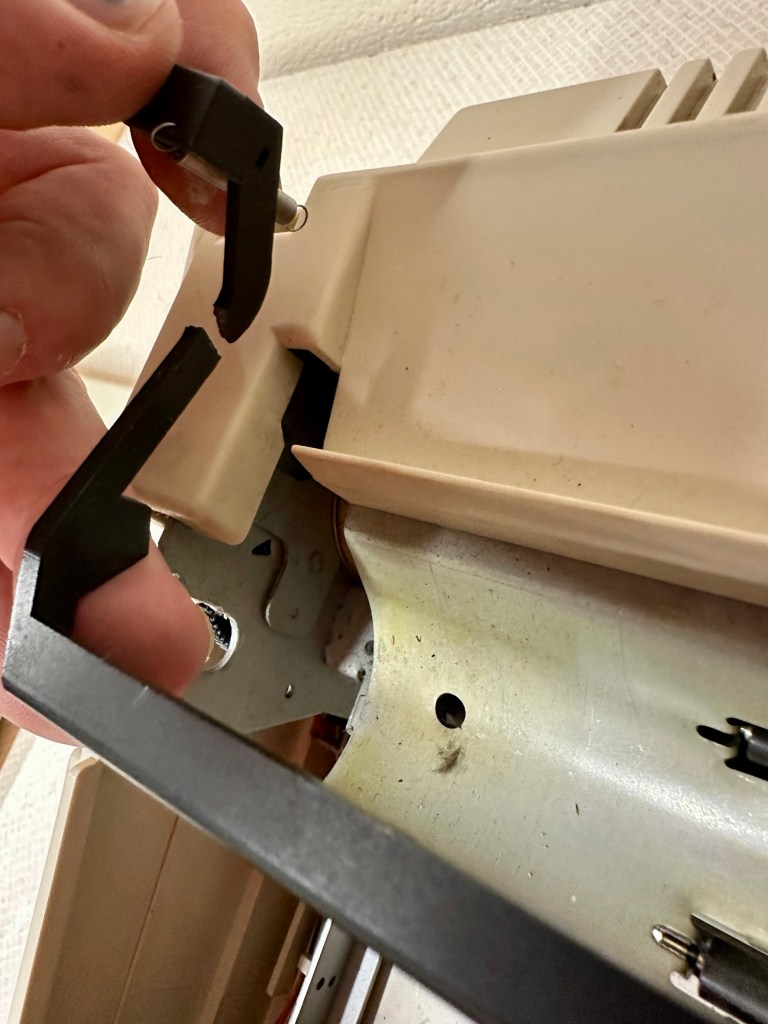
Paper bail snappedBroken piece recovered
Before I took the roller out to get to the paper bail I did start the machine up. Everything went as expected and when I tried to type I was getting some weird reactions to the keys I was pushing. All kinds of characters were appearing.
Before
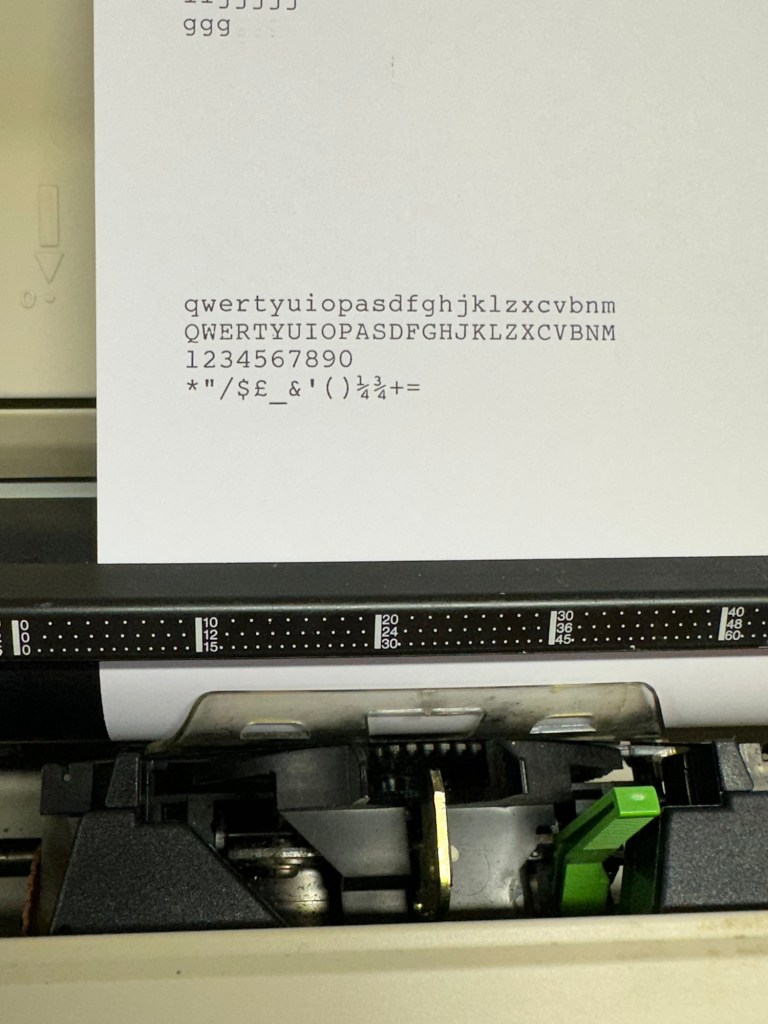
I checked the daisy wheel and there was a click. It wasn’t sitting right. I reset the machine using the two reset buttons and the machine then went through its reset programme, pretty much the same effect as turning it off and on again. (Not much changes in the way of tech there then)
After
Well that’s worked fine, I have tried every combination on the keyboard including the erase function and this is now fully working. It really was quite simple. My next job is to try and fix this paper bail.
Paper bail removed for fixing
There is quite a bit of dust and dirt inside that needs removing. And whilst I’m at it I will lightly re grease the areas that need it. Let’s be honest it’s not been done in the last 30yrs so now is as good a time as any. Inside will get a light hoovering and a bit of a tart up, I’m not going to go mad. I will clean the outside and all knobs and buttons and try to get rid of some of the yellowing, but to be honest as long as it’s clean I’m not too worried about age marks.
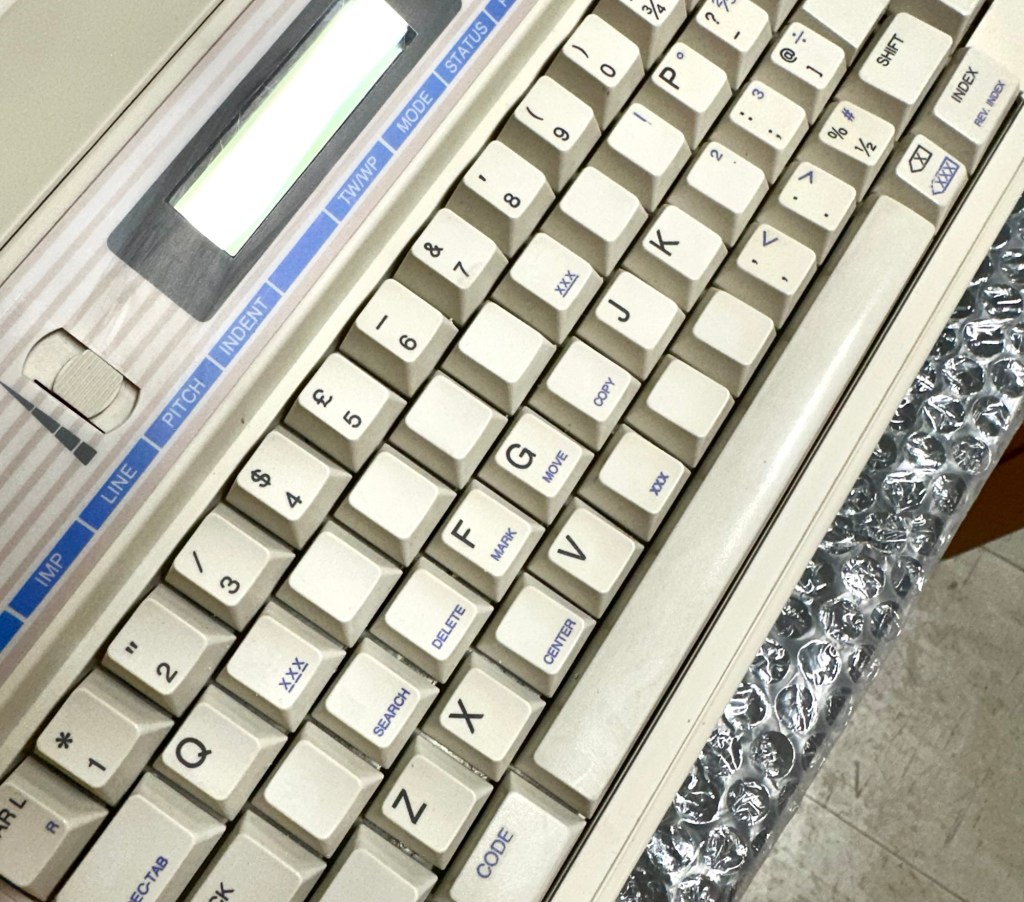
The keyboard has lost a few of its letters. I will remove what is left of some of them and use some keyboard decals to replace the missing ones. This will be one of the last jobs I do.
Characters missingKeyboard
Well that’s the assessment done and apart from a few small issues and requiring some basic maintenance I don’t think we have an immense amount of work to carry out. We know it now works. Let’s hope I don’t cause any further carnage whilst working on it.
Let’s get to work.
Repair
Right it’s straight onto the paper bail to try and fix the snapped end. Firstly I’m just going to use some superglue to get it in place. When this is dry I’m going to create two “Doublers”, place one either side of the damaged part and glue these in place to create a stronger repair and to add some stability to this area.
I’ve got some black semi rigid plastic. I’ve created a small template from a tracing that I did of the good right hand side of the bail.
PlasticTemplate
I now have two doublers cut from the plastic that I will use as explained above.
Two doublers
It doesn’t matter that they are not perfectly shaped, however they both fit perfectly well into the profile of the bail arm, and this portion of the arm is hidden in the typewriter housing anyway, so the part will not be visible, but it will now be strong.
SupergluedDoublers in place and clamped
The Doublers have been put in place using a quick set epoxy resin, I will leave this to dry for a good few hours before I tidy it up, with a light clean, and then I will try to get it back in place.
Bail arm repaired, installed and working.
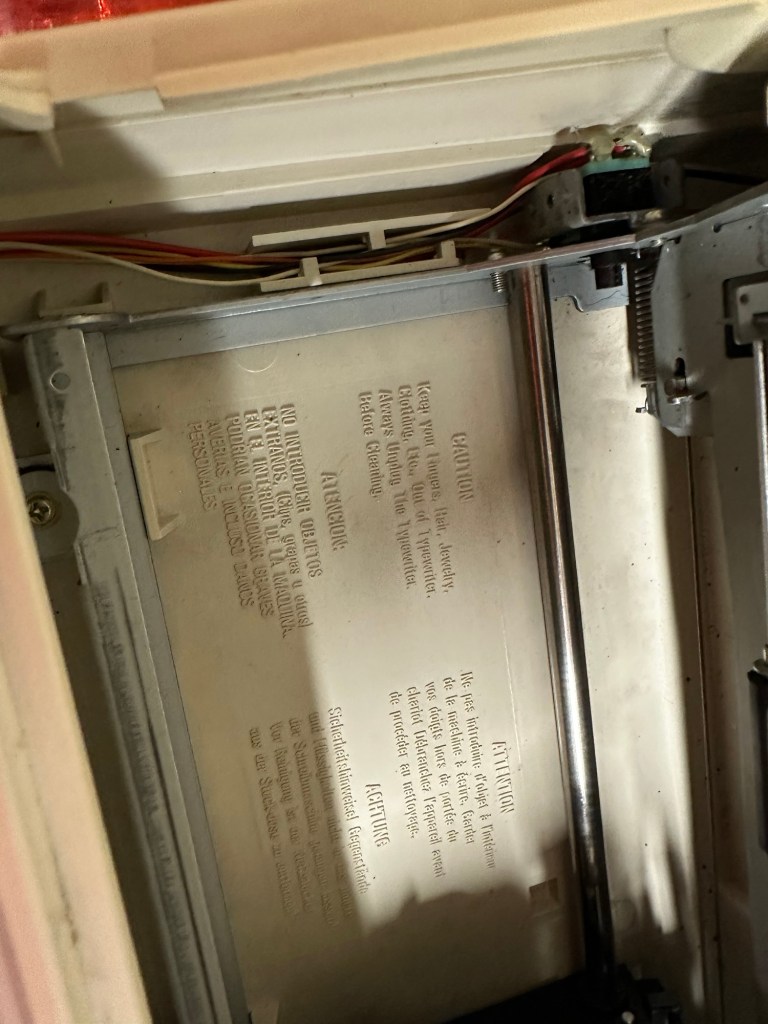
Now that’s done i’ve gone inside and there were a nice couple of spider webs around the transformer that are now history. I’ve secured the cable in the rear of the unit that never had any tension restraint, so that there will be no issues, should anyone now give a good yank on the cable lead. This is a safety addition I have made that was never on the original unit.
Cable restraint screwed to base to prevent strain on internal wires in and around the transformer bay.
I have also tightened all screws and checked the wiring and this all seems ok. Plug and fuse have been checked and all is looking good. I’ll carry out a PAT test once I’ve finished the clean up.
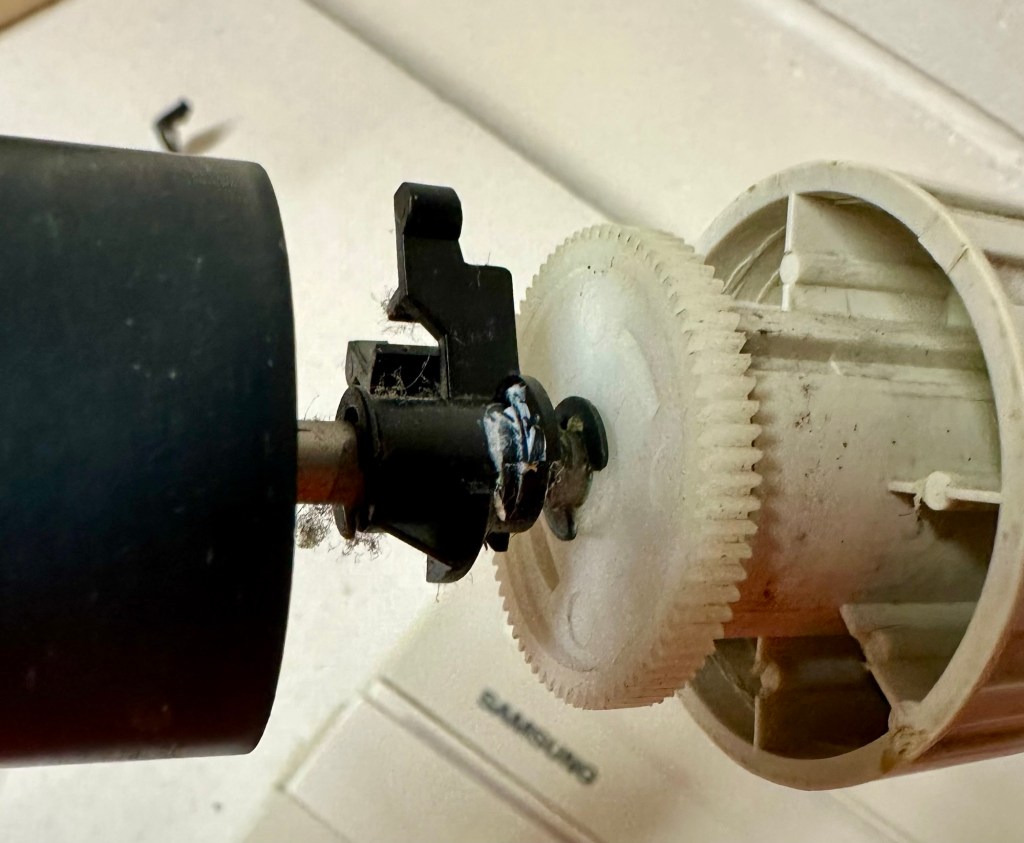
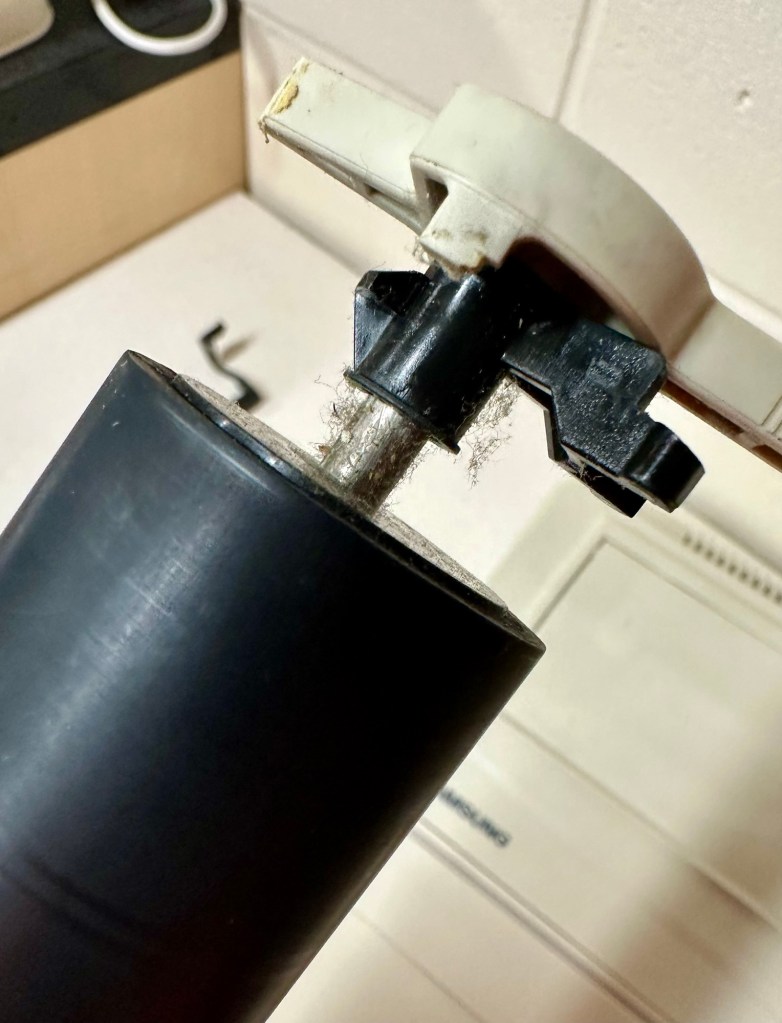
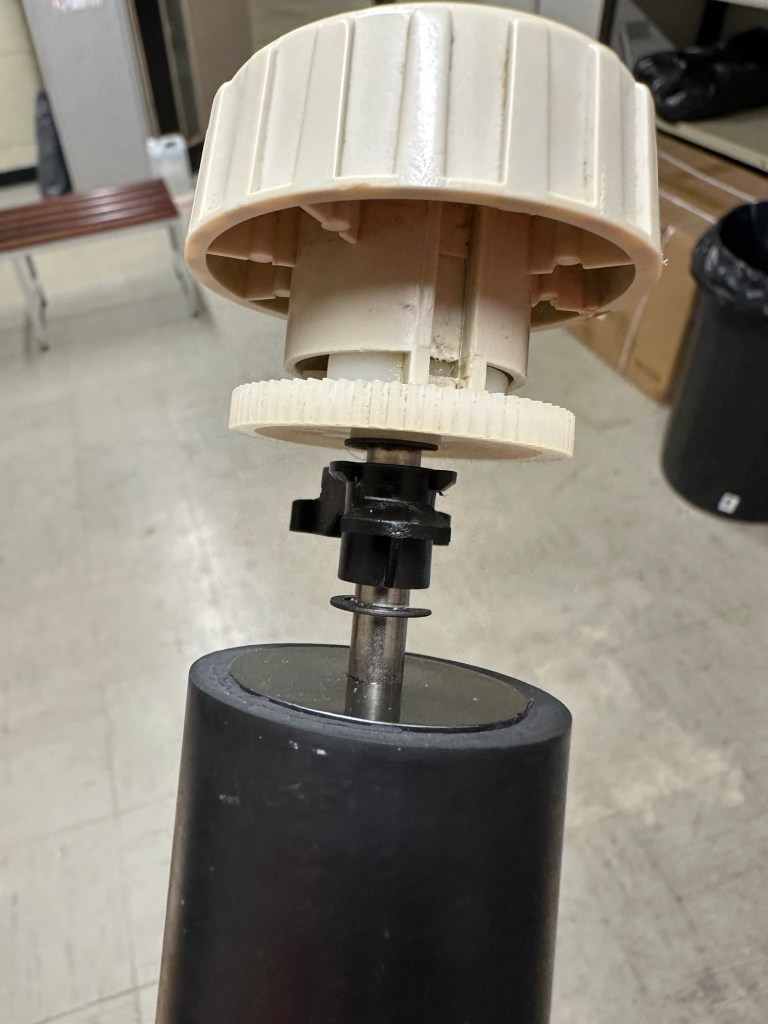
Roller cleaned and degreased Platten switch cleaned
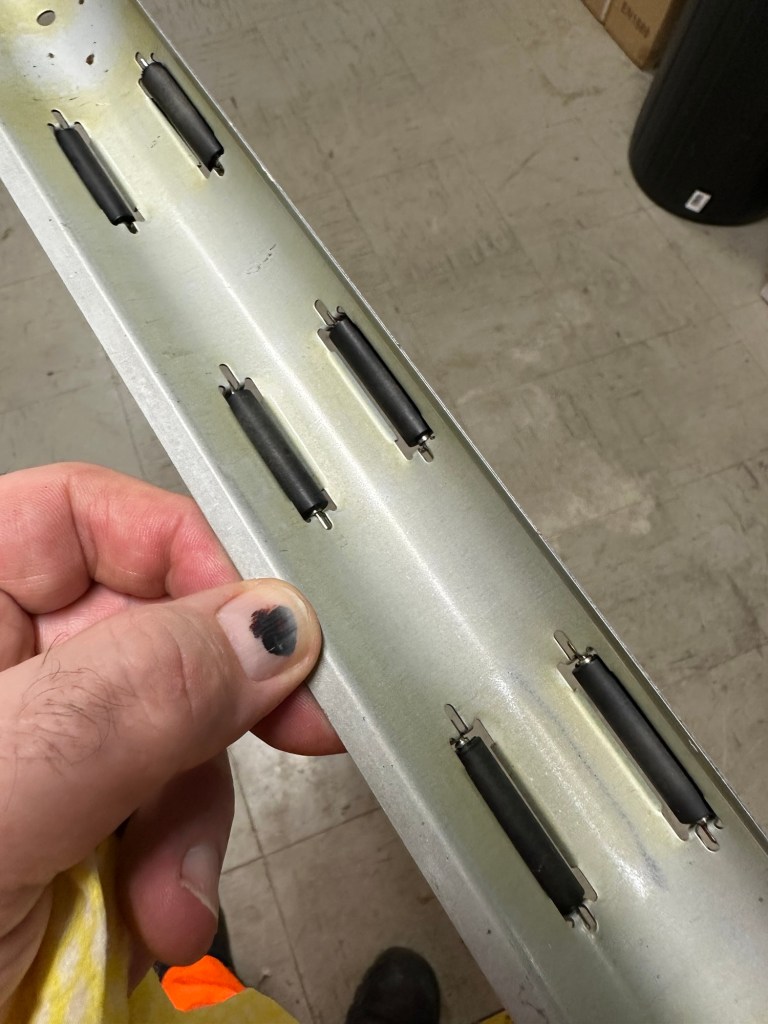
I’ve cleaned the main roller with alcohol, and removed all the old grease and dirt from the platten adjuster switch and the roller advance knob. I have removed the platten plate as well as the six mini rollers that are here. I’ve cleaned them all and re assembled/installed them.
Platten platePlatten rollerRollers installed and platten complete
I have cleaned the daisy wheel as well as in and around the printing head unit.
Clean insideDegreased
Inside the unit I have given a good hoover as well as a light clean and again removed more old grease. I have given the exterior plastic a preliminary polish, this has removed some of the yellowing and made it look “cleaner” I am not going to worry too much about the yellowing as it isn’t that bad, and I don’t really want to venture into carrying out a “Retrobrite” on this unit. It would take too long and there would be no benefit for this project.
I’ve now added very small amounts of a watch lubricant to those areas that i have previously cleaned and removed the old grease from.
Light lubricantMain transport lightly lubricated
The unit has been reassembled and I’m pleased to say it is still working fine. It’s running smoothly and all aspects of the unit seem to be working just fine. To be honest it seems to be printing clearer to me.
Daisy wheel and print quality is perfect
I don’t know how long the print cartridge has been installed but I suspect it may have been a few years back. It’s almost finished, and I do have a replacement on order. I’m sure a fresh cartridge will make the print stand out even more.
Next I’m going to have a go at replacing some, or even all of the keyboard letters. It all depends how it looks when I start replacing them. I’m going to gently rub off the lettering that is left and clean the keys using a 95% pure Isopropyl alcohol solution (IPA).
All damaged and missing key decals removed in preparation for replacement new decals. Others may have to be removed dependant on how the new ones look when in place.
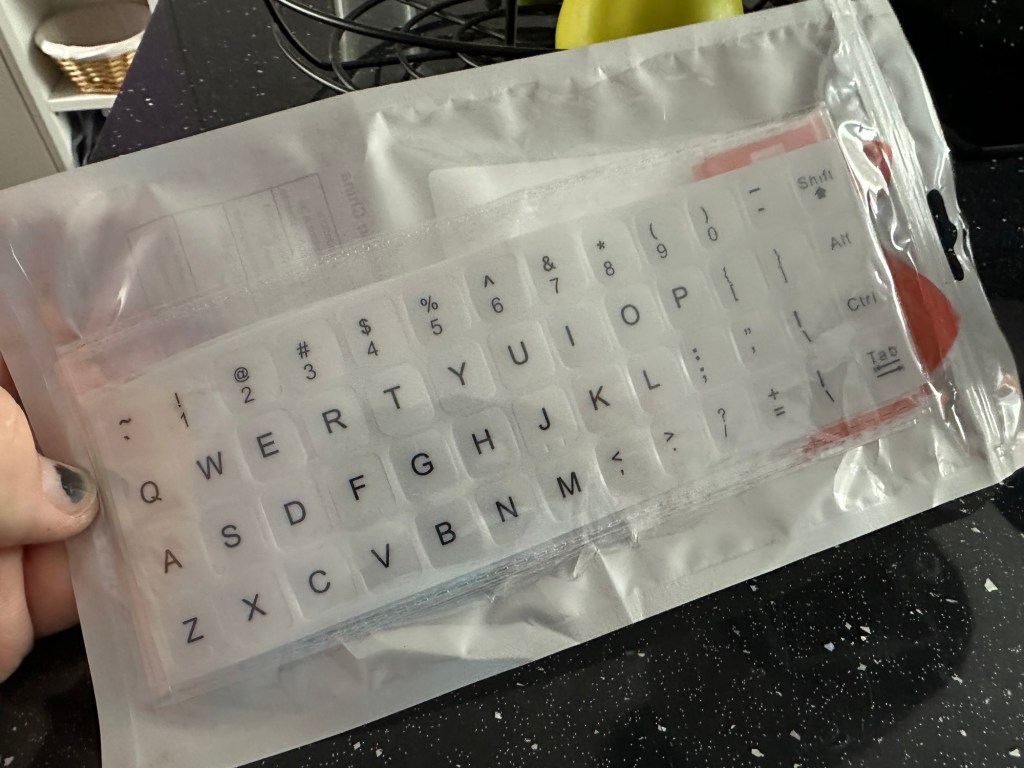
These are the replacement key decals I will be attempting to use.
Qwerty keyboard decals
I’ve replaced the damaged key decals. The ones I’ve used are a lot brighter than the original ones and really accentuate the yellowing. I’m not troubled by this as it keeps its “Old” look. I would have to scrape and wipe for hours to remove all the other keys and to be honest it would look just like someone had gone abroad to have a bright white set of dodgy veneers installed, it would look quite out of place, and in your face. Just like a Cheshire Cat smile.
New veneers anyone?
It serves a purpose and just allows the unit to be usable again.
The final product:
Looking damned fine if I say so myself
Fortunately a lot of the equipment and parts I have used, I was already in possession of, so there are no additional costs for this project. Below you can view the total costings for this project as they currently stand:
Purchase inc postage £13.14
Cable restraint £0.25
Keyboard decals £1.25
Total cost of project £14.64
Again I have managed to save a fantastic 90s retro item from landfill for very little cost, and that is a fantastic result. It has years of use left in it, as long as the consumables remain available, and of that I am confident that they will be available, for at least the next few years. The unit is clean, I’ve just carried out an electrical PAT test and it is electrically sound.
Believe it or not I’m going to go back in time and will write some traditional typewritten letters to friends and family. I’m looking forward to doing that and it will certainly surprise them, it will be totally unexpected.
When all that is done, i will donate this unit to our local LOROS Hospice shop so they can sell it on and raise much needed funds. They deserve it. Edit: This was done in March 2025 at their shop in Hamilton Leicester. I hope it gets them a good price.
Watch the brief video for the final words on this restoration. All 13 seconds of it.


You must be logged in to post a comment.