I have just finished a run of night shifts, as we are heading out to the coast for a few days with 12 others from the wife’s side of her family. I’ve kind of been in that frame of mind for a few days when people get closer to a vacation or break away when they just slip into “Holiday mode” at work, you know that feeling when the not so important stuff gets shoved to one side in the hope that one of your colleagues will pick it up, when in fact it will probably still be waiting for you to complete on your return. Yep I’ve been in that frame of mind for a few days now. I need a break, no matter how brief.
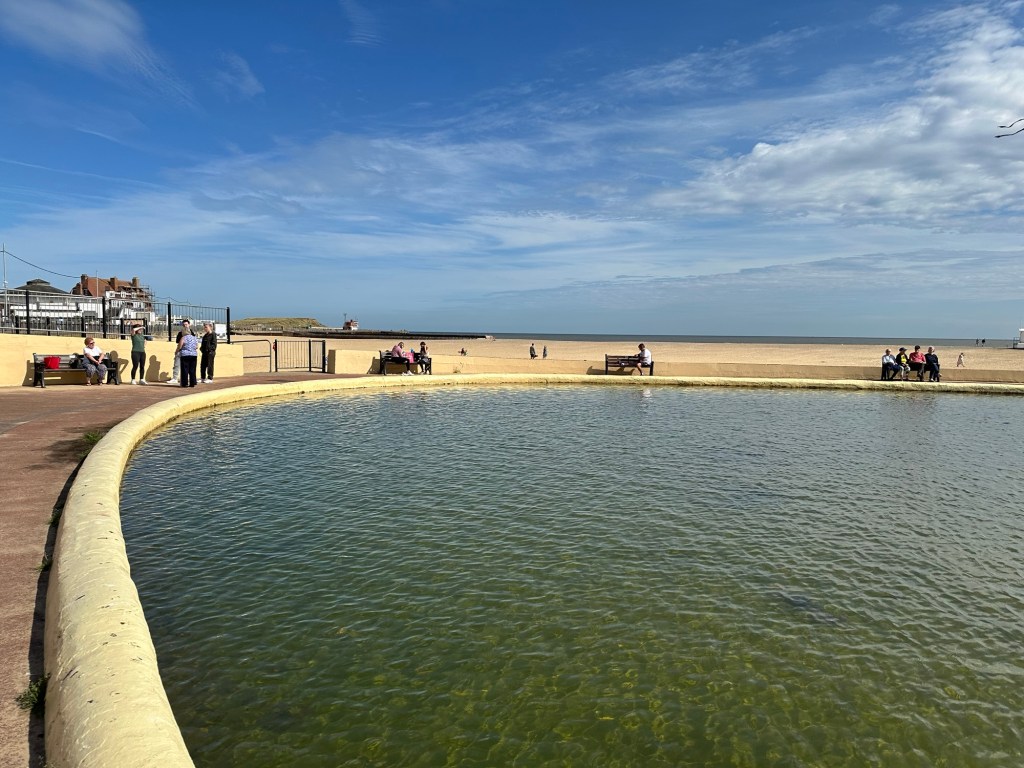
It’s going to involve an early start tomorrow as we head out to the east coast, first stop Gorleston in Norfolk where us old farts in the family gather at the local boating pond for a break, before moving on to our destination further up the coast. Gorleston is a beautiful part of the UK with one of the finest beaches you will ever see, it just seems to go on forever.
Gorleston beach
At Gorleston as I’ve previously mentioned, there is a very large boating pond. Here the older specimens of the clan take a break from driving to float their model boats. I’ve been watching them do this for years and have always threatened to build a model warship to jokingly blow them out of the water.
Gorleston boating lake
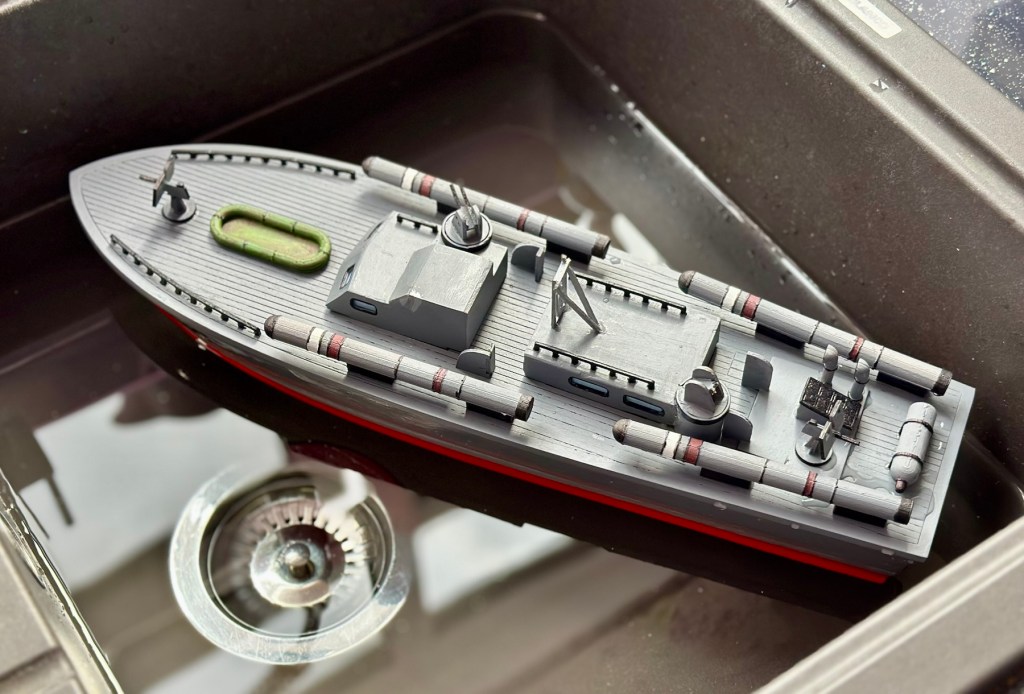
This year I have built a model boat, it is a torpedo boat, I know it floats but this will be its first true test of operation, it could go either way, it’s so damned fast that it could either just take off or dive into the depths of the lake. I hope it doesn’t though. You can read about the build of this boat in the two posts I created about its construction: PT109 wooden torpedo boat kit – construction and the last part: PT109 wooden torpedo boat kit – finishing. I hope to post a video of the actual “Sea trial” pending its maiden voyage or ritual sinking.
The boat
Anyway that’s tomorrow and to be totally honest I’m really looking forward to it.
Yesterday was a busy one, I rose fairly early considering I was working nights as there was a special event taking place. One of the younger members of the family, Jude who is only 14 was going to have his first flying lesson, purchased for him by his parents as a Christmas gift from last year. Luckily we have an airport close by that used to be a base for American forces back in the day, that was visited by Dwight D Eisenhower, and was also the home to a squadron of old Stirling bombers. Today it is a local aerodrome, but keeps the title of Leicester airport.
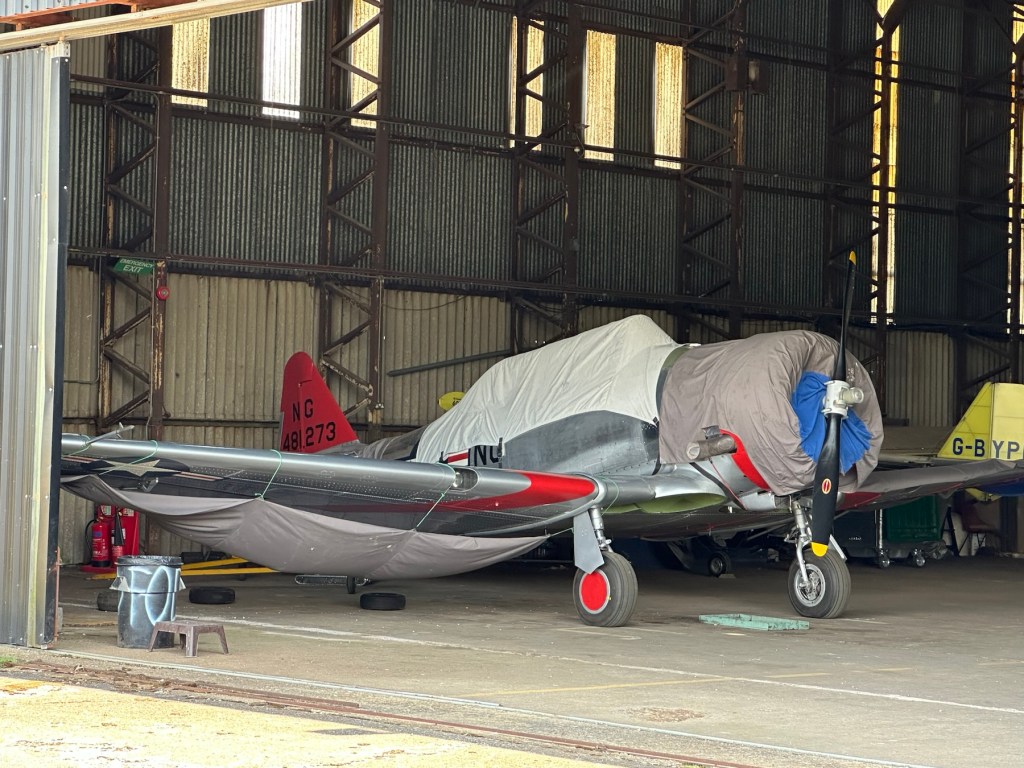
I love having a wander around old airports and in one hangar I found a beautiful old plane tucked away under tarpaulins, a MkIV Harvard built in 1952 for the Canadian Airforce but currently wearing the colours of the California ANG. Registered as G-CJWE (NG481273) known as “Dazzling Debs”.
Pic courtesy of Steve CoeSitting in a corner of the hangar
Jude was going to be heading off from Leicester up over Oakham and the Burleigh estate and Rutland water on a flight that was to be approximately 45 minutes in duration. His parents had paid for two passengers to accompany him, and I was asked if I’d like to be one of those passengers. I politely declined, as much as I love aircraft I’m not a good passenger and don’t really want to fly if there is not really the need to. This refusal worked out quite well as it now allowed both of his grandfathers to be those two accompanying passengers. How lovely is that, I never even got to meet either of my grandfathers, now Jude, has both of his grandfathers sitting proudly behind him.
A walk around with both Grandfathers “J” just about to get airborne
First flight ✈️
Needless to say, he created some lasting memories this day and was full of smiles on his return, in fact they all were. And to top it all it was a gorgeous day, with some cracking food and fun company.
Blog wise I’ve got the backlog down to ten posts in draft now, and by the end of next week that should be reduced by another couple as two older posts come to fruition. It’s been a busy week, no more estate agent tours as yet, we’ve requested a strict viewing criteria with them now, to deter the time wasters who most definitely have spare time in bucket loads.
Have a great weekend everyone, stay safe and try to stay happy.
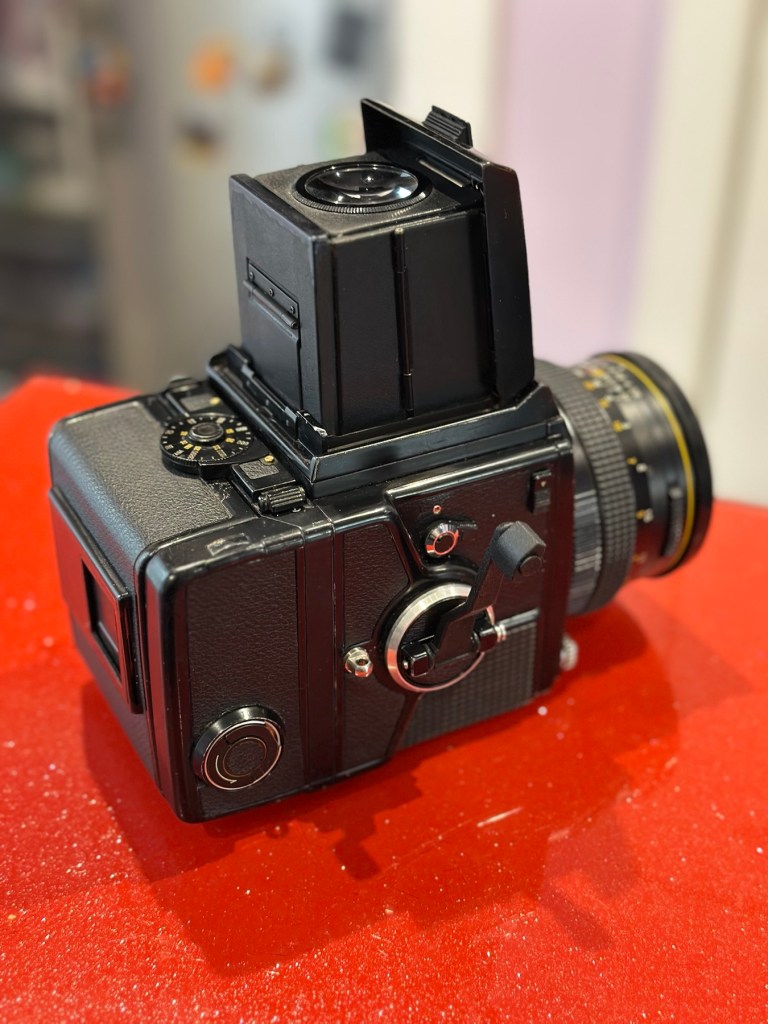
To build a usable, basic issue, medium format camera (Bronica SQ-A) from damaged items and spare parts, for as little outlay as possible and shoot one black and white, and one colour roll of film as proof of its successful completion.
Getting started:
Building a camera from damaged parts is no easy task when the name happens to be a high end brand and any parts that are available, are being snapped up by others to service their own stock or to break up for sellable parts. I’m going to keep a running total to try and build this as cheaply as possible, and to keep track of this total I’m going to use my trusty Psion Organiser II LZ from 1989 to keep a tally.
How the project currently looks.
Fourth purchases:
Now we have the bulk of the camera, we just need those annoying little bits to finish off. I’m calling them annoying, because if I was just to pay out for the 5 or 6 little finishing touches I need they would cost more than the total amount I have paid so far for the camera itself. I would be paying a premium for items that will in the end have no effect on the result I require to complete this project, that being two properly exposed rolls of film.
So here we go.
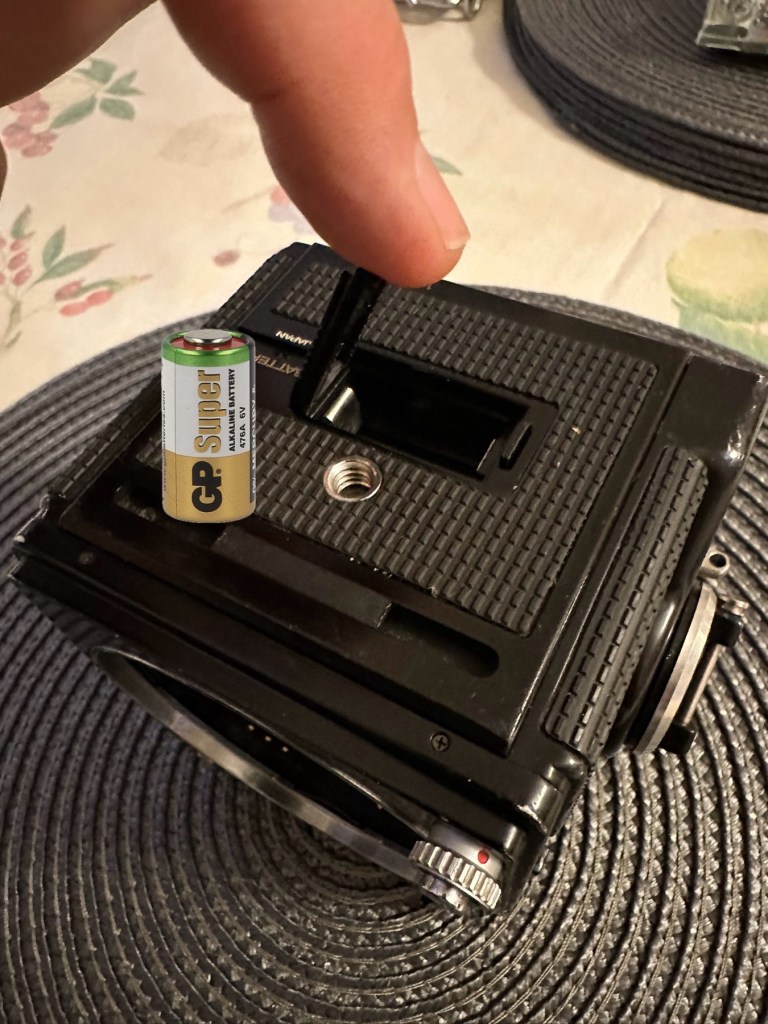
Battery:
Probably the cheapest item you will buy for this camera. The camera requires a single 6v alkaline battery and is quite important. Without it the mechanical shutter still works but at only 1/500 second. To obtain all the other available shutter speeds you need the battery to work the system electronically. This has cost me only £3:50GBP. After testing I can confirm that the battery works fine and all shutter speeds are as expected. Perfect.
Winding handle/Crank:
For some reason sellers always remove the crank prior to selling. That’s because the original Bronica crank is currently being sold at between £70-£80GBP and it really isn’t worth it. Everyone is after a quick buck and some people are willing to pay it. I’m not however, and my handle here is a special strength 3D printed version that I have paid the grand total of £11:20GBP for. It will need a couple of small “O” rings just to pad the handle on the spindle as it’s a tiny bit narrower than the original over priced one. It’s more than capable for the job in hand though, looks absolutely fine and has saved me around £65:00GBP of money.
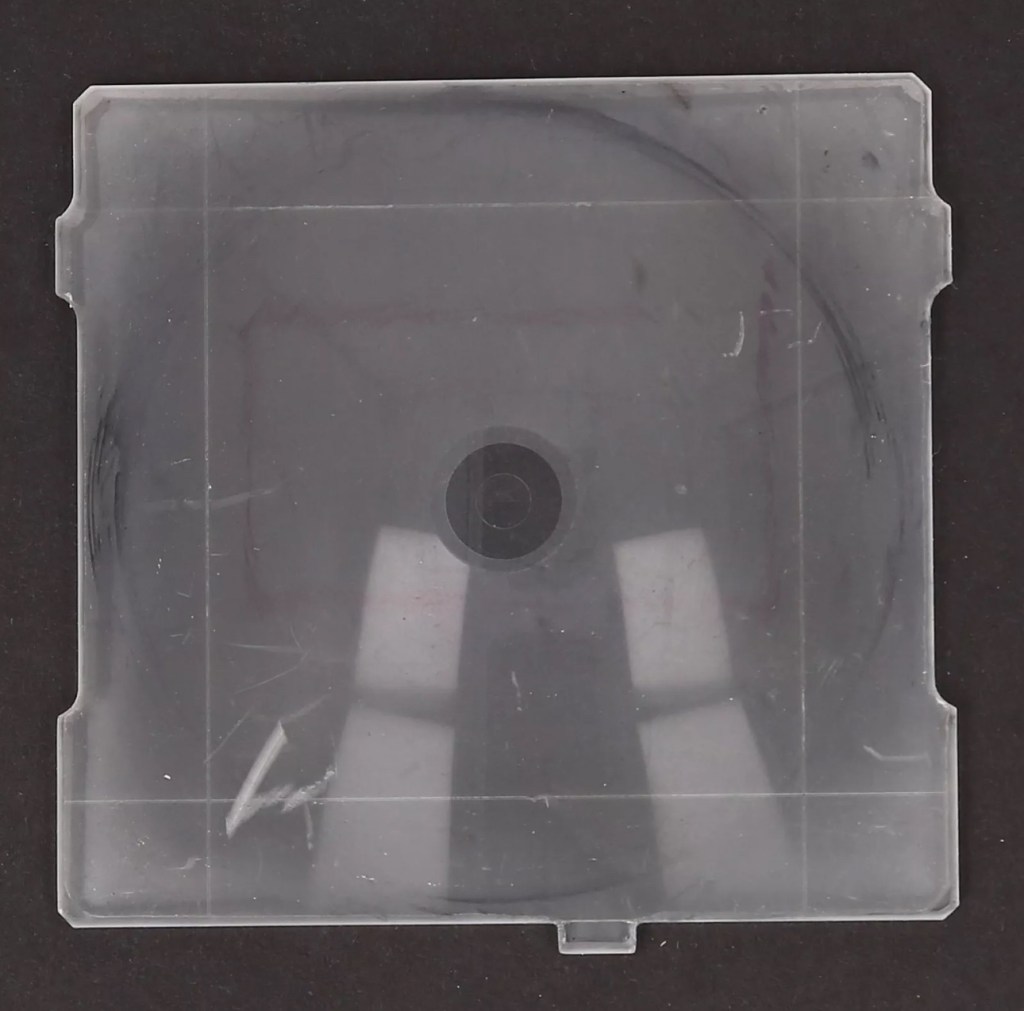
The focussing glass:
This is another item that the sellers withold for individual sale. I wonder why? Yes a standard focussing glass is going to set you back anything up to £150:00GBP and again it’s not worth it. However my one is a “damaged” one in that it has handling and pen marks on it. It looks as if some has sadistically drawn their own frame on the glass, the fool! I’m hoping this will clean up a bit but as long as I can see the focussed image I’m not all that fussed. I only paid £11:75GBP for this so yet again a further saving of around £140:00. See, savings can be made, if you are happy to make the trade for a lower quality item.
Camera aperture covers:
Not really essential at this point, but to be honest you need to protect the fragile equipment you now have so it is really worth investing. I’m not purchasing these just yet, that’s a later purchase, I have a lens cover and hood cover now, so that is all I really need to start the real testing.
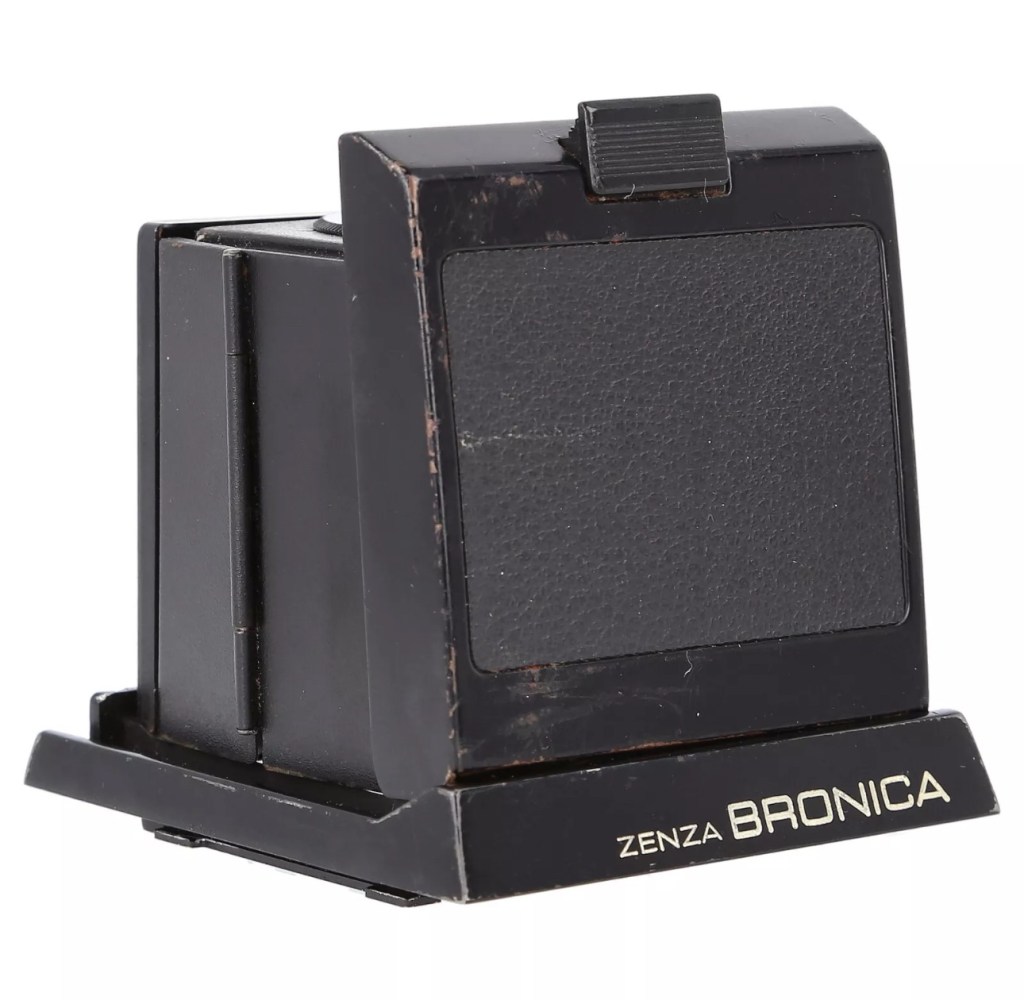
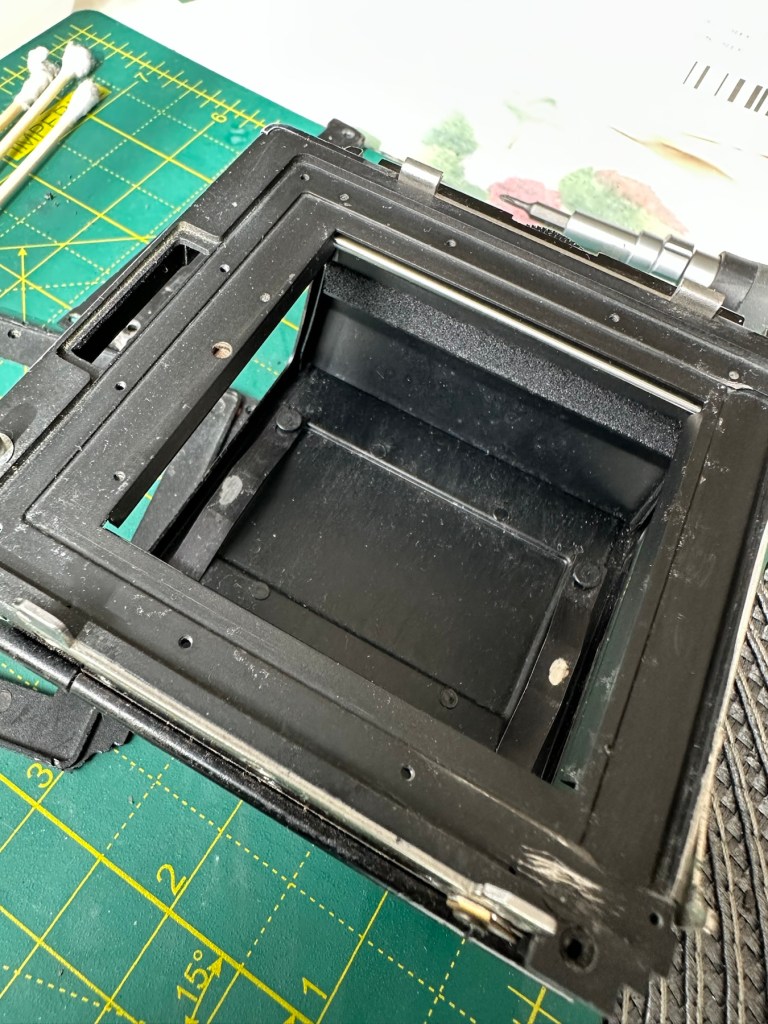
Waist level viewfinder:
Now this is a real bone of contention for me. Individually it is probably the most overpriced single item you could buy. It’s basically just a flip up hood that acts as a cover for the focussing glass, that affords a bit of light protection, as has been common on old twin lens cameras over the last century. But because the sellers again sell these as “additional items” they control the price and at an average of £150:00GBP (Recent eBay sales data) again the consumer is being ripped off. I’m currently monitoring some damaged ones for repair on the sale sites.
And as of the 4th May 2025 I am now the proud owner of one of these items. I’ve paid a total including postage of £39:75GBP and that’s a very fair price. I’ve been searching the sale sites for quite a time before coming across this one. There is one caveat though, it has some slight damage, but that’s what this site is all about and it ties in nicely with the Frankenstein aspect of this post.
Assessment:
I’m going to be very brief with the assessment, as you will see this project is made from a selection of parts that at time of purchase all had their own faults. Each part that has required repair has been highlighted in the relevant posts associated with this series. Links to those posts can be found in the link supplied in the first paragraph of this post. There are five parts in total. I’m generally pleased that the parts I have obtained have combined to make a very nice “Frankenstein” camera from a brand of camera that is becoming increasingly expensive as an “Antiquity”. Not that it was ever a cheap option for a camera in the first instance. Let’s move on to cover some repairs that have occurred for some of the pieces covered in this particular post.
Repairs:
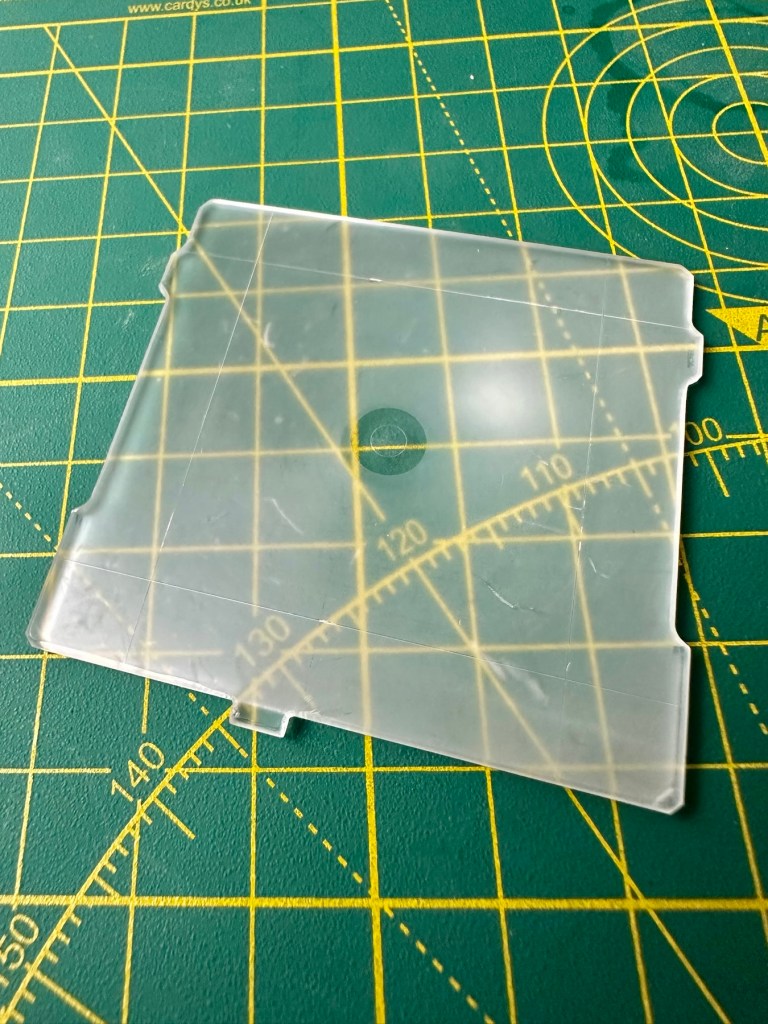
The focussing glass as you will see above was in quite a poor state on its arrival. This one had some scars and it looks as if someone has used pen to draw their own frame in the glass, to be quite fair it was in quite a state, but it was purchased for a really low price and i believe it can be made to look a lot better. Listen to anyone who is,”in the know” and you will always be told to not handle these screens. A load of tosh, I’ve been handling these ground plane glass screens for years and sometimes you just need to get hands on and this is one of those cases. Yes, if it’s in a pristine condition then cotton gloves would be the order of the day, but this example bypassed pristine conditions many years ago.
Before: How the glass was received with scratches and ingrained ink
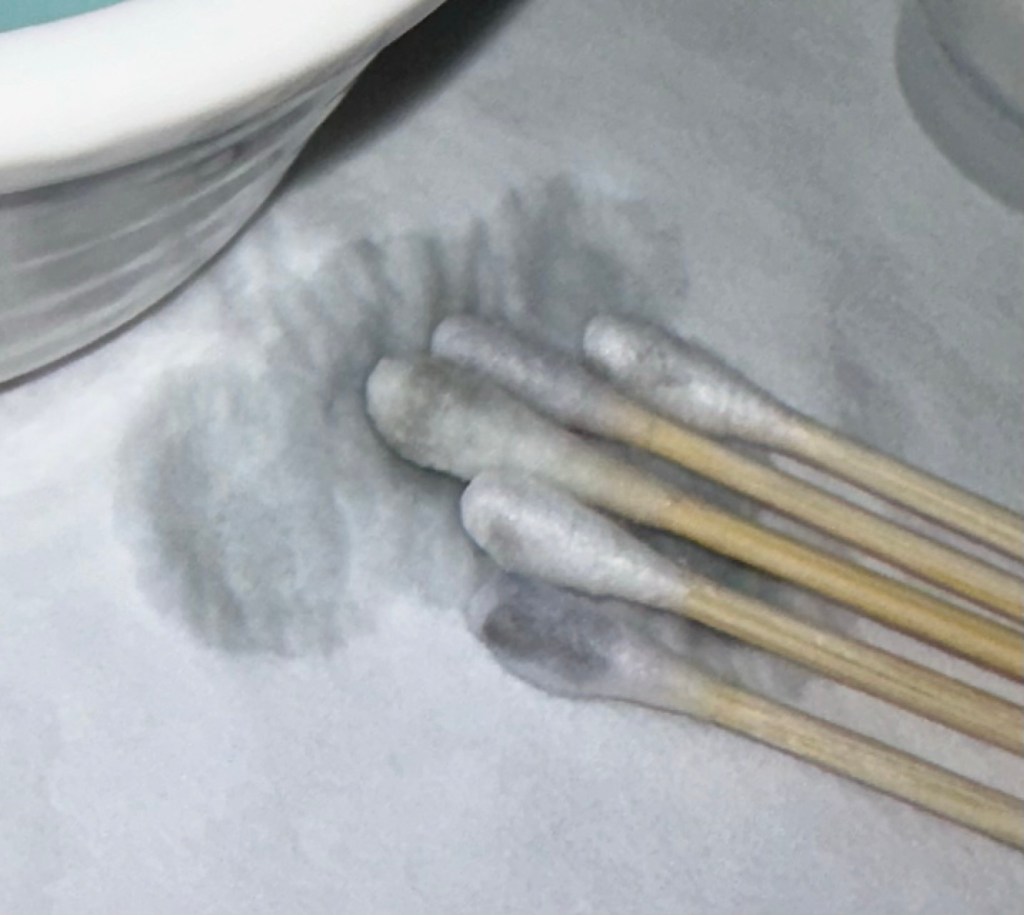
I started off with a good clean using IPA and cotton buds, I used about six cotton buds in this process using a new one every time the cotton was overrun with dirt.
Dirt from the IPA clean
Once the IPA clean had been done I then soaked the glass in a detergent solution and then again used cotton buds to get the solution into the scratched areas of the glass.
Detergent bath
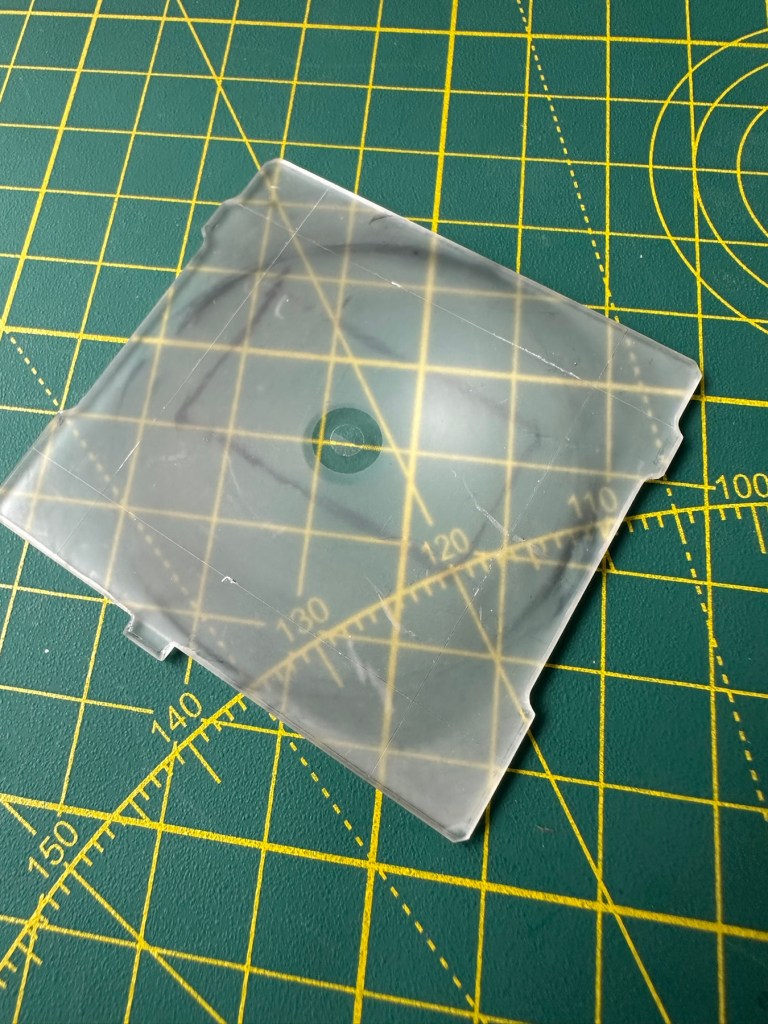
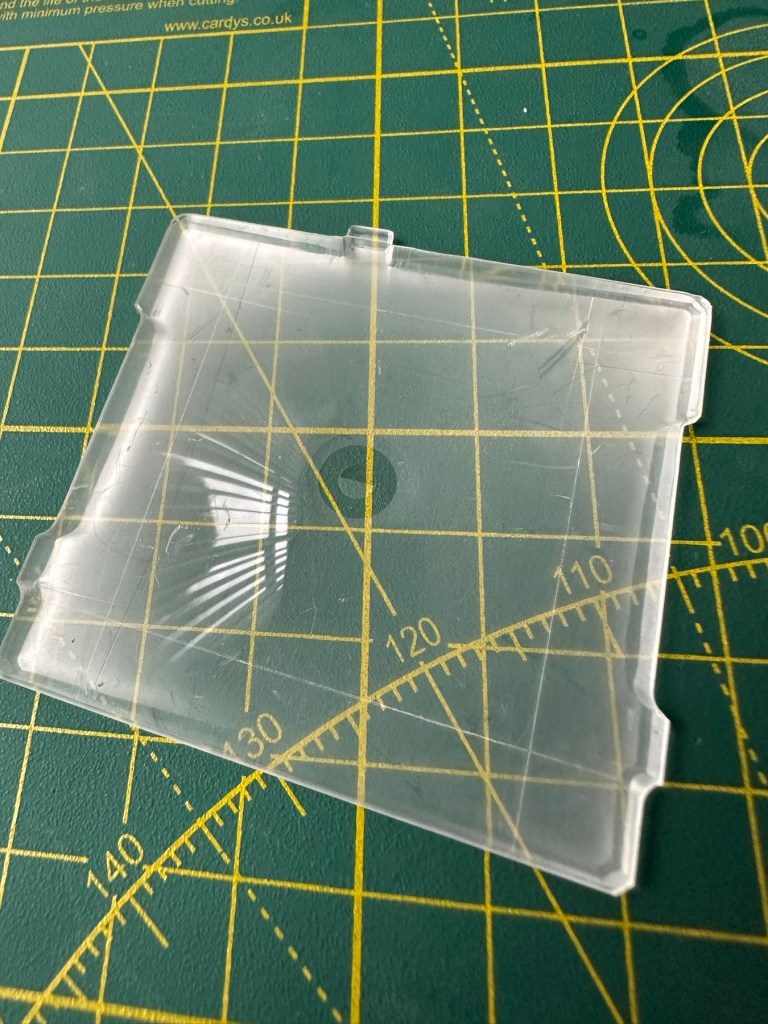
I’ve finished the clean with a rinse of hot water to remove all the solutions, and left the glass to dry on some paper roll. A light polish with a lint free cloth finishes the job.
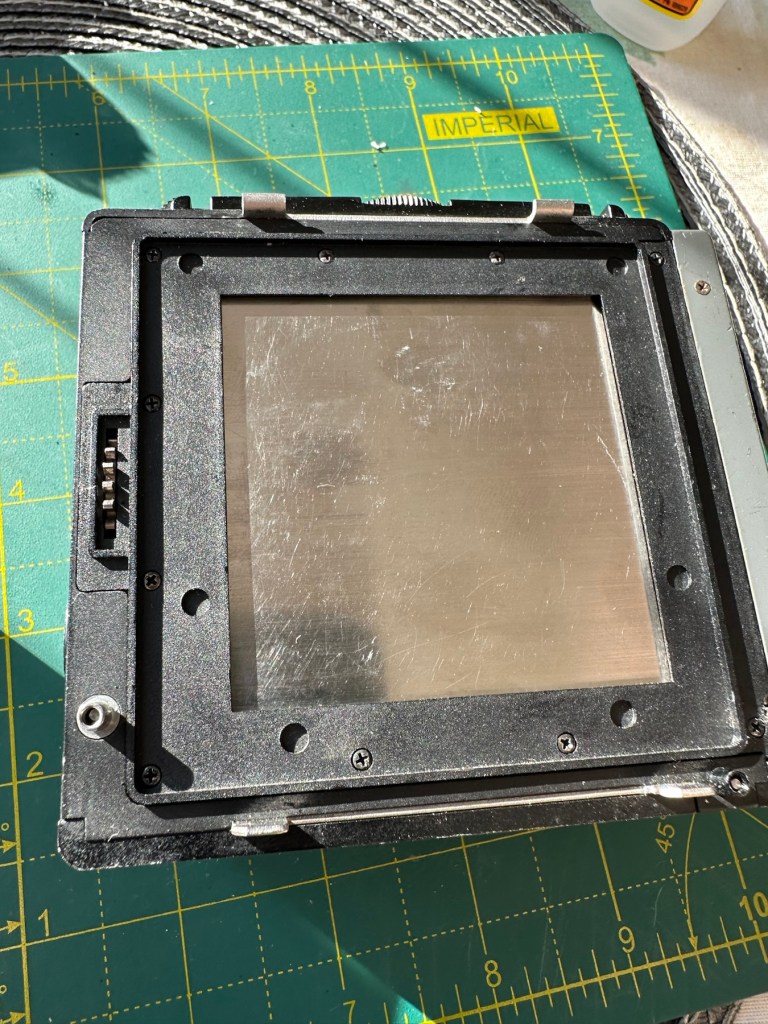
After: all ink and dirt removed, only deep scratch remains but does not cause any issue with use
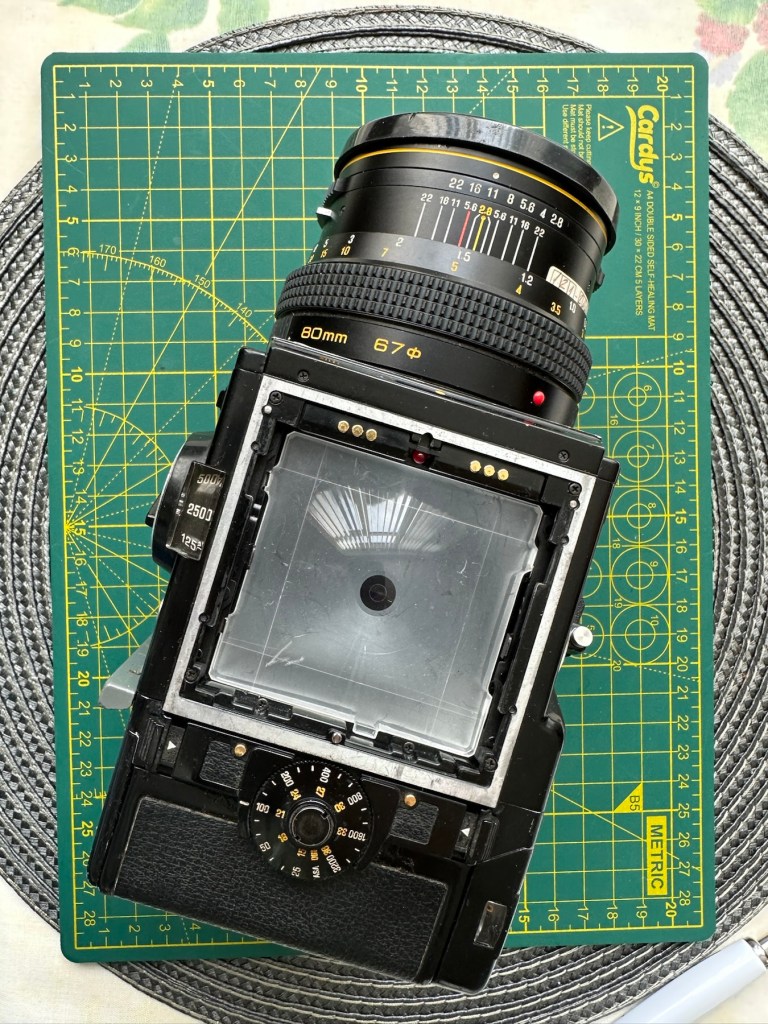
And this is how it all looks in the camera.
All looking fine in position in the camera
I’m extremely happy with the outcome with the glass, it does its job and works really well. With no distractions on the screen apart from a couple of scratches this item has been transformed. Just a little TLC and patience was all that was required.
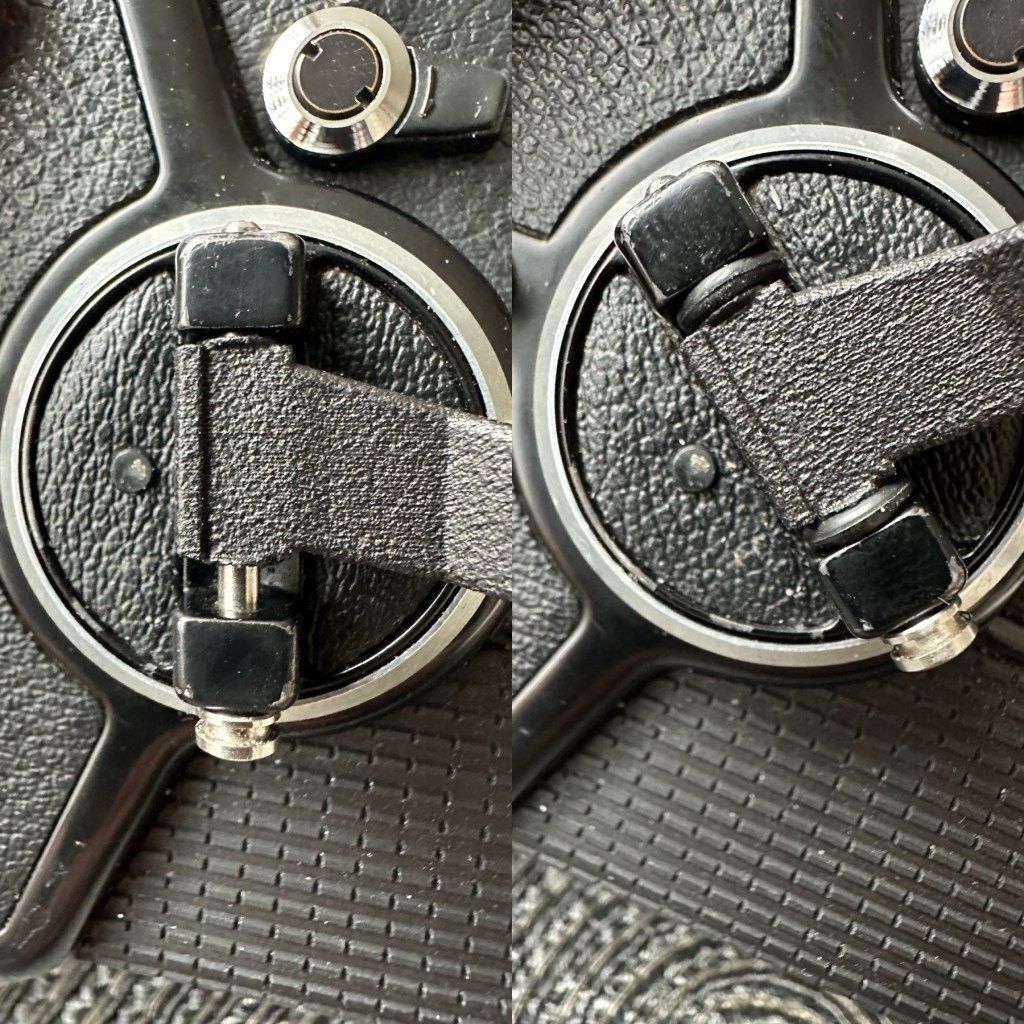
The Winding handle crank doesn’t really have any issues, it just needs some aesthetic teasing. This crank was 3D printed for the ETRS version of the camera and as such the actual base of the crank shaft is slightly slimmer than that of the SQ model here. It works fine. I’m just being a bit of an OCD freak and want it to look better.
Before and after. “O” rings in place in the winder
Not a problem though as I only have to pack out about 4mm of space and I have just the thing to use. Two perfectly fitting minuscule “O”rings. Job done, let’s move on.
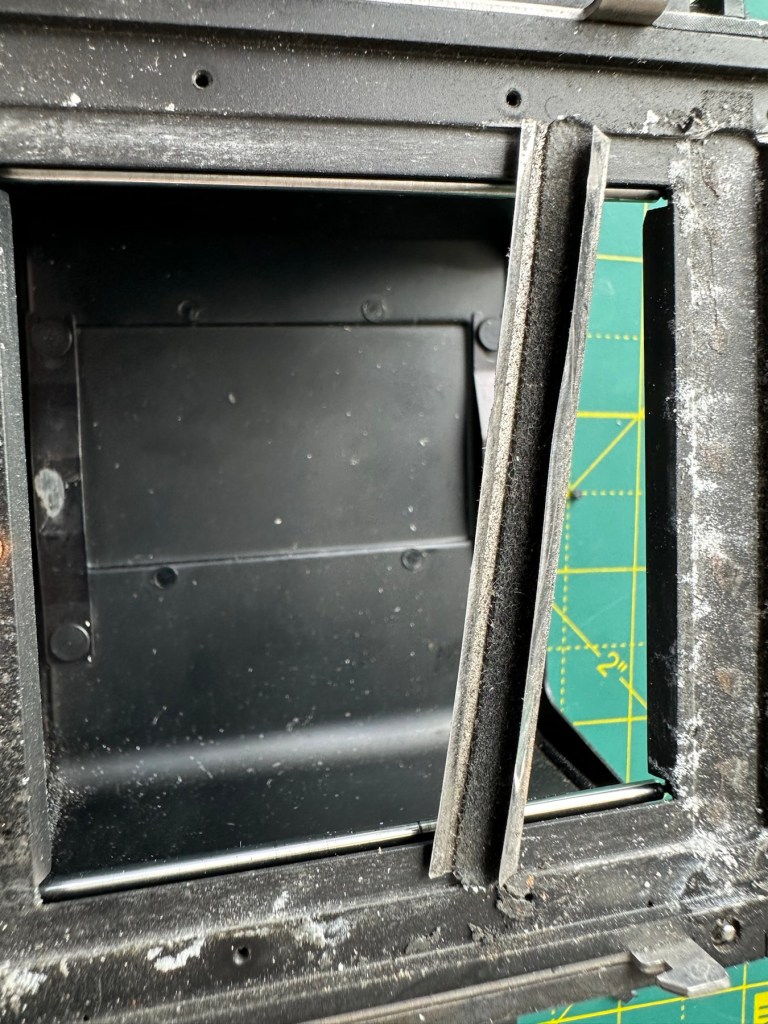
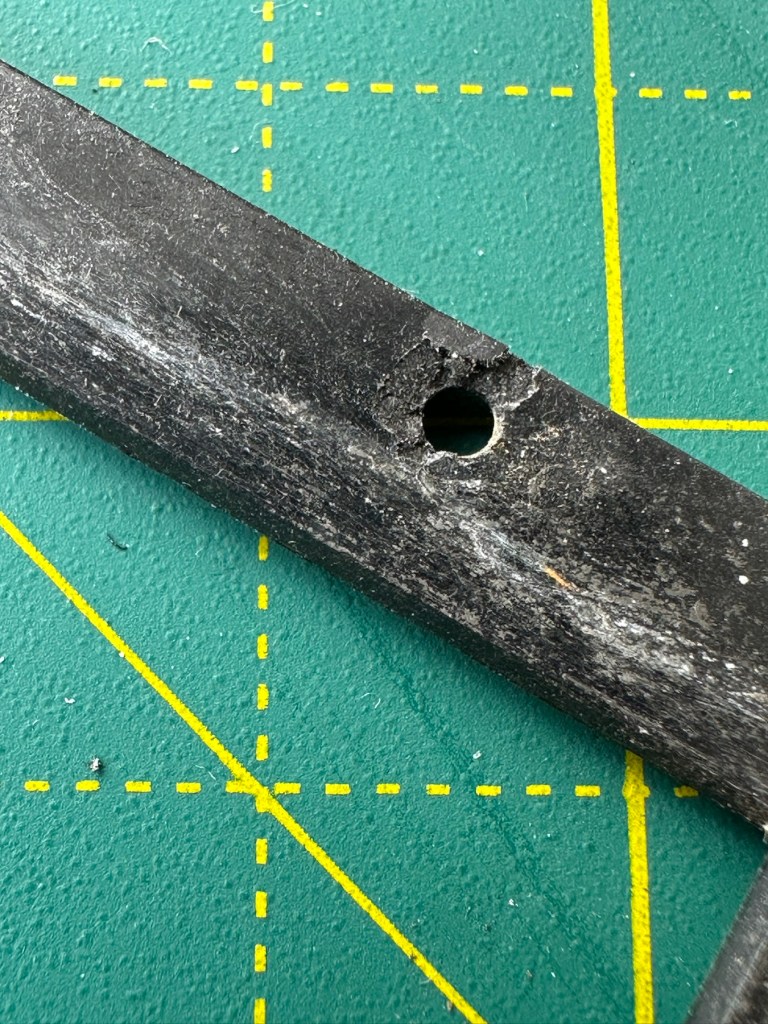
The Waist level viewfinder has one particular issue in that the folding action is slightly affected by an issue with the spring. Again it is fully usable and does not cause any issues operating wise, it is purely an aesthetic issue that I will get around to sorting once the camera has been tested.
Age related wear and tearThe spring “issue”My waist level finder just showing signs of age
This is one of those parts that has signs of age with small signs of wear and tear, however that adds to it’s character and shows it was once a very much loved item that saw some good usage.
I think, we are now ready to get the entire unit assembled and ready for the testing phase of this build.
Total Outlay:
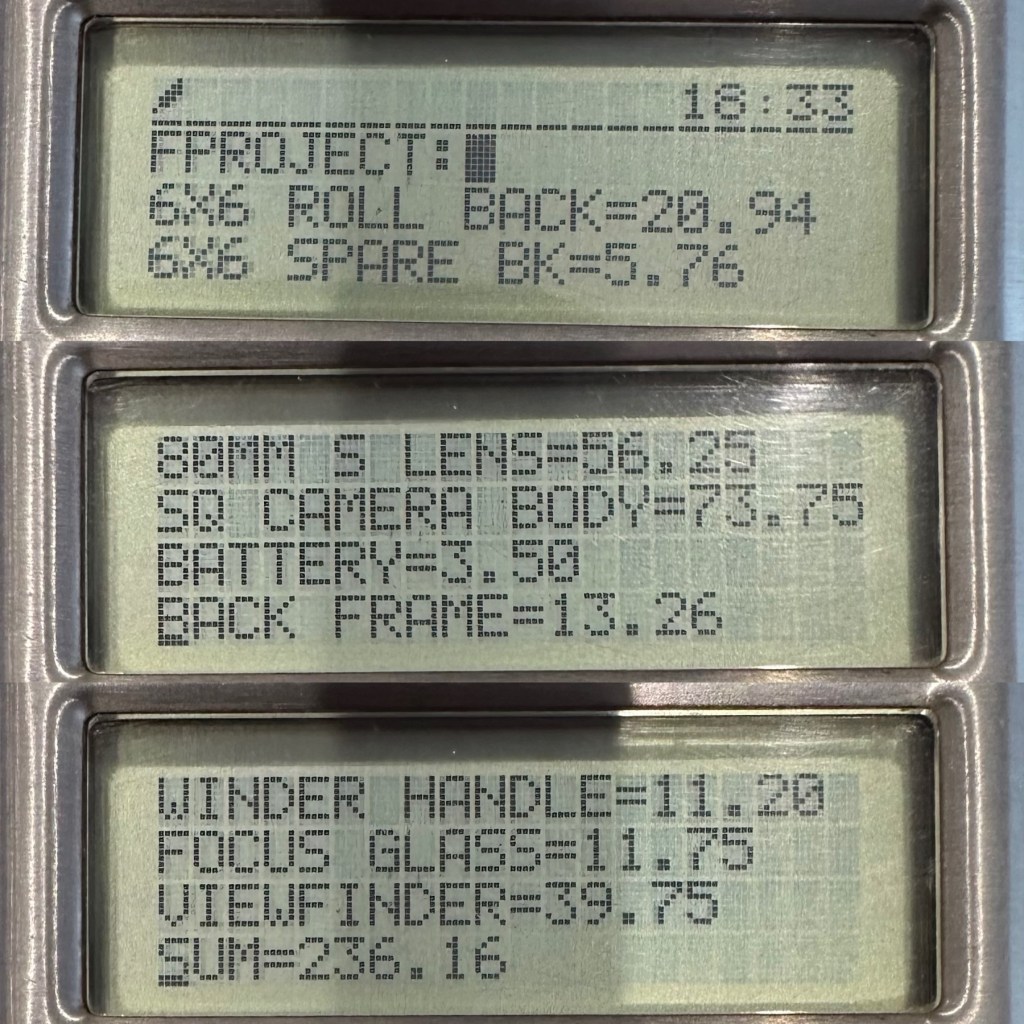
So just how much has this little project actually cost? Over to my trusty Psion Organiser 2 LZ for a final update.
Running total of £236.16 GBP
So the total cost of this project is £236.16GBP and I’m very pleased with that considering that sales for fully working similar cameras command prices similar to those seen in the picture below.
Recent sale prices
So taking this evidence into consideration, the route I have taken of building from damaged stock has saved me between £100-£350GBP. And as it is now a fully operational camera, I could probably command a price that would make a quite nice profit. But I’m not selling. This stays in my collection.
Outcome:
I want to take some pictures with both colour and Black and white film, to prove this camera is capable of this function considering it was constructed with broken or discarded parts.
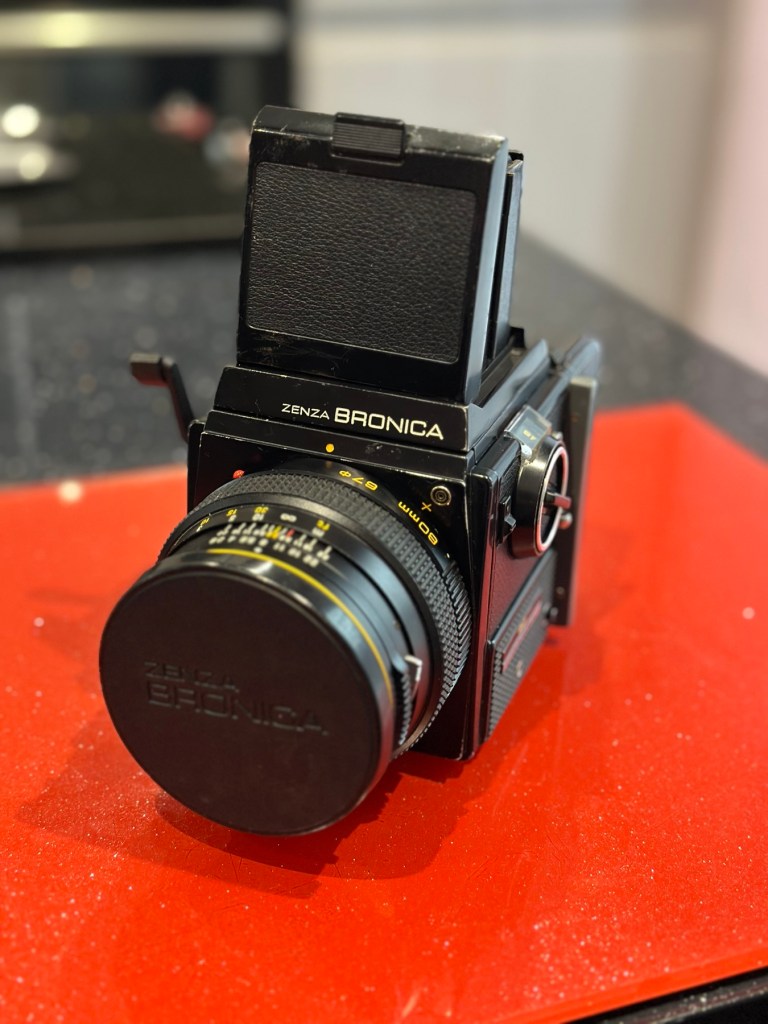
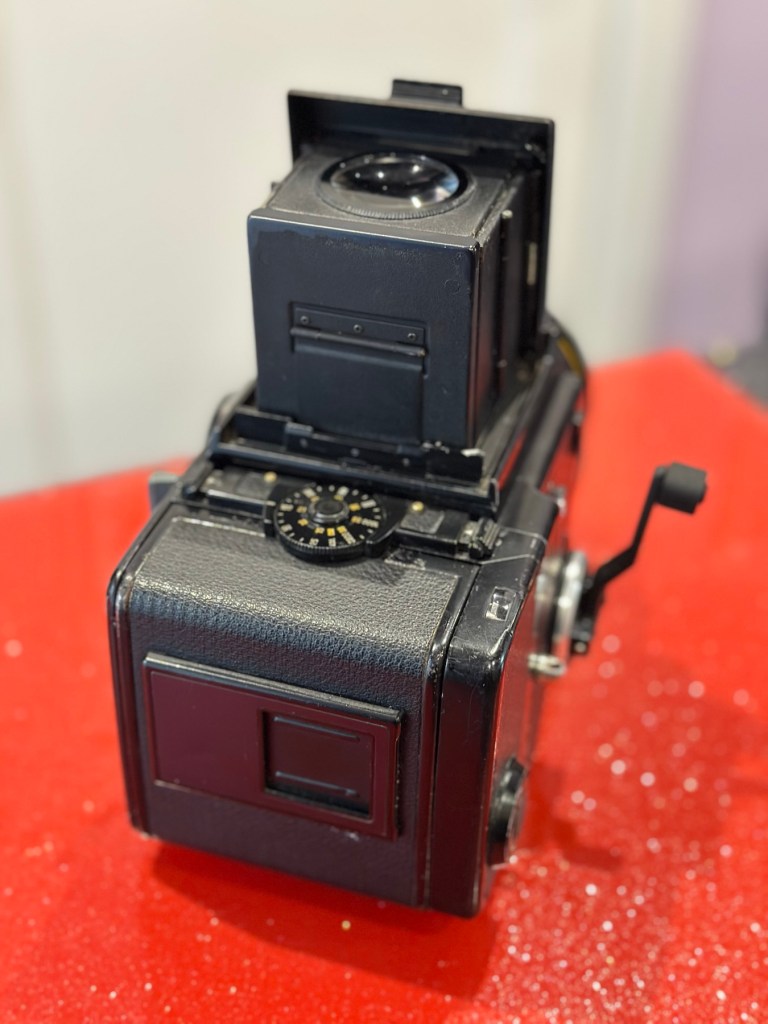
Now complete, I have restored a beautiful piece of camera history
I will post some sample photos of the tests, and will also produce a couple of galleries to link to within this site. First I will try my luck with the Black and white film, as I have one here currently, though out of date it should suffice as it has been kept refrigerated during my ownership. I also have the chemicals and ability to develop film at home, so this should not be an altogether time consuming process.
This has been a satisfying build making a working piece of camera history entirely with damaged and alternative parts logged throughout all of these posts.
Look out for part 5 of this project that will cover the final testing and the results gained from these tests. Hopefully we will have some good photos and will then be able to wrap this project up.
Oh yes many a time, always with my friends back in the day. Whenever there was a bank holiday we would all pack ourselves up and head off to a little place called Farleigh Hungerford not far away from Bath in Somerset.
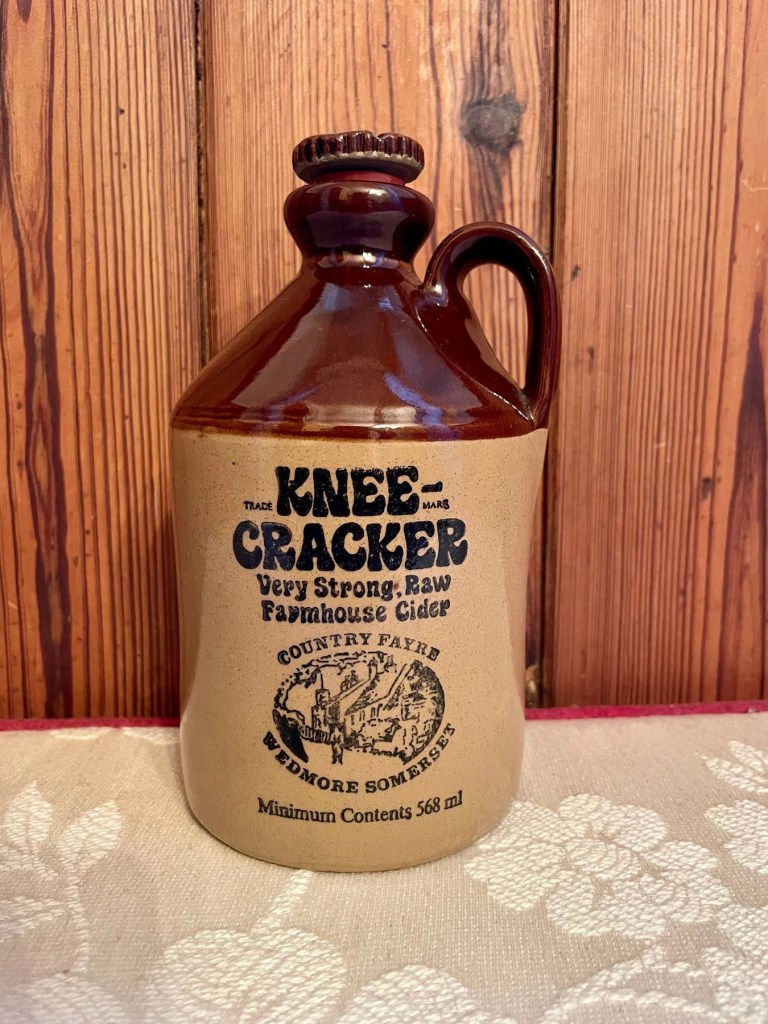
Perfectly placed for visiting places such as Glastonbury Tor, Wookey Hole and Cheddar gorge we used to always have an enjoyable few days away, and were always suitably chaperoned by one set of parents (Well to be honest they always tagged along because they enjoyed our company and we enjoyed theirs). There was a local delicacy that could only be found in the Cheddar gorge area and that was Knee Cracker cider.
Knee Cracker
Unfortunately no one will ever be able to experience the joys of Knee Cracker again as I believe the company that produced it ceased to trade a few years back. They used to say that when purchased it had to be left to settle for a few days to be fully enjoyed. Nah, we were impatient teenagers and we would drink it walking across the fields heading back to the campsite after a day out, hence we would be taking in all the sediment and nastiness and by god it was potent. They also used to say, “Drink too much of this cider and you will fall to your knees, praying to the gods for forgiveness”. They weren’t wrong, the hangover this and many other “Scrumpy ciders” from the region used to leave you with were well documented. I remember being so drunk one night I actually fell over a cow sleeping in the field, the resulting noise from said bovine suddenly awaking and alerting the rest of the herd, sobered me up fairly quickly and I went through that field like Usain Bolt on acid.
I’ve tried to convince the wife all through our married life to go camping, and she’s having none of it. She always says it’s fine for me to camp but she would be in a local hotel. So I know where I stand there.
I still have camping equipment, in fact I renewed it all only a couple of years ago, and intend to do some wild camping when I get the chance. I really love camping, being out in nature, absolute peace and quiet and tranquility is unbeatable, the campsite full of families though is not for me.
Give it a try, it’s one of those things you’ll either love or hate. For me it’s definitely love.
My wife is a fantastic organiser. The family owes an awful lot to her as she always arranges meals and get togethers keeping us all in touch. Without her doing this I very much believe we’d all lose contact quite rapidly. She keeps the family together. And she is brilliant at what she does.
Today is one of those days, Easter Saturday, she has hired the Skittle alley at our local pub and we are all meeting there for a meal prior to throwing our “Cheeses” at the skittles. No perfectly round balls here, these are good old solid wood, full of splinters and shaped more like tin cans to be honest. And they can go off in any direction, there is no way to control them. Just don’t get in their way!
We play it differently up here in the East Midlands as can be seen here:
In the East Midlands, people play Long Alley in which the projectiles are rough balls or small capsule shaped logs called “cheeses” and a score is only made if the cheeses bounce a single time just in front of the pins.
Wikipedia
It can be quite brutal. But that’s how we roll in the East Midlands 😂
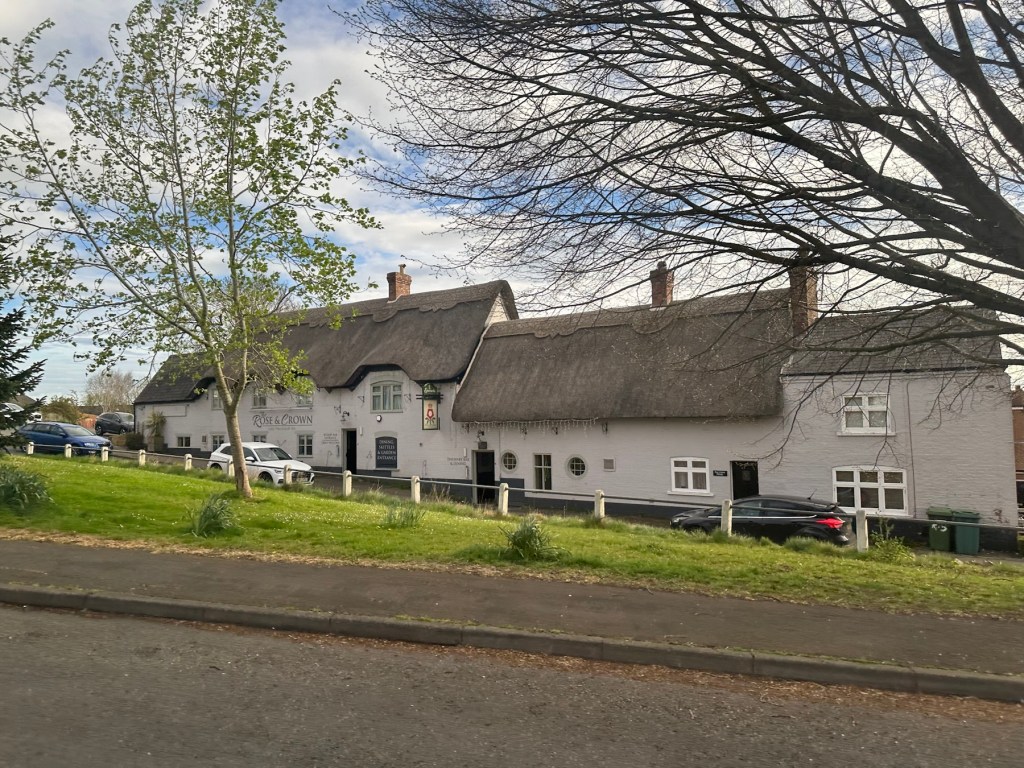
Our local
It’s a beautiful old pub, and we kind of adopted it when we moved up here. A right old traditional pub. I think there is about 22 of us up there tonight from all different areas, so it should be a nice evening.
Tomorrow is a different story when we will all be off to watch our home football team get slaughtered at home to our visitors- Liverpool.
But let’s not get too depressed about that, here’s how today has gone instead.
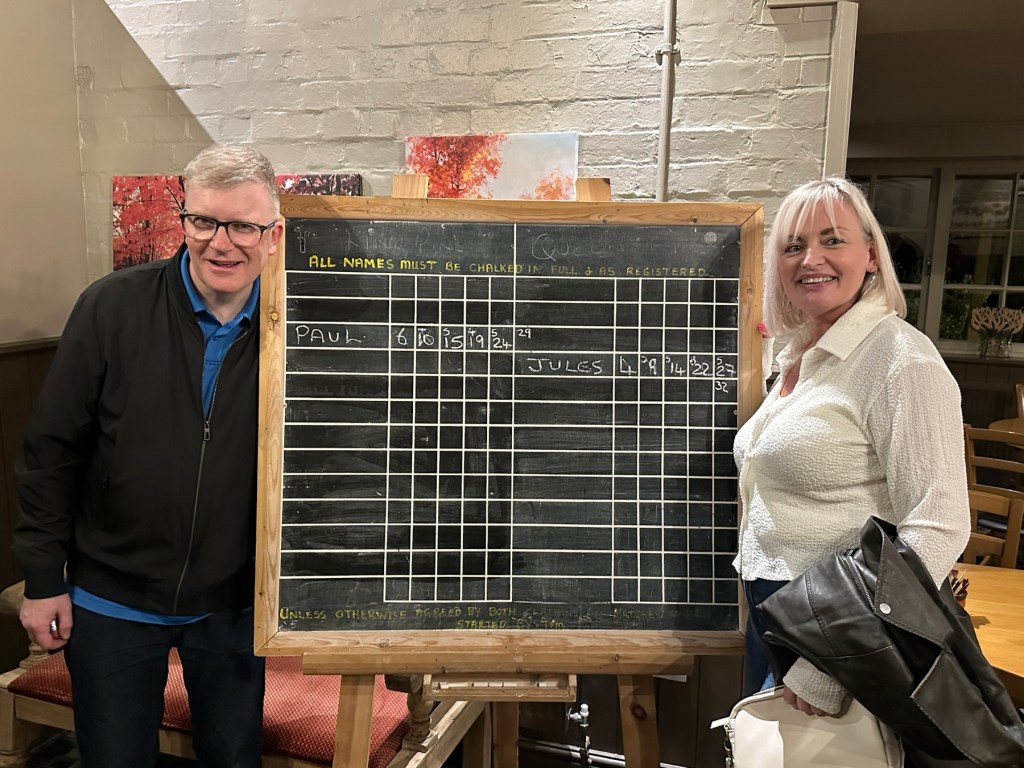
Paul wins the skittles
Winner and his prize.
4 rounds of 3 cheeses each and we had sorted out the final four of the contest, cousin Paul wins outright and wins the first prize a Cadbury crème egg. Highest score of the evening went to niece Julie who managed to down eight skittles in one round.
Overall winner Paul, and high scorer Julie.
The remainder of the evening was just people talking and catching up. It was a lovely day and My wife has already sorted out the Christmas party dinner. She’s so damned organised.
The day started at our house earlier when everyone went down our garden pub to play darts, have a drink and kick the day off in a really fun and friendly fashion. It’s ended around 12 hours later when the tiredness sets in and people start to make their excuses and gradually filter off into the night.
In the bar, after.
Tomorrow we go again when we meet at my nieces home for her house warming party. It’ll be a little more subdued as some are back to work on Monday, however I’m really looking forward to meeting up with them all again.
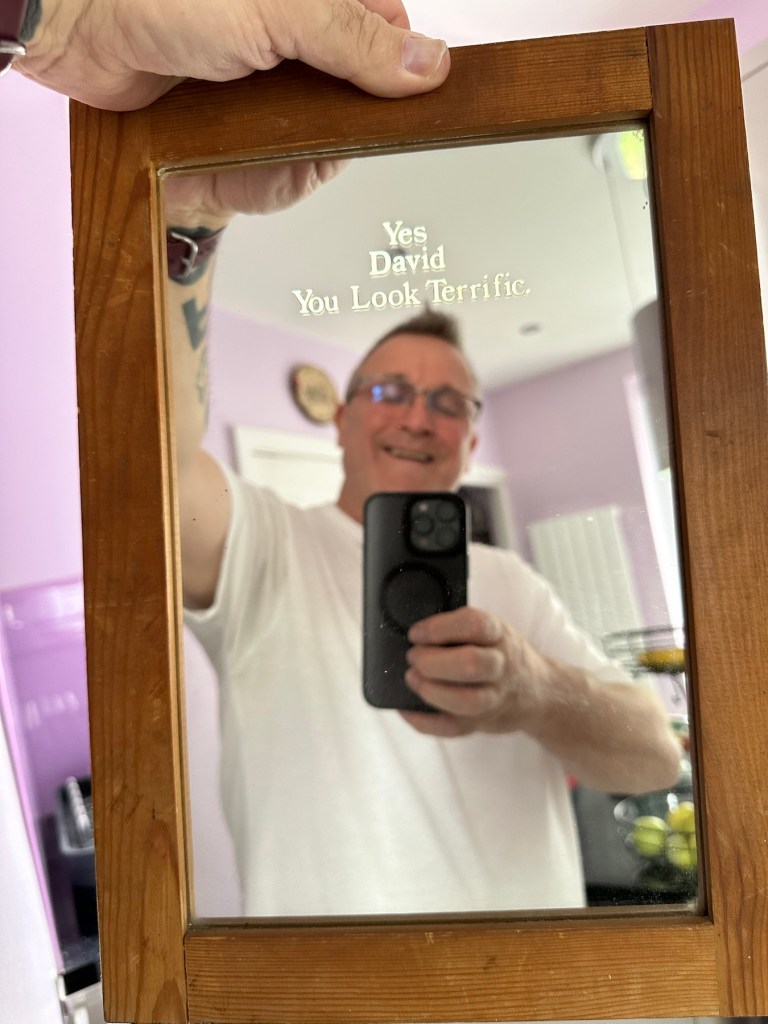
There’s a little story that has developed here. Spring cleaning the house today and a mirror appears out of a cupboard and my wife has said,” You don’t need that, that can go.”
The mirror
At this statement I jumped up and unusually for me I gave the wife a firm reply of, “No” and told her it’s not going anywhere, there is a story behind that mirror and I then poured it out to her. Just as I am about to do so now to you all.
The mirror was a purchase from a Sunday magazine sometime in the mid 80s, nothing overly expensive but it always made me smile.
I’d just left home as my father’s abusive behaviour had taken a more violent turn. I was ashamed of myself for deserting my sister and mother, but I was just so fed up of being attacked both physically and mentally that I just snapped and left home.
I was about 18, I sofa surfed for a while, occasionally I sneaked into my workplace at night and slept there, I was all over the place and then found a spare room for rent in a property close by to where I’d originally lived. I had some stability in my life at last and was learning very quickly about moving on in life and the new responsibilities I’d now taken on. I then purchased this mirror, and would smile when I looked into it, it gave me some much needed fun and laughter in my life. Something that had been in very short supply for a while.
Then one night I broke when my sister appeared at the door, to tell me my father was attacking my mother, I grabbed the nearest thing to me that just happened to be a metal pole from an old photographic enlarger and I ran like the wind to their house. I charged up the stairs to their bedroom and stood over my father telling him just how I felt, and what a B***ard he was. I was about to bring that pole down on him when I realised he was in such a drunken stupor, he didn’t even know I was there, but beside him my Mum was reaching out to me weeping and calling my name. What she told me whilst we were embracing there is highly private and will always remain so, the crux of it was that she never wanted me to leave and begged me to come home.
I was back in that house before he’d even sobered up the following day. And that mirror I’d brought was on my bedroom wall where it stayed for a good few years.
I told my wife the story, and that the cheap worthless mirror was a subtle reminder of the time I started to turn my life around. I’d overcome fear of a tyrant and become the protector of the two most important people in my life at that time, my mum and younger sister. And I stayed with them until they both stepped away from this horrific existence.
A cheap mirror it maybe. But it still makes me smile. The wife has now said it must stay and be prominent in the house.
This picture was taken today, look, I’m smiling as I’m deciding where to put it up.
To build a usable, basic issue, medium format camera (Bronica SQ/SQ-A) from damaged items and spare parts, for as little outlay as possible and shoot one black and white, and one colour roll of film as proof of its successful completion.
Getting started:
Building a camera from damaged parts is no easy task when the name happens to be a high end brand and any parts that are available, are being snapped up by others to service their own stock or to break up for sellable parts. I’m going to keep a running total to try and build this as cheaply as possible, and to keep track of this total I’m going to use my trusty Psion Organiser II LZ from 1989 to keep a tally.
First purchase:
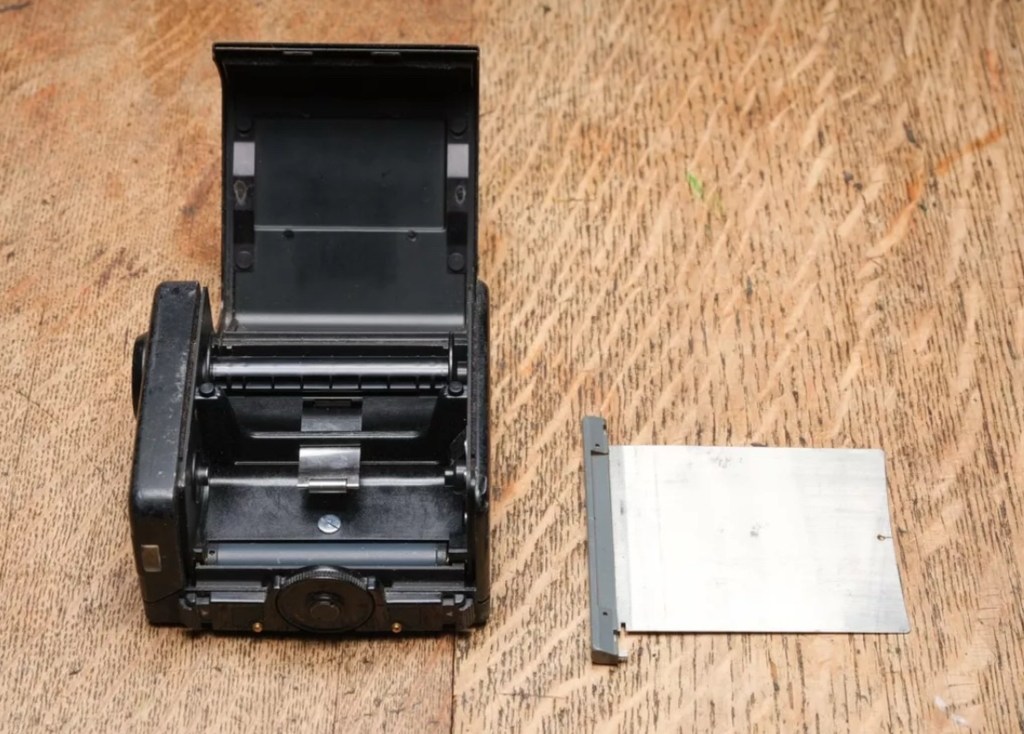
The first purchase has been made and it is for a 6×6 120 roll film back unit with dark slide. I think I’ve paid quite a good price for this item. This is the back piece that fits on the rear of the camera. Here is what the listing stated:
ZENZA BRONICA SQ 6X6 120 ROLL FILM BACK WITH DARK SLIDE Signs of wear, untested. Uk Buyers Only Please
EBay
First purchase, the film back.
And the total paid including all postage is £20:94GBP. Let’s now start the running total in the Psion II LZ.
Running total
All I can really check at the moment is cosmetic condition and this looks a little beat up, however I don’t really care how it looks externally, as long as it’s light tight, that is all that matters and I won’t even be able to check that until later on in the build. Cosmetically I will attend to it, if I feel so inclined at the end of the project, for now it’s ability to be light tight will be my major concern.
Assessment:
The unit has arrived and yes it has seen use, but not in a few years I suspect. The old smell hit me the second the package was opened, it’s kind of a reminiscent pong from the past, however I’ve got to see beyond this.
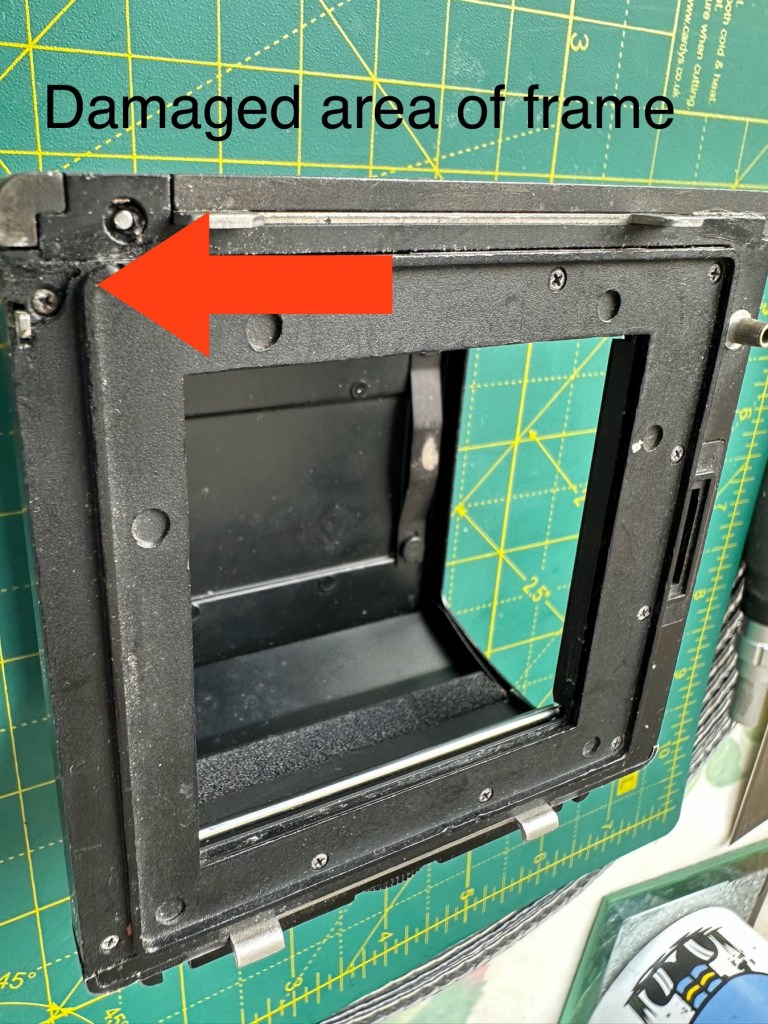
The light slide seems fine, however the surrounding frame has been bashed and a small bit of frame has gone missing. There is also a screw missing and I suspect the area that is missing the screw may well have been glued down. there are some slight rust spots on the exterior framework, however everything inside appears to be fine apart from some light seals that will probably need replacing. The rollers inside are grubby so a good overall clean is in order.
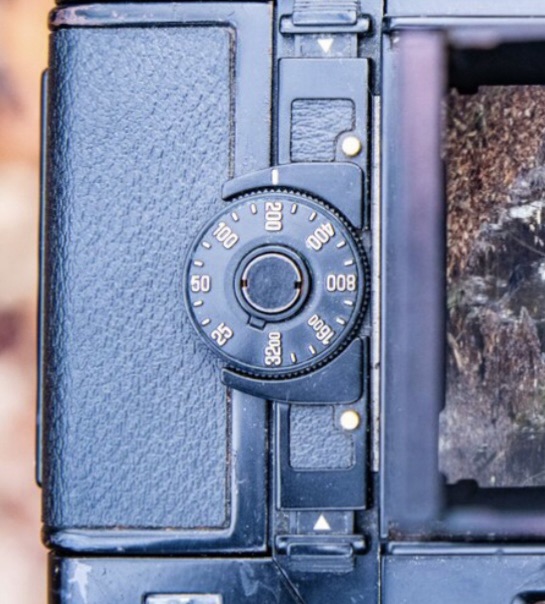
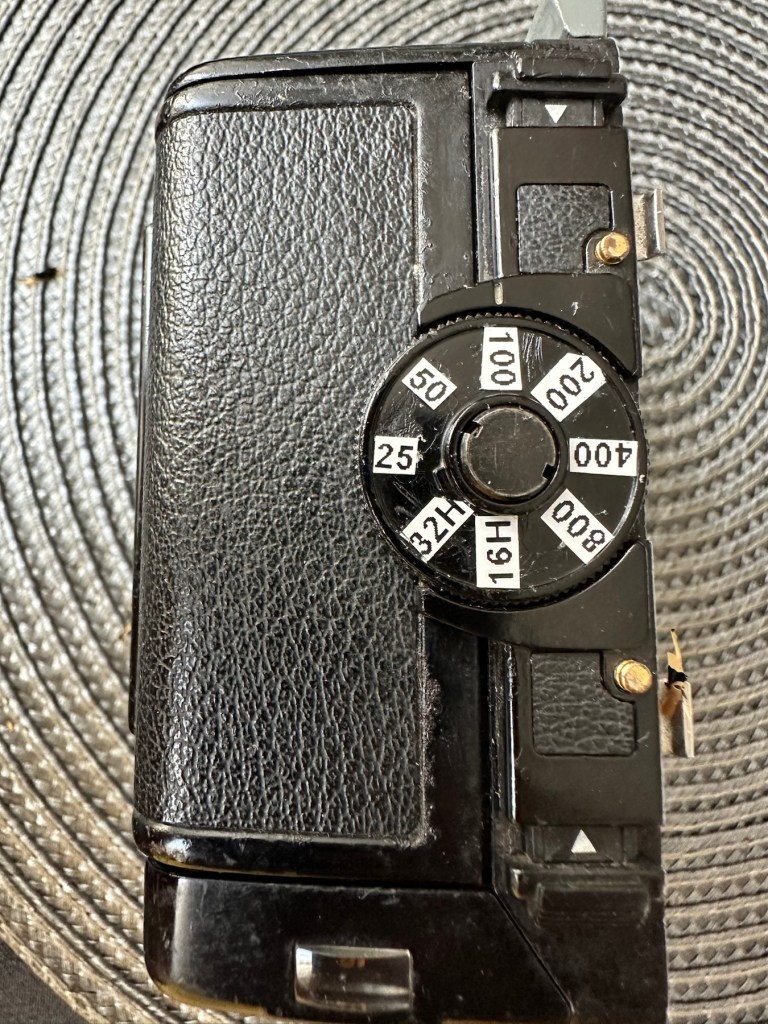
Annoyingly the ASA markings on the dial atop of the roll holder are missing. I will make something basic up to remedy this issue. Again it’s an exterior issue and I’m not too fussed at the moment.
Yes there is some work required, but there is no rush. And thankfully I don’t see anything that really scares me about it. I won’t really know how it stands mechanically until I find a suitable body to attach it to. I have that to look forward to in a future post.
Repairs:
The ASA dial. Simple solution here, until one becomes available sometime in the distant future, is to use some very small dymo labels I have printed. I will cut these down to size and put them in place where they should be on the dial. Quick and temporary solution a’la Frankenstein. No need to over manufacture things, this will do fine.
Size 9 dymo labelsHow it should lookHow mine currently looksAfter I’ve added some ASA numbers- temporarily
The old asa wheel has been cleaned to remove the original glue, and temporary stickers have now been applied. This completes this fix for the ASA dial, for now.
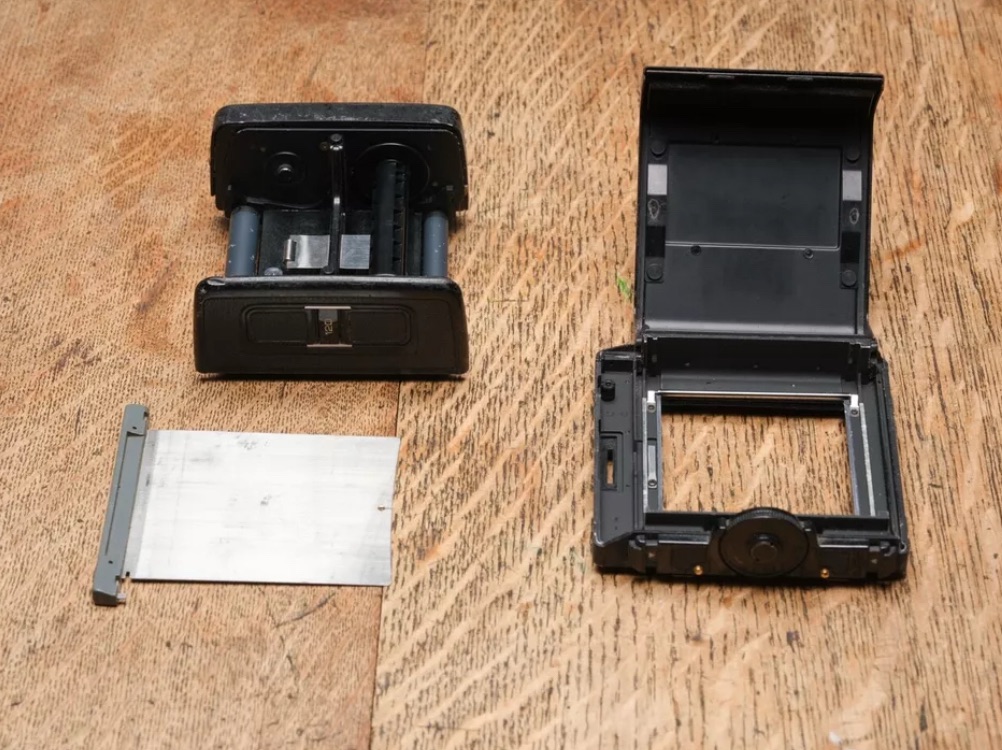
Two items to make one good unit
Edit: I’ve managed to obtain a damaged roll back for a grand total of £5:76GBP, absolute bargain and it also has a working ASA dial. So I’m hoping I’ll be able to use this donor to help in the repair of this item. I’ve used a combination of parts from this and the earlier roll back and I’m happy I have a good working unit. We now have a proper ASA dial off of the spare unit transplanted onto the old unit.
Front frame:
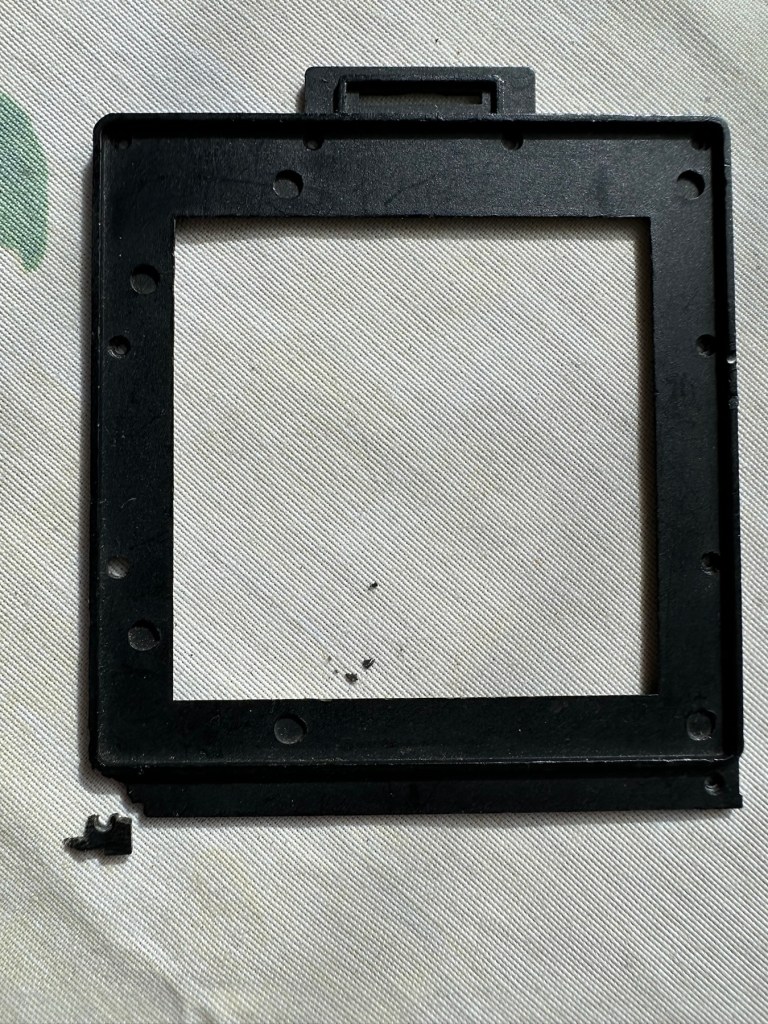
I’m taking this off to give the whole area underneath it a good clean. There are some film guides under this frame that are contaminated and that could cause a scratch on the film, I’m going to clean this whole area under the frame and will then reassemble. The cartridge slide is in a good condition and has just required a polish. Apparently this front frame is prone to breaking and the screw holes splitting, as it gets quite brittle. This has happened to this unit, and I’ve found a guy that 3D print’s replacement front frames and I have ordered one of these to ensure that the whole frame is secure and light tight, as currently one corner can be lifted and this could cause a fogging issue. At a cost include postage of £12:75GBP it’s a small price to pay seeing the only way to get one nowadays is by purchasing a donor unit at cost far exceeding what I have paid here.
The new frame, will be blackThe old frame with broken corner and damaged screw holesDamaged area of frame in situ on the roll back
There are a couple of screws missing of which I have plenty of spares so these will be simply replaced. I’m happy now that this portion of the camera is in a good condition and will soon be ready to be put to use.
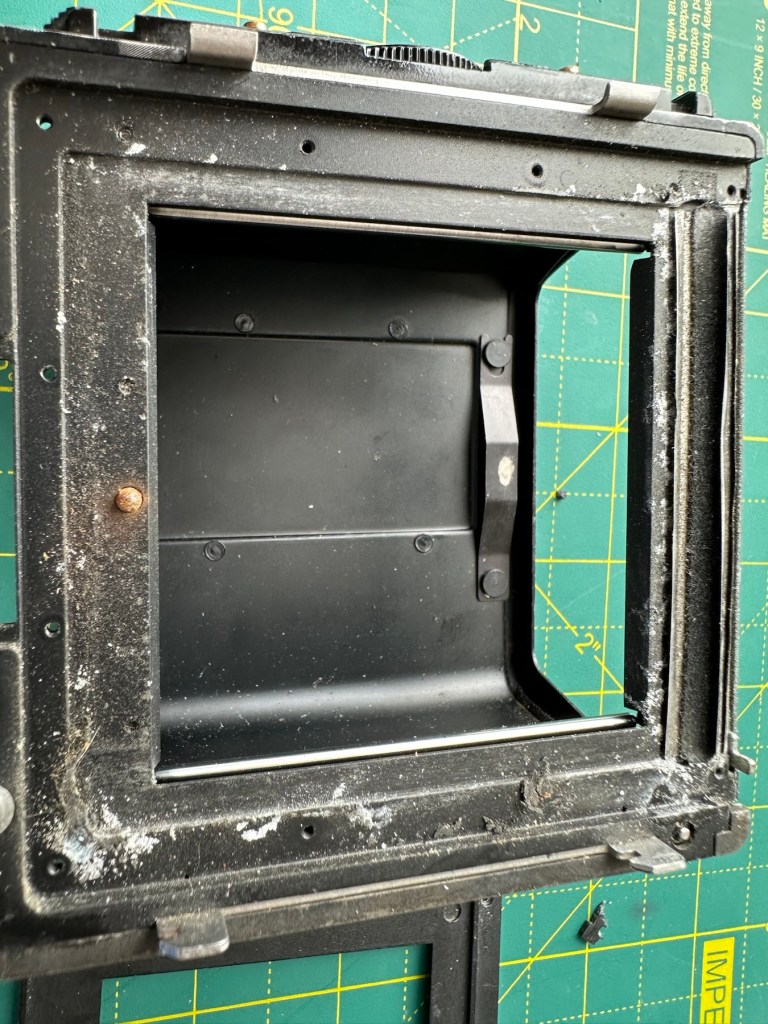
Before AfterDirty seals Damaged frameworkRemoval of the frame presented years of debris and filth that needed cleaning as well as a requirement for some replacement parts
There was a lot of contamination under the plate when it was removed, I was quite amazed just how bad it was. This has since been cleaned prior to the new frame and seals being put back into place. When everything is re assembled there will be another clean, I will also be using compressed air to finally clear any remaining debris from the roll back. Edit: the 3D printed frame has arrived and to be totally truthful it’s not much good. The part where the slide goes in is not usable and I’m not confident this will be as light tight as first thought.
Good front frame from the donor spare unit
However the spare unit I purchased has a good front frame that just needed a tiny bit of adjustment to work, I’m now confident the roll unit will work as it should.
Light seals:
To be honest there are only two immediate areas of concern that I can see. All other light seals seem to be sufficient. I already have plenty of light seals material from where I fix other cameras so this should be simple enough to replace.
New and old light seals replaced
There were only two pieces that needed replacing, these were both on the roll film back. All other light seals were fine.
Rust spots:
These are purely external and there are no issues inside the cartridge. However I may just give them a very fine rub down and a quick spray with a black gloss to just make them look better. Then again I may not, and then I’ll attend to the cosmetics once I have completed the project. Edit: I’ve decided to leave this for the moment and will attend to this sometime in the future as it is not affecting anything at this stage.
Film cartridge:
Again this has just been cleaned and some contamination has been removed from all rollers and guides within. I have adjusted the back plate pressure pad for the film and also given this a good clean to remove any contaminants. I’m happy the internal cartridge is in a good condition and only requires a light clean. This cartridge is superior to the one I have obtained as a spare so this will be the one i work with. I have replaced all the exterior screws to replace the original ones as they were all a little crusty and contaminated.
New screws. I will touch the heads up with black dye
The whole roll section has been cleaned with tack cloths and compressed air to ensure all contaminants have been removed.
I’m going to store the whole roll film back, in a sealed plastic bag with some Silica gel packs to try and remedy the mustiness that I mentioned at the beginning of this post, though I must admit after all the cleaning and replacement of parts, the issue has reduced immensely. Some exposure to sunlight on a window seal usually helps immensely. That’s where it’s sitting for the moment. It’ll go in the bag with some silica gel, during the more inclement weather.
Outcome:
This part has been the most demanding part of this project so far. I’ve looked into the possibility of using 3D made parts, but I must admit defeat here. The items are about 80% ok, there are holes missing that should be there and as it’s a two piece fix you are then introducing glues, and potentially increasing the chances of light accessing the one area you want dark. Maybe in time they may perfect it. I was exceptionally lucky to obtain a spares unit for literally one pence. Yes one whole pence. It cost £5:75 to post making a total of £5:76GBP, but in many aspects some of its parts were far superior to what I already had. I am happy that this part of the build is now complete.
All good to go. Please keep an eye on the other blog posts that are coming regarding this project.
A great conversation starter, just like talking about the weather in the UK.
Music is one of those things that finely entwines itself into all our lives. We have happy sounds, sad sounds and everything in between, there are inspirational records, as well as others that take you to a distant place where you can just be a mad, wild, untamed, crazy, dancing freak of nature. Yes it’s fair to say music plays a massive role in our lives and emotions.
However if you are put on the spot and asked to choose two favourites, could you?
I have often mulled over this question through the years and i do really think that i can. As a child of the sixties i have gone through an awful lot of fads and musical genres, all the way through Swing, soul, New Romanticism, Punk, Heavy metal, classical and everything in between. My most influential years were probably the late 70s early 80s when i was starting to form my own choices as i was entering into my teenage years.
These choices by no means reflect my favourite group. That choice was made in the mid to late 80s when American rock group R.E.M came into my life and they remain firmly rooted there to this day. However their music obviously rates highly in my opinion, but neither of my favourite all time records were theirs. For some obscure reason my choices are both extremely middle of the road.
I honestly have heard so much music in my life, as i suspect has anyone else who browses this post, and i always come back to these two choices. So my mind is made up, no swaying, it is and will always be these two:
Doobie Brothers – Listen to the music
Doobie Brothers
What do i like about this record. Just spend some time listening to it, early American rock at its very best, probably 4 Guitars in perfect harmony with an absolutely fantastic rhythm, and a banjo picking around in the background adding to the atmosphere, Just a wonderful happy and upbeat song in my view, it lifts me to play it and reminds me of the hazy days of my childhood. This was 1972 when it was released, i was very young but it was a happy tune, and as a child i think that is one of the things you look for in music, good melody, easy chorus who could ask for more. And it’s stuck with me ever since.
Here’s what the songwriter Tom Johnston said at the time:
“The chord structure of it made me think of something positive, so the lyrics that came out of that were based on this utopian idea that if the leaders of the world got together on some grassy hill somewhere and either smoked enough dope or just sat down and just listened to the music and forgot about all this other bullshit, the world would be a much better place. It was very utopian and very unrealistic (laughs). It seemed like a good idea at the time.”
Wikipedia
Though I didn’t even know what dope was at this age I can’t really comment. Though looking back now it seemed like a good idea.
Bellamy brothers – Let your love flow
Bellamy brothers
Another “Brother” named group. This was a crossover record from Country to mainstream and boy was it a successful crossover. 1976 was a fantastic year for me packed with great memories of being with my friends, the heatwave of that year and wonderful times wandering around with my pals just doing stuff. Again it was a record that came along at a good period in my life and has registered itself in that role ever since. Just a really good rhythm, some cracking easy to learn lyrics and a dead easy chorus, packed with loads of rhythmic guitar and passion, what a record.
So, thats it for me, two easy choices that i know will never ever change. I always have these tunes within easy reach on my phone or music player as in times of stress, worry or just when reminiscing, they are chosen and played loud. The world then for a few solitary moments is a whole better place.
Been looking through some old photos and this one instantly hit me as beautiful.
A very young Alf staring out into a big old world
This was our little Alf back in 2013 at Camber sands in Sussex. We had a family day out there on a beautiful sunny, but wind swept day where we were all suitably sandblasted. It was Alfs first ever visit to a beach as he was only about five months old here. To me I see a young creature just starting his life looking out into a big old world of adventure and learning. To me it’s beautiful as it has a wonderful story connected to it.
We are all mortal and one day our time will be done. All we have in the end are cherished memories and they can never be taken away.
To build a usable, basic issue, medium format camera (Bronica SQ-A) from damaged items and spare parts, for as little outlay as possible and shoot one black and white, and one colour roll of film as proof of its successful completion.
Getting started:
Building a camera from damaged parts is no easy task when the name happens to be a high end brand and any parts that are available, are being snapped up by others to service their own stock or to break up for sellable parts. I’m going to keep a running total to try and build this as cheaply as possible, and to keep track of this total I’m going to use my trusty Psion Organiser II LZ from 1989 to keep a tally.
This may be a strange situation where Pt:2 and Pt:3 of this project gets published before Pt:1, quite simply Pt:1, the film back. needs a fair bit of work still doing to it.
Third purchase:
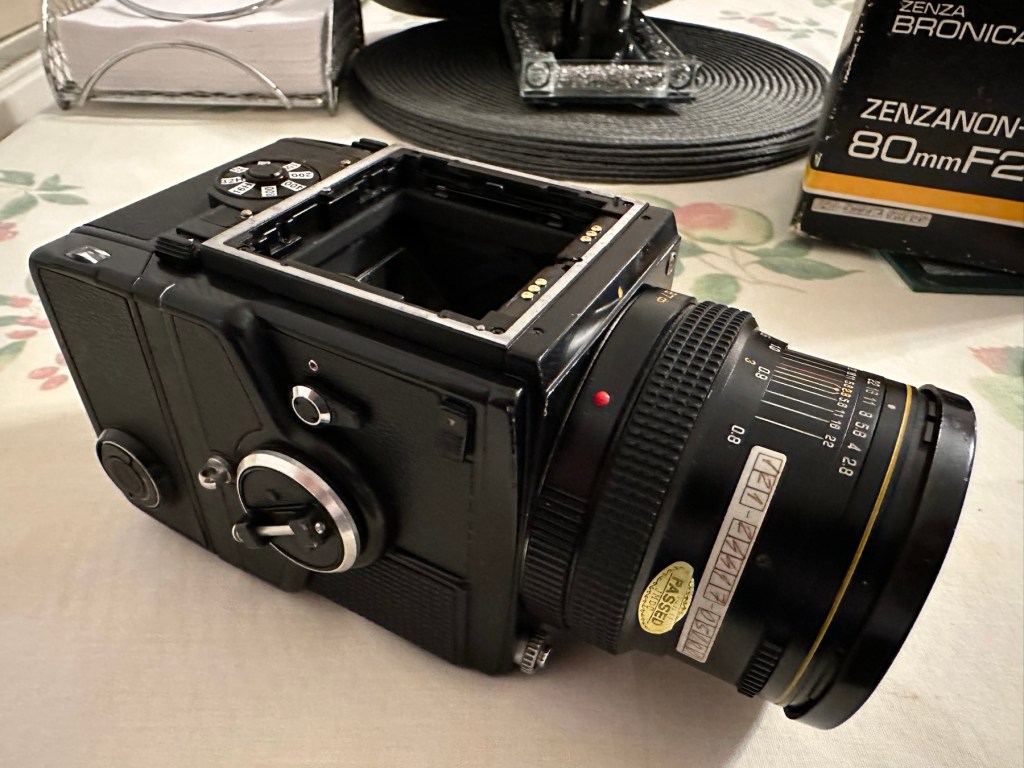
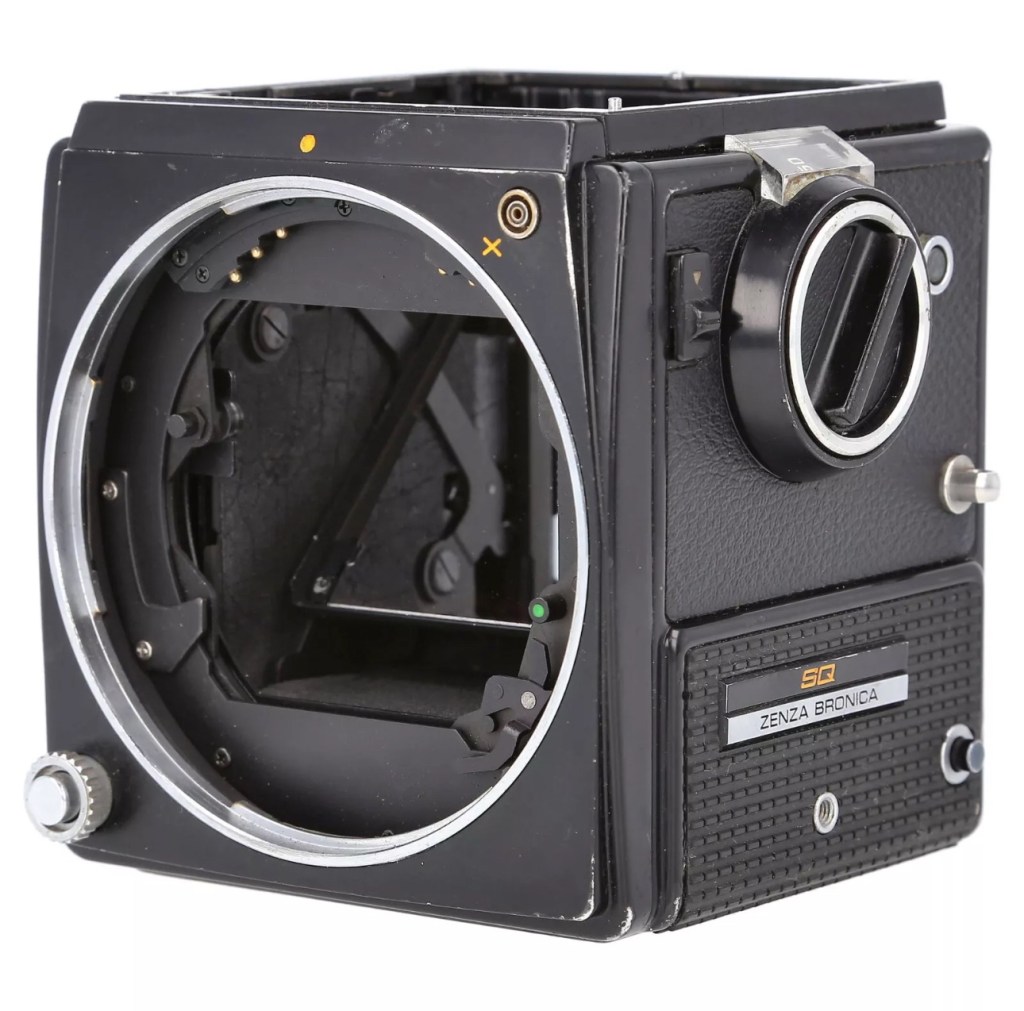
And the third purchase is for an SQ body. This appears to be well used, but appears to be in a working condition. Here’s what the listing stated:
Zenza Bronica SQ Body Only / Medium Format 6×6 Camera
Condition:
Used but still in good usable condition with usual signs of use – see photos for details please. Fully tested and in perfect working order. Supplied with: Camera body as pictured.
EBay
Now I’m happy with this purchase as well. Not quite the SQ-A I wanted but to be honest the only difference is mirror lock up and metering that I don’t really need so I can live with that, we all managed prior to the metering being done for us, I’m sure we will all survive now . (Oh how we have been pandered over the years)
The Bronica SQ body I have purchased
I’ve paid the grand total if £73:75GBP for this body including the postage. There are some bits I will require to complete the body, namely a focus screen and waist level finder that could be a bit pricey, and a winder for the body. Now, the winders are pathetically expensive at around £60 for a bit of plastic. I know a guy who 3D prints a good alternative for a fraction of the price. And that will be the route that I take.
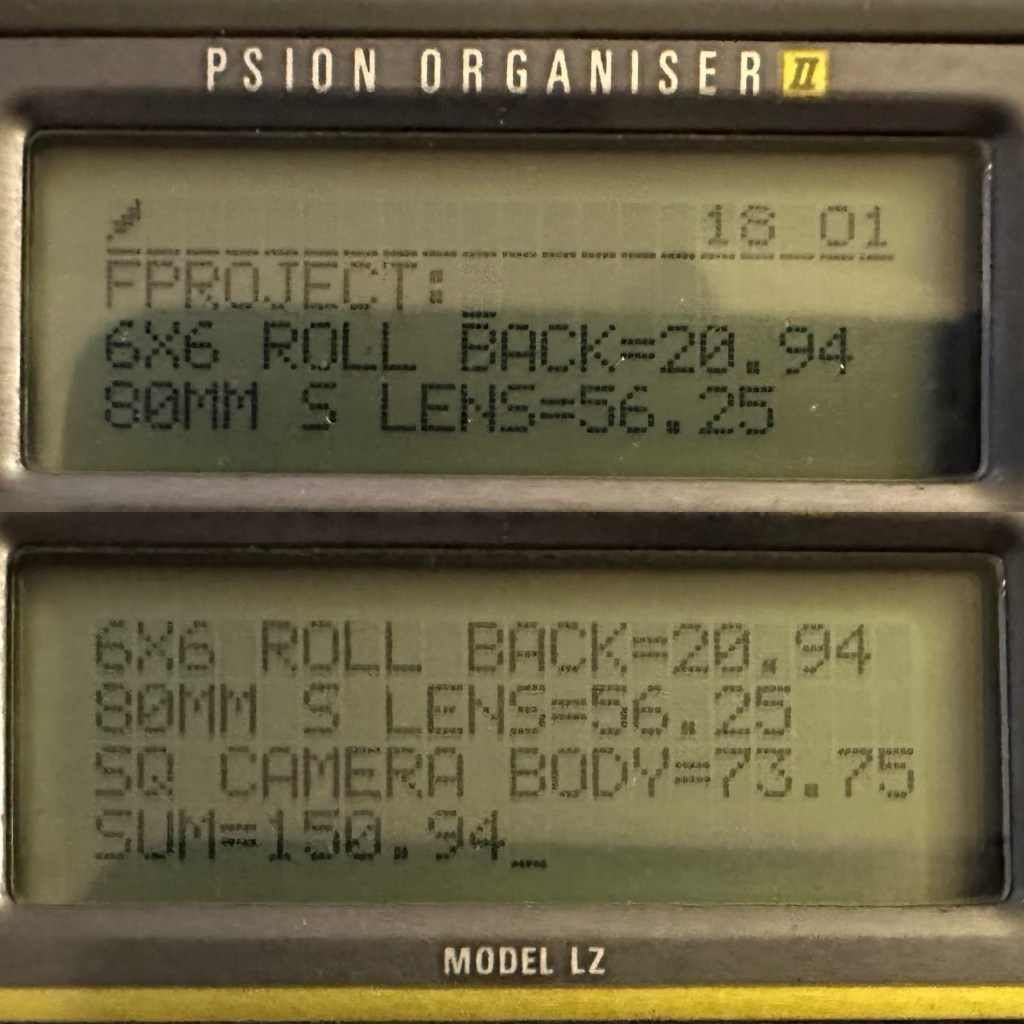
So over to my trusty old Psion II LZ for the running total for these first three items.
Current running total
So the total for these three items comes in at a total of £150:94GBP, and in Bronica terms this is extremely reasonable!
Assessment:
The parcel has arrived and yet again I’m really happy with this purchase. Very well packaged, a very faint age related mustiness that I guess should only be expected on an item that is now 45 years old. It seems to work just fine. I have connected the lens and that seems to be working ok, I just need to verify the shutter speeds are all correct. There is no battery in the base and this needs replacing as this is what controls the shutter speeds. Without the battery the mechanical shutter works, but only at a speed of 1/500 of a second. (Edit: the battery has arrived and after testing i can confirm that all speeds are operating as expected). The film back fits fine but I still have some work to do on that before I can say that this part is working ok. Overall I’m satisfied with what I have for the price I have paid.
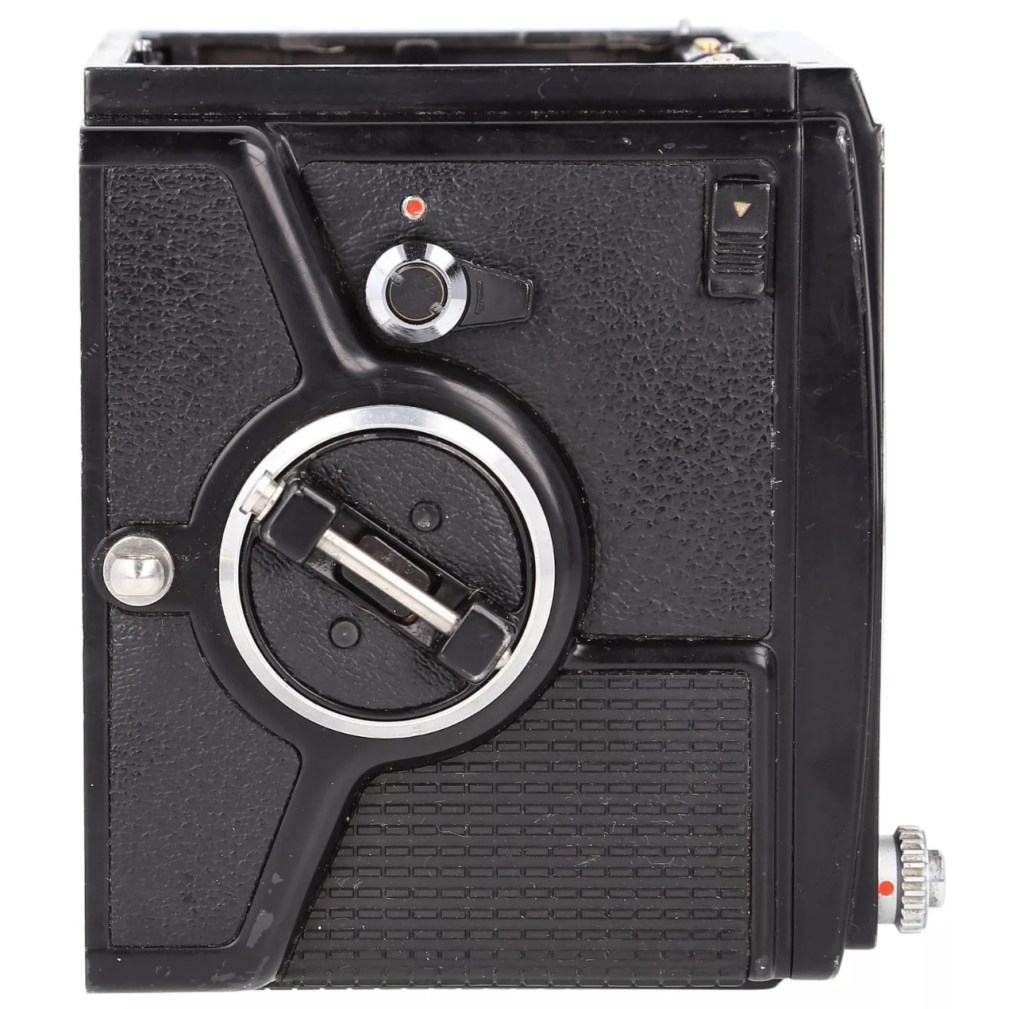
No batteryNo winder A selection of covers for the sides, top and bottom are required
Repairs:
Not so much repairs but additions that are required, such as a crank winder arm and a focus screen, a new battery and a selection of covers to protect the central unit in transport. All horrendously over priced and i will deal with these items in Pt:4 of this project.
Outcome:
Current situation, looking good, smelling old. Not me, the camera 😂
We are almost there. The lens is fine, the main body is fine and just needs some final testing. The film cartridge is the item that needs the most attention and this will hopefully be finished when I have the new front plate that is being 3D printed. The next instalment will be just a tidy up with all the little bits I need to complete the build. These small pieces in Bronica terms are so bloody expensive, or should I say extortionate, can be obtained at a fraction of the cost elsewhere, you just need to shop around, if you are happy to have a non named spare part as a stand in. I’m happy with that as these parts have absolutely no effect on how the camera performs, and what we want to achieve at the end of this project, that being a well exposed two rolls of negatives that will produce a number of well presented photographs.
All good to go. Please keep an eye on the other blog posts that are coming regarding this project.
I’m parked in a local park. I’m waiting for my wife who has a hair appointment, and I’m now looking for Dolly.
That last day. Me and Alf in this very carpark
Who’s Dolly?
Dolly is a puppy, she would be 18 months old now and when I last saw her it was on the 16th August 2024. The day our Alf lost his battle with his illness and went to sleep. Is there a cure for a broken heart 💔
We took a little walk into the park that day and he just sat at the entrance, nothing left in the tank, when an 11 month old bundle of fluff bounced up to him and wanted to play. He let her sniff around but he didn’t stir from his staring out into the fields where he once used to bound around just like Dolly.
Nothing in the tank, just so tired
I spoke with Dollys owners and told them what was happening that day, Dolly did not want to leave him, she knew something.
It was a sad and at the same time wonderful thing to see, as one life was ending and an exciting new one was just beginning.
I often pop back here in the hope that I will see Dolly again, even my wife encourages me to do so. I just want to say thank you to her and her owners, it was a beautiful moment when they both met but so tragically cut short. They would have been great friends as Alf loved everyone and didn’t have a bad bone in his body.
And if her owners allow, I want to give her a big cuddle. Another beautiful little soul.


You must be logged in to post a comment.