Canon EOS 10

An old EOS 10 was in need of attention. And I was able to lend a helping hand

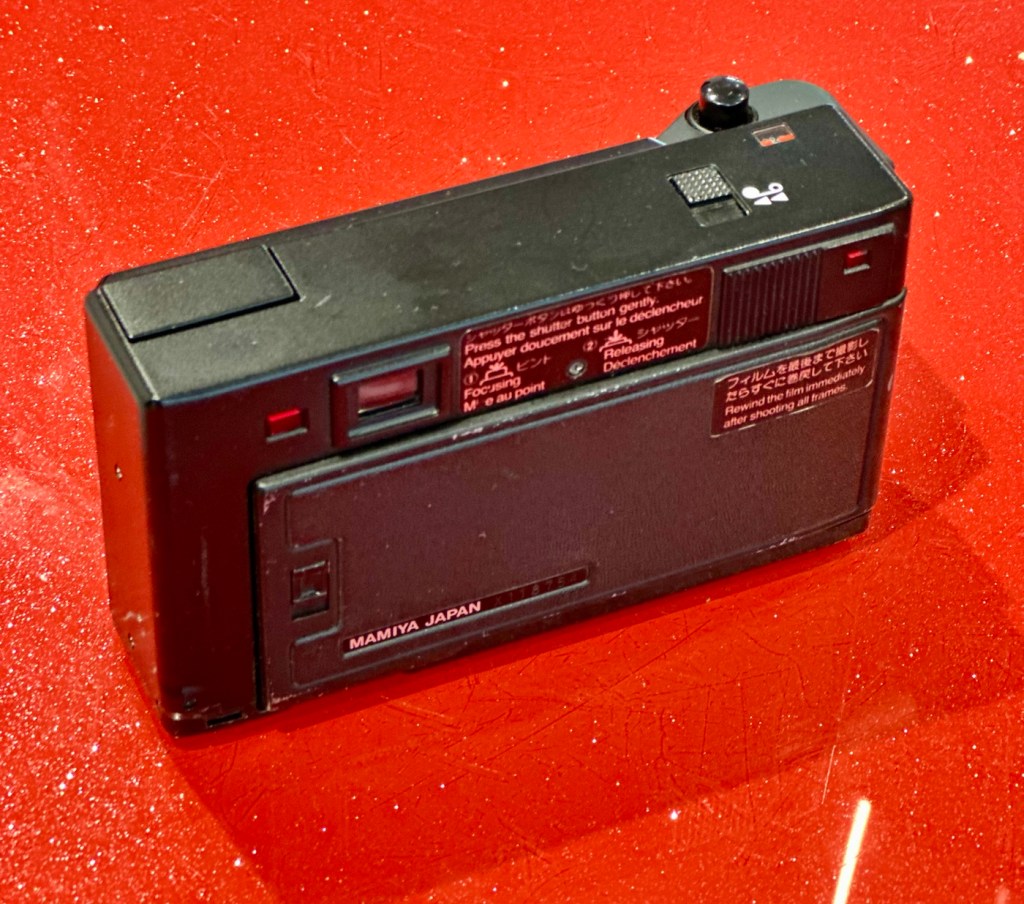
Here I have a Canon EOS 10, a quite superb little camera. The date code within the film barrel is HE1213, indicating that this camera was manufactured in December 1990. At the time of manufacture this camera sat firmly at the top of Canons camera tree only surpassed by the EOS1 professional camera that had been released the year earlier in 1989.

My EOS 10 35mm SLR

This camera was amongst a selection of cameras and equipment passed on to me by a good friend and professional photographer as can be seen here: Cameras…i need more!

Here is a little history regarding the EOS 10

The Canon EOS 10 is an autofocus 35mm SLR introduced in 1990. The model name was EOS 10S in the Americas, and EOS 10QD in Japan. There was a commemorative metallic-silver version introduced in 1991 to mark Canon’s 60 millionth 35mm camera sold.

The improvements over the original EOS cameras are a newly improved autofocus sensor. Focus modes include One-Shot AF for non moving subjects and AI Servo AF for moving subjects. It is able to detect and switch automatically between the autofocus modes. Shutter ranges from 30 sec. to 1/4000 sec., with B. X-sync at 1/125 sec. Similar to the EOS 750, is has a built-in flash with a guide number 12 (at ISO 100). It uses one 2CR5 lithium battery and weighs approx 625g for the body without battery.

Camera wiki.org

Assessment:

One of the nuances introduced on this camera was the barcode option. Introduced at a time where barcodes were starting to creep into our life, in a knock at Minolta and their use of specific expansion cards for specific scene settings, Canon thought it would be good to utilise barcodes that you could scan, to automatically set your camera with these options without expansion cards. Needless to say it didn’t take off and was soon dropped from later camera production. It was a sign that the development teams were looking for advancement opportunities.

That barcode mode – soon forgotten

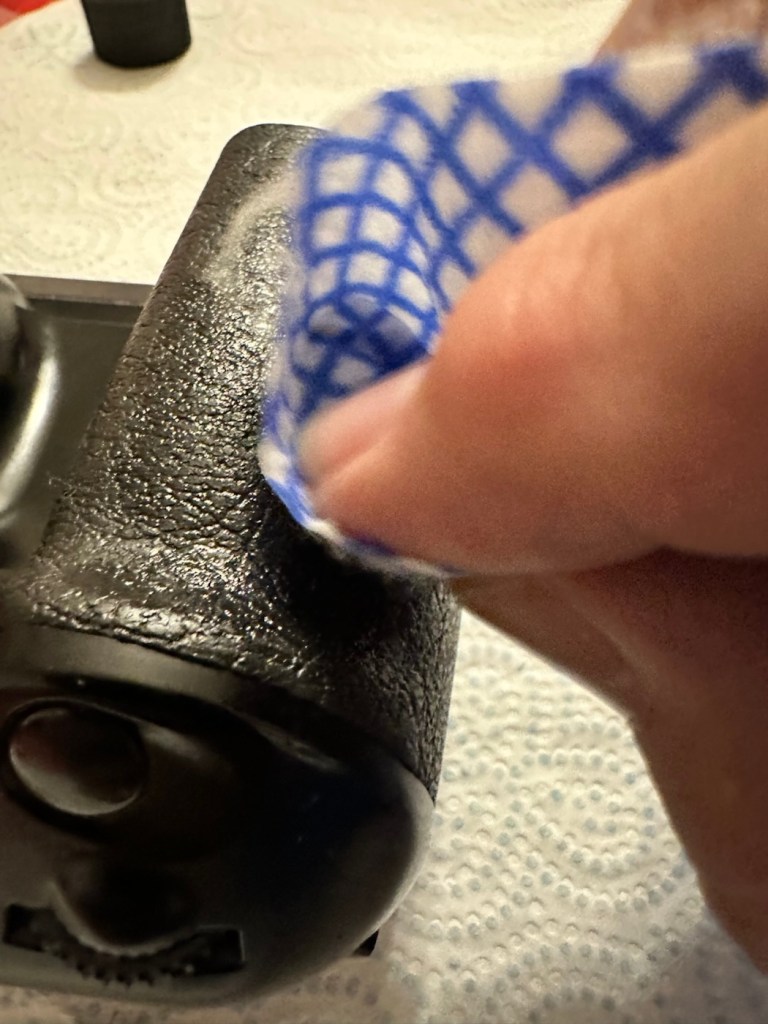
These cameras are available at fairly reasonable prices now partly due to the dreaded sticky rubber grip issue that tends to send buyers running for the hills, god knows why, it’s an easily remedied issue that just takes a little time and patience. I did a previous post about cleaning these cameras here: Sticky, Rubber camera grips it’s all down to the polymers in the Vulcanised rubber breaking down and reacting with hand sweat and other stuff. Have a read, and never throw away a camera just because it’s sticky.

This camera has some stickiness but it is not an advanced case. It will still be cleaned in the same manner, to prevent it developing any further.

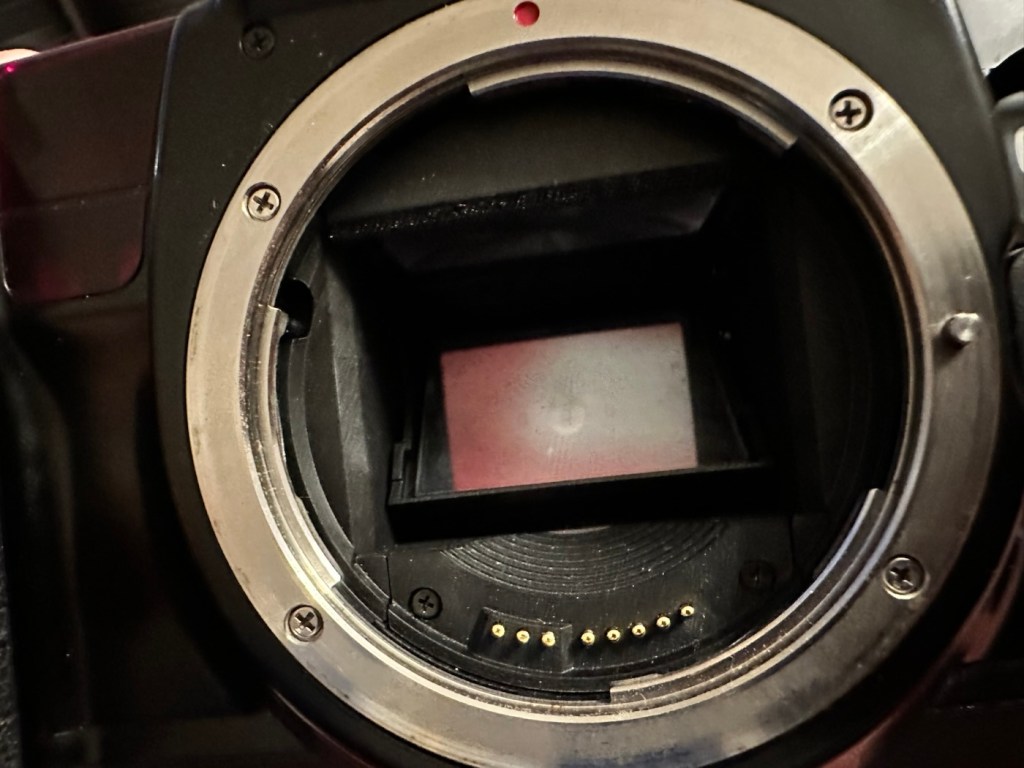
The camera is just a bit dusty and in need of a good clean. The mirror is dusty and needs cleaning, a blow out of the interior should suffice as the shutter blades are opening and closing with no issue.

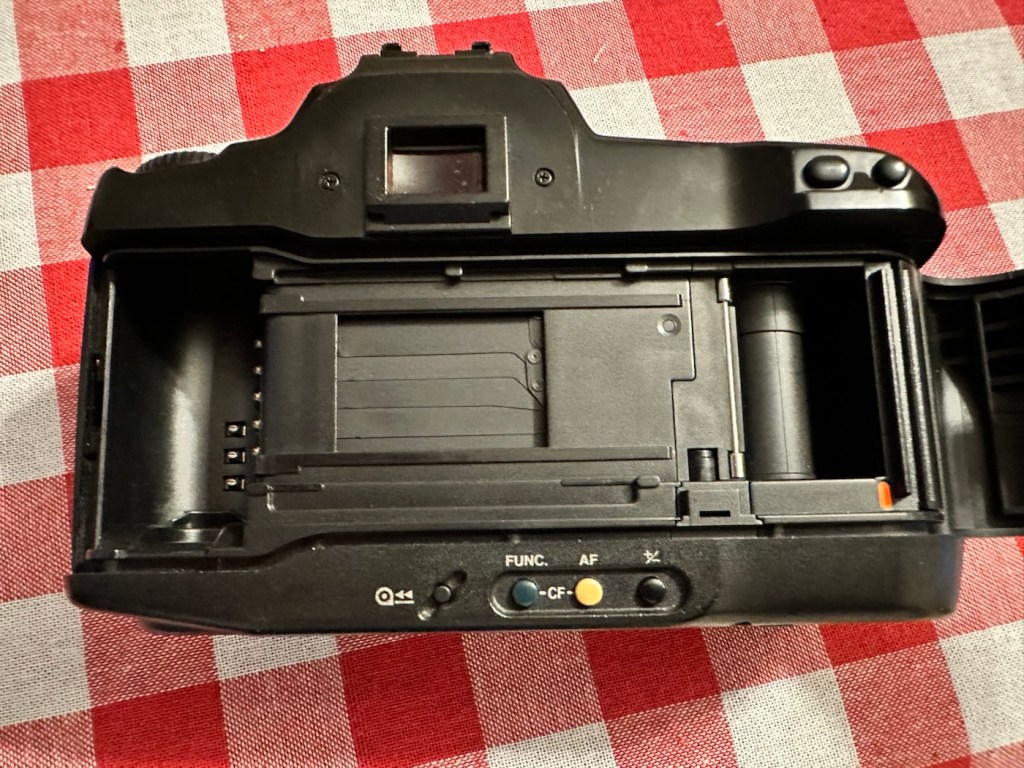
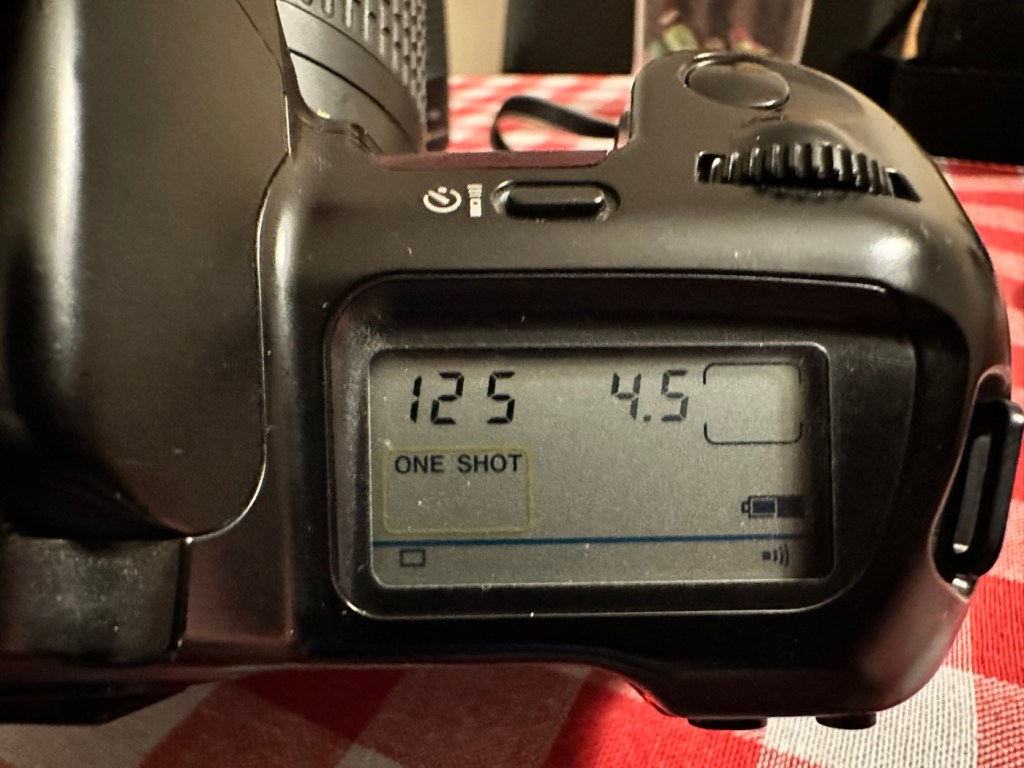
The battery is a lithium 2CR5 cell. The battery chamber is clean with no signs of battery contamination, this is a very good sign. When placed into the camera the screen comes on, is clear with no damage. A lens put on the front confirms that auto focus can be achieved and the camera fires and winds as expected.

To be quite honest, there doesn’t seem to be a lot wrong with the camera. It really seems to be just a clean and maintenance issue. I’m going to give the camera a thorough look over, dust and clean, a thorough clean of the external rubber and finish it all of with a good exterior body treatment. I will then run a roll of used film through to check the DX reader is working, as well as the transport system. Fingers crossed nothing major raises its head during the repair process.

Repair:

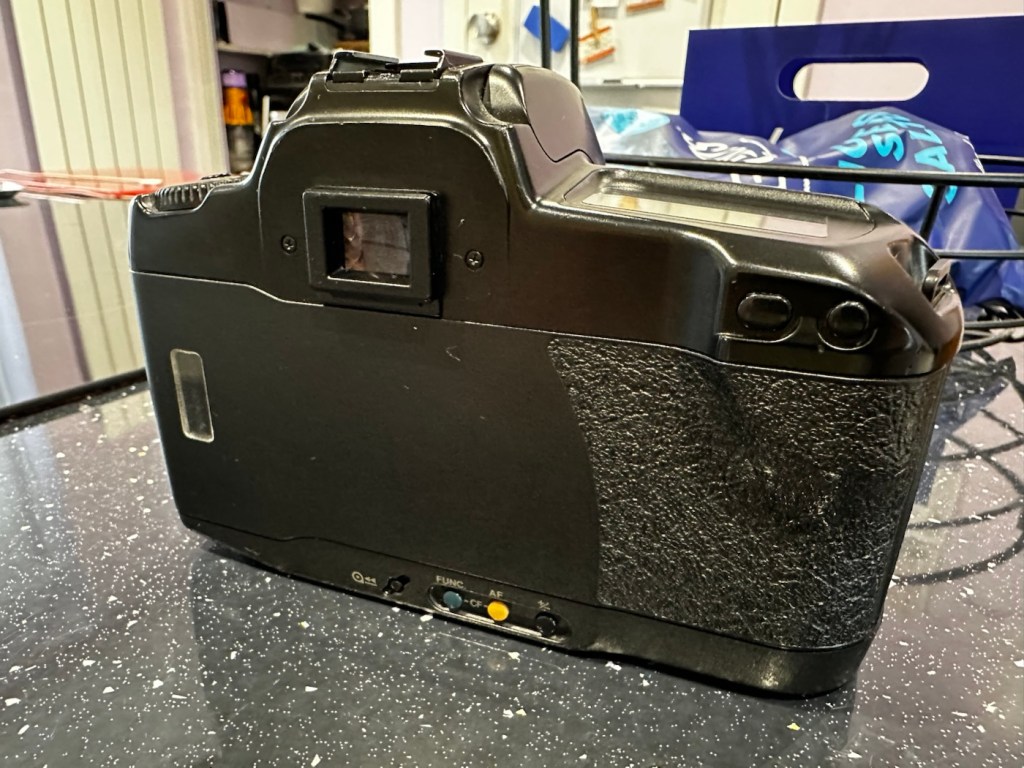
Straight in and at the cleaning, and to be honest the rubber wasn’t too bad. I only used two applications and not a lot of dirt came off on either. After it has dried, it does feel a great deal better.

Heavy cleaning, wasn’t that heavy

The mirror has cleaned up nicely, so has the prism above it, however whilst in there I noticed that the mirror damper felt was failing, so this I have now removed and will have to replace prior to using as I don’t want to cause any further damage.

The missing damper felt area, highlighted in red

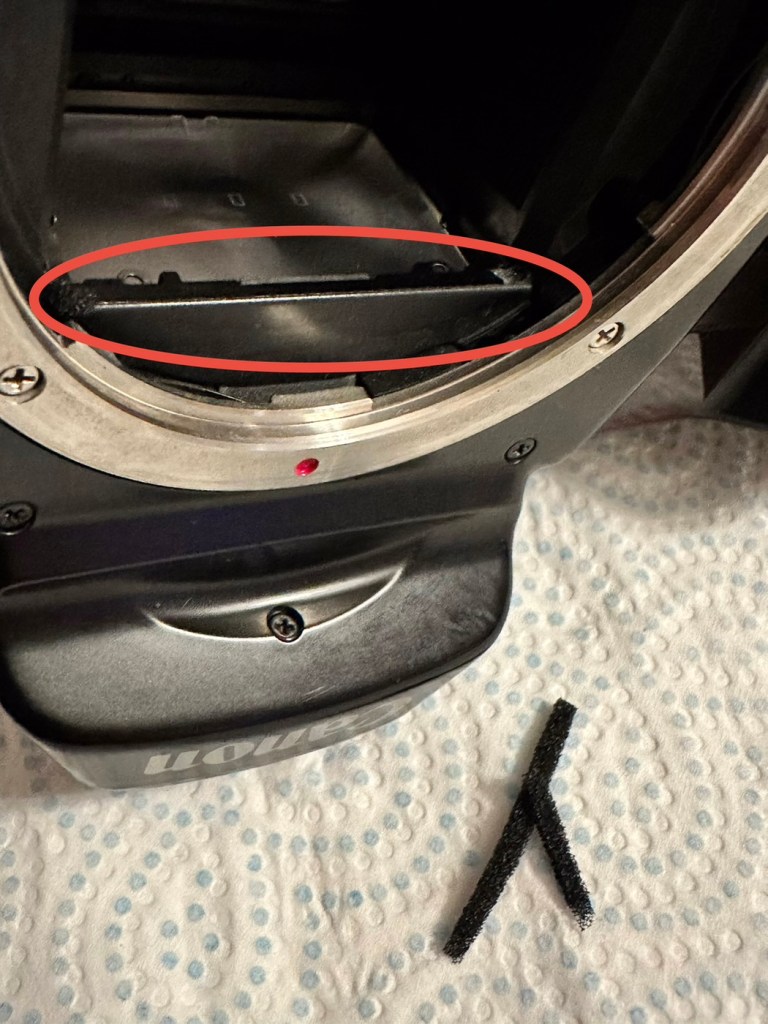
I’ve had to order some new material that will hopefully be here shortly, as my supply, as is always the problem lately, is in storage with all my other gear pending this house move that will probably never occur. it’s a real pain in the butt not being able to access your most required kit. Hey ho.

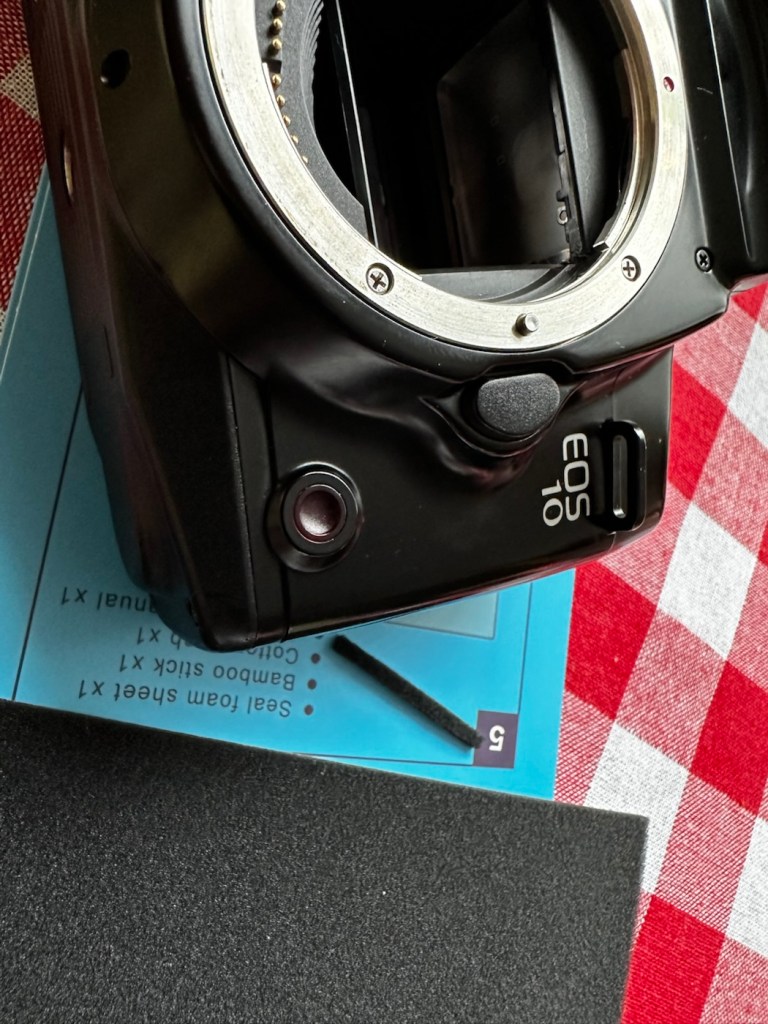
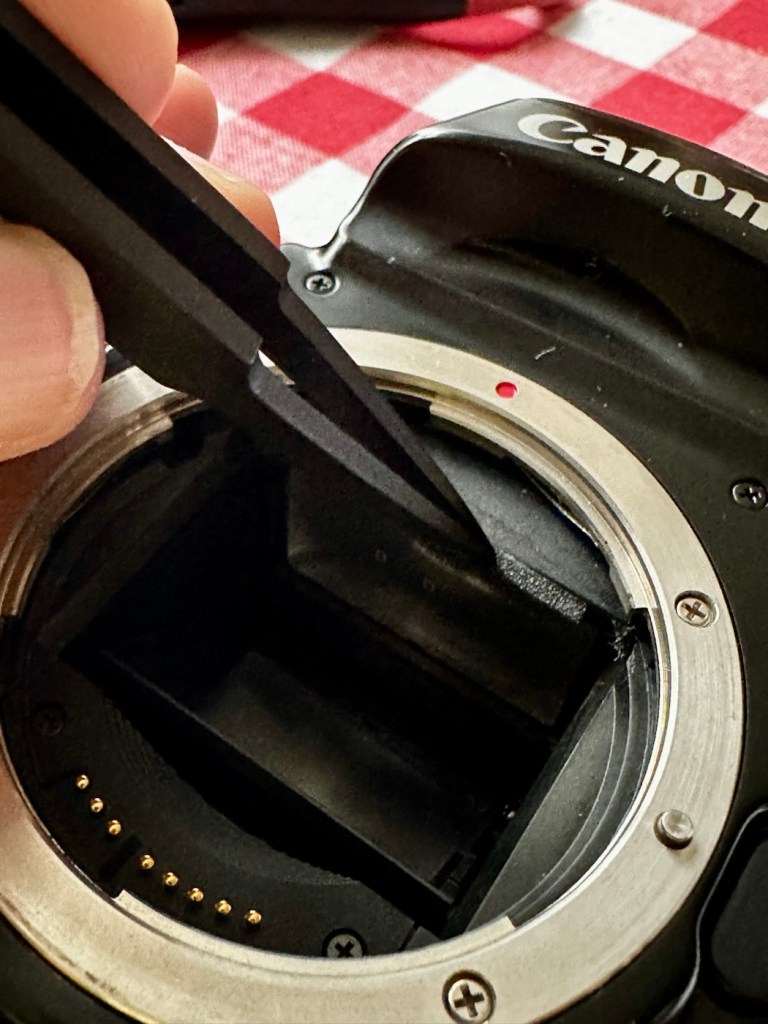
The light seal has arrived, and so I start by getting the damper felt put in place. First I cut it to size, remove the sticky back paper and just wipe the sticky bit with some water, this allows me a little more time to reposition it before the adhesive does its work.

Below is a very small video with me putting the camera into manual mode on a single exposure setting to test the actual worth of the damper foam.

All working fine

I’m happy with what has been done so far.

Strap cleaned and restored

I’ve even given the neck strap a good buff up, the rubber on it was almost white rather than black, a bit of a clean and a polish and it’s now been restored to it’s original glory.

With the new damper in place it’s now time to run a film through it, I have an old test film I use for this purpose, I’m going to set the camera to its highest shutter setting and just run the whole roll through in quick succession to check the transport and rewind.

And here is that test, it went super fine and the full roll rewound at the end.

Transport works just fine

I’ve tested all settings, shutter speeds and functions including the flash and all is as it should be. I’m happy to say that this camera appears to be in full working order.

Now for the final clean and presentation.

Result:

Well, a little bit of car cockpit cleaner has done wonders. It looks beautiful and has a nice aromatic smell as well. I know I’m biased when it comes to cameras but I think this is an absolute beauty.

All polished and looking fine

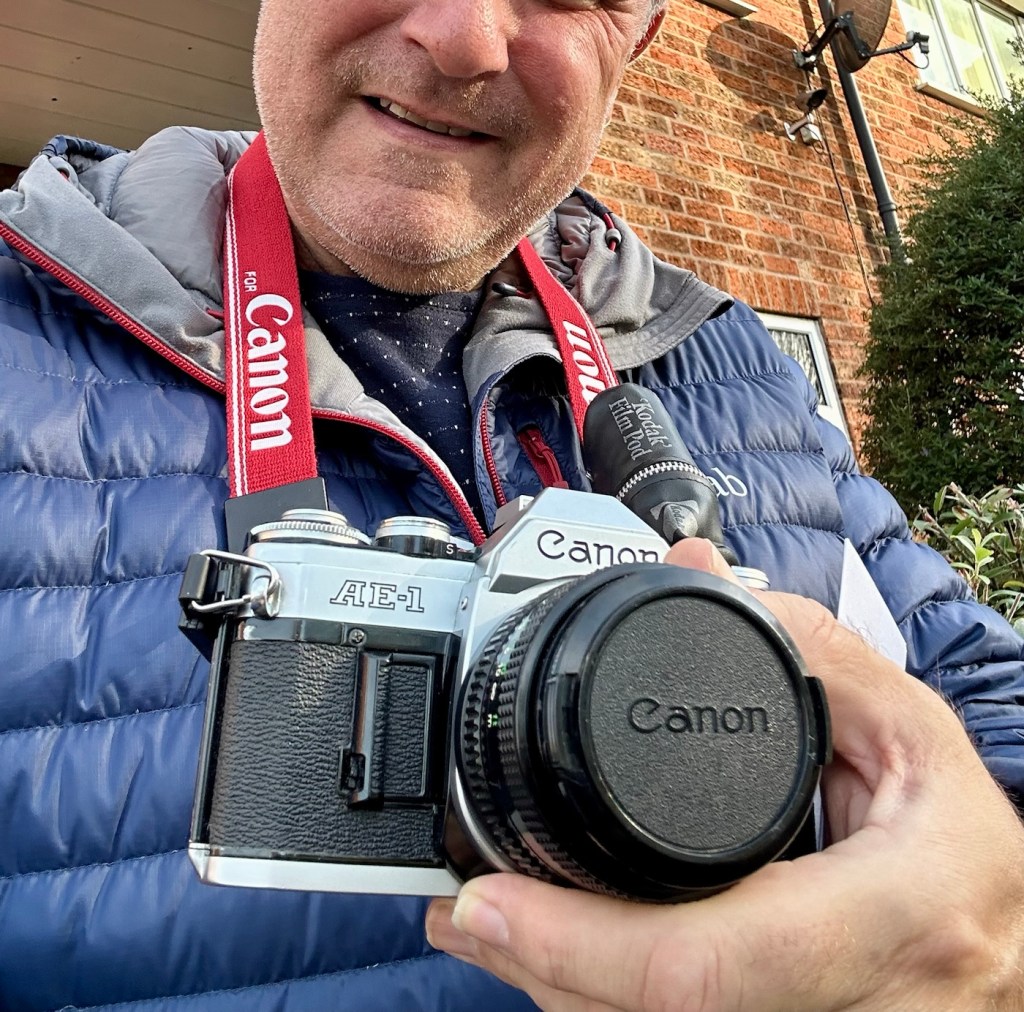
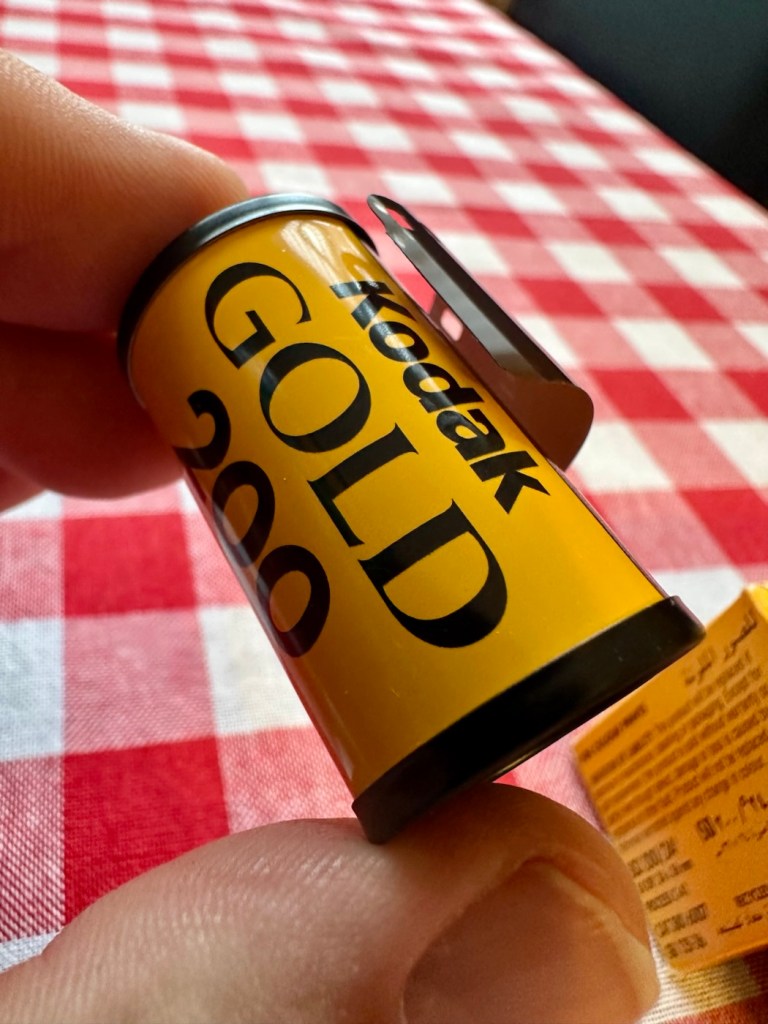
I’m really pleased with this camera, I’m heading out later today to watch a relative play football and I’m going to take this along to grab some snaps with an expired film from 20 years ago. It will be a good final test of the capabilities of this camera, and should finalise its renovation. It’s been a great camera to work on and is yet another worthy addition to my collection. I will post the photos here when they are finalised. Canon Eos 10 test shots

Thank you all for passing by, it’s always most appreciated.

20yr old Kodak Gold

How did the old film trial go? Come in and take a peek.

I posted earlier today Well, that was most enjoyable! Regarding popping out for a morning stroll and taking a 48 year old camera with me to shoot a roll of film that had expired 20 years since.

The camera

At 20 years old, the roll was an experiment where i exposed at normal settings, +1 stop overexposed and +2 stops overexposed. I obtained 39 exposures, always possible from a 36 exposure roll, I won’t bother you with them all, just 2 from each exposure range with a brief description. Don’t expect fine art here, it was a snap session to test a number of factors and to see how the film has deteriorated over time.

These pictures have not been retouched apart from having a frame put around them. They are as scanned, for authentic representation.

200ASA

The advertised, original roll ASA rating. Very low expectations and it didn’t disappoint.

Extremely underexposed
Again under exposure, and a brown hint

At 200ASA the shots were certainly under exposed. The pictures have a cast over them and after development there is a lot of curl on the emulsion (Age) and the base of the film also has a darker tone, creating that yellow brown cast.

100ASA (+1 stop overexposed)

The best two exposures represent the first overexposure of one stop from 200ASA to 100ASA.

Pretty nice overall exposure
Again nice exposure and highlights very prominent

At 100ASA everything seems quite acceptable. There is that hue over the film still, and highlights seem quite prominent. Grain is present but not too distracting.

50ASA (+2 stops overexposed)

If you work by the suggested standard of one stop of exposure for every 10 years then this should be the standard. However I’m not so sure.

Nice colour, highlight prominent and quite a bit of a yellow hue, would need adjustment post processing
Could have been taken in the late 70s or early 80s

So with the exposure at 50ASA we have now introduced quite a bit of grain, a yellow hue and quite prominent highlights. I’m sure all of these pictures would post process fine if run through photo shop or light room. But to be quite honest I love that retro look that they have.

For me i’d probably aim at the 100ASA +1 stop of overexposure on the remaining rolls I have, I believe that would be quite enough, however even the 50ASA option is not too bad though you would require a lot of post working and you’d have quite a noticeable size grain.

Horses for courses as they say, but I’m going down the +1 stop overexposure route for the next film.

I found a little local photo store here in Leicestershire called Classic photo supplies, who specialise in all film processing, supply, printing and Sundry items. The owner Brett invited me in and we just chatted classic photography whilst my film was developing. He’s a super guy, and I’m all for supporting small businesses, so this is my new go to lab. The scans were done and over to me by email within an hour, super quick service. I’ll pick the negatives up in the week when I drop off another film to be developed and scanned.

Thanks for passing by. As always I am honoured by your presence.

Thanks. For your time.

Expired camera film

What shall I do with all these expired rolls of 35mm film? I know, let’s take some pictures

I’ve recently inherited 8 rolls of life expired 35mm film. In other hands I guess these would just be discarded, and thrown away, however this is me writing, you know, that fool who collects old knackered cameras. That’s me that is.

Well I’m going to use them.

What could possibly go wrong.

8 rolls of film 20 years old

A number of things to be precise, let me enlighten you. As these rolls of films all expired back in 2005 this means they expired 20 years ago, that’s a third of my life span, phew! Film loses its sensitivity over time and we will have to compensate for that when we get to use the film. Colours and dyes fade, and the finished product (if there is one) is likely to look washed out. Add to that the issue of not knowing how the film has been stored over the last 20 years, and this could be the difference between there being an image and just being blank film. If the film has been kept cool, and in a darker environment, there is more of a chance of getting a result than one that has been stored in light and heat. You get the picture….or not.

These rolls are colour negative film all using the C41 chemical development process. And for this type of film and process, the line drawn in the sand says that it’s wise to overexpose the film by 1 stop, for every 10 years (Decade) of expiry. Since the rolls i have are now twenty years out of date, following these guidelines I would be advised to overexpose these films by 2 stops.

Black and white film is more forgiving and might not require adjusting at all, whilst transparency film is totally unforgiving, and personally i wouldn’t touch it with a barge pole.

The higher the ASA setting on the film, means that it requires less light, a lower settings means that more light is required. Therefore, as an example, if these films were originally rated at 400 asa i would now be advised to expose them at 100 asa therefore allowing more light in to expose the deteriorating film accordingly. But remember, when you process the films they must be processed at standard normal development times, if you push or pull the development times you will not achieve the result you require. Develop as normal.

The unknown factor here really is how the film was stored. Chances are that if it was stored in perfect conditions, then we could probably get away with using its original asa setting. But we just don’t know and will just have to suck it and see as they say. We won’t really know how things are going to turnout until we’ve developed the film.

Old film is good for experimental purposes, you don’t really want to trust old film to a photo shoot as you could be wasting time and money. Unless you really want that old washed out retro 70s look.

The film stock I have is listed below:

I have 4 rolls of Kodak Gold 200ASA colour film.

Gold 200 ASA

I also have 4 rolls of Kodak Gold Ultra 400ASA film.

Gold Ultra 400 ASA

All expiry dates are circa 2005, so they are exactly 20 years out of date. I’ve put them all in to cold storage for now but it could well be 20 years too late. Typical for me, always late to the party!

As an aside to these films, I’ve also found a Canon EOS 30 body that I have also been given to get working again, it just so happens to have a partially exposed film inside it. Now this roll I will have to expose as per normal as it has a dx code reader inside, and I can’t override it from what I can tell initially. It will be interesting to see what it returns.

So. When I get around to exposing these films, the 400ASA will be exposed at 100ASA and the 200ASA ones will be exposed at 50ASA. To be honest, I will probably expose half a roll of each at the original setting and then half at the modified setting. It will be good to see the difference, the deterioration and the grain quality. I have a number of old 35mm cameras still to test, so these rolls will be a welcome opportunity to test and experiment, and you don’t often get the opportunity to do this, so I’m going to make the most of it and have some fun.

I’ll let you know how it goes 🤞

Cameras…i need more!

I say more cameras, my wife begs to differ.. my friends agree with me.

Well, my wife would probably disagree with the above comment.

However, i have some very good friends who are quite happy to ignore my wife and her protestations. Some would say they are very brave…others would even say they are foolish. Time will tell.

A couple of beauties – you wouldn’t understand

Jon, is a friend and former work colleague that i have known for many years. We both worked at the same Kodak plant in Harrow, me on the graphics art film production track and Jon was in the training and development area. We rarely met there as the plant was so huge that our paths crossed quite infrequently. However Jon has also been the mainstay and life blood of a local football team since the early 70s, and it’s true to say he is a local legend and pillar of the community. This is how i really met Jon, and we have always discussed issues of photography, he is very much involved with promoting the armed forces and has been fortunate in the subject matter he has been asked to photograph. Needless to say, he has a lot of redundant equipment, and when he became aware of my blog site and the repairs i attempt to do, he very kindly donated a number of items for me to write posts about, and to be quite honest it will keep me busy for quite a long time.

The majority of the items probably just need a little service and a test session, a couple have some battery corrosion issues, but in general cosmetically, they are in good condition. We have a number of old lenses, but as you’d expect from someone who looks after their equipment, there isn’t a sign of haze or fungus in them. They just need a clean up, and very little else.

Here’s a list of what i have received, and observed after a very quick look at the items.

8 cameras:

  • 1 Canon AE1 film camera and user manual, mirror was stuck, now freed up and firing ok but requiring a check over.
  • 1 Canon EOS 30 film camera, a bad case of sticky body.
  • 1 Canon EOS 10 film camera, issues unknown
  • 2 Canon EOS 500N film cameras, issues unknown
  • 1 Canon EOS 3000 film camera, issues unknown
  • Canon EOS 1N film cameras with E1 power drive, beautiful camera, issues unknown.
  • Canon EOS 7D digital camera with BG-E7 battery grip, stunning camera, issues unknown.

7 lenses: all Canon fit

  • 2 x Canon FD 50mm 1:1.8
  • Tokina 300mm 1:5.6
  • Tokina 135mm 1:2.8
  • Tokina 35mm 1:2.8
  • Canon 75-300mm 1:4-5.6
  • Canon 28-80mm 1:3.5-5.6

There is a separate lens that i have been asked to look at and repair for him as it’s his third go to lens, that is a Canon EF 28-200 1:3.5-5.6 USM lens. It doesn’t focus in auto, i notice it has lens wobble and a lens washer appears to be exposed in the zoom section of the lens. It needs investigation.

Other items:

  • Canon Power winder-A. Part of the AE1 camera, you can smell its issue as you hold it, battery corrosion. Batteries inside have seriously corroded, however i believe the issue is salvageable.
  • Canon speedlite 199A flash gun, untested.
  • Metz 45 CT-1 flash, again there is corrosion in the battery pack, you can smell it. Again this should be salvageable.
  • Sangamo Euro master light meter and invercone. In excellent condition, could be that the selenium light cell is dead. Needs investigating.
  • 8 rolls of film, expiry date 2005, may still work..who knows.
  • 3 x 6v lithium batteries, all tested and working.

Add to that the two camera bags and a hard case that they all came in and I’m sure that you will agree that it was a pretty nice package to receive.

I’m extremely confident i can get these all into a good working condition, any cameras that i will not be keeping will either be sold on to benefit charities supported by Jon or donated to local charities for their benefit. Either way nothing will be heading to waste, that is a promise i have made to Jon and thats just how it will be, i do not break promises.

Thanks for passing by, and i will be posting articles on all these products in the coming months. As I already have 13 projects already in draft awaiting a time when i can back to repairing them, you can plainly see I’m going to be very busy for quite a while and should be able to supply quite a regular feed to this blog.

Have a super day. stay safe.

Smoke and wasteland

My role, occasionally requires me getting involved with some old engineering treasures. I sometimes have to go ahead of these trains to areas where there are “pinch points” and ensure that their movements through these areas are without delay or hindrance. The thing is if one of these old girls break down they can cause absolute havoc to timetabled passenger traffic, and passengers, rightly so, don’t take to well to being delayed by what they class as unnecessary big boys toys.

60103 – The flying Scotsman

One such old treasure is the steam train “The flying Scotsman” now I’ve been associated with this train one way or another for many years now, and only recently I was ahead of it as it made its way to a big 200 year train gathering up in Derby. I took the above Picture a few years ago at Tulse Hill station in South London. The bridge at this station is the most frequently hit bridge in the area causing massive delays to trains heading south. Me being there means a bridge exam can be carried out quickly and things can get moving fairly expediently. There is also quite a complex junction nearby, again if points were to fail I could get things running smoothly again, with a small team who work alongside me. This picture has been run through a Matte black mask to give it a vintage type look, it was taken on an old phone and was just snapped whilst I was checking timings with the train crew.

More graffiti- but with humour

Another train hit by the local graffiti artists passed through our patch. Whilst this one was parked up I had to laugh at the message conveyed on an empty stone hopper during the current economic crisis here in the UK . Living La Vida Broke-A! it made me smile.

Wasteland

Just a few months ago this compound next to where I am based was a buzzing hive of activity. Then our government cancelled the electrification of the Midland main line between Leicester and Sheffield, putting an end to the activity in this area. All the men and women laid off, another nail in the coffin of the cities outside of the “One and only London”

This Government really is blinkered and doesn’t really understand that there are communities and businesses north of Watford!

Nothing is going to change anytime soon.

Have a great day, in whatever you are doing.

Pancake/Cookie lens

It’s a colloquial term for a flat thin lens assembly that started to emerge from the 60s through to the 80’s, commonly seen in compact SLR cameras of the time. This then developed into a body cap lens, an extreme type of pancake lens that is designed to both protect the camera internals as a body cap normally would, yet still allow the user to take photos. These lenses are manual focus only and generally have no more than a couple of optical lens elements, no image correcting elements, a very-slow fixed aperture, an extremely thin focusing ring (if any at all), and a retractable lens element cover. Due to this compromise in design, body-cap lenses generally suffer from numerous image quality issues such as heavy vignetting and poor image sharpness.

Recently there has been a resurgence in this type of lens culminating in the one that seems extremely popular at this time, a cookie lens.

Cookie lens

It’s not hard to see why it is named so, it looks like a big Oreo cookie, it even looks as if it has the cream between the two biscuit pieces. These current ones are sold as being recycled from old disposable cameras. Original pancake lenses can cost many hundreds of pounds, however these ones are classed as disposable, and are priced at around £30 to £40GBP, being sold by a company called Retropia. But hold it! Don’t waste your money on that one, as they can be purchased for at least half that price from Ali Express of Temu, just make sure you shop around. By looking at the reviews £30 can still be a bit of a hefty outlay for what is basically a cheapo lens out of a disposable camera set in a cookie shaped piece of plastic.

One guys in depth review of the “Cookie” lens

These lenses have risen in popularity, as the new mirror less cameras have become more accessible. This lens allows these cameras to be used as a straight forward point and shoot camera, no focussing or metering. achieving that retro disposable camera look, but in much more modern equipment. It’s a fun item and for an outlay of around £13GBP, which is what I paid for mine, it’s not too big an outlay to do some experimenting with, and if it turns out to be a load of old bilge, then it’s no real loss. Reviews are mixed, but in general it seems people are having fun, and that’s what photography should be.

I’m waiting for mine to arrive, and when it does I shall post some photos below to see how I’ve got on with it. Oh, and I now have a suitable camera to use with this lens and that can be found here Sony A7II Mirrorless camera.

It’s such a simple thing. It turns a complex camera into a quite basic point and shoot disposable, lomography type of camera. Perfect for street photography and just everyday randomness, yep kind of like you’d now find on your mobile phone. However this is more fun and you actually have a camera into your hand, Perfect.

The lens is 32mm, and the CCD in the camera is full 35mm so there is a kind of small vignette around the edges of each shot, but that just adds to the basic rawness of the lens. it’s a bit of fun.

Angles in the living room
Garden pub
Rusty chair
Across the kitchen early morning

Above are a small selection of some of the scenes around home, taken quite randomly and all I have done in the post process is added some vintage presets. The light has been so poor lately that to be honest this already added to the vintage effect. If we see any sun I suspect the results would be very similar to the hazy 70s effect that the disposables always managed to achieve. Don’t expect too much from these lenses, they are just fun to experiment with, and that’s just what photography should be. Fun.

Thanks for passing by. Always appreciated.

Sony A7II test pics – Warning Cats!

Now I’m not a Cat person as such and you are not going to find copious amounts of Cat pictures on my pages. However, tonight is different as I required a suitable model to just test the new camera, so here I introduce “Tabs”.

There is a story around Tabs, we purchased our current house about 8 yrs ago and she featured in all the pictures that the estate agents took of the garden. We thought she was the sellers cat but this is not so, she is a Feral soul, and this is in fact her territory and we have moved into it. It’s her property and not ours.

She chases all foxes and other cats from the garden and is an excellent mouser, she had a lovely relationship with our little dog that passed away last year, she likes the hedgehogs and she loves company.

But she will never enter the house, we have all doors wide open and she remains outside, she is more than likely a domestic cat that chose to go feral.

She is fed numerous times a day by us, it’s our way of paying her rent to use her garden. My new camera was purchased as an early present from my lovely wife, and needed a quick test, and Tabs was there in the garden mooching around as she wanted feeding. I therefore just rattled off a few shots to do some basic testing of the camera. I’m really happy with it, but there is still a lot to learn about it.

Tabs in her Garden

Have a great day everyone.

Mamiya M Autofocus – 35mm point and shoot camera – Part two

Here we are again. I recently wrote of my failed attempt to get this 80s camera operating here: Mamiya M Autofocus – 35mm point and shoot camera.

Not one to give up on a project I have looked at a suitable donor camera and believe I have found one as detailed below. Only difference is that I had to buy two cameras as they came as a bundle. Not a problem as I can always do a separate post on the other one, the two have cost me a total of £15:00GBP bartered down from the original price of £30:00GBP. A bargain! So let’s just call it £7:50GBP per camera.

What the listing stated:

mamiya shutter button is stuck. red light on the right comes on. some external corrosion pictured

ricoh no power at all

EBay

Assessment:

The Mamiya is in quite a poor state, and is the Time Memory version that differs very slightly from the version I originally worked on, it’s essentially the same camera as the Mamiya M, but with an added quartz dating mechanism for imprinting time and date information on the film. This model was the last 35mm camera Mamiya produced before focusing solely on medium format. However the back seems to be a bit rusty whereas mine is in excellent condition, so I will be using a mix of the two units to make the one good one.

Repair:

The Mamiya looks good cosmetically until you open the rear and see the rust around the door, not a problem as I won’t be using this part of the camera. The red light does not come on at all and the shutter button is stuck, that’s for sure. The whole camera is dead.

Let’s get into it.

Once opened all looks ok so I decide to have a search around with the multimeter checking the basic operation. Am I getting 3 volts at the top of the battery barrel? No I’m not. It appears that one of the traces on the positive side of the power input board has lost continuity. For some reason the traces has been damaged, this could be either from corrosion or rubbing on something. The area affected is in the photo with the red ring around it.

I’ve fixed this immediately using some solder to bridge the gap, I have checked continuity and all seems ok. I put some batteries in and the motor squeals like a banshee and then stops. You can hear the screaming motor below in the short video from its first screaming session through to its proper 80s sounding drone.

The screaming motor through to its repair

I don’t think this motor has run for years and it does not run consistently. I have sprayed it with some contact cleaner and let it soak. I have left it overnight and checked the operation in the morning and it seems to have improved.

I’ve used the original fascia, rear door, focussing beam and flash capacitor from the first failed unit, and apart from a few bits of soldering, plenty of contact cleaner and some silicone grease, I’ve revitalised a failing motor and it is now working as it should. I forgot to mention I used some graphite on the shutter leafs to “lubricate” them. All optics cleaned and camera has been tested without film and is working just fine.

View finder indications are good with light meter operational, motor rewind works, flash and exposure is fine, and the motor advances as well.

Result:

I’m really pleased with this little camera and am pleased I didn’t give up on it. It’s taken two broken cameras to make one good one, and I have a good few spare parts left over to be used at a later date.

The unit looks so smart, the only real issue is the battery door that is notoriously flimsy and lots of references to its poor design can be found on line. A temporary way around this is just to put some tape across it to keep it closed.

Beyond that issue, the camera is a really good looking unit that has cleaned up really well.

I can’t wait to run some film through it to see how it performs. I have a few cameras like this to test so I’m looking for some decent priced film to use, as i do need quite a bit.

As soon as I have some photographs availability I will link to this post accordingly.

Many thanks for following the repair, it’s always very much appreciated.

A walk in Humberstone park

Today I took the wife to have some dental treatment. Whilst awaiting for her to rise from the chair, I decided to take a walk around the local park and surrounding areas to take some pictures. I only had my iPhone with me, so I snapped away. Whilst back in the surgery waiting for her to exit her temporary “Prison” (Her words, not mine) i was able to do some edits of what I’d seen. A thoroughly enjoyable walk, and a view of the area that on previous walks, has just passed me by.

Have a great day.

Shooting blind

Strange title. I know. But I had my first experience of it only yesterday. A photographic moment that I’ve never experienced before, but shall be using more of in the future.

My dear wife – totally unaware, as was i

I’m currently in the middle of repairing a Nikon Coolpix L820 16mp bridge camera. The camera has a broken rear LCD screen, and this is the only way of seeing the subject as there is no through the lens viewfinder. Whilst testing its limits and finding out about the faulty screen, I became aware that it sounded as if was working, it was making all the right sounds. So I threw an SD card into the camera to give it a try.

I was just pointing anywhere and pushing the exposure button, taking pictures of everything and nothing, I had no control on settings and functions only the exposure button. Anyway, I did this for a few minutes then transferred the SD card to a reader connected to my iPhone.

Nikon Coolpix L820

Wow, I was impressed with this one picture only, of my dear wife just finishing some lunch. She wasn’t aware I had taken it and neither was i.

This is the magic of photography.

The original was colour, I was so impressed with the sharpness, tones and colours in the picture. It’s not a particularly good picture, just a candid one of someone going about their day, totally innocent and unaware.

I love Black and white pictures, so I quickly converted the colour version via my phone.

I was in two minds as to whether I continued with this repair, as the cost of parts were rising the more I delved into it. This picture alone, changed my mind. I am going to finish the repair as this camera is too good to let go.

And I’m just amazed, that a random photo, that the photographer and the subject were both totally unaware of being taken, has come out so well. (All that has been done is a bit of cropping to align the subject)

The post for the camera referred to herein, will be published shortly.

Thanks for passing by.