Stick with me on this one, I’ll get there eventually it’s a bit of a ramble but I promise I’ll get there.
It’s 04:45 in the morning and I am awake. I’m beside my lovely wife in a bed in her friend’s house in Sunbury west London. It’s a lovely old house with a beautiful back garden in one of Londons leafier suburbs. I’m awake as I’m listening to a beautiful dawn chorus where the birds have awoken and are obviously discussing avian issues quite vocally and beautifully through birdsong. It s a lovely sound and one of natures most pleasant daily occurrences, by the sounds of it it’s going to be a lovely sunny day.
I’m blessed with exceptionally good hearing. Some may call it a curse but to me it’s a godsend. My wife states that i,”Can hear a fly fart from 50ft away” and she’s probably not wrong to be honest. It’s a godsend, as it seems the female members of her family, yes all of them, have particularly bad hearing and my dear wife is in fact registered as partially deaf, and if it wasn’t for her super duper high tech hearing devices she would more than likely be totally deaf. Therefore, my superb hearing doubles as her safety blanket when I am with her. It’s just one of those strange coincidences in life when you are magically paired with someone to be their help, in their time of need. I’ve already stated in earlier posts how she has helped and nurtured me through our life together. There is truly a mystical tie that binds.
I dropped my wife off at her friends house about 11 days ago, just prior to me heading back north to begin a stint of night shifts. It’s allowed the two of them to have some real good time with each other to catch up and do the things they enjoy doing. Her friend as you would already know, if you follow my journal posts, had some quite serious issues last year with some mental health issues after the passing of her long time partner a couple of years back. The wife switched into full time angel mode to help her, and I remain so proud of them for what they have both achieved. You don’t just suddenly get better from such an episode, but she has improved so much she is pretty much back to the old her we used to know, and have always loved. Thankfully my wife has a constant eye on her, and is speaking to her at least 3-4 times a day, so there is really no chance of her sinking back into the abyss she has just come out from, as my wife firmly has hold of the support rope keeping her back from falling down once again.
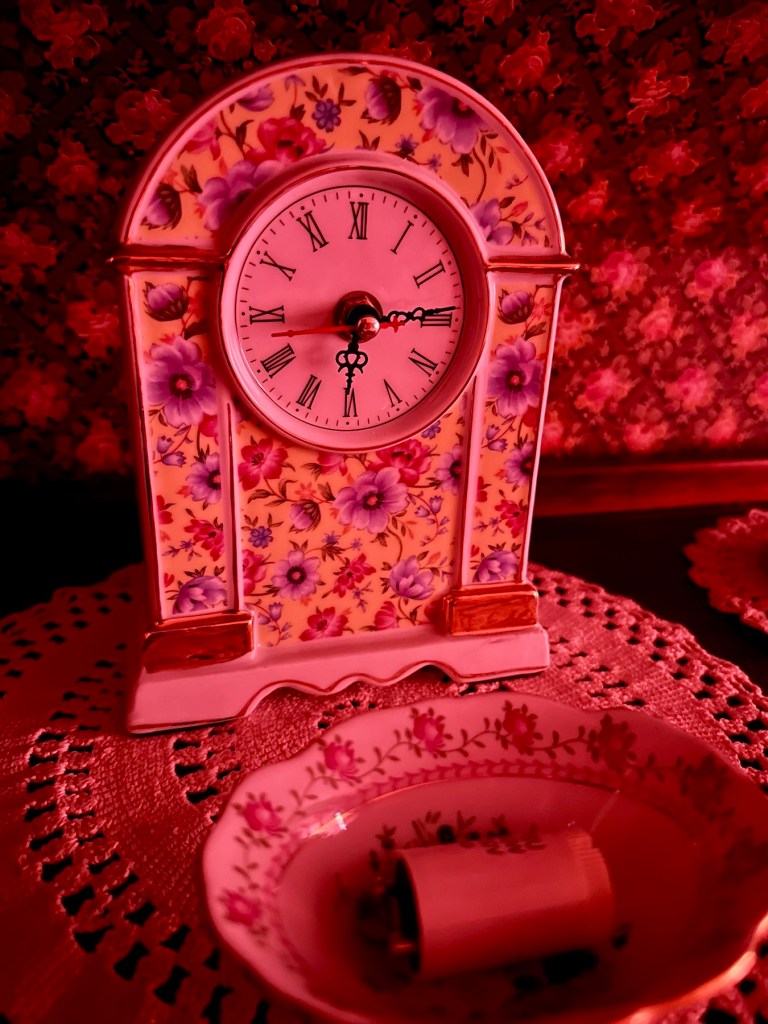
The very clock I’m talking about
Now the clock analogy. I love clocks. Good old fashioned clocks that tick mechanically, not the digital versions that silently do their thing within the scope of silence. I’ve stated that my hearing is above par, and you’d think noise would be a curse. Well it is sometimes. In a silent house such as our own that has those very same digital clocks, I do hear everything. It’s an old house that makes noises. Pipes clank, floorboards creak and changes in temperature cause expansion and contraction noises all around. My hearing is such that I’m not at peace until I can associate a noise with the potential creator, yes I overthink even when I am attempting to sleep, i want total silence and that is not possible in an old house.
However at my wife’s friend’s house it is different. It’s an old house, digital clocks do not exist here and all clocks are mechanical, this house has a heartbeat. I have something to focus on and that comforts me into the most peaceful sleep, and awakes me at the other end with the most wonderful birdsong from outside. I love it.
When I delivered my wife here 11 days ago I had focussed on that clock heartbeat in our bedroom only to be mystified as to why, half way through the night the clock had stopped ticking, its heart had stopped. Why?
It became apparent the next morning that I looked at the clock that the hour hand was bent out of shape, and on its journey around the clock face the minute hand had clashed with it and it had come to an abrupt stop. This had occurred, and come to light when her friend had spoken with her step-son and found out that he hated the sound of a ticking clock and had fumbled in the night to hide it away causing the damage to the two hands.
Now as you know, I love fixing stuff and this item needed my help. The hands were very delicate and to be honest I didn’t think they were strong enough to take being bent back into shape. I used some tweezers and gently moved them back into position and I was able to restore that heartbeat.
I sit here now writing, getting great comfort from that ticking in the background. I don’t know why, I can only presume that like a child laying against its mothers breast, they gain great comfort from hearing their mothers heart beating. Maybe it’s the same with me? That constant, accurate non stop repetitive sound gives me something to focus on, turning my good hearing away from all the other little distractions that keep me awake.
I know one thing, I’m on the lookout for a good old fashioned mantle clock, or wall clock to have within listening distance of the bedroom at our house, that I can focus on.
I wish I could have been a horologist, working on clocks is tantamount to being a heart surgeon in my eyes. A most fantastic invention, and how I would love to be someone who looks after these fantastic mechanical masterpieces, however my eyesight is what lets me down here. But guess what? My wife’s eyesight is perfect. See, we are truly made for each other!
Gotta be pretty much any politician I’ve seen or heard from in my life. The ones I’ve witnessed who will help in a situation always seem to have an ulterior motive, normally one that lines their pockets or doesn’t want issue in their own back yards. (Nimbyism)
Our local politician
I point you to the farce that is Leicester city council and the gelatinous mess who are representing us there. All got their snouts in the trough, don’t really give a toss about the local populace as long as they are ok.
A good old, “I’m alright Jack” attitude.
They’re all as bad as each other, many different parties all with the same agendas.
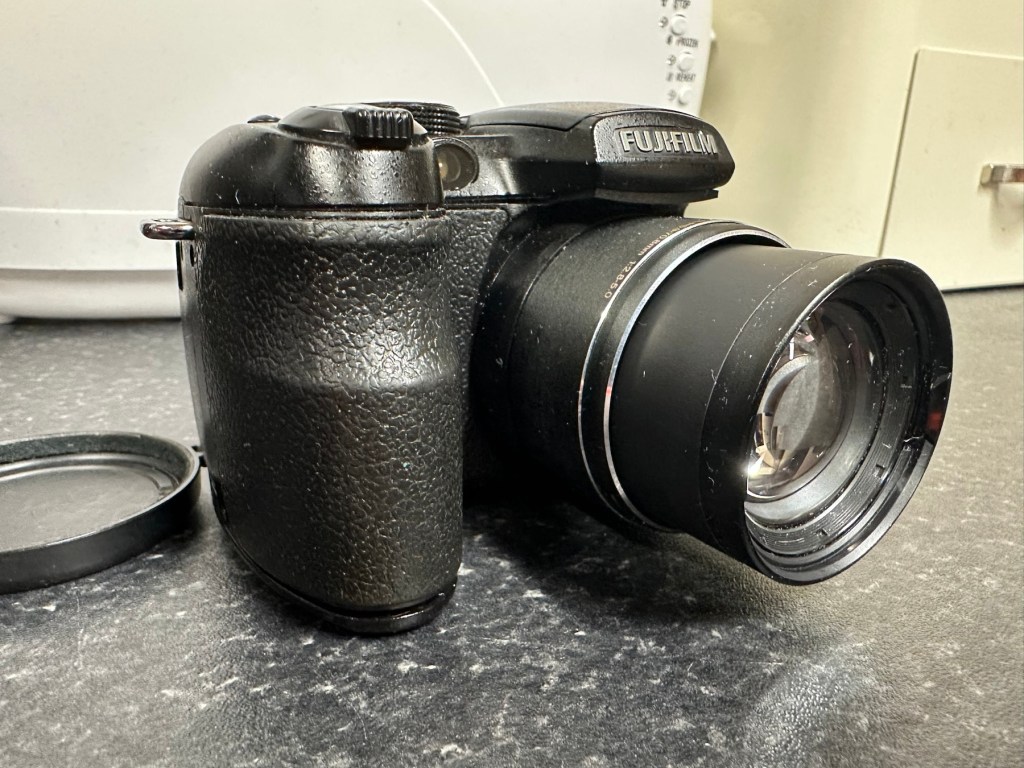
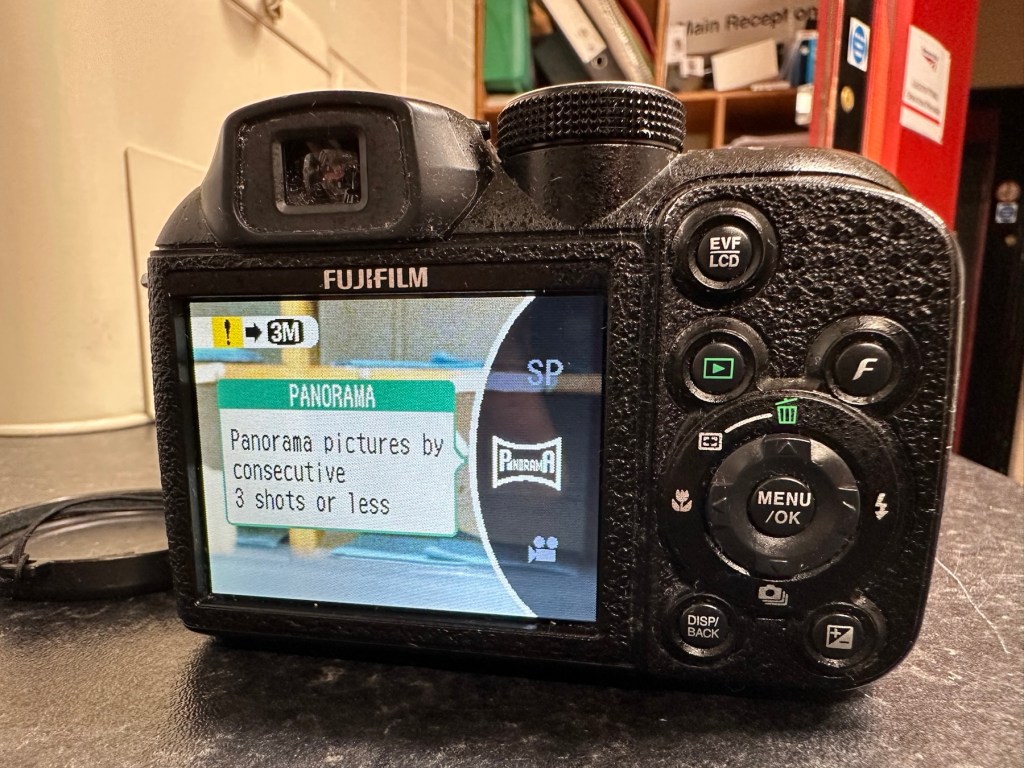
I purchased this item from EBay in April 2024 and have only just got around to finishing what had been a draft post put together all that time ago. I had written about it briefly in this earlier post Fuji Finepix S1500
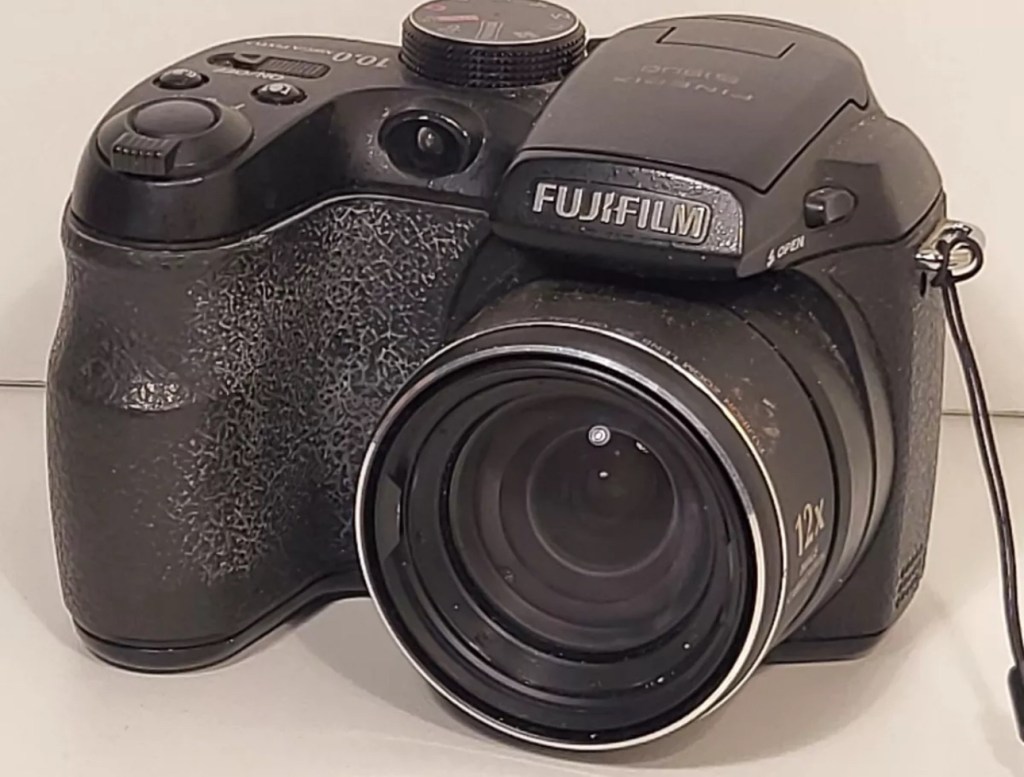
A little bit about this digital “Bridge” camera
Successor to the S1000FD (at the time the world’s smallest 12x zoom camera), the FinePix S1500 is the latest in a long line of very compact SLR-styled big zoom cameras designed to appeal to those wanting a lot of lens on a tight budget. The big change is the inclusion of optical (CCD shift) image stabilization, making the long zoom a lot more usable in less than perfect light, and for the money you’re getting a lot of features – including full photographic controls and a 7.5fps burst mode (at reduced resolution) – in a lightweight package. Price on the market back in 2009 was £219:00GBP
DP Review
Assessment:
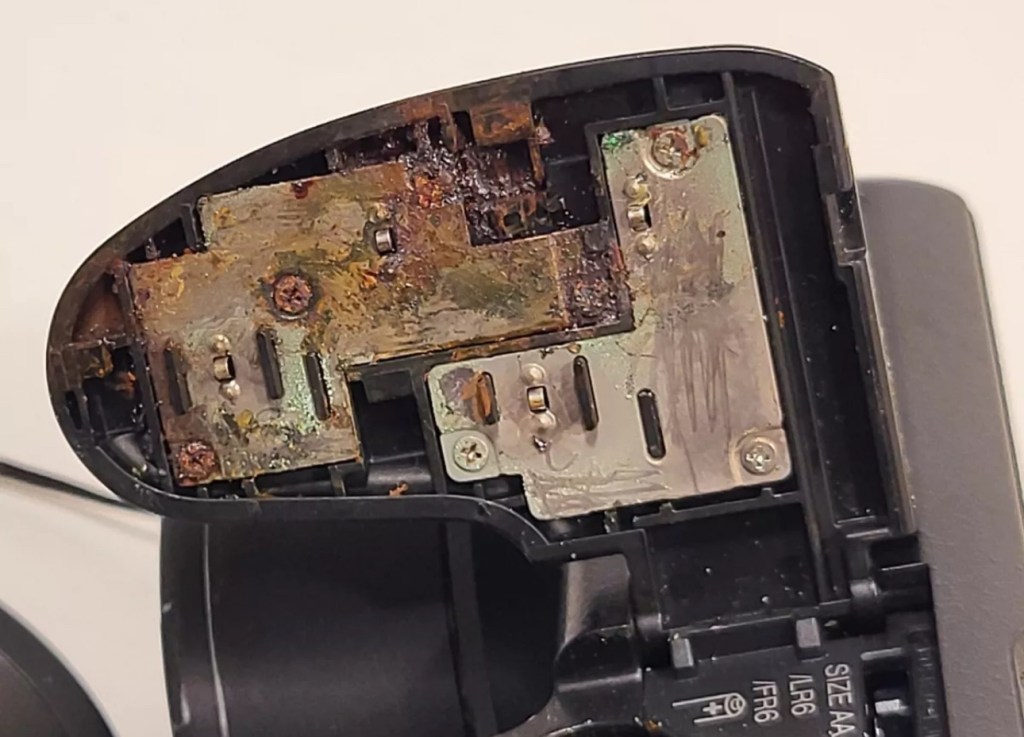
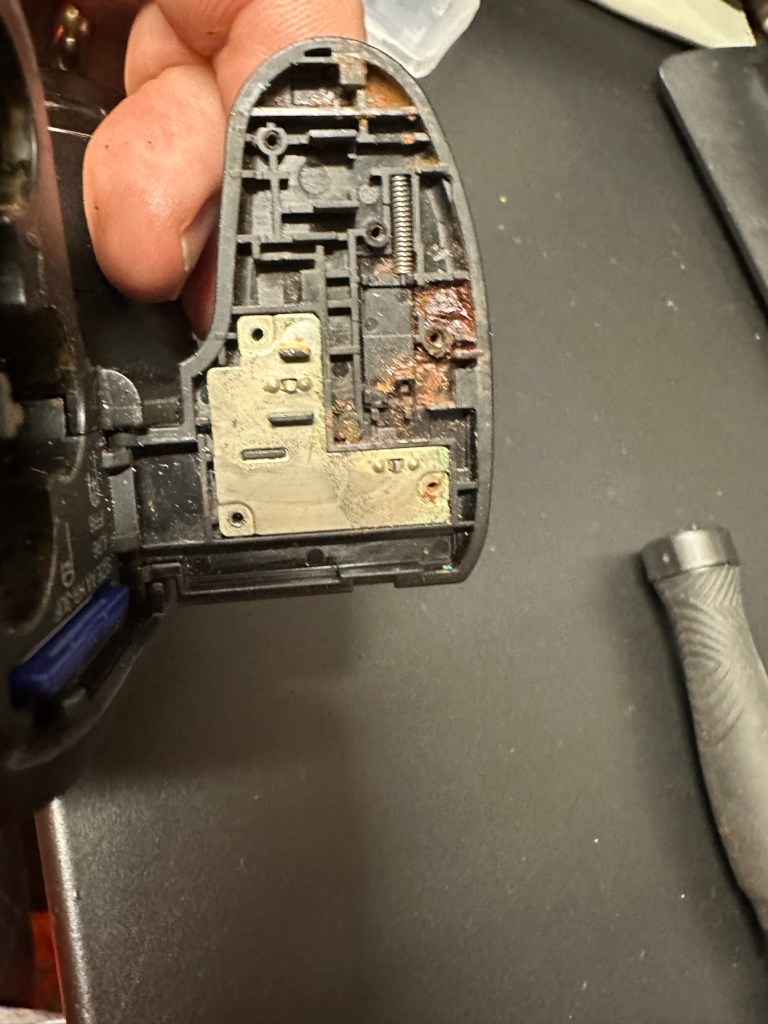
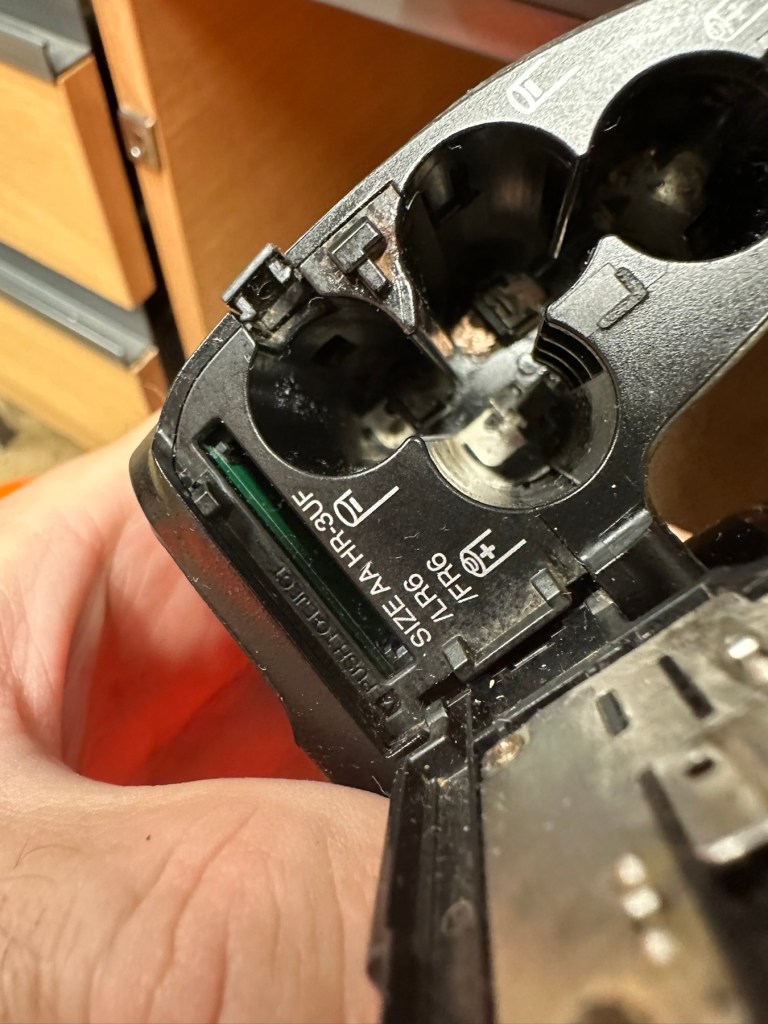
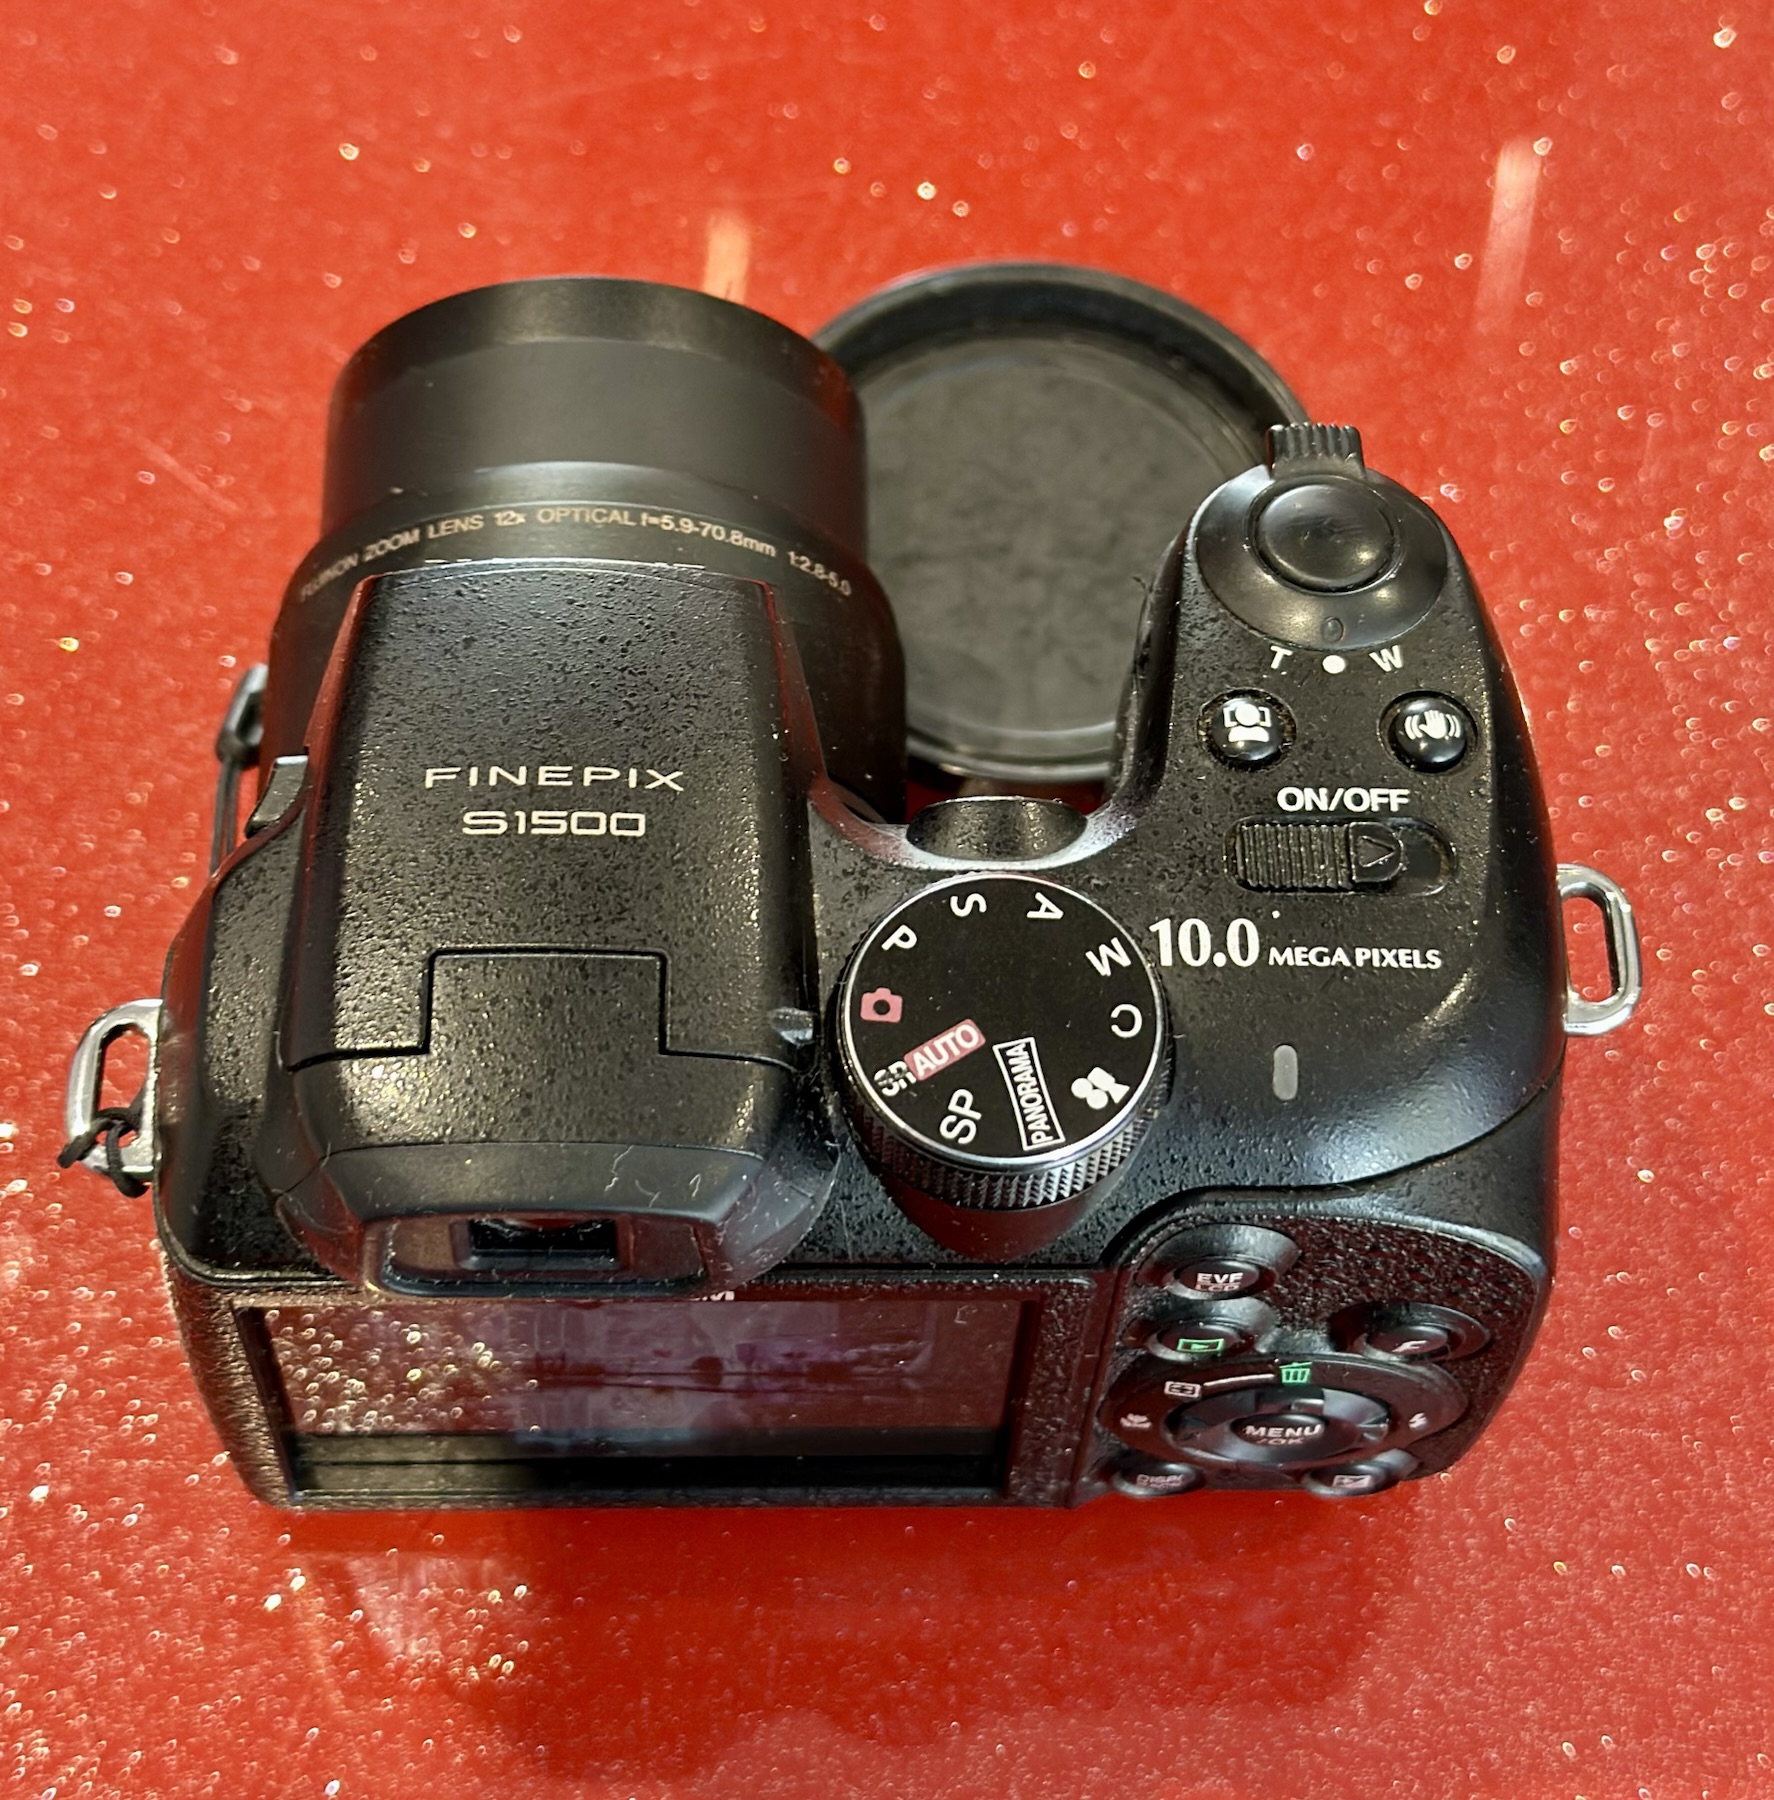
This camera was launched in 2009. The unit has arrived and is cosmetically tidy, however when you open the battery door the issue is obvious, two of the contacts are badly corroded and despite some initial cleaning there is no continuity and no power present. The unit is very much dead and not working.
A tatty and unloved camera
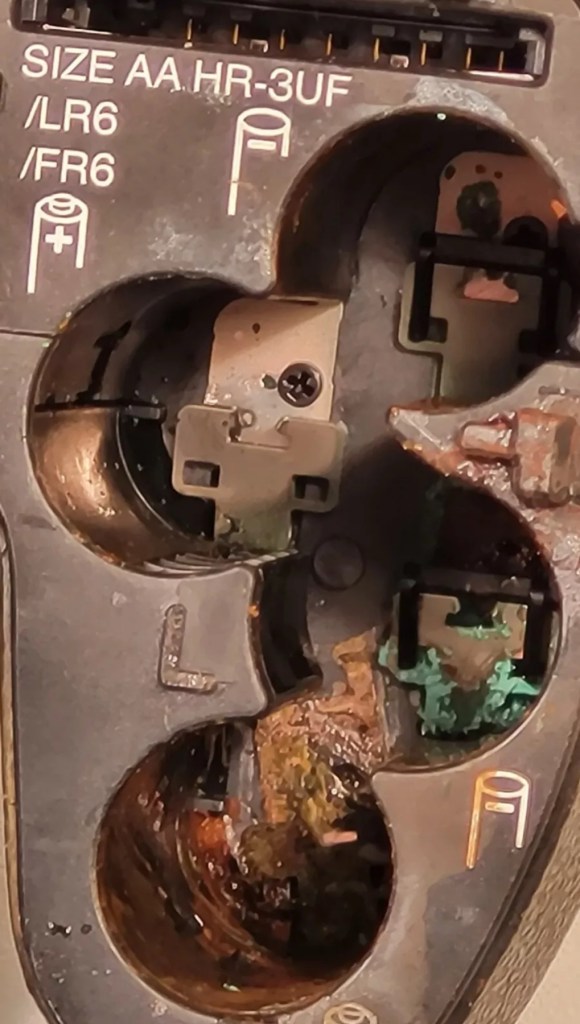
The issue with these units is that the power chambers are hard to access and to get to the point where the battery connectors are, you have to remove the powerboard assembly and this involves de soldering a number of points. There does not however appear to be any major signs of corrosion on the visible side of the board, when it’s removed it may reveal a darker issue hidden below.
Power board assembly
It’s going to be no easy task but I may look at running six volts from the bench power supply to a point on the power board assembly to see if I can breathe life into this camera. I don’t want to waste time in the battery terminal area if there are issues elsewhere on the unit.
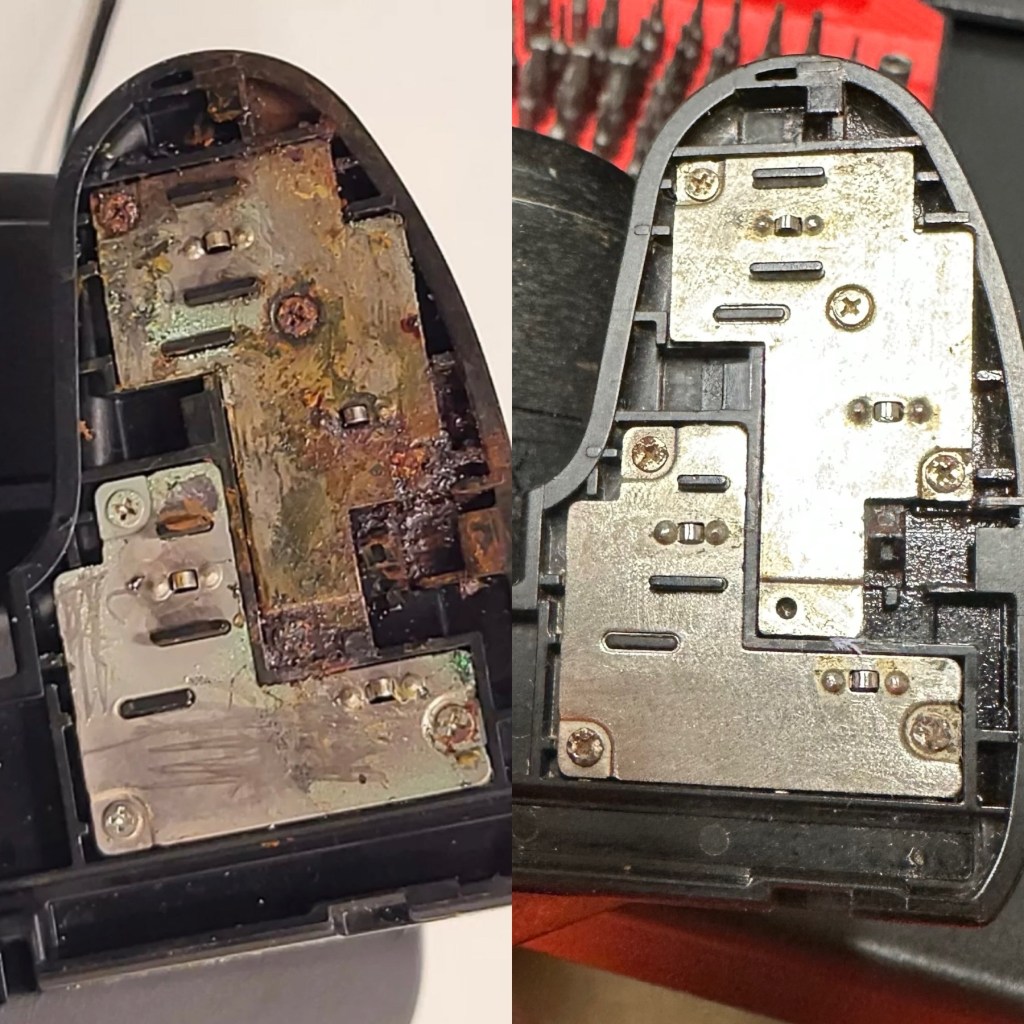
The corrosion on this camera is horrendous
Repair:
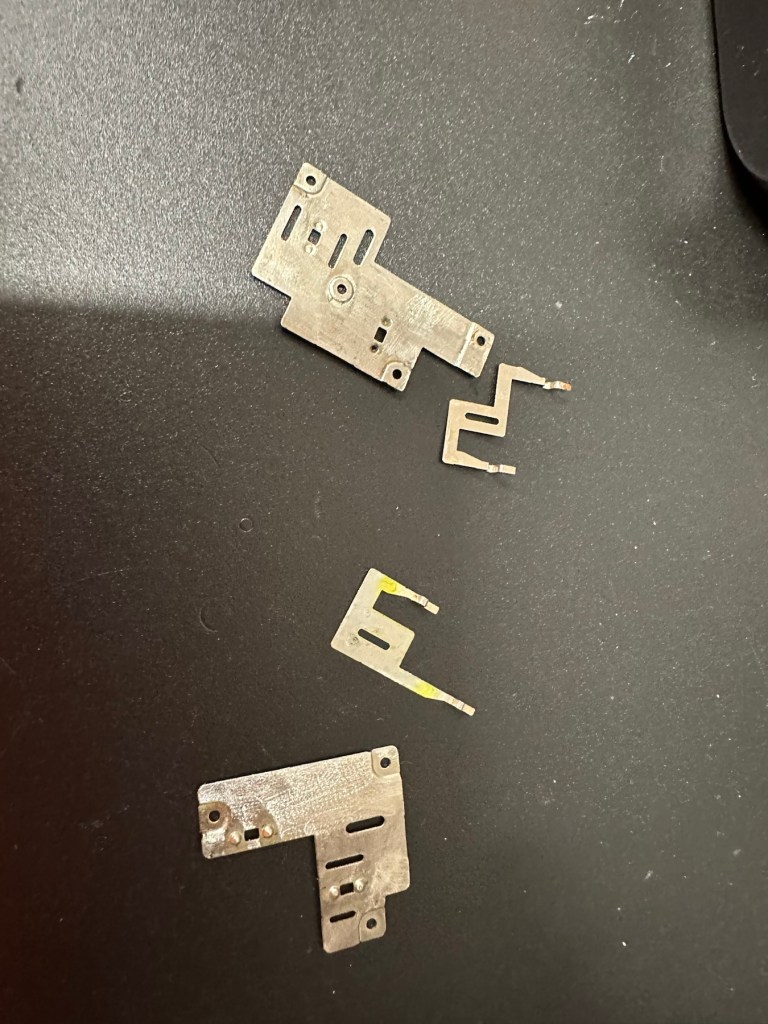
Looking at the boards again I am not going to pay them any further attention. The contamination has not reached under them and is isolated to the battery chamber so that’s where I will concentrate on.
I’ve started with the contacts on the battery door, as you can see above, they are particularly bad and have no continuity through them.
Corroded door Contaminated contactsBadly corroded All clean
When reassembled the door section looks good, it will just need a good clean at the end.
Before and after
Rather than dismantle the whole camera, and because I know there is no contamination on the main board I was able to get down into the battery chambers with a steel braid pen that I have, that allows me to gradually scrape off the contamination. Followed off with a good chamber clean of Isopropyl alcohol, I was able to get the remaining acid contamination out of the camera.
Attacking the contamination in the battery chamber
Result:
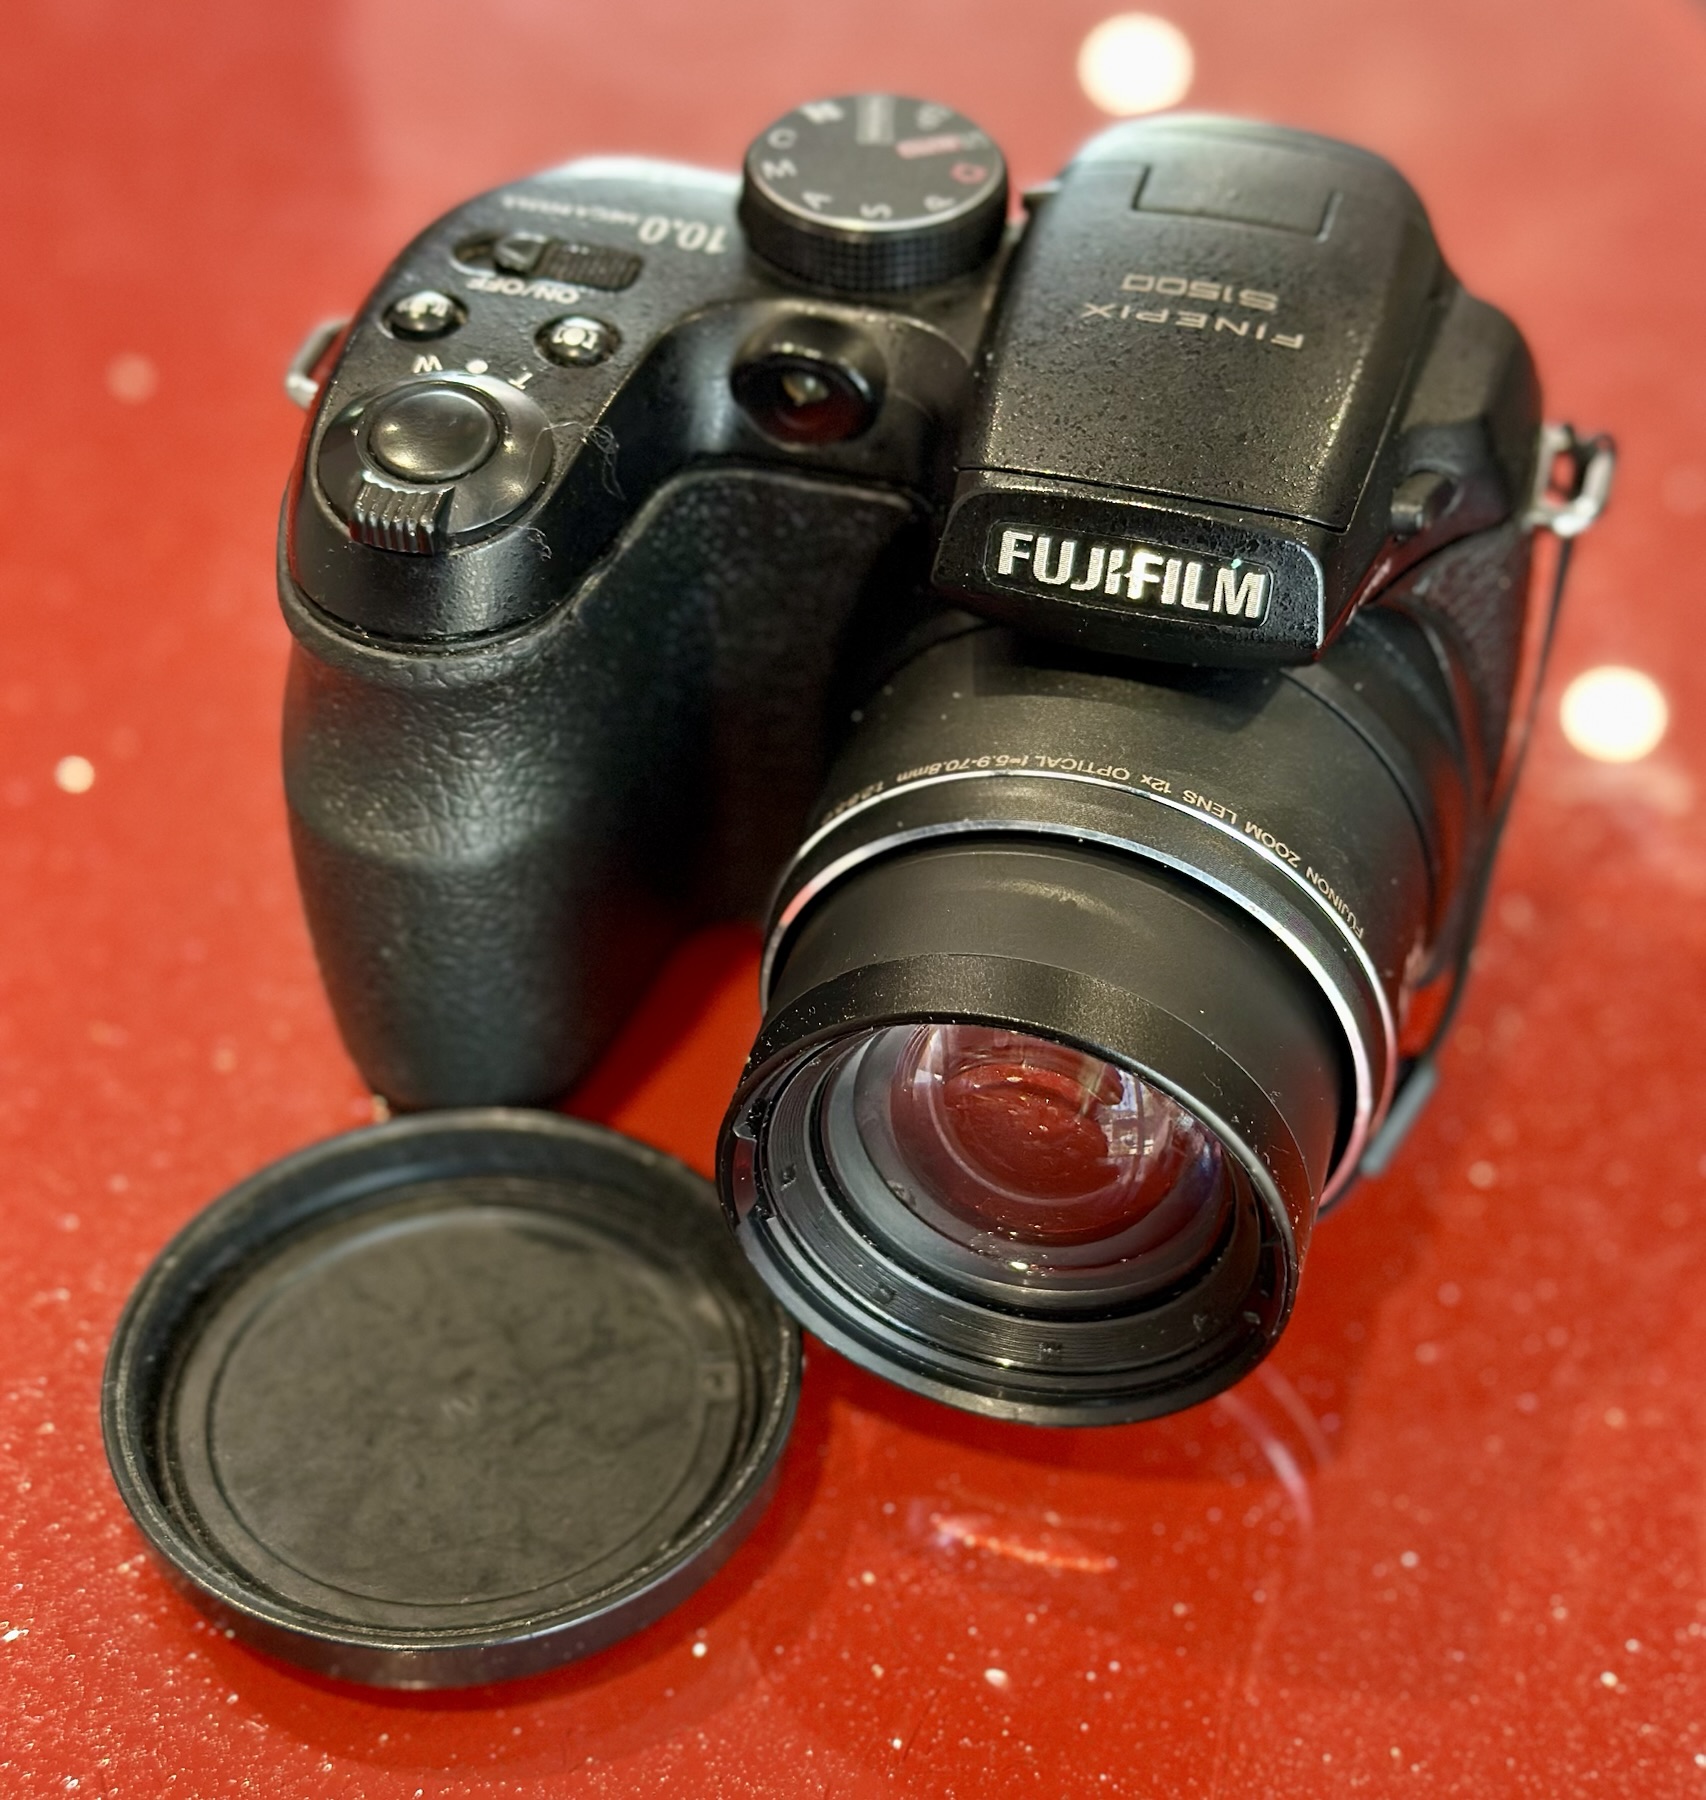
Once I did all of this I paid some more attention to the exterior using some car cockpit polish, this removed those horrid white sweat marks you see on the faux leather coverings of these older cameras, and it came up quite well and had a lovely vanilla smell to it .
Looking mighty good….and clean
Polished
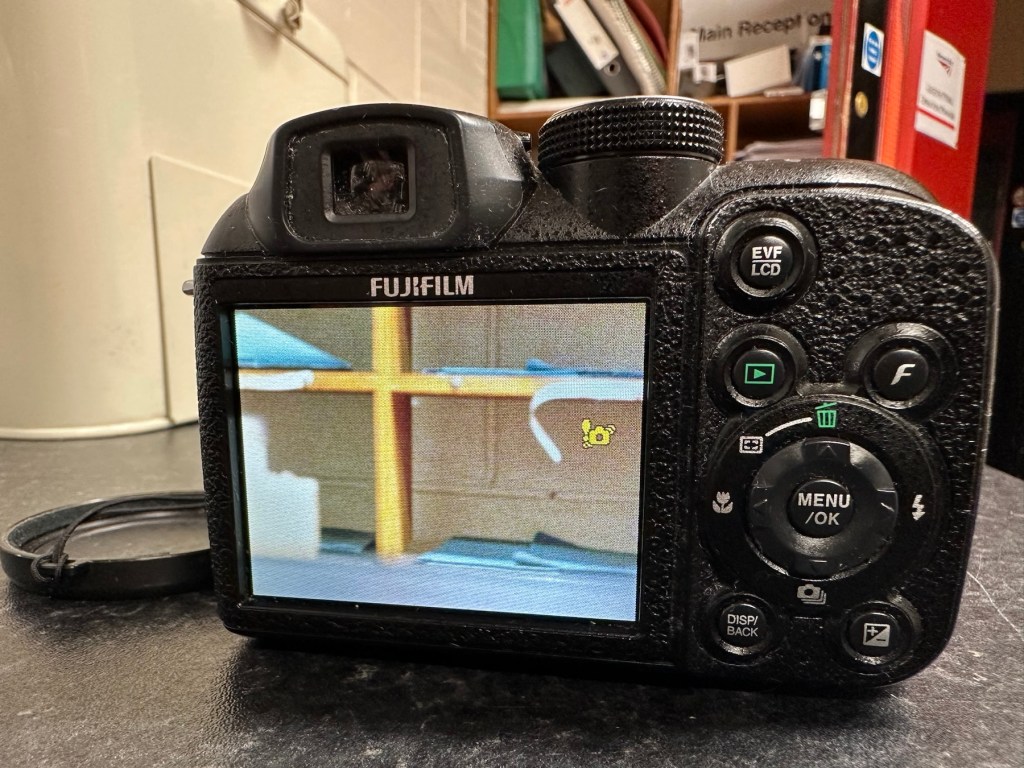
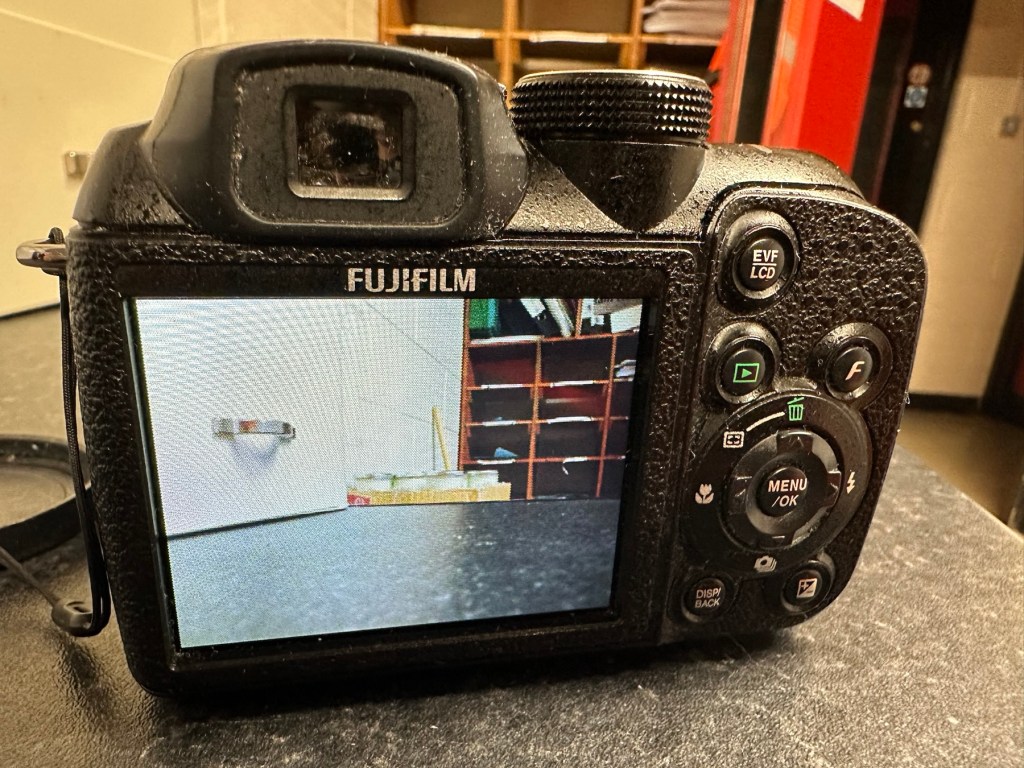
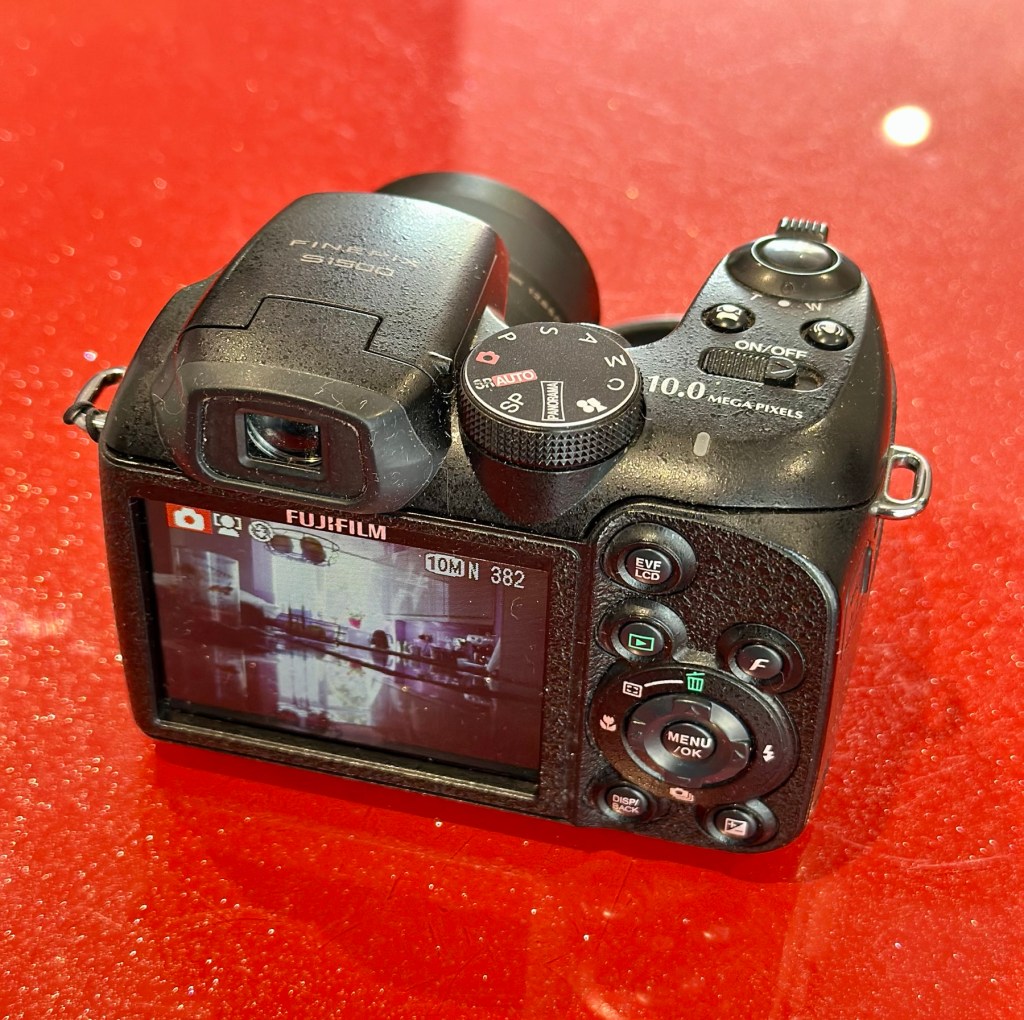
I have turned it on and hey presto we have life. Everything is working as it should. It’s a 10 Megapixel camera and I have a 1Gb Sd card installed and it is taking pictures as expected.
And it works
Nothing more really to say about it, it cost me about £6:00GBP spares and repairs as it was totally dead, thankfully we’ve managed to get it working instead of breaking it up for spares that would more than likely never be used anyway.
Finished item
This unit is of no real use to me, so I will get it up to our local Hospice shop for them to sell on.
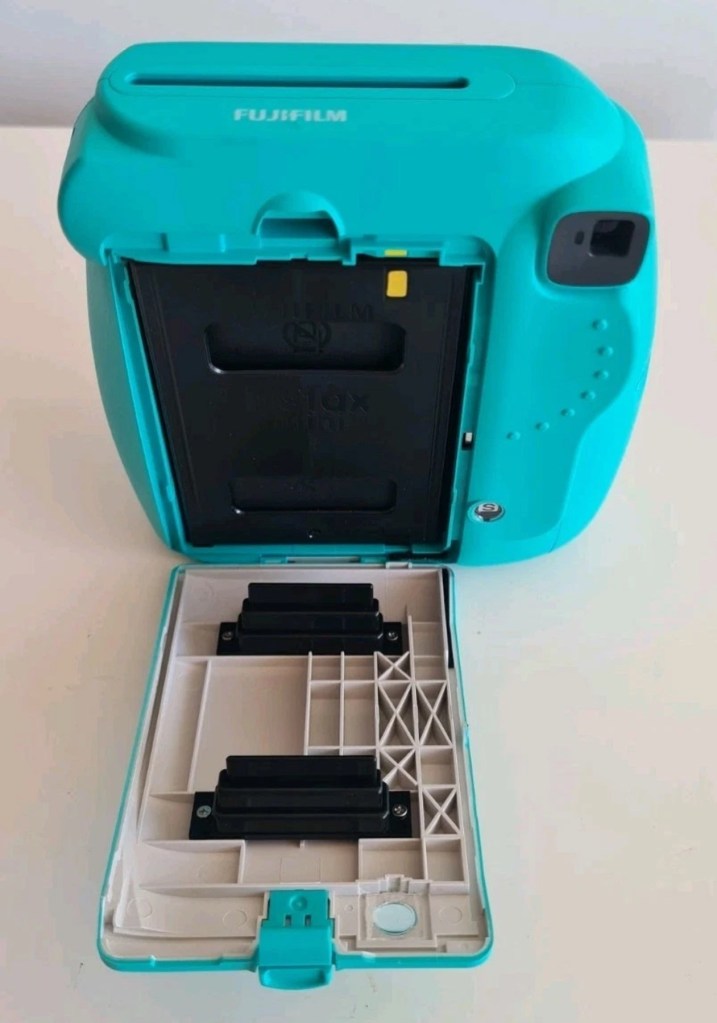
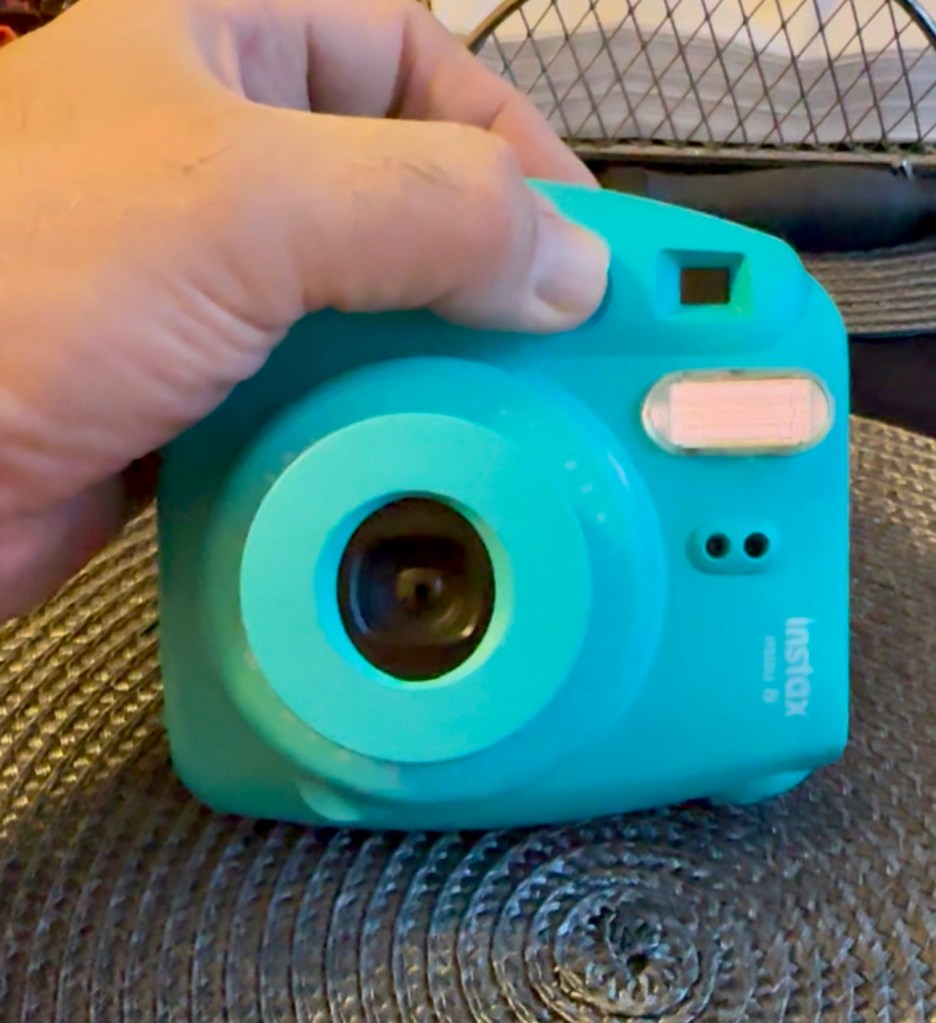
Fujifilm Instax Mini 8 Instant Camera Teal Blue Spares & Repairs
Please see photos for condition this will be the item you will be receiving.
The camera will not turn on.
Thank you for looking!
EBay
It’s about time I started to get back to repairing some cameras, I have a mountain of them to get through but they can wait a little longer. These little Fuji units are really popular with the younger generation, and in my view anything that gets youngsters interested in, and involved with photography is a good move. We have some youngsters in our clan, and I have this earmarked for one of them if I can get it working. We had some conversations during our family gathering over Easter, and the subject of photography, and this particular member of our family came out. Seeing this auction today, I acted and purchased as this is a perfect little starter unit for her. My total outlay for this unit was £11:45GBP and considering the current costs are around £30-£40GBP for a working example, this is not too bad an initial outlay.
The Instax Mini 8
Here’s some history on these cameras:
Instax is a brand of instant still cameras and instant films marketed by Fujifilm.
The first camera and accompanying film, the Instax Mini 10 and Instax Mini film, were released on November 10, 1998. The “Wide” film and first accompanying camera were released the following year. The Instax Square film and accompanying camera were released in 2017.
The formats of Instax film give an image size of 46 mm × 62 mm (1.8 in × 2.4 in) for the Mini, 99 mm× 62 mm (3.9 in × 2.4 in) for the Wide and 62 mm× 62 mm (2.4 in × 2.4 in) for the Square. The Instax colour film is available in Mini, Wide, and Square formats and the black and white Instax Monochrome is available in Mini and Wide formats.
Wikipedia
For anyone that was around in the 70s, these cameras are an extension of and an advancement of the then Polaroid instant photography system. Nearly every household back then had access to Polaroid cameras. If you look back at any photo album or collection from that time, you will invariably find some Polaroid photos stored within that collection.
Here is a typically over enthusiastic review produced by a very pleasant chap when it came out about 8 years ago. Sums up in a few minutes just what it can do, and just how easy it is to use.
A very enthusiastic review
This unit looks to be in quite a nice condition but as always we will never truly know until it has arrived and can be assessed, never forget, this is EBay that we are purchasing from 😂
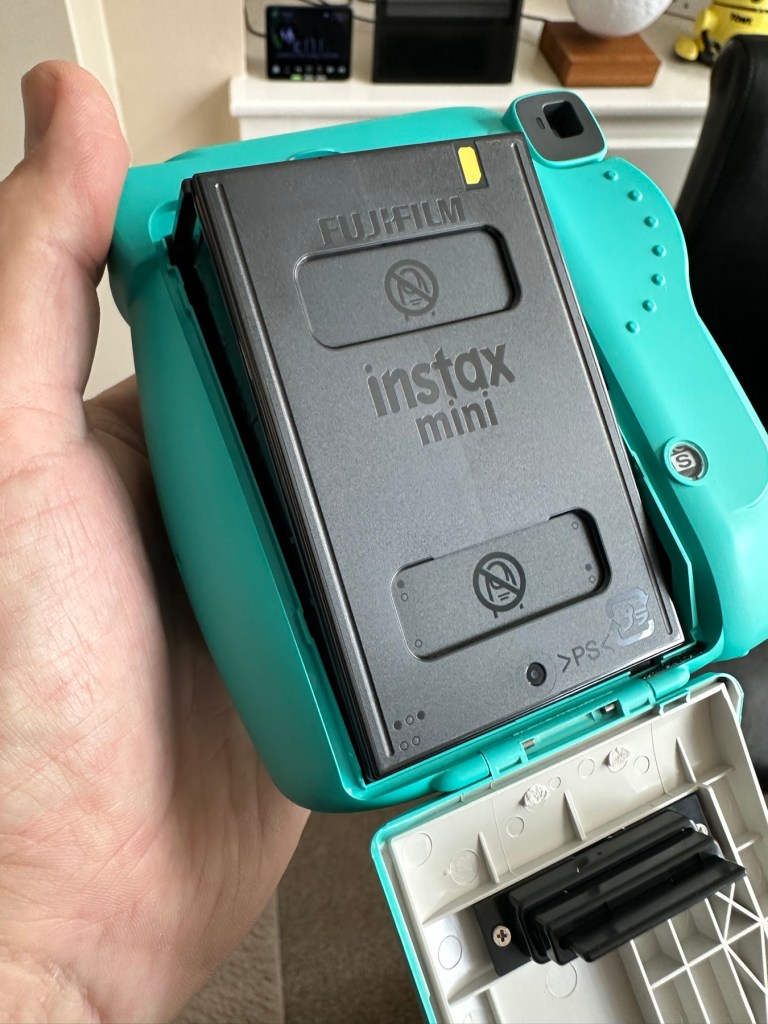
Battery compartment…suspicious!
Something looks suspicious in the battery compartment. There seems to be contacts missing, they might be fine I just don’t know. They just don’t look right to me. There may well be some minor signs of corrosion as well. Who knows, I’ll just have to wait until the unit arrives. So let’s just be patient until then.
Come on Mr.Postman!
Assessment:
I’ve downloaded the instructions and they consist of just half of one sheet of A4. To be honest they are about as basic as are needed I guess, but in technical quality they are about as much use as an ashtray on a motorbike! And those contacts I mentioned above, look just as they were from the factory. What a strange design.
On arrival the camera appears to be in a really good cosmetic condition, there is even an old film cartridge still inside that I suspect is well fogged by now. However this will be of use if I can get it working, as it will prove if the film transport works.
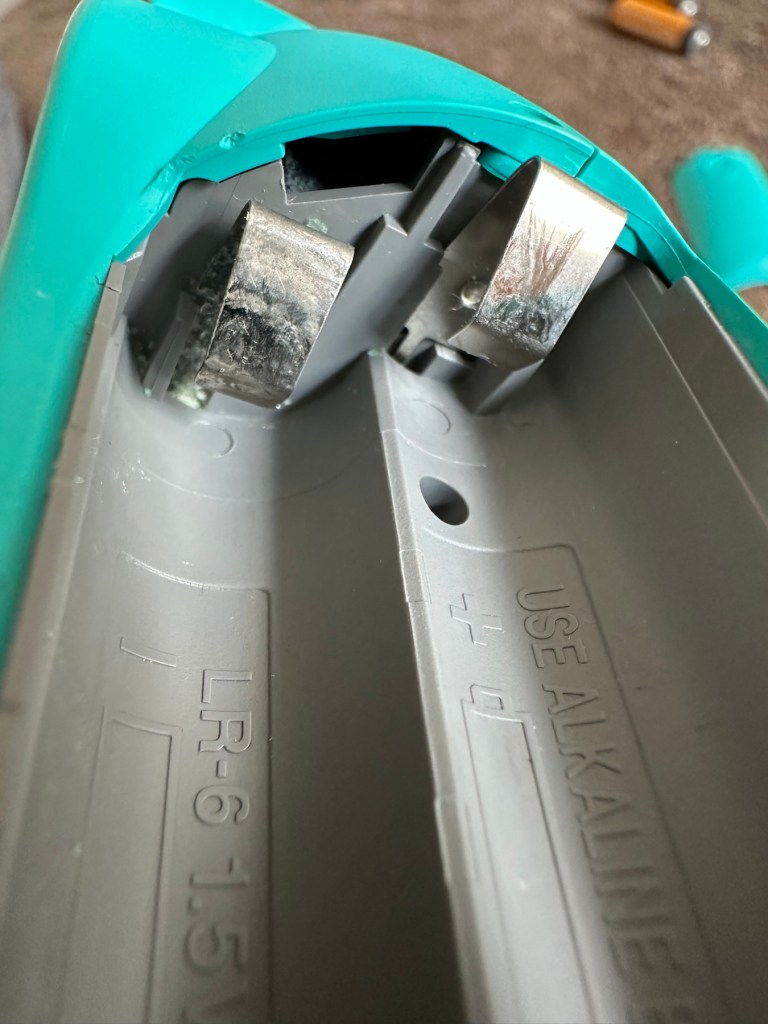
The battery connectors are exactly as they were when the unit was assembled, so my earlier suspicions have come to nothing. However there are small indications of battery leakage on the outside that are always concerning, because they can always hide a greater issue occurring inside the camera. When batteries are put in place the unit is totally dead, just as advertised.
Cosmetically tidyBatteries – no powerContacts show evidence of light contaminationlight contamination in evidence
So no more to it, I have to open the unit up and see what I can find inside. Before doing that though I have connected a bench power supply to the contacts and there was still no draw on the power at all. It is definitely dead.
Repair:
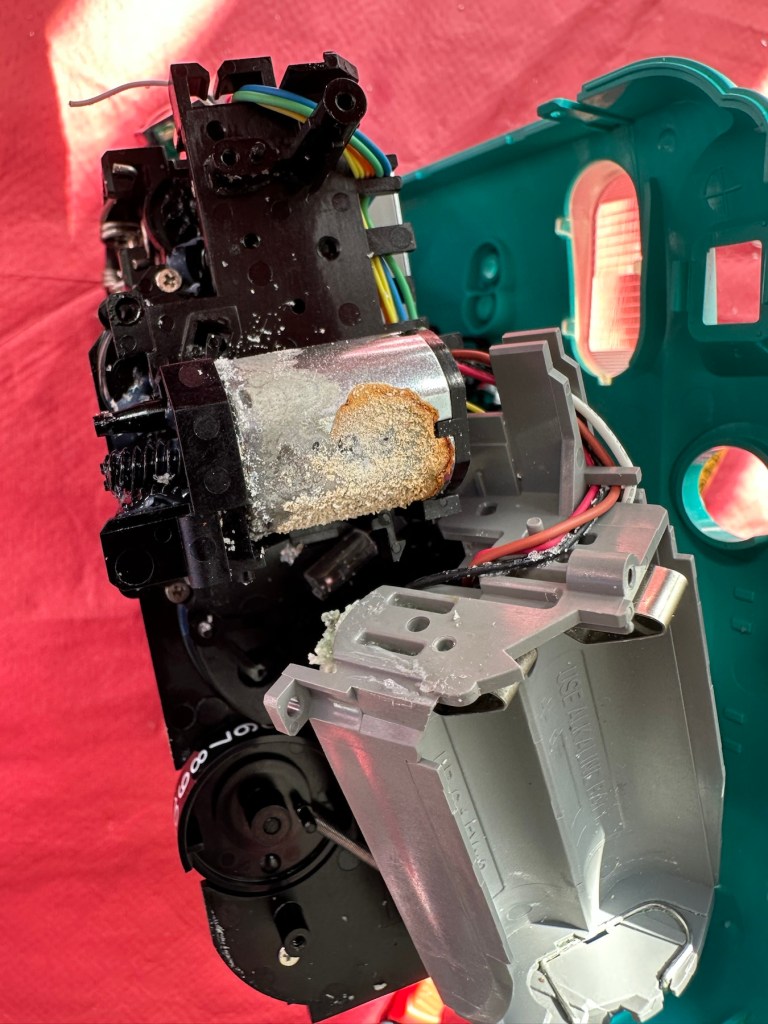
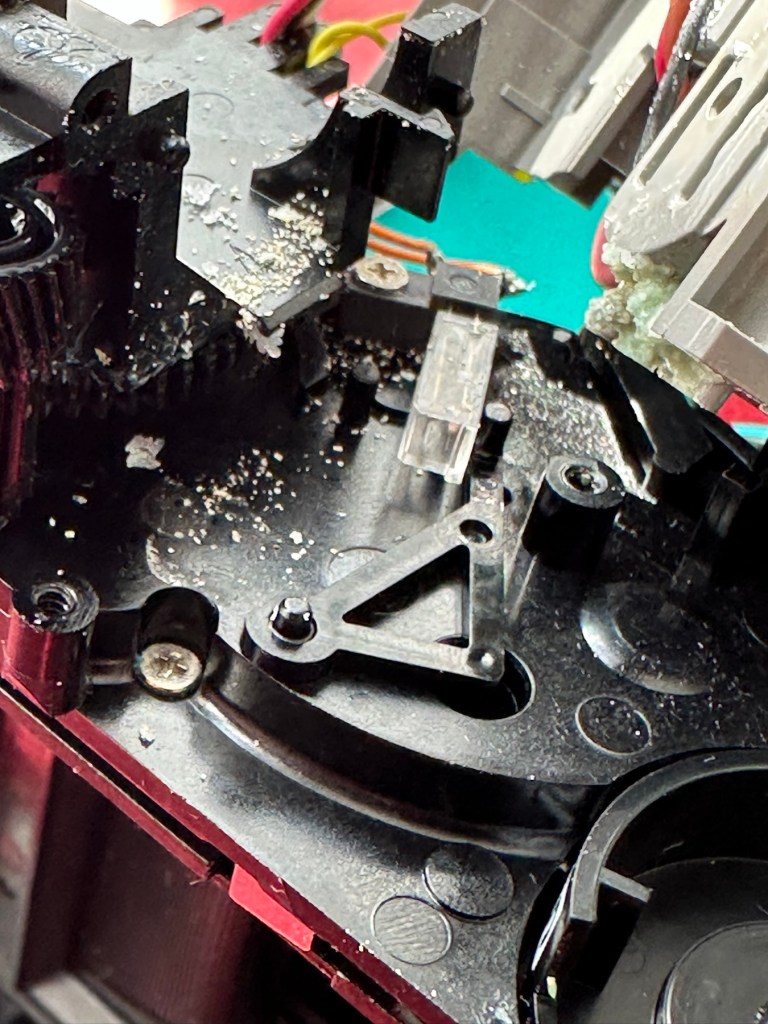
On opening. Oh my word. What the heck is that? I have never seen contamination around a battery terminal like that before, the battery contacts have been totally consumed.
Under that crystallised mess is what is left of a battery terminal, and that thing that looks like a biscuit on the left is the main motor. Totally crusted up
I could hear some rattling around inside the case and thought something had worked itself loose. No. It was what looked like broken glass, but it wasn’t, it was crystals of contamination, this camera has more stalagmites than Wookey Hole! The motor was badly contaminated and every part of the working mechanism had signs of this contamination, it was everywhere.
Contamination crystalsMotor contamination
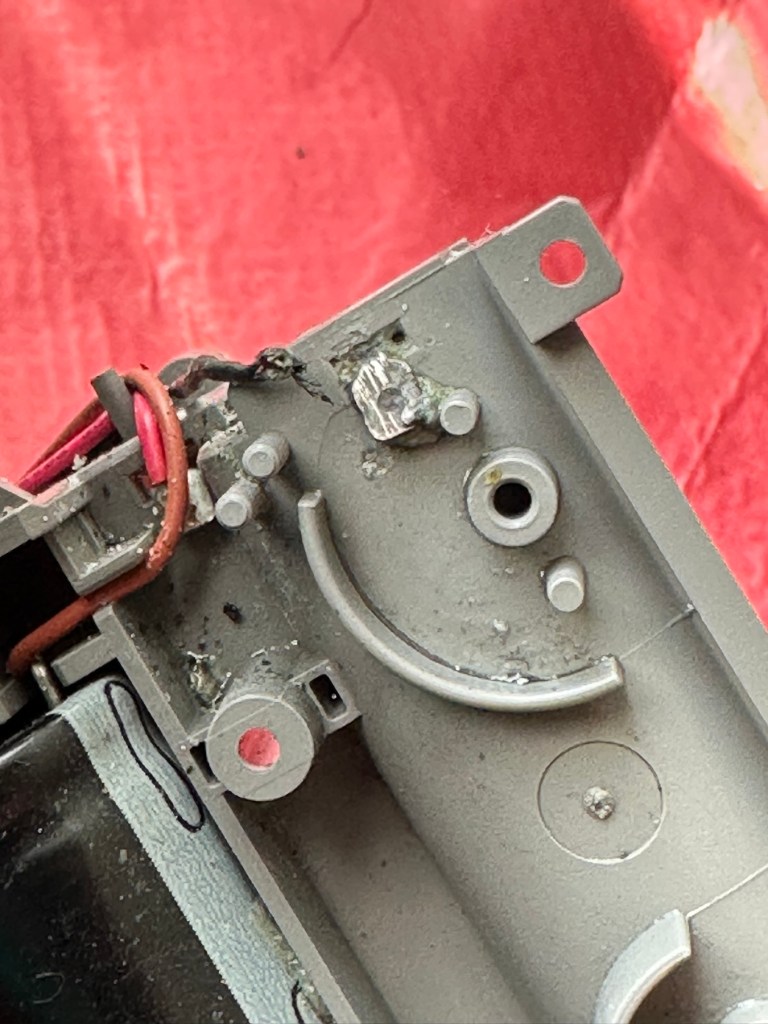
First things first, the issue with the power supply is purely at the point of that big mass of battery contamination on the battery terminal, there is no continuity here and this needs removing and attending to.
What was under that crust of contamination All cleaned and ground down ready for re soldering
Using a combination of alcohol to break down the contamination, and a grinding pen, the offending crust was eventually removed. It had eaten through the wire at the battery terminal and was being held in place by the mass of crust that has built up around it. I was able to cut back the wire and re solder the terminal to make it good. There was contamination everywhere and this all had to be removed, if left in place it would cause more problems in the future. It had to be eliminated completely.
Contamination everywhere, what a mess
I removed the motor, and used a contact cleaner to free up its motion, I constantly turned it back and forth for about 15 minutes and I could gradually feel it freeing up. A wire had broken off from the led light on the viewfinder, this was soldered back into place and we were now ready to test. I put the batteries in and flipped the switch. I could hear the flash capacitor charging and all lights came on, I switched the unit off and began preparing to re assemble the unit, not before accidentally touching the flash circuit and taking a quick 300v shock in the hand. It’s a big capacitor as all flash units usually are. I’m an idiot, it was a school boy error. And I had a capacitor discharge unit sitting right beside me. Fool!
Ok. I’ve stopped cursing myself and the reassembly continues, and I manage to complete this with no further issues.
It seems to be working.
I’ve loaded in that old cartridge it came with and can confirm that it was all fogged film. However it has proved that the film transport system and flash are working as you can see in the video above. I’m now going to have to source some fresh film for a true test. Before that I’m going to open up the unit again and give it a good blast with compressed air and a final check to make sure I’ve got all of that contamination. It’s just the OCD coming out in me.
That said, the flash has now ceased working even though I can hear the capacitor charging up. I suspect the flash bulb has failed, so I need to get back inside anyway. Oh well, here we go again!
Like the idiot I am, I realise I have not been using sufficiently powerful batteries and the flash capacitor and flash unit are both in fine working order. I’m just going to make a small adjustment on the shutter opening switch though, and also the power contacts connected to the lens internal focus ring.
I’ve removed an unnecessary small spring from the aperture ring on the left, and I found some more of the crystal type of contamination on the circuit board near to the flash capacitor.
I’ve removed an unnecessary spring that was on the aperture ring, it was causing the aperture ring to sit in an opposing position to the light indicator on the side. The two of them have to match to ensure the correct exposure. The spring was pulling down on the ring, and moving it to a lower position on the indicator. Thus causing an exposure issue. I’ve removed it, it is not needed and is now working better. I have also cleaned the circuit board as I found another small patch of crystallised contamination. It’s now cleaner than when it departed the factory.
The lens aperture ring, and indicator
And here we have a picture where I’ve captured the flash unit working.
Flash captured working
Now all back fully assembled I’m confident that the camera unit is in as good a condition as it could be. Fully serviced, clean and operational just as it should be. The next real test will be when I get some film inside of it to carry out some realtime tests. I’m hoping I’ll have the film within the next day or two.
Result:
I dont know why but I really love this little camera. I’ve enjoyed the challenge, the issues thrown up by it, and have gained immense satisfaction in getting it back into a working order. I don’t know if it’s the size or just the pure simplicity of having a picture to hand that is fully developed in about 15mins. The excitement of watching a picture form in front of your very eyes and even the fun factor is incredible. It’s what is needed in photography today, a step back to the 70s world of Polaroid, it’s true that back then they really knew they were on to something big, but I bet they didn’t think that it would now be having such a resurgence with the younger generation 50 years later. Instant memories preserved right in front of your eyes. The Japanese photographic industry, are so up there with modern photographic trends and demands. If only some of the now defunct big players such as Kodak who I used to work for, had gleaned such future insight, things may have been very different.
This unit as was stated earlier, is promised to a younger member of the family and that is where it will be going. I think I’m probably going to buy another damaged one to fix for myself, because I just love these little packages of fun and instant memories.
My film arrives within the next 24hrs and I’m really looking forward to getting some pictures taken.
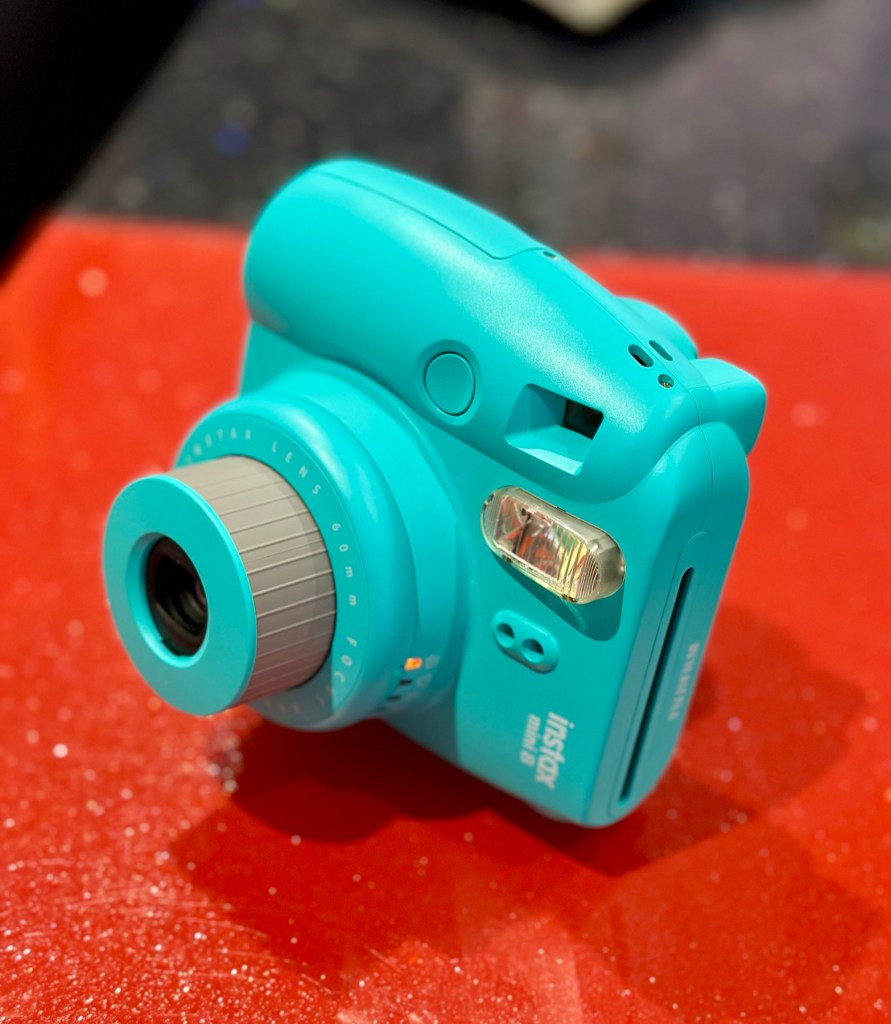
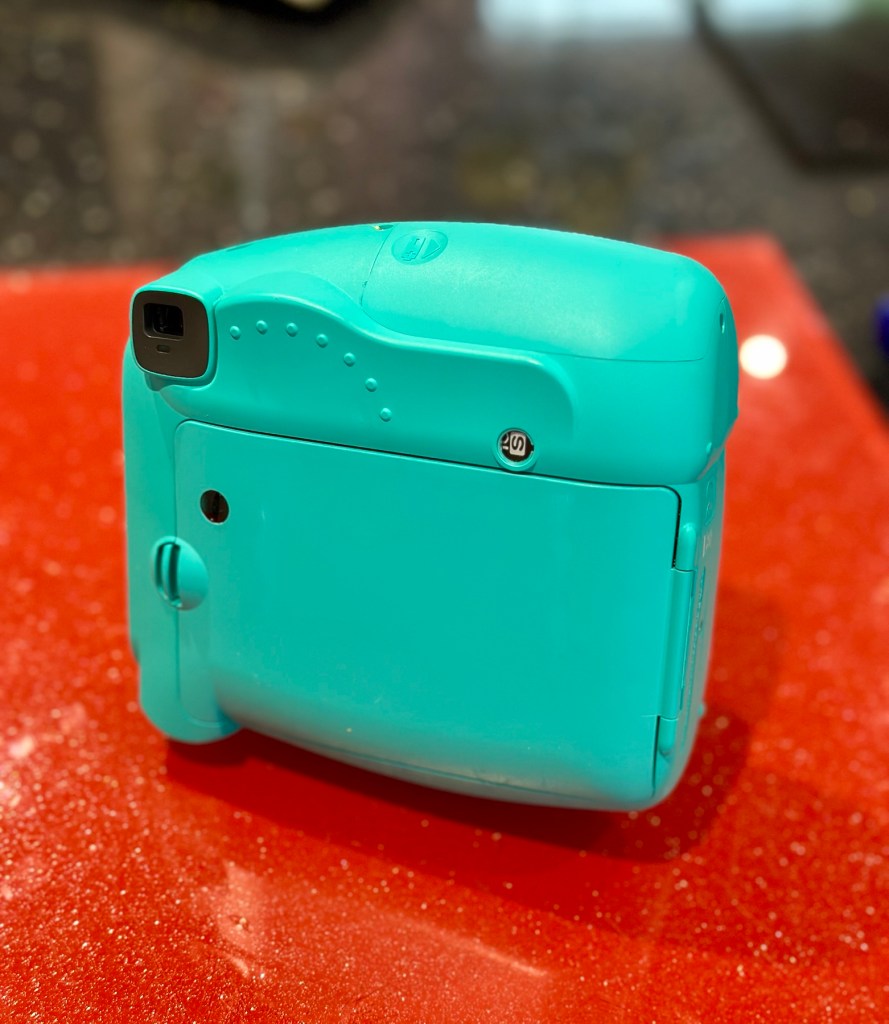
Now all polished and cleaned and looking splendid.
Sparkling, clean and pristine (Inside and Out)
The film is here and I’ve put in new batteries and tested the unit prior to putting the film in. Anyway, film installed let’s take the first picture that will remove the cover off the film cartridge within.
Cartridge inFilm cover out
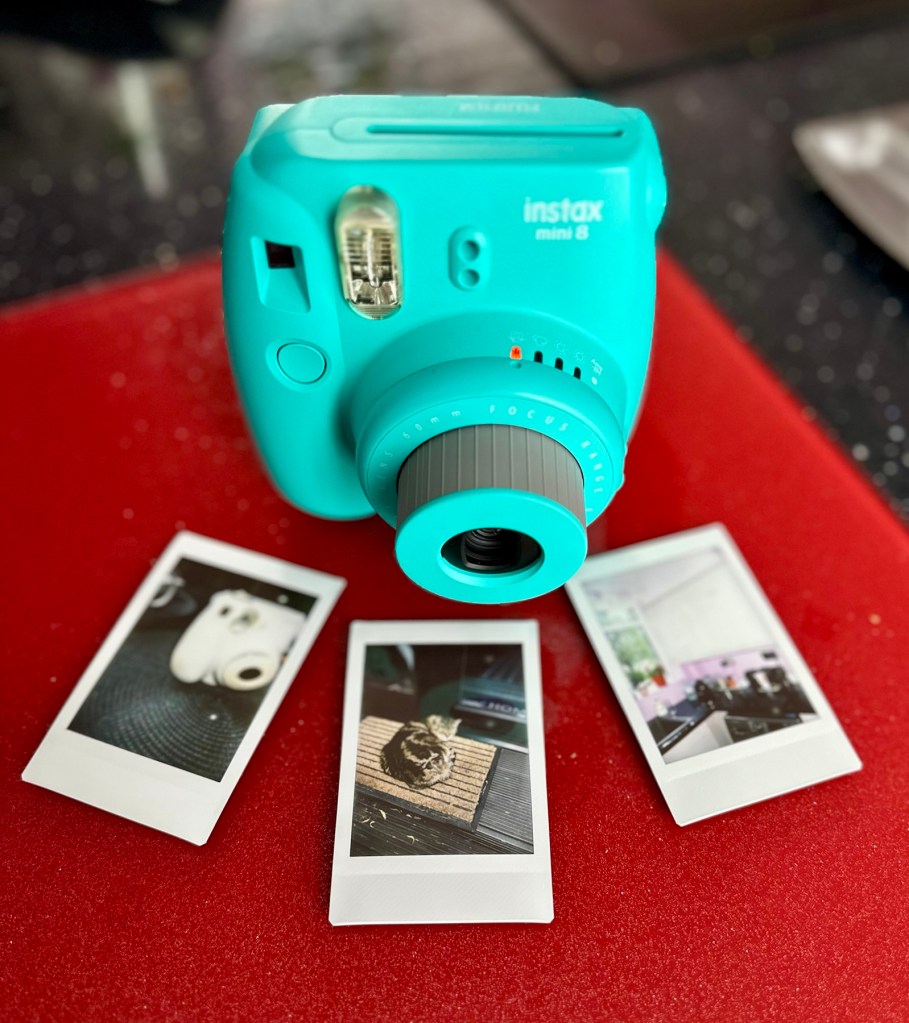
Now to find some subjects without wasting too much film. Picture one was of another Instax camera i am working on, bit close to be honest but there is at least an image, the camera is working. Second one is in the corner of the kitchen this comes out well. Third one is of the feral cat “Tabs” who owns our garden. She wasn’t too happy that I’d disturbed her sleep but that said it was a good photo.
First three trial photos
Overall I’m exceptionally pleased with the results. Closer examinations shows some repeating white spots up the right side of the photos, no big deal but this probably points to some contamination on the film roller. I can’t clean this now without fogging the remaining film, so I’m happy to leave this until this cartridge has been used. I’m happy that this is the only minor issue after all the other problems this camera had.
Working perfectly and looking great
Been a great little project that I have thoroughly enjoyed working on. These little units are great fun and the little lady that is going to get this camera is going to have a great time with it.
Another one of mass manufacturings victims, revived, and repaired and now facing a much longer and rosier future. Another one successfully kept from landfill. A winner in every sense of the word.
Many thanks for passing by, as always it is very much appreciated.
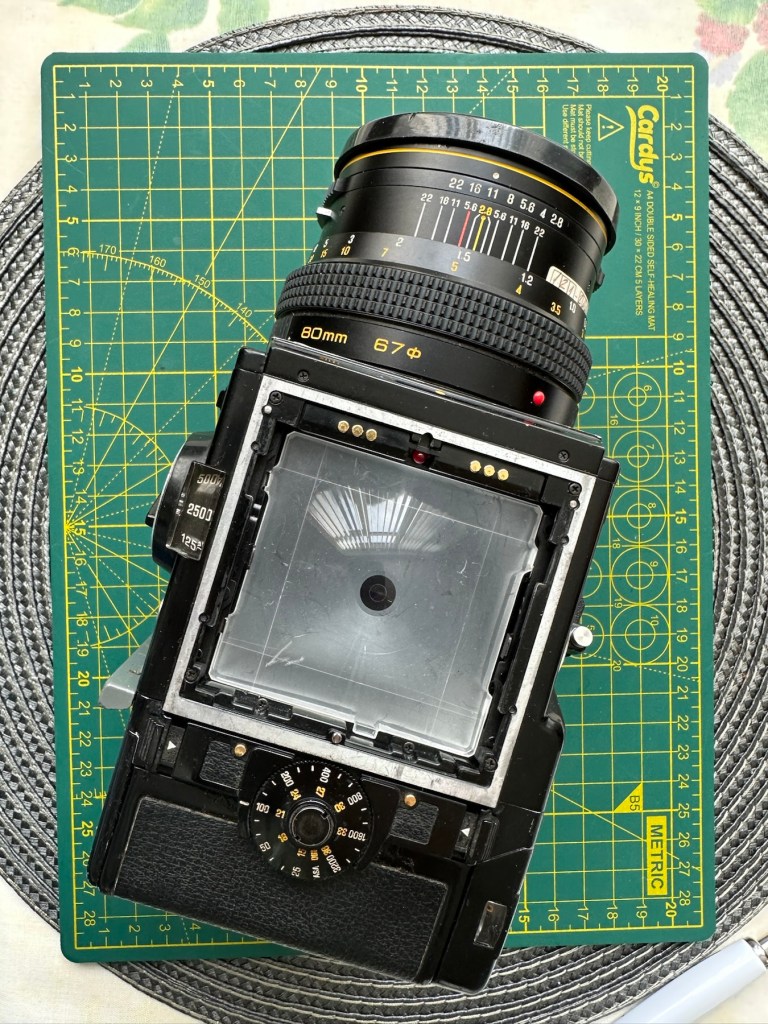
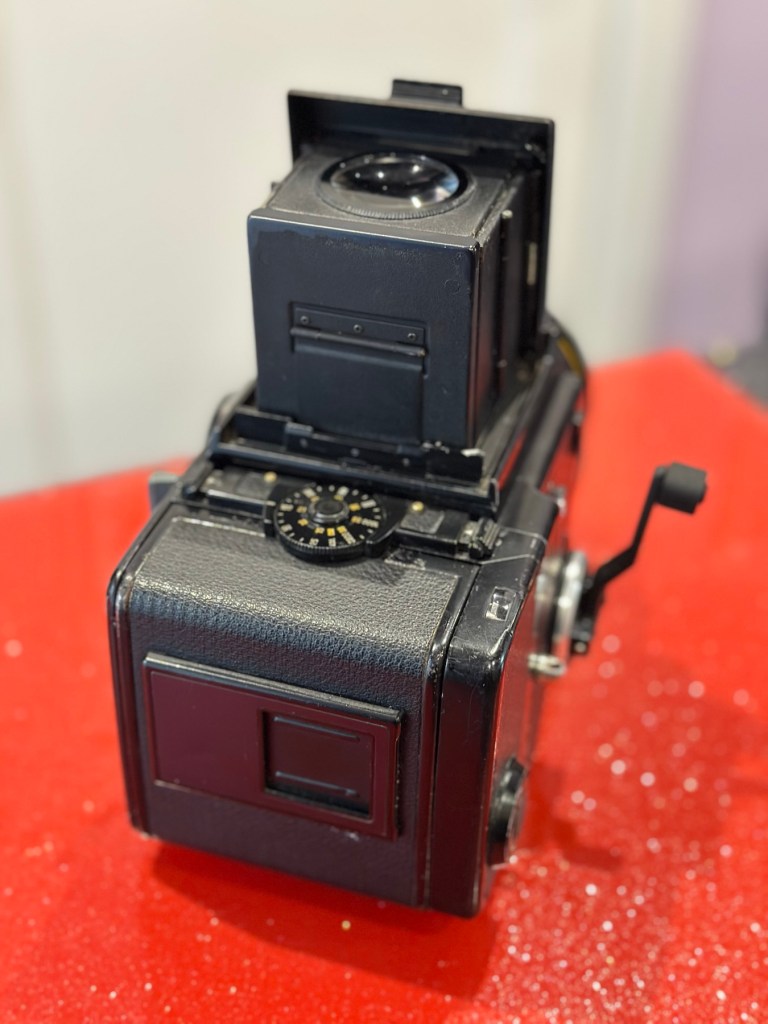
To build a usable, basic issue, medium format camera (Bronica SQ-A) from damaged items and spare parts, for as little outlay as possible and shoot one black and white, and one colour roll of film as proof of its successful completion.
Getting started:
Building a camera from damaged parts is no easy task when the name happens to be a high end brand and any parts that are available, are being snapped up by others to service their own stock or to break up for sellable parts. I’m going to keep a running total to try and build this as cheaply as possible, and to keep track of this total I’m going to use my trusty Psion Organiser II LZ from 1989 to keep a tally.
How the project currently looks.
Fourth purchases:
Now we have the bulk of the camera, we just need those annoying little bits to finish off. I’m calling them annoying, because if I was just to pay out for the 5 or 6 little finishing touches I need they would cost more than the total amount I have paid so far for the camera itself. I would be paying a premium for items that will in the end have no effect on the result I require to complete this project, that being two properly exposed rolls of film.
So here we go.
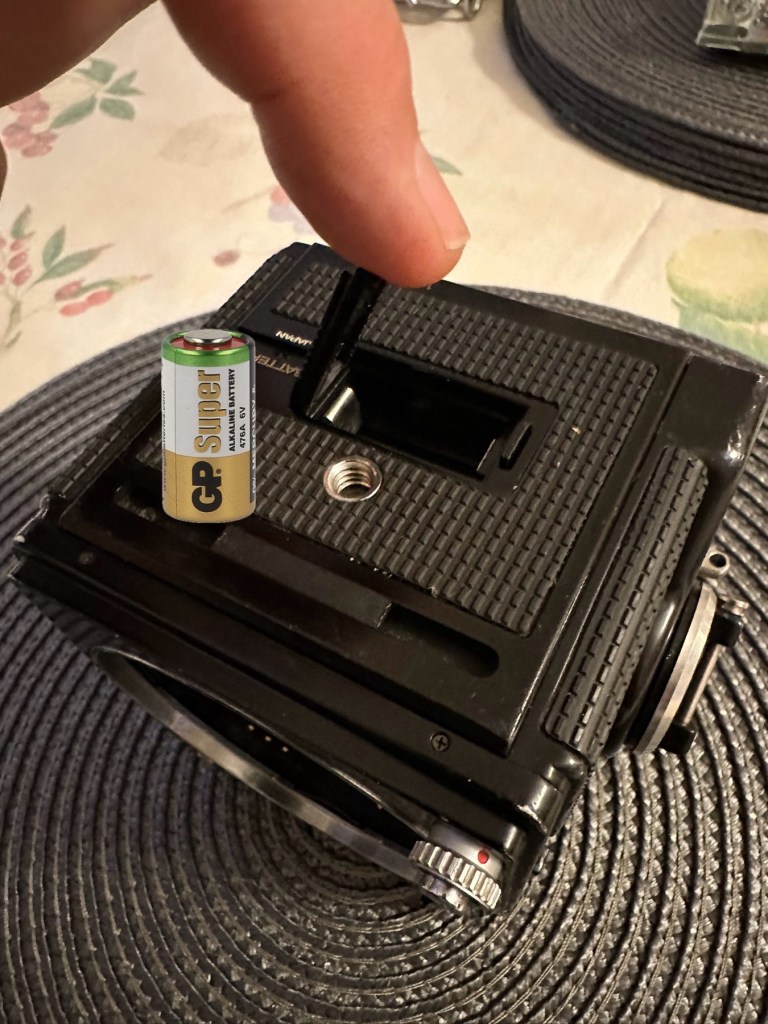
Battery:
Probably the cheapest item you will buy for this camera. The camera requires a single 6v alkaline battery and is quite important. Without it the mechanical shutter still works but at only 1/500 second. To obtain all the other available shutter speeds you need the battery to work the system electronically. This has cost me only £3:50GBP. After testing I can confirm that the battery works fine and all shutter speeds are as expected. Perfect.
Winding handle/Crank:
For some reason sellers always remove the crank prior to selling. That’s because the original Bronica crank is currently being sold at between £70-£80GBP and it really isn’t worth it. Everyone is after a quick buck and some people are willing to pay it. I’m not however, and my handle here is a special strength 3D printed version that I have paid the grand total of £11:20GBP for. It will need a couple of small “O” rings just to pad the handle on the spindle as it’s a tiny bit narrower than the original over priced one. It’s more than capable for the job in hand though, looks absolutely fine and has saved me around £65:00GBP of money.
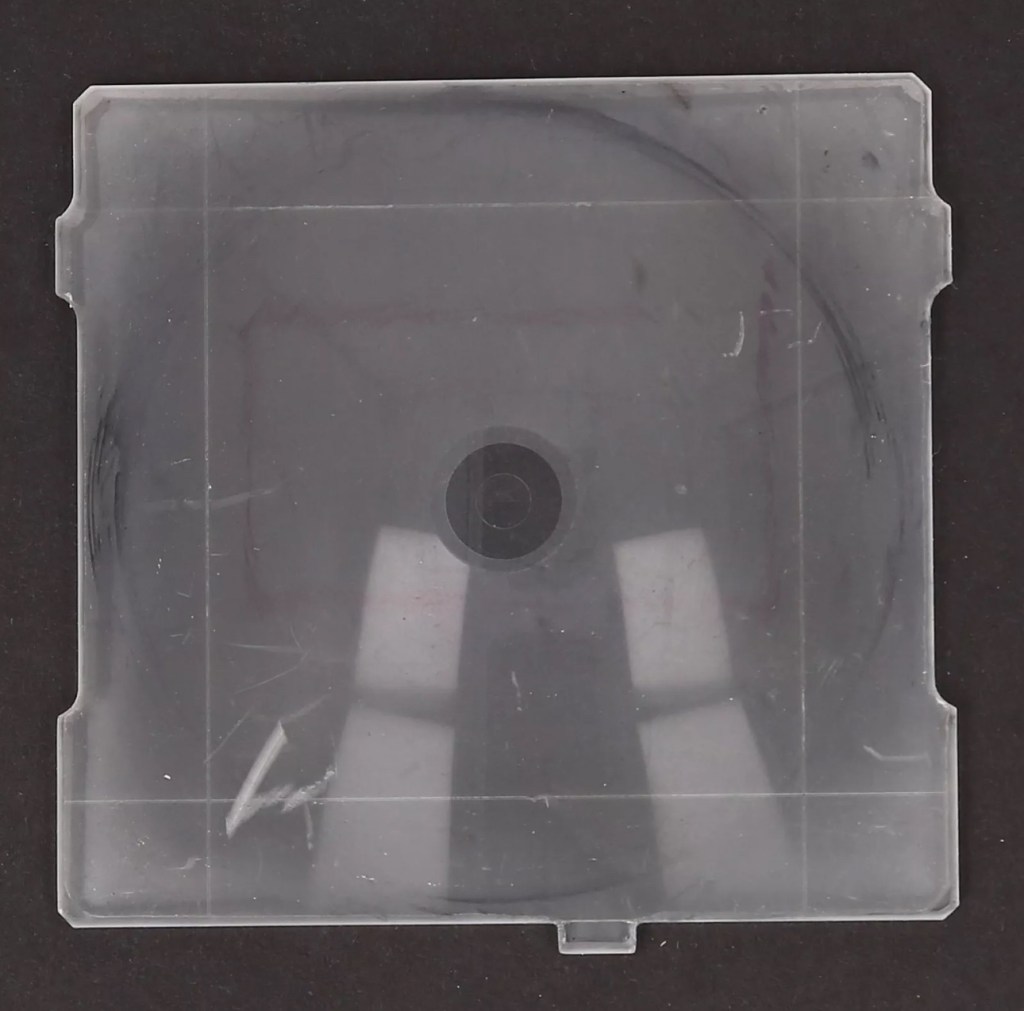
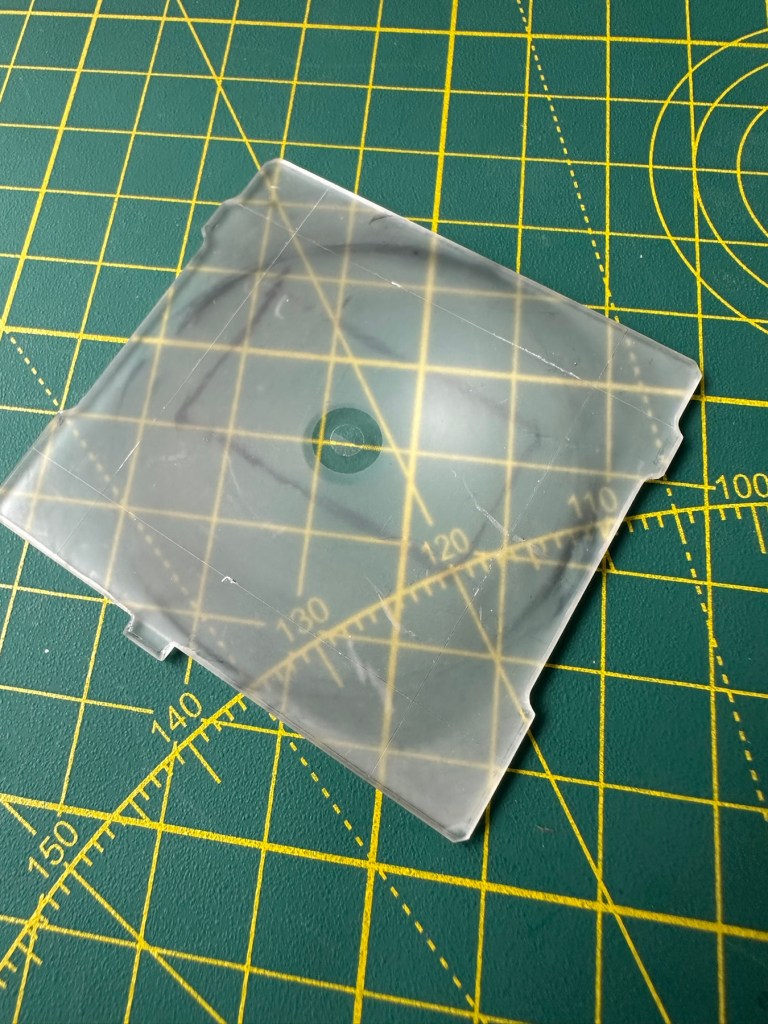
The focussing glass:
This is another item that the sellers withold for individual sale. I wonder why? Yes a standard focussing glass is going to set you back anything up to £150:00GBP and again it’s not worth it. However my one is a “damaged” one in that it has handling and pen marks on it. It looks as if some has sadistically drawn their own frame on the glass, the fool! I’m hoping this will clean up a bit but as long as I can see the focussed image I’m not all that fussed. I only paid £11:75GBP for this so yet again a further saving of around £140:00. See, savings can be made, if you are happy to make the trade for a lower quality item.
Camera aperture covers:
Not really essential at this point, but to be honest you need to protect the fragile equipment you now have so it is really worth investing. I’m not purchasing these just yet, that’s a later purchase, I have a lens cover and hood cover now, so that is all I really need to start the real testing.
Waist level viewfinder:
Now this is a real bone of contention for me. Individually it is probably the most overpriced single item you could buy. It’s basically just a flip up hood that acts as a cover for the focussing glass, that affords a bit of light protection, as has been common on old twin lens cameras over the last century. But because the sellers again sell these as “additional items” they control the price and at an average of £150:00GBP (Recent eBay sales data) again the consumer is being ripped off. I’m currently monitoring some damaged ones for repair on the sale sites.
And as of the 4th May 2025 I am now the proud owner of one of these items. I’ve paid a total including postage of £39:75GBP and that’s a very fair price. I’ve been searching the sale sites for quite a time before coming across this one. There is one caveat though, it has some slight damage, but that’s what this site is all about and it ties in nicely with the Frankenstein aspect of this post.
Assessment:
I’m going to be very brief with the assessment, as you will see this project is made from a selection of parts that at time of purchase all had their own faults. Each part that has required repair has been highlighted in the relevant posts associated with this series. Links to those posts can be found in the link supplied in the first paragraph of this post. There are five parts in total. I’m generally pleased that the parts I have obtained have combined to make a very nice “Frankenstein” camera from a brand of camera that is becoming increasingly expensive as an “Antiquity”. Not that it was ever a cheap option for a camera in the first instance. Let’s move on to cover some repairs that have occurred for some of the pieces covered in this particular post.
Repairs:
The focussing glass as you will see above was in quite a poor state on its arrival. This one had some scars and it looks as if someone has used pen to draw their own frame in the glass, to be quite fair it was in quite a state, but it was purchased for a really low price and i believe it can be made to look a lot better. Listen to anyone who is,”in the know” and you will always be told to not handle these screens. A load of tosh, I’ve been handling these ground plane glass screens for years and sometimes you just need to get hands on and this is one of those cases. Yes, if it’s in a pristine condition then cotton gloves would be the order of the day, but this example bypassed pristine conditions many years ago.
Before: How the glass was received with scratches and ingrained ink
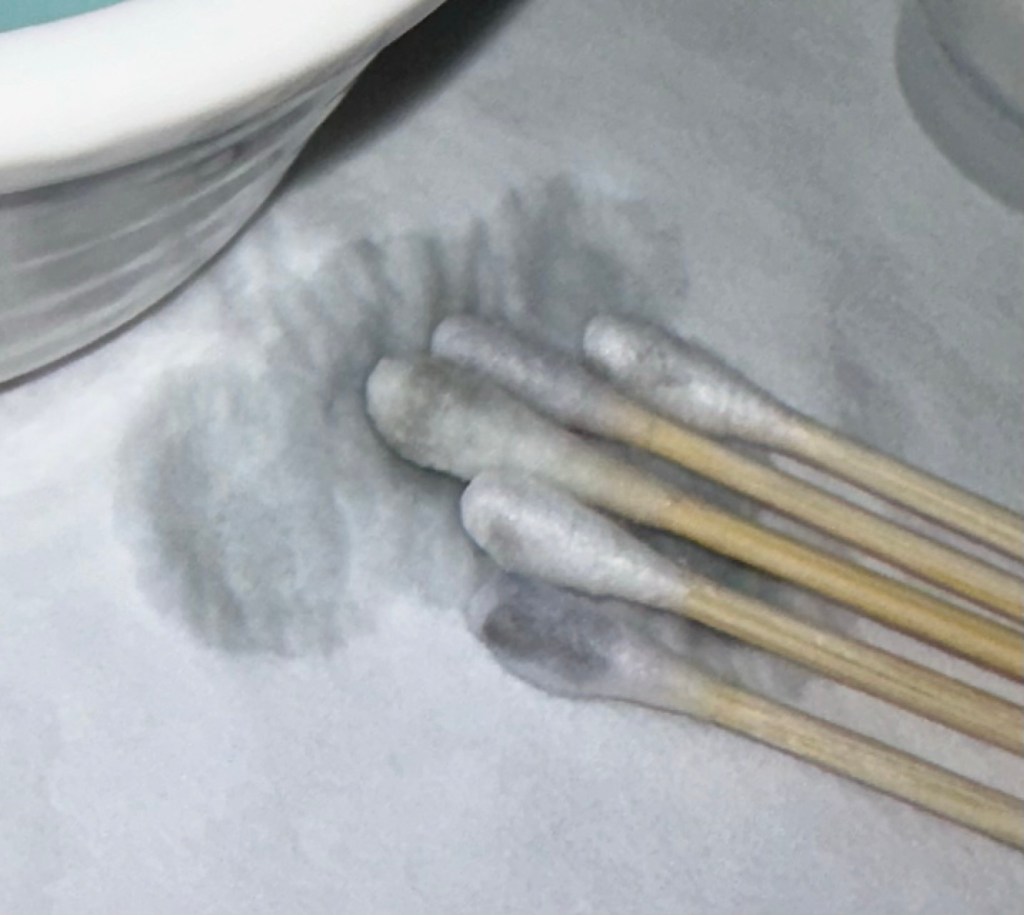
I started off with a good clean using IPA and cotton buds, I used about six cotton buds in this process using a new one every time the cotton was overrun with dirt.
Dirt from the IPA clean
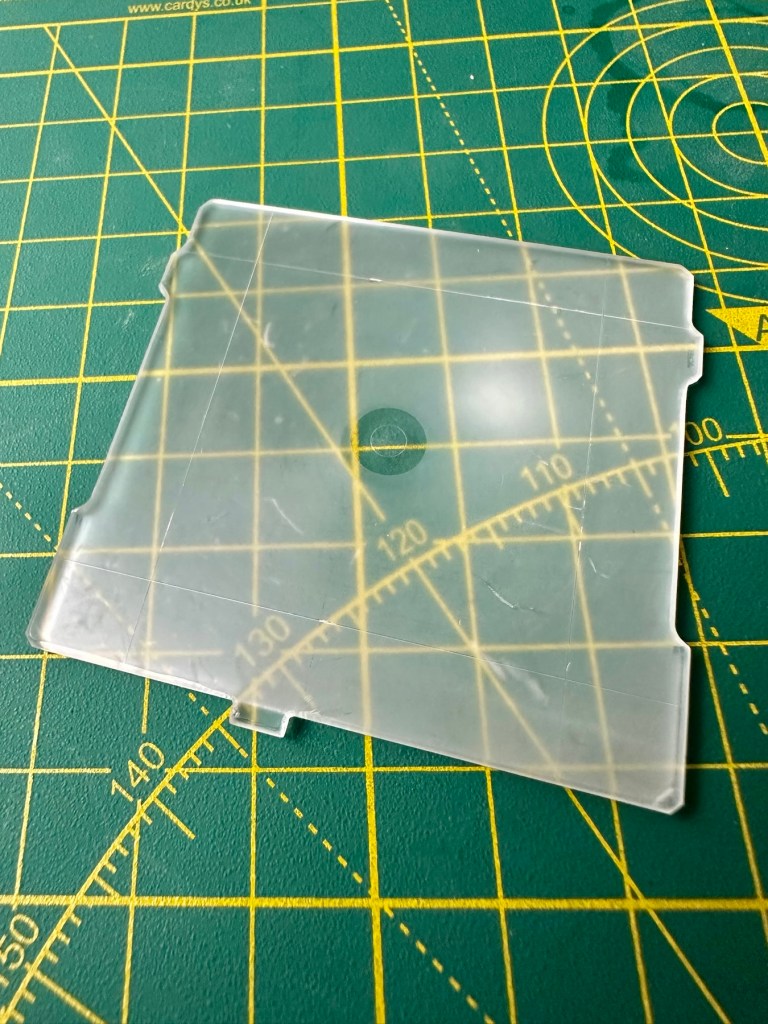
Once the IPA clean had been done I then soaked the glass in a detergent solution and then again used cotton buds to get the solution into the scratched areas of the glass.
Detergent bath
I’ve finished the clean with a rinse of hot water to remove all the solutions, and left the glass to dry on some paper roll. A light polish with a lint free cloth finishes the job.
After: all ink and dirt removed, only deep scratch remains but does not cause any issue with use
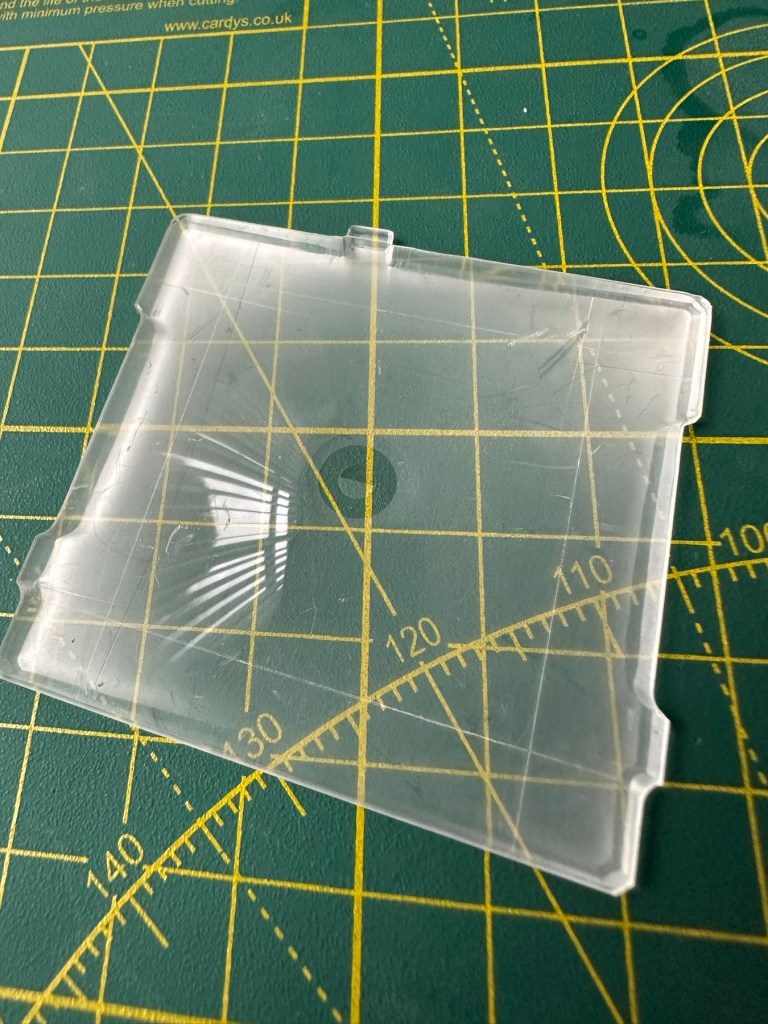
And this is how it all looks in the camera.
All looking fine in position in the camera
I’m extremely happy with the outcome with the glass, it does its job and works really well. With no distractions on the screen apart from a couple of scratches this item has been transformed. Just a little TLC and patience was all that was required.
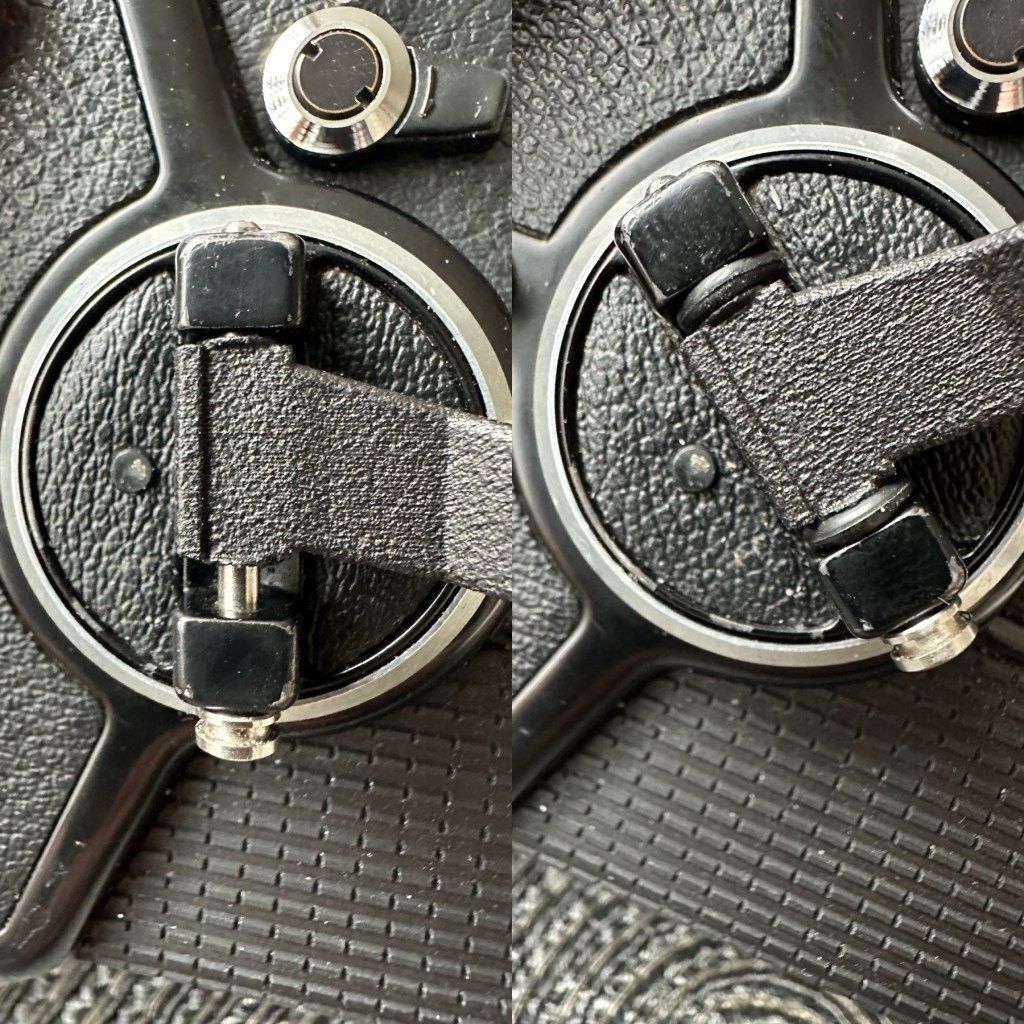
The Winding handle crank doesn’t really have any issues, it just needs some aesthetic teasing. This crank was 3D printed for the ETRS version of the camera and as such the actual base of the crank shaft is slightly slimmer than that of the SQ model here. It works fine. I’m just being a bit of an OCD freak and want it to look better.
Before and after. “O” rings in place in the winder
Not a problem though as I only have to pack out about 4mm of space and I have just the thing to use. Two perfectly fitting minuscule “O”rings. Job done, let’s move on.
The Waist level viewfinder has one particular issue in that the folding action is slightly affected by an issue with the spring. Again it is fully usable and does not cause any issues operating wise, it is purely an aesthetic issue that I will get around to sorting once the camera has been tested.
Age related wear and tearThe spring “issue”My waist level finder just showing signs of age
This is one of those parts that has signs of age with small signs of wear and tear, however that adds to it’s character and shows it was once a very much loved item that saw some good usage.
I think, we are now ready to get the entire unit assembled and ready for the testing phase of this build.
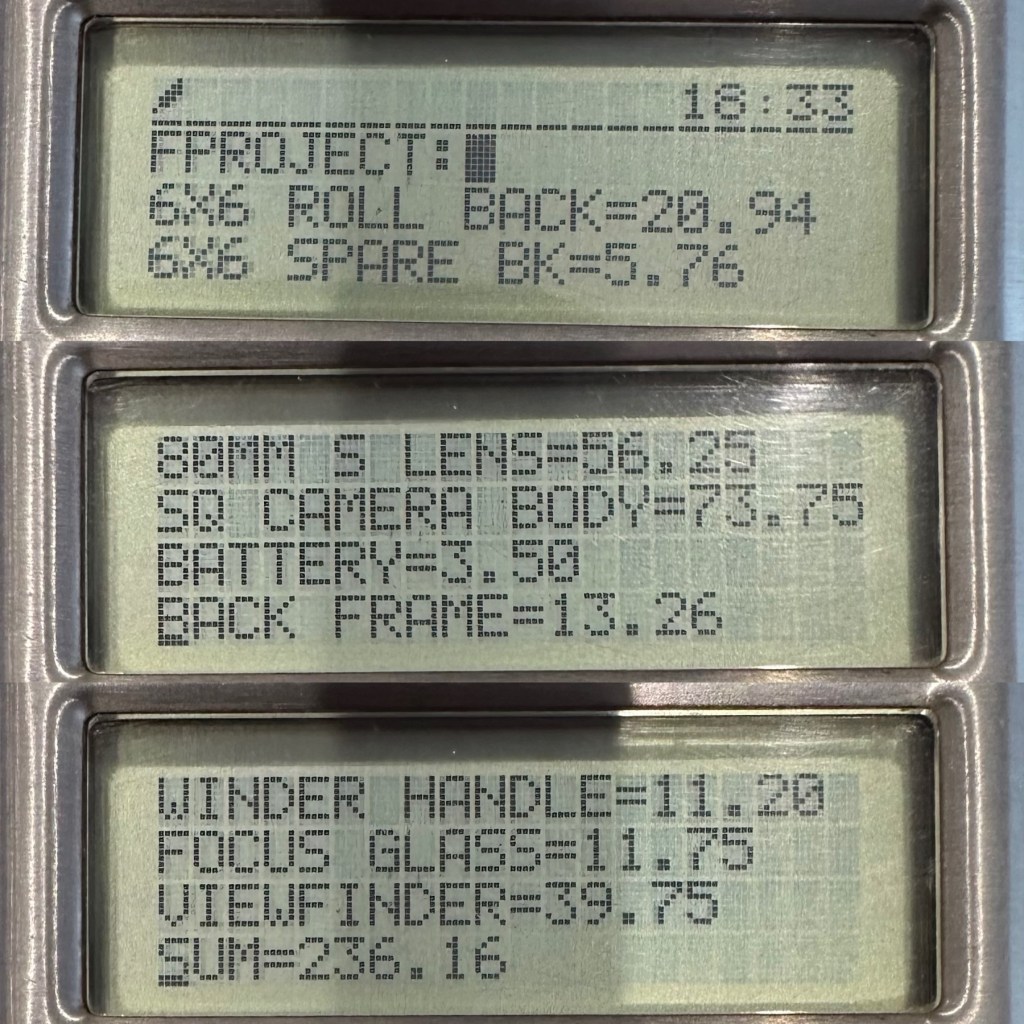
Total Outlay:
So just how much has this little project actually cost? Over to my trusty Psion Organiser 2 LZ for a final update.
Running total of £236.16 GBP
So the total cost of this project is £236.16GBP and I’m very pleased with that considering that sales for fully working similar cameras command prices similar to those seen in the picture below.
Recent sale prices
So taking this evidence into consideration, the route I have taken of building from damaged stock has saved me between £100-£350GBP. And as it is now a fully operational camera, I could probably command a price that would make a quite nice profit. But I’m not selling. This stays in my collection.
Outcome:
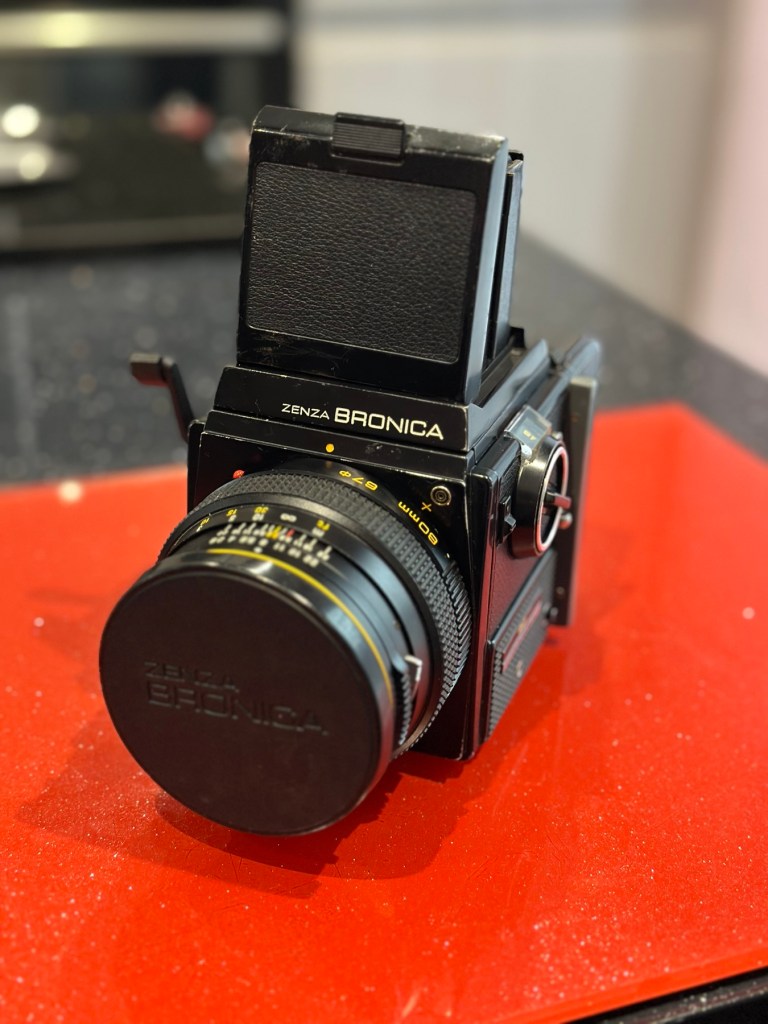
I want to take some pictures with both colour and Black and white film, to prove this camera is capable of this function considering it was constructed with broken or discarded parts.
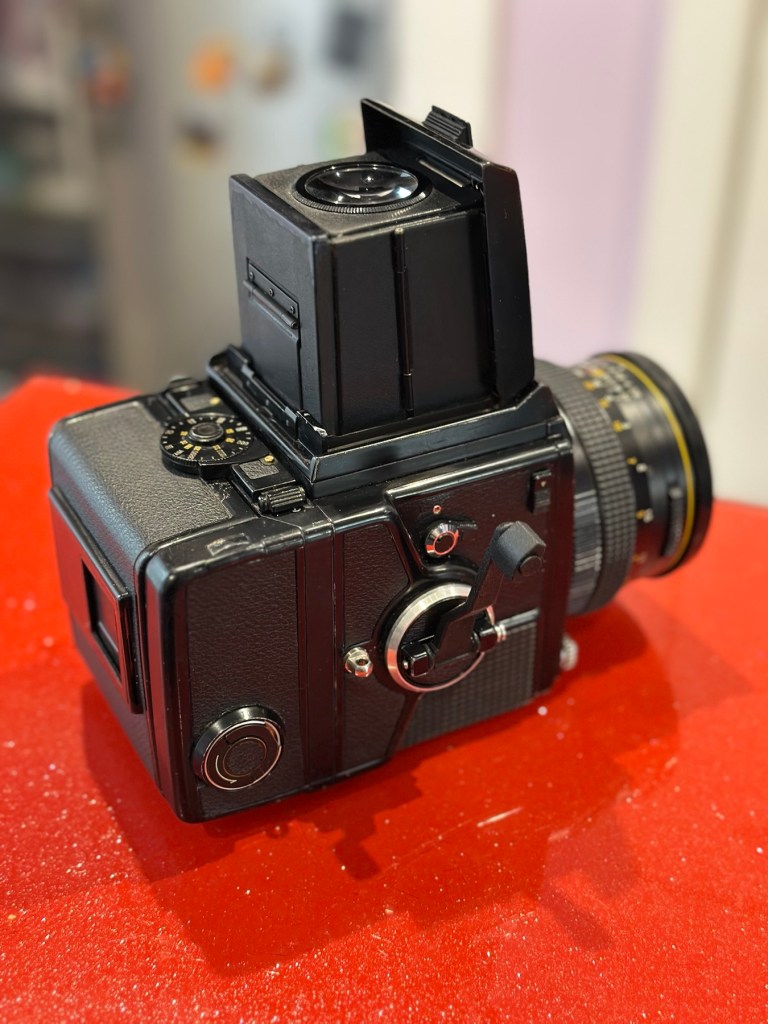
Now complete, I have restored a beautiful piece of camera history
I will post some sample photos of the tests, and will also produce a couple of galleries to link to within this site. First I will try my luck with the Black and white film, as I have one here currently, though out of date it should suffice as it has been kept refrigerated during my ownership. I also have the chemicals and ability to develop film at home, so this should not be an altogether time consuming process.
This has been a satisfying build making a working piece of camera history entirely with damaged and alternative parts logged throughout all of these posts.
Look out for part 5 of this project that will cover the final testing and the results gained from these tests. Hopefully we will have some good photos and will then be able to wrap this project up.
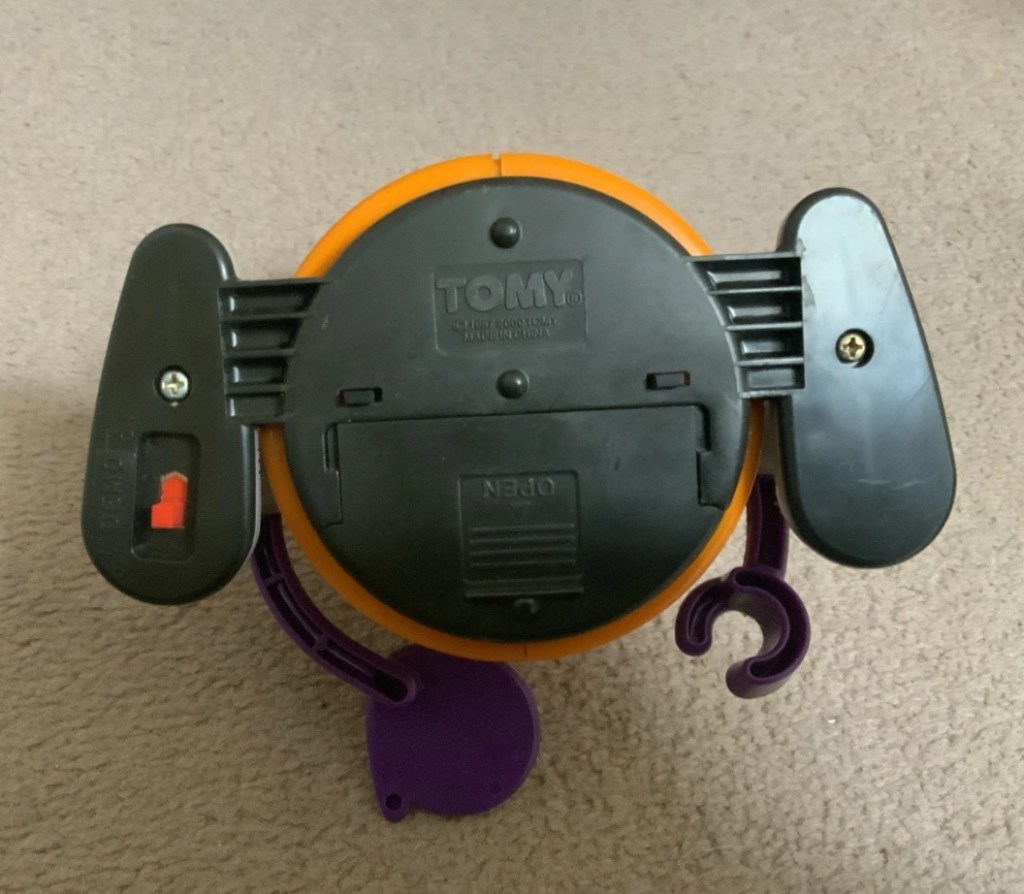
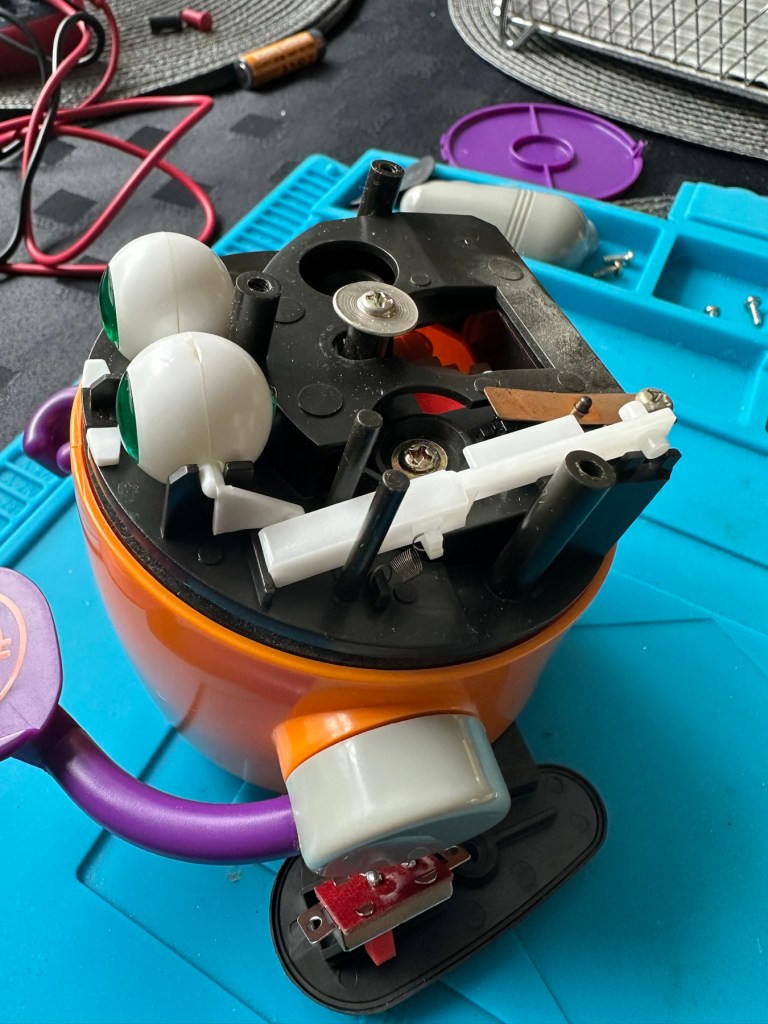
One yellow with pound coin on hand and one orange with a dollar on his hand.
I don’t think either are working and the yellow one is missing the battery cover so selling as spares or repairs.
EBay
Two more heading home
Dirty boys – Missing battery cover
Those of you who follow this site will realise I purchased one of these a while back and did the repair here: Tomy – Mr.Money bank
I paid a total of £10:20GBP for the one in that repair post, and he is currently earning his keep at work collecting money for our local hospice charity – LOROS.
These two I have managed to get for a total of £19:26, so in theory these two are in the similarly price range as the other two. These were produced in 1987 to encourage children to save, with the element on a little bit of fun. These money boxes, when in a good, working condition do command a fair price. Just look at the screen grab of the latest prices being charged on the sale sites.
Latest prices
Both apparently, are not working and they do look quite disgustingly dirty, I’ve no idea what the actual faults are but I’d bet they centre around the switch area as that is a common issue. Add to that one of the battery covers is missing, and the price will rise by about another £5:86GBP as I get a new cover 3D printed, that will mean a total outlay of £25:14GBP or to be specific £12:57GBP per unit.
I more than likely will keep one of them and move the other one on. Let’s wait and see what arrives for us to begin the assessment.
Assessment:
Well, have a look at these two scruffy urchins that turned up today. Both in an absolutely filthy state, need a really good clean. It really surprises me that anyone can send such a filthy item through the post. Does it really take too long to just dust an item down with some furniture polish? Thankfully the wife wasn’t here when they arrived or else she wouldn’t have let them through the door 😂
That said they are as described. Everything is in place apart from the battery cover that I have already ordered as a new 3D print.
Two scruffy urchins
First thing to do is to clean them. They are filthyOne missing battery cover, a 3D replacement has been ordered
Setting a good example. My perfectly clean, and working example at the front
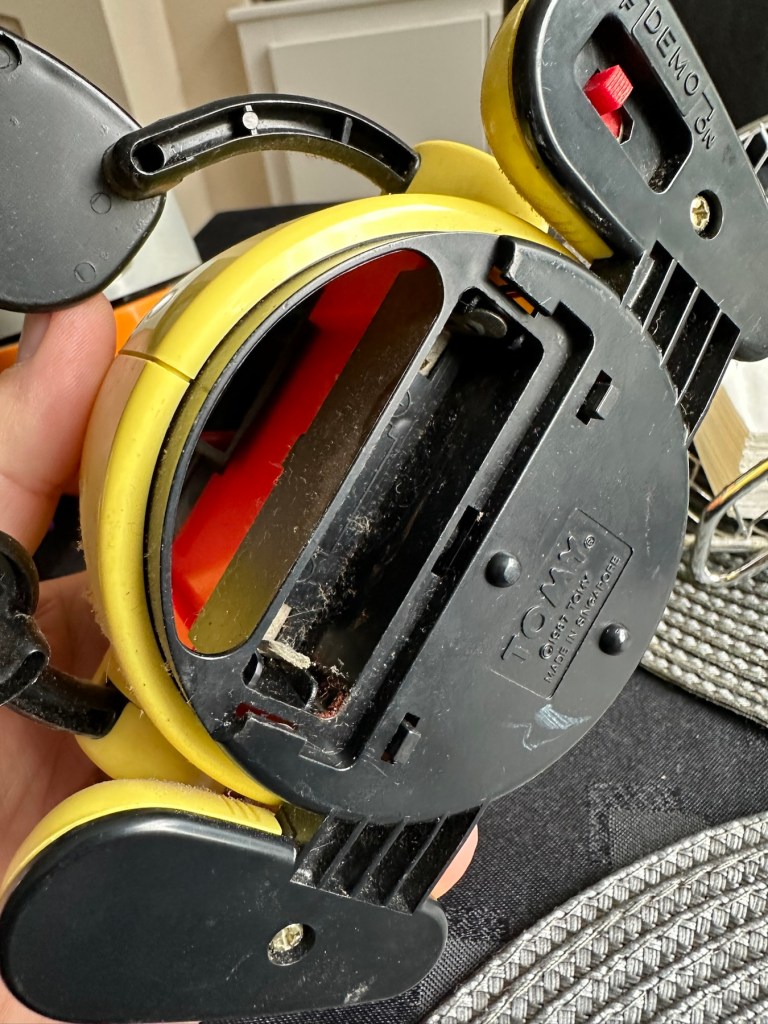
Apart from the above all seems fine. I have put a battery in each and turned them on, nothing happens. On the yellow example there is a little contamination on the battery contacts and when I move the battery I do get some motion but it sounds as if there is a sticking or broken gear inside. The orange example is totally dead but the contacts are clean. This could be the classic switch issue. So the order of the day is to get these both cleaned before dismantling just to keep any mess to a minimum, open them up, clean inside and check the gearings and then lubricate with some silicone grease. I’m hoping these will not be too labour intensive as I have been inside one of these before, and I’m more than aware of the issues of small parts falling out.
Repair:
First a clean with some polish.
A quick clean and they come up lovely
Cleaning done, they’ve come up lovely, I’ll give them a final clean at the end after we’ve attended to the internal issues. So let’s get on.
I’ve chosen the orange chap first, however my suspicions about the faulty switch are wrong. The switch tests fine and I then go a bit deeper into its soul 😂
Off with his head and down into the cogs and sprockets
I get down to the motor and the cogs and sprockets and realise the motion has ceased. A little silicon grease over all the moving parts and a little bit of teasing and the unit springs into life. I let it run for a few minutes and then reassemble, cleaning everything along the way. This unit is now working.
The second unit, the yellow one, was working sort of. So as I have done above, this one was also stripped down, cleaned along the way and also had all cogs and sprockets greased accordingly. It also is now working fine.
I have already purchased a 3D printed battery cover to replace the missing one, and this is now installed, so we now have two complete units. For what I’ve paid for 3D printed pieces over the last year, it would probably be worth investing in my very own 3D printer.
The new replacement, 3D printed battery cover
Result:
Well I now have three absolutely perfect working examples of this fun piece of 1980s technology. One is in use earning money for the local hospice.
The Orange one is going to be used by a work colleague to raise money for the British Heart Foundation.
Earning his keep
He is selling candles and I’m going to brand this one with a BHF logo to add some fun to his fundraising.
The three amigos
I have put together this little video regarding feeding time for these three . Enjoy!
Feeding time
The third unit will probably be sold on unless I can find someone else who can put it to good use.
Thanks for visiting, as you know it is always very much, appreciated.
A title that sounds like an intro into the latest episode of Sesame Street, refers in reality to a question my wife has put to me over the last few days.
How many projects do you have on the go at present?
Now, she wasn’t asking how many types of different projects i get involved in, she was specifically asking due to the amount of deliveries that i am currently getting from online sale rooms and auction sites. I didn’t honestly think about it at the time, I wasn’t aware of the actual number, however i am now very aware.
A selection of outstanding repairs that I have in draft mode
And that number is 21. I have that amount of draft repair posts on this platform awaiting completion. Some are quite complex and demand time that i just don’t have at the moment, others are awaiting components that are needed to complete them. My wife, bless her has pointed out to me that rather than obtaining yet more items for repair, wouldn’t it be better if i just cleared the back log first? She is of course right, and a small selection of those draft posts awaiting attention can be seen in the photo above.
Not only do i have a back log, i also have a number of boxes that are full of now, fully operational items varying from microphones and cameras all the way through to a working music system. I think i need to break away from sentimentality and start to move some of these items on. To be honest this would be the best thing to do as it would release some funding for a few other projects that i wish to look into in the near future, and it would also create some extra space at home.
I love being busy that’s just me, knowing i have a batch of drafts awaiting allows me to spread my focus over a wider area of interest. I do pop into them all occasionally and just add a few lines here and there, or an item of interest that I’ve just remembered, so they are all in fact works in progress. I do need to concentrate on that backlog though, and maybe reduce that backlog to probably 5 or 6 repairs in total.
This whole website/ blog thing has been something that I have really put my heart into, I’m by no means an ace practitioner of blogging practices and I have never set out to be such a person, and will definitely never be one. I started this site purely for my own benefit, an extension to a journal i used to keep at home, that i may have discussed within these pages a few times previously. I’m not trying to teach anything, it’s a personal record of my failures, my learnings and achievements, and it just works just fine for me.
I really don’t understand how it has now gained a good few followers, I never expected that but I am eternally grateful to everyone who reads a post or comments upon them. That said i would still do the same if there was no one paying an interest in what is posted. Again, as stated earlier in this post, it was always set up as a personal journal. And it has worked for me. It has been a good well being tool.
So. I have temporarily agreed to cease any further purchases until I’ve got the backlog under control, and I’ve also agreed to employ a one in, one out policy in regards to all repairs and incoming projects, and believe me there are some quite complex ones to be published shortly.
Got exited originally as I thought this said favourite bands, had to sit back down and rethink my reply, as well as putting away my collection of R.E.M memorabilia.
So Brands it is then. I have no real affinity to brands to be totally honest, I have Apple devices, and Dyson devices at home but to be honest with you I would be just the same if they were Samsung phones or a Shark hoover, as long as they do the job I’m not that fussed.
Lindt shop Wembley
Chocolate though is a whole different topic. I love chocolate, but my go to brand has always been Lindt. I don’t think you can beat or replicate the taste of their offerings. I will actually go out of my way to purchase from their own shops. Some people prefer Cadbury chocolate, but to be honest if you go to any branch of Aldi and try their own brand fruit and nut bar you will be hooked. It actually has fruit within and that is something the Cadburys bar severely lacks.
So it’s Lindt chocolate for me. No contest.
And as for Coffee it can only be this bad boy.
Skull Crusher it does what it says on the bag
At work where we are fighting fatigue through long hours of working a 24hr Roster, you cannot beat this coffee. Too much and your heart rate is racing and you will be awake for the next millennium, just like a fine wine or good medicine it has to be taken in moderation. But by heck, does it make you alert. Just what you need, and that’s why we have a tea kitty that we all contribute to so we can keep a good stock of it at hand.
So no real fancy brand expense for me, as long as I have good Chocolate and good Coffee, then Dave’s a happy chap.
List the people you admire and look to for advice…
I guess we will all at some time look to a mixture of people for different kinds of advice.
Contentment
For emotional advice there is no one but my wife who I’d turn to in the first instance. I think for her, I’d fit that bill as well, heck, we’ve been together so long we sometimes know each other better than we know ourselves. She’s my confidante and I know anything we discuss stays totally between us. She’s just such an understanding and calm influence for me. I need that sometimes. Don’t misunderstand me, when she cracks she goes full loop de loop, and is known in the family as the Rottweiler, you just don’t cross her. And when this does rarely occur I’m the one that calms her. God, we were truly meant to be together to keep each other at peace. So far so good.
At work I’m in probably the best work team I have known in all my working days. We are always there for each other, there is always support for each other 24hrs a day, and when things get a bit too much, there is always a calming elder figure to talk to. I guess that is why it’s recognised in our organisation that our depot pretty much runs itself, with no issues and no need for guidance, we self manage and are a well oiled machine in all aspects. The guys I work with are just the most fantastic, supportive and caring bunch you could ever work with. And a combined fabulous sense of humour doesn’t go unnoticed.
Work
Outside of these two highlighted above, I look to some older and much wiser friends, elders of my life if you like for that additional advice, that advice that sometimes you just have to run past someone on the fringes of your group, to see if you are thinking it all out correctly, and addressing any issues logically.
I don’t really look to anyone else in my family group for advice, but saying that it is sometimes good to discuss approaches to issues with the younger members of the family to see their reactions and ways of dealing with similar issues. Sometimes they just seem to have a less tangled and somewhat easier approach to problem solving. Some times though they don’t.
So here I guess I am saying, that I can advise the younger generation from an experienced point of view, but at the same time I must be open to learning from them. It really is two way traffic.
Advice must be listened to and acted on, if we are to learn how to deal with a multitude of problems/ issues. Taking advice and not following through with it achieves noting and leaves you empty and confused. And that is where the “What ifs” arise. Good advice can definitely alleviate doubt.
This is going to be quite a short post. Do I vote? Yes I do.
And if apathy has gotten to you and you don’t vote, do you have the right to complain when it all goes wrong? You could have made the difference, but you just couldn’t be arsed, could you?
Many good people died on the way to ensure we all have a right to vote.
Do your duty for you and your fellow citizens, make your voice heard. Kick apathy into touch, then maybe we might not end up with so many half wits in positions of power.


You must be logged in to post a comment.