Tomy / Palitoy Missile strike

Here’s what the listing stated:

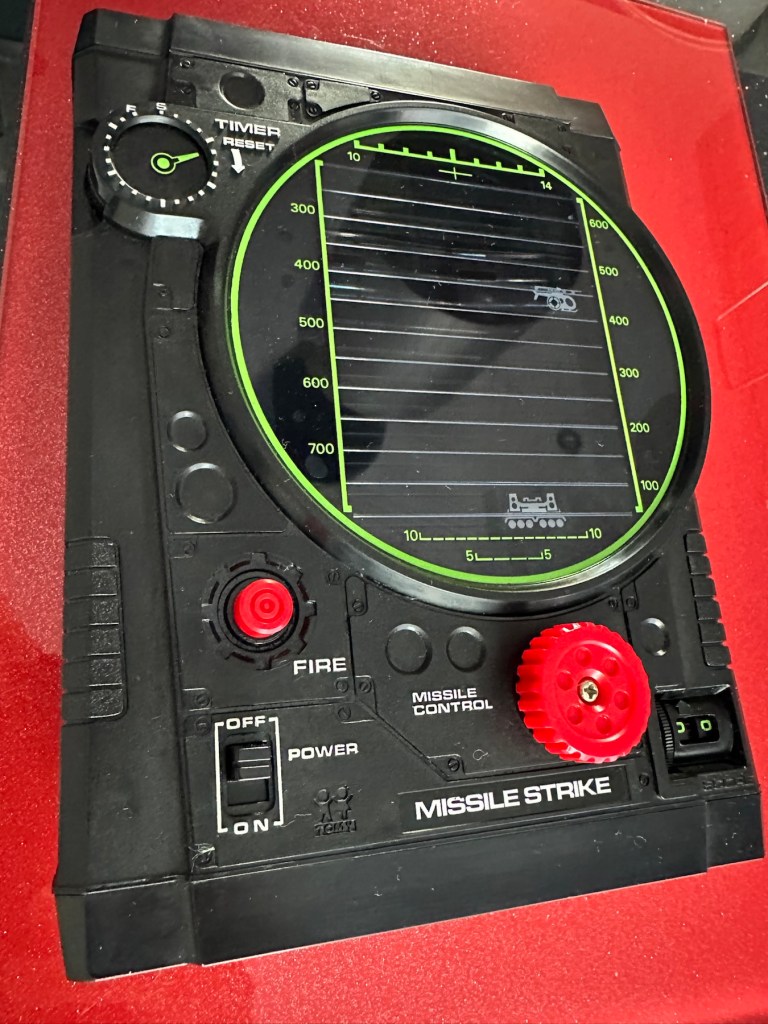
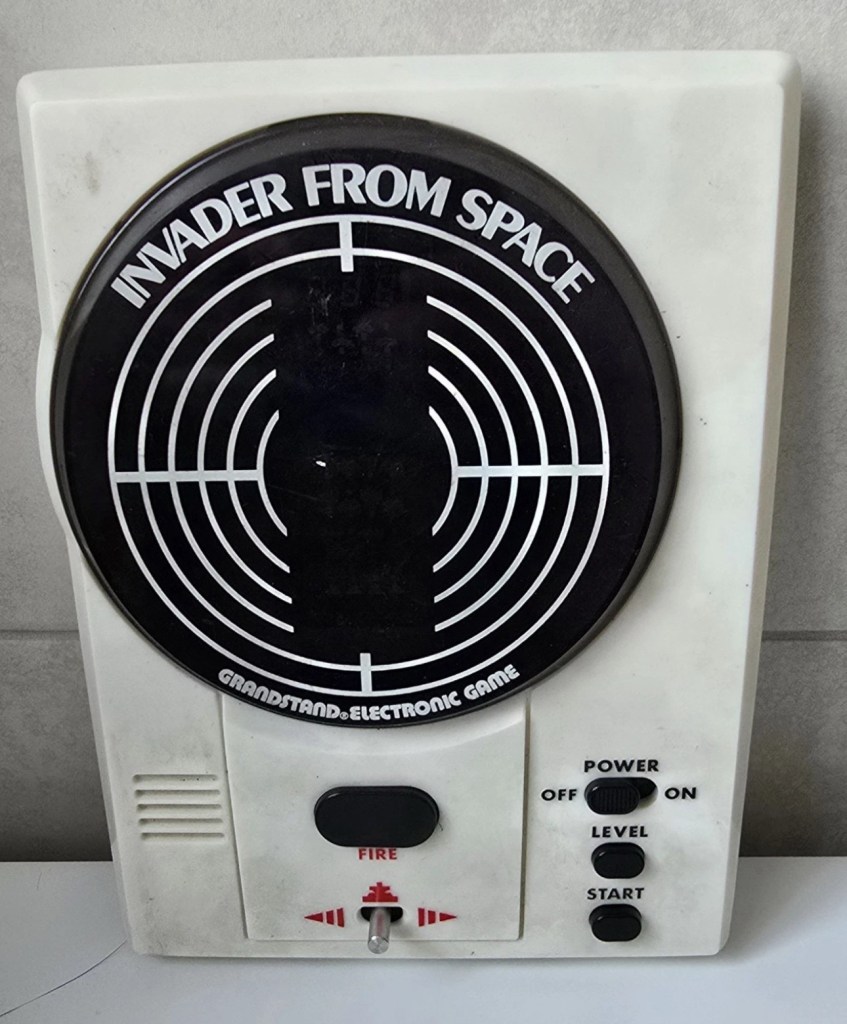
This is a nice example of a Tomy ‘Missile Strike’ electro/ mechanical handheld game. It was made circa 1979 and is battery operated. It appears clean for age and works, apart from the missile light not illuminating. Battery terminals very good. This is a nice genuine item that is shown as I found it. NOTE – NO BATTERIES ARE ENCLOSED.  Nice example for any collector. 

EBay

Missile strike

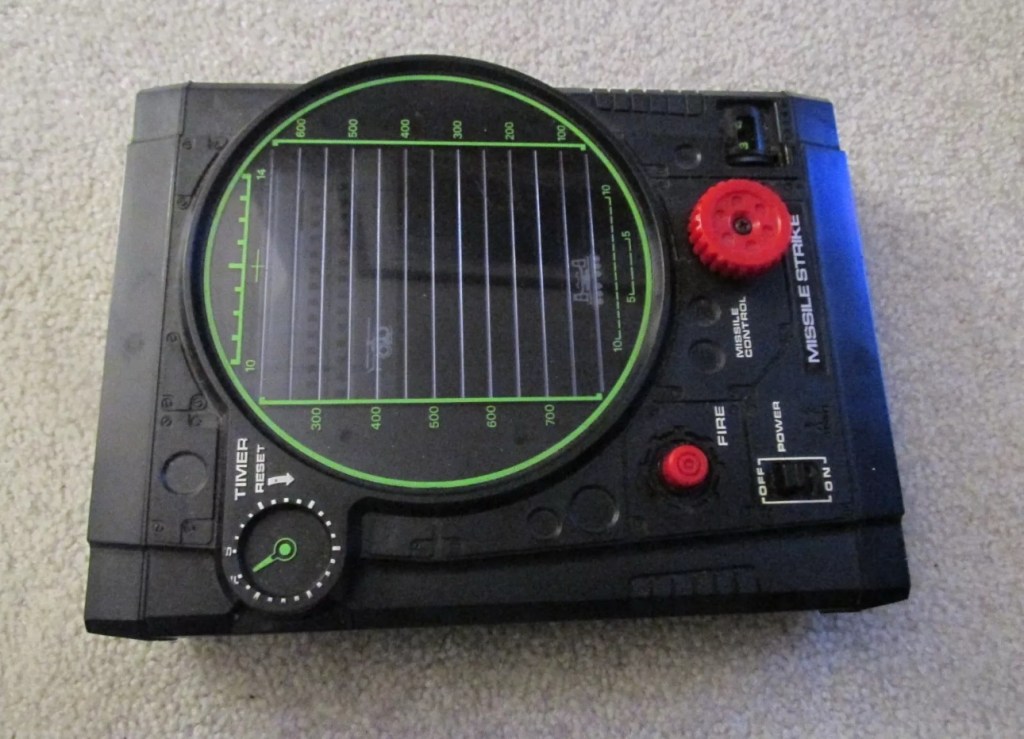
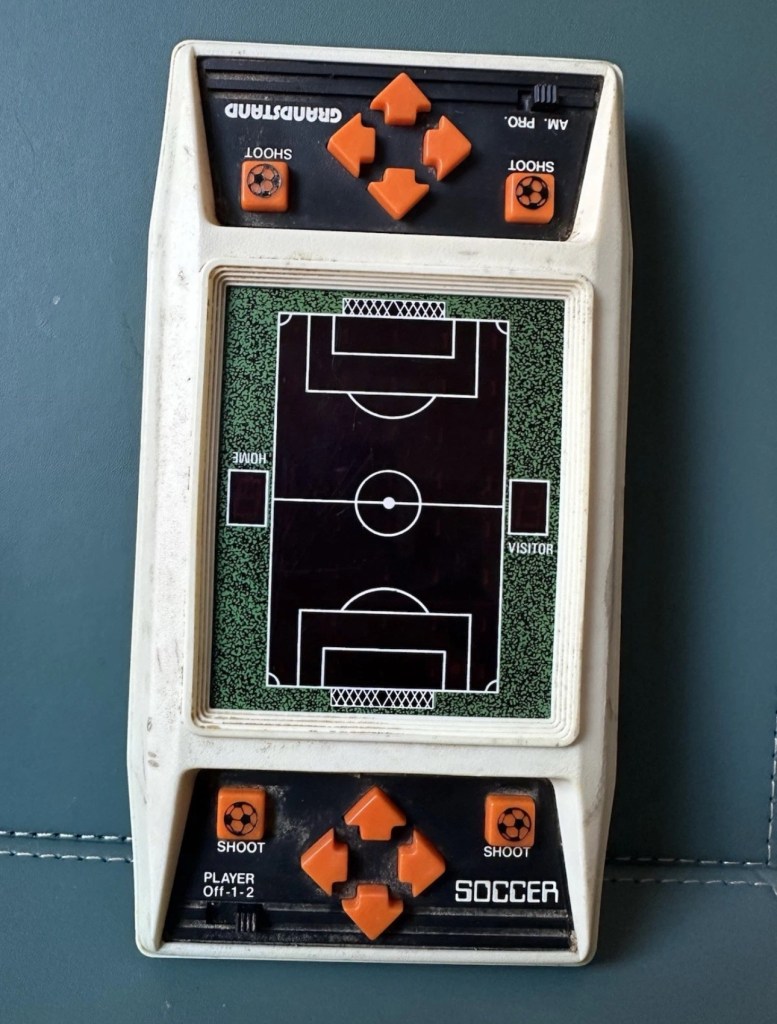
On first seeing the listing for this item, my thoughts are that it looks quite clean and tidy. The usual state of these units are quite tatty with scratched screens. This looks good, however pictures, especially from EBay can be greatly misleading so I’ll guess I will just have to be patient and wait.

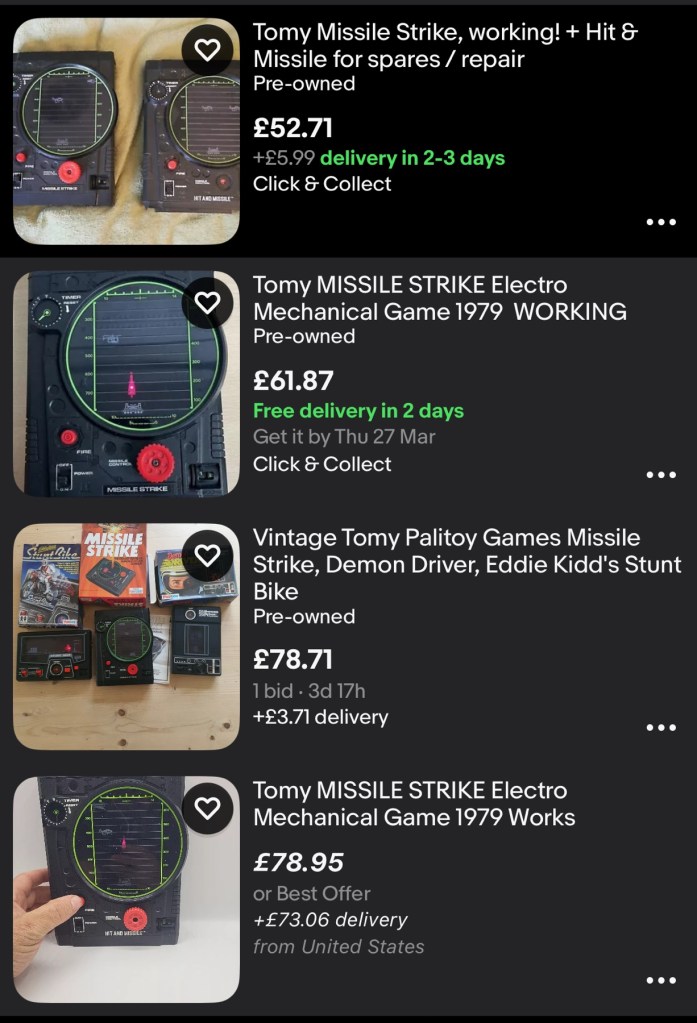
This units only issue seems to be with the LED missile light, so hopefully it will be a quick fix. These units are currently selling between £52-£79GBP as per the picture below. I managed to secure my unit for a total including postage of £24GBP so I think I’ve done well in that aspect. I’m quite happy with this.

Current sale prices on EBay

A little history:

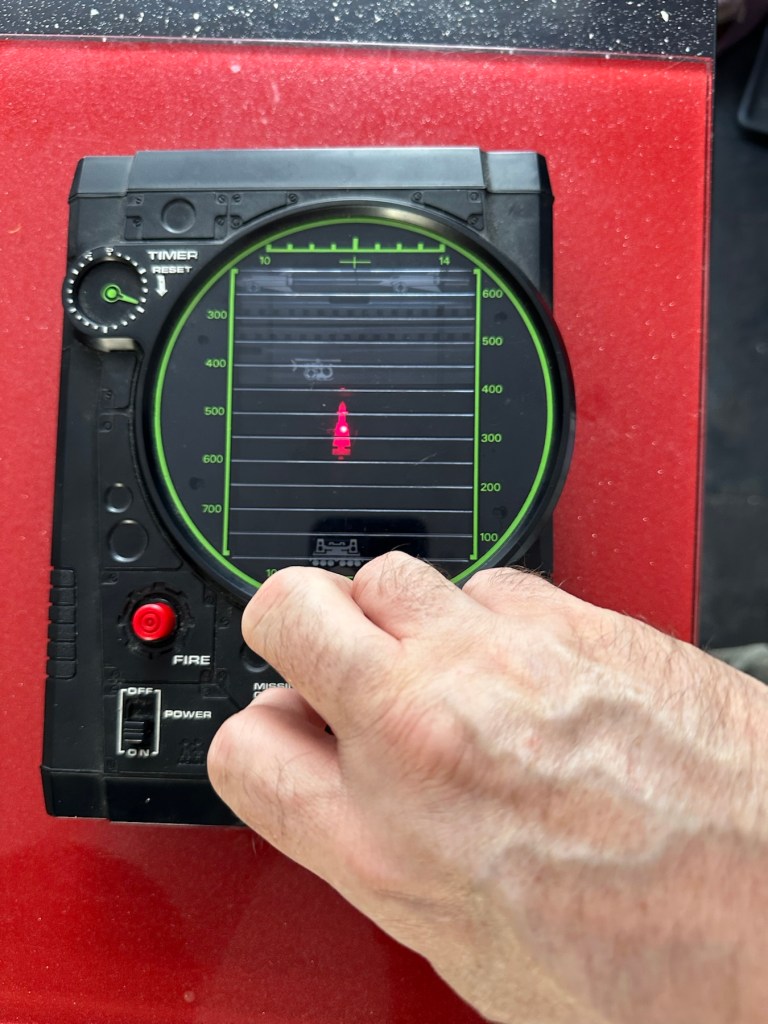
Tomy released Missile strike in 1979 in its international line of electro/mechanical handheld games. Known under different titles in other regions such as Terra-Hit (UK), Missile Strike (UK), and Space Attack (Japan).  One of TOMY’s electro-mechanical handheld games, Missile strike is a Space Invaders-like shooter game, the units small motor winds strips of aircraft across the screen, which the player attempts to hit in order to earn points. There is a mechanical wind up timer that controls the action, and the purpose is to score as many hits on aircraft as possible with in the time it takes the winder to stop. The game includes one small, flashing LED light as the exploding missile.

So it’s another game that has reached its 46th year, and for the only issue to be its one light source, I think that’s acceptable. Let’s wait to see what arrives.

Assessment:

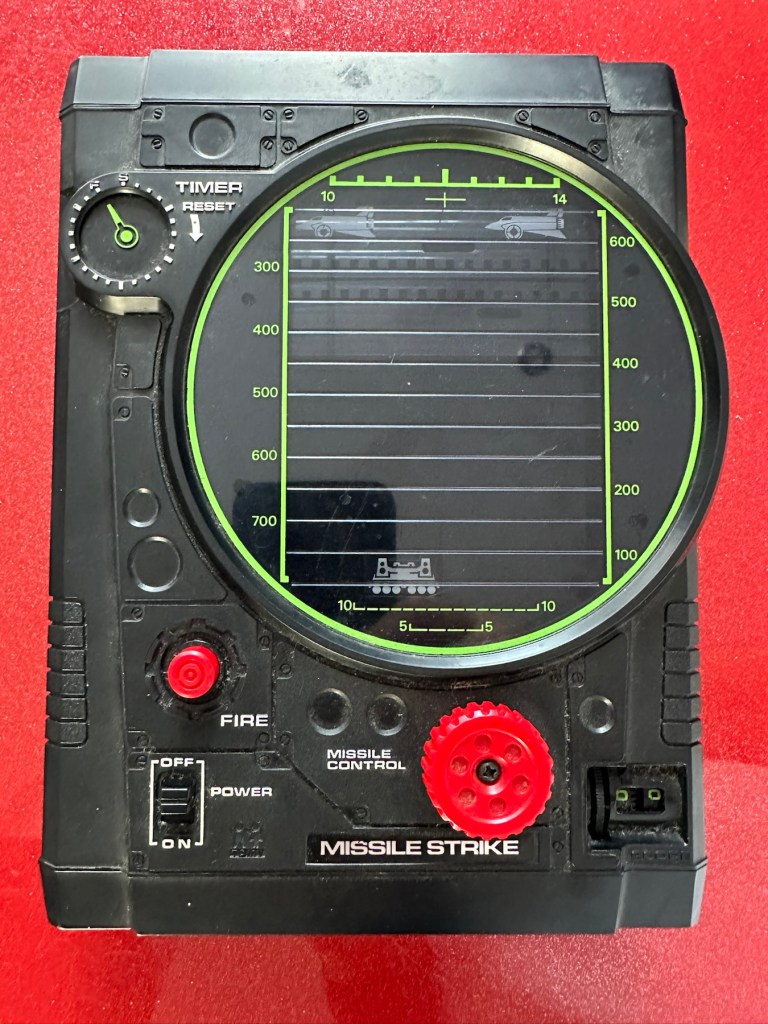
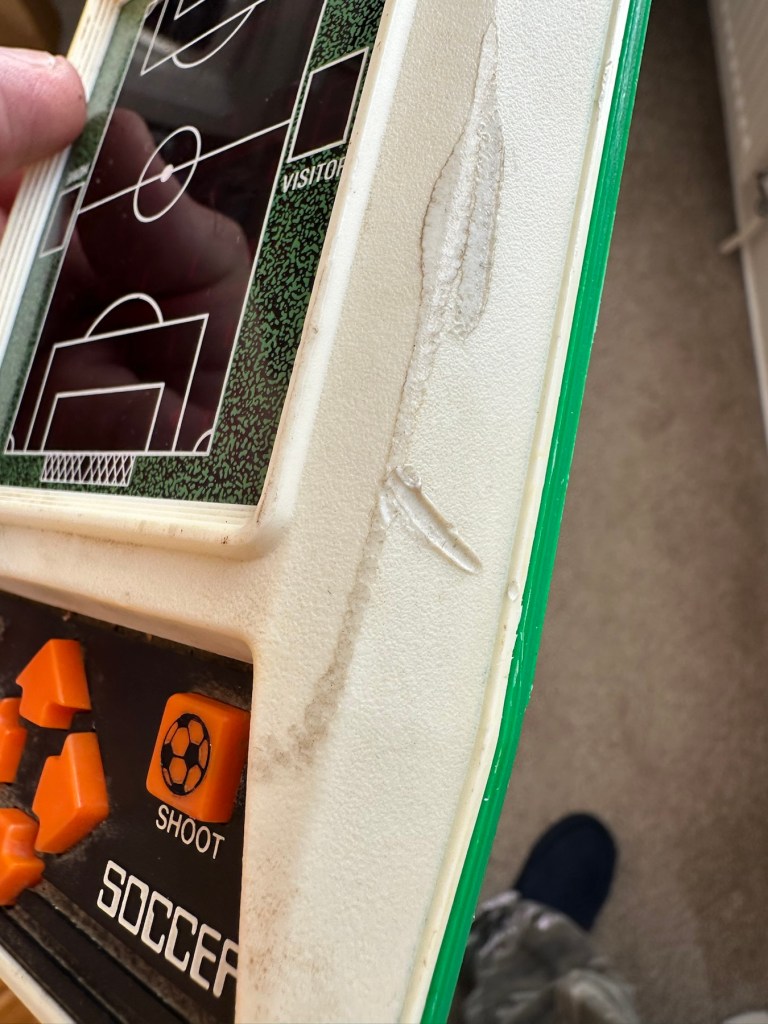
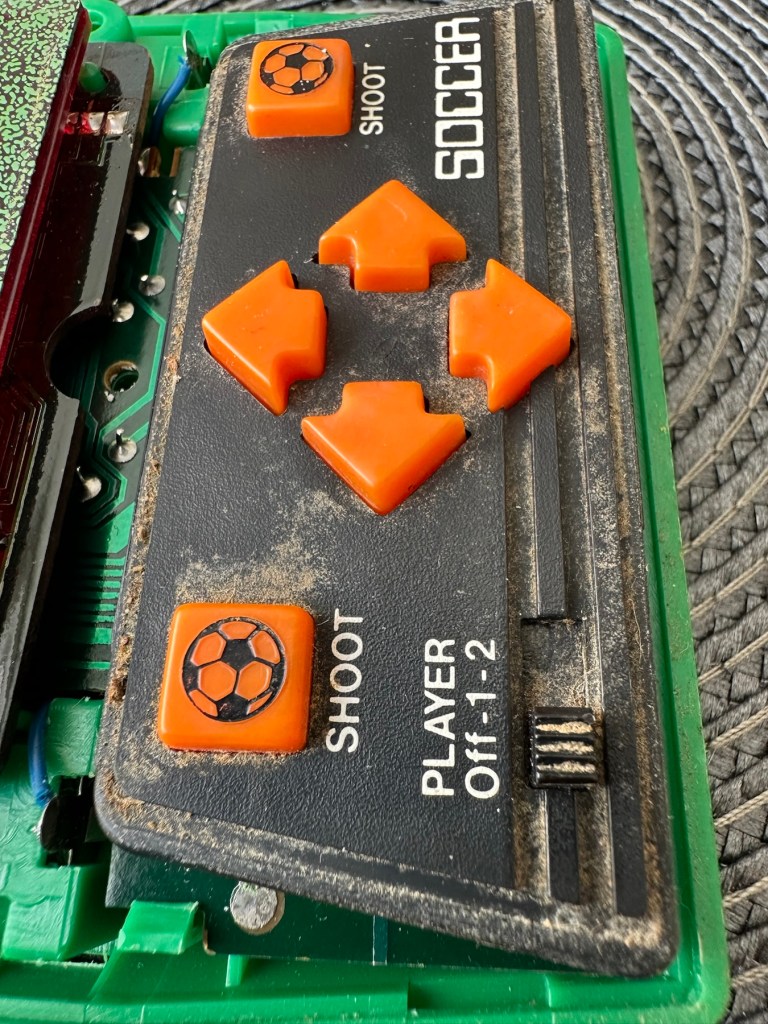
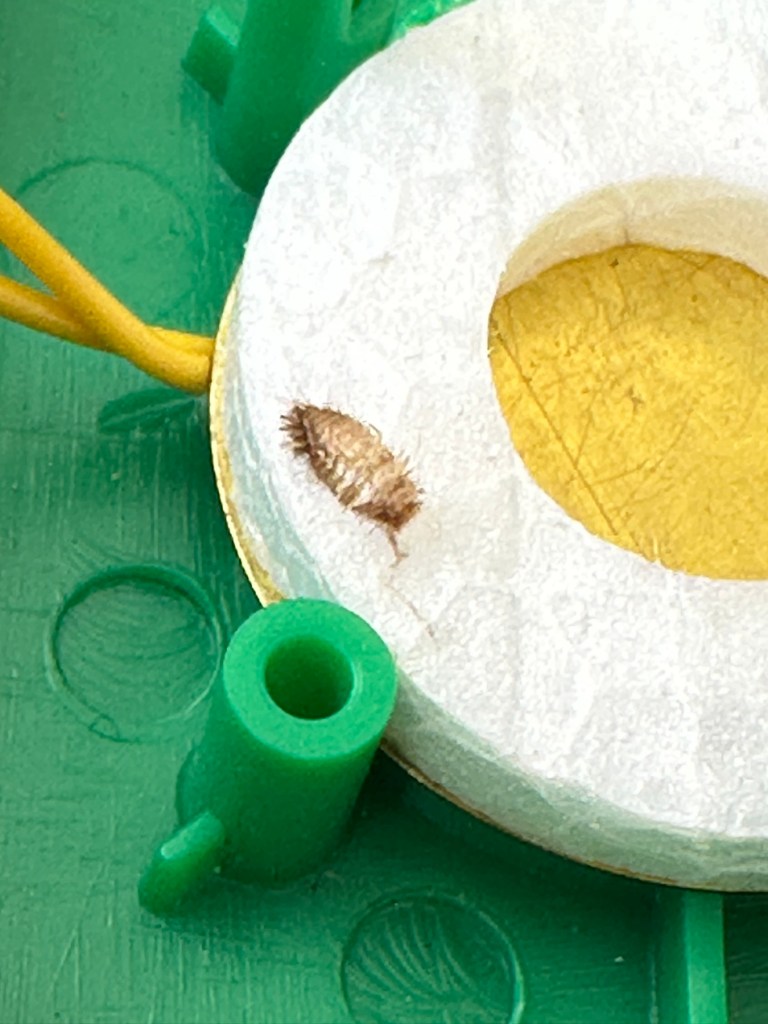
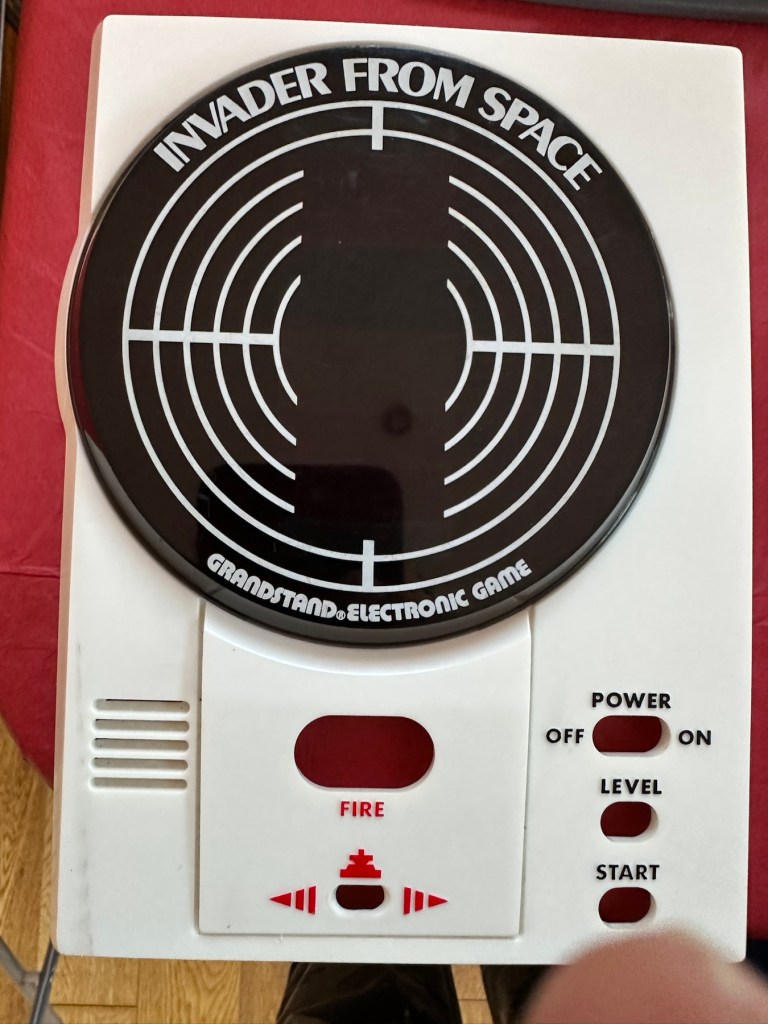
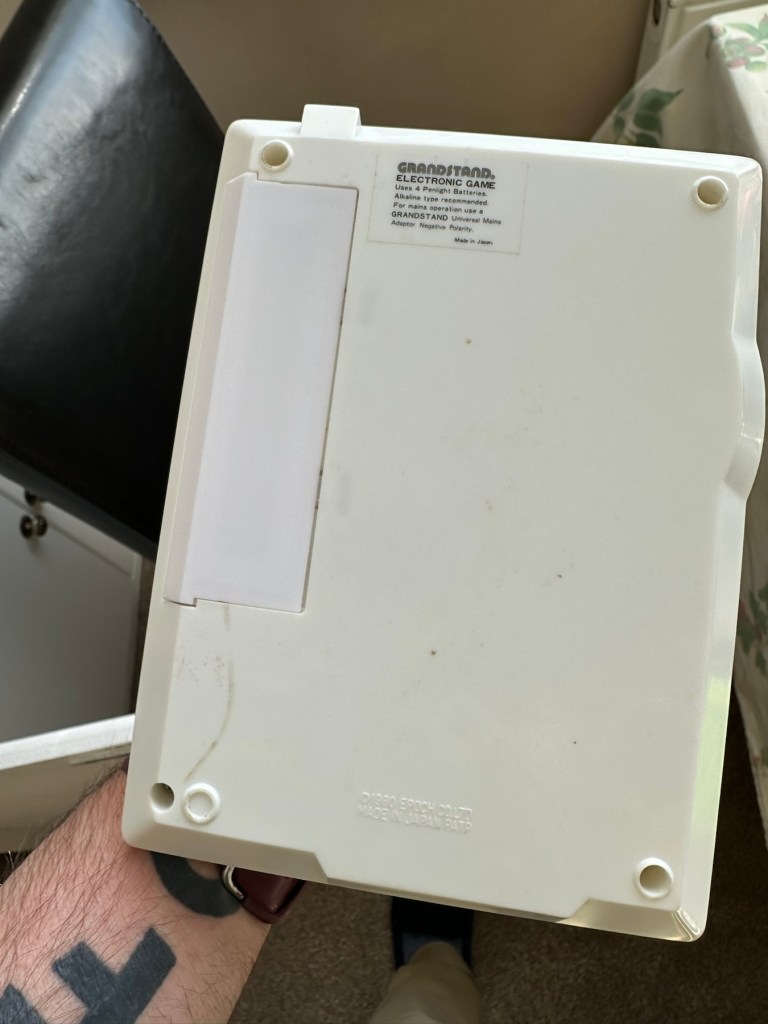
On arrival the first thing that hits you is that this is yet another filthy item. I seem to attract these kind of sales, so it will require a deep clean. Cosmetically the game is in good shape with no deep scarring and only minimal fine scratches on the screen lens commensurate with its 46 year old age.

Tidy cosmetically but filthy

It was sold as the missile light not working, this is partially right as it is an intermittent fault, I suspect this is down to dirty contacts.

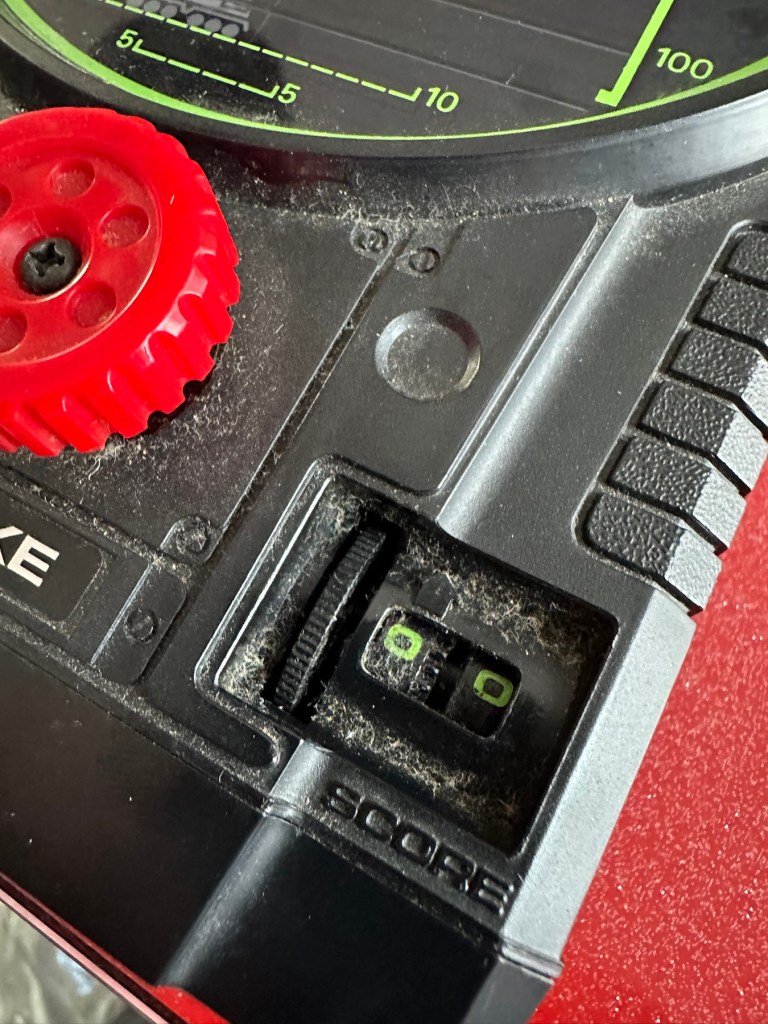
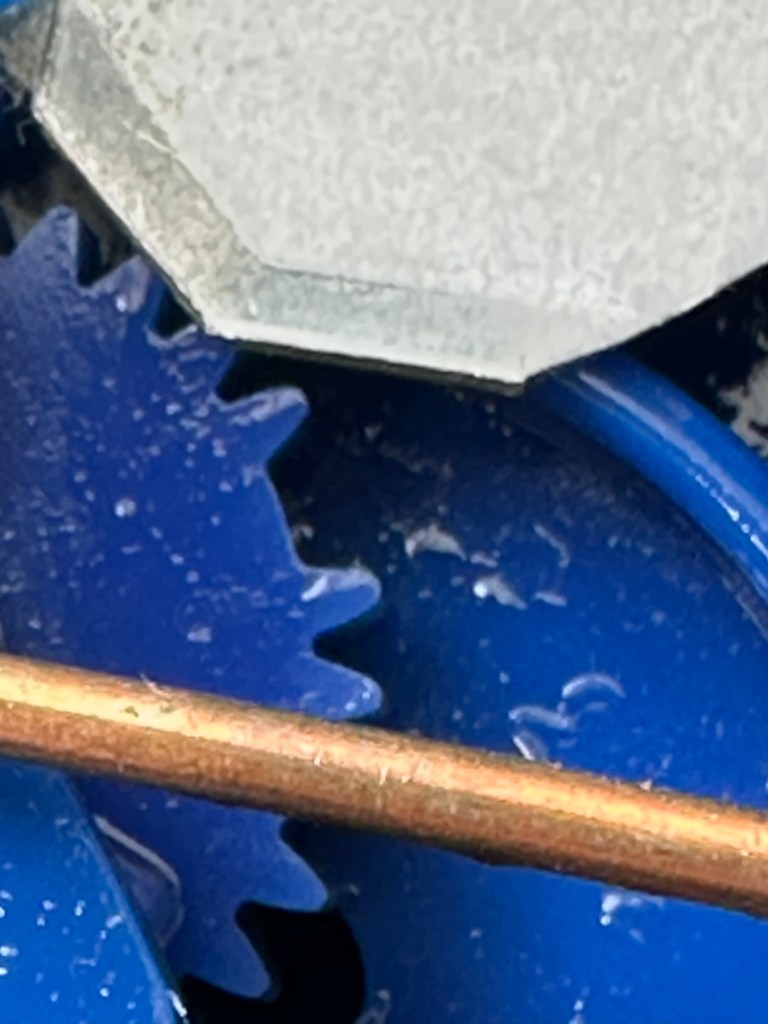
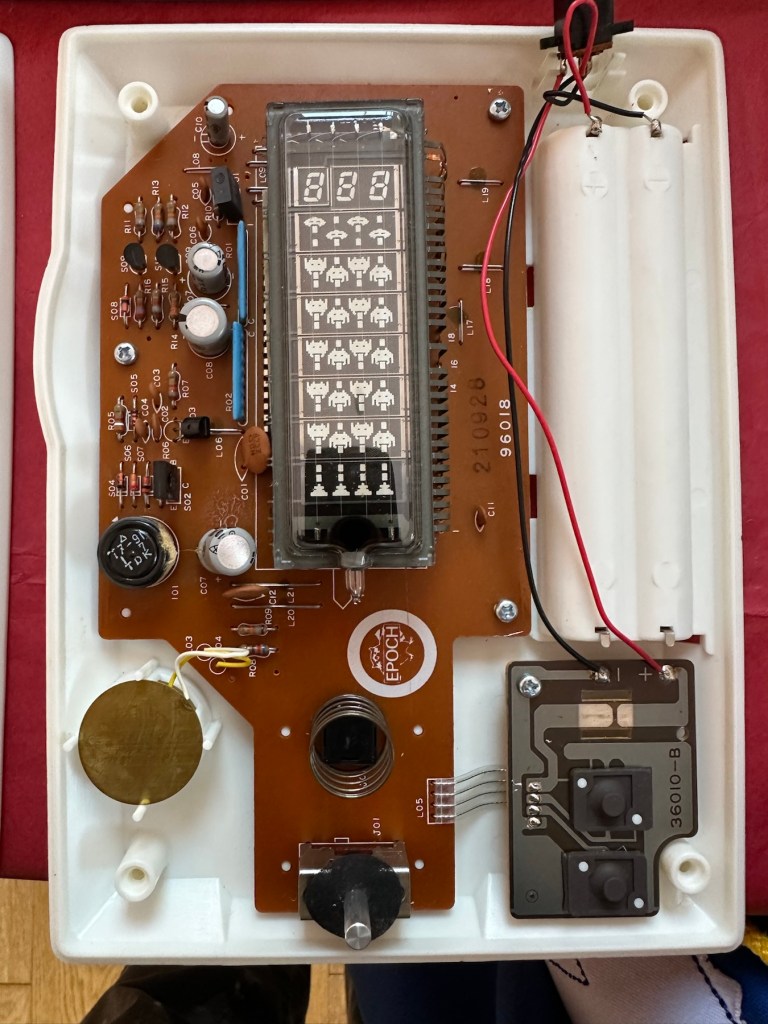
This game has two bands of film that run across the top of the screen displaying aircraft, the top band is intermittent and needs attention. The score counter will also need attention as it is not turning smoothly, again I suspect this to be as a result of the build up of dirt.
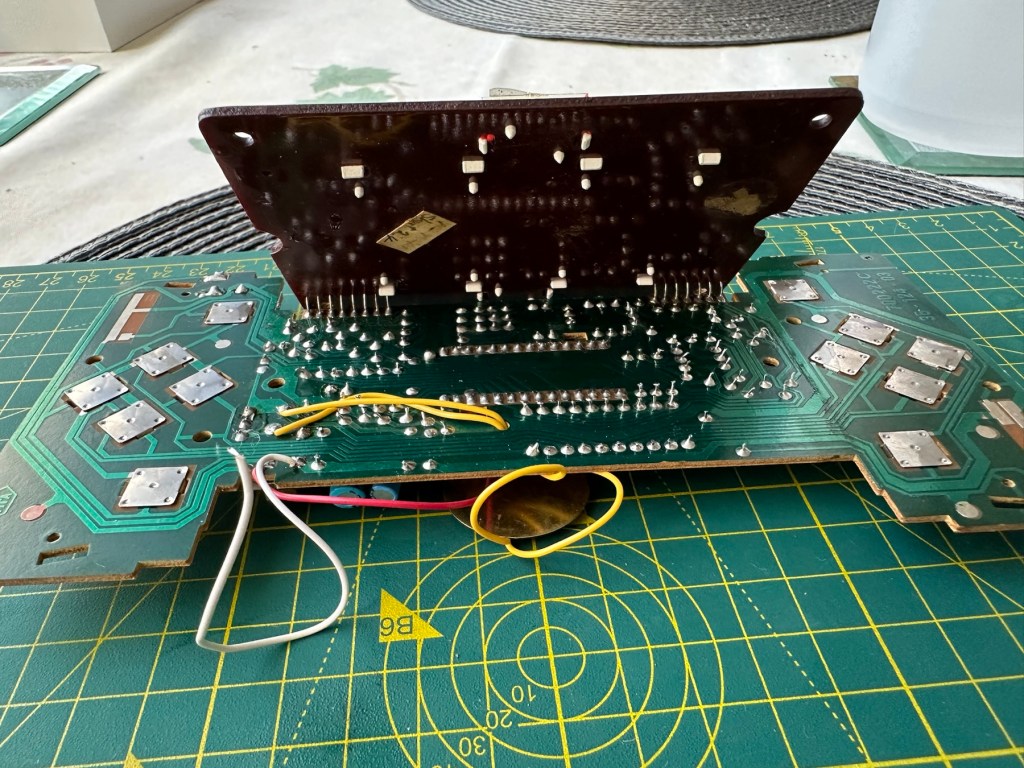
Repair:

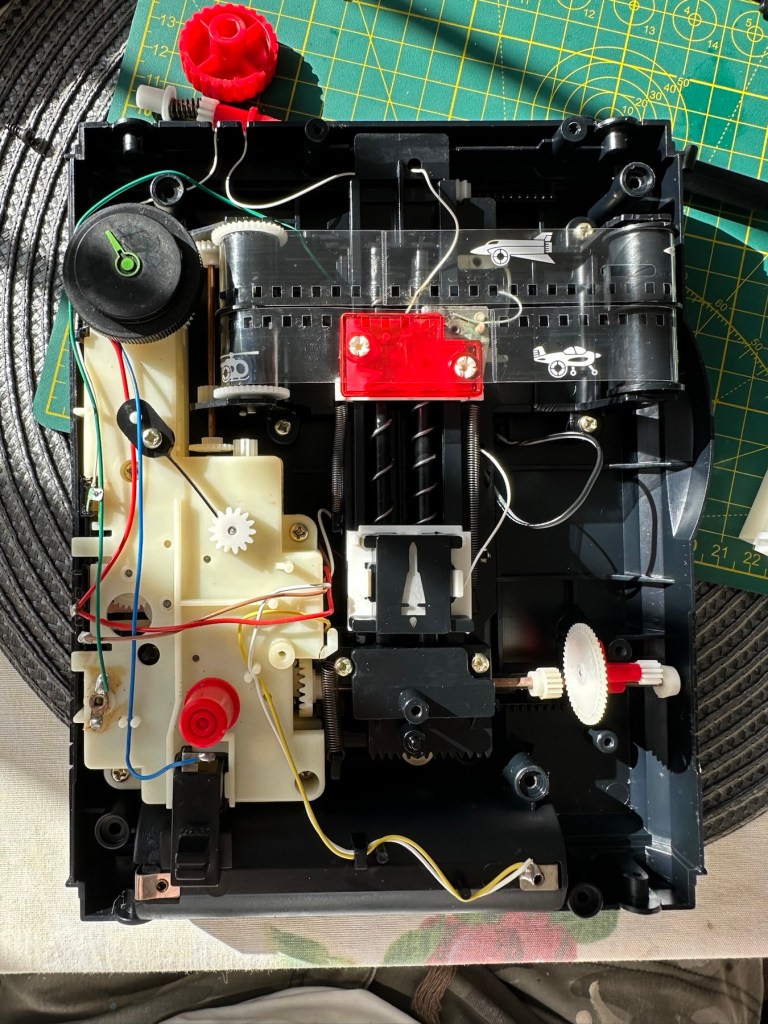
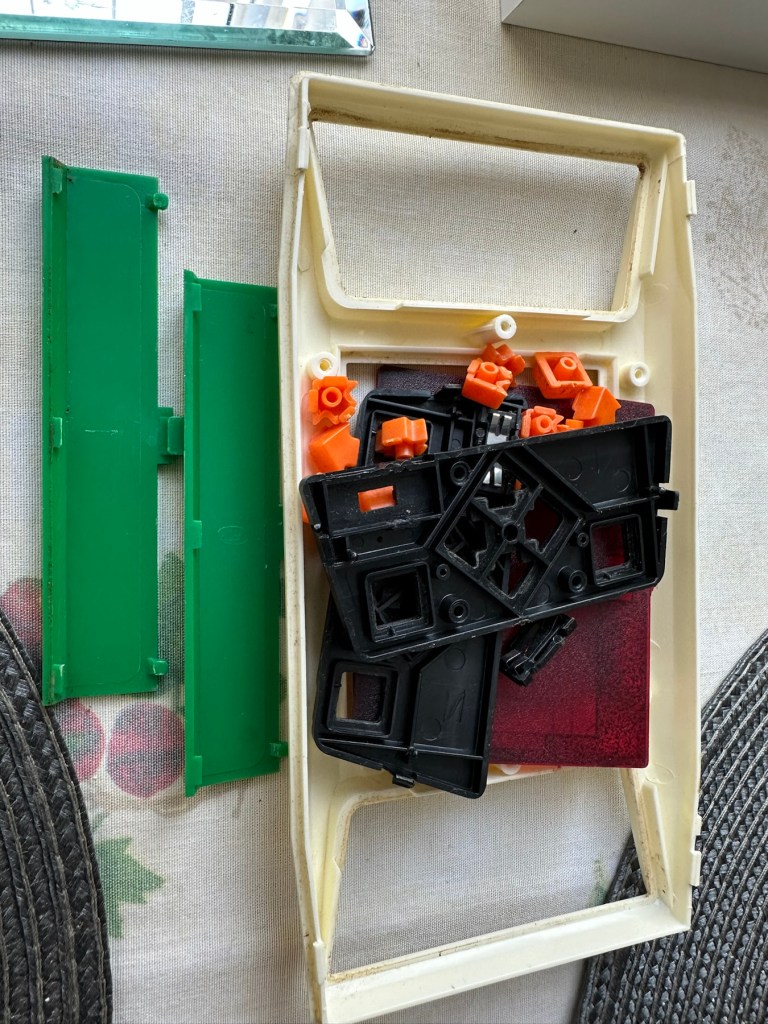
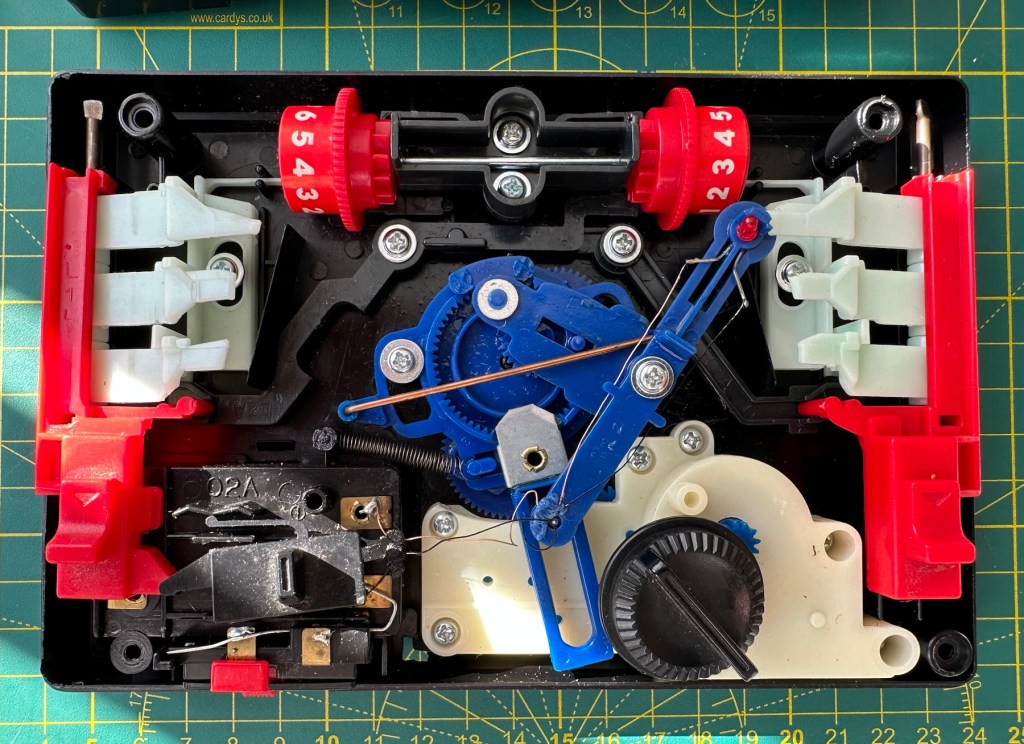
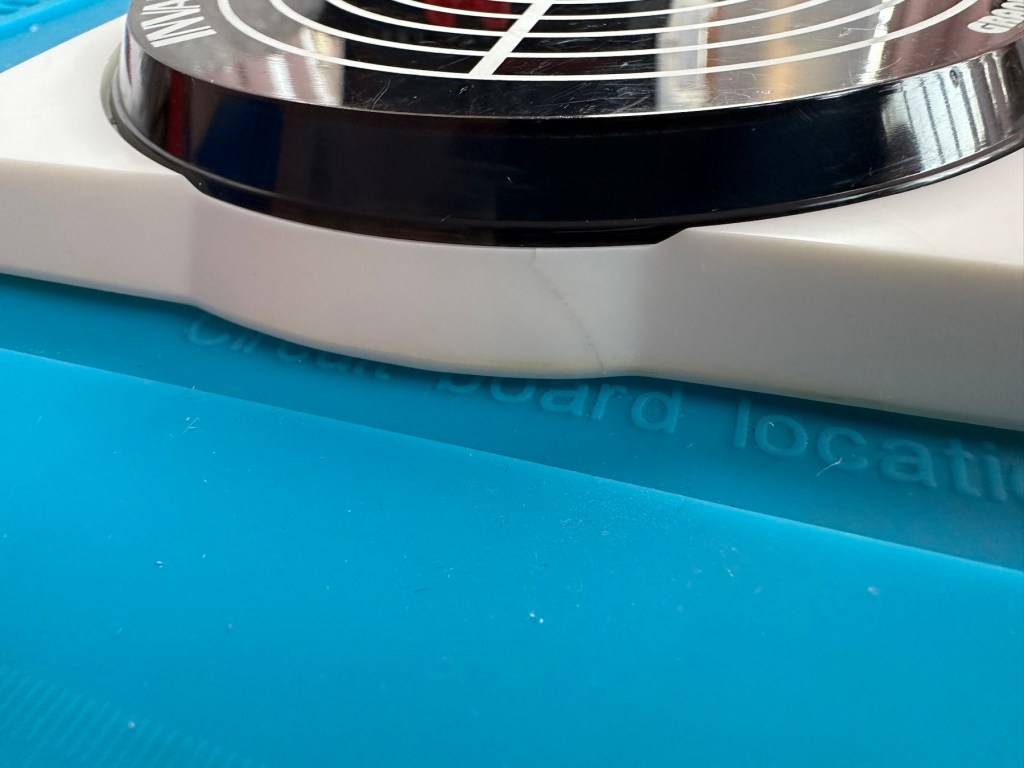
First thing to do is dismantle the unit and to get some cleaning done. The small video below shows the issue with the top band aircraft not moving.

Film transport fault

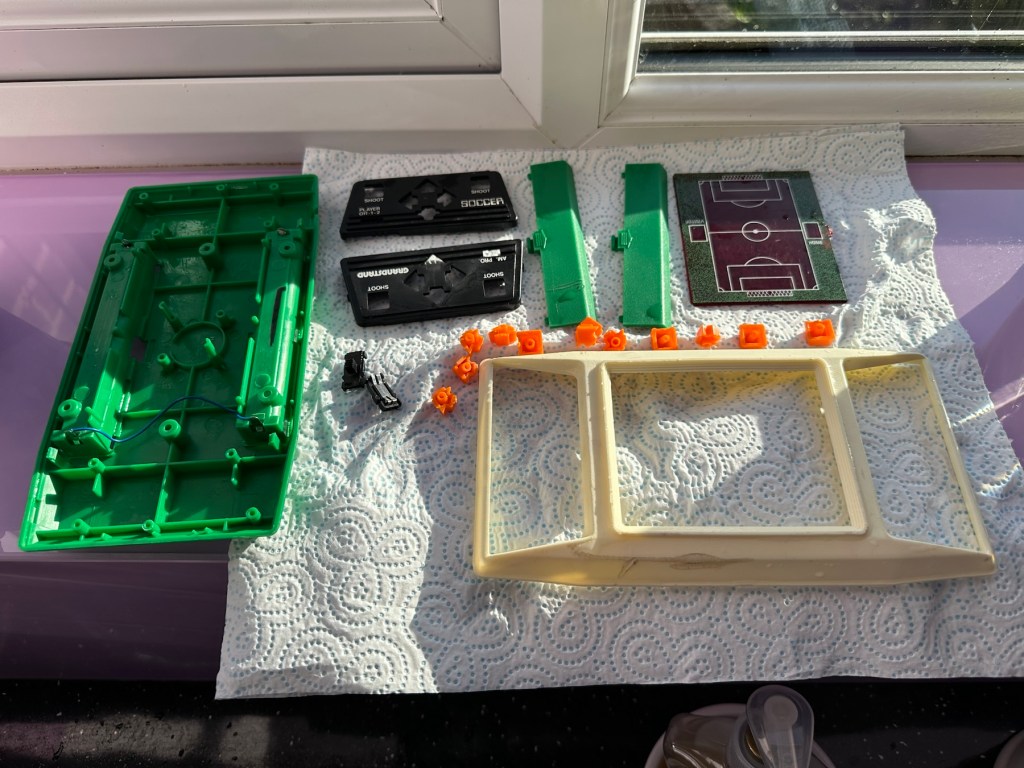
I’ve taken the counter out after removing the case and all exposed buttons and switches.

Dismantling

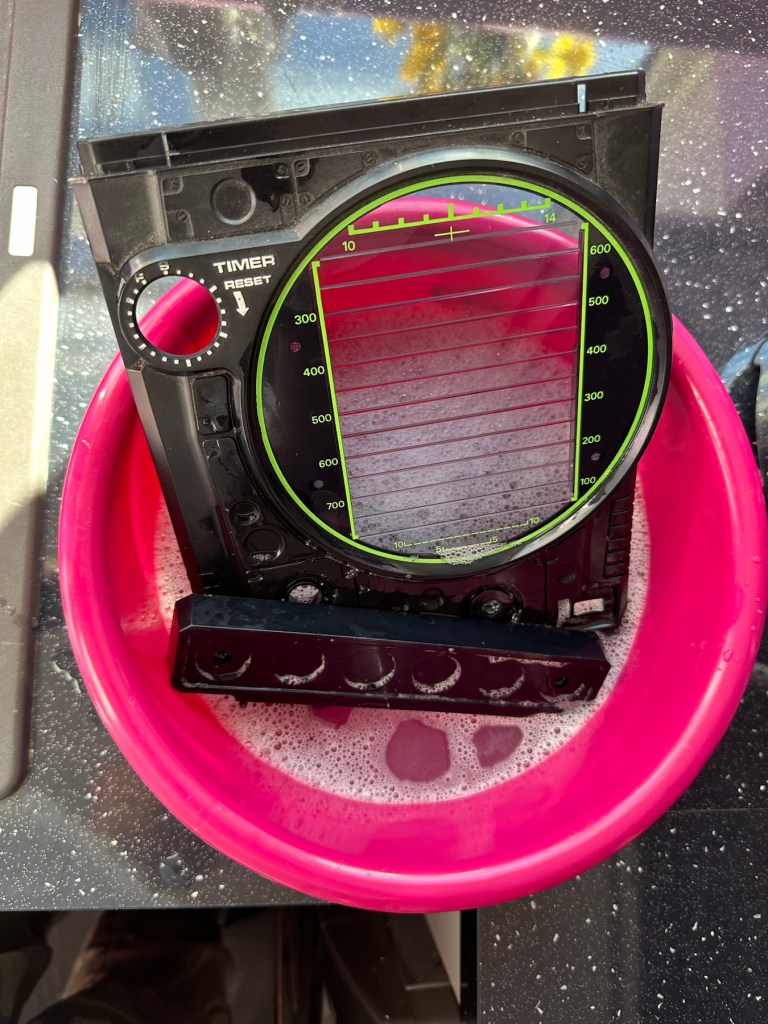
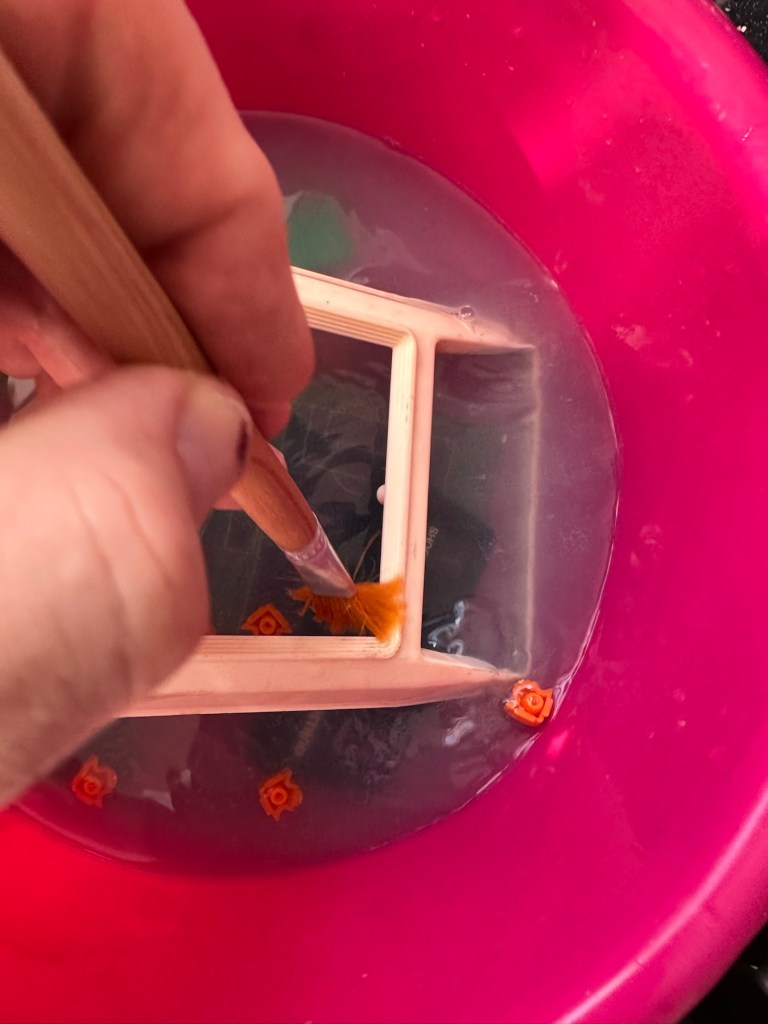
Off to the kitchen sink. let’s get these items washed.

Whilst I’m waiting for the washed items to dry I clean the counter mechanism of old dirt and fluff.

Counter mechanism cleaned, fluff removed. Silicon grease applied

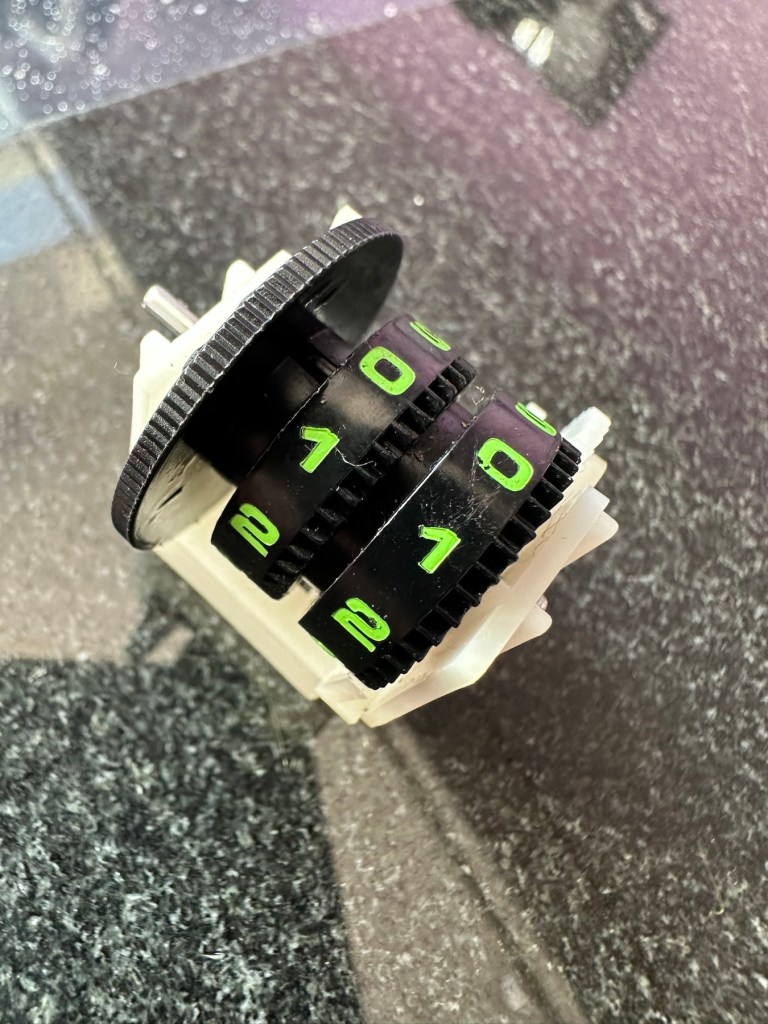
I’ve slightly greased the counter with silicon grease and it’s behaving well and doing what it should. This will go back in place when we do the final reassembly.

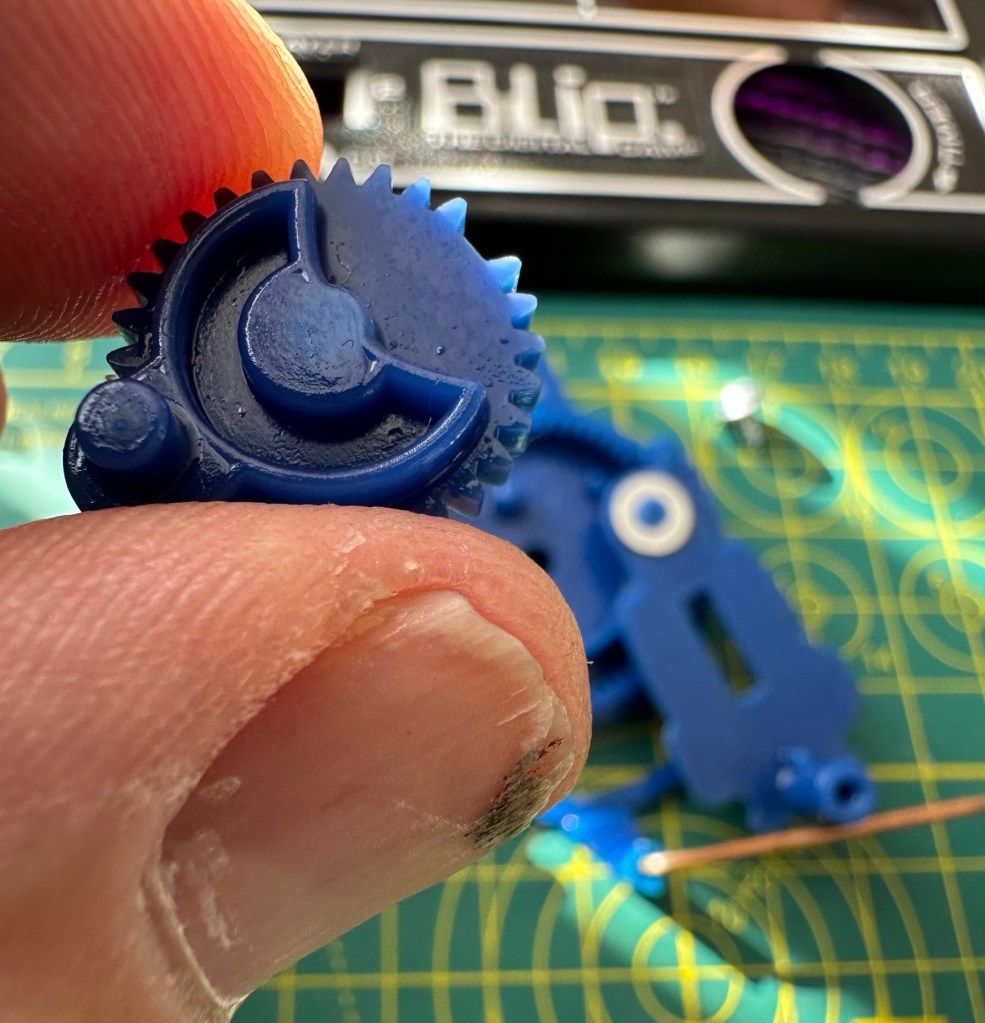
The issue with the film movement was a strange one. There was no way to tension the two capstans that the film roll over and there were no teeth missing off the capstans. One capstan pulls whilst the other pushes, all I’ve done is swap these around and the issue has disappeared. About as simple a fix as you can get.

Just swapped the capstans around

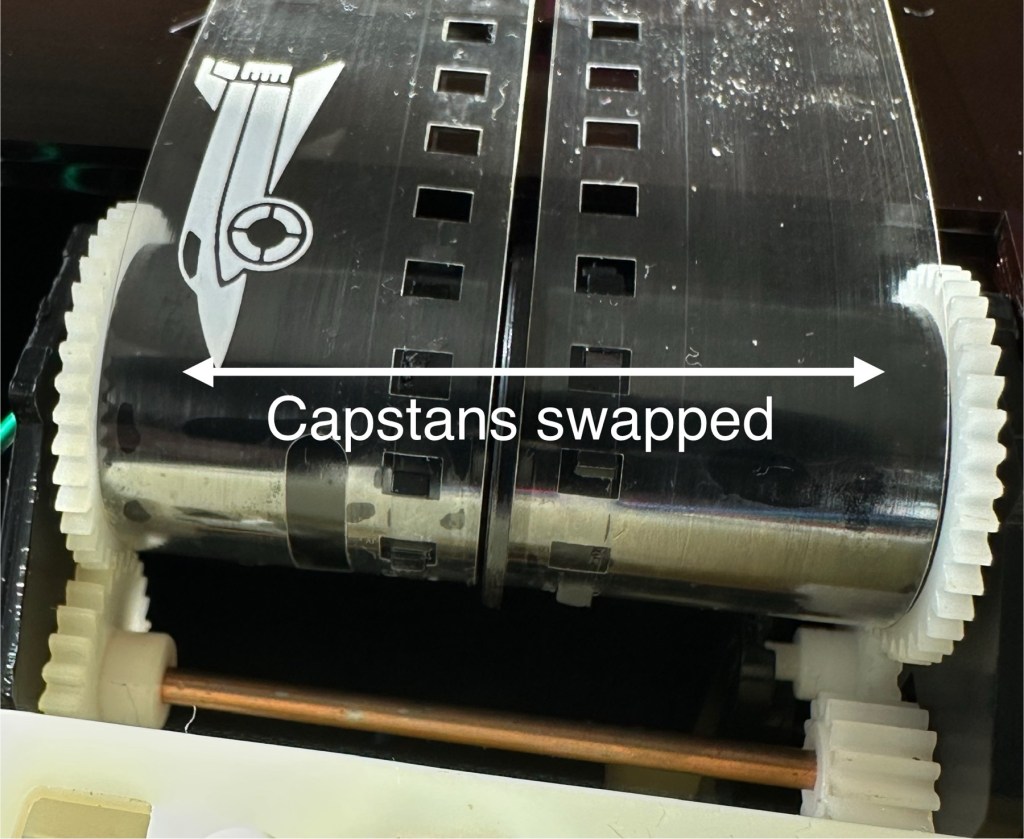
I’ve put a little before and after video here that shows the effect of swapping the capstans around.

How swapping capstans worked

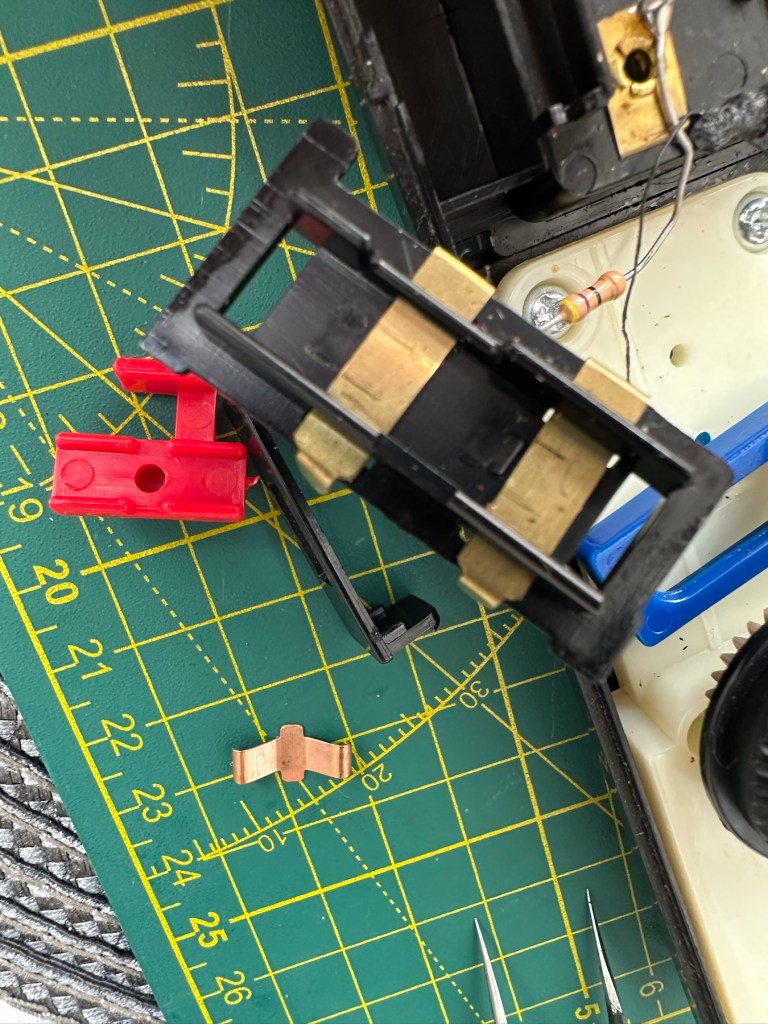
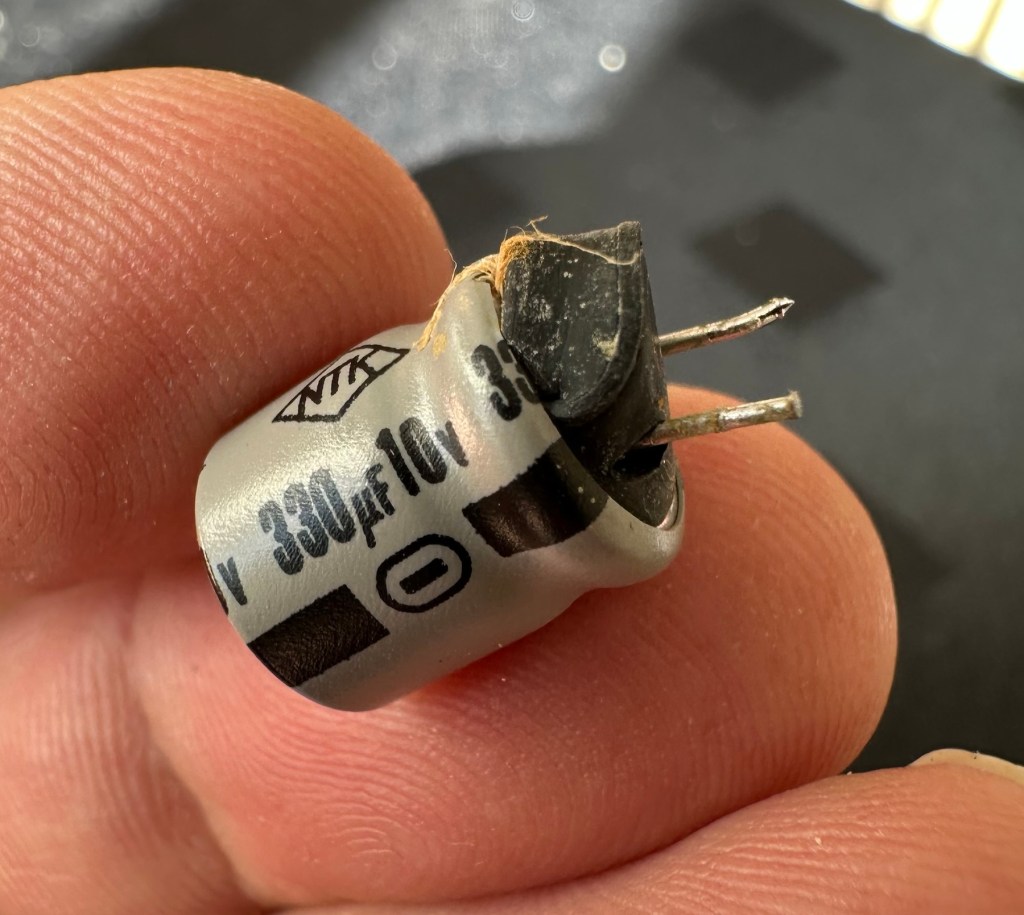
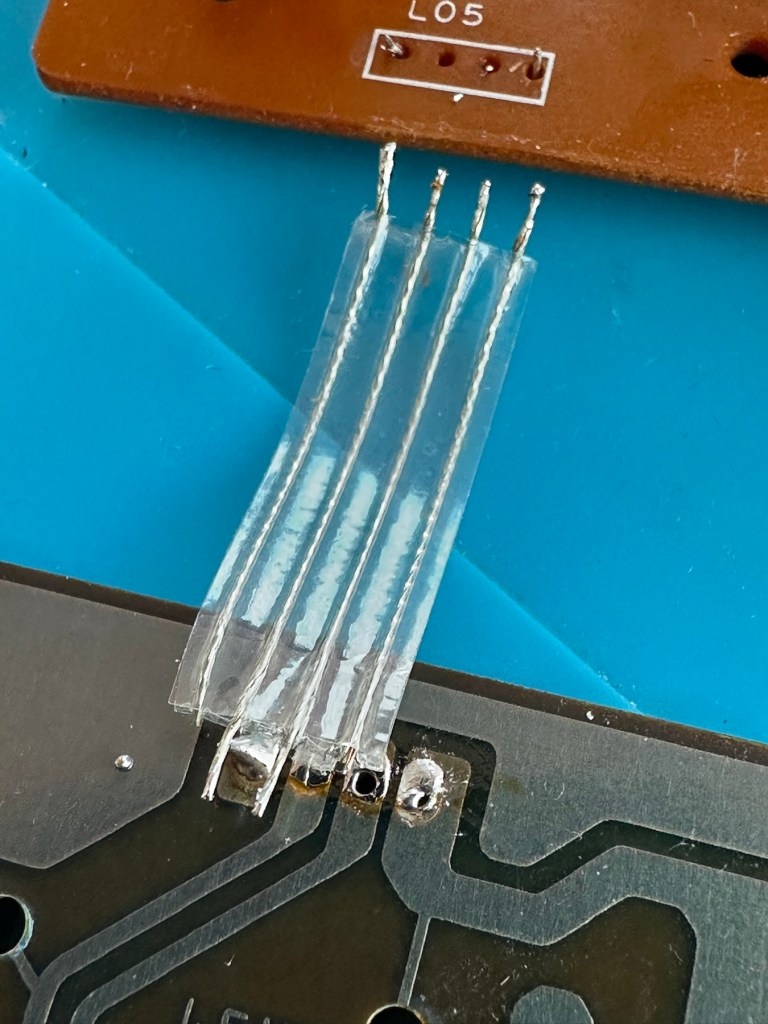
The issue with the intermittent light was easy as expected. This is the only electrical piece on this game and it was down to contaminated battery contacts that just needed a bit of a clean with my grinding pen and a wipe over with IPA.

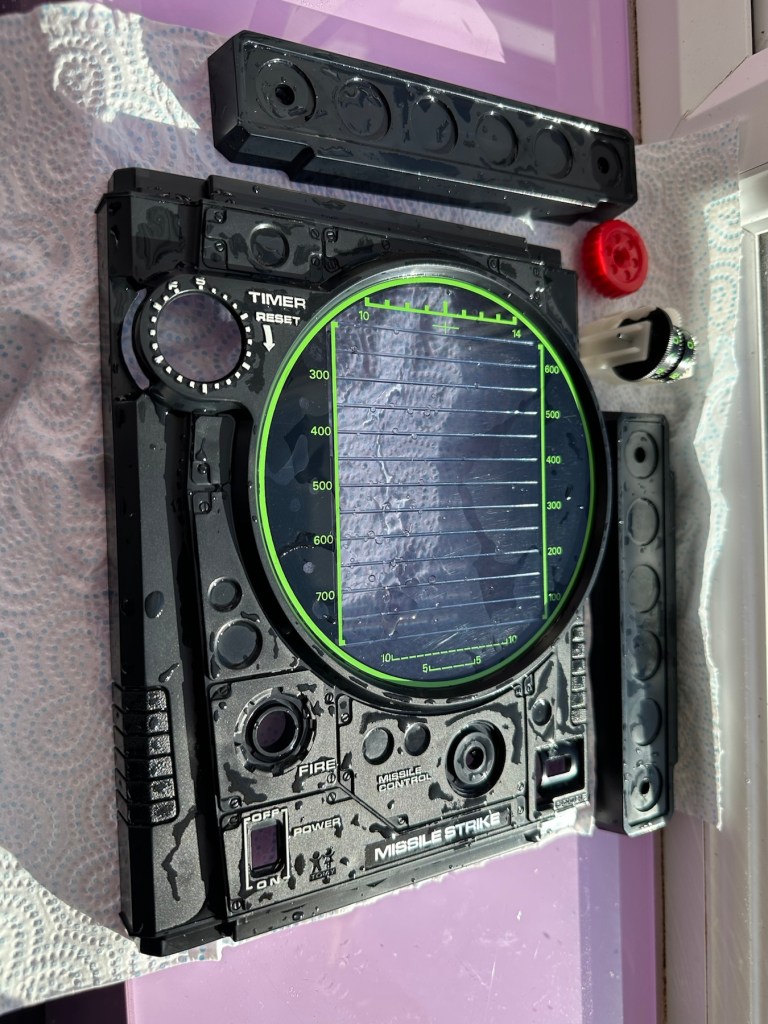
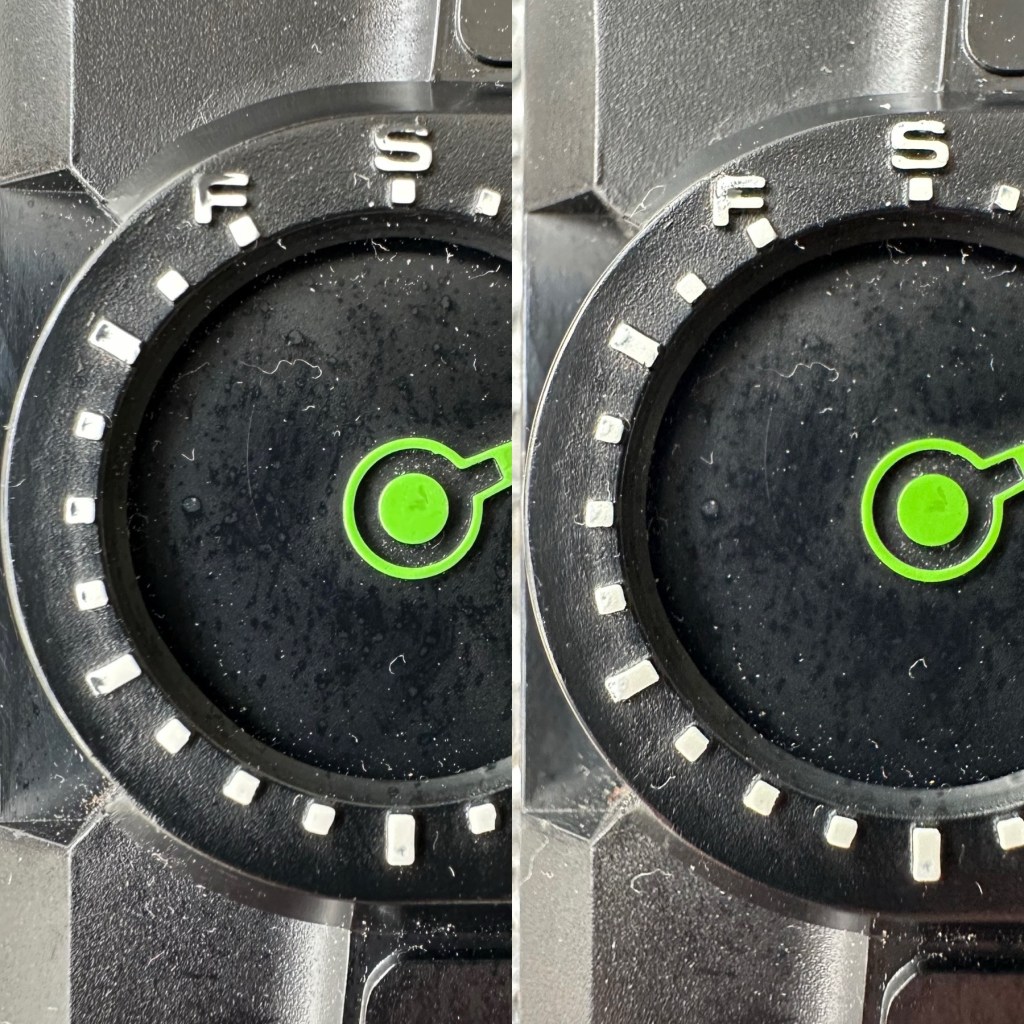
Final little touch was just to accentuate some of the old lettering by the timer. This was just with a white paint pen.

Before and after

Now we can reassemble and test again.

Result:

The game has been reassembled and tested and is now working fine. All intermittent issues have gone and it has now been polished and now looks superb.

I’ve attached this small video that shows the game working as it should, with no film slipping and lights and counter now working.

Working perfectly

It’s really pleased me this repair, as it’s another one of those mainly mechanical games. Dirt featured big time, and age issues have been overcome and the game given a new lease of life. Another one for my personal collection, it will go on now for many more years to come.

The best outcome that was possible, we have another superb seventies product that has been saved from the scrap heap.

And that is the biggest win of all.

Thanks for passing by, it’s always appreciated.

Grandstand – Kevin Keegan’s Match of the Day game

Here’s what the listing stated:

***NOT WORKING***

Spares or repairs

Fair overall condition some cosmetic damage as expected for a 56 year old item

Very rare well worth restoration if you know how

EBay

This guy sells retro games on EBay at exceptionally inflated, ridiculous prices. I suspect he doesn’t get involved with repair or renovation as he had this one advertised at over £30GBP but when I put in a cheeky bid for £12GBP he bit my hand off… I wasn’t expecting that! The usual mistakes in the listing such as stating it’s 56 years old when its actually 46, and stating it’s Very rare – it’s not, there were a few hundred thousand churned out and to be honest and they come up quite often on the sale sites. But I do agree it’s worth restoring and will pair up nicely with another retro football game from 1979 that i repaired a few months ago Bambino kick the goal football game. And what makes this unit even more appealing is that it is complete with both of its battery covers – now that is rare!

This game was made by Grandstand in 1979. Here’s the original advert that appeared on UK TV promoting the game back in the late 70’s.

European footballer of the year 1978/1979 Kevin Keegan – questionable late 70’s advert

This particular unit is listed as Not working, it looks filthy from what I can see, but having experience with these games in the past the biggest issue is age related problems such as old components, track decay and battery corrosion. No doubt the first thing I will do will be to dismantle it, give it a thorough inspection and then a good cleanup both inside and out. And then we can look at the issues around why it’s not operating.

Assessment:

The unit has arrived today and it sure is filthy cosmetically. Like someone who has grown up throughout those 46 years it has its scars. It looks as if it has been placed against something hot, and shows a burn mark up one side.

How it looks on arrival
Caked in filth
Battle scars and burns

I have put batteries in and the good news is that there is life of sorts. By that I mean there is a distorted noise from the speaker and a flash of life on the screen and then it dies. Wiggle the start button and there are more flashes of life but that’s it. No other buttons seem to be working. I’m not tempting fate but this could be a case of the unit being just as filthy inside as well as out. But knowing my luck this will not be the case. Let’s have a look inside.

Repair:

First of all we need to get the unit open, remove the circuit board and get the thing clean. So let’s do that.

As you can see in the pictures above, the inside hid a lot of accumulated dirt and grime, there were even dead bugs inside. Everything that could be washed was taken to the kitchen given a good soak, brush and rinse.

Whilst I’m waiting for everything to dry my attention turns to the board. A quick inspection reveals that all tracks are in a fair condition and we don’t need to rescue anything there. The buttons on either end have been taken apart and all cleaned with IPA, I’ve also used the same method to clean the switches and the board and after checking continuity all contacts are working as they should.

Now everything is clean, I resolder the battery contacts, check the buttons and all appears well, I attach my bench power supply, give it 6v, turn on the switch and we have life. No intermittent issues and a very loud sounding speaker. I turn this off and look at getting it all reassembled.

Unit now fully assembled, it is looking a whole lot healthier and apart from its burn scar is looking pretty good.

And when turned on it’s working just as well as it did back in 1979.

Result:

Sometimes these units just need some care and attention, and as I stated at the beginning all this really needed was a deep clean and service. Not a thing wrong with the electrical circuits apart from contamination on the contacts and switches.

All working. Job done

I’m now in possession of a lovely example of 70’s technology with slight battle scars. It’s had a tough life but now it has had a new lease of life and is good to go for many more years yet. It will take a place in my “Retirement home” collection of old discarded retro game units.

As always, it’s a win as we have prevented another unit being heaved into landfill.

Job done.

Thanks for passing by, it’s always appreciated.

Tomy / Palitoy Blip LED game

What the listing stated:

Boxed Tomy Palitoy Blip Vintage 1977 LED Game 

Good condition and powers up but need to shake it to make ‘ball’ move.

Could be a spring tension has weakened or something

Box is very worn

EBay

This purchase kind of excites me as it was a couple of years before games started to go truly digital. The year was 1977 some 48 yrs ago from the current time of writing. It was labelled as a digital game however that was a bit of a misnomer, it was more an electro mechanical game as the battery source in this unit had only one purpose, to power the LED light source. The main guts of the unit are mechanical being powered by a wind up motor that does the majority of the work. However the mechanics within this unit are superb and it’s worth a look under the cover just to revel in its construction.

These units were released at the time when pretty much the only video game available was the tennis game “Pong”. The TV game units produced at the time were selling for around £70GBP where as this unit was priced somewhere around the £8GBP mark. Hence, it was a cheap option for the children and didn’t need extra hardware such as a TV and a power supply. However, it wasn’t a match for the far superior “Pong”. It was in theory a totally different and far more frustrating game.

Want to give it a try? There is a really good true to life version available from the App Store to play on your phone. Believe me it will have you cussing as it’s not as easy as it looks. So realistic right down to the motor noise and light movement. It’s really addictive and annoying in equal measure.

The App for iPhone…it’s frustrating

This video below by Randi Rain shows a total refurbishment start to finish and is a great source of information regarding the breakdown and repair of this item.

Breakdown and restoration of a TOMY Blip

Some history:

Blip was designed by Hikoo Usami for the Tomy Kogyo Co., the patent being filed in 1976 and awarded on December 19, 1977.

Tomy marketed Blip in the U.S. starting in 1977. In Japan, Blip was marketed as World Tennis and differed from the U.S. game by having the words “World Tennis” emblazoned on the screen and replacing the 1, 2, and 3 on the screen with silhouettes of tennis players. The Blip name remained on the Japanese version. In France, the game was marketed by Meccatronic. The German version was called Blip-o-Matic, although the Blipname remained on the case.

It is the timer which provides the motor function to the game. Upon the timer dial being turned, a spring is wound which then, via several gears, drives the arm upon which the LED light (the ball) is mounted. The movement repeats after the ball hits each player’s side 36 times, so it is possible to memorise the sequence of buttons to press.

Wikipedia

I’m really looking forward to receiving this unit and can’t wait to get it up and running again. I’ve been after one of these for quite a while.

For those who may be interested and who have a photographic memory this is the sequence that the movement repeats in its 36 movement cycle:

Pic courtesy of Tech Tangents

Assessment:

The unit is in good cosmetic condition considering it is 48yrs old. The box is tatty but usable and as always smells a bit musty (To be honest as expected). The mechanical condition is not as described and is a total non starter. It seems the winder may have even been overwound, I hope this is not the case. The “Ball” light does come on when batteries are put in but only intermittently and when pressure is applied in the battery area. However the contacts do look clean with no sign of battery leakage or corrosion. And I know someone has been in this unit prior to me as one of the four body securing screws is missing. God knows what I will find awaiting me within. The seller has been a little, how can I say it, inconsistent with the truth in his description of this unit.

But that’s why I buy these things. Let’s get inside and find out what is needed to get it back into being a working game.

My unit. And the ball light came on for a few seconds to allow me to take this picture. Then promptly died again.

Repair:

Open the case and this is what you are faced with.

Complex mechanical interior

If you remove the left and right control paddles you can get to see the mechanism running unhindered. However this one has an intermittent fault where the movement stops mid travel, there is something restricting its movement.

Something stopping movement

There is an inherent issue with these units where the gears have to be set up in exactly the right position or else it does not work. Similar to changing the timing belt on a car. This confirms to me that someone has been inside previously and messed with the gearing.

I also noticed a cog with a tooth missing, this was strange as to be honest it didn’t look as if there had ever been a tooth there in the first place!

Looking at its motion it transpires that this is another cog that just has to be in the perfect position and the “Missing tooth” corresponds with a flat post on the rear of the gear train. It’s missing for a purpose. This pleased me somewhat.

Calibration holes on the cogs correspond with holes in the shell base.

I put the cogs back in place paying special attention to their positioning and tried the unit once again. Here is the result.

Now a nice smooth movement

Next I’ve taken the light switch to pieces, I’ve cleaned all the contacts with IPA, reshaped the contact and put back together.

I’m pleased to say this did the job, the light works fine and there is no longer an intermittent fault. It’s all that was required.

I have reassembled the unit, given it a good clean and it looks pretty smart if I say so myself. It was already well oiled so there was no need to add more at this point. It is now fully working and will last a good few more years yet.

Now Working

Result:

A successful repair of a 48yr old toy game. I’m really pleased with my purchase and it’s another cracking example to add to my ever growing collection.

All clean and looking smart

Repairs on these games need approaching from a different point of view. The electronic content is minimal and mechanical workings are the order of the day. Look how it has all reversed in today’s gaming world, that’s advancement for you.

Really pleasing positive result here. Another one saved from landfill.

Thanks for passing by and reading this post. It’s always very much appreciated.

A gaming device in a tin. How quaint…

Being one of those from the Ham radio community there was always a fascination with putting a Morse code transmitter into a disused Altoids tin (Other tins are available). Here and now though we have a gaming device that can fit in the same tin. Worth visiting Git hub via the link to see the actual boards and the plans for making this a kit version. I’ve signed up, let’s wait and see what happens.

Earning on YouTube

I follow a number of channels on YouTube. It’s the only social media site apart from this one that I do get involved in. I have absolutely no intention of ever making a living on these platforms as to be honest I couldn’t really be arsed to.

Hugh tells you how it is

However a lot of individuals nowadays want to do just that and make their livings on line.

Now Hugh has a very interesting site for someone like me that likes anything from the retro era. He’s been without a smartphone for over a year and his progress without one has been really interesting to follow.

Hugh does earn from his online presence but to be honest it isn’t a living. He goes through the figures in this video that show all the hoops you have to jump through to earn a living from having an online presence.

Enjoy.

Grandstand Invaders from space game

What the listing stated:

Can’t get to turn on unfortunately. No battery cover. Any questions please ask

EBay

I know, there is no battery cover, however I have already sourced a seller of one if needed. This item looks quite dirty so a good soak might be the order of the day to get started. I’ll wait for its arrival before I jump to order any other bits for it.

Now as I’ve said in the past these units fall into that crazy price category on the selling platforms as the “New Antiques” of today. For an item that was low cost, somewhere between £25-40GBP when it came on the market, they can certainly command a wide range of crazy prices, here is an example of price ranges from today:

The massive range in prices for these units

This one I purchased today only came up for sale about 3 hrs ago and I thought it would have been snapped up by now, it hadn’t so I didn’t hang around any longer and purchased it for a total of £16:38GBP including its delivery. I’m not going to get too smug yet, as for all I know I may have just purchased an empty shell. Let’s wait until it arrives.

Here’s a little history of this unit:

Grandstand “Invader from Space” is a tabletop LED game dating back 45 years to 1980. Four ‘AA’ batteries power the unit or, alternatively, the Grandstand 5.5V@300mA power adapter (or an equivalent power pack) sold separately. The game, licensed to Grandstand, is a copy of Epoch’s “Invader from Space”

The company initially behind the “Grandstand” label was Adam Imports Ltd., (from 1980 Adam Leisure Group Ltd. and by 1983 Adam Leisure Group PLC) founded in 1973 by Chris Rycroft and Les Kenyon of Harrogate, UK. The company initially started as a mail order company and was the single largest supplier of calculators in the UK by 1974. By August 1978, George Bassett had acquired a 75% holding in the capital of Adam Imports for £750,000 cash, plus 60p in the pound of profits before tax in excess of £500,000 for year to December 31, 1978. Adam Imports was re-acquired from George Bassett by Chris Rycroft in 1980. It chiefly imported electronic products from other manufacturers such as VTech, Epoch, Tomy & Entex, selling them in the UK re-branded under the Grandstand name.

Wikipedia and others

So that’s the history

There is a good link to a similar repair on YouTube from a guy I follow named Stez Stix Fix, it’s very much worth a look and he has a great if not sometimes crazy way of diagnosing and repairing items. A cool guy though.

The Grandstand invaders from space game

Anyway back to my own purchase.

Assessment:

I must admit the unit doesn’t look as dirty as in the original pictures. The battery cover is missing and there is a crack in the side and a deep scar at the bottom, this won’t be too much of an issue if I can weld it all back together. I will still give it a good soak to clean it all up though. I’ve put four batteries in place, and the unit is definitely dead. There are no loose wires, voltages are getting around the board according to the multimeter and nothing is getting hot. There appears to be no short circuits, and then I notice this, capacitor CO7, slight bulge on top and what looks like leakage from the bottom. We have a candidate as to why this unit is not working.

CO7 looking unhealthy to me, you can see the component to the left that looks like it’s covered in a fur ball. The result of the old capacitor “coughing”

I’ll whip this out and see what we have but I suspect this old capacitor has failed and is causing an issue, heres hoping I have a suitable replacement.

Repair:

This little beast is a 330uf 10v electrolytic capacitor. I have none available so have had to purchase a pack of ten. These should be here in the next few days. There are three other old electrolytic capacitors that I will also change whilst I’m in there, as these are all likely to fail at some point soon. These components are now all around 45 years old, it’s a wise move to change them out.

One very dead capacitor removed.

I’ve ordered a 3D printed battery cover to replace the one that is missing. This should be here in a couple of weeks.

Whilst waiting I have cleaned the inside and outside of the casing as best I can. I still have a piece of broken surround to repair, however this is just a simple glue and a little bit of support job.

Broken surround repaired

The surround that was broken has been repaired and secured with some nylon soaked in a superglue compound inside the casing. It’s rock solid. Outside the break is hardly noticeable. The break is secure and much stronger now.

New capacitor here

I’ve replaced all the offending capacitors and the unit remains dead. I’ve reflowed most of the board as there were some dry solder joints. I’ve also rewired the bridge from the control panel to the main board as one of the wires here had broken.

Bridge required resoldering

After using the multimeter to check some traces and components it’s now pointing to this component (a power transistor D882) being the cause of this catastrophic breakdown as its readings are all over the place. I suspect this item has overheated, the capacitor has blown and then it’s just died itself. I’m probably wrong, but I know what I mean. Probably just a catastrophic chain of events that all contributed to the units demise.

D882 transistor – power regulator

And as usual I have none available so will have to send for some new ones. The new components have arrived and the new power transistor has taken its place on the board. Now reassembled I place some new batteries in and the unit comes to life. It was the power transistor at fault, I should have really checked here first after seeing that damaged capacitor at the beginning.

All old components removed and replaced in this unit

Not to worry though as it’s had a good overhaul and has been totally recapped as a precaution. I’ve used some conformal coating on a few tracks that had some copper exposed after a good clean, to ensure they don’t deteriorate any further.

It has life

The unit is looking really good and these items were traditionally very loud and this certainly is. It’s working well just as it should do and I’m exceptionally happy with this repair. I’m still awaiting the battery cover that I have had 3D printed and this should be here in the next week to complete the fix.

So with that I will bring this build to a conclusion. It has been a fun project, I’ve learned a number of things about this circuit board and gained valuable knowledge.

But best of all we have rescued another item and saved it from landfill.

Winner 🥇 👍

Thanks for passing by

Nintendo Game Boy Pokémon pinball game

What the listing stated:

You will receive what you see in the photos, please look at the photos as this is part of my description to show you what you would be receiving. Please note the game comes up with the main Game Boy & Nintendo screen & then won’t go any further, as you can see👀in the photo. 

Any questions please feel free to ask. 

EBay

Hopefully this will be a simple repair, but who knows it might just be a little more technical.

This game is built for the game boy colour console and is an original Nintendo product, it is the Pokémon pinball game. I’ve purchased something I never normally buy and usually detest buying, an item with the battery cover missing. Damn it, there is a fortune waiting to be made by anyone who owns a decent 3D printer, with the amount of missing battery covers that are waiting to be reproduced out there. Edit: ( Just looked on line and it seems the gaming community are already on the case, loads of options available, great to see) Anyway I’ve brought this unit as it can either be kept to await a suitable battery cover or passed straight on. Edit#2: I have, in anticipation of its arrival already ordered a suitable 3D replacement cover from a UK company. It was probably the best priced and best looking print to be honest, some of the others looked a little rough and postage was excessive to say the least. These guys at Cool spot gaming were the best in my opinion.

Released in Japan in 1999 this game made it to European shores in 2000.

These games came with a rumble pack at the top of the cartridge that simulates the vibrations of a normal pinball machine, and I believe this is what the single cell AAA battery is for. And as it is a black cartridge this indicates it can be used on the GameBoy colour and original versions. I have purchased this for about half the price that a good working one with battery cover sells for, now that I’ve had to pay for a 3D replacement battery cover I now move into the higher end price of the cartridge valuation, however I do have a few pounds worth of wriggle room should I decide to sell, considering most of the ones on sale at the moment are missing the battery cover and commanding horrendously high prices. I’m comfortable with that. That said it will go into my personal GameBoy collection anyway. Let’s get it working.

Here’s a link to the actual 3D print program for the battery cover on Thingiverse, if you should ever wish to print one yourself. I have absolutely no idea about 3D printing so this is just like brain surgery to me: 3D print program

Assessment

A nice tidy little package has arrived clean, battery cover missing as stated and exterior looks nice and clean. Original label is intact.

Repair:

New 3D battery cover has arrived and this fits perfectly, no issues here.

I’ve placed the unit into my GameBoy to check what occurs, and just as posted it does not progress beyond the Nintendo start up screen. I’ve opened the cartridge to do some basic checks and cleaning, the cartridge contacts have been cleaned using an eraser and some IPA, but in all honesty they were already pretty clean. I’ve checked the onboard battery and this is healthy at 3v as it should be. Cleaning competed, I recheck the game and the results are the same.

Next I’m going to reflow the joints on the ROM chip on the right hand side of the board, the one that has the letters MX on it. These pins or the ones on the RAM chip directly beside it are well known for having bad contacts and often need reflowing/tacking down. It’s something that seems to occur over a period of time on these game cartridges, just plain bad contacts.

ROM chip on the right with the RAM chip on the left, both are notorious for developing loose contacts

All items on the board have been reflowed using hot air, with extra attention being paid to the two chips described in the picture above. I removed the battery prior to doing this as the last thing you want is exploding batteries. With the battery back in place and the game now reassembled it’s now time to test.

And it works including the rumble pack feature.

I can only presume the hot air reflow has fixed an issue with joint continuity on one of these chips as expected. Excellent, another item has been saved from the bin and can now be added to my collection.

Another little project to put to bed, there always seems to be an issue with these games after a good number of years where the solder joints just become unstable. I don’t know if it was the solder quality they used all those years ago or the heavy use and abuse the games endured during their hey day. At least we can fix them and ensure they are still good to go and enjoy for a few more years yet.

Thanks for passing by.

Plastic Gear Repair

An excellent post. I often come across broken plastic gears and they are the Bain of my “Hobby life”

Maybe I need to start repairing my own gears or invest in a 3D printer.

We’ve seen several methods of repairing plastic gears. After all, a gear is usually the same all the way around, so it is very tempting to duplicate …

Plastic Gear Repair

Sega Game gear – game cartridges

What the listing stated:

Untested

EBay

Yep that’s it. The good old EBay untested. Anyone who buys from here knows that this can mean anything from working to totally wrecked, or even should have been binned because a good portion of it is missing.

But I try to remain positive… some people call it stupid.

Cheap, probably broken

Here I have purchased two of the same games for the grand total of £1.49 GBP. About 75 of your finest British pennies each. My suspicions are such as the guy who posted is selling a couple of “tested” game cartridges (the same game) for a considerably higher price. I just don’t understand how he couldn’t test these two. I suspect they are knackered to coin a phrase.

Anyway, let’s await the mailman.

I’ll apologise in advance for how easy this fix was. They arrived and both game cartridges looked ok. I then loaded them into the unit and one worked and one didn’t.

Both Cartridges tested

I decided to just clean the contacts on both cartridges with a bit of IPA and hey presto. Two working game cartridges for next to no cost.

2nd cartridge up and working

So again, I apologies for the simplistic fix, I was hoping I would at least be opening the cartridge and doing a bit of trace repair, but sometimes that is all it takes. I’ll keep one, and the other i will move on with another unit that I’m currently repairing.

But most importantly they are not off to landfill. Result.

Modified Sega game gear 2110-50

You may wish to refer to this post: Sega game gear 2110-50 where I purchased a non working Sega Game gear and brought it back to life.

The (I thought it was repaired) Game gear

I’m now ready to do some modifications on this unit, and I will save the replaced items for use on later projects.

Pretty much every Game Gear that was ever produced (and that is approximately 10.6 million units) has suffered with the dreaded (Capacitor plague) that I have discussed in an older post. The first job that is recommended to be carried out when purchasing an old Game Gear is to replace the old capacitors, it’s quite an easy task and nine times out of ten will remedy any issues that you have and allow you to continue gaming for years to come.

However there are other issues.

The screen is an old tube powered system that is exceptionally power hungry, you can replace this with much superior LCD versions, I’m withholding from doing this at the moment as I want to get as much use out of the old screen, and to be honest my unit doesn’t require replacement just yet, there’s still life in the old girl. I’m sure that this will be a future project though.

Occasionally after doing the capacitor replacement on the power board, other components such as a small IC and three transistors that control voltages across the system, start to misbehave causing the unit to switch off after just a few seconds. This is currently occurring with mine and I am intending to replace these components to see if this sorts out my issue. I have also ordered a replacement power board from China that is a fraction of the cost of a European one, it may work, it may not but if the change out of components dosen’t work at least I’ll have an alternative option.

There are a few checks we can do prior to replacement of these components on the power board that will confirm the various voltages required by the system. It’s best that these tests are done prior to diving in head first to replace them. You could be just wasting time. You may need a new power board or maybe even consider converting to a rechargeable battery system. It’s all doable.

Expected voltages – photo courtesy Retrosix

Here are the results from my test of voltages on the power board, I’ve injected 9v via a bench power supply to the battery contacts on the board:

  • At the 34v pin I had 0v
  • At the 9v pin I had 8.9v
  • At the 1.28v pin I had 1.28v
  • The three ground pins read as ground
  • At the two 5v pins I had 0v

So as a result I obviously have an issue with the 5v rail and the 34v rail, I believe the 5v rail is the one that affects the boot sequence and the 34v is not an issue at the start up, however, it’s there for a reason and this simple test proves there is an issue. I will therefore only change the IC and three transistors as the capacitors were changed when I did a full recap.

For my modifications I am getting a new clean amp duo audio board with dual speakers instead of the single mono one that is standard. This is an upgrade on the original, extremely efficient and with better sound processing.

I am also replacing the shell with a new Blue case and glass to replace the scuffed old screen, this shell also has dual speaker outlets to compliment the audio board replacement. The shell is already prepped to accept a rechargeable battery system should I decide to install it at a later date.

I shall be getting these upgrades from Retrosix who specialise in supplies and modifications for gaming consoles.

All the items have now arrived and the first thing I’m going to do is sort out the replacement IC and transistors on the power board. The rest is fairly straightforward. However they have sent me the wrong shell, a single speaker one instead of a dual speaker one, so I’ve now got to await a replacement, annoying!

Scratch that, they are saying that they never did have any duo speaker ones even though they were advertising them on their site ( as per picture above..) and after a protracted discussion with the supplier / owner i’ve come to the conclusion that he might think he is a wizard at modding and designing circuitry but is totally and utterly inept at customer service, he wouldn’t know good service if it bit him in the ass. Hey ho on we go, it is what it is.

If you choose to use them in the future then just be aware. They have an uncanny knack of trying to pin their inadequacies and mistakes on you, the customer. Caveat Emptor – as they say.

So now the sound will be original mono, but hopefully improved. I have a spare speaker and mount as a result and I can use the new clean amp duo board in a mono configuration. Should I get a duo speaker shell sometime in the future I can always do a swap out.

Today I’ve taken the empty new shell and installed the new audio card and speaker, as well as the new buttons and silicon pads. I’ve then installed the main board minus the power board that still needs the new components.

I’ve also installed the new front lens on the unit and I must say it looks nice.

New front lens on unit

Let’s get to the difficult bit, replacing the components on the power board. I’m not joking when saying that some of these items are not much bigger than a grain of rice. I suspect a lot of bad language will be used here, as this is a new level of soldering for me. I’ve never replaced anything so small before. If I balls it up I’ll just have to await my cheap Chinese power board.

Ok, the power board from Ali Express got here really quick, to be honest even before I could set some time aside to change the components on the old board, so therefore I’ve decided to try this new board as a straight swap.

I will keep the the components and the old board to use at a later date.

First though I have used the bench power supply to test it is ok, and it’s a big tick on all voltages as per the test I did on the old board. All voltages are stable and consistent, so I have secured the board in place and put the required batteries inside. Works perfectly.

Back together, awaiting the big switch on
Working perfectly

I now have a perfectly good looking updated Game gear that I am exceptionally pleased with. The sound system is a good upgrade, it has a really loud volume (adjustable) and is crisp. The powerboard from China at a total cost of £10.80 is an absolute bargain, and works perfectly with good stable voltages. The case is good, fits well and the lens is clean easy to install and scratch free, the whole thing looks brand new.

Two old rebuilds, rejuvenated

I now have two perfectly good looking and working examples of 90’s retro rivalry in perfect working condition. The plan is to display these in the house, on a custom made display. I’ve really enjoyed working on this little project and I’m made up with the outcome.

The only things left to be done would be to change the power supplies to rechargeable and to change the screens to new IPS/LCD screens, but I don’t think I’m going to do that on these two, I’m keeping them original or as close as possible to original, I want to keep these as they are, to cherish in this condition for as long as I can.

I love them. And they are fantastic.