At a family gathering this weekend, an elderly family member approached me and asked if I could take a look at his Panasonic personal tape player, and maybe get it back up and working.
Who am I, to turn down such an invitation, so I took it on and promised him I’d have a look into it. There is, “No rush“ I was told. Just as well, as it’s busy in every aspect of my life at the moment.
Here’s the spec:
Type: Auto Reverse Cassette Player
Tape Type: type I, CrO2, Metal
Output: 20mW
Battery: 2 x AA
Power Supply: RP-AC33 (3V DC)
Dimensions: 114.2 x 84.4 x 33.1mm
Weight: 156g
Finish: black
Year: 1993
Hifiengine
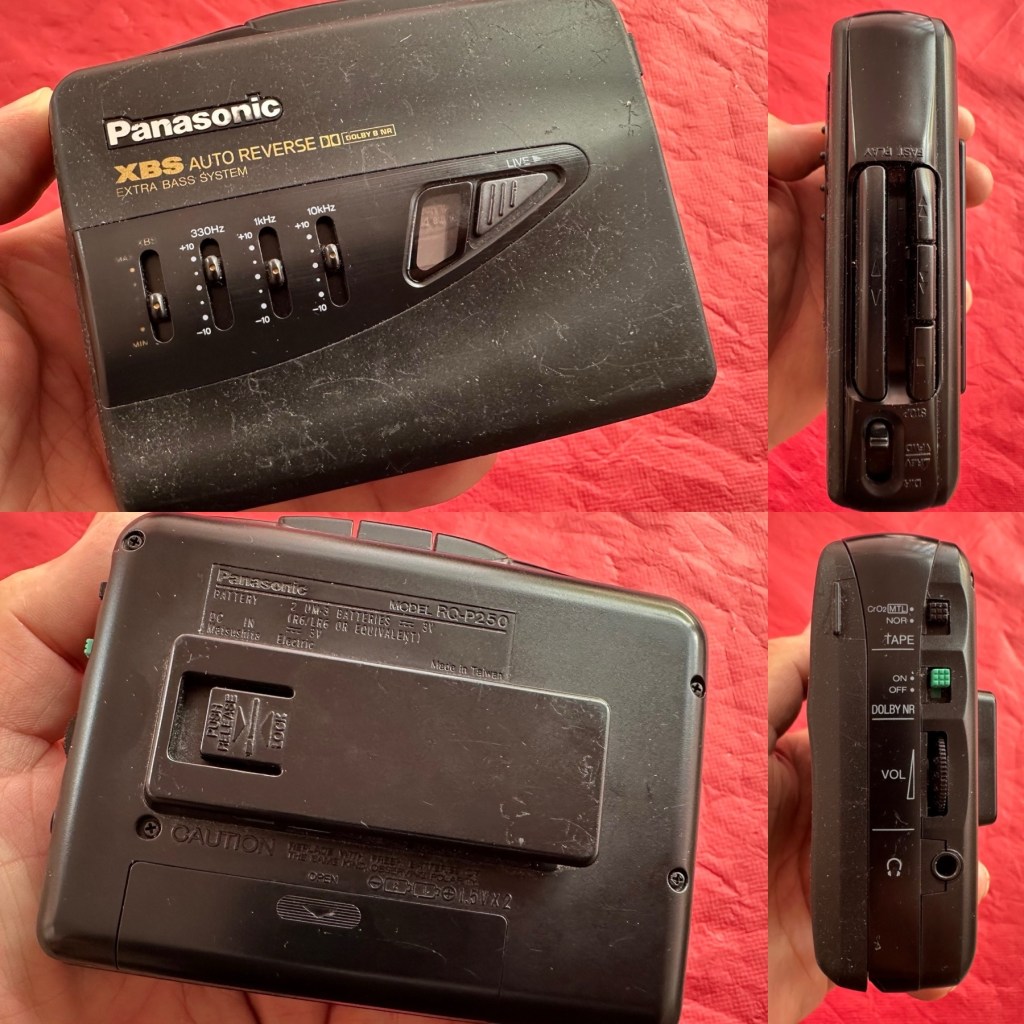
Panasonic RQ-P250
Assessment:
It’s well used, and has always been and if I can get it working, will continue to be so. At the grand old age of 79 my brother in law is not about to change his ways and is quite comfortable listening to his old Cassette collection whilst out and about, on trains quite a bit of the time, as he travels up and down the country. He’s a lovely old fashioned set in his ways guy and we wouldn’t have him any other way. It would be blooming lovely to get this back to him working again.
It’s scarred, been well used but looked after, apparently it’s gone from playing quite well, to slowing down and dying completely. I think I know what the issue is but I’m not going to curse myself by saying I know what is wrong, when it actually turns out to be something totally different.
On the Beach – Chris Rea
And I love his choice of music. Let’s get this repair underway so we can listen to Mr. Rea in a lovely crisp sounding manner befitting of an 80s rock star.
Repair:
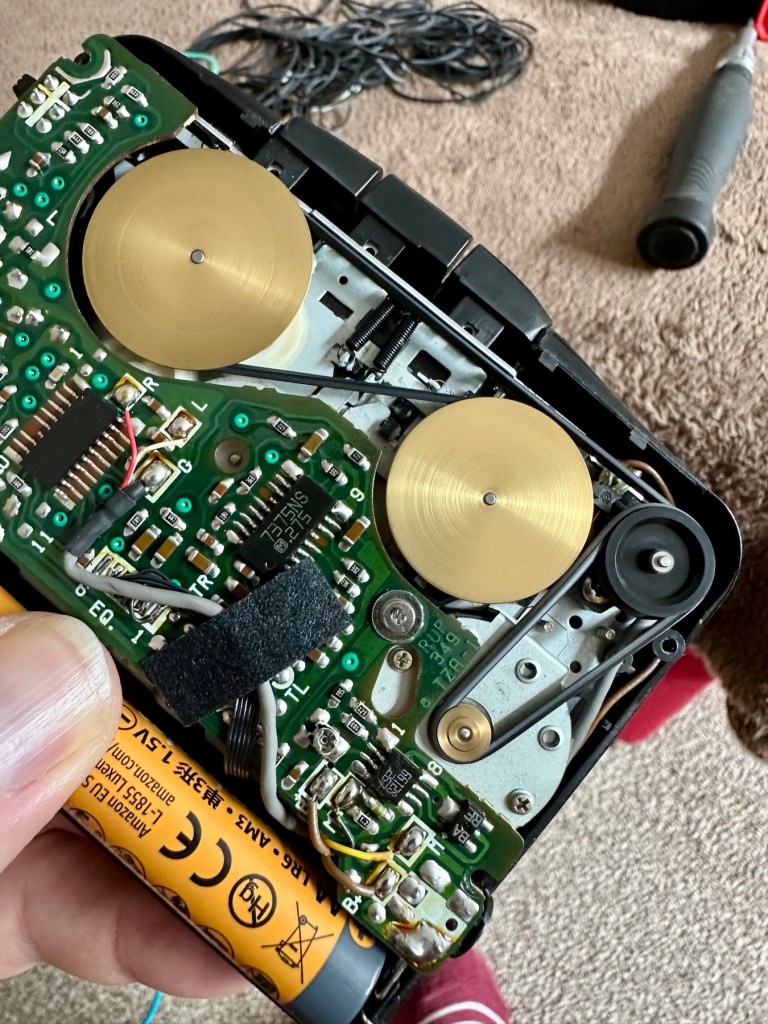
Batteries in place, earphones connected, push play. No movement from the capstans, and even when put in forward and reverse there is no movement from either capstan. I can hear all the electrical noises such as the tape head picking, and I suspect at the grand old age of 32 years old that the drive belts have probably given in. Let’s open it up and have a look.
And just as I thought. Two drive belts in here, they are both loose, one though is so loose that it has wrapped itself around the two capstans, no wonder it wouldn’t start up.
Two drive belts visible, both so stretched that they have ceased working
I have plenty of these belts spare, I just had to sort out the two closest matching in size. Too slack and you introduce warble, too tight and it will be off speed, you need to get it just right. Adjustments can be made to the motor speed but this will only come back to bite you once the belts wear in.
New belts in placeOld slackened belts
I’ve put two new belts in place, and at some frequencies there is a little wobble, but with Dolby switched in place this can be removed digitally, this will settle over the coming weeks after more use.
I have used some silicon grease on the cogs, I have put contact spray in the motor and the volume controls, and used IPA to clean all the tape contacts and capstan wheels and posts, it’s basically been given a little service to see it forward for a while longer.
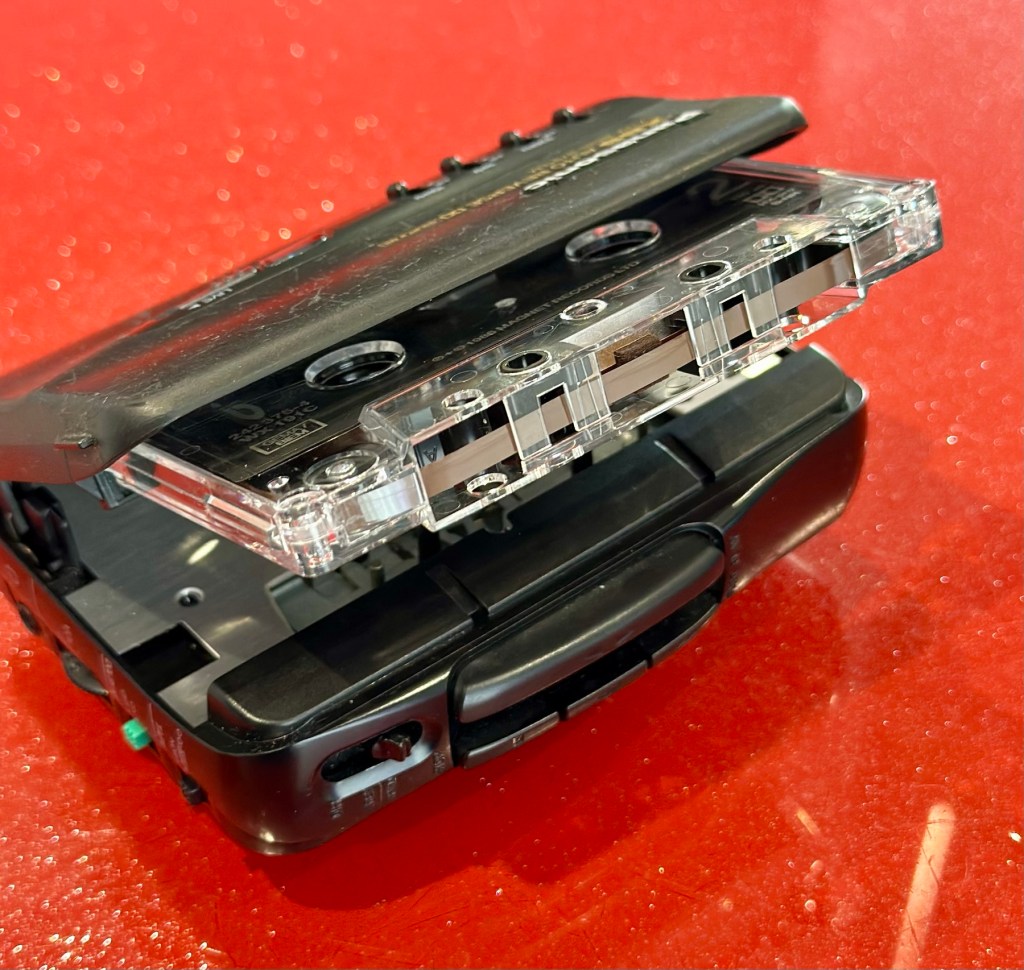
Body now reassembled, new batteries put in place, it’s time to test it.
Result:
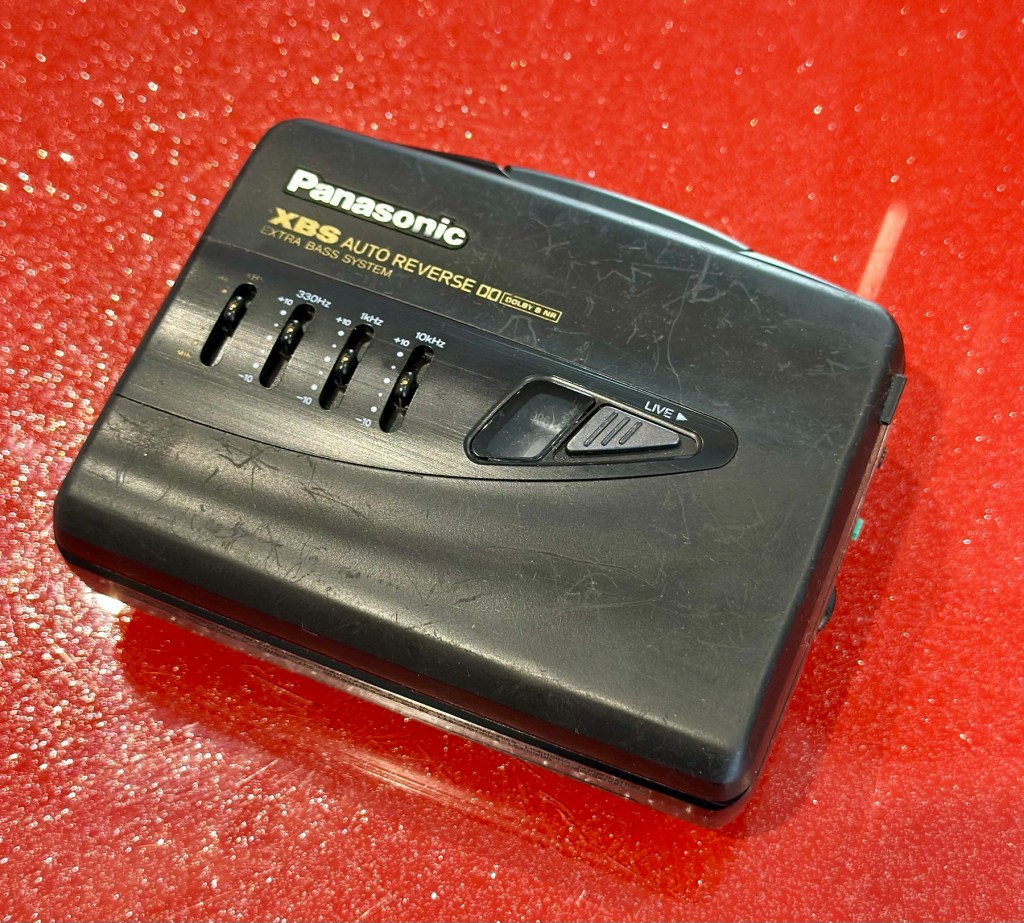
A quick polish, to tidy up, won’t get rid of the deep scuffs, just makes it a little more presentable. Cassette inserted, headphones plugged in and as expected it’s working just fine, we can hear Mr.Rea in all his gravel voiced glory. So can you, in this video snippet below, that hopefully won’t get a copyright strike 🤞
🎶 On the beach 🎵
So there we have it. Another item brought back to life with about 30 minutes work. It’s going to make someone’s day, and I’m as pleased as punch that I could play a part in contributing to that.
Working well, looking ok after a quick service and some TLC
There you go. Hope you enjoyed this quick fix.
Many thanks for passing by. Always most appreciated.
ALL ITEMS IN THIS LISTING ARE FAULTY FAULTS MAY VARY BETWEENS ITEMS
SOLD AS IS
NO RETURNS
EBay
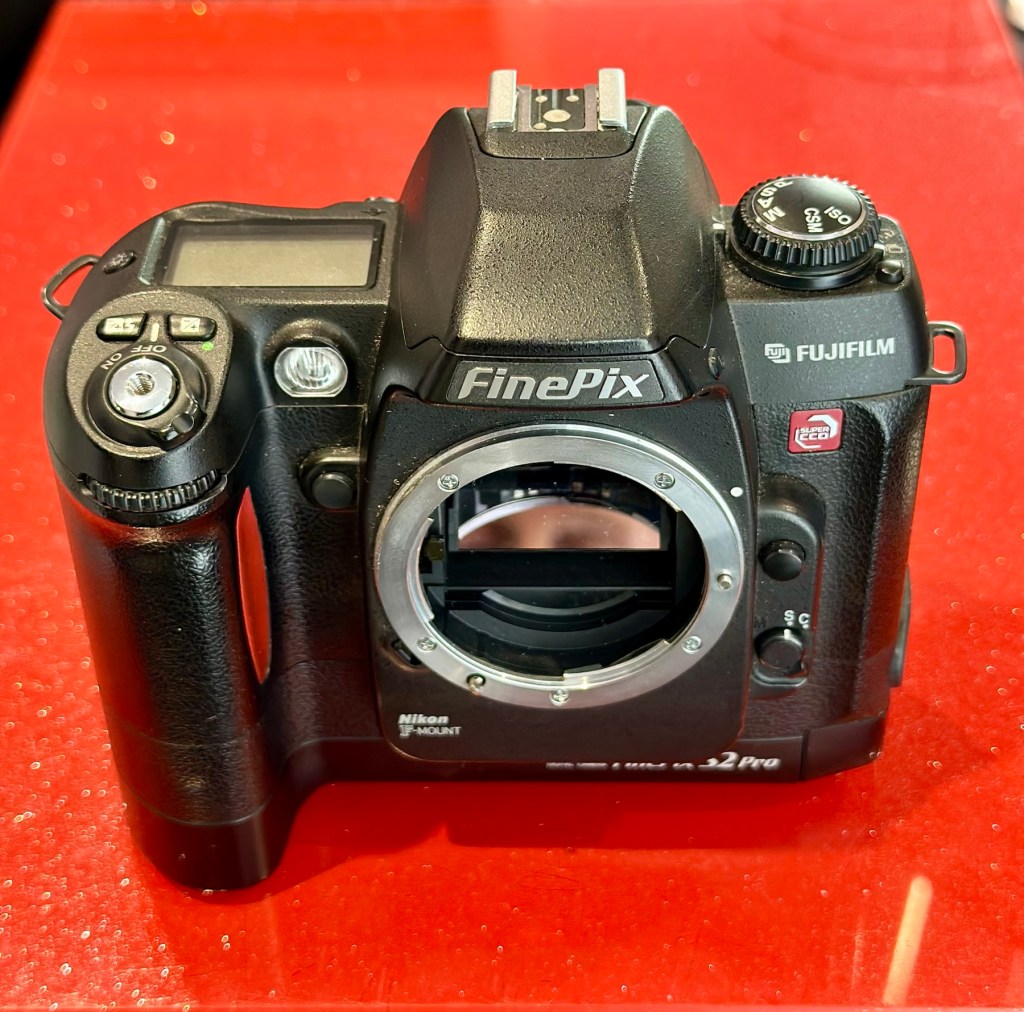
The Finepix S2 Pro
I’ve purchased three cameras as a job lot in an auction. All of them have issues but the issues have not been clarified. This is very much a “Suck it and see” auction where I get what I’m given. I’ve paid £24:22GBP for all three and that includes free postage. I’ve purchased from this seller before who is a bonafide Camera business based in South Wales. He has no time for faulty items though, quick in and out is his way of working, no time to fix stuff. I’ve got three good cameras in this bundle and this works out at just about £8:00GBP per camera. And where can you get cameras like this for those prices nowadays.
I’ve just read a blog where a guy had one of these cameras from new, and in 2002 he had paid £1550.00GBP for this camera. Wow, and here i am 23 years later paying the grand total of £8:00GBP for one. Even if I don’t get it working, I’m happy with that.
Now this particular camera had two issues in its lifetime that caused concern, and one of them meant it was pretty much game over, and that one was the CCD issue that used to plague this range of cameras. Fuji released a whole bunch of these cameras with a faulty CCD that had to be fixed under a recall. They built sufficient replacement CCDs to cover the recall and that was about it. There were no remaining CCDs left and at that point what was left had become as rare as hens teeth. If you suddenly developed that faulty a later date, then tough…you were stuffed.
Serial numbers affecting CCD problems are listed below:
Model Serial Number Range
FinePix S2 Pro 31A127**~31A143**
32A000**~32A039**
33A000**~33A007**
34A000**~34A004**
Fujifilm
The second issue was with a batch of these models that had a “bad” resistor in the power circuit that prevented lock up if there was a power spike, if this failed then the camera just stopped and you were stuck. There was another recall on the second issue but there is probably a lot of cameras out there that again weren’t part of this recall. And I guess owners were pretty fed up of recalls at this point and were off loading their equipment as quick as they could.
The serial numbers regarding the lock up problem are listed below:
Between serial numbers 24L00441 and 24L00680 Between serial numbers 24L01057 and 24L01256 Between serial numbers 24L01553 and 24L01863 Between serial numbers 24L10257 and 24L10608
Fujifilm
My camera serial number
Above you can see the serial number for my camera. Thankfully my number falls outside the range of any of the cameras inflicted with either problem, so it’s fair to say (Fingers crossed 🤞) that I shouldn’t suffer with any of the known issues with this unit. In layman’s terms I think i may well have dodged a bullet here.
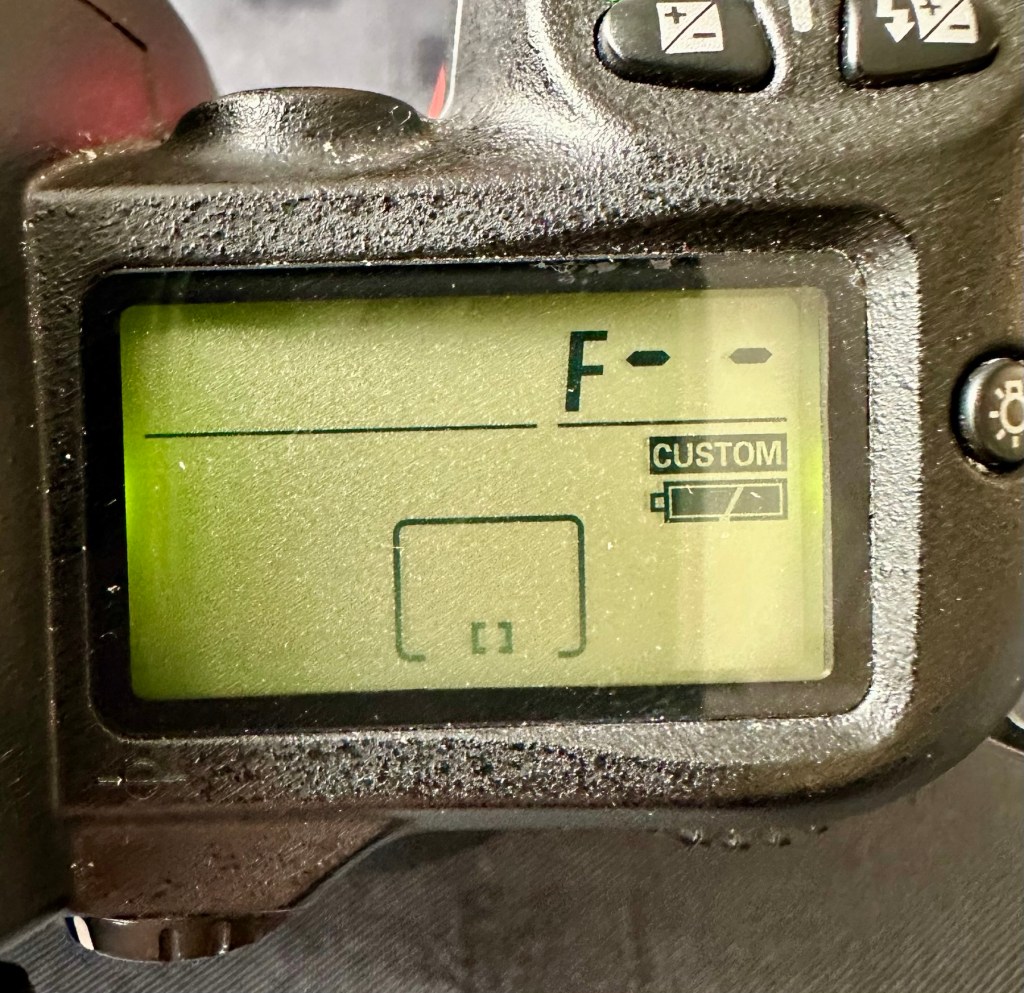
I did speak to the seller regarding the fault on this camera and he stated it was just a general error code on the top screen. There is a general error that arises occasionally regarding certain lenses where they have to be locked on their minimum aperture for the camera to work properly, however I’ve not attached a lens yet so this cannot be confirmed.
Here’s some history:
The Fujifilm FinePix S2 Pro is an interchangeable lens digital single-lens reflex camera introduced in January 2002. It is based on a Nikon F80 (N80 in the U.S.) film camera body that was modified by Fujifilm to include its own proprietary image sensor and electronics. Because of the Nikon body, it has a Nikon AF lens mount and so can use most lenses made for Nikon 35 mm cameras. It is autofocusing, with an electronically controlled focal plane shutter with speeds from 30 sec. to 1/4000 sec., built-in exposure metering and pop-up flash. Its ISO film speed equivalents range from 100 – 1600. The S2 Pro also has sound recording capability. The camera is no longer in production, having been superseded by the Fujifilm FinePix S3 Pro in February 2004.
Aside from the Nikon lens mount, the camera’s principal distinction is its 6.17 megapixel photo sensor. Known as the Super CCD, it is unique in having its photodiodes oriented diagonally rather than horizontally and vertically as in all other DSLR cameras. This allows the use of a sophisticated interpolation system that produces an output image equivalent to 12.1 megapixels. The apparent resolution of images in this interpolated mode lies somewhere between 6.17 megapixels and the 12.1 megapixel interpolated output.
A huge number of these cameras were built using a Sony sourced defective CCD that was subject to a recall by Fuji. The recall ended when the stock of these replacement CCD’s was depleted. There is word that no other stockpiles exist of this Super HAD CCD, making these cameras that are found with the purple or black tinted image problems extinct, only usable for parts. The Fuji F700 used a similar defective HAD CCD, but in 3.1/6.2Mp size. That camera has met a similar fate.
Wikipedia
So let’s hope that we can get some pictures out of this unit. We just have to wait and see what arrives.
Assessment:
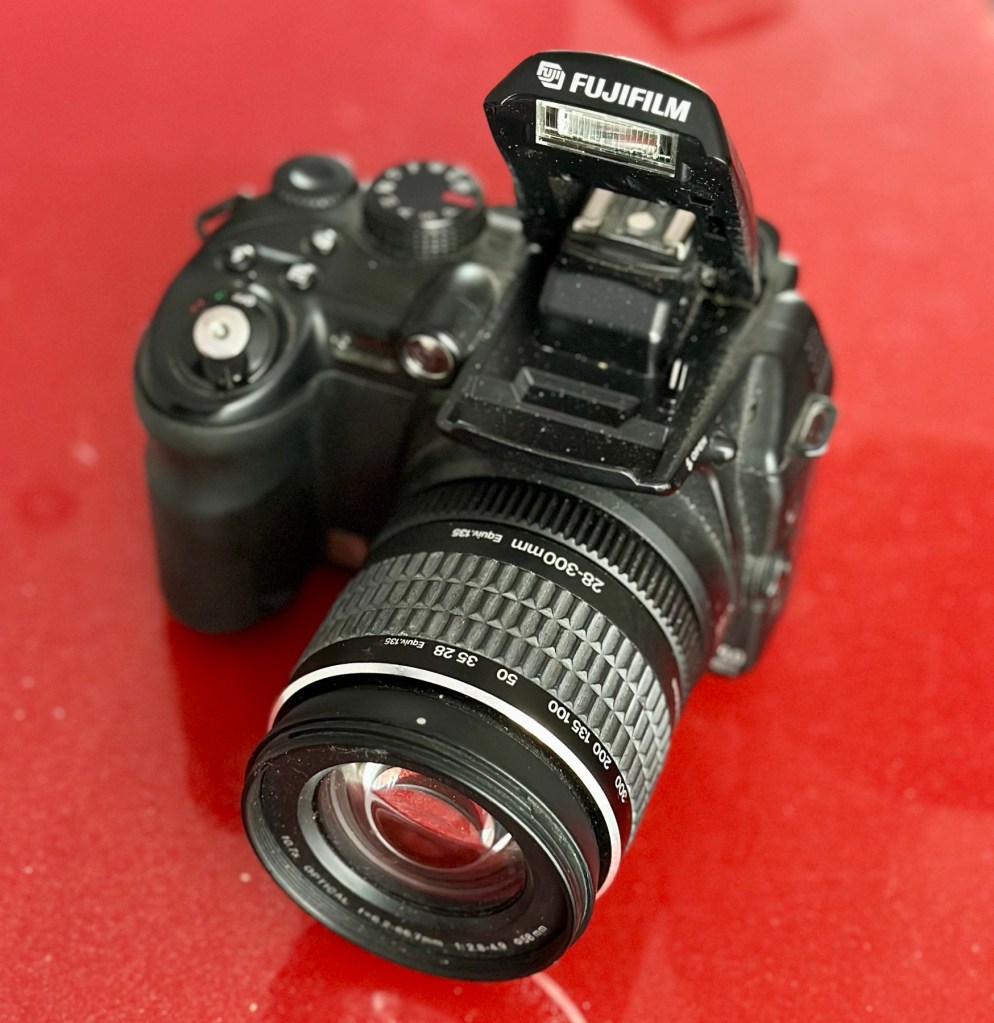
Well the camera has now arrived, and I must say it is in an absolutely beautiful condition. Cosmetically there isn’t a scrape or scratch, all screens are scuff free and it looks as if this unit has been well cared for. It just needs a wipe over to clean. The package is just the camera body with no extras such as a body aperture cover or neck strap, but who’s worried about that, they can be procured at a later date.
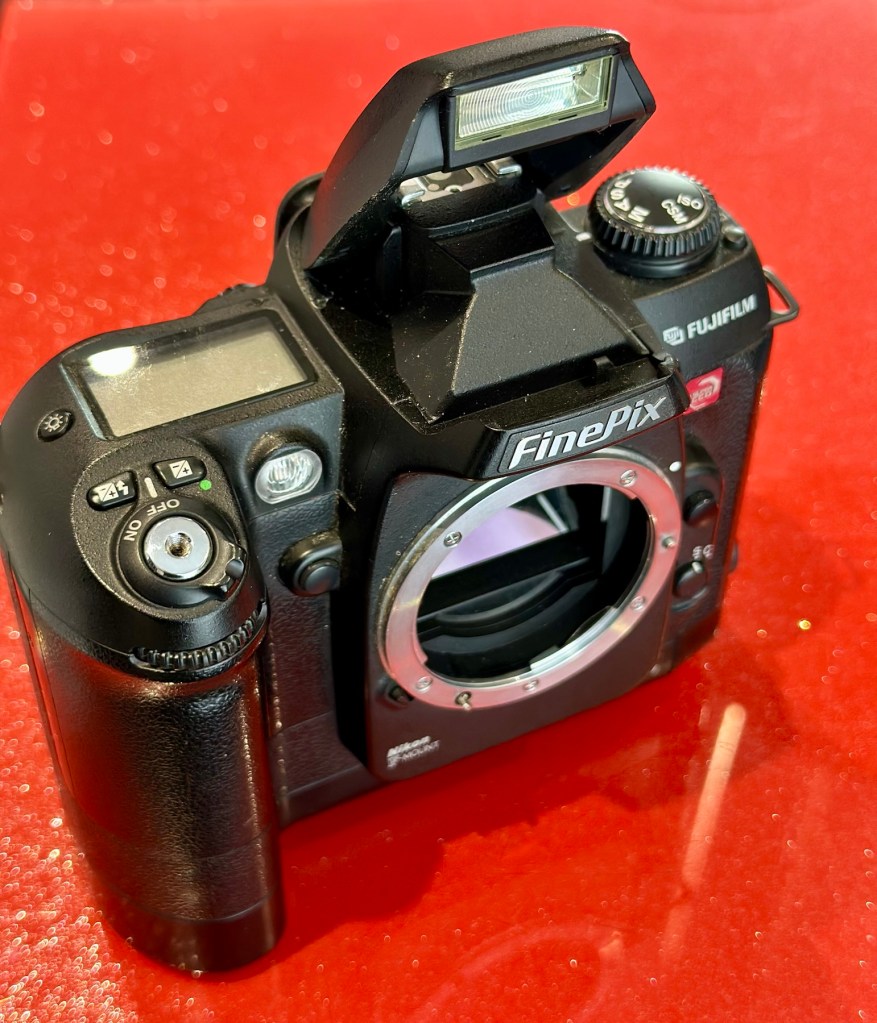
Front viewRear viewFlash openNikon type F mount
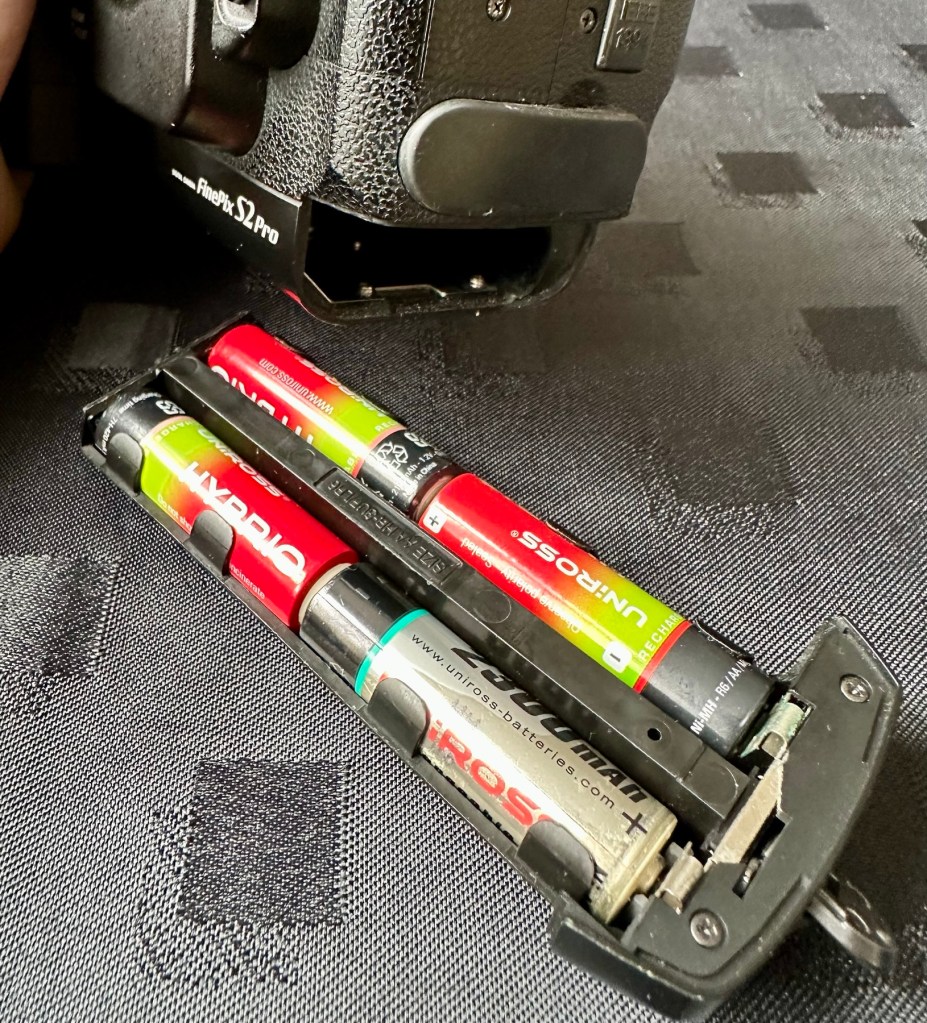
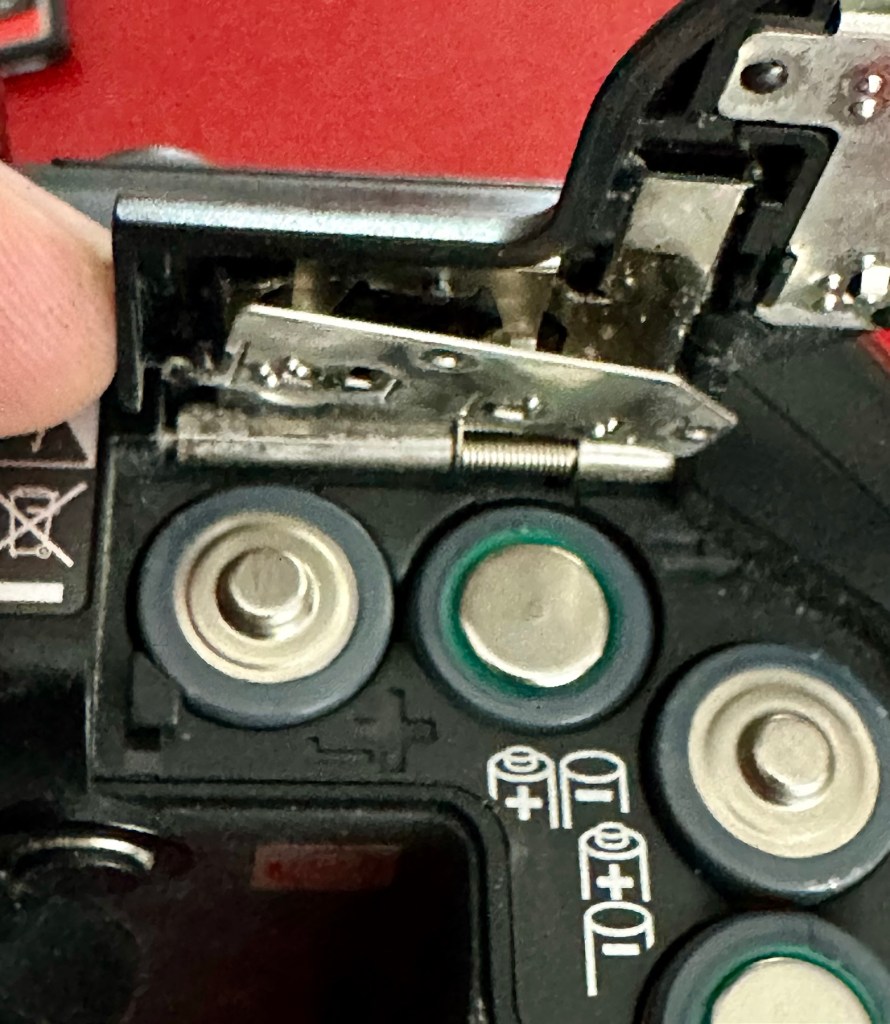
These units are quite power hungry requiring a total of six batteries. 4 AA cells go in the base and two Lithium CR123A batteries go in the grip. These batteries work in unison, one set handling the basic camera functions whilst the other deals with the capture and processing of images. It’s a strange affair, loosely based around the same setup that was originally on their film based camera counterparts.
AA batteries CR123A batteries
I’ve had to order the lithium batteries, however I can still get displays and Information using just the AA batteries in the base, basically it is semi functional in this situation.
The lens mount is a standard Nikon F mount, I’m going to have to search through my equipment to see if I have such a lens, I suspect I don’t, so I may well have to purchase a small lens purely for test purposes. I have some other Nikon repairs in the queue, so a lens to have for test purposes wouldn’t really go amiss.
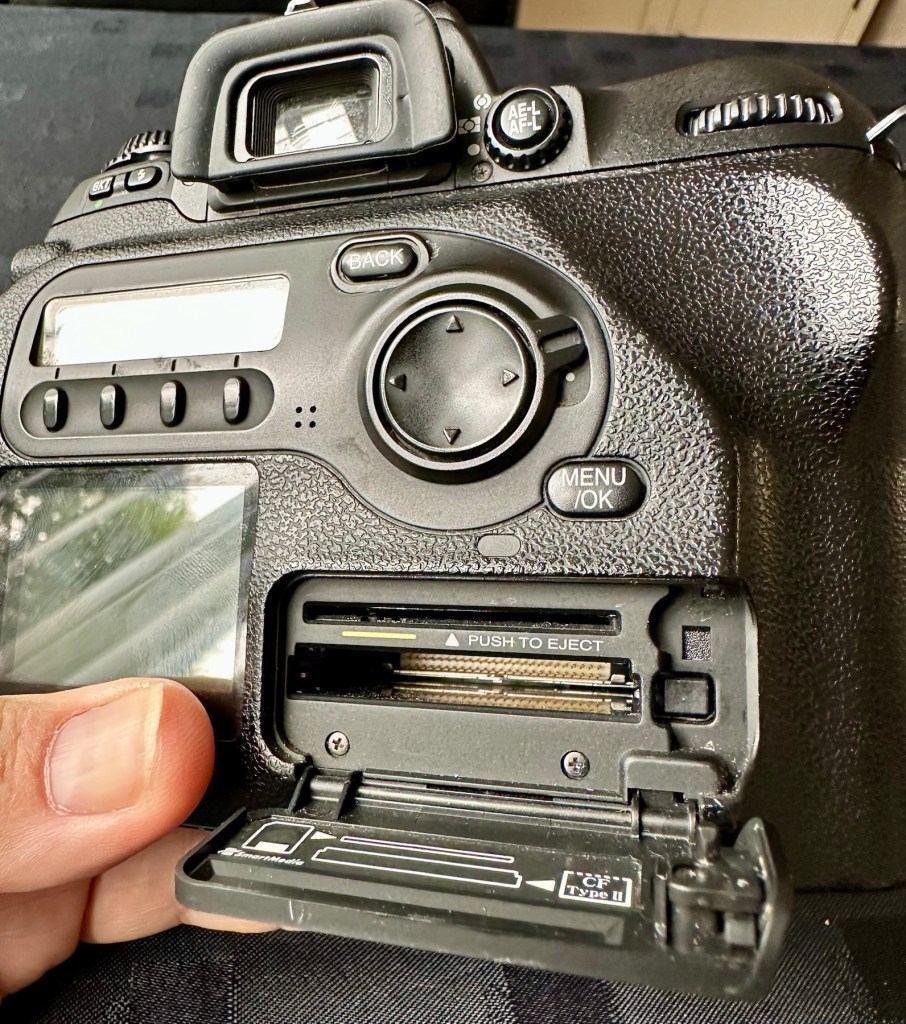
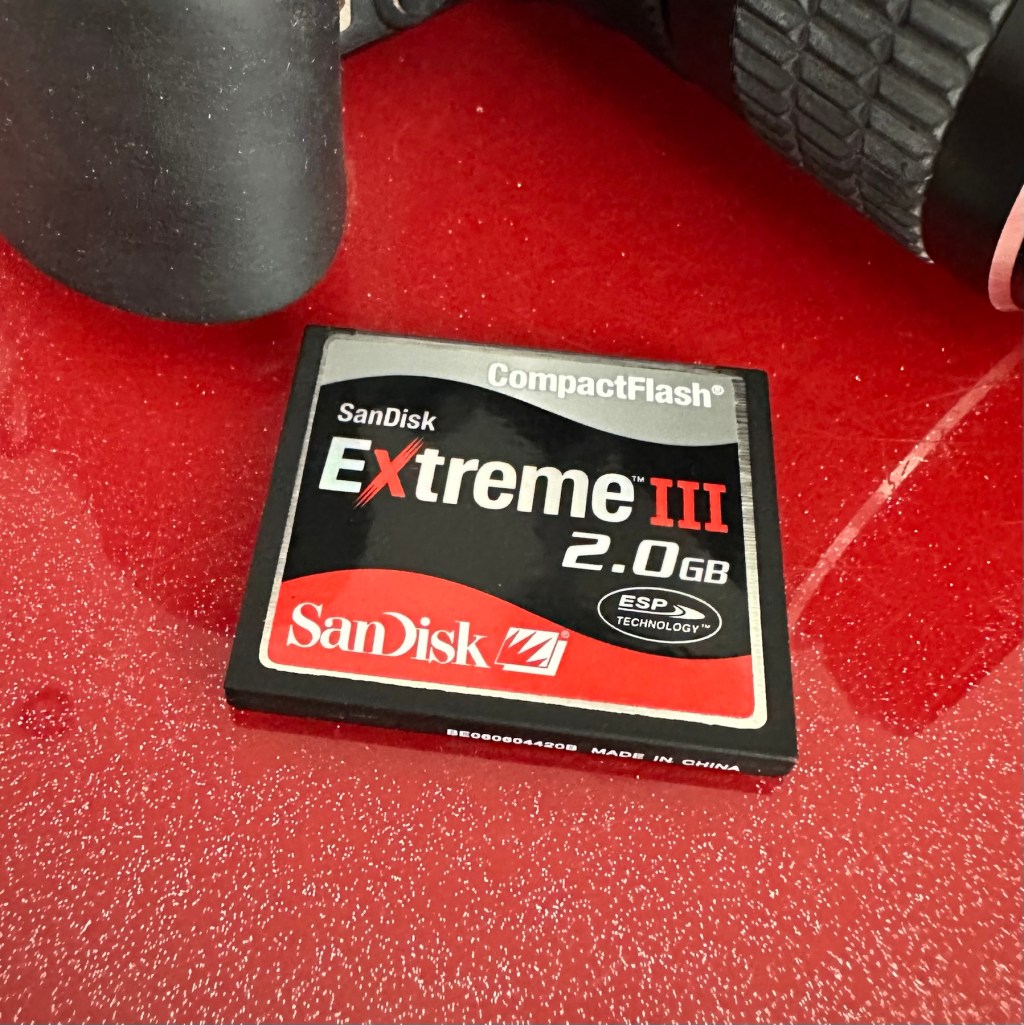
The unit takes either a CF card type II or a Smart-media card (Max size of 2Gb on both) that is located behind a hinged section on the rear of the camera, these work fine and have no bent pins.
Media card ports at the rear
With batteries in place I get the full range of menus, and nothing comes across as suspect at all at this stage in the assessment.
The top menu – no lens attached to test
The top menu by the exposure button is the only “F” indication showing, I have no lens attached so this might be the reasoning for that, but if I do put the menu into manual mode I get the full range of shutter speeds and can even operate the shutter, the shutter seems to be working at all selected speeds with no issues as far as I can see.
Some of the shutter speeds available in manual mode
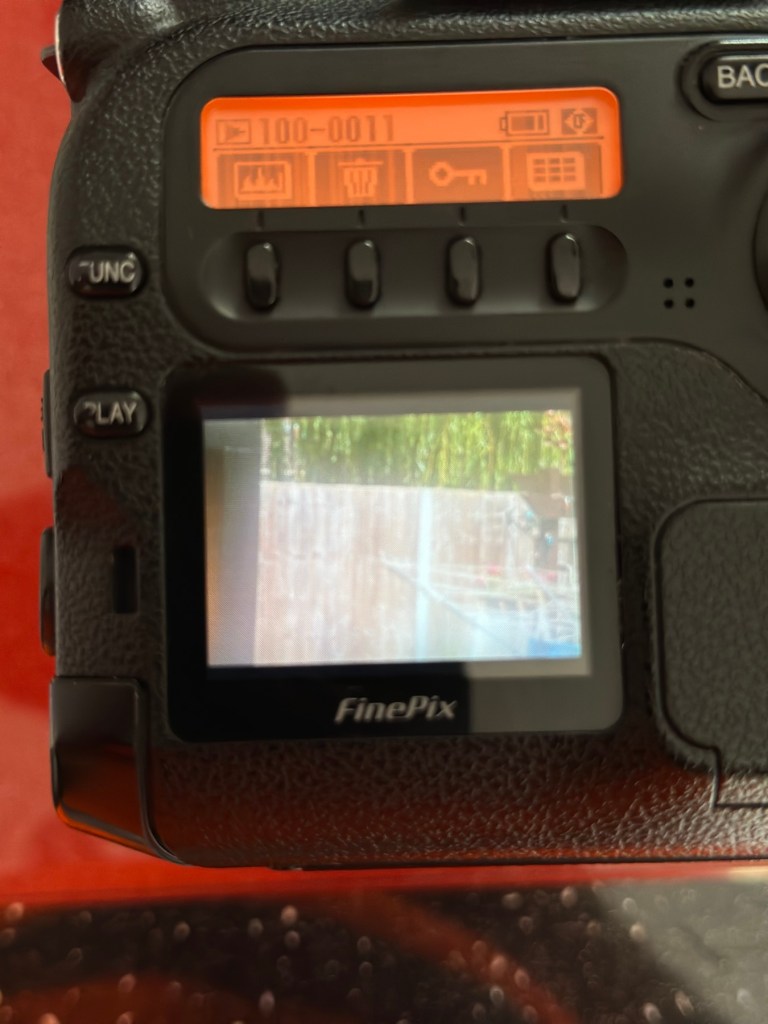
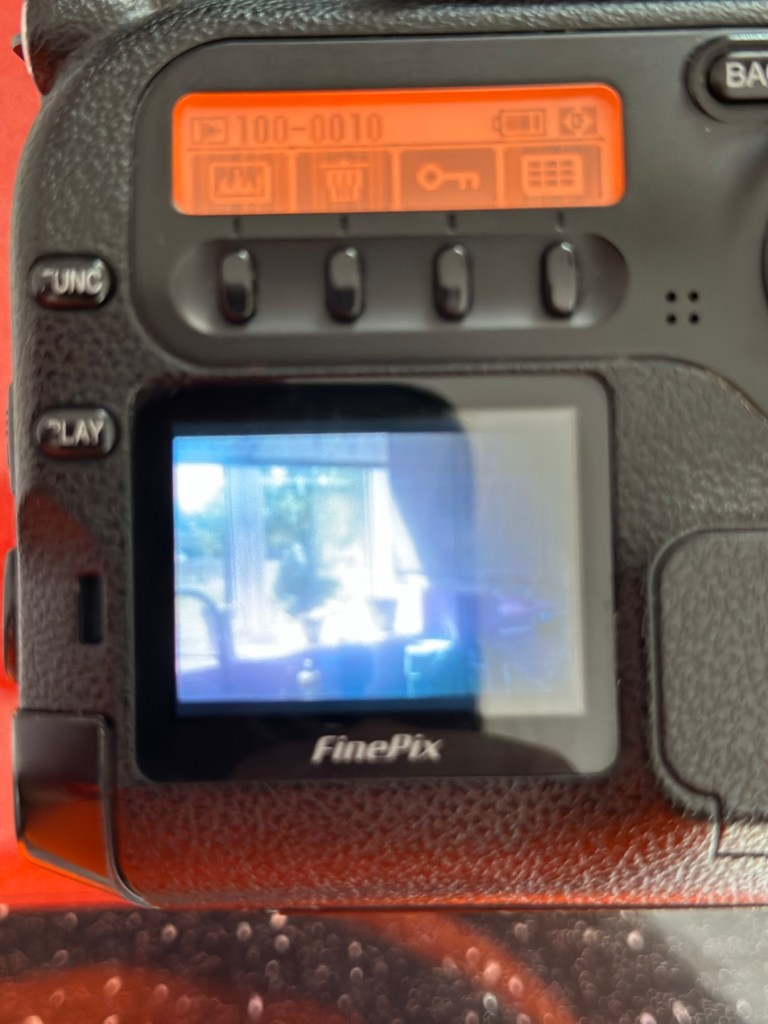
All other menus are available and I’m even able to format the CF card via the cameras menu. The picture you see on the screen was taken on another camera. It wiped fine so no issues here.
Various menus and the screen after a format was completed through the cameras menu controls
The camera seems to be working with no apparent communication issues as yet. When you try to use the flash it even informs you that you need to insert the correct batteries to test. As I’m awaiting the CR123A batteries I won’t be able to test the flash functionality until they arrive.
No CR123A batteries installed? – You can’t use the flash
As I have stated the testing can only go so far until I have the missing items in my possession, for me that is the two missing batteries and a suitable lens. I’m currently in the process of procuring both. Physically there is nothing wrong with this camera after spending a good couple of hours going over it. I’m quite comfortable with it and believe it could be a lens communication error or just a failure to read the instructions properly by the previous owner. All I need now is that lens. I’ll let you know what occurs in the repair section.
Repair:
To be quite honest it’s not really been a repair, it’s been more of a “pre flight check” to collar a phrase, going through all of the cameras capabilities and ensuring that they are all functioning correctly. As the camera was listed as faulty, and the fault was not identified, I have had to do many hours of testing and Investigation to get to this point.
I’ve done a bit of shopping and managed to buy a nice little lens from the Southern hospice group. Always happy to help a charity and secured this at a good price of £15:50GBP, and that includes the postage, for a Sigma 28-200 f/3.8-5.6 Ø72 Zoom Lens Nikon F Mount. There looks like a bit of fungus on the outermost optic, however I can always clean this if it’s too bad. If not I’ll just leave as is for the moment and keep it vacuum bagged between uses, I can always do a separate post on cleaning up fungus in a lens at a later date. (I have done a basic fungus clean in the past : Canon EF lens 35-80mm)
My new – old test lens
I wasn’t looking at spending too much here, as I only wanted a lens to test a number of Nikon repairs I have upcoming as well as this S2 Pro. This lens will fit that role perfectly, and be added to my collection of other lenses that I have that allows me to test a range of different camera products. I have also purchased an “F” mount body cover for the camera to protect the unit when there isn’t a lens attached to it.
The two CR123A batteries have arrived and have been placed in the handle grip. The warning that was there before the batteries were installed (see picture above) has disappeared and when placed in manual mode the flash fires just perfectly, no issues here.
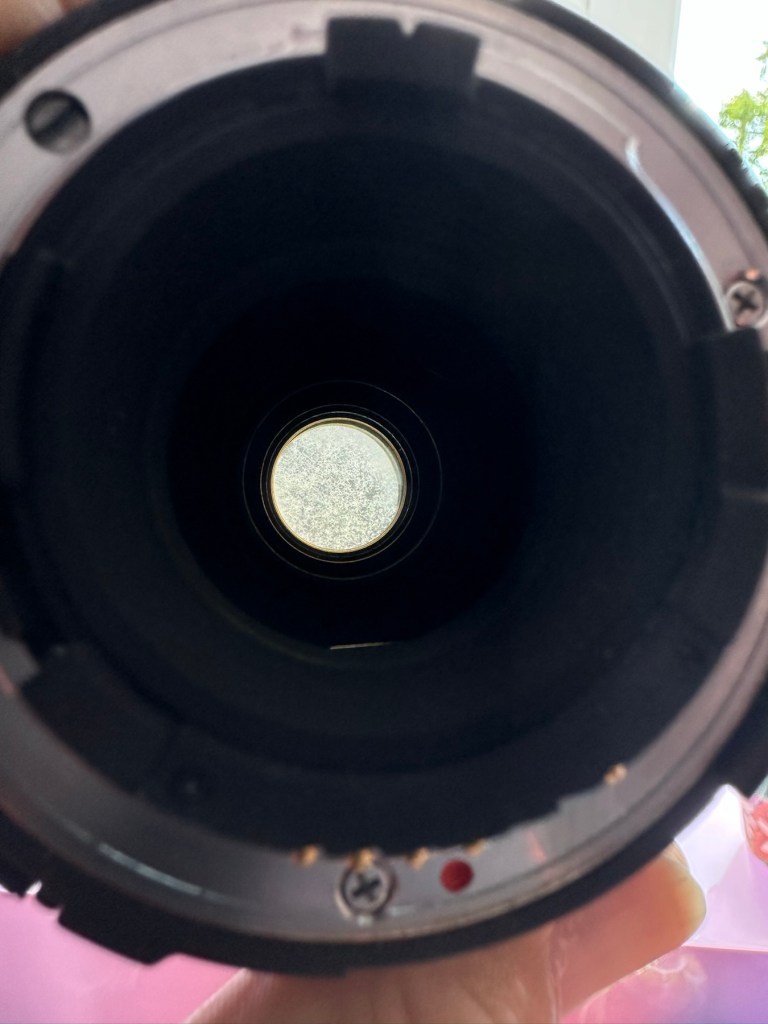
The Lens has arrived. Good point is that it fits fine and looks good, and all electrical contacts are good. Bad point is it has severe fungus throughout, and is just like looking through a fog.
Severe fungus in the lens
I will do a separate post on cleaning this problem up in a later post. However I’m not overly worried at this point, I paid a very low price so it was to be expected, I’m not complaining to the seller who was a Hospice, they need the money and I can fix it so there really is no problem.
That lovely looking lens hides a problem
The excellent news is that the lens does exactly what it should. The camera indications are good, all working exactly as expected . However the pictures via the screen are extremely hazy due to the fungus infection on the lens. There are no black or purple casts on the pictures so I am quite happy that we haven’t inherited the dreaded CCD issue discussed earlier in this post.
Hazy days – Lens fungus
If I use the lens wide open and pop the camera into auto mode I do get an “ERR33” code and that is a communication issue between the lens and the camera. As I have stated earlier in this post, you have to have the lens set at its lowest aperture and locked for the error code to go. Fortunately this lens allows you to lock the aperture and once this is done the camera takes over the exposure when it is working in automatic mode. So as I also stated earlier, it appears the seller was probably not aware of this requirement/issue.
Result:
We have a fantastic working camera, it does all it was produced to do, it has its little quirks and oddities, but being familiar with these cameras and at least having some knowledge and awareness of how they operate is always a wise thing. Read the instructions and don’t just throw them in the drawer until you eventually sell the camera on as a damaged item, when in fact you were just lacking the knowledge on how it operates in the first place. Instruction manuals are good, they serve a purpose. Knowledge is king.
The complete camera with lens
This camera cost me £8:00GBP. That is a superb price for a camera of this quality even though it is now 23 years old. It has a lot of life left in it, and I can’t wait to get it out and give it a real test.
It’s a little beauty – And the lens that needs attention
So in theory I’m confident and happy that this camera is now in a fully operational order, it’s needed a clean, it’s needed a lot of research to find out how it works, and I’ve also downloaded the operating instructions and repair pack should they be required.
It’s taking pictures and storing them. It’s just the lens at the moment isn’t performing at its best due to its fungus on the optics issue. I’m keeping the pictures stored on the card to compare them with the new pictures that will be taken once I have another lens to use.
Once the lens clean up is complete, if I ever get around to it, I will link it through this post.
Edit:
As 12/7/25 I have purchased a newer higher quality lens without any of the above issues to be able to get some instantaneous results, and as I have about seven other Nikon cameras requiring testing, some with sensor issues, it was wise to invest in a better quality lens. I have purchased a Nikon 28-100mm AF Zoom Nikkor Lens G AF-d, in perfect condition and the post regarding it can be found here: Nikon 28-100mm AF Zoom Nikkor Lens G AF-D
A newer – old lens, much superior quality
As previously stated I will add photos in this post once the new lens arrives, to show the difference from the fungus infected lens to a decent lens. The old lens is still a work in progress and I will post about it again as a separate post once the clean up is complete. It will probably be a job completed once the long winter nights are back in situ.
Below are comparison photos between the old lens with fungal issues and this new lens:
It’s just typical for me to manage to make another post from an issue that has arisen from fixing a different item. But isn’t that life? Continuous improvement is a factor we come across on an almost daily basis, and if you deal with old items as much as I do, then there is always something else that needs repairing, something that requires your attention and I just love that. The ability to improve or make something better, gives such a feeling of achievement and accomplishment, and total satisfaction. And that’s why I write this drivel. It’s for me, it’s what this blog was originally set up for. It’s my journal of what I do.
Many thanks for following this post. You know it is always very much appreciated.
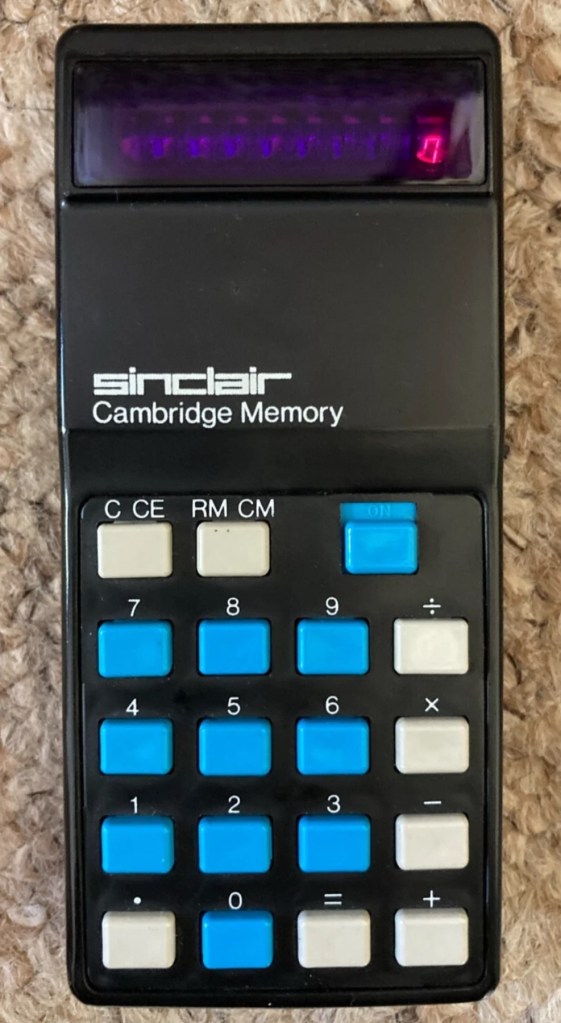
This auction is for a used cased Sinclair Cambridge Memory pocket calculator and original case. The item is in very good cosmetic condition as is the case which still has its instruction sheet. The item is powered with 4 x AAA batteries (not supplied) and does work although 1 of the digits is faulty and does not display (see pictures) plus the number 5 digit is not working. Please refer to the pictures and description provided before bidding.
EBay
It’s faulty…obviously
So it does work, but it doesn’t? This calculator is a model one memory calculator, that dates from around July 1973, ( Actually May 1975 see photos below) and is one of the earliest available mass produced electronic calculators available in the UK at the time. And it was produced in collaboration with a guy called (Sir) Clive Sinclair, who in the following decade would become synonymous with tech development in the UK. It retailed at £29:95GBP, and given the rate of inflation, its cost today in 2025 would be a staggering £463GBP. Wow!
Courtesy of Vintagecalculators.com
I love collecting old calculators, I couldn’t afford one back in the day when they arrived on the scene as I was only a child and probably only on about 20 pence a week pocket money, and savings and investments were not even known to me at this period of my life. The thought of saving that precious 20p a week for the next 150 weeks wouldn’t have even remotely crossed my mind. What no sweeties?
But I can buy them now, so no big issue!
So this one has become available, and I’ve been tracking it for a week or so, there were nine other people watching but I secured it for a total including postage of £14:49GBP, and I’m happy with that, it’s a piece of retro history for a very good price. Even if it remains faulty, or should I say working but not working?
This unit obviously has its problems, the button number 5 doesn’t work and one of the led digits is also not functioning. Hopefully I can get these issues sorted and soon have the calculator back up and working as it should. That would be nice. I’m looking forward to this little project.
Assessment:
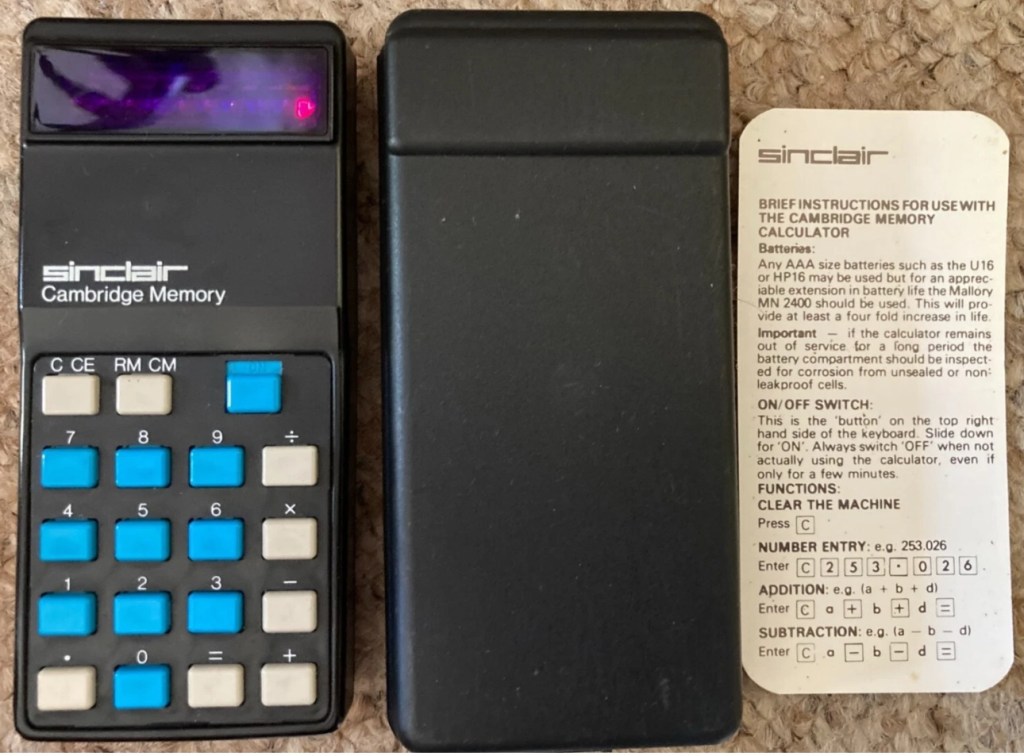
It’s arrived and it’s a lot smaller than I anticipated. It has a separate hard protective case, which is a nice touch and a small info sheet on its operation. Cosmetically it’s in a good condition with just minor signs that are age related. There are no gouges or scars so it has been treated well, though it’s not pristine.
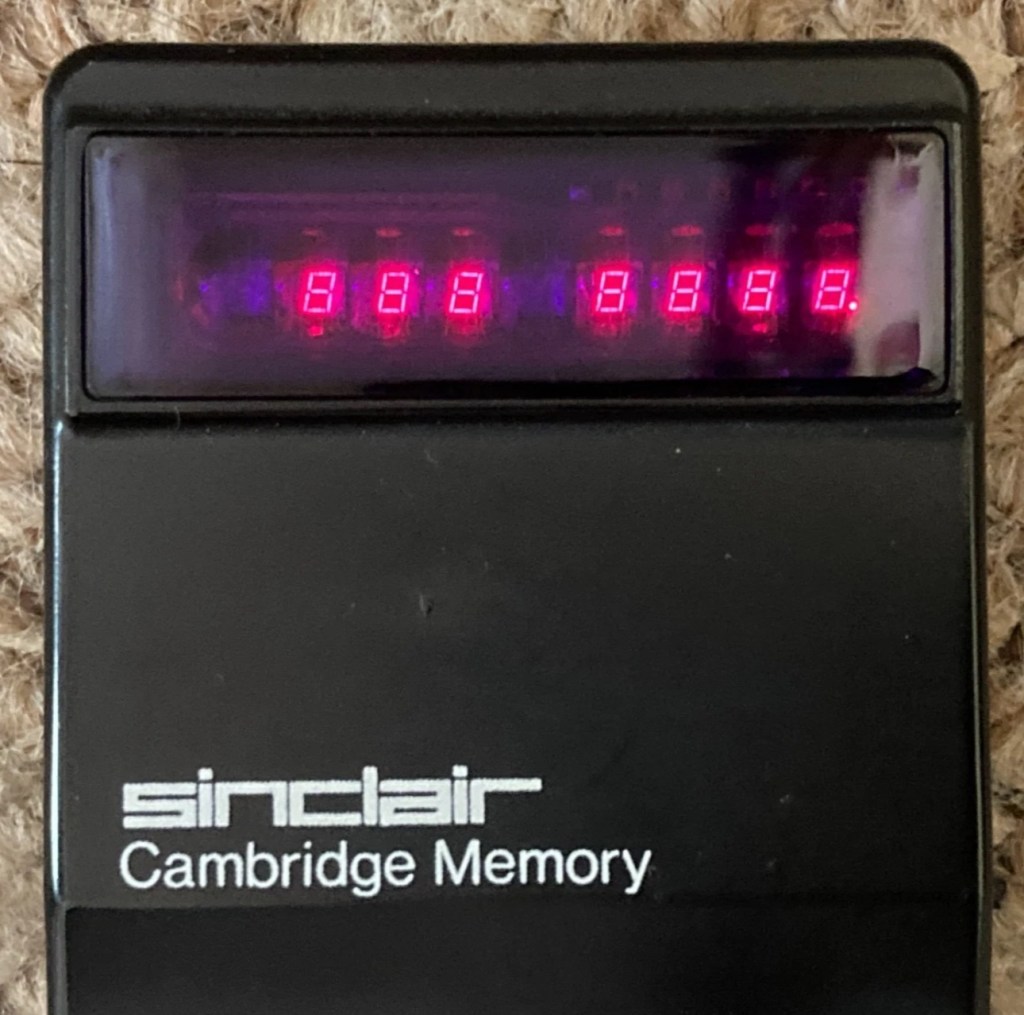
Two buttons unresponsive and one LED
Batteries go in ok but, I believe old style AAA batteries were a little wider than those used today and would sit a bit more snuggly in the battery compartment. As you can see there is a little wriggle room here, and springs at both ends need adjusting to help prevent this. I may have to use some spacers so the batteries sit tighter in place.
Gaps between batteries – means movement
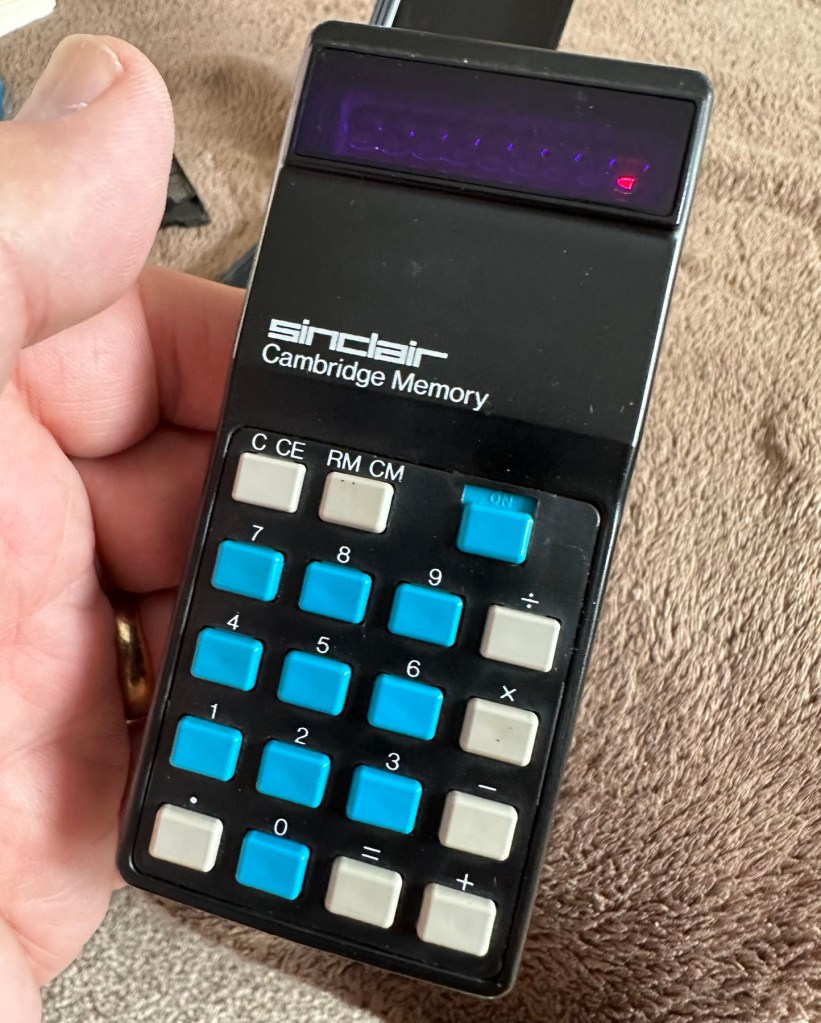
The switch is a bit temperamental and can be seen quite plainly from the battery compartment. It looks strangely out of place with no batteries in place.
Switch offSwitch on
It is such a basic design solely relying on tension of a small metal plate to short across the connection points. Should be a simple enough issue to sort.
There is a little battery contamination on one of the battery contacts, again this shouldn’t be too much of an issue and should clean up ok with some IPA.
Some battery contamination
It was originally reported that there was one unresponsive button this being the number “5”, there is also another unresponsive button, the multiplication “X” button. There is also one LED indicator, the 4th one in from the left hand side that is not operating. Add to this the issue with the On/Off switch and the contamination, and the original faults reported in the original sales pitch have now doubled. I just wish people would spend more time going over the issues and then give actual accurate feedback as to what the real faults are, it would make for a far more pleasant buying experience. Rant over.
There doesn’t seem to be a single screw holding the body together, I just hope it isn’t all heat welded.
Let’s try to get inside.
Repair:
Well it cracked open quite nicely with no issues with just a plastic flat prise tool. The main board just sat comfortably in the unit, secure, and not a screw in sight. Strange as time moves on some of the games units I come across have best part of fifty of the little blighters to remove before you get anywhere. sometimes the old way is good.
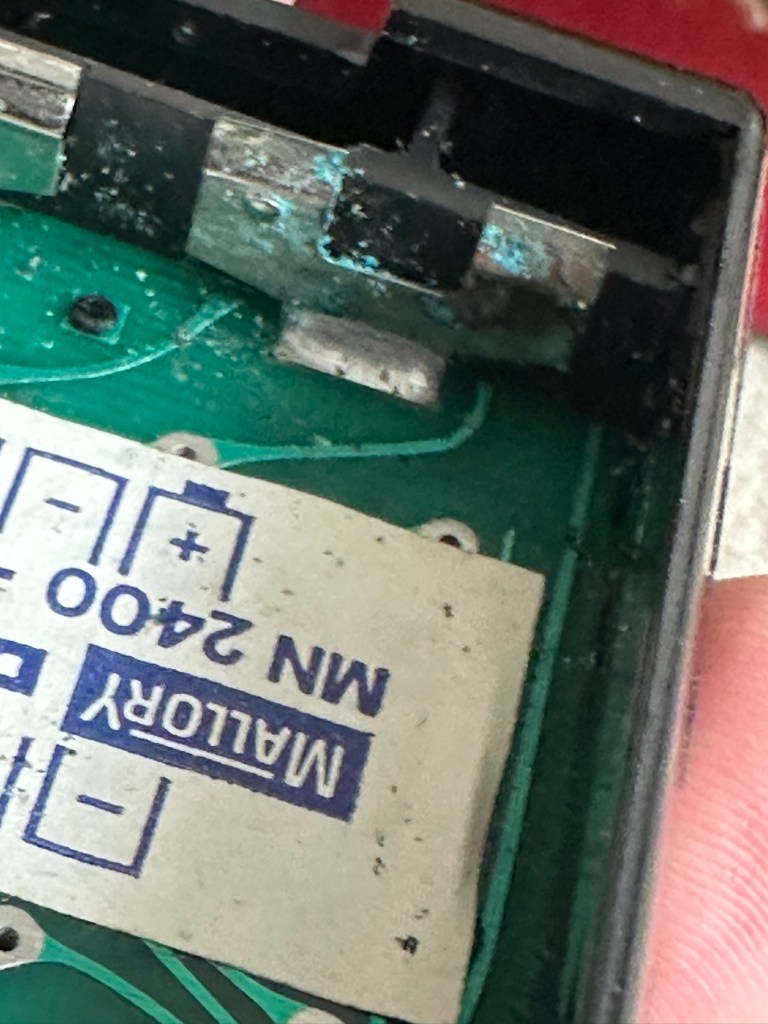
Bare boardOpposite side of boardDate is May 1975
The dismantling of the keyboard is a little complex and you have to take time and make sure you know how it’s going to go back together, it’s just a bit fiddly. The board is quite straightforward and as soon as I see some of the IC’s it dates the unit perfectly. The chips are dated May 1975, and that is about 18 months younger than what I originally thought, it’s quite informative to get inside and learn occasionally and this is just as good as having a birth certificate presented to you. All good stuff.
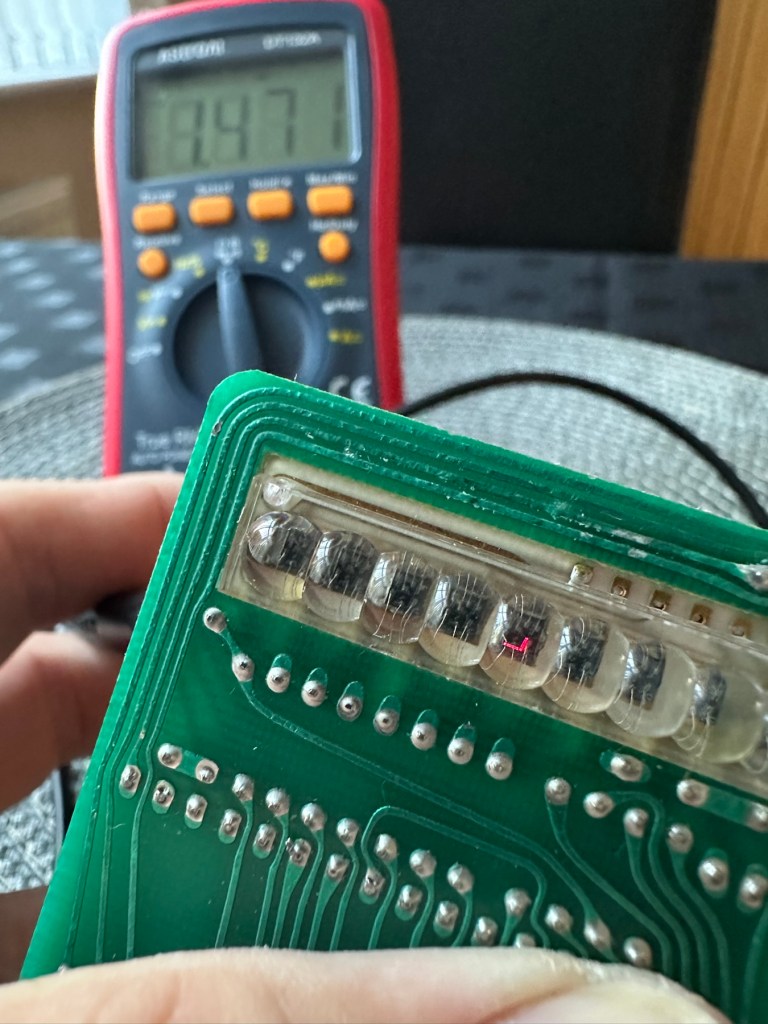
I’ve proved that there isn’t a problem with the missing digit on the display as using my multimeter in diode mode I am able to prove that this LED is working fine.
LED working
The picture shows just one part of the display range on this particular digit, I can assure you all other sections of the display are also working.
Regarding the case with the buttons not working. I have checked this out for continuity and both digits go through the same portion of the main IC and there doesn’t appear to be any broken traces. It’s a strange one but I have also found some really poor solder joints that are either cold joints or just poorly soldered from the start, there are a couple of resistors that need re soldering. It may be nothing at all, but it needs attention, a full reflow wouldn’t go amiss or take too much time.
Faulty resistor joint
I’ve reflowed the entire board due to there being a few cold solder joints.
Full reflow completed
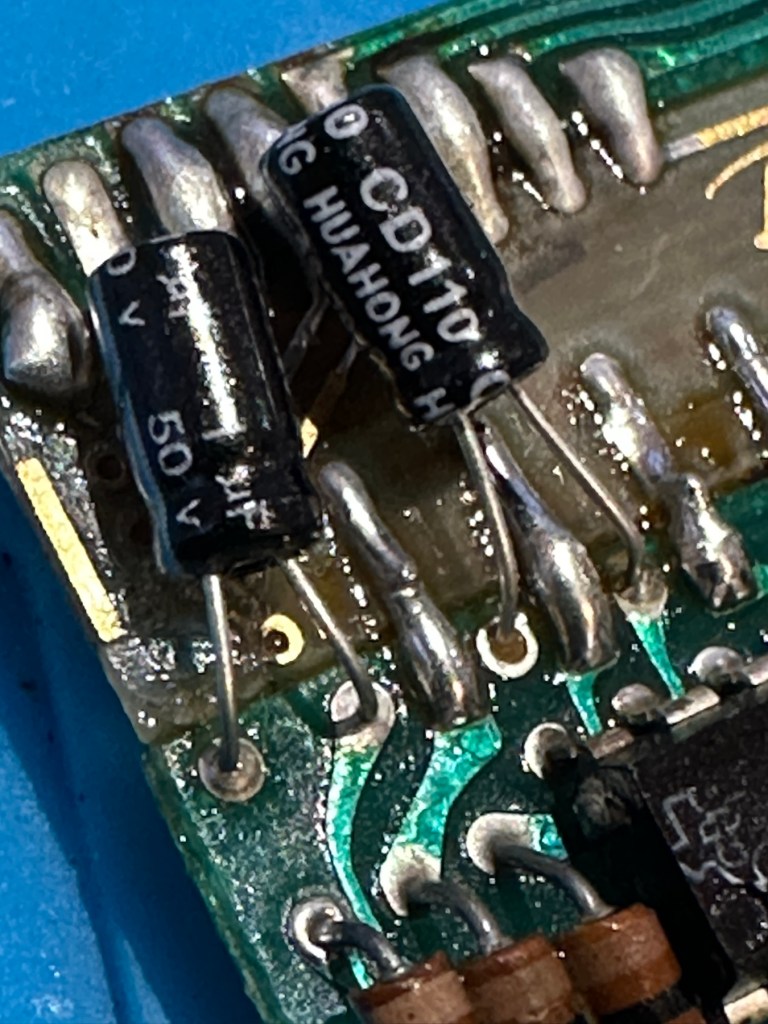
On top of this I have taken off two old capacitors and tested them out of circuit, and both were out of their operable range of +/- 10%. As a result of this I have replaced the offending components with comparable new ones.
Old capacitorsNew capacitors
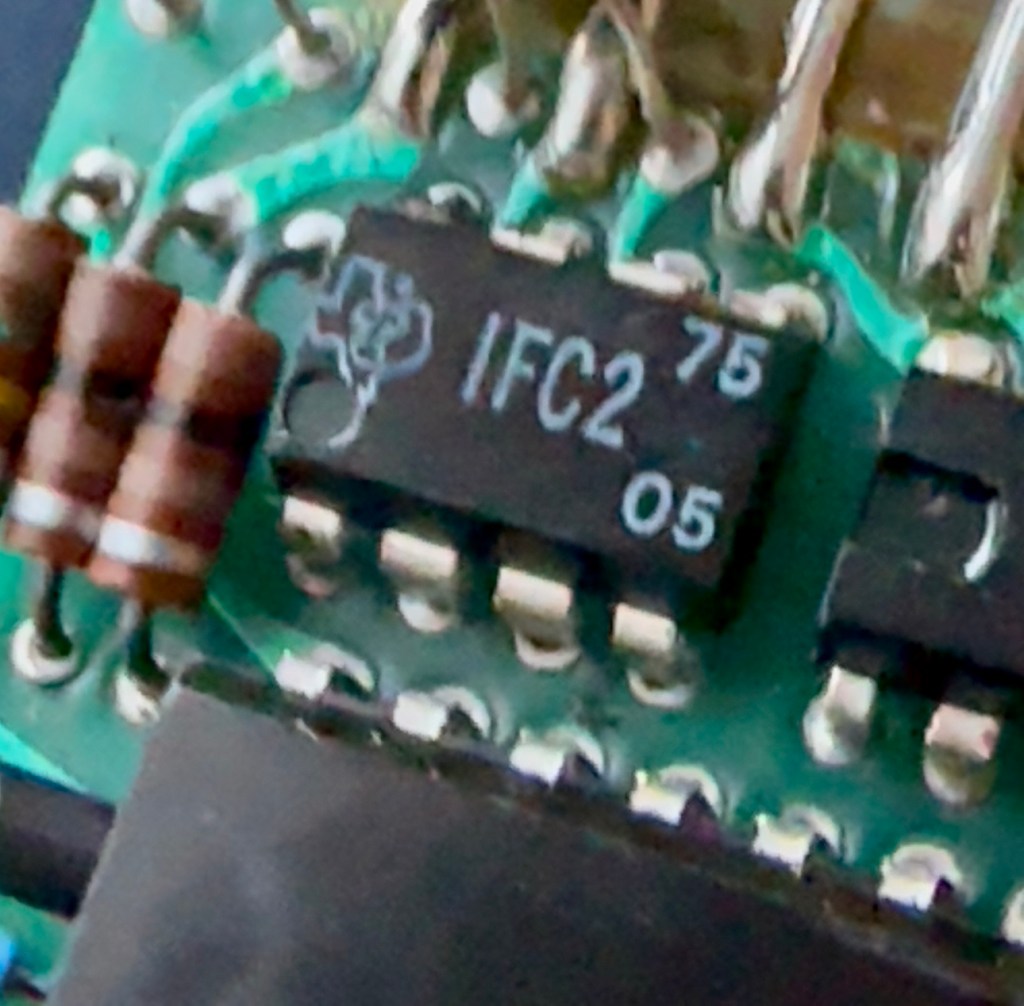
Even with all these extra tasks being undertaken there is absolutely no change in the way it operates. Nothing has gotten worse, the faults that were originally there still remain. I have done some research on line and carried out some further tests and checked expected voltages, most are within range except one that appears to be less than its expected value. After testing everything on this board, every component I can only surmise that one of the three chips has failed, I suspect very much that this, the main chip, a CZL550 integrated circuit. Otherwise known as “Calculator on a chip” is the one that is at fault.
A CZL550 chip
To be quite honest these chips are fairly rare and command a price far in excess of what I paid for the original unit, and I don’t really want to do that. I think I’ll wait around to see if I can secure another faulty unit to complete this repair, so in the meantime, and until I can secure such a unit I will put this repair on hold.
Result:
Well, it’s not what I wanted but sometimes you just can’t win with some of these old projects. In no way am I walking away from it, it’s just that the parts are so difficult to get hold of that you really do have to just wait until a sufficiently faulty one comes up for sale. And that could be days, it could be weeks or months. So for now i admit defeat, but it will not be going to trash. It will remain in my ever expanding “To do” box, for me to pick up on at a later date. And when I am in a position to move this project on, I’ll pick it up in a continuation of this post.
Many thanks for passing by. It’s always appreciated.
Just as Neil Diamond serenaded us in 1976 in the middle of a summer heatwave, it was the first song that came to my head when I awoke around 06:30 this morning.
A nice amount of water above us
It was raining. The UK, or at least our little bit of it up here in the East Midlands has been under heatwave conditions for a few weeks now. We haven’t seen a good rainfall for a couple of months now, only the occasional spot of rain, but not sufficient to fill a hollow tooth….of a mouse.
It has been proper raining today, and it reminds me that in one of the upper gutter systems i have a joint that needs attention as it leaks a constant metronomic amount of water on to the downstairs conservatory roof, giving a constant, tap, tap, tap that is somewhat comforting to listen to. My water collection butts around the house are all nicely filling as a result with good fresh water that the plants and baskets love and crave.
It’s a beautiful sound.
I know there are parts of the world that probably only hear or feel this kind of weather on very rare occasions, and for those people, when it does finally arrive it must be super special and spectacular.
But they manage.
Where as here in the Uk or any other part of the so called developed western world, a week without rain and the whole nation starts to panic, water companies that are ripping us off with their inflated prices are telling us to cut down, and then the nanny state kicks in with its list of things you must and mustn’t do. It’s crazy, we’re in a crazy world.
But my part of that world just lays here quite content, I have my metronomic drip to comfort me, I have a cup of tea beside me, and my whole world lays beside me in a comfortable and cool slumber, totally unaware of the weather situation developing around us. She will be happy when she awakes. The plants are happy, the birds are content and for a brief moment the world is good.
Then the weather report comes up saying we are in for another heatwave next week. Oh well, that didn’t last long did it. A brief reprieve from the intense heat was nice, but I can’t complain at seeing the sun, as to be honest that will soon be gone and we will go through a long autumn and winter all praying for its swift return. We can’t have it all, can we?
But it is an absolutely beautiful noise isn’t it?
Have a super day, enjoy the rain, sun or whatever you have in your region. Just stay safe.
ALL ITEMS IN THIS LISTING ARE FAULTY FAULTS MAY VARY BETWEENS ITEMS
SOLD AS IS
NO RETURNS
EBay
Finepix S9500
I’ve purchased three cameras as a job lot in an auction. All of them have issues but the issues have not been clarified. This is very much a “Suck it and see” auction where I get what I’m given. I’ve paid £24:22GBP for all three and that includes free postage. I’ve purchased from this seller before who is a bonafide Camera business based in South Wales. He has no time for faulty items though, quick in and out is his way of working, no time to fix stuff. I’ve got three good cameras in this bundle and this works out at just about £8:00GBP per camera. And where can you get cameras like this for those prices nowadays.
I really don’t know what the specific issue is with this camera only that it is faulty. I guess we will just have to wait it’s arrival for a full assessment. In the meantime here is a little bit about it.
Fujifilm FinePix S9500 or FinePix S9000 is a bridge digital camera released by Fujifilm in 2005 and intended for the enthusiastic amateur. It is a member of the Fujifilm FinePix family and has been superseded by the Fujifilm FinePixS100fs. It has a long list of advanced prosumer features, like combining having wide-angle ability (28 mm equivalent on a 35 mm camera), full range of manual settings, mechanical zoom ring, high ISO-sensitivities, and some of the versatile features of Live-Preview Digital cameras (LPDs) like movie mode, movable LCD panel, and macro mode.
Wikipedia
Assessment:
Wow. Another camera in a fantastic condition as part of this damaged package of three. And I owned one of these when they first came out in 2005.
Working fine Flash worksAll menus okScreen and extension fine
I really had to look hard to find the issue with this camera, I have checked every menu, mode and function and it is working absolutely perfectly. Then I found the issue when removing the battery.
Loose battery contact under battery door
Unbelievable, the only issue with this camera is a loose battery contact plate under the battery door. These are normally sealed with moulded plastic, but it looks as if this one has come adrift. It just needs fixing back in place, I can’t believe this is all that is wrong with this camera. Apart from needing a little clean.
Another bonus
And an added bonus with this camera was that it came with a 2Gb CF card. This just so happens to be the biggest drive size these cameras take. You can also use TF cards. Again, this was a very welcome bonus.
Repair:
Probably the simplest of repairs you’ll probably see. I really apologise for this being a bit of an anticlimax to anyone wanting to see a technical repair, because you won’t be seeing one. But just sit and think it over for a moment, that someone was prepared to dispose of this perfectly working camera as it was not working in their eyes. We really are a throwaway society. And then there are simple people like me who love these items. And we fix them.
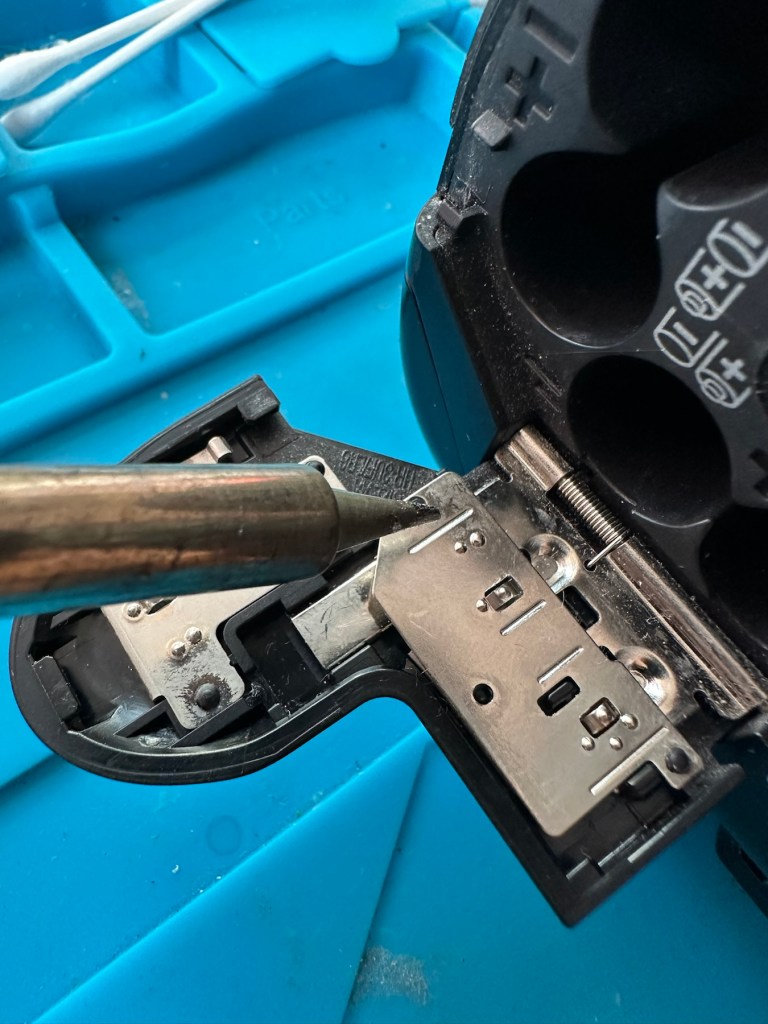
A hot soldering ironPlastic re-welded
All it took was a hot soldering iron and a pair of tweezers. The metal plate was held down and what remained of the broken plastic welds protruded above the plate. Using the hot iron the welds were melted back to secure the plate in place as it had been when it left the factory. There you go. Job done. Simple.
Result:
For £8:00 I have brought myself a little bargain here. Ok it’s 20 years old now, works perfectly and does what it was built for. Capturing history, your personal history, both good and bad and creating moments for you to treasure forever.
All cleaned and looking beautiful
It doesn’t matter what the megapixels are or any of that chuff the “purists” insist you must have in a camera, just push the button and treasure the output for the rest of your days. These cameras are the ones we should be carrying for fun, to learn about photography, the cameras the kids should have now that we had 20 years back, they still have that life in them and the ability to teach and encourage a younger generation to get into photography. And before you say they have phones, that’s not the same. They’ll learn more from one of these on a phone free afternoon, then they ever will by being interrupted by “Soshul Meeja” all day.
Get out there, get your kids recording their world. They’ll thank you one day.
And yes it works well, the Camera is in cracking order and only missing a strap and maybe a lens cap that I may procure later down the line.
The good thing is that it has been saved from disposal, and has years of good honest life left in it.
Thanks for passing by, you know it’s always appreciated.
This is another post based around the current circus that is the selling of our house.
The estate agent tourist fiasco goes on despite us telling the agent that no one comes into our house without having the available funds, or proof that their own house is on sale. I thought we’d finally broken through the thick skull of our agent when we had an appointment for one gentlemen on Monday earlier this week. The cameras on the house told a different story when 8 other people went traipsing through our property.
I have duly phoned the agent and burned him another asshole. I don’t think he will be sitting down for a while. But this seems to be the way it operates in the East Midlands, and I don’t like it, in fact I bloody hate it. These charlatans that hide under a cloak of professionalism will do anything to appease the viewer, rather than abide by the rules and instructions of the seller.
And then they have the cheek to send feedback a couple of days later. Why?
I’ve told them in the past to forget feedback. I’m not going to change anything because someone doesn’t like something. You want to change things? Buy the bloody house then and you can change everything. Totally pointless.
Feedback on house visits, about as pointless as the person who installs indicator units into BMW motor cars. They’re never used.
Pointless
Apart from that life is extremely busy, all my work stuff is packed up so the tourists have a nice view of tidiness, and that’s why I have posted very little lately. I have a mahoosive back log of stuff but at the moment it’s a very much, I don’t give a hoot attitude as I take some well earned R&R.
Have a pleasant day, and don’t let the B***ards grind you down.
the quality of being thankful; readiness to show appreciation for and to return kindness.
Before all the posts start appearing from the do as I say but not as I do, positive thinking brigade, it’s a quite simple response to be honest.
As it says, it’s a “Quality “ and not everyone possesses that quality. A rapid change in mindset will normally suffice.
Just be appreciative of what you have whatever that may be, a loving relationship, maybe someone has done well or made you feel a million dollars, with just a simple compliment you pay them back. Just be appreciative. Use the words please and thank you a little more, it will always go a long way. And always offer assistance. Just be nice and stop being an asshole.
Simplistic attitudes prevent the negative outcomes.
There’s a hairdressers that I drive past pretty much everyday whilst negotiating the traffic mess around the city of Leicester. I’m not knocking them, I wish them well and from what i can see, they do seem to have some high profile customers from the local community/football club. But whatever made them name their business Suez Canal barbers?
Strange choice of name
Anyone else have some strange names businesses in their area as I’d be interested to know?
This one caused me confusion when I moved to the area as I didn’t know whether I was getting a haircut or a chicken dinner.
Chicken or short back and sides?
Another Barbers shop, when I used to live in Watford, was a barbers called Bhatti Barbers. Nothing too sinister there as it was probably named after the owner
All the same it always made you look up and notice it, and maybe that’s the point of it all.
I’ve been in a pretty low mood of late due to suffering the post holiday blues, pretty much self imposed and just needing a good kick up the ass to get me motivated.
On top of that being a person who suffers continuously with respiratory issues I’ve been fighting off a nasty chest infection that I think I may have finally just got the better of. (Fingers crossed)
Then I get that kick up the ass I was talking about in the first paragraph.
My good work Colleague and Signaller Nick, who lives in London has contacted me to ask if I’ve spoken to one of our other colleagues lately ( who shall remain nameless)
I told him I hadn’t spoken for about 6 months only to be told he now has cancer in both lungs and his kidney, he’s fighting his last battle as I’m writing.
Nicks told me he has just spoken to him, and he’s telling him of all the things he has to do for his family before it’s too late.
This is where I broke. He’s early 50s, has a young family and… I just can’t put it into words. What a beautiful human being, one of the nicest guys you could ever wish to meet and work with. This guy earned an award when I was his gaffer, after saving 12 people who suffered cardiac arrests whilst on train stations in London. His actions ensured Those people are here today. And this is how he gets rewarded. Sick joke…
And I’m feeling low because of post holiday blues and a chest infection. How pathetic am i?
I’m a pathetic wretch, get real and buck your ideas up son.
Sometimes, it takes the sledge hammer effect straight in the face to really bring it home to you. Thank you Nick for making me see reality again.
Thinking of you on your hardest journey bud. Remember 2012. You life saver.
This could also be titled, “When is a mum not a mum?”
I married my dear wife over 30+ years ago now, and to say she has been the stabiliser of my life would be an understatement, the rudder to my boat, you get the point I’m a lucky guy.
However we knew very early on in our marriage that we would not be having children, and that was difficult at the start. Not as much to me as, to be honest, children weren’t really in my plans at that early stage, but to my wife, she viewed it as if it was her duty to produce a child, she was a woman after all and she dearly wanted a child. And I’d do anything to make her life complete. However this was never going to be a dream come true in our life time as unfortunately and for reasons I won’t discuss here, we were dealt the bum deal as they say. It wasn’t to be. We were to remain childless.
Those first ten years of our marriage were an immense test of our feelings for each other, I’d come home at times and often find her crying for the child she could never have, and yes my heart broke every time, it was a very sad period in our lives. We explored every possibility, in the early days when Kim Cotton was the first in the UK to venture into surrogacy, we followed that closely and were considering the possibility of going down that same route, it was early days and there were lots of pitfalls and heartbreak stood in each corner of the decision making progress. It was fraught with problems and legal issues. We stepped away from this opportunity, reluctantly.
Back in the early 90s the adoption process was not as open as it is nowadays, we just wouldn’t have been considered, it was so selective and as we were quite young and in local government housing at the time, we wouldn’t have even got through the initial application stages, oh how times have changed.
There’s a strange feeling taking your wife to baby shops such as “Mothercare” to chose prams and a decor for the child you would never have, we knew we would never be buying but it was “fun” in a weird sense as we learned a lot about how life would have been if we were dealt a fairer set of cards.
Then the younger members of the family started having children of their own, I thought things would be worse for us as I was worried about my wife’s reaction to all these upcoming births. I needn’t had worried, as this turned out to be the point in our married life where it all changed for the better.
We pretty much became permanent baby sitters, it’s fair to say we probably witnessed more periods of excitement and firsts in their little life’s than their own parents did, it was fantastic, and we could hand the nippers back at the end of the day, even though we did have the occasional overnight stay.
That was definitely the turning point, and my wife changed when this occurred, she was accepting of the fate she had been dealt, but she now had what she wished for, children to look after.
We had brilliant days out with them kids, we did all the stuff you just do and we could now visit those shops to buy gifts for these little visitors that we had been gifted the chance to look after.
We even witnessed teenage angst
To this day those kids, or should I say young adults spend so much time with us, they’ve even joined us on a recent holiday and the relationship we have with them is fantastic. They have grown up to be beautiful souls and it’s nice to think we played a part in their stories. We still ask each other what we think our kids would have been like, and often comment that if they are just like the nieces and nephews we helped bring up, then we couldn’t do much better than that.
The prompt for this post was encouraged by the fact that even though we are the only childless couple in our family, every Mother’s Day and Father’s Day we are showered with cards and gifts, and whilst I question it every year it’s their way of showing their appreciation, and just saying thank you.
I’ve sent them all a WhatsApp message telling them what I have purchased with their gift cards, as I like them to know where it’s been spent. This year I’ve purchased some new tools and a special extraction fan for my soldering, just so I can stay around and appreciate them a little longer. They and their parents changed our life’s for the better.
I should really be thanking them. But they know I’m always here for them. I’m not a dad, but they make me feel so much like a dad. ❤️
Thanks for passing by. Stay blessed and try to be happy.


You must be logged in to post a comment.