Apparently the puzzle can be completed in 18 moves. Well, can it?
I remember this fad coming into school the first time around. I never had one, never particularly wanted one either, probably as my attention span was never that concentrated and I’d probably have ended up throwing it at a wall.
However, as I get older my attention span has expanded slightly, but not to the point that I actually want one. But I have been triggered by a small video I’m seeing online apparently showing how to solve a Rubik’s cube in 18 moves!
But does it really work?
Courtesy of t’internet
If anyone out there actually has one I’d be interested to know your thoughts. Apparently if you repeat the moves shown in the photo above, eighteen times you will have the answer.
If you could instantly master any skill, what would it be and why?
I think I already posses that skill.
And that skill is:
Just minding my own business.
In life we have control over just two things, our thoughts and our own actions. You can’t control whatever anyone else thinks or does, so why waste your time in trying!
Just mind your own business. That’s work a plenty in many cases.
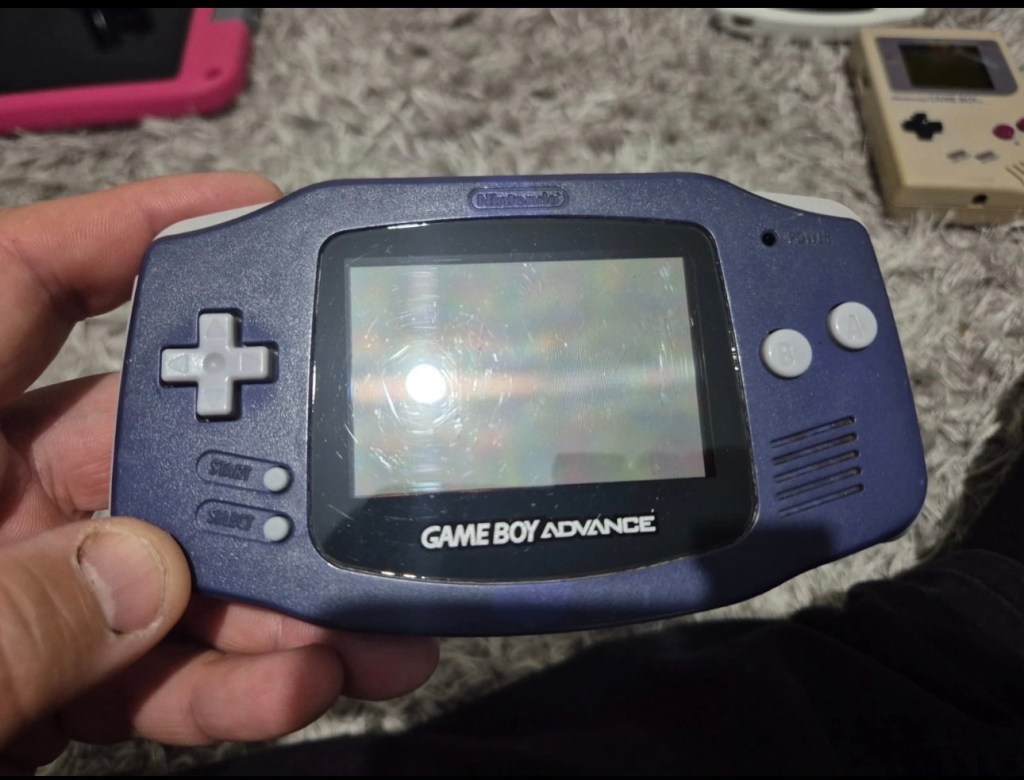
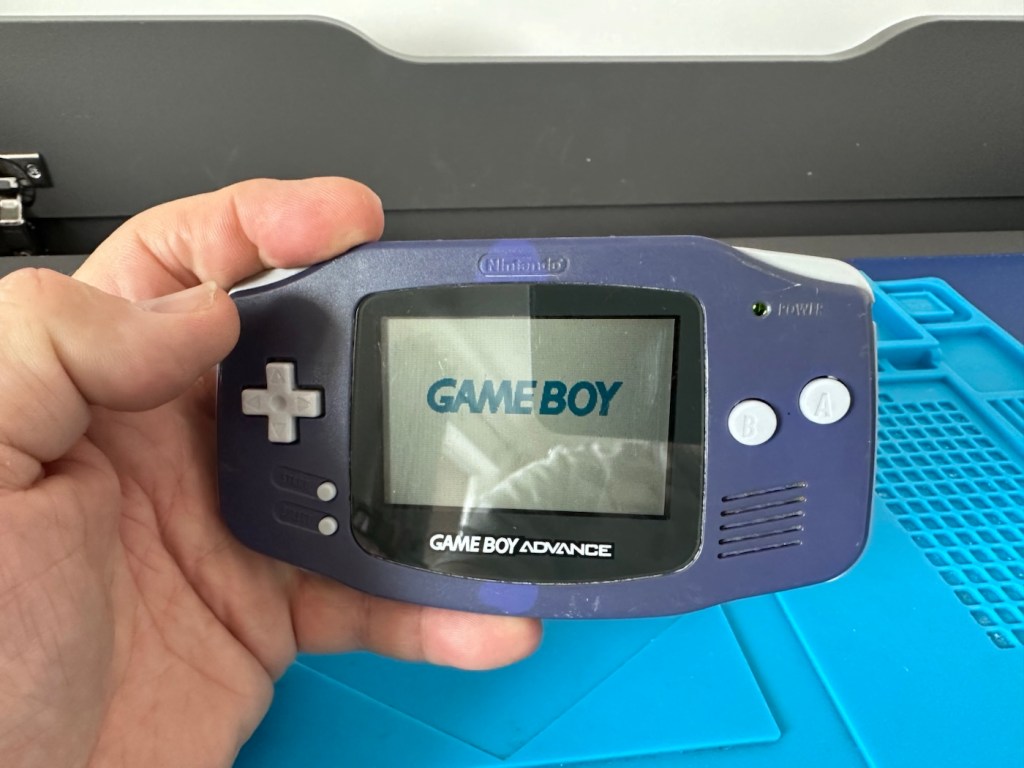
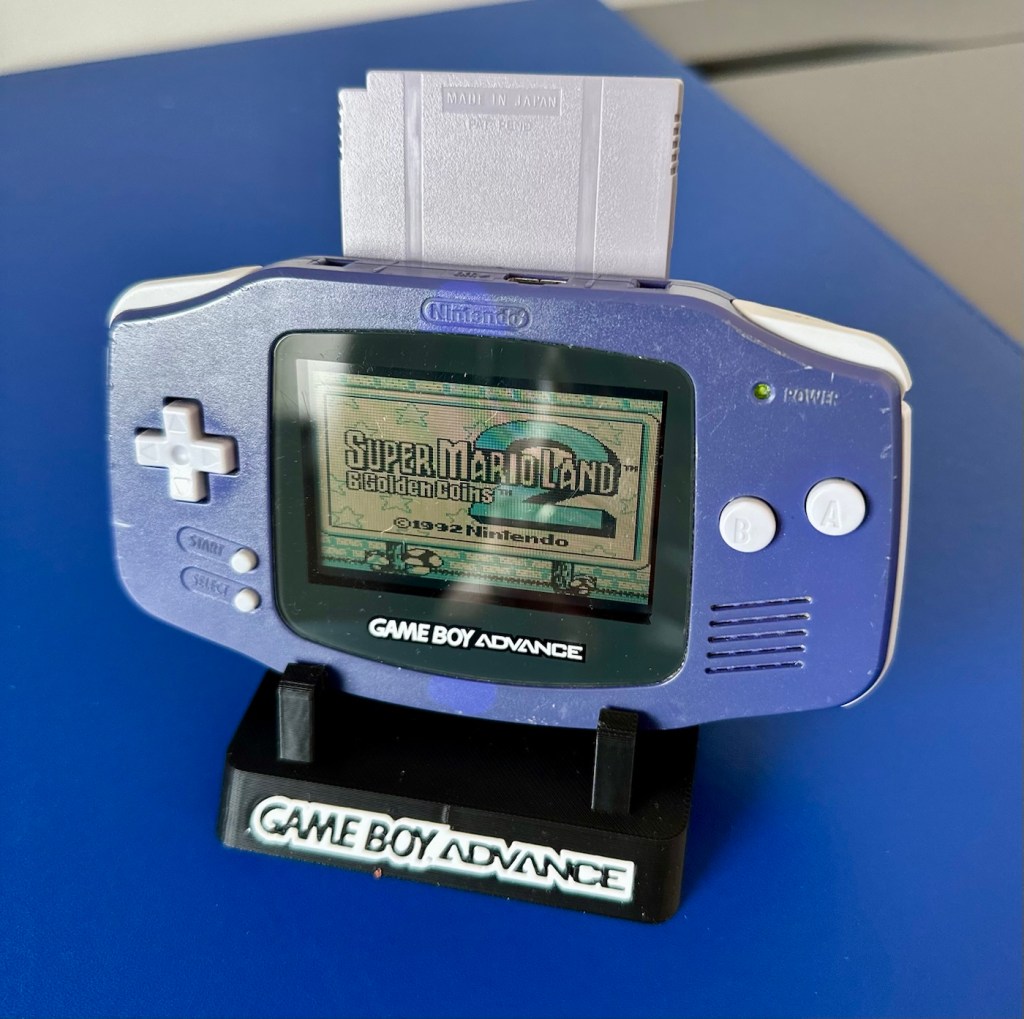
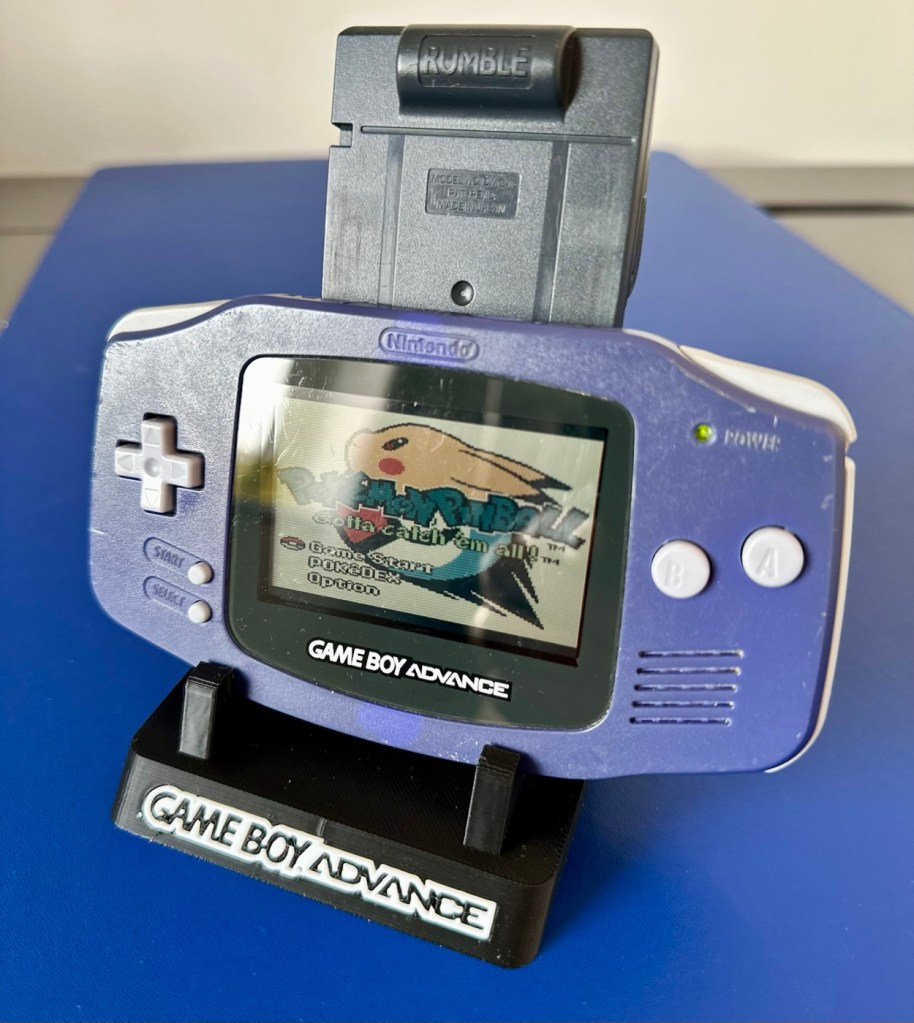
Another one of Nintendos mass produced hand held gaming systems has arrived, with audio issues. It’s a Gameboy Advance, with no sound,so let’s try to fix it.
Here’s what the listing stated:
Gameboy advance console, complete with battery cover, all buttons works and powers on but no sound, has marks on screen and a few marks on shell and scuffs/indentations.
Photos of exact item you will recieve, FAULTY Uk buyers only. Has cover missing that the power light shines through on
EBay
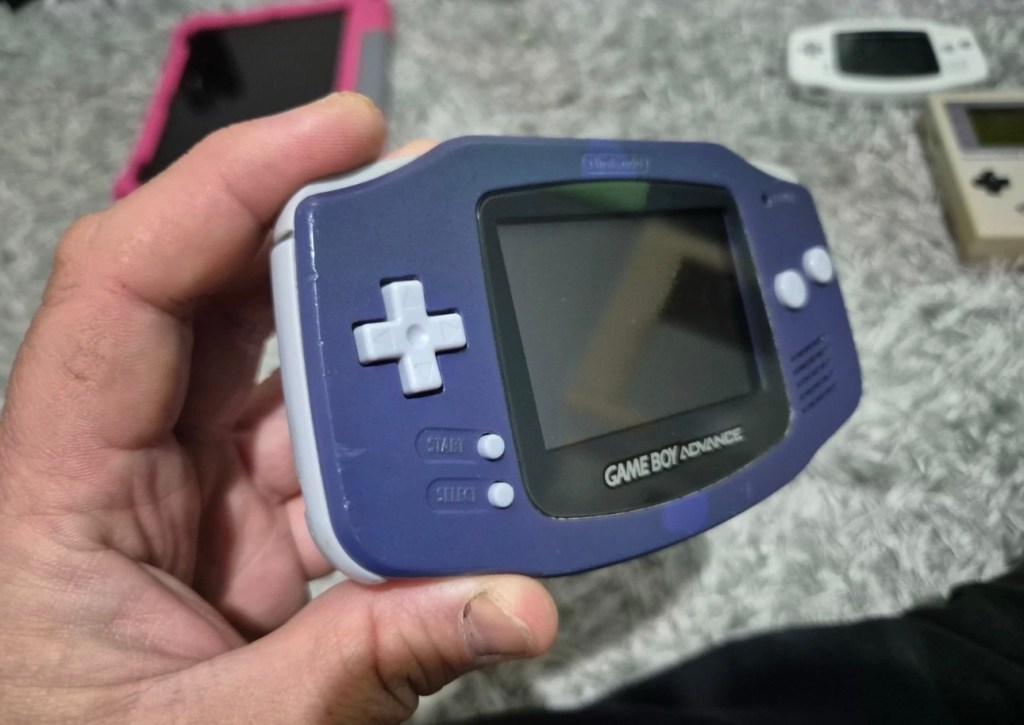
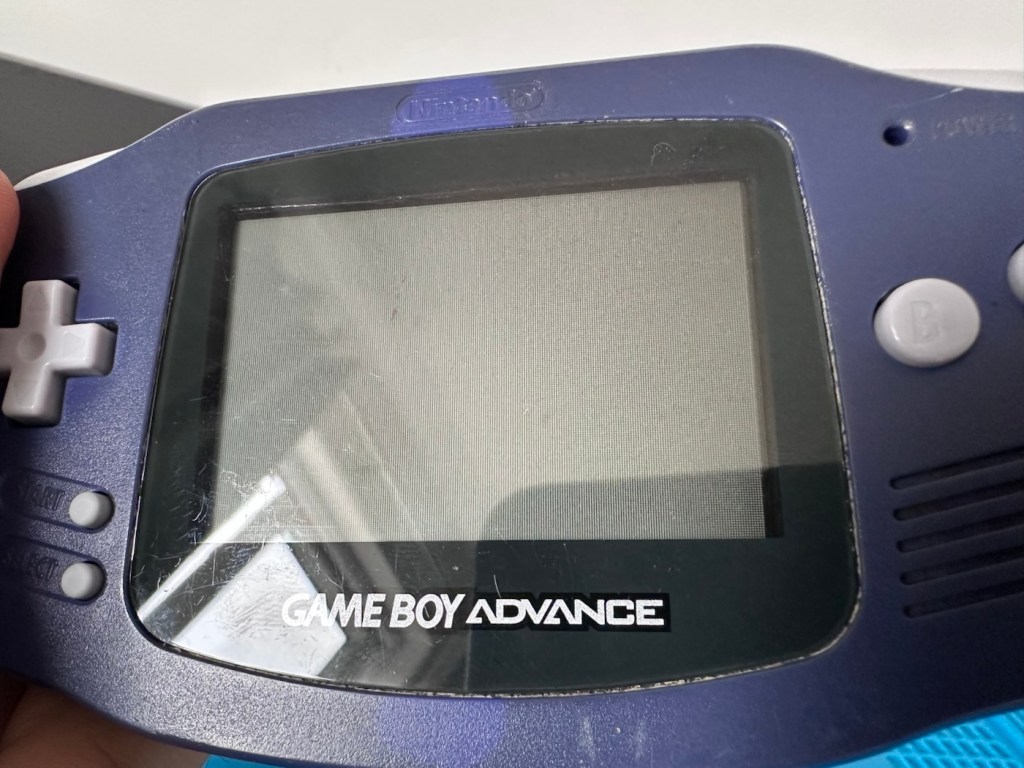
The unit I have purchased
I’ve purchased this as another addition to my collection of handheld retro gaming consoles. As usual it dosen’t work, and that sometimes keeps the cost down a little. This one has cost me £24:00GBP and I’m happy that that is a fair price for one of these units. Here’s a little about the GBA:
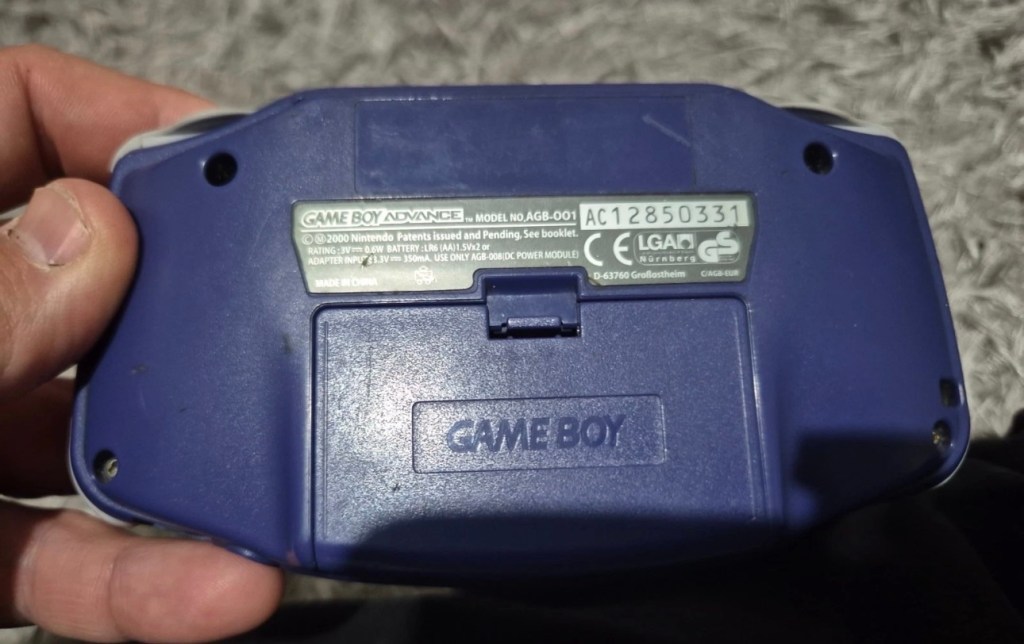
The Game Boy Advance(GBA) is a 32-bit handheld game console, manufactured by Nintendo, which was released in Japan on March 21, 2001, and to international markets that June. It was later released in mainland China in 2004, under the name iQue Game Boy Advance. Compared to the Game Boy Color it succeeded, the console offered a significantly more powerful ARM7 processor and improved graphics, while retaining backward compatibility with games initially developed for its predecessor.
The GBA is part of the sixth generation of video game consoles, competing against Nokia’s N-Gageand Bandai’s Japan-only WonderSwan. The original model was followed in 2003 by the Game Boy Advance SP, a redesigned model with a frontlitscreen and clamshell form factor. A newer revisionof the SP with a backlit screen was released in 2005. A miniaturized redesign, the Game Boy Micro, was released in September 2005.
By June 2010, the Game Boy Advance series including revisions, had sold 81.51 million units worldwide, massively outselling its competitors. Its successor, the Nintendo DS, launched in November 2004, was backward compatible with GBA games. GBA sales ended by 2010 after over nine years.
In 2008, the GBA was still Nintendo’s predominant handheld console in terms of market presence and global installed base. It was only in late October 2008 that Nintendo announced that the Nintendo DS had officially surpassed the GBA worldwide in sales. This milestone consolidated the definitive global leadership transition between generations,[13]although in specific markets, such as the United States, the GBA was only surpassed by the Nintendo DS in sales in late 2009.
Wikipedia
Now just to reiterate. These units are now 25 years old, there were in excess of 81 Million of these units produced and they still command a good price today. Just consider how many of those units have been sent back into landfill, the figure is probably immense. But then again we produce many items en masse, and we have been just chucking stuff away for years. The figures must be mad.
Except for this one. It will be repaired, cherished and reused. And displayed for all to see.
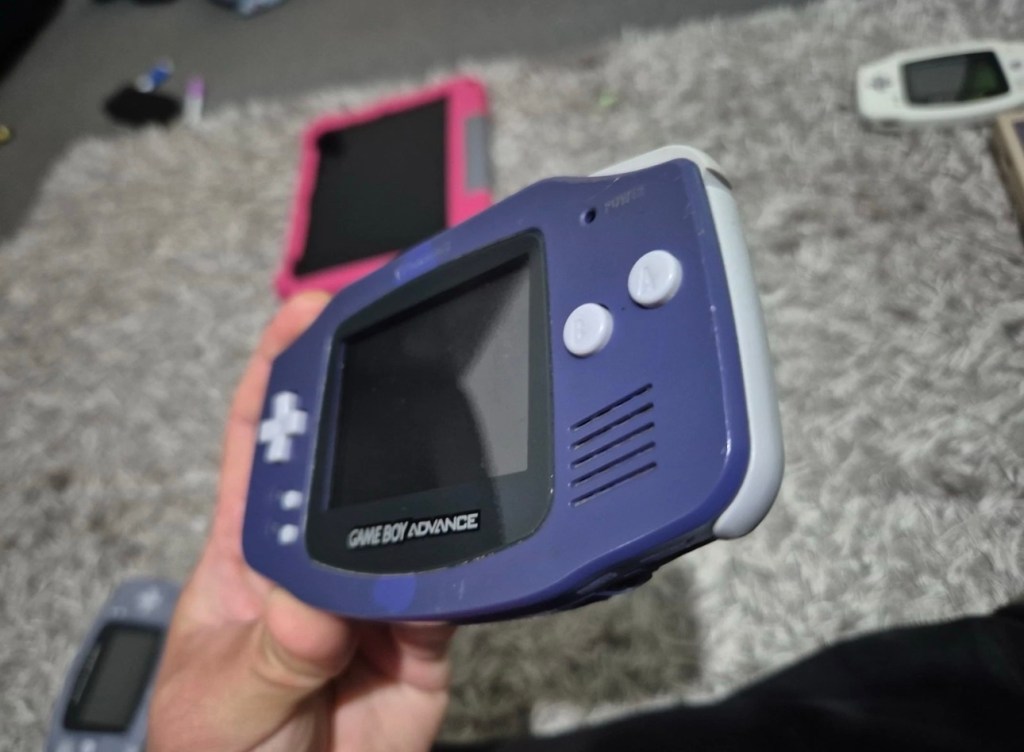
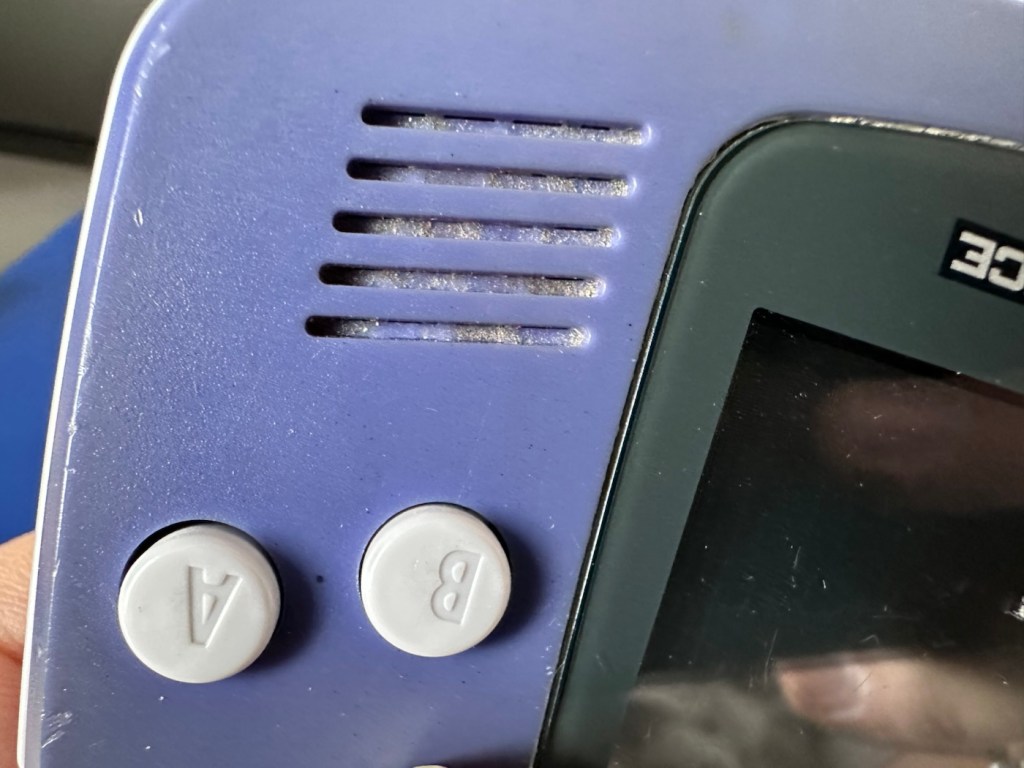
This one has been advertised as having no sound. Just from viewing the sellers photos you can see there is an awful lot of staining around the speaker grill area, maybe some liquid has been spilled here and the speaker is damaged, or maybe the audio capacitor inside has blown. These are usually the two main culprits, but you never know it could be for some other totally different reason. Let’s not make assumptions, let’s see what turns up.
Assessment:
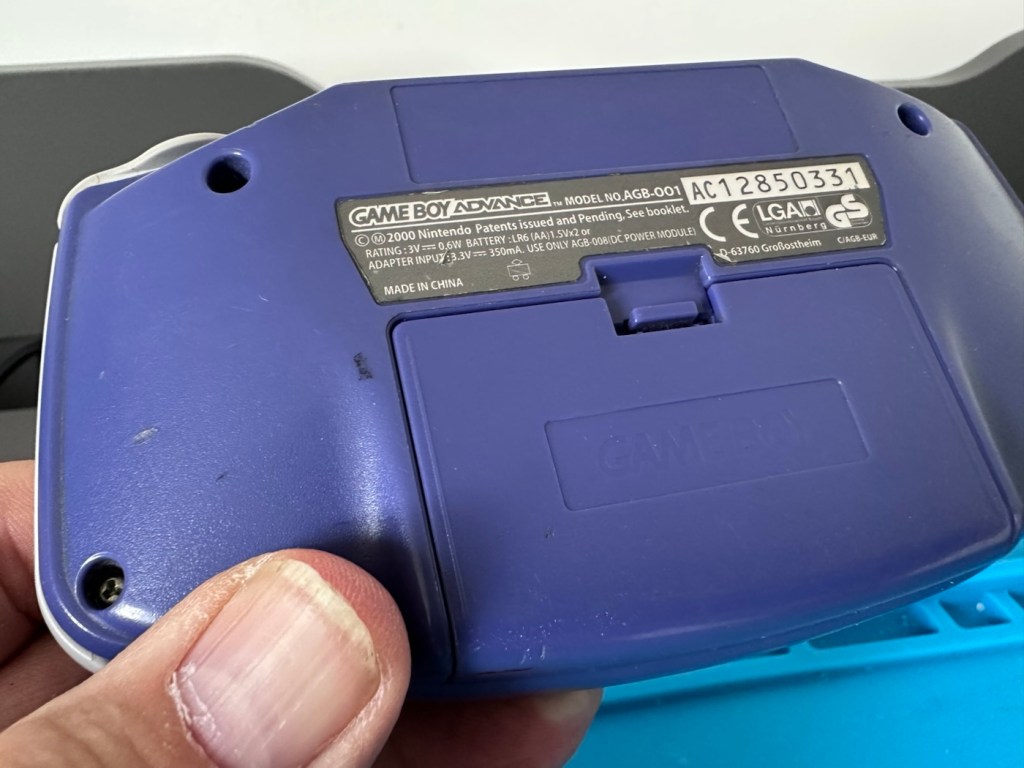
The unit has arrived all in one piece. The battery cover is in place, a little loose at the clip but I might be able to strengthen by heating and gently manipulating it.
It works but no soundBattery cover Clean contactsClean but a bit grubbyConnection ok, needs a cleanNo sound, dirtyNo light lensLight scratches
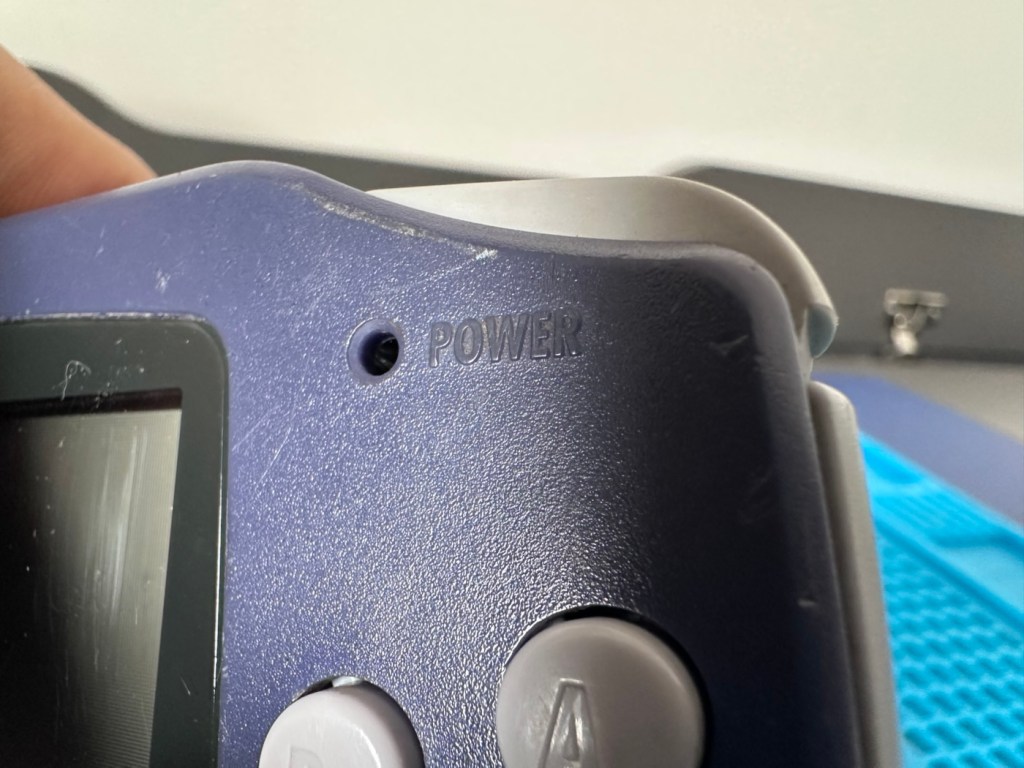
Battery contacts show no sign of corrosion but are a little grubby. There are signs of good use but nothing really bad to be honest, all connectors and buttons appear to be doing what they should. The unit is in good need of a thorough clean, as it does look a little worn in that aspect. Screen has very minor scratches, nothing that will cause any issues. The little acrylic lens by the power light is missing and there is as stated, no sound even though we do have a picture and are able to play the games. In all aspects the unit is functioning, just with no audio.
This is a fair unit, it will clean up and if we can get the audio working we have a potentially very good unit.
It is dirty though, and a good clean will make an immense difference.
Repair:
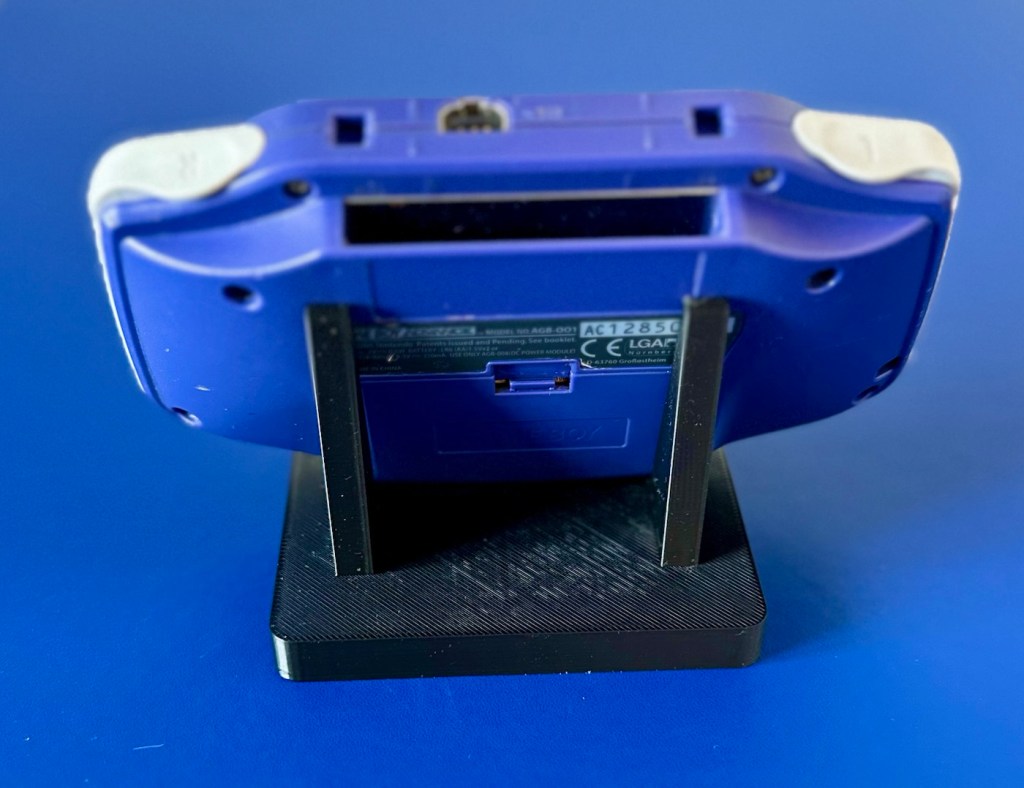
The printer is on and warmed up so before we get repairing, let’s print a suitable display stand for this unit.
Display stand printing
Now let’s open up the unit and see what we have inside.
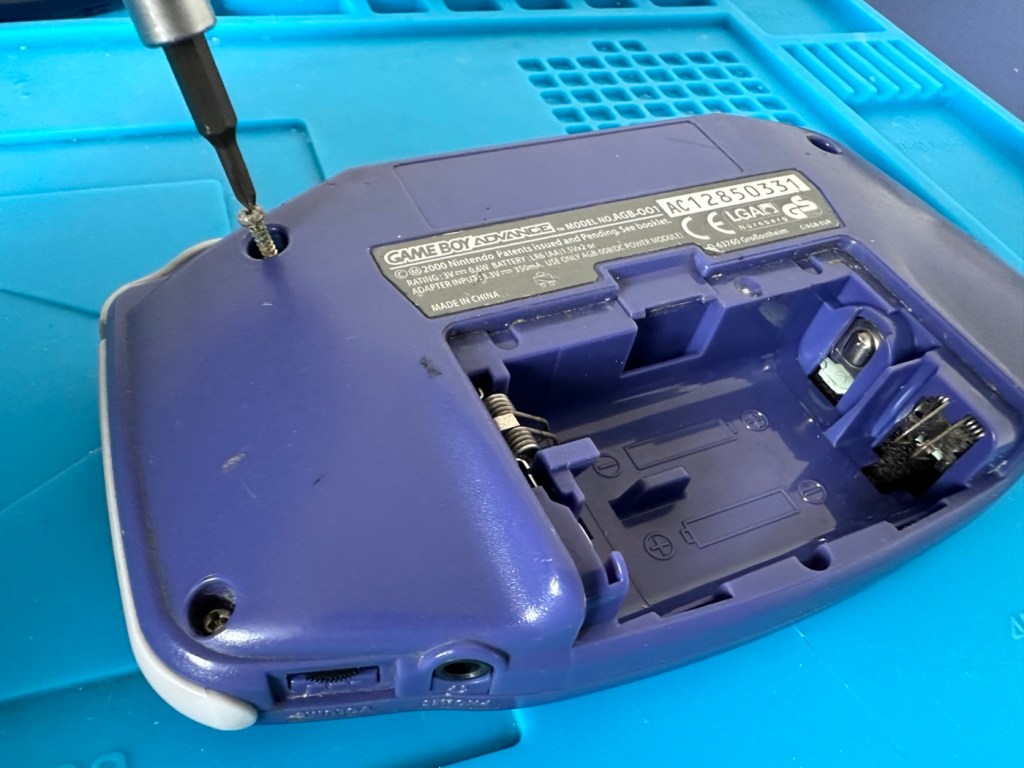
First there are seven tri wing screws securing the shell. Remove these and the rear of the unit just lifts off.
Seven screwsRear removed. Board missing two screws
Next there should be three screws to remove the mainboard but there is only one. Someone has previously been in this unit and has left two screws out. Next we remove the ribbon cable that secures the screen to the mainboard.
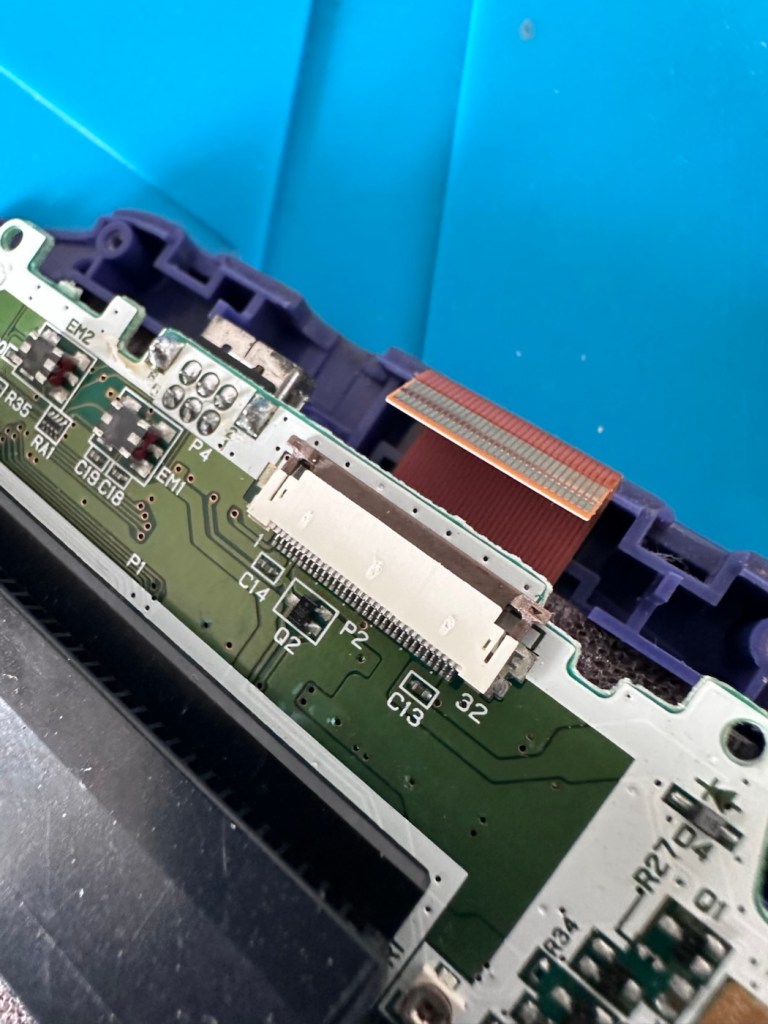
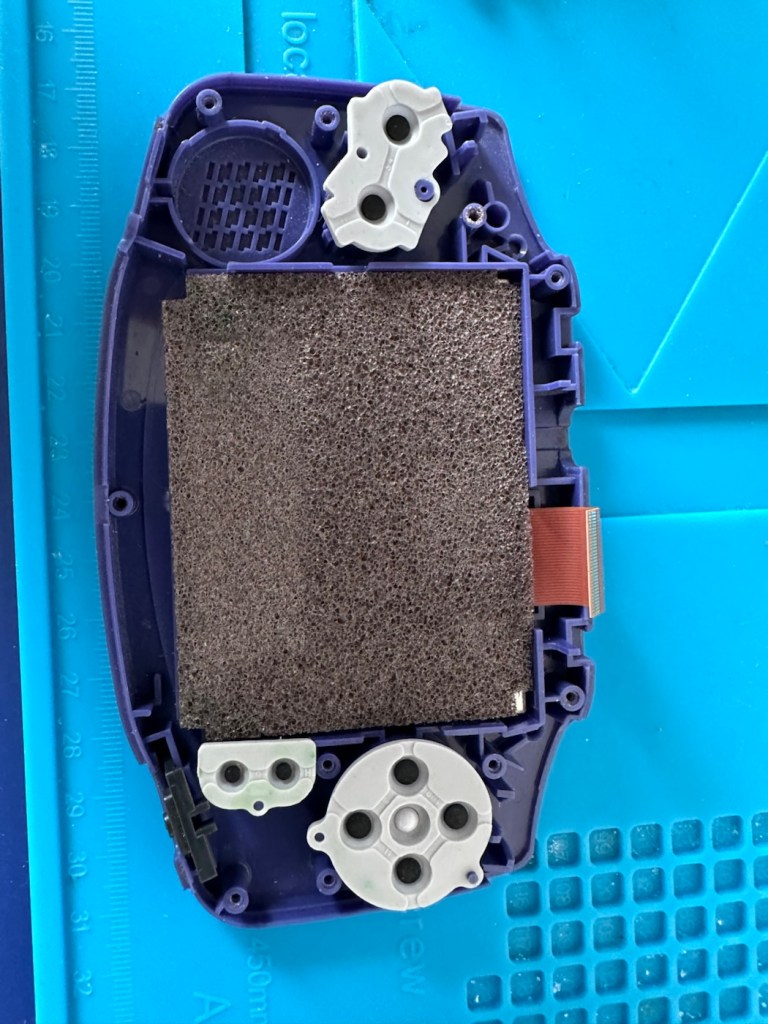
Remove ribbon cableScreen and front of the casing put to one side
We now have free access to both sides of the board and can put everything else to one side to start our fault finding process.
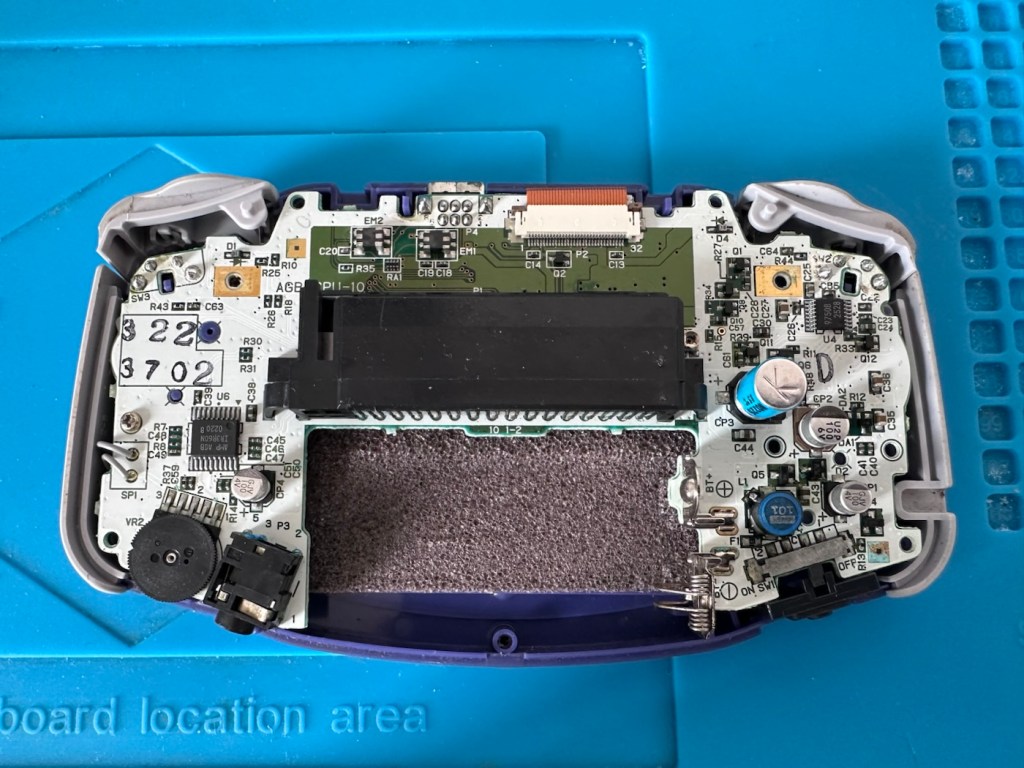
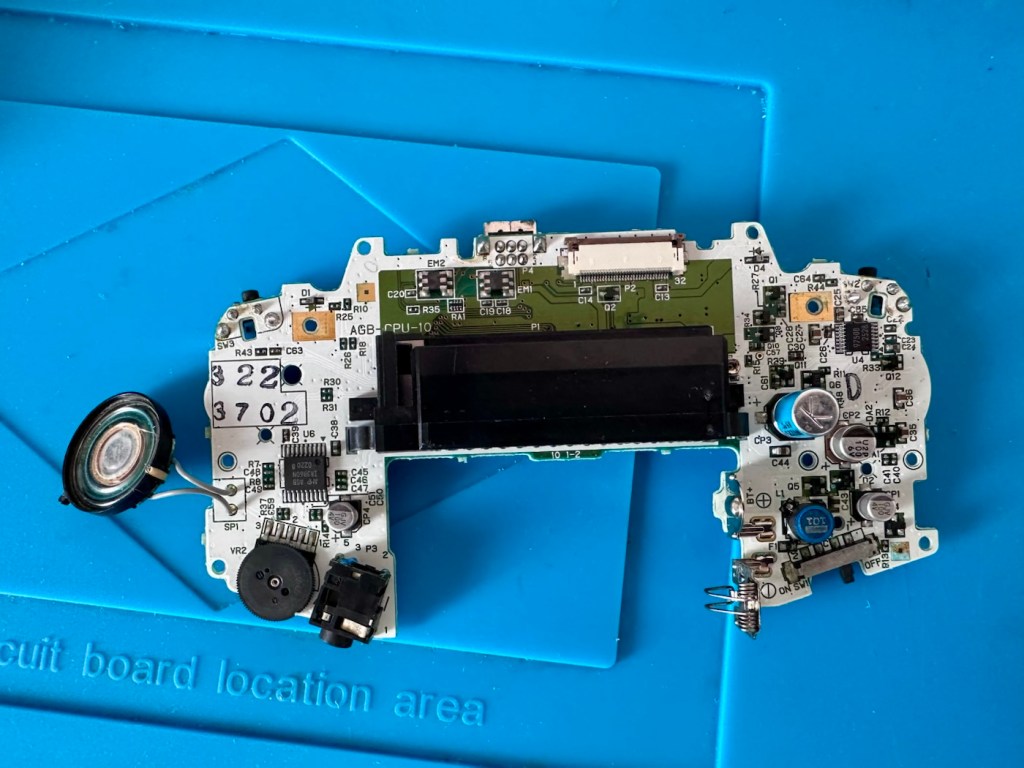
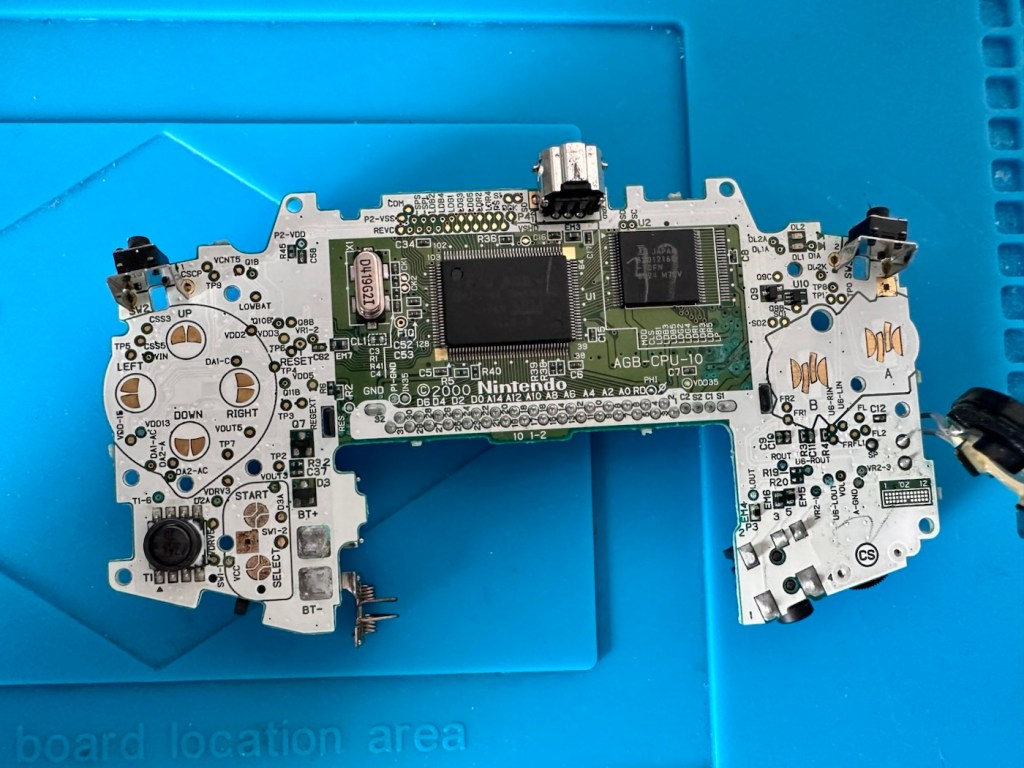
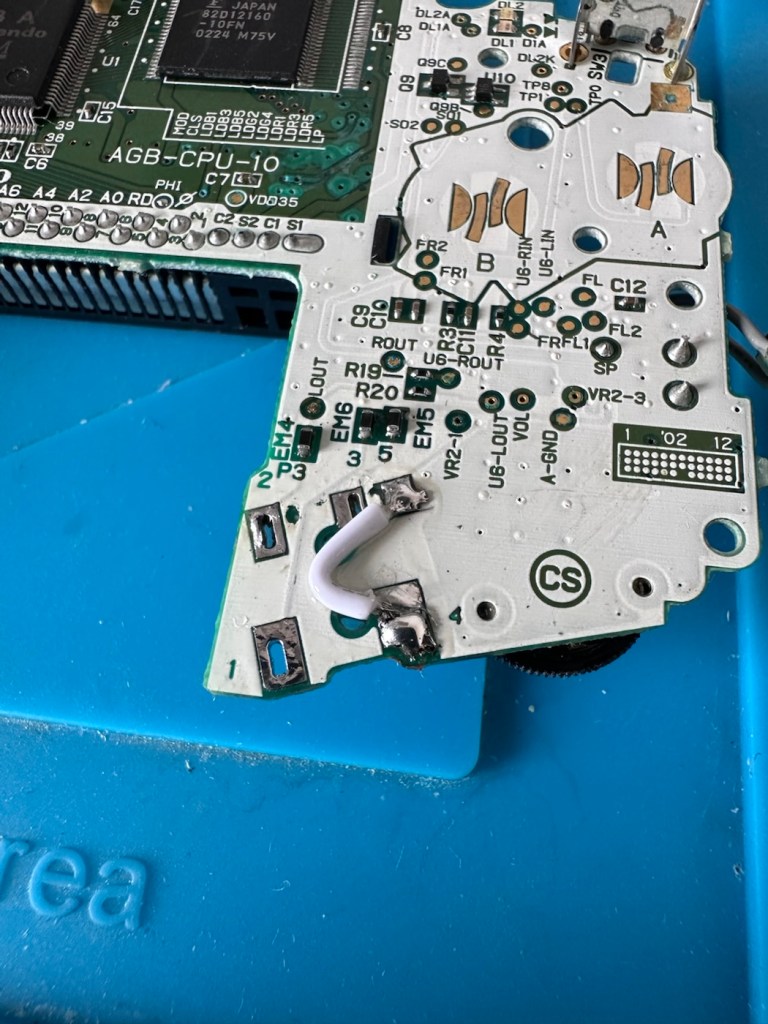
Rear of boardFront of board
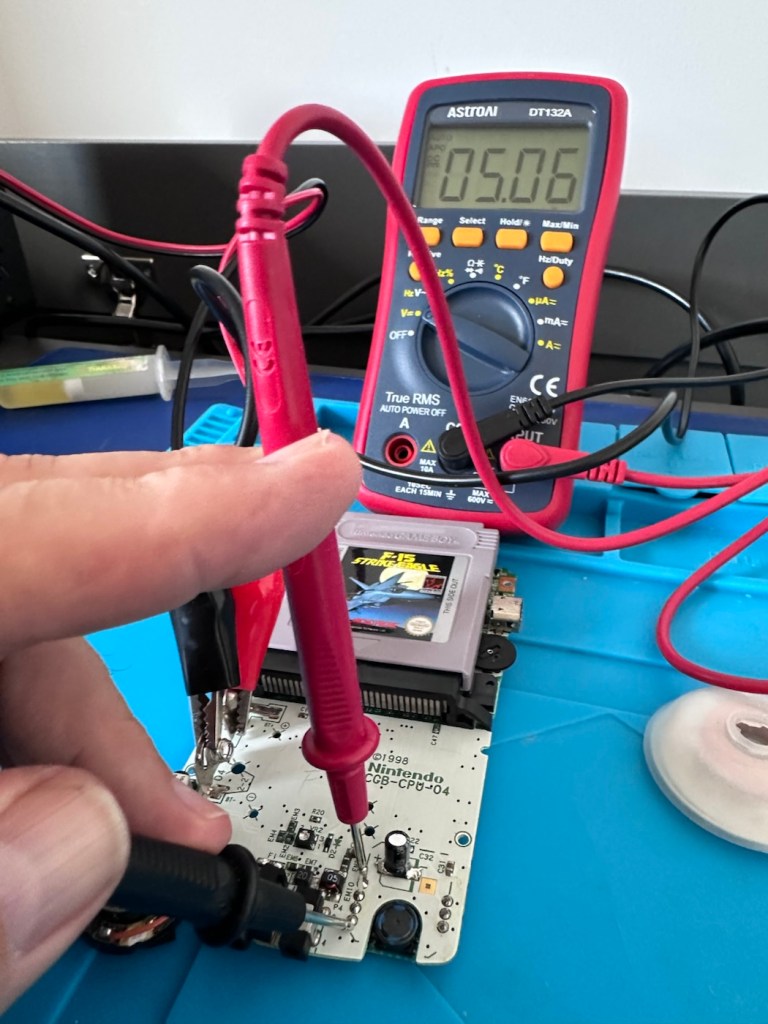
First things first, let’s check the speaker. With the multimeter it’s showing 8 Ohms so I’m happy that the speaker is ok. A quick check for shorts and not one capacitor shows a short, I plug in a set of headphones and I can hear sound, but as soon as they are unplugged there is no sound again. My attention is now at the earphone socket.
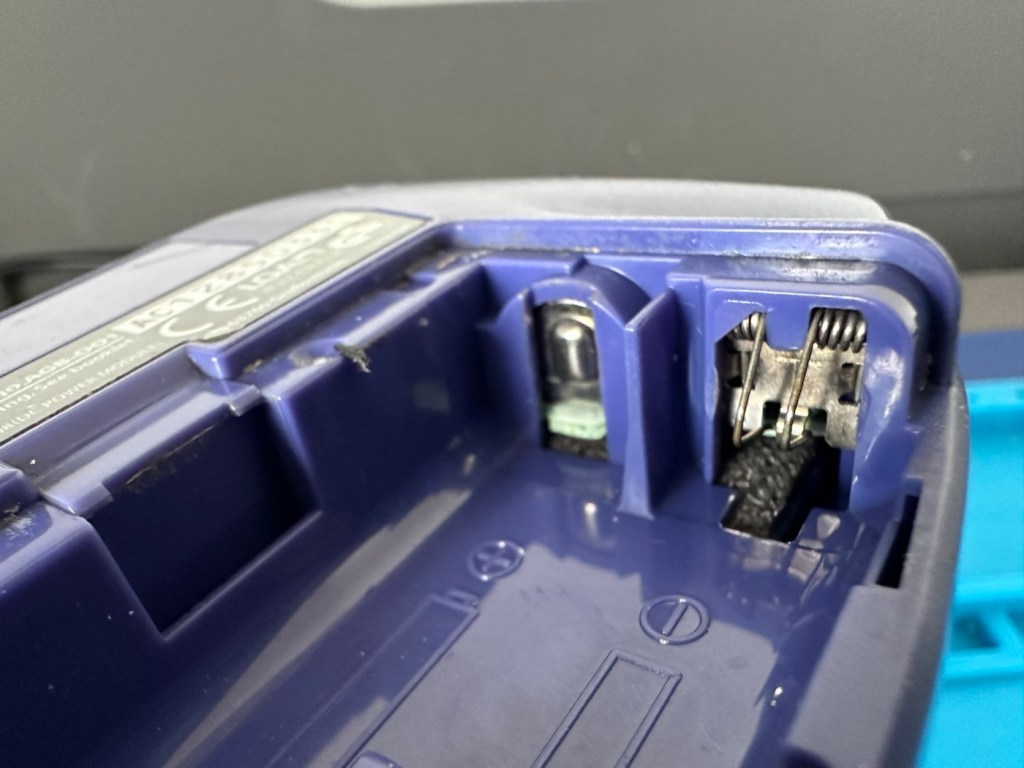
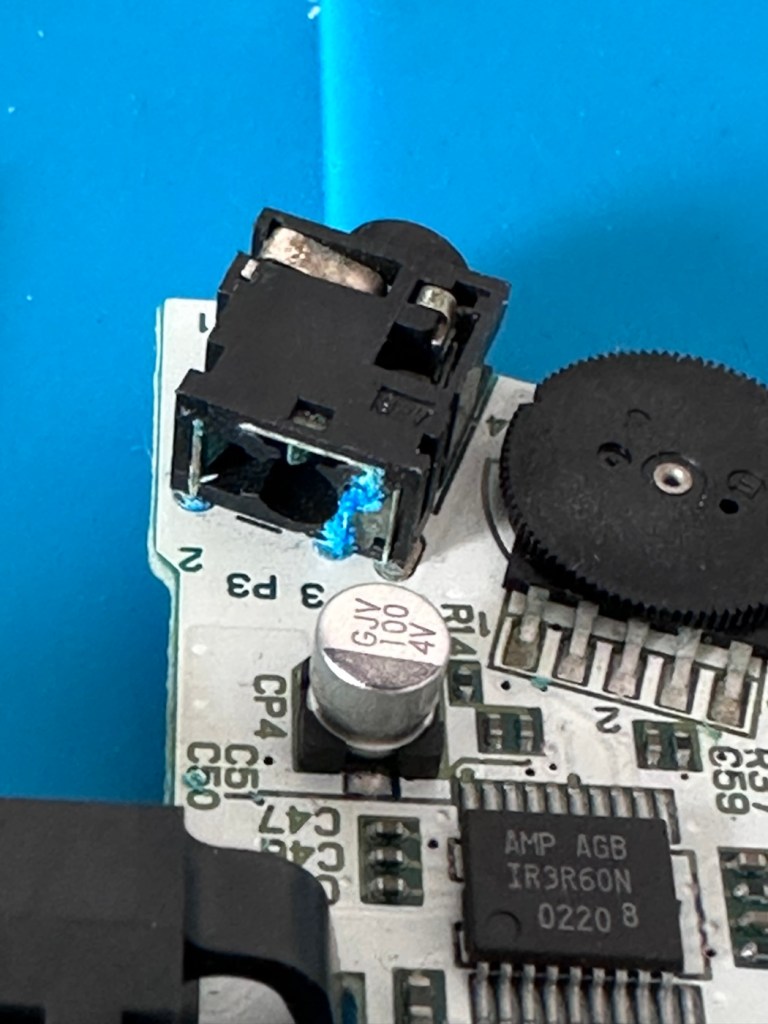
ContaminationHeadphones plugged in
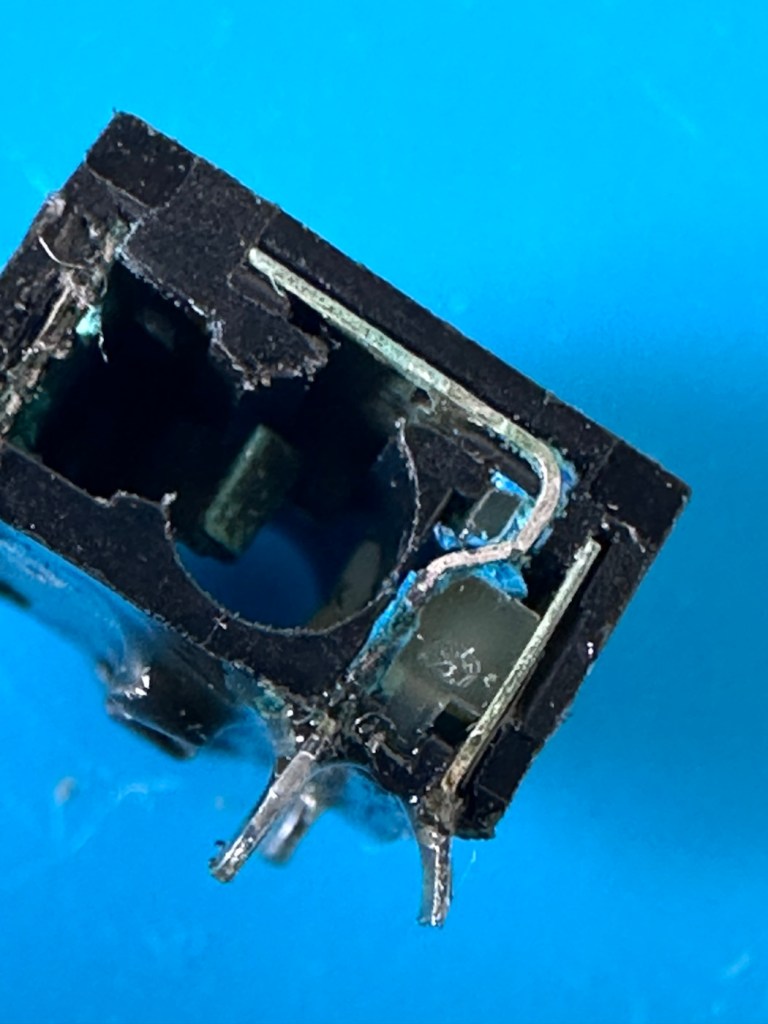
On close examination other is a considerable amount of battery acid contamination in the earphone module. This is strange as there is none evident in the battery contact area. A close look around shows some spots of contamination, however these are easily cleaned with some IPA. I have a feeling this may have been a previous issue and the person in here prior to me, has cleaned up, but given up on the repair.
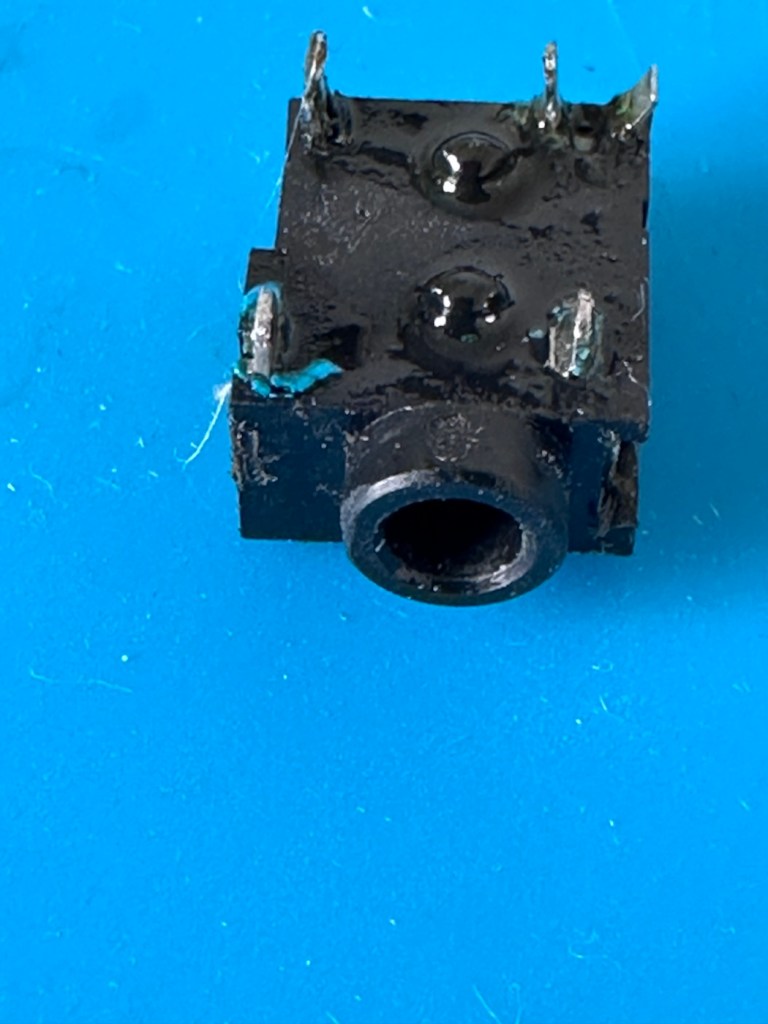
I remove the earphone module, and clean the surrounding area.
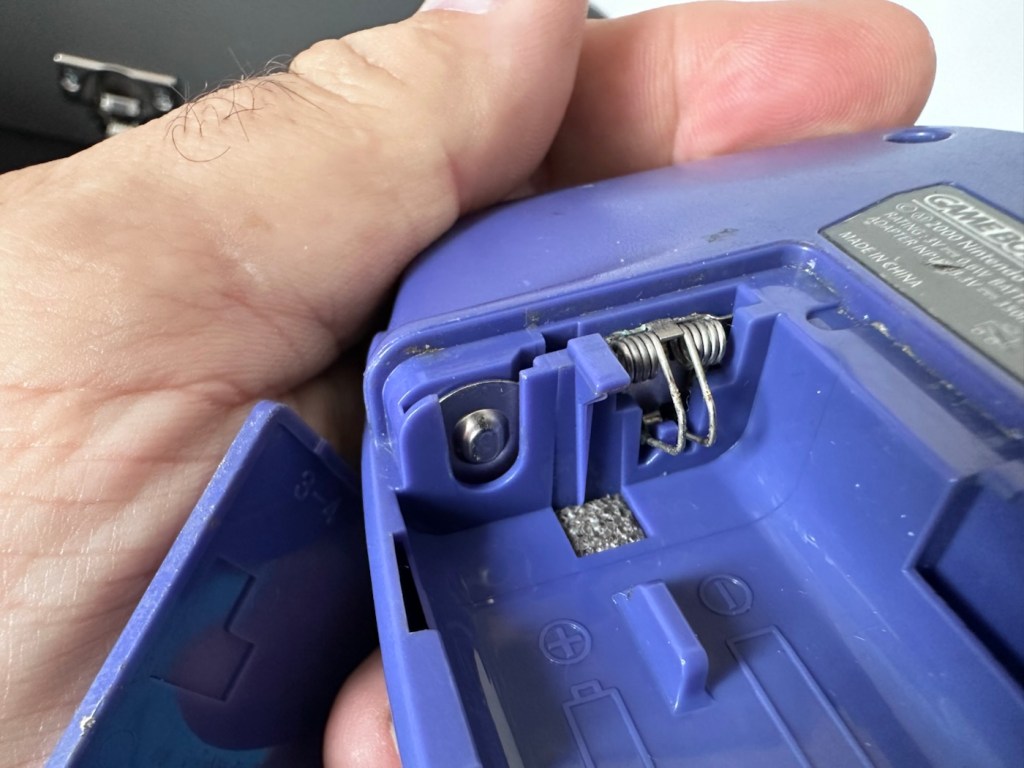
Front Rear Contaminated See the blue contaminants
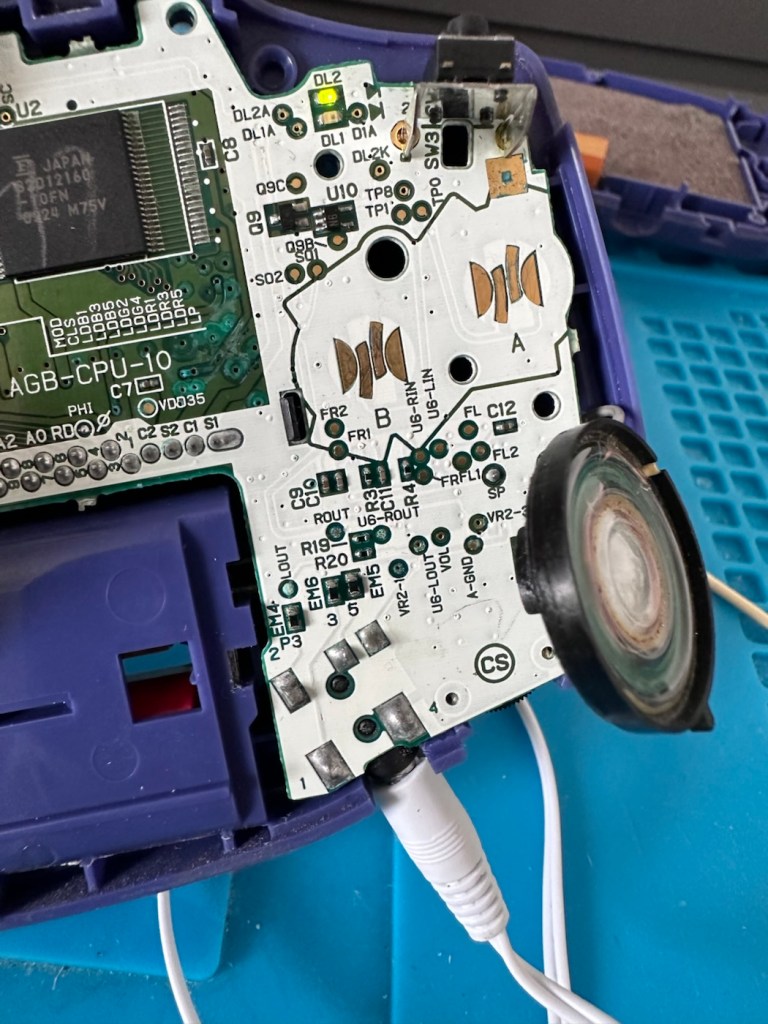
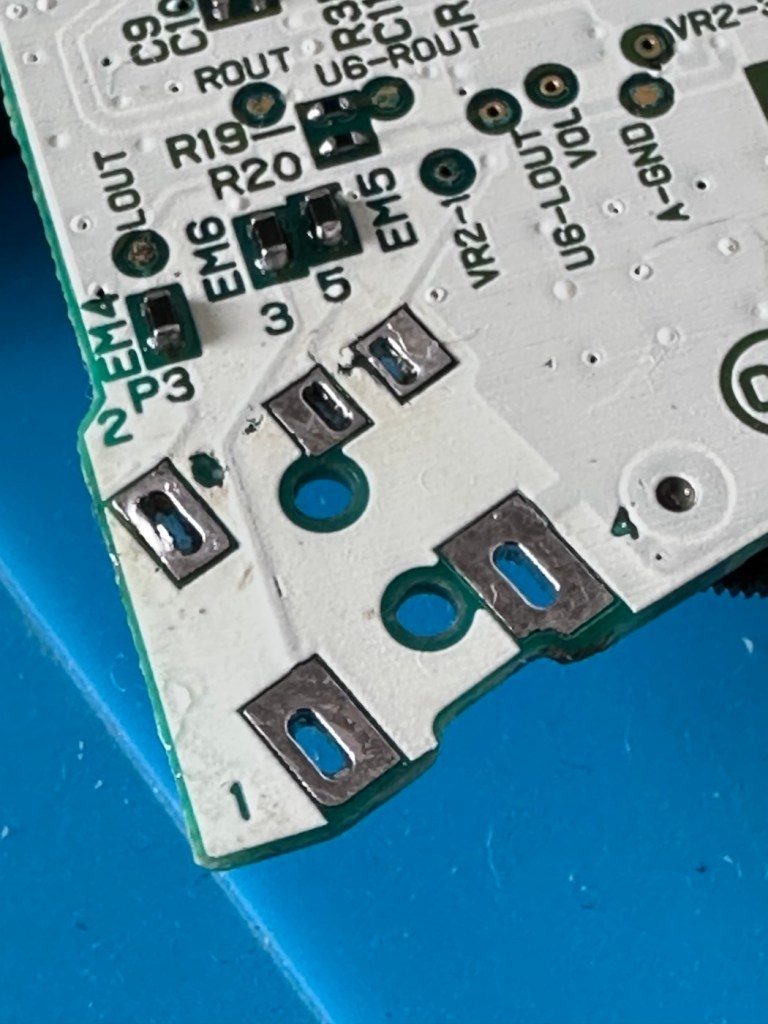
A simple check here is to see if there is any continuity between the two tabs that occupied positions 4 & 5 as marked on the mainboard. This check is carried out on the actual module. If you have continuity between these two pins, then in theory the circuit is good, and the speaker should be working. My results here were negative as there was no continuity on this module between those points.
The way the earphone works is thus. Plug the earphone jack in, it opens up the contacts and by passes the external speaker. Remove the earphone jack and the contacts close, opening up the main speaker. If there are contaminants on the contacts, this can prevent continuity and hence there is no sound on the main speaker.
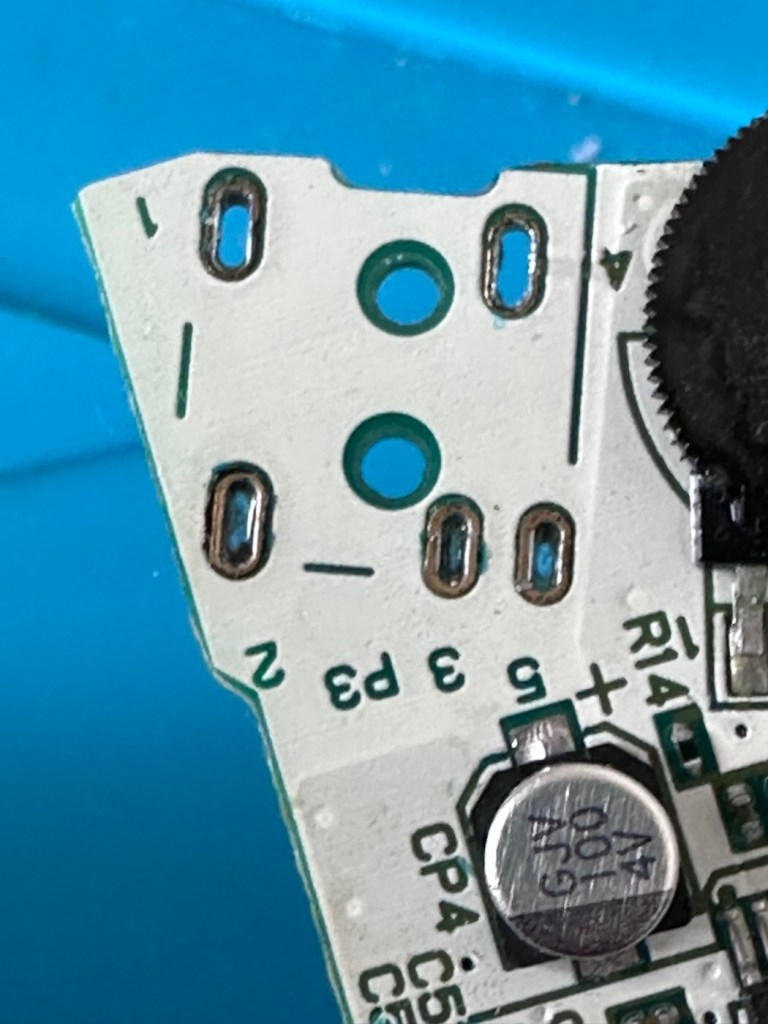
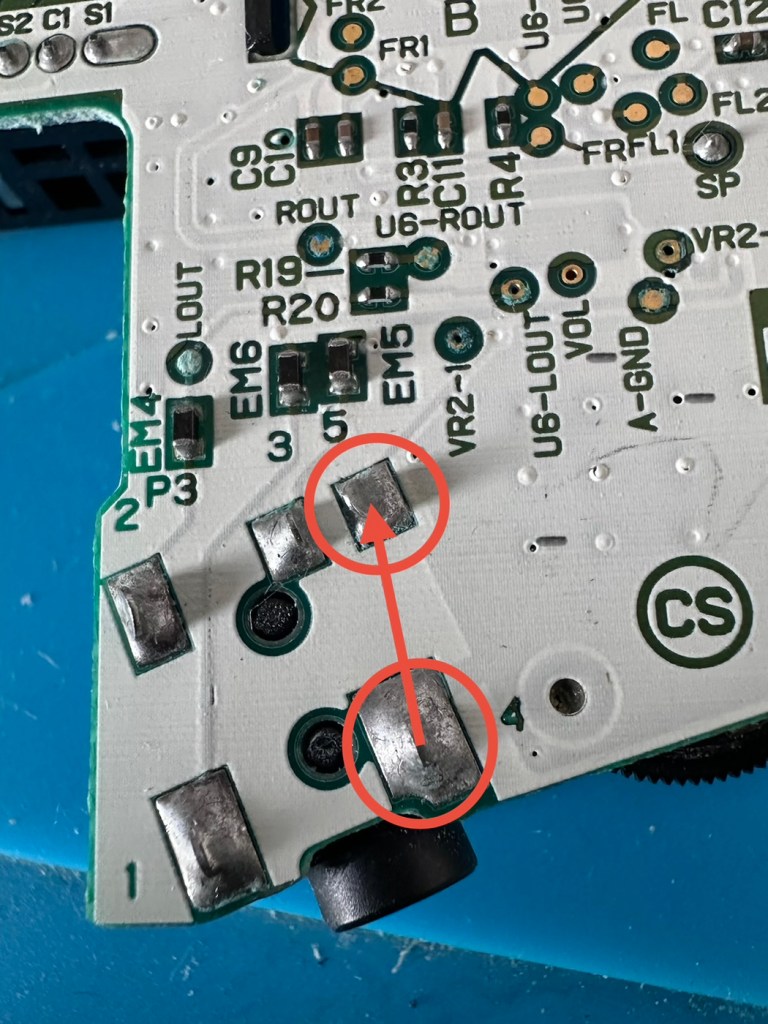
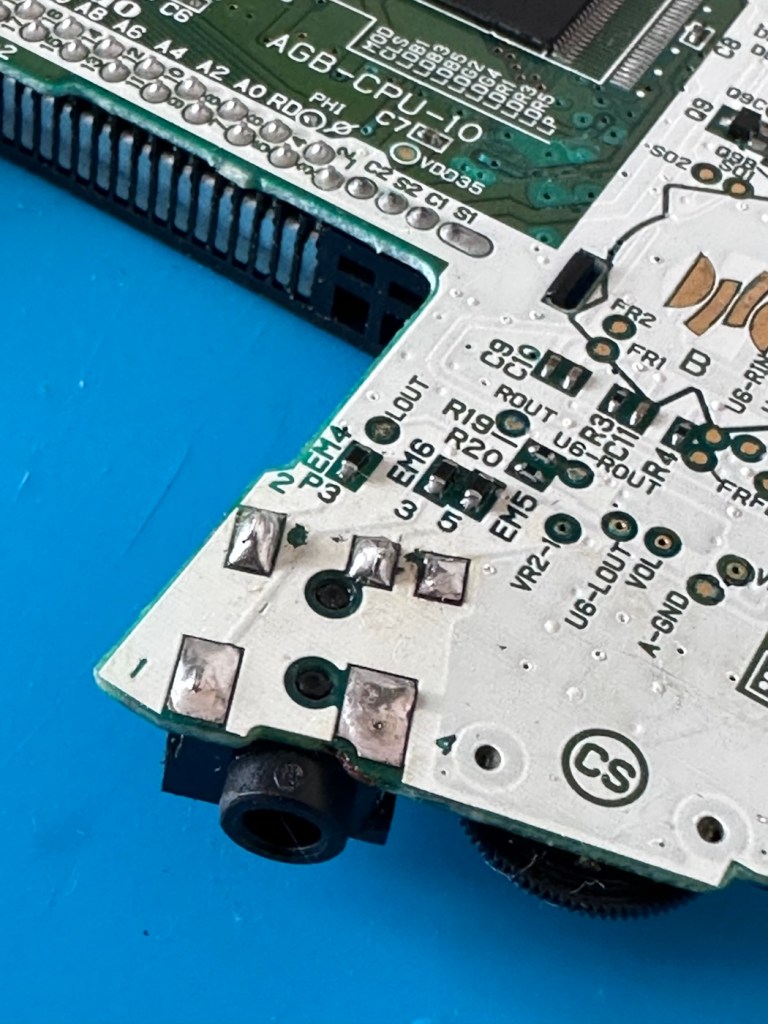
You can double check that this is the issue by soldering a small wire between points 4 & 5 on the mainboard in theory by passing the earphone circuit leaving the speaker circuit open and accessible.
Short these two pointsShorted with a small wire
And my suspicions were correct, this small video below was the result of bypassing this part of the circuit.
We have sound in the speaker
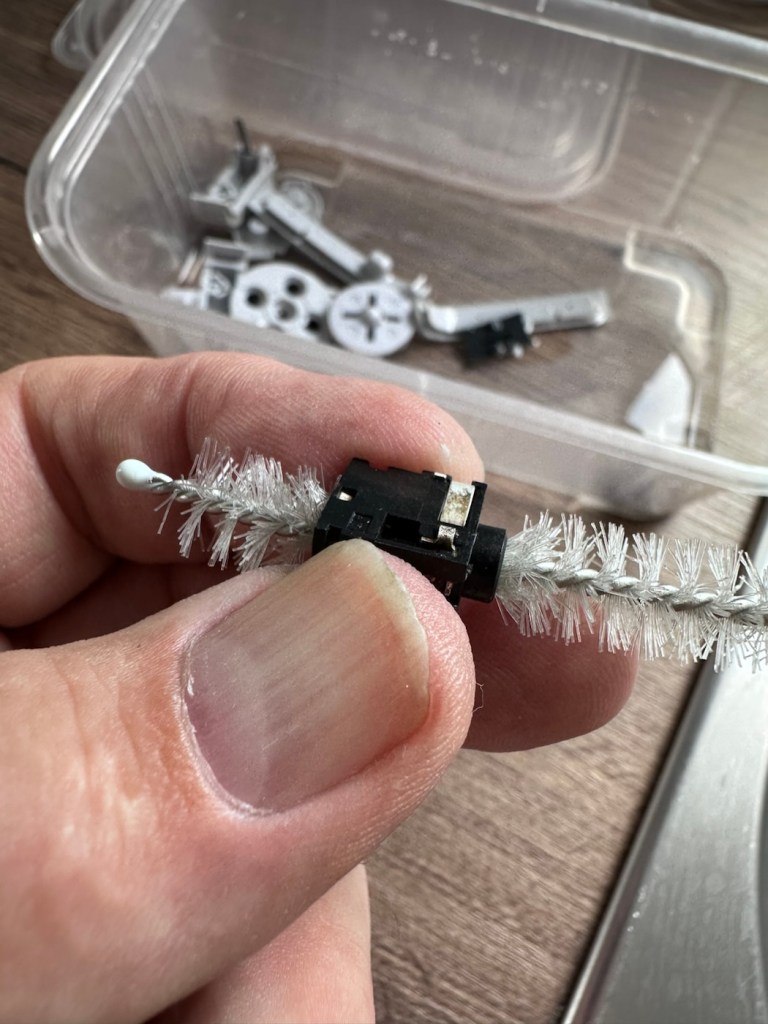
Looking inside the earphone socket it was easy to see this piece had a solid lump of contamination exactly where I was expecting to see it. I have no spares of these and to obtain one off of the auction sites is an absolute ripoff. I can order one from our friends in China but I’m looking at a four week turnaround here, and I’m inpatient and not willing to wait that long. I’m going to try and repair it.
I’ve gathered everything up that needs cleaning, buttons, connectors, screws, pads and the suspect connector, and dropped the lot into a small dish of white vinegar. White vinegar is great for removing contaminants and you can actually watch it fizzing away and working. I left these items bathing for about 30 minutes before giving them all a good scrub clean. On the earphone jack I “borrowed” a small bottle cleaner from the wife, it fits right through one side and out the other allowing you to get a really good scrub inside.
White vinegar and a bottle scrubber
I also cleaned the outside thoroughly removing all signs of contamination, the tabs were gleaming when I finished. I then put everything I’d just cleaned in between two sheets of kitchen roll and put them in a cooling oven to dry off.
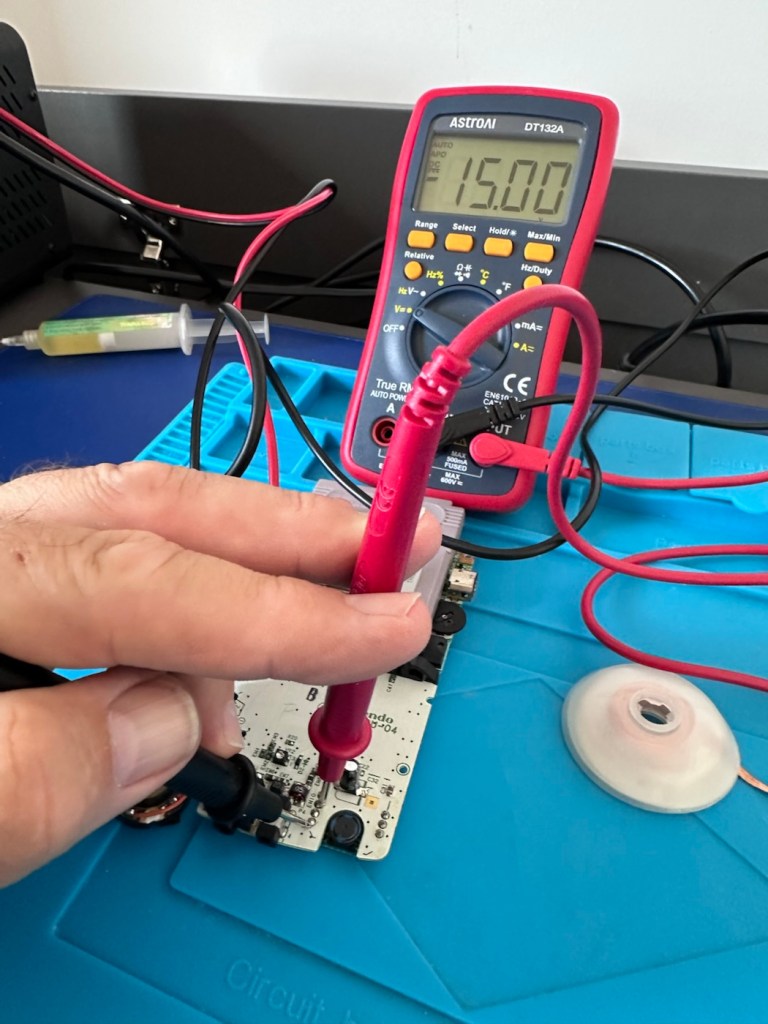
When dry I took the bottle cleaner again, inserted it back into the earphone jack, sprayed quite a bit of electrical contact cleaner back onto it and vigorously scrubbed again for the next few minutes. When dry, I took the multimeter and again checked for continuity across points 4 & 5 and a tone was heard. Continuity had been restored and the earphone contacts were now working. Plugging in a jack and then removing it confirmed that all was working as it should. It’s now time to put this jack back on the board.
Earphone port, back in place
Final touch is to put a tiny pice of clear silicon in place of the missing power light lens on the front of the case. Job done.
Time to reassemble this unit.
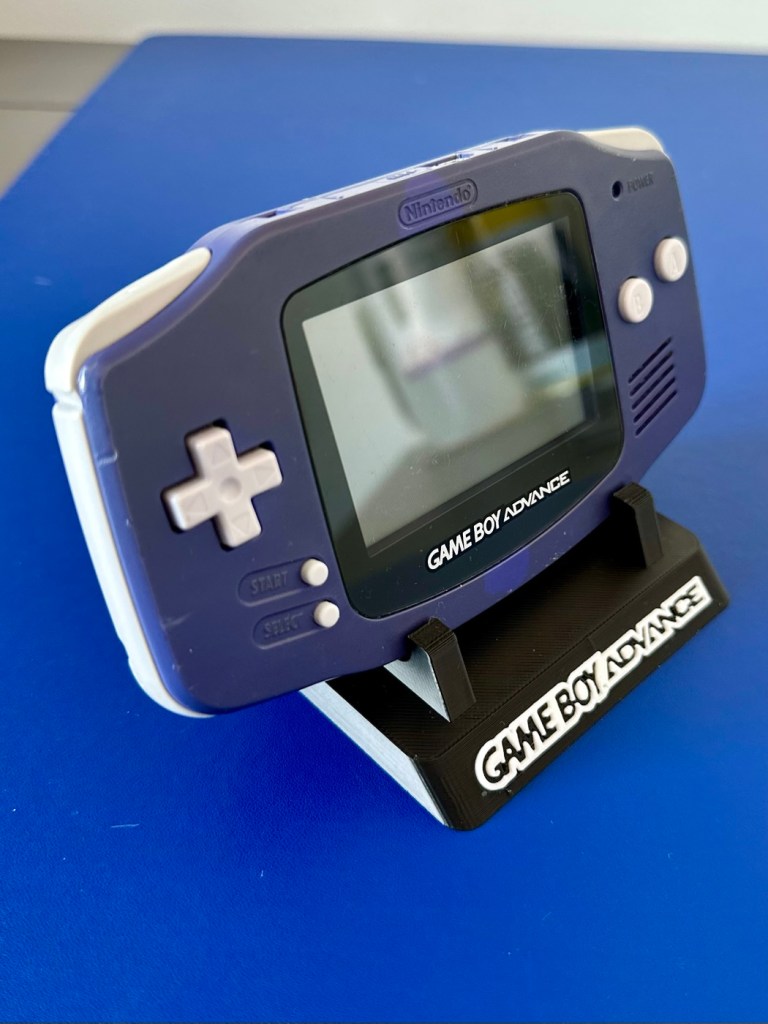
Result:
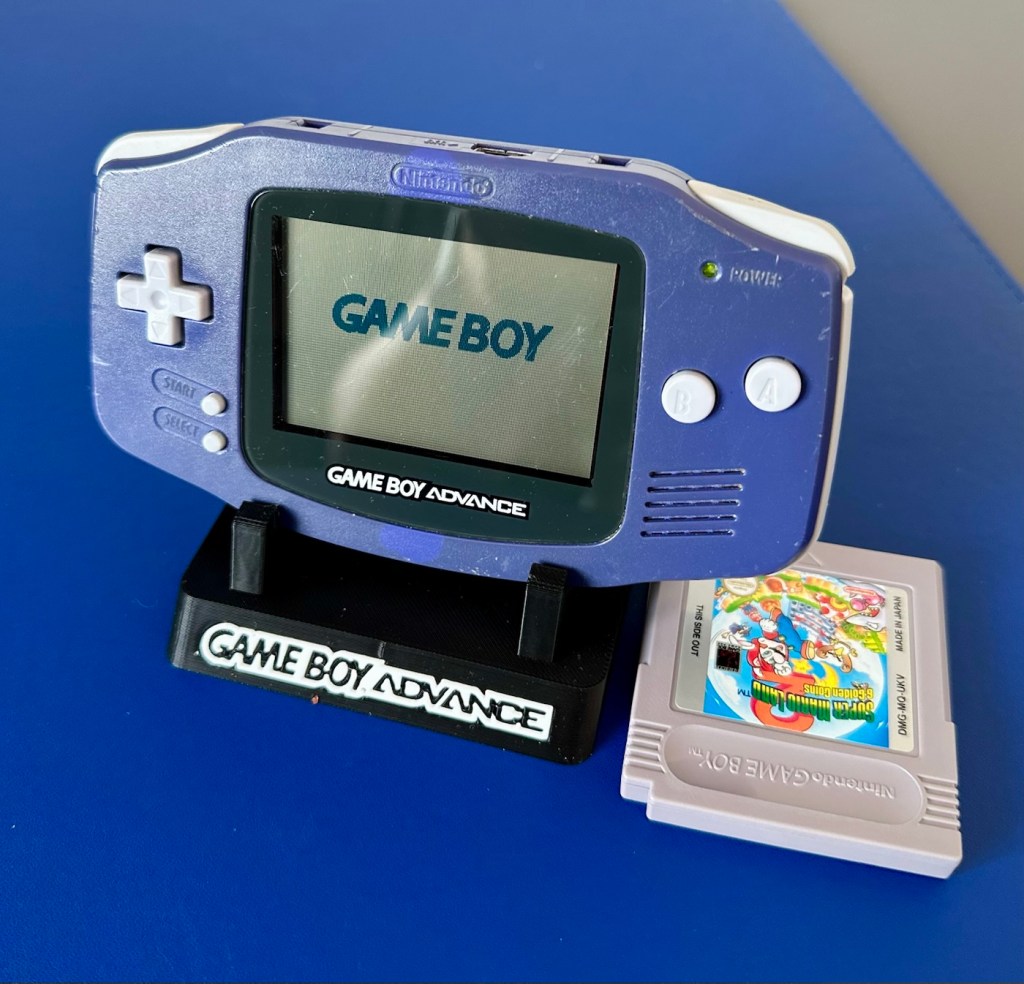
And here we are. The original unit has been thoroughly cleaned, it’s come up ok but is probably a good candidate for a case upgrade and a Capacitor change at some point. That’s just cosmetic though, what really matters is that this unit is now working perfectly, and it sounds just fine.
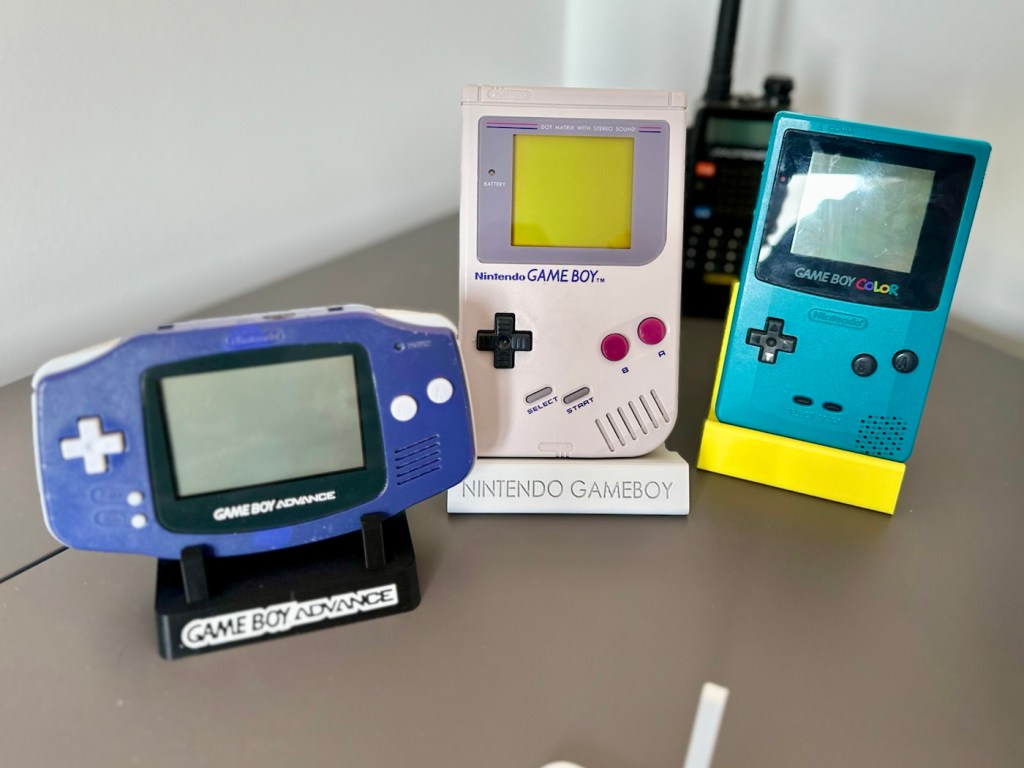
Fixed, cleaned, on its new stand with its fellow Gameboy counterparts
This unit actually came from a guy who restores these units, I guess he was just having an off day as to be honest, it wasn’t the most difficult issue to diagnose and repair. It honestly took longer to clean this unit than it did to repair it. I’m pleased that I’ve used all the original parts and just been able to do a proper restoration as such.
81 million of these units were produced, so this is just one in that 81 million, that has been saved again from landfill to be enjoyed for many more years to come.
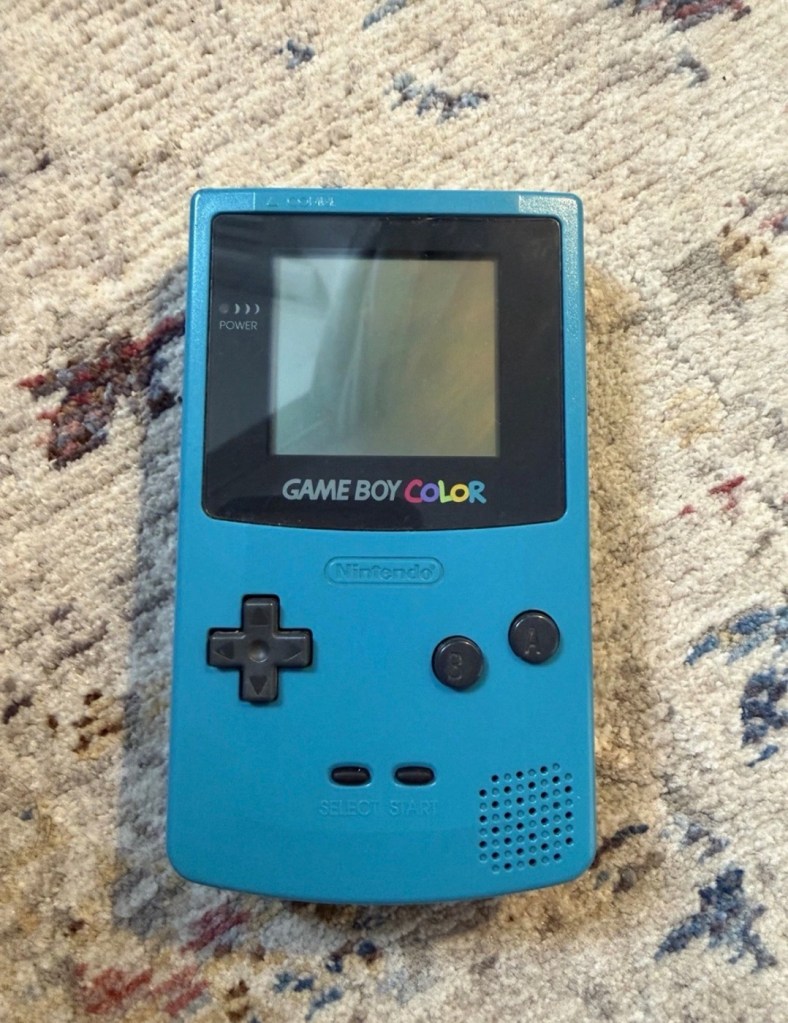
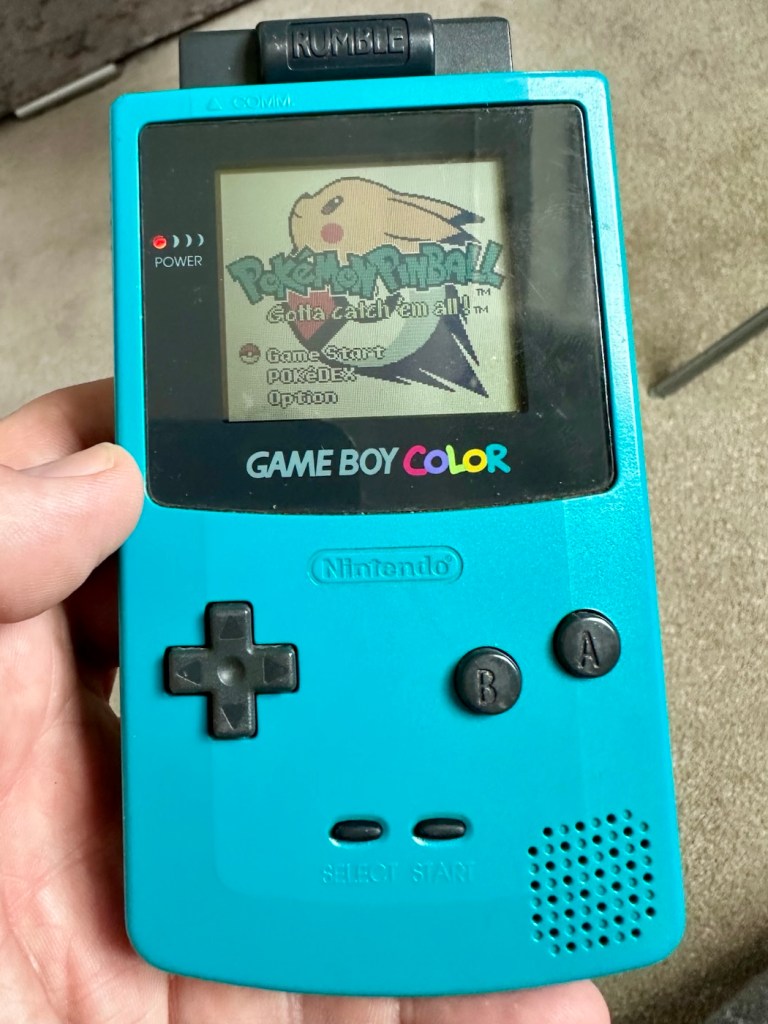
I’ve purchased a faulty Gameboy Color for my collection. It has no power, so let’s have a look and try to get it working again.
What the listing stated:
Very clean, but doesn’t turn on
EBay
Gameboy Color
Yep. It’s a Gameboy Colour to me, but as it was sold using the American spelling of “Color” then that’s what it will be addressed as, going forward.
I’ve been after a “Color” to add to my collection for a while now, but it had to fit my very strict quality requirements, in truth it just has to be faulty, and this particular example has met my conditions. I’ve paid £30.00GBP for this example and I’m happy with that, it’s a very fair price.
The good news seems to be that it is in a really good condition, it looks as if the battery door is missing, however they are freely available and this is not an issue should I require one.
These units are known to sustain power failures and the repairs are well documented. By now the unit is close to 30 years old and as time advances components start to fail, these include, but are not limited to:
Power switch failure: either a complete failure that requires replacement or quite simply a simple clean to remove years of tarnish and environmental gunk.
Fuse failure: there are two fuses F1&F2 that are known to fail, normally due to a short somewhere else on the circuit, but sometimes due to a power surge or incorrect addition of an incorrect power supply.
Via failure, small through the board connectors that are known to suffer with corrosion, requiring intervention with the addition of small wires to bypass the issue.
Capacitors – known to fail on a regular basis, it’s sometimes good housekeeping just to get these replaced as they are a contributing factor as to why other components such as the fuses also fail.
Worst case scenario: major corrosion or main board component failure.
We’ll cross these bridges when and if we need to.
Here’s a little info about the Gameboy Color console:
The Game Boy Color(abbreviated as CGB or GBC) is an 8-bit handheld game console developed by Nintendo. It was released in Japan on October 21, 1998, and in international markets the following month. Compared with the original Game Boy, the Game Boy Color features a color TFT screen instead of monochrome, a CPU running at up to twice the speed, and four times as much memory. It is backward compatible with games developed for its predecessor. The Game Boy Color was released during the fifth generation of video game consoles and competed with Bandai’s Japan-only WonderSwan, SNK’s Neo Geo Pocket Color, and Sega’s North America-only Genesis Nomad.
The handheld is slightly thicker, taller and has a smaller screen than its immediate predecessor, the Game Boy Pocket, but is significantly smaller than the original Game Boy. As with its predecessors, the Game Boy Color has a custom 8-bit processor made by Sharp. The American English spelling of the system’s name, Game Boy Color, remains consistent throughout the world.
Wikipedia
So, for now, let’s not speculate on its quality and issues until it arrives, when we can then carry out a proper assessment of the unit that has been received.
Assessment:
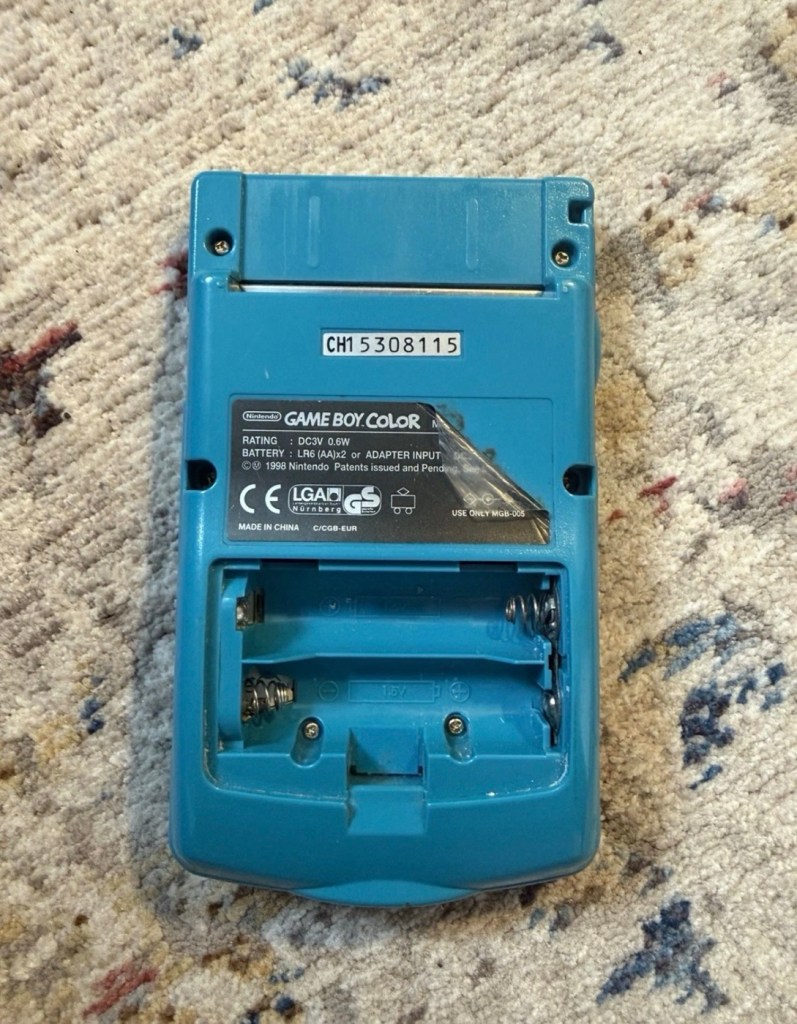
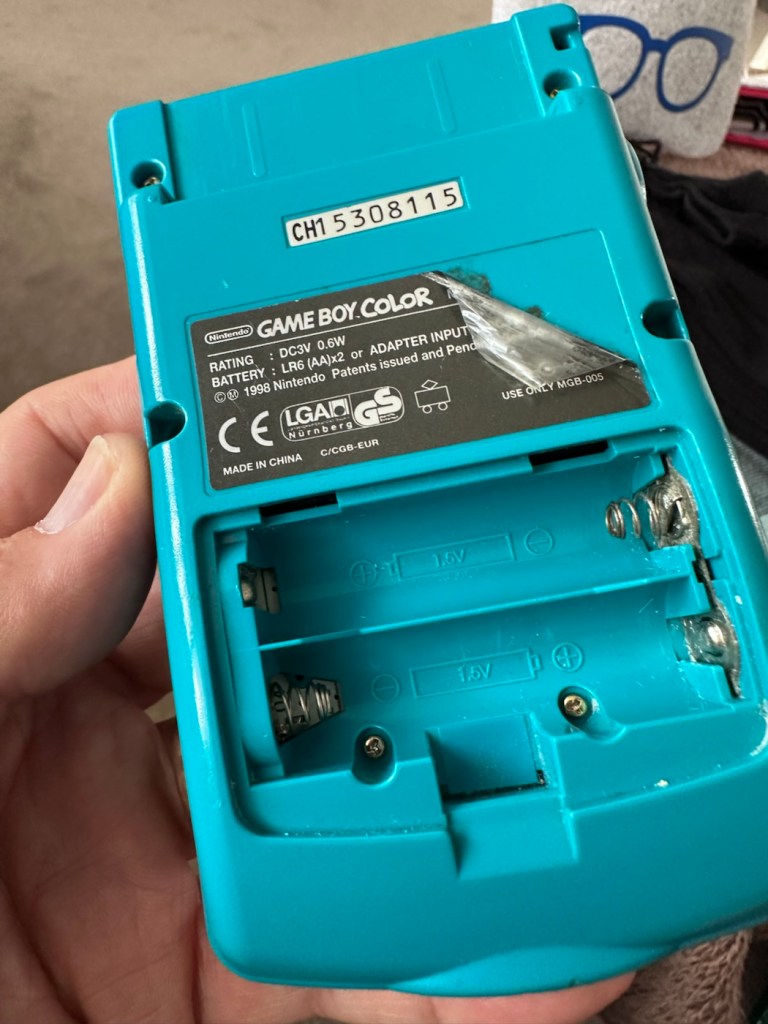
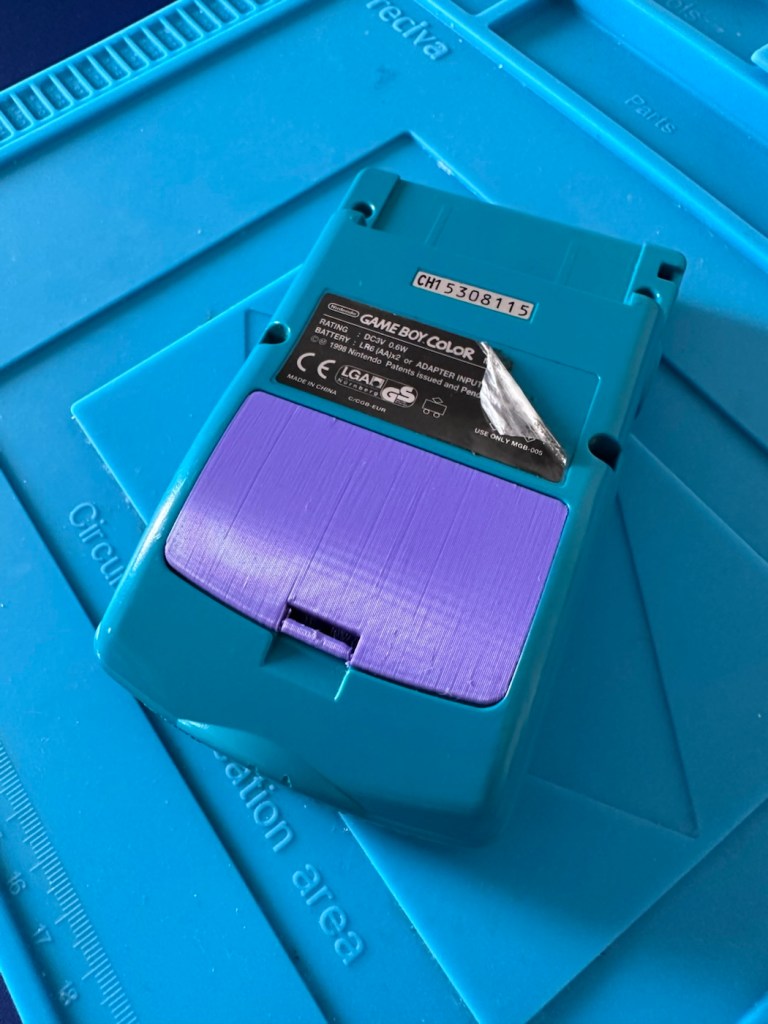
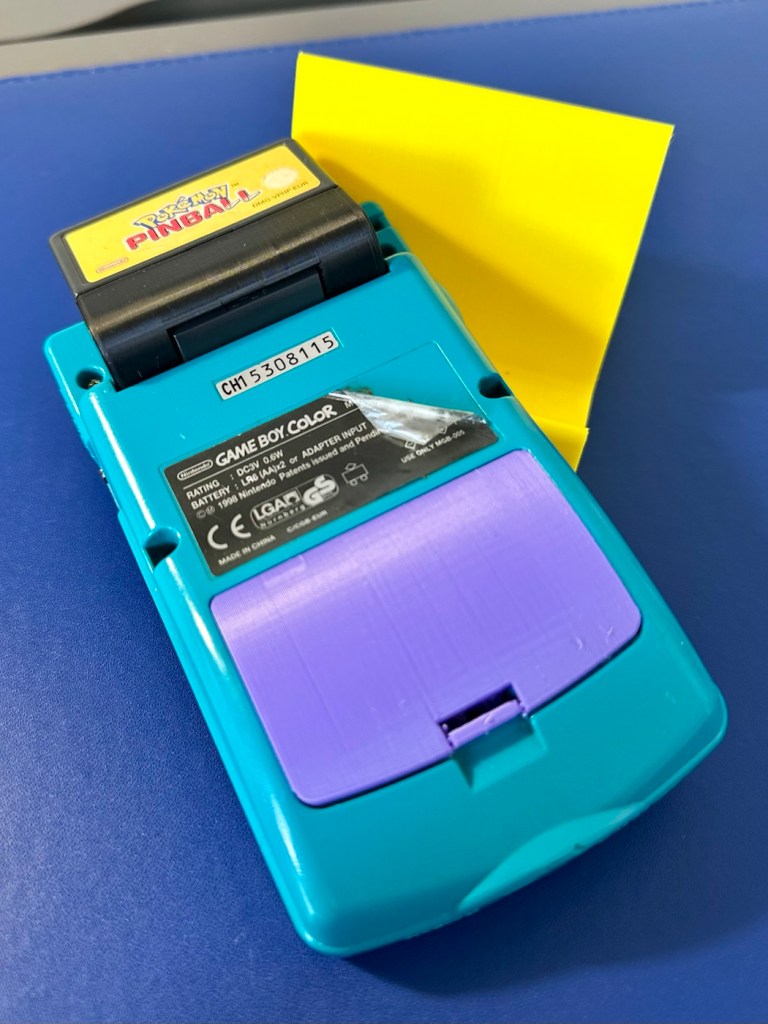
The package has arrived. The battery lid is missing as kind of expected, I will get a replacement sometime, but for the moment I’ll probably print one out on the 3D printer, it’ll be a totally different colour as I don’t have a “Teal” coloured filament to use. The product label on the rear is also damaged but I can easily get one of these as a replacement, however it’s not essential and will only be of cosmetic appeal.
Missing battery cover and old product label
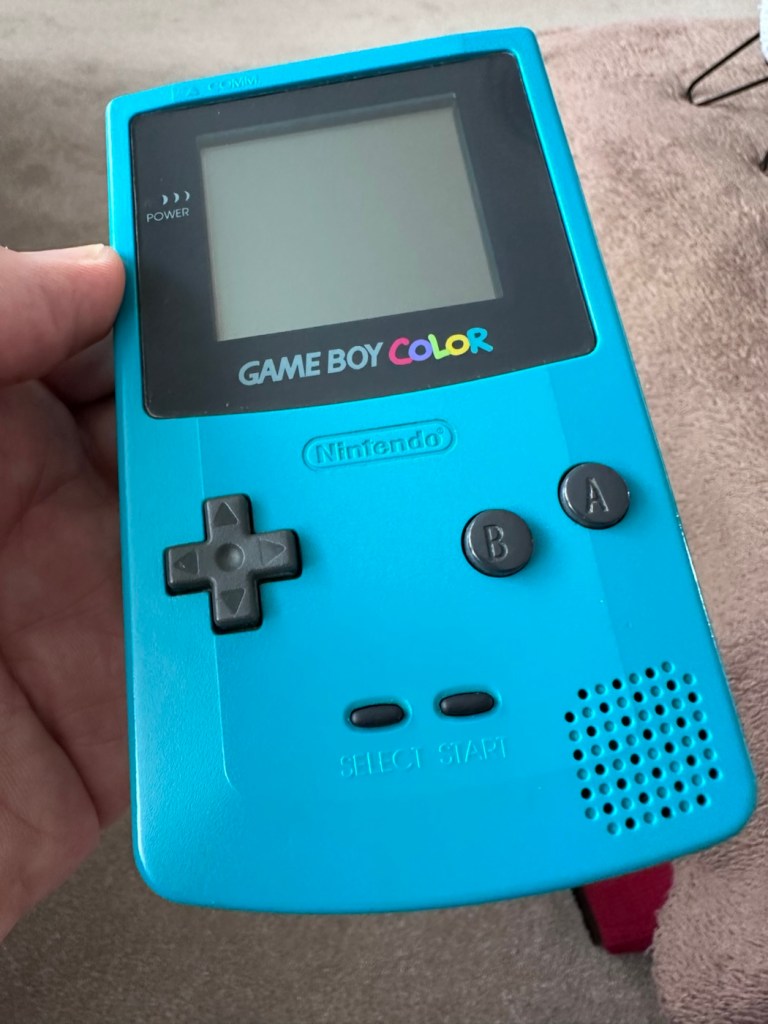
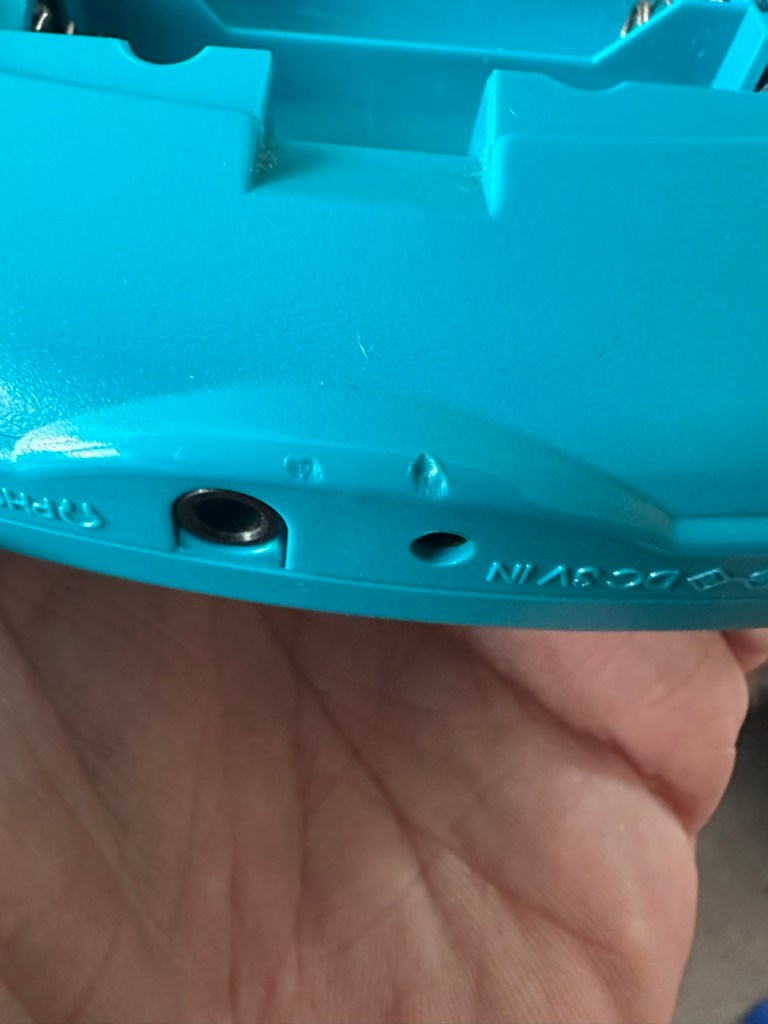
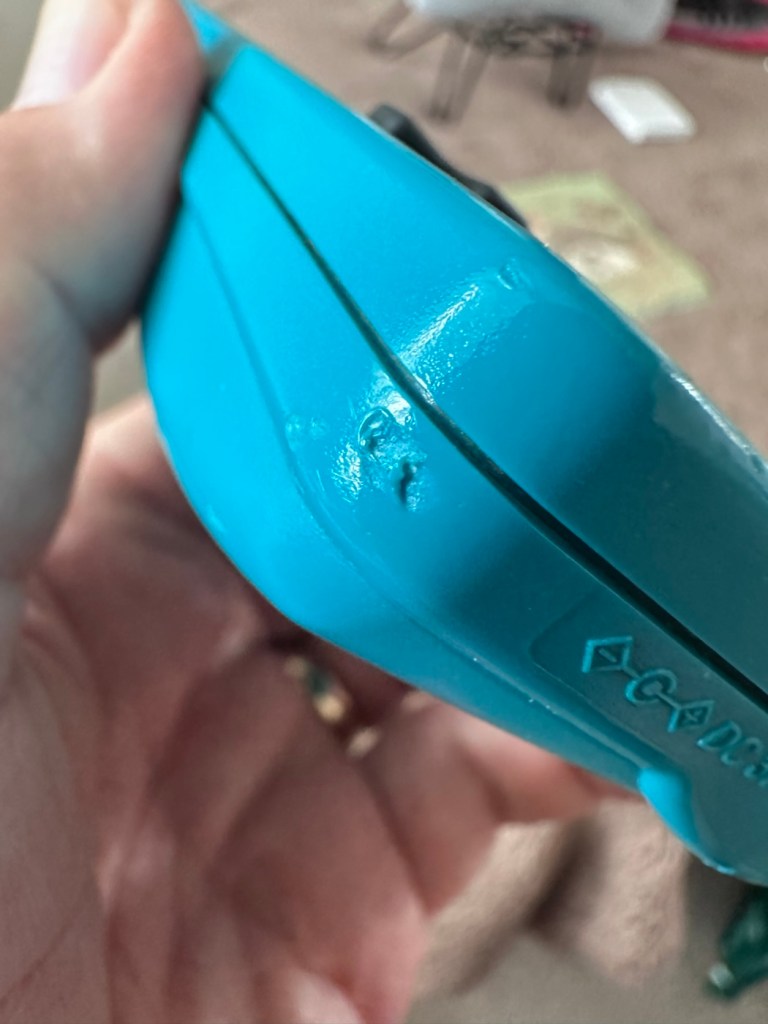
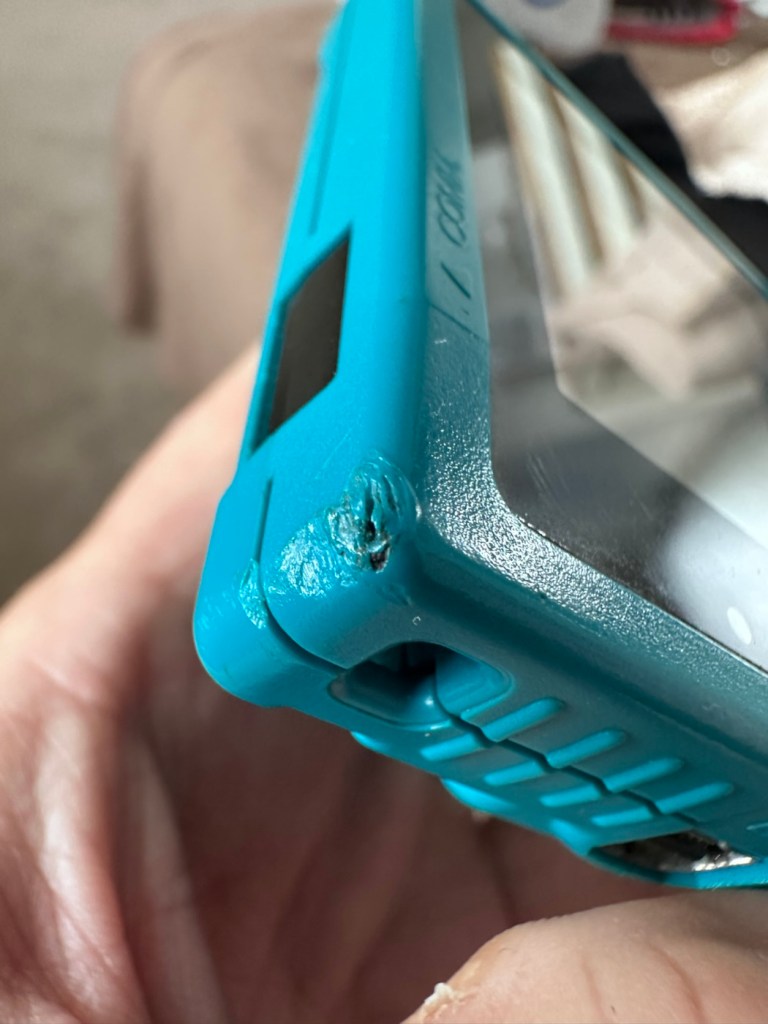
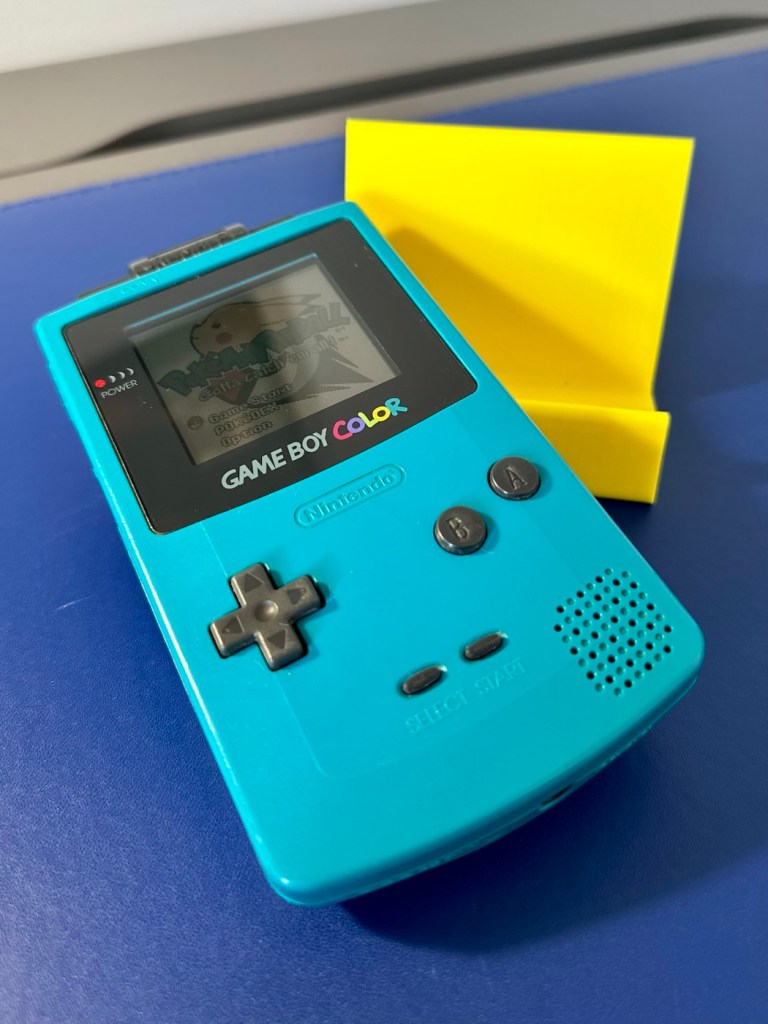
The front fascia is in a good condition with only a minor scratch on the screen, however there are a couple of dents and dinks on the body where it looks as if it’s been dropped or bashed at some point.
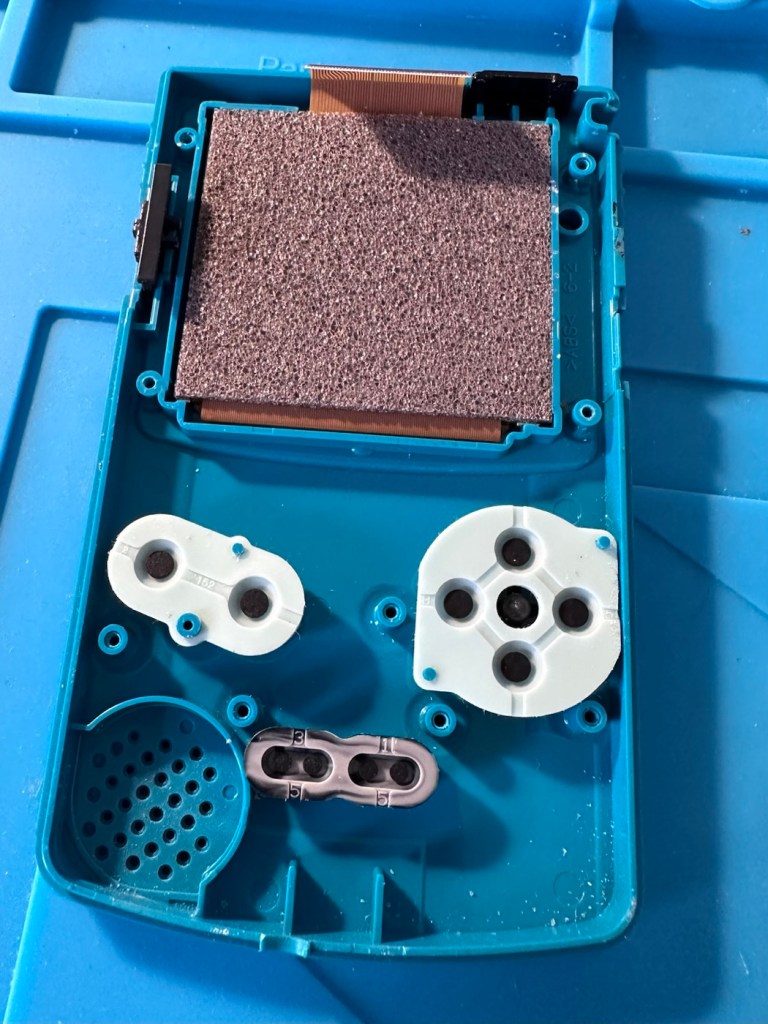
Front fascia is good
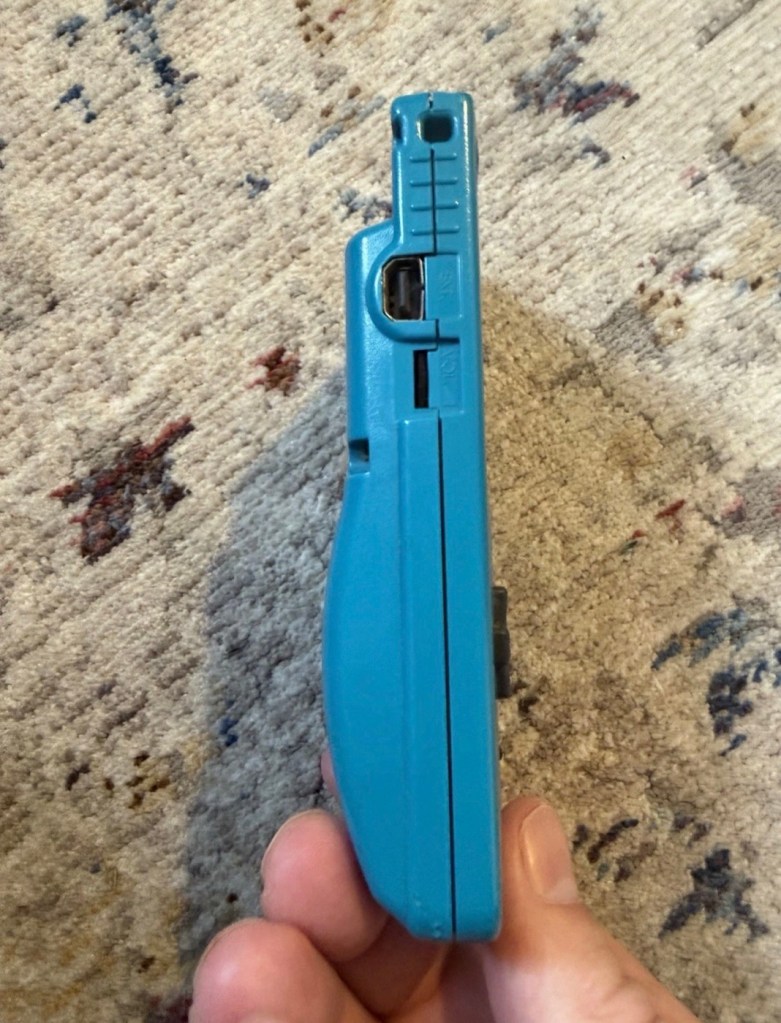
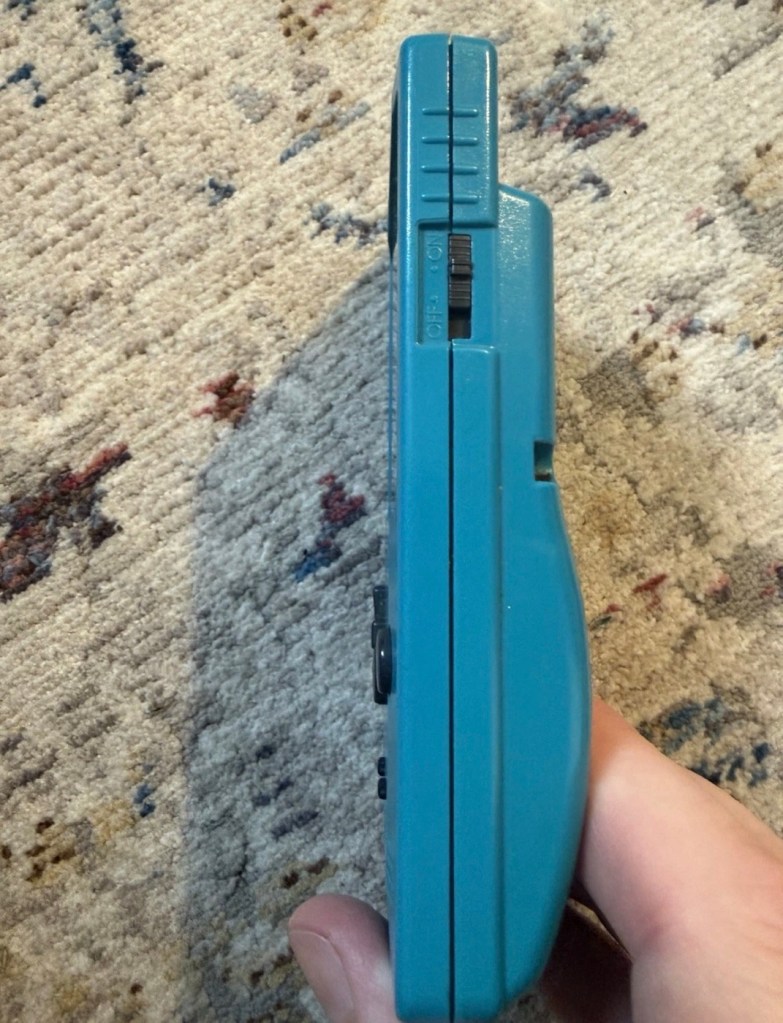
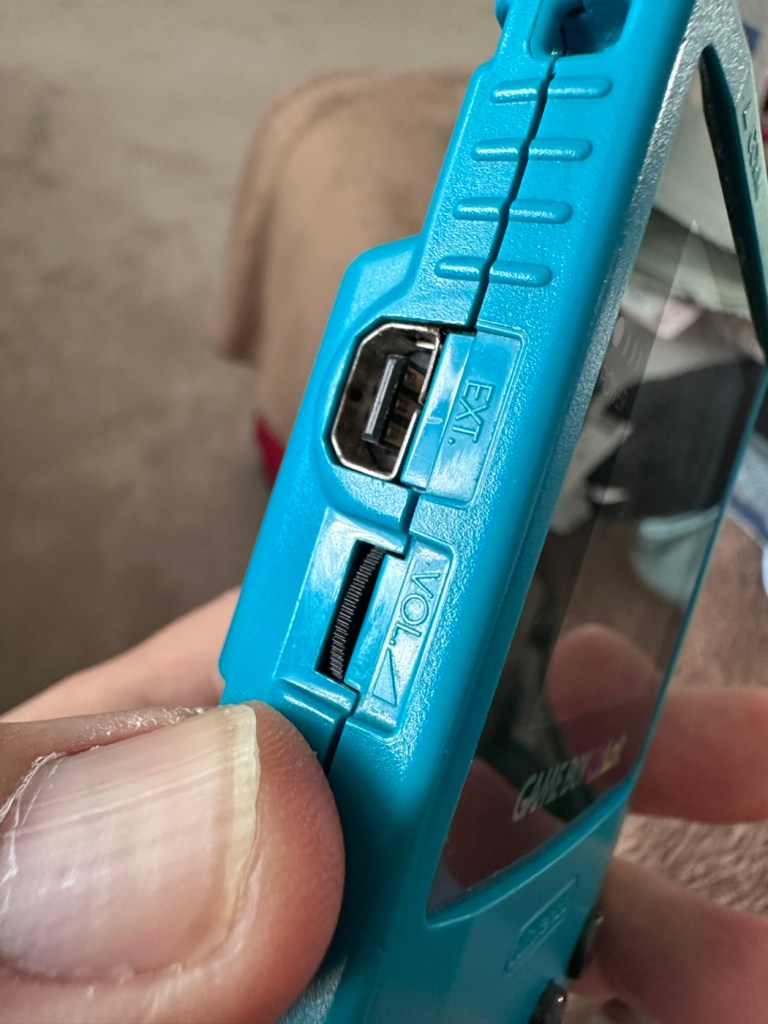
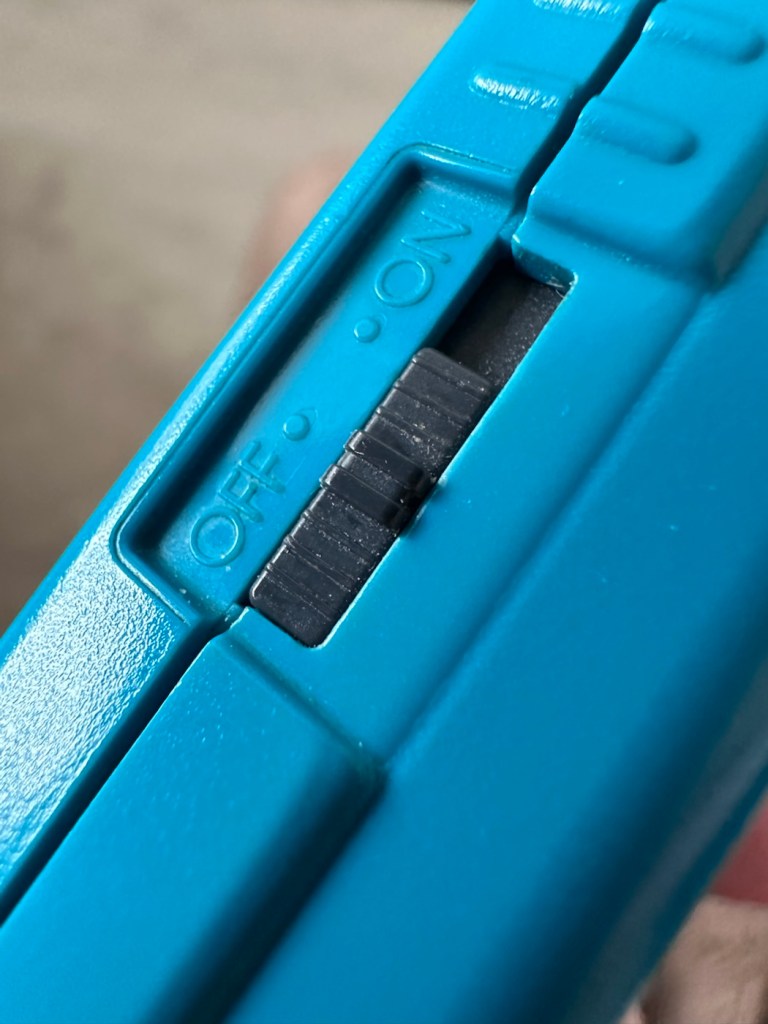
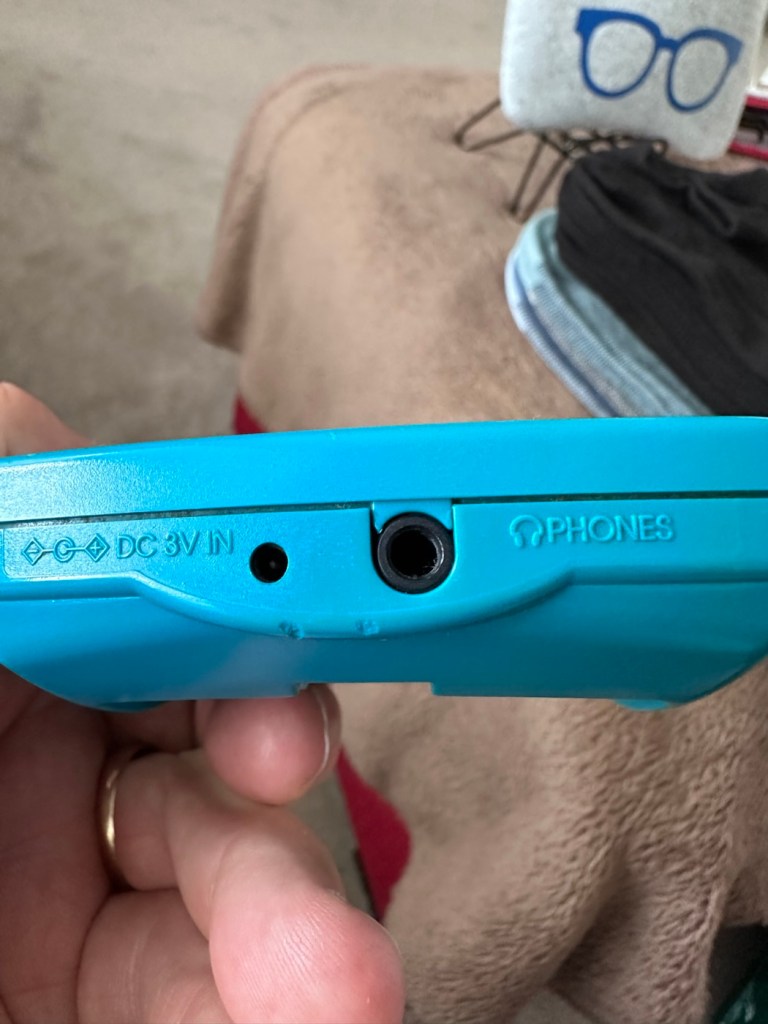
All ports, switches, buttons and sockets look ok and seem to be operating as such with no resistance or signs of stickiness.
All ports appear ok, there are a few dents and bashes visible
Again, the casing is in general fit to use, and in no way causes any issues with its operation when working. It is purely a cosmetic issue that i can address when the unit is finally working.
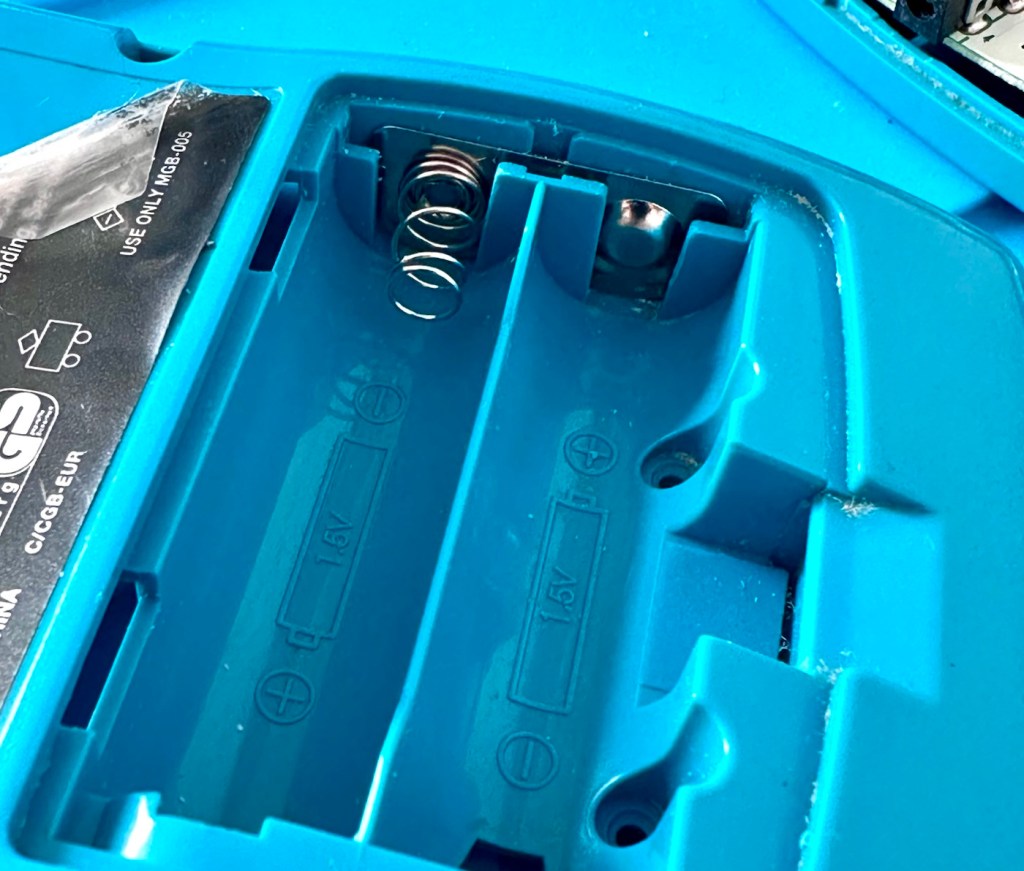
I have installed two AA size batteries, switched the unit on and it is most definitely dead. Repeatedly flicking the switch does nothing at all, so it is a situation where the unit will have to be opened up and further investigated. The assessment has not thrown up any other issues not already highlighted in the sales documentation, so in general I am quite happy with the outcome at this stage. let’s get inside and see what we can find.
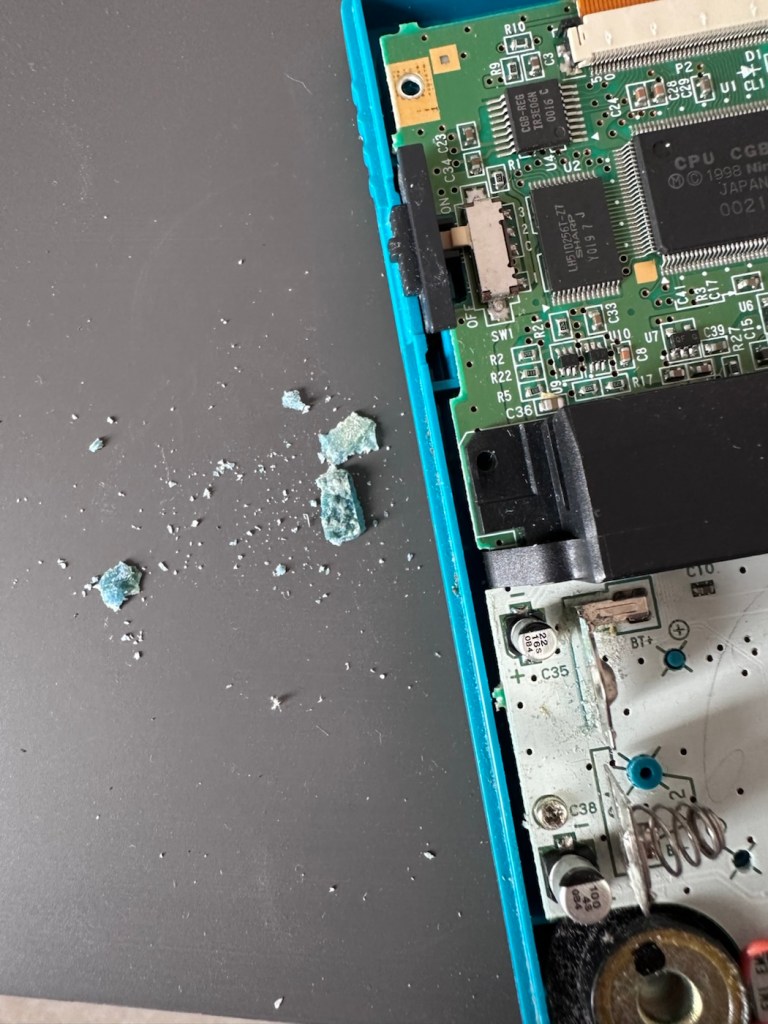
Oops. Wasn’t expecting that. I’ve removed the six “tri” screws and as soon as I’ve separated the two halves, an amount of what looks like battery corrosion “crap” has fallen out as well.
Oops – corrosion is present
With the two halves separated, I then remove the screen ribbon cable, remove three more screws and the main board lifts out.
Screen ribbon cable removalInside upper part of the unit
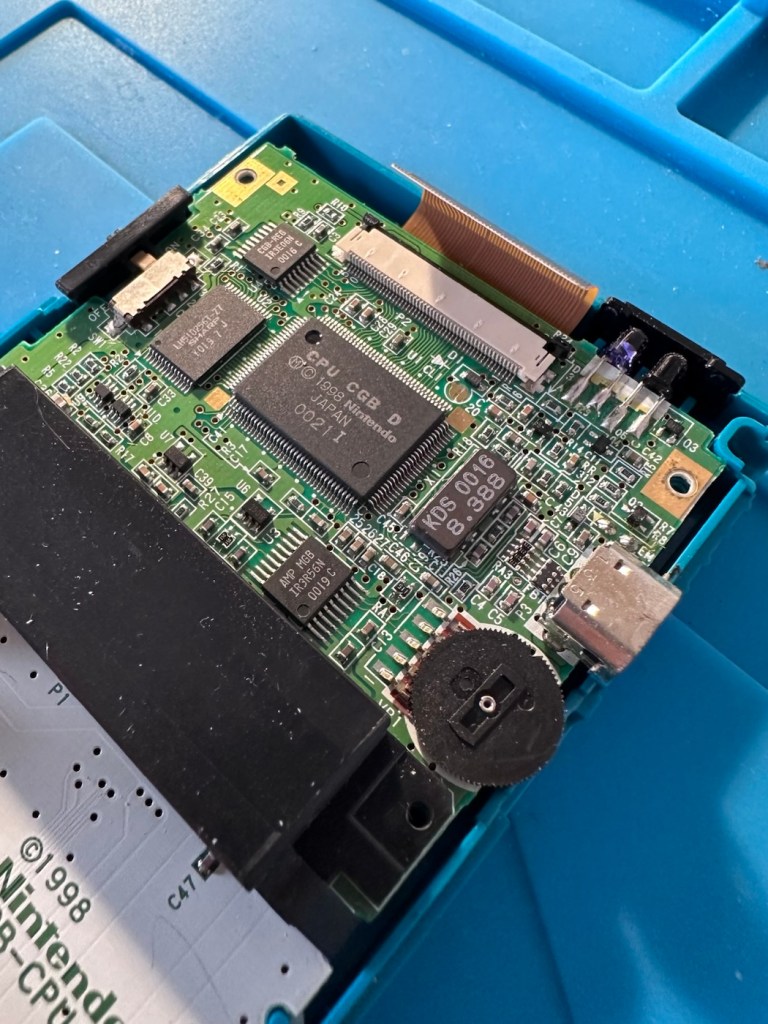
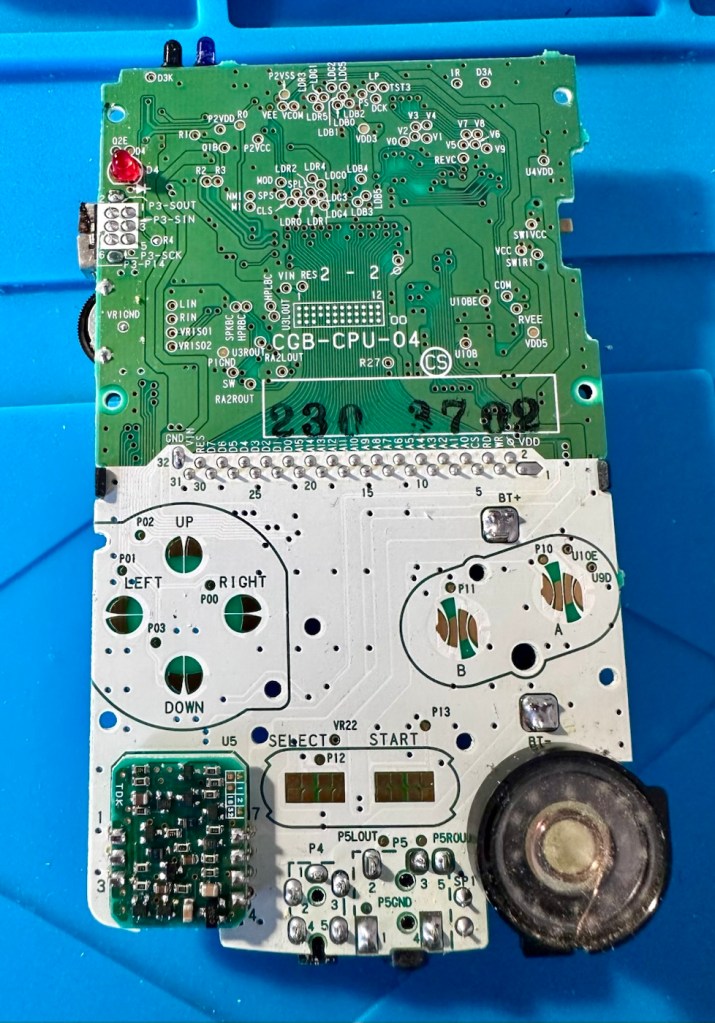
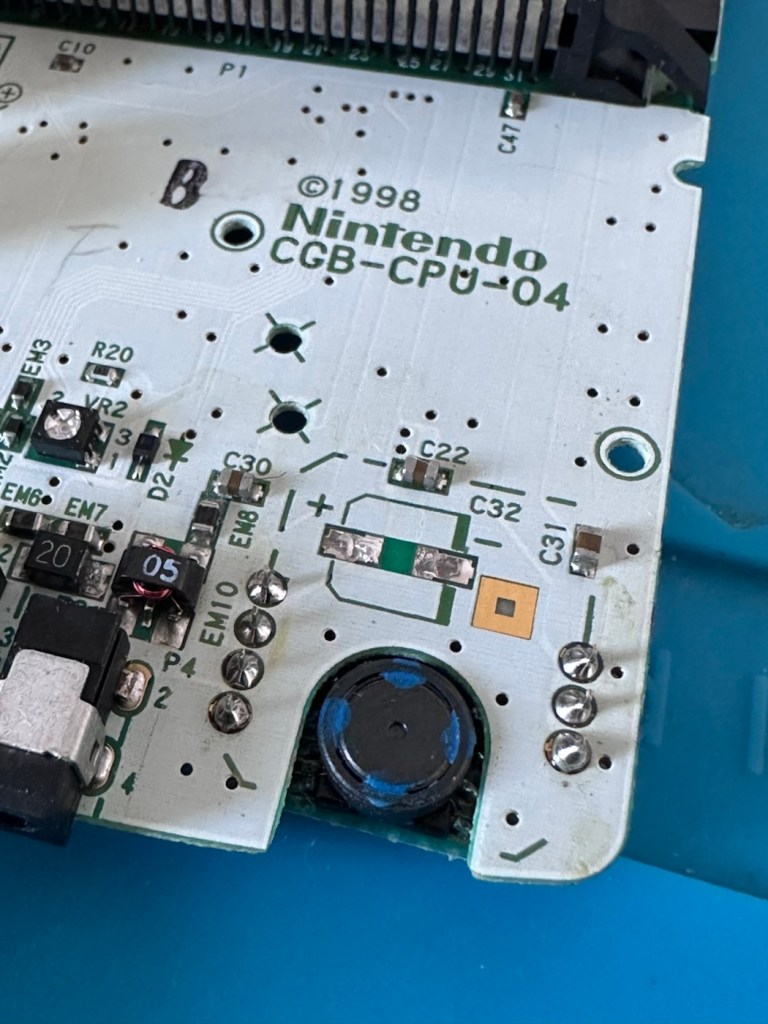
There’s some good news here. The contamination looks as if it has been completely isolated to within the battery area, there is no sign of any damage to the Vias, or any other components on the main board.
Main board on both sides, cleaned with IPA
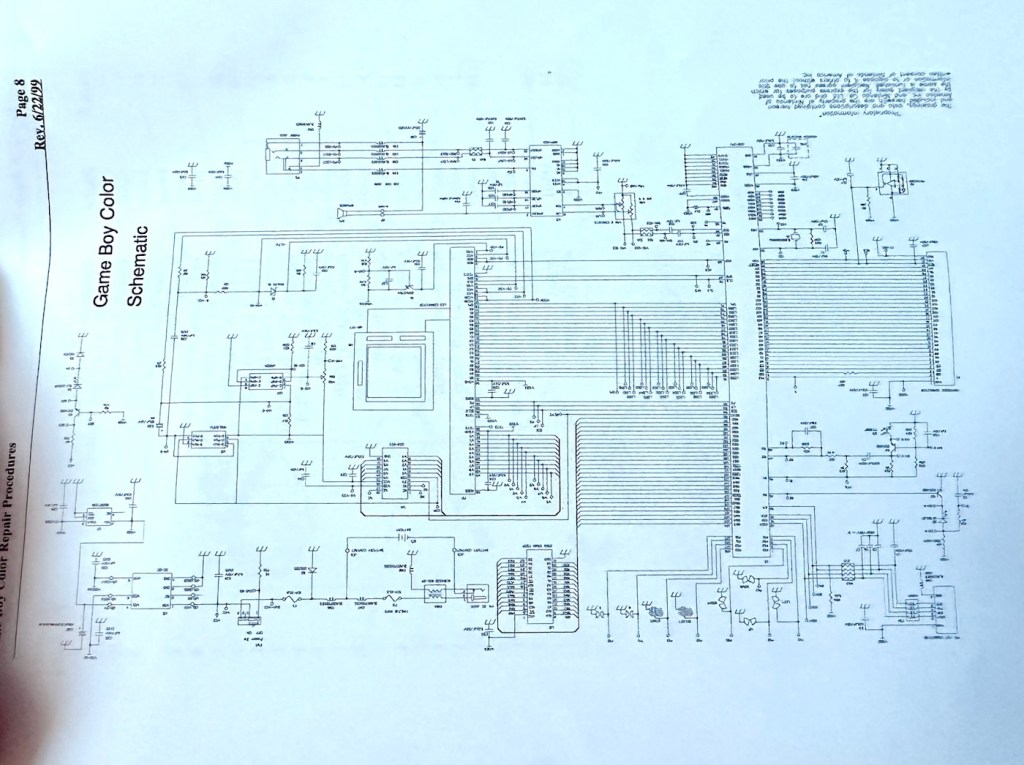
I have obtained the schematic diagram for this circuit board for checking continuity, and i’ve been able to confirm there are no issues with any contamination damaging any traces to the board. We’ve been very lucky here, dodged a bullet, to coin a phrase.
Schematic diagram
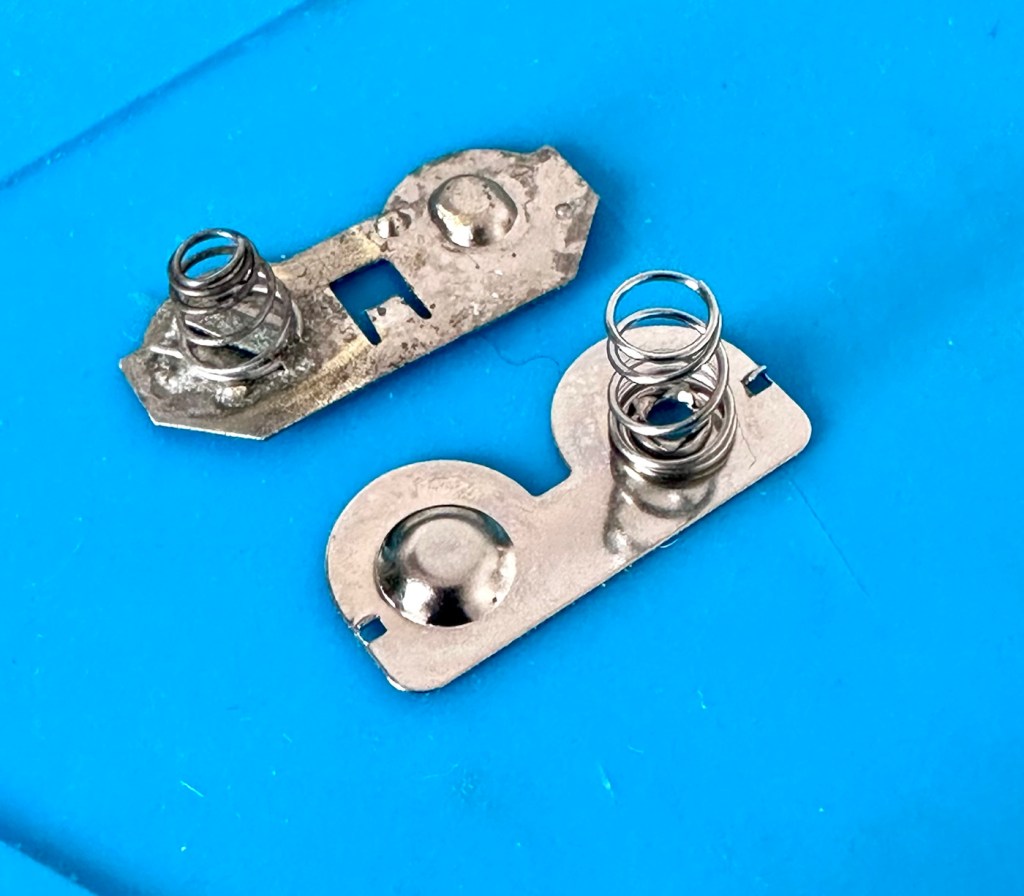
I have removed a set of battery contacts from the battery area, and replaced these with a new set that I have in my spares box. I could clean these, but it’s good to remove all items that were originally contaminated and very possibly contributory to the fault we have today.
Old and new contactsNew contacts in place
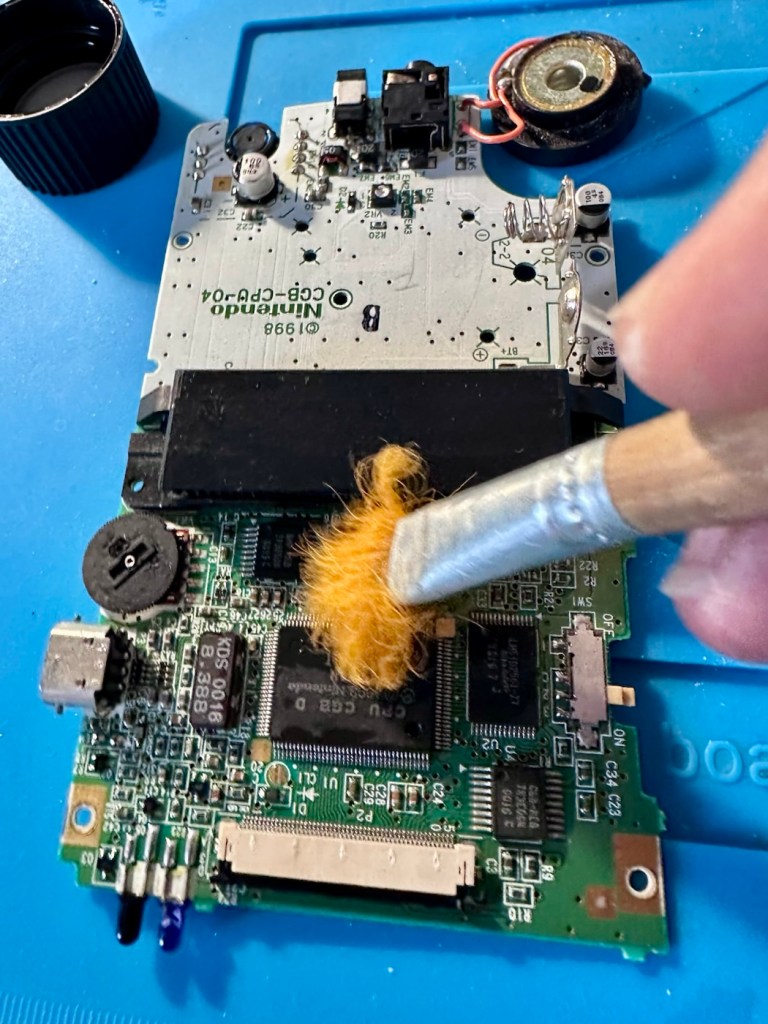
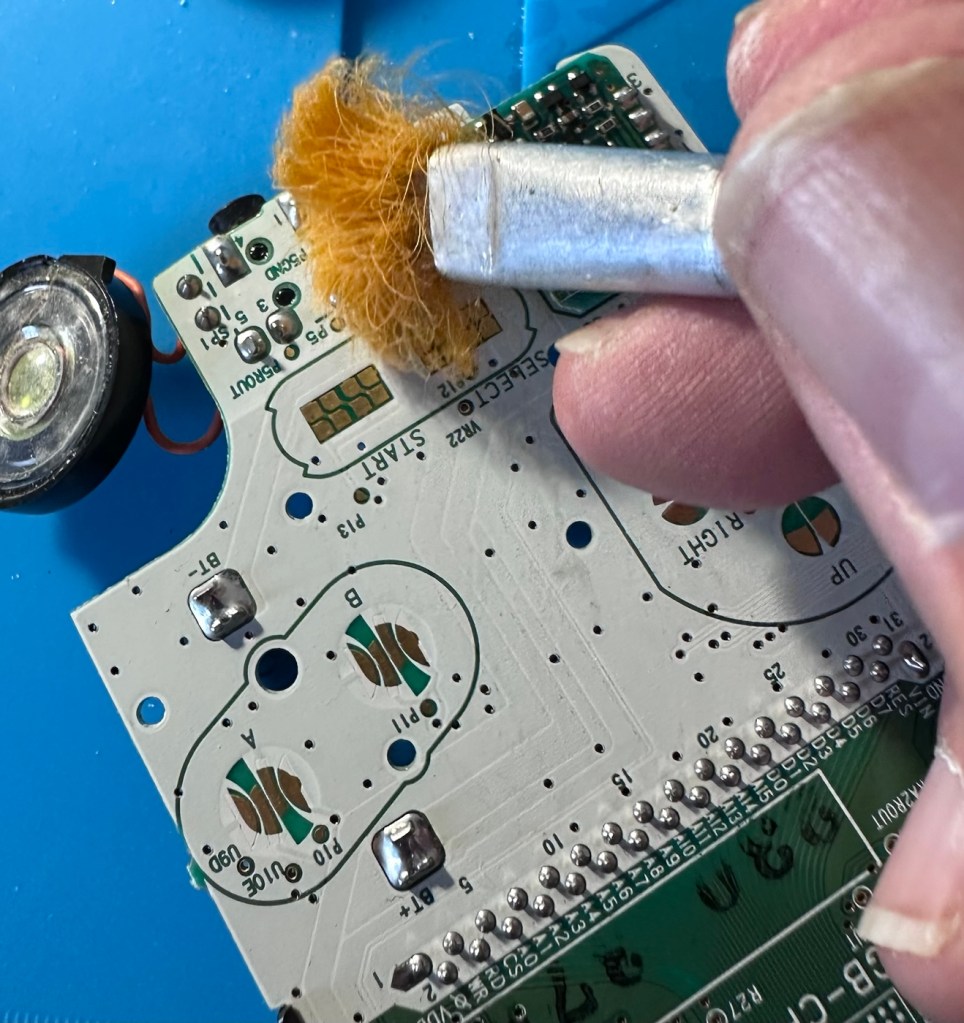
I have also cleaned the front and rear of the main board with IPA just to ensure that if there was any issues with contaminants on the board, they’ve now been removed.
The switch has been tested electrically with a multimeter and this is working fine. The three capacitors have been looked over and seem to show no signs of wear or deterioration, they haven’t been properly tested though, so let’s now check fuses F1 & F2.
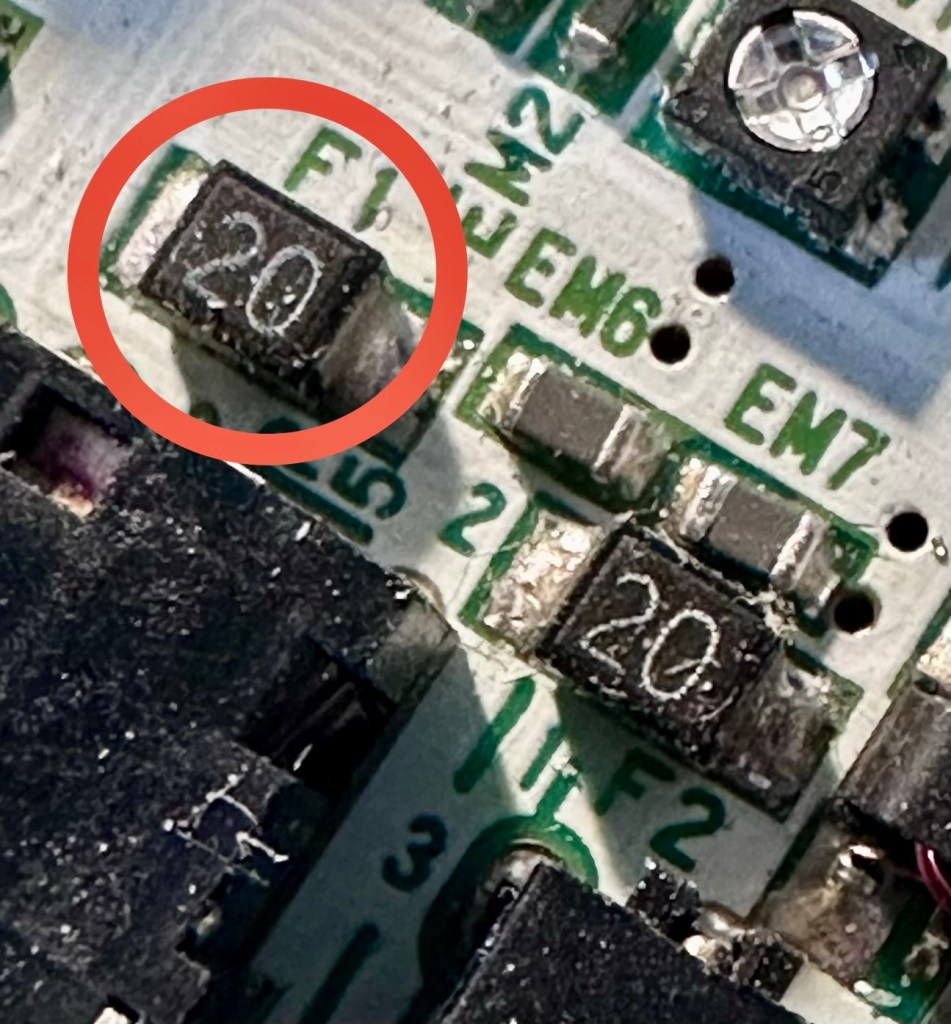
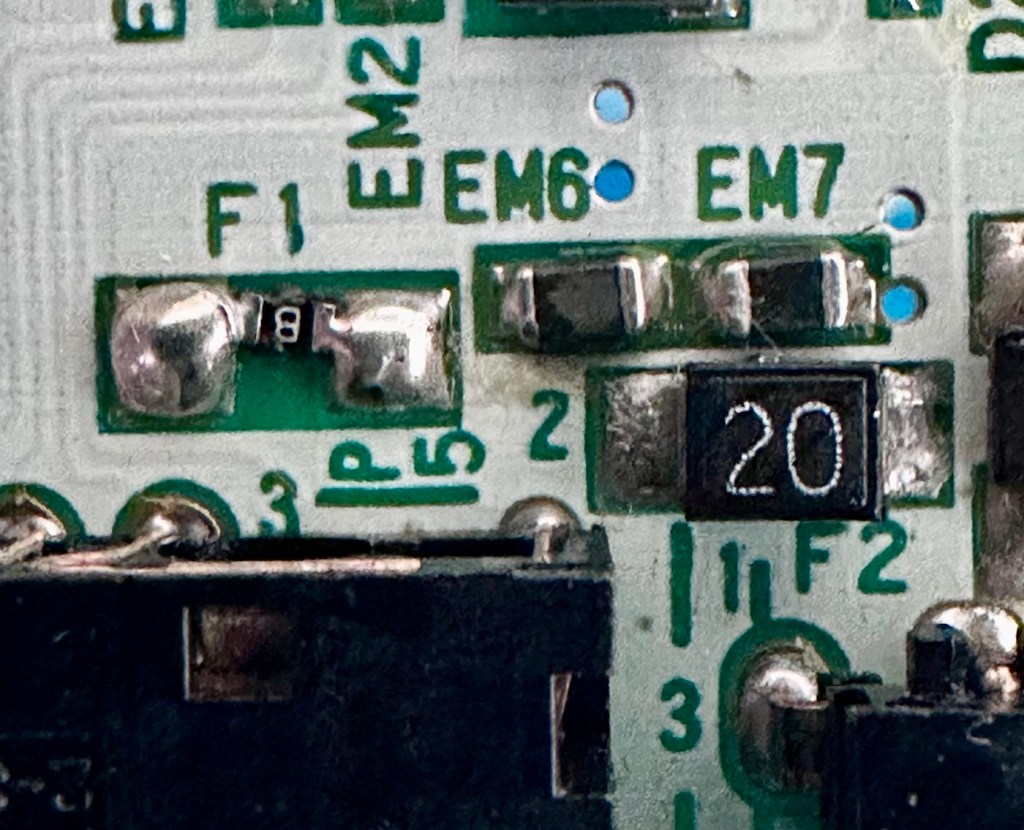
For reference: Fuse F2 protects the DC jack, whilst F1 protects the battery compartment. Using the continuity mode on the multimeter, a continuity through the fuse should present an audible buzz that let us know the fuse is complete and has not failed in any way.
I start on F2 and get a healthy buzz that tells me F2 is working fine. However fuse F1 is a different story, there is no continuity and there is no sound, I check again and can confirm that this fuse has blown, maybe this is a result of the contamination that was in the battery area?
The two fuses, F1 is dead
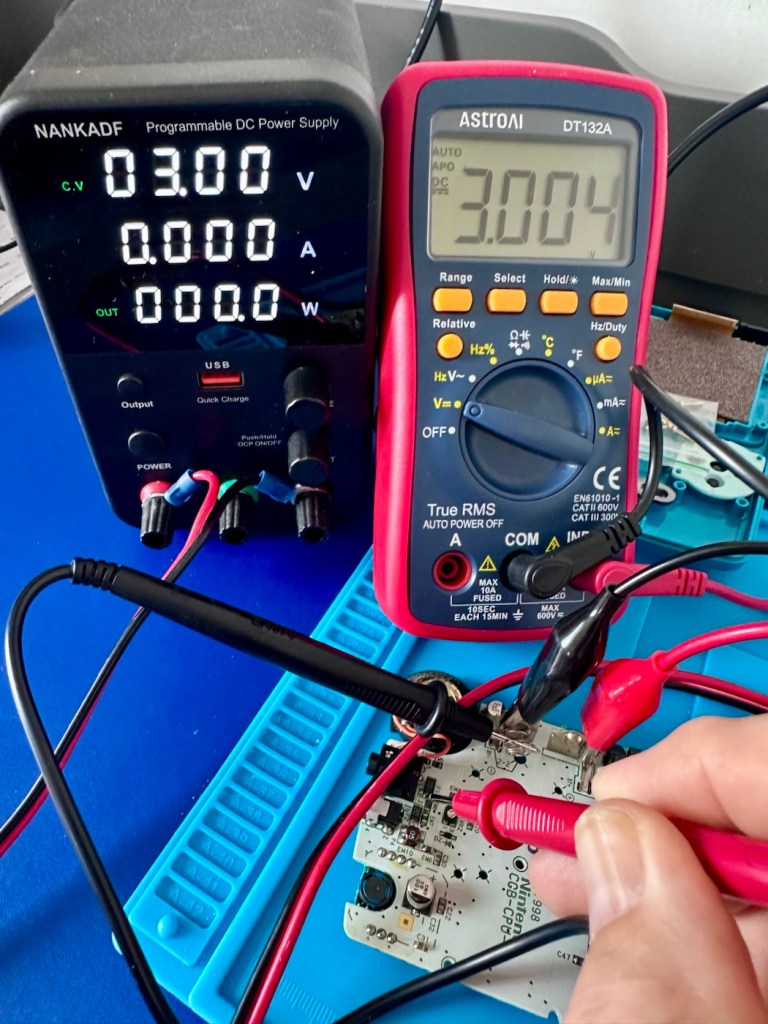
I’ve now attached the bench power supply supplying a 3v input to clarify the fault.
A 3v supply proves the fault
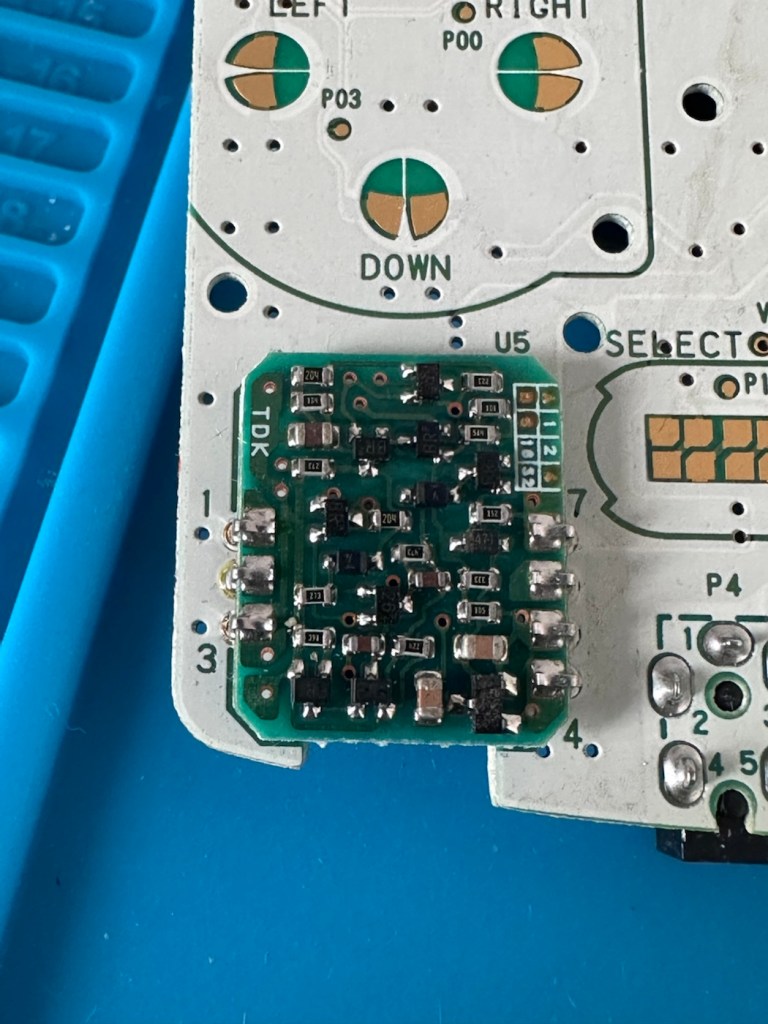
Fuse F2 has a 3v supply on each side, however our suspect fuse F1 only has a 3v supply on one side confirming that this fuse has blown. Once this fuse has been replaced I can check the voltage supplies on the remainder of the board, especially on the DC-DC regulator board, that supplies varying voltages from 3v – 13.6v required around the main board. On the main board the voltage regulator can be recognised as U5.
DC-DC voltage regulator U5
A quick check for short circuits doesn’t show anything of concern, maybe when the fuse is replaced it may well open up some other issues, the fuses I will be using are “resettable” fuses. These fuses seem to be the standard now for these units. Most resettable fuses—known as Polymeric Positive Temperature Coefficient (PPTC) or polyswitches—reset automatically and do not have a physical reset button. Once the underlying overcurrent or fault condition is removed, you simply disconnect the power source to allow the fuse to cool down, then you switch on again, if the same issue occurs, there is an obvious issue present that needs investigation, as stated above, once the faulty fuse is replaced I will be able to check other areas on the mainboard for correct voltages.
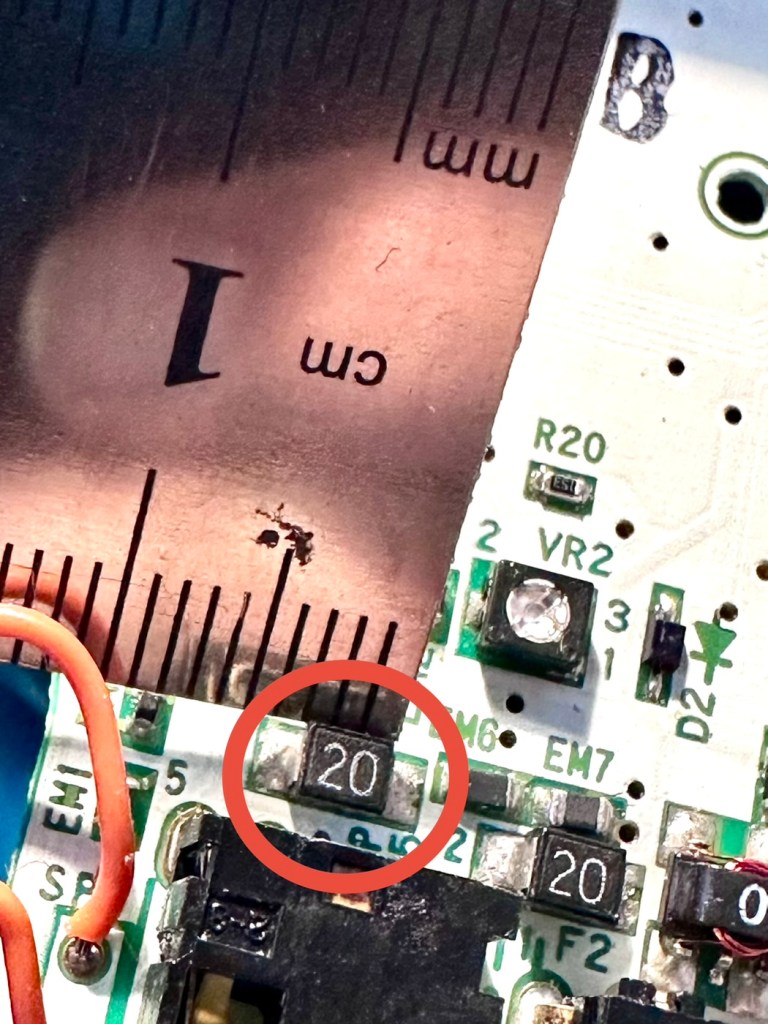
Just for information the fuse that needs replacing is approximately 4mm in width. You can see the scale in this picture taken alongside a ruler.
The tiny suspect fuse
Let’s get on with the repair.
Repair:
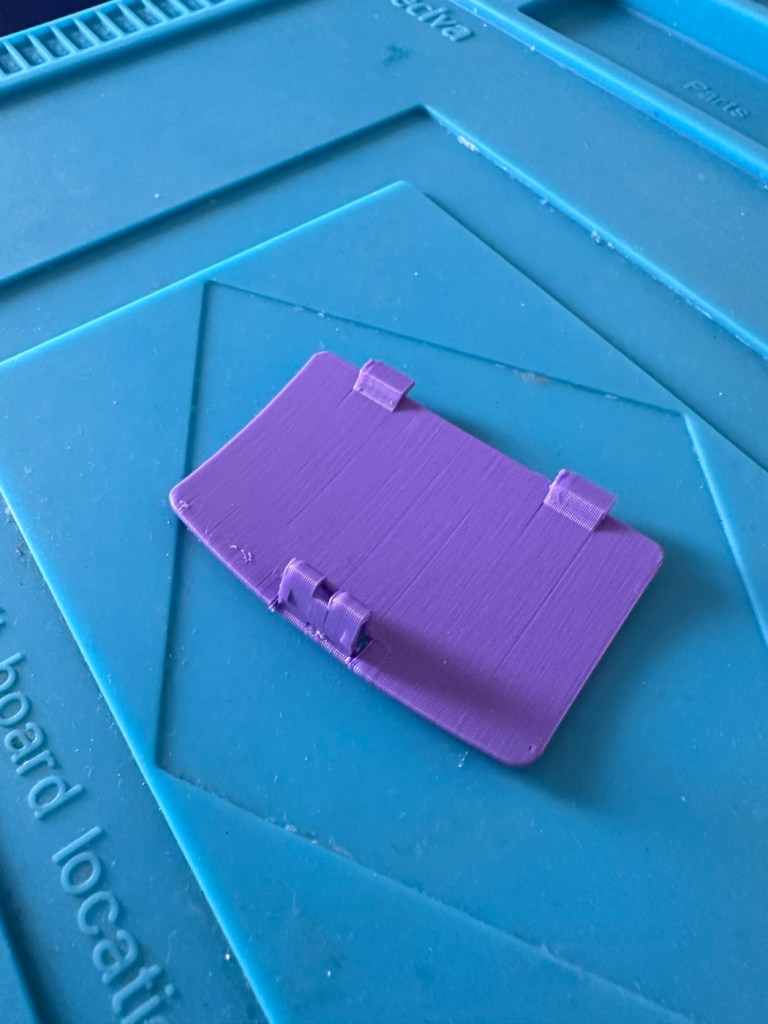
First off I’ve printed a replacement battery door cover. As stated earlier I don’t have any “Teal” filament so I’ve printed it out on a purple filament. For the purposes of practicality (holding the batteries in place) it will serve a purpose whilst carrying out the repairs.
The 3D printed cover in place
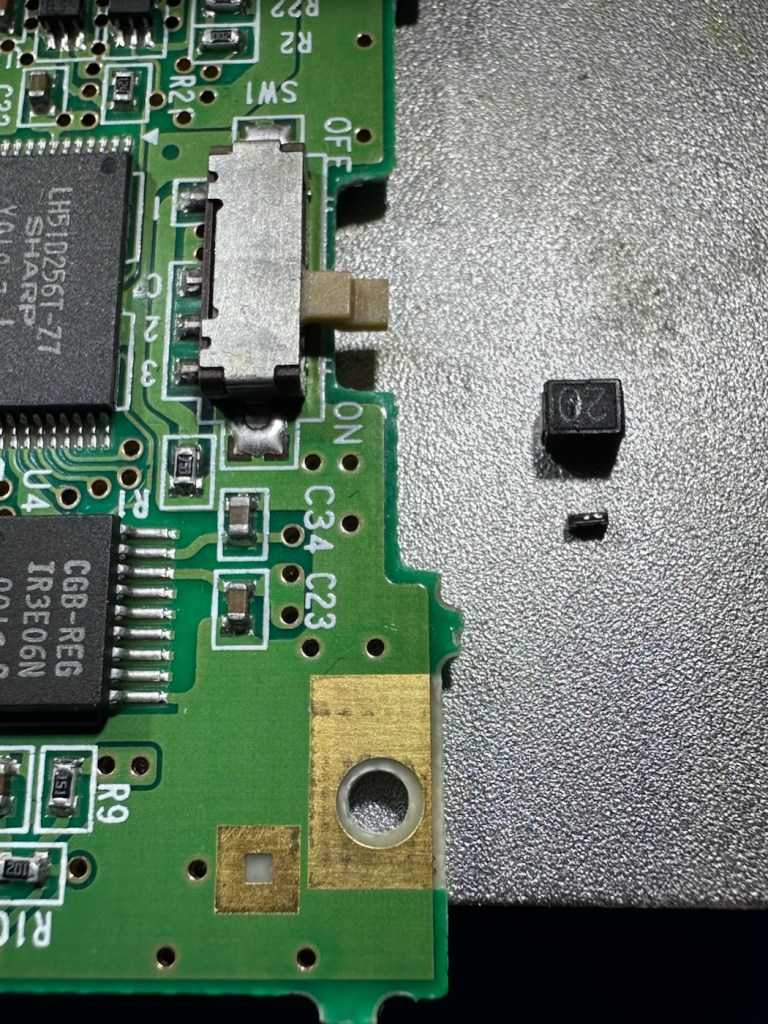
I have a replacement fuse, this work will now have to take place under the microscope as it’s just so tiny, think grain of rice size and you will understand just how small this component is, and it’s amazing that a component so tiny can completely shut down a unit such as this.
The supplied fuse is even smaller than the one on the board. If the original was 4mm then this one is probably around 1-2mm it really is minute. Here’s a comparison of them side by side on the microscope base.
Tiny and teeny tiny….
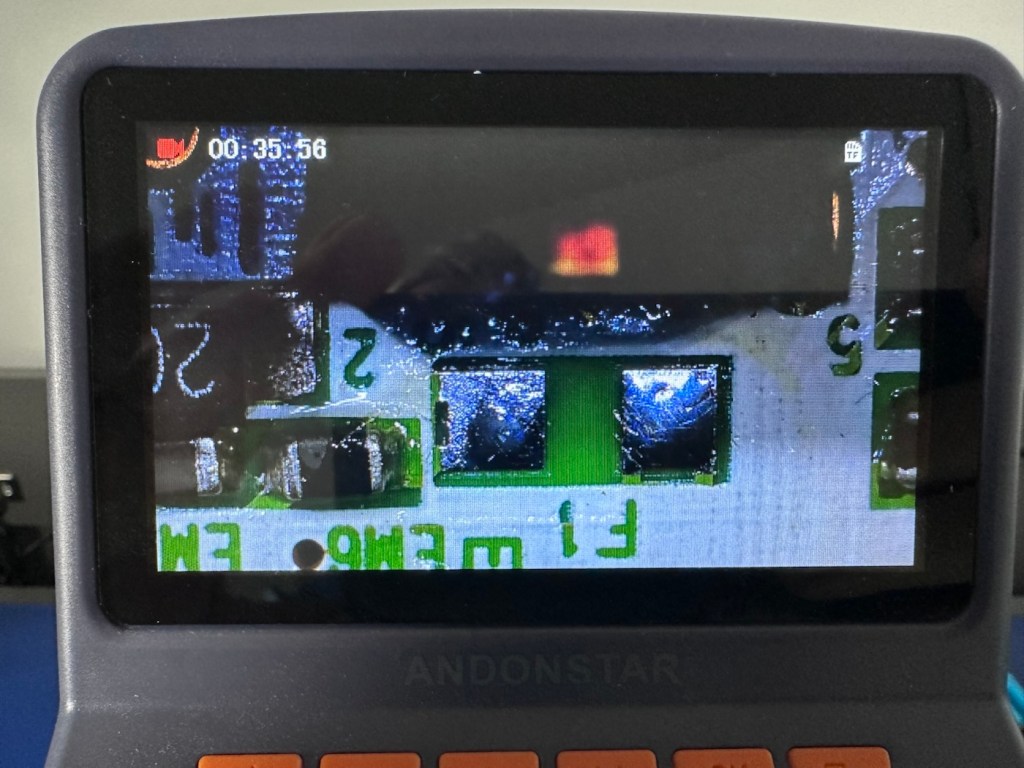
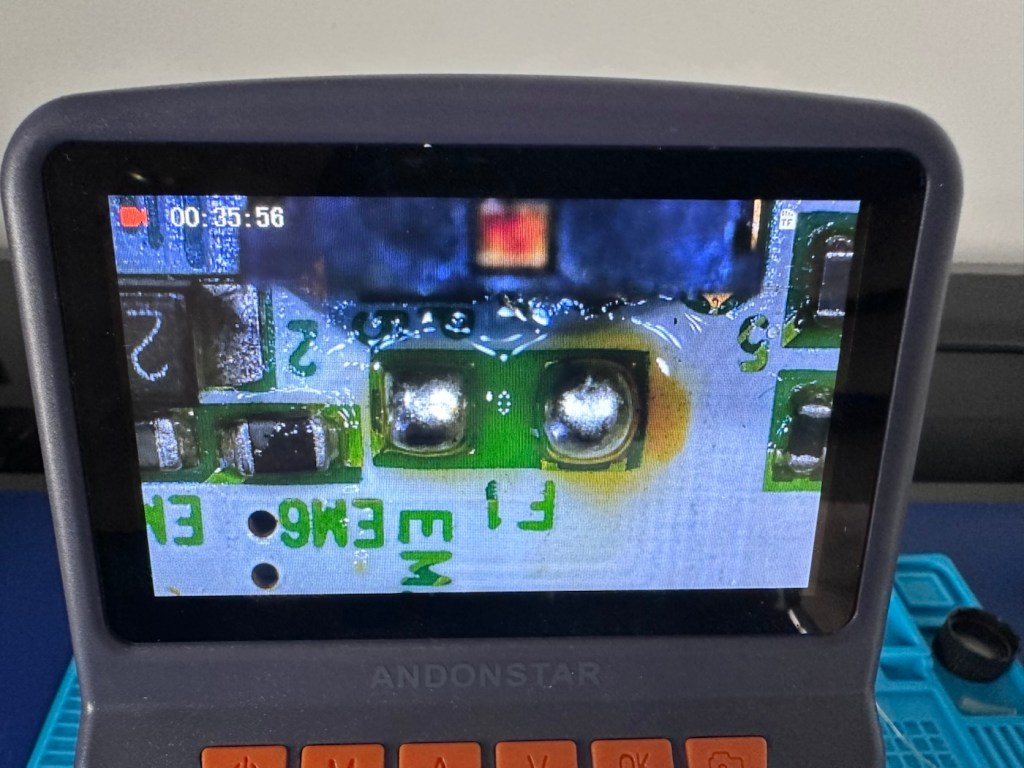
That said I’ve removed the old fuse, wicked away the old solder and applied some flux and a couple of new dabs of solder. Compared to these new fuses the solder looks massive, I can assure you it isn’t and is greatly magnified.
Pads cleanedTwo new blobs of solderNew fuse “B” compared to the size of its original counterpart “20”
With the bench power supply providing 3v I’m able to use the multimeter to confirm that the fuses are both working, however there is another issue and I suspect it is something I discussed earlier, but omitted to heed my own advice, about good housekeeping. I’ll come to that in a second.
Power is getting around on the 3v rail and is not an issue. However at the Dc converter I’m not getting the 5v or 13.6v rail, so there is another issue. The new fuse has dropped out again, and this is good as it proves it works. I let it cool for 30 seconds and it is back up and working and I’m able to continue tracing the fault. The big capacitor C32 that sits beside the DC-DC converter appears to be carrying a short, it is probably this that has caused the fuse to previously fail.
And my good advice was to change these capacitors for good housekeeping purposes…..and I didn’t.
Guess what I will be doing next?
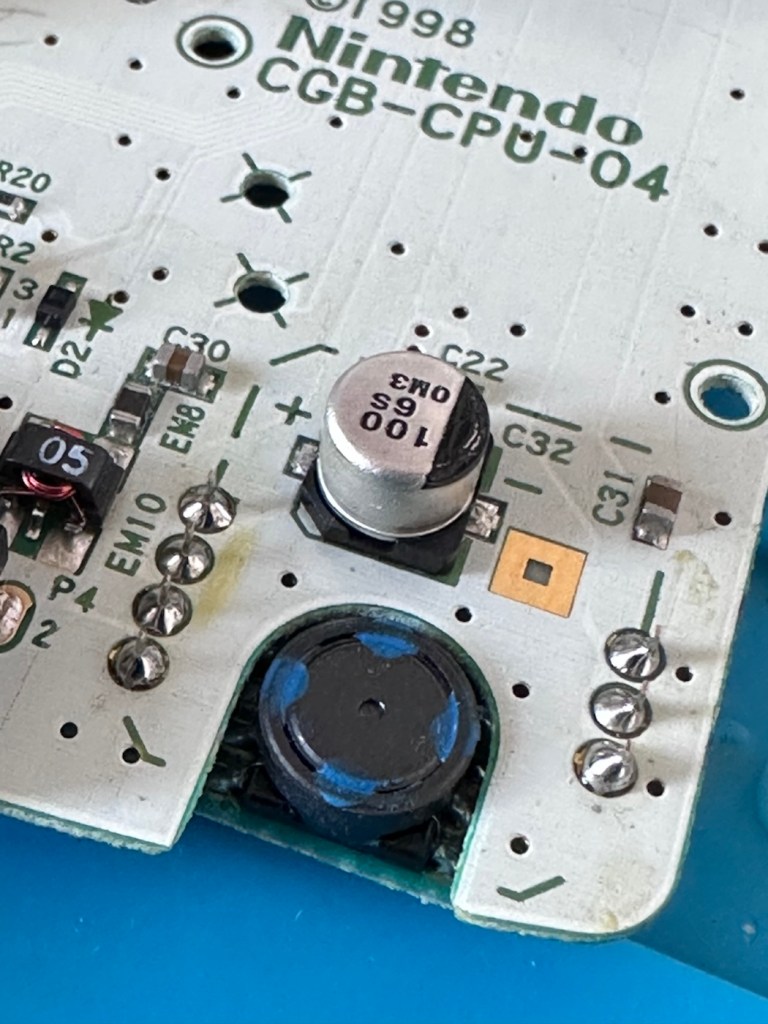
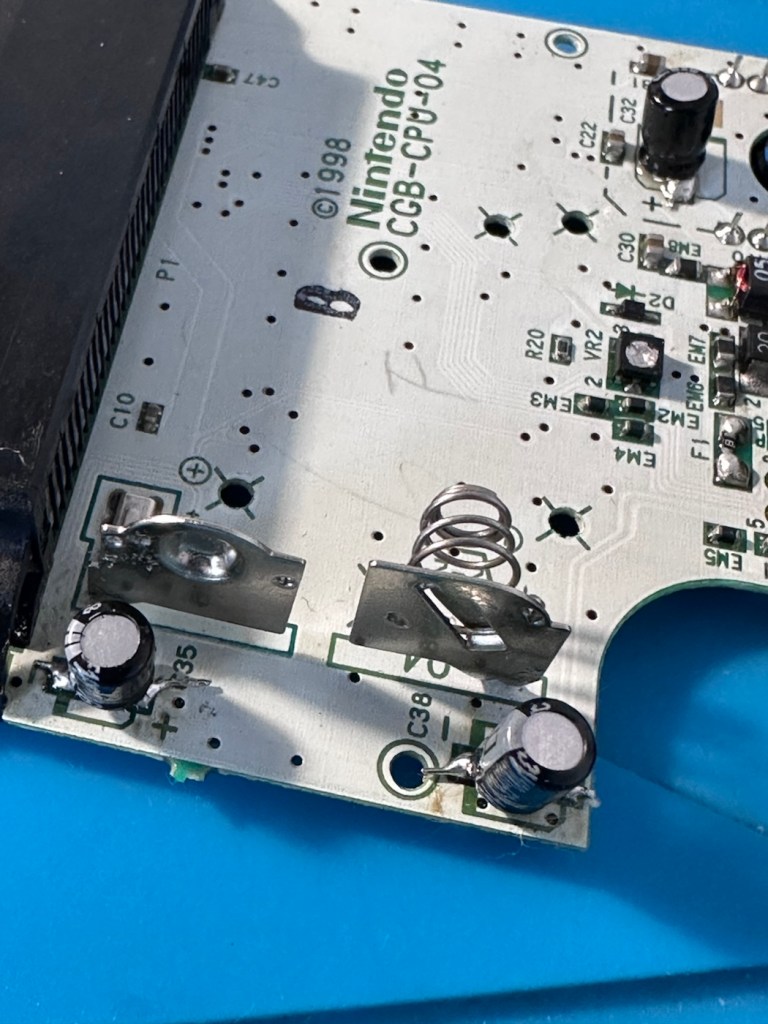
There are three Capacitors on the main board and below you can see what their primary functions are:
C32 (Main Power / DC-DC Filter): 100µF, 6.3V (Filters the incoming voltage; if faulty, the system won’t boot or will repeatedly reset).
C35 (LCD Display Filter): 22µF, 16V (Stabilises the voltage to the liquid crystal screen; if faulty, it results in a dim or washed-out image).
C38 (Audio Amplifier / Sound): 100µF, 4V (Powers the speaker and headphone output; a failure here is the leading cause of whisper-quiet audio).
Ok. Fortunately I have plenty of capacitors in my spares box so I was able to replace the three capacitors with no issue.
Faulty power CapacitorCleaned and readyAll three Capacitors replaced
This done I then decided, prior to any reassembly to see if the power was now being distributed as it should, and I’m pleased to say it is. We have the full range of voltages now coming out of the DC-DC converter.
All expected voltages now present.
Now let’s get the unit reassembled, cleaned and then get some tasty pics taken👍
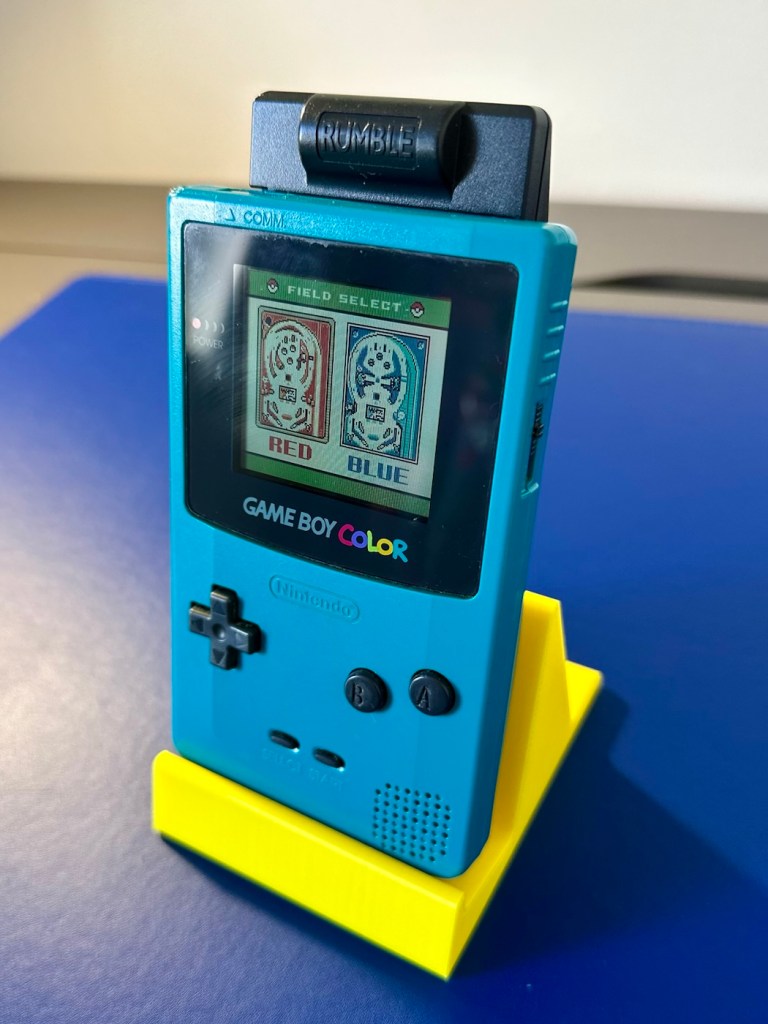
Result:
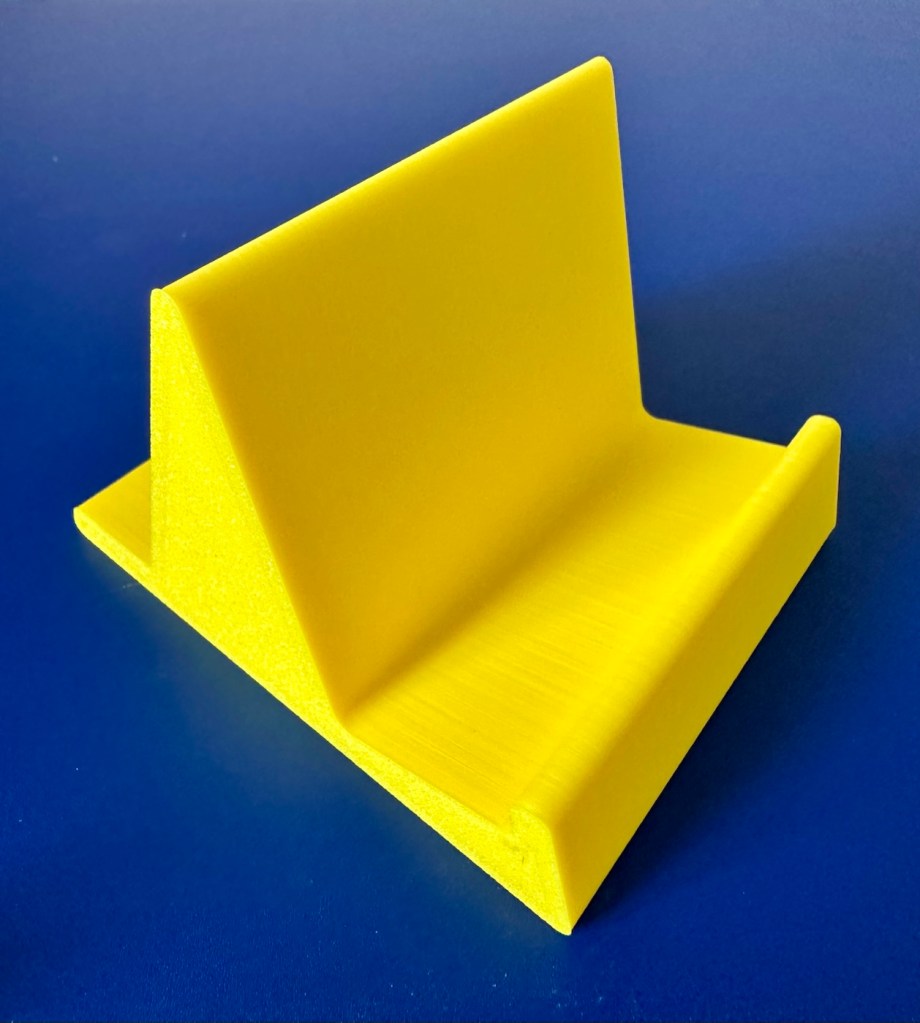
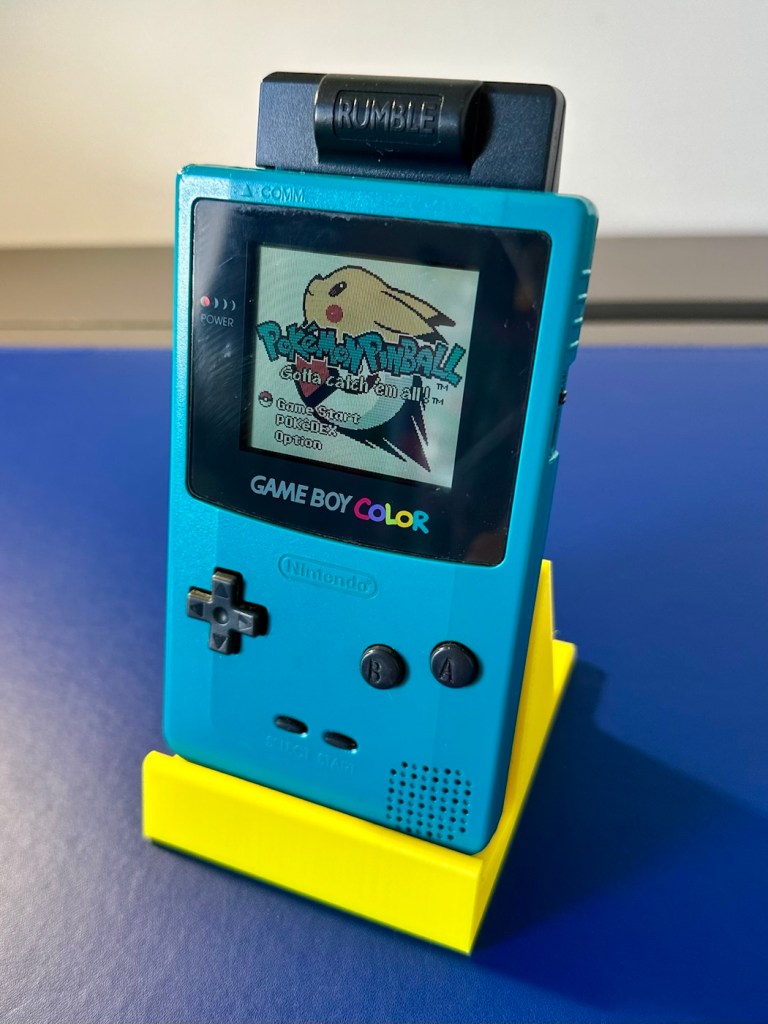
To finish it off and whilst the 3D printer was still warm, I’ve printed a simple brightly coloured yellow display stand to show it off on.
A new printed display stand
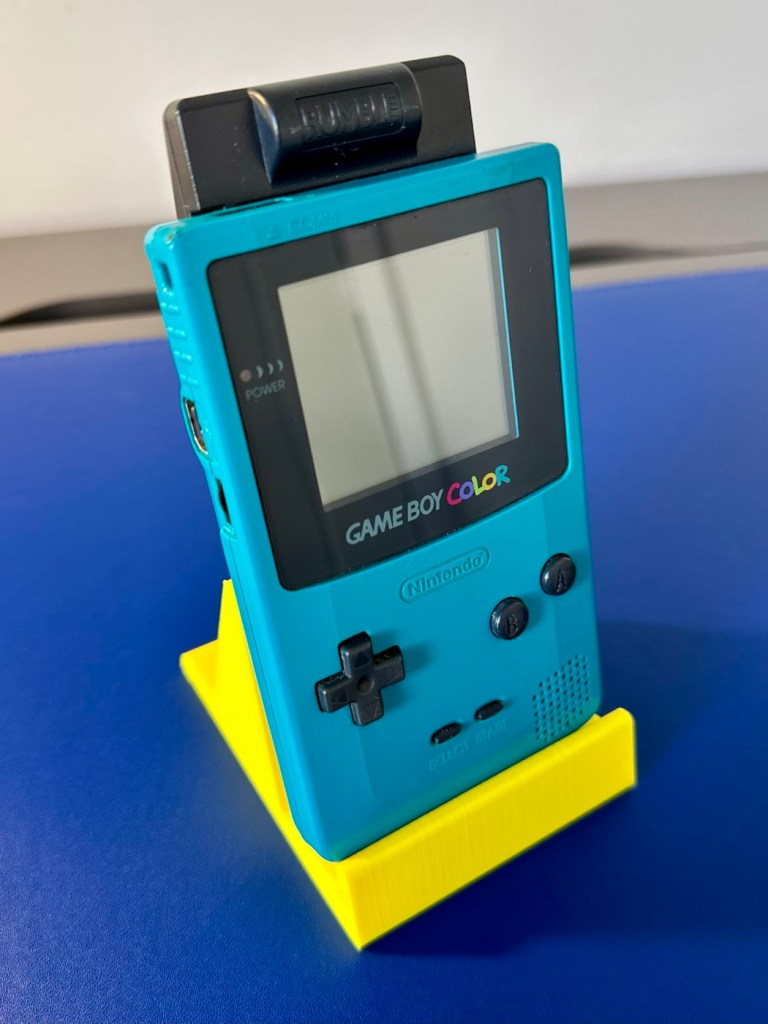
After a good clean the unit is now in a perfectly good working order. The fault appears to have been the faulty capacitors and battery contamination all probably combining to make the power fuse fail, a perfect storm if you like. The fuse and three capacitors have now been replaced to breathe new life into this game console. Cosmetically it’s still tatty and would probably benefit from a new outer shell and some labelling, however it works and to be honest that is all that really matters.
A small video showing the unit working Looks different but it works, it’s just a patchwork quilt of a project
I wonder how many of these items just get thrown away because they don’t work? This probably took me about three hours in total with diagnostics and repair. Another piece of retro history restored, now joining my original Gameboy classic as part of my collection.
It’s been a pleasing little project, enjoyable and educational and it’s always good to hear the familiar beeps when it springs back into action.
Another one saved from landfill.
Thanks for passing by, as always it’s very much appreciated.
A pocket computer from 2004 that needs a little attention. Let’s get it working.
What the listing stated:
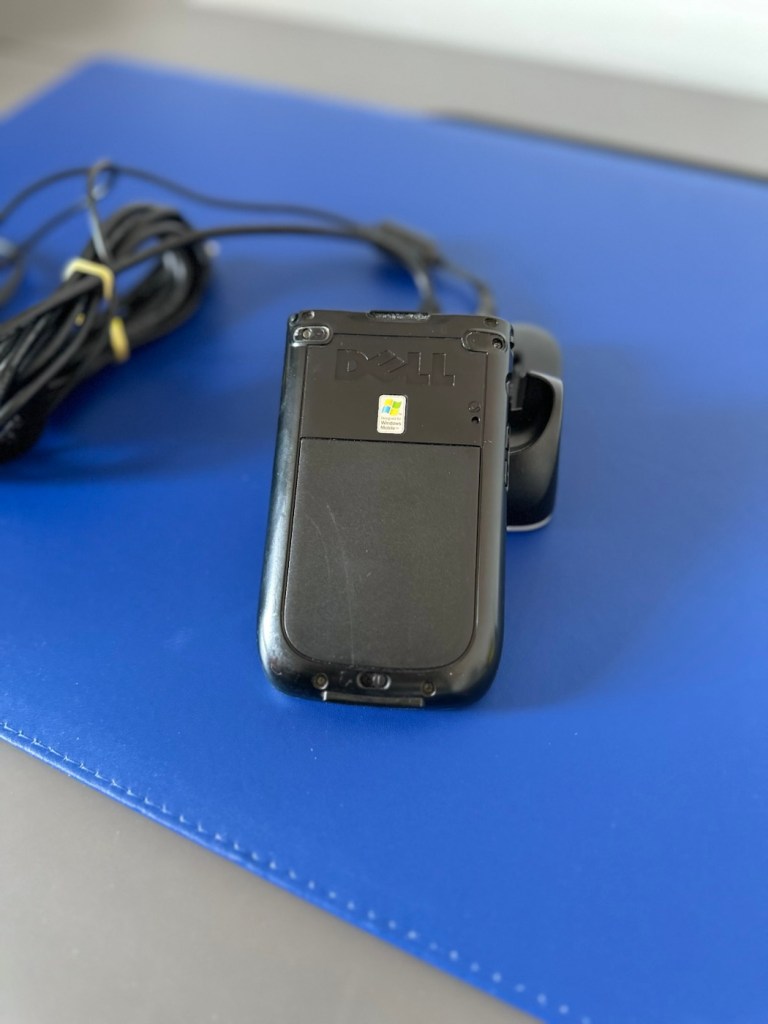
Dell Axim X50V Handheld PDA with Windows Mobile 2003 SE. The PDA is in a used working condition and advertised as for spares or repair due to a faulty battery cover switch, It is also missing its rubber feet and SD slot cover.
The Battery has recently been replaced.
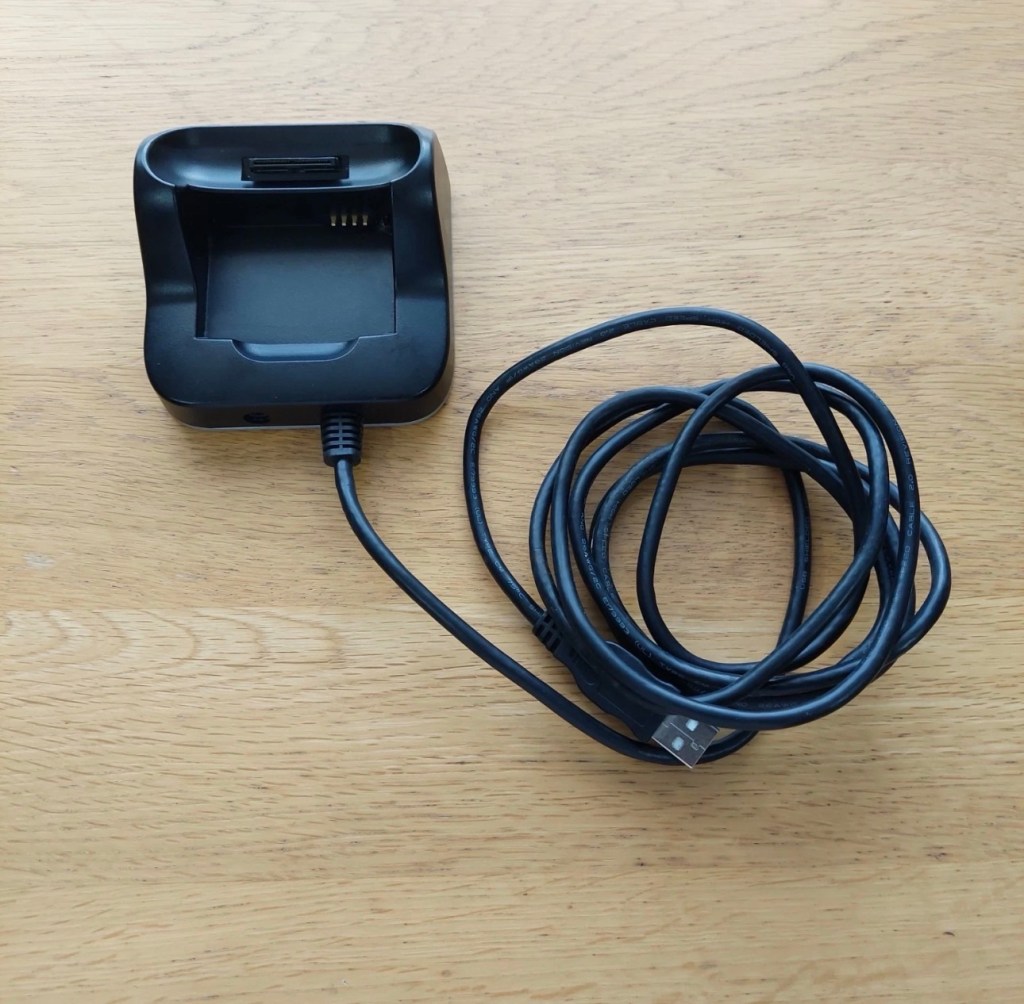
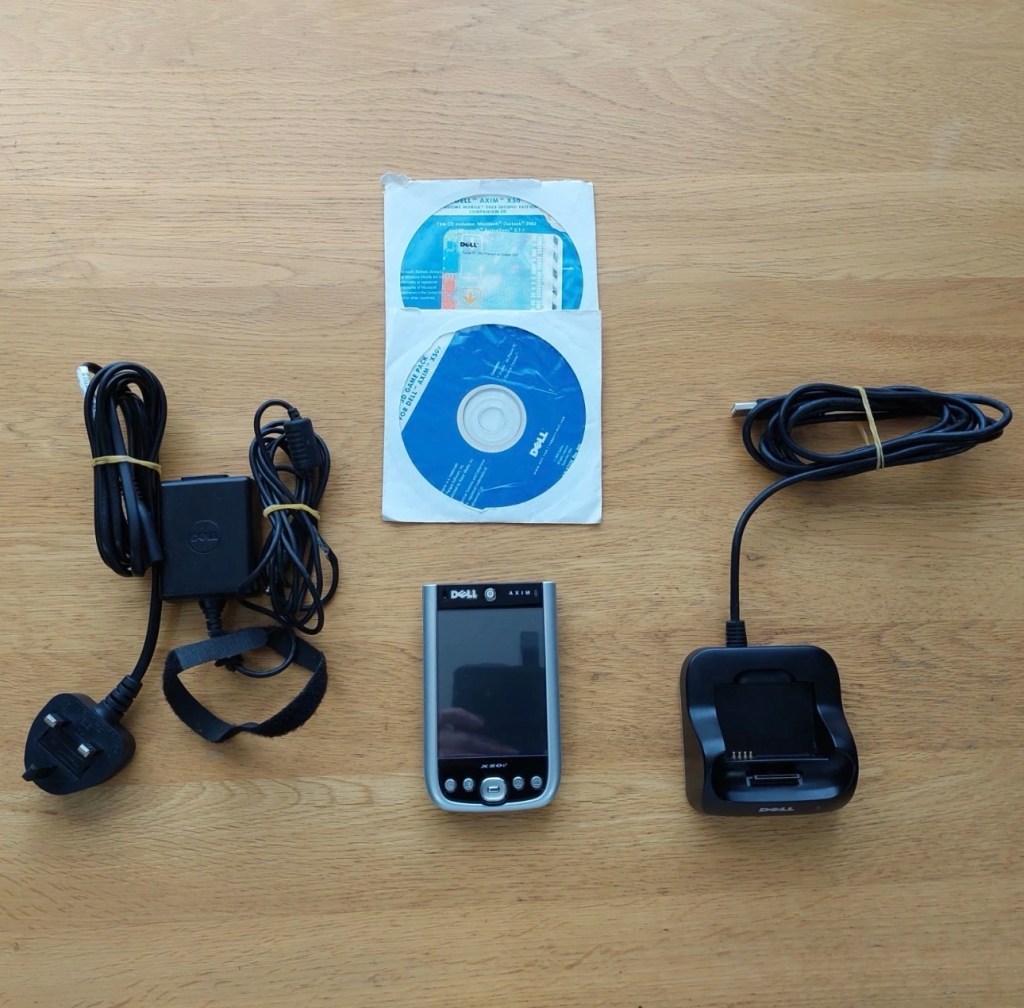
Comes complete with the following.
Desktop Cradle
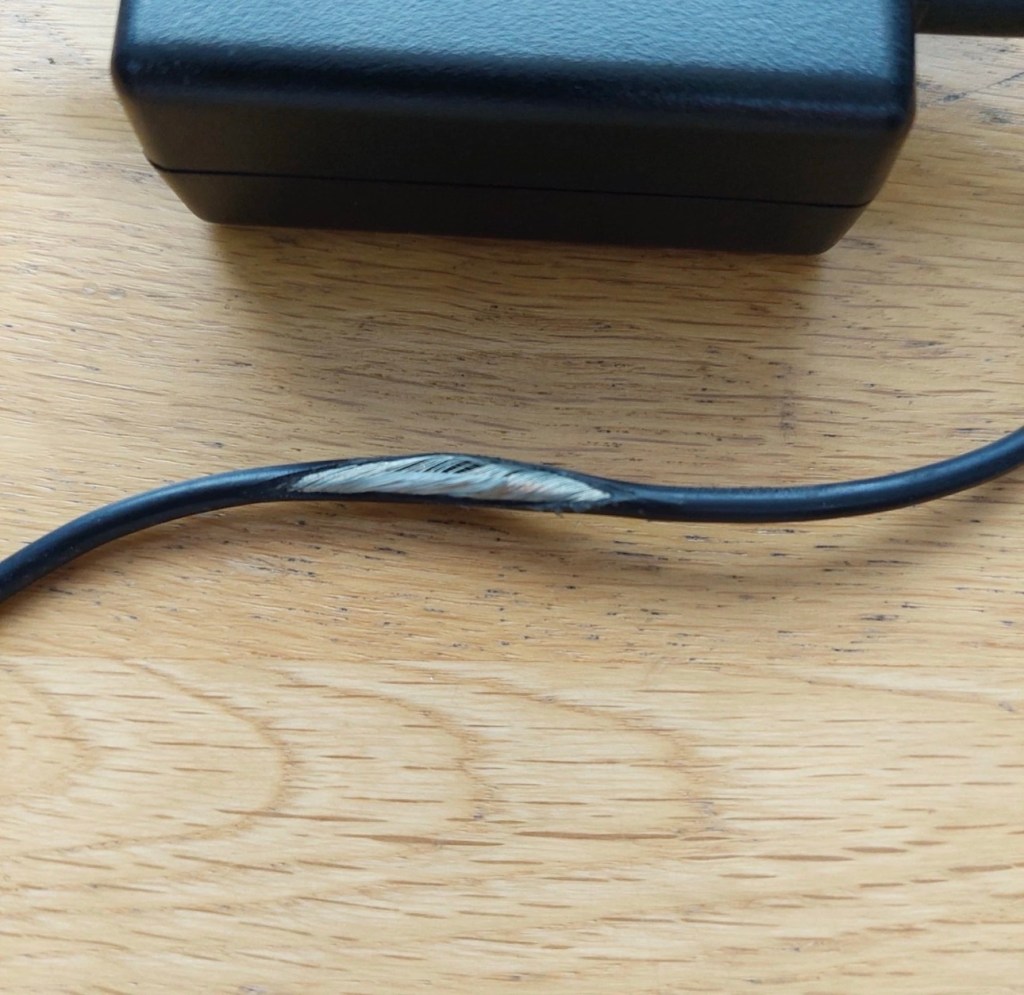
Power Supply (Damaged lead, please see photo)
Windows Mobile 2003 Second Edition Companion CD
3D Game Pack for Dell AXIM X50V
Please see photos for overall condition.
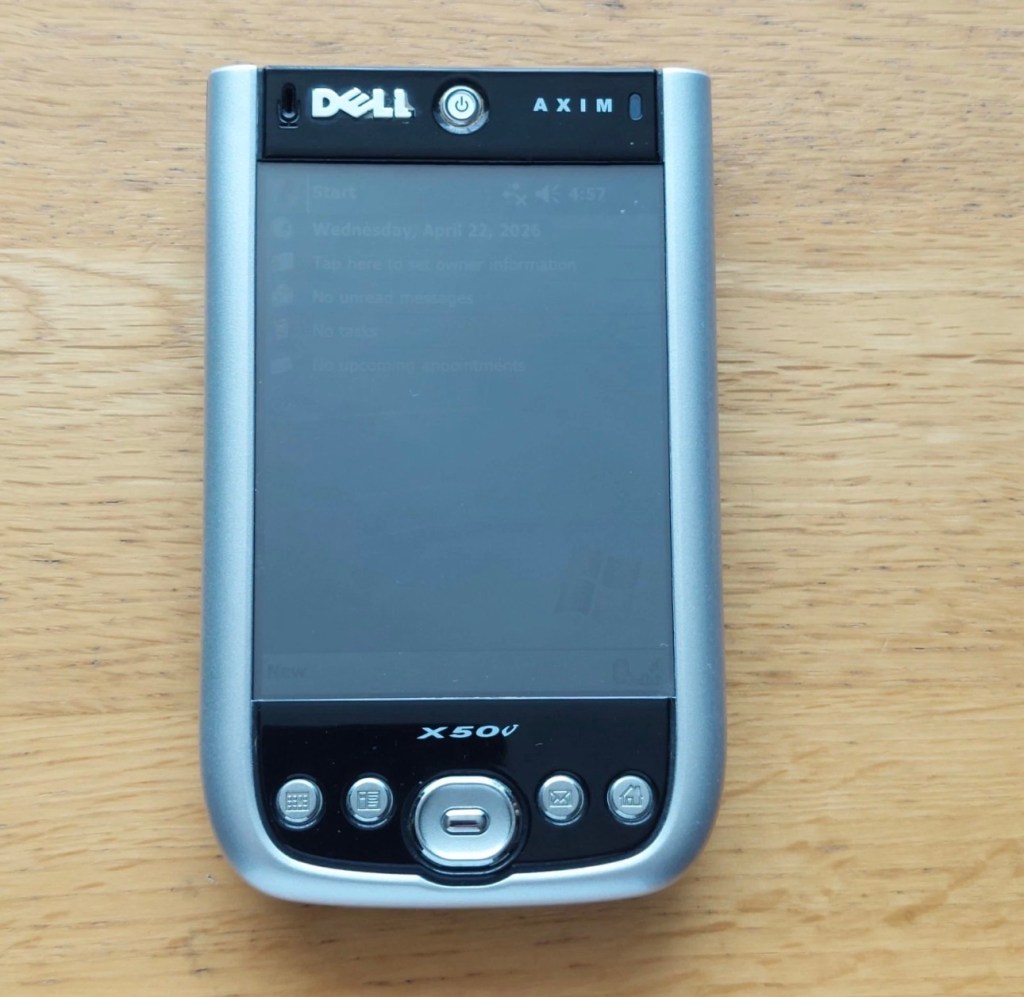
EBay
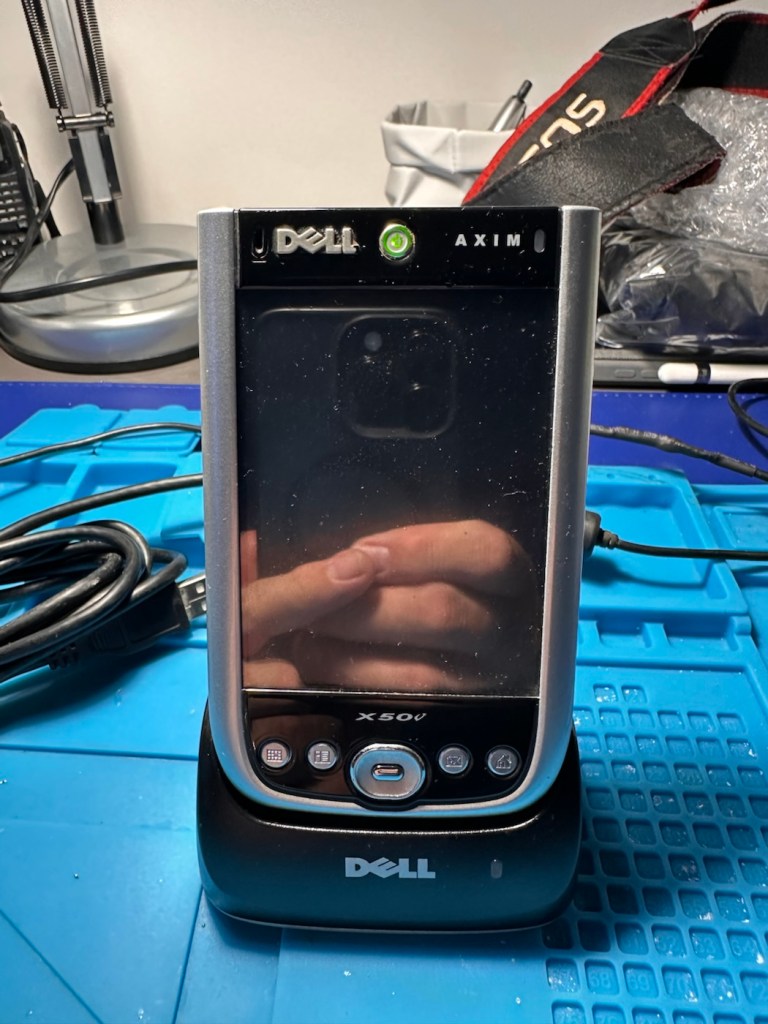
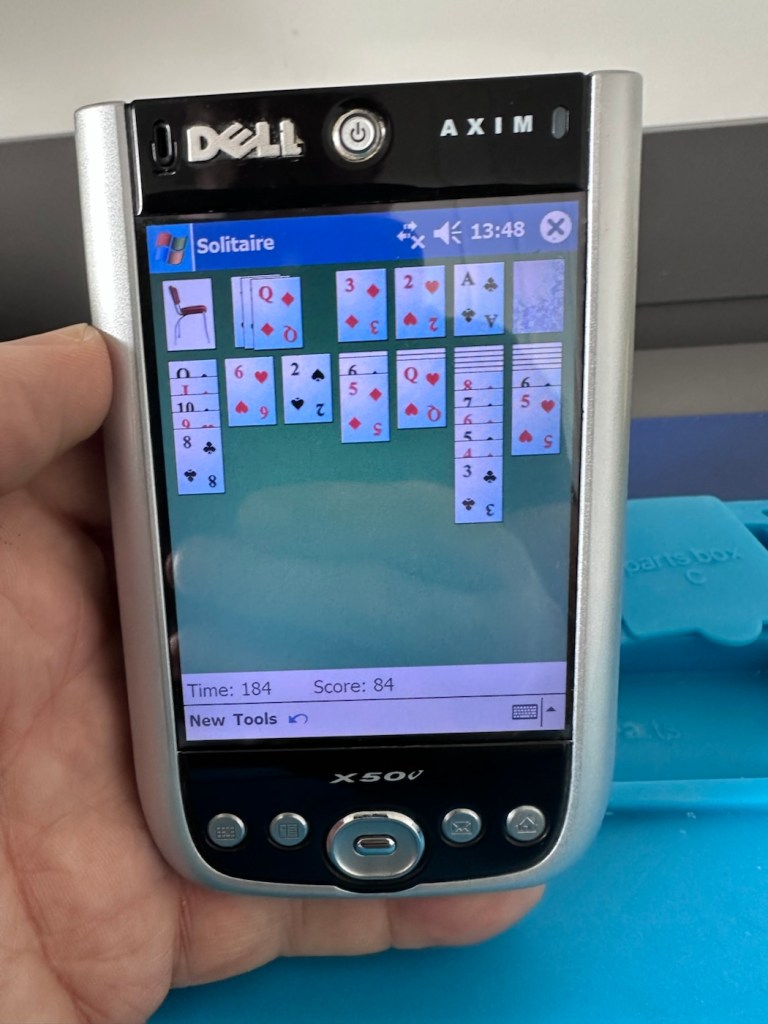
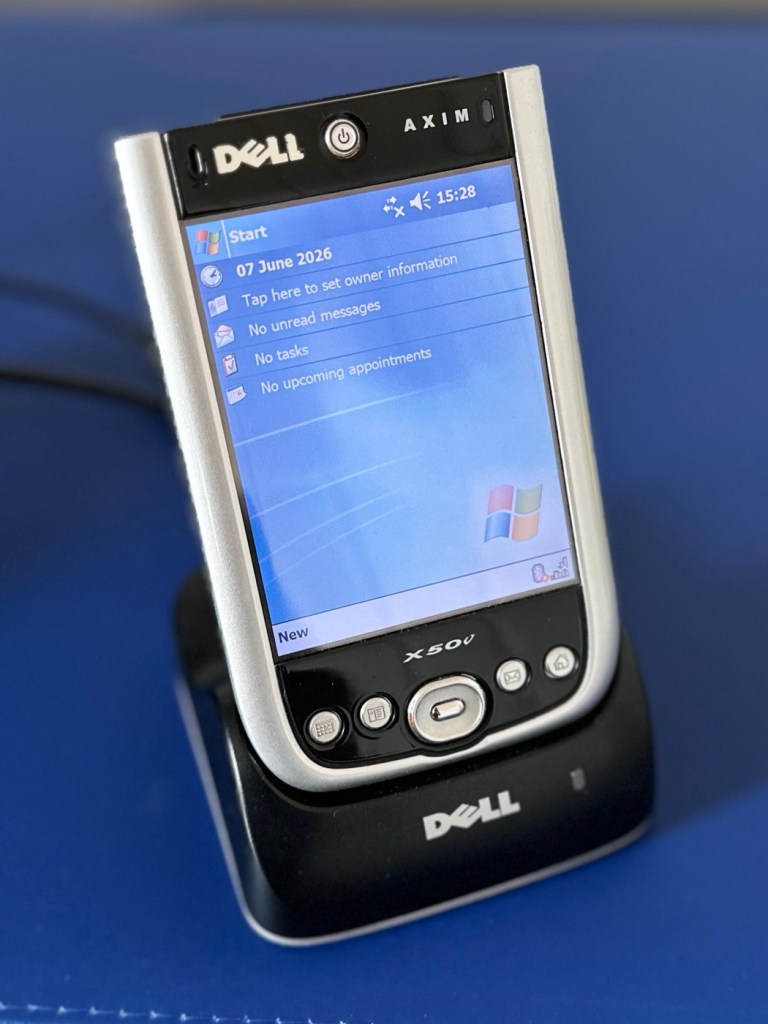
The purchased Dell Axim X50V
Here’s some info regarding these units:
The Dell Axim X50v was a high-end Personal Digital Assistant (PDA) released in late 2004. It was a flagship device in the Axim line, notable for its advanced multimedia capabilities, specifically its VGA screen and dedicated graphics accelerator.
Key Technical Specifications
Processor: 624 MHz Intel XScale PXA270.
Display: 3.7-inch transflective VGA TFT color display with \(480 \times 640\) resolution.
Graphics: Intel 2700G multimedia accelerator with 16MB of dedicated video memory.
Memory: 128MB Intel StrataFlash ROM and 64MB SDRAM.
Operating System: Originally shipped with Microsoft Windows Mobile 2003 Second Edition.
Expansion Slots: Dual slots featuring one CompactFlash (CF) Type II and one Secure Digital (SD/MMC) slot with SDIO support.
Connectivity: Integrated 802.11b Wi-Fi, Bluetooth 1.2, and Infrared (IrDA).
Features and Performance
Multimedia & Gaming: The Intel 2700G chip allowed for smooth 3D gaming and high-quality video playback, which were advanced for its time.
Design: Compared to previous Axim models, the X50 series featured a sleeker design with rounded edges and a curved base.
Battery: It uses a user-replaceable 1100 mAh Lithium-Ion battery.
Software Upgrades: While an official upgrade to Windows Mobile 5.0 was released, some users found it ran slower than the original OS due to the slow NOR flash memory used in the X50 series.
Multiple on line sources
Let’s await its arrival to see what we have.
Assessment:
The package has arrived, very well packaged. I have enough bubble wrap now to to last for quite some while.
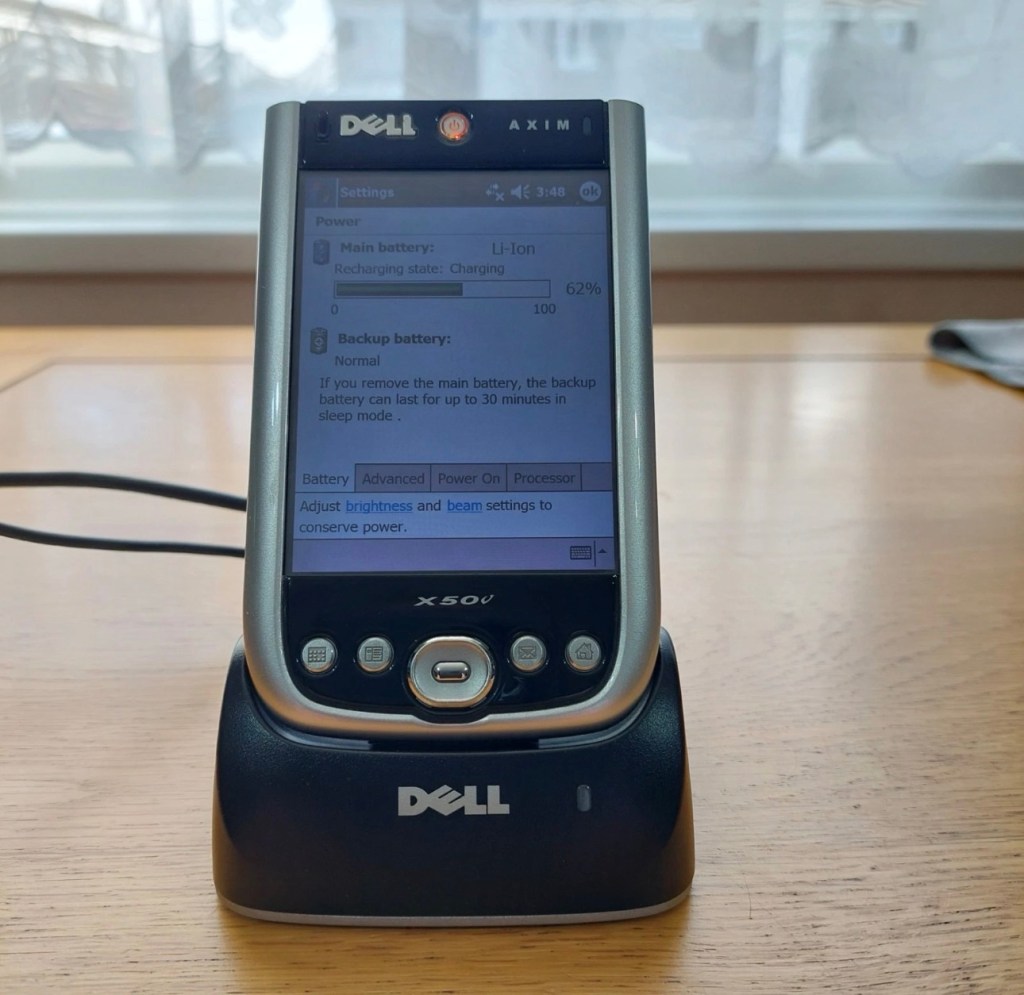
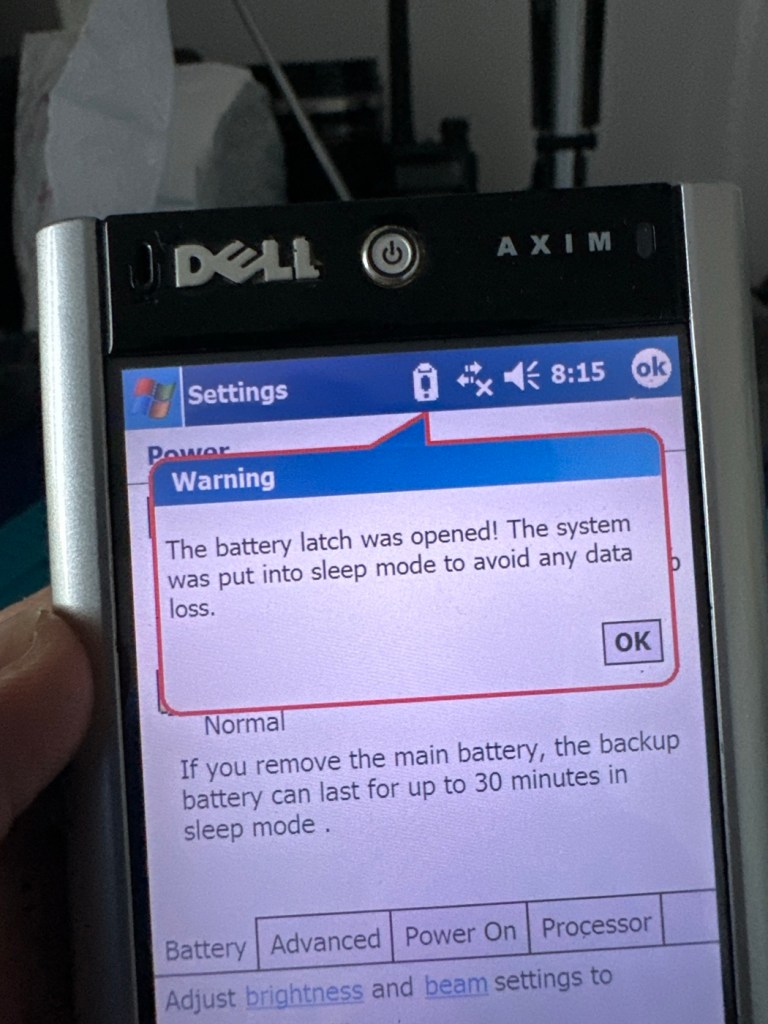
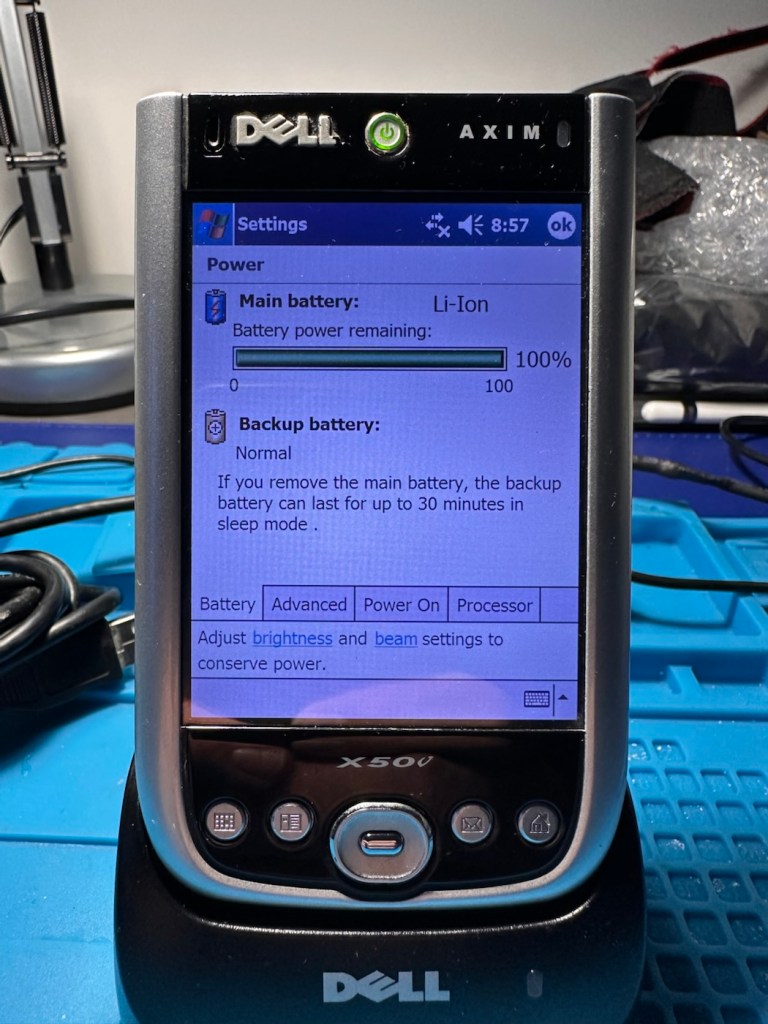
The item turns on, and appears to be doing what it should and then without even touching the back of the unit, an error appears on the screen.
A common fault apparently
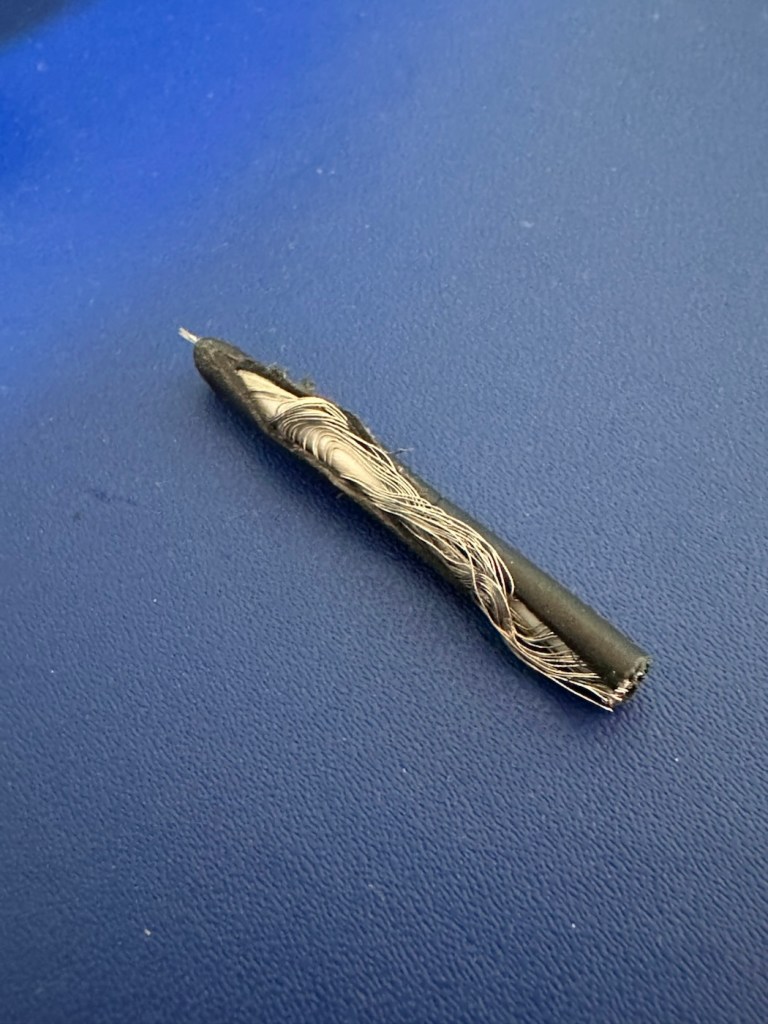
On the cable directly from the charger unit there appears to be some damaged cable sheath. I have tested the power output and flexing this area does not cause any interruptions to the power supply, it appears to be that only the external earthing of the cable is exposed, so I am happy that it will be fine to just apply some heat shrink tubing to this portion so that the cabling inside is no longer exposed. It looks as if at sometime someone has probably used a knife instead of the correct tooling to access the unit.
Exposed earthing
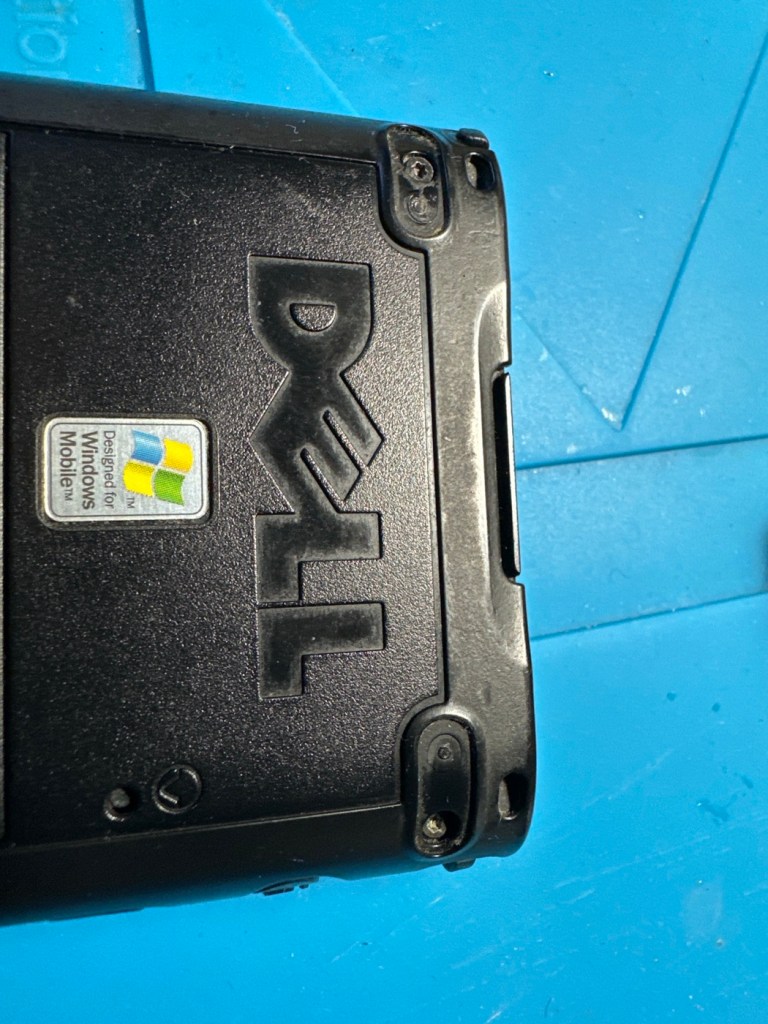
There are a couple of rubber feet missing, that just so happen to cover screws that allow access to the unit, further strengthening my suspicions that this unit has been previously accessed internally.
Missing rubber feet
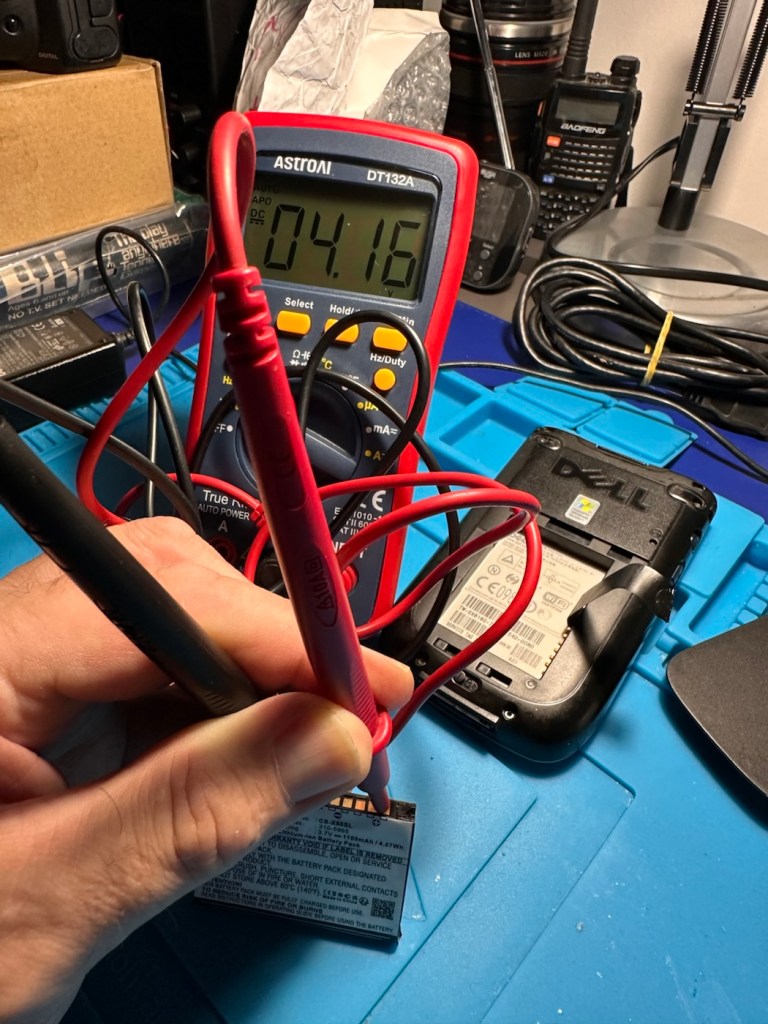
The battery is new, and is holding a good charge of 4.16v at an indicted 100% indication, and it is rated at 3.7v so this appears to be a healthy battery.
Battery holds a good charge
Cosmetically this is a nice unit for its age, it has a stylus pen included, along with a charging cradle and original software that came with the unit. There is a small SD card slot cover that is missing, however this is not an issue as I will probably install a small SD card to fill that void. It can also take CF cards and there is also a blanking plate installed to fill that portion of the top of the unit.
Let’s get repairing…
Repair:
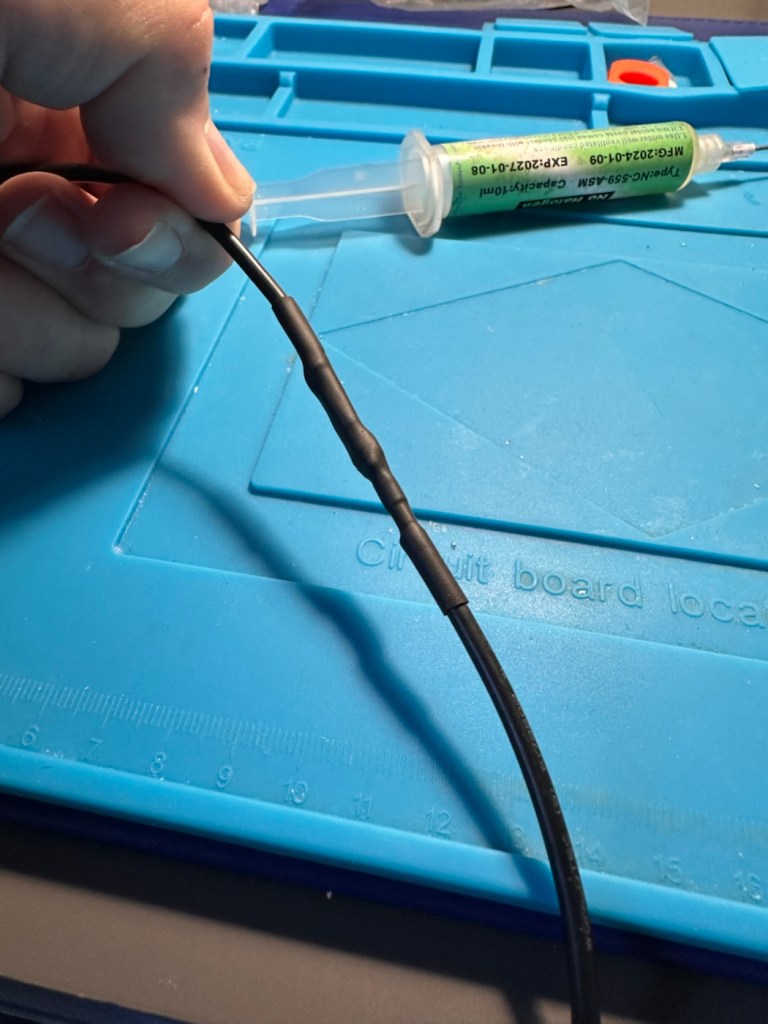
I’ve gone straight in at the charger cable and have chopped the offending portion out. I’ve had to do this to be able to get some suitably sized shrink tubing in place. With the wires exposed I strip them back, tin them with some solder and, then finally connect them back together ensuring they are suitably insulated from each other, and safe and secure. It doesn’t look pretty, but it’s safer than it was.
Chopped out sectionAll insulated and heat shrunk
I’ve tested the output with a multimeter and the output is around 6 volts as stated on the power pack, so no issues there.
With the charging cable all sorted it’s time to look at the error message problem associated with the battery latch.
The Dell Axim X50v battery latch often degrades, triggering a false “battery door open” warning or sudden sleep mode shutdown. If your device is frequently going to sleep on its own or reporting a false “battery door open” error, it is typically caused by a loose, dirty, or misaligned latch switch inside the device.
There are a number of options we can go through to attempt to alleviate this issue:
Clean the Contacts: Power down the device, remove the battery, and gently clean the small plastic sensor switch and surrounding contacts inside the battery cavity with a cotton swab dipped in isopropyl alcohol.
Mechanical Shim: Over time, the plastic door can warp, failing to press the microswitch down. By placing a tiny, folded piece of paper inside the microswitch channel to force it into the “closed” position. Then snap the battery door into place.
Permanent Bypass: For an advanced fix, you can bypass the switch entirely by soldering the connections or using conductive paint to bridge the gap on the motherboard, ensuring the system always thinks the door is closed.
Replace the Door or Latch: If the physical latch or door is broken or entirely missing, replacement battery doors can still be sourced from specialty PDA parts sites.
Taking the above suggested remedial actions into consideration I’m going to approach this repair combining two of the above suggestions. Firstly I will clean the contacts as in the first option, this is standard work practice for me. I will probably use a contact cleaner rather than IPA in this instance. I will ignore suggestion number two, as that’s a temporary “Bodge job” fix that should only really be used to test for an issue. The third suggestion of the permanent bypass is what I will use should action number one not be successful, the error is one of those pain in the butt errors that are really unnecessary, and serve no real purpose at all, so let’s permanently disable its ability to reappear. The door itself is in a good order and does not require replacement therefore cancelling out suggestion number four.
So. To recap I will go with suggestions one and three.
Let’s get going then….
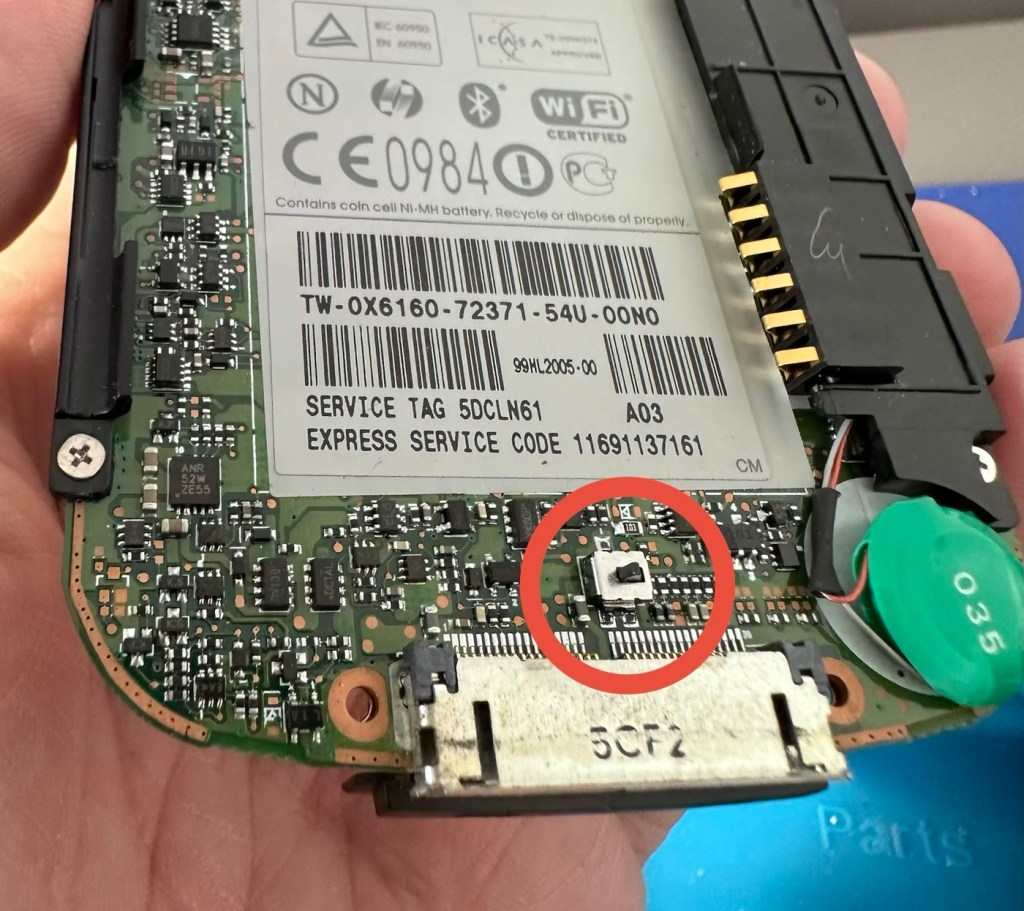
Four small star screws are all that need to be removed to get the shell open. Inside everything looks lovely and clean and there sitting at the bottom of the main board is the tiny switch that is causing the issues.
The switch that’s causing the issues
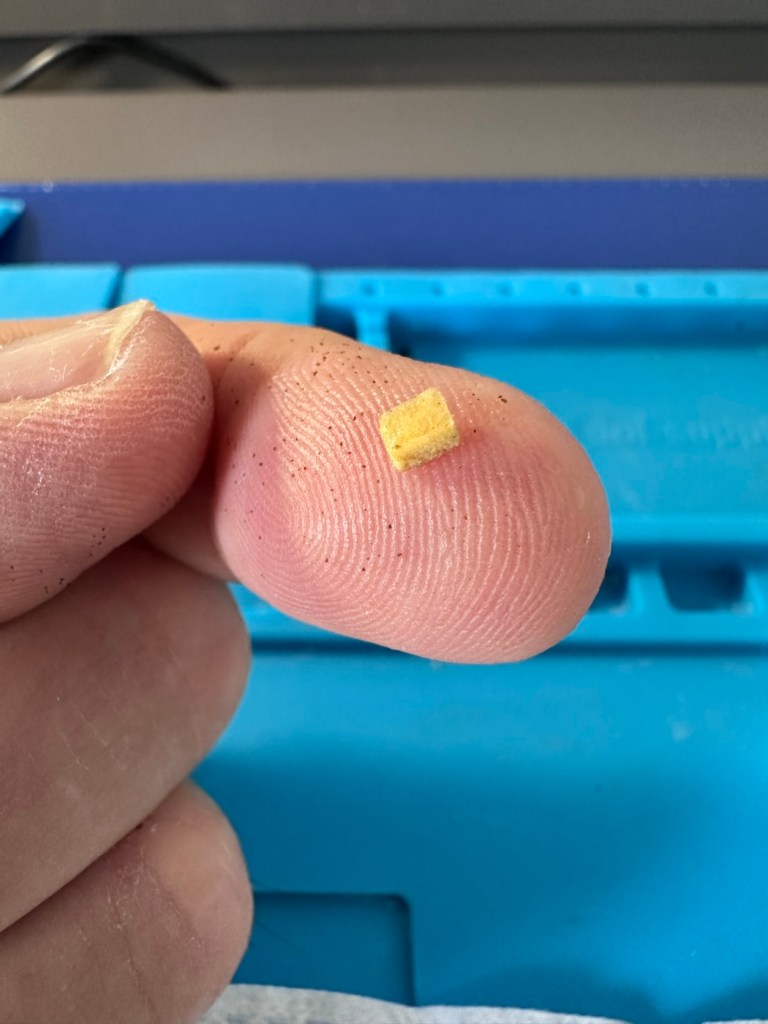
Immediately opposite this switch on the battery panel switch is a small piece of felt that I presume was originally set in place to hold the switch down.
The tiny piece of felt
Well, it had moved and was sitting in the wrong place. I’ve cut a small piece of felt that I use for repairing light seals on cameras, cut this to size and placed it in the correct position. The small switch is like a rocker switch, I have cleaned this with IPA and it is now clean. A quick clean around the main board and now it is time to reassemble.
Now all back together, battery now in place and the unit switches on fine. A little shake of the battery panel cover, and no error message appears. In fact no error message appears until I physically open the battery panel, but once it is put back in place and locked it again, the fault clears. The repair as such has been successful. You can see in the picture below, the battery error at the top of the screen, that results in a restricted use, until it is cleared. A standard fault with these units, now repaired.
Fault No fault
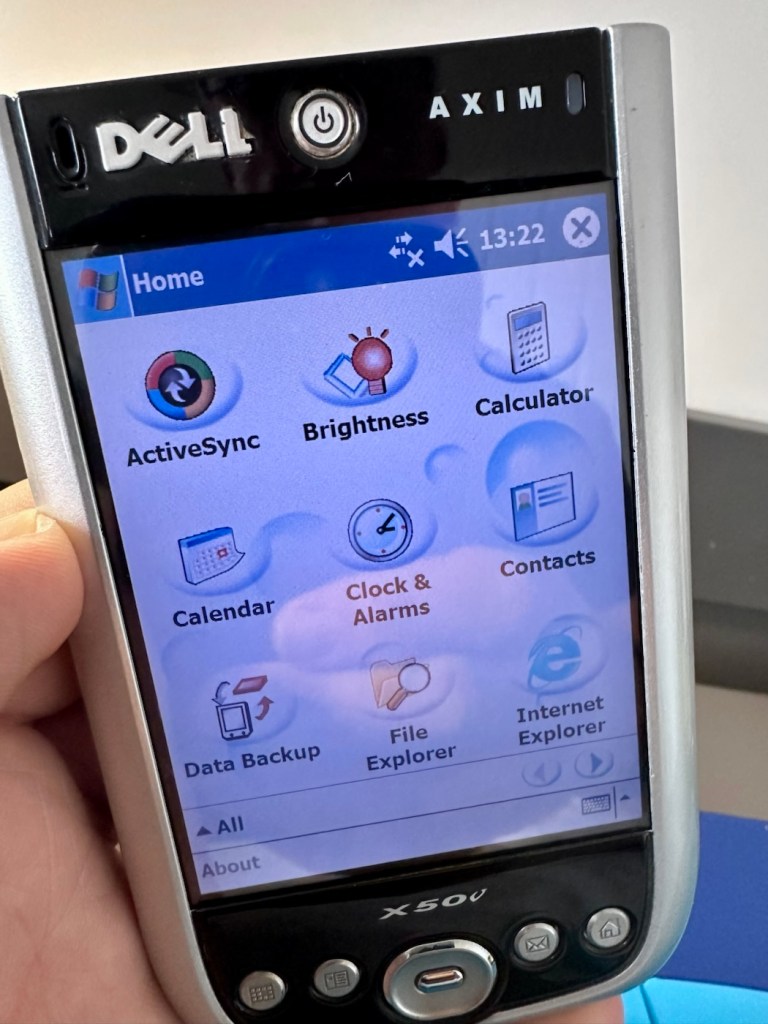
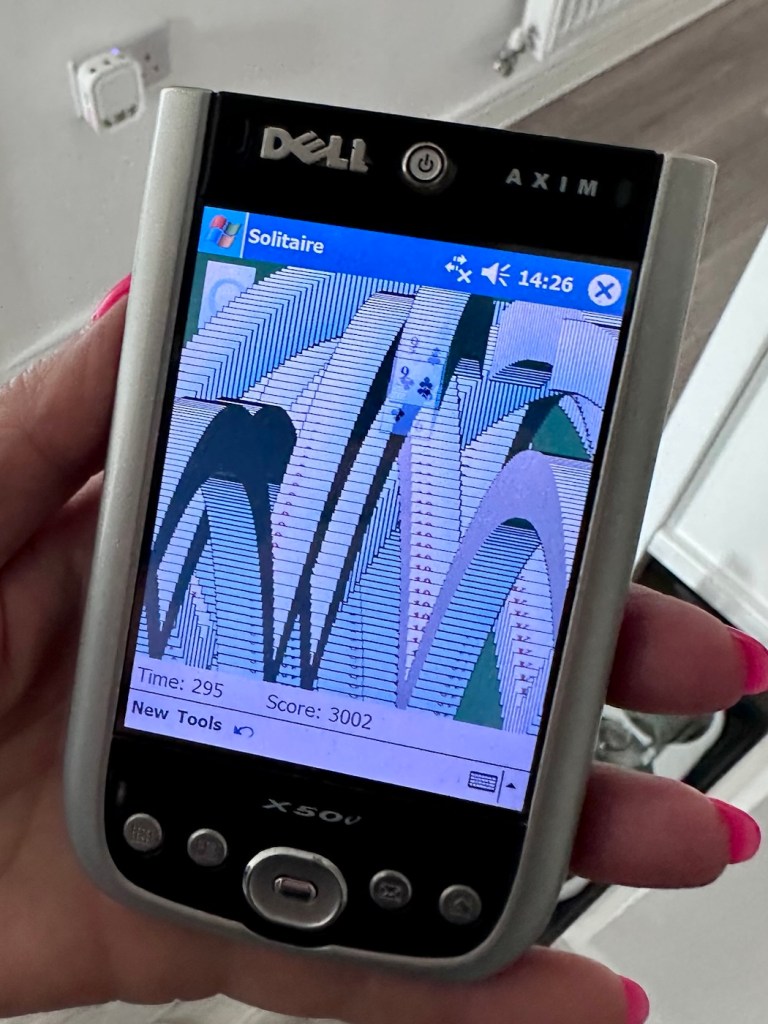
Everything is working fine on this unit, it voice records, the stylus is present and I have all the original software. It’s year 2K compliant and is working as good now as it ever has, the only items I have not replaced are the two small rubber pads used as feet. Not really necessary and if I ever find anything suitable, I’ll utilise it.
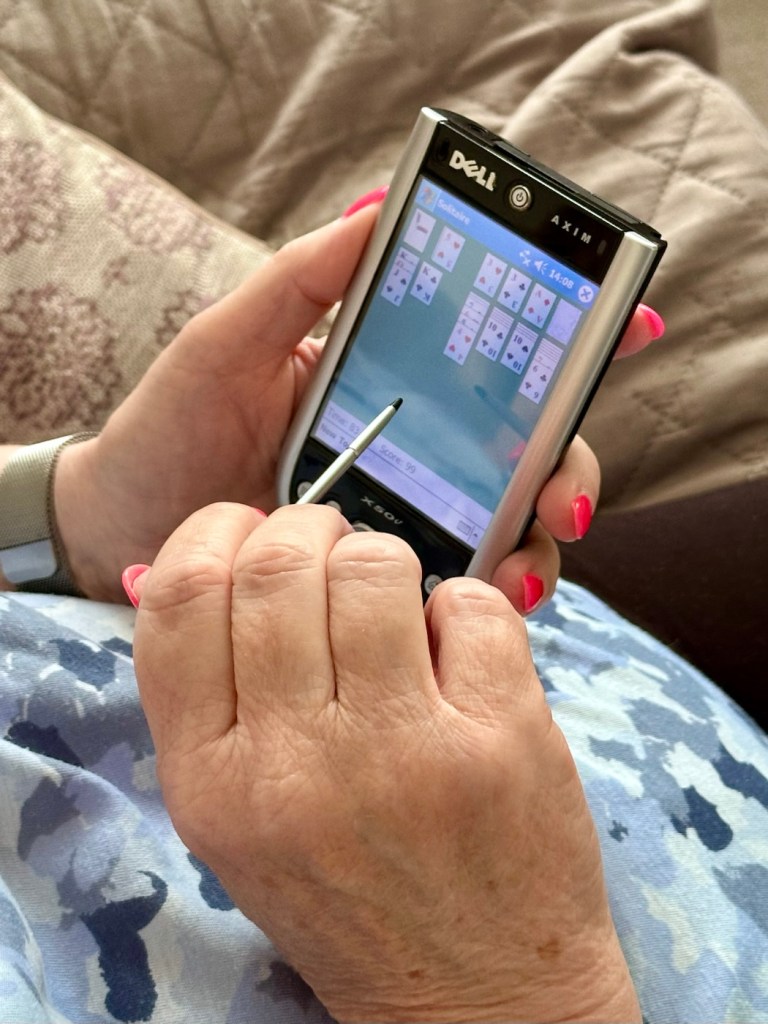
I’ve given this unit probably the best soak test it could ever be given, a rather long session playing original solitaire with my wife. She’s played for a little over an hour solid now and no error codes or faults have appeared.
The ultimate soak test
I’m happy we have a good working item, resurrected from impending doom in a landfill. Let’s get it cleaned and finished off.
Result:
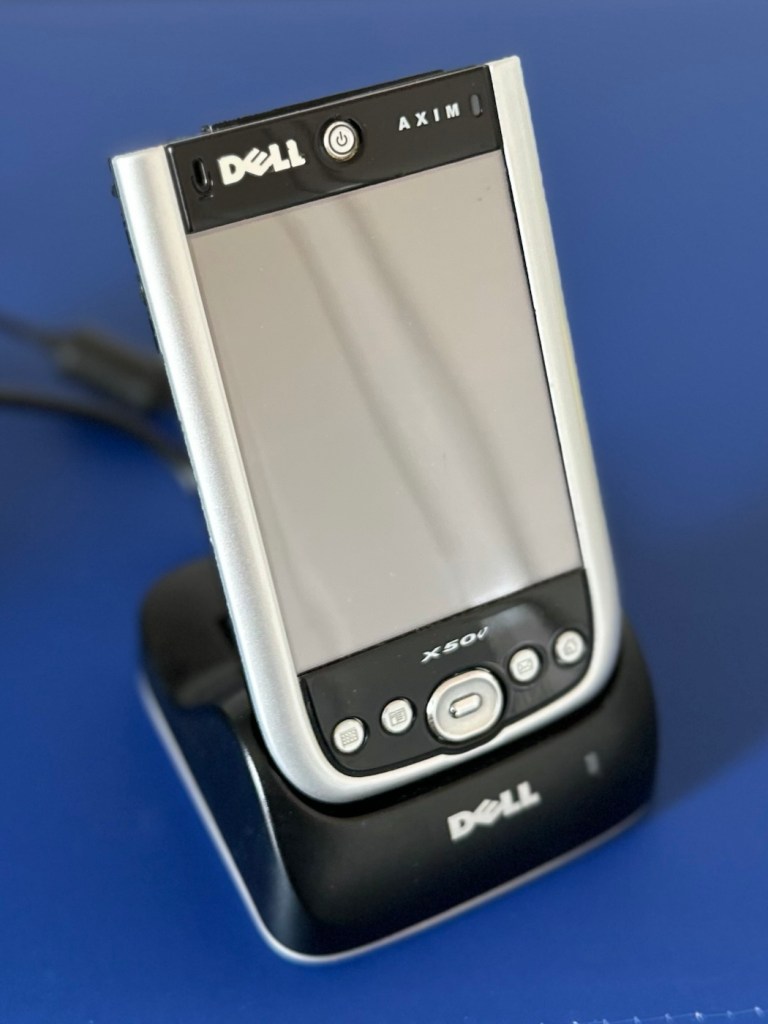
The unit has cleaned up nicely, and for an item that is 22 years old, pre smartphone technology, it has aged really well.
Looking smart
I just love these items from probably the best tech area there ever was, 90s through to year 2k and just beyond. Technology was developing, it was new and exciting with lots of choice unlike today.
It gives me a chance to now go back and buy the items I’d never be able to afford as a youngster/teenager, even though they may be broken. And that’s the fun of it all, learning, repairing and enjoying a momentary rerun of good times gone by.
I love it. And another item is repaired, saved from landfill and another piece of tech history goes on for others to enjoy for a few more years to come.
Thanks for passing by. It’s always very much appreciated.
Plant it, and they will come. This is proof of just how true that is.
I wrote a short while back about installing a presentable garden in our new home that is just a standard, blank and bland, new build stamp of grass, here in the East Midlands: Making a work of art
The build goes on, however today I had a very welcome and unexpected visitor. I have today visited a local nursery to purchase some plants for the garden. As always I always go for the plants that the pollinators love, so I stocked up with plenty of Verbena, Salvia and Hebe that they all appear to gravitate towards. Whilst placing them in the garden, still in their pots to see what would be best in various positions, the pollinators started to arrive. However there was a special visitor on one of those plants. Look at the little fellah in the video below.
Humming bird hawk moth
You can easily tell them apart from other moths by their distinct behavior and appearance:
The Hover: They beat their wings up to 70 times per second, creating a distinct, audible “humming” sound while remaining completely stationary in mid-air.
The Tongue: They extend an incredibly long, tube-like tongue (called a proboscis) to drink nectar deeply from flowers without ever landing.
Coloration: They have greyish-brown forewings, bright orange-brown hindwings (highly visible in flight), and a black-and-white chequered body.
Size: They are medium-to-large moths with a wingspan of 50–58mm.
And it’s the first one I’ve seen personally for around five years.
Made my day this has. Remember that quote from the Kevin Costner film, Field of dreams? “If you build it, he will come.”
Well I use the same quote for wildlife in the garden, slightly amended though, “If you plant it, they will come.”
I read this and had to share. Writers of the world should be able to relate. Wisdom from 92 years ago today.
Made me smile so I’m sharing this.
These words were written on this very day in 1934 apparently. That’s 92 years ago…..and I bet many of you out there can still relate to this at sometime in your writing career.
Not me though, as pretty much every thing I write goes in that basket 😂 and I’m not a writer.
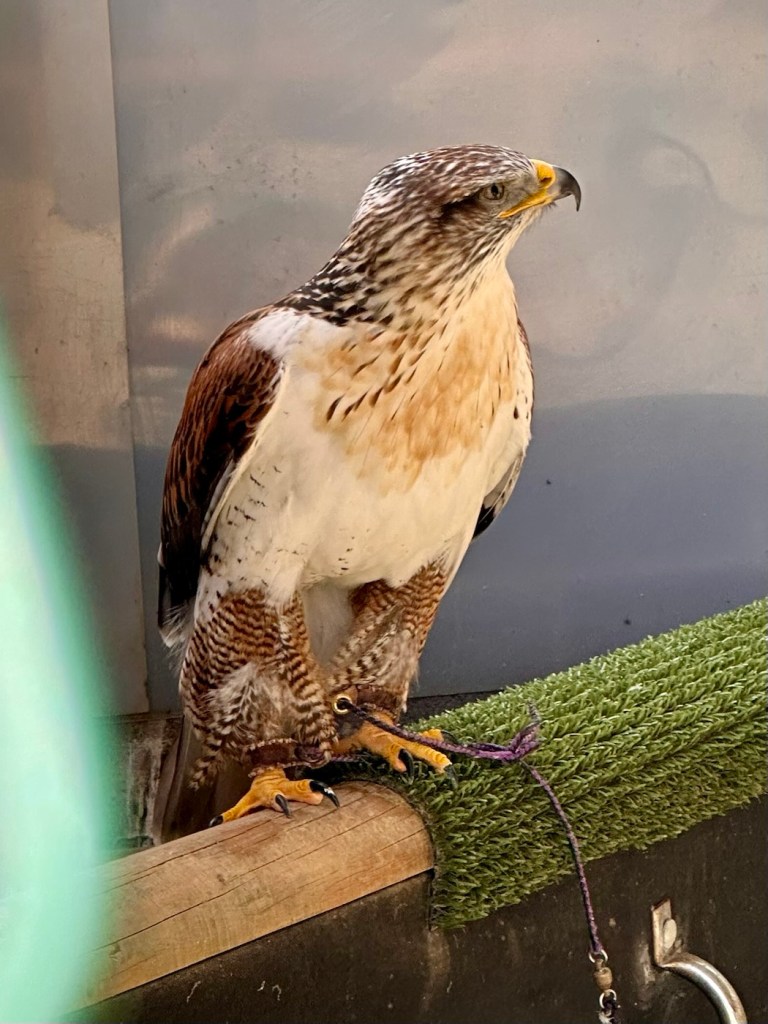
I was gifted a falconry experience for my last birthday. Here’s some pictures and videos of my day.
Last November i hit the 60yr target, and was gifted the present of a falconry experience at a location close to home in the Langton area of Market Harborough in Leicestershire.
We chose a pretty good day as we weren’t affected by the awful weather of the last few days. Once the day had ended though the heavens did open again. We struck lucky. Here are a few pictures and videos from today’s day with some of the most gorgeous creatures on the planet.
Some beautiful birds
And here are a few small videos….
Elvis, a Eurasian eagle owl
Elvis, dive bombing the group
Midnight, a Harris hawk, what a bird
Cheese and pickle, two tiny burrowing owls
A fantastic day at close quarters with some beautiful birds of prey.
Just a picture of a heavily pollen laden bee on a flower I was purchasing today. Lovely to see.
Or poppy, if you like.
A Papaver
As I purchased this beautiful poppy for the garden today, at a garden centre in Shepperton West London, there appeared to be a very welcome stowaway. There was a heavily pollen laden bee 🐝 coming along for the ride. Always lovely to see.
A lovely weekend with family, inappropriate headwear and exceedingly hot sauce, and beer. And talk of weddings.
It’s been a lovely weekend with family and friends staying with us. It’s been sun all the way on what is a bank holiday weekend in the UK, but as is tradition here, the closer it gets to bank holiday Monday, the rain is starting to arrive.
And it caught me out last night when I had to make it to the garage to get some beer, for my guests as stocks were getting low, my headwear was highly inappropriate for the weather. See this small video below:
A box is highly inappropriate in wet conditions. Leading to moments of total blindness.
A box is probably not the most appropriate headwear in wet weather, it gets soggy and when it falls over your eyes causes temporary blindness when you are trying to put the key in the lock. Yes I was a fool.
But that was not my only foolish activity this weekend. No, I had to surpass myself in the art of Tom foolery.
We visit a local farm shop, in itself a pleasant experience where I manage to get a lovely Fuchsia bush for my garden. Then we went into the farm shop.
Here there was a display asking you to sample a range of quite hot chilli sauces, ranging from mild to bloody ridiculous. All the family declined the offer, but silly me decides to go right in at the deep-end and sample the hottest one on display. There was a subtle clue in the product name. “ Crazy Bastard sauce” I just wish I’d read the tasting notes below the bottle that you can see in this picture below.
“Feels like getting a tattoo on your tongue”
5 flames plus. I should have known better. I spent the following hour thinking a hole was developing in the roof of my mouth trying to make its way to by brain, my lips and gums were numb, my speech was impeded and I was dribbling, to be honest I was a mess at the amusement of the rest of my family. Lesson learned. Would i recommend it? As a paint stripper and general rust removal solution it would be fantastic. As for making your food taste better, I’d give it a wide berth to be honest.
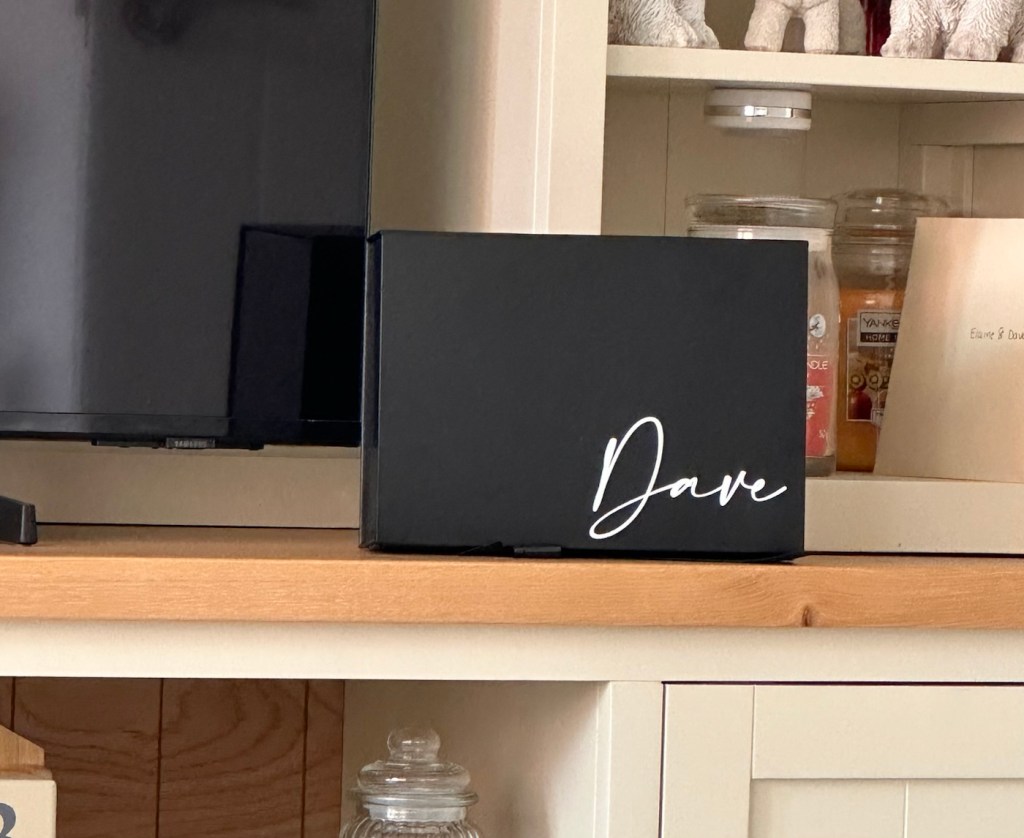
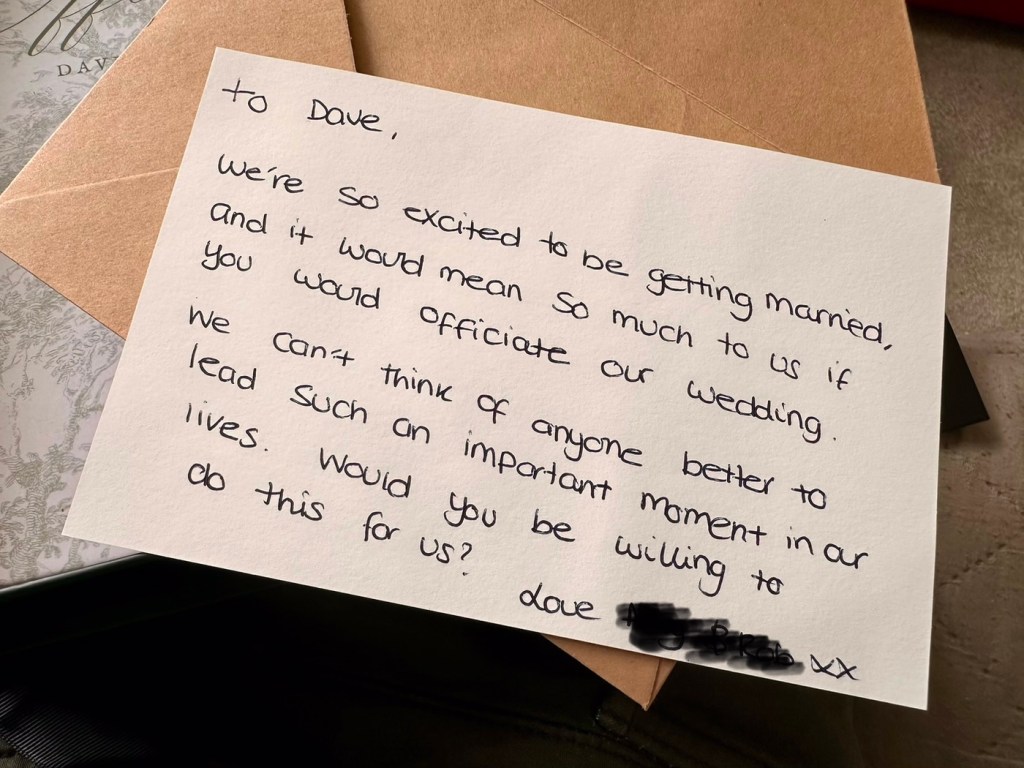
But nicer things were to come. Whilst all sitting around the table, one of the younger members of the family and her fiancé approached me with a small black box with my name upon it. This is for you “Dave”.
The box
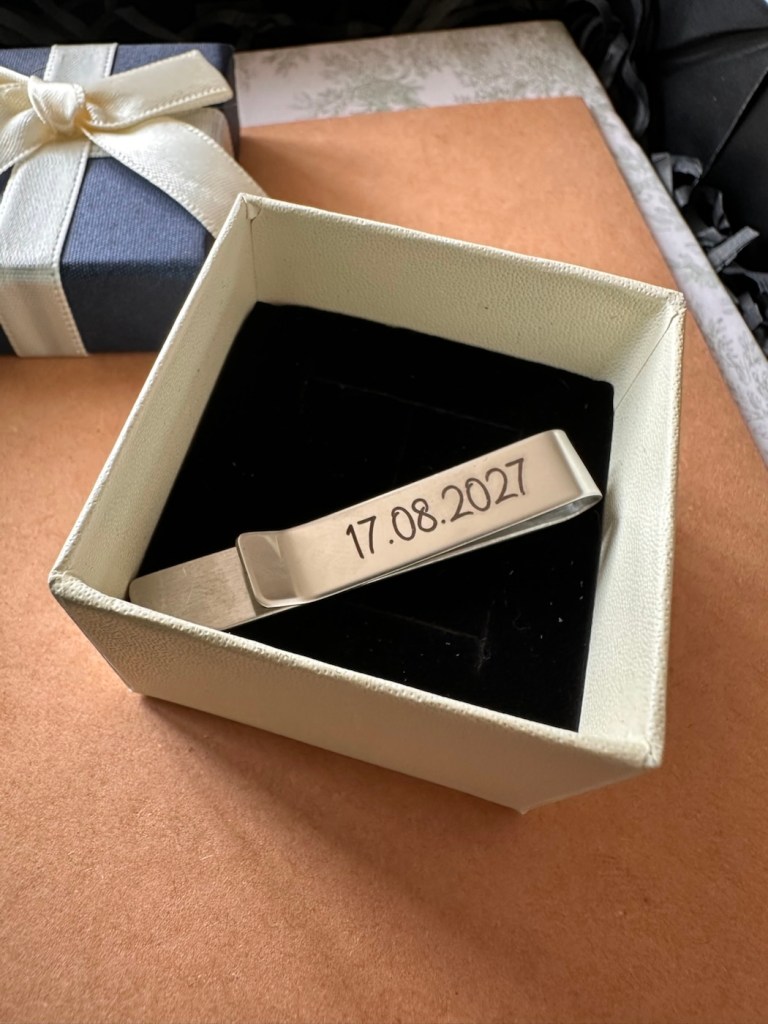
After stating that it’s not my birthday for another six months, I was told to stop yapping and just open it. They get married in a beautiful part of Portugal in 2027 and they have asked me to be the Officiant at their wedding. I jokingly replied that I’m not a priest or vicar, but immediately said yes. How lovely and thoughtful, and wonderful that they would consider me to be a part of their big day.
Wow, what an honour
The role of the Officiant is to guide the couple through their vows. They will be getting married officially in the UK in a private ceremony before heading to Portugal, so my role is non legal as they will already be legally married, I will be there to supply some continuity to those family members attending who are resident in Portugal or who were not in attendance at the official wedding in the UK.
Wow, I am so proud and honoured to even be considered for such a role, it means so much to me and to be honest my wife is completely over the moon about it. I think she is worrying more about it than I am at the moment, but in a good, let’s get this done and do them proud kind of way.
So even with over a year to go, it’s time to think it over exactly what needs to be done, and to think even after they have witnessed me wearing inappropriate headwear and questioning my lack of judgment with hot chilli sauces, they still believe I’m the right person for the job.


You must be logged in to post a comment.