Blah blah….

When everything in life lines up perfectly to cause maximum confusion

Have you ever had one of those days where you are determined to write something but just don’t know what to write about? I’m having one of those days today, I don’t even know what the title of the post is, hence I’ve just called it Blah, blah as a draft title.

I might keep it at that.

I look through all of the posts that i subscribe to and I’m immensely impressed by the frequency that some posters write at, you guys are so organised and regimented that i can be nothing more than mightily impressed. And i am. Well done all of you.

This site, as i have stated previously, on many occasions was put in place purely as an extension to the journal i used to keep by my bedside. However it has also extended to be a journal of my hobbies and interests, in no way was it ever to have a professional “Air” to it and to that extent i have been very successful.

I’m inherently aware that lately i have used this medium to whinge and moan about a number of things, one of those is the process (or should i say endurance) of moving home in the UK. Before you shut your computers down and redirect to a site on do it yourself lobotomies, I’m not going to go on about it too much in this post, i promise. I might just touch on it a teeny tiny bit, sorry.

So let’s get it over with. After the collapse of the chain on Monday, a new purchaser was in the frame by Wednesday, who had previously viewed the house and loved it. They were disappointed that we had sold, and left instructions with the agent that should things not work out then they would be happy to step in. Their dream came true and on Wednesday they officially committed to purchasing, however the price they were offering was lower than we wanted, you can’t win them all i guess. The whole process rides on them coming back again early next week, and to be honest it could still fall flat on its face. And it probably will. However the wife is now in a better state of mind and we have had some good discussion on how we carry things forward. Things are good, and we have plans. Either way, whatever happens it was meant to be. Just roll with the punches, that’s life.

See i told you it would be brief.

Now, health. I don’t normally talk health as it’s no one’s business apart from mine. And the wife’s. I’m fast approaching a landmark birthday, and as you get older, things start to happen. Things that make you question yourself, ”That’s never happened before”. Well, somethings occurred that has made me contact the doctor. And if you live in the UK you would generally understand that, that alone is no easy task. To partake in the 8am lottery to get a doctor’s appointment is no task for the weak hearted. How ironic, as that is exactly what my problem appears to be. The ultimate test of strength and endurance.

You get on the phone at 8am when the doctor’s appointments line opens, within 3 minutes you are number 32 in the queue, and at this point you realise there is probably no point at hanging on as you are not going to get to see anyone today. Just remain incapacitated and try and call back tomorrow, there’s a good lad!

No wonder many people just say, “sod it, what’s the point” and that’s probably why at this stage our entire hospital and A&E system is at bursting point. Crazy. The NHS is such a diamond, but it’s at a straining point that can’t be sustained, it just can’t handle the demands put upon it, and its the every day man and woman on the street that will eventually pay the price.

The good news is that prices for cremations have dropped in price, a classic sign of supply and demand being in perfect harmony.

My head is full of bloat at the moment, and i just had to unload some of it here, how do you writers put it all into some type of order? That’s what I don’t understand. Where do you get your motivation from?

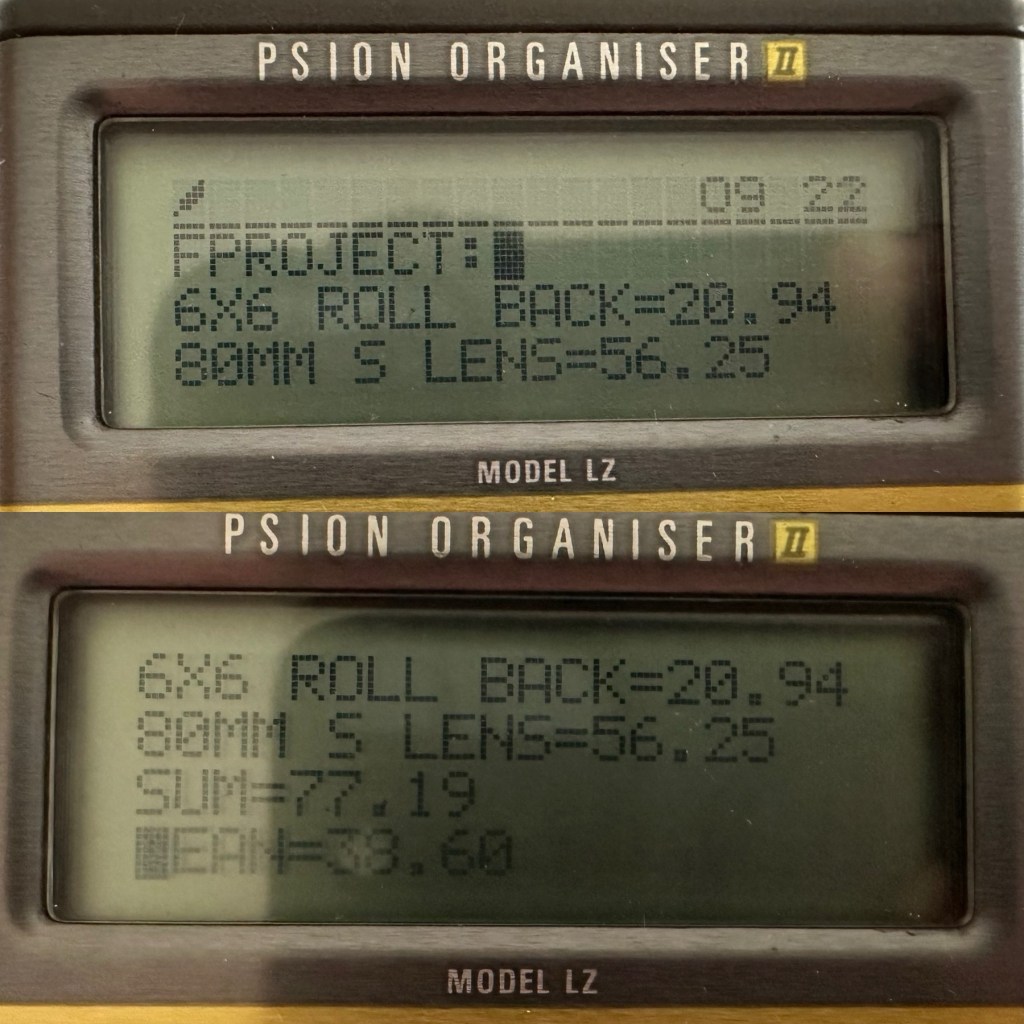
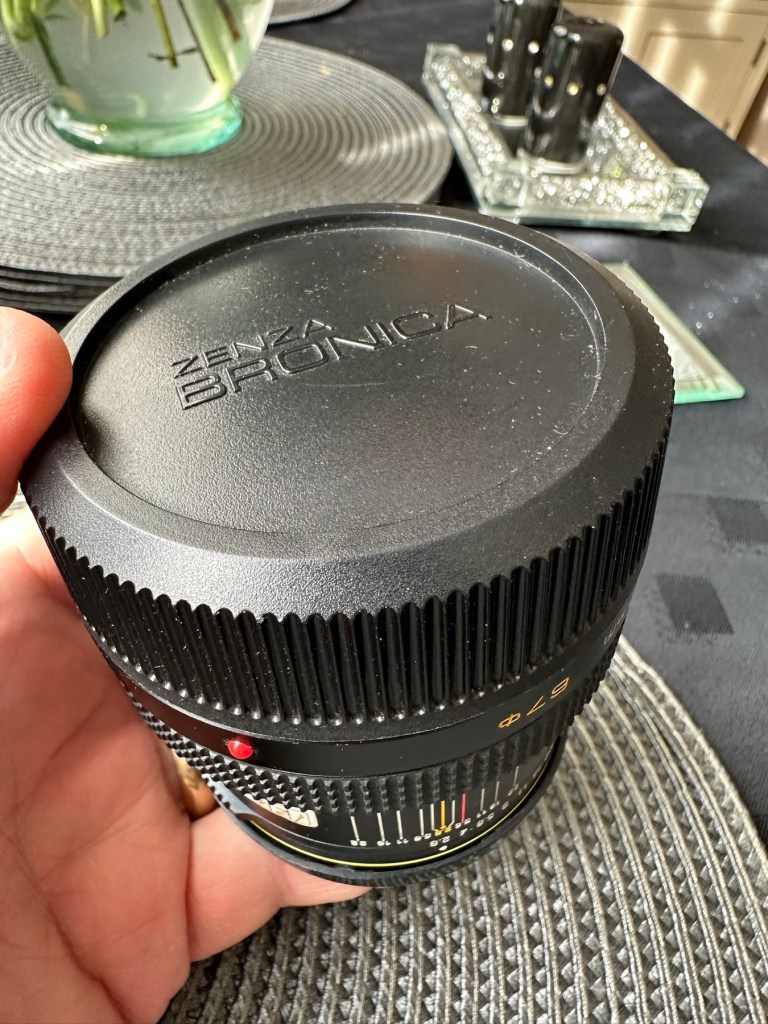
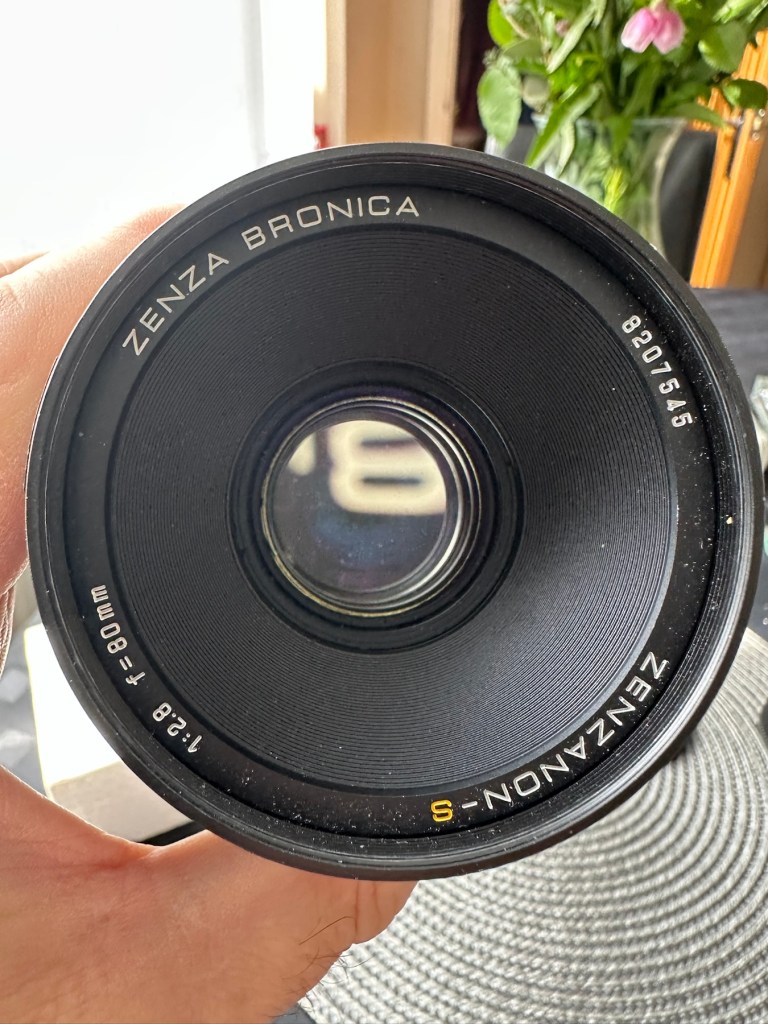
My entire life is packed into boxes at the moment, and i really do miss the activities that gave me a little bit of artistic licence, I’m on all the auction sites at the moment just itching to push that “Buy now” button, but its hard….very hard. I already have 13 projects on WordPress currently in draft mode, awaiting completion but this entire process of moving home has sent my anxiety and patience levels through the roof, but I’m keeping it together somehow, i have to stay strong for my wife. However she is in exactly the same situation as me, and at times she well and truly puts me to shame. Selfishness has no position in a stable relationship, we are partners, and partners share the burden, rethink your attitude, refocus and share the burden. Simple as that.

So that’s today’s rant put to paper…or the cloud, and do i have a suitable title now? No I don’t. So Blah, blah it is then.

Stay safe. Have a beautiful day.

Always the radio

What do you listen to while you work?

As a child of the 60s, Tv was very much still in its infancy and has never really had a hold on me. To this day I watch very little Tv whereas my wife is the total opposite, and all those Tv subscriptions really add up.

I however prefer the radio, always have done and always will do, you can take the Tv away and I truly would not miss it for a single second.

I was brought up on radio, the excitement of owning your very own transistor radio that went everywhere with you. In bed late at night listening to those old sports broadcasts as well as walking the streets with it permanently held to your ear listening to your favourite channel, way before Walkmans and MP3 players got in on the act.

The radio I always have on in my workspace

I learnt about radio at an early age, how it worked, who invented it as well as participating in its experimental usage as I grew up, I even took the RAE exam and got my City and guilds qualification in radio, I became a radio Amateur and the experimentation went up a few notches. I think this is where my fascination in repairing all these devices comes from, an incessant, absolute thirst for knowledge and a fascination in just knowing how things work.

I sit in my little work area and have a simple radio I recently repaired, set on my station of choice, and in the Uk that is “Boom radio”. It plays my type of music and still has familiar DJs I grew up with as a child, I’m stuck in a fantastical time warp.

Radio, I use it all the time, and to me it will always be the premier medium of entertainment that i will always turn to.

Have a great day.

Bronica SQ-A / The Frankenstein project Pt:4

To find out what I am trying to accomplish with this project please refer to my initial post: Bronica SQ-A Medium format camera

Task:

To build a usable, basic issue, medium format camera (Bronica SQ-A) from damaged items and spare parts, for as little outlay as possible and shoot one black and white, and one colour roll of film as proof of its successful completion.

Getting started:

Building a camera from damaged parts is no easy task when the name happens to be a high end brand and any parts that are available, are being snapped up by others to service their own stock or to break up for sellable parts. I’m going to keep a running total to try and build this as cheaply as possible, and to keep track of this total I’m going to use my trusty Psion Organiser II LZ from 1989 to keep a tally.

How the project currently looks.

Fourth purchases:

Now we have the bulk of the camera, we just need those annoying little bits to finish off. I’m calling them annoying, because if I was just to pay out for the 5 or 6 little finishing touches I need they would cost more than the total amount I have paid so far for the camera itself. I would be paying a premium for items that will in the end have no effect on the result I require to complete this project, that being two properly exposed rolls of film.

So here we go.

Battery:

Probably the cheapest item you will buy for this camera. The camera requires a single 6v alkaline battery and is quite important. Without it the mechanical shutter still works but at only 1/500 second. To obtain all the other available shutter speeds you need the battery to work the system electronically. This has cost me only £3:50GBP. After testing I can confirm that the battery works fine and all shutter speeds are as expected. Perfect.

Winding handle/Crank:

For some reason sellers always remove the crank prior to selling. That’s because the original Bronica crank is currently being sold at between £70-£80GBP and it really isn’t worth it. Everyone is after a quick buck and some people are willing to pay it. I’m not however, and my handle here is a special strength 3D printed version that I have paid the grand total of £11:20GBP for. It will need a couple of small “O” rings just to pad the handle on the spindle as it’s a tiny bit narrower than the original over priced one. It’s more than capable for the job in hand though, looks absolutely fine and has saved me around £65:00GBP of money.

The focussing glass:

This is another item that the sellers withold for individual sale. I wonder why? Yes a standard focussing glass is going to set you back anything up to £150:00GBP and again it’s not worth it. However my one is a “damaged” one in that it has handling and pen marks on it. It looks as if some has sadistically drawn their own frame on the glass, the fool! I’m hoping this will clean up a bit but as long as I can see the focussed image I’m not all that fussed. I only paid £11:75GBP for this so yet again a further saving of around £140:00. See, savings can be made, if you are happy to make the trade for a lower quality item.

Camera aperture covers:

Not really essential at this point, but to be honest you need to protect the fragile equipment you now have so it is really worth investing. I’m not purchasing these just yet, that’s a later purchase, I have a lens cover and hood cover now, so that is all I really need to start the real testing.

Waist level viewfinder:

Now this is a real bone of contention for me. Individually it is probably the most overpriced single item you could buy. It’s basically just a flip up hood that acts as a cover for the focussing glass, that affords a bit of light protection, as has been common on old twin lens cameras over the last century. But because the sellers again sell these as “additional items” they control the price and at an average of £150:00GBP (Recent eBay sales data) again the consumer is being ripped off. I’m currently monitoring some damaged ones for repair on the sale sites.

And as of the 4th May 2025 I am now the proud owner of one of these items. I’ve paid a total including postage of £39:75GBP and that’s a very fair price. I’ve been searching the sale sites for quite a time before coming across this one. There is one caveat though, it has some slight damage, but that’s what this site is all about and it ties in nicely with the Frankenstein aspect of this post.

Assessment:

I’m going to be very brief with the assessment, as you will see this project is made from a selection of parts that at time of purchase all had their own faults. Each part that has required repair has been highlighted in the relevant posts associated with this series. Links to those posts can be found in the link supplied in the first paragraph of this post. There are five parts in total. I’m generally pleased that the parts I have obtained have combined to make a very nice “Frankenstein” camera from a brand of camera that is becoming increasingly expensive as an “Antiquity”. Not that it was ever a cheap option for a camera in the first instance. Let’s move on to cover some repairs that have occurred for some of the pieces covered in this particular post.

Repairs:

The focussing glass as you will see above was in quite a poor state on its arrival. This one had some scars and it looks as if someone has used pen to draw their own frame in the glass, to be quite fair it was in quite a state, but it was purchased for a really low price and i believe it can be made to look a lot better. Listen to anyone who is,”in the know” and you will always be told to not handle these screens. A load of tosh, I’ve been handling these ground plane glass screens for years and sometimes you just need to get hands on and this is one of those cases. Yes, if it’s in a pristine condition then cotton gloves would be the order of the day, but this example bypassed pristine conditions many years ago.

I started off with a good clean using IPA and cotton buds, I used about six cotton buds in this process using a new one every time the cotton was overrun with dirt.

Dirt from the IPA clean

Once the IPA clean had been done I then soaked the glass in a detergent solution and then again used cotton buds to get the solution into the scratched areas of the glass.

Detergent bath

I’ve finished the clean with a rinse of hot water to remove all the solutions, and left the glass to dry on some paper roll. A light polish with a lint free cloth finishes the job.

And this is how it all looks in the camera.

I’m extremely happy with the outcome with the glass, it does its job and works really well. With no distractions on the screen apart from a couple of scratches this item has been transformed. Just a little TLC and patience was all that was required.

The Winding handle crank doesn’t really have any issues, it just needs some aesthetic teasing. This crank was 3D printed for the ETRS version of the camera and as such the actual base of the crank shaft is slightly slimmer than that of the SQ model here. It works fine. I’m just being a bit of an OCD freak and want it to look better.

Before and after. “O” rings in place in the winder

Not a problem though as I only have to pack out about 4mm of space and I have just the thing to use. Two perfectly fitting minuscule “O”rings. Job done, let’s move on.

The Waist level viewfinder has one particular issue in that the folding action is slightly affected by an issue with the spring. Again it is fully usable and does not cause any issues operating wise, it is purely an aesthetic issue that I will get around to sorting once the camera has been tested.

This is one of those parts that has signs of age with small signs of wear and tear, however that adds to it’s character and shows it was once a very much loved item that saw some good usage.

I think, we are now ready to get the entire unit assembled and ready for the testing phase of this build.

Total Outlay:

So just how much has this little project actually cost? Over to my trusty Psion Organiser 2 LZ for a final update.

Running total of £236.16 GBP

So the total cost of this project is £236.16GBP and I’m very pleased with that considering that sales for fully working similar cameras command prices similar to those seen in the picture below.

Recent sale prices

So taking this evidence into consideration, the route I have taken of building from damaged stock has saved me between £100-£350GBP. And as it is now a fully operational camera, I could probably command a price that would make a quite nice profit. But I’m not selling. This stays in my collection.

Outcome:

I want to take some pictures with both colour and Black and white film, to prove this camera is capable of this function considering it was constructed with broken or discarded parts.

I will post some sample photos of the tests, and will also produce a couple of galleries to link to within this site. First I will try my luck with the Black and white film, as I have one here currently, though out of date it should suffice as it has been kept refrigerated during my ownership. I also have the chemicals and ability to develop film at home, so this should not be an altogether time consuming process.

This has been a satisfying build making a working piece of camera history entirely with damaged and alternative parts logged throughout all of these posts.

Look out for part 5 of this project that will cover the final testing and the results gained from these tests. Hopefully we will have some good photos and will then be able to wrap this project up.

Garden therapy

Currently I’m in the west of London in the Sunbury on Thames area. I’ve brought my wife down to spend ten days with her friend as I’m about to embark on a long stint of night shifts. It will allow them to spend good time together. I shall be heading back to the East Midlands later today on my own.

Anyone who reads my posts will know that last year we spent a lot of time down here as her friend went through quite a bad episode of poor mental health. My wife assisted her through that, and helped put her on a care plan and arranged for her to have visits, so she could be checked on regularly to ensure she was receiving the necessary care and attention that she required.

I’m pleased to say all that worked out well, her friend has recovered and is back to her old self, confident and strong willed, you’d have thought nothing had happened. She has been weaned off her medications by the doctor, the welfare visits have ceased and it is so wonderful to see her back to her old self. We all need a little care and attention at times, and it certainly helps. And it’s good to have such a friend as my wife.

Azalea

And the above picture from her garden sums it all up for me. Last year there was none of this, the garden, though well kept lacked colour. This year it is so different and is ablaze with colour. This is what she is capable of, producing things of beauty just like this fantastic Azalea plant.

I’m lucky if my Azaleas get just a few flowers each year. She is so talented when it comes to gardening.

As I’ve always stated, never show envy, always turn that into appreciation and that’s what I have done here, she has such a talent, she is so capable and knowledgeable and I can only appreciate that I will be a better person, a better gardener by listening to the wisdom of those such as her.

Have a wonderful day everyone.

Wedgwood Clio ceramic clock

What the listing stated:

Wedgwood Clio style Ceramic Clock Casing – Clock not working. Attractive casing showing fruit and berries. About 20 years old. Unfortunately, the clock is not working and has battery corrosion making it uneconomic to repair.

One of the photos shows the casing with the clock inserted and I will include this clock for information purposes. The casing is 90mm high and 90mm wide with a depth of 50mm.

EBay

This had just been listed and had a really low buy now price so I took it. With postage and all costs it’s cost a total of £8:32GBP, and I think that’s a good price for late issue mass produced Wedgwood piece. I’ve always fancied having a go at fixing a timepiece so I’m happy to trawl around at the low price end to give it a go. This will my second piece I have attempted, the first one being even cheaper and very tacky that i passed on to my older sister, and she just loves it : Rock & Roll clock

The Wedgwood Clio style was introduced in 1992 and ceased production in 2005. The fact that the seller dates this clock as around twenty years old would tie in nicely with this piece being part of the last production run of this range.

You can buy replacement Clio design clock inserts from Wedgwood direct at about £27GBP per item, but that’s not the purpose of this site, so I will attempt to make the repair. If all else fails and it is actually beyond repair, then I will source something similar to replace it with. This is a 36mm fitting clock insert.

Anyway, let’s await its arrival so we can fully assess things.

Assessment:

A lovely piece of my favourite pottery in just as good condition as described in the listing.

If you remove the timepiece and crack the back open there is definitely signs of battery corrosion around the battery connectors. Measuring the battery voltage it is registering 1.4v, I may well replace this as I don’t know if this is the one that caused the issue or whether it is depleting under load, and I wouldn’t expect that load to be too excessive. But you never know so I will source a fresh battery.

Battery registering 1.4 volts

Repair:

The internals are contaminated with green/blue corrosion from an old battery, using my magnifier and a small grinding pen I am able to remove all the visible corrosion.

After I’d used the grinding pen, I cleaned the timepiece with some compressed air and then cleaned the workings with some Isopropyl Alcohol to remove any residual contamination.

With the unit now reassembled, i can confirm the unit is ticking along quite nicely.

It’s just gone 8pm and keeping good time
20’minutes later still going well. You’ll just have to take my word for it.

Result:

It amazes me that someone sells a unit as lovely as this stating that it’s “Beyond economical repair”. What nonsense, this has cost me the grand total of “Zero” to get fixed. At the very most it’s taken 15 minutes of my time. I love easy repairs such as this, the fact that I purchased such a charming little timepiece at pretty much no cost at all makes it all the more satisfying. An item such as this needs to be looked at as it’s too nice to just be stuffed in the back of a cupboard until it’s thrown out with the junk.

Still quietly ticking away after being repaired

Again, some things are just so easy to repair if you just commit some time and patience to it. This clock now has many years of good use ahead of it. On display, right where it belongs.

Another item saved from waste.

A positive outcome in my personal point of view.

Thanks for passing by. It’s always very much appreciated.

Bronica SQ-A / The Frankenstein project Pt:1

To find out what I am trying to accomplish with this project please refer to my initial post: Bronica SQ-A Medium format camera

Task:

To build a usable, basic issue, medium format camera (Bronica SQ/SQ-A) from damaged items and spare parts, for as little outlay as possible and shoot one black and white, and one colour roll of film as proof of its successful completion.

Getting started:

Building a camera from damaged parts is no easy task when the name happens to be a high end brand and any parts that are available, are being snapped up by others to service their own stock or to break up for sellable parts. I’m going to keep a running total to try and build this as cheaply as possible, and to keep track of this total I’m going to use my trusty Psion Organiser II LZ from 1989 to keep a tally.

First purchase:

The first purchase has been made and it is for a 6×6 120 roll film back unit with dark slide. I think I’ve paid quite a good price for this item. This is the back piece that fits on the rear of the camera. Here is what the listing stated:

ZENZA BRONICA SQ 6X6 120 ROLL FILM BACK WITH DARK SLIDE Signs of wear, untested.
Uk Buyers Only Please

EBay

And the total paid including all postage is £20:94GBP. Let’s now start the running total in the Psion II LZ.

Running total

All I can really check at the moment is cosmetic condition and this looks a little beat up, however I don’t really care how it looks externally, as long as it’s light tight, that is all that matters and I won’t even be able to check that until later on in the build. Cosmetically I will attend to it, if I feel so inclined at the end of the project, for now it’s ability to be light tight will be my major concern.

Assessment:

The unit has arrived and yes it has seen use, but not in a few years I suspect. The old smell hit me the second the package was opened, it’s kind of a reminiscent pong from the past, however I’ve got to see beyond this.

The light slide seems fine, however the surrounding frame has been bashed and a small bit of frame has gone missing. There is also a screw missing and I suspect the area that is missing the screw may well have been glued down. there are some slight rust spots on the exterior framework, however everything inside appears to be fine apart from some light seals that will probably need replacing. The rollers inside are grubby so a good overall clean is in order.

Annoyingly the ASA markings on the dial atop of the roll holder are missing. I will make something basic up to remedy this issue. Again it’s an exterior issue and I’m not too fussed at the moment.

Yes there is some work required, but there is no rush. And thankfully I don’t see anything that really scares me about it. I won’t really know how it stands mechanically until I find a suitable body to attach it to. I have that to look forward to in a future post.

Repairs:

The ASA dial. Simple solution here, until one becomes available sometime in the distant future, is to use some very small dymo labels I have printed. I will cut these down to size and put them in place where they should be on the dial. Quick and temporary solution a’la Frankenstein. No need to over manufacture things, this will do fine.

Size 9 dymo labels

The old asa wheel has been cleaned to remove the original glue, and temporary stickers have now been applied. This completes this fix for the ASA dial, for now.

Two items to make one good unit

Edit: I’ve managed to obtain a damaged roll back for a grand total of £5:76GBP, absolute bargain and it also has a working ASA dial. So I’m hoping I’ll be able to use this donor to help in the repair of this item. I’ve used a combination of parts from this and the earlier roll back and I’m happy I have a good working unit. We now have a proper ASA dial off of the spare unit transplanted onto the old unit.

Front frame:

I’m taking this off to give the whole area underneath it a good clean. There are some film guides under this frame that are contaminated and that could cause a scratch on the film, I’m going to clean this whole area under the frame and will then reassemble. The cartridge slide is in a good condition and has just required a polish. Apparently this front frame is prone to breaking and the screw holes splitting, as it gets quite brittle. This has happened to this unit, and I’ve found a guy that 3D print’s replacement front frames and I have ordered one of these to ensure that the whole frame is secure and light tight, as currently one corner can be lifted and this could cause a fogging issue. At a cost include postage of £12:75GBP it’s a small price to pay seeing the only way to get one nowadays is by purchasing a donor unit at cost far exceeding what I have paid here.

There are a couple of screws missing of which I have plenty of spares so these will be simply replaced. I’m happy now that this portion of the camera is in a good condition and will soon be ready to be put to use.

There was a lot of contamination under the plate when it was removed, I was quite amazed just how bad it was. This has since been cleaned prior to the new frame and seals being put back into place. When everything is re assembled there will be another clean, I will also be using compressed air to finally clear any remaining debris from the roll back. Edit: the 3D printed frame has arrived and to be totally truthful it’s not much good. The part where the slide goes in is not usable and I’m not confident this will be as light tight as first thought.

Good front frame from the donor spare unit

However the spare unit I purchased has a good front frame that just needed a tiny bit of adjustment to work, I’m now confident the roll unit will work as it should.

Light seals:

To be honest there are only two immediate areas of concern that I can see. All other light seals seem to be sufficient. I already have plenty of light seals material from where I fix other cameras so this should be simple enough to replace.

New and old light seals replaced

There were only two pieces that needed replacing, these were both on the roll film back. All other light seals were fine.

Rust spots:

These are purely external and there are no issues inside the cartridge. However I may just give them a very fine rub down and a quick spray with a black gloss to just make them look better. Then again I may not, and then I’ll attend to the cosmetics once I have completed the project. Edit: I’ve decided to leave this for the moment and will attend to this sometime in the future as it is not affecting anything at this stage.

Film cartridge:

Again this has just been cleaned and some contamination has been removed from all rollers and guides within. I have adjusted the back plate pressure pad for the film and also given this a good clean to remove any contaminants. I’m happy the internal cartridge is in a good condition and only requires a light clean. This cartridge is superior to the one I have obtained as a spare so this will be the one i work with. I have replaced all the exterior screws to replace the original ones as they were all a little crusty and contaminated.

New screws. I will touch the heads up with black dye

The whole roll section has been cleaned with tack cloths and compressed air to ensure all contaminants have been removed.

I’m going to store the whole roll film back, in a sealed plastic bag with some Silica gel packs to try and remedy the mustiness that I mentioned at the beginning of this post, though I must admit after all the cleaning and replacement of parts, the issue has reduced immensely. Some exposure to sunlight on a window seal usually helps immensely. That’s where it’s sitting for the moment. It’ll go in the bag with some silica gel, during the more inclement weather.

Outcome:

This part has been the most demanding part of this project so far. I’ve looked into the possibility of using 3D made parts, but I must admit defeat here. The items are about 80% ok, there are holes missing that should be there and as it’s a two piece fix you are then introducing glues, and potentially increasing the chances of light accessing the one area you want dark. Maybe in time they may perfect it. I was exceptionally lucky to obtain a spares unit for literally one pence. Yes one whole pence. It cost £5:75 to post making a total of £5:76GBP, but in many aspects some of its parts were far superior to what I already had. I am happy that this part of the build is now complete.

All good to go. Please keep an eye on the other blog posts that are coming regarding this project.

Bronica SQ-A / The Frankenstein project Pt:3

To find out what I am trying to accomplish with this project please refer to my initial post: Bronica SQ-A Medium format camera

Task:

To build a usable, basic issue, medium format camera (Bronica SQ-A) from damaged items and spare parts, for as little outlay as possible and shoot one black and white, and one colour roll of film as proof of its successful completion.

Getting started:

Building a camera from damaged parts is no easy task when the name happens to be a high end brand and any parts that are available, are being snapped up by others to service their own stock or to break up for sellable parts. I’m going to keep a running total to try and build this as cheaply as possible, and to keep track of this total I’m going to use my trusty Psion Organiser II LZ from 1989 to keep a tally.

This may be a strange situation where Pt:2 and Pt:3 of this project gets published before Pt:1, quite simply Pt:1, the film back. needs a fair bit of work still doing to it.

Third purchase:

And the third purchase is for an SQ body. This appears to be well used, but appears to be in a working condition. Here’s what the listing stated:

Zenza Bronica SQ Body Only / Medium Format 6×6 Camera

Condition:

Used but still in good usable condition with usual signs of use – see photos for details please. Fully tested and in perfect working order.
Supplied with: Camera body as pictured.

EBay

Now I’m happy with this purchase as well. Not quite the SQ-A I wanted but to be honest the only difference is mirror lock up and metering that I don’t really need so I can live with that, we all managed prior to the metering being done for us, I’m sure we will all survive now . (Oh how we have been pandered over the years)

I’ve paid the grand total if £73:75GBP for this body including the postage. There are some bits I will require to complete the body, namely a focus screen and waist level finder that could be a bit pricey, and a winder for the body. Now, the winders are pathetically expensive at around £60 for a bit of plastic. I know a guy who 3D prints a good alternative for a fraction of the price. And that will be the route that I take.

So over to my trusty old Psion II LZ for the running total for these first three items.

Current running total

So the total for these three items comes in at a total of £150:94GBP, and in Bronica terms this is extremely reasonable!

Assessment:

The parcel has arrived and yet again I’m really happy with this purchase. Very well packaged, a very faint age related mustiness that I guess should only be expected on an item that is now 45 years old. It seems to work just fine. I have connected the lens and that seems to be working ok, I just need to verify the shutter speeds are all correct. There is no battery in the base and this needs replacing as this is what controls the shutter speeds. Without the battery the mechanical shutter works, but only at a speed of 1/500 of a second. (Edit: the battery has arrived and after testing i can confirm that all speeds are operating as expected). The film back fits fine but I still have some work to do on that before I can say that this part is working ok. Overall I’m satisfied with what I have for the price I have paid.

Repairs:

Not so much repairs but additions that are required, such as a crank winder arm and a focus screen, a new battery and a selection of covers to protect the central unit in transport. All horrendously over priced and i will deal with these items in Pt:4 of this project.

Outcome:

Current situation, looking good, smelling old. Not me, the camera 😂

We are almost there. The lens is fine, the main body is fine and just needs some final testing. The film cartridge is the item that needs the most attention and this will hopefully be finished when I have the new front plate that is being 3D printed. The next instalment will be just a tidy up with all the little bits I need to complete the build. These small pieces in Bronica terms are so bloody expensive, or should I say extortionate, can be obtained at a fraction of the cost elsewhere, you just need to shop around, if you are happy to have a non named spare part as a stand in. I’m happy with that as these parts have absolutely no effect on how the camera performs, and what we want to achieve at the end of this project, that being a well exposed two rolls of negatives that will produce a number of well presented photographs.

All good to go. Please keep an eye on the other blog posts that are coming regarding this project.

Bronica SQ-A / The Frankenstein project Pt:2

To find out what I am trying to accomplish with this project please refer to my initial post: Bronica SQ-A Medium format camera

Task:

To build a usable, basic issue, medium format camera (Bronica SQ-A) from damaged items and spare parts, for as little outlay as possible and shoot one black and white, and one colour roll of film as proof of its successful completion.

Getting started:

Building a camera from damaged parts is no easy task when the name happens to be a high end brand and any parts that are available, are being snapped up by others to service their own stock or to break up for sellable parts. I’m going to keep a running total to try and build this as cheaply as possible, and to keep track of this total I’m going to use my trusty Psion Organiser II LZ from 1989 to keep a tally.

This may be a strange situation where Pt:2 and Pt:3 of this project gets published before Pt:1, quite simply Pt:1 needs a fair bit of work still doing to it.

Second purchase:

The lens. Probably the most important purchase of this project. Looking for a “cheap” lens is normally not the thing to do when exploring lenses as you do really get what you pay for. You want good clarity? You need a good lens. However this lens came on offer and what sold it to me was that there were no scratches and fungus in the lens, and that was music to my ears. It is a duplicate of a lens the owner already has and was surplus to his requirements. He has also supplied recent proof of photos taken on this lens and i believe he has sold me a little diamond to be honest. Everything about it seems good. There is nothing really to do to it, so no maintenance apart from maybe a light external clean and that will be it until everything else comes together.

Here is what the listing stated:

This is the S version of the 80mm lens and although there’s a slight difference in the lens design on the PS version, I’ve compared the two and couldn’t see any real difference other than a slightly more modern colour rendering. The T mode is also working without issue. This lens has been my main user lens and has never let me down. Glass is clear of fungus, haze and scratches. Aperture and shutter blades are snappy and clear of any oil. Shutter speeds are accurate and the lens produces just delightful images and is massively underrated. I’ve included several shots taken recently with this lens mounted on an SQ-A as per the examples. Focusing is smooth, apertures have a nice smooth click and the lens focuses just fine all the way through the range. I will include the origin box as well as the front and rear lens cap with the lens

EBay

I’ve paid the total cost including postage of £56:25GBP and I think that this is an absolute bargain for what I am getting. It’s an 80mm f2:8 Zenzanon-S lens in its box with two end caps. I’m really pleased with this purchase and there is not a lot else I can say.

So here we have the scores after two purchases, the 120 roll film back and this lens. Over to my old mate the Psion II LZ for the running total.

Running total

So the total for two items currently sits at a comfy total of £77:19GBP so far, with an average per item price of £38:60GBP. And in Bronica terms that is quite reasonable!

Assessment:

The lens has arrived and to be honest it has surpassed anything I could ask for, for the price I have paid. For this project it is in perfect condition with nothing required regarding any repairs. It’s good to go.

And out of the box the lens is lovely and clear. Just a few bits of dust but that is nothing at all.

Repairs:

None: I know this is boring on a repair front, but for this project it is the perfect result.

Outcome:

All good to go. Please keep an eye on the other blog posts that are coming regarding this project.

Bronica SQ-A Medium format camera

First a little history.

This will be post No:1 of a series, where I attempt to buy parts of a damaged camera system to repair, reassemble and get back into working order.

I have chosen this particular camera as it was one that featured prominently in my career when leaving school and starting in the Photographic world. I’m going to buy this camera in bits, as it is modular. I’m going to try and buy parts that are for spares and repair for me to fix, to see if I can get a half decent working example. So expect a bit of a Frankenstein project here.

Bronica SQ-A

Just like my post on the Canon A1 that I previously published, this was another loan camera in my early years of photography back in the 80s. When money was sparse, colleagues usually allowed the loan of their equipment under certain conditions, one of those being,”Don’t break it”. I used this camera when I did my first studio session when a friend of a friend was setting up a business selling Teddy bears. She wanted good quality portrait photos of her work and this camera enabled me to do that. This was the first medium format camera I had ever used, and for that reason alone it will always sit as my favourite. Many people favour later models and other equipment, but this is my personal favourite. It has its flaws as some do, however this camera was significant in me learning a profession, as well as it triggering many treasured memories for me personally.

Now I want one of my own. 41 years after I first used one. But I don’t want to pay a premium price for it. In fact i wish to pay as little as possible, and that’s where it’s going to be difficult.

You can read more about the camera here: Bronica SQ-A

Requirements

As this is modular camera unit, I will need these parts to form the most basic camera, no bells and whistles as they say, just the basic version:

  • Lens – obviously
  • Main body – got to be the SQ family
  • Viewfinder – a few to choose from
  • Film back – I’m after the standard 120 roll film back

I’m looking at this being a medium term project so these items will be purchased over a currently undefined period of time, I’m hoping to buy items that require attention so I can keep the costs down, something that needs attention and repair would suit, as I can create a post regarding its repair. Individual spare parts do command some high prices so I’ll look at maybe purchasing some beat up stock that I can use as spares. I’ll keep a running total of the spend, I know I could buy a working complete unit for around £6-800GBP second hand, but that’s damned expensive in my eyes, I believe it was only £400Gbp (Minus lens) back in the mid 80s. I want to prove that a good usable unit can be built with just a little attention at a much lower and more realistic price. On the cheap if you like, as good quality photography does not need to be expensive. It might not look pretty, but it will be practical, and it will work. Most working cameras look beaten up. Most of the ones I used whilst working for a photo agency were total wrecks but took great photographs. I want to run a roll of colour and one of Black and white through it to prove i have made a working practical camera. It’s probably going to be a lengthy project, it’s going to be hellishly tough, but one I’m very much looking forward to.

From now on it will be known as….

The Frankenstein project.

And more posts will appear as the parts start to arrive and are assessed. Each part will have its own post dedicated to its purpose and repair, and a final post where it will be finally assembled and tested.

Thanks for passing by, please be sure to check back as this exciting project comes together, using the links below:

Part 1

Part 2

Part 3

Part 4

Part 5

Duga radar

What’s that then? I hear you ask. Well since I became a radio amateur (M0ESB) back in Feb 2003 anything regarding radio has fascinated me.

The Duga or – Russian woodpecker issue of the early 80s has always been an item of interest to me. It was allegedly constructed as a Russian over the horizon early warning system and was replaced in the late 80s when satellite systems took over the early warning mantle.

However it obtained notoriety by creating havoc on the airwaves worldwide for quite a considerable period of time.

This video by a fellow Amateur radio enthusiast M3HHY explains quite eloquently, in 11 minutes what the issue was. Some great photos of this absolutely massive antenna array can be seen in this video.

And whilst we are still here this is what Wikipedia has to say:

The duga system was extremely powerful, reaching over 10 MW, and emitted in the shortwave radiobands. It was given the nickname Russian Woodpecker by shortwave listeners for its emissions randomly appearing and sounding like sharp, repetitive tapping noises at a frequency of 10 Hz. The random frequency hops often disrupted legitimate broadcasts, amateur radio operations, oceanic, commercial, aviation communications, and utility transmissions, resulting in thousands of complaints from many countries worldwide. 

Courtesy: Wikipedia

I hope you find this as fascinating and informative as I have. Radio remains to this day special to me. I’d sooner be listening to it in any form rather than watching a tv. In my eyes or should I say ears, it was the most significant invention ever made, if only Marconi knew back in the 1890s just how important this communication method would become he would have been blown away. It has helped to shape so much, our modern day world, and how we communicate with each other on a daily basis.