I say more cameras, my wife begs to differ.. my friends agree with me.
Well, my wife would probably disagree with the above comment.
However, i have some very good friends who are quite happy to ignore my wife and her protestations. Some would say they are very brave…others would even say they are foolish. Time will tell.
A couple of beauties – you wouldn’t understand
Jon, is a friend and former work colleague that i have known for many years. We both worked at the same Kodak plant in Harrow, me on the graphics art film production track and Jon was in the training and development area. We rarely met there as the plant was so huge that our paths crossed quite infrequently. However Jon has also been the mainstay and life blood of a local football team since the early 70s, and it’s true to say he is a local legend and pillar of the community. This is how i really met Jon, and we have always discussed issues of photography, he is very much involved with promoting the armed forces and has been fortunate in the subject matter he has been asked to photograph. Needless to say, he has a lot of redundant equipment, and when he became aware of my blog site and the repairs i attempt to do, he very kindly donated a number of items for me to write posts about, and to be quite honest it will keep me busy for quite a long time.
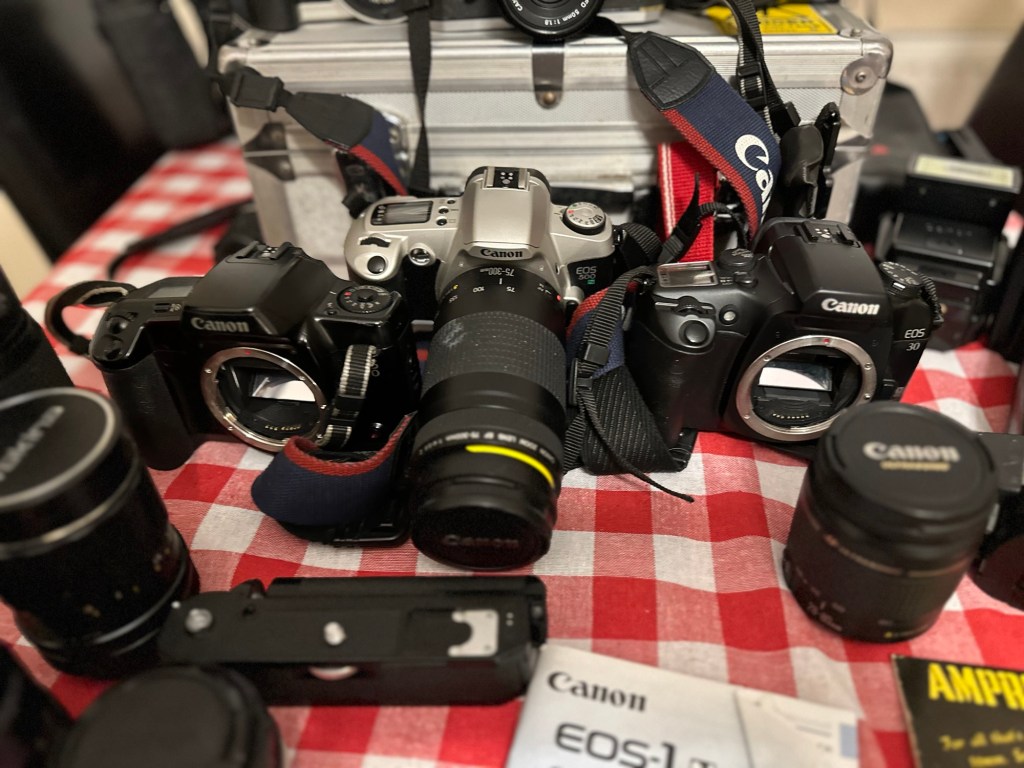
A few items to keep me busy
The majority of the items probably just need a little service and a test session, a couple have some battery corrosion issues, but in general cosmetically, they are in good condition. We have a number of old lenses, but as you’d expect from someone who looks after their equipment, there isn’t a sign of haze or fungus in them. They just need a clean up, and very little else.
Here’s a list of what i have received, and observed after a very quick look at the items.
8 cameras:
1 Canon AE1 film camera and user manual, mirror was stuck, now freed up and firing ok but requiring a check over.
1 Canon EOS 30 film camera, a bad case of sticky body.
1 Canon EOS 10 film camera, issues unknown
2 Canon EOS 500N film cameras, issues unknown
1 Canon EOS 3000 film camera, issues unknown
Canon EOS 1N film cameras with E1 power drive, beautiful camera, issues unknown.
Canon EOS 7D digital camera with BG-E7 battery grip, stunning camera, issues unknown.
7 lenses: all Canon fit
2 x Canon FD 50mm 1:1.8
Tokina 300mm 1:5.6
Tokina 135mm 1:2.8
Tokina 35mm 1:2.8
Canon 75-300mm 1:4-5.6
Canon 28-80mm 1:3.5-5.6
There is a separate lens that i have been asked to look at and repair for him as it’s his third go to lens, that is a Canon EF 28-200 1:3.5-5.6 USM lens. It doesn’t focus in auto, i notice it has lens wobble and a lens washer appears to be exposed in the zoom section of the lens. It needs investigation.
Other items:
Canon Power winder-A. Part of the AE1 camera, you can smell its issue as you hold it, battery corrosion. Batteries inside have seriously corroded, however i believe the issue is salvageable.
Canon speedlite 199A flash gun, untested.
Metz 45 CT-1 flash, again there is corrosion in the battery pack, you can smell it. Again this should be salvageable.
Sangamo Euro master light meter and invercone. In excellent condition, could be that the selenium light cell is dead. Needs investigating.
8 rolls of film, expiry date 2005, may still work..who knows.
3 x 6v lithium batteries, all tested and working.
Add to that the two camera bags and a hard case that they all came in and I’m sure that you will agree that it was a pretty nice package to receive.
I’m extremely confident i can get these all into a good working condition, any cameras that i will not be keeping will either be sold on to benefit charities supported by Jon or donated to local charities for their benefit. Either way nothing will be heading to waste, that is a promise i have made to Jon and thats just how it will be, i do not break promises.
Thanks for passing by, and i will be posting articles on all these products in the coming months. As I already have 13 projects already in draft awaiting a time when i can back to repairing them, you can plainly see I’m going to be very busy for quite a while and should be able to supply quite a regular feed to this blog.
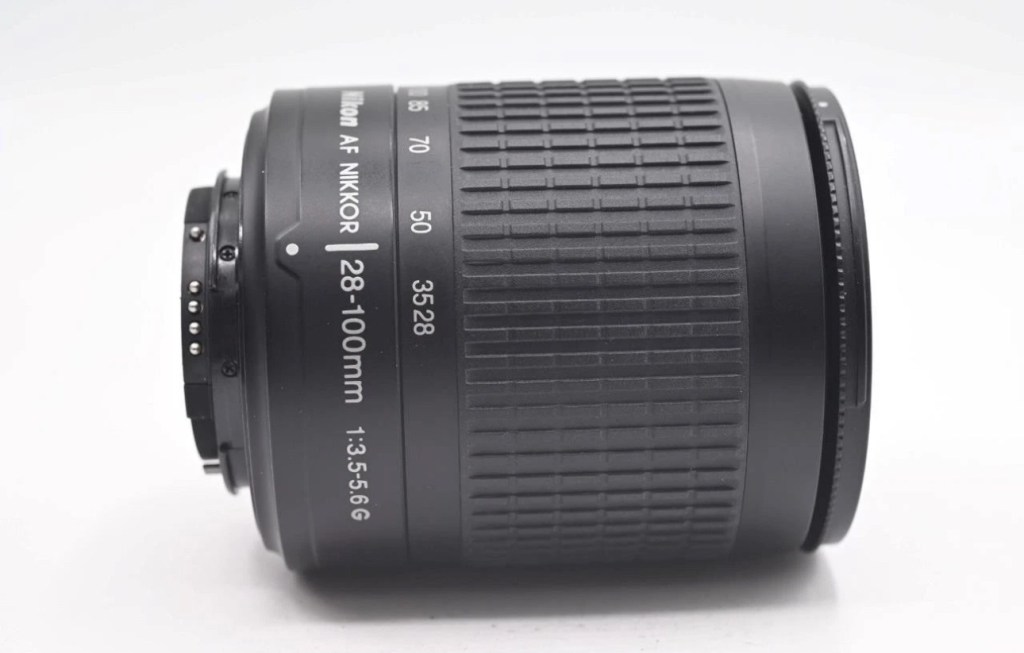
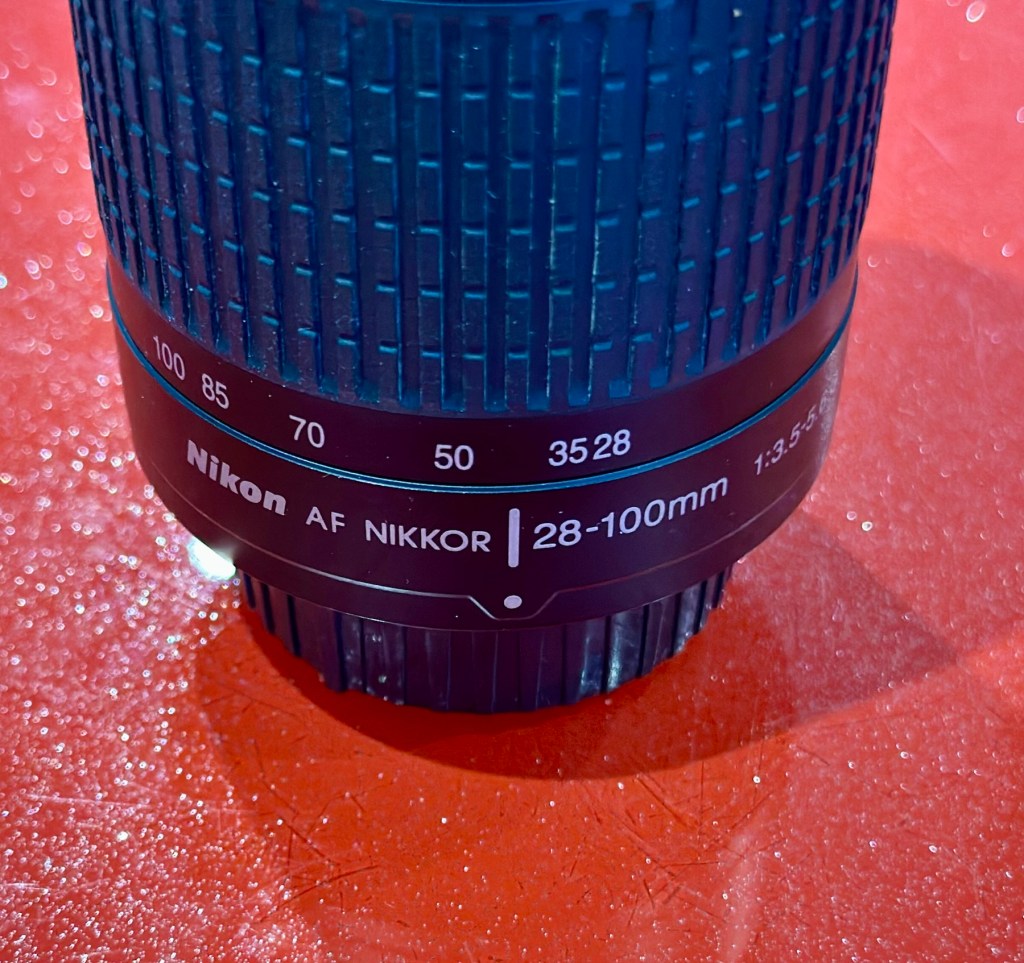
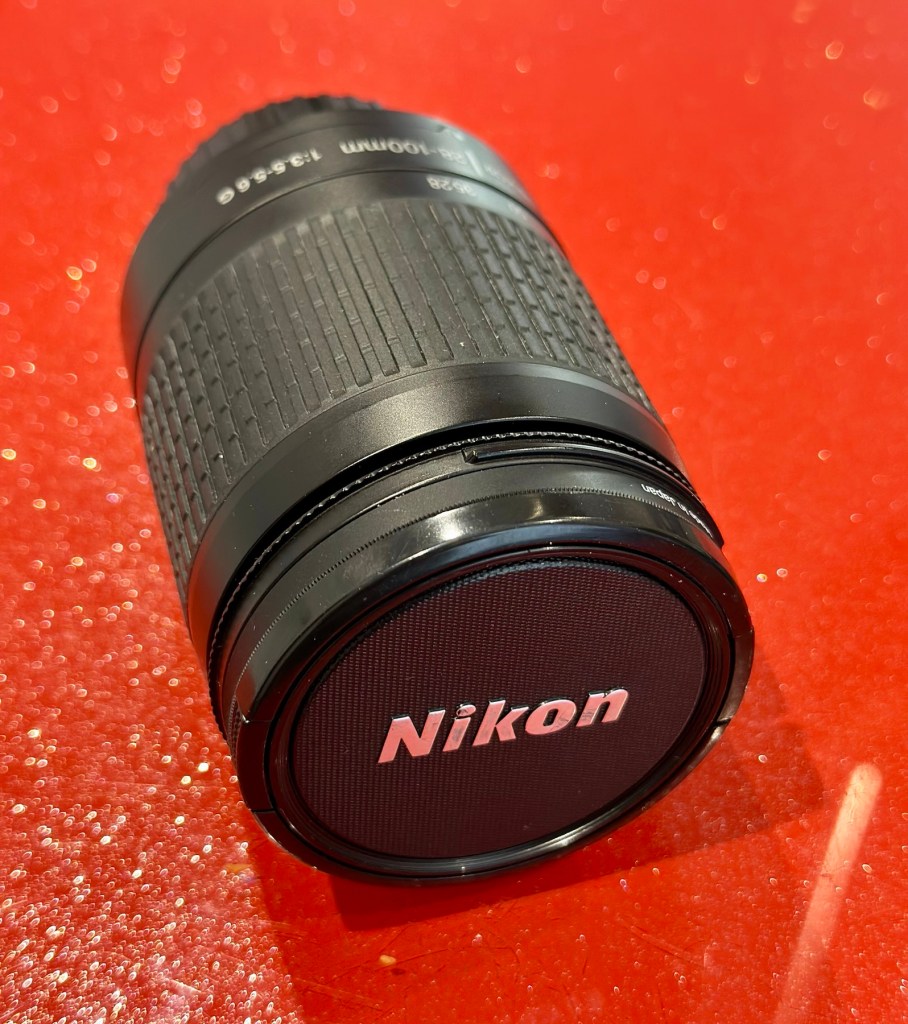
Nikon Nikkor 28-100mm Zoom Auto Focus Lens F3.5-5.6 G
It will autofocus with: Df-D1-D1x-D1H-D2-D2x-D2xs-D3-D3x-D3S-D50-D70-D70s-D80-D90-D7000-D100-D200-D300-D300s-D600-D610-D700-D750-D780-D800-D810-D850-D7000-D7100-D7200-D7500 & Fuji S1, S2, S3,S5
This lens will not autofocus with : D40-D40x-D60-D3000-D3100-D3200-D3300-D3500-D3600-D5000-D5100-D5200-D5300-D5500-D5600 as these cameras do not have integrated autofocus motors in their bodies, but it will still work with manual focus and auto exposure as it has a “chip” mount.
It will also work Nikon 35mm AF film cameras: F80, F90/90x, F75, F70, F65, F60, F55, F50, F80, F90/90x, F101, F100, F401.
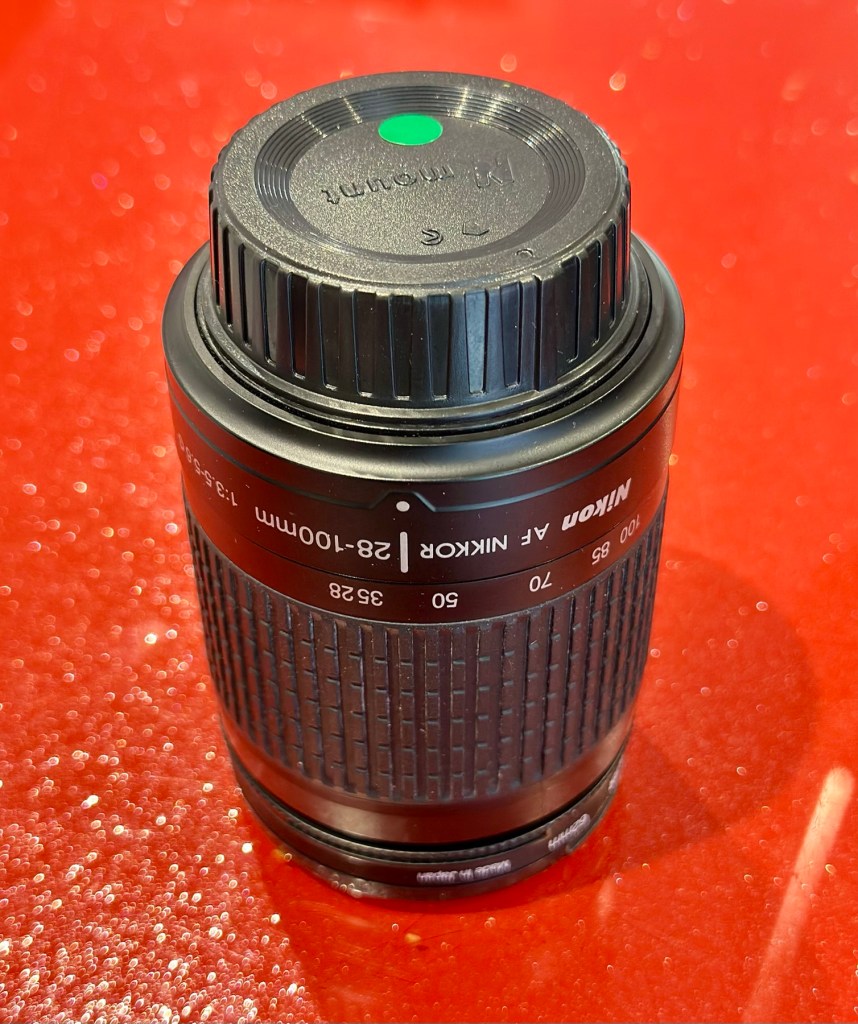
Comes with front / rear lens caps
EBay
Anyone that has followed my recent repair of the camera: Fujifilm Finepix S2 Pro will be aware that I purchased a lens as a test lens for working on some stock that required a Nikon mount. I went cheap and purchased a lens that was so badly affected with lens fungus that it will require a deep clean and some TLC. Anyway, it allowed me to test electrical contacts and all the menus, and that was about it, it served a purpose there, but taking a picture was like looking into a deep fog, it was hopeless. Anyway that lens is now set aside and will become one of those projects to dig into on a long winter evening…or two, or three.
As I have a number of Nikon based cameras needing assessment on the horizon, some with sensor issues, i have made the decision to pay a little more for some quality, from a company called AP photographic who specialise in quality used equipment, a company that is based close to where i used to live down in the south. This Lens has cost me £58:95GBP including postage, a fair but good price for some peace of mind. This post will not be a repair post as there is nothing wrong with this lens, it will be more of an assessment of the lens when used with the Fuji S2 pro i featured in a previous post.
Nikon Nikkor 28-100mm Zoom Auto Focus Lens F3.5-5.6
I’ve put this post up to show the difference in the pictures taken on the S2 with both the old lens as well as this lens. I think the results will show quite a noticeable contrast and confirm just how restrictive a lens is when it is infected with a fungus problem.
Assessment:
The lens has arrived
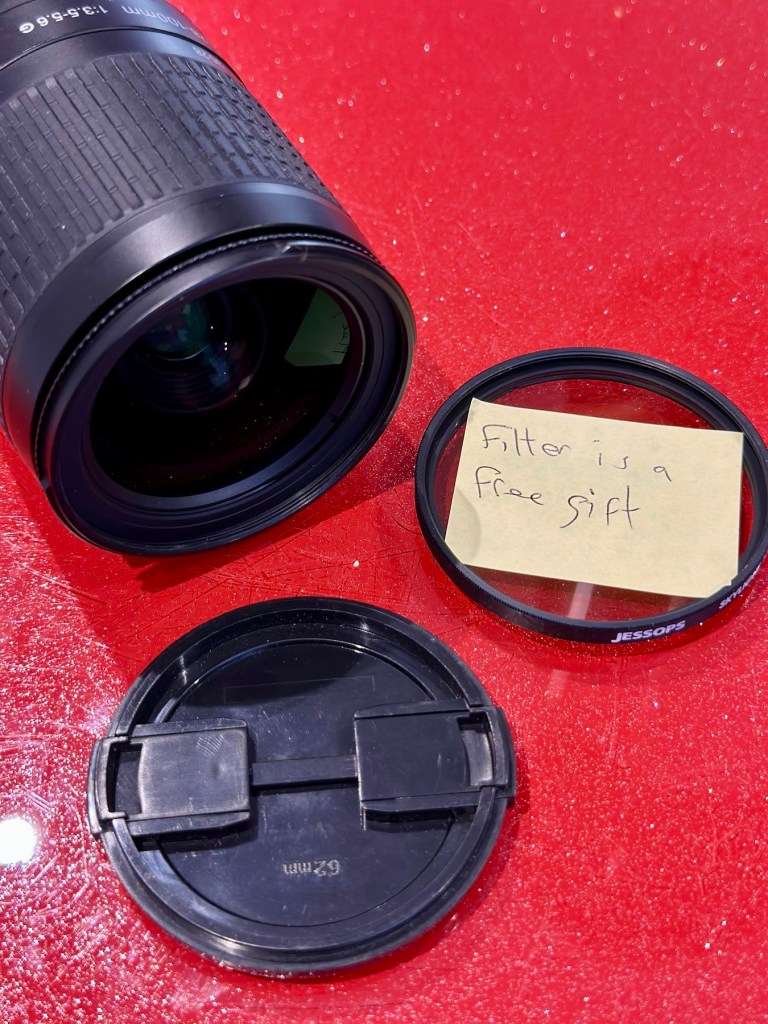
The lens arrived within a couple of days and is in perfect condition. It has a lens cap and bayonet cap so is perfectly protected against dust dirt and damage from foreign objects. And when the lens cover is removed there is another little surprise, a post it note saying “Filter is a free gift” that just happens to be attached to a daylight filter. Nice little touch 👌
Nice touch
Lens is a perfect fit, no aperture ring on it as it is fully automatic, full autofocus. I’m not sure how the flash will work with this lens though when I use the Fuji S2 Pro, as that body works best with a fully closed lens aperture, but I’m sure I’ll be able to work it all out and get it functioning as it should. And I did, i played with the Aperture settings in “A” mode and it works just fine. It’s faultless.
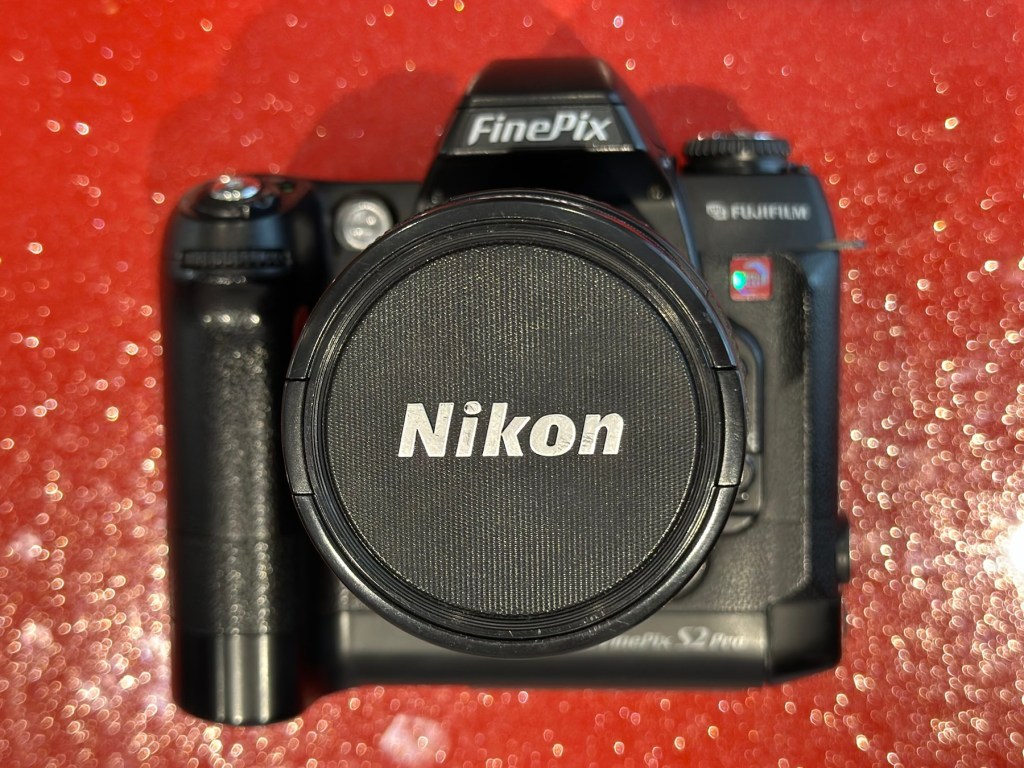
Attached to the Fuji S2 Pro
That said on the S2 it not only looks good, it takes good pictures. Compared to the lens I last used this one is crystal clear, not a bit of fungus no aberrations and not a speck of dirt. This is a good lens and will serve me well for the purpose of testing other equipment I have awaiting attention. I think I’ve purchased a good example here.
Result:
I can confirm that the Fuji S2 Pro does not have a thing wrong with it and is working perfectly. All modes, all conditions are performed just as they should be. This lens is gorgeous as it is so clear and has been so well looked after. I believe this whole unit will be the one I wander about with when i go out on my walks. I can’t wait to take some serious photos to post.
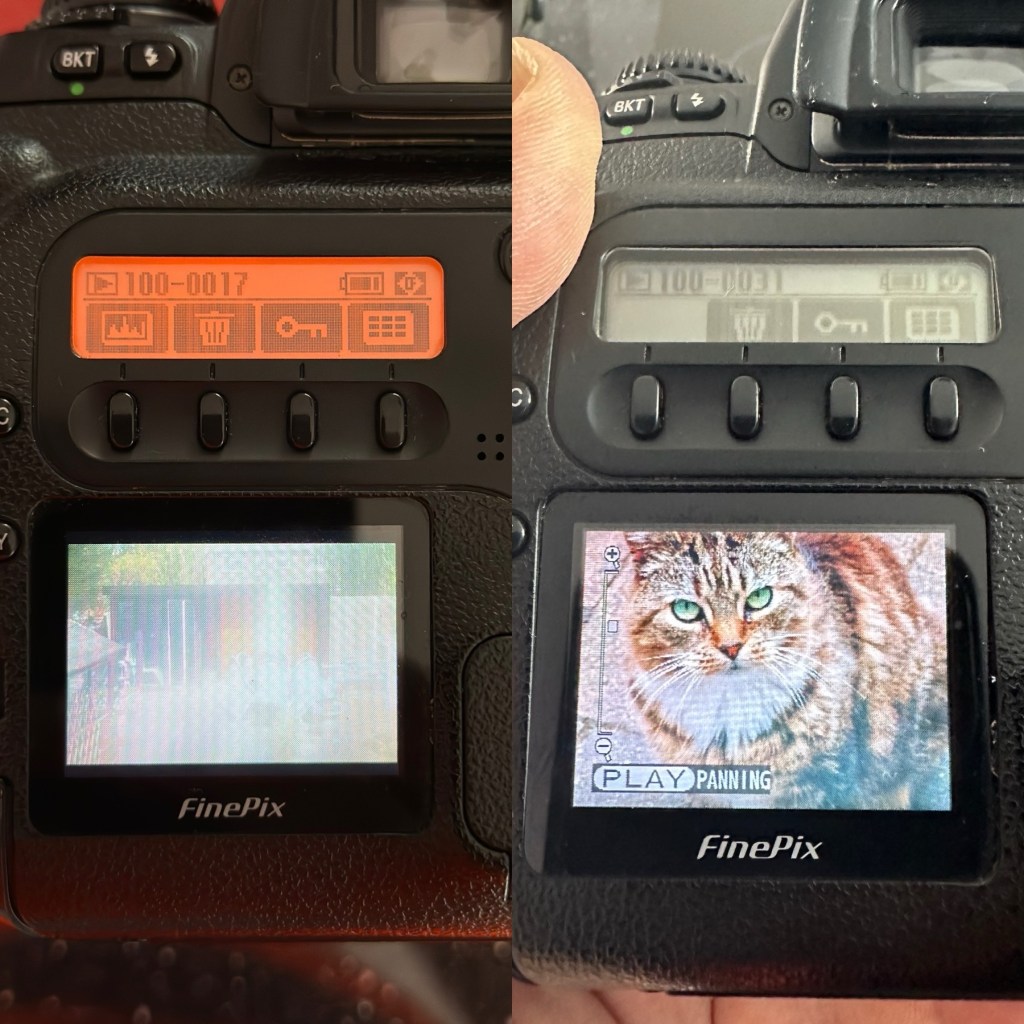
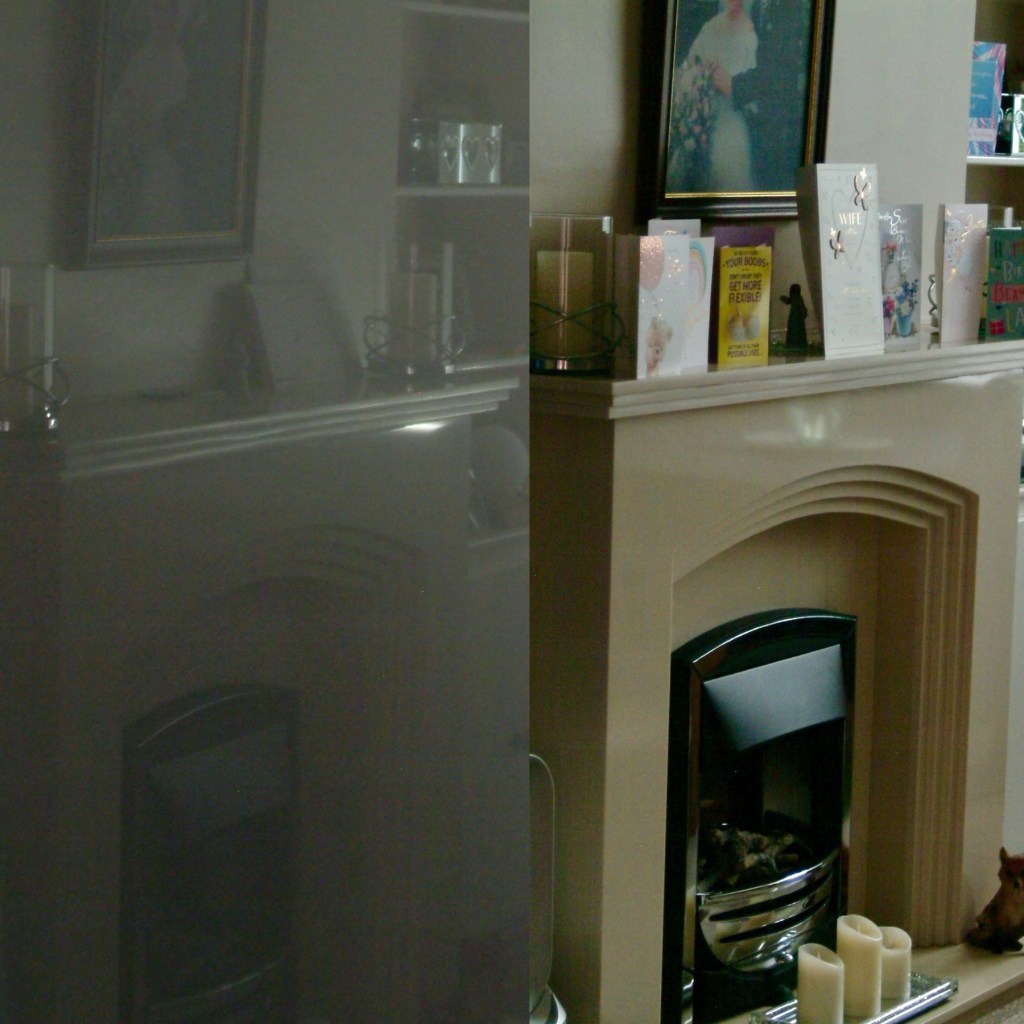
A quick comparison fungus lens v clear lens as seen on the camera LCD screen
I took some pictures just randomly around the home setting with the old lens to show how foggy things were with the lens fungus. I have tried to take some more photos of the same locations with the new lens as well to just show how they compare and these can be seen in the pictures grouped below.
Before and after pictures, what a difference the fungus has had on the results.
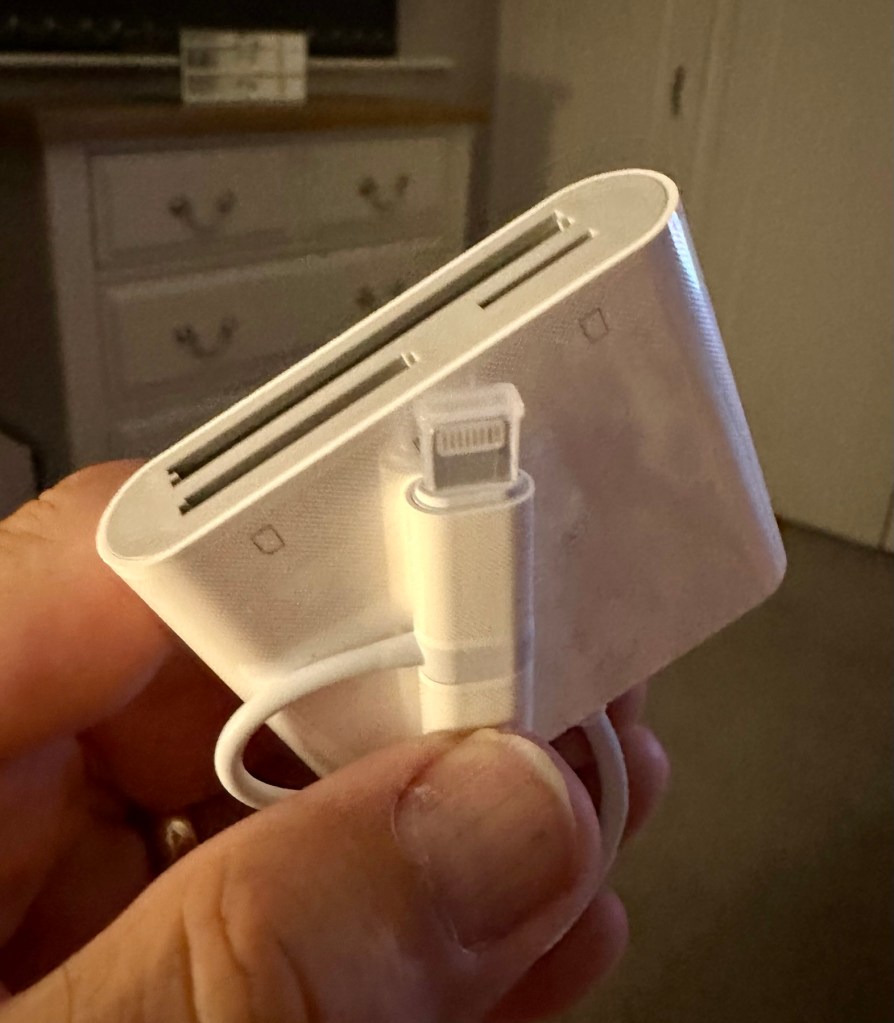
All these pictures are on an old CF card so it is a bit of a palaver to get them on to new technology, but it is doable, it just takes a little time, and this gadget allows me to load numerous card types even the CF cards direct to my iPhone via a lightning connector. It also has a USB-C connector for other phones. It works really well as you can see in all the pictures in this post.
Multiple media cards direct to my iPhone
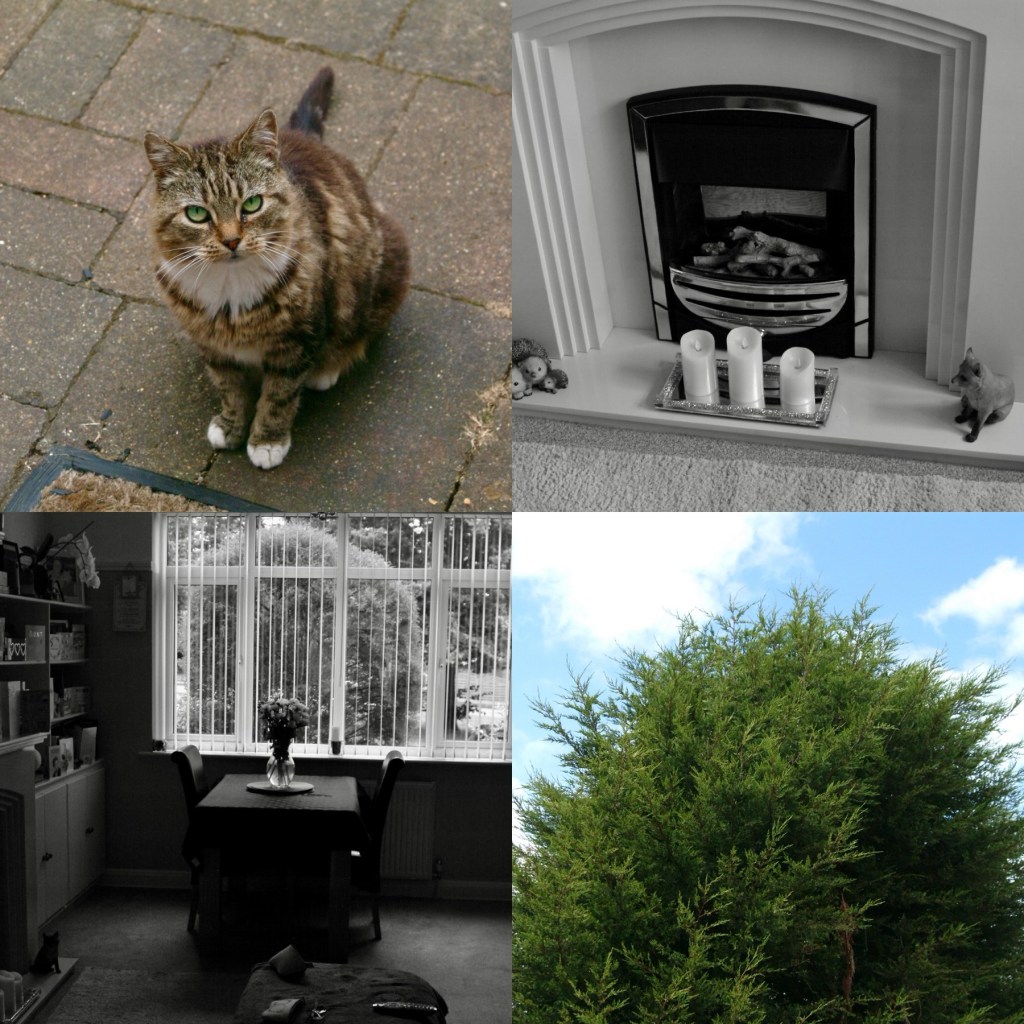
And below are a few random photos taken on the S2, it has a good black and white mode but is quite heavy on contrast. Post editing would probably be recommended, but to be honest I really love its moody appearance.
4 random photos in and around the house. And Tabs the feral cat popped by
This camera and this lens have proved fantastic. I know you can get far superior picture sizes and quality on a basic mobile phone, but where the heck is the fun in that? This camera cost me £8:00GBP. Just £8:00. And it is a superb camera that will be going on many trips with me as I just love it and how it looks. I now know it intimately after reading up on it and testing it, and cannot wait to put that knowledge to use.
Cameras are better than mobile phones. Old ones like this are fun, and an absolute privilege to use. It’s not all about the Megapixels, just remember these old cameras were the ones taking high quality professional pictures back in their day. Just because time moves on, and just like an elderly old lady or gentleman, they should not be discarded because they no longer serve a purpose. Respect the older technology, learn from it and you will ultimately become a wiser person yourself. Oldies rule! Never forget it. 👊
Thank you so much for passing by. It’s always very much appreciated.
ALL ITEMS IN THIS LISTING ARE FAULTY FAULTS MAY VARY BETWEENS ITEMS
SOLD AS IS
NO RETURNS
EBay
The Finepix S2 Pro
I’ve purchased three cameras as a job lot in an auction. All of them have issues but the issues have not been clarified. This is very much a “Suck it and see” auction where I get what I’m given. I’ve paid £24:22GBP for all three and that includes free postage. I’ve purchased from this seller before who is a bonafide Camera business based in South Wales. He has no time for faulty items though, quick in and out is his way of working, no time to fix stuff. I’ve got three good cameras in this bundle and this works out at just about £8:00GBP per camera. And where can you get cameras like this for those prices nowadays.
I’ve just read a blog where a guy had one of these cameras from new, and in 2002 he had paid £1550.00GBP for this camera. Wow, and here i am 23 years later paying the grand total of £8:00GBP for one. Even if I don’t get it working, I’m happy with that.
Now this particular camera had two issues in its lifetime that caused concern, and one of them meant it was pretty much game over, and that one was the CCD issue that used to plague this range of cameras. Fuji released a whole bunch of these cameras with a faulty CCD that had to be fixed under a recall. They built sufficient replacement CCDs to cover the recall and that was about it. There were no remaining CCDs left and at that point what was left had become as rare as hens teeth. If you suddenly developed that faulty a later date, then tough…you were stuffed.
Serial numbers affecting CCD problems are listed below:
Model Serial Number Range
FinePix S2 Pro 31A127**~31A143**
32A000**~32A039**
33A000**~33A007**
34A000**~34A004**
Fujifilm
The second issue was with a batch of these models that had a “bad” resistor in the power circuit that prevented lock up if there was a power spike, if this failed then the camera just stopped and you were stuck. There was another recall on the second issue but there is probably a lot of cameras out there that again weren’t part of this recall. And I guess owners were pretty fed up of recalls at this point and were off loading their equipment as quick as they could.
The serial numbers regarding the lock up problem are listed below:
Between serial numbers 24L00441 and 24L00680 Between serial numbers 24L01057 and 24L01256 Between serial numbers 24L01553 and 24L01863 Between serial numbers 24L10257 and 24L10608
Fujifilm
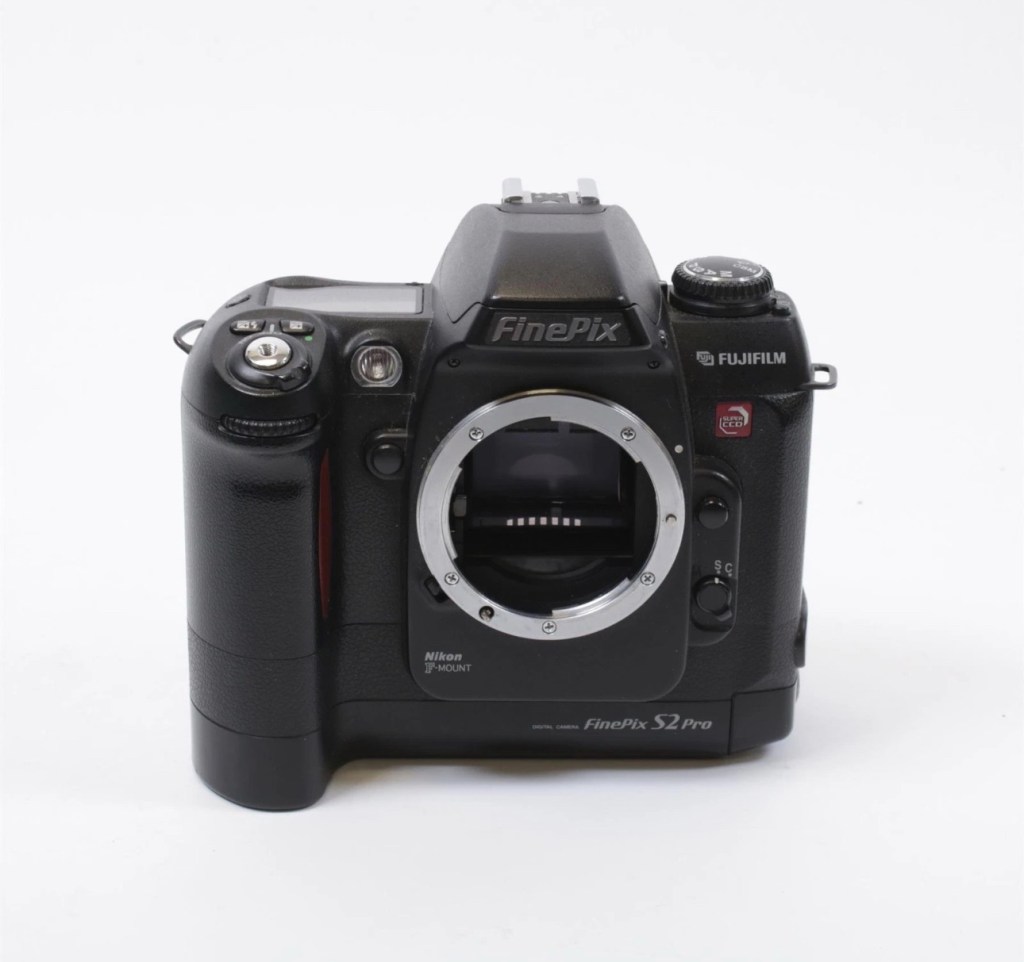
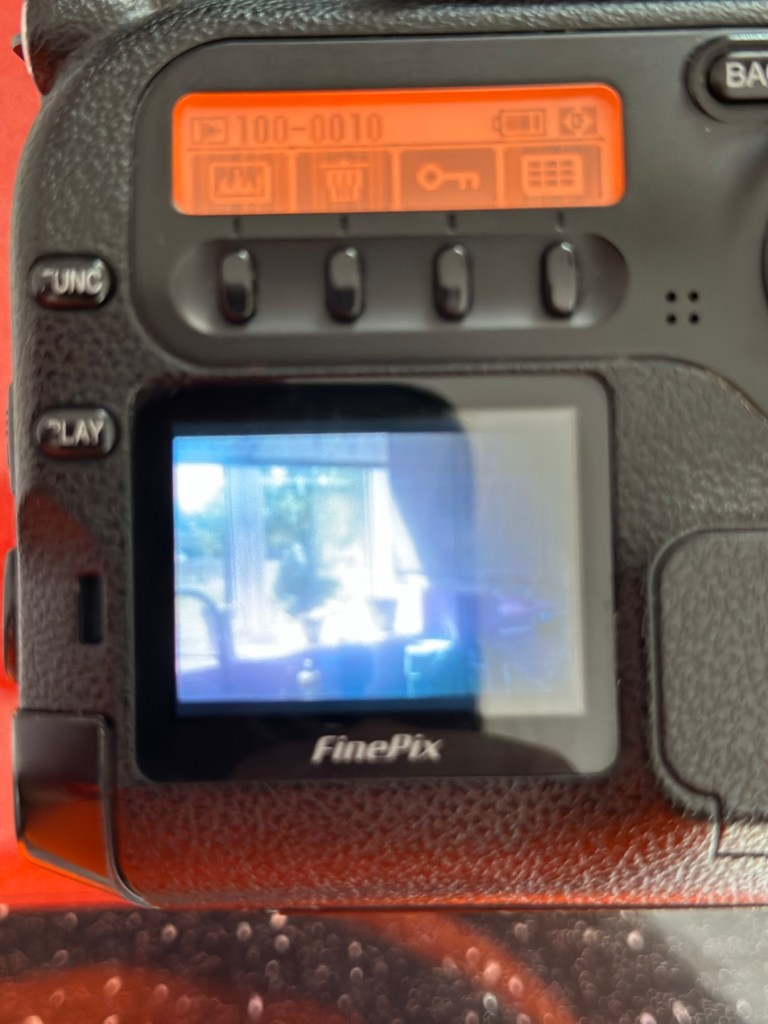
My camera serial number
Above you can see the serial number for my camera. Thankfully my number falls outside the range of any of the cameras inflicted with either problem, so it’s fair to say (Fingers crossed 🤞) that I shouldn’t suffer with any of the known issues with this unit. In layman’s terms I think i may well have dodged a bullet here.
I did speak to the seller regarding the fault on this camera and he stated it was just a general error code on the top screen. There is a general error that arises occasionally regarding certain lenses where they have to be locked on their minimum aperture for the camera to work properly, however I’ve not attached a lens yet so this cannot be confirmed.
Here’s some history:
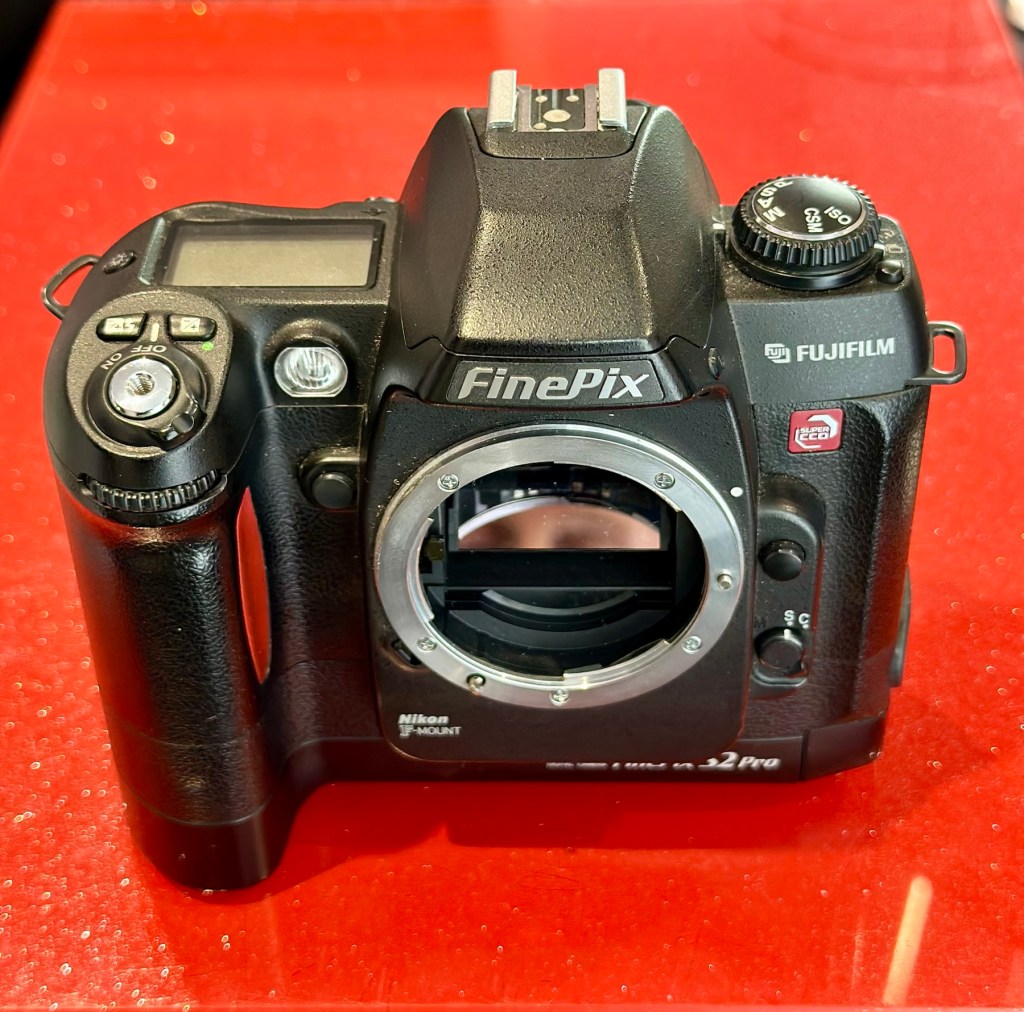
The Fujifilm FinePix S2 Pro is an interchangeable lens digital single-lens reflex camera introduced in January 2002. It is based on a Nikon F80 (N80 in the U.S.) film camera body that was modified by Fujifilm to include its own proprietary image sensor and electronics. Because of the Nikon body, it has a Nikon AF lens mount and so can use most lenses made for Nikon 35 mm cameras. It is autofocusing, with an electronically controlled focal plane shutter with speeds from 30 sec. to 1/4000 sec., built-in exposure metering and pop-up flash. Its ISO film speed equivalents range from 100 – 1600. The S2 Pro also has sound recording capability. The camera is no longer in production, having been superseded by the Fujifilm FinePix S3 Pro in February 2004.
Aside from the Nikon lens mount, the camera’s principal distinction is its 6.17 megapixel photo sensor. Known as the Super CCD, it is unique in having its photodiodes oriented diagonally rather than horizontally and vertically as in all other DSLR cameras. This allows the use of a sophisticated interpolation system that produces an output image equivalent to 12.1 megapixels. The apparent resolution of images in this interpolated mode lies somewhere between 6.17 megapixels and the 12.1 megapixel interpolated output.
A huge number of these cameras were built using a Sony sourced defective CCD that was subject to a recall by Fuji. The recall ended when the stock of these replacement CCD’s was depleted. There is word that no other stockpiles exist of this Super HAD CCD, making these cameras that are found with the purple or black tinted image problems extinct, only usable for parts. The Fuji F700 used a similar defective HAD CCD, but in 3.1/6.2Mp size. That camera has met a similar fate.
Wikipedia
So let’s hope that we can get some pictures out of this unit. We just have to wait and see what arrives.
Assessment:
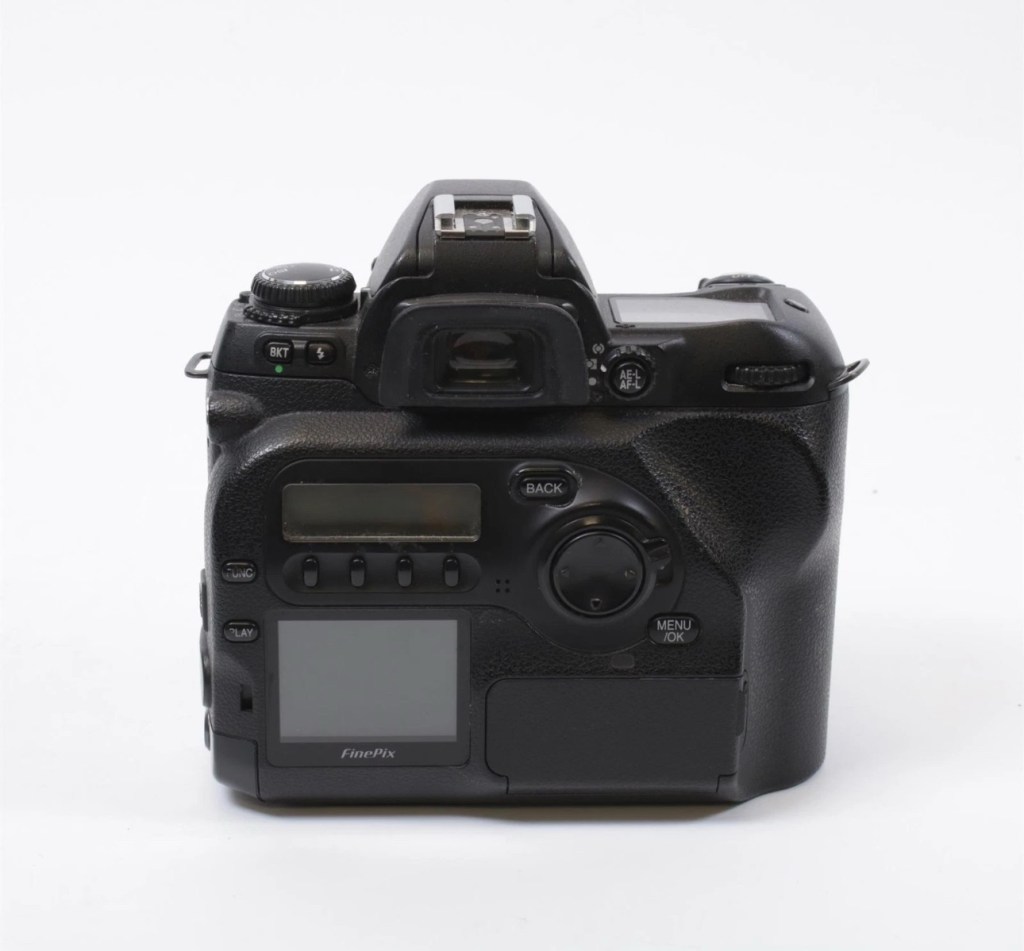
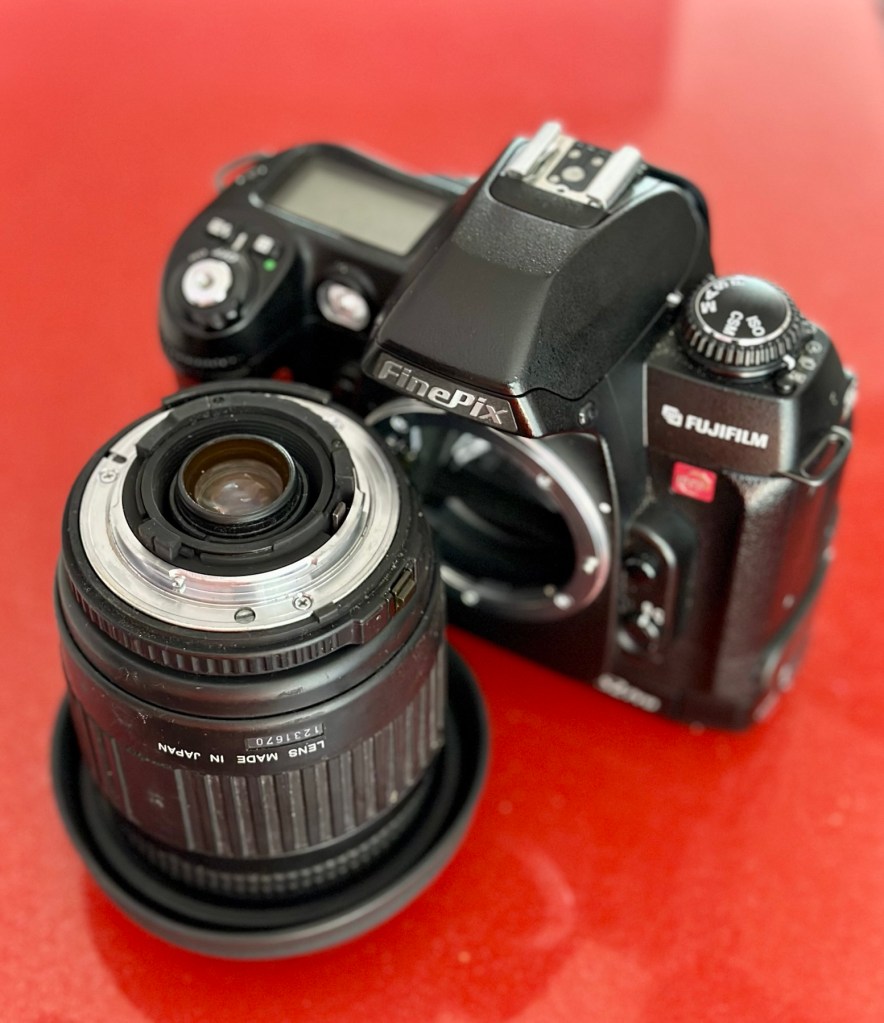
Well the camera has now arrived, and I must say it is in an absolutely beautiful condition. Cosmetically there isn’t a scrape or scratch, all screens are scuff free and it looks as if this unit has been well cared for. It just needs a wipe over to clean. The package is just the camera body with no extras such as a body aperture cover or neck strap, but who’s worried about that, they can be procured at a later date.
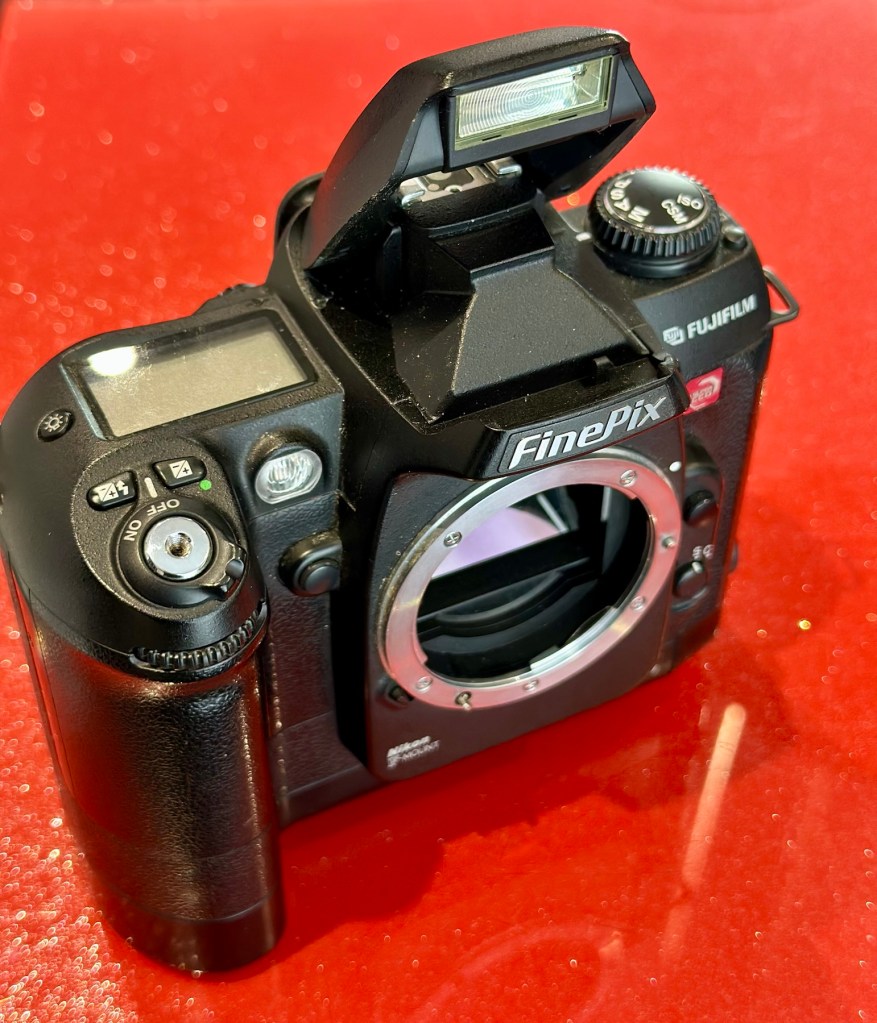
Front viewRear viewFlash openNikon type F mount
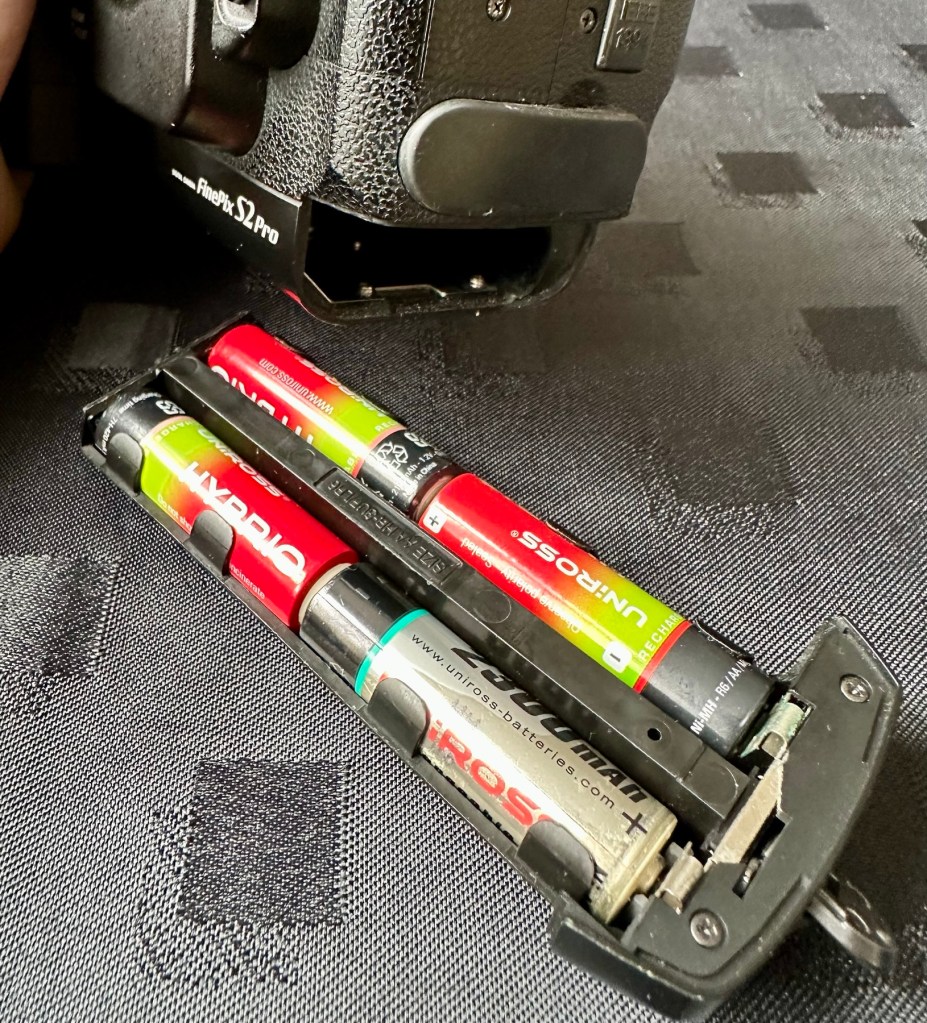
These units are quite power hungry requiring a total of six batteries. 4 AA cells go in the base and two Lithium CR123A batteries go in the grip. These batteries work in unison, one set handling the basic camera functions whilst the other deals with the capture and processing of images. It’s a strange affair, loosely based around the same setup that was originally on their film based camera counterparts.
AA batteries CR123A batteries
I’ve had to order the lithium batteries, however I can still get displays and Information using just the AA batteries in the base, basically it is semi functional in this situation.
The lens mount is a standard Nikon F mount, I’m going to have to search through my equipment to see if I have such a lens, I suspect I don’t, so I may well have to purchase a small lens purely for test purposes. I have some other Nikon repairs in the queue, so a lens to have for test purposes wouldn’t really go amiss.
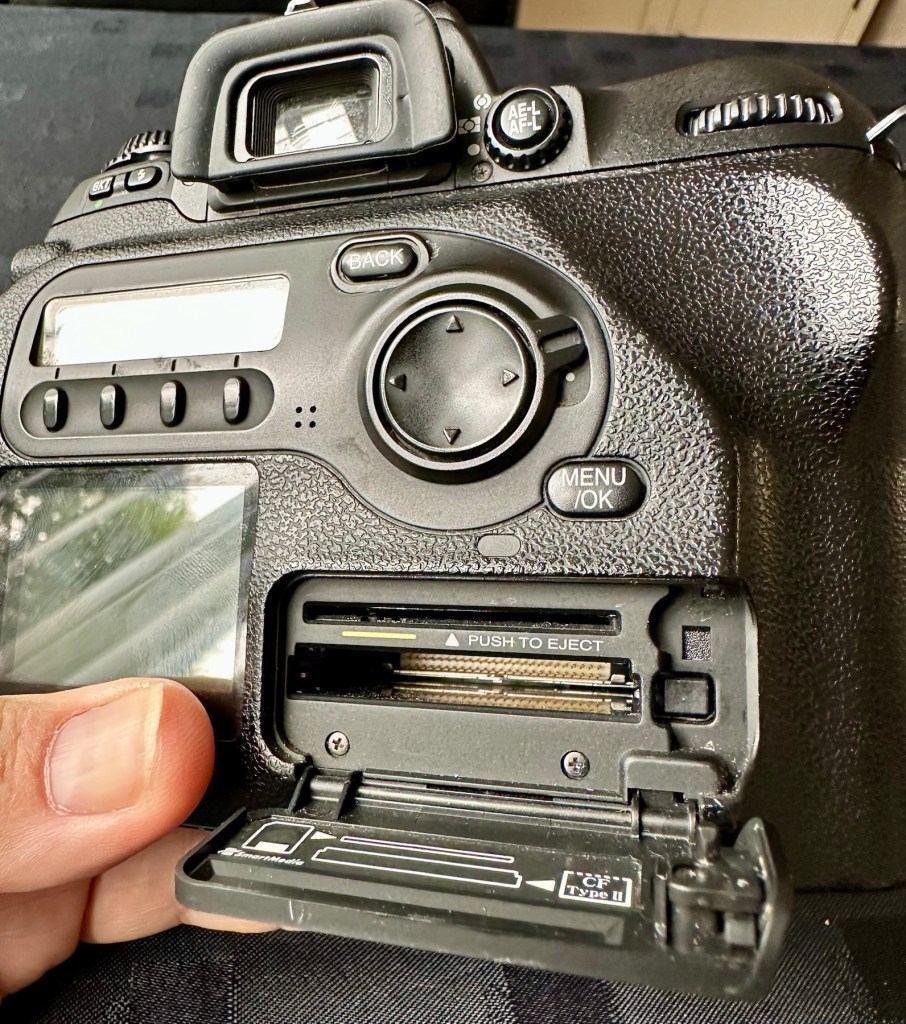
The unit takes either a CF card type II or a Smart-media card (Max size of 2Gb on both) that is located behind a hinged section on the rear of the camera, these work fine and have no bent pins.
Media card ports at the rear
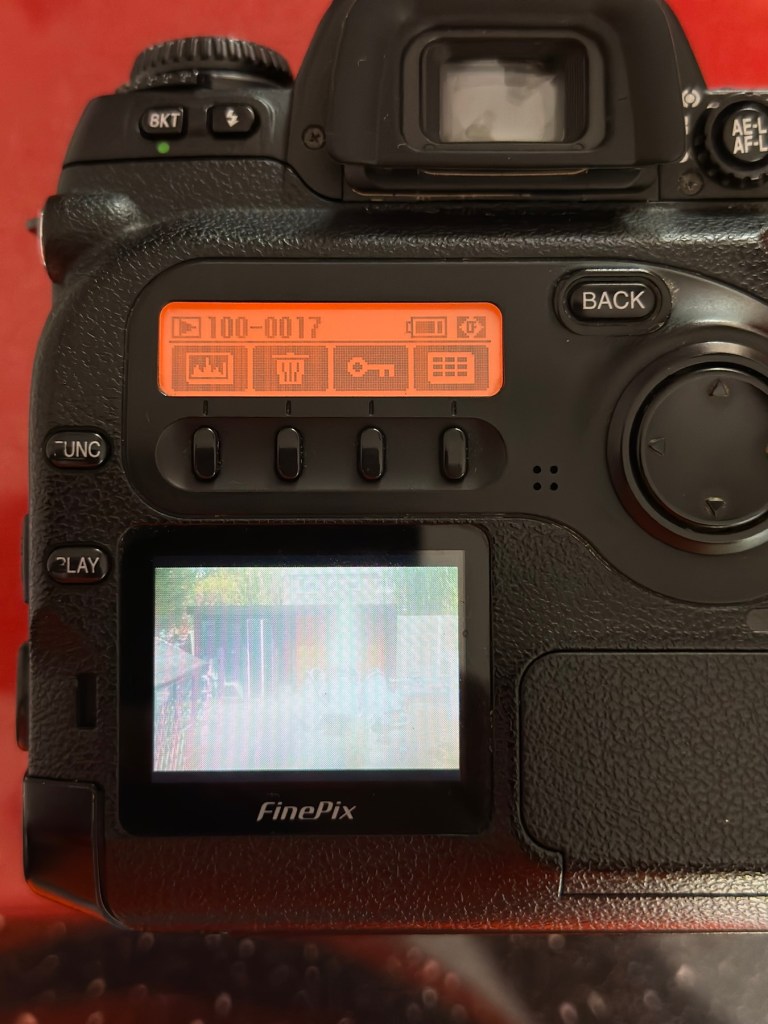
With batteries in place I get the full range of menus, and nothing comes across as suspect at all at this stage in the assessment.
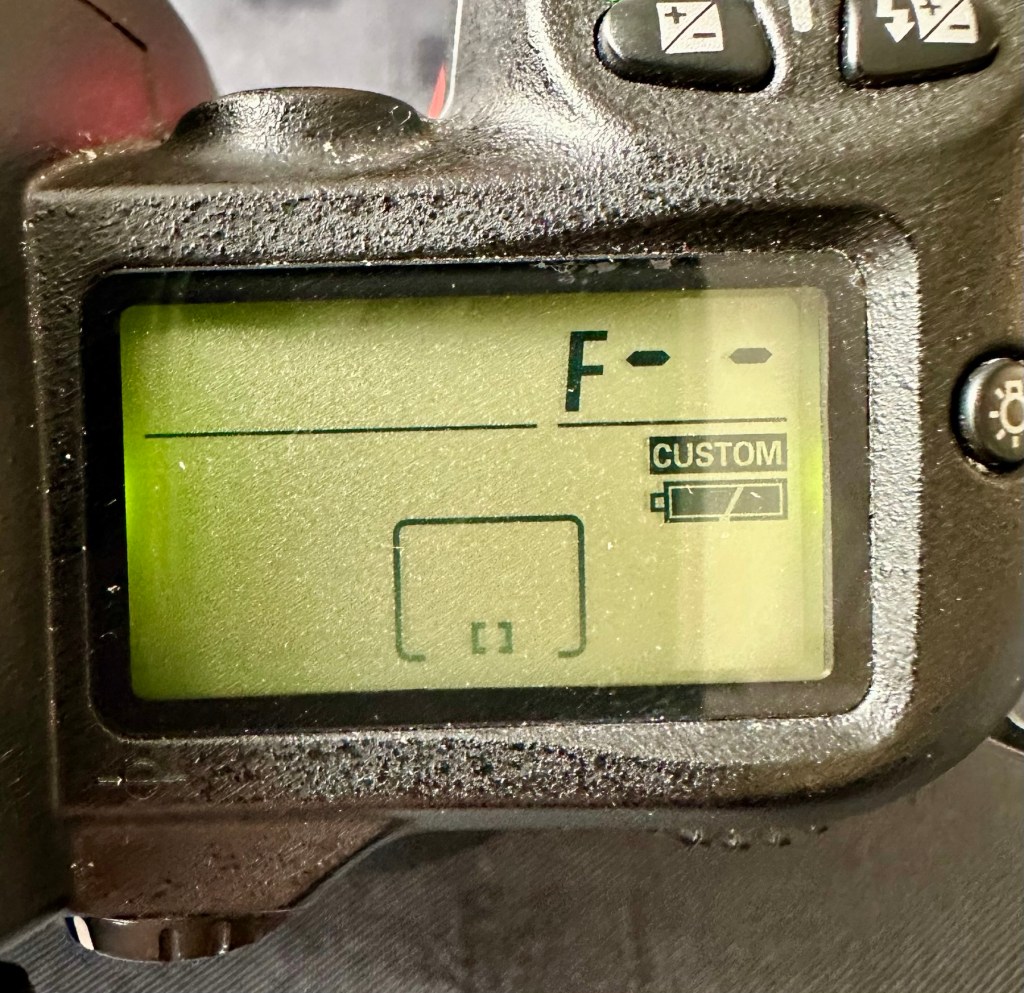
The top menu – no lens attached to test
The top menu by the exposure button is the only “F” indication showing, I have no lens attached so this might be the reasoning for that, but if I do put the menu into manual mode I get the full range of shutter speeds and can even operate the shutter, the shutter seems to be working at all selected speeds with no issues as far as I can see.
Some of the shutter speeds available in manual mode
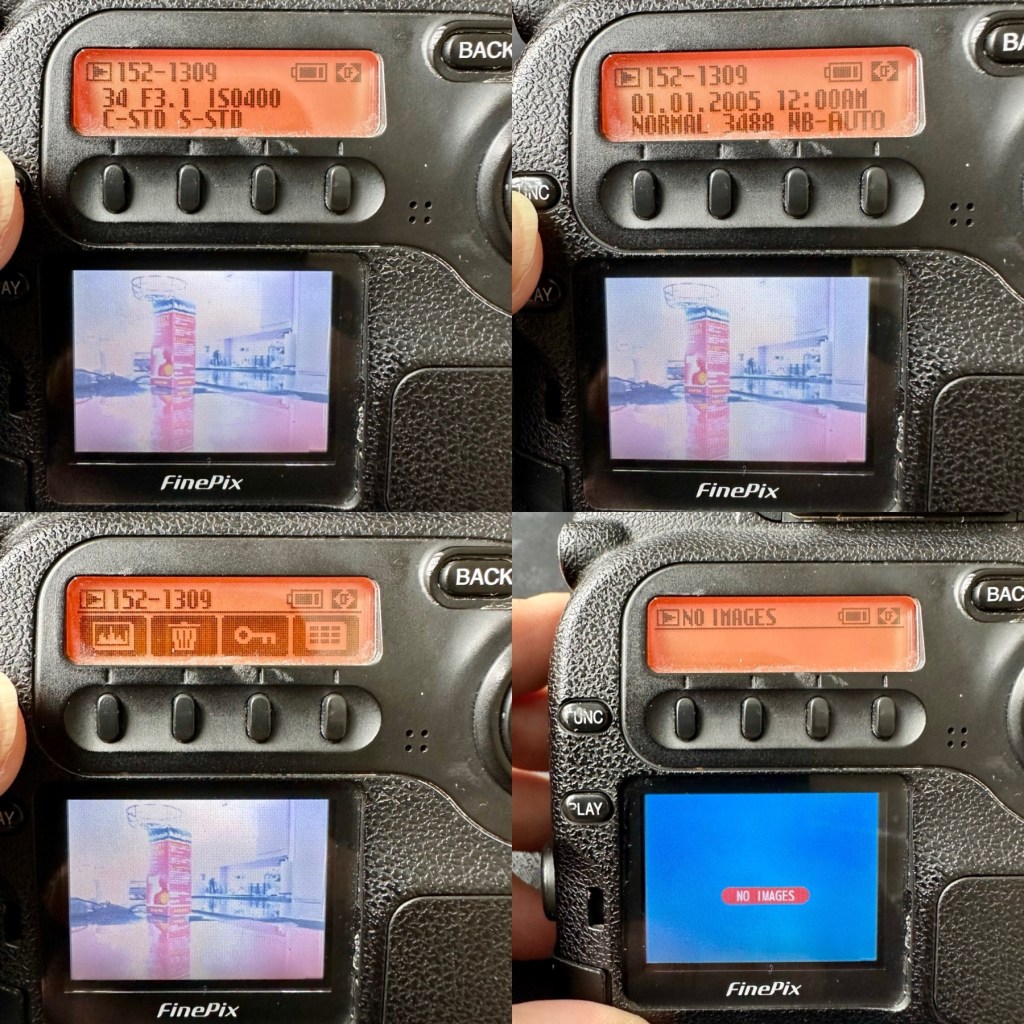
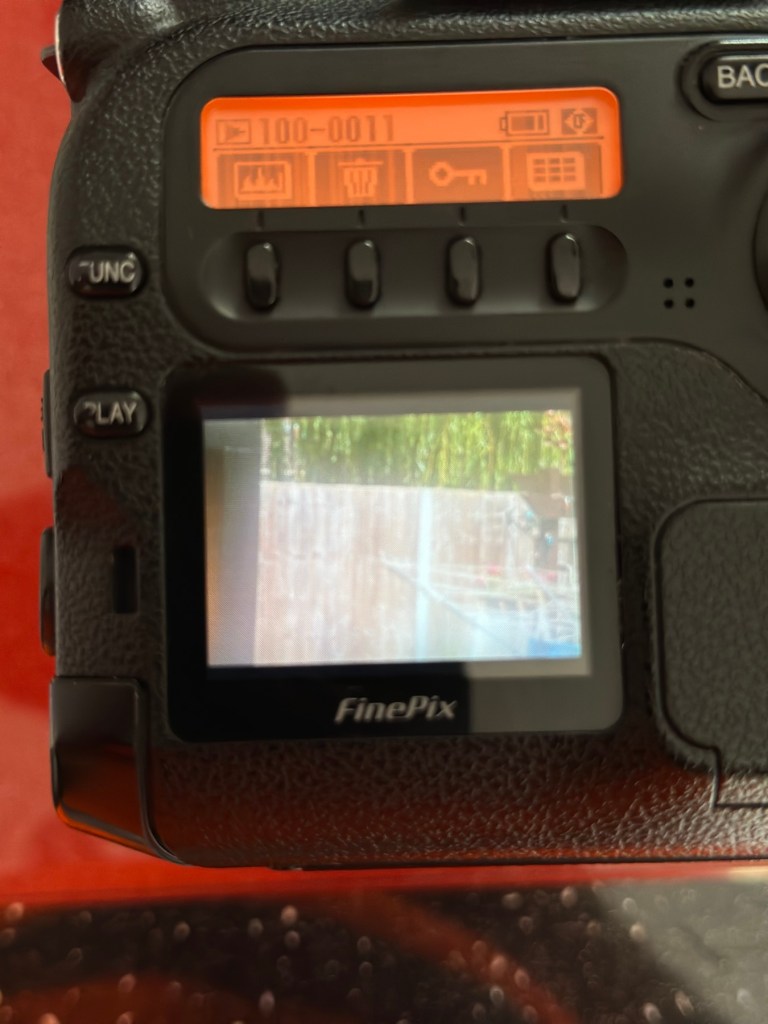
All other menus are available and I’m even able to format the CF card via the cameras menu. The picture you see on the screen was taken on another camera. It wiped fine so no issues here.
Various menus and the screen after a format was completed through the cameras menu controls
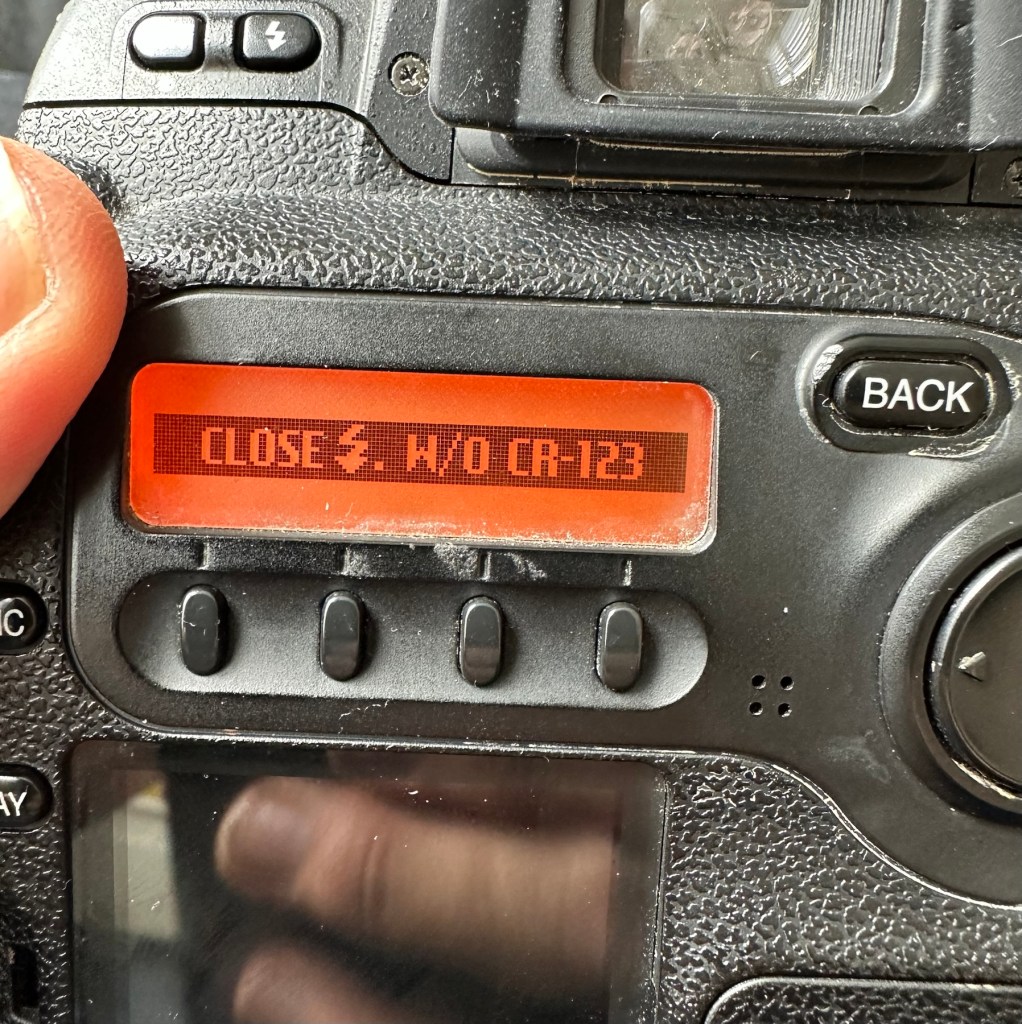
The camera seems to be working with no apparent communication issues as yet. When you try to use the flash it even informs you that you need to insert the correct batteries to test. As I’m awaiting the CR123A batteries I won’t be able to test the flash functionality until they arrive.
No CR123A batteries installed? – You can’t use the flash
As I have stated the testing can only go so far until I have the missing items in my possession, for me that is the two missing batteries and a suitable lens. I’m currently in the process of procuring both. Physically there is nothing wrong with this camera after spending a good couple of hours going over it. I’m quite comfortable with it and believe it could be a lens communication error or just a failure to read the instructions properly by the previous owner. All I need now is that lens. I’ll let you know what occurs in the repair section.
Repair:
To be quite honest it’s not really been a repair, it’s been more of a “pre flight check” to collar a phrase, going through all of the cameras capabilities and ensuring that they are all functioning correctly. As the camera was listed as faulty, and the fault was not identified, I have had to do many hours of testing and Investigation to get to this point.
I’ve done a bit of shopping and managed to buy a nice little lens from the Southern hospice group. Always happy to help a charity and secured this at a good price of £15:50GBP, and that includes the postage, for a Sigma 28-200 f/3.8-5.6 Ø72 Zoom Lens Nikon F Mount. There looks like a bit of fungus on the outermost optic, however I can always clean this if it’s too bad. If not I’ll just leave as is for the moment and keep it vacuum bagged between uses, I can always do a separate post on cleaning up fungus in a lens at a later date. (I have done a basic fungus clean in the past : Canon EF lens 35-80mm)
My new – old test lens
I wasn’t looking at spending too much here, as I only wanted a lens to test a number of Nikon repairs I have upcoming as well as this S2 Pro. This lens will fit that role perfectly, and be added to my collection of other lenses that I have that allows me to test a range of different camera products. I have also purchased an “F” mount body cover for the camera to protect the unit when there isn’t a lens attached to it.
The two CR123A batteries have arrived and have been placed in the handle grip. The warning that was there before the batteries were installed (see picture above) has disappeared and when placed in manual mode the flash fires just perfectly, no issues here.
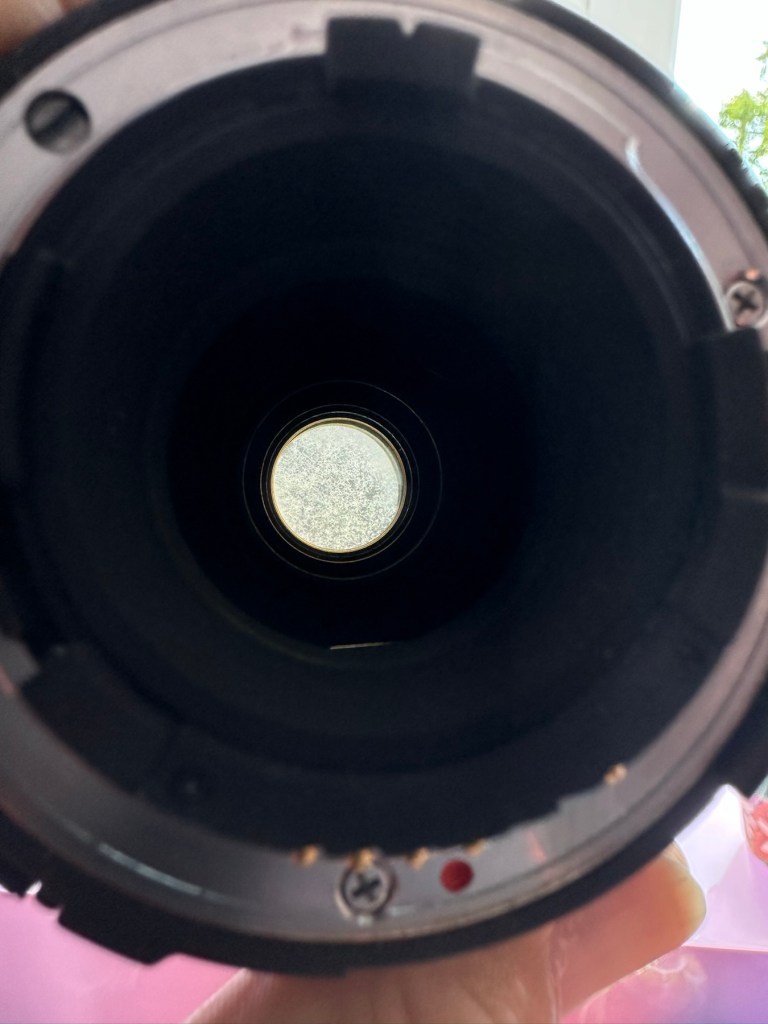
The Lens has arrived. Good point is that it fits fine and looks good, and all electrical contacts are good. Bad point is it has severe fungus throughout, and is just like looking through a fog.
Severe fungus in the lens
I will do a separate post on cleaning this problem up in a later post. However I’m not overly worried at this point, I paid a very low price so it was to be expected, I’m not complaining to the seller who was a Hospice, they need the money and I can fix it so there really is no problem.
That lovely looking lens hides a problem
The excellent news is that the lens does exactly what it should. The camera indications are good, all working exactly as expected . However the pictures via the screen are extremely hazy due to the fungus infection on the lens. There are no black or purple casts on the pictures so I am quite happy that we haven’t inherited the dreaded CCD issue discussed earlier in this post.
Hazy days – Lens fungus
If I use the lens wide open and pop the camera into auto mode I do get an “ERR33” code and that is a communication issue between the lens and the camera. As I have stated earlier in this post, you have to have the lens set at its lowest aperture and locked for the error code to go. Fortunately this lens allows you to lock the aperture and once this is done the camera takes over the exposure when it is working in automatic mode. So as I also stated earlier, it appears the seller was probably not aware of this requirement/issue.
Result:
We have a fantastic working camera, it does all it was produced to do, it has its little quirks and oddities, but being familiar with these cameras and at least having some knowledge and awareness of how they operate is always a wise thing. Read the instructions and don’t just throw them in the drawer until you eventually sell the camera on as a damaged item, when in fact you were just lacking the knowledge on how it operates in the first place. Instruction manuals are good, they serve a purpose. Knowledge is king.
The complete camera with lens
This camera cost me £8:00GBP. That is a superb price for a camera of this quality even though it is now 23 years old. It has a lot of life left in it, and I can’t wait to get it out and give it a real test.
It’s a little beauty – And the lens that needs attention
So in theory I’m confident and happy that this camera is now in a fully operational order, it’s needed a clean, it’s needed a lot of research to find out how it works, and I’ve also downloaded the operating instructions and repair pack should they be required.
It’s taking pictures and storing them. It’s just the lens at the moment isn’t performing at its best due to its fungus on the optics issue. I’m keeping the pictures stored on the card to compare them with the new pictures that will be taken once I have another lens to use.
Once the lens clean up is complete, if I ever get around to it, I will link it through this post.
Edit:
As 12/7/25 I have purchased a newer higher quality lens without any of the above issues to be able to get some instantaneous results, and as I have about seven other Nikon cameras requiring testing, some with sensor issues, it was wise to invest in a better quality lens. I have purchased a Nikon 28-100mm AF Zoom Nikkor Lens G AF-d, in perfect condition and the post regarding it can be found here: Nikon 28-100mm AF Zoom Nikkor Lens G AF-D
A newer – old lens, much superior quality
As previously stated I will add photos in this post once the new lens arrives, to show the difference from the fungus infected lens to a decent lens. The old lens is still a work in progress and I will post about it again as a separate post once the clean up is complete. It will probably be a job completed once the long winter nights are back in situ.
Below are comparison photos between the old lens with fungal issues and this new lens:
It’s just typical for me to manage to make another post from an issue that has arisen from fixing a different item. But isn’t that life? Continuous improvement is a factor we come across on an almost daily basis, and if you deal with old items as much as I do, then there is always something else that needs repairing, something that requires your attention and I just love that. The ability to improve or make something better, gives such a feeling of achievement and accomplishment, and total satisfaction. And that’s why I write this drivel. It’s for me, it’s what this blog was originally set up for. It’s my journal of what I do.
Many thanks for following this post. You know it is always very much appreciated.
Fujifilm Instax 100 Instant Film Camera – Faulty Untested See Lens Shutter
Otherwise clean,
battery compartment is clean,
unable to test so selling for spares or repair considering the lens shutter
EBay
Instax 100 Instant film camera
I’m a tad annoyed at myself here as I had arranged a good price with the seller but because I was too eager I pushed the wrong button and purchased at the original advertised price. The seller must think I am a right plum, and I’d be inclined to agree with him. That said I’ve secured this for a good all in price, and it will be a nice addition to my collection. It’s a 26 year old camera, and i’ve been looking for one of these particular cameras that use the wider format of Instax film for quite a while, but even the damaged ones command hefty prices. I’ve paid an all in price of £28:55GBP here when I should have paid £23:55GBP. Never mind, lesson learned and don’t be so hasty in the future. They can command a good price as can be seen in the photo below:
Some recent sale prices
Here’s some info about this camera:
The Fujifilm Instax 100 was released on May 1st, 1999. It has been replaced by the newer Instax 200, which is very similar except the flash is on one side rather than directly above the lens.
Focusing: Motor-driven 2-range switching (0.9 to 3m/3m to infinity)
Power supply: 4 LR6/AA-size 1.5V alkaline batteries for around 10 film packs.
Dimensions: 171.5 x 91.5 x 119.5 mm
Weight: 650 gr (without batteries, strap and film pack).
Camera-wiki.org
Now this one is being sold with what looks like only one fault that the seller is concerned with and that being a shutter problem. From experience and as can be seen in this recent post of mine: Another Fujifilm Instax mini 8 I know that this is not a “Lens” issue it is in fact an issue with the iris that protects the lens, and is probably as a result of a small spring being disturbed in that area. It’s quite a simple fix and if it is the only fault then that would be quite some result. However, this is EBay that we are talking about and there could be a number of further faults we haven’t been informed of. Now I will just have to be patient until it arrives, there is no other choice.
Assessment:
It’s a big one. Compared to the other Instax mini cameras this one is very big. It’s probably 1.5 times bigger than your standard SLR. It’s big. And weighty!
It’s clean…ish. And there seems to be a strip of plastic, a gate as such missing from the top of the camera near the exit slot. This wasn’t mentioned and I’m quite annoyed about that. When batteries are put inside it makes all the noises, but the action isn’t smooth in the lens extension range. This probably ties in with the advertised issue of the lens iris operation. I’m thinking I paid well over the odds for this particular camera, I’ve been conned here, lesson learned.
There could well be multiple problems here, and if that missing piece on the top is anything to do with light proofing, then we could have an issue. Anyway we will cross that bridge when we come to it. Initially I’m going to stick with the original fault, so let’s attack that and worry about any other issues if and when they crop up.
Repair:
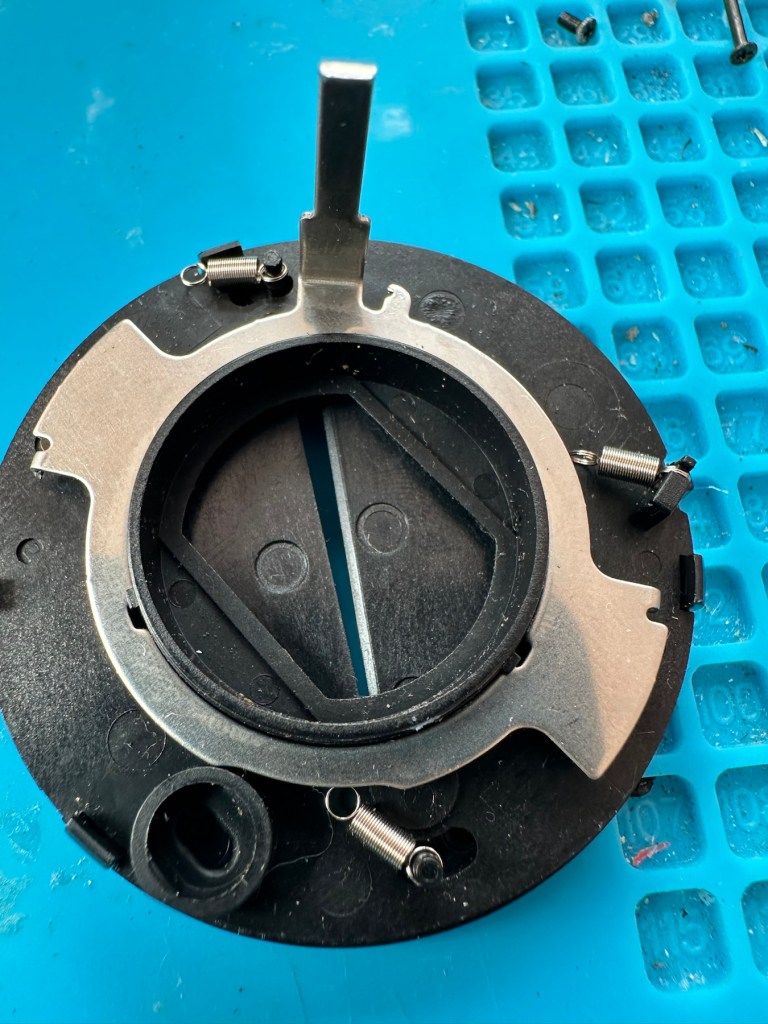
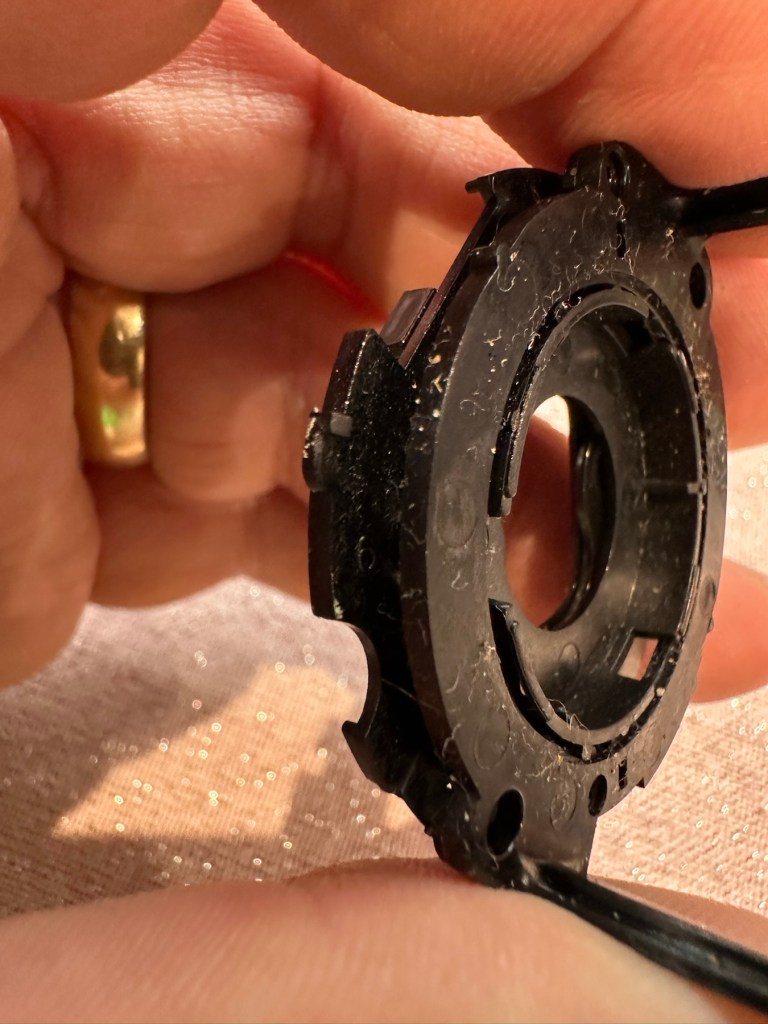
The more I get into this camera the more I find wrong with it. The main issue of the faulty lens iris is a fiddly one. You prise off the last section of the lens turret and the iris mechanism comes away fairly easy.
Mechanism removed from lens turret3 tiny springs all disconnected from the mechanism
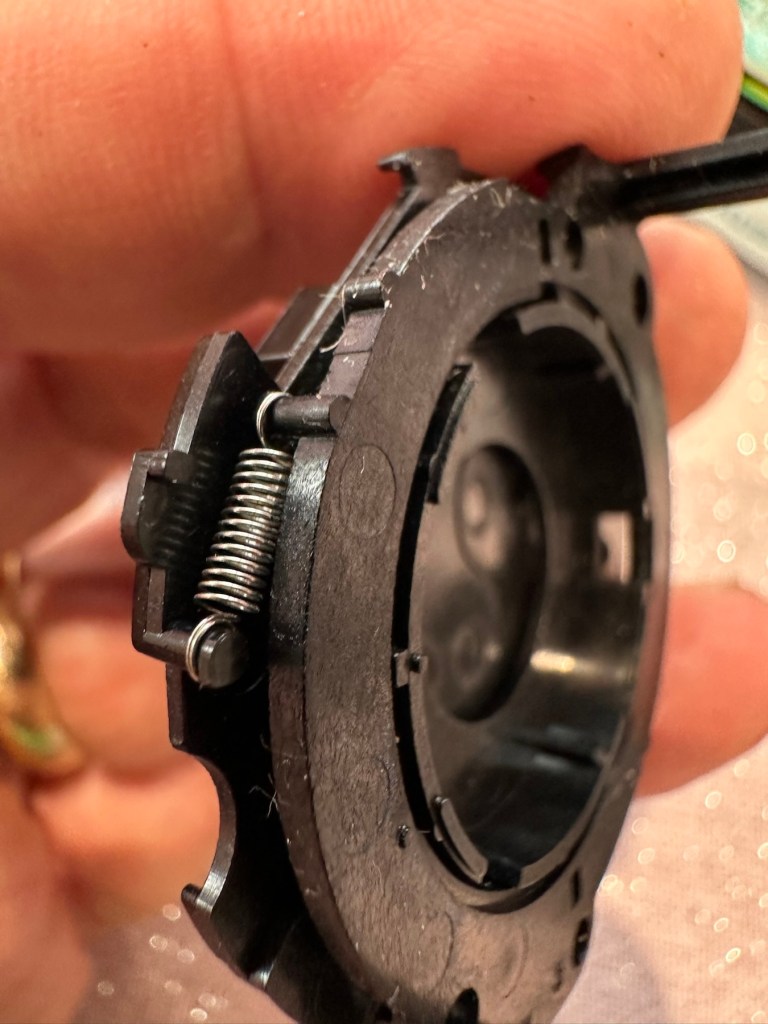
But then three tiny springs just fall out and this is why the iris didn’t work. Trying to get them in place is a puzzle itself, as no sooner do you have one connected then another drops off. It’s a fine balancing act to get them all back into place. When they are all reconnected it’s a very delicate operation to get them back into place. And even then you have to go to the inside of the camera to ensure that the lever inside that operates the iris, is aligned to the iris mechanism that is being installed back in the lens turret. It’s a fiddly time consuming job.
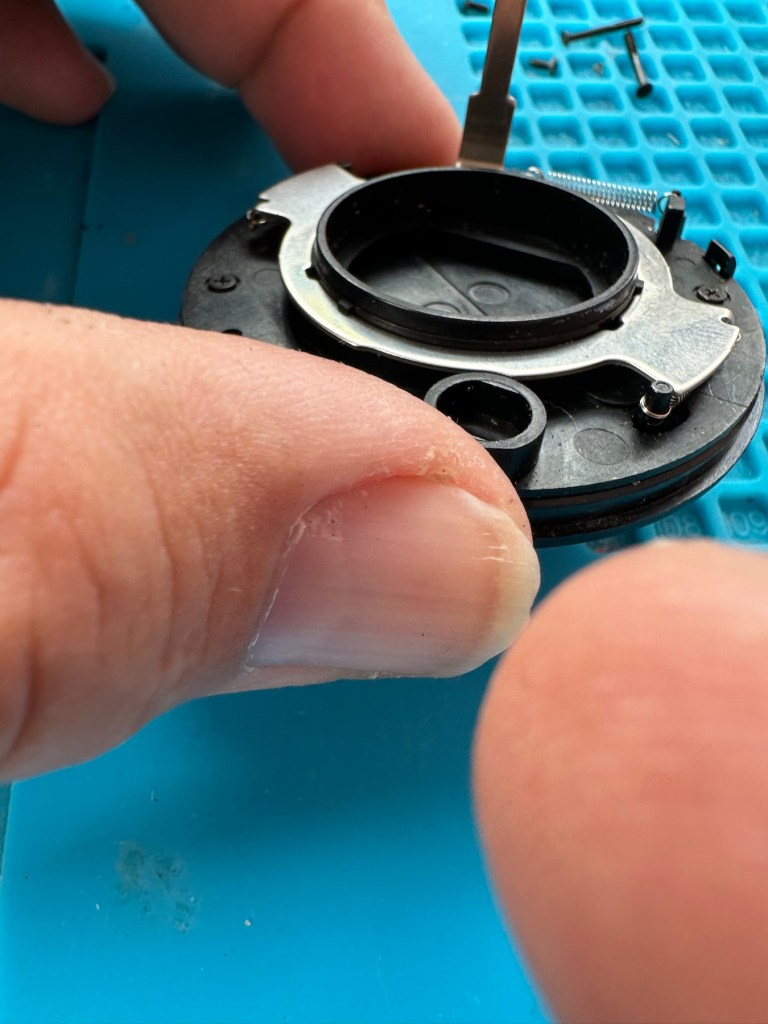
All springs attachedThe lever on the inside that has to be in the correct position when the iris is attached
Iris now working
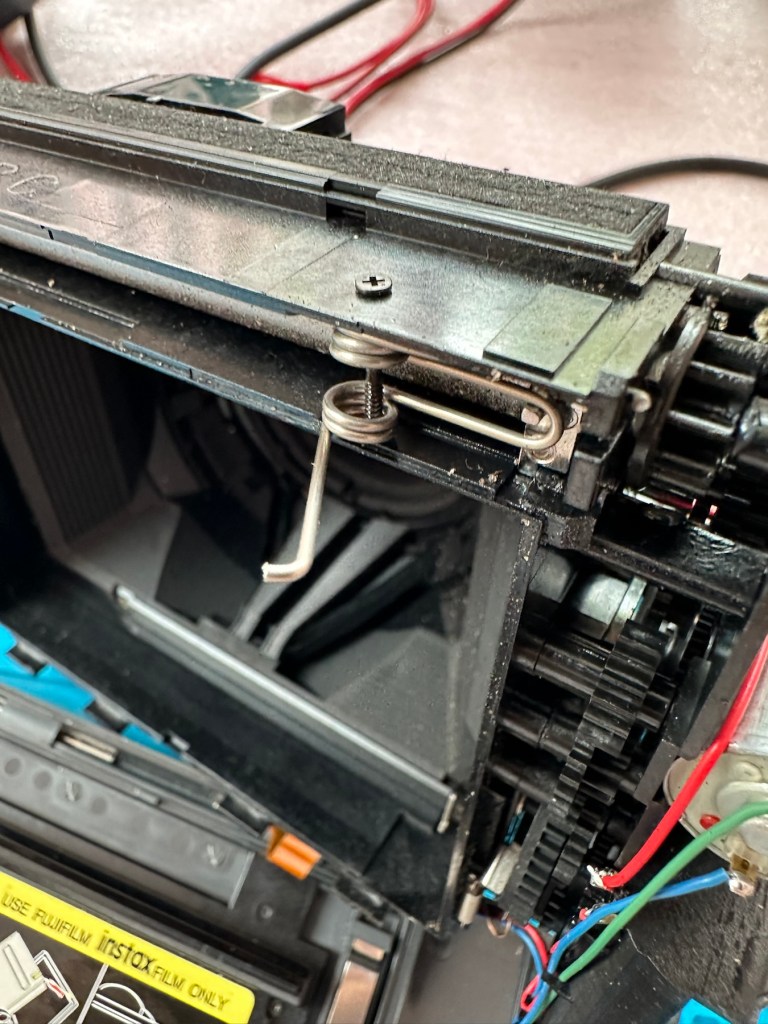
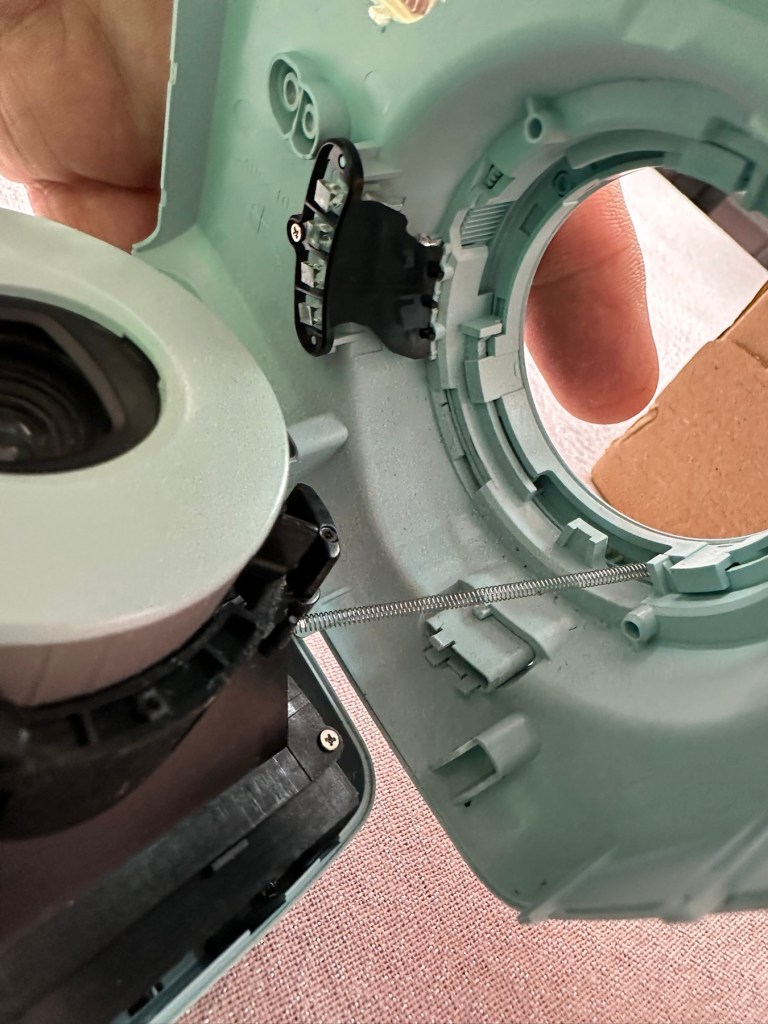
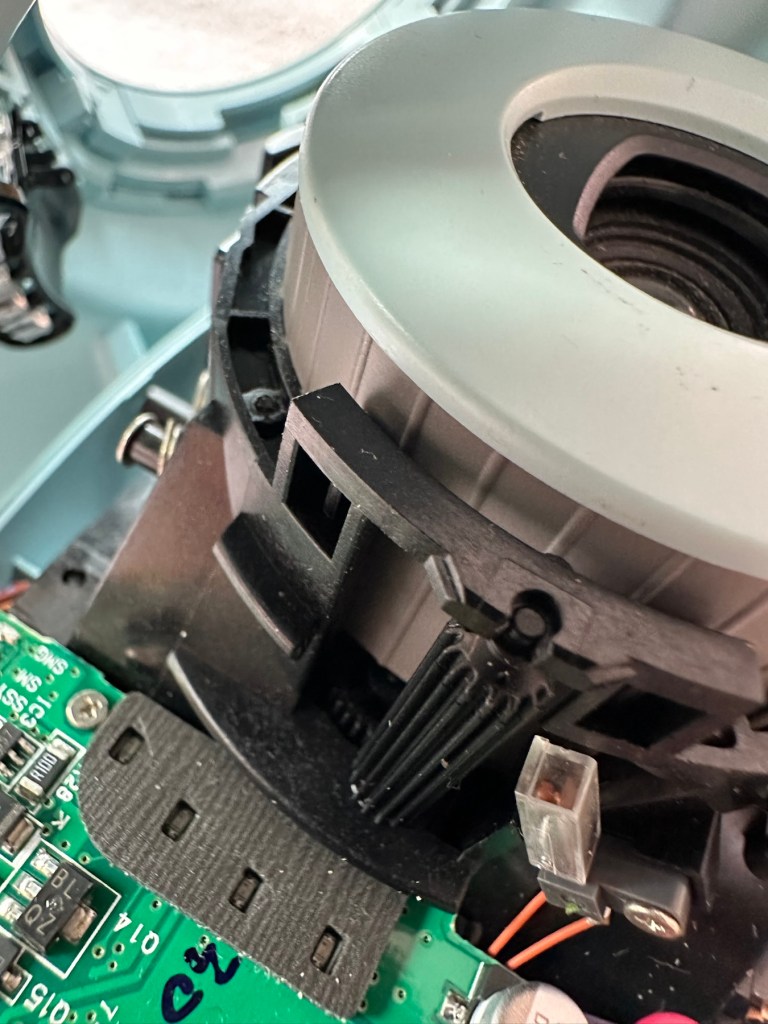
At this point the rear fascia and associated ribbon cable need to be removed to facilitate this repair. That’s when a piece of broken plastic falls out, it just so happens that one of the posts putting tension on the print rollers has broken. Great. Another problem. I’ve quickly fixed this by using some wire to act as a retention point. Bodge? Yes, but there really is nothing else that can be done here as the plastic case is thin and brittle. I have used some silicone grease to lubricate the cogs and the whole movement is now a lot smoother. It Will work. of that I am confident.
Broken plastic post, spring out.Wire bodge, spring now back giving tension
Result:
Well it works but it remains one of my most disappointing fixes due to the dishonesty of the seller. I know, if you buy off auctions it’s Caveat Emptor as they say, I preach it enough but this time I was caught off guard. Lesson learned. But I remain disappointed. Multiple faults, sold as just the one when in fact it also had bits missing that were not declared, very misleading in my opinion. Maybe in future I need to look deeply into these purchases before I give any feedback, i need to change my operation as I was truly shafted here.
Polishes up nice
It does everything that it should, the motor and transport system work, the iris now works, shutter is good, and flash operates. I’m confident that the camera is working fine but I haven’t tried any film through it yet as it uses a bigger format film and is quite expensive, and I’m not forking out for any just yet. Maybe when I get another wider format model to look at I will pay out. Just not yet though. When I do get some film through it I will amend this post accordingly.
I’m off to calm down a bit now, thanks for passing by, I really do appreciate it. Have a great day.
Fujifilm Fuji instax mini 40 instant camera . Functional, but flash NOT working .
LISTED REPAIR OR SPARES . NO RETURN .
THE CAMERA IS TESTED AND WILL,POWER UP AND TAKE A SHOT AND EJECT A SLIDE CORRECTLY. Please watch uploaded video .
HOWEVER THE CAMERAS FLASH IS NOT WORKING . This is the reason I have listed the cameras as repairs or spares.
Hopefully someone knows about these cameras and knows whether the flash unit just needs replacing or if it is an electronic fault that needs sorting out can fix it . Otherwise the parts will be useful to someone who repairs these .
No batteries or film is included .
The camera body is in very good cosmetic condition. There are only light surface marks in terms of signs of use . . Please see images as they are part of the description.
The red light to show the camera has powered up lites up when the button is pressed to extend the lens and turns the camera on .
When you close the lens down it locks securely into place .
The frame counter is working .
The film compartment is clean and the rear door shut correctly and securely.
Battery compartment is clean and the battery cover locked into place securely.
The camera is powered by to easily available AA batteries ( not included) .
EBay
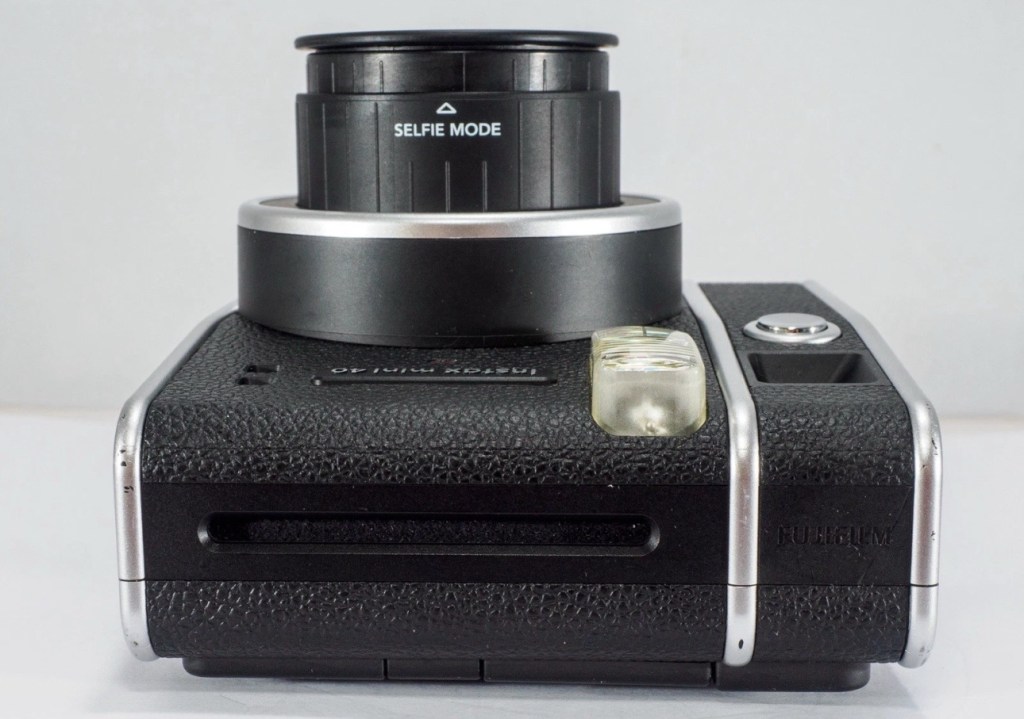
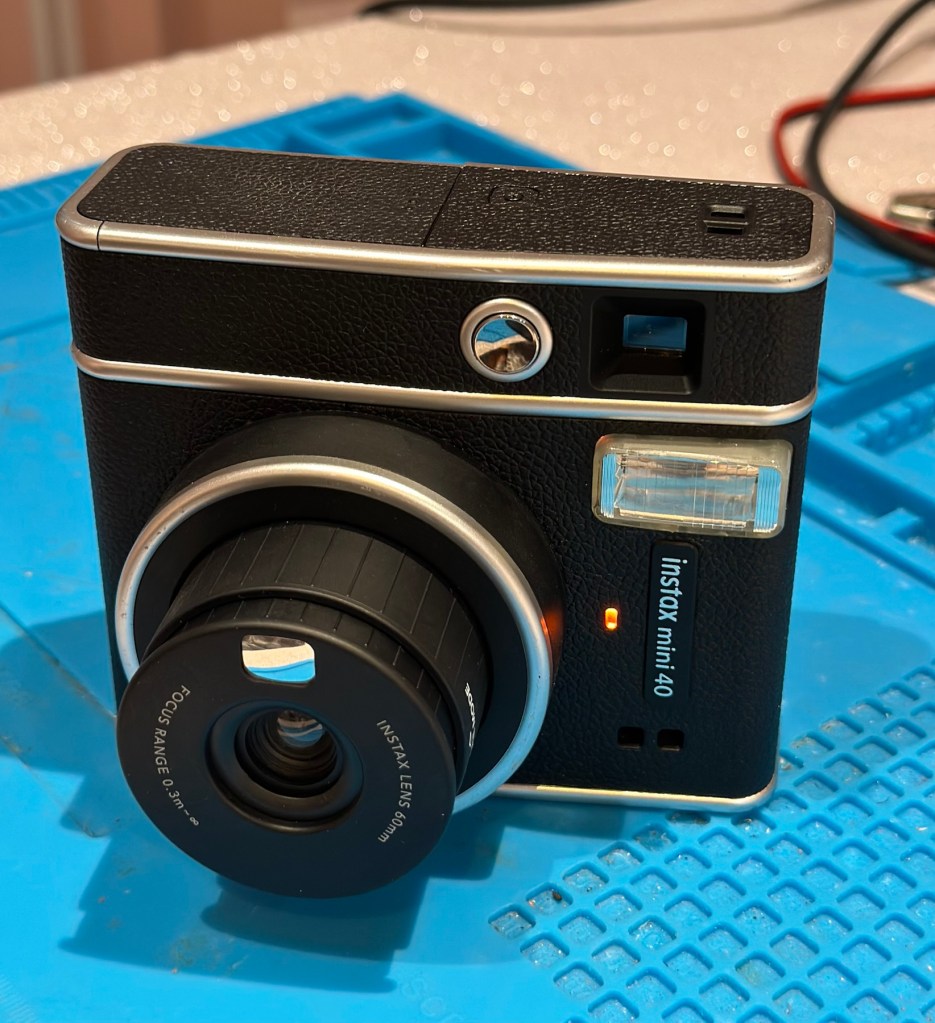
The Instax mini 40
Now that’s what I call a great descriptive sales pitch. And that’s because the guy is a professional seller of photographic equipment. I’ve seen the video he posted and all the above is true, it really is just a problem around the flash. Maybe it’s an easy fix? I suspect not but either way it will be an interesting project.
Here’s a little info on this camera:
Hitting the market in April 2021, the Fujifilm Instax Mini 40 takes the updates the Fujifilm Instax Mini 11 introduced but wraps them up in a cooler, more retro-styled instant camera body. Instant film fans will probably love it and with its improved design, there’s a chance that those who aren’t instantly drawn to this form of photography may just want to have a play around with the Fujifilm Instax Mini 40, too. It does cost more than the Fujifilm Instax Mini 11, though, so you’ll have to decide if the cooler design is worth an extra £20.
+ Pros
It’s fun
Great party camera
Easy to use
Looks cool
– Cons
Film is expensive
Viewfinder could be better
Powered by AA-batteries
Ephotozine.com
I first of all went in with a cheeky bid of £15:00GBP that the seller originally turned down, so I then put in a high bid of £18:00 and as no one else was wanting it, it actually sold for £16:00, just £1:00 more than I’d originally offered. All in all the cost with the postage was £19:45GBP and I’m really pleased with this. Im surprised though that there are flash issues in a unit that is only just four years old. As you can see in the photo below recent sale prices have been strong and a great deal higher priced than what I have just paid. These are certainly popular little camera’s with the younger generation.
Recent sale prices have been strong
I guess we will just have to await its arrival to assess the flash issue. I’m very confident that I will be able to get this camera up and running again.
Assessment:
Out of all the Instax cameras I have dealt with lately, this has got to be one of the best ones I have had my hands on. This is a mid range instax camera that is more sober in colour aimed at those who enjoy their lomography or better quality instant photography. It certainly looks good, and to be honest I’d rather carry this one around rather than a bright pink one.
Looking nice and sober
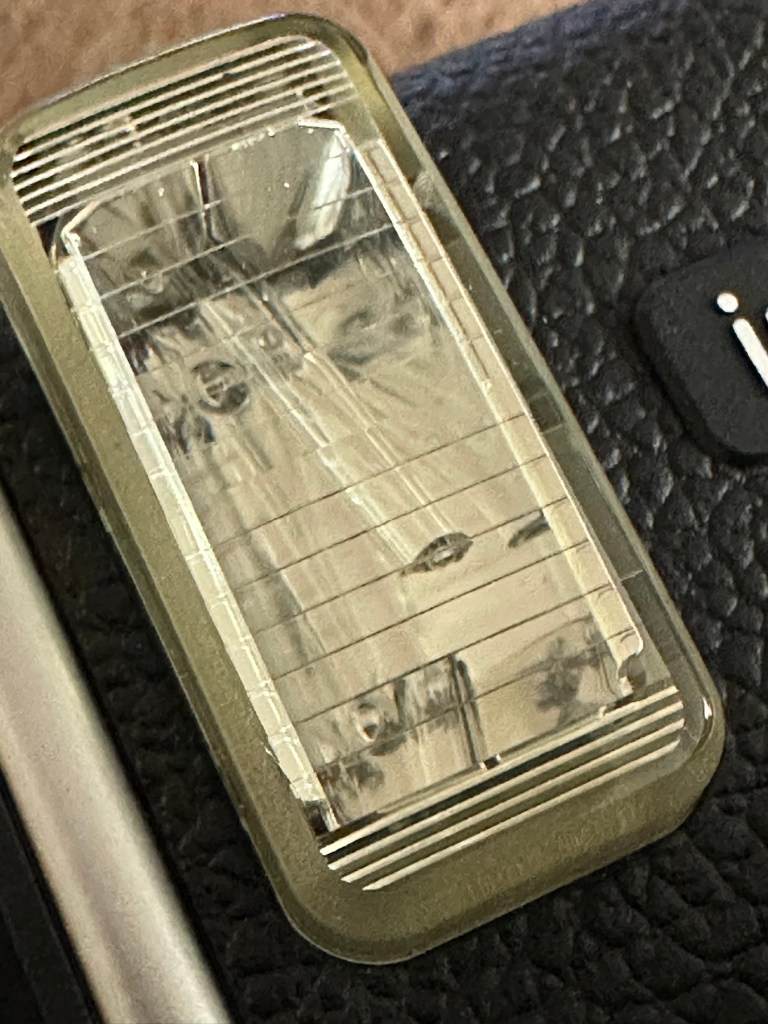
As posted in the description above it is in near perfect condition and a quick Look at the flash head shows that the flash bar within the unit is broken.
Flash bar brokenConfirmed broken when removed
Let’s get on with replacing this damaged flash unit.
Repair:
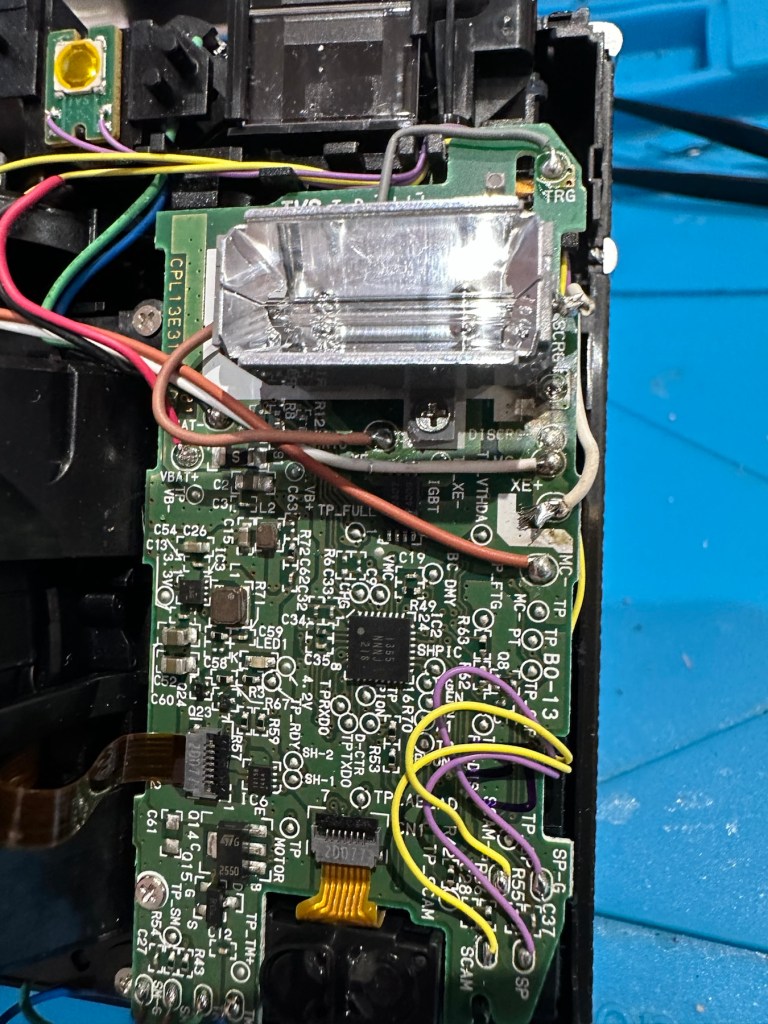
Let’s get it opened up.
Dismantling
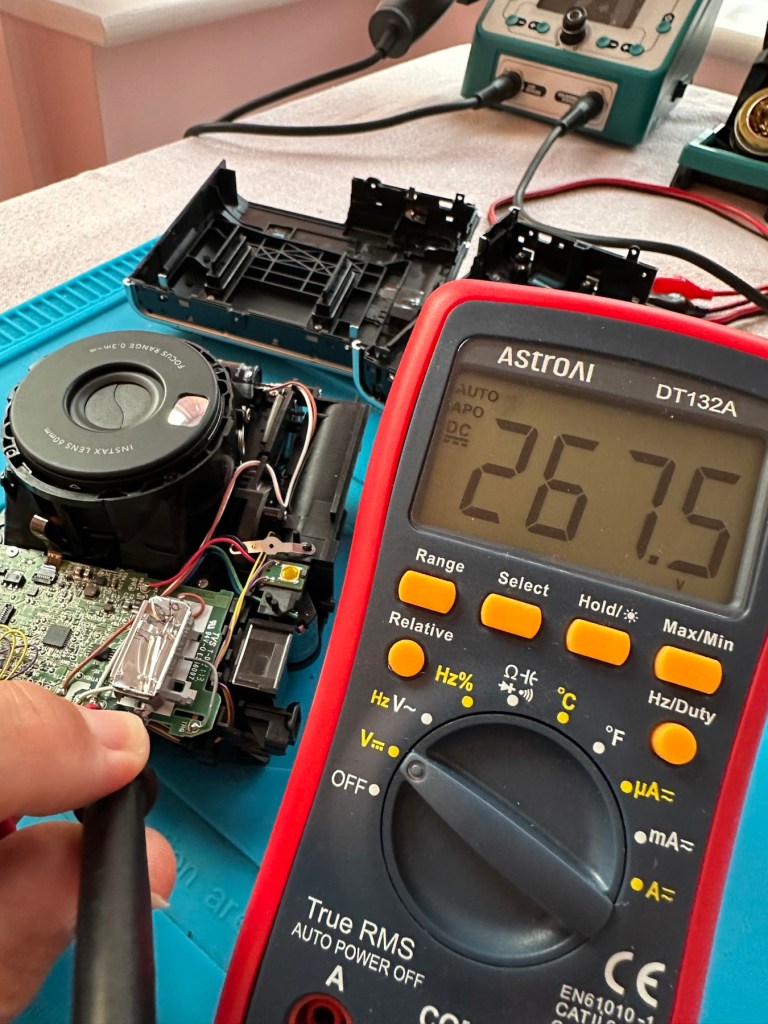
People laugh at me when i tell them that playing around inside these units could kill you. I can understand the contempt aimed at me for such a statement, when I’m carrying a bright pink camera that hardly looks dangerous. Just look at the voltage still in the flash capacitor though once I have opened it. Savage.
Residual voltage of 267v still in the flash capacitor
270v would quite easily send you across the room, if you had a heart condition it would probably be game over. I’ve learned my lesson in the past so I ensure I use a capacitor bleed probe before I go anywhere near one of these flash capacitors. The capacitor on this camera is rated at 320v, not to be messed with. Beware. What’s more impressive is that all this energy is supplied from two 1.5v AA batteries. Clever stuff.
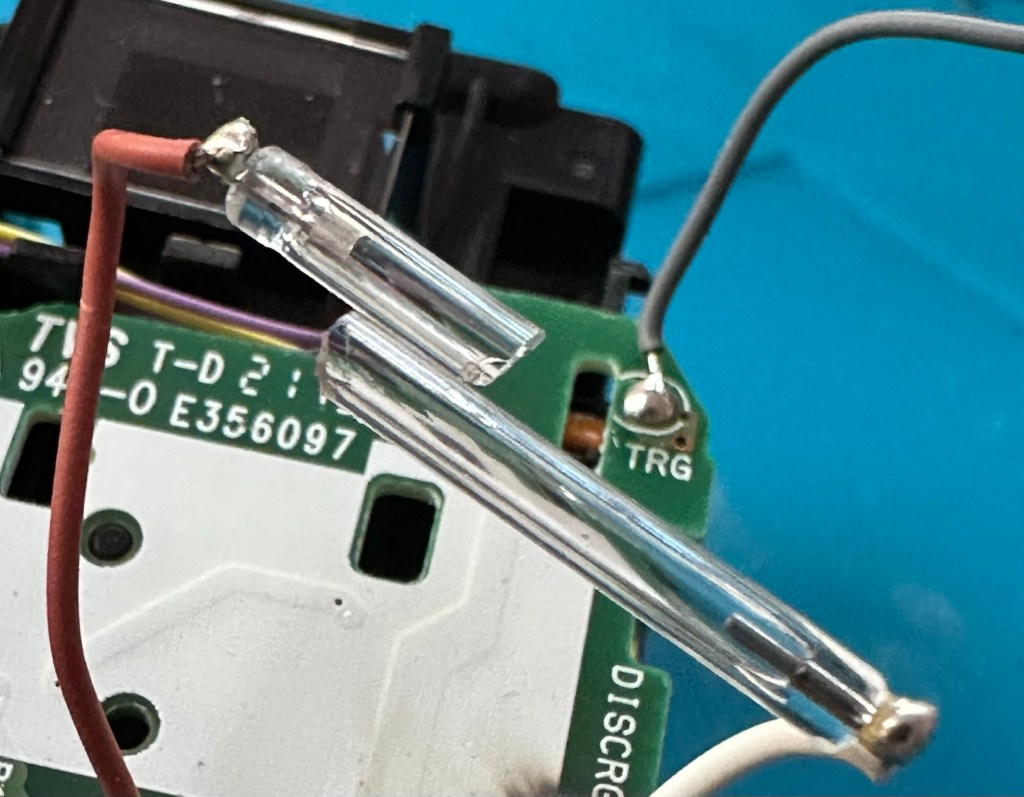
I have a donor flash bar in an old spare unit. I have carefully unsoldered its connections and gently removed the very thin glass tube from the donor unit and placed this in the one situated on the new camera.
The donor unitIn place and soldered onto the board of the repaired camera
Carefully, once inserted into the flash reflector, i have soldered it back onto the board. All looking good. However I need to test the flash so I temporarily put the case on, bung in two batteries and turn the camera on. Press the exposure button and the flash fires perfectly. Happy days. I now can confidently reassemble the camera back together, and I’m pleased that when this is done there are no screws left over. All small wins.
I have some film available so there is no better time than the present to give it a try.
Result:
Nice flash – working Working perfectly
I’ve loved doing this repair, this is a good quality, great condition, and now in perfect working order camera, brought back to life with many more years of use left in it.
But it could have been just chucked in the waste. I’m keeping this one for my collection as it’s a fantastic example acquired at a very good price. Thirty minutes of attention is all it took.
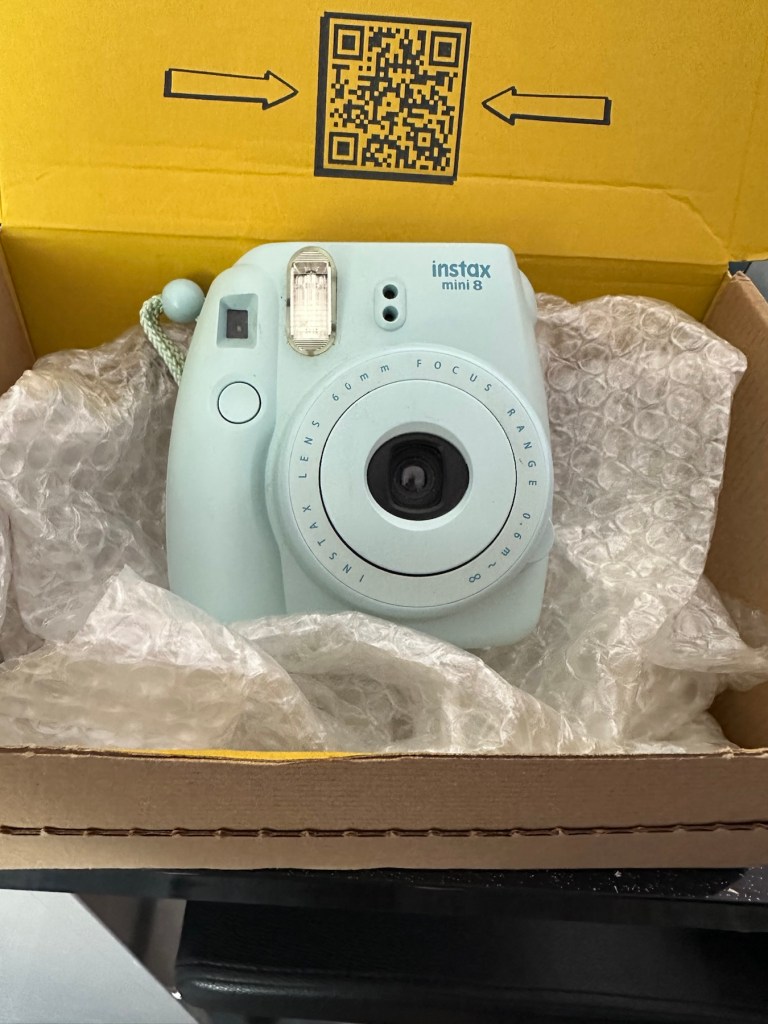
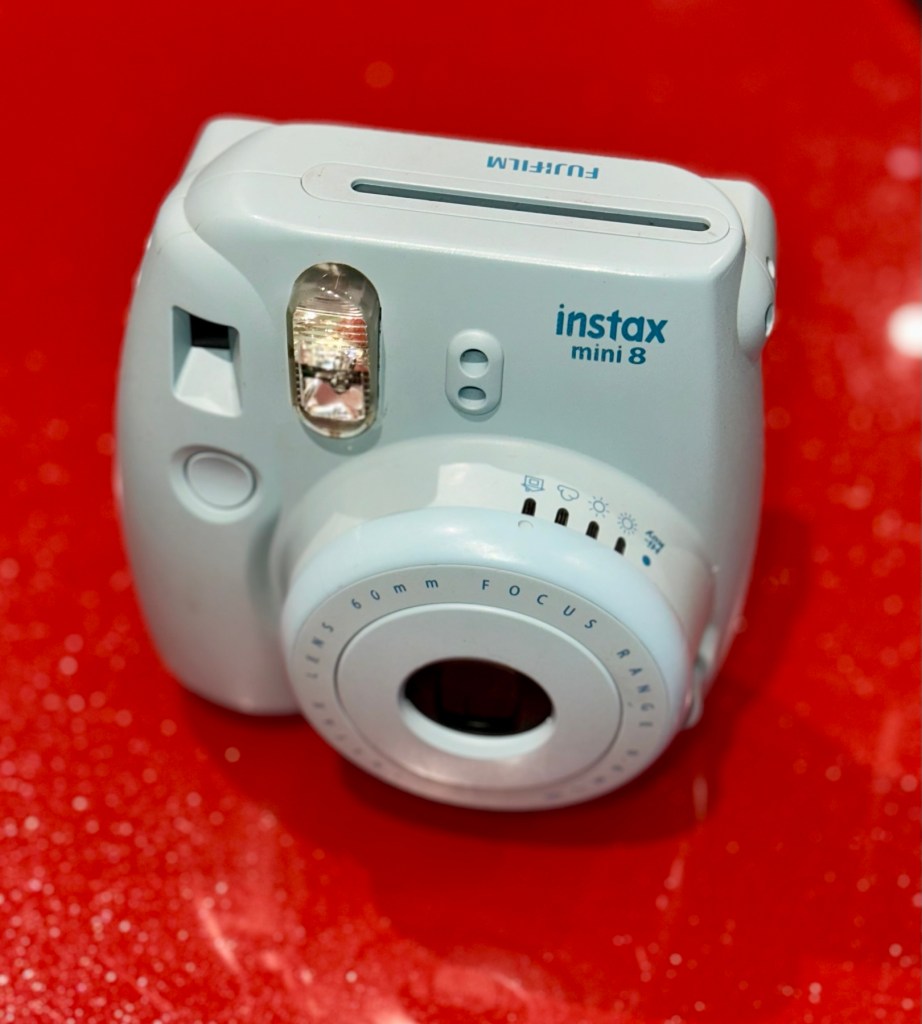
Yes another one. Anyone that reads what I post will realise that these little cameras have really become popular with the youngsters within our family. I recently posted about a family get together: The garden gathering and in this post I stated that a young member of the family liked these cameras so much, that she went out and purchased a damaged one and asked if I could fix it for her. How could I turn down such an offer?
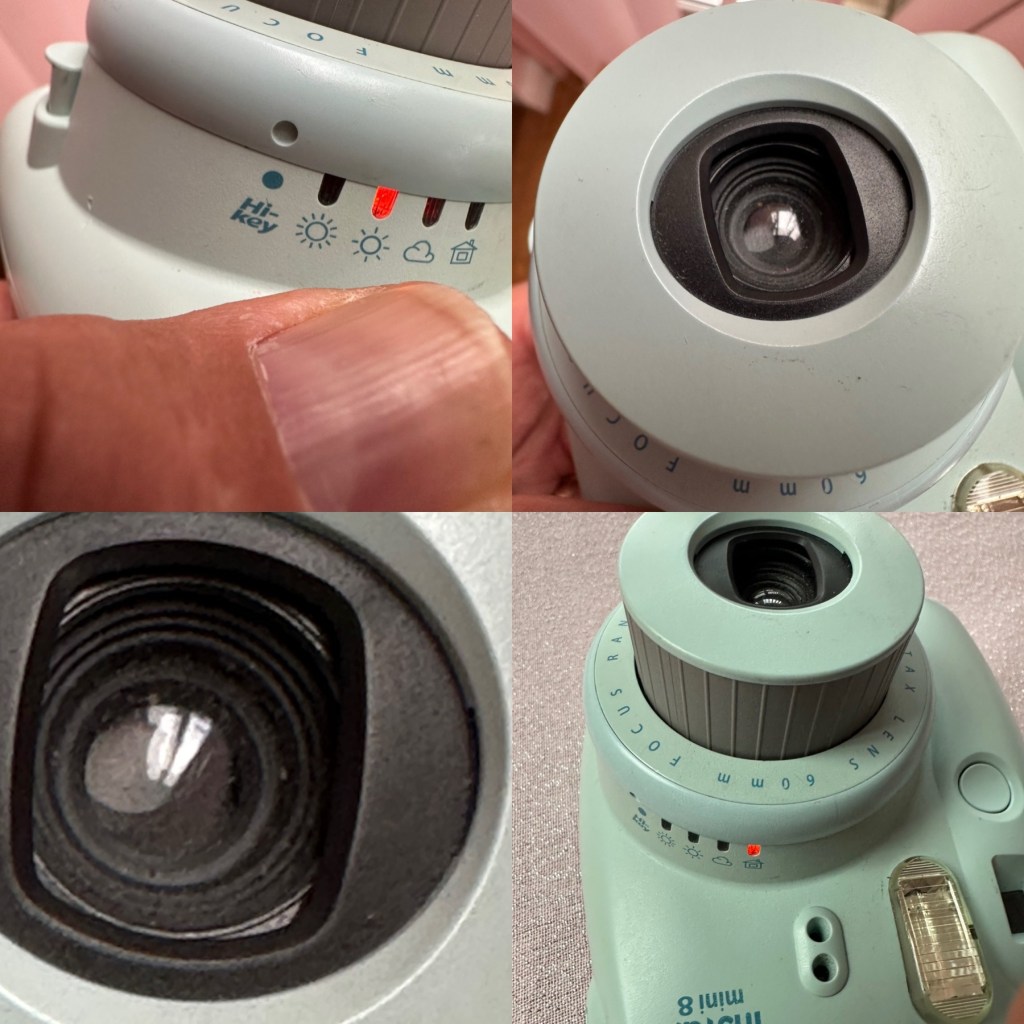
Another Instax mini 8 and that Iris should be closed
And here it is. Needs a little clean and immediately I can see an issue, what I’ve noticed is that the little iris lens protectors that close when the lens is retracted are missing, or not operating and opening properly. Everything else seems to be doing what it should, motor, film transport system etc, however the initial issue reported with this camera was that it’s exposure was sometimes hit and miss, it most definitely all related to the lens issue. A good clean wouldn’t go amiss with some extra attention paid to the light sensor area.
Anyway, enough chat, let’s crack on.
Assessment:
A nice tidy camera, needs a little clean, flash fires, film transport mechanism inside is working and the motor runs. It gives the impression that it is working fine, however….
Here’s a reminder from the young family member who made the purchase, regarding its issues:
I’ve just remembered, I think the advert said something about the photos coming out dark no matter what setting it is on! x
I’d already noticed the little iris mechanism on the front of the lens didn’t open and close when the camera was turned on, so I was going to be looking in this area anyway. But when I looked a little closer and moved the aperture ring on the side of the lens, the relative apertures in the lens were only moving to roughly the half way point, off centre, hence there was no corresponding fully positioned aperture, and in relation to the lighting situation that was presented, they were stuck and blocking the incoming light. In a nutshell there was not a sufficient sized aperture “hole” for any light to get through, resulting in the exposure issue stated above. This needs adjusting. You can see what I mean in the photo below. The lens aperture leaf does not sit central in the lens.
Incorrect aperture settings and positioning in the lens
Apart from the highlighted problems above, i don’t believe there are any other underlying issues. So I’m going to concentrate on the front of the camera solely in the lens turret area.
Let’s get on with the repair.
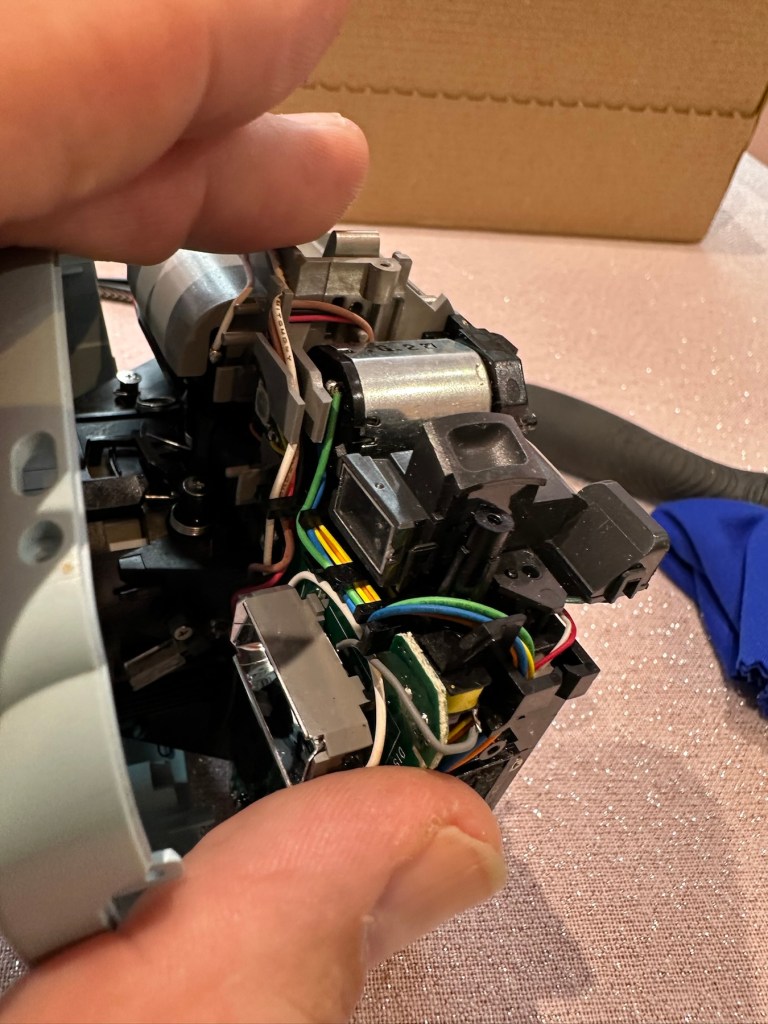
Repair:
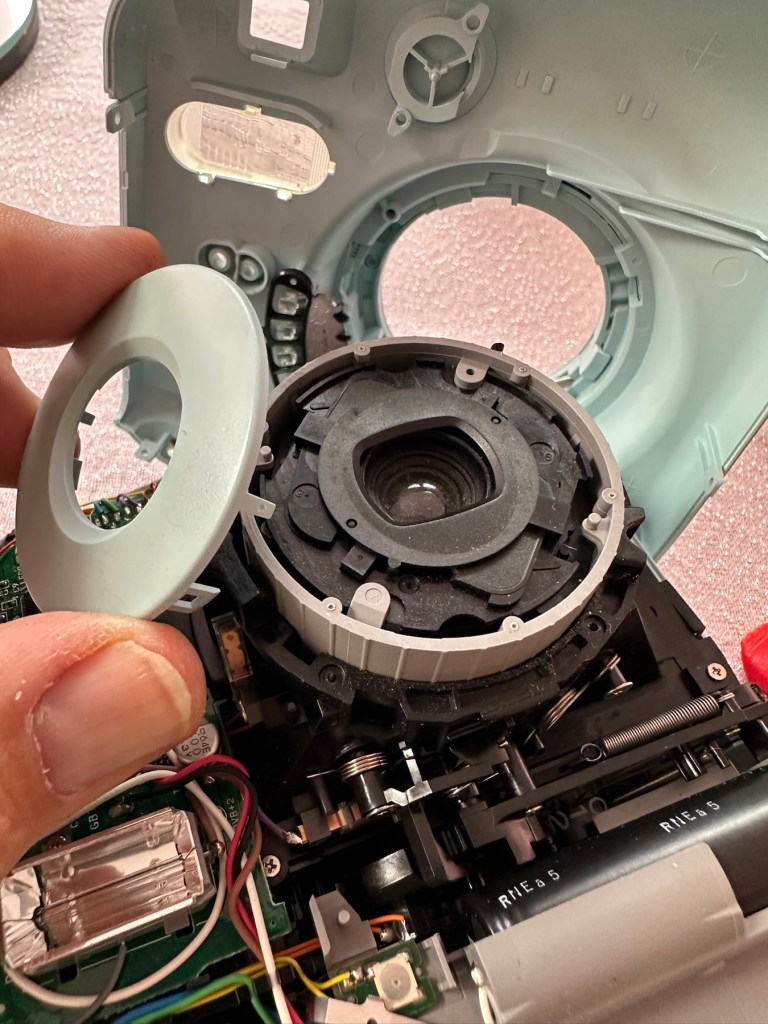
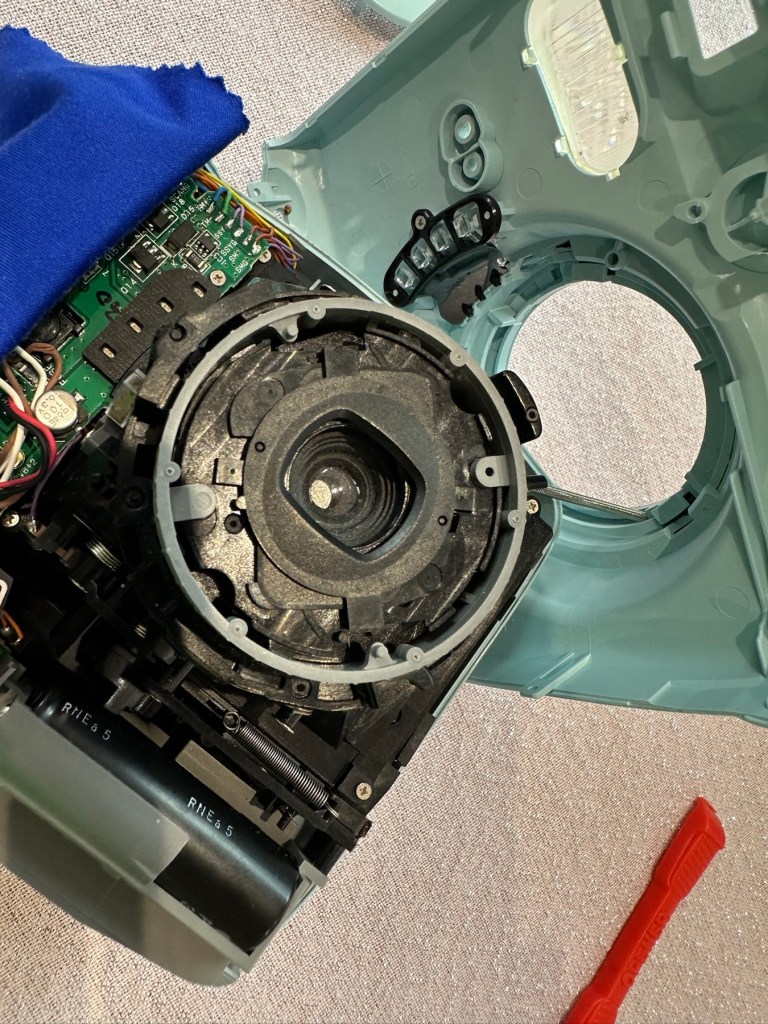
The iris issue is within the lens turret so this will need to be dismantled to access the iris.
Lens top cover removed exposing the iris mechanism below
It was a bit of a head scratcher this one, as I spent a lot of time just staring at the mechanism trying to figure out how it worked. When the iris lids were manually manipulated to the closed position when the turret was retracted all was fine. When the turret was opened up the iris lens did the same, but then if you again retracted the lens the iris remained open exposing the lens. I was thinking it must be missing a spring somewhere and I was about to be proved right.
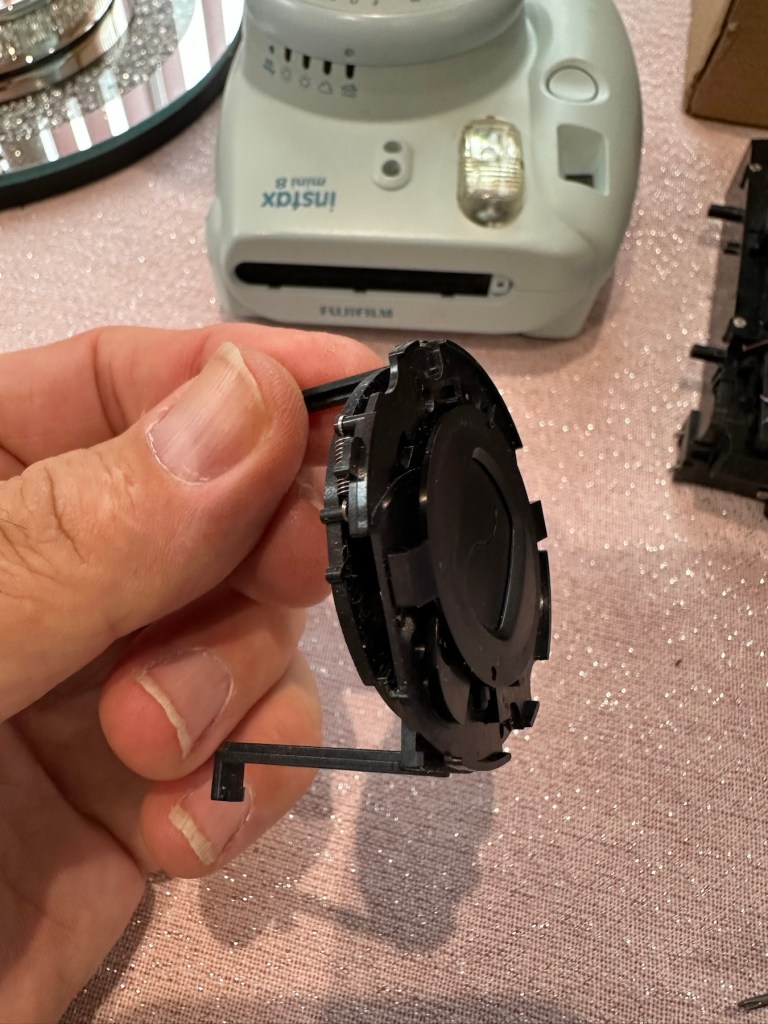
I found a replacement iris turret in my spares box for instax cameras
I found a replacement iris mount that fits within the lens turret. I had this in a spare box and used this as a reference to compare to the old non operating one. Here is where it was confirmed that there was a spring missing and this is why the iris was not operating.
Spring missingSpring in place The old iris mechanism compared to the working one
I replaced the old mechanism with the new one and this was installed back in the camera, this now works fine. I have however found a suitable spring for the old iris so I do now have another spare ready should another be needed in the future.
Iris mechanism installed and now working
The issue with the aperture positioning has been sorted by ensuring that the aperture ring is correctly positioned in relation to the cog mechanism in the lens turret area. It’s a bit like sorting out the timing belt in a car, it just has to be in the right position to achieve the correct aperture settings.
Springs and levers everywhere, and the “Timing” cog on the right that is in the turret area
This sorted, the last thing to do was to give the viewfinder a little clean. You have to be very careful here as the viewfinder is connected to the camera “ready to shoot” indicating light, and there are very fine wires all around this area. Be just a bit too clumsy here and you’d have a difficult soldering project to also add to the original problems. Anyway, no such issues today, the viewfinder was un clipped and prisms and glass cleaned and reassembled. All looking good.
Viewfinder and lots of little wires
I’m now happy that all the issues have been attended to and I’m just going to reassemble the camera ready for a quick clean. Luckily all the screws that came out went back in with none leftover. Result!
Result:
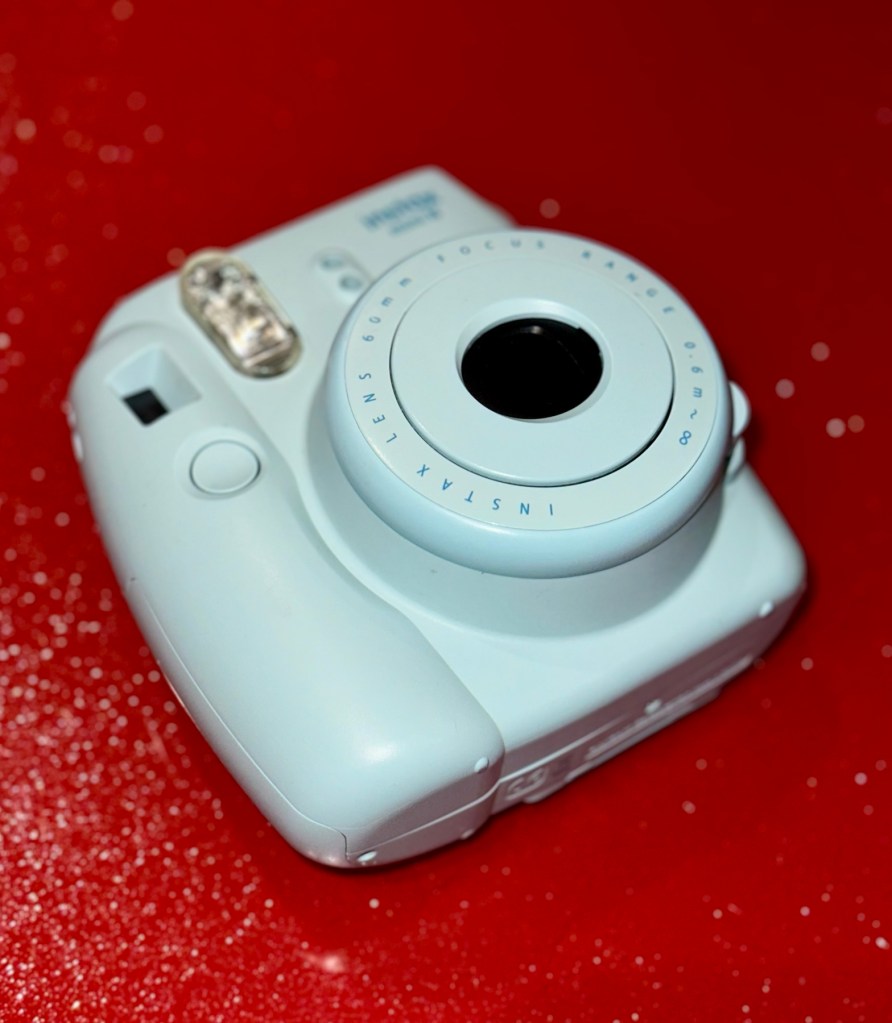
We now have a nice little unit, all aperture settings are working as they should and the lens iris is operating as it was always supposed to do. The viewfinder has also been cleaned and it’s now a nice clear unobstructed view. It just works.
All cleaned and now working, a lovely little camera
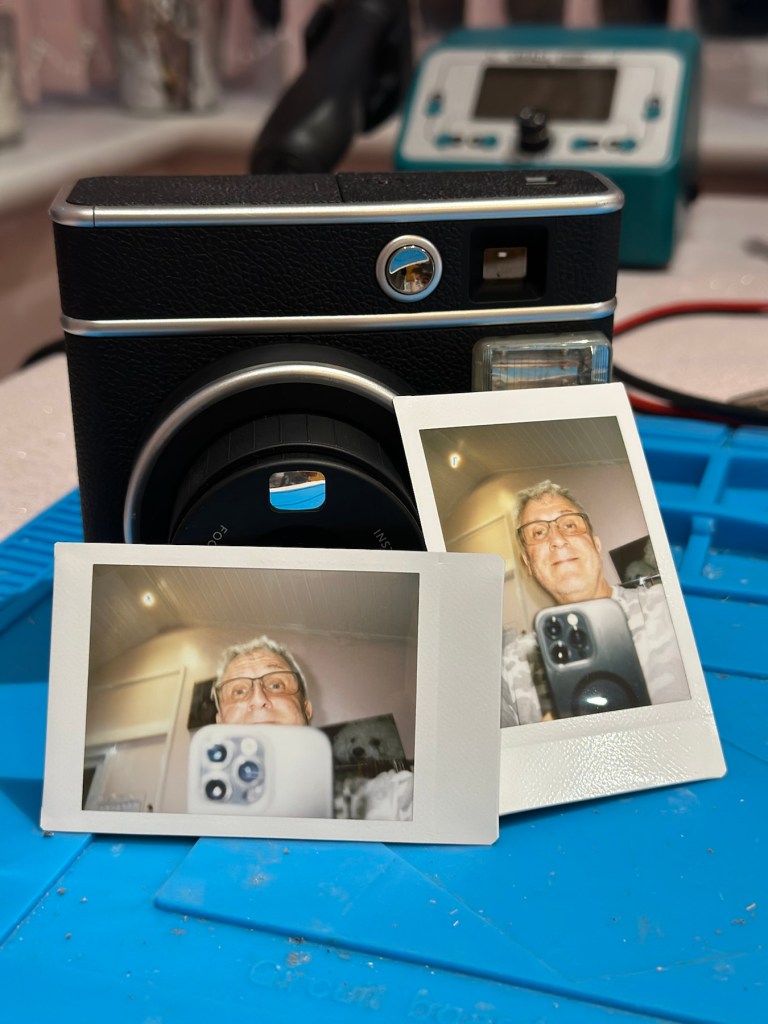
I’m guessing this camera will be coming away with the owner on a family holiday that we are all about to embark on shortly. I’m hoping to run some film through this soon but I am ultra confident it will work as all the issues have now been addressed.
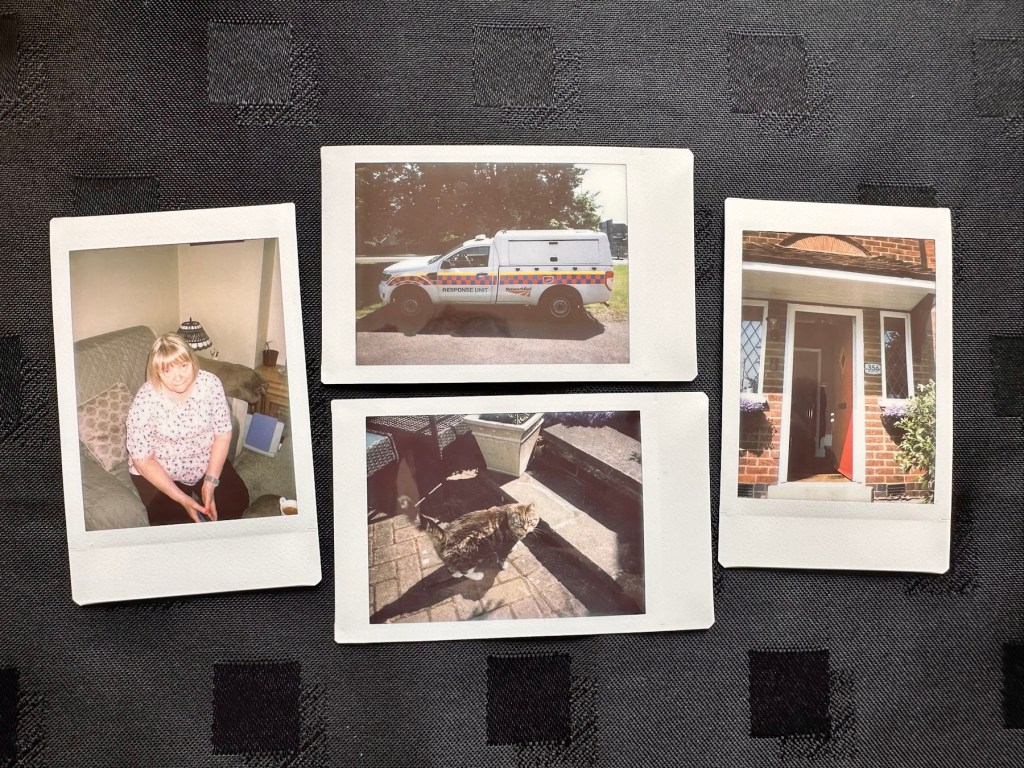
I’ve just got some film and rattled off 4 quick shots, one of them indoors. Exposures are fine so I’m happy this is a perfectly good working camera.
4 quickly produced shots
I’m sure there will be one younger member of the family who will be very happy with her new camera. And may she have many years of capturing good times and fantastic memories. This is what these little cameras are made for after all.
Thanks for passing by, it’s always very much appreciated.
To build a usable, basic issue, medium format camera (Bronica SQ-A) from damaged items and spare parts, for as little outlay as possible and shoot one black and white, and one colour roll of film as proof of its successful completion.
Getting started:
Building a camera from damaged parts is no easy task when the name happens to be a high end brand and any parts that are available, are being snapped up by others to service their own stock or to break up for sellable parts. I’m going to keep a running total to try and build this as cheaply as possible, and to keep track of this total I’m going to use my trusty Psion Organiser II LZ from 1989 to keep a tally.
How the project currently looks.
Fourth purchases:
Now we have the bulk of the camera, we just need those annoying little bits to finish off. I’m calling them annoying, because if I was just to pay out for the 5 or 6 little finishing touches I need they would cost more than the total amount I have paid so far for the camera itself. I would be paying a premium for items that will in the end have no effect on the result I require to complete this project, that being two properly exposed rolls of film.
So here we go.
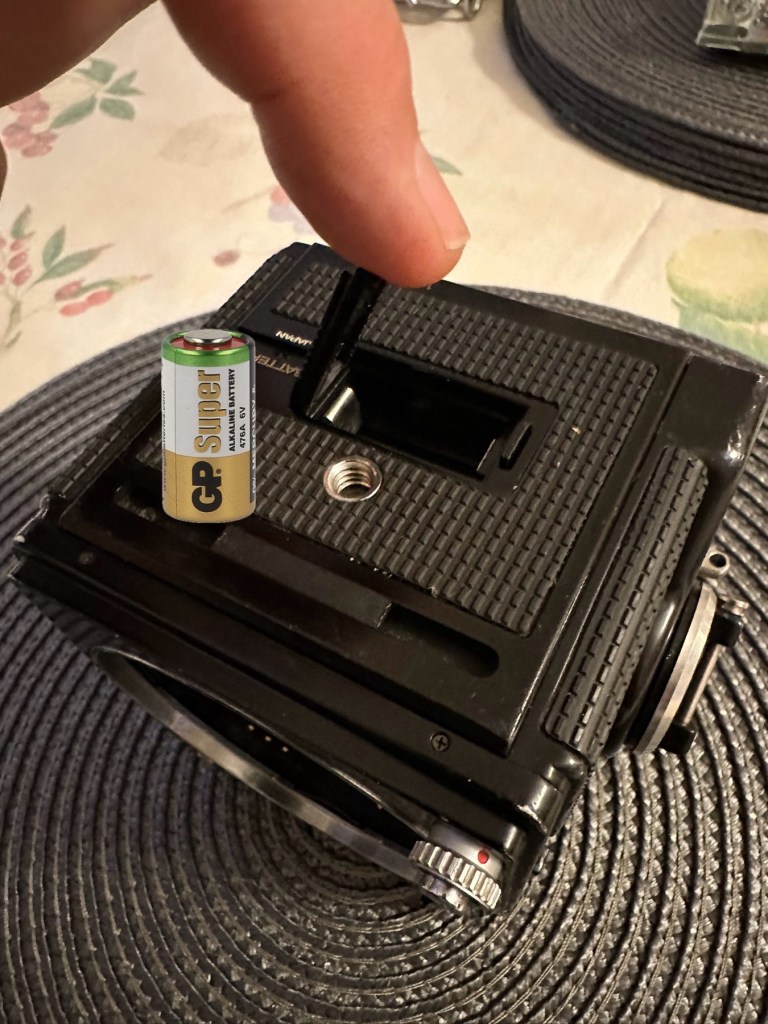
Battery:
Probably the cheapest item you will buy for this camera. The camera requires a single 6v alkaline battery and is quite important. Without it the mechanical shutter still works but at only 1/500 second. To obtain all the other available shutter speeds you need the battery to work the system electronically. This has cost me only £3:50GBP. After testing I can confirm that the battery works fine and all shutter speeds are as expected. Perfect.
Winding handle/Crank:
For some reason sellers always remove the crank prior to selling. That’s because the original Bronica crank is currently being sold at between £70-£80GBP and it really isn’t worth it. Everyone is after a quick buck and some people are willing to pay it. I’m not however, and my handle here is a special strength 3D printed version that I have paid the grand total of £11:20GBP for. It will need a couple of small “O” rings just to pad the handle on the spindle as it’s a tiny bit narrower than the original over priced one. It’s more than capable for the job in hand though, looks absolutely fine and has saved me around £65:00GBP of money.
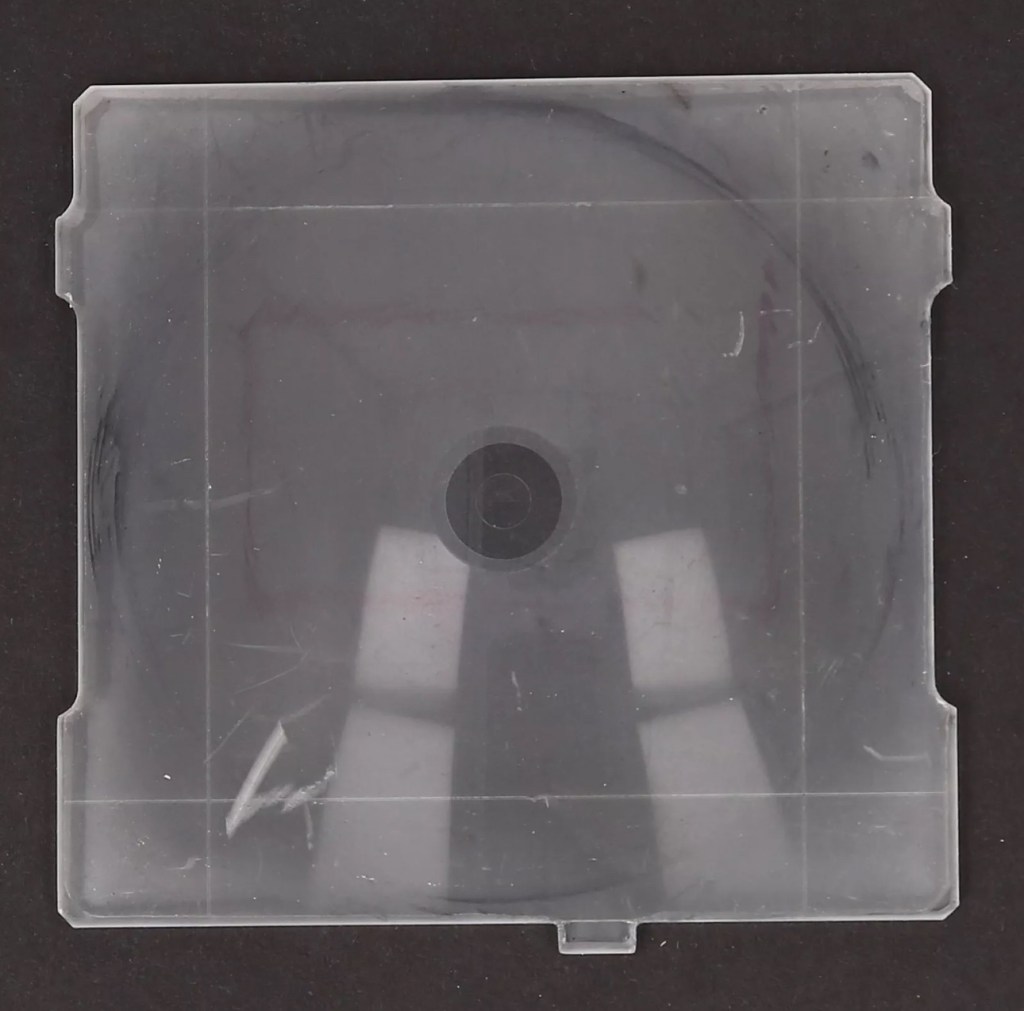
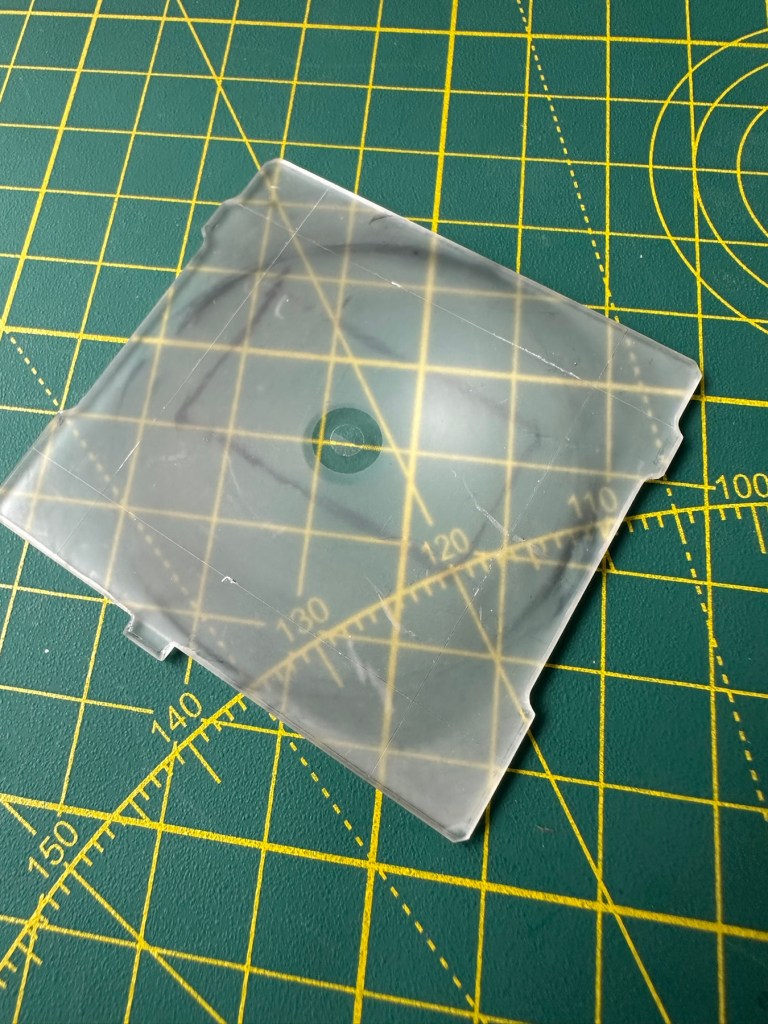
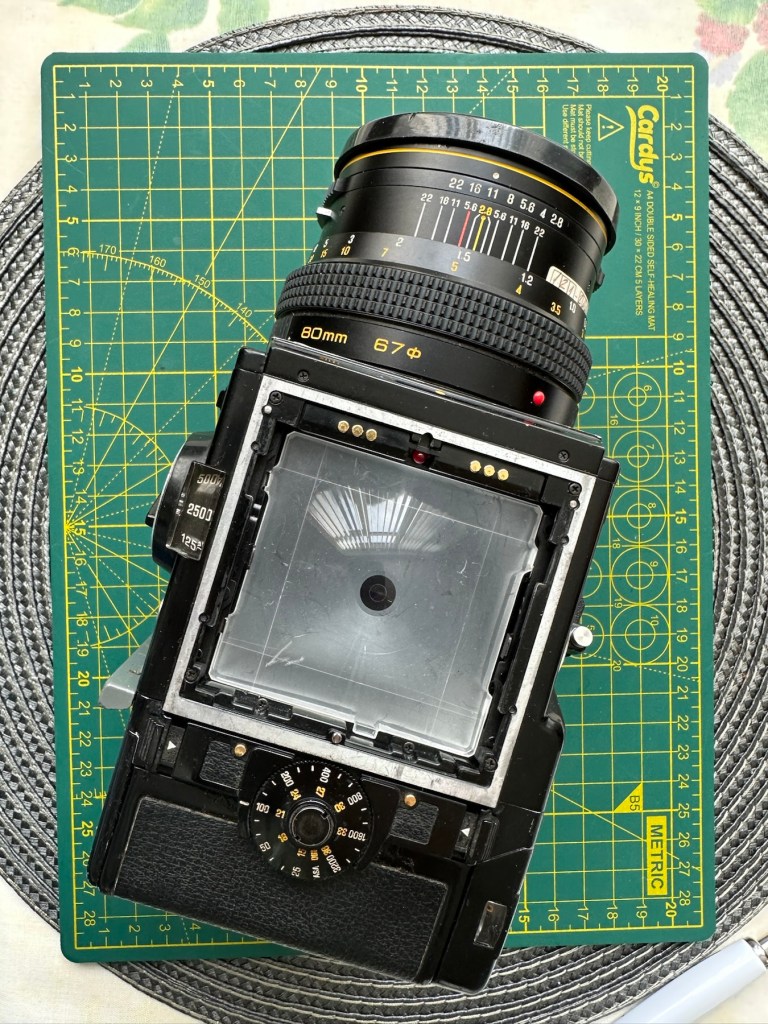
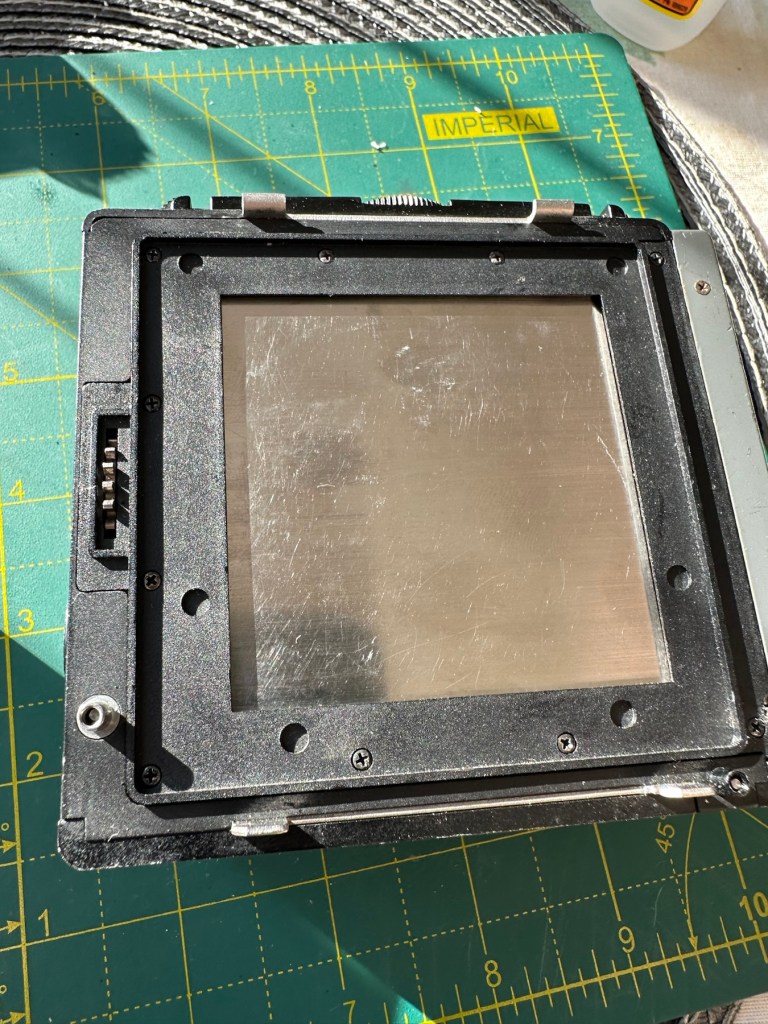
The focussing glass:
This is another item that the sellers withold for individual sale. I wonder why? Yes a standard focussing glass is going to set you back anything up to £150:00GBP and again it’s not worth it. However my one is a “damaged” one in that it has handling and pen marks on it. It looks as if some has sadistically drawn their own frame on the glass, the fool! I’m hoping this will clean up a bit but as long as I can see the focussed image I’m not all that fussed. I only paid £11:75GBP for this so yet again a further saving of around £140:00. See, savings can be made, if you are happy to make the trade for a lower quality item.
Camera aperture covers:
Not really essential at this point, but to be honest you need to protect the fragile equipment you now have so it is really worth investing. I’m not purchasing these just yet, that’s a later purchase, I have a lens cover and hood cover now, so that is all I really need to start the real testing.
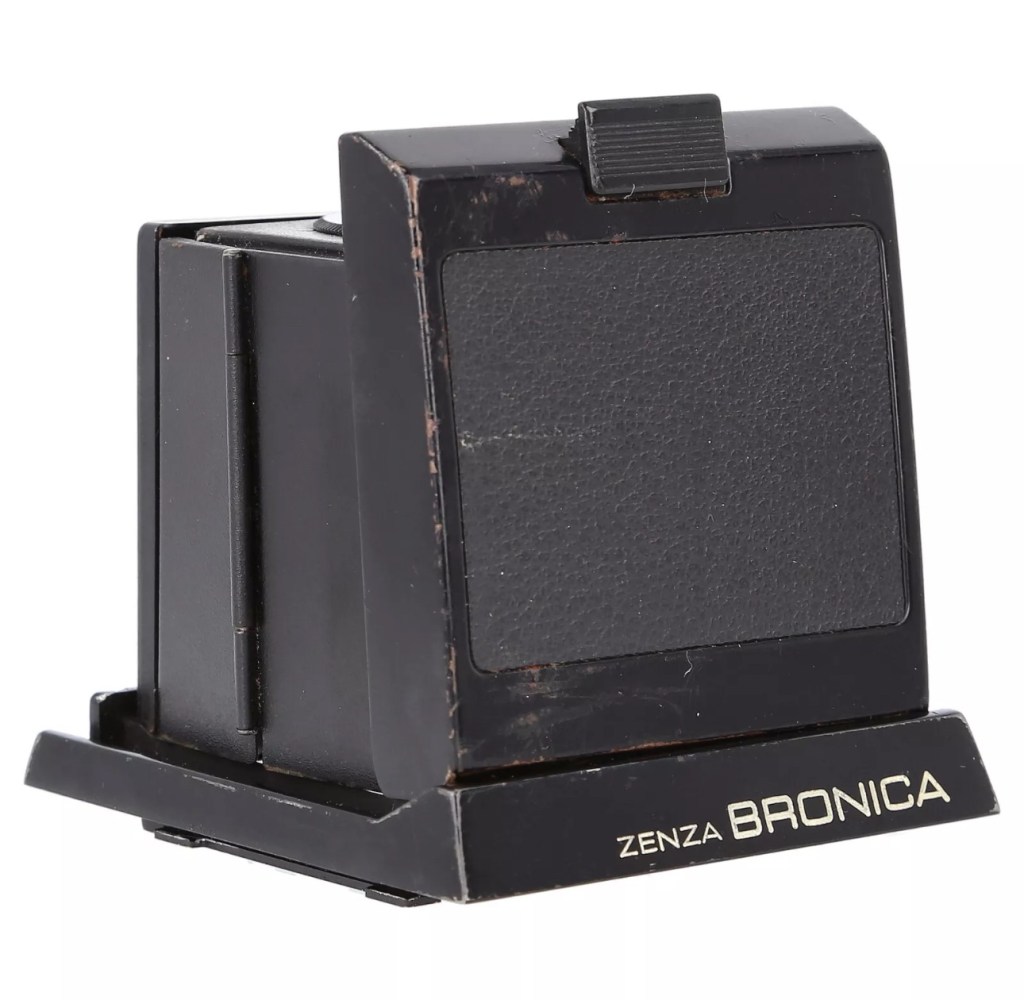
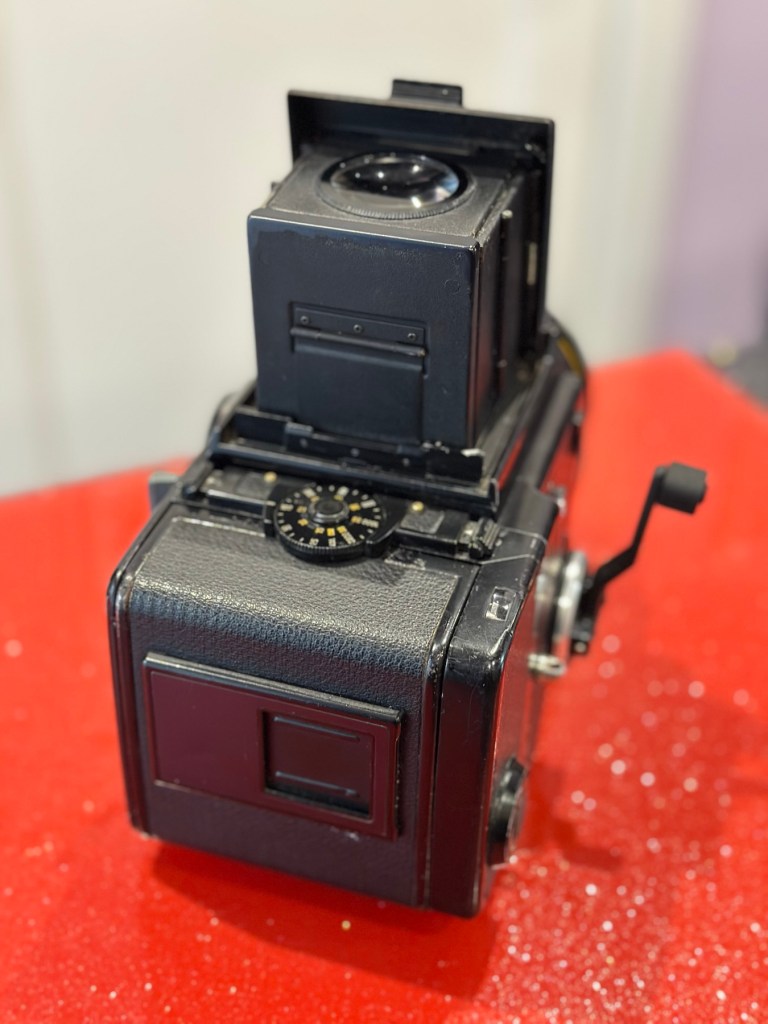
Waist level viewfinder:
Now this is a real bone of contention for me. Individually it is probably the most overpriced single item you could buy. It’s basically just a flip up hood that acts as a cover for the focussing glass, that affords a bit of light protection, as has been common on old twin lens cameras over the last century. But because the sellers again sell these as “additional items” they control the price and at an average of £150:00GBP (Recent eBay sales data) again the consumer is being ripped off. I’m currently monitoring some damaged ones for repair on the sale sites.
And as of the 4th May 2025 I am now the proud owner of one of these items. I’ve paid a total including postage of £39:75GBP and that’s a very fair price. I’ve been searching the sale sites for quite a time before coming across this one. There is one caveat though, it has some slight damage, but that’s what this site is all about and it ties in nicely with the Frankenstein aspect of this post.
Assessment:
I’m going to be very brief with the assessment, as you will see this project is made from a selection of parts that at time of purchase all had their own faults. Each part that has required repair has been highlighted in the relevant posts associated with this series. Links to those posts can be found in the link supplied in the first paragraph of this post. There are five parts in total. I’m generally pleased that the parts I have obtained have combined to make a very nice “Frankenstein” camera from a brand of camera that is becoming increasingly expensive as an “Antiquity”. Not that it was ever a cheap option for a camera in the first instance. Let’s move on to cover some repairs that have occurred for some of the pieces covered in this particular post.
Repairs:
The focussing glass as you will see above was in quite a poor state on its arrival. This one had some scars and it looks as if someone has used pen to draw their own frame in the glass, to be quite fair it was in quite a state, but it was purchased for a really low price and i believe it can be made to look a lot better. Listen to anyone who is,”in the know” and you will always be told to not handle these screens. A load of tosh, I’ve been handling these ground plane glass screens for years and sometimes you just need to get hands on and this is one of those cases. Yes, if it’s in a pristine condition then cotton gloves would be the order of the day, but this example bypassed pristine conditions many years ago.
Before: How the glass was received with scratches and ingrained ink
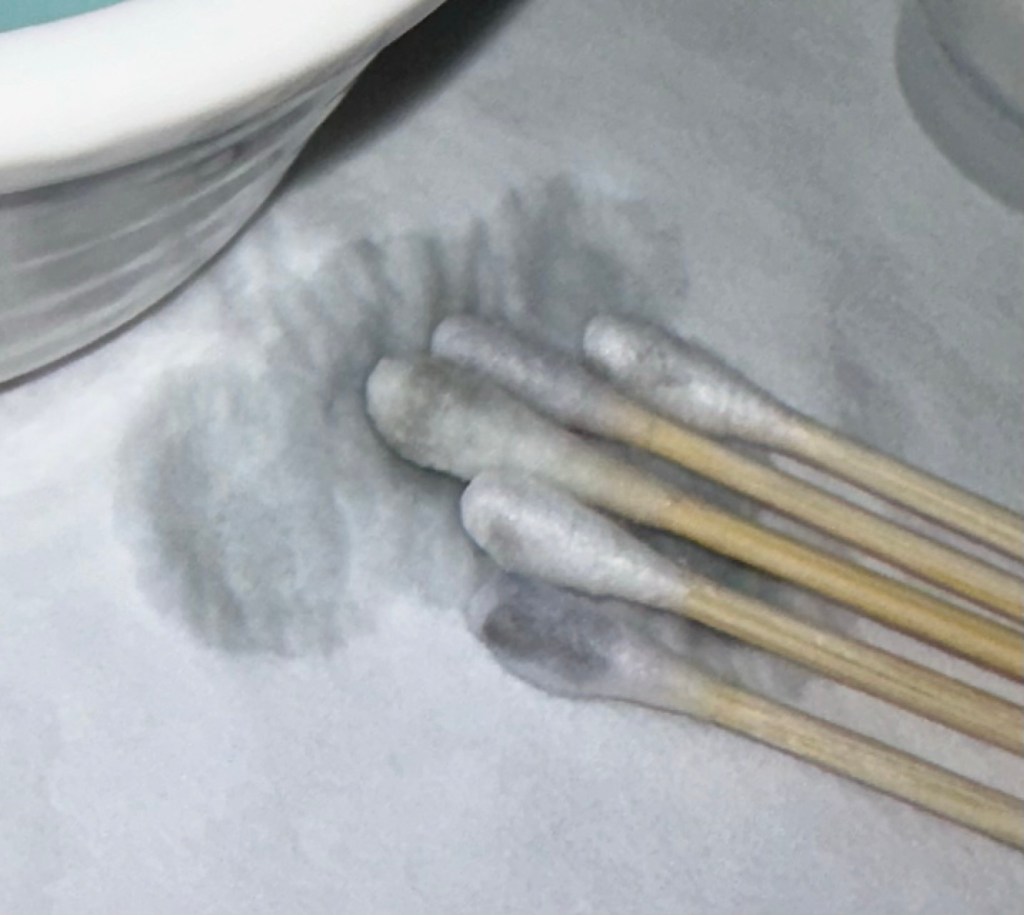
I started off with a good clean using IPA and cotton buds, I used about six cotton buds in this process using a new one every time the cotton was overrun with dirt.
Dirt from the IPA clean
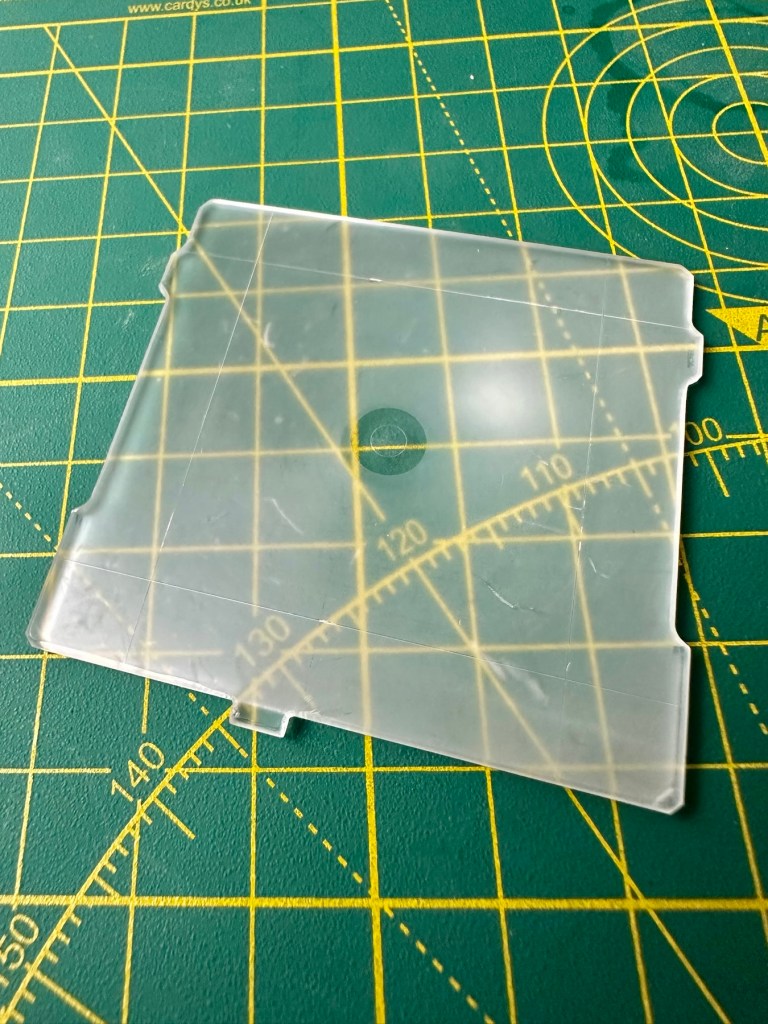
Once the IPA clean had been done I then soaked the glass in a detergent solution and then again used cotton buds to get the solution into the scratched areas of the glass.
Detergent bath
I’ve finished the clean with a rinse of hot water to remove all the solutions, and left the glass to dry on some paper roll. A light polish with a lint free cloth finishes the job.
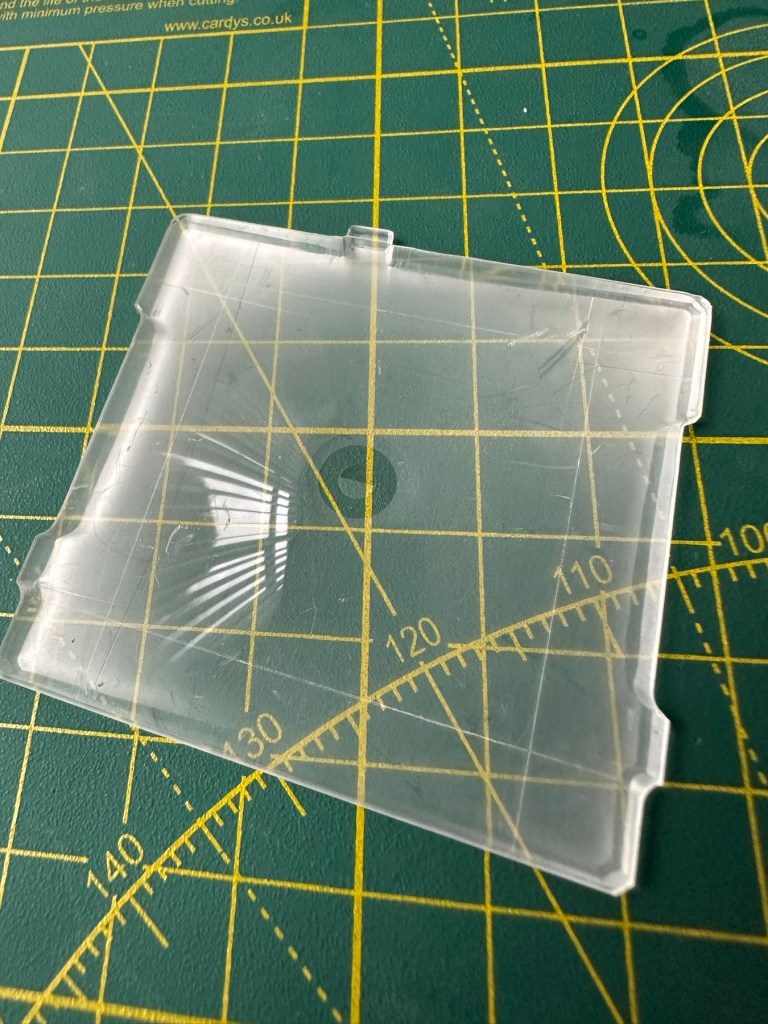
After: all ink and dirt removed, only deep scratch remains but does not cause any issue with use
And this is how it all looks in the camera.
All looking fine in position in the camera
I’m extremely happy with the outcome with the glass, it does its job and works really well. With no distractions on the screen apart from a couple of scratches this item has been transformed. Just a little TLC and patience was all that was required.
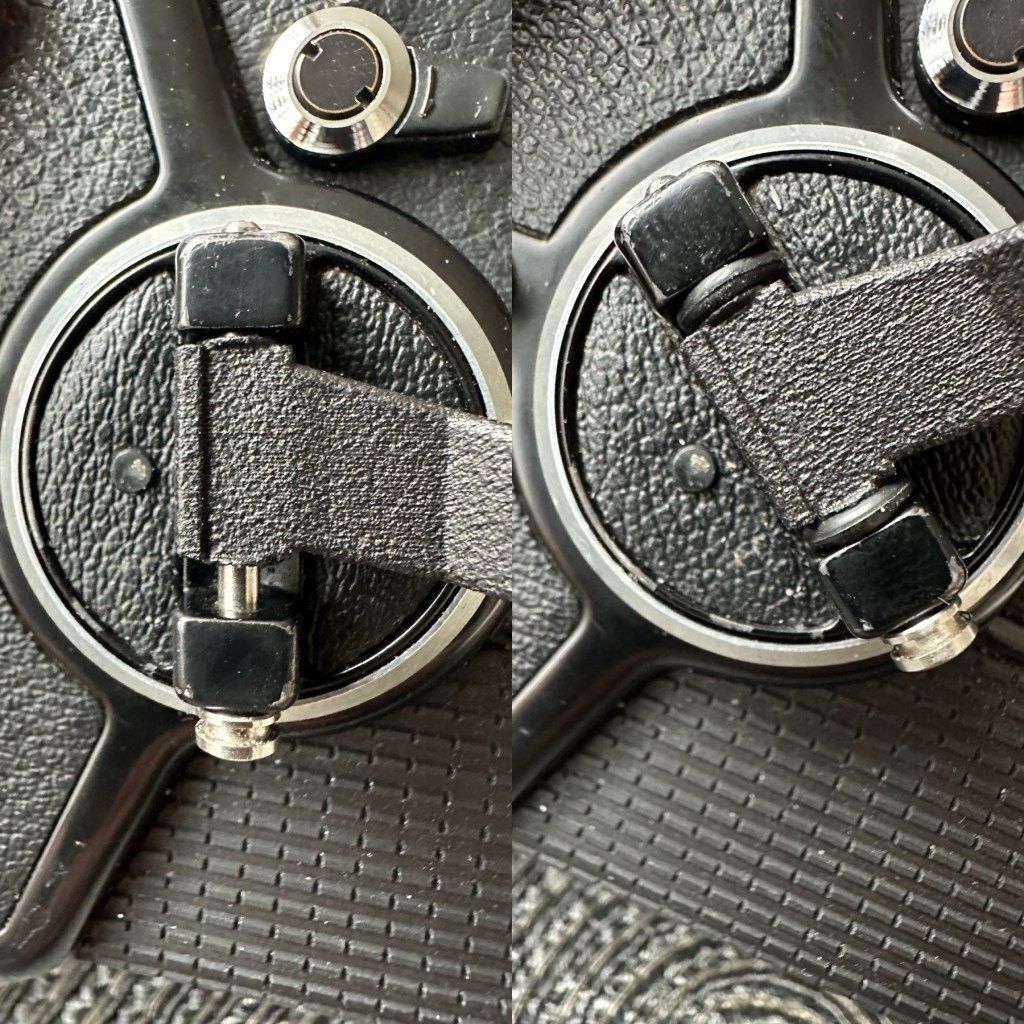
The Winding handle crank doesn’t really have any issues, it just needs some aesthetic teasing. This crank was 3D printed for the ETRS version of the camera and as such the actual base of the crank shaft is slightly slimmer than that of the SQ model here. It works fine. I’m just being a bit of an OCD freak and want it to look better.
Before and after. “O” rings in place in the winder
Not a problem though as I only have to pack out about 4mm of space and I have just the thing to use. Two perfectly fitting minuscule “O”rings. Job done, let’s move on.
The Waist level viewfinder has one particular issue in that the folding action is slightly affected by an issue with the spring. Again it is fully usable and does not cause any issues operating wise, it is purely an aesthetic issue that I will get around to sorting once the camera has been tested.
Age related wear and tearThe spring “issue”My waist level finder just showing signs of age
This is one of those parts that has signs of age with small signs of wear and tear, however that adds to it’s character and shows it was once a very much loved item that saw some good usage.
I think, we are now ready to get the entire unit assembled and ready for the testing phase of this build.
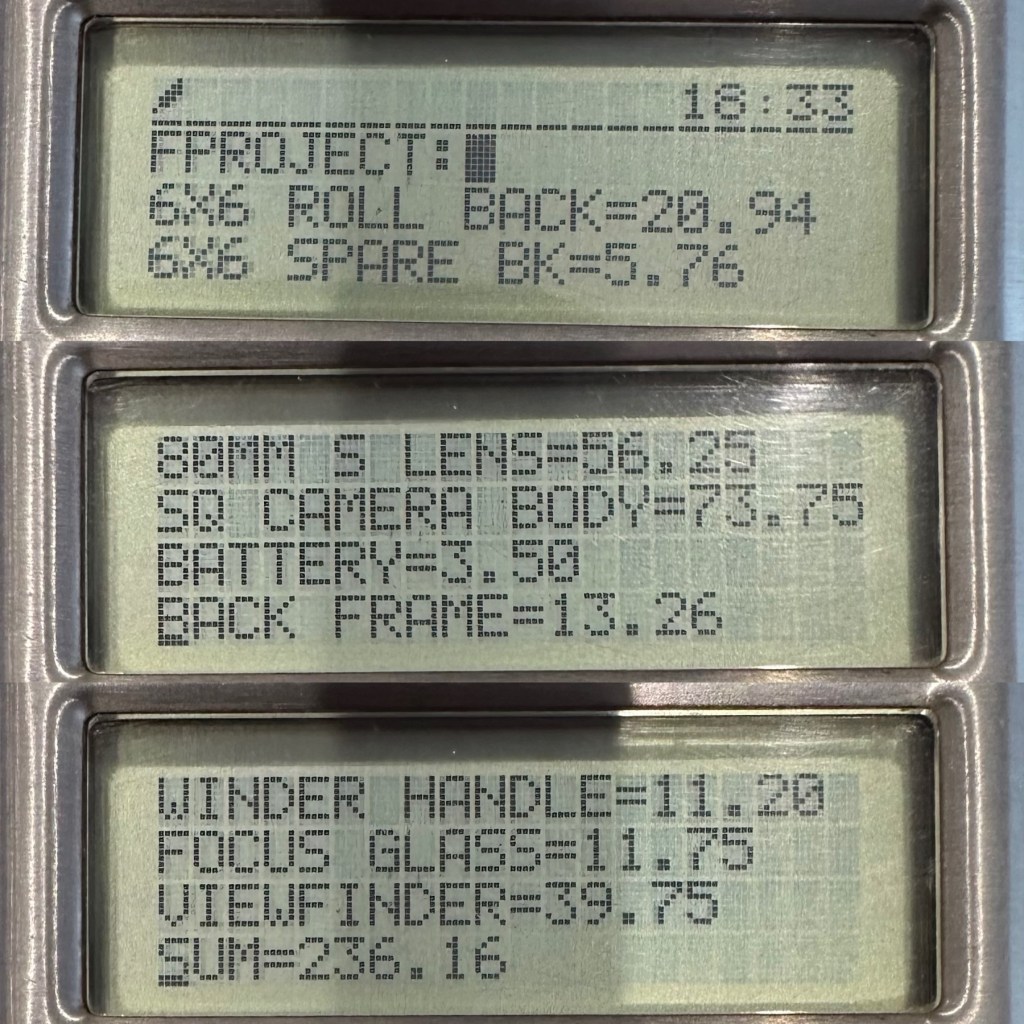
Total Outlay:
So just how much has this little project actually cost? Over to my trusty Psion Organiser 2 LZ for a final update.
Running total of £236.16 GBP
So the total cost of this project is £236.16GBP and I’m very pleased with that considering that sales for fully working similar cameras command prices similar to those seen in the picture below.
Recent sale prices
So taking this evidence into consideration, the route I have taken of building from damaged stock has saved me between £100-£350GBP. And as it is now a fully operational camera, I could probably command a price that would make a quite nice profit. But I’m not selling. This stays in my collection.
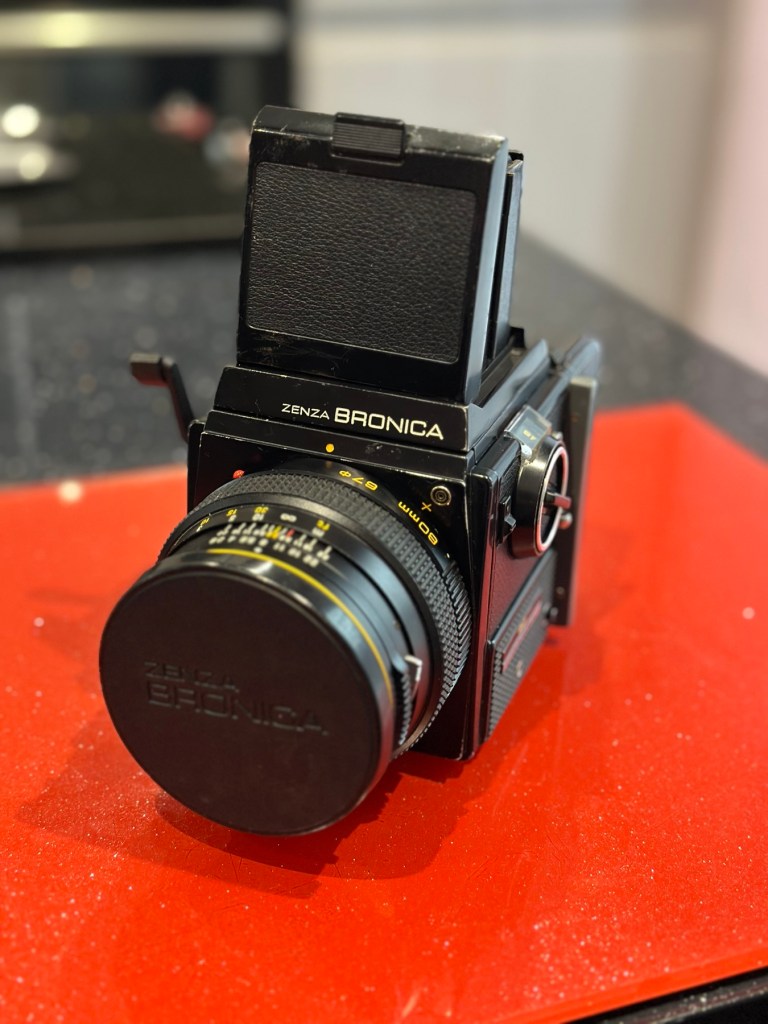
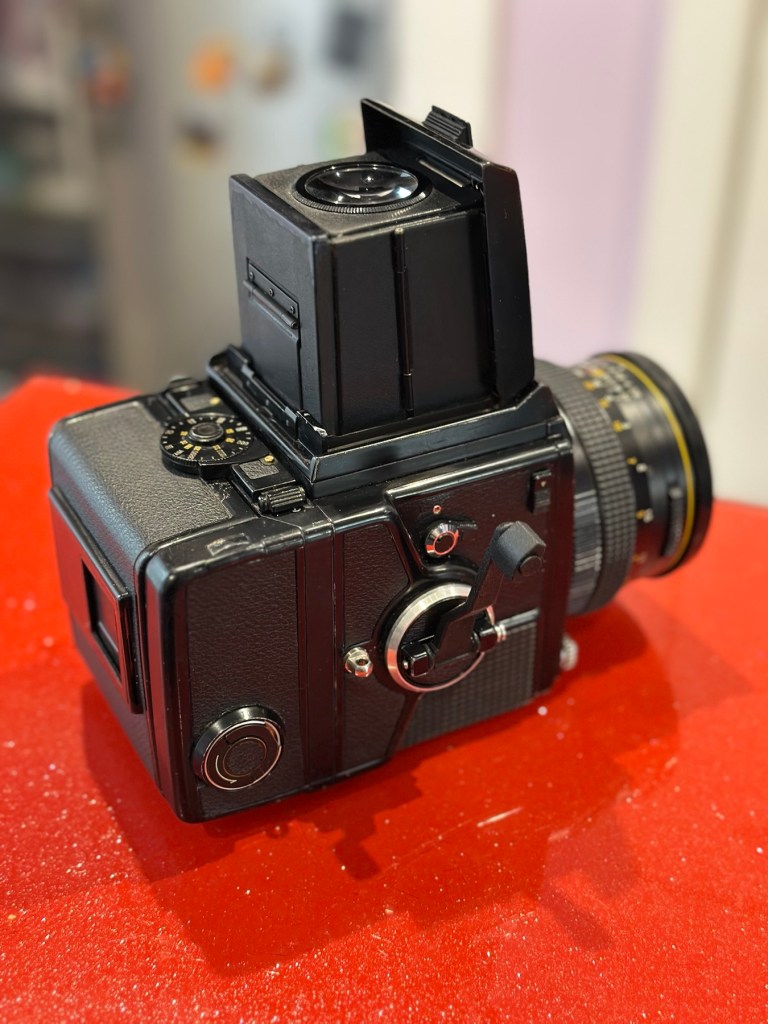
Outcome:
I want to take some pictures with both colour and Black and white film, to prove this camera is capable of this function considering it was constructed with broken or discarded parts.
Now complete, I have restored a beautiful piece of camera history
I will post some sample photos of the tests, and will also produce a couple of galleries to link to within this site. First I will try my luck with the Black and white film, as I have one here currently, though out of date it should suffice as it has been kept refrigerated during my ownership. I also have the chemicals and ability to develop film at home, so this should not be an altogether time consuming process.
This has been a satisfying build making a working piece of camera history entirely with damaged and alternative parts logged throughout all of these posts.
Look out for part 5 of this project that will cover the final testing and the results gained from these tests. Hopefully we will have some good photos and will then be able to wrap this project up.
To build a usable, basic issue, medium format camera (Bronica SQ/SQ-A) from damaged items and spare parts, for as little outlay as possible and shoot one black and white, and one colour roll of film as proof of its successful completion.
Getting started:
Building a camera from damaged parts is no easy task when the name happens to be a high end brand and any parts that are available, are being snapped up by others to service their own stock or to break up for sellable parts. I’m going to keep a running total to try and build this as cheaply as possible, and to keep track of this total I’m going to use my trusty Psion Organiser II LZ from 1989 to keep a tally.
First purchase:
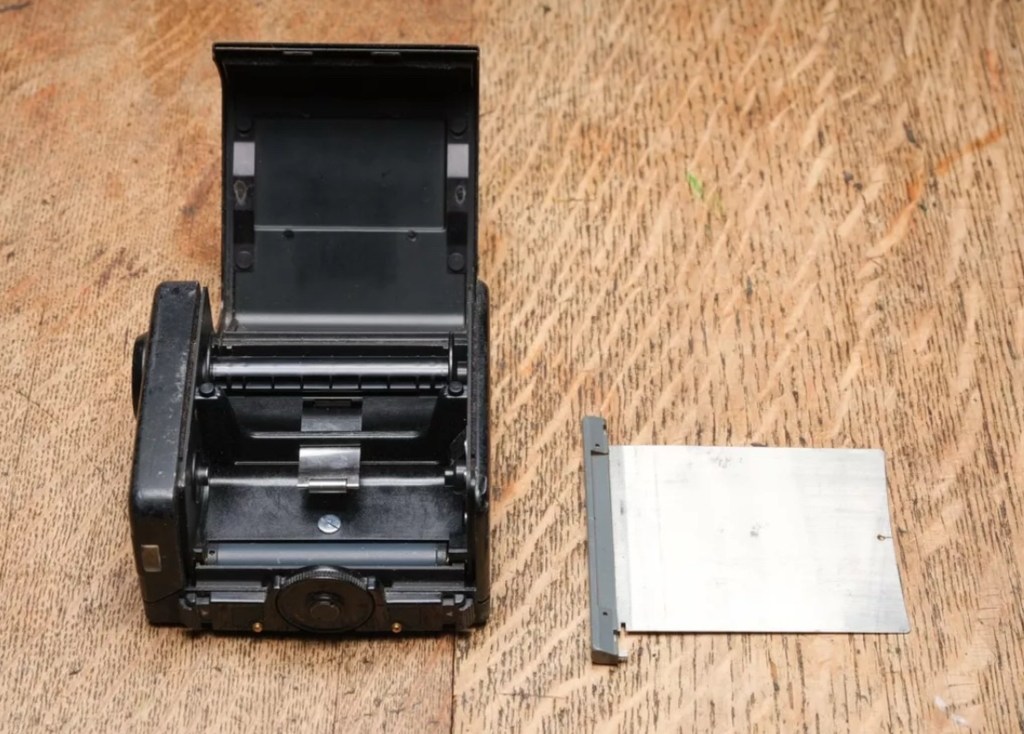
The first purchase has been made and it is for a 6×6 120 roll film back unit with dark slide. I think I’ve paid quite a good price for this item. This is the back piece that fits on the rear of the camera. Here is what the listing stated:
ZENZA BRONICA SQ 6X6 120 ROLL FILM BACK WITH DARK SLIDE Signs of wear, untested. Uk Buyers Only Please
EBay
First purchase, the film back.
And the total paid including all postage is £20:94GBP. Let’s now start the running total in the Psion II LZ.
Running total
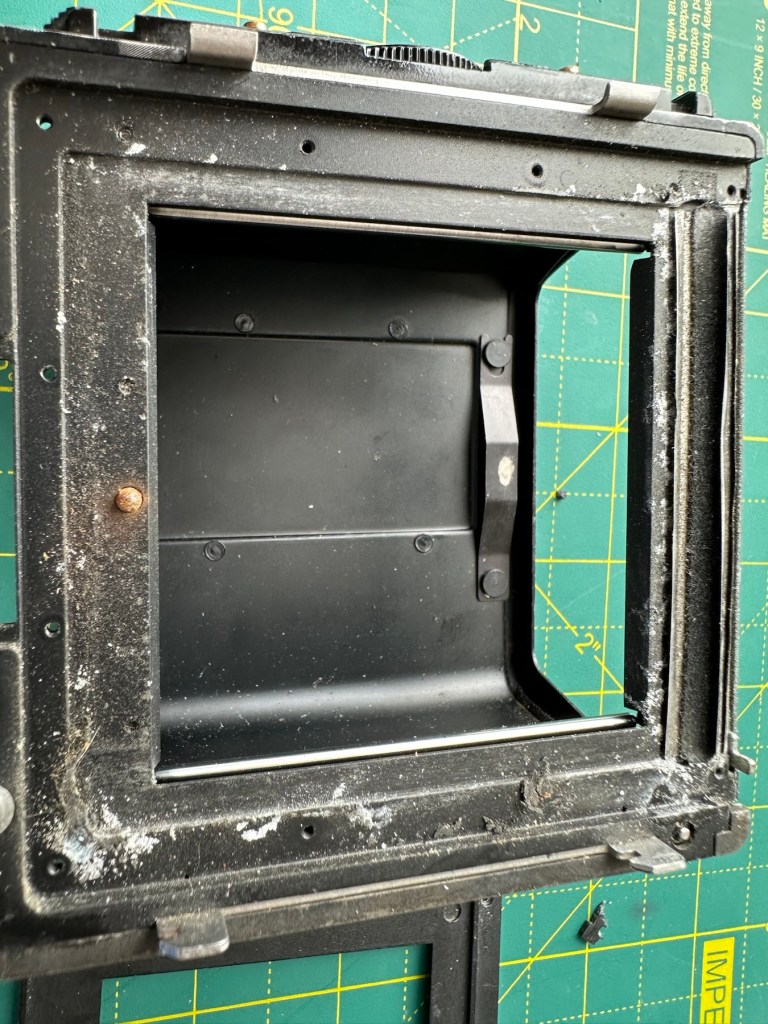
All I can really check at the moment is cosmetic condition and this looks a little beat up, however I don’t really care how it looks externally, as long as it’s light tight, that is all that matters and I won’t even be able to check that until later on in the build. Cosmetically I will attend to it, if I feel so inclined at the end of the project, for now it’s ability to be light tight will be my major concern.
Assessment:
The unit has arrived and yes it has seen use, but not in a few years I suspect. The old smell hit me the second the package was opened, it’s kind of a reminiscent pong from the past, however I’ve got to see beyond this.
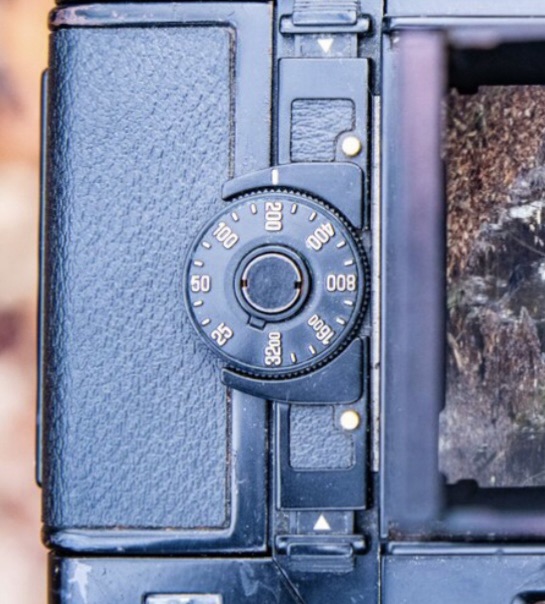
The light slide seems fine, however the surrounding frame has been bashed and a small bit of frame has gone missing. There is also a screw missing and I suspect the area that is missing the screw may well have been glued down. there are some slight rust spots on the exterior framework, however everything inside appears to be fine apart from some light seals that will probably need replacing. The rollers inside are grubby so a good overall clean is in order.
Annoyingly the ASA markings on the dial atop of the roll holder are missing. I will make something basic up to remedy this issue. Again it’s an exterior issue and I’m not too fussed at the moment.
Yes there is some work required, but there is no rush. And thankfully I don’t see anything that really scares me about it. I won’t really know how it stands mechanically until I find a suitable body to attach it to. I have that to look forward to in a future post.
Repairs:
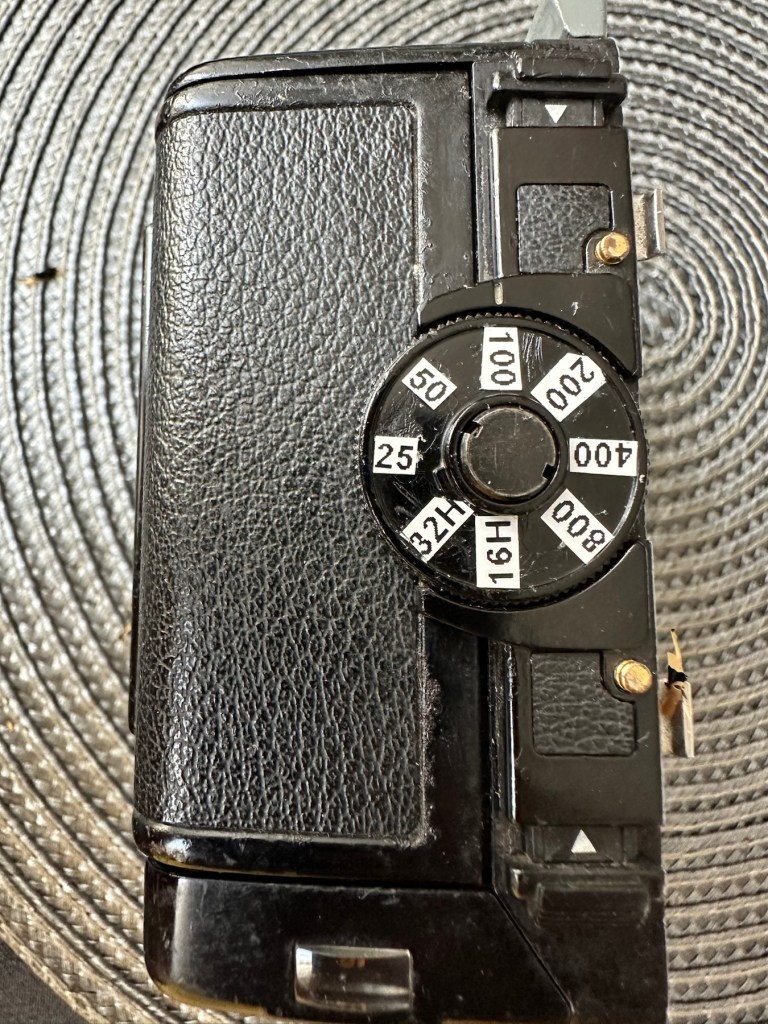
The ASA dial. Simple solution here, until one becomes available sometime in the distant future, is to use some very small dymo labels I have printed. I will cut these down to size and put them in place where they should be on the dial. Quick and temporary solution a’la Frankenstein. No need to over manufacture things, this will do fine.
Size 9 dymo labelsHow it should lookHow mine currently looksAfter I’ve added some ASA numbers- temporarily
The old asa wheel has been cleaned to remove the original glue, and temporary stickers have now been applied. This completes this fix for the ASA dial, for now.
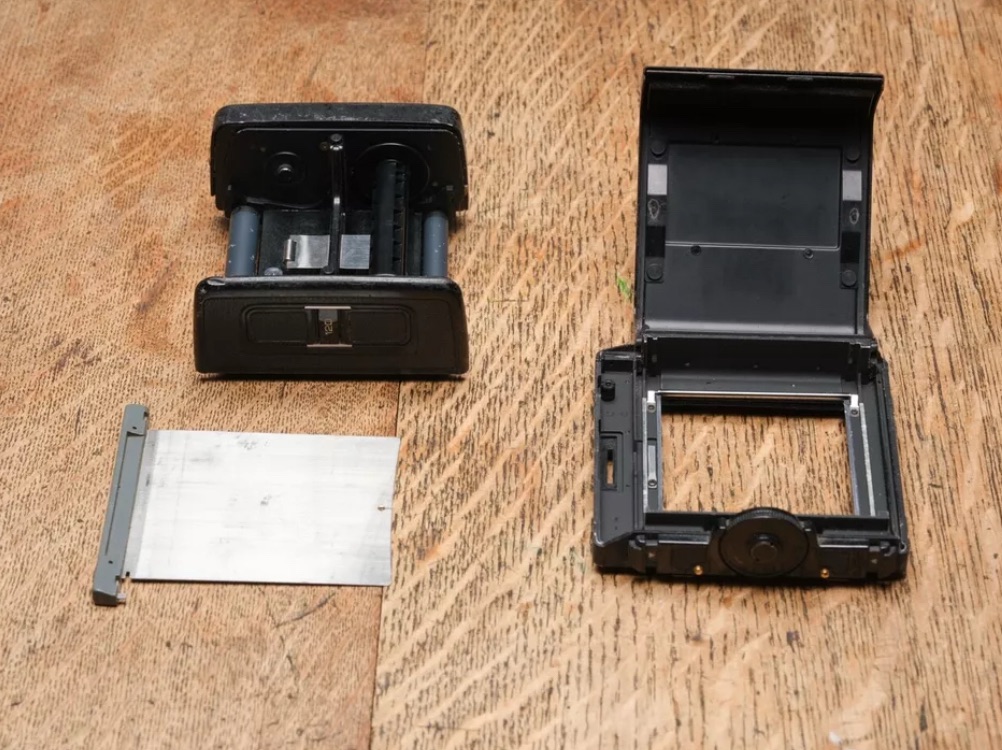
Two items to make one good unit
Edit: I’ve managed to obtain a damaged roll back for a grand total of £5:76GBP, absolute bargain and it also has a working ASA dial. So I’m hoping I’ll be able to use this donor to help in the repair of this item. I’ve used a combination of parts from this and the earlier roll back and I’m happy I have a good working unit. We now have a proper ASA dial off of the spare unit transplanted onto the old unit.
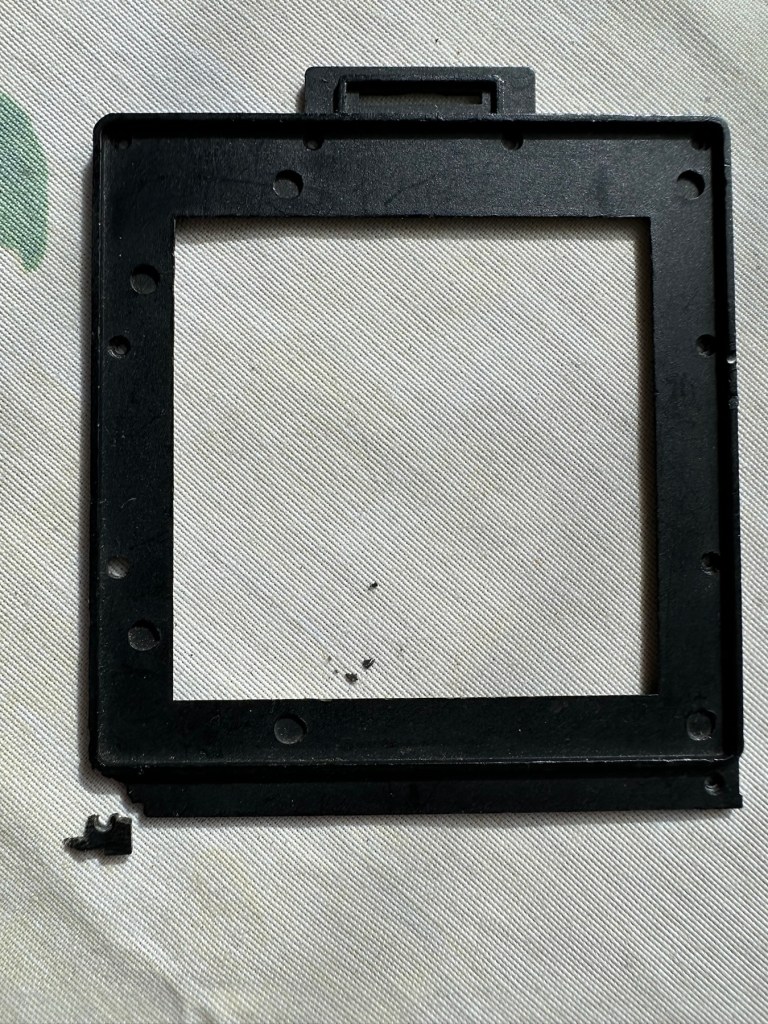
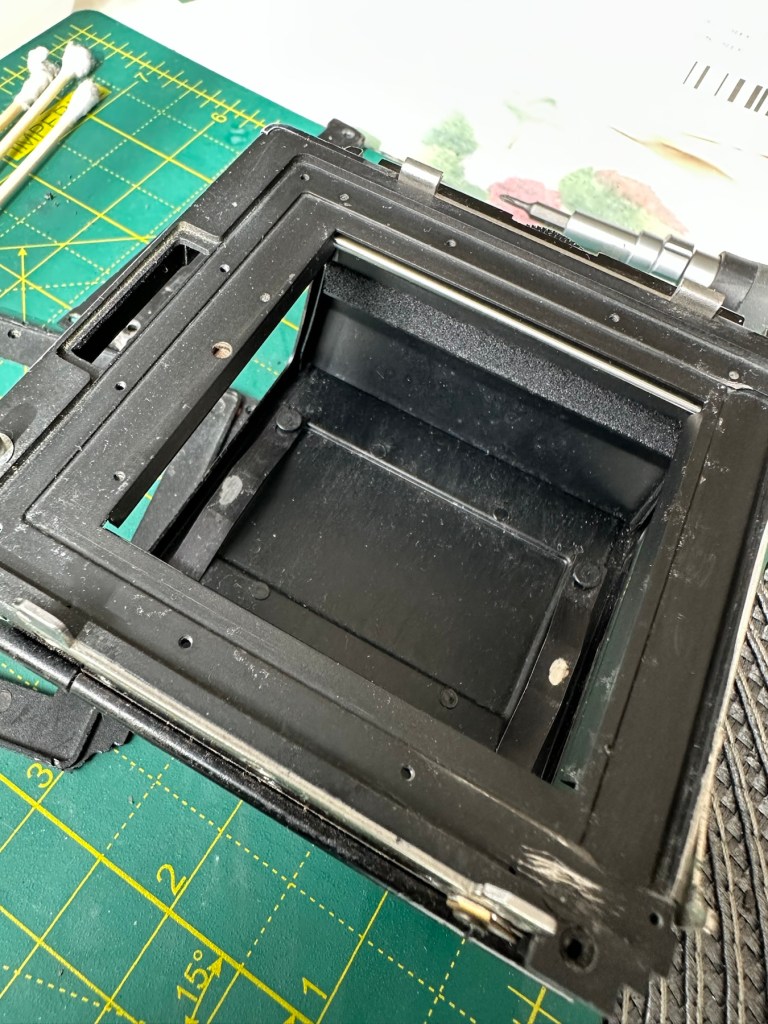
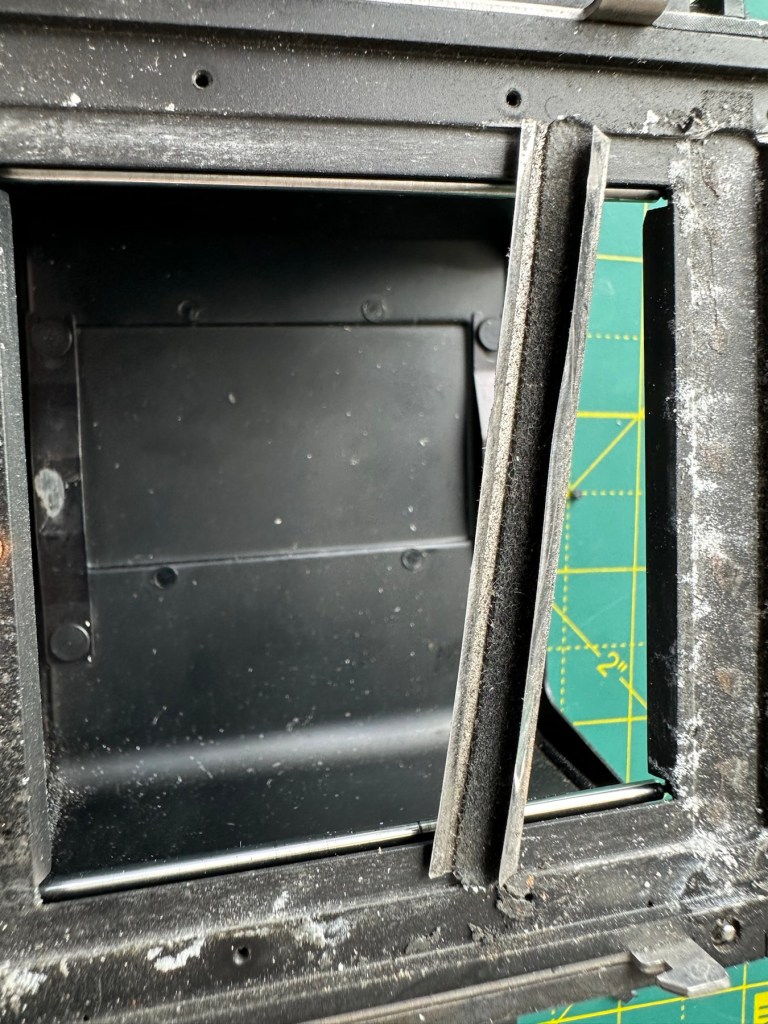
Front frame:
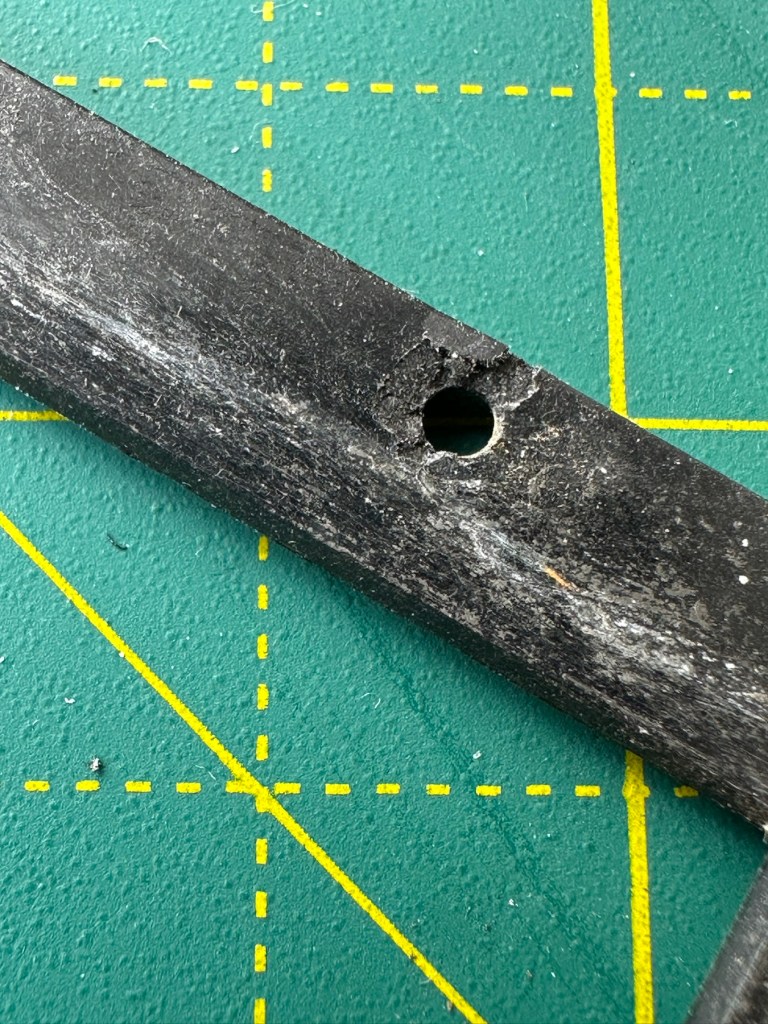
I’m taking this off to give the whole area underneath it a good clean. There are some film guides under this frame that are contaminated and that could cause a scratch on the film, I’m going to clean this whole area under the frame and will then reassemble. The cartridge slide is in a good condition and has just required a polish. Apparently this front frame is prone to breaking and the screw holes splitting, as it gets quite brittle. This has happened to this unit, and I’ve found a guy that 3D print’s replacement front frames and I have ordered one of these to ensure that the whole frame is secure and light tight, as currently one corner can be lifted and this could cause a fogging issue. At a cost include postage of £12:75GBP it’s a small price to pay seeing the only way to get one nowadays is by purchasing a donor unit at cost far exceeding what I have paid here.
The new frame, will be blackThe old frame with broken corner and damaged screw holesDamaged area of frame in situ on the roll back
There are a couple of screws missing of which I have plenty of spares so these will be simply replaced. I’m happy now that this portion of the camera is in a good condition and will soon be ready to be put to use.
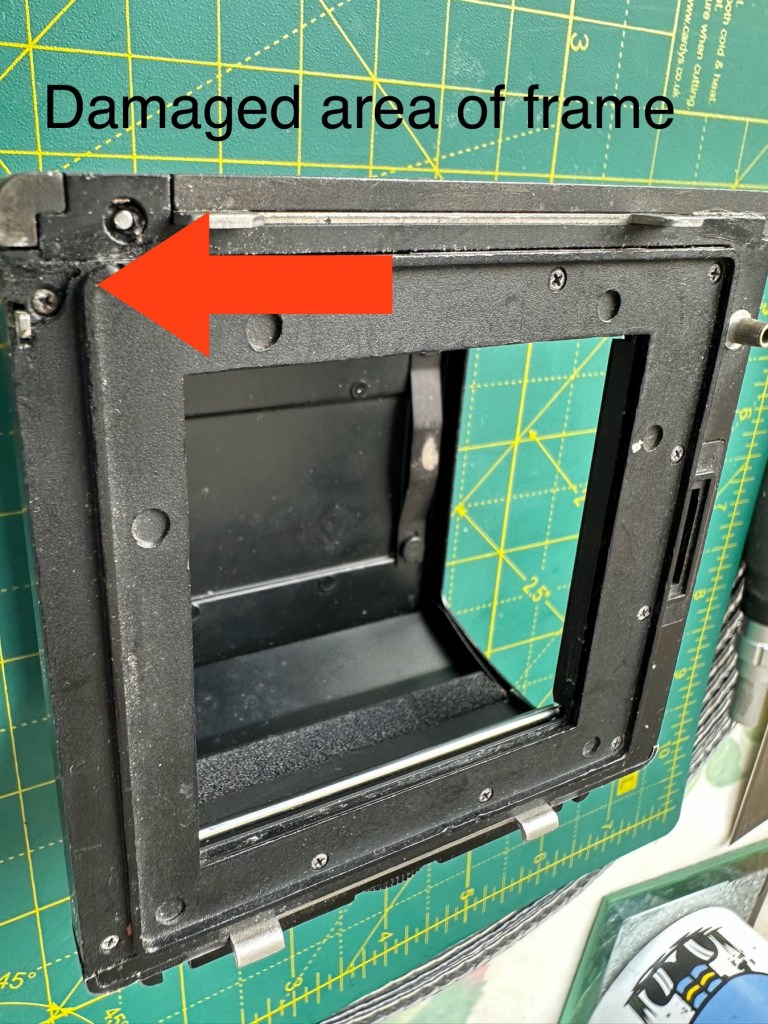
Before AfterDirty seals Damaged frameworkRemoval of the frame presented years of debris and filth that needed cleaning as well as a requirement for some replacement parts
There was a lot of contamination under the plate when it was removed, I was quite amazed just how bad it was. This has since been cleaned prior to the new frame and seals being put back into place. When everything is re assembled there will be another clean, I will also be using compressed air to finally clear any remaining debris from the roll back. Edit: the 3D printed frame has arrived and to be totally truthful it’s not much good. The part where the slide goes in is not usable and I’m not confident this will be as light tight as first thought.
Good front frame from the donor spare unit
However the spare unit I purchased has a good front frame that just needed a tiny bit of adjustment to work, I’m now confident the roll unit will work as it should.
Light seals:
To be honest there are only two immediate areas of concern that I can see. All other light seals seem to be sufficient. I already have plenty of light seals material from where I fix other cameras so this should be simple enough to replace.
New and old light seals replaced
There were only two pieces that needed replacing, these were both on the roll film back. All other light seals were fine.
Rust spots:
These are purely external and there are no issues inside the cartridge. However I may just give them a very fine rub down and a quick spray with a black gloss to just make them look better. Then again I may not, and then I’ll attend to the cosmetics once I have completed the project. Edit: I’ve decided to leave this for the moment and will attend to this sometime in the future as it is not affecting anything at this stage.
Film cartridge:
Again this has just been cleaned and some contamination has been removed from all rollers and guides within. I have adjusted the back plate pressure pad for the film and also given this a good clean to remove any contaminants. I’m happy the internal cartridge is in a good condition and only requires a light clean. This cartridge is superior to the one I have obtained as a spare so this will be the one i work with. I have replaced all the exterior screws to replace the original ones as they were all a little crusty and contaminated.
New screws. I will touch the heads up with black dye
The whole roll section has been cleaned with tack cloths and compressed air to ensure all contaminants have been removed.
I’m going to store the whole roll film back, in a sealed plastic bag with some Silica gel packs to try and remedy the mustiness that I mentioned at the beginning of this post, though I must admit after all the cleaning and replacement of parts, the issue has reduced immensely. Some exposure to sunlight on a window seal usually helps immensely. That’s where it’s sitting for the moment. It’ll go in the bag with some silica gel, during the more inclement weather.
Outcome:
This part has been the most demanding part of this project so far. I’ve looked into the possibility of using 3D made parts, but I must admit defeat here. The items are about 80% ok, there are holes missing that should be there and as it’s a two piece fix you are then introducing glues, and potentially increasing the chances of light accessing the one area you want dark. Maybe in time they may perfect it. I was exceptionally lucky to obtain a spares unit for literally one pence. Yes one whole pence. It cost £5:75 to post making a total of £5:76GBP, but in many aspects some of its parts were far superior to what I already had. I am happy that this part of the build is now complete.
All good to go. Please keep an eye on the other blog posts that are coming regarding this project.
To build a usable, basic issue, medium format camera (Bronica SQ-A) from damaged items and spare parts, for as little outlay as possible and shoot one black and white, and one colour roll of film as proof of its successful completion.
Getting started:
Building a camera from damaged parts is no easy task when the name happens to be a high end brand and any parts that are available, are being snapped up by others to service their own stock or to break up for sellable parts. I’m going to keep a running total to try and build this as cheaply as possible, and to keep track of this total I’m going to use my trusty Psion Organiser II LZ from 1989 to keep a tally.
This may be a strange situation where Pt:2 and Pt:3 of this project gets published before Pt:1, quite simply Pt:1, the film back. needs a fair bit of work still doing to it.
Third purchase:
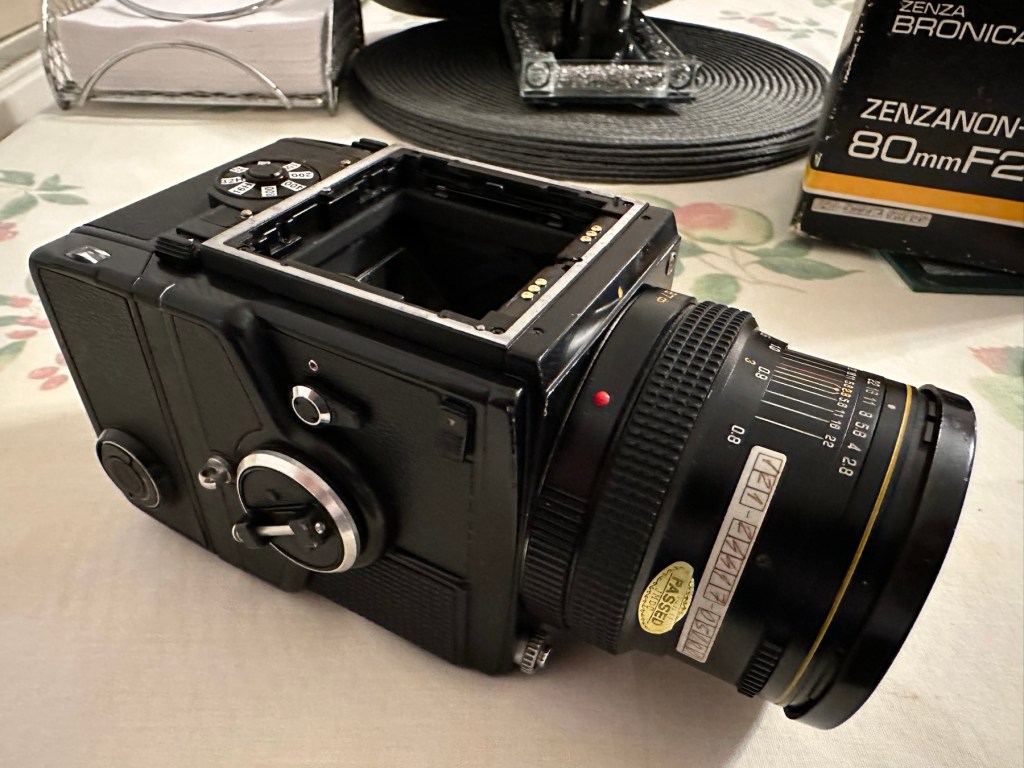
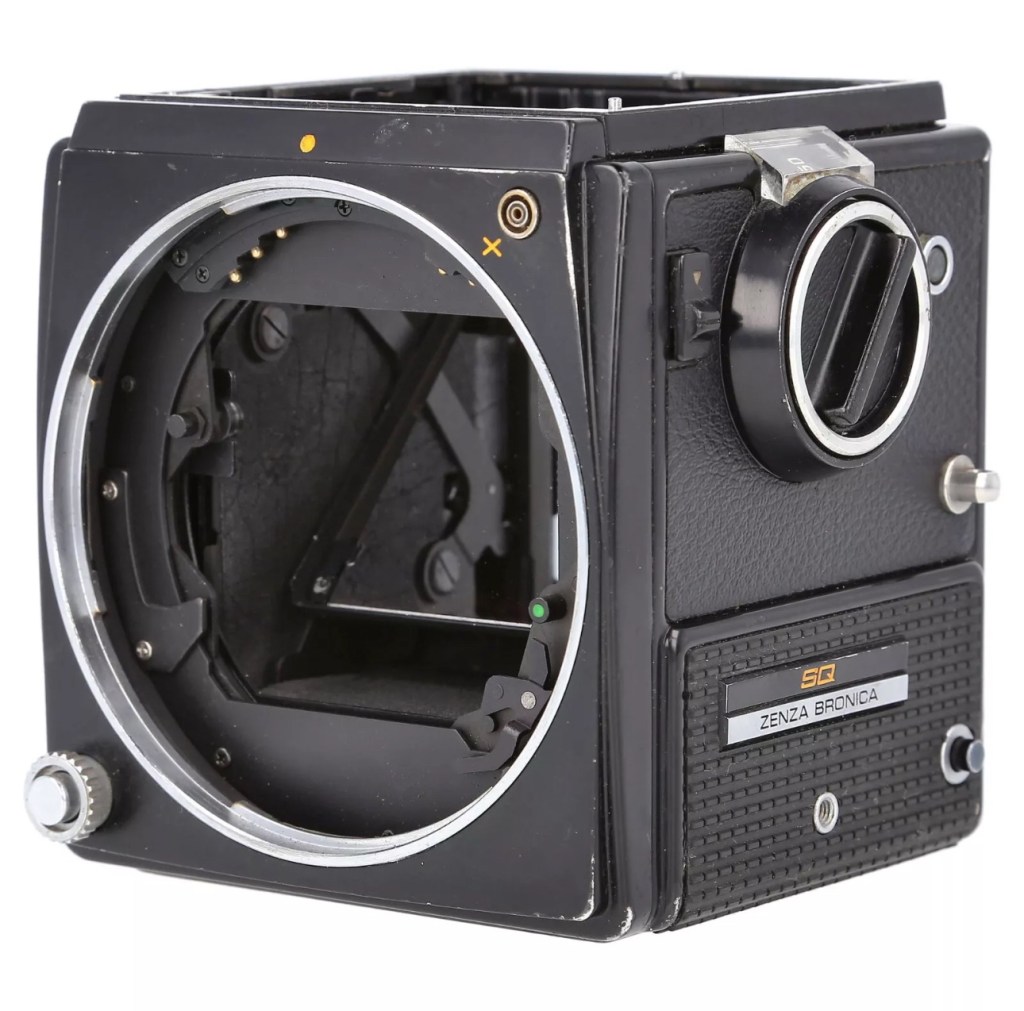
And the third purchase is for an SQ body. This appears to be well used, but appears to be in a working condition. Here’s what the listing stated:
Zenza Bronica SQ Body Only / Medium Format 6×6 Camera
Condition:
Used but still in good usable condition with usual signs of use – see photos for details please. Fully tested and in perfect working order. Supplied with: Camera body as pictured.
EBay
Now I’m happy with this purchase as well. Not quite the SQ-A I wanted but to be honest the only difference is mirror lock up and metering that I don’t really need so I can live with that, we all managed prior to the metering being done for us, I’m sure we will all survive now . (Oh how we have been pandered over the years)
The Bronica SQ body I have purchased
I’ve paid the grand total if £73:75GBP for this body including the postage. There are some bits I will require to complete the body, namely a focus screen and waist level finder that could be a bit pricey, and a winder for the body. Now, the winders are pathetically expensive at around £60 for a bit of plastic. I know a guy who 3D prints a good alternative for a fraction of the price. And that will be the route that I take.
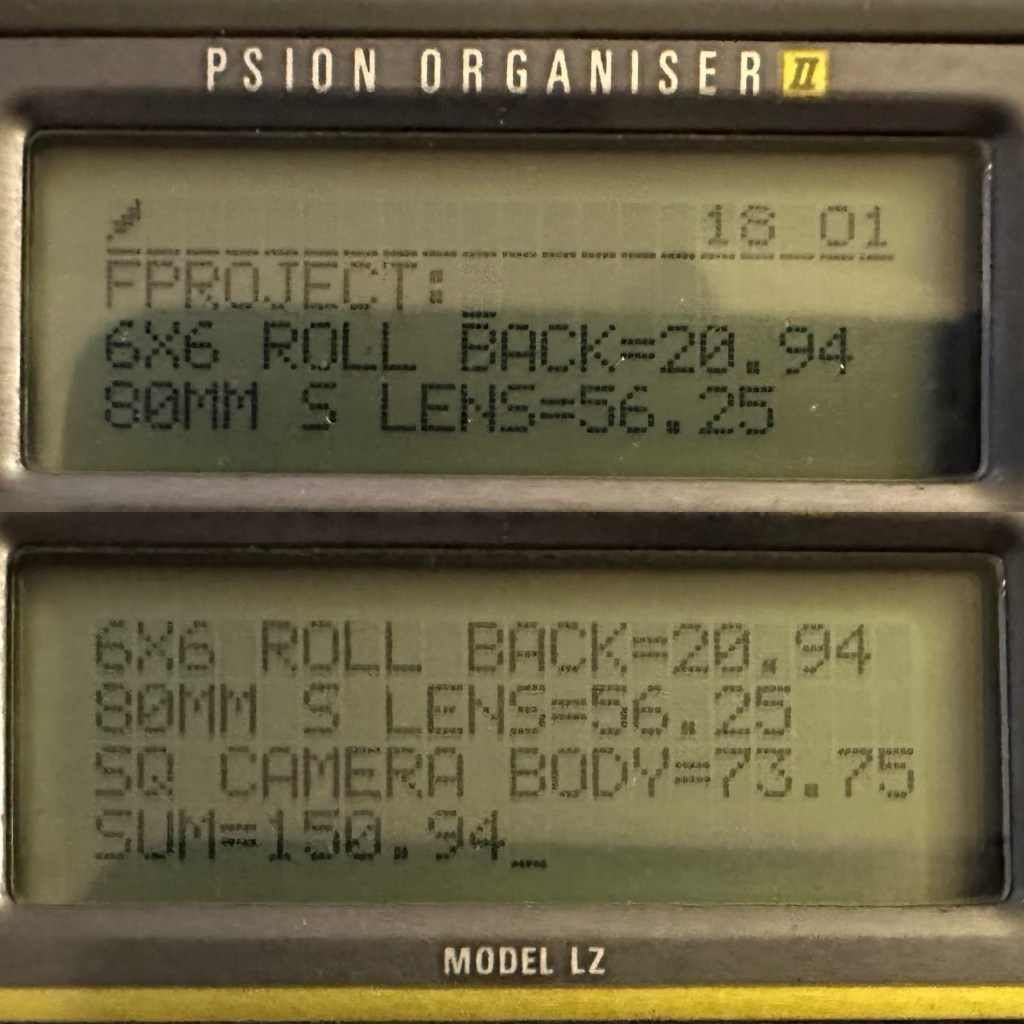
So over to my trusty old Psion II LZ for the running total for these first three items.
Current running total
So the total for these three items comes in at a total of £150:94GBP, and in Bronica terms this is extremely reasonable!
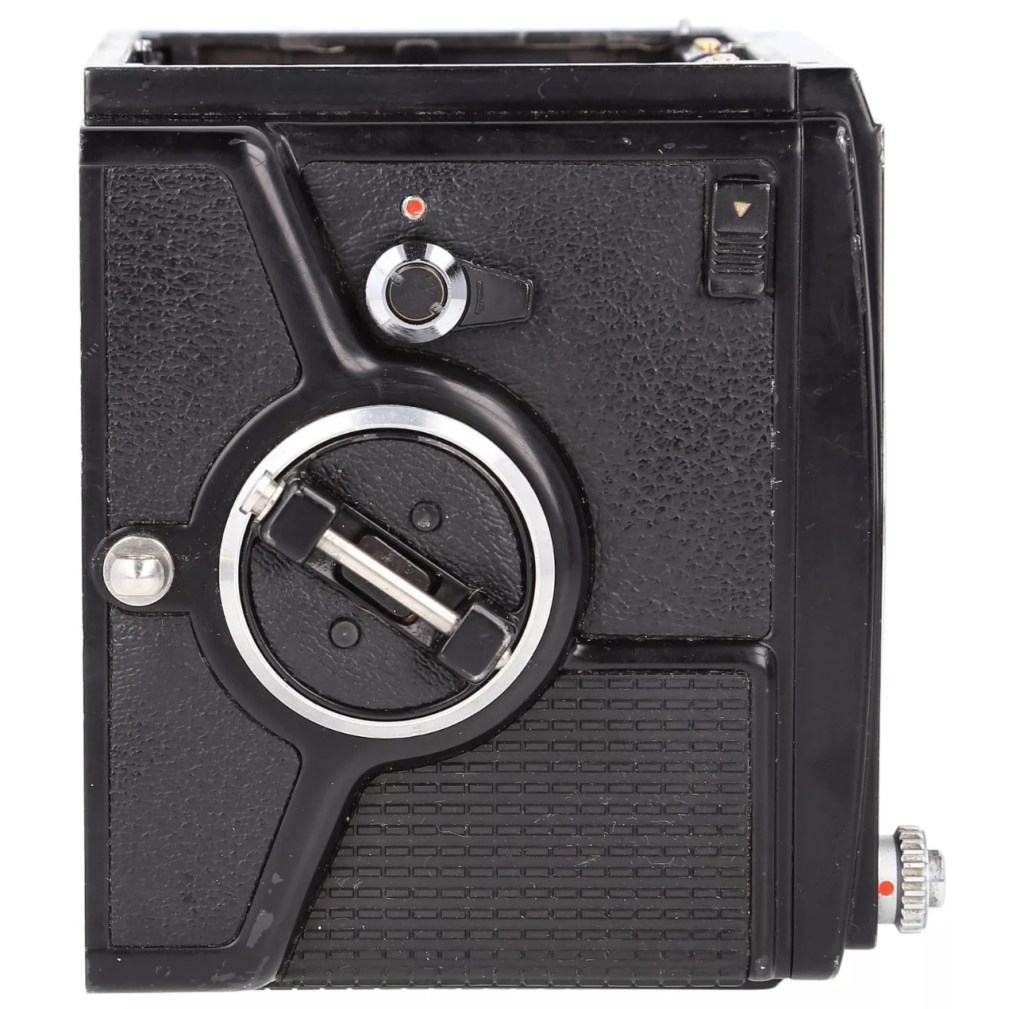
Assessment:
The parcel has arrived and yet again I’m really happy with this purchase. Very well packaged, a very faint age related mustiness that I guess should only be expected on an item that is now 45 years old. It seems to work just fine. I have connected the lens and that seems to be working ok, I just need to verify the shutter speeds are all correct. There is no battery in the base and this needs replacing as this is what controls the shutter speeds. Without the battery the mechanical shutter works, but only at a speed of 1/500 of a second. (Edit: the battery has arrived and after testing i can confirm that all speeds are operating as expected). The film back fits fine but I still have some work to do on that before I can say that this part is working ok. Overall I’m satisfied with what I have for the price I have paid.
No batteryNo winder A selection of covers for the sides, top and bottom are required
Repairs:
Not so much repairs but additions that are required, such as a crank winder arm and a focus screen, a new battery and a selection of covers to protect the central unit in transport. All horrendously over priced and i will deal with these items in Pt:4 of this project.
Outcome:
Current situation, looking good, smelling old. Not me, the camera 😂
We are almost there. The lens is fine, the main body is fine and just needs some final testing. The film cartridge is the item that needs the most attention and this will hopefully be finished when I have the new front plate that is being 3D printed. The next instalment will be just a tidy up with all the little bits I need to complete the build. These small pieces in Bronica terms are so bloody expensive, or should I say extortionate, can be obtained at a fraction of the cost elsewhere, you just need to shop around, if you are happy to have a non named spare part as a stand in. I’m happy with that as these parts have absolutely no effect on how the camera performs, and what we want to achieve at the end of this project, that being a well exposed two rolls of negatives that will produce a number of well presented photographs.
All good to go. Please keep an eye on the other blog posts that are coming regarding this project.


You must be logged in to post a comment.