Another bunch of photographic waifs and strays have arrived at my door. Can they be saved or are they beyond redemption?
What the listing stated:
Job lot of 5 slr film camera bodies
Canon ae-1 program, Olympus om10 x 2, Pentax me super, Fujica stx-1
Sold as spares and repairs only, all have some sort of fault
Please see photos for condition
EBay
I’ve just purchased a job lot of old cameras all requiring repair, god knows what the real issue with them is, however they all do seem to have all knobs and buttons available which in many cases is quite a rarity. I’ve paid a grand total of £40:00GBP so if you break it down to a total of £8:00GBP per camera then I’m quite happy with that. Even at this price, i get some good spares, should that be all they are useful for.
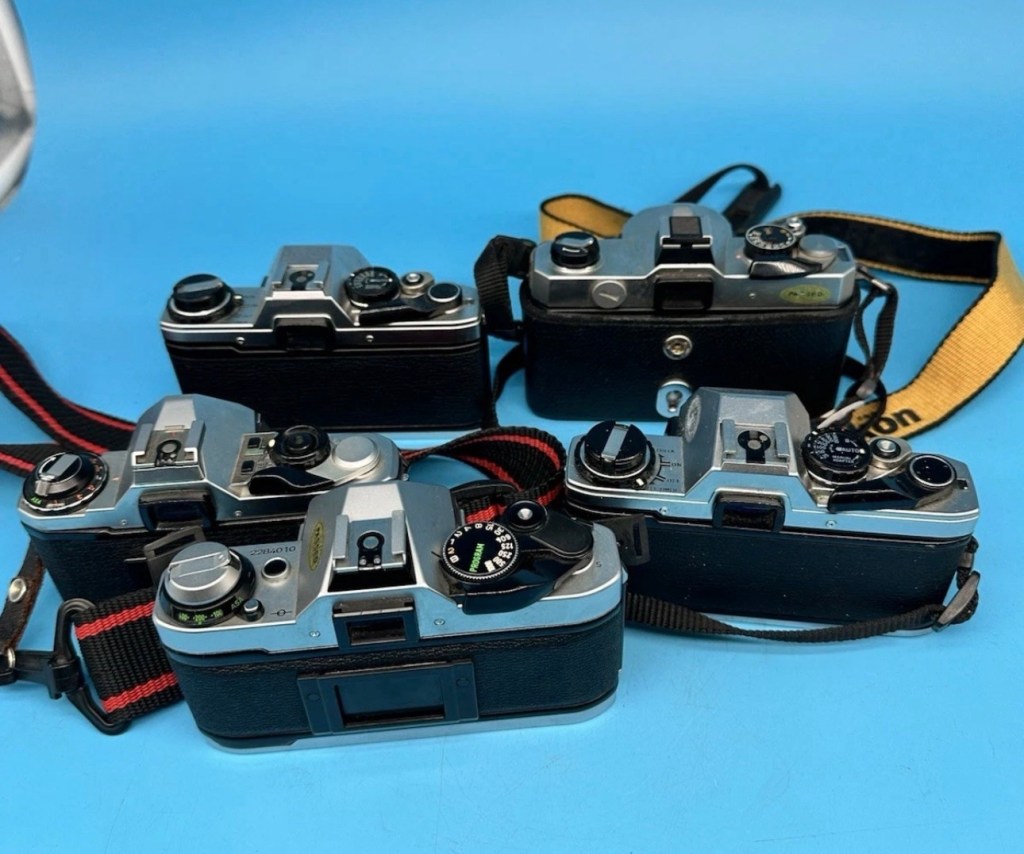
The collective purchase
Canon AE-1 programPentax ME- SuperOlympus OM-10 No:1Olympus OM-10 No:2Fujica STX-1All with external buttons and dials
My intentions here are thus. The AE1 program is the only Canon camera I need to complete my “A” series collection so my main focus will be on that. The two Olympus OM10s I will be looking at repairing then selling on as I already have a good example of this camera. The Fujica and the Pentax I will possibly look at adding to my collection as I do not have either of these.
I have my fingers crossed that there’s nothing seriously wrong with this purchase, and i will be featuring their respective repairs over the coming weeks. Firstly I’m going to carry out a very basic assessment on their arrival, just to see whether or not I have purchased a collection of proverbial Christmas Turkeys.
Quick assessment:
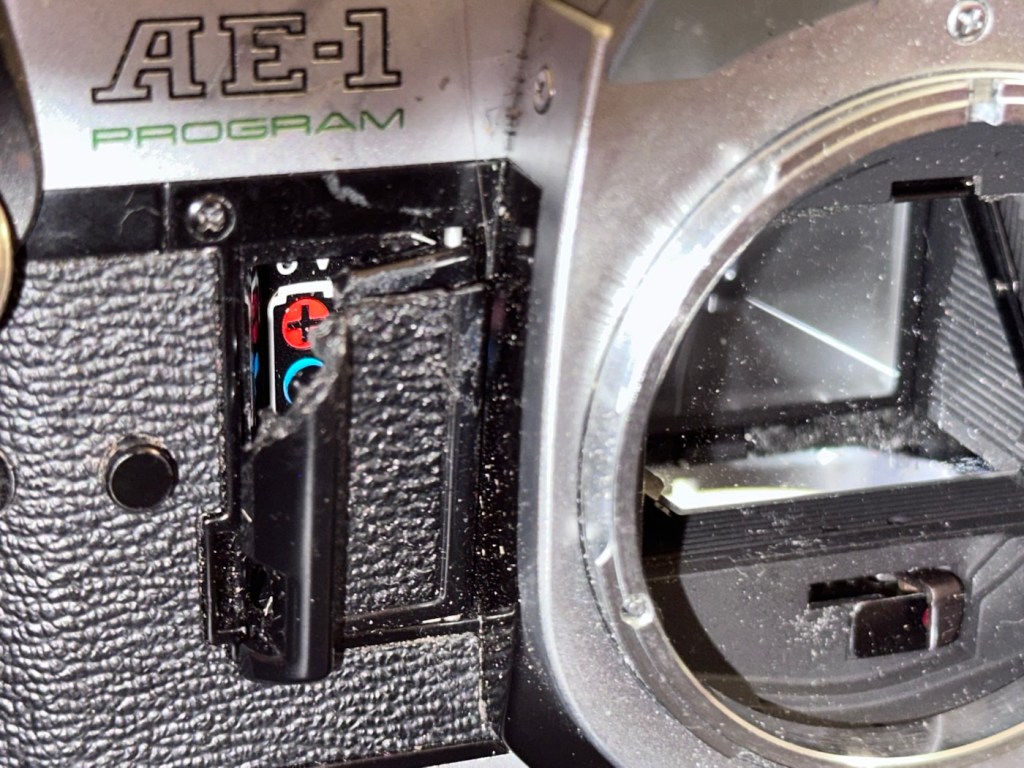
Canon AE1- Program:
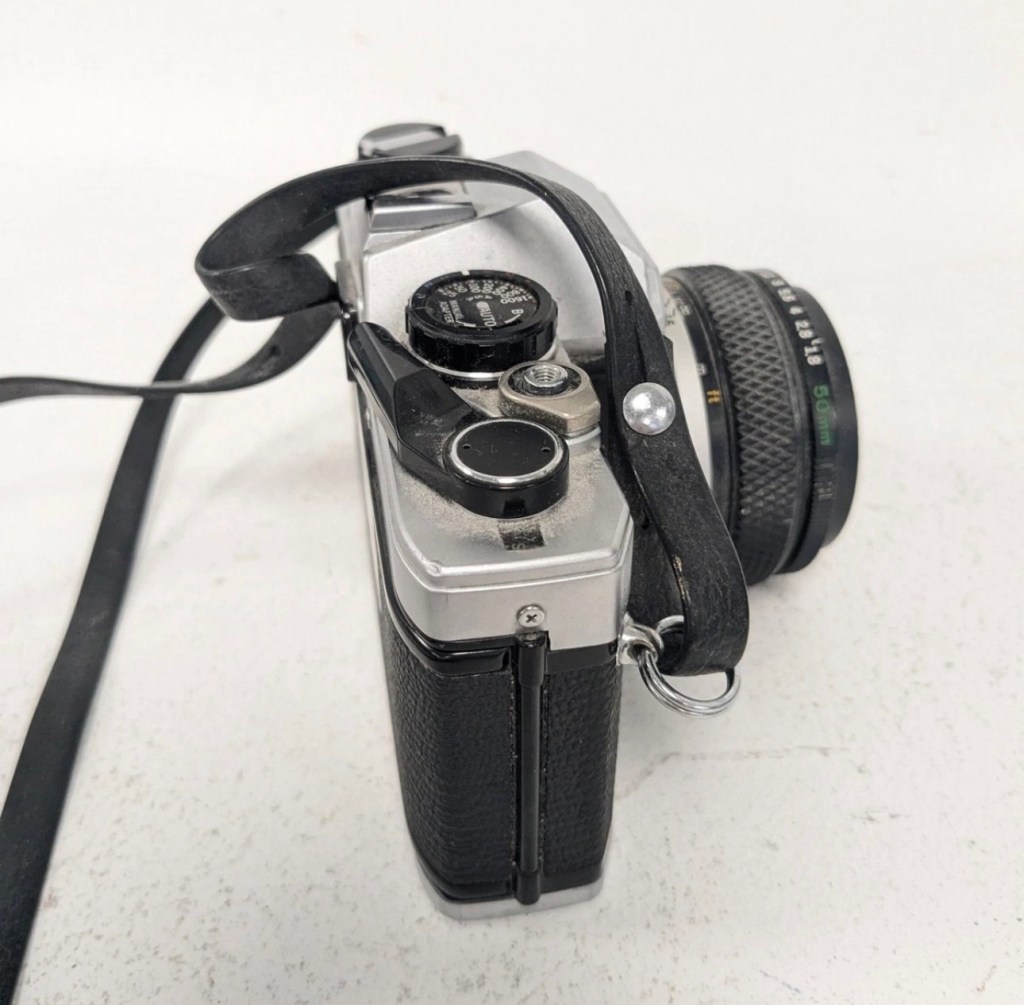
Canon AE-1 program
This is the one I’m most excited about as it could possibly be my last piece of the puzzle for my Canon “A” series collection. Cosmetically it’s ok, it’s grubby, it has a broken battery door and a missing winder cover from the base. All dials, buttons and levers are working as they should, and when a battery is installed everything is as it should be. The battery check audio is fine, all indications in the viewfinder illuminate as they should, the camera fires (with a little camera cough) but other than that all seems well. The mirror and prism need cleaning and there is possibly some ingrained marks on the prism but this will not affect picture quality. All light seals need replacing and a good CLA is required.
Is it a Turkey 🦃 no it isn’t. I’m convinced this camera will soon be back in good working order.
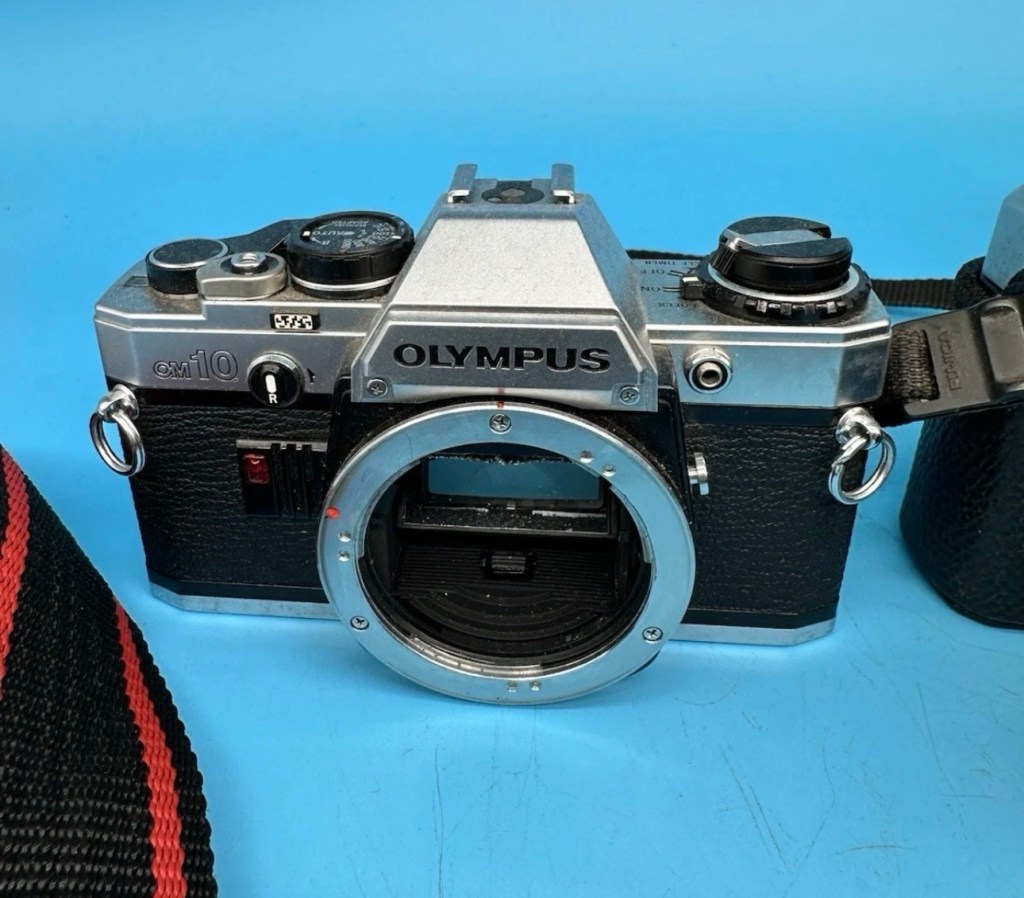
Olympus OM10 – No:1:
Olympus OM10 No:1
In really good condition, battery terminals have a slight corrosion due to old batteries being in place. However new batteries work fine and shutter fires and viewfinder is clean. To be honest, this camera is in a better cosmetic condition than the one I currently have. This is an excellent camera that requires little attention.
Is it a Turkey 🦃 ? Most definitely not.
Olympus OM10- No:2:
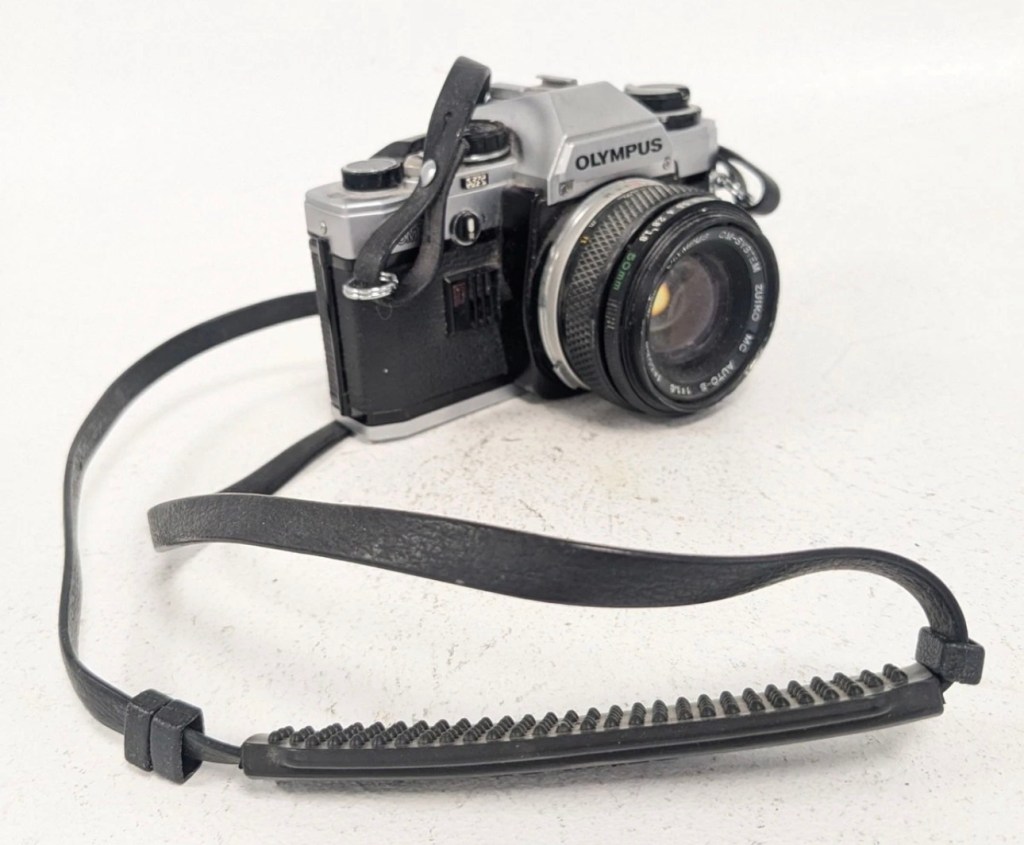
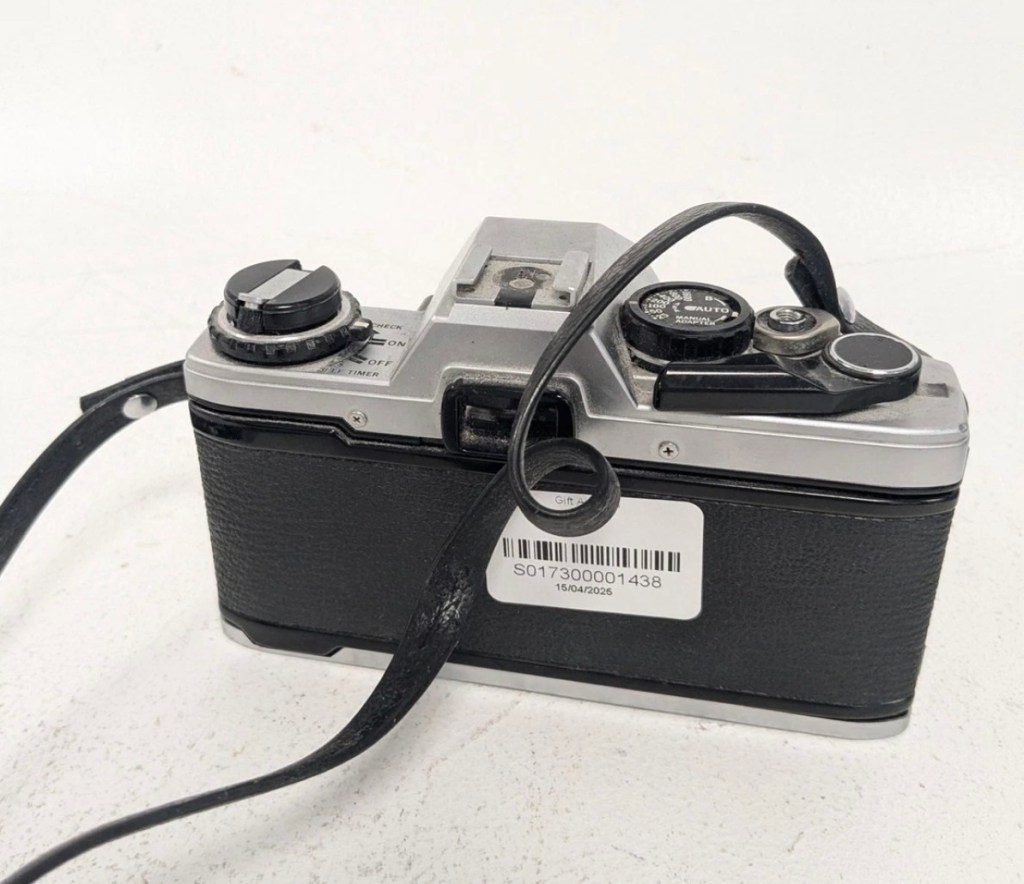
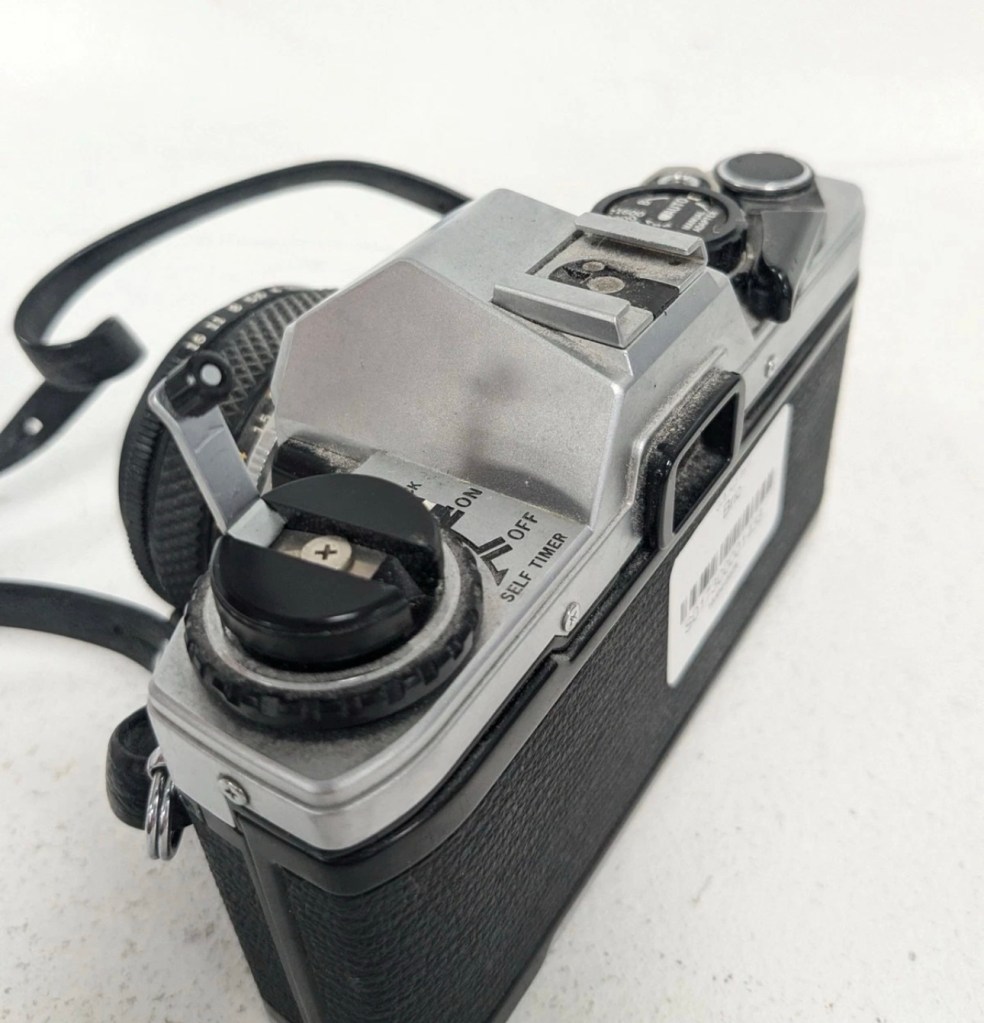
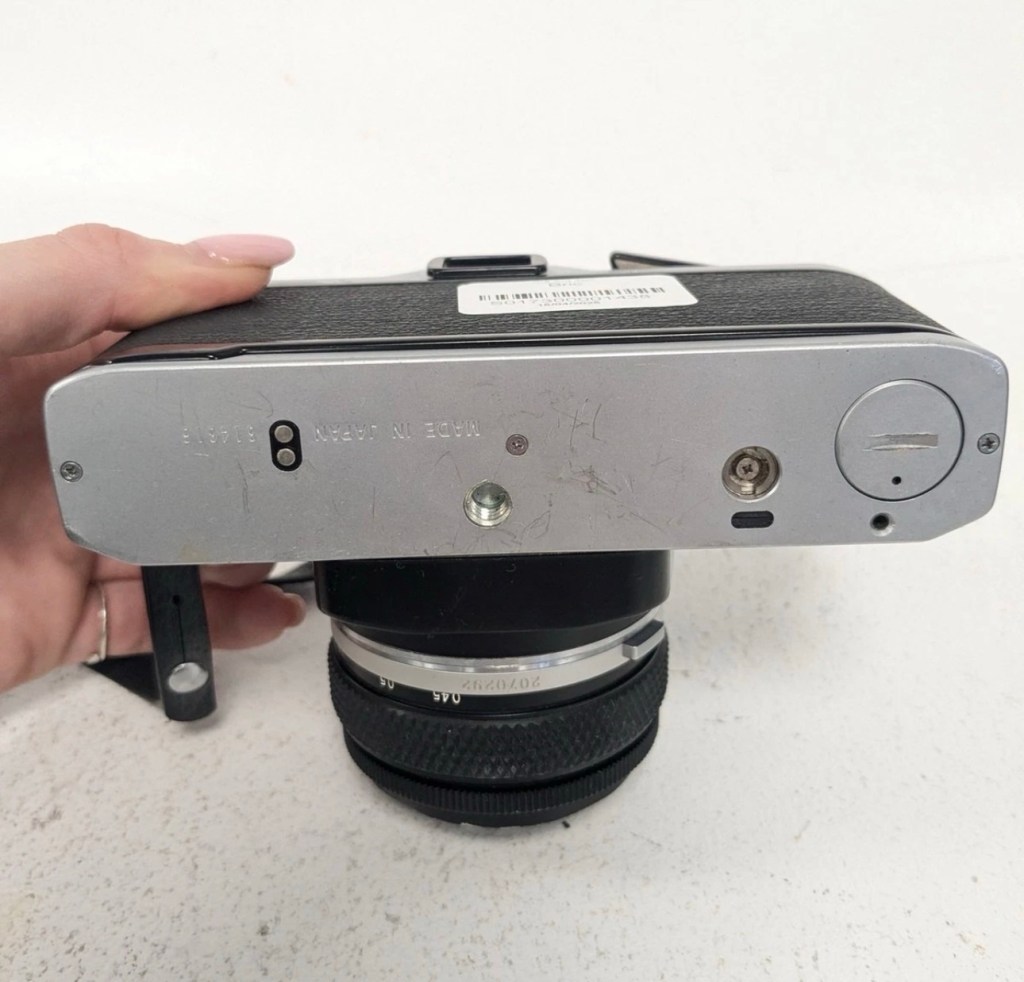
Olympus OM10 No:2
As with the first OM10 this is cosmetically a nice camera just a little more grubby, and missing the battery cover on the base. But it has a nice Nikon neck strap – strange. The battery chamber looks as if it has had some minor battery leakage but nothing too serious. Using the battery cover from No: 1 camera I’m able to test all the electricals, and there is no issues here, with the camera displaying the exposure in the viewfinder correctly, and the self timer and battery check all as they should be. Again a good CLA of the camera should have it back and working in no time at all.
Is it a Turkey 🦃 it most definitely isn’t. This is a good camera just needing some TLC.
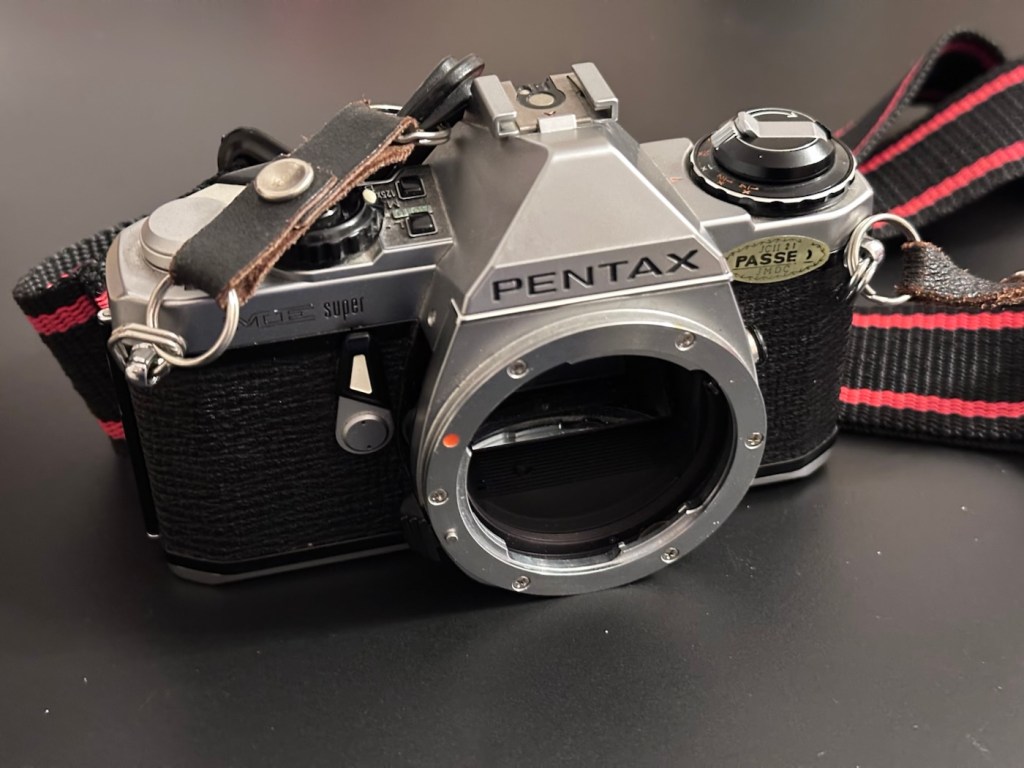
Pentax ME-Super:
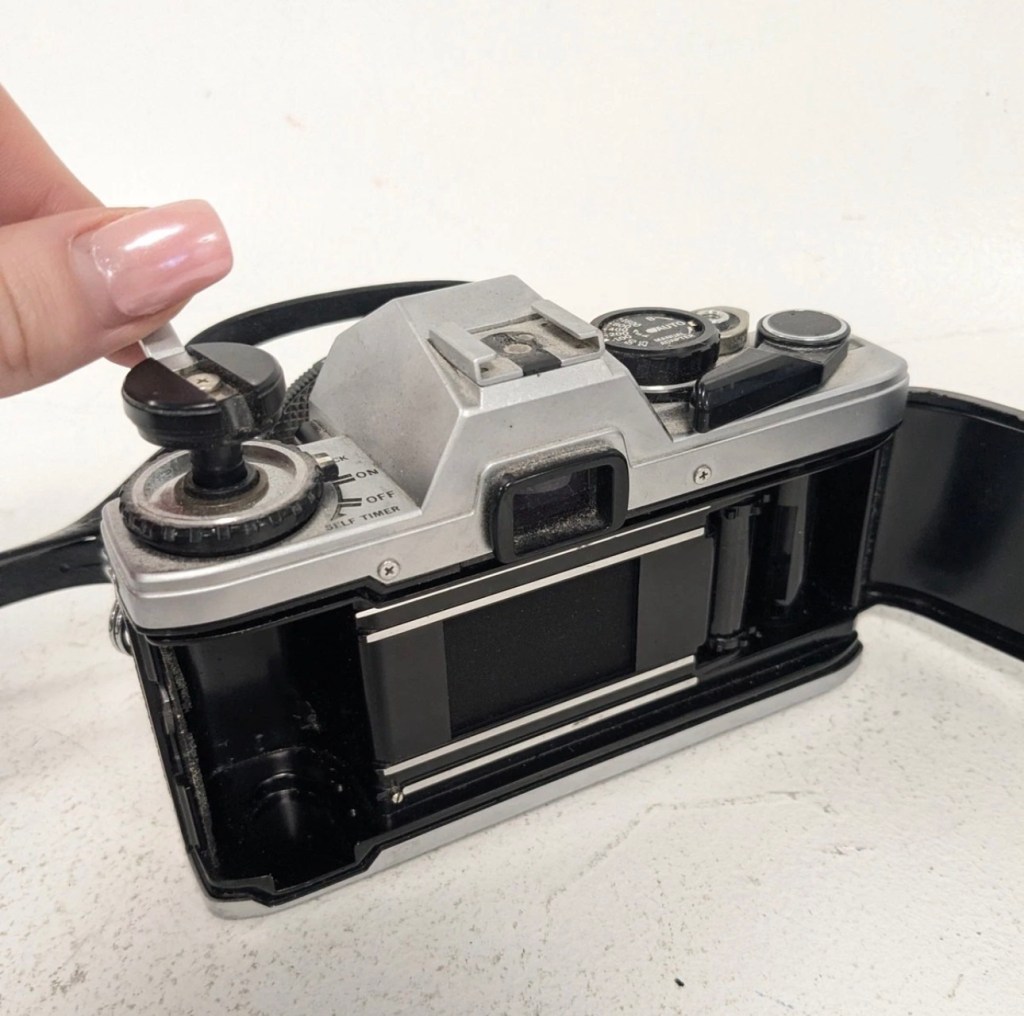
Pentax ME-Super
Again, cosmetically in good condition but missing the battery cover on the base. I was able to overcome this and load some batteries and had movement in the metering via the viewfinder. It’s quite dirty and the function dial on the top is jammed, I couldn’t get the shutter to fire. I suspect it needs a good CLA, and will make a good little project .
Is it a Turkey 🦃 ? I’d say not at this stage. It needs attention on the bench. It’s promising.
Fujica STX-1:
Fujica STX-1
The batteries were dead but the chamber was free of any contaminants. New batteries in place and the light meter in the viewfinder is working fine. Everything works, the shutter fires and winder operates without issue. This camera is in a good but grubby condition. Will require new light seals and a good CLA, but nothing beyond that.
Is it a Turkey 🦃? Absolutely not, this is a good sturdy camera just itching to get back to taking photographs again.
Conclusion:
So out of five cameras, I’m exceptionally pleased that every single one of them can be brought back to a working condition, with very little intervention. every single one of them will need a Clean, lubrication and adjustment (CLA) and also new light seals as the majority of them have turned to a dusty residue that gets everywhere. I need to buy some replacement parts, so I will get on with sourcing those items, and then I will also get some body caps to protect the cameras when I’m finished.
I will create individual posts to cover these repairs, and they will be delivered here on this site over the coming month or two. I’m in no real rush and to be honest, time is a rare commodity at the moment as I will be working as one of the “Orange army” (It’s a railway term) over the Christmas and New year periods, and on top of that we may also still be moving home, fingers crossed 🤞 in early January 2026.
Always liked and wanted an Olympus OM10. 46 years later I now have one. Of course, it needed repair.
Much to the wife’s annoyance, and because I was feeling a little low and in need of some retail therapy, I’ve purchased this lovely little camera from the Barnardos charity. It looks like it’s been stored in a full Hoover bag, it is so dusty. It has a few dents and dinks, this one is going to be a challenge. I like challenges. I’ve paid the grand total of £17:67GBP for the camera and the standard Zuiko 50MM F1.8 Lens. I think that is an excellent price.
These cameras were produced between 1979 and 1987. I’m hoping I’ll be able to date this actual camera more accurately when I receive it.
This is what the original listing stated:
This listing is for a vintage Olympus OM-10 35mm Single-Lens Reflex (SLR) film camera, bundled with a Zuiko 50mm f/1.8 lens and a leather neck strap. This is a single bundle containing the camera body, lens, and strap, ideal for collectors or film photography enthusiasts.
UNTESTED. This sale is for spares/repairs. There are some marks and cosmetic imperfections. Please see images for more detail.
The standard untested post from the auction sites, but I’m not really bothered to be honest. It’s a charity, and I’m happy to pay for these items as the charity always benefits, and that’s all that matters to be honest.
I have some history around this camera and whenever I see one I think of Bruce Springsteen and here’s why.
1984, Bruce released this Album
Born in the USA was released in 1984, so I can kind of pinpoint the first time I’d ever really heard him, courtesy of my friend David K, when I used to live in a small town in Hertfordshire called Bushey. David had been a school friend, we were now in our mid to late teens, he was working in a restaurant whilst I was in a photographic lab. He introduced Bruce to me and for many months after he first purchased that album, we played it non stop and knew it off by heart, beat for beat, and word for word, we were totally smitten with it. It was the Bruce effect. At this time i would have been about 18-19 years old, and had a very basic Russian Zenit camera, it took some great photos. However, David had recently had a bonus payment at work and purchased himself the Olympus OM10. I was envious, who wouldn’t be? What a camera and this is where it all ties in with our hobby, we loved photography and used to always discuss it with Bruce in the background singing his heart out. It all ties in now, fantastic memories, and a single camera can bring back these memories. Amazing isn’t it?
Anyway here’s some pictures where you can see the amount of dirt, and what looks like some bumps on the outer edge of the lens.
Nice camera, few dinks and dents, and a lot of dirt
Here’s some information regarding this camera:
The OM10 was the first consumer OM series body. Launched in 1979 it accepted the full line of OM lenses and most of the OM accessories for a lower price. The lower price was reflected in the construction of this camera and the features available, however, it was still a very competent performer and it reflected the elegant lines established by the compact OM-1 and 2 designs. Early production runs of the OM10 have known malfunction issues with electronics, metering, and shutter magnets. Olympus later changed the shutter to a ‘Type II’ design to correct the latter problem.
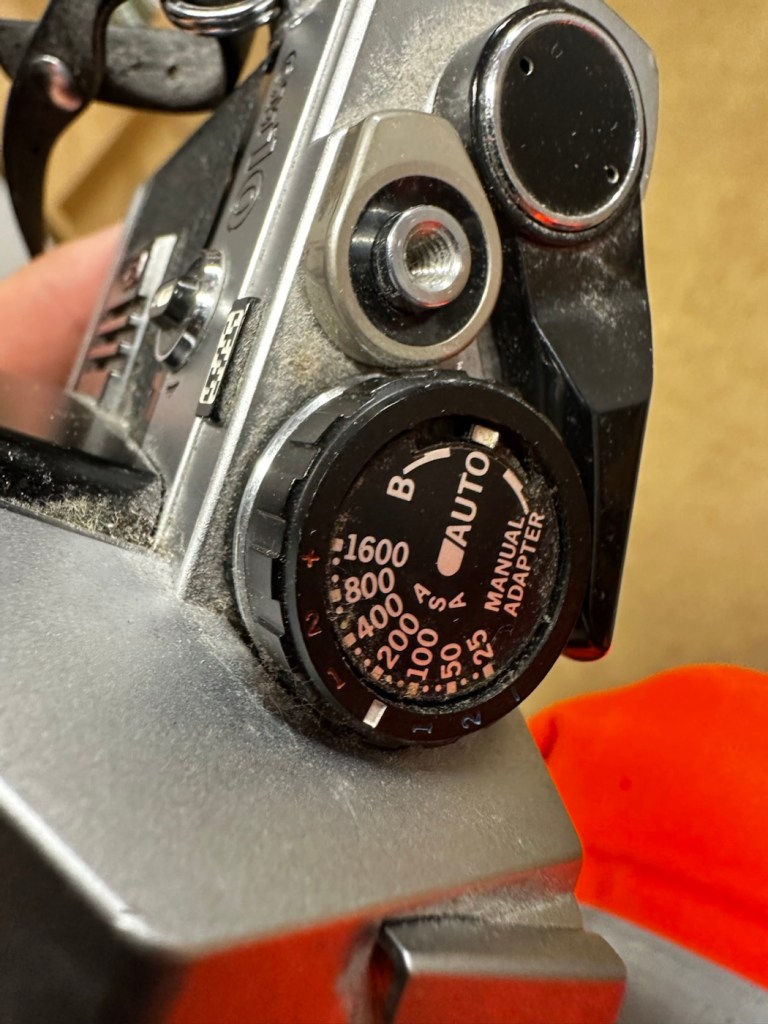
In its standard configuration the OM10 offered aperture priority automatic exposure, simple and accurate enough for a consumer camera in most lighting situations. It also offered exposure compensation for more complicated lighting situations and for more advanced users. A small plug-in manual adaptor was available as an accessory to enable manual control of shutter speed. The manual adaptor is possibly not as easy to use as the typical shutter speed ring around the lens bayonet on the OM-1.
While not well known to consumers, the focusing screen for the OM10 is indeed interchangeable, though not as easily as the OM-1. It shares the same focusing screen as the OM-1, but the extra protruding tab needs to be cut off as the OM10 doesn’t have a placeholder for it.
The OM10 can accept all the lenses of the OM system.
The finder screen is fixed, as well as the back. It can accept the winder but not the motor drive. It existed in chrome and in black finish.
In 1980 the OM10 Quartz was released with a fixed databack (equivalent of a Recordata Back 3) to print the time or date on your pictures. The OM10 Quartz was only released in black finish.
The OM10 was sold in large quantities before production ceased in 1987 and many working examples are still being used today. Largely overlooked in favor of its more professional ‘single digit’ siblings, you can easily pick up a working example for $50. Try to find one that includes the manual adaptor though, as this accessory alone can fetch $30 at auction.
Camera-wiki.org
Assessment:
In a perfect world this camera would just need a clean. But this is me and to be honest I’d like a little bit more of a challenge, as a lot of the cameras I have worked with lately did not need a lot of maintenance because they’d been well looked after. This one may be different.
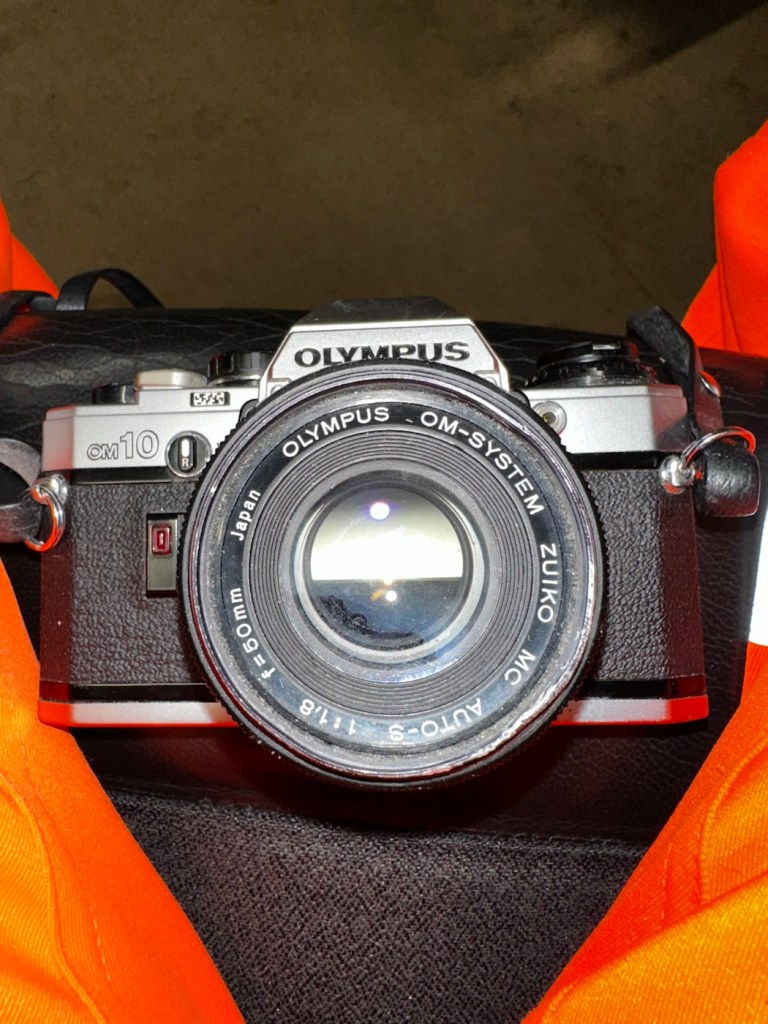
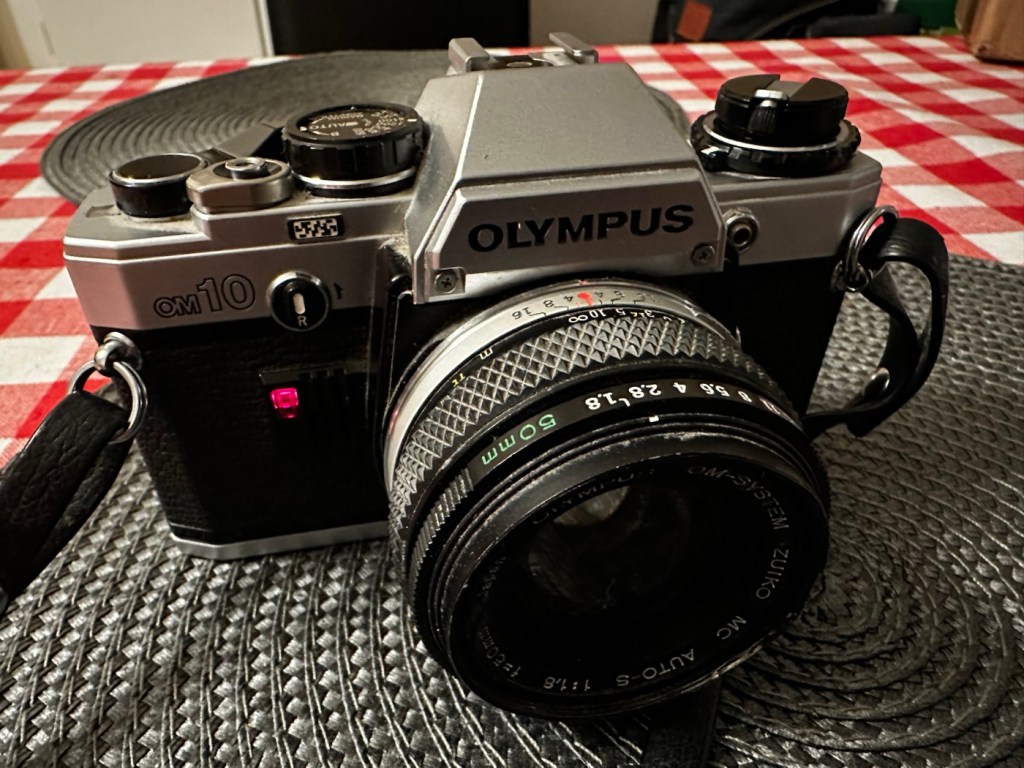
The camera that has been received
These cameras were renowned for electrical faults especially with their mirror motion magnets, very similar to the issues suffered on Canons earlier EOS cameras such as the 1N. But to be honest I am just surmising at this point as the camera is not yet in my hands. I need to be patient and await its arrival.
Well, it’s arrived so let’s have a look and see what’s good, what’s bad and what’s indifferent. It has dirt, yes, quite a bit of it, so it will require quite a deep clean as we need to get into all those little crevices, where the dust has settled.
Dirt in all the crevices
Cosmetically it looks really good with no dinks, dents or scratches, so that is very much a positive. It’s in not too bad a shape for being 46 years old.
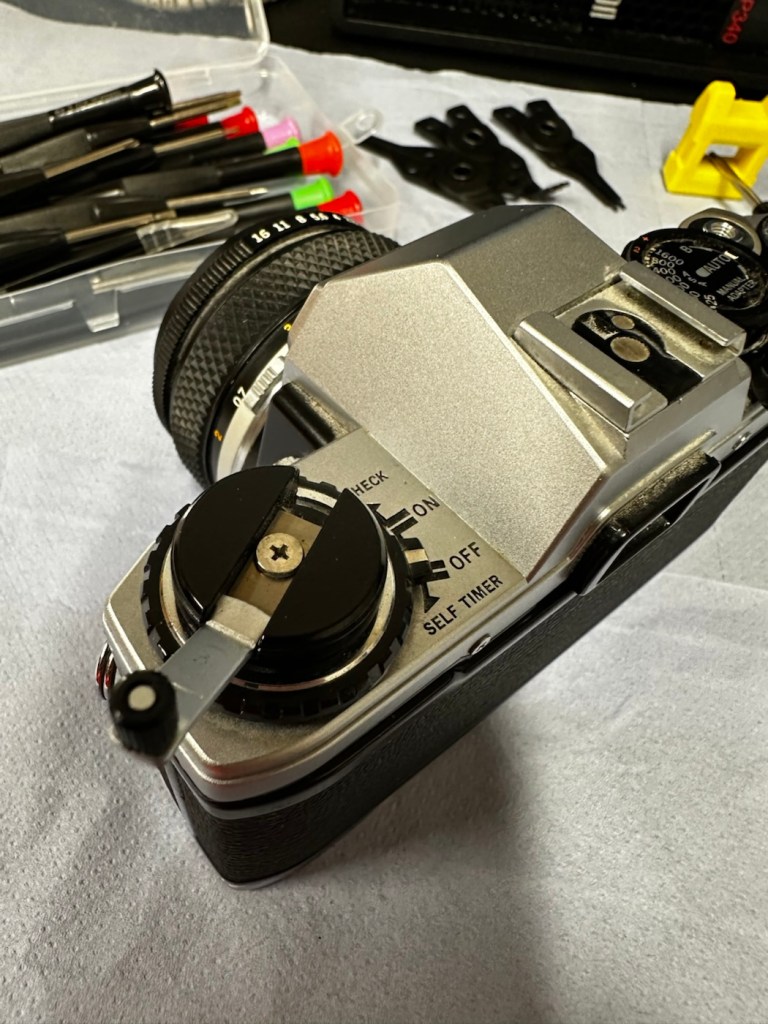
The capstan to open the camera film door, along with the operation dial are a little loose, so they will require tightening.
Loose capstan and controller
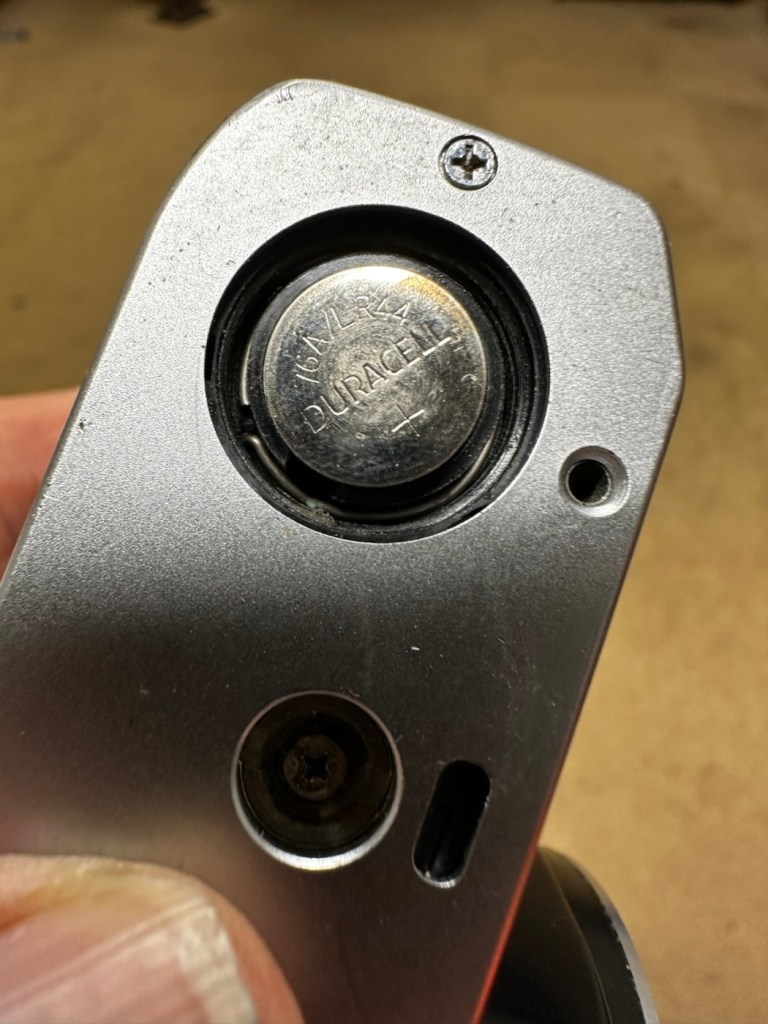
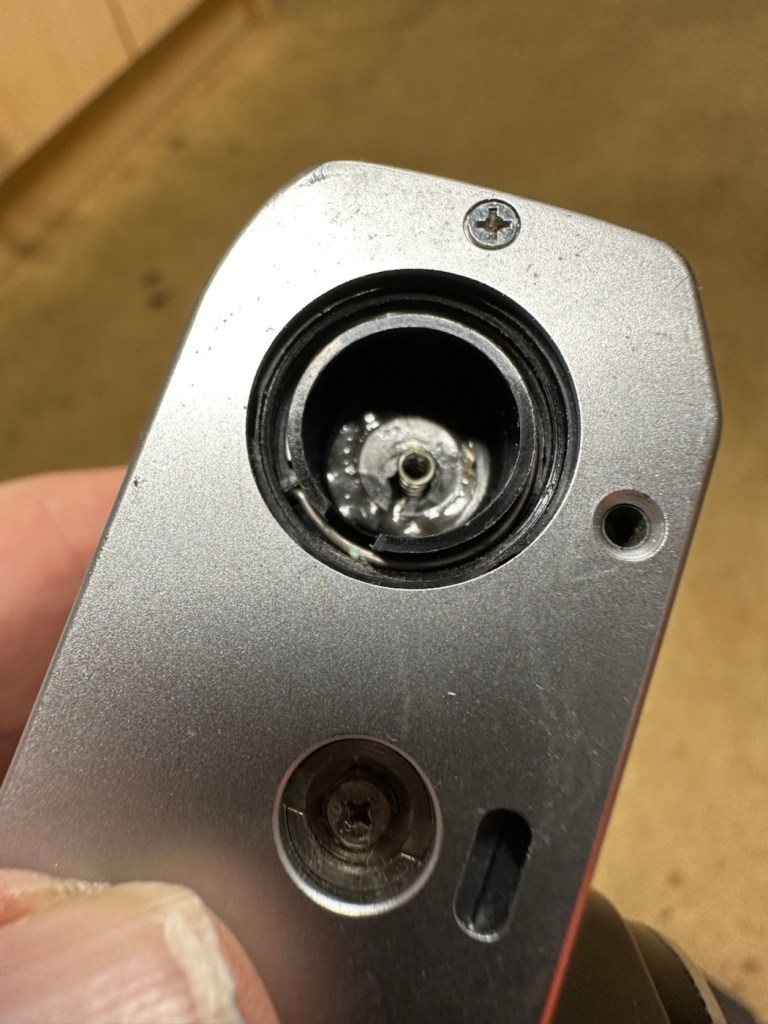
Batteries are long dead, this camera requires two LR44 button batteries to do even the basics, I have tested the batteries with a multimeter and they are so low that they hardly register, they are very dead indeed. The good thing however is that they have not leaked in anyway and the battery chamber is clear of corrosion.
Battery chamber is clean
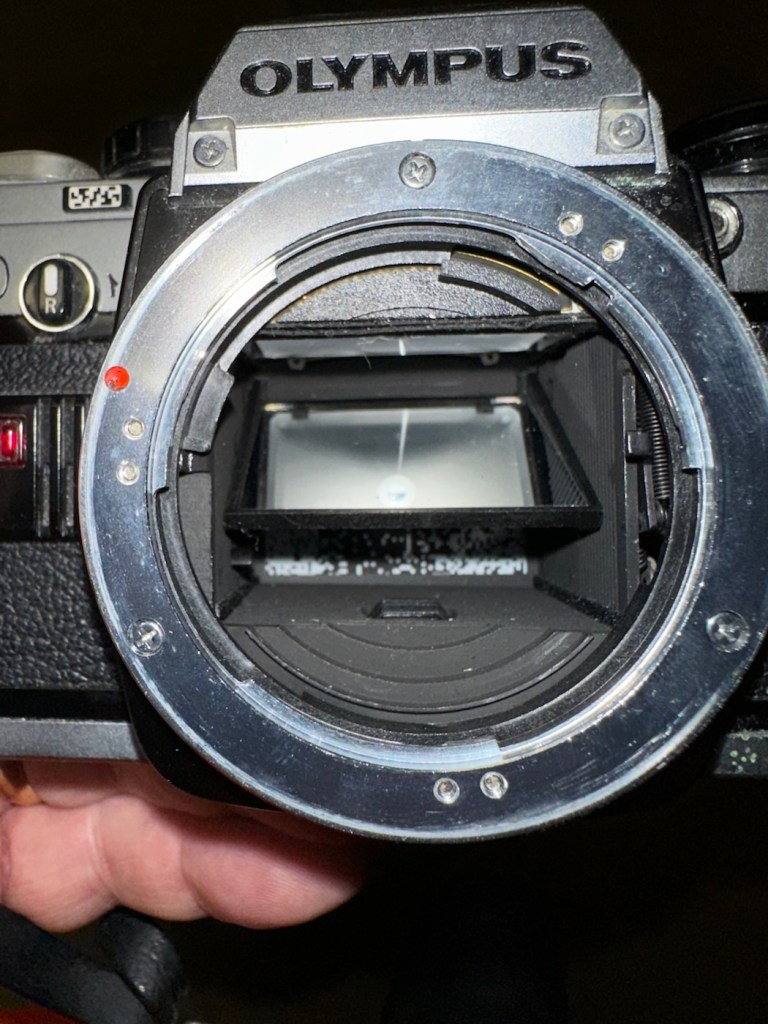
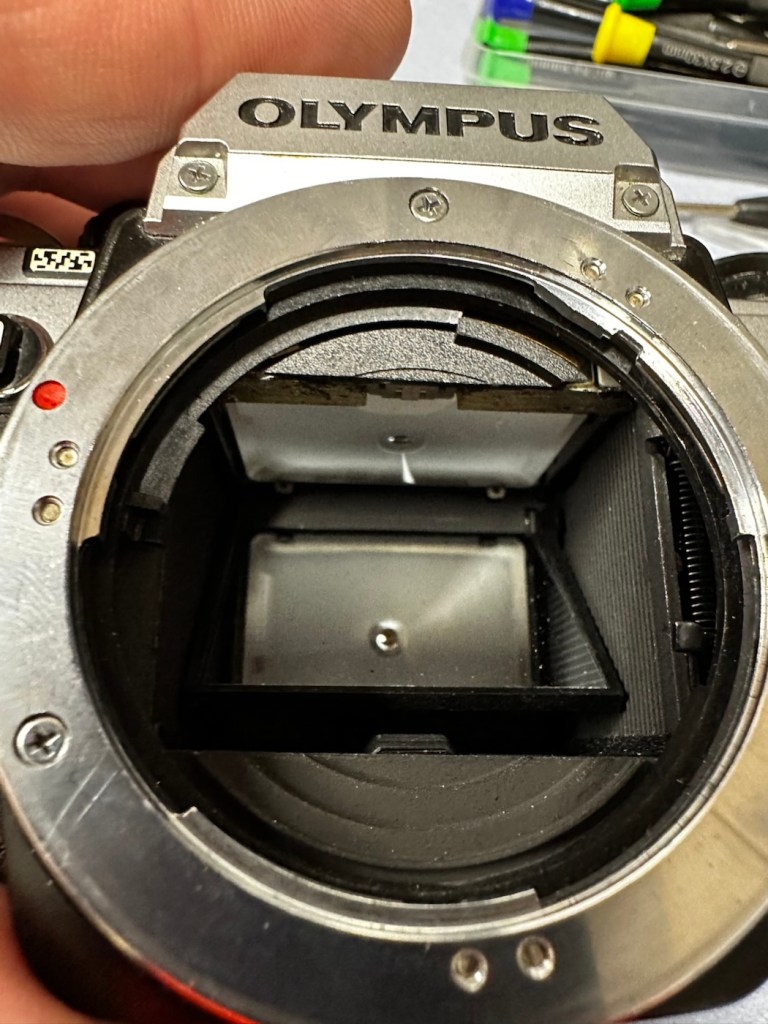
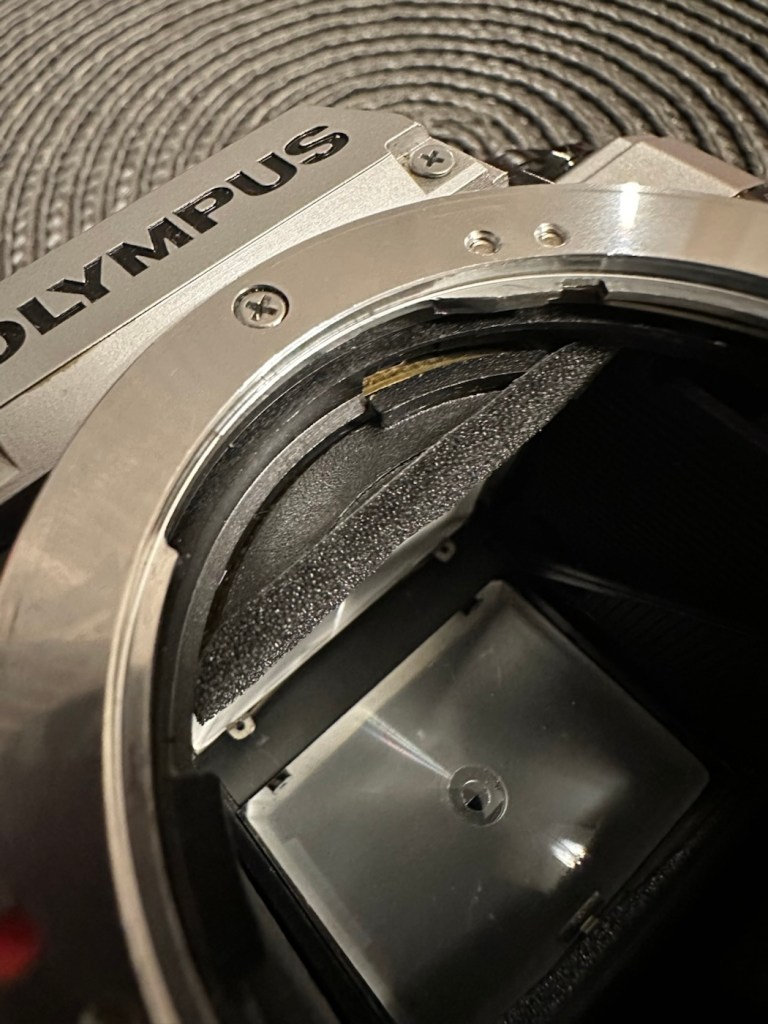
The mirror is stuck in the halfway position, this could be purely to do with there being no battery in the camera. It would be good to see with new batteries installed, if the mirror magnets would then kick in, and then they’d be no further issue. However, knowing my luck they are probably inoperable as well, we will just have to wait. And for this same reason the winder is also stuck, again the batteries may well solve this problem 🤞
Mirror trapped at the halfway point
Good news is though that the mirror and curtain are in really good condition, because the old lens has been kept in place preventing any contamination getting into that area.
Viewfinder looks clear apart from a little dust build up
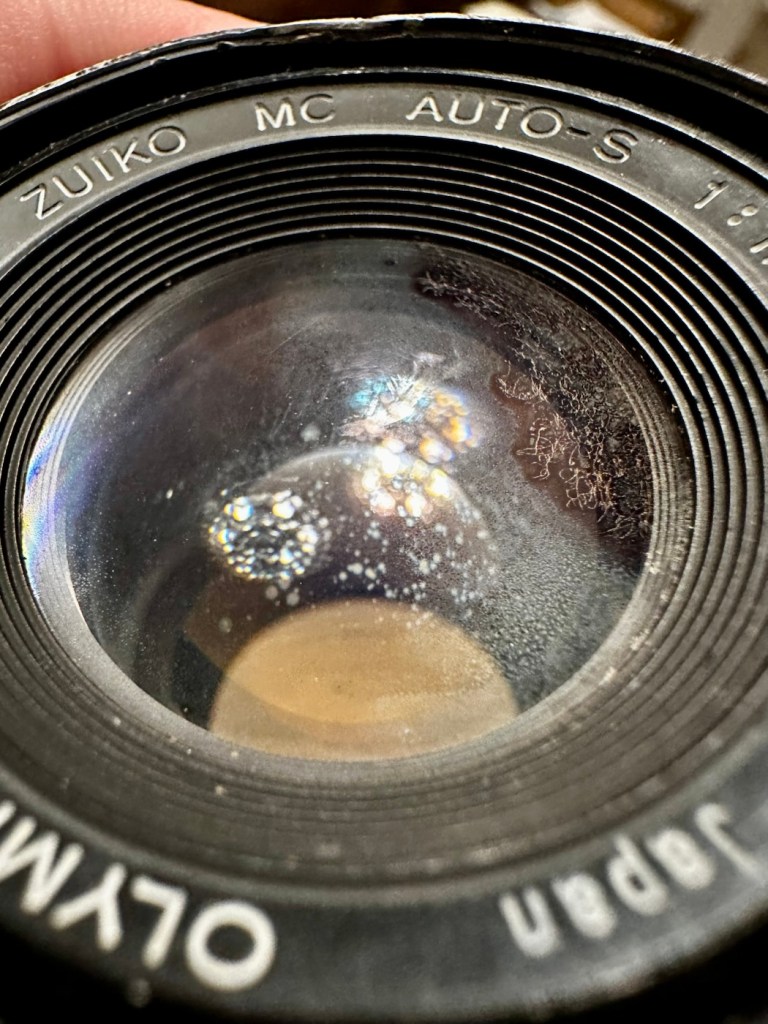
However the lens, does appear to have fungus in it, and will require a clean at some point along the way.
Visible lens fungus
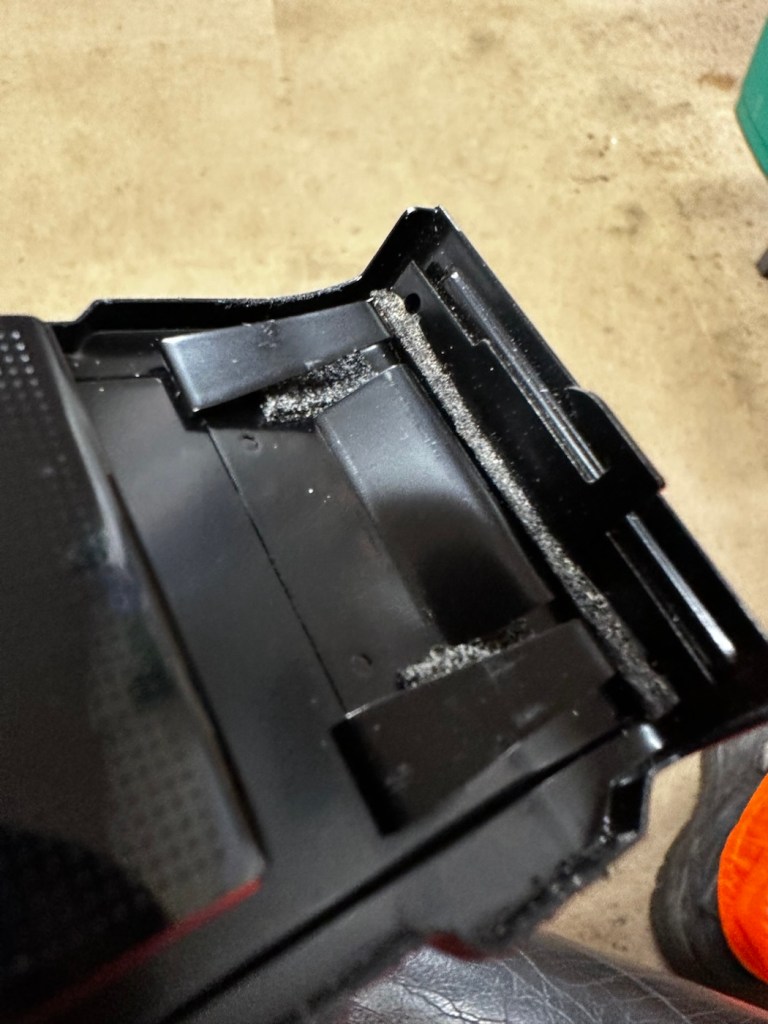
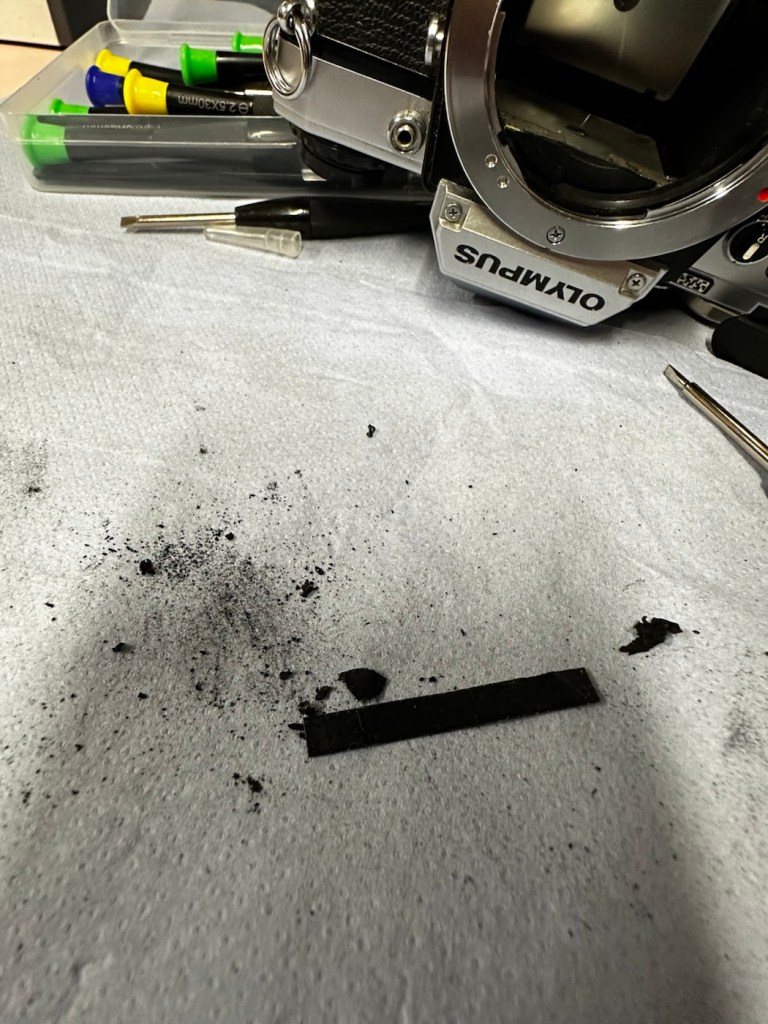
There are also a number of light seals that need replacing as they have perished.
Some light seals need replacing
To be quite honest, the easiest part of this camera to clean will be the standard plastic and rubber neck strap. This can just go in some warm soapy water to rejuvenate it. However, my first priority will be to get some batteries in place and see what occurs. I may have to rethink my approach to this camera dependent on the outcome of this simple action.
Repair:
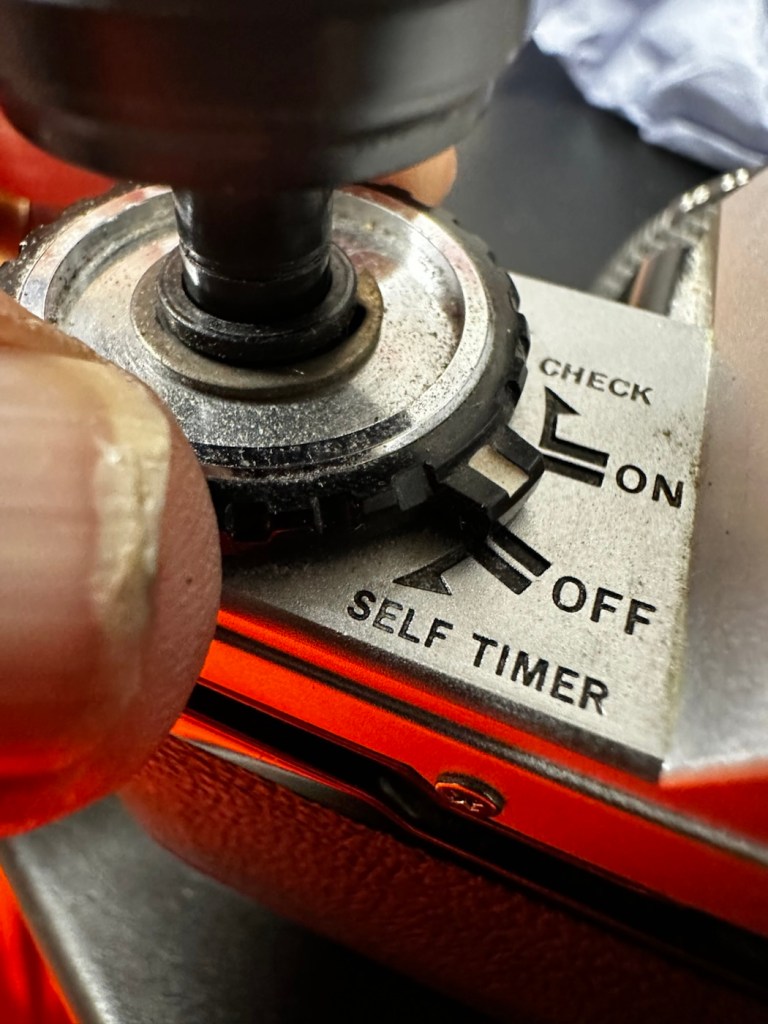
Straight home and I’ve found a couple of LR44 batteries that had a little more power than the old ones. In they go….and nothing. There is a check position on the main dial that should light up and a buzzer should sound to confirm that there is sufficient power, obviously there isn’t in this case. I run all the other LR44 batteries I have through a tester ( I had a packet of 12 ) and they all show as low power, they’ve died during storage. I then pop over the road to see my brother in law who always has a good supply of batteries and bingo, he has a couple of spare LR44s.
We have the check light, and a little buzz…intermittently
With these in place I get an intermittent buzz and a light, it appears the capstan control and operation dial that I mentioned earlier was loose, and has intermittent contact issues, it will need removing and cleaning then reseating.
If I hold the capstan in place I do get a good signal, with both buzzer and light operating in the check position, and when I move the control to “On” position I can now cock the shutter lever. It will then fire but again only to the half way position as it did earlier. If I gently push the mirror down and let it spring back it will then fire. But you have to do this on every stroke of priming the advance lever. Not good.
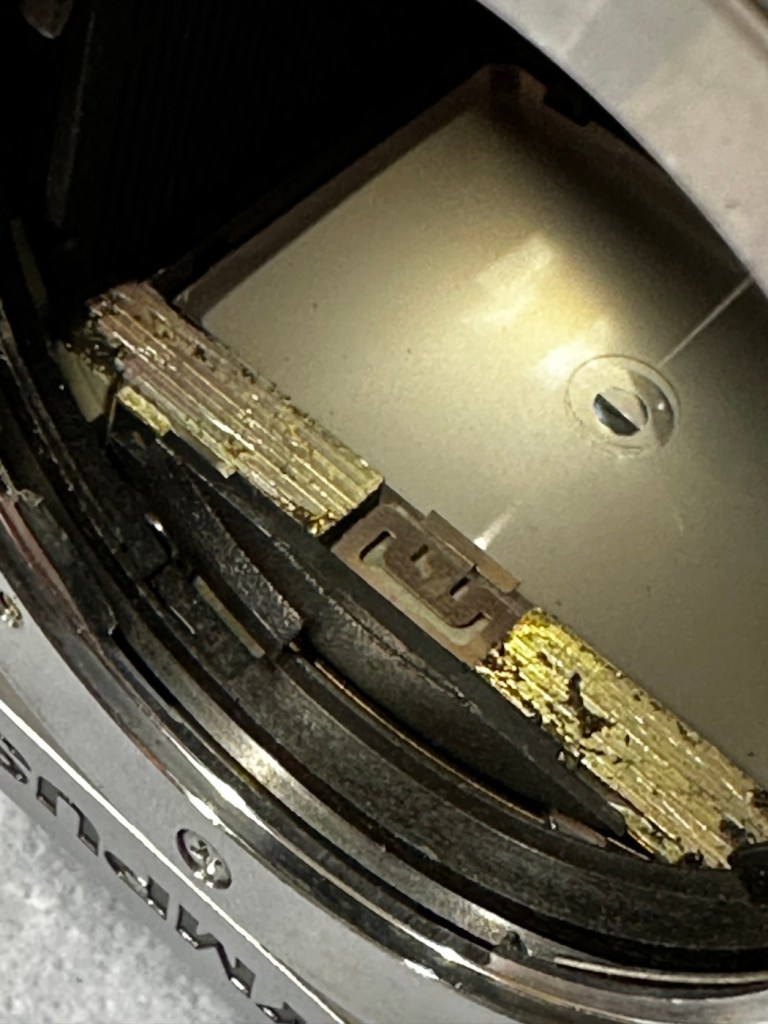
This is pointing towards an issue with the magnets and I believe I’m almost there, and that’s when I have a eureka moment.
Eureka moment
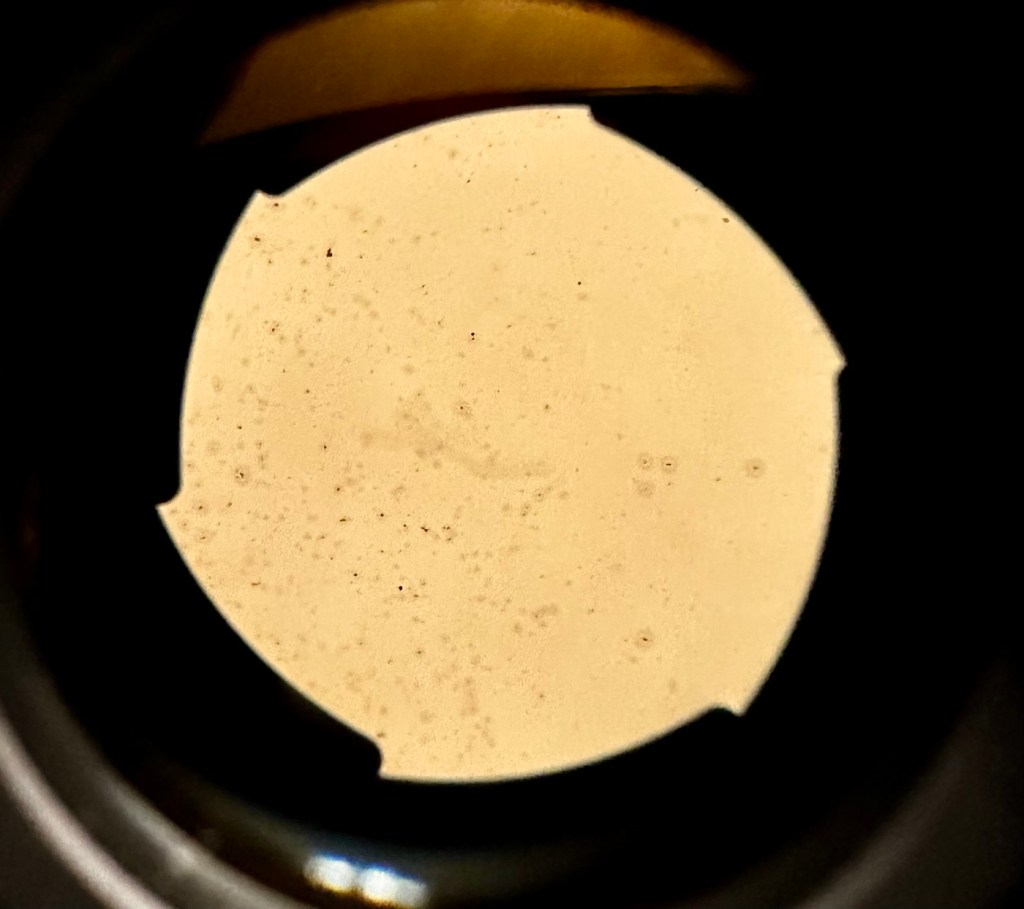
In the bottom of the mirror and curtain bay on the base of the camera is where the mirror magnets are situated, along with a light sensor that takes a reading off the shutter curtain behind, that is checkerboard coloured. Something here didn’t look quite right for me as it did not look level, the base seemed quite uneven. I just simply put my finger in here, applied some light pressure on this base and it just clicked into position, nice and level and then the stuck mirror fired, just like that. Every single prime of the shutter and actuation since, has worked just perfectly, I wonder if this camera has been dropped at some time just knocking this part out of true configuration? Or has someone been here before me? I’m going to have to remove the base to check a few things anyway, so I can then make sure this issue doesn’t happen again. For now, I’m satisfied that the shutter and winder are working fine. I just need to make the contacts and the electrical continuity a little bit more reliable.
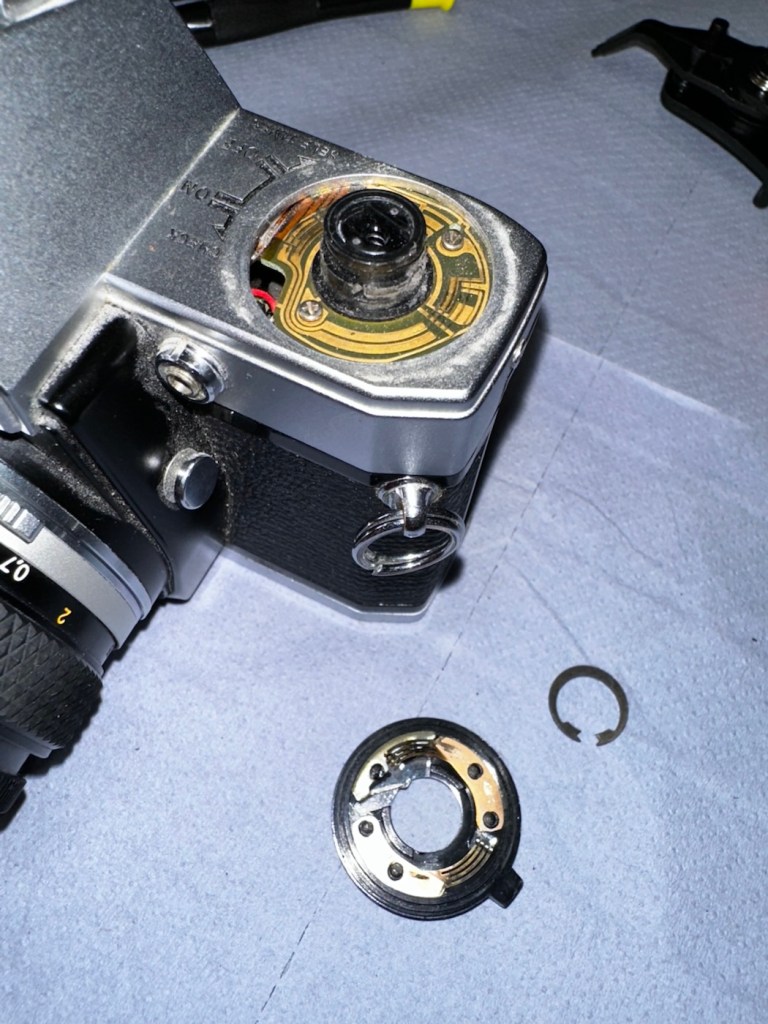
I’ve dismantled the faulty switch. Inside, the old tracks on the camera and the pickups on the switch were showing signs of tarnish so I used some contact cleaner go get these looking better. I’ve re assembled the switch and used a new circlip to hold it all together. It’s a lot more secure and responsive now with no interruption to the check signal. It’s quite solid as it always should be.
Capstan needs dismantling Circlip needs removing Those tarnished tracks
Here’s a small video regarding the switch repair.
Switch working as it should
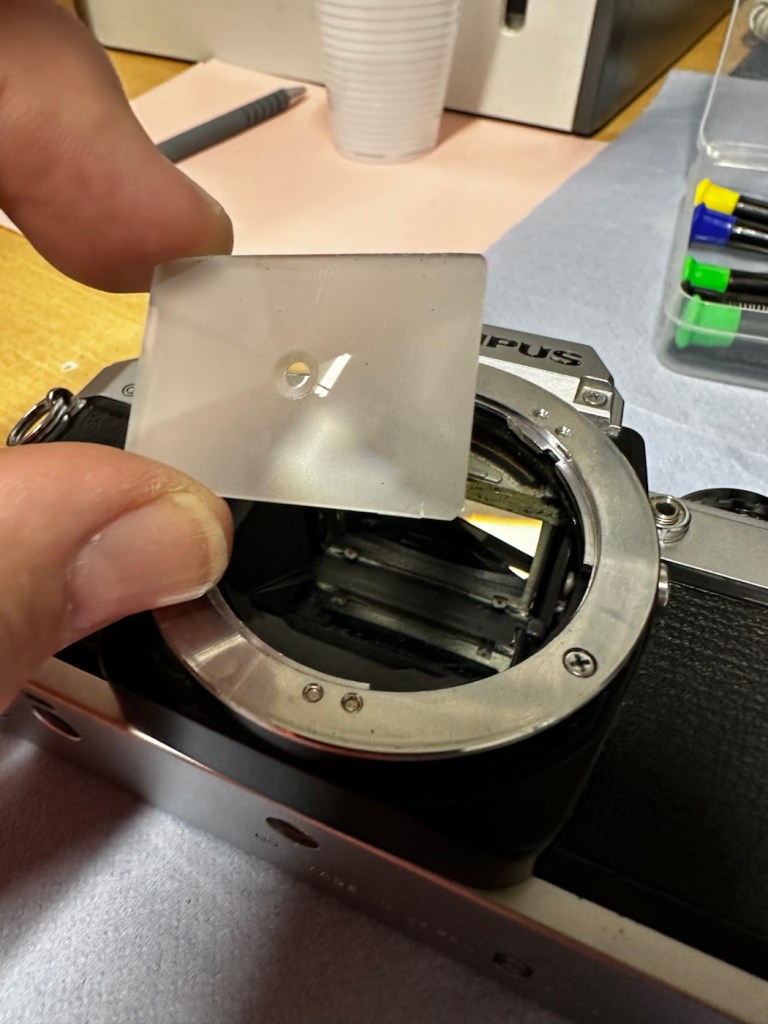
With the switch sorted I’ve now removed the focus screen to give that a bit of a clean.
Focus screen removal, cleaning and replacement
And after this I have gradually started to remove the old light seals in preparation for their replacement. They really are in quite a bad way and creating a lot of dust and dirt as they degrade.
Old light seals removed and degraded Mirror damper seal removed
Now to get the remainder of the old seals removed, clean the troughs they sat in, and then put the new seals in place.
With some IPA, and a large bamboo stick it’s time to remove the old seals
Some seal cut to sizeDoor seal replacedTop seal installed Bottom seal installed
I’ve replaced all the seals on the camera body apart from the mirror damper. I need to get some adhesive first, to secure the plastic plate that sits above the damper. Hence I have to wait for this to be in place before I can finally put the damper in situ, i will do this in the next 24hrs.
Now, the plastic piece that covers the focussing screen access is now secured in place and the mirror damper has been installed, all light proofing has now been completed.
Mirror damper installed
The original lens that was suffering with fungus has been dismantled and given a clean, however because the top two optics are a sealed assembly, guess what? The fungus is within the sealed section and is unable to be accessed. Therefore the lens will never be cured of this issue, it has been improved by cleaning the other optics but it’s not in anyway good enough to use with film in the camera, I will therefore use the old lens purely for testing purposes, it works fine for that and will be just fine for testing other Olympus equipment. In the meantime I have purchased two further OM 50mm std lenses, one is an earlier “Silver nose” model with a single lens protective coating whilst the other is a later production “Black” MC (Multi coated) model. Both are in an excellent clean condition conducive for film photography.
The two new lenses – “Silver nose” to the right
I’m happy that the repairs have now been completed, all that is left now to do, is to give the unit a thorough clean, and to clean that original plastic/rubber camera strap with some warm water.
Result:
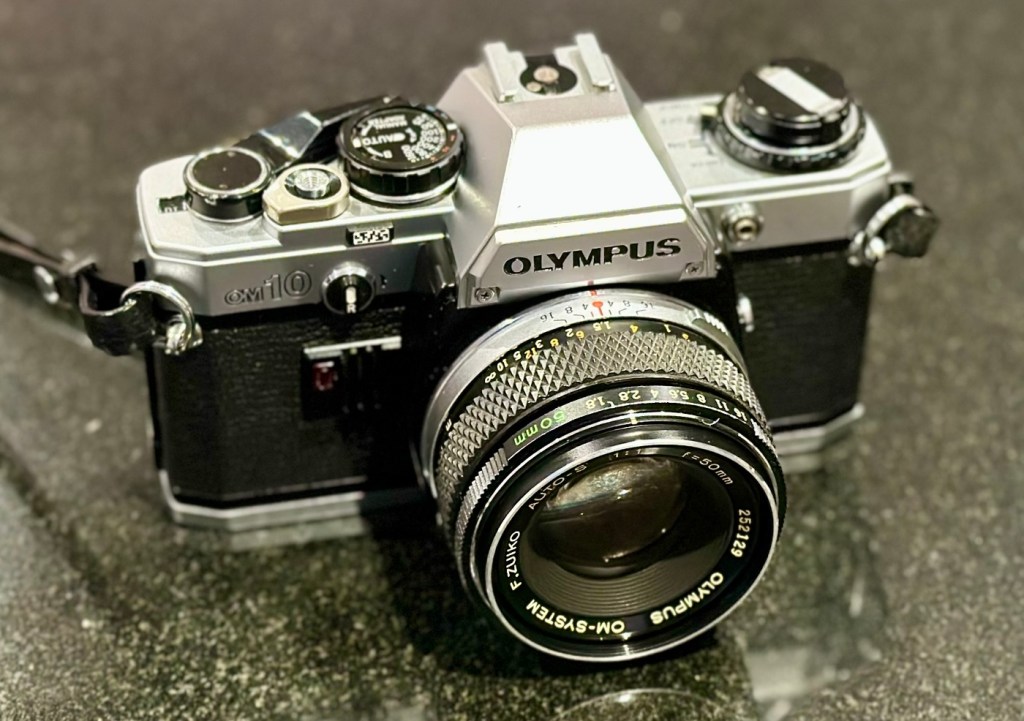
Here we present a fully cleaned and maintained Olympus OM10 35mm SLR camera from the 1980s looking quite resplendent after all the work on it has been completed.
All cleaned
Looking superb with a new lens
Looking fine from all angles
It’s been a lovely camera to work on. The make of this camera is superb, and back in the 80s Olympus were on a high note with the high end advertising, using many well known celebrities, and their cameras as a result became extremely popular. They are very well made and have stood the test of time. This one camera will go on to continue being used, and has many good years of life ahead of it. Another one saved from the scrap heap. As with all my cameras I have an immense backlog of units all awaiting the time when they have a roll of film run through them, and this one is no different. When I do pass a test roll through it I will post a link to the results here.
As always, thank you for passing by and glimpsing this post. It is always very much appreciated.
This lot is being sold for PARTS / REPAIRS, it is currently NOT in a working condition
Olympus Trip 35 w/ D. Zuiko 40mm F/2.8 Lens & Original Lens Cap
EBay
Olympus trip 35
I brought this item along with a Canon A1 as a job lot. The full detail of what was in the auction and how it progressed can be found here: Not the lottery, but for me – just as good
The page regarding the repair of the A1 can be found here: (Still in draft – coming soon)
Meanwhile here is a little history about the Olympus trip:
The Olympus Trip 35 is a 35mmcompact camera, manufactured by Olympus. It was introduced in 1967 and discontinued, after a lengthy production run, in 1984. The Trip name is a reference to its intended market—people who wanted a compact, functional camera for holidays. During the 1970s, it was the subject of an advertising campaign that featured popular British photographer David Bailey. Over ten million units were sold.
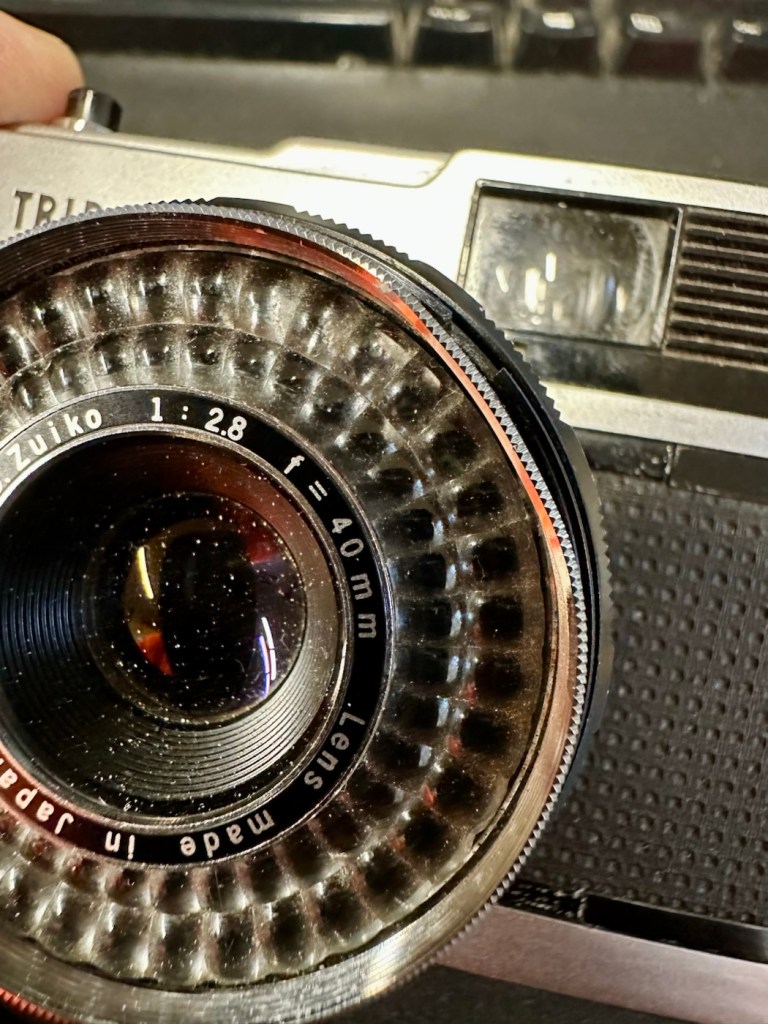
The Trip 35 was a point and shoot model with a 40 mm ƒ/2.8 lens, solar-powered selenium light meter, and just two shutter speeds. In ‘A’ mode, the camera operates as a Program automatic, choosing either 1/40 s or 1/200 s. The camera could also sync with flash, and has a range of aperture settings, from ƒ/2.8 to ƒ/22. In flash sync mode, the shutter is set at 1/40 s. Apart from a simple four-position zone focus system, and an ISO setting from 25 to 400,[2]the camera has no other photographic controls. The camera has a Prontor-Compur sync connector and a hot shoe. Its lens was a coated Zuiko 40 mm ƒ/2.8, with four elements in three groups.
The camera has an ISO range of 25–400, as films faster than 400 were uncommon at the time and delivered reduced image quality. 25 speed allowed the use of Kodachrome, while 400 speed allowed use of Kodak Tri-X and similar fast materials under low light. Earlier models, from the first few years of production, have a maximum ISO speed of 200.
The use of a selenium photocell to select the shutter speeds and aperture let novices use the camera as a “point & shoot”. No batteries are needed to power the camera.
The lack of more than two shutter speeds was not a problem. At 1/200 s and ƒ/22 with 400-speed film, the camera could deliver correct exposure in full sunlight, while at 1/40 s and ƒ/2.8, correct exposure could be obtained under bright fluorescent light, without a flash.
Wikipedia
And who could ever forget the series of star studded television adverts, featuring the photographer David Bailey, put together to promote this camera.
David Bailey
I never really got to use one, I admired one from a distance instead. My brother in law, Jim had one around about the mid to late 70s and he took some fantastic snaps with it. I wasn’t into photography at that time as I was still more interested in LEGO and Tonka trucks. However he did let me try it a couple of times, it really was that easy to use.
I’m not really sure what the problem is with this one, as the listing was not really clear on its issues. I just really wish sellers would just take a few seconds to describe the problems, it really could be an instant decision for the buyer – is it repairable or not? I’ll just have to wait until it’s arrived, and then i can do an assessment of its condition.
Assessment:
Well, it’s arrived and cosmetically it looks fine. However, zoom in a tad and the issues become apparent. It’s been dropped at some time, the lens has a little bit of wobble and you can see the outer ring of the lens has an obvious dent in it.
Drop damage
It does wind so that’s a bonus. The exposure button works and it clicks as it should, and the old selenium exposure meter appears to be responding, the red flag appears in low light and thus the exposure button will not depress. This is good.
Exposure indicator in viewfinder
When you half press the exposure button you would expect to see the relevant shutter leaf aperture close down, to the corresponding f- stop reading, this occasionally happens. If you move the lens barrel slightly it does have an effect, but it looks as if there is also some contamination on one of the shutter leafs, all of this is probably as a result of that tumble that has occurred sometime in the past.
Obvious lens wobble
I will definitely have to remove the whole lens housing from the camera to see if I can do anything regarding that wobble. This is going to be quite some task, and I’m not confident I will succeed, but who knows.
Let’s attempt to get inside.
Repair:
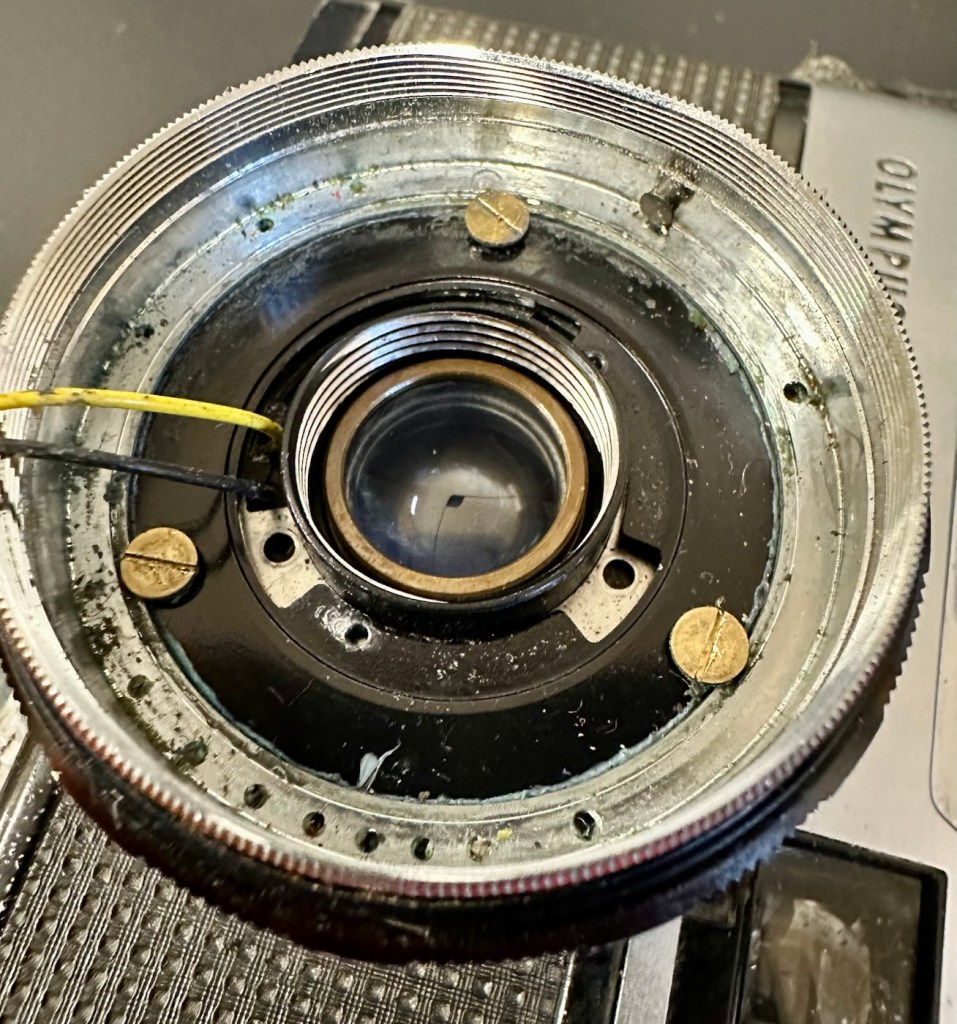
To get into the lens there are three tiny screws on the inner turret bezel that have to be removed that sit around the edge of it. This then pulls out and the lens optics can then be unscrewed.
Here are then two more screws that allow you to remove the selenium light sensor. Below this are three brass screws that hold the body to the lens. One of these screws were loose, hence the wobbly lens, this must have occurred when it was dropped.
Removing the sensorThe three brass body screws
I’ve pretty much had a cleanup here, applied a tiny drop of camera grease to the ring mechanisms, and tightened all these screws, and now the turret is nice and tight. I’ve just given the shutter blades a wipe with a soft brush and that is all it really needs. I’ve reassessed the camera, and tested its operation and it’s all good, working just as expected.
Result:
The dent in the ring remains as it’s causing no issues and is a subtle reminder of its past. The lens issue and its movement has been repaired and this in turn has cured the issue with the sticky aperture blades.
I haven’t touched the inner workings in the top of the camera such as the light metering, as it’s working fine and what’s the point in fixing what’s not damaged?
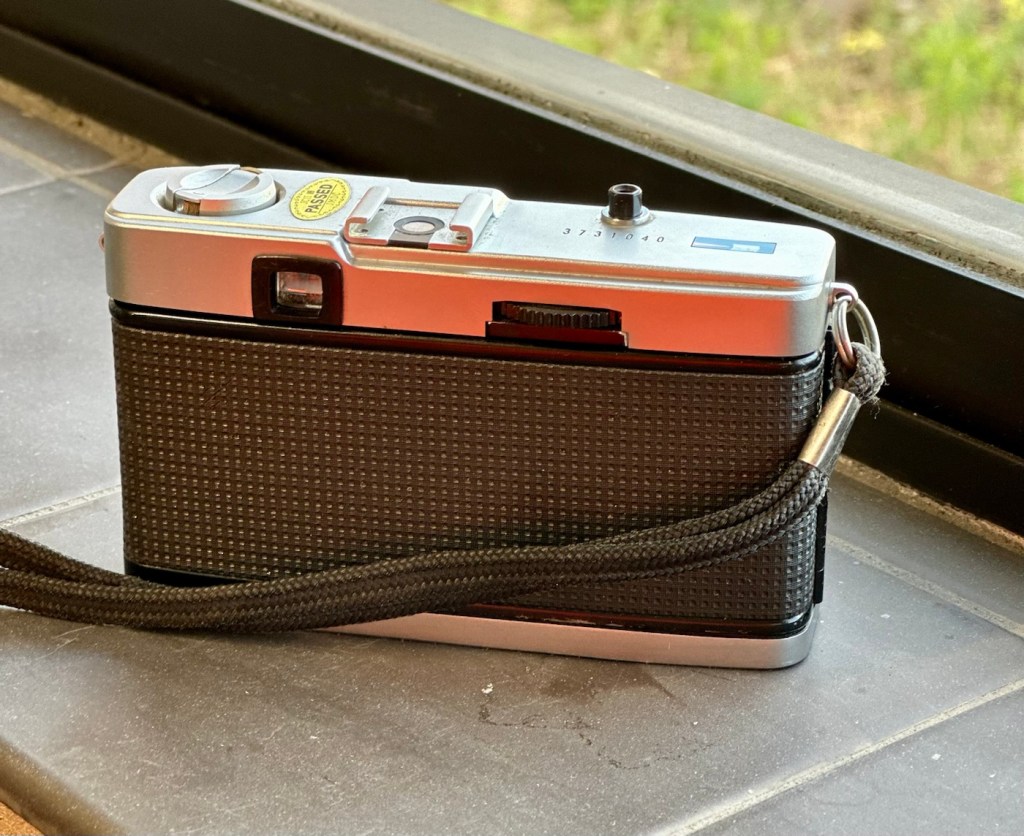
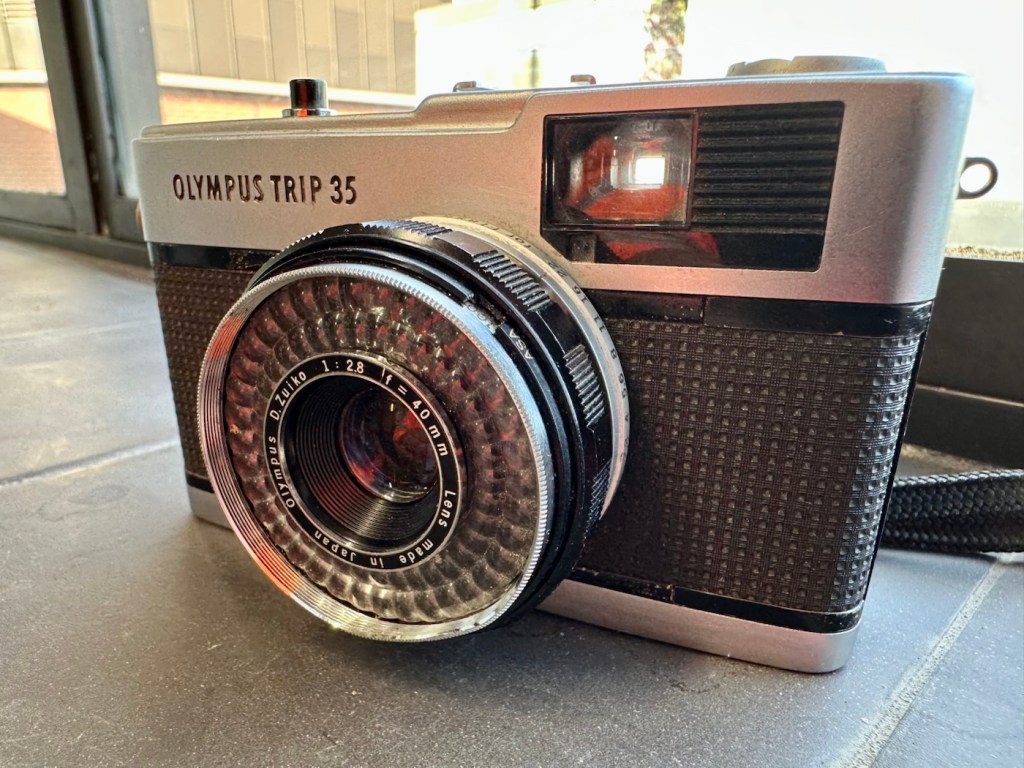
All repaired and looking good
I’ve still to run a film through it, and this will be done shortly as I have quite a backlog of film cameras to be tested. As soon as I have photos available I will link through this posting.
Really pleased with how this has gone, a nice easy fix but I can’t believe just how small those screws are around the lens bezel. I need my eyes testing that’s for sure.
Thanks for passing by, as always it’s very much appreciated.
I’ve been after a couple of cameras for quite a while now that hold a great deal of sentimental meaning to me. This will become apparent when i publish the individual posts for them, but for now i just want to share the result of an auction i participated in on the 31st July 2025.
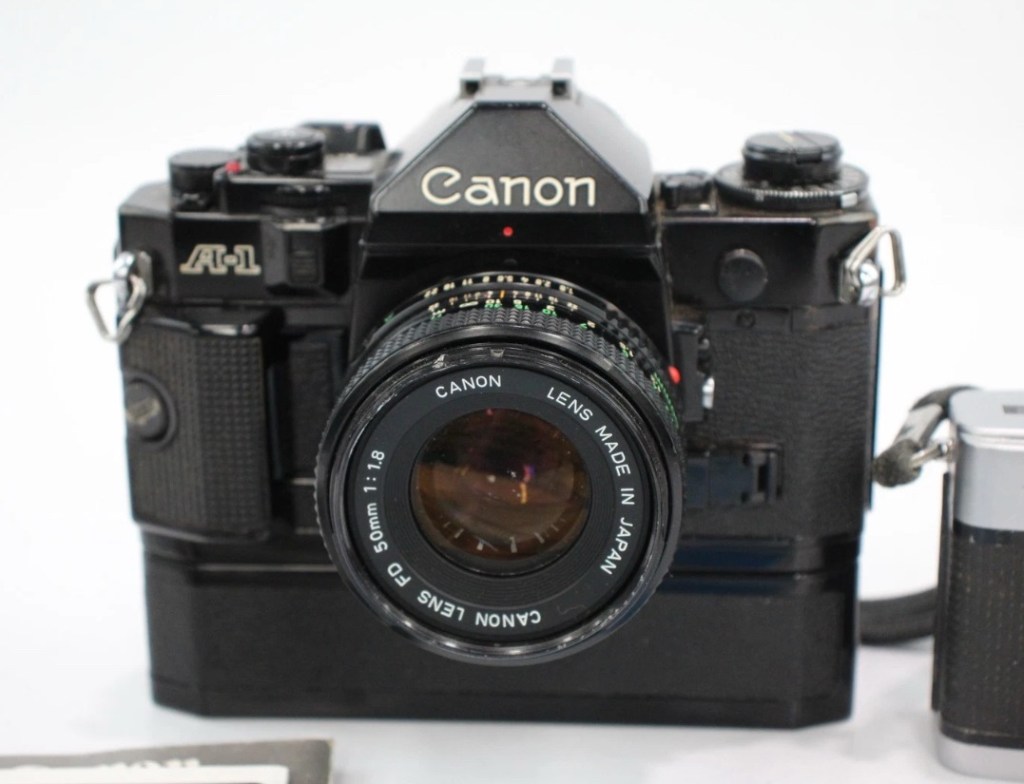
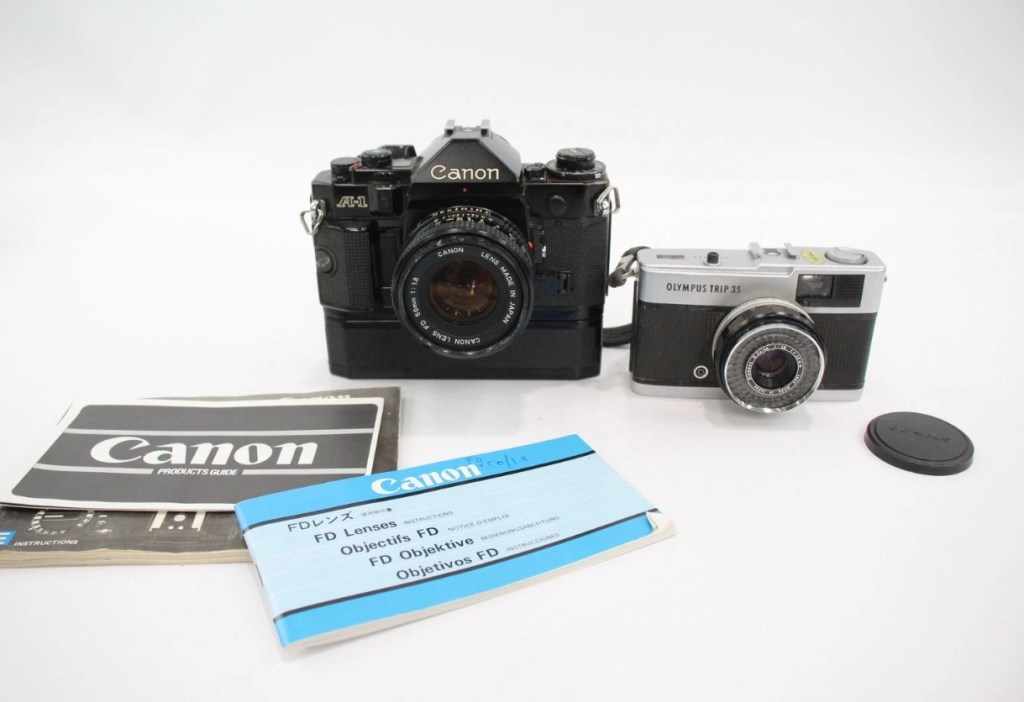
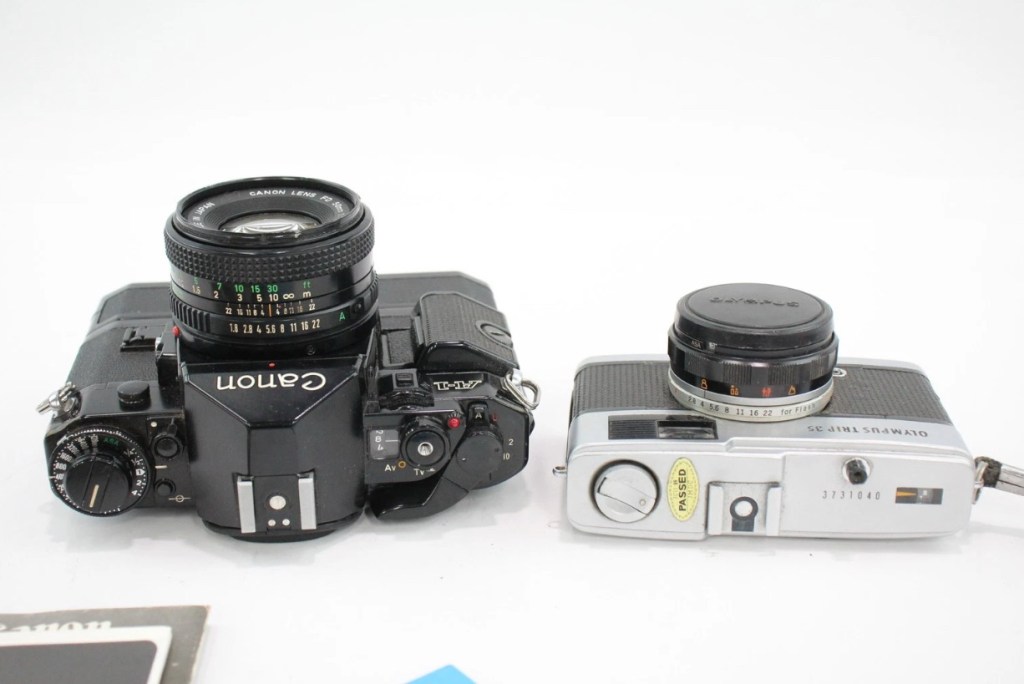
A Canon A1 and an Olympus trip
Today I’ve probably made the best purchase off of an auction site that I have ever made previous. I’ve been following a number of Canon A1s lately and they have all been going in the £120+GBP bracket, some even higher than that. Today I have lost out on two that sold for £93 for a damaged body and one for £121 that was just a body but of a much better quality. This particular auction I was watching was for an untested duo of cameras, a Canon A1 as well as an Olympus Trip 35mm. The Olympus alone normally commands the high £80GBP range and both of these were in this particular auction. I was just watching as this was going to sky rocket in my opinion, two good cameras from a respected seller who I have used before. Two minutes from the auction end, bidding was sat at £39GBP and I thought that any second now the price was going to go crazy, especially in the last 30 seconds. I put in a max bid of £55GBP for the lot, as I pretty much knew it would sail past that amount and go for a price in the £150-£200 price range. I hit the bid button with 20 seconds left on the auction….
You have won – congratulations!
I thought you’re having a laugh, no way. And then it came up with the winning bid being £39:00GBP no one else was bidding, crazy.
The A1 camera consists of the body, a winder, an FD 50 1:1.8 lens, a camera manual as well as a lens manual.
Postage was the grand total of £4:99 so my total for these two cameras was £43:99GBP. That is nuts, and to say I’m pleased about this is the understatement of the century. I have two of the cameras I wish for the most, and I have just landed the bargain of the day, I was in the right place at the right time. Wow. It’s unusual to catch other auction bidders sleeping, it will probably never happen again for me, it’s a very rare occurrence. Two cameras of this magnitude for £22:00GBP each! That’s unheard of.
I don’t know for what reason they are not working, as they both appear to be quite tidy examples. I have used this seller before and the posting above could also be worded such as to imply that the units may well not have been tested. But, that’s what this site is about, repairing old cameras and getting them working again. There’s no fun in talking about a good functional camera, that’s boring. We want the meat and potatoes as they say, we want to see things being fixed, or broken further….you never know with me.
Thanks for sharing my excitement at this purchase. It will all make sense once i’ve assessed the cameras and carried out any repairs.
Thank you for passing by. It’s always appreciated.
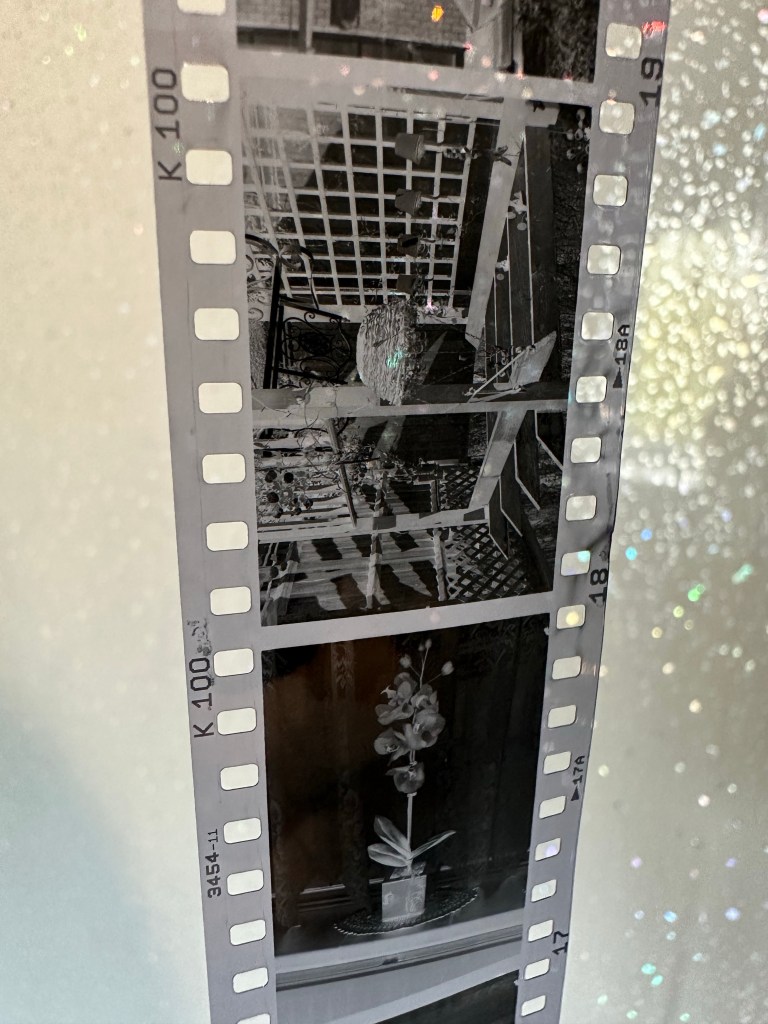
I have processed the roll of Kentmere 100 at home today, it’s currently drying in the shower and I’m really pleased with what I’ve seen so far. The carriage of the camera is working well with even spacing, exposures look promising and no sign of fogging proving the new light seals are good.
Kentmere 100 through Olympus 35ECRKentmere 100 through Olympus 35ECRCheck my gallery’s to see these results
I’m yet to run the negatives through the scanner, still waiting for them to dry but when they do I will post a gallery here. Gallery – Olympus 35 ECR trial roll
The camera in my eyes is now in good working condition, all that I did with it has proven beneficial and I’m adding this into my personal collection.
Olympus 35ECR now in storage
I’ve now packed it in a bag with all the air extracted and a couple of silica bags to stop any potential moisture. I do this to all the cameras I store for their protection and to save me having to go through the whole process of maintaining them again.
I’ve enjoyed this little project and am now happy to say….
The little Olympus I’ve been working on is now ready to be tested. It’s all working as well as I can see and has new battery adaptors and a new light seal around the camera. Has been cleaned as best as I can however now is the time to give it a proper run out. I have a roll of Kentmere 100asa B/W film that expired about 3-4 years ago so hopefully I’ll get something from this barring disaster.
Sunbury on Thames
Going to be in Sunbury on Thames for a few days so I’m hoping I can get some nice pictures of the Thames and surrounding areas.
When I get back I’ll develop the film at home and scan it myself for results. Fingers crossed 🤞 it all performs ok, if not then it’s back to the drawing board.
I have obtained some 1.5mm camera seal and have commenced the replacement of the old seal. First thing to do is measure the widths required for each of the 5 pieces needing replacement.
Measuring seal width Measuring seal width on doorMeasure all required seal widths
Easiest piece to seal is the larger segment at the hinge of the door. Setting this piece first allows you to get the start point’s correct for the longer more fiddly sections.
Door light seal replacement
When it comes to the longer runs there are two width measurements. For the seals on the back door they are approximately 2 mm wide and the ones on the camera itself are 1.5 mm wide. I have cut these myself and believe me they are awkward little buggers to get in place, I very much doubt you will do it first time (well done if you do) it’s taken me a number of attempts and to be honest I’m still not 100% happy with the results. The rear door is the second easiest piece to do as you can remove the film guard to give you some space to work.
Rear door with new light seal installed
The camera body is ultra awkward as the seal is so thin. I have put in two lengths and it’s stayed in place overnight but I may well redo it again at a later date. I will run a film through to see if it is sufficient as I suspect it may well be. My trouble is I’m just trying to be perfect but sometimes you just have to lower your expectations slightly. A couple of things I would recommend though:
Use an ultra sharp craft knife
Use a metal ruler
Wet the adhesive as you put it in place as it allows you some option to move it prior to sticking
Be patient, you will have to cut a number of strips
Be prepared to remove re clean and try again
Practice and don’t be downhearted if you fail
Try again
Practice makes perfect 👍
This is going to be a stock camera for me so there is no rush to move it on. Keep a camera spare for yourself to practice on as it will only improve your technique in the long run. This was my first attempt at seal replacement and I have learned a lot from this exercise. Come back to see the results of my test film on this camera.
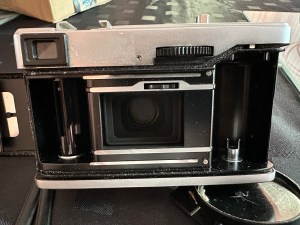
What I noticed whilst inspecting this camera was that the light seals around the rear had decayed sufficiently to require replacement, and after approximately 50 yrs that seemed to be a reasonable assessment.
Quick video of the light seal removal
This page will cover the light seal removal, it is important that the camera is thoroughly cleaned and all debris removed as this will make mthe replacement of the new light seals so much easier and less cumbersome.
Items required:
Isopropyl or another sufficient cleaner
Cotton buds
Cocktail sticks or plastic modelling knifes
Compressed air can
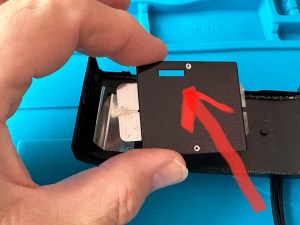
Remove film plate – remember the correct orientation
Remove the film plate on the camera door as this assists when cleaning, easy to do, just be careful when removing to ensure you don’t bend the retaining springs, and ensure it goes back in the correct orientation so that the small hole in the top corresponds with the winder sprocket on the camera body.
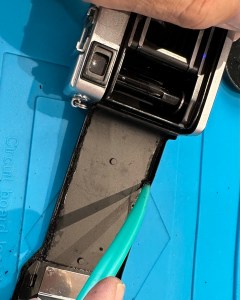
Scraping out the old light seal
There are 5 seals on this camera. Two on the camera body one top and one bottom, the same again on the rear door and a final one where the door hinges on the camera. Lightly wet these with some isopropyl and let this seep in for a couple of minutes. Using a cocktail stick or a plastic modelling tool (not metal as you will scratch the frame) start to gently remove the old seal and remove any debris away from the camera. Take your time here as it is important to get each channel clean and debris free to ensure the refitting phase goes without issue. Now wet a cotton bud with the isopropyl and run this numerous times along each edge where you have removed the seal to ensure it is really clean.
Using a plastic tool to clear the old light seal
I would suggest you set a good hour aside to ensure you do this job correctly and completely, it really is that important to ensure you get good results.
Hinge door light seal- before and after cleaning
When the removal of all seals is complete I’d recommend that you clean again, yep I know it’s boring what I am saying but the cleaning really is that important. When it’s done, get the compressed air can and give a few well aimed blasts of air into the areas you have cleaned making sure you do not direct any debris towards the shutter, please keep this area sheltered or you can create other issues.
The debris left over after a good clean
Once you are happy with the clean up, shut the camera door and leave it alone until you begin to install the new light seal on another occasion. Then we will clean the camera yet again 🤦♂️
So the camera I recently ordered has been delivered and the assessment of the unit has begun. The original post claimed it wasn’t winding, I wasn’t concerned about this as nine times out of ten it’s purely because the batteries are not installed.
The original batteries that came with the unit back in the day were PX640 mercury batteries x2 . These are now outlawed for sale so we have to now look at alternatives to use, this may involve using a converter to achieve the results we require. I have decided to use these converters for this camera.
converters in place and batteries installed
On first inspection I was worried as there looked like some battery acid damage to the terminal on the left (see picture) however with a wipe with some alcohol on a cotton bud it appears to be only age as it cleaned up ok. With these cameras sometimes the damage goes beyond the terminals and requires new wires soldering within the body. I dodged a bullet on this occasion.
You have a choice of batteries now, you can use two LR44 batteries or 675 air batteries. Difference here is all to do with the working battery limits of the camera. It was designed to work at 2.8v with the old Mercury batteries, the LR44s give you 3v that has been noted on some chat groups to require you to make exposure changes as it can overexpose sometimes by one stop.
The other option is to use the 675 batteries that have a lower voltage total of 2.8v however as soon as these batteries are opened they start depleting and have a shorter shelf life as such ( they are meant for hearing aids) however they are much cheaper than the LR44s . The choice is yours, I have gone with the 675s.
Batteries in place the shutter works well as does the winder and the shutter check light, excellent result as in theory the camera is working.
Camera works electrically
Cosmetically the camera needs a clean, the light seal around the film door is old and could do with replacing so I will do this in the coming weeks.
Light seal needs replacing
Overall I’m really pleased with this camera, I just now need to source some 35mm B&W film and put it to a test. I can then develop and scan this at home to see the results. But first I’m going to do the cleaning as stated earlier as well as replacing the light seals. It has also come with an Olympus pen lens cap that I may replace. I will also source a wrist strap to complete the look.
Hopefully this will be a nice little addition to my collection.
I have been after an original Olympus trip for a while now, however the prices are so volatile for them at the moment even the non working ones demand high prices, it’s crazy just how popular they are. So, I’ve had to settle for a camera that was sold alongside the “Trip” a 35 ECR.
Olympus 35 ECR
Asking for a reasonable price, this one flashed up on my phone and I purchased it immediately, I could end up regretting it but fingers crossed 🤞 it will not be too bad. If I’d left it a few minutes longer i believe it would have been snapped up.
I believe the main fault on this unit is a winder issue that is quite well documented on these cameras, and to be honest if that is the only issue then I should be able to rectify this and add it to my collection.
A good clean and assessment of the optics is the first and foremost action to take.
Another problem that sometimes raises its head on these units is with the two little batteries that originally powered the metering, they used to be mercury based 1.35v versions (PX640 x 2) and to add further pain to the problem, they can no longer be manufactured or legally purchased. There are alternatives but they are 1.5v and have been known to cause issues with the metering resulting in film exposure/rating issues, widely documented online. The best option is to purchase a battery convertor that allows you to use a more appropriate lower power pair of hearing aid batteries (Zinc Air 1.45v – 675 battery x 2), much friendlier in the long run as well as being a much cheaper option. However i will use this option only if there is the need to do so. I have a couple on standby if required.
Im really looking forward to running a black and white film through this camera, to develop it myself and see the results.
Come back and see what is found when the camera is assessed on its arrival.


You must be logged in to post a comment.