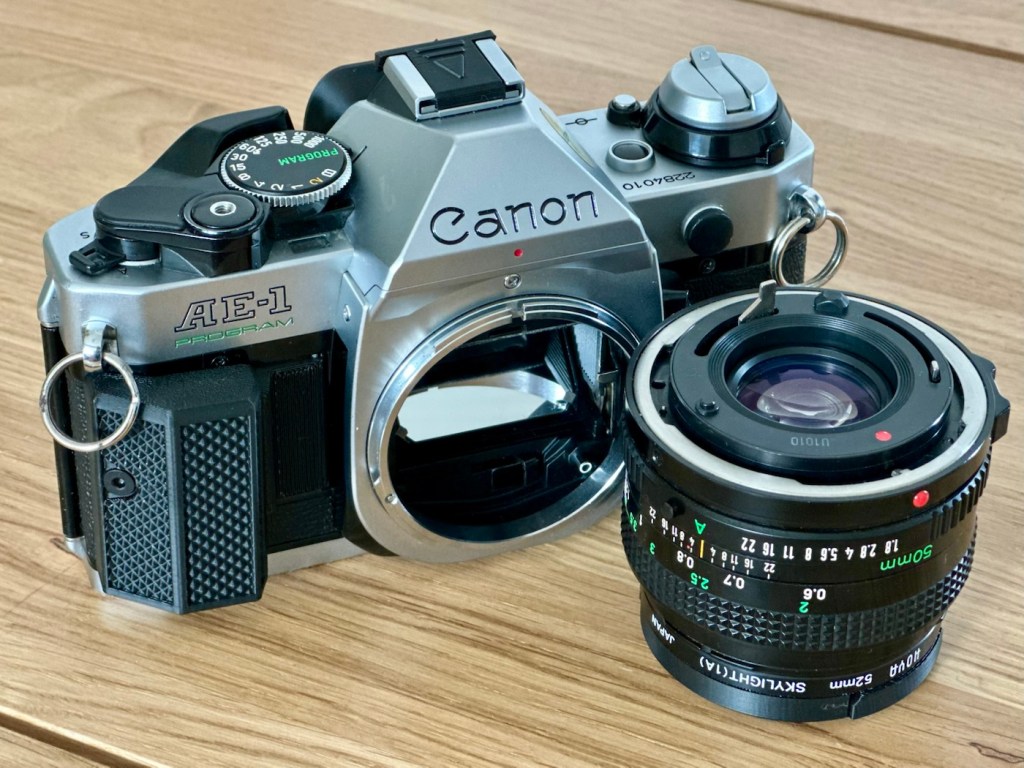
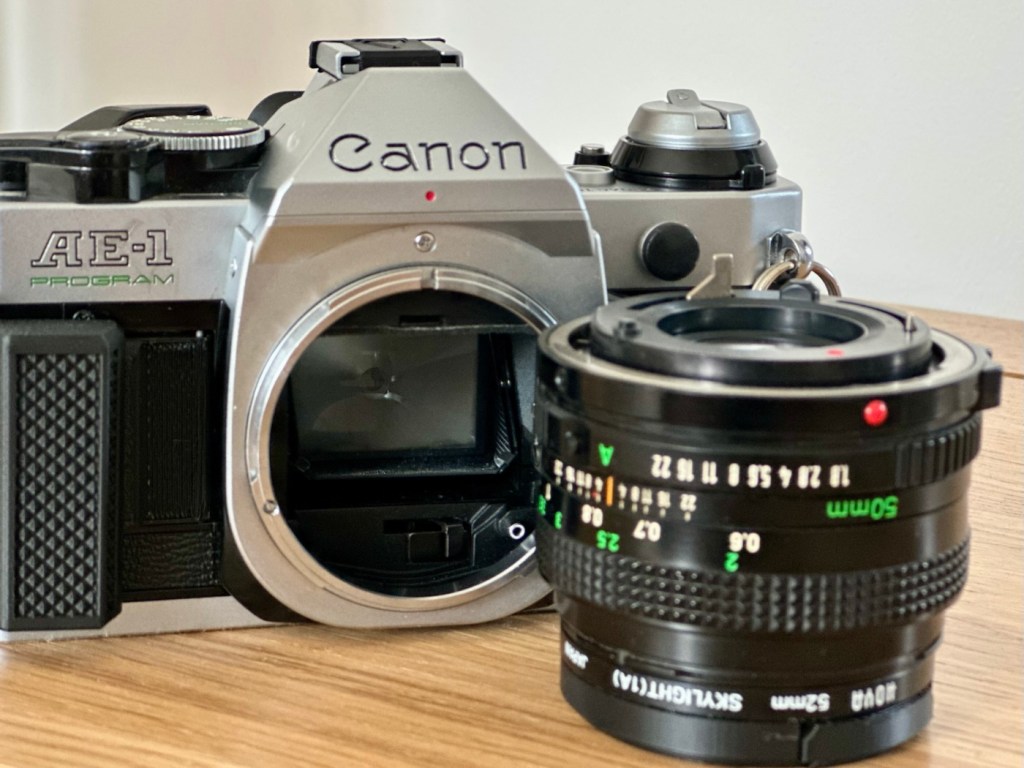
Canon AE1 – Program

I have my final piece of the jigsaw. My sixth, and final camera of the classic Canon “A” series collection

I purchased this camera as part of a job lot of 5 cameras that were faulty, read about that purchase here: More camera odds & sods

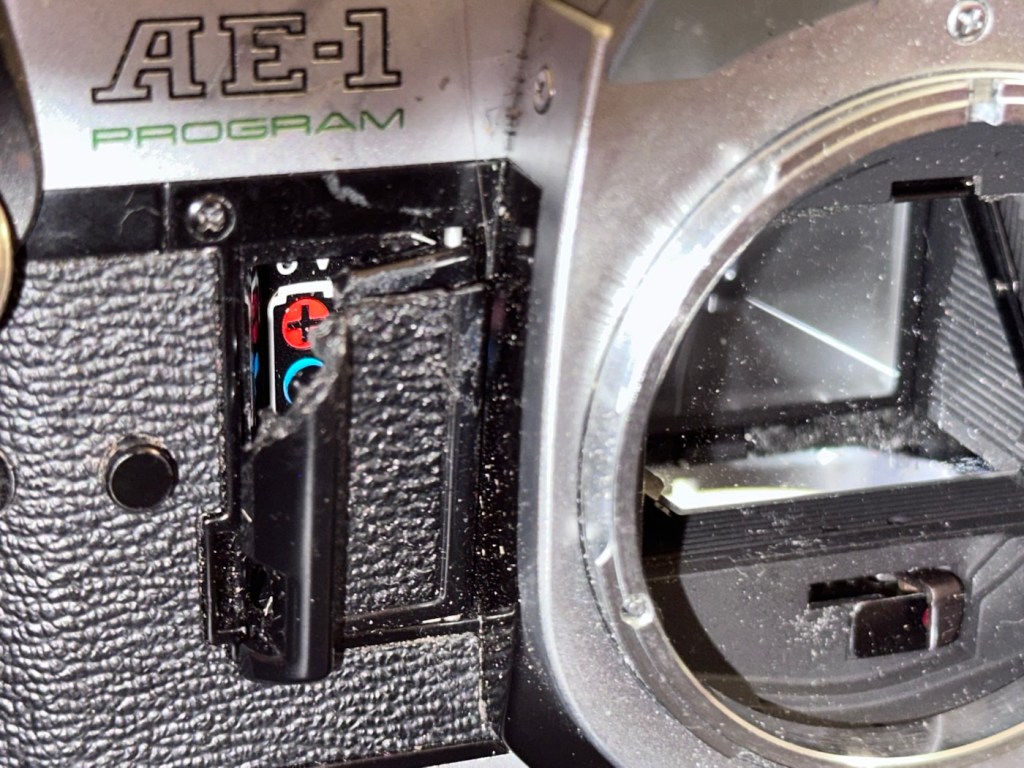
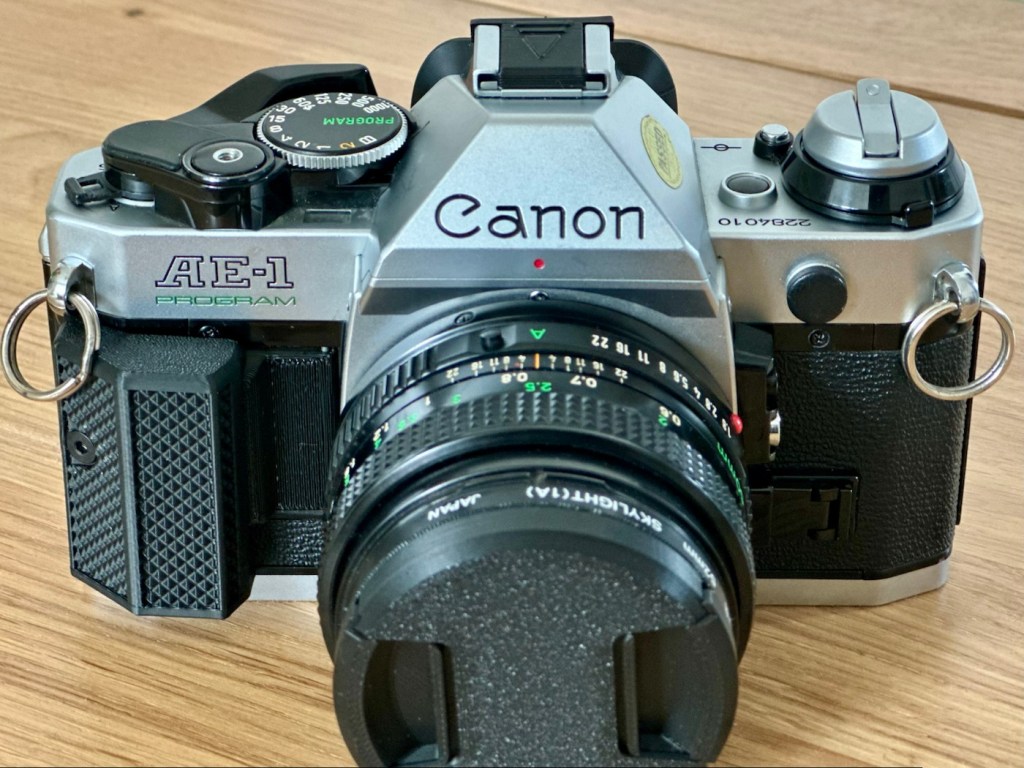
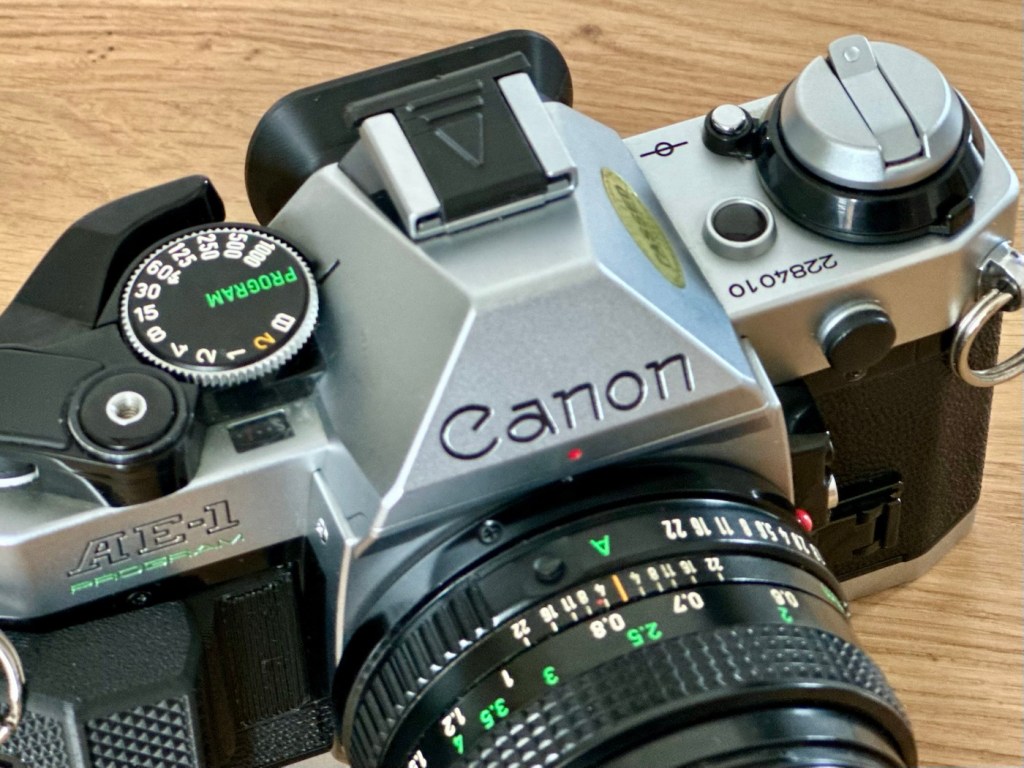
Canon AE1 – Program
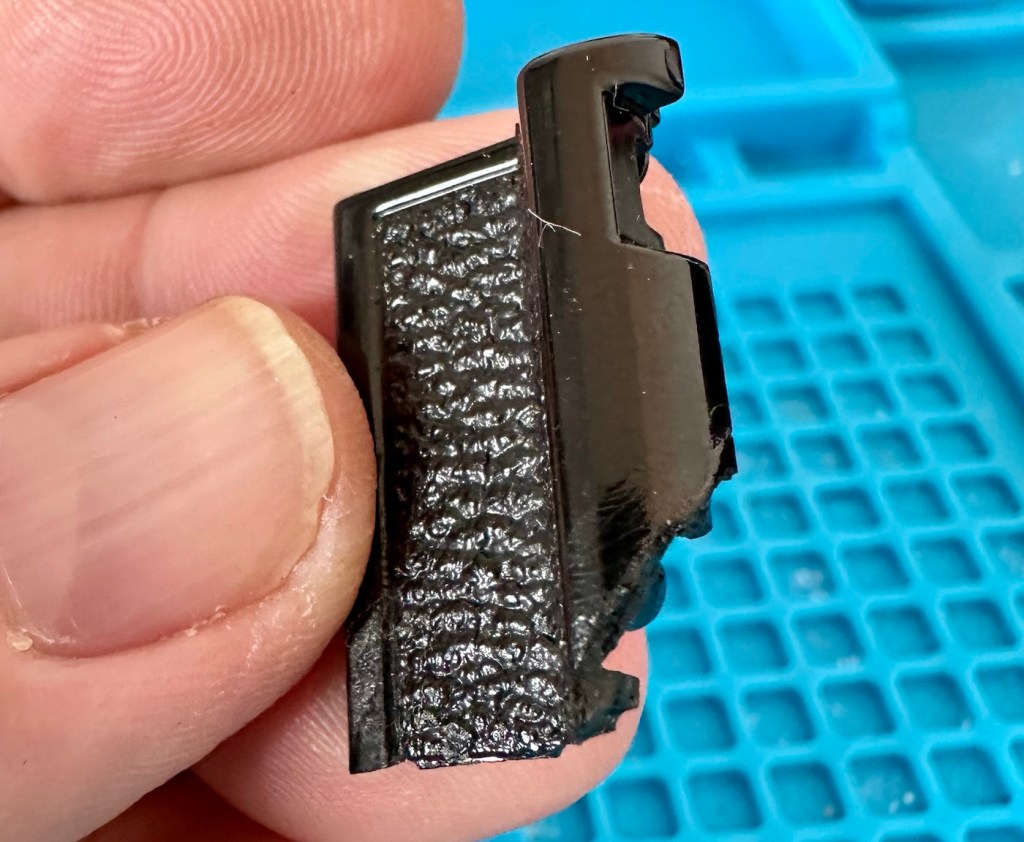
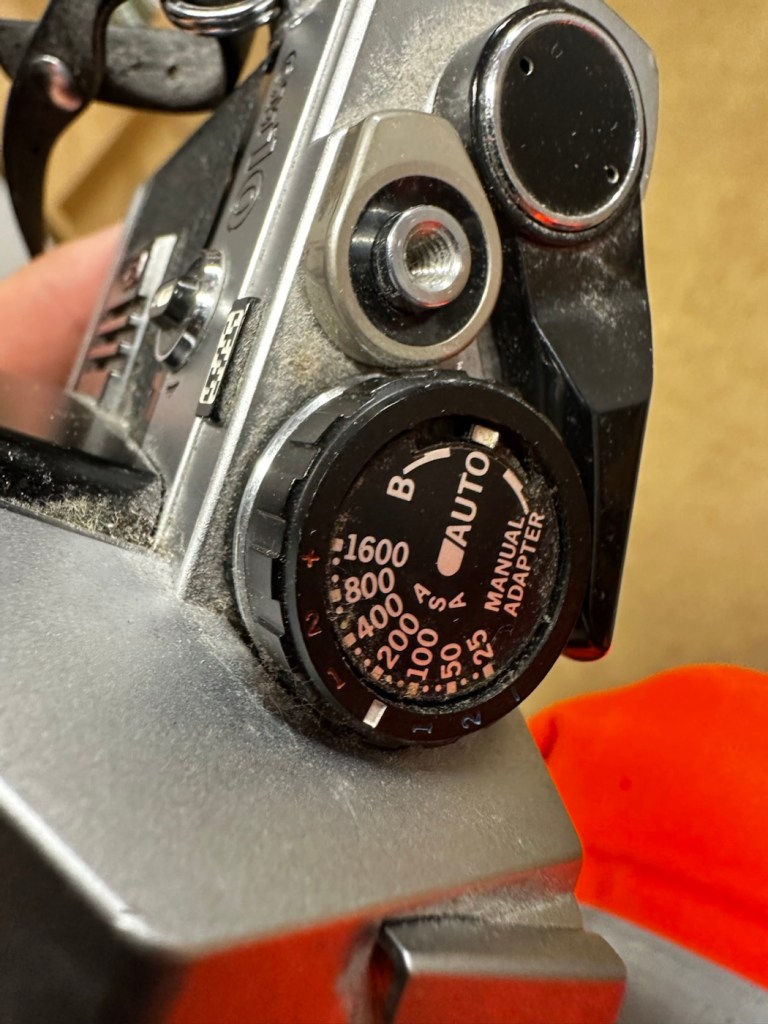
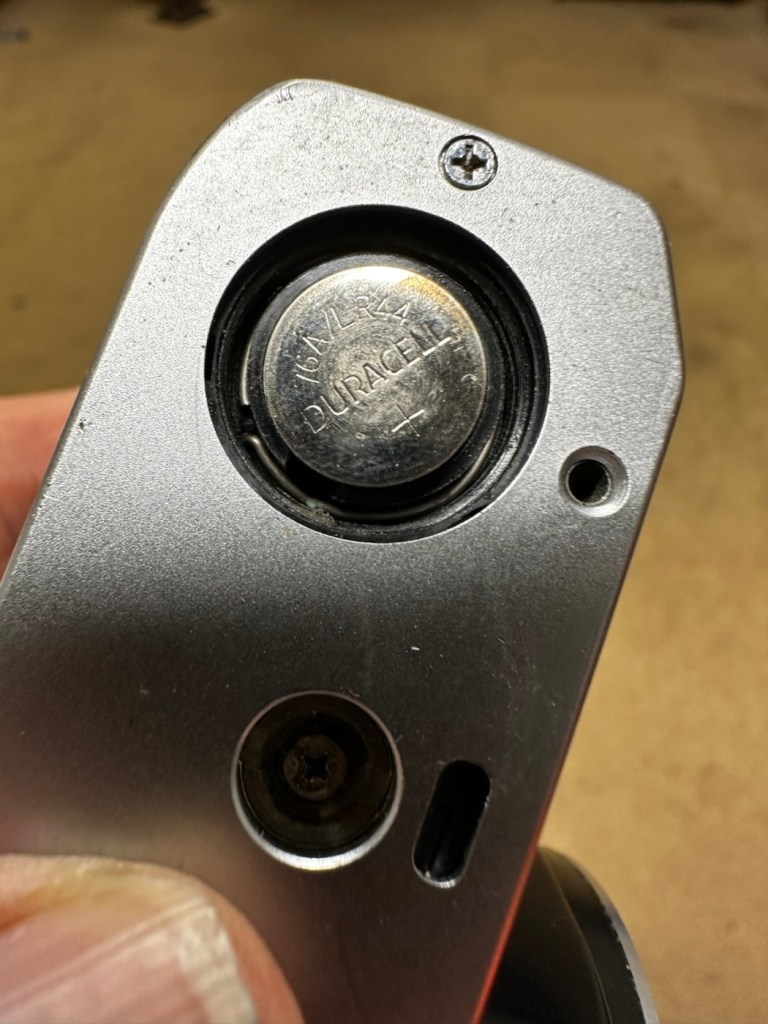
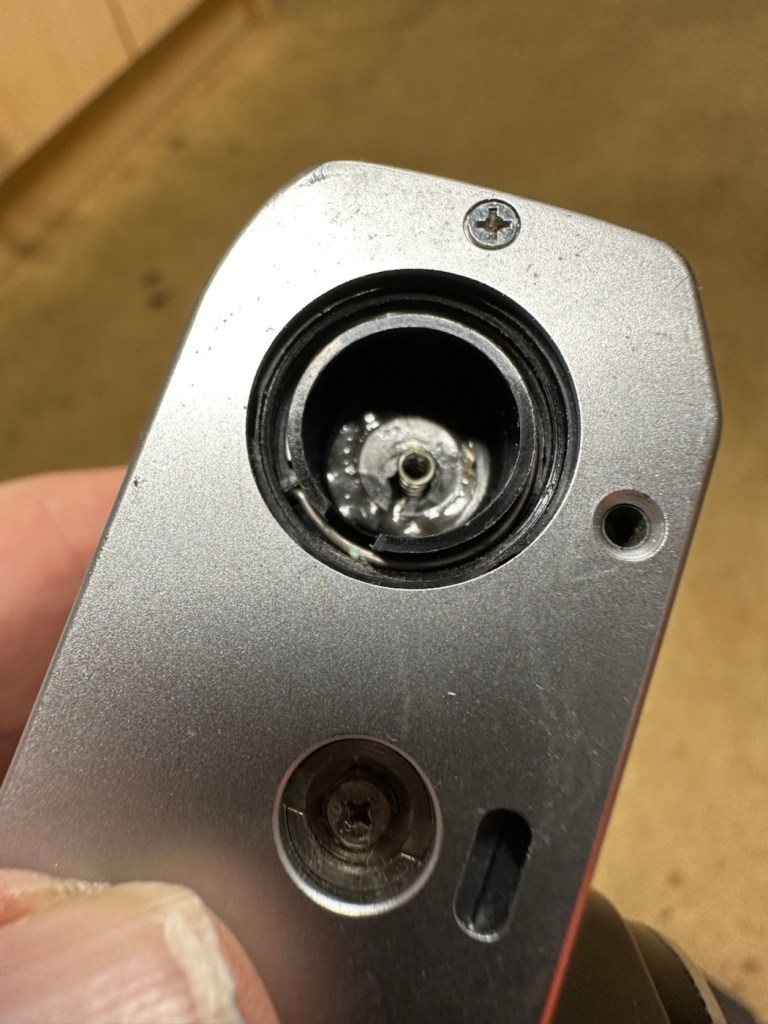
Broken battery door

I’ve been working towards purchasing the entire range of Canon “A” series cameras, and this is the final piece of the jigsaw for me. I haven’t paid premium prices, I have purchased each and every one of them as damaged items and have had to effect the repairs on them to get them working. It’s a wonderful collection of old cameras, all showing their individual battle scars but each performing without fault in taking photographs. What they were designed to do, growing old gracefully and with a now extended life span.
My complete collection

It works out that this camera has only cost me £8:00GBP, and that is a superb price to pay for one of these cameras, even if it was only for parts it would have been a bargain, however these all have the ability to be revitalised and to be given another crack at life. I have done a very brief assessment and nothing appears to be operating as it should be. Electronically this is potentially a very unstable camera, I just need to run a final test on the electrical system. It has two parts that need replacing. There is a small power winder cover that is missing, it’s not important but I will replace it purely for aesthetic reasons. Secondly the battery cover is broken, I do have a 3D file downloaded so I will see how that prints out.

This camera is currently unloved, very dirty and will require quite a bit of work just to bring it up to usable standards. I don’t wish for it to be pristine and at display standards, I want it to be clean and capable of carrying out what it was originally purposed to do, it will be used and thoroughly loved.

Here’s a little bit about the AE1-Program:

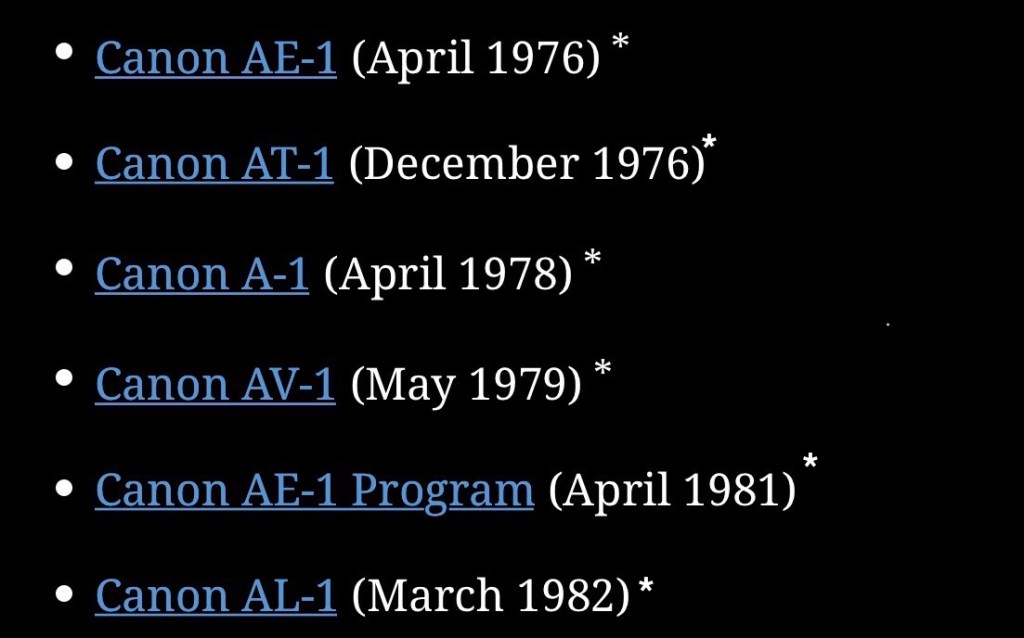
The Canon AE-1 Program is a 35 mm single-lens reflex camera that uses Canon’s FD mount lenses manufactured by Canon Camera (today Canon Incorporated) in Japan and introduced in April 1981 as the successor to the Canon AE-1, five years after that camera’s introduction.  The major difference was the addition of the Program AE mode first seen in the A-1. This mode sets both the shutter speed and aperture automatically—albeit with a slight bias towards the shutter speed setting. The user focuses the camera and then presses the shutter button. For those desiring more control, the AE-1’s shutter priority auto-exposure and full manual modes are still available.

Wikipedia

Repair

The first thing to do is to get the relevant battery in place and to see what does or doesn’t light up or function. These cameras take a standard 6v 4LR44 battery, and I have some more of these arriving later today, these cameras are reliant on that power source to pretty much do everything, so we have to have one in place to carry out an accurate assessment. Once i can see how the electrical system is working I can then make a decision on how to progress.

The battery has arrived and when it is installed, nothing happens. Electrically the camera is dead and requires attention, and that’s not good. The auto, lock, self timer switch under the winder is not moving, and hence the winder won’t wind, and the shutter won’t fire. It’s a very poorly camera. I go to remove the 6v battery and it is extremely hot, I’d suspect very close to exploding, this is not good at all. I’ve put the battery to one side, it’s now obvious that we have a short circuit somewhere causing the battery to overheat.

I have printed off a replacement door and catch. It’s not to the original standard but should do the job, until a quality one becomes available. To replace this door the top of the camera has to be removed anyway, so whilst I’m in there I will try to see if I can find the cause of the short circuit.
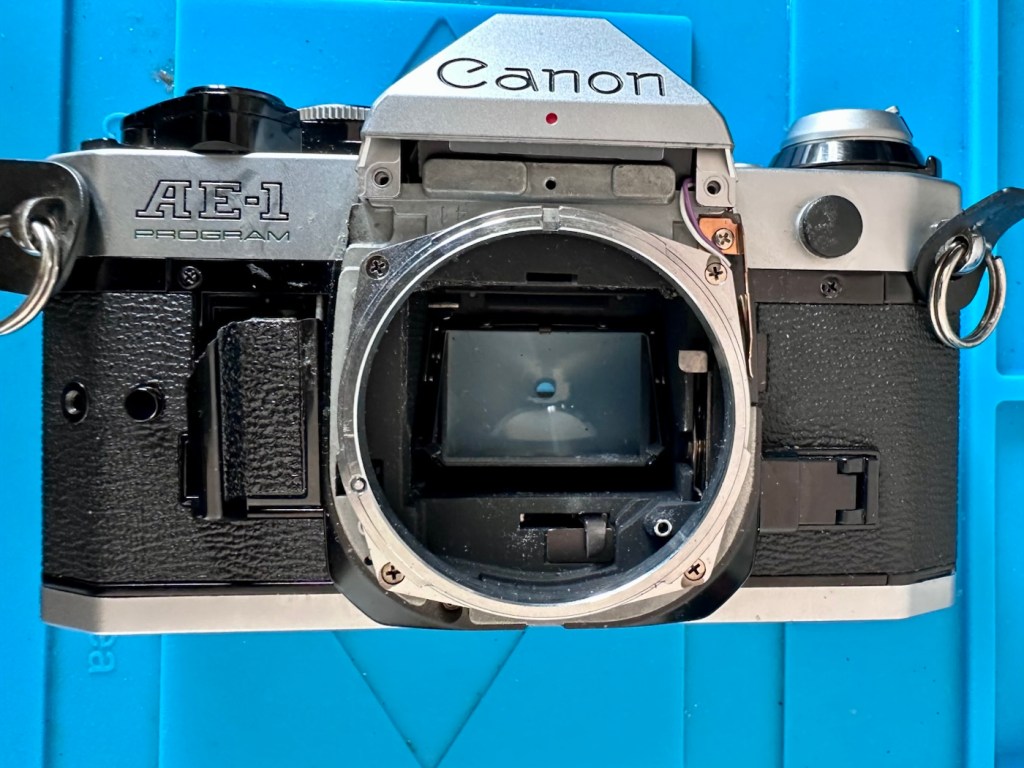
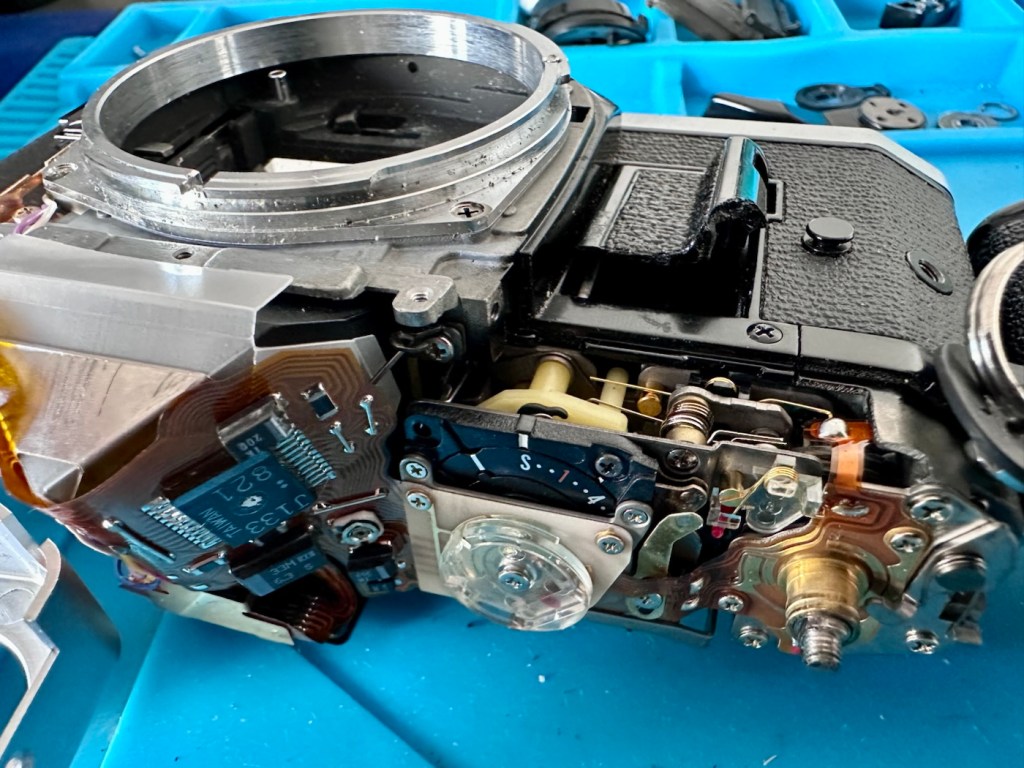
The pin that supports the door has to be pulled up through the mass of electronics to release the old door and the little spring that opens the door.
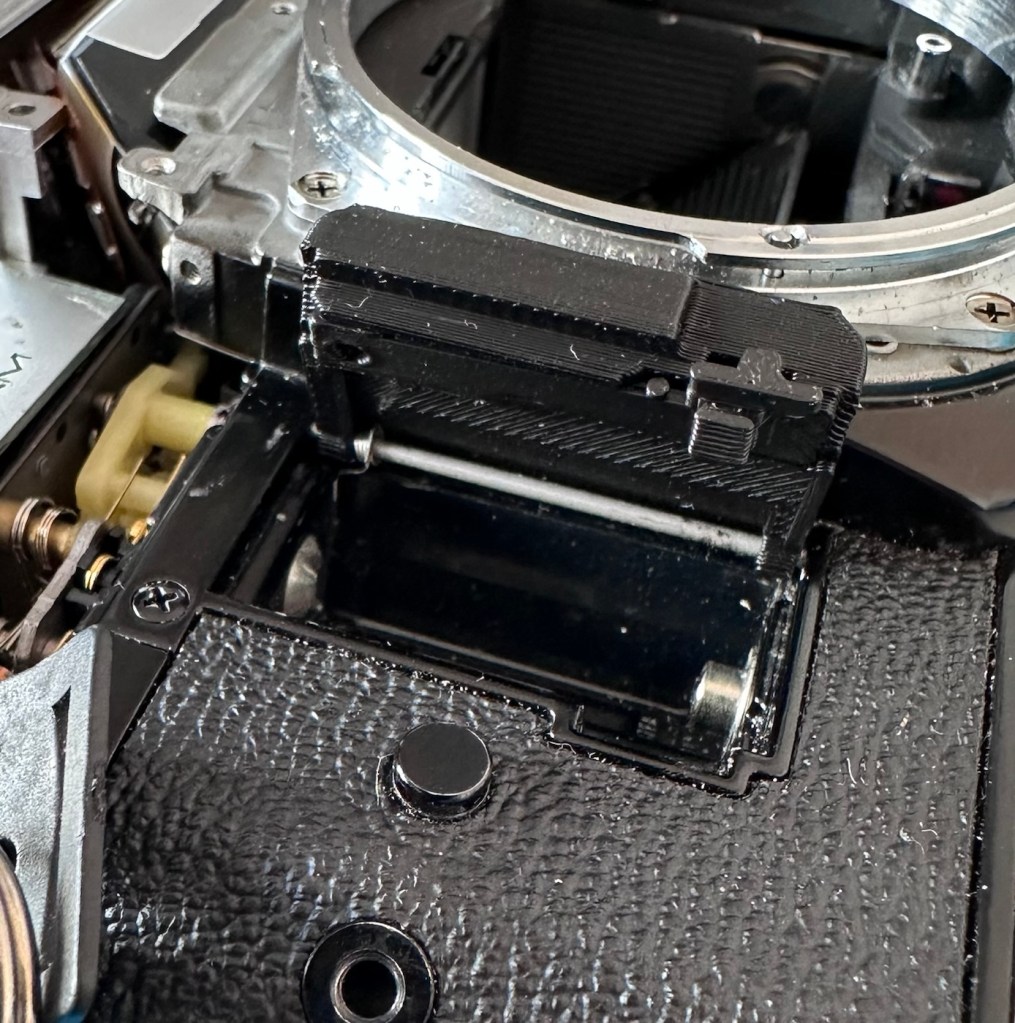
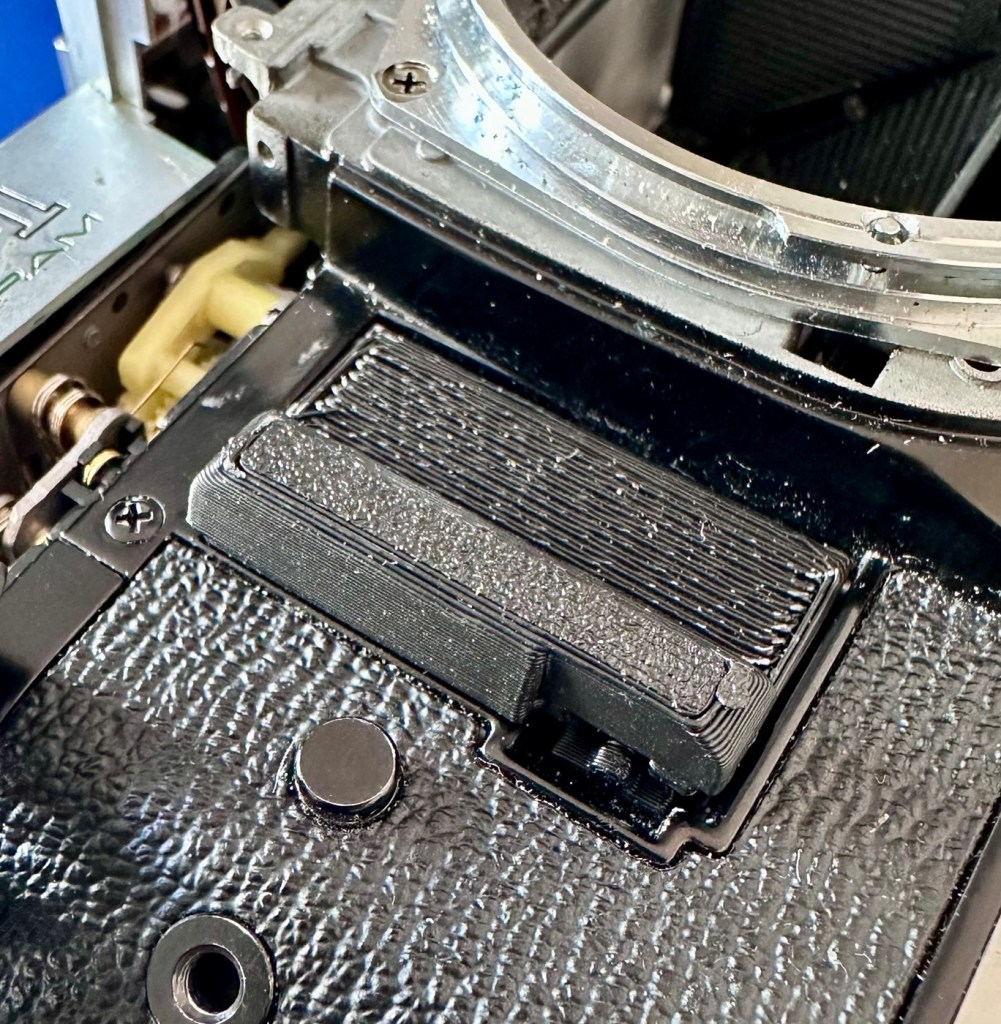
The printed door has cost me approximately 0.22p to print, and considering that Canon no longer produce the door, the options are limited to auction sites that charge horrendous amounts up to £30:00GBP, or the alternative is a 3D printed option of about £15:00GBP. Seeing this camera has cost me £8:00GBP, a layout of 0.22p will do for me just to get this camera up and running. I can always “tart” it up in the end if I choose to. To be honest, if it does a job, if the camera does what it should, then should I really worry about it? Probably not.

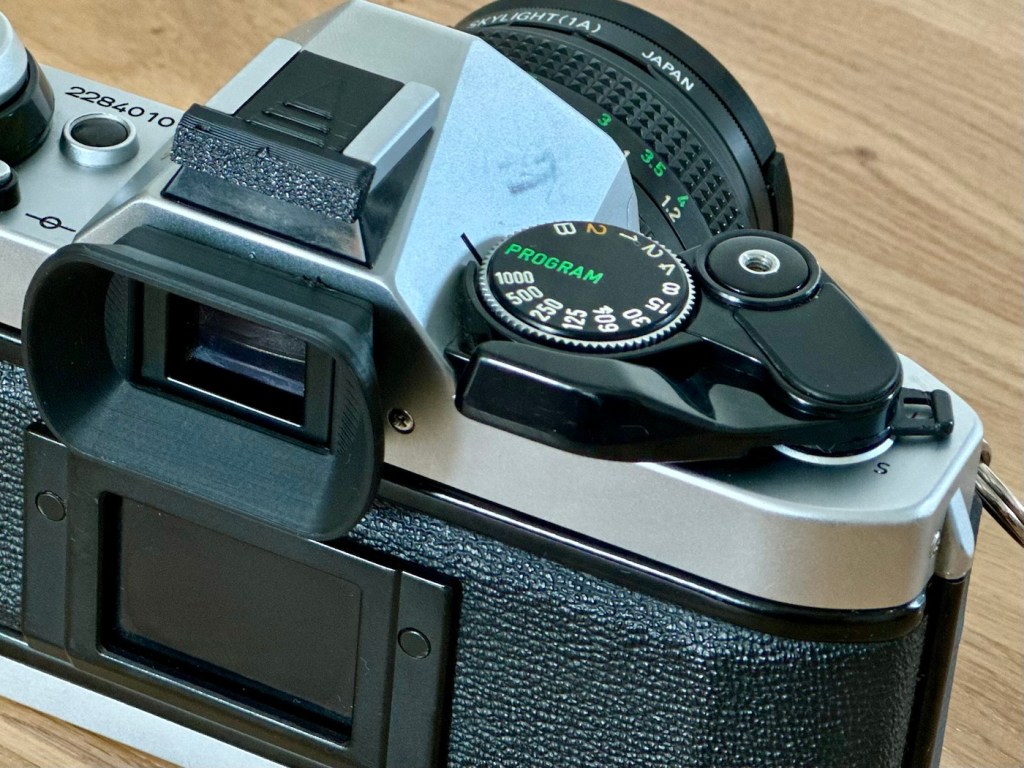
Just for the sake of it I have also 3D printed a speed grip that used to be facilitated on the “A” series cameras. These give a little more security to the battery chamber door, stop the door opening if the catch should fail, and give extra grip to the camera body. And it kind of looks nice so I have printed one out to use. I just need a black M3/8 screw to attach it.
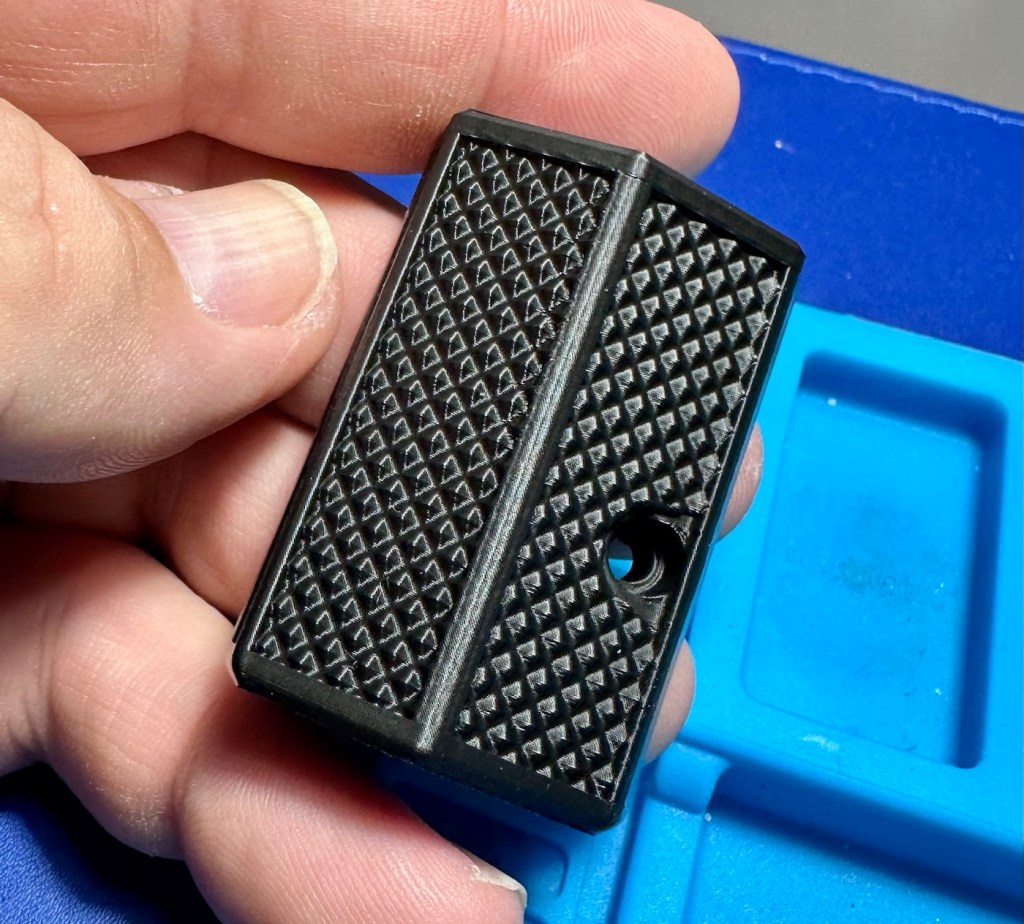
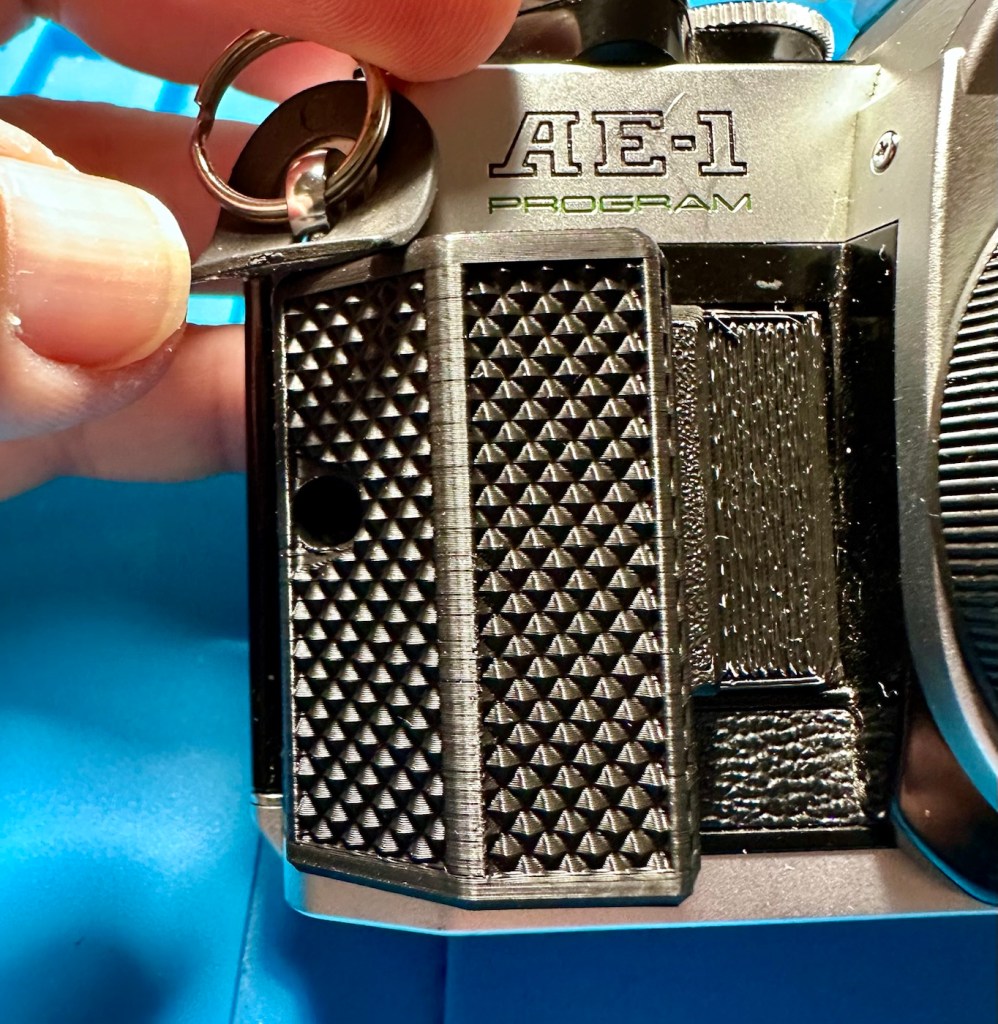
I’ve also printed off a eye cap for the camera. Just because I can to be honest, it just finishes it off in my opinion.
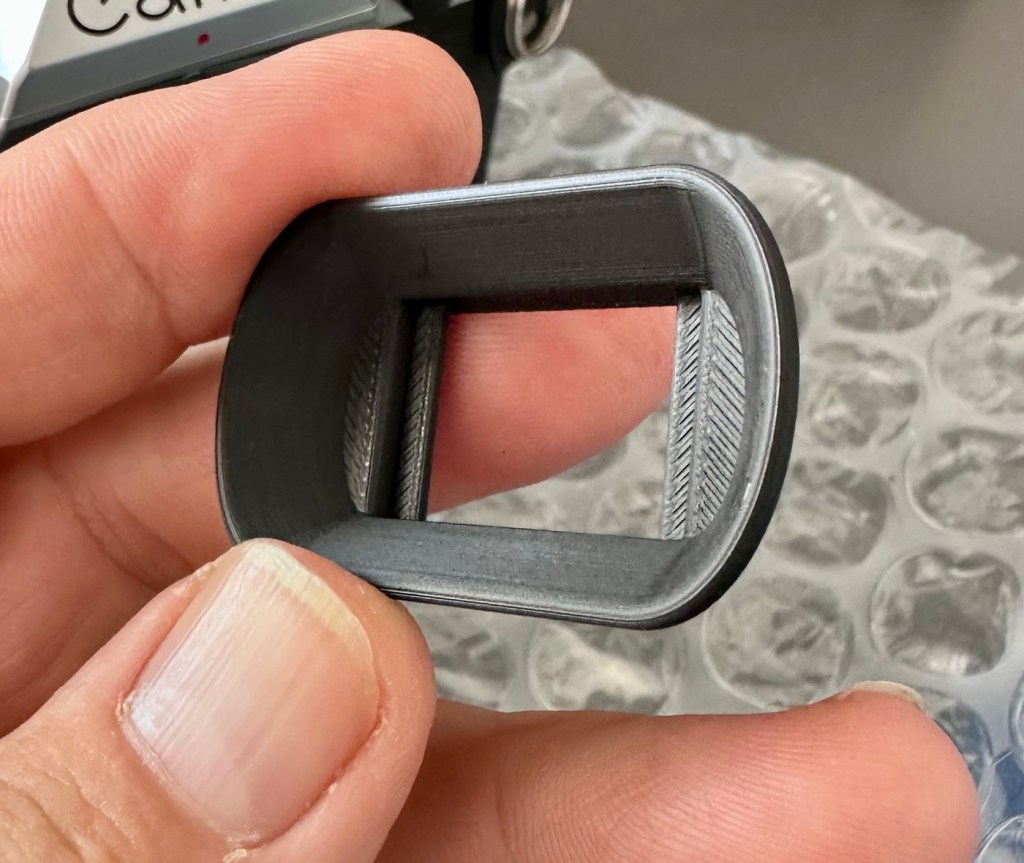
New eye cap

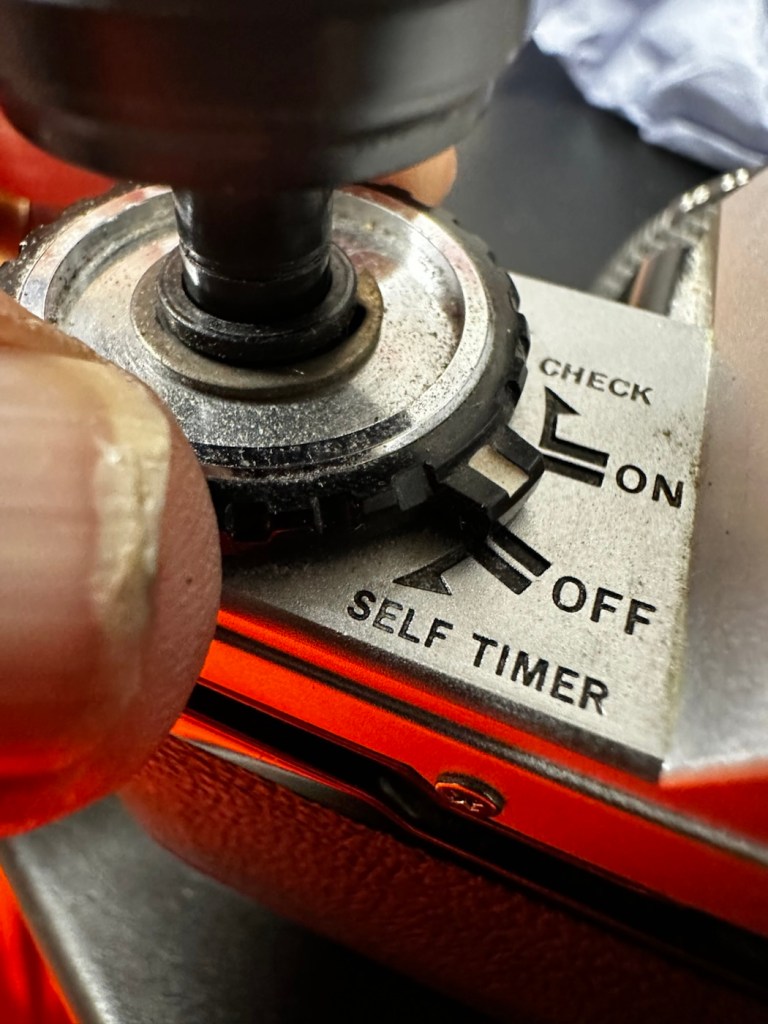
I stated that the switch that puts the camera into auto mode, switches it off and operates the self timer was seized. When the top is removed and all the relevant parts are removed the area in question can then be observed. And there was a problem.

Under the film winder is a small Perspex frame with a spring loaded catch. This operates the three settings “A” – auto, “L” – lock or “S” – self timer. The switch must have been forced in the past, as the metal catch had sprung under the Perspex plate and was firmly wedged between the copper contacts underneath causing the short.
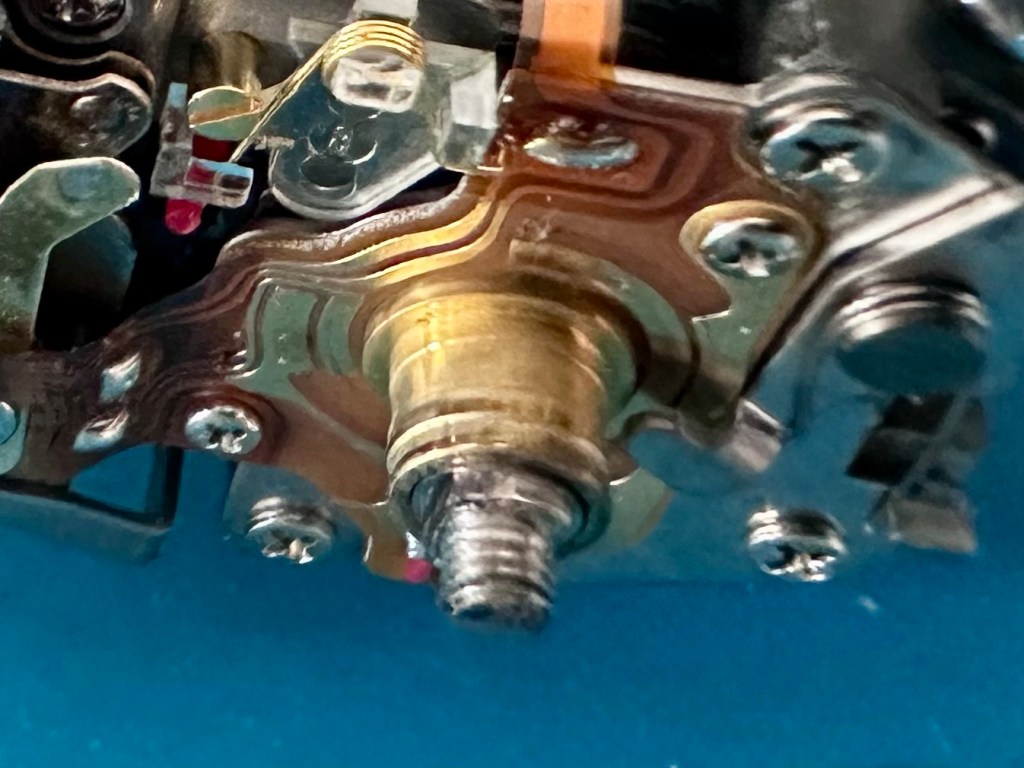
The copper traces under the Perspex

The metal catch had to be coerced back into position, lifted slightly to sit comfortably back in the position it had previously occupied. A quick test confirmed that the switch was now behaving how it should, and clicking firmly throughout its range.
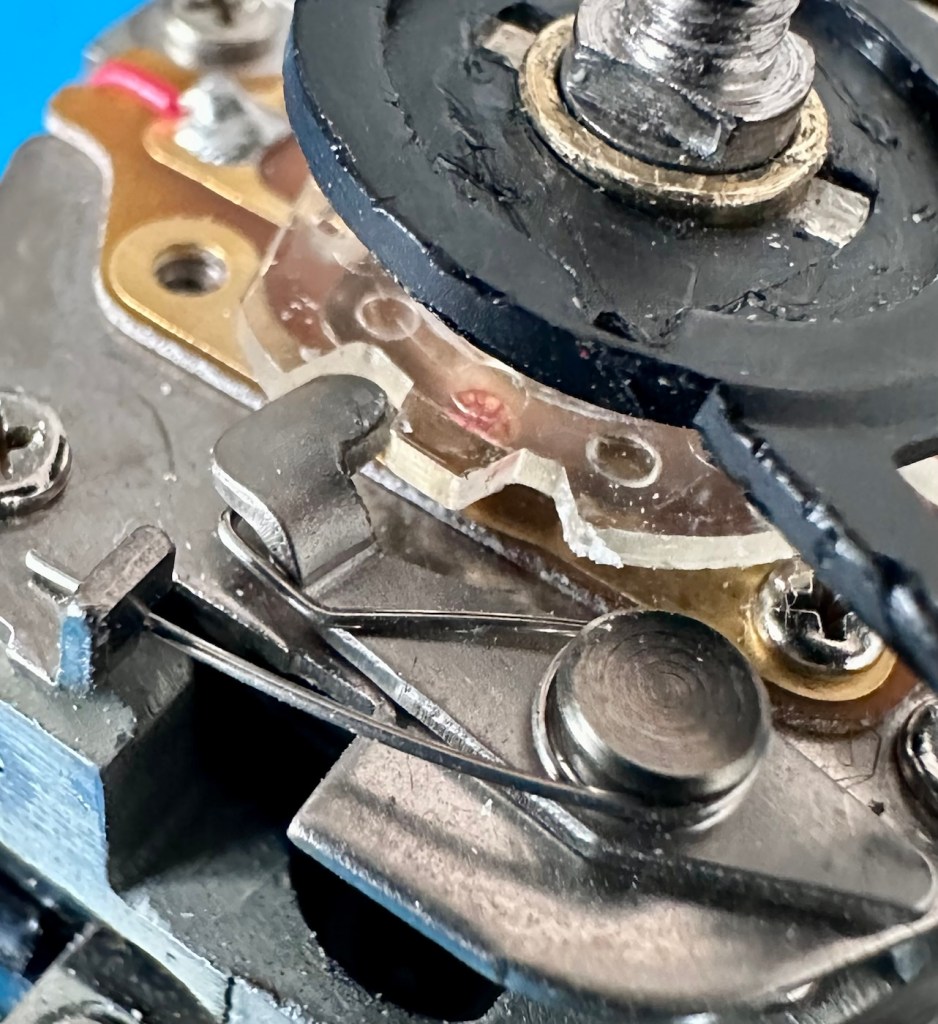
The selector switch under the film winder in the correct position

The original battery that overheated was now showing as severely depleted due to the earlier problem, this has had to be disposed of, and so into the battery recycling receptacle it goes.

With the camera now reassembled I can try a new battery, and the result is the polar opposite of what occurred earlier. Straight away the shutter fired, when I put the switch into auto mode, the shutter could be fired again in fact it could be fired repeatedly. The light meter inside the viewfinder is working and showing lights. When in auto mode, and the battery check button is pressed you hear an intermittent sounder showing the electrical circuit is now operational, the more frequent the sound the healthier the battery is. When in self timer mode it didn’t work, it should beep and after ten seconds should fire. Hopefully it’s just dirty contacts, but none the less it will need looking at next time I take the top off. And all the while the new battery has remained cool with no temperature change. We have found the short circuit and the basic camera operation has been restored.

One thing I noticed with the shutter working is that there is quite a “Shutter cough” often heard on these older unloved canon cameras. Not a real issue, this will mean further dismantling of the camera to get to the shutter area for a little clean and some light lubrication.

So, let’s deal with that little “Cough”….open wide now!

I’m going to approach this issue by going in through the base of the camera, here I can deal with two issues at the same time. I suspect someone has been in here before me as there is only one screw securing the base when there should in fact be three. I will get these replaced now as I do have a fairly good supply of spares in stock.

This is the magnet coil, it’s known to get dirty after time causing issues such as a continuous wind with no mirror movement.
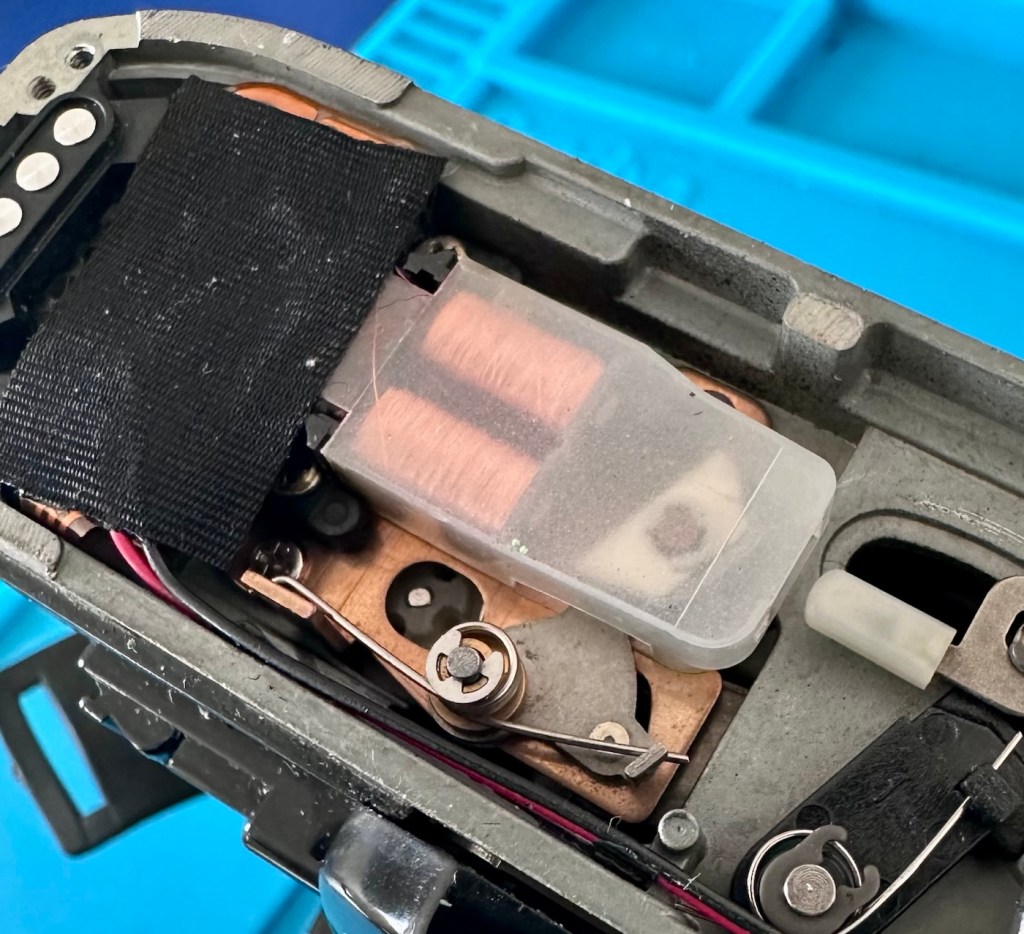
Magnet coil

This camera doesn’t have that issue, but because I’m in here it’s a simple case of removing two screws, the casing and then just clean the magnet and coil contacts with some IPA.
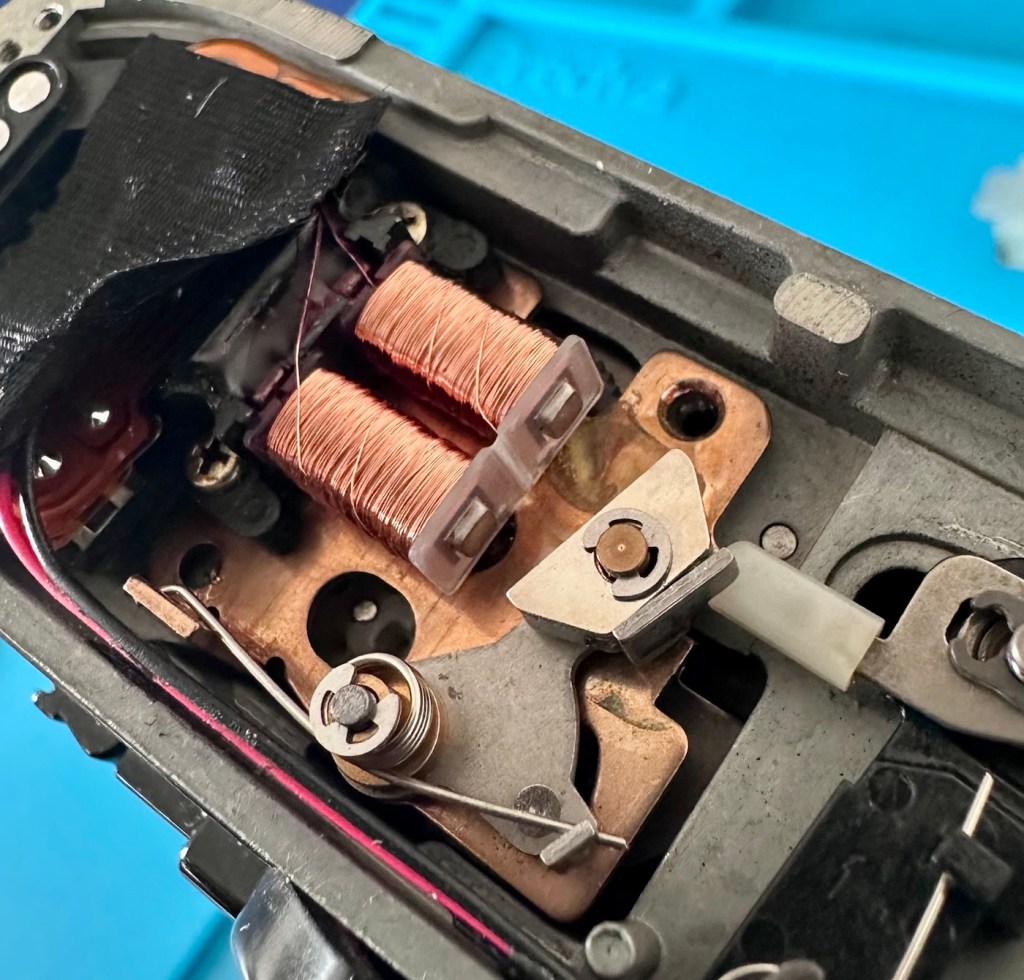
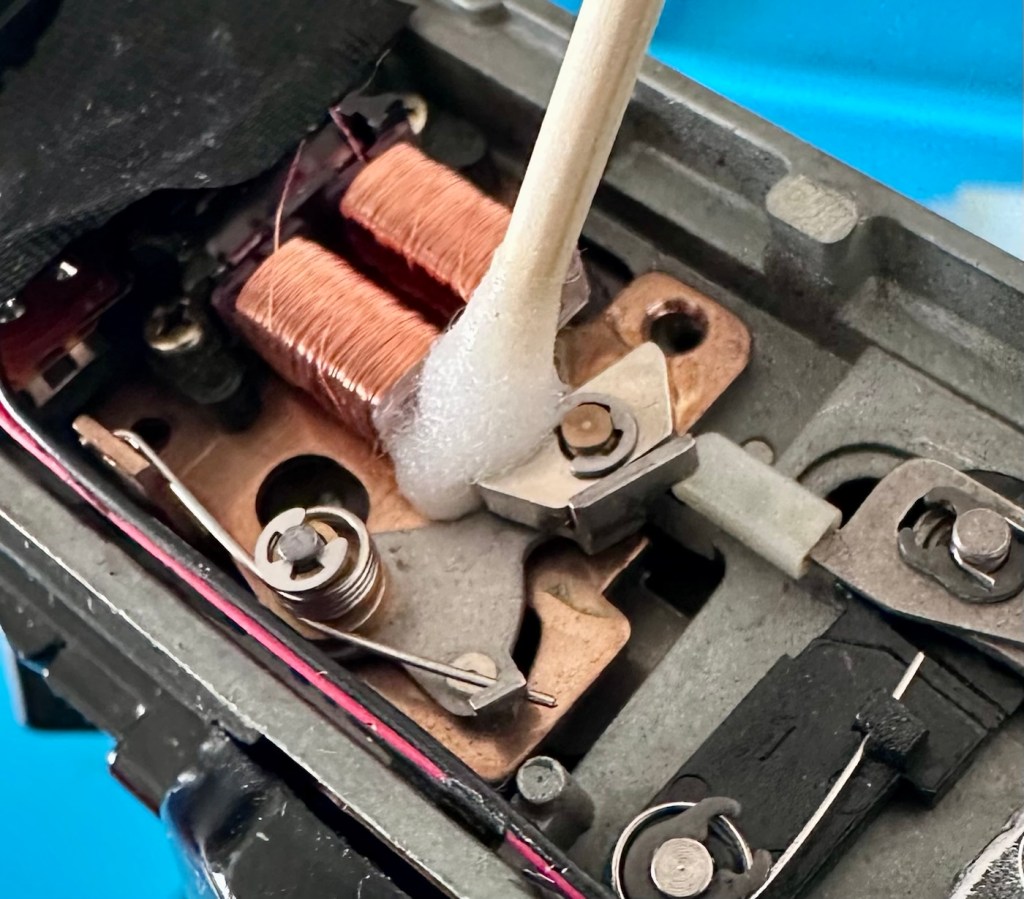
That done, the plastic case is put back on, and the two screws put back into place. Simple job done, it’s future proofing the camera against this issue ever occurring. A blow through with an air canister and a little light lubrication of moving parts in the area and then we can move onto the next issue I want to address.

I’m going to attempt a shortcut with my oiler pen to see if I can deal with the camera cough without going too deep inside the camera. With the long needle of the oiler I may be able to reach deep enough into the internal workings of the camera to oil up the offending cogs and levers. If it doesn’t work then I will have no option but to open up the camera and get inside. It’s worth seeing if I can get the shortcut to work, it’s not a permanent fix but might buy me a year or so of cough free operation.

I’ve left the camera overnight for the very limited amount of clock oil I used to get into all the nooks and crannies, and I’ve checked when I got back home from work, and I’m pleased to say it’s has worked perfectly. Have a look at this little video below that shows how it sounded with the cough, and then after treatment.

Before and after cough

Now with the cough issue sorted it’s time to go back to see if we can address the self timer issue. With the base now secure with all its screws (I’ve replaced the two missing ones) it’s time to get the top off again and have another look around.

Inside the camera just below the wind on lever is the mechanism that operates the selector lever. There are four tiny copper contacts that connect with the copper circuit just below. One of these four contacts had been crushed to a level where contact was no longer made with the circuit board below.
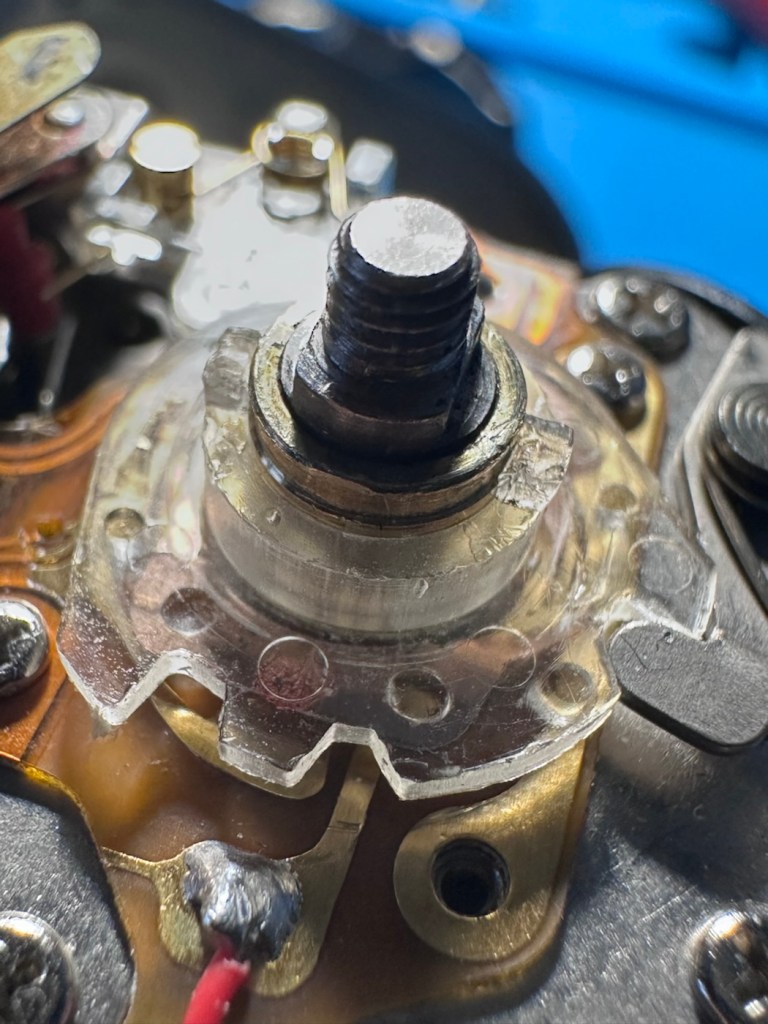
Copper based circuit board and copper contacts under this acrylic selector

Using a small set of tweezers, I was able to bend the delicate copper contact back into shape allowing it to once again make a connection with the contacts on the circuit board. I’ve also cleaned all points of contact with IPA to ensure all surfaces were clean. A quick test at this point proved the circuit, I was now able to reassemble the camera yet again. Prior to this though I gave a good blow through the circuitry with some compressed air before sealing the top of the camera back in place.

The self timer is now fully operational.

Self timer now working

The major issues have now been addressed. Let’s get on with the bread and butter items.

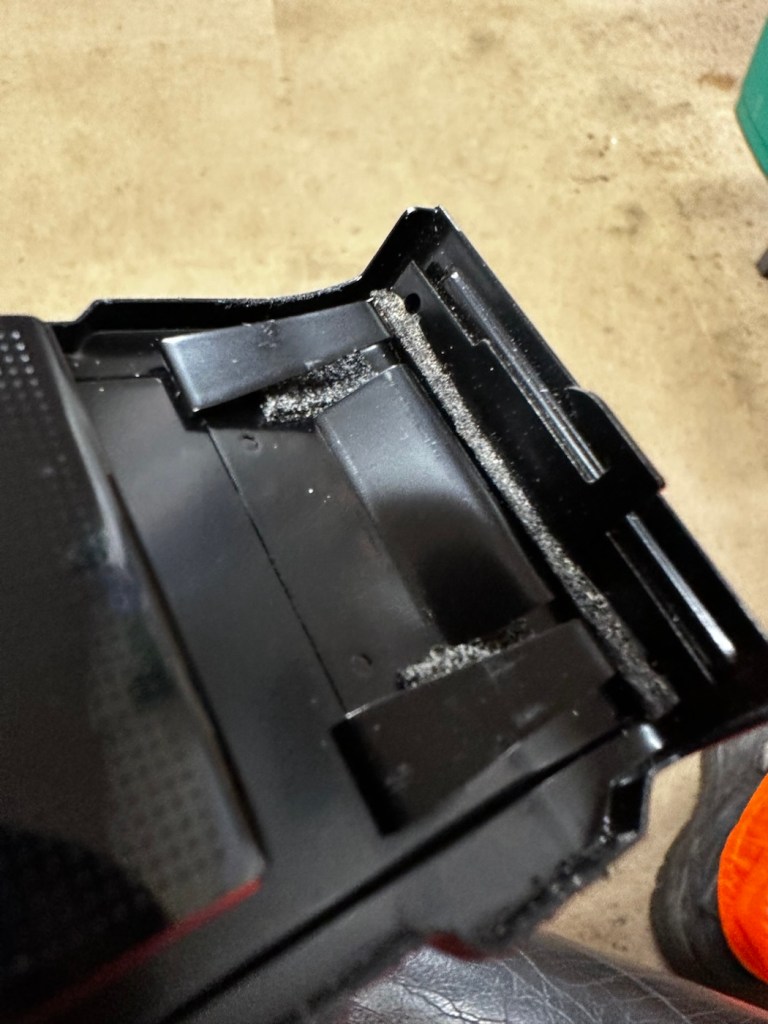
The light seals including the mirror bumper were in a very poor state and had to be removed. This took a lot of patience as the felt had broken down into dust and clumpy particles. I used IPA to soften the old adhesive and probably used about a dozen cotton buds to remove all the debris. The thing with cleaning these areas is when you think it’s clean, clean it again, and once more for luck. In theory cleanliness here is your friend as it helps you through the next stages immensely.
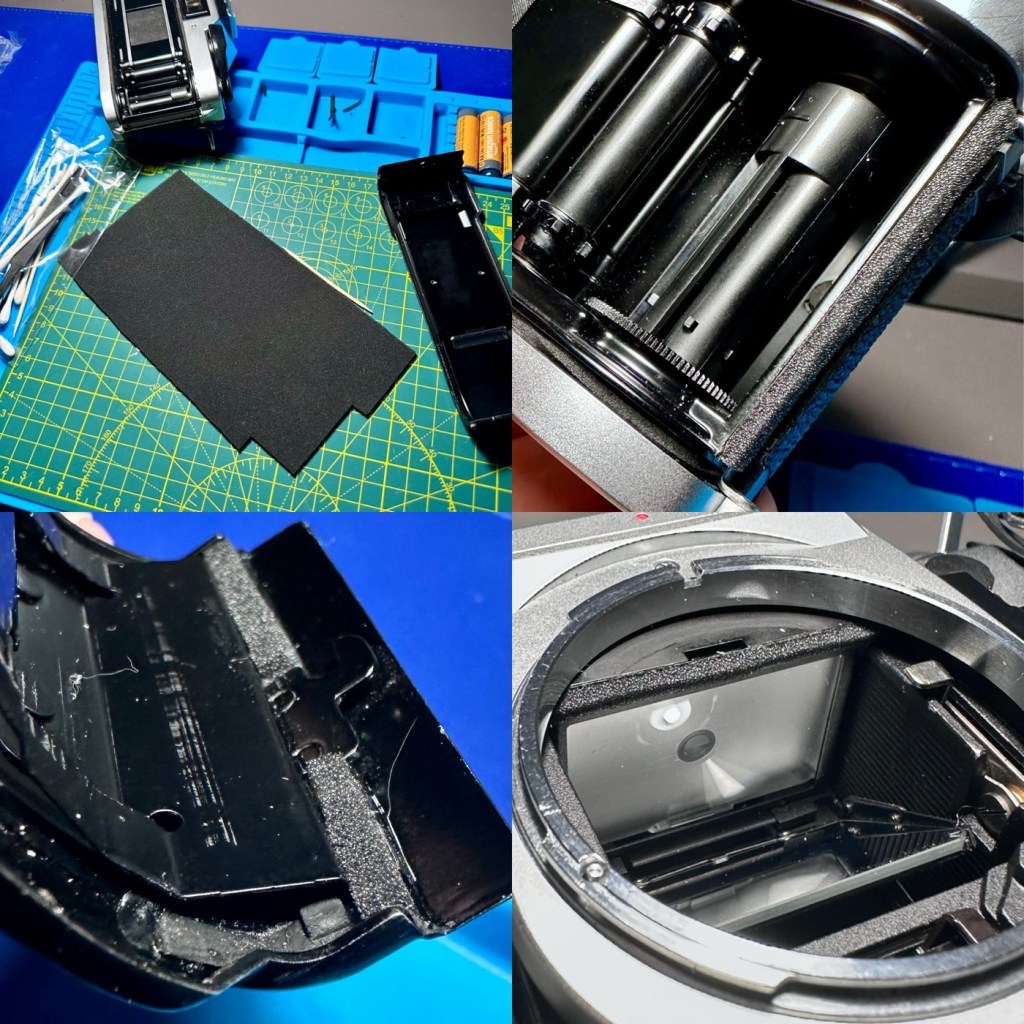
New felt and light seals

Once all the old felt and seals are removed, and dried, I can cut the new seals to size and get them installed. This has been completed and the new seals have gone into place without issue. Personally for me, this is the most boring but essential task in restoring old cameras. It’s one of those tasks you put off until the end as it is so fiddly and has to be just right.

With the light seals now complete, the last task now is to give the camera a thorough clean.

Result

A buff of the leatherette, and a good polish of the metal work and she is looking resplendent. A new quick grip, hot shoe cover and battery door and the look is complete. My £8:00GBP cast off, dirty, damaged and broken camera is now looking a lot healthier and is now in a good working order.
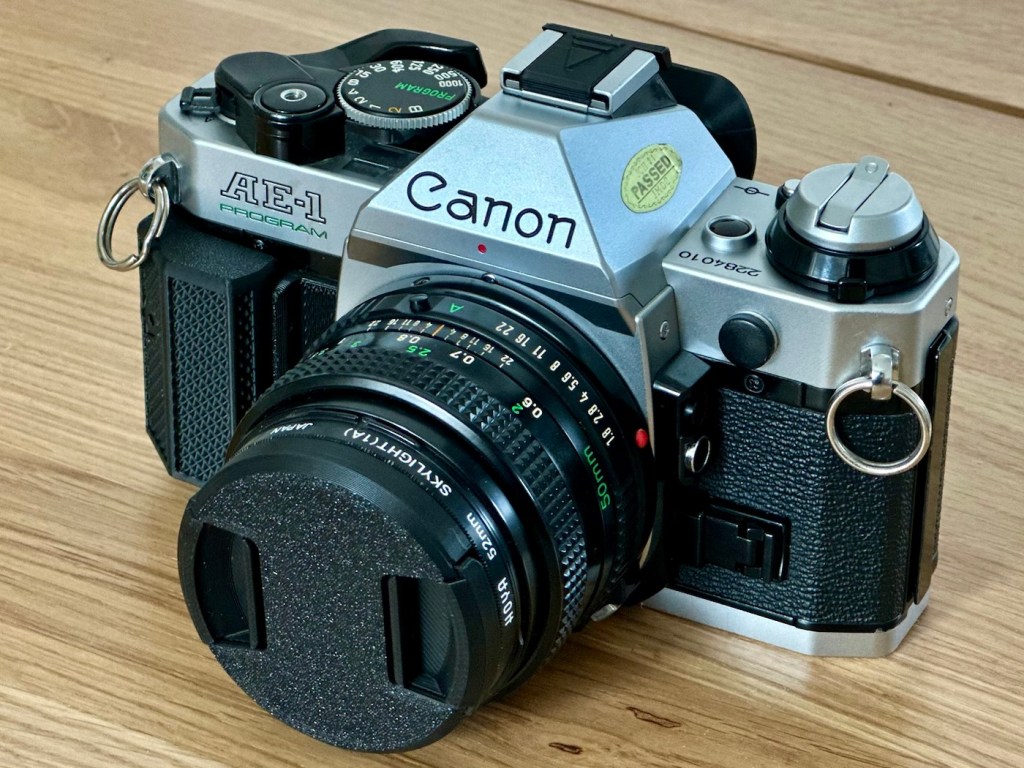
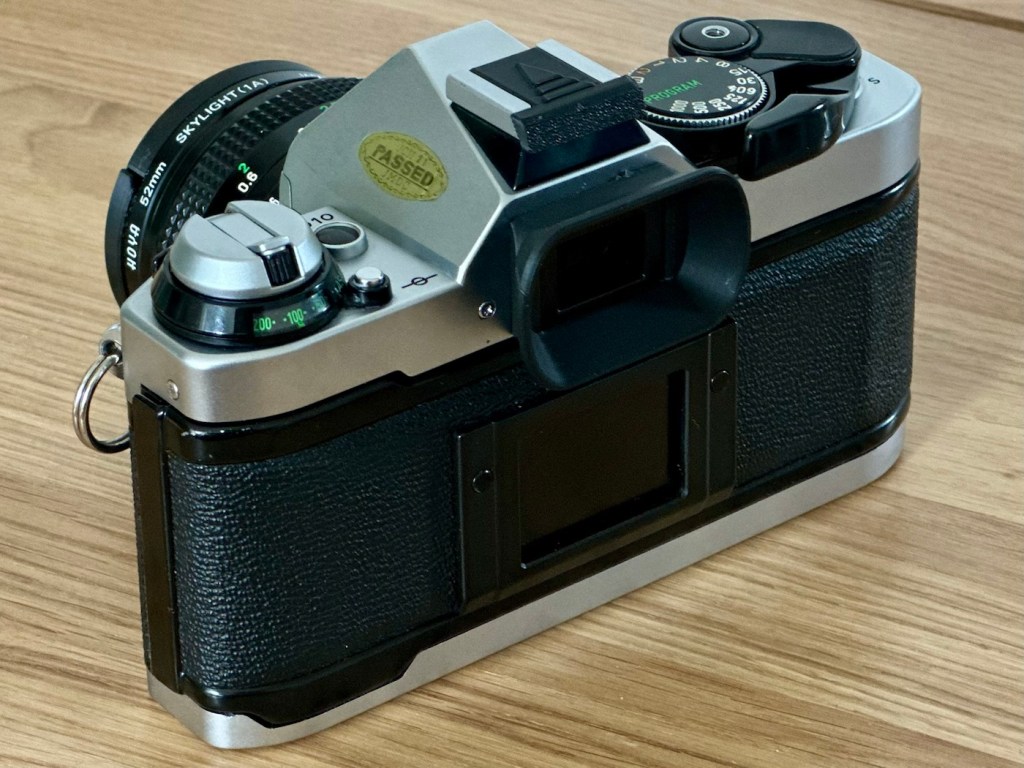
I’m awaiting a roll of XP2 black and white film to arrive, and that will be the test film for this camera. I’m probably going to feature it in my weekly 7 days and 7 photos series at some point. I will post a link to that post when it occurs.

It’s been a long time bringing this camera back to life but I’m so pleased at how it has gone. These “A” series cameras will always be my favourite because of the place they have in my photographic past. I have a few that I have been working on, but this was the one that actually completed my collection. I now need to find a suitable way to display them all, rather than leave them packed away in storage.

Thank you for passing by, as always it is very much appreciated.

Stay safe.

Olympus OM10

Always liked and wanted an Olympus OM10. 46 years later I now have one. Of course, it needed repair.

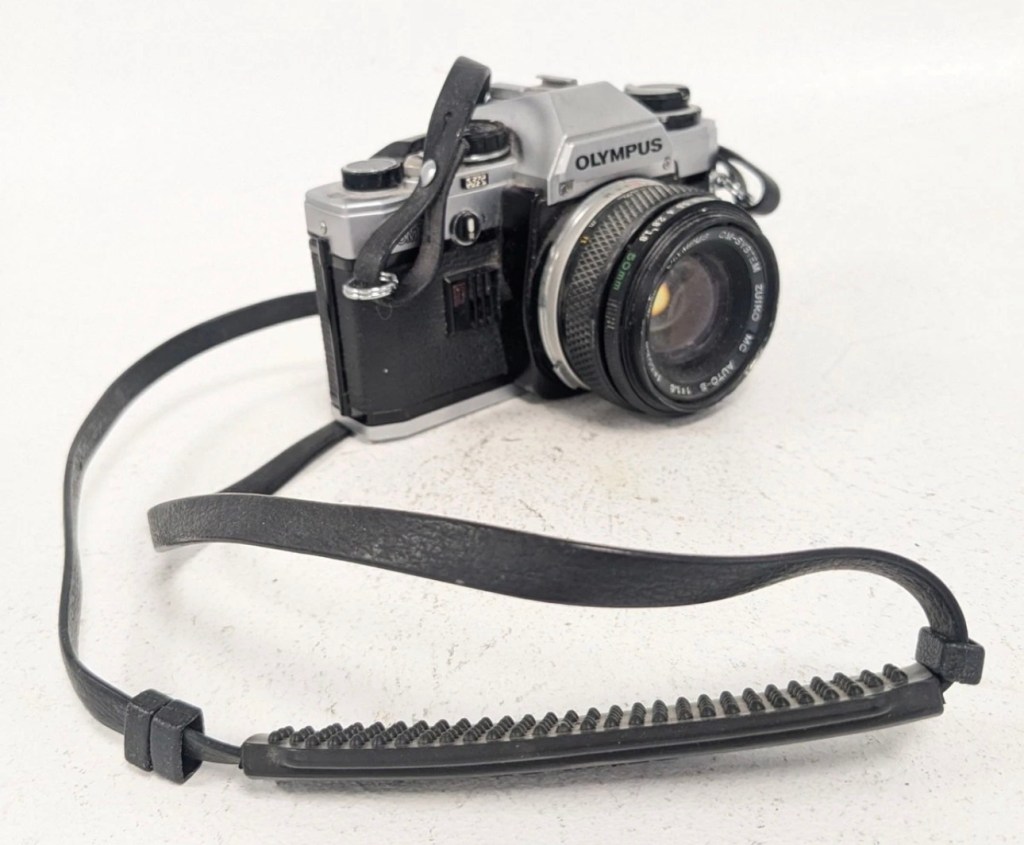
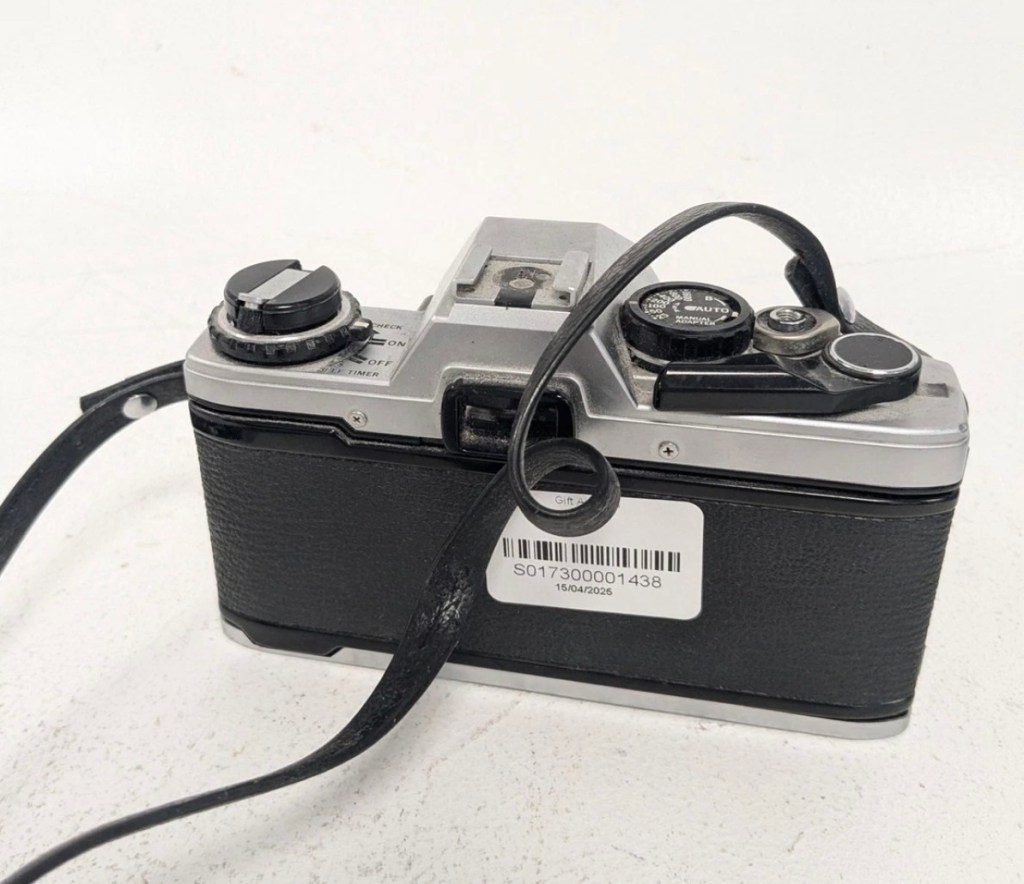
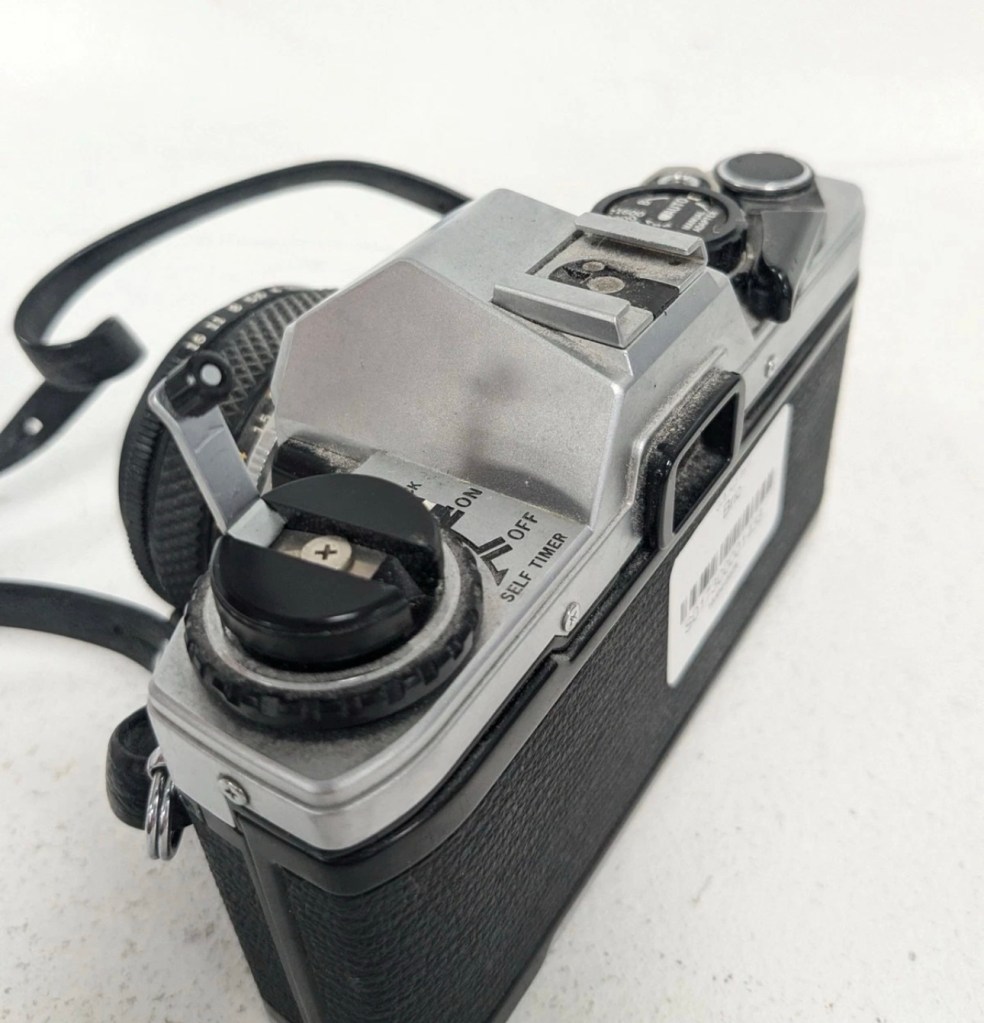
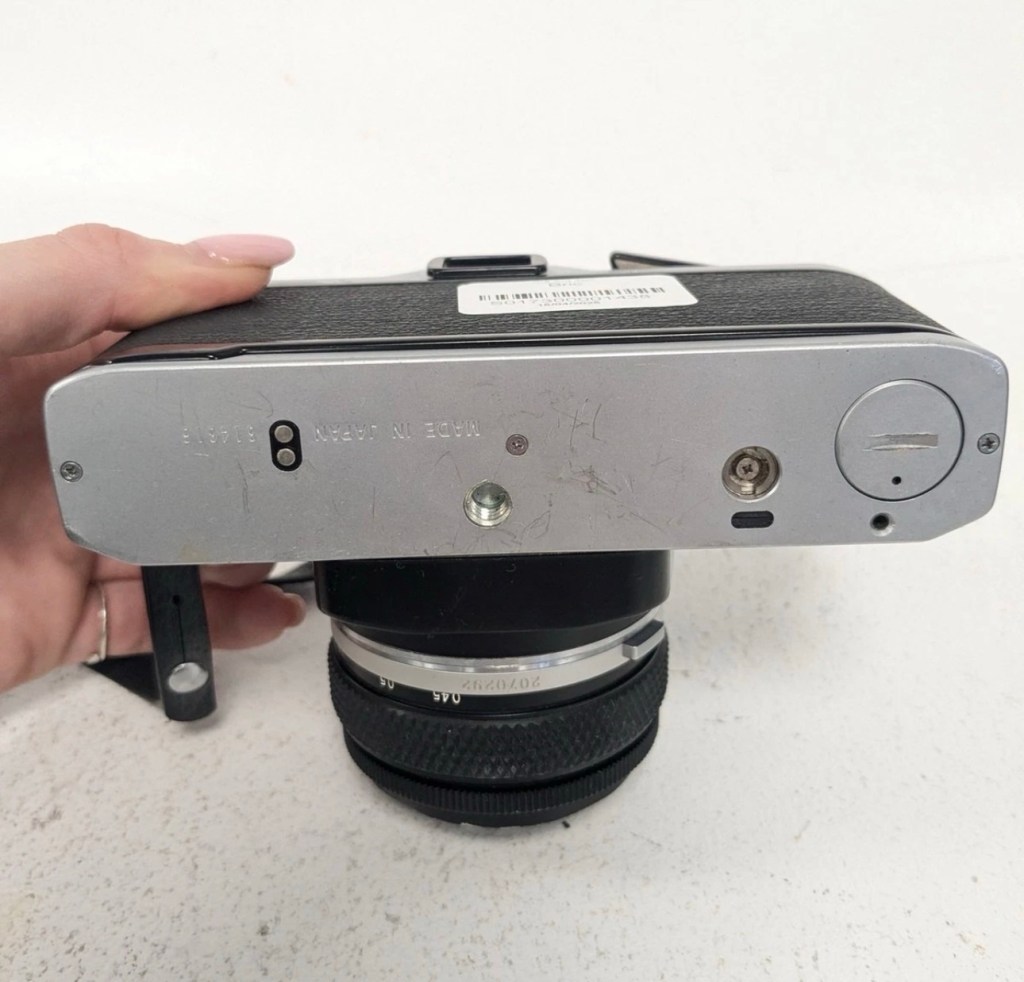
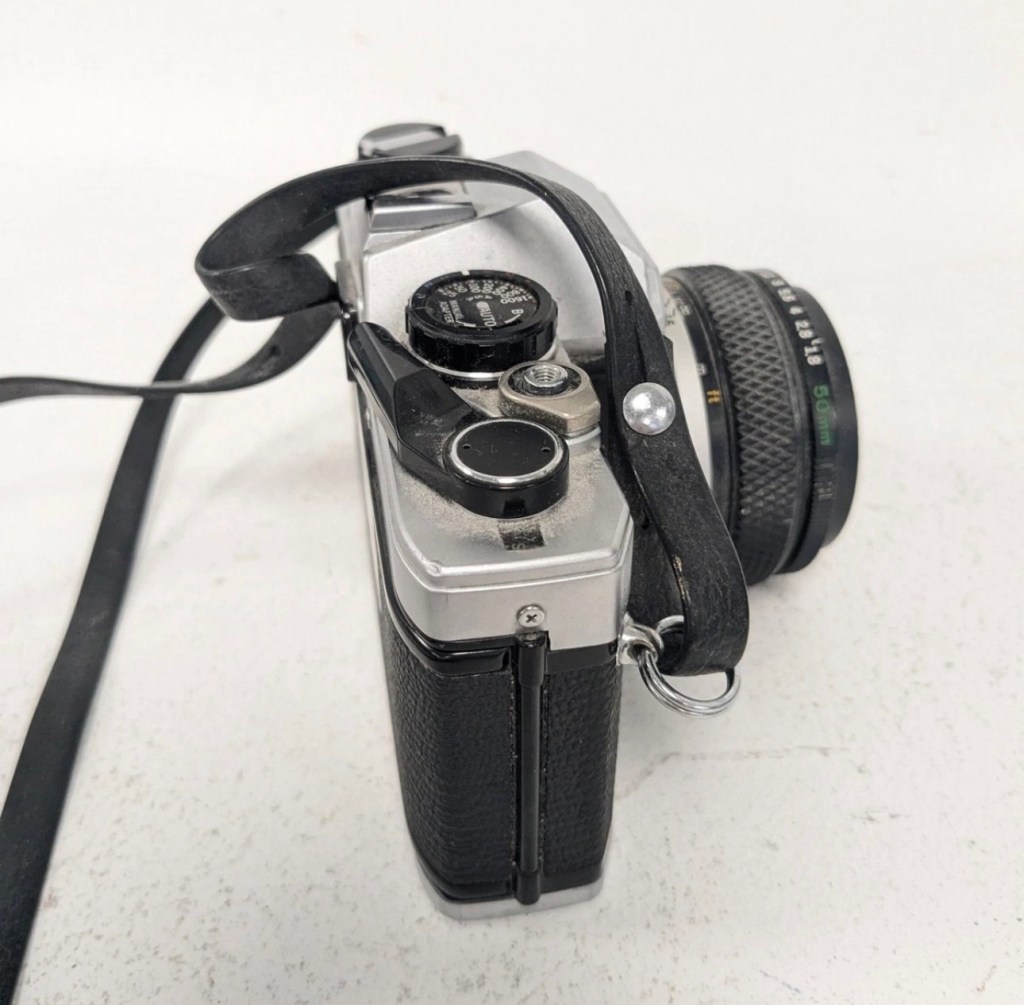
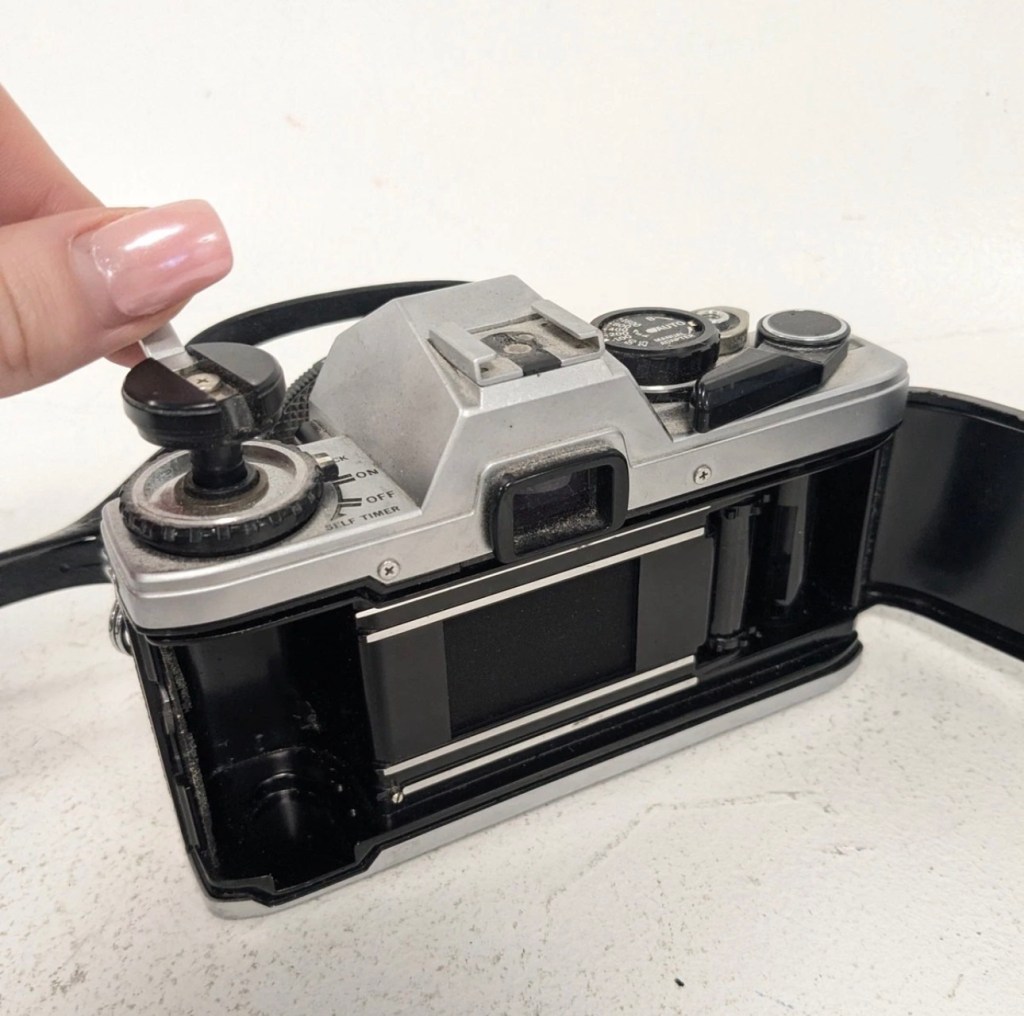
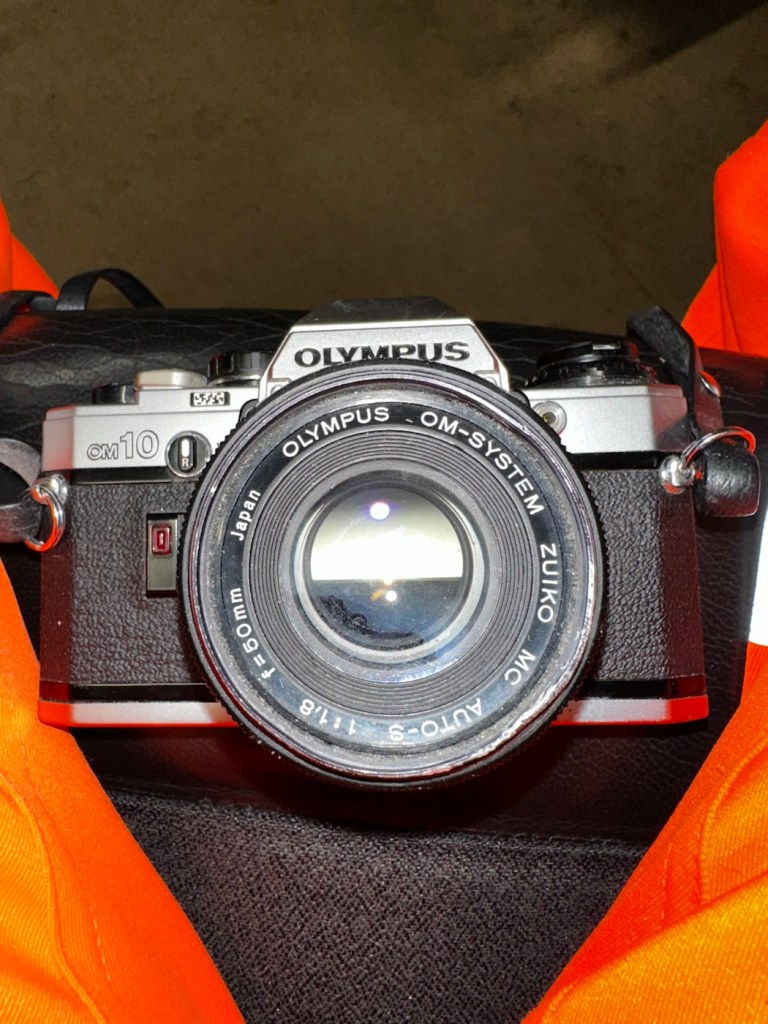
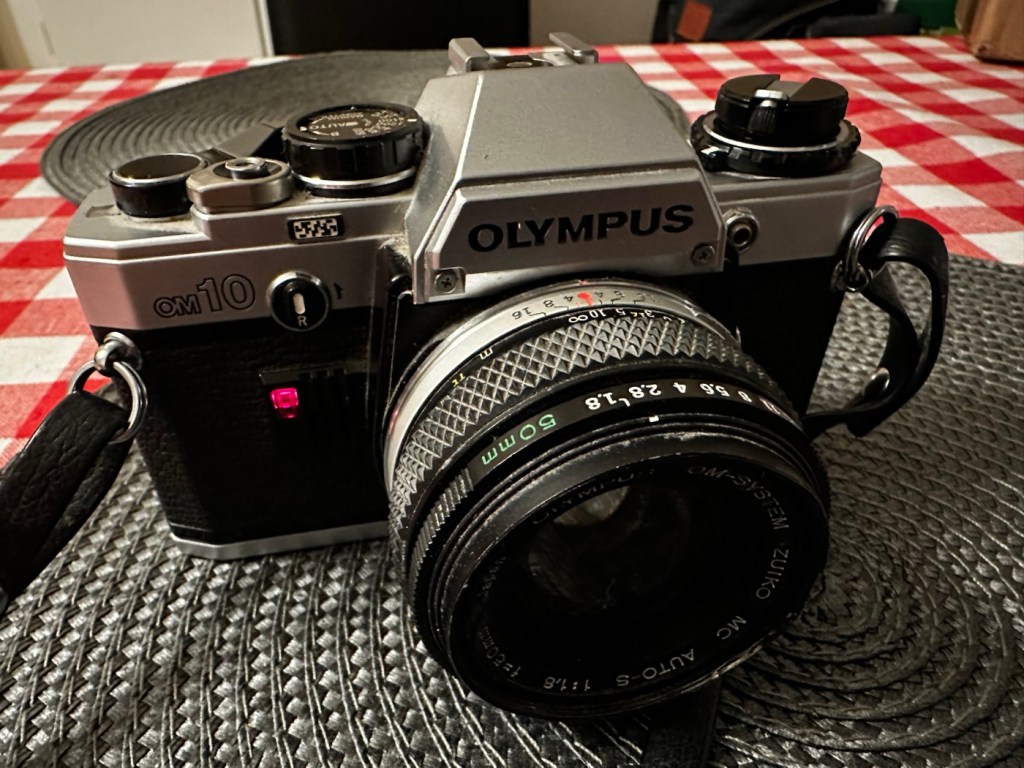
Much to the wife’s annoyance, and because I was feeling a little low and in need of some retail therapy, I’ve purchased this lovely little camera from the Barnardos charity. It looks like it’s been stored in a full Hoover bag, it is so dusty. It has a few dents and dinks, this one is going to be a challenge. I like challenges. I’ve paid the grand total of £17:67GBP for the camera and the standard Zuiko 50MM F1.8 Lens. I think that is an excellent price.

These cameras were produced between 1979 and 1987. I’m hoping I’ll be able to date this actual camera more accurately when I receive it.

This is what the original listing stated:

This listing is for a vintage Olympus OM-10 35mm Single-Lens Reflex (SLR) film camera, bundled with a Zuiko 50mm f/1.8 lens and a leather neck strap. This is a single bundle containing the camera body, lens, and strap, ideal for collectors or film photography enthusiasts.

UNTESTED. This sale is for spares/repairs. There are some marks and cosmetic imperfections. Please see images for more detail.

The standard untested post from the auction sites, but I’m not really bothered to be honest. It’s a charity, and I’m happy to pay for these items as the charity always benefits, and that’s all that matters to be honest.

I have some history around this camera and whenever I see one I think of Bruce Springsteen and here’s why.

1984, Bruce released this Album

Born in the USA was released in 1984, so I can kind of pinpoint the first time I’d ever really heard him, courtesy of my friend David K, when I used to live in a small town in Hertfordshire called Bushey. David had been a school friend, we were now in our mid to late teens, he was working in a restaurant whilst I was in a photographic lab. He introduced Bruce to me and for many months after he first purchased that album, we played it non stop and knew it off by heart, beat for beat, and word for word, we were totally smitten with it. It was the Bruce effect. At this time i would have been about 18-19 years old, and had a very basic Russian Zenit camera, it took some great photos. However, David had recently had a bonus payment at work and purchased himself the Olympus OM10. I was envious, who wouldn’t be? What a camera and this is where it all ties in with our hobby, we loved photography and used to always discuss it with Bruce in the background singing his heart out. It all ties in now, fantastic memories, and a single camera can bring back these memories. Amazing isn’t it?

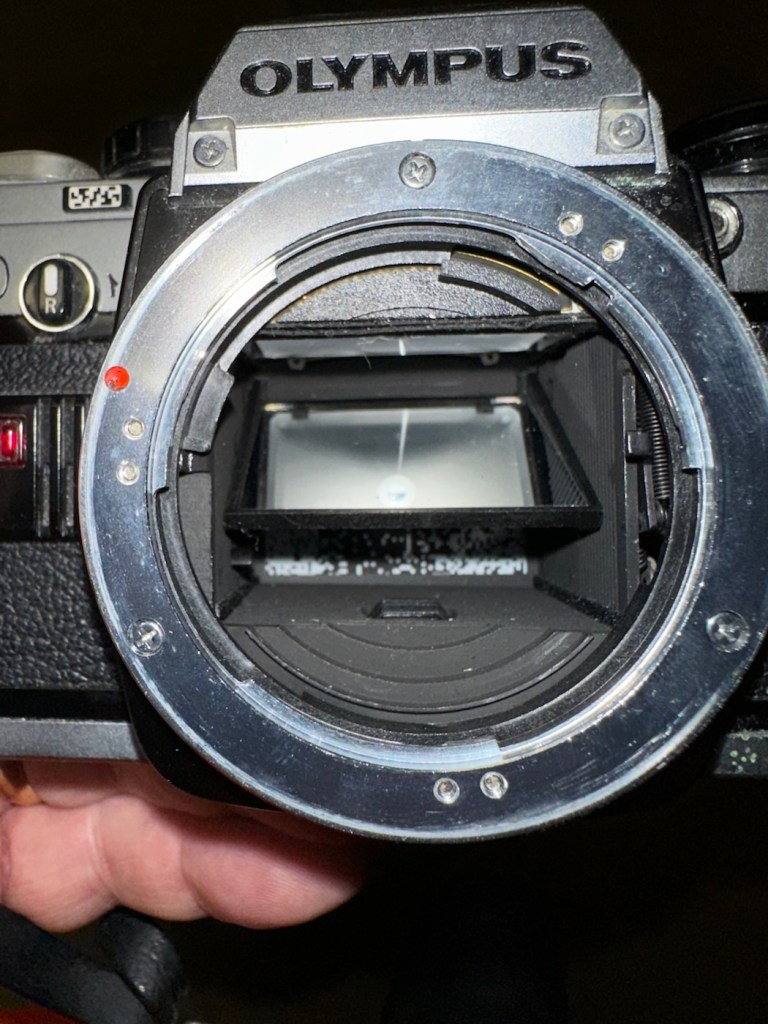
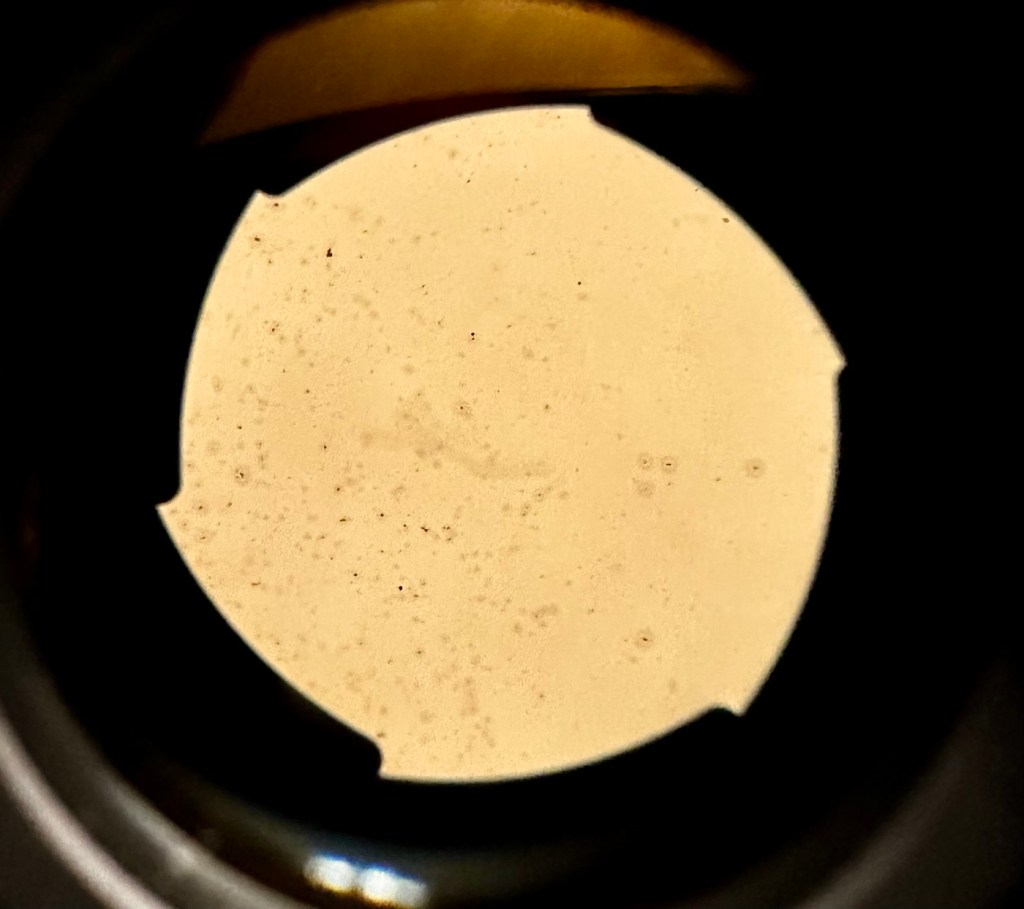
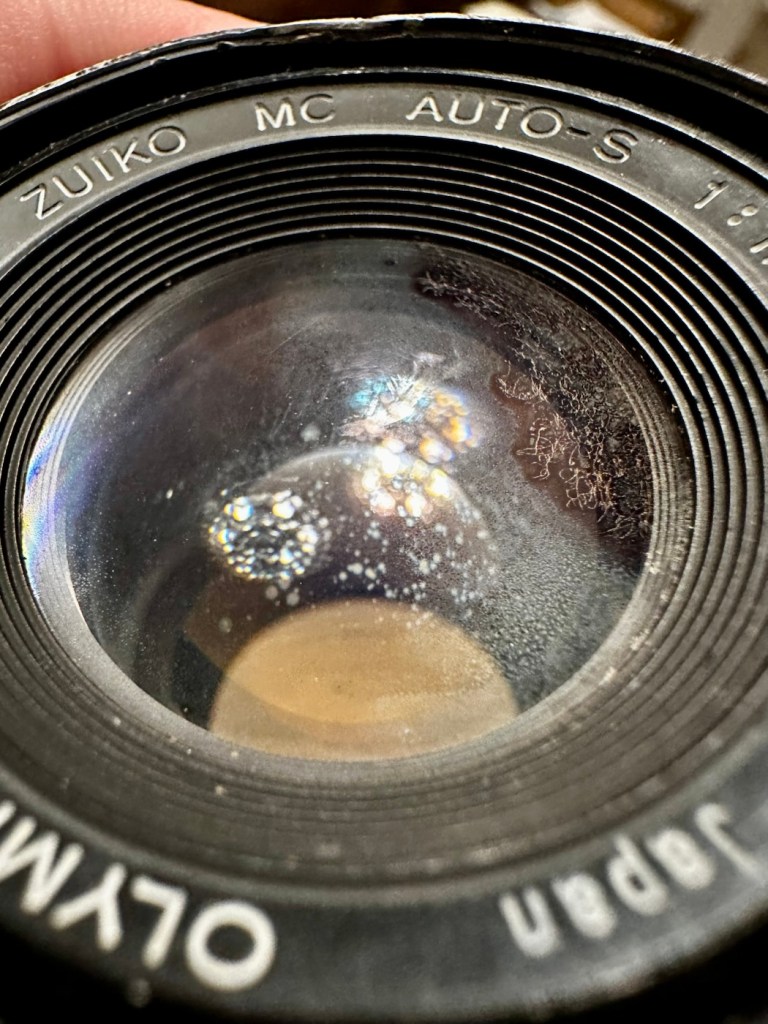
Anyway here’s some pictures where you can see the amount of dirt, and what looks like some bumps on the outer edge of the lens.

Here’s some information regarding this camera:

The OM10 was the first consumer OM series body. Launched in 1979 it accepted the full line of OM lenses and most of the OM accessories for a lower price. The lower price was reflected in the construction of this camera and the features available, however, it was still a very competent performer and it reflected the elegant lines established by the compact OM-1 and 2 designs. Early production runs of the OM10 have known malfunction issues with electronics, metering, and shutter magnets. Olympus later changed the shutter to a ‘Type II’ design to correct the latter problem.

In its standard configuration the OM10 offered aperture priority automatic exposure, simple and accurate enough for a consumer camera in most lighting situations. It also offered exposure compensation for more complicated lighting situations and for more advanced users. A small plug-in manual adaptor was available as an accessory to enable manual control of shutter speed. The manual adaptor is possibly not as easy to use as the typical shutter speed ring around the lens bayonet on the OM-1.

While not well known to consumers, the focusing screen for the OM10 is indeed interchangeable, though not as easily as the OM-1. It shares the same focusing screen as the OM-1, but the extra protruding tab needs to be cut off as the OM10 doesn’t have a placeholder for it.

The OM10 can accept all the lenses of the OM system. 

The finder screen is fixed, as well as the back. It can accept the winder but not the motor drive. It existed in chrome and in black finish.

In 1980 the OM10 Quartz was released with a fixed databack (equivalent of a Recordata Back 3) to print the time or date on your pictures. The OM10 Quartz was only released in black finish.

The OM10 was sold in large quantities before production ceased in 1987 and many working examples are still being used today. Largely overlooked in favor of its more professional ‘single digit’ siblings, you can easily pick up a working example for $50. Try to find one that includes the manual adaptor though, as this accessory alone can fetch $30 at auction.

Camera-wiki.org

Assessment:

In a perfect world this camera would just need a clean. But this is me and to be honest I’d like a little bit more of a challenge, as a lot of the cameras I have worked with lately did not need a lot of maintenance because they’d been well looked after. This one may be different.

These cameras were renowned for electrical faults especially with their mirror motion magnets, very similar to the issues suffered on Canons earlier EOS cameras such as the 1N. But to be honest I am just surmising at this point as the camera is not yet in my hands. I need to be patient and await its arrival.

Well, it’s arrived so let’s have a look and see what’s good, what’s bad and what’s indifferent. It has dirt, yes, quite a bit of it, so it will require quite a deep clean as we need to get into all those little crevices, where the dust has settled.

Cosmetically it looks really good with no dinks, dents or scratches, so that is very much a positive. It’s in not too bad a shape for being 46 years old.

The capstan to open the camera film door, along with the operation dial are a little loose, so they will require tightening.

Batteries are long dead, this camera requires two LR44 button batteries to do even the basics, I have tested the batteries with a multimeter and they are so low that they hardly register, they are very dead indeed. The good thing however is that they have not leaked in anyway and the battery chamber is clear of corrosion.

The mirror is stuck in the halfway position, this could be purely to do with there being no battery in the camera. It would be good to see with new batteries installed, if the mirror magnets would then kick in, and then they’d be no further issue. However, knowing my luck they are probably inoperable as well, we will just have to wait. And for this same reason the winder is also stuck, again the batteries may well solve this problem 🤞

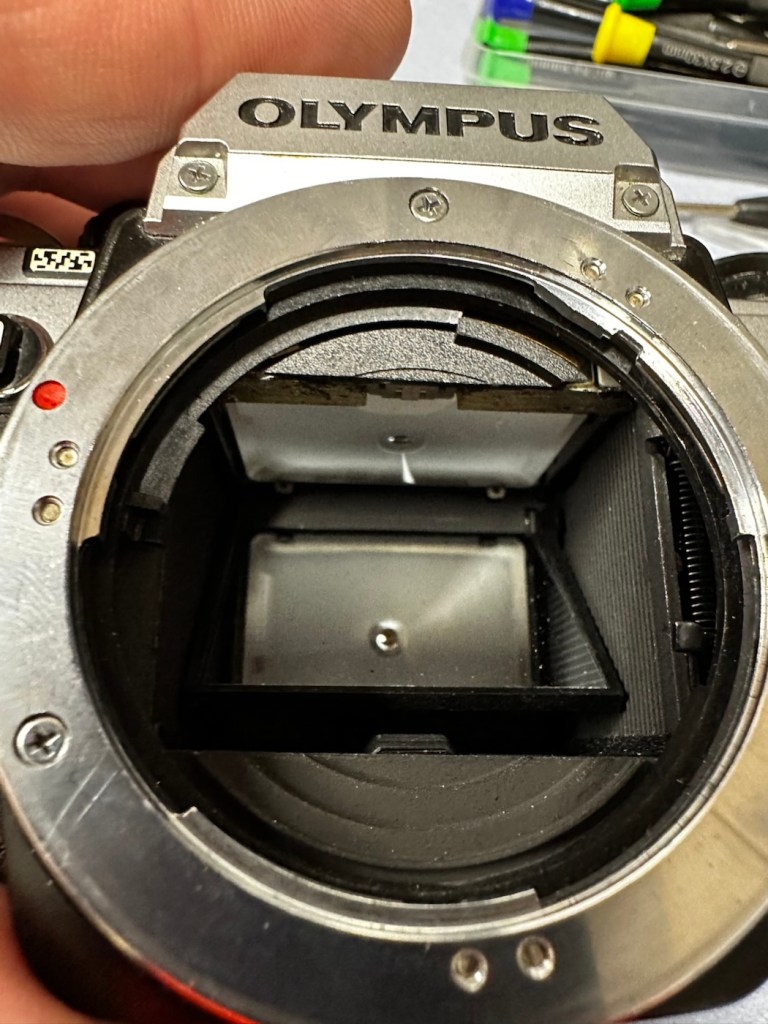
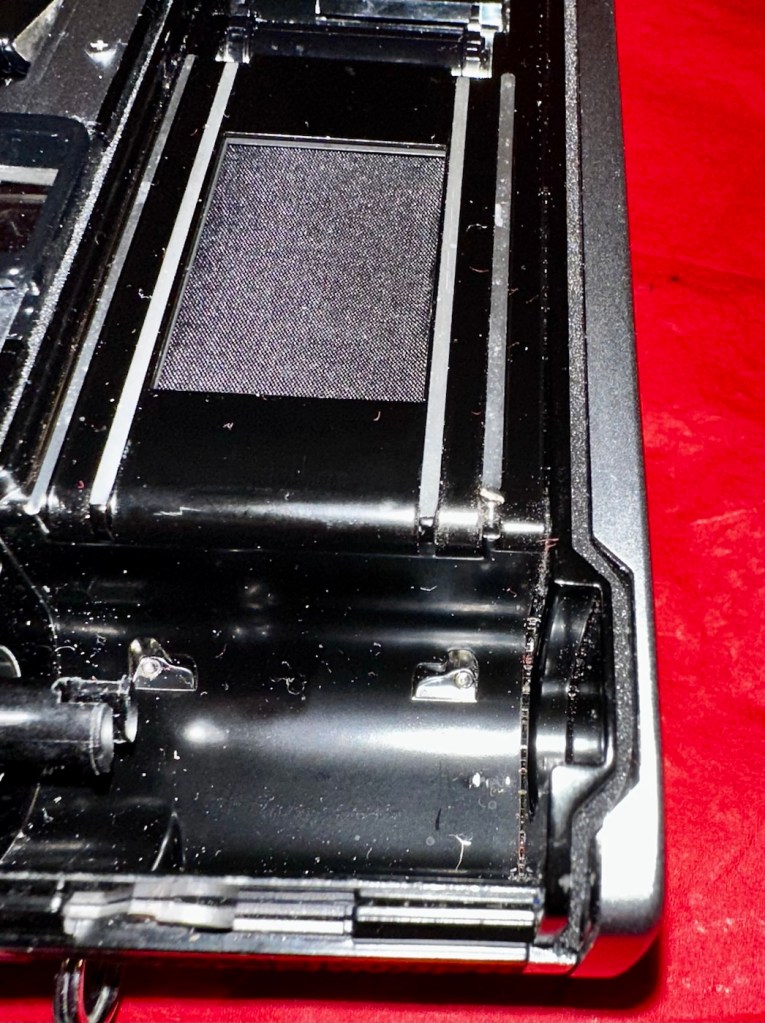
Good news is though that the mirror and curtain are in really good condition, because the old lens has been kept in place preventing any contamination getting into that area.

Viewfinder looks clear apart from a little dust build up

However the lens, does appear to have fungus in it, and will require a clean at some point along the way.

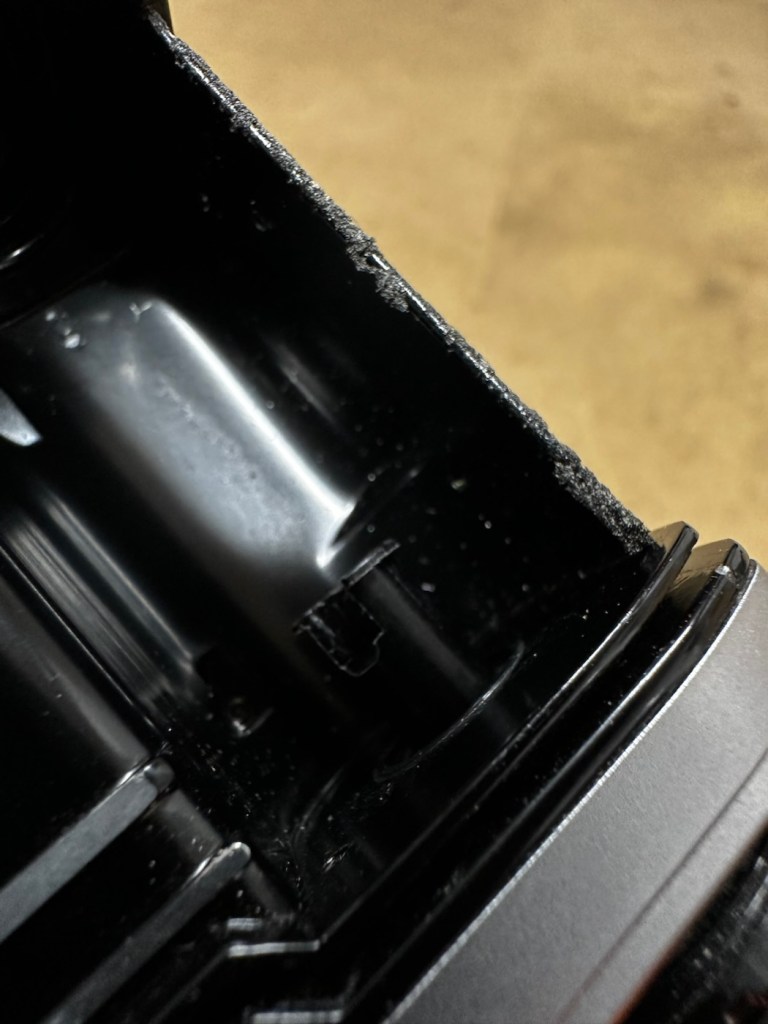
There are also a number of light seals that need replacing as they have perished.

To be quite honest, the easiest part of this camera to clean will be the standard plastic and rubber neck strap. This can just go in some warm soapy water to rejuvenate it. However, my first priority will be to get some batteries in place and see what occurs. I may have to rethink my approach to this camera dependent on the outcome of this simple action.

Repair:

Straight home and I’ve found a couple of LR44 batteries that had a little more power than the old ones. In they go….and nothing. There is a check position on the main dial that should light up and a buzzer should sound to confirm that there is sufficient power, obviously there isn’t in this case. I run all the other LR44 batteries I have through a tester ( I had a packet of 12 ) and they all show as low power, they’ve died during storage. I then pop over the road to see my brother in law who always has a good supply of batteries and bingo, he has a couple of spare LR44s.

We have the check light, and a little buzz…intermittently

With these in place I get an intermittent buzz and a light, it appears the capstan control and operation dial that I mentioned earlier was loose, and has intermittent contact issues, it will need removing and cleaning then reseating.

If I hold the capstan in place I do get a good signal, with both buzzer and light operating in the check position, and when I move the control to “On” position I can now cock the shutter lever. It will then fire but again only to the half way position as it did earlier. If I gently push the mirror down and let it spring back it will then fire. But you have to do this on every stroke of priming the advance lever. Not good.

This is pointing towards an issue with the magnets and I believe I’m almost there, and that’s when I have a eureka moment.

Eureka moment

In the bottom of the mirror and curtain bay on the base of the camera is where the mirror magnets are situated, along with a light sensor that takes a reading off the shutter curtain behind, that is checkerboard coloured. Something here didn’t look quite right for me as it did not look level, the base seemed quite uneven. I just simply put my finger in here, applied some light pressure on this base and it just clicked into position, nice and level and then the stuck mirror fired, just like that. Every single prime of the shutter and actuation since, has worked just perfectly, I wonder if this camera has been dropped at some time just knocking this part out of true configuration? Or has someone been here before me? I’m going to have to remove the base to check a few things anyway, so I can then make sure this issue doesn’t happen again. For now, I’m satisfied that the shutter and winder are working fine. I just need to make the contacts and the electrical continuity a little bit more reliable.

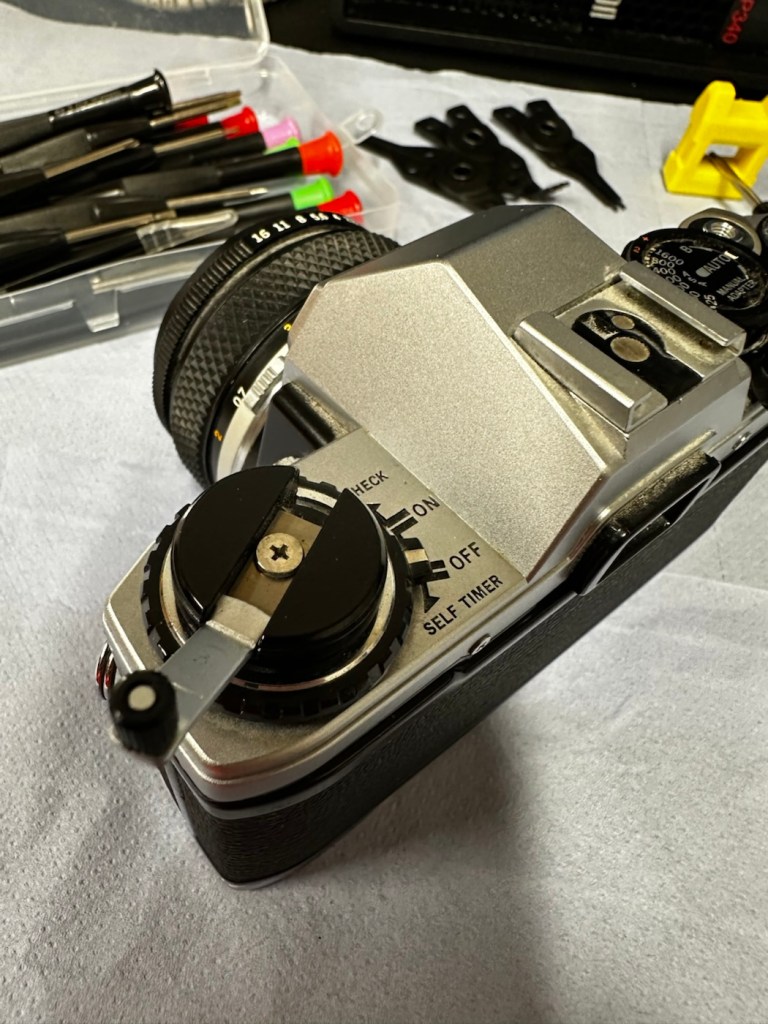
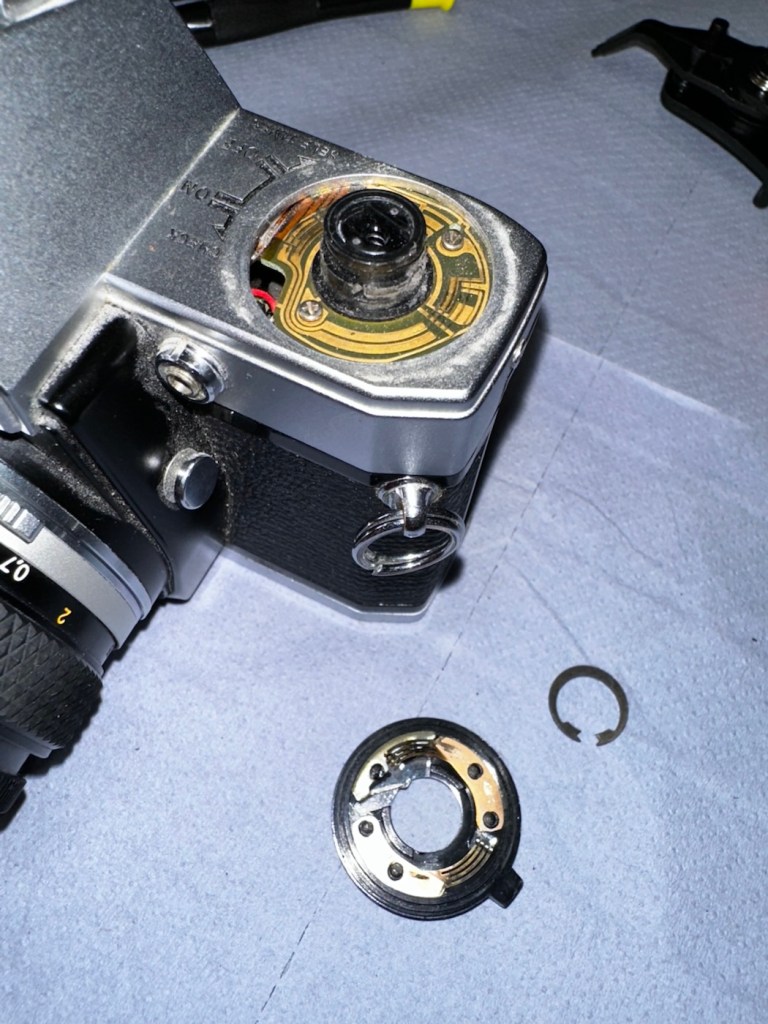
I’ve dismantled the faulty switch. Inside, the old tracks on the camera and the pickups on the switch were showing signs of tarnish so I used some contact cleaner go get these looking better. I’ve re assembled the switch and used a new circlip to hold it all together. It’s a lot more secure and responsive now with no interruption to the check signal. It’s quite solid as it always should be.

Here’s a small video regarding the switch repair.

Switch working as it should

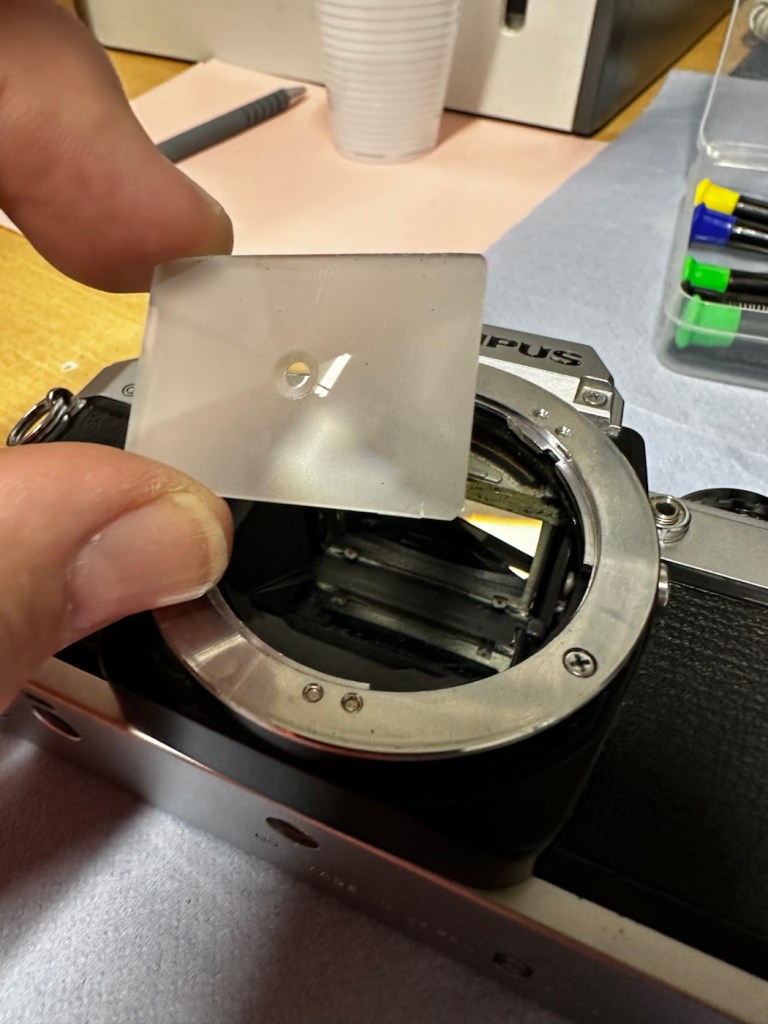
With the switch sorted I’ve now removed the focus screen to give that a bit of a clean.

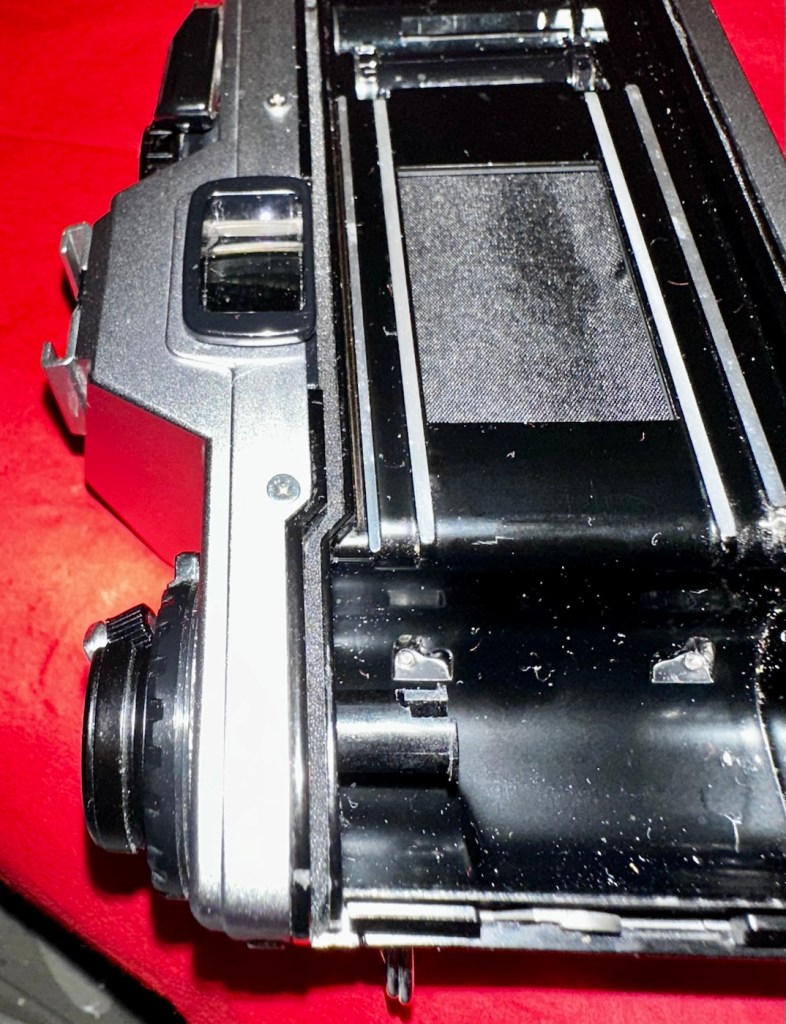
And after this I have gradually started to remove the old light seals in preparation for their replacement. They really are in quite a bad way and creating a lot of dust and dirt as they degrade.

Now to get the remainder of the old seals removed, clean the troughs they sat in, and then put the new seals in place.

With some IPA, and a large bamboo stick it’s time to remove the old seals

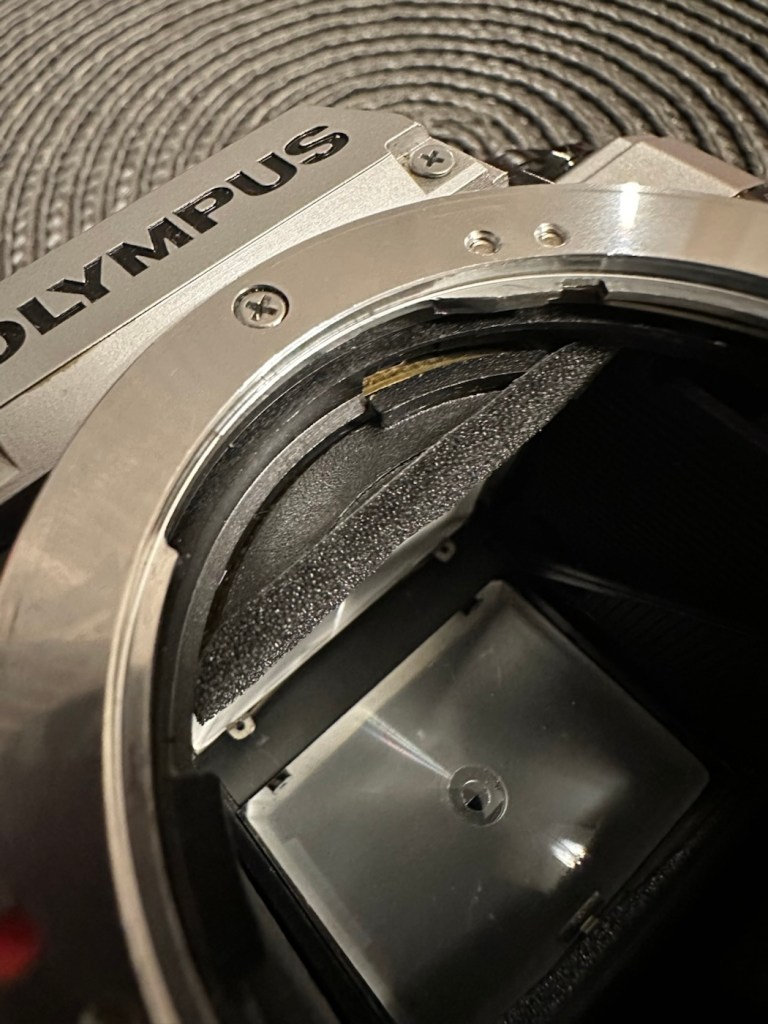
I’ve replaced all the seals on the camera body apart from the mirror damper. I need to get some adhesive first, to secure the plastic plate that sits above the damper. Hence I have to wait for this to be in place before I can finally put the damper in situ, i will do this in the next 24hrs.

Now, the plastic piece that covers the focussing screen access is now secured in place and the mirror damper has been installed, all light proofing has now been completed.

Mirror damper installed

The original lens that was suffering with fungus has been dismantled and given a clean, however because the top two optics are a sealed assembly, guess what? The fungus is within the sealed section and is unable to be accessed. Therefore the lens will never be cured of this issue, it has been improved by cleaning the other optics but it’s not in anyway good enough to use with film in the camera, I will therefore use the old lens purely for testing purposes, it works fine for that and will be just fine for testing other Olympus equipment. In the meantime I have purchased two further OM 50mm std lenses, one is an earlier “Silver nose” model with a single lens protective coating whilst the other is a later production “Black” MC (Multi coated) model. Both are in an excellent clean condition conducive for film photography.

The two new lenses – “Silver nose” to the right

I’m happy that the repairs have now been completed, all that is left now to do, is to give the unit a thorough clean, and to clean that original plastic/rubber camera strap with some warm water.

Result:

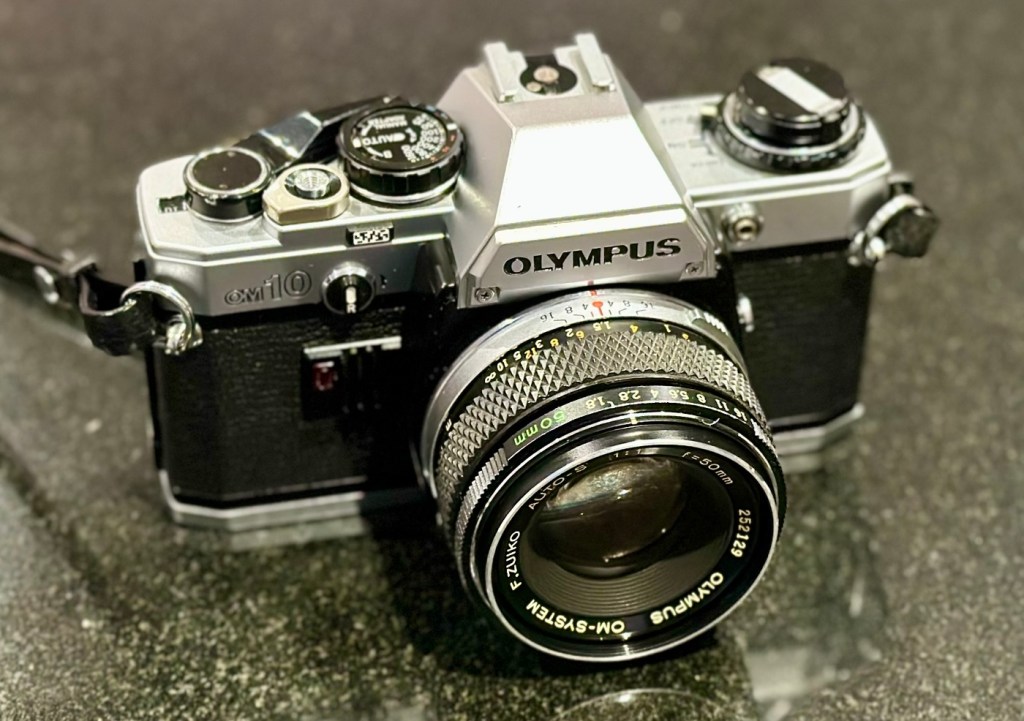
Here we present a fully cleaned and maintained Olympus OM10 35mm SLR camera from the 1980s looking quite resplendent after all the work on it has been completed.

All cleaned
Looking superb with a new lens

It’s been a lovely camera to work on. The make of this camera is superb, and back in the 80s Olympus were on a high note with the high end advertising, using many well known celebrities, and their cameras as a result became extremely popular. They are very well made and have stood the test of time. This one camera will go on to continue being used, and has many good years of life ahead of it. Another one saved from the scrap heap. As with all my cameras I have an immense backlog of units all awaiting the time when they have a roll of film run through them, and this one is no different. When I do pass a test roll through it I will post a link to the results here.

As always, thank you for passing by and glimpsing this post. It is always very much appreciated.

Canon EOS1 N HS

The EOS1 N with the well documented BC fault. Can I repair it?

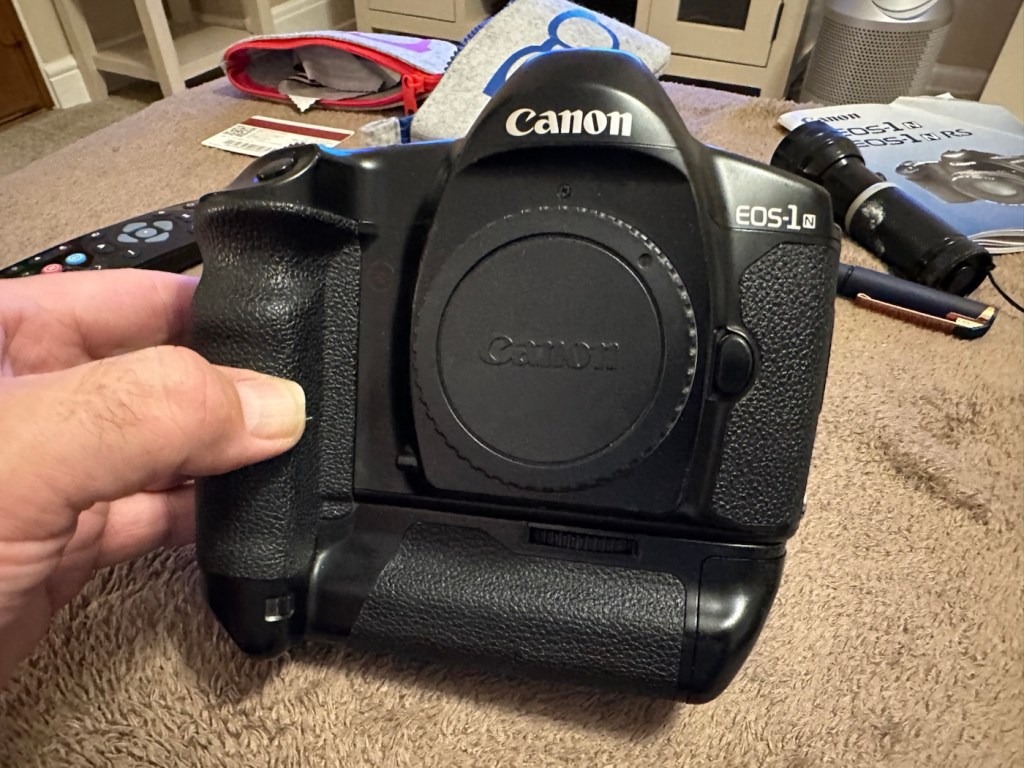
The EOS1 N was a professional 35mm camera from 1994, it is currently 31 years old. This model is basically the EOS1 N with the E1 drive booster/winder earning it the HS suffix.

Canon EOS1 N HS

These are beautiful analogue cameras and over the years I’ve had a fair few of these pass through my hands, I have not however owned one with the E1 booster/winder before. I’ve recently had a number of cameras passed on to me by a good friend and that post can be found here: Cameras…i need more!

This is one of those cameras that he passed onto me and it carries the well known BC fault. We’ll come on to that later, in the meantime here is a little history lesson, of the evolution of this camera.

The EOS-1N is a 35mm single lens reflex (SLR) camera body produced by Canon. It was announced by Canon in 1994, and was the professional model in the range, superseding the original Canon EOS-1.The camera was itself superseded by the EOS-1V in 2000.

The original EOS-1 had been launched in 1989, two years after the company had introduced their new EOS autofocus system. It was the company’s first professional-level EOS camera and was aimed at the same photographers who had used Canon’s highly regarded, manual focus professional FD mount SLRs, such as the Canon New F-1 and the Canon T90. On a physical level the EOS-1 resembled the T90, which had been designed for Canon by Luigi Colani. The EOS-1N was a revision of the EOS-1, with five autofocus points spread across the frame rather than a single centrally mounted autofocus point, plus more effective weather sealing, a wider exposure range, and numerous other improvements. In common with the EOS-1, the 1N used Canon’s A-TTL automatic flash system, and does not support the more modern E-TTL.

Assessment:

Right, let’s get on to the problem. The BC fault is a blanket fault, covering a multitude of issues, predominantly electrical, even addressed in the accompanying instruction manual as a potential battery issue. However the issue that it is more associated with the fault is the failing shutter mirror magnets. See the video below.

BC error repair

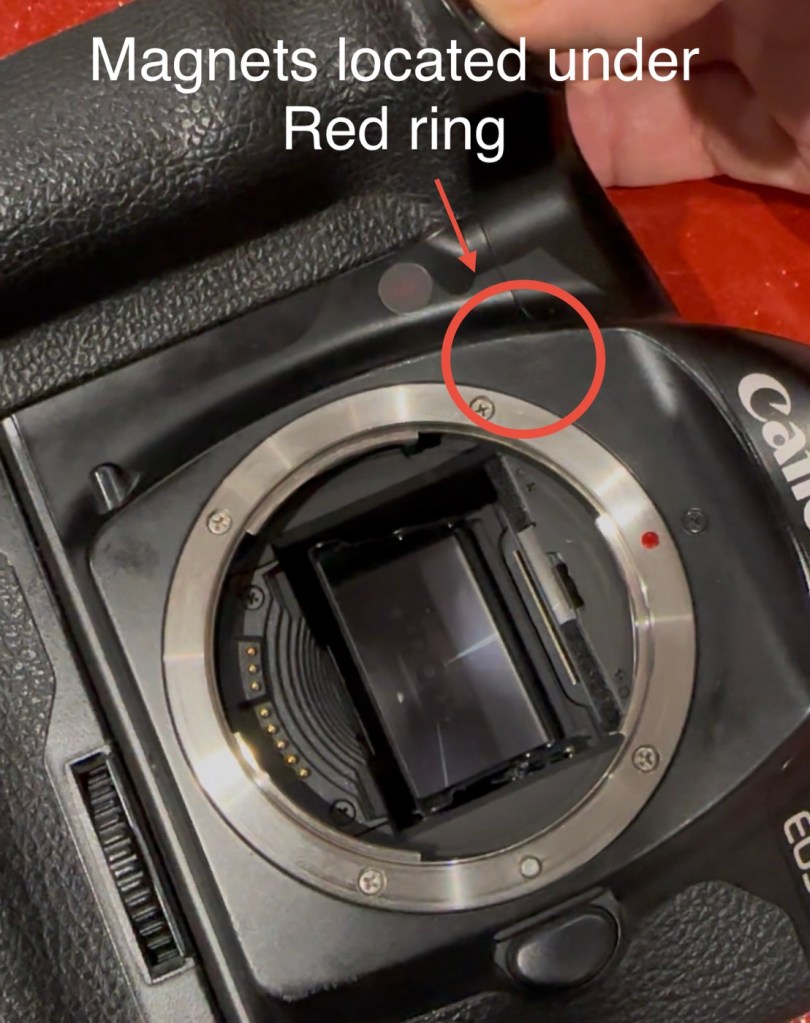
The video above gives a very good insight to the issues, and what to look for and how to get the shutter operational again. It’s not a permanent fix, sometimes the magnets haven’t been used for such a long time that they just seize up. They can be de magnetised, they can just be dirty, either way it’s worth having a look at, to try and restore what is in all aspects a very good camera. It seems to be an issue that an open or close signal is sent, however the magnets for some reason do not react, dirt can be a contributing factor. Below I have put together a very short video of my own camera, the early part shows me trying to get it working and showing the BC indication, the second part shows the mirror “sort of” working after I have tapped in the area just above the top screw on the left side of the lens mount under which the magnets are situated.

My own EOS1 N showing the BC fault

It still doesn’t work properly though and is extremely intermittent, but it’s a start, it proves the fault. I have also used a strong magnet to fool the internal magnets, this works for a couple of firings but that’s it. This also adds credibility to confirm the magnet issue.

I haven’t yet taken the fascia off to access the magnets, I’ve just tapped in their general area, or probed with a strong magnet, this was enough to allow the shutter to intermittently fire, and it is now quite apparent that this is the issue I have with this unit.

You can see exactly where the magnets are located under the fascia

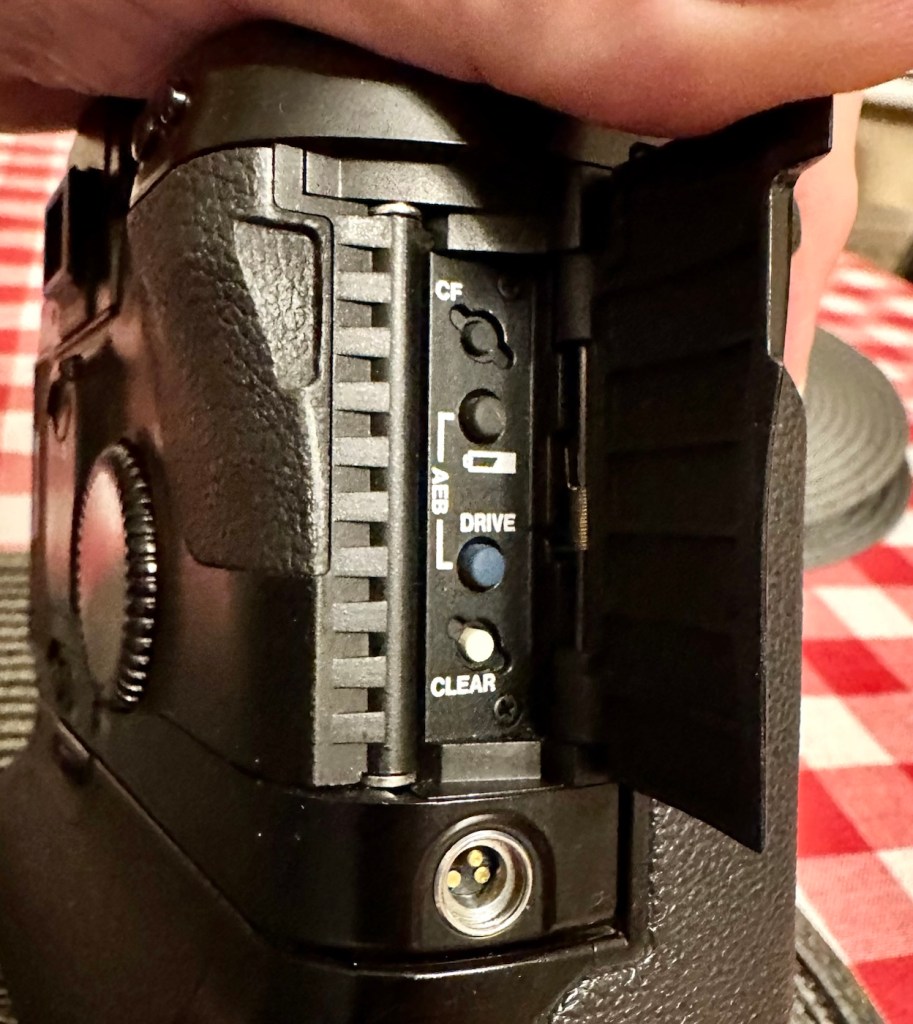
I’ve done some further checks to confirm the fault. If you turn the camera on and open the small door to the right on the rear of the camera, there are a number of buttons inside that allow you to check battery levels and to do resets, and so forth.

The battery check button

By pushing both the clear button and the battery check button together, you can get a fault code to appear on the screen on the top of the camera.

Battery full and Fault code 6

Here as you can see, I have fault code number 6. If you look at the chart below supplied by Canon you will see it refers to a mirror fault, more specifically the mirror is up, but didn’t switch back to on from off, as I mentioned in the above paragraph.

Fault codes

As you can also see above, fault codes 6,7 & 9 refer to the mirror operation issue.

I’ve done all I can really on the outside of the unit, and I think I have conclusively proved the area of the fault. Before we look at replacement of the part, I am going to give it a good clean to see if that will clear the issue. I’ll worry about spare parts later if required. Let’s get the fascia off and have a closer look.

Repair:

I’ve been a right stubborn sod with this one. I really didn’t want to dismantle this camera at all. Something inside was telling me it was unnecessary so I decided to persist with what I had been doing earlier. If only I could get the magnets to fire for a few exposures at a time, it would be just like a coughing car engine clearing out its system and kicking in to life, once it bites you can accelerate it a little more until it starts ticking over. Old motors and cameras are a strange but similar comparison, the longer they are left unused the more inclined they become to not partake in doing what they were made to do, whether powering a car or taking photos. Stop using them and they do just that. Stop.

Well, that’s what I think anyway, My world is as simple as that. And I think it might just work.

So I have persisted….

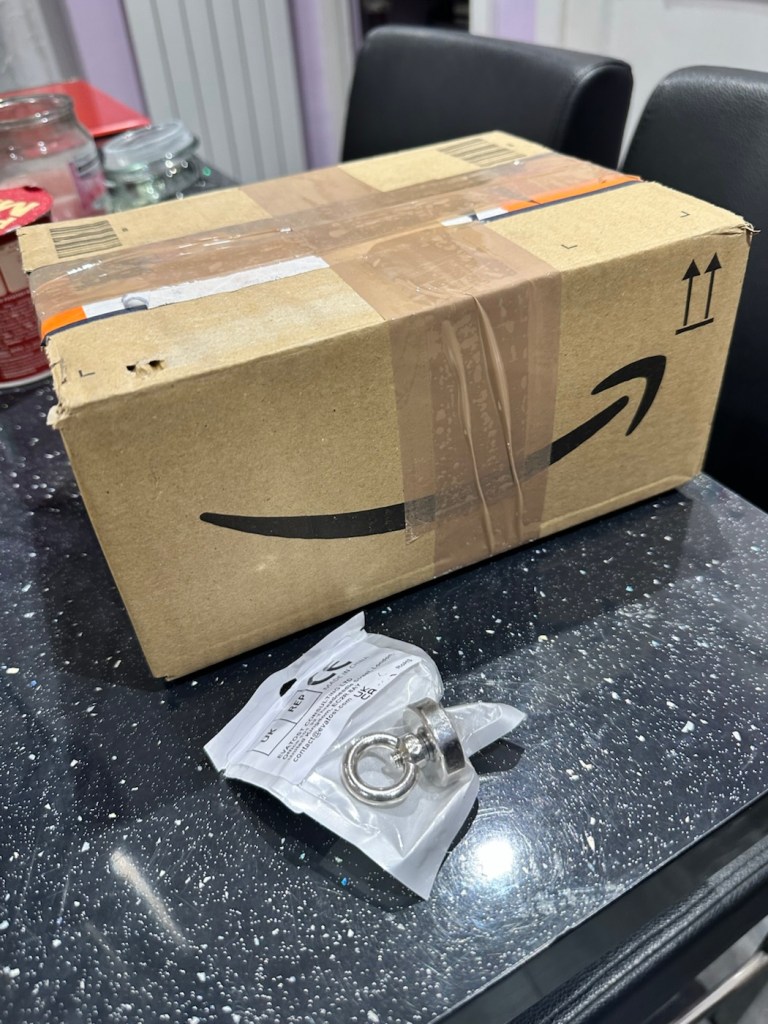
And purchased a much stronger magnet a “Rare earth” one to be precise. These are the sort of magnets they use for magnet fishing, however this one is small and despite having credentials behind it saying it has 19kg of pulling power I’d suggest that is a lie. Probably a maximum of 3kg if you’re lucky, but either way more than sufficient for me wanting to kick start a tiny electro magnet in a camera.

The most surprising issue around this magnet is the absolute ridiculous size of the packaging that it came in.

This tiny magnet, came in this massive box. Good old Amazon

So I persisted with the magnet, around the lens ring. I reset again and again. Nothing. I used my knuckle to tap the area near the magnet, a single cough, good. More resets, single coughs, more taps two coughs….this is good. I set the camera to high speed wind, kept the exposure button depressed and continued tapping, five or six coughs then stop. It’s an improvement. The magnet is starting to pick up. More tapping then I’m getting about 20 coughs with an obvious delay on one or two activations… we are now getting somewhere.

I put the rare earth magnets near the camera magnet and then switch off and reset. I turn back on again and then get a good 15 seconds or so of rapid fire, the internal magnets are clearing. I remove the rare earth magnet, reset again and the old girl fires into life for about 30 seconds continuously with only the occasional “misfire” the internal magnets are sparking back into life.
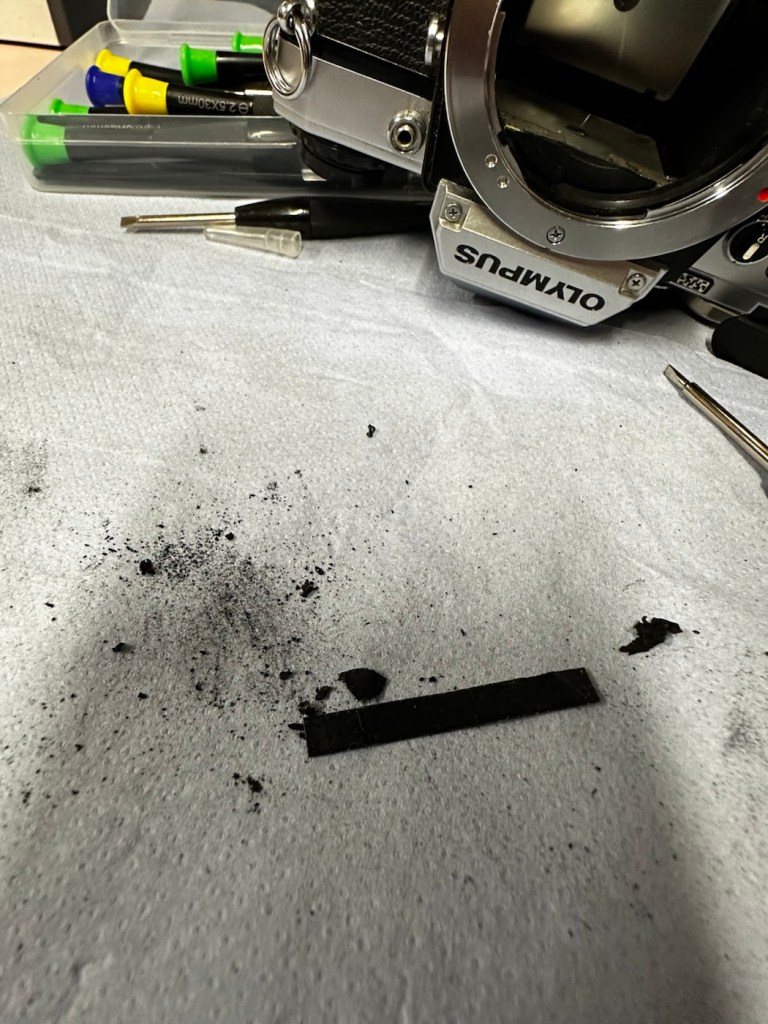
You get the idea.

Once you get these magnets operational, the best thing you can do is continually fire them, until they fire smoothly. This camera has not fired up for years, and these components inside are made to be used, and just like someone trying to keep fit, similar to a muscle, if you don’t use it you’ll lose it, it’s the same with these cameras, they need to be used on a fairly regular basis.

I did a 3 minute firing and I’m pleased to say she is now chugging away beautifully with no coughs and splutters. I’m sure glad I persisted with my hunch. I was right. And believe it or not. The battery levels are still good.

I’ve put together a little video here showing it working before and after.

My EOS 1N shutter magnet issue

Well what more can I say. It appears to be working.

Result:

To say I’m chuffed with this repair is an understatement. Sometimes you don’t have to dive in and start dismantling to get results. Do your research and make your own plan of attack with the information you have at your disposal. You will find equal amounts of good and bad advice out there, you’ll soon become aware of the differences, just follow your feelings and do what you think is right, if it’s wrong, well you’ve learned a lesson.

She’s ready to go – what a beauty

I am so looking forward to getting a day out with this camera and really letting her loose. I just love the sound of these clunking old machines, I don’t understand why anyone dislikes them. I loved visiting air shows when you had the big old really noisy aircraft that shook your soul from head to toe, they then sanitised that with super quiet aircraft…so boring. They’ve done that to cameras as well that nowadays make no noise. I love these old cameras, every click, clunk and whir brings back superb memories to me. I just love old cameras. I like to think I’m helping a few last just a little bit longer.
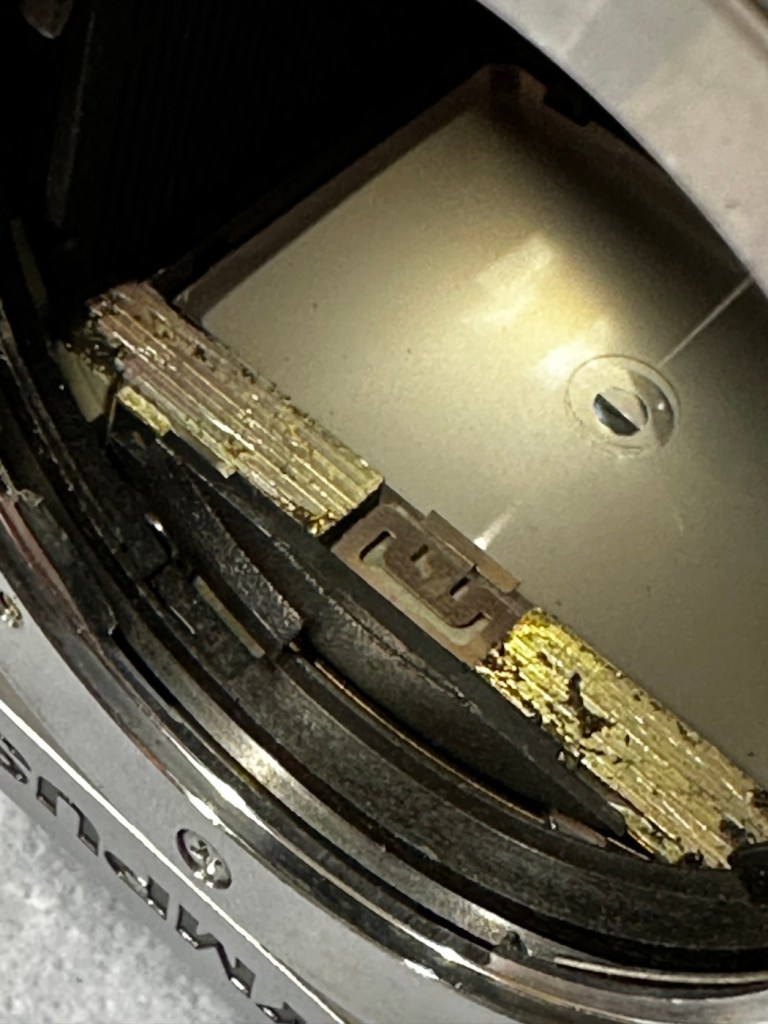
Many thanks for passing by, it’s always very much appreciated.

Peace to all.