Canon AE1 35mm SLR

A sympathetic restoration of a 70s classic camera.

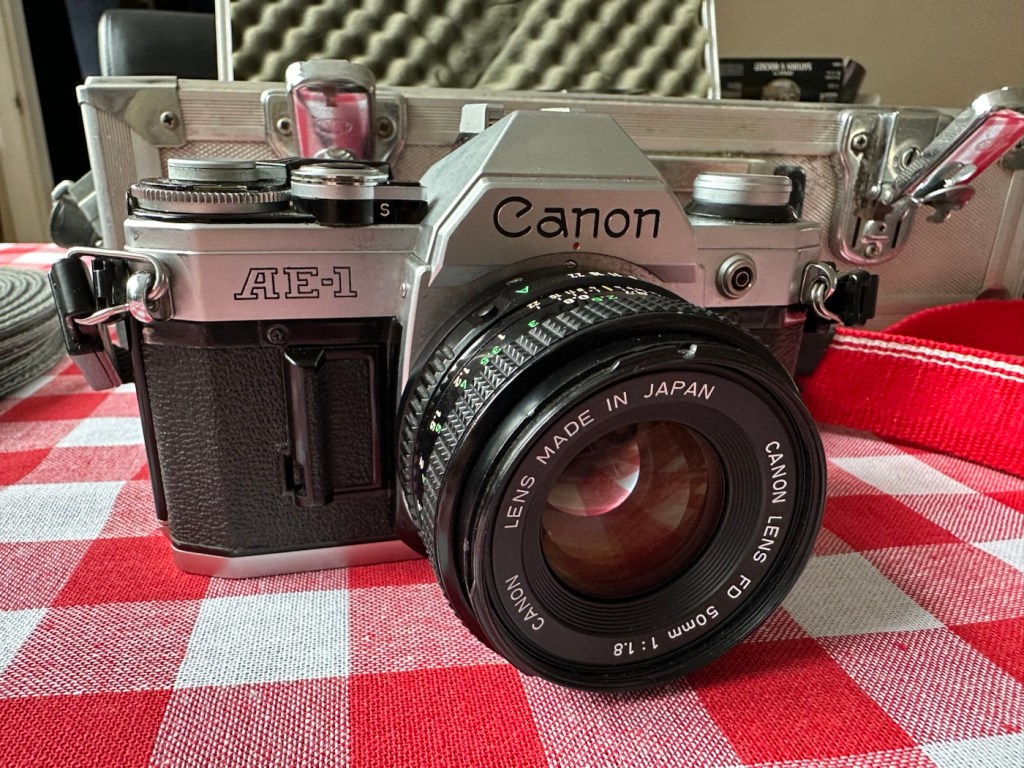
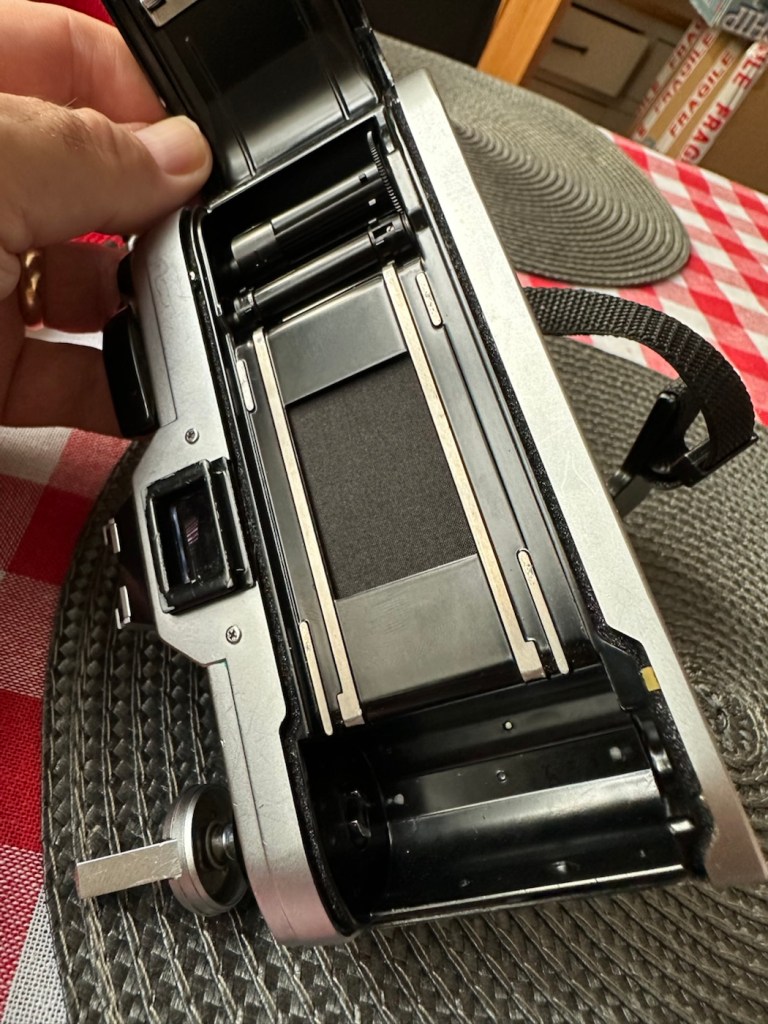
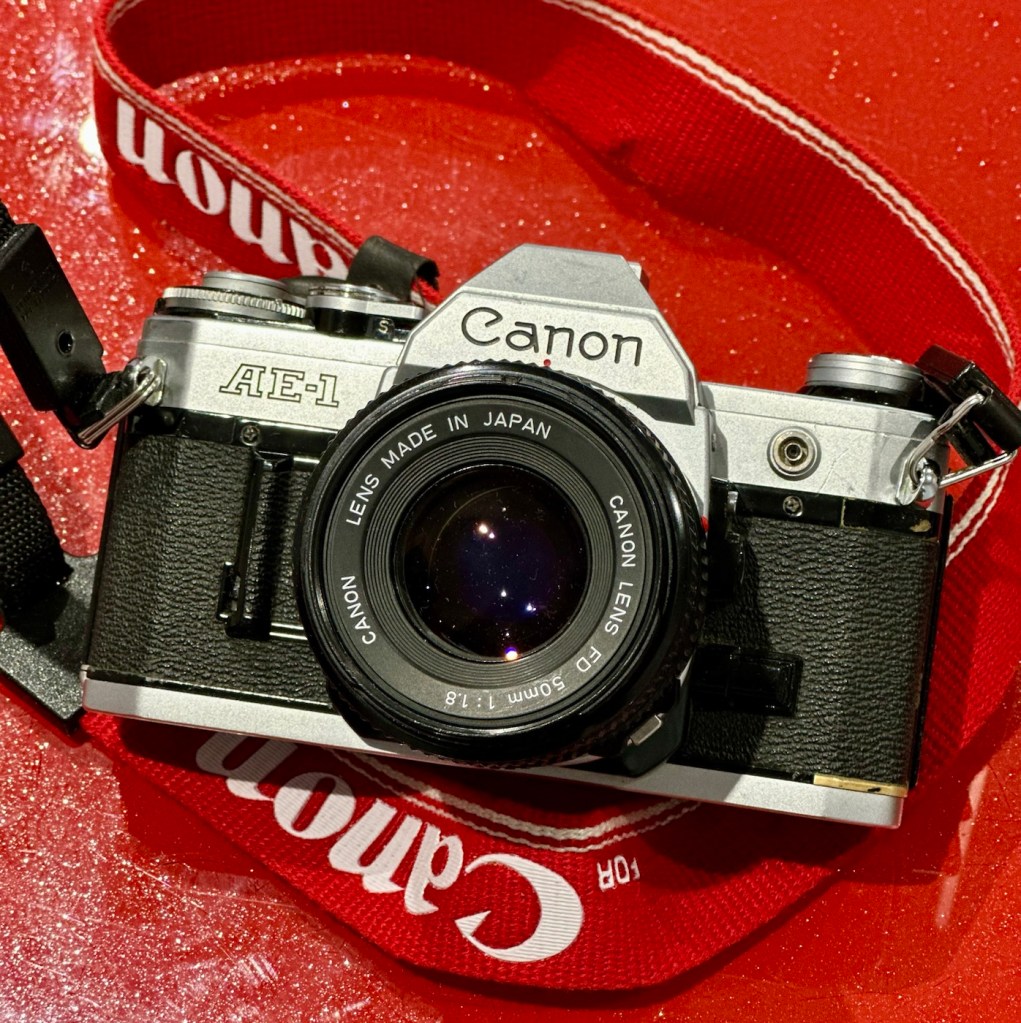
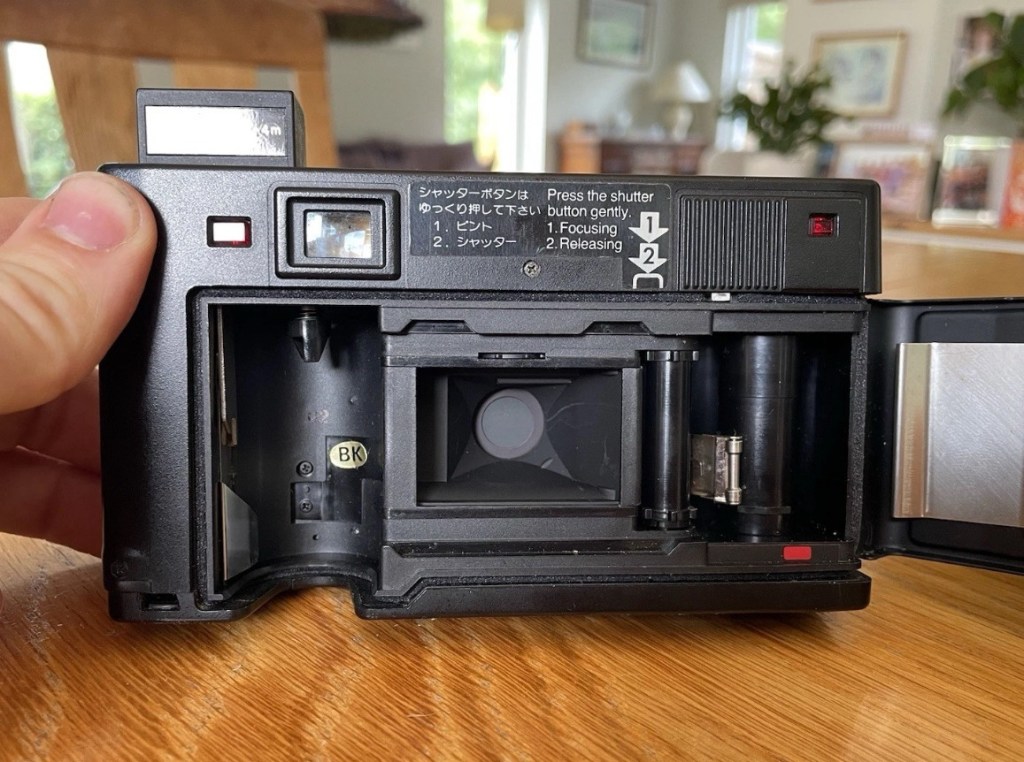
This is a Canon AE1 that was produced around May 1977. I know this because of the date code within the spool area where the film sits. Seeing these units were produced between 1976 – 1984 this particular unit is quite an early one. It is currently 48 years old and looking very good.

Canon AE-1

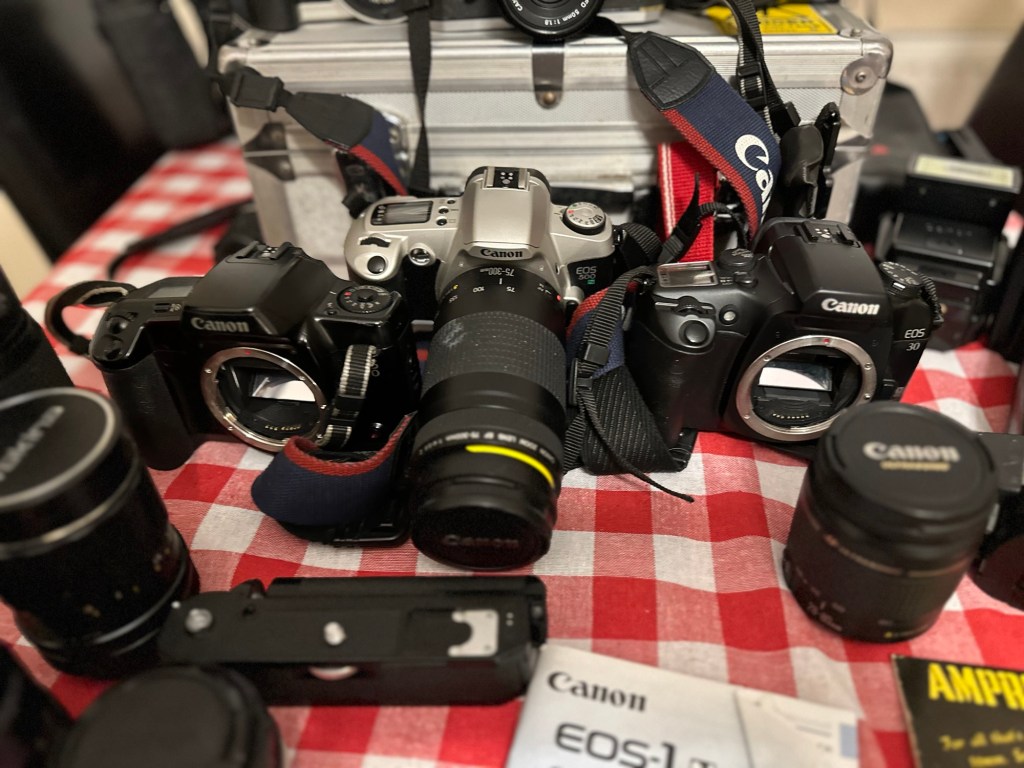
This camera is part of a batch of cameras recently received from a good friend of mine Jon, who has been in the photography business for more years than he cares to remember… it’s a big number and that’s all I’m saying. I did discuss his very kind donation here: Cameras…i need more!

How did you date this camera?

Surprisingly quite easy. There is a number on most Canon cameras externally, and contrary to belief this is not the ID number, the id number we require is inside the camera, printed in the film spool bay in a very dark ink. You have to position it in the light to view it properly.

The number can consist of 4 or more digits. In my case the number is R519. If you go to this site by a guy called Bob Atkinson he has a chart here that explains how to source the date of your Canon Camera or lens: Bob Atkins Photography- Date codes

So using Bobs code the letter “R” refers to the year of manufacture and in this case represents 1977 or 2003 (the dates were recycled when they reached the end of the alphabet) seeing this camera’s production run was between 1976 – 1984, “R” in this case represents 1977. The next two digits represent the month of manufacture, and occasionally in months 1-9 the preceding zero was omitted. In my case considering the number 51 does not represent a Month, the zero was omitted in my case therefore making the month of manufacture “05” hence month 5 – May. So this unit was more than likely produced in May 1977. Occasionally there would be a final letter such as an “F” that would represent the factory it was made in. “F “ would have been the factory in Fukushima. See, that’s how I dated this unit. Check Bob’s site out and date your Canon equipment.

Anyway, here’s a little history about this superb little camera:

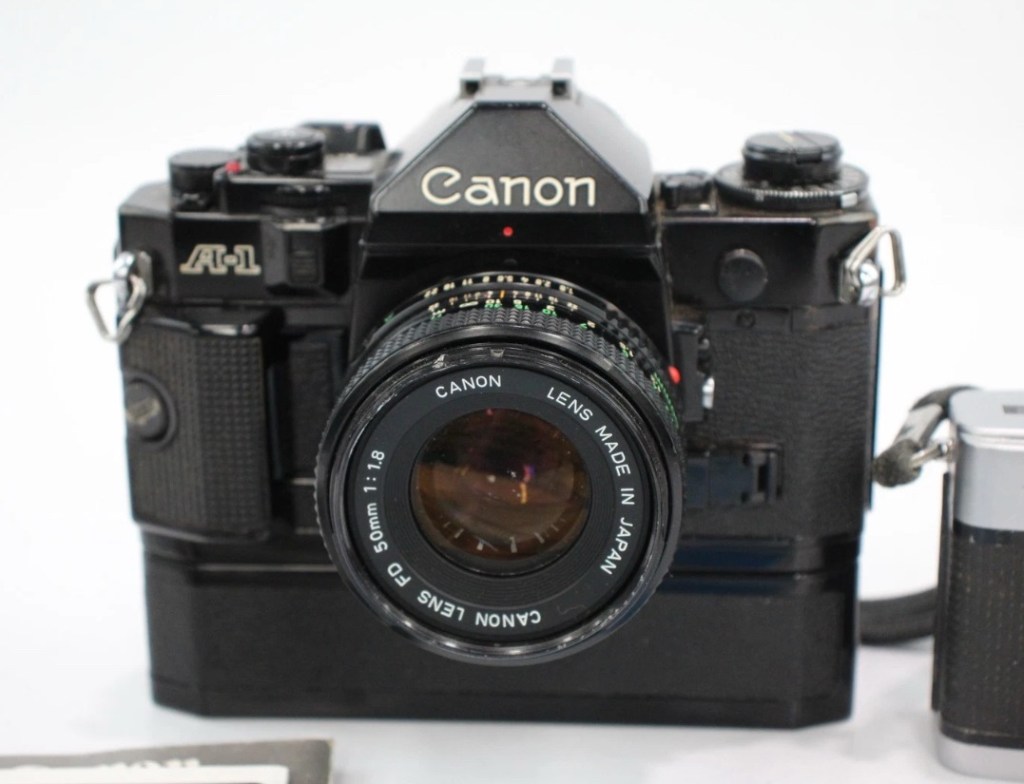
The Canon AE-1 is a 35 mm single-lens reflex (SLR) film camera for use with interchangeable lenses, manufactured by Canon Camera K. K. (today Canon Incorporated) in Japan from April 1976 to 1984. It uses an electromagnetically controlled, horizontal cloth focal plane shutter, with a speed range of 2 to 1/1000 second plus Bulb and flashX-sync of 1/60 second. The camera body is 87 mm tall, 141 mm wide, and 48 mm deep; it weighs 590 g. Most are silver, with black grip and chrome trim, but some are black with chrome trim.

Its name refers to the fact that it is an electronic camera using aperture control for automatic exposure. The AE-1 is the first SLR containing a digital integrated circuit, which allowed Canon to integrate more functionality while making the camera smaller. Both the digitally-controlled automatic exposure and the small size helped to make the camera a success: backed by a major advertising campaign, the AE-1 sold over 5.7 million units, which made it an unprecedented success in the SLR market.

Wikipedia

So there is a lot of them about, but it’s rarer now to find one in a good condition. I think I have one that is in a good condition, has very slight signs of ageing (Patina) and shouldn’t take too much effort to get it working again.

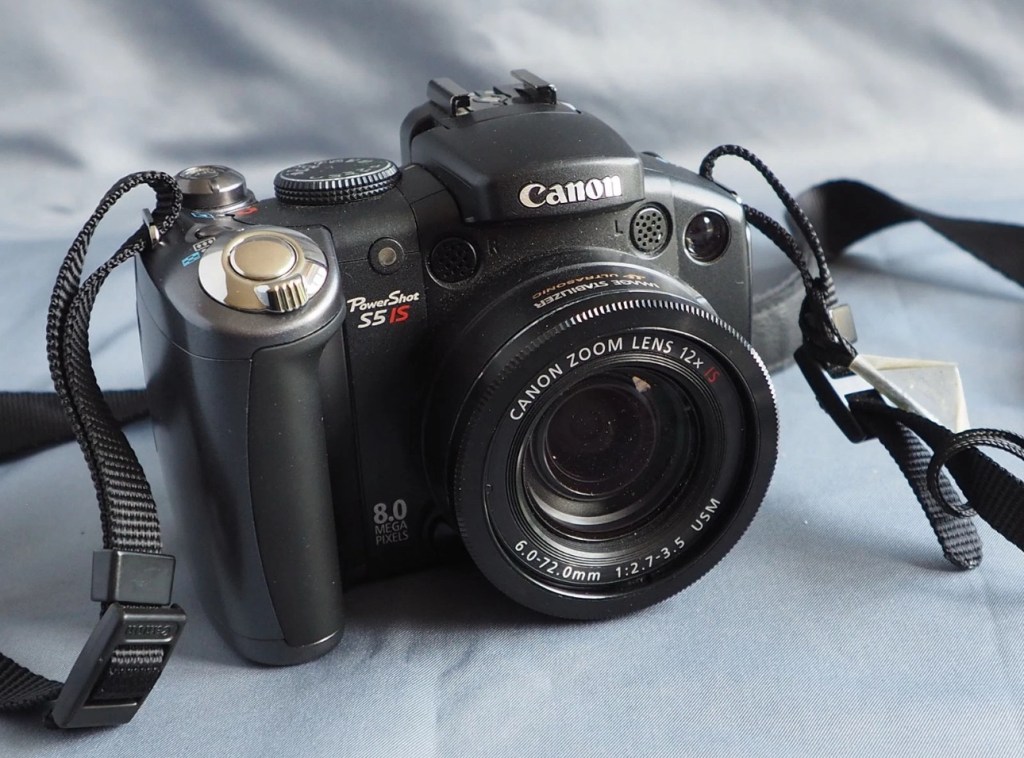
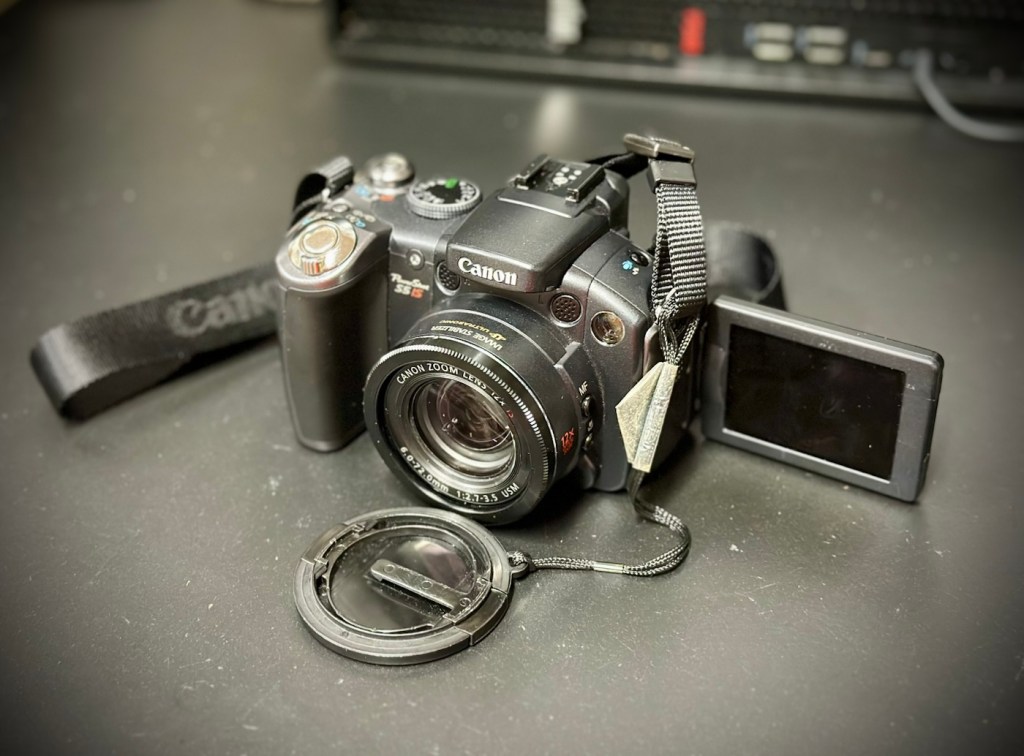
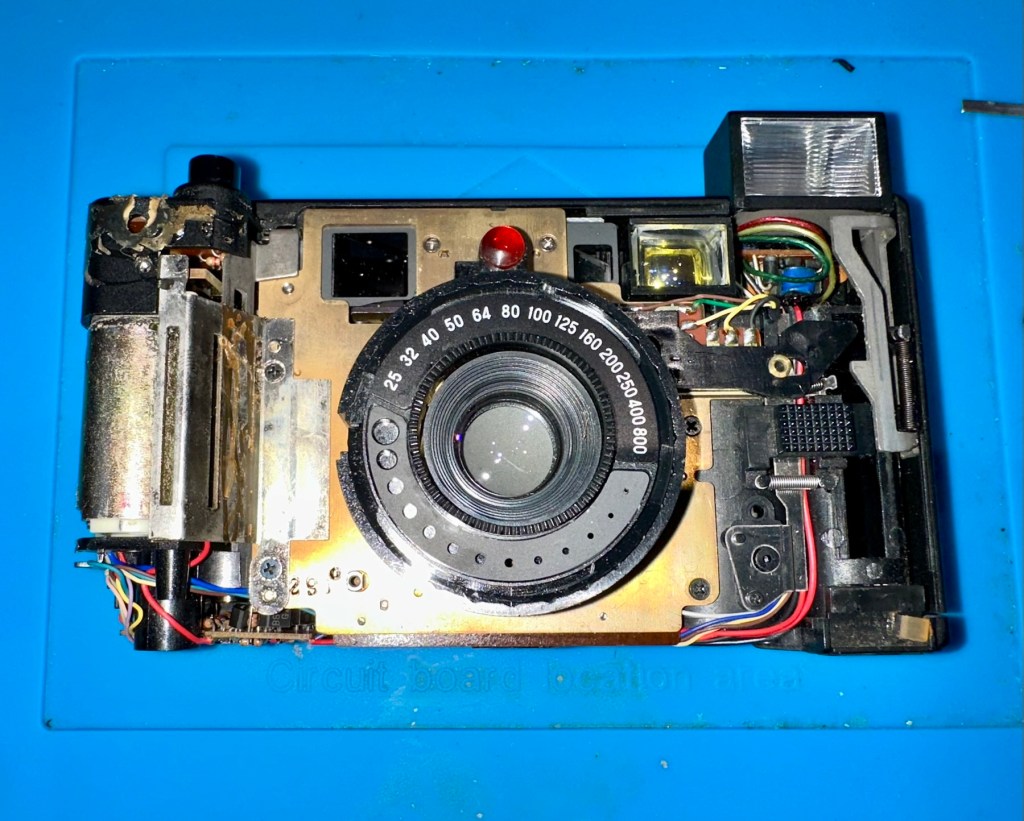
Let’s have a closer look at my inherited camera.

Assessment:

It’s been in storage within a foam lined metal box for a few years and this appears to have assisted in maintaining its overall good quality. There are a few slight signs of wear that are present as you would expect with a camera that has been well used but cared for, but there are no major dinks or signs of bits being broken. It has been loved.

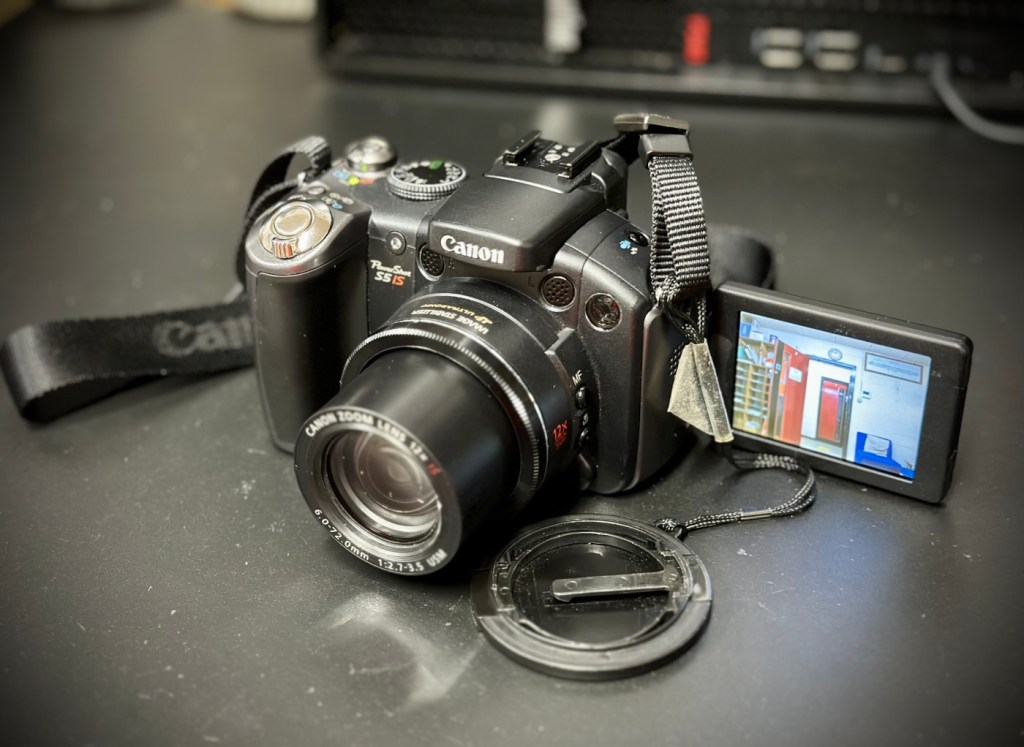
Looking at the shell all the buttons are doing what they should, it’s a bit dusty and grubby and looking through the viewfinder you can see a lot of dust in the view, but I believe this is just dust on the mirror, or at least I hope so.

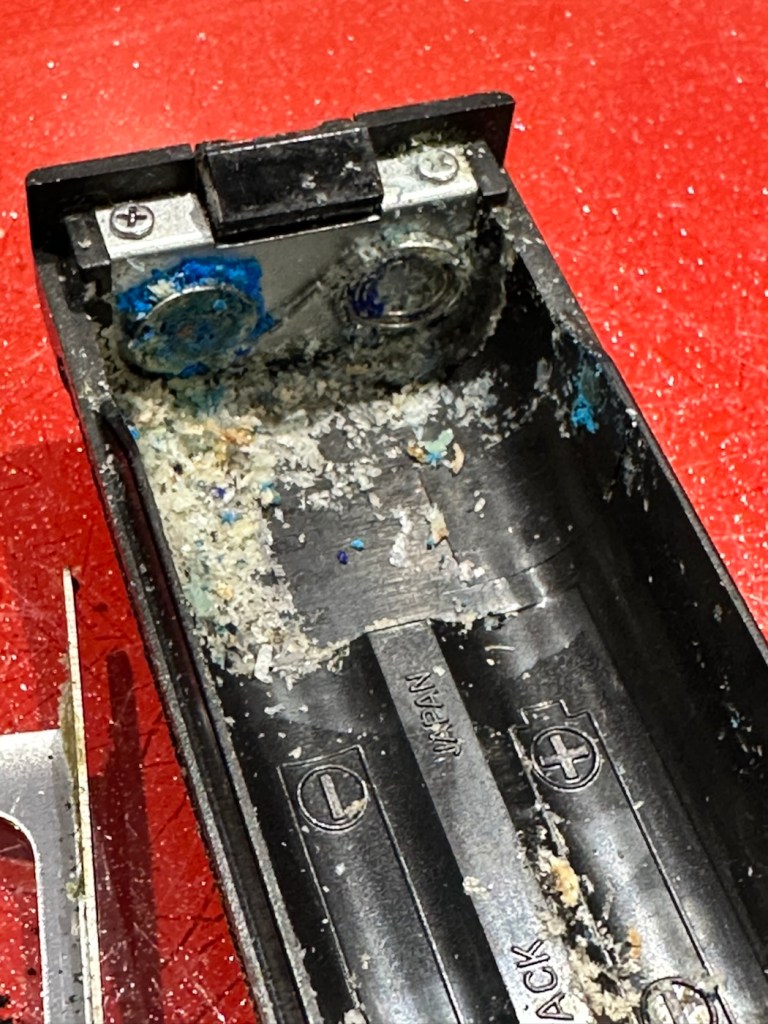
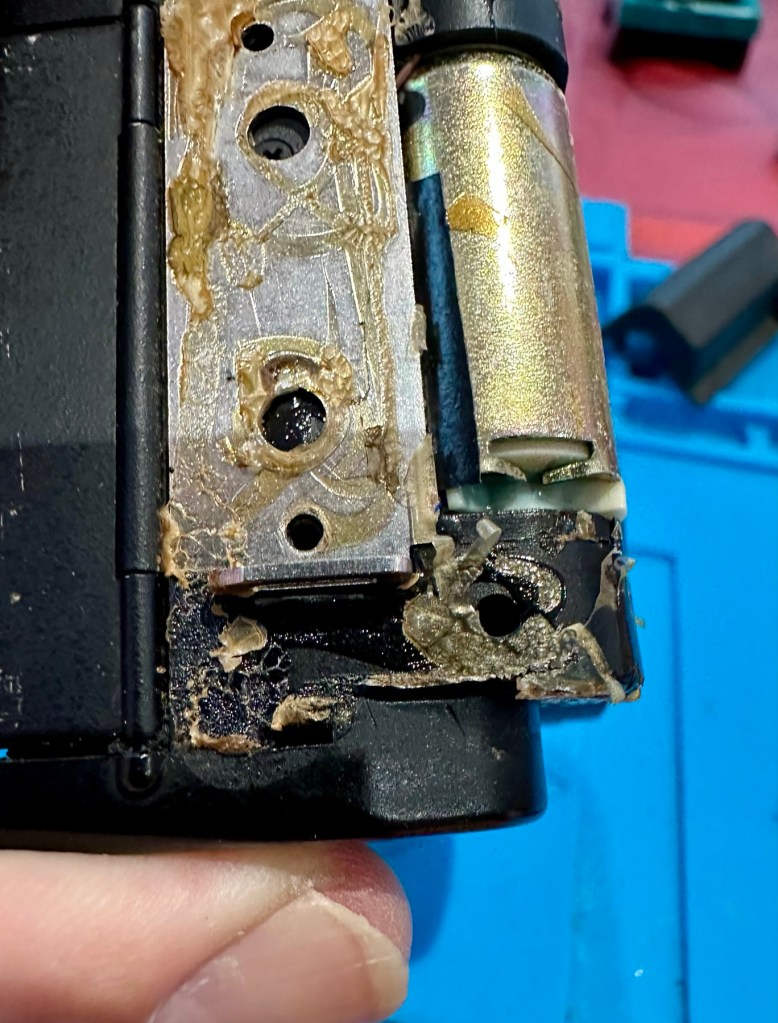
The camera has attached to it a Canon power winder “A” and this does not work, it has serious corrosion that I suspect that has gone behind the contacts and will need dismantling, cleaning and rebuilding. I will cover this activity in a separate post, whilst this one covers the camera and is a separate activity.

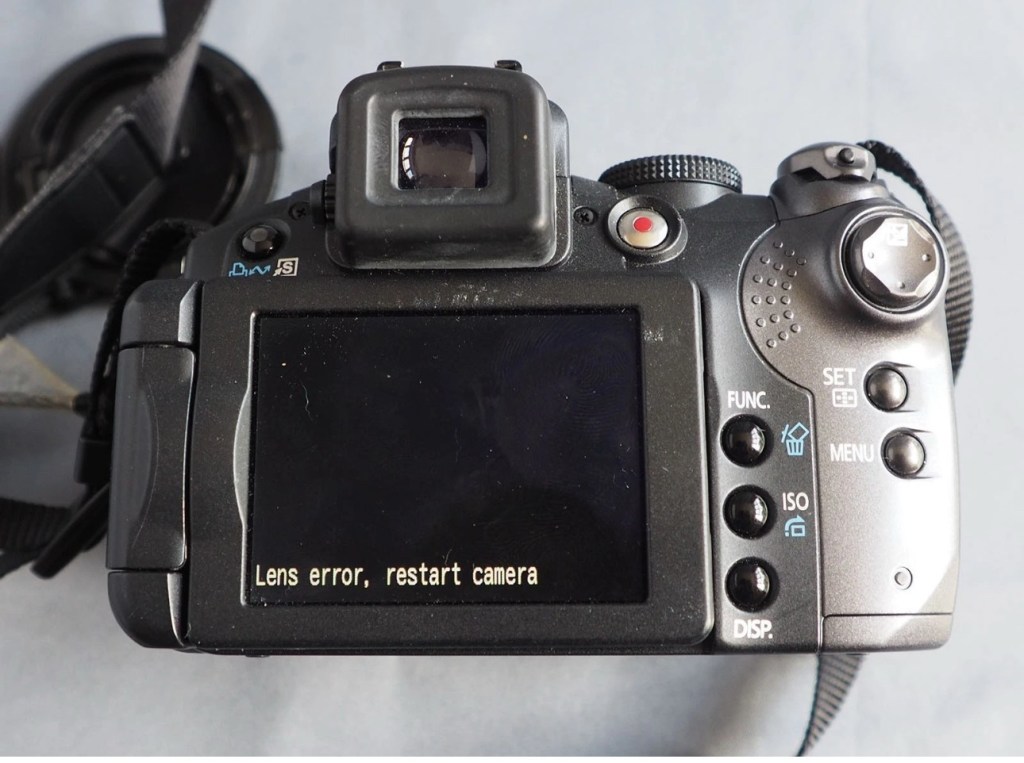
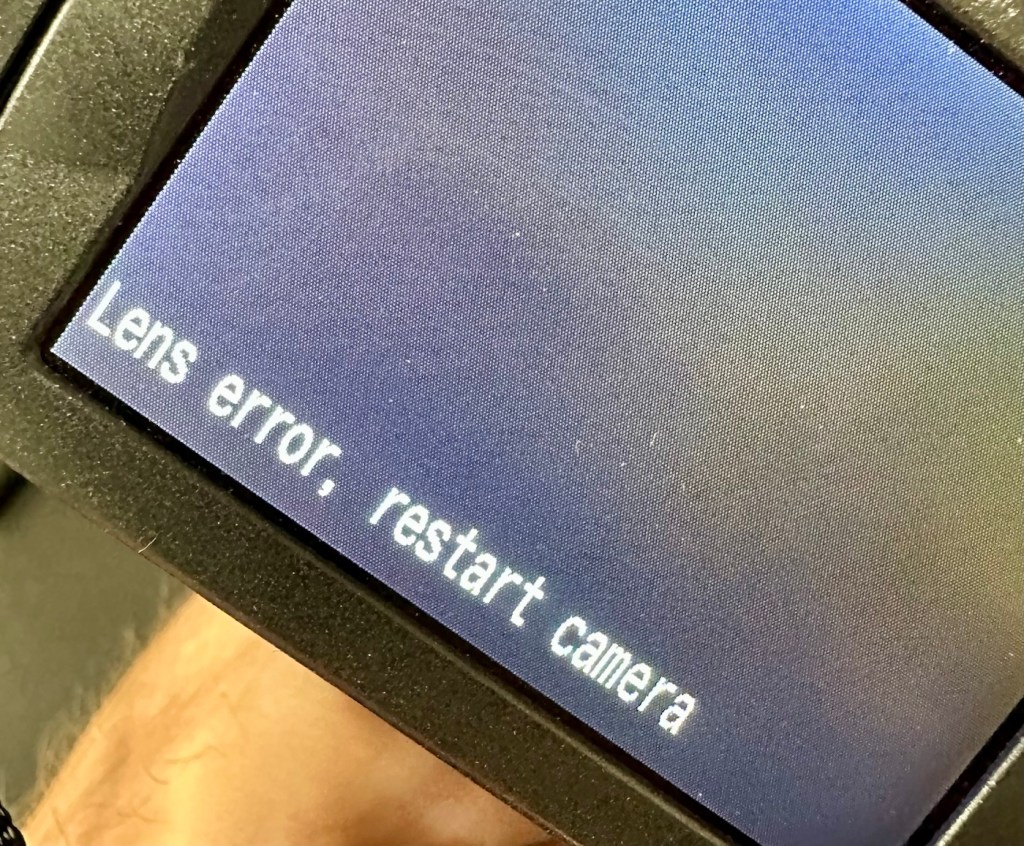
Anyway back to the camera. The wind lever seems to be locked, it can’t be cocked. The shutter doesn’t fire but there does seem to be movement in the exposure meter in the viewfinder but it seems erratic, not quite as it should be. I have a feeling and in fact I’m quite confident it is an electrical issue, as with the Canon A1, a bad power source would render the entire camera useless.

Repair:

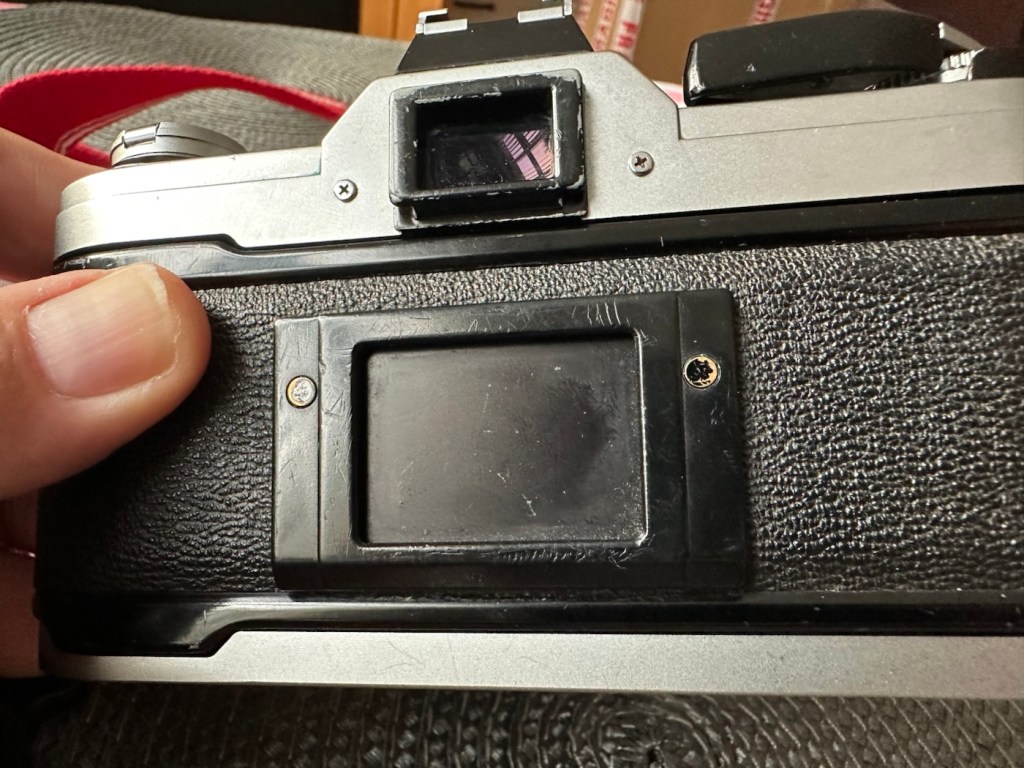
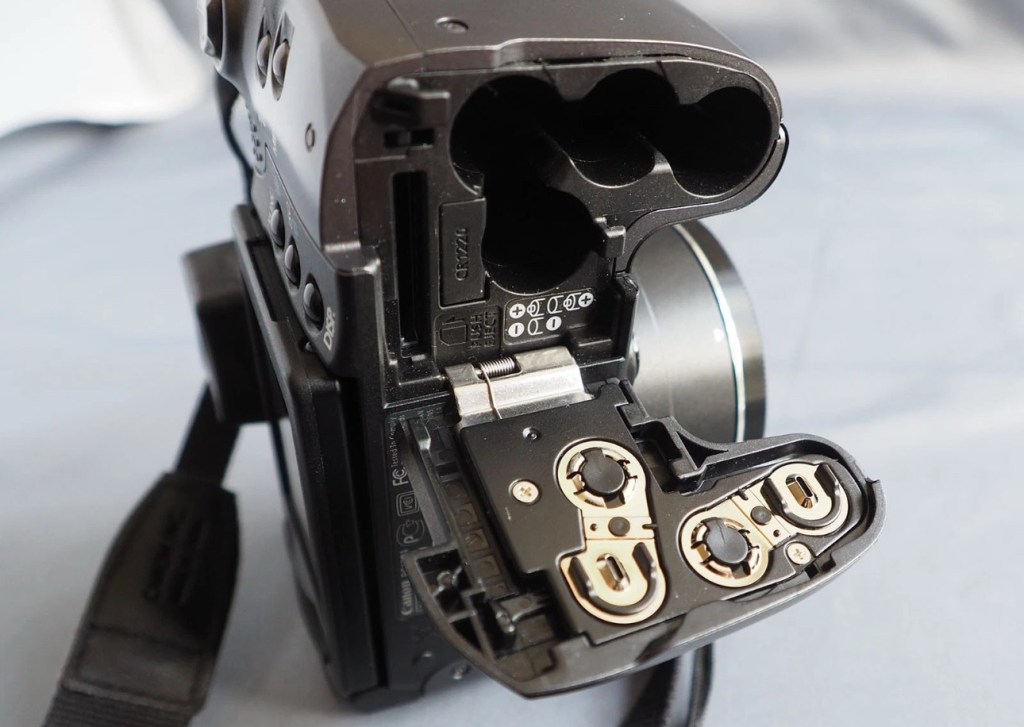
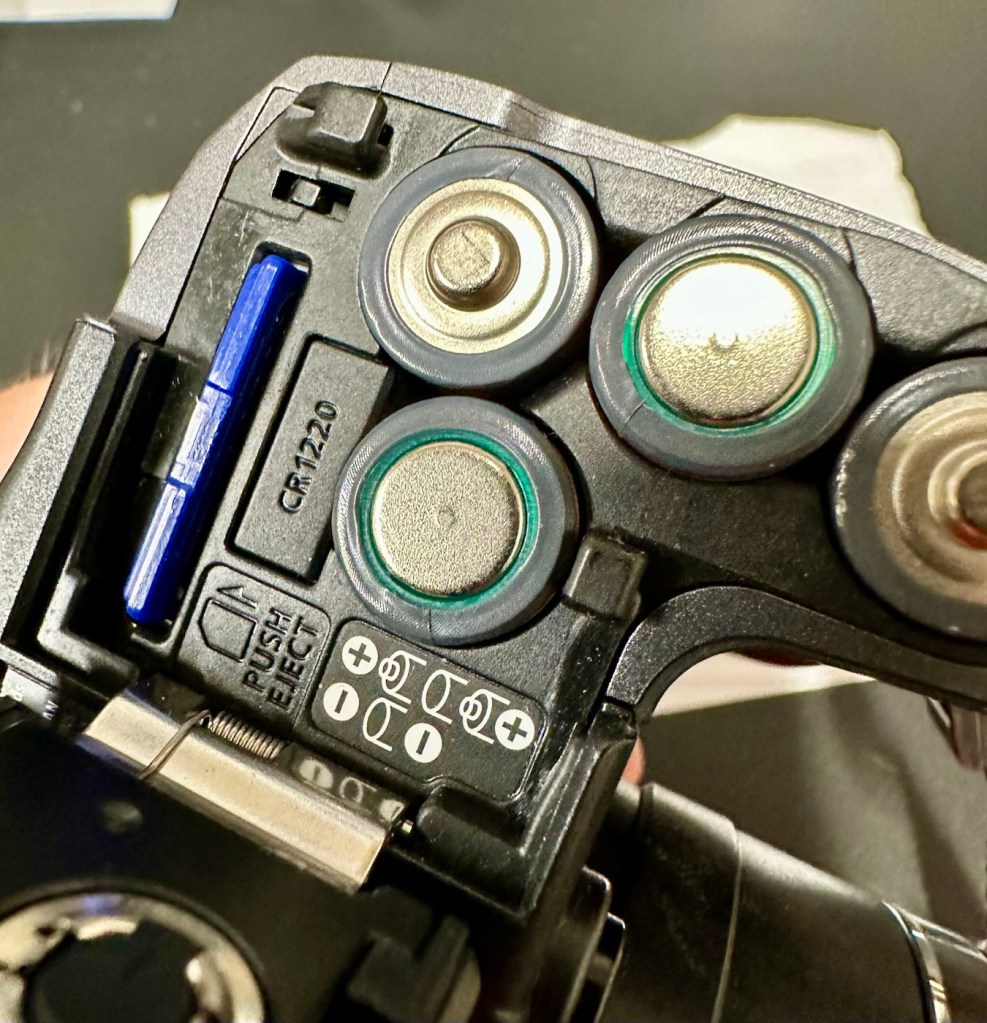
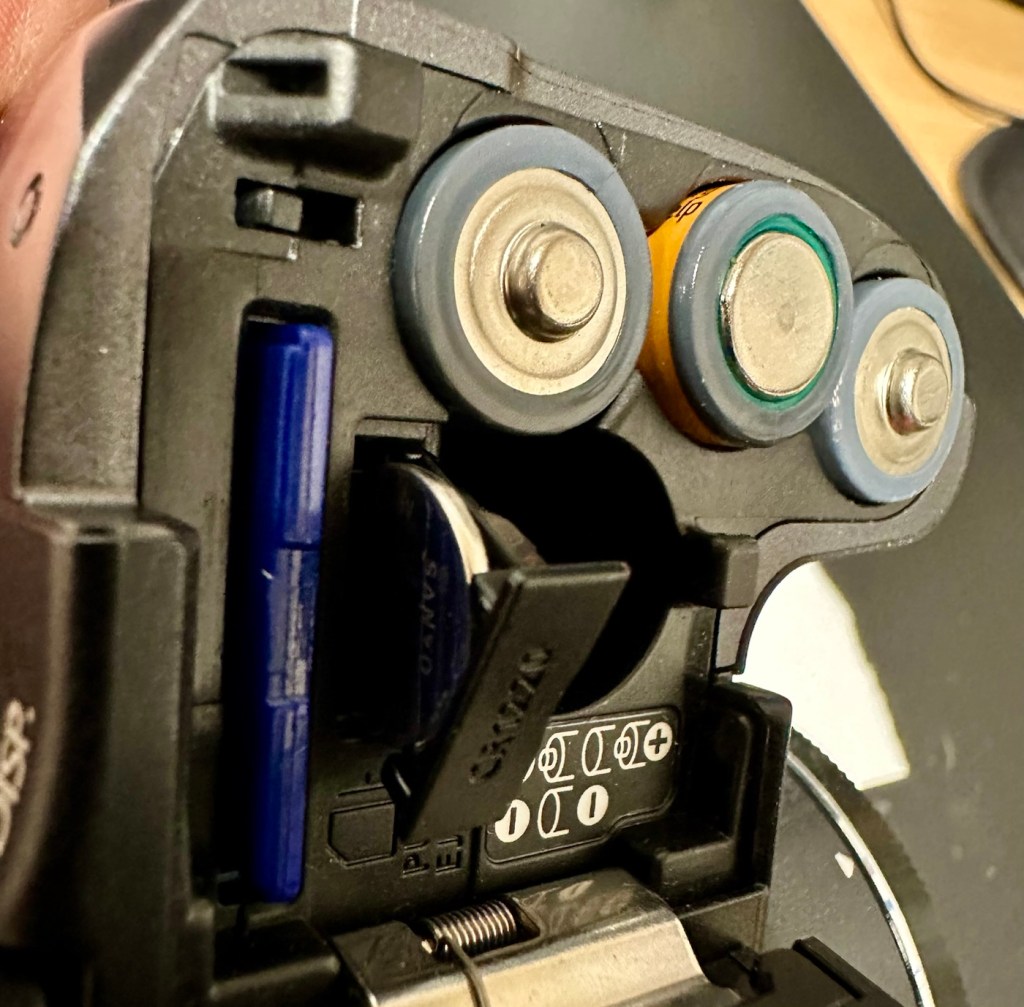
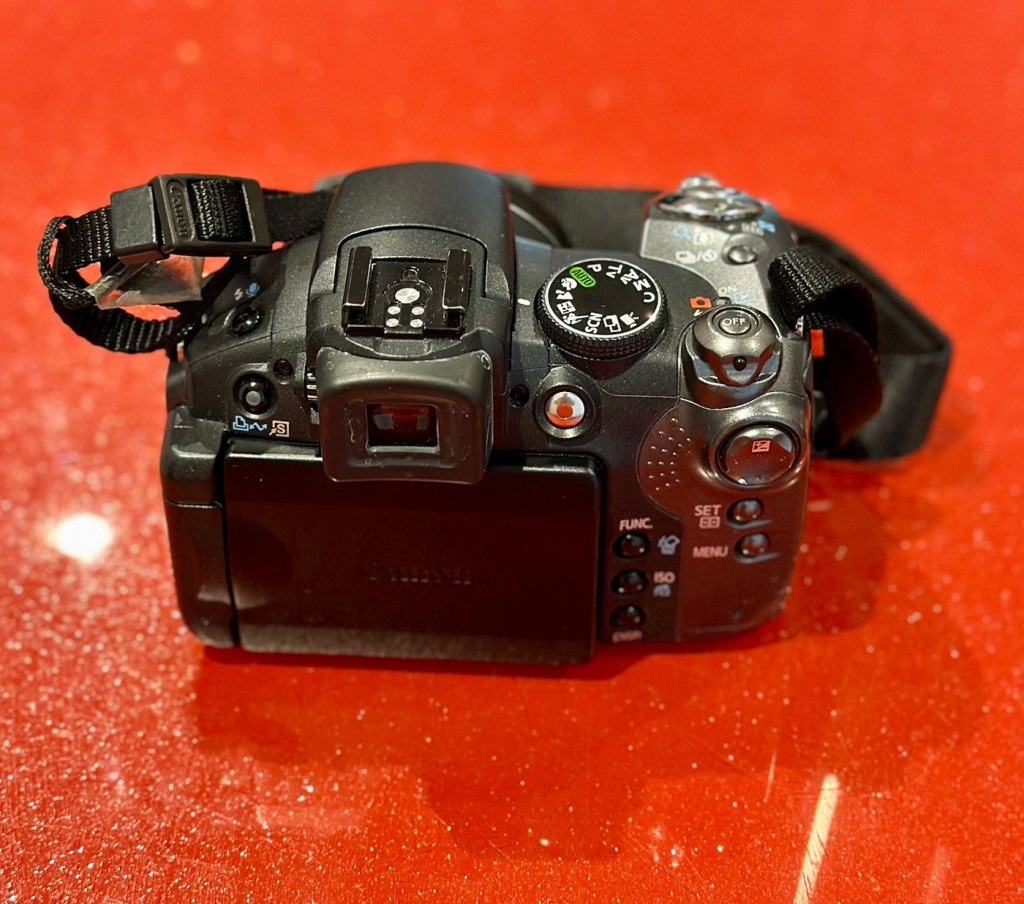
With my suspicions about the electrical element on this camera the first thing I did was to do a battery check in the camera. This camera has one cell in it, mounted on the front face just to the right hand side of the lens in a small chamber. It is a 6v lithium battery. I suspect this one has been in place many years.

Battery check button

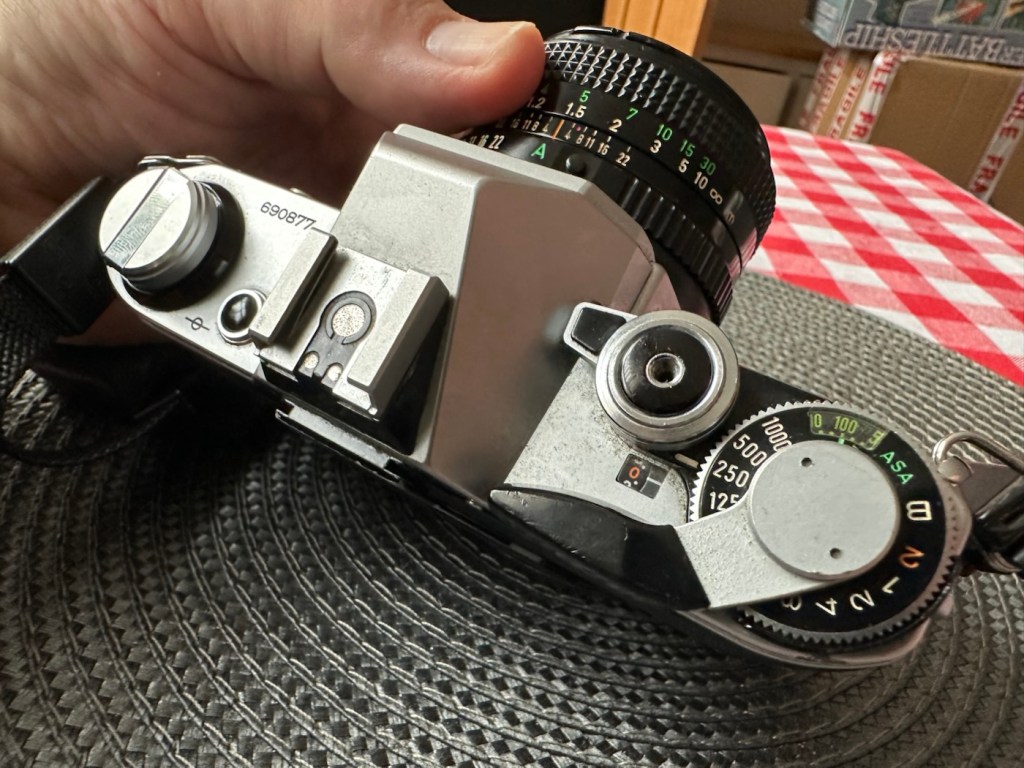
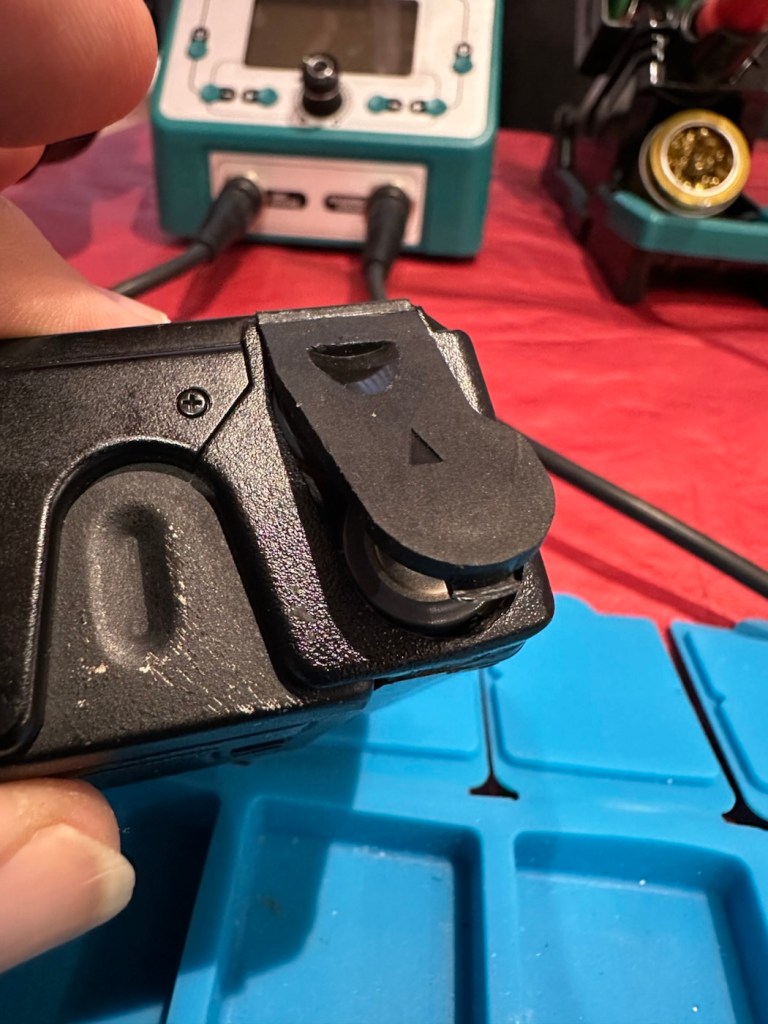
To check the battery power you look through the viewfinder at the light meter to the right of your field of view and depress the little black button on the top left of the viewfinder on top of the camera.

This. Battery is dead

As you can see above, when you push the little battery check button the needle on the exposure meter moves. It may settle, it may move about, but the battery should be indicating below the 5.6 level to prove it has life, this battery is indicating dead. Let’s confirm that on an external battery checker for confirmation.

Yep. It’s dead

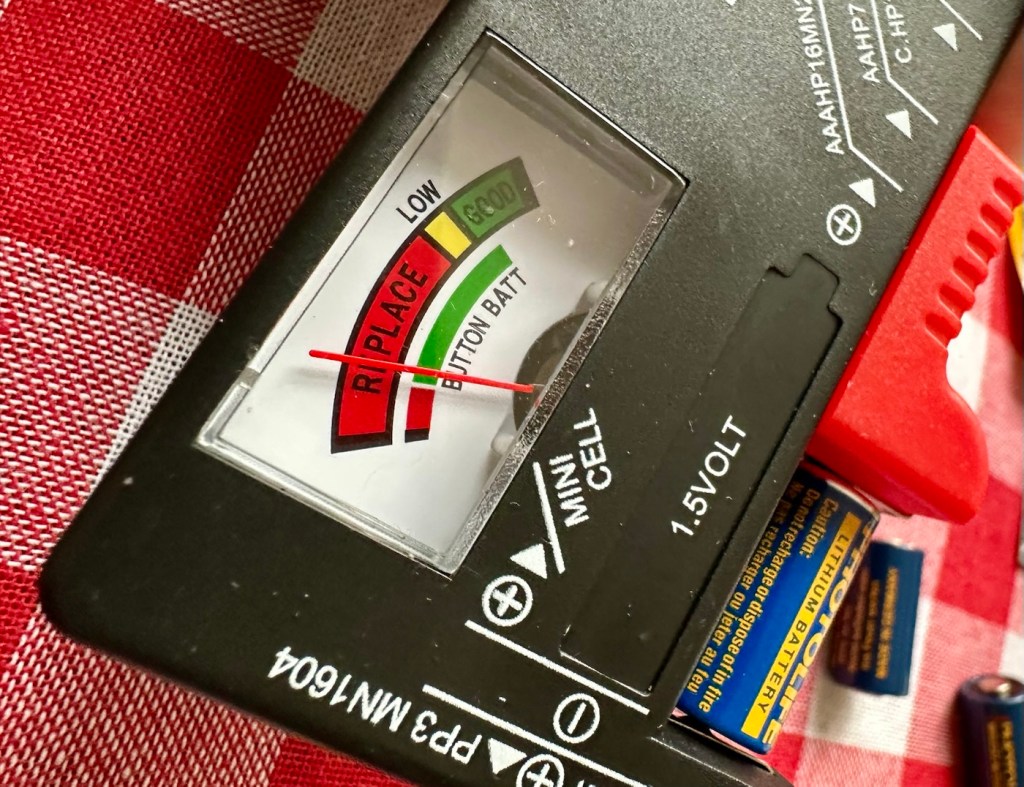
And I think that confirms things for us that this old battery is dead. Fortunately I have plenty of replacements available so I just put a new one in to see what happens.

New battery

The new battery is in place and now you can see the indication has dipped well below 5.6 indicating a healthy battery supply. I push the shutter button and it fires perfectly. Power has been restored.

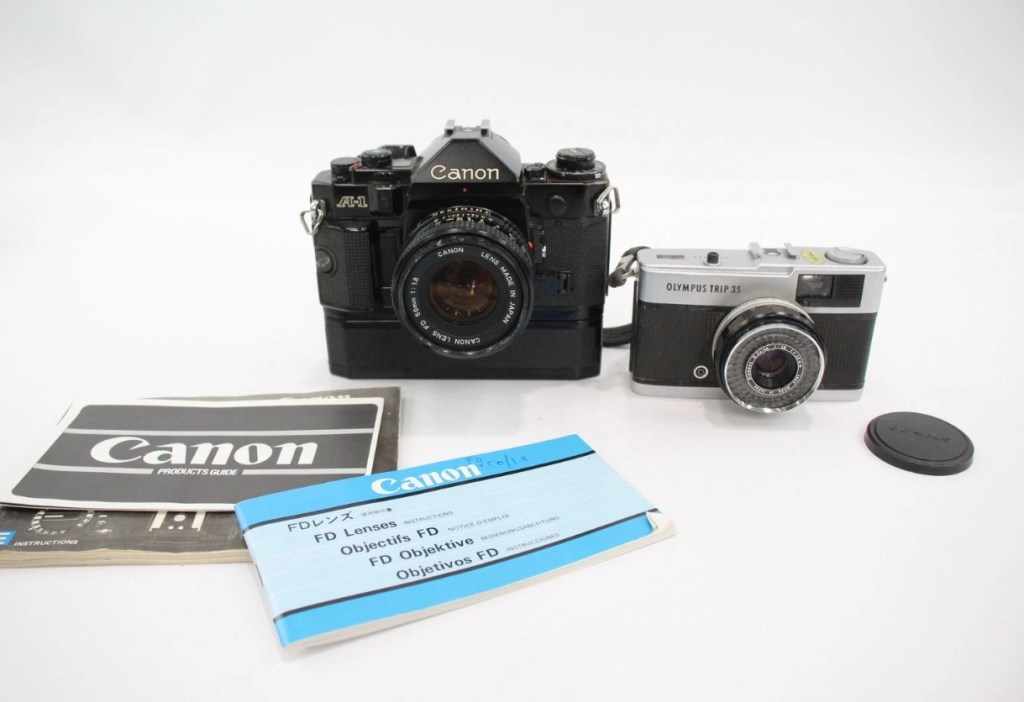
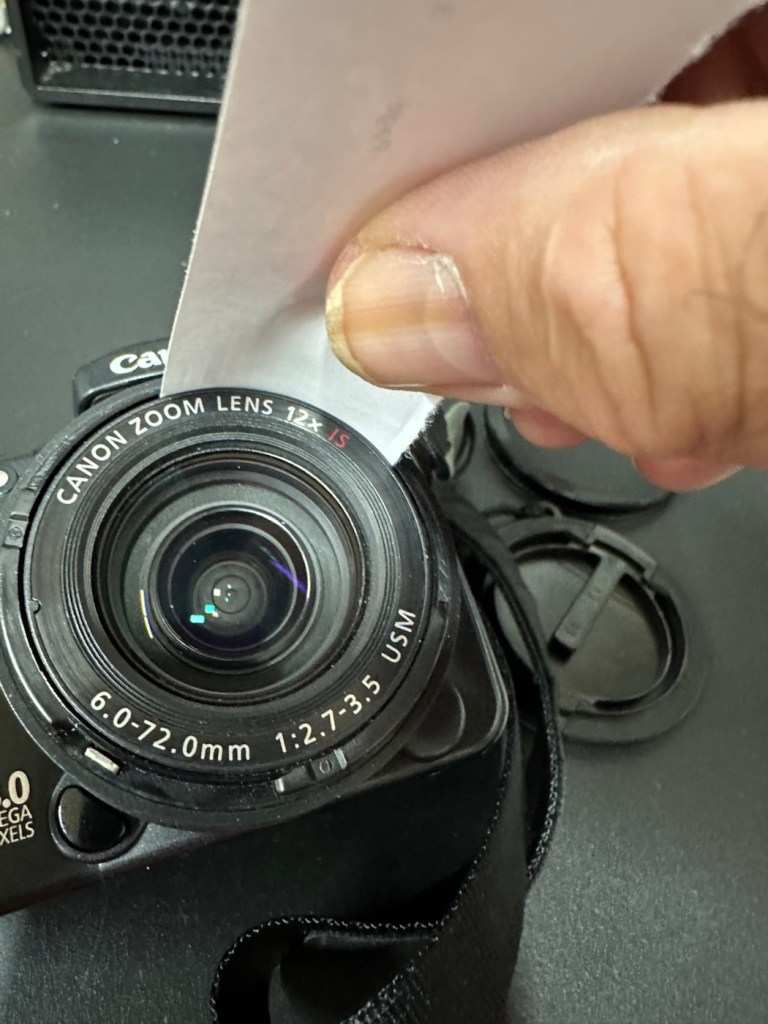
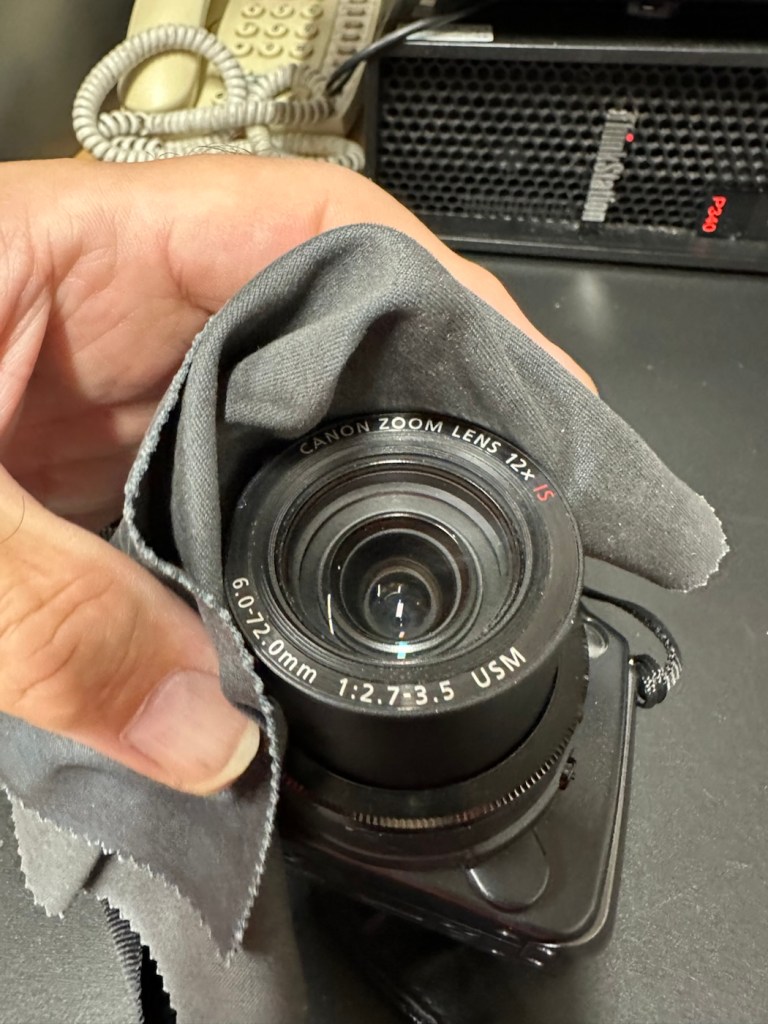
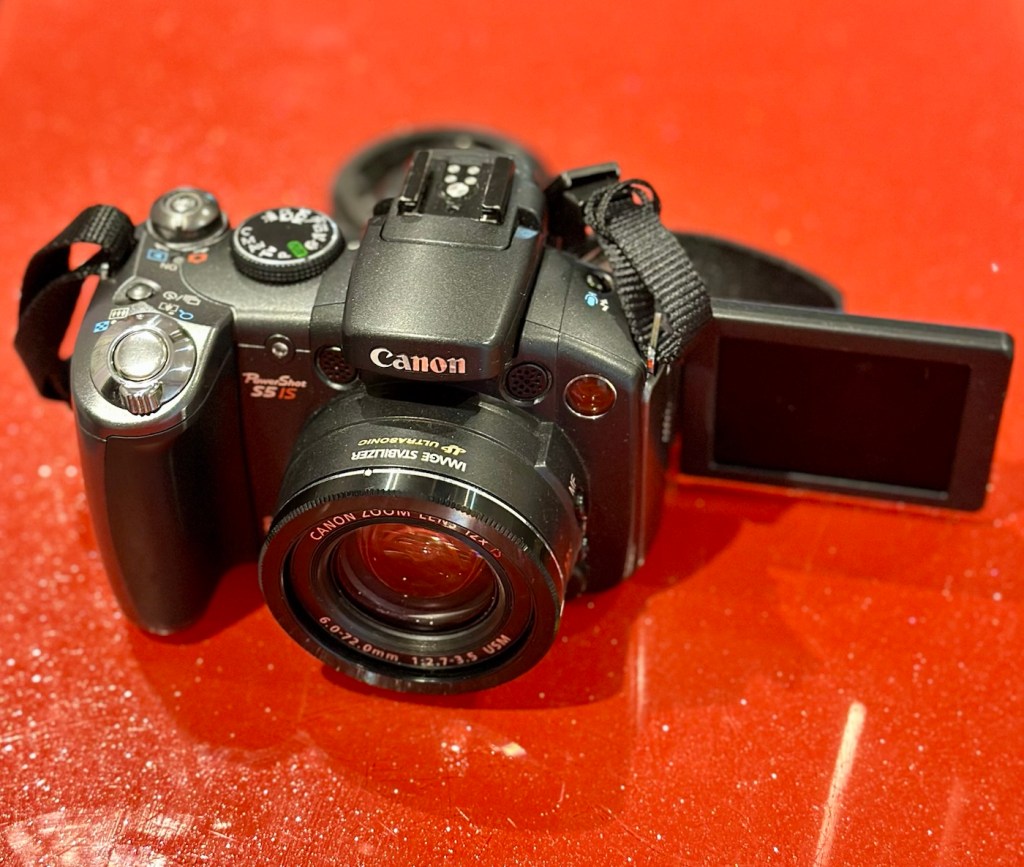
The lens on this camera is pretty much the stock issue FD 50mm. I have removed it and exposed it to high lighting levels to see if there are any imperfections and I’m pleased to say there are none. No Mould or fungus build up, I must admit my friend who passed this on to me has stored it perfectly. Apart from a little dust build up, I was able to use a lens cloth on both the lens and mirror and the issue was sorted in minutes, not that it was ever an issue really.

I’ve used a dummy film and the carriage works fine, the lens apertures all react smoothly, and the shutter speed’s respond as they should. There is no shutter scream or lag, and everything seems just right. After spending a good few hours going through the instruction manual and checking all its functions I am happy it is doing just what it should. It is very rare to find such a good condition of camera that requires very little maintenance. It’s a credit to the previous owner.

This is a sympathetic restoration. I’m leaving it looking as it is. I’m not fixing something that isn’t broken, and I will attend to it with lubrication and maintenance as and when it is needed. I will very soon run a roll of film through and see just what comes back as a result. I have a number of films here that are now 20 years out of date so there could be some interesting results.

Result:

A beautiful camera

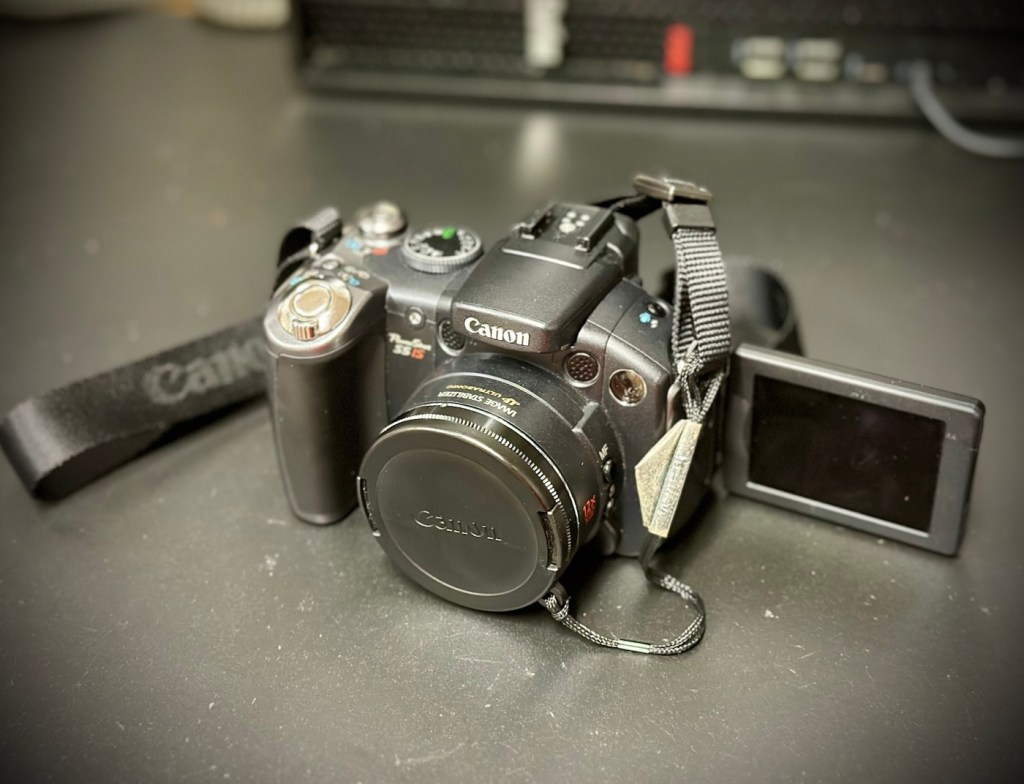
The camera has cleaned up beautifully after a good deep clean and polish. I have a superb little example of a well loved and well used retro superstar of the late 70s. In perfect working order and ready once again to be used for what it was designed for. Taking great photographs.

As stated I’m going to run a film through and I will post the results on here whenever I get the time to do so. See the test results here: 20yr old Kodak Gold

My plan is to have this displayed in a case in my workroom alongside my Canon A1 when I have completed its repair. I took up photography in the period of time that these cameras were produced, and they hold great memories and sentimentality for me. They come from a time when cameras had style and innovation, before they all started to look the same, quality and style, it’s what’s missing today.

For someone like me that loves old cameras, I think these are superb and will always hold a place in my heart.

Thank you for passing by, it’s always very much appreciated.

Cameras…i need more!

I say more cameras, my wife begs to differ.. my friends agree with me.

Well, my wife would probably disagree with the above comment.

However, i have some very good friends who are quite happy to ignore my wife and her protestations. Some would say they are very brave…others would even say they are foolish. Time will tell.

A couple of beauties – you wouldn’t understand

Jon, is a friend and former work colleague that i have known for many years. We both worked at the same Kodak plant in Harrow, me on the graphics art film production track and Jon was in the training and development area. We rarely met there as the plant was so huge that our paths crossed quite infrequently. However Jon has also been the mainstay and life blood of a local football team since the early 70s, and it’s true to say he is a local legend and pillar of the community. This is how i really met Jon, and we have always discussed issues of photography, he is very much involved with promoting the armed forces and has been fortunate in the subject matter he has been asked to photograph. Needless to say, he has a lot of redundant equipment, and when he became aware of my blog site and the repairs i attempt to do, he very kindly donated a number of items for me to write posts about, and to be quite honest it will keep me busy for quite a long time.

The majority of the items probably just need a little service and a test session, a couple have some battery corrosion issues, but in general cosmetically, they are in good condition. We have a number of old lenses, but as you’d expect from someone who looks after their equipment, there isn’t a sign of haze or fungus in them. They just need a clean up, and very little else.

Here’s a list of what i have received, and observed after a very quick look at the items.

8 cameras:

  • 1 Canon AE1 film camera and user manual, mirror was stuck, now freed up and firing ok but requiring a check over.
  • 1 Canon EOS 30 film camera, a bad case of sticky body.
  • 1 Canon EOS 10 film camera, issues unknown
  • 2 Canon EOS 500N film cameras, issues unknown
  • 1 Canon EOS 3000 film camera, issues unknown
  • Canon EOS 1N film cameras with E1 power drive, beautiful camera, issues unknown.
  • Canon EOS 7D digital camera with BG-E7 battery grip, stunning camera, issues unknown.

7 lenses: all Canon fit

  • 2 x Canon FD 50mm 1:1.8
  • Tokina 300mm 1:5.6
  • Tokina 135mm 1:2.8
  • Tokina 35mm 1:2.8
  • Canon 75-300mm 1:4-5.6
  • Canon 28-80mm 1:3.5-5.6

There is a separate lens that i have been asked to look at and repair for him as it’s his third go to lens, that is a Canon EF 28-200 1:3.5-5.6 USM lens. It doesn’t focus in auto, i notice it has lens wobble and a lens washer appears to be exposed in the zoom section of the lens. It needs investigation.

Other items:

  • Canon Power winder-A. Part of the AE1 camera, you can smell its issue as you hold it, battery corrosion. Batteries inside have seriously corroded, however i believe the issue is salvageable.
  • Canon speedlite 199A flash gun, untested.
  • Metz 45 CT-1 flash, again there is corrosion in the battery pack, you can smell it. Again this should be salvageable.
  • Sangamo Euro master light meter and invercone. In excellent condition, could be that the selenium light cell is dead. Needs investigating.
  • 8 rolls of film, expiry date 2005, may still work..who knows.
  • 3 x 6v lithium batteries, all tested and working.

Add to that the two camera bags and a hard case that they all came in and I’m sure that you will agree that it was a pretty nice package to receive.

I’m extremely confident i can get these all into a good working condition, any cameras that i will not be keeping will either be sold on to benefit charities supported by Jon or donated to local charities for their benefit. Either way nothing will be heading to waste, that is a promise i have made to Jon and thats just how it will be, i do not break promises.

Thanks for passing by, and i will be posting articles on all these products in the coming months. As I already have 13 projects already in draft awaiting a time when i can back to repairing them, you can plainly see I’m going to be very busy for quite a while and should be able to supply quite a regular feed to this blog.

Have a super day. stay safe.

Fuji Finepix S9500 test pics

I purchased this camera for just £8:00GBP, damaged a few weeks back. It’s a 9mp camera from back in 2005. It was the simplest of repairs and that post can be found here: Fujifilm Finepix S9500. It’s a lovely little camera, and today we took my 11 year old nephew to Liverpool for the day, to celebrate his birthday and to do a stadium tour of his favourite team. And i took the Finepix S9500 to see if it worked, and I’m pleased with the results. I got some looks of sympathy when I pulled this one out of the rucksack, but who cares, I fixed this, and it works. Yes your big flash fandango cameras are lovely, but to be honest I’m just interested in enjoying my time out with family and getting some snaps. Here’s a selection from today. Nothing special, as I said just snaps.

And that proves it works.

Have a great day.

Olympus Trip 35

What the listing stated:

This lot is being sold for PARTS / REPAIRS, it is currently NOT in a working condition

Olympus Trip 35 w/ D. Zuiko 40mm F/2.8 Lens
& Original Lens Cap

EBay

I brought this item along with a Canon A1 as a job lot. The full detail of what was in the auction and how it progressed can be found here: Not the lottery, but for me – just as good

The page regarding the repair of the A1 can be found here: (Still in draft – coming soon)

Meanwhile here is a little history about the Olympus trip:

The Olympus Trip 35 is a 35mmcompact camera, manufactured by Olympus. It was introduced in 1967 and discontinued, after a lengthy production run, in 1984. The Trip name is a reference to its intended market—people who wanted a compact, functional camera for holidays. During the 1970s, it was the subject of an advertising campaign that featured popular British photographer David Bailey. Over ten million units were sold.

The Trip 35 was a point and shoot model with a 40 mm ƒ/2.8 lens, solar-powered selenium light meter, and just two shutter speeds. In ‘A’ mode, the camera operates as a Program automatic, choosing either 1/40 s or 1/200 s. The camera could also sync with flash, and has a range of aperture settings, from ƒ/2.8 to ƒ/22. In flash sync mode, the shutter is set at 1/40 s. Apart from a simple four-position zone focus system, and an ISO setting from 25 to 400,[2]the camera has no other photographic controls. The camera has a Prontor-Compur sync connector and a hot shoe. Its lens was a coated Zuiko 40 mm ƒ/2.8, with four elements in three groups.

The camera has an ISO range of 25–400, as films faster than 400 were uncommon at the time and delivered reduced image quality. 25 speed allowed the use of Kodachrome, while 400 speed allowed use of Kodak Tri-X and similar fast materials under low light. Earlier models, from the first few years of production, have a maximum ISO speed of 200.

The use of a selenium photocell to select the shutter speeds and aperture let novices use the camera as a “point & shoot”. No batteries are needed to power the camera.

The lack of more than two shutter speeds was not a problem. At 1/200 s and ƒ/22 with 400-speed film, the camera could deliver correct exposure in full sunlight, while at 1/40 s and ƒ/2.8, correct exposure could be obtained under bright fluorescent light, without a flash.

Wikipedia

And who could ever forget the series of star studded television adverts, featuring the photographer David Bailey, put together to promote this camera.

David Bailey

I never really got to use one, I admired one from a distance instead. My brother in law, Jim had one around about the mid to late 70s and he took some fantastic snaps with it. I wasn’t into photography at that time as I was still more interested in LEGO and Tonka trucks. However he did let me try it a couple of times, it really was that easy to use.

I’m not really sure what the problem is with this one, as the listing was not really clear on its issues. I just really wish sellers would just take a few seconds to describe the problems, it really could be an instant decision for the buyer – is it repairable or not? I’ll just have to wait until it’s arrived, and then i can do an assessment of its condition.

Assessment:

Well, it’s arrived and cosmetically it looks fine. However, zoom in a tad and the issues become apparent. It’s been dropped at some time, the lens has a little bit of wobble and you can see the outer ring of the lens has an obvious dent in it.

Drop damage

It does wind so that’s a bonus. The exposure button works and it clicks as it should, and the old selenium exposure meter appears to be responding, the red flag appears in low light and thus the exposure button will not depress. This is good.

Exposure indicator in viewfinder

When you half press the exposure button you would expect to see the relevant shutter leaf aperture close down, to the corresponding f- stop reading, this occasionally happens. If you move the lens barrel slightly it does have an effect, but it looks as if there is also some contamination on one of the shutter leafs, all of this is probably as a result of that tumble that has occurred sometime in the past.

Obvious lens wobble

I will definitely have to remove the whole lens housing from the camera to see if I can do anything regarding that wobble. This is going to be quite some task, and I’m not confident I will succeed, but who knows.

Let’s attempt to get inside.

Repair:

To get into the lens there are three tiny screws on the inner turret bezel that have to be removed that sit around the edge of it. This then pulls out and the lens optics can then be unscrewed.

Here are then two more screws that allow you to remove the selenium light sensor. Below this are three brass screws that hold the body to the lens. One of these screws were loose, hence the wobbly lens, this must have occurred when it was dropped.

I’ve pretty much had a cleanup here, applied a tiny drop of camera grease to the ring mechanisms, and tightened all these screws, and now the turret is nice and tight. I’ve just given the shutter blades a wipe with a soft brush and that is all it really needs. I’ve reassessed the camera, and tested its operation and it’s all good, working just as expected.

Result:

The dent in the ring remains as it’s causing no issues and is a subtle reminder of its past. The lens issue and its movement has been repaired and this in turn has cured the issue with the sticky aperture blades.

I haven’t touched the inner workings in the top of the camera such as the light metering, as it’s working fine and what’s the point in fixing what’s not damaged?

I’ve still to run a film through it, and this will be done shortly as I have quite a backlog of film cameras to be tested. As soon as I have photos available I will link through this posting.

Really pleased with how this has gone, a nice easy fix but I can’t believe just how small those screws are around the lens bezel. I need my eyes testing that’s for sure.

Thanks for passing by, as always it’s very much appreciated.

Mamiya M Autofocus – 35mm point and shoot camera – Part two

Here we are again. I recently wrote of my failed attempt to get this 80s camera operating here: Mamiya M Autofocus – 35mm point and shoot camera.

Not one to give up on a project I have looked at a suitable donor camera and believe I have found one as detailed below. Only difference is that I had to buy two cameras as they came as a bundle. Not a problem as I can always do a separate post on the other one, the two have cost me a total of £15:00GBP bartered down from the original price of £30:00GBP. A bargain! So let’s just call it £7:50GBP per camera.

What the listing stated:

mamiya shutter button is stuck. red light on the right comes on. some external corrosion pictured

ricoh no power at all

EBay

Assessment:

The Mamiya is in quite a poor state, and is the Time Memory version that differs very slightly from the version I originally worked on, it’s essentially the same camera as the Mamiya M, but with an added quartz dating mechanism for imprinting time and date information on the film. This model was the last 35mm camera Mamiya produced before focusing solely on medium format. However the back seems to be a bit rusty whereas mine is in excellent condition, so I will be using a mix of the two units to make the one good one.

Repair:

The Mamiya looks good cosmetically until you open the rear and see the rust around the door, not a problem as I won’t be using this part of the camera. The red light does not come on at all and the shutter button is stuck, that’s for sure. The whole camera is dead.

Let’s get into it.

Once opened all looks ok so I decide to have a search around with the multimeter checking the basic operation. Am I getting 3 volts at the top of the battery barrel? No I’m not. It appears that one of the traces on the positive side of the power input board has lost continuity. For some reason the traces has been damaged, this could be either from corrosion or rubbing on something. The area affected is in the photo with the red ring around it.

I’ve fixed this immediately using some solder to bridge the gap, I have checked continuity and all seems ok. I put some batteries in and the motor squeals like a banshee and then stops. You can hear the screaming motor below in the short video from its first screaming session through to its proper 80s sounding drone.

The screaming motor through to its repair

I don’t think this motor has run for years and it does not run consistently. I have sprayed it with some contact cleaner and let it soak. I have left it overnight and checked the operation in the morning and it seems to have improved.

I’ve used the original fascia, rear door, focussing beam and flash capacitor from the first failed unit, and apart from a few bits of soldering, plenty of contact cleaner and some silicone grease, I’ve revitalised a failing motor and it is now working as it should. I forgot to mention I used some graphite on the shutter leafs to “lubricate” them. All optics cleaned and camera has been tested without film and is working just fine.

View finder indications are good with light meter operational, motor rewind works, flash and exposure is fine, and the motor advances as well.

Result:

I’m really pleased with this little camera and am pleased I didn’t give up on it. It’s taken two broken cameras to make one good one, and I have a good few spare parts left over to be used at a later date.

The unit looks so smart, the only real issue is the battery door that is notoriously flimsy and lots of references to its poor design can be found on line. A temporary way around this is just to put some tape across it to keep it closed.

Beyond that issue, the camera is a really good looking unit that has cleaned up really well.

I can’t wait to run some film through it to see how it performs. I have a few cameras like this to test so I’m looking for some decent priced film to use, as i do need quite a bit.

As soon as I have some photographs availability I will link to this post accordingly.

Many thanks for following the repair, it’s always very much appreciated.

Shooting blind

Strange title. I know. But I had my first experience of it only yesterday. A photographic moment that I’ve never experienced before, but shall be using more of in the future.

My dear wife – totally unaware, as was i

I’m currently in the middle of repairing a Nikon Coolpix L820 16mp bridge camera. The camera has a broken rear LCD screen, and this is the only way of seeing the subject as there is no through the lens viewfinder. Whilst testing its limits and finding out about the faulty screen, I became aware that it sounded as if was working, it was making all the right sounds. So I threw an SD card into the camera to give it a try.

I was just pointing anywhere and pushing the exposure button, taking pictures of everything and nothing, I had no control on settings and functions only the exposure button. Anyway, I did this for a few minutes then transferred the SD card to a reader connected to my iPhone.

Nikon Coolpix L820

Wow, I was impressed with this one picture only, of my dear wife just finishing some lunch. She wasn’t aware I had taken it and neither was i.

This is the magic of photography.

The original was colour, I was so impressed with the sharpness, tones and colours in the picture. It’s not a particularly good picture, just a candid one of someone going about their day, totally innocent and unaware.

I love Black and white pictures, so I quickly converted the colour version via my phone.

I was in two minds as to whether I continued with this repair, as the cost of parts were rising the more I delved into it. This picture alone, changed my mind. I am going to finish the repair as this camera is too good to let go.

And I’m just amazed, that a random photo, that the photographer and the subject were both totally unaware of being taken, has come out so well. (All that has been done is a bit of cropping to align the subject)

The post for the camera referred to herein, will be published shortly.

Thanks for passing by.

Not the lottery, but for me – just as good

I’ve been after a couple of cameras for quite a while now that hold a great deal of sentimental meaning to me. This will become apparent when i publish the individual posts for them, but for now i just want to share the result of an auction i participated in on the 31st July 2025.

Today I’ve probably made the best purchase off of an auction site that I have ever made previous. I’ve been following a number of Canon A1s lately and they have all been going in the £120+GBP bracket, some even higher than that. Today I have lost out on two that sold for £93 for a damaged body and one for £121 that was just a body but of a much better quality. This particular auction I was watching was for an untested duo of cameras, a Canon A1 as well as an Olympus Trip 35mm. The Olympus alone normally commands the high £80GBP range and both of these were in this particular auction. I was just watching as this was going to sky rocket in my opinion, two good cameras from a respected seller who I have used before. Two minutes from the auction end, bidding was sat at £39GBP and I thought that any second now the price was going to go crazy, especially in the last 30 seconds. I put in a max bid of £55GBP for the lot, as I pretty much knew it would sail past that amount and go for a price in the £150-£200 price range. I hit the bid button with 20 seconds left on the auction….

You have won – congratulations!

I thought you’re having a laugh, no way. And then it came up with the winning bid being £39:00GBP no one else was bidding, crazy.

The A1 camera consists of the body, a winder, an FD 50 1:1.8 lens, a camera manual as well as a lens manual.

Postage was the grand total of £4:99 so my total for these two cameras was £43:99GBP. That is nuts, and to say I’m pleased about this is the understatement of the century. I have two of the cameras I wish for the most, and I have just landed the bargain of the day, I was in the right place at the right time. Wow. It’s unusual to catch other auction bidders sleeping, it will probably never happen again for me, it’s a very rare occurrence. Two cameras of this magnitude for £22:00GBP each! That’s unheard of.

I don’t know for what reason they are not working, as they both appear to be quite tidy examples. I have used this seller before and the posting above could also be worded such as to imply that the units may well not have been tested. But, that’s what this site is about, repairing old cameras and getting them working again. There’s no fun in talking about a good functional camera, that’s boring. We want the meat and potatoes as they say, we want to see things being fixed, or broken further….you never know with me.

Thanks for sharing my excitement at this purchase. It will all make sense once i’ve assessed the cameras and carried out any repairs.

Thank you for passing by. It’s always appreciated.

Canon Powershot S5 IS

What the listing stated:

This is a Canon Powershot S5 IS Digital Bridge Camera which is faulty and sold for spares or repair only.

The camera is in excellent cosmetic condition but when switched on there is an error message saying lens error please restart camera (see photo).

It takes 4xAA batteries and SD cards (not supplied)

A little bit about this camera:

Released in June 2007, the PowerShot S5 IS is the successor to the S3 IS model launched in April 2006, which was well received for its optical image stabilization, high zoom ratio and ample movie-shooting capabilities. Like its predecessor, the high-function, high-performance S5 IS features a 12x optical zoom lens equipped with a lens shift image stabilizer and realizes fast, quiet zoom performance by means of a high-speed Ultrasonic Motor (USM).

Compared with its predecessor, the PowerShot S5 IS delivers improved imaging performance through the incorporation of an 8.0-megapixel CCD sensor-increased from 6.0 megapixels in the S3 IS-and an upgrade to Canon’s high-performance DIGIC III image processor from the earlier model’s DIGIC II. Additionally, the S5 IS employs a 2.5-inch high-resolution (approximately 207,000 dots) vari-angle LCD monitor that offers a wide viewing angle to realize a high level of shooting flexibility, and includes a hot shoe for compatibility with Canon EX-series Speedlite flashes.

The new Canon PowerShot model supports the recording of high-quality movies by enabling users to make use of the camera’s optical zoom and Face Detection AF/AE functions. The S5 IS also offers an LP movie mode, which employs a higher rate of image compression to enable longer recording times for VGA movies, as well as high-quality stereo sound, and seamless transitions between the shooting of still images and movie recording.

Canon

I’ve been watching this one for a little while, it looks very good cosmetically and I’m surprised as I was the only one that bid on it. I’ve paid a total, including postage of £8:81GBP and I think that is an absolute bargain. An issue with these cameras has always been a motor/lens error. These motors within these cameras are an ultrasonic motor (USM) and to be totally honest they can be quite delicate and are known to give up as such, if even a grain of sand was to get stuck in the lens gear mechanism. They are delicate souls that don’t really like hard work 😂

A good clean is sometimes all that is needed to get these cameras working again, however I’m not going to get ahead of myself here, as I just don’t know what kind of pain the previous owner has inflicted on this camera. I just hope they have not been too brutal.

Assessment:

Now this is an absolutely beautiful looking little camera in pristine cosmetic condition. The previous owner has in fact been extremely careful and treated this camera very well.

The elephant in the room

The only issue that I can see is the one that flashes up on the screen, continuously when to turn on the camera. Even moving the telephoto/wide switch when starting up does not clear the fault. I really need to get the lens extended to see what’s going on. If I can do that without getting the screwdriver involved then that is even better.

Repair:

The lens remains stuck in the closed position despite there being movement with the lens iris, all other actions are as expected, just no extension of the lens turret. It does sound as if something is trying to move inside.

I’ve tried resetting and going back to factory defaults with no joy. I have been noticing though that when i put in a time and date, it is resetting every time i turn the camera off and then back on again. This is usually a sign that the small internal memory battery is dead, and as it’s probably been in the camera since 2007 it’s probably a good idea to change it. If I can find it. That is.

Panic over I have found the memory battery (CMOS) it was located in the battery chamber beside the SD card slot. It’s a small CR1220 coin battery and I have one of these in my battery box, so this will be replaced as soon as I get it home, now replaced all is working as it should be.

Back to the error. The error is more often than not caused by something, even a grain of sand getting in the turret area and catching in the workings, as these cameras are so delicate. We have to somehow get into the turret area to see if we can dislodge whatever is causing the problem.

I’d advise against using canned air here, as doing so would most probably dislodge the obstruction, however the route down the turret leads directly to the image sensor and you don’t want debris on that. Careful is the buzz word.

I cut a small strip of paper and feed this down between the tiny gap between the lens and the body. I manoeuvre this around the full circumference of the lens, and as I do I can feel some slight resistance as if something is there. I go around again and that resistance has gone. I turn the camera on and still there is no extension of the turret. At this point I put the mode dial on the camera into video mode and then turn it on. Straight away the turret extends and what looks like some grains of dirt fall from the lens area, at last we have the lens extended and there is an image on the LCD screen.

I clean the lens turret with an optics cloth and you can see it was very dusty inside, there had definitely been some debris enter this area causing the issue.

I operated the on off button a number of times to ensure the turret motion was smooth, and it was. There are no further obstacles in this area, causing the mechanism to seize.

I have taken a number of test photos trying out all modes and features and the camera is just perfect.

The camera operating as it should

I’ll show a few more photos below, once I have been able to download them.

Result:

This camera is simply a little beauty. It is probably one of the best looking of the later generations of bridge cameras but maybe not the best photo quality wise at 8mp. But who cares though, when you are as good looking as this?

The camera is pristine in my eyes, and for just over £8GBP this is a bargain. These fixes do not always involve a total dismantling of the item, sometimes it is so simple it’s unbelievable. Here I used a piece of paper and a lens cloth, that’s all. Now a camera destined for an old box in the loft and then the tip has been saved to carry on taking photos for a good few years yet. In fact here are a few photos that I have taken randomly around work, and around my garden.

I’m probably going to use this camera with its pivoting screen to construct videos to display on this site regarding future repairs, I’m going to ensure it gets good usage under my ownership.

Did I tell you how much I love this camera and how handsome it is? Oh, I did, sorry about that, I get really carried away with these older cameras, I just wish everyone else could get as excited as I do, and maybe so many of these wonderful machines wouldn’t then, just get thrown out with the bath water.

Thanks for passing by. It’s always most appreciated.

Sticky, Rubber camera grips

Anyone who has had an 80s/90s/00s camera through their hands would have experienced this at some point. During this time period many if not all camera manufacturers went through the phase of putting rubber hand grips on their cameras. Aesthetically pleasing, and ensuring a good grip of your new “Expensive” toy. I guess, they thought they had got it right. But as with all these good ideas they often come back and bite you right on the bum at a later date.

My particularly sticky Nikon D70

Ok there were probably no recalls regarding this issue, it’s just affected the price of these goods on the second hand after market, and more than likely a perfectly good unit has most probably gone to landfill for no other reason than “Feeling sticky”

Let’s look into the reasons why this occurs.

It’s pretty much down to a process called Vulcanisation. Vulcanisation is a chemical process that hardens rubber by cross-linking polymer chains, making it more durable and elastic. This process, often using sulfur, heat, and other additives, transforms natural or synthetic rubber into a material with improved properties like resistance to heat, cold, and deformation. 

However after many years, the process begins to break down, this causes the rubber to become sticky and in some cases the rubber just breaks down causing traces of rubber dust all over the place. Add to that the normal oils from fingers and palms and the stickiness then becomes highly noticeable, and makes for a very unpleasant experience.

We can’t stop the progress of the degradation, we can however do something about the sticky state, maintain good quality and make the use of the item as pleasurable an experience, just as it was when first purchased. Many believe the stickiness is down to the way the item is stored, and it not being used on a regular basis, as there is plenty of evidence out there of similar aged cameras not suffering from the issue at all, as they are used daily, namely by professional types where these cameras are tools of their trade.

It involves some work, and patience. I am writing this post as I have 8 cameras that i am currently working on, all Nikon D70/D70S and they all have this problem, and they date from 2004.

A load of very sticky Nikons

I use a process that you will easily find on line, the most simple process and it involves using a substance called Isopropyl Alcohol, my one is 99% pure, (also known as rubbing alcohol) I don’t think the purity of 99% is essential but i use it as i have plenty of it around, what with all the circuit board work i do, and the cleaning they also require.

Some people have had results just using a dry cloth and no chemicals, patiently rubbing and rubbing, some for a few hours at a time, until all the mess is removed. If that’s the way you wish to go then fine, i haven’t got the time for all that, i’ll be talking you through the way i do it below, with a chemical.

My technique is simple, lint free cloth and some cotton buds are all that i use, along with a tissue wipe (Such as armoral, or a car cockpit cleaner solution with a dry cloth) and a cocktail stick to finish. The reason for the wipe will become clear at the end.

My Guinea pig for today is a Nikon D70 I have requiring repair. It is a particularly “Sticky” individual and will be a good candidate on how to deal with this sticky situation. This is the process I use on all my equipment that has rubber such as this as part of its structure. It’s worked for me for many years, some people say that it will need doing again after a short while, that’s never been the case for me, and there are a number of documented cases on line where six years after this treatment has been done, there is no repeat of the initial problem. The rubber remains good.

Using a small amount of IPA on a lint free cloth gently wipe the area of concern and you will see the stickiness start to lift, it looks like a glue.

Make your way around the whole camera paying particular attention to those really sticky areas. The IPA evaporates really quickly so you get to see results really quickly. If after one try the stickiness remains then try another application. A good indicator is that when you use a fresh part of the cloth, you see less dirt come off with each application. When you put an application on and come away with a clean cloth, your job is done.

The cotton buds are used for getting into those inaccessible crevices you can’t get into with the cloth. As before as they stay cleaner and pick up less dirt your work is done. All this cleaning and moving about of dirt sometimes transfers the dirt into creases and joins between the rubber and the camera body, this is what the cocktail stick is for, to get into those small gaps and scoop the dirt and debris out. Complete with a final application of IPA in this area and the dirty work is now done.

Now earlier I mentioned about using Amorall wipes or a car cockpit cleaner. Sometimes this process can dull rubber, as you have just removed the layer that was providing the gleaming glory back in the day. You can’t have it all your own way but a good quality interior dashboard cockpit cleaner really does add some shine and life to that old camera and really does do a good job of restoring it. I use Auto Glym interior shampoo on a lint free cloth and apply this by gently applying all over the exterior of the camera. It is now exceptionally clean. A quick rub over with a dry cloth once this is dried and what more can I say? This is a different camera, looks stunning and has lost all trace of stickiness and dirt. Now it has that extra layer of protection as well, it’s now a pleasure to behold.

The finishing touch.

This little task probably took just over 20 minutes to achieve and gives so much satisfaction to me as you can see a cameras appearance change in front of your very eyes, and anyone can do it. No camera deserves to go to landfill just because it has this sticky exterior, it’s simple to do and can revitalise an old and much loved camera.

I hope this has helped with dealing with the stickiness issue, if you ever experience it. I have even heard reports that a good quality window cleaner can also give similar results, but I’ve never tried it, so there really is no excuse if you have a camera in your ownership needing similar attention.

Many thanks for passing by. You legend👍

Mamiya M Autofocus – 35mm point and shoot camera

What the listing stated:

Mamiya M point and shoot camera. It’s in fantastic original condition and is cosmetically excellent with original case and lens cap included. The lens appears to be bright and clear from the front. 
HOWEVER…when batteries are inserted the shutter does not fire and I suspect it is jammed somewhere. The lights come on and it goes “click” but the aperture does not open, nor does the film winding do anything. 
For spares or repairs only, I’m sure somebody with the know how could get it up and running again. 
Priced super low as I want it shifted and can’t bring myself to bin it! 
No returns please

EBay

Here’s a little bit about it:

The Mamiya M is a 35mm autofocus compact from 1982.  It has a boxy plastic shape, with a fixed Mamiya Sekor 38mm f/2.8 lens.  The lens is four elements in three groups.  Exposure is fully automatic, based on the film speed, where the ISO is selected via a dial around the lens. Film speed available is 25 – 800 ISO.  

The metering cell is located just under the lens, but within the lens ring.  This allows for the metering to take into account any 46mm filter screwed onto the lens.  That is assuming it is not a graduated filter.  Fastest shutter speed is 1/500thsecond with the slowest at 1/8th.  The camera is always on, except when fitted with a specially designed lens cap, which triggers the off state.  There is a strategically placed switch it pushes against on the right side of the lens.  Most of these caps are lost, including mine.

Photothinking.com

I don’t know what attracted me to this camera, but the fact the seller just wanted rid of it at a cheap price was a starting point. It was advertised as £4:36 GBP and £2:45 delivery, a total of £6:81GBP. I bartered a bit and got it all in for £5:44GBP so I got it a little bit cheaper, a bargain if you like.

Mamiya has a great reputation for building high quality lenses. They were only in the 35mm autofocus point and shoot sector for a short while before immersing themselves totally into the medium format camera market. This 35mm camera was only in production for about a year or so, even though quite a few were produced, we are looking at the low hundreds of thousands, not the many millions, so the camera itself was not a major mass produced and marketed unit. It is a plastic preformed body unit. Known in polite society back in the day as “A plastic fantastic”.

If a Mamiya camera had a blue ring around the lens, specifically on its other models, it denoted a higher quality lens type, it was never confirmed this was the case with these small autofocus 35mm cameras, though many believe it is still the case. Photo quality with these little units was generally of a very high quality.

Lens caps with these cameras are very rare, this one has one and it is the original, and i suspect (from what I see in the picture) that there may be a small crack on the side of this one, but that is not an issue. This lens cap is integral to this cameras operation, as when it is placed over the lens, it turns off the camera, without it the camera remains live at all times, and would soon lose its power. It is an early power conserving device if you like. The camera looks to be in overall good condition, probably down to being stored in its original case.

You can view a lot more than I could ever tell you, just by watching this review by Mr.50mm that was posted earlier this year.

Excellent recent review

Since reading up a little on these cameras it appears that I may well have bagged a bargain, if it ever works. And I also believe the seller may well again be unaware of the operation of this camera and it may in fact be working just fine? Who knows? I have my suspicions but we will just have to wait until it gets here for assessment.

Below are some sale prices relative to this camera model that are currently selling on EBay, some extremely high prices compared to what I have paid today:

Current selling prices for this model

It’s plastic and so 80’s. And people obviously loved it. I’d like to be able to get this camera working again, and would love to run a roll of film through it to give it a test run. But first I have to assess it and see just what is wrong with it. I have a roll of old film available to test its “faulty” rewind system, and I have all my tools ready to crack it open and get inside, if I have to. So let’s get at it….

Assessment:

It’s arrived and I must say it is in an excellent cosmetic condition, probably down to being kept in its original Mamiya soft case. The lens cap I thought had a crack in, is actually broken, probably beyond reasonable repair, but at the moment that is not important. Let’s put that to one side for now.

The actual camera is partially alive. When batteries are installed there is a red light that appears on the right rear side of the camera, this is the film transport light and should extinguish when transport is complete. The flash switch sticks a little, and when the flash is clicked into position the distance sensor light on the lens activates however the flash does not charge. The winding system is inoperative and does not auto wind at all. The shutter does not operate, despite the shutter leaves being able to move when gently coaxed.

There seems to be partial electricity throughout, this could very well be the issue. There just doesn’t seem to be a uniform continuity throughout the camera. This will need to be looked at. Something very weird is going on inside.

Repair:

I’m really annoyed, closer inspection shows there are 6 screws missing and someone has been inside this camera prior to me. Again I think I’ve been stung by the EBay curse of “Spares and repairs- no returns” will I ever learn?

I’ve removed the remaining screws, and had to peel off the rubber grip to access and expose the motor and associated component board in this area. There will need to be a lot of cleaning here before gluing it all back in place.

I’ve managed to get the flash charging light illuminated, and a current of 214v in the flash confirms that the Flash capacitor is holding a charge and more importantly, receiving a charge from the battery circuit. But I cannot get it to fire. There seems to be an issue with the shutter mechanism and the related electrical circuit in this area. The motor is not working, it’s either dead or not receiving power. I need to look in this area a little more thoroughly.

Front fascia removed

I’ve now removed the front fascia and now have a good view of the overall workings inside the camera.

Ive taken out the lens and the leaf shutter, these seem ok and are working freely when operated. To me it looks as if the mechanism that triggers the leaf shutter is either seized or the variable capacitance system located at the top of the camera, that is basically just a needle on a circuit board connected to the focus light, could be at fault, it does not freely move on each camera actuation as it should, and this is not a readily available part.

That faulty part of the board
Misfiring- faulty

It seems the deeper I delve into this camera that I am finding more issues, and I’ve just found two parts that are incorrectly installed that are on a cog system connected to the motor. I’m fighting a losing battle as it appears the person who has been here before has probably added to the issues of this camera in their attempt to fix the original issue.

On top of the missing screws I’ve now found a missing capstan cog related to the leaf mechanism that would help explain a certain lack of movement in areas. The motor is dead, I’ve taken it out and used the bench power supply and it is non responsive. Even after spraying with some contact cleaning fluid and sitting there spinning the axis to get the solution absorbed, there is still no response. It’s totally dead and will require replacement.

Result:

Well. Once again I have been mislead by incorrect descriptions on the auction sites. It’s a shame really as this is a lovely camera and if it had not been tampered with inside, I’d probably be posting a different review today, one that would be more positive. With screws, cams and cogs missing I was pretty much set up to fail here.

I’ve reassembled the camera and it is now back in its pouch. The positives are that I have learned a lot about how this camera operates, and just dismantling and reassembling the camera allows you to learn a lot about it, and the technology used during that period in time. All the screws that I removed have gone back into place with none leftover, yet another positive.

So it’s a failure I’m afraid, but it will be kept and either used as spares or I will obtain a suitable donor to get this one up and running, it will not be disposed of in any way. It will be reused. I’ve only paid a small amount for this, it’s worth it for the spares alone.

I have already set up a notification on the auction sites for when another suitable camera becomes available. I will update this post or post a new one that incorporates either the repair of this unit or its use as a spare parts donor, when that time comes.

Thanks for passing by. Its appreciated.