There is a form of amateur radio comms that I enjoy and that is slow scan television. Here’s a basic explanation:
A literal term for SSTV is narrowband television. Analog broadcast television requires at least 6 MHz wide channels, because it transmits 25 or 30 picture frames per second (see ITU analog broadcast standards), but SSTV usually only takes up to a maximum of 3 kHz of bandwidth. It is a much slower method of still picture transmission, usually taking from about eight seconds to a couple of minutes, depending on the mode used, to transmit one image frame.
Since SSTV systems operate on voicefrequencies, amateurs use it on shortwave (also known as HF by amateurradio operators), VHF and UHF radio.
Wikipedia
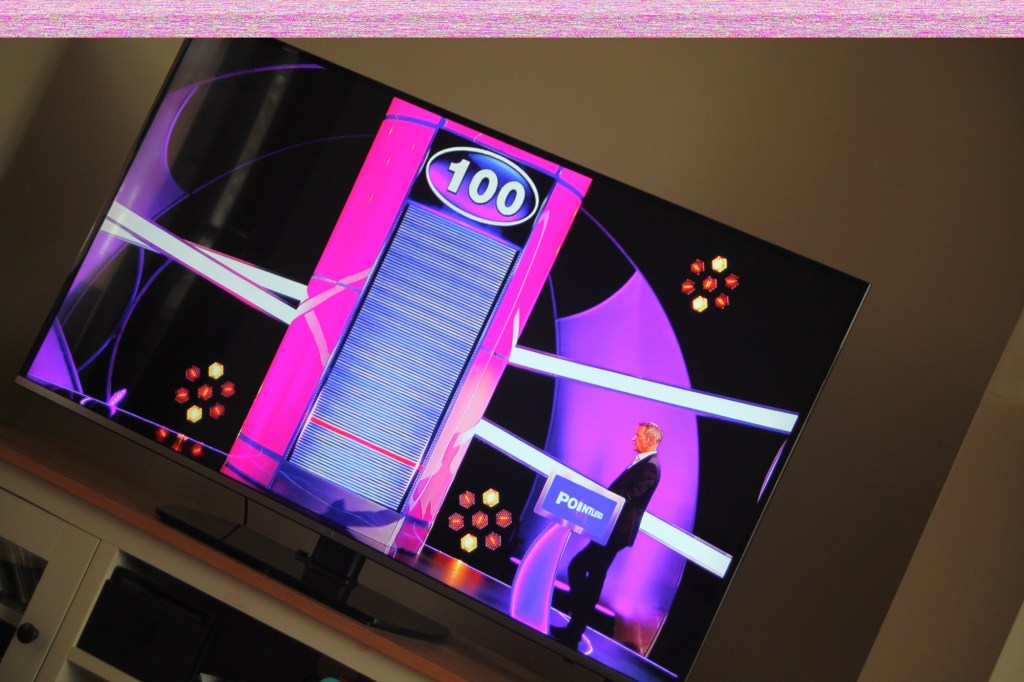
In this Instance below I used a digital transceiver and was pointing the aerial in the general direction of the International space station as it passed overhead on a specific date, when the Russian section of the ISS was transmitting slow scan television pictures as it passed over. I used my iPhone to decode the signal and to produce the pictures, using an app I had installed earlier. This was all part of a day celebrating the anniversary of Sputnik, the world’s first man made transmitting satellite.
My setup was totally mobile and so basic that I just about managed to get partial scans via this technique, see the two pictures below. I was literally sitting in the front seat of my car.
The picture I received from the ISS and my radio
Even though my pictures were not perfect I was still able to supply proof that I received the transmission and as a result was issued with the certificate below from ARISS – Amateur radio on the International Space Station, find out more about ARISS Here: ARISS
ARISS certificate
There are many of these types of events that occur all year round where you can experiment with all types of equipment to make contact with distant radio stations. This is the spirit of amateur radio.
This will be a running repair with regular updates. There is quite a bit going on.
The bargain basement DSLR has arrived (See original blog post here: Canon EOS 5D Mk2) and I’ve been able to give it a quick once over. It’s not had an easy life and has taken some bangs and knocks. Other than that it’s about 16 years old and has had about 69000 actuations, I don’t think it looks too bad personally. I’ve spent a good hour just giving it a good clean up and it was filthy, all knobs and buttons are working fine, the shutter isn’t locked and when a lens is attached, manually it all focuses just fine and the screen looks clean. There is no evidence of damage to the curtain however I can’t test this further until the battery and charger arrives.
Eos 5D MK2- assessment Eos 5D MK2- assessment
To be honest if I can get this working it will be going into my own personal collection. As long as I can get some nice results I’m not that worried about how it looks cosmetically. The body can be touched up or I can add a skin, we’ll see how it goes.
Eos 5D MK2- assessment Eos 5D MK2- assessment
Update: 6/4/24
I’ve now received a couple of bits consisting of two new batteries and a charger as well as a new battery door cover. Once powered up all indications, buttons, sensors are working and TTL indications are displaying as they should.
New battery coverTTL indicationsBack indications Top indications
All lenses are working and moving and focusing as they should. The real good news is that the shutter fires at all speeds and is not stuck, and the sensor cleaner appears to be working.
I’m really happy with what I have found so far, I need to get a CF card to check the original issues that were reported with the suspect sensor. If that is the only issue I will get one ordered and install that at a later date. I have cleared all settings and the firmware is up to date. I’ve downloaded a raft of Canon software so I will be able to test this all once I get that CF card that should be here in a few days.
23/4/24
The CF card adapter has arrived from China. I’ve purchased this type as this particular adapter allows an SD card to be utilised in CF form. I have ample SD cards in use all around so this makes sense for me, I have nothing apart from this camera that uses CF cards so for a relatively low outlay this is the best option for me.
CF SD adapter
Now I have Every thing in place to test the camera. I’m using basic settings and an old test lens so I’m not looking for any spectacular photos as that’s not going to happen here. I just want to see what’s going on.
What happens most of the time
When I’m taking a shot everything lights up ok. Indications are all good, the shutter fires but all I see is a pinkish screen as demonstrated in the small video above. However every now and again I do get a “proper” photo, usually only the one then you have to turn the camera off then on again to get another and that’s not always guaranteed. As you will see in the two photos below you can get one photo and then the next has a pink band appearing from above.
No issues with picturePink issue emerges at top
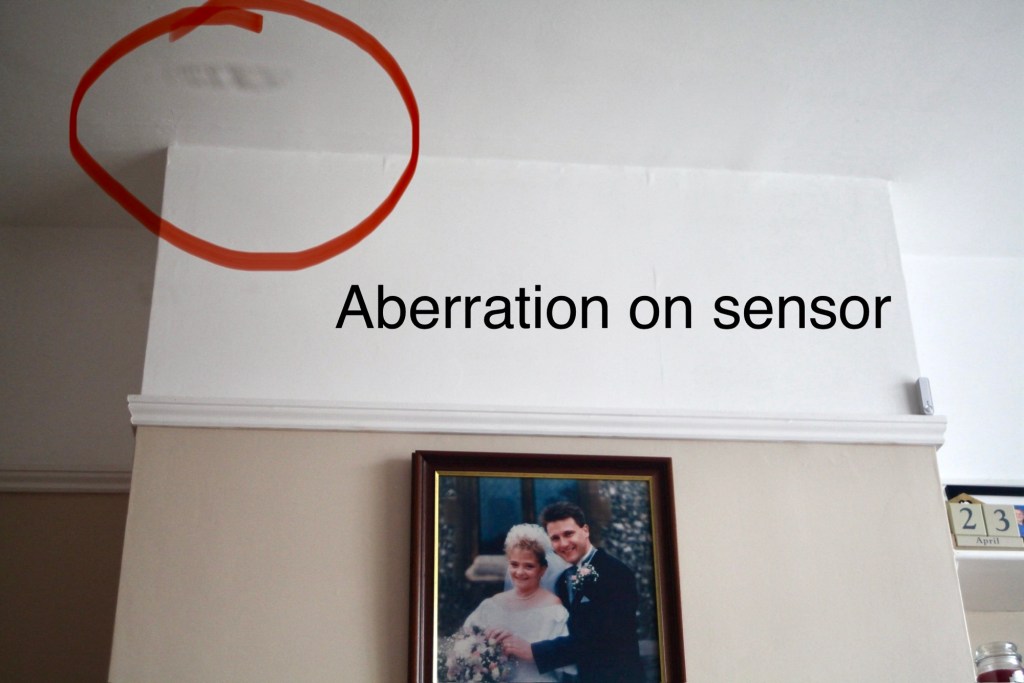
Whilst taking a random photo looking at our ceiling, I became aware of what looked like a water leak by the chimney stack. This gave me some concern but I needn’t have been worried as it appears in other photos and is more than likely an Abberation mark on the sensor. The two pictures below show that mark on the sensor in the same area.
Sensor Abberation issueAbberation still visible
Occasionally the pink line that appears at the top of the photo also takes on a pixelated test card look. The weird thing is that if you put the camera into video mode the image is clear with good sound and no playback issues. Strange 🤷♂️
The general view and picture stateThe pink issue has occurred
It really is looking as if the issue is around the sensor that in this camera is a CMOS sensor. But before I make any decisions on what action I’m taking I’m exhausting all the obvious issues if I can. I have looked at several forums on line and there are a multitude of tasks I could try but it all seems to filter down to two in general. A full camera reset and a reinstall of the last issued firmware.
Now I have completed the full reset and on top of this I’m going to install a new CR1616 CMOS cell, as I just don’t know when this was last done.
Replacing the cmos battery
The CMOS deterioration rate is about 3% of the battery value per year, now if this camera was purchased around 2008 when they first came out then it dosen’t take a mathematical genius to work out that the cell could be sufficiently depleted. In fact I don’t know why I haven’t used the multi meter to test it🤦♂️
I’ll get on to that and will report back. It kind of makes sense seeing the sensor on this camera is a Cmos sensor. All tested, battery was at 2.3v, I have now replaced the battery but everything is still the same. I don’t know if updating the firmware will assist in any way, but I’m just following a procedure that most who have been in this position before have also done. it’s just a process of elimination before doing a full tear down of the camera. And if I can do anything to avoid that I certainly will.
I’ve finished all the testing and it is certainly looking like the Cmos sensor needs replacing. I’ve done all I can here, but I’m reluctant to order the new sensor from China as I’m not 100% confident of having the facilities or time to do the work required. Will I gain anything after the outlay? I very much doubt it. I’m going to move this camera on now with all my findings and hopefully I can find someone who will be able to take this project on to a successful completion.
I know parts wise I can make a good profit on the original outlay so maybe that is the route to take.
So I’ve failed on this renovation, but nothing is going to waste, it just needs to go to some who is somewhat more experienced with these type of upgrades than me. Hopefully I can gain some experience along the cheaper more available stock route.
I have learned some interesting things about this camera and it’s operating. So in many ways that’s a win, knowledge is everything.
Just a quick post, after having taken some time to think just how much electrical component’s have reduced in size in my lifetime.
What made you think this way? I hear you ask (or at least imagine that you ask.)
Well, today I had ten Audio amplifiers and fifty charging points delivered. Now, years ago I’d have probably had a large van deliver this little lot but today a small sized Jiffy bag came through my door containing all the above.
50 micro usb ports10 audio amplifiers
Ok the charging ports were micro usb ports and the audio amps were some small audio amps in an IC format needed for a current project I’m working on.
Amazing isn’t it just how far this technology has progressed. And shrunk in size.
Me and my wife both collect. She loves a certain brand of handbag, me, I collect cameras, photo postcards, radios, models, garden plants and ornaments and empty boxes.
Together we both collectively collect dust as we’d both rather be out making memories than doing boring household chores.
For parts or not working, Does not power on don’t know what is wrong with it,screen looks to have a leak
EBay
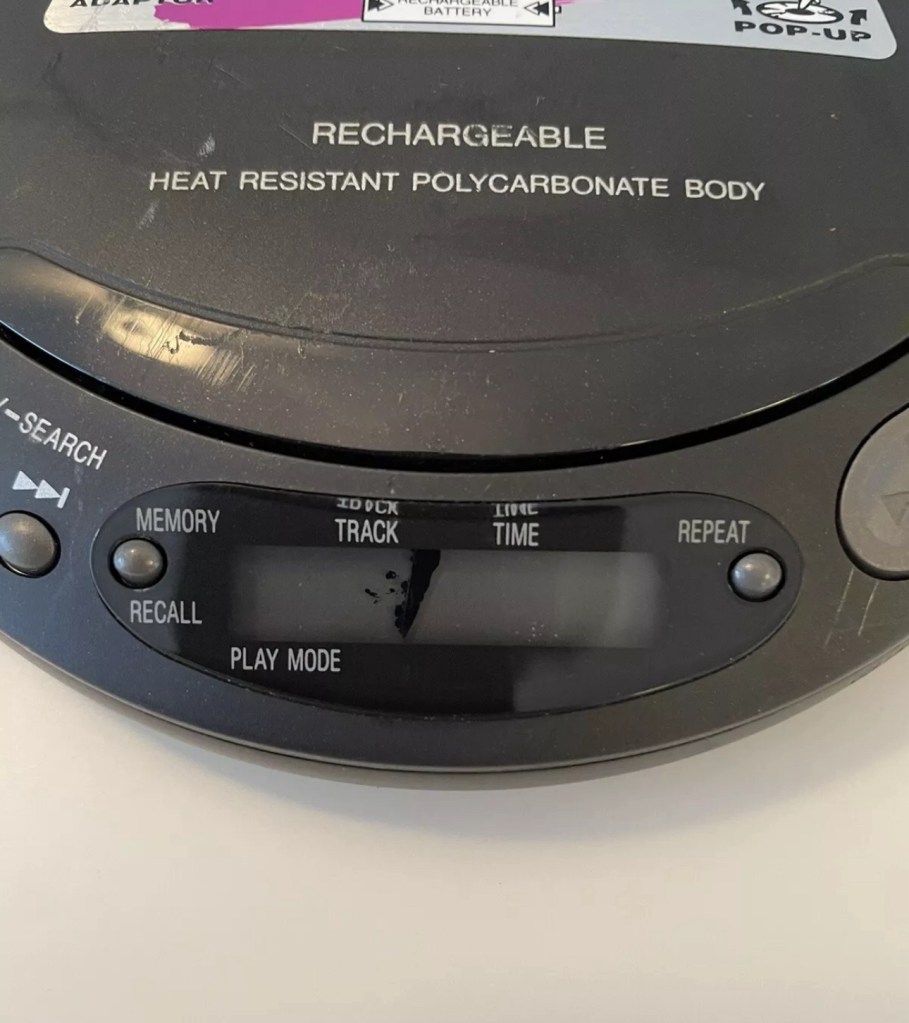
Technics SL-XP165 portable CD player
This is probably going to be one of if not the least problematic units I have received yet. Probably more along the lines of boring for those looking for a repair report, I fear I have brought you here under false pretences, that was not my intention and I apologise if that has been the case.
Another unit from 1996 (therefore now 28 years old) this one originally had rechargeable batteries which were a bonus item for such a unit at the time. Personally I’m using good old alkaline batteries for test purposes, I doubt I will be using rechargeables.
I down loaded the instruction pamphlet, grabbed a pair of earphones and then dropped in two AA batteries and a CD.
Nothing. Silence…..
I looked at the unit, the seller is right I thought….then I pushed the play button and took the switch off hold on the side and put the second switch into normal operation and almost blew my ears off.
SL-XP165SL-XP165Screen minor issues
Superb sound and it was quite obvious that the unit was working. All buttons are doing what they should do, the Xbass system is phenomenal and the volume dial is faultless and crackle free.
SL-XP165SL-XP165A bit tatty but perfect sound
It just goes to show the seller in this case wasn’t fully aware regarding how the unit works. You have to turn it on and off to get it working, it’s not all automated like other similar units. See video below.
Stop start works good
The unit is a bit tatty and the indicator panel has had some leak by the looks of it (See photo at top of this post) but even though this looks a bit poor cosmetically it does still display most of the information, it’s just not showing the track number info. Yes I could probably try another screen on this unit but what is the point? It works fine and the unit will gain no significant value for doing such a fix. It’s just not a financially viable choice unless I somehow come across a no value donor unit and seeing the prices people think these units are worth, I can’t see that happening anytime soon. And the Sony donors I have just aren’t compatible.
So I’ll leave it as it is. As the saying goes, “if it ain’t broke, don’t try to fix it.” It isn’t faulty, the only fault was in the sellers knowledge of its workings.
Another one saved from landfill. And that’s a positive.
I purchased a pack of 5 of these cheap old garden lights from a local garden centre. I know if you buy cheap you pay twice but these did look quite reasonable. I know that most people only expect a season out of these lights however I try to look after mine, bringing them in during winter months when the garden isn’t being used and sunlight is non cooperative.
These were so full of promise, worked lovely for a few days and then two of them just didn’t work at all.
Broken garden solar lights
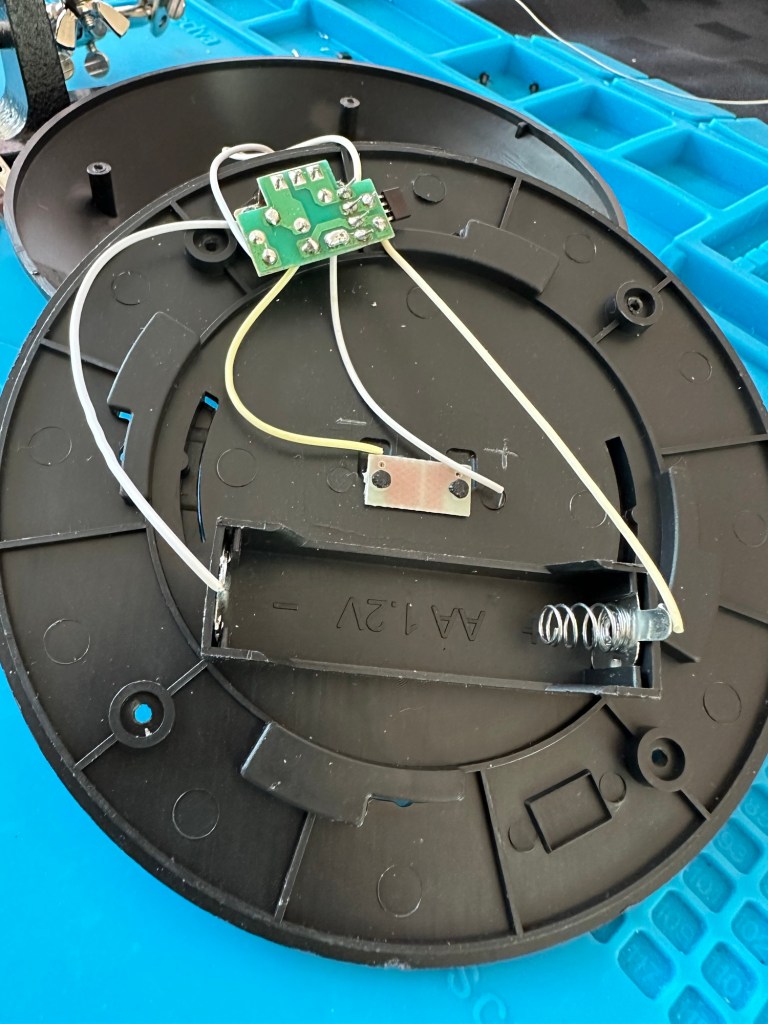
I took them apart and decided to test the batteries, both were showing 0.6v so i suspected the charge circuit was not working. When I put in a fully charged AA battery the lights came on but when exposed to light they remained on, so in a way I am right but it might be slightly more complicated. The battery isn’t charging, also the switch off is not occurring when exposed to light.
I’ve done a few tests using the multimeter, the solar panel is ok and giving a reasonable voltage under sunlight of 2.4v.
Solar panels working
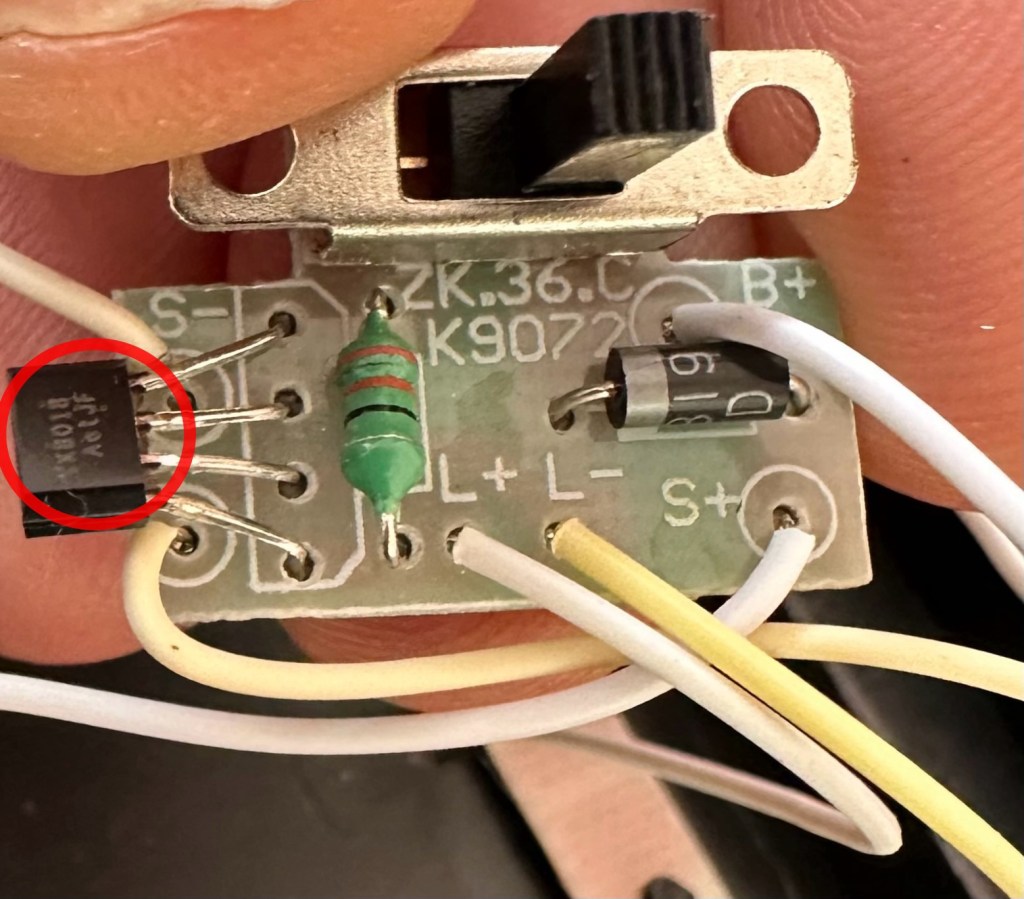
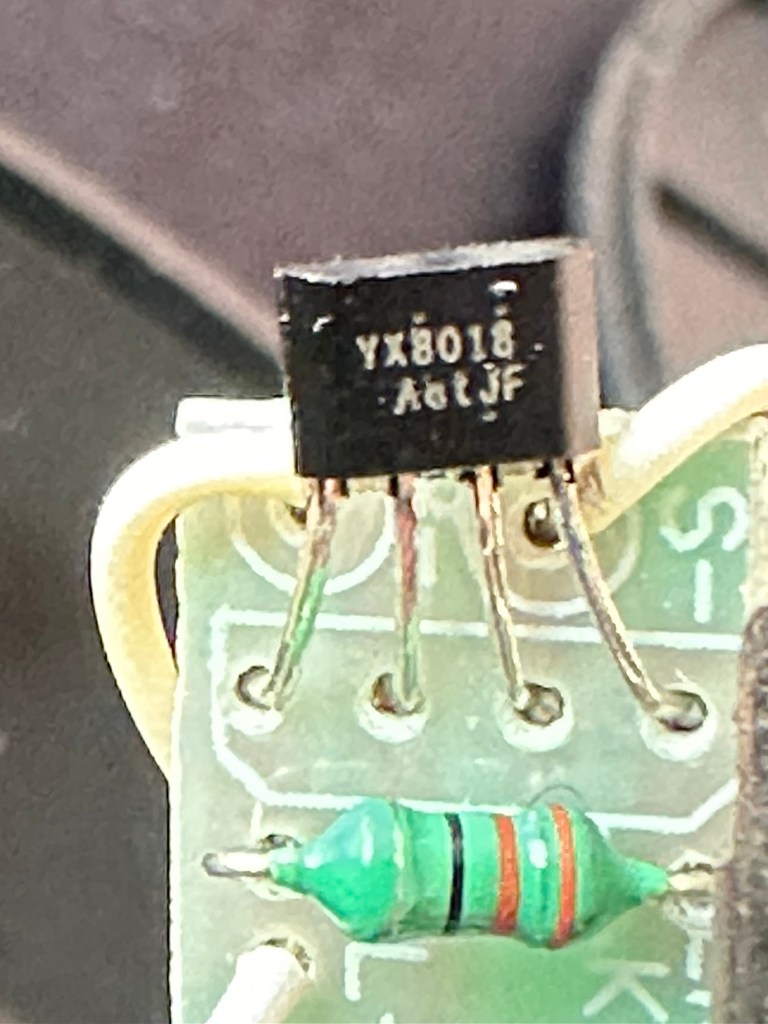
The circuit board only consists of three components and two out of the three test ok. The issue seems to be with the YX8018 controller, the small four legged component in the pictures below.
Failed component circled
Failed YX8018 component
What is a YX8018 controller?
YX8018 is a high-performance solar lawn lamp boost control chip, which is suitable for a solar lawn lamp powered by a 1.2V rechargeable battery in series.
The main functions include charging control, boost drive, optical control, etc. The solar lawn lamp mainly uses the energy of the solar cell to work. When the sunlight shines on the solar cell during the day, the light energy is transformed into electric energy and stored in the battery, and then the battery provides power for the LED (light emitting diode) of the lawn lamp at night.
It has the advantages of safety, energy saving, convenience and environmental protection.It is applicable to solar products powered by one 1.2V rechargeable battery.
Conrad electronic SE
YX8018 circuit diagram
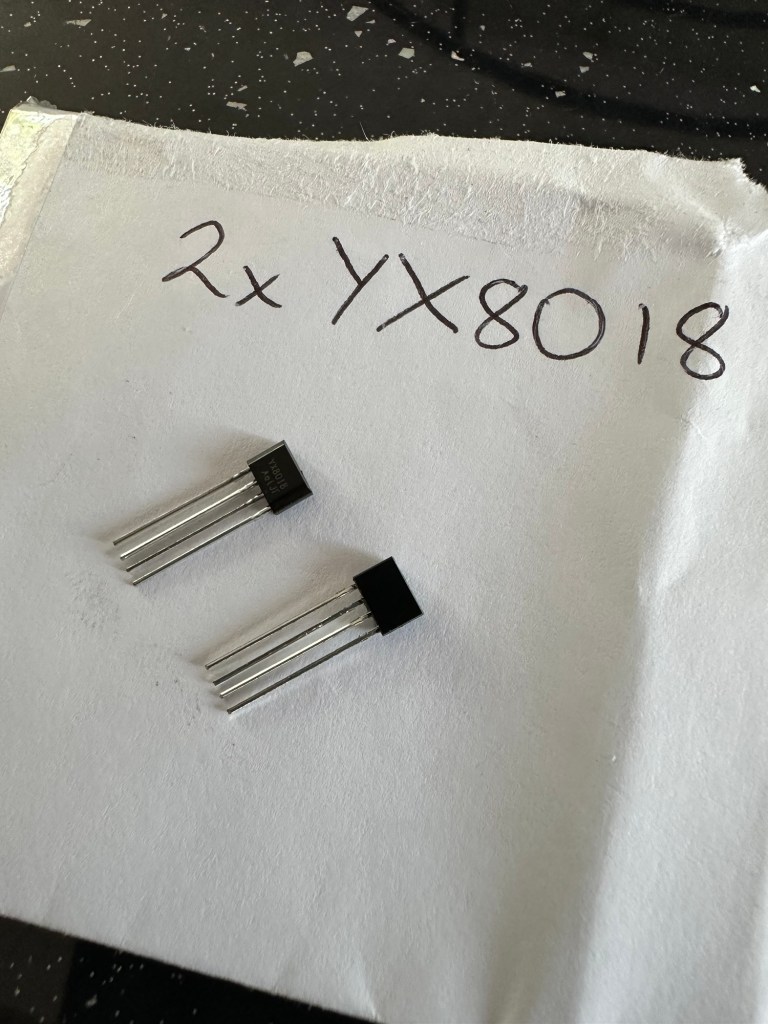
This appears to be the culprit after some basic tests have been carried out, there is about a 16% failure rate in these components so I don’t hold out a great deal of hope for the two that I’ve ordered. I shall eventually order a stack of them from China but for now I wanted some a bit quicker so I have ordered locally.
Two arrived….i now need three
Well, the two components I ordered have arrived today. But now I need three, as in the week another one has suffered the same issue. On top of that I have dropped one of the units and the solar panel has parted company. I’m now sourcing some liquid solder that may assist with getting this problem sorted. As is normal with me this little project has escalated due to my utter clumsiness. I must do better in the future. (Sounds just like one of my old school reports.)
In place ready to solder
I dismantled the two units I previously mentioned and followed pretty much the same process with each. Desolder, remove component, wick solder, put new component in place and then put a semi charged battery back in.
All soldered
I left the lights in the sun for a couple of hours and the charge has lifted from 0.8 to just over 1.1 volts so I’m happy that the charge circuit is now working.
The final test was to turn on and see what happens. Good news, nothing seen until I covered the solar panel and then the lights came on. Excellent, job done and more items saved from landfill. I must say I was really happy with my soldering on this job, it appears to be getting better.
Now working
I just need another component for that other one I broke in the week. However I won’t bother you with that one 😂
I love this little unit, it has a great radio reception probably better than a number of Sony Walkmans I have worked on to be honest. It has arrived in good cosmetic condition with only a few dinks and scratches commensurate with its 30 year plus age.
Radio works well
On opening up the unit it’s patently obvious that this is another drive belt issue, it’s saggy and breaks on removal. Luckily I have a replacement belt that I purchased earlier.
It’s another saggy worn belt issue
And that is basically it. No major dramas it’s as simple as replacing the belt.
Speed adjuster circled
A bit of light grease on the gears, a tweak of the speed adjustment and all sounds as it should.
I’ve used a calibration tape with a 3Khz sine wave, it’s tuned in pretty close to the tone and I’ve used a downloaded oscillator software package to check the matching. It’s not a professional setup but it’s fine for my requirements.
All working with a new belt
Sorry there is nothing else much to write but I have a good working unit that plays tapes well and all I can say is I’ve saved yet another easily repairable unit from landfill. I already have someone who wants to take this one off my hands so I hope it will have many more years of trouble free operation.
The initial report of the purchase stated the issue was solely with the tape playback and that every else works fine. Cosmetically it looks fine apart from a bit of cleaning that is needed in the battery compartment, touch wood there isn’t any battery corrosion.
New belt kit
I’ve kind of jumped the gun a bit here in ordering a set of new drive belts for the unit, the fact it is 33 years old now probably means it would be money well spent. ( I may order a stock of belts for any future projects that I partake in) The belts alone were £6.95GBP so that now takes the total for this project to around £26.00GBP in total, but I’m going to use this personally so I’m not too concerned. In good condition and in full working order I could still make a small profit on this so at this stage I’m not too concerned.
The unit arrived on the 29th April. It is in a very good cosmetic state and all the lettering on the buttons is intact, a few small scratches and battle scars as expected but overall very good.
Radio and all button functions work fine, when you push any of the cassette buttons you can hear the motor run so no issues there. Let’s get this package dismantled.
Once inside the most obvious issue is that the belts have turned to mush.
Broken rotted beltsWhat’s left of the old belts
I remove what’s left of the old belts, give a good clean to the cams and reinstall new belts that I have purchased earlier. A little bit of grease to the moving parts and cogs and all moving smoothly. As I’m doing this I notice a problem that I was not expecting, there seems to be a damaged cog, see the video below:
Damaged cog
Well, that’s a bummer as I’m going to have to obtain a donor for a new cog on the fast forwarding capstan, I’m hoping they are all pretty much standard so I will keep an eye out for a cheap option to repair. Whilst checking the system out it becomes apparent that this cog is specific to the fast forward operation so as long as I don’t use this then it should all be ok…shouldn’t it?
New belts installed
In theory yes, however every now and then when in play mode there is a slight dip in quality so I’m not going to chance damage to a tape.
Conclusion: it’s fixed, sort of. I’m looking for a donor cog that will fully fix the issue, the radio is fine, tapes can be played it’s just that I don’t really want to damage any until this issue is sorted. It’s a shame as it really was just those rotten belts that needed replacing. I’m pleased with what has been accomplished, yet again another 30+ year old electronic item has been saved from landfill. That’s a result.
Just purchased this item, here is what the listing said:
Radio works fine but the cassette is poor at playing tapes as the sound quality is really slow.
EBay
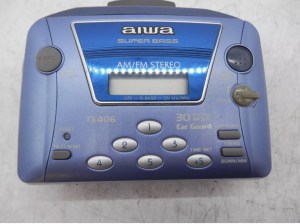
Aiwa HS-TX406
Yet another Cassette player circa 1990. Again possibly another one that needs its drive belt renewing, so in that case I’ll order one in. This one cost the grand total of £9.95GBP.
This link takes you to Radio museum.org where you see the technical detail of this unit : Aiwa HS-TX406
I have today received this item that I recently purchased on EBay, the original blog post can be found here: Blaupunkt Dab CD radio
Blaupunkt CD Radio
Did you know that Blaupunkt translates as Blue point or Blue dot from German to English? This relates to the blue dot that quality control used to paint on their headphones that were being produced. In fact all their products now have that blue dot as part of the logo on all of their range.
I think I mentioned that this might be an easy repair, it’s probably not going to be anything too technical, but it will need a bit of deconstructing to get to where I need to be, due to the way this item is assembled.
The unit is cosmetically sound, radio in both FM and DAB works perfectly, Bluetooth and USB also work perfectly, in fact the whole unit works perfectly apart from two obvious issues.
The CD was reported as an issue however the actual fault wasn’t clear. It appears that when the unit is turned on the cd drawer opens no matter what mode the set is in. You can close the door and it opens again about 10 seconds later. It won’t stay shut and it dosen’t recognise any media.
CD drawer opens constantly
The second and what is an unlisted issue is that the unit has inherited a knocking from inside that I suspect has probably occurred in transit. On opening the unit one of the speakers has broken loose as a securing catch on the speaker grill has broken. I will need to fix this, it’s really nothing major.
Who’s knocking?Broken speaker bracket
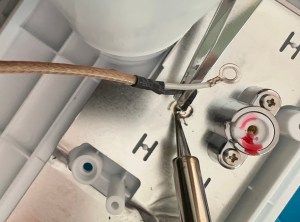
To get to the front of the unit you first have to go in through the back. When the back panel is removed you have to unsolder the aerial to be able to get into the box and unscrew the front unit, this then allows you to extricate everything through the front of the unit.
Aerial wire removal
Reading about similar issues on line it appears there could be a number of issues here from loose belts, dry drivetrains, loose cogs, sensors needing cleaning, lasers needing cleaning right through to total replacement of the cd unit. I will wait and see what presents itself when I can spend some time on this in the next couple of days. It really is a nice little unit and it would be good to get it back working fully.
The mains circuit contains a big capacitor that needs bleeding before I get anywhere near it. This is done and work begins.
Speaker post fixOld cd stuck in driveHighly charged capacitor being bled
I’ve fixed the broken speaker securing clip by using some Araldite 2 part adhesive and a small clamp. I’ve left this for a few hours until it set hard. It’s now back in position and doing the job it was designed to do. Both speakers are now secure.
I found out why the Cd drawer kept opening. There was a previously installed and damaged disc sitting under the carriage. As soon as that was removed the Opening/Closing scenario is no more.
I reassembled the unit and it all appeared to go well until….no disc error 🤦♂️
Sort one issue and another arises
Damn, I checked the drives they’re ok, I’ve cleaned the lens and reassembled yet again. Same issue.
Laser diode adjusterLaser diode check
I’ve opened it up yet again and checked the output power of the Laser and that is at .03 ohms. Small adjustments on the diode show no improvement in either direction so it is looking as if the damage is within the laser itself. I don’t hold out much hope of getting the cd working as it’s not really a replaceable unit as it wasn’t designed that way. So unless I can find some way of getting around this issue I might just have to accept that the unit will just be used in Dab, FM, USB and Bluetooth modes.


You must be logged in to post a comment.