Tiger “Sonic the Hedgehog” handheld console

What the listing said:

Console is sold as nonworking, shows no sign of life. Item is in good physical condition but there is a lot of corrosion in the battery compartment

Ebay

I’ve decide to look into what seems to be the “New Antique” sector of retro gaming. The prices being commanded for 1980s/90s old school gaming is crazy with many small handheld items that would have cost a couple of pounds being sold into the hundreds. Absolutely nuts!

Sonic – Tiger console

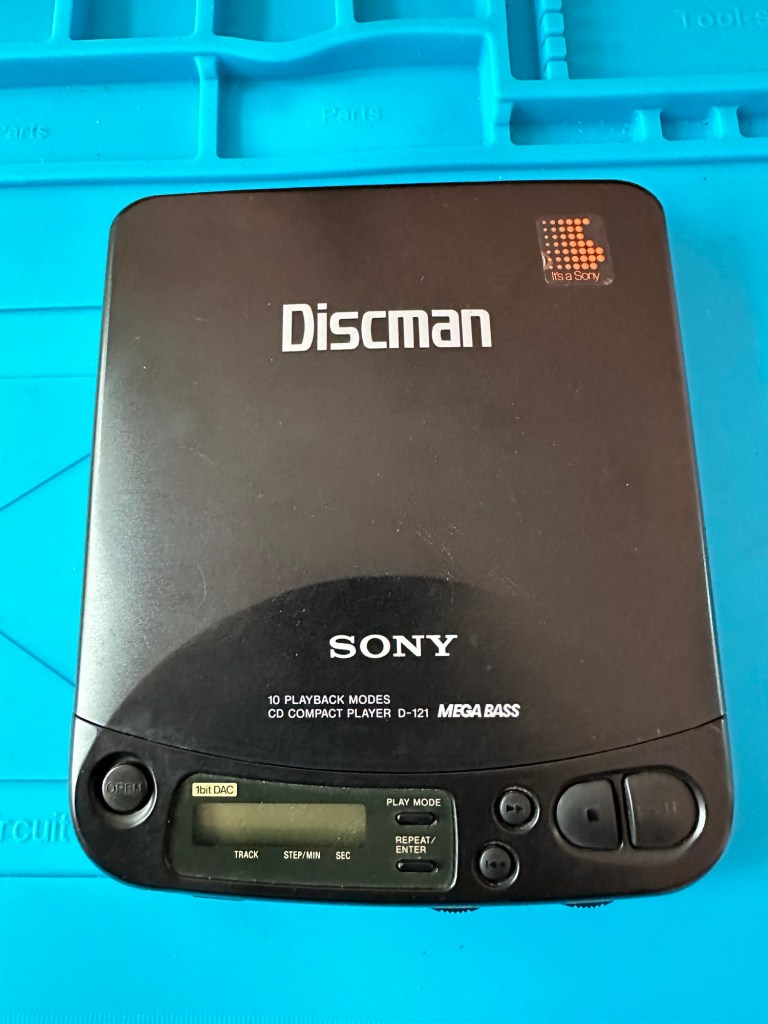
My decision making process on this was simple. I love hedgehogs, we have plenty of hedgehog visitors to our garden, so what better game than “Sonic the Hedgehog?”

Anyway, at the cheaper end I managed to bag this for £9 GBP. If I get it working, those units are selling between £20 – £45 so I should at least get my original outlay back, pending on what work needs doing.

So here we go….

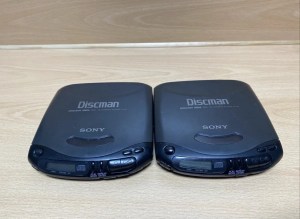
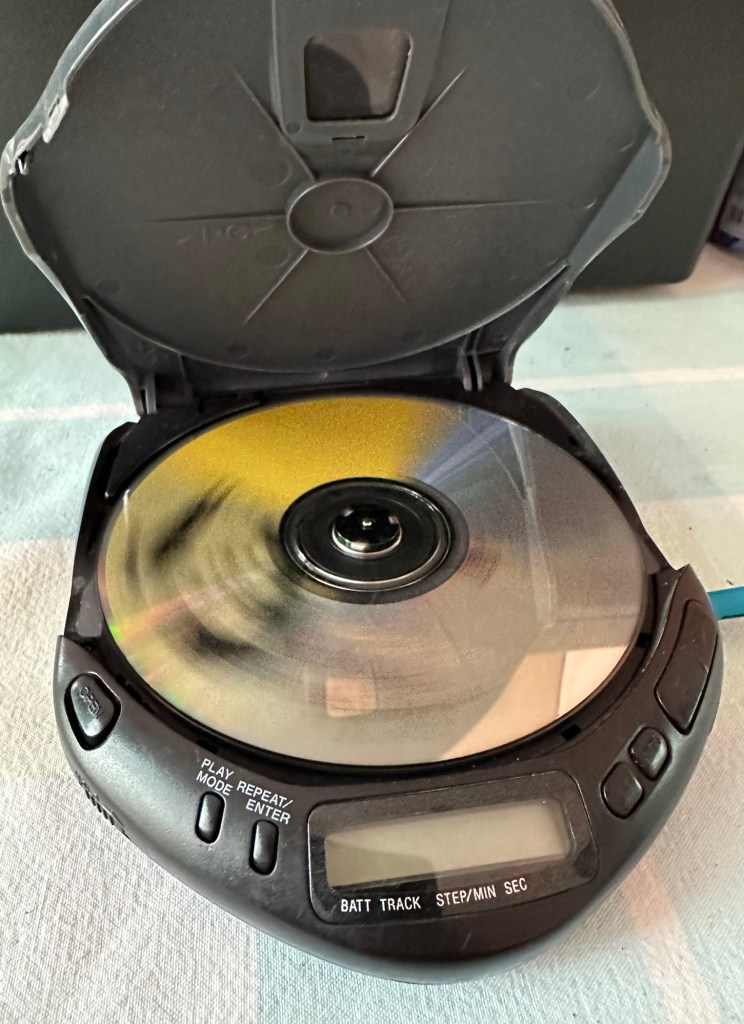
Well, it’s arrived and cosmetically it looks fine.

Looks good cosmetically

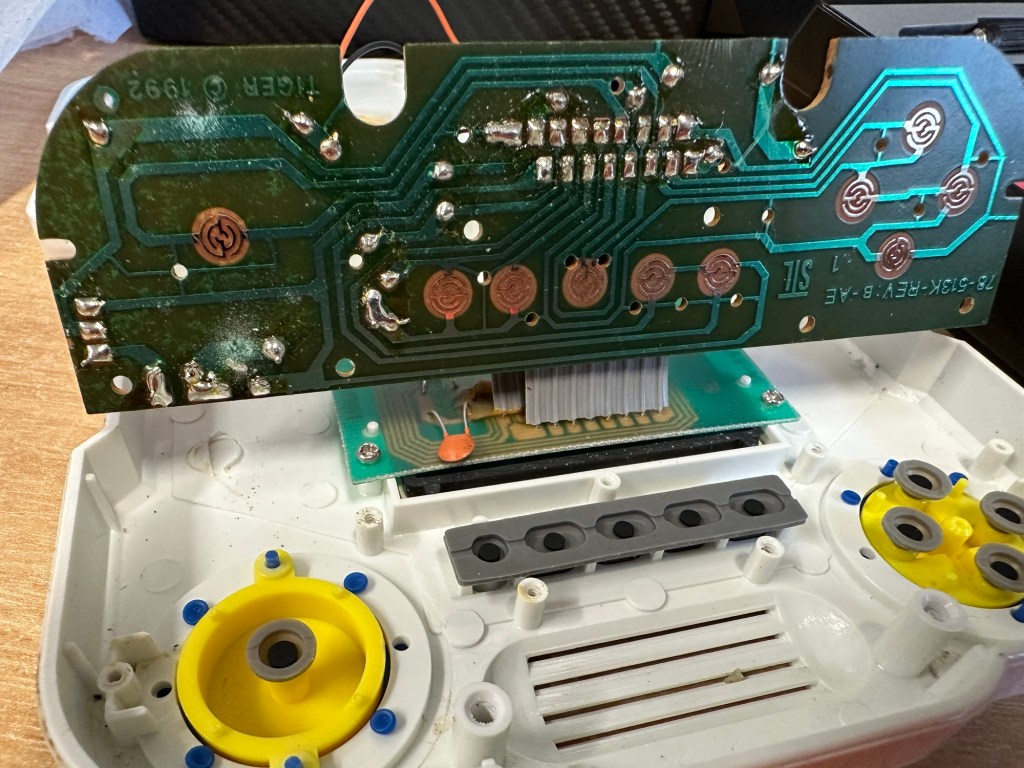
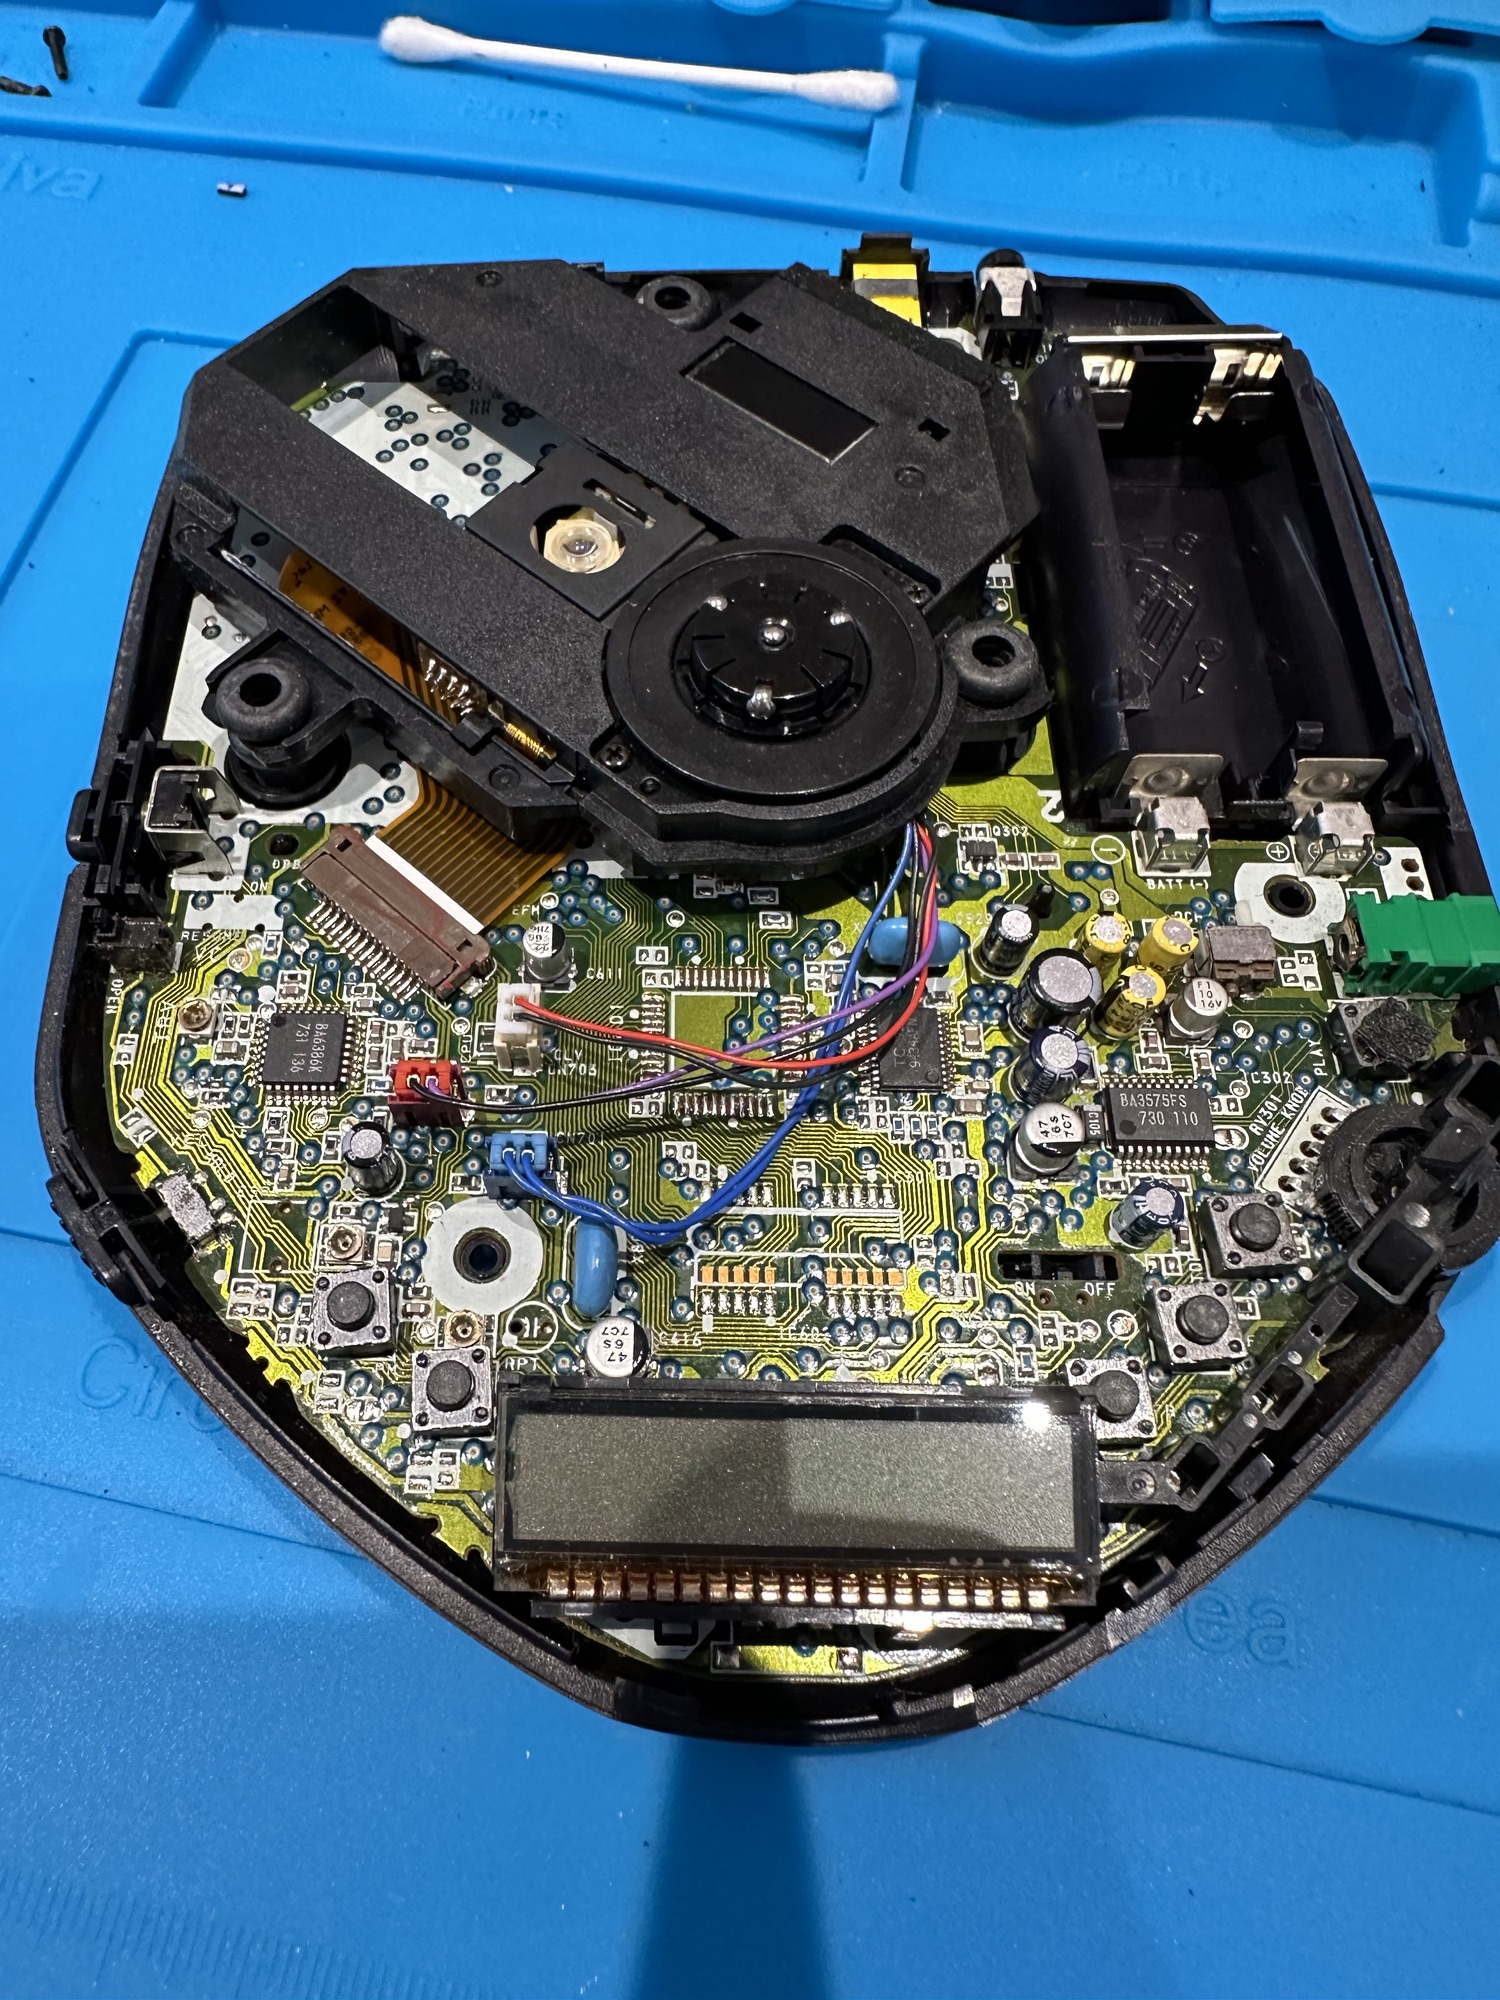
Now I opened the battery compartment and could see no corrosion, on opening further I noticed some of the screws had been threaded so I guess someone has been in here before me. And I was right. The corrosion can be quite clearly seen on opening the unit.

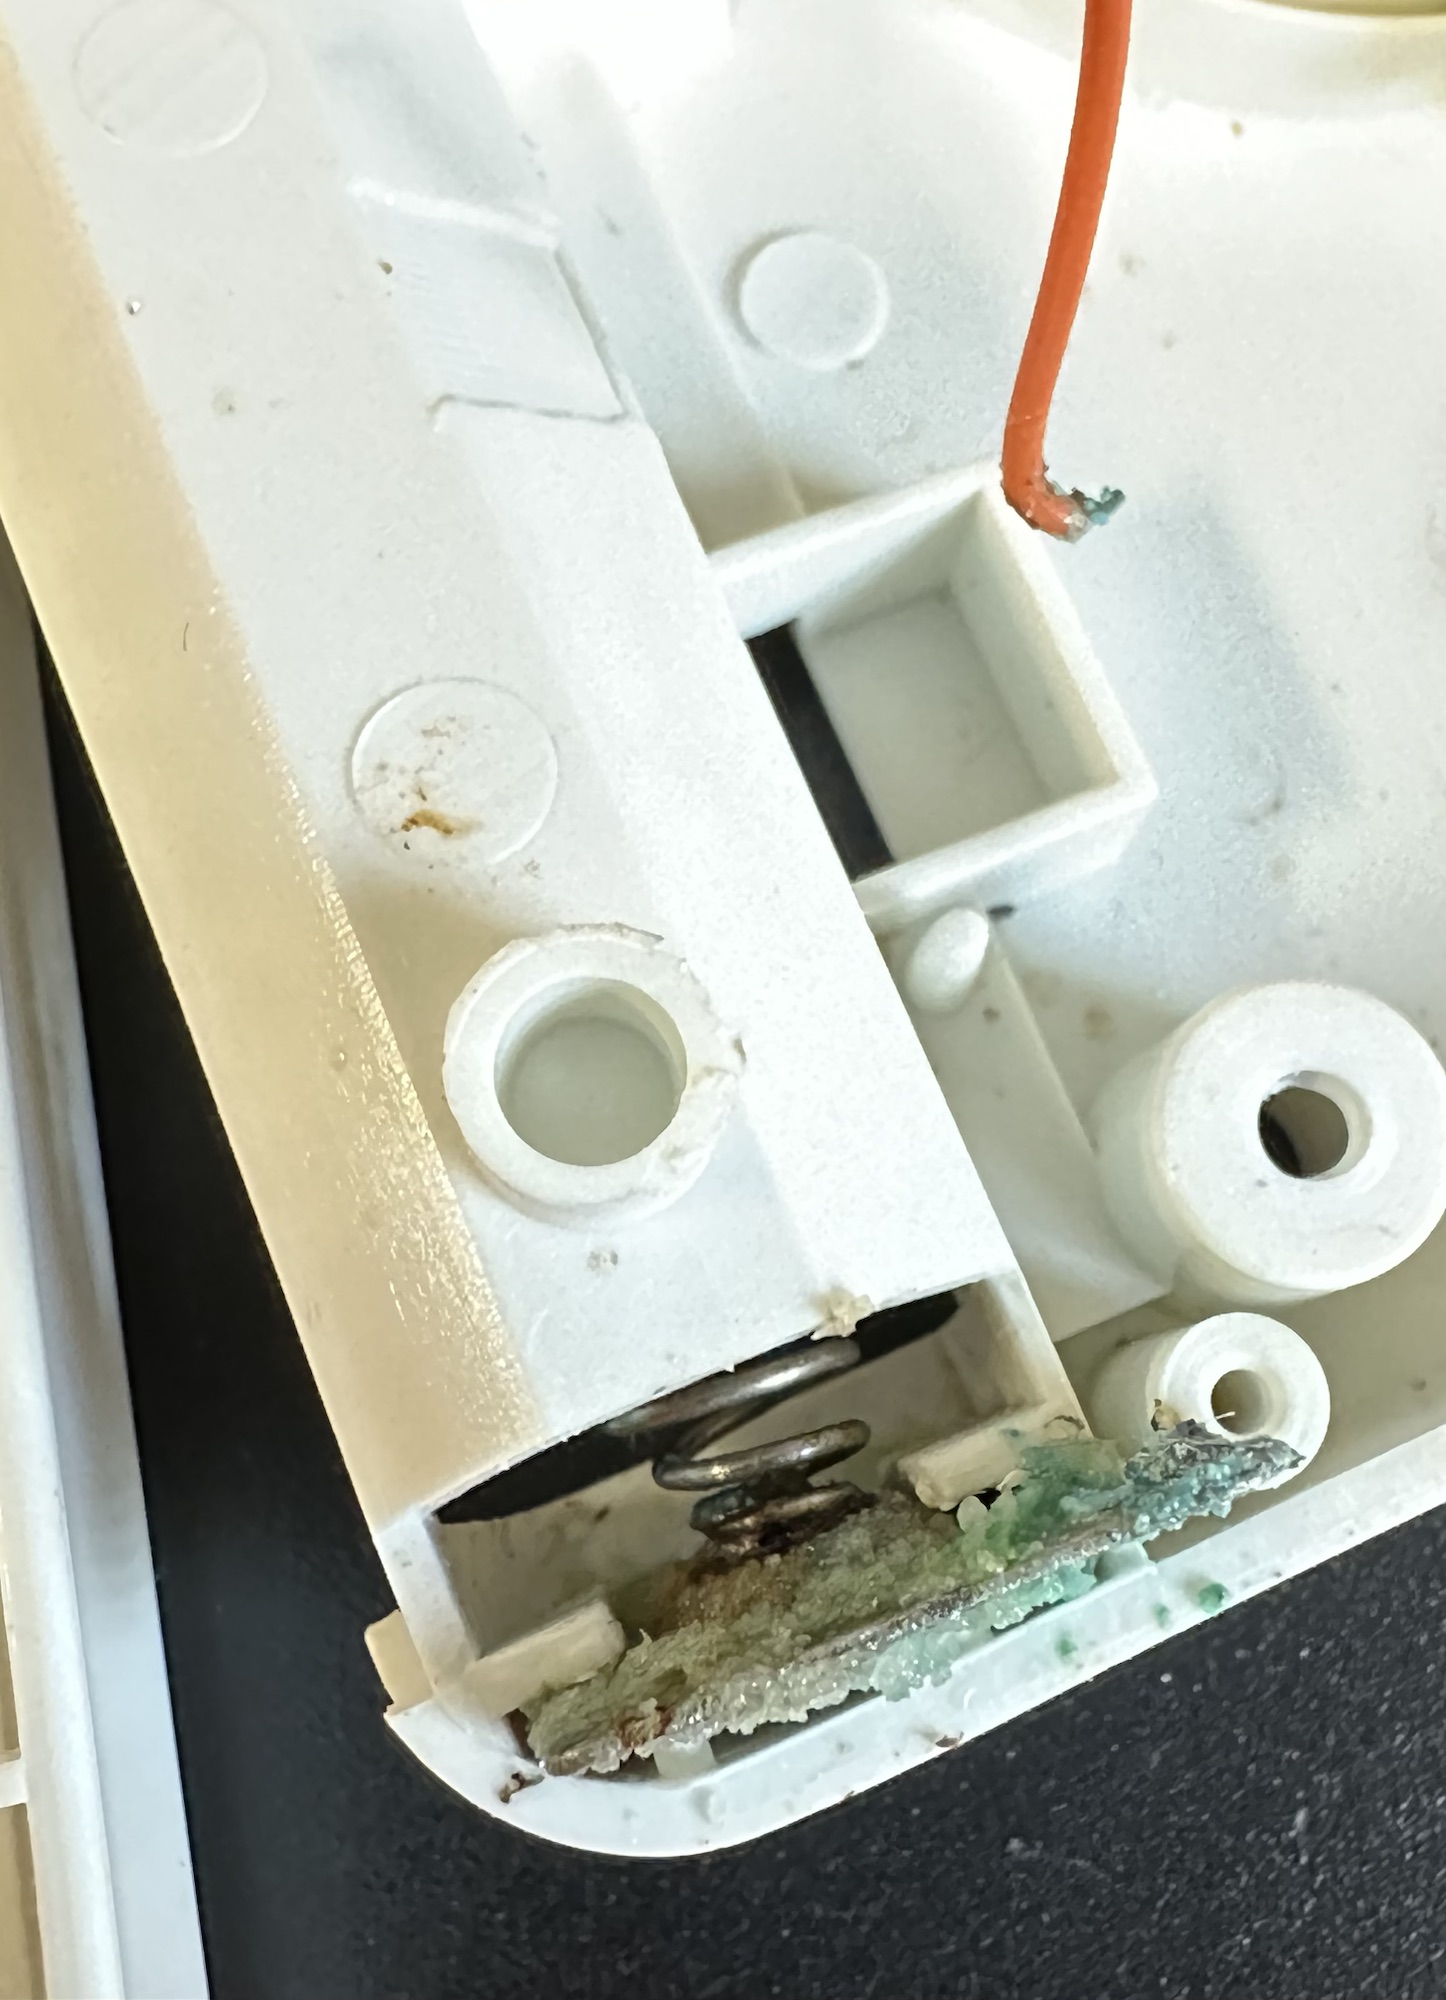
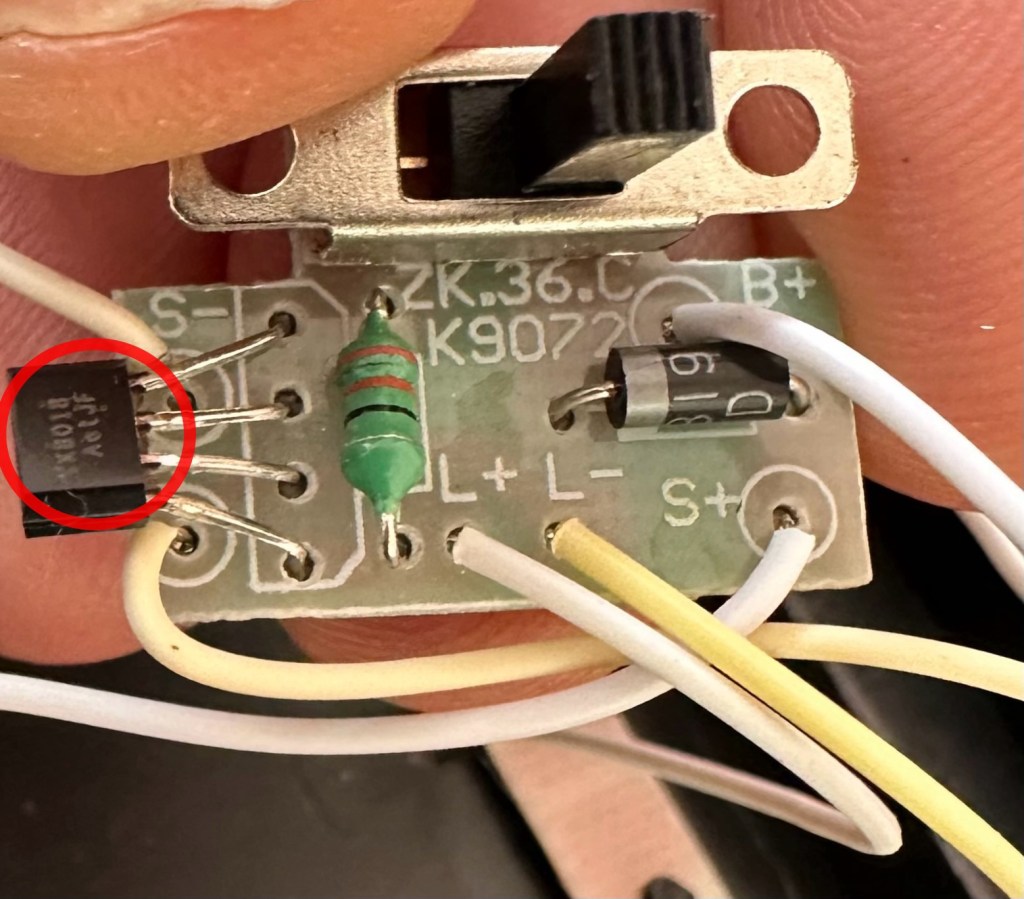
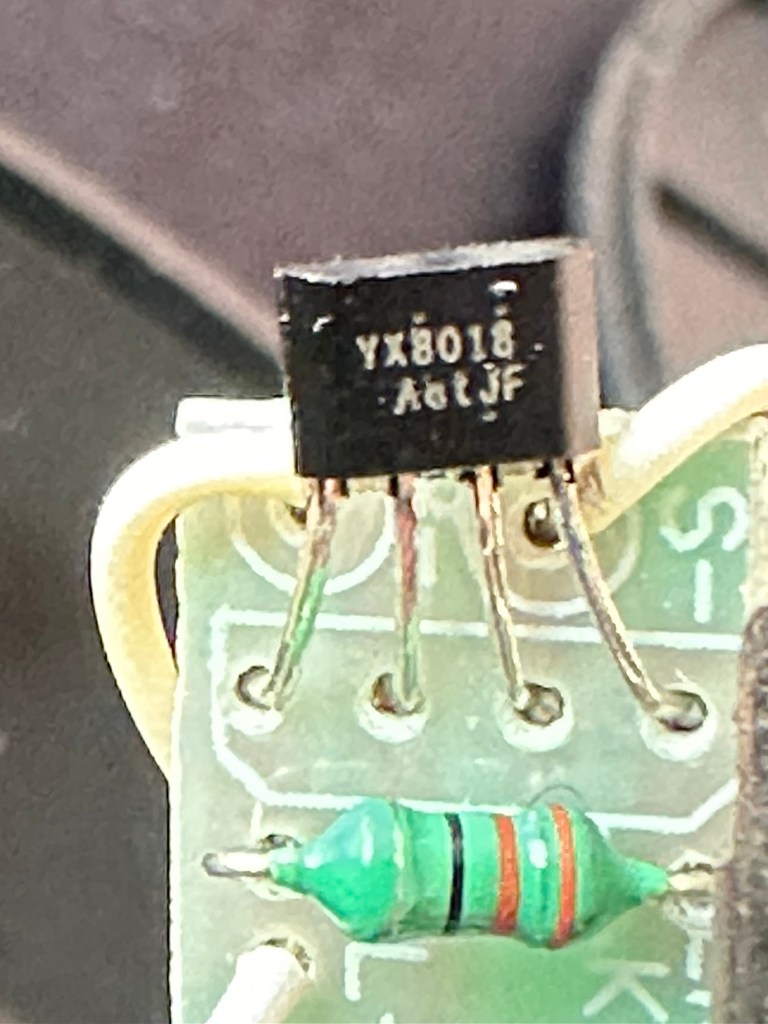
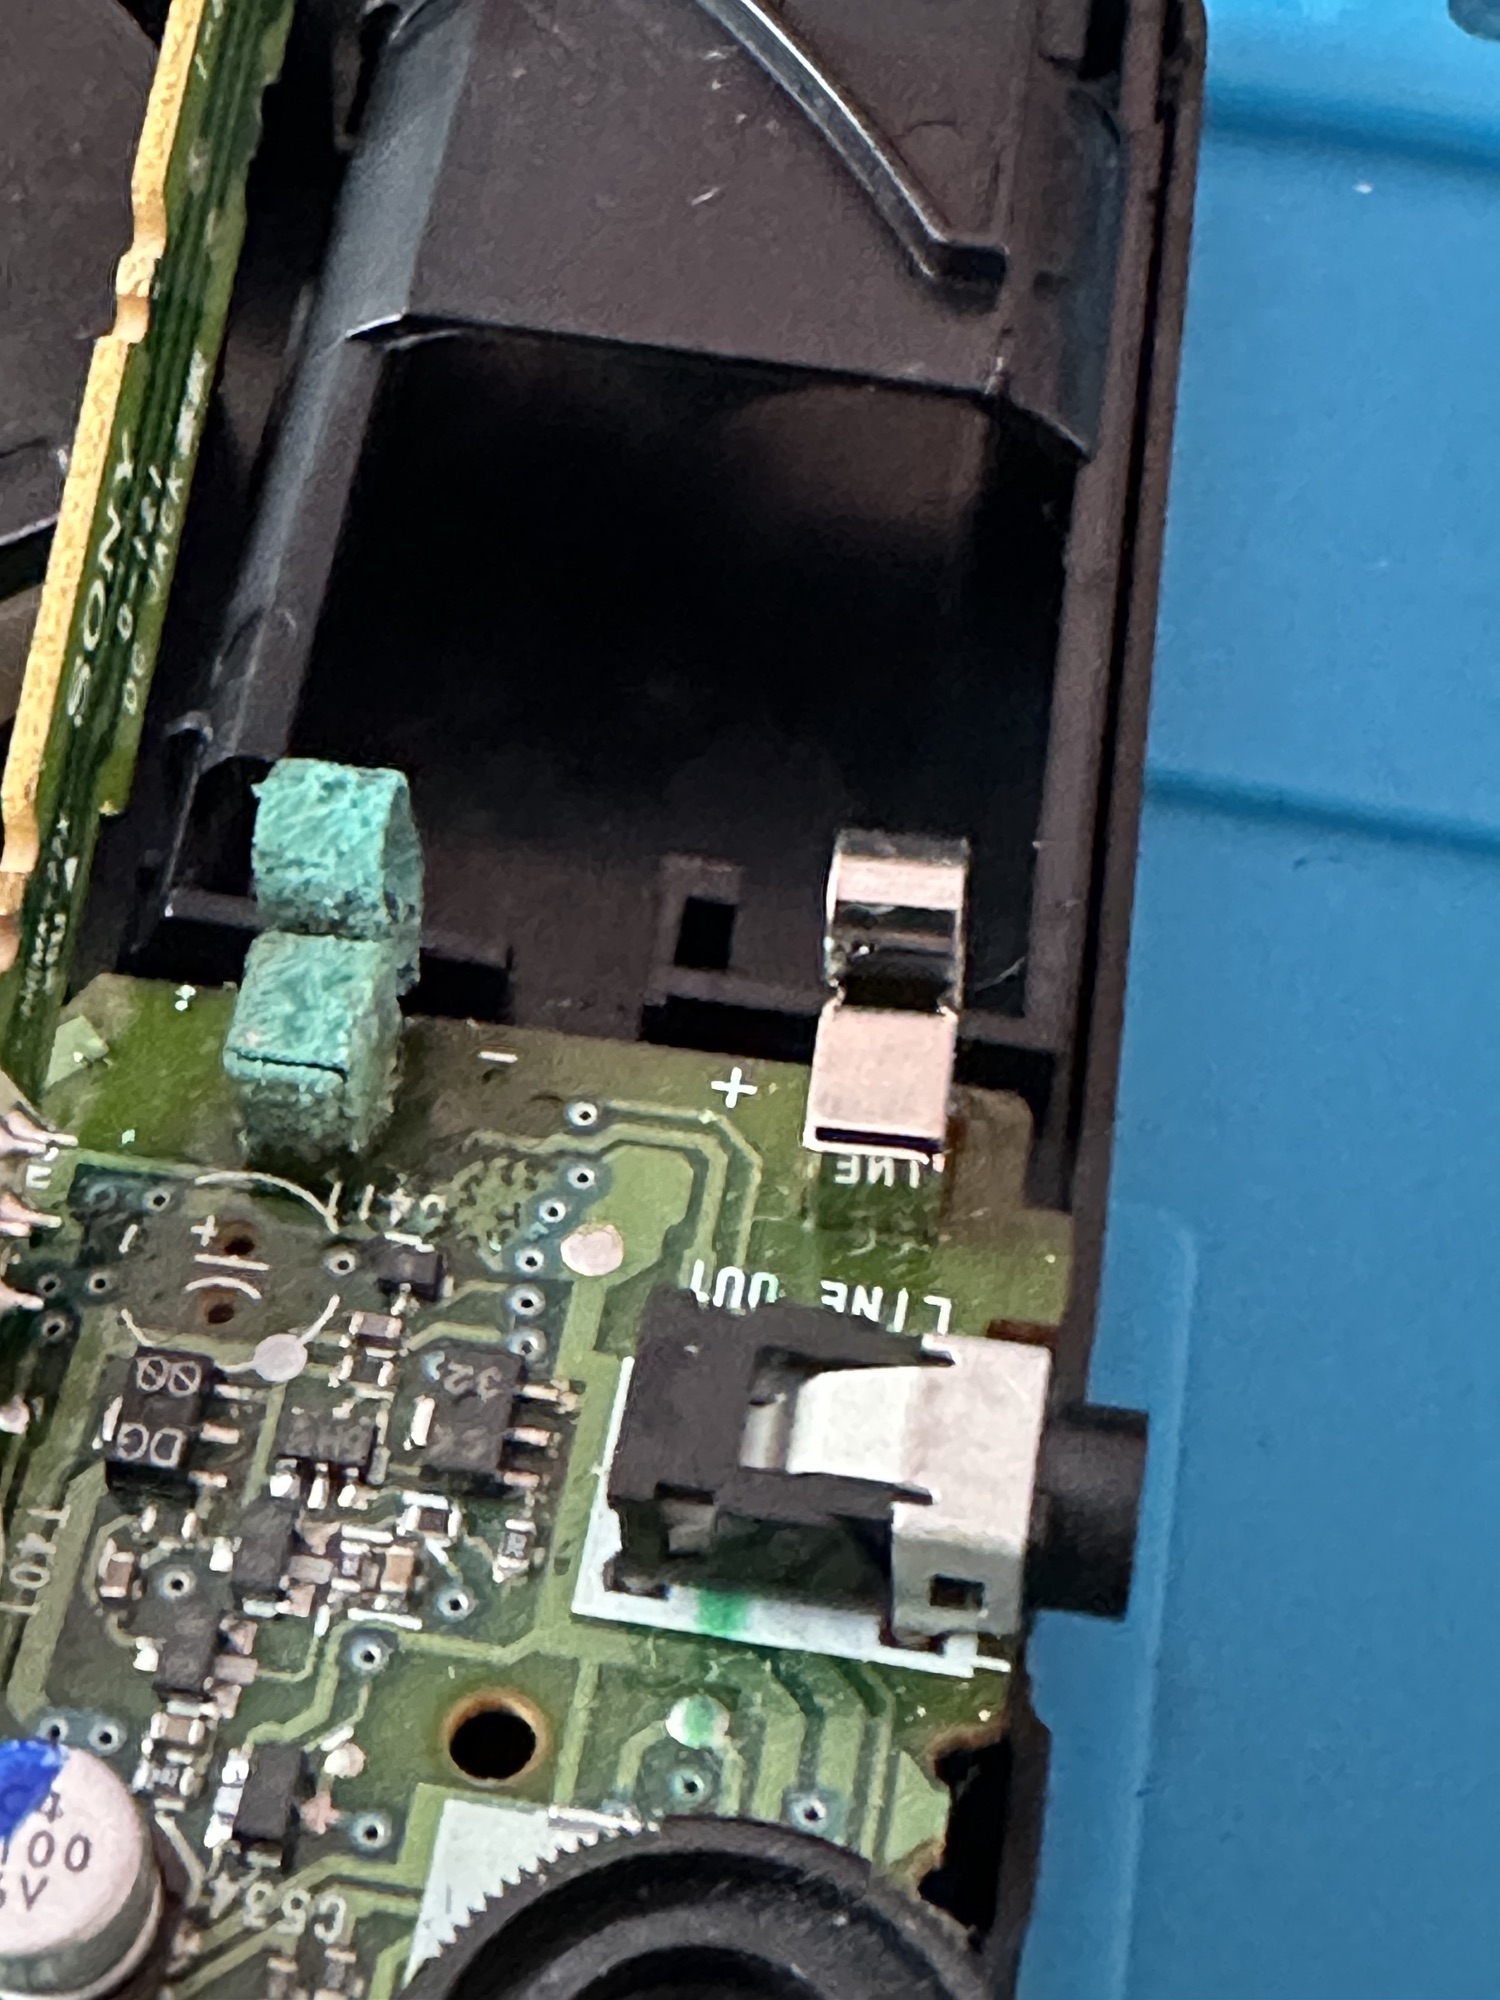
Where the corrosion is on the negative terminal, a wire is also disconnected, hooray I thought, an easy fix. Hold on tiger, it’s not that simple. it appears the corrosion has leaked down the wire to where the negative wire joins the circuit board, in fact all four wires at this point are holding on by threads of wire. These will need re soldering.

This game appears to be from 1992 according to the stamp on the main board.

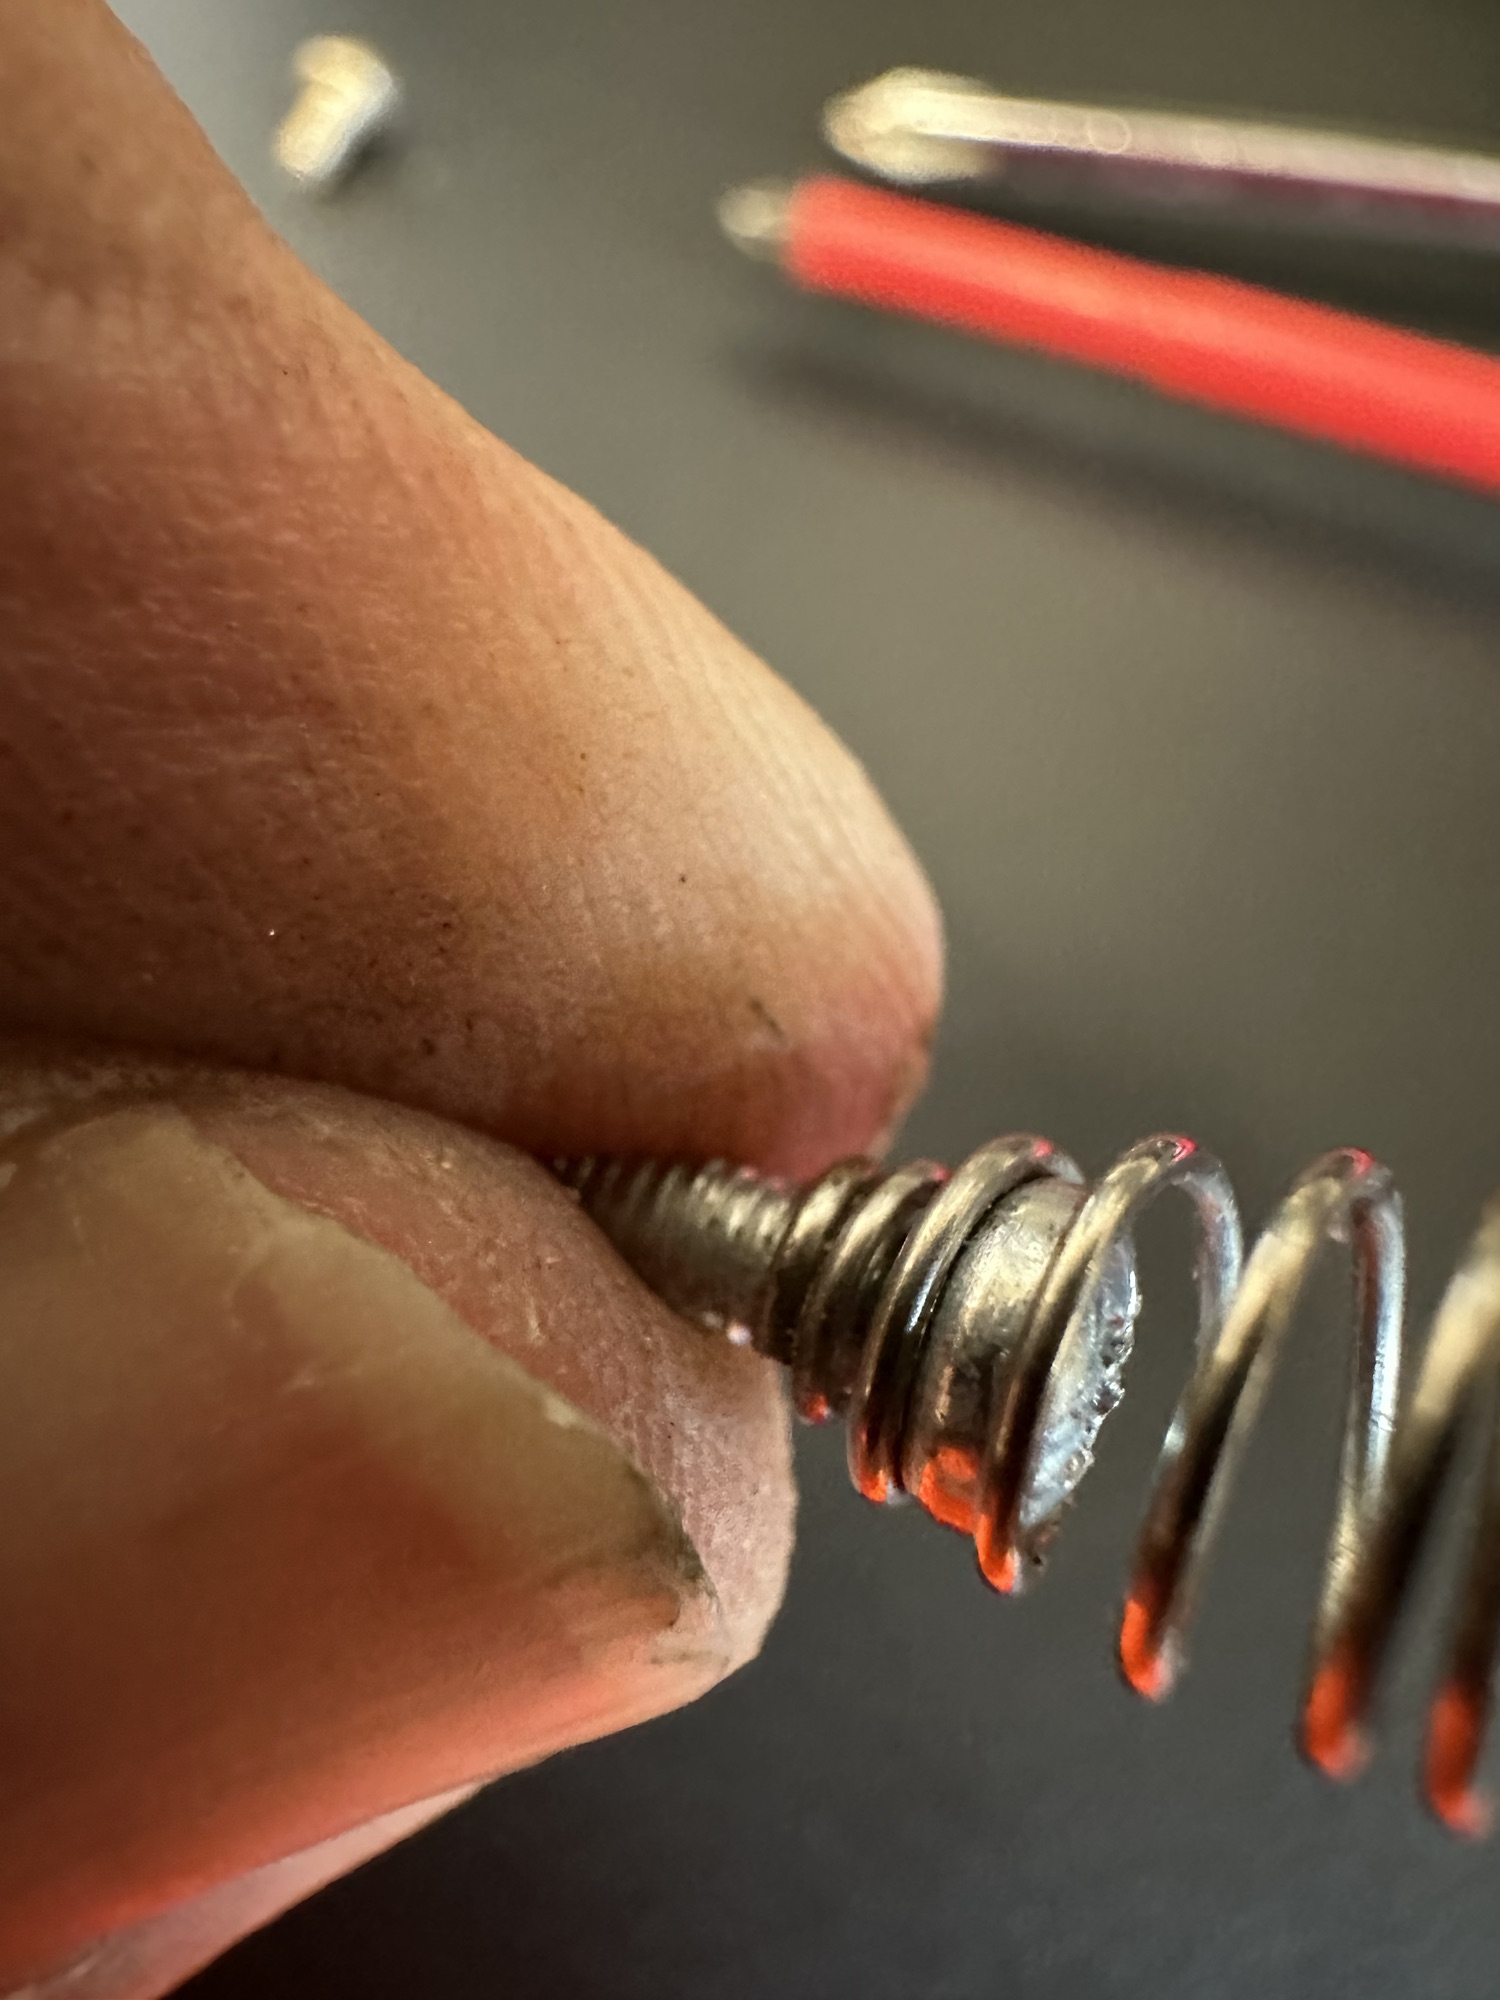
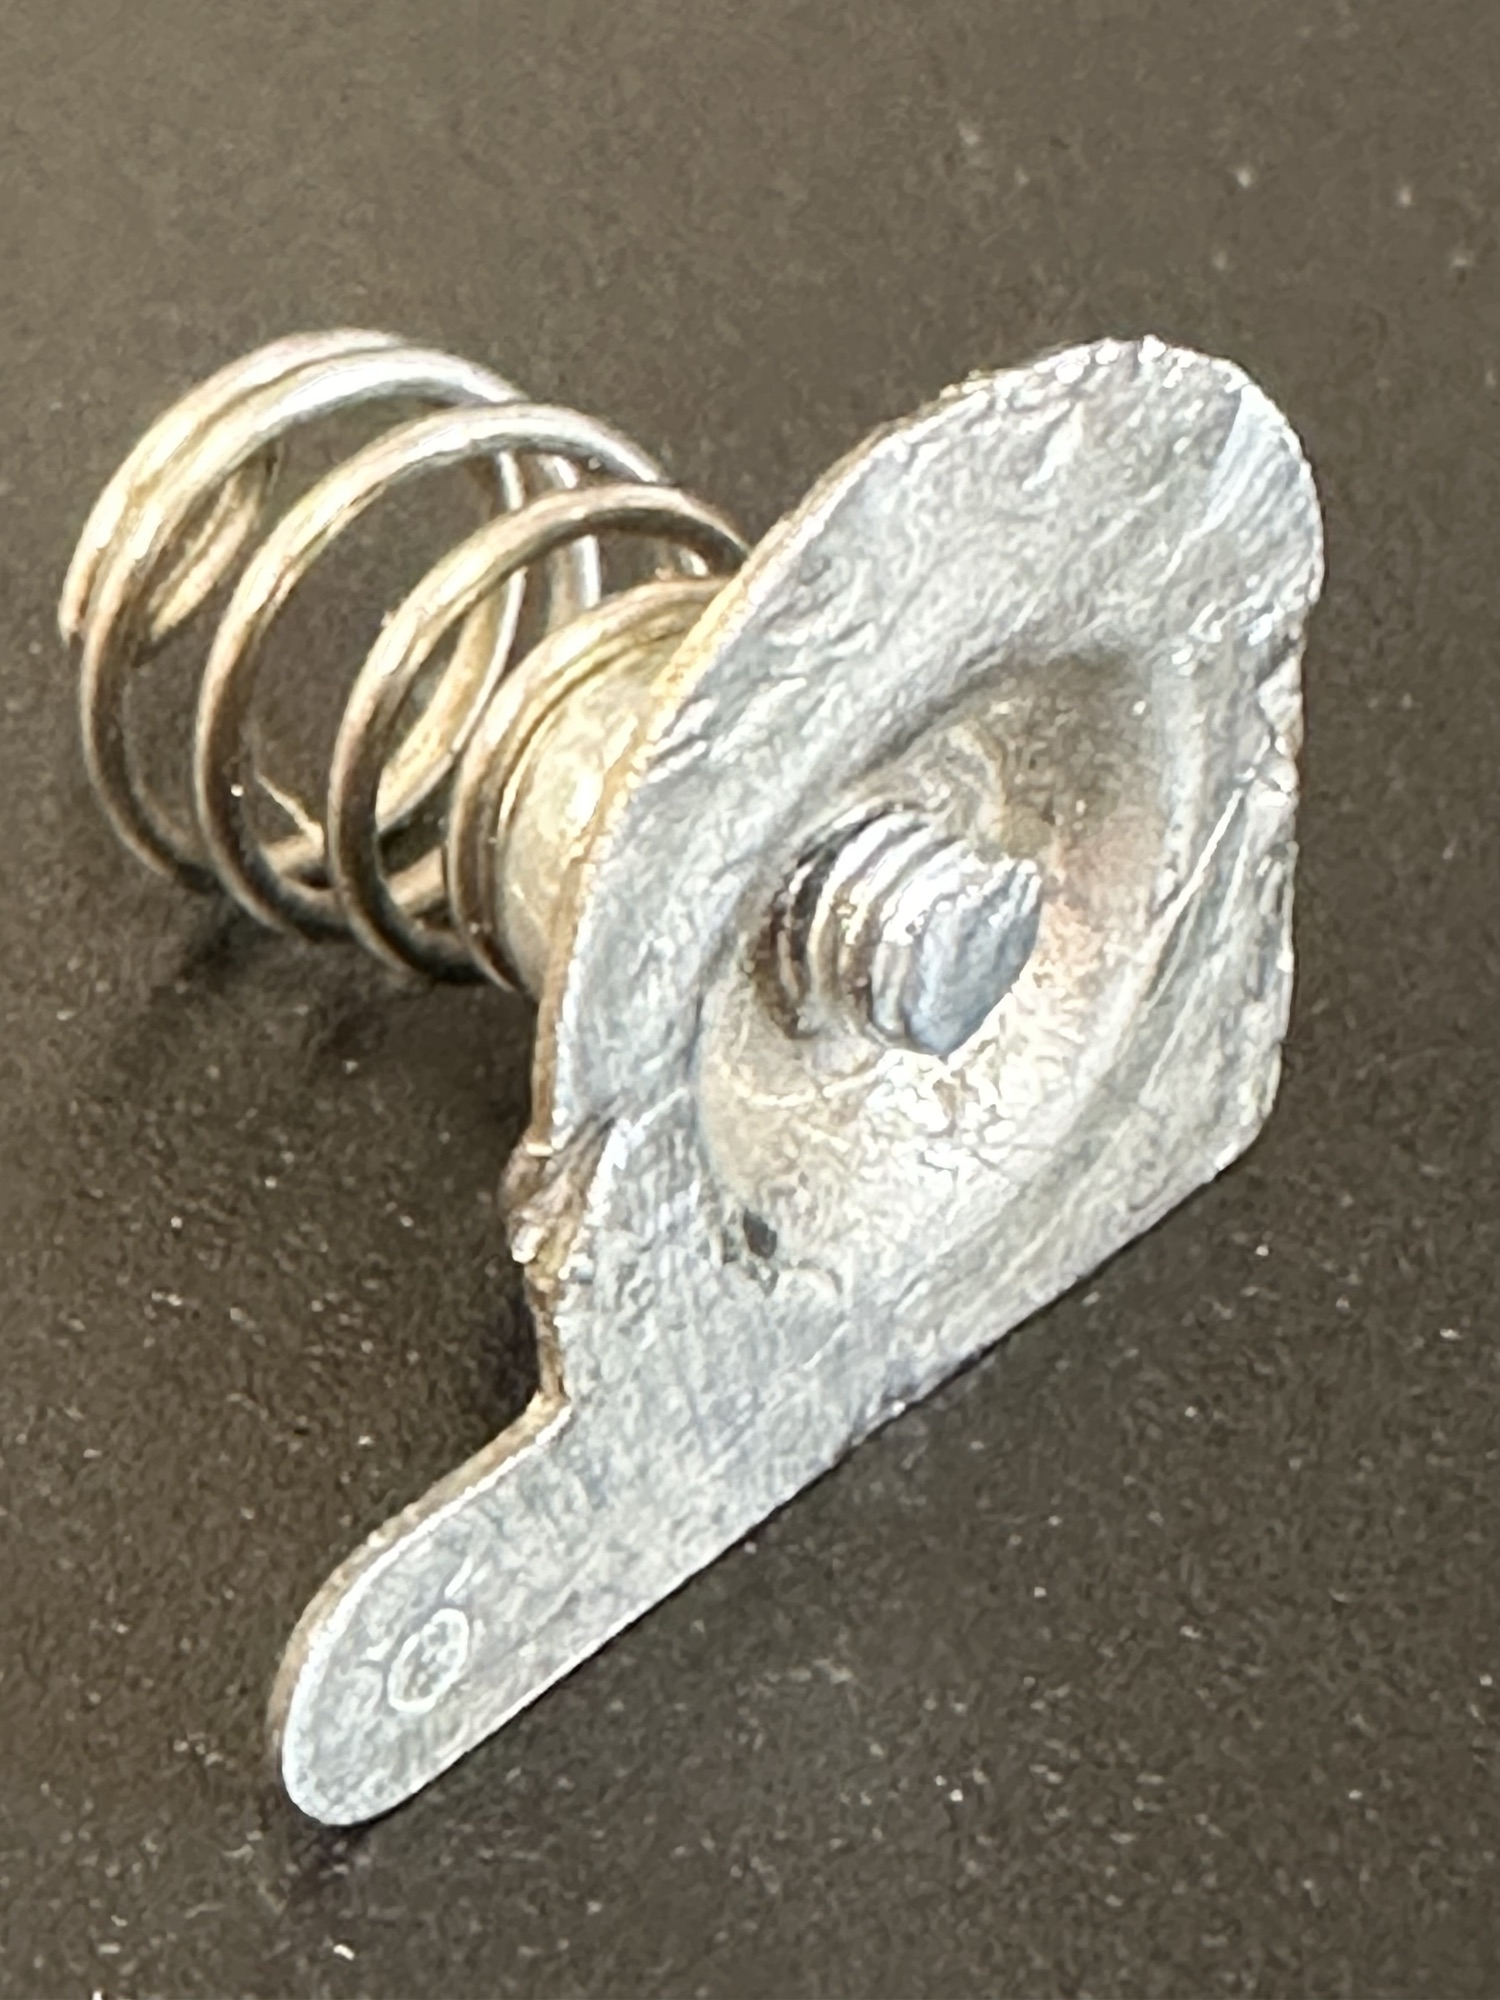
The negative terminal connector is broken, i have some replacements on order but I’m going to repair this one.

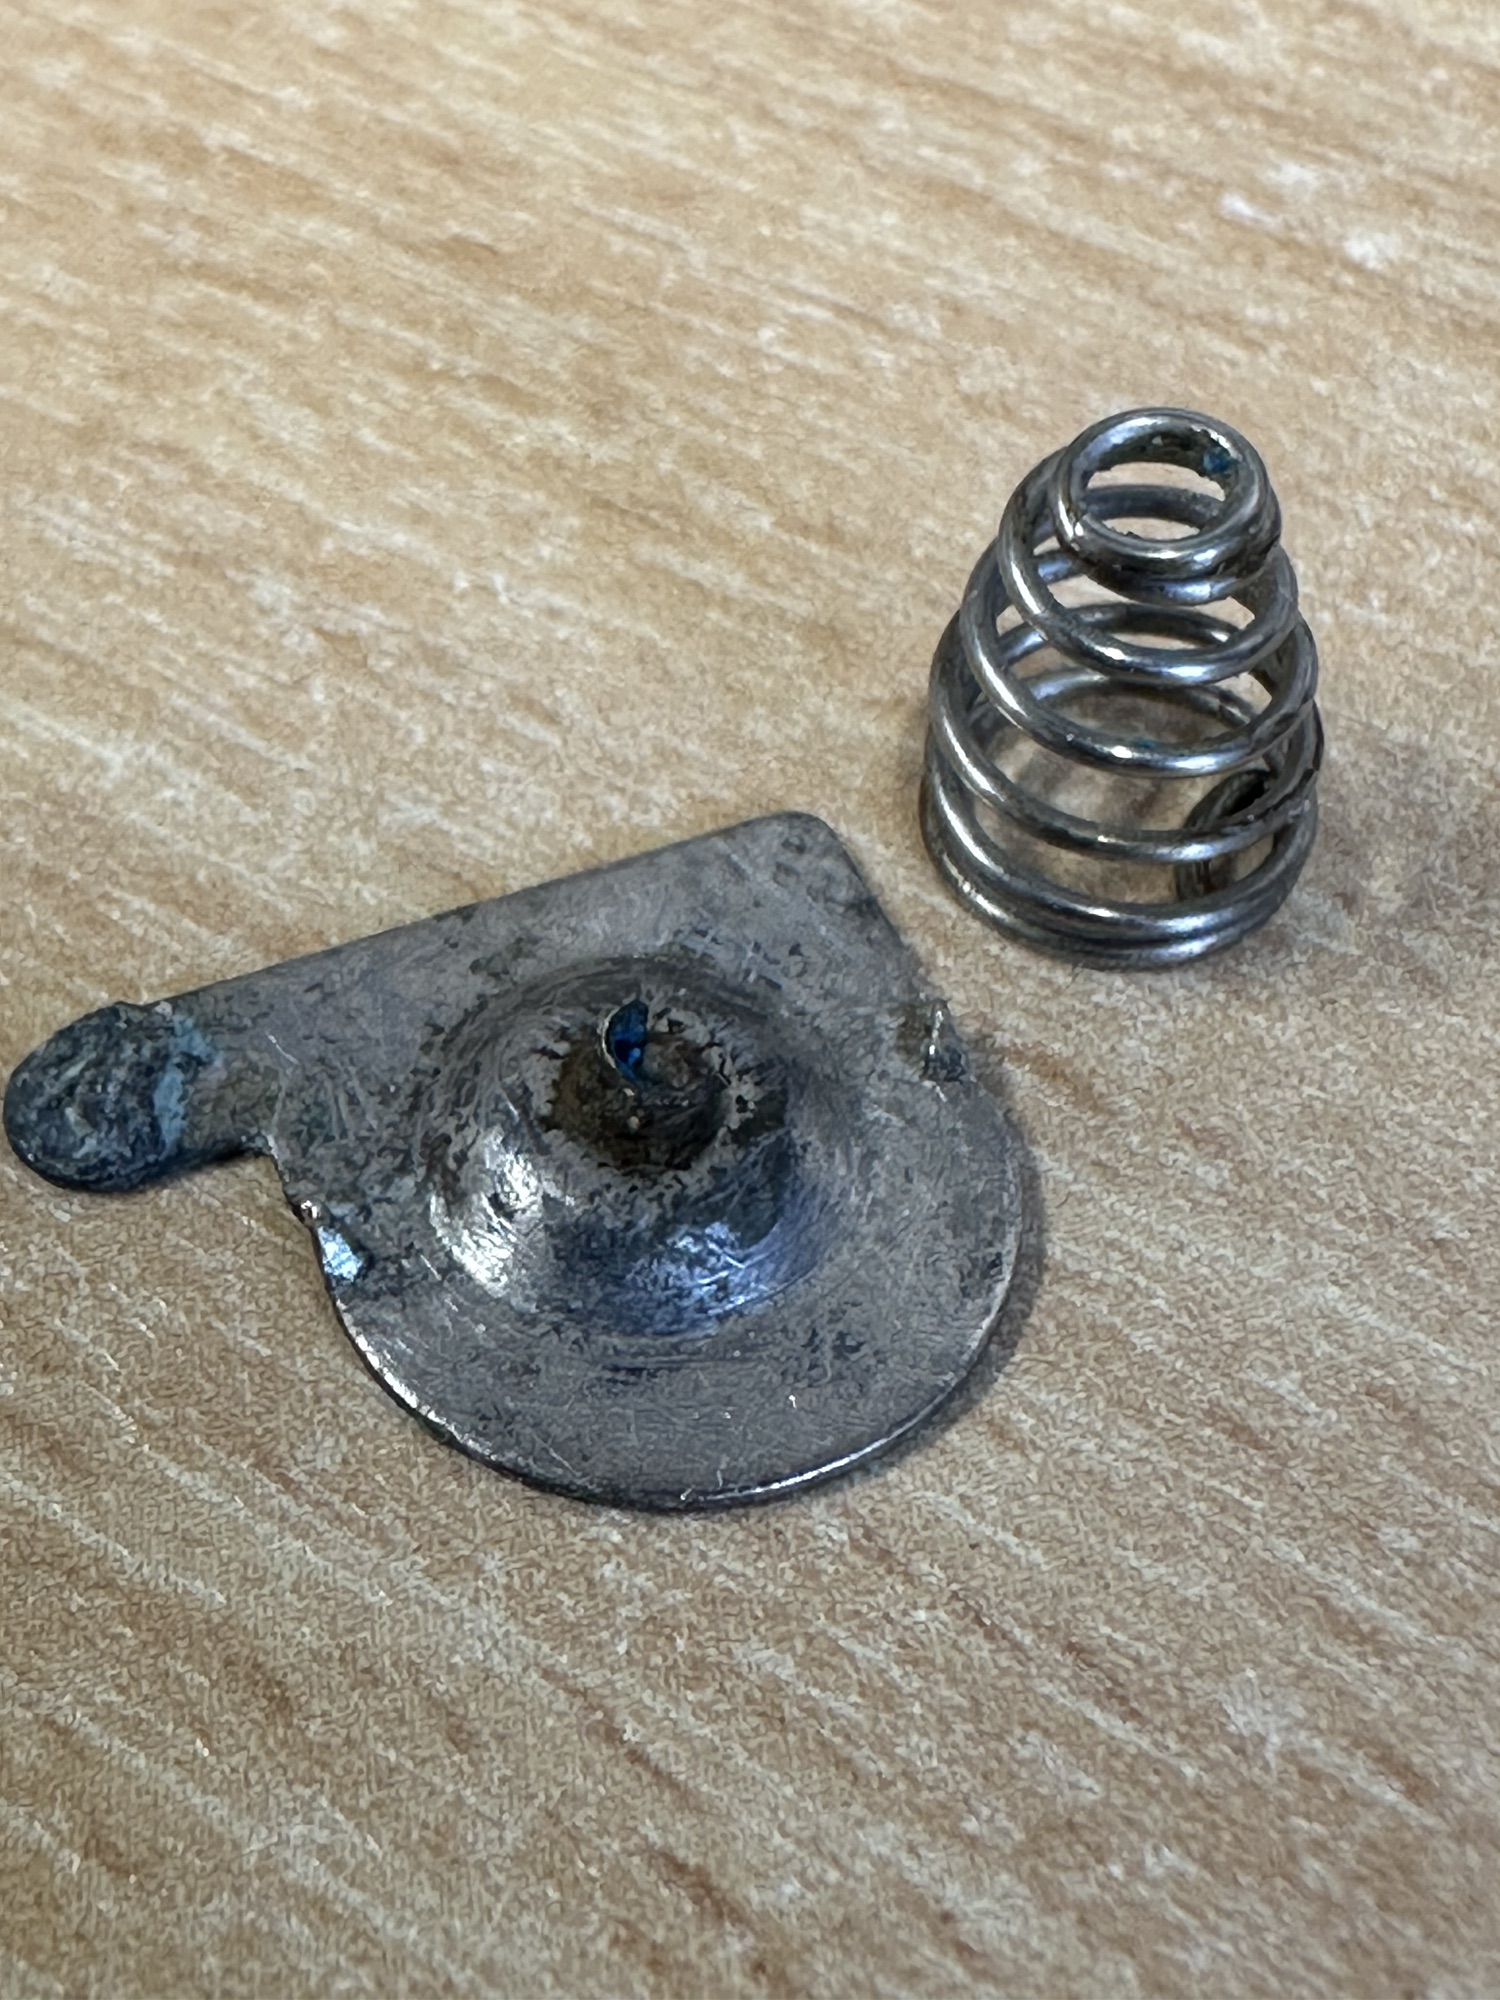
I’ve taken the corroded rivet out that held the spring. I’ve found a small screw and have used this to connect to the plate. I’ve cleaned the whole lot with wire wool and have cut off the excess screw and filed it all down. It now looks as good as new and no cost involved. I will finish it off with a dab of solder on the back to ensure good contact is maintained.

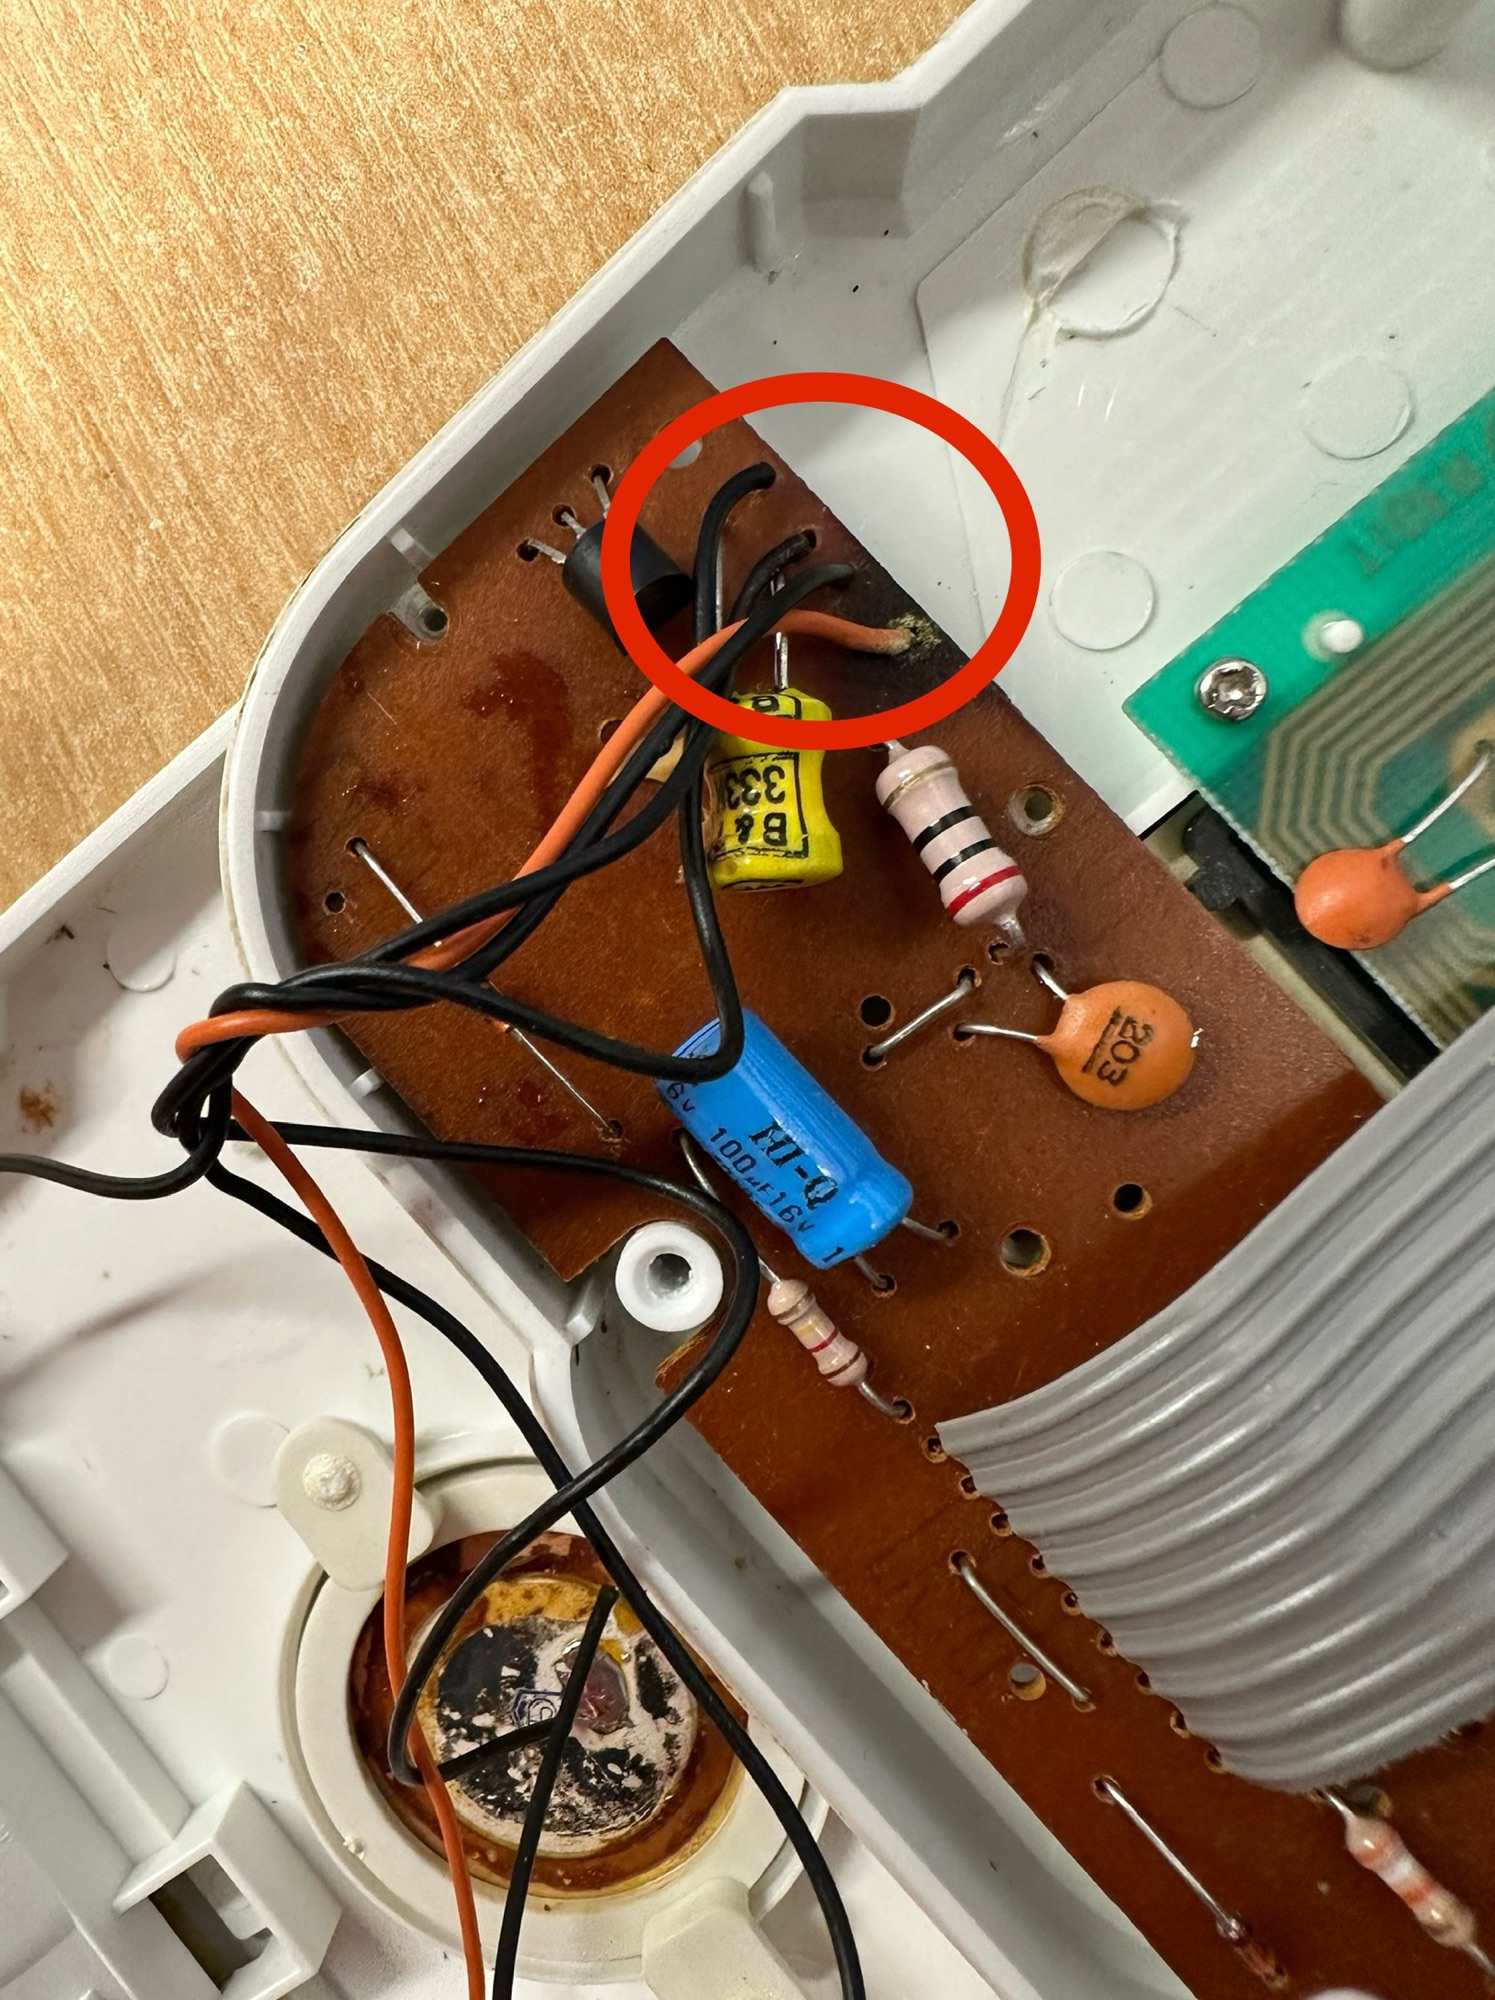
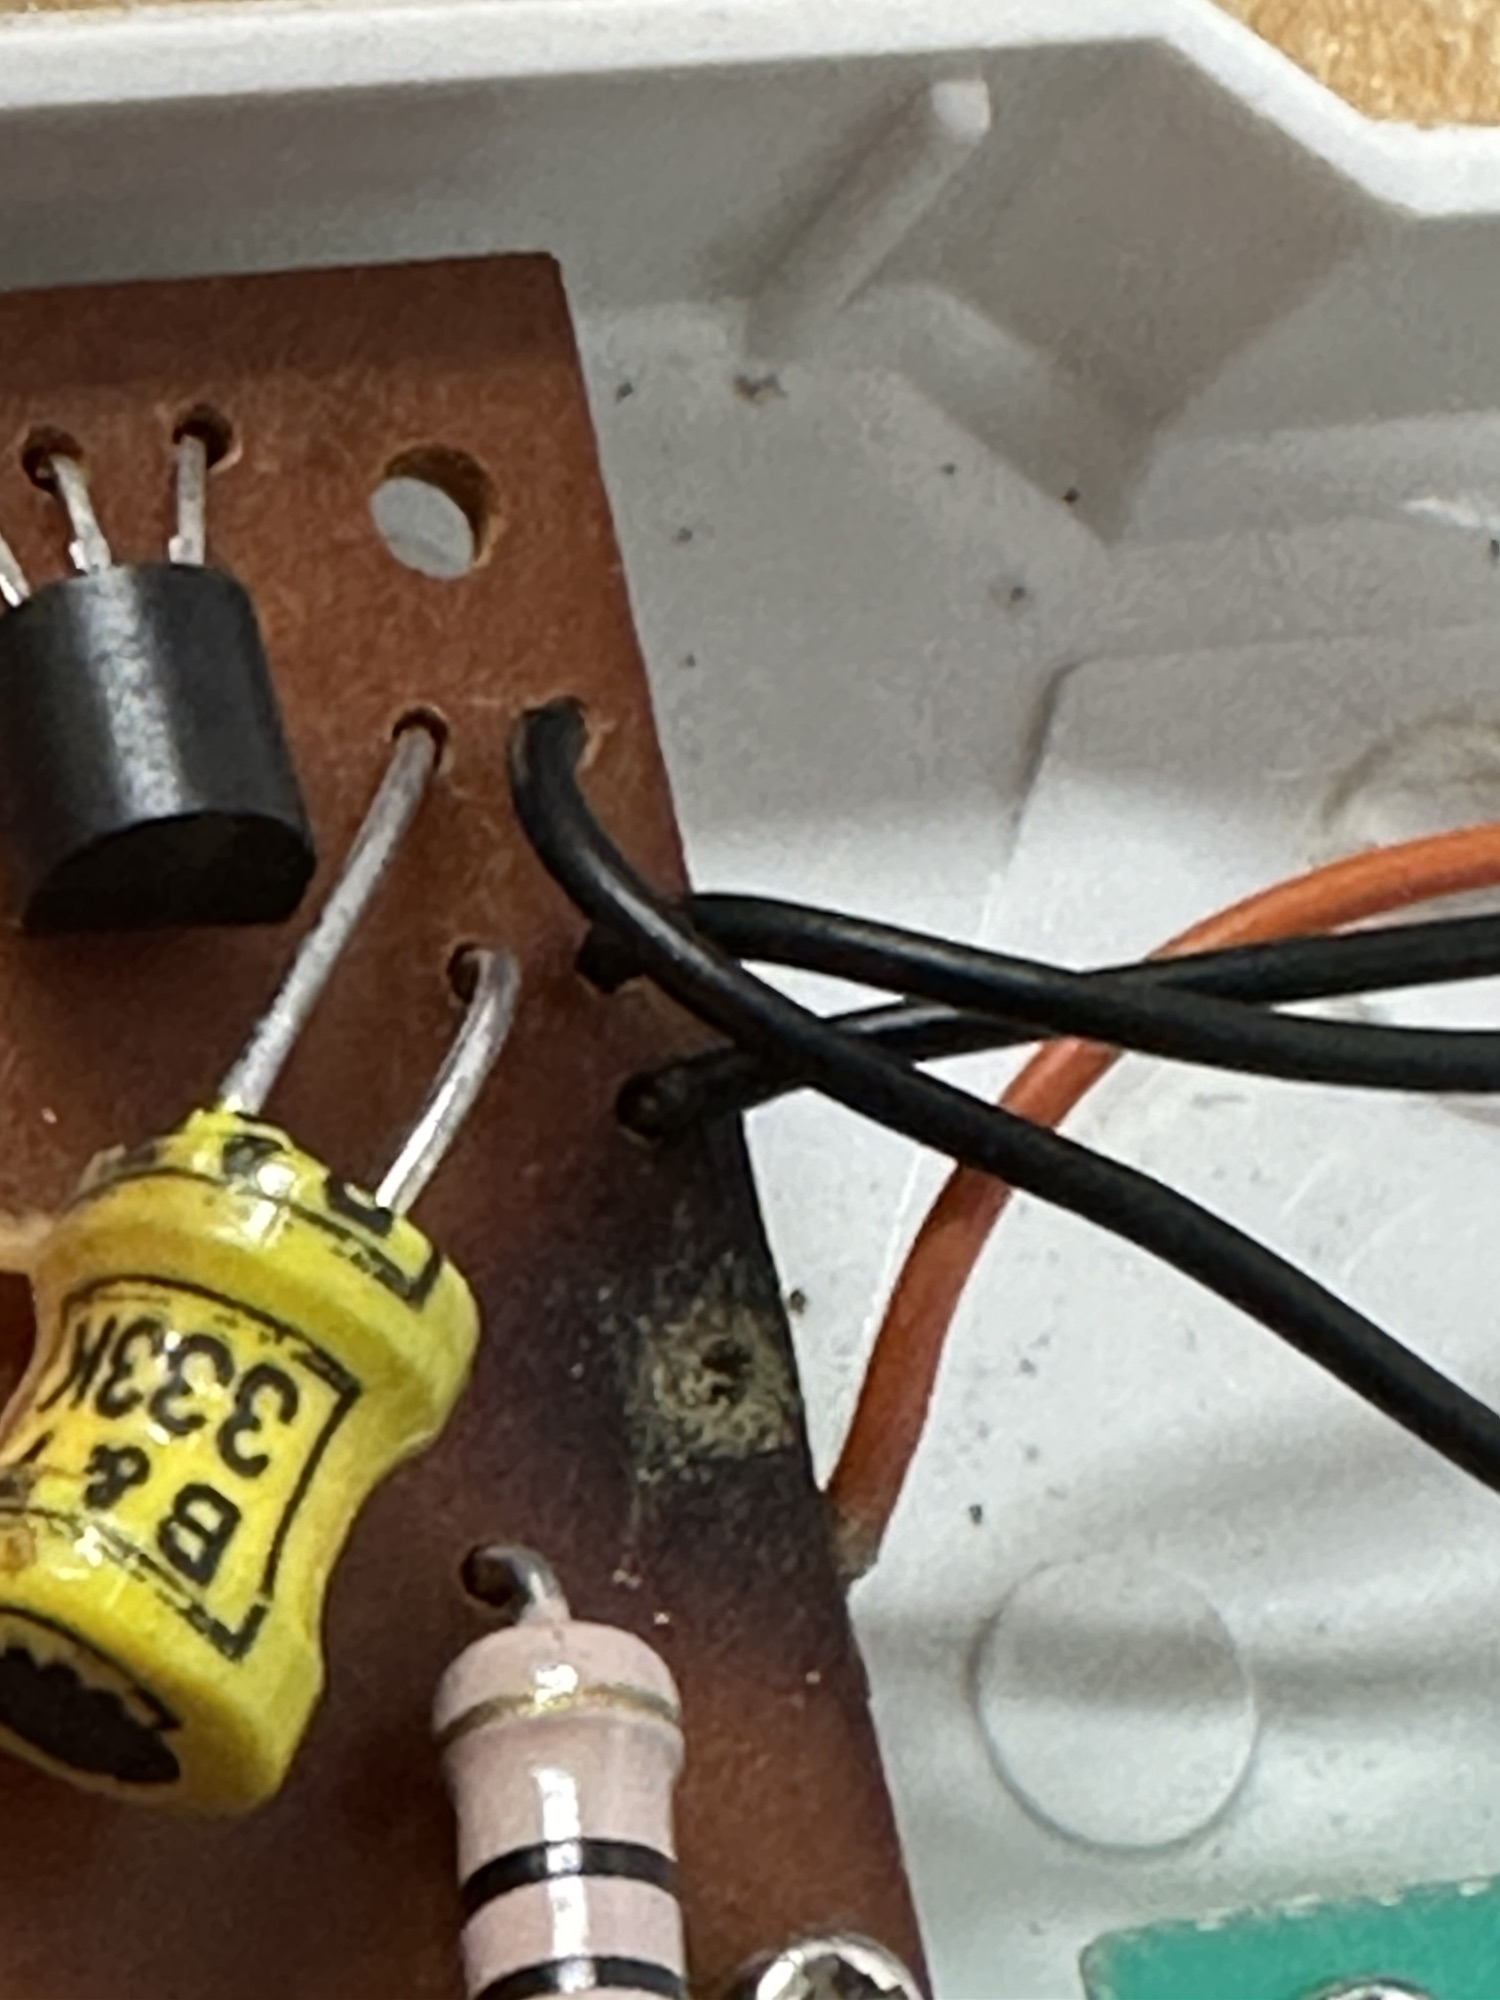
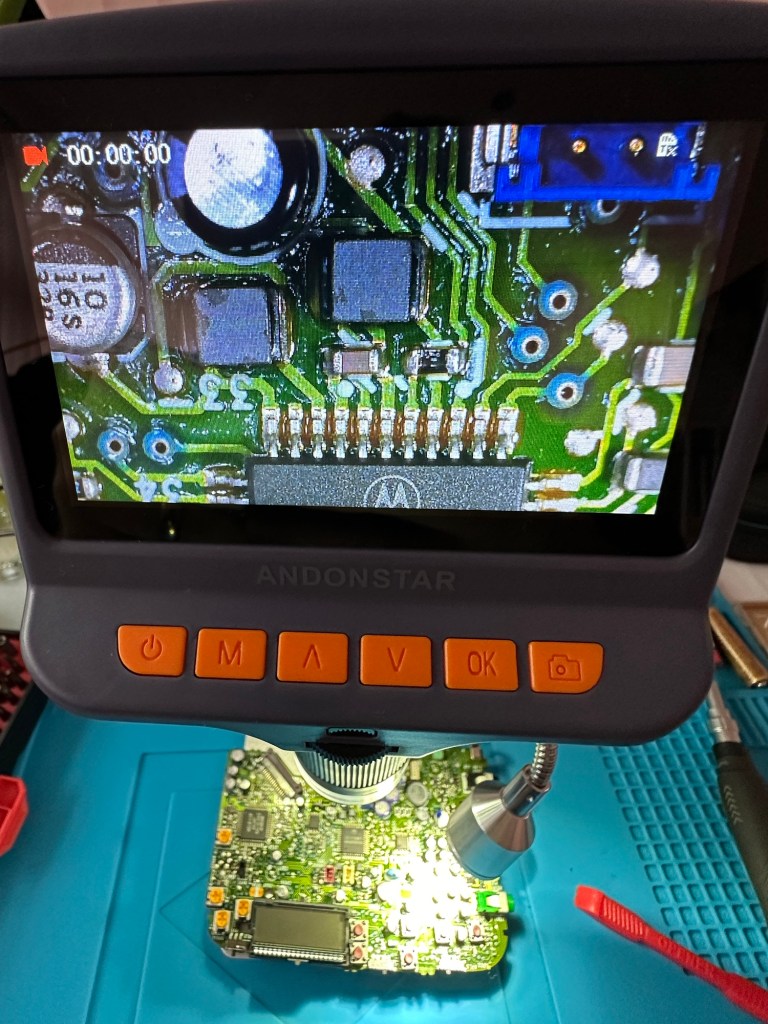
Peering underneath at the board it all looks ok, needing just a good clean with IPA. However, I’m not really going to be able to confirm this until I’ve re soldered and checked continuity from the batteries.

Signs of light corrosion under board

There could be some damaged tracks, again I’ll know that when all the basic setup and tests have been done. There is also a possibility the speaker could be damaged as the corrosion has reached there. I’ll test with the multimeter in the meantime. That all checked out ok and the speaker is fine.

I’ve given a good overall clean with some IPA and the entire unit inside and out looks as good as new.

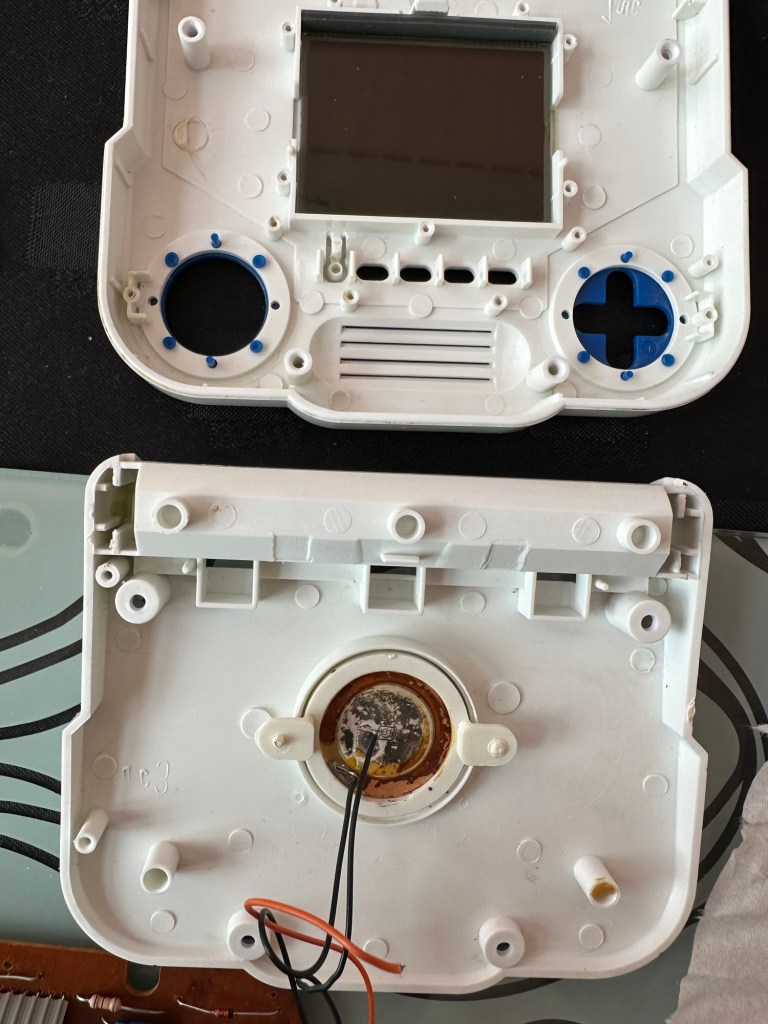
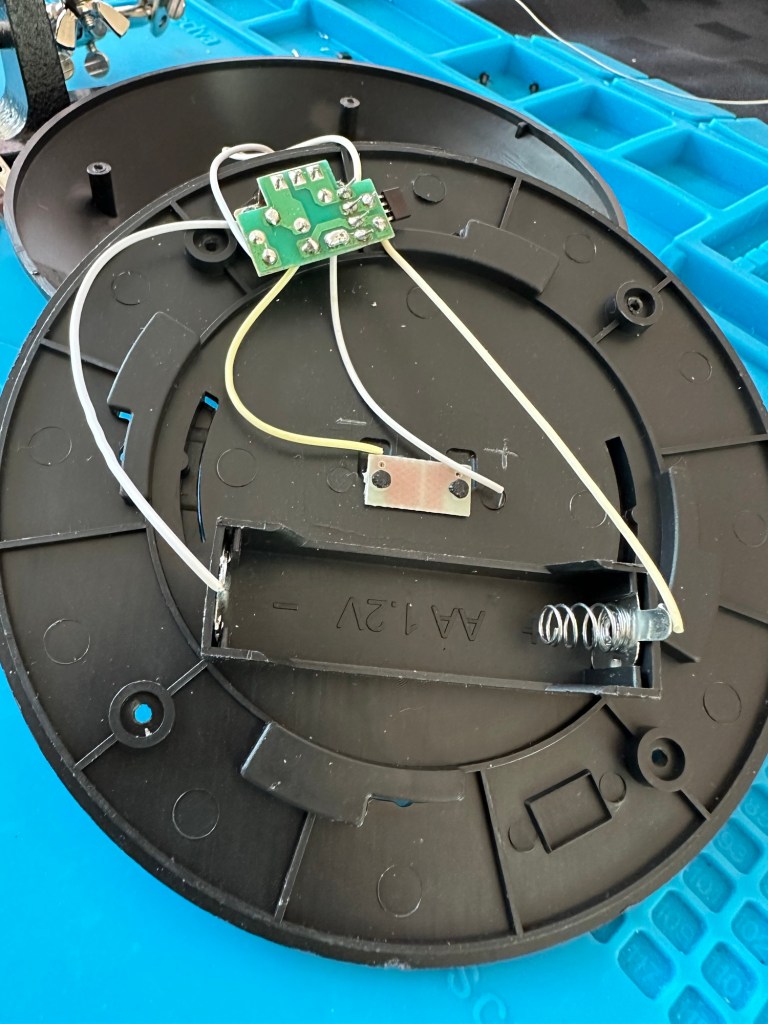
I’ve replaced both the power cables from the battery unit as one had fallen off and the negative one had looked as if it had been crushed. I was changing so it made no odds to change the other.

New power cables

I ran some checks with the multimeter and everything is fine, all tracks are good and it looks as if the corrosion was localised, this unit has dodged a bullet.

Batteries in and it’s now working well, see this video short:

When you don’t know what you’re doing

However, as I’m not a gamer I have absolutely no idea what I’m doing, it makes a lot of noise and appears to work but god knows what I do. It certainly does a lot more than it did when I received it.

Another one saved from landfill.

Keep Britain tidy

Are there things you try to practice daily to live a more sustainable lifestyle?

When I was a tot at school, we were all enrolled in the Tufty club. Tufty was a squirrel used to promote road safety and clean living whilst teaching us mere mortals not to litter.

50 years later I’m still sold hook line and sinker to this mantra. One thing you will never see me do is litter. Not so much as a cough sweet wrapper. If I have any litter at all it goes in my pocket until it can be disposed of properly. That Little Squirrel had a massive effect on me.

It’s a pity that others didn’t join the Tufty club as my country is sinking under a population that just doesn’t seem to care about their environment.

In later life I do take it further now, I will always look to recycle and reuse, that is a big part of my blog site, it’s what I do and I will not dispose of anything unnecessarily.

It’s the only constant I really have in my daily life apart from waking and sleeping.

And that’s not a bad thing is it?

Peace.

Vintage Photographic manuals

I’ve just obtained a bunch of photo manuals for cameras and related photography items from the last 40 years or so. Close to 80 of them.

Now I know these aren’t repairable items keeping in harmony with this site, however they are popular, and I just happen to have a few of these cameras available. What I’m thinking is that these manuals would be a nice little addition when I sell on said cameras to the unsuspecting world. It’s just that little bit extra that just could swing a sale.

The ones I have left I can just sell on as they seem to attract a reasonable price on line. Either way, I’m keeping them out of landfill and that is one of the purposes of this site.

I may even be able to make some kind of collage back drop with them or use some old photos as an alternative skin on one of my old cameras. Something arty-farty you know.

Listing them all online is going to take an age. Maybe I could ask the wife to assist in this matter. Now that will cost me a handbag at least.

Garden solar lights

I purchased a pack of 5 of these cheap old garden lights from a local garden centre. I know if you buy cheap you pay twice but these did look quite reasonable. I know that most people only expect a season out of these lights however I try to look after mine, bringing them in during winter months when the garden isn’t being used and sunlight is non cooperative.

These were so full of promise, worked lovely for a few days and then two of them just didn’t work at all.

Broken garden solar lights

I took them apart and decided to test the batteries, both were showing 0.6v so i suspected the charge circuit was not working. When I put in a fully charged AA battery the lights came on but when exposed to light they remained on, so in a way I am right but it might be slightly more complicated. The battery isn’t charging, also the switch off is not occurring when exposed to light.

I’ve done a few tests using the multimeter, the solar panel is ok and giving a reasonable voltage under sunlight of 2.4v.

Solar panels working

The circuit board only consists of three components and two out of the three test ok. The issue seems to be with the YX8018 controller, the small four legged component in the pictures below.

Failed component circled
Failed YX8018 component

What is a YX8018 controller?

YX8018 is a high-performance solar lawn
lamp boost control chip, which is suitable for a solar lawn lamp powered by a 1.2V rechargeable
battery in series.

The main functions include charging control, boost drive, optical control, etc.
The solar lawn lamp mainly uses the energy of
the solar cell to work. When the sunlight shines on the solar cell during the day, the light energy is transformed into electric energy and stored in the battery, and then the battery provides power for the LED (light emitting diode) of the lawn lamp at night.

It has the advantages of safety, energy saving,
convenience and environmental protection.It is
applicable to solar products powered by one 1.2V
rechargeable battery.

Conrad electronic SE

YX8018 circuit diagram

This appears to be the culprit after some basic tests have been carried out, there is about a 16% failure rate in these components so I don’t hold out a great deal of hope for the two that I’ve ordered. I shall eventually order a stack of them from China but for now I wanted some a bit quicker so I have ordered locally.

Two arrived….i now need three

Well, the two components I ordered have arrived today. But now I need three, as in the week another one has suffered the same issue. On top of that I have dropped one of the units and the solar panel has parted company. I’m now sourcing some liquid solder that may assist with getting this problem sorted. As is normal with me this little project has escalated due to my utter clumsiness. I must do better in the future. (Sounds just like one of my old school reports.)

In place ready to solder

I dismantled the two units I previously mentioned and followed pretty much the same process with each. Desolder, remove component, wick solder, put new component in place and then put a semi charged battery back in.

All soldered

I left the lights in the sun for a couple of hours and the charge has lifted from 0.8 to just over 1.1 volts so I’m happy that the charge circuit is now working.

The final test was to turn on and see what happens. Good news, nothing seen until I covered the solar panel and then the lights came on. Excellent, job done and more items saved from landfill. I must say I was really happy with my soldering on this job, it appears to be getting better.

Now working

I just need another component for that other one I broke in the week. However I won’t bother you with that one 😂

Sony Discman D-141

Assessment and fault finding….will it work ?

Double trouble here as I’ve purchased two of them.

Sony Discman D-141 – double trouble

These variants are from 1994 just around the height of the capacitor plague problem. As I’ve already dealt with a D-121 version this week that was riddled with the issues and being only a year older, I’m not too hopeful that these two will be any different. They both have the same issue being that they turn off after about 10 seconds, this could be due to a number of issues, let’s get them unpacked and get an initial inspection done.

On initial inspection they both appear to be quite tidy considering they are 30 years old. One is missing a disc capstan however i do have a replacement from the old D-121 that was added to the spare parts box earlier this week.

Both start up, spin and then stop, sometimes showing a no disc error, sometimes not. The good news is there is no sign of corrosion on either unit.

Time to open them up….

I used the old donor D-121 from earlier in the week to replace the missing capstan on one of the units.

On opening of the cases the boards looked ok. No signs of corrosion or plague damage, this was a good sign and it was now time to look a little deeper.

Looking at the board

I did the standard clean of the lenses with IPA, I re greased the worm gears and rails but none of this alleviated the issue of the discs stopping just after start up. I did some continuity checks and component checks, all seemed ok. All buttons worked, all switches worked, something just wasn’t right. I decided to check the output of the laser adjustment pot and this was extremely low. I spent a good hour on the first unit and a similar time on the second trying to adjust the range up and down before realising that after 30 yrs both lasers seemed to be at fault. No adjustments improved the output.

Faulty laser assembly removed and replaced

I was facing the fact that I’d now have two more failed units to go with the D-121 earlier this week. Then I thought why not try the laser out of that failed unit?

It worked. The D-121 donor unit was compatible with the D-141 and after a few minutes adjusting the laser we were able to play an audio Cd.

We have life

This week I have looked at 4 faulty units and managed to get 2 fully working with a third one needing a replacement laser sled when one becomes available. I have one spare redundant unit that has been indispensable for the repair of the other units, in theory i potentially have 3 out of the four available.

All dressed up

I won’t be wasting anymore time on Discmans in the foreseeable future. They had their time and digital sound has obviously pushed this medium in to the dark distant past. The units are becoming life extinct and it’s like performing knee surgery on an elderly individual, you are improving their quality of life for the moment until the ravages of old age take over. Bit of a crude analogy I know, what I’m saying is steer clear of these as they are going to be trouble, people seem to think they are worth a fortune and are charging ridiculously high prices for something that just about works.

It’s been fun though and I have learned a lot from it so it can’t all be bad.

Good people, stay safe. Thanks for passing by.

Sony Discman D-171

Assessment and fault finding….will it work ?

My latest purchase from EBay has arrived and god knows what is wrong with this one as the listing contained just one word “Untested”.

There is no one else to blame but me so let’s get this package open and have a look…here goes.

This unit is circa 1996, so there is a gap of 3 years between this and the D-121 that i recently attempted repair on that was badly affected by poor components. Hopefully technology has moved on slightly in those three years, and the plague of the past isn’t as prevalent in this unit.

Well, once in your life you buy something that restores your faith in your fellow man, unfortunately EBay isn’t always that place and you have to take your chances when purchasing using that platform. Today is a good day. The package was minimal and I didn’t hold out much hope. The first thing I did was to open the tray, good it’s working👍

Next I held my breath and opened the battery compartment…. Excellent no corrosion 👍

Batteries inserted I chose an old Bryan Adams album, put the volume about mid way and turned it on.

IT WORKED 😳

Ok, if tapped it jumps, so I will give the lens a clean and will lubricate the worm gear and rail and see if that helps, if not I might test the laser output and make a tiny adjustment but I’ll avoid that if I can.

All buttons have been used, wiggled about and are working fine, all menus are displayed and basically it’s all working pretty much as it should be apart from some little adjustments. The shell is un damaged but a little tatty so a good clean up will assist here.

When taken apart the thing that strikes you is the lack of capacitors compared to the last item I worked on that was only 3 years older. I put some fine lubricant on the worm gear and the laser guide rail and also cleaned the laser lens with some Isopropyl (IPA)

I made a slight adjustment on the laser strength by using the Multimeter to get measurements across the laser pot.

The reading was very low, to what it would have been when new so, I made an adjustment to the higher end of the recommended scale but the unit didn’t like it and refused to recognise any Cd, so I’ve reduced it back to what appears to be it’s operating maximum, after 28yrs I guess the laser is approaching the end of it’s useful life.

Testing the laser

The sound quality has really improved, the unit still skips if it is knocked or shaken but as I’m intending to use the unit on a table or other surface I’m not really that concerned. It’s not as if I’m going to go jogging with it, no chance. To be honest I don’t think the anti jog system that was introduced for this purpose really came in until about 2000.

Put back together, I’ve now cleaned and buffed up the exterior, this is a nice little example of one of the lower end Discman units, but I’ve enjoyed working on it and getting to know a little more about how it works and fits together. I can put this one to bed now as a successful restoration, it’s going in my locker at work for listening to my old Cd collection whilst I’m doing the tedious paperwork or a night shift.

Thanks for passing by, I have another Discman post coming soon.

Sony Discman D-121 Pt:2

Assessment and fault finding… will it work?

My recent purchase of a Sony Discman D-121 from EBay has arrived. Just as described it wasn’t really working so I decided to give it a once over to check condition.

Cosmetically sound

Cosmetically it’s in very good condition, open the battery compartment and it’s a different story, definite signs of corrosion and at this point I’m thinking the worst. I put two batteries in to check, the display comes on and shows some strange indication of “HI VOLTS” even though all I have are the two AA batteries in. Strange.

I do manage to play one song but that’s it, any slight move and it skips and hops and shows a raft of other error messages that don’t Instil any confidence into me that this is going to have a good outcome. Then the CD drive motor breathes its last. That’s it….kaput.

So I open up the unit, and put the circuit board under the microscope. The area around the corroded battery terminal has progressed on to the board and a couple of the circuit board tracks have been totally destroyed. A few components look to have issues and have some spurious test results. A check for continuity with the multimeter confirms that one track is dead and another is intermittent at the very least.

Under the microscope

I clean the offending section of the circuit board with IPA and this just confirms the issue, but at least it looks cleaner. If this had been the only issue I’d have happily soldered in a couple of thin wires to the undamaged track to ensure a reliable continuity.

A further look around the board, and there’s nothing blatantly obvious, but seeing this unit was produced in 1993 it’s now in its 31st year of use I also suspect the capacitors (of which there are many) may well be of that era of suspect capacitors I discussed on a previous post. Read here: Capacitor plague

The main drive motor is known to fail after time and a sure sign is if the CD jumps when moved off the horizontal, apparently this is due to bearings becoming misshapen due to use.

This unit therefore is beyond economical repair for me, and I’m not going to progress it any further. The good news is that I can use the unit for spares and as a number of these older units have interchangeable parts, I’m hopeful that as I have a few more units turning up later this week they may have a willing donor.

So the recycling goes on, and that’s always a good thing.

Happy day to you all.

Sony Discman D-121

Anyone remember these? To say they were popular in my younger years is an understatement. Originally I had the Walkman (A cassette tape version) and I came to the Compact disc quite late in the 1990’s to be honest. Lately I’ve been looking at getting a Discman as I do still have an amount of discs at home and I like to listen to my old music whilst walking the dog. Yep I have my phone and Spotify so I guess I have access to pretty much everything there is out there but I just fancy trying a bit of retro and stepping back into my formative years.

Why not buy one that needs attention? I can kill two birds with one stone, get a repair on this site hopefully and the jobs a good one.

So off to EBay I trot and find this Sony Discman D121 that the seller agrees to sell to me for my offer of £10 GBP.

I expect age related issues, as this particular model was produced sometime in the mid to late 90s. This one has an issue where the disc isn’t recognised and is intermittent. This range has a few known issues and to be honest I don’t think I will have too much trouble in getting this one going again (Famous last words 🤦‍♂️)

I’m expecting its arrival sometime in the coming week so I’ll come back to this post when it’s in my possession for an update on its condition.


Update: 9/3/24 23:11 – For some reason I’ve now purchased a damaged Discman D171 as well🤦‍♂️ I’m a glutton for punishment.

Sony Discman D171


Further update: 11/3/24 22:30 – Stop 🛑 🛑 just 🛑 😳

For some reason I’ve just brought another 2 faulty Discman. This time the D-141, two of them. That’s it I’ve got to stop now 😂 really I have to stop 🛑

Sony Discman D-141 x2

Thanks for passing by. Always appreciated.

Halina A1 Reflex…it’s a wrap

I have tonight added a new gallery to complete the Halina A1 Reflex renovation I completed in August of 2023. The gallery can be found by using the links in the margin or by clicking HERE.

As I don’t have the correct mask for my scanner I have had to go about getting the photos on the site in a peculiar way. Firstly I take pictures on my phone and then invert them to get a positive image, an action that I discussed in a previous article that was posted HERE.

Please don’t expect anything too fantastic, it was a test roll and mistakes were made, but a lot of enjoyment was had getting the results.

And that’s this project put to bed.

Thanks for passing by.

Capacitor plague

What the heck is that?

Blown capacitors

Photo copyright : Wikimedia Commons

For many this is old news and pretty much everyone involved in electronics is aware of this problem that swept through the industry in the mid to late 2000s. Chances are you may have such a unit in your home that has either luckily survived the issue to still be working, or may well be not working and assigned to that part of the house (Normally the loft) where it left until the day you move premises and visit the local tip.

Those of us that number a great many who like to tinker and repair old machines and equipment from this era are still seeing the back end of this issue to this day, its fairly easy to deal with and those that especially work with old computer motherboards and graphics card notice issues the most, its an interesting back story and ill try to cover it as best as i can in this post.

What is a capacitor?

  • A capacitor is a device that stores electrical energy by accumulating electrical charges on two closely spaced surfaces that are insulated from each other. It is like a little battery but thats where the similarities end, as a capacitor distributes energy in short bursts rather than a battery that is distributing power linearly. Originally known as the condenser, the capacitor is used within a circuit to add capacitance to that circuit.
  • Capacitance is the ability of a component to store an electrical charge – (Simple version)

What was the issue?

  • The issue was with Electrolytic capacitors produced between 1999 and 2007
  • The origins of the issue was with the use of water based electrolytes developed during the late 90s. These capacitors using this type of electrolyte were found to be exceptional components when used in power supply circuits. The problem was that the water based caps produced aluminium oxide when reacting with the capacitor “Can” and that reaction was Hydrogen. The Hydrogen built up until the stamped vent on the top broke. Resulting in a failure within the circuit.

It was only in the mid 2000s when the plague really set in, some of these capacitors would have had hundreds of thousands of hours of use and even though they would have passed initial testing protocols they were doomed to fail, and that just so happened to be in the mid 2000s.

The Blame game

It was around this time with exceptional failure rates on certain items and claims being raised against major players in the electronics industry that deeper investigation took place.

Findings

  • The cause of the failures was due to a mis-copied formula, in 2001 a scientist working for a major corporation that made these type of capacitors stole a mis-copied formula for the capacitors electrolytes. He then took this faulty formula to another company. That same year the scientists staff where he previously was employed left that company, again with the stolen formula and started their own company in Taiwan producing immense amounts of faulty capacitor electrolytes.
  • No one was ever really brought to justice for the failures, no one company ever really came clean over the issue, the tech companies tended to absorb the cost of repairs and the end result was probably that the consumer paid in the long run…nothing changes there then!

When this started to occur, many individuals in the industry jumped on the band wagon to repair these items, many selling capacitor kits for certain brands to allow those who were willing, to make their own repairs.

Today the issue still occurs but it is not so prevalent, older circuitry does still throw up some classic blown capacitors and these are fairly simple to replace, some smell quite fishy as well, so sometimes a good sniff of a circuit board can alert you to a blown capacitor…very strange!