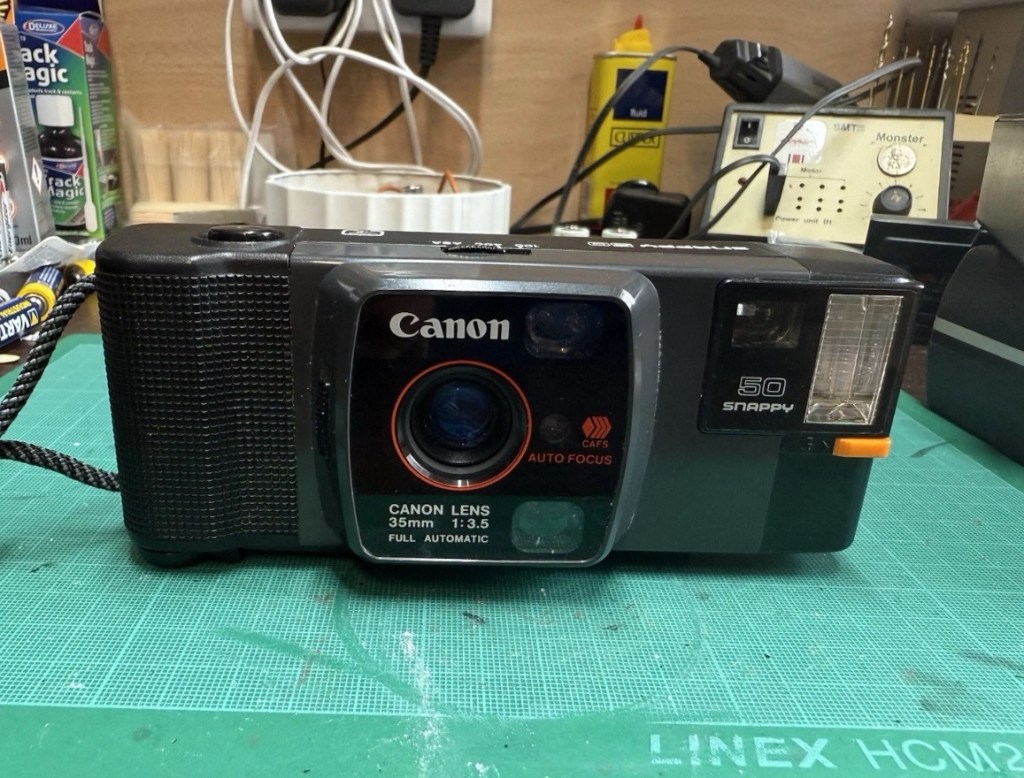
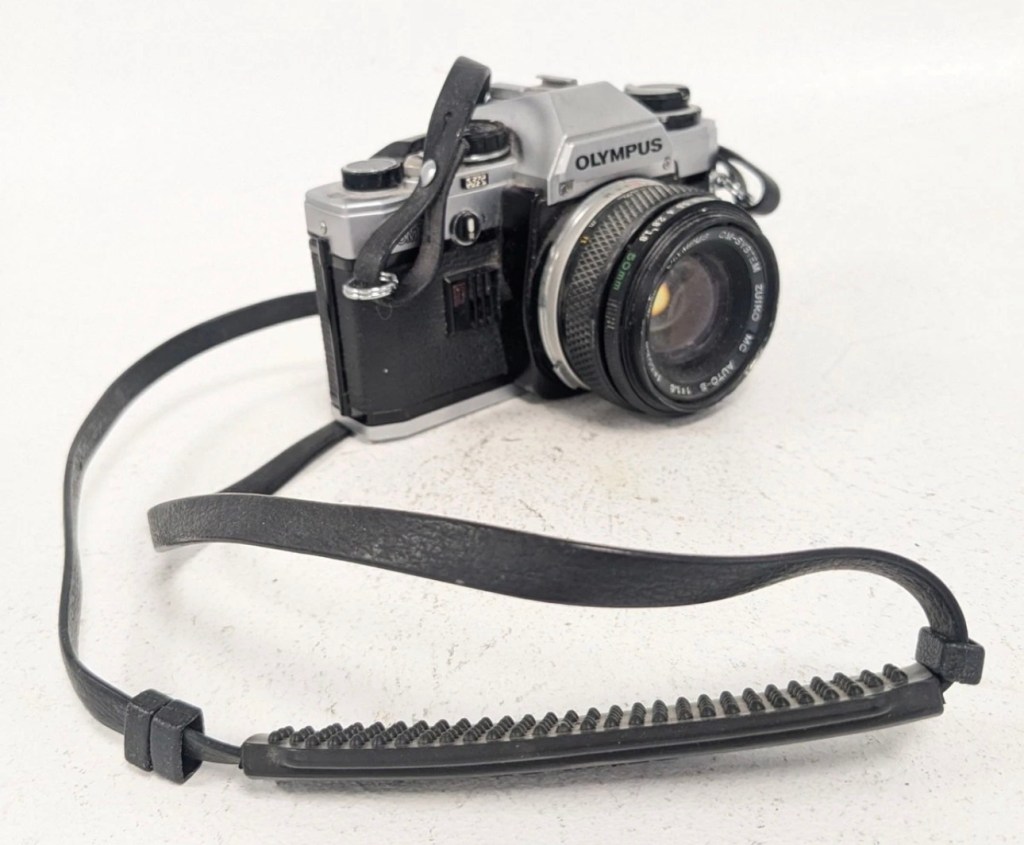
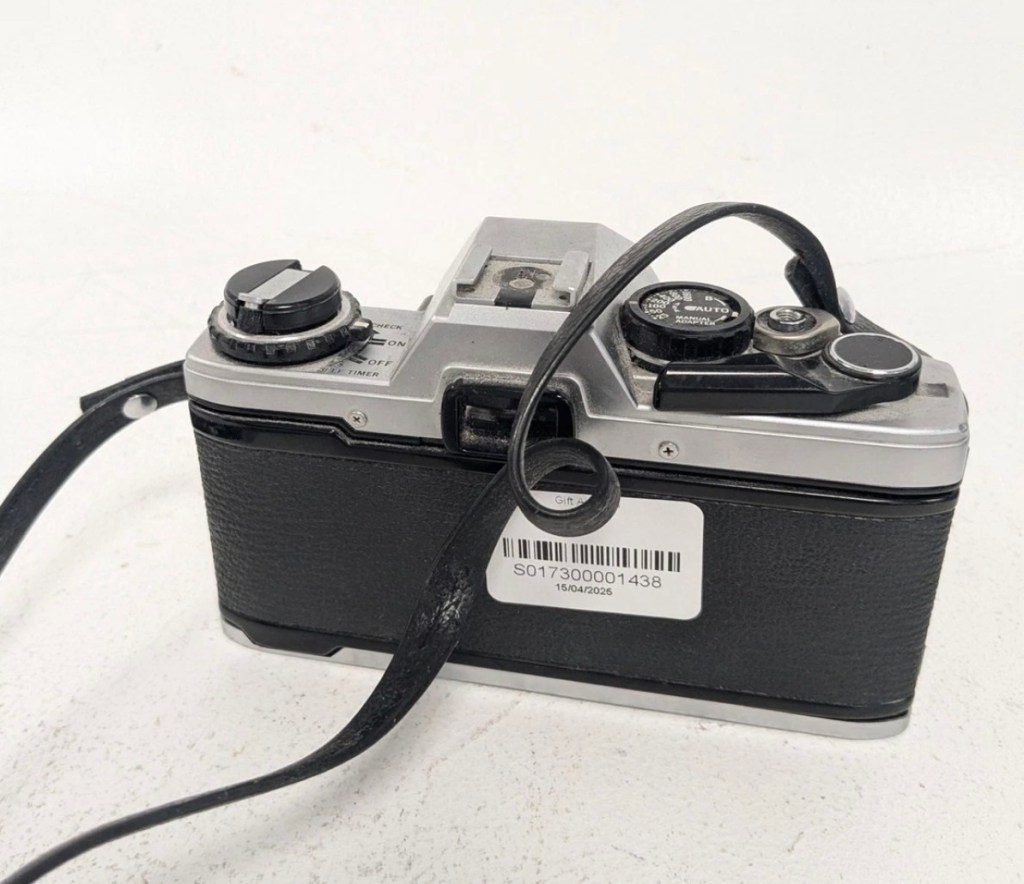
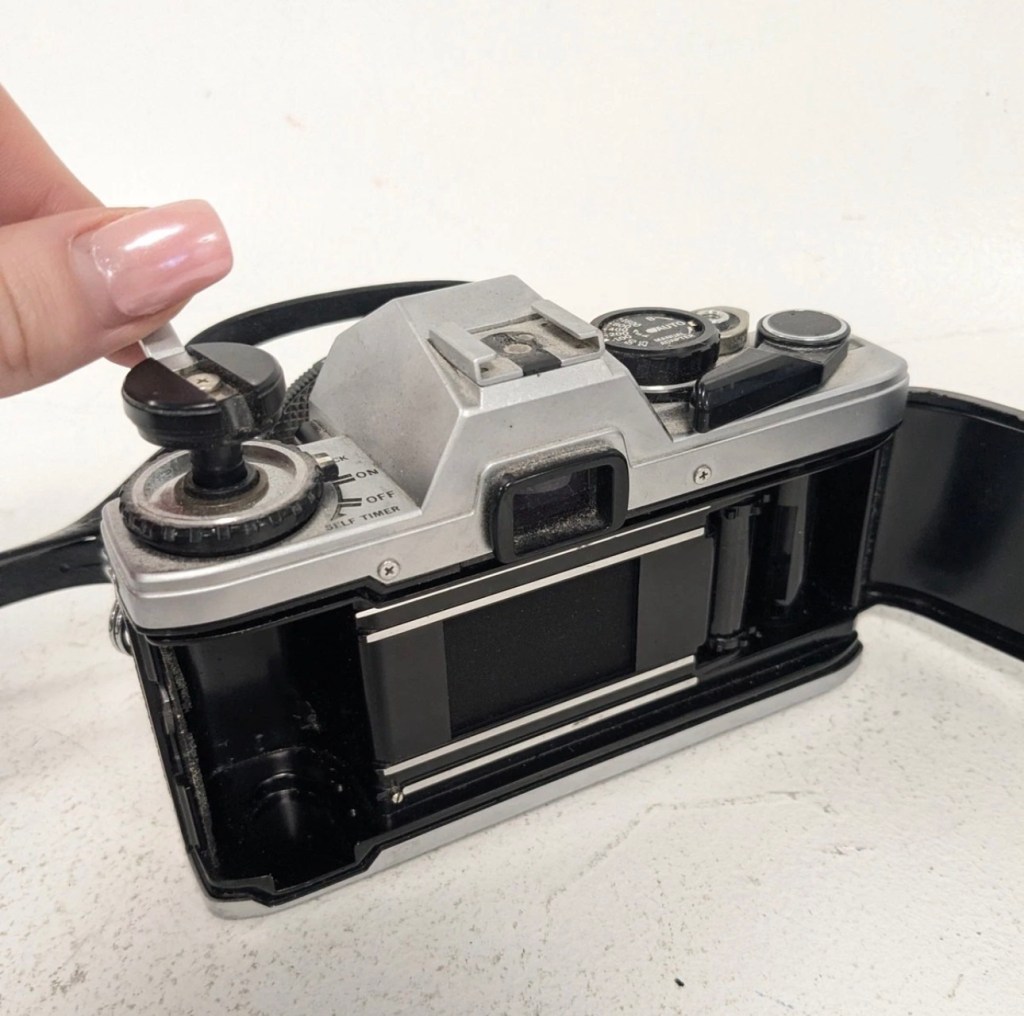
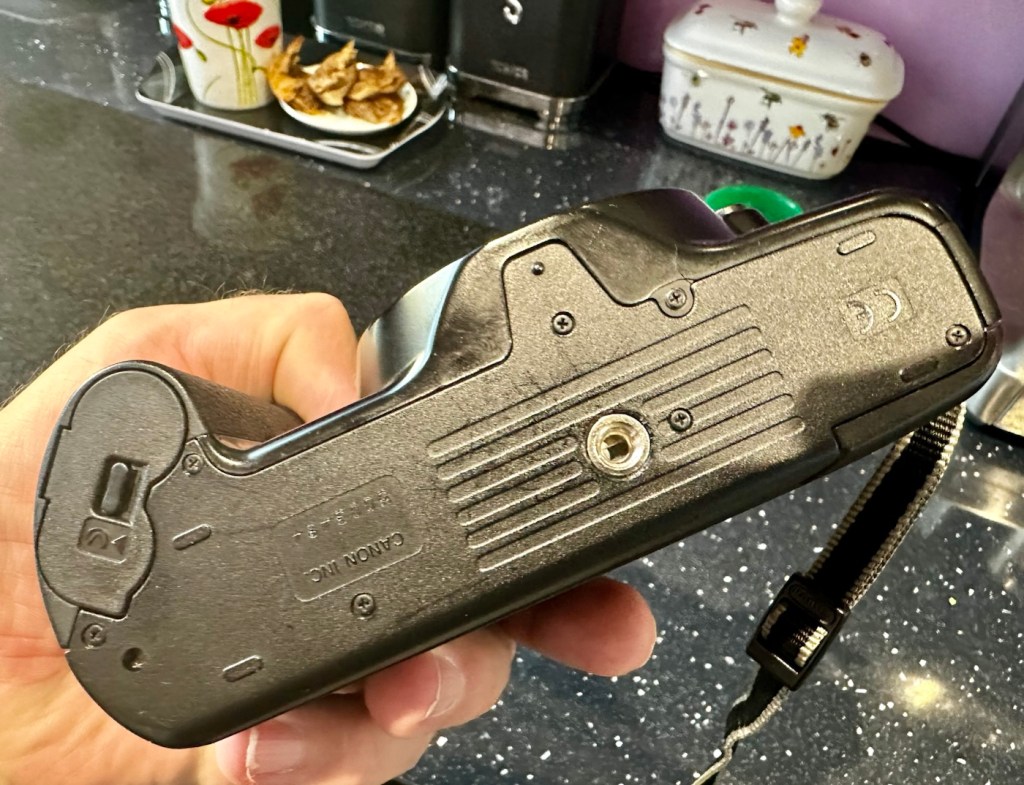
A compact Canon 35mm camera from 1982. It doesn’t work, so let’s make it work!
What the listing stated:
In generally good condition but does not power up Sold as spares or repair
EBay
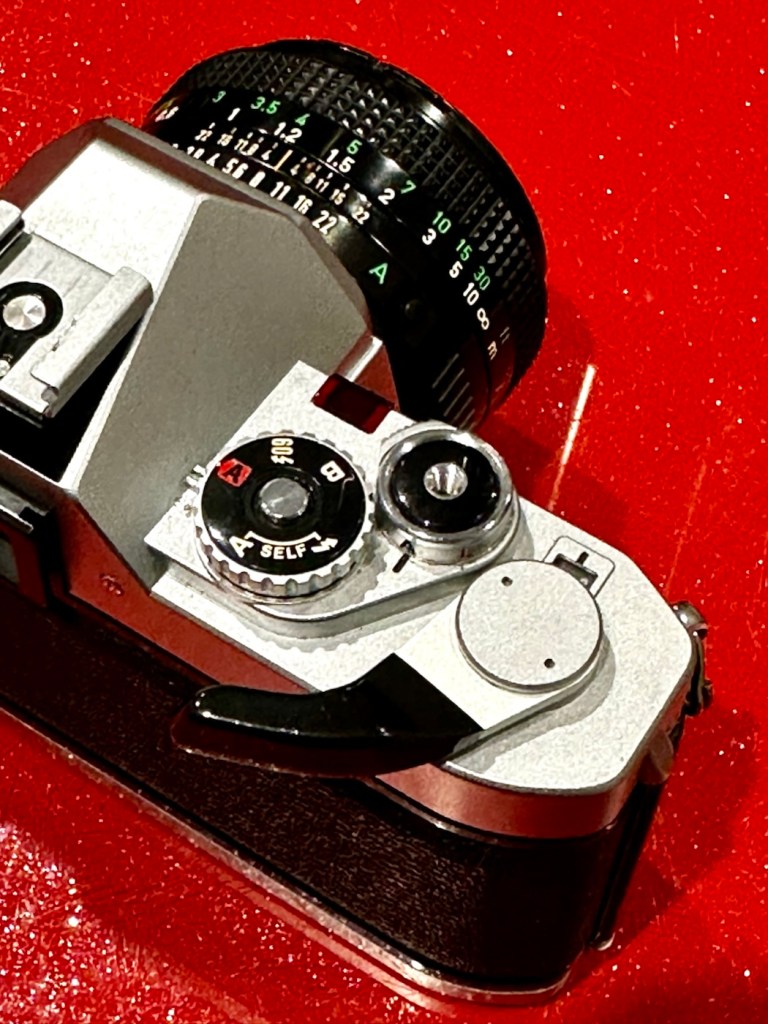
Canon snappy 50
I came across one of these a few weeks back and was just taken by the shape and aesthetics of it. However i wasn’t going to pay a high price demanded by the seller, so i just hung around and waited for others to come on the market. I have just purchased this camera with free postage for a total of £1:13GBP. I’m confused, the seller will basically be paying me to take it off his hands as postage will be at least twice the value of what I have paid today. Let’s wait and see if this sale gets suddenly cancelled, as I suspect it may well do.
Anyway here’s a little bit of its history:
Released in July 1982 and based on a new concept, this is a fully automatic 35mm Lens-Shutter compact camera.
The camera height was reduced by about 30 percent, giving the camera an oblong and unique form.
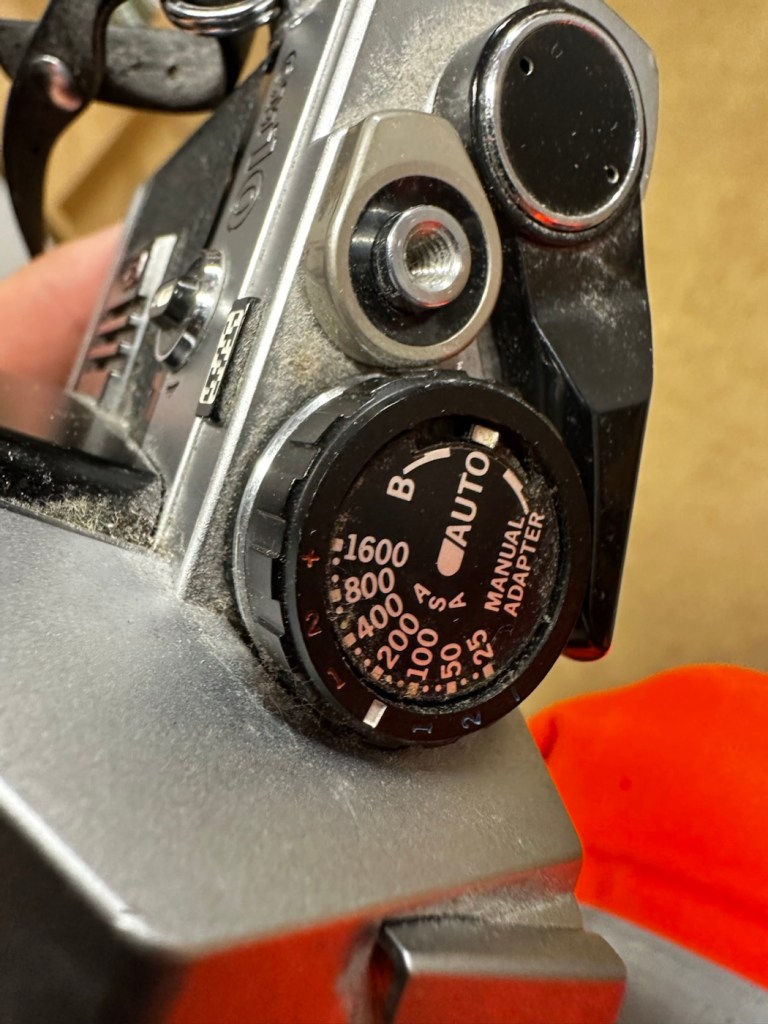
The camera uses active autofocus with a solid-state near-infrared beam. EE and the aperture are controlled electronically with a program. Metering range is EV 8.6 (f/3.5 at 1/30 sec.) to EV 15 (f/9.5 at 1/350 sec.). The shutter speed is set within a range of 1/20 sec. to 1/500 sec. to suit the film speed.
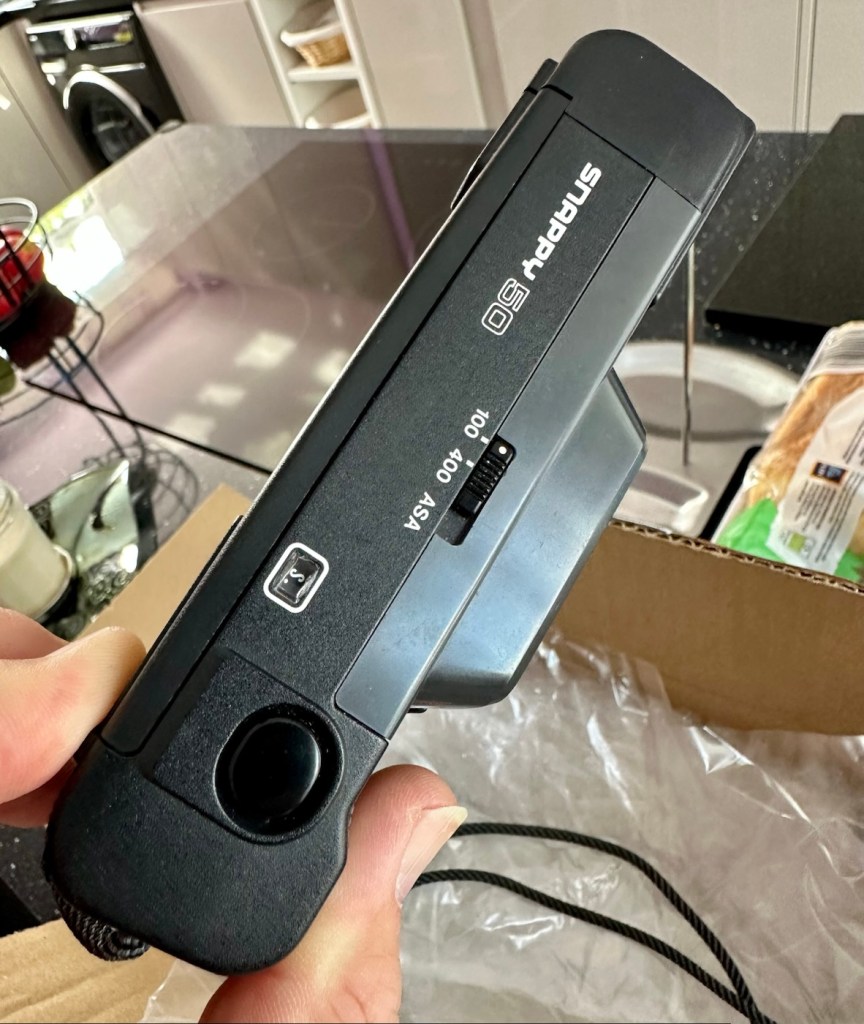
There is only two film speed settings. ISO/ASA of 100 or 400.
The built-in flash (Guide No. 11 at ISO 100 in m) must be turned on manually with a switch when the camera-shake warning lamp lights in the viewfinder.
Canon
I’ll just wait now to see if it turns up. I don’t know what the problem with it is, it’s just listed as a power up problem.
Well I’m shocked, I’ve received a postage notification so it is definitely on its way. Next stop…Assessment.
Assessment:
Well, it arrived, I’m shocked. It’s got to be one of the best packaged items I’ve ever received, never have I seen so much bubble wrap protecting an item that cost just £1:13GBP.
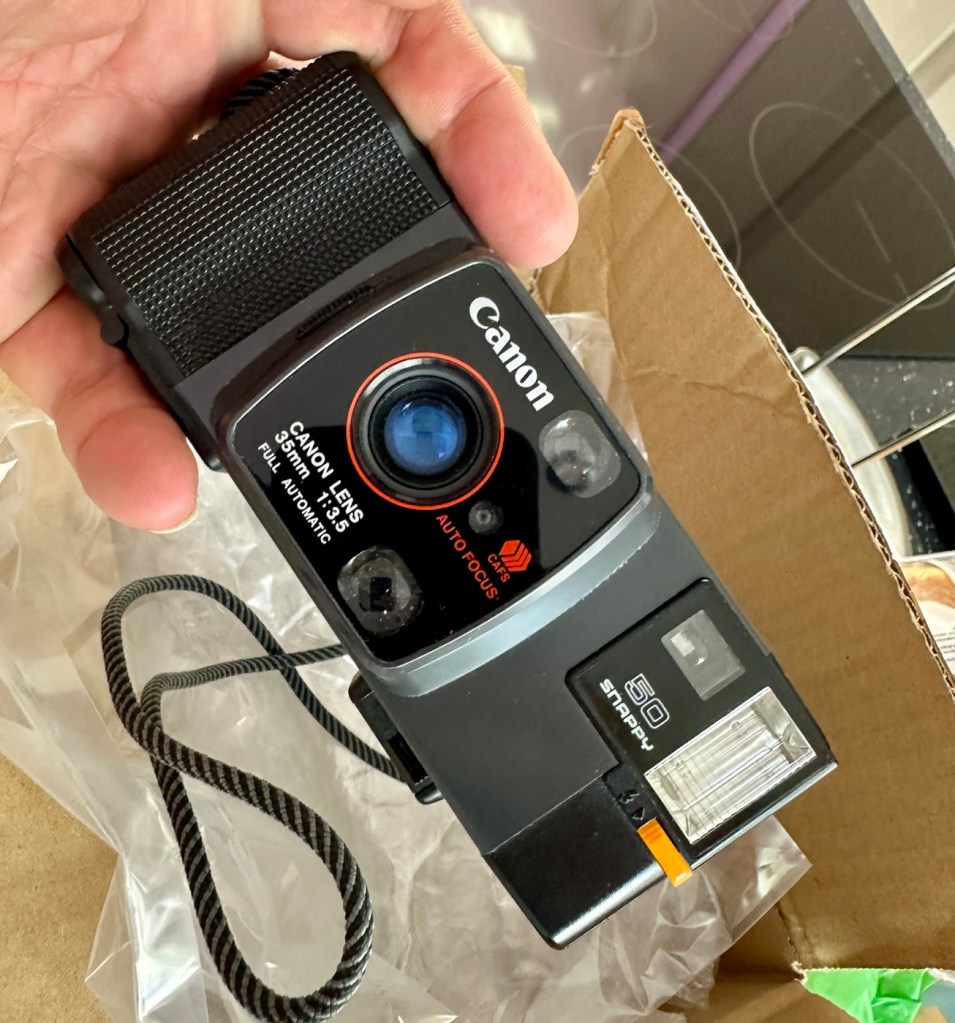
My Canon snappy 50
On top of that the sender has spent £3:45GBP on postage and charged me nothing. God I feel guilty now, least I can do is give him some glowing feedback.
Wow – And I paid nothing
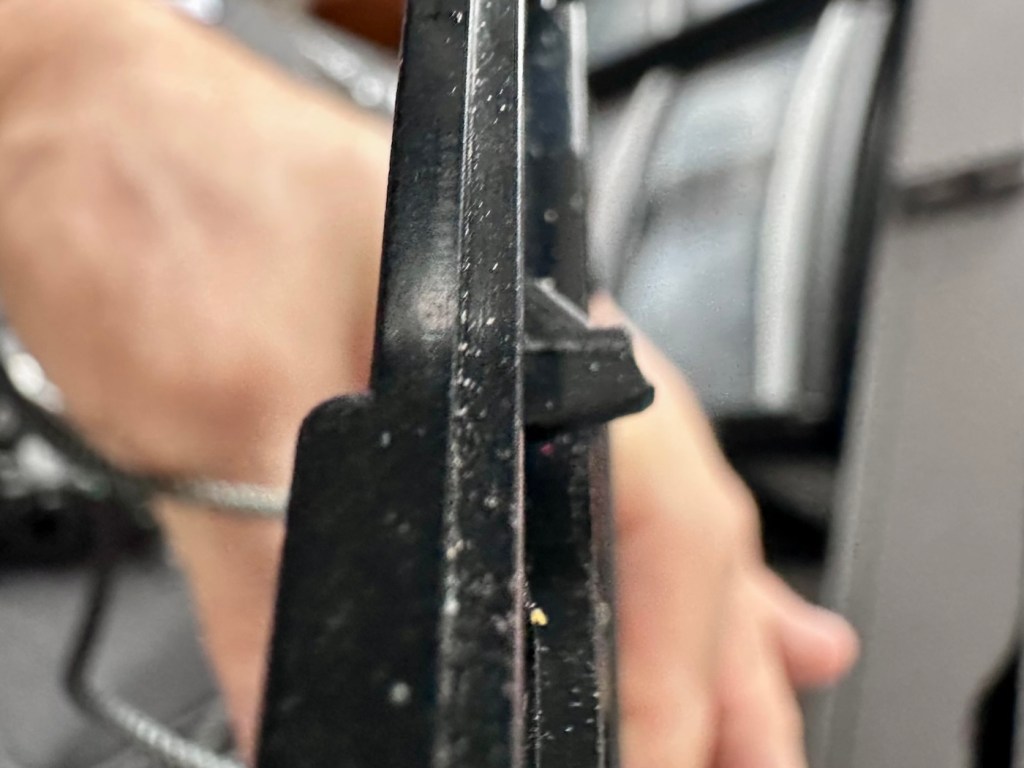
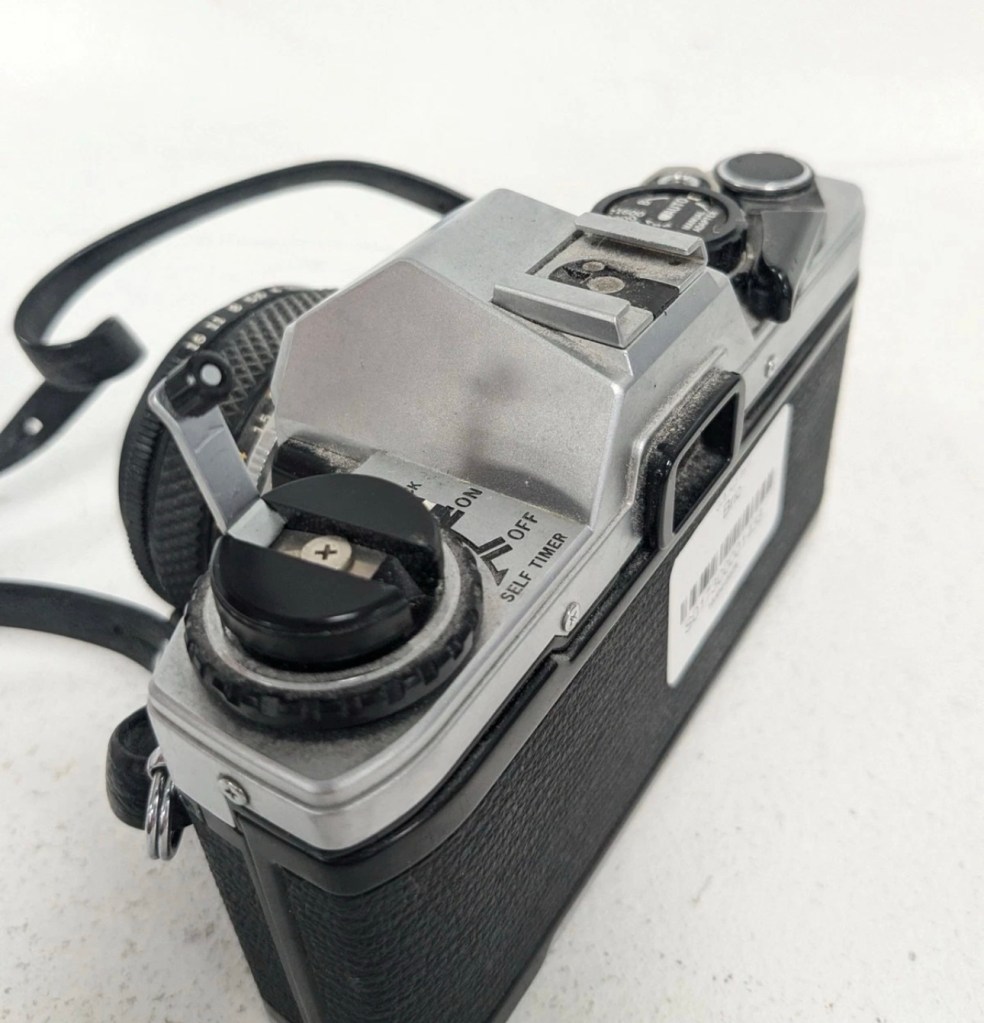
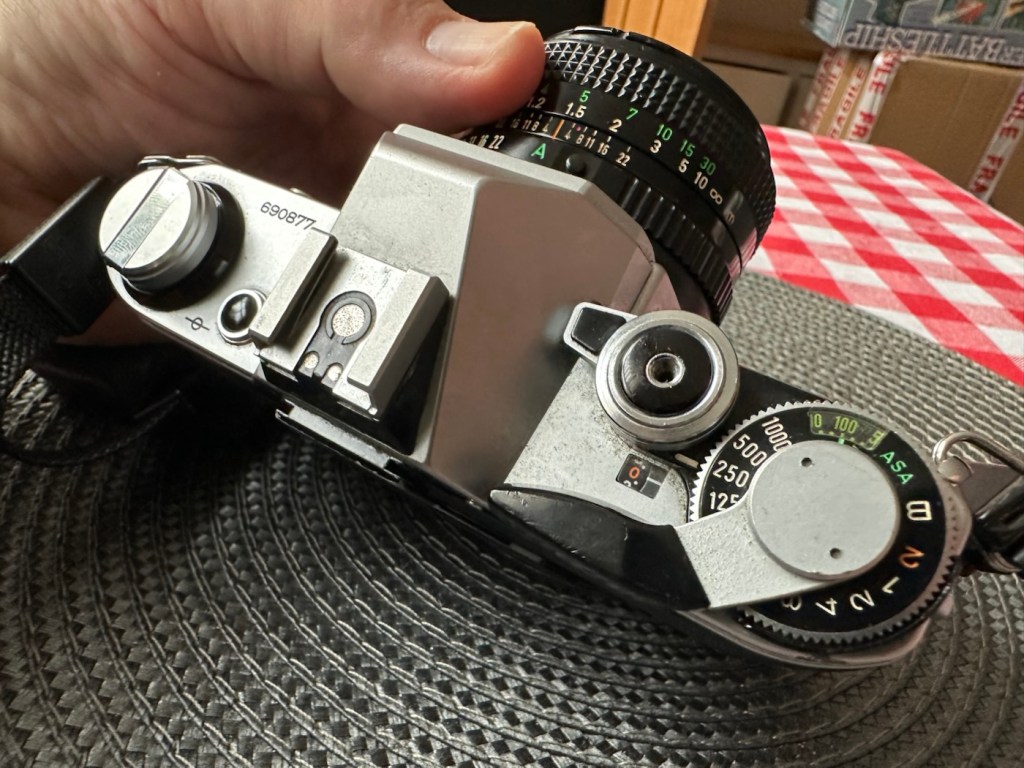
Right, back to the camera. For a 44 year old camera it really is in beautiful cosmetic condition and needs nothing but a slight dusting to finish it off. But first I put in two AA batteries and can confirm it is dead. No life at all. Also, the film door is flapping about (So there was another issue!). I’m going to have to get inside this unit to see what is wrong. To be honest the unit is such a basic one, I suspect there isn’t a lot that can go wrong with it.
Repair:
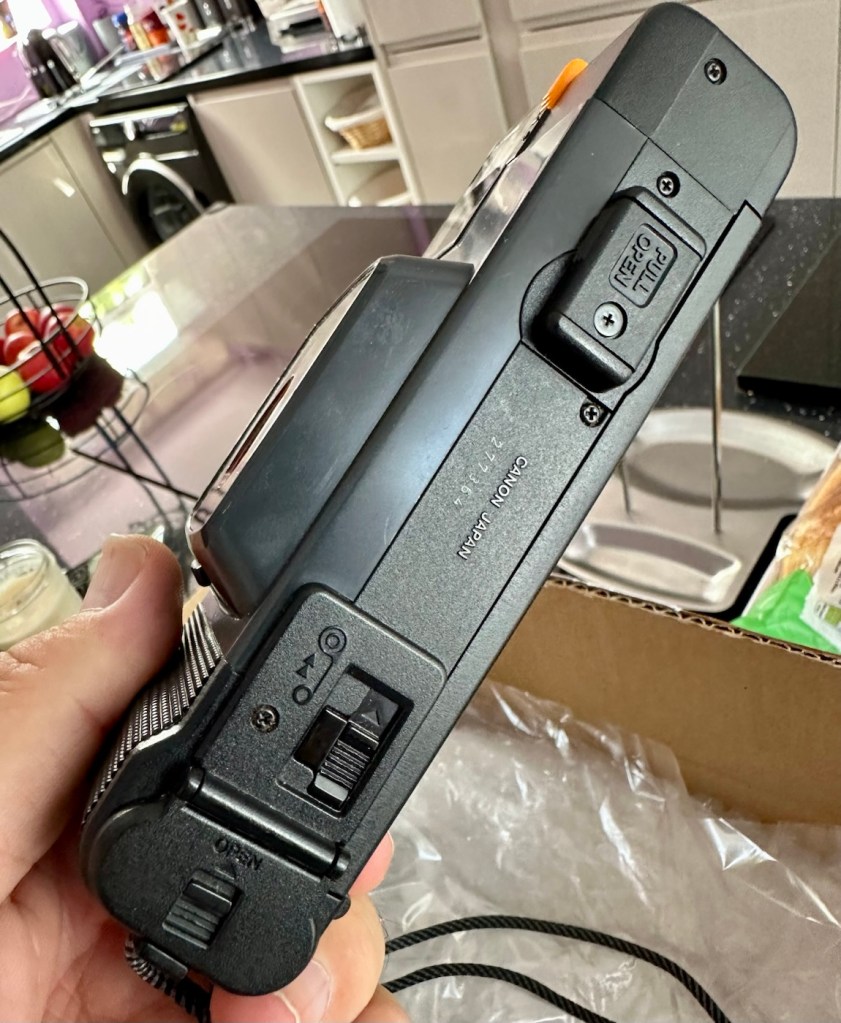
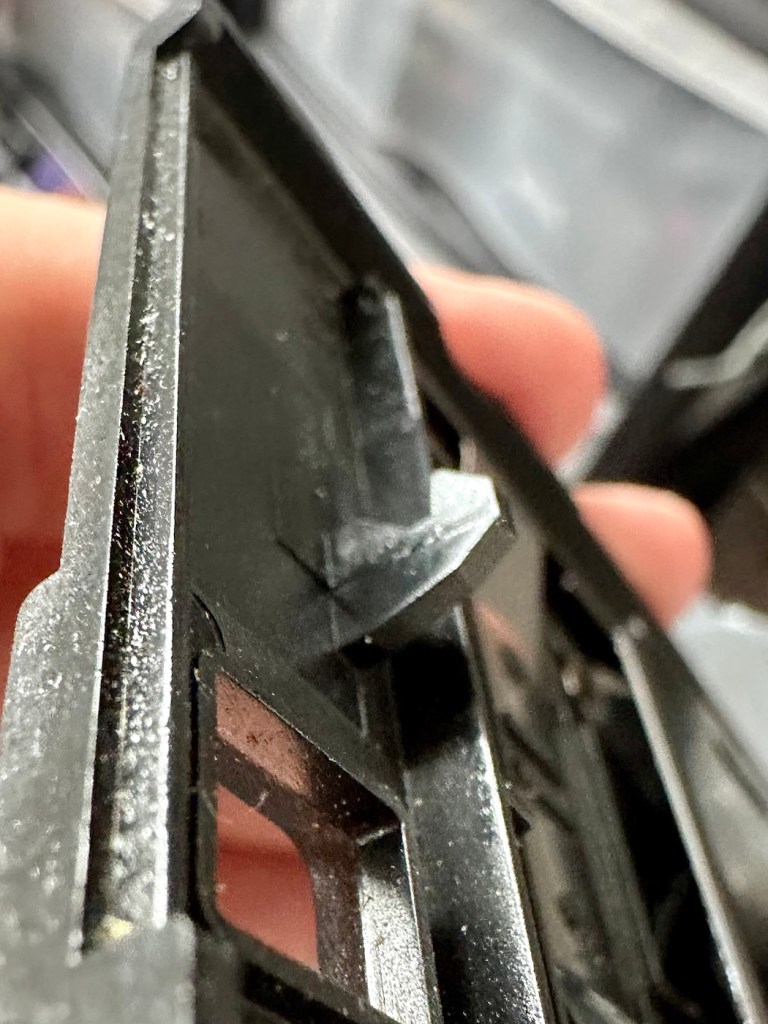
The film door issue is a simple one, and if I didn’t have a ton of spare parts spread around the place, I’d be quite annoyed to say the least. It would have been either a case of making a new catch for the door or building some Heath Robinson contraption to secure the door, looking completely out of place. However, I just so happen to have a complete rear door for one of these cameras so hopefully it should be a simple swap out of parts.
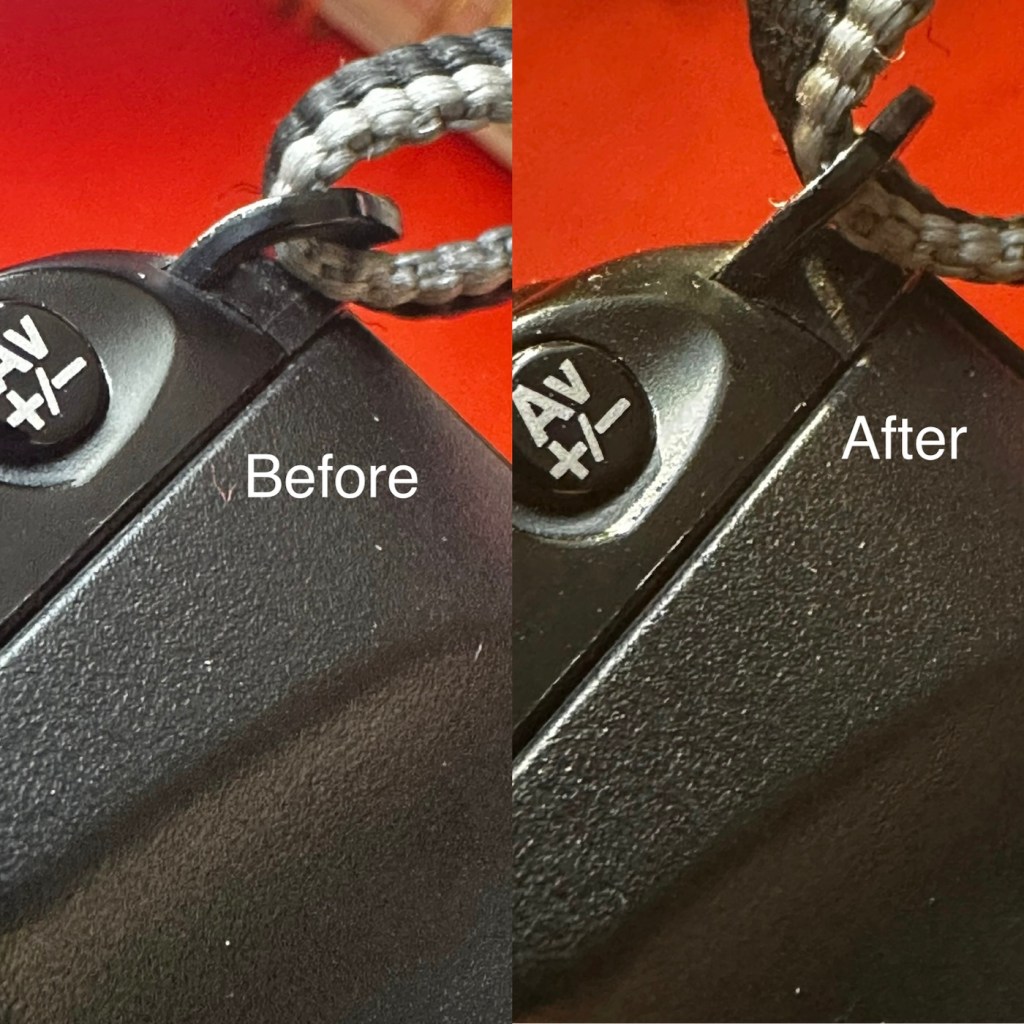
Broken door catchReplacement door with catch
But before I do this simple replacement, I need to get the top and bottom off of the camera to check where the electrical issues lie.
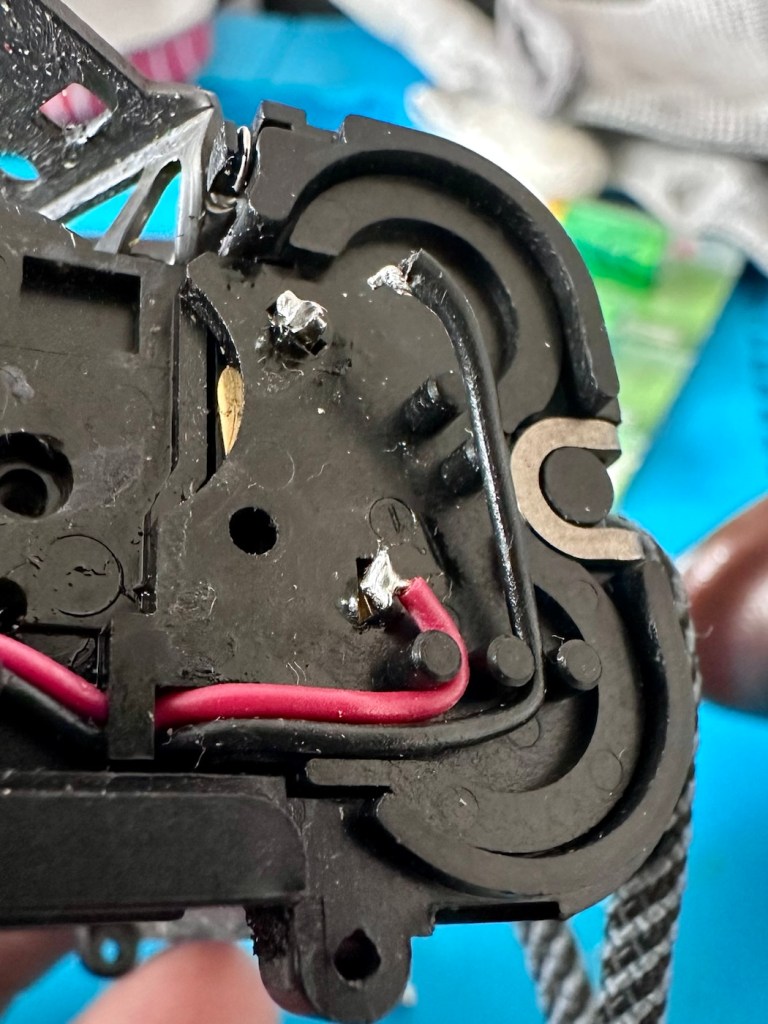
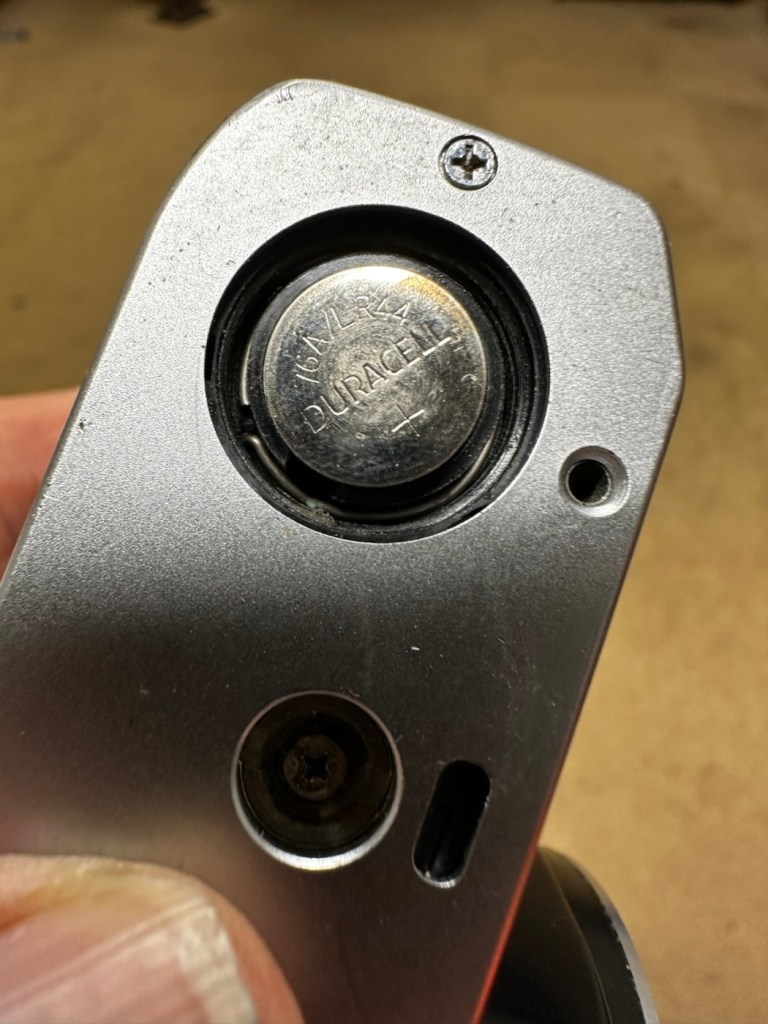
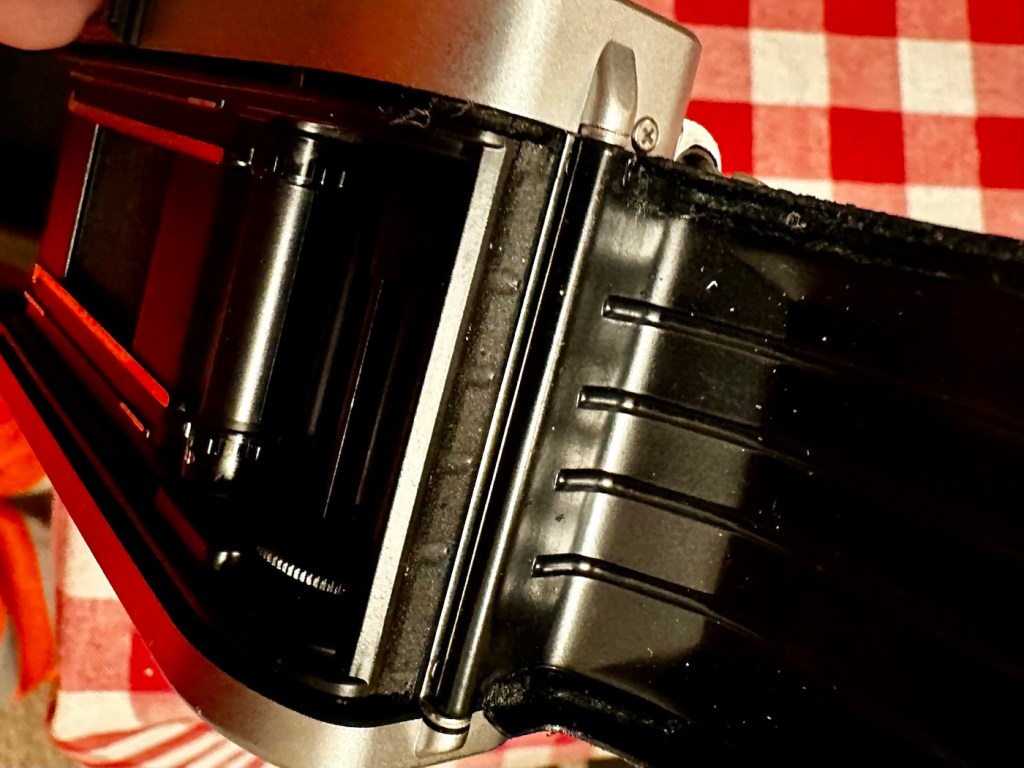
Taking the bottom off of the camera, the problem presents itself quite clearly. At the bottom of the battery chamber the negative wire has detached and needs soldering back into place.
Negative wore detached from battery chamber
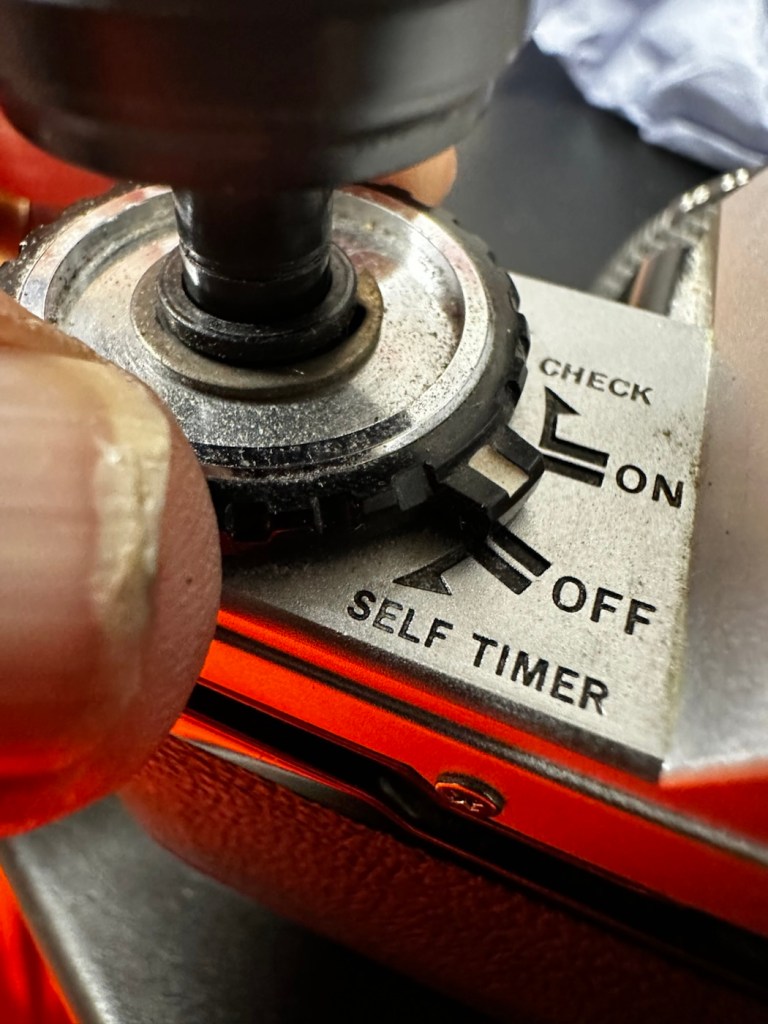
I put the base back on and put two batteries into the chamber and the rewind motor instantly kicks in. We now have power. The shutter works and the winder motor operates as it should. When the rewind button is depressed the rewind motor kicks in as well, all seems to be good…..until!
The live supply to the flash was detached
I try the flash, and nothing. Not even the usual sound of the flash capacitor charging. Damn, I hope that capacitor isn’t dead! So now I have the top off of the camera and another problem presents itself just as clearly as the first. Not a problem here as I need the top off to replace the rear door.
Rear door hinge removed and replaced
The live supply to the flash had broken loose and this also needed re soldering, in fact I re soldered about eight wires in total as it seemed that the solder joints in these critical areas could possibly be fairly. They may not be failing, but whilst I’m inside why not just do this simple task to prevent anymore premature failings?
Batteries back in, flash turned on (it’s manual on this camera) and the check light illuminates. This camera is now fully operational.
Flash check light now illuminates
Result:
I’ve had a fairly simple repair here with some soldering and luckily, some spare parts available. These cameras are quite tricky to repair due to their compact build. Normally when you detach one part you have tiny springs and other parts that fly out, leaving you with a head scratching puzzle to add to your issues. However having dealt with these cameras in the past and having learned my lesson previously, I was very careful and took my time ensuring nothing occurred that would cause me any issues further along in this fix. I also open these cameras in a box, so if anything does fly out, it doesn’t fall onto a carpet disappearing into the pile, it just falls into the box, saving me the embarrassment of looking for a tiny piece of camera, that could be just about anywhere on the floor of that room. You learn from previous mistakes, I have, and i now have procedures in place to prevent such issues happening again.
All cleaned up and working
And neatly cased
We now have a lovely example of compact 35mm photography, rejuvenated, repaired and ready to get back to doing what it was designed for, creating memories.
And long may that last, another one saved from landfill, repaired, recycled and now with many more years of purpose.
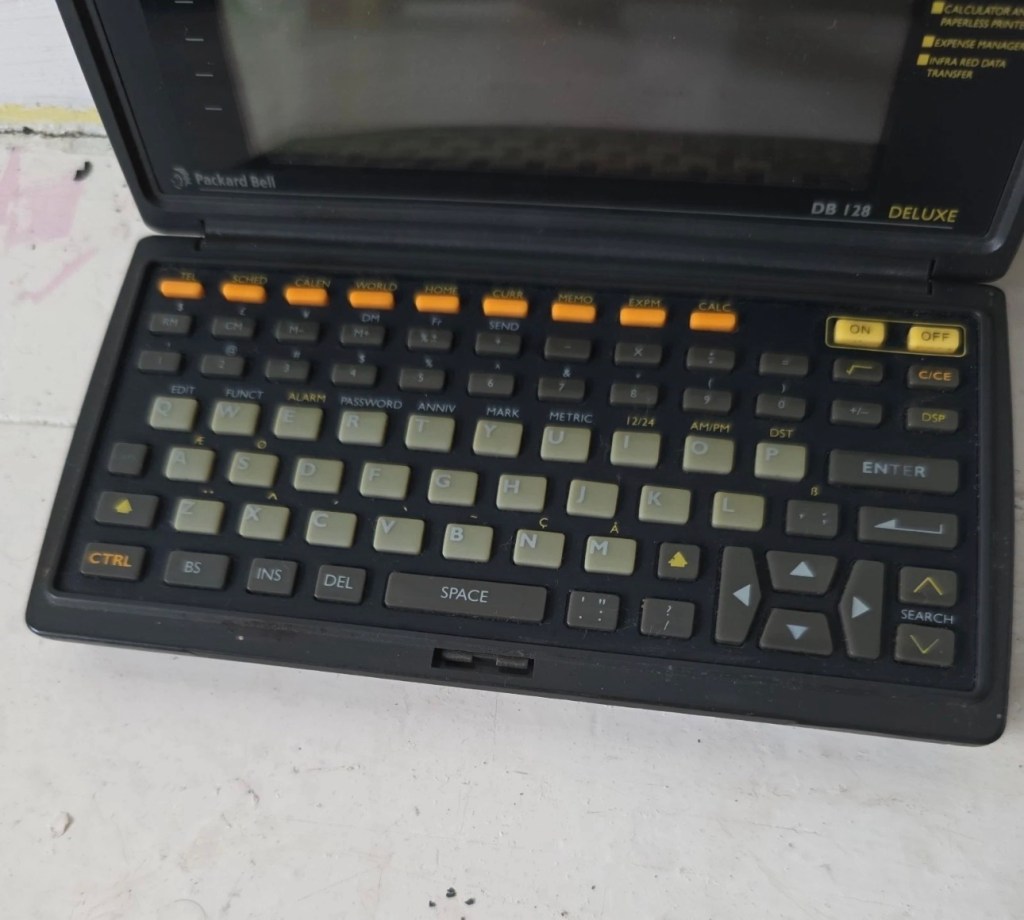
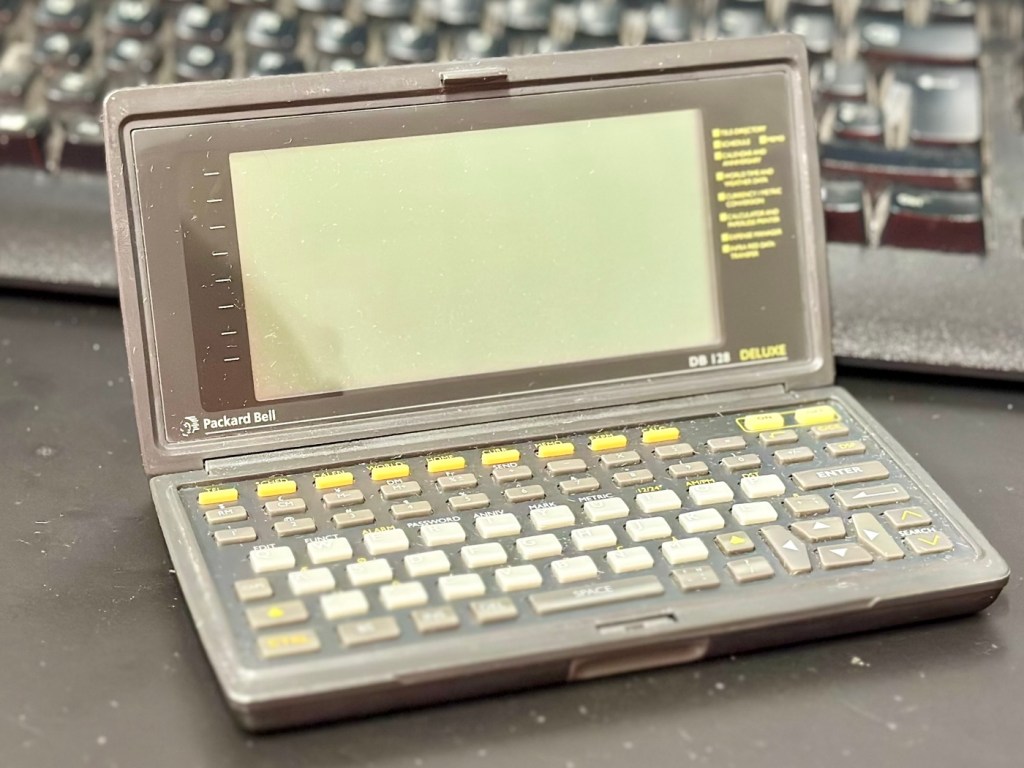
Another personal organiser / PDA from 1992. The Packard Bell DB128. Does it work? Is it just needing new batteries? Who knows? Let’s have a look.
What the listing stated:
The Vintage Packard Bell DB128 Deluxe PDA Personal Organiser from 1992 is a charming piece of retro computing history. Manufactured by Packard Bell in China, this personal organiser is a single unit that serves as a reminder of the technology of the early 90s. With its vintage appeal, this item is ideal for collectors of vintage computing devices or those who appreciate the nostalgia of older electronics. The Packard Bell DB128 Deluxe PDA is a unique and rare find for those curious about the evolution of personal digital assistants. Needs new batteries at the very least. For repair or spares only
EBay
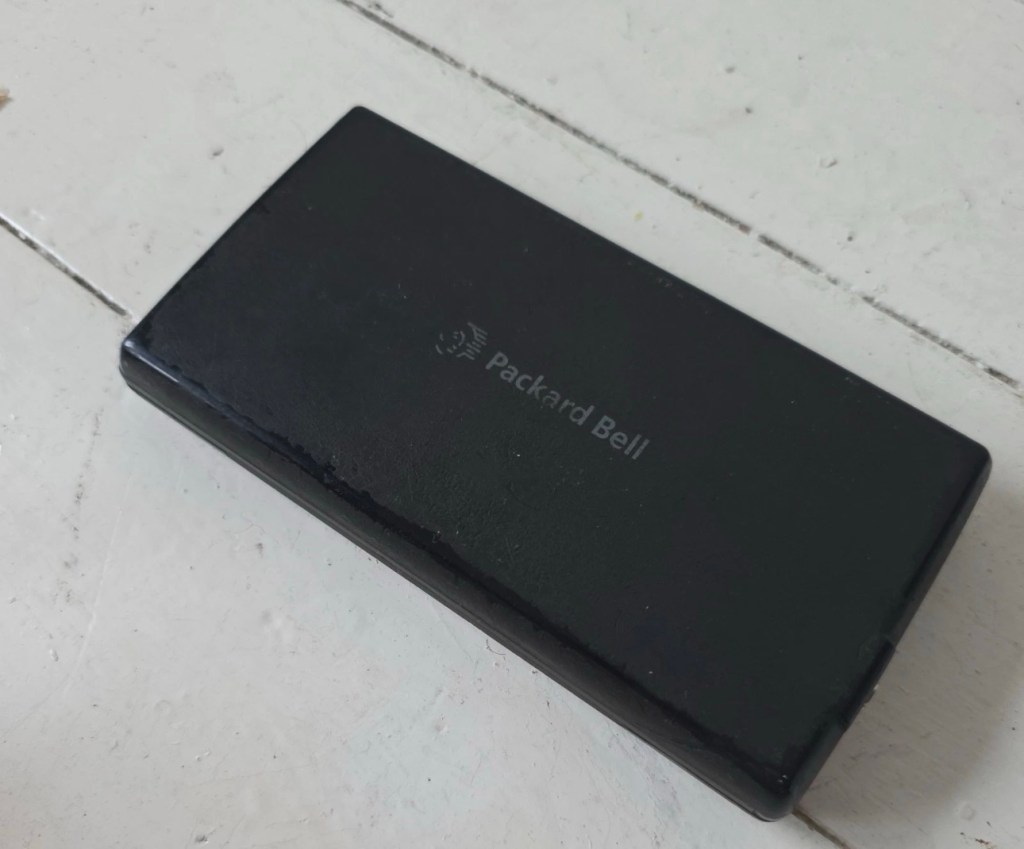
Packed Bell DB128 personal organiser
I love these postings on the selling sites, no actual real description of the state and condition of the unit you are purchasing, only a potted history of the item with the standard EBay get out excuse of “For repairs or spares only” I know, I can hear you saying, “ Well don’t buy it then – fool” and I agree with you wholeheartedly, I am a fool and I’ve brought it. But, it only cost me £3:30GBP so I’m happy with that, a good price for a bit of retro tech from 1992.
There is a good chance that this unit does only need some power, wouldn’t that be good? However it wouldn’t make very good copy on a site that looks at fixing other peoples castoffs, but I can happily go with the odd quick fix once in a while.
I love these old PDA devices from the 90s, and lots of people do, I guess some of us are still stuck in a period where technology was so wonderfully new and interestingly different. Whereas today everything is pretty much the same and controlled by a few massive organisations, when back in the 90s there were lots of different companies for you to choose your wears from.
I’ve certainly worked on a few on this site, just check the links on the home page to see what I have worked with.
If you are interested in the 90s PDA technology, may I suggest you look at this guys YouTube site. His name is Hugh and his channel is called Handheld Computing and he is a very interesting chap, and the technology is superb. Give him a visit.
Ok. Let’s read a little bit more about this unit:
The Packard Bell DB128 (also known as the DB-128 or DB 1280 IR) is a vintage handheld personal organiser released in 1992. Also known as the Oregon Scientific DB-388P. It was designed as a compact digital databank to store contacts, manage schedules, and perform basic calculations.
Technical Specifications
The device features the following hardware details:
Memory: 128 KB total memory, with a user-available area of 131,070 bytes.
Display: An 8-line by 32-character dot-matrix screen.
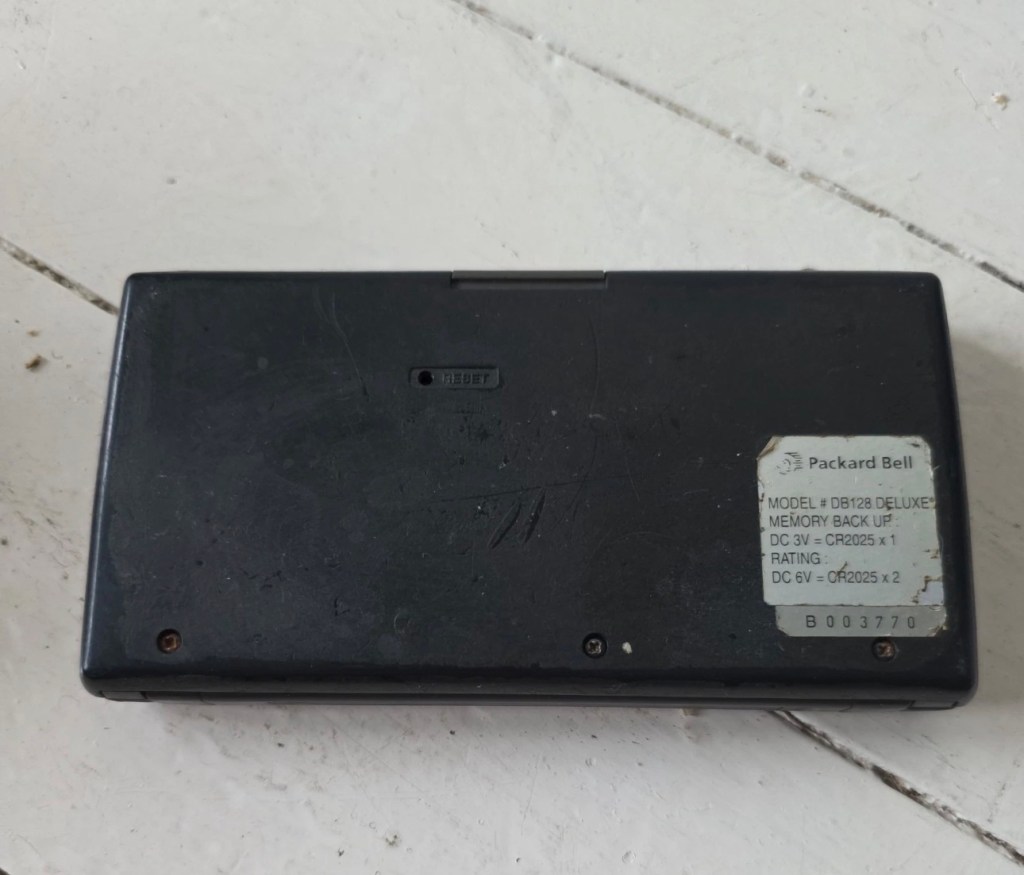
Power: Operates on two or three CR-2025 or CR2032 button cell batteries, often with an additional battery for memory backup.
Physical Dimensions: Approximately 15.8 x 8.2 x 2.3 cm, weighing about 252g.
Connectivity: Data can be synchronised with a PC via a serial cable or infrared (IR) LEDs.
Core Functions
The DB128 includes several built-in applications for daily organisation:
Phone Book: Stores multiple contact categories including names, fax, mobile, and email addresses.
Scheduler: Features a calendar and appointment system with start/end times and audible or silent alarms.
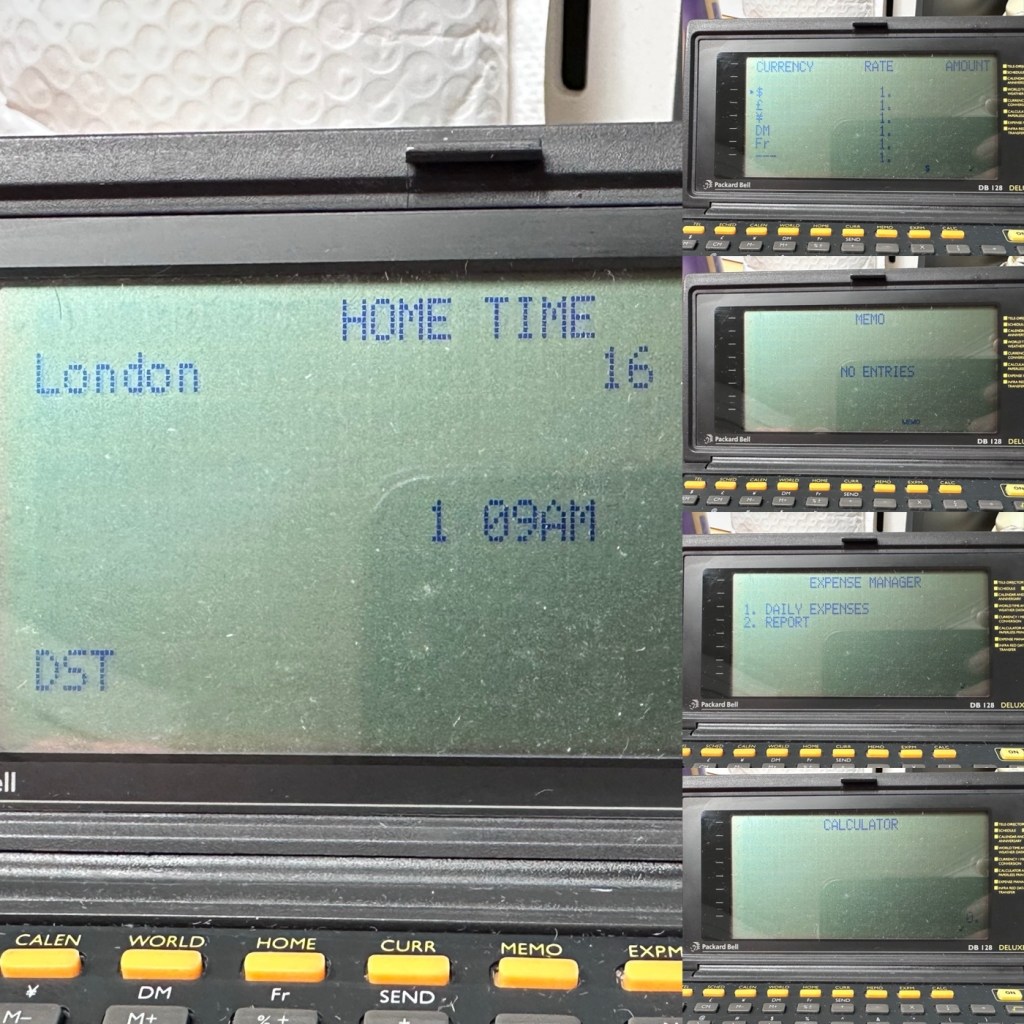
Utility Tools: Includes a 12-digit calculator, home and world clocks, currency/metric converters, and a memo/expense tracker.
Security: Offers a password protection feature for sensitive data.
Google
I just have to wait for its arrival now and I’m looking forward to that, I won’t speculate anymore about what might be, I best just wait for its arrival to carry out a suitable assessment.
Assessment:
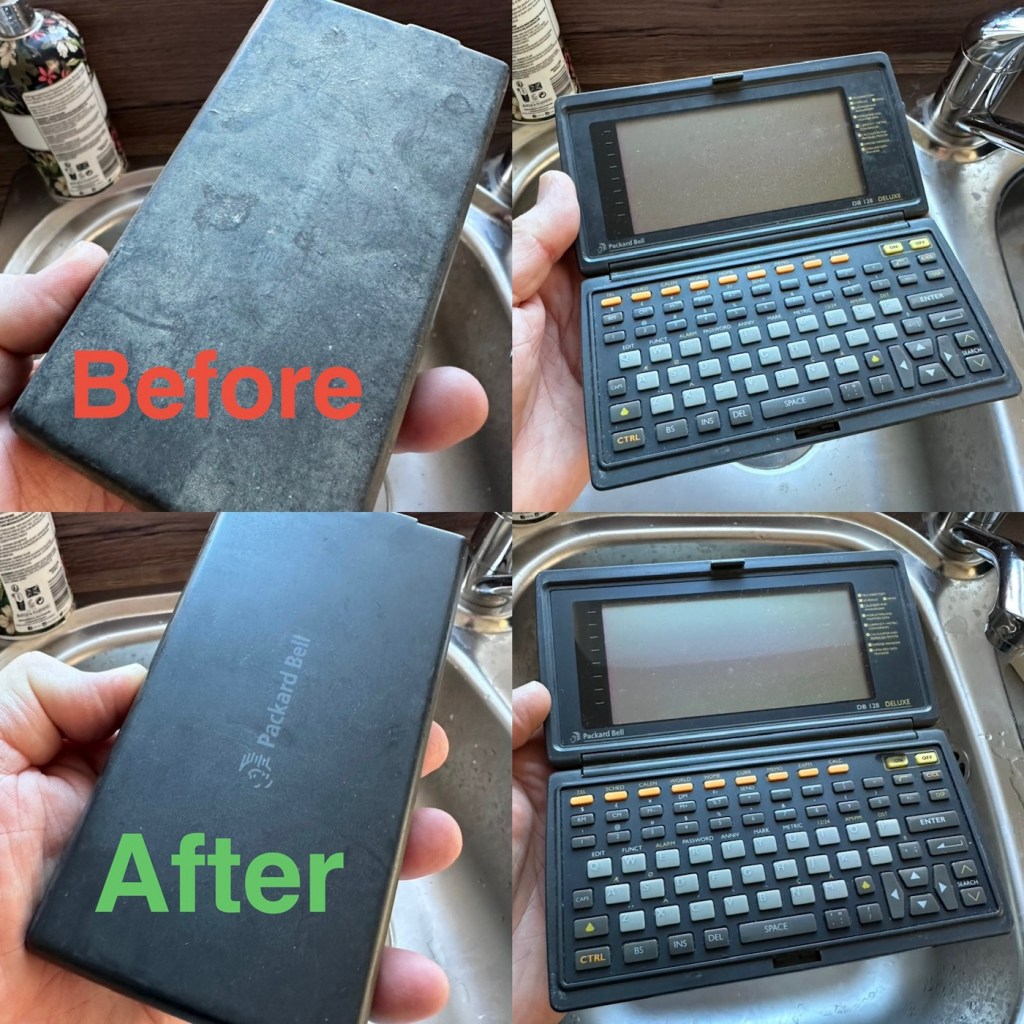
It’s arrived and good god, it looks as if it’s been stored in a vacuum cleaner bag 🤦♂️ it’s utterly filthy, funny how none of the original photos showed this isn’t it? I don’t believe this is the same unit as was in the original posting.
If I’d have taken this into the house with the wife present, i think she’d have murdered me, or at least severely injured me one way or another… So that is why you will see that these pictures were taken at the kitchen sink, the first thing this unit received was a clean with a cloth and warm water. After that it’s had a good polish and it is now nice and clean. Now it can come further into the house, into my domain!
Before and after over the kitchen sink
Now the unit is tidy, everything is as it should be, and the screen is in a good condition barring a few minor age related scuffs. It’s dead, and that’s to be expected, I’m just hoping there are no major surprises awaiting me when I get the back off to have a check inside.
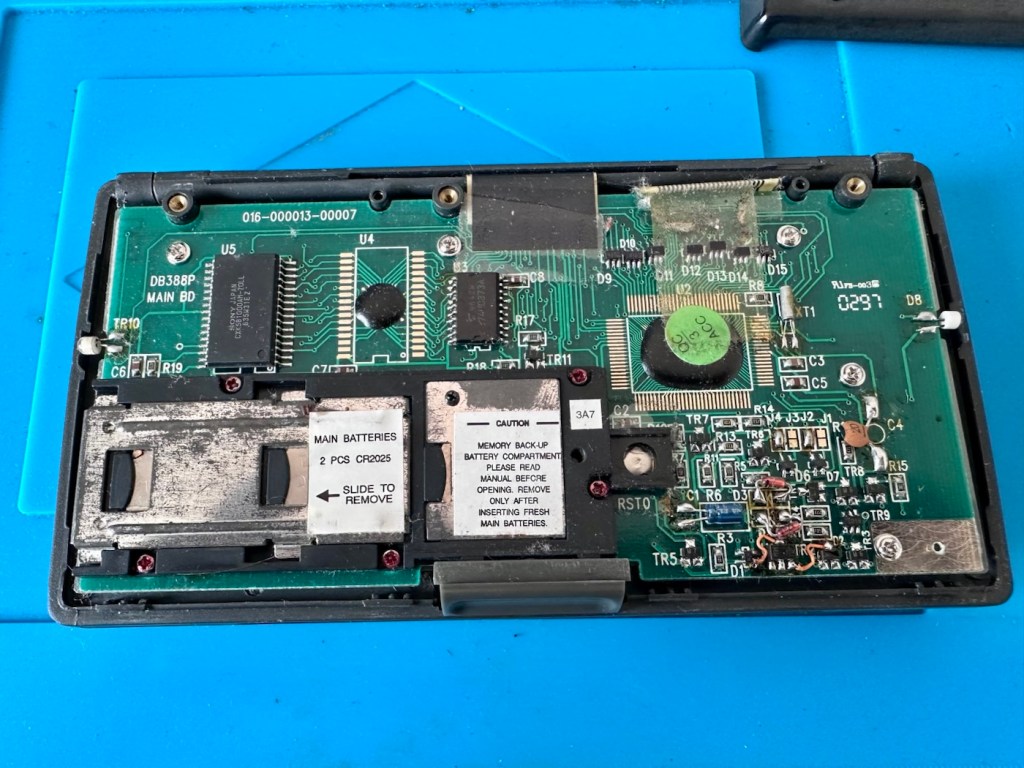
Three screws later and the back is off. All three batteries are still in place, all very dead but fortunately there is no corrosion or battery leakage. All that is visible is some age related tarnishing of the battery enclosure, this however has no effect on the board or electronics and will tidy up with a little brush over with some relevant cleaning solution.
Case off Battery cover removed
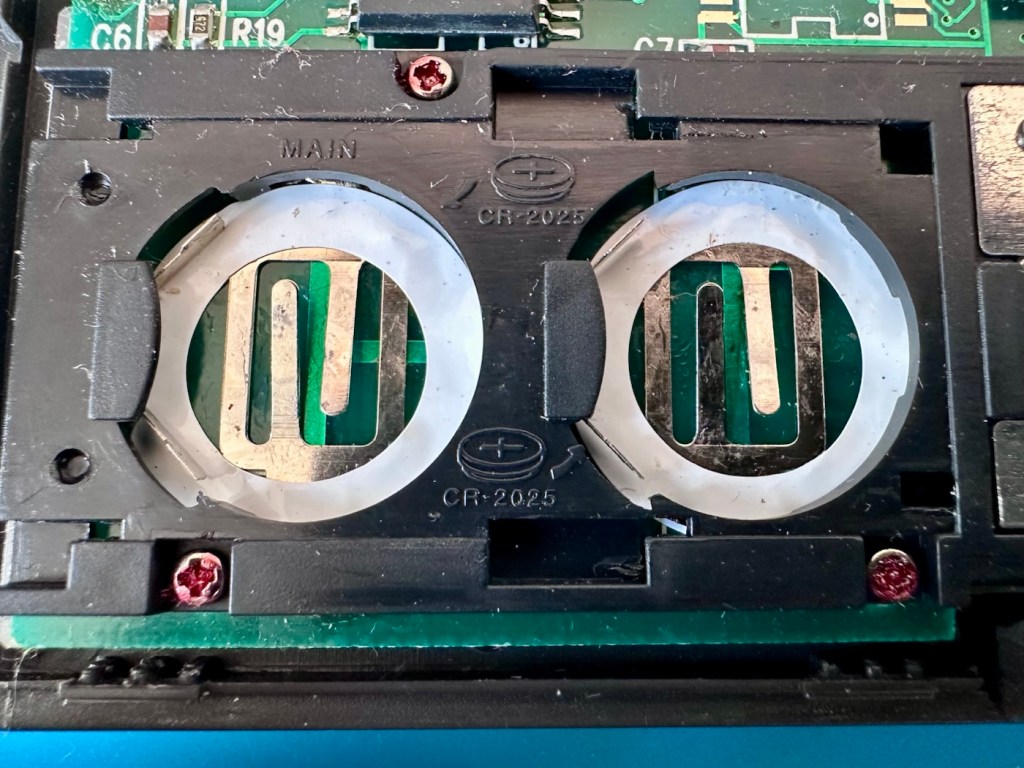
With these little database units you were always supposed to change the two main batteries and get them in place before even considering removal of the single back up battery. This was purely to ensure that saved data was not erased from the memory bank, however as all these batteries are dead, it’s no real issue here. The backup battery is protected with a single screw that needs to be removed to allow access. This unit was able to transmit and receive data using infrared technology. If you look at the picture above with the case off, on the left and the right of the chassis you will see a white diode component, these are the infrared transmitter and receiver parts of the data transfer circuit.
Clean battery contactsBatteries very dead
The batteries needed within this unit are CR2025 mini cell batteries, I currently only have CR2032 batteries, they look the same but just what is the difference? Thanks for asking, i will now explain.
The letter “C” refers to the batteries chemical compound, “Lithium” or to be absolutely precise “Lithium Manganese Dioxide”.
The letter “R” refers to the battery shape, in this case its “Round”.
The numbers “20” refer to its diameter in millimetres in this case “20mm”.
The numbers “25 or 32” refer to the “Height or Thickness” of the battery in millimetres “2.5 or 3.2”
And there endeth the lesson for today. So, in all aspects the batteries are exactly the same, 3 volts, but there is just a slight variation of 7/10 of a mm in thickness. In some cases this is not an issue where there might be that slight bit of space for you to use an alternative cell, however in the case where tolerances are tight such as in watch mechanisms, that tiny difference in size may not allow you to reassemble the backplate to the watch. I hope that clears up the difference between the two coin cell letter and number allocations.
I can use CR2032 batteries in this unit as there is the space. I have some CR2025 batteries on order, so I will comply with the original standard when they arrive. But for the purpose of testing further, the CR2032 batteries will suffice.
Repair:
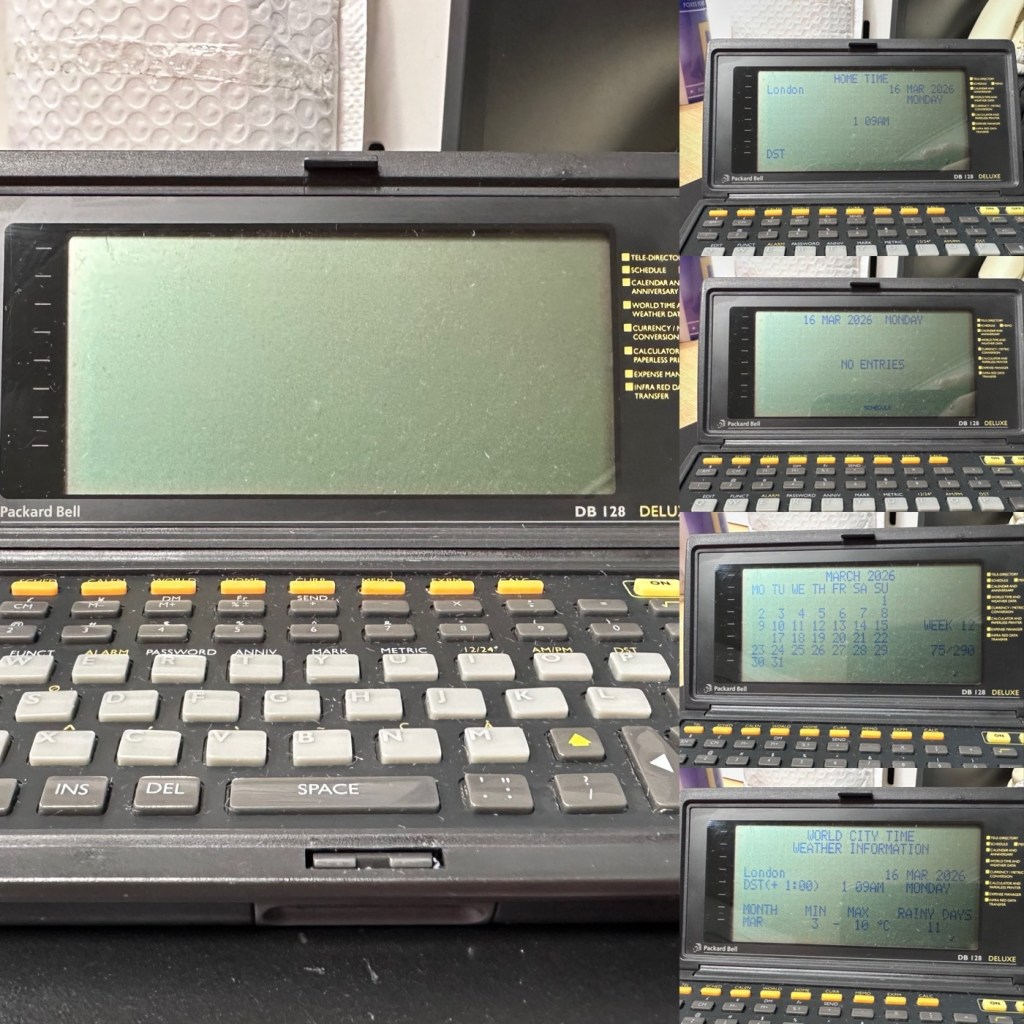
What repair, to be honest it’s been more of a clean, I’ve cleaned the inside circuit board with some IPA and a brush and cleaned all the crevices with a pick and finished off the outer case with a good coat of antiseptic cleaner and polish. I have inserted the three required batteries and switched the unit on.
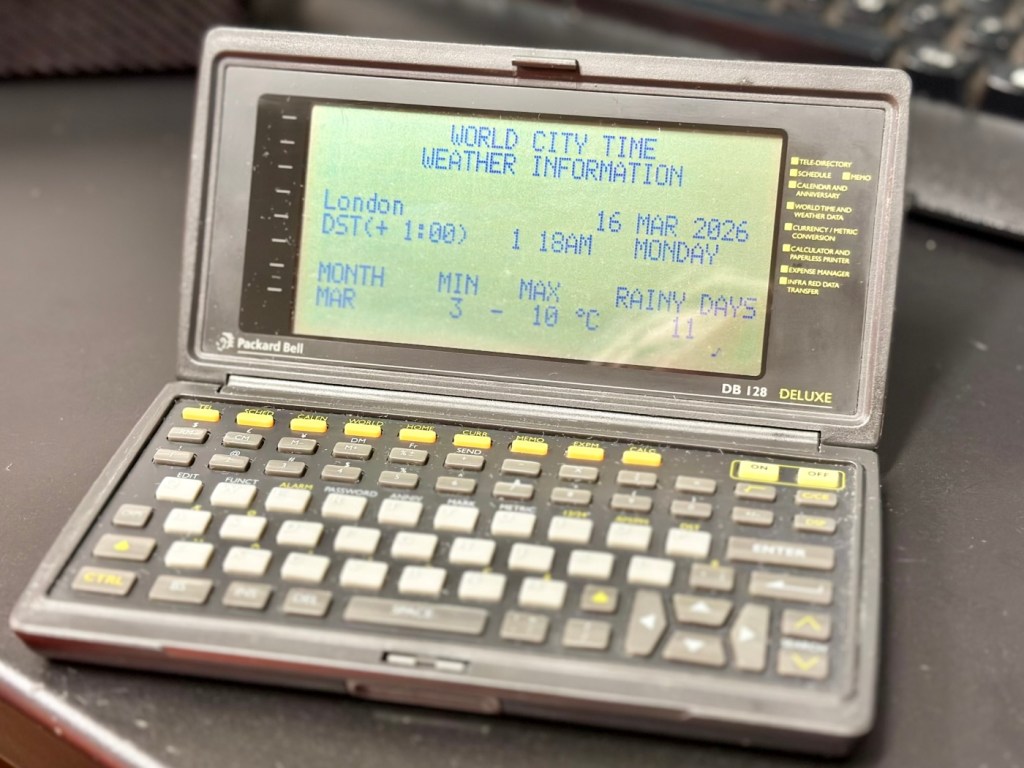
All working, all features functional
Not a great deal more I can say. It’s clean, in fact it’s very clean, and fully functional.
Result:
It’s 34 years old, it’s been discarded, put aside for disposal, given one last chance in its chequered life and I purchased it for £3:30GBP. It’s now revitalised, cleaned inside and out and been given a new lease of life. One of those very simple clean and repairs that anyone can do. And another item is saved from landfill.
When turned off
When turned on
This will now be added to my ever growing collection of old PDA equipment from the 90s, a collection that is starting to grow at quite a considerable rate. I have a few more little projects similar to this in the pipeline, quite similar to this one but requiring quite a bit more attention. Please keep passing by to keep up to date with these “mini” projects.
Once again, thank you for passing by, it is always very much appreciated.
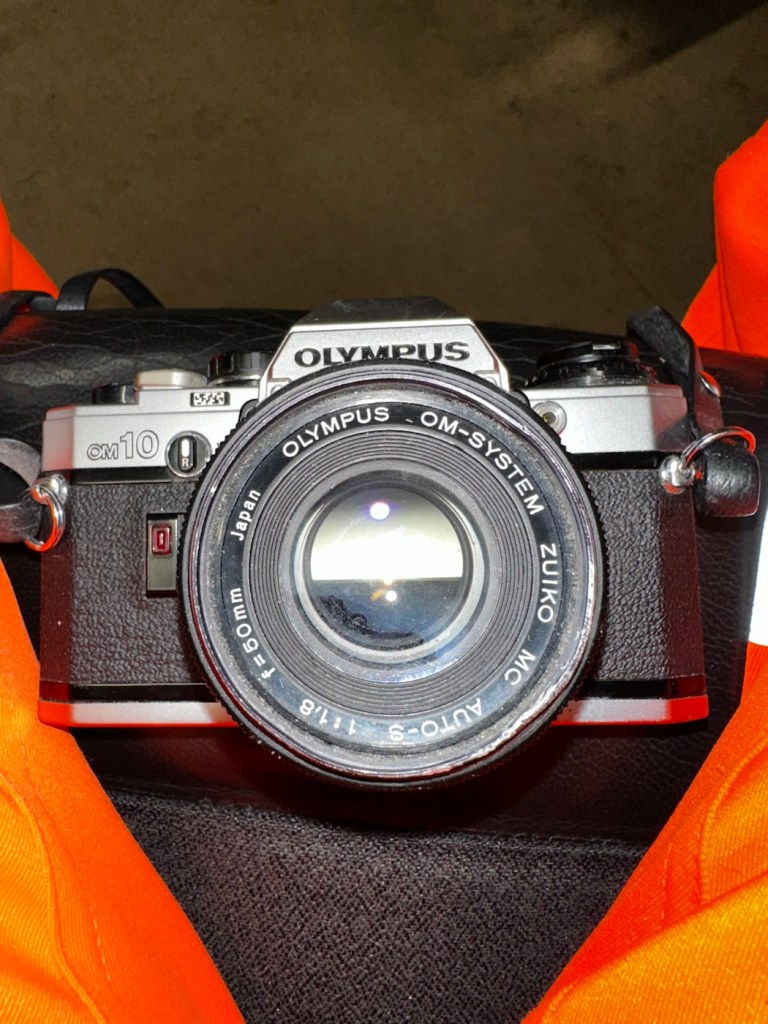
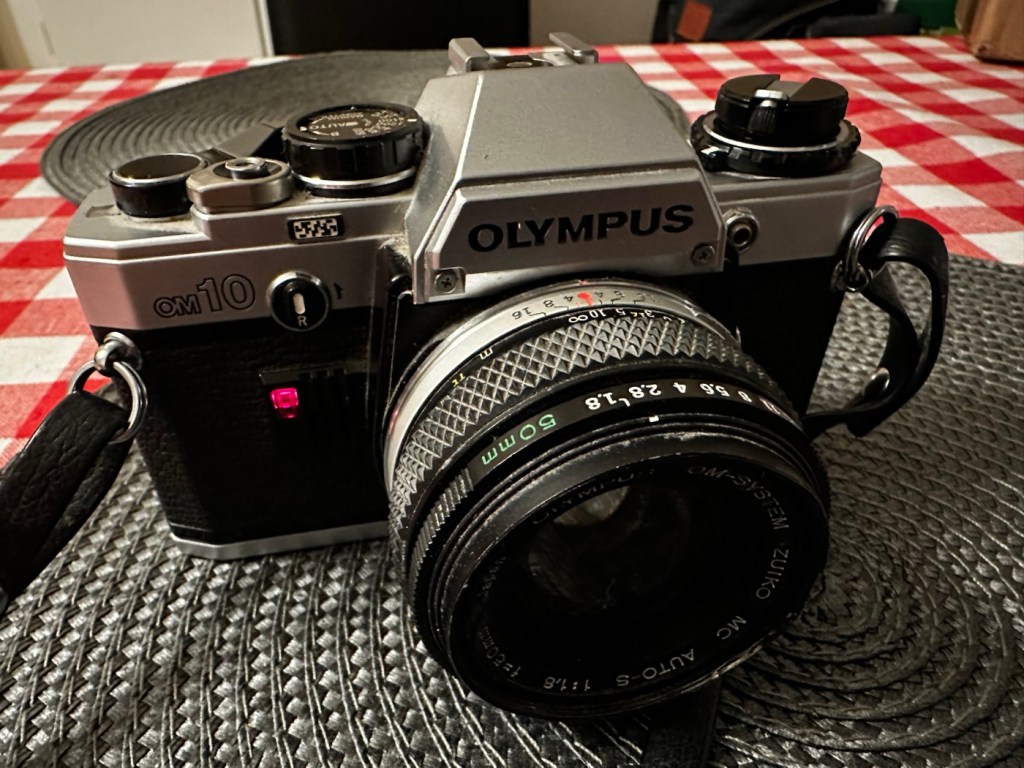
Always liked and wanted an Olympus OM10. 46 years later I now have one. Of course, it needed repair.
Much to the wife’s annoyance, and because I was feeling a little low and in need of some retail therapy, I’ve purchased this lovely little camera from the Barnardos charity. It looks like it’s been stored in a full Hoover bag, it is so dusty. It has a few dents and dinks, this one is going to be a challenge. I like challenges. I’ve paid the grand total of £17:67GBP for the camera and the standard Zuiko 50MM F1.8 Lens. I think that is an excellent price.
These cameras were produced between 1979 and 1987. I’m hoping I’ll be able to date this actual camera more accurately when I receive it.
This is what the original listing stated:
This listing is for a vintage Olympus OM-10 35mm Single-Lens Reflex (SLR) film camera, bundled with a Zuiko 50mm f/1.8 lens and a leather neck strap. This is a single bundle containing the camera body, lens, and strap, ideal for collectors or film photography enthusiasts.
UNTESTED. This sale is for spares/repairs. There are some marks and cosmetic imperfections. Please see images for more detail.
The standard untested post from the auction sites, but I’m not really bothered to be honest. It’s a charity, and I’m happy to pay for these items as the charity always benefits, and that’s all that matters to be honest.
I have some history around this camera and whenever I see one I think of Bruce Springsteen and here’s why.
1984, Bruce released this Album
Born in the USA was released in 1984, so I can kind of pinpoint the first time I’d ever really heard him, courtesy of my friend David K, when I used to live in a small town in Hertfordshire called Bushey. David had been a school friend, we were now in our mid to late teens, he was working in a restaurant whilst I was in a photographic lab. He introduced Bruce to me and for many months after he first purchased that album, we played it non stop and knew it off by heart, beat for beat, and word for word, we were totally smitten with it. It was the Bruce effect. At this time i would have been about 18-19 years old, and had a very basic Russian Zenit camera, it took some great photos. However, David had recently had a bonus payment at work and purchased himself the Olympus OM10. I was envious, who wouldn’t be? What a camera and this is where it all ties in with our hobby, we loved photography and used to always discuss it with Bruce in the background singing his heart out. It all ties in now, fantastic memories, and a single camera can bring back these memories. Amazing isn’t it?
Anyway here’s some pictures where you can see the amount of dirt, and what looks like some bumps on the outer edge of the lens.
Nice camera, few dinks and dents, and a lot of dirt
Here’s some information regarding this camera:
The OM10 was the first consumer OM series body. Launched in 1979 it accepted the full line of OM lenses and most of the OM accessories for a lower price. The lower price was reflected in the construction of this camera and the features available, however, it was still a very competent performer and it reflected the elegant lines established by the compact OM-1 and 2 designs. Early production runs of the OM10 have known malfunction issues with electronics, metering, and shutter magnets. Olympus later changed the shutter to a ‘Type II’ design to correct the latter problem.
In its standard configuration the OM10 offered aperture priority automatic exposure, simple and accurate enough for a consumer camera in most lighting situations. It also offered exposure compensation for more complicated lighting situations and for more advanced users. A small plug-in manual adaptor was available as an accessory to enable manual control of shutter speed. The manual adaptor is possibly not as easy to use as the typical shutter speed ring around the lens bayonet on the OM-1.
While not well known to consumers, the focusing screen for the OM10 is indeed interchangeable, though not as easily as the OM-1. It shares the same focusing screen as the OM-1, but the extra protruding tab needs to be cut off as the OM10 doesn’t have a placeholder for it.
The OM10 can accept all the lenses of the OM system.
The finder screen is fixed, as well as the back. It can accept the winder but not the motor drive. It existed in chrome and in black finish.
In 1980 the OM10 Quartz was released with a fixed databack (equivalent of a Recordata Back 3) to print the time or date on your pictures. The OM10 Quartz was only released in black finish.
The OM10 was sold in large quantities before production ceased in 1987 and many working examples are still being used today. Largely overlooked in favor of its more professional ‘single digit’ siblings, you can easily pick up a working example for $50. Try to find one that includes the manual adaptor though, as this accessory alone can fetch $30 at auction.
Camera-wiki.org
Assessment:
In a perfect world this camera would just need a clean. But this is me and to be honest I’d like a little bit more of a challenge, as a lot of the cameras I have worked with lately did not need a lot of maintenance because they’d been well looked after. This one may be different.
The camera that has been received
These cameras were renowned for electrical faults especially with their mirror motion magnets, very similar to the issues suffered on Canons earlier EOS cameras such as the 1N. But to be honest I am just surmising at this point as the camera is not yet in my hands. I need to be patient and await its arrival.
Well, it’s arrived so let’s have a look and see what’s good, what’s bad and what’s indifferent. It has dirt, yes, quite a bit of it, so it will require quite a deep clean as we need to get into all those little crevices, where the dust has settled.
Dirt in all the crevices
Cosmetically it looks really good with no dinks, dents or scratches, so that is very much a positive. It’s in not too bad a shape for being 46 years old.
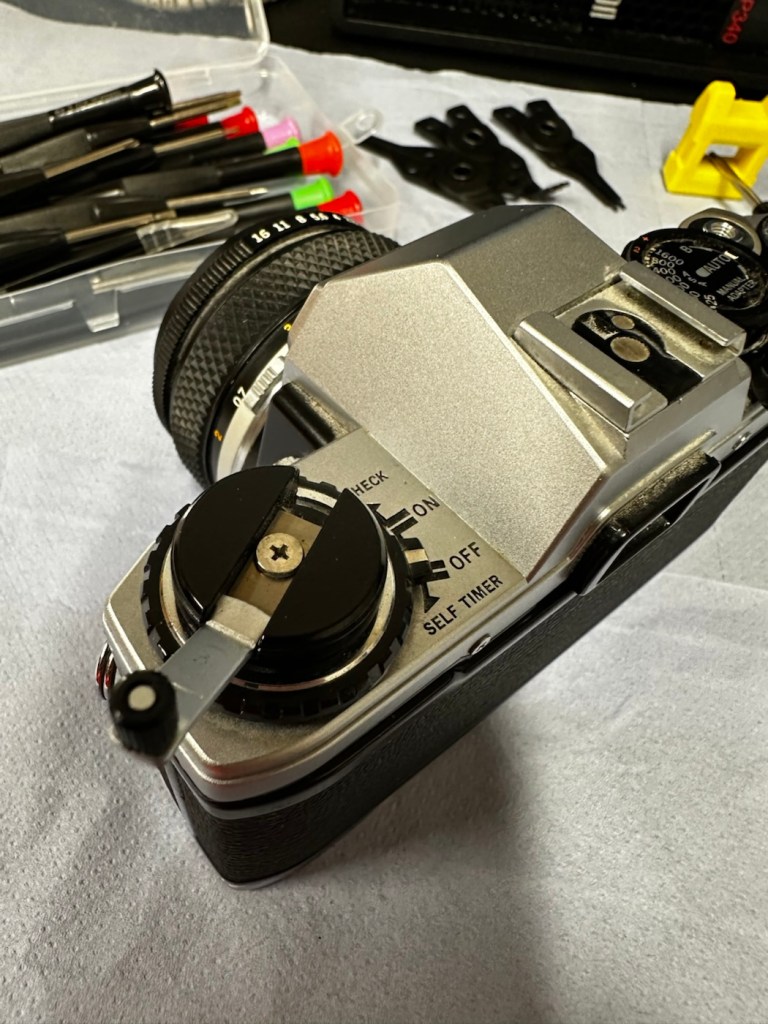
The capstan to open the camera film door, along with the operation dial are a little loose, so they will require tightening.
Loose capstan and controller
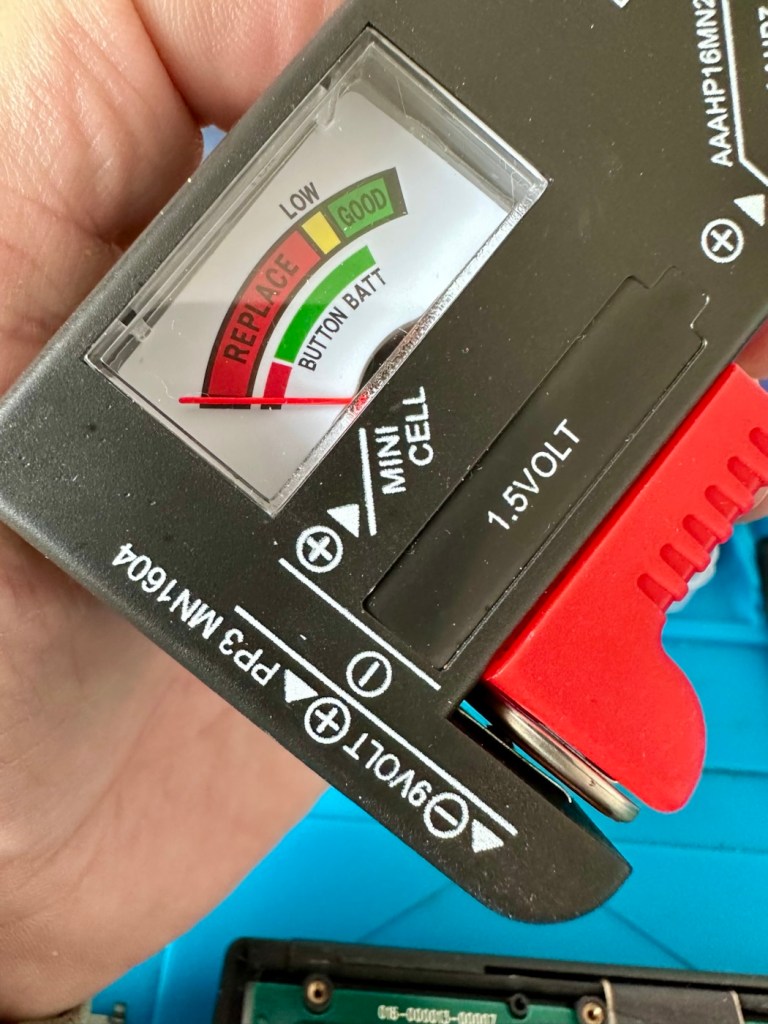
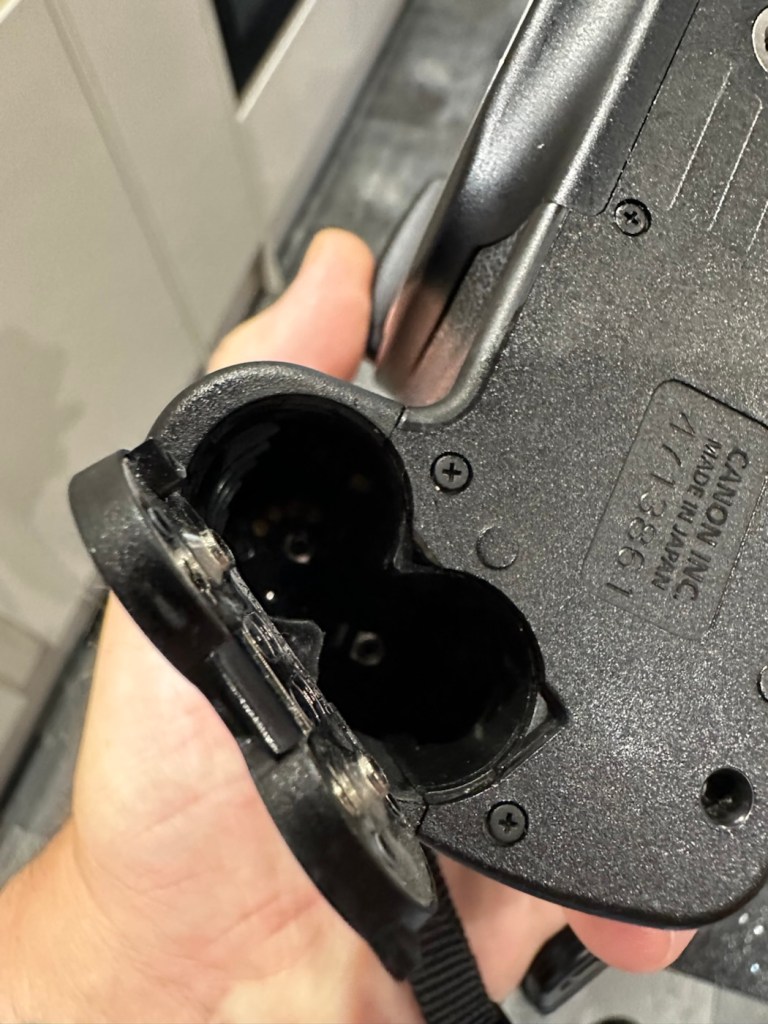
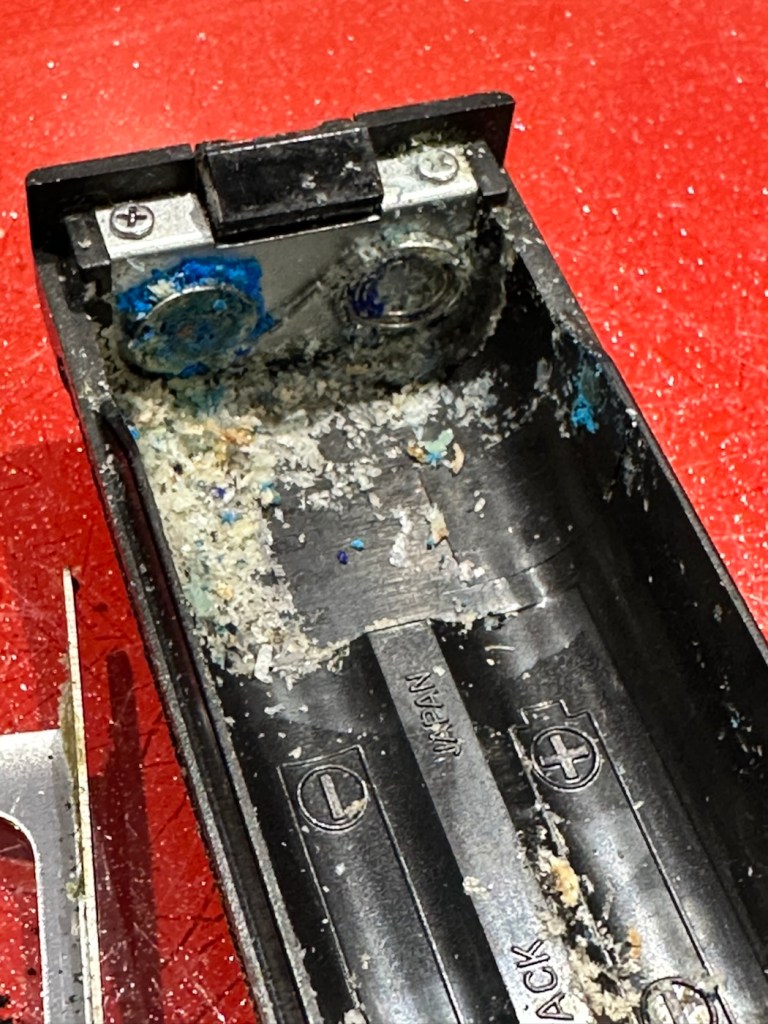
Batteries are long dead, this camera requires two LR44 button batteries to do even the basics, I have tested the batteries with a multimeter and they are so low that they hardly register, they are very dead indeed. The good thing however is that they have not leaked in anyway and the battery chamber is clear of corrosion.
Battery chamber is clean
The mirror is stuck in the halfway position, this could be purely to do with there being no battery in the camera. It would be good to see with new batteries installed, if the mirror magnets would then kick in, and then they’d be no further issue. However, knowing my luck they are probably inoperable as well, we will just have to wait. And for this same reason the winder is also stuck, again the batteries may well solve this problem 🤞
Mirror trapped at the halfway point
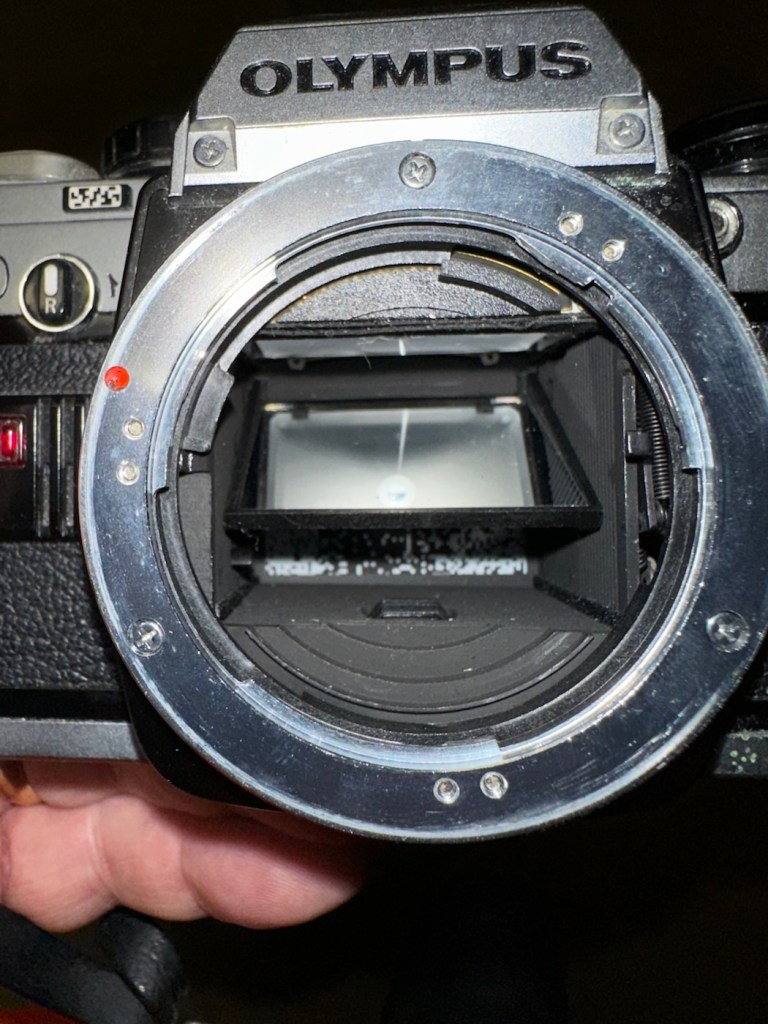
Good news is though that the mirror and curtain are in really good condition, because the old lens has been kept in place preventing any contamination getting into that area.
Viewfinder looks clear apart from a little dust build up
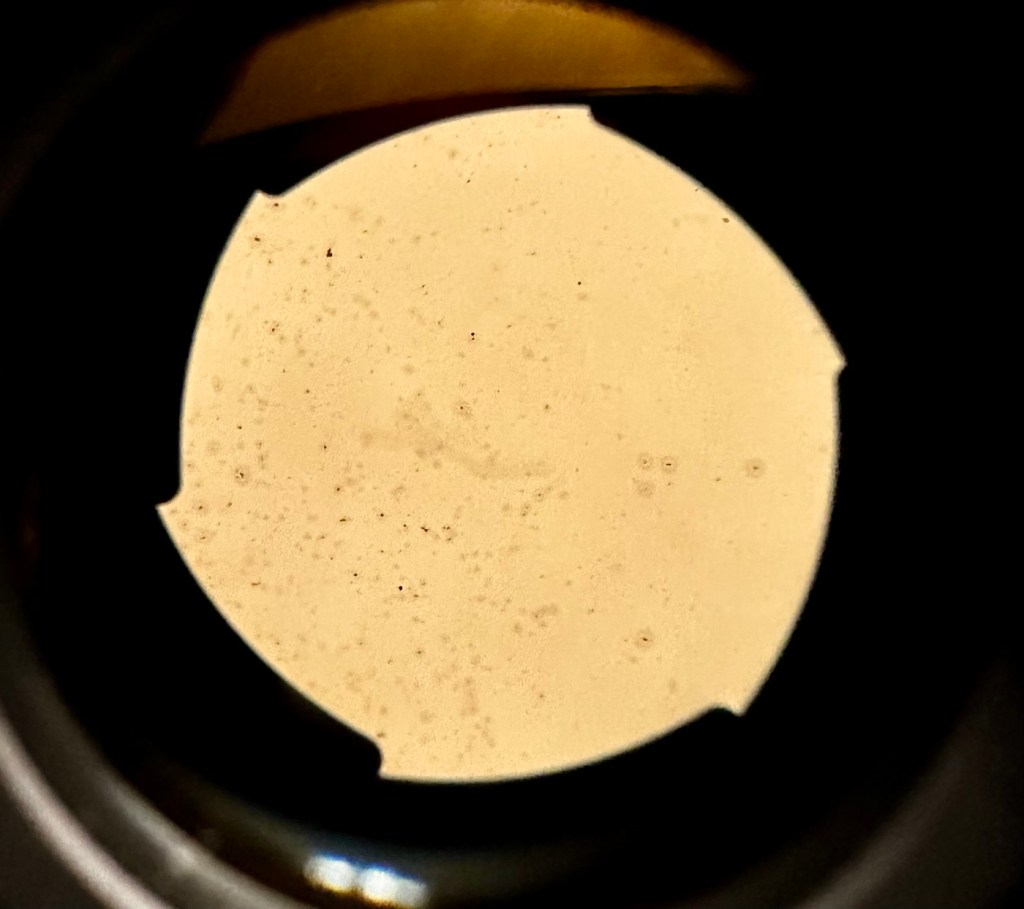
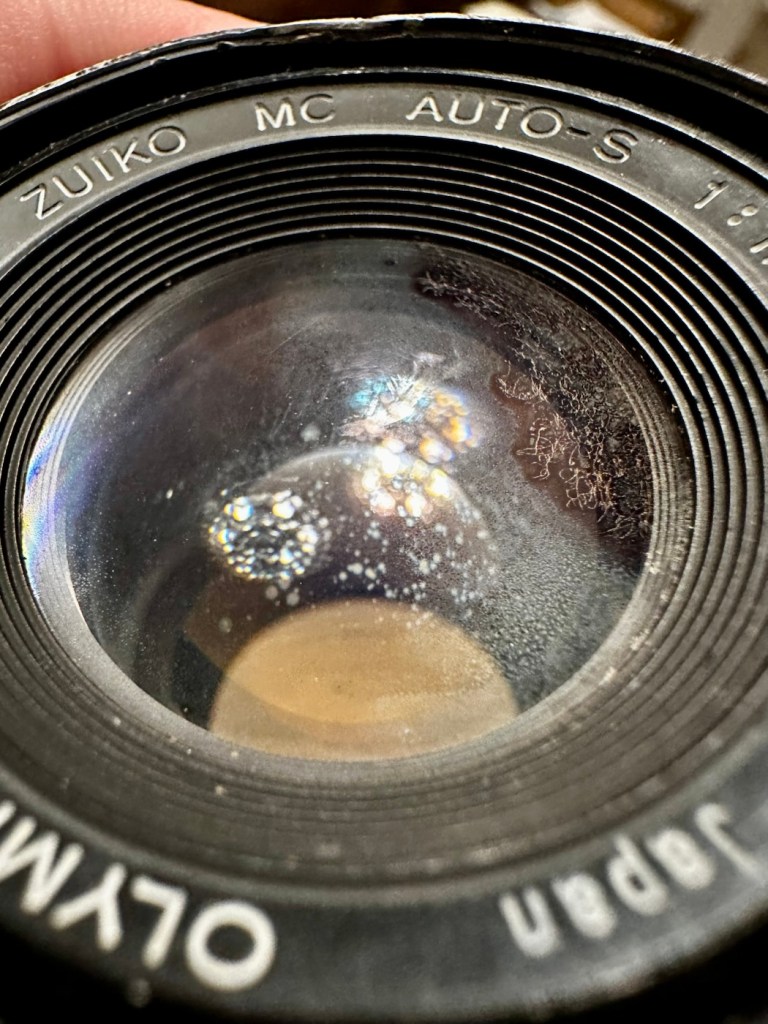
However the lens, does appear to have fungus in it, and will require a clean at some point along the way.
Visible lens fungus
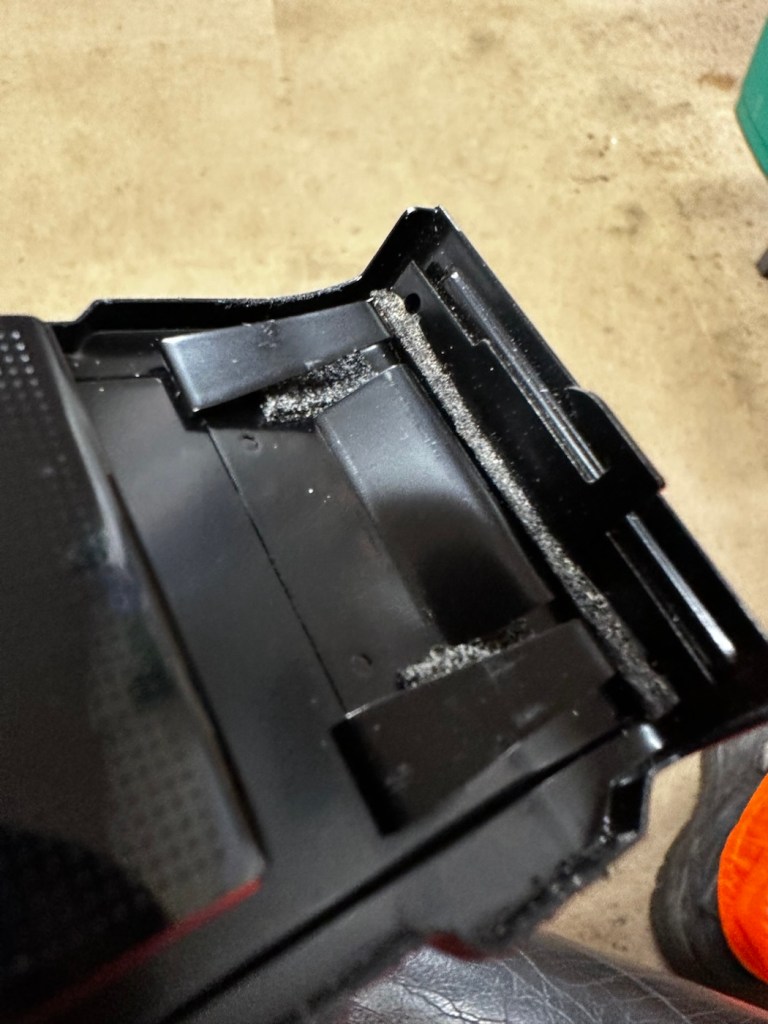
There are also a number of light seals that need replacing as they have perished.
Some light seals need replacing
To be quite honest, the easiest part of this camera to clean will be the standard plastic and rubber neck strap. This can just go in some warm soapy water to rejuvenate it. However, my first priority will be to get some batteries in place and see what occurs. I may have to rethink my approach to this camera dependent on the outcome of this simple action.
Repair:
Straight home and I’ve found a couple of LR44 batteries that had a little more power than the old ones. In they go….and nothing. There is a check position on the main dial that should light up and a buzzer should sound to confirm that there is sufficient power, obviously there isn’t in this case. I run all the other LR44 batteries I have through a tester ( I had a packet of 12 ) and they all show as low power, they’ve died during storage. I then pop over the road to see my brother in law who always has a good supply of batteries and bingo, he has a couple of spare LR44s.
We have the check light, and a little buzz…intermittently
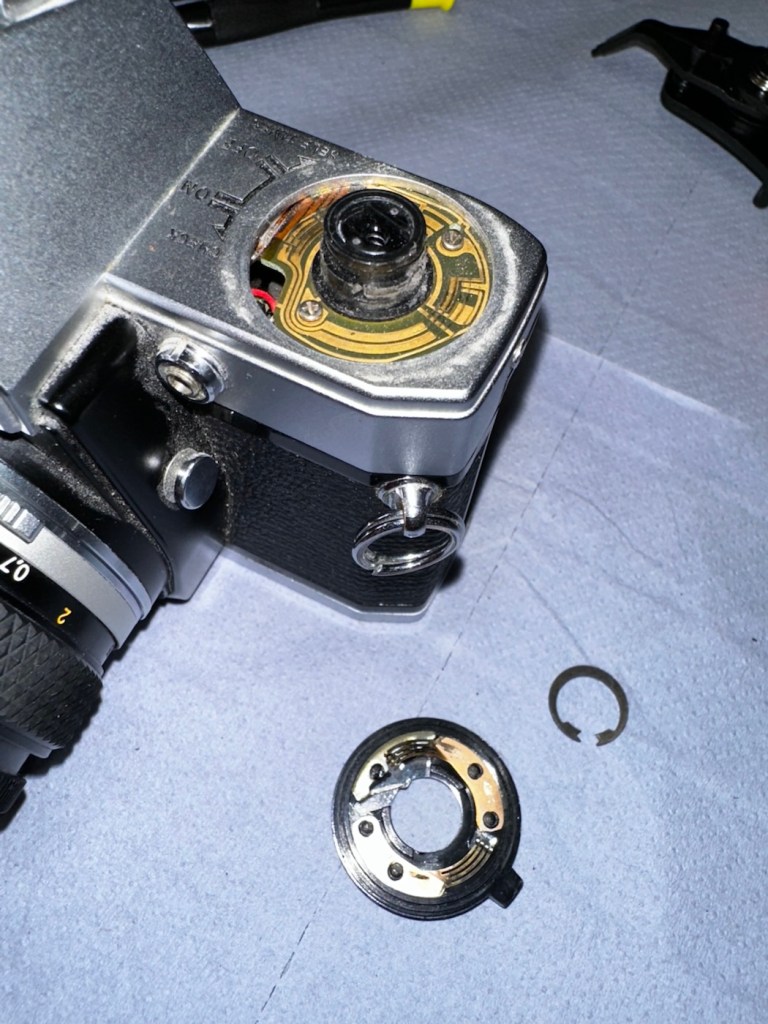
With these in place I get an intermittent buzz and a light, it appears the capstan control and operation dial that I mentioned earlier was loose, and has intermittent contact issues, it will need removing and cleaning then reseating.
If I hold the capstan in place I do get a good signal, with both buzzer and light operating in the check position, and when I move the control to “On” position I can now cock the shutter lever. It will then fire but again only to the half way position as it did earlier. If I gently push the mirror down and let it spring back it will then fire. But you have to do this on every stroke of priming the advance lever. Not good.
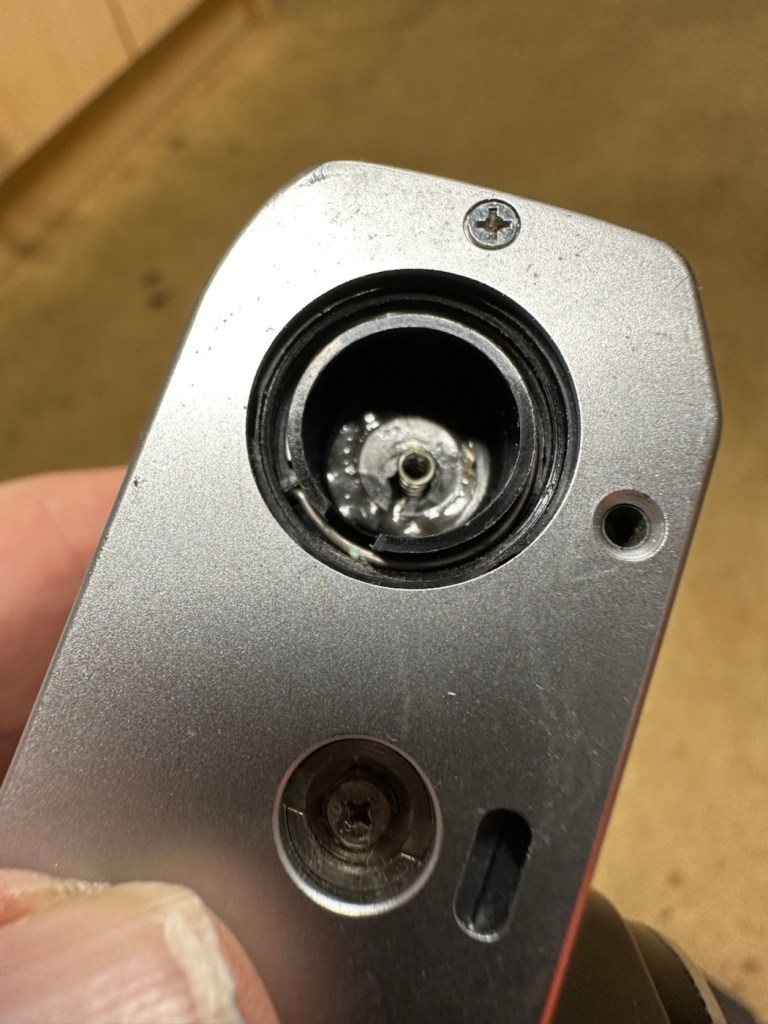
This is pointing towards an issue with the magnets and I believe I’m almost there, and that’s when I have a eureka moment.
Eureka moment
In the bottom of the mirror and curtain bay on the base of the camera is where the mirror magnets are situated, along with a light sensor that takes a reading off the shutter curtain behind, that is checkerboard coloured. Something here didn’t look quite right for me as it did not look level, the base seemed quite uneven. I just simply put my finger in here, applied some light pressure on this base and it just clicked into position, nice and level and then the stuck mirror fired, just like that. Every single prime of the shutter and actuation since, has worked just perfectly, I wonder if this camera has been dropped at some time just knocking this part out of true configuration? Or has someone been here before me? I’m going to have to remove the base to check a few things anyway, so I can then make sure this issue doesn’t happen again. For now, I’m satisfied that the shutter and winder are working fine. I just need to make the contacts and the electrical continuity a little bit more reliable.
I’ve dismantled the faulty switch. Inside, the old tracks on the camera and the pickups on the switch were showing signs of tarnish so I used some contact cleaner go get these looking better. I’ve re assembled the switch and used a new circlip to hold it all together. It’s a lot more secure and responsive now with no interruption to the check signal. It’s quite solid as it always should be.
Capstan needs dismantling Circlip needs removing Those tarnished tracks
Here’s a small video regarding the switch repair.
Switch working as it should
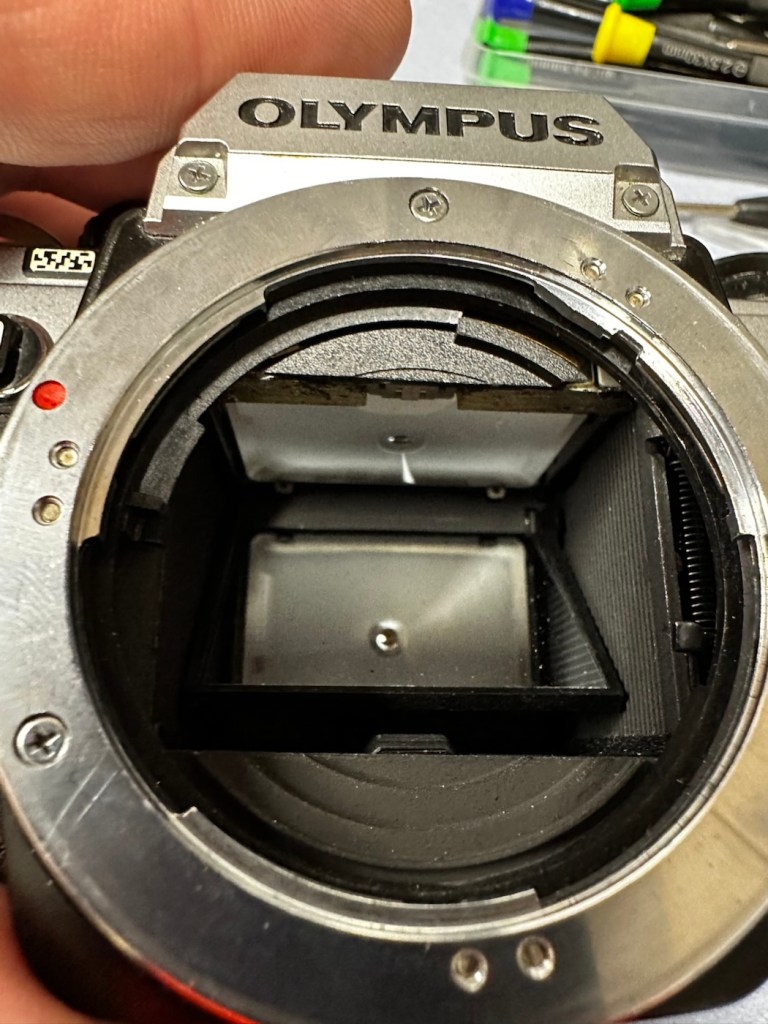
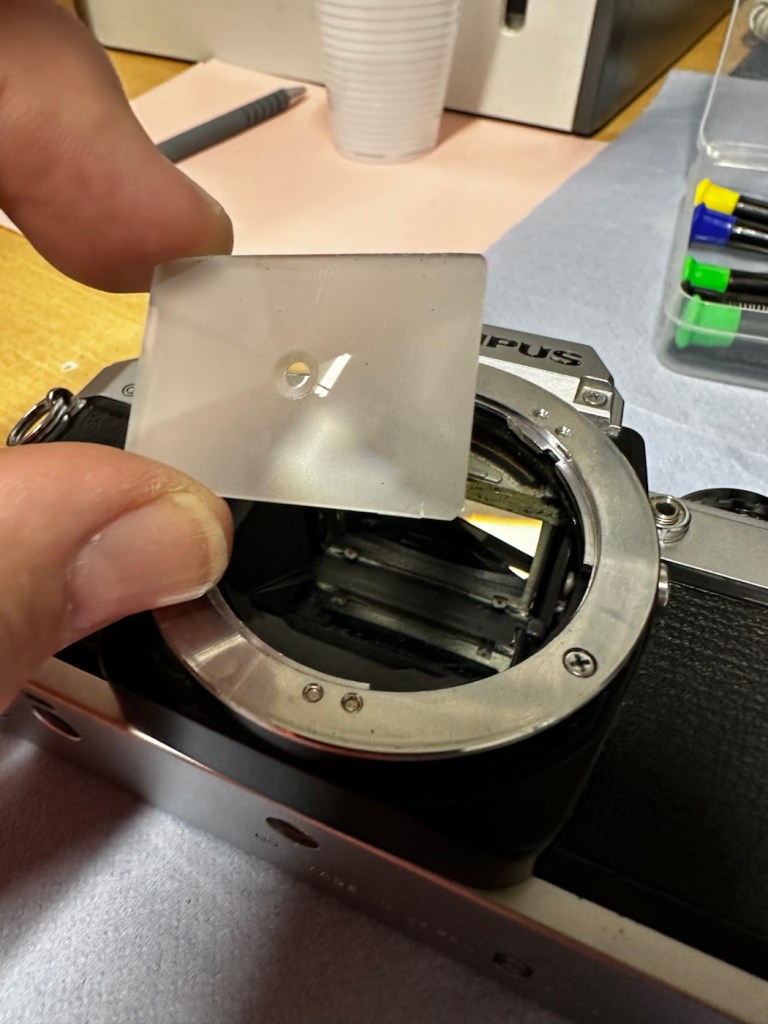
With the switch sorted I’ve now removed the focus screen to give that a bit of a clean.
Focus screen removal, cleaning and replacement
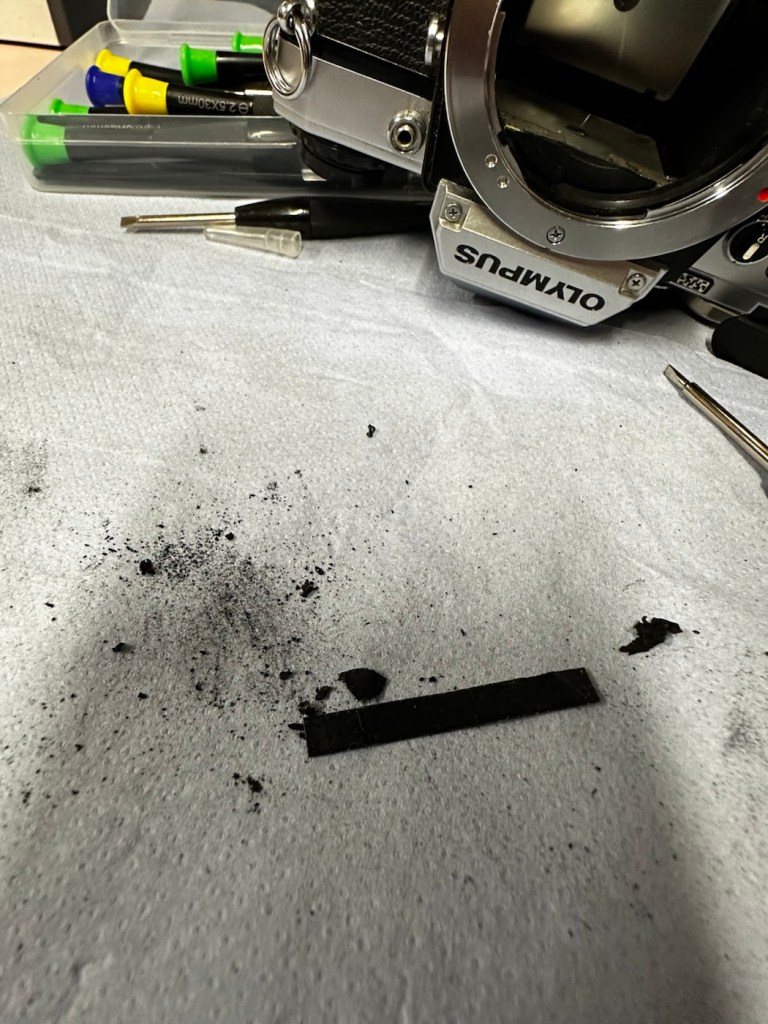
And after this I have gradually started to remove the old light seals in preparation for their replacement. They really are in quite a bad way and creating a lot of dust and dirt as they degrade.
Old light seals removed and degraded Mirror damper seal removed
Now to get the remainder of the old seals removed, clean the troughs they sat in, and then put the new seals in place.
With some IPA, and a large bamboo stick it’s time to remove the old seals
Some seal cut to sizeDoor seal replacedTop seal installed Bottom seal installed
I’ve replaced all the seals on the camera body apart from the mirror damper. I need to get some adhesive first, to secure the plastic plate that sits above the damper. Hence I have to wait for this to be in place before I can finally put the damper in situ, i will do this in the next 24hrs.
Now, the plastic piece that covers the focussing screen access is now secured in place and the mirror damper has been installed, all light proofing has now been completed.
Mirror damper installed
The original lens that was suffering with fungus has been dismantled and given a clean, however because the top two optics are a sealed assembly, guess what? The fungus is within the sealed section and is unable to be accessed. Therefore the lens will never be cured of this issue, it has been improved by cleaning the other optics but it’s not in anyway good enough to use with film in the camera, I will therefore use the old lens purely for testing purposes, it works fine for that and will be just fine for testing other Olympus equipment. In the meantime I have purchased two further OM 50mm std lenses, one is an earlier “Silver nose” model with a single lens protective coating whilst the other is a later production “Black” MC (Multi coated) model. Both are in an excellent clean condition conducive for film photography.
The two new lenses – “Silver nose” to the right
I’m happy that the repairs have now been completed, all that is left now to do, is to give the unit a thorough clean, and to clean that original plastic/rubber camera strap with some warm water.
Result:
Here we present a fully cleaned and maintained Olympus OM10 35mm SLR camera from the 1980s looking quite resplendent after all the work on it has been completed.
All cleaned
Looking superb with a new lens
Looking fine from all angles
It’s been a lovely camera to work on. The make of this camera is superb, and back in the 80s Olympus were on a high note with the high end advertising, using many well known celebrities, and their cameras as a result became extremely popular. They are very well made and have stood the test of time. This one camera will go on to continue being used, and has many good years of life ahead of it. Another one saved from the scrap heap. As with all my cameras I have an immense backlog of units all awaiting the time when they have a roll of film run through them, and this one is no different. When I do pass a test roll through it I will post a link to the results here.
As always, thank you for passing by and glimpsing this post. It is always very much appreciated.
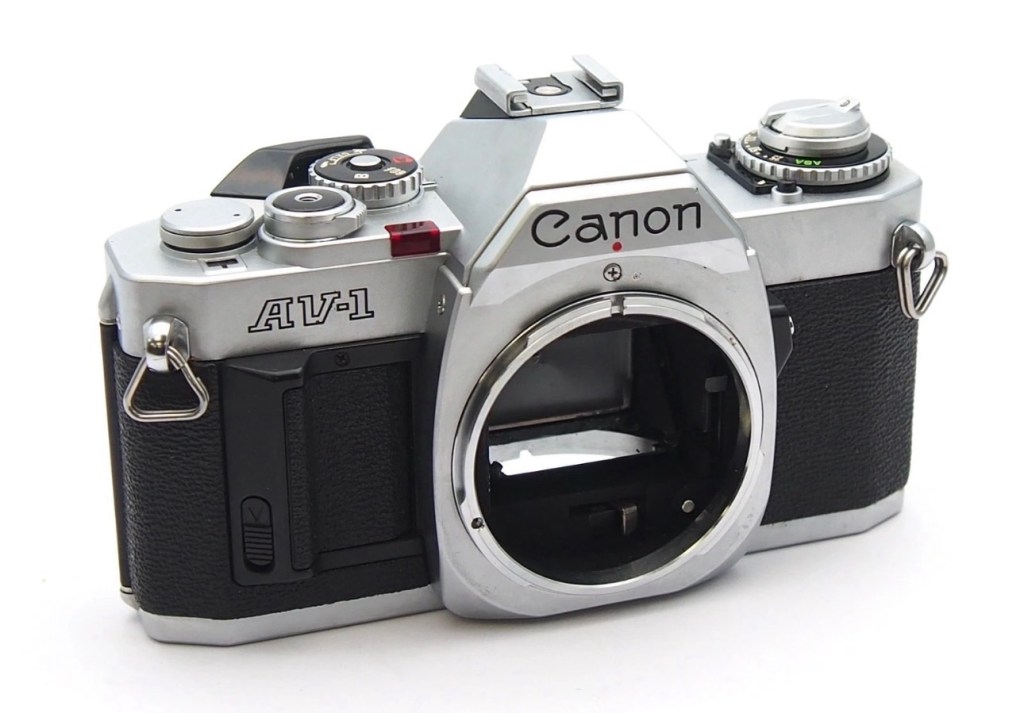
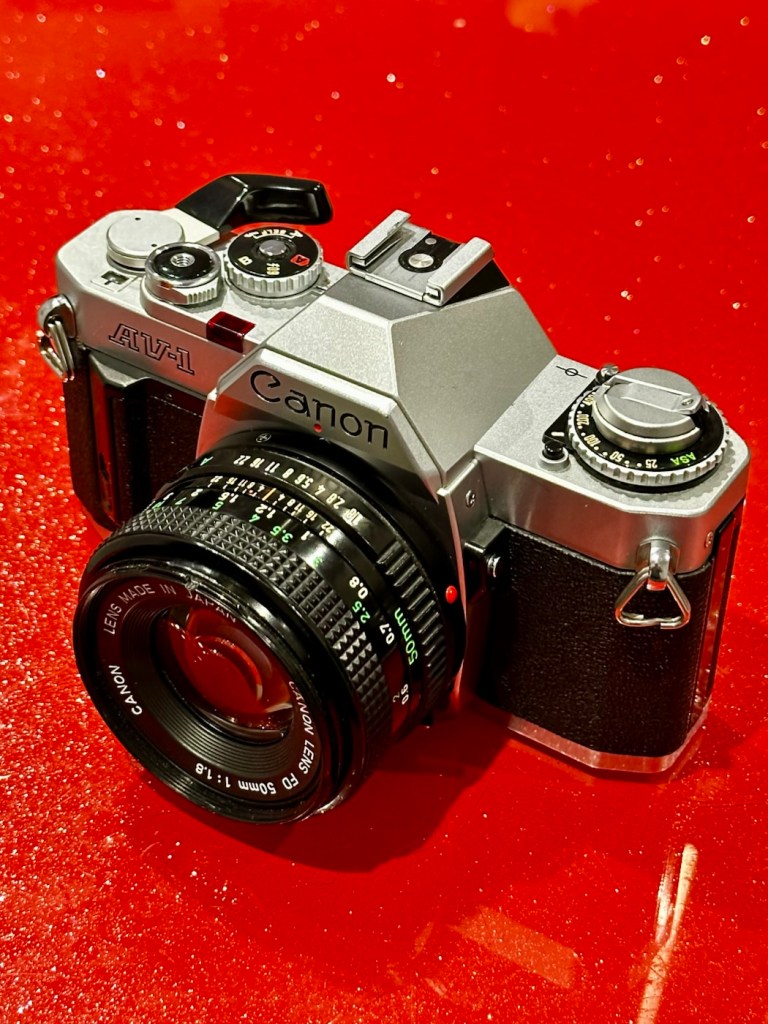
I now have a Canon AV1 with a shutter problem. Can I fix it? I’ll have a good go…
What the listing stated:
This camera is in very good overall condition. Some light signs of use but this is generally minor. The light meter is responsive when you press the shutter button down. However, the shutter will not fire. Spares or repairs only.
EBay
I’ve just paid £8:98GBP for this camera, and I believe this is a great price for a piece of camera history. The AV was introduced due to there being a demand for aperture priority at the time, whereas its Sibling, the AE1 was purely shutter priority. Later cameras would come to incorporate both systems. This one has a known problem with a stuck mirror – it won’t fire and I think I can easily sort this problem. Well I hope I can.
The Canon AV1 I have just purchased
Here’s a little information about this camera:
The Canon AV-1 is a 35 mm single-lens reflex camera with an FD lens mount, introduced by Canon Inc. in 1979.
The AV-1 is very similar to the 1976 AE-1 but provides aperture priority autoexposure rather than the AE-1’s shutter speed priority AE.The camera is not capable of fully manual exposure. Canon’s international distributors, particularly in the United States, had clamored for such a camera because competing brands offered mostly aperture-priority cameras and some preferred it. The AV in the name referred to the type of autoexposure; Av (Aperture Value) is a common abbreviation for aperture priority.
When this camera appeared, a new range of FD lenses was introduced, with instant mounting/unmounting of the lens. This is called the New FD mount and does away with the older type of mounting ring which was fitted on to the rear of the lens and was awkward to use and needed two hands, to a newer, easier system whereby the user lined up the red dot on the lens, with the red dot on the camera and simply turned the whole lens clockwise until it clicked into place.
All the other AE-1 accessories fit the AV-1.
Wikipedia
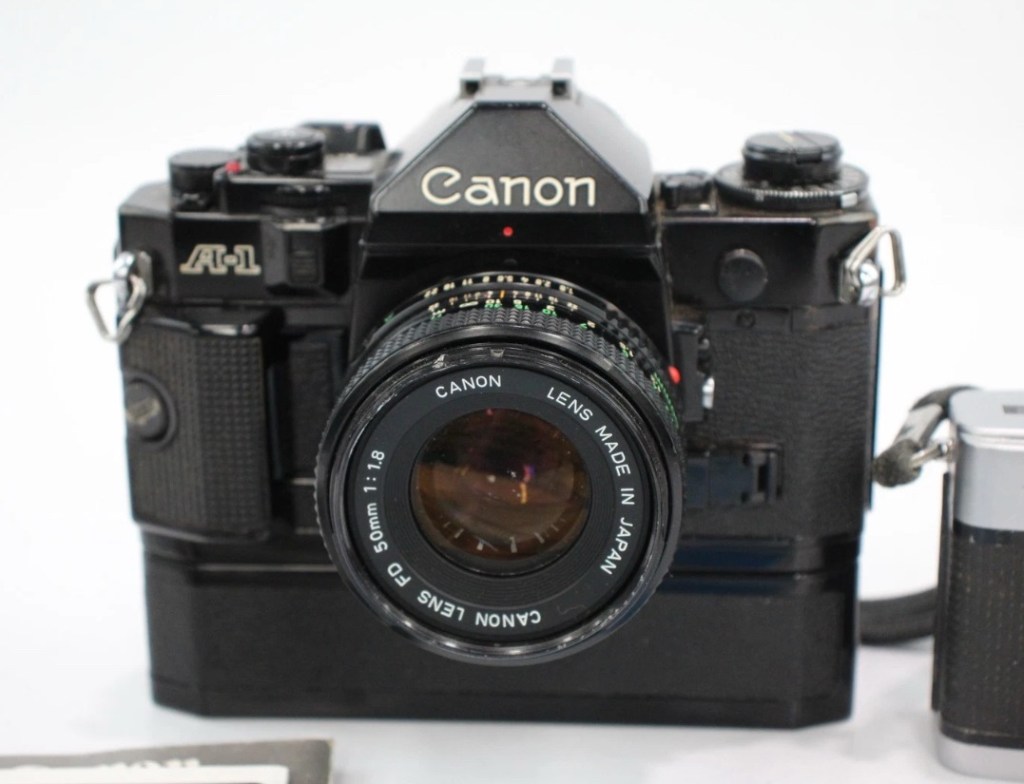
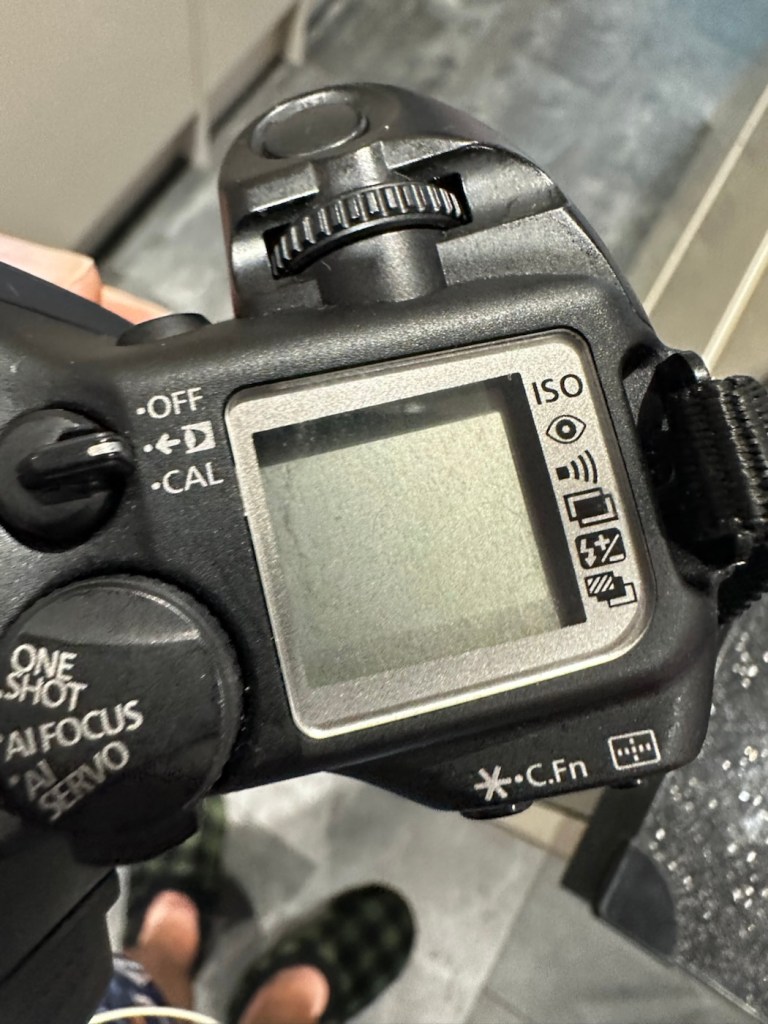
I’ve decided to collect all of the Canon “A”Series of cameras, and this adds to my current collection that consists of an A1 and an AE1. There were I believe, six cameras in this range and this current camera will be my fourth. Here’s a list of the “A” range of cameras below. I have highlighted with an asterisk all that I currently have at the date of this blog post being published:
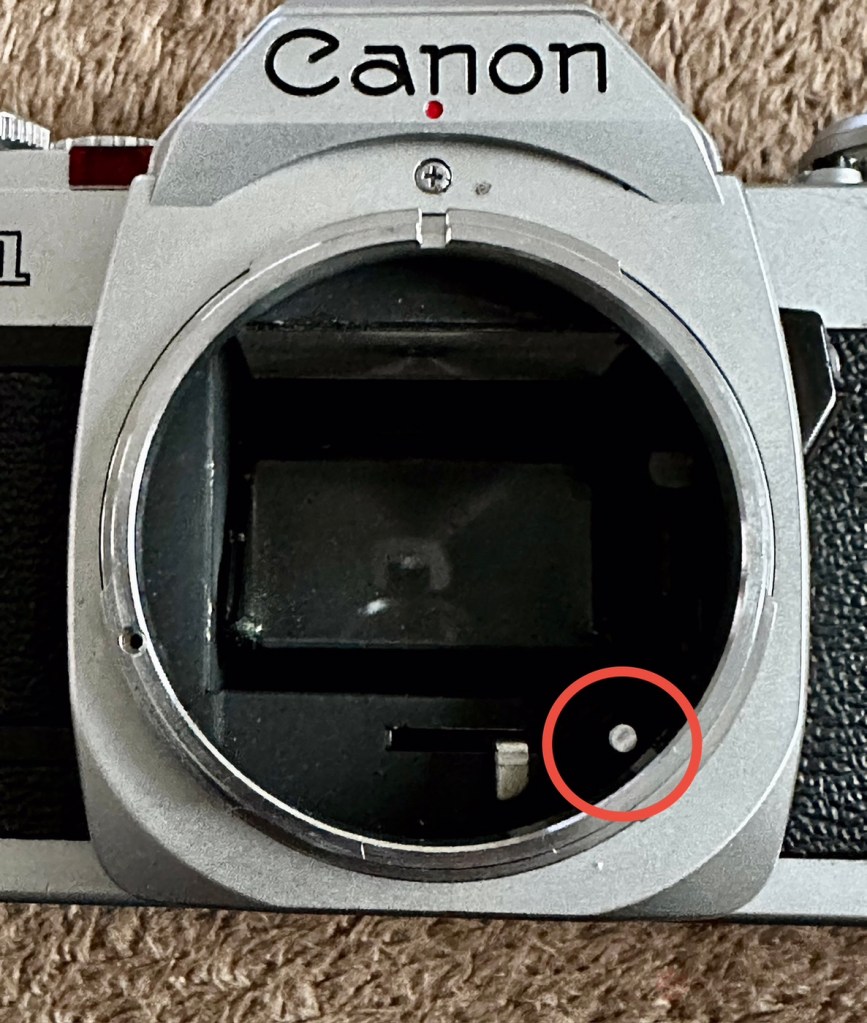
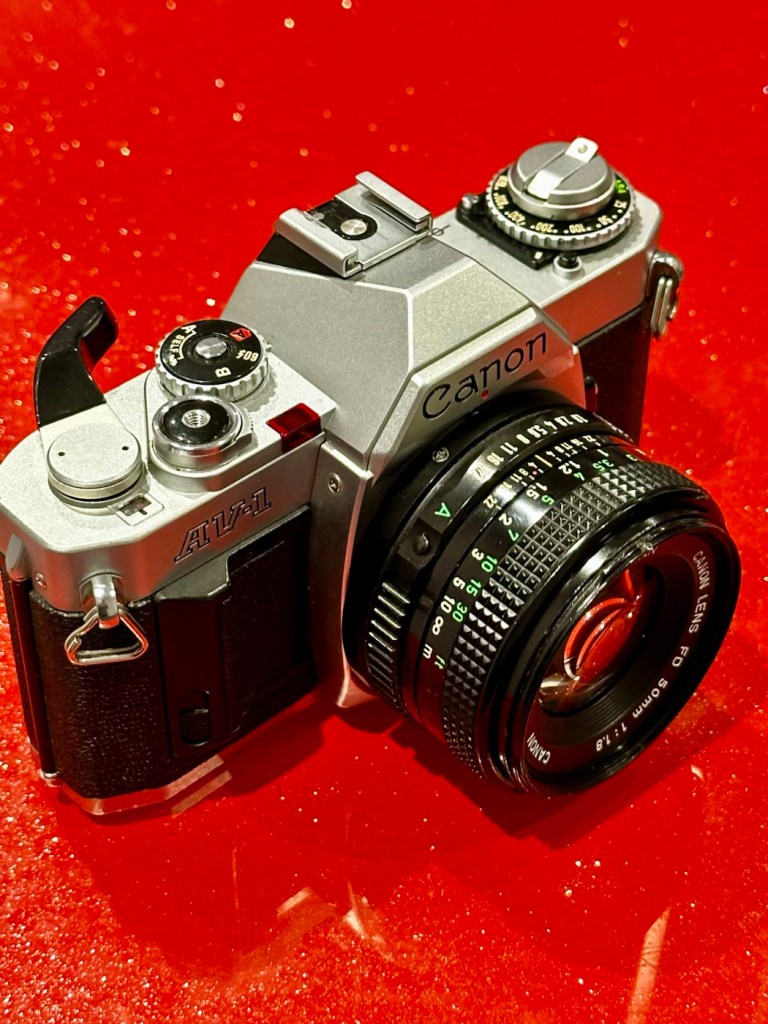
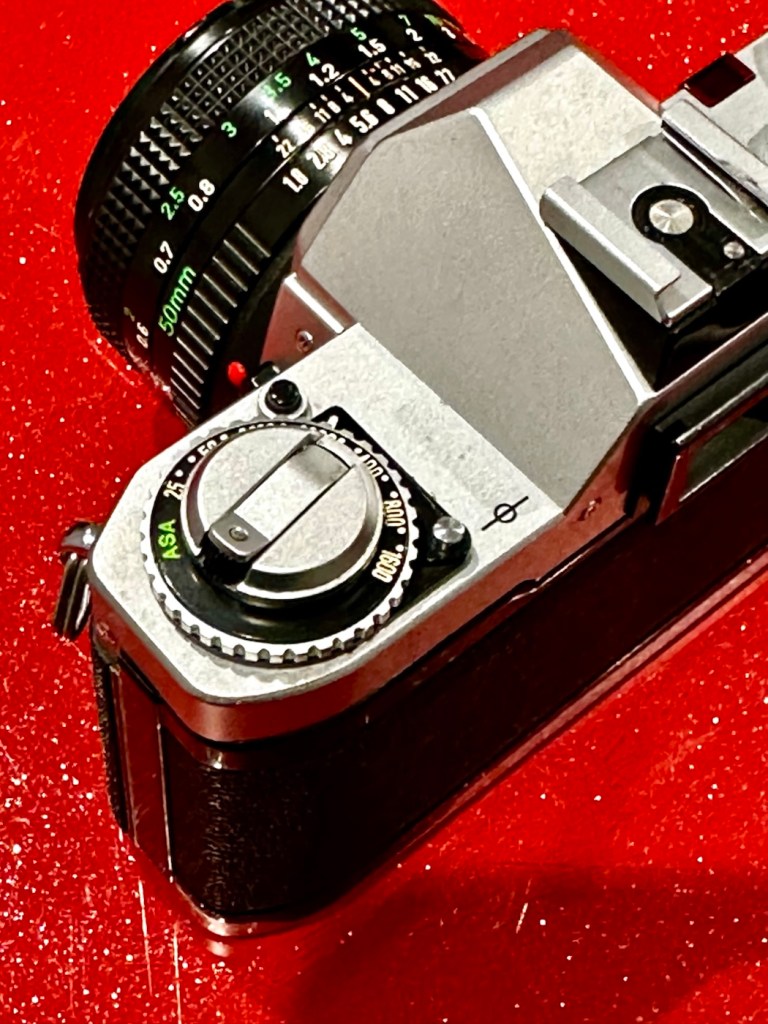
The original listing description does not match the issues that I have found. It originally stated that the light meter is responsive, it isn’t. It also stated that the shutter does not fire, it does when a battery is installed. The battery level indicator in the viewfinder does work when the check button on the camera is depressed. However when you focus the camera and half depress the exposure button to get a meter reading, the needle in the viewfinder doesn’t respond, this is the only real issue I can see, I guess the seller must have been looking at another camera as he wrote the listing for this camera.
Battery level reading in the viewfinder
All settings appear to be working as they should, the “B”setting allows me to scroll through the “f” stop settings to see the aperture leaves working as they should. All “f” stop settings appear to work on the auto setting.
Camera appears tidy but grubby
It’s a smart little camera, this a tidy example of this version with no dents, dinks and just some very fine scrapes on the base as you’d expect from a camera fast approaching 46 years old (1979-2025). It’s a bit dirty and needs a good clean inside and out, the light seals are in a good state and not requiring replacement or repair just yet, however the mirror bumper has deteriorated and this will need replacement.
Mirror bumper needs replacement
The shutter curtain is in a good and untouched condition.
I’m going to research issues with the exposure indication, and I will incorporate my findings within the repair section.
Repair:
I thought, perhaps the camera is suffering from lack of use? It certainly is probably some considerable time since this camera was last used. Firstly I’ll try exercising all the controls that affect the exposure reading, including the mode dial, film speed dial, aperture ring, etc. I’ll work them backwards and forwards a few times to see if this helps to clean the variable resistor tracks inside from any surface contamination. When the FD lens is attached you must be mindful that the “A” setting on the lens is not used and that the f stop settings are used in a manual manner, lens auto is not a function on this camera.
Auto shutter on cameraDo not use the “A” setting on the lens. It doesn’t work
To be honest, this did seem to work sort of. The needle has moved off the bottom a bit. The ASA setting was on 100, so I put it up to 1600 as it is quite a dark day and the sensitivity of the light sensor would be reflected better at this setting. It moved a bit but I wasn’t totally convinced that this indication in the viewfinder reflected the true light situation.
I set a higher ASA for testing
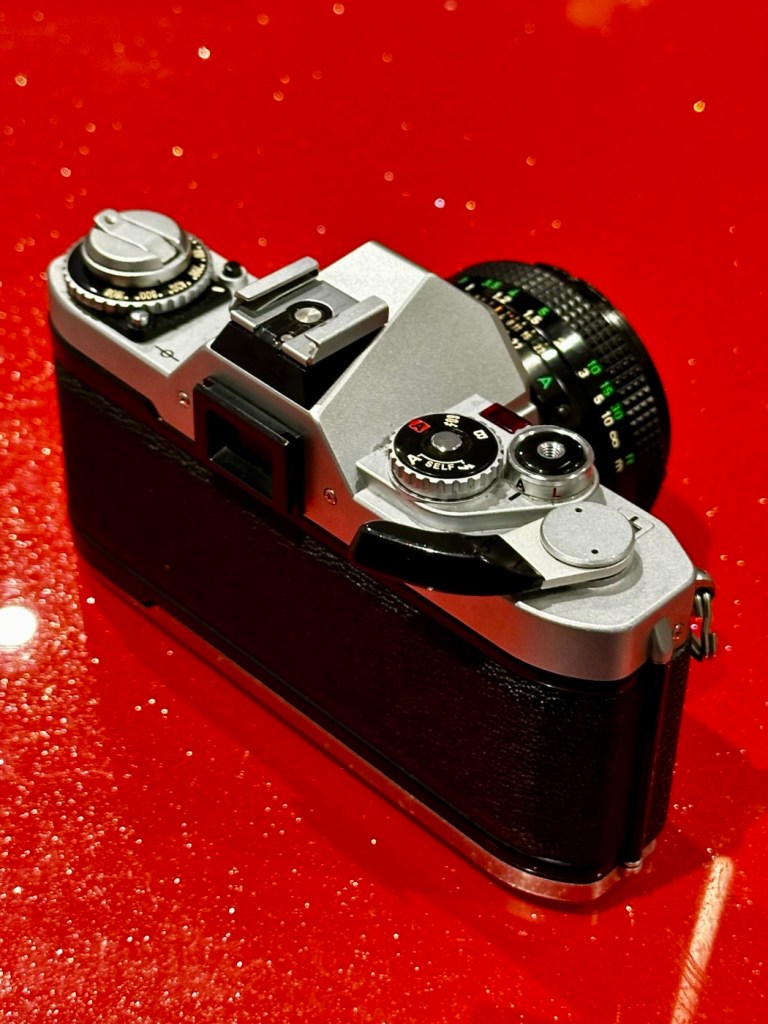
There’s also a small, silver push-button just inside the lens mount at about the 4-5 o’clock position. If you press this in and release it a few times for the same reason, as exercising the dials as I did above, it is just like exercising a body part and keeping it supple. Leave items like this, designed for high usage redundant for a while and they soon seize up. it has also been known to assist with getting the needle indication working after a long lay off.
That silver button, highlighted
(A little bit of trivia here – this button is normally used for the lens to inform the body of the lens’s maximum aperture. This information isn’t needed on the AV-1, but Canon included it anyway for some reason, and it does affect the exposure.)
And combining these actions, moving the settings dial and the button inside the lens mount seems to have revitalised the light meter and I’m now quite confident that it is working as intended. It was just lazy due to low use and needed a bit of non invasive intervention to get it working again. And non invasive intervention is always a good thing. So with the setting back to 200ASA I was able to show the meter working in this very short and basic video below.
A brief video showing the meter needle moving
I’m confident that the metering issue is now sorted so let’s get that new mirror damper installed.
A lot of dirt came off of the area where the replacement damper had to go, it had completely deteriorated and took quite a bit of cleaning.
New damper in place Dirt that came off, and replacement damper ready to go into place
Now in place it has silenced the mirror movement somewhat, and will provide some longevity as it moves into the twilight of its years. It will be good for many more rolls of film yet. Whilst in the lens area I have cleaned the mirror and prism, and given the area a good blow through and put the lens back in place to seal it all up. It is now clean internally. I have a couple of body caps on order that will assist with storage when the lens is removed.
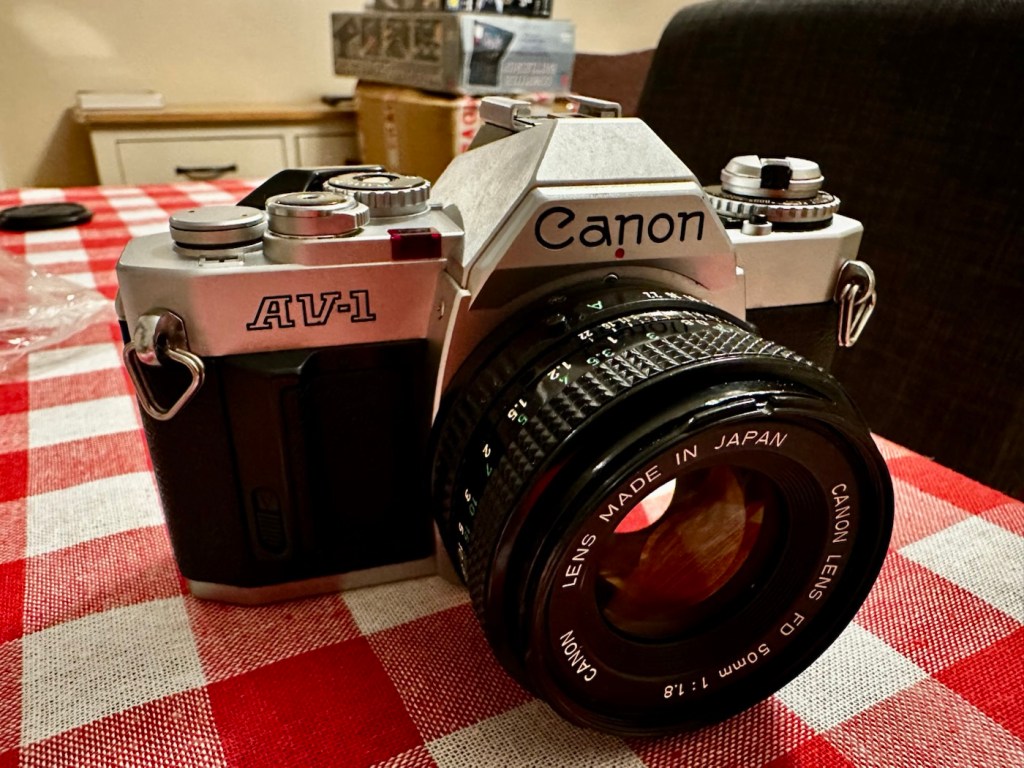
Just a final clean with some cockpit cleaner, and this camera has come up lovely, I’ve tested it on a Power winder “A” as well and it sounds just so good and “retro”. It’s perfect.
Result:
Well. I now have another lovely example of one of the Canon “A” range of cameras to add to my collection. This brings my current total to four out of the six available, two of which are still currently under repair. For less than £10:00GBP it is so easy to own a piece of photographic history. I have been lucky here that the work that had to be done was non intrusive, and to be quite honest was just basic everyday maintenance. The only real work of sorts was installing some mirror damper felt, of which I have plenty of stock. Cleaning was quite intensive but the overall result is amazing.
Front views after cleaning Looking amazing compared to what arrived
I will eventually run a roll of film through for a final quality check, however I have such a backlog it will take me a while. When I do however run that test roll I will post a link here:
Really pleased with this repair, and the fact that another lovely old camera has been saved from the scrap heap and been given a new lease of life.
Thanks as always for passing by. It is as always, very much appreciated.
A small piece regarding the Canon “A” series camera range. Development and technological advancement.
As i seem to be purchasing a number of the old “A” type camera bodies for repair, I have now decided to add the full range of “A” type cameras to my collection. I’m a tad biased as I have used Canon cameras right from the very start of my photographic education, in fact the first one i used was an A1 variant. I’ve put together the following piece to explain why these cameras were so popular, and to highlight their technological advancement along the way, the technology that influenced other manufacturers to up their game and give the consumer just what they wanted out of a camera, options and greater control.
My Canon A1
The Canon A-series of 35mm SLR cameras, produced from the mid-1970s through to the early 1980s, represents one of the most influential periods in Canon’s film-camera history. It began with the groundbreaking Canon AE-1 in 1976, a camera that reshaped the industry by integrating a microprocessor – the first mass-market SLR to do so. This innovation allowed Canon to simplify mechanical complexity and reduce manufacturing costs whilst offering features previously found only in higher-end professional bodies. The AE-1’s shutter-priority auto-exposure, bright viewfinder, and strong reliability made it both approachable for beginners and capable enough for enthusiasts, turning it into one of the best-selling SLRs of all time.
My AE-1
Canon quickly expanded the lineup to address different types of photographers and to test new electronics-driven features. The AT-1 provided a more affordable, all-manual alternative, whilst the AV-1 (1979) offered aperture-priority automation, catering to photographers who preferred creative control over depth of field. The flagship A-1 (1978) pushed the boundaries even further – it became the world’s first SLR to offer full programmed auto-exposure, alongside shutter priority, aperture priority, and manual modes. This versatility foreshadowed the automation and electronic sophistication that would dominate future camera generations.
My AV-1
In the early 1980s, Canon introduced the AE-1 Program, refining the original AE-1 with a more advanced program mode and improved ergonomics. The final notable entry, the AL-1, included an innovative Focus Assist system that used contrast-detection indicators to help users achieve sharp focus – an early technological step toward the autofocus systems that would soon reshape the industry.
Collectively, the Canon A-series brought electronic control, affordability, and ease of use into the mainstream, playing a key role in shifting photography toward the automated, electronically driven era. Decades later, these cameras remain admired for their durability, classic design, and the satisfying, hands-on shooting experience they continue to provide.
At the time of writing, i have in my possession three of the six variants that were produced, and presently I am scouring the sales platforms to acquire suitable candidates for the remaining parts of this collection, to work on. I will update via this site as and when i have another one of this series to feature in a post. My current collection consists of the cameras below marked with an asterisk:
My current cameras in the “A” range marked with an asterisk
I would like to obtain a special mount for this series of cameras so i can display them as a collective sample of this wonderful range. They will all of course, all be fully usable, not museum pieces.
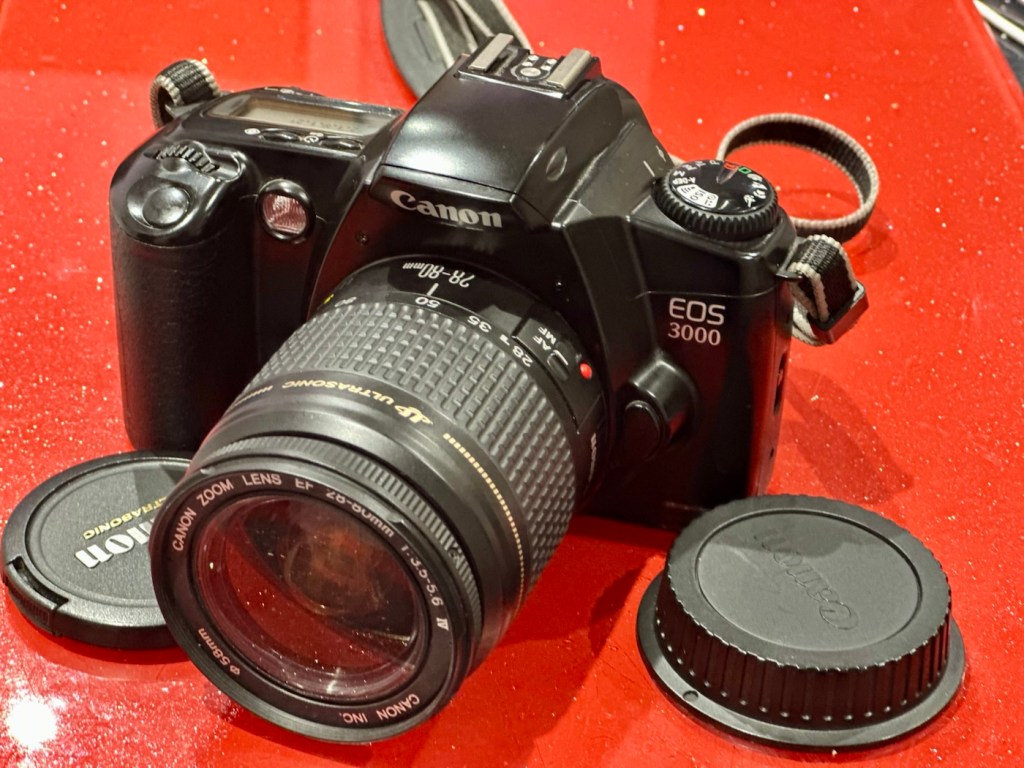
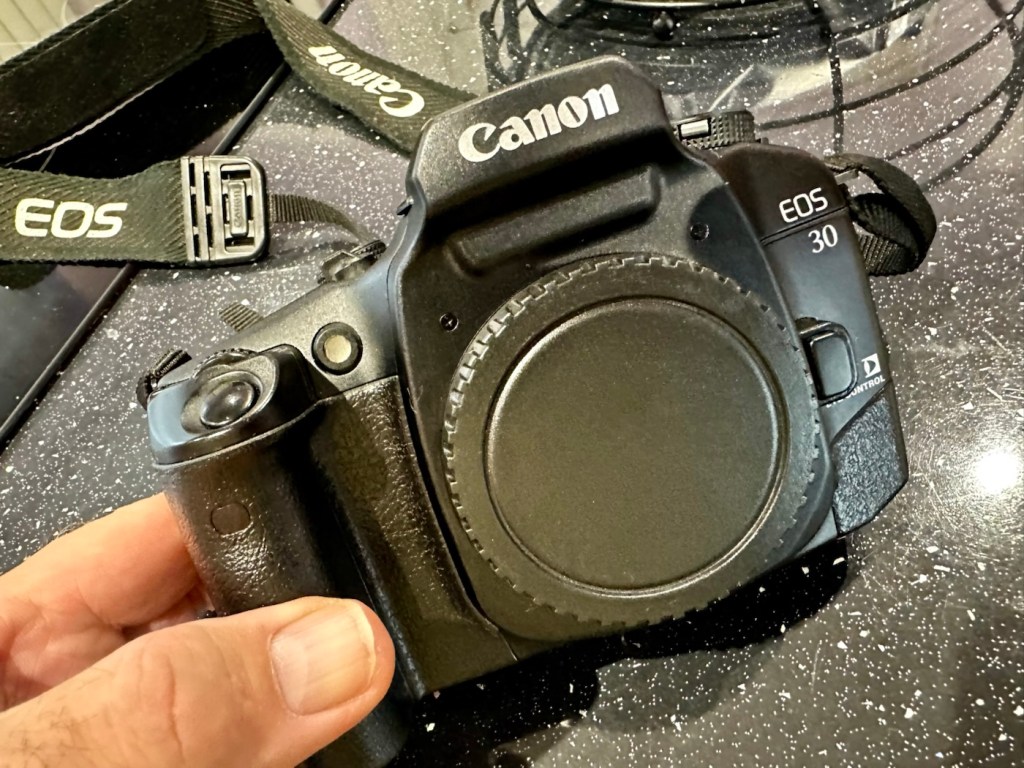
Here I have another basic, entry level camera made by Canon. Produced around 1999? this camera is probably around 26 years old. These cameras don’t have the traditional identification number printed within the film spool holder that the older cameras had, hence the precise manufacturing date is difficult to confirm.
Canon EOS 3000
This is a camera passed onto me by a good friend and professional photographer, Jon, as can be seen in this post: Cameras…i need more!
Here’s a little information about this camera:
The EOS 3000 is an autofocus SLR for 35mm film introduced by Canon in 1999. It was sold as the EOS 88 in Asia. (It was not sold in the US.) The pentamirror viewfinder and manually-activated popup flash helped keep this a lower-cost model; but a full range of autoexposure modes were included, including off-the-film flash exposure setting. Film transport is motorized and the camera requires two 3-volt CR123 lithium batteries to operate.
A compact, lightweight, low-priced SLR camera. Successor to the EOS5000, but with greatly expanded basic functions. The camera incorporates the Mode Dial and most other basic features of the EOS Kiss/EOS REBEL XS/EOS500 and includes six-zone evaluative metering linked to three focusing points. In addition, the flash is linked to the measurement point so that during shooting the flash out-put level is constantly adjusted for optimum exposure control. For reasons of cost, the flash unit is manual pop-up/retractable head type. The EOS3000 is compatible with system accessories for the Kiss and New Kiss. The high-quality design has a feel of genuine elegance.
Canon/ Camera-wiki.org
This camera was pitched at a low cost to attract people into photography, and to encourage those who were just hobbyists to upgrade to something more than the traditional point and shoots/disposables available at the time.
There is not a lot wrong with this camera as far as I can see, let’s have a look and do some tests.
Assessment:
It has a grip that’s starting to develop the sticky issue so that will need cleaning. The mirror and prism are dusty and will need a cleaning.
Sticky grip and dusty internals
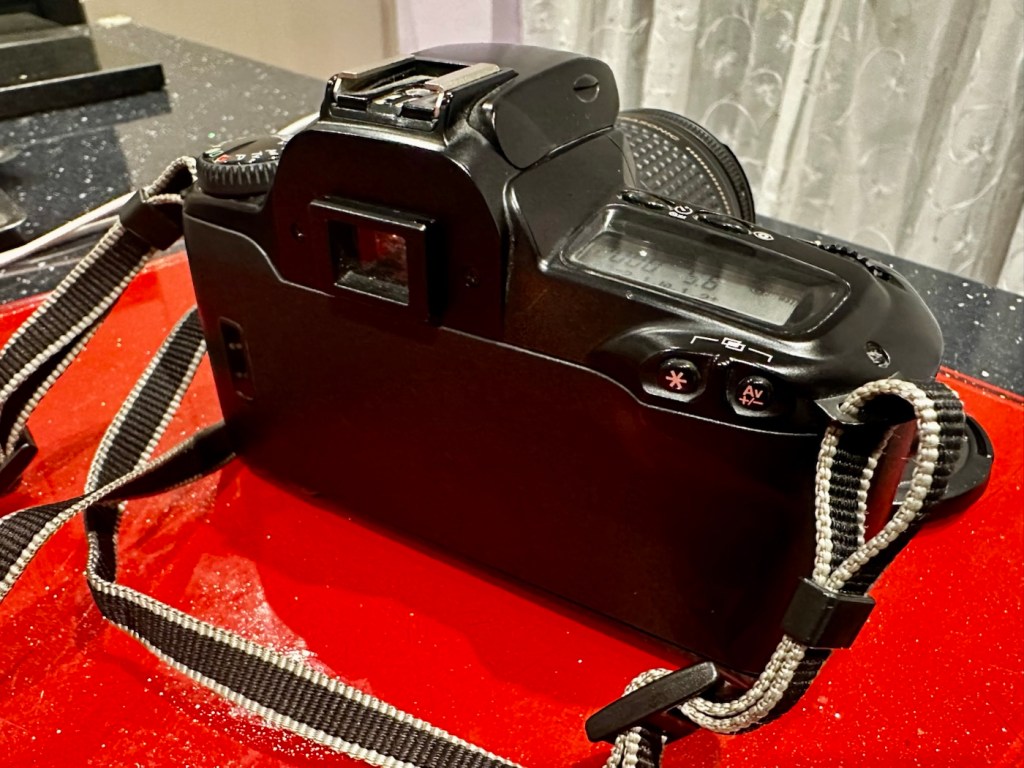
Overall the condition is very good, again this was a training camera, and seems to have had a quite low usage, as there is no scratches or marks. And only one dink as such. That dink happens to be the right hand strap holder that has been bent down to a point where the rear case does not open completely, it restricts its full movement.
Strap holder bent, restricting door opening
Door doesn’t open fully
Top and bottom of camera look fine, no bleed on the LCD screen that is always a good sign
No screen bleed Bottom clean
Battery chamber is clean and there is no contamination. This camera takes two 3v Lithium CR123A batteries. Let’s put two in to see if we have any life.
Clean chamberBatteries installed
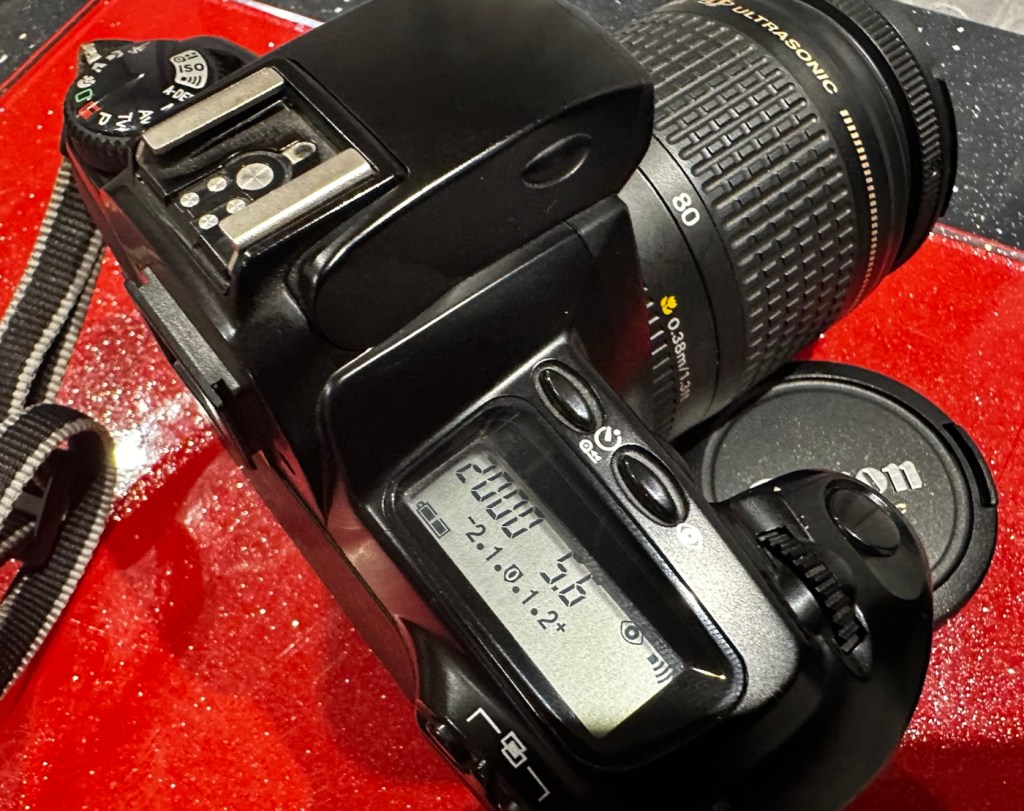
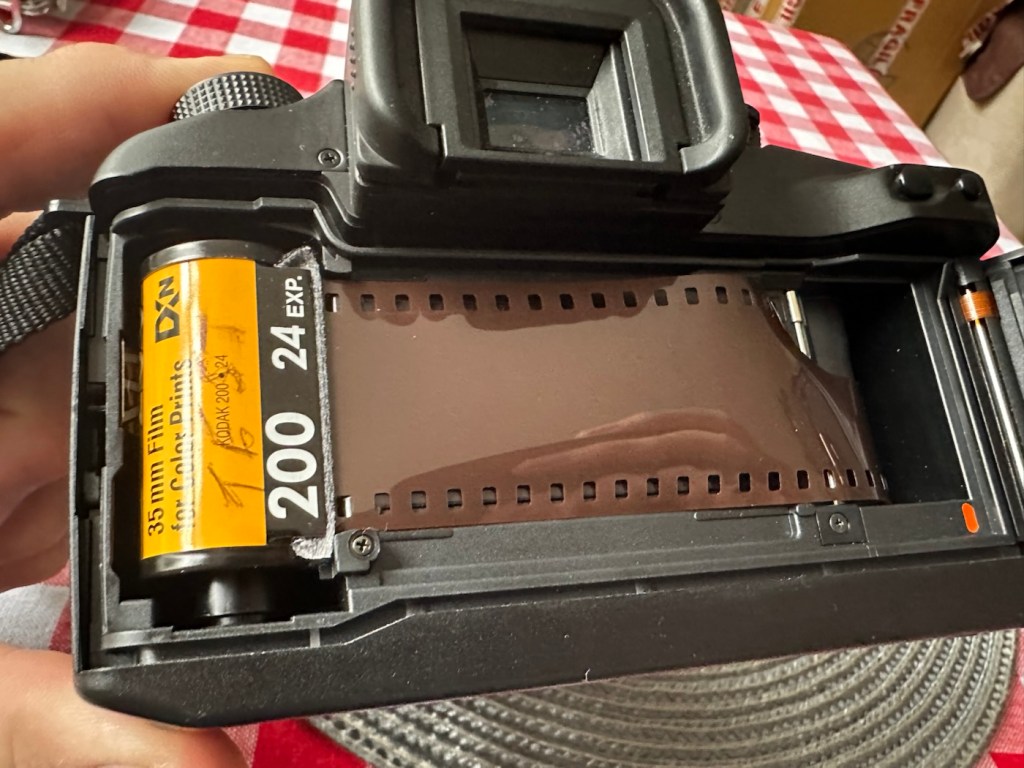
With the batteries installed we have a good display on the screen with no pixelation and it’s nice and clear. I install a roll of test film to see what happens. This camera winds the whole film onto the take up spool and winds back one exposure at a time. The take up when the door is closed works perfectly.
All lights up fineFilm ready to load24 exposures loaded on to the take up spool
I then operate the shutter, to fire off the 14 exposures, all viewfinder indicators are good, with my 28-90 EF lens attached it focuses well and fires well. When the last exposure has been taken the film rewinds as expected with no issues. In reality the camera is working very well with no internal issues.
Repair:
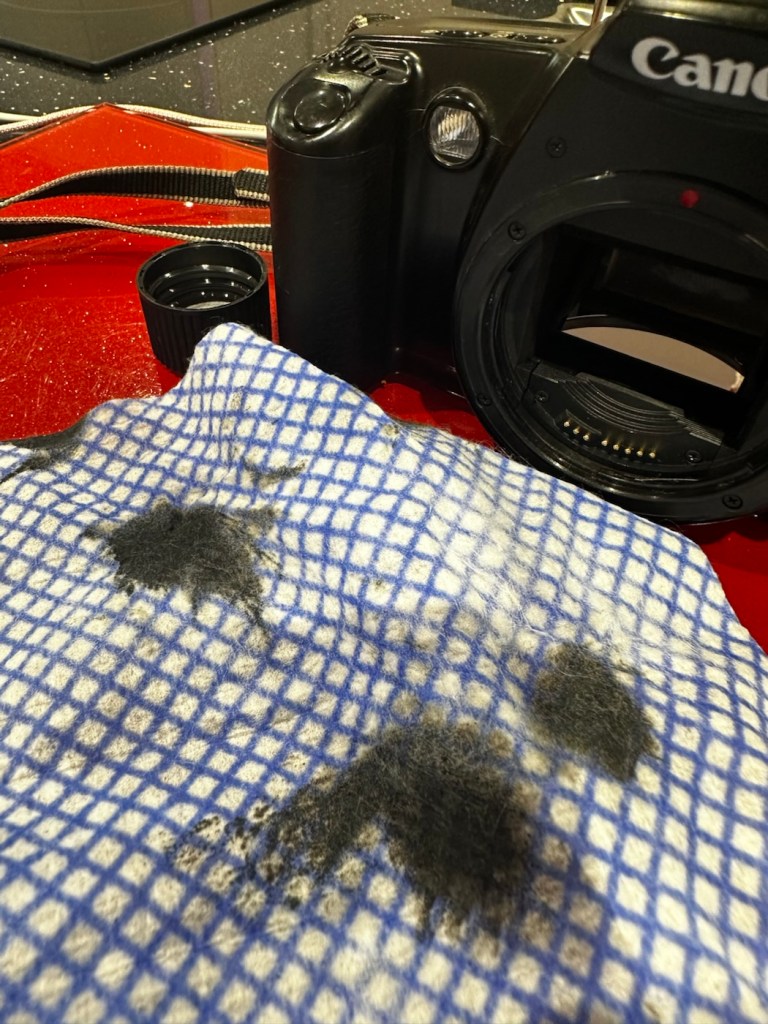
First the dirty stuff. Let’s get that goo off of the sticky grip. I use my IPA and lint free cloth method that I posted about in a previous post here: Sticky, Rubber camera grips. This one is actually worse than I thought and has taken four applications to remove the deterioration on the grip. It feels a lot more pleasant though now that it is done.
The dirt from this grip can be seen on the cloth. Each black blob is one application
The issue with the strap lug restricting the door movement. Quite simply, a gentle movement with a pair of pliers was all that was required. Gently does it as these parts are brittle and easily broken. Don’t over do it, give up when it looks right.
A little gentle coaxing was all that was required
I’ve checked the film pressure pad and this is fine, there are no sharp ridges and the light seals are good. I don’t expect them to be bad as in theory they are not that old, they are in a good healthy condition.
I have cleaned the prism and the mirror with a swab and they are now fine. Using a B setting I have opened the mirror and curtain and used some compressed air to clean throughout. A brush blower was used with the curtain closed to clean around the film spool area and back plate. A quick final blow of the mirror and the aperture is then sealed with a cap to insure no further dirt and dust gets into the internal parts of the camera.
The final action is to use some cockpit polish to finish off the exterior of the camera.
Result:
I’ve cleaned the exterior and used some ceramic cockpit polish to finish it off, I must admit it’s looking very good.
Cleaned up lovely
Looking just gorgeous
Here I have yet another nice little camera packed with features that will make a great camera for someone to learn the basics of traditional photography with. However, it’s remaining in my collection for the while.
It’s yet another camera that I need to test, another one that needs to have a film put through it for its final test, however I am 100% confident of it’s capabilities and the fact that it operates just fine and all its settings, buttons and controls are doing exactly what they should. When I do get to put a film through, I will link to it here.
Another successful restoration and return to use of another old camera that had been put to one side. Not that this one really required a lot of attention, just a bit of servicing and tlc.
Thanks for passing by. It’s always very much appreciated
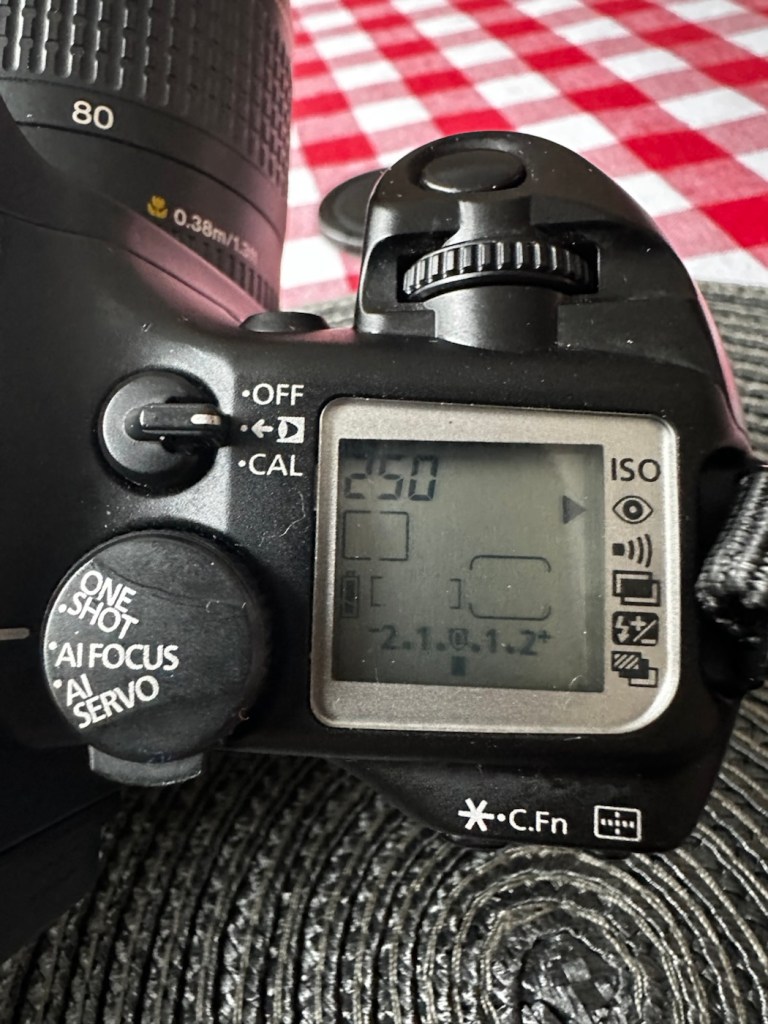
Cleaning, repair and maintenance of an old Canon EOS 30 35mm SLR
I’m calling this camera my EOS Dirty, it really is suffering a bad case of the sticky rubber syndrome that was widely experienced on cameras of this era, where the Vulcanised rubber used in its construction, had a falling out with its own internal polymers, and they then decided to part company. Creating a sticky mess. This camera is currently 25 years old, originally manufactured in the year 2000.
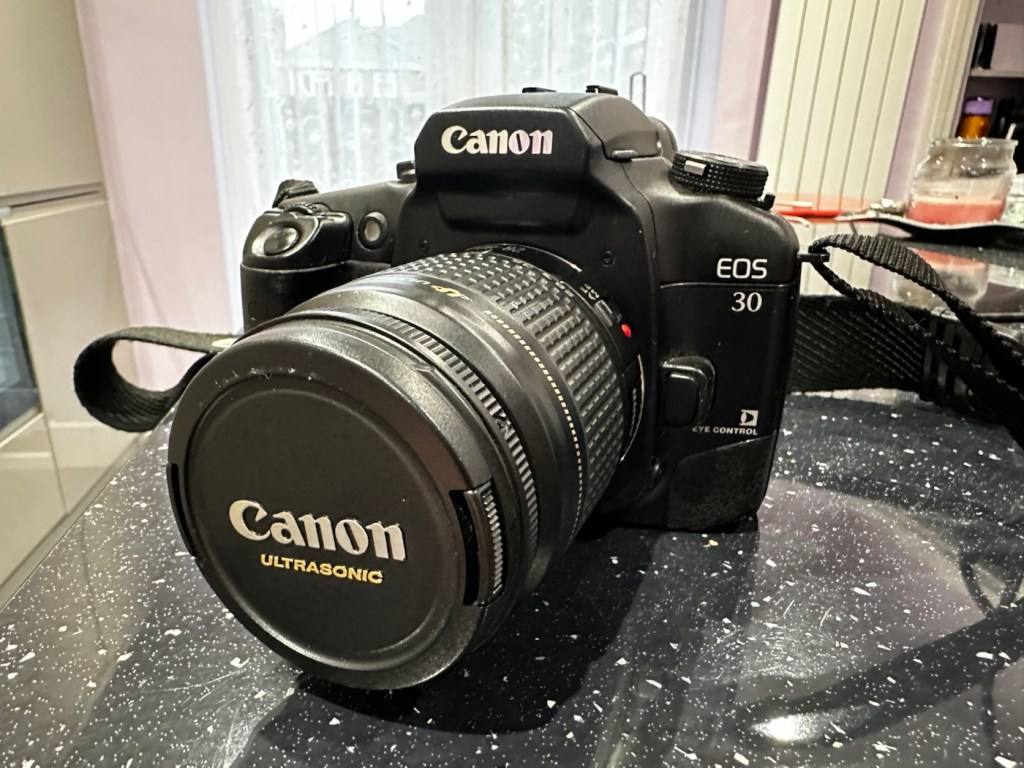
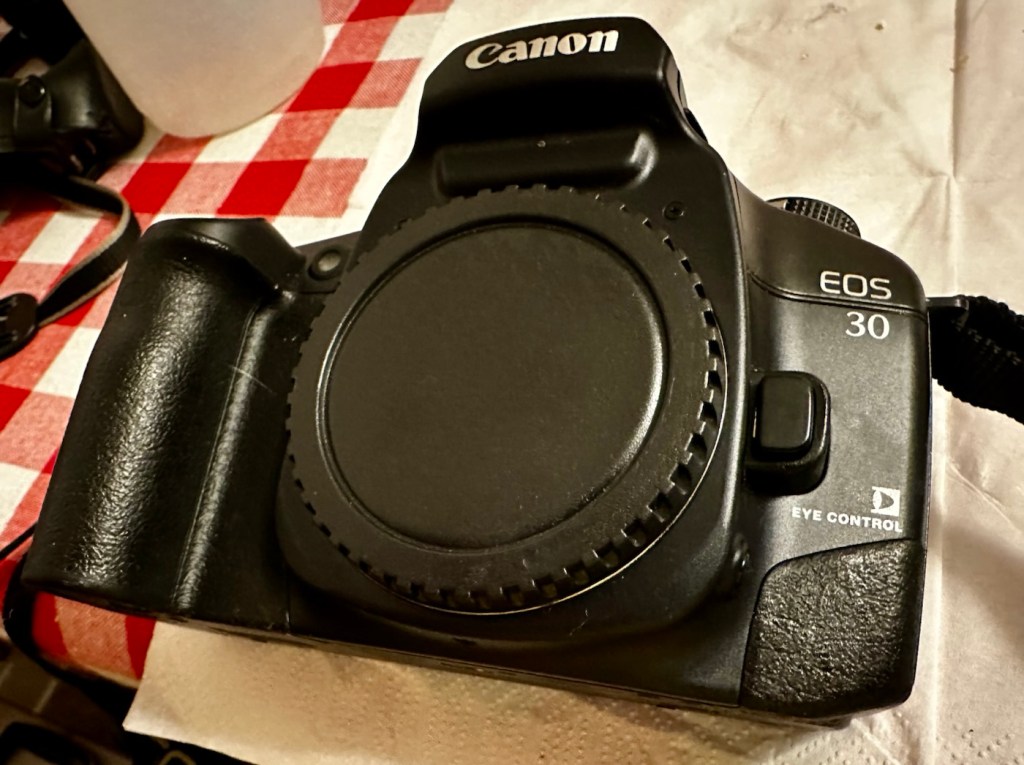
A lovely lump of a camera
My hand, simply after handling this camera for no more than a minute.
That said, it’s a lovely camera with a lot of features, this was pretty much one of the last 35mm cameras that Canon produced, and they threw a lot of R&D into these units prior to producing its “D” Digital offering, hence it was packed with lots of pre “D” technology. It has “Eye” control, the Eye Control focusing feature makes selective focusing quicker for many. It uses IR to detect eye movements to determine focusing areas. Up to 5 eye presets can be stored for different users. I wonder if that still works?
This dirty sticky pup, needs some heavy cleaning
Here is some information, about this camera:
The EOS 30 (or Elan 7 / Elan 7e / EOS 7 / EOS 33 in different global markets) is a Canon autofocus 35mm SLR camera that uses the Canon EF lens mount. The camera was introduced in 2000.
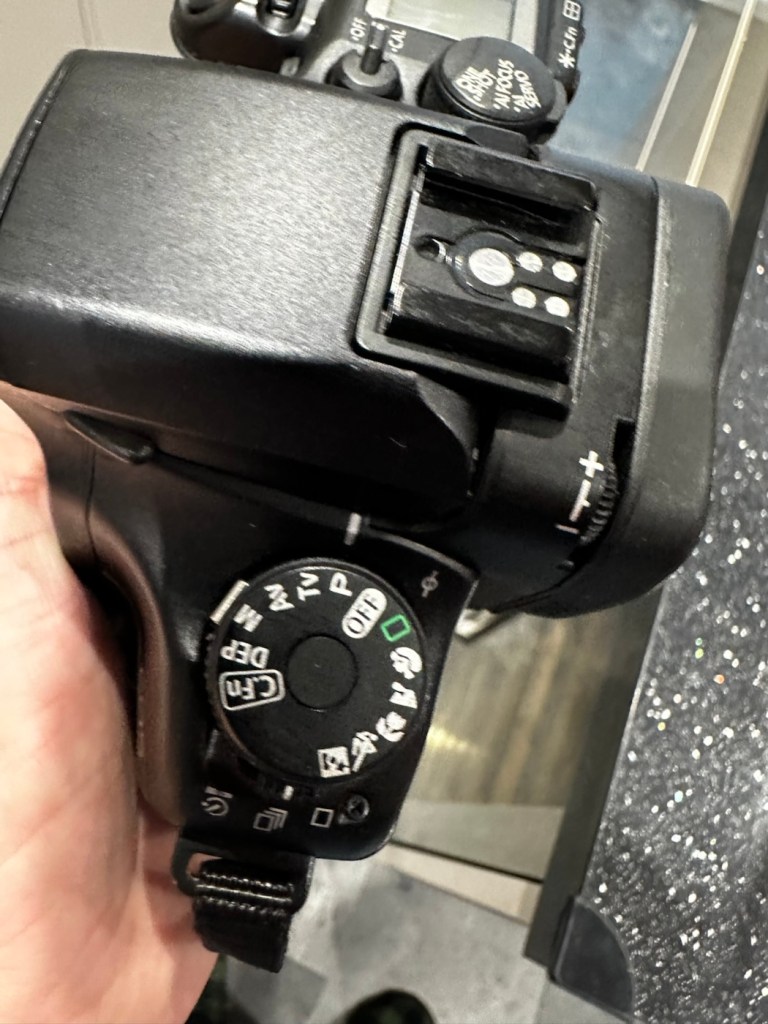
There are three main auto focusing modes. Automatic, manual selection focusing, and Eye Control (EOS 30, EOS Elan 7E). It was given the 7 name because it has 7 auto focus points in manual selection mode. The Eye Control focusing feature makes selective focusing quicker for many. It uses IR to detect eye movements to determine focusing areas. Up to 5 eye presets can be stored for different users. Some users with corrective lenses may experience problems using this feature. The shutter speed ranges from 30 sec. to 1/4000 sec. in 1/2-stop increments with bulb. X-sync at 1/125 sec.
Metering modes use a TTL max. aperture metering with a 35-zone silicon photocell. The included modes are evaluative, partial and center-weighted averaging metering. The measurement range is from 1 to 20 EV (at 20-degree with 50mm f/1.4 lens, at ISO 100). The ISO can be set automatically with DX-coded film at ISO 25 to 5000. Exposure compensation can be adjusted from +/-2 stops in 1/2-steps.
Exposure modes available include Program mode, shutter priority, aperture priority, Depth-of-field, Auto, scene modes with (Portrait, Landscape, Close-up, Sports, Night Scene), manual exposure and bulb mode. Flash exposure includes modes for E-TTL, A-TTL and TTL program flash modes. The motor drive is capable of up to 4 fps. The finder has dioptre adjustments built-in with settings from -2.5 to +0.5 dpt. Two CR123A batteries power the camera.
If equipped, the QD (Quartz Date) / Date back require the use of one CR2025 coin type battery. Imprint display modes include M/D/Y, D/M/Y, Y/M/D, D/H/M and off. The last date the unit can imprint is Dec. 31, 2019
Camera wiki.org
Assessment:
As stated in the sections above, the biggest problem with this camera is its stickiness, and to be honest that is not really a problem. I have cleaned many of these in the past and this one will be no different. Here’s a post I wrote a while back about sticky camera bodies: Sticky, Rubber camera grips
This really does feel like a lot of camera. You can see the digital “thought” that the development guys introduced into this camera in preparation for the arrival of its “Digital” brothers and sisters, I’m going to have to do a bit more reading up on its full operation and capabilities. This camera is in very good condition, no dinks, dents and very few scuffs, all doors are functional and when a battery is installed (a 2CR5 – 6v lithium) everything lights up, and appears to do what it should. I will check this thoroughly though later.
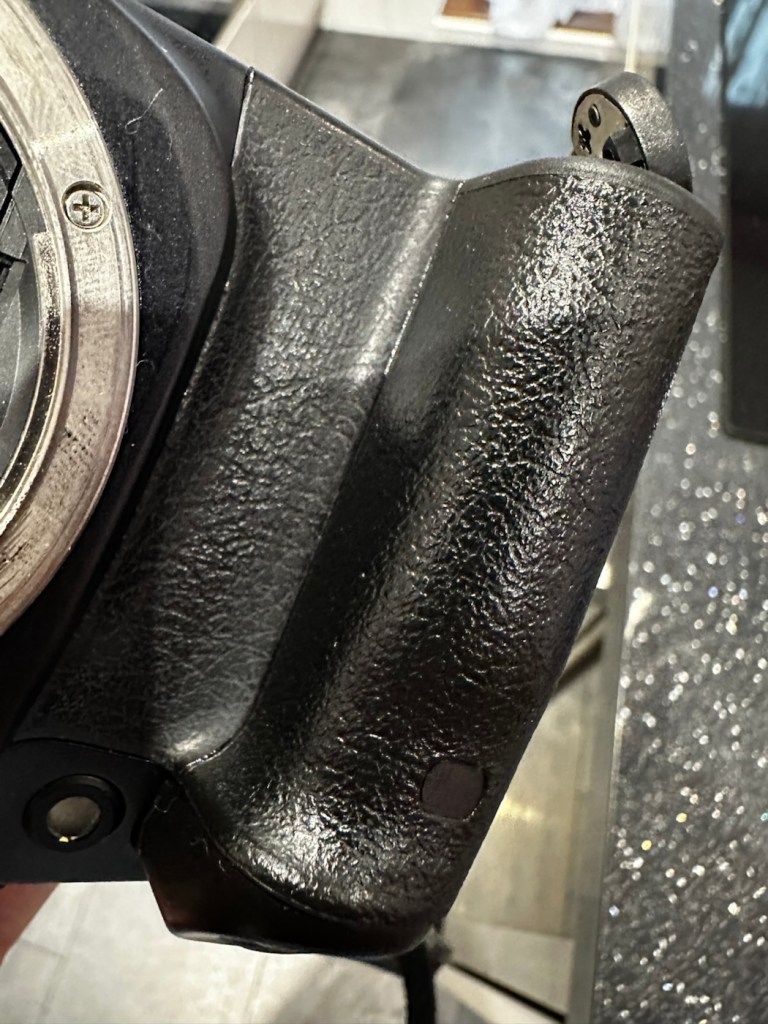
The horrendously sticky areasRear Mode dialScreen
The battery chamber is clear of any contamination, and looks nice, the mirror will need cleaning and the area within it will need a blow through, the shutter curtain seems to be working well at this stage. I will test it more after the clean.
Clean battery barrel Dusty mirror and curtain chamber
So. Let’s get on with the repair and maintenance.
Repair:
I’ve started the clean of the rubber and it is filthy. The amount of black that came off on the first clean has required me to get another cloth as it really is that bad. Another two applications and the cloth is a lot cleaner, it has removed a massive amount of goo and dirt and feels a lot better to the touch, and my hands are staying clean and that’s a good sign. I will give a final clean with the car cockpit polish that should finish it off nicely.
Looks beautiful after a proper clean
I’ve cleaned the mirror and prism above using a swab and the effect is instantaneous, there was a lot of dust here. Opening the curtain in a “B” setting I gave the whole interior a good blast with compressed air that has left the chamber as free of dust and contaminants as I can get it. With the curtain back down, a bulb blower and brush is all that was needed to complete the task. A lens mount cover is now in place to prevent anymore dirt getting in.
Transport tested
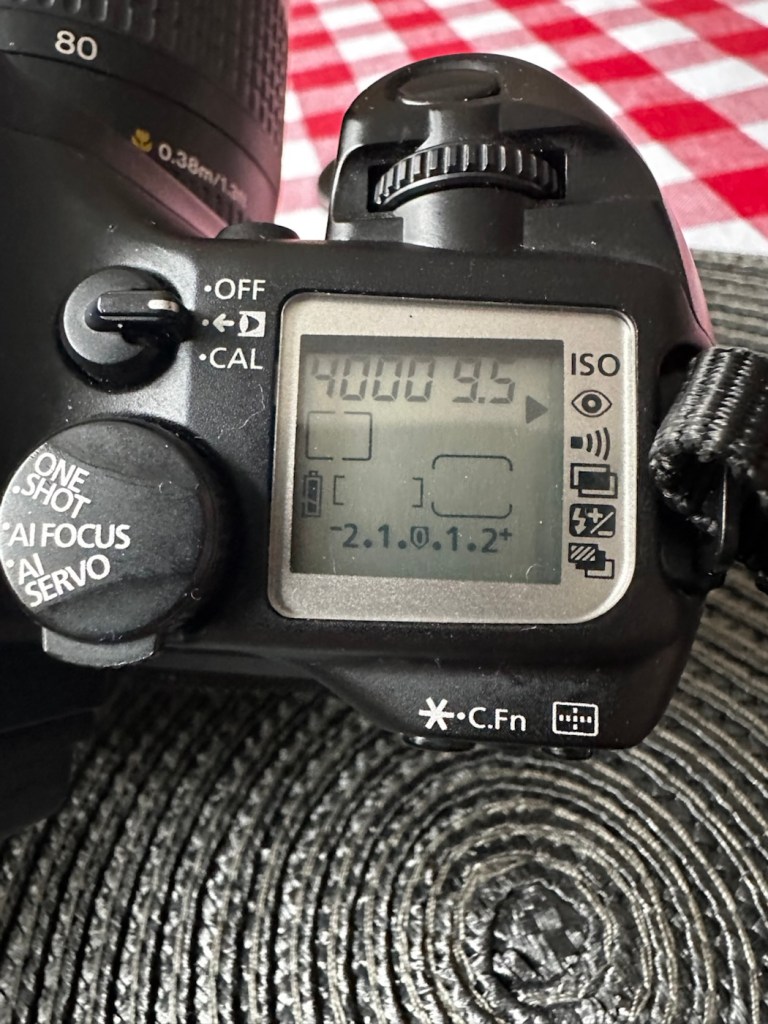
I’ve put in one of my old test films to check the camera’s function, and it’s transport & rewind, and I’m pleased to say this works just fine. At a shutter speed of 4000 I’ve never heard such a sweet sounding camera. This really feels like a lovely camera that I can’t wait to take out and run a film through.
All functions and options tested via the display screen
Going through the function screen, there are no bad pixels and all options are available. I have tested the eye control function and programmed my own profile into the camera, it does seem to be working, it might be a little hit and miss, I programmed it very quickly so maybe I just have to read up on it more, just to tweak its use as such.
All rear sub menus working, and buttons operable
All sub menus on the rear of the camera are operable and all buttons and dials are doing what they should. This camera is ready to go, and is in a perfect working order.
Result:
She’s a beauty
Canon EOS 30
This camera was probably discarded to one side when the sticky grip problem started to rear its ugly head. It really is a shame that this happens, it’s such a simple problem to eradicate. This is an absolutely superb camera and packed with technology that would eventually have gone on to be incorporated into the soon to appear professional digital offerings from Canon. For 35mm photography this was a perfect swan song, 35mm photography had peaked with this range of cameras and Canon had perfectly produced cameras that in effect had pushed this theme of photography to its highest level. It was the best of the rest at the time.
This camera deserves some respect, it feels superb in the hand, looks good, sounds terrific and performs exceptionally well. There will always be the haters out there, there always will be. But as you will have gathered, I don’t really report badly of any of my cameras as I truly love them all. They are superb items of modern and semi modern technology that have captured history. They just deserve to be preserved and protected and most of all enjoyed.
I will shortly be posting some pictures from this camera that can be found here:
Thank you for passing by, as always it is very much appreciated.
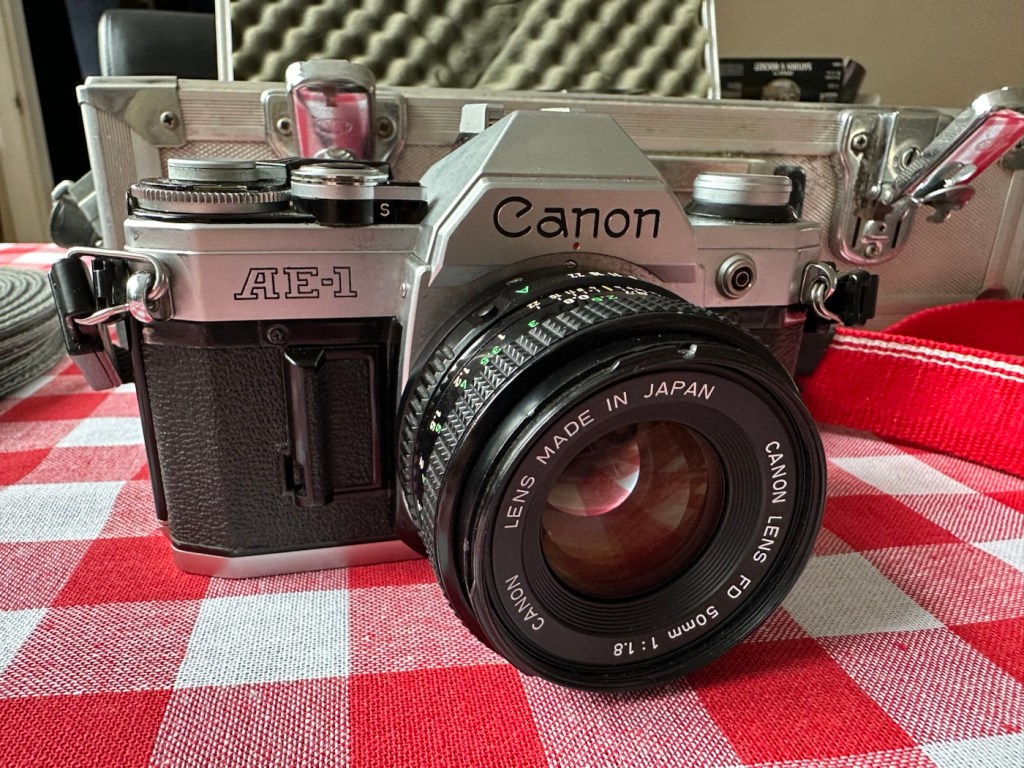
A sympathetic restoration of a 70s classic camera.
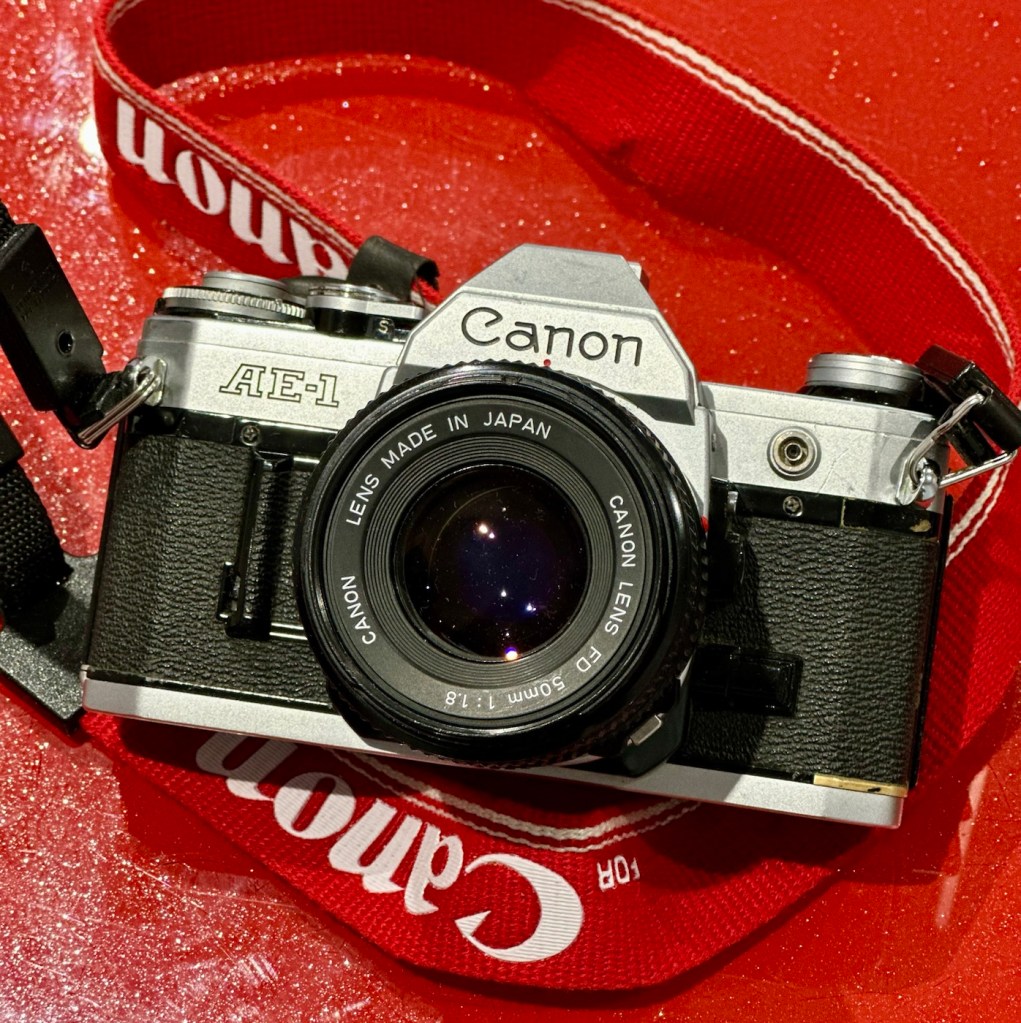
This is a Canon AE1 that was produced around May 1977. I know this because of the date code within the spool area where the film sits. Seeing these units were produced between 1976 – 1984 this particular unit is quite an early one. It is currently 48 years old and looking very good.
Canon AE-1
This camera is part of a batch of cameras recently received from a good friend of mine Jon, who has been in the photography business for more years than he cares to remember… it’s a big number and that’s all I’m saying. I did discuss his very kind donation here: Cameras…i need more!
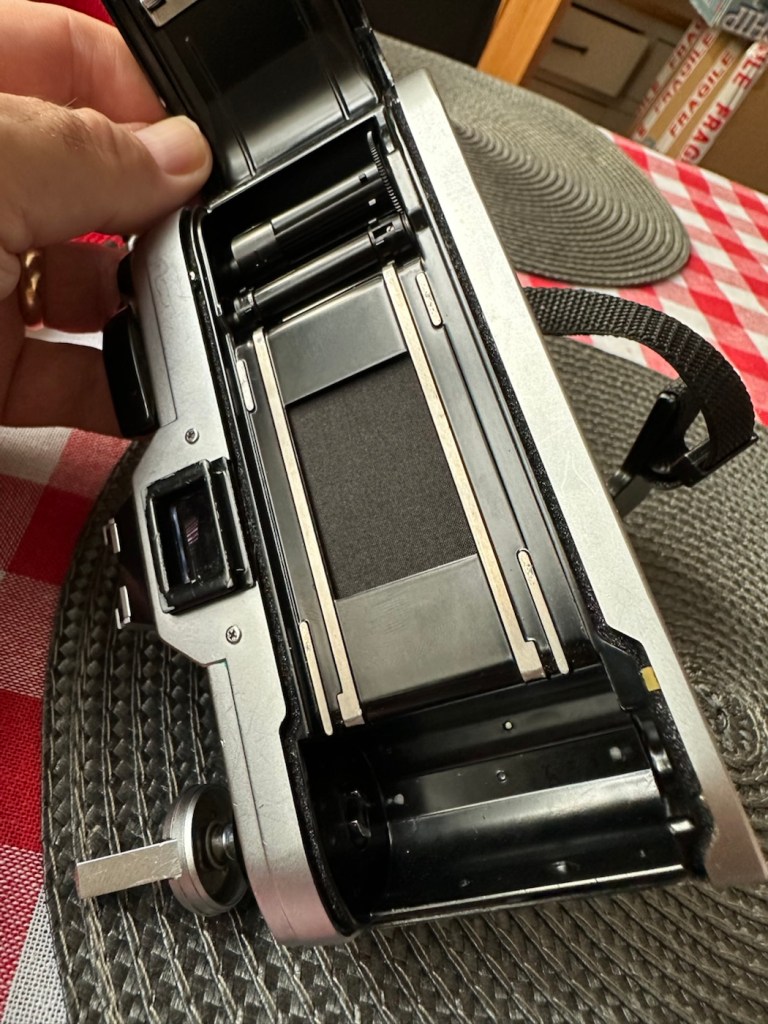
How did you date this camera?
Surprisingly quite easy. There is a number on most Canon cameras externally, and contrary to belief this is not the ID number, the id number we require is inside the camera, printed in the film spool bay in a very dark ink. You have to position it in the light to view it properly.
ID number in film barrelThe ID number
The number can consist of 4 or more digits. In my case the number is R519. If you go to this site by a guy called Bob Atkinson he has a chart here that explains how to source the date of your Canon Camera or lens: Bob Atkins Photography- Date codes
So using Bobs code the letter “R” refers to the year of manufacture and in this case represents 1977 or 2003 (the dates were recycled when they reached the end of the alphabet) seeing this camera’s production run was between 1976 – 1984, “R” in this case represents 1977. The next two digits represent the month of manufacture, and occasionally in months 1-9 the preceding zero was omitted. In my case considering the number 51 does not represent a Month, the zero was omitted in my case therefore making the month of manufacture “05” hence month 5 – May. So this unit was more than likely produced in May 1977. Occasionally there would be a final letter such as an “F” that would represent the factory it was made in. “F “ would have been the factory in Fukushima. See, that’s how I dated this unit. Check Bob’s site out and date your Canon equipment.
Anyway, here’s a little history about this superb little camera:
The Canon AE-1 is a 35 mm single-lens reflex (SLR) film camera for use with interchangeable lenses, manufactured by Canon Camera K. K. (today Canon Incorporated) in Japan from April 1976 to 1984. It uses an electromagnetically controlled, horizontal cloth focal plane shutter, with a speed range of 2 to 1/1000 second plus Bulb and flashX-sync of 1/60 second. The camera body is 87 mm tall, 141 mm wide, and 48 mm deep; it weighs 590 g. Most are silver, with black grip and chrome trim, but some are black with chrome trim.
Its name refers to the fact that it is an electronic camera using aperture control for automatic exposure. The AE-1 is the first SLR containing a digital integrated circuit, which allowed Canon to integrate more functionality while making the camera smaller.Both the digitally-controlled automatic exposure and the small size helped to make the camera a success: backed by a major advertising campaign, the AE-1 sold over 5.7 million units, which made it an unprecedented success in the SLR market.
Wikipedia
So there is a lot of them about, but it’s rarer now to find one in a good condition. I think I have one that is in a good condition, has very slight signs of ageing (Patina) and shouldn’t take too much effort to get it working again.
Let’s have a closer look at my inherited camera.
Assessment:
It’s been in storage within a foam lined metal box for a few years and this appears to have assisted in maintaining its overall good quality. There are a few slight signs of wear that are present as you would expect with a camera that has been well used but cared for, but there are no major dinks or signs of bits being broken. It has been loved.
Curtain clean and smoothSilver worn, nice patinaJust a bit dusty Just needs a good clean
Looking at the shell all the buttons are doing what they should, it’s a bit dusty and grubby and looking through the viewfinder you can see a lot of dust in the view, but I believe this is just dust on the mirror, or at least I hope so.
The camera has attached to it a Canon power winder “A” and this does not work, it has serious corrosion that I suspect that has gone behind the contacts and will need dismantling, cleaning and rebuilding. I will cover this activity in a separate post, whilst this one covers the camera and is a separate activity.
The winder looks goodInside tells a different storyOld batteriesSerious corrosion
Anyway back to the camera. The wind lever seems to be locked, it can’t be cocked. The shutter doesn’t fire but there does seem to be movement in the exposure meter in the viewfinder but it seems erratic, not quite as it should be. I have a feeling and in fact I’m quite confident it is an electrical issue, as with the Canon A1, a bad power source would render the entire camera useless.
Repair:
With my suspicions about the electrical element on this camera the first thing I did was to do a battery check in the camera. This camera has one cell in it, mounted on the front face just to the right hand side of the lens in a small chamber. It is a 6v lithium battery. I suspect this one has been in place many years.
Battery check button
To check the battery power you look through the viewfinder at the light meter to the right of your field of view and depress the little black button on the top left of the viewfinder on top of the camera.
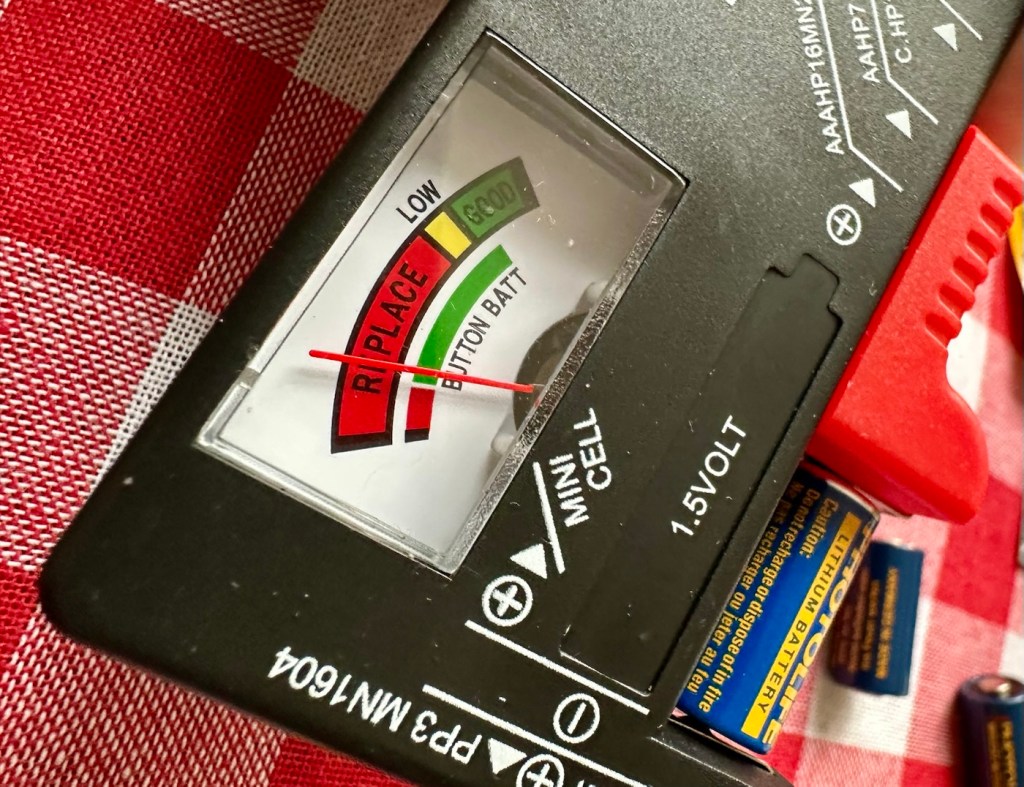
This. Battery is dead
As you can see above, when you push the little battery check button the needle on the exposure meter moves. It may settle, it may move about, but the battery should be indicating below the 5.6 level to prove it has life, this battery is indicating dead. Let’s confirm that on an external battery checker for confirmation.
Yep. It’s dead
And I think that confirms things for us that this old battery is dead. Fortunately I have plenty of replacements available so I just put a new one in to see what happens.
New battery
The new battery is in place and now you can see the indication has dipped well below 5.6 indicating a healthy battery supply. I push the shutter button and it fires perfectly. Power has been restored.
The lens on this camera is pretty much the stock issue FD 50mm. I have removed it and exposed it to high lighting levels to see if there are any imperfections and I’m pleased to say there are none. No Mould or fungus build up, I must admit my friend who passed this on to me has stored it perfectly. Apart from a little dust build up, I was able to use a lens cloth on both the lens and mirror and the issue was sorted in minutes, not that it was ever an issue really.
View through backAnd front
I’ve used a dummy film and the carriage works fine, the lens apertures all react smoothly, and the shutter speed’s respond as they should. There is no shutter scream or lag, and everything seems just right. After spending a good few hours going through the instruction manual and checking all its functions I am happy it is doing just what it should. It is very rare to find such a good condition of camera that requires very little maintenance. It’s a credit to the previous owner.
This is a sympathetic restoration. I’m leaving it looking as it is. I’m not fixing something that isn’t broken, and I will attend to it with lubrication and maintenance as and when it is needed. I will very soon run a roll of film through and see just what comes back as a result. I have a number of films here that are now 20 years out of date so there could be some interesting results.
Result:
A beautiful camera
Stunningly beautiful
The camera has cleaned up beautifully after a good deep clean and polish. I have a superb little example of a well loved and well used retro superstar of the late 70s. In perfect working order and ready once again to be used for what it was designed for. Taking great photographs.
As stated I’m going to run a film through and I will post the results on here whenever I get the time to do so. See the test results here: 20yr old Kodak Gold
My plan is to have this displayed in a case in my workroom alongside my Canon A1 when I have completed its repair. I took up photography in the period of time that these cameras were produced, and they hold great memories and sentimentality for me. They come from a time when cameras had style and innovation, before they all started to look the same, quality and style, it’s what’s missing today.
For someone like me that loves old cameras, I think these are superb and will always hold a place in my heart.
Thank you for passing by, it’s always very much appreciated.
It’s a colloquial term for a flat thin lens assembly that started to emerge from the 60s through to the 80’s, commonly seen in compact SLR cameras of the time. This then developed into a body cap lens, an extreme type of pancake lens that is designed to both protect the camera internals as a body cap normally would, yet still allow the user to take photos. These lenses are manual focus only and generally have no more than a couple of optical lens elements, no image correcting elements, a very-slow fixed aperture, an extremely thin focusing ring (if any at all), and a retractable lens element cover. Due to this compromise in design, body-cap lenses generally suffer from numerous image quality issues such as heavy vignetting and poor image sharpness.
Recently there has been a resurgence in this type of lens culminating in the one that seems extremely popular at this time, a cookie lens.
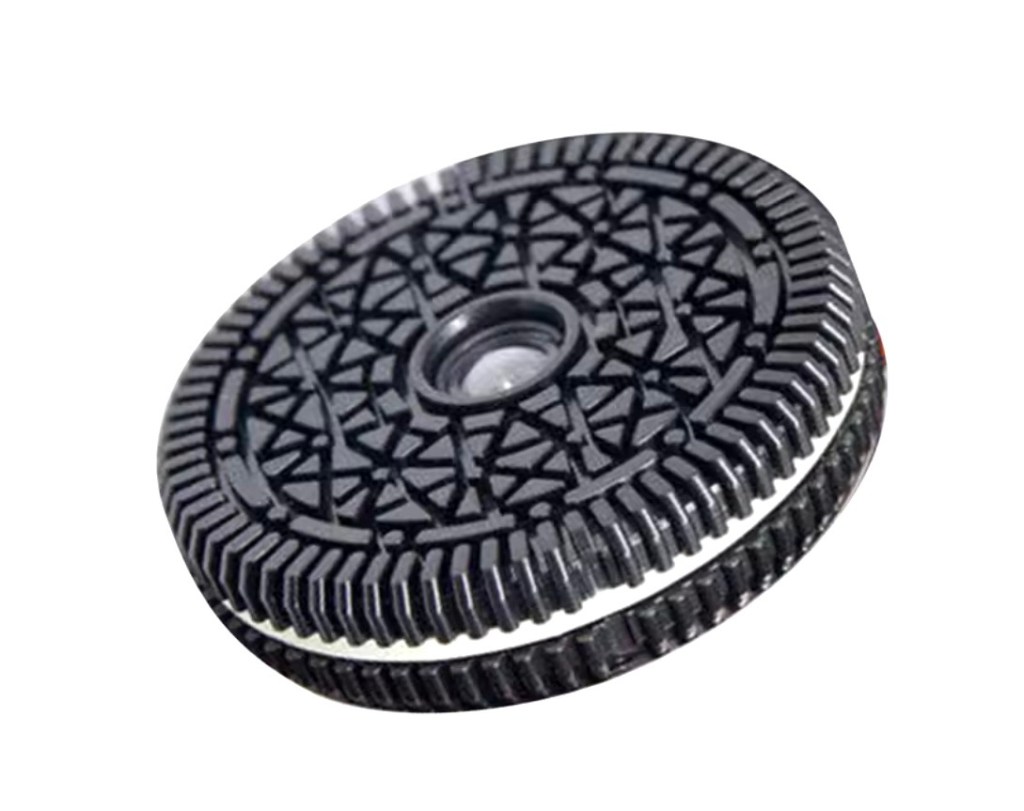
Cookie lens
It’s not hard to see why it is named so, it looks like a big Oreo cookie, it even looks as if it has the cream between the two biscuit pieces. These current ones are sold as being recycled from old disposable cameras. Original pancake lenses can cost many hundreds of pounds, however these ones are classed as disposable, and are priced at around £30 to £40GBP, being sold by a company called Retropia. But hold it! Don’t waste your money on that one, as they can be purchased for at least half that price from Ali Express of Temu, just make sure you shop around. By looking at the reviews £30 can still be a bit of a hefty outlay for what is basically a cheapo lens out of a disposable camera set in a cookie shaped piece of plastic.
One guys in depth review of the “Cookie” lens
These lenses have risen in popularity, as the new mirror less cameras have become more accessible. This lens allows these cameras to be used as a straight forward point and shoot camera, no focussing or metering. achieving that retro disposable camera look, but in much more modern equipment. It’s a fun item and for an outlay of around £13GBP, which is what I paid for mine, it’s not too big an outlay to do some experimenting with, and if it turns out to be a load of old bilge, then it’s no real loss. Reviews are mixed, but in general it seems people are having fun, and that’s what photography should be.
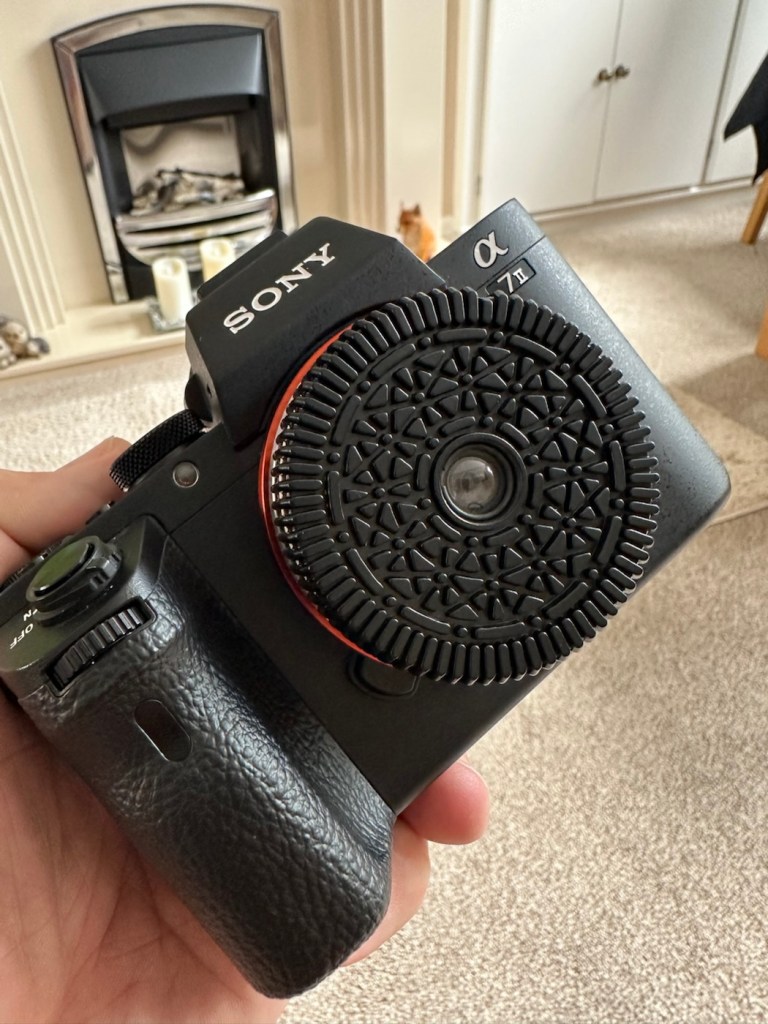
I’m waiting for mine to arrive, and when it does I shall post some photos below to see how I’ve got on with it. Oh, and I now have a suitable camera to use with this lens and that can be found here Sony A7II Mirrorless camera.
The lens has arrivedLens installed
It’s such a simple thing. It turns a complex camera into a quite basic point and shoot disposable, lomography type of camera. Perfect for street photography and just everyday randomness, yep kind of like you’d now find on your mobile phone. However this is more fun and you actually have a camera into your hand, Perfect.
The lens is 32mm, and the CCD in the camera is full 35mm so there is a kind of small vignette around the edges of each shot, but that just adds to the basic rawness of the lens. it’s a bit of fun.
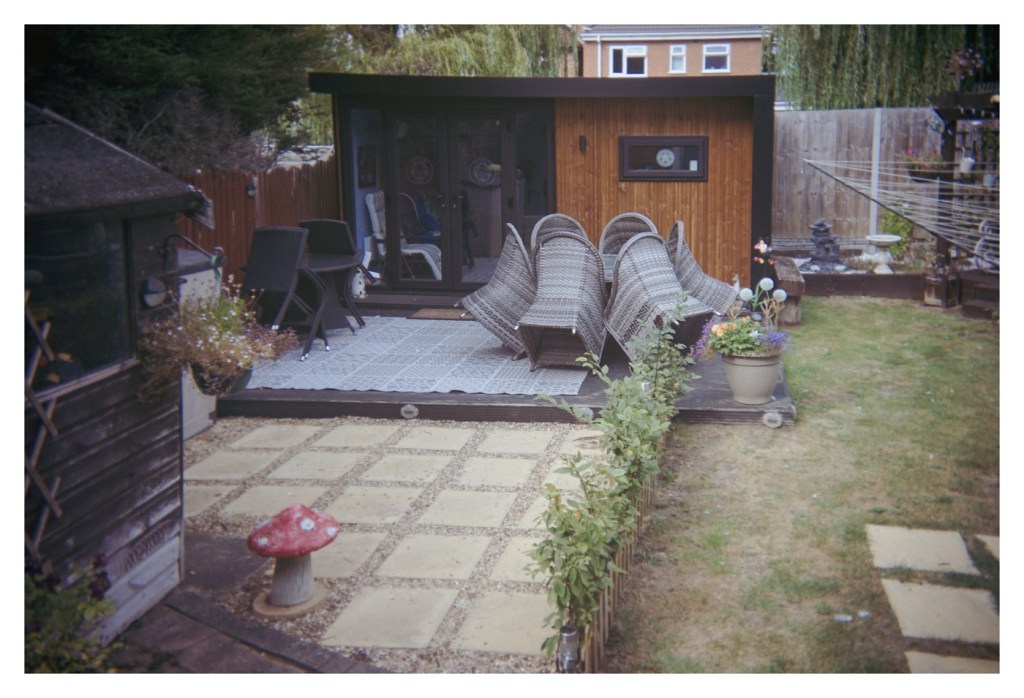
Angles in the living room
Garden pub
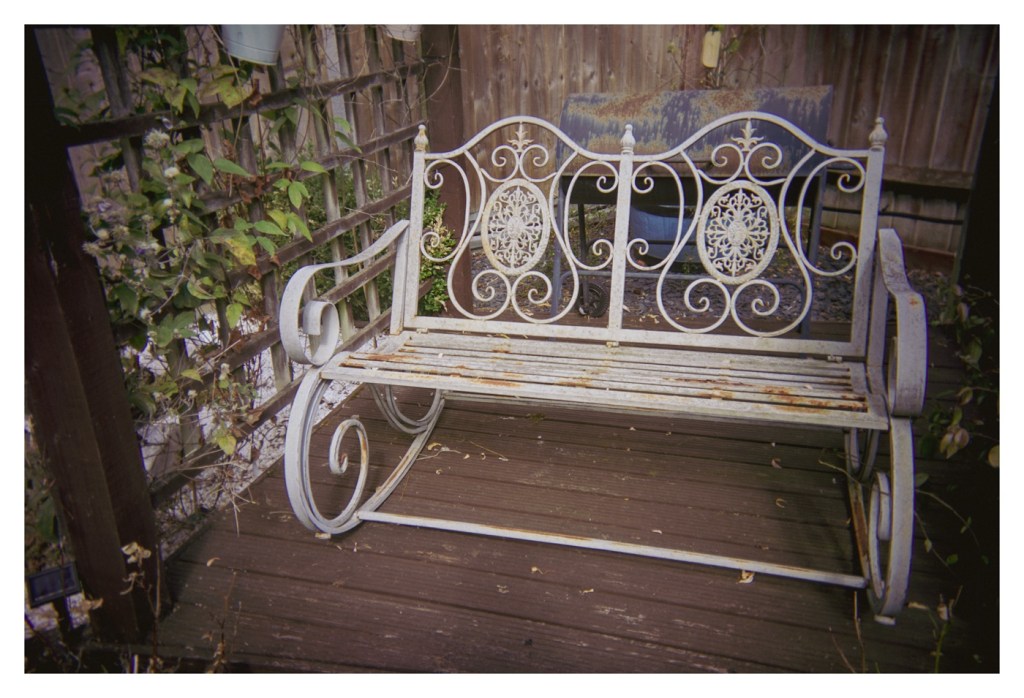
Rusty chair
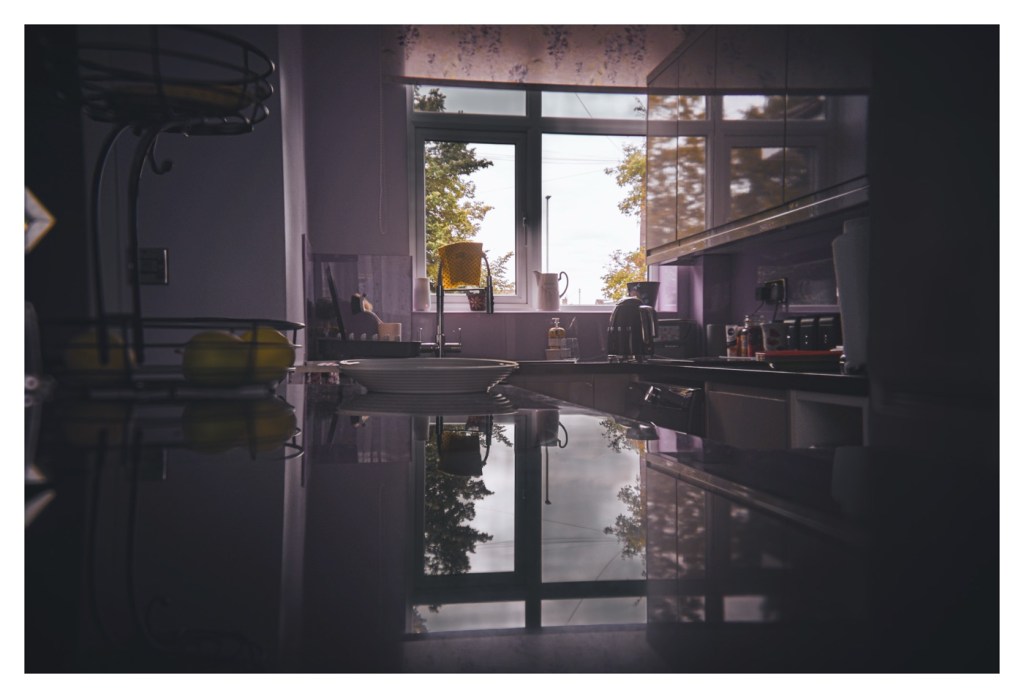
Across the kitchen early morning
Above are a small selection of some of the scenes around home, taken quite randomly and all I have done in the post process is added some vintage presets. The light has been so poor lately that to be honest this already added to the vintage effect. If we see any sun I suspect the results would be very similar to the hazy 70s effect that the disposables always managed to achieve. Don’t expect too much from these lenses, they are just fun to experiment with, and that’s just what photography should be. Fun.
This lot is being sold for PARTS / REPAIRS, it is currently NOT in a working condition
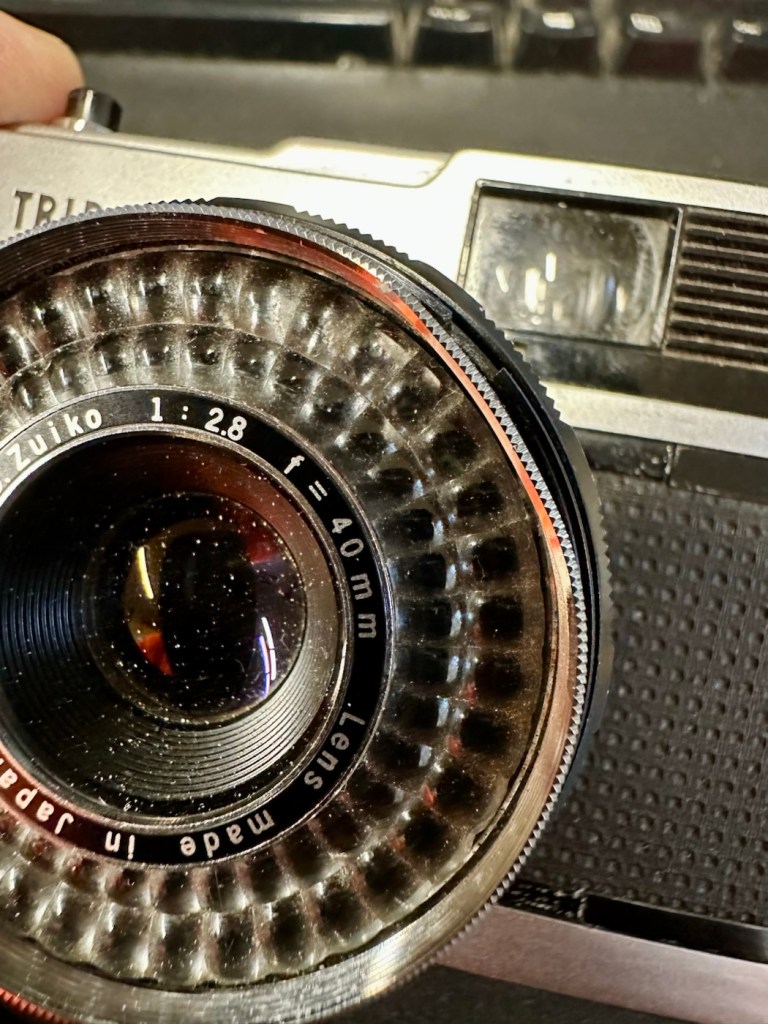
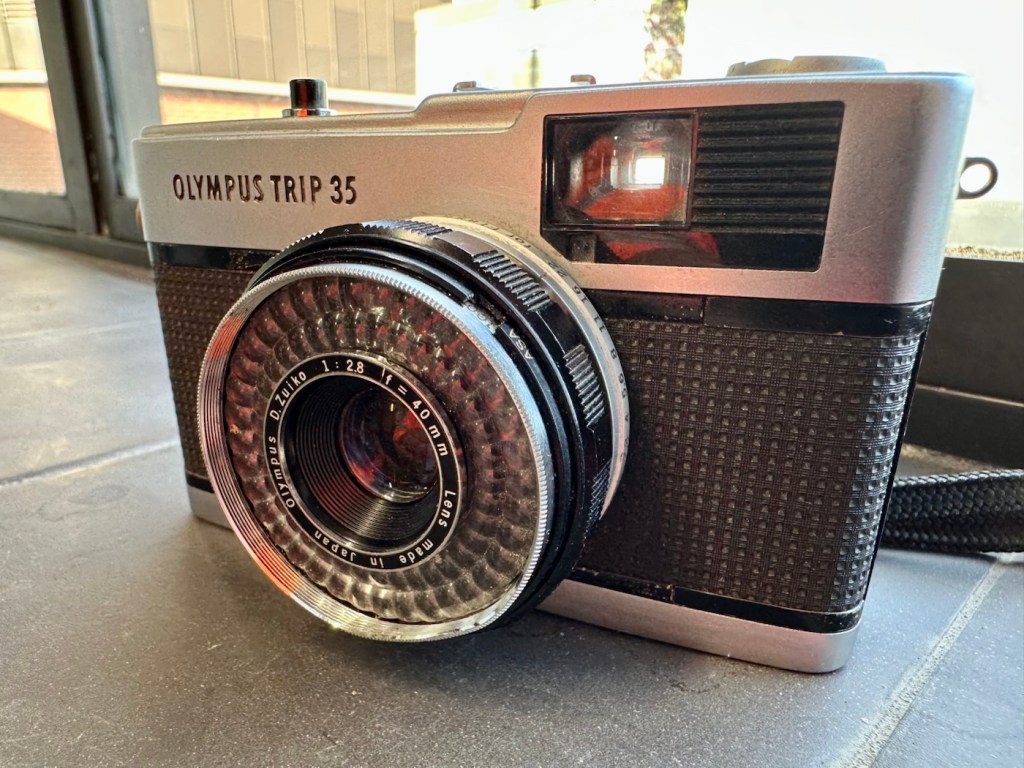
Olympus Trip 35 w/ D. Zuiko 40mm F/2.8 Lens & Original Lens Cap
EBay
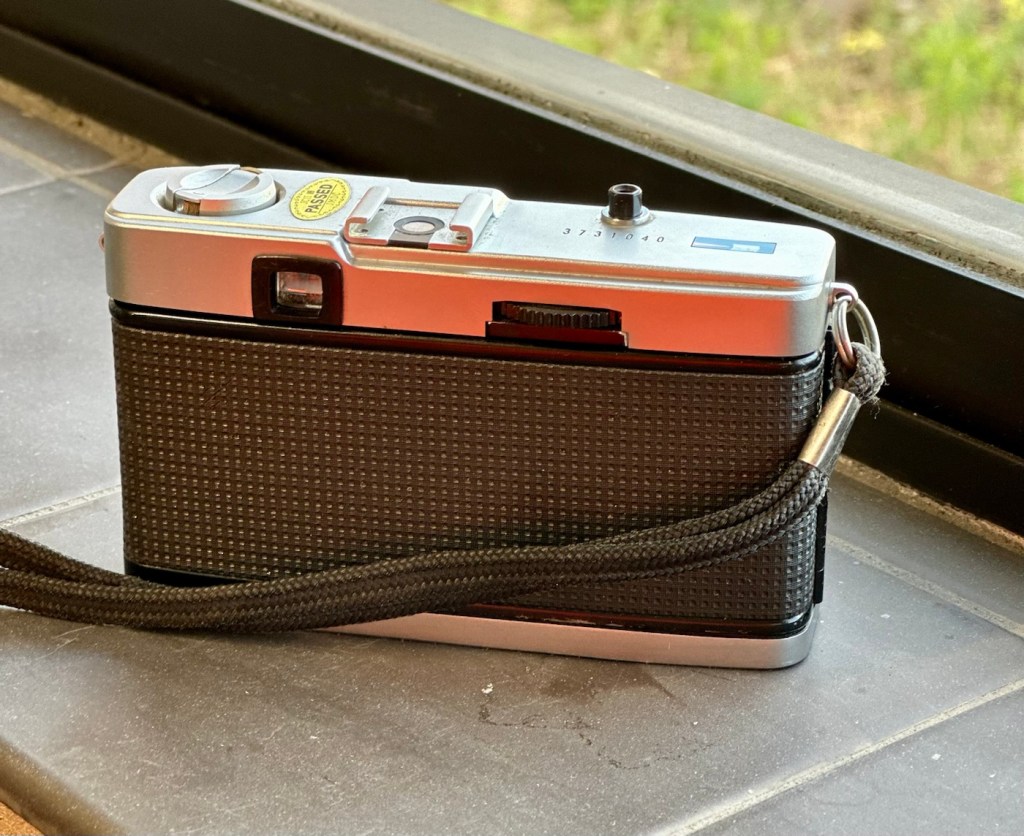
Olympus trip 35
I brought this item along with a Canon A1 as a job lot. The full detail of what was in the auction and how it progressed can be found here: Not the lottery, but for me – just as good
The page regarding the repair of the A1 can be found here: (Still in draft – coming soon)
Meanwhile here is a little history about the Olympus trip:
The Olympus Trip 35 is a 35mmcompact camera, manufactured by Olympus. It was introduced in 1967 and discontinued, after a lengthy production run, in 1984. The Trip name is a reference to its intended market—people who wanted a compact, functional camera for holidays. During the 1970s, it was the subject of an advertising campaign that featured popular British photographer David Bailey. Over ten million units were sold.
The Trip 35 was a point and shoot model with a 40 mm ƒ/2.8 lens, solar-powered selenium light meter, and just two shutter speeds. In ‘A’ mode, the camera operates as a Program automatic, choosing either 1/40 s or 1/200 s. The camera could also sync with flash, and has a range of aperture settings, from ƒ/2.8 to ƒ/22. In flash sync mode, the shutter is set at 1/40 s. Apart from a simple four-position zone focus system, and an ISO setting from 25 to 400,[2]the camera has no other photographic controls. The camera has a Prontor-Compur sync connector and a hot shoe. Its lens was a coated Zuiko 40 mm ƒ/2.8, with four elements in three groups.
The camera has an ISO range of 25–400, as films faster than 400 were uncommon at the time and delivered reduced image quality. 25 speed allowed the use of Kodachrome, while 400 speed allowed use of Kodak Tri-X and similar fast materials under low light. Earlier models, from the first few years of production, have a maximum ISO speed of 200.
The use of a selenium photocell to select the shutter speeds and aperture let novices use the camera as a “point & shoot”. No batteries are needed to power the camera.
The lack of more than two shutter speeds was not a problem. At 1/200 s and ƒ/22 with 400-speed film, the camera could deliver correct exposure in full sunlight, while at 1/40 s and ƒ/2.8, correct exposure could be obtained under bright fluorescent light, without a flash.
Wikipedia
And who could ever forget the series of star studded television adverts, featuring the photographer David Bailey, put together to promote this camera.
David Bailey
I never really got to use one, I admired one from a distance instead. My brother in law, Jim had one around about the mid to late 70s and he took some fantastic snaps with it. I wasn’t into photography at that time as I was still more interested in LEGO and Tonka trucks. However he did let me try it a couple of times, it really was that easy to use.
I’m not really sure what the problem is with this one, as the listing was not really clear on its issues. I just really wish sellers would just take a few seconds to describe the problems, it really could be an instant decision for the buyer – is it repairable or not? I’ll just have to wait until it’s arrived, and then i can do an assessment of its condition.
Assessment:
Well, it’s arrived and cosmetically it looks fine. However, zoom in a tad and the issues become apparent. It’s been dropped at some time, the lens has a little bit of wobble and you can see the outer ring of the lens has an obvious dent in it.
Drop damage
It does wind so that’s a bonus. The exposure button works and it clicks as it should, and the old selenium exposure meter appears to be responding, the red flag appears in low light and thus the exposure button will not depress. This is good.
Exposure indicator in viewfinder
When you half press the exposure button you would expect to see the relevant shutter leaf aperture close down, to the corresponding f- stop reading, this occasionally happens. If you move the lens barrel slightly it does have an effect, but it looks as if there is also some contamination on one of the shutter leafs, all of this is probably as a result of that tumble that has occurred sometime in the past.
Obvious lens wobble
I will definitely have to remove the whole lens housing from the camera to see if I can do anything regarding that wobble. This is going to be quite some task, and I’m not confident I will succeed, but who knows.
Let’s attempt to get inside.
Repair:
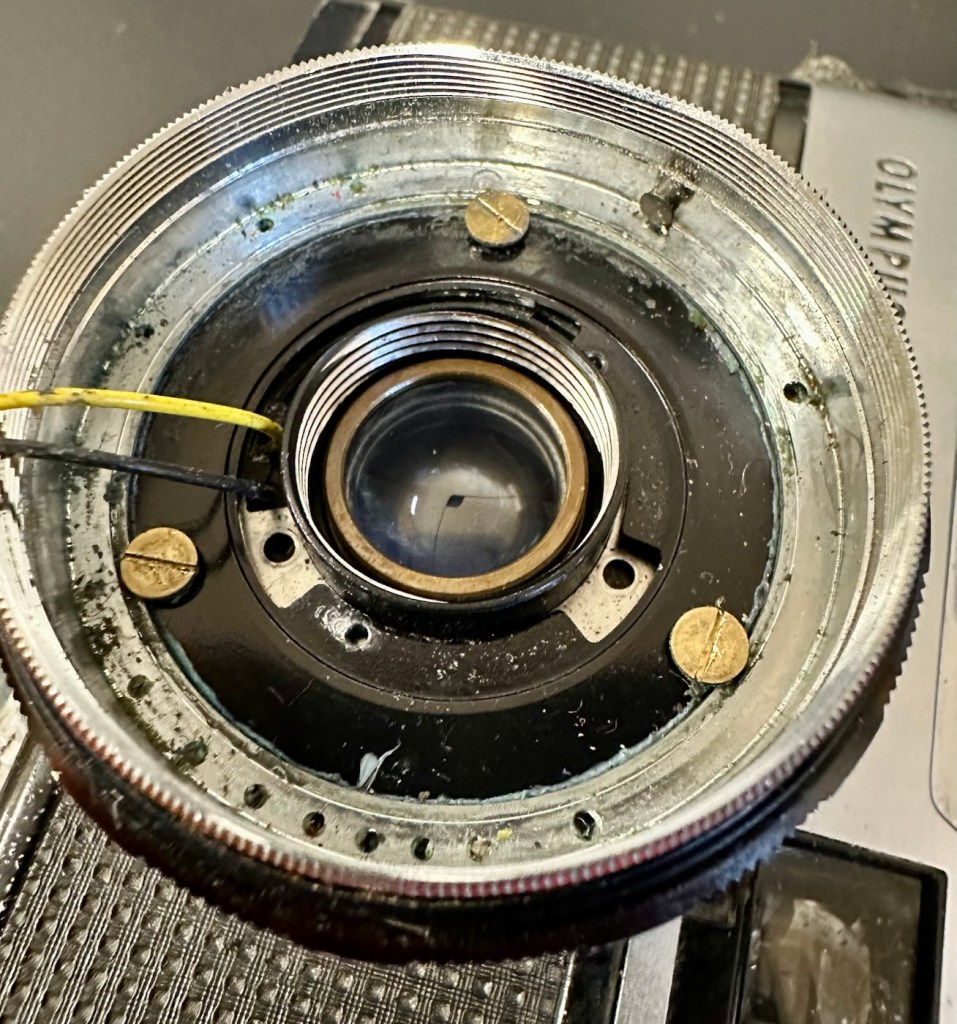
To get into the lens there are three tiny screws on the inner turret bezel that have to be removed that sit around the edge of it. This then pulls out and the lens optics can then be unscrewed.
Here are then two more screws that allow you to remove the selenium light sensor. Below this are three brass screws that hold the body to the lens. One of these screws were loose, hence the wobbly lens, this must have occurred when it was dropped.
Removing the sensorThe three brass body screws
I’ve pretty much had a cleanup here, applied a tiny drop of camera grease to the ring mechanisms, and tightened all these screws, and now the turret is nice and tight. I’ve just given the shutter blades a wipe with a soft brush and that is all it really needs. I’ve reassessed the camera, and tested its operation and it’s all good, working just as expected.
Result:
The dent in the ring remains as it’s causing no issues and is a subtle reminder of its past. The lens issue and its movement has been repaired and this in turn has cured the issue with the sticky aperture blades.
I haven’t touched the inner workings in the top of the camera such as the light metering, as it’s working fine and what’s the point in fixing what’s not damaged?
All repaired and looking good
I’ve still to run a film through it, and this will be done shortly as I have quite a backlog of film cameras to be tested. As soon as I have photos available I will link through this posting.
Really pleased with how this has gone, a nice easy fix but I can’t believe just how small those screws are around the lens bezel. I need my eyes testing that’s for sure.
Thanks for passing by, as always it’s very much appreciated.


You must be logged in to post a comment.