Canon EOS 7D

Can I get this classic EOS 7D operational again? It has damaged card reader pins.

I received this camera from a good friend who is a professional photographer, a few weeks back in a bundle of cameras and photographic equipment he no longer uses, he has kindly donated them to me to get working again. You can see that post, and just what was donated here: Cameras…i need more!

Canon EOS 7D

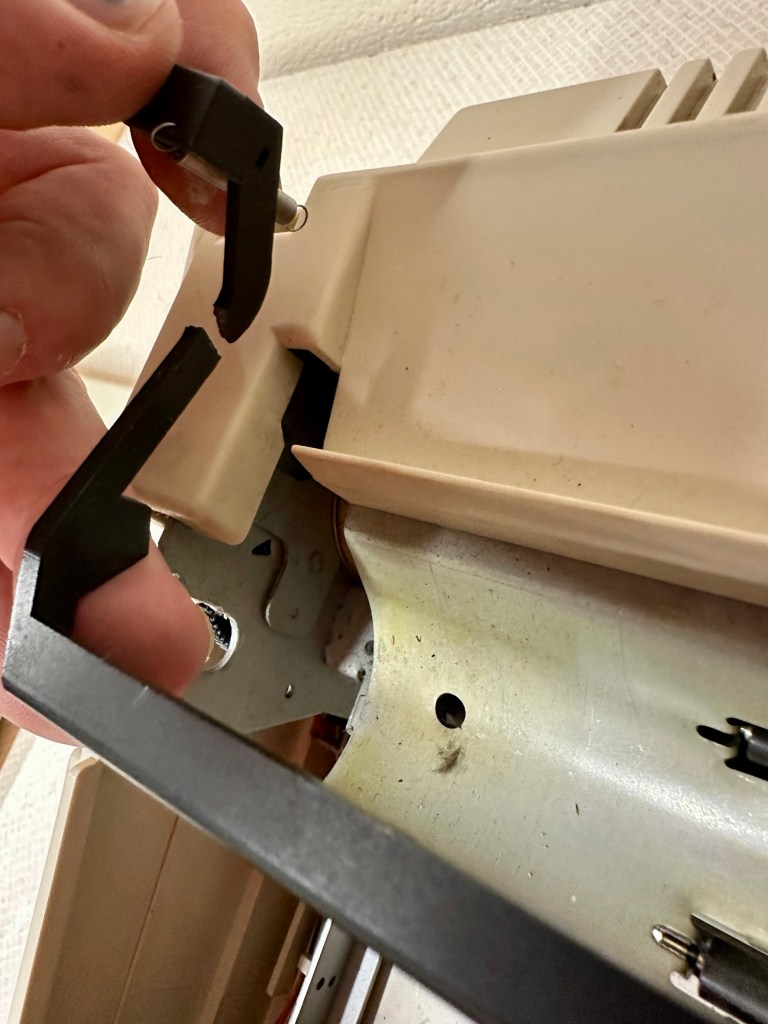
I’m in a situation where I don’t have my repair gear with me at the moment, as it is all packed and in storage awaiting our impending house move. Hence the reason I am racking up a whole load of draft posts that I can’t complete until I have my workspace back in use. Therefore any work I can do is severely restricted to inspection, cleaning and preparation with the only maintenance being attempted on the outside of the camera.

Let’s have a brief history on the Canon EOS 7D:

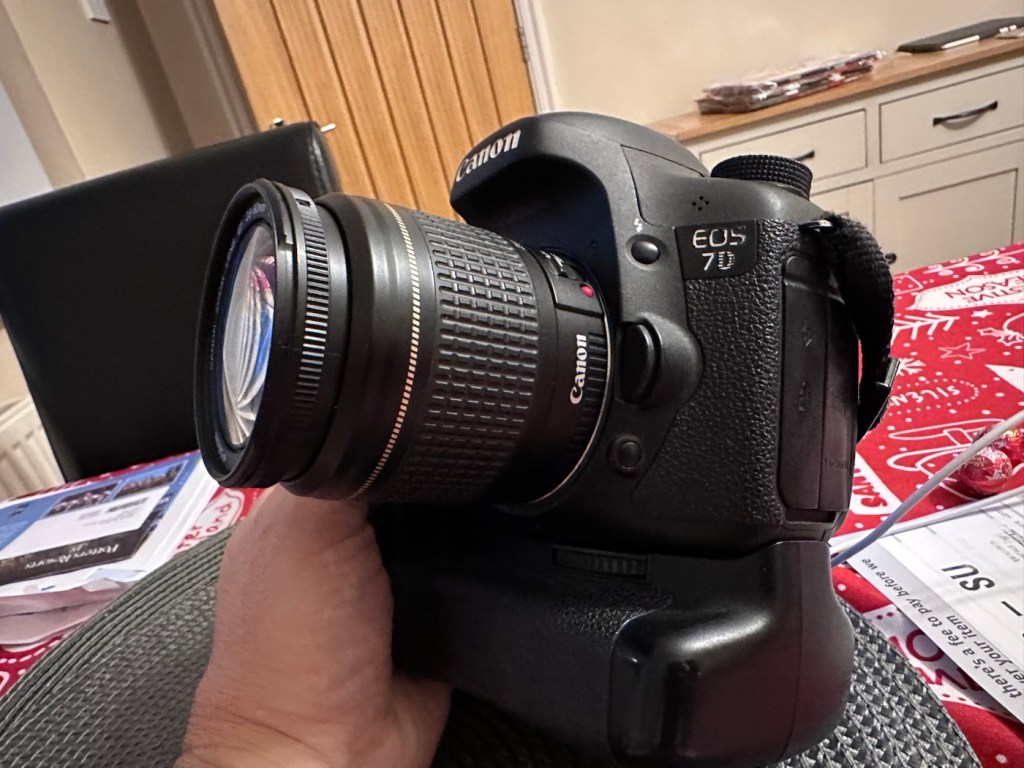
The Canon EOS 7D is a high-end APS-Cdigital single-lens reflex camera made by Canon. It was announced on 1 September 2009 with a suggested retail price of US$1,699, and was marketed as a semi-professional DSLR camera.

Among its features are an 18.0 effective megapixel CMOS sensor, Full HD video recording, its 8.0 frames per second continuous shooting, new viewfinder which offers 1.0X magnification and 100% coverage, 19-point auto-focus system, movie mode, and built-in Speedlite transmitter.

The EOS 7D remained in Canon’s single-digit APS-C model lineup without replacement for slightly more than five years—the longest product cycle for any EOS digital camera. Its successor was the Canon EOS 7D Mark II, announced on 15 September 2014.

Wikipedia

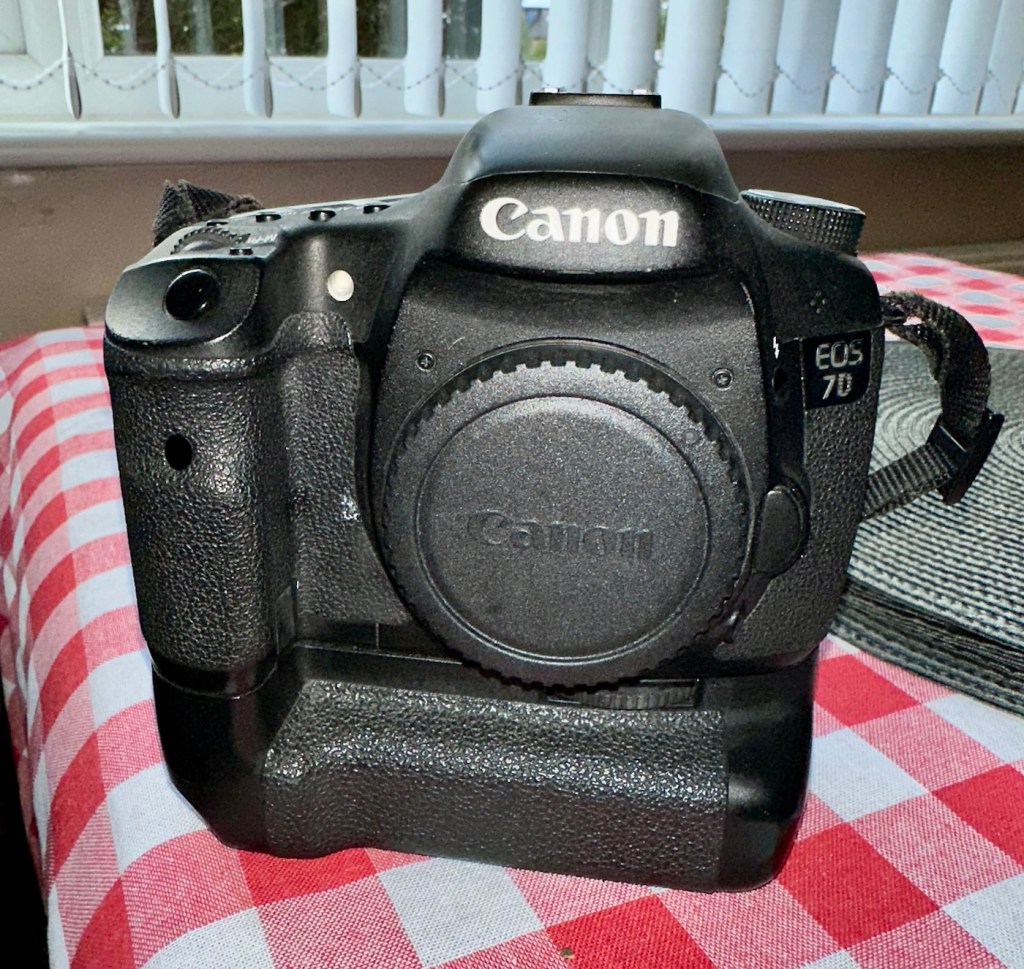
Structurally and cosmetically this is a beautiful camera in very good condition. However it would not have been donated to me unless it had problems. Let’s now put my detective hat on and go looking for clues.

Assessment:

As stated earlier, cosmetically there is nothing at all wrong with this camera, it even has the plastic screen cover in place. Mirror looks clean and curtain looks fine no issues here. All electrical contacts such as HDMI are in good condition with no visible damage to the ports.

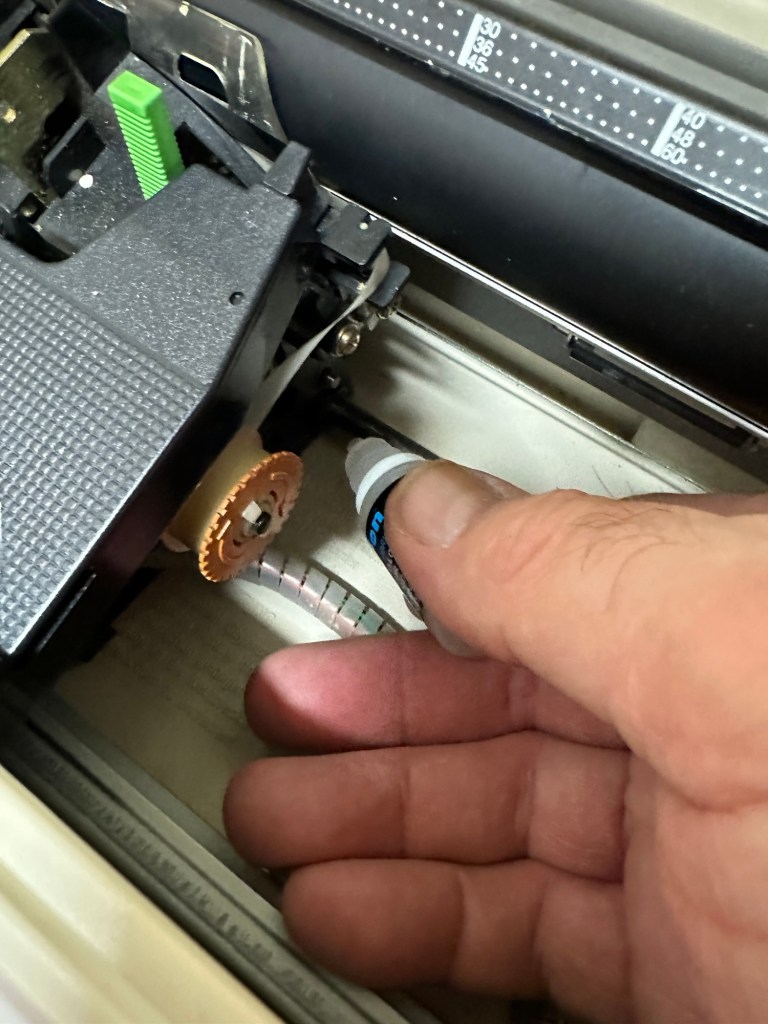
One last place to check and I now believe this is where the problem lies. This is the CF card door, and when opened it reveals one possible big issue.

Bent pins

Bent pins on the CF card reader. These pins are quite small and only millimetres in diameter, in a very restricted space about 8 cms deep and 6cm in width, it really is quite a small aperture. There are two options here, one I try to gently coax these pins back into place with a fine point tool, however the pins are minuscule, and brittle and prone to breaking. I can see potentially 7 pins that are out of position, not an easy or expedient option. But I’ll have to give it a go. Option two is to purchase a new CF card reader replacement, this option carries some expense and quite a complex dismantling of the camera to achieve said replacement. Needless to say I will initially attempt the pin bending procedure. Pending on success or failure, i could venture into step two. Read on to see what occurs.

Repair:

With a fine point set of tweezers, I’ve decided to have the first attempt at seeing if I can straighten the pins. Using a bright LED torch I angle the beam slightly so I get a bit of shadow on the pins, and this allows me to see how many are bent. I can see seven pins in total that are bent, and two of these seem as if they have been forced down to about half their height. This is quite normal when people go in a bit heavy with the CF card, if these pins go down too far there is no option but to go inside the camera and push them out from inside, or replace the card reader completely. I kind of hope that I have been able to pull them out far enough for them to work. I won’t know though until I get the CF card and batteries out of storage.

The camera in question

I’ve spent about an hour, bright lights, little subject matter, and now have very tired eyes. I’ve been breathing slowly just like a surgeon heading into a part of an operation that requires the utmost concentration, and precise and very delicate movements. I think I’ve done a good job. Only testing will tell.

Speaking with my friend Jon, who this camera came from, he has stated that he rather foolishly lent this camera to a ham fisted colleague who hammered the card into the camera, causing the issues that I am dealing with today.

If we have to open up the camera, I will probably be looking at about 3 hours of work, as there is an awful lot of dismantling that has to occur, and I believe there are around 30 screws to remove just to get under the skin of this camera. It’s built like a brick, weighs about the same and is just packed with electronics.

Fingers crossed 🤞 let’s hope option number one has been successful.

Well, today I went to the lock up and dug out a small 2GB CF card and the two Canon batteries and a charger. I came home and Put the batteries in that surprisingly still held a little charge, sufficient to turn the camera on. I gently inserted the CF card only for the following message to appear on the screen, “Card cannot be accessed. Reinsert/change the card or format card with camera.” Aww shucks I thought, it hadn’t worked. I tried to format the card and the format failed, at this point I thought the pin maintenance had not worked. Damn. I was a tad annoyed.

CF card being installed

So I removed the card and checked the pins, they were ok. I reinserted the card and the same fault appeared, however this time when the option came up to format the card it worked. I was so shocked I tried it again and forced another format, again it worked!

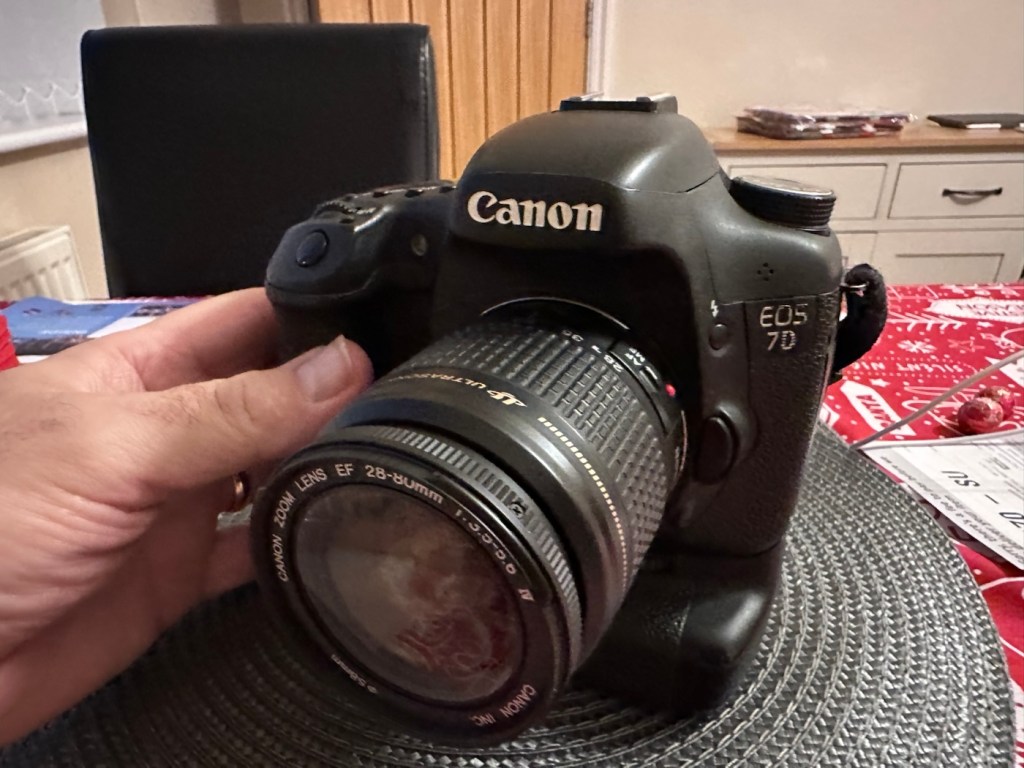
Right it was now time to get a lens on the front and test the camera to check to see if it would write to the card, it’s only a stock lens, nothing special but absolutely fine for testing purposes. Just walking around the house I put the unit into auto, the flash popped up and I proceeded to rattle off a few random shots. And it worked, the results all came up on the rear screen.

Random shot 1
Random shot 2
Random shot 3

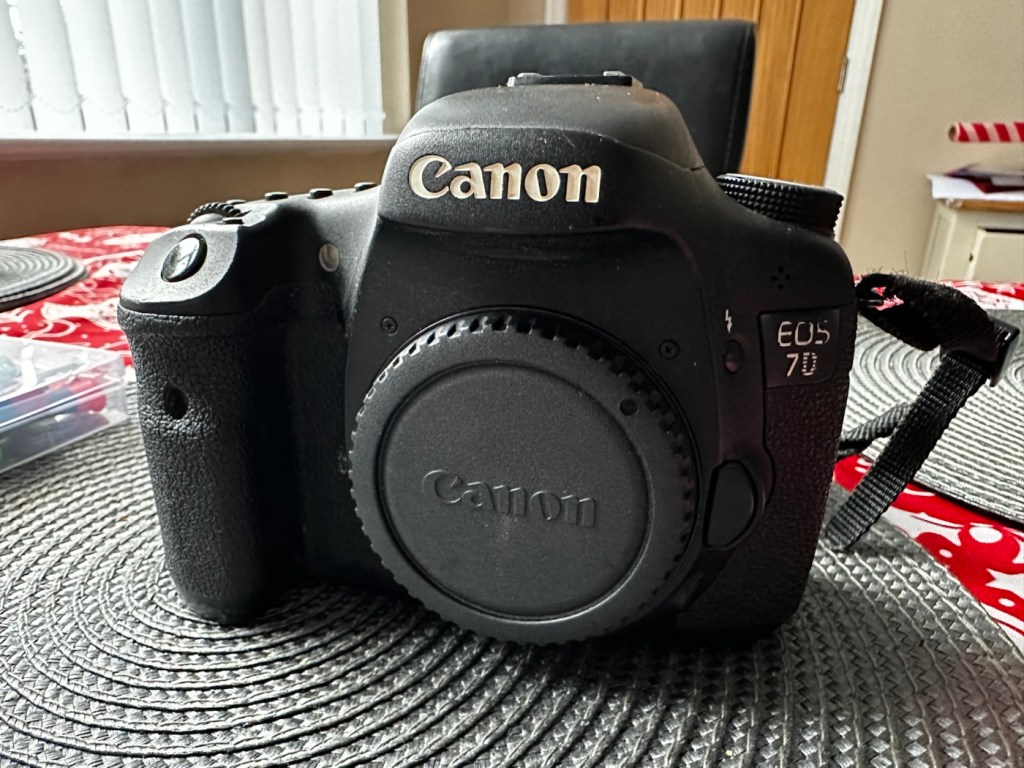
To say I was pleased at this is an absolute understatement. The work on the pins has worked and I now have a perfectly well working example of quite a top end camera. There’s no doubt that in the future the camera will require a replacement card reader, but for the moment it’s been given a new lease of life, and whilst I remember to be gentle with the removal and placement of the CF card, let’s just enjoy the camera and its capabilities until that time comes. In the meantime here are just a few, “Randoms” taken to test the card and camera in and around my home.

Result:

You little beauty

Time to give this camera a little buff up. (Clean)

This unit only appears to have taken 1,860 pictures. It is completely unused, and in perfect condition. And it now works. To be honest I feel more confident with this camera than I do with the mirrorless Sony that my wife purchased for my birthday. This was going to become my number two camera, however it’s just been promoted to my number one, as long as that card pin issue and repair holds up, and I have no reason to doubt that it should be a long time before any issues arise. I am confident that my repair has longevity as they say.

I want to give it a good test in daylight conditions in all modes rather than auto. I want to get a bigger CF card maybe a couple of 8GB ones, I don’t see the point in going for the bigger cards just in case there is a read/write issue in the future. It’s just an OCD thing for me, you know what I’m like.

So overall I’m really quite happy and satisfied with this camera. Of all the cameras I was gifted by my good friend Jon, all have been repaired apart from one that was beyond economic repair, even that has been broken down into it component parts, every screw recovered and will be used for spare parts. Nothing, and I mean nothing has been disposed of from this collection of cameras and accessories.

That’s what I do, I don’t waste anything. Ask the wife!

Many thanks for passing by, it’s always very much appreciated.

Ensign Ful-Vue II

I’ve had this camera sitting around since March 2023, when I first wrote about its purchase along with a couple of other cameras here: New old stock 📸

Barnet Ensign Ful-Vue II

I’m not sure what I paid for these cameras but it wouldn’t have been a great deal. I love the Ful-Vue due to its looks and the kind of Art Nouveau feel it has about it. It’s a very basic mass produced camera of its time and It is an old 120 film camera, and the bonus is that this film type is still readily available, in fact I still have a few rolls in my fridge at home today.

The shutter is an all mechanical, spring loaded system which swings a piece of metal over a hole to create the exposure. The approximate timing is 1/30th of a second and that’s slow. It is understandable when taking in to account that ISO 400 wasn’t that common in the 50s and would have produced very noisy results. It was far more common to use ISO 50-100 film and that would’ve required a slower shutter speed at the approximate f11 of the lens of this unit.

I obviously want to get it back into full working order. And want to do as sympathetic a restoration as possible. It’s a 120 roll film camera with a 6cm x 6cm frame inside, it was a cheap and cheerful camera of its day, sold as, “Easy, even for a child to use.”

In the meantime, here’s some history about this little camera:


Barnet Ensign Ross Ful-Vue II

Originally released in its initial form in 1939, this version was introduced in 1950 after further improvements were made. The new flash synchronised shutter, the turn-able lens barrel allowing three different distance settings instead of two, an all-plastic front panel, and an optional flashgun. The improved version was called Ful-Vue II. Pictures were 6×6cm on 120 film. It has been stated that colored models (red, white and blue) were sold in 1952-3, to celebrate the coronation of Queen Elizabeth II; However, no other evidence for these cameras has been seen: in particular, the Ful-Vue is not mentioned in a coronation advertising supplement to the BJP Almanac of 1953. Colored Ful-Vues were advertised as ‘Ful-Vue à la Mode’ in late 1952. Examples of the regular Ful-Vue II, repainted and presented as the colored model, have been seen in online auctions.

Camera wiki.org

So I estimate this camera to have been produced sometime between 1950-54 when this particular model had its production run, just prior to yet another version becoming available. Making this particular camera approx 70+ years old. Let’s have a look at the unit that I am now in possession of.

Assessment:

The case is leather and is very dry and brittle, it’s complete, so I may well look at revitalising this one just as I did to an old Kodak camera in this old post: Kodak Brownie reflex. If I do, I will cover its repair in the following section.

The camera itself is in quite a good condition cosmetically, it has chips off the paint and a little wear and tear that will require some attention. There appears to be a screw missing on the front plate, this will be replaced.

The mirror inside the viewfinder seems to have moved and will need reseating, all glass and mirrors appear quite foggy and need a good clean, all workings within the camera inside appear ok. Light seals appear ok but may well need replacing purely due to their age.

The lens barrel and shutter mechanism will be checked over to check correct operation, however at first glance, all seems to be ok. There is a little red window on the rear panel where you can see the film exposure numbers. A little thumbscrew can be turned to blacken this window out, this will be very handy for when we try to install a colour film to prevent any fogging issues.

Repair:

I want this to be a sympathetic restoration, so I will endeavour to keep the look and feel of the unit as original as possible.

The case:

I’m starting with the case as this is probably going to be the most time consuming and will require numerous periods of drying and moisturising, it’s probably about 70 years old now and to be honest has probably had no care taken of it during that time.

Using some mild detergent, but just the soap suds on a cotton pad I have gently wiped all over the case, paying special attention to any old folds in the material. This has had a dual purpose of removing ing a lot of age related dirt (As you can see in the photos above, that show the dirty cotton pads) as well as adding a little bit of moisture but not too much. I want to do this in stages to minimise any more damage. I will now let this dry for 24 hrs and I will then do the same again.

24hrs later I have cleaned the case again, in exactly the same manner. let’s leave it another 24hrs and then apply a little polish to give it back some colour and a little bit more moisture. I’m keeping it as low cost as I can, no doubt a brown shoe polish will suffice for the result I’m looking for.

I’ve treated the leather and polished it twice using a black shoe polish. The third coat I have given is a tan regimental high gloss polish. I’m leaving this for a few hours and then I will buff the case up. I’m not repairing stitching or holes as I want it to retain age and it’s old look. I just want the leather to look healthier, last a while longer and to get some moisture back into what was a very brittle leather case.

I have today buffed the case up after all the treatments of the last couple of days. The case feels lovely and soft and much more pliable than when I first started on it. I’m now going to bring this part of the repair to an end as that’s as far as I wish to take it at this time. I want it to still carry its signs of age. Without further a do, let’s move on to the camera.

The camera:

I have decided to totally dismantle the camera and work on it bit by bit. In this case there is not a great deal to dismantle.

Firstly I release a retaining clip inside of the main body and this releases the “Viewing head” on top of the camera. This part of the camera contains the mirror that has become detached, and two glass optics that complete the viewer section of the camera. There is a single spring structure that holds both pieces of glass in place, release this and they just fall out. Easy.

I’ve started by placing the three optical items above in a mild warm detergent soak. I will leave these there for about an hour, in hope that a soak will help in cleaning that muck off the back of the mirror. The two other optics are in great condition and I’m sure the soak and then a final rinse will be all that they require. This treatment worked just fine, and now onto the next part.

Next I’ve removed the shutter mechanism from the camera body.

Here is a very small video showing the simplicity of this shutter mechanism

A The mechanism is beautifully simple and is such a lovely piece of work to look at. To think im probably the first person to look in here in the last 70 years is special. All I’m going to do here is very carefully get rid of as much old ingrained dirt as possible and very gently clean the shutter leaf. I will use a minuscule amount of clock oil on the mechanism only, I will use some fine graphite dust on the actual leaf part of the shutter.

The lens and mechanism have been cleaned now and reassembled, all tested, and working as expected.

The body work is fine apart from some small chips and paint flakiness. I’m going to retouch these missing areas with some enamel paint and a bit of thickener to enable me to obtain the stipple effect of the original paint job. Then I will finish with a nice black polish.

Let’s now get the mirror back in place and the head back on the camera unit.

And that’s it. Apart from a little polish we are now done here

Before and after

Result:

I’ve put quite a bit of work into this little camera. Some people will ask why bother as it was only a cheap mass produced camera? Well, I like it, it’s a lovely little camera and it deserves to be displayed. Now, as it’s also working it’s a big bonus. It gives me something to do, and it’s how I relax, as I’ve been shoulders deep in DIY at home recently and doing my shifts at work, so this is a welcome distraction for me.

So that’s another one saved from scrap. This camera will now go into storage where I will vacuum pack it with some silica packets to prevent it from getting damp. I’m surprised just how good this camera “smells” considering its age, there is no mustiness at all compared to some cameras I get from this era.

Many thanks for popping by, you know it is always very much appreciated.

Have a super day.

Old iPad To New Screen

This is a great blog from Hackaday that shows how old iPads that are no longer usable can have their screens used as standalone monitors. Since Apple are openly criticised for their throw away culture it’s a reasonable way of keeping these old units out of landfill, and saving you some money as well. I love the example of using an old screen as an additional screen for an iMac.

Turning surplus LCD panels into stand-alone monitors with the help of a driver board is an established hack, and a search of eBay or AliExpress will …

Old iPad To New Screen

Samsung SQ3000 electronic typewriter – assessment & repair

This is the follow up to a recently obtained electronic typewriter that was purchased in January 2025, the initial post can be found here: Samsung SQ3000 electronic typewriter.

Samsung SQ3000 electronic typewriter

The following post will deal with the assessment on its arrival and what I am going to try to do, to get it back working again, as close as possible to its original state.

I’ve downloaded an instruction I manual, I’ve had to download one for a Smith Corona Wordsmith 200, it is in theory the exact same unit, just under a different manufacturers branding.

Assessment

It’s arrived and apart from a little age yellowing it looks ok. There is a PAT testing sticker that says it was last electrically tested back in 1998 and is due a retest in 1999. This corresponds with my date estimate of mid 90s.

I will retest and renew the safety checks when I’m finished working on it. I have noticed that the paper bail/release rail is broken on the left hand side so I will have to add that to the repairs, this shouldn’t be a major concern.

Before I took the roller out to get to the paper bail I did start the machine up. Everything went as expected and when I tried to type I was getting some weird reactions to the keys I was pushing. All kinds of characters were appearing.

Before

I checked the daisy wheel and there was a click. It wasn’t sitting right. I reset the machine using the two reset buttons and the machine then went through its reset programme, pretty much the same effect as turning it off and on again. (Not much changes in the way of tech there then)

After

Well that’s worked fine, I have tried every combination on the keyboard including the erase function and this is now fully working. It really was quite simple. My next job is to try and fix this paper bail.

Paper bail removed for fixing

There is quite a bit of dust and dirt inside that needs removing. And whilst I’m at it I will lightly re grease the areas that need it. Let’s be honest it’s not been done in the last 30yrs so now is as good a time as any. Inside will get a light hoovering and a bit of a tart up, I’m not going to go mad. I will clean the outside and all knobs and buttons and try to get rid of some of the yellowing, but to be honest as long as it’s clean I’m not too worried about age marks.

The keyboard has lost a few of its letters. I will remove what is left of some of them and use some keyboard decals to replace the missing ones. This will be one of the last jobs I do.

Well that’s the assessment done and apart from a few small issues and requiring some basic maintenance I don’t think we have an immense amount of work to carry out. We know it now works. Let’s hope I don’t cause any further carnage whilst working on it.

Let’s get to work.

Repair

Right it’s straight onto the paper bail to try and fix the snapped end. Firstly I’m just going to use some superglue to get it in place. When this is dry I’m going to create two “Doublers”, place one either side of the damaged part and glue these in place to create a stronger repair and to add some stability to this area.

I’ve got some black semi rigid plastic. I’ve created a small template from a tracing that I did of the good right hand side of the bail.

I now have two doublers cut from the plastic that I will use as explained above.

Two doublers

It doesn’t matter that they are not perfectly shaped, however they both fit perfectly well into the profile of the bail arm, and this portion of the arm is hidden in the typewriter housing anyway, so the part will not be visible, but it will now be strong.

The Doublers have been put in place using a quick set epoxy resin, I will leave this to dry for a good few hours before I tidy it up, with a light clean, and then I will try to get it back in place.

Bail arm repaired, installed and working.

Now that’s done i’ve gone inside and there were a nice couple of spider webs around the transformer that are now history. I’ve secured the cable in the rear of the unit that never had any tension restraint, so that there will be no issues, should anyone now give a good yank on the cable lead. This is a safety addition I have made that was never on the original unit.

Cable restraint screwed to base to prevent strain on internal wires in and around the transformer bay.

I have also tightened all screws and checked the wiring and this all seems ok. Plug and fuse have been checked and all is looking good. I’ll carry out a PAT test once I’ve finished the clean up.

I’ve cleaned the main roller with alcohol, and removed all the old grease and dirt from the platten adjuster switch and the roller advance knob. I have removed the platten plate as well as the six mini rollers that are here. I’ve cleaned them all and re assembled/installed them.

I have cleaned the daisy wheel as well as in and around the printing head unit.

Inside the unit I have given a good hoover as well as a light clean and again removed more old grease. I have given the exterior plastic a preliminary polish, this has removed some of the yellowing and made it look “cleaner” I am not going to worry too much about the yellowing as it isn’t that bad, and I don’t really want to venture into carrying out a “Retrobrite” on this unit. It would take too long and there would be no benefit for this project.

I’ve now added very small amounts of a watch lubricant to those areas that i have previously cleaned and removed the old grease from.

The unit has been reassembled and I’m pleased to say it is still working fine. It’s running smoothly and all aspects of the unit seem to be working just fine. To be honest it seems to be printing clearer to me.

Daisy wheel and print quality is perfect

I don’t know how long the print cartridge has been installed but I suspect it may have been a few years back. It’s almost finished, and I do have a replacement on order. I’m sure a fresh cartridge will make the print stand out even more.

Next I’m going to have a go at replacing some, or even all of the keyboard letters. It all depends how it looks when I start replacing them. I’m going to gently rub off the lettering that is left and clean the keys using a 95% pure Isopropyl alcohol solution (IPA).

All damaged and missing key decals removed in preparation for replacement new decals. Others may have to be removed dependant on how the new ones look when in place.

These are the replacement key decals I will be attempting to use.

Qwerty keyboard decals

I’ve replaced the damaged key decals. The ones I’ve used are a lot brighter than the original ones and really accentuate the yellowing. I’m not troubled by this as it keeps its “Old” look. I would have to scrape and wipe for hours to remove all the other keys and to be honest it would look just like someone had gone abroad to have a bright white set of dodgy veneers installed, it would look quite out of place, and in your face. Just like a Cheshire Cat smile.

New veneers anyone?

It serves a purpose and just allows the unit to be usable again.

The final product:

Fortunately a lot of the equipment and parts I have used, I was already in possession of, so there are no additional costs for this project. Below you can view the total costings for this project as they currently stand:

  • Purchase inc postage £13.14
  • Cable restraint £0.25
  • Keyboard decals £1.25
  • Total cost of project £14.64

Again I have managed to save a fantastic 90s retro item from landfill for very little cost, and that is a fantastic result. It has years of use left in it, as long as the consumables remain available, and of that I am confident that they will be available, for at least the next few years. The unit is clean, I’ve just carried out an electrical PAT test and it is electrically sound.

Believe it or not I’m going to go back in time and will write some traditional typewritten letters to friends and family. I’m looking forward to doing that and it will certainly surprise them, it will be totally unexpected.

When all that is done, i will donate this unit to our local LOROS Hospice shop so they can sell it on and raise much needed funds. They deserve it. Edit: This was done in March 2025 at their shop in Hamilton Leicester. I hope it gets them a good price.

Watch the brief video for the final words on this restoration. All 13 seconds of it.

And that’s it folks..

Thanks for passing by.

Keep Britain tidy

Are there things you try to practice daily to live a more sustainable lifestyle?

When I was a tot at school, we were all enrolled in the Tufty club. Tufty was a squirrel used to promote road safety and clean living whilst teaching us mere mortals not to litter.

50 years later I’m still sold hook line and sinker to this mantra. One thing you will never see me do is litter. Not so much as a cough sweet wrapper. If I have any litter at all it goes in my pocket until it can be disposed of properly. That Little Squirrel had a massive effect on me.

It’s a pity that others didn’t join the Tufty club as my country is sinking under a population that just doesn’t seem to care about their environment.

In later life I do take it further now, I will always look to recycle and reuse, that is a big part of my blog site, it’s what I do and I will not dispose of anything unnecessarily.

It’s the only constant I really have in my daily life apart from waking and sleeping.

And that’s not a bad thing is it?

Peace.