Describe the most ambitious DIY project you’ve ever taken on.
I’ll always attempt anything, but when it comes to plumbing or high voltage electricity, that’s when I get the professionals involved.
In my current home the most ambitious DIY has probably been landscaping the garden. We purchased a rickety old house that’s been a constant project since it was brought, back in 2018. So really that could be the most ambitious couldn’t it?
Anyway, the one I’ve enjoyed most is landscaping the garden, not concreted over with no concerns for wildlife, my garden was designed around the needs of the Hedgehogs and birdlife we have that visit throughout the year. They have easy access to the whole garden, a part that is wilded for them to forage in and plenty of food and water stations as well.
One of our visitors
We also have a feral cat “Tabs” who has lived in our garden longer than we have, she gets on with us, we feed her and she has plenty of weather protection in and around the garden, and she tolerates the hedgehogs, so that’s harmonious.
Some colours in our garden
The garden has been a big project taking about 6 years to reach a maturity with flowers, shrubs and trees all planted to create a little bit of the country side in a city urban environment. I am so proud of my garden come spring time when all the new buds are breaking through, and it is a riot of colours come summertime. And it took a lot of planning as it’s a north facing garden.
The gardens the place i’d rather be, it’s like producing art, art that changes on a weekly basis.
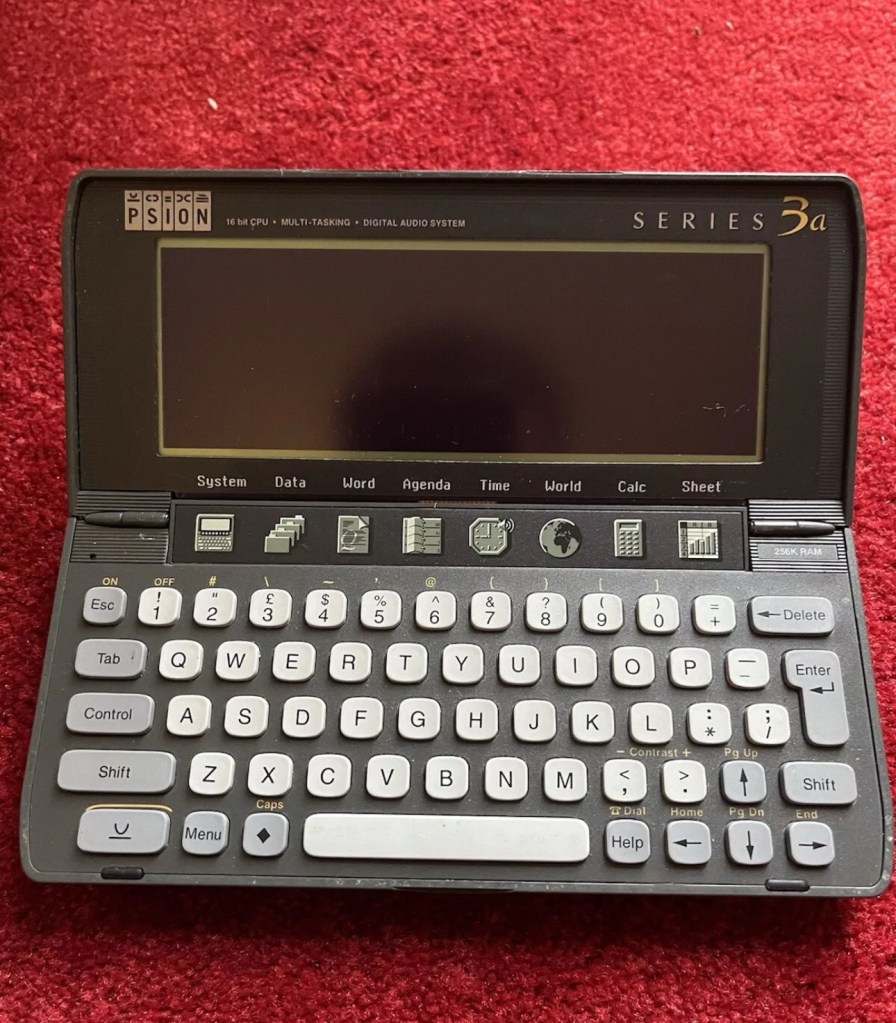
It fires up and turns on, then get a black screen. Every time I press a key on the keyboard it makes a beeping sound, so it is registering something.
EBay
From a distance, and in my opinion, the fault could be a simple one such as adjusting the contrast by using the Psion key and either of the <> keys. This was often an issue when first turning on the Psion II, you had to turn the contrast wheel. However it could be a terminal one requiring a donor unit. In layman’s terms it could be knackered, (to coin a phrase). But hey, what do I know 🤦♂️
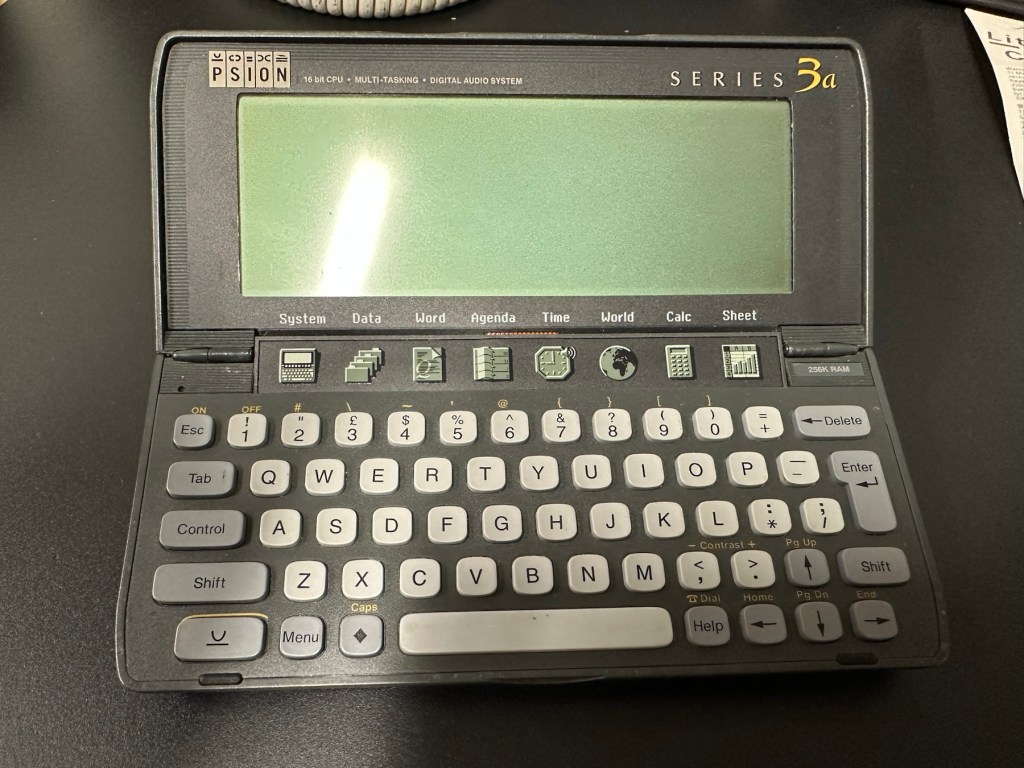
Psion 3a – Faulty
Fingers crossed 🤞 as usual.
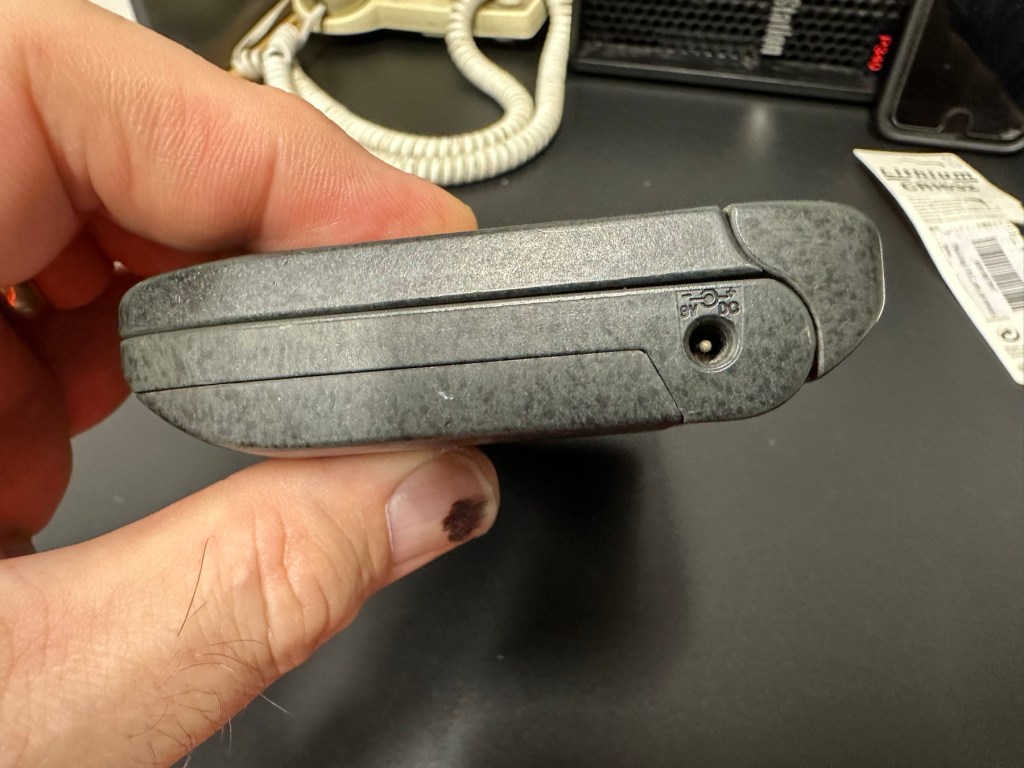
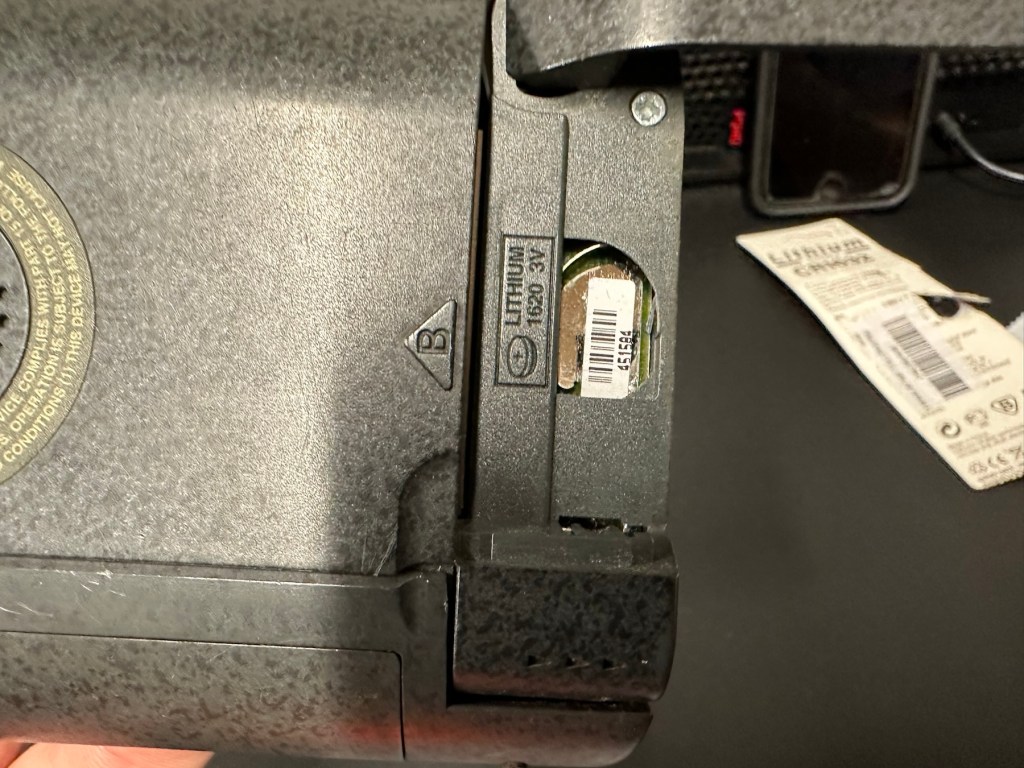
I have a what looks like a nice tidy little unit here obtained for a very reasonable price £17:69Gbp including postage. These units retailed between £179-£249 when they first appeared back in 1993. However, there is only the one picture in the advert so the rear, sides and hinges could be wrecked. “Caveat emptor” as they say. It does have a problem that will need some investigation. It runs off of two AA batteries and a CR1620 coin battery as a backup, and these will be the first items to be changed, I’ll also check the voltage of that coin battery and replace that if necessary. This is an early version with 256KB of internal Ram. 3a versions from 1995 either had 1Mb or 2Mb of ram. You can also use an external power supply if required, but the batteries in these units have an excellent long life span, so external power is rarely necessary. I’m looking forward to this project. I’ll make a more detailed analysis when the unit arrives shortly.
The Psion Series 3 range of personal digital assistants were made by Psion PLC. The four main variants are the Psion Series 3 (1991), the Psion Series 3a (1993), the Psion Series 3c (1996), and the Psion Series 3mx (1998), all sized 165 by 85 by 22 millimetres (6.50 in × 3.35 in × 0.87 in). Further, a Psion Series 3a variant with factory installed software for the Russian language was called a Psion Series 3aR, and Acorn Computers sold renamed versions of the Psion Series 3 and 3a marketed as the Acorn Pocket Book and Acorn Pocket Book II.
Wikipedia
A little history:
This particular unit dates from 1993 and was the next in the series of Psion organisers that succeeded the extremely successful Series 2 models. It was a massive step forward in design as the whole PDA market was kicking in big time in the early to mid nineties. More info regarding the series 3 organisers can be found here: Psion series 3
And the strange fact for today is this:
Manufacture of Psion 3s was discontinued in 1998 shortly after the launch of the Psion Series5 (a Psion Series 4 does not exist, due to Psion’s concern of Tetraphobia in their Asian markets)
Wikipedia
What is Tetraphobia?
The fear of the number four: Tetraphobia is mainly suffered in China, Vietnam, Korea, Japan, because the word for the number four is similar to the word for death in their languages. Tetraphobia results in many people avoiding referring to 4 in phone numbers and so on.
Cambridge dictionary
There you go, question answered and that was why there was no Psion 4.
Onwards…
What has arrived, and what’s the diagnosis?
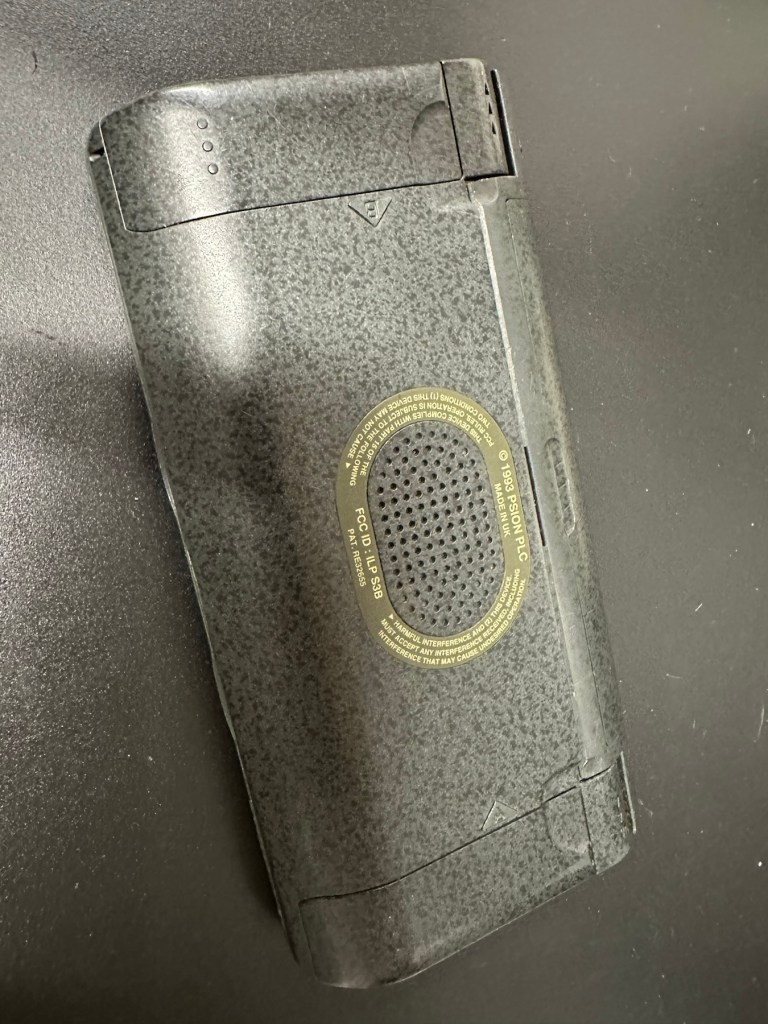
The unit has arrived and despite my suspicions it is in an excellent cosmetic condition. Just some very light signs of usage, needs a light clean, all hinges are in place and solid. Everything is as it was all those years ago and all the warranty labels are in place, this unit has never been opened.
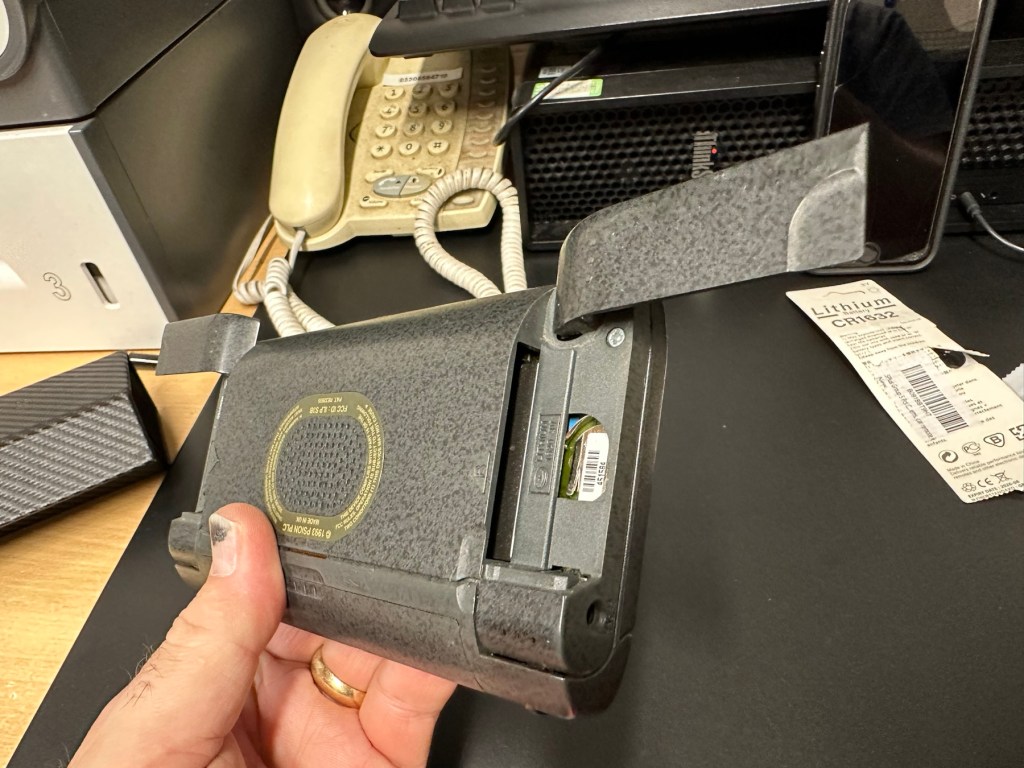
Front goodRear goodPower adapter port goodOutput port good Drive A goodDrive B goodNo back up battery in place
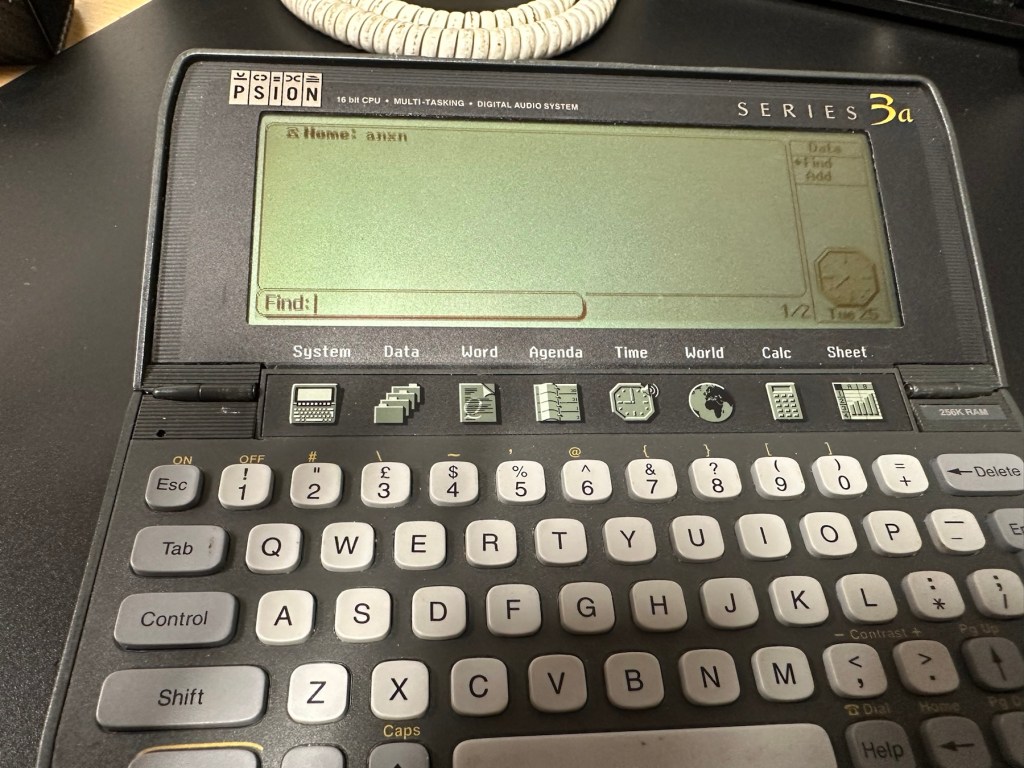
I placed the new AA batteries in and it came up with the black screen as the seller had stated. Using the contrast adjustment at this stage had no effect but the buttons were sounding so something was happening. Whilst looking in the memory card doors I could see one glaring issue, there was no backup CR1620 battery, so I dropped one in place . When I started the unit up again the screen went from black to clear, over a few seconds and then I operated the contrast buttons, and hey presto it worked. Watch this little video to see what happens.
We have life
I can only surmise that not having the correct batteries in for god knows how long, and then livening up the circuitry must just be like giving Frankenstein a fresh transfusion of blood. “It’s alive!” Well, that’s all I can think it would be.
I’ve run every function on the unit and it all works fine apart from the voice recorder function that seems to have a lot of feedback on the recording. I suspect this might be as I’m using the already full internal memory. It’s not a real problem, I’m just going to have to read up on it, as I could be doing it all wrong. (I have since done a hard reset and deleted old files from the system and this has cured the feedback issue, the voice recorder works fine). However it would still probably work better using an additional drive in the unit, and not the low internal memory.
OffMenu screen Data screenAgenda screenYearly agendaWorld time Sheet tab
Just as you could on the Psion II you can write your own programs using OPL language. And it is a lot easier on this unit as you have a full Qwerty keyboard and a much bigger display. There are more applications on this unit than the series II, including word, spreadsheets, DTMF dialler, calculator and others that can be purchased as plug in additions.
I’m really happy with this, if the seller would have just taken a little time to run the unit and have some patience he’d have realised there really is nothing wrong with this unit. Big negative for him, big bonus for me. He could have charged more than double the price for this item, or more, considering current prices on the selling platforms.
Another strange thing i have noticed is that when I’ve left it overnight and started it up the following day it takes a minute or so for the screen icons to appear, just like putting on an old valve radio. So it maybe that a repair is necessary, I’ll have to ask around and see if any else has had this issue.
Valve powered Psion3A
Edit: A few days later and I’ve looked into this a little more. For some unknown reason, probably my rank stupidity, I’ve checked the coin battery and I’ve installed a CR2032 instead of the required CR1620 and have tonight corrected this and installed the CR1620 coin battery. I don’t know if, or why this would have an effect, but after putting the correct battery in place the unit started up in a couple of seconds even after sitting unused for at least a couple of days, instead of the usual 2 minutes as per the video. I can only think it must be something more related to the capacity rather than the size, unless for some reason the contacts were not sitting true. (There is a slight difference of 4mm in width) I remain puzzled as I thought the battery was just for backup purposes, maybe it does perform more as a computer CMOS battery does, but I’m pleased it’s now operating as it should. I can now stop monitoring the sale sites for units to use as spares.
Sometimes your suspicions pay off, and on this occasion I was spot on. EBay untested items can swing either way and most of the time the sellers use it as an easy get out for not accepting any responsibility. But this time I win, and that makes me happy as I have a very good item for my retro collection.
This is a great blog from Hackaday that shows how old iPads that are no longer usable can have their screens used as standalone monitors. Since Apple are openly criticised for their throw away culture it’s a reasonable way of keeping these old units out of landfill, and saving you some money as well. I love the example of using an old screen as an additional screen for an iMac.
Turning surplus LCD panels into stand-alone monitors with the help of a driver board is an established hack, and a search of eBay or AliExpress will …
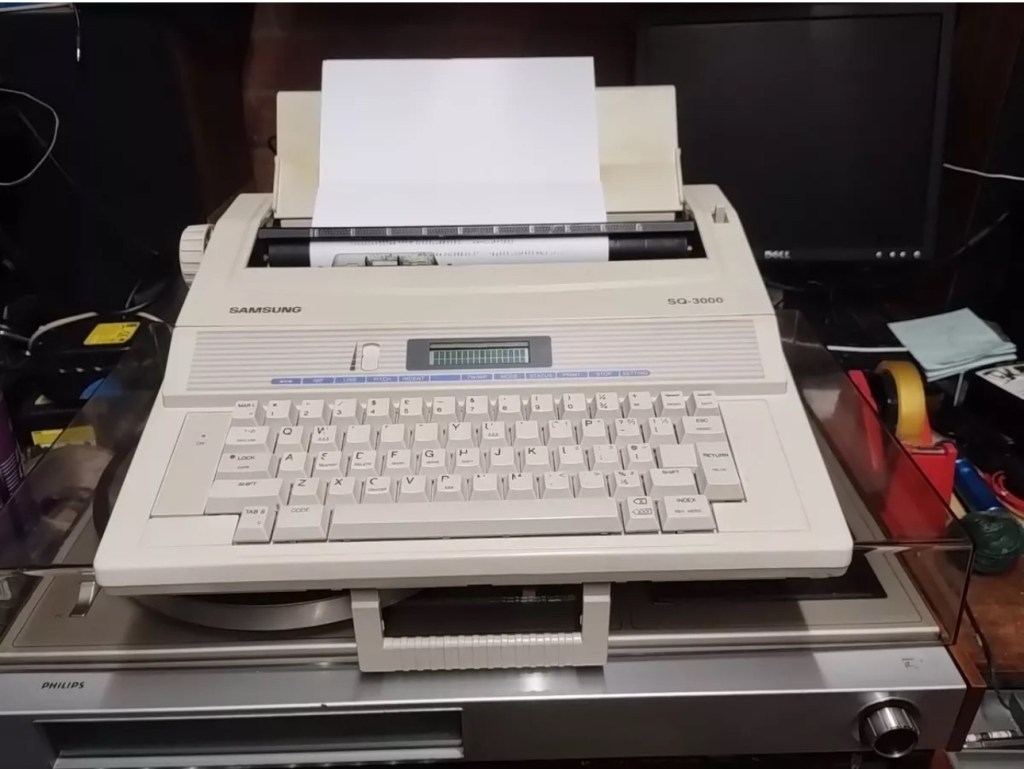
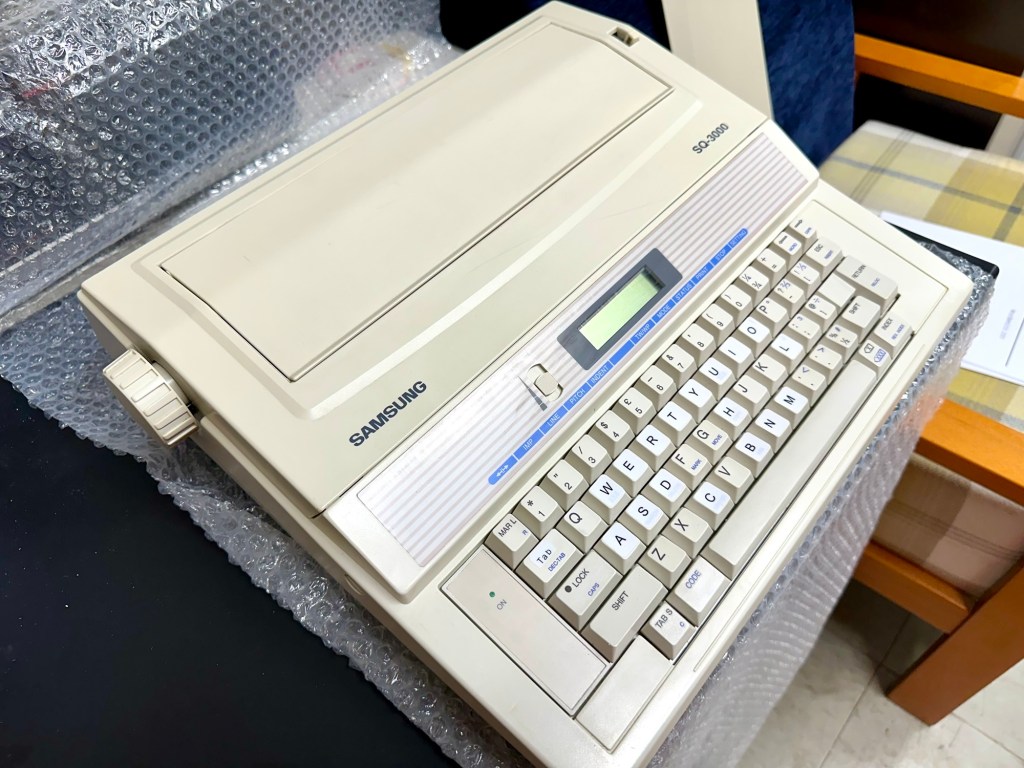
This is the follow up to a recently obtained electronic typewriter that was purchased in January 2025, the initial post can be found here: Samsung SQ3000 electronic typewriter.
Samsung SQ3000 electronic typewriter
The following post will deal with the assessment on its arrival and what I am going to try to do, to get it back working again, as close as possible to its original state.
I’ve downloaded an instruction I manual, I’ve had to download one for a Smith Corona Wordsmith 200, it is in theory the exact same unit, just under a different manufacturers branding.
Assessment
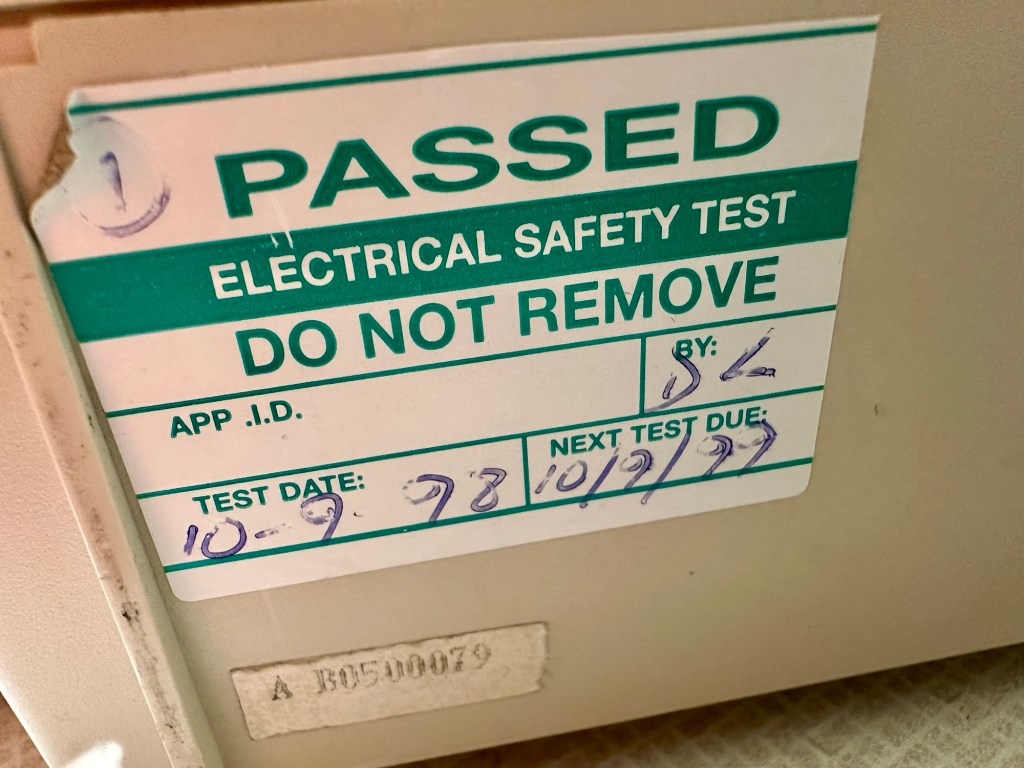
It’s arrived and apart from a little age yellowing it looks ok. There is a PAT testing sticker that says it was last electrically tested back in 1998 and is due a retest in 1999. This corresponds with my date estimate of mid 90s.
Yellowing Pat test date
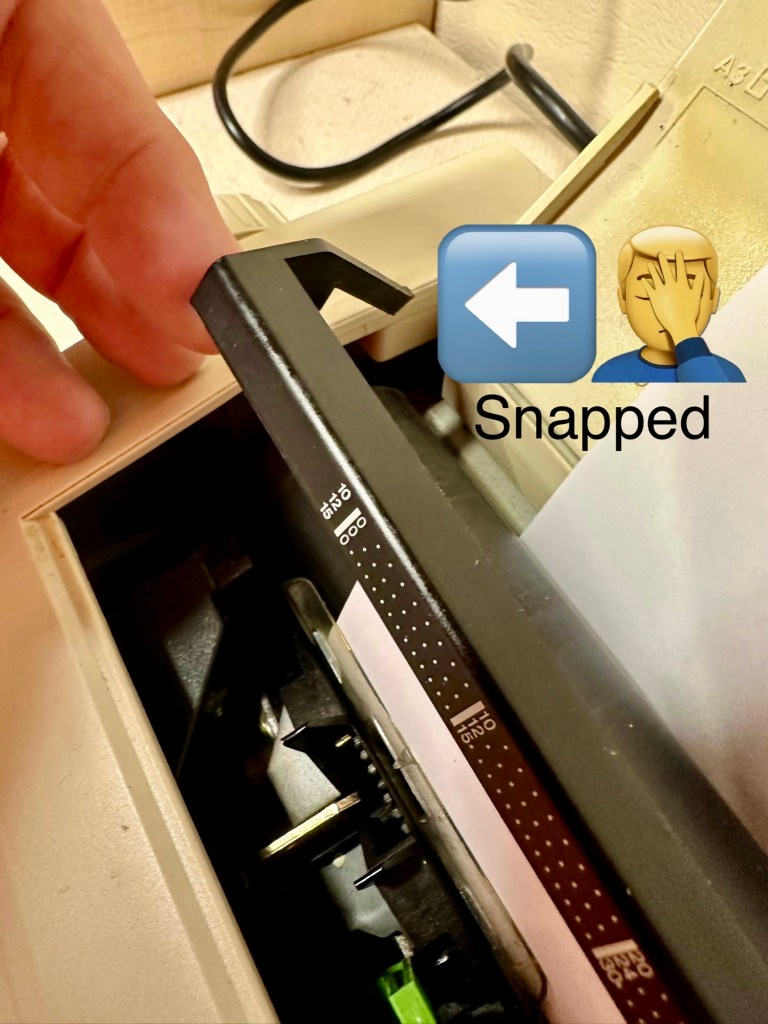
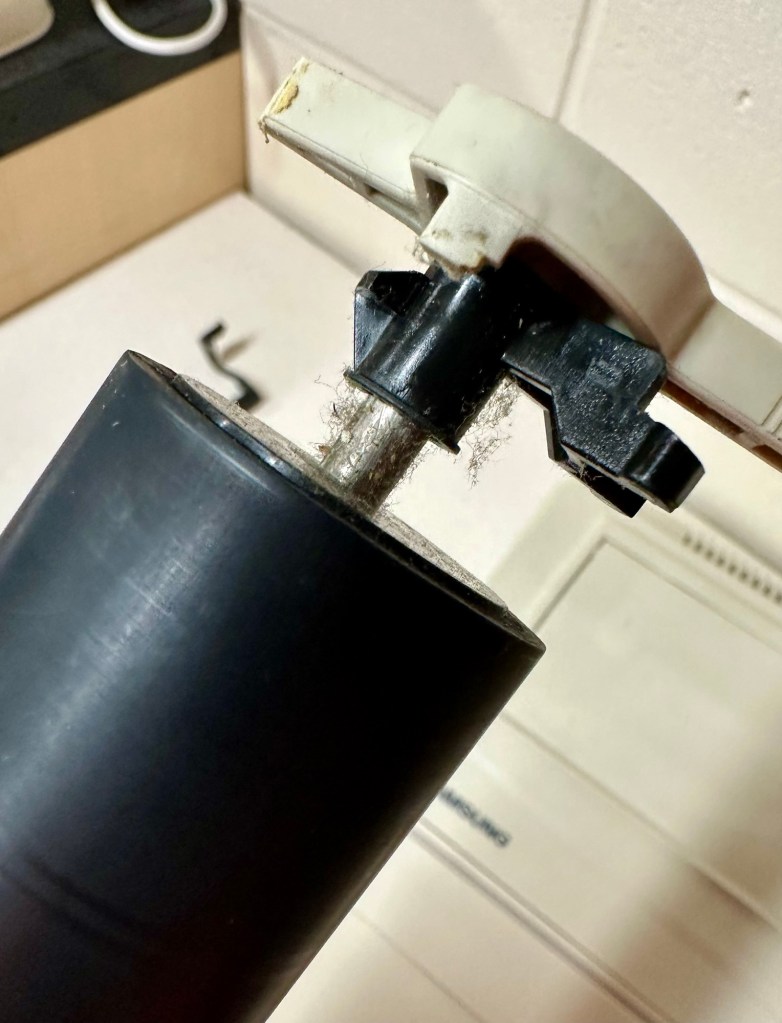
I will retest and renew the safety checks when I’m finished working on it. I have noticed that the paper bail/release rail is broken on the left hand side so I will have to add that to the repairs, this shouldn’t be a major concern.
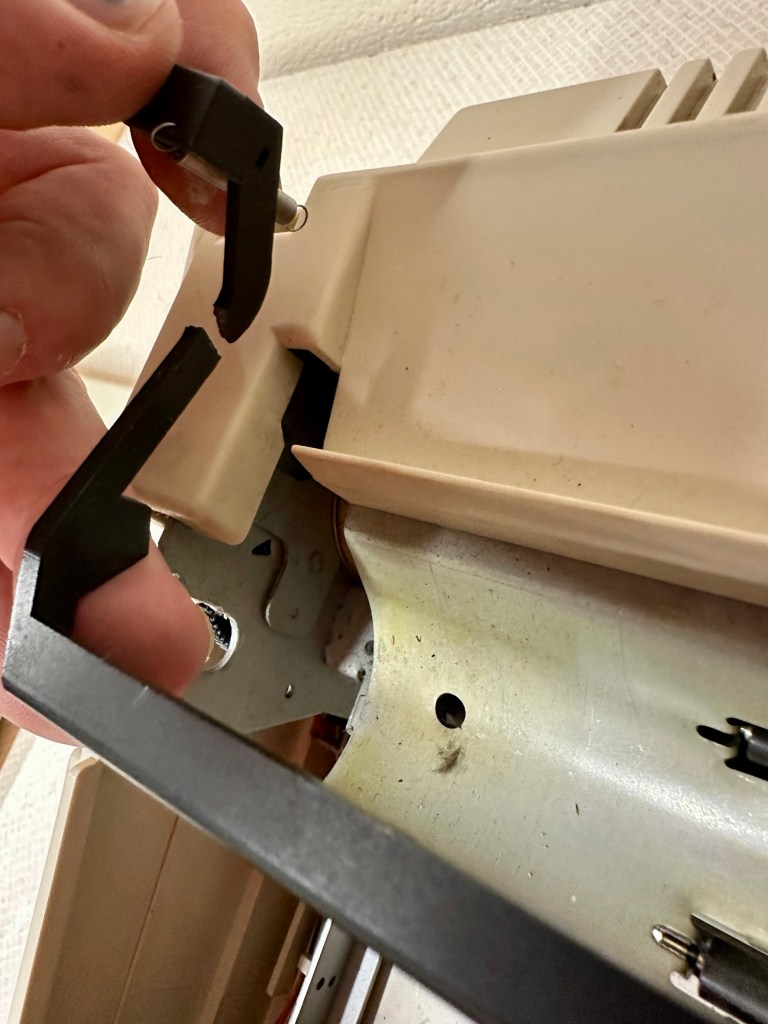
Paper bail snappedBroken piece recovered
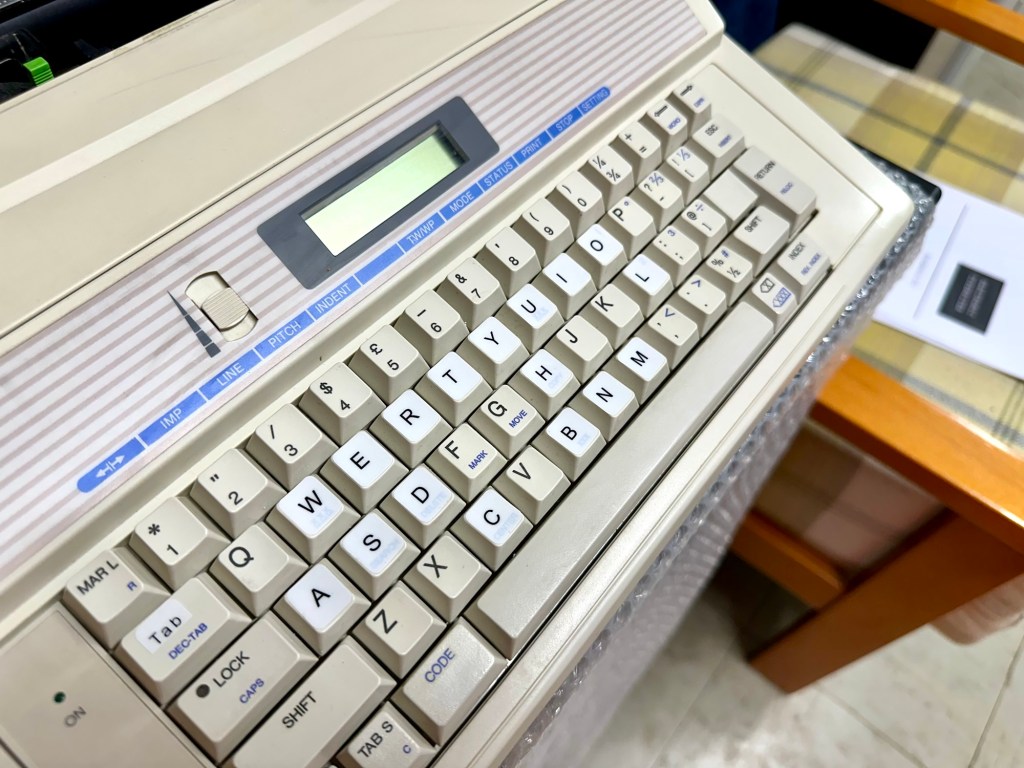
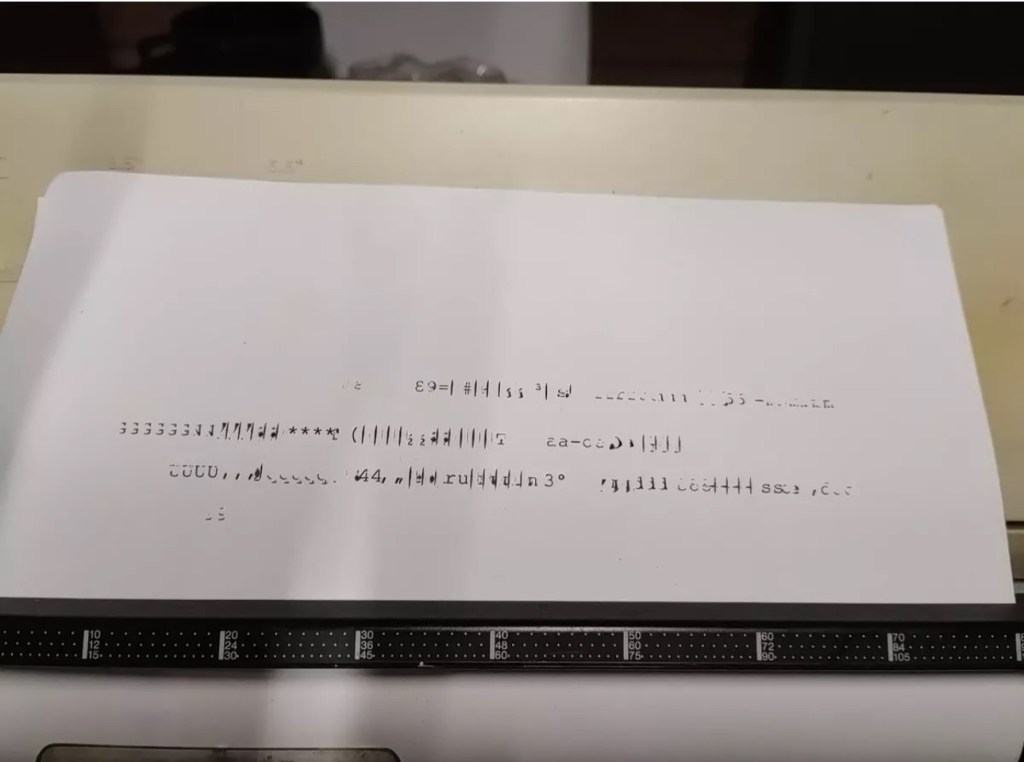
Before I took the roller out to get to the paper bail I did start the machine up. Everything went as expected and when I tried to type I was getting some weird reactions to the keys I was pushing. All kinds of characters were appearing.
Before
I checked the daisy wheel and there was a click. It wasn’t sitting right. I reset the machine using the two reset buttons and the machine then went through its reset programme, pretty much the same effect as turning it off and on again. (Not much changes in the way of tech there then)
After
Well that’s worked fine, I have tried every combination on the keyboard including the erase function and this is now fully working. It really was quite simple. My next job is to try and fix this paper bail.
Paper bail removed for fixing
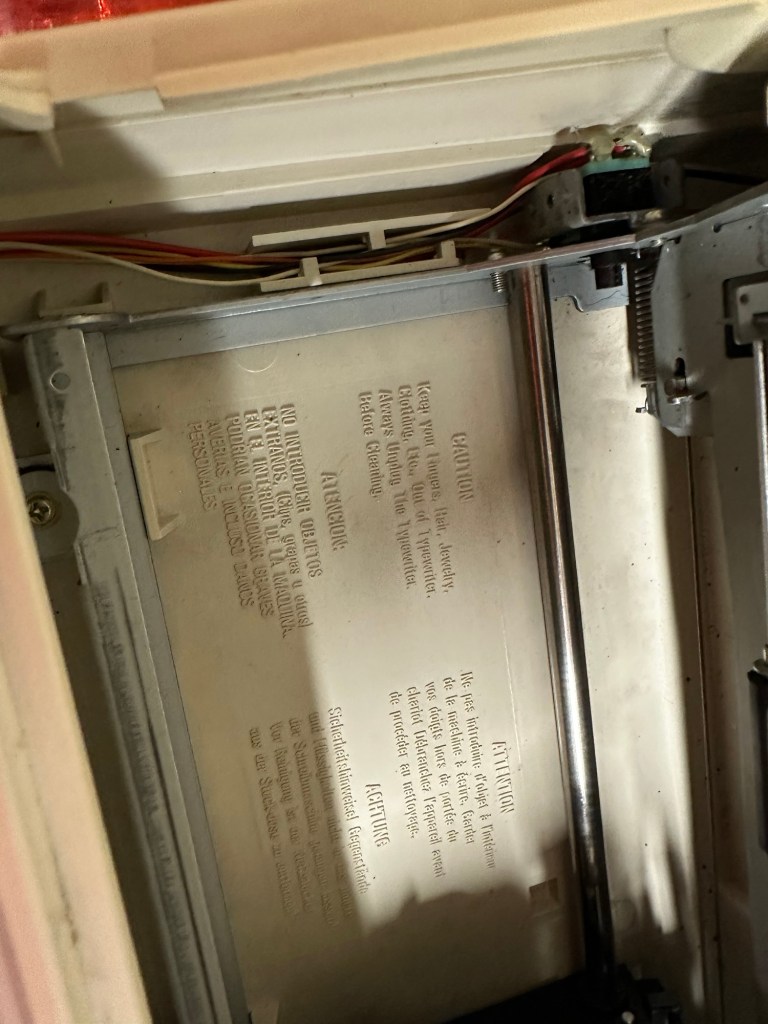
There is quite a bit of dust and dirt inside that needs removing. And whilst I’m at it I will lightly re grease the areas that need it. Let’s be honest it’s not been done in the last 30yrs so now is as good a time as any. Inside will get a light hoovering and a bit of a tart up, I’m not going to go mad. I will clean the outside and all knobs and buttons and try to get rid of some of the yellowing, but to be honest as long as it’s clean I’m not too worried about age marks.
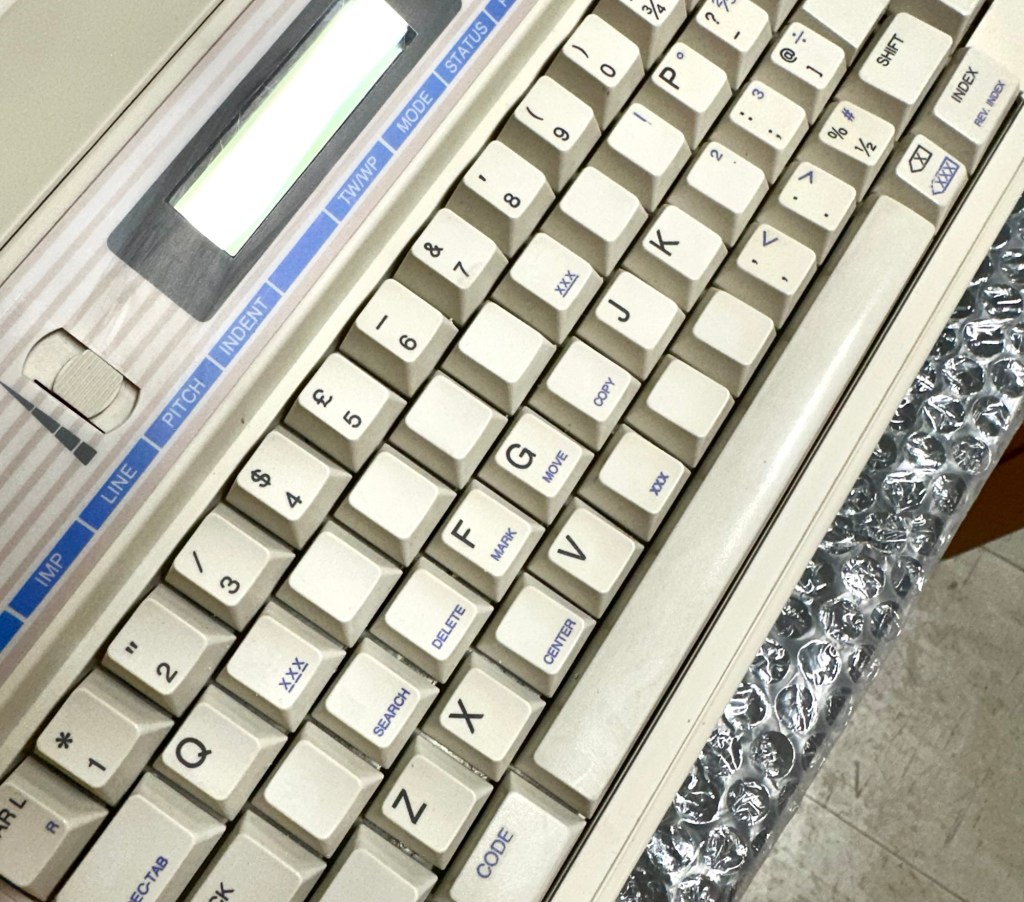
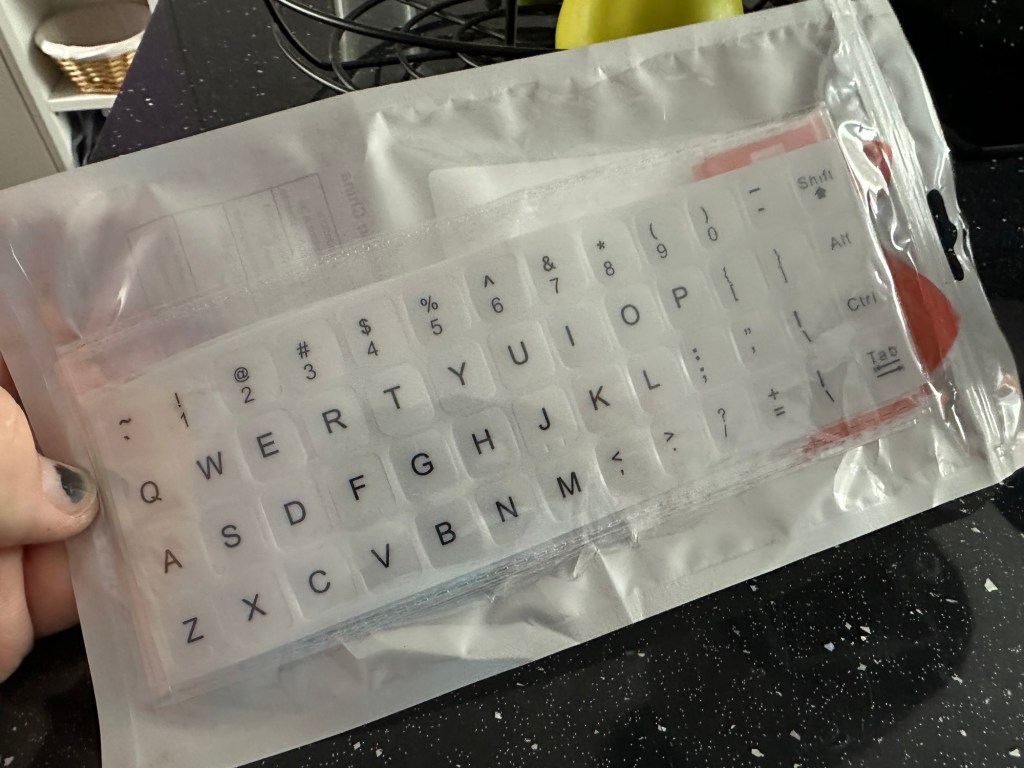
The keyboard has lost a few of its letters. I will remove what is left of some of them and use some keyboard decals to replace the missing ones. This will be one of the last jobs I do.
Characters missingKeyboard
Well that’s the assessment done and apart from a few small issues and requiring some basic maintenance I don’t think we have an immense amount of work to carry out. We know it now works. Let’s hope I don’t cause any further carnage whilst working on it.
Let’s get to work.
Repair
Right it’s straight onto the paper bail to try and fix the snapped end. Firstly I’m just going to use some superglue to get it in place. When this is dry I’m going to create two “Doublers”, place one either side of the damaged part and glue these in place to create a stronger repair and to add some stability to this area.
I’ve got some black semi rigid plastic. I’ve created a small template from a tracing that I did of the good right hand side of the bail.
PlasticTemplate
I now have two doublers cut from the plastic that I will use as explained above.
Two doublers
It doesn’t matter that they are not perfectly shaped, however they both fit perfectly well into the profile of the bail arm, and this portion of the arm is hidden in the typewriter housing anyway, so the part will not be visible, but it will now be strong.
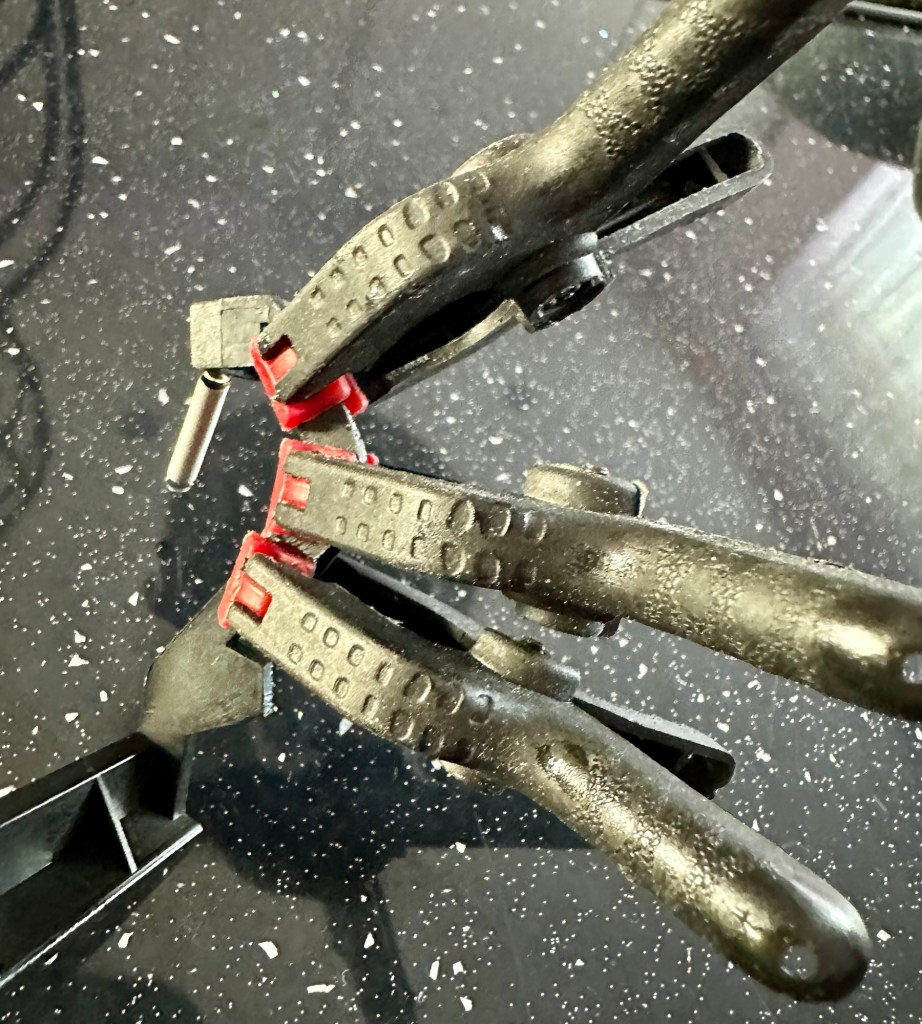
SupergluedDoublers in place and clamped
The Doublers have been put in place using a quick set epoxy resin, I will leave this to dry for a good few hours before I tidy it up, with a light clean, and then I will try to get it back in place.
Bail arm repaired, installed and working.
Now that’s done i’ve gone inside and there were a nice couple of spider webs around the transformer that are now history. I’ve secured the cable in the rear of the unit that never had any tension restraint, so that there will be no issues, should anyone now give a good yank on the cable lead. This is a safety addition I have made that was never on the original unit.
Cable restraint screwed to base to prevent strain on internal wires in and around the transformer bay.
I have also tightened all screws and checked the wiring and this all seems ok. Plug and fuse have been checked and all is looking good. I’ll carry out a PAT test once I’ve finished the clean up.
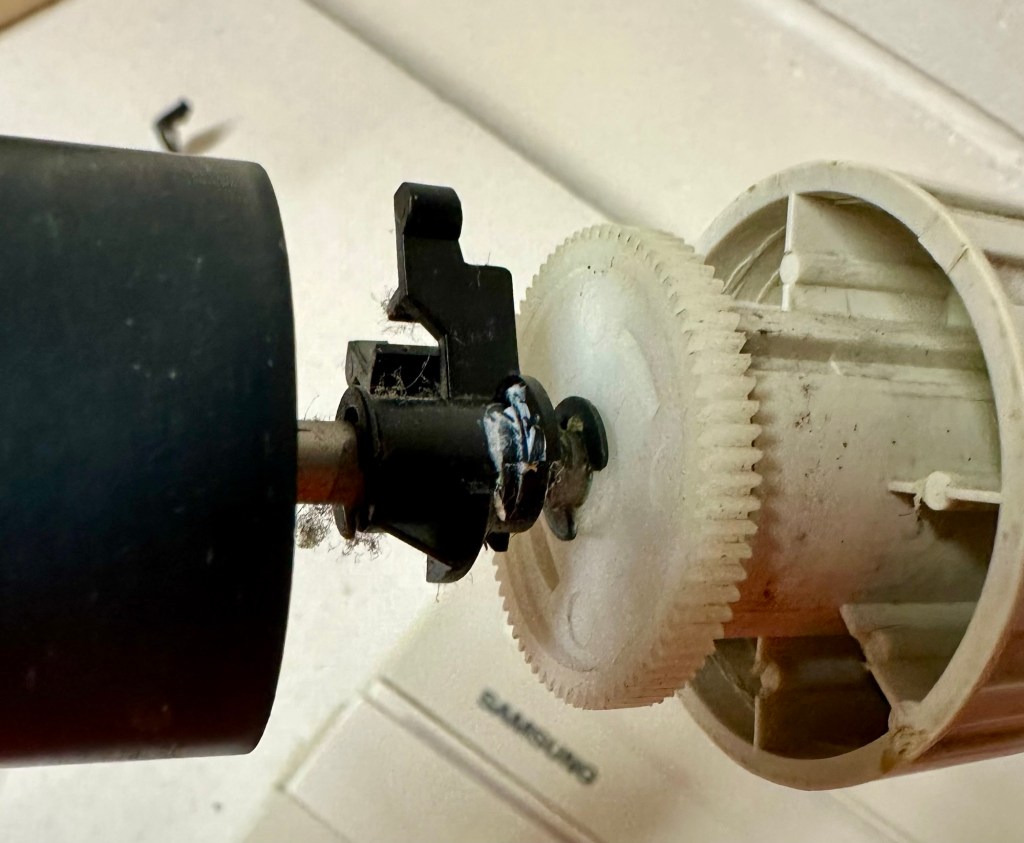
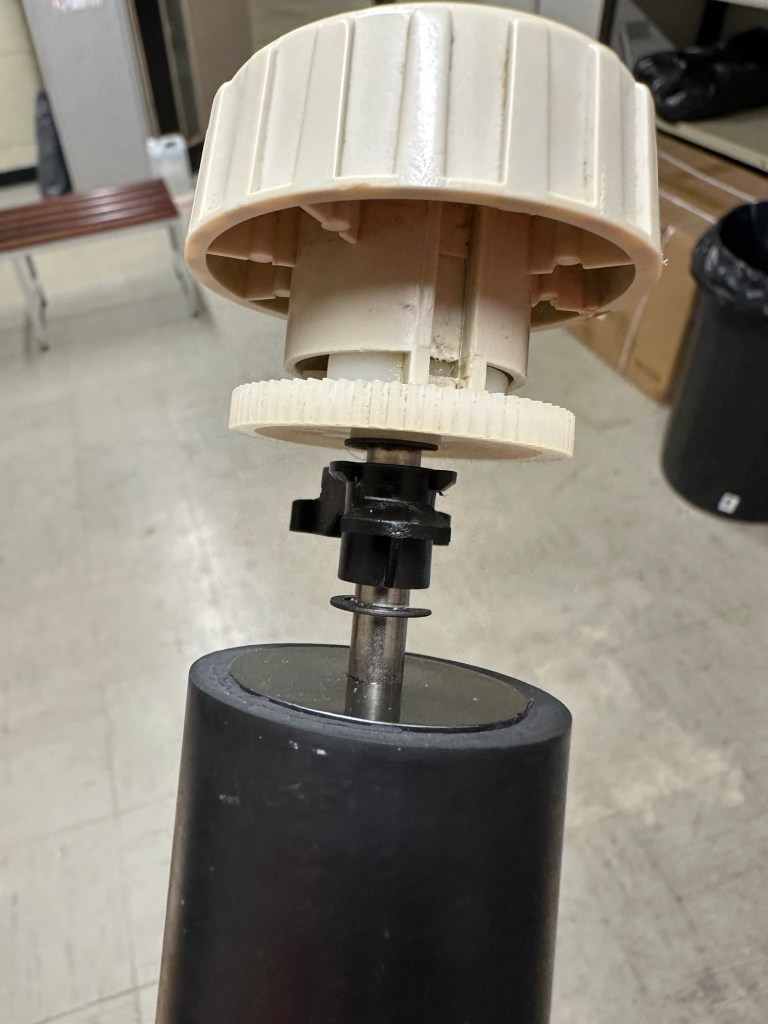
Roller cleaned and degreased Platten switch cleaned
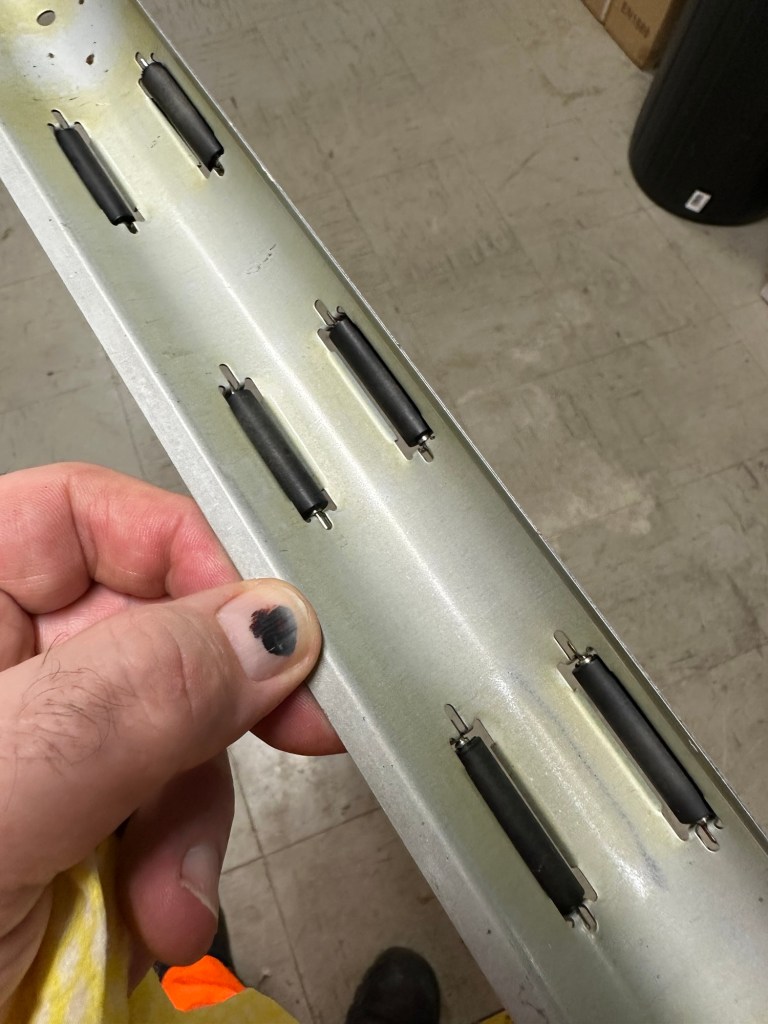
I’ve cleaned the main roller with alcohol, and removed all the old grease and dirt from the platten adjuster switch and the roller advance knob. I have removed the platten plate as well as the six mini rollers that are here. I’ve cleaned them all and re assembled/installed them.
Platten platePlatten rollerRollers installed and platten complete
I have cleaned the daisy wheel as well as in and around the printing head unit.
Clean insideDegreased
Inside the unit I have given a good hoover as well as a light clean and again removed more old grease. I have given the exterior plastic a preliminary polish, this has removed some of the yellowing and made it look “cleaner” I am not going to worry too much about the yellowing as it isn’t that bad, and I don’t really want to venture into carrying out a “Retrobrite” on this unit. It would take too long and there would be no benefit for this project.
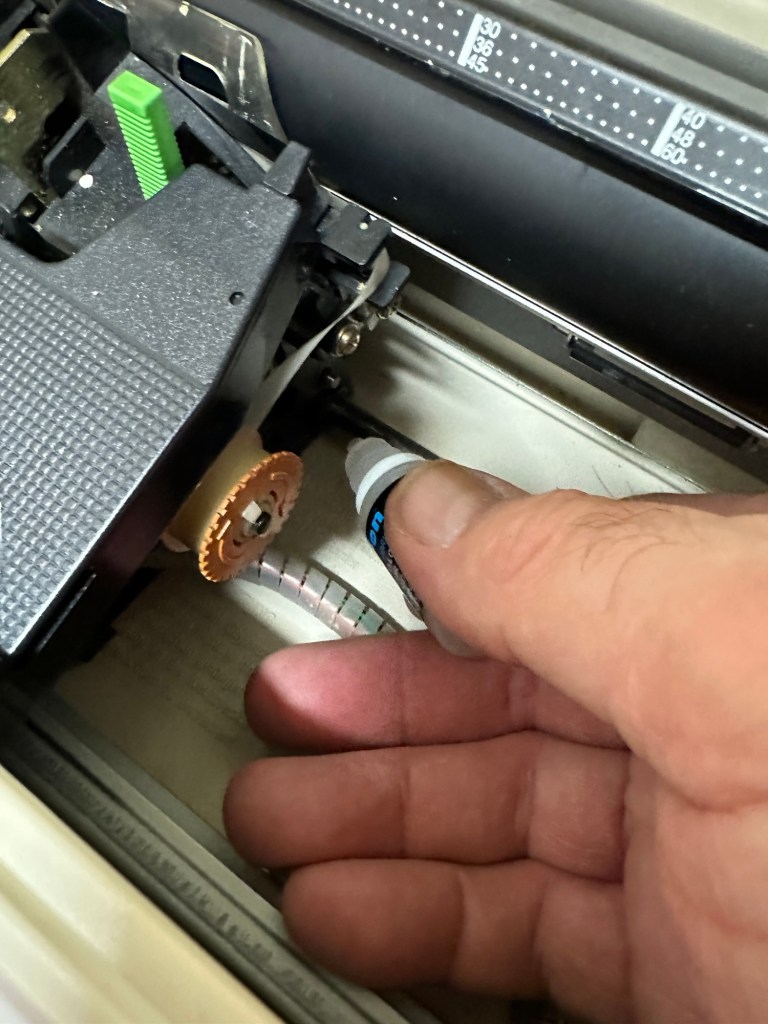
I’ve now added very small amounts of a watch lubricant to those areas that i have previously cleaned and removed the old grease from.
Light lubricantMain transport lightly lubricated
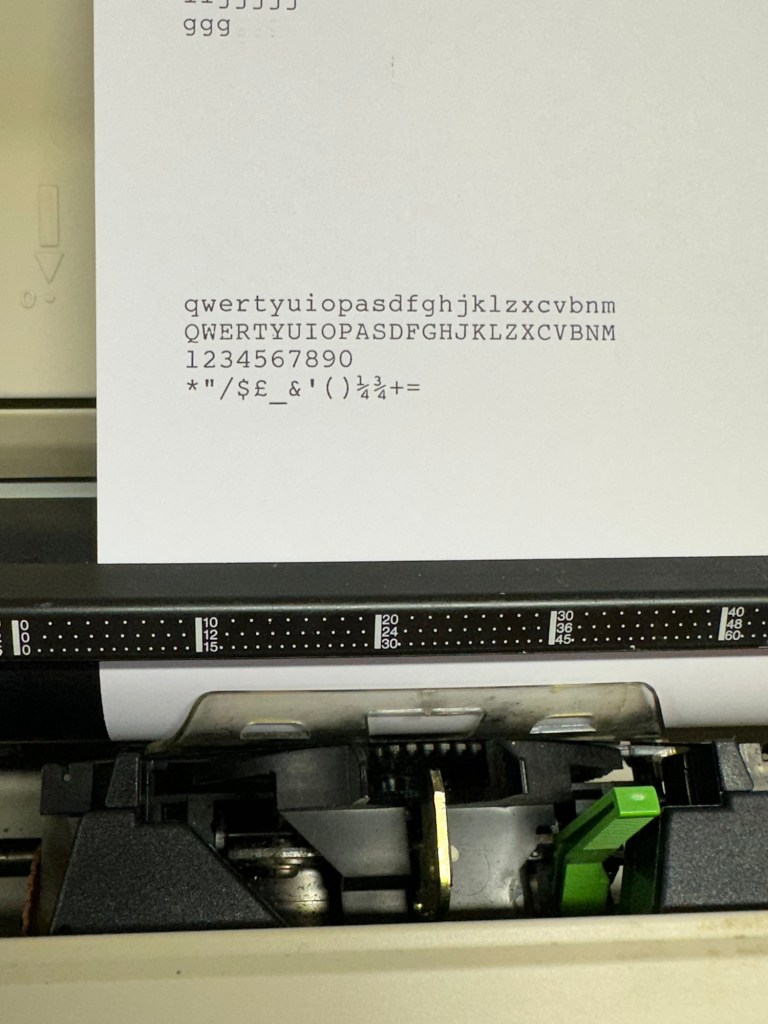
The unit has been reassembled and I’m pleased to say it is still working fine. It’s running smoothly and all aspects of the unit seem to be working just fine. To be honest it seems to be printing clearer to me.
Daisy wheel and print quality is perfect
I don’t know how long the print cartridge has been installed but I suspect it may have been a few years back. It’s almost finished, and I do have a replacement on order. I’m sure a fresh cartridge will make the print stand out even more.
Next I’m going to have a go at replacing some, or even all of the keyboard letters. It all depends how it looks when I start replacing them. I’m going to gently rub off the lettering that is left and clean the keys using a 95% pure Isopropyl alcohol solution (IPA).
All damaged and missing key decals removed in preparation for replacement new decals. Others may have to be removed dependant on how the new ones look when in place.
These are the replacement key decals I will be attempting to use.
Qwerty keyboard decals
I’ve replaced the damaged key decals. The ones I’ve used are a lot brighter than the original ones and really accentuate the yellowing. I’m not troubled by this as it keeps its “Old” look. I would have to scrape and wipe for hours to remove all the other keys and to be honest it would look just like someone had gone abroad to have a bright white set of dodgy veneers installed, it would look quite out of place, and in your face. Just like a Cheshire Cat smile.
New veneers anyone?
It serves a purpose and just allows the unit to be usable again.
The final product:
Looking damned fine if I say so myself
Fortunately a lot of the equipment and parts I have used, I was already in possession of, so there are no additional costs for this project. Below you can view the total costings for this project as they currently stand:
Purchase inc postage £13.14
Cable restraint £0.25
Keyboard decals £1.25
Total cost of project £14.64
Again I have managed to save a fantastic 90s retro item from landfill for very little cost, and that is a fantastic result. It has years of use left in it, as long as the consumables remain available, and of that I am confident that they will be available, for at least the next few years. The unit is clean, I’ve just carried out an electrical PAT test and it is electrically sound.
Believe it or not I’m going to go back in time and will write some traditional typewritten letters to friends and family. I’m looking forward to doing that and it will certainly surprise them, it will be totally unexpected.
When all that is done, i will donate this unit to our local LOROS Hospice shop so they can sell it on and raise much needed funds. They deserve it. Edit: This was done in March 2025 at their shop in Hamilton Leicester. I hope it gets them a good price.
Watch the brief video for the final words on this restoration. All 13 seconds of it.
Offered here is a good vintage Samsung SQ-3000 electronic typewriter. It powers up and operates when the keys are pressed. However, the symbols printed do not match the button pressed ! The daisywheel may be out of line. Otherwise, good cosmetic condition. Any questions, then please ask.
EBay
I have again succumbed to purchasing something very retro, a typewriter. Yep it has a fault just as most things I buy have, that’s part of the fun of it all, can I fix it and save another item from landfill? Who knows but I’ll give it a try.
This Typewriter, the SQ3000 was also sold as the Elite S-7500, Hanseatic Europa II, Leader MD, Olympia Textstar MD, Opperman S-7100, Privilege Electronic 2600, Royal RT 7700, Silver Reed EX-133 MD, Smith Corona Wordsmith 200 and Welco EX 260 DS. It was manufactured sometime between 1990 -1995 and was a mass produced low cost typewriter of the time. Personally I think it was around 1995 as this was when regulations insisted that electronic items such as this required wired in power supplies, and this unit is a hard wired unit.
Samsung loosely translated/stands for “Three Stars”Apparently the three represents “Something big, numerous and powerful” and the “Stars” represent “Everlasting and eternal” so there you have it, that is today’s history lesson.
I loved using typewriters prior to the word processor/Pc rendering them useless. There is just something special about them, I can’t quite put my finger on it.
This item looks to be in fantastic cosmetic condition, and I have also checked that the consumables are available, they are so I might have struck lucky. From what I can see in the pictures a number of letters have worn off the keys, hopefully I can source replacements, or decals or I may even repaint them myself.
I have had to download the instruction manual for the Smith Corona Wordsmith 200 as it is the exact same unit under a different name, Samsung just don’t seem to have anything listed or historically available for download.
Looks niceSeems clean and tidySeems to be a potential daisywheel problem
I think I’ve bagged a bargain (if I can get it working) I’ve paid a grand total including the postage of £13:14 GBP and that was after knocking the seller down a few pounds from the original price. He bit my hand off to be honest, so we’ll just have to wait and see what arrives. If all else fails I can certainly use it for spare parts in the future.
Anyway, this now gets added to the long list of other items I have, that need to be repaired. Please check back to view the “Assess and repair” post that will follow, explaining what arrived, its condition and what I will be doing to get it back in working order.
What’s that then? I hear you ask. Well since I became a radio amateur (M0ESB) back in Feb 2003 anything regarding radio has fascinated me.
The Duga or – Russian woodpecker issue of the early 80s has always been an item of interest to me. It was allegedly constructed as a Russian over the horizon early warning system and was replaced in the late 80s when satellite systems took over the early warning mantle.
However it obtained notoriety by creating havoc on the airwaves worldwide for quite a considerable period of time.
This video by a fellow Amateur radio enthusiast M3HHY explains quite eloquently, in 11 minutes what the issue was. Some great photos of this absolutely massive antenna array can be seen in this video.
And whilst we are still here this is what Wikipedia has to say:
The duga system was extremely powerful, reaching over 10 MW, and emitted in the shortwave radiobands. It was given the nickname Russian Woodpecker by shortwave listeners for its emissions randomly appearing and sounding like sharp, repetitive tapping noises at a frequency of 10 Hz. The random frequency hops often disrupted legitimate broadcasts, amateur radio operations, oceanic, commercial, aviation communications, and utility transmissions, resulting in thousands of complaints from many countries worldwide.
Courtesy: Wikipedia
I hope you find this as fascinating and informative as I have. Radio remains to this day special to me. I’d sooner be listening to it in any form rather than watching a tv. In my eyes or should I say ears, it was the most significant invention ever made, if only Marconi knew back in the 1890s just how important this communication method would become he would have been blown away. It has helped to shape so much, our modern day world, and how we communicate with each other on a daily basis.
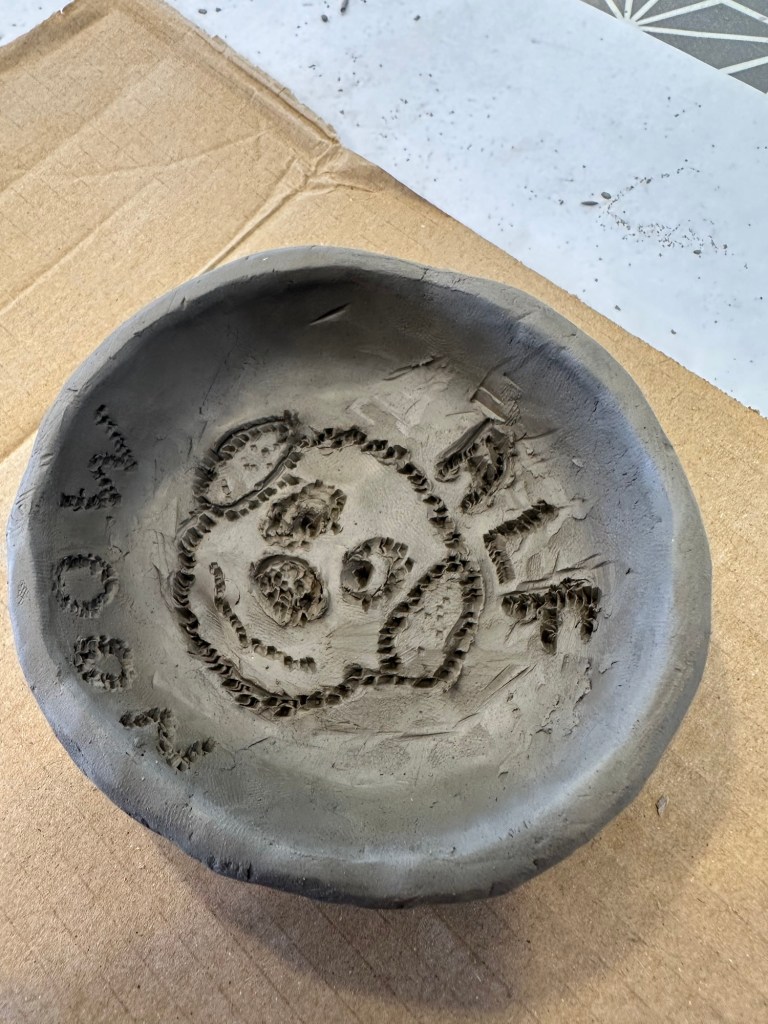
Back in September 2024 I wrote this post about pinch Pottery: Pinch pottery
It’s been a few months and I’ve just decided to finish it off and give it some bright colouring and a sealant coat or two. I want it to represent a bright sun if I can, but when I get to actually paint it, it could well turn out looking totally different. Here we go.
This is one of those things I think my wife dislikes but she knows it means a lot to me, even though it is a poor quality and there are probably kids of 5 or 6 years of age that could produce something a lot better. But I made it, it was made at a time when I was grieving and gave me a lot of pleasure. It still does and this will probably remain in my workshop when I eventually get it up and running. It makes me smile when I look at it and i love it. It’s simple, it’s how life should be.
This is how it originally looked:
AlfReminder
I started painting the base Yellow, and the inside Orange, with the dog done in white with a black outline. This is what I have so far.
Just started to paint.
I’m using acrylic paints here. I’m going to put a line of vine type effects around where the yellow joins the orange. At the moment I’m letting the piece dry for the next 24hrs and then I will try some touching up and repainting what I have already done. The yellow coat is quite dull as it is being absorbed quite literally into the clay base. I’m kind of hoping that the next coat will not be absorbed so much, fingers crossed.
Multicoloured madness
I’ve gone with a yellow scheme for the underneath and a red – orange on the inside. I’ve tried the same type of painting that you find on narrowboats on Uk Canals, when they paint the buckets and metalwork with flowers. I’ve used this effect around the rim and from one angle it looks like he is looking over a hedgerow. It’s exceptionally basic, but it’s brightened up a piece of pottery that would otherwise sit in the corner unnoticed, discarded and unloved. You can’t miss this now, it just stands out.
First coat of lacquerFast drying enamel clear coat lacquer
The final task is to give a nice coat of lacquer to protect the acrylic paint. I’m going to use some fast drying lacquer that I have sitting in the shed at home. About two coats will be sufficient.
Before and after
Side decorations
I’m pleased with the outcome, it’s made me happy, and I smile whenever I see it. It’s kept me occupied and busy, It’s special to me and that is all that matters. It’s adult pottering and nonsense at its best. But it’s my nonsense.
Loved this post regarding the reuse and repurposing of old cameras. I know its social media based, but you can’t have it all your own way. I’ve got about 70 candidates that could quite easily be adapted for this purpose…
Social media microblogging has brought us many annoying things, but some of the good things that have come to us through its seductive scrolling are …
Jan 2021, Covid in full effect and I’ve been brought a new set or art stuff for the previous Christmas. Using pencil and pastels I attempt a picture of our dear late family member, Alfie, familiarly known throughout the family as “Alfie Moon”.


You must be logged in to post a comment.