Not one to give up on a project I have looked at a suitable donor camera and believe I have found one as detailed below. Only difference is that I had to buy two cameras as they came as a bundle. Not a problem as I can always do a separate post on the other one, the two have cost me a total of £15:00GBP bartered down from the original price of £30:00GBP. A bargain! So let’s just call it £7:50GBP per camera.
What the listing stated:
mamiya shutter button is stuck. red light on the right comes on. some external corrosion pictured
ricoh no power at all
EBay
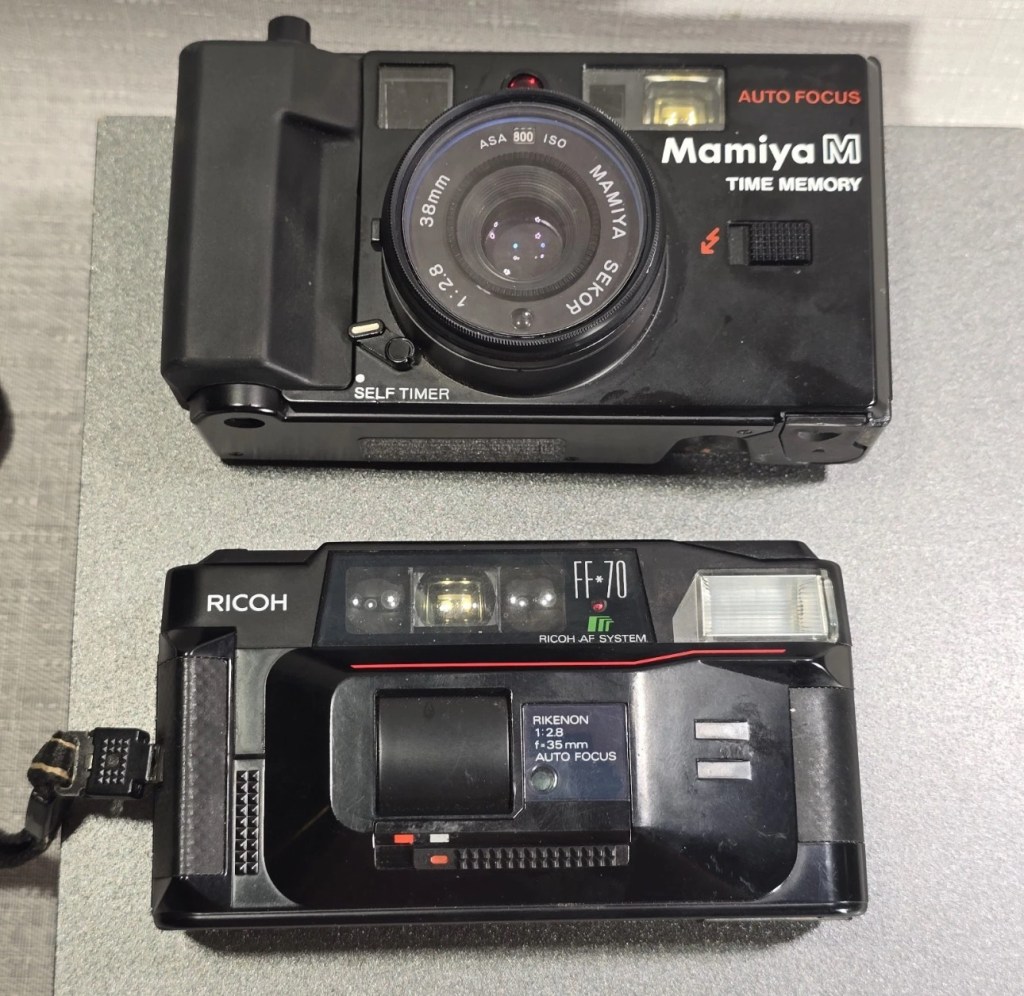
The two cameras
Assessment:
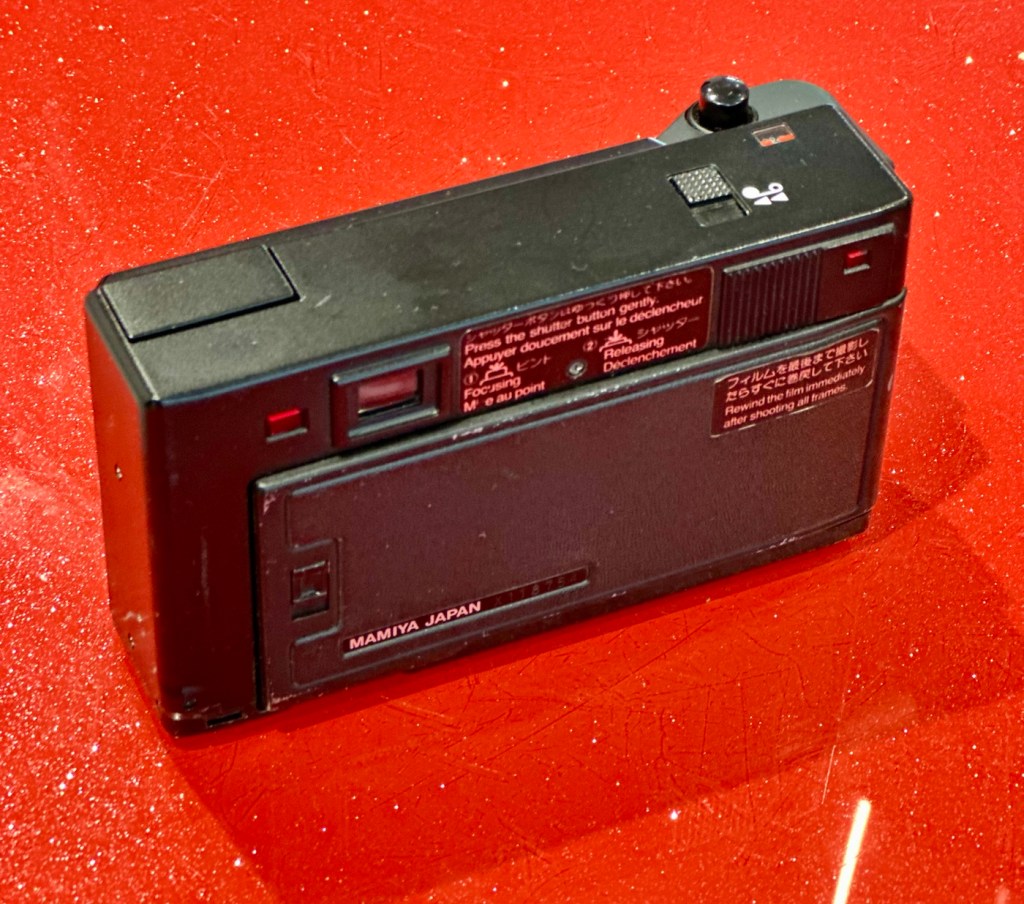
The Mamiya is in quite a poor state, and is the Time Memory version that differs very slightly from the version I originally worked on, it’s essentially the same camera as the Mamiya M, but with an added quartz dating mechanism for imprinting time and date information on the film. This model was the last 35mm camera Mamiya produced before focusing solely on medium format. However the back seems to be a bit rusty whereas mine is in excellent condition, so I will be using a mix of the two units to make the one good one.
Repair:
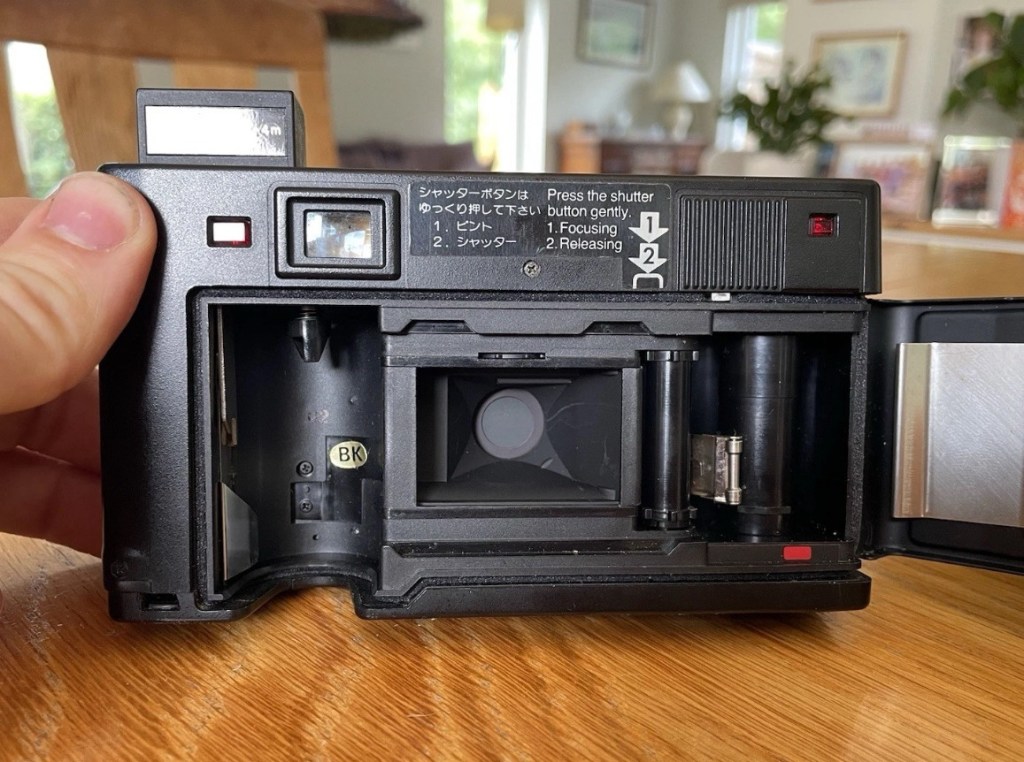
The Mamiya looks good cosmetically until you open the rear and see the rust around the door, not a problem as I won’t be using this part of the camera. The red light does not come on at all and the shutter button is stuck, that’s for sure. The whole camera is dead.
Let’s get into it.
Once opened all looks ok so I decide to have a search around with the multimeter checking the basic operation. Am I getting 3 volts at the top of the battery barrel? No I’m not. It appears that one of the traces on the positive side of the power input board has lost continuity. For some reason the traces has been damaged, this could be either from corrosion or rubbing on something. The area affected is in the photo with the red ring around it.
The board top rightArea of no continuity
I’ve fixed this immediately using some solder to bridge the gap, I have checked continuity and all seems ok. I put some batteries in and the motor squeals like a banshee and then stops. You can hear the screaming motor below in the short video from its first screaming session through to its proper 80s sounding drone.
The screaming motor through to its repair
I don’t think this motor has run for years and it does not run consistently. I have sprayed it with some contact cleaner and let it soak. I have left it overnight and checked the operation in the morning and it seems to have improved.
I’ve used the original fascia, rear door, focussing beam and flash capacitor from the first failed unit, and apart from a few bits of soldering, plenty of contact cleaner and some silicone grease, I’ve revitalised a failing motor and it is now working as it should. I forgot to mention I used some graphite on the shutter leafs to “lubricate” them. All optics cleaned and camera has been tested without film and is working just fine.
View finder indications are good with light meter operational, motor rewind works, flash and exposure is fine, and the motor advances as well.
Result:
I’m really pleased with this little camera and am pleased I didn’t give up on it. It’s taken two broken cameras to make one good one, and I have a good few spare parts left over to be used at a later date.
Re assembly taking place
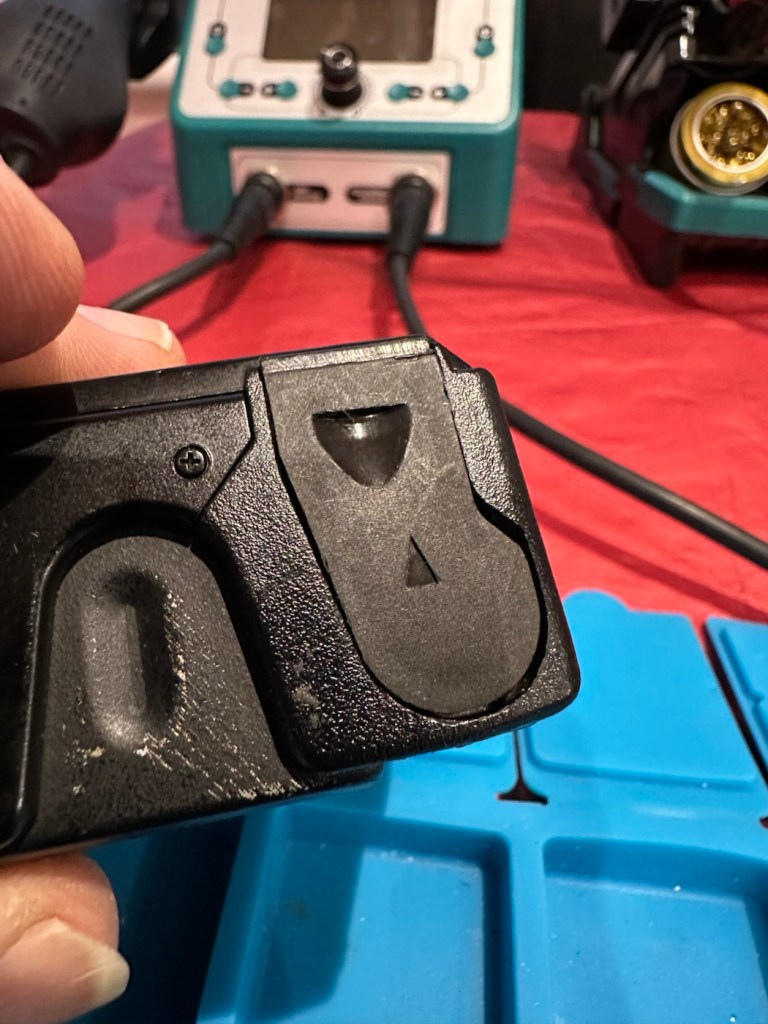
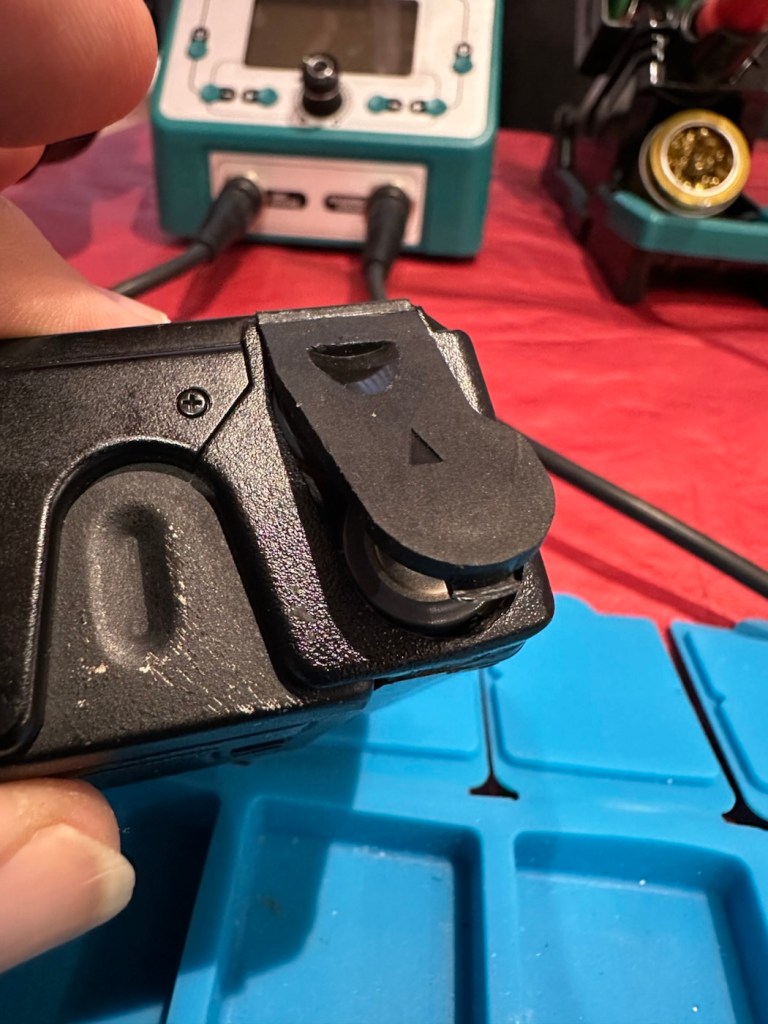
The unit looks so smart, the only real issue is the battery door that is notoriously flimsy and lots of references to its poor design can be found on line. A temporary way around this is just to put some tape across it to keep it closed.
That flimsy battery door
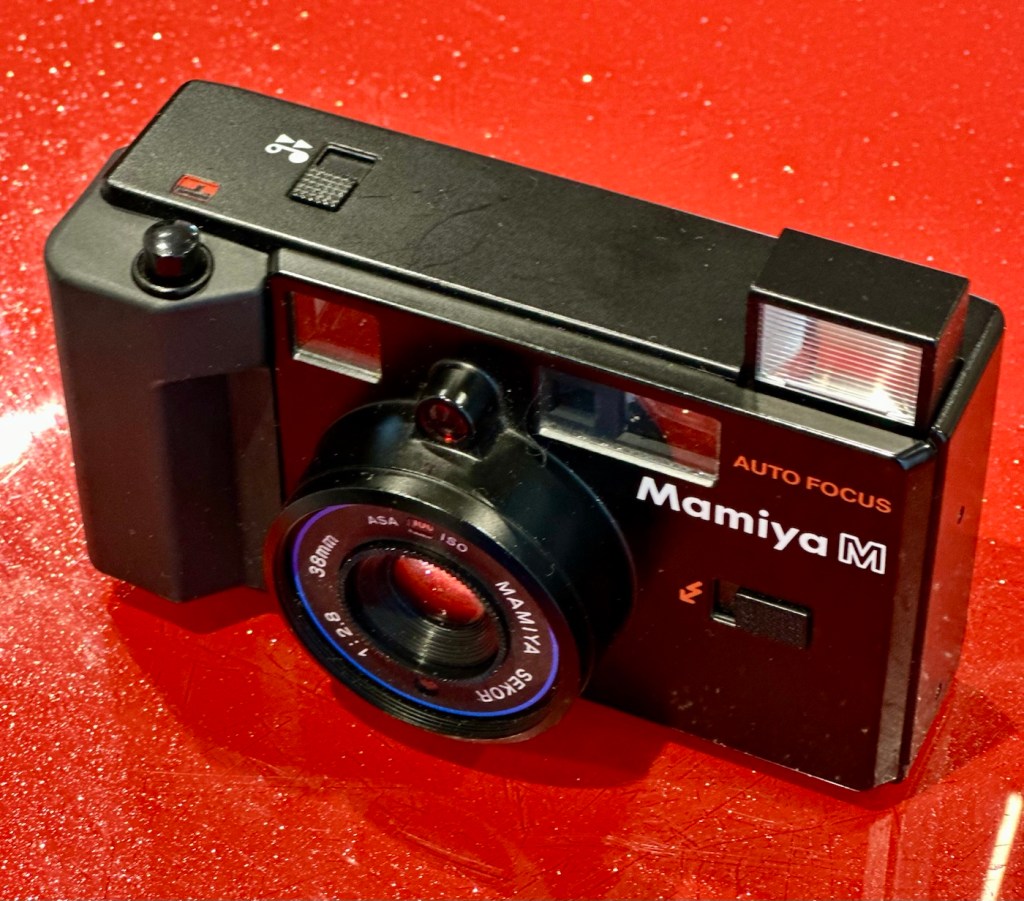
Beyond that issue, the camera is a really good looking unit that has cleaned up really well.
The completed camera
I can’t wait to run some film through it to see how it performs. I have a few cameras like this to test so I’m looking for some decent priced film to use, as i do need quite a bit.
As soon as I have some photographs availability I will link to this post accordingly.
Many thanks for following the repair, it’s always very much appreciated.
I’ve been after a couple of cameras for quite a while now that hold a great deal of sentimental meaning to me. This will become apparent when i publish the individual posts for them, but for now i just want to share the result of an auction i participated in on the 31st July 2025.
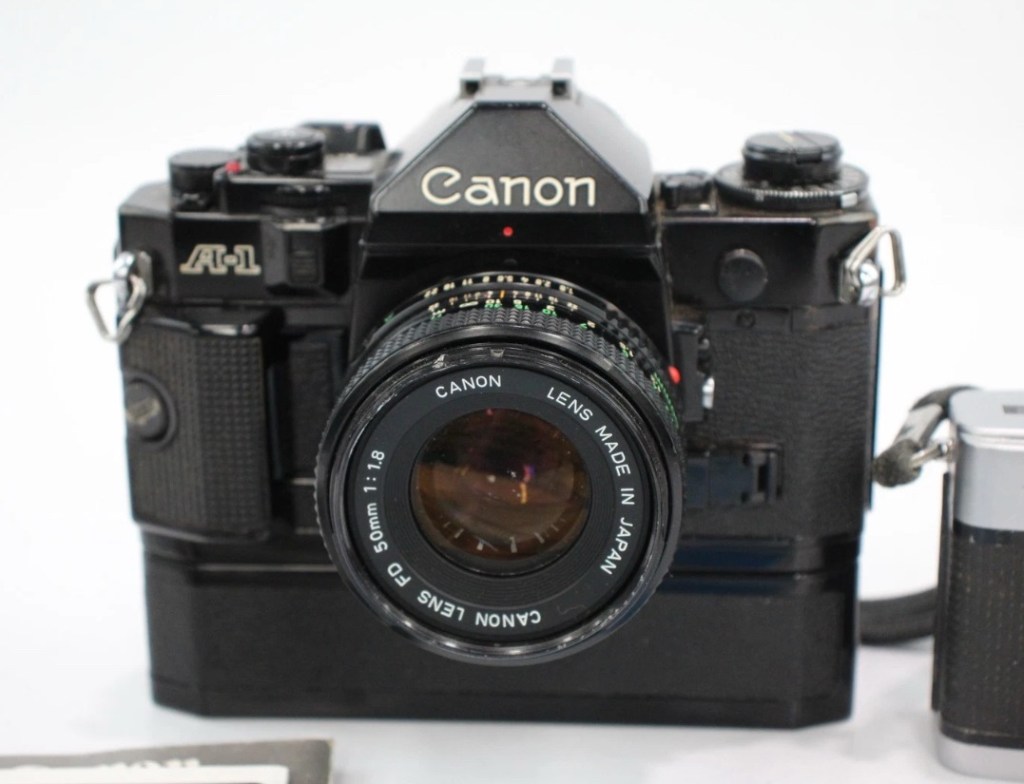
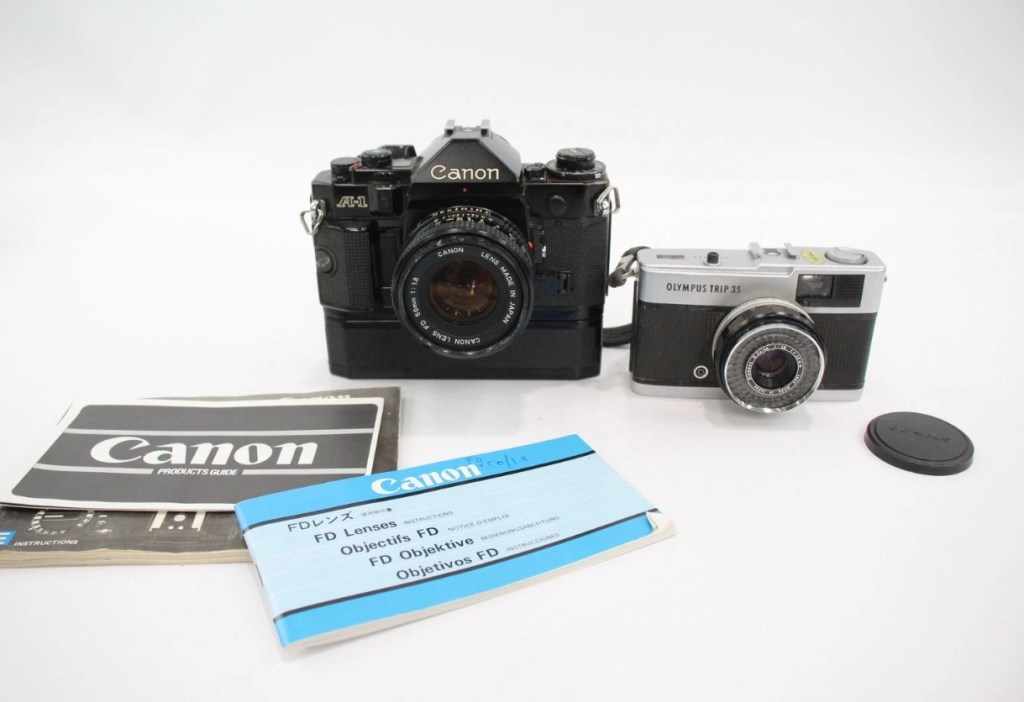
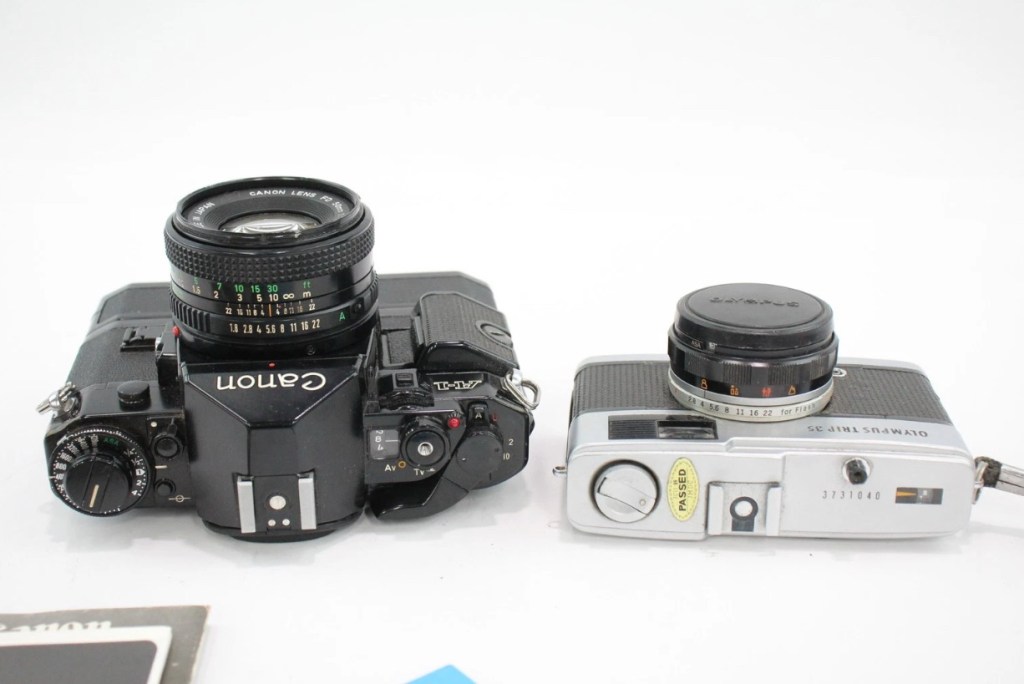
A Canon A1 and an Olympus trip
Today I’ve probably made the best purchase off of an auction site that I have ever made previous. I’ve been following a number of Canon A1s lately and they have all been going in the £120+GBP bracket, some even higher than that. Today I have lost out on two that sold for £93 for a damaged body and one for £121 that was just a body but of a much better quality. This particular auction I was watching was for an untested duo of cameras, a Canon A1 as well as an Olympus Trip 35mm. The Olympus alone normally commands the high £80GBP range and both of these were in this particular auction. I was just watching as this was going to sky rocket in my opinion, two good cameras from a respected seller who I have used before. Two minutes from the auction end, bidding was sat at £39GBP and I thought that any second now the price was going to go crazy, especially in the last 30 seconds. I put in a max bid of £55GBP for the lot, as I pretty much knew it would sail past that amount and go for a price in the £150-£200 price range. I hit the bid button with 20 seconds left on the auction….
You have won – congratulations!
I thought you’re having a laugh, no way. And then it came up with the winning bid being £39:00GBP no one else was bidding, crazy.
The A1 camera consists of the body, a winder, an FD 50 1:1.8 lens, a camera manual as well as a lens manual.
Postage was the grand total of £4:99 so my total for these two cameras was £43:99GBP. That is nuts, and to say I’m pleased about this is the understatement of the century. I have two of the cameras I wish for the most, and I have just landed the bargain of the day, I was in the right place at the right time. Wow. It’s unusual to catch other auction bidders sleeping, it will probably never happen again for me, it’s a very rare occurrence. Two cameras of this magnitude for £22:00GBP each! That’s unheard of.
I don’t know for what reason they are not working, as they both appear to be quite tidy examples. I have used this seller before and the posting above could also be worded such as to imply that the units may well not have been tested. But, that’s what this site is about, repairing old cameras and getting them working again. There’s no fun in talking about a good functional camera, that’s boring. We want the meat and potatoes as they say, we want to see things being fixed, or broken further….you never know with me.
Thanks for sharing my excitement at this purchase. It will all make sense once i’ve assessed the cameras and carried out any repairs.
Thank you for passing by. It’s always appreciated.
Mamiya M point and shoot camera. It’s in fantastic original condition and is cosmetically excellent with original case and lens cap included. The lens appears to be bright and clear from the front. HOWEVER…when batteries are inserted the shutter does not fire and I suspect it is jammed somewhere. The lights come on and it goes “click” but the aperture does not open, nor does the film winding do anything. For spares or repairs only, I’m sure somebody with the know how could get it up and running again. Priced super low as I want it shifted and can’t bring myself to bin it! No returns please
EBay
A well made 80s point and shoot 35mm camera
Here’s a little bit about it:
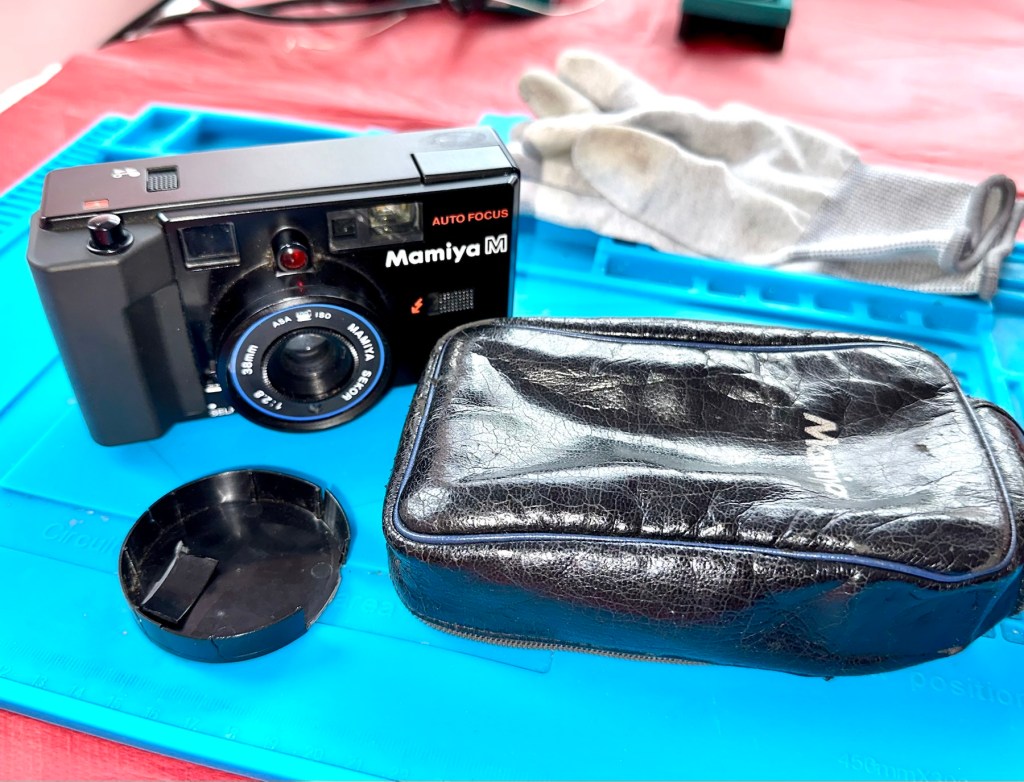
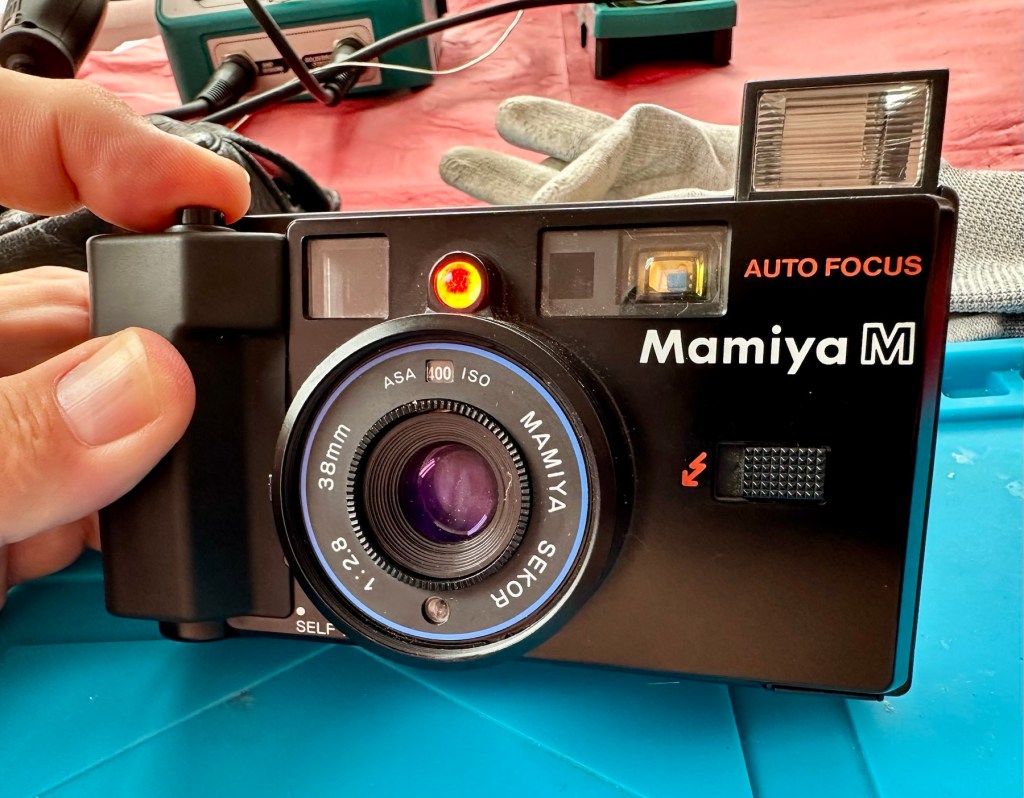
The Mamiya M is a 35mm autofocus compact from 1982. It has a boxy plastic shape, with a fixed Mamiya Sekor 38mm f/2.8 lens. The lens is four elements in three groups. Exposure is fully automatic, based on the film speed, where the ISO is selected via a dial around the lens. Film speed available is 25 – 800 ISO.
The metering cell is located just under the lens, but within the lens ring. This allows for the metering to take into account any 46mm filter screwed onto the lens. That is assuming it is not a graduated filter. Fastest shutter speed is 1/500thsecond with the slowest at 1/8th. The camera is always on, except when fitted with a specially designed lens cap, which triggers the off state. There is a strategically placed switch it pushes against on the right side of the lens. Most of these caps are lost, including mine.
Photothinking.com
I don’t know what attracted me to this camera, but the fact the seller just wanted rid of it at a cheap price was a starting point. It was advertised as £4:36 GBP and £2:45 delivery, a total of £6:81GBP. I bartered a bit and got it all in for £5:44GBP so I got it a little bit cheaper, a bargain if you like.
Mamiya has a great reputation for building high quality lenses. They were only in the 35mm autofocus point and shoot sector for a short while before immersing themselves totally into the medium format camera market. This 35mm camera was only in production for about a year or so, even though quite a few were produced, we are looking at the low hundreds of thousands, not the many millions, so the camera itself was not a major mass produced and marketed unit. It is a plastic preformed body unit. Known in polite society back in the day as “A plastic fantastic”.
If a Mamiya camera had a blue ring around the lens, specifically on its other models, it denoted a higher quality lens type, it was never confirmed this was the case with these small autofocus 35mm cameras, though many believe it is still the case. Photo quality with these little units was generally of a very high quality.
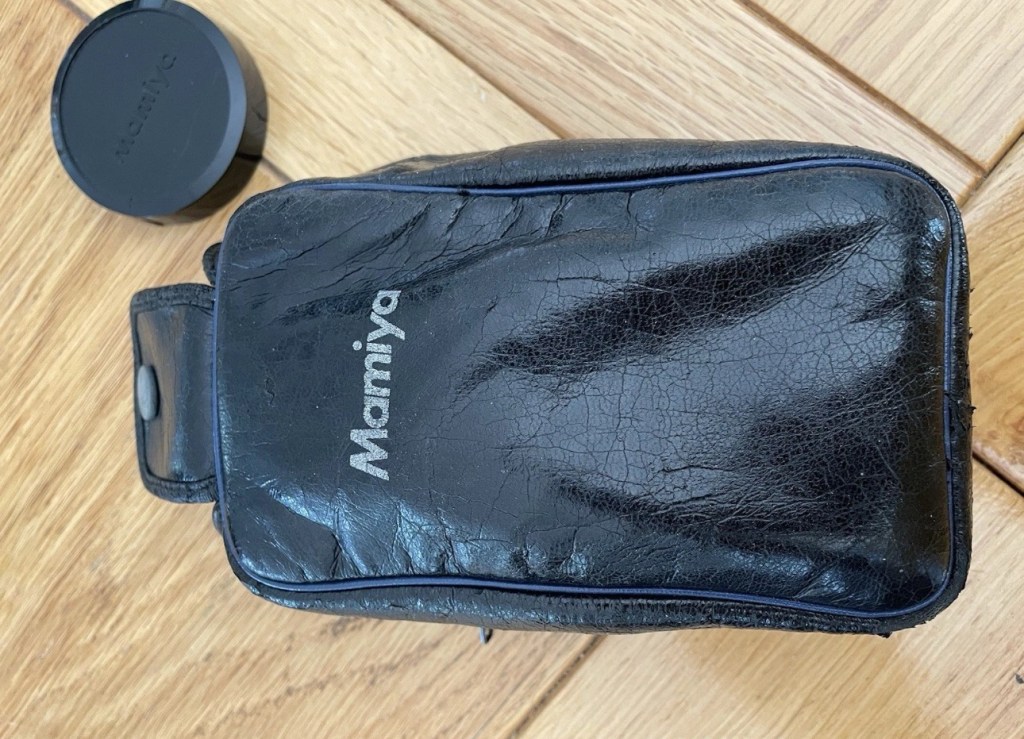
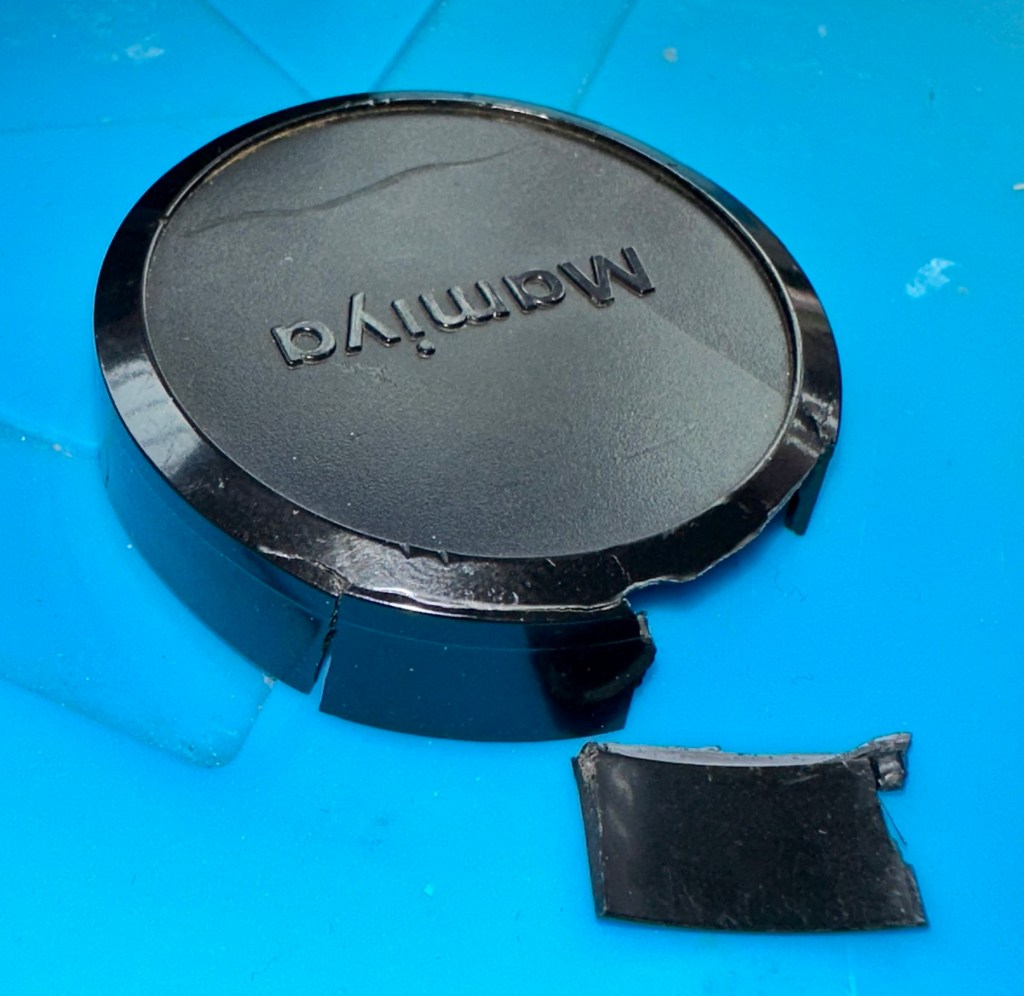
Lens caps with these cameras are very rare, this one has one and it is the original, and i suspect (from what I see in the picture) that there may be a small crack on the side of this one, but that is not an issue. This lens cap is integral to this cameras operation, as when it is placed over the lens, it turns off the camera, without it the camera remains live at all times, and would soon lose its power. It is an early power conserving device if you like. The camera looks to be in overall good condition, probably down to being stored in its original case.
You can view a lot more than I could ever tell you, just by watching this review by Mr.50mm that was posted earlier this year.
Excellent recent review
Since reading up a little on these cameras it appears that I may well have bagged a bargain, if it ever works. And I also believe the seller may well again be unaware of the operation of this camera and it may in fact be working just fine? Who knows? I have my suspicions but we will just have to wait until it gets here for assessment.
Below are some sale prices relative to this camera model that are currently selling on EBay, some extremely high prices compared to what I have paid today:
Current selling prices for this model
It’s plastic and so 80’s. And people obviously loved it. I’d like to be able to get this camera working again, and would love to run a roll of film through it to give it a test run. But first I have to assess it and see just what is wrong with it. I have a roll of old film available to test its “faulty” rewind system, and I have all my tools ready to crack it open and get inside, if I have to. So let’s get at it….
Assessment:
It’s arrived and I must say it is in an excellent cosmetic condition, probably down to being kept in its original Mamiya soft case. The lens cap I thought had a crack in, is actually broken, probably beyond reasonable repair, but at the moment that is not important. Let’s put that to one side for now.
Nice condition Lens cover damage
The actual camera is partially alive. When batteries are installed there is a red light that appears on the right rear side of the camera, this is the film transport light and should extinguish when transport is complete. The flash switch sticks a little, and when the flash is clicked into position the distance sensor light on the lens activates however the flash does not charge. The winding system is inoperative and does not auto wind at all. The shutter does not operate, despite the shutter leaves being able to move when gently coaxed.
Shutter not firingTransport light in top right cornerFocus light illuminates on front
There seems to be partial electricity throughout, this could very well be the issue. There just doesn’t seem to be a uniform continuity throughout the camera. This will need to be looked at. Something very weird is going on inside.
Repair:
I’m really annoyed, closer inspection shows there are 6 screws missing and someone has been inside this camera prior to me. Again I think I’ve been stung by the EBay curse of “Spares and repairs- no returns” will I ever learn?
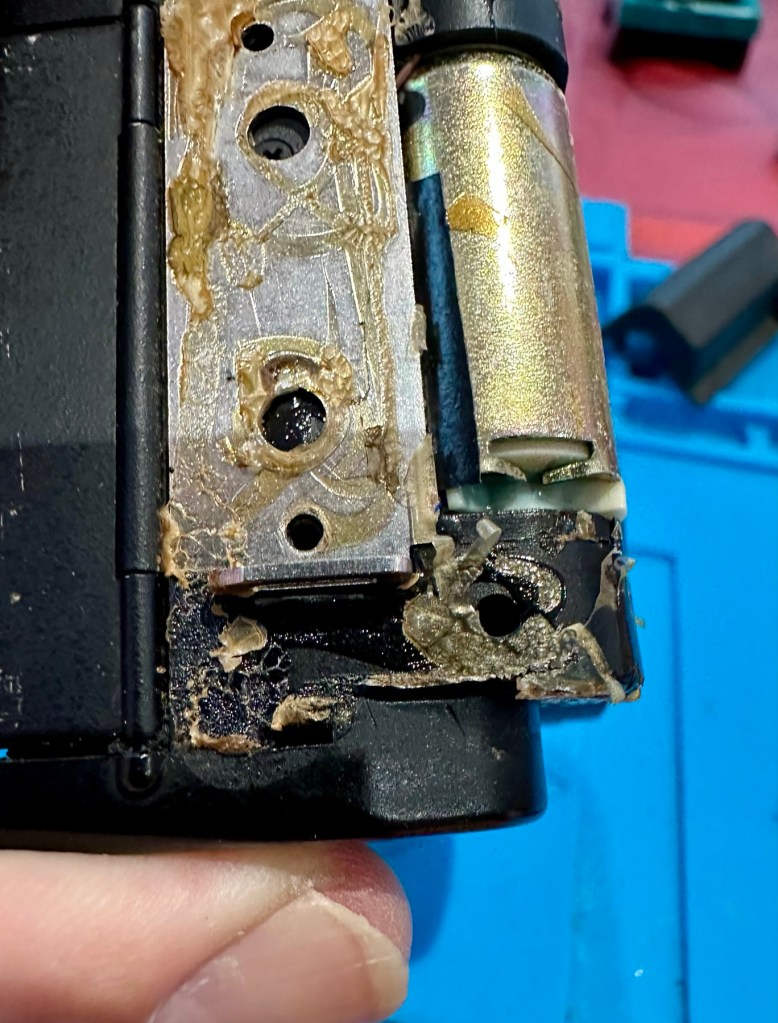
I’ve removed the remaining screws, and had to peel off the rubber grip to access and expose the motor and associated component board in this area. There will need to be a lot of cleaning here before gluing it all back in place.
That glueMotor exposed The grip gently peeled away
I’ve managed to get the flash charging light illuminated, and a current of 214v in the flash confirms that the Flash capacitor is holding a charge and more importantly, receiving a charge from the battery circuit. But I cannot get it to fire. There seems to be an issue with the shutter mechanism and the related electrical circuit in this area. The motor is not working, it’s either dead or not receiving power. I need to look in this area a little more thoroughly.
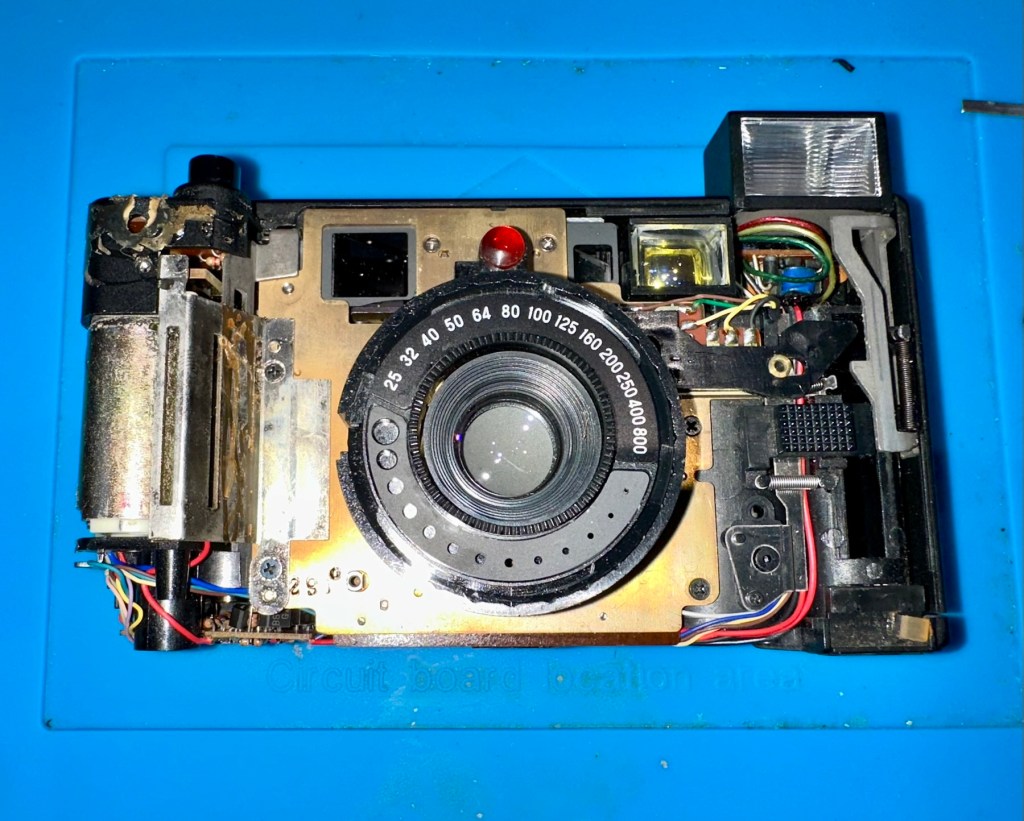
Front fascia removed
I’ve now removed the front fascia and now have a good view of the overall workings inside the camera.
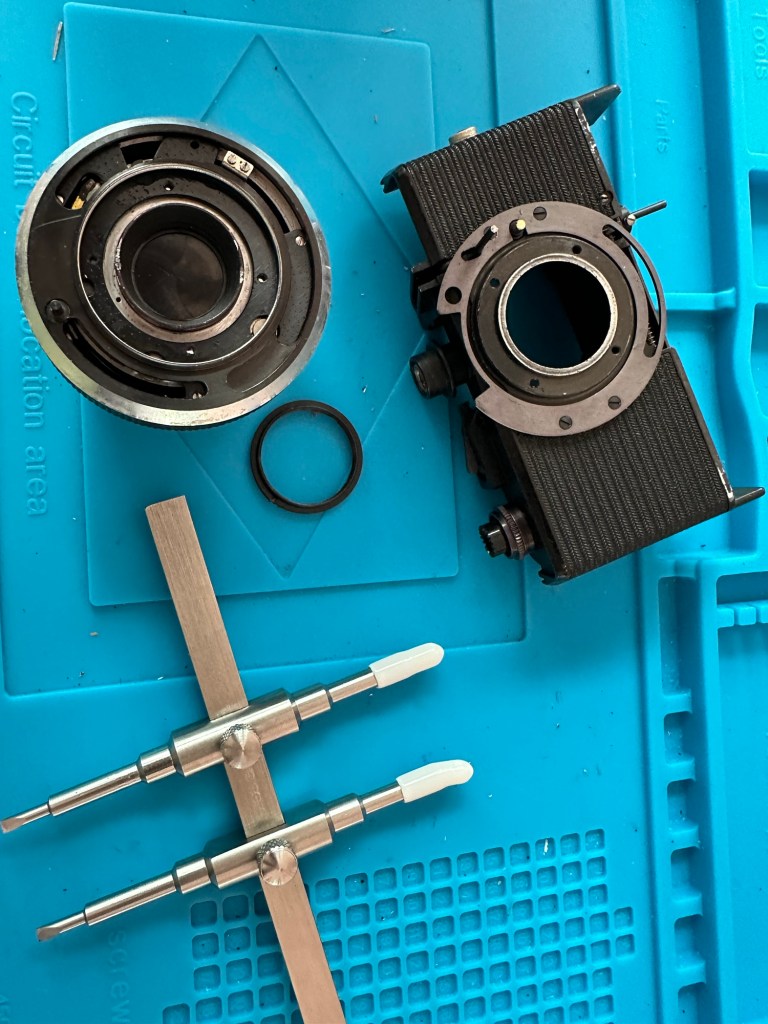
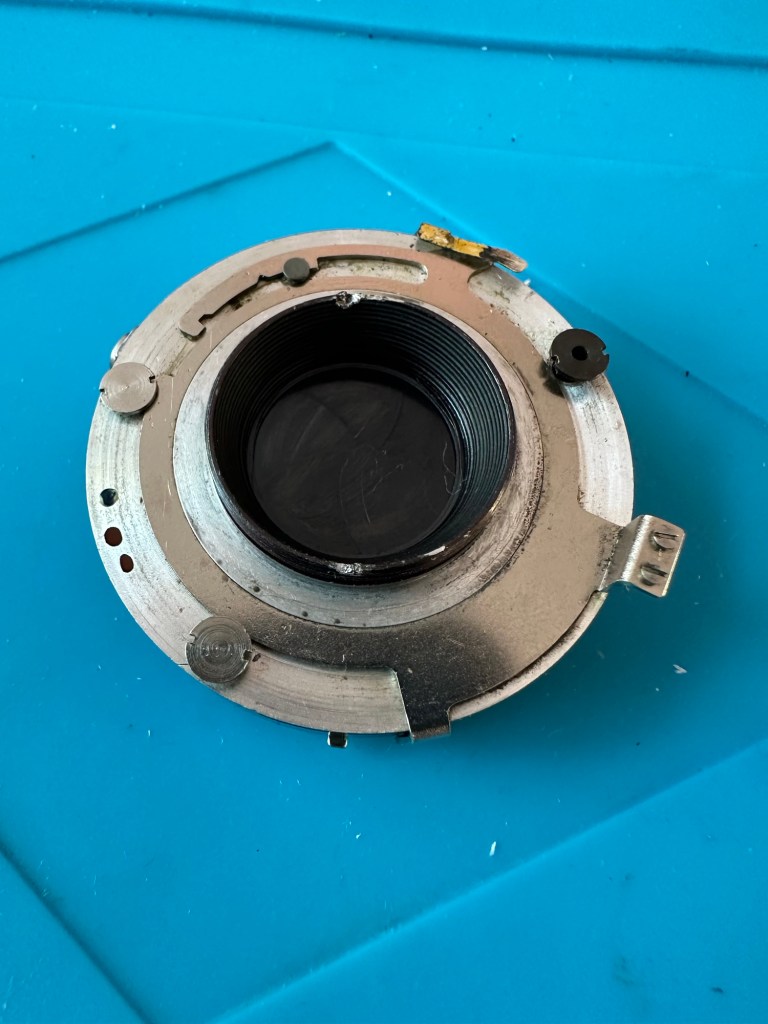
Flash circuit board- tested okLens and leaf shutter removed
Ive taken out the lens and the leaf shutter, these seem ok and are working freely when operated. To me it looks as if the mechanism that triggers the leaf shutter is either seized or the variable capacitance system located at the top of the camera, that is basically just a needle on a circuit board connected to the focus light, could be at fault, it does not freely move on each camera actuation as it should, and this is not a readily available part.
That faulty part of the board
Misfiring- faulty
It seems the deeper I delve into this camera that I am finding more issues, and I’ve just found two parts that are incorrectly installed that are on a cog system connected to the motor. I’m fighting a losing battle as it appears the person who has been here before has probably added to the issues of this camera in their attempt to fix the original issue.
On top of the missing screws I’ve now found a missing capstan cog related to the leaf mechanism that would help explain a certain lack of movement in areas. The motor is dead, I’ve taken it out and used the bench power supply and it is non responsive. Even after spraying with some contact cleaning fluid and sitting there spinning the axis to get the solution absorbed, there is still no response. It’s totally dead and will require replacement.
Result:
Well. Once again I have been mislead by incorrect descriptions on the auction sites. It’s a shame really as this is a lovely camera and if it had not been tampered with inside, I’d probably be posting a different review today, one that would be more positive. With screws, cams and cogs missing I was pretty much set up to fail here.
Reassembled Back in its case
I’ve reassembled the camera and it is now back in its pouch. The positives are that I have learned a lot about how this camera operates, and just dismantling and reassembling the camera allows you to learn a lot about it, and the technology used during that period in time. All the screws that I removed have gone back into place with none leftover, yet another positive.
So it’s a failure I’m afraid, but it will be kept and either used as spares or I will obtain a suitable donor to get this one up and running, it will not be disposed of in any way. It will be reused. I’ve only paid a small amount for this, it’s worth it for the spares alone.
I have already set up a notification on the auction sites for when another suitable camera becomes available. I will update this post or post a new one that incorporates either the repair of this unit or its use as a spare parts donor, when that time comes.
I recently purchased this camera and wrote about it in a previous blog entry Werra 1
I’ve commenced taking the Werra to pieces. The winder was not working and the shutter was not firing. Before starting this work I’ve viewed this page at Everything Vintage where they have recently carried out a full strip down of the Werra and you can view the page HERE, it’s all great advice.
Getting below the top plate was relatively easy exposing the mechanics from 58 years ago, I don’t think it’s ever been opened in all this time. I always love to see the ingenuity that went into these old cameras in years gone by.
Werra 1 stripdown
The internals look dirty in the photo but to be truthful I don’t think the lighting is doing it any justice, yep there is a fine oxidation coating but it’s at a very acceptable level considering its age. When I get to the point of dismantling as much as I can, I will start to clean and lubricate these pieces. But at the moment my goal is getting to the shutter.
Werra winding system – shutter not working
In the video above I’ve managed to get the shutter cocking using the lens ring, however the shutter actuator does work intermittently, but there is no movement of the shutter (Or is there…)
The only reason I ask the question above is that after reading the “Everything Vintage” link in the first paragraph it appears there is a second shutter that closes the light path to the film back when you wind on. When you are ready to expose the film this shutter opens and then there is a second shutter that controls the exposure. if you watch the small video above I think it is this shutter you can hear when I wind the camera on. Hopefully this one is working, I just need to get the one on the rear working, and for this I need to remove the lens from the housing. To do this I need a tool I don’t currently have but have now ordered. More to follow when the lens ring removal tool arrives.
Lens ring spanner
The lens ring spanner has arrived, the ring is being right stubborn at the moment and Im struggling to release it from its 58 years of rigidity. I’m tired as well and don’t want to cause any damage to the shutter so I’ll come back to this later.
18 hrs later, I’m rested and have another go at releasing that lens ring, this time I’m successful and I manage to release it. Sometimes it’s better to sleep on a problem and approach it with fresh eyes rather than continuing whilst tired and prone to making mistakes.
Werra Lens ring removed
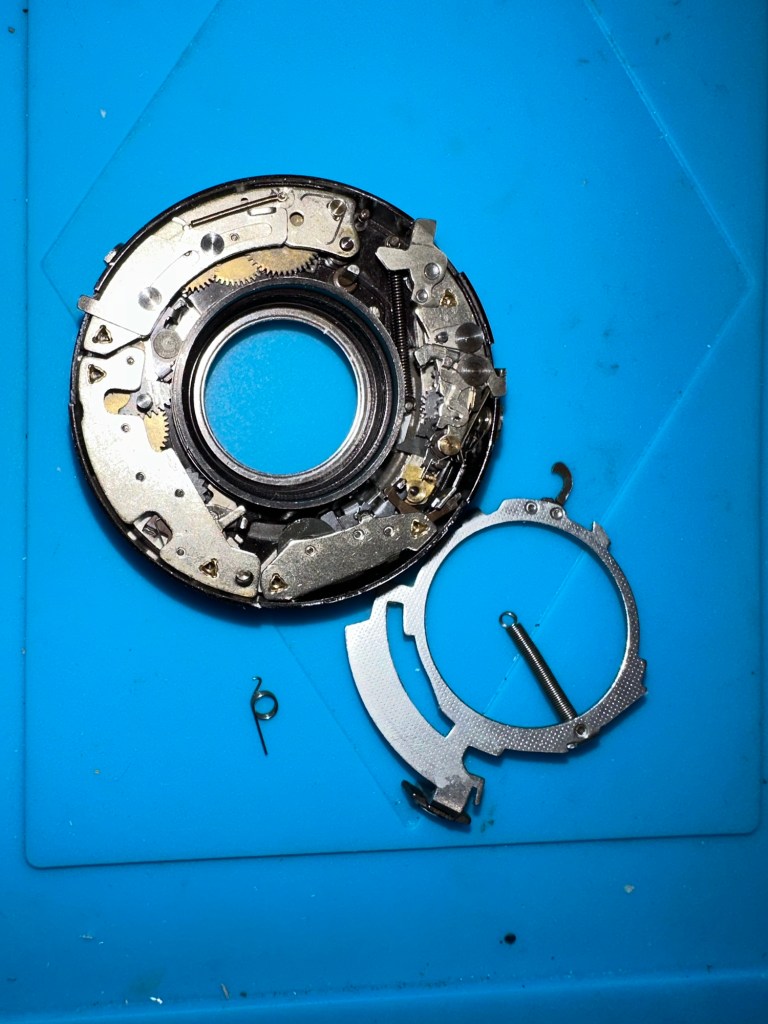
With the lens off the body, the shutter cassette can now be removed. It amazes me just how intricate this cassette is and the workmanship that must have gone into it. I’d estimate at least 10 small cogs and a number of tiny springs with levers and pivot points, amazing really considering it’s about 60 years old. It’s amazing how modern technology has advanced.
Werra lens breakdownWerra shutter moduleWerra lens – another shutter on the rear
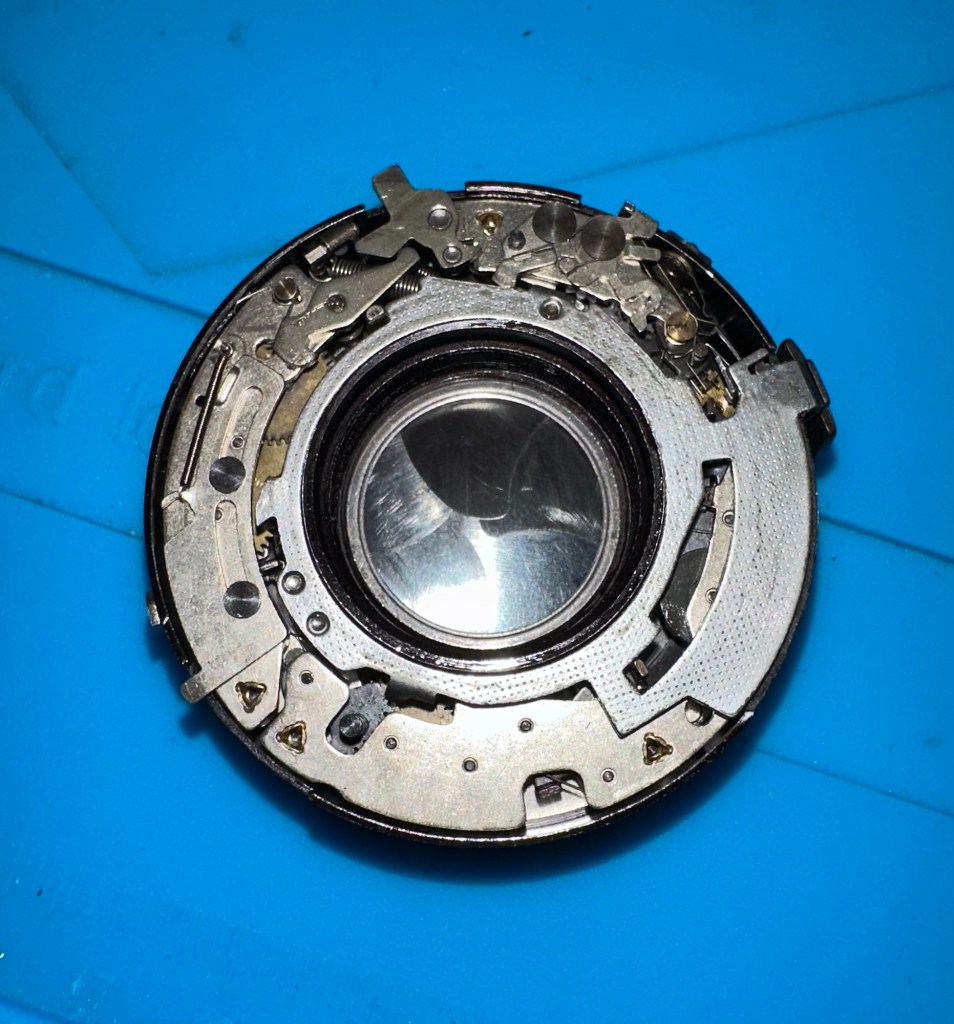
It takes some time getting into the shutter cassette as there are springs and things flying off everywhere, you really do have to photograph everything you do just to be able to check what goes where and how.
Inside mechanism – where is that spring from?Complexity of the shutter mechanism
The shutter itself is rather clean apart from some fingerprints on the shutter leaves that must have been from years ago. I have cleaned this down with IPA and then used some finely ground carbon (pencil lead) as a dry lubricant and this has got the shutter moving just fine.
Werra shutter after being lubricated with carbon
I’m now starting to reassemble the lens and shutter as I’m happy that there is nothing else restricting the shutter and it is now moving quite freely. I will clean the camera as I progress and put some watch lubricant on the mechanics that are external to the lens and shutter assembly.
Werra 1 rearWerra 1 baseWerra 1 topWerra 1 front
Well it’s all been reassembled and is now back in one piece. It looks good, the shutter works fine and I’ve now vacuum packed it to go back into storage. I won’t be firing up a roll of film on it yet as I don’t have the time to did so at the moment. I’ll probably save that until the summertime when the weather is more favourable. I’ve really enjoyed this restoration even though at times it was very frustrating. This rebuild has taught me patience, or at least that I need to have more patience and just take my time. Intricate jobs on such old equipment need a clear head and a lot of concentration. I’ve learned my lesson and will endeavour to remedy that situation in my future dealings with such equipment.
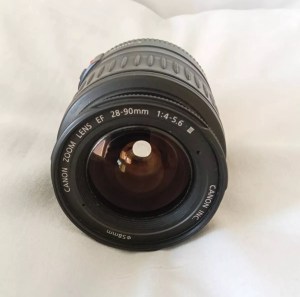
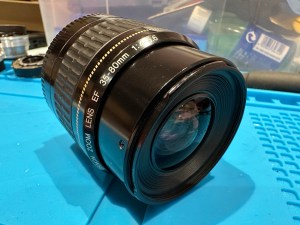
Canon EF 28-90mm Lens Working Then Produces Err99. Reduced to sell at a bargain price will be easy fix
EBay
Canon EF lens 28-90mm
The dreaded err99. It’s a general error code that seems to annoy many Canon owners, and can be a simple fix or a tedious one. I wonder what it will be for me? I’ve seen a good article on Improve Photography’s website that explains some of the steps that can be taken to remedy this error, you can read that article HERE.
I now have the lens in front of me so here is what I can see. Overall the lens is in good order for its age and mounts to the camera ok. All manual focus and zoom works and the lens is clean with no sign of fungus or haze so I’m happy with that. I’m still waiting for the camera battery to arrive so I can’t really comment yet on the error code. I’m not cleaning anything just yet as I want to see for myself if the error shows on one of my cameras, if it does then i’ll start the process of cleaning the contacts which is what I would of attempted first off.
The battery has now arrived and I have now commenced further testing. I have placed it into auto mode and all seems well. I have tried the lens in 4 different camera bodies and have had no sign of the Err99 error code. The only issue I have noticed that may not be contributed to the lens is that when connected to an Eos5 body there is a fair drop in battery power. Again this has been noted in the past as something than can be connected to dirty contacts on the lens, so as a precautionary measure I shall be using some IPA and a fibre glass scratch pen to clean those up.
Using a fibre glass scratch pen
I’m unable to recreate the advertised fault as everything about this lens is working fine as far as I can see. I’m going to wrap this one up as complete now.
I’ve really enjoyed working on these two cheap damaged lenses that I originally purchased just to test my old SLR kit. They are now both working fine and i believe the invested effort shows in the end result.
The batch of cameras I purchased the other day, all old SLRs / DSLRs have now arrived… with a bonus.
I was expecting 10 cameras but I’ve trumped that with 12 and a lot of spares as well. The guy I purchased the Nikons from has thrown in two more D70 as spares, with loads more spare parts. He was having a clear out so I guess he’s funneled that stock my way…thanks old chap.
So I have received today
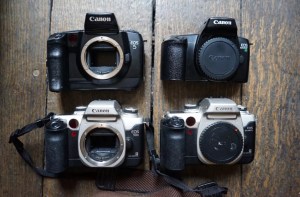
One Canon 5 SLR – stuck mirror, missing some small Connection covers and like a lot of these old cameras has a sticky rubber covering that was well known back In the day.
One Canon EOS 50E – damaged curtain, faulty lock and again sticky.
One Canon EOS 1000F – cosmetically sound no other visible issues.
One Canon EOS Elan 2 – cosmetically sound, just sticky.
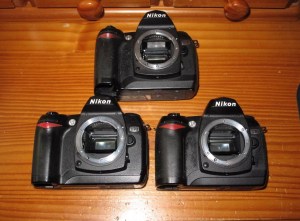
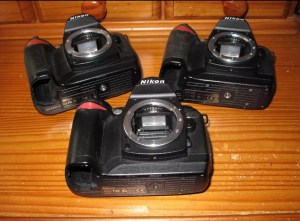
Two Nikon D70S DSLR – missing battery covers and some other small accessory covers, both sticky.
Six Nikon D70 DSLR – all missing battery covers, or other accessory covers, one missing a CF card reader and all sticky.
And two sizeable bags of D70/D70s spares
And then there were 12
I’ll be starting with a good clean to get rid of that stickiness and then I’ll power each up individually to see what other issues lie in wait. I’m hopeful I can get most of them up and running, I’m confident that the majority of the DSLRs will be repairable.
I’ll feature the repairs once I’m in a position to donate the time to them. I’m a busy boy at the moment what with work and the wife’s growing list of things that need doing around the house.
Needs opening cleaning and fixing sounds like something loose so selling as a repair project cheap.
EBay
Canon EF lens 35-80mm
No error code so in theory this should be an easier fix, however the fact that something is moving about inside tells me there could be more wrong with it than expected.
I now have the lens in front of me so here is what I can see.
Shake rattle and roll
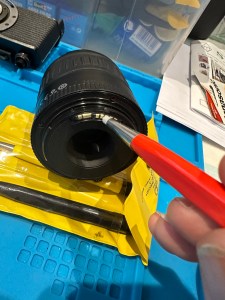
Well, it certainly does rattle, something quite significant is moving about inside. When Connected to a camera you can’t focus or zoom so something in there is restricting movement. There is also fungus on the lens so this one will need to be carefully dismantled and cleaned throughout.
Fungus in the rear of lensFungus from front of lens
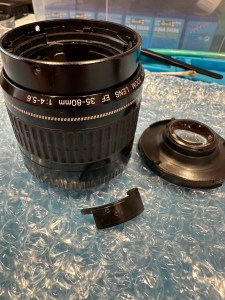
About 10 small screws later I am into the internal parts of the lens and the cause of all the rattling becomes apparent. A piece of the internal zoom mechanism has broken off stopping the zoom from smoothly operating through its range.
The piece that was broken
The part of the barrel that the item had snapped off was broken due to forceful action with the previous owner. There are two options here, junk the lens or see if it can be saved, I went for the latter. I mixed some epoxy resin and fixed the piece back into place also gluing it to a part of the mechanism that was not liable to hinder future movements. I left this for a couple of hours to cure.
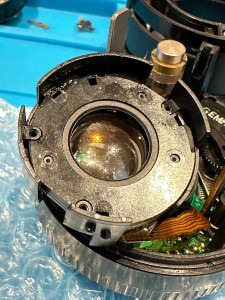
Epoxy resin and waitLens internals
Whilst waiting for the glue to cure I used a mixture of water and hydrogen peroxide to clean all the lens elements. I thoroughly dried them and gave a quick polish and reassembled them into the casing. The glue was dry now so I was careful to reassemble the lens not damaging any ribbon cables or contacts along the way. The lens looks lovely and clear of any fungus now.
Fungus gone frontFungus gone rear
I’ve put the lens onto a test camera and it’s fantastic. I couldn’t get focus when I unpacked the lens but now I have the full range of action and a lovely clean working lens for very little outlay and probably just 2 to 3 hrs of maintenance. Well worth it in my opinion. I wanted a good cheap lens to test my old stock and I now have one that I can easily sell on at some point, on top of that I’ve learnt a lot from working on one of these lenses. I’m certainly going to attempt working on more in the future.
I’ve spent the grand total of £91 GBP on more damaged/faulty stock today, I now have enough stuff to be working on to keep me busy for months.
On top of the 6 Canon cameras I purchased last week I now have a further 4 Canon film cameras ( Eos Elan 2, 50E, 1000fn and an Eos 5) I’ve also got two faulty EF lenses to test the old Canons with, these will also get the repair treatment.
Canon EF lens 35-80mmCanon EF lens 28-90mm
I’ve also purchased four Nikon D70 and 2 Nikon D70S units all needing the repair treatment, I’ve even blagged some spare parts here as well so overall it’s been quite a good days shopping.
Three Nikon D70 camerasMore Canon SLR film camerasMore Nikons
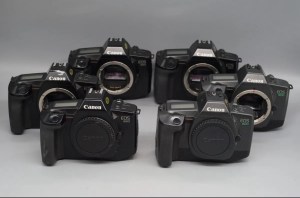
I have just purchased 6 untested ( probably the polite way to say totally useless) cameras from the late 80s.
I ended paying out the equivalent of £6:17(GBP) per unit. That’s inclusive of delivery and costs as well, not too bad really and if I can repair (if needed) I should still be able to move them on at a small profit. But I may also be passing these onto a local charity that teaches photography to youngsters and disadvantaged people in Leicestershire.
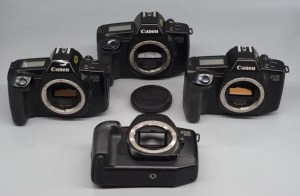
Canon Eos SLR bundle
I have purchased a job lot of Canon Eos 650/600 cameras from quite a reputable seller who specialises in old film cameras.
Canon Eos 600
I have 2 Canon Eos 600 units that date from 1989. These have motorised film advance and rewind, and are able to reach 5fps in one shot Af mode. Shutter speeds range from 30 sec to 1/2000 sec, with B mode. X-sync is at 1/125 sec. Powered by 1x6v 2CR5 lithium battery.
Canon Eos 650
I also have 4 Eos 650 units.
The Eos 650 is the camera responsible for the first photograph used on the World Wide Web when a photo of the band “Les Horribles Cernettes” was taken on 18th July 1992 by photographer Silvano de Cennaro.
This camera was produced in 1987 and was the first of Canons Eos (Electro-Optical System) ushering in a new era for Canon cameras. The shutter is electronic, vertical metal focal plane capable of 30 sec to 1/2000 sec exposures as well as having 1/125 sec exposure with a flash. Also powered by 1x6v 2CR5 lithium battery rated for up to 100 36 exp rolls.
Both types use the Canon EF mount.
I’m happy from the pictures and knowing the sellers reputation that these units are cosmetically tidy, fingers crossed they don’t need a great deal doing on them but you never know. When they arrive I will do an assessment of both cameras and create a post accordingly.
These cameras were produced from the mid 50s until the late 60s. I’ve done some research on this particular one and the lens number and case number tie it to the year 1966.
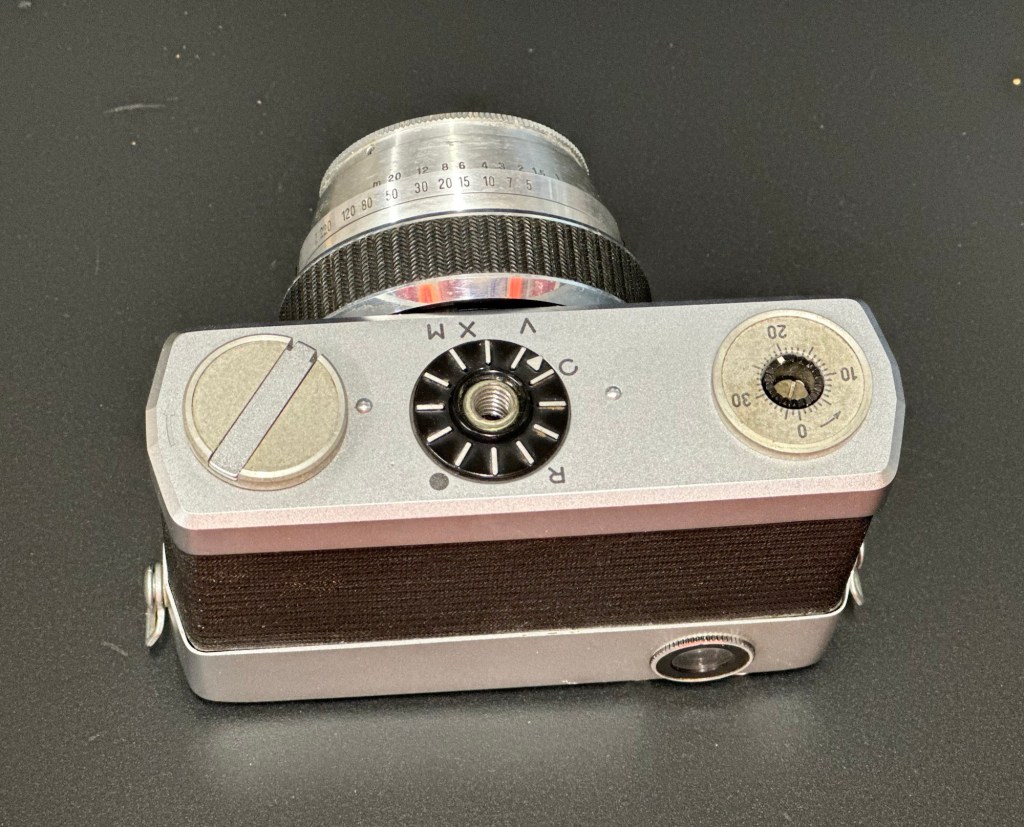
Werra 1 front
I tend to buy cameras I like the look of, I just wish that I’d read into them a little deeper to find out the issues. This camera was so good looking when up against the boxy cameras of the 60s, it was a trailblazer in that the winder for the film was incorporated into the lens. A quick flick of the wrist on the inner lens ring and the film was advanced. Impressive….when it worked and didn’t jam!
Werra 1 topWerra 1 base
You can find out more about this camera by visiting Camera Wiki.org by clicking HERE
This unit is in great cosmetic condition apart from a little age related tarnishing. It has some rattles, the lens needs cleaning and the view finder needs attention. The lens rings are stiff so a little lubrication may be required.
Werra 1 rearWerra 1 internals
When cleaned I will run a film through it to give a test, I may even reskin the camera to really bring some attention to it.
Please keep an eye out for updates as I will be commencing work on this really smart little antique very soon. It’ll give me a break from working on pesky Sony Discman players 🤦♂️


You must be logged in to post a comment.