Interesting to read this. I passed my RAE exam back in December 2003. We didn’t have to master Morse code but I did take it on and even today I’m ok at deciphering it, if a tad slowly. I could transmit it at about 8 words a minute, and if I’d stuck at it I’m sure I’d have become better.
But like most things i just didn’t have the time available to further it. I do still like to put the radio on occasionally and listen to slow Morse on the amateur bands.
If you were in Tunisia in October, you might have caught some of the Morse Code championships this year. If you didn’t make it, you could catch the …
I so much wish to write some posts of substance on this blog but in the last few weeks I just can’t be bothered. I’ve reposted a few posts that I’ve liked or found a familiarity with but that’s about it.
Looking at my draft posts I have 14 – yes 14 that are in the process of being completed dating back to May of this year. These are all a number of projects I have on going including Camera repair, musical keyboards, video games, a complete radio control boat build as well as radios and some old cassette players that I have taken on board. I’m stuck for a number of reasons.
I do most of my repairs in our conservatory out of the main house away from the wife. My equipment that I use can be moved in three large boxes that take about an hour or so to assemble and disassemble, hence I like to be able to leave it assembled for a while to get any satisfaction and achievement out of what I’m trying to repair. If I had to put it all together and take it straight down again I think I’d lose total interest in the task at hand.
However it’s getting near Christmas and the wife has invited her entire family around for Christmas Day dinner, hence I have had to make myself and my gear scarce, as she plans to be feeding them all in our conservatory, my workshop.
It’s like I have had to shut up shop for the season, with so much still to do. I’m also awaiting a good number of parts to finish these projects, so that doesn’t help either.
A selection of the backlog of projects I have ongoing
So as it stands, unless I can adapt my kit to be a bit more stealth like then I’m probably not going to be attending to any of these much before the new year.
That said, has anyone tried these usb portable soldering irons at all? I may be in the market for one.
In the meantime I suppose I’ll just have to mingle and be nice. It’s going to be a tough Christmas 😂
FAULTY no power, NOT WORKING for Spare Parts or Repair.
TEST NOTES: Does not power up, no further testing, unable to check any functions. Battery leakage with corrosion in and around battery compartment.
Ebay
The unitYes…there is corrosion
Another low priced item that I fancy getting working. And as is standard with me it has corrosion. This item is from 2003, it is a self contained game arcade system that plugs into the tv. It has five games installed including classics such as Galaxian and PAC Man, so compared to some items I’ve purchased of late, at 21 years old this one is a relative baby.
Well, we now await its arrival where we can give it a good look over and assessment. Hurry along now delivery person…..
It’s arrived.
It’s in pretty much perfect condition, all stickers are in place and it hasn’t been previously opened.
I’ve put in 4 new batteries, and damn it. It powers on. It’s working.
It switches on
I’ve plugged it into the back of a television and it also plays.
Damn, it works
Yes there is a little corrosion on the battery springs but I’ve seen a lot worse. I’ll give these a little clean just so I can say I’ve done something.
It’s quite rare these days to get a bargain off of EBay, and for the seller to be truthful in his description, in fact he’s been exceptionally honest, just writing it off without testing. A big bonus to me.
As the saying goes, if it ain’t broken, don’t try to fix it.
Makes a boring post though, sorry about that. A bargain, yes, and another one kept from the tip and will be used at home in the garden pub, the wife will love this as she’s a big Pac-Man fan.
If you were going to open up a shop, what would you sell?
I miss the stores such as Maplins (aka Radio Shack). When I used to go into town with the wife at the weekends she would go do her thing and I would go into and spend a lot of time in Maplins. For her it was like a kind of Man Crèche as she knew where she could easily find me ( don’t forget this was in the days when mobile communication was in its infancy)
Here you could buy individual electrical components, it must have been murder doing a stocktake. But I loved it. All the kits, all the ideas, and all the boys toys you could dream of.
I really miss Maplins.
I’d also love to have a store where you could get hold of good quality retro games, and equipment at a reasonable price, not at rip off prices that are currently being seen on auction sites. People really do have inflated ideas of the worth of items only a few decades old, they really are becoming the new antiquities.
So maybe the shop I’d like to own would be a mix of Maplins and a quality second hand store of memories. Somewhere the hobbyist or dreamer could walk into and spend a good while reminiscing, and maybe buying some stuff.
We have tried a few batteries but the unit does not power up so beig sold for spares.
EBay
I obtained this for a very reasonable price considering the amounts being charged these days for similar battery operated 1970’s items.
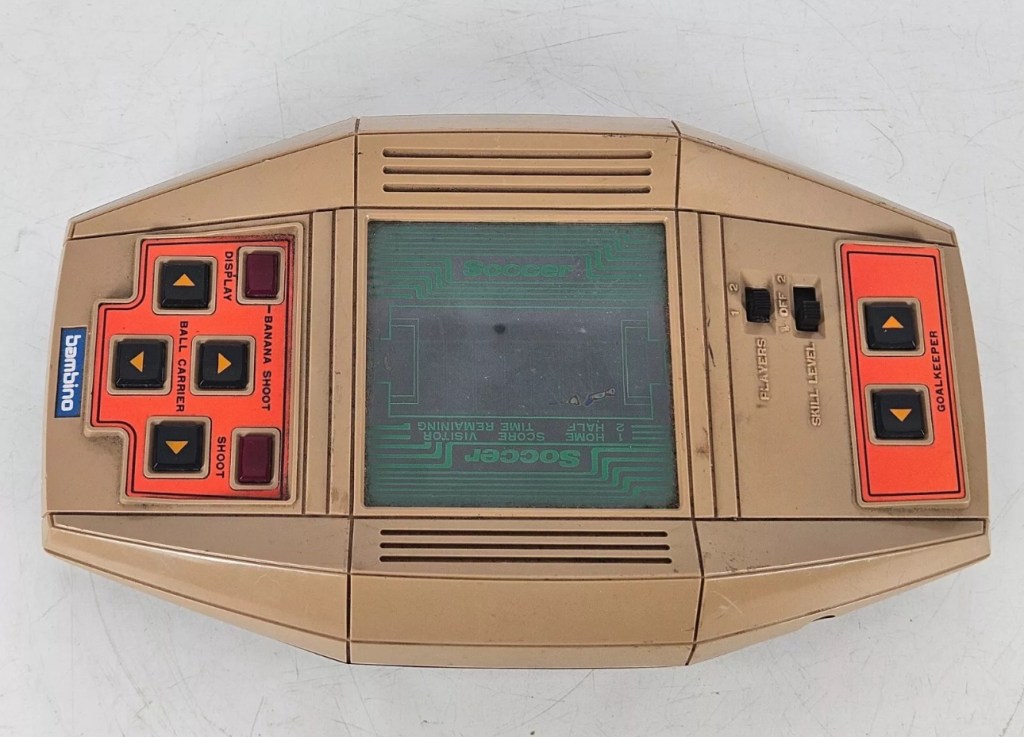
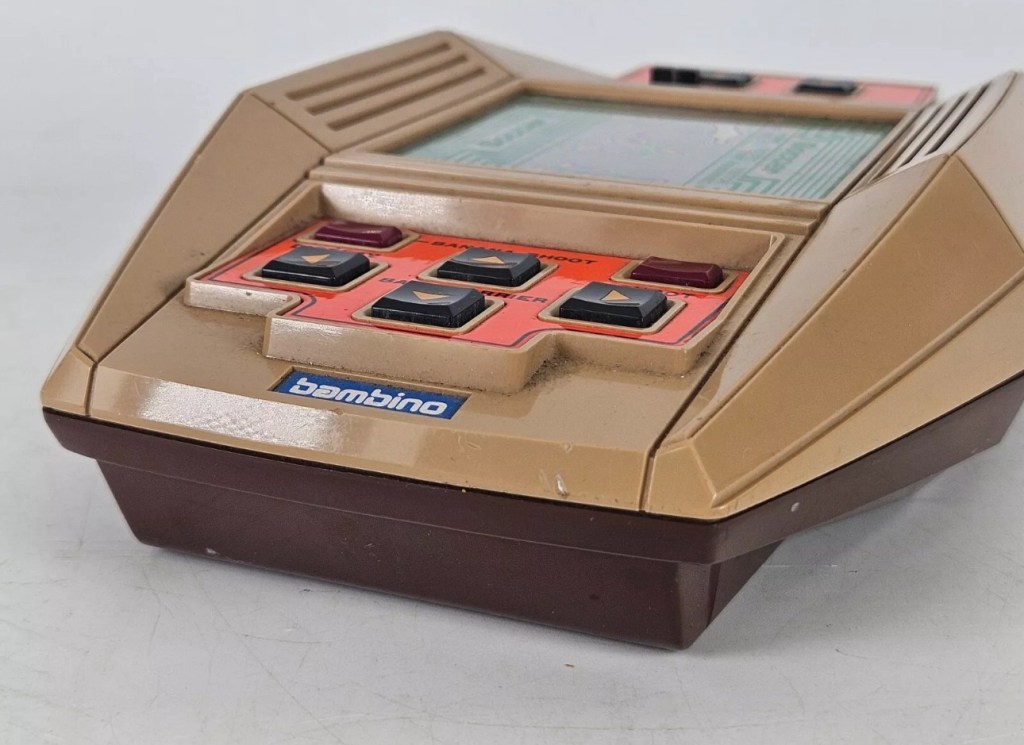
Bambino gameLooks tidyNo Corrosion Bambino Kick the goal soccer game
This unit was assembled in 1979. From initial pictures a few things are pleasing. It looks fairly tidy, the battery cover is supplied, there appears to be no corrosion and the labels appear intact. However actual delivery and when it appears in my own hands may prove otherwise so I’ll await its arrival to give a final judgement.
Well the item has arrived and considering it’s 45 years old it appears to have had a good life. A few small knocks and scars, no more than what you would expect….lets get some batteries in and see what occurs.
A few cold solder joints needed re flowing45 years old and clean as a whistleGame pads all to cleanButtons to clean
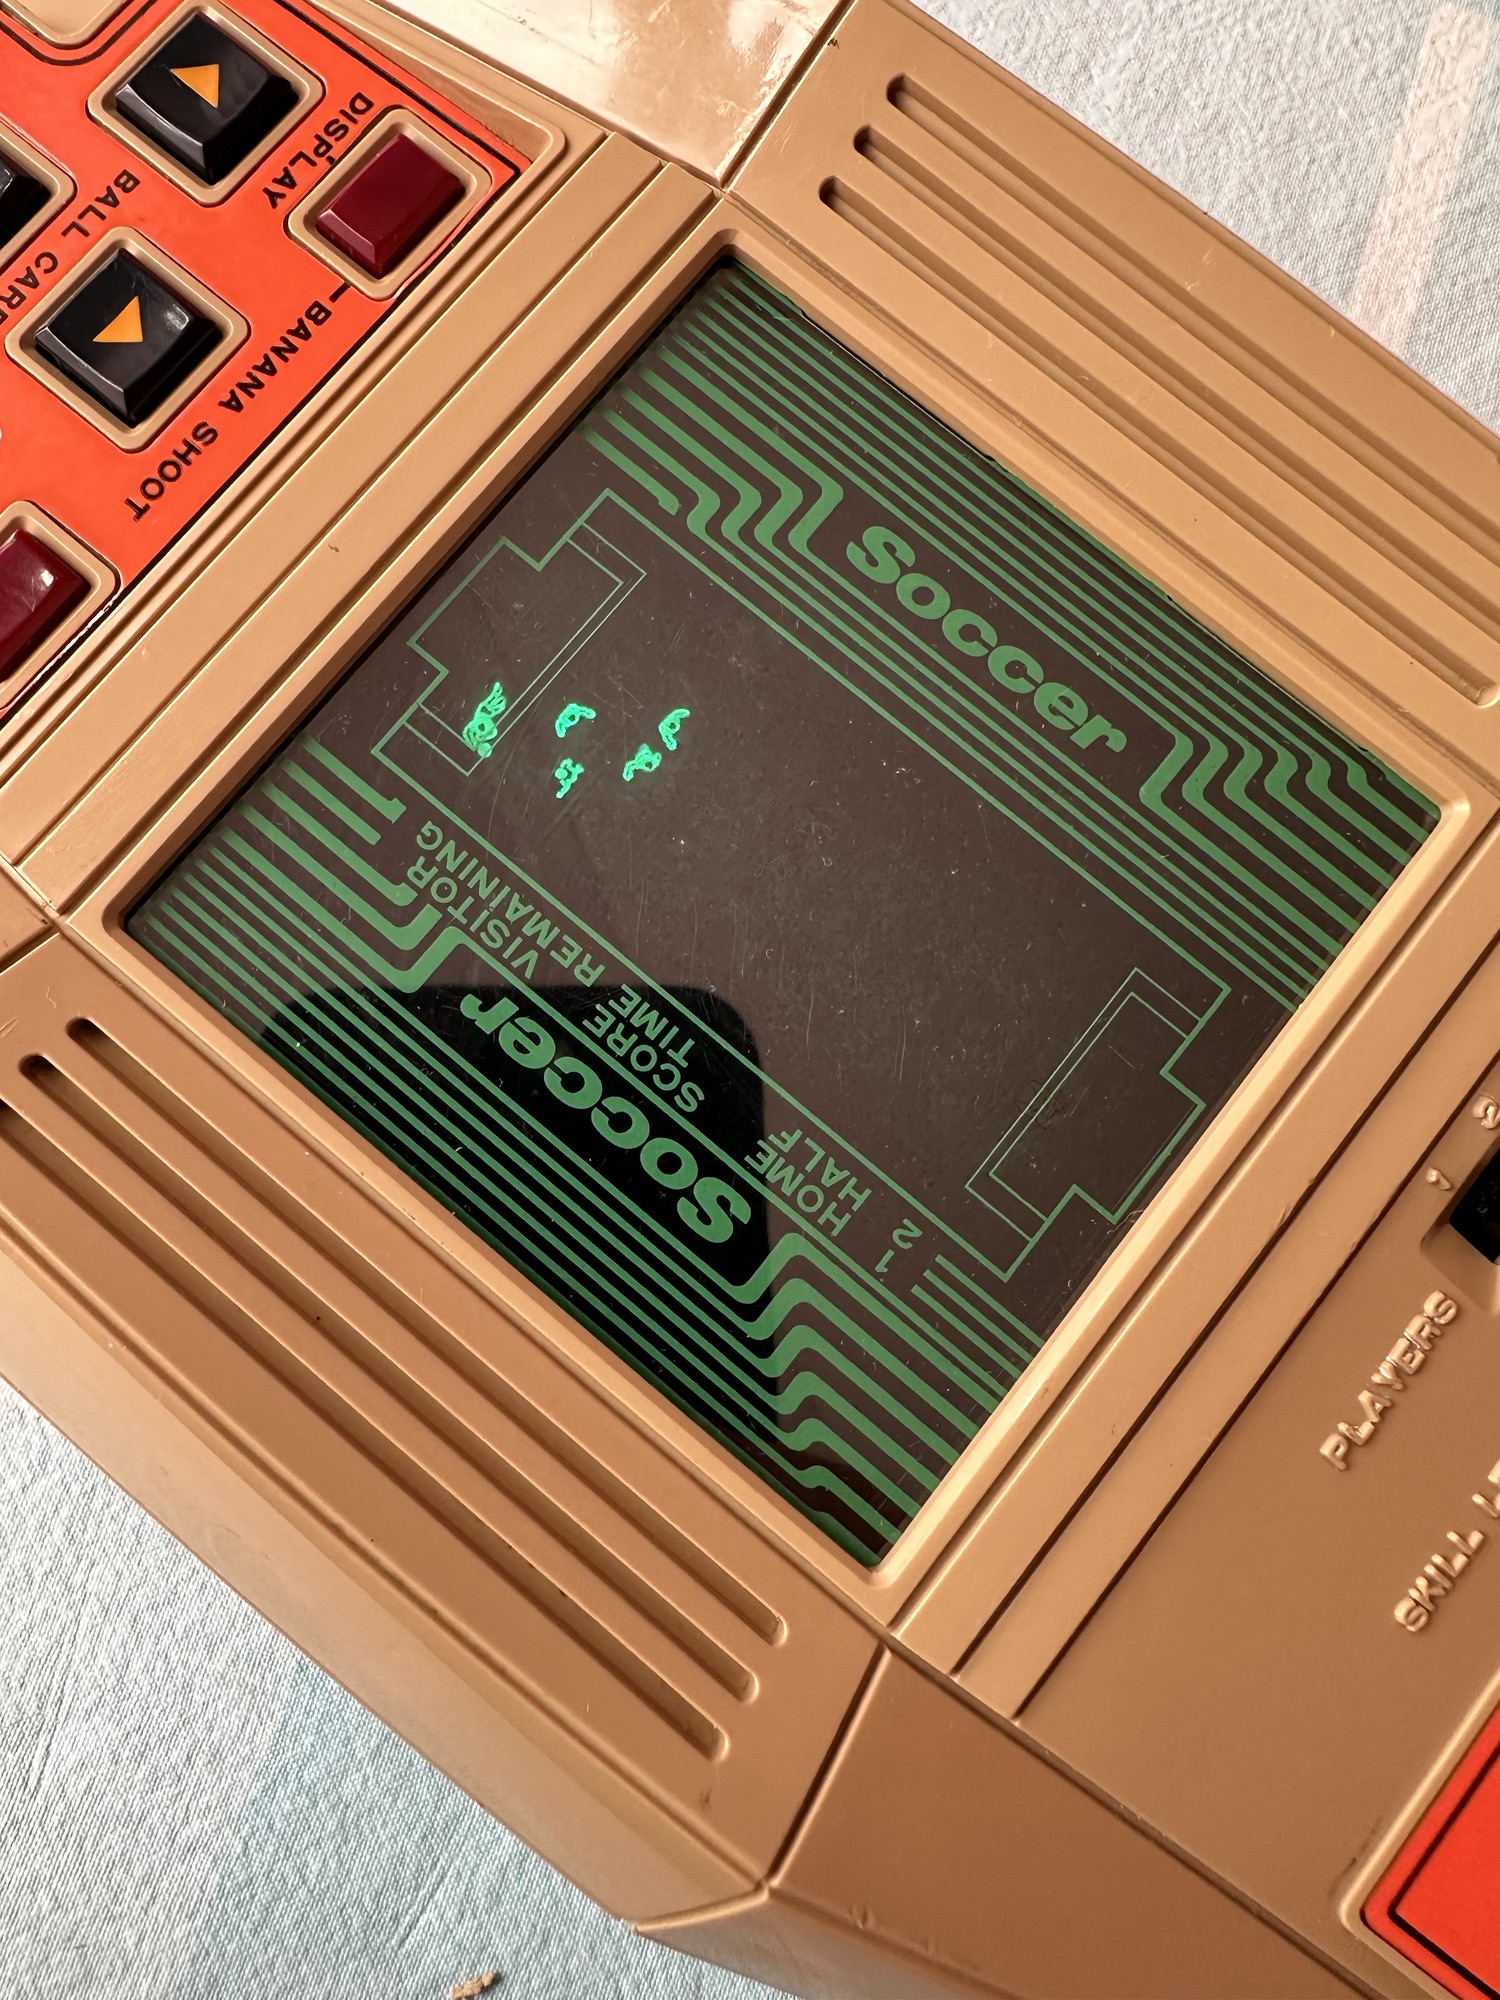
Inside is amazing, no LED screen just a tube that looks like an old Cathode Ray tube that you’d have on a TV. (Actually known as a Vacuum fluorescent display) Thank god this isn’t damaged as it would be game over. Wiggling a few contacts and I can hear the speaker crackling, closer inspection shows some cold solder joints so I quickly reflow these and it all springs into life. Excellent.
Lovely old display- more like a cathode tube
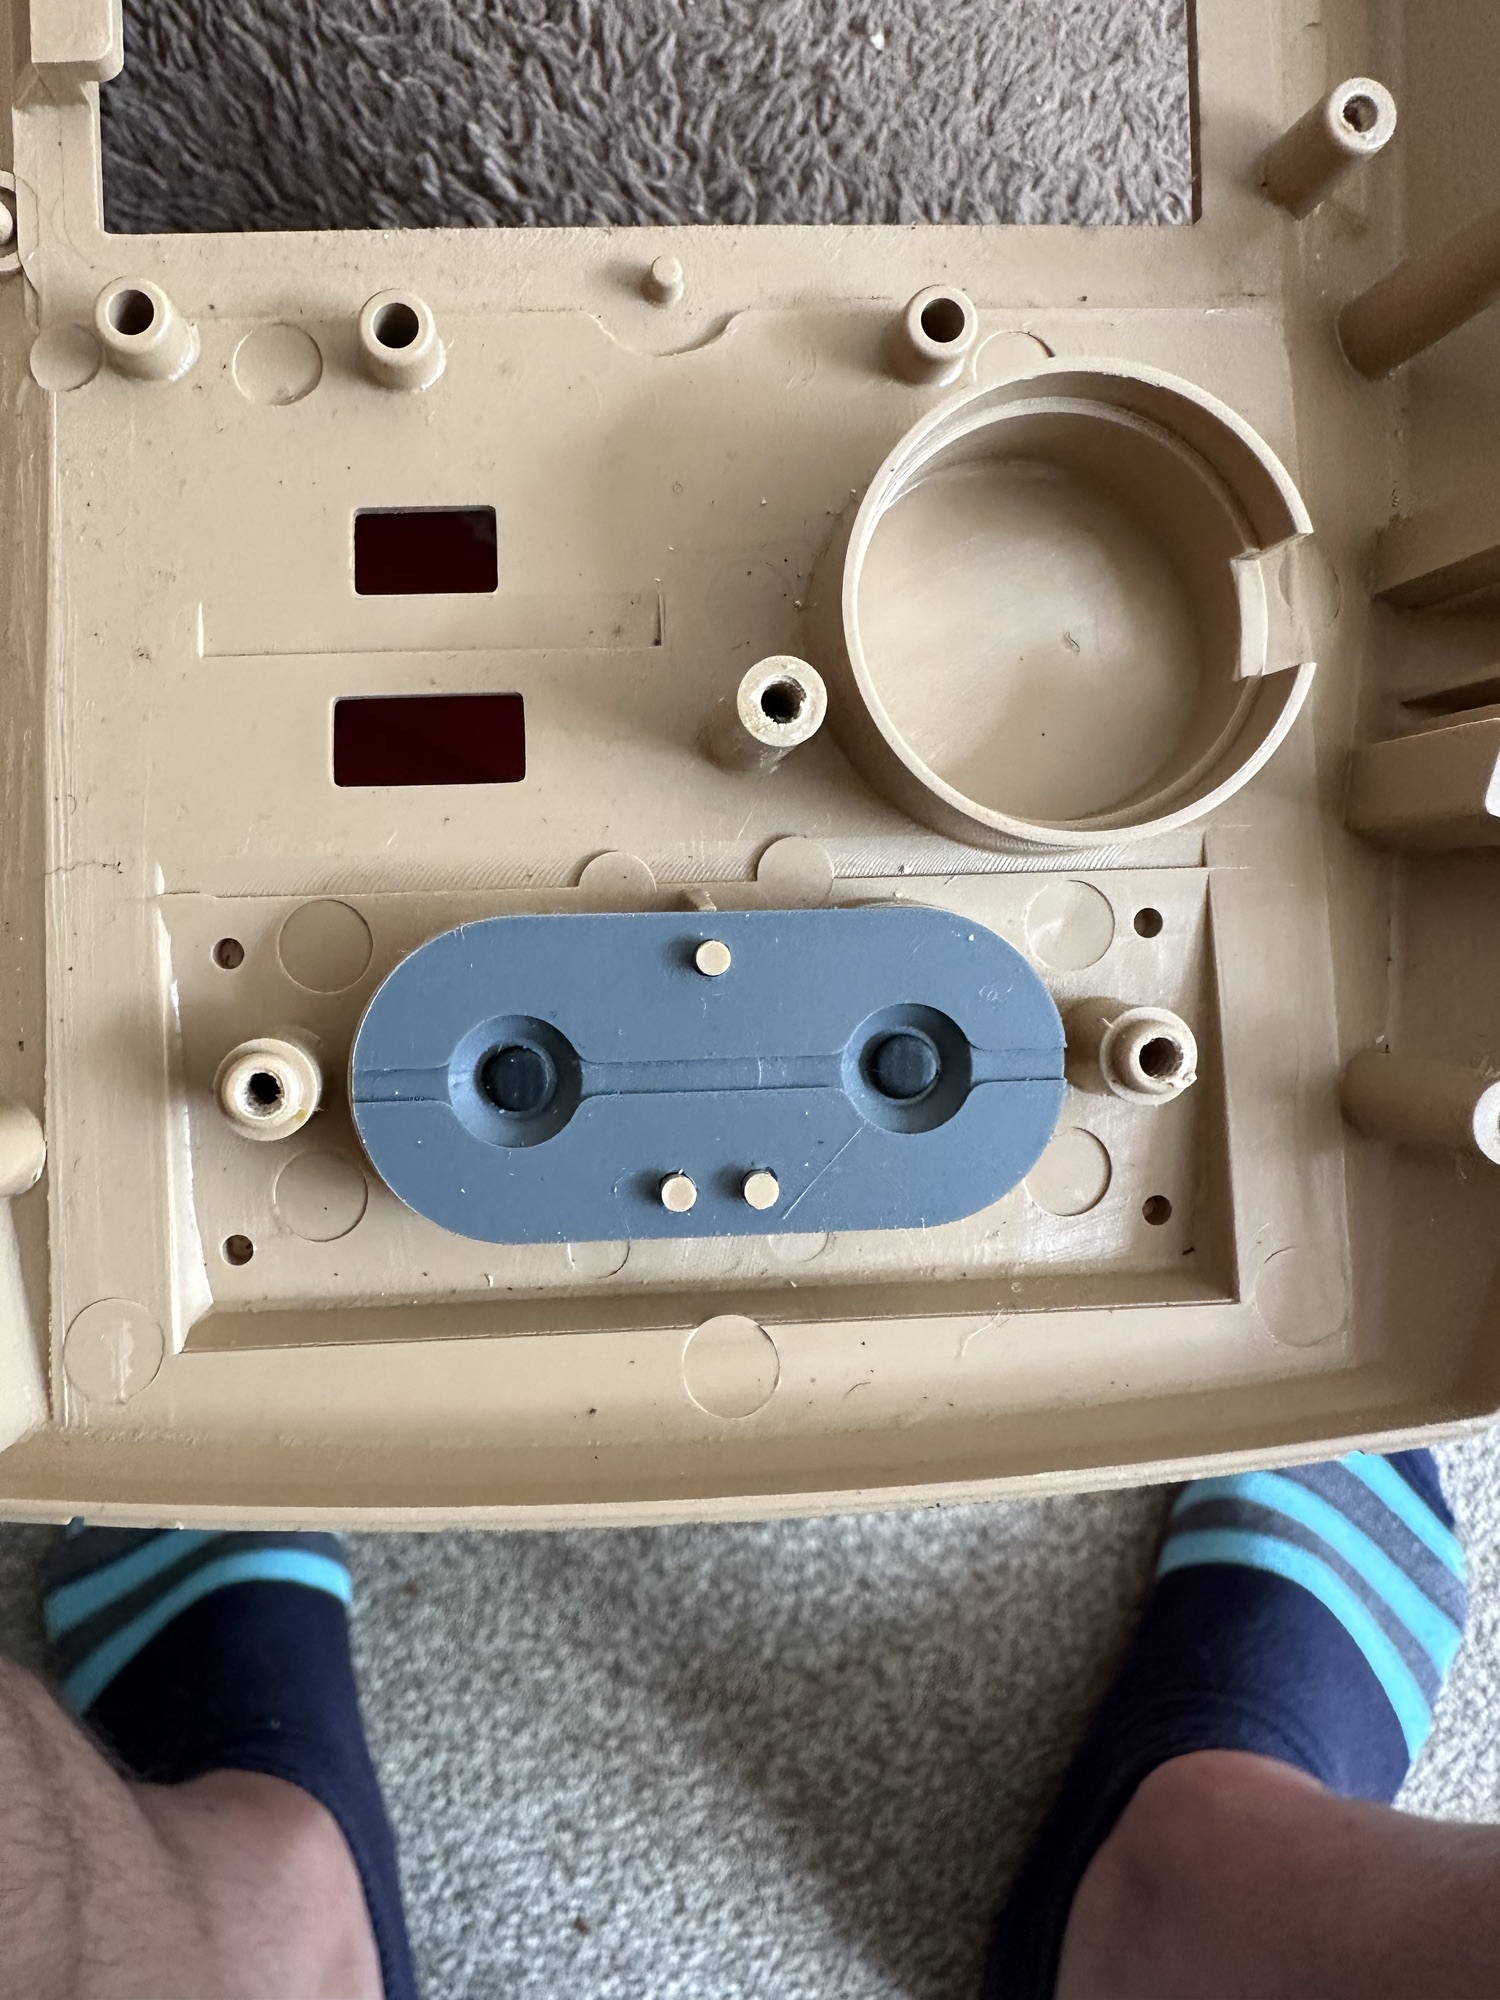
I’ve decided to take it all apart and give the parts a good deep wash in some soapy water.
Bath time Drying off
I’ve cleaned the two switches with a contact cleaner, I’ve cleaned the screen membrane and all buttons and their attached membranes as well.
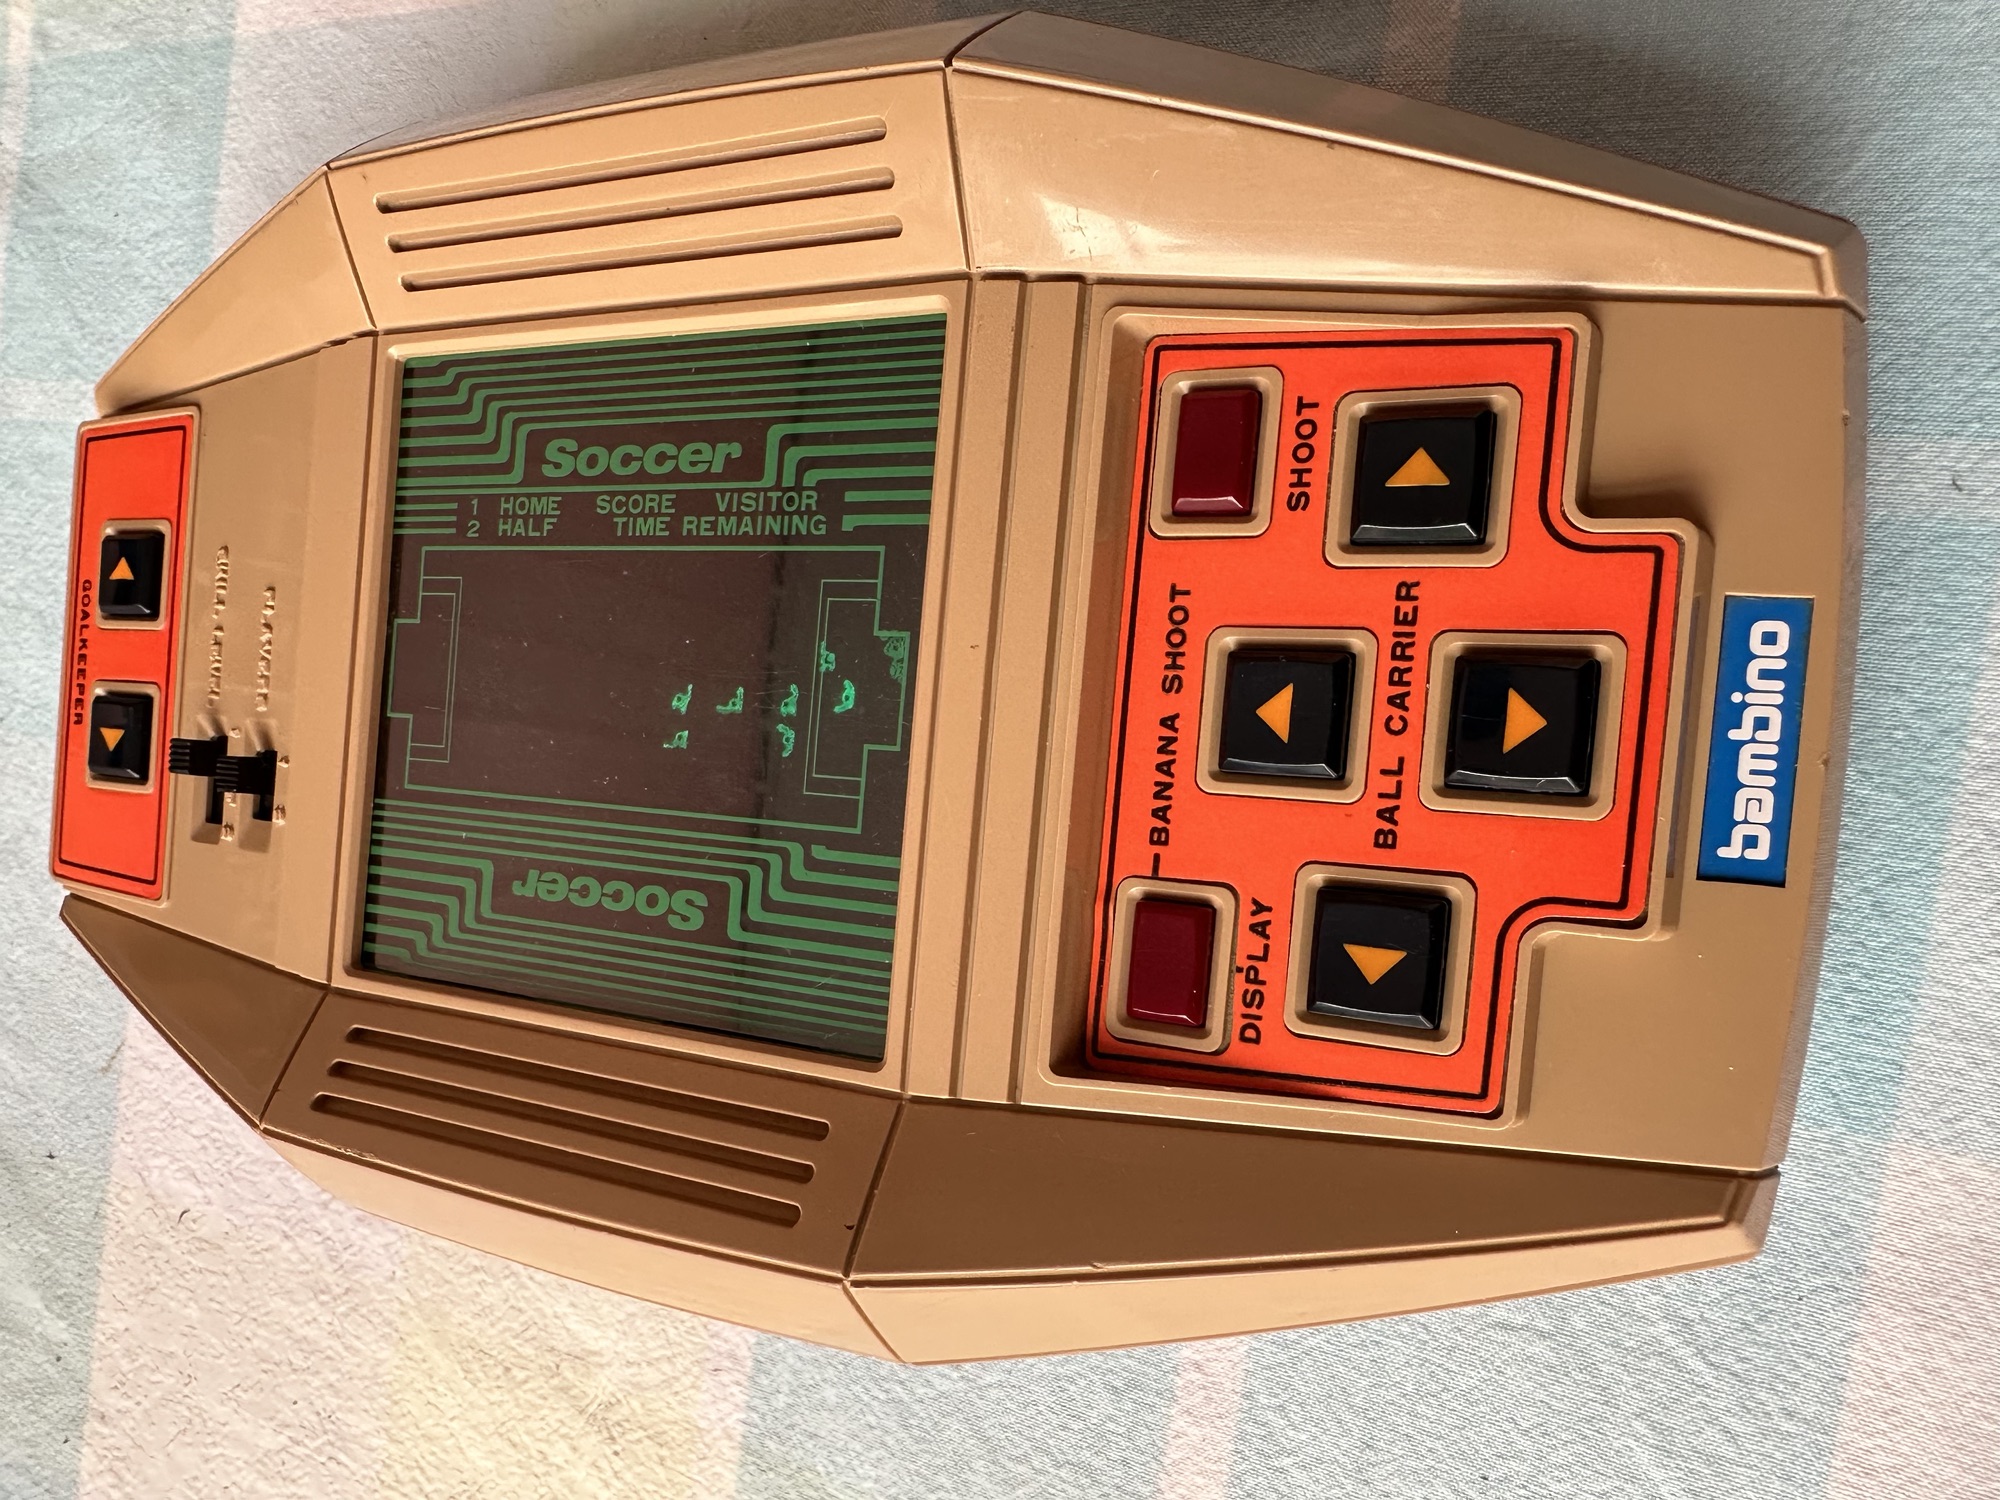
Looks stunningAssembled and workingNice and clean
The whole shell has also been cleaned in all the nooks and crannies, and it looks superb.
Before and after
Now assembled it is in full working order, everything works as it should and the display is bright. The batteries are a tight fit but that’s not so much of an issue. Once you get into the game it’s quite addictive as single player mode is a right challenge as the computer is a great goal keeper 😂
Just can’t score – computers goal keeper is too good
Again it’s been quite a simple fix but an enjoyable one. It’s always good to see something that is about to be disposed of brought back to life and saved from the landfill. I paid a total price of £12.71GBP for this unit, and items of a far worse condition are currently selling in excess of £40GBP on EBay. However this is going into our games box in the garden pub for use by the family, especially the kids who I hope will appreciate the height of technology we had in the 70s.
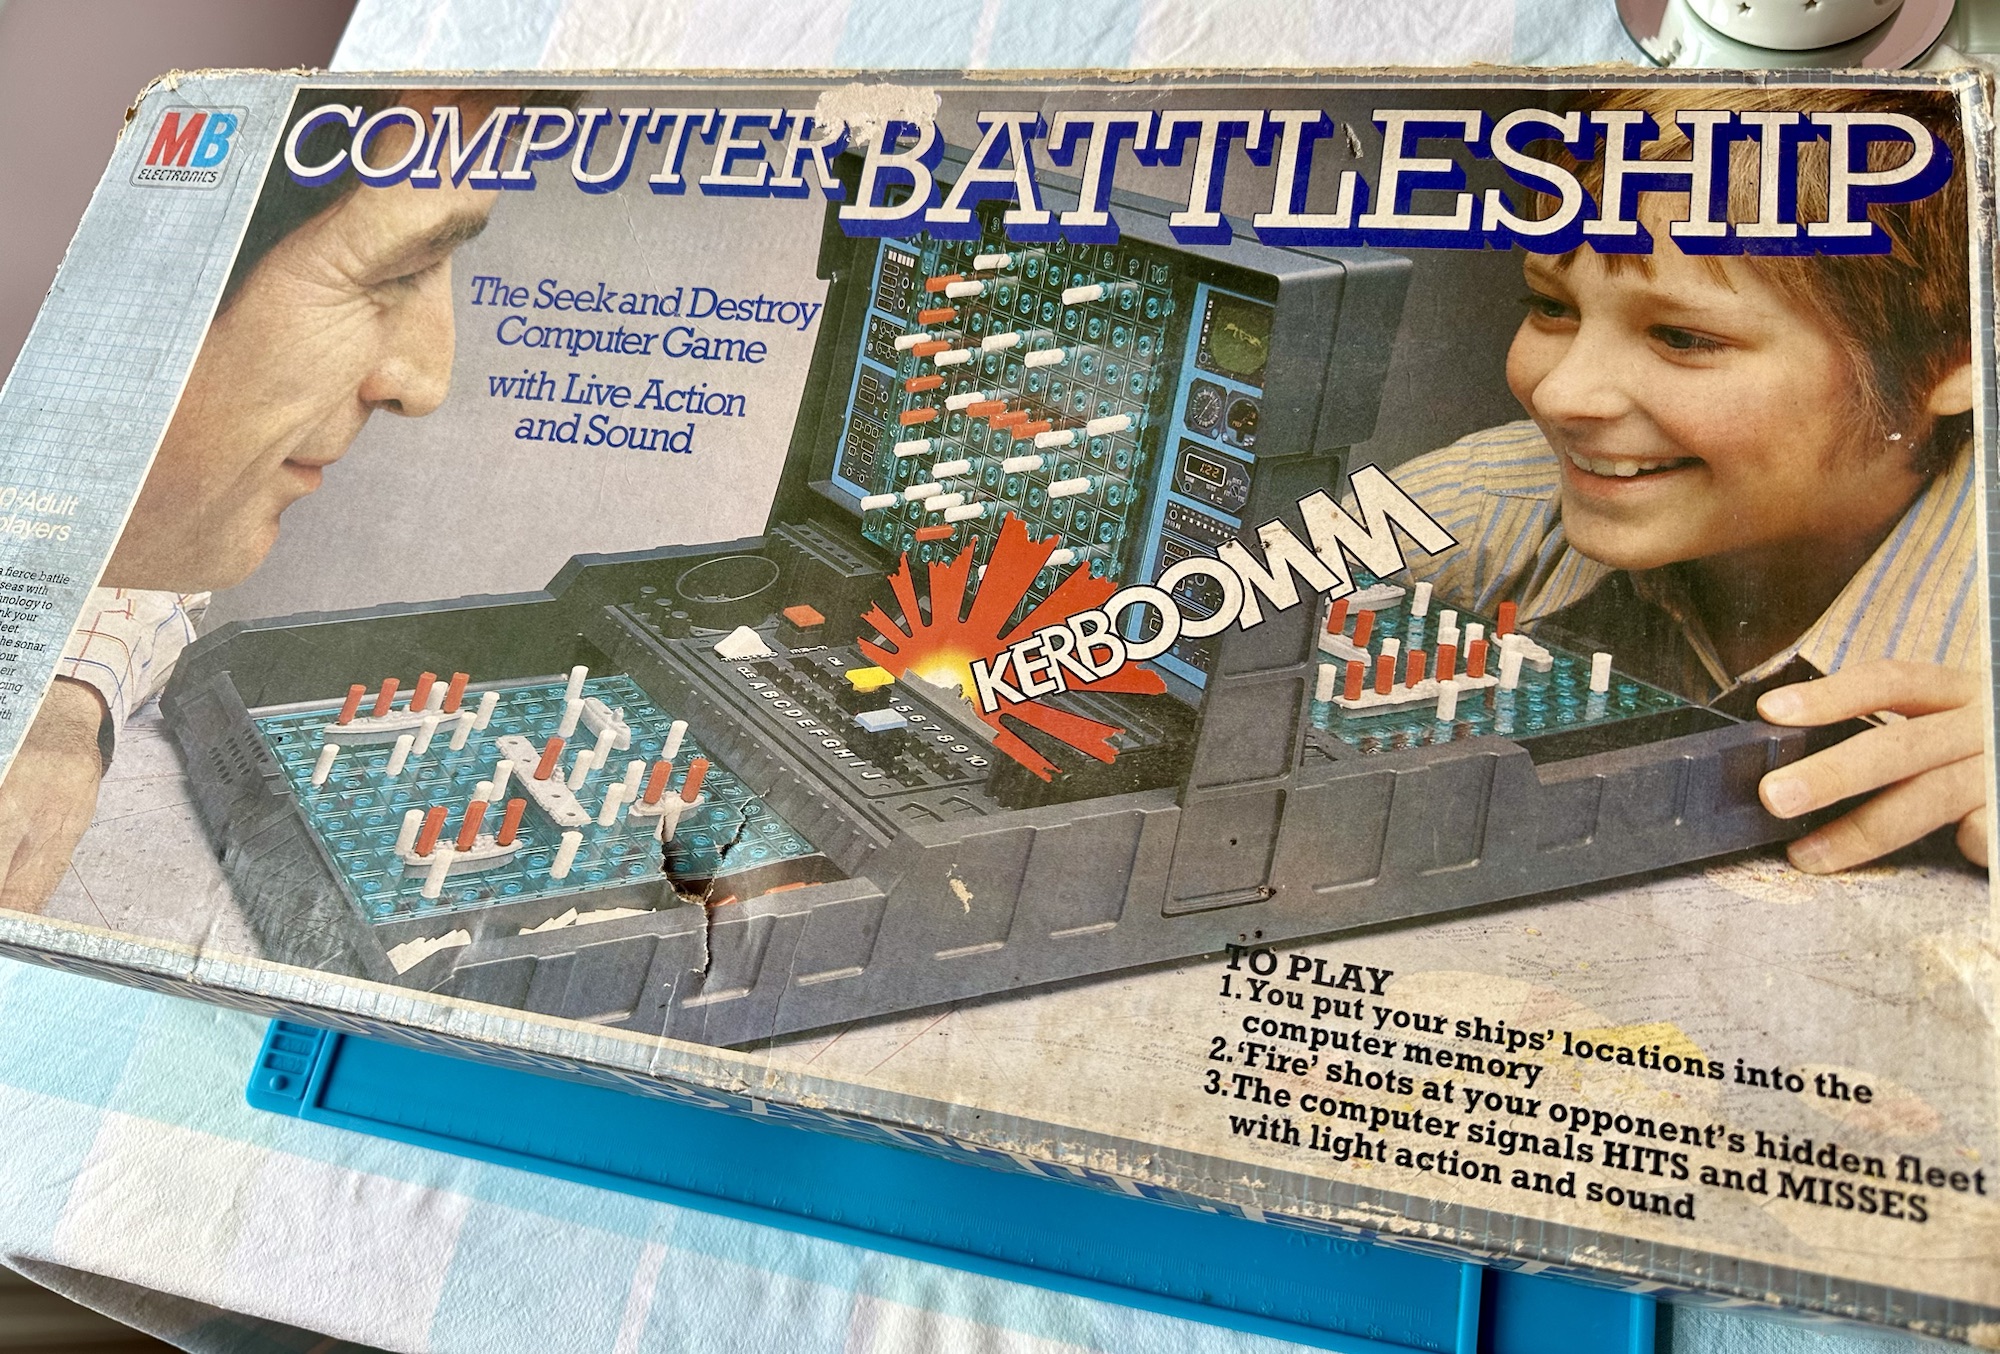
VINTAGE COMPUTER BATTLESHIP MB ELECTRONICS GAME FOR SPARES / REPAIRS APPEARS TO BE COMPLETE BUT THE GAME IS NOT WORKING WHEN TESTED WITH BATTERIES HENCE BEING SOLD FOR SPARES / REPAIRS
Ebay
And here’s some info around it:
In 1977, Milton Bradley released a computerized Electronic Battleship, a pioneering microprocessor-based toy, capable of generating various sounds. Electronic Battleship was designed by Dennis Wyman and Bing McCoy.
Wikipedia
Now this is another toy from my childhood that I had envy over. This game is the one that coined the phrase, “ You sank my Battleship” as seen on many TV ads towards the end of the 70s. This time my nephew was brought one of these games for his birthday back in the late 70s when I was about 12 years old. I’ll be able to give a more accurate date of the unit when I get to see the main board inside. I suspect I’m looking at something around the 1979 timeline. Man this toy was the bees knees, again early computer technology at its finest. Here I am approaching the sixth decade of my life and I’m having another menopausal moment just as I did in this post a few months back: Big Trak CE3962 restoration
Computer Battleship
This is going to go in the games box in our garden pub / Man cave. I’m confident I’m going to get it working. I’m not too bothered if there are any small parts missing as there seems to be plenty of spare parts available online.
Let’s have a look at what has turned up.
Original boxOriginal packaging
Well I’m impressed. This game is in its original box with original packaging and is in pristine condition. It comes with the original instruction manual and all parts listed in the contents section are there. In fact there are more of the red and white pegs than required so to be honest it looks as if I have bagged a bargain here.
I’ve paid a grand total of £19:96 GBP for this game and that includes the postage, by far the best price that was on offer for any similar advertised games that I could see at the moment of purchase. Considering this game is now somewhere between 45-47 years old, a bargain you might say, if I can get it working.
I’m thinking that all the capacitors on this board as a matter of good practice should be removed and replaced. Let’s face it they are almost the same age as me, could fail at anytime (if they haven’t already) and are as cheap as chips so what’s the point of just replacing a singular one when there are only two of them on the board. I think I will do this, test them all and report back.
I know that this unit is a 70s creation but it is interesting to get some facts on capacitors and problems that they have caused over the years, especially during the 90s and early 2000s. See this old post on capacitor plague: Capacitor plague
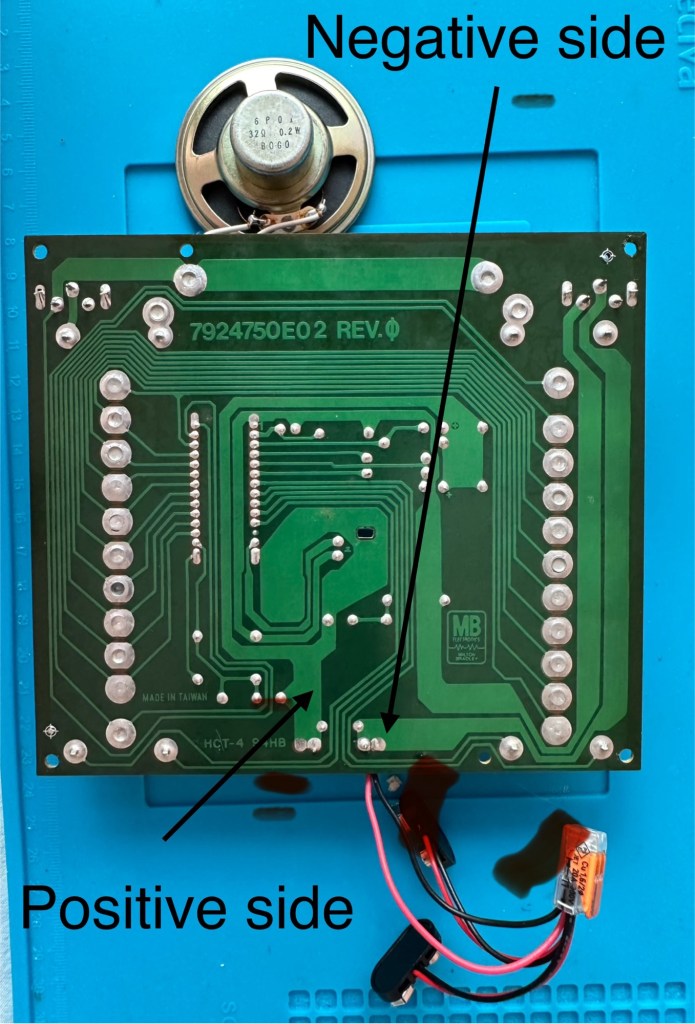
Board removed One side of board
I have removed the board and there seems to have been some pre work done where all the wires are relayed through a connector block. This was a dangerous situation as the work that had been done diverted both negative and positive leads through this dodgy connector to the negative side of the board, causing a short that caused the batteries to heat up to a point where I thought they were going to explode as they were so hot. You may as well of just connected the two batteries together…childish mistake. I was testing for voltages and was suspicious that I was getting no readings, just as well I went straight to the battery when I did. Lesson learned for me.
Bad wiring
I have checked the speaker is working, this is a 32ohm speaker and it was indicating 31ohm so there were no issues there. I have removed the two capacitors and checked them and they are both within tolerance, hence I will leave these in place.
Speaker is fine
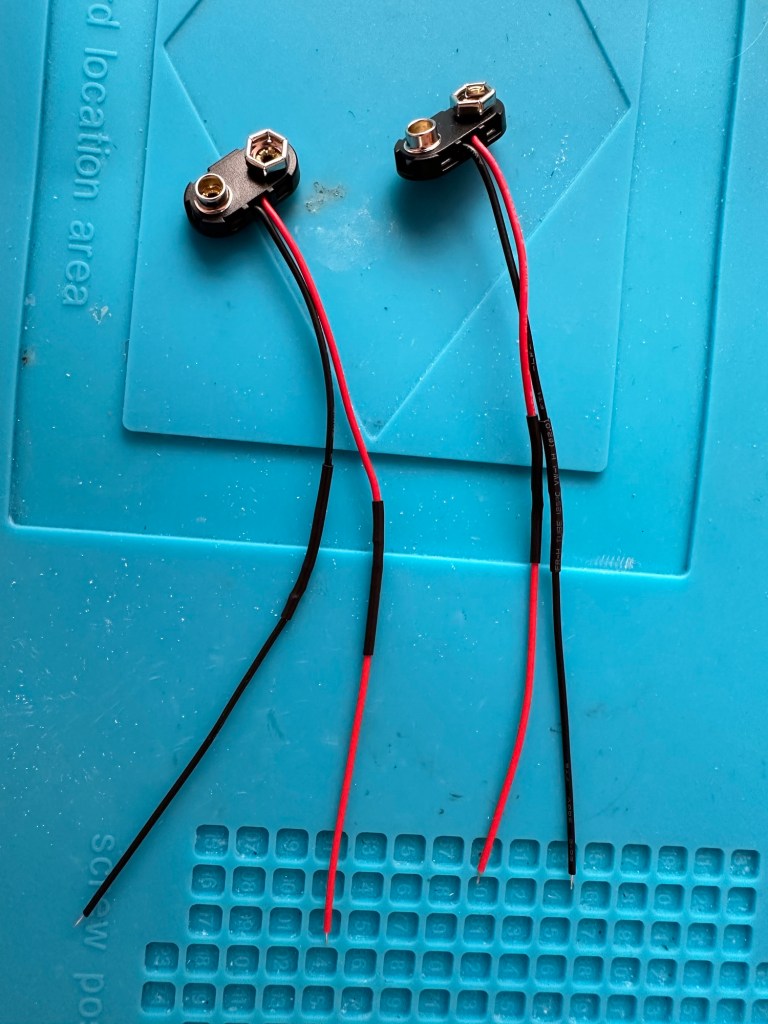
The batteries are separately wired on this board. The two negative wires go to the negative side and the positive wires go to the positive side, straight forward wiring, I don’t know why the previous clown wired it as he did. These four wires now soldered in place with new leads and connections allow me to attach the batteries and check voltages, all is good and reading as it should.
New leads made
I clean all the switches with contact cleaner, I clean the board with IPA and clean all the contacts. A good suction and polish of the frame and all is good.
I can confirm the board indicates that this unit is week 24 of 1979 as per the writing on the main board. That puts this particular unit at 45 years old. Will it work.
Hell yeah it does!
Main switch into the on position and the annoying sonar sound kicks in, my dog leaves the room as it’s annoying him, to me I have just been transported back to my childhood. It’s brilliant.
I collar the wife into a game, I have to teach her how to program it and it works perfectly. Every sound is there, it’s noisy repetitive and computer programming at its absolute most basic level. And it’s mine.
Computer Battleship – It works
It’s going down our garden pub to be used by the youngsters and adults alike. I think the kids will love it due to its primitive technology. They’ll learn from it.
Another piece of my past saved from landfill, and it will be put to good use. Just don’t trust any mods or fixes done by others, don’t inherit a fire risk. Check check check.
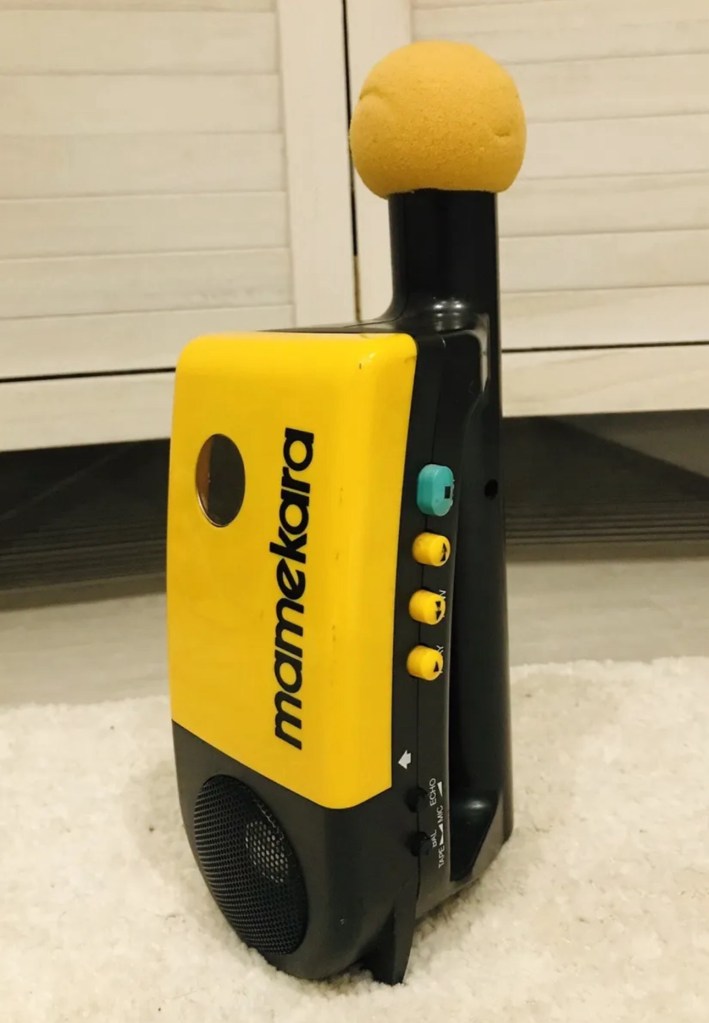
This is a handy karaoke cassette player released by Epson over 30 years ago in Japan. The item it self does not function. Recommended for retro collectors
Ebay
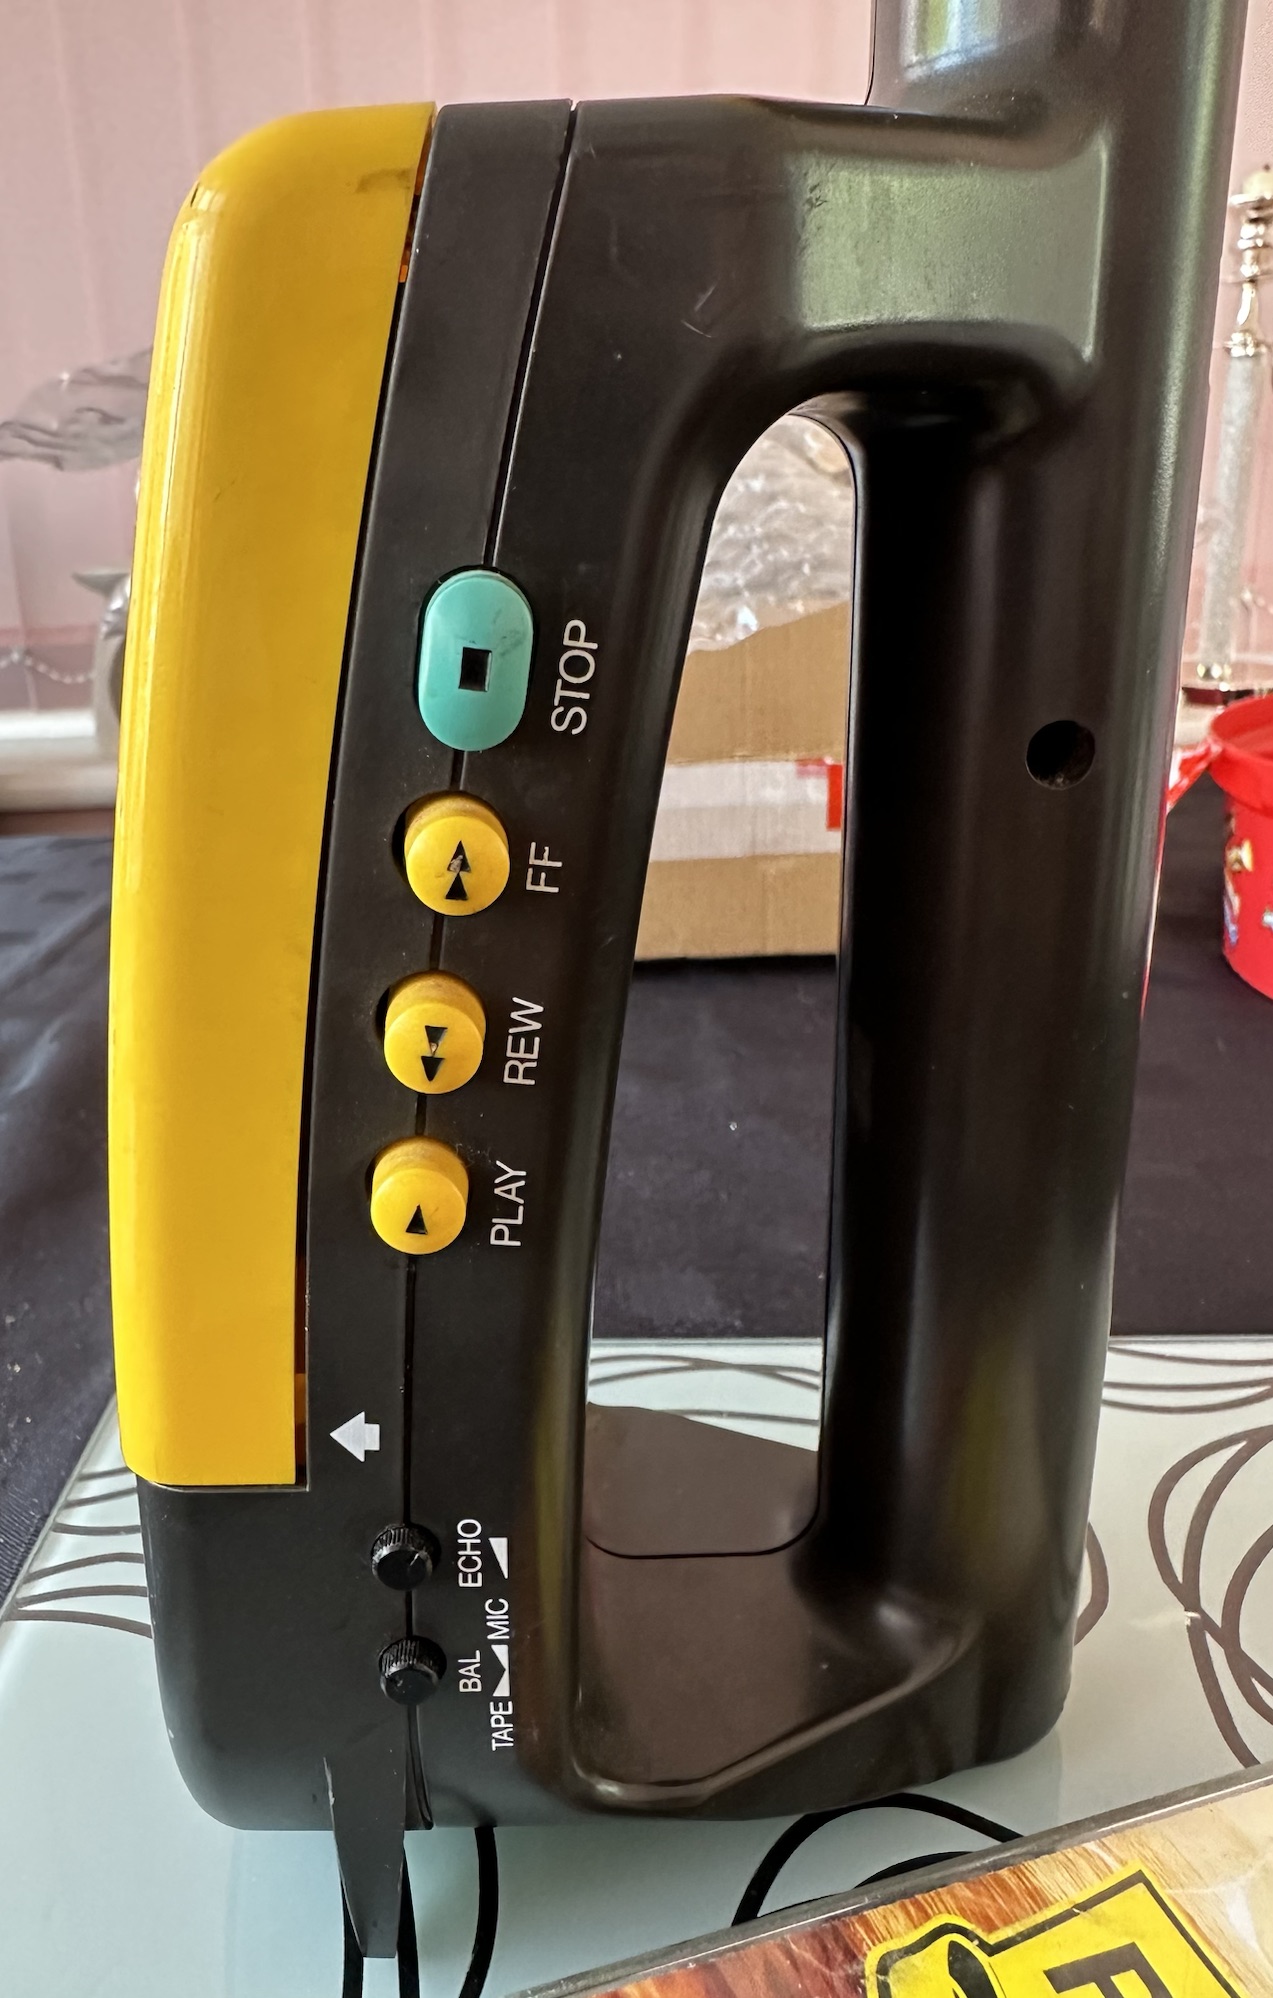
Mamekara Karaoke machine
This video sums it up, apologies to those with sensitive hearing:
The pub singer
Anyway, enough of the frivolities, let’s see what’s wrong and try to fix it.
On initial examination, everything seems to be there, no damage to the shell. Four AA batteries inserted and I do hear some feedback from the mic.
Four AA batteries
There are some volume controls that control the tape sound versus mic sound, there is also a speech on and off switch along with a balance control, these seem to work intermittently and I suspect they might just need contacts cleaning.
All works but needs contacts cleaning More controls that need cleaning
The tape seems to sort of work but the play button does not stay on, the recorded sound is slow. Echo and balance buttons also seem to work but again probably need contacts cleaning. I suspect the belt of the cassette needs replacing and the tape heads will need cleaning.
Cassette runs slow
Good news is that for once there is no corrosion on the battery contacts.
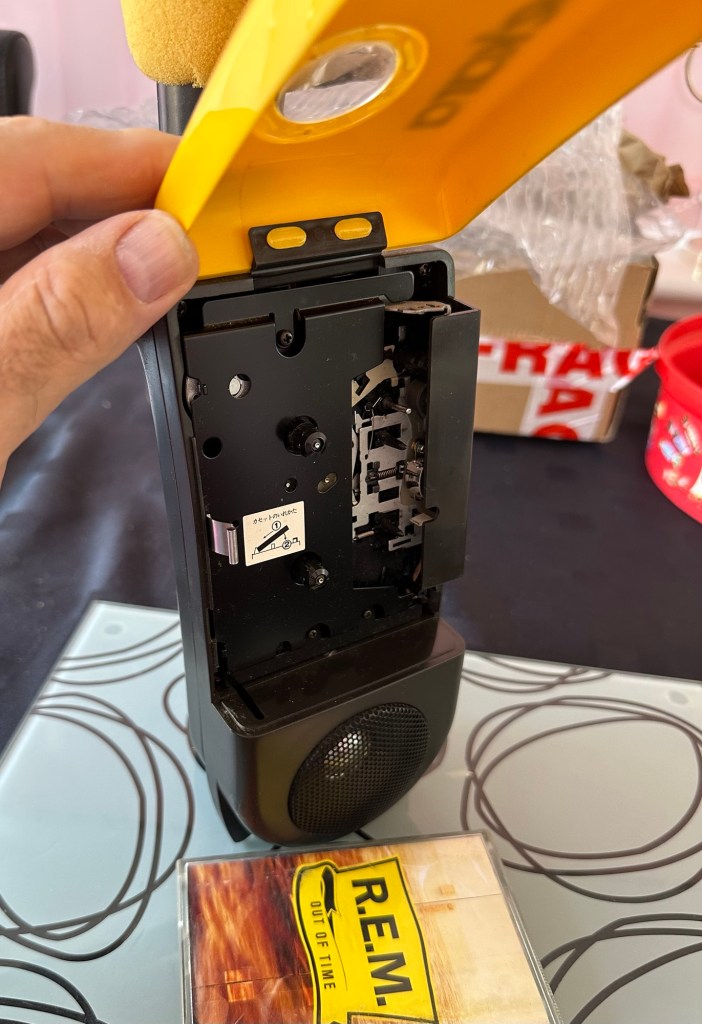
I will now have to open the unit up to observe closer.
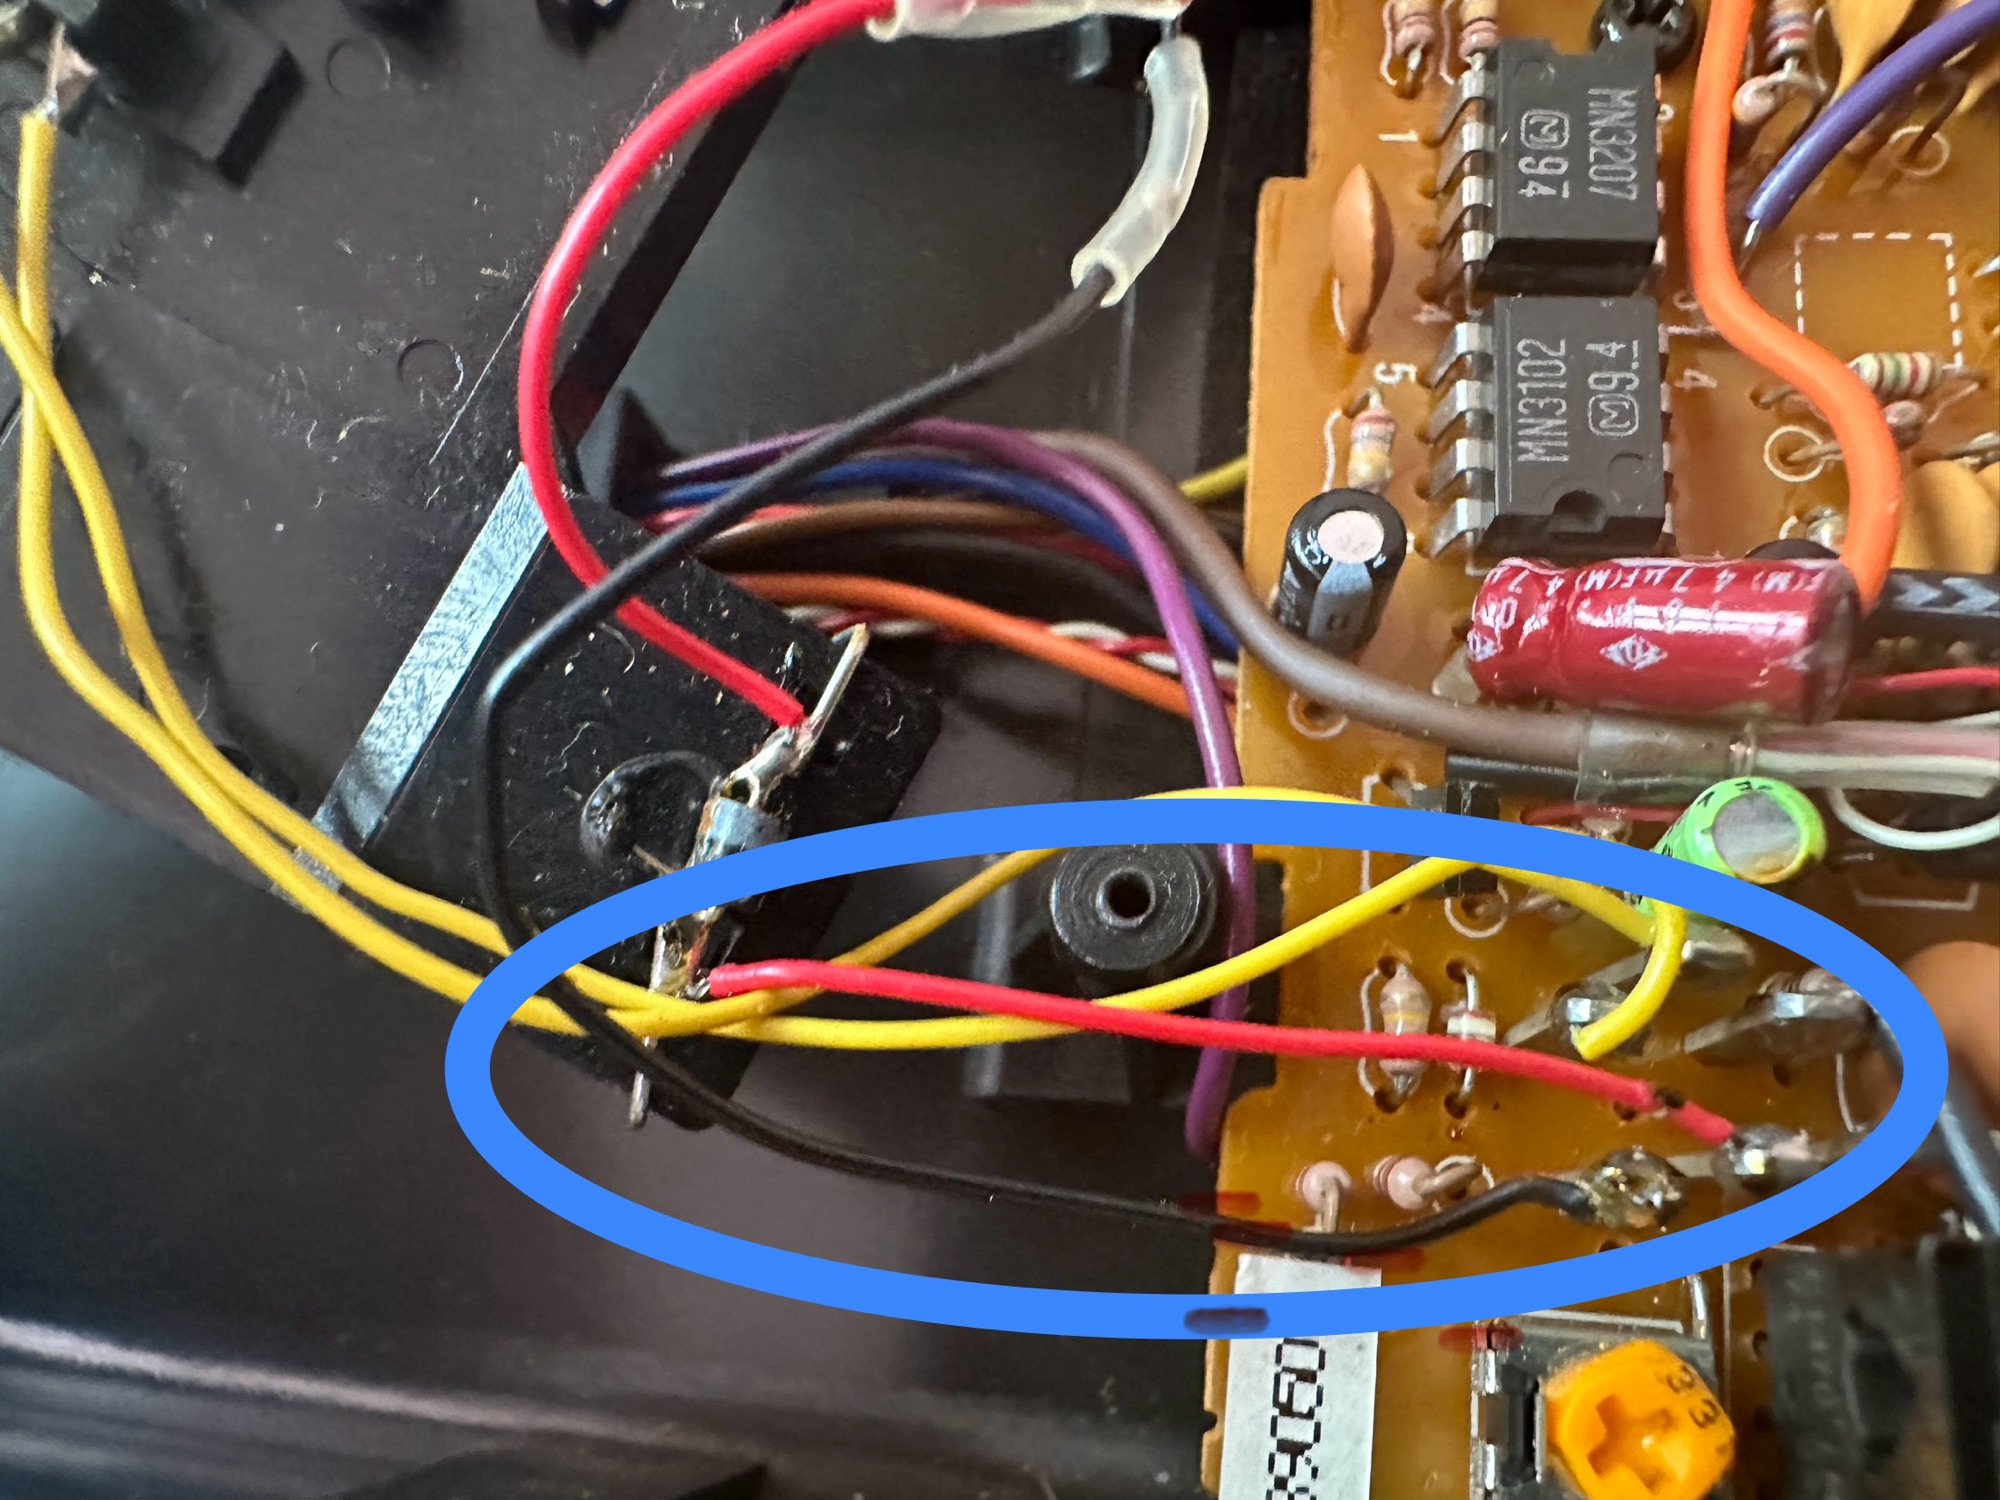
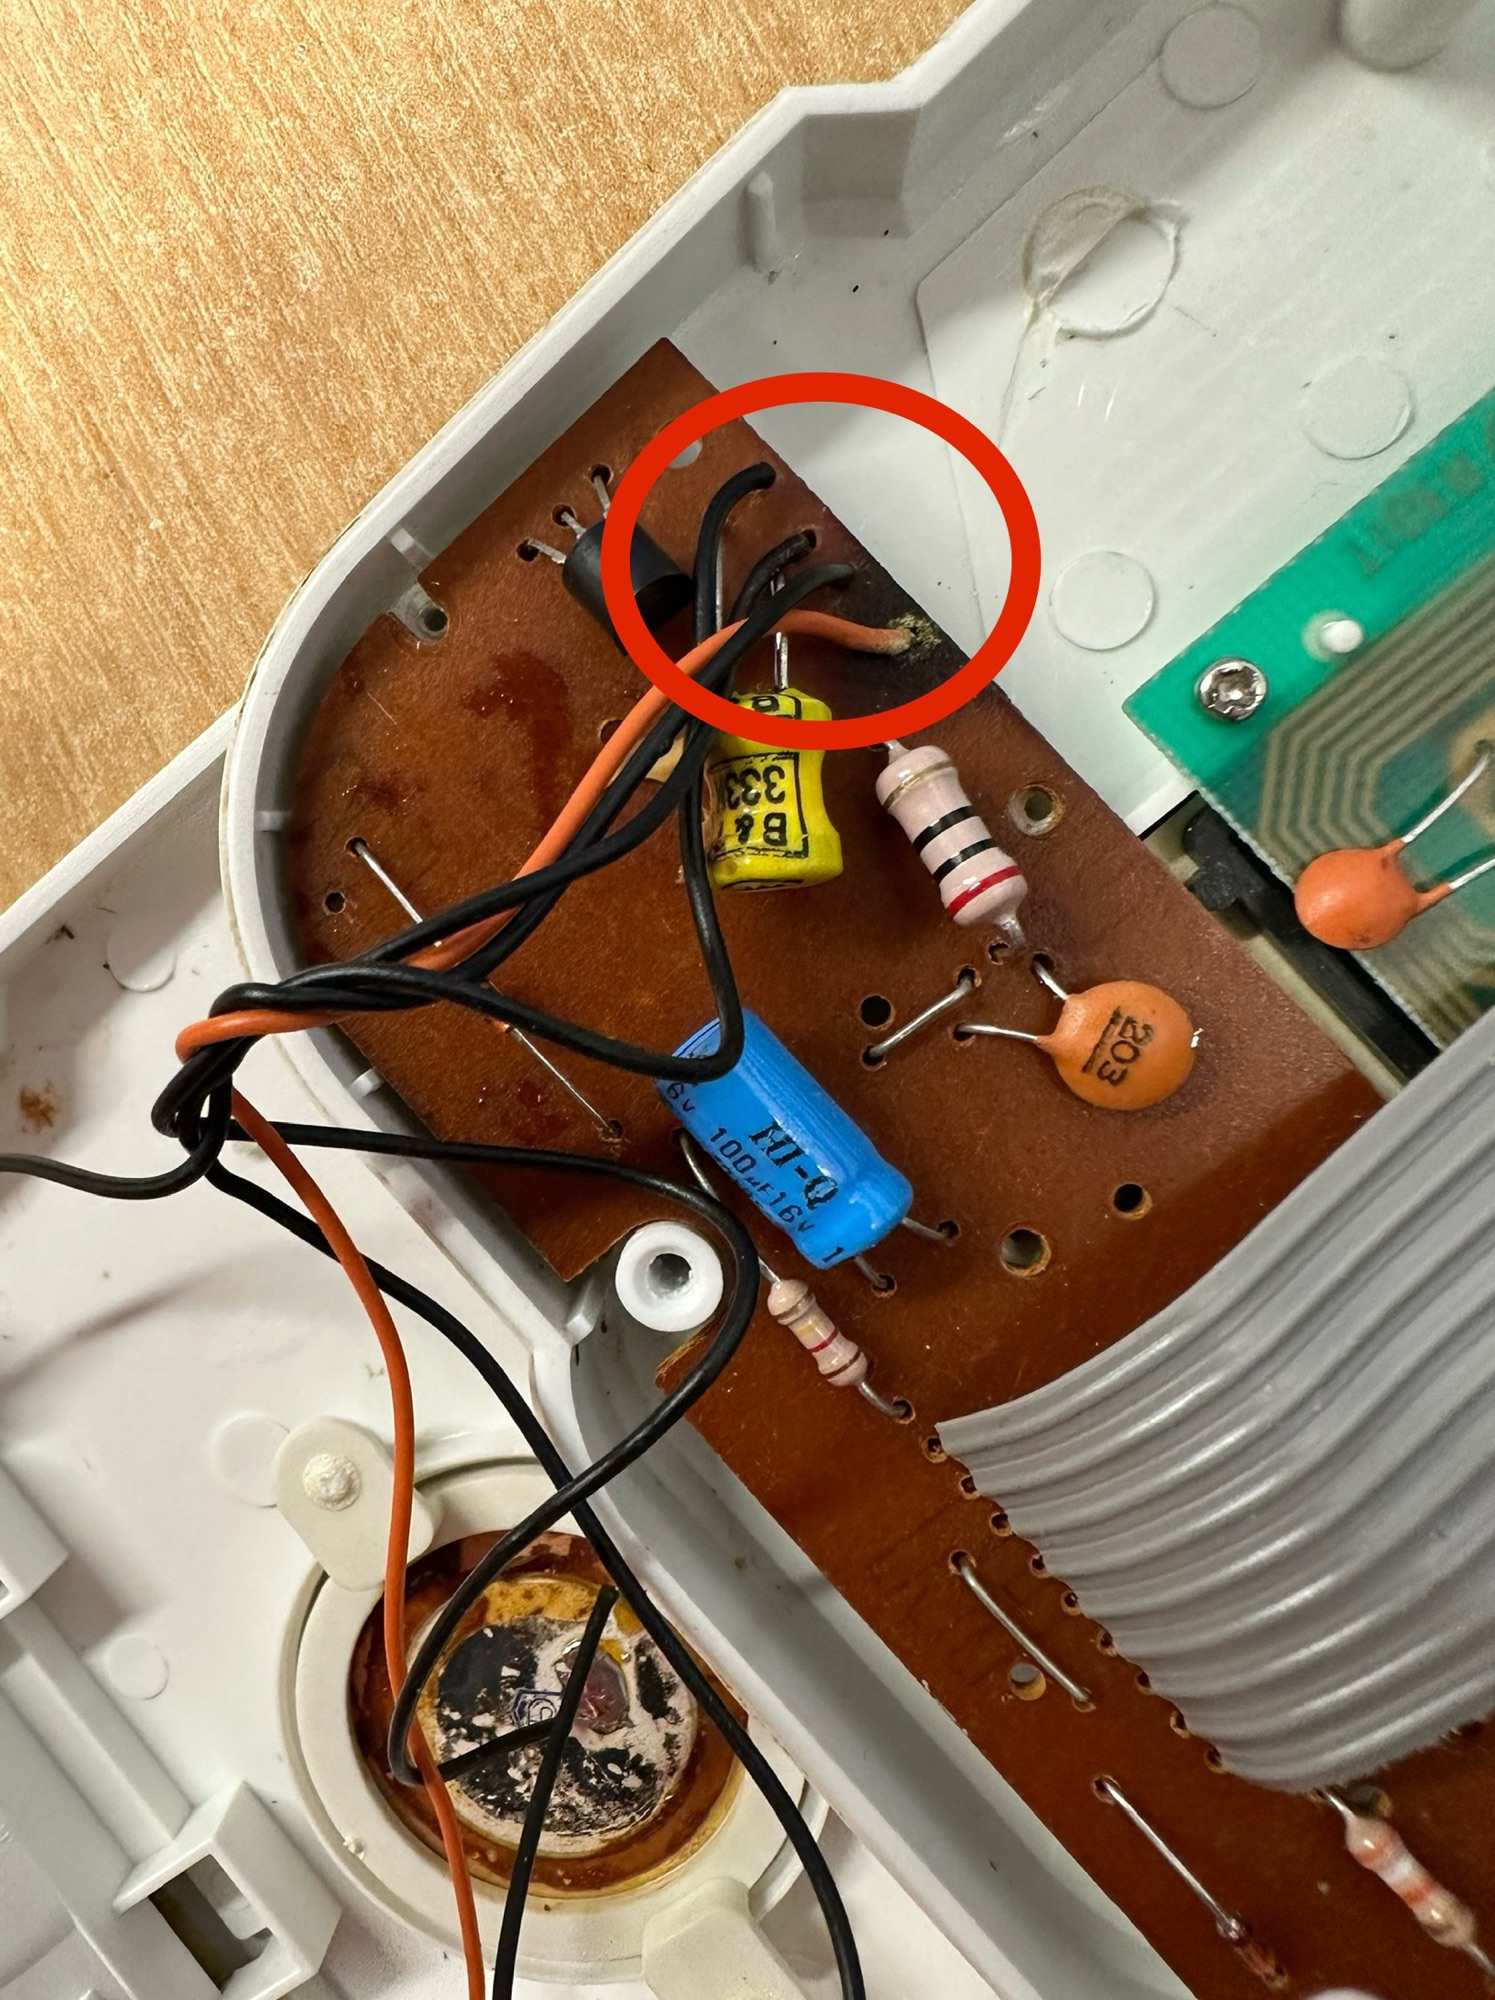
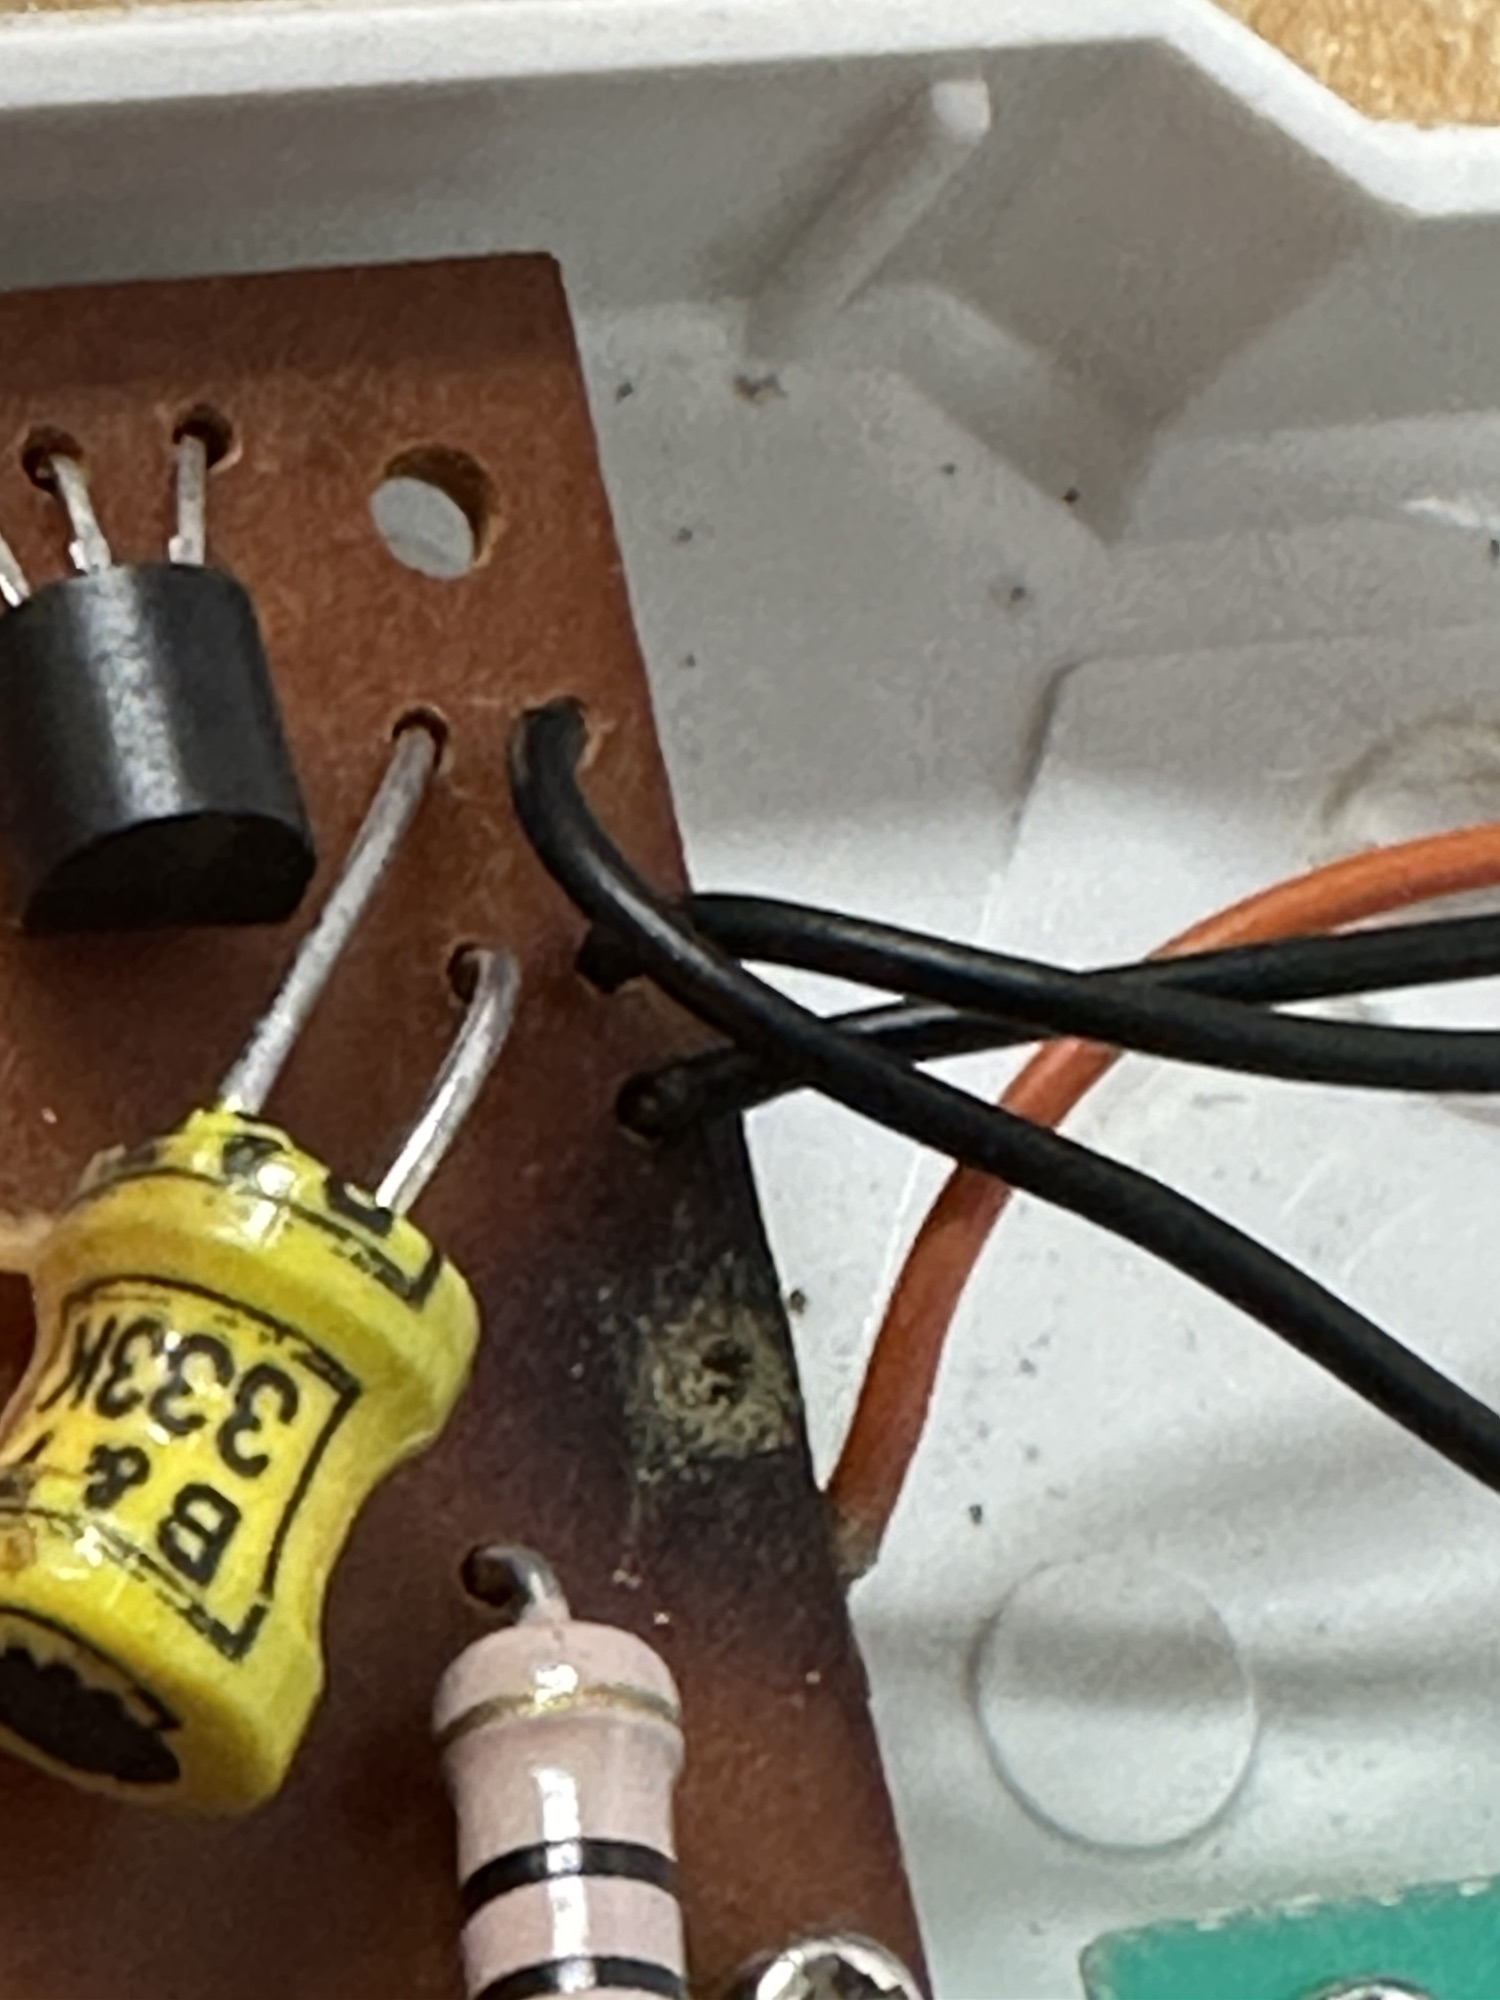
Once inside there are a couple of issues that show straight away. The two drive belts are very loose and will require replacing, luckily I have a bag full of these that should do the job. There is also a wire detached that controls the motor, this will need re attaching at both ends.
Two loose drive beltsThe red wire inside the circle needed re soldering Little red wire in place
I’ve reattached the wire and replaced the two drive belts. I’ve checked the board and found what looks like a burnt capacitor, but checks confirm there is no issue. Looks like the component has a small burn on it as a result of an earlier soldering attempt, probably during manufacture.
The main issue is that the play button will not engage. I spent a good 30 minutes scratching my head here until I spent some time clicking the buttons that worked and the stop button. There is a catch on the rear of the tape head that should click into the sliding stop mechanism when depressed, this was not quite making the full range of travel. A pair of pinch nose pliers and a slight adjustment of about 1mm ensured we were now working. I was worried I might over stress this catch, however it was made of steel and I had nothing to worry about. See the video below:
Loose belts and non engaging play button
There was nothing wrong with any of the volume controls or switches, so I used some contact cleaning spray and vigorously operated them for a minute or so each. This worked just fine.
I then reassembled the unit, put in some batteries and hey presto, good loud clean sound. I put a tape in and it played just fine, probably better than some of the Walkmans I’ve fixed lately.
Excuse the pub singing
I’ve put a little video up above of me singing into it, I haven’t played a tape due to copyright issues that might occur. I’ve sent the video to the family of me singing with a tape and they are suitably bemused, the unit now sits in our garden pub awaiting more customers, once I get a few Karaoke tapes to use.
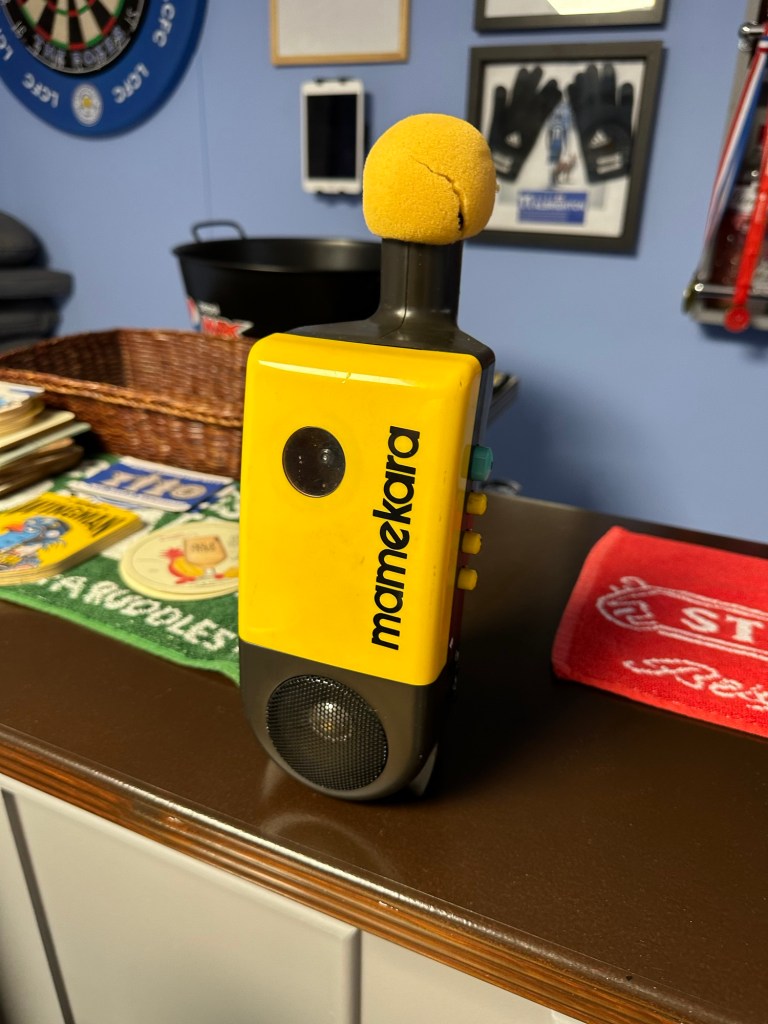
Fully working in our garden pub.
The only thing I’m going to do is replace the foam mic cover, I’ve managed to source one and that should be here shortly. I’ve also found some cheap old Karaoke tapes that I’ll store in the pub for the families entertainment.
I’ve really enjoyed this little project, and once again I’ve salvaged another item that was broken from the 90s and saved it from landfill. It lives on.
Console is sold as nonworking, shows no sign of life. Item is in good physical condition but there is a lot of corrosion in the battery compartment
Ebay
I’ve decide to look into what seems to be the “New Antique” sector of retro gaming. The prices being commanded for 1980s/90s old school gaming is crazy with many small handheld items that would have cost a couple of pounds being sold into the hundreds. Absolutely nuts!
Sonic – Tiger console
My decision making process on this was simple. I love hedgehogs, we have plenty of hedgehog visitors to our garden, so what better game than “Sonic the Hedgehog?”
Anyway, at the cheaper end I managed to bag this for £9 GBP. If I get it working, those units are selling between £20 – £45 so I should at least get my original outlay back, pending on what work needs doing.
So here we go….
Well, it’s arrived and cosmetically it looks fine.
Looks good cosmetically
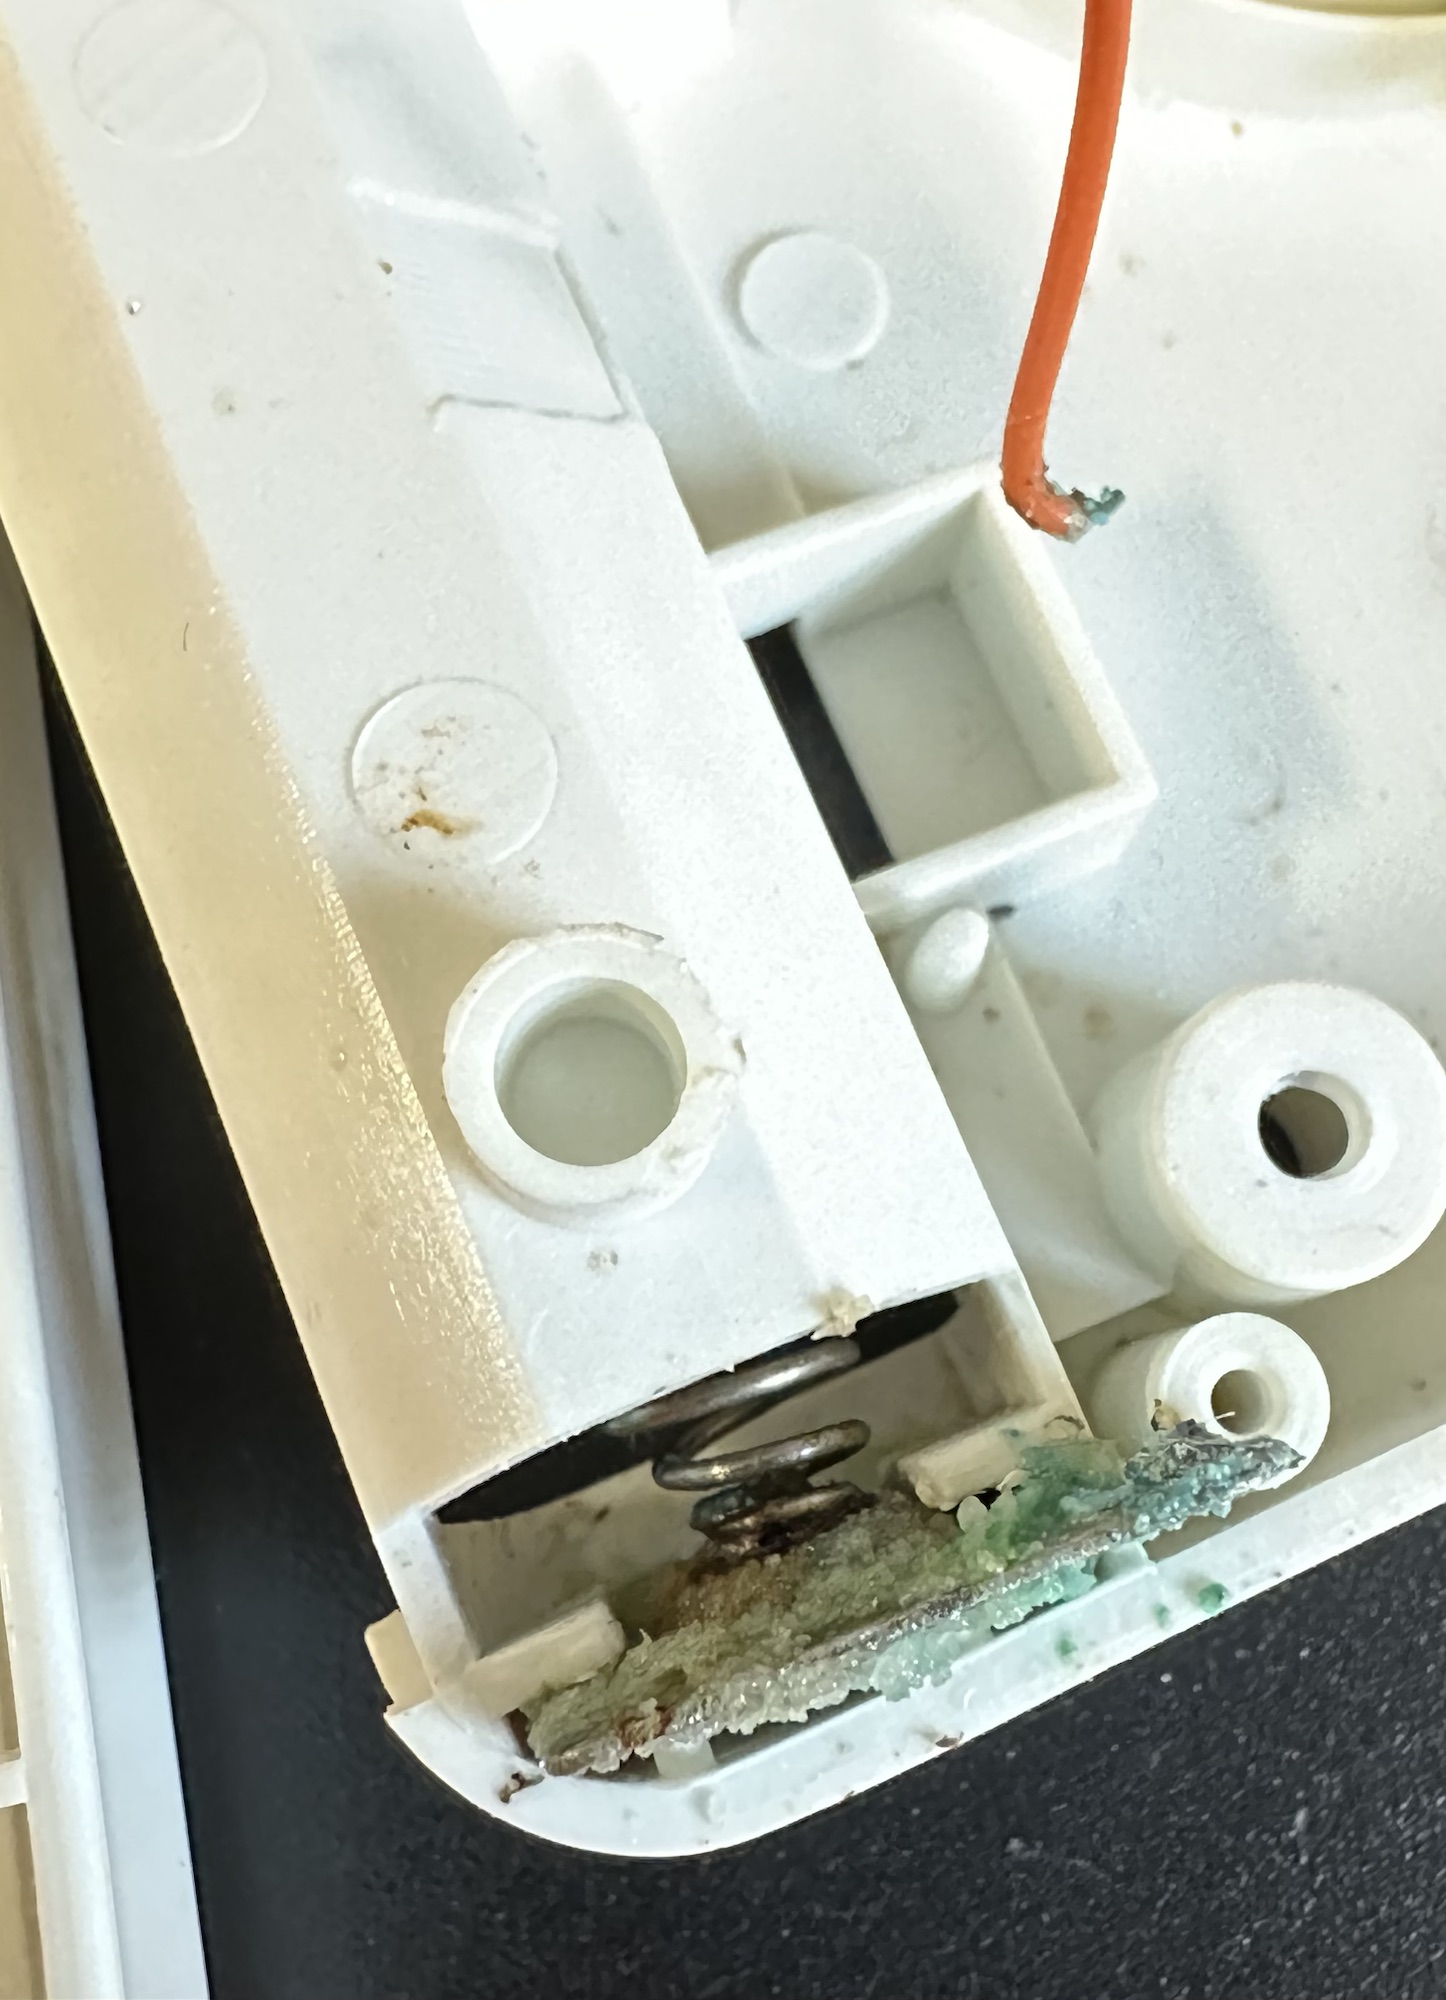
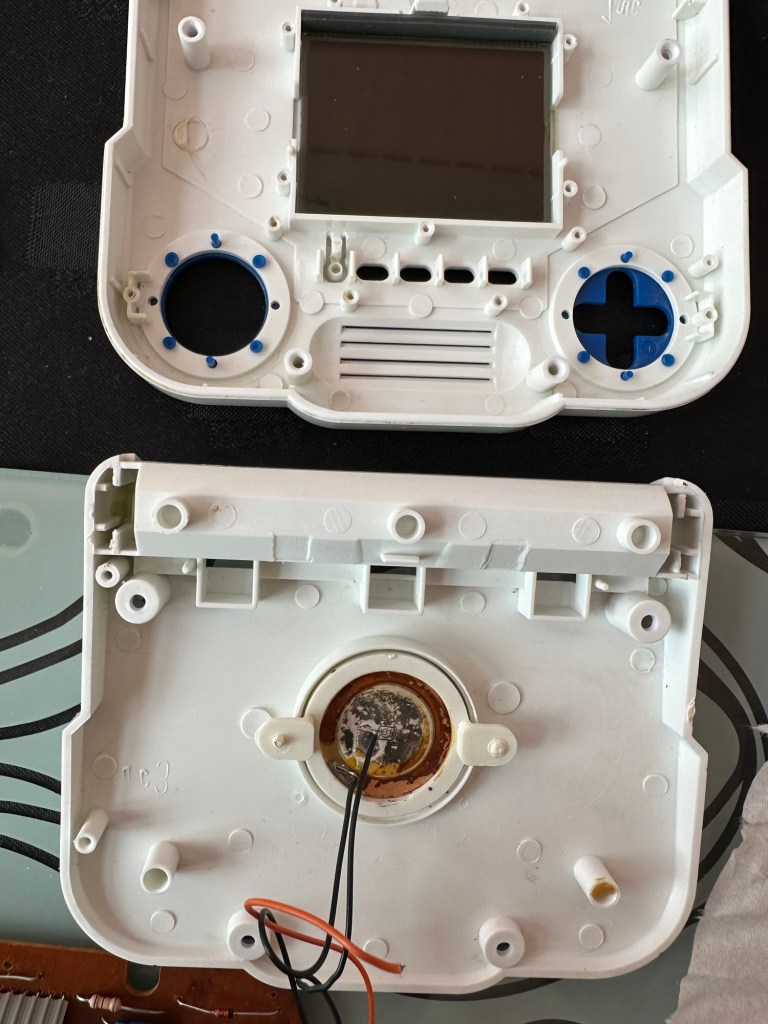
Now I opened the battery compartment and could see no corrosion, on opening further I noticed some of the screws had been threaded so I guess someone has been in here before me. And I was right. The corrosion can be quite clearly seen on opening the unit.
Bad corrosion and detached wireCleaned, broken but going to repair
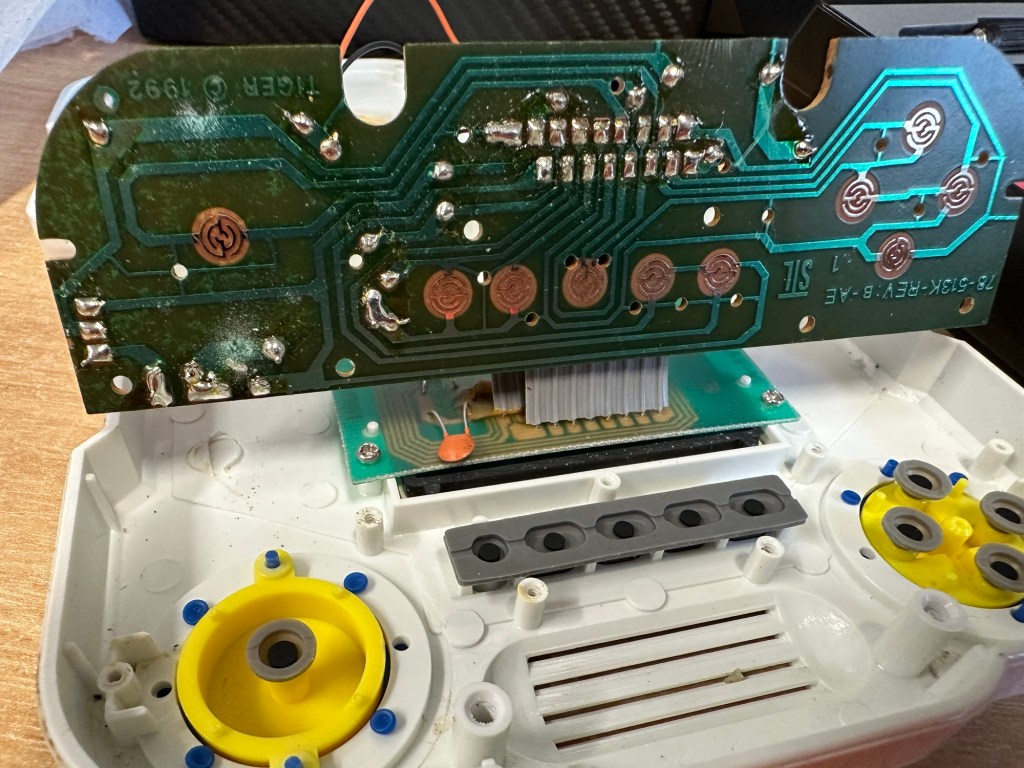
Where the corrosion is on the negative terminal, a wire is also disconnected, hooray I thought, an easy fix. Hold on tiger, it’s not that simple. it appears the corrosion has leaked down the wire to where the negative wire joins the circuit board, in fact all four wires at this point are holding on by threads of wire. These will need re soldering.
This game appears to be from 1992 according to the stamp on the main board.
Loose wires circled Corrosion
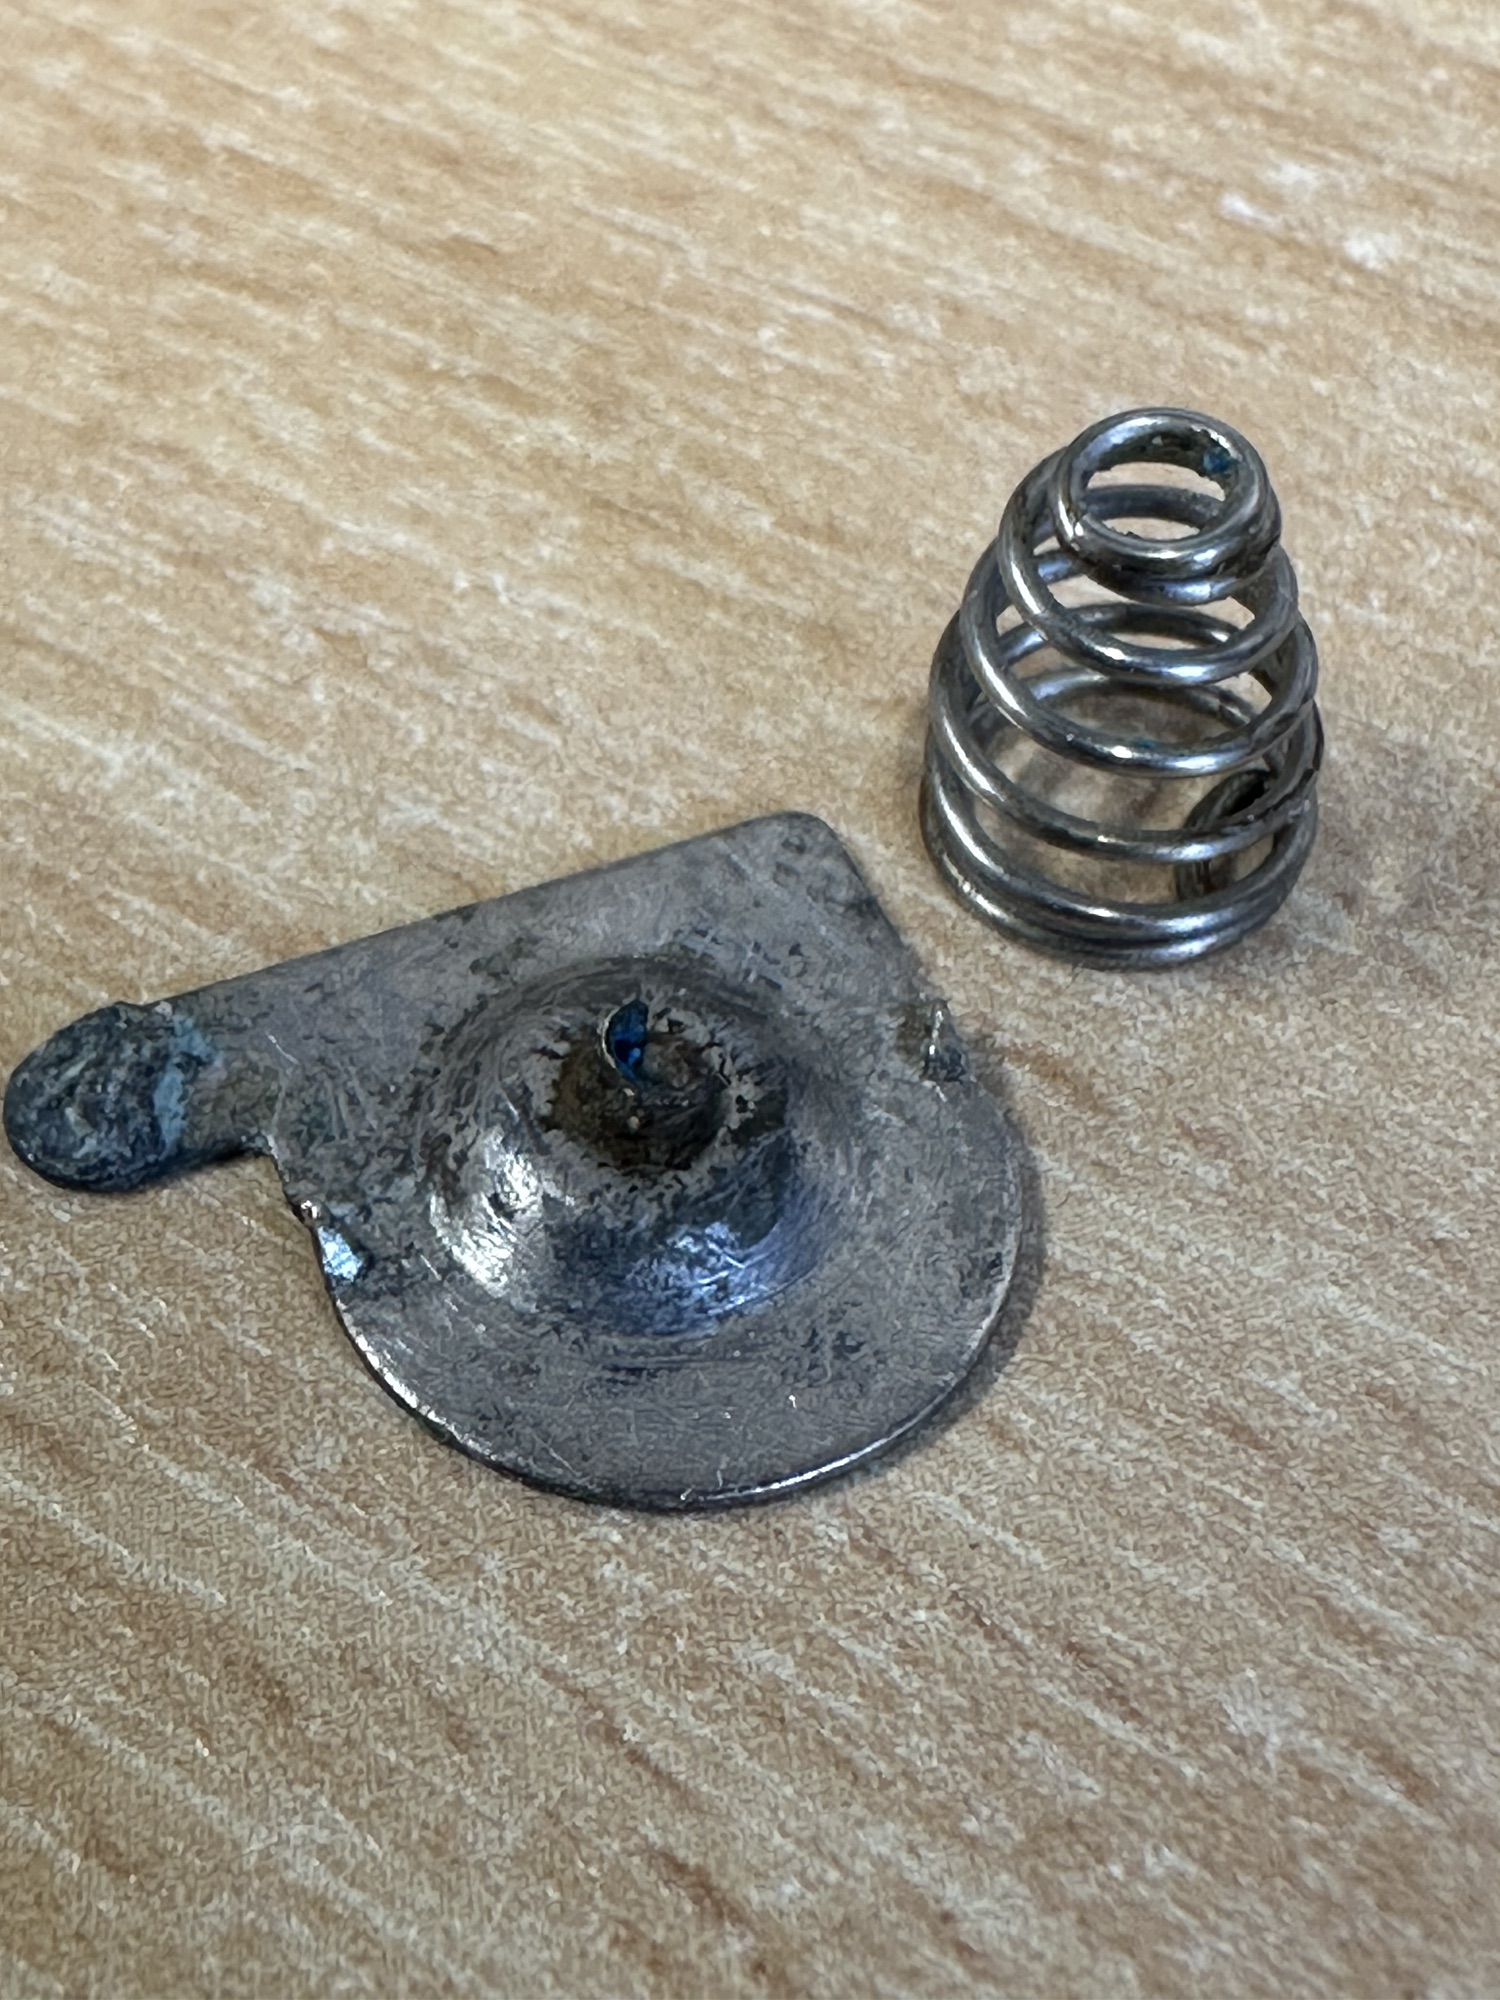
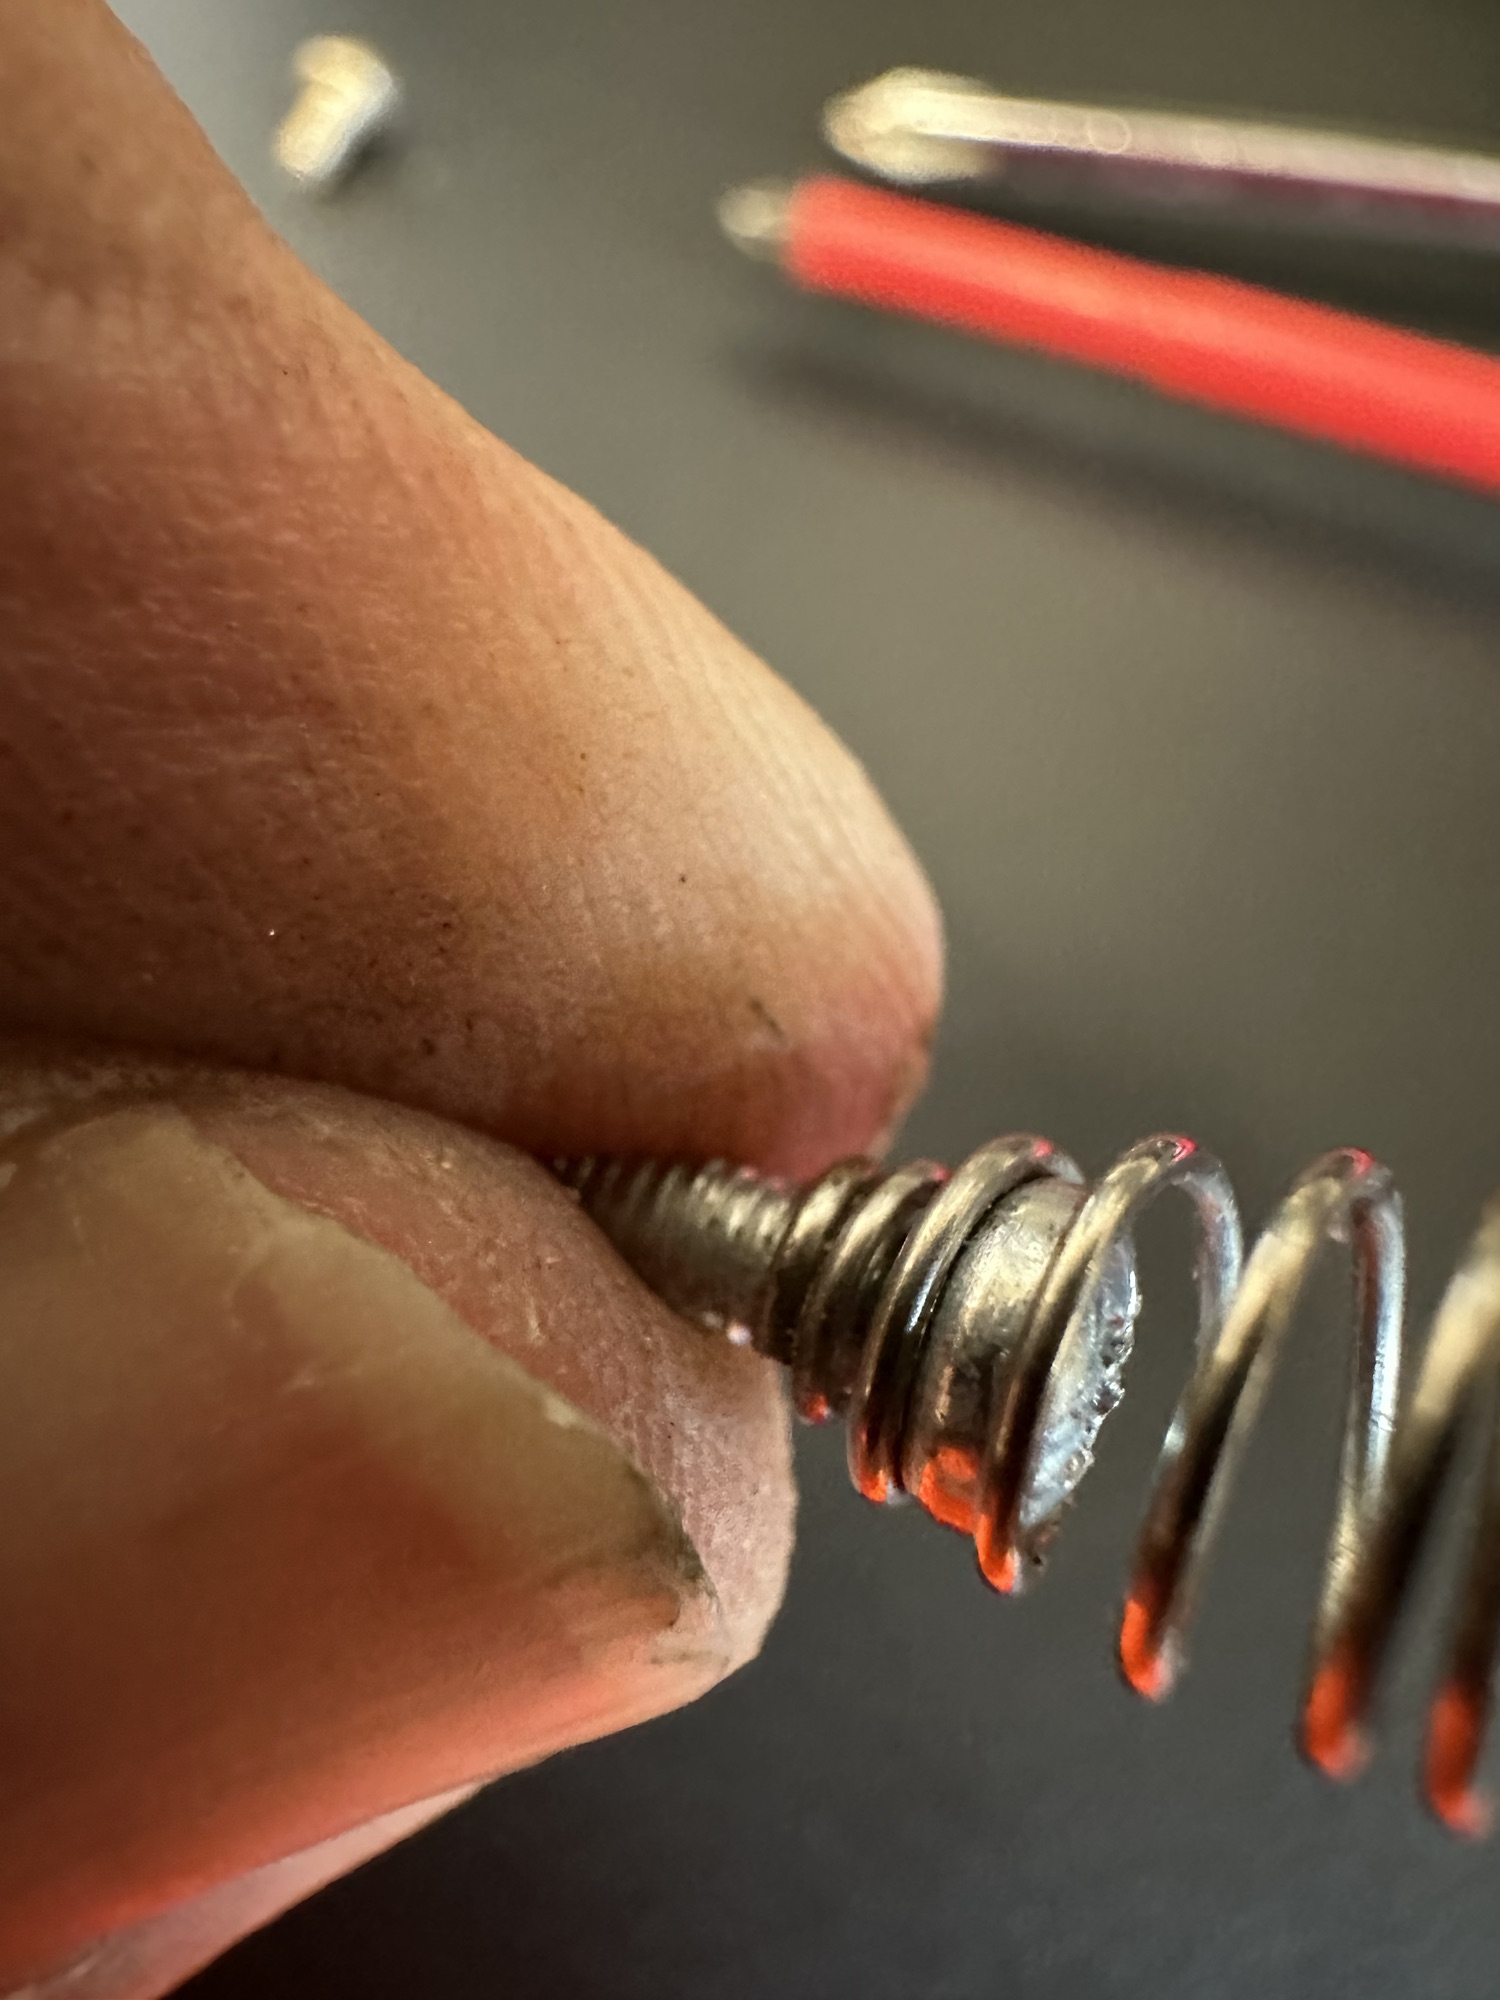
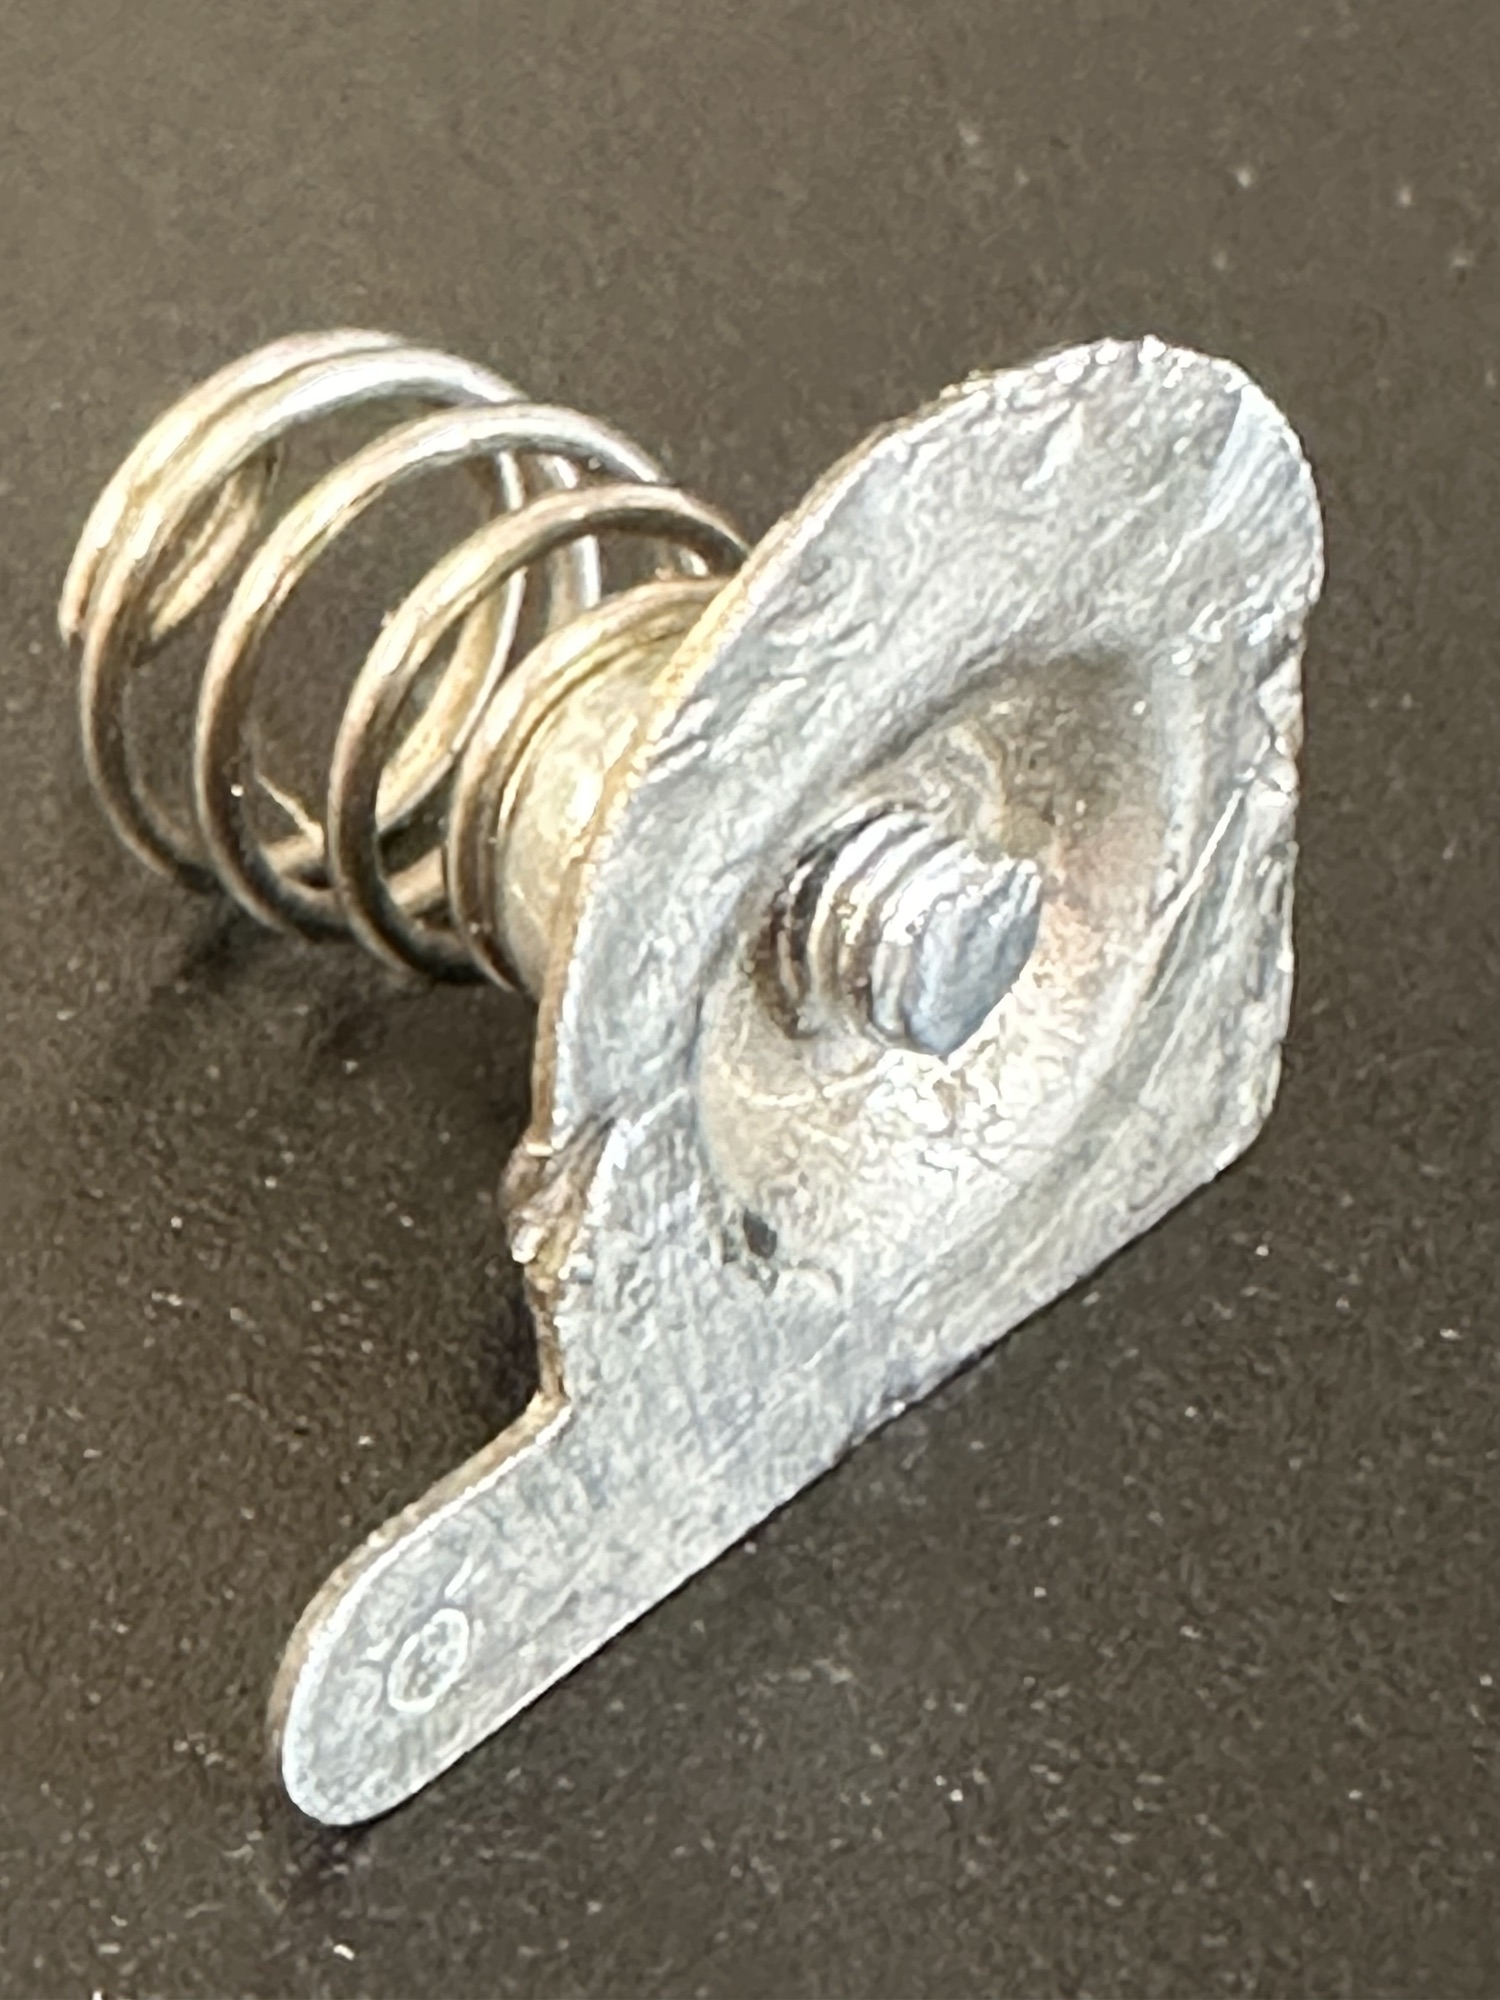
The negative terminal connector is broken, i have some replacements on order but I’m going to repair this one.
I’ve taken the corroded rivet out that held the spring. I’ve found a small screw and have used this to connect to the plate. I’ve cleaned the whole lot with wire wool and have cut off the excess screw and filed it all down. It now looks as good as new and no cost involved. I will finish it off with a dab of solder on the back to ensure good contact is maintained.
Rivet removedFirst a screwNow to cut off the excessFiled down All polished and good to go
Peering underneath at the board it all looks ok, needing just a good clean with IPA. However, I’m not really going to be able to confirm this until I’ve re soldered and checked continuity from the batteries.
Signs of light corrosion under board
There could be some damaged tracks, again I’ll know that when all the basic setup and tests have been done. There is also a possibility the speaker could be damaged as the corrosion has reached there. I’ll test with the multimeter in the meantime. That all checked out ok and the speaker is fine.
I’ve given a good overall clean with some IPA and the entire unit inside and out looks as good as new.
Cleaned shellCleaned board
I’ve replaced both the power cables from the battery unit as one had fallen off and the negative one had looked as if it had been crushed. I was changing so it made no odds to change the other.
New power cables
I ran some checks with the multimeter and everything is fine, all tracks are good and it looks as if the corrosion was localised, this unit has dodged a bullet.
Batteries in and it’s now working well, see this video short:
When you don’t know what you’re doing
However, as I’m not a gamer I have absolutely no idea what I’m doing, it makes a lot of noise and appears to work but god knows what I do. It certainly does a lot more than it did when I received it.
There is a form of amateur radio comms that I enjoy and that is slow scan television. Here’s a basic explanation:
A literal term for SSTV is narrowband television. Analog broadcast television requires at least 6 MHz wide channels, because it transmits 25 or 30 picture frames per second (see ITU analog broadcast standards), but SSTV usually only takes up to a maximum of 3 kHz of bandwidth. It is a much slower method of still picture transmission, usually taking from about eight seconds to a couple of minutes, depending on the mode used, to transmit one image frame.
Since SSTV systems operate on voicefrequencies, amateurs use it on shortwave (also known as HF by amateurradio operators), VHF and UHF radio.
Wikipedia
In this Instance below I used a digital transceiver and was pointing the aerial in the general direction of the International space station as it passed overhead on a specific date, when the Russian section of the ISS was transmitting slow scan television pictures as it passed over. I used my iPhone to decode the signal and to produce the pictures, using an app I had installed earlier. This was all part of a day celebrating the anniversary of Sputnik, the world’s first man made transmitting satellite.
My setup was totally mobile and so basic that I just about managed to get partial scans via this technique, see the two pictures below. I was literally sitting in the front seat of my car.
The picture I received from the ISS and my radio
Even though my pictures were not perfect I was still able to supply proof that I received the transmission and as a result was issued with the certificate below from ARISS – Amateur radio on the International Space Station, find out more about ARISS Here: ARISS
ARISS certificate
There are many of these types of events that occur all year round where you can experiment with all types of equipment to make contact with distant radio stations. This is the spirit of amateur radio.
This will be a running repair with regular updates. There is quite a bit going on.
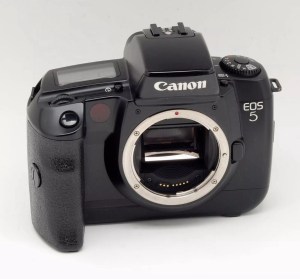
The bargain basement DSLR has arrived (See original blog post here: Canon EOS 5D Mk2) and I’ve been able to give it a quick once over. It’s not had an easy life and has taken some bangs and knocks. Other than that it’s about 16 years old and has had about 69000 actuations, I don’t think it looks too bad personally. I’ve spent a good hour just giving it a good clean up and it was filthy, all knobs and buttons are working fine, the shutter isn’t locked and when a lens is attached, manually it all focuses just fine and the screen looks clean. There is no evidence of damage to the curtain however I can’t test this further until the battery and charger arrives.
Eos 5D MK2- assessment Eos 5D MK2- assessment
To be honest if I can get this working it will be going into my own personal collection. As long as I can get some nice results I’m not that worried about how it looks cosmetically. The body can be touched up or I can add a skin, we’ll see how it goes.
Eos 5D MK2- assessment Eos 5D MK2- assessment
Update: 6/4/24
I’ve now received a couple of bits consisting of two new batteries and a charger as well as a new battery door cover. Once powered up all indications, buttons, sensors are working and TTL indications are displaying as they should.
New battery coverTTL indicationsBack indications Top indications
All lenses are working and moving and focusing as they should. The real good news is that the shutter fires at all speeds and is not stuck, and the sensor cleaner appears to be working.
I’m really happy with what I have found so far, I need to get a CF card to check the original issues that were reported with the suspect sensor. If that is the only issue I will get one ordered and install that at a later date. I have cleared all settings and the firmware is up to date. I’ve downloaded a raft of Canon software so I will be able to test this all once I get that CF card that should be here in a few days.
23/4/24
The CF card adapter has arrived from China. I’ve purchased this type as this particular adapter allows an SD card to be utilised in CF form. I have ample SD cards in use all around so this makes sense for me, I have nothing apart from this camera that uses CF cards so for a relatively low outlay this is the best option for me.
CF SD adapter
Now I have Every thing in place to test the camera. I’m using basic settings and an old test lens so I’m not looking for any spectacular photos as that’s not going to happen here. I just want to see what’s going on.
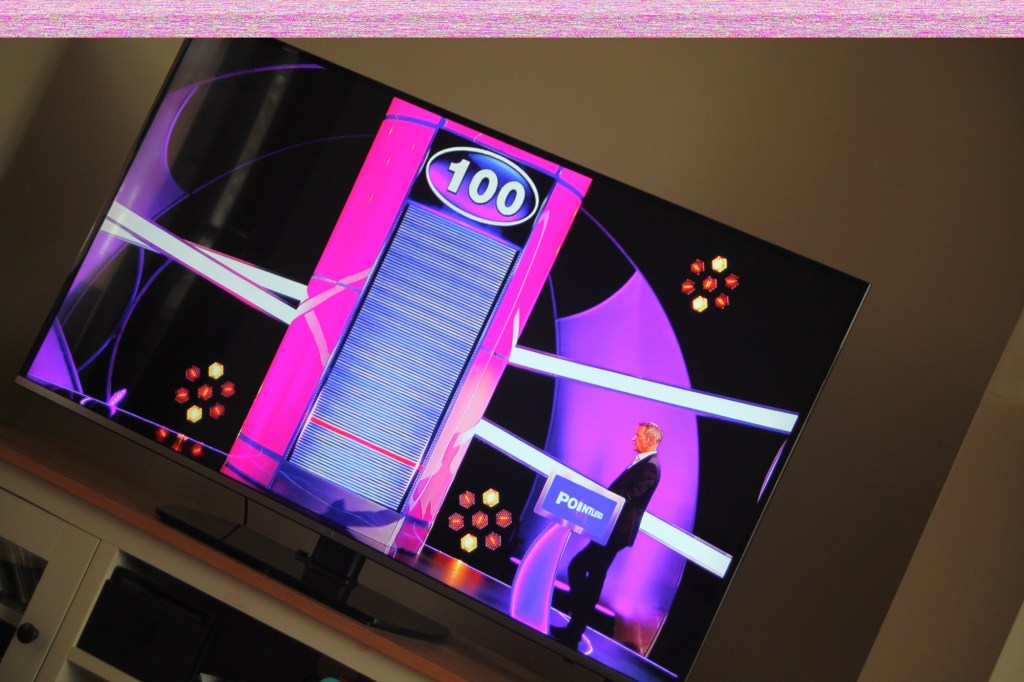
What happens most of the time
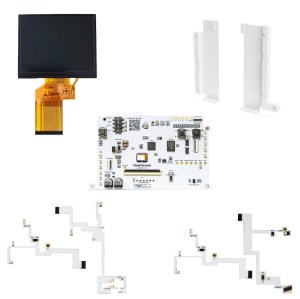
When I’m taking a shot everything lights up ok. Indications are all good, the shutter fires but all I see is a pinkish screen as demonstrated in the small video above. However every now and again I do get a “proper” photo, usually only the one then you have to turn the camera off then on again to get another and that’s not always guaranteed. As you will see in the two photos below you can get one photo and then the next has a pink band appearing from above.
No issues with picturePink issue emerges at top
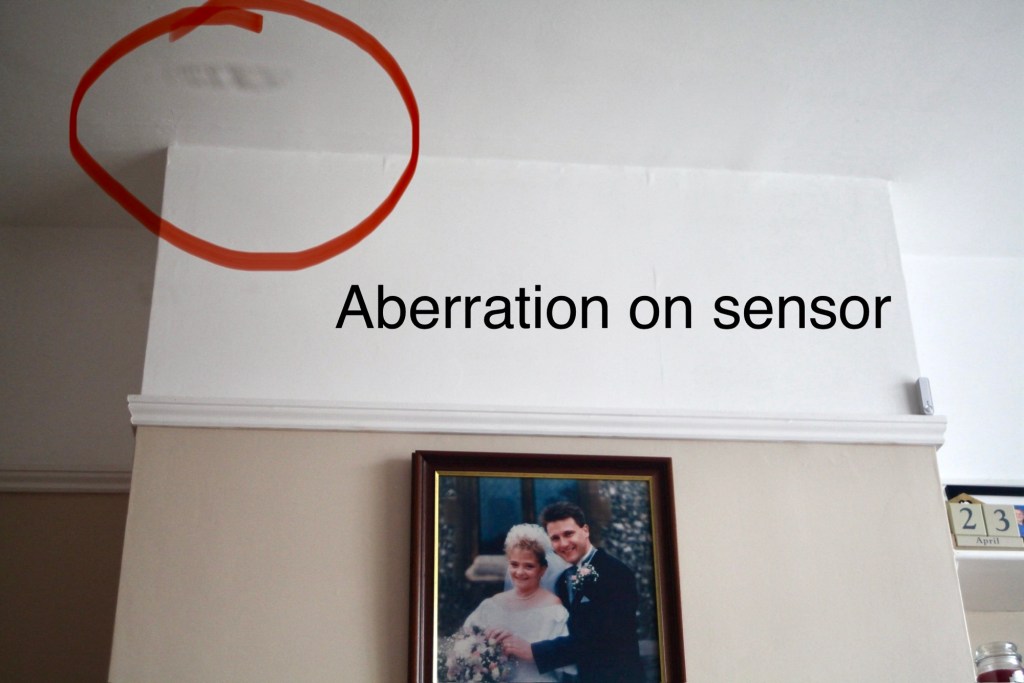
Whilst taking a random photo looking at our ceiling, I became aware of what looked like a water leak by the chimney stack. This gave me some concern but I needn’t have been worried as it appears in other photos and is more than likely an Abberation mark on the sensor. The two pictures below show that mark on the sensor in the same area.
Sensor Abberation issueAbberation still visible
Occasionally the pink line that appears at the top of the photo also takes on a pixelated test card look. The weird thing is that if you put the camera into video mode the image is clear with good sound and no playback issues. Strange 🤷♂️
The general view and picture stateThe pink issue has occurred
It really is looking as if the issue is around the sensor that in this camera is a CMOS sensor. But before I make any decisions on what action I’m taking I’m exhausting all the obvious issues if I can. I have looked at several forums on line and there are a multitude of tasks I could try but it all seems to filter down to two in general. A full camera reset and a reinstall of the last issued firmware.
Now I have completed the full reset and on top of this I’m going to install a new CR1616 CMOS cell, as I just don’t know when this was last done.
Replacing the cmos battery
The CMOS deterioration rate is about 3% of the battery value per year, now if this camera was purchased around 2008 when they first came out then it dosen’t take a mathematical genius to work out that the cell could be sufficiently depleted. In fact I don’t know why I haven’t used the multi meter to test it🤦♂️
I’ll get on to that and will report back. It kind of makes sense seeing the sensor on this camera is a Cmos sensor. All tested, battery was at 2.3v, I have now replaced the battery but everything is still the same. I don’t know if updating the firmware will assist in any way, but I’m just following a procedure that most who have been in this position before have also done. it’s just a process of elimination before doing a full tear down of the camera. And if I can do anything to avoid that I certainly will.
I’ve finished all the testing and it is certainly looking like the Cmos sensor needs replacing. I’ve done all I can here, but I’m reluctant to order the new sensor from China as I’m not 100% confident of having the facilities or time to do the work required. Will I gain anything after the outlay? I very much doubt it. I’m going to move this camera on now with all my findings and hopefully I can find someone who will be able to take this project on to a successful completion.
I know parts wise I can make a good profit on the original outlay so maybe that is the route to take.
So I’ve failed on this renovation, but nothing is going to waste, it just needs to go to some who is somewhat more experienced with these type of upgrades than me. Hopefully I can gain some experience along the cheaper more available stock route.
I have learned some interesting things about this camera and it’s operating. So in many ways that’s a win, knowledge is everything.


You must be logged in to post a comment.