Psion datapak formatter

What the listing stated:

old computer bit , powers up ( red light shines on ) but otherwise untested  , please note my other similar computer items      

EBay

My previous post Formatting the Psion II Datapack explains my thinking and reasoning behind making this purchase.

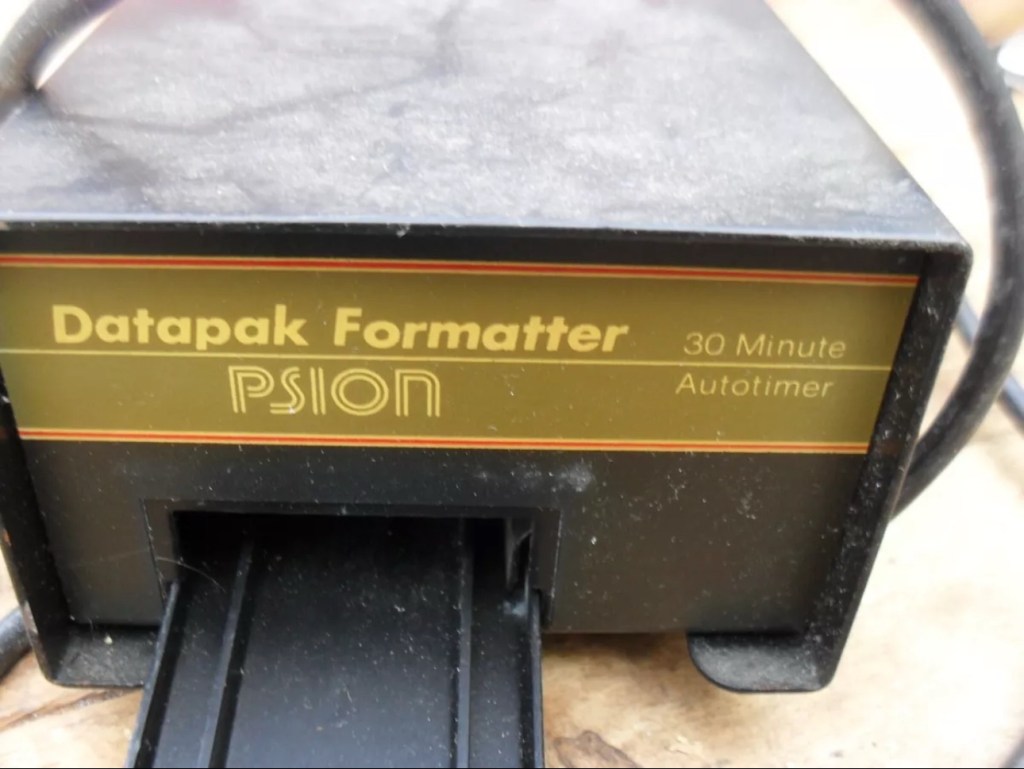
Most EPROMS made around this time in the 1980s had memory that could be formatted by using a method of exposing them to high levels of Ultraviolet light for between 10-30 minutes. The Psion Datapaks required about 30 minutes of “exposure” in one of these units to format the drive.

By high levels of light, i mean UV light around the wavelength at or close to 253.7nm. A UV light you may have in your home or in the form of a torch operates at somewhere around 395nm, a considerably safer wavelength of operation than what is needed to format these EPROMS.

The UV light spectrum. As you can see the wavelength we need to format the Datapak at 253nm falls into the dangerous UVC Shortwave spectrum. The standard house hold UV light or torch falls into the much safer UVA Longwave category at around 395nm. Picture courtesy of The Hepacart blog.

This unit was purchased after I had spoken to the seller, a nice chap that specialised in old diy tools and computer peripherals, but wasn’t quite sure what this unit did or how it operated. He had stated that the red light was working, but nothing else. My concern here was that the UV light inside was broken, and these tubes i believe are known as low pressure mercury discharge tubes, and finding them in this size is pretty difficult to say the least. The UV tube in this unit could potentially be 40yrs old as this is a Mk1 unit circa 1984. I just don’t know if its tube has ever been replaced at all in its lifetime. Have a read of this post by Dave Curran who had similar issues sourcing a light supply for one of these units, it resulted in him having to make a hybrid concoction combining one of these units and a cheap Chinese import – Eprom eraser/upgrade

I asked the seller, John, if the Ultraviolet light inside was operational and I have supplied a screen shot of his reply:

The reply to my question

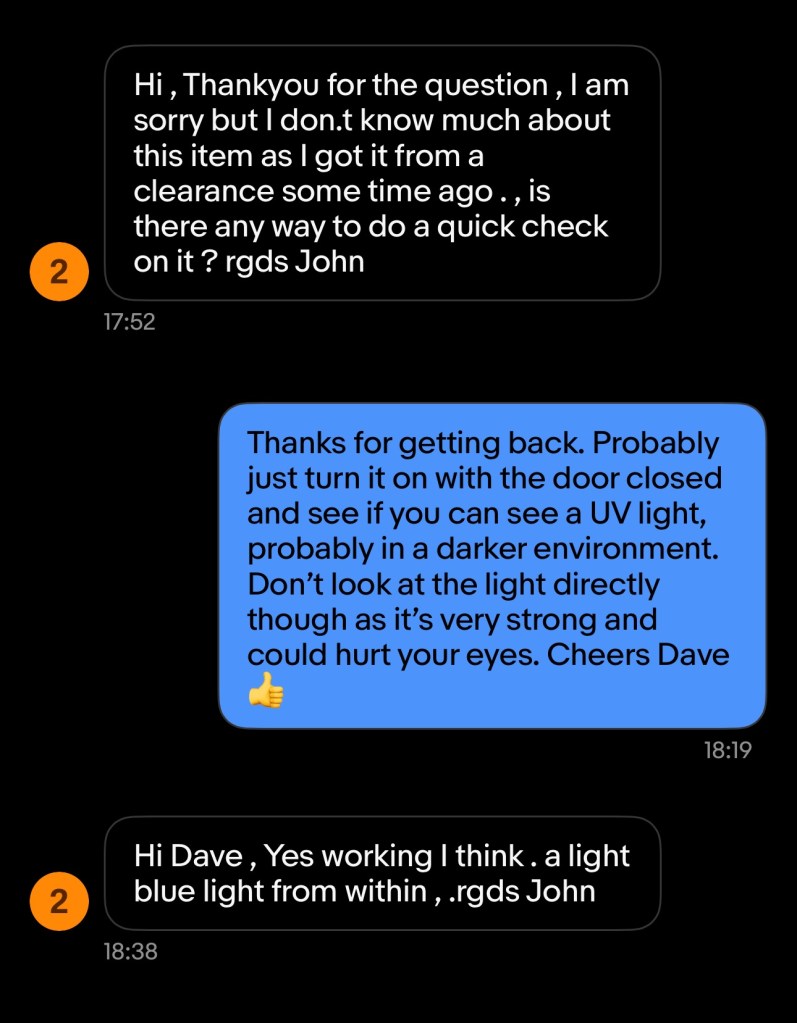
When I received John’s reply I jumped in with an offer and this was accepted. He had been so helpful. I’m now awaiting the unit, but I’m now a lot more confident that the unit, and most importantly the UV light is currently operational. However it’s probably going to be subjected to some pretty rough conditions on its delivery journey, so I’ll keep my fingers crossed for now.

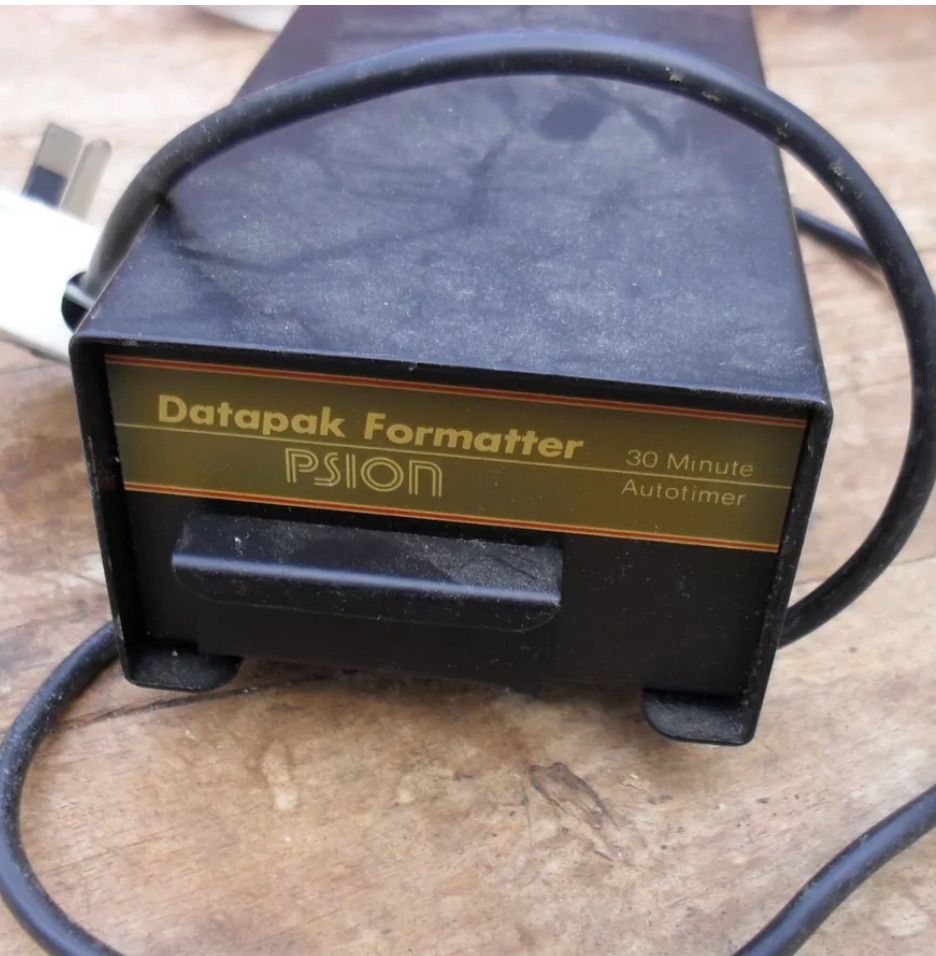
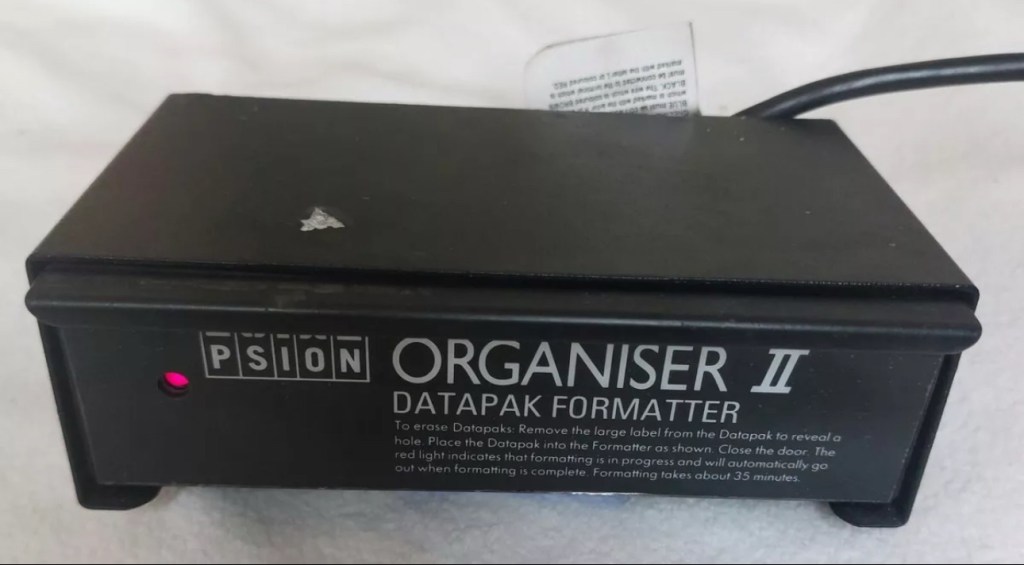
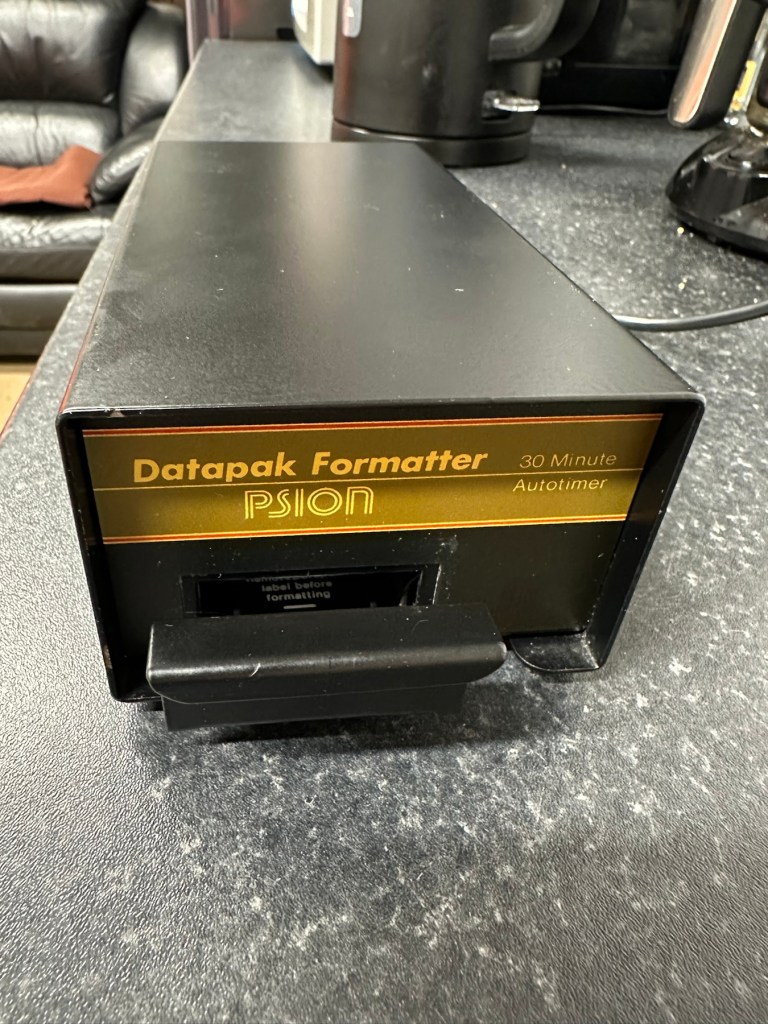
This formatter is a series one version that came out around the same time as Psions Mk1 organiser first appeared on the scene, circa 1984. It was used right through to when the MK2 organisers were released sometime between the years 1986/89.

This unit will be cleaned, opened up, checked for electrical and mechanical stability, its safety features will be confirmed and it will then be reassembled and PAT tested prior to use. Once this is done i will attempt my first format of a Psion Datapak whilst the unit is in my possession. However we have a little way to go just yet, before we can consider carrying out that task.
The seller was very prompt at getting the unit out to me as it has arrived less than 24hrs later.

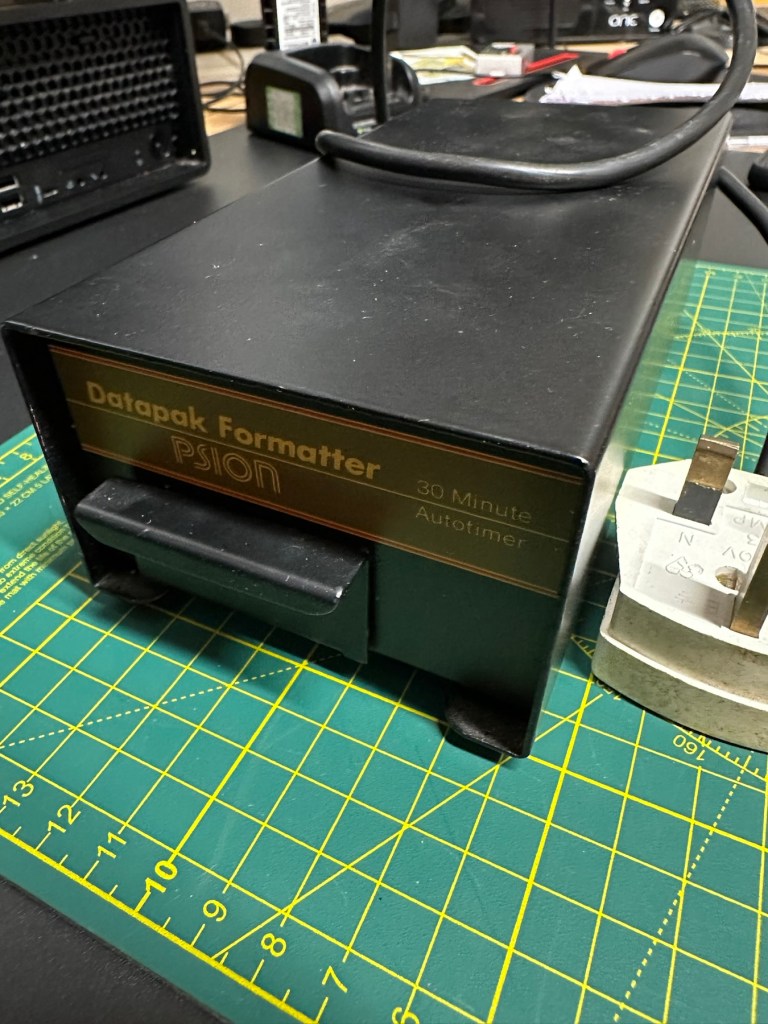
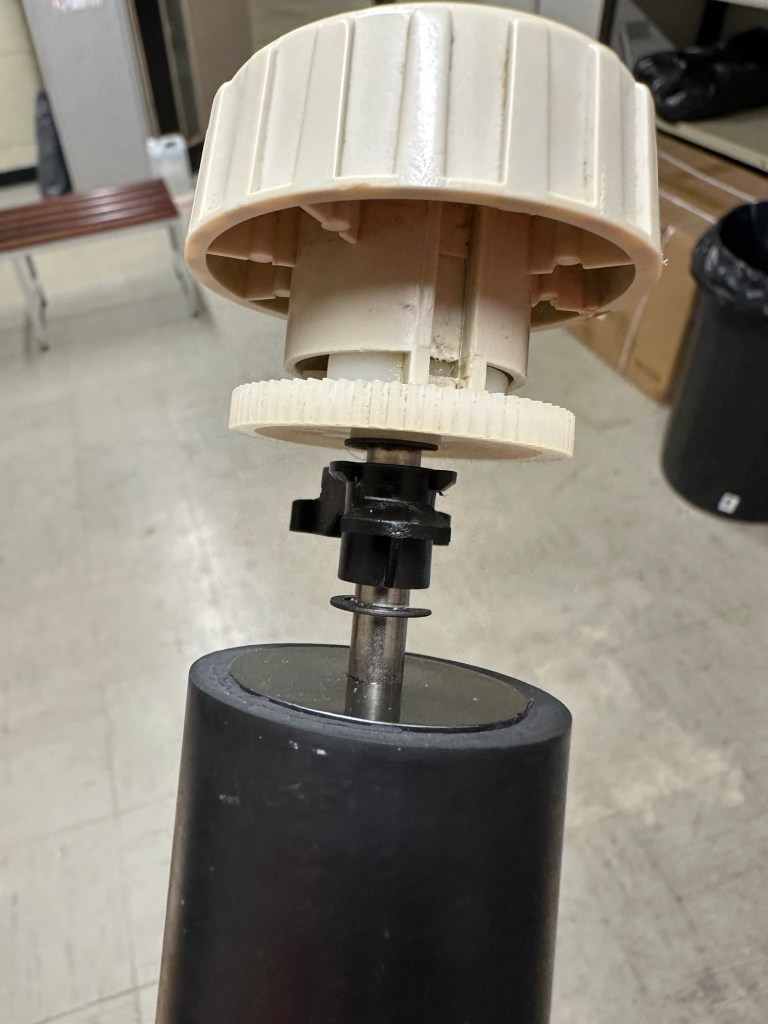
The general condition on first inspection is that it looks good, but it’s very dirty and has a slight musky dampness to it. I have given the plug and the cable and case a good clean with a bit of degreaser and this has cleaned well. I’ve done this just so getting inside is a slightly more pleasant experience without my hands getting covered in gunk. The unit looks a lot bigger in the pictures. It only measures 19cm L, 10cm W and 7cm H, so in theory it’s relatively small.

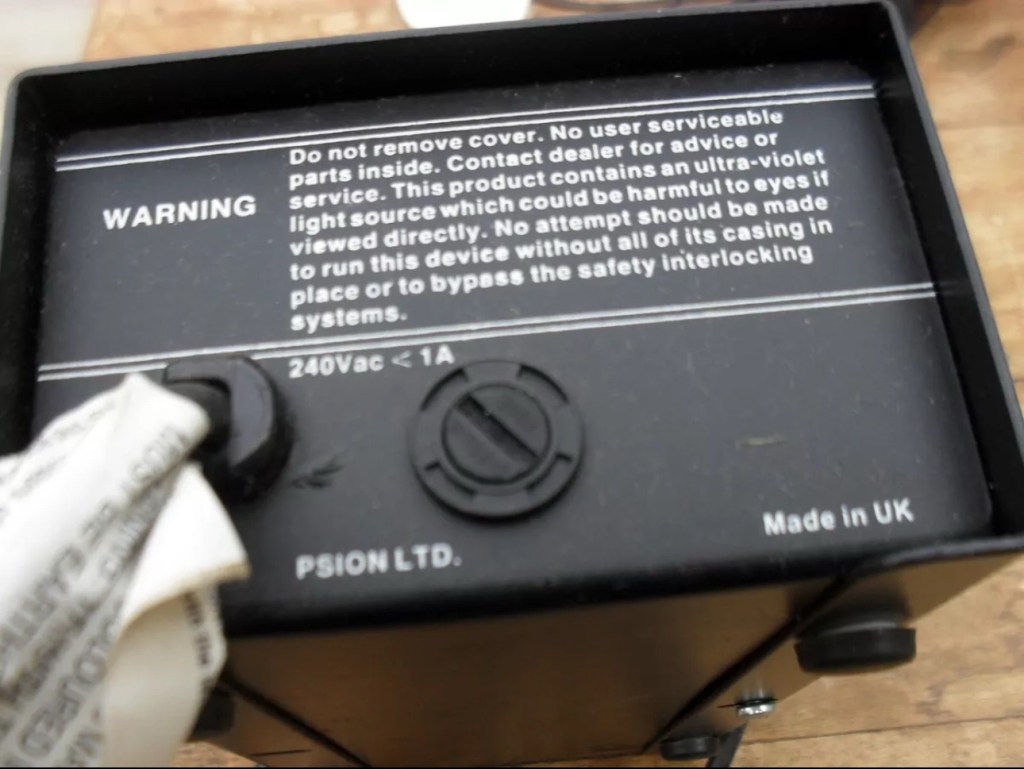
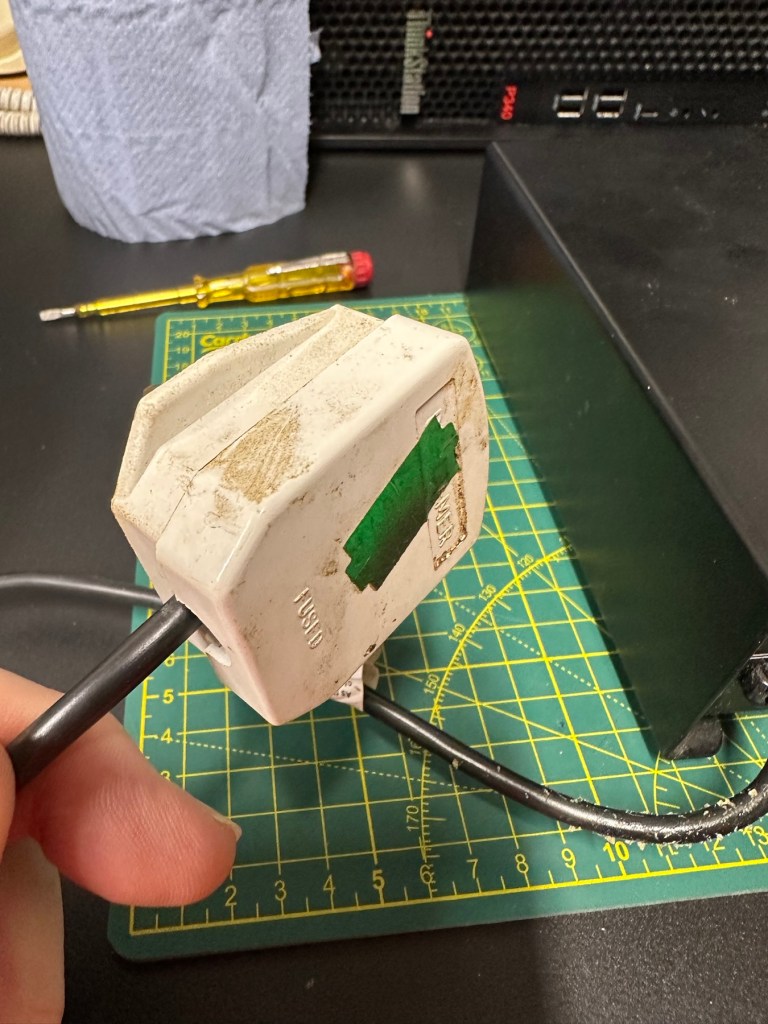
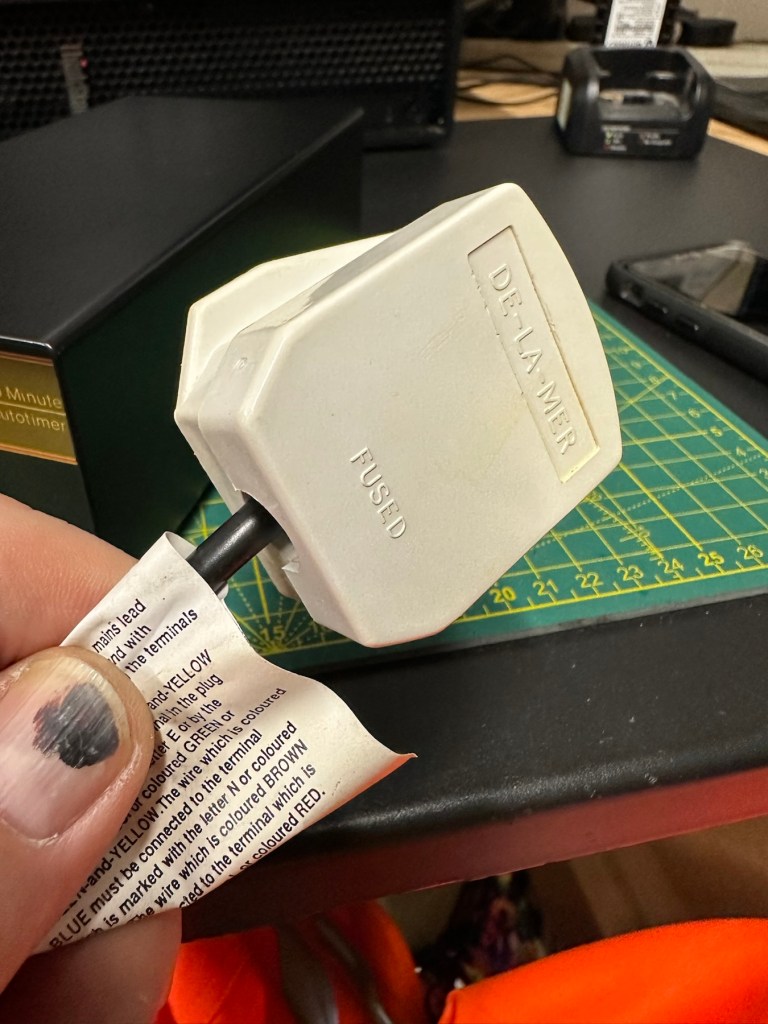
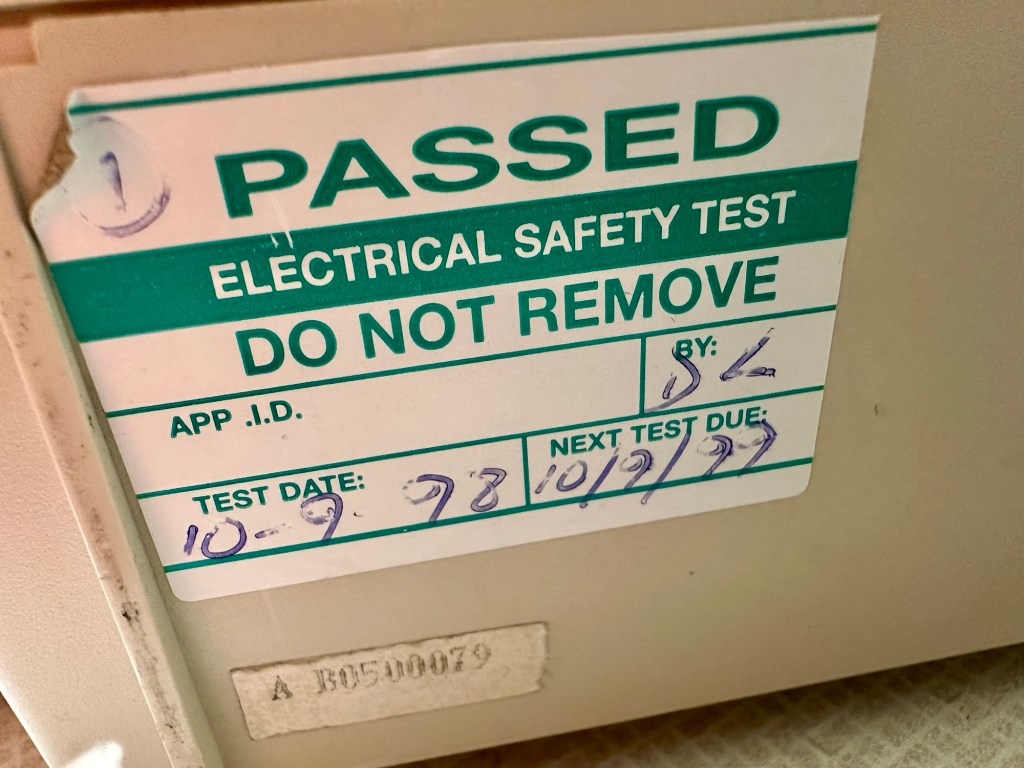
Before I do go inside I have first checked the plug, it currently is carrying a 13amp fuse that is way to large for this unit. It only requires a 3amp fuse so I have replaced this. I haven’t used the Pat tester yet I’m just using the multimeter, and I’m a bit concerned as there is no continuity between the earth pin and the unit case. Time to get inside.

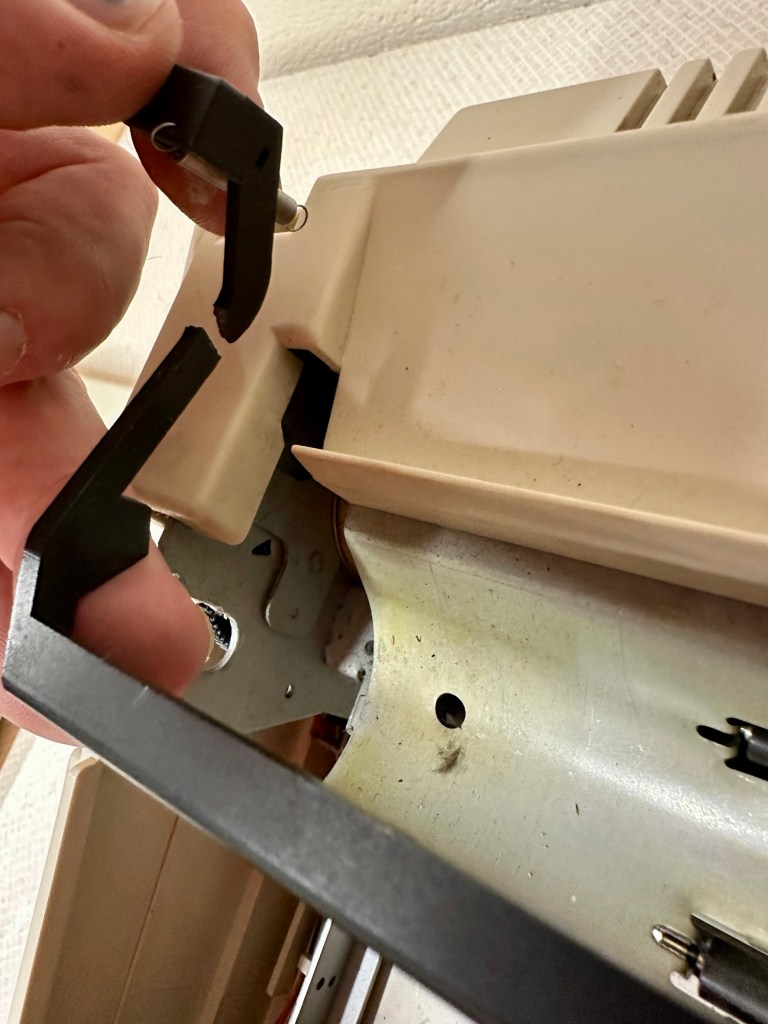
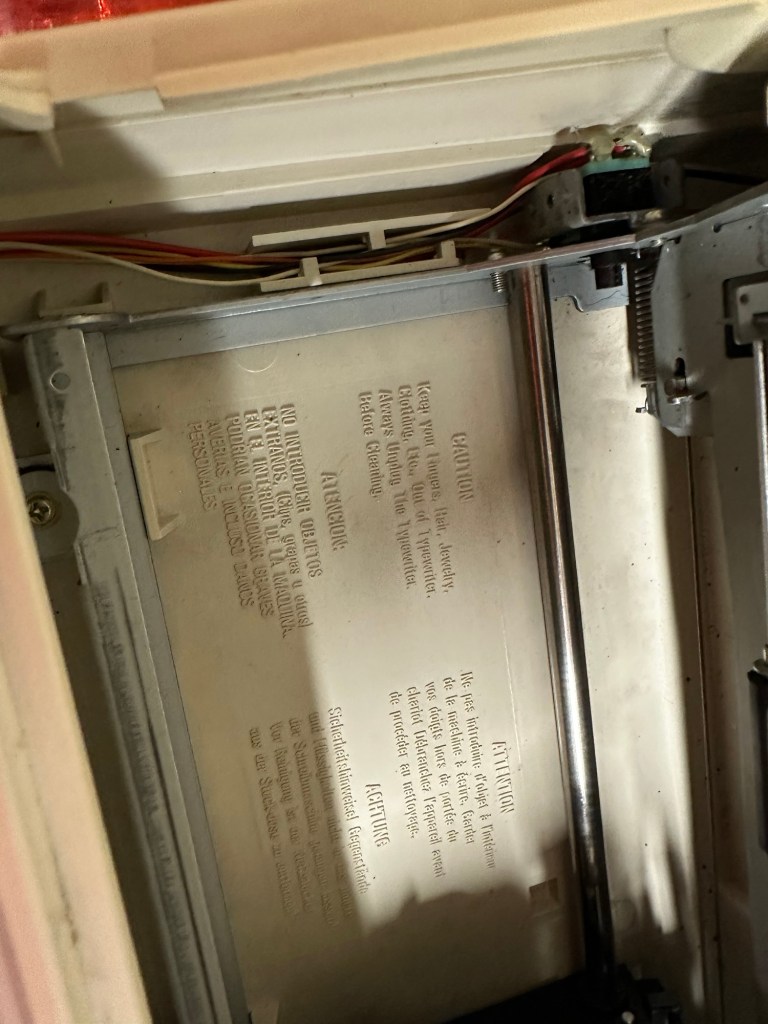
Inside looks tidy but I then become aware of a problem immediately. The earth wire from the mains cable is just sitting there in mid air connected to nothing. No wonder there was no continuity. I have now connected this back in place where it should be and I now get a good earth continuity throughput the casing. All other connections checked and tightened accordingly. This proves that the Pat test would have failed miserably. This was a potentially dangerous situation, that’s why it’s best to carry out these checks on any old powered units you get from a third party. Trust no one.

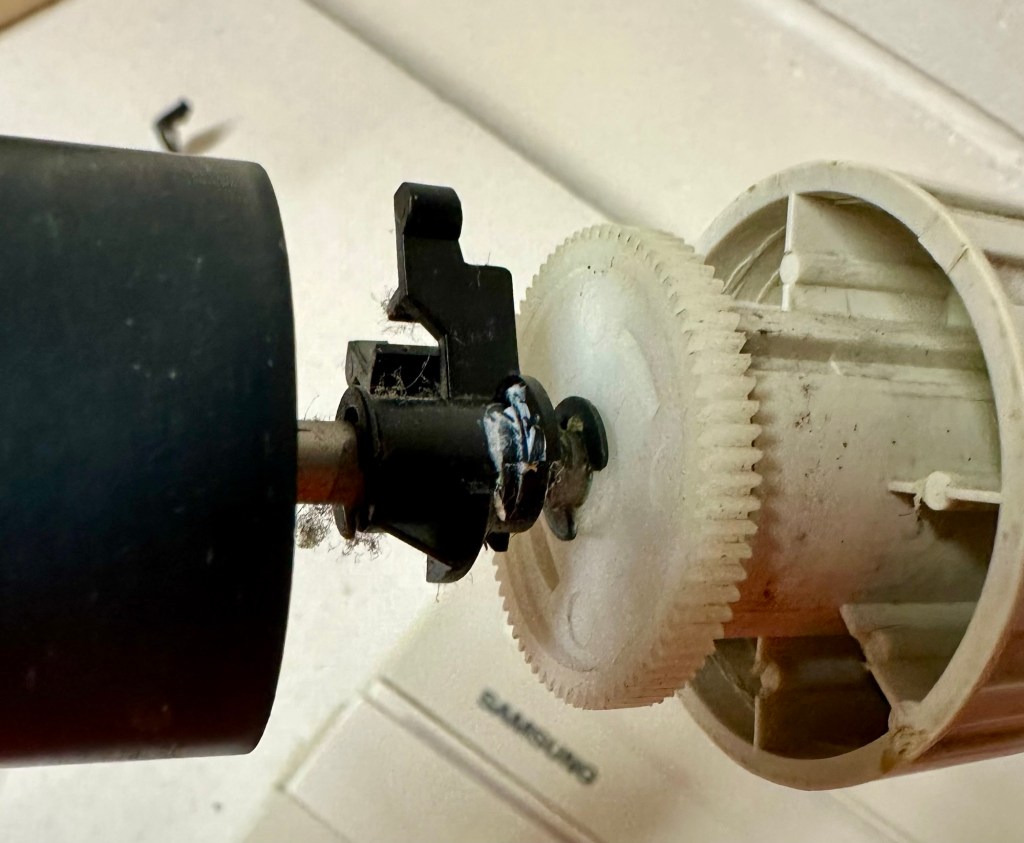
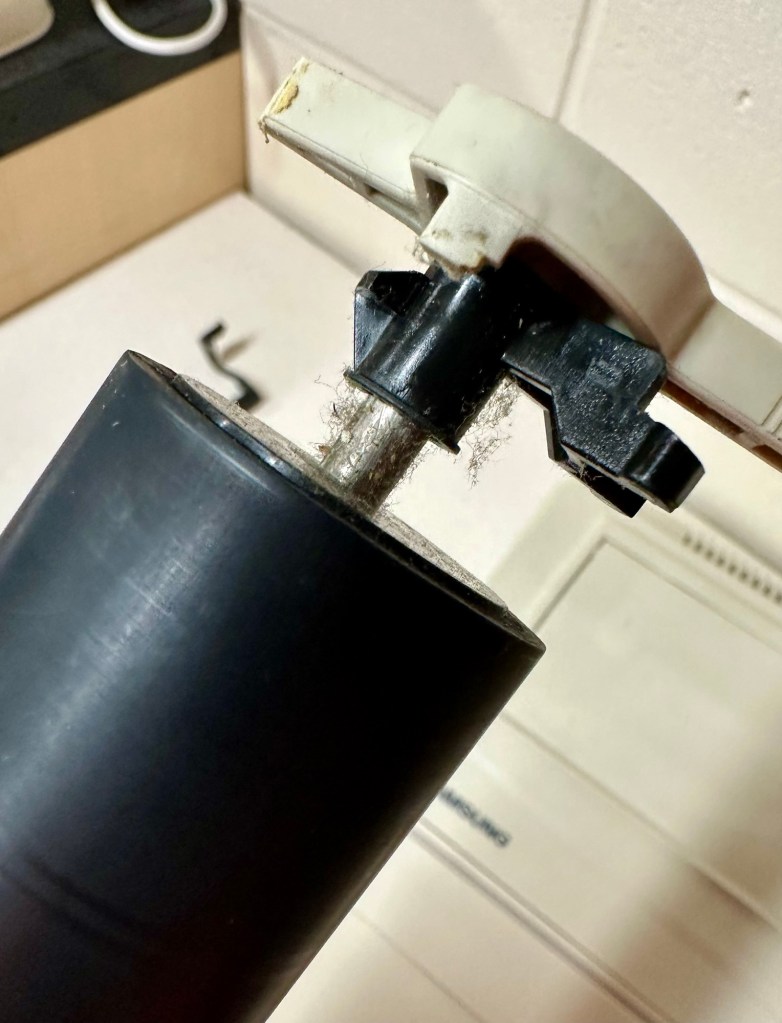
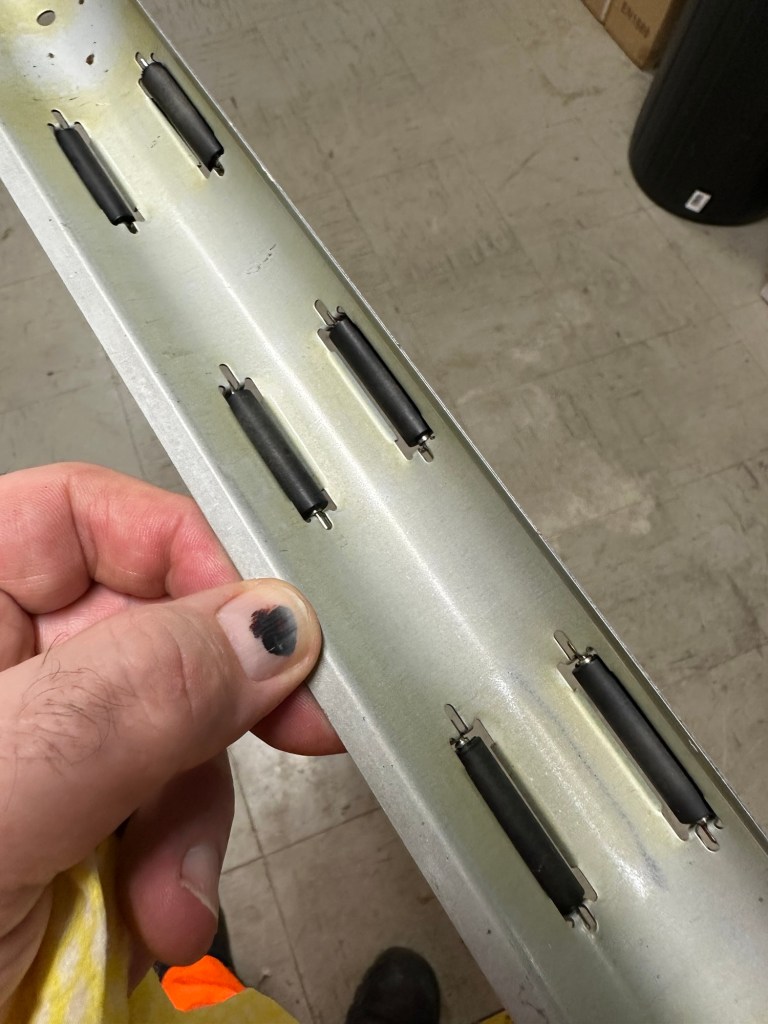
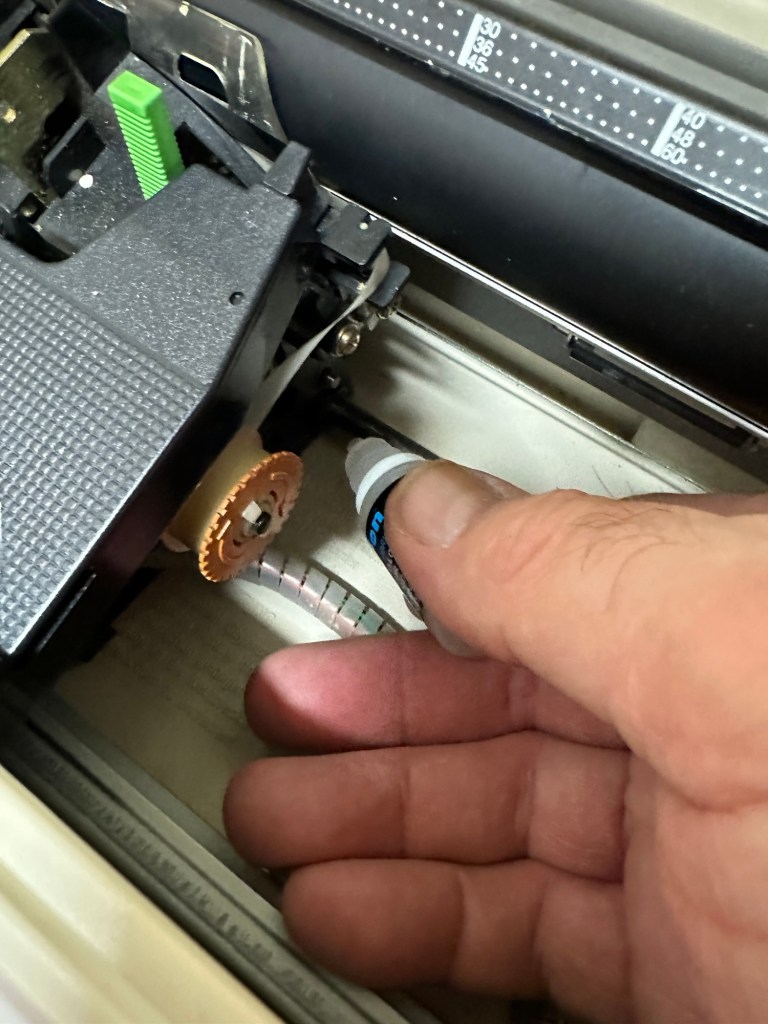
Next I need to check that the safety switch that turns off the UV light when the drawer is opened is operating. Again I use the multimeter to probe the switch and this seems to be ok. A good listen to the action confirms that it is clicking in and out. A quick clean inside and then the internal checks are complete.

The safety switch clicking in and out

There is no real way to test for actual operation until the safety case is back in place, that’s the safest way. Case on and another quick clean and the unit is looking good .

At this point I’ve carried out the Pat test before plugging it into the mains and the results have come back good and it’s a pass, the earth is good. I’m now confident about plugging the unit into the mains.

Everything seems fine I now just need to place a Datapak inside to see if the format process works. Also it’s a good time to check if the 30 minute timer is working. No time like the present, so I’ve found a suitable candidate and what better way to do the 30 minute countdown than with a Psion organiser I just happen to have hanging around. Here goes 🤞

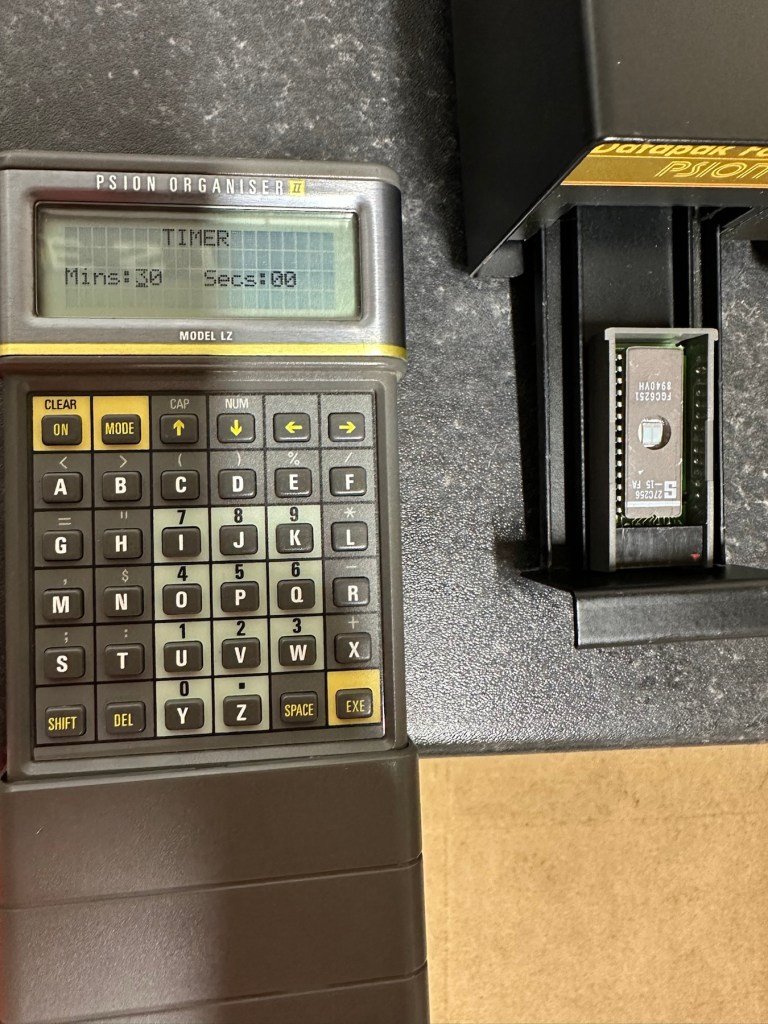
The unit has been on about 15 minutes and all seems fine, the unit is not overheating and there is nothing occurring that shouldn’t be occurring. Fingers still tightly crossed. 🤞 The Psion timer duly sounded at the 30 minute mark, the unit turned itself off about 2 minutes later.

It continued about another 2 minutes after the timer finished

So 32 minutes seems to be the actual time under the lamp. Not too bad considering its age. The unit was only slightly warm to the touch after this time. I’ve left the Datapak to allow it to get to room temperature before testing it .

Success the system is sizing

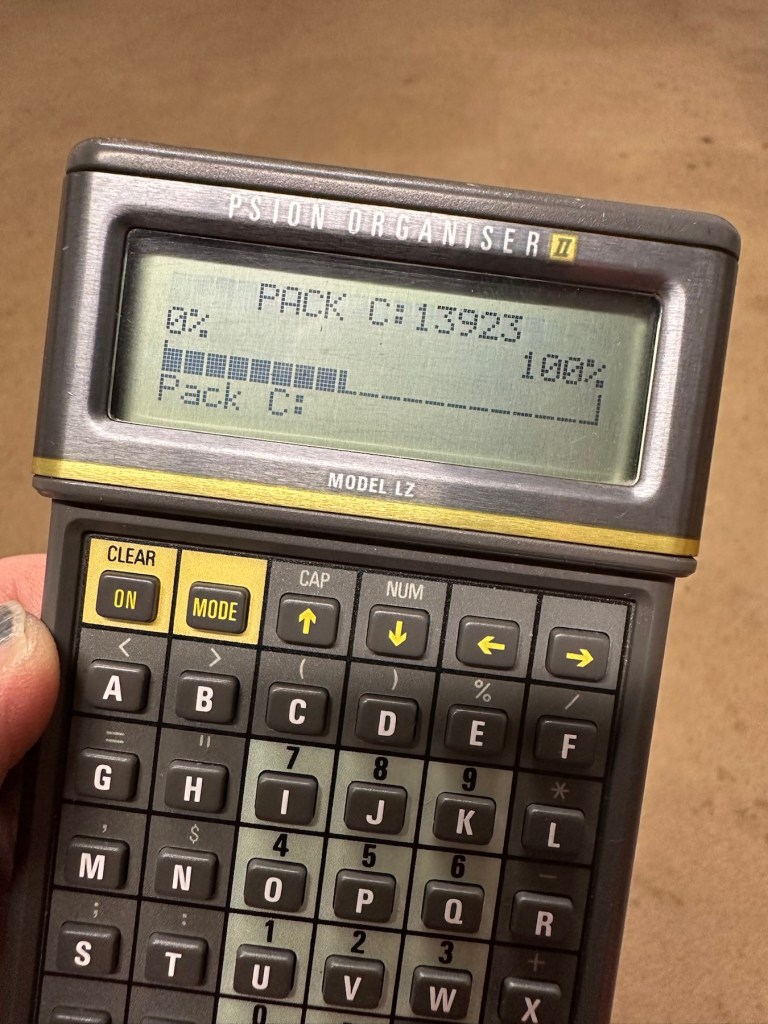
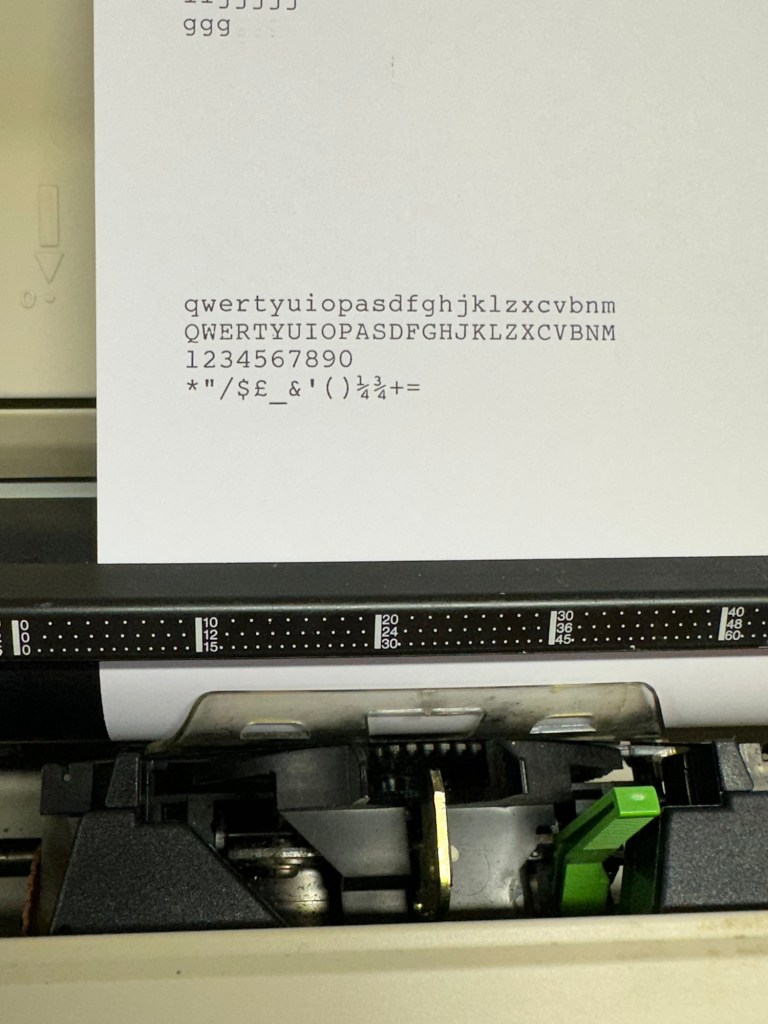
Here we go, and it’s fantastic news as the format has worked. When plugged in it has informed me it is going through the sizing process that occurs on these organisers when you put in a newly formatted pack.

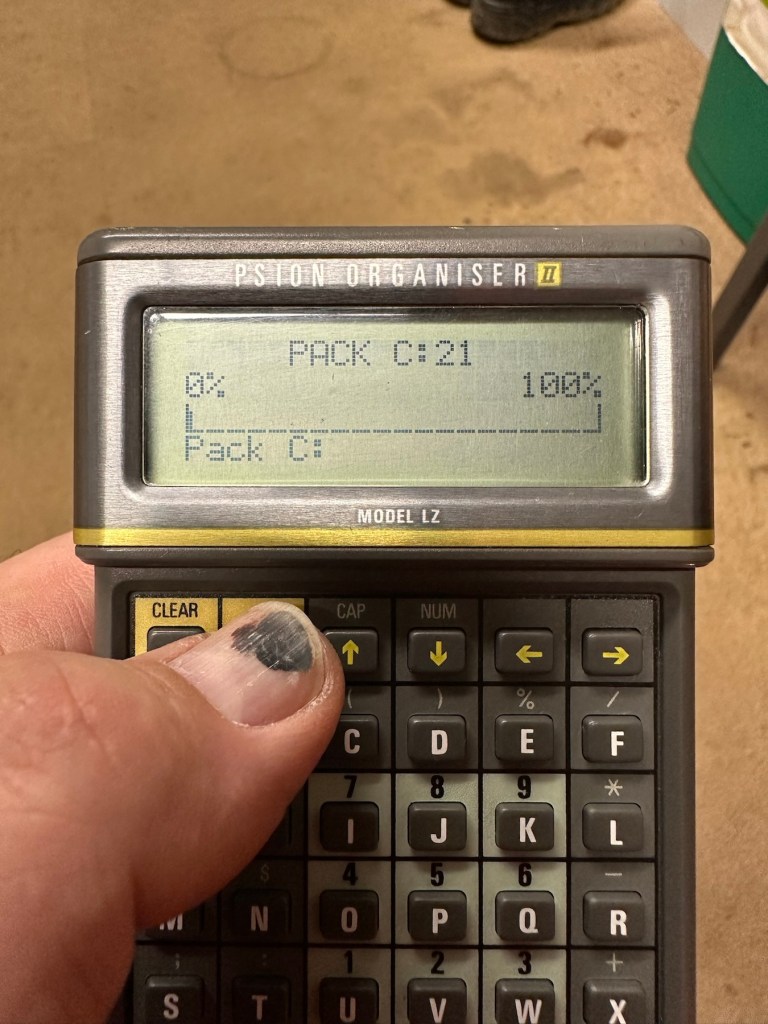
And when you go to check the info you can see the previously stored old data has now been deleted.

I now have a very useful, safe and working item of equipment. A very slight mustiness remains but that is only to be expected with an item that is 40 years old that you have had no input into how it is stored. I’ll probably store this in a sealable bag with some silica gel sachets to try and draw that mustiness out. I’m really pleased with this project and now have a very handy piece of kit to boot.

As I said earlier, make sure you always check thoroughly any items electrical such as this, coming from a third party. It’s your life, preserve it, safety first and trust no one. It’s a good mantra in this aspect or restoration.

Another item saved from landfill 👍

Thanks for taking the time to follow this project.

Werra 1 stripdown and rebuild

I recently purchased this camera and wrote about it in a previous blog entry Werra 1

I’ve commenced taking the Werra to pieces. The winder was not working and the shutter was not firing. Before starting this work I’ve viewed this page at Everything Vintage where they have recently carried out a full strip down of the Werra and you can view the page HERE, it’s all great advice.

Getting below the top plate was relatively easy exposing the mechanics from 58 years ago, I don’t think it’s ever been opened in all this time. I always love to see the ingenuity that went into these old cameras in years gone by.

Werra 1 stripdown

The internals look dirty in the photo but to be truthful I don’t think the lighting is doing it any justice, yep there is a fine oxidation coating but it’s at a very acceptable level considering its age. When I get to the point of dismantling as much as I can, I will start to clean and lubricate these pieces. But at the moment my goal is getting to the shutter.

Werra winding system – shutter not working

In the video above I’ve managed to get the shutter cocking using the lens ring, however the shutter actuator does work intermittently, but there is no movement of the shutter (Or is there…)

The only reason I ask the question above is that after reading the “Everything Vintage” link in the first paragraph it appears there is a second shutter that closes the light path to the film back when you wind on. When you are ready to expose the film this shutter opens and then there is a second shutter that controls the exposure. if you watch the small video above I think it is this shutter you can hear when I wind the camera on. Hopefully this one is working, I just need to get the one on the rear working, and for this I need to remove the lens from the housing. To do this I need a tool I don’t currently have but have now ordered. More to follow when the lens ring removal tool arrives.

Lens ring spanner

The lens ring spanner has arrived, the ring is being right stubborn at the moment and Im struggling to release it from its 58 years of rigidity. I’m tired as well and don’t want to cause any damage to the shutter so I’ll come back to this later.

18 hrs later, I’m rested and have another go at releasing that lens ring, this time I’m successful and I manage to release it. Sometimes it’s better to sleep on a problem and approach it with fresh eyes rather than continuing whilst tired and prone to making mistakes.

Werra Lens ring removed

With the lens off the body, the shutter cassette can now be removed. It amazes me just how intricate this cassette is and the workmanship that must have gone into it. I’d estimate at least 10 small cogs and a number of tiny springs with levers and pivot points, amazing really considering it’s about 60 years old. It’s amazing how modern technology has advanced.

It takes some time getting into the shutter cassette as there are springs and things flying off everywhere, you really do have to photograph everything you do just to be able to check what goes where and how.

The shutter itself is rather clean apart from some fingerprints on the shutter leaves that must have been from years ago. I have cleaned this down with IPA and then used some finely ground carbon (pencil lead) as a dry lubricant and this has got the shutter moving just fine.

Werra shutter after being lubricated with carbon

I’m now starting to reassemble the lens and shutter as I’m happy that there is nothing else restricting the shutter and it is now moving quite freely. I will clean the camera as I progress and put some watch lubricant on the mechanics that are external to the lens and shutter assembly.

Well it’s all been reassembled and is now back in one piece. It looks good, the shutter works fine and I’ve now vacuum packed it to go back into storage. I won’t be firing up a roll of film on it yet as I don’t have the time to did so at the moment. I’ll probably save that until the summertime when the weather is more favourable. I’ve really enjoyed this restoration even though at times it was very frustrating. This rebuild has taught me patience, or at least that I need to have more patience and just take my time. Intricate jobs on such old equipment need a clear head and a lot of concentration. I’ve learned my lesson and will endeavour to remedy that situation in my future dealings with such equipment.

Exec Helper 8200 electronic organiser

What the listing stated:

Good condition – with instructions and original box

EBay

No beating about the bush, straight to the point. No messing. Cost me the grand total including postage of £9.94Gbp

What? You’ve never heard of it? Have a google and I think you will agree there is very little information anywhere regarding this unit. There may be a few items on eBay, where you will see a couple on sale (normally faulty) for a very reasonable price, however all are missing two very important items, a box and instructions, the latter being as rare as hens teeth.

I’m fortunate to have an excellent example now, with both with only one polystyrene insert and not two, a box and instructions. They call it an organiser, that really is an overstatement, because if you read below you will see it is a really difficult unit to get to grips with. However it can be done, it just takes patience. The unit has three functions that are: Dictionary, Address book and Calculator.

This isn’t a repair video. As there is not a thing wrong with it, it’s absolutely cosmetically perfect. It just requires you to read thoroughly through the instructions, if you are fortunate enough to have some that is, and in this instance I can be very smug. I do have those original instructions, and there are probably more copies of the Magna Carta out there than there are instructions for this unit, or so it seems.

This video was from a chap, who posted it on YouTube a couple of years back. In the video the presenter had no instructions to follow. He also knew nothing at all about this unit. Its origin, age and use was a mystery. Using the Exec Helper 8200 can be both perplexing and frustrating.

Exec Helper 8200

What it does

  • Dictionary

One of the main features of this unit is its dictionary function. Users can Type in a word and press enter to retrieve its confirmation as a valid word. However, the device does not provide definitions or additional information beyond confirming the existence of the entered word. While it does allow scrolling through words, the lack of comprehensive definitions limits its utility as a traditional dictionary. Additionally, any misspelled words will not be recognized, resulting in a “not in memory” message.

  • Address book

The address book feature of the unit offers the potential to store and search for contact information. However, the functionality of this feature is somewhat confusing and not user-friendly. Users are prompted to enter a name, but pressing enter does not submit the entry. Instead, a separate search button needs to be pressed. The device’s scrolling and next line buttons suggest the ability to store multiple addresses, but the precise method of doing so remains unclear. Overall, the address book feature of the unit lacks intuitive design and may frustrate users attempting to utilise it effectively.

  • Calculator

In addition to its dictionary and address book capabilities, the unit functions as a calculator. When numbers are entered, the device immediately switches to calculator mode, allowing for basic mathematical operations. The calculator feature includes memory recall, addition, subtraction, percentages, and other commonly used functions. Unlike the address book and dictionary functions, the calculator feature of the unit appear to be straightforward and functional.

Date of manufacture?

The exact release date and availability of this unit remains uncertain. Judging from its design and styling, it is likely that the device originated from the late 80s or early 90s. However, due to its scarcity, finding a working unit or acquiring one in boxed condition can be challenging. I struck lucky with this one.

That said it probably was once a mass produced piece of tat that failed so miserably, that everyone who owned one threw them away, before they could ever be associated with owning one. They were that bad….or were they? I don’t know, there is so little out there about them that you can’t really make a reasonable judgement or gain constructive feedback regarding them.

It was probably a unit that was killed off in its infancy by one of the bigger names that were starting out around the mid 80’s that had a better, product and presence at this particular time. (Psion for example) A simple case of being in the right place at the right time.

Or is that the right place at the wrong time?

Edit: I have done some digging around and it seems to be that these units were sold via the UK newspaper “The Daily Mail” as a reader offer. I even have the original return form for it however there is no sign of a date. The only thing that ties it to the 90s is that refunds can go either to “Access or Visa. The Access “ Your flexible friend” card ceased in 1991 when the banks involved started doing their own card transactions. So it was definitely very early 90s maybe even late 80s. I’ll update this post if I uncover anything further.

Basically, It’s BASIC

And here we are after 40yrs still getting a lot of satisfaction out of pushing Basic to its limits.

Good post here, and very informative.

The BASIC language may be considered old-hat here in 2025, and the days when a computer came as a matter of course with a BASIC interpreter are far …

Basically, It’s BASIC

Morse code on a Psion organiser

I did my Morse test back in 2003 just after I passed my City and Guilds 765 RAE exam in Amateur radio. It wasn’t a compulsory requirement as it was in the States at that time, but I chose to go with it. I wasn’t the fastest in the world but I enjoyed using it to be able to partake in my favourite part of the hobby, low power QRP operations.

As morse uses such a small bandwidth, distant operations using very low power below 5 watts are very achievable. Wspr transmissions operate in even smaller power ranges, however that’s a whole different story.

So what’s the Psion organiser got to do with Morse?

When you set out trying to master Morse you look at loads of techniques and ways to make your journey that much easier. There are Morse trainers, there are even Morse decoders and encoders that basically allow you to “Cheat”, but what’s the point of that as you’re not going to learn anything that way.

I used a technique called the visual mode technique that allows you to learn Morse by associating the dots and dashes with the actual shape of the letter and number. It works well when translating to paper, however Morse is a sound mode and it is better to use sound association, that will always work the best. I have this on a book mark to this day, as well as having it as screensaver at work. It worked for me. That’s where the Psion also had a part to play in my education.

Visual mode technique

I have a pre loaded data pack that runs perfectly on this old 1980’s machine. I used a very similar program back in the day, but not this actual one (See pictures above). The program and files are extracted and copied from the Interair Airnav pack and i have uploaded a small video below to show it whilst working.

“Peace”

With this program every digit you press on the keyboard is repeated back to you in Morse code. It’s a fantastic way to keep yourself on the ball. There are a few minor errors but the numbers and letters are pretty much spot on. It’s a great way to learn the shape of a word by sounds, and that’s a big part of Morse code, where you use phonics or the sound and shape of a string of dots and dashes to learn particular words or formations of groups of words. I’m probably making it sound more difficult than it actually is, and I apologise for that as it really doesn’t have to be. Each person finds their favourite way to learn, and this worked just fine for me all the way back in the early 2000’s about 22 years ago.

Have a great day and peace to you all or should that be :

.- -././.-/-.-./. (Check above) 👆

Stylophone portable organ – you were warned

Earlier in January I posted that I’d brought this retro pocket organ from EBay. Stylophone pocket organ It has now arrived and wow, it is in near perfect condition, the seller did not lie when stating it hadn’t been used since 2008. It is almost mint.

Mint condition

Anyway not being a person to disappoint anyone, I did promise that I’d video myself learning to play the unit. I wanted to prove that anyone can play these “Toys” that were hugely popular over the last 40 years. You lucky people. Here’s the video below.

Enjoy.

You were warned

Sinclair ZX81

Write about your first computer.

Now this is a prompt that excites me as it is a nod in the direction of all that i really like, retro.

I started my first full time job in about 1982. The ZX81 came out in 1981, and I used my first months pay to purchase one, it cost around £70Gbp if my memory serves me well.

Sinclair ZX81

My first real surprise when I opened it was that it wouldn’t do a thing unless you actually programmed it, I really hadn’t done my homework and what followed was a crash course in BASIC programming to get it to do something, but I loved it.

Looking back the best thing about this product was that it got you learning stuff, and I have no doubt that items such as this started many people off on the road of computer technology employment, computing was now available at a good price to everyone, and we youngsters really took to this unit en mass as 1.5 million units were sold prior to it being discontinued two years later in 1984.

I moved on fairly quickly to the Vic20, Spectrum, Amstrad CPC464 and then the traditional home computer and as they say the rest is history. They were fantastic times back in the early days, and I cherish them immensely. In fact I’ve never fallen out of love with this technology and I will soon write a more in depth piece about the ZX81 as I am looking at purchasing another one for my retro collection.

Have a wonderful weekend.

Samsung SQ3000 electronic typewriter – assessment & repair

This is the follow up to a recently obtained electronic typewriter that was purchased in January 2025, the initial post can be found here: Samsung SQ3000 electronic typewriter.

Samsung SQ3000 electronic typewriter

The following post will deal with the assessment on its arrival and what I am going to try to do, to get it back working again, as close as possible to its original state.

I’ve downloaded an instruction I manual, I’ve had to download one for a Smith Corona Wordsmith 200, it is in theory the exact same unit, just under a different manufacturers branding.

Assessment

It’s arrived and apart from a little age yellowing it looks ok. There is a PAT testing sticker that says it was last electrically tested back in 1998 and is due a retest in 1999. This corresponds with my date estimate of mid 90s.

I will retest and renew the safety checks when I’m finished working on it. I have noticed that the paper bail/release rail is broken on the left hand side so I will have to add that to the repairs, this shouldn’t be a major concern.

Before I took the roller out to get to the paper bail I did start the machine up. Everything went as expected and when I tried to type I was getting some weird reactions to the keys I was pushing. All kinds of characters were appearing.

Before

I checked the daisy wheel and there was a click. It wasn’t sitting right. I reset the machine using the two reset buttons and the machine then went through its reset programme, pretty much the same effect as turning it off and on again. (Not much changes in the way of tech there then)

After

Well that’s worked fine, I have tried every combination on the keyboard including the erase function and this is now fully working. It really was quite simple. My next job is to try and fix this paper bail.

Paper bail removed for fixing

There is quite a bit of dust and dirt inside that needs removing. And whilst I’m at it I will lightly re grease the areas that need it. Let’s be honest it’s not been done in the last 30yrs so now is as good a time as any. Inside will get a light hoovering and a bit of a tart up, I’m not going to go mad. I will clean the outside and all knobs and buttons and try to get rid of some of the yellowing, but to be honest as long as it’s clean I’m not too worried about age marks.

The keyboard has lost a few of its letters. I will remove what is left of some of them and use some keyboard decals to replace the missing ones. This will be one of the last jobs I do.

Well that’s the assessment done and apart from a few small issues and requiring some basic maintenance I don’t think we have an immense amount of work to carry out. We know it now works. Let’s hope I don’t cause any further carnage whilst working on it.

Let’s get to work.

Repair

Right it’s straight onto the paper bail to try and fix the snapped end. Firstly I’m just going to use some superglue to get it in place. When this is dry I’m going to create two “Doublers”, place one either side of the damaged part and glue these in place to create a stronger repair and to add some stability to this area.

I’ve got some black semi rigid plastic. I’ve created a small template from a tracing that I did of the good right hand side of the bail.

I now have two doublers cut from the plastic that I will use as explained above.

Two doublers

It doesn’t matter that they are not perfectly shaped, however they both fit perfectly well into the profile of the bail arm, and this portion of the arm is hidden in the typewriter housing anyway, so the part will not be visible, but it will now be strong.

The Doublers have been put in place using a quick set epoxy resin, I will leave this to dry for a good few hours before I tidy it up, with a light clean, and then I will try to get it back in place.

Bail arm repaired, installed and working.

Now that’s done i’ve gone inside and there were a nice couple of spider webs around the transformer that are now history. I’ve secured the cable in the rear of the unit that never had any tension restraint, so that there will be no issues, should anyone now give a good yank on the cable lead. This is a safety addition I have made that was never on the original unit.

Cable restraint screwed to base to prevent strain on internal wires in and around the transformer bay.

I have also tightened all screws and checked the wiring and this all seems ok. Plug and fuse have been checked and all is looking good. I’ll carry out a PAT test once I’ve finished the clean up.

I’ve cleaned the main roller with alcohol, and removed all the old grease and dirt from the platten adjuster switch and the roller advance knob. I have removed the platten plate as well as the six mini rollers that are here. I’ve cleaned them all and re assembled/installed them.

I have cleaned the daisy wheel as well as in and around the printing head unit.

Inside the unit I have given a good hoover as well as a light clean and again removed more old grease. I have given the exterior plastic a preliminary polish, this has removed some of the yellowing and made it look “cleaner” I am not going to worry too much about the yellowing as it isn’t that bad, and I don’t really want to venture into carrying out a “Retrobrite” on this unit. It would take too long and there would be no benefit for this project.

I’ve now added very small amounts of a watch lubricant to those areas that i have previously cleaned and removed the old grease from.

The unit has been reassembled and I’m pleased to say it is still working fine. It’s running smoothly and all aspects of the unit seem to be working just fine. To be honest it seems to be printing clearer to me.

Daisy wheel and print quality is perfect

I don’t know how long the print cartridge has been installed but I suspect it may have been a few years back. It’s almost finished, and I do have a replacement on order. I’m sure a fresh cartridge will make the print stand out even more.

Next I’m going to have a go at replacing some, or even all of the keyboard letters. It all depends how it looks when I start replacing them. I’m going to gently rub off the lettering that is left and clean the keys using a 95% pure Isopropyl alcohol solution (IPA).

All damaged and missing key decals removed in preparation for replacement new decals. Others may have to be removed dependant on how the new ones look when in place.

These are the replacement key decals I will be attempting to use.

Qwerty keyboard decals

I’ve replaced the damaged key decals. The ones I’ve used are a lot brighter than the original ones and really accentuate the yellowing. I’m not troubled by this as it keeps its “Old” look. I would have to scrape and wipe for hours to remove all the other keys and to be honest it would look just like someone had gone abroad to have a bright white set of dodgy veneers installed, it would look quite out of place, and in your face. Just like a Cheshire Cat smile.

New veneers anyone?

It serves a purpose and just allows the unit to be usable again.

The final product:

Fortunately a lot of the equipment and parts I have used, I was already in possession of, so there are no additional costs for this project. Below you can view the total costings for this project as they currently stand:

  • Purchase inc postage £13.14
  • Cable restraint £0.25
  • Keyboard decals £1.25
  • Total cost of project £14.64

Again I have managed to save a fantastic 90s retro item from landfill for very little cost, and that is a fantastic result. It has years of use left in it, as long as the consumables remain available, and of that I am confident that they will be available, for at least the next few years. The unit is clean, I’ve just carried out an electrical PAT test and it is electrically sound.

Believe it or not I’m going to go back in time and will write some traditional typewritten letters to friends and family. I’m looking forward to doing that and it will certainly surprise them, it will be totally unexpected.

When all that is done, i will donate this unit to our local LOROS Hospice shop so they can sell it on and raise much needed funds. They deserve it. Edit: This was done in March 2025 at their shop in Hamilton Leicester. I hope it gets them a good price.

Watch the brief video for the final words on this restoration. All 13 seconds of it.

And that’s it folks..

Thanks for passing by.

Samsung SQ3000 electronic typewriter

What the listing stated:

Offered here is a good vintage Samsung SQ-3000 electronic typewriter. It powers up and operates when the keys are pressed. However, the symbols printed do not match the button pressed ! The daisywheel may be out of line. Otherwise, good cosmetic condition. Any questions, then please ask. 

EBay

I have again succumbed to purchasing something very retro, a typewriter. Yep it has a fault just as most things I buy have, that’s part of the fun of it all, can I fix it and save another item from landfill? Who knows but I’ll give it a try.

This Typewriter, the SQ3000 was also sold as the Elite S-7500, Hanseatic Europa II, Leader MD, Olympia Textstar MD, Opperman S-7100, Privilege Electronic 2600, Royal RT 7700, Silver Reed EX-133 MD, Smith Corona Wordsmith 200 and Welco EX 260 DS. It was manufactured sometime between 1990 -1995 and was a mass produced low cost typewriter of the time. Personally I think it was around 1995 as this was when regulations insisted that electronic items such as this required wired in power supplies, and this unit is a hard wired unit.

Samsung loosely translated/stands for “Three Stars”Apparently the three represents “Something big, numerous and powerful” and the “Stars” represent “Everlasting and eternal” so there you have it, that is today’s history lesson.

I loved using typewriters prior to the word processor/Pc rendering them useless. There is just something special about them, I can’t quite put my finger on it.

This item looks to be in fantastic cosmetic condition, and I have also checked that the consumables are available, they are so I might have struck lucky. From what I can see in the pictures a number of letters have worn off the keys, hopefully I can source replacements, or decals or I may even repaint them myself.

I have had to download the instruction manual for the Smith Corona Wordsmith 200 as it is the exact same unit under a different name, Samsung just don’t seem to have anything listed or historically available for download.

I think I’ve bagged a bargain (if I can get it working) I’ve paid a grand total including the postage of £13:14 GBP and that was after knocking the seller down a few pounds from the original price. He bit my hand off to be honest, so we’ll just have to wait and see what arrives. If all else fails I can certainly use it for spare parts in the future.

Anyway, this now gets added to the long list of other items I have, that need to be repaired. Please check back to view the “Assess and repair” post that will follow, explaining what arrived, its condition and what I will be doing to get it back in working order.

Thanks for passing by.

Past & Present

Do you spend more time thinking about the future or the past? Why?

Anyone who reads anything on this site will know I am a glass half full kind of guy, most of the time.

Do I think about the future? I plan like most people and that’s about it, I don’t really dwell on the future as i kind of have a tomorrow never comes attitude. I’ve developed a live for today way of life because too much sorrow and heartbreak has hit me in the past, and what you have today, may well be taken from you tomorrow, so take what you have now and cherish and appreciate whatever that may be, as the future is a thief that steals everything of importance from you.

Do I think about the past? Again, I try not to dwell on it but when you are a fan of most things “antique” it’s hard. Fantastic memories and people you have met along the way, why would you not reminisce on how they have shaped your life. If you have loved, it’s built on what has happened in the past and determines how you feel about that relationship in the present.

So in summary I am a thinker of the past and present. Life is a precious gift, what’s the point of worrying yourself about the future, we all know what the outcome is. Enjoy what you have had and what you have at this moment. That’s all that matters.

Peace to you all.