

TinyGS is one of the most exciting grassroots radio‑space projects to emerge in recent years. Built around inexpensive ESP32‑based LoRa boards, it …
TinyGS: The Open Satellite Network Anyone Can Join

It’s easy to get involved with low cost satellite tracking. Here’s a repost of a recent article about TinyGS
TinyGS is one of the most exciting grassroots radio‑space projects to emerge in recent years. Built around inexpensive ESP32‑based LoRa boards, it …
TinyGS: The Open Satellite Network Anyone Can Join
My favourite purchase, from the days of my youth…
Describe an item you were incredibly attached to as a youth. What became of it?
It was around 1984 that the Raleigh bicycle company in the UK released the Raleigh Record Sprint entry level racing bicycle. I would have been around 18-19 years of age at the time and I would have been working in central London, temping as a photographic technician at the time. I would have been working between Edgware Road and Farringdon, and would be cycling in from Bushey in Hertfordshire every day, about 25 miles each way at the time. I was quite fit back then.


My mum at the time had one of those catalogues where you could purchase items over a period of time otherwise known in the UK as on the, “Never Never”. I loved this bike as this particular model had a lot of Gold coloured attributes, gold handle bars and levers as well as a gold chain set and mudguards. This bike really looked like, “The mutts nuts” as they say.
It was a pleasure to ride however the pot holed roads of London were not the ideal surface for a road racing bike with pencil thin tyres and narrow rimmed wheels. It gradually got to the stage where I was spending more time in maintaining the bike at the roadside, and being late for work, that I made the decision to transfer to public transportation.
I worked with a lad at the time who was mad on biking and he turned up to work one day on what I believe was one of the first mountain bikes I had ever seen. I was very sceptical at the time joking that there were, “No mountains in London” however he was the one cycling the roads of London daily with no issues with punctured tyres or breakdowns.
It turned out that Mountain bikes were the way forward on the mean pot holed roads of central London. Though, it would be a few years before I could afford one of my own.
I’ve seen many old Raleigh Record Sprint bikes since and have always considered getting another. But to be honest they command such a strong price now that to be realistic, it just wouldn’t be worth it as I’m probably never going to actually ride one again.
It was a lovely bike, it served a purpose but was killed by the potholes that were strewn across London in the mid eighties. The roads haven’t improved much since, but the bikes have, hence the amount of them you see if you ever venture that way.
Have a lovely day. Stay safe.
“Who is wise? Nobody, apparently.

“Who is wise? He that learns from everyone. Who is powerful? He that governs his passions. Who is rich? He that is content. Who is that? Nobody.”
Benjamin Franklin
If you want peace and tranquility. Don’t mention politics or religion.
How have your political views changed over time?
You develop political exposure from a young and influential age, mainly encouraged by the leanings towards the political views of your parents. Wrong or right, you tend to follow their views until you get out into the big wide world and see for yourself exactly what is going on. And then you realise the majority of them are all the same, all likewise little piggies with their snouts in the trough, all looking for something for themselves. All self serving little tow rags for want of a better word.
And that’s pretty much all I will say about politics. As with religion, I have very personal views on both, and as they are both probably the two most proven causes of distrust and war in this world, that is where I will remain quiet. My views, my business, and never will they be imposed upon anyone.
Let’s change the subject.
Have a good weekend.
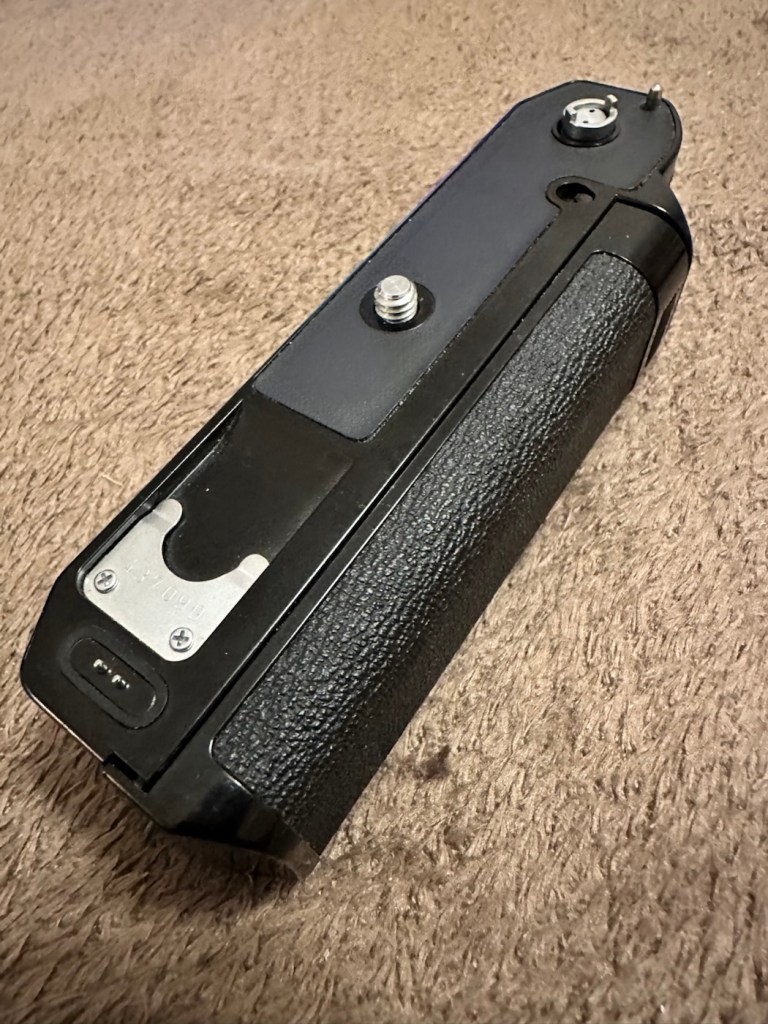
A very corroded Canon power winder “A” from the 70s
This is what it looks like externally, looks fine, but as this post goes on, you will notice a very marked deterioration in quality. It’s a horror story of battery acid contamination.

This unit is part of a bundle that was donated to me by my good friend Jon, see here: Cameras…i need more!
It was part of a Canon AE1 combo, the Camera i have previously posted about here: Canon AE1 35mm SLR, however the batteries within it had been left for such a long time that they had started to dissolve into the unit, leaving quite a restoration project behind. Here’s some history about this unit:
The Canon Power Winder A was originally introduced with the Canon AE-1 camera in 1975 but it also can be used with all the A series models (in fact, it is applicable to use the Winder A with the professional class Canon F-1(n) system SLR camera but without power rewind feature). It is an automatic film winder which greatly increases the automation and mobility of these manual focus cameras. Its exceptional versatility, due to its compact design provided by the principal control circuit built into the electronic circuitry with most of the electronic models such as AE-1, A-1 or AE-1 Program etc, and allows it to be attached to any models mentioned earlier and provides for its use without any special adjustments.
Winding Speed: Approximately 0.5 seconds.
Operation: When the shutter button on the AE-1 is pressed, the winder will function.
Shutter Speed Coupling Range: 1/50 to 1/1000 second for continuous photography. “B”, or 2 to 1/1000 second for single frame photography. (When the winder is set at “B”, AE photography cannot be performed).
Film Counting: Is performed by the frame counter on the AE-1.
Automatic Cut off Circuit: When the film roll is completely wound up or if the batteries should run out, the winder will automatically stop and the warning lamp (LED) will light up.
Power Source: Use 4 size AA batteries. (In normal temperatures they can take more than twenty rolls of 36-exposure film).
Attachment: Take off the winder coupler cover on the bottom of the camera, and mount the power winder using the tripod socket.
Size: 141 x 42 x 34mm (5-9/16″ x 1-5/8″ x 1-5/16″)
Weight: 3009 (including batteries) (10.9/16 ozs.)Mir.com
I already have one of these winders on my A1 that I am currently repairing, however that’s away in storage at the moment until I get get my workspace back up and running when we eventually move home.
Im aware that these winders can take a max of two exposures per second if the lighting and conditions are right, meaning you could crack out a 36 exposure roll of film in under 20 seconds! They don’t do auto rewind either, you still have to do it manually, it would be a couple of years yet before that option became available. The red light on the case indicates one of two things, the battery is low, or the end of the roll has been reached, time to rewind!
They are quite reasonably priced if I wanted to buy one, but why would I do that? The purpose of this site is to repair and recycle, so that’s what I will attempt to do. It will be quite a task with this one I think.
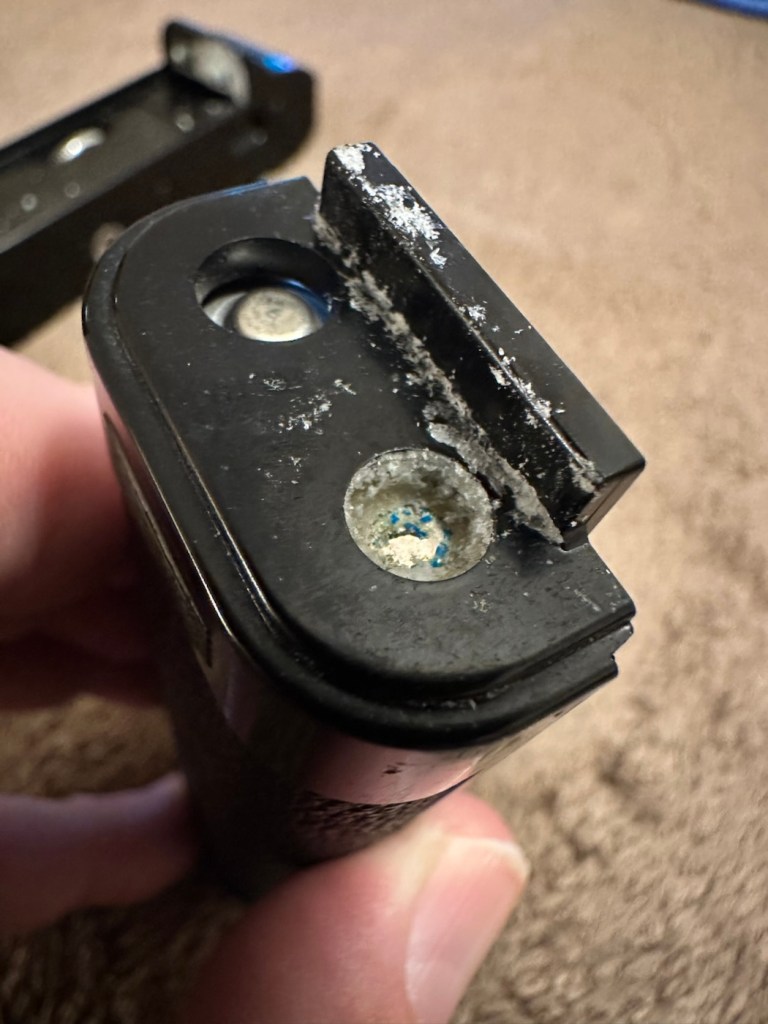
As stated above, and from the outside, all looks well.
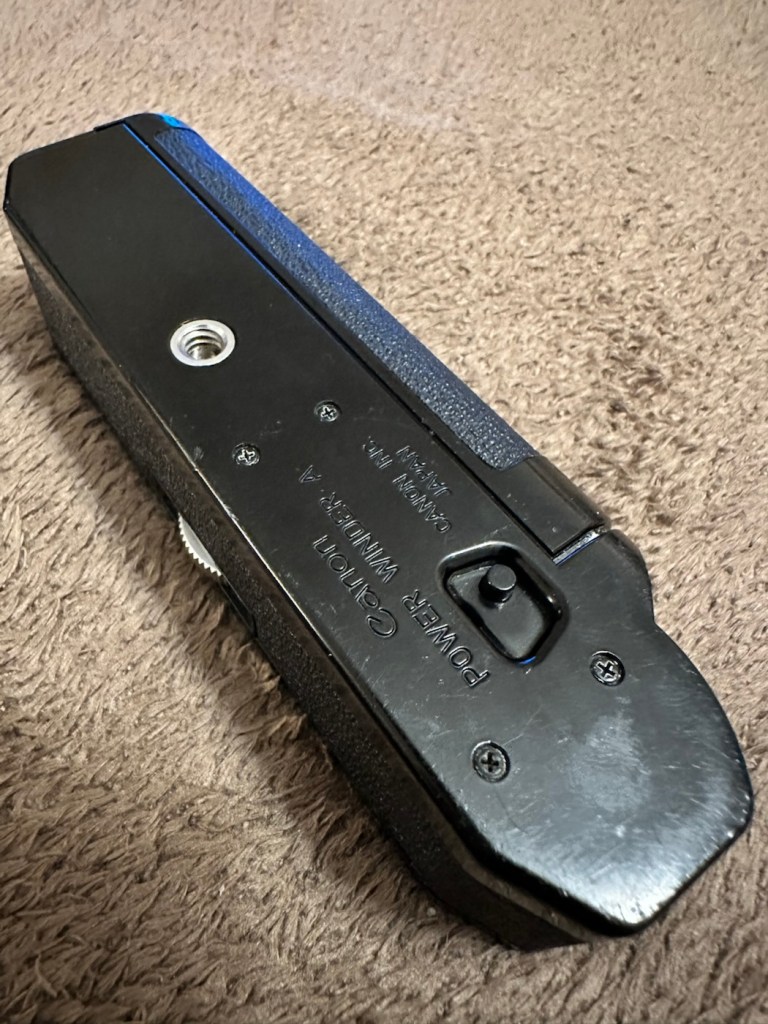
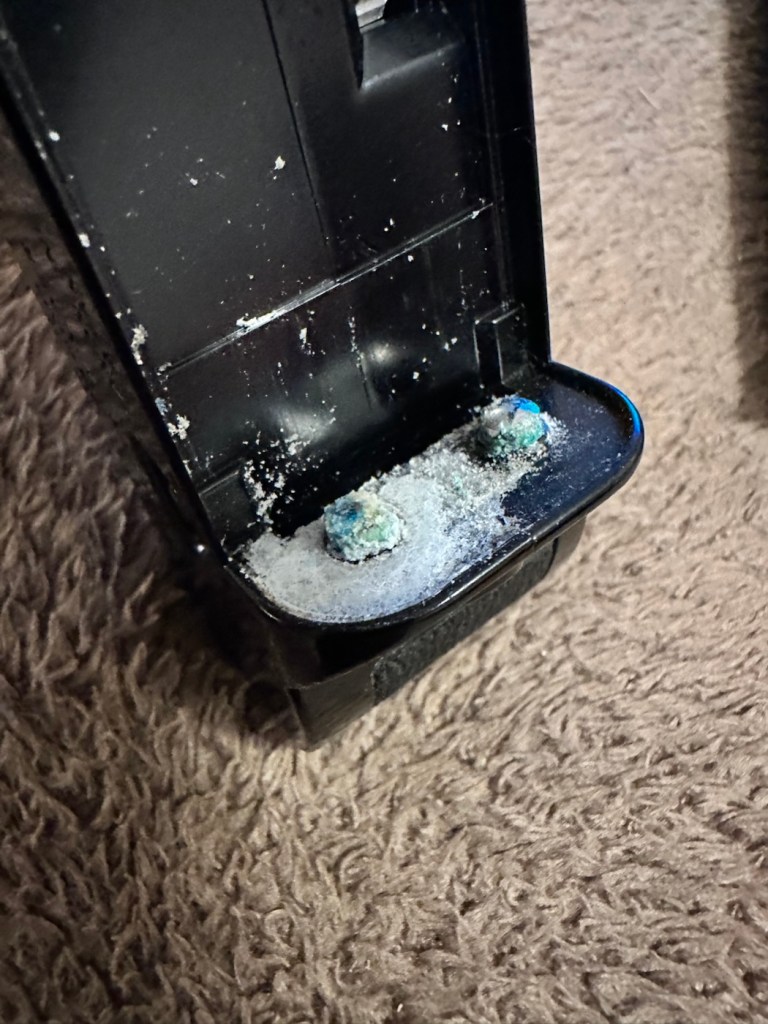
However there are a couple of giveaways that alert you to the immediate issue. Firstly there is an aroma, a kind of metallic musty smell that instantly alerts you to “Corrosion”. Secondly near the switch there are some “blue” granular stains that confirm corrosion.


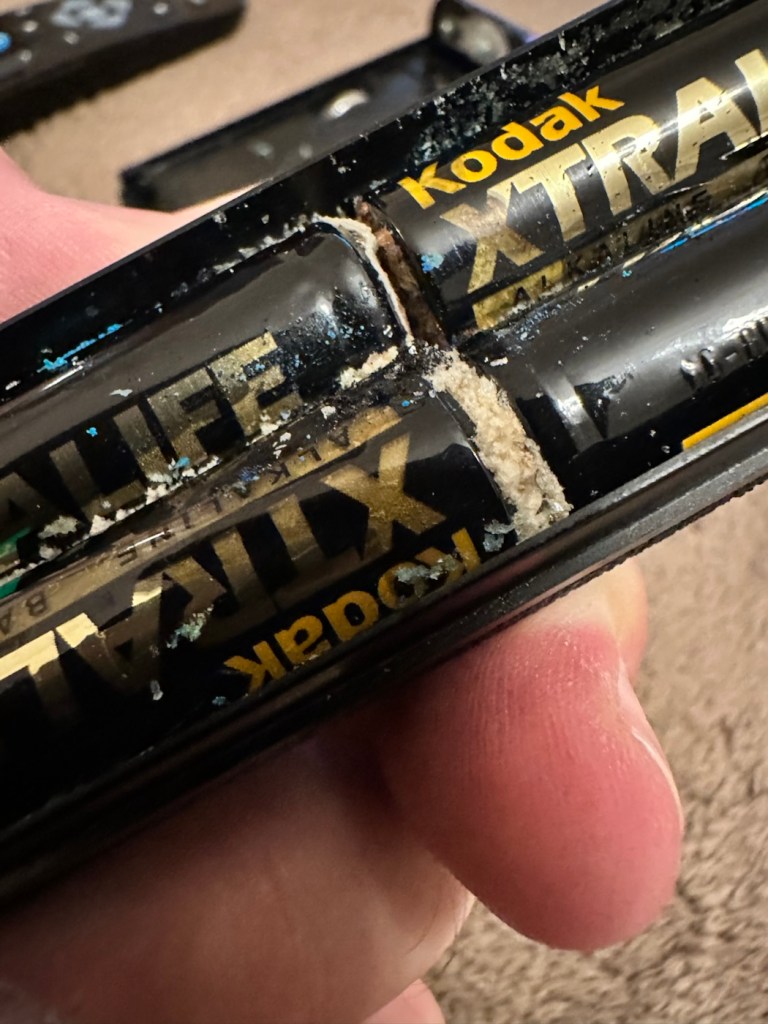


It’s pointless even putting batteries in here yet as they will not work, the damage is too extensive for the batteries to work. To be honest we now need to do a good clean and decontamination before we can even start to look at the extent of the contamination.
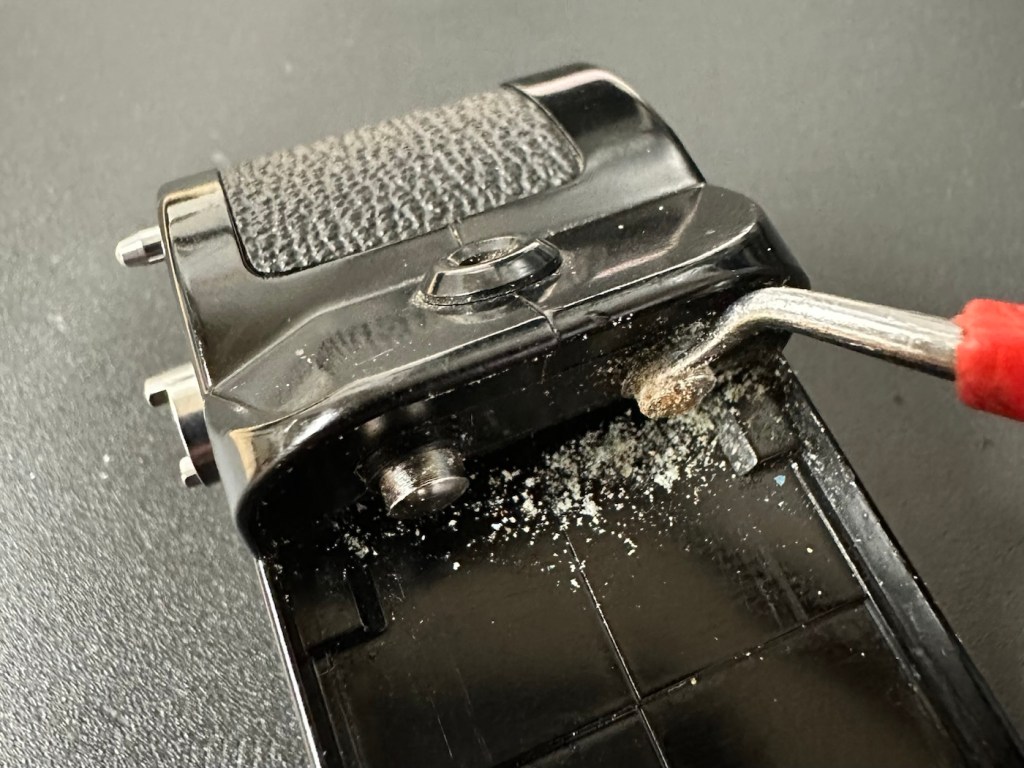
First we have no choice but to get rid of the corrosion, this will involve brushes, a pencil grinder, and copious amounts of isopropyl alcohol. Let’s get started.


I attack the contact end of the winder with a sonic brush and some IPA. After about 10 minutes and multiple applications, using a small scraping tool i was able to remove the corrosion that had started to eat away at the chrome on the contacts, a small rub with some fine sanding paper restored the metal as best I could. I’m not going too over the top here as the corrosion could have well gone past this point into the internal workings, I’ll tidy up once I can get it working as it should.
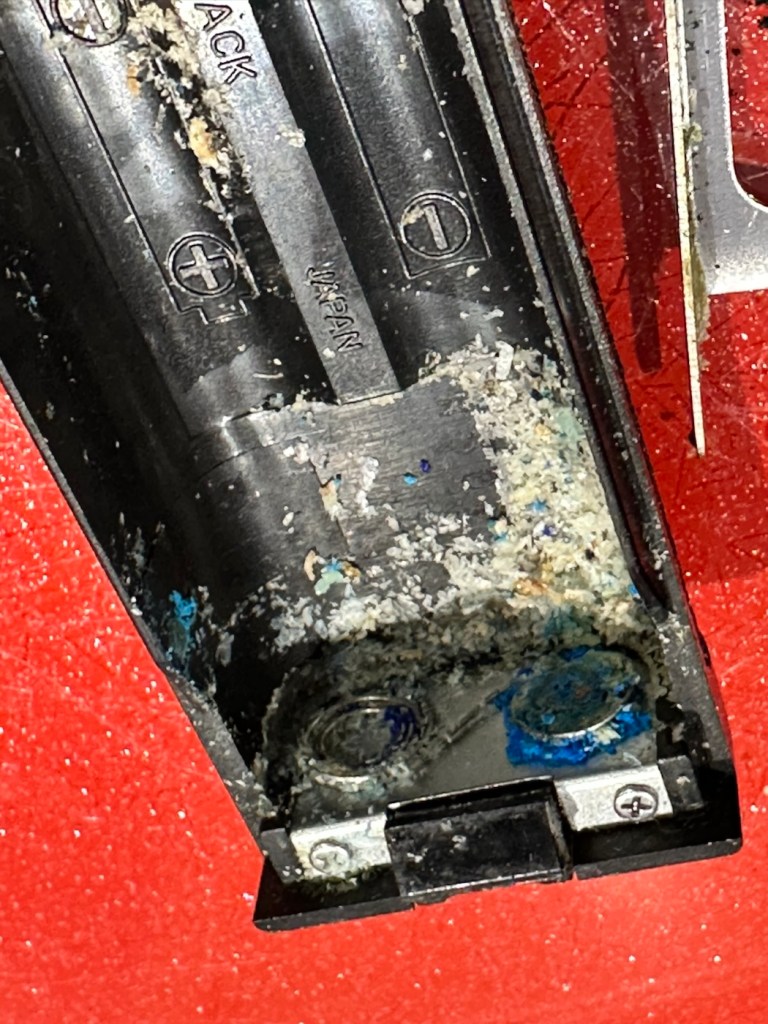

The battery compartment was cleaned using a similar process. However the contact end that used to have springs mounted for the batteries, have all rotted and the springs have had to be removed. I will replace the springs later, it’s not required for testing purposes just yet. All this contamination and blue staining has to be removed completely, if you leave contamination behind, it can start to attack the unit again at a later date, take your time and ensure you get as much off as you can. Clean, clean and clean again. It’s a boring part of the process but essential for long term results.
With everything cleaned and left to dry, I put some power across the winder power contacts and nothing happens. No noise, not any sign of clicking or of any movement at all. Just as previously feared i think the corrosion has gone further. Let’s get it opened.


And as expected the corrosion has made its way inside, the picture above shows a wire at the contact point rotted due to corrosion, in fact the second wire fell off just after removal, the contamination has eaten the cables and is rotting the connections. The good news is that it seems that the issue hasn’t gone beyond these contacts.
I’ve now cleaned and polished the contacts at the rear in preparation for being re soldered, the issue here is that I may have to extend the cables slightly as they are quite short. This may aid my testing of the unit prior to reassembly, let’s wait and see.
I have now soldered both contacts back into position, without any extra wire, hell, it was really fiddly and I doubt it would be able to be opened again without these wires being extended a bit further. I have also thoroughly cleaned throughout the internal workings removing all signs of contamination. I have reassembled the unit and it now sits in one piece. I have taken a dentist tool to further scrape down the contact point within the battery barrel area.
Using a little wire wool and IPA to clean the area I now have two good points of contact. Using the multimeter confirms we have continuity over the contacts that we didn’t have previously.
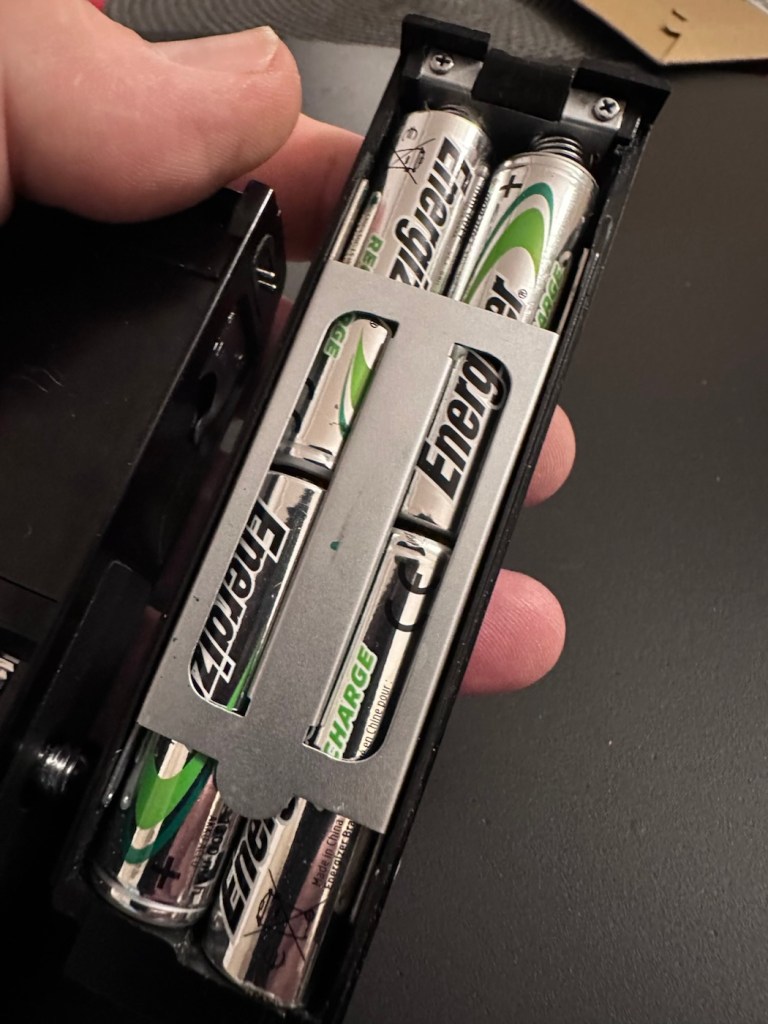
Reading the section above, you will remember that I had to remove the two springs on the battery case as they had totally corroded and broken away. I have some new ones but they are in storage, so for now I will just have to compromise until I can get to the new ones and solder them in place. Here I just obtained an old spring from a waste metal box, split it in two, added a small washer one end for the positive contact and just left the other as it was. Both springs were put in place, just being held there by the four AA batteries. As I stated this is purely for testing purposes and will be corrected once I have confirmed the unit works.


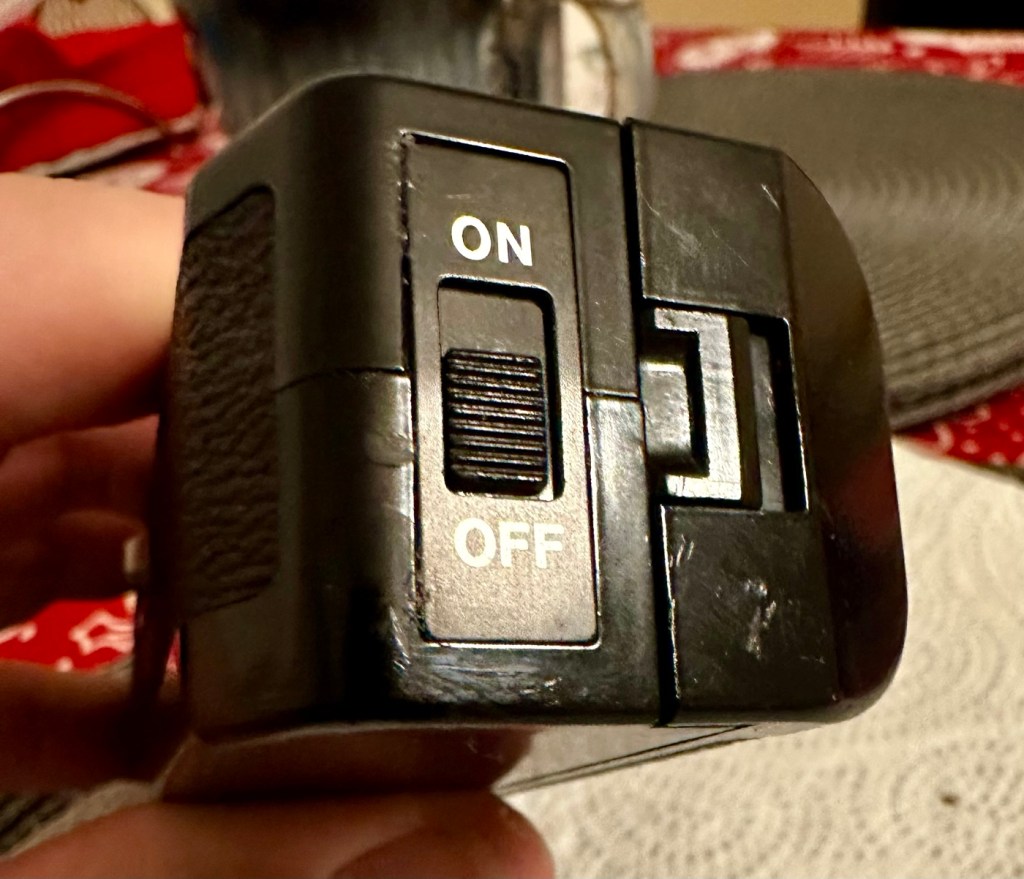
The battery holder was attached and then switched on. Nothing. Then I remembered I have to simulate the signal from the camera and this can be done by putting a metal short across the two raised pins at the power switch end. This worked, and the motor did its quick burst as expected. See the small video below.
I’m pleased with this, as all the work I have done has been worthwhile. I just need to get the new springs soldered in place, give the whole unit a thorough final clean, ensure the leatherette that was removed is stuck back down and that the on off indicator is stuck back into place. And then we can put it onto the Canon AE1 to see if it works as it should.

Today I have taken out the battery spring connector and I am about to put the new spring contacts in place. I’ve found even more corrosion behind this plate so this will need to be cleaned before reassembly.

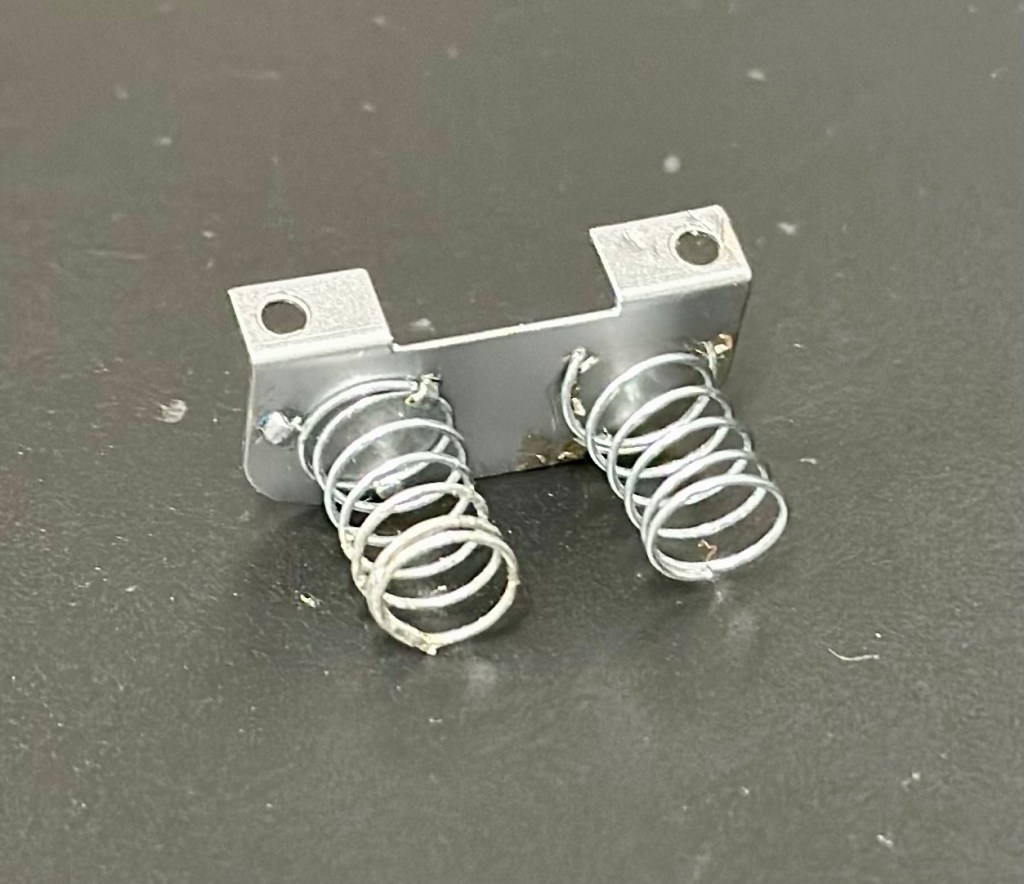
I’ve now fixed the new permanent springs in place, they wouldn’t solder so I’ve had to use a combination of using the old clips that were originally there and weaving the spring though the holes where some clips used to be but had corroded away. Either way it has worked well and both springs are quite solid, and don’t look out of place at all, they probably look better than the originals.
With the battery pack contamination removed I can now reinstall the battery contact back into place.


I know that the pack works, and now the final touches have been added, this winder is now back into a good working order, and fit to go back to work doing what it was originally designed to do.
This is an item you can readily buy on the auction sites at a very reasonable, some would say even very cheap price.


Is it worth the repair you say? Well yes, it is. The trouble is, it is so easy to throw stuff away these days, that in reality, can be given an extended life and purpose for pretty much no cost apart from your time and patience. On top of that, getting these items apart and reassembling them is a great learning circle, and you can never stop Learning. You are preserving the past, and that’s always a good thing.
As you can see above in this small video I have taken today, here I have my Canon AT-1 with the winder attached, doing what it is meant to do and sounding so retro with that motorised winding sound. Don’t you just love it? I most certainly do.
Thanks for passing by. It’s always very much appreciated.
Another bunch of photographic waifs and strays have arrived at my door. Can they be saved or are they beyond redemption?
What the listing stated:
Job lot of 5 slr film camera bodies
Canon ae-1 program, Olympus om10 x 2, Pentax me super, Fujica stx-1
Sold as spares and repairs only, all have some sort of fault
Please see photos for condition
EBay
I’ve just purchased a job lot of old cameras all requiring repair, god knows what the real issue with them is, however they all do seem to have all knobs and buttons available which in many cases is quite a rarity. I’ve paid a grand total of £40:00GBP so if you break it down to a total of £8:00GBP per camera then I’m quite happy with that. Even at this price, i get some good spares, should that be all they are useful for.


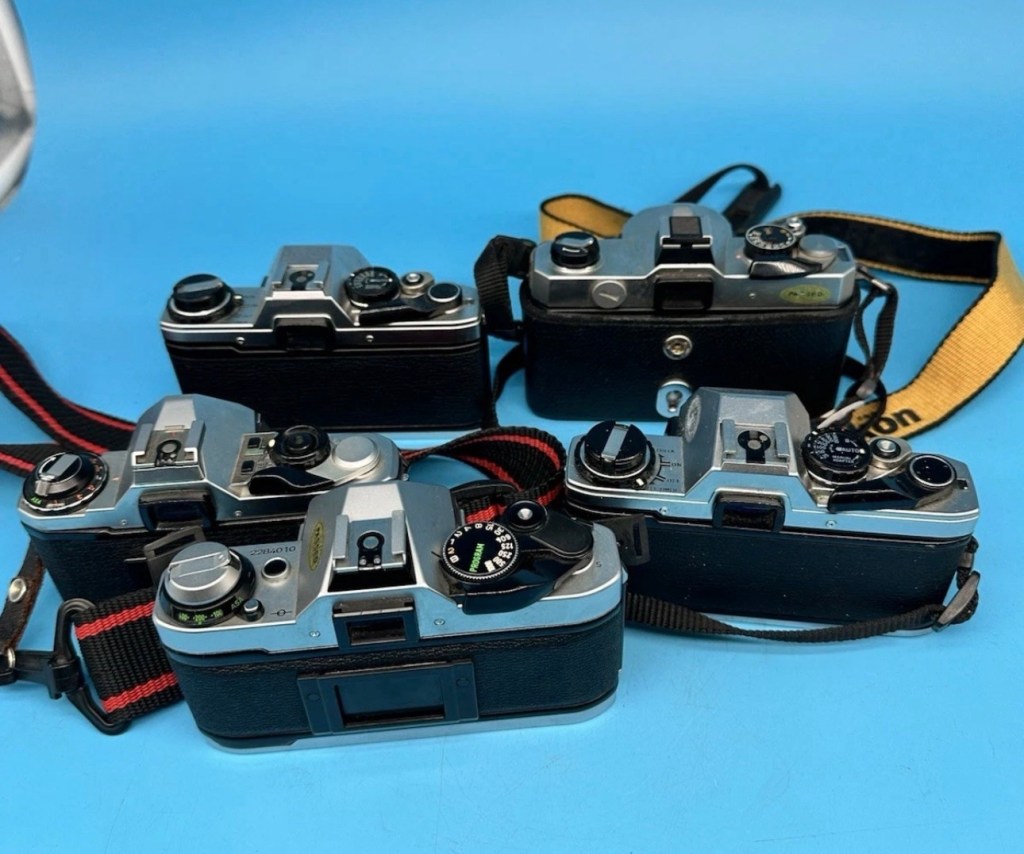
My intentions here are thus. The AE1 program is the only Canon camera I need to complete my “A” series collection so my main focus will be on that. The two Olympus OM10s I will be looking at repairing then selling on as I already have a good example of this camera. The Fujica and the Pentax I will possibly look at adding to my collection as I do not have either of these.
I have my fingers crossed that there’s nothing seriously wrong with this purchase, and i will be featuring their respective repairs over the coming weeks. Firstly I’m going to carry out a very basic assessment on their arrival, just to see whether or not I have purchased a collection of proverbial Christmas Turkeys.
Canon AE1- Program:

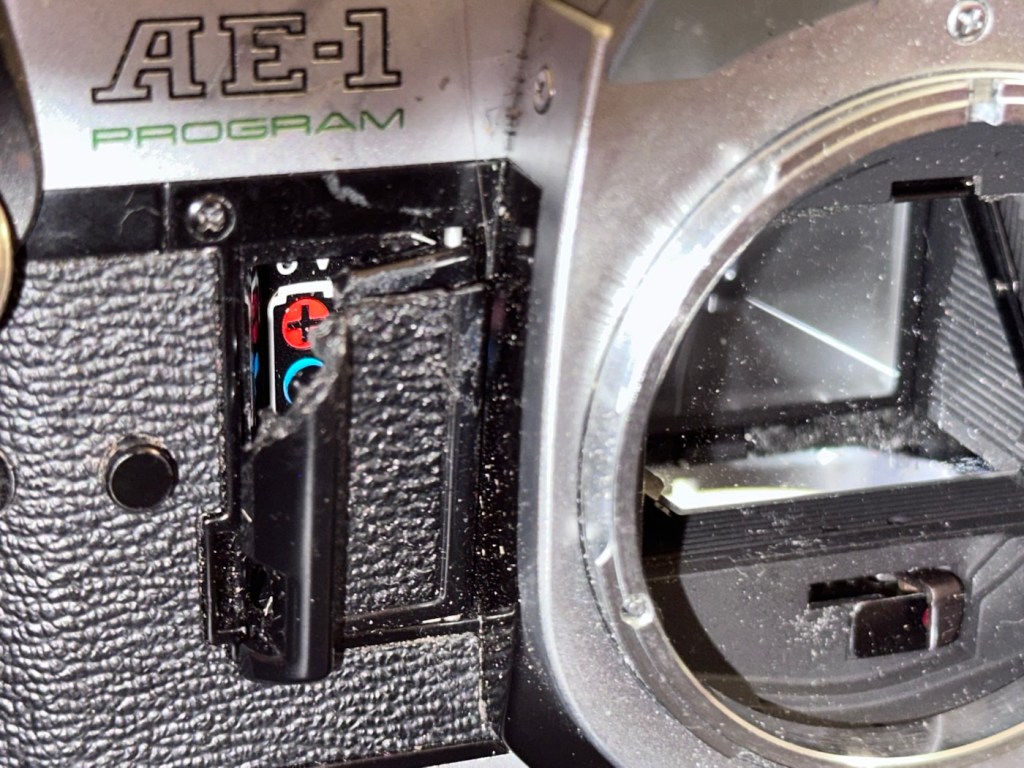
This is the one I’m most excited about as it could possibly be my last piece of the puzzle for my Canon “A” series collection. Cosmetically it’s ok, it’s grubby, it has a broken battery door and a missing winder cover from the base. All dials, buttons and levers are working as they should, and when a battery is installed everything is as it should be. The battery check audio is fine, all indications in the viewfinder illuminate as they should, the camera fires (with a little camera cough) but other than that all seems well. The mirror and prism need cleaning and there is possibly some ingrained marks on the prism but this will not affect picture quality. All light seals need replacing and a good CLA is required.
Is it a Turkey 🦃 no it isn’t. I’m convinced this camera will soon be back in good working order.
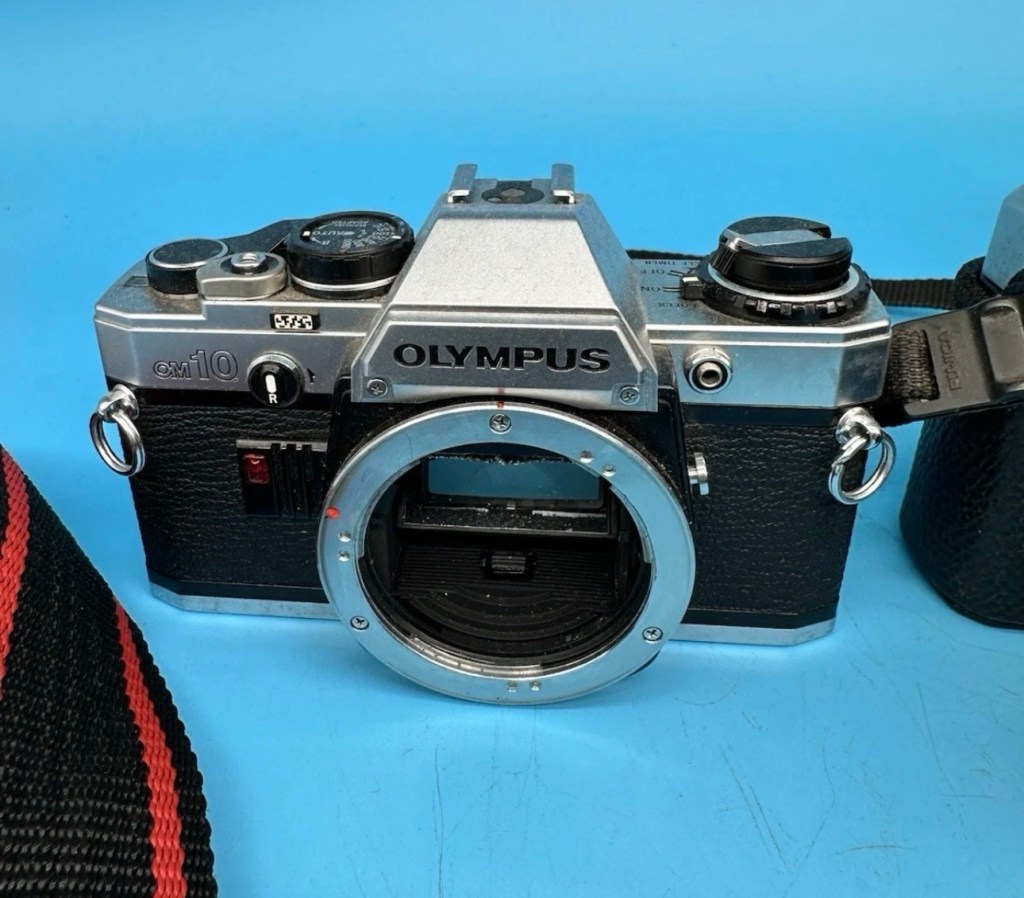
Olympus OM10 – No:1:

In really good condition, battery terminals have a slight corrosion due to old batteries being in place. However new batteries work fine and shutter fires and viewfinder is clean. To be honest, this camera is in a better cosmetic condition than the one I currently have. This is an excellent camera that requires little attention.
Is it a Turkey 🦃 ? Most definitely not.
Olympus OM10- No:2:


As with the first OM10 this is cosmetically a nice camera just a little more grubby, and missing the battery cover on the base. But it has a nice Nikon neck strap – strange. The battery chamber looks as if it has had some minor battery leakage but nothing too serious. Using the battery cover from No: 1 camera I’m able to test all the electricals, and there is no issues here, with the camera displaying the exposure in the viewfinder correctly, and the self timer and battery check all as they should be. Again a good CLA of the camera should have it back and working in no time at all.
Is it a Turkey 🦃 it most definitely isn’t. This is a good camera just needing some TLC.
Pentax ME-Super:
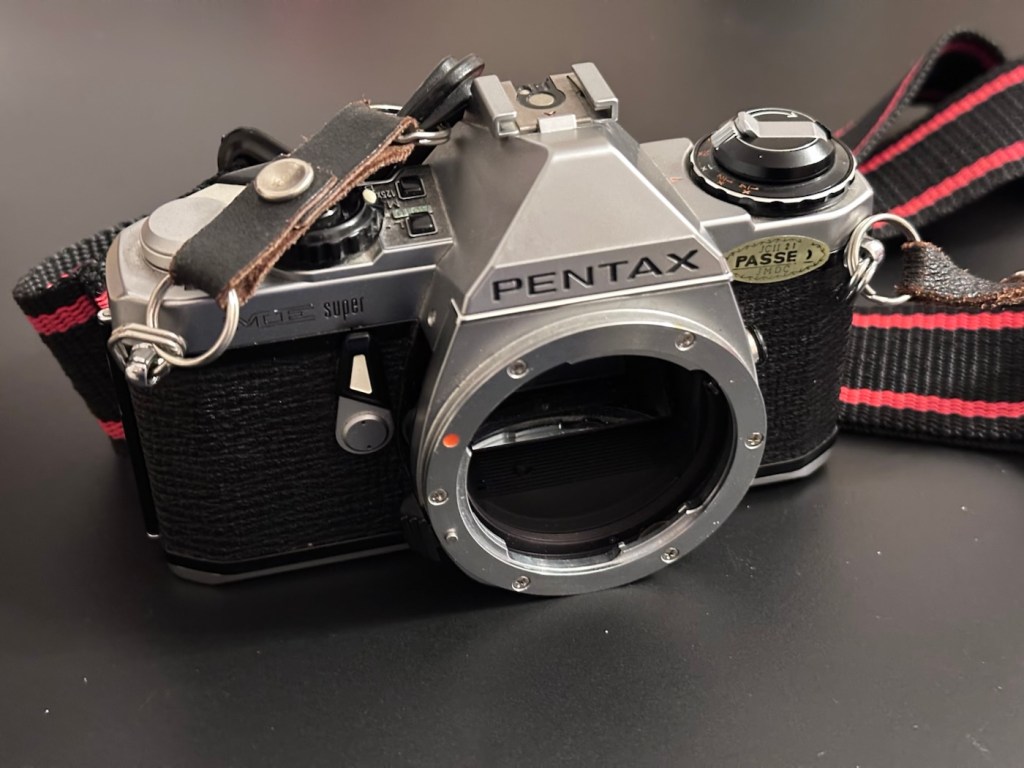

Again, cosmetically in good condition but missing the battery cover on the base. I was able to overcome this and load some batteries and had movement in the metering via the viewfinder. It’s quite dirty and the function dial on the top is jammed, I couldn’t get the shutter to fire. I suspect it needs a good CLA, and will make a good little project .
Is it a Turkey 🦃 ? I’d say not at this stage. It needs attention on the bench. It’s promising.
Fujica STX-1:

The batteries were dead but the chamber was free of any contaminants. New batteries in place and the light meter in the viewfinder is working fine. Everything works, the shutter fires and winder operates without issue. This camera is in a good but grubby condition. Will require new light seals and a good CLA, but nothing beyond that.
Is it a Turkey 🦃? Absolutely not, this is a good sturdy camera just itching to get back to taking photographs again.
So out of five cameras, I’m exceptionally pleased that every single one of them can be brought back to a working condition, with very little intervention. every single one of them will need a Clean, lubrication and adjustment (CLA) and also new light seals as the majority of them have turned to a dusty residue that gets everywhere. I need to buy some replacement parts, so I will get on with sourcing those items, and then I will also get some body caps to protect the cameras when I’m finished.
I will create individual posts to cover these repairs, and they will be delivered here on this site over the coming month or two. I’m in no real rush and to be honest, time is a rare commodity at the moment as I will be working as one of the “Orange army” (It’s a railway term) over the Christmas and New year periods, and on top of that we may also still be moving home, fingers crossed 🤞 in early January 2026.
Thanks for passing by. It’s most appreciated.
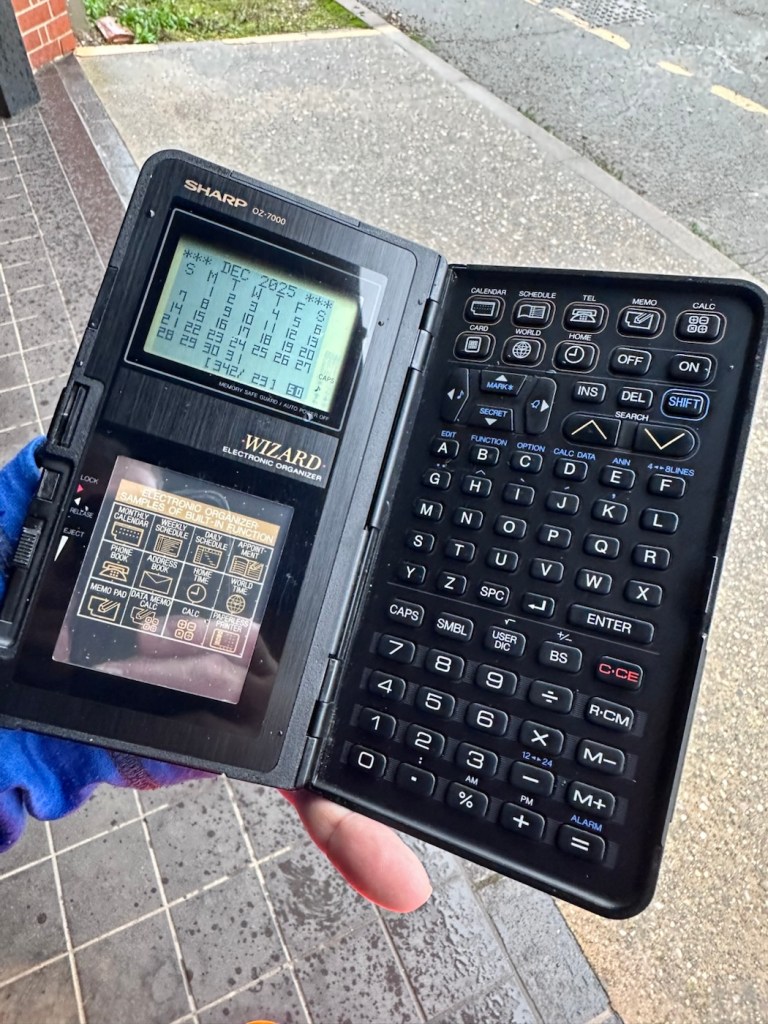
The Sharp OZ-7000, Amongst one of the first electronic organisers and precursor the PDA. Needs repair. Or does it?
What the listing stated:
Not working. I have replaced the two batteries and cannot get it to work. I have not touched the memory battery. See picture for actual item. Case is a bit sticky unfortunately with age.
EBay
First of all, what is it?
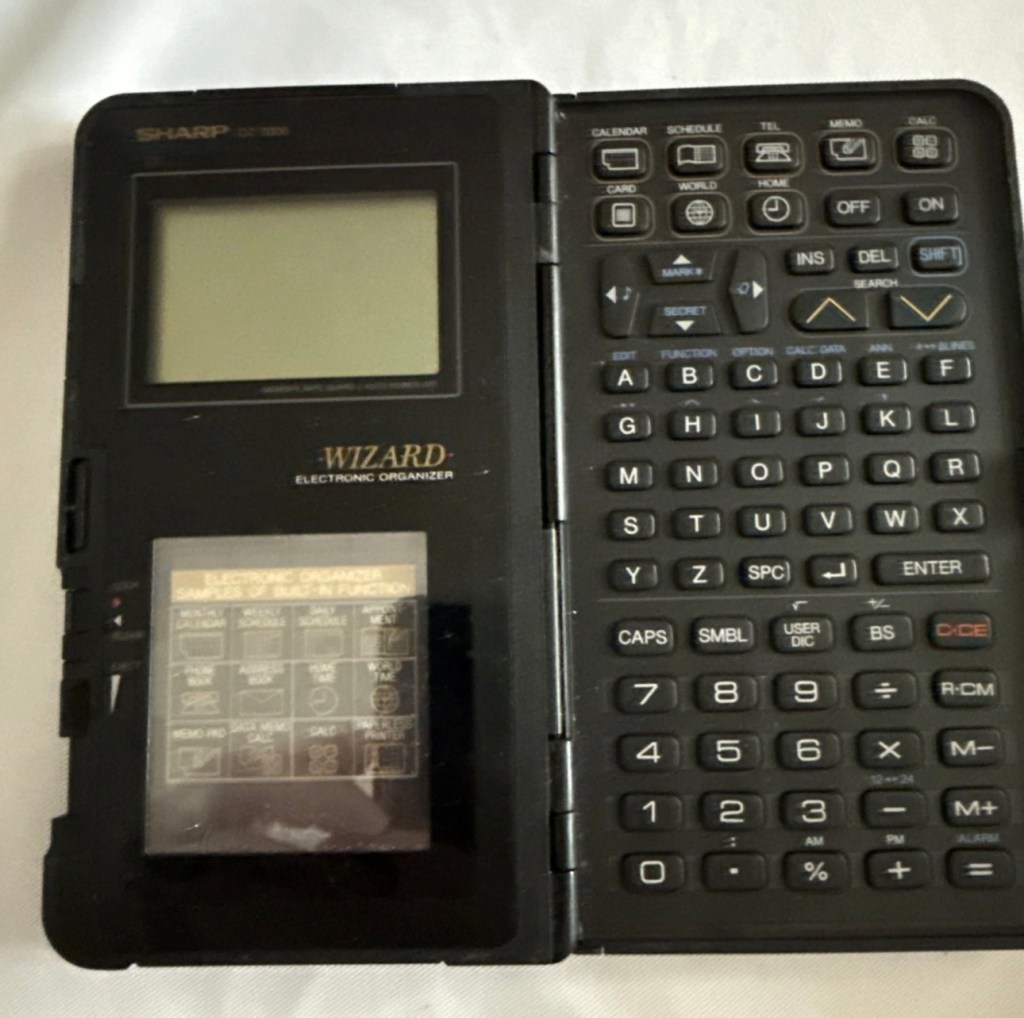


The Sharp Wizard series, introduced by the Sharp Corporation in 1989, was among the first electronic organizers and a precursor to personal digital assistants (PDAs). The debut model, the OZ-7000 (known as the IQ-7000 in Europe), combined organizer functions with an IC Card expansion system, allowing users to install software and memory cards. Over time, Sharp refined the series with larger displays, increased memory, and enhanced features, such as infrared communications port for wireless data transfer, touch-sensitive displays, and clamshell designs.
The out-of-the-box functionality of the OZ-7000/IQ-7000 included a memo pad, a telephone pad, calendar and scheduling with alarms and repeating events, multi-time zone clocks, and a calculator, thus covering all the basic functions found in PDAs since. The keyboard was not QWERTY, although later models, starting with OZ/IQ-8000, changed the orientation of the screen and keyboard layout.
The OZ-7000 was about 6.3 inches (163 mm) tall, 3.7 inches (94 mm) wide closed, 7.25 inches (184 mm) open, and 0.85 inches (21.5 mm) thick closed, making it much larger than later PDAs. It featured a serial port (proprietary connector) to attach to a Windows PC or Macintosh or another OZ-7xxx/OZ-8xxx device, an optional thermal printer port and a cassette tape backup. The OZ-7000/IQ-7000 model featured 32 kilobytes of internal memory and a 96 x 64 dot (8 lines x 16 characters or 4 lines x 12 characters) black and white LCD with controllable contrast but without a back light. A major advertised feature of the model was the IC Cards expansion slot for accessory cards developed by Sharp.
Wikipedia
A bit of a break from the mountain of photographic equipment I have been dealing with lately, I thought I’d take a bit of a detour and have a look at some prehistoric PDA gear, as I have also done in the past, as you will no doubt be aware of, if you have ever read any of my posts on Psion organisers.
From what I can gather, this one is a little beaten up and battle scarred, and quite simply does not work. I’ve paid the princely sum of £8:54GBP after i managed to knock the seller down by a few pounds. I just now have to await its arrival before we can carry out a thorough assessment.
Its here, everything is as it should be apart from the base being a bit loose in one corner where the clip inside has broken, however that’s not an issue and can probably be repaired.
The exterior is a little sticky but again, this is just one of those 1989 rubber enhanced products where the vulcanised rubber coating has started to degrade. A post I previously published shows how I deal with these 80’s degrading rubber issues: Sticky, Rubber camera grips


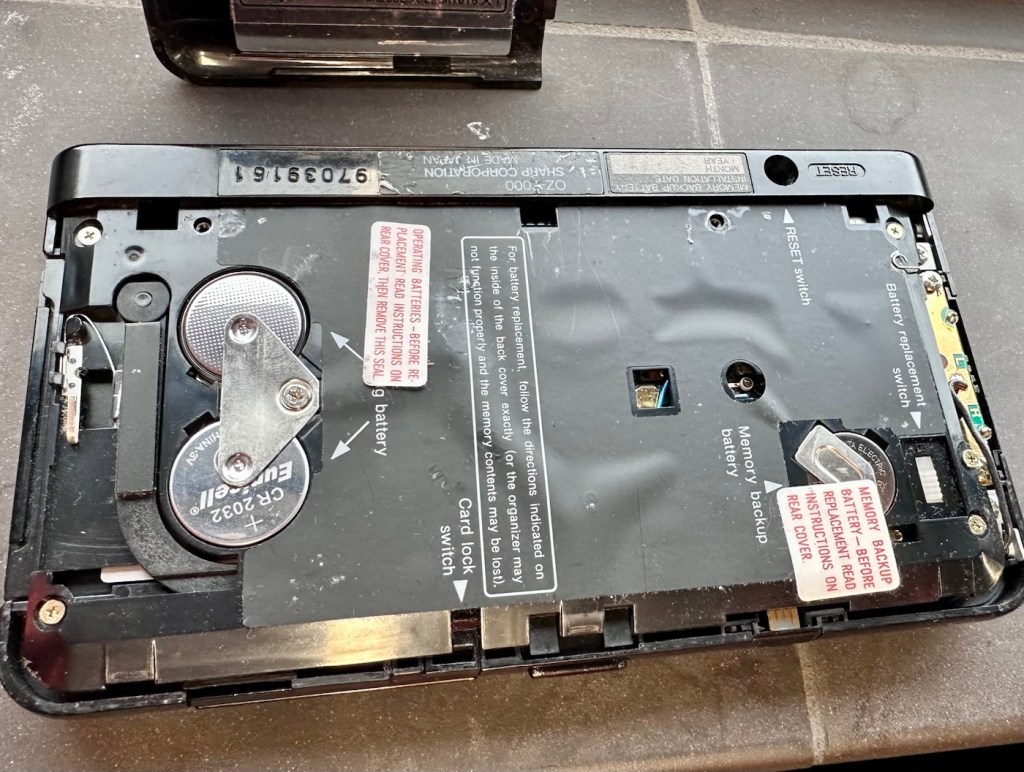
The unit has three batteries, under the rear shell. These are two CR2032 and one C1616 coin cell, with the C1616 being the units memory battery. These batteries will need to be tested as this unit does not start up, the whole unit is dead. The previous owner has stated that they have changed the two main batteries but not the memory battery, testing them will tell.
Beyond that, all catches, buttons and switches seem to be performing as expected, no cracks or major damage to the external shell, or screen area. Naturally there are signs of usage as you would expect on an item that is now 36 years old, light signs of age related wear and tear, nothing of concern that is detrimental to its operation.
I’m leaving the broken clip on the rear shell as it is, it’s not visibly exposing anything of the interior and to be honest needs quite a bit of force to show the gap, it’s not a problem and not necessarily requiring a repair. In normal handling it is not even noticeable, so it will remain as it is.
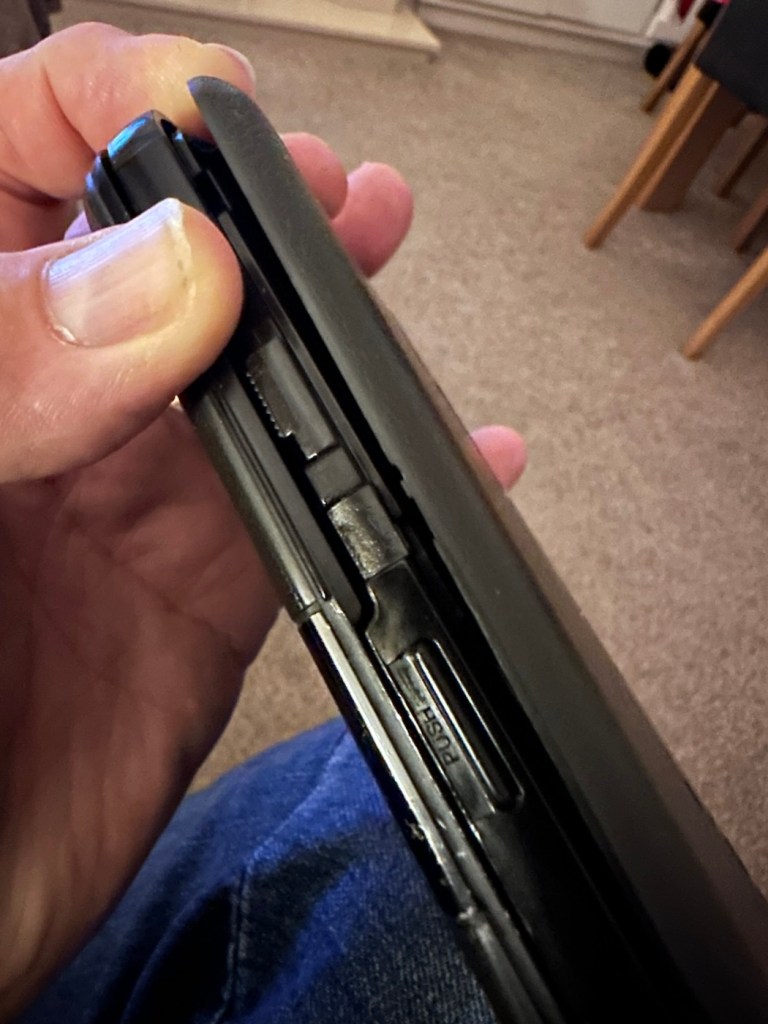
The main fault, and I apologise in advance, as it was not really a fault, was a misunderstanding of the unit’s operation by the previous owner. When you take the back off and change the batteries, you have to operate a switch so as to not interrupt the backup of the system.
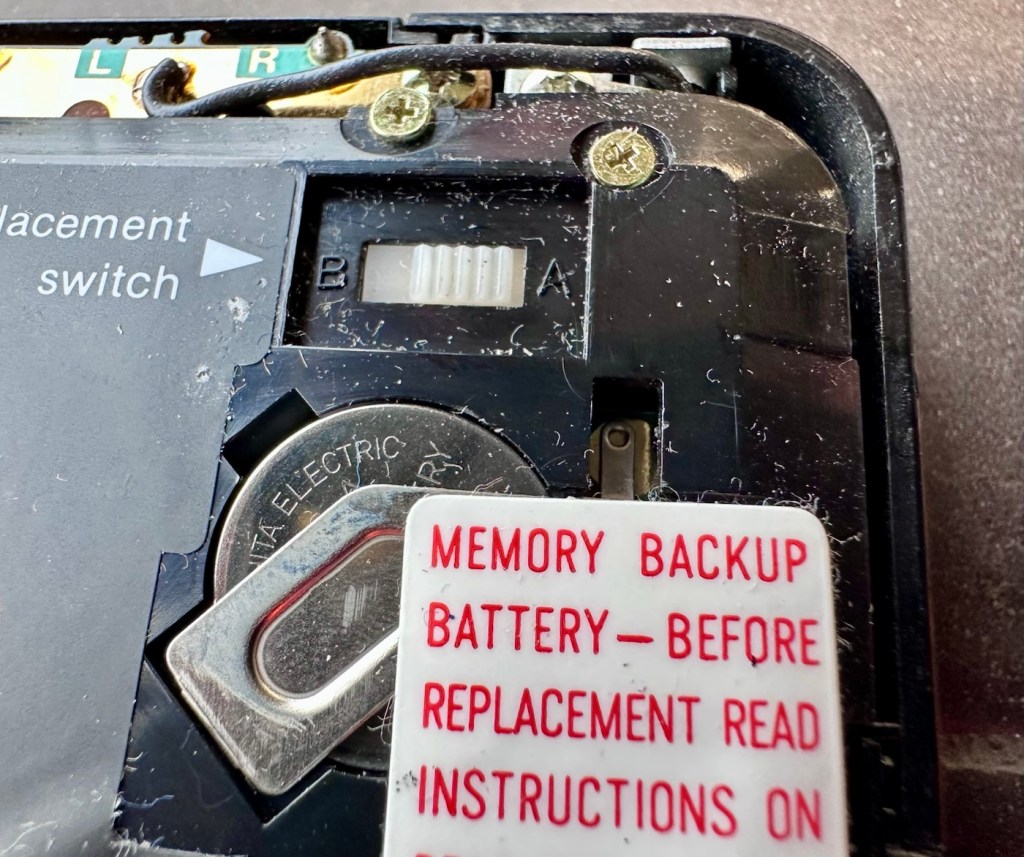
There are two modes and these are explained below. This switch is located inside the battery compartment and is used when replacing the main batteries to prevent data loss.
To replace the main batteries safely and avoid losing your data, you must follow a specific procedure that involves setting this switch to “B”, changing the main batteries, and then switching it back to “A” after the new batteries are inserted.
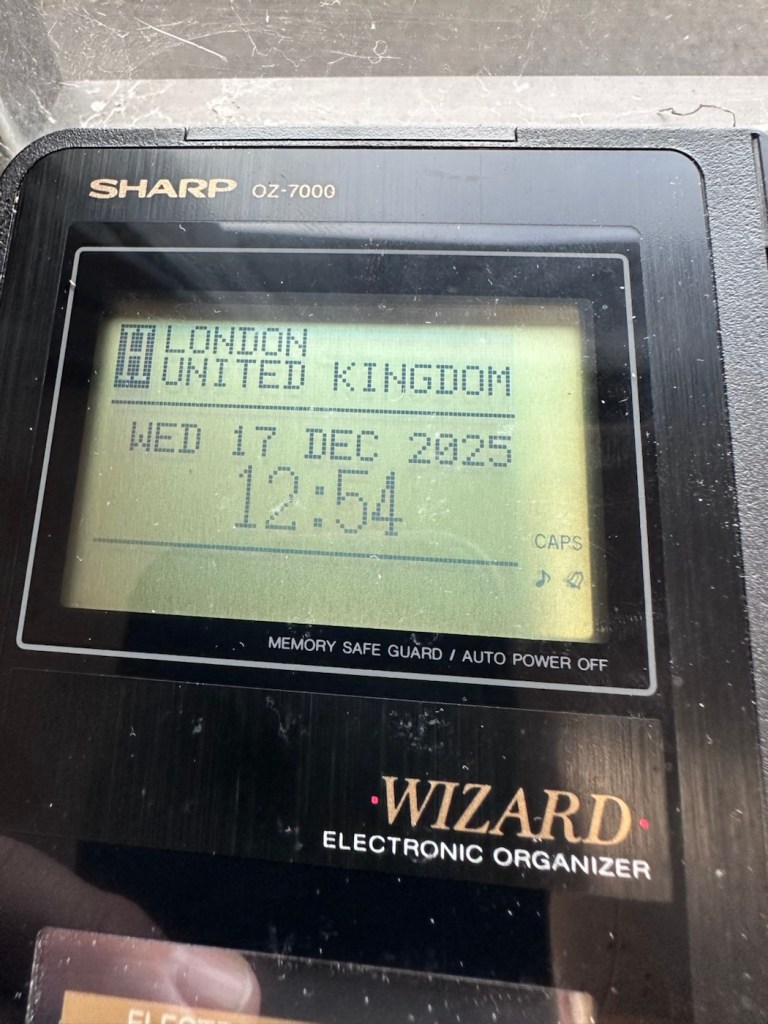
The issue here was that the batteries had been changed and the switch was put into the correct “Backup” mode. However the previous owner had not placed the switch back into the ”Active” mode when the batteries were changed and the back of the shell was put back in place. Hence the unit would not work as in theory the batteries were locked out of use. On opening the shell up, this was the first thing I looked at, and when the switch was put into the correct position the unit sprung into life once the “On” button was pushed.
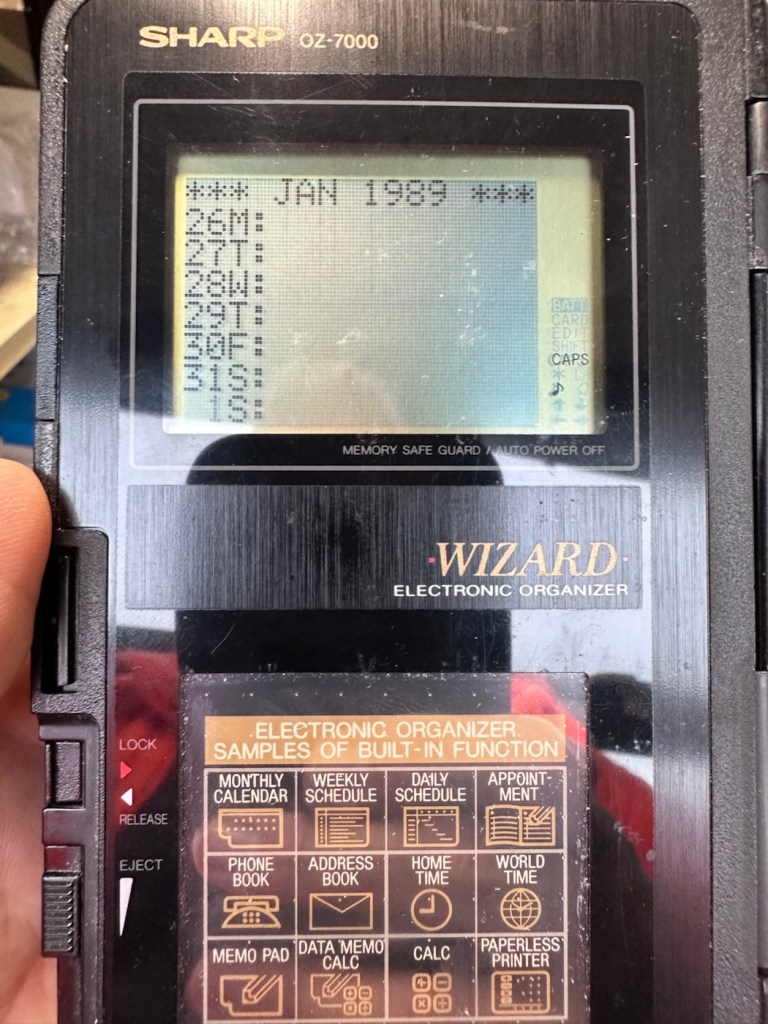
When the unit was turned on it then reset to 1989, I was able to change the times and date, and I was pleasantly surprised to find out that the date range on this unit covered the years 1901-2099. Considering this unit was released 11 years prior to the Y2K bug of 2000, it showed some advanced thinking in the implementation of these units.

One of the issues with this particular unit is that there is no backlight on the display, the display is black and white and the only change that can be made is to the contrast. Back lights eventually arrived with later models. So use of these units was pretty much limited to daylight hours, or whilst under a light source of some kind, that said the display is very good and has a good contrast range.

The last thing I have done is clean with some IPA to remove the years of gunk and I think this was quite successful

After this I have finished off with a nice polish with some car cockpit cleaner. It’s finished this repair off just nicely.
Here we have a nicely presented, clean and fully working example of a nice little bit of personal computing history.


So. With these older items, it’s sometimes good to just have an awareness of how these old timers operate. Get an instruction manual, study how it works, it can make the difference between selling it as damaged, when in fact there really was nothing really wrong with it. The seller could have sold this for 3 or 4 times the value that I purchased it for, but I’m not worried about that, as far as I’m concerned I got myself a bargain and to be honest, that doesn’t happen that often.
It’s a win win situation as far as I’m concerned, I win as I now have a lovely example of pre PDA technology, and it’s a small win for the environment as another piece of “Waste” has been saved from landfill.
Thanks for passing. Thanks for being there. Always appreciated 🙏
House sale collapse and expectations, and some random photographic chuff
Just invented that word, I think.
Lately there’s not been a great deal to write about. Our continuing saga regarding the house sale that has been going on since August this year, has had the chain collapse yet again for the third time. Not our end but lower down the chain. It’s a pain in the ass, the whole system of selling in this country is crap, it’s poor and only allows the legal people a way to squeeze more money out of you. Meanwhile we have a load of stuff in storage, and guess what? Every thing you need is now in that storage about 15 miles away. Damn it.
Hey ho, the house went back up on sale for the fourth time last Tuesday, we had five viewings on Wednesday and four offers on Thursday, it was sold on Friday. Wow that’s quick, but you watch it slow down from here on in, it will believe me.
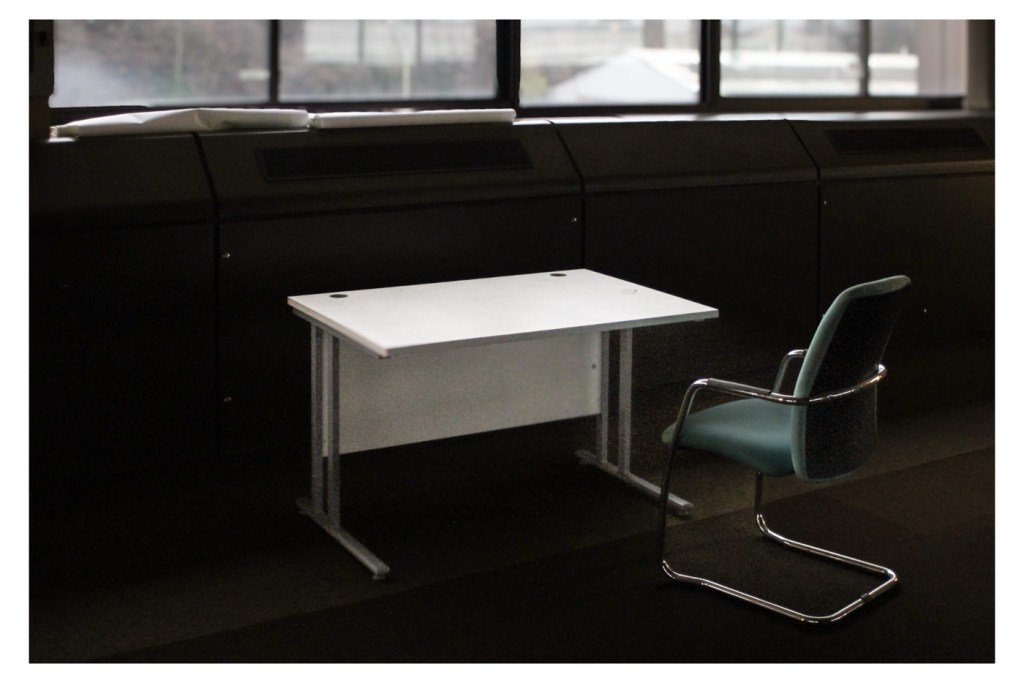
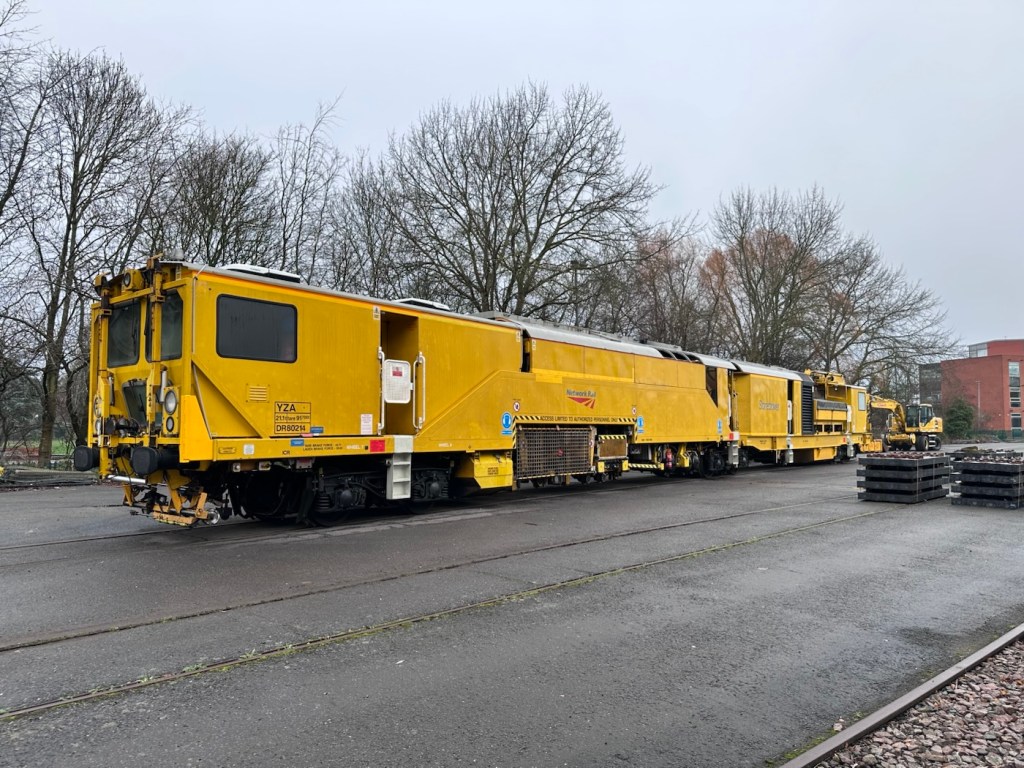
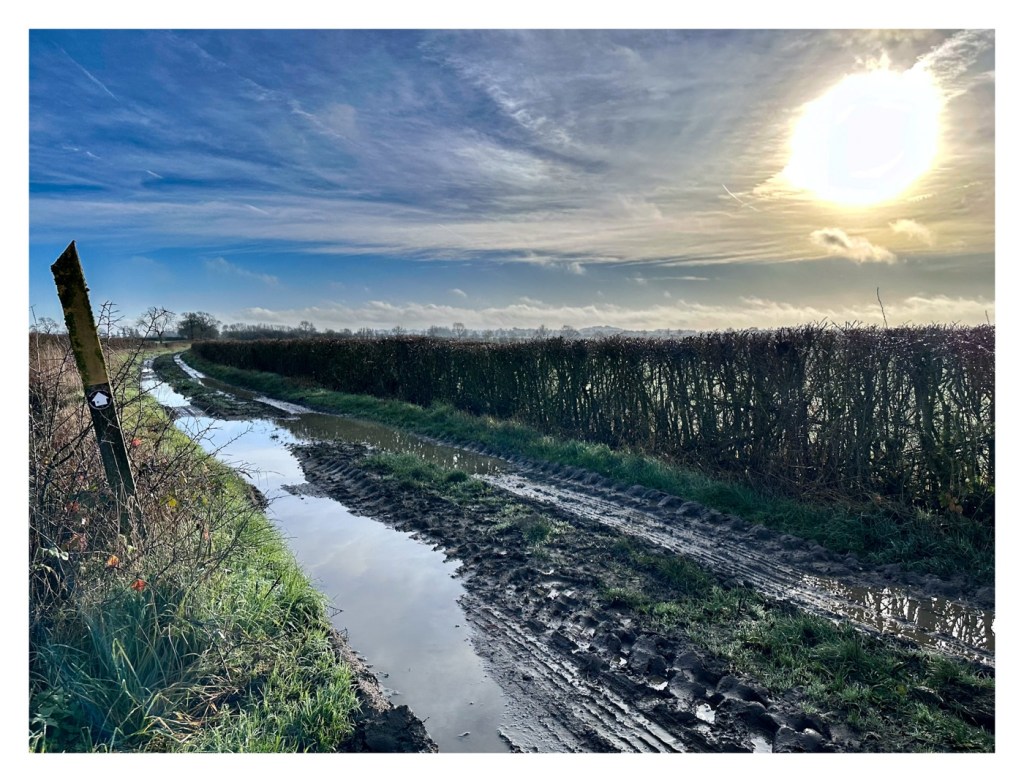
Meanwhile here are a few pictures taken recently on multiple media types, just to fill some space.


Have a happy day, behave yourself and stay happy.
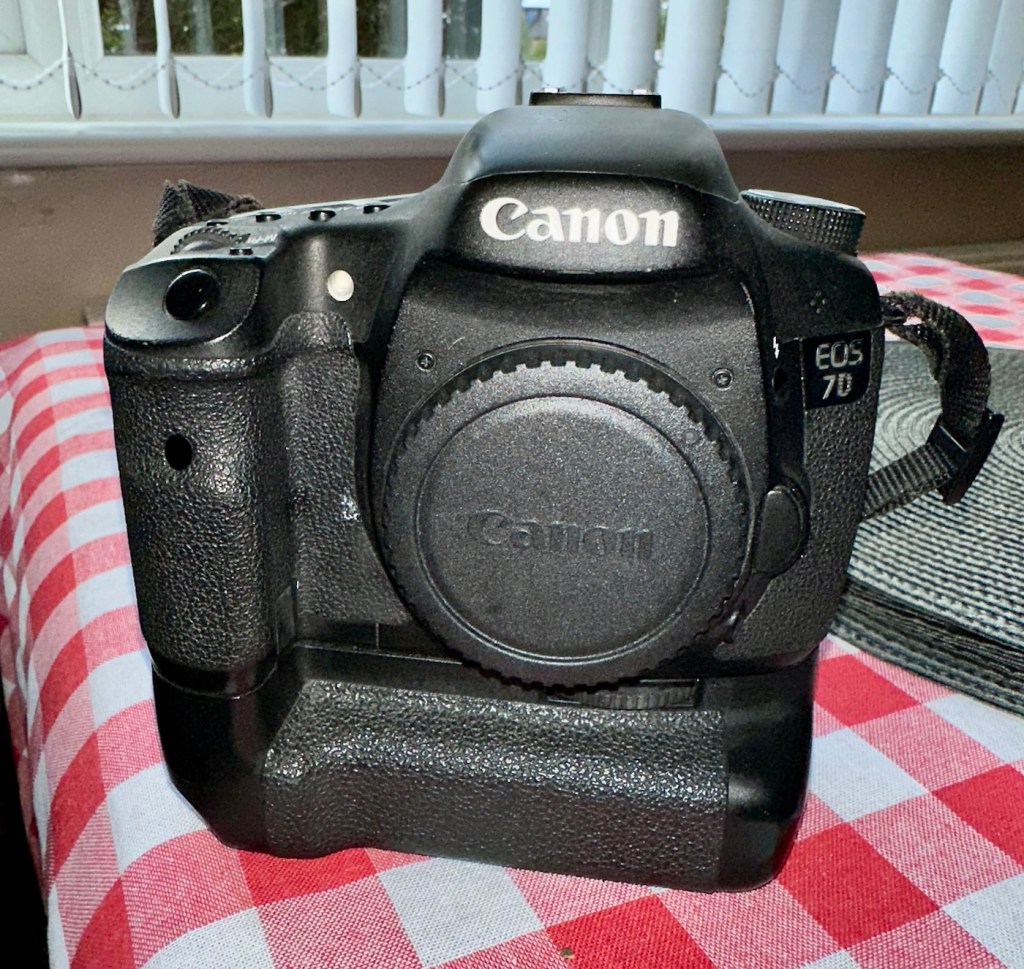
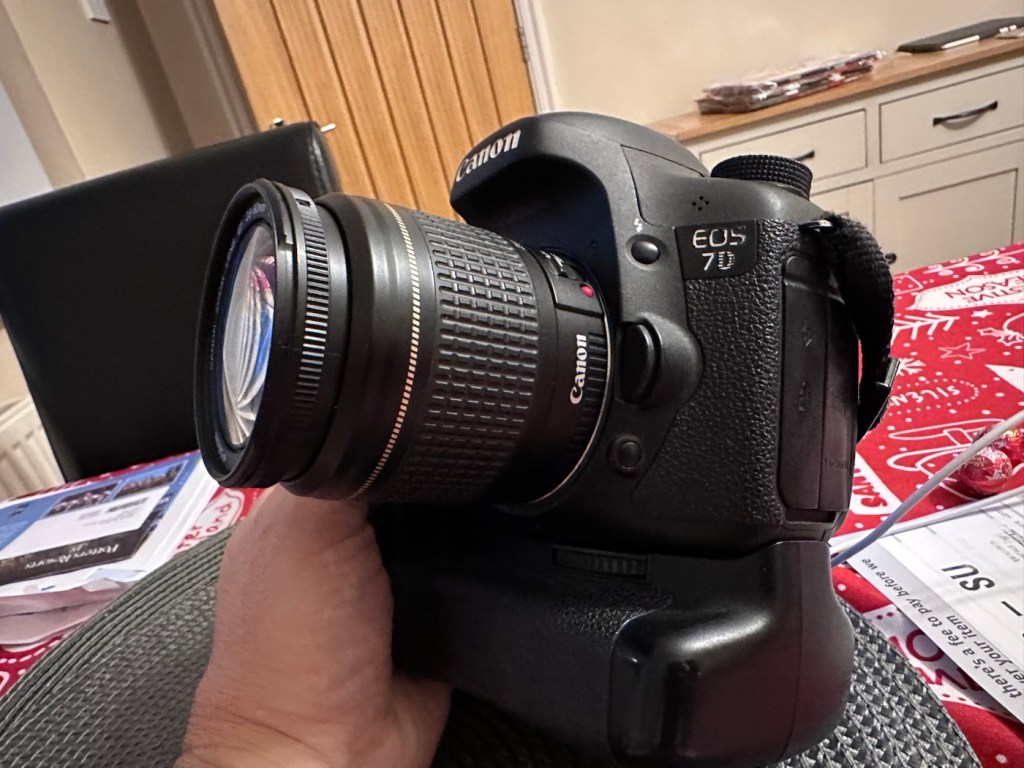
Can I get this classic EOS 7D operational again? It has damaged card reader pins.
I received this camera from a good friend who is a professional photographer, a few weeks back in a bundle of cameras and photographic equipment he no longer uses, he has kindly donated them to me to get working again. You can see that post, and just what was donated here: Cameras…i need more!
I’m in a situation where I don’t have my repair gear with me at the moment, as it is all packed and in storage awaiting our impending house move. Hence the reason I am racking up a whole load of draft posts that I can’t complete until I have my workspace back in use. Therefore any work I can do is severely restricted to inspection, cleaning and preparation with the only maintenance being attempted on the outside of the camera.
Let’s have a brief history on the Canon EOS 7D:
The Canon EOS 7D is a high-end APS-Cdigital single-lens reflex camera made by Canon. It was announced on 1 September 2009 with a suggested retail price of US$1,699, and was marketed as a semi-professional DSLR camera.
Among its features are an 18.0 effective megapixel CMOS sensor, Full HD video recording, its 8.0 frames per second continuous shooting, new viewfinder which offers 1.0X magnification and 100% coverage, 19-point auto-focus system, movie mode, and built-in Speedlite transmitter.
The EOS 7D remained in Canon’s single-digit APS-C model lineup without replacement for slightly more than five years—the longest product cycle for any EOS digital camera. Its successor was the Canon EOS 7D Mark II, announced on 15 September 2014.
Wikipedia
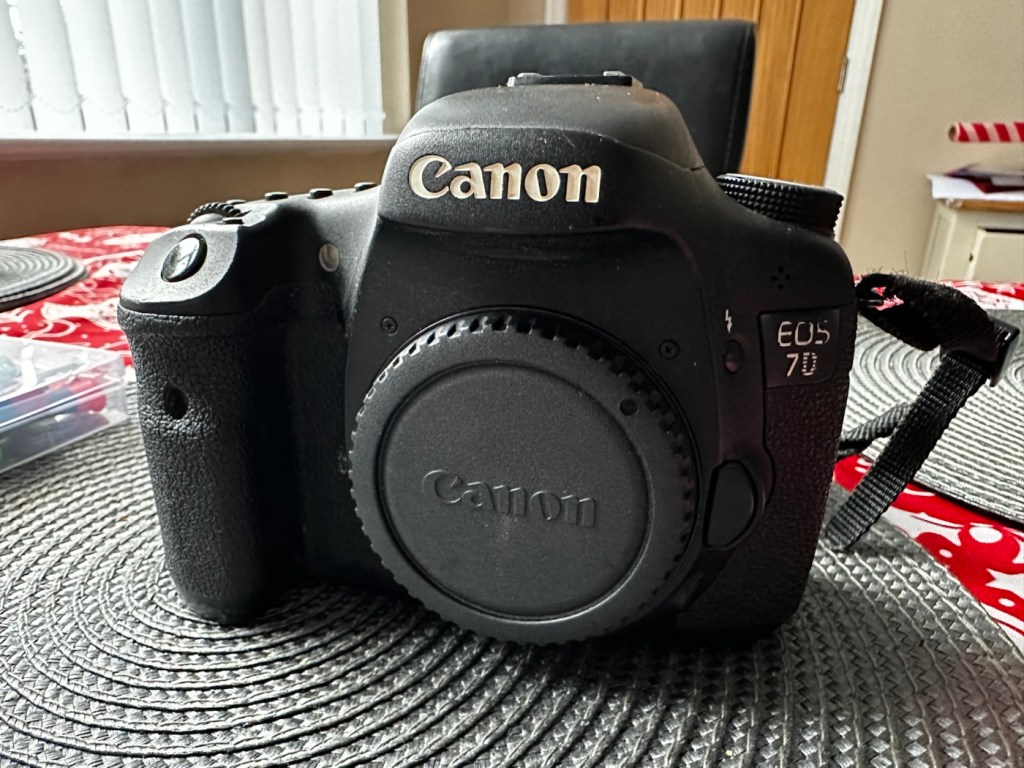
Structurally and cosmetically this is a beautiful camera in very good condition. However it would not have been donated to me unless it had problems. Let’s now put my detective hat on and go looking for clues.
As stated earlier, cosmetically there is nothing at all wrong with this camera, it even has the plastic screen cover in place. Mirror looks clean and curtain looks fine no issues here. All electrical contacts such as HDMI are in good condition with no visible damage to the ports.


One last place to check and I now believe this is where the problem lies. This is the CF card door, and when opened it reveals one possible big issue.

Bent pins on the CF card reader. These pins are quite small and only millimetres in diameter, in a very restricted space about 8 cms deep and 6cm in width, it really is quite a small aperture. There are two options here, one I try to gently coax these pins back into place with a fine point tool, however the pins are minuscule, and brittle and prone to breaking. I can see potentially 7 pins that are out of position, not an easy or expedient option. But I’ll have to give it a go. Option two is to purchase a new CF card reader replacement, this option carries some expense and quite a complex dismantling of the camera to achieve said replacement. Needless to say I will initially attempt the pin bending procedure. Pending on success or failure, i could venture into step two. Read on to see what occurs.
With a fine point set of tweezers, I’ve decided to have the first attempt at seeing if I can straighten the pins. Using a bright LED torch I angle the beam slightly so I get a bit of shadow on the pins, and this allows me to see how many are bent. I can see seven pins in total that are bent, and two of these seem as if they have been forced down to about half their height. This is quite normal when people go in a bit heavy with the CF card, if these pins go down too far there is no option but to go inside the camera and push them out from inside, or replace the card reader completely. I kind of hope that I have been able to pull them out far enough for them to work. I won’t know though until I get the CF card and batteries out of storage.
I’ve spent about an hour, bright lights, little subject matter, and now have very tired eyes. I’ve been breathing slowly just like a surgeon heading into a part of an operation that requires the utmost concentration, and precise and very delicate movements. I think I’ve done a good job. Only testing will tell.


Speaking with my friend Jon, who this camera came from, he has stated that he rather foolishly lent this camera to a ham fisted colleague who hammered the card into the camera, causing the issues that I am dealing with today.
If we have to open up the camera, I will probably be looking at about 3 hours of work, as there is an awful lot of dismantling that has to occur, and I believe there are around 30 screws to remove just to get under the skin of this camera. It’s built like a brick, weighs about the same and is just packed with electronics.
Fingers crossed 🤞 let’s hope option number one has been successful.
Well, today I went to the lock up and dug out a small 2GB CF card and the two Canon batteries and a charger. I came home and Put the batteries in that surprisingly still held a little charge, sufficient to turn the camera on. I gently inserted the CF card only for the following message to appear on the screen, “Card cannot be accessed. Reinsert/change the card or format card with camera.” Aww shucks I thought, it hadn’t worked. I tried to format the card and the format failed, at this point I thought the pin maintenance had not worked. Damn. I was a tad annoyed.

So I removed the card and checked the pins, they were ok. I reinserted the card and the same fault appeared, however this time when the option came up to format the card it worked. I was so shocked I tried it again and forced another format, again it worked!
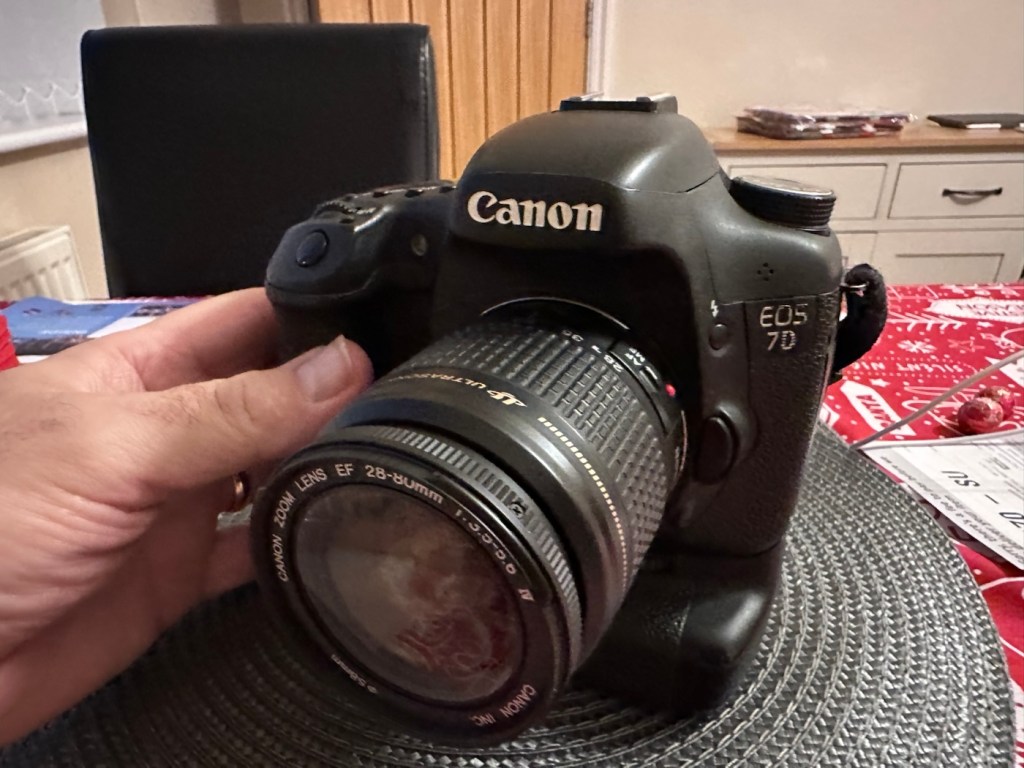
Right it was now time to get a lens on the front and test the camera to check to see if it would write to the card, it’s only a stock lens, nothing special but absolutely fine for testing purposes. Just walking around the house I put the unit into auto, the flash popped up and I proceeded to rattle off a few random shots. And it worked, the results all came up on the rear screen.


To say I was pleased at this is an absolute understatement. The work on the pins has worked and I now have a perfectly well working example of quite a top end camera. There’s no doubt that in the future the camera will require a replacement card reader, but for the moment it’s been given a new lease of life, and whilst I remember to be gentle with the removal and placement of the CF card, let’s just enjoy the camera and its capabilities until that time comes. In the meantime here are just a few, “Randoms” taken to test the card and camera in and around my home.


Time to give this camera a little buff up. (Clean)
This unit only appears to have taken 1,860 pictures. It is completely unused, and in perfect condition. And it now works. To be honest I feel more confident with this camera than I do with the mirrorless Sony that my wife purchased for my birthday. This was going to become my number two camera, however it’s just been promoted to my number one, as long as that card pin issue and repair holds up, and I have no reason to doubt that it should be a long time before any issues arise. I am confident that my repair has longevity as they say.
I want to give it a good test in daylight conditions in all modes rather than auto. I want to get a bigger CF card maybe a couple of 8GB ones, I don’t see the point in going for the bigger cards just in case there is a read/write issue in the future. It’s just an OCD thing for me, you know what I’m like.
So overall I’m really quite happy and satisfied with this camera. Of all the cameras I was gifted by my good friend Jon, all have been repaired apart from one that was beyond economic repair, even that has been broken down into it component parts, every screw recovered and will be used for spare parts. Nothing, and I mean nothing has been disposed of from this collection of cameras and accessories.
That’s what I do, I don’t waste anything. Ask the wife!
Many thanks for passing by, it’s always very much appreciated.
Where has all the calmness and patience gone…
What is something others do that sparks your admiration?
I admire absolute patience that people display in their day to day activities. Not everyone, as not all possess the ability to do so.
Those people who spend time with the elderly, and those with special needs, always willing to give help and advice and not be distracted until the person requiring that assistance is content and has an understanding.
Those people are special, remaining calm and never showing signs of panic, or frustration and remaining level headed throughout.
I must admit I have only ever met a few of these people however they always have my utmost respect and admiration.
What happened along the way that the majority of people lost this ability? What have we done wrong and can we ever get that ability back again? Wouldn’t that be truly wonderful.
Wouldn’t it be a much more pleasant existence if we could all be just that way.
As you may suspect, I haven’t met many people like this lately.
Have a good day.

You must be logged in to post a comment.