To build a usable, basic issue, medium format camera (Bronica SQ-A) from damaged items and spare parts, for as little outlay as possible and shoot one black and white, and one colour roll of film as proof of its successful completion.
Getting started:
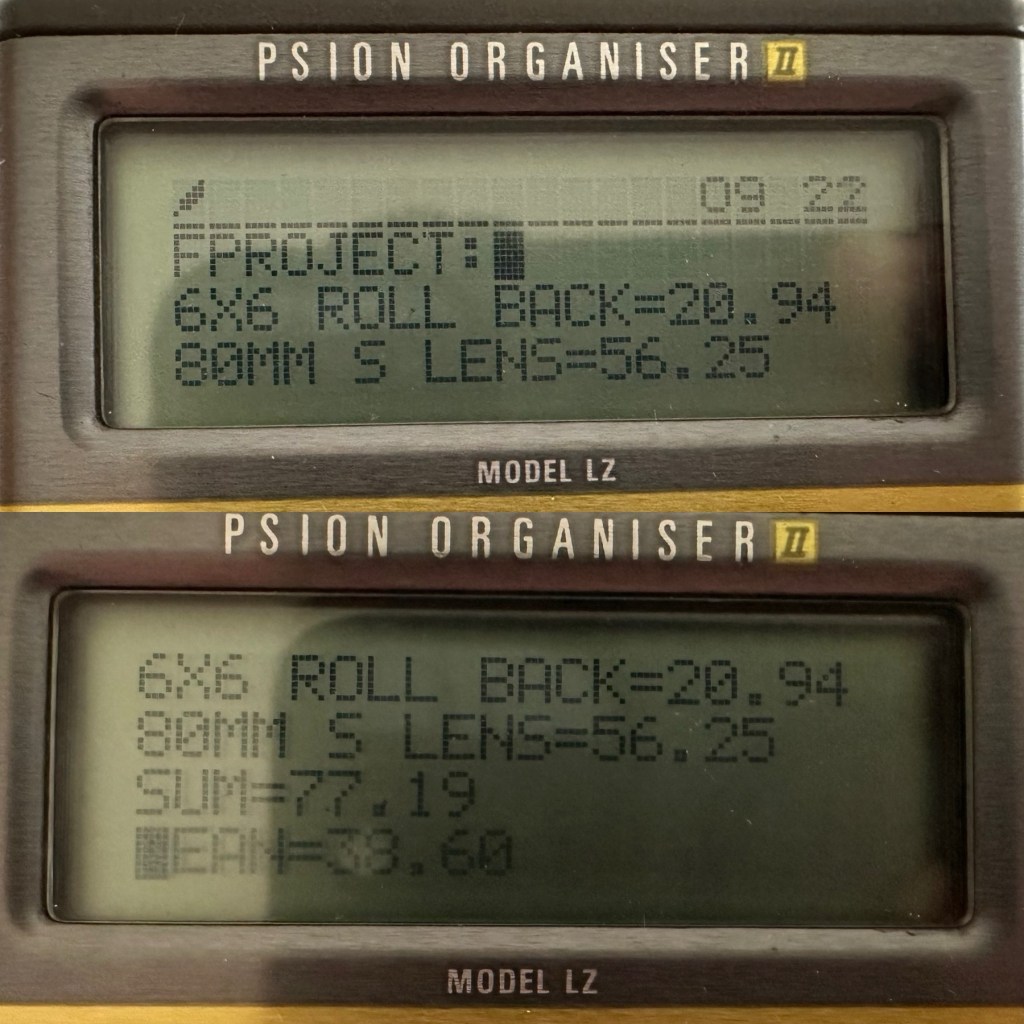
Building a camera from damaged parts is no easy task when the name happens to be a high end brand and any parts that are available, are being snapped up by others to service their own stock or to break up for sellable parts. I’m going to keep a running total to try and build this as cheaply as possible, and to keep track of this total I’m going to use my trusty Psion Organiser II LZ from 1989 to keep a tally.
This may be a strange situation where Pt:2 and Pt:3 of this project gets published before Pt:1, quite simply Pt:1 needs a fair bit of work still doing to it.
Second purchase:
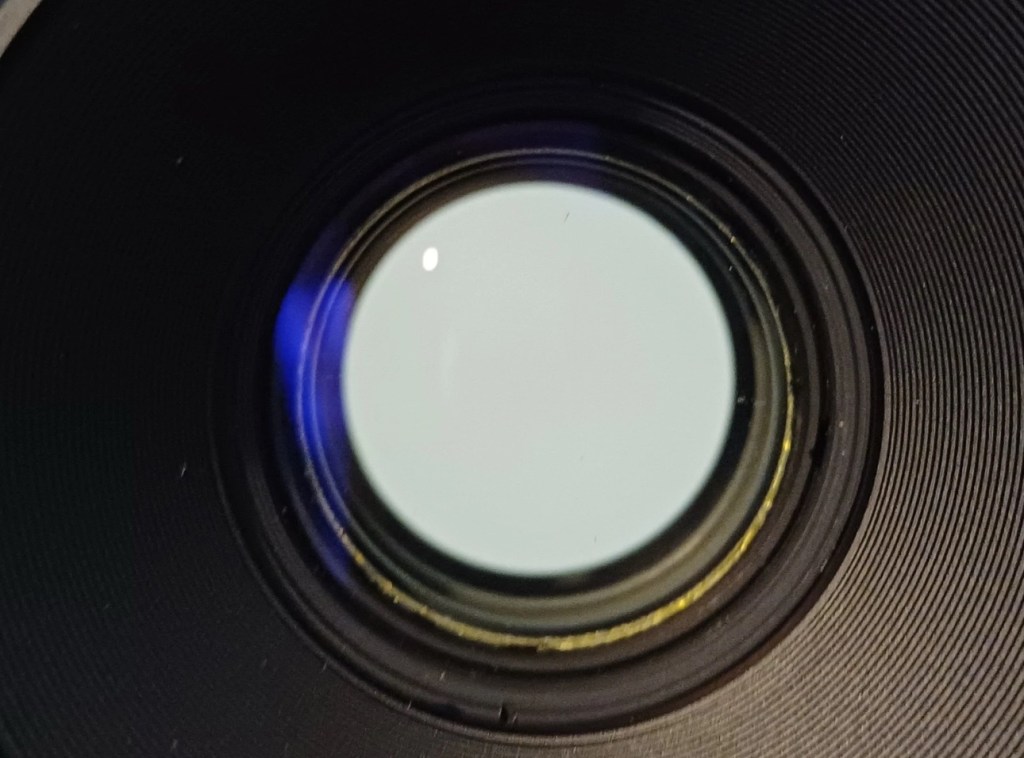
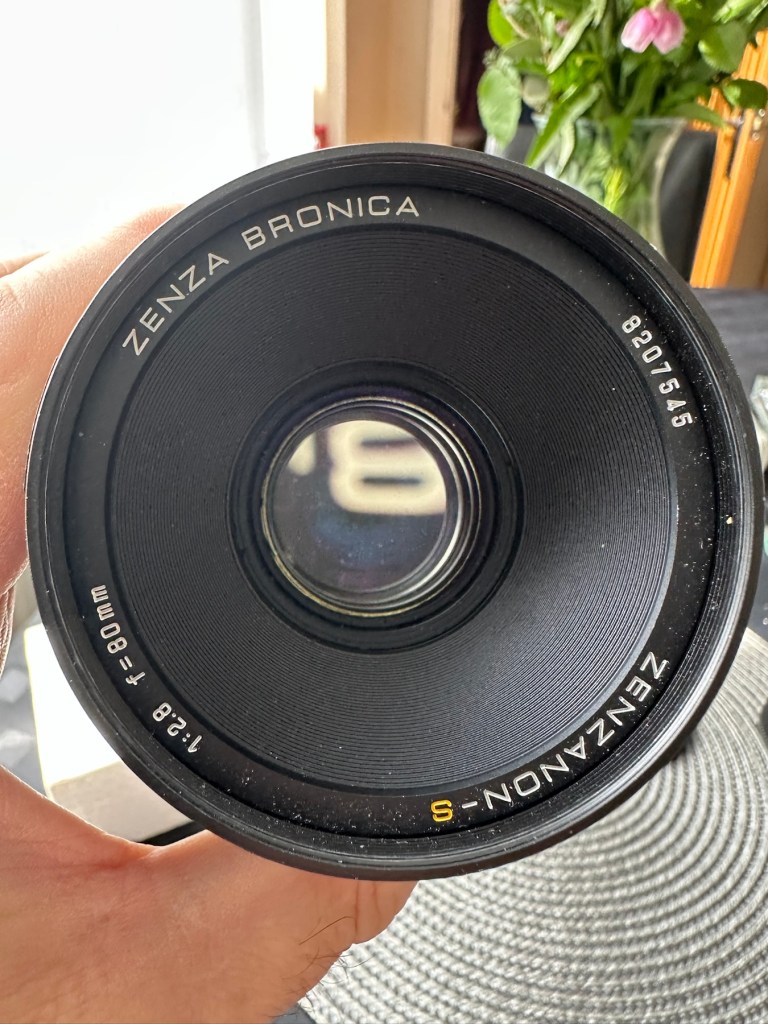
The lens. Probably the most important purchase of this project. Looking for a “cheap” lens is normally not the thing to do when exploring lenses as you do really get what you pay for. You want good clarity? You need a good lens. However this lens came on offer and what sold it to me was that there were no scratches and fungus in the lens, and that was music to my ears. It is a duplicate of a lens the owner already has and was surplus to his requirements. He has also supplied recent proof of photos taken on this lens and i believe he has sold me a little diamond to be honest. Everything about it seems good. There is nothing really to do to it, so no maintenance apart from maybe a light external clean and that will be it until everything else comes together.
Here is what the listing stated:
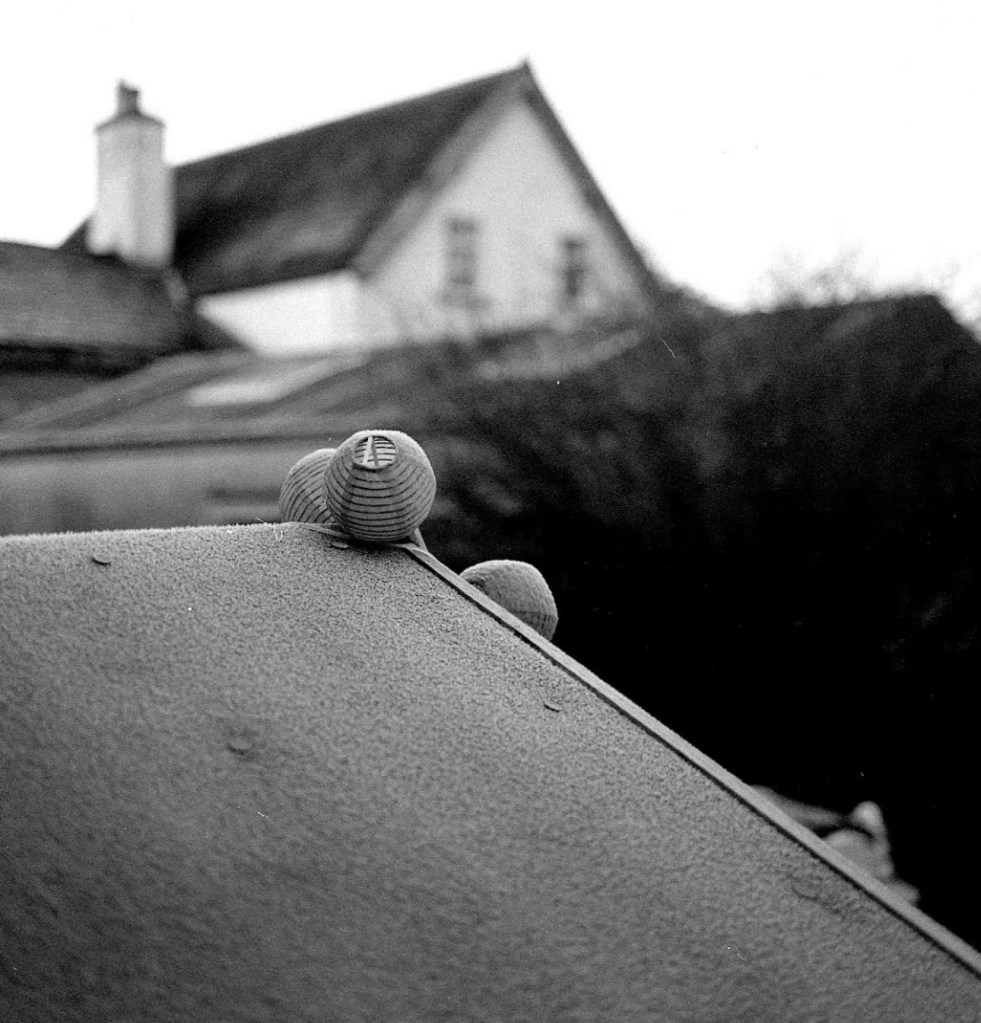
This is the S version of the 80mm lens and although there’s a slight difference in the lens design on the PS version, I’ve compared the two and couldn’t see any real difference other than a slightly more modern colour rendering. The T mode is also working without issue. This lens has been my main user lens and has never let me down. Glass is clear of fungus, haze and scratches. Aperture and shutter blades are snappy and clear of any oil. Shutter speeds are accurate and the lens produces just delightful images and is massively underrated. I’ve included several shots taken recently with this lens mounted on an SQ-A as per the examples. Focusing is smooth, apertures have a nice smooth click and the lens focuses just fine all the way through the range. I will include the origin box as well as the front and rear lens cap with the lens
EBay
Lens and box Front of lens no fungusRear of lens no fungusTwo pictures shot on the sellers SQ-A with this lens (pics: pooface76)
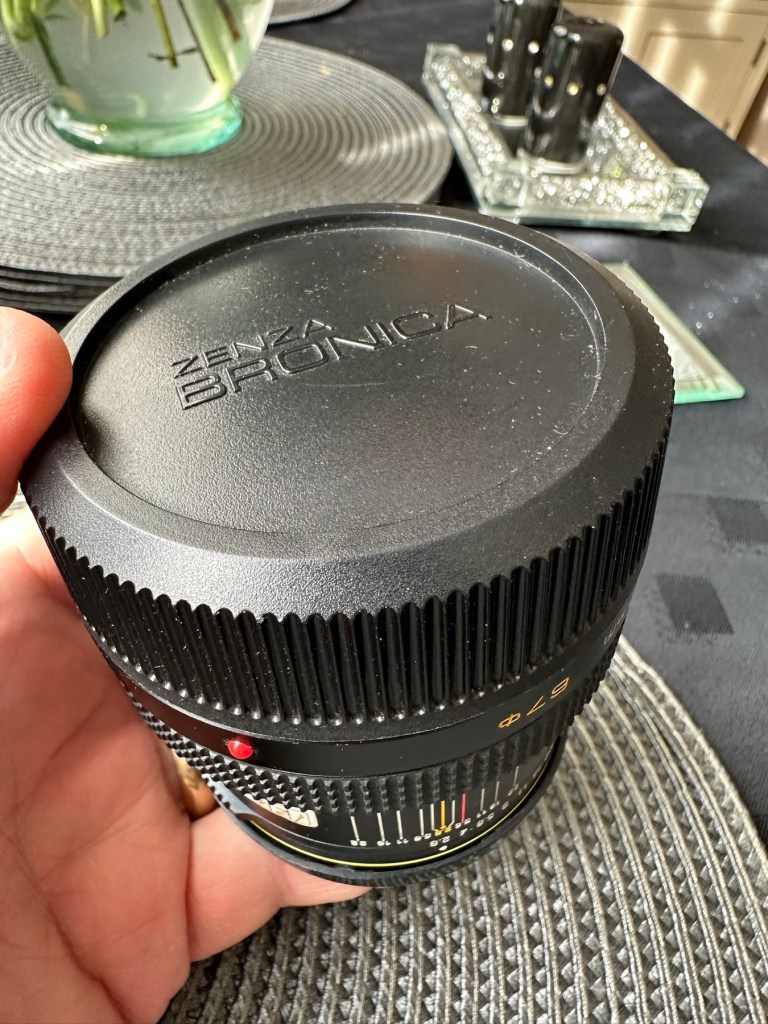
I’ve paid the total cost including postage of £56:25GBP and I think that this is an absolute bargain for what I am getting. It’s an 80mm f2:8 Zenzanon-S lens in its box with two end caps. I’m really pleased with this purchase and there is not a lot else I can say.
So here we have the scores after two purchases, the 120 roll film back and this lens. Over to my old mate the Psion II LZ for the running total.
Running total
So the total for two items currently sits at a comfy total of £77:19GBP so far, with an average per item price of £38:60GBP. And in Bronica terms that is quite reasonable!
Assessment:
The lens has arrived and to be honest it has surpassed anything I could ask for, for the price I have paid. For this project it is in perfect condition with nothing required regarding any repairs. It’s good to go.
Boxed Original insertsBoth end caps
And out of the box the lens is lovely and clear. Just a few bits of dust but that is nothing at all.
Original end capNice and clear No fungus
Repairs:
None: I know this is boring on a repair front, but for this project it is the perfect result.
Outcome:
All good to go. Please keep an eye on the other blog posts that are coming regarding this project.
This will be post No:1 of a series, where I attempt to buy parts of a damaged camera system to repair, reassemble and get back into working order.
I have chosen this particular camera as it was one that featured prominently in my career when leaving school and starting in the Photographic world. I’m going to buy this camera in bits, as it is modular. I’m going to try and buy parts that are for spares and repair for me to fix, to see if I can get a half decent working example. So expect a bit of a Frankenstein project here.
Bronica SQ-A
Just like my post on the Canon A1 that I previously published, this was another loan camera in my early years of photography back in the 80s. When money was sparse, colleagues usually allowed the loan of their equipment under certain conditions, one of those being,”Don’t break it”. I used this camera when I did my first studio session when a friend of a friend was setting up a business selling Teddy bears. She wanted good quality portrait photos of her work and this camera enabled me to do that. This was the first medium format camera I had ever used, and for that reason alone it will always sit as my favourite. Many people favour later models and other equipment, but this is my personal favourite. It has its flaws as some do, however this camera was significant in me learning a profession, as well as it triggering many treasured memories for me personally.
Now I want one of my own. 41 years after I first used one. But I don’t want to pay a premium price for it. In fact i wish to pay as little as possible, and that’s where it’s going to be difficult.
You can read more about the camera here: Bronica SQ-A
Requirements
As this is modular camera unit, I will need these parts to form the most basic camera, no bells and whistles as they say, just the basic version:
Lens – obviously
Main body – got to be the SQ family
Viewfinder – a few to choose from
Film back – I’m after the standard 120 roll film back
I’m looking at this being a medium term project so these items will be purchased over a currently undefined period of time, I’m hoping to buy items that require attention so I can keep the costs down, something that needs attention and repair would suit, as I can create a post regarding its repair. Individual spare parts do command some high prices so I’ll look at maybe purchasing some beat up stock that I can use as spares. I’ll keep a running total of the spend, I know I could buy a working complete unit for around £6-800GBP second hand, but that’s damned expensive in my eyes, I believe it was only £400Gbp (Minus lens) back in the mid 80s. I want to prove that a good usable unit can be built with just a little attention at a much lower and more realistic price. On the cheap if you like, as good quality photography does not need to be expensive. It might not look pretty, but it will be practical, and it will work. Most working cameras look beaten up. Most of the ones I used whilst working for a photo agency were total wrecks but took great photographs. I want to run a roll of colour and one of Black and white through it to prove i have made a working practical camera. It’s probably going to be a lengthy project, it’s going to be hellishly tough, but one I’m very much looking forward to.
From now on it will be known as….
The Frankenstein project.
And more posts will appear as the parts start to arrive and are assessed. Each part will have its own post dedicated to its purpose and repair, and a final post where it will be finally assembled and tested.
Thanks for passing by, please be sure to check back as this exciting project comes together, using the links below:
Not working not powering on, the vinyl case has some marks and scratches.
EBay
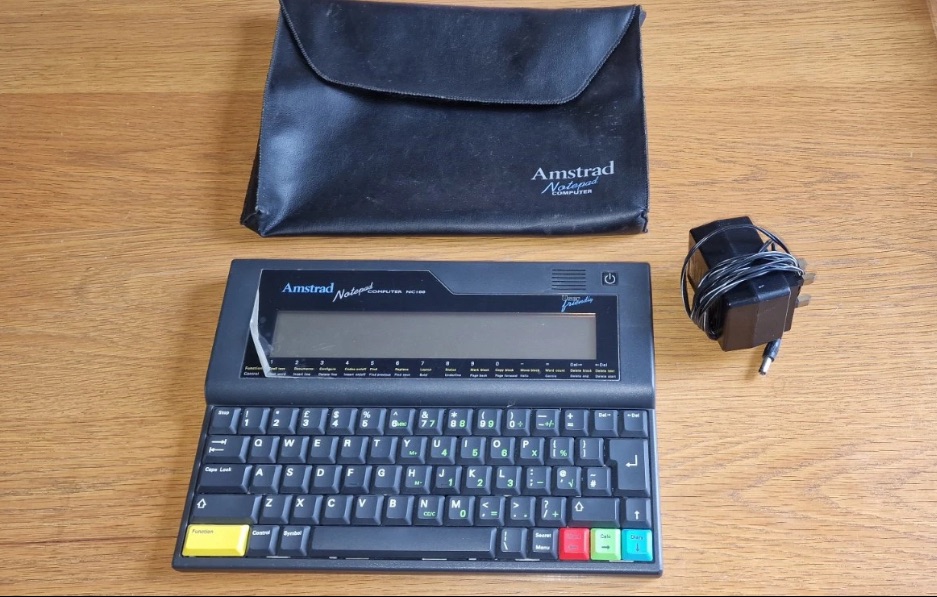
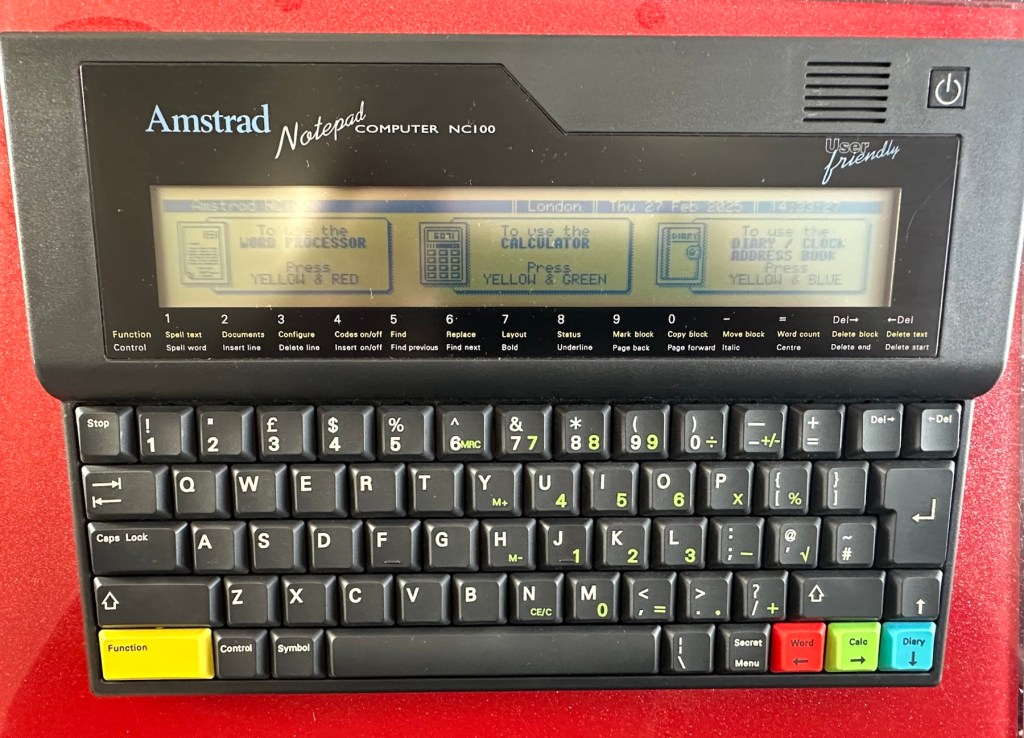
Amstrad NC100Screen Vinyl peeling
I’ve been after one of these for a little while, I’ve just been awaiting one at a good price and this one became available, post included at £30GBP, they retailed for £199Gbp back in 1992. It says it is not working but that’s good in my eyes as it makes these posts more appealing, as it gives me something to repair. I don’t know what the issue is off hand as the post didn’t state that, but I do know these items have suffered with capacitor problems over time, but that is not necessarily the case here. We will just have to wait until we do the assessment on its arrival. And as it comes from around the early 90s it fits right in with my modus operandi. And this little cutie dates from 1992.
Here’s a little history behind this unit courtesy of Wikipedia:
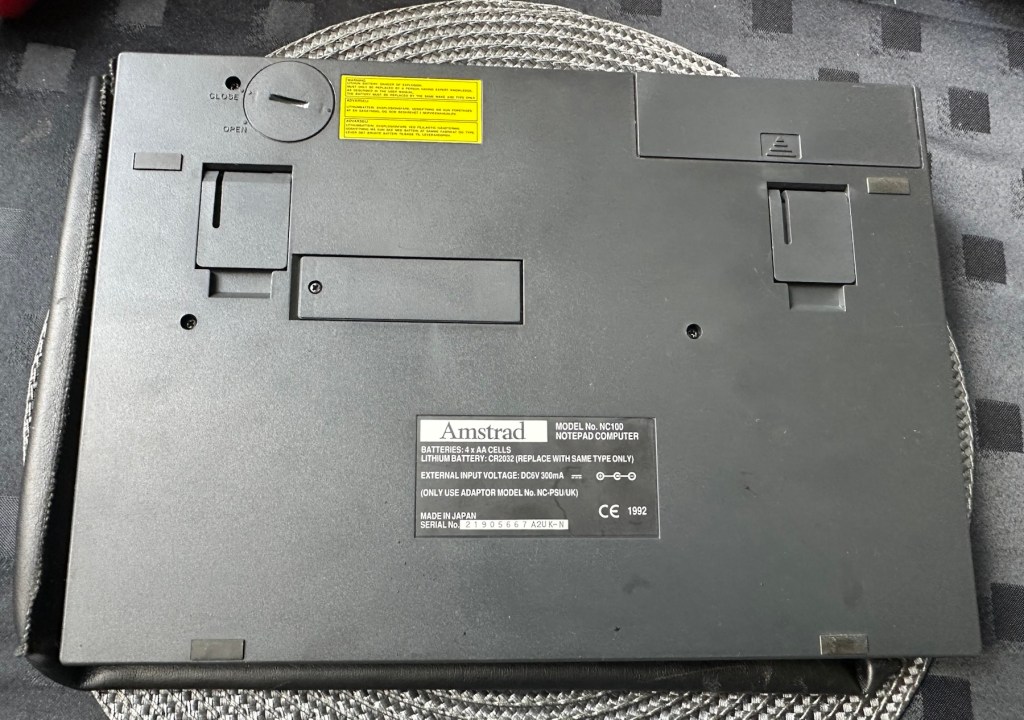
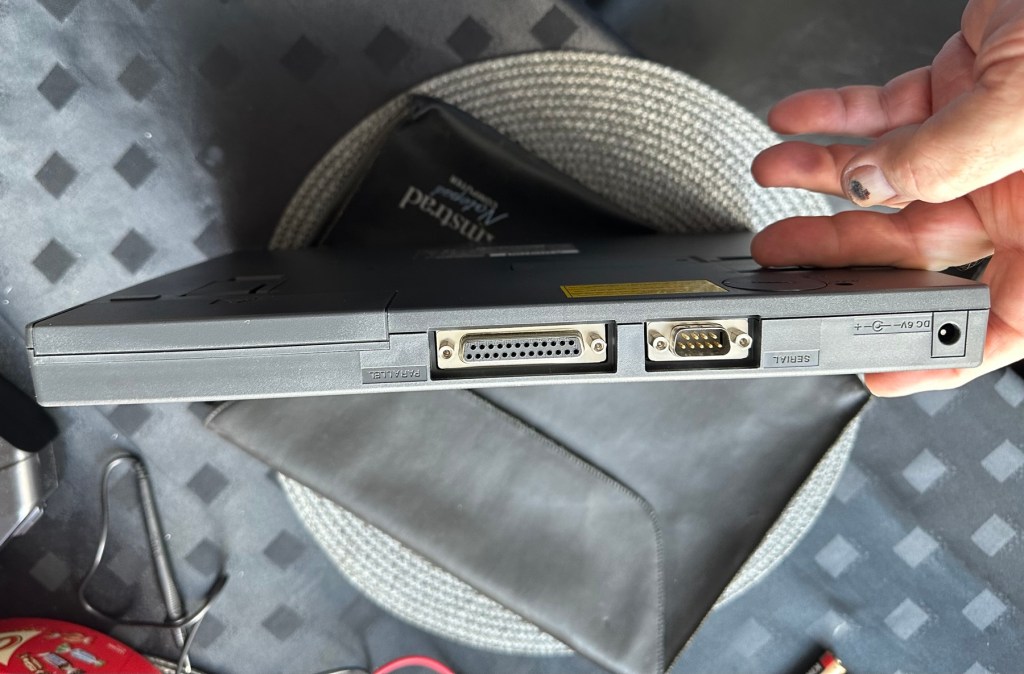
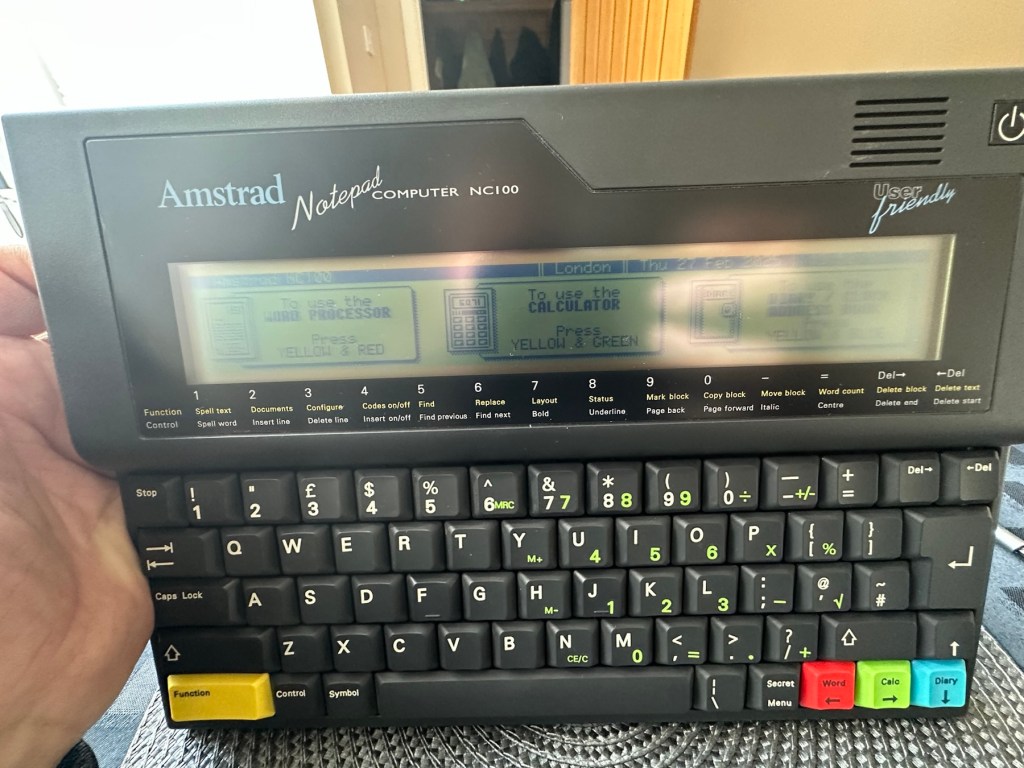
The Amstrad NC100 Notepad is an A4-size, portable Z80-based notebook computer, released by Amstrad in July 1992. It featured 64 KB of RAM, 256KB of Rom, the Protextwordprocessor, various organiser-like facilities (diary, address book and time manager), a simple calculator, and a version of the BBC BASIC interpreter. The computer’s design, evocative of the TRS-80 Model 100, features a screen with 80 character columns by eight rows, and not backlit, but this let the NC100 run for up to 20 hours on four standard AA cellbatteries. There was an RS-232serial port, a parallel port for connecting a printer, and a PC card socket, by means of which the computer’s memory could be expanded up to 1 MB.
Assessment
The unit has arrived and cosmetically it is in very good condition apart from the peeling plastic screen cover. A little bit of dust and grime, all keys in good order and no dinks or dents. the vinyl bag is a little tatty but that’s not a problem, it’s obviously done it’s job over the years due to the good condition of the unit.
The unit on its arrival, generally in good condition
So down to testing. First thing I’ve done is check the power supply is giving a 6.5 v output and this is ok.
Power supply doing what it should.
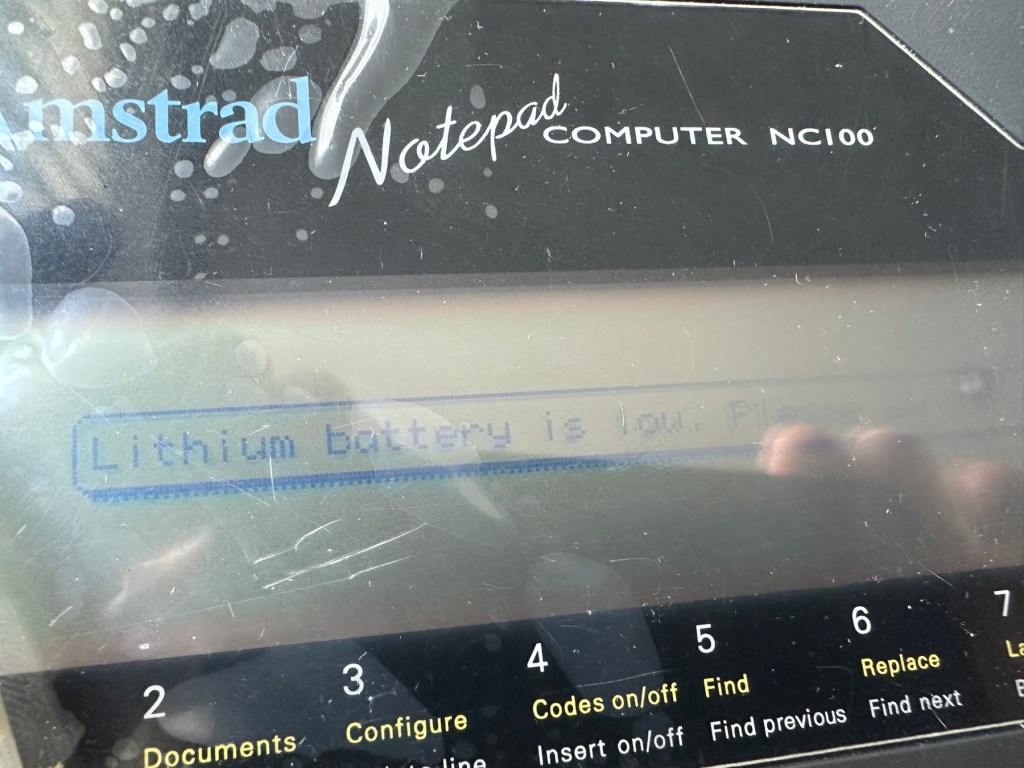
Secondly I’ve put 4 AA batteries in place and turned the unit on but then it abruptly stops, displaying a lithium battery issue.
Lithium battery warning
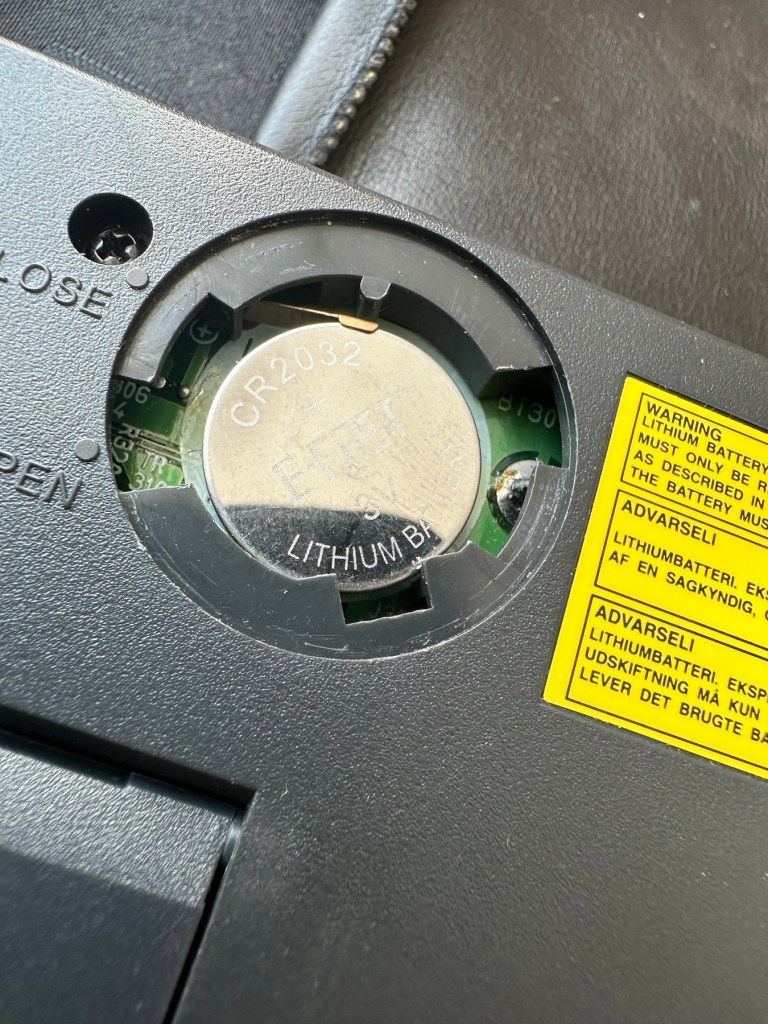
The lithium battery is an old CMOS type battery, a CR2032 coin battery. This is the battery that keeps the info in the system when you turn it off. I thought I’d run this through the multimeter and was surprised with the voltage I saw, the battery seemed fine to me at 2.8v, so I replaced it with a new one measuring 3.4v. And the issue came up again…..head scratching time!
Old batteryNew battery
Looking on line it seems there is an issue with the lithium cell battery contacts on these units when they are being resurrected to modern day usage, time has not been good to them. The coin contacts have now been cleaned and slightly bent to ensure a better contact and hey presto it’s operational with no further issues.
Battery contacts needed cleaning and repositioning
The main AA battery contacts are fine and the external supply is doing what it should. Now let’s look at sorting that screen issue.
Quite simply there were two options, use a bit of heat to try and stick the plastic down, but I decided against this as it would not lay flat, it had too many kinks in it. So the only other option was to remove it and this is what I did, it peeled off with no issues. In time I will see if I can get a suitable replacement but to be honest it isn’t really required as I’m not going to be using it that often.
Let’s get that screen cover off
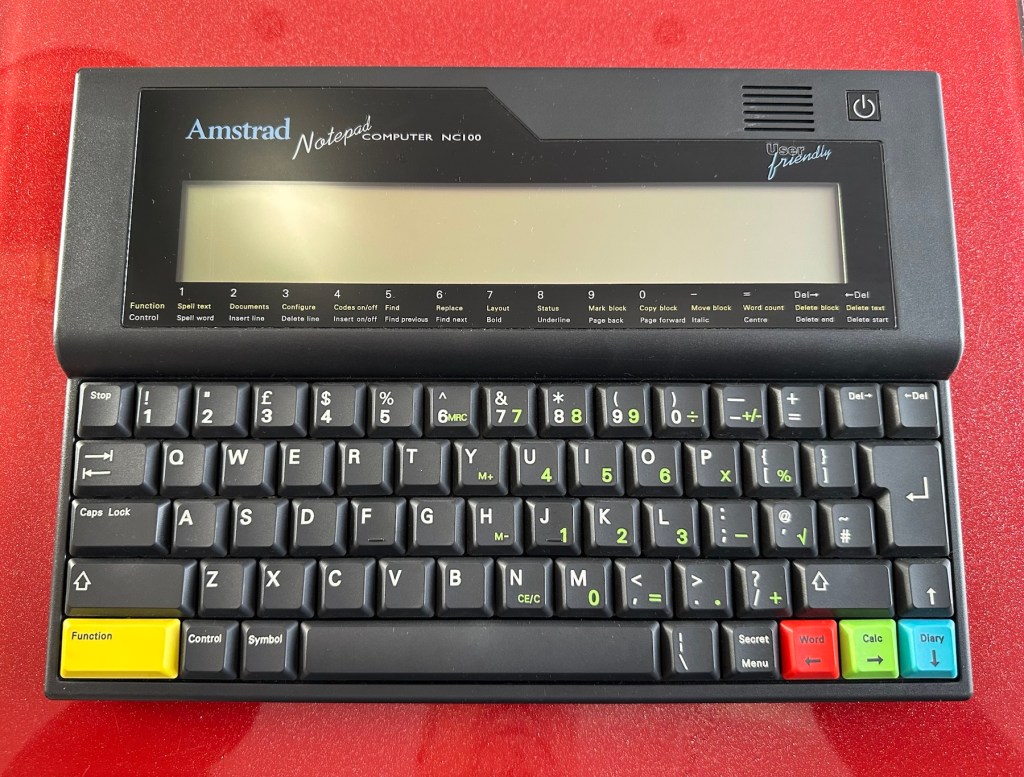
Looking goodAfter screen cover removal
I’ve tried every function and keystroke of the board and all is good there are no issues and I now have a perfectly acceptable unit for my collection. It looks like i have had a second win against the “Untested” brigade who sell on EBay. This was the simplest of repairs and the issues are readily available to research on line. There is no excuse for not looking into the issues, when a good unit like this can now sell for up to three times the amount that I paid for it.
Your loss my win. Another one kept from landfill.
I’ve given the unit a good polish and I think you’ll agree that the project has come up good.
PouchFront viewRear viewWorking as it shouldProfileLook at that screen
Now to just go and read the user manual on line to see if I’ve missed anything. Thanks for passing by, as always it’s most appreciated.
This is just one of those quick posts, i had to post as it made me giggle.
Store fronts such as EBay and others, are sometimes places where descriptions of items are at times questionable to say the least. However every once in a while a listing has a description that makes you smile. Today is one of those days.
A post on EBay today, the description is the seller for me 😂
This caught my eye and I thought I’d dig in a little deeper to read the description.
In a nut shell
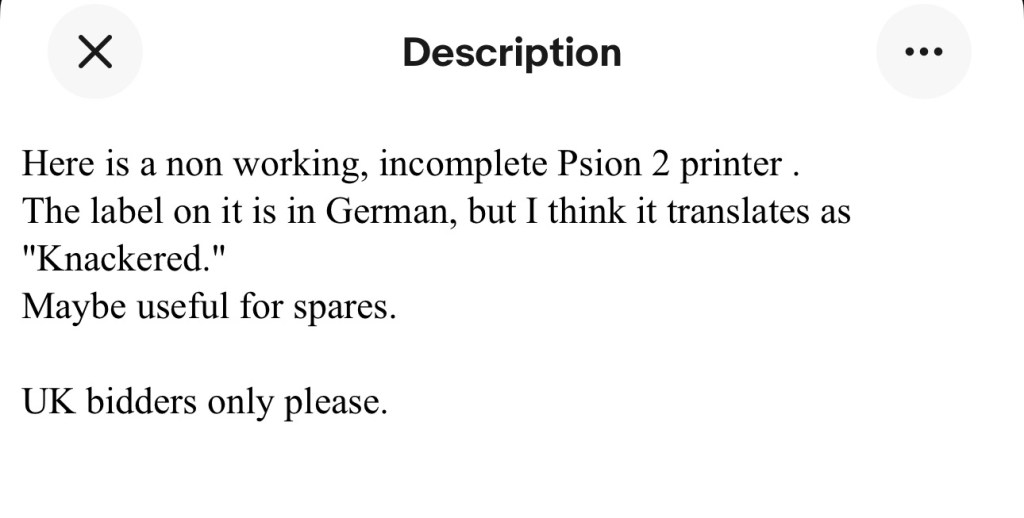
I just love the part where it states the label translates for “Knackered” in German .
Made me giggle.
I think the label says something like “ Defect, Tailor in Oststeinbek. A region of Germany, however I may be wrong as my translation is basic at best.
However I know it dosen’t say Knackered as I believe that is “ Beschadigt” or “Geschlaucht” and that only translates as damaged! Which doesn’t quite fit the scenario does it?. Or maybe it does!
This is the follow up to a recently obtained electronic typewriter that was purchased in January 2025, the initial post can be found here: Samsung SQ3000 electronic typewriter.
Samsung SQ3000 electronic typewriter
The following post will deal with the assessment on its arrival and what I am going to try to do, to get it back working again, as close as possible to its original state.
I’ve downloaded an instruction I manual, I’ve had to download one for a Smith Corona Wordsmith 200, it is in theory the exact same unit, just under a different manufacturers branding.
Assessment
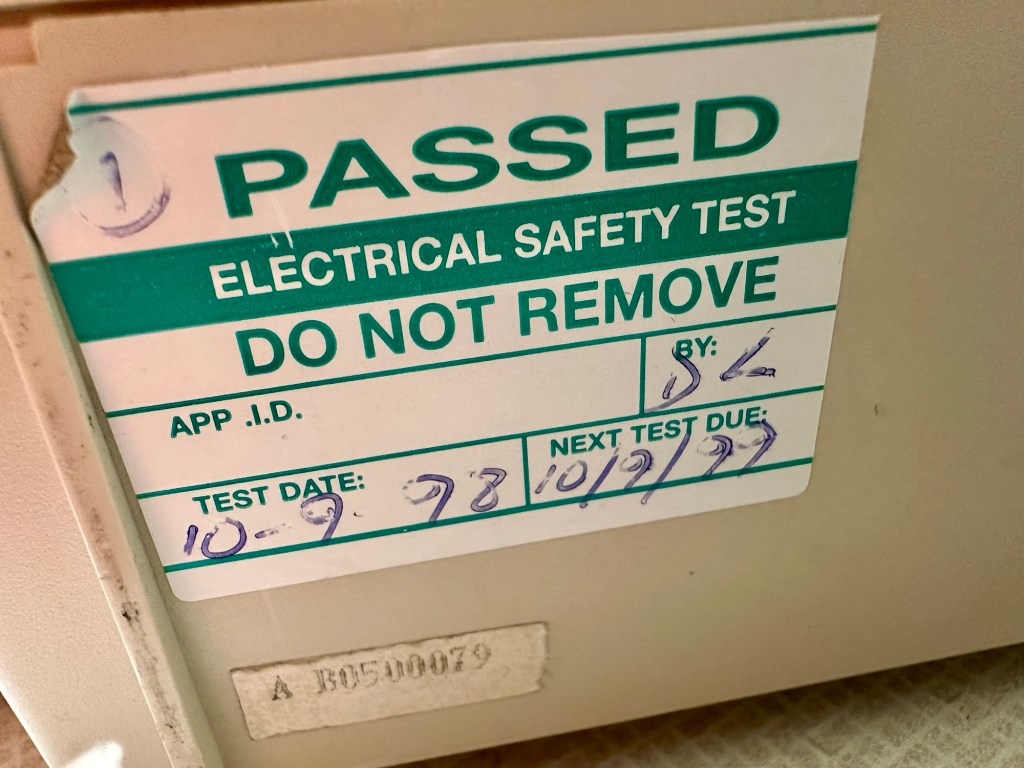
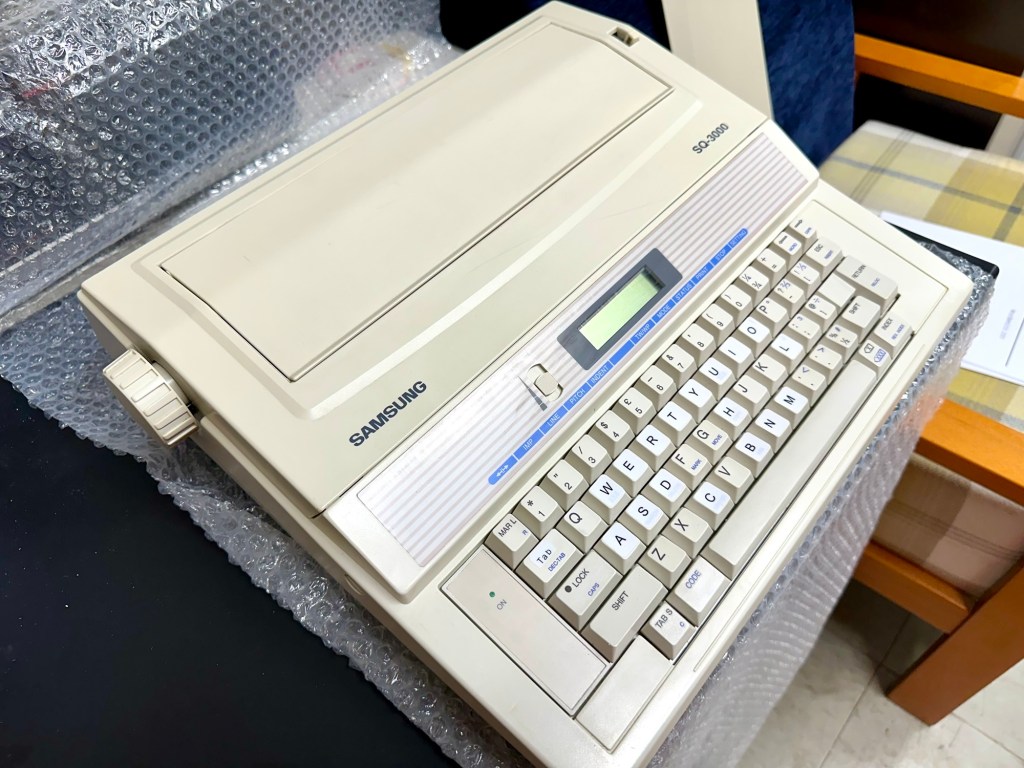
It’s arrived and apart from a little age yellowing it looks ok. There is a PAT testing sticker that says it was last electrically tested back in 1998 and is due a retest in 1999. This corresponds with my date estimate of mid 90s.
Yellowing Pat test date
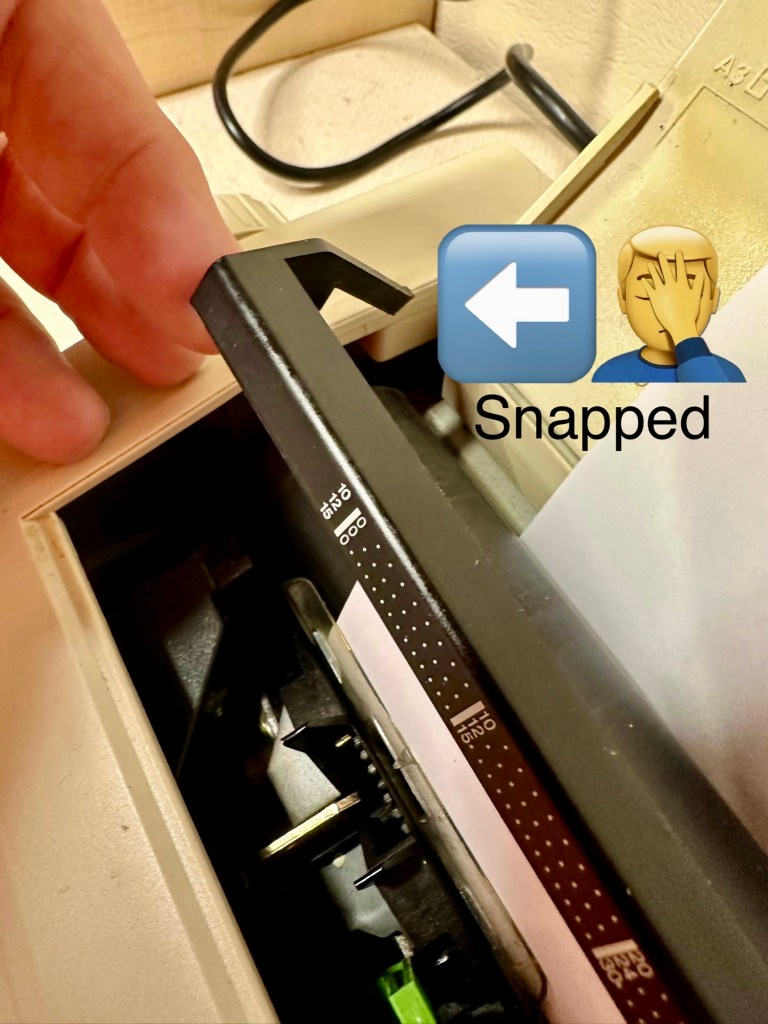
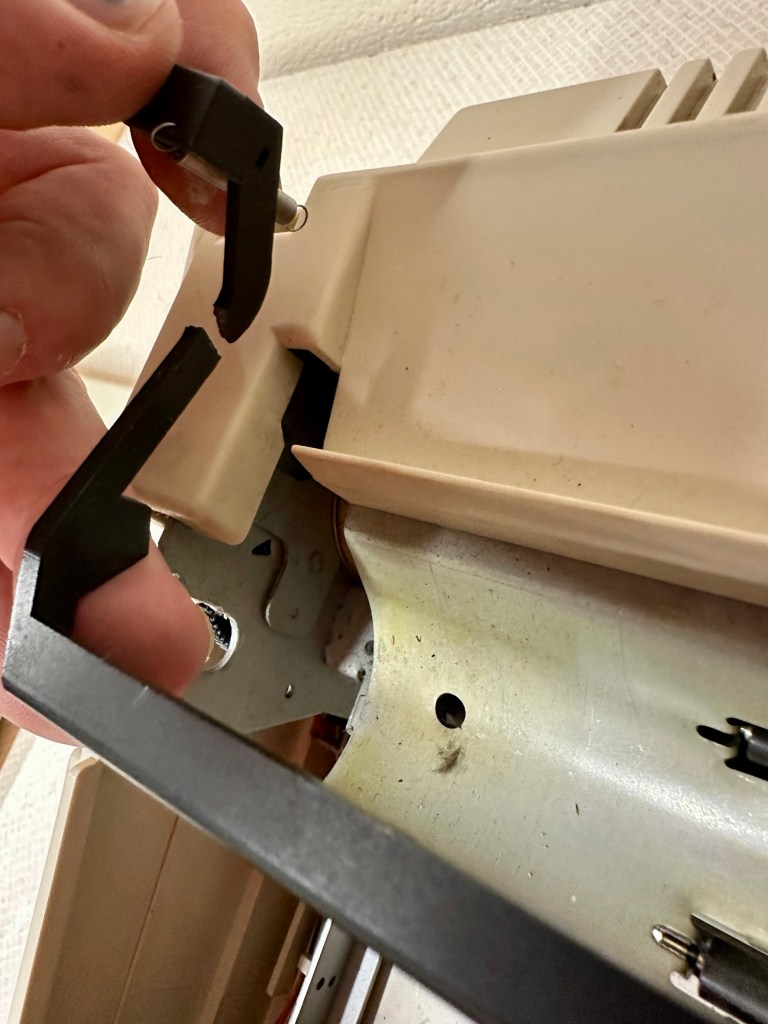
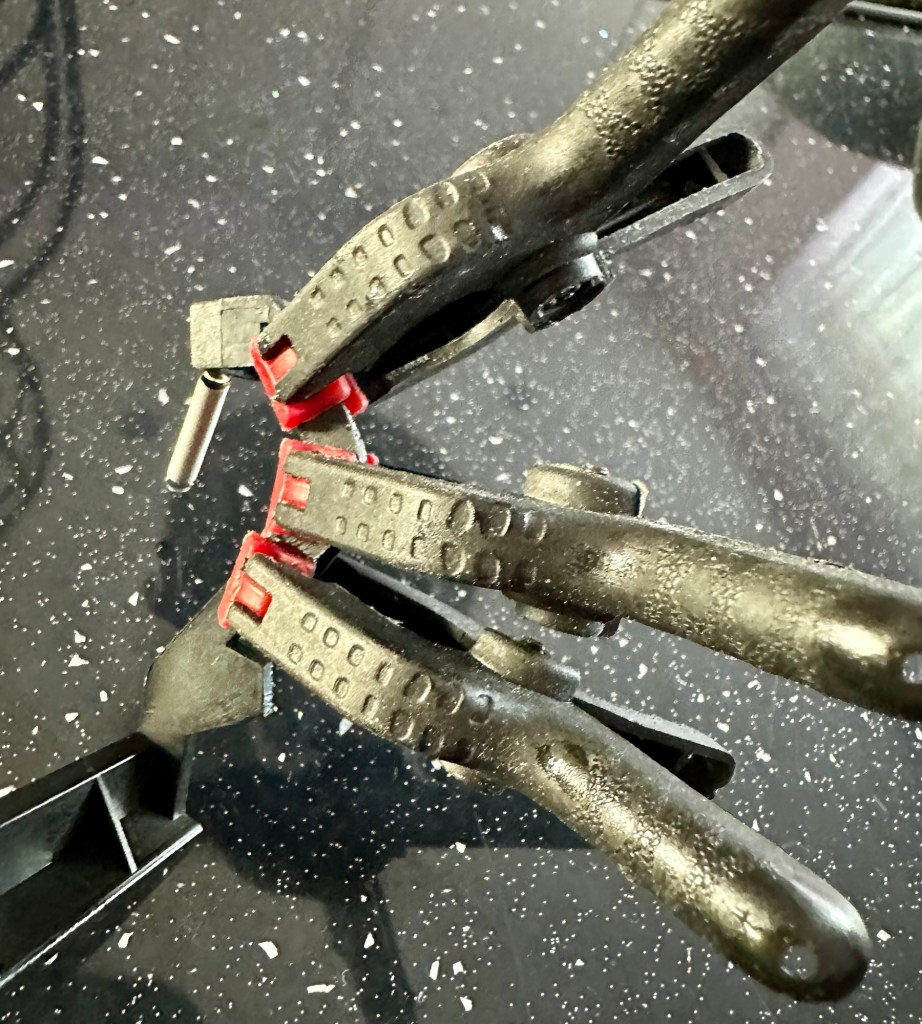
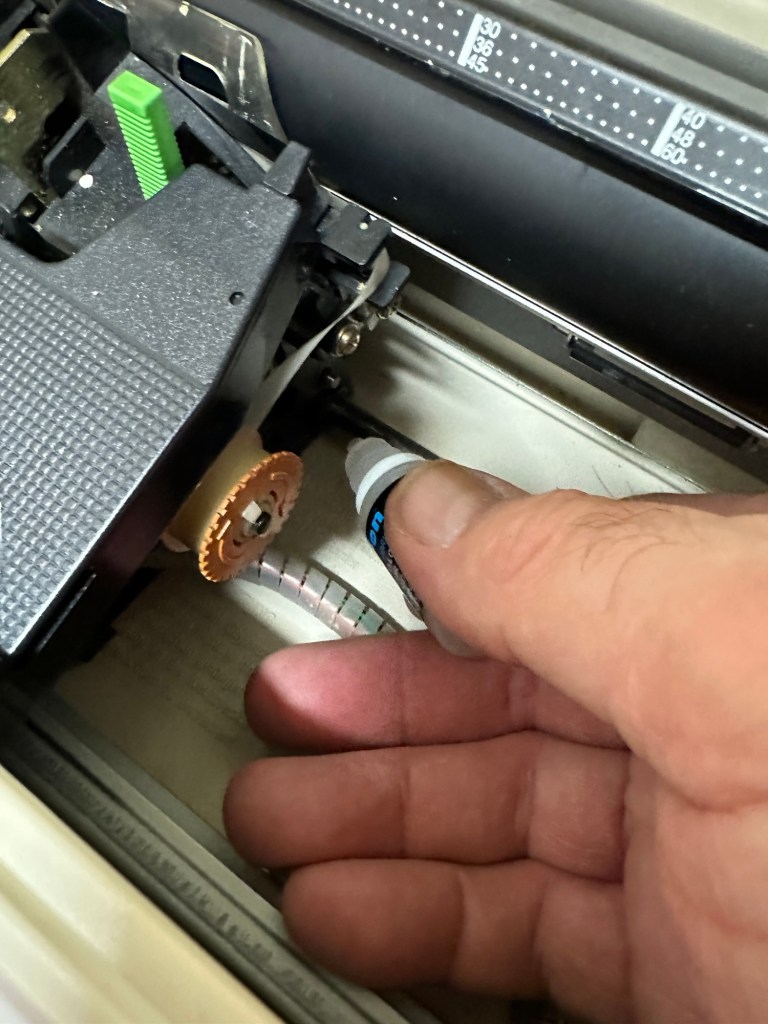
I will retest and renew the safety checks when I’m finished working on it. I have noticed that the paper bail/release rail is broken on the left hand side so I will have to add that to the repairs, this shouldn’t be a major concern.
Paper bail snappedBroken piece recovered
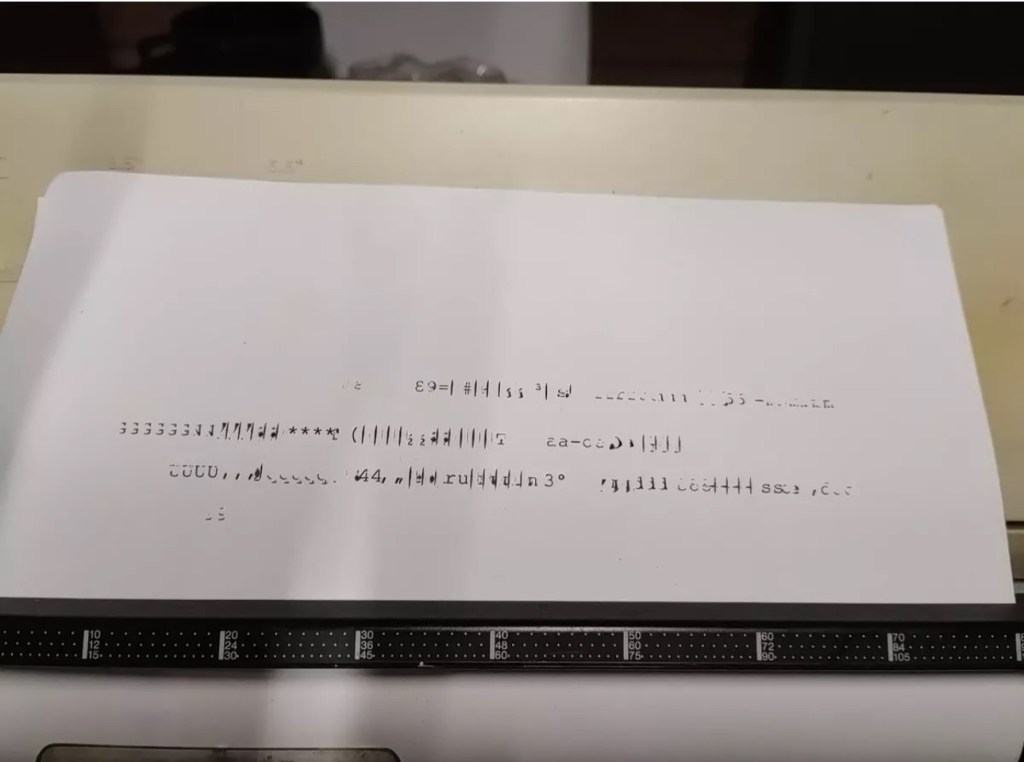
Before I took the roller out to get to the paper bail I did start the machine up. Everything went as expected and when I tried to type I was getting some weird reactions to the keys I was pushing. All kinds of characters were appearing.
Before
I checked the daisy wheel and there was a click. It wasn’t sitting right. I reset the machine using the two reset buttons and the machine then went through its reset programme, pretty much the same effect as turning it off and on again. (Not much changes in the way of tech there then)
After
Well that’s worked fine, I have tried every combination on the keyboard including the erase function and this is now fully working. It really was quite simple. My next job is to try and fix this paper bail.
Paper bail removed for fixing
There is quite a bit of dust and dirt inside that needs removing. And whilst I’m at it I will lightly re grease the areas that need it. Let’s be honest it’s not been done in the last 30yrs so now is as good a time as any. Inside will get a light hoovering and a bit of a tart up, I’m not going to go mad. I will clean the outside and all knobs and buttons and try to get rid of some of the yellowing, but to be honest as long as it’s clean I’m not too worried about age marks.
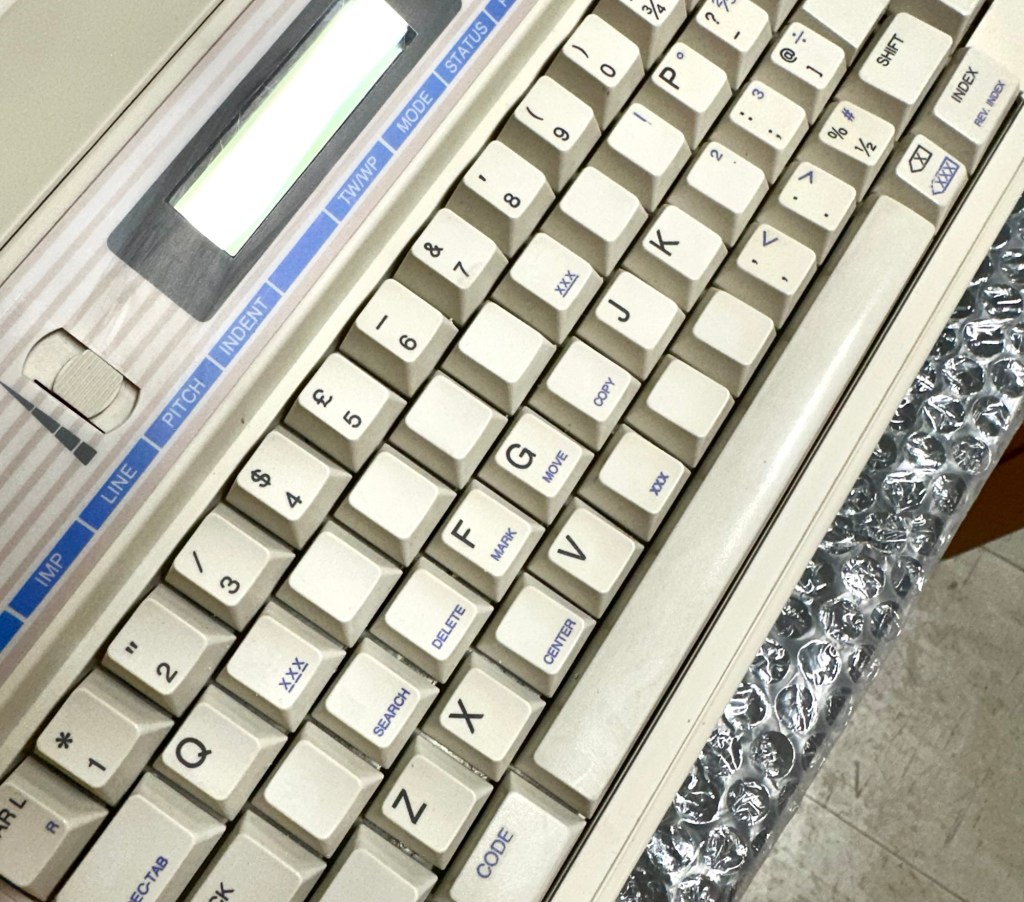
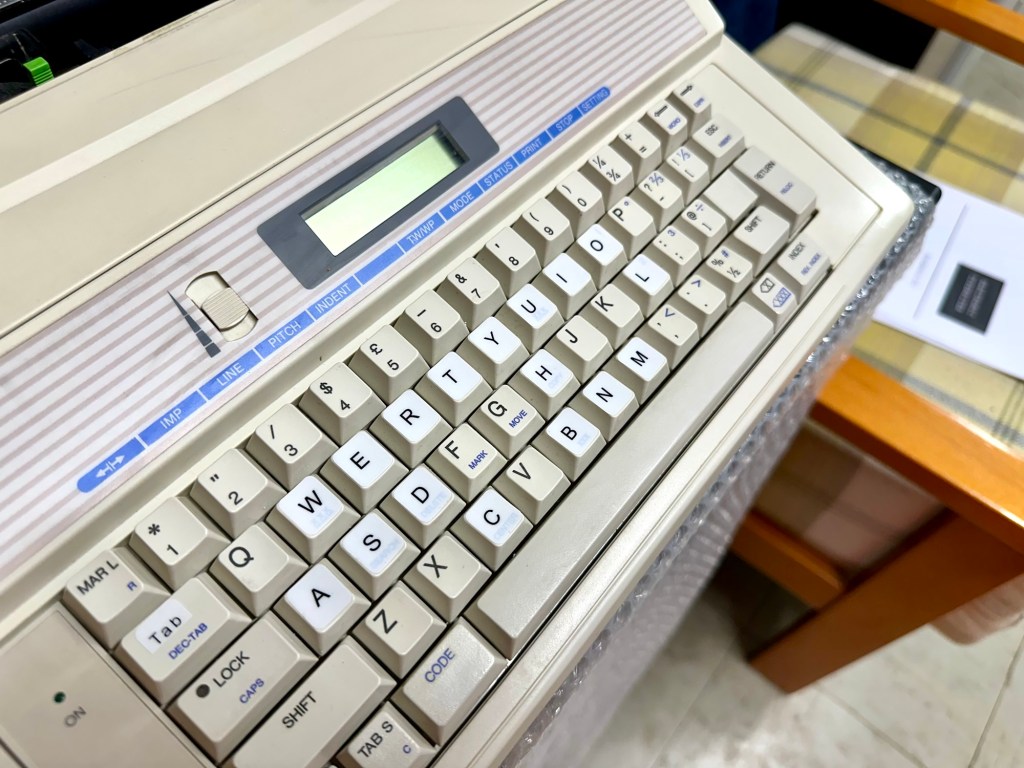
The keyboard has lost a few of its letters. I will remove what is left of some of them and use some keyboard decals to replace the missing ones. This will be one of the last jobs I do.
Characters missingKeyboard
Well that’s the assessment done and apart from a few small issues and requiring some basic maintenance I don’t think we have an immense amount of work to carry out. We know it now works. Let’s hope I don’t cause any further carnage whilst working on it.
Let’s get to work.
Repair
Right it’s straight onto the paper bail to try and fix the snapped end. Firstly I’m just going to use some superglue to get it in place. When this is dry I’m going to create two “Doublers”, place one either side of the damaged part and glue these in place to create a stronger repair and to add some stability to this area.
I’ve got some black semi rigid plastic. I’ve created a small template from a tracing that I did of the good right hand side of the bail.
PlasticTemplate
I now have two doublers cut from the plastic that I will use as explained above.
Two doublers
It doesn’t matter that they are not perfectly shaped, however they both fit perfectly well into the profile of the bail arm, and this portion of the arm is hidden in the typewriter housing anyway, so the part will not be visible, but it will now be strong.
SupergluedDoublers in place and clamped
The Doublers have been put in place using a quick set epoxy resin, I will leave this to dry for a good few hours before I tidy it up, with a light clean, and then I will try to get it back in place.
Bail arm repaired, installed and working.
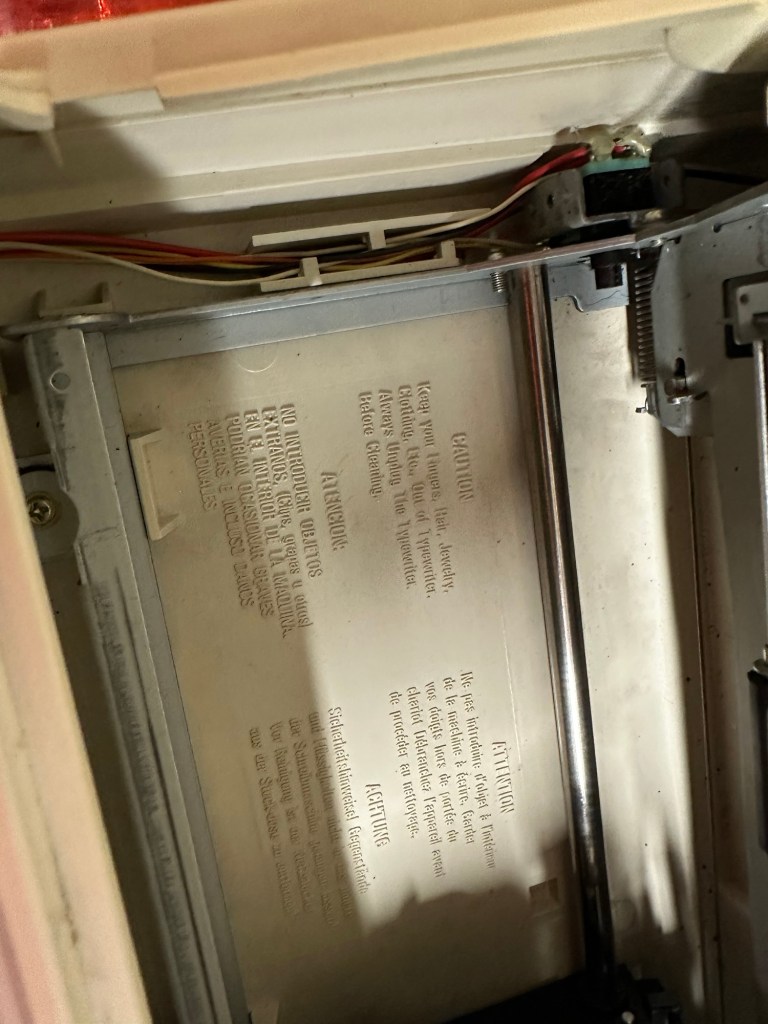
Now that’s done i’ve gone inside and there were a nice couple of spider webs around the transformer that are now history. I’ve secured the cable in the rear of the unit that never had any tension restraint, so that there will be no issues, should anyone now give a good yank on the cable lead. This is a safety addition I have made that was never on the original unit.
Cable restraint screwed to base to prevent strain on internal wires in and around the transformer bay.
I have also tightened all screws and checked the wiring and this all seems ok. Plug and fuse have been checked and all is looking good. I’ll carry out a PAT test once I’ve finished the clean up.
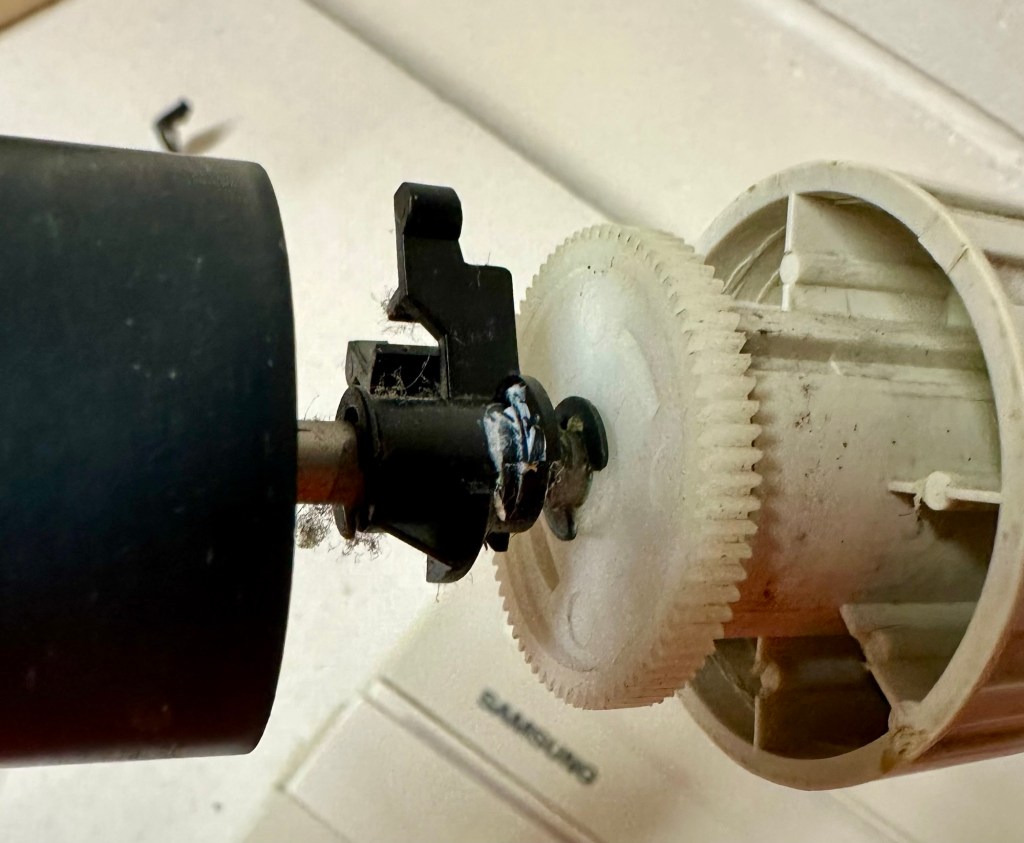
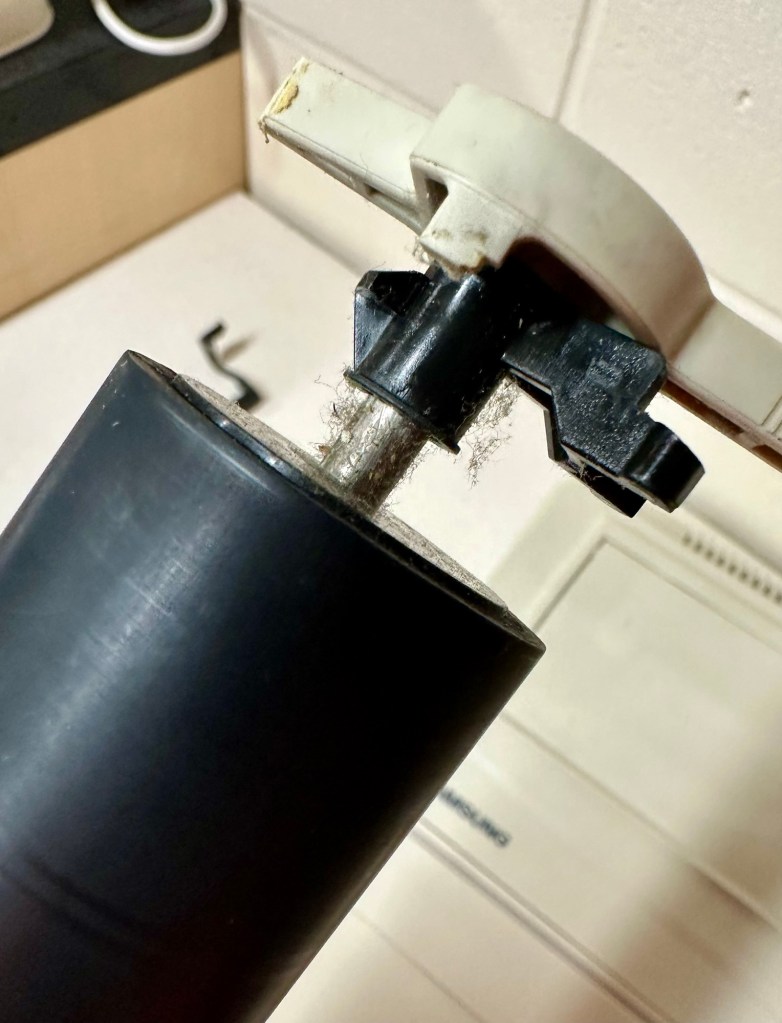
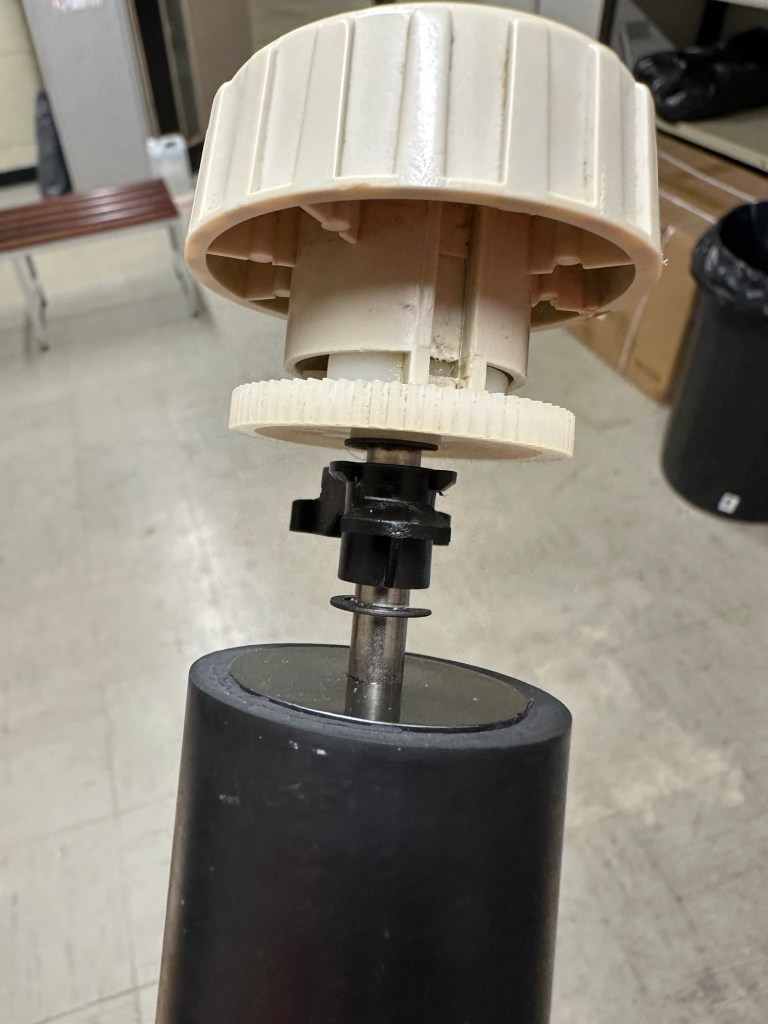
Roller cleaned and degreased Platten switch cleaned
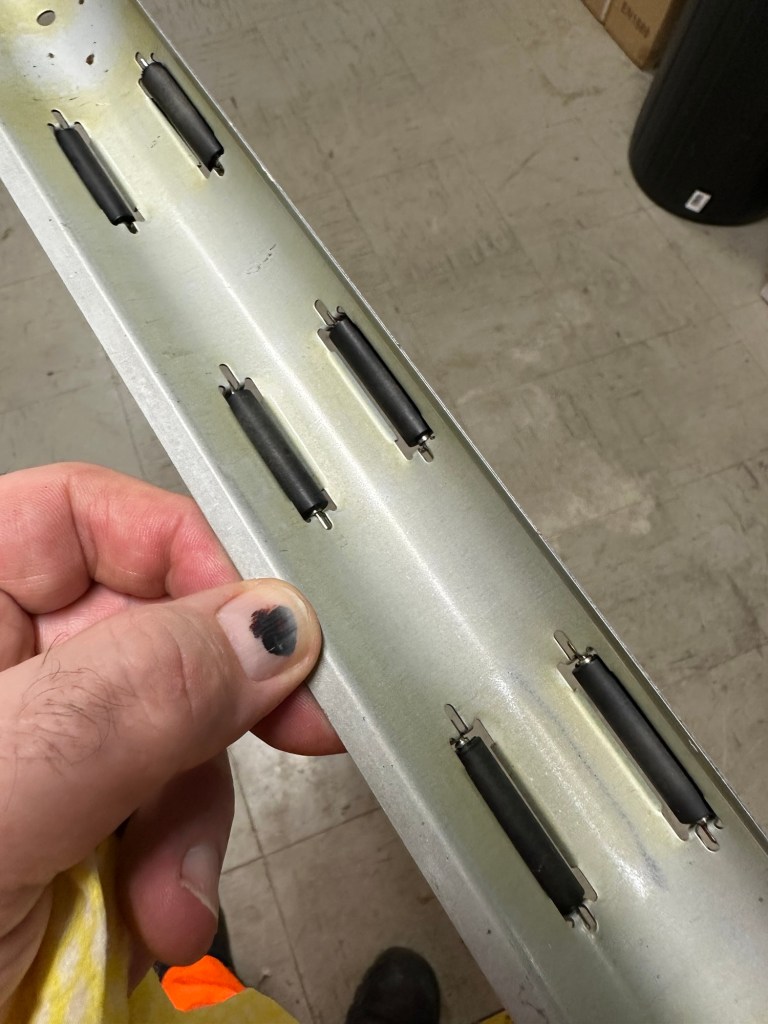
I’ve cleaned the main roller with alcohol, and removed all the old grease and dirt from the platten adjuster switch and the roller advance knob. I have removed the platten plate as well as the six mini rollers that are here. I’ve cleaned them all and re assembled/installed them.
Platten platePlatten rollerRollers installed and platten complete
I have cleaned the daisy wheel as well as in and around the printing head unit.
Clean insideDegreased
Inside the unit I have given a good hoover as well as a light clean and again removed more old grease. I have given the exterior plastic a preliminary polish, this has removed some of the yellowing and made it look “cleaner” I am not going to worry too much about the yellowing as it isn’t that bad, and I don’t really want to venture into carrying out a “Retrobrite” on this unit. It would take too long and there would be no benefit for this project.
I’ve now added very small amounts of a watch lubricant to those areas that i have previously cleaned and removed the old grease from.
Light lubricantMain transport lightly lubricated
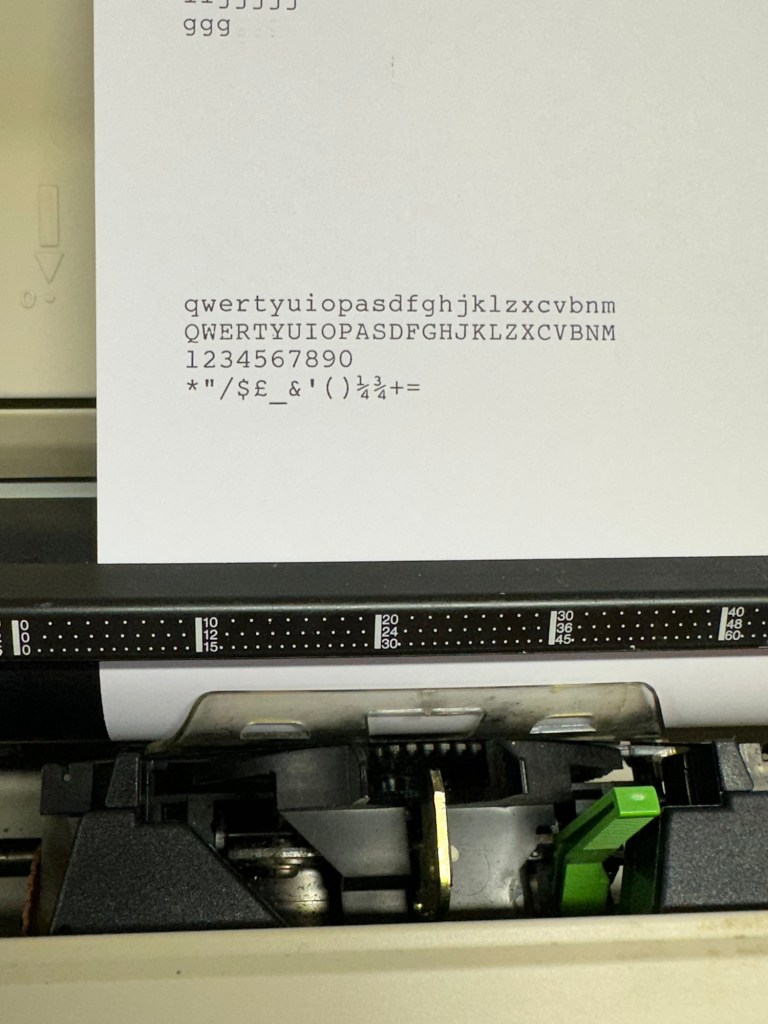
The unit has been reassembled and I’m pleased to say it is still working fine. It’s running smoothly and all aspects of the unit seem to be working just fine. To be honest it seems to be printing clearer to me.
Daisy wheel and print quality is perfect
I don’t know how long the print cartridge has been installed but I suspect it may have been a few years back. It’s almost finished, and I do have a replacement on order. I’m sure a fresh cartridge will make the print stand out even more.
Next I’m going to have a go at replacing some, or even all of the keyboard letters. It all depends how it looks when I start replacing them. I’m going to gently rub off the lettering that is left and clean the keys using a 95% pure Isopropyl alcohol solution (IPA).
All damaged and missing key decals removed in preparation for replacement new decals. Others may have to be removed dependant on how the new ones look when in place.
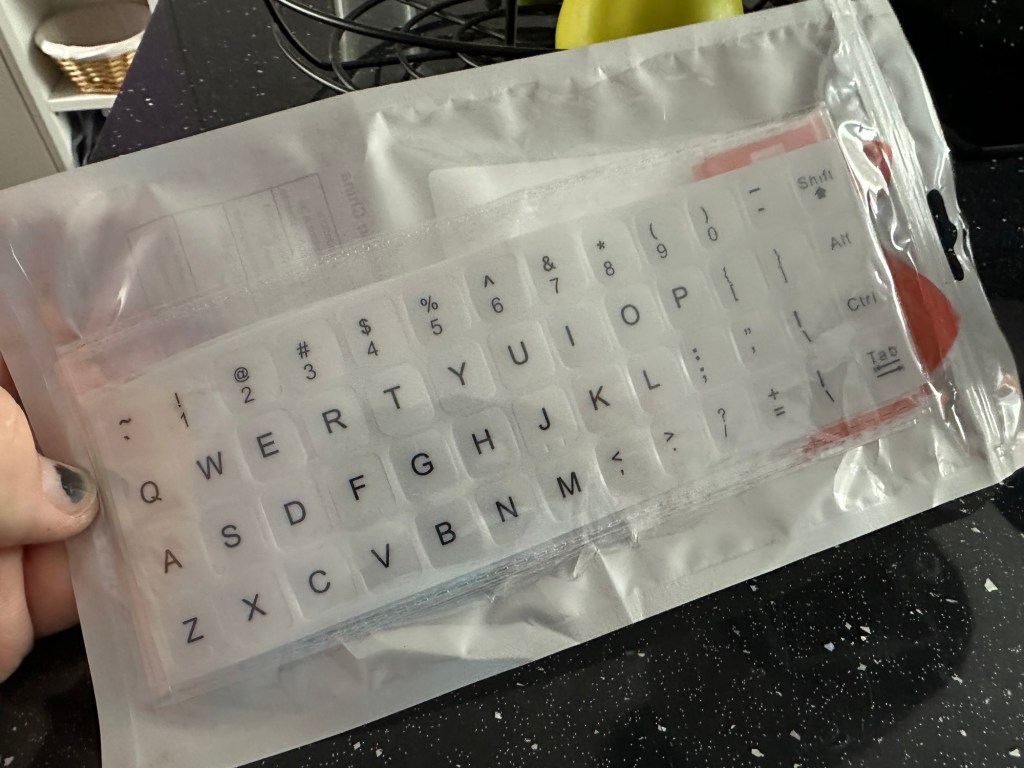
These are the replacement key decals I will be attempting to use.
Qwerty keyboard decals
I’ve replaced the damaged key decals. The ones I’ve used are a lot brighter than the original ones and really accentuate the yellowing. I’m not troubled by this as it keeps its “Old” look. I would have to scrape and wipe for hours to remove all the other keys and to be honest it would look just like someone had gone abroad to have a bright white set of dodgy veneers installed, it would look quite out of place, and in your face. Just like a Cheshire Cat smile.
New veneers anyone?
It serves a purpose and just allows the unit to be usable again.
The final product:
Looking damned fine if I say so myself
Fortunately a lot of the equipment and parts I have used, I was already in possession of, so there are no additional costs for this project. Below you can view the total costings for this project as they currently stand:
Purchase inc postage £13.14
Cable restraint £0.25
Keyboard decals £1.25
Total cost of project £14.64
Again I have managed to save a fantastic 90s retro item from landfill for very little cost, and that is a fantastic result. It has years of use left in it, as long as the consumables remain available, and of that I am confident that they will be available, for at least the next few years. The unit is clean, I’ve just carried out an electrical PAT test and it is electrically sound.
Believe it or not I’m going to go back in time and will write some traditional typewritten letters to friends and family. I’m looking forward to doing that and it will certainly surprise them, it will be totally unexpected.
When all that is done, i will donate this unit to our local LOROS Hospice shop so they can sell it on and raise much needed funds. They deserve it. Edit: This was done in March 2025 at their shop in Hamilton Leicester. I hope it gets them a good price.
Watch the brief video for the final words on this restoration. All 13 seconds of it.
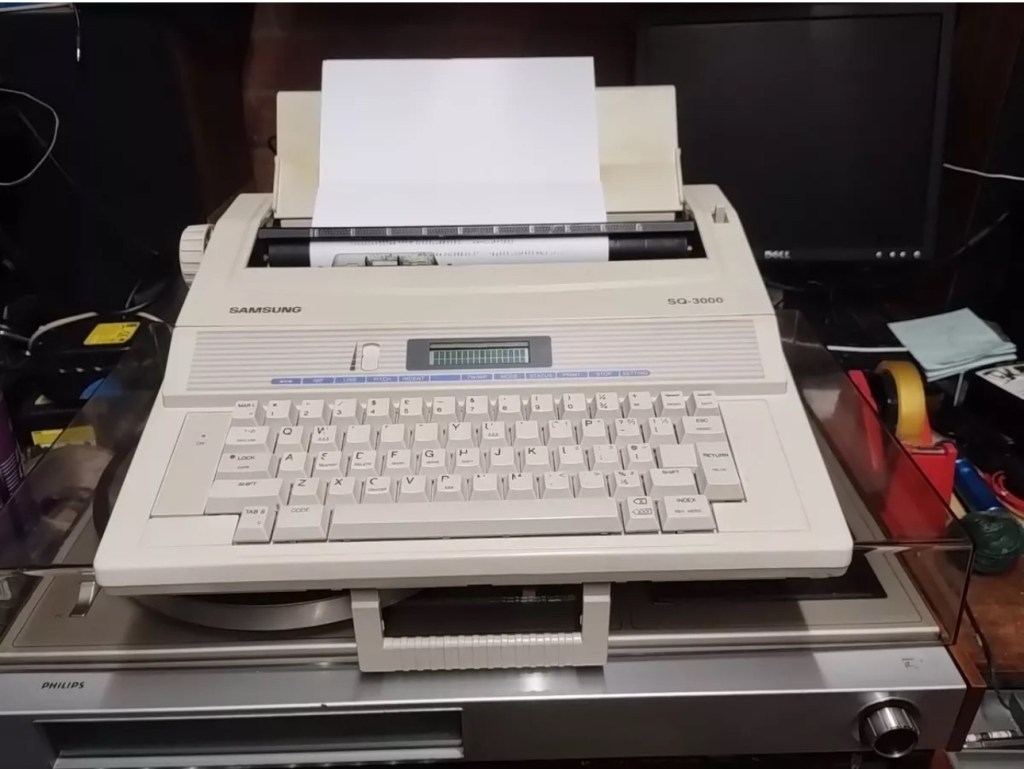
Offered here is a good vintage Samsung SQ-3000 electronic typewriter. It powers up and operates when the keys are pressed. However, the symbols printed do not match the button pressed ! The daisywheel may be out of line. Otherwise, good cosmetic condition. Any questions, then please ask.
EBay
I have again succumbed to purchasing something very retro, a typewriter. Yep it has a fault just as most things I buy have, that’s part of the fun of it all, can I fix it and save another item from landfill? Who knows but I’ll give it a try.
This Typewriter, the SQ3000 was also sold as the Elite S-7500, Hanseatic Europa II, Leader MD, Olympia Textstar MD, Opperman S-7100, Privilege Electronic 2600, Royal RT 7700, Silver Reed EX-133 MD, Smith Corona Wordsmith 200 and Welco EX 260 DS. It was manufactured sometime between 1990 -1995 and was a mass produced low cost typewriter of the time. Personally I think it was around 1995 as this was when regulations insisted that electronic items such as this required wired in power supplies, and this unit is a hard wired unit.
Samsung loosely translated/stands for “Three Stars”Apparently the three represents “Something big, numerous and powerful” and the “Stars” represent “Everlasting and eternal” so there you have it, that is today’s history lesson.
I loved using typewriters prior to the word processor/Pc rendering them useless. There is just something special about them, I can’t quite put my finger on it.
This item looks to be in fantastic cosmetic condition, and I have also checked that the consumables are available, they are so I might have struck lucky. From what I can see in the pictures a number of letters have worn off the keys, hopefully I can source replacements, or decals or I may even repaint them myself.
I have had to download the instruction manual for the Smith Corona Wordsmith 200 as it is the exact same unit under a different name, Samsung just don’t seem to have anything listed or historically available for download.
Looks niceSeems clean and tidySeems to be a potential daisywheel problem
I think I’ve bagged a bargain (if I can get it working) I’ve paid a grand total including the postage of £13:14 GBP and that was after knocking the seller down a few pounds from the original price. He bit my hand off to be honest, so we’ll just have to wait and see what arrives. If all else fails I can certainly use it for spare parts in the future.
Anyway, this now gets added to the long list of other items I have, that need to be repaired. Please check back to view the “Assess and repair” post that will follow, explaining what arrived, its condition and what I will be doing to get it back in working order.
FAULTY no power, NOT WORKING for Spare Parts or Repair.
TEST NOTES: Does not power up, no further testing, unable to check any functions. Battery leakage with corrosion in and around battery compartment.
Ebay
The unitYes…there is corrosion
Another low priced item that I fancy getting working. And as is standard with me it has corrosion. This item is from 2003, it is a self contained game arcade system that plugs into the tv. It has five games installed including classics such as Galaxian and PAC Man, so compared to some items I’ve purchased of late, at 21 years old this one is a relative baby.
Well, we now await its arrival where we can give it a good look over and assessment. Hurry along now delivery person…..
It’s arrived.
It’s in pretty much perfect condition, all stickers are in place and it hasn’t been previously opened.
I’ve put in 4 new batteries, and damn it. It powers on. It’s working.
It switches on
I’ve plugged it into the back of a television and it also plays.
Damn, it works
Yes there is a little corrosion on the battery springs but I’ve seen a lot worse. I’ll give these a little clean just so I can say I’ve done something.
It’s quite rare these days to get a bargain off of EBay, and for the seller to be truthful in his description, in fact he’s been exceptionally honest, just writing it off without testing. A big bonus to me.
As the saying goes, if it ain’t broken, don’t try to fix it.
Makes a boring post though, sorry about that. A bargain, yes, and another one kept from the tip and will be used at home in the garden pub, the wife will love this as she’s a big Pac-Man fan.
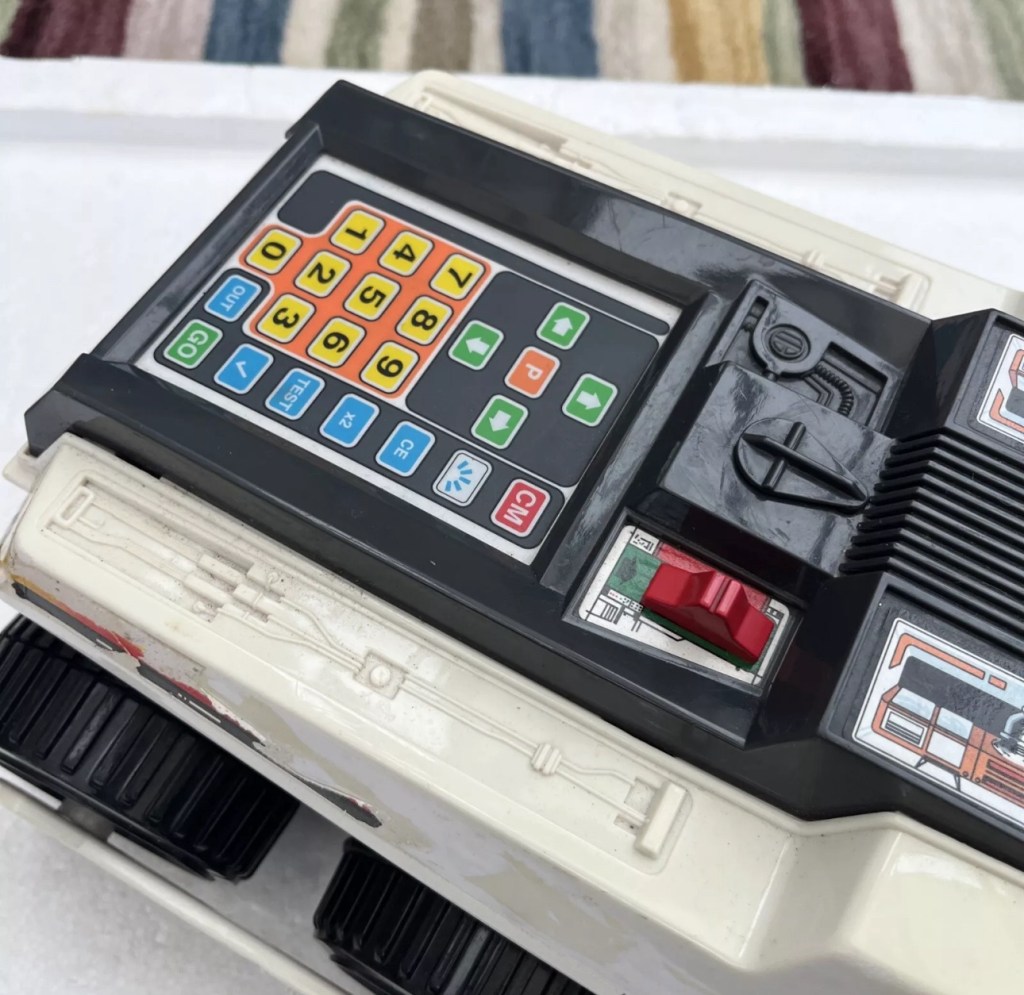
Here I purchased the toy I most wanted back in my teenage years. Unfortunately I wasn’t available to get the original MB version produced in 1979 so I had to settle for the latter “improved” version made by Zeon Ltd that was made in 2010.
It’s arrived and to be honest dosen’t look too shabby, needs a bit of a clean up and maybe some new transfers applying but we’ll get to that at another time, for now we need to try and get the machine up and running.
I’ve eventually managed to get the lid off. This unit was built to ensure that it was difficult to get into so repairs couldn’t be carried out. Some of the screws are buried under fascia dressings, and if you aren’t careful you could end up snapping some of the body shell.
Big trak body shellBig trak circuit boardDetached speaker wireDetached battery wireBig trak wheels removed
With the two halves of the body shell detached it’s obvious there are some detached wires. One was a battery wire, one was a speaker wire. Oh if this was the issue wouldn’t it be great? But it wasn’t. I soldered these wires back into place, put the three D types in place and it was still dead.
I’ve now desoldered all connections from the circuit board to assist in carrying out checks for continuity and tracing voltage. I can also check the board under the microscope. I may change all the capacitors for SMD ones.
I started checking continuity and tracing voltages and was doing really well until I got to a large section of the main board where everything seemed dead and unresponsive. What the heck was going on here? And then I noticed the wire had detached from the positive probe of my multimeter thus ending any further testing for today. I need to order some new probes. Well, I’ve ordered some nice new probes and croc clip connectors as well, so as soon as they arrive I’ll get back on with the testing. They arrived and were damaged on arrival, so back to the drawing board.
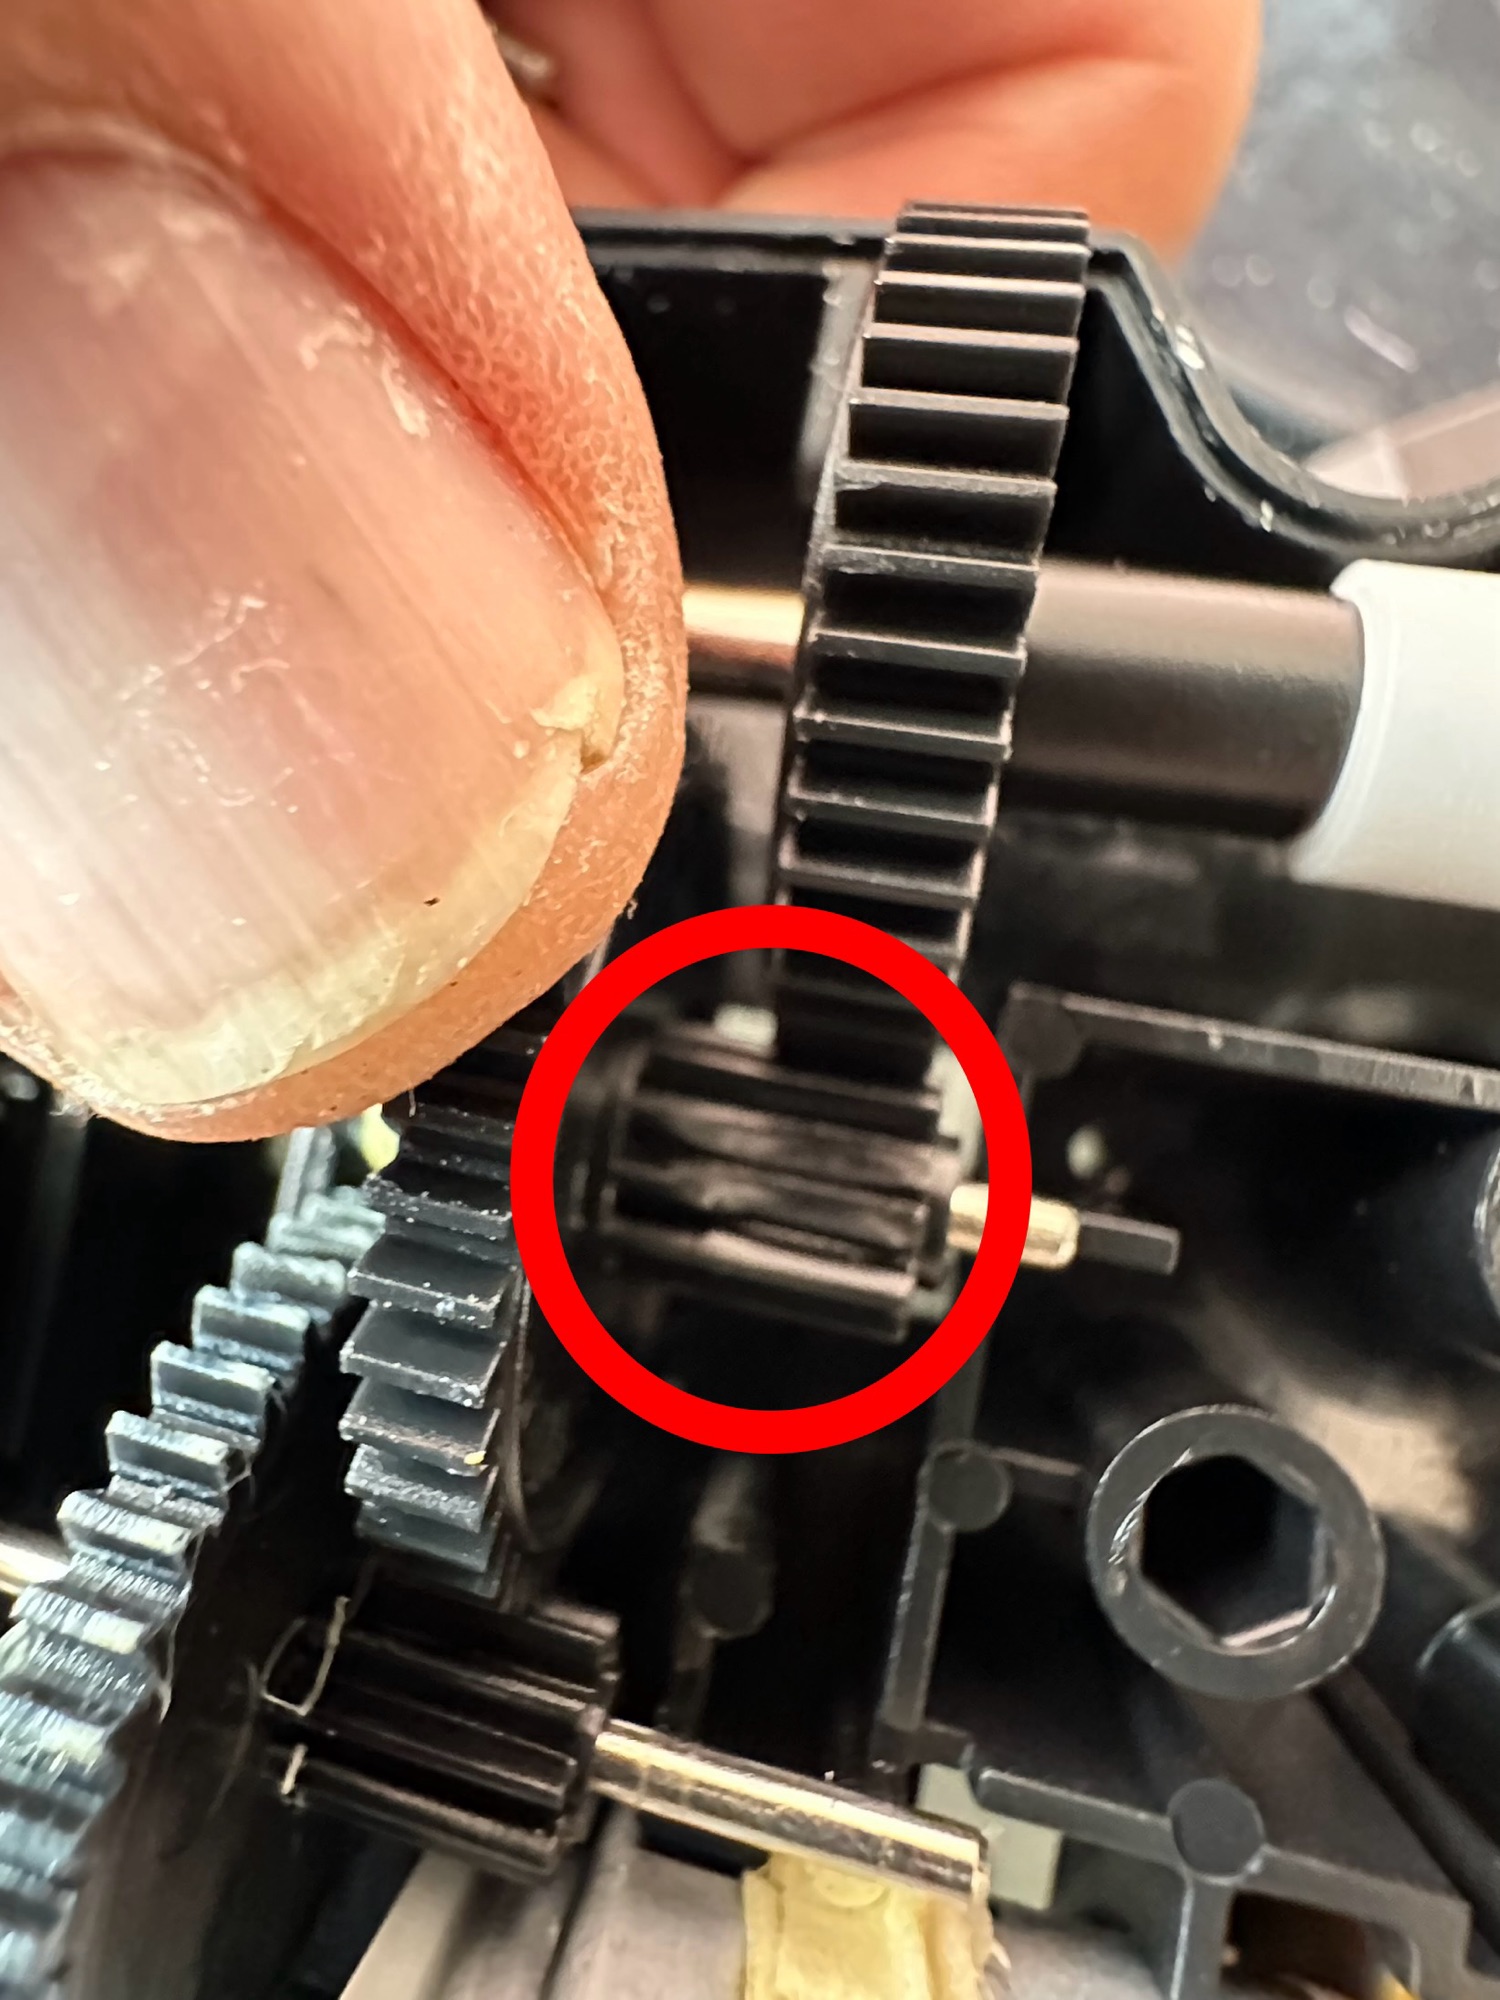
Big trak worn cogsBig trak worn cogs
I took the drive train to pieces and here it became apparent that a number of the cogs are damaged. I believe there is also some issues with the motion detector but I can’t confirm that until I get some power into the motors. I can’t find spare cogs online so I have ordered myself a second damaged unit to use as salvage. To be honest this new unit has all the transfers in place so I will probably use that shell and the guts of my original unit to form one complete Big Trak.
New donor Big Trak – better than my original one
The donor unit has arrived and boy I’m impressed. It’s in far better condition than my original one, so as expected this one will become the working unit and my original one will be come the donor. Any parts left over will be sold on as spares or even used on another damaged one if I can source it.
My new Bigtrak
If you look at the video above you will see the new Big Trak going through the motions. However the one thing it dosen’t do is turn. Could be a wheel sensor issue who knows. Good thing is that the cogs haven’t broken as the drive wheels are both solid and not free wheeling.
There are only two real issues with the donor here. Firstly it will not do the turn command and secondly, one of the drive wheels is damaged. Luckily I have a spare wheel so this was swapped over, some decals were missing but I coaxed these off my old truck with a hot air gun and reapplied them with no issues.
Missing decalsDecals applied
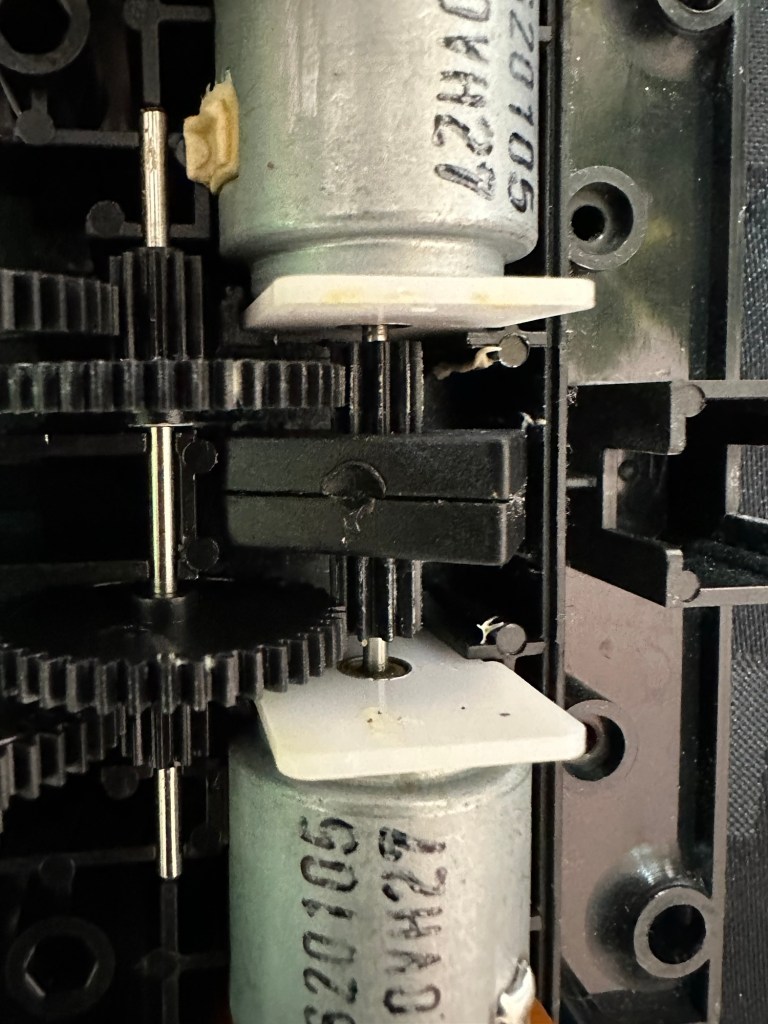
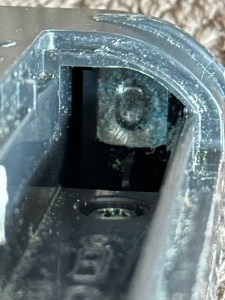
Looking into the drive issue meant opening the gear box. In here we have two magnetic independent gear controls that should have a gap between them, these two were stuck together thus rendering independent motor operations of the turning control useless.
Magnetic sensors joinedMagnetic sensors as they should be
I removed the two motors and repositioned them and the cogs holding the magnetic gear, this gave a gap of about 3mm that now allows the wheels to turn in opposite directions allowing the unit to turn.
Now the Magnetic sensors are adjusted….it turns
Whilst in this gear box I was able to confirm the issue with my old gear box and it really is all down to two damaged drive cogs that I need to obtain. I’m pleased with that as I could now get two good working units for just a small outlay once I can source some cogs. I will have to repair the wheel I removed to replace the one on my new unit however I have an idea how I’m going to remedy this and again it’s a low cost option. But that’s a job for another day.
2:18 of rebuild magic
So if you look at the video above, it’s the full fix that I posted on YouTube. Really pleased with this fix, again I’ve learned quite a bit about these units and I’m going to have immense fun programming it. My wife dosen’t understand my excitement over this toy, but all my old buddies and colleagues understand it as they grew up in the same era. Maybe it’s the male menopause, reliving the past and all that.
But hey, it keeps me occupied and out of mischief so who should worry about that
This one is going on my shelf so when the kids visit I can show them the joys of basic programming we experienced back in the day.
I’ve just brought one of these, it’s a toy and I’m heading for the senior end of adulthood:
Big Trak CE3962
BIG TRAK / bigtrak is a programmable toy electric vehicle created by Milton Bradley in 1979, resembling a futuristic Sci-Fi tank / utility vehicle. The original Big Trak was a six-wheeled (two-wheel drive) tank with a front-mounted blue “photon beam” headlamp, and a keypad on top. The toy could remember up to 16 commands, which it then executed in sequence. There also was an optional cargo trailer accessory, with the UK version being white to match its colour scheme; once hooked to the Bigtrak, this trailer could be programmed to dump its payload.
WikipediA
Here’s what the original listing said:
Item probably does not work. I recall attempting to fix corroded terminals years ago and it’s still not working. I do not have D cell batteries to test now.
EBay
I was just browsing around as I do and this popped up on my timeline, the wife is going to disown me for bringing such junk into the house, however for a split second 14 year old me was in the house and a flood of memories, not all good came back to me. These toys came out in 1979 when I was aged 14. My friend over the way from me was brought one of these for Christmas and I experienced one of my first ever episodes of Jealousy. Back in 1979 I believe they retailed for approximately £39 Gbp, and my parents weren’t about to part with hard earned cash to invest in developing technology like computing – “It’ll never last, it’s just a fad” (Famous last words).
I made every excuse possible to go around his house to play and even offered to look after it for him when he went on holiday, he never let me though and I believe at that moment my friend realised what the term obsessive meant, as he was experiencing it big time with me.
Now I own one, however this is the later version from 2010, it only cost me £9.99 Gbp and its probably a wreck, but I’m really going to treat this like a proper full sized car restoration and I want this to work, crikey I’ve even found out I can buy the original decals from Australia, so it’s patently obvious the obsession is still there.
I can’t say I have genuinely looked so forward to a parcel arriving as much as this one. I sincerely hope I have no regrets…. And I have all fingers crossed.
This is going to be a labour of love and I can’t wait.
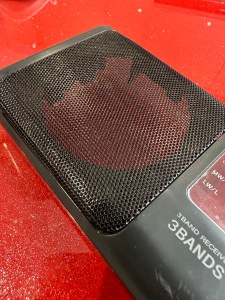
The radio was received earlier today. Cosmetically it is a bit tatty, batteries were placed into it and apart from a quick flash from the power light when it was switched on there was no sign of life. So the original description was false as it stated that it powered up with a very low volume. Oh well, not to worry, it now gives us something else to look at.
Tatty appearance
Looking in the battery compartment there looks to be corrosion, this seems to be a common problem with items I’m buying at the moment. The screws have all been tampered with so I suspect others have been inside this radio prior to my purchase, this could be interesting to see what’s already been tampered with or attempted.
Tatty appearance, non workingCorrosion….again
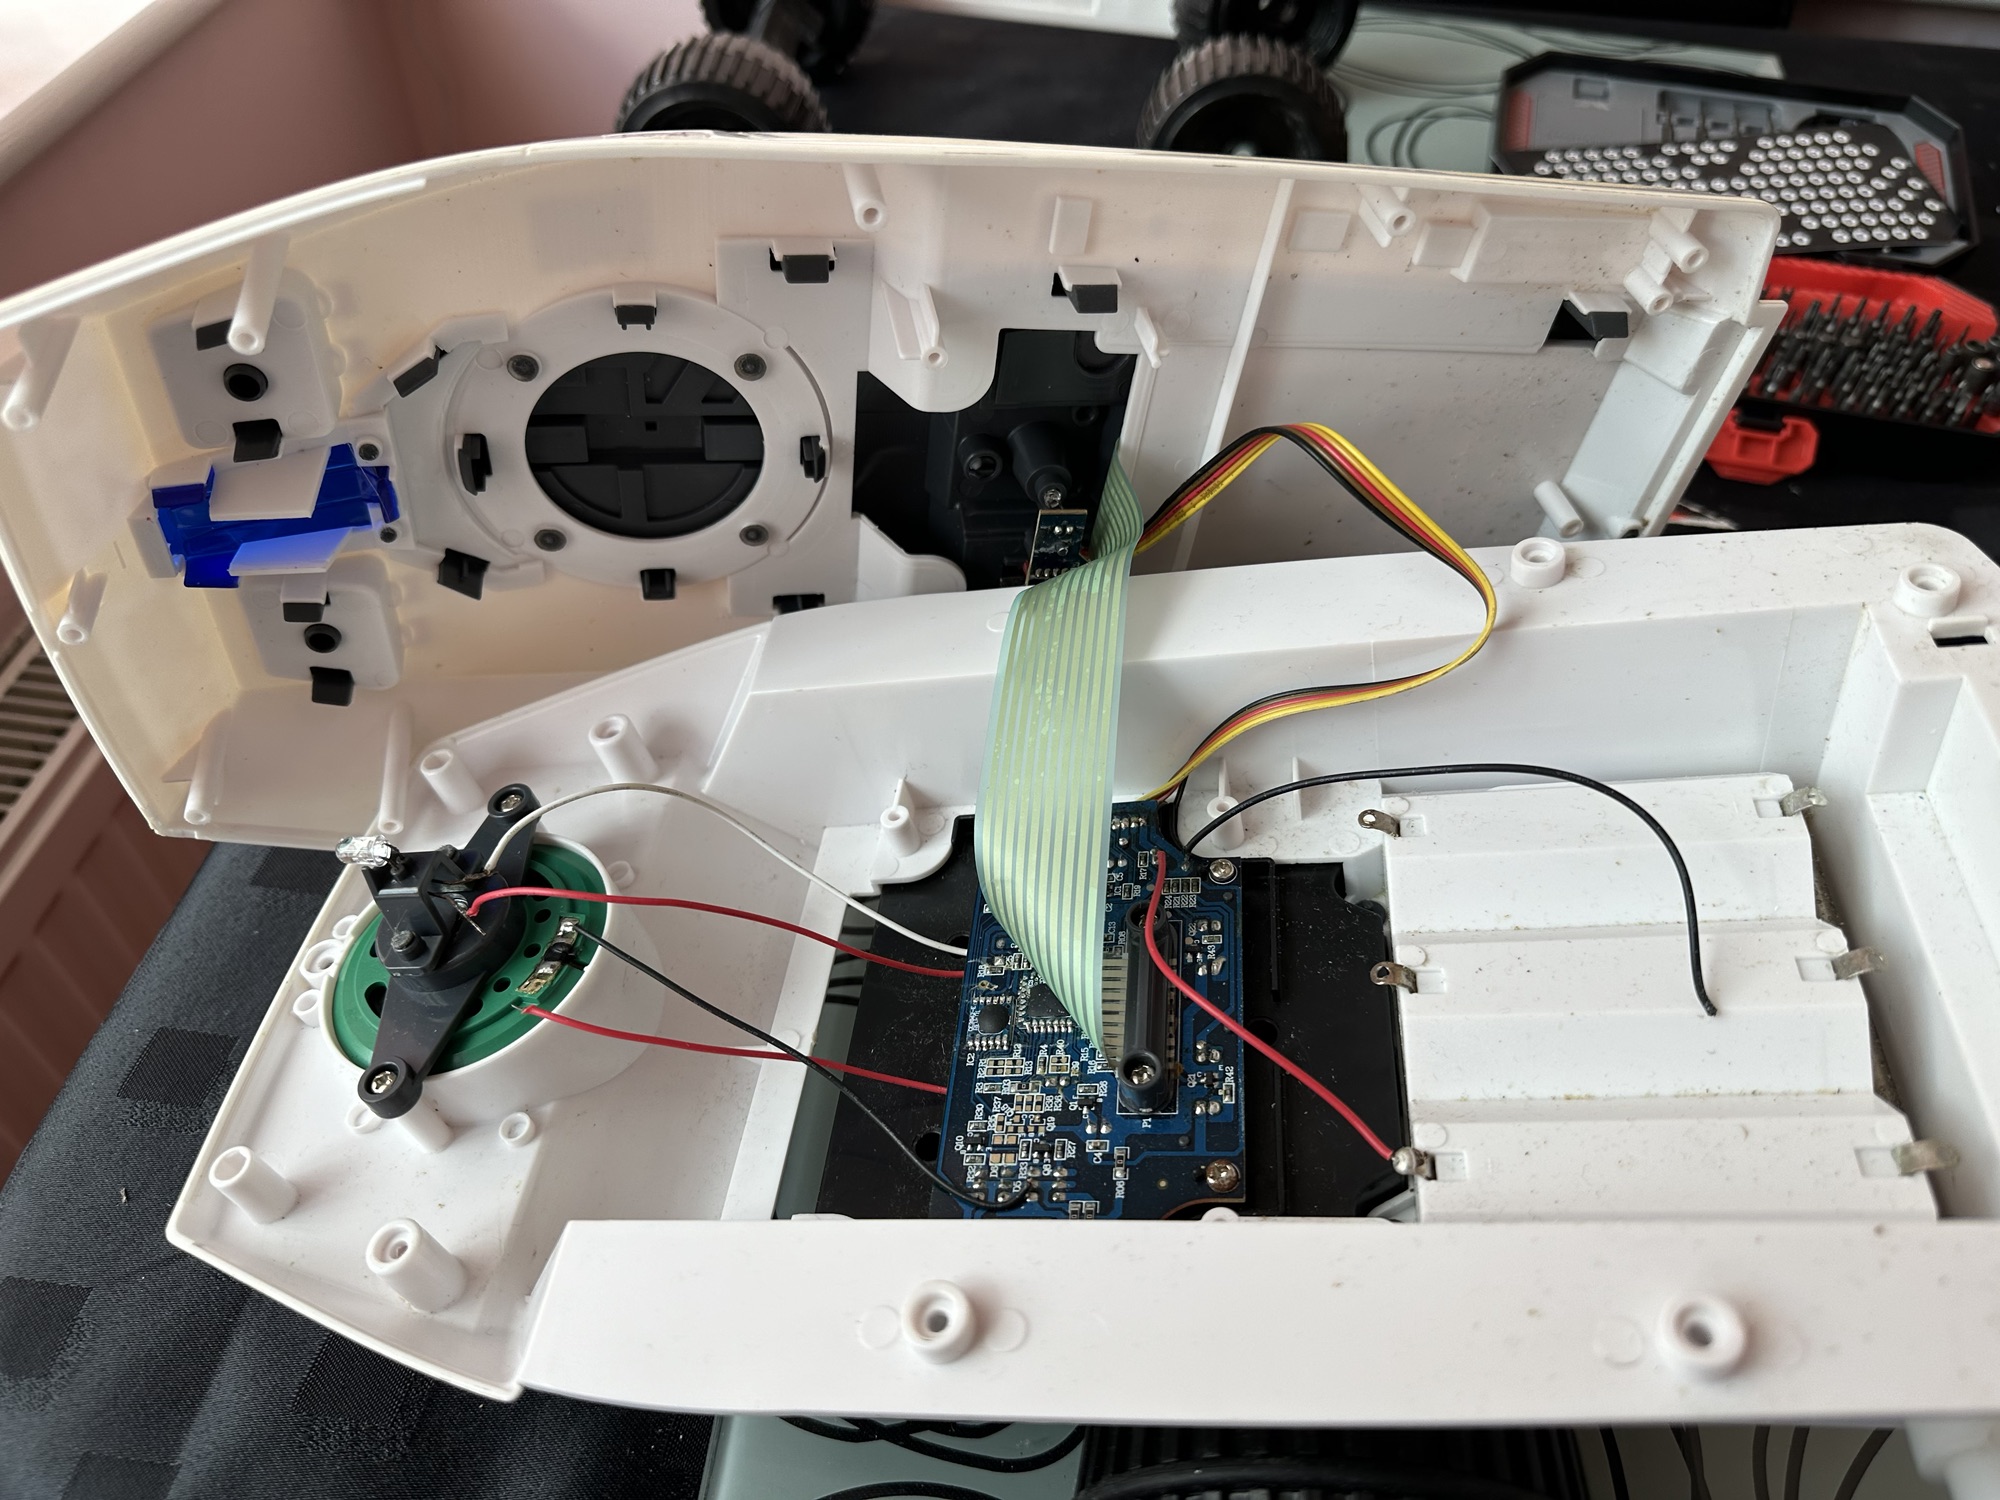
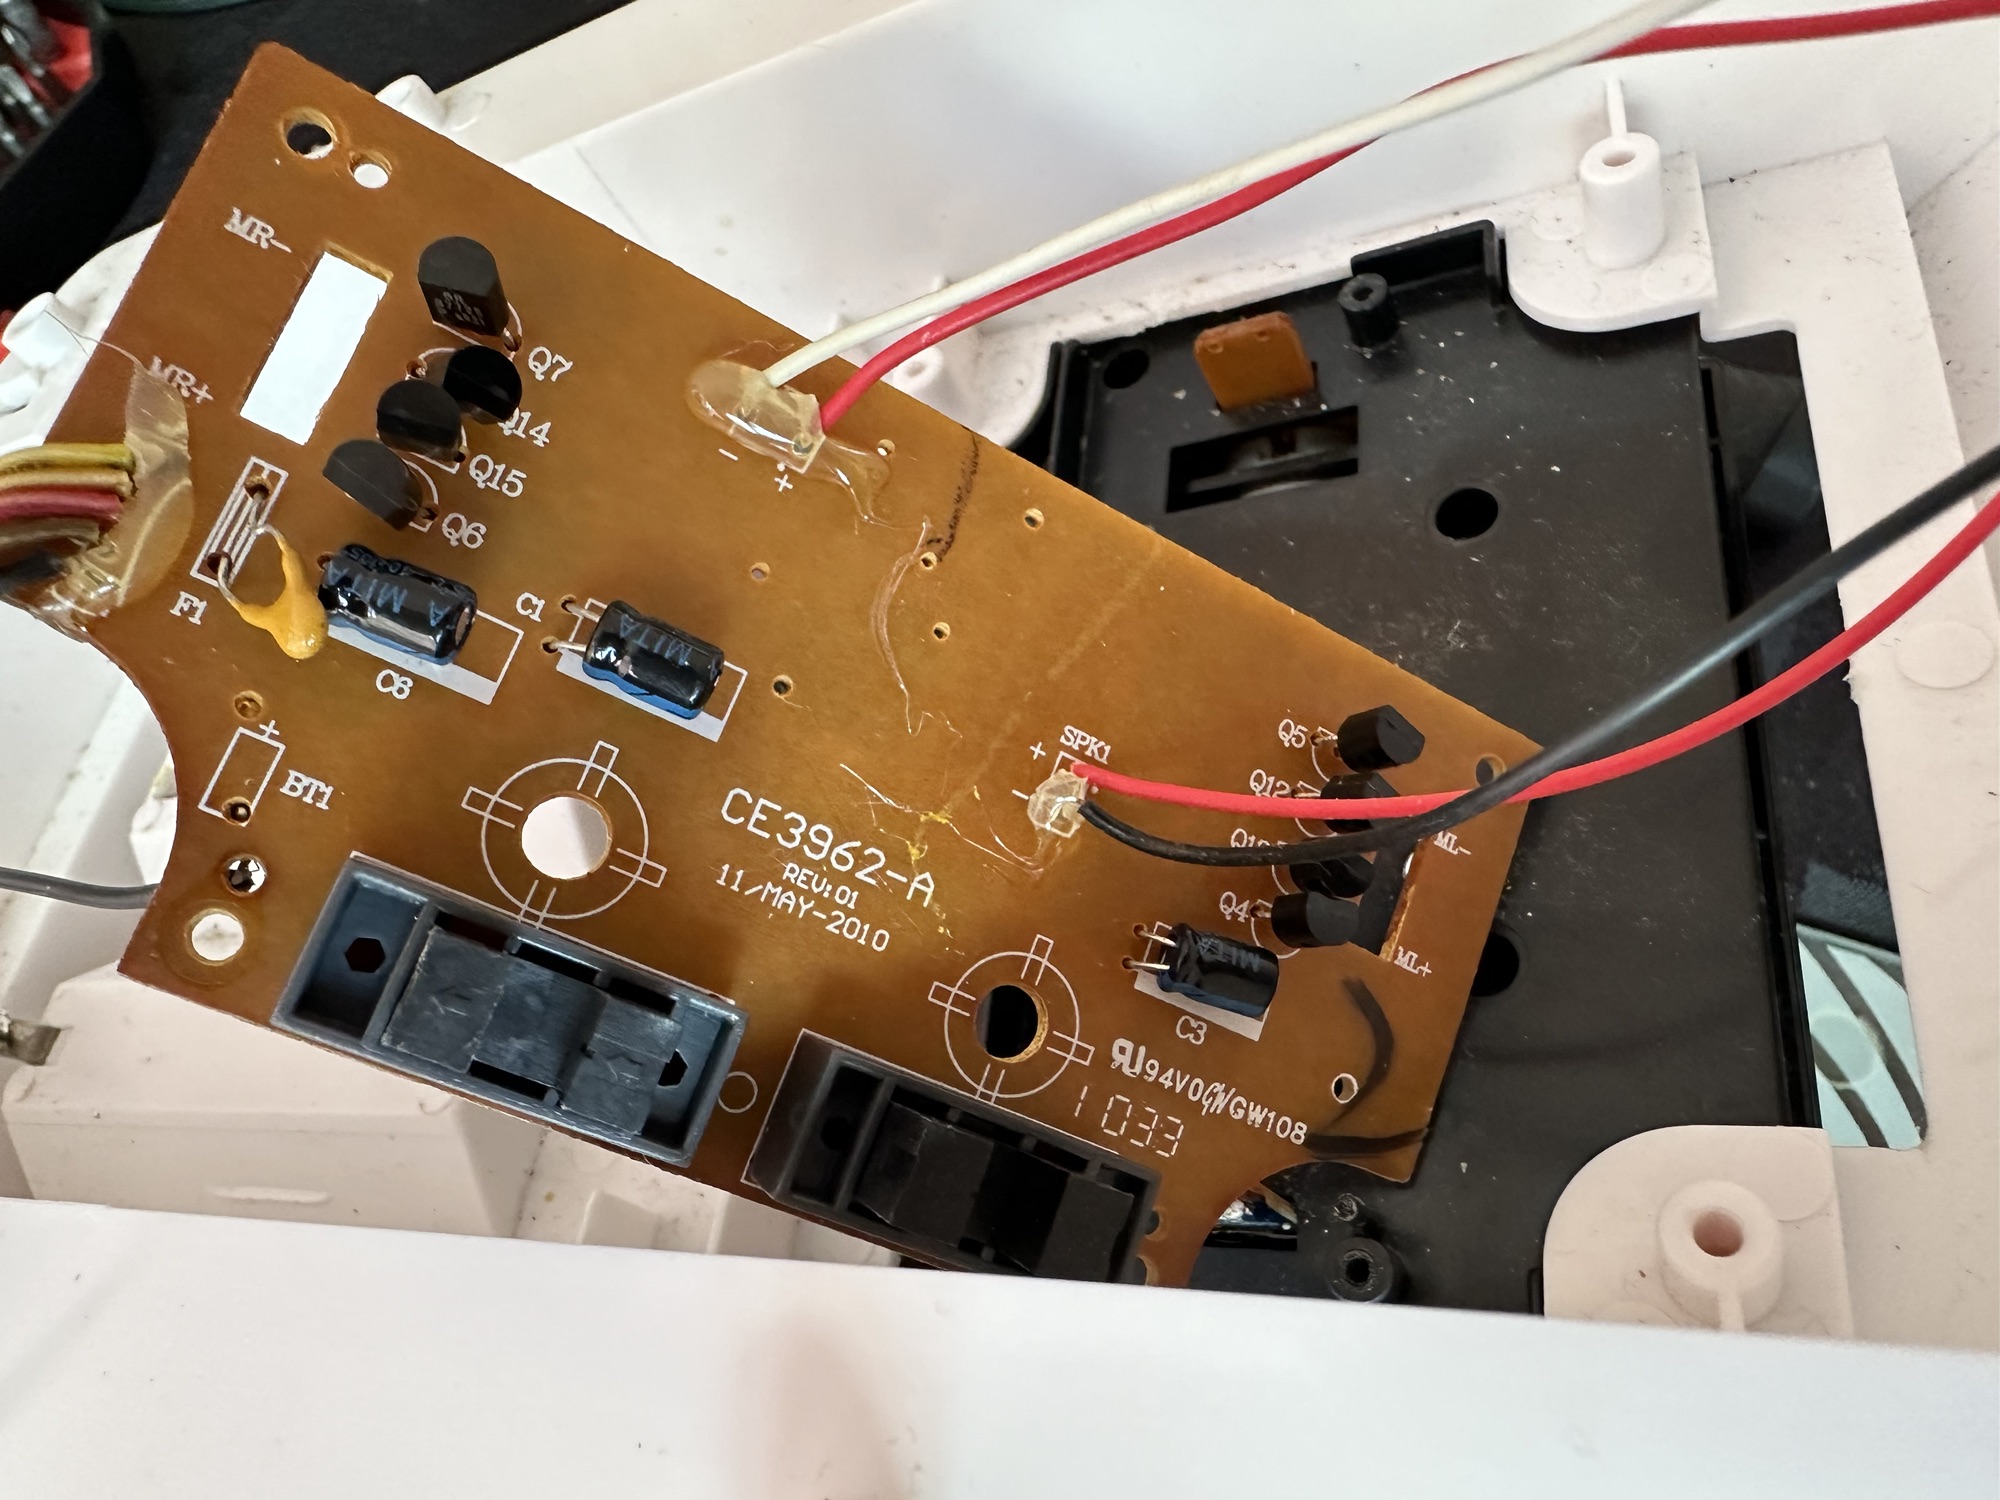
I’ve had the unit open and the first thing that comes to light is the utter filth inside. The speaker is thick with god knows what and the board and switches are also covered in the same filth. Before I do anything I’m going to get this cleaned up.
Filthy circuit boardDirt from speakerCorrosion
I’ve used IPA on the board and cover and on the (thankfully small) corrosion on the positive battery pole and this has cleaned up nice. I’ve used contact cleaner on all the switches and dials and these have also come up ok.
Speaker before cleanSpeaker after clean
The speaker grill, I have tidied up and used permanent marker to get rid of the marks on this item. This has tidied it up really nicely.
Tatty appearance Grill after polish and touch up
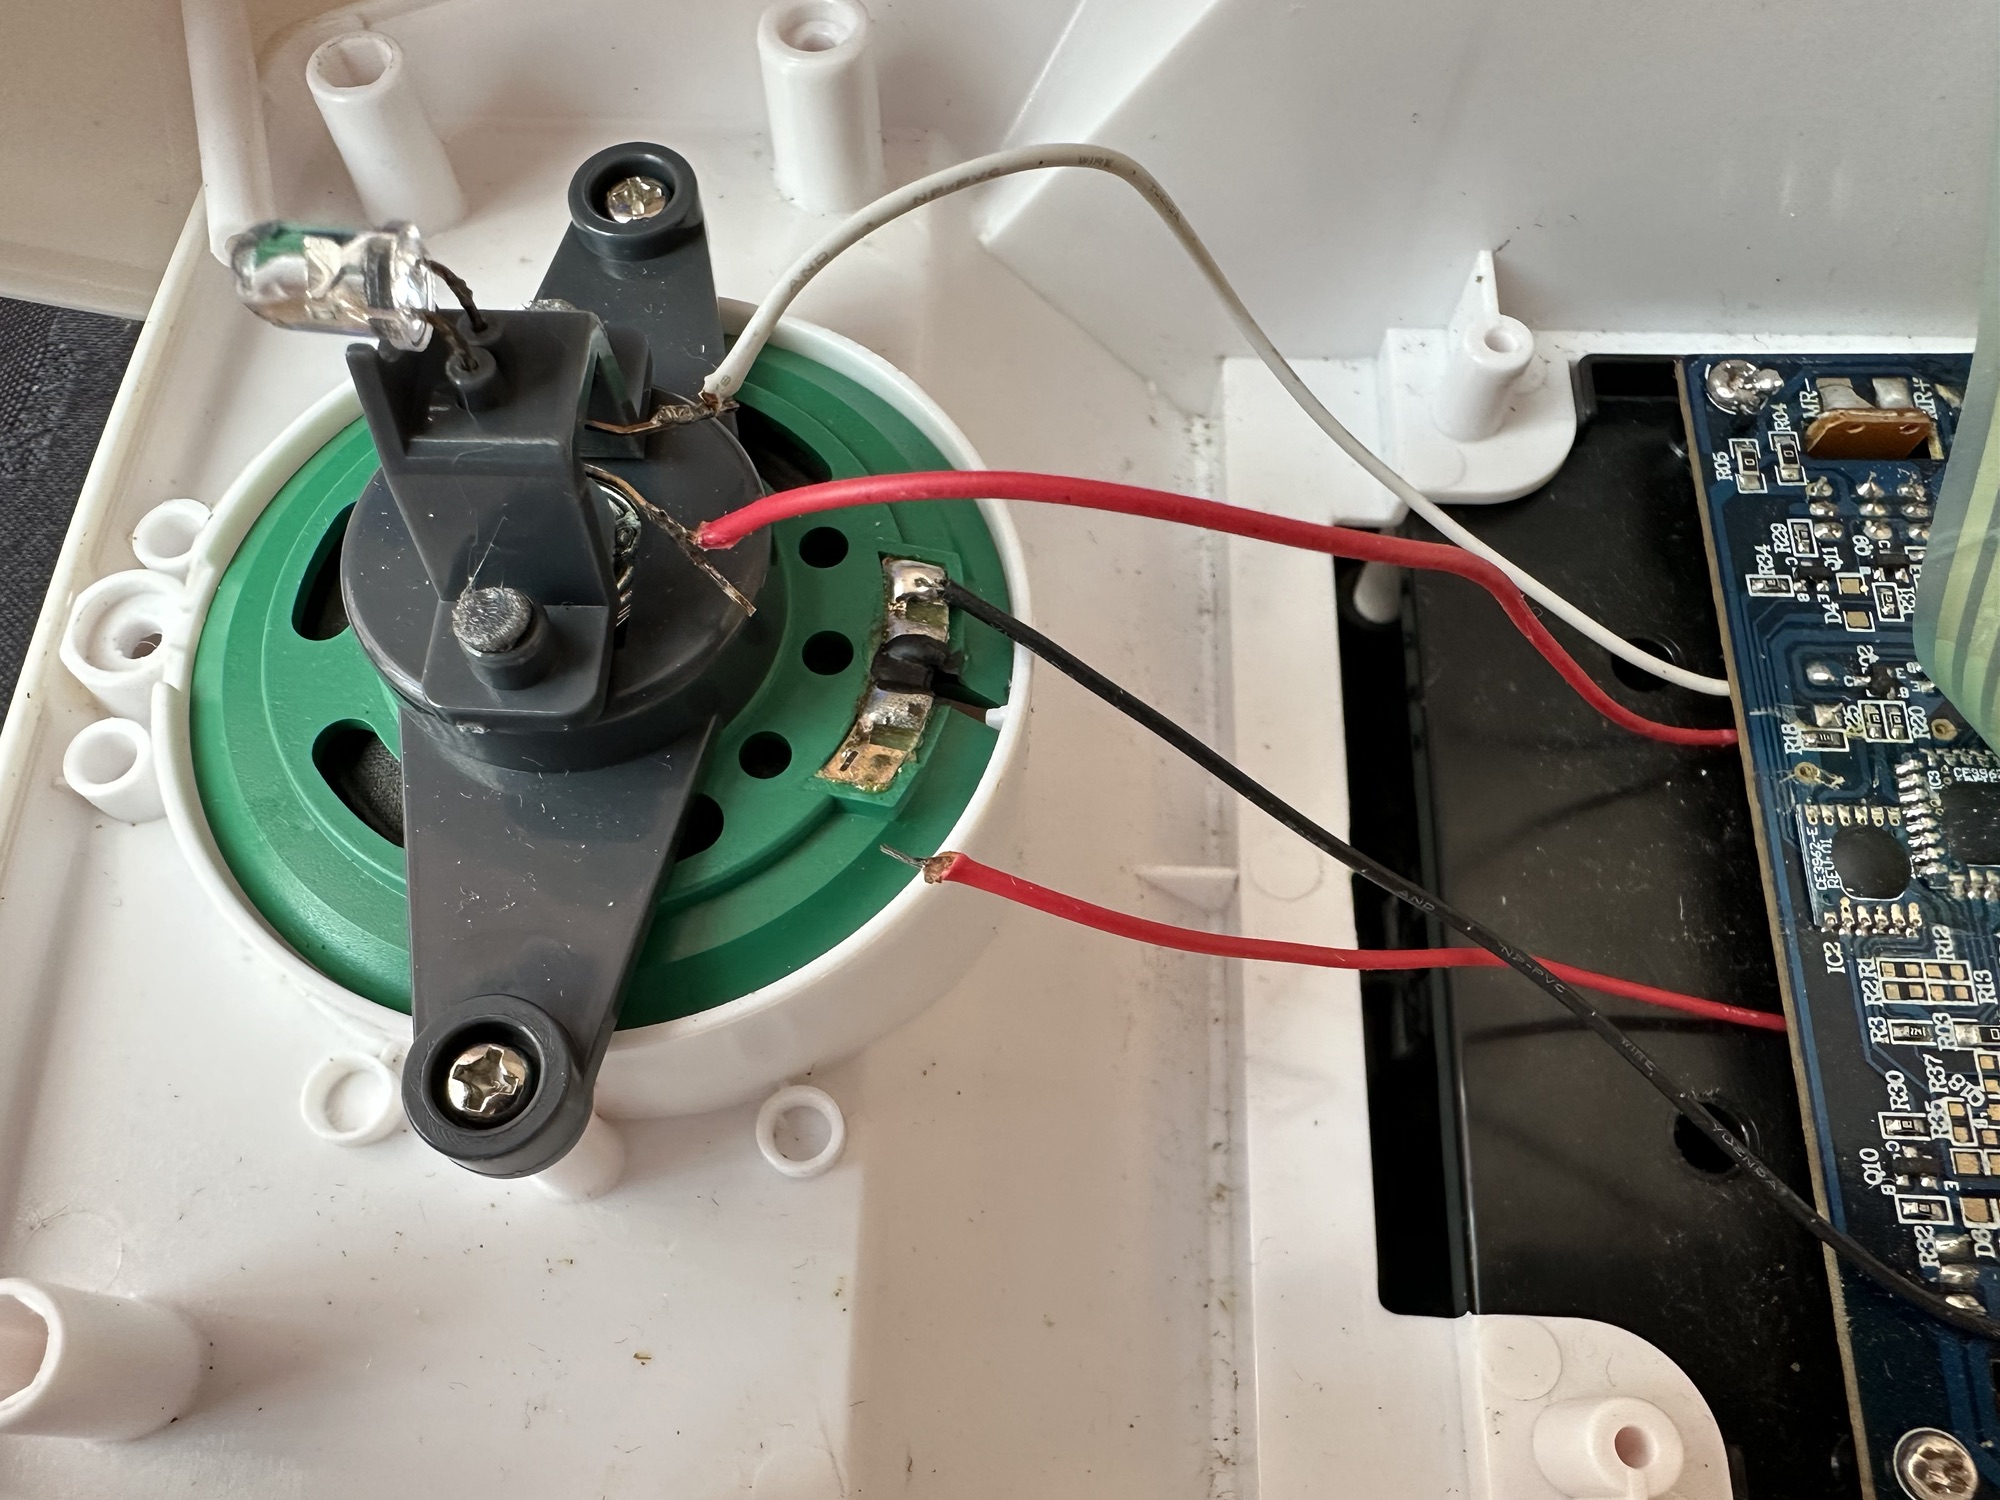
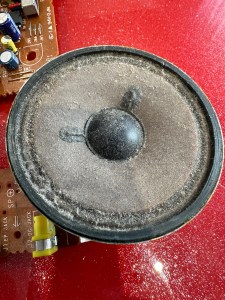
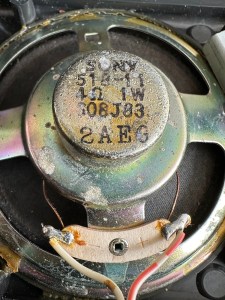
On the speaker I just used a dry cotton bud to wipe it over but I have my suspicions with this speaker, it looks quite worn and earlier reports on the lack and consistency of sound points to this being a potential issue with this unit. There are no clicks and pops when turning the unit on, there is a power and tuning light. Just no sound.
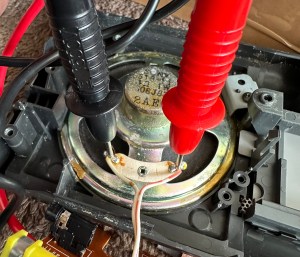
Speaker defective Multimeter to check speaker
The speaker is a 4 ohm 1w speaker, I’ve used a multimeter to check its operation and it’s showing as dead, not registering at all, it should be looking at indicating something within its 4 ohm range. I’ve double checked it by putting a battery across the terminals and there are no pops or clicks so this confirms things. I now need to source a new speaker.
Trying to source this speaker in the uk is a tad problematic. There are items available but I’m not paying out two to three times the value of the whole unit. I’m going to try some thrift shops to see if there are any suitable donor units available if not I’ll have to purchase a few of them from China, and that will still be cheaper than purchasing here in the UK, crazy isn’t it? But it’s a long wait….
I did manage to get one from the Uk. Paid about £5.18GBP and it should be here in a couple of days. The annoying thing is that the postage is almost the same cost as the actual speaker and that only cost £2.69GBP. Annoying though that is, it has to be done if we want to get this fixed.
New speaker Speaker placed
I couldn’t get a 1w 4 ohm speaker only a 1w 8 ohm speaker, this will be fine as at this level of use it will not affect output at all.
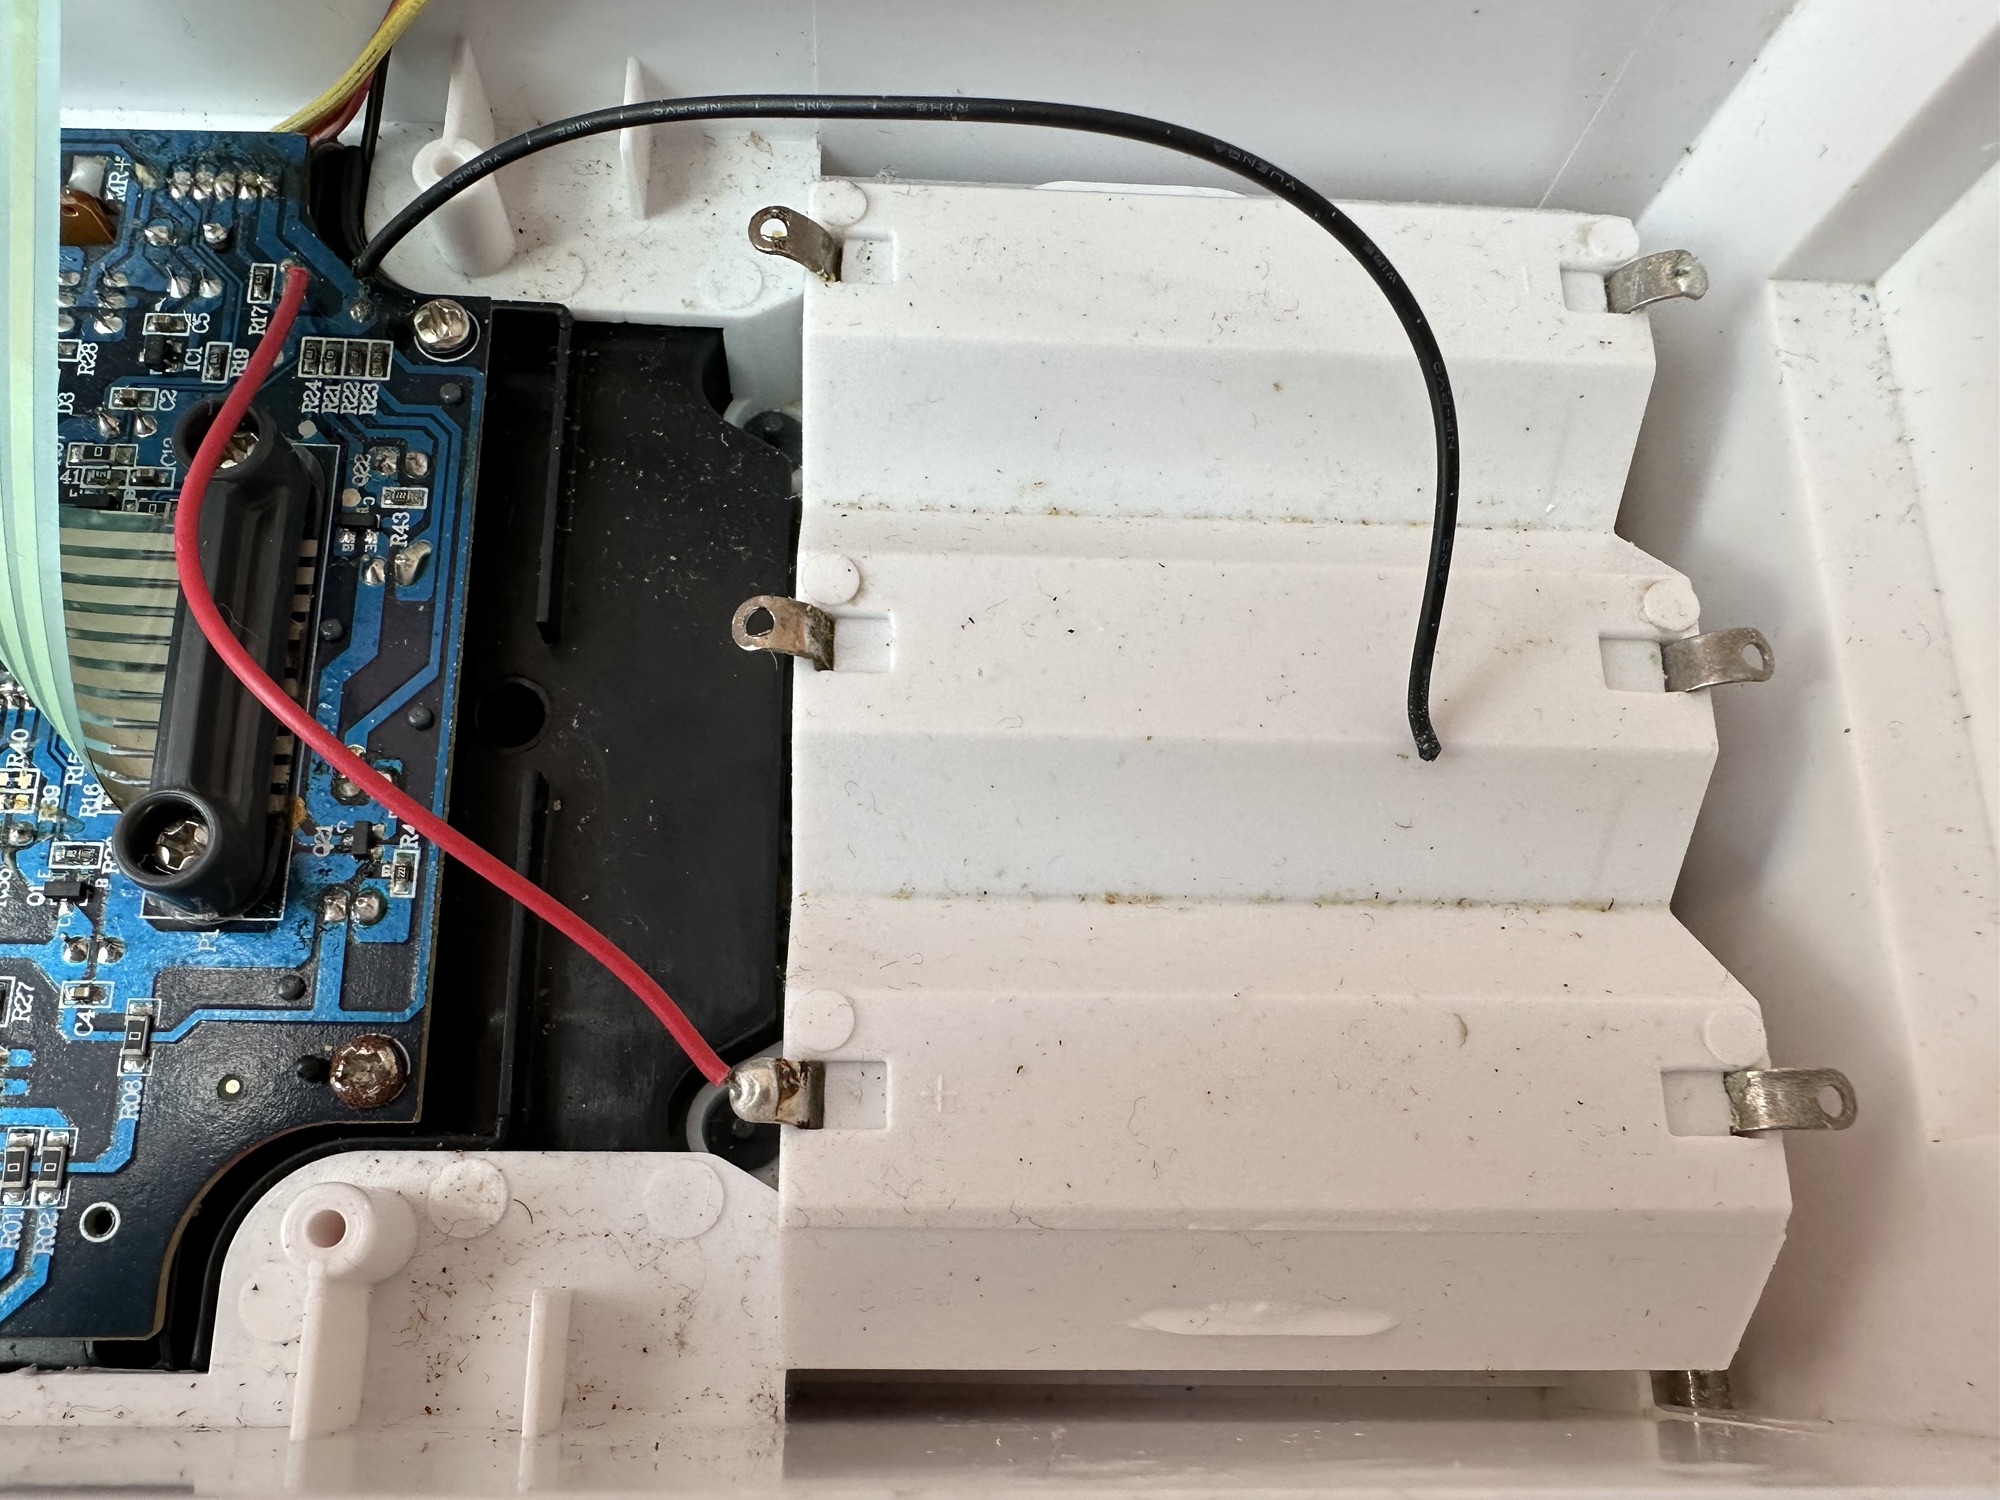
A small bit of desoldering, removal of the speaker clamp and the speaker comes away after a little persuasion. I take the opportunity to clean the board and all the battery contacts with some cleaner, and all corrosion marks and debris are now a thing of the past.
Corrosion cleaned
I put some contact adhesive on the speaker grill and put the new speaker in place, clamp is attached and I now solder the speaker wires back in place.
All screws back in place, new batteries in the rear and battery hat hatch closed, the unit looks good.
But does it work?
Radio works – have a listen
You betcha! Have a listen to the short video above to hear it as it should be.
I’m very pleased with this little project. Simple repair in the end but in my eyes it’s another item that isn’t going to landfill. And that’s a win for me, as it’s a nice little radio and I’m going to get some good use out of this.


You must be logged in to post a comment.