

What the listing stated:
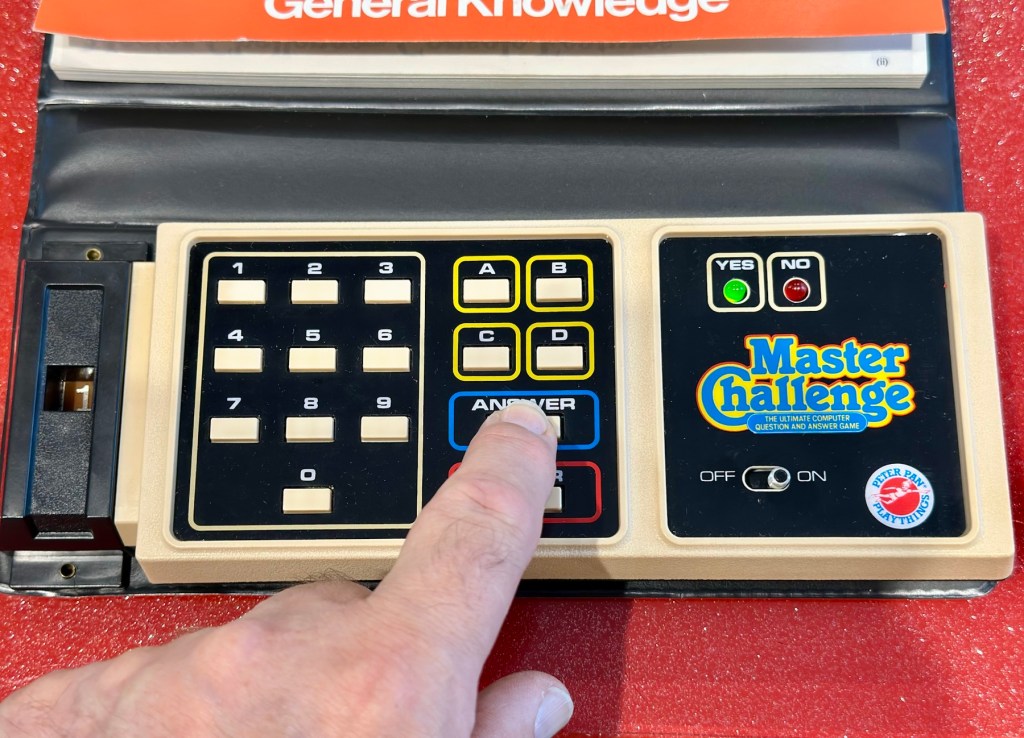
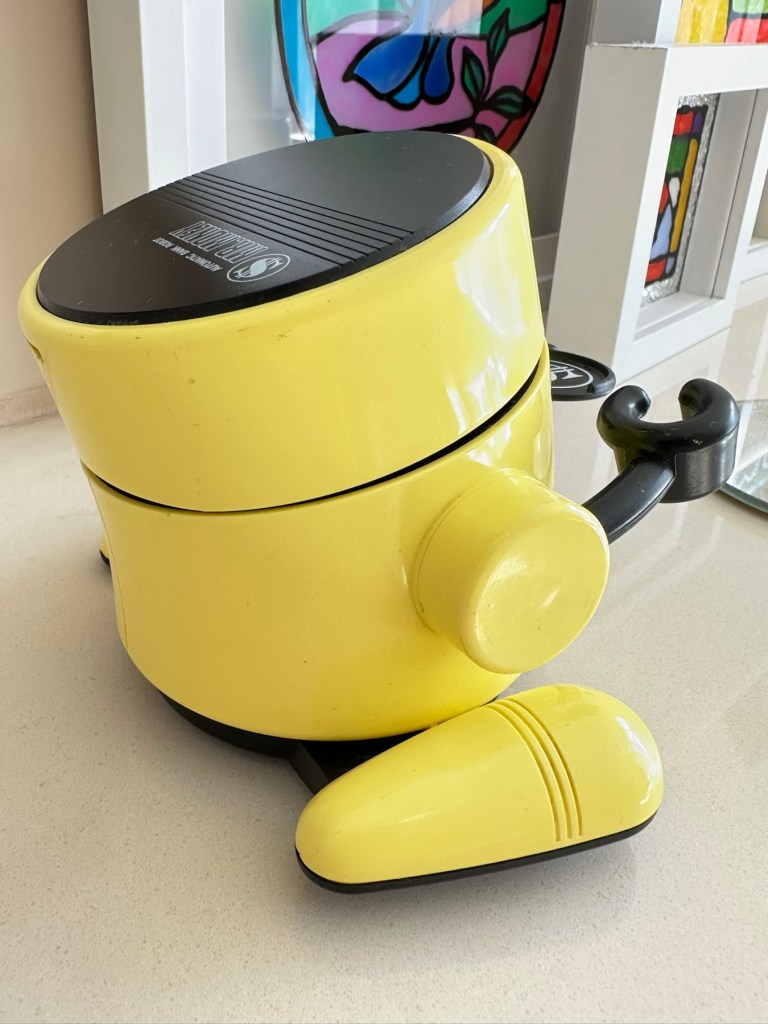
Embark on a journey down memory lane with the vintage Master Challenge Computer Electronic Quiz Game by Peter Pan. This handheld electronic game offers a test of knowledge and skill, making it a splendid addition to any game’s collection. Ideal for enthusiasts of retro gaming, it provides hours of entertainment as you tackle a variety of questions and challenges.
As a sought-after piece amongst collectors, this game is a testament to the era of classic toys and games. Whether you’re looking to complete your set of electronic games or seeking a unique gift for a vintage game aficionado, the Master Challenge game promises to be a talking point at any gathering.
This item is sold as spares and repairs as not working. Please send offers or ask any questions.
EBay
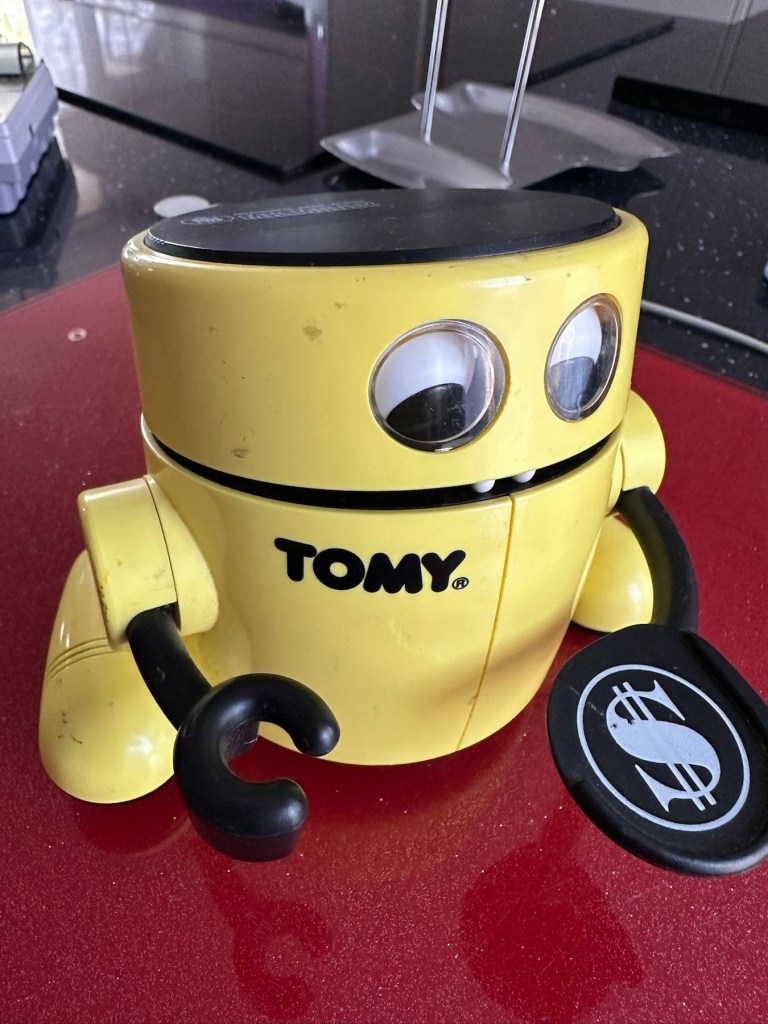
The seller here has obviously used the wonderful AI assistant to write this post as it is so false. The unit is incomplete, it is probably not sought after, as it was not that well received back in the day, and in its current state is probably only fit to be disposed of, also an important part of it is missing. However I’m not for disposing of items such as this and will endeavour to get it back into a working state, it’s just going to take a little time and patience.


Some history:
Peter Pan Playthings Ltd was a British toy company founded in 1963. It bought Salter Science and other assets from the receivers of Thomas Salter Ltd. In 1972 the company reported a £80,000 profit. The following year it was acquired by Berwick Timpo.
The company was sold on to Bluebird Toys in 1987, which continued to use the Peter Pan Playthings brand for several years.
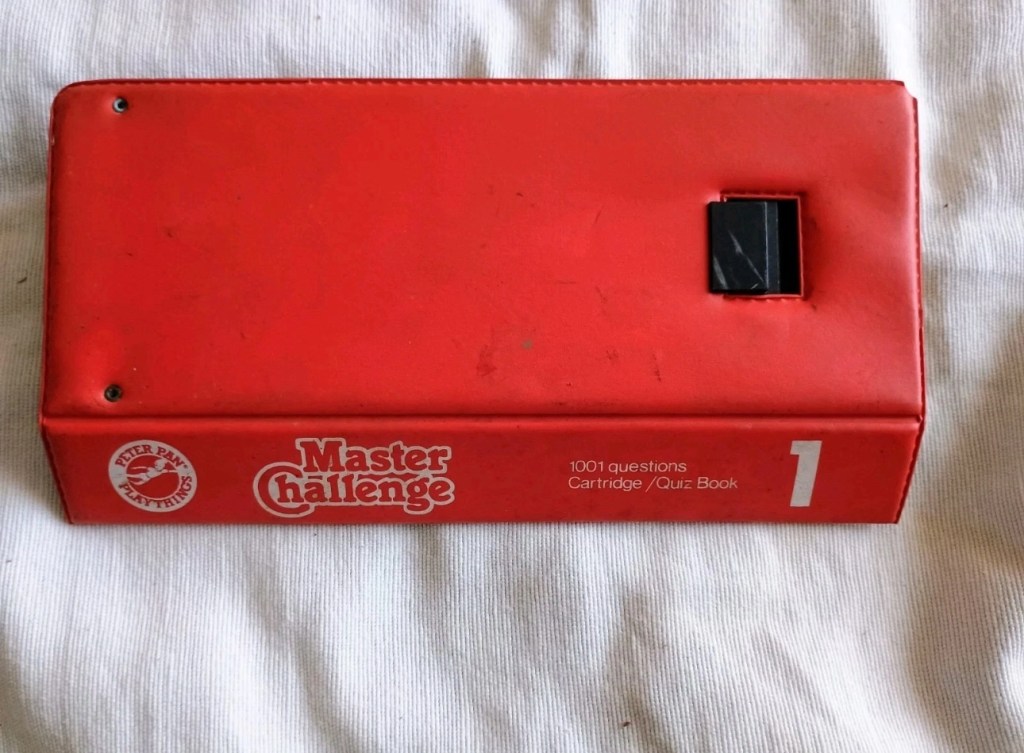
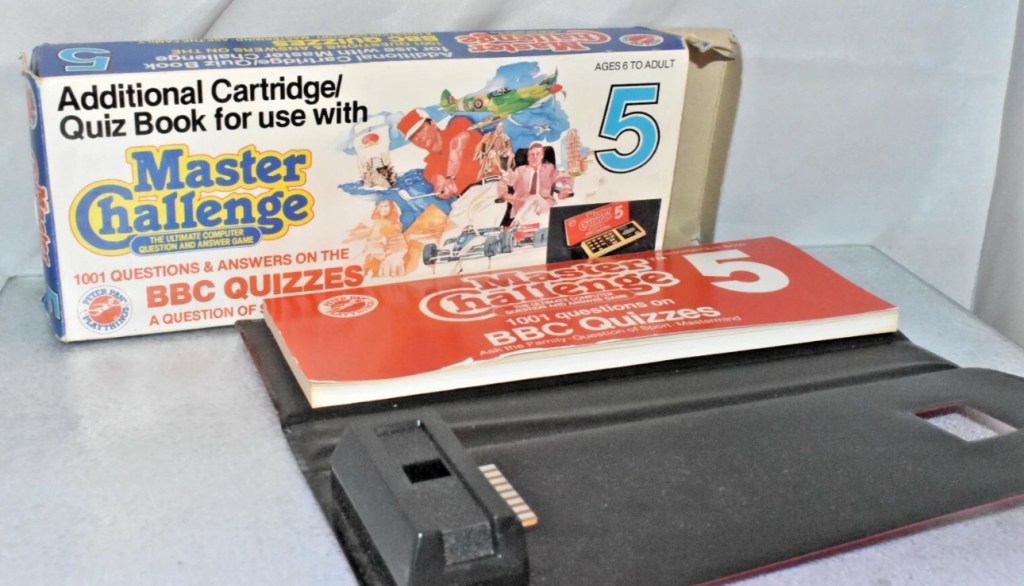
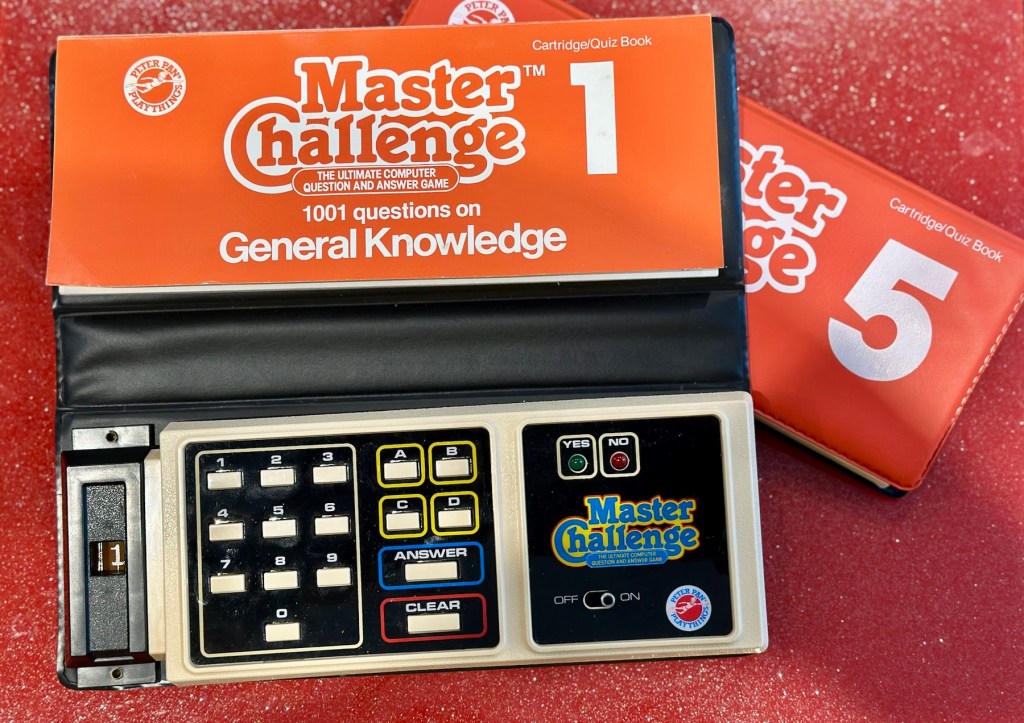
Produced around 1980, the Master Challenge system was licensed from Coleco (Coleco’s Quiz Wiz system), this was released in the U.K. by Peter Pan Playthings. There were 30 different cartridges for Coleco’s version. The unit comes with a question book and the system is used to answer those questions. It is currently unknown how many cartridges were made for the UK version.
T’internet
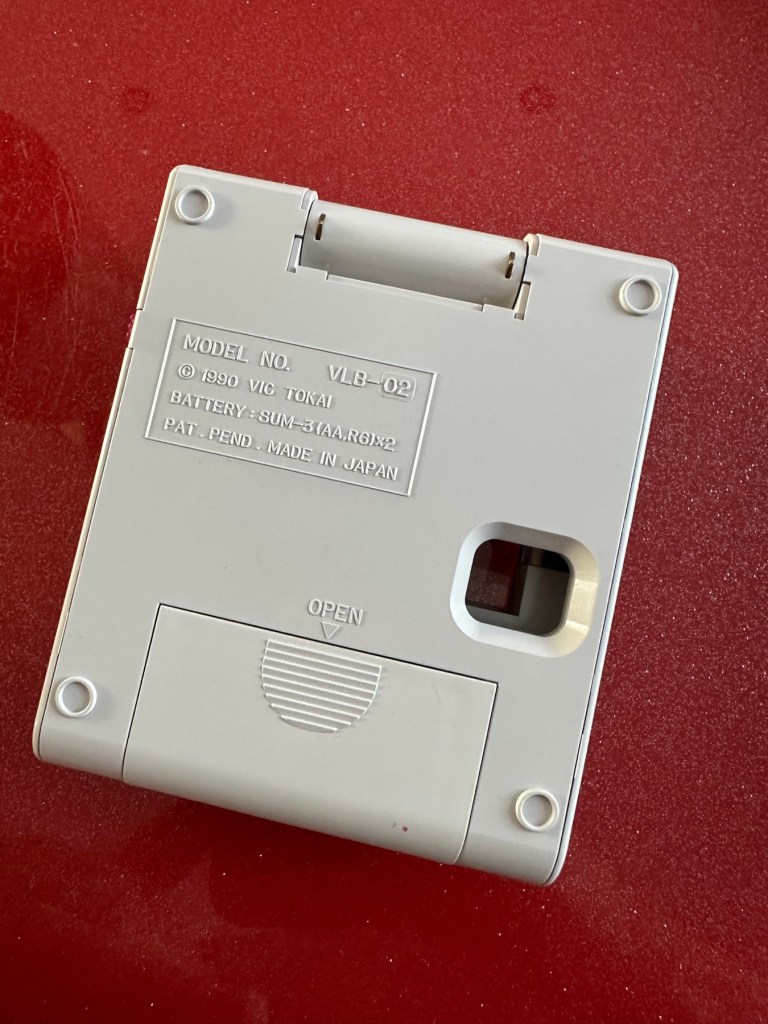
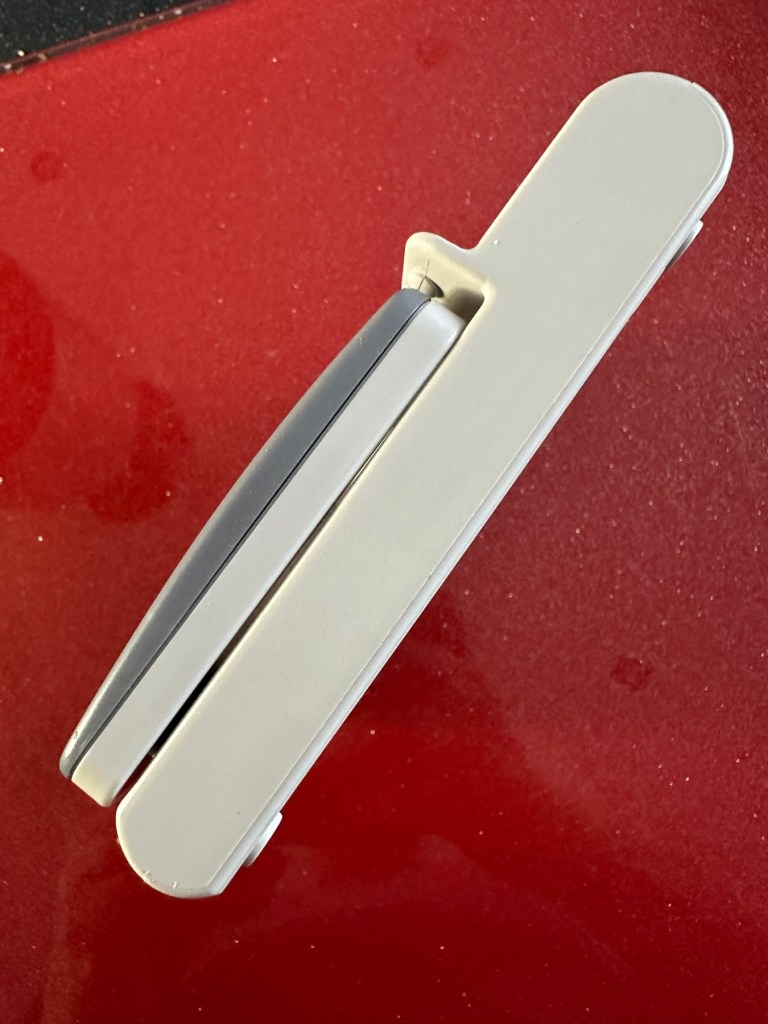
So for some unknown reason I have purchased this 45yr old piece of retro nonsense because I just can’t keep my bidding finger still. That’ll teach me a lesson. I’ve paid the grand total including postage of £5:69GBP, and I think it is missing the most important part, the book of questions that go with the cartridge, usually attached to the binder that encompasses the unit. It’s also broken, so it needs fixing anyway, and I believe extra cartridges can be purchased, so if I can get it working, and I can obtain further cartridges then no problem. If I can’t, then there is a problem. The battery cover is also missing. I’m a fool, honestly I am.
Whereas the Coleco Wiz system had 30 different cartridges available I believe the Uk version only had the 6 as listed below:
- 1 – General knowledge
- 2 – World of sport
- 3 – Music
- 4 – The bible
- 5 – BBC quizzes
- 6 – BBCs Top of the form
And back in the 1980 these additional cartridges and quiz books could be purchased for £6:99 GBP and 50 pence postage! Quite pricey for the time.
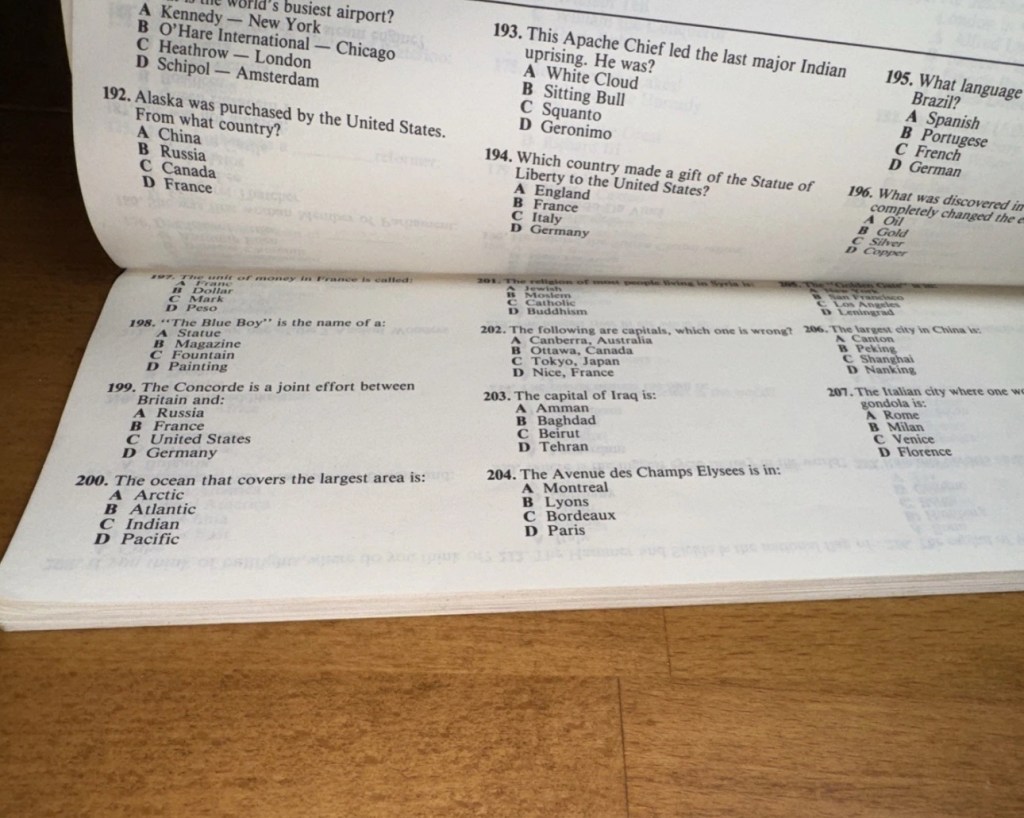
On this particular cartridge or what remains of it are the pre programmed answers to 1001 questions that I’m not in possession of. How novel. I have managed to find a photo on line that has some questions showing on it, these would have been in the original book that would normally be attached to the binder of this unit, so this should be sufficient to at least test the game in its current form.
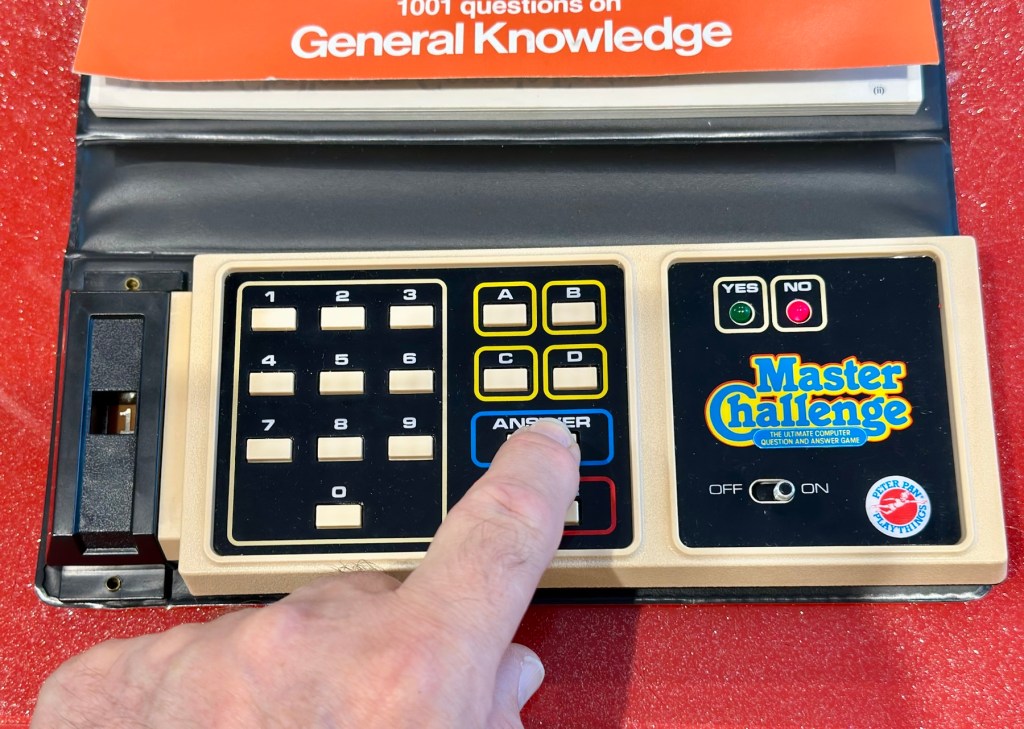
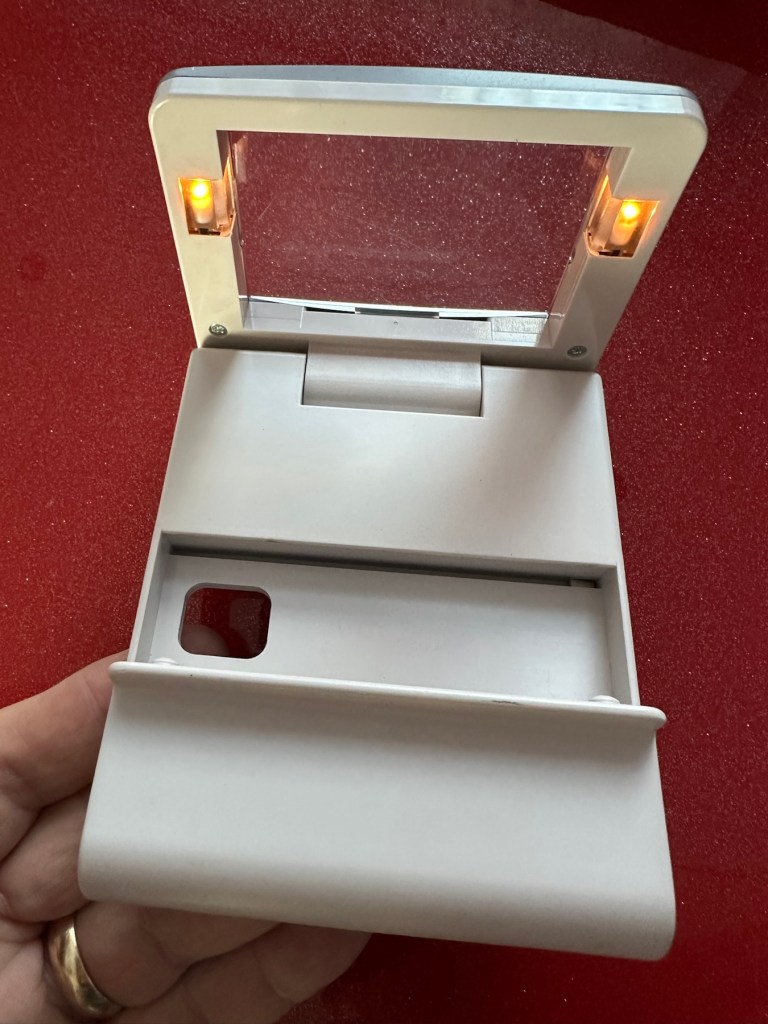
The game works in such a way that you choose a question from the book, you then use the unit to give your answers. If the answer is wrong you hear a corresponding low pitched sound and get a red light. If you are right you hear a high pitch sound and see a green light.

So basic in its operation, many thought it was totally pointless back in the day. However this was computerised technology in its earliest and most basic form and was at the dawn of a new era of personal entertainment. It deserves to be preserved.
To cover my apparent foolishness I have found another cartridge that I’m going to purchase to make this unit complete.
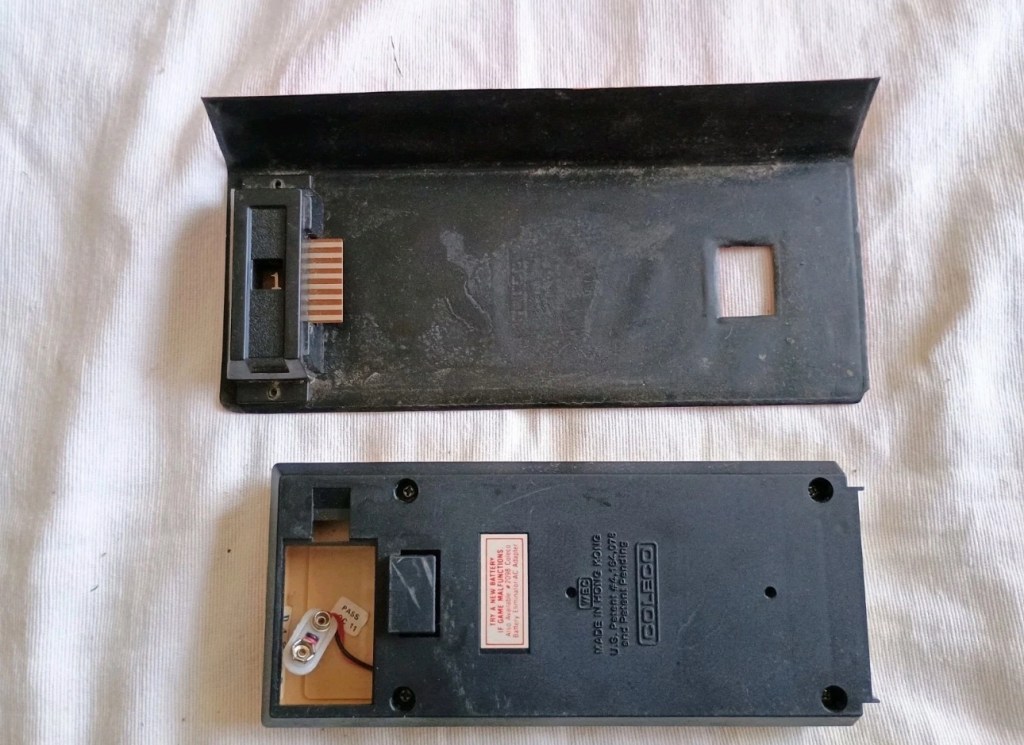
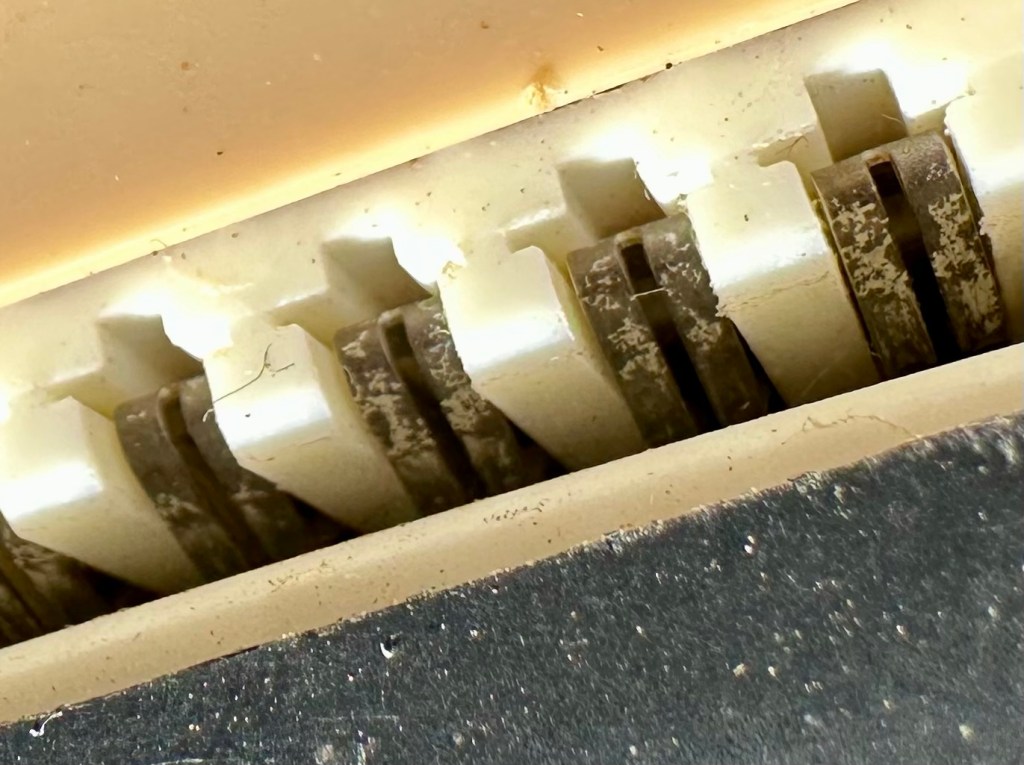
These plug in units come in a binder format with the brains of the game situated in an enclosed plastic block on the base of the binder, i suspect it is something along the lines of an integrated circuit. I can’t open this one as it is sealed, however when the old one arrives i will open it up as that one doesn’t have a quiz book with it. It will be good to see just what is inside. This little unit contains all the answers to the 1001 questions that are provided in the attached quiz book that slots into the top of the binder. The number inside the block indicates the quiz book reference.


The faulty computer unit I am awaiting, then slots into the binder and block by the pins you see in the photo above. The computer then simply has to decide whether your answer choices are right or wrong. And that’s the crux of the game in a nutshell.
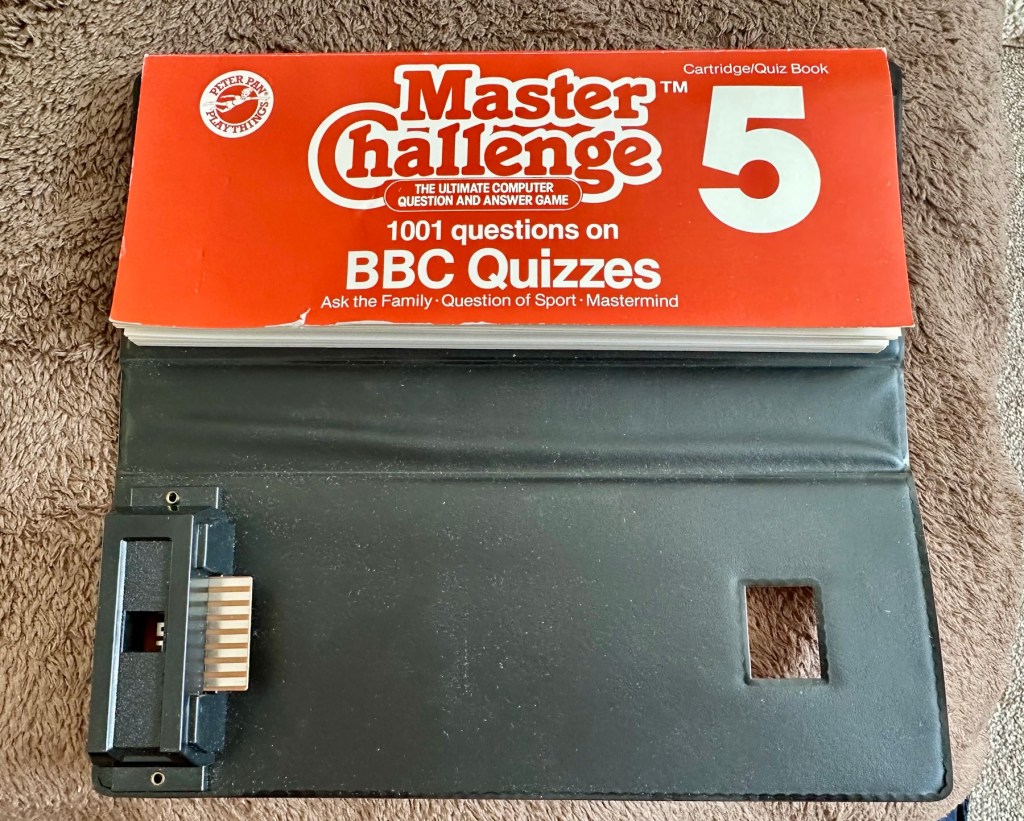
Whilst awaiting this broken units arrival, I’ve purchased the additional set of plug in questions seen in the pictures above. This is an additional 1001 questions set, based on all the old BBC quizzes. It’s complete with answer book and the complete surrounding binder. It has arrived ahead of the faulty unit and is in an exceptionally good condition considering its age. None of the mustiness you’d expect from an item that is 45 years old. It must have been stored with great consideration. It’s cost me more than the broken unit, this cost a total of £8:15GBP, so that makes a running total of £13:84. I do have another game cartridge on order that I picked up for another £7:83GBP but I’m quite happy with this. It will be a nice addition to the games box that comes out when the family or guests come around, and everyone loves an old retro style game. It will certainly be a talking point, that’s for sure.
Assessment:
I’ve not even received the unit yet and I’m getting a bit ahead of myself wondering just what could be wrong with it. Its operation is so basic, think it could only be one of five things possibly be at fault.
- Pins that read the cartridge are dirty/damaged
- Contamination in the battery area
- Loose wires
- Faulty switch
- Cold solder joints
I guess we will just have to await its arrival when we can make an accurate assessment.
The unit has arrived and it’s a tatty looking piece. Dirty, and only the remains of the binder that used to accompany it.

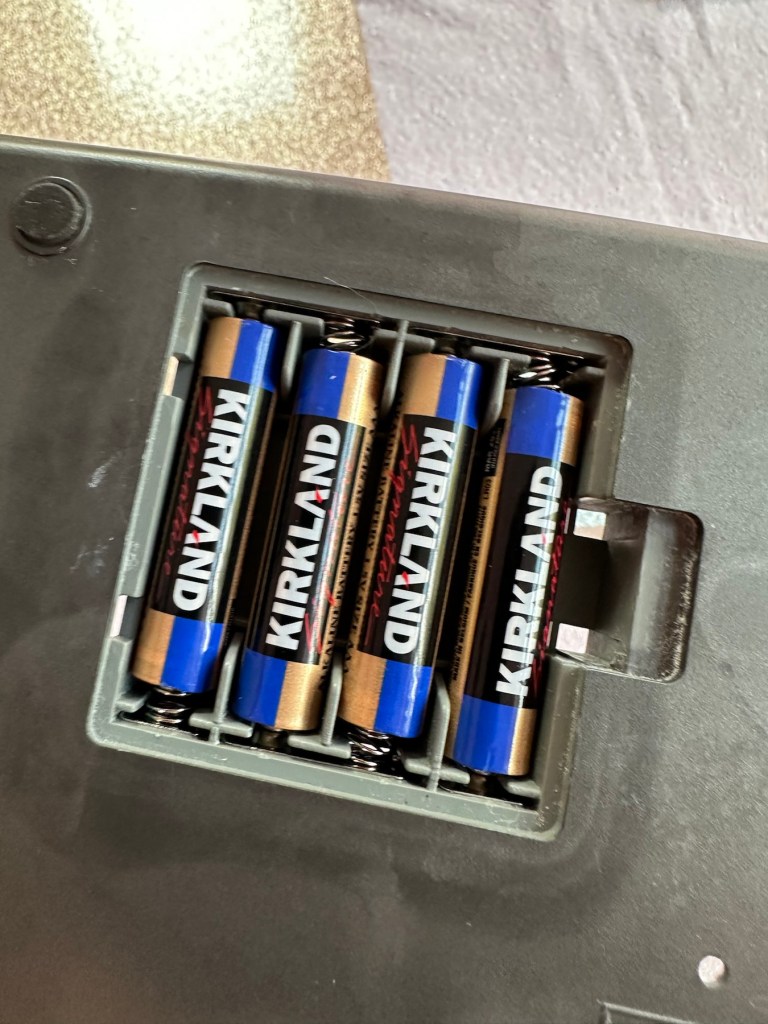
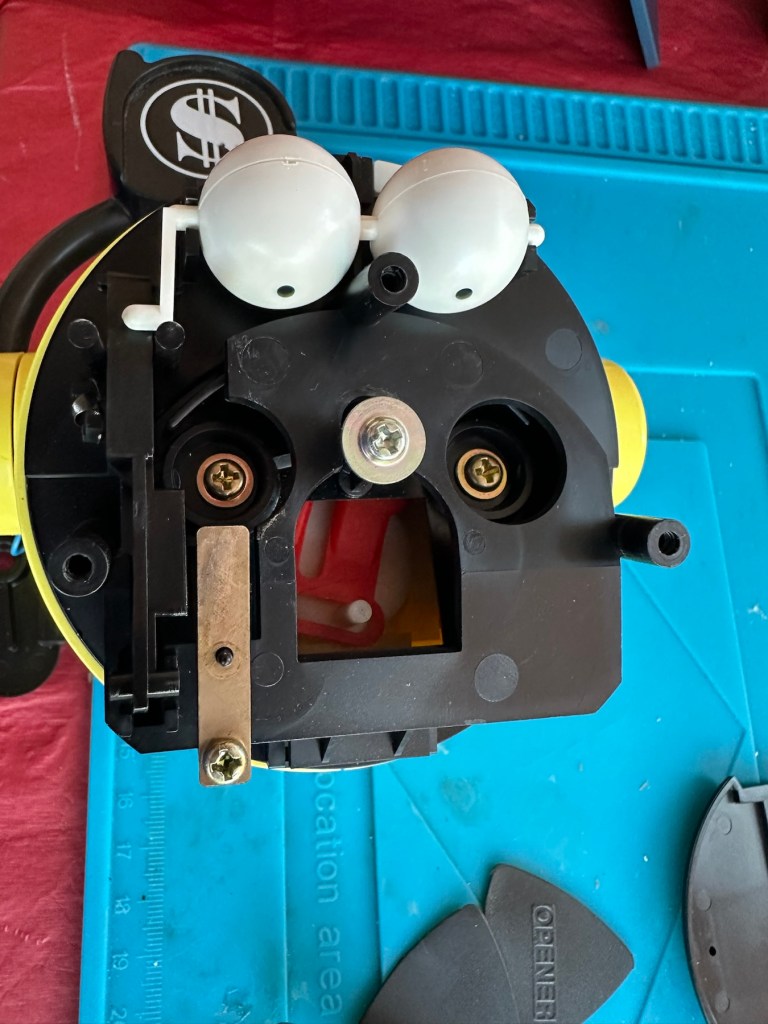
I’ve put in some batteries and there is very dead. There is the occasional buzz when the switch is slowly moved but nothing else. It could be a faulty switch, it could be the contacts. I’m going to have to open it up and get down to board level.
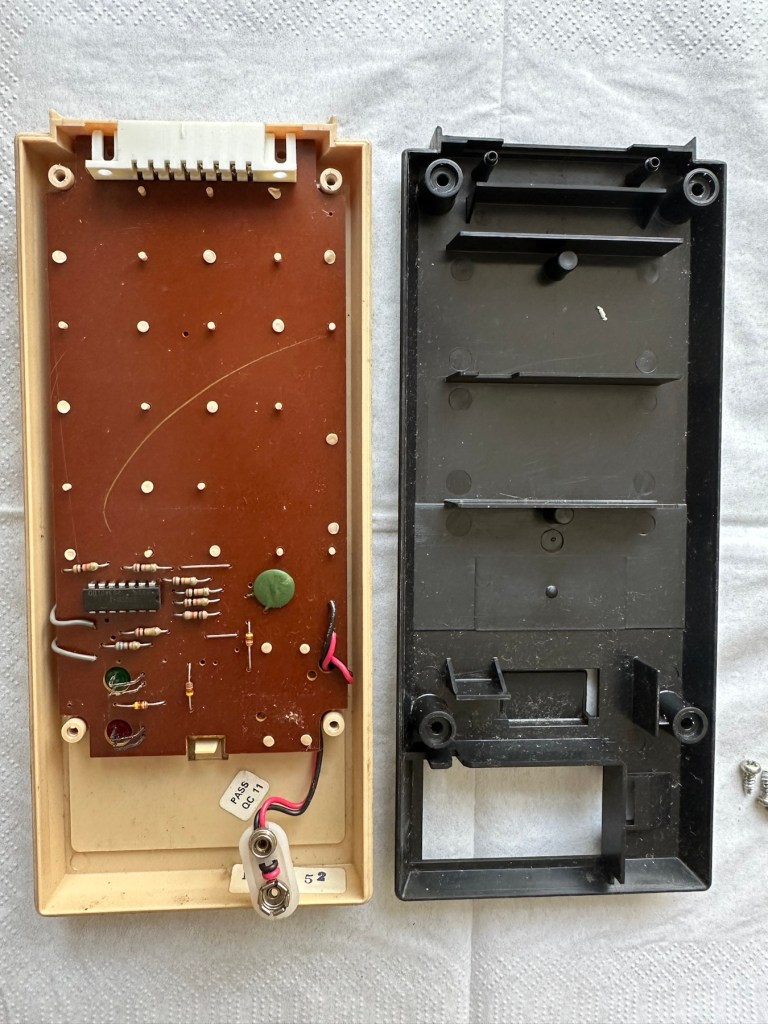
The problem here is that inside there are no screws attached to the inside support posts. The whole unit has been welded, all plastic posts have had heat applied to moulding the post tops. I’m going to have to break these off and try to re-weld them when we’ve got it all working again….if we can.
In the meantime I’m going to open up the the plug in module that’s attached to what is left of the old binder, i might as well sacrifice that piece as it’s of no use to me and it’s in the name of research.

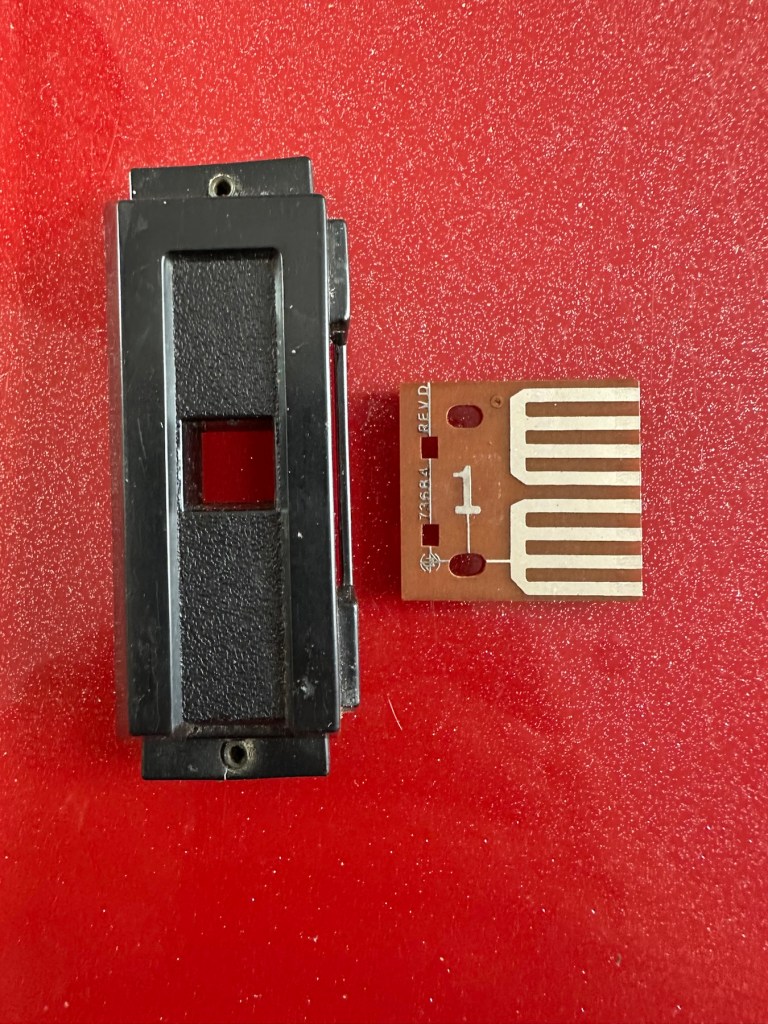

Now I thought they’d be some kind of integrated circuit in here but there is not. It appears to be just a board with two sets of comb like traces that would appear to just short together in the unit. Makes you wonder if the questions in the book follow some simple kind of algorithm that the unit just adheres to. Maybe every so many questions, they all have the same answer, there must be some simple and basic way that the unit knows the preprogrammed answers. Maybe I’ll find out more when I look inside the actual “Computer” unit.
Repair:
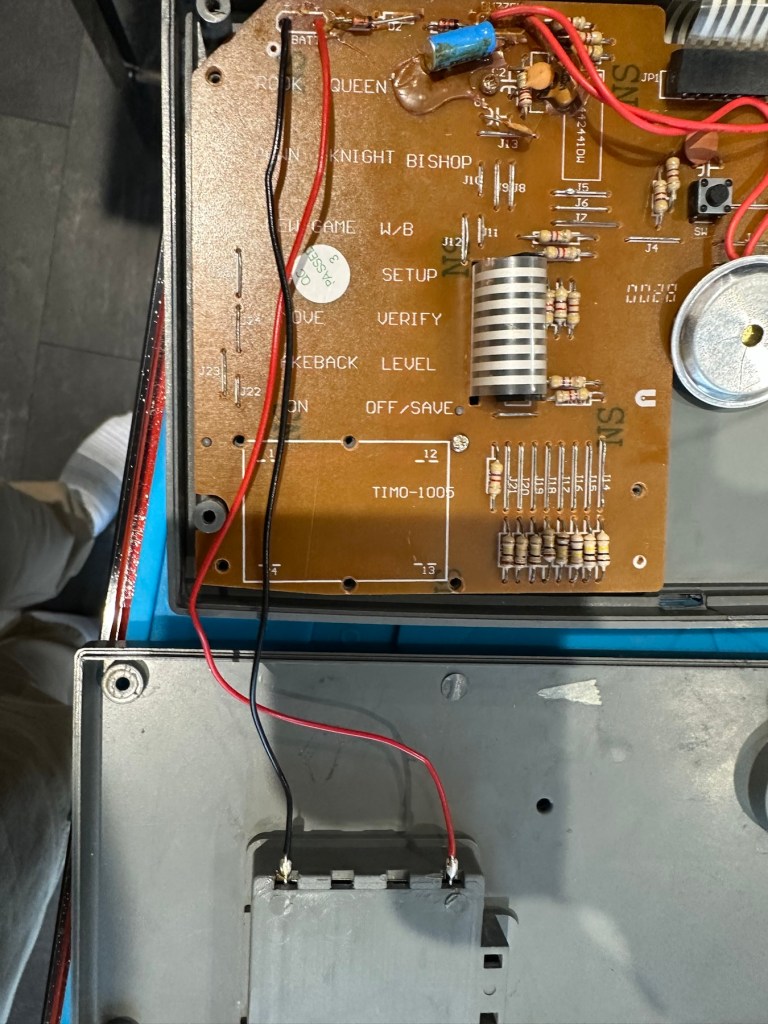
Inside the unit there is not a great deal of components apart from a single IC a capacitor and a number of diodes and resistors.
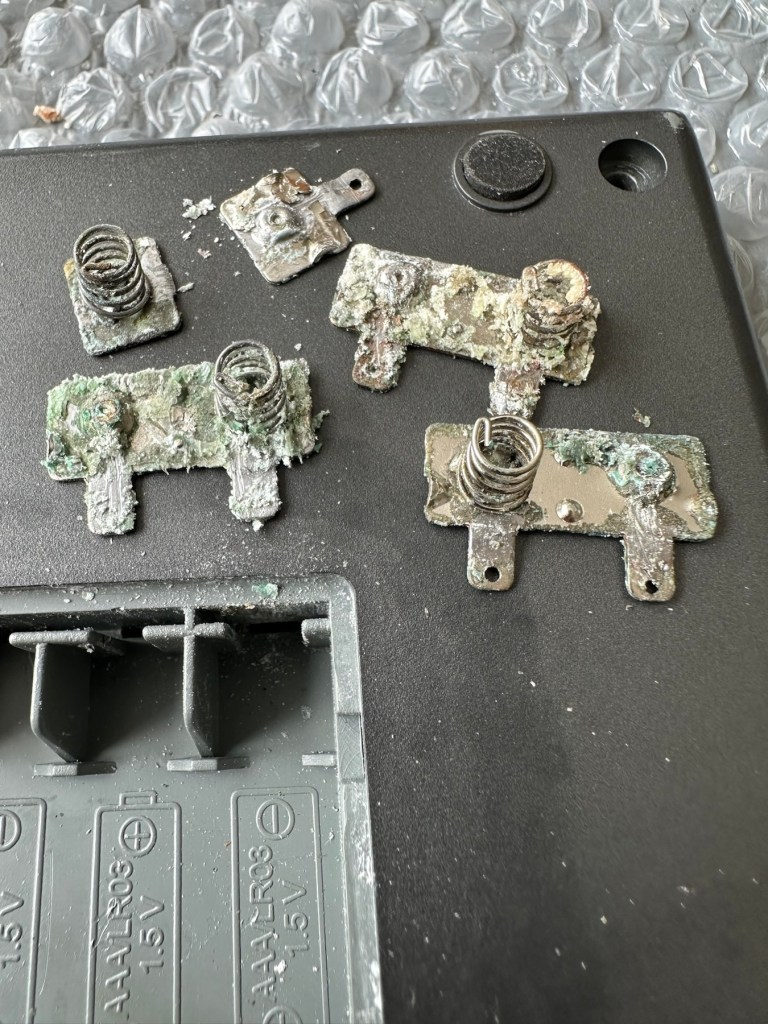
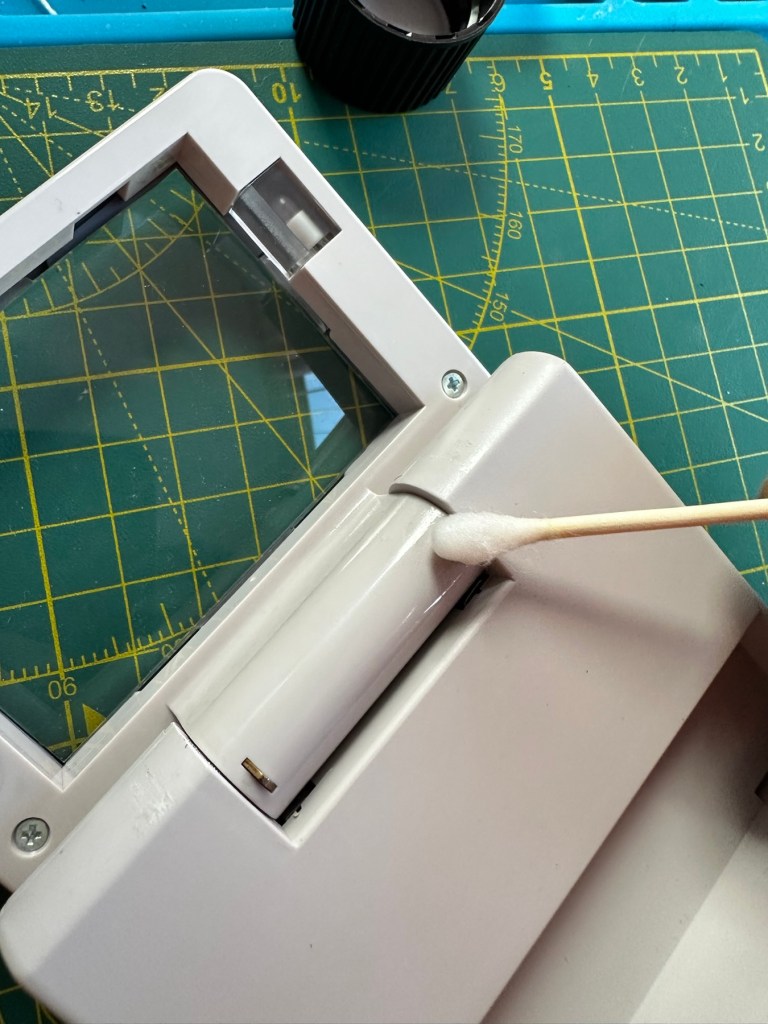
I’ve used a very fine emery board I borrowed off of my wife (don’t tell her) to try to get in and clean these contacts, as I believe this is what is causing the issue.

All buttons are under a sheet of tape. I have removed this tape, cleaned all the contacts with IPA and repositioned them and re taped them using Kapton tape. They are a lot cleaner and are clicking nicely.

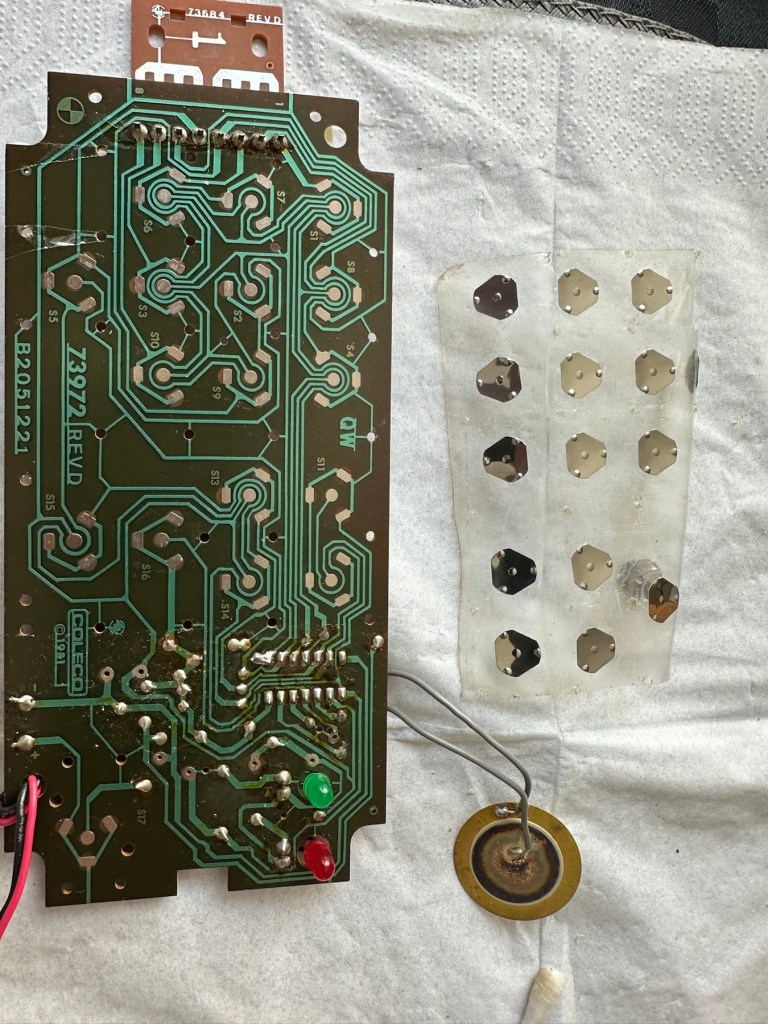
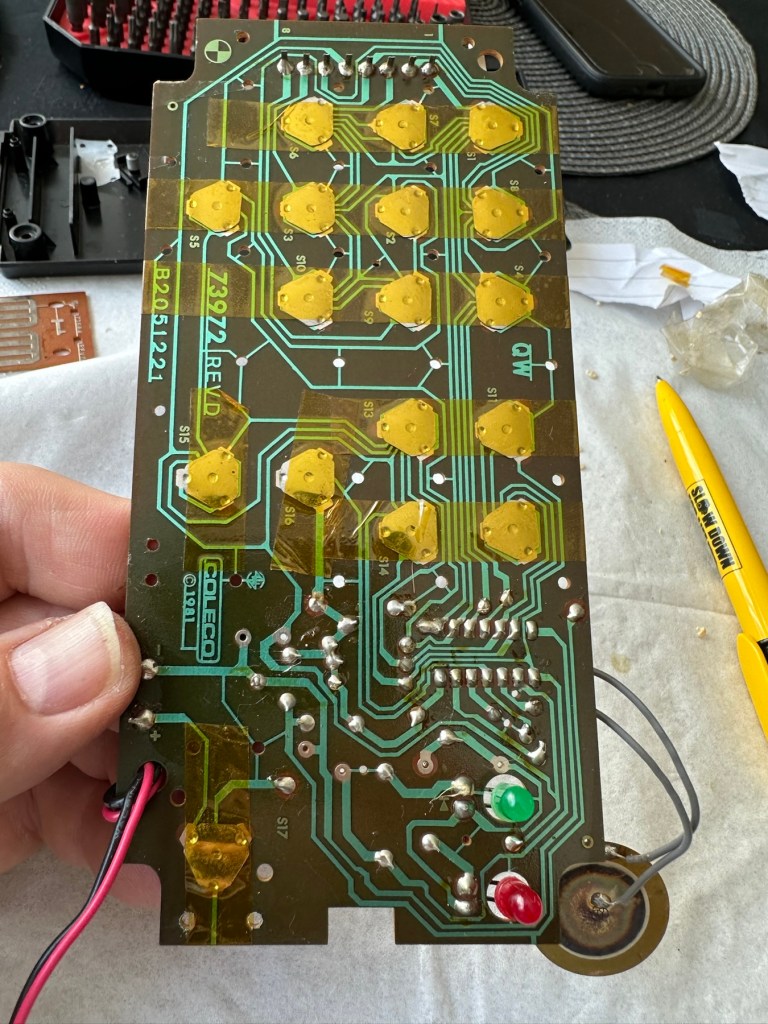
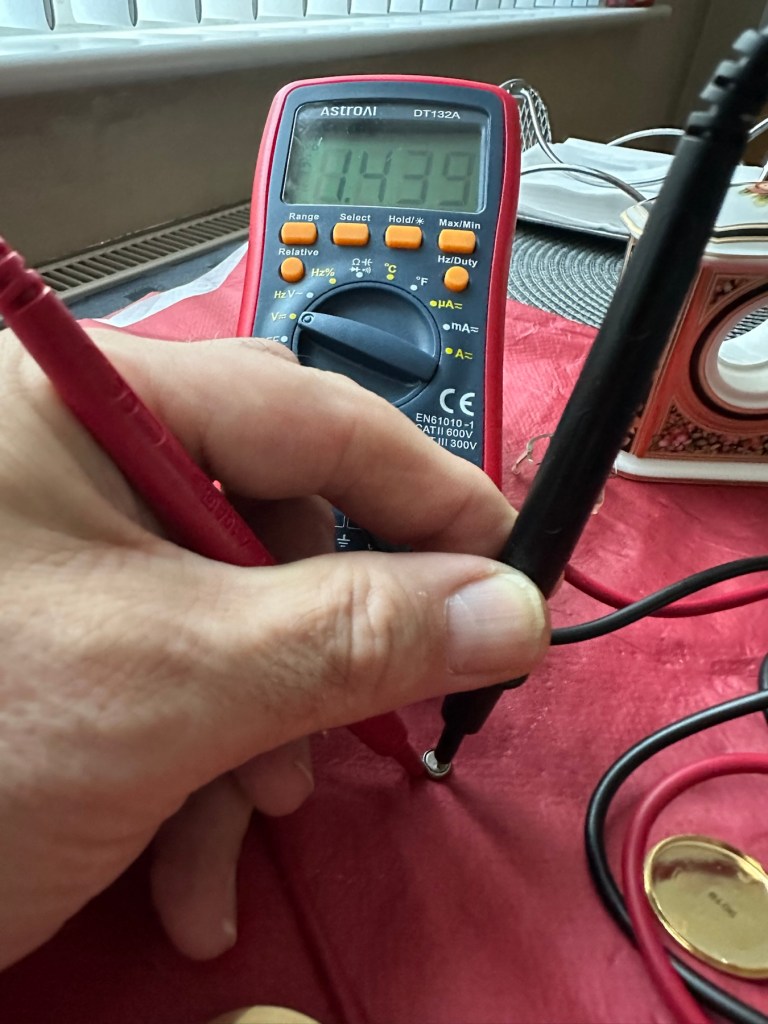
The contacts where the game cartridge is inserted are quite contaminated so these also have to be cleaned.
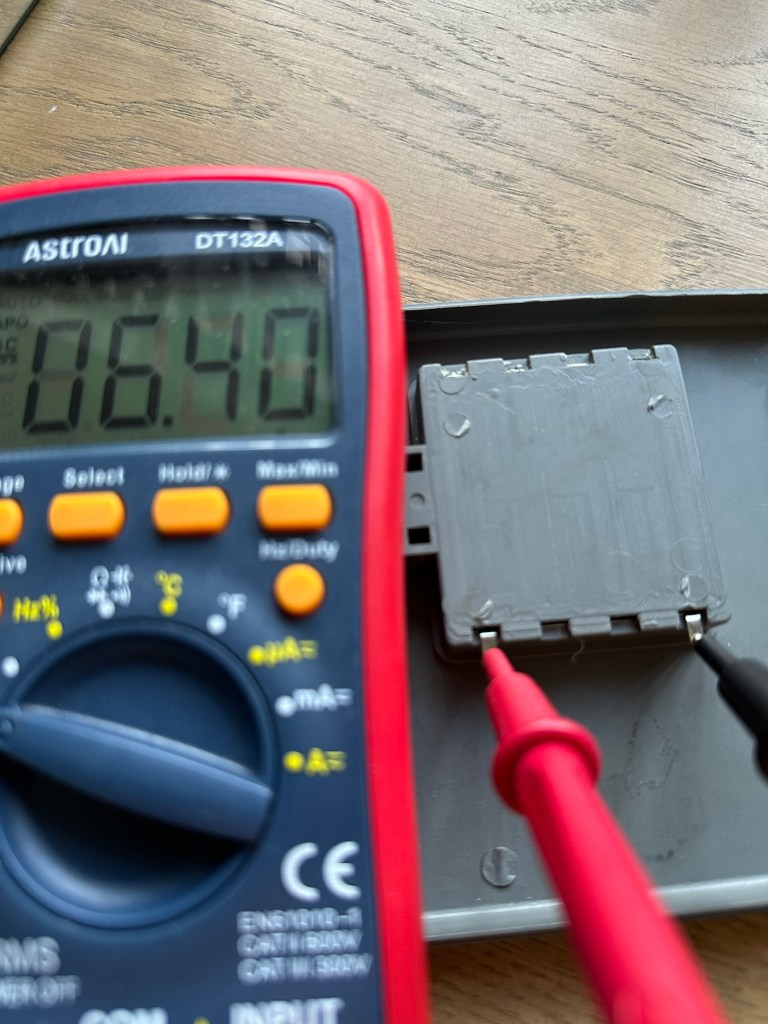
I’ve used an emery board to clean the contacts up on the unit, and when the cartridge is inserted we have a result. The first ten questions I have input have had correct answers only and no duplicates, so it really does really look as if the contacts were contaminated causing some kind of issue with the two parts of the game communicating.
Result:
It’s had a good clean both inside and out and a few of the old items inside replaced and given a new lease of life. The unit is now fully working and can be seen doing so in the little video below.
I’ve since purchased a new binder for question set 1, so I now have that along with question set number 5. I’ll keep an eye on the auction sites to see if any of the other sets become available, and who knows I may try to get a full set. Now that would be quite rare I’d imagine.


I love digging around in these 80s units and just wonder at how basic the technology was back then, it’s just amazingly simple and so well put together. Anyway, this one is now working and good to go for a few more years yet. Saved from landfill we have another successful repair under the belt.
Thanks as usual for popping by. It’s most appreciated.


You must be logged in to post a comment.