The world’s first SLR 110 format film camera. A strange creation that has its issues, from 1976-79. Can it be resurrected and put back to use?
What the listing stated:
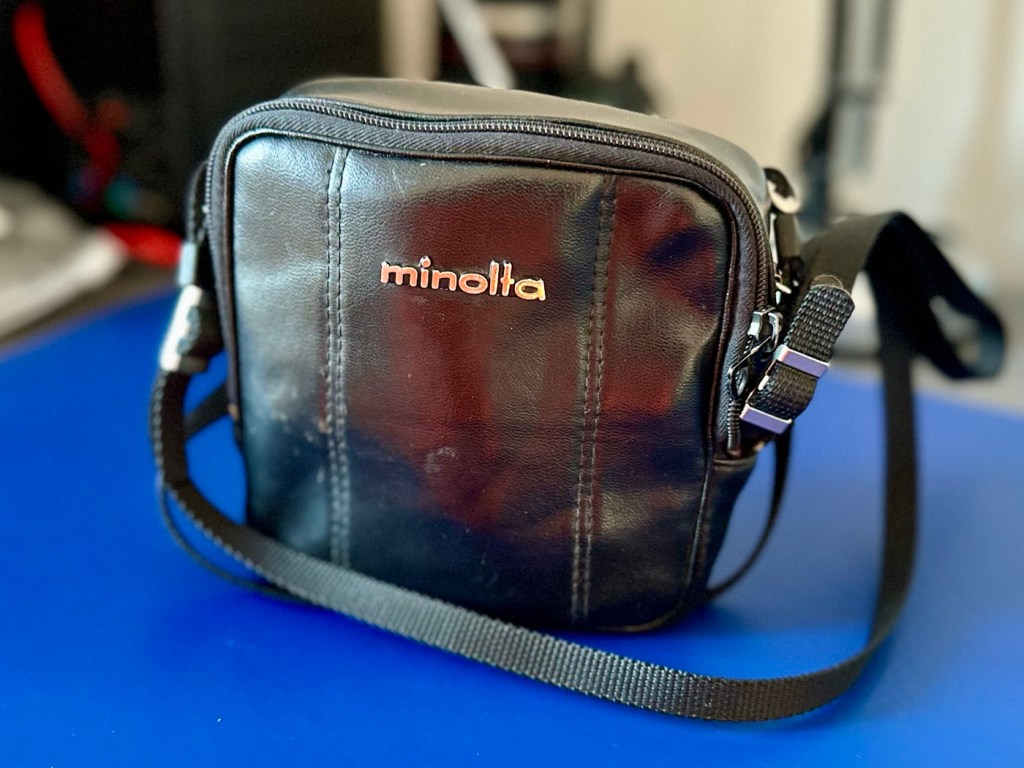
The Untested MK1 1970s Minolta 110 Zoom SLR is a vintage film camera that comes with a case and strap, making it easy to transport and store. This compact camera from Minolta features manual focus and is designed for 110 film in a 13x17mm format. The black-coloured body gives it a classic and timeless look, perfect for film photography enthusiasts looking to experiment with older technology.
With its retro charm and unique capabilities, this Minolta 110 Zoom SLR offers a glimpse into the photographic world of the 1970s. Untested
EBay
Yes you did read right, this is a 110 format camera with SLR. Now, I have had this camera sitting amongst my backlog for a few months now, it was purchased towards the end of 2025. I believe I paid the sum of £14:00GBP for it, and considering current prices on the sales sites it’s quite the bargain I think.
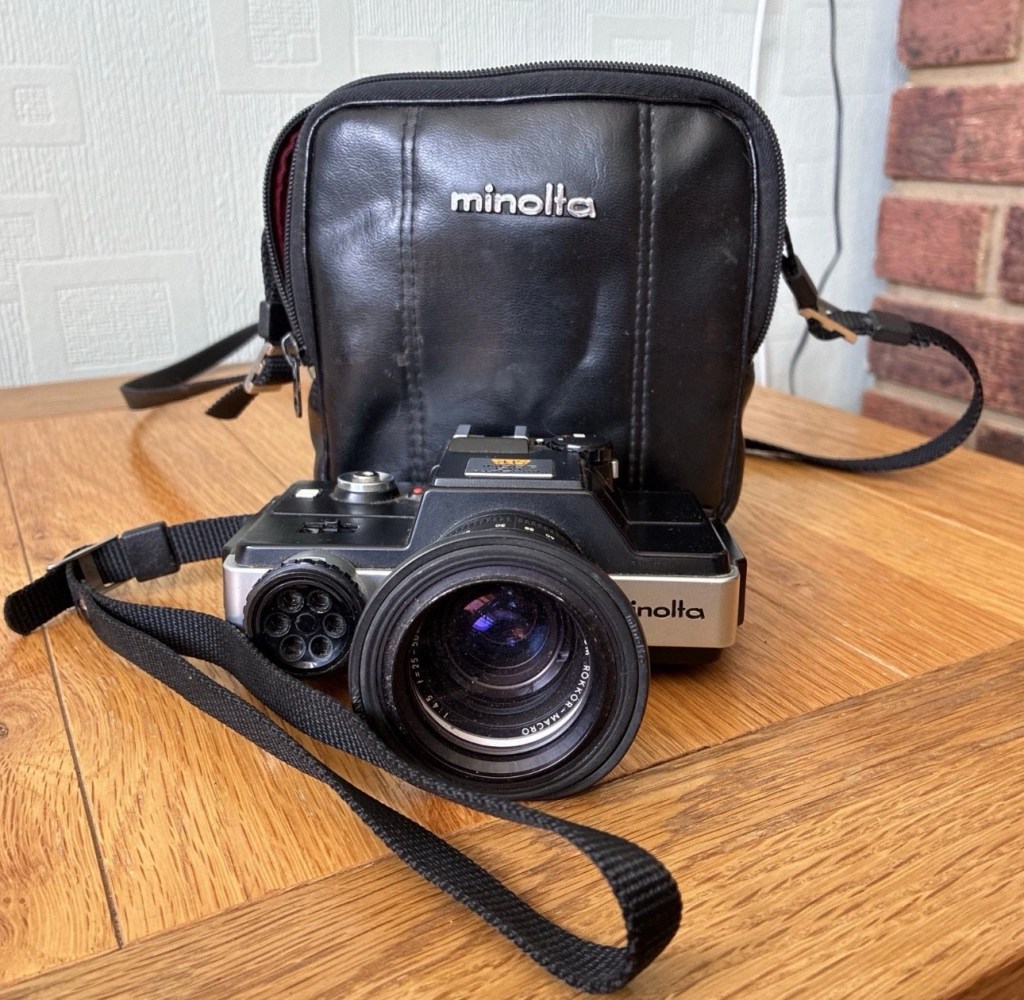
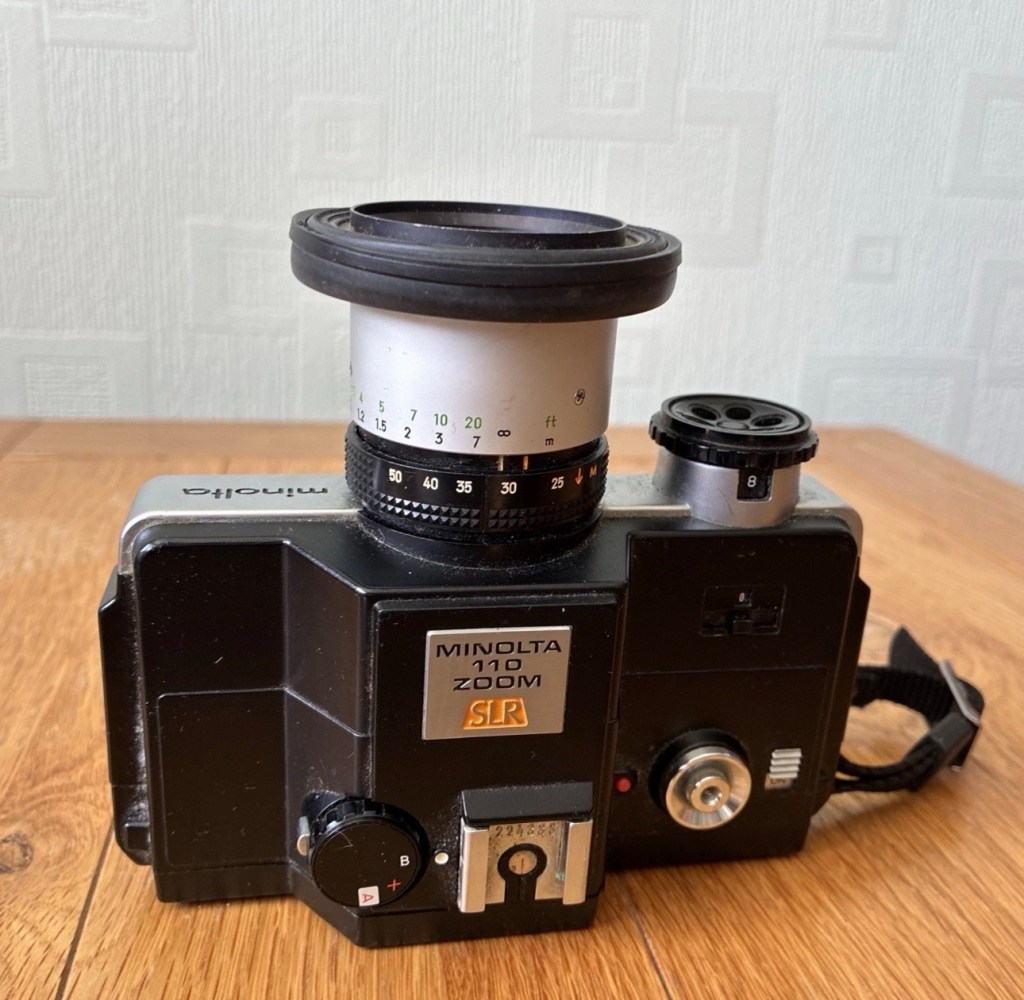
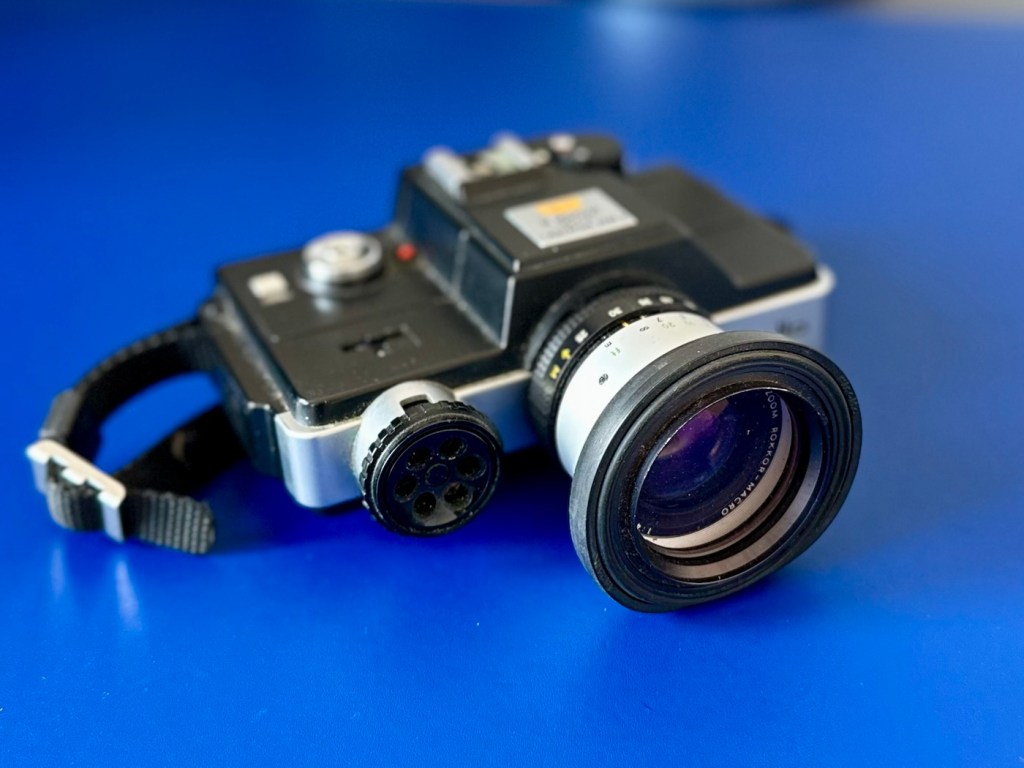
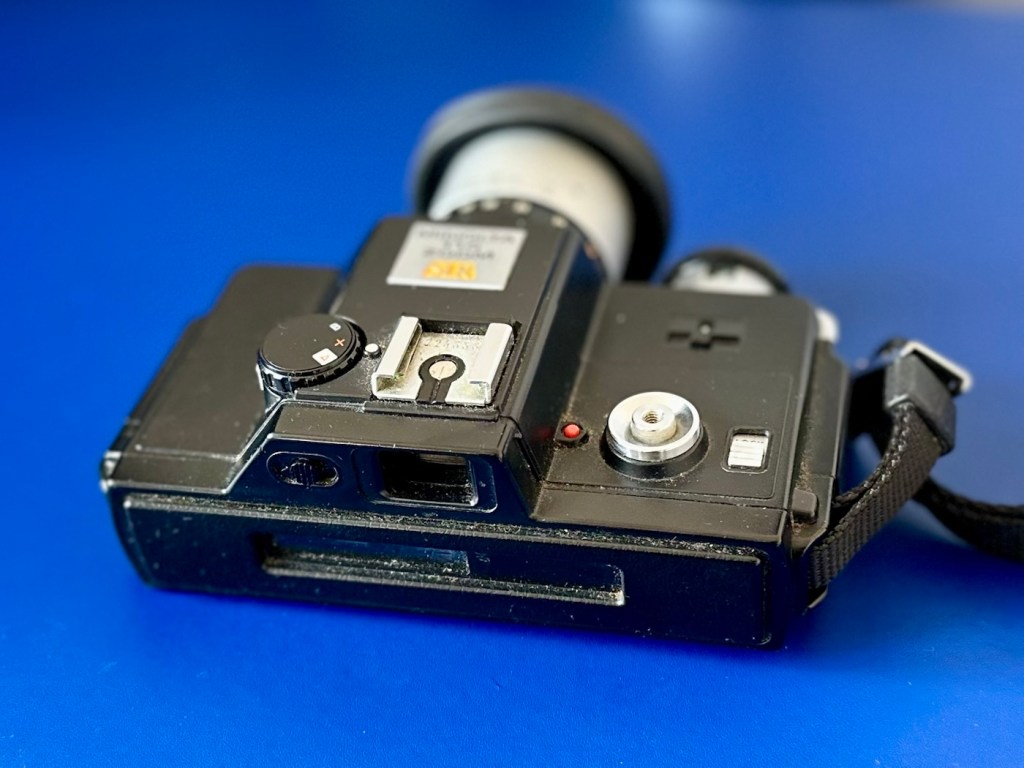
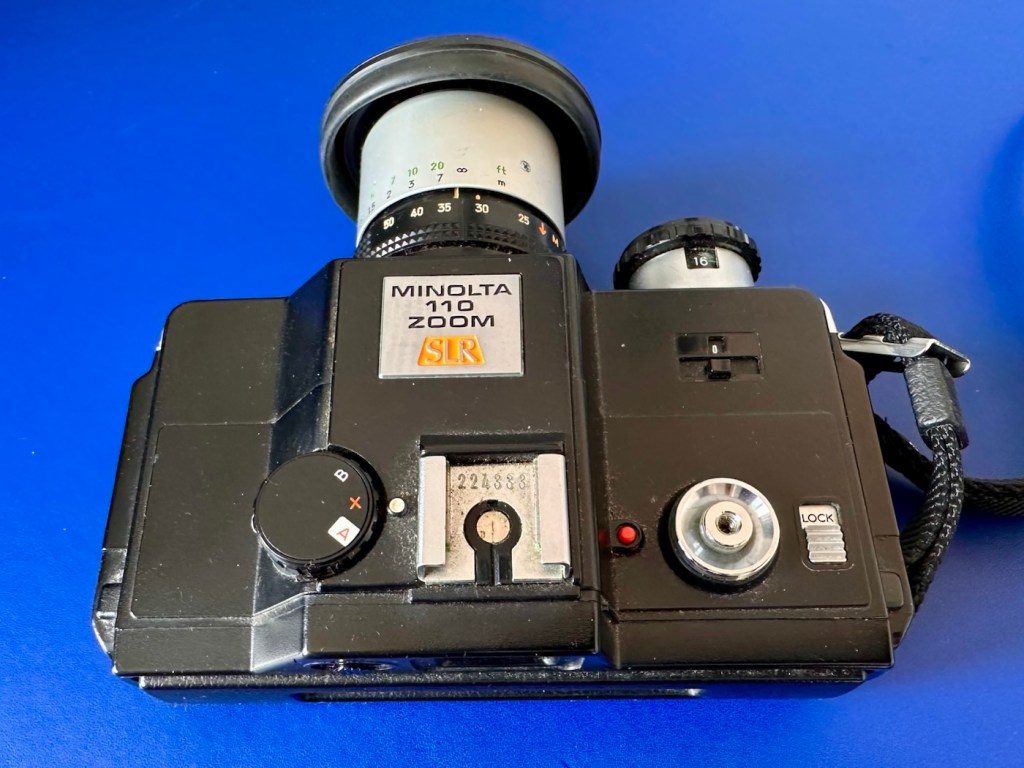
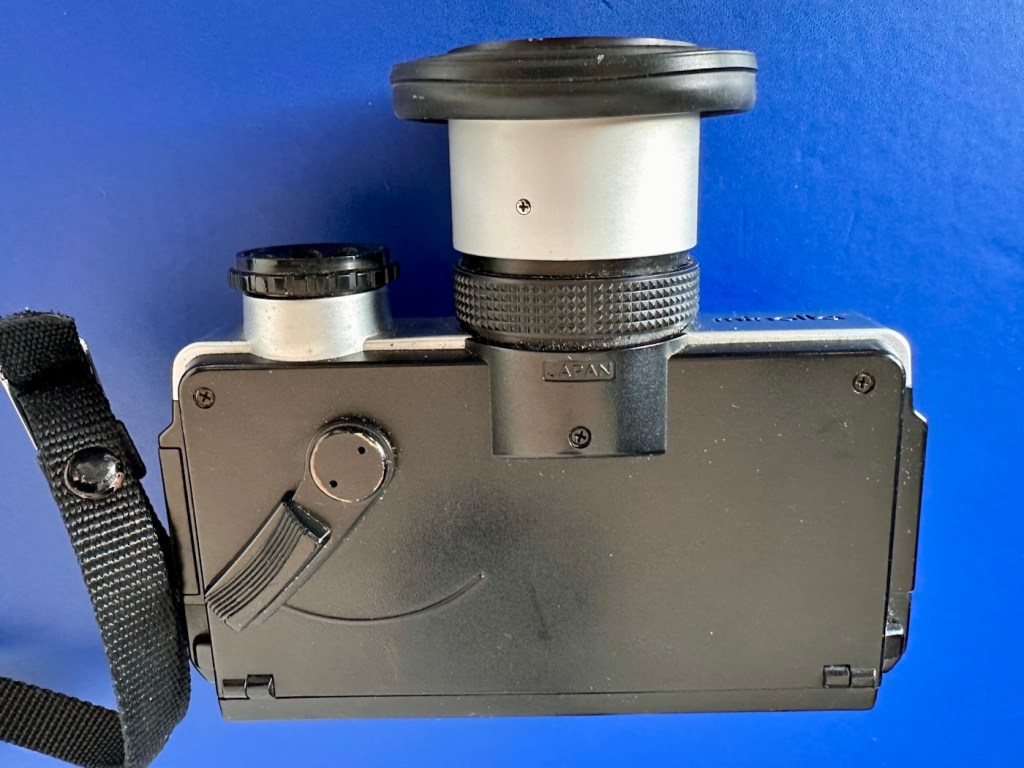
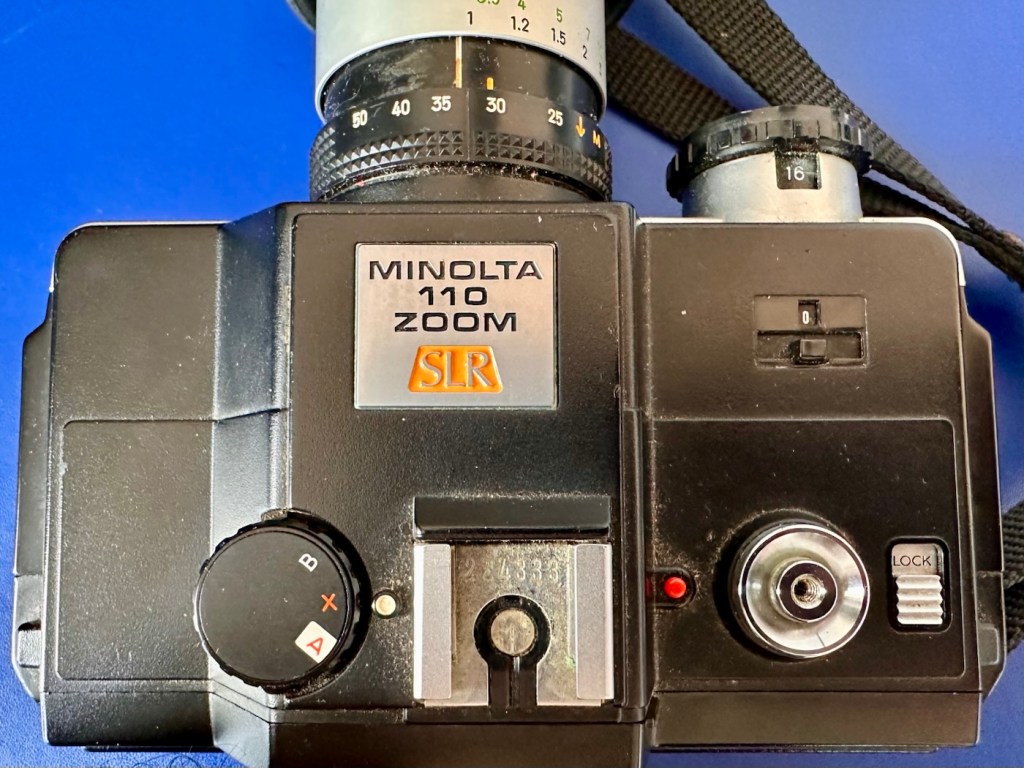
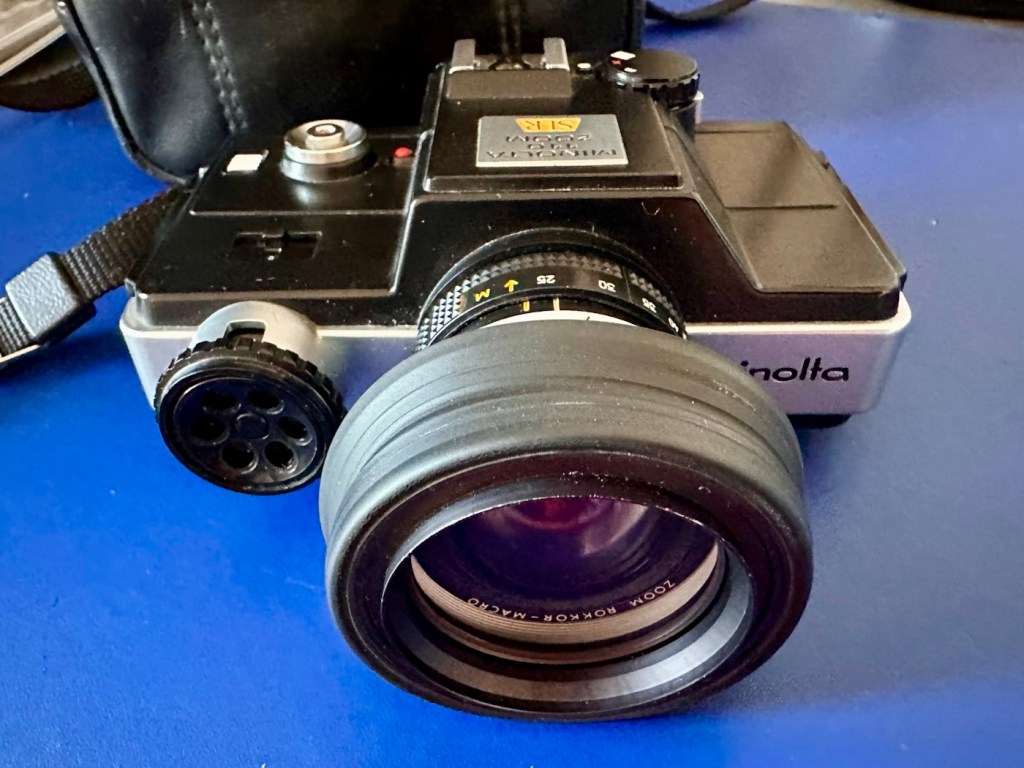
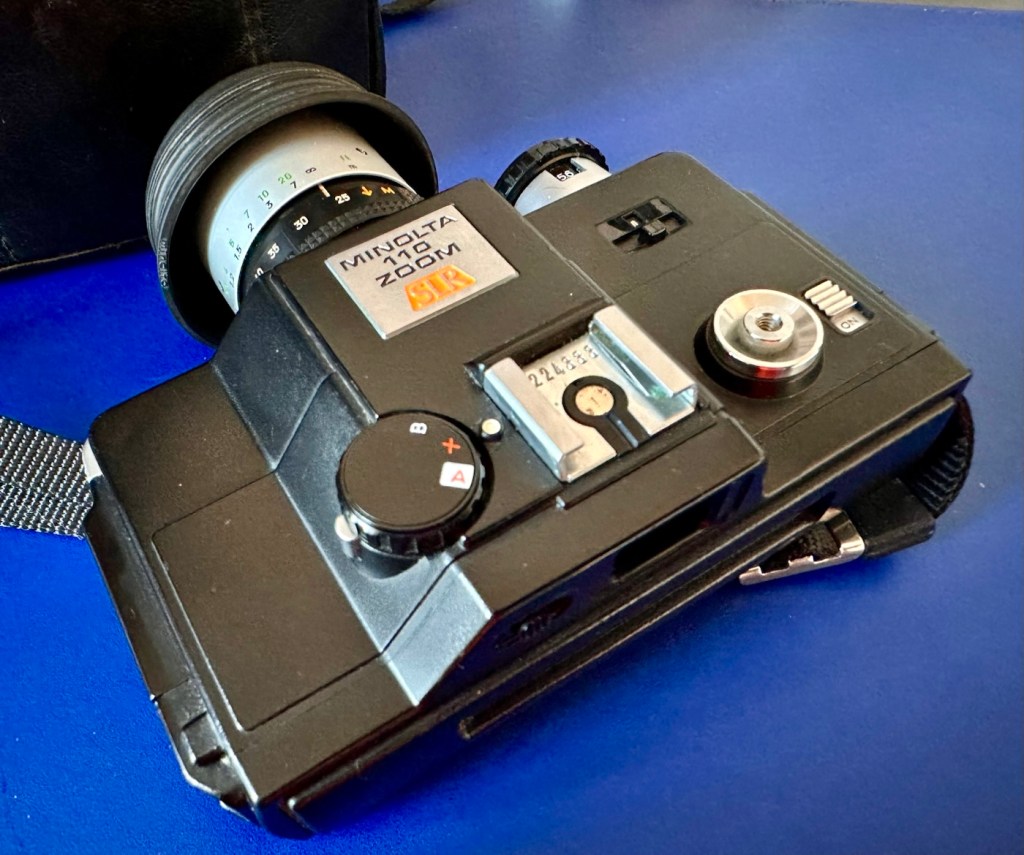
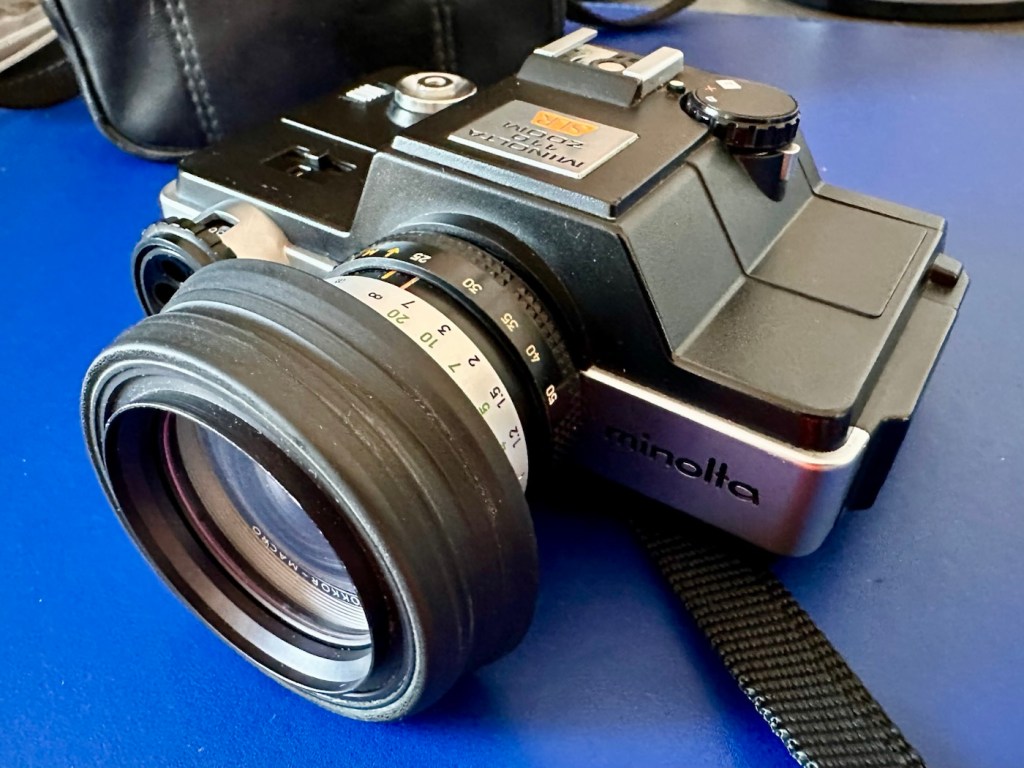
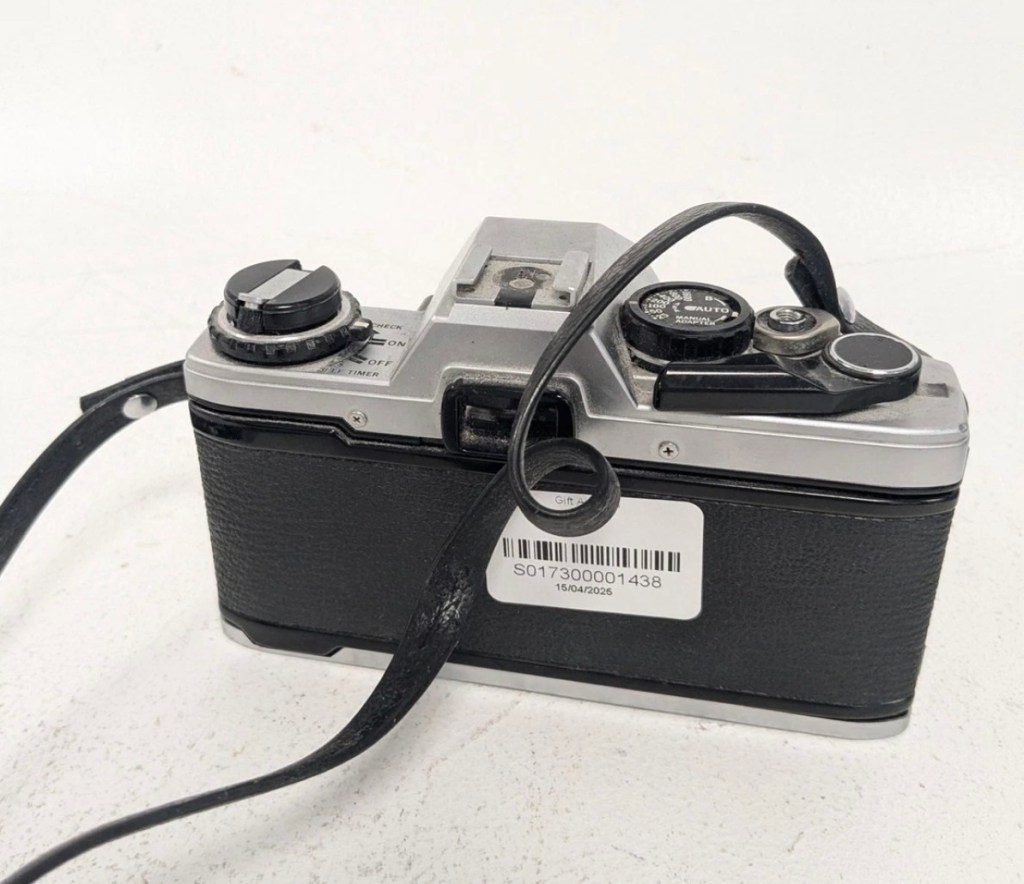
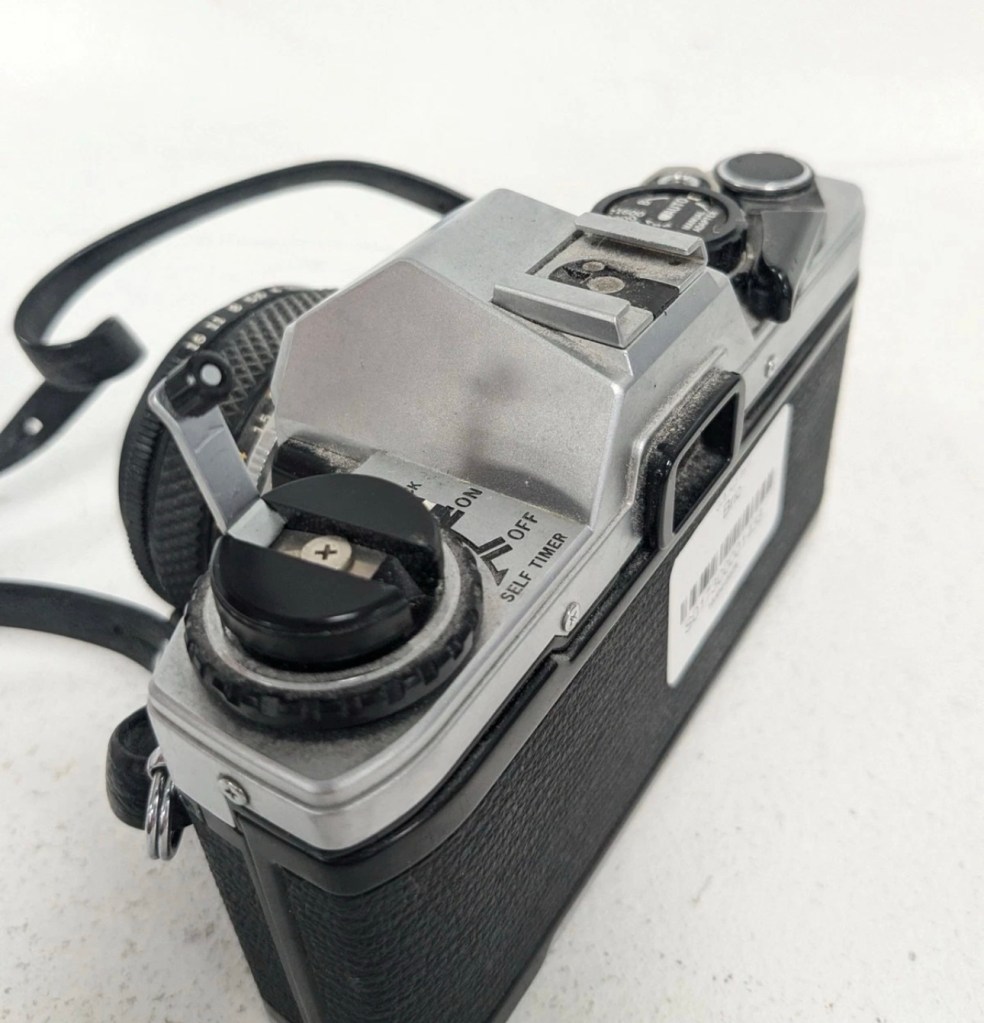
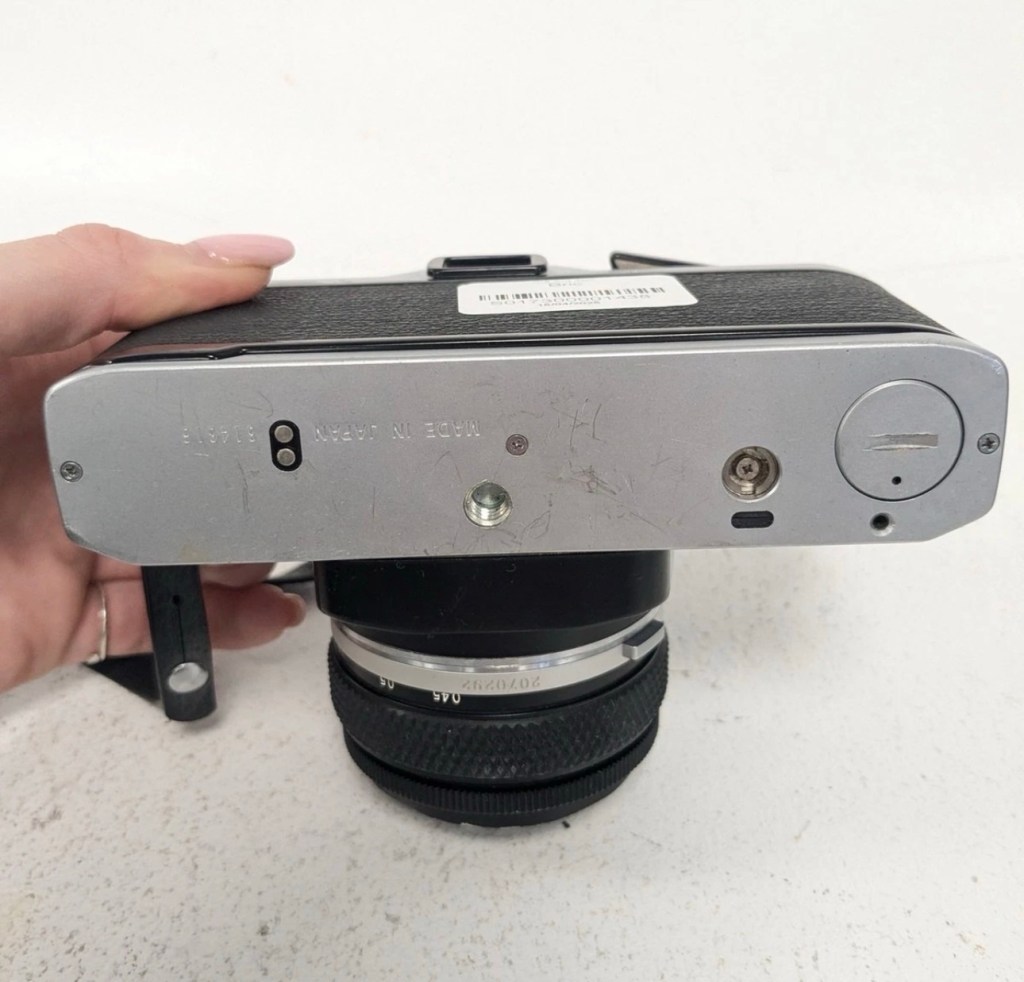
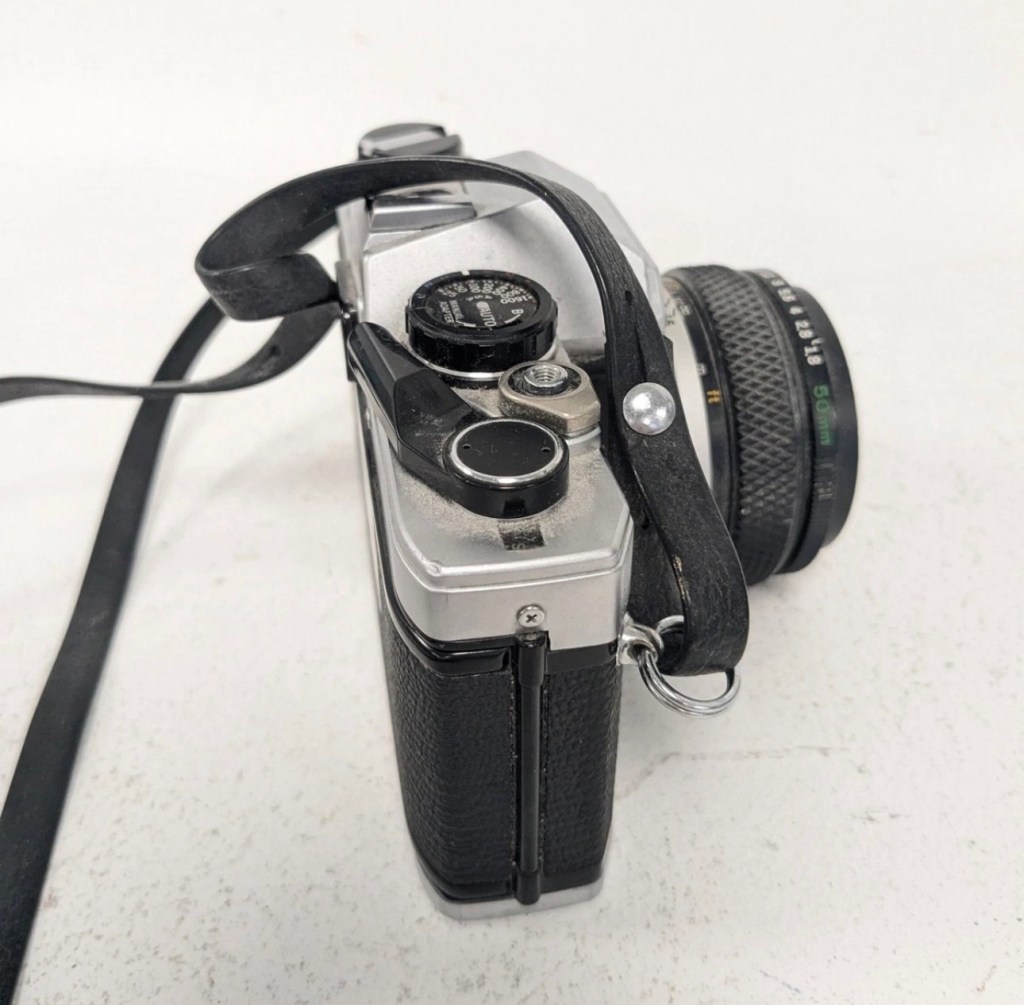
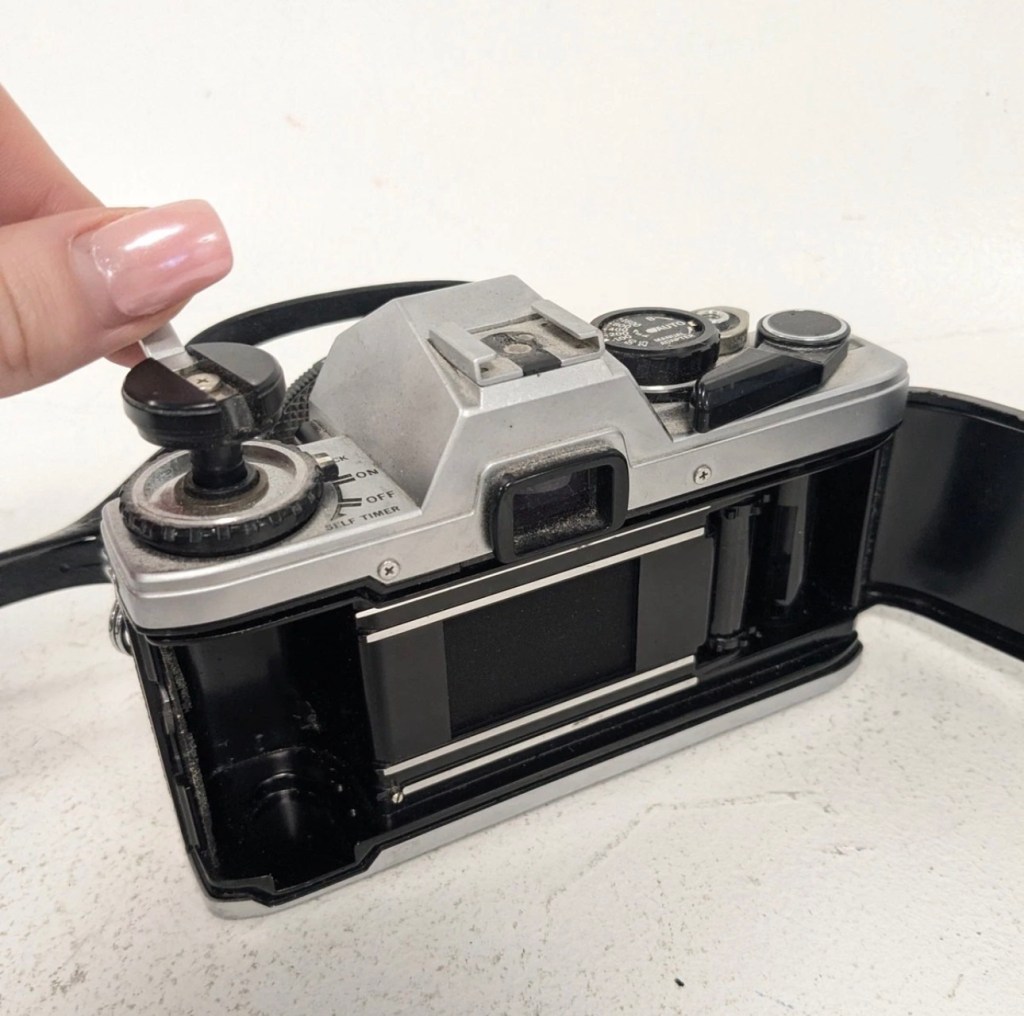
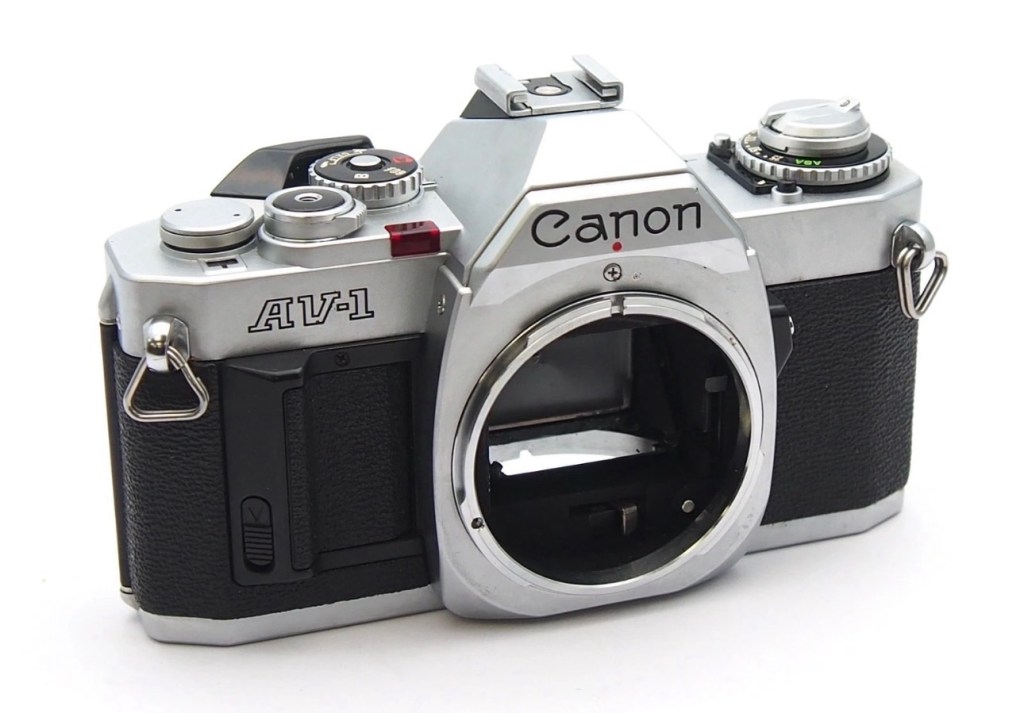
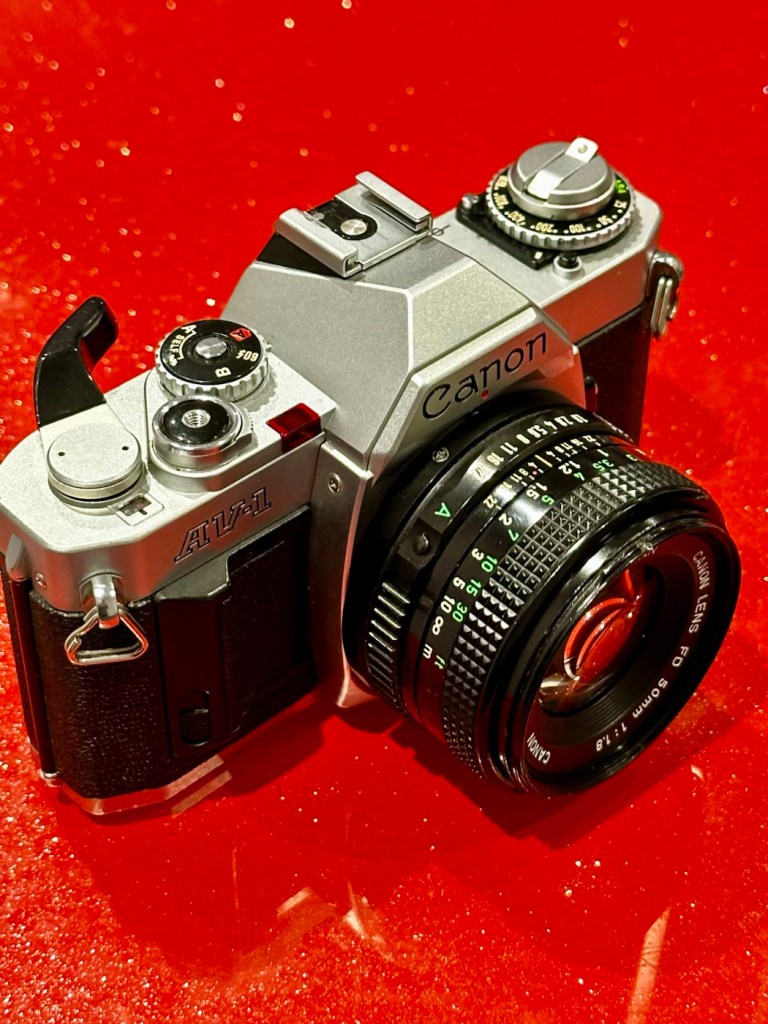
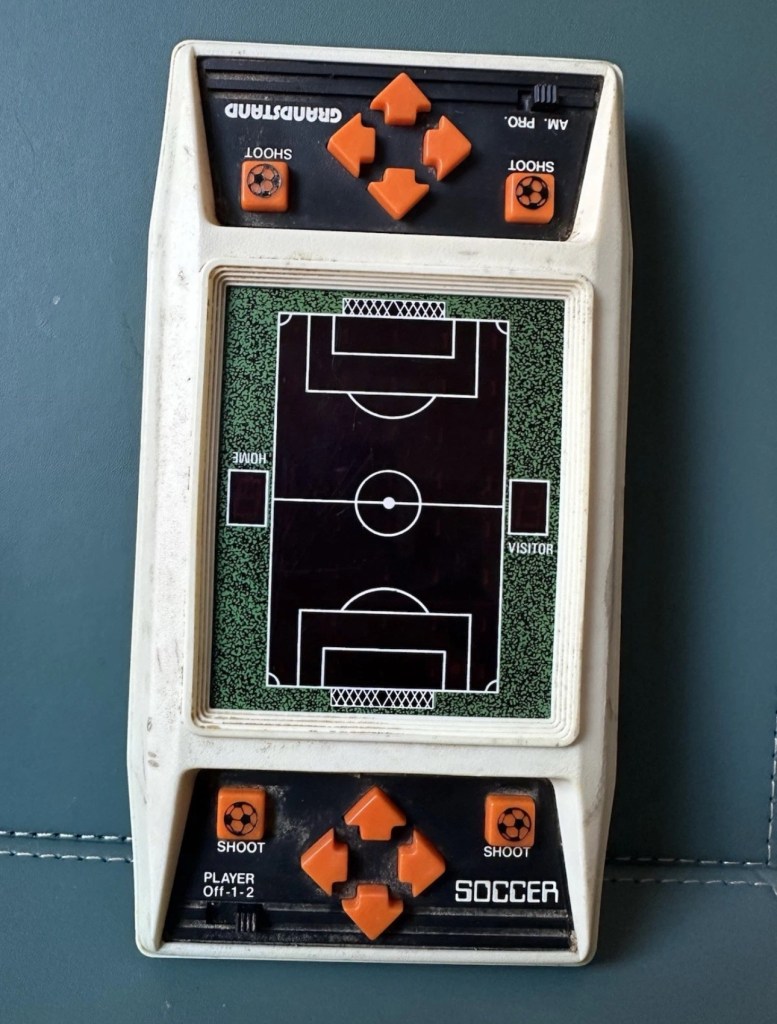
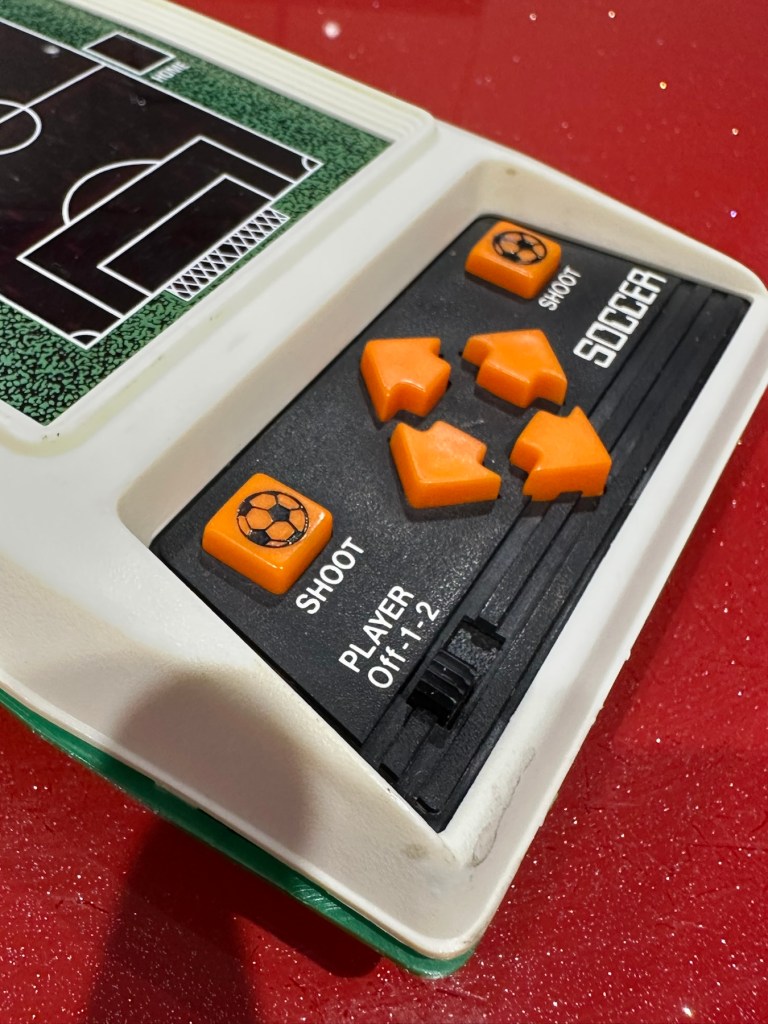
Minolta 110 zoom Mk1
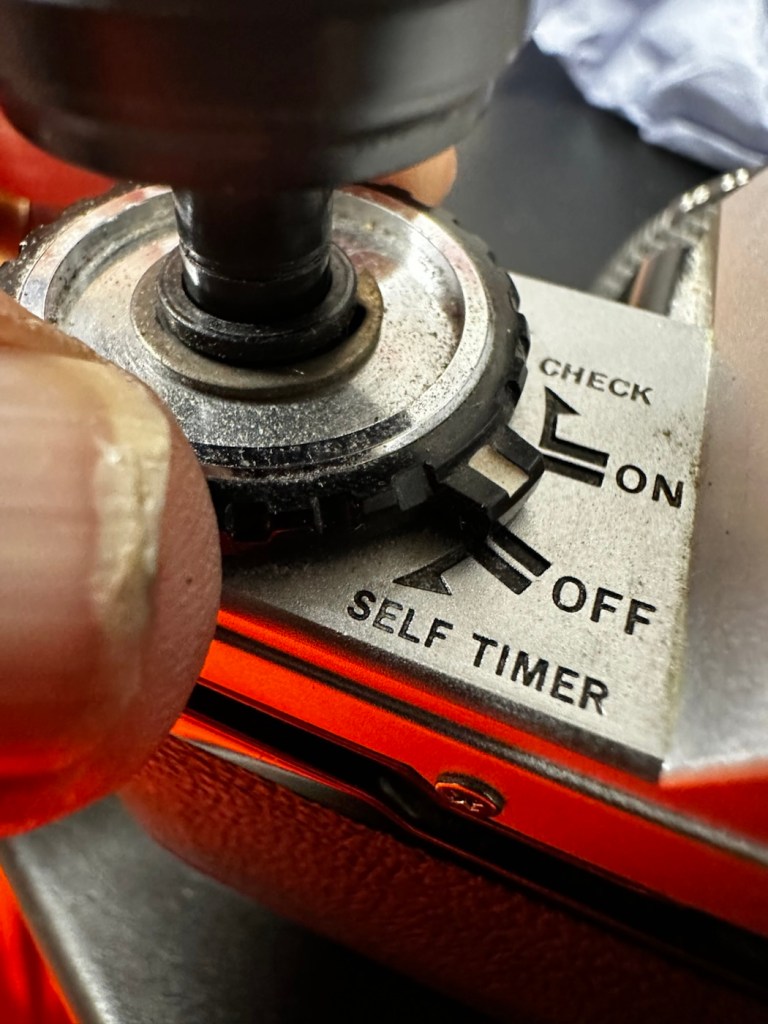
The reason I’m looking at this one is because I have been approached by someone to repair their one, now before I look at their issue (a stuck mirror) that seems to be a standard issue with this model, I want to look at my own one that I believe may well have the same issue. It’s best to learn how to deal with the issue on your own unit, before being let loose on someone else’s.
However, saying that, the listing was a little vague with only the standard “Untested” EBay catch all quote meaning it could be anything between a total wreck, to working perfectly.
Here’s some information regarding this camera:
The Minolta 110 Zoom SLR is a 110 format single-lens reflex (SLR) camera produced by Minolta of Japan between 1976 and 1979. It was the first SLR in 110 format. It has an unusual, flattened shape. Other 110 SLRs were shaped like SLRs in larger formats, but the 110 Zoom SLR took the flat format of the typical 110 pocket camera and added a larger lens and prism hump to it. 1979’s replacement, the Minolta 110 Zoom SLR Mark II, has a more conventional shape.
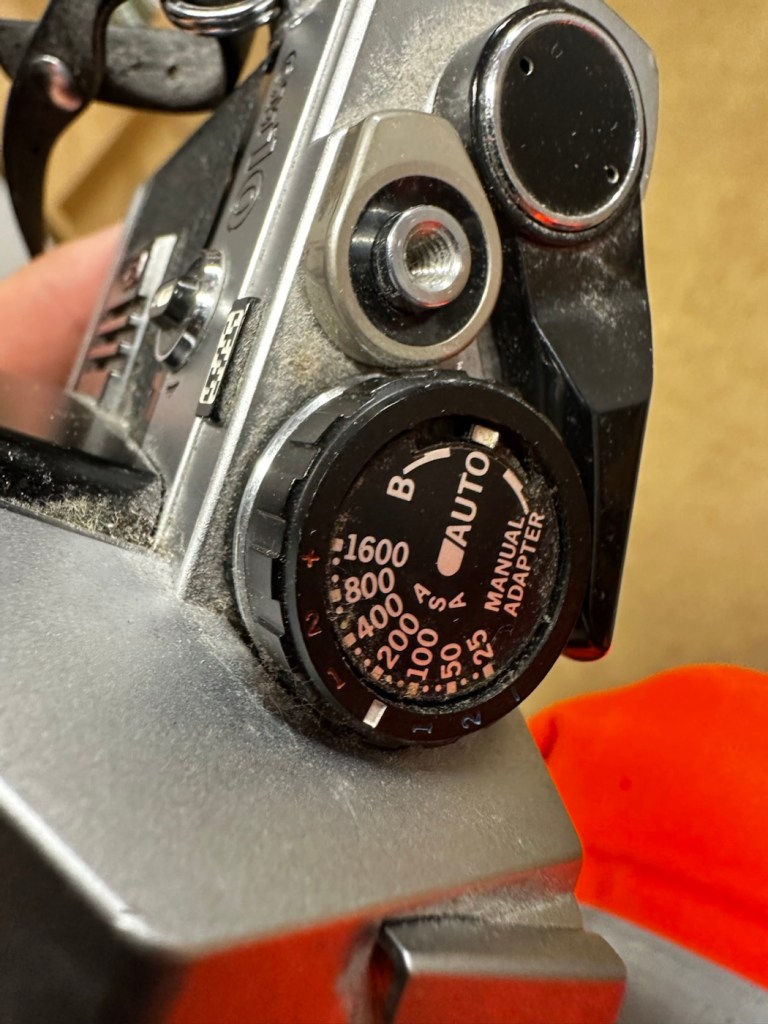
The 110 Zoom SLR provides aperture priority autoexposure; fully manual exposure is not available. Light metering is with a CdS meter mounted on the front of the camera. An exposure compensation dial allows the photographer to compensate for unusual lighting situations; it also allows the use of film speeds other than the ISO 100 and 400 auto-selected by the cartridge tab, by applying the appropriate compensation factor.
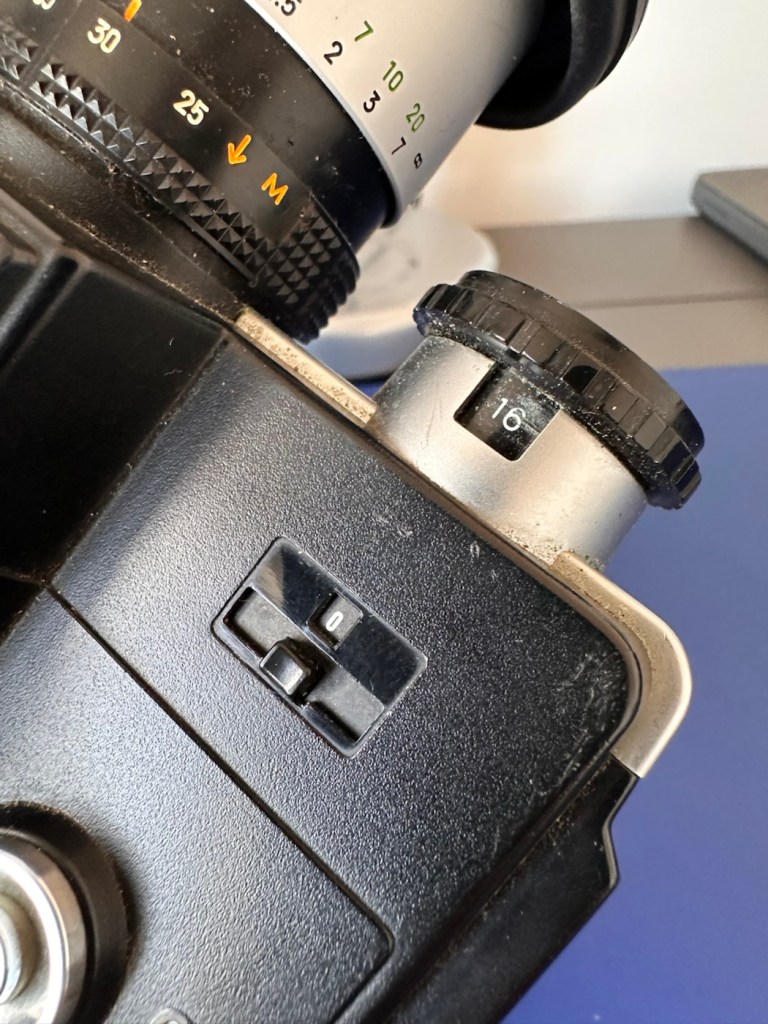
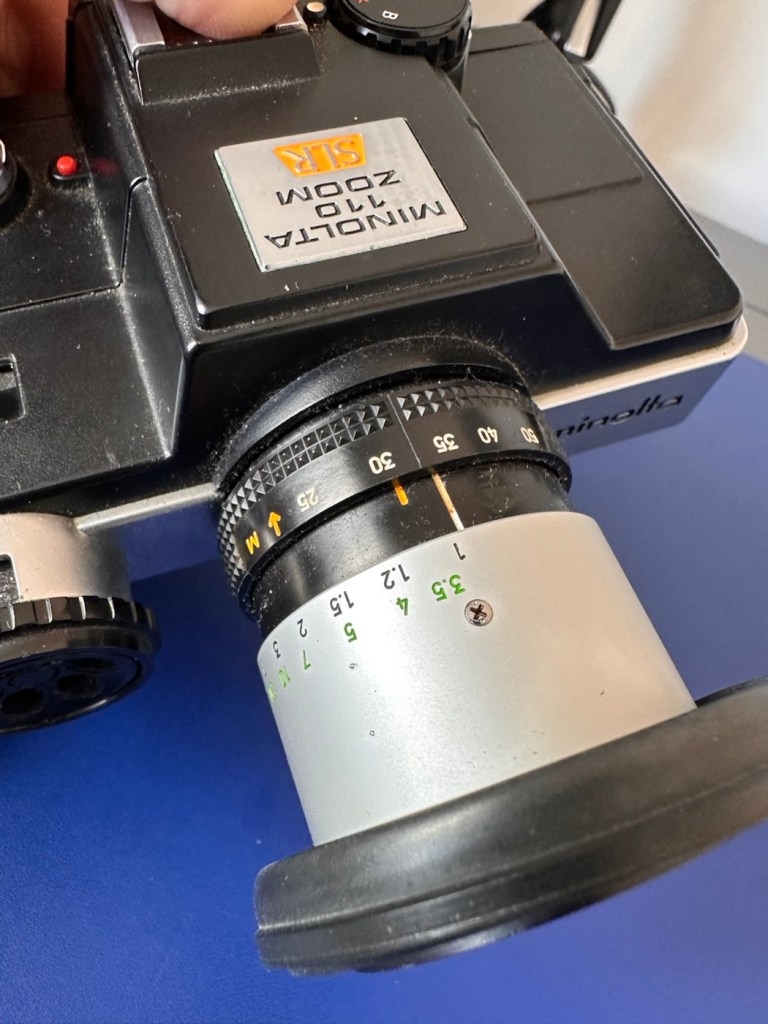
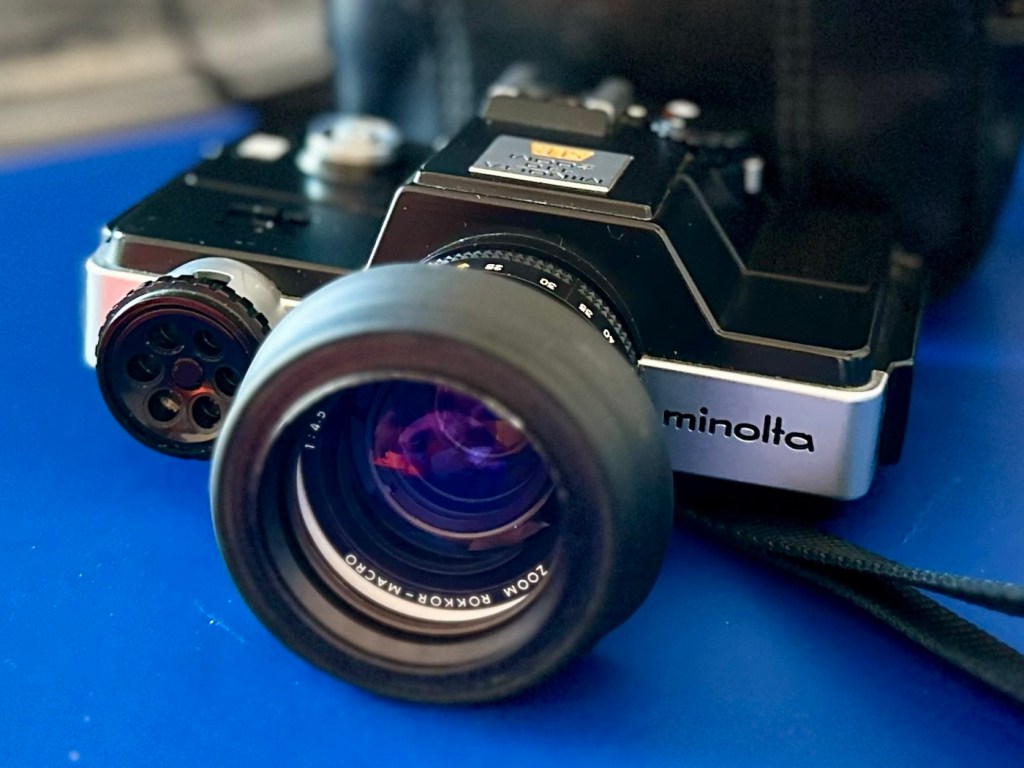
The lens is a fixed 25–50 mm f/4.5-16 manual focus zoom with macro focusing down to 11 in (280 mm). This gives a field of view range approximately equivalent to a 50–100 mm zoom lens on a 35 mmformat camera. There is a built-in, pop out lens shade. The filter thread diameter is 40.5 mm. Minolta sold UV, yellow and 1B filters.
Available shutter speeds are 1/1000 second through 10 seconds, with a 1/150 second X-sync speed and support for bulb exposure. There is no built-in flash, but a hot shoe on the top allows an external flash to be attached. A tripod socket is provided.
Wikipedia
Let’s get the assessment out of the way.
Assessment:
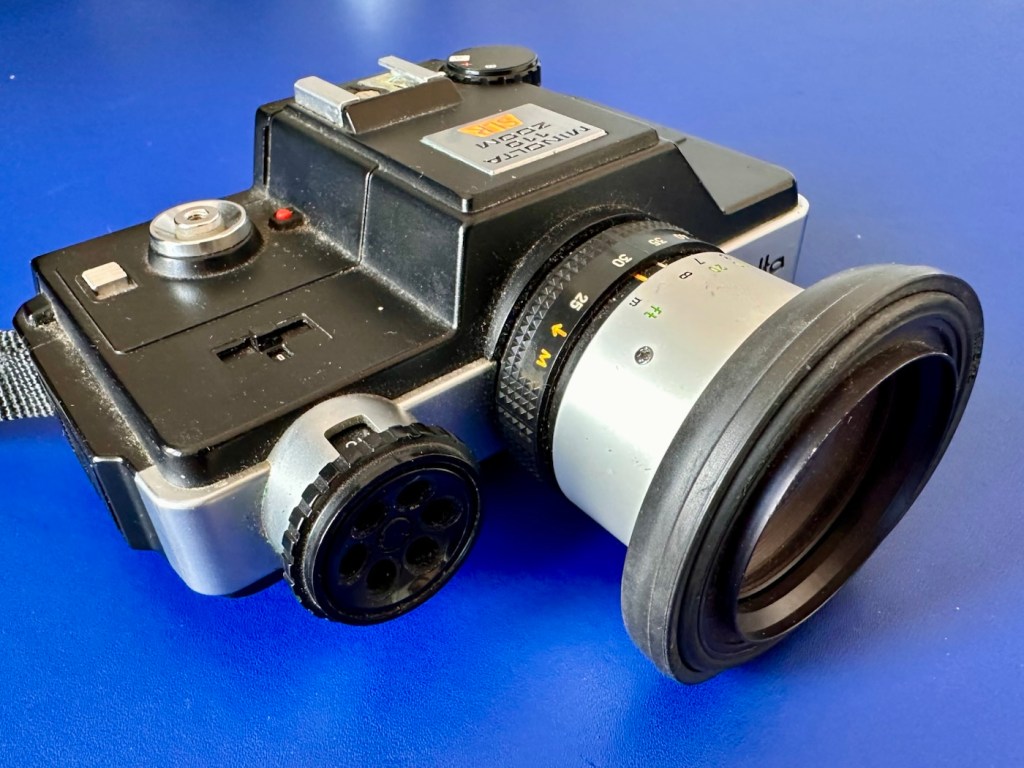
The camera has arrived. And the most annoying thing about it, is that it appears to be working just fine. I have been through every possible combination of settings available, hoping to get the mirror to stick up (as is common with these cameras) but to no avail. Everything appears to be working just fine. Damn that’s annoying as the “untested” EBay get out clause used so often by questionable sellers, has on this occasion gone in my favour. If you refer to the opening paragraphs, you will see I wanted to work on this one to diagnose an issue that a potential customer has asked me about. I may well just send him this working one in exchange for his knackered one, how’s that for service!
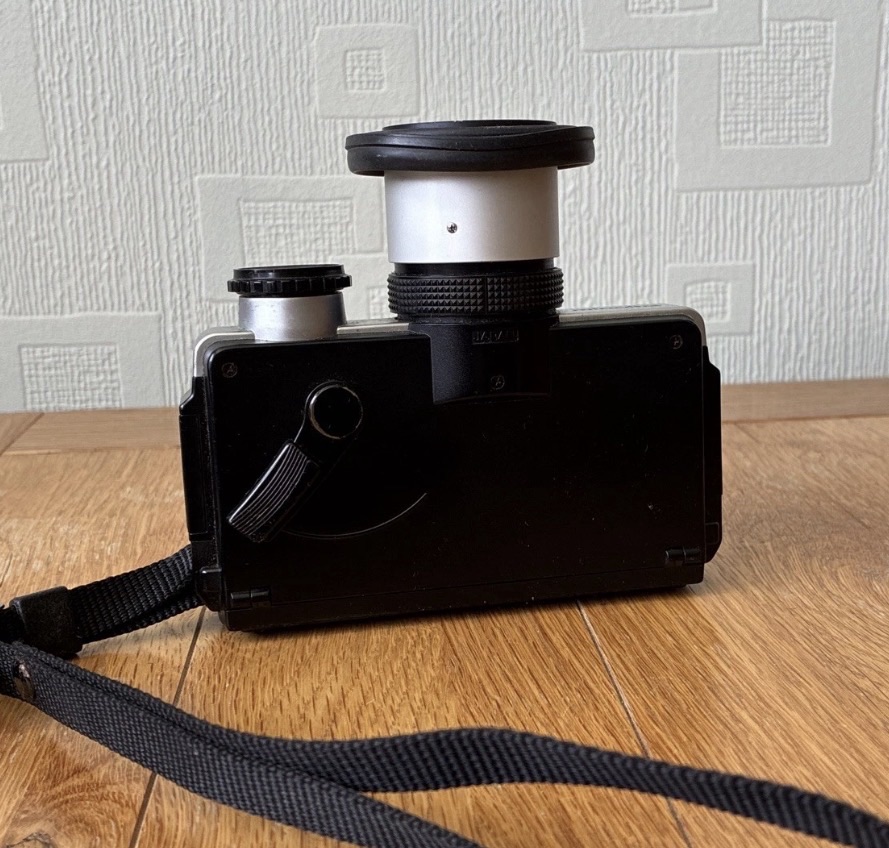
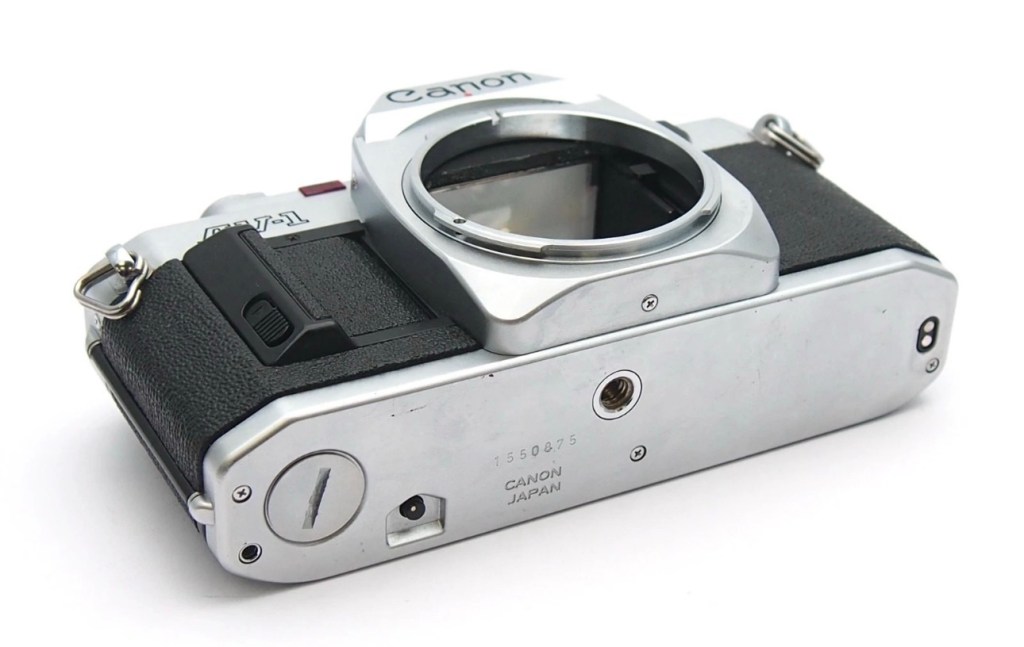
Anyway, here is what I received, in a black Minolta case, it has been well looked after and is just a bit dirty and in need of a clean.
All in a good, just dirty/dusty condition
Lovers of lomography really rate these cameras, the 110 film cartridge is quite an expensive outlay these days and from what I can see with film costing about £9:00GBP for a roll and then about £18:00GBP for developing and scans only, you are looking at quite an outlay of almost £30:00GBP for the results. I don’t think I will be attempting this unless I come across a less expensive option, as I’m sure there will be one out there….somewhere.
So, with not much more to tell, let’s move on to getting it repaired….or should that be cleaned?
Repair:
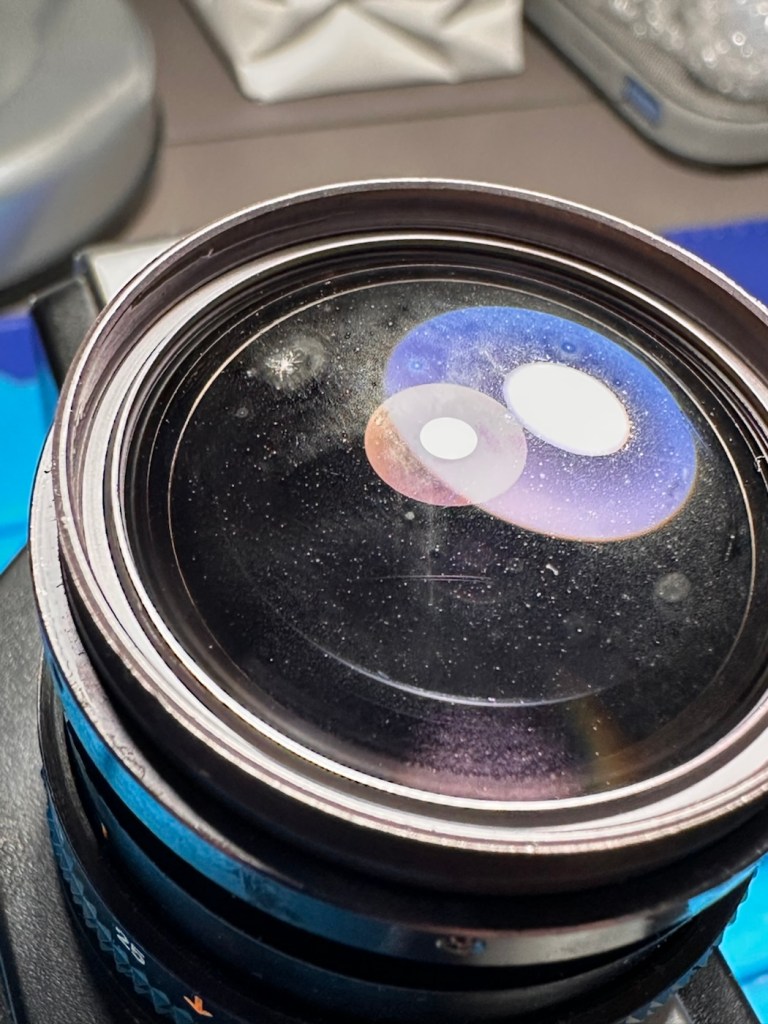
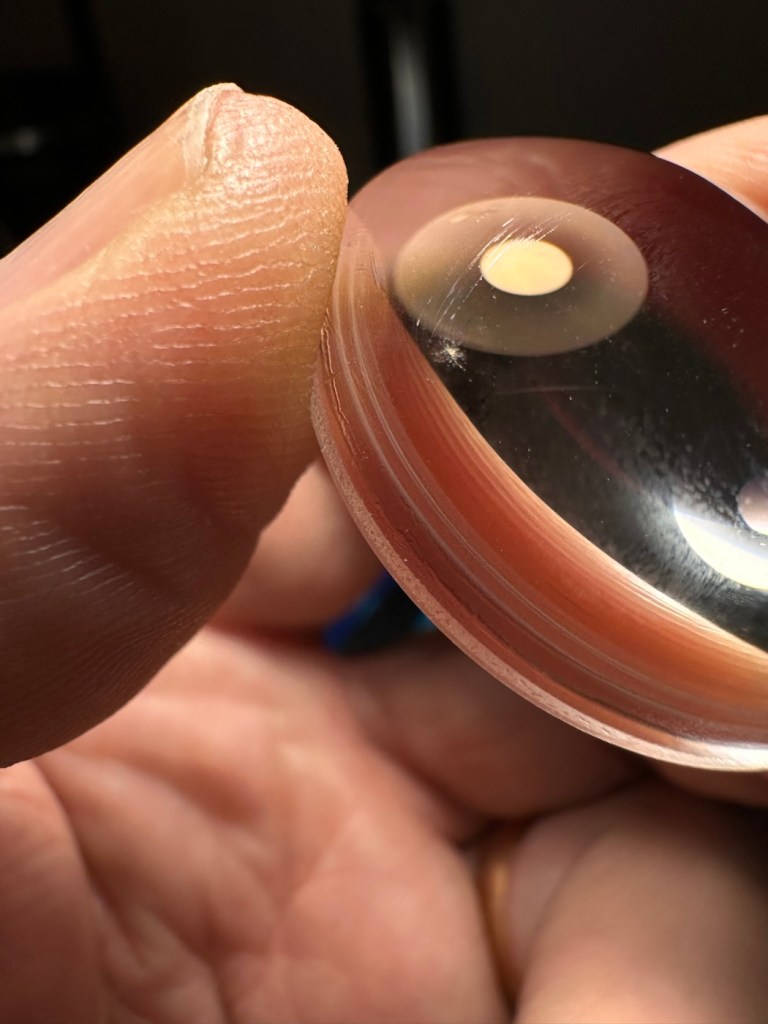
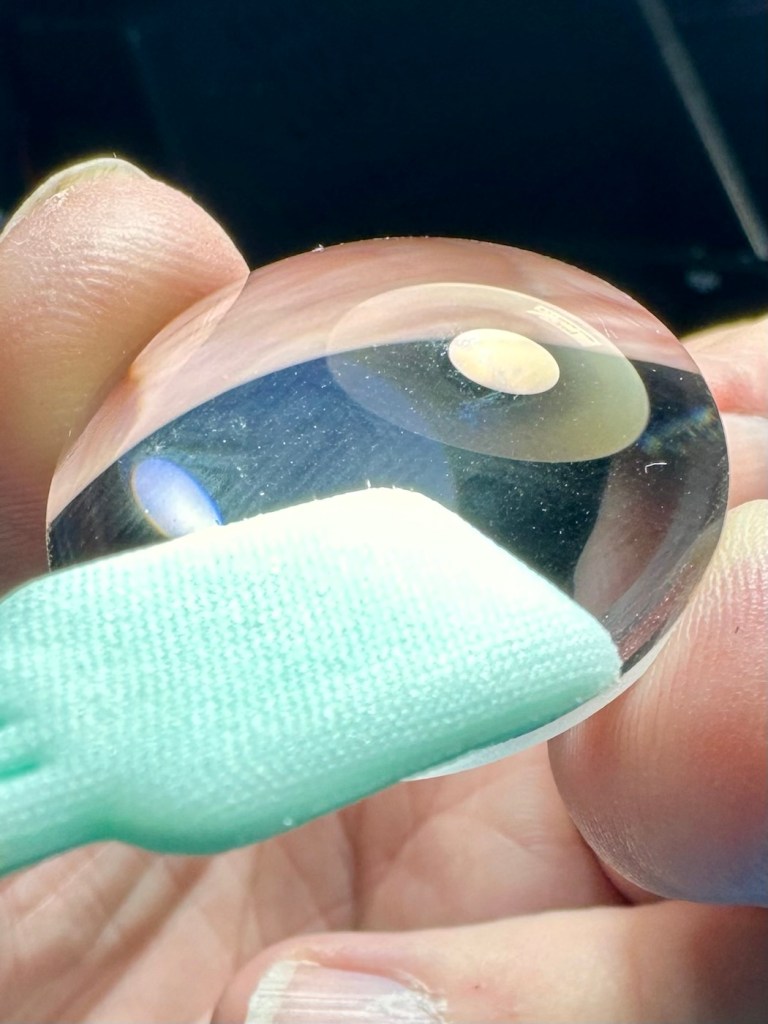
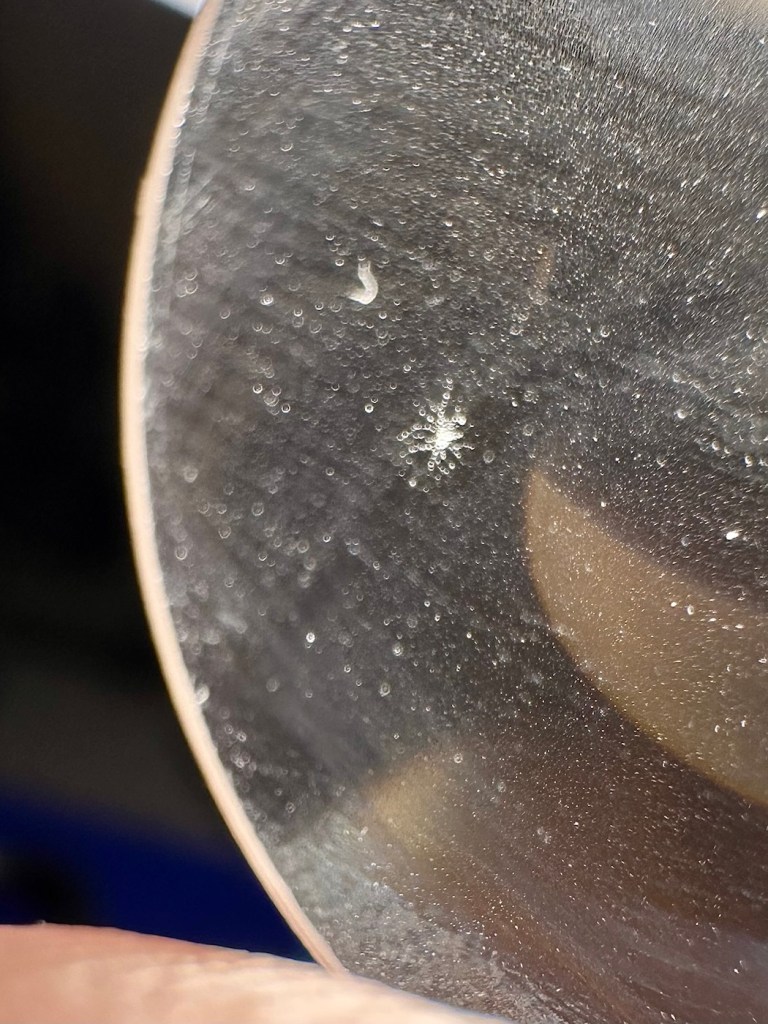
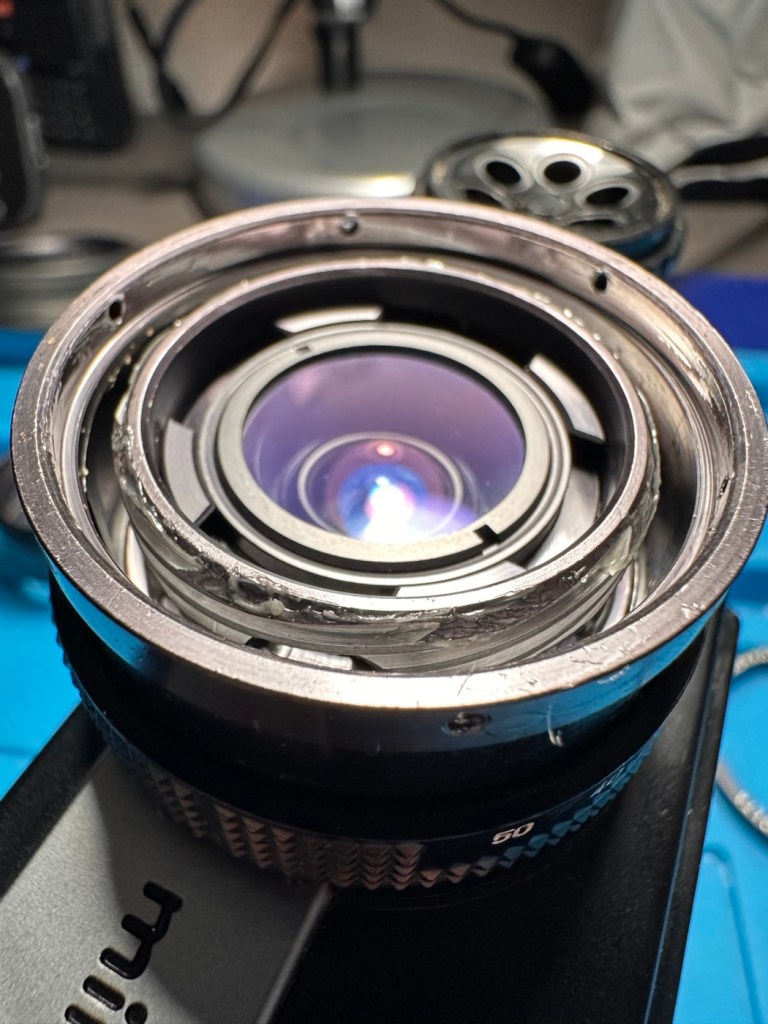
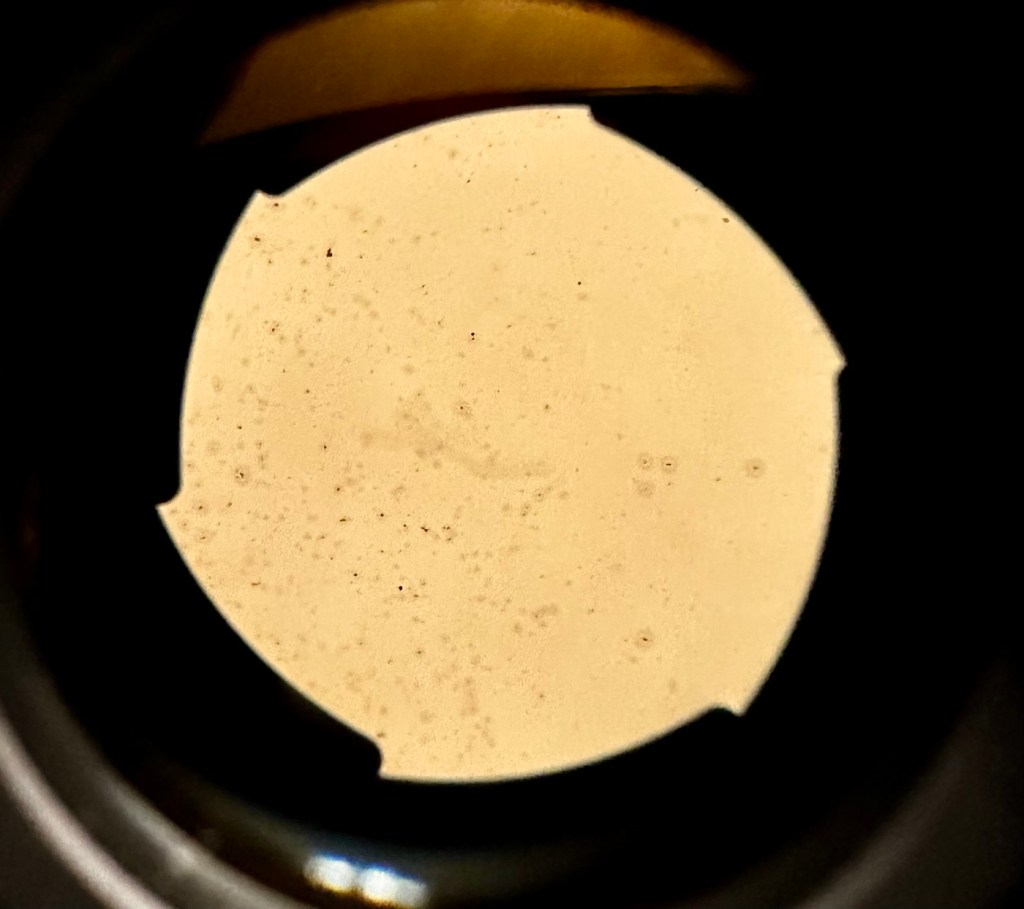
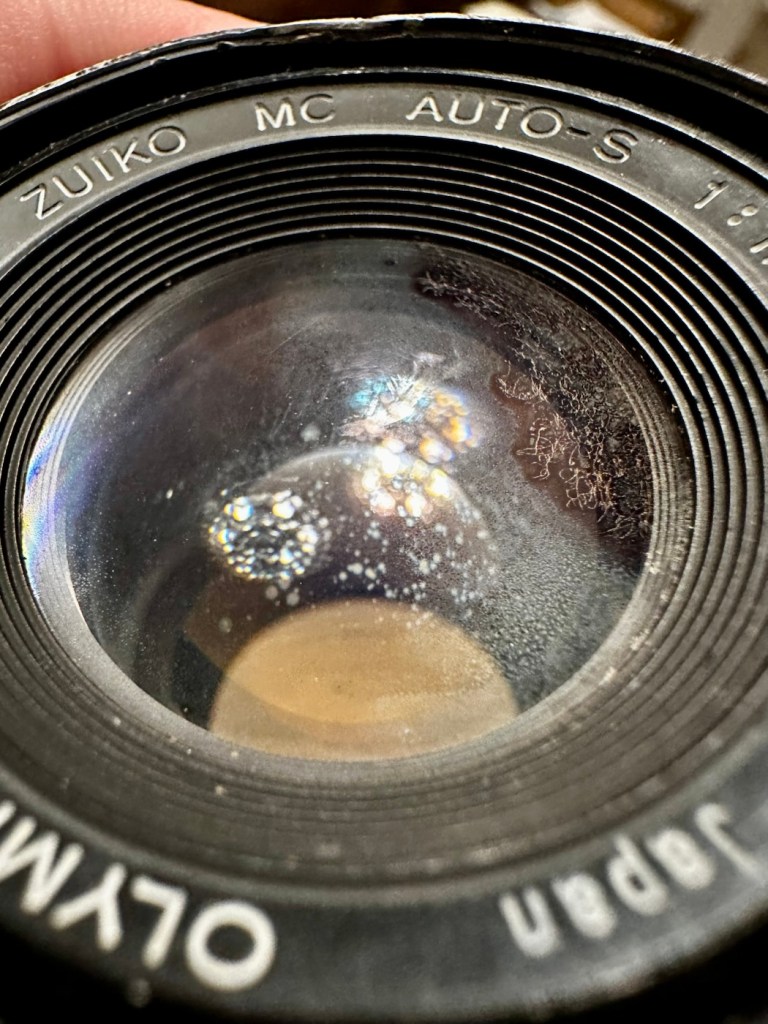
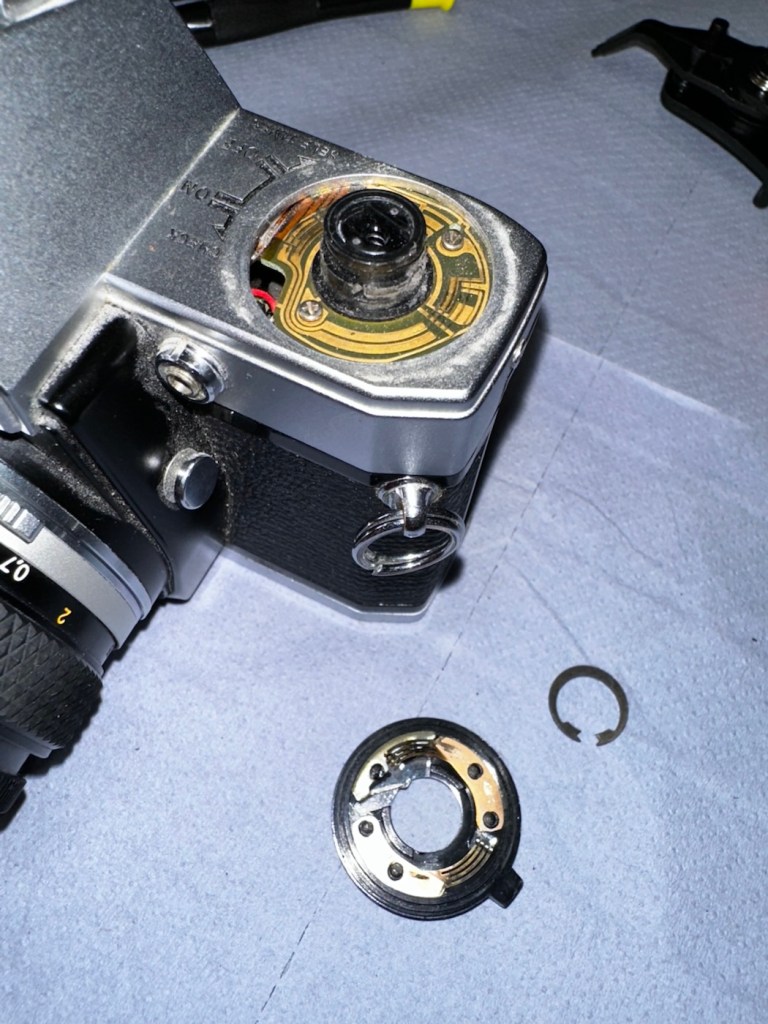
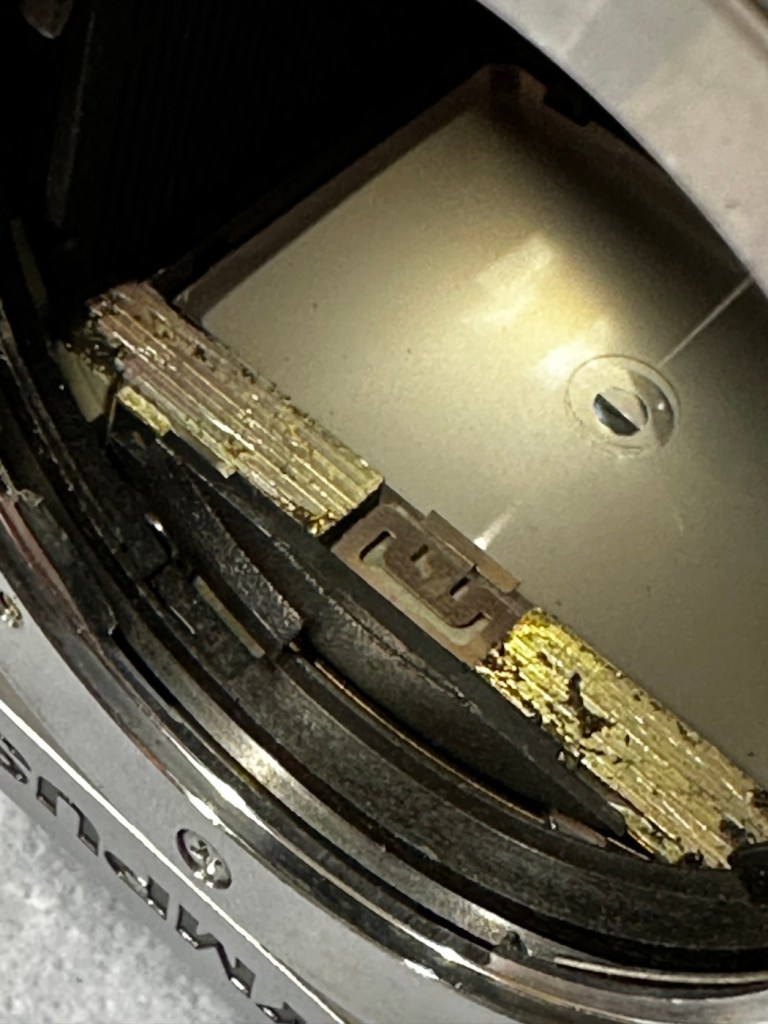
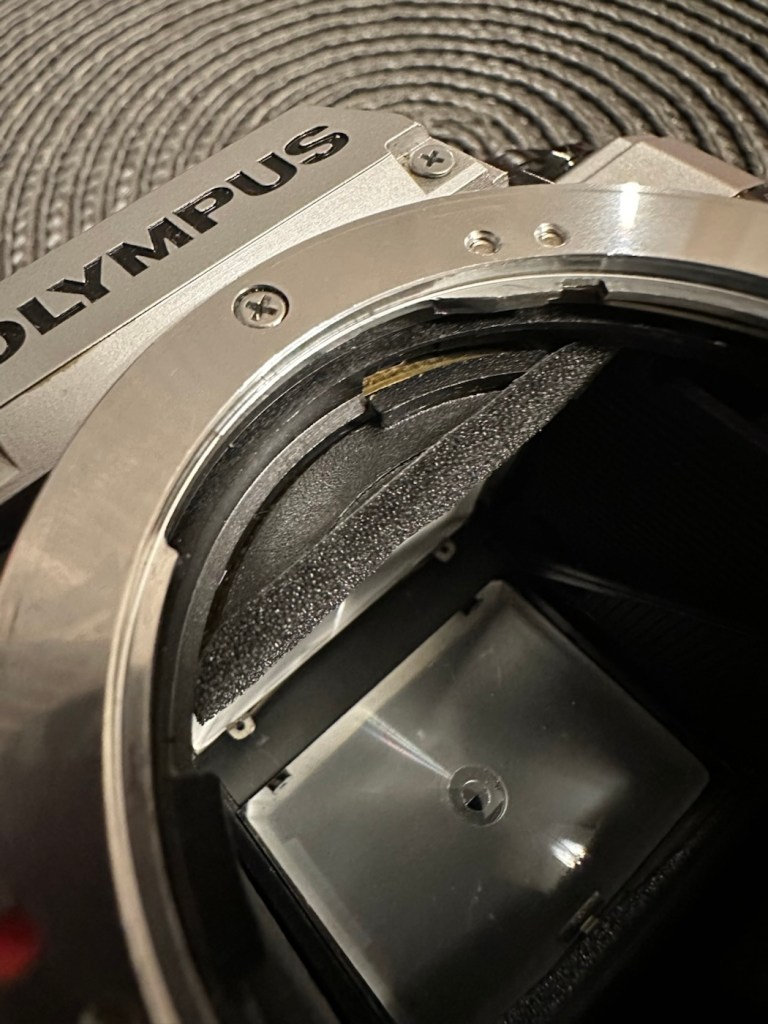
Closer inspection of the lens when I’m cleaning shows me that there is a small area on the outer optic of the lens that has a solitary spore of fungus. It’s nothing too much, however a quick clean of the exterior of the optic, confirms the issue is inside. I’ve now got to dismantle the lens barrel to get to it.
Exterior of barrel dismantled Fungus under the lens in the 11pm area
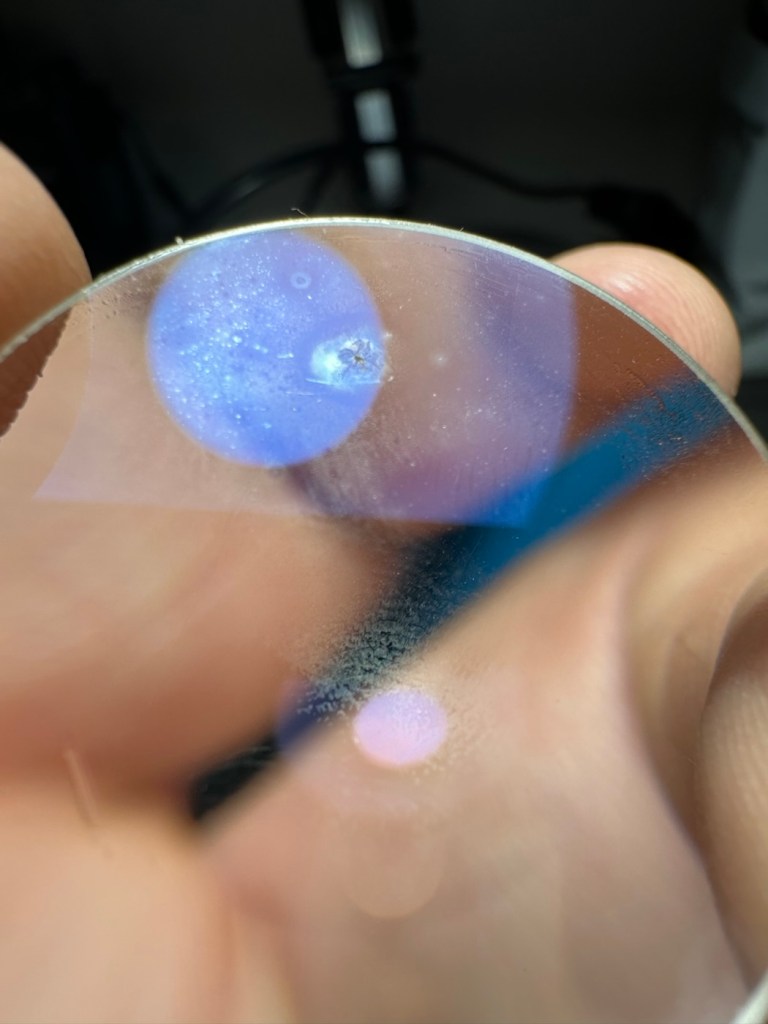
The fungus is on the rear, not the front of the outer optic.
Viewed from outerViewed innerLight dust offThe fungus spore magnified
The bad news is that on close inspection and using a soft plastic pick, a tiny indentation at the point of the fungus can be felt, this shows that the fungus has eaten into the optic coating and no amount of cleaning will ever eradicate it. Two options here are a new optic, or to get the optic ground down, both totally beyond the value of the camera and to be honest totally unnecessary. The good news is that there is no fungus on the inner optics, and luckily this needs no cleaning or attention.
Inner optics clean and clear
To be totally honest, the negatives in these cameras are so small, and the outer lens magnification is probably sufficient enough to make this aberration appear as nothing more than a slight blur, if it even shows up at all! I’ll give it a good clean to prevent any further growth, and just put it back together again. There is a good possibility that a film will never be run through this camera again, even so I would like it to look as good as possible, and operate as it should, if there is even the remotest chance of a film being used in it, sometime in the distant future.
Result:
The camera has been reassembled and is looking quite nice. It’s a really weird camera. So weird that someone has offered to take it off my hands, as they believe it’s quite a novel item, so as soon as I’ve posted this report it will be winging its way to its new owner.
It’s probably best that I pass this on to someone who will either use it, or at least make a use of it should it become a display item.
Minolta 110 zoom
A nice little camera, but to be honest it’s more than likely more of a display piece rather than a working camera. It is fully operational though and has been nice to work on. I’m pleased someone else will eventually benefit from it.
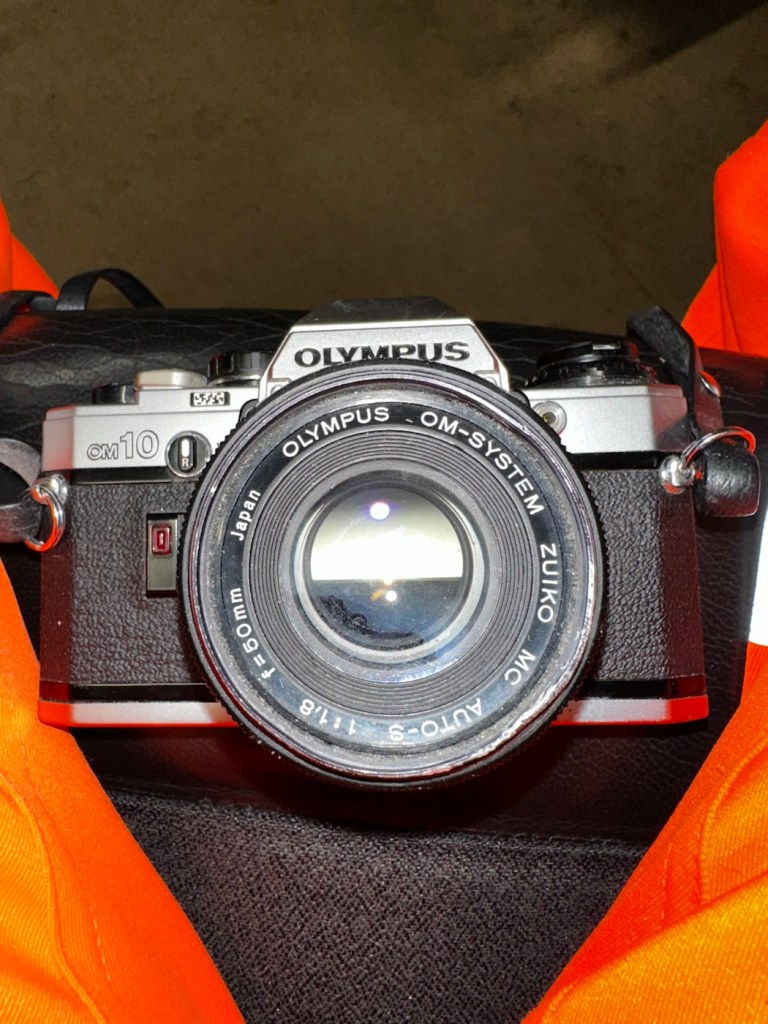
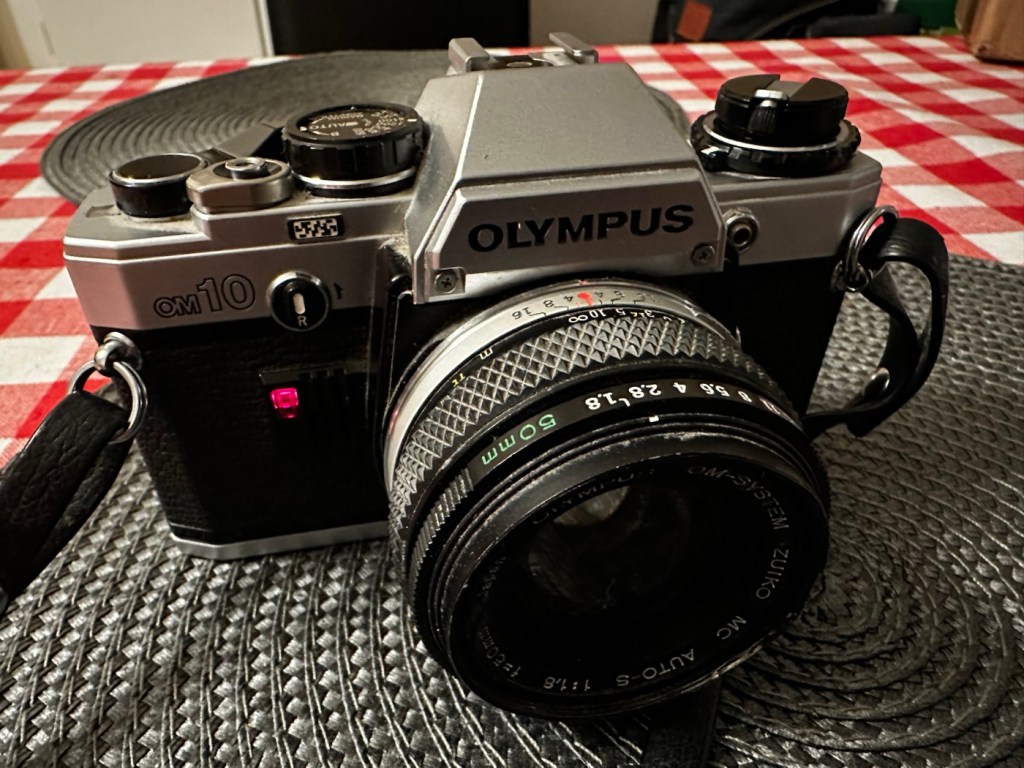
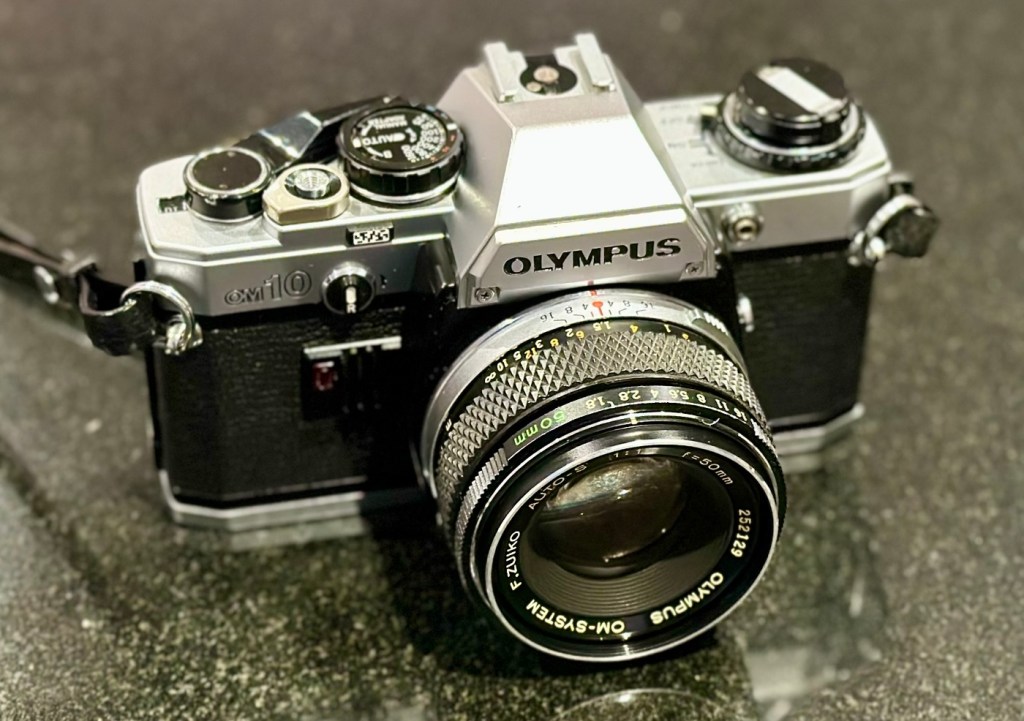
Always liked and wanted an Olympus OM10. 46 years later I now have one. Of course, it needed repair.
Much to the wife’s annoyance, and because I was feeling a little low and in need of some retail therapy, I’ve purchased this lovely little camera from the Barnardos charity. It looks like it’s been stored in a full Hoover bag, it is so dusty. It has a few dents and dinks, this one is going to be a challenge. I like challenges. I’ve paid the grand total of £17:67GBP for the camera and the standard Zuiko 50MM F1.8 Lens. I think that is an excellent price.
These cameras were produced between 1979 and 1987. I’m hoping I’ll be able to date this actual camera more accurately when I receive it.
This is what the original listing stated:
This listing is for a vintage Olympus OM-10 35mm Single-Lens Reflex (SLR) film camera, bundled with a Zuiko 50mm f/1.8 lens and a leather neck strap. This is a single bundle containing the camera body, lens, and strap, ideal for collectors or film photography enthusiasts.
UNTESTED. This sale is for spares/repairs. There are some marks and cosmetic imperfections. Please see images for more detail.
The standard untested post from the auction sites, but I’m not really bothered to be honest. It’s a charity, and I’m happy to pay for these items as the charity always benefits, and that’s all that matters to be honest.
I have some history around this camera and whenever I see one I think of Bruce Springsteen and here’s why.
1984, Bruce released this Album
Born in the USA was released in 1984, so I can kind of pinpoint the first time I’d ever really heard him, courtesy of my friend David K, when I used to live in a small town in Hertfordshire called Bushey. David had been a school friend, we were now in our mid to late teens, he was working in a restaurant whilst I was in a photographic lab. He introduced Bruce to me and for many months after he first purchased that album, we played it non stop and knew it off by heart, beat for beat, and word for word, we were totally smitten with it. It was the Bruce effect. At this time i would have been about 18-19 years old, and had a very basic Russian Zenit camera, it took some great photos. However, David had recently had a bonus payment at work and purchased himself the Olympus OM10. I was envious, who wouldn’t be? What a camera and this is where it all ties in with our hobby, we loved photography and used to always discuss it with Bruce in the background singing his heart out. It all ties in now, fantastic memories, and a single camera can bring back these memories. Amazing isn’t it?
Anyway here’s some pictures where you can see the amount of dirt, and what looks like some bumps on the outer edge of the lens.
Nice camera, few dinks and dents, and a lot of dirt
Here’s some information regarding this camera:
The OM10 was the first consumer OM series body. Launched in 1979 it accepted the full line of OM lenses and most of the OM accessories for a lower price. The lower price was reflected in the construction of this camera and the features available, however, it was still a very competent performer and it reflected the elegant lines established by the compact OM-1 and 2 designs. Early production runs of the OM10 have known malfunction issues with electronics, metering, and shutter magnets. Olympus later changed the shutter to a ‘Type II’ design to correct the latter problem.
In its standard configuration the OM10 offered aperture priority automatic exposure, simple and accurate enough for a consumer camera in most lighting situations. It also offered exposure compensation for more complicated lighting situations and for more advanced users. A small plug-in manual adaptor was available as an accessory to enable manual control of shutter speed. The manual adaptor is possibly not as easy to use as the typical shutter speed ring around the lens bayonet on the OM-1.
While not well known to consumers, the focusing screen for the OM10 is indeed interchangeable, though not as easily as the OM-1. It shares the same focusing screen as the OM-1, but the extra protruding tab needs to be cut off as the OM10 doesn’t have a placeholder for it.
The OM10 can accept all the lenses of the OM system.
The finder screen is fixed, as well as the back. It can accept the winder but not the motor drive. It existed in chrome and in black finish.
In 1980 the OM10 Quartz was released with a fixed databack (equivalent of a Recordata Back 3) to print the time or date on your pictures. The OM10 Quartz was only released in black finish.
The OM10 was sold in large quantities before production ceased in 1987 and many working examples are still being used today. Largely overlooked in favor of its more professional ‘single digit’ siblings, you can easily pick up a working example for $50. Try to find one that includes the manual adaptor though, as this accessory alone can fetch $30 at auction.
Camera-wiki.org
Assessment:
In a perfect world this camera would just need a clean. But this is me and to be honest I’d like a little bit more of a challenge, as a lot of the cameras I have worked with lately did not need a lot of maintenance because they’d been well looked after. This one may be different.
The camera that has been received
These cameras were renowned for electrical faults especially with their mirror motion magnets, very similar to the issues suffered on Canons earlier EOS cameras such as the 1N. But to be honest I am just surmising at this point as the camera is not yet in my hands. I need to be patient and await its arrival.
Well, it’s arrived so let’s have a look and see what’s good, what’s bad and what’s indifferent. It has dirt, yes, quite a bit of it, so it will require quite a deep clean as we need to get into all those little crevices, where the dust has settled.
Dirt in all the crevices
Cosmetically it looks really good with no dinks, dents or scratches, so that is very much a positive. It’s in not too bad a shape for being 46 years old.
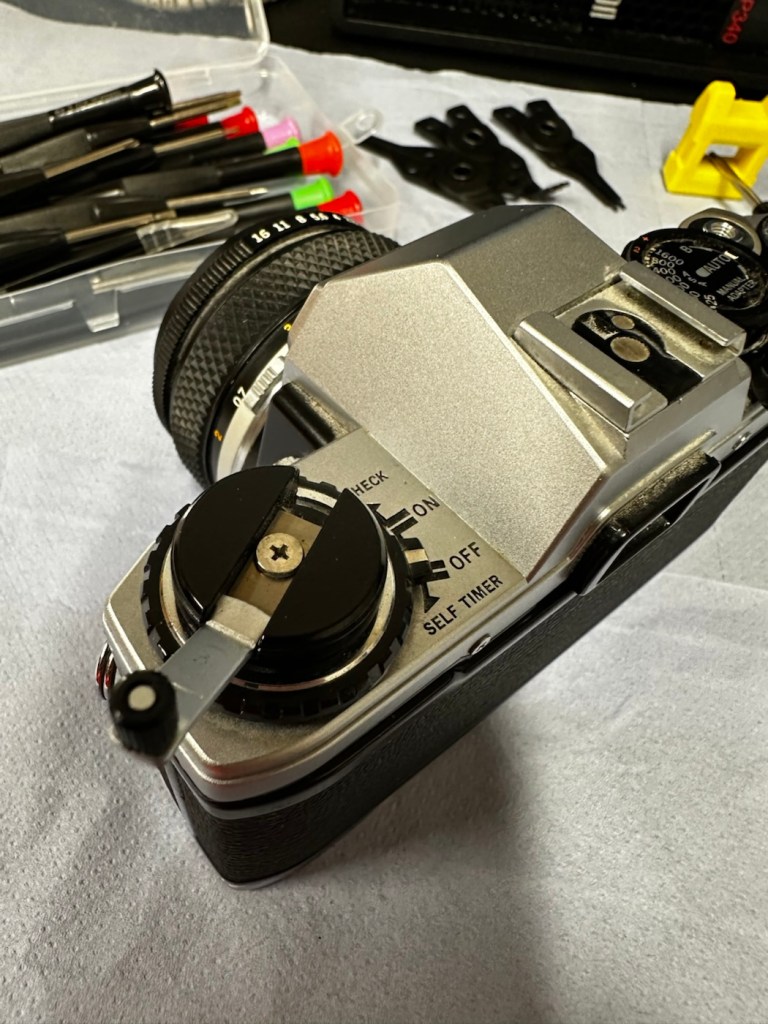
The capstan to open the camera film door, along with the operation dial are a little loose, so they will require tightening.
Loose capstan and controller
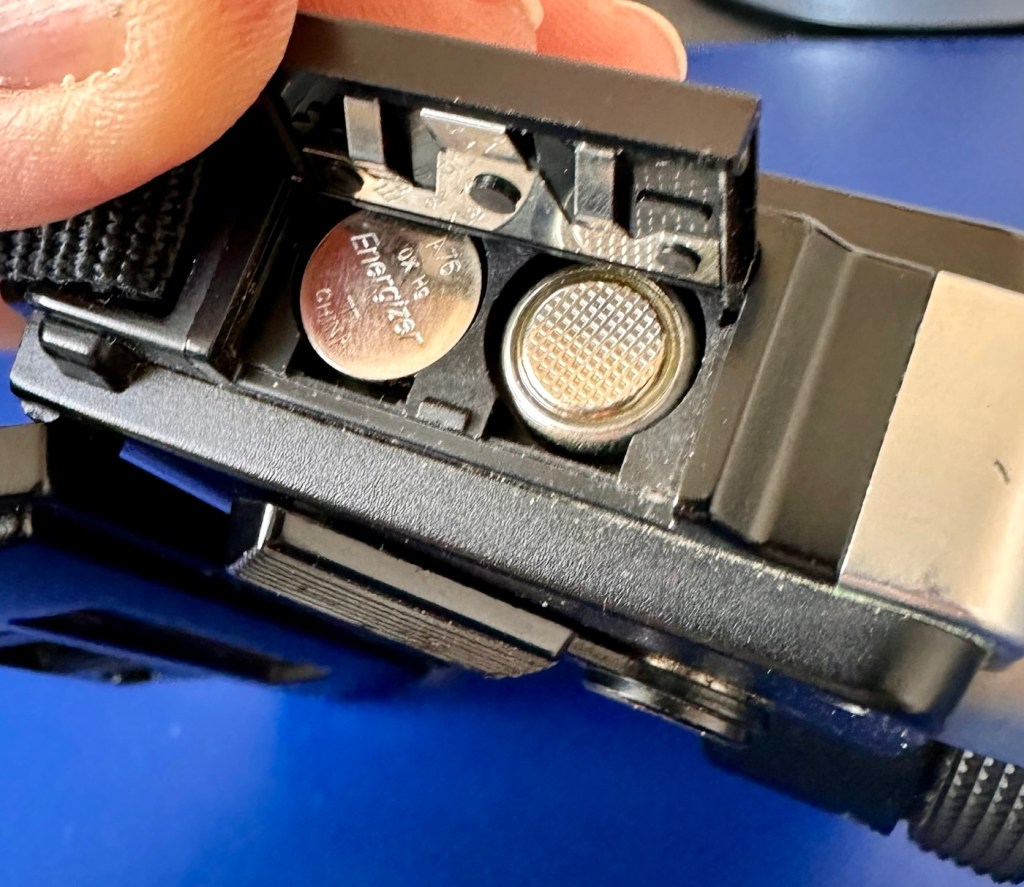
Batteries are long dead, this camera requires two LR44 button batteries to do even the basics, I have tested the batteries with a multimeter and they are so low that they hardly register, they are very dead indeed. The good thing however is that they have not leaked in anyway and the battery chamber is clear of corrosion.
Battery chamber is clean
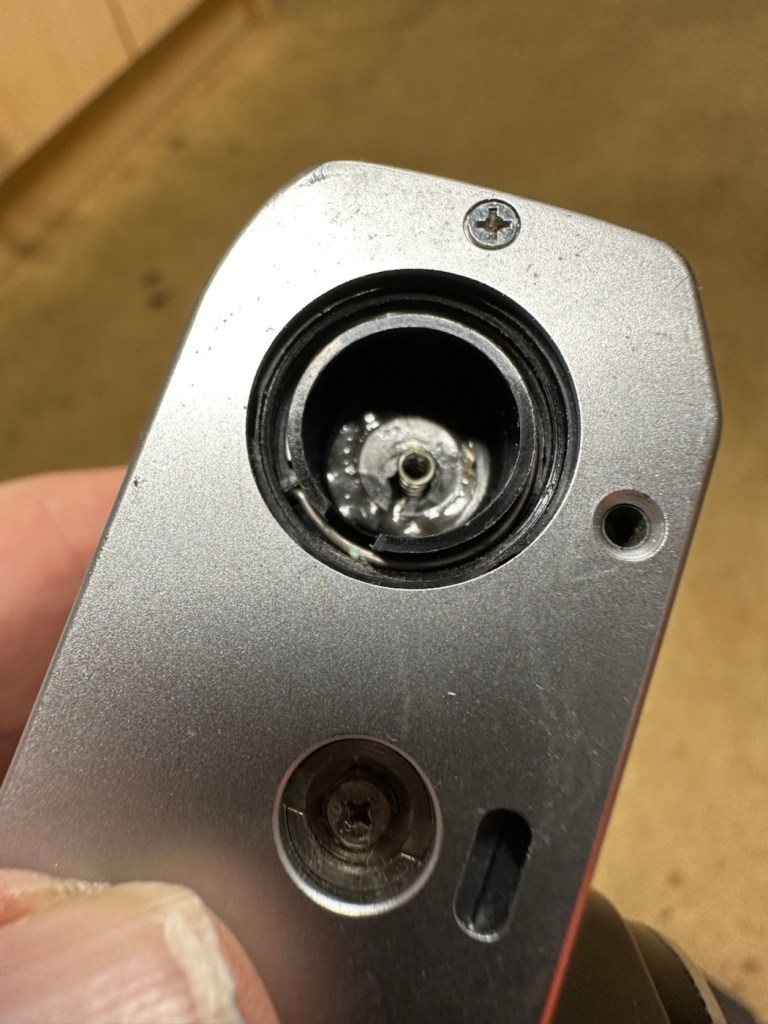
The mirror is stuck in the halfway position, this could be purely to do with there being no battery in the camera. It would be good to see with new batteries installed, if the mirror magnets would then kick in, and then they’d be no further issue. However, knowing my luck they are probably inoperable as well, we will just have to wait. And for this same reason the winder is also stuck, again the batteries may well solve this problem 🤞
Mirror trapped at the halfway point
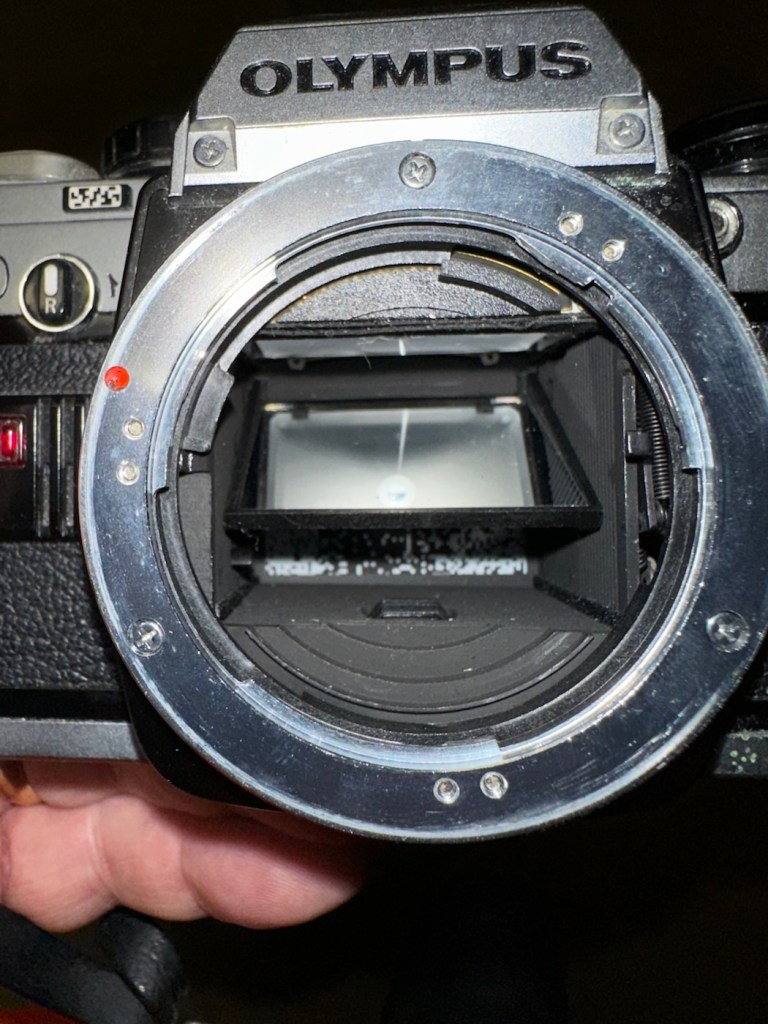
Good news is though that the mirror and curtain are in really good condition, because the old lens has been kept in place preventing any contamination getting into that area.
Viewfinder looks clear apart from a little dust build up
However the lens, does appear to have fungus in it, and will require a clean at some point along the way.
Visible lens fungus
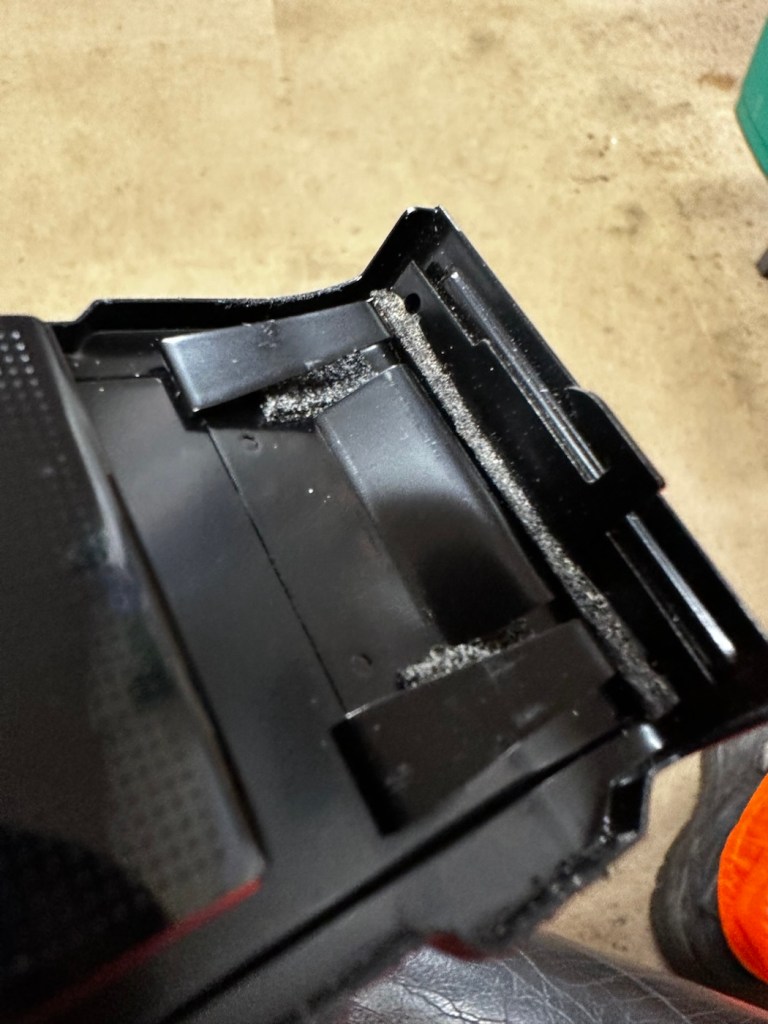
There are also a number of light seals that need replacing as they have perished.
Some light seals need replacing
To be quite honest, the easiest part of this camera to clean will be the standard plastic and rubber neck strap. This can just go in some warm soapy water to rejuvenate it. However, my first priority will be to get some batteries in place and see what occurs. I may have to rethink my approach to this camera dependent on the outcome of this simple action.
Repair:
Straight home and I’ve found a couple of LR44 batteries that had a little more power than the old ones. In they go….and nothing. There is a check position on the main dial that should light up and a buzzer should sound to confirm that there is sufficient power, obviously there isn’t in this case. I run all the other LR44 batteries I have through a tester ( I had a packet of 12 ) and they all show as low power, they’ve died during storage. I then pop over the road to see my brother in law who always has a good supply of batteries and bingo, he has a couple of spare LR44s.
We have the check light, and a little buzz…intermittently
With these in place I get an intermittent buzz and a light, it appears the capstan control and operation dial that I mentioned earlier was loose, and has intermittent contact issues, it will need removing and cleaning then reseating.
If I hold the capstan in place I do get a good signal, with both buzzer and light operating in the check position, and when I move the control to “On” position I can now cock the shutter lever. It will then fire but again only to the half way position as it did earlier. If I gently push the mirror down and let it spring back it will then fire. But you have to do this on every stroke of priming the advance lever. Not good.
This is pointing towards an issue with the magnets and I believe I’m almost there, and that’s when I have a eureka moment.
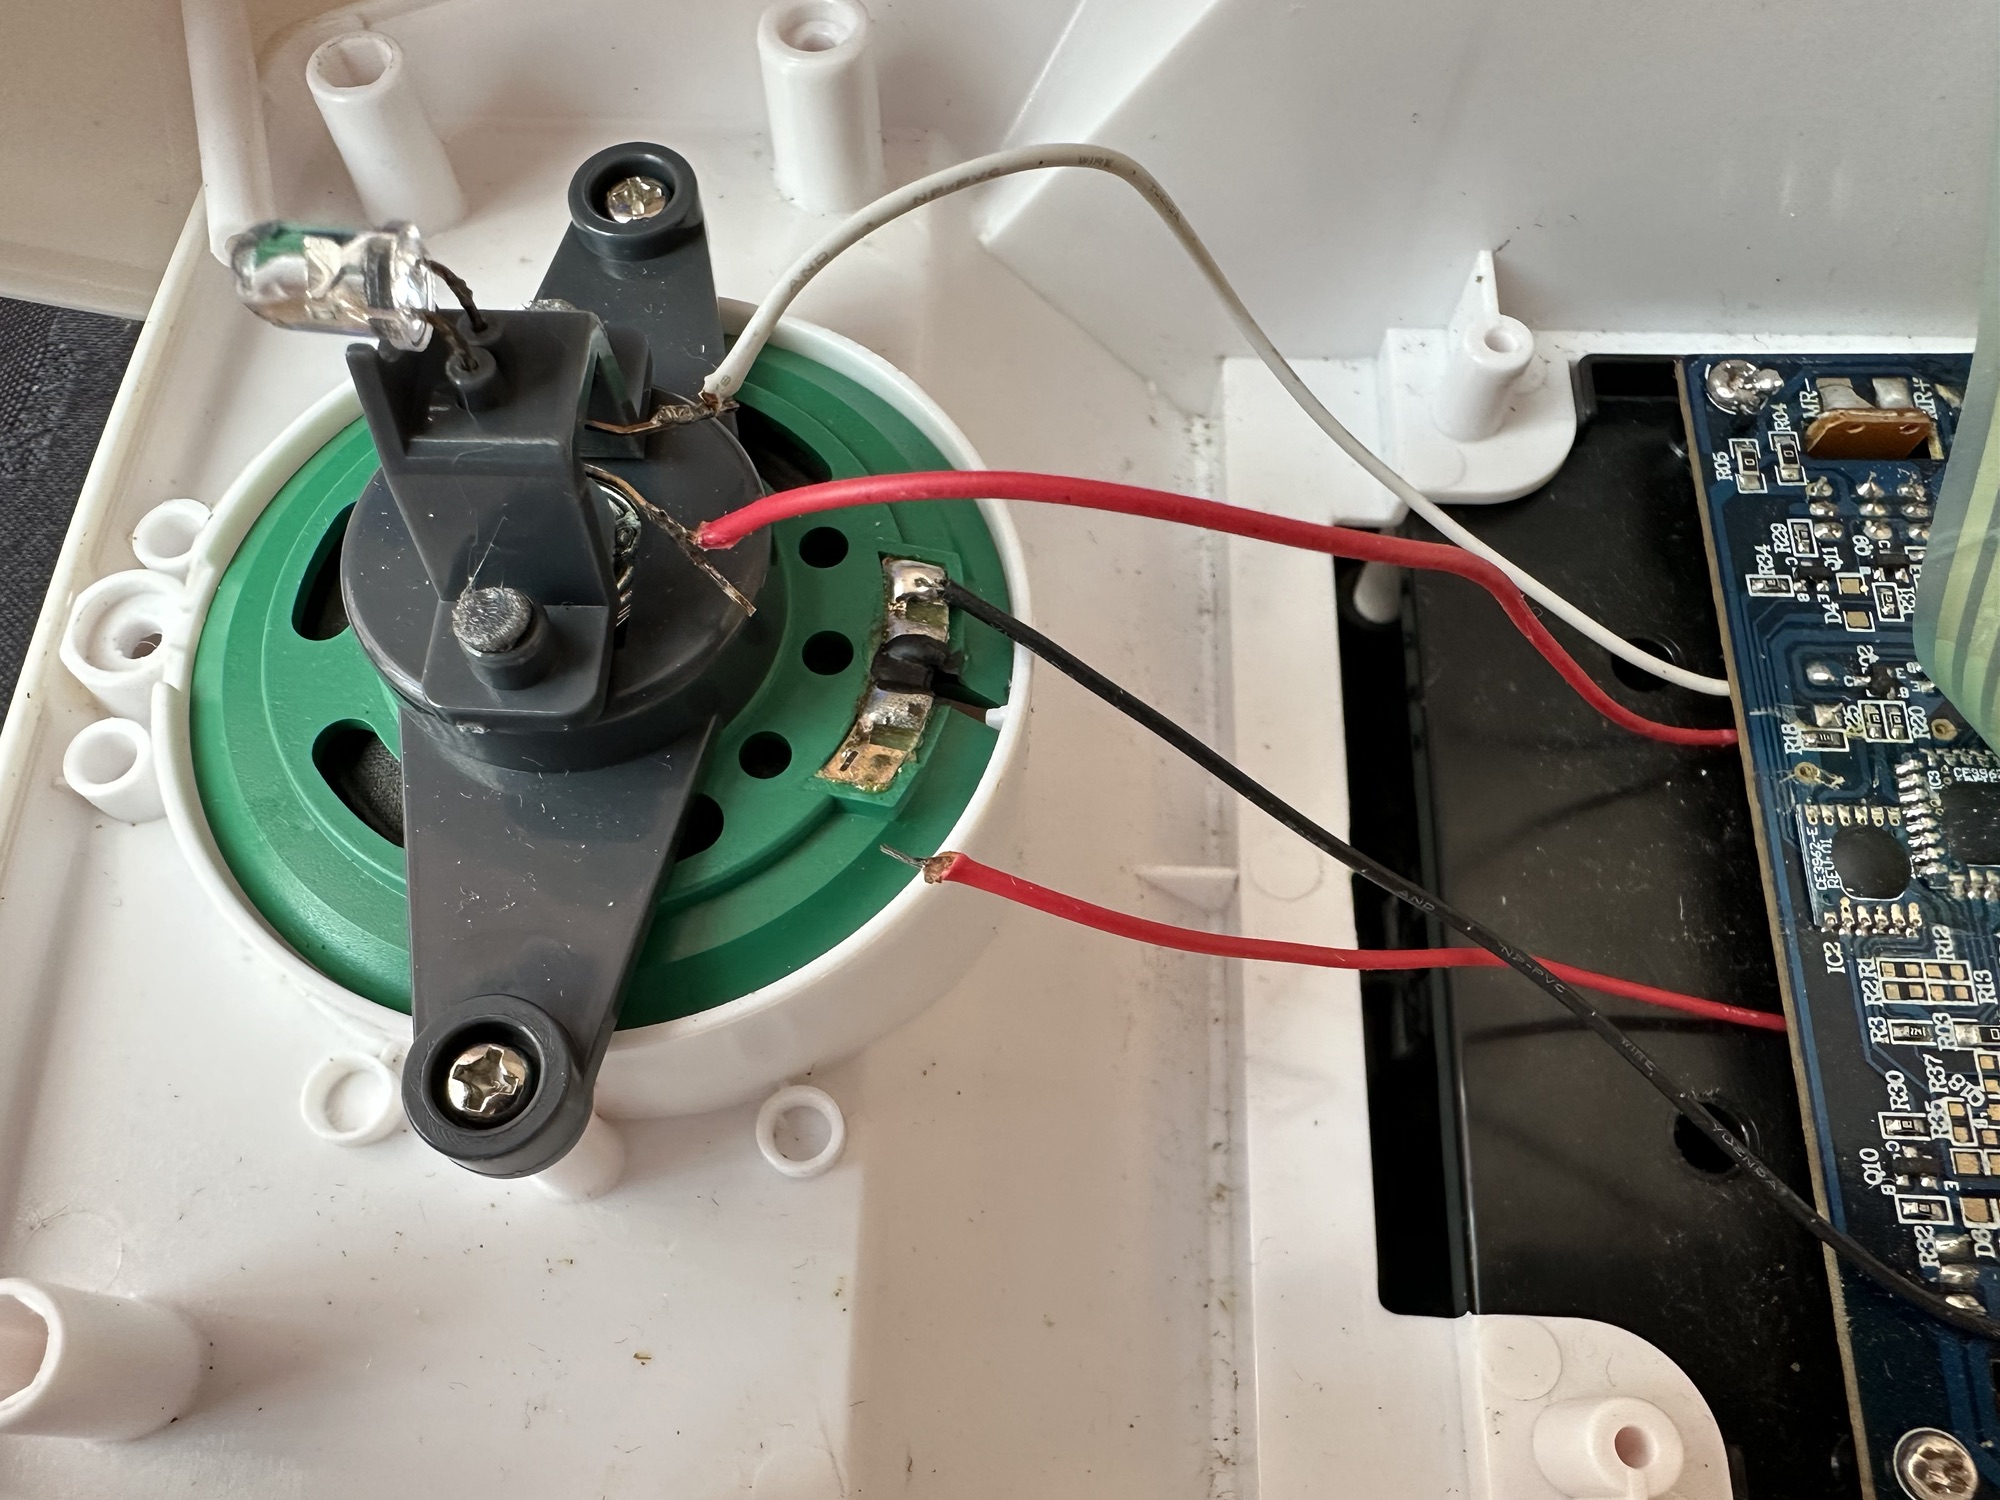
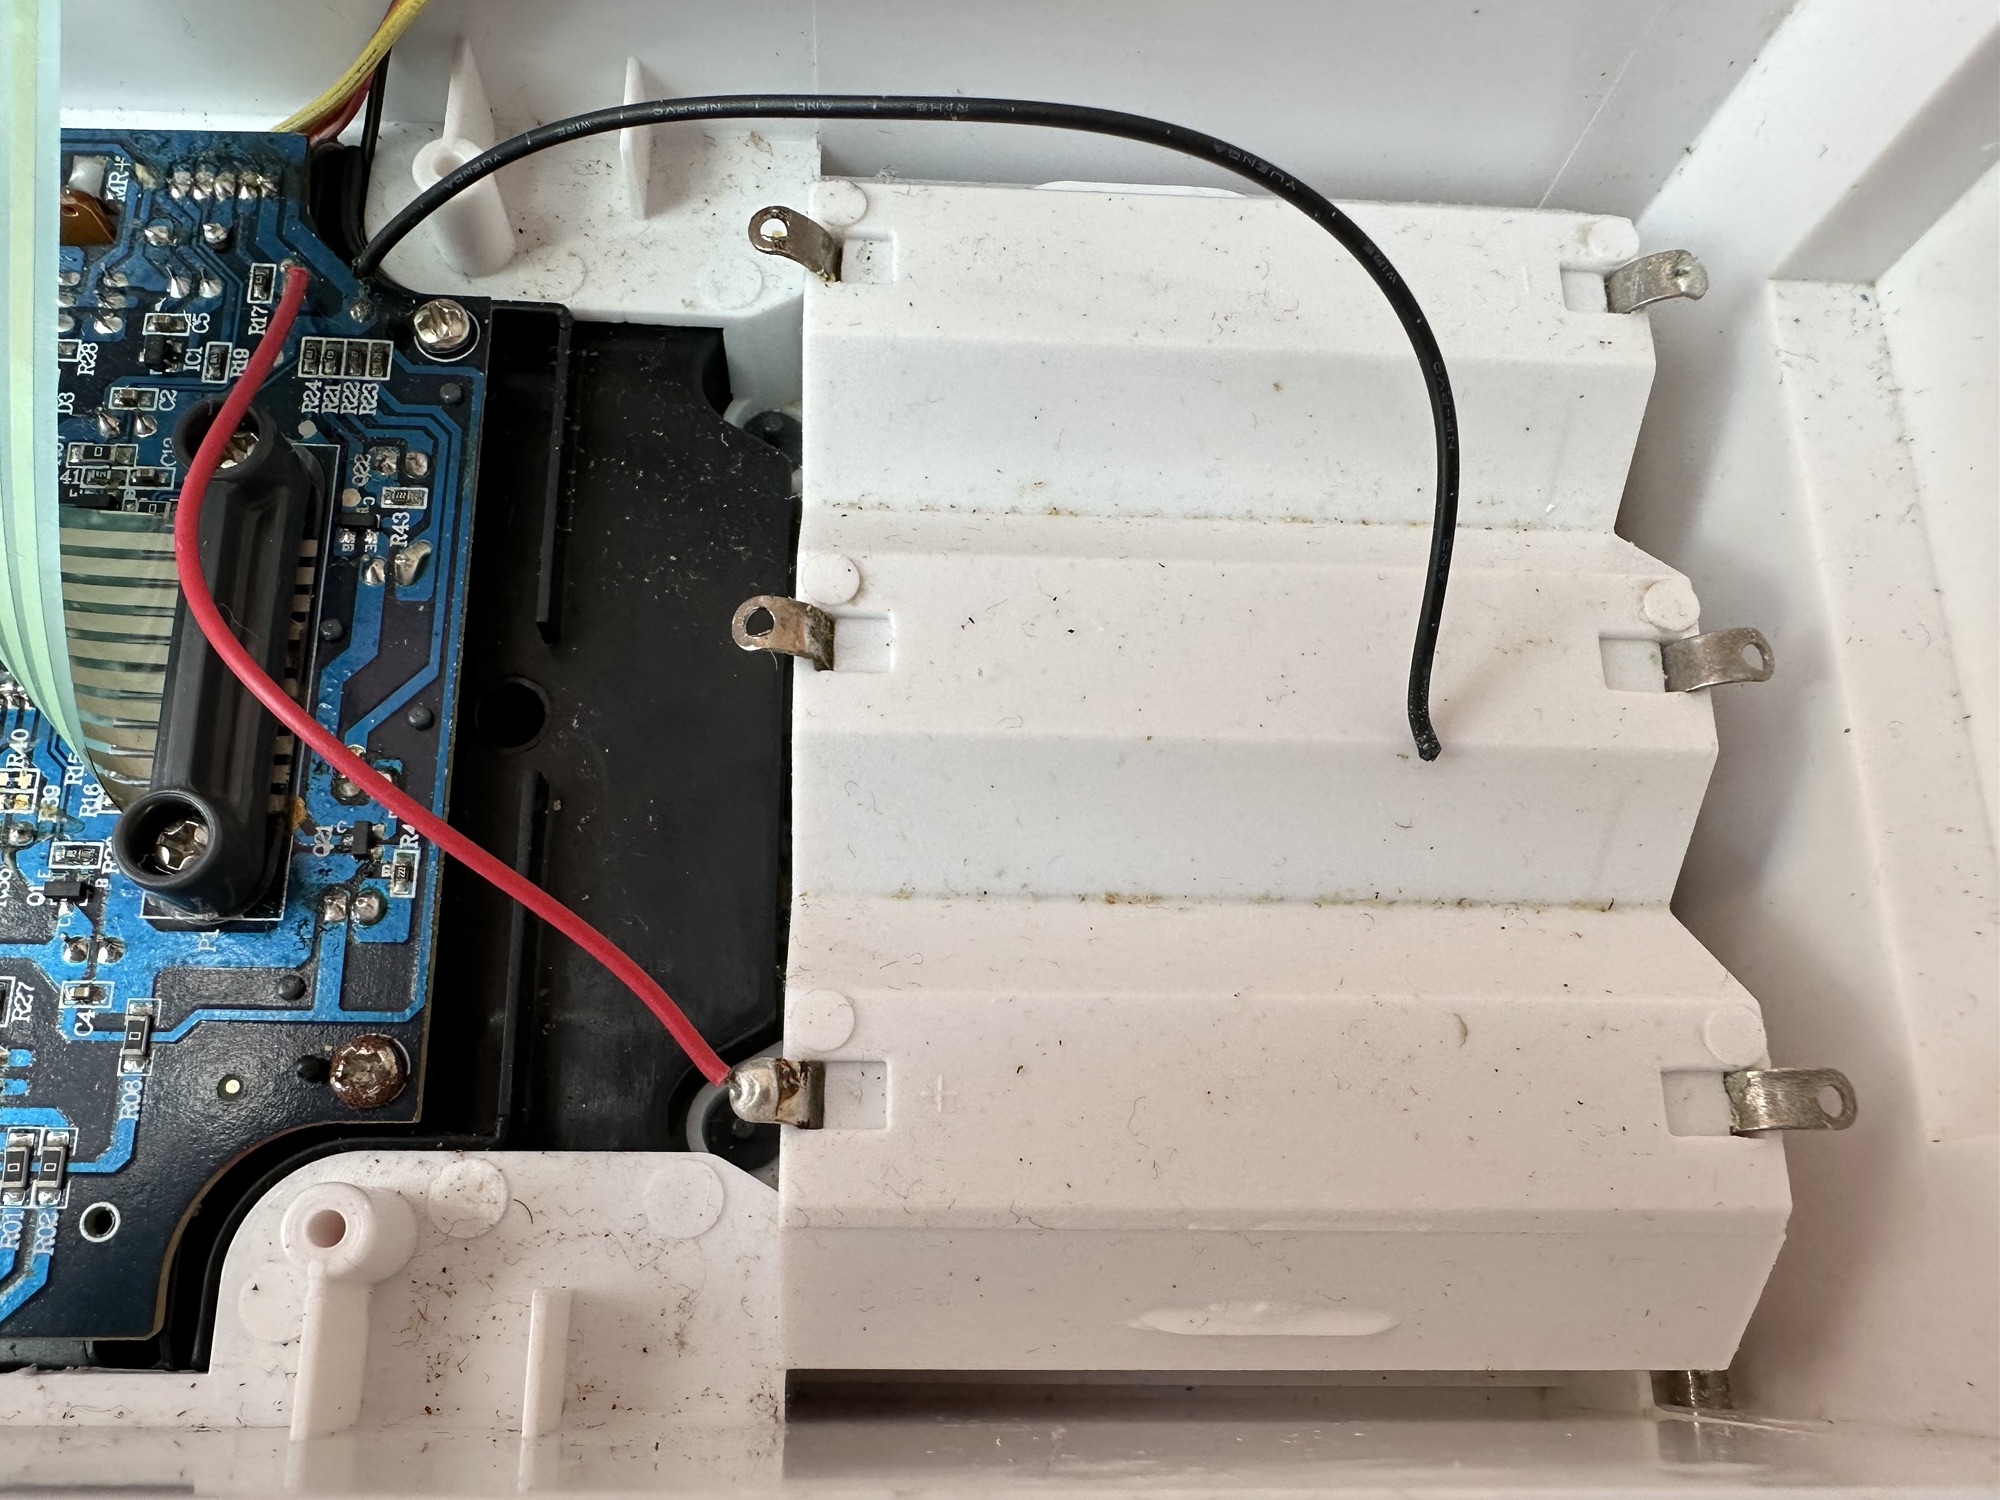
Eureka moment
In the bottom of the mirror and curtain bay on the base of the camera is where the mirror magnets are situated, along with a light sensor that takes a reading off the shutter curtain behind, that is checkerboard coloured. Something here didn’t look quite right for me as it did not look level, the base seemed quite uneven. I just simply put my finger in here, applied some light pressure on this base and it just clicked into position, nice and level and then the stuck mirror fired, just like that. Every single prime of the shutter and actuation since, has worked just perfectly, I wonder if this camera has been dropped at some time just knocking this part out of true configuration? Or has someone been here before me? I’m going to have to remove the base to check a few things anyway, so I can then make sure this issue doesn’t happen again. For now, I’m satisfied that the shutter and winder are working fine. I just need to make the contacts and the electrical continuity a little bit more reliable.
I’ve dismantled the faulty switch. Inside, the old tracks on the camera and the pickups on the switch were showing signs of tarnish so I used some contact cleaner go get these looking better. I’ve re assembled the switch and used a new circlip to hold it all together. It’s a lot more secure and responsive now with no interruption to the check signal. It’s quite solid as it always should be.
Capstan needs dismantling Circlip needs removing Those tarnished tracks
Here’s a small video regarding the switch repair.
Switch working as it should
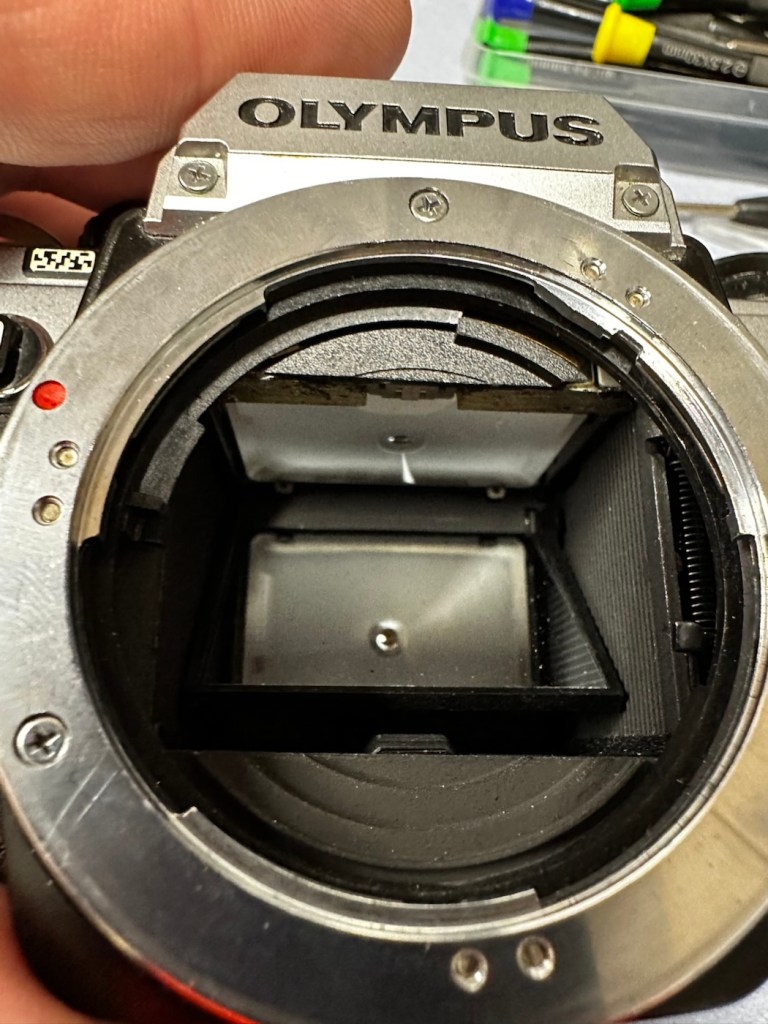
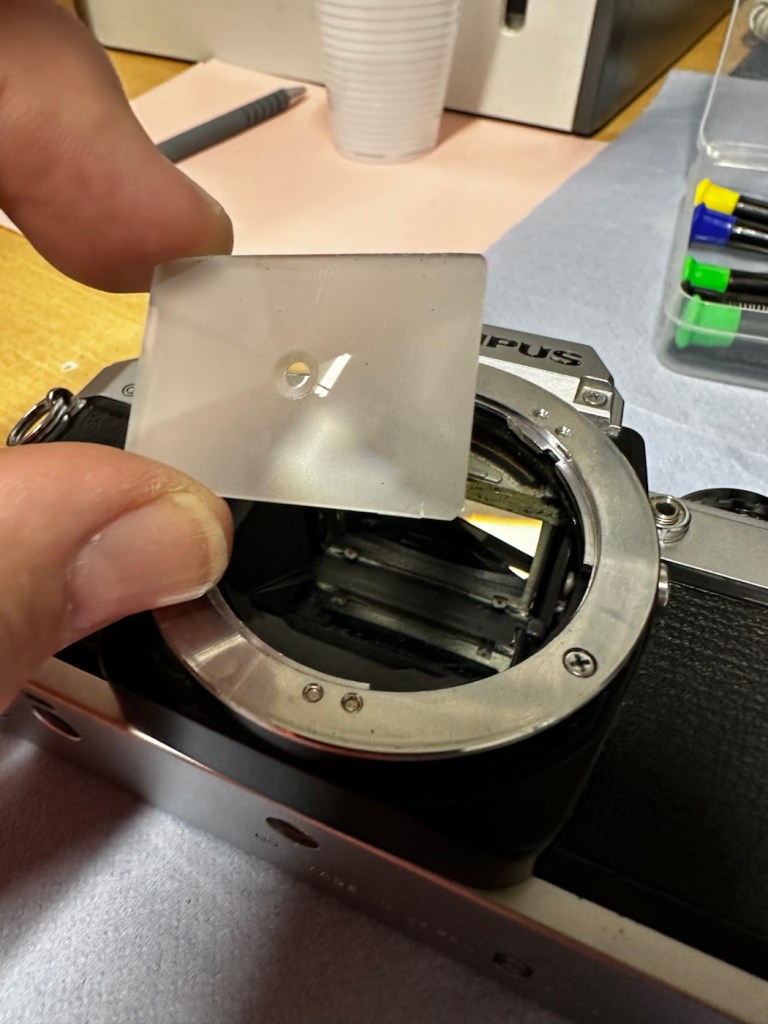
With the switch sorted I’ve now removed the focus screen to give that a bit of a clean.
Focus screen removal, cleaning and replacement
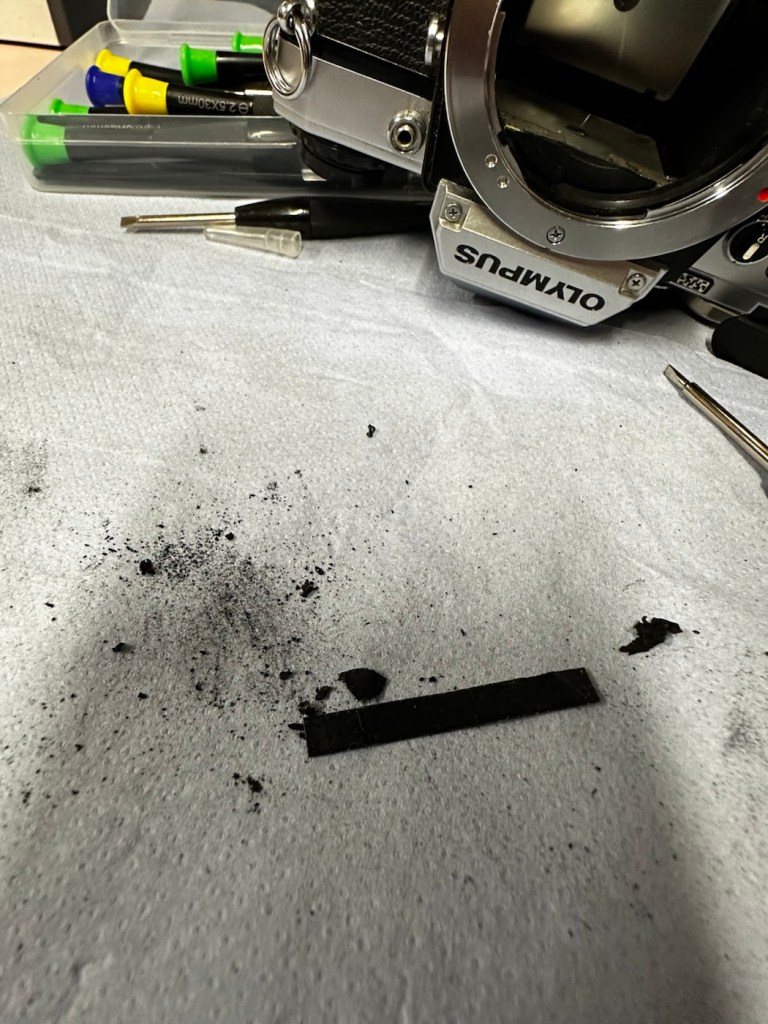
And after this I have gradually started to remove the old light seals in preparation for their replacement. They really are in quite a bad way and creating a lot of dust and dirt as they degrade.
Old light seals removed and degraded Mirror damper seal removed
Now to get the remainder of the old seals removed, clean the troughs they sat in, and then put the new seals in place.
With some IPA, and a large bamboo stick it’s time to remove the old seals
Some seal cut to sizeDoor seal replacedTop seal installed Bottom seal installed
I’ve replaced all the seals on the camera body apart from the mirror damper. I need to get some adhesive first, to secure the plastic plate that sits above the damper. Hence I have to wait for this to be in place before I can finally put the damper in situ, i will do this in the next 24hrs.
Now, the plastic piece that covers the focussing screen access is now secured in place and the mirror damper has been installed, all light proofing has now been completed.
Mirror damper installed
The original lens that was suffering with fungus has been dismantled and given a clean, however because the top two optics are a sealed assembly, guess what? The fungus is within the sealed section and is unable to be accessed. Therefore the lens will never be cured of this issue, it has been improved by cleaning the other optics but it’s not in anyway good enough to use with film in the camera, I will therefore use the old lens purely for testing purposes, it works fine for that and will be just fine for testing other Olympus equipment. In the meantime I have purchased two further OM 50mm std lenses, one is an earlier “Silver nose” model with a single lens protective coating whilst the other is a later production “Black” MC (Multi coated) model. Both are in an excellent clean condition conducive for film photography.
The two new lenses – “Silver nose” to the right
I’m happy that the repairs have now been completed, all that is left now to do, is to give the unit a thorough clean, and to clean that original plastic/rubber camera strap with some warm water.
Result:
Here we present a fully cleaned and maintained Olympus OM10 35mm SLR camera from the 1980s looking quite resplendent after all the work on it has been completed.
All cleaned
Looking superb with a new lens
Looking fine from all angles
It’s been a lovely camera to work on. The make of this camera is superb, and back in the 80s Olympus were on a high note with the high end advertising, using many well known celebrities, and their cameras as a result became extremely popular. They are very well made and have stood the test of time. This one camera will go on to continue being used, and has many good years of life ahead of it. Another one saved from the scrap heap. As with all my cameras I have an immense backlog of units all awaiting the time when they have a roll of film run through them, and this one is no different. When I do pass a test roll through it I will post a link to the results here.
As always, thank you for passing by and glimpsing this post. It is always very much appreciated.
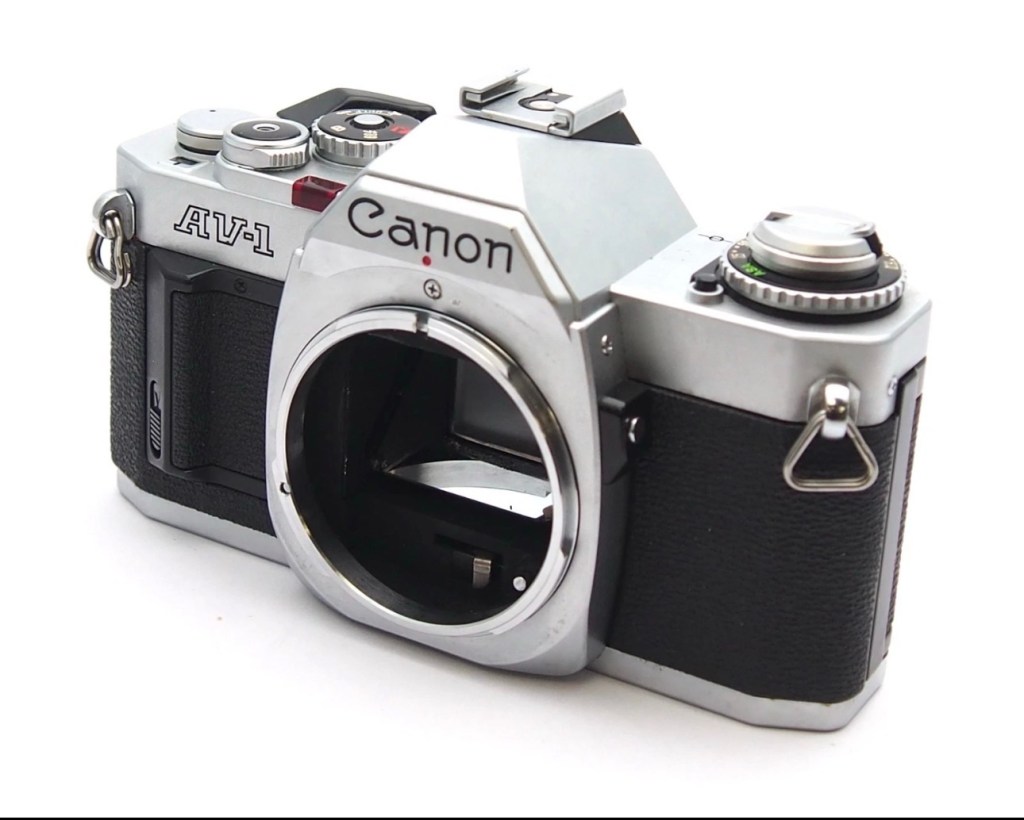
I now have a Canon AV1 with a shutter problem. Can I fix it? I’ll have a good go…
What the listing stated:
This camera is in very good overall condition. Some light signs of use but this is generally minor. The light meter is responsive when you press the shutter button down. However, the shutter will not fire. Spares or repairs only.
EBay
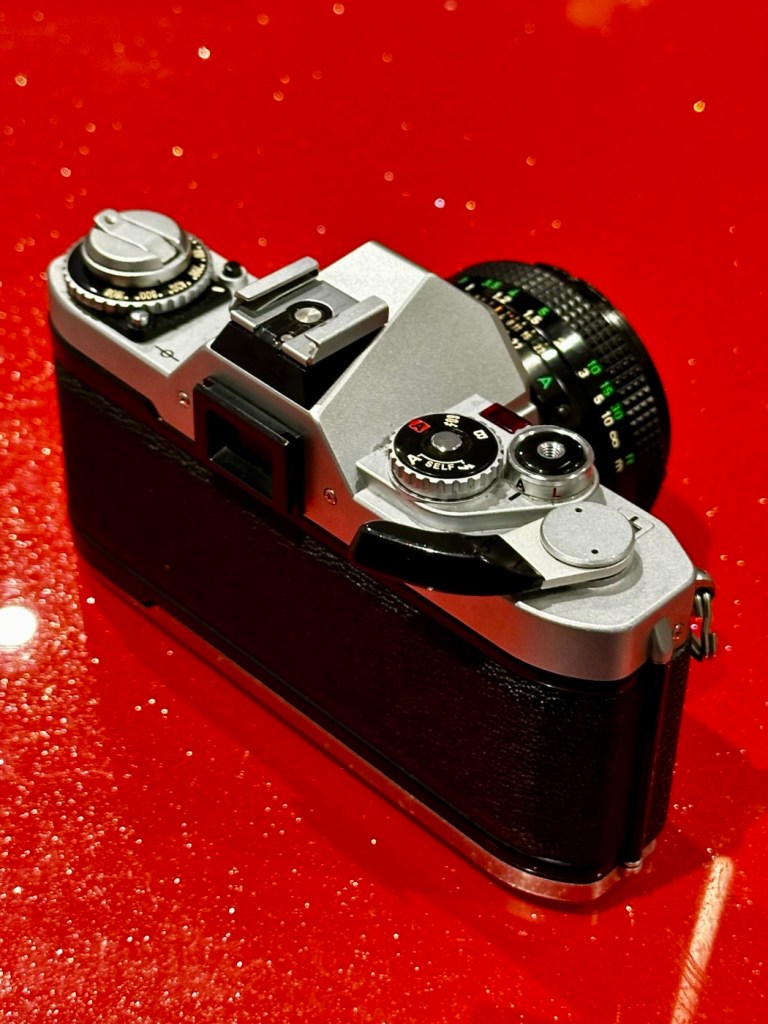
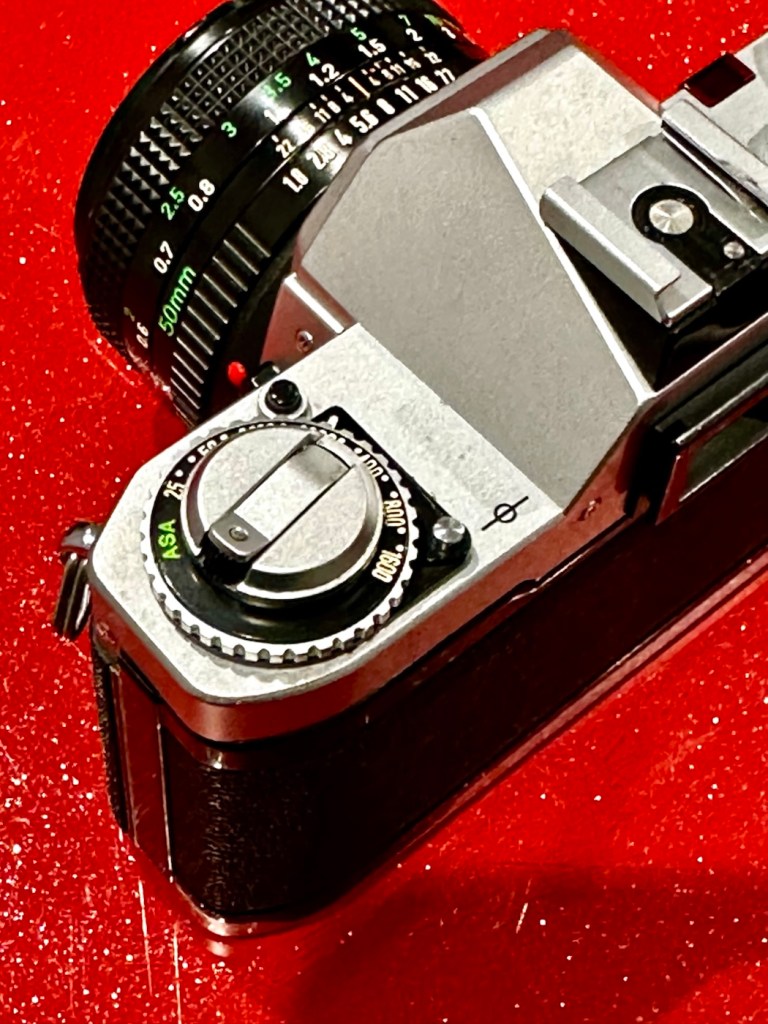
I’ve just paid £8:98GBP for this camera, and I believe this is a great price for a piece of camera history. The AV was introduced due to there being a demand for aperture priority at the time, whereas its Sibling, the AE1 was purely shutter priority. Later cameras would come to incorporate both systems. This one has a known problem with a stuck mirror – it won’t fire and I think I can easily sort this problem. Well I hope I can.
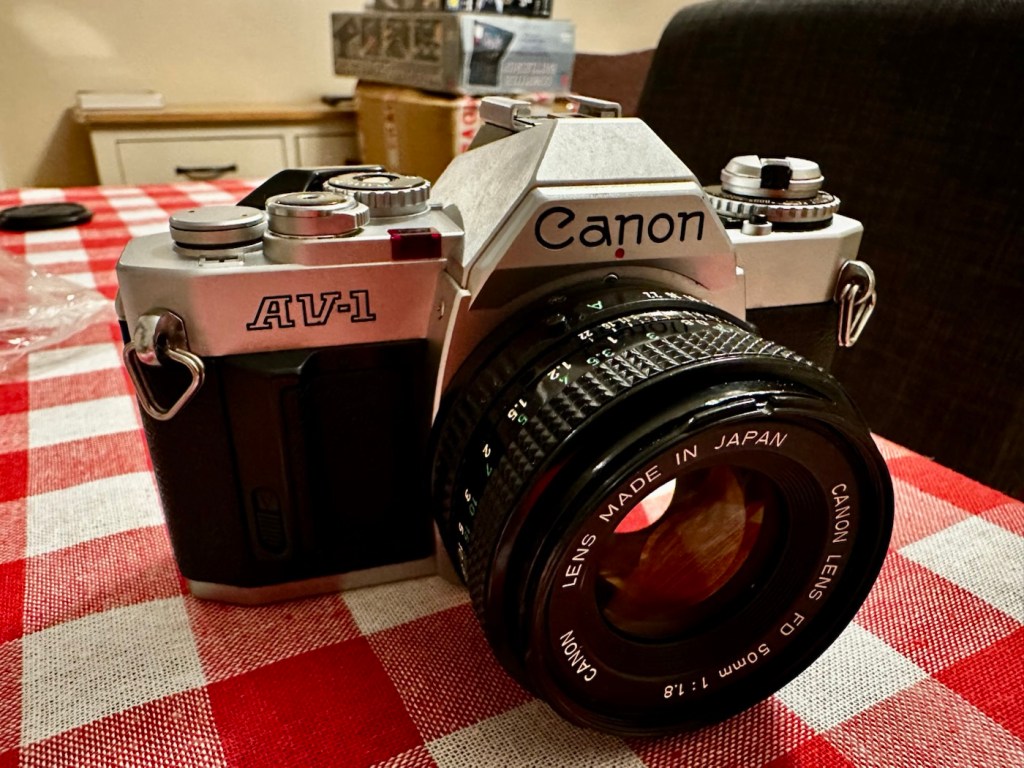
The Canon AV1 I have just purchased
Here’s a little information about this camera:
The Canon AV-1 is a 35 mm single-lens reflex camera with an FD lens mount, introduced by Canon Inc. in 1979.
The AV-1 is very similar to the 1976 AE-1 but provides aperture priority autoexposure rather than the AE-1’s shutter speed priority AE.The camera is not capable of fully manual exposure. Canon’s international distributors, particularly in the United States, had clamored for such a camera because competing brands offered mostly aperture-priority cameras and some preferred it. The AV in the name referred to the type of autoexposure; Av (Aperture Value) is a common abbreviation for aperture priority.
When this camera appeared, a new range of FD lenses was introduced, with instant mounting/unmounting of the lens. This is called the New FD mount and does away with the older type of mounting ring which was fitted on to the rear of the lens and was awkward to use and needed two hands, to a newer, easier system whereby the user lined up the red dot on the lens, with the red dot on the camera and simply turned the whole lens clockwise until it clicked into place.
All the other AE-1 accessories fit the AV-1.
Wikipedia
I’ve decided to collect all of the Canon “A”Series of cameras, and this adds to my current collection that consists of an A1 and an AE1. There were I believe, six cameras in this range and this current camera will be my fourth. Here’s a list of the “A” range of cameras below. I have highlighted with an asterisk all that I currently have at the date of this blog post being published:
The original listing description does not match the issues that I have found. It originally stated that the light meter is responsive, it isn’t. It also stated that the shutter does not fire, it does when a battery is installed. The battery level indicator in the viewfinder does work when the check button on the camera is depressed. However when you focus the camera and half depress the exposure button to get a meter reading, the needle in the viewfinder doesn’t respond, this is the only real issue I can see, I guess the seller must have been looking at another camera as he wrote the listing for this camera.
Battery level reading in the viewfinder
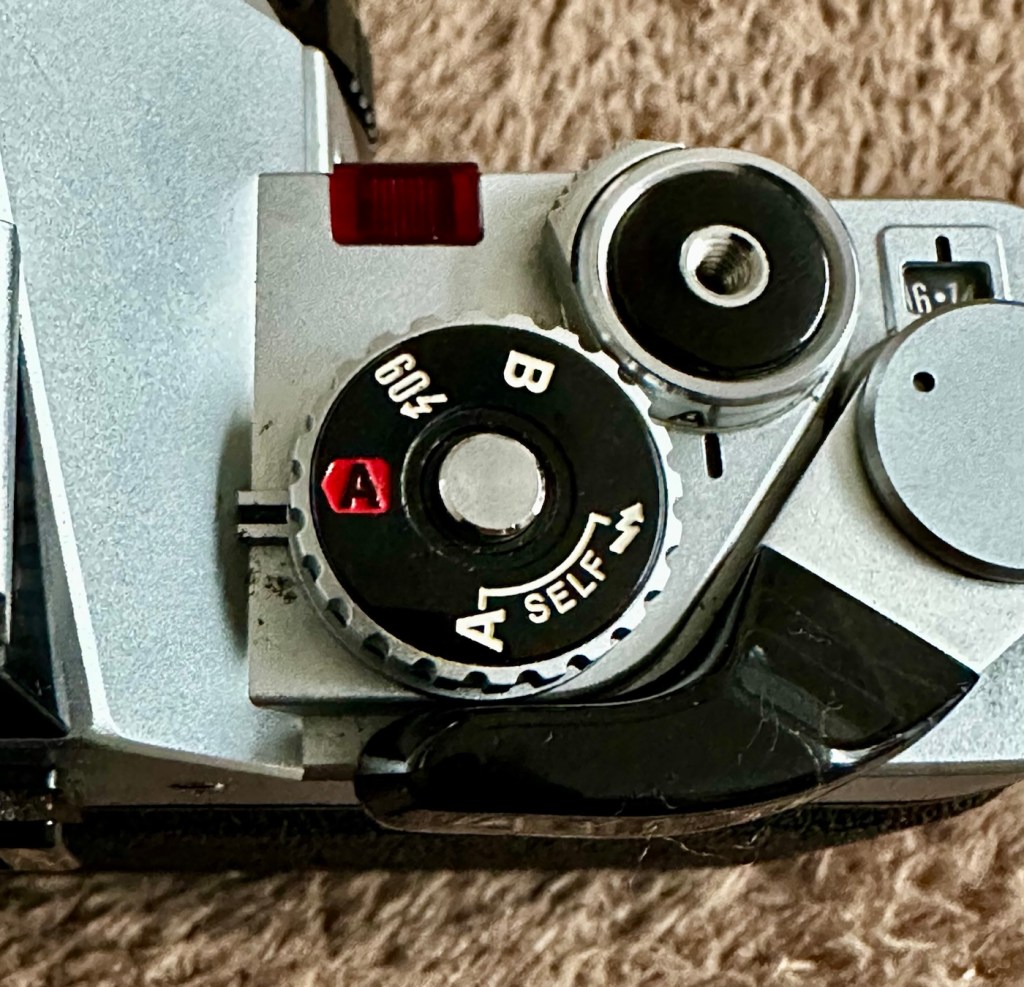
All settings appear to be working as they should, the “B”setting allows me to scroll through the “f” stop settings to see the aperture leaves working as they should. All “f” stop settings appear to work on the auto setting.
Camera appears tidy but grubby
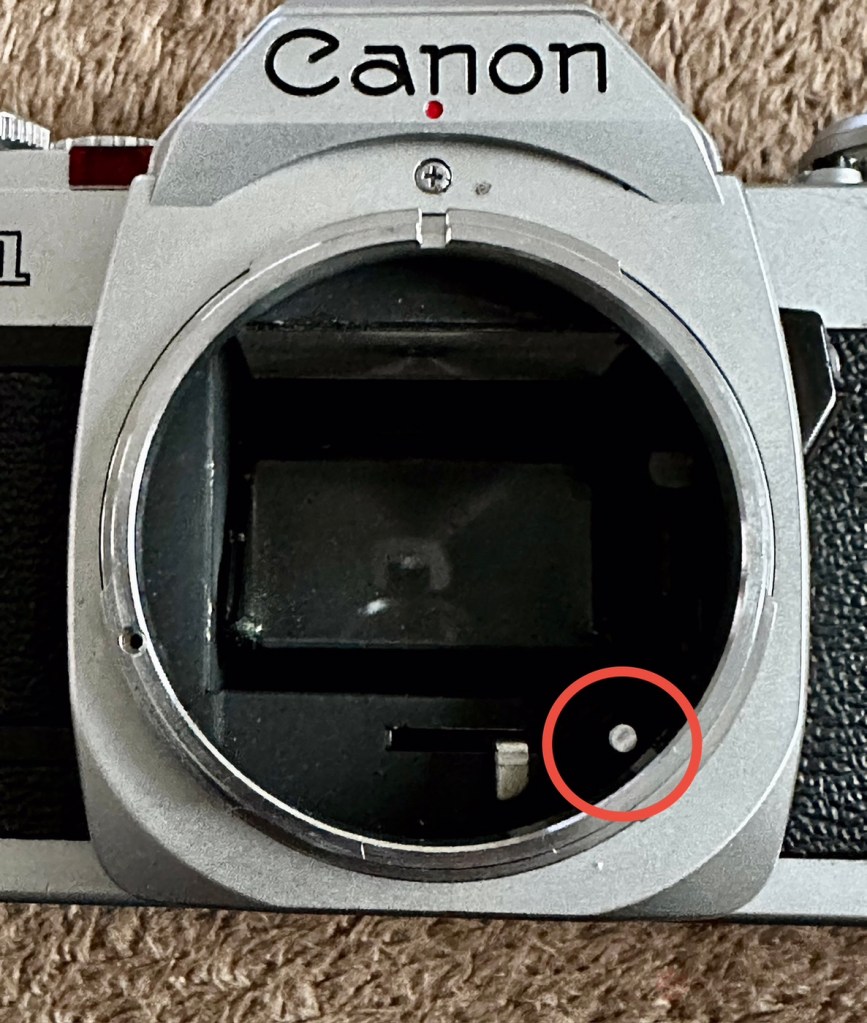
It’s a smart little camera, this a tidy example of this version with no dents, dinks and just some very fine scrapes on the base as you’d expect from a camera fast approaching 46 years old (1979-2025). It’s a bit dirty and needs a good clean inside and out, the light seals are in a good state and not requiring replacement or repair just yet, however the mirror bumper has deteriorated and this will need replacement.
Mirror bumper needs replacement
The shutter curtain is in a good and untouched condition.
I’m going to research issues with the exposure indication, and I will incorporate my findings within the repair section.
Repair:
I thought, perhaps the camera is suffering from lack of use? It certainly is probably some considerable time since this camera was last used. Firstly I’ll try exercising all the controls that affect the exposure reading, including the mode dial, film speed dial, aperture ring, etc. I’ll work them backwards and forwards a few times to see if this helps to clean the variable resistor tracks inside from any surface contamination. When the FD lens is attached you must be mindful that the “A” setting on the lens is not used and that the f stop settings are used in a manual manner, lens auto is not a function on this camera.
Auto shutter on cameraDo not use the “A” setting on the lens. It doesn’t work
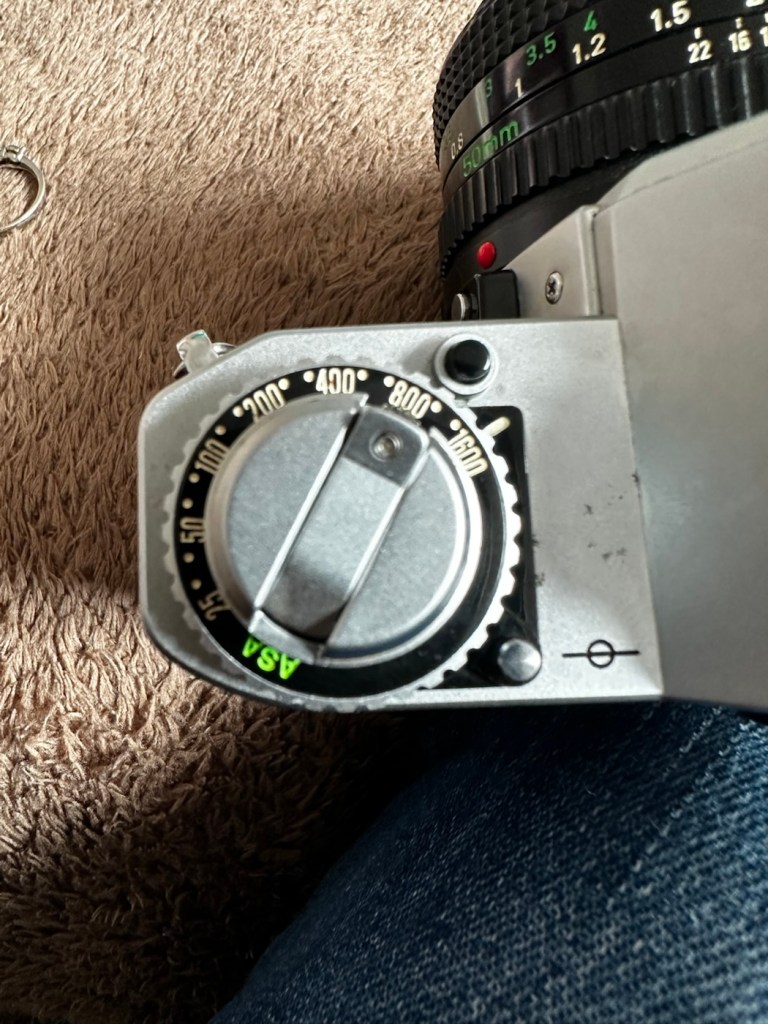
To be honest, this did seem to work sort of. The needle has moved off the bottom a bit. The ASA setting was on 100, so I put it up to 1600 as it is quite a dark day and the sensitivity of the light sensor would be reflected better at this setting. It moved a bit but I wasn’t totally convinced that this indication in the viewfinder reflected the true light situation.
I set a higher ASA for testing
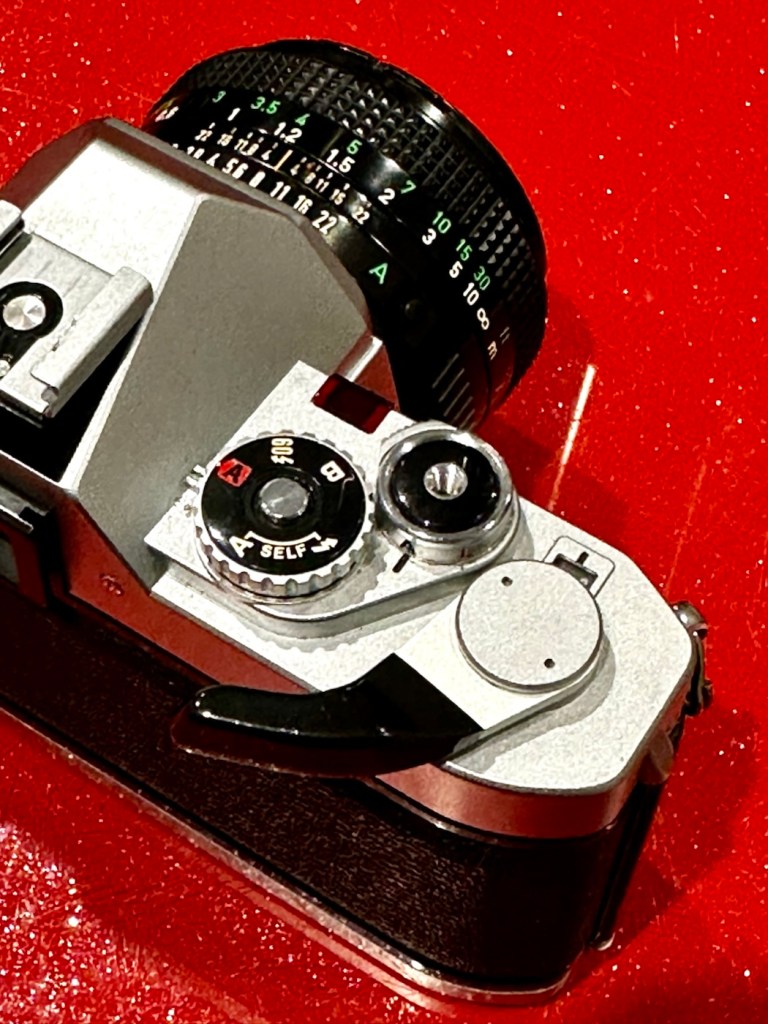
There’s also a small, silver push-button just inside the lens mount at about the 4-5 o’clock position. If you press this in and release it a few times for the same reason, as exercising the dials as I did above, it is just like exercising a body part and keeping it supple. Leave items like this, designed for high usage redundant for a while and they soon seize up. it has also been known to assist with getting the needle indication working after a long lay off.
That silver button, highlighted
(A little bit of trivia here – this button is normally used for the lens to inform the body of the lens’s maximum aperture. This information isn’t needed on the AV-1, but Canon included it anyway for some reason, and it doesn’t affect the exposure.)
And combining these actions, moving the settings dial and the button inside the lens mount seems to have revitalised the light meter and I’m now quite confident that it is working as intended. It was just lazy due to low use and needed a bit of non invasive intervention to get it working again. And non invasive intervention is always a good thing. So with the setting back to 200ASA I was able to show the meter working in this very short and basic video below.
A brief video showing the meter needle moving
I’m confident that the metering issue is now sorted so let’s get that new mirror damper installed.
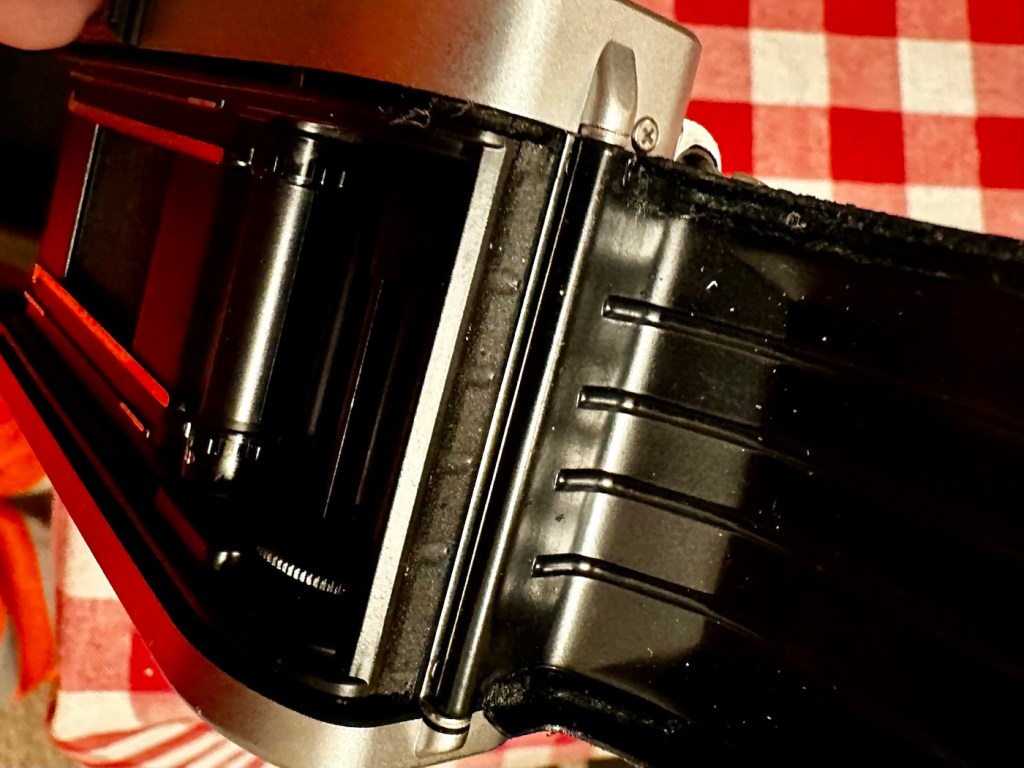
A lot of dirt came off of the area where the replacement damper had to go, it had completely deteriorated and took quite a bit of cleaning.
New damper in place Dirt that came off, and replacement damper ready to go into place
Now in place it has silenced the mirror movement somewhat, and will provide some longevity as it moves into the twilight of its years. It will be good for many more rolls of film yet. Whilst in the lens area I have cleaned the mirror and prism, and given the area a good blow through and put the lens back in place to seal it all up. It is now clean internally. I have a couple of body caps on order that will assist with storage when the lens is removed.
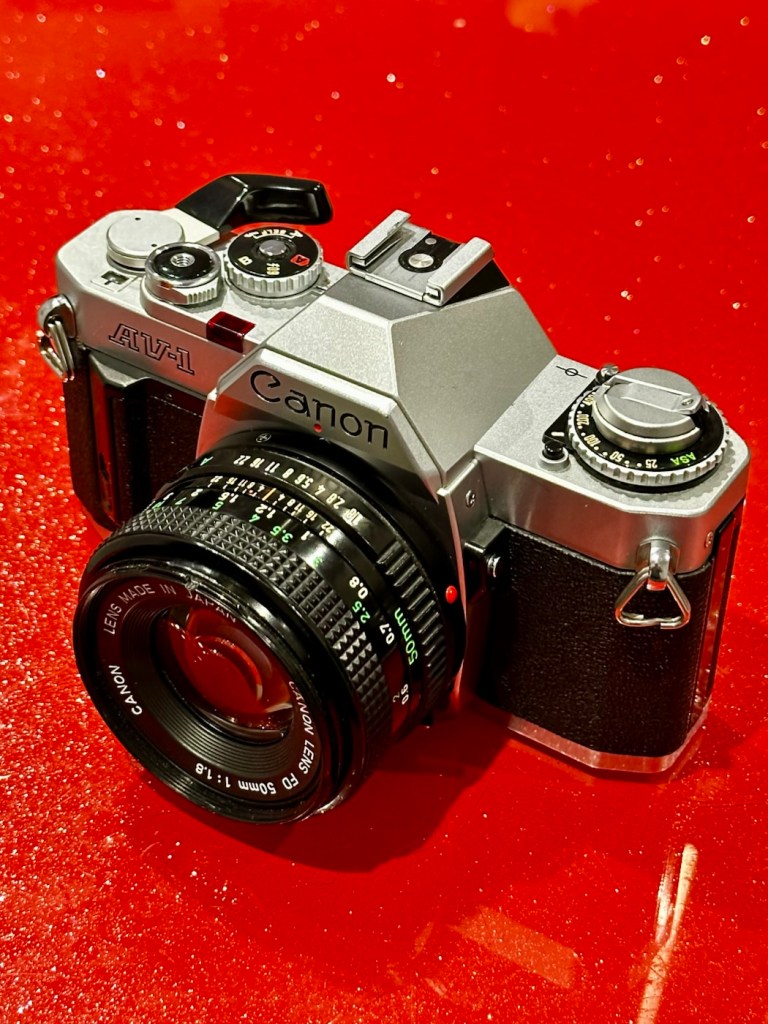
Just a final clean with some cockpit cleaner, and this camera has come up lovely, I’ve tested it on a Power winder “A” as well and it sounds just so good and “retro”. It’s perfect.
Result:
Well. I now have another lovely example of one of the Canon “A” range of cameras to add to my collection. This brings my current total to four out of the six available, two of which are still currently under repair. For less than £10:00GBP it is so easy to own a piece of photographic history. I have been lucky here that the work that had to be done was non intrusive, and to be quite honest was just basic everyday maintenance. The only real work of sorts was installing some mirror damper felt, of which I have plenty of stock. Cleaning was quite intensive but the overall result is amazing.
Front views after cleaning Looking amazing compared to what arrived
I will eventually run a roll of film through for a final quality check, however I have such a backlog it will take me a while. When I do however run that test roll I will post a link here:
Really pleased with this repair, and the fact that another lovely old camera has been saved from the scrap heap and been given a new lease of life.
Thanks as always for passing by. It is as always, very much appreciated.
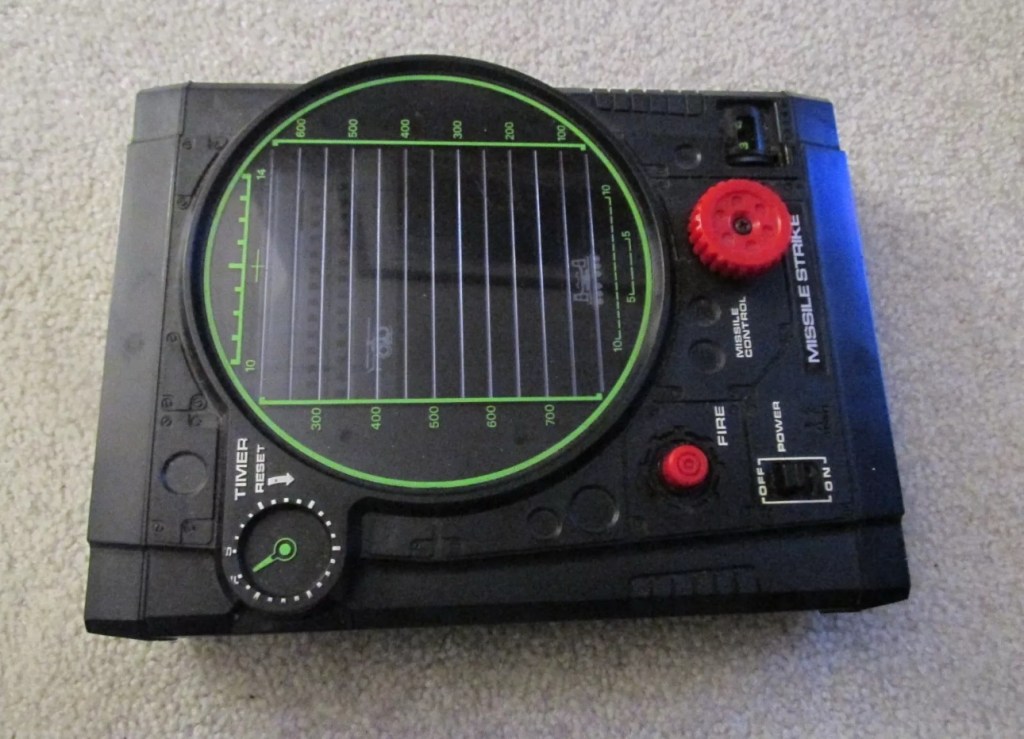
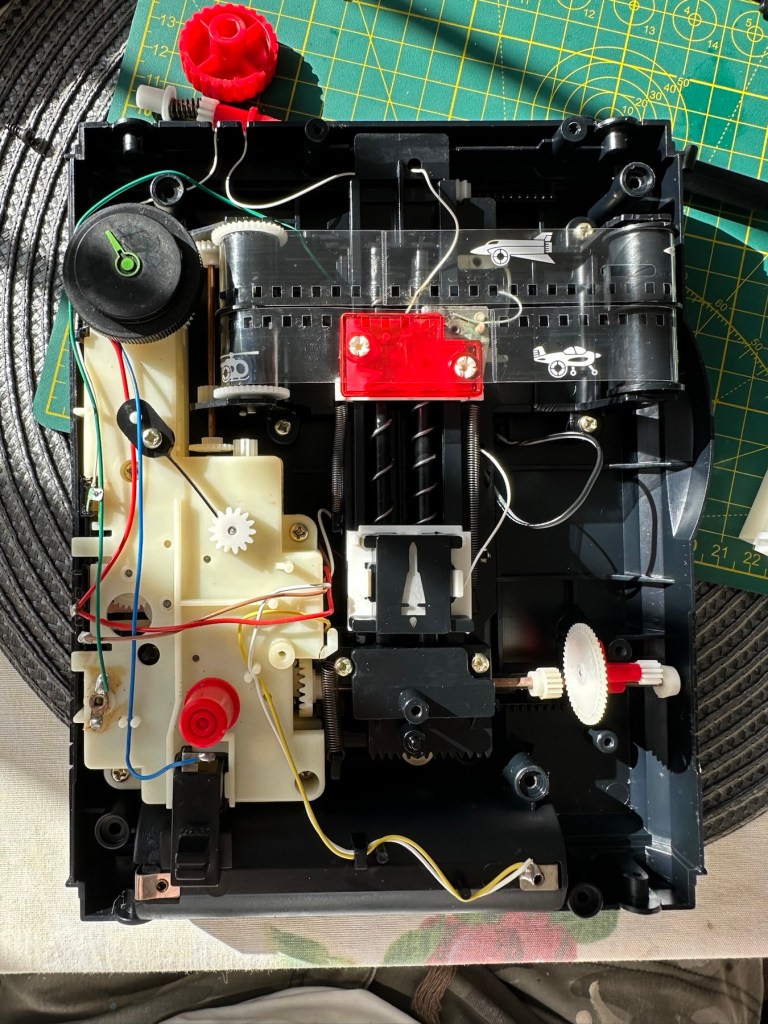
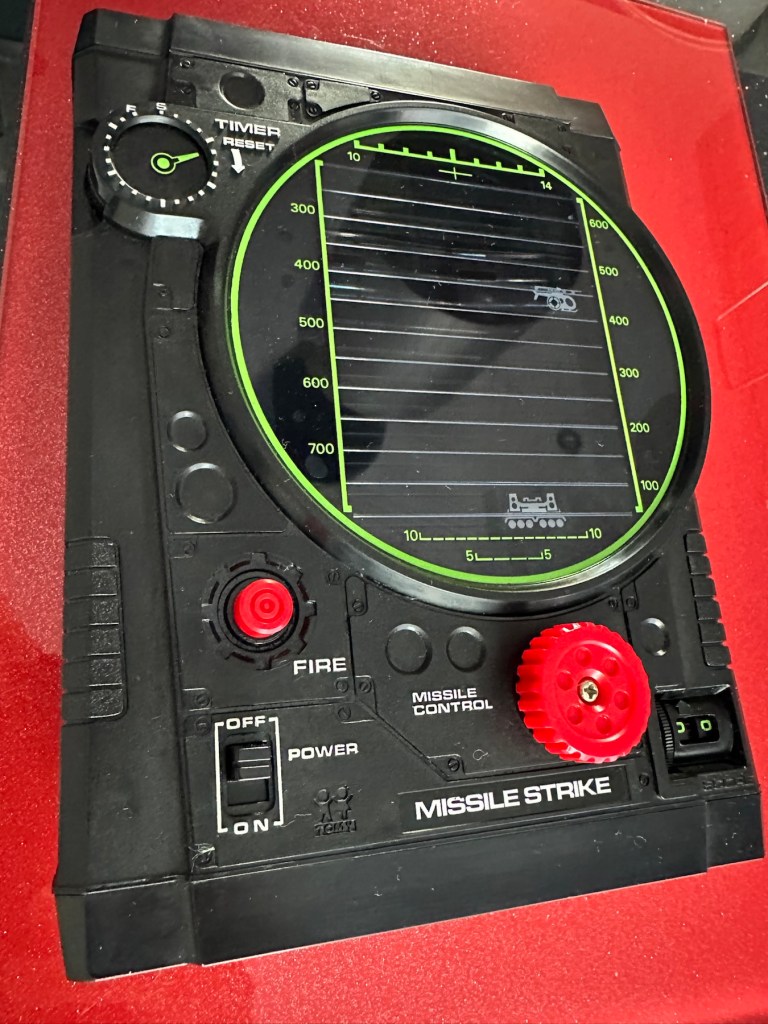
This is a nice example of a Tomy ‘Missile Strike’ electro/ mechanical handheld game. It was made circa 1979 and is battery operated. It appears clean for age and works, apart from the missile light not illuminating. Battery terminals very good. This is a nice genuine item that is shown as I found it. NOTE – NO BATTERIES ARE ENCLOSED. Nice example for any collector.
EBay
Missile strike
On first seeing the listing for this item, my thoughts are that it looks quite clean and tidy. The usual state of these units are quite tatty with scratched screens. This looks good, however pictures, especially from EBay can be greatly misleading so I’ll guess I will just have to be patient and wait.
This units only issue seems to be with the LED missile light, so hopefully it will be a quick fix. These units are currently selling between £52-£79GBP as per the picture below. I managed to secure my unit for a total including postage of £24GBP so I think I’ve done well in that aspect. I’m quite happy with this.
Current sale prices on EBay
A little history:
Tomy released Missile strike in 1979 in its international line of electro/mechanical handheld games. Known under different titles in other regions such as Terra-Hit (UK), Missile Strike (UK), and Space Attack (Japan). One of TOMY’s electro-mechanical handheld games, Missile strike is a Space Invaders-like shooter game, the units small motor winds strips of aircraft across the screen, which the player attempts to hit in order to earn points. There is a mechanical wind up timer that controls the action, and the purpose is to score as many hits on aircraft as possible with in the time it takes the winder to stop. The game includes one small, flashing LED light as the exploding missile.
So it’s another game that has reached its 46th year, and for the only issue to be its one light source, I think that’s acceptable. Let’s wait to see what arrives.
Assessment:
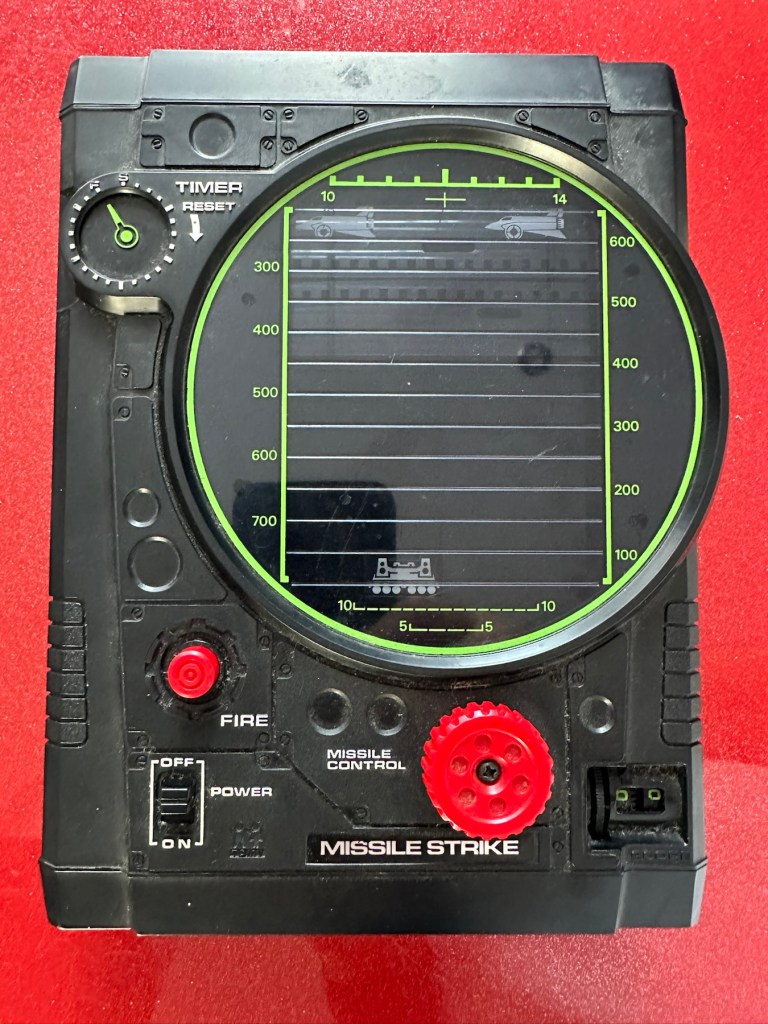
On arrival the first thing that hits you is that this is yet another filthy item. I seem to attract these kind of sales, so it will require a deep clean. Cosmetically the game is in good shape with no deep scarring and only minimal fine scratches on the screen lens commensurate with its 46 year old age.
Tidy cosmetically but filthy
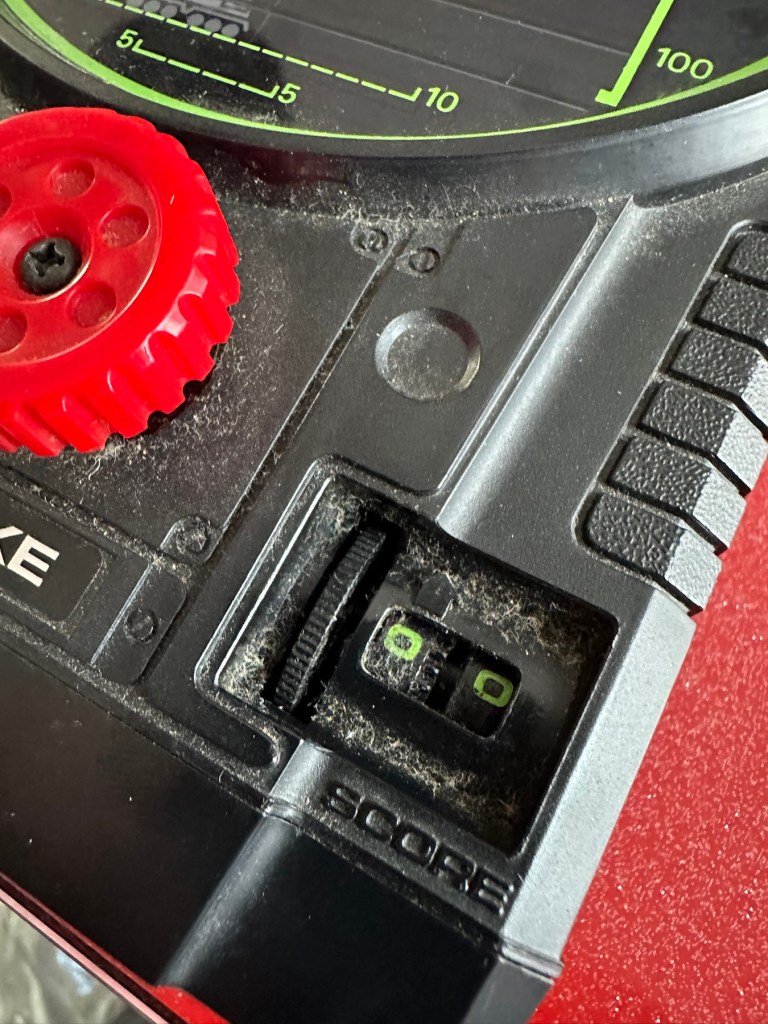
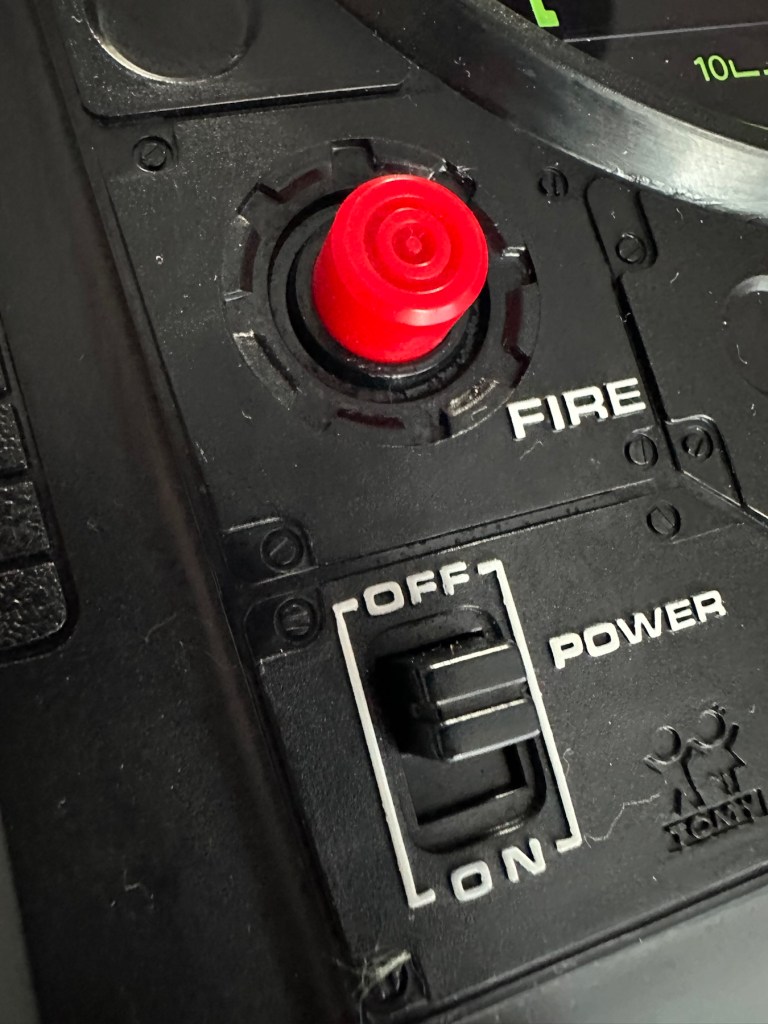
It was sold as the missile light not working, this is partially right as it is an intermittent fault, I suspect this is down to dirty contacts.
Filthy, and counter not workingMissile light is intermittent
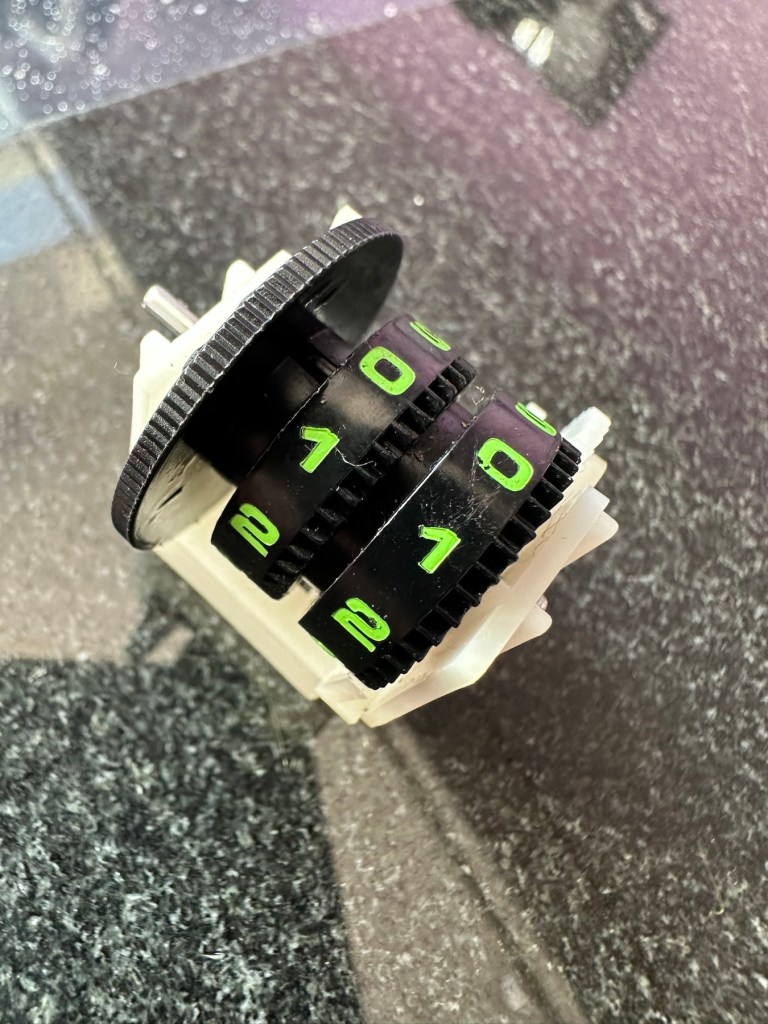
This game has two bands of film that run across the top of the screen displaying aircraft, the top band is intermittent and needs attention. The score counter will also need attention as it is not turning smoothly, again I suspect this to be as a result of the build up of dirt.
Repair:
First thing to do is dismantle the unit and to get some cleaning done. The small video below shows the issue with the top band aircraft not moving.
Film transport fault
I’ve taken the counter out after removing the case and all exposed buttons and switches.
Dismantling
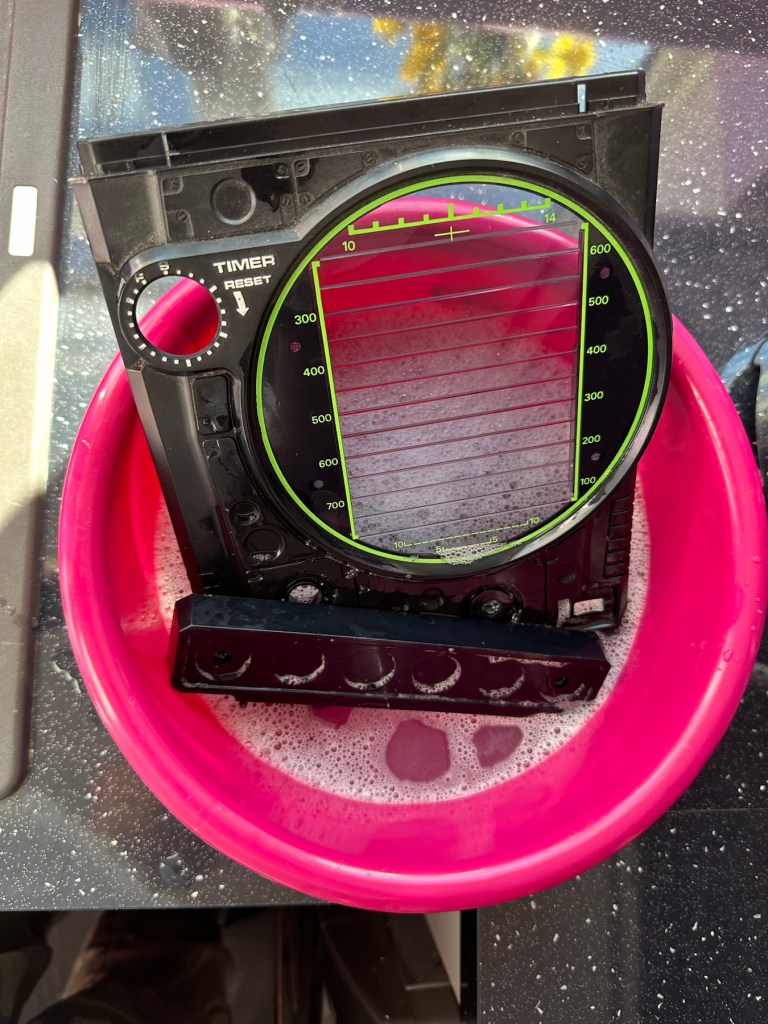
Off to the kitchen sink. let’s get these items washed.
To be cleaned Getting washedDrying down
Whilst I’m waiting for the washed items to dry I clean the counter mechanism of old dirt and fluff.
I’ve slightly greased the counter with silicon grease and it’s behaving well and doing what it should. This will go back in place when we do the final reassembly.
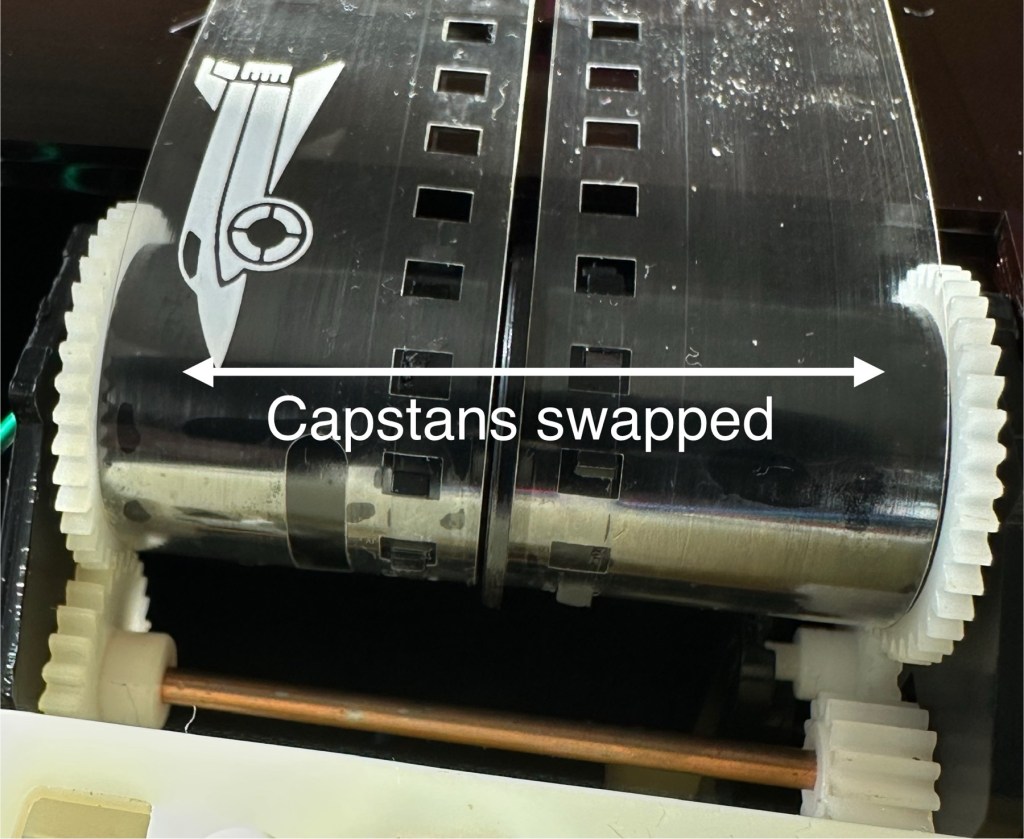
The issue with the film movement was a strange one. There was no way to tension the two capstans that the film roll over and there were no teeth missing off the capstans. One capstan pulls whilst the other pushes, all I’ve done is swap these around and the issue has disappeared. About as simple a fix as you can get.
Just swapped the capstans around
I’ve put a little before and after video here that shows the effect of swapping the capstans around.
How swapping capstans worked
The issue with the intermittent light was easy as expected. This is the only electrical piece on this game and it was down to contaminated battery contacts that just needed a bit of a clean with my grinding pen and a wipe over with IPA.
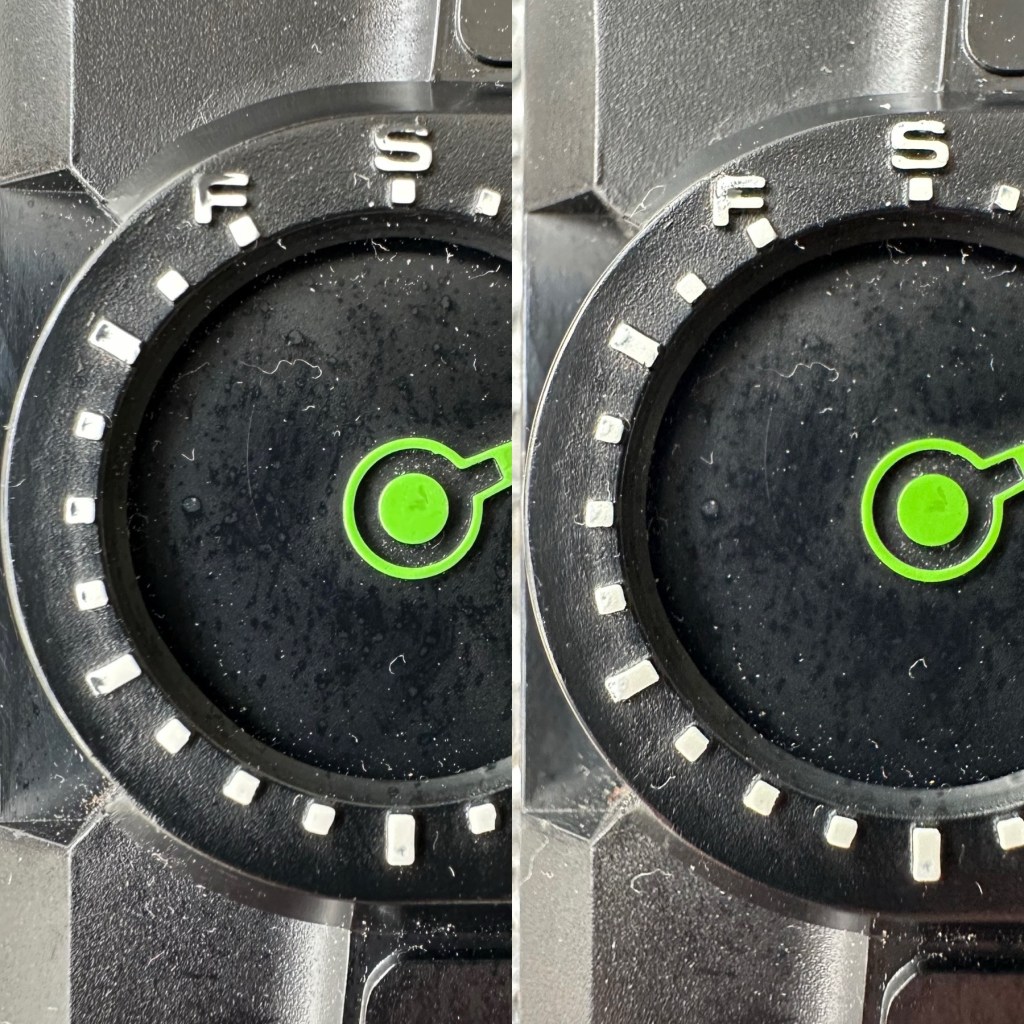
Final little touch was just to accentuate some of the old lettering by the timer. This was just with a white paint pen.
Before and after
Now we can reassemble and test again.
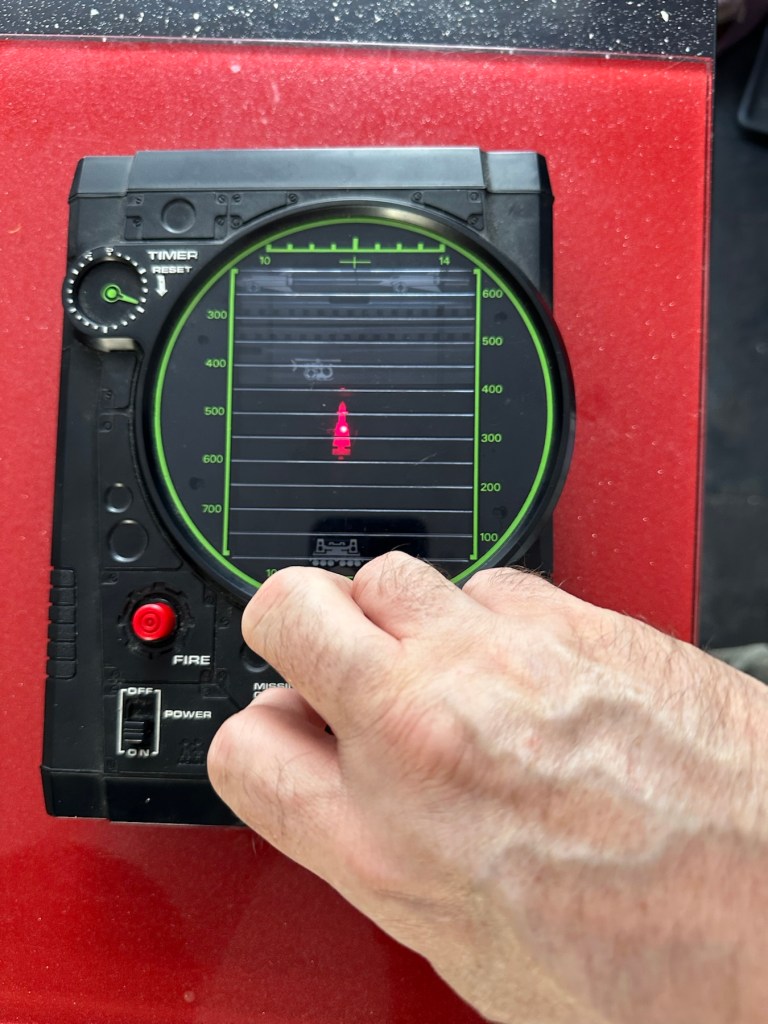
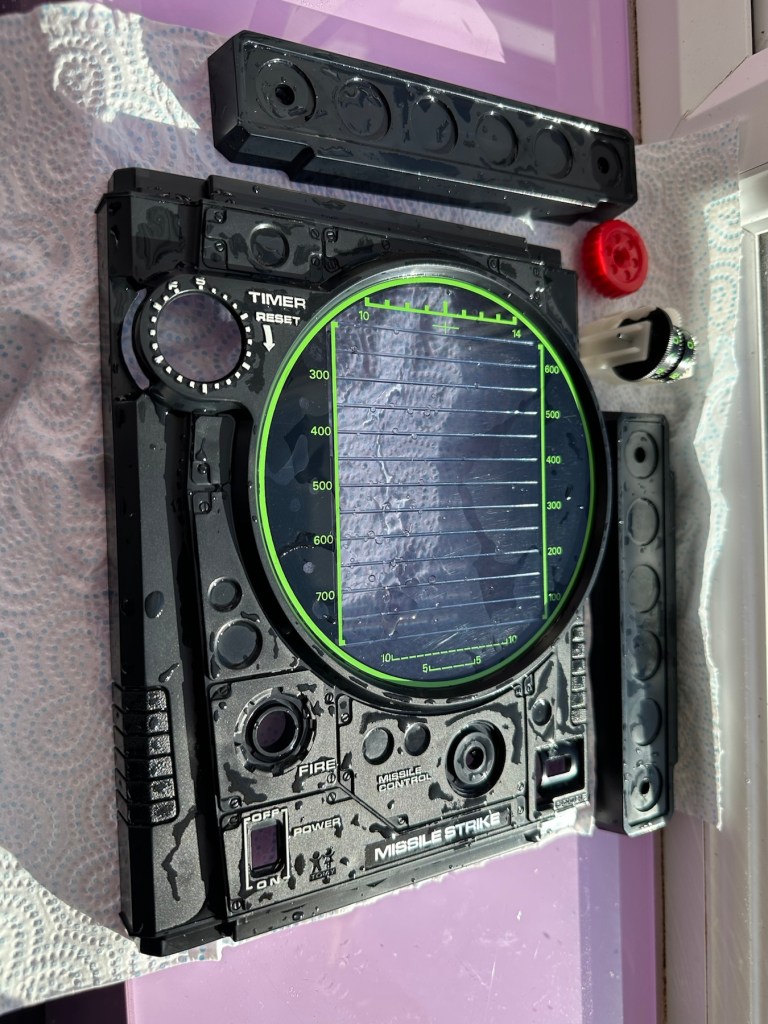
Result:
The game has been reassembled and tested and is now working fine. All intermittent issues have gone and it has now been polished and now looks superb.
I’ve attached this small video that shows the game working as it should, with no film slipping and lights and counter now working.
Working perfectly
It’s really pleased me this repair, as it’s another one of those mainly mechanical games. Dirt featured big time, and age issues have been overcome and the game given a new lease of life. Another one for my personal collection, it will go on now for many more years to come.
The best outcome that was possible, we have another superb seventies product that has been saved from the scrap heap.
Fair overall condition some cosmetic damage as expected for a 56 year old item
Very rare well worth restoration if you know how
EBay
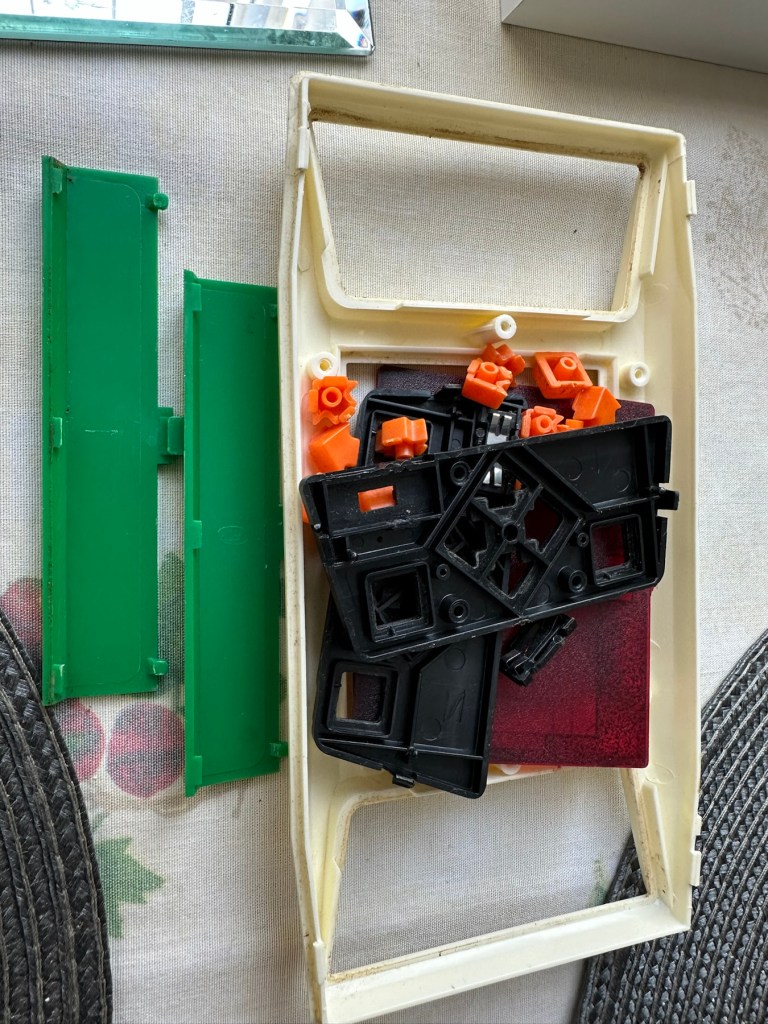
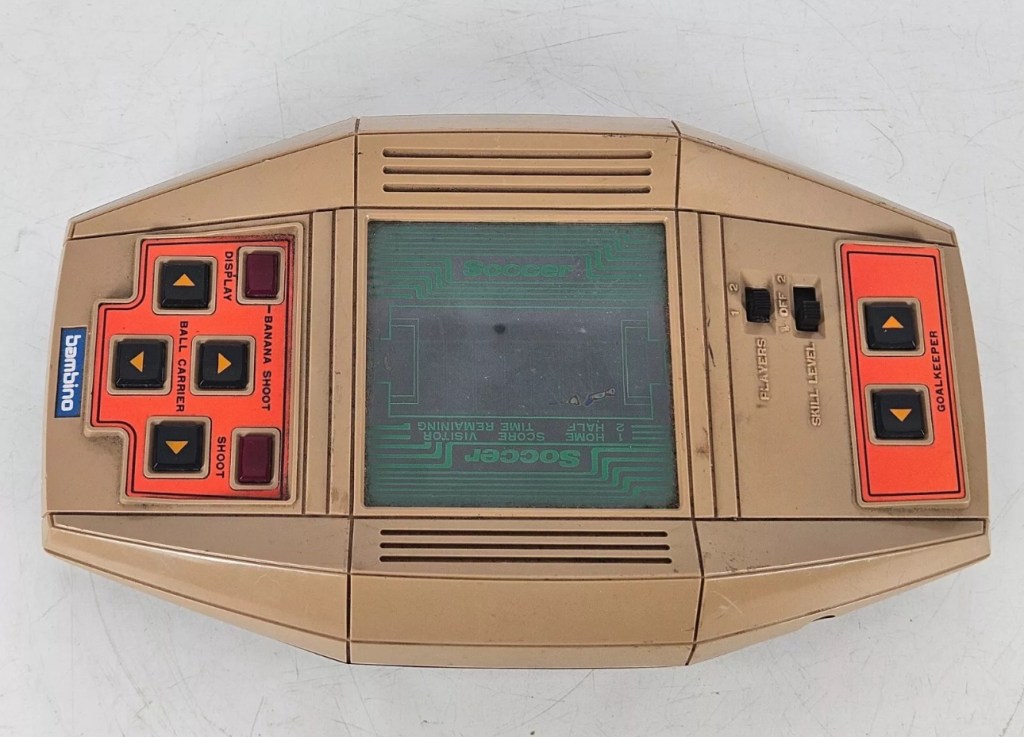
This guy sells retro games on EBay at exceptionally inflated, ridiculous prices. I suspect he doesn’t get involved with repair or renovation as he had this one advertised at over £30GBP but when I put in a cheeky bid for £12GBP he bit my hand off… I wasn’t expecting that! The usual mistakes in the listing such as stating it’s 56 years old when its actually 46, and stating it’s Very rare – it’s not, there were a few hundred thousand churned out and to be honest and they come up quite often on the sale sites. But I do agree it’s worth restoring and will pair up nicely with another retro football game from 1979 that i repaired a few months ago Bambino kick the goal football game. And what makes this unit even more appealing is that it is complete with both of its battery covers – now that is rare!
The game I have purchased Absolutely filthy
This game was made by Grandstand in 1979. Here’s the original advert that appeared on UK TV promoting the game back in the late 70’s.
European footballer of the year 1978/1979 Kevin Keegan – questionable late 70’s advert
This particular unit is listed as Not working, it looks filthy from what I can see, but having experience with these games in the past the biggest issue is age related problems such as old components, track decay and battery corrosion. No doubt the first thing I will do will be to dismantle it, give it a thorough inspection and then a good cleanup both inside and out. And then we can look at the issues around why it’s not operating.
Assessment:
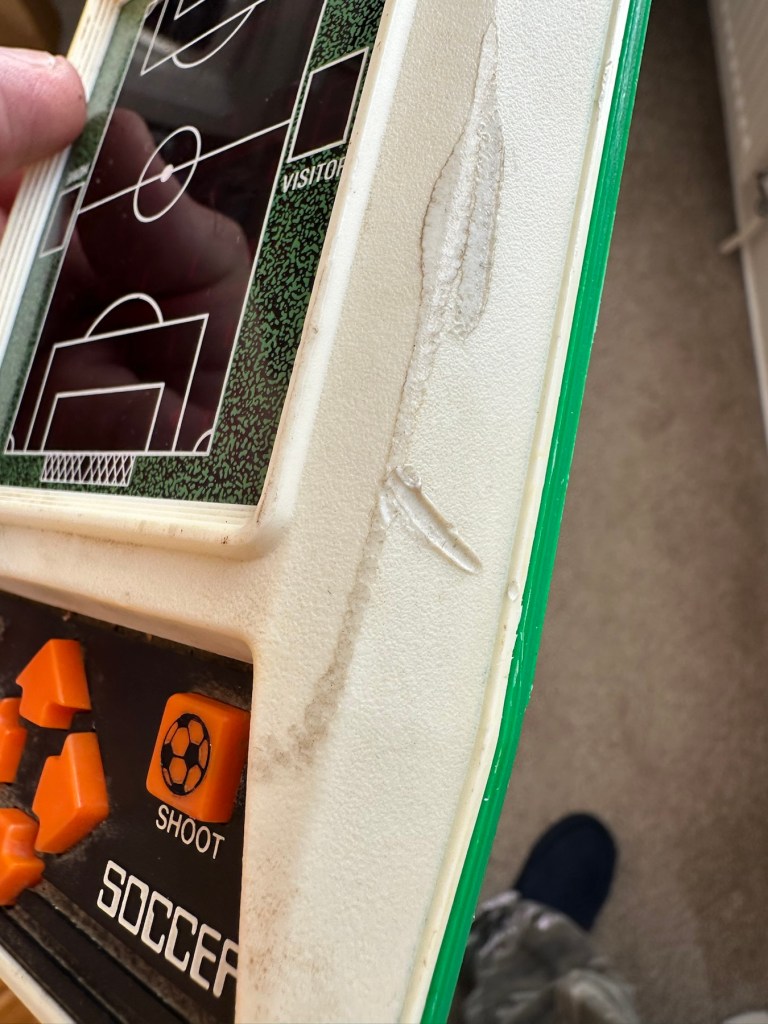
The unit has arrived today and it sure is filthy cosmetically. Like someone who has grown up throughout those 46 years it has its scars. It looks as if it has been placed against something hot, and shows a burn mark up one side.
How it looks on arrival
Caked in filth
Battle scars and burns
I have put batteries in and the good news is that there is life of sorts. By that I mean there is a distorted noise from the speaker and a flash of life on the screen and then it dies. Wiggle the start button and there are more flashes of life but that’s it. No other buttons seem to be working. I’m not tempting fate but this could be a case of the unit being just as filthy inside as well as out. But knowing my luck this will not be the case. Let’s have a look inside.
Repair:
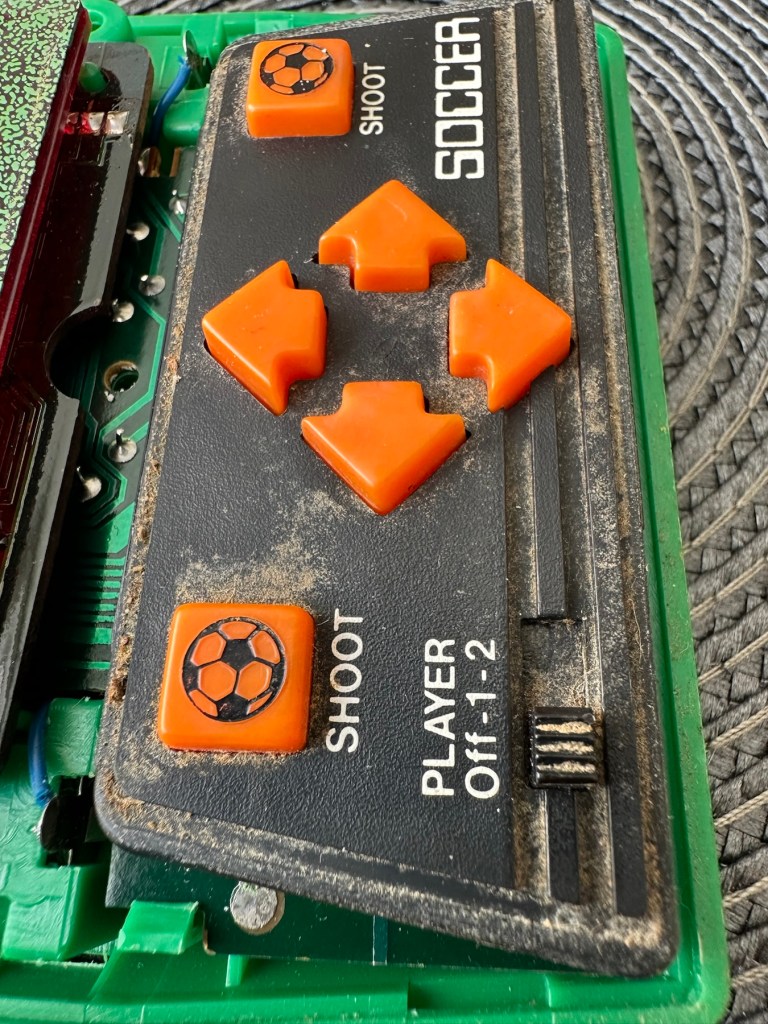
First of all we need to get the unit open, remove the circuit board and get the thing clean. So let’s do that.
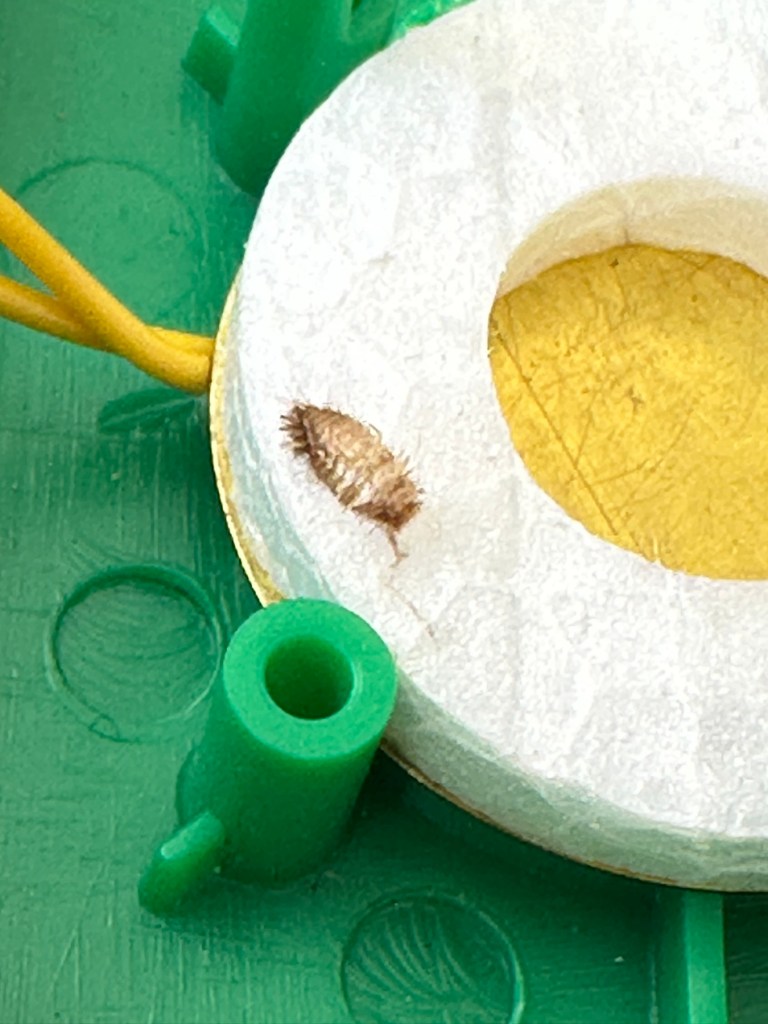
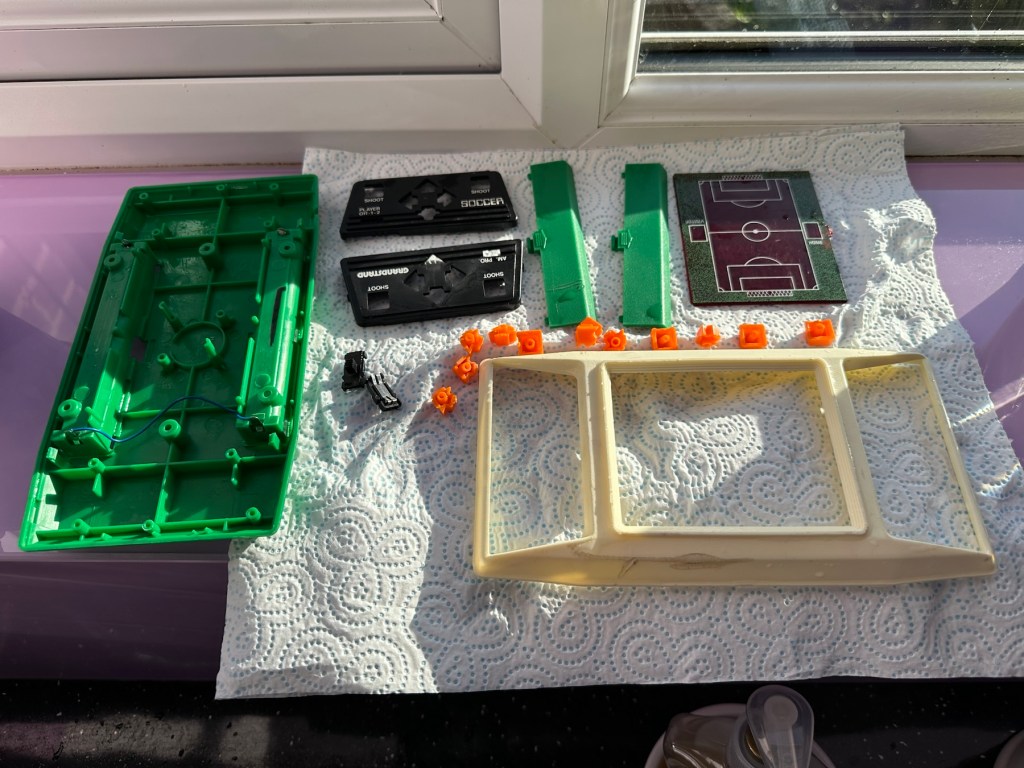
Utter filthCircuit board Push buttons to be cleaned, the rest is off to be washed. Even a dead bug inside 😧
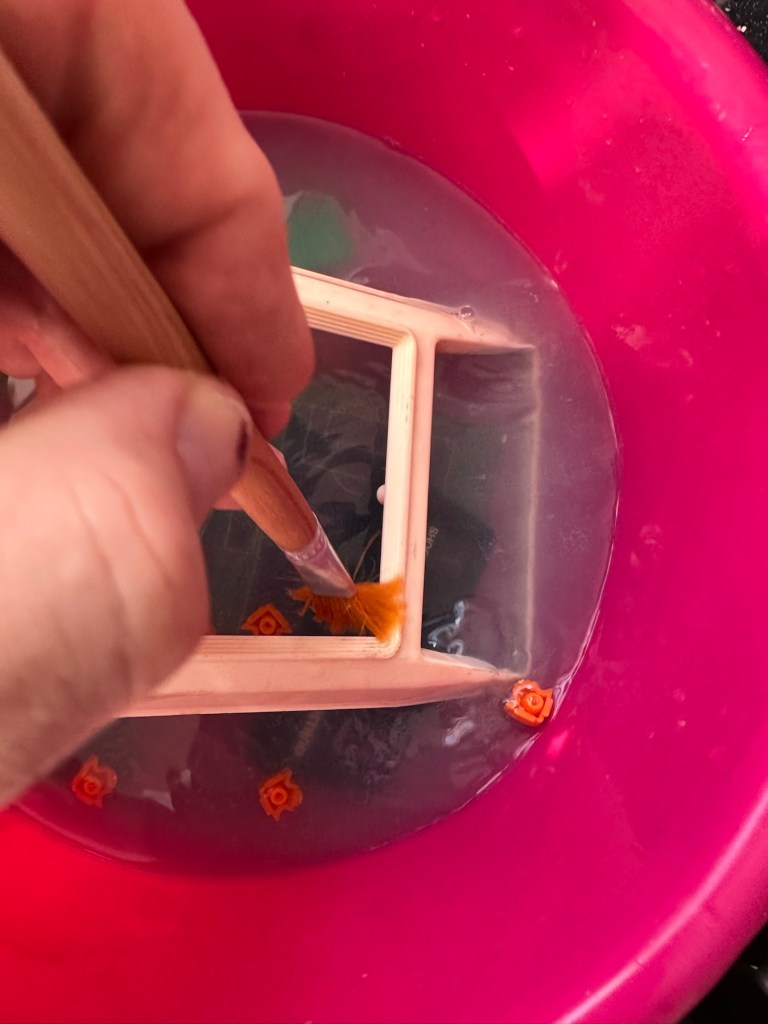
As you can see in the pictures above, the inside hid a lot of accumulated dirt and grime, there were even dead bugs inside. Everything that could be washed was taken to the kitchen given a good soak, brush and rinse.
Off to the basinGood clean and scrubDrying on the window cill
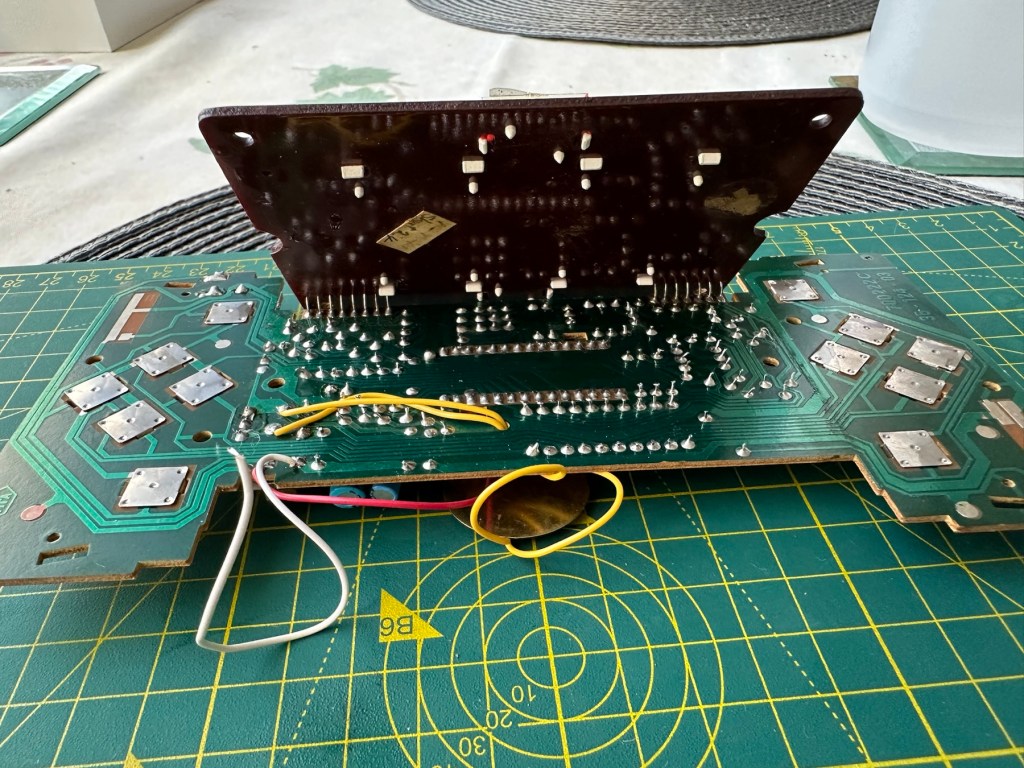
Whilst I’m waiting for everything to dry my attention turns to the board. A quick inspection reveals that all tracks are in a fair condition and we don’t need to rescue anything there. The buttons on either end have been taken apart and all cleaned with IPA, I’ve also used the same method to clean the switches and the board and after checking continuity all contacts are working as they should.
Board before cleaningChecking tracksNote found under upper portion of main board
Now everything is clean, I resolder the battery contacts, check the buttons and all appears well, I attach my bench power supply, give it 6v, turn on the switch and we have life. No intermittent issues and a very loud sounding speaker. I turn this off and look at getting it all reassembled.
Unit now fully assembled, it is looking a whole lot healthier and apart from its burn scar is looking pretty good.
Where’s the dirt?TransformedLooking good
And when turned on it’s working just as well as it did back in 1979.
Result:
Sometimes these units just need some care and attention, and as I stated at the beginning all this really needed was a deep clean and service. Not a thing wrong with the electrical circuits apart from contamination on the contacts and switches.
All working. Job done
I’m now in possession of a lovely example of 70’s technology with slight battle scars. It’s had a tough life but now it has had a new lease of life and is good to go for many more years yet. It will take a place in my “Retirement home” collection of old discarded retro game units.
As always, it’s a win as we have prevented another unit being heaved into landfill.
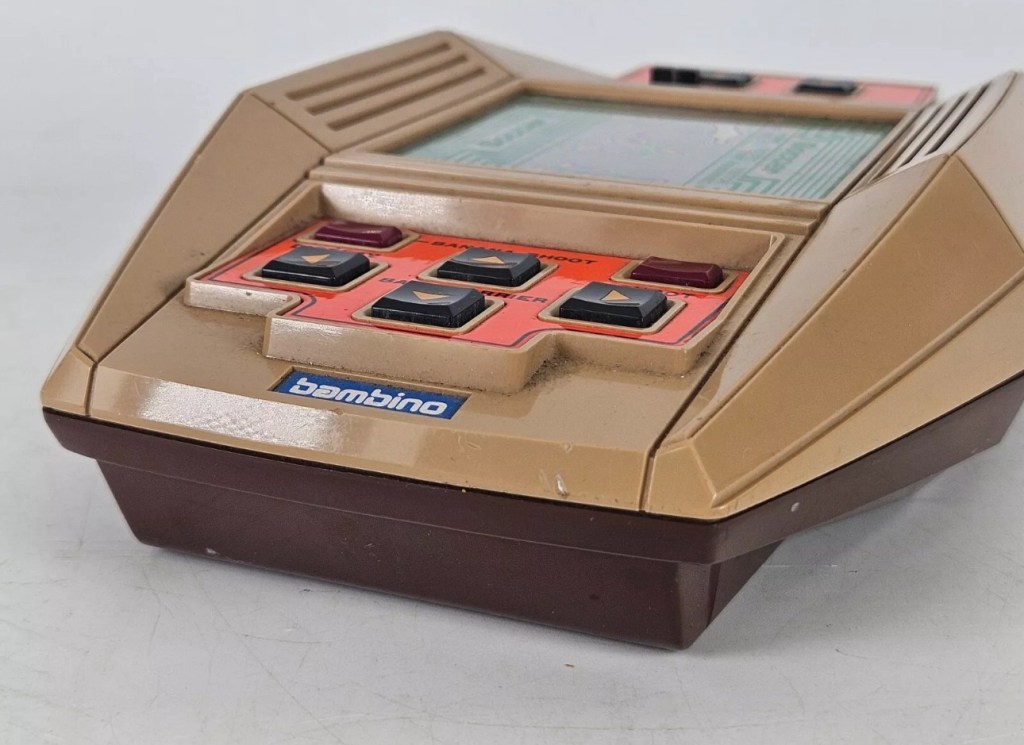
We have tried a few batteries but the unit does not power up so beig sold for spares.
EBay
I obtained this for a very reasonable price considering the amounts being charged these days for similar battery operated 1970’s items.
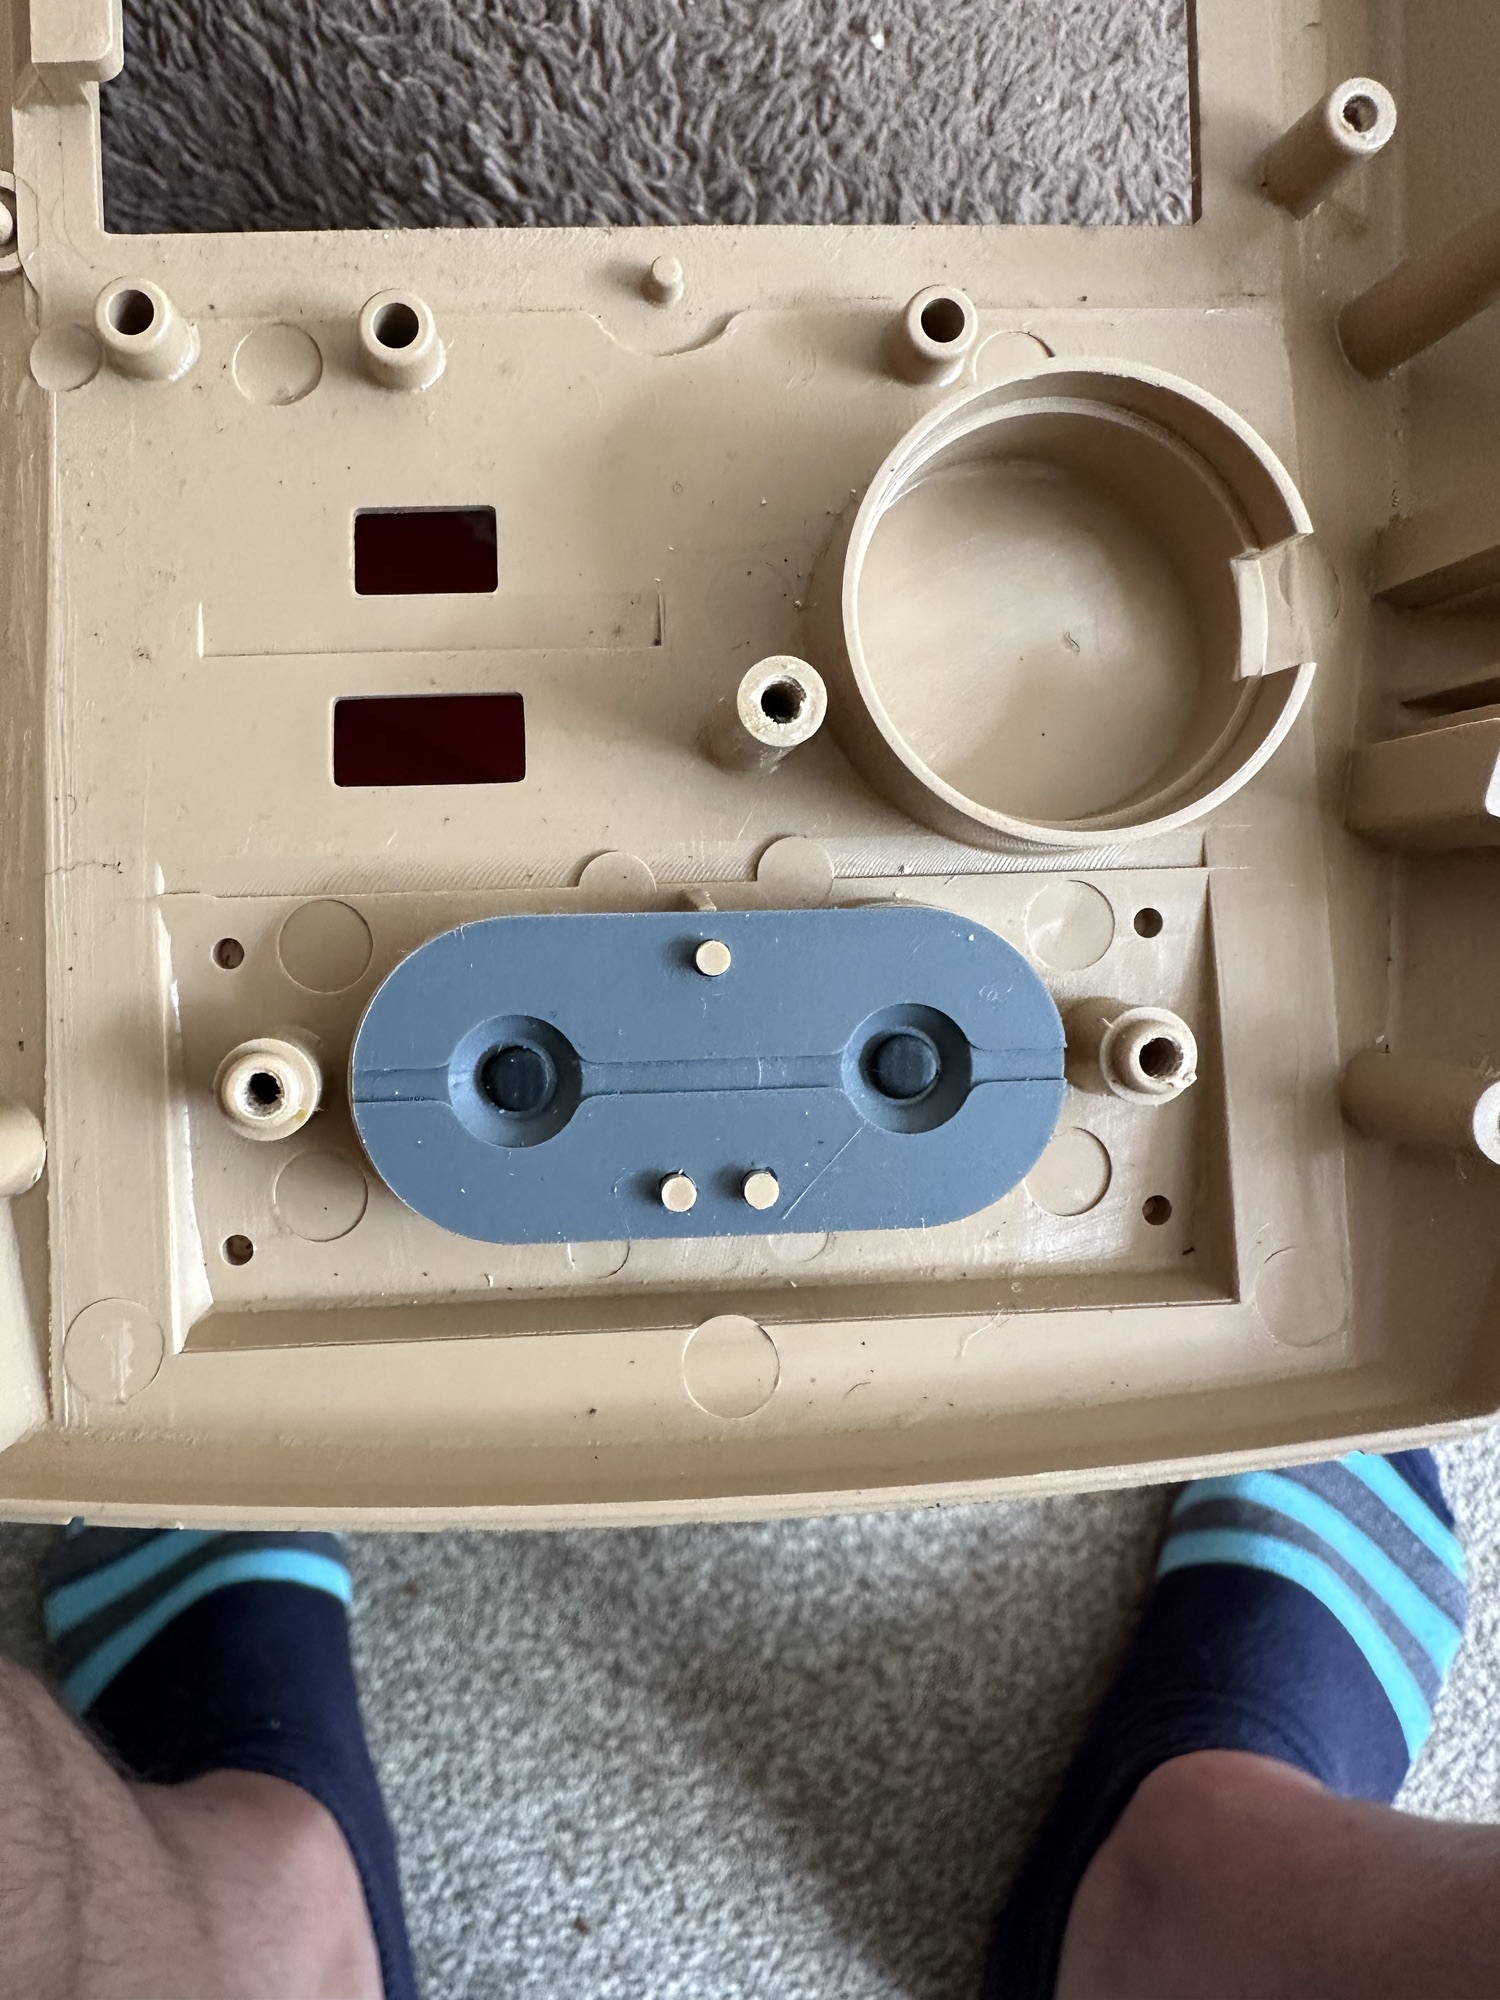
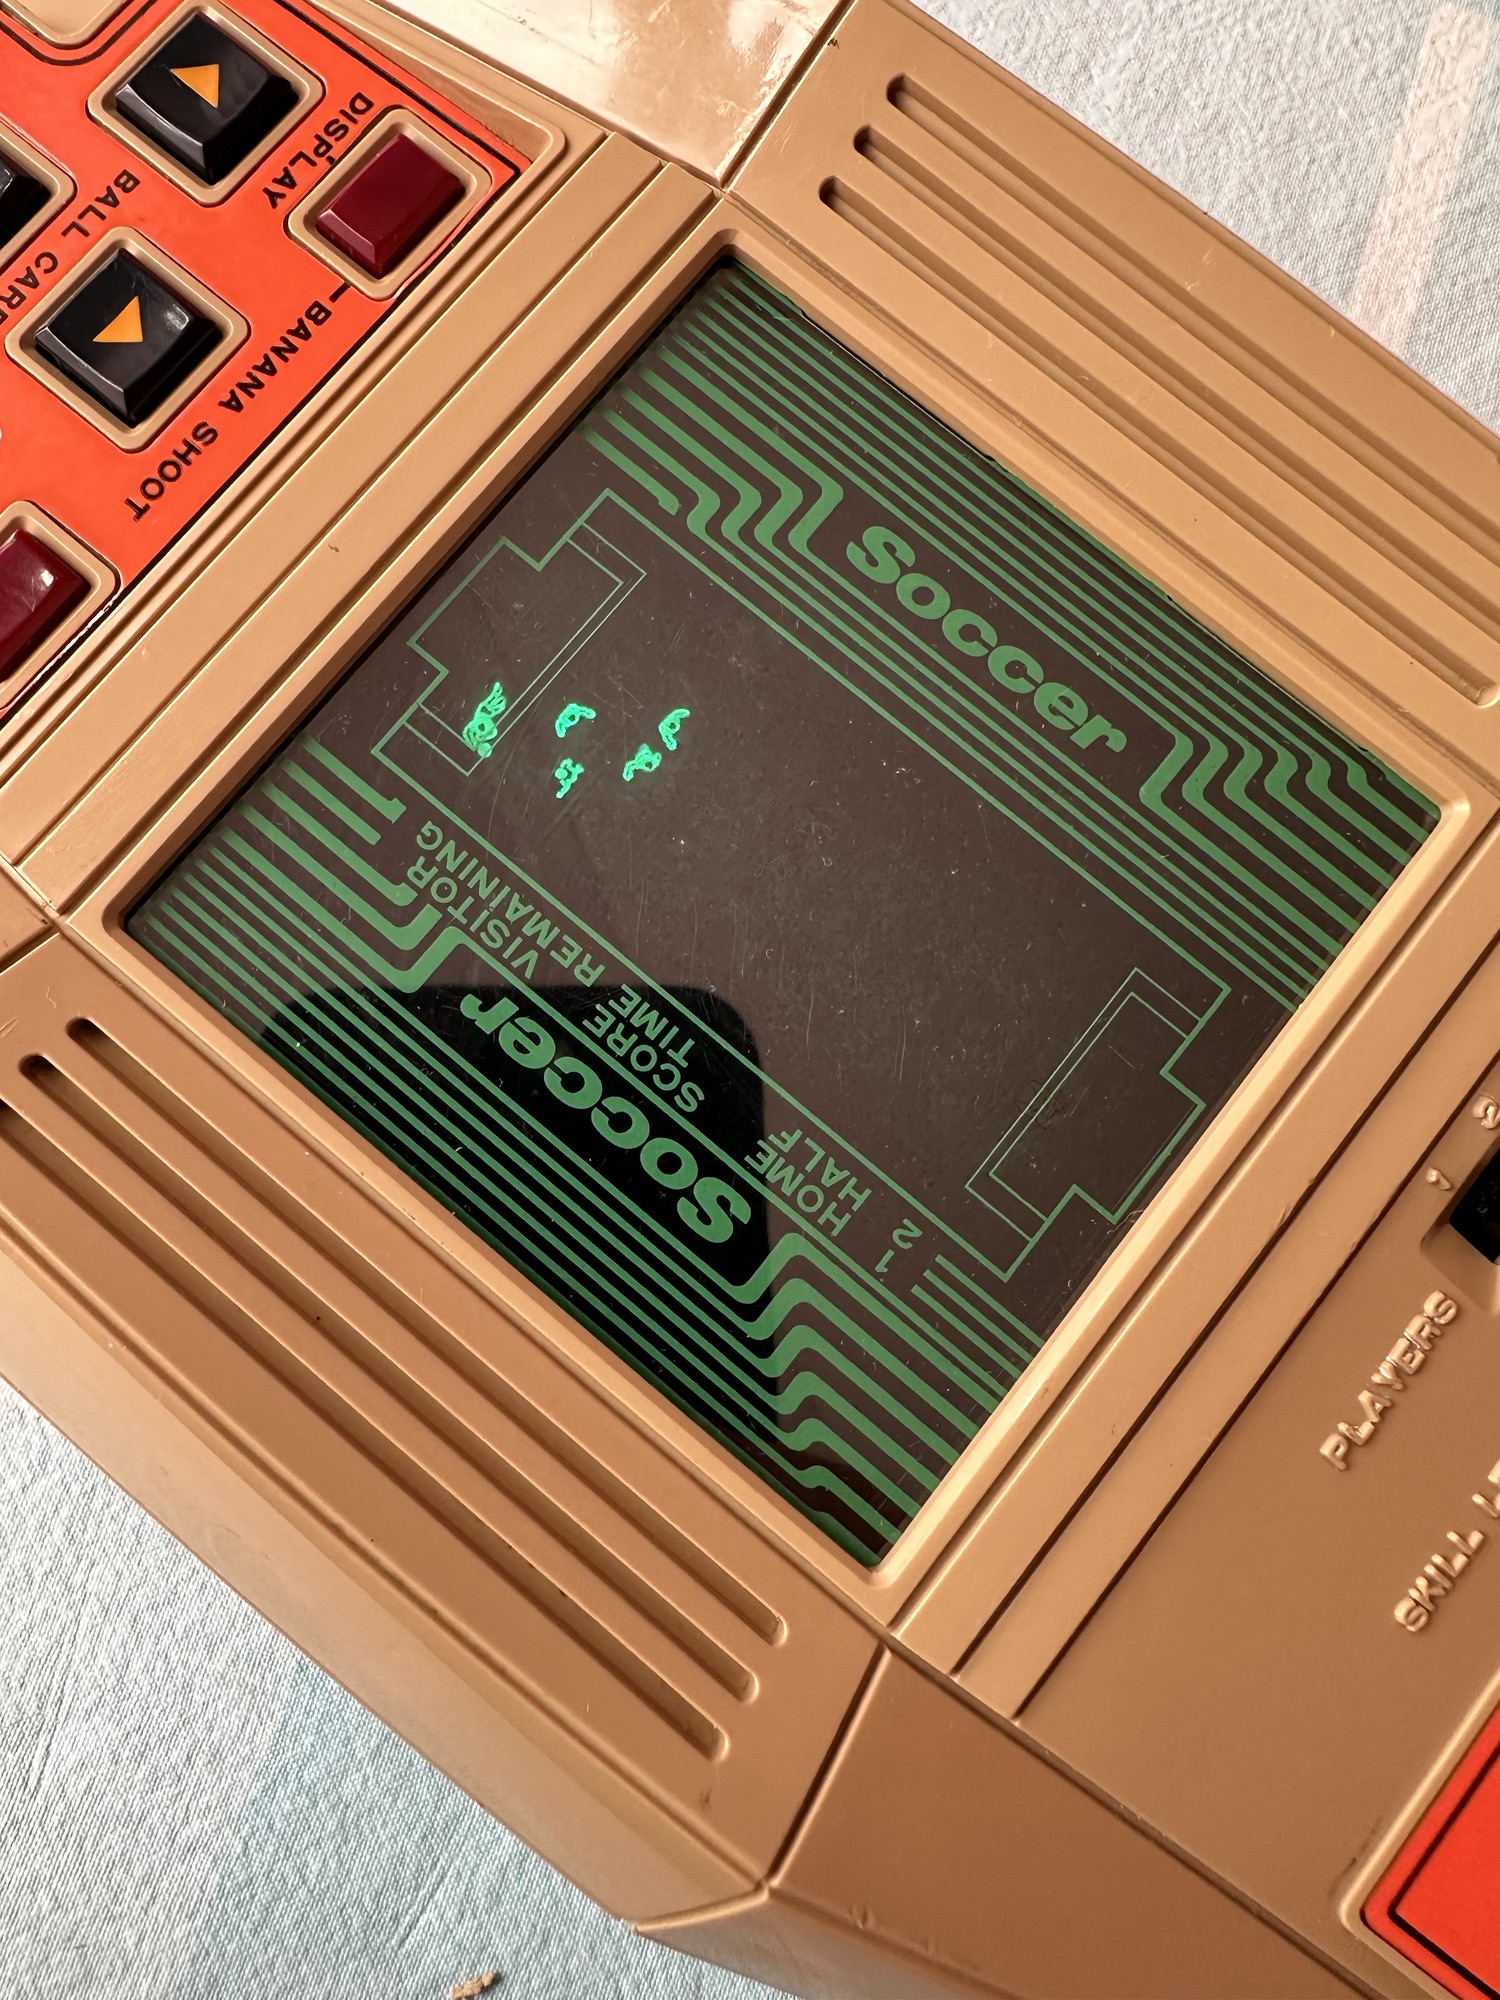
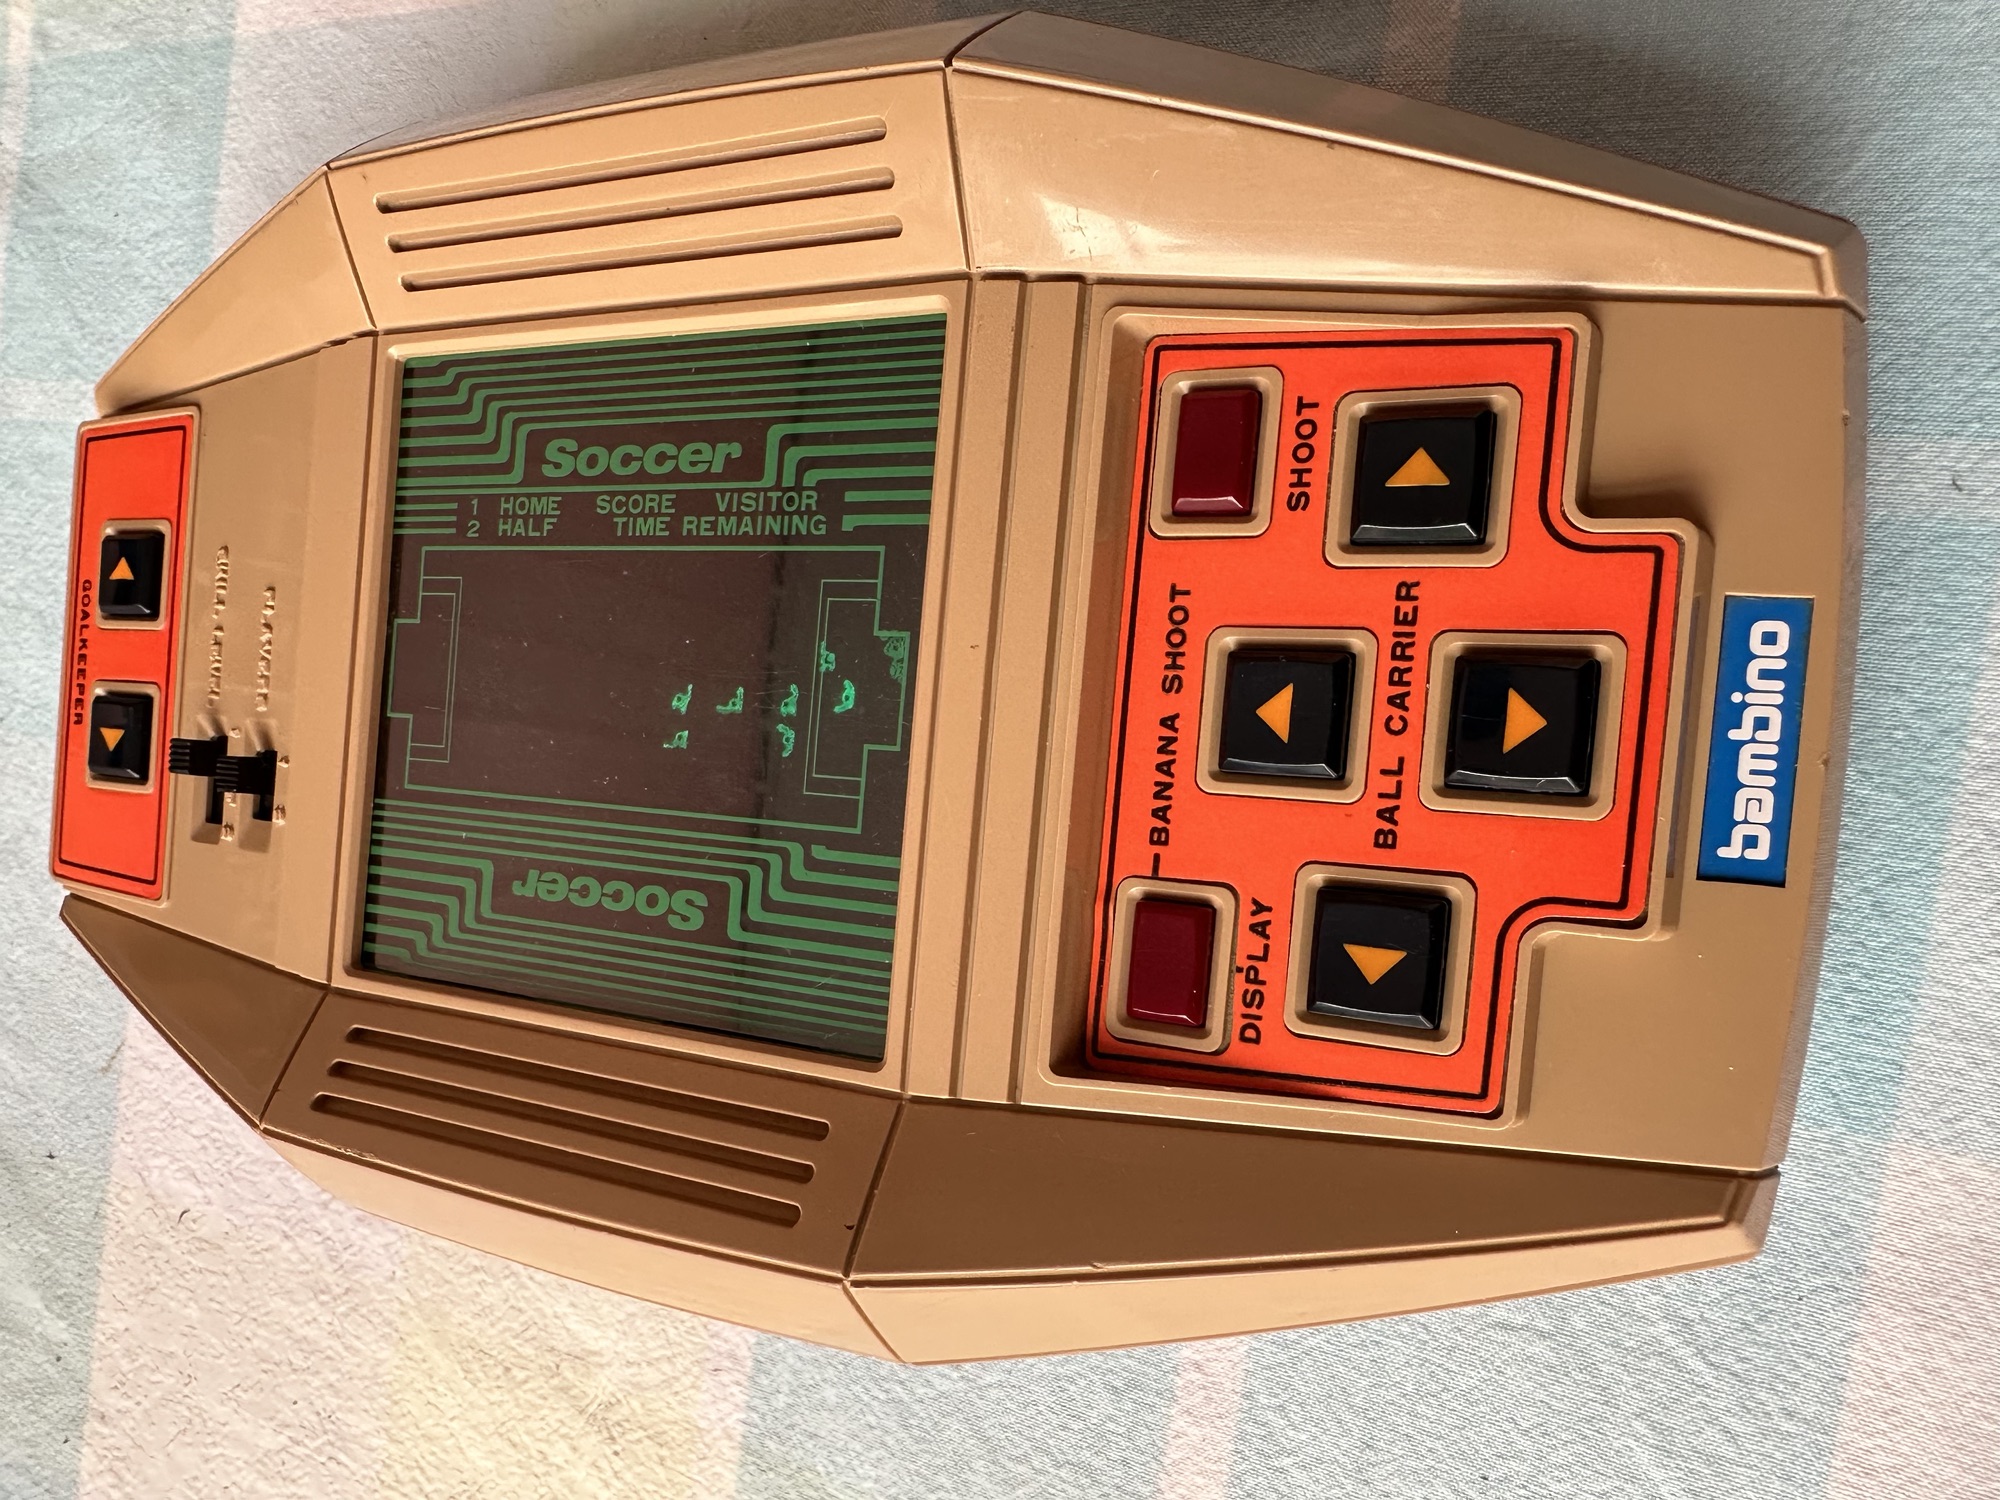
Bambino gameLooks tidyNo Corrosion Bambino Kick the goal soccer game
This unit was assembled in 1979. From initial pictures a few things are pleasing. It looks fairly tidy, the battery cover is supplied, there appears to be no corrosion and the labels appear intact. However actual delivery and when it appears in my own hands may prove otherwise so I’ll await its arrival to give a final judgement.
Well the item has arrived and considering it’s 45 years old it appears to have had a good life. A few small knocks and scars, no more than what you would expect….lets get some batteries in and see what occurs.
A few cold solder joints needed re flowing45 years old and clean as a whistleGame pads all to cleanButtons to clean
Inside is amazing, no LED screen just a tube that looks like an old Cathode Ray tube that you’d have on a TV. (Actually known as a Vacuum fluorescent display) Thank god this isn’t damaged as it would be game over. Wiggling a few contacts and I can hear the speaker crackling, closer inspection shows some cold solder joints so I quickly reflow these and it all springs into life. Excellent.
Lovely old display- more like a cathode tube
I’ve decided to take it all apart and give the parts a good deep wash in some soapy water.
Bath time Drying off
I’ve cleaned the two switches with a contact cleaner, I’ve cleaned the screen membrane and all buttons and their attached membranes as well.
Looks stunningAssembled and workingNice and clean
The whole shell has also been cleaned in all the nooks and crannies, and it looks superb.
Before and after
Now assembled it is in full working order, everything works as it should and the display is bright. The batteries are a tight fit but that’s not so much of an issue. Once you get into the game it’s quite addictive as single player mode is a right challenge as the computer is a great goal keeper 😂
Just can’t score – computers goal keeper is too good
Again it’s been quite a simple fix but an enjoyable one. It’s always good to see something that is about to be disposed of brought back to life and saved from the landfill. I paid a total price of £12.71GBP for this unit, and items of a far worse condition are currently selling in excess of £40GBP on EBay. However this is going into our games box in the garden pub for use by the family, especially the kids who I hope will appreciate the height of technology we had in the 70s.
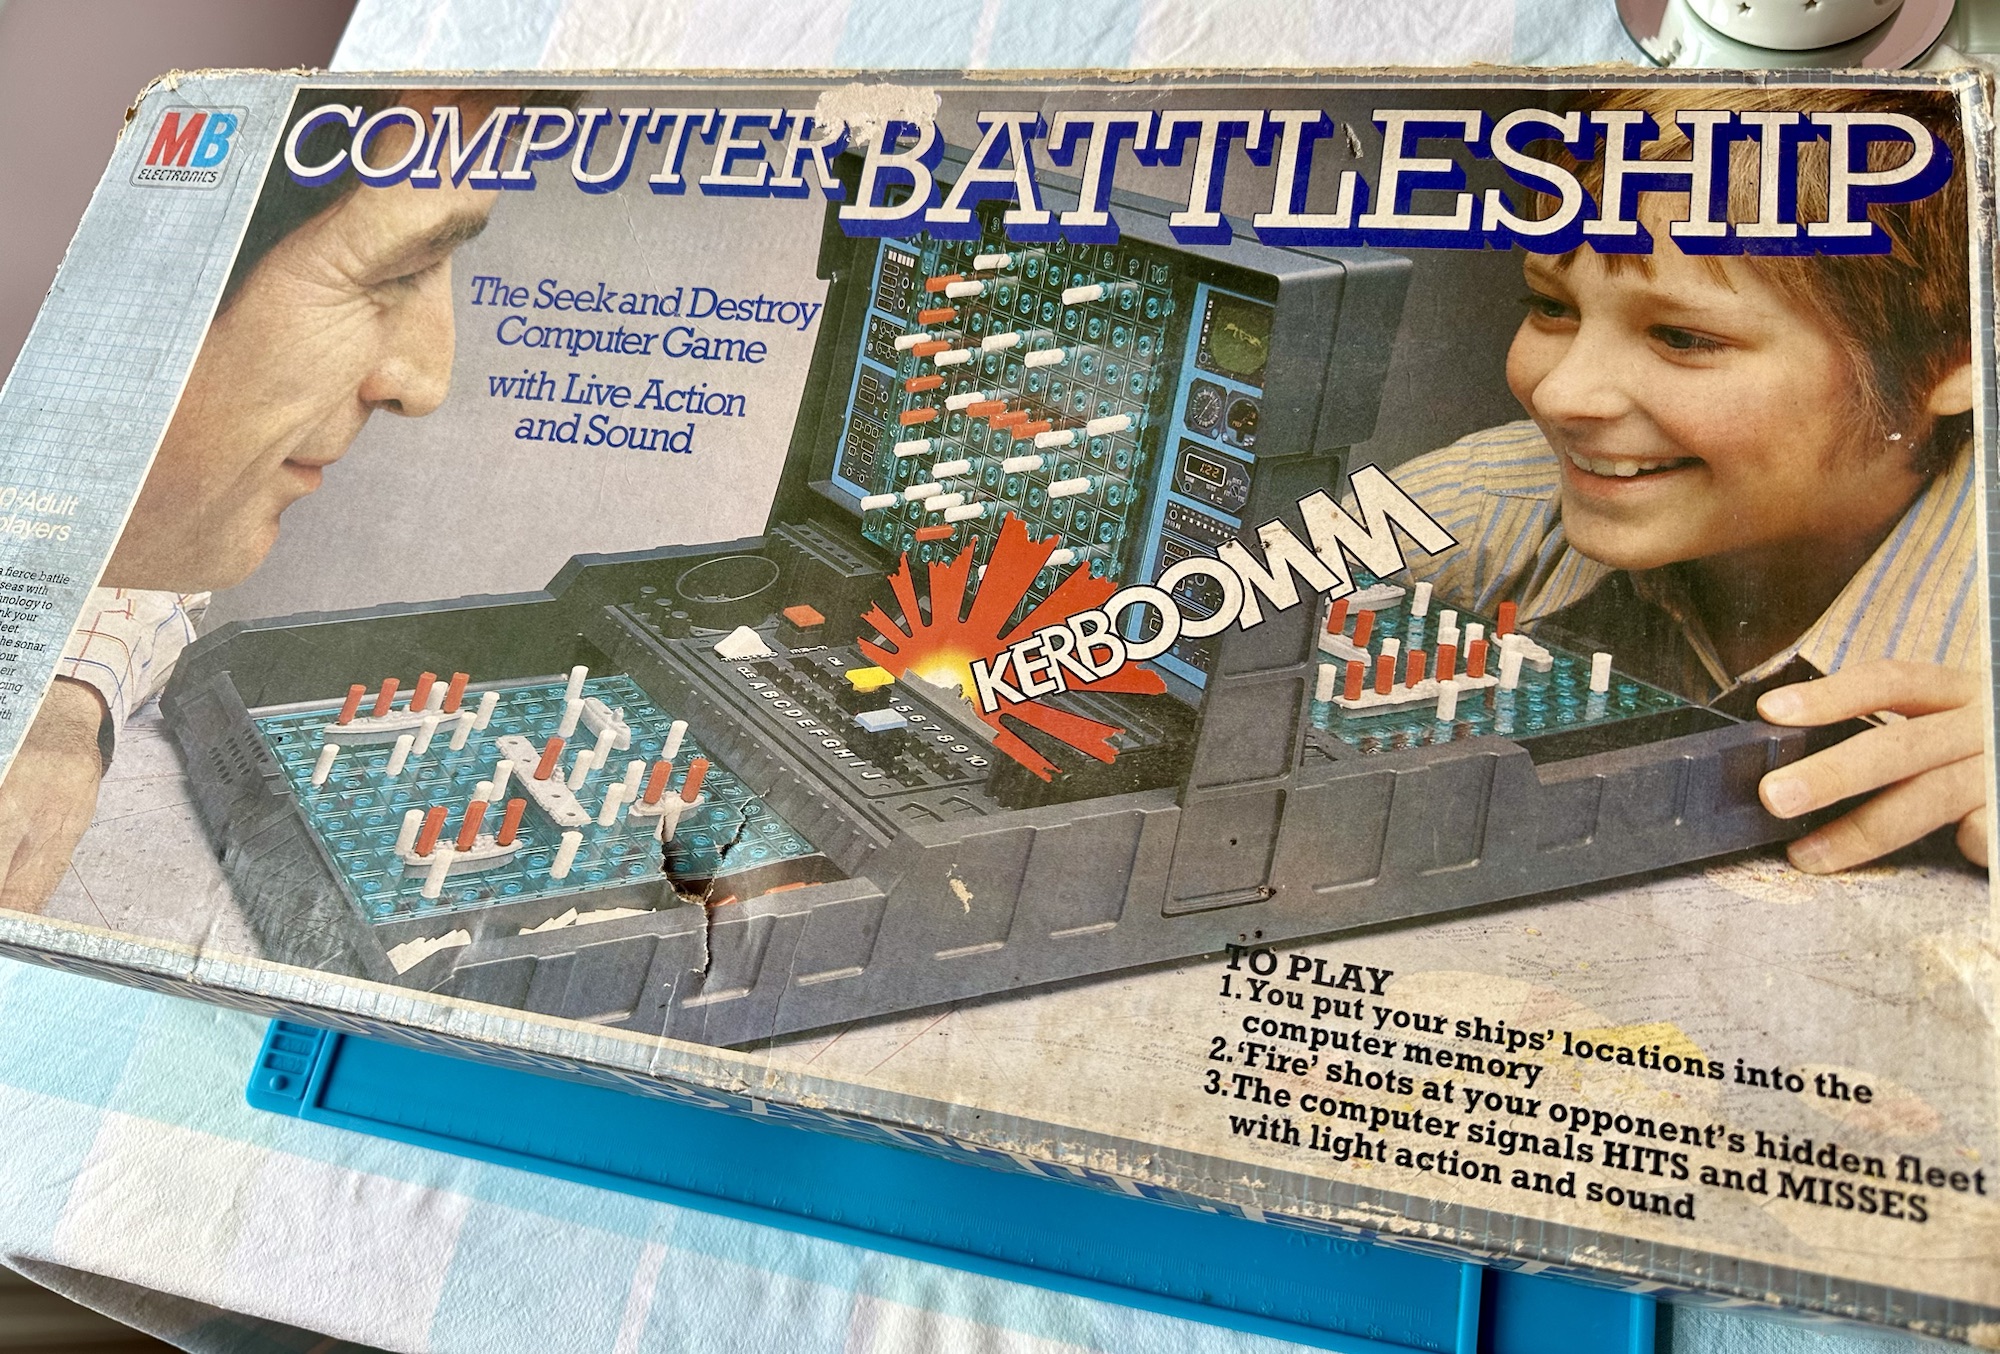
VINTAGE COMPUTER BATTLESHIP MB ELECTRONICS GAME FOR SPARES / REPAIRS APPEARS TO BE COMPLETE BUT THE GAME IS NOT WORKING WHEN TESTED WITH BATTERIES HENCE BEING SOLD FOR SPARES / REPAIRS
Ebay
And here’s some info around it:
In 1977, Milton Bradley released a computerized Electronic Battleship, a pioneering microprocessor-based toy, capable of generating various sounds. Electronic Battleship was designed by Dennis Wyman and Bing McCoy.
Wikipedia
Now this is another toy from my childhood that I had envy over. This game is the one that coined the phrase, “ You sank my Battleship” as seen on many TV ads towards the end of the 70s. This time my nephew was brought one of these games for his birthday back in the late 70s when I was about 12 years old. I’ll be able to give a more accurate date of the unit when I get to see the main board inside. I suspect I’m looking at something around the 1979 timeline. Man this toy was the bees knees, again early computer technology at its finest. Here I am approaching the sixth decade of my life and I’m having another menopausal moment just as I did in this post a few months back: Big Trak CE3962 restoration
Computer Battleship
This is going to go in the games box in our garden pub / Man cave. I’m confident I’m going to get it working. I’m not too bothered if there are any small parts missing as there seems to be plenty of spare parts available online.
Let’s have a look at what has turned up.
Original boxOriginal packaging
Well I’m impressed. This game is in its original box with original packaging and is in pristine condition. It comes with the original instruction manual and all parts listed in the contents section are there. In fact there are more of the red and white pegs than required so to be honest it looks as if I have bagged a bargain here.
I’ve paid a grand total of £19:96 GBP for this game and that includes the postage, by far the best price that was on offer for any similar advertised games that I could see at the moment of purchase. Considering this game is now somewhere between 45-47 years old, a bargain you might say, if I can get it working.
I’m thinking that all the capacitors on this board as a matter of good practice should be removed and replaced. Let’s face it they are almost the same age as me, could fail at anytime (if they haven’t already) and are as cheap as chips so what’s the point of just replacing a singular one when there are only two of them on the board. I think I will do this, test them all and report back.
I know that this unit is a 70s creation but it is interesting to get some facts on capacitors and problems that they have caused over the years, especially during the 90s and early 2000s. See this old post on capacitor plague: Capacitor plague
Board removed One side of board
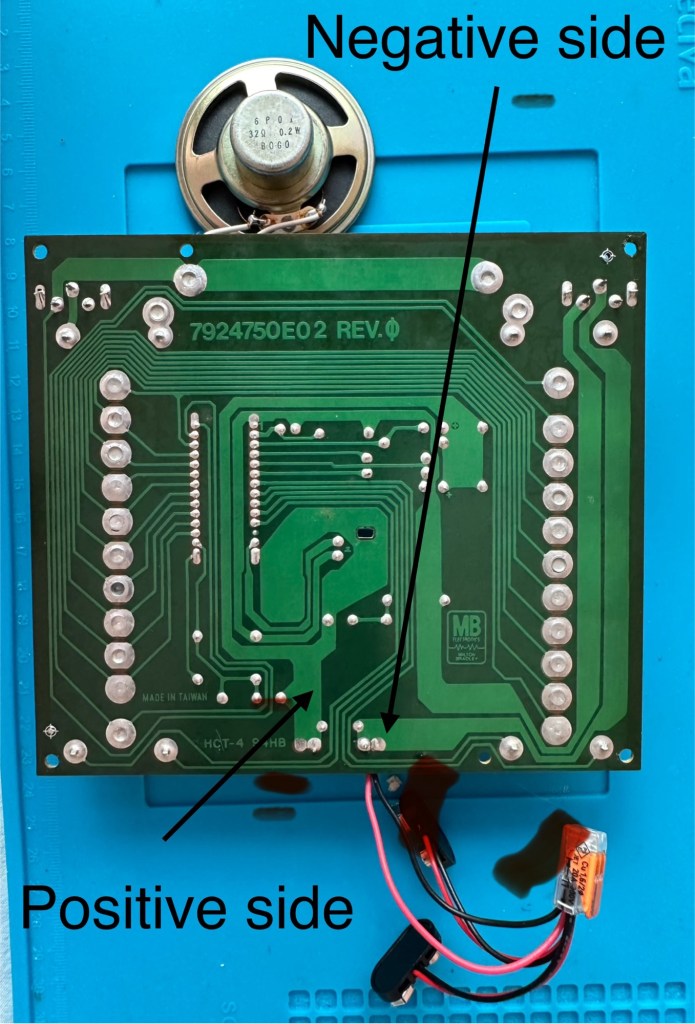
I have removed the board and there seems to have been some pre work done where all the wires are relayed through a connector block. This was a dangerous situation as the work that had been done diverted both negative and positive leads through this dodgy connector to the negative side of the board, causing a short that caused the batteries to heat up to a point where I thought they were going to explode as they were so hot. You may as well of just connected the two batteries together…childish mistake. I was testing for voltages and was suspicious that I was getting no readings, just as well I went straight to the battery when I did. Lesson learned for me.
Bad wiring
I have checked the speaker is working, this is a 32ohm speaker and it was indicating 31ohm so there were no issues there. I have removed the two capacitors and checked them and they are both within tolerance, hence I will leave these in place.
Speaker is fine
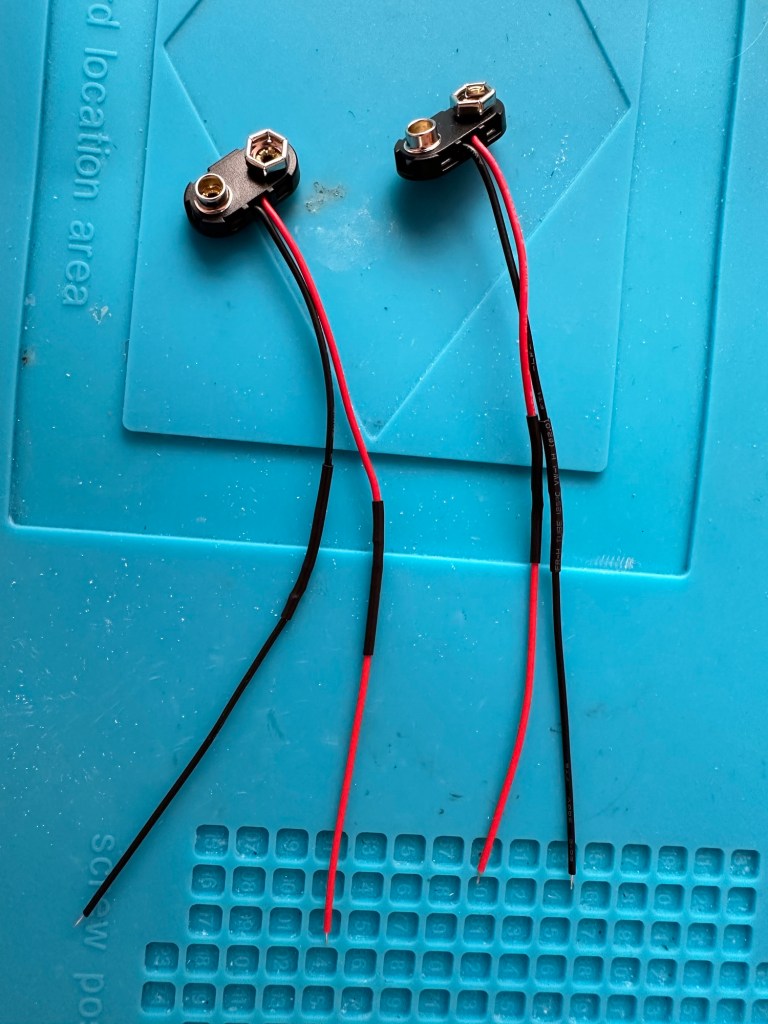
The batteries are separately wired on this board. The two negative wires go to the negative side and the positive wires go to the positive side, straight forward wiring, I don’t know why the previous clown wired it as he did. These four wires now soldered in place with new leads and connections allow me to attach the batteries and check voltages, all is good and reading as it should.
New leads made
I clean all the switches with contact cleaner, I clean the board with IPA and clean all the contacts. A good suction and polish of the frame and all is good.
I can confirm the board indicates that this unit is week 24 of 1979 as per the writing on the main board. That puts this particular unit at 45 years old. Will it work.
Hell yeah it does!
Main switch into the on position and the annoying sonar sound kicks in, my dog leaves the room as it’s annoying him, to me I have just been transported back to my childhood. It’s brilliant.
I collar the wife into a game, I have to teach her how to program it and it works perfectly. Every sound is there, it’s noisy repetitive and computer programming at its absolute most basic level. And it’s mine.
Computer Battleship – It works
It’s going down our garden pub to be used by the youngsters and adults alike. I think the kids will love it due to its primitive technology. They’ll learn from it.
Another piece of my past saved from landfill, and it will be put to good use. Just don’t trust any mods or fixes done by others, don’t inherit a fire risk. Check check check.
Here I purchased the toy I most wanted back in my teenage years. Unfortunately I wasn’t available to get the original MB version produced in 1979 so I had to settle for the latter “improved” version made by Zeon Ltd that was made in 2010.
It’s arrived and to be honest dosen’t look too shabby, needs a bit of a clean up and maybe some new transfers applying but we’ll get to that at another time, for now we need to try and get the machine up and running.
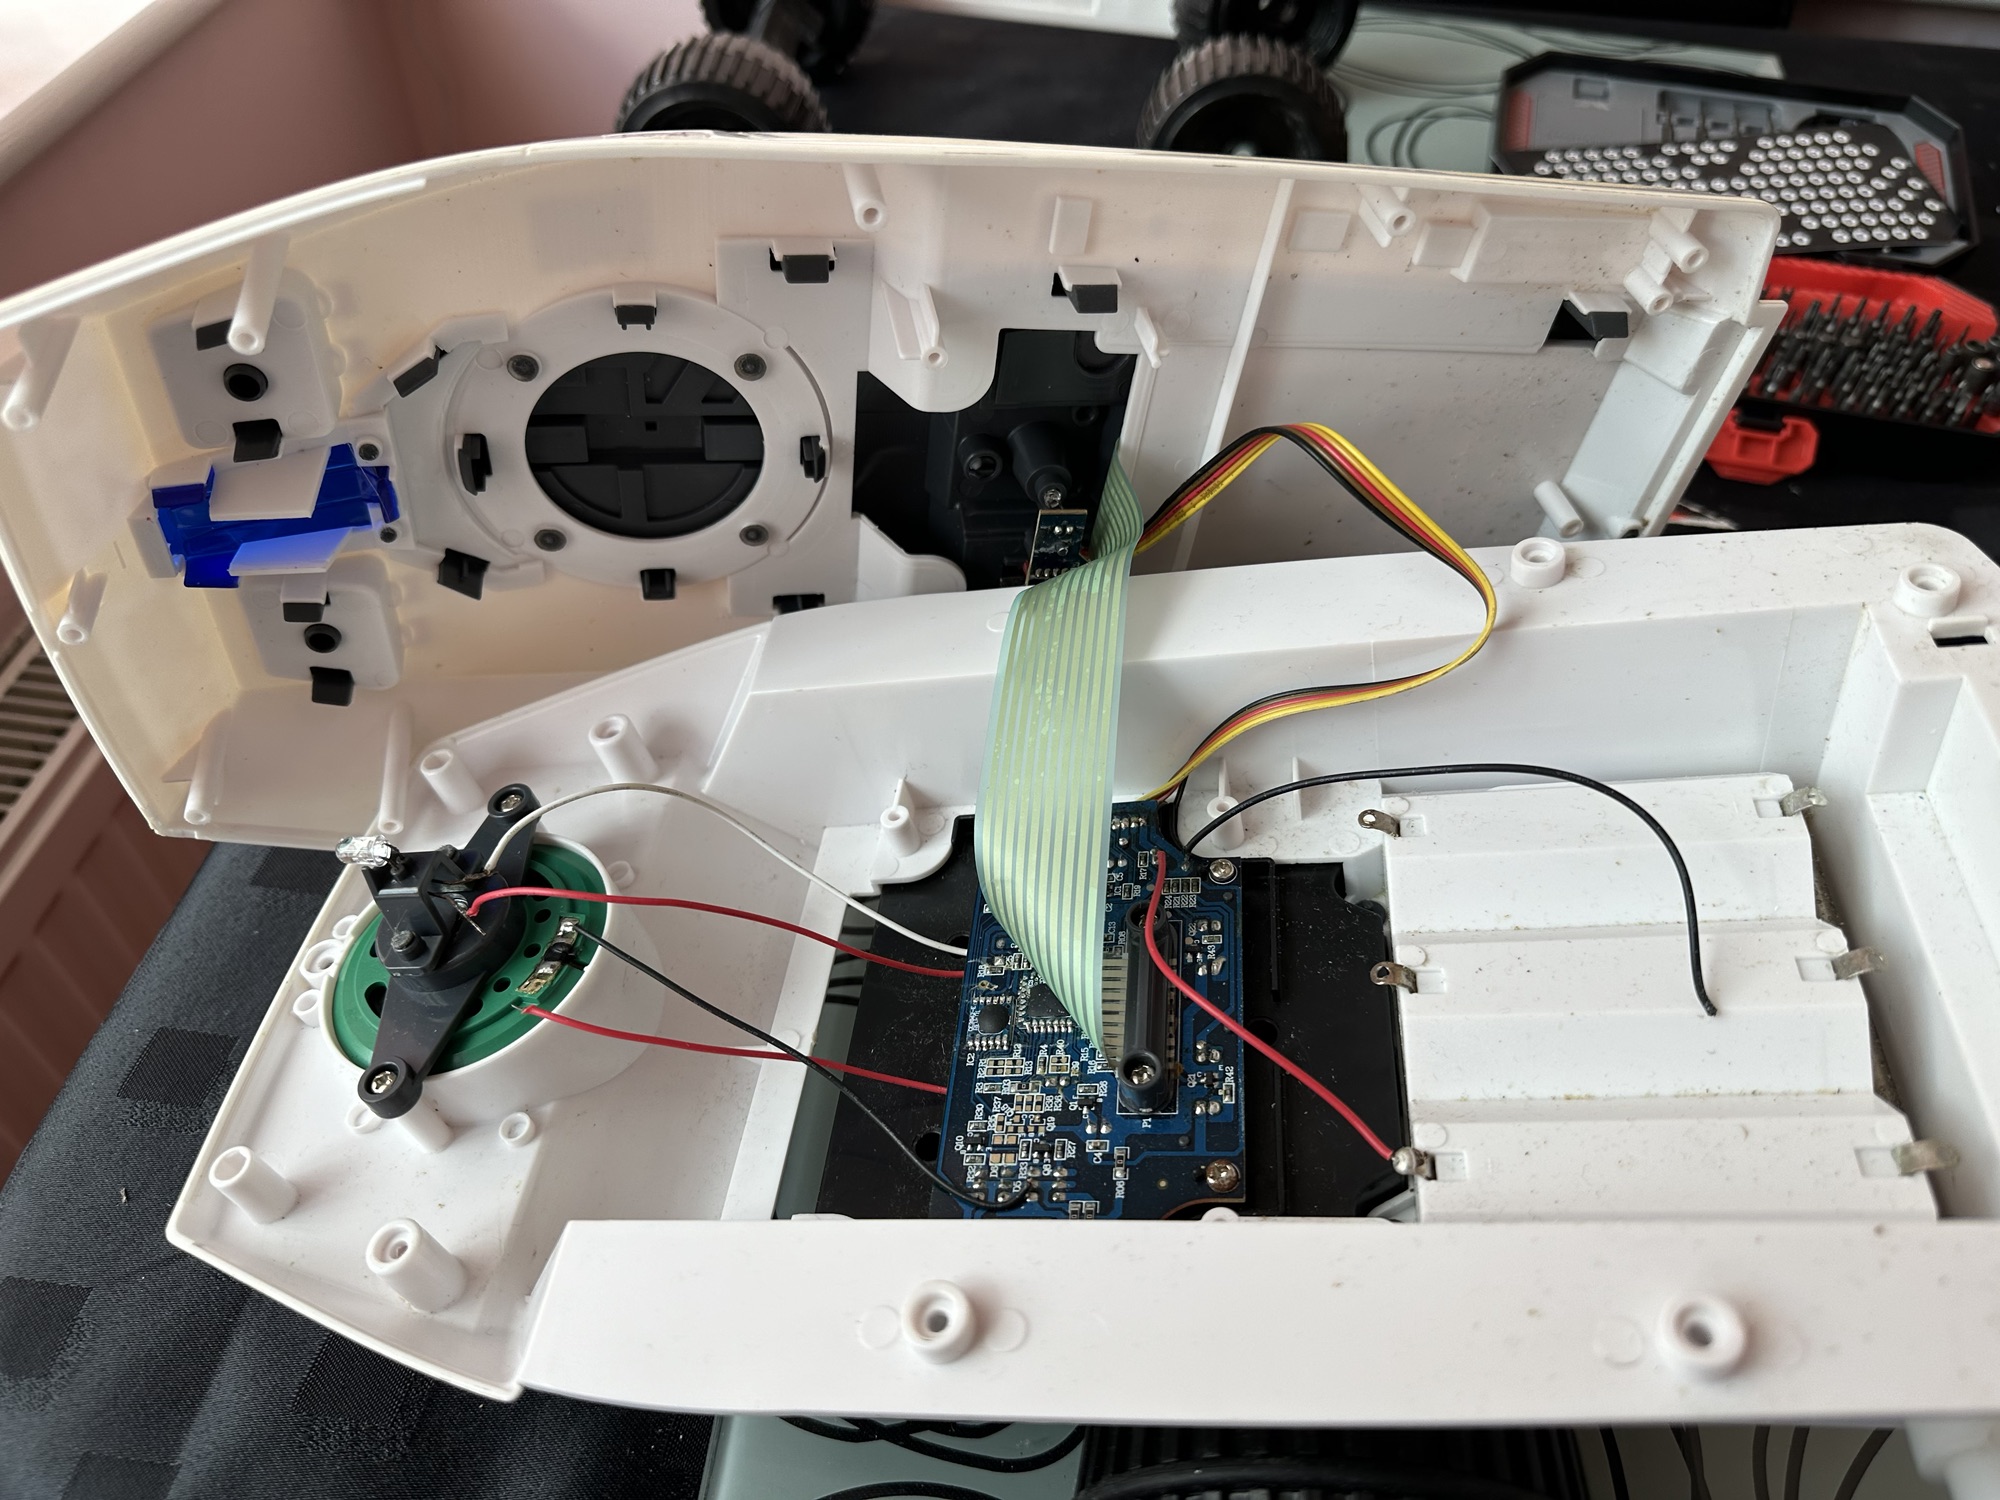
I’ve eventually managed to get the lid off. This unit was built to ensure that it was difficult to get into so repairs couldn’t be carried out. Some of the screws are buried under fascia dressings, and if you aren’t careful you could end up snapping some of the body shell.
Big trak body shellBig trak circuit boardDetached speaker wireDetached battery wireBig trak wheels removed
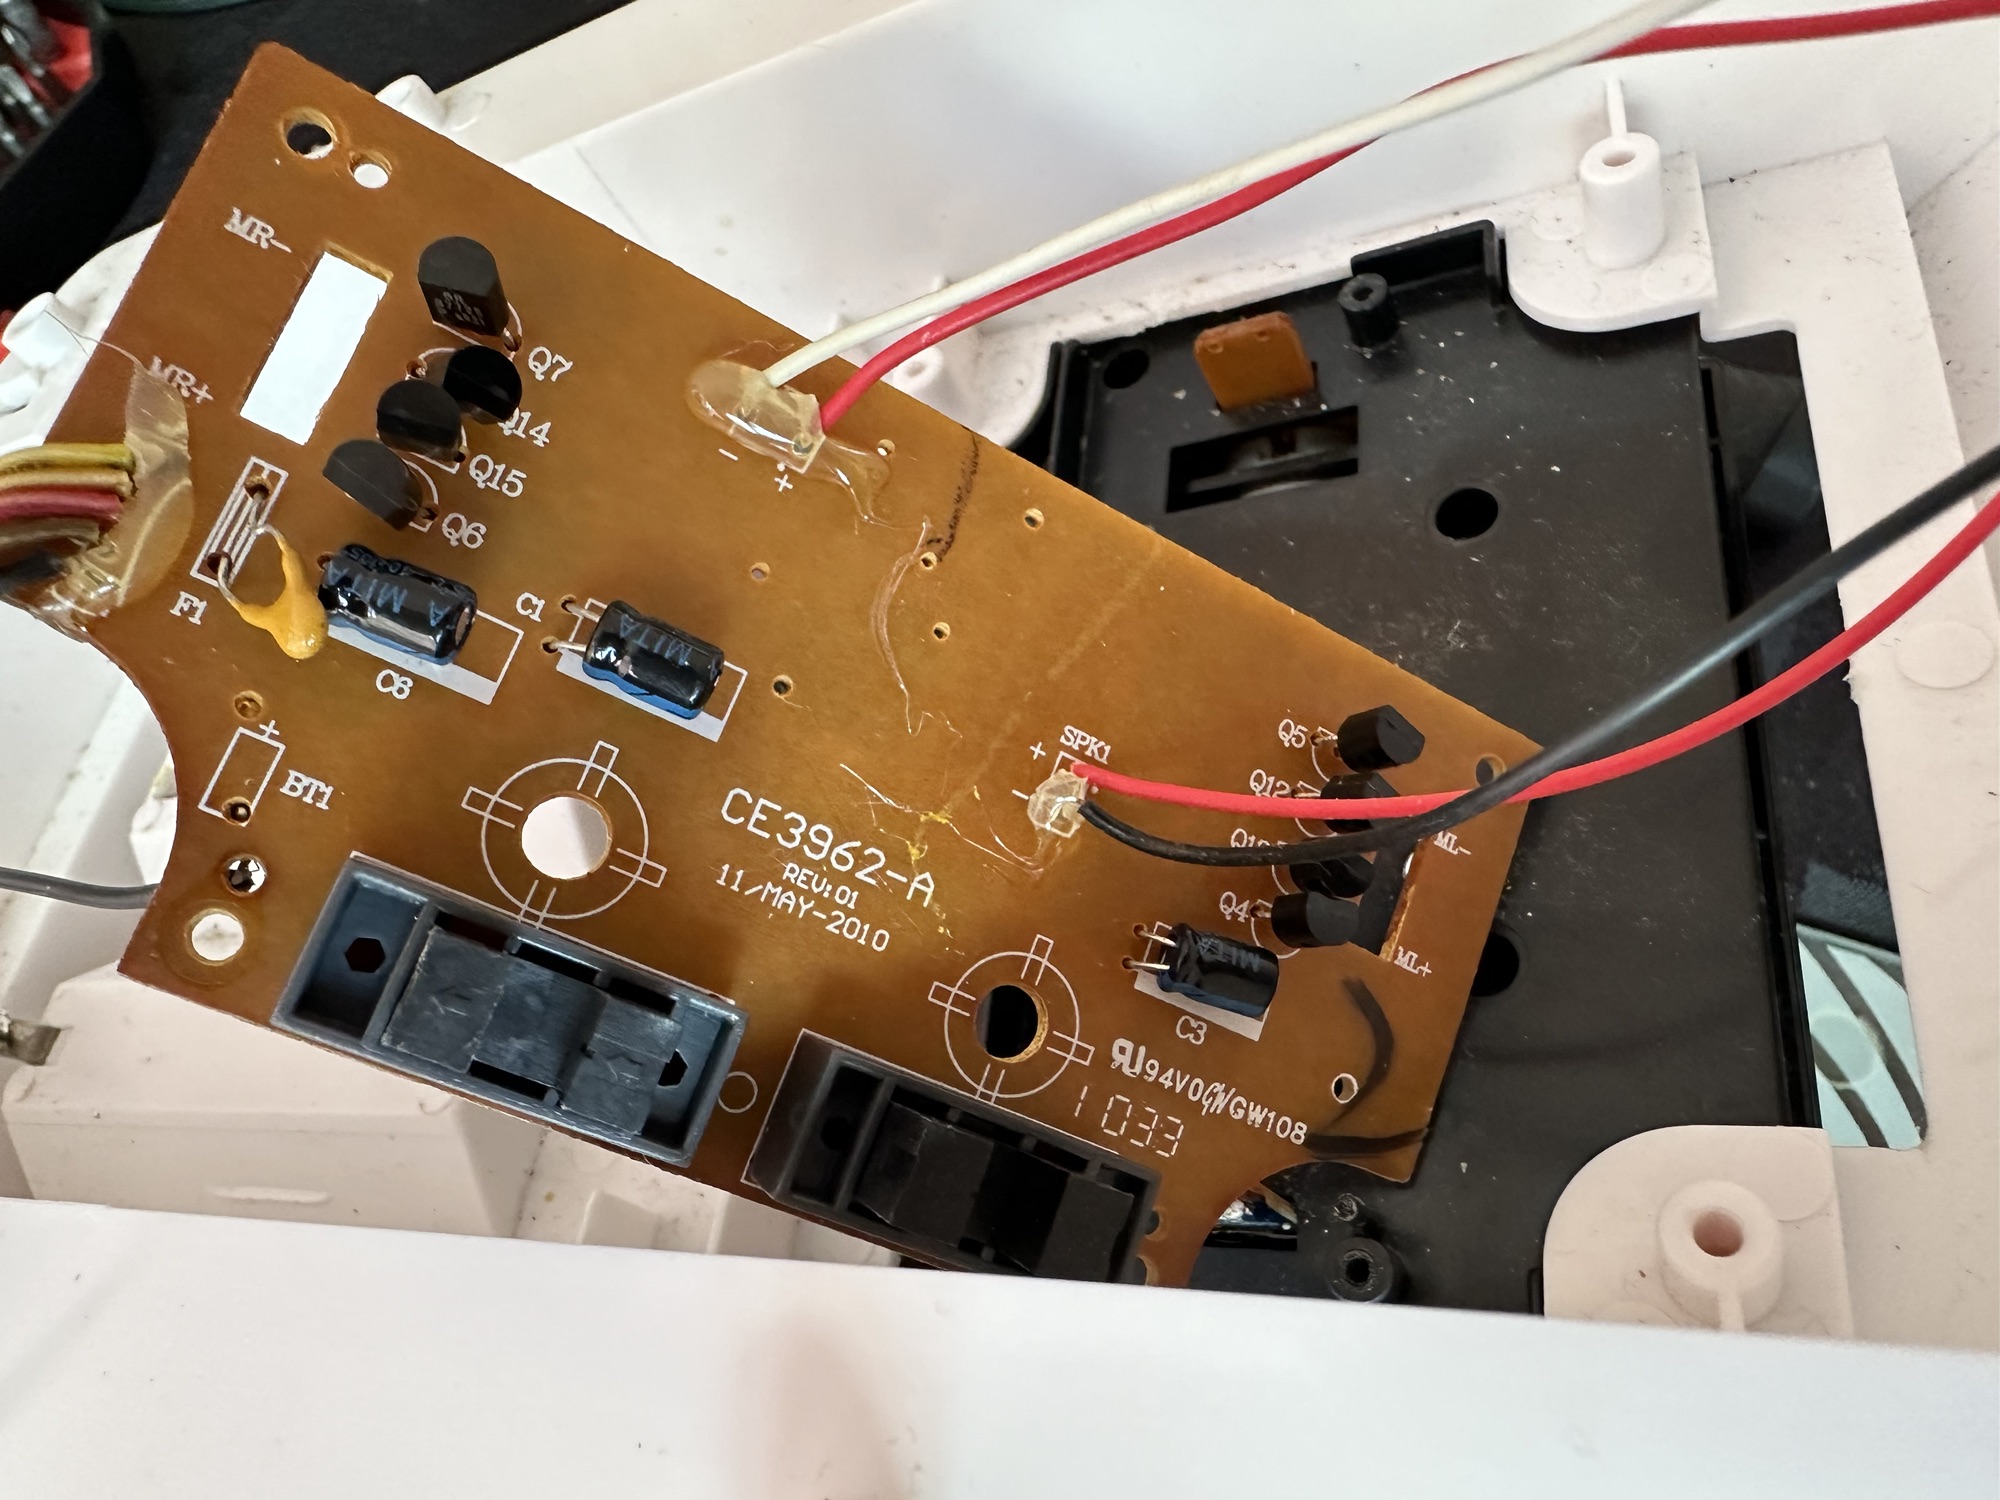
With the two halves of the body shell detached it’s obvious there are some detached wires. One was a battery wire, one was a speaker wire. Oh if this was the issue wouldn’t it be great? But it wasn’t. I soldered these wires back into place, put the three D types in place and it was still dead.
I’ve now desoldered all connections from the circuit board to assist in carrying out checks for continuity and tracing voltage. I can also check the board under the microscope. I may change all the capacitors for SMD ones.
I started checking continuity and tracing voltages and was doing really well until I got to a large section of the main board where everything seemed dead and unresponsive. What the heck was going on here? And then I noticed the wire had detached from the positive probe of my multimeter thus ending any further testing for today. I need to order some new probes. Well, I’ve ordered some nice new probes and croc clip connectors as well, so as soon as they arrive I’ll get back on with the testing. They arrived and were damaged on arrival, so back to the drawing board.
Big trak worn cogsBig trak worn cogs
I took the drive train to pieces and here it became apparent that a number of the cogs are damaged. I believe there is also some issues with the motion detector but I can’t confirm that until I get some power into the motors. I can’t find spare cogs online so I have ordered myself a second damaged unit to use as salvage. To be honest this new unit has all the transfers in place so I will probably use that shell and the guts of my original unit to form one complete Big Trak.
New donor Big Trak – better than my original one
The donor unit has arrived and boy I’m impressed. It’s in far better condition than my original one, so as expected this one will become the working unit and my original one will be come the donor. Any parts left over will be sold on as spares or even used on another damaged one if I can source it.
My new Bigtrak
If you look at the video above you will see the new Big Trak going through the motions. However the one thing it dosen’t do is turn. Could be a wheel sensor issue who knows. Good thing is that the cogs haven’t broken as the drive wheels are both solid and not free wheeling.
There are only two real issues with the donor here. Firstly it will not do the turn command and secondly, one of the drive wheels is damaged. Luckily I have a spare wheel so this was swapped over, some decals were missing but I coaxed these off my old truck with a hot air gun and reapplied them with no issues.
Missing decalsDecals applied
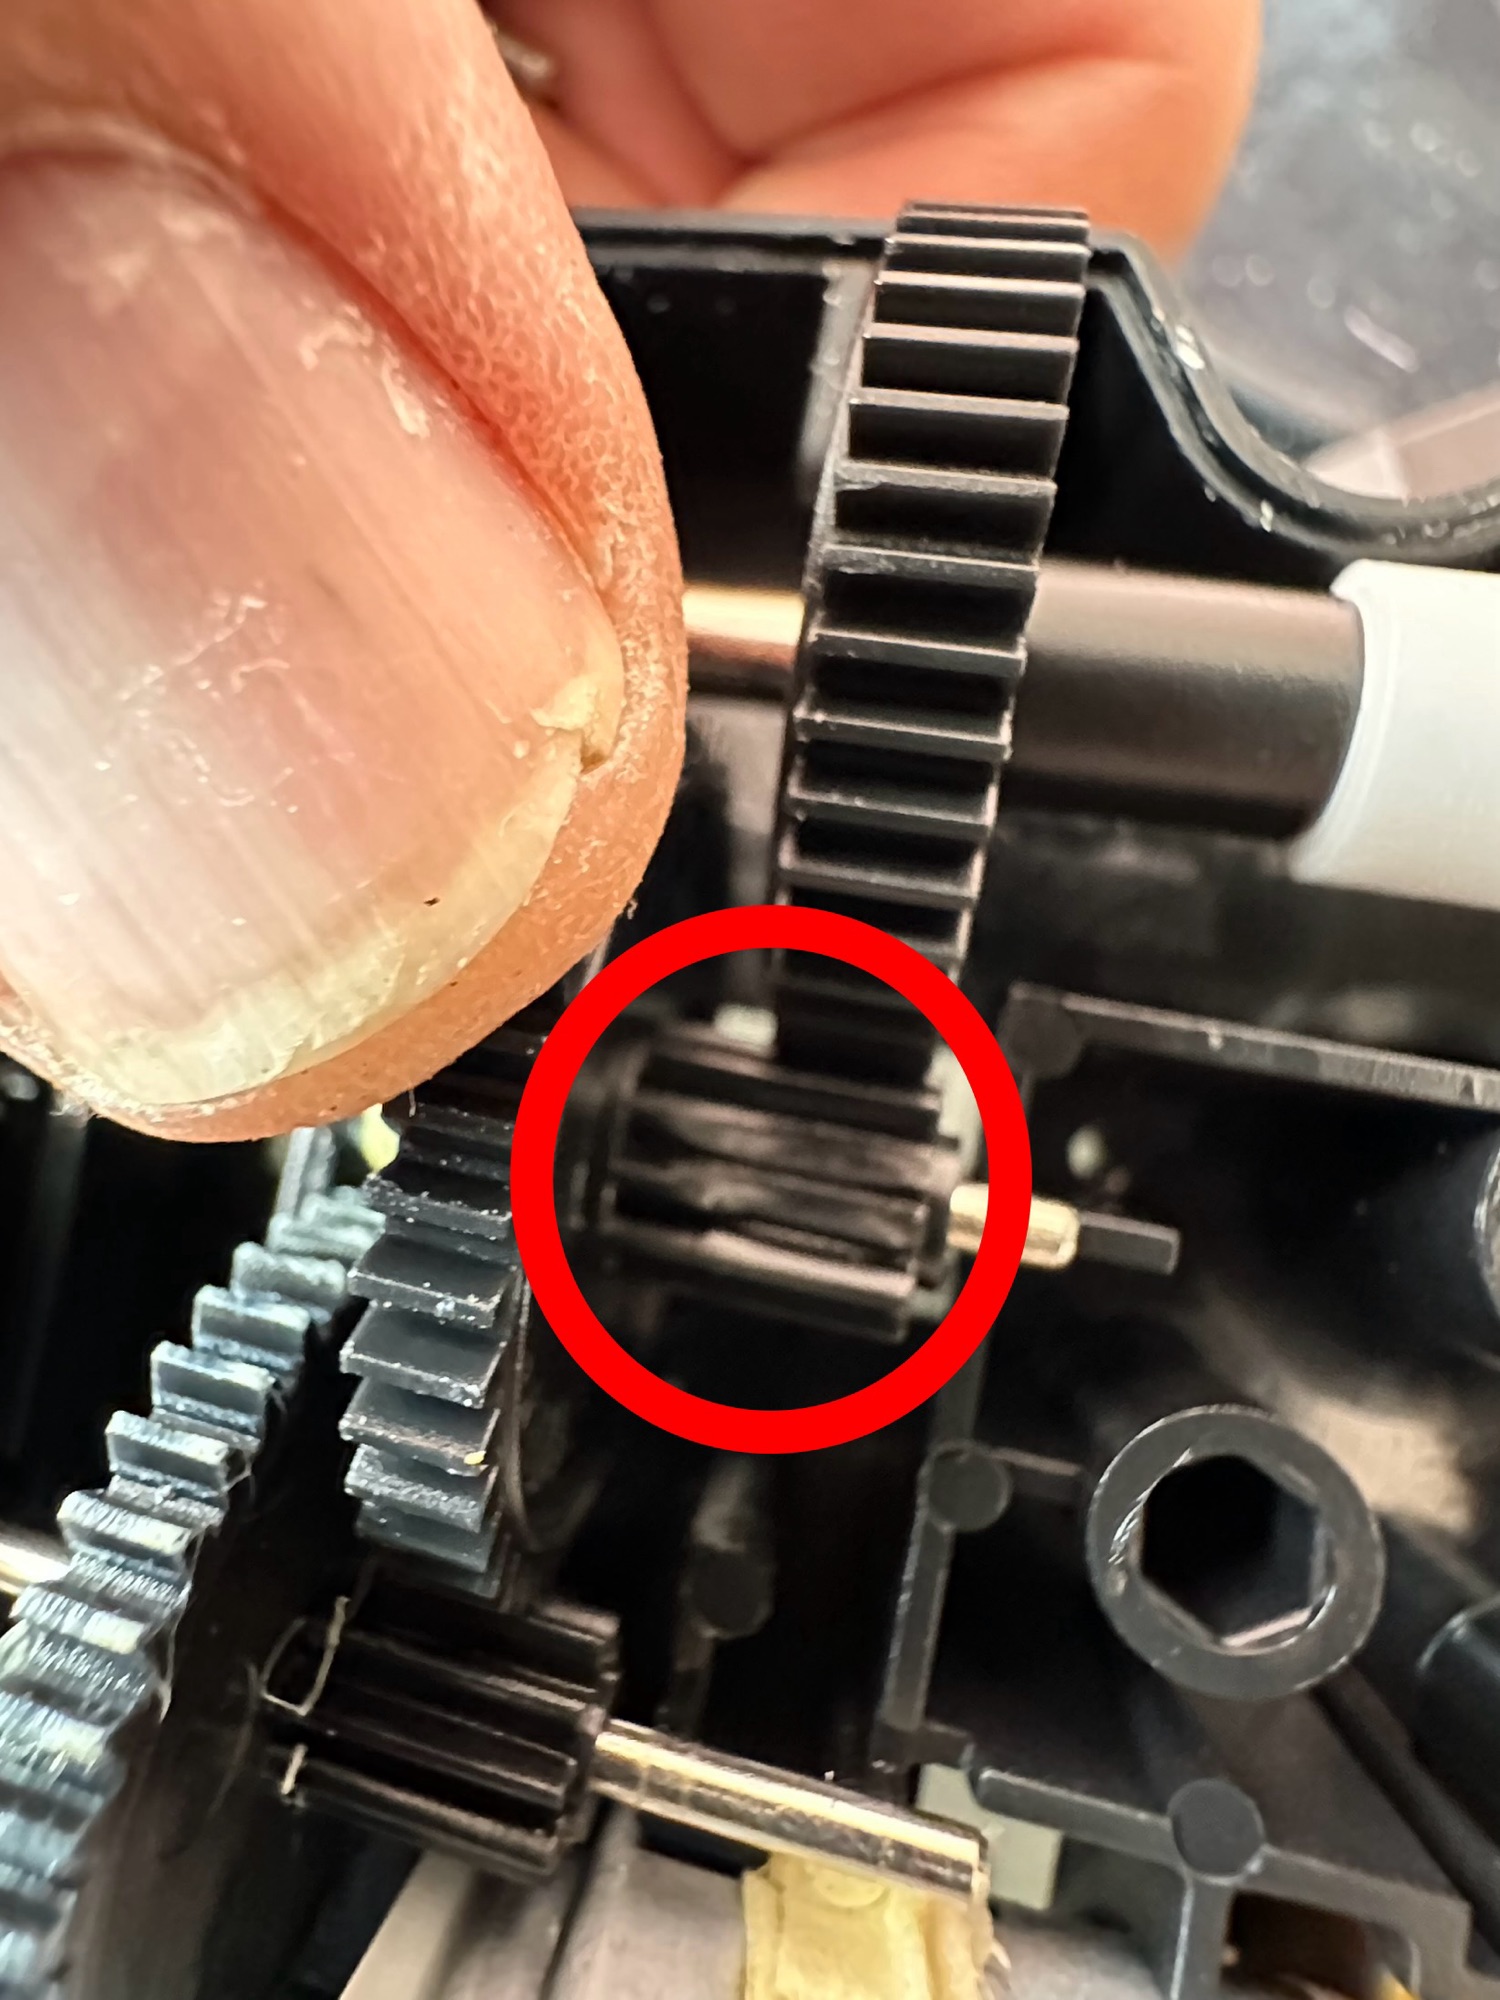
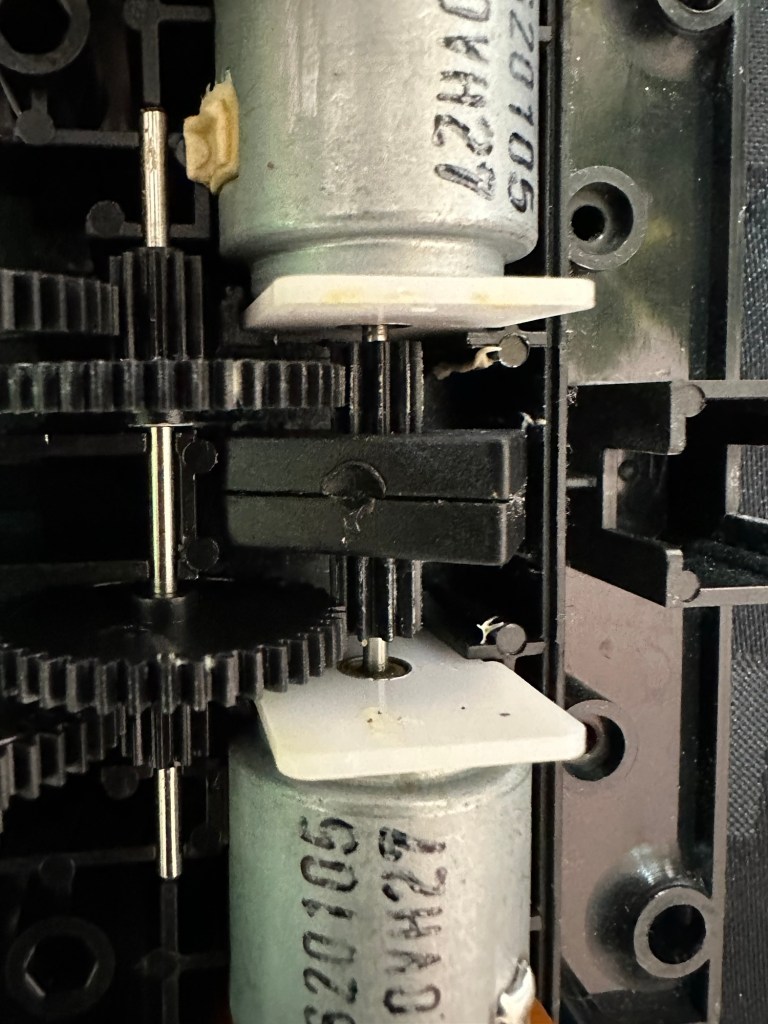
Looking into the drive issue meant opening the gear box. In here we have two magnetic independent gear controls that should have a gap between them, these two were stuck together thus rendering independent motor operations of the turning control useless.
Magnetic sensors joinedMagnetic sensors as they should be
I removed the two motors and repositioned them and the cogs holding the magnetic gear, this gave a gap of about 3mm that now allows the wheels to turn in opposite directions allowing the unit to turn.
Now the Magnetic sensors are adjusted….it turns
Whilst in this gear box I was able to confirm the issue with my old gear box and it really is all down to two damaged drive cogs that I need to obtain. I’m pleased with that as I could now get two good working units for just a small outlay once I can source some cogs. I will have to repair the wheel I removed to replace the one on my new unit however I have an idea how I’m going to remedy this and again it’s a low cost option. But that’s a job for another day.
2:18 of rebuild magic
So if you look at the video above, it’s the full fix that I posted on YouTube. Really pleased with this fix, again I’ve learned quite a bit about these units and I’m going to have immense fun programming it. My wife dosen’t understand my excitement over this toy, but all my old buddies and colleagues understand it as they grew up in the same era. Maybe it’s the male menopause, reliving the past and all that.
But hey, it keeps me occupied and out of mischief so who should worry about that
This one is going on my shelf so when the kids visit I can show them the joys of basic programming we experienced back in the day.
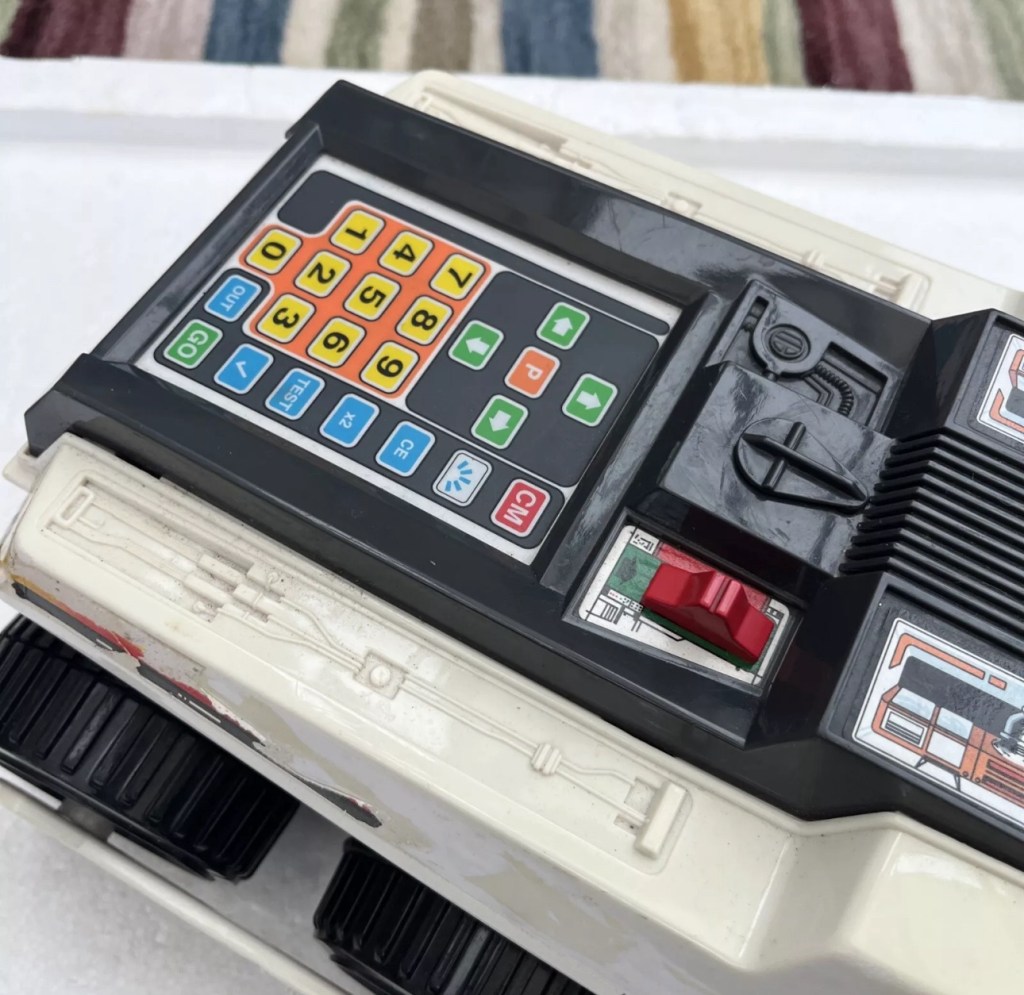
I’ve just brought one of these, it’s a toy and I’m heading for the senior end of adulthood:
Big Trak CE3962
BIG TRAK / bigtrak is a programmable toy electric vehicle created by Milton Bradley in 1979, resembling a futuristic Sci-Fi tank / utility vehicle. The original Big Trak was a six-wheeled (two-wheel drive) tank with a front-mounted blue “photon beam” headlamp, and a keypad on top. The toy could remember up to 16 commands, which it then executed in sequence. There also was an optional cargo trailer accessory, with the UK version being white to match its colour scheme; once hooked to the Bigtrak, this trailer could be programmed to dump its payload.
WikipediA
Here’s what the original listing said:
Item probably does not work. I recall attempting to fix corroded terminals years ago and it’s still not working. I do not have D cell batteries to test now.
EBay
I was just browsing around as I do and this popped up on my timeline, the wife is going to disown me for bringing such junk into the house, however for a split second 14 year old me was in the house and a flood of memories, not all good came back to me. These toys came out in 1979 when I was aged 14. My friend over the way from me was brought one of these for Christmas and I experienced one of my first ever episodes of Jealousy. Back in 1979 I believe they retailed for approximately £39 Gbp, and my parents weren’t about to part with hard earned cash to invest in developing technology like computing – “It’ll never last, it’s just a fad” (Famous last words).
I made every excuse possible to go around his house to play and even offered to look after it for him when he went on holiday, he never let me though and I believe at that moment my friend realised what the term obsessive meant, as he was experiencing it big time with me.
Now I own one, however this is the later version from 2010, it only cost me £9.99 Gbp and its probably a wreck, but I’m really going to treat this like a proper full sized car restoration and I want this to work, crikey I’ve even found out I can buy the original decals from Australia, so it’s patently obvious the obsession is still there.
I can’t say I have genuinely looked so forward to a parcel arriving as much as this one. I sincerely hope I have no regrets…. And I have all fingers crossed.
This is going to be a labour of love and I can’t wait.


You must be logged in to post a comment.