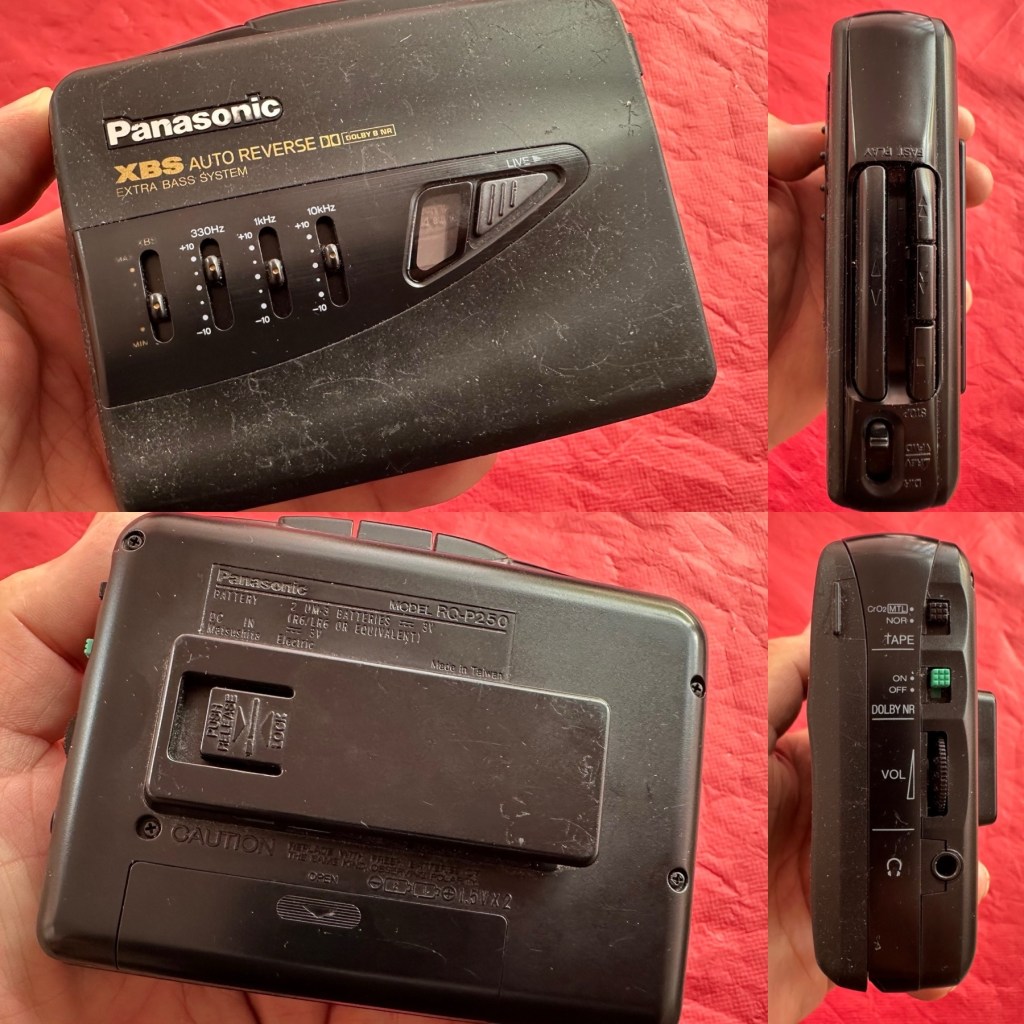
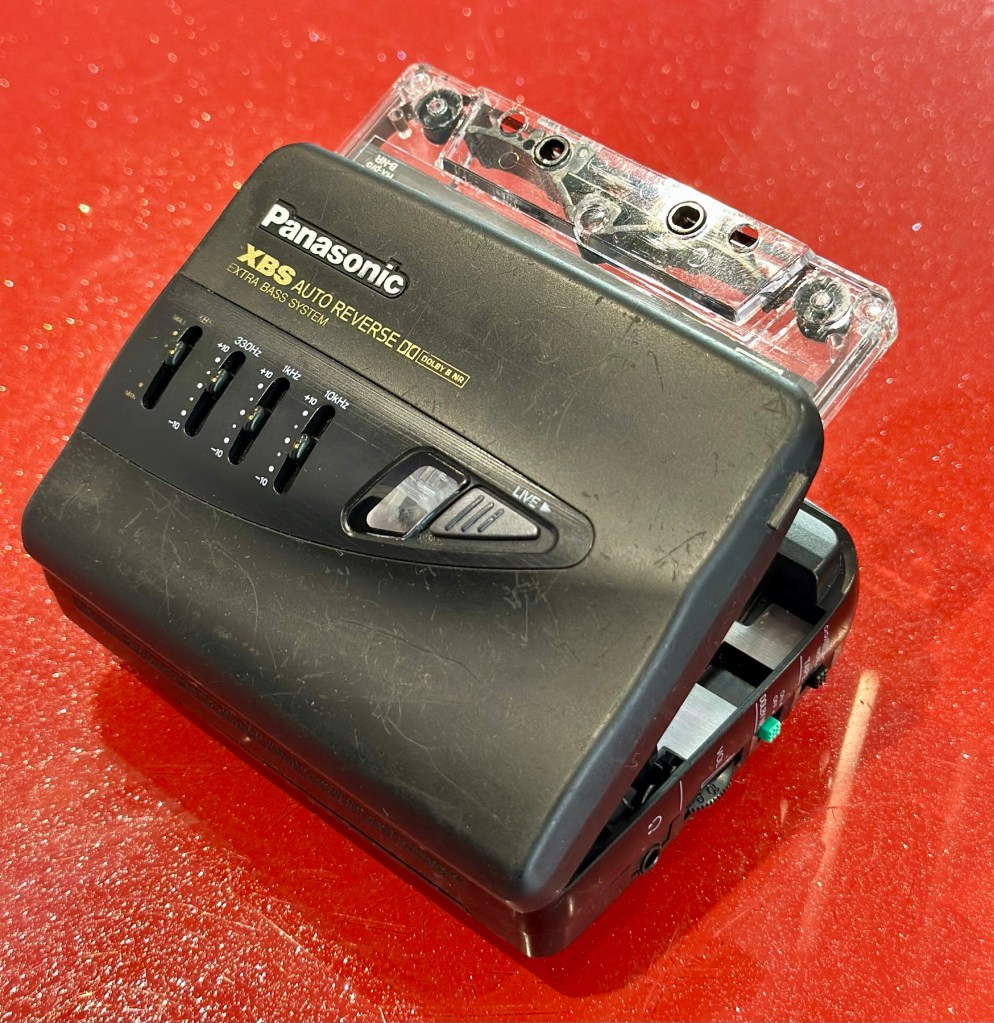
At a family gathering this weekend, an elderly family member approached me and asked if I could take a look at his Panasonic personal tape player, and maybe get it back up and working.
Who am I, to turn down such an invitation, so I took it on and promised him I’d have a look into it. There is, “No rush“ I was told. Just as well, as it’s busy in every aspect of my life at the moment.
Here’s the spec:
Type: Auto Reverse Cassette Player
Tape Type: type I, CrO2, Metal
Output: 20mW
Battery: 2 x AA
Power Supply: RP-AC33 (3V DC)
Dimensions: 114.2 x 84.4 x 33.1mm
Weight: 156g
Finish: black
Year: 1993
Hifiengine
Panasonic RQ-P250
Assessment:
It’s well used, and has always been and if I can get it working, will continue to be so. At the grand old age of 79 my brother in law is not about to change his ways and is quite comfortable listening to his old Cassette collection whilst out and about, on trains quite a bit of the time, as he travels up and down the country. He’s a lovely old fashioned set in his ways guy and we wouldn’t have him any other way. It would be blooming lovely to get this back to him working again.
It’s scarred, been well used but looked after, apparently it’s gone from playing quite well, to slowing down and dying completely. I think I know what the issue is but I’m not going to curse myself by saying I know what is wrong, when it actually turns out to be something totally different.
On the Beach – Chris Rea
And I love his choice of music. Let’s get this repair underway so we can listen to Mr. Rea in a lovely crisp sounding manner befitting of an 80s rock star.
Repair:
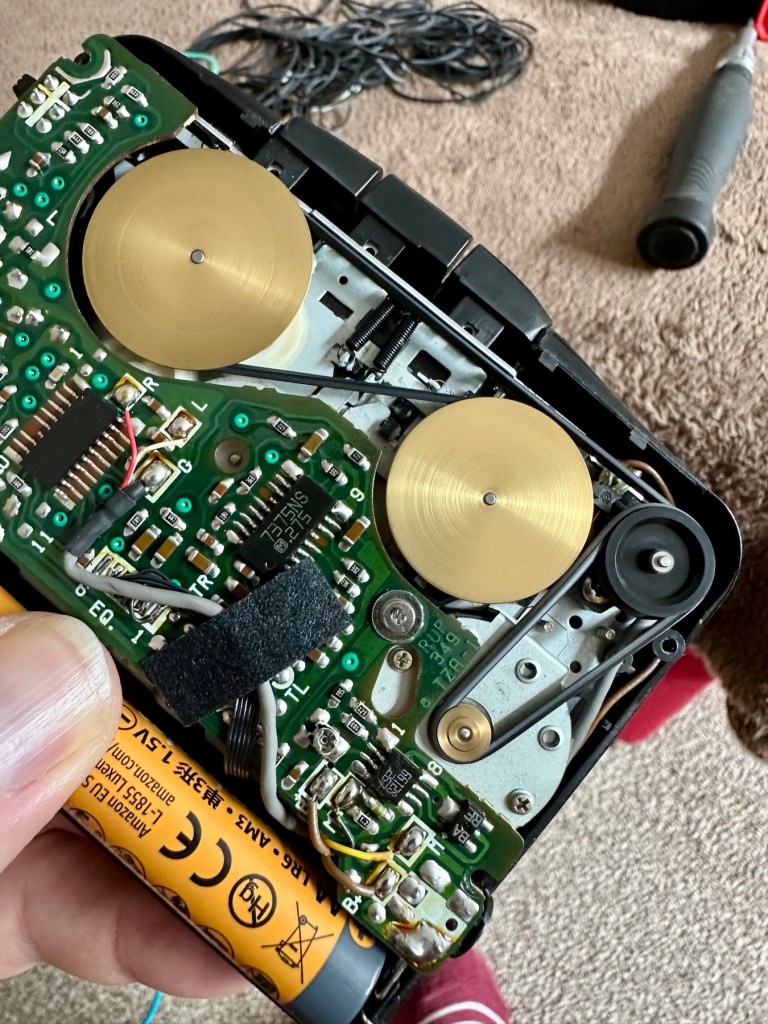
Batteries in place, earphones connected, push play. No movement from the capstans, and even when put in forward and reverse there is no movement from either capstan. I can hear all the electrical noises such as the tape head picking, and I suspect at the grand old age of 32 years old that the drive belts have probably given in. Let’s open it up and have a look.
And just as I thought. Two drive belts in here, they are both loose, one though is so loose that it has wrapped itself around the two capstans, no wonder it wouldn’t start up.
Two drive belts visible, both so stretched that they have ceased working
I have plenty of these belts spare, I just had to sort out the two closest matching in size. Too slack and you introduce warble, too tight and it will be off speed, you need to get it just right. Adjustments can be made to the motor speed but this will only come back to bite you once the belts wear in.
New belts in placeOld slackened belts
I’ve put two new belts in place, and at some frequencies there is a little wobble, but with Dolby switched in place this can be removed digitally, this will settle over the coming weeks after more use.
I have used some silicon grease on the cogs, I have put contact spray in the motor and the volume controls, and used IPA to clean all the tape contacts and capstan wheels and posts, it’s basically been given a little service to see it forward for a while longer.
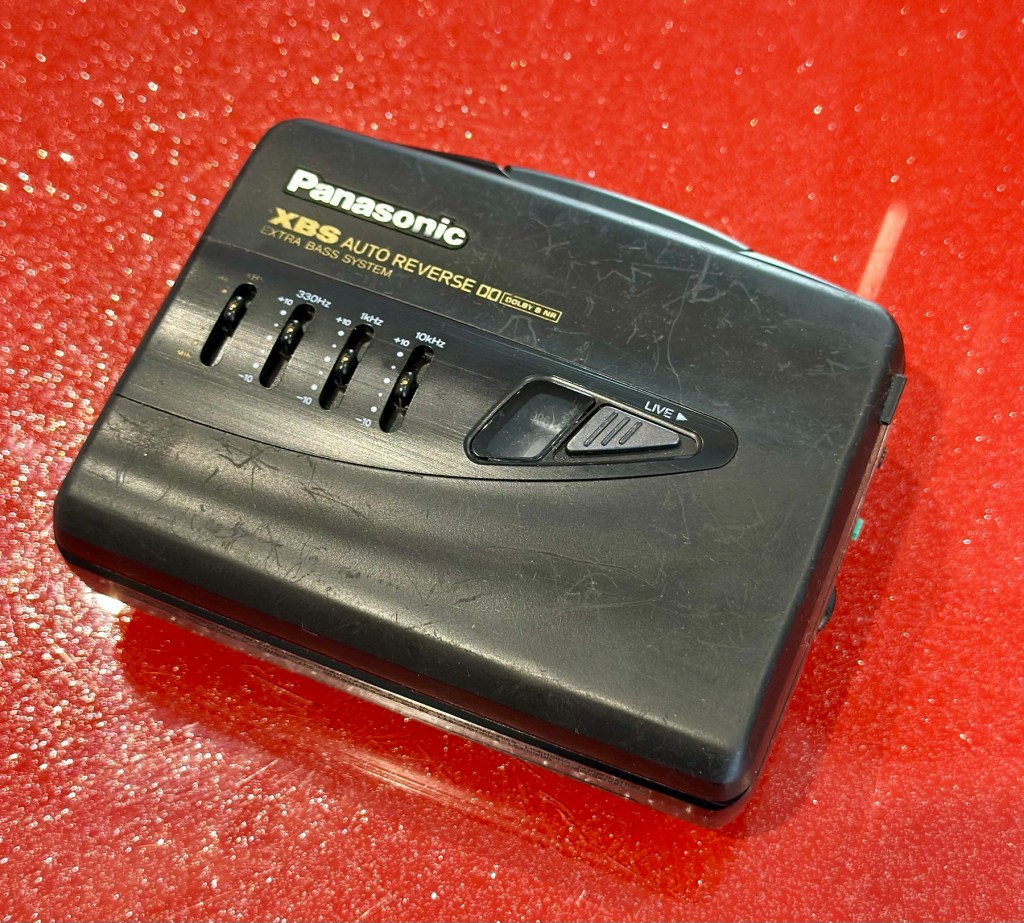
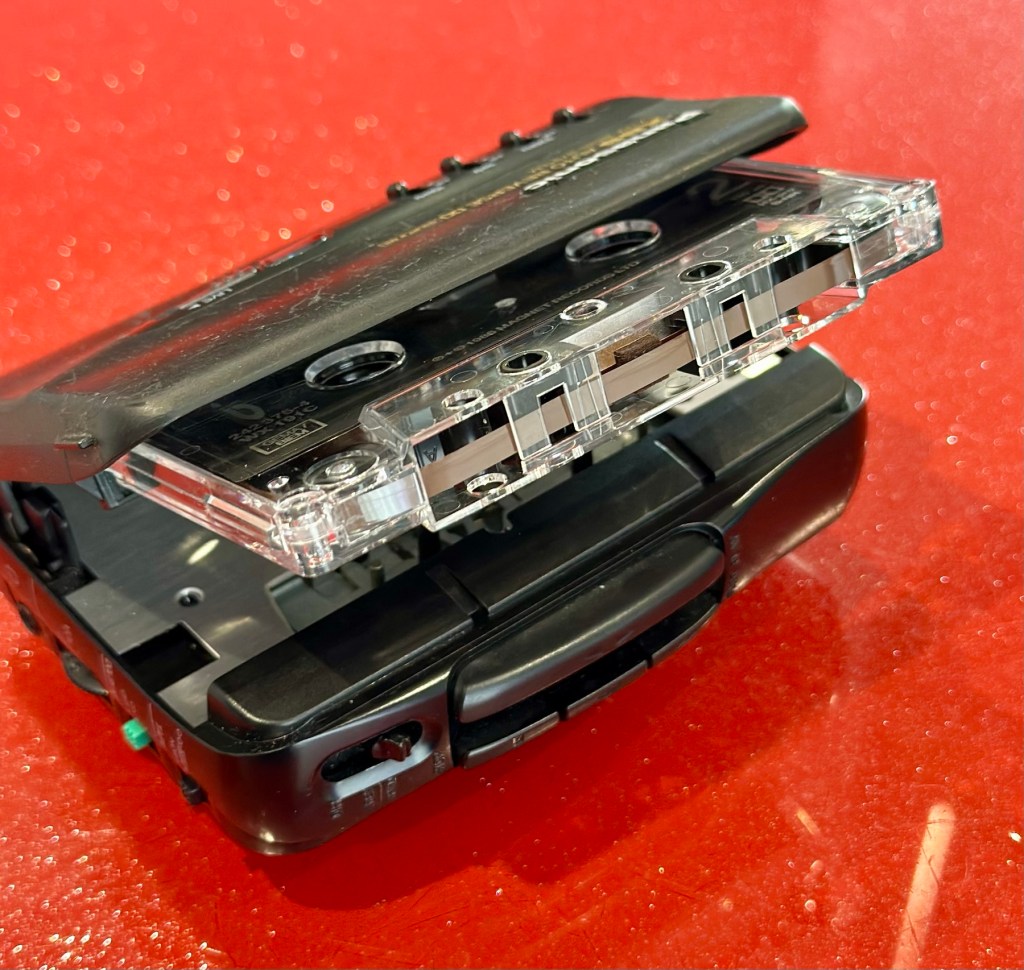
Body now reassembled, new batteries put in place, it’s time to test it.
Result:
A quick polish, to tidy up, won’t get rid of the deep scuffs, just makes it a little more presentable. Cassette inserted, headphones plugged in and as expected it’s working just fine, we can hear Mr.Rea in all his gravel voiced glory. So can you, in this video snippet below, that hopefully won’t get a copyright strike 🤞
🎶 On the beach 🎵
So there we have it. Another item brought back to life with about 30 minutes work. It’s going to make someone’s day, and I’m as pleased as punch that I could play a part in contributing to that.
Working well, looking ok after a quick service and some TLC
There you go. Hope you enjoyed this quick fix.
Many thanks for passing by. Always most appreciated.
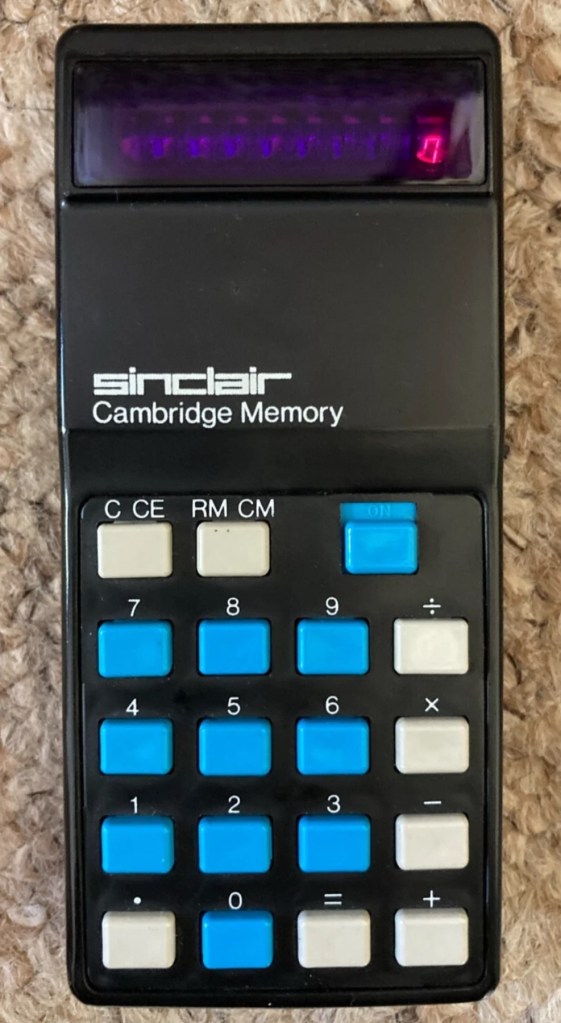
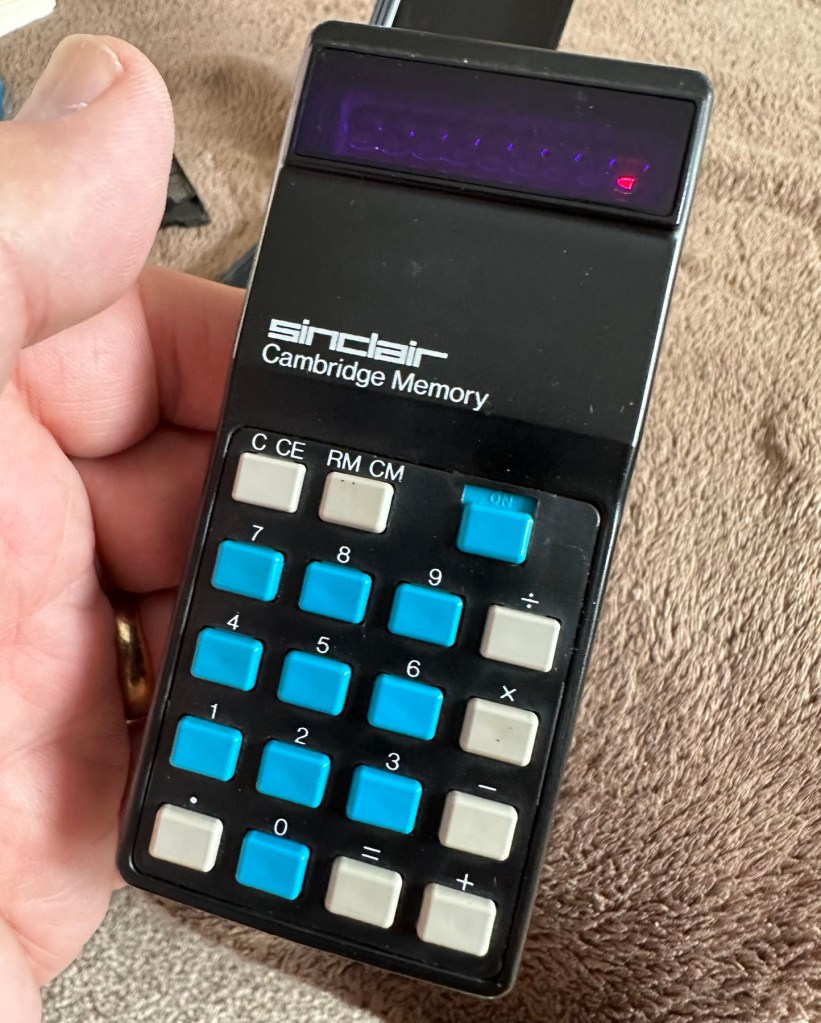
This auction is for a used cased Sinclair Cambridge Memory pocket calculator and original case. The item is in very good cosmetic condition as is the case which still has its instruction sheet. The item is powered with 4 x AAA batteries (not supplied) and does work although 1 of the digits is faulty and does not display (see pictures) plus the number 5 digit is not working. Please refer to the pictures and description provided before bidding.
EBay
It’s faulty…obviously
So it does work, but it doesn’t? This calculator is a model one memory calculator, that dates from around July 1973, ( Actually May 1975 see photos below) and is one of the earliest available mass produced electronic calculators available in the UK at the time. And it was produced in collaboration with a guy called (Sir) Clive Sinclair, who in the following decade would become synonymous with tech development in the UK. It retailed at £29:95GBP, and given the rate of inflation, its cost today in 2025 would be a staggering £463GBP. Wow!
Courtesy of Vintagecalculators.com
I love collecting old calculators, I couldn’t afford one back in the day when they arrived on the scene as I was only a child and probably only on about 20 pence a week pocket money, and savings and investments were not even known to me at this period of my life. The thought of saving that precious 20p a week for the next 150 weeks wouldn’t have even remotely crossed my mind. What no sweeties?
But I can buy them now, so no big issue!
So this one has become available, and I’ve been tracking it for a week or so, there were nine other people watching but I secured it for a total including postage of £14:49GBP, and I’m happy with that, it’s a piece of retro history for a very good price. Even if it remains faulty, or should I say working but not working?
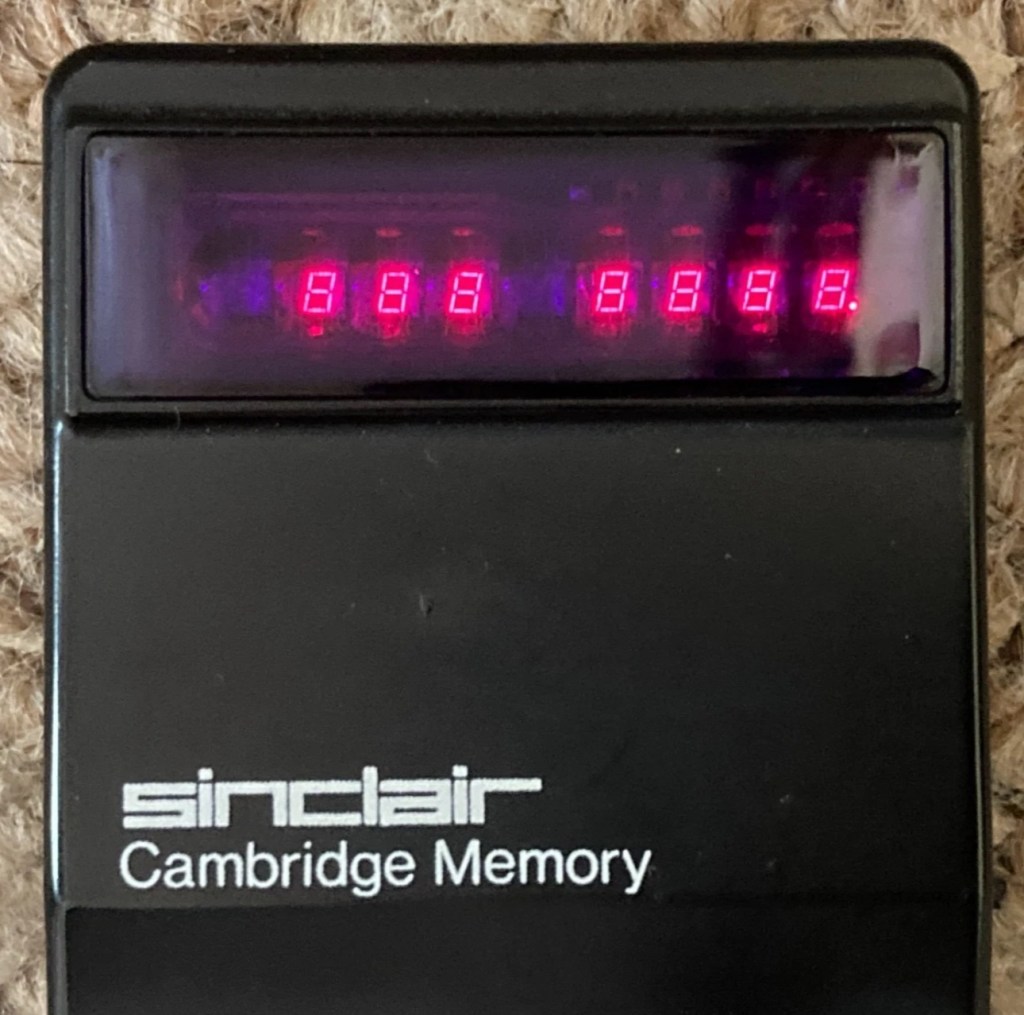
This unit obviously has its problems, the button number 5 doesn’t work and one of the led digits is also not functioning. Hopefully I can get these issues sorted and soon have the calculator back up and working as it should. That would be nice. I’m looking forward to this little project.
Assessment:
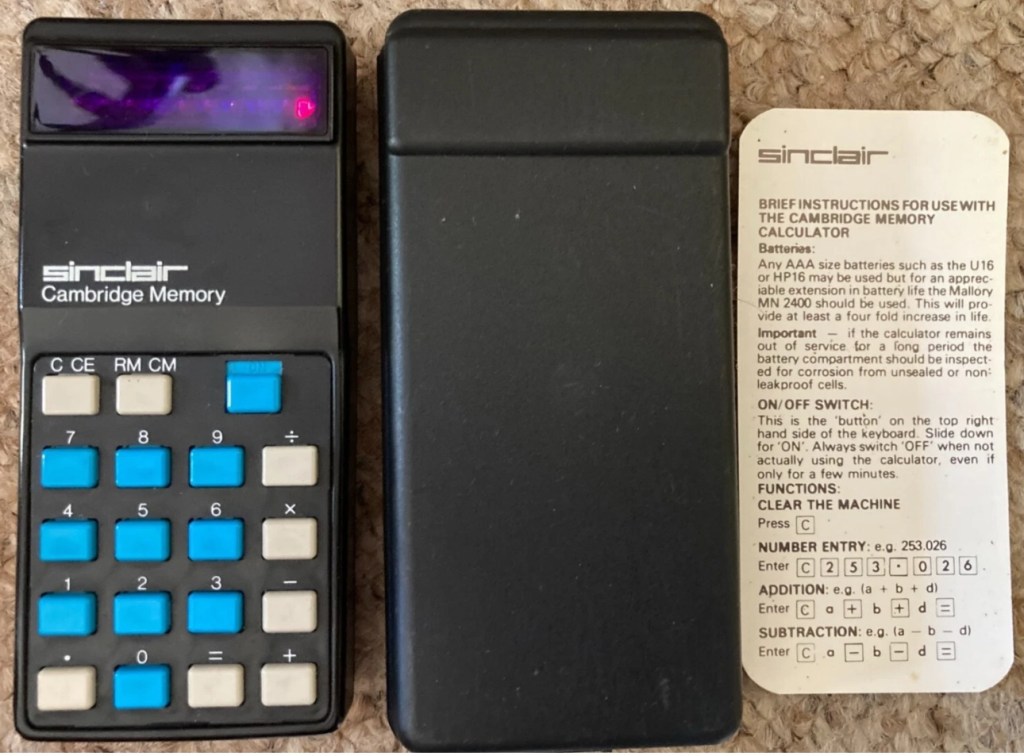
It’s arrived and it’s a lot smaller than I anticipated. It has a separate hard protective case, which is a nice touch and a small info sheet on its operation. Cosmetically it’s in a good condition with just minor signs that are age related. There are no gouges or scars so it has been treated well, though it’s not pristine.
Two buttons unresponsive and one LED
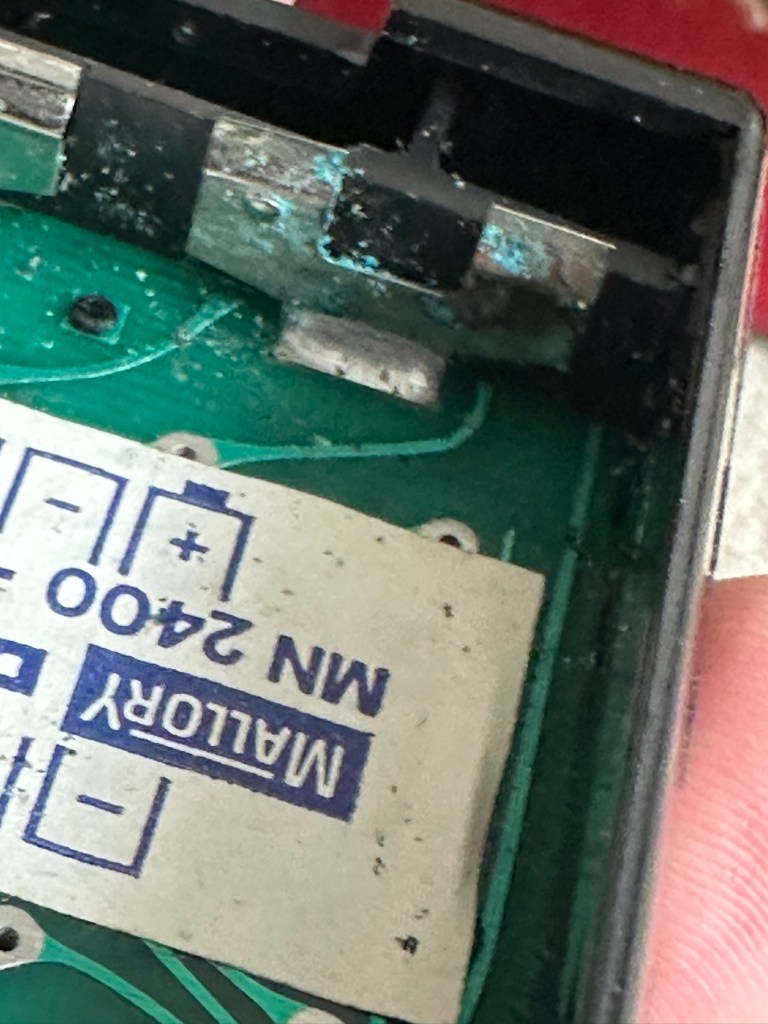
Batteries go in ok but, I believe old style AAA batteries were a little wider than those used today and would sit a bit more snuggly in the battery compartment. As you can see there is a little wriggle room here, and springs at both ends need adjusting to help prevent this. I may have to use some spacers so the batteries sit tighter in place.
Gaps between batteries – means movement
The switch is a bit temperamental and can be seen quite plainly from the battery compartment. It looks strangely out of place with no batteries in place.
Switch offSwitch on
It is such a basic design solely relying on tension of a small metal plate to short across the connection points. Should be a simple enough issue to sort.
There is a little battery contamination on one of the battery contacts, again this shouldn’t be too much of an issue and should clean up ok with some IPA.
Some battery contamination
It was originally reported that there was one unresponsive button this being the number “5”, there is also another unresponsive button, the multiplication “X” button. There is also one LED indicator, the 4th one in from the left hand side that is not operating. Add to this the issue with the On/Off switch and the contamination, and the original faults reported in the original sales pitch have now doubled. I just wish people would spend more time going over the issues and then give actual accurate feedback as to what the real faults are, it would make for a far more pleasant buying experience. Rant over.
There doesn’t seem to be a single screw holding the body together, I just hope it isn’t all heat welded.
Let’s try to get inside.
Repair:
Well it cracked open quite nicely with no issues with just a plastic flat prise tool. The main board just sat comfortably in the unit, secure, and not a screw in sight. Strange as time moves on some of the games units I come across have best part of fifty of the little blighters to remove before you get anywhere. sometimes the old way is good.
Bare boardOpposite side of boardDate is May 1975
The dismantling of the keyboard is a little complex and you have to take time and make sure you know how it’s going to go back together, it’s just a bit fiddly. The board is quite straightforward and as soon as I see some of the IC’s it dates the unit perfectly. The chips are dated May 1975, and that is about 18 months younger than what I originally thought, it’s quite informative to get inside and learn occasionally and this is just as good as having a birth certificate presented to you. All good stuff.
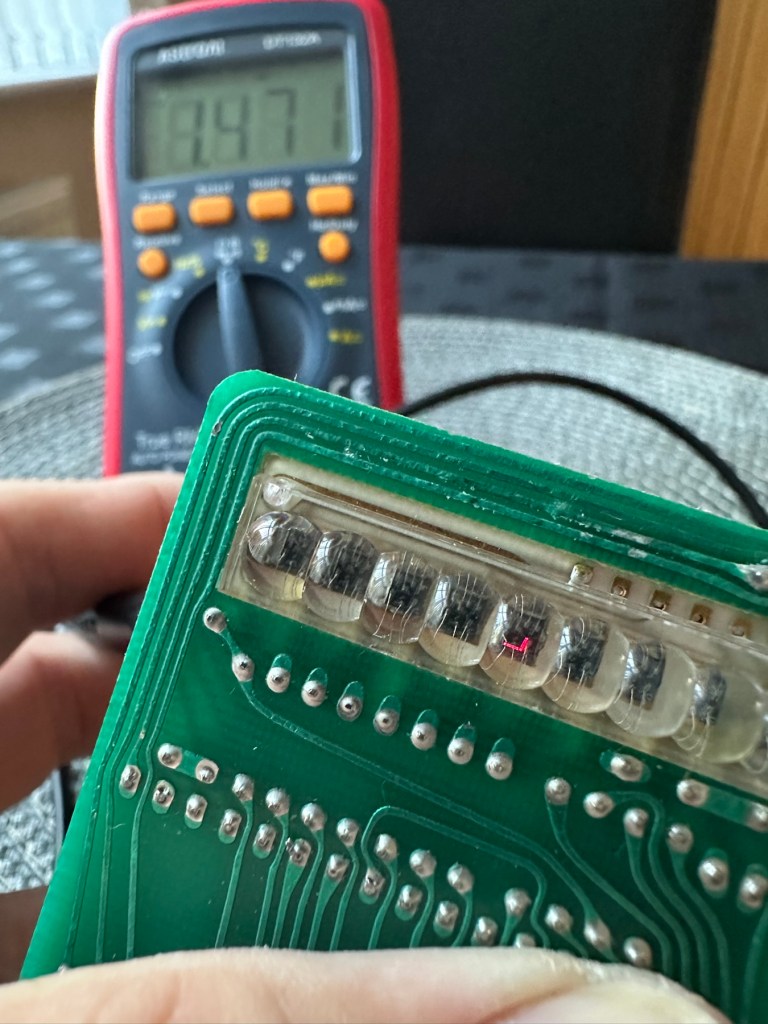
I’ve proved that there isn’t a problem with the missing digit on the display as using my multimeter in diode mode I am able to prove that this LED is working fine.
LED working
The picture shows just one part of the display range on this particular digit, I can assure you all other sections of the display are also working.
Regarding the case with the buttons not working. I have checked this out for continuity and both digits go through the same portion of the main IC and there doesn’t appear to be any broken traces. It’s a strange one but I have also found some really poor solder joints that are either cold joints or just poorly soldered from the start, there are a couple of resistors that need re soldering. It may be nothing at all, but it needs attention, a full reflow wouldn’t go amiss or take too much time.
Faulty resistor joint
I’ve reflowed the entire board due to there being a few cold solder joints.
Full reflow completed
On top of this I have taken off two old capacitors and tested them out of circuit, and both were out of their operable range of +/- 10%. As a result of this I have replaced the offending components with comparable new ones.
Old capacitorsNew capacitors
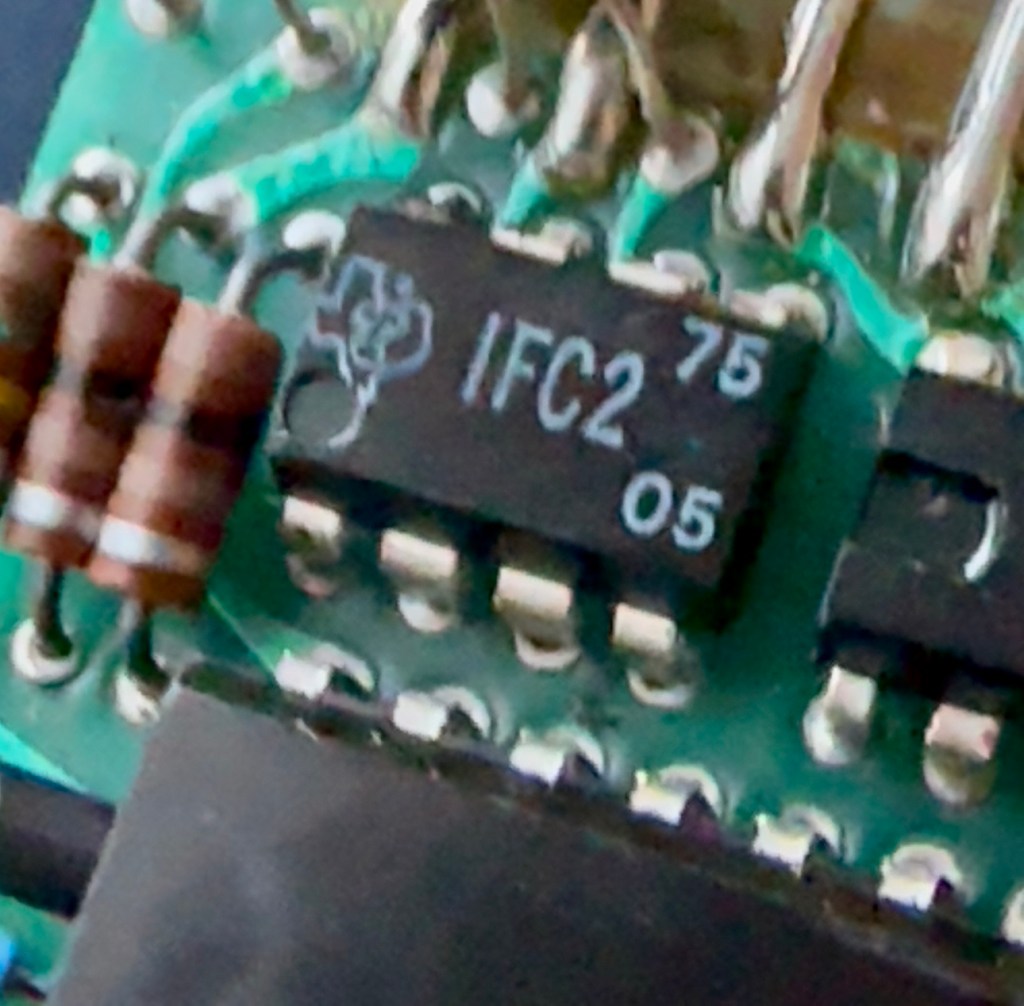
Even with all these extra tasks being undertaken there is absolutely no change in the way it operates. Nothing has gotten worse, the faults that were originally there still remain. I have done some research on line and carried out some further tests and checked expected voltages, most are within range except one that appears to be less than its expected value. After testing everything on this board, every component I can only surmise that one of the three chips has failed, I suspect very much that this, the main chip, a CZL550 integrated circuit. Otherwise known as “Calculator on a chip” is the one that is at fault.
A CZL550 chip
To be quite honest these chips are fairly rare and command a price far in excess of what I paid for the original unit, and I don’t really want to do that. I think I’ll wait around to see if I can secure another faulty unit to complete this repair, so in the meantime, and until I can secure such a unit I will put this repair on hold.
Result:
Well, it’s not what I wanted but sometimes you just can’t win with some of these old projects. In no way am I walking away from it, it’s just that the parts are so difficult to get hold of that you really do have to just wait until a sufficiently faulty one comes up for sale. And that could be days, it could be weeks or months. So for now i admit defeat, but it will not be going to trash. It will remain in my ever expanding “To do” box, for me to pick up on at a later date. And when I am in a position to move this project on, I’ll pick it up in a continuation of this post.
Many thanks for passing by. It’s always appreciated.
ALL ITEMS IN THIS LISTING ARE FAULTY FAULTS MAY VARY BETWEENS ITEMS
SOLD AS IS
NO RETURNS
EBay
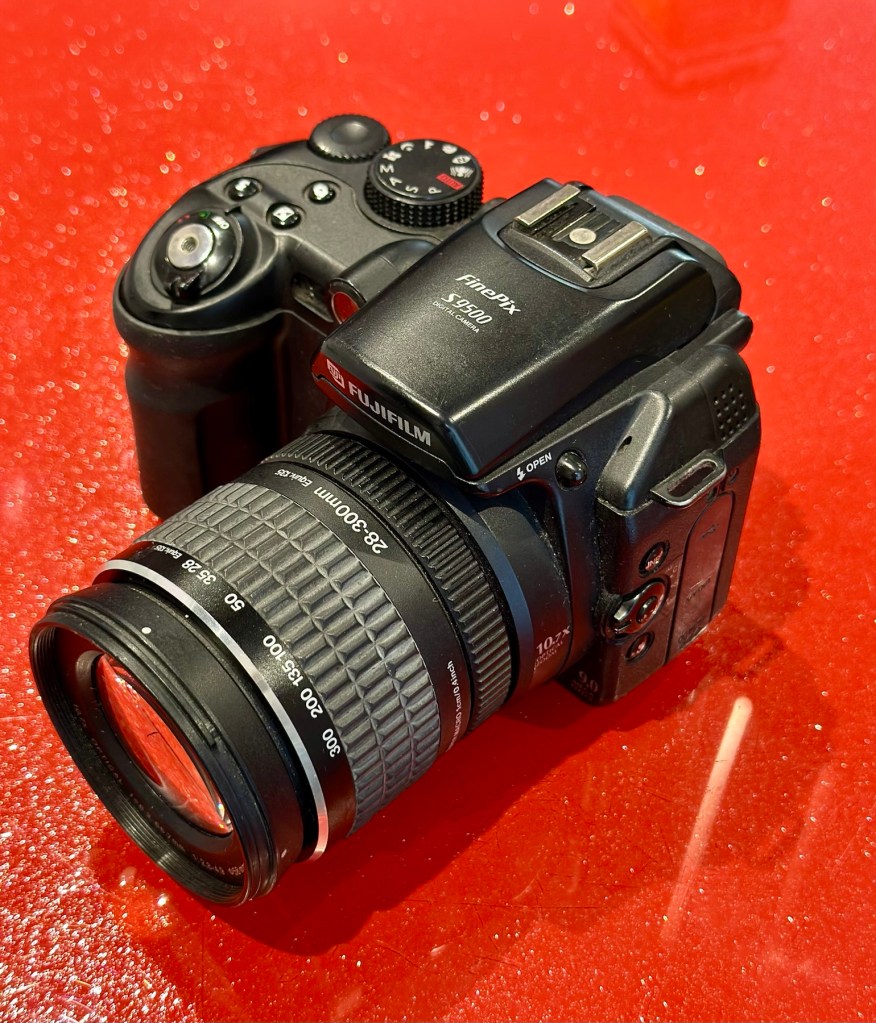
Finepix S9500
I’ve purchased three cameras as a job lot in an auction. All of them have issues but the issues have not been clarified. This is very much a “Suck it and see” auction where I get what I’m given. I’ve paid £24:22GBP for all three and that includes free postage. I’ve purchased from this seller before who is a bonafide Camera business based in South Wales. He has no time for faulty items though, quick in and out is his way of working, no time to fix stuff. I’ve got three good cameras in this bundle and this works out at just about £8:00GBP per camera. And where can you get cameras like this for those prices nowadays.
I really don’t know what the specific issue is with this camera only that it is faulty. I guess we will just have to wait it’s arrival for a full assessment. In the meantime here is a little bit about it.
Fujifilm FinePix S9500 or FinePix S9000 is a bridge digital camera released by Fujifilm in 2005 and intended for the enthusiastic amateur. It is a member of the Fujifilm FinePix family and has been superseded by the Fujifilm FinePixS100fs. It has a long list of advanced prosumer features, like combining having wide-angle ability (28 mm equivalent on a 35 mm camera), full range of manual settings, mechanical zoom ring, high ISO-sensitivities, and some of the versatile features of Live-Preview Digital cameras (LPDs) like movie mode, movable LCD panel, and macro mode.
Wikipedia
Assessment:
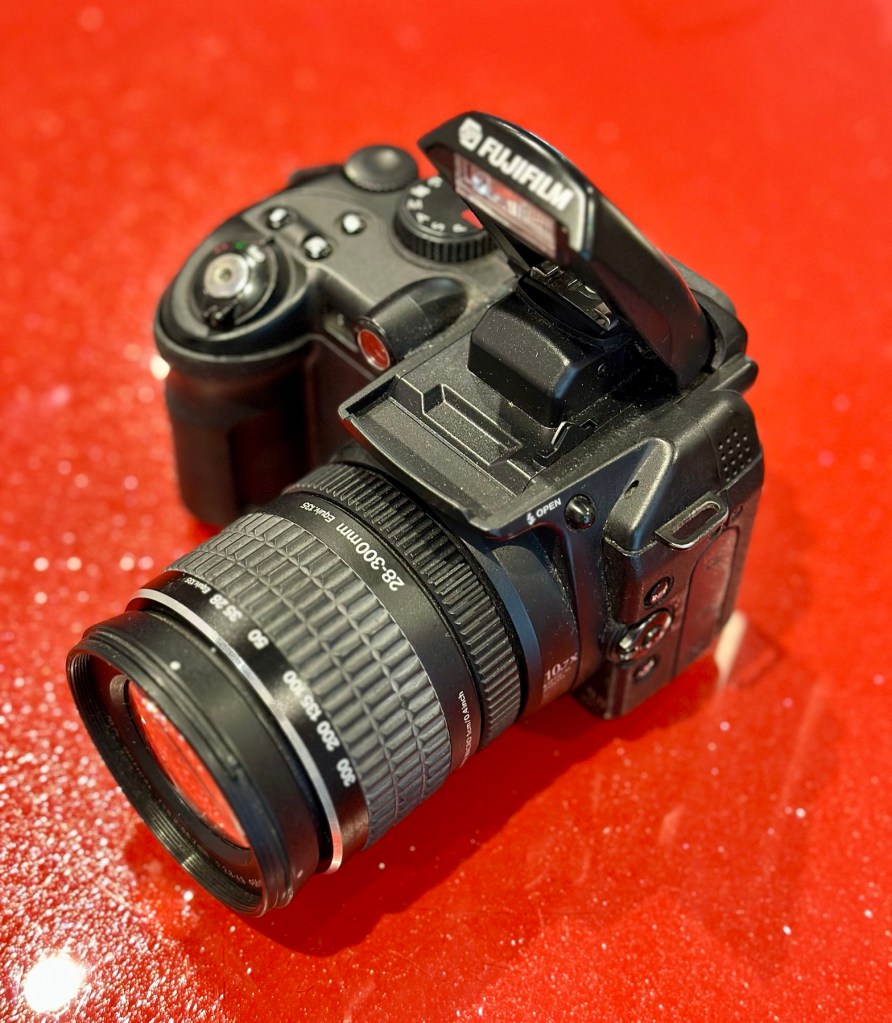
Wow. Another camera in a fantastic condition as part of this damaged package of three. And I owned one of these when they first came out in 2005.
Working fine Flash worksAll menus okScreen and extension fine
I really had to look hard to find the issue with this camera, I have checked every menu, mode and function and it is working absolutely perfectly. Then I found the issue when removing the battery.
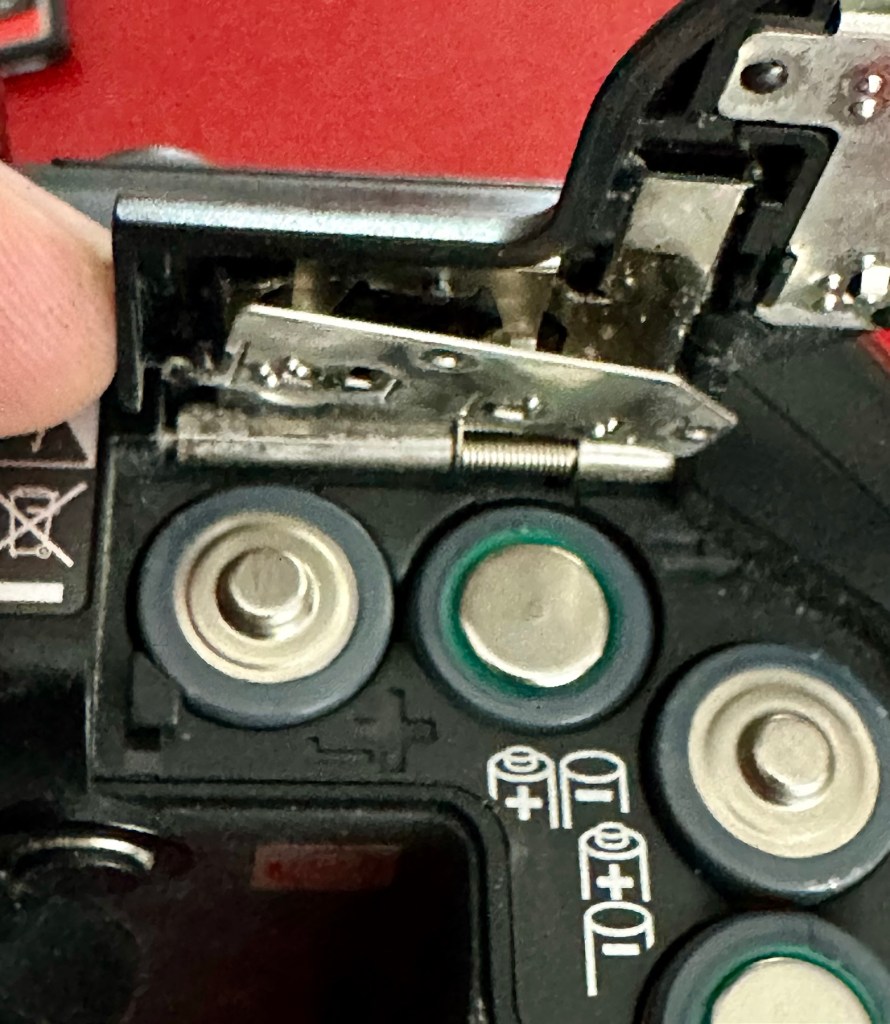
Loose battery contact under battery door
Unbelievable, the only issue with this camera is a loose battery contact plate under the battery door. These are normally sealed with moulded plastic, but it looks as if this one has come adrift. It just needs fixing back in place, I can’t believe this is all that is wrong with this camera. Apart from needing a little clean.
Another bonus
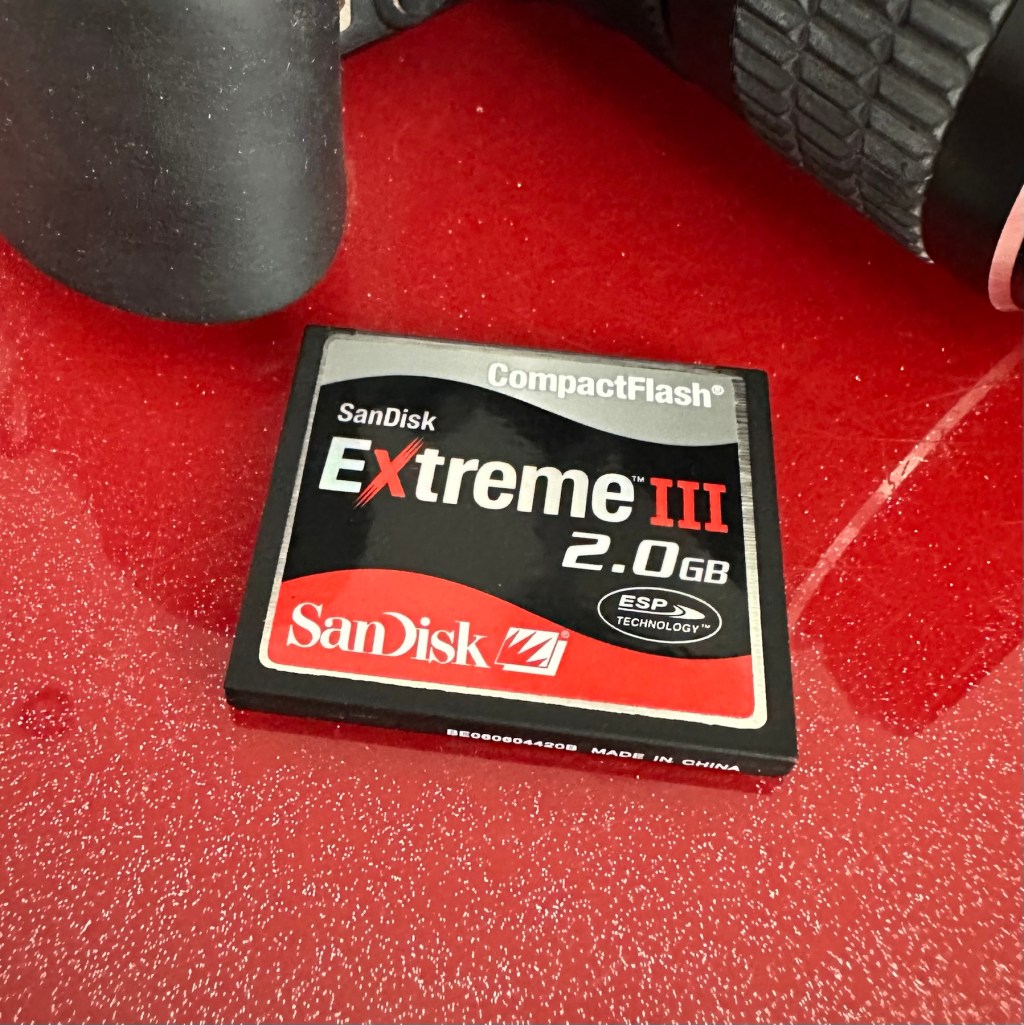
And an added bonus with this camera was that it came with a 2Gb CF card. This just so happens to be the biggest drive size these cameras take. You can also use TF cards. Again, this was a very welcome bonus.
Repair:
Probably the simplest of repairs you’ll probably see. I really apologise for this being a bit of an anticlimax to anyone wanting to see a technical repair, because you won’t be seeing one. But just sit and think it over for a moment, that someone was prepared to dispose of this perfectly working camera as it was not working in their eyes. We really are a throwaway society. And then there are simple people like me who love these items. And we fix them.
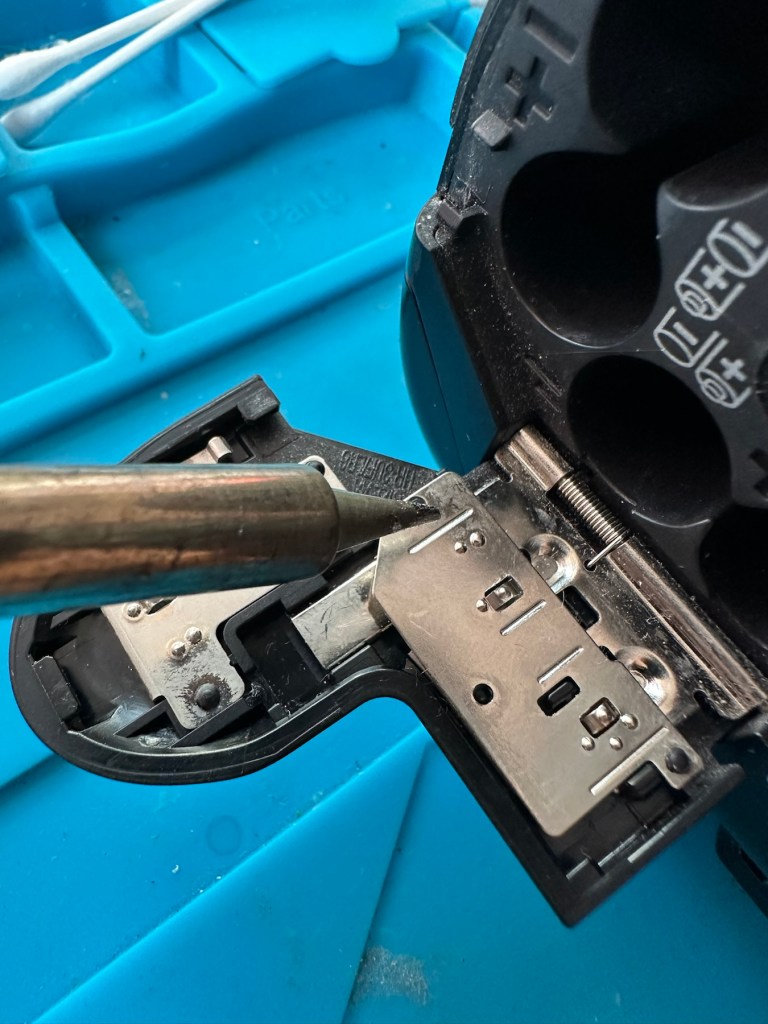
A hot soldering ironPlastic re-welded
All it took was a hot soldering iron and a pair of tweezers. The metal plate was held down and what remained of the broken plastic welds protruded above the plate. Using the hot iron the welds were melted back to secure the plate in place as it had been when it left the factory. There you go. Job done. Simple.
Result:
For £8:00 I have brought myself a little bargain here. Ok it’s 20 years old now, works perfectly and does what it was built for. Capturing history, your personal history, both good and bad and creating moments for you to treasure forever.
All cleaned and looking beautiful
It doesn’t matter what the megapixels are or any of that chuff the “purists” insist you must have in a camera, just push the button and treasure the output for the rest of your days. These cameras are the ones we should be carrying for fun, to learn about photography, the cameras the kids should have now that we had 20 years back, they still have that life in them and the ability to teach and encourage a younger generation to get into photography. And before you say they have phones, that’s not the same. They’ll learn more from one of these on a phone free afternoon, then they ever will by being interrupted by “Soshul Meeja” all day.
Get out there, get your kids recording their world. They’ll thank you one day.
And yes it works well, the Camera is in cracking order and only missing a strap and maybe a lens cap that I may procure later down the line.
The good thing is that it has been saved from disposal, and has years of good honest life left in it.
Thanks for passing by, you know it’s always appreciated.
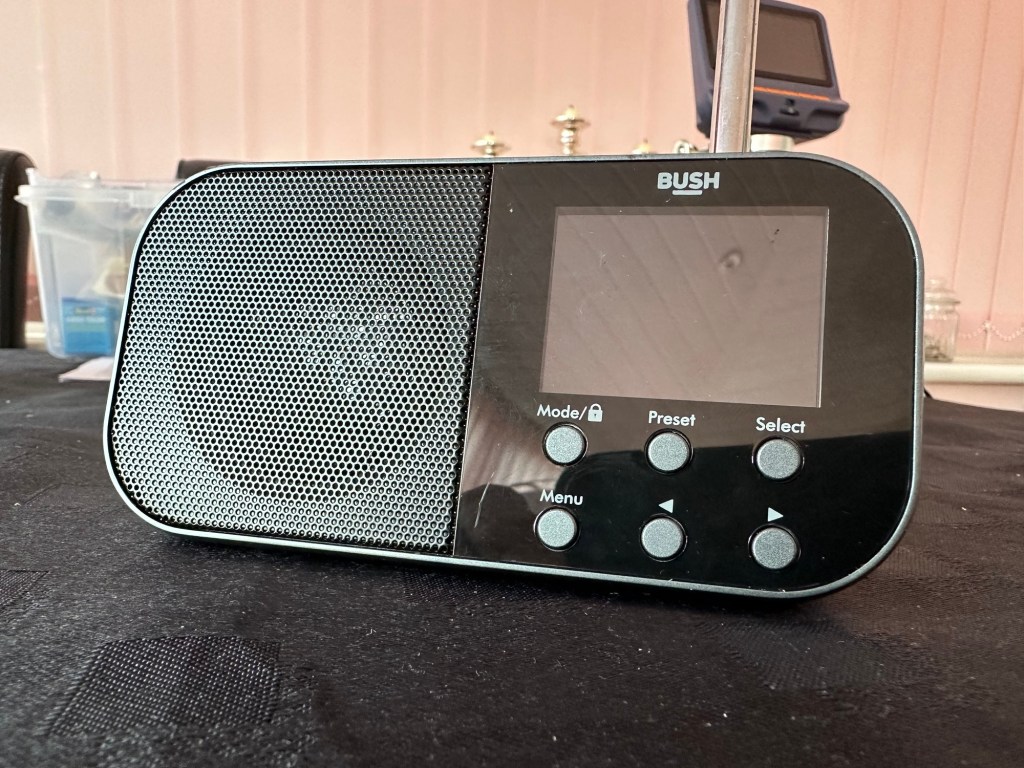
Simple as that. And yes it’s a tiny radio but in excellent condition cosmetically.
Bush handheld
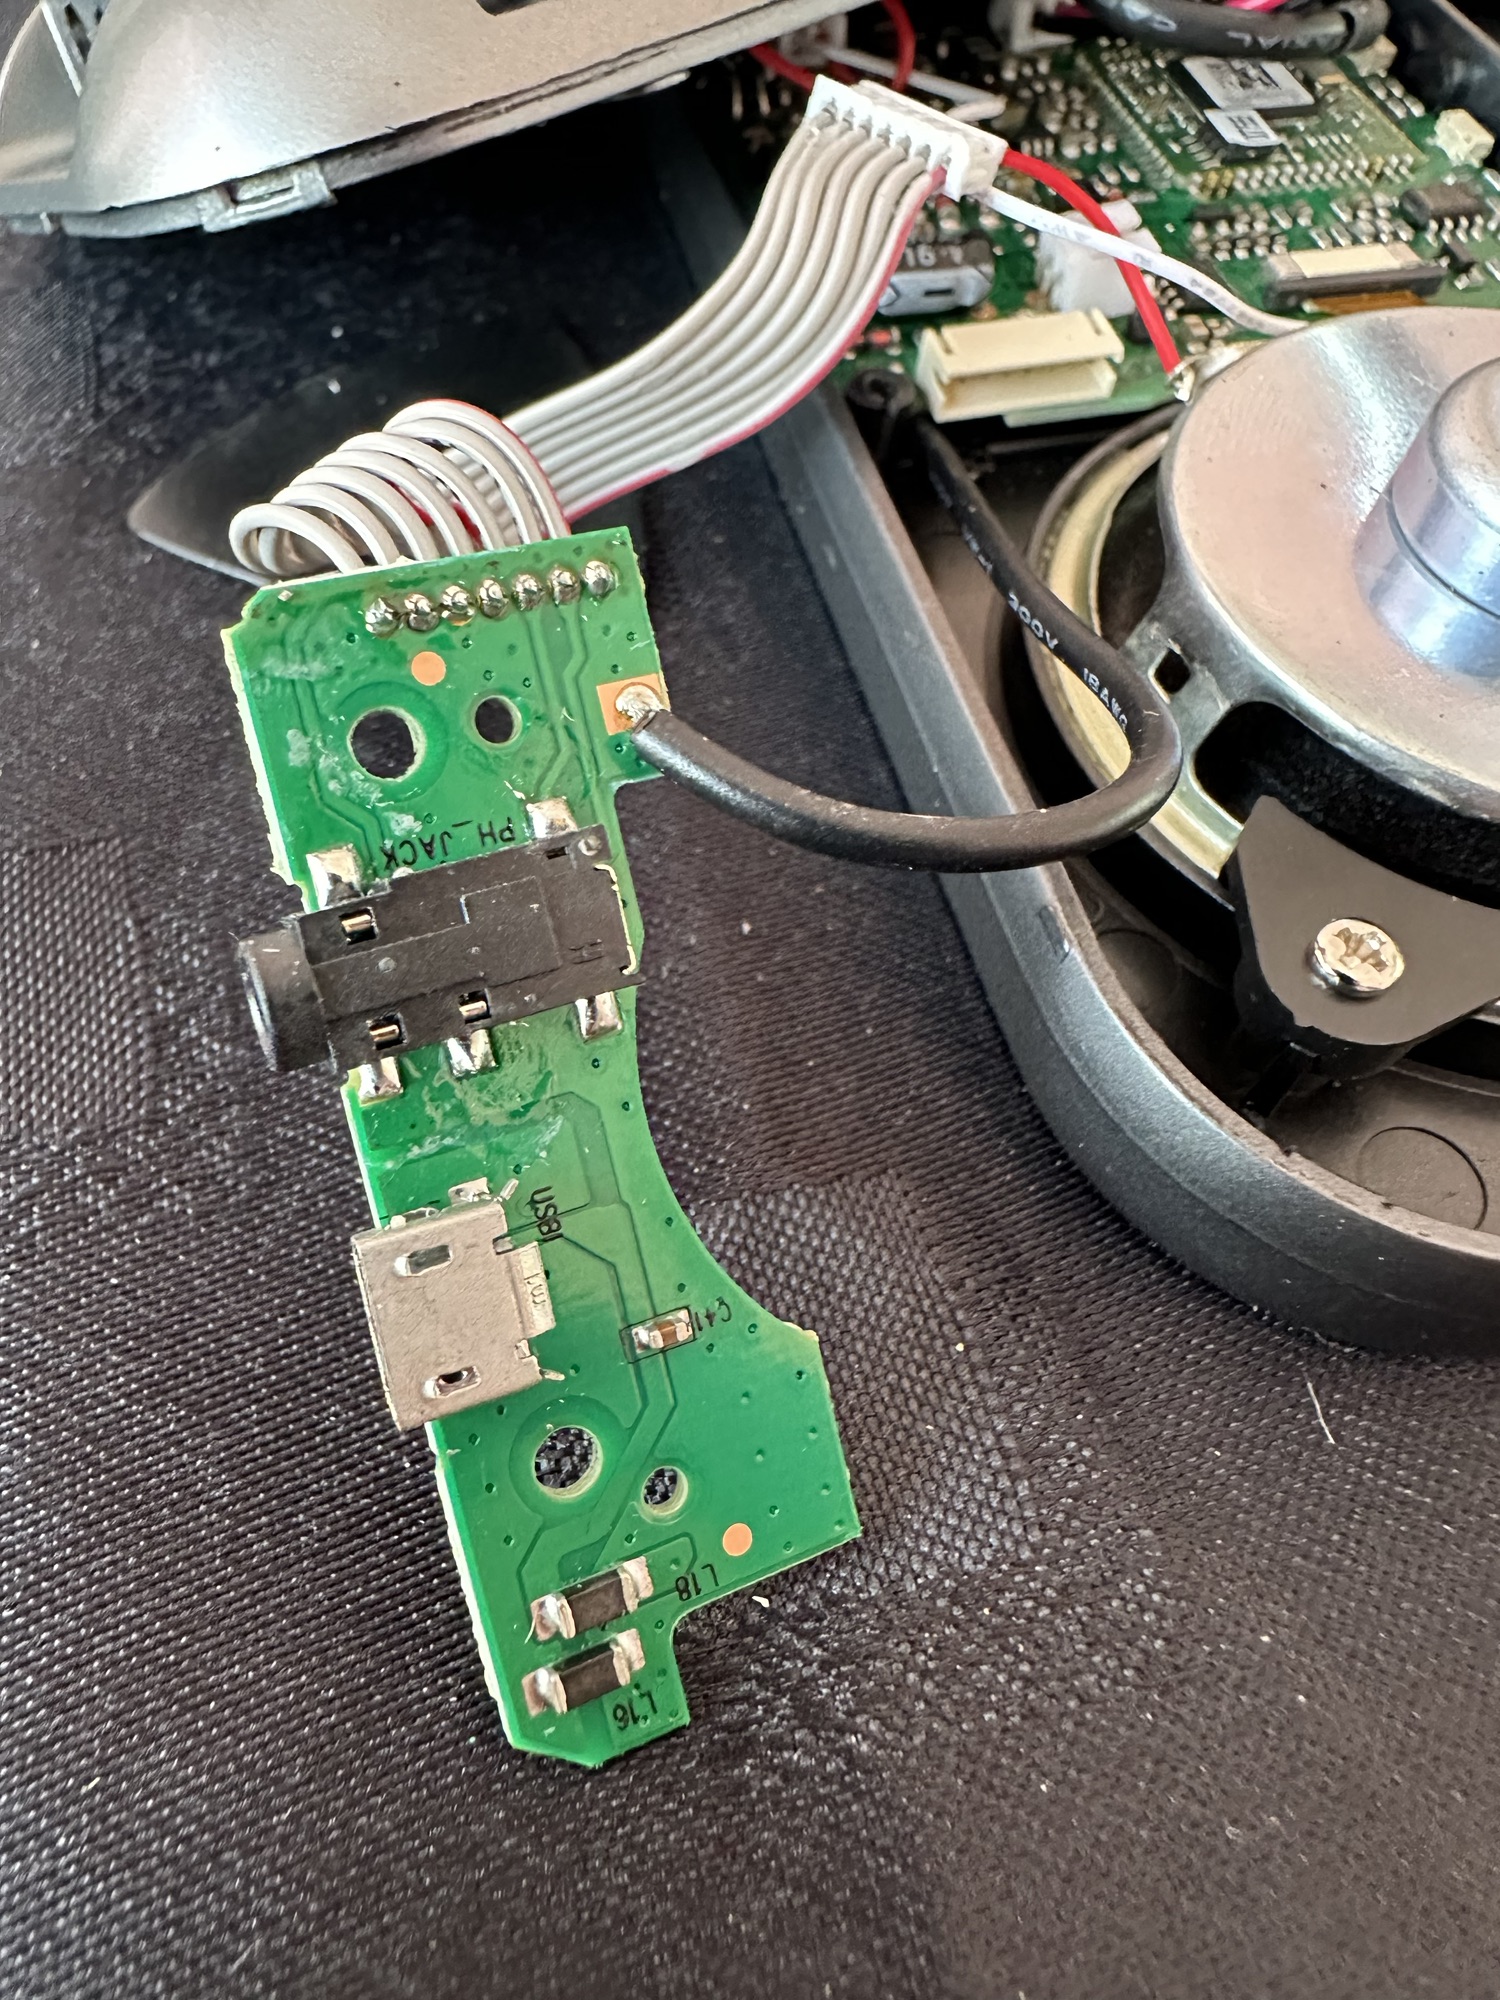
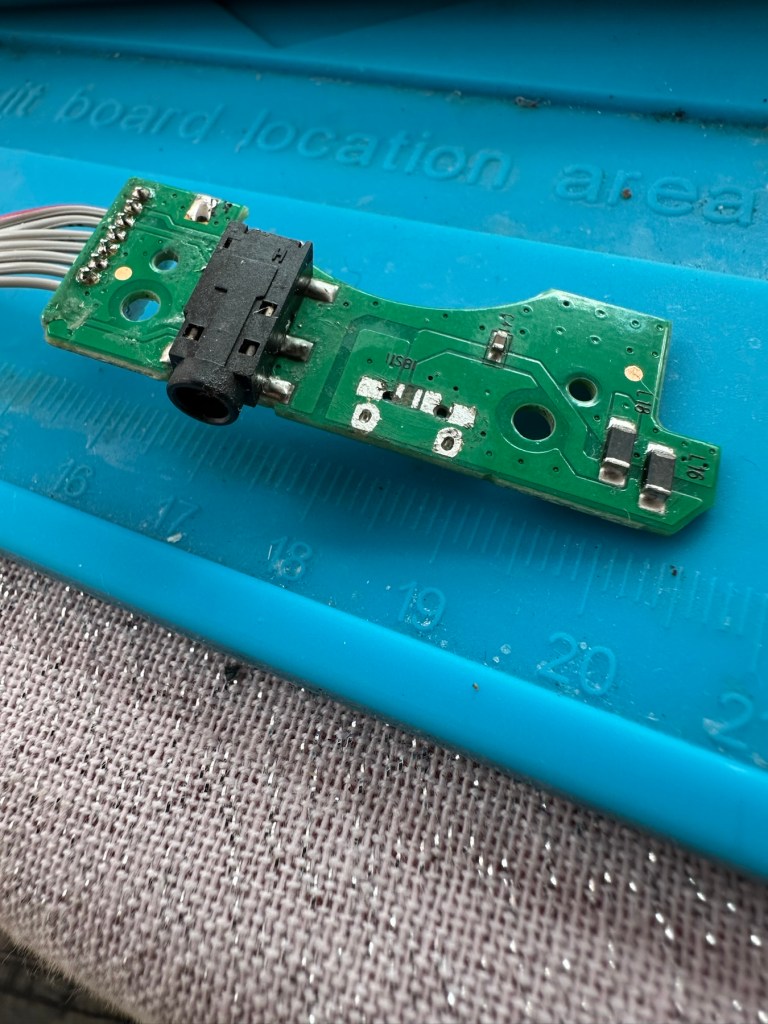
On inspection it’s obvious that the micro USB port is damaged and will need replacing.
Broken micro USBWhat’s wrong?Power board
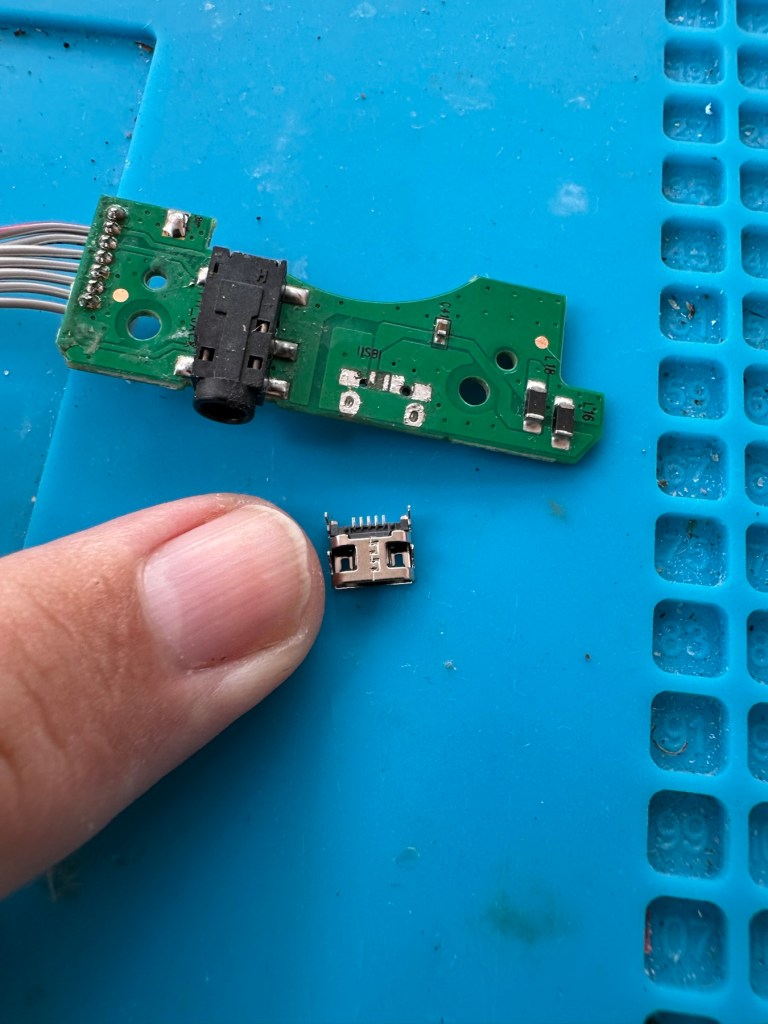
I’ve ordered some replacements USB ports from our friends in China so I’ll have to wait a few weeks before I can progress this project any further.
Micro usb ports
The ports have arrived from China, so let’s look to see if we can repair this unit.
*This project has been on the back burner since May 2024. 13 months later and I’m now on it*
Hello all, time to clear that backlog and what better place to start than here. I do in fact have two of these with the same problem so this is a two for the price of one project.
This should be a simple case of replacing the faulty charging ports that are both micro usb ports. They are small believe me.
Old port removedNew port that has to be fitted
There has to be some preparation before we can get the new port on. Using a soldering iron and flux and a little solder wick, I clean the old board remove the old solder and give a good clean with IPA. I then prime the small connections on the rear of the charge port with a little solder. Now I put the port to the board and tack on the earth points. Then using a rework hot air gun I blast the port at about 350 degrees Celsius and hold the port in place with some tweezers until I see the solder glisten and melt around the port. I take the heat off and let the solder set before moving the tweezers and when it’s cooled a bit I check that it’s setting straight, all connections are good and solid. I then just add a tiny bit more solder to the anchor points for strength.
Whilst this is cooling down I check the status of the battery. It is a 3.7v rated battery and is currently holding a charge of 2.8v. It’s a little low but far from being dead. The second battery shows a similar charge.
Battery level
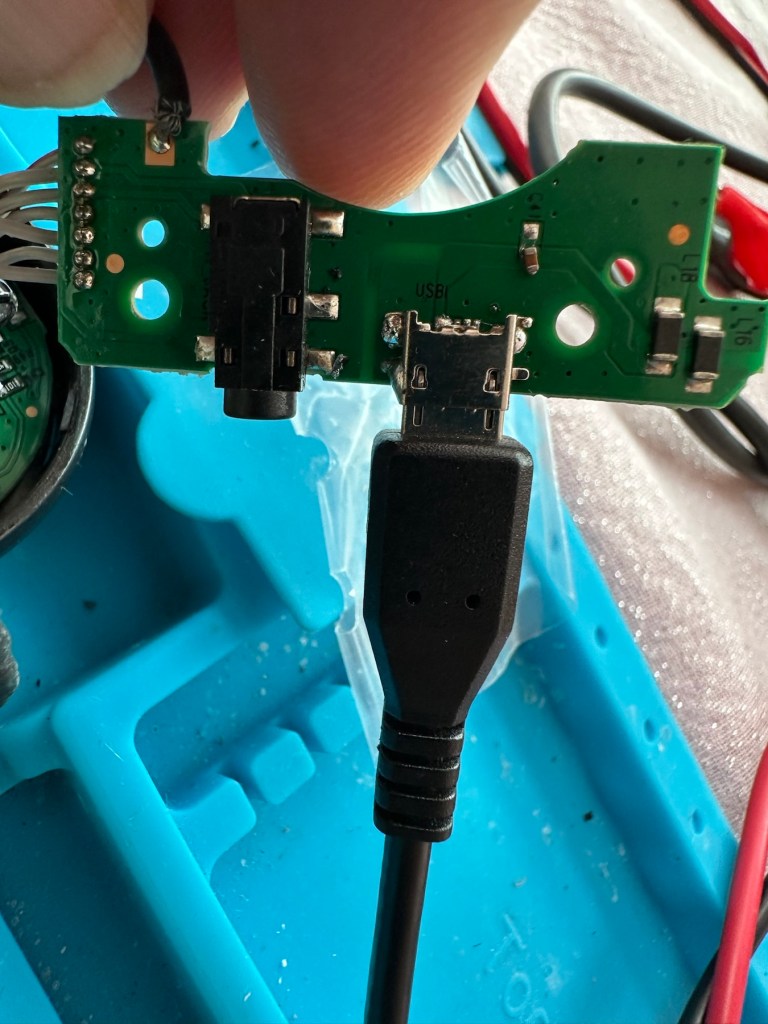
After the solder work has cooled I use my battery pack connected to a small ammeter to see if the radio and more importantly the battery is demanding any power.
Power cable connectedWe have a power demand from the battery.
Well that’s good news, 5v in and the demand from the battery is 0.96 of an amp. The battery is charging. And the fix is as simple as that.
Two perfectly good radios
A little bit of soldering aerial contacts and a couple of other wires back into place and the whole unit clicks back together. Two screws inserted in the rear and time to switch on. Both radios tune in perfectly and the sound is surprisingly good for these little units. I’m keeping one in my work space at home, as I love having some music around me, I’d sooner listen to the radio any day as I hardly watch TV. The other radio will go into my work locker for when I’m working nights or in the workshop.
In my work space, but it won’t be staying here…
Im very happy with this little project, it only took about an hour and I don’t know why I left it so long. Another couple of items saved from the tip, it amazes me that these units probably all suffered with the same problem of inferior parts that failed early on in the radios existence. Kind of scares me just how many did go to landfill.
Two cracking little radios
Well at least these two are going to carry on for a few more years yet. And that’s a positive in my eyes.
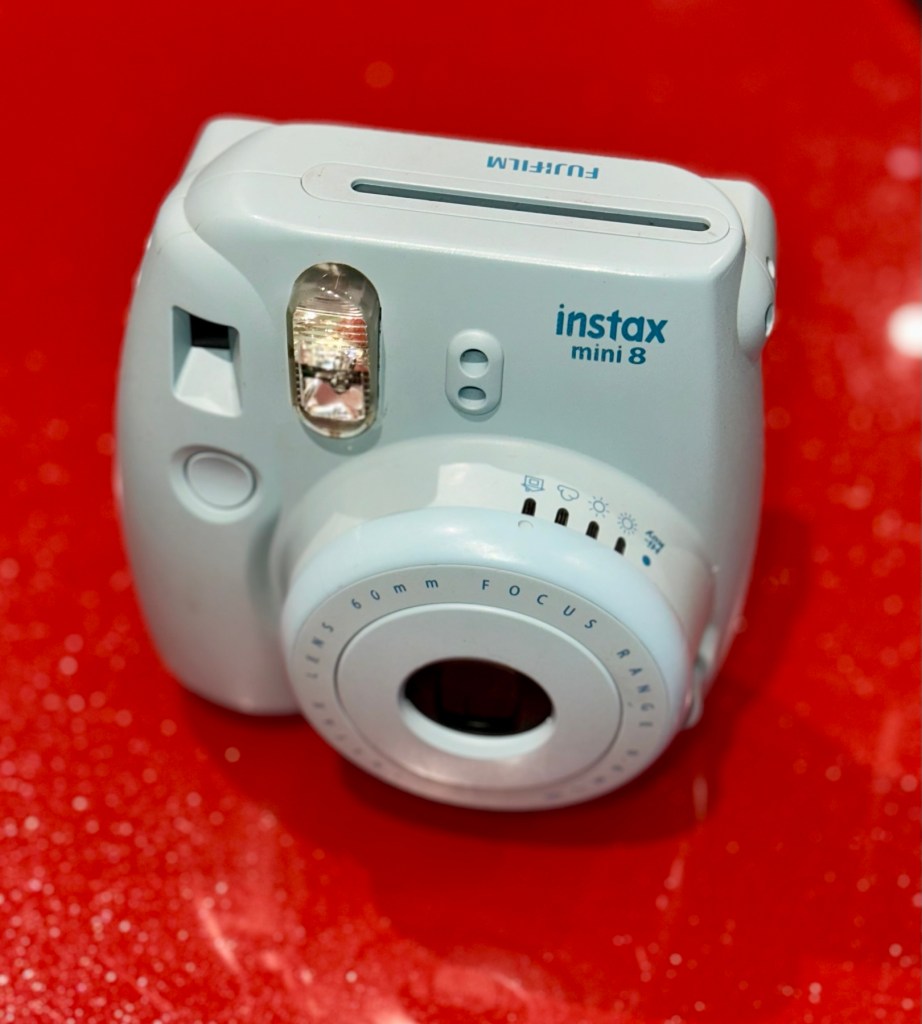
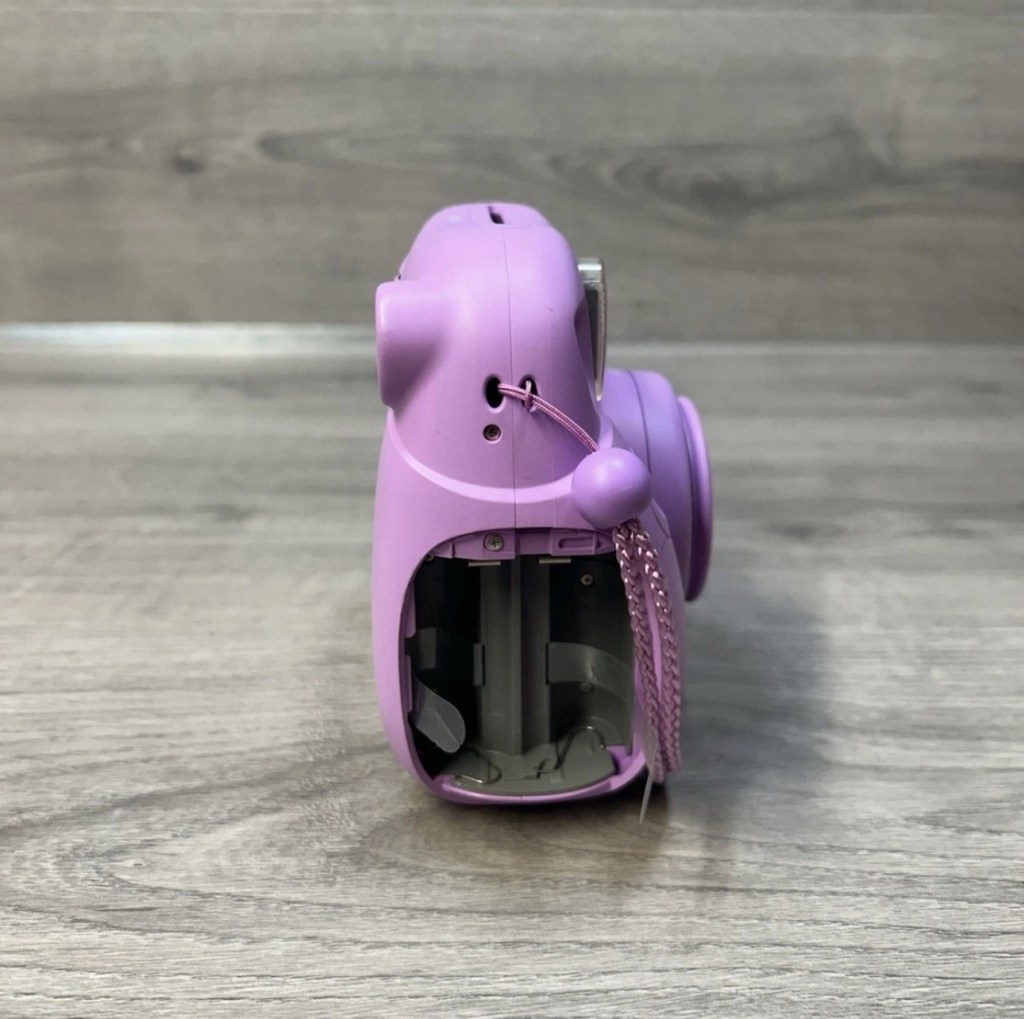
Fujifilm Instax 100 Instant Film Camera – Faulty Untested See Lens Shutter
Otherwise clean,
battery compartment is clean,
unable to test so selling for spares or repair considering the lens shutter
EBay
Instax 100 Instant film camera
I’m a tad annoyed at myself here as I had arranged a good price with the seller but because I was too eager I pushed the wrong button and purchased at the original advertised price. The seller must think I am a right plum, and I’d be inclined to agree with him. That said I’ve secured this for a good all in price, and it will be a nice addition to my collection. It’s a 26 year old camera, and i’ve been looking for one of these particular cameras that use the wider format of Instax film for quite a while, but even the damaged ones command hefty prices. I’ve paid an all in price of £28:55GBP here when I should have paid £23:55GBP. Never mind, lesson learned and don’t be so hasty in the future. They can command a good price as can be seen in the photo below:
Some recent sale prices
Here’s some info about this camera:
The Fujifilm Instax 100 was released on May 1st, 1999. It has been replaced by the newer Instax 200, which is very similar except the flash is on one side rather than directly above the lens.
Focusing: Motor-driven 2-range switching (0.9 to 3m/3m to infinity)
Power supply: 4 LR6/AA-size 1.5V alkaline batteries for around 10 film packs.
Dimensions: 171.5 x 91.5 x 119.5 mm
Weight: 650 gr (without batteries, strap and film pack).
Camera-wiki.org
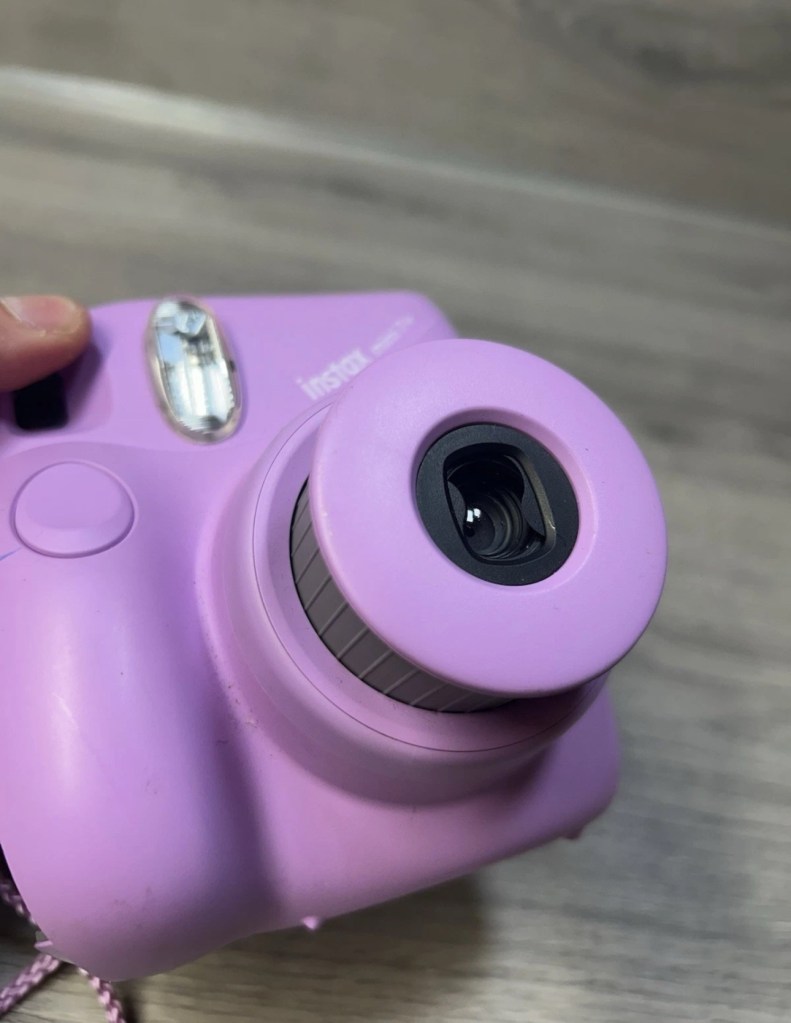
Now this one is being sold with what looks like only one fault that the seller is concerned with and that being a shutter problem. From experience and as can be seen in this recent post of mine: Another Fujifilm Instax mini 8 I know that this is not a “Lens” issue it is in fact an issue with the iris that protects the lens, and is probably as a result of a small spring being disturbed in that area. It’s quite a simple fix and if it is the only fault then that would be quite some result. However, this is EBay that we are talking about and there could be a number of further faults we haven’t been informed of. Now I will just have to be patient until it arrives, there is no other choice.
Assessment:
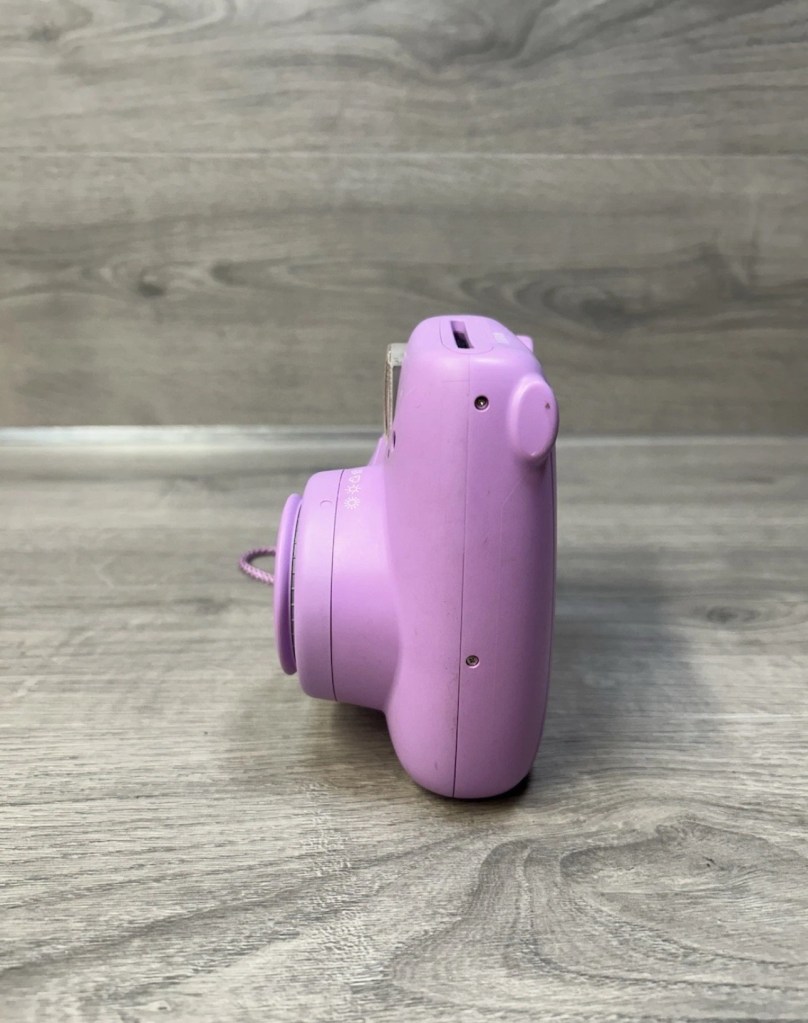
It’s a big one. Compared to the other Instax mini cameras this one is very big. It’s probably 1.5 times bigger than your standard SLR. It’s big. And weighty!
It’s clean…ish. And there seems to be a strip of plastic, a gate as such missing from the top of the camera near the exit slot. This wasn’t mentioned and I’m quite annoyed about that. When batteries are put inside it makes all the noises, but the action isn’t smooth in the lens extension range. This probably ties in with the advertised issue of the lens iris operation. I’m thinking I paid well over the odds for this particular camera, I’ve been conned here, lesson learned.
There could well be multiple problems here, and if that missing piece on the top is anything to do with light proofing, then we could have an issue. Anyway we will cross that bridge when we come to it. Initially I’m going to stick with the original fault, so let’s attack that and worry about any other issues if and when they crop up.
Repair:
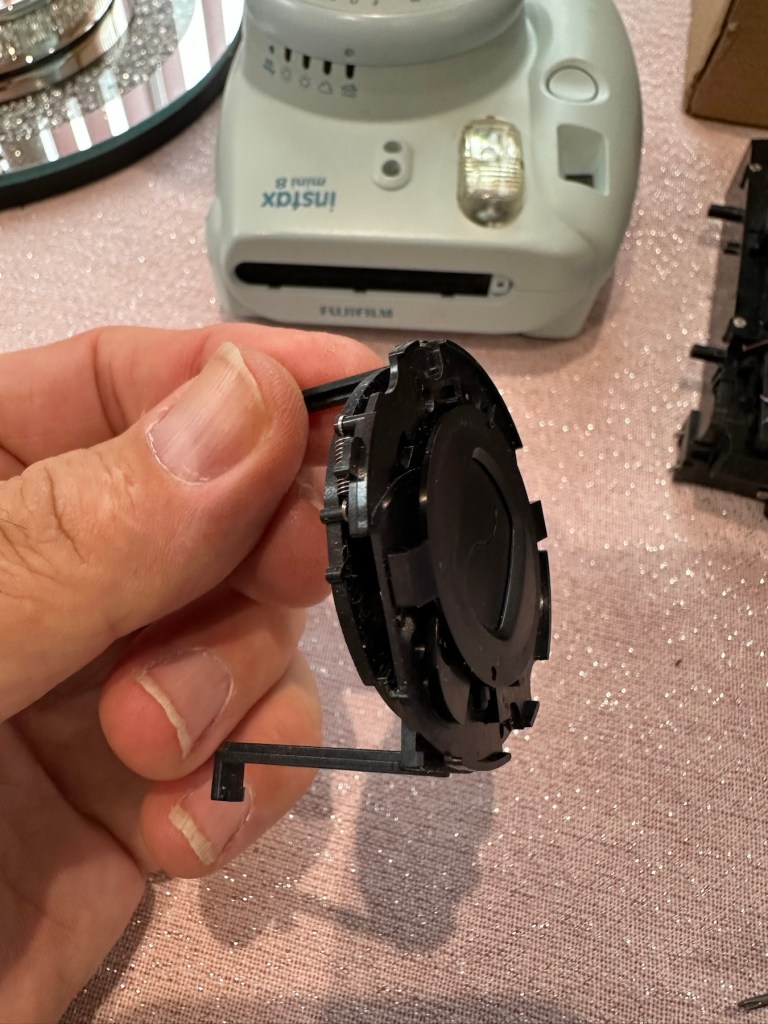
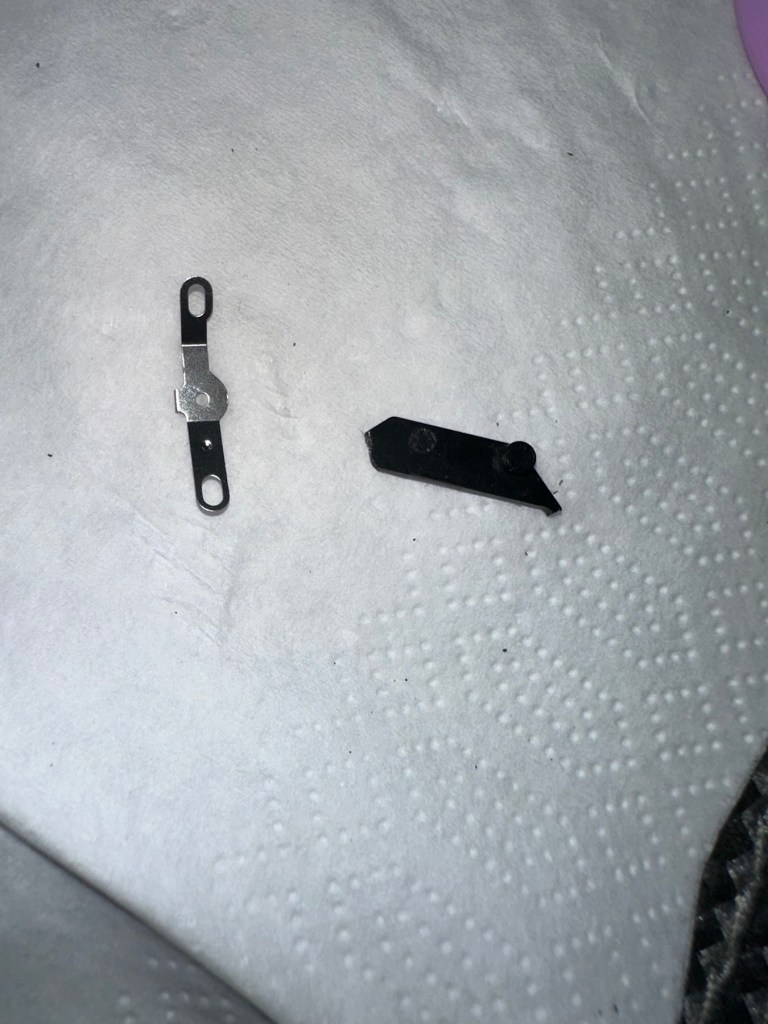
The more I get into this camera the more I find wrong with it. The main issue of the faulty lens iris is a fiddly one. You prise off the last section of the lens turret and the iris mechanism comes away fairly easy.
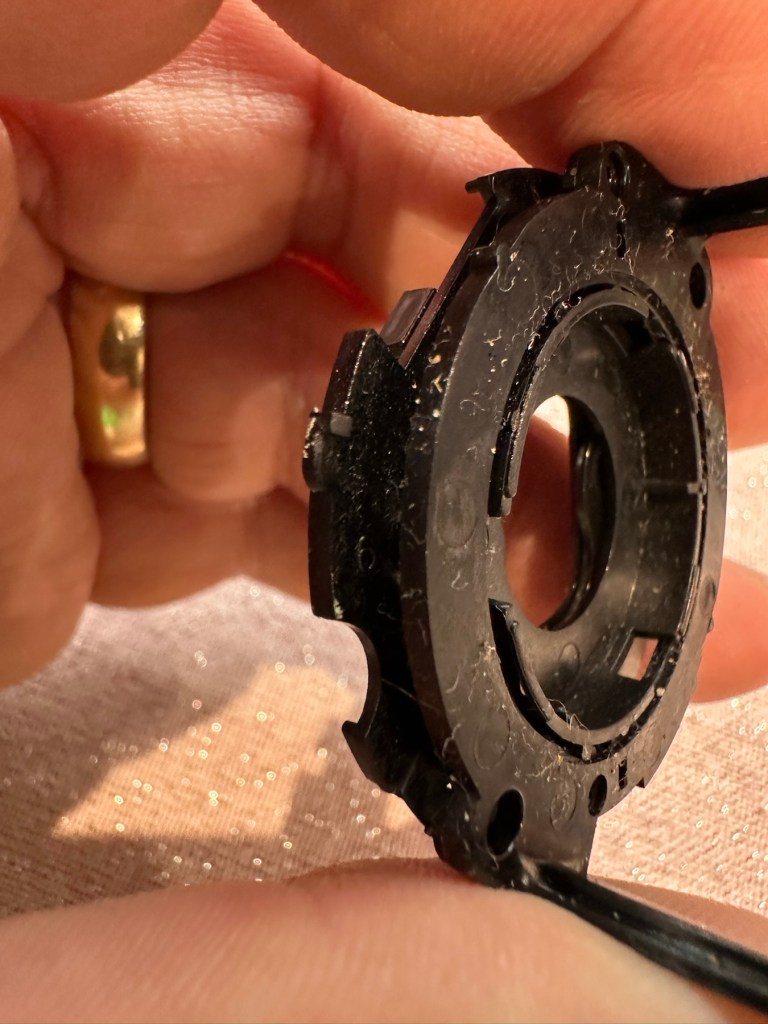
Mechanism removed from lens turret3 tiny springs all disconnected from the mechanism
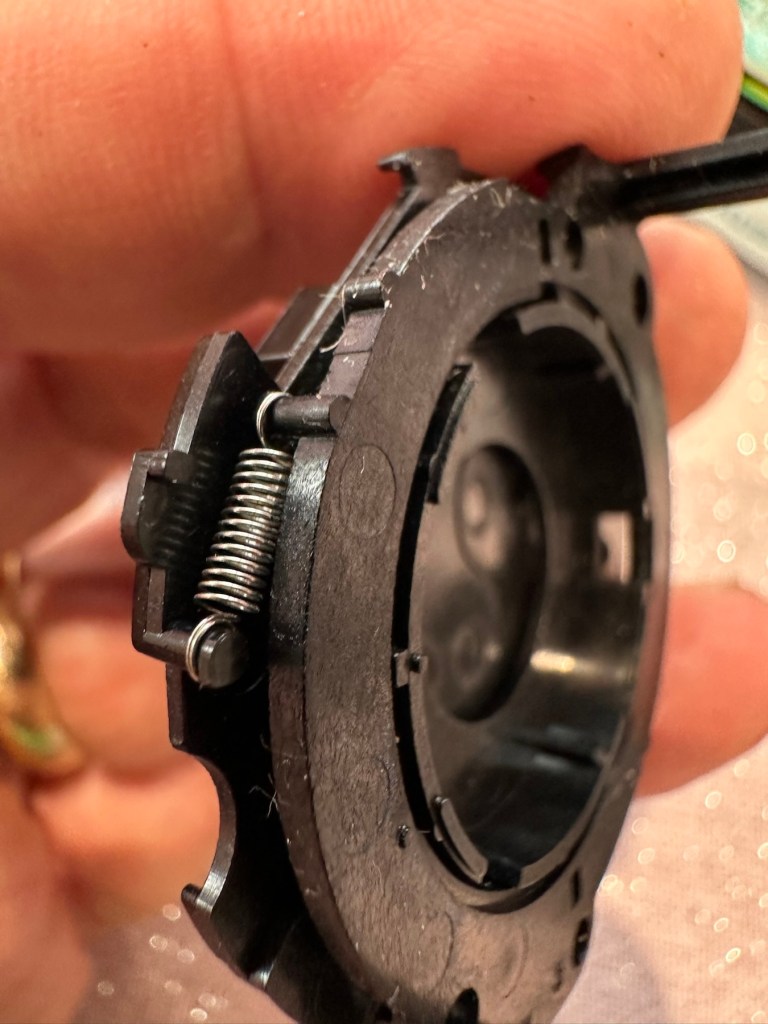
But then three tiny springs just fall out and this is why the iris didn’t work. Trying to get them in place is a puzzle itself, as no sooner do you have one connected then another drops off. It’s a fine balancing act to get them all back into place. When they are all reconnected it’s a very delicate operation to get them back into place. And even then you have to go to the inside of the camera to ensure that the lever inside that operates the iris, is aligned to the iris mechanism that is being installed back in the lens turret. It’s a fiddly time consuming job.
All springs attachedThe lever on the inside that has to be in the correct position when the iris is attached
Iris now working
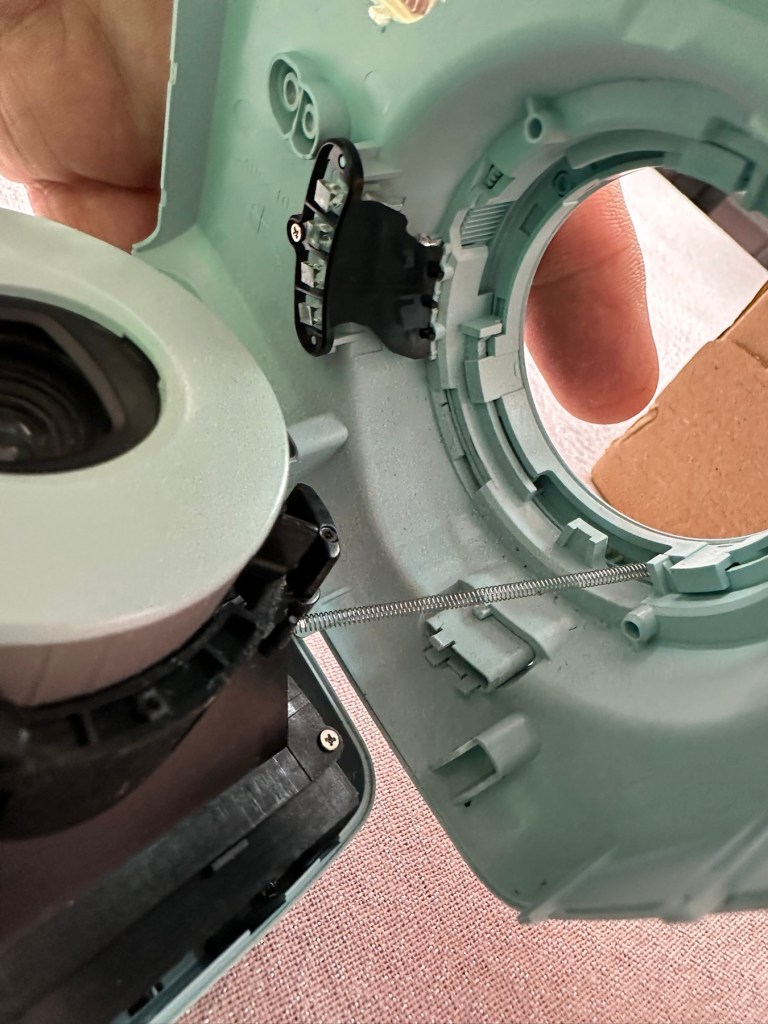
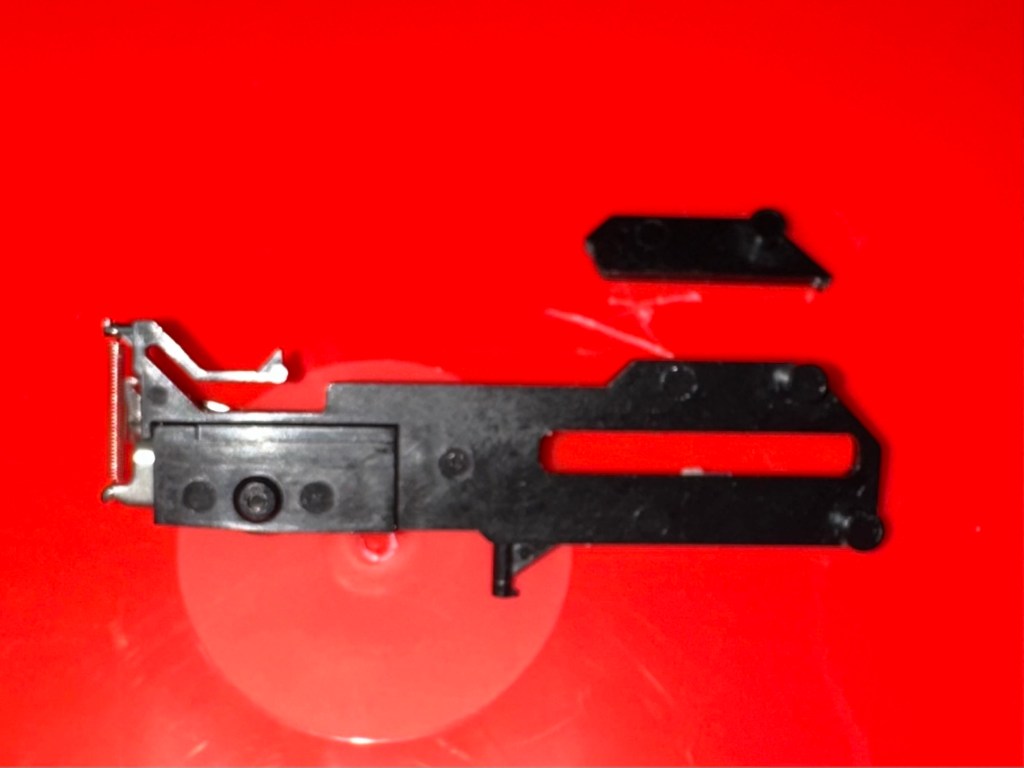
At this point the rear fascia and associated ribbon cable need to be removed to facilitate this repair. That’s when a piece of broken plastic falls out, it just so happens that one of the posts putting tension on the print rollers has broken. Great. Another problem. I’ve quickly fixed this by using some wire to act as a retention point. Bodge? Yes, but there really is nothing else that can be done here as the plastic case is thin and brittle. I have used some silicone grease to lubricate the cogs and the whole movement is now a lot smoother. It Will work. of that I am confident.
Broken plastic post, spring out.Wire bodge, spring now back giving tension
Result:
Well it works but it remains one of my most disappointing fixes due to the dishonesty of the seller. I know, if you buy off auctions it’s Caveat Emptor as they say, I preach it enough but this time I was caught off guard. Lesson learned. But I remain disappointed. Multiple faults, sold as just the one when in fact it also had bits missing that were not declared, very misleading in my opinion. Maybe in future I need to look deeply into these purchases before I give any feedback, i need to change my operation as I was truly shafted here.
Polishes up nice
It does everything that it should, the motor and transport system work, the iris now works, shutter is good, and flash operates. I’m confident that the camera is working fine but I haven’t tried any film through it yet as it uses a bigger format film and is quite expensive, and I’m not forking out for any just yet. Maybe when I get another wider format model to look at I will pay out. Just not yet though. When I do get some film through it I will amend this post accordingly.
I’m off to calm down a bit now, thanks for passing by, I really do appreciate it. Have a great day.
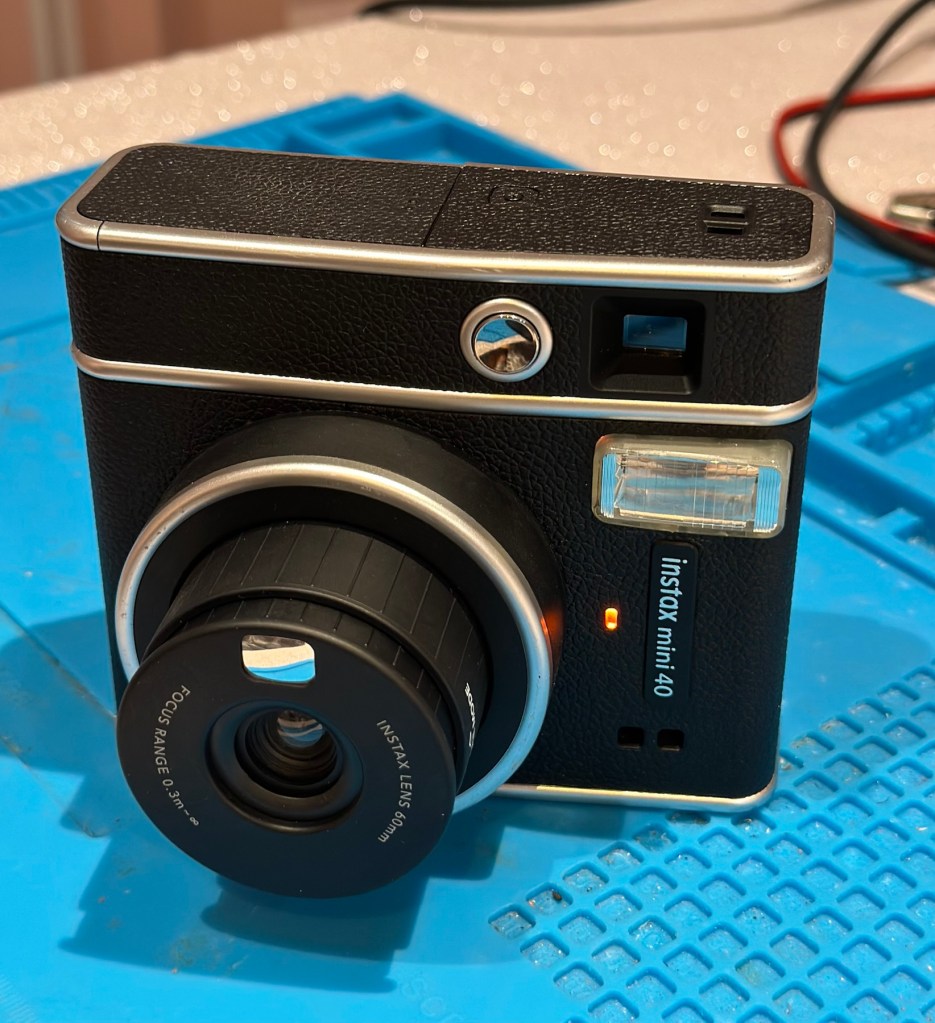
Fujifilm Fuji instax mini 40 instant camera . Functional, but flash NOT working .
LISTED REPAIR OR SPARES . NO RETURN .
THE CAMERA IS TESTED AND WILL,POWER UP AND TAKE A SHOT AND EJECT A SLIDE CORRECTLY. Please watch uploaded video .
HOWEVER THE CAMERAS FLASH IS NOT WORKING . This is the reason I have listed the cameras as repairs or spares.
Hopefully someone knows about these cameras and knows whether the flash unit just needs replacing or if it is an electronic fault that needs sorting out can fix it . Otherwise the parts will be useful to someone who repairs these .
No batteries or film is included .
The camera body is in very good cosmetic condition. There are only light surface marks in terms of signs of use . . Please see images as they are part of the description.
The red light to show the camera has powered up lites up when the button is pressed to extend the lens and turns the camera on .
When you close the lens down it locks securely into place .
The frame counter is working .
The film compartment is clean and the rear door shut correctly and securely.
Battery compartment is clean and the battery cover locked into place securely.
The camera is powered by to easily available AA batteries ( not included) .
EBay
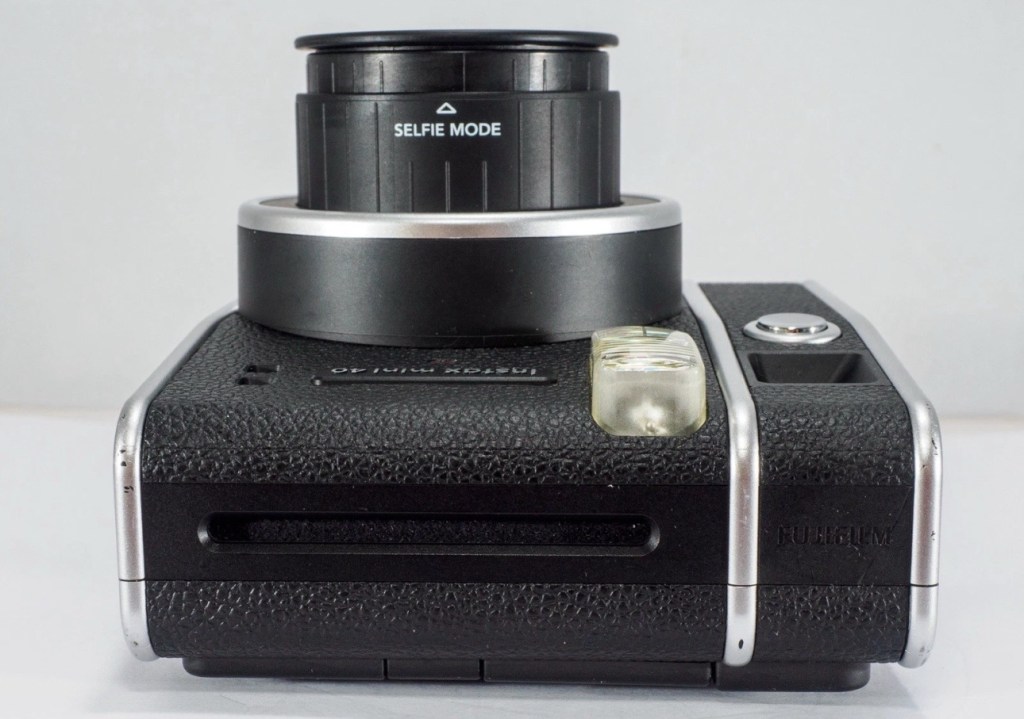
The Instax mini 40
Now that’s what I call a great descriptive sales pitch. And that’s because the guy is a professional seller of photographic equipment. I’ve seen the video he posted and all the above is true, it really is just a problem around the flash. Maybe it’s an easy fix? I suspect not but either way it will be an interesting project.
Here’s a little info on this camera:
Hitting the market in April 2021, the Fujifilm Instax Mini 40 takes the updates the Fujifilm Instax Mini 11 introduced but wraps them up in a cooler, more retro-styled instant camera body. Instant film fans will probably love it and with its improved design, there’s a chance that those who aren’t instantly drawn to this form of photography may just want to have a play around with the Fujifilm Instax Mini 40, too. It does cost more than the Fujifilm Instax Mini 11, though, so you’ll have to decide if the cooler design is worth an extra £20.
+ Pros
It’s fun
Great party camera
Easy to use
Looks cool
– Cons
Film is expensive
Viewfinder could be better
Powered by AA-batteries
Ephotozine.com
I first of all went in with a cheeky bid of £15:00GBP that the seller originally turned down, so I then put in a high bid of £18:00 and as no one else was wanting it, it actually sold for £16:00, just £1:00 more than I’d originally offered. All in all the cost with the postage was £19:45GBP and I’m really pleased with this. Im surprised though that there are flash issues in a unit that is only just four years old. As you can see in the photo below recent sale prices have been strong and a great deal higher priced than what I have just paid. These are certainly popular little camera’s with the younger generation.
Recent sale prices have been strong
I guess we will just have to await its arrival to assess the flash issue. I’m very confident that I will be able to get this camera up and running again.
Assessment:
Out of all the Instax cameras I have dealt with lately, this has got to be one of the best ones I have had my hands on. This is a mid range instax camera that is more sober in colour aimed at those who enjoy their lomography or better quality instant photography. It certainly looks good, and to be honest I’d rather carry this one around rather than a bright pink one.
Looking nice and sober
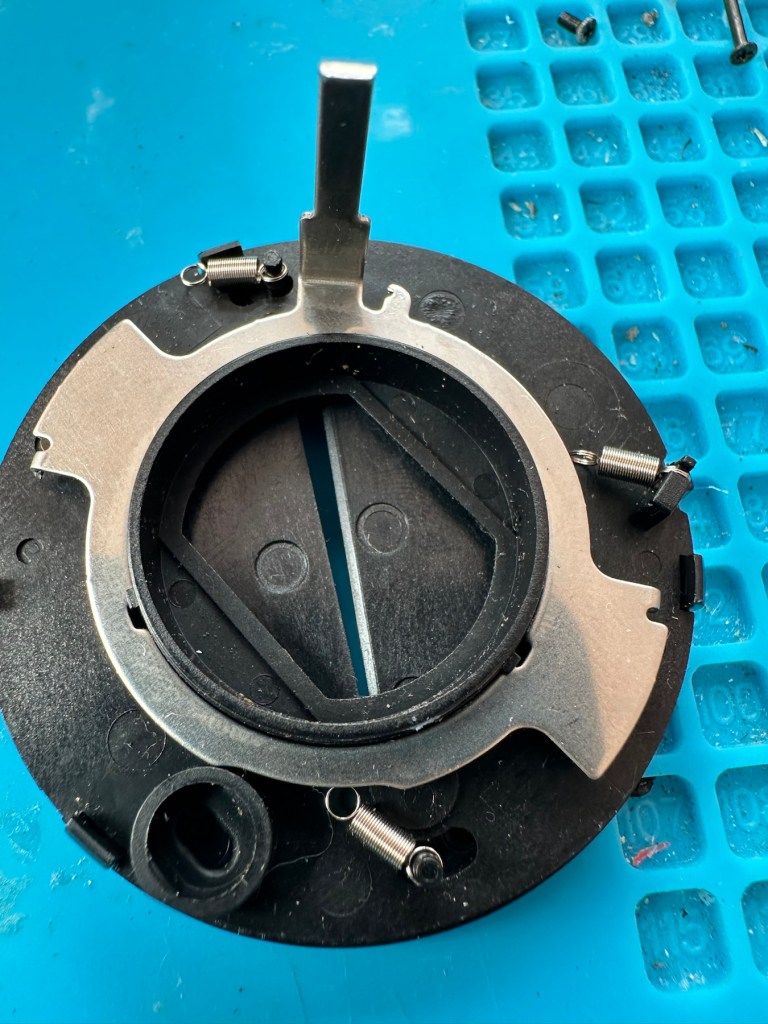
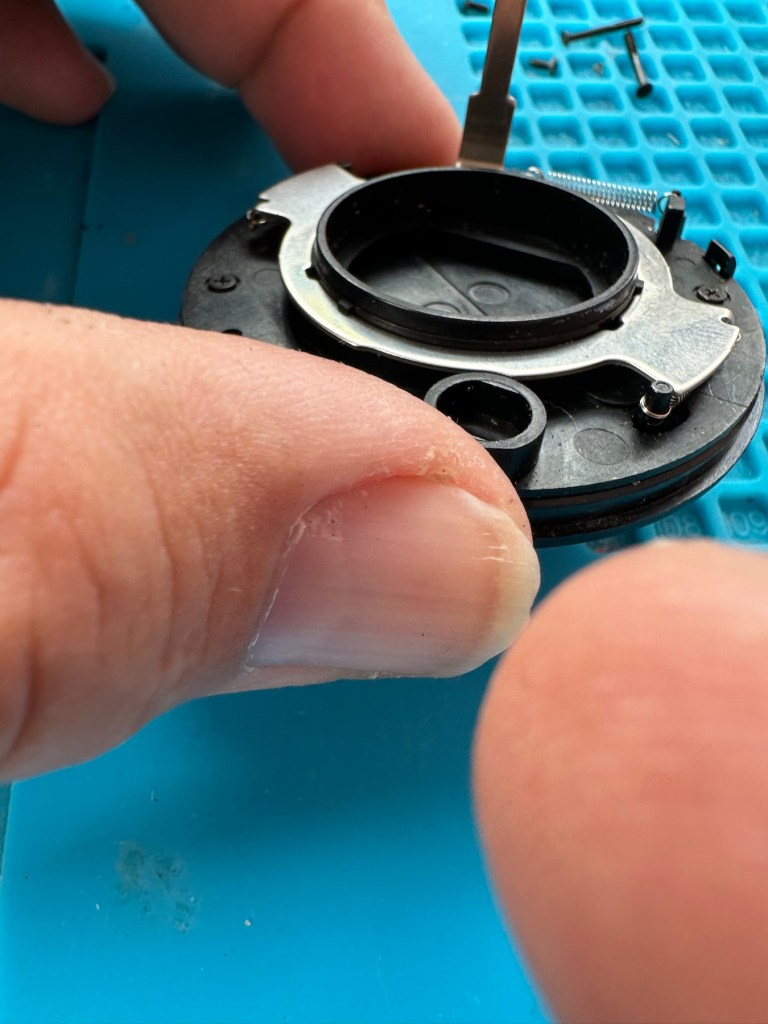
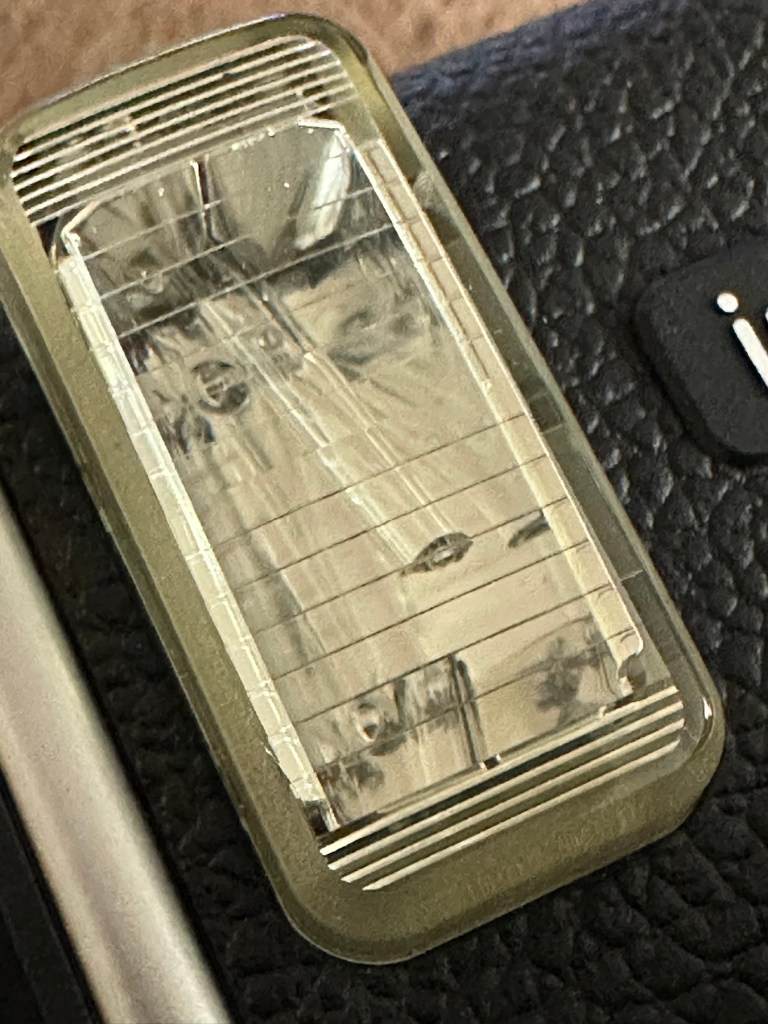
As posted in the description above it is in near perfect condition and a quick Look at the flash head shows that the flash bar within the unit is broken.
Flash bar brokenConfirmed broken when removed
Let’s get on with replacing this damaged flash unit.
Repair:
Let’s get it opened up.
Dismantling
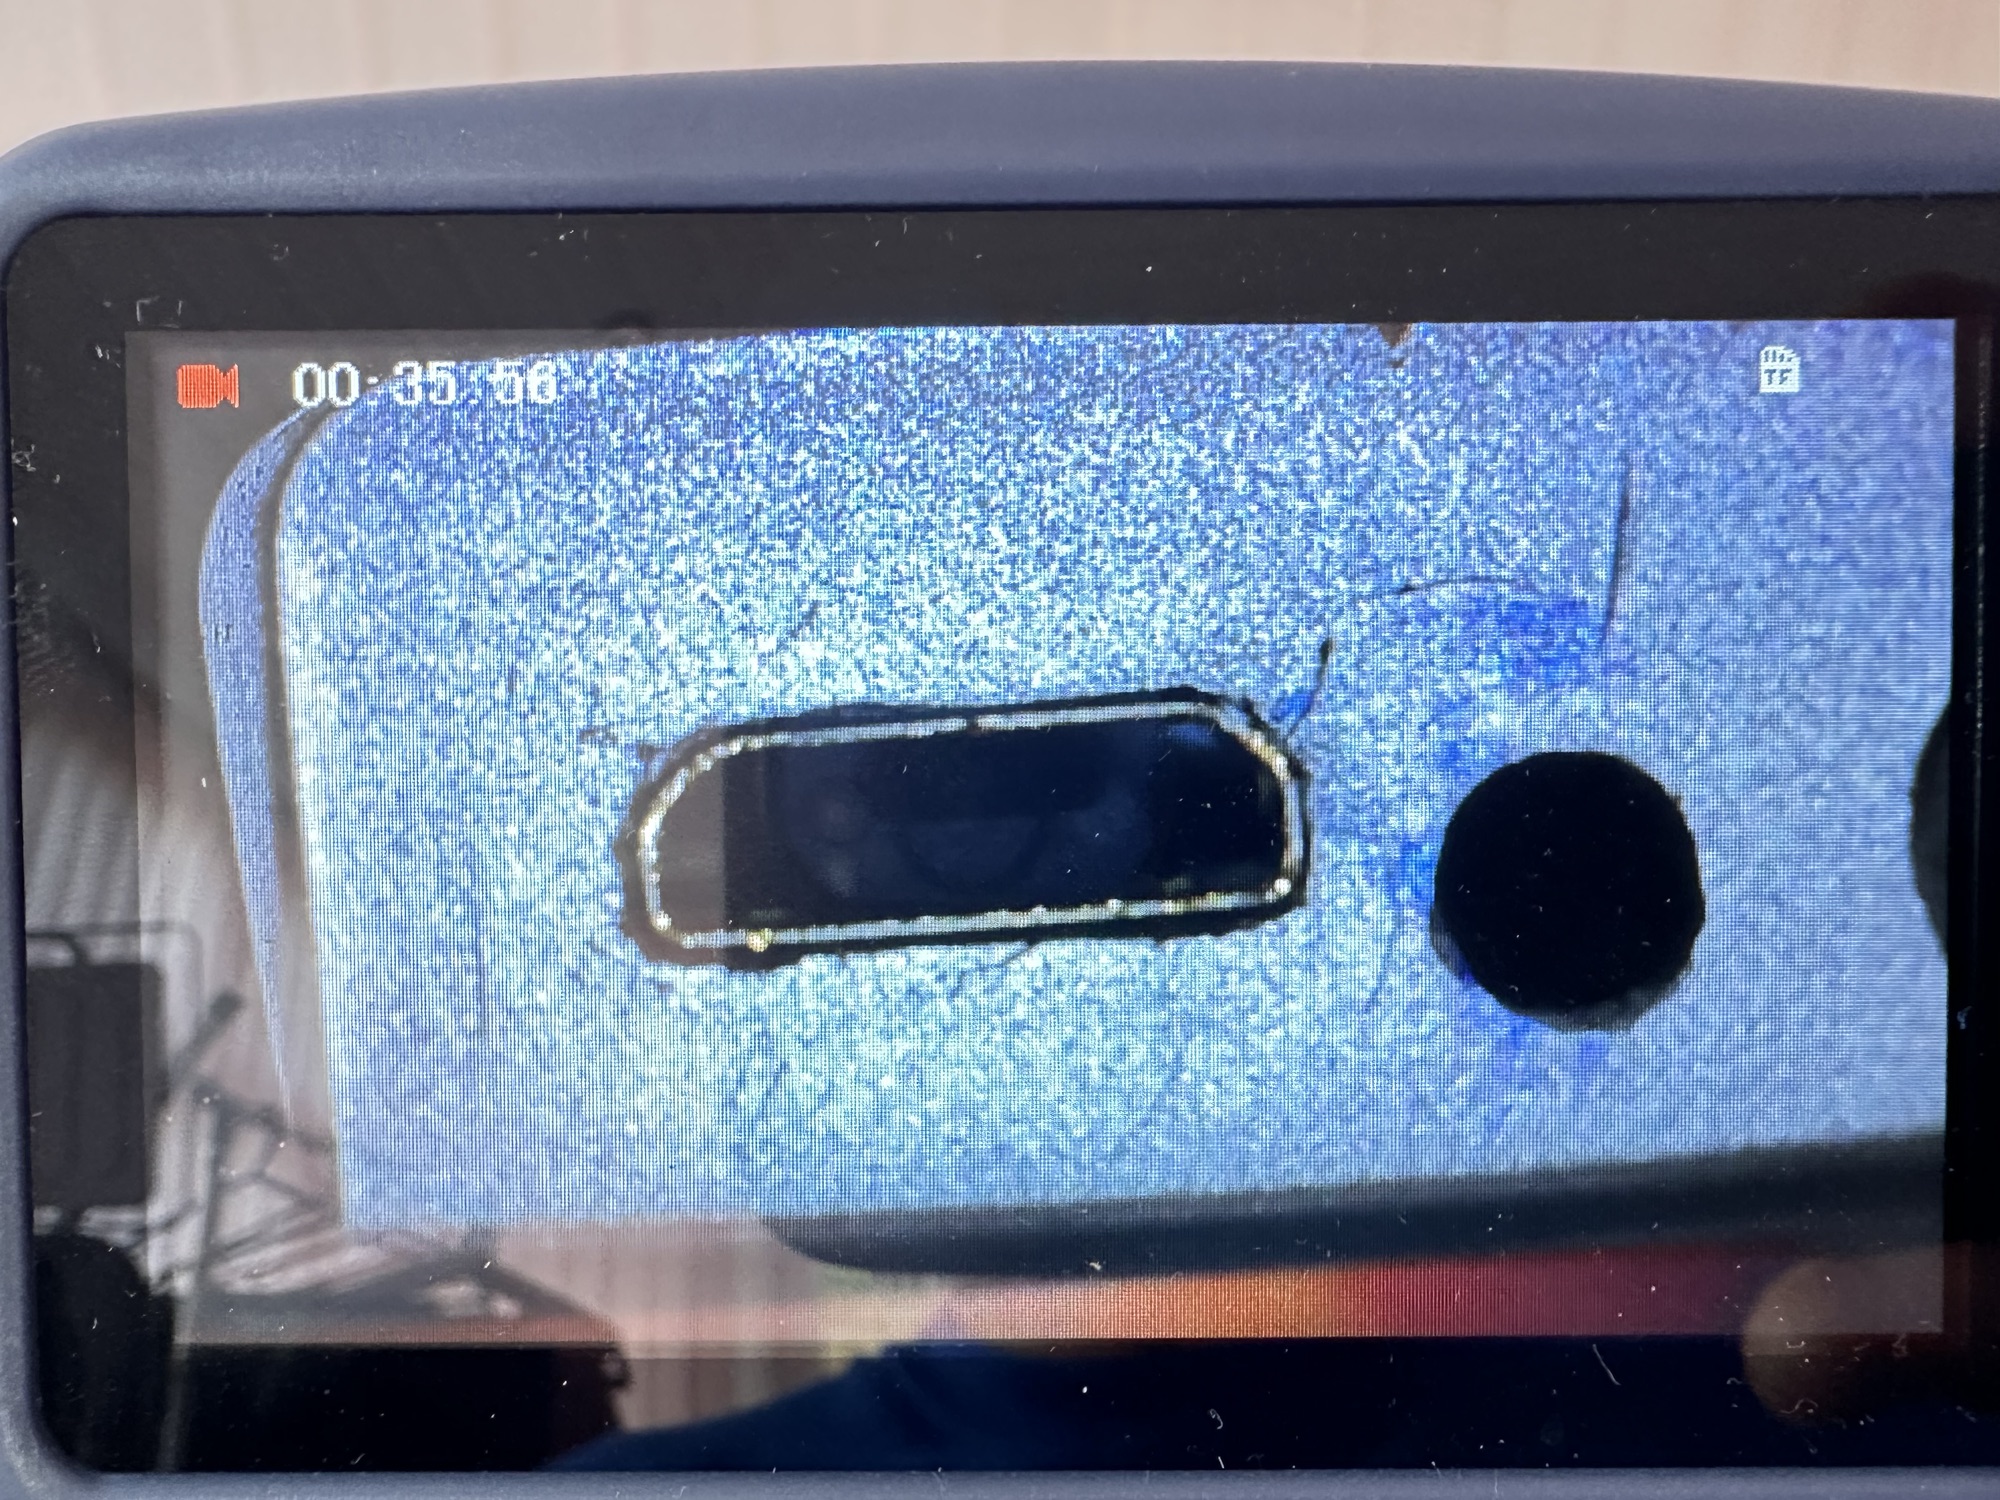
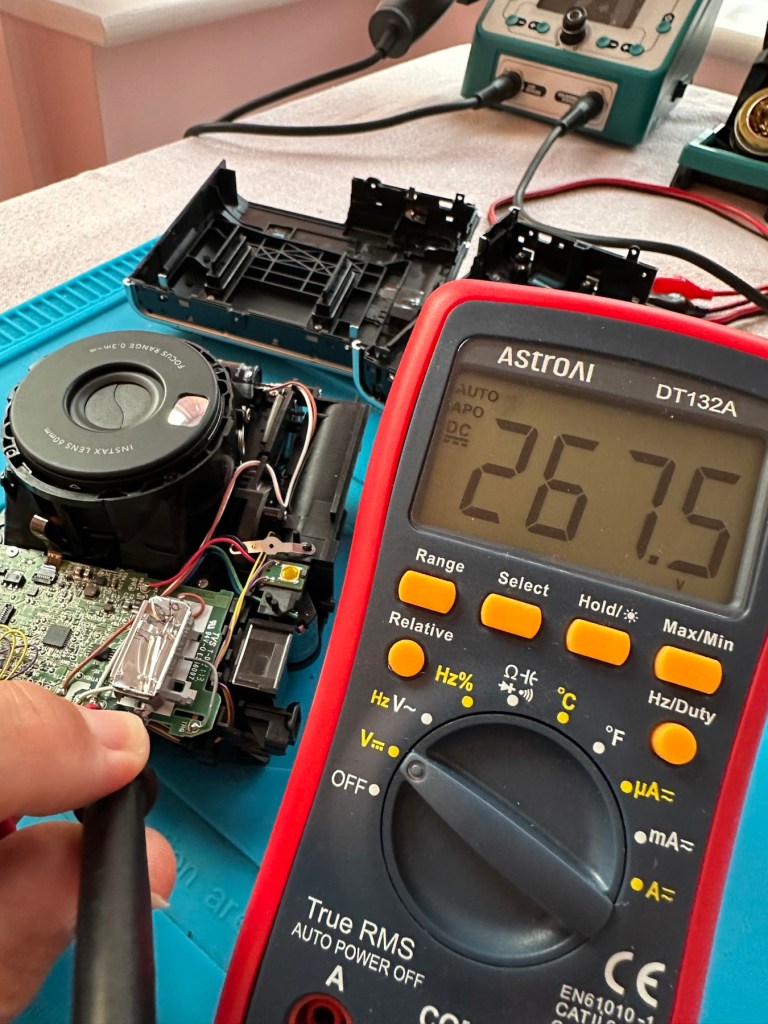
People laugh at me when i tell them that playing around inside these units could kill you. I can understand the contempt aimed at me for such a statement, when I’m carrying a bright pink camera that hardly looks dangerous. Just look at the voltage still in the flash capacitor though once I have opened it. Savage.
Residual voltage of 267v still in the flash capacitor
270v would quite easily send you across the room, if you had a heart condition it would probably be game over. I’ve learned my lesson in the past so I ensure I use a capacitor bleed probe before I go anywhere near one of these flash capacitors. The capacitor on this camera is rated at 320v, not to be messed with. Beware. What’s more impressive is that all this energy is supplied from two 1.5v AA batteries. Clever stuff.
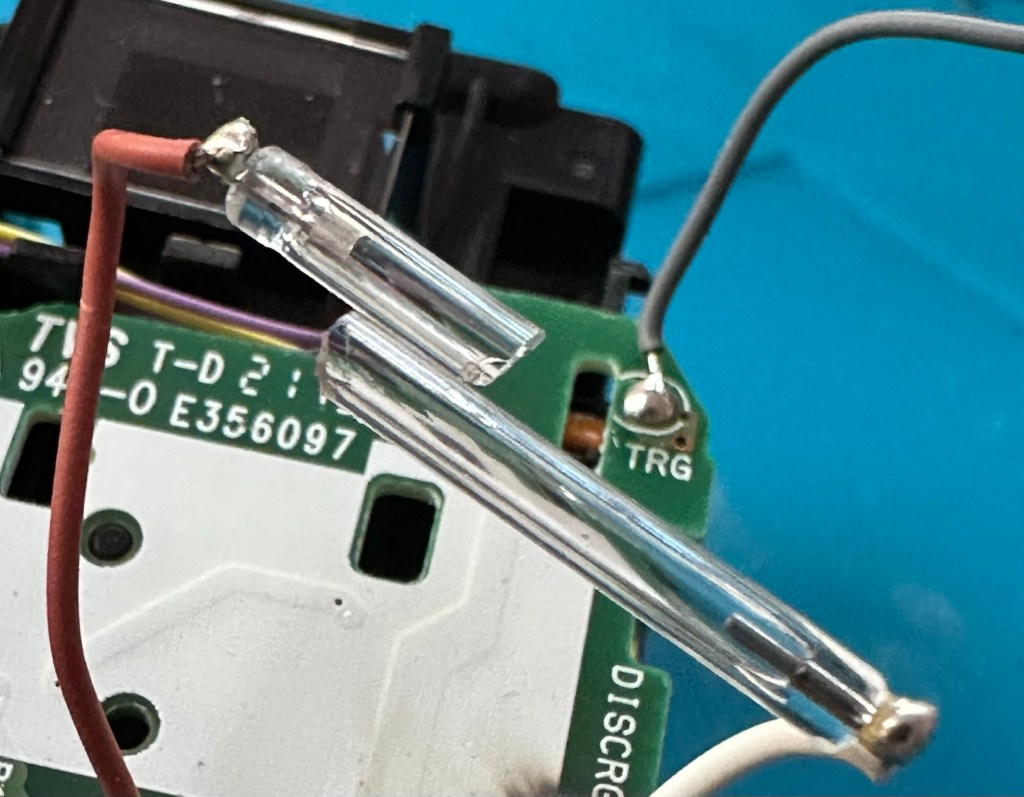
I have a donor flash bar in an old spare unit. I have carefully unsoldered its connections and gently removed the very thin glass tube from the donor unit and placed this in the one situated on the new camera.
The donor unitIn place and soldered onto the board of the repaired camera
Carefully, once inserted into the flash reflector, i have soldered it back onto the board. All looking good. However I need to test the flash so I temporarily put the case on, bung in two batteries and turn the camera on. Press the exposure button and the flash fires perfectly. Happy days. I now can confidently reassemble the camera back together, and I’m pleased that when this is done there are no screws left over. All small wins.
I have some film available so there is no better time than the present to give it a try.
Result:
Nice flash – working Working perfectly
I’ve loved doing this repair, this is a good quality, great condition, and now in perfect working order camera, brought back to life with many more years of use left in it.
But it could have been just chucked in the waste. I’m keeping this one for my collection as it’s a fantastic example acquired at a very good price. Thirty minutes of attention is all it took.
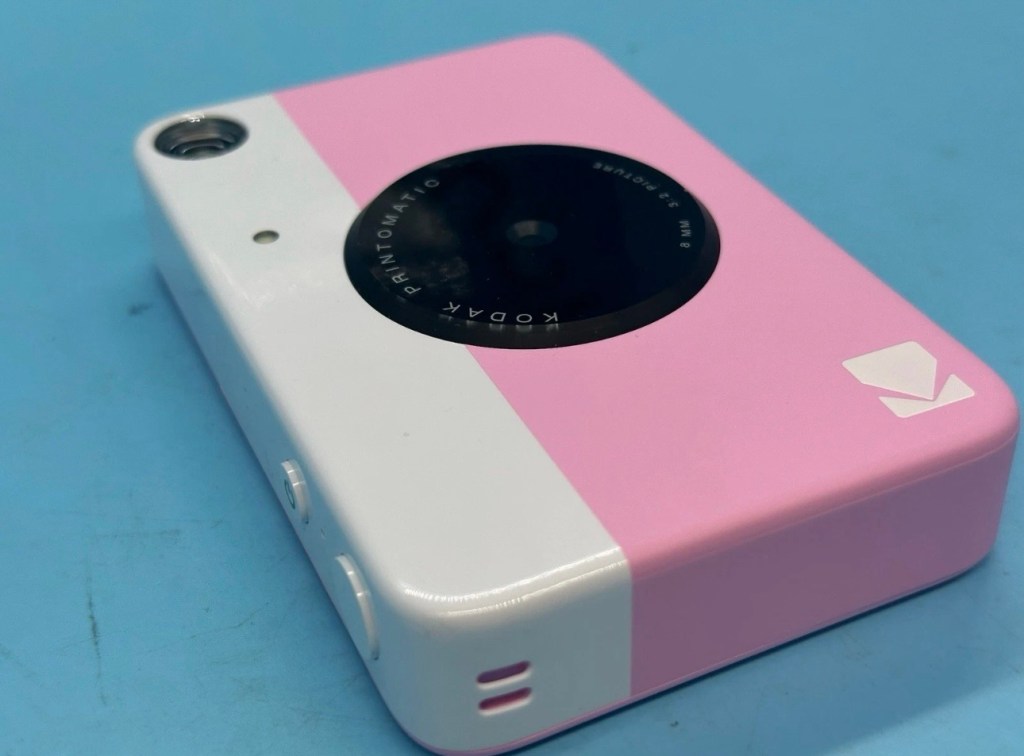
I’ve just purchased three of these cameras for a total of £24:98GBP. All non working of course but when healthy they normally command a price around £35:00GBP each. Here is what the listing said for each one:
Camera one:
Camera one
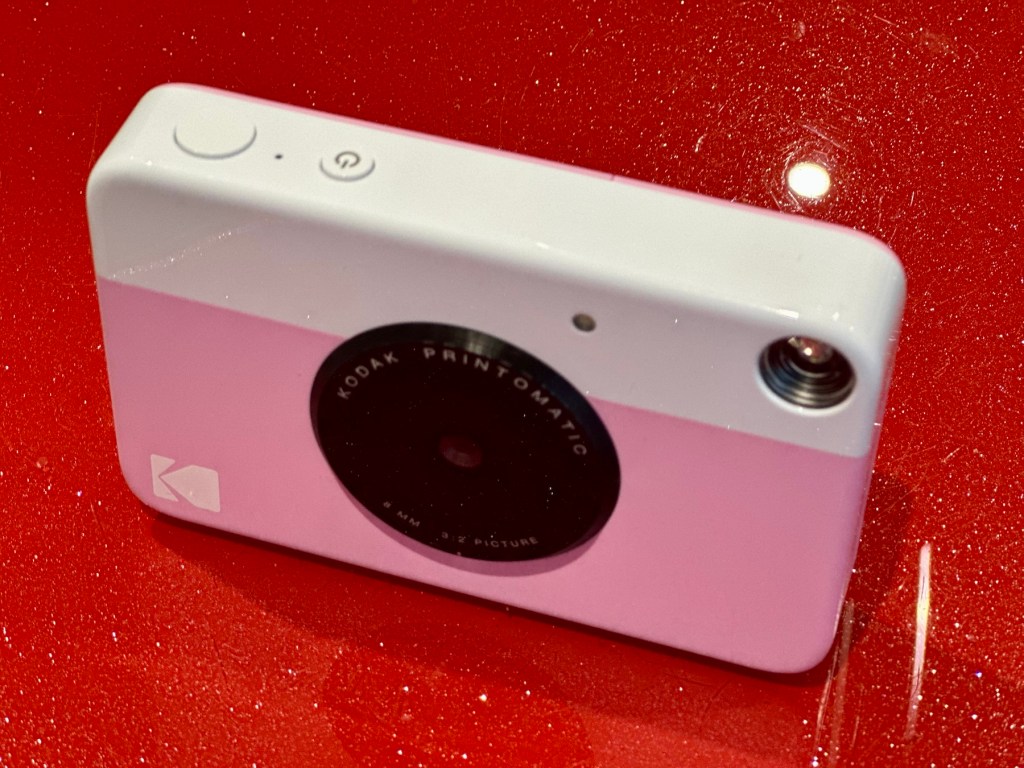
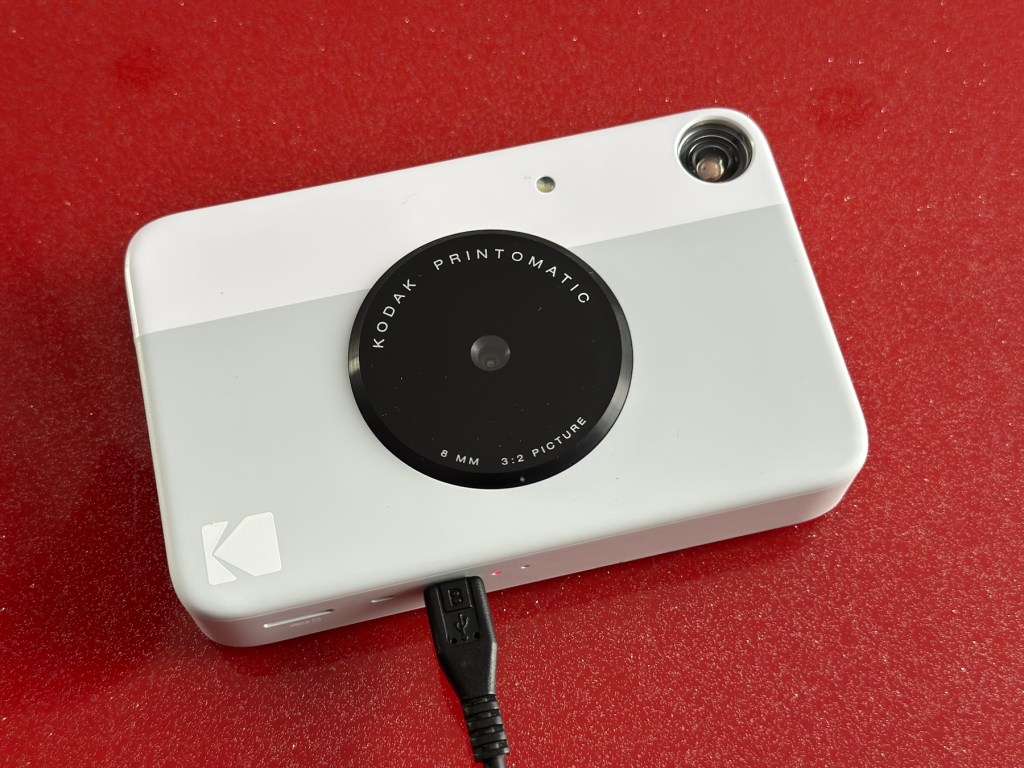
Kodak Printomatic Digital Instant Print Camera
Camera does not print
Can be repaired or used for parts
EBay
Camera two:
Camera two
Camera is in good cosmetic condition.
Camera doesn’t charge. Battery charging light flashes but it doesn’t hold battery.
It hasn’t been tested further.
EBay
Camera three:
Camera three
Please look at the photos carefully, as they make up the majority of the description.
It has two faults
The springs on the back are broken, meaning the rear metal plate is bent , and it often doesn’t push photo paper through correctly.
The shutter button is also depressed.
EBay
This third one might be a longer term repair as I’ve never known a quick fix for a depressed button, that requires a psychiatrist… (That’s me just trying to be humorous, I’ll grab my coat and leave now 😂🤦♂️)
To be honest the issue with the third camera seems to be a regular problem based around the design of this camera. Too much pressure on the button normally results in the switch inside detaching from the main board, it’s poorly positioned at an angle and usually not soldered in place too well. The springs should be an easy fix.
I’ve brought these cameras from three different sellers. if I’m lucky I’ll be able to get all three up and running, worst case scenario is that I use one for spares and have two good working examples.
Anyway I’ll just have to wait for their arrival to assess them all, and decide what repairs are required. In the meantime here’s a little bit about these cameras that are again very similar to the Polaroid “Snap” camera range, that also use zink paper. And seeing what is quoted below, the Polaroid “Snap” and this Kodak Printomatic are in all aspects one and the same camera.
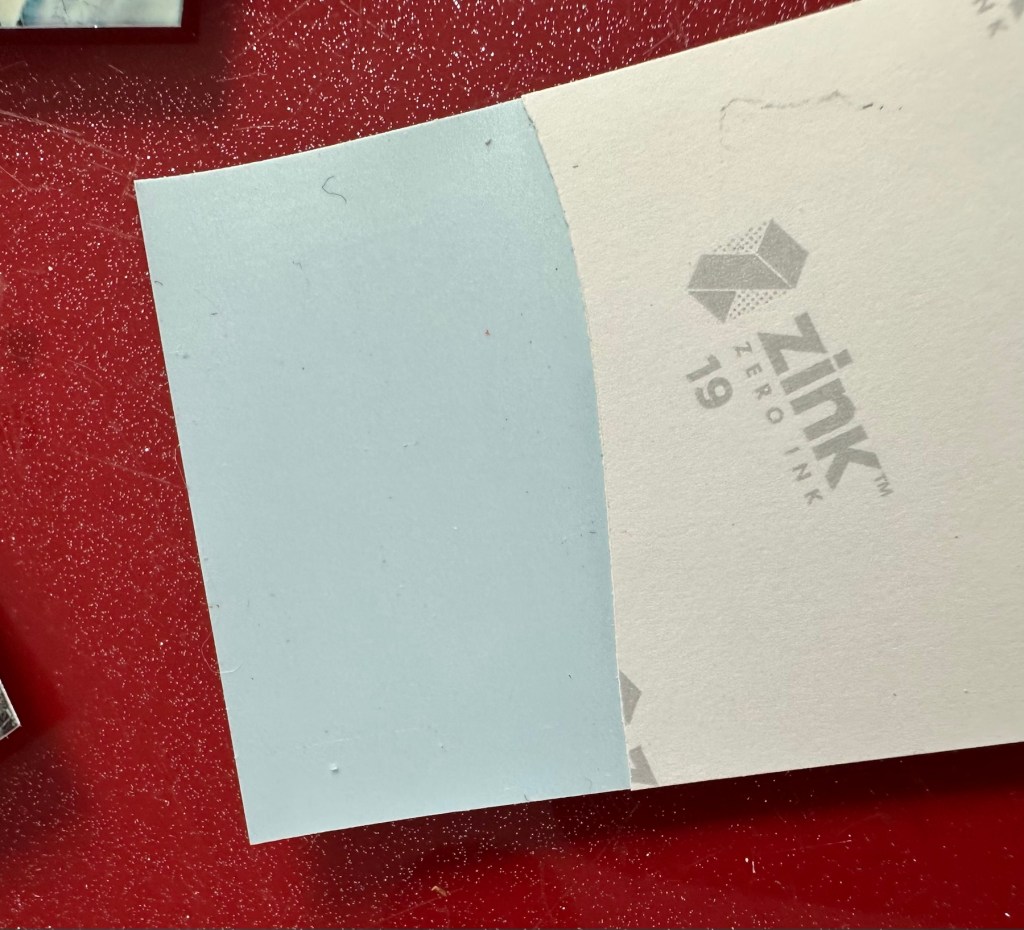
Well, since Kodak doesn’t really make its own consumer cameras anymore, the Printomatic is actually being produced by a company called C+A Global, which is just licensing the Kodak name and branding. C+A also licenses Polaroid, and was behind the two-year-old Snap. Both cameras were designed by Silicon Valley firm Ammunition Group, which confirmed to The Verge that the Printomatic is basically the same camera as the Snap, though simplified and rebadged. (The cherry on top of this corporate synergy sundae is that C+A also works with Zink.)
Released 2017
The PRINTOMATIC camera instantly and automatically prints high-quality, full color photos with point-and-shoot ease. It uses KODAK ZINK Photo Paper, so no ink cartridges or toners are needed. The photo prints are durable, water resistant, and adhesive backed for extra fun. The camera’s speed allows you to shoot a new photo while printing the previous shot. The KODAK PRINTOMATIC is fast, fun, and easy to use.
Features
5MP image sensor
Prints automatically when image is captured
Vibrant 2″ x 3″ photo prints are durable, water resistant, and adhesive backed
Built-in flash
Optical viewfinder
microSD™ card slot
Kodak Ltd & The Verge
The reviews all vary, from very good to downright diabolical, I’m not really surprised since Kodak “Hoared” out its brand name to the lowest bidder many years ago. Am I bitter? A little, as I used to work for Kodak in the days when they were a world leader, the mistakes they made, the decisions and leadership were absolutely awful. And the fact that their demise has lowered my pension pot by about 40% due to their financial mismanagement is another axe that I regularly grind. Yes I am bitter, and since I’ve recently repaired and reviewed their competitors cameras I thought I’d give these a try. Will I be impressed or disappointed? Who knows but I do have an inkling on which way this may swing. But for what I’ve paid for three cameras I’m not really that fussed, it’s just pocket money.
Assessment:
Camera one:
Apparently doesn’t print. Well I’ve put a couple of sheets of Zink paper inside and two pictures were produced. The sd card slot is fine, the charging port is in good condition. Transport is working perfectly. It certainly does print. Just needs a bit of a clean. To be totally honest there is nothing wrong with this camera and for an outlay of £8:00GBP in total I have a working bargain. Kerching – a rare EBay win.
Printer works, camera works
Charges fine Looking nice after a light clean – no marking
Nothing more to do on this one. So on to camera two.
Camera two:
It’s a bit grubby cosmetically but nothing that a light clean wouldn’t sort. This particular one cost £8:99GBP all in. It was dead on arrival so I’ve checked that the charging port was ok, and then put it straight on charge.
On charge
I’ve also given it a light clean whilst charging and the overall appearance has greatly improved. I must just be patient and wait and see if the unit does take a charge, or the original fault appears.
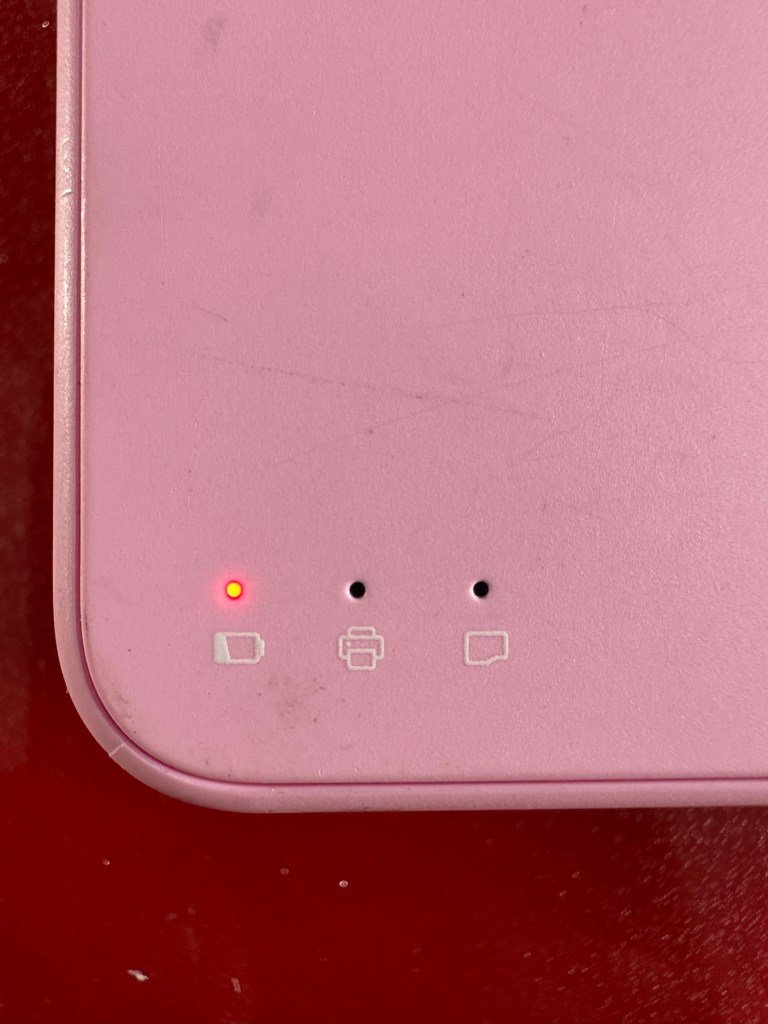
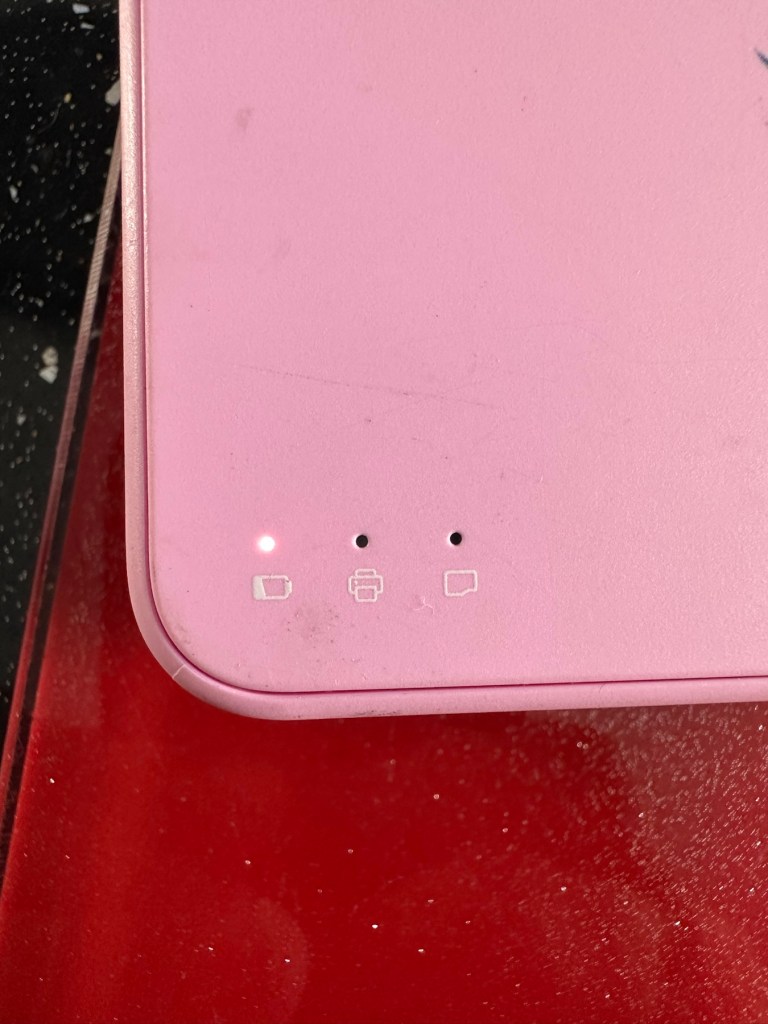
Initial red indicationNow a rapid flashing white indication
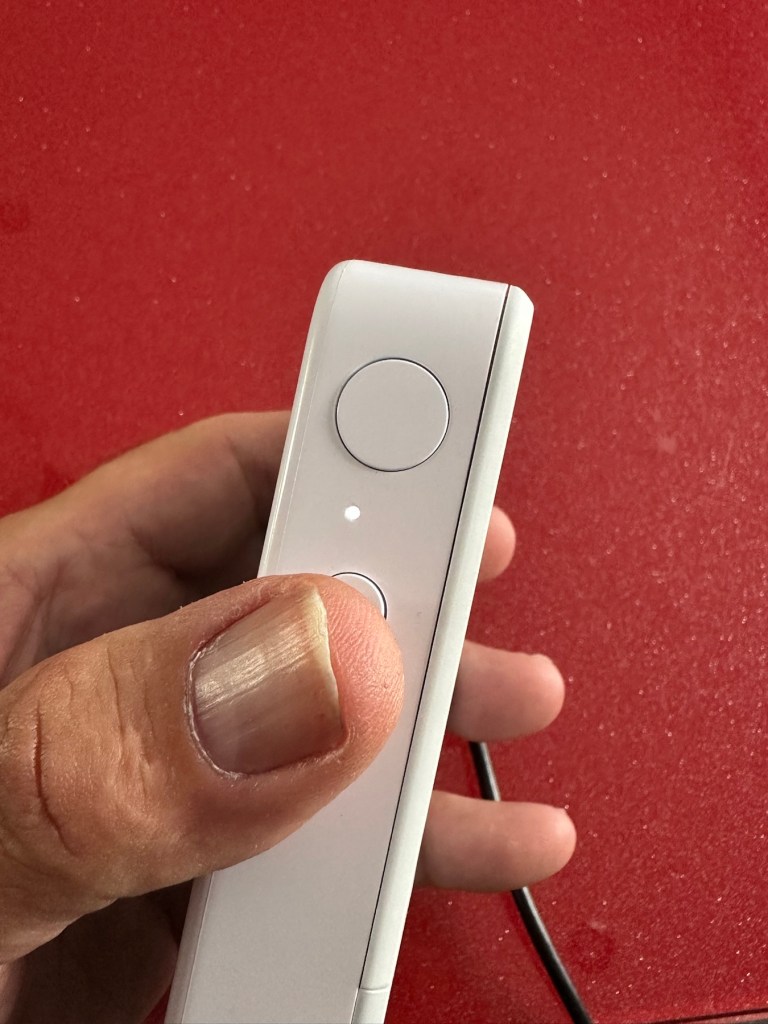
Whilst on charge the originally mentioned fault appears. The charging light was showing a steady red, it is now a rapidly flashing white light with the occasional steady red indication for all of a few seconds and then it’s back to the rapid white indication and it then all repeats. I’ll leave it for a while to see if there is an improvement, the battery just might be so dead that the inbuilt battery management system may just well be refusing to cooperate.the on/off button on the front doesn’t work as well, this might be also related to the battery issue.
Camera three:
Looking very nice and cosmetically very clean.
Nice camera
This one cost £7:99GBP all in. This one is reported to have two issues, a damaged paper pressure pad and a button stuck in the depressed position.
Paper pressure pad is bent and missing two springs Exposure button stuck in, white light flashing as a result
But first I’ve put it on charge to see that it charges, I’m pleased to report that everything is alright in that aspect, and I’m pleased to say it charged fully with the correct lights illuminated. The white light on the top by the exposure button is flashing as a result of the button being stuck in the depressed position, I believe.
Camera has charged fine
This one will need the paper pressure pad repairing as well as the button that is stuck in the depressed position.
Repair:
Camera one:
See above. No repair required. Just a light clean and some TLC. Why did they sell it as damaged? Who knows just what goes on, in the mind of an EBay seller.
Camera two:
This will need to be opened to get near the battery. We may well be able to get the battery to accept a small charge and this may be just enough to fool the battery management system in the camera to take over and continue charging.
Cover off and the confusing lights
Cover off I’ve checked the battery readings and it’s reading a healthy 6.5v and as it’s a 7.5v rated battery I believe this to be healthy, it holds a steady charge the battery is fine. Looking at the led lights they are capable of two indications, red or white and that’s it. I believe the charging light flashes when it’s charged as it cannot possibly show a green light as there isn’t one. This is confusing as normally a flashing white/red light normally indicates that the battery needs charging. Everything that is happening goes against what the producer has published regarding the led indications. But I am convinced the battery is good despite it not turning on. Hold on, I think I’ve found out the problem here…..
Cable disconnectedCable now connected On off button ribbon connector was not in place
It appears that someone has been here before me or that the on/off button ribbon connector has disconnected itself over time. Either way it’s not where it should be. I’ve put the connector back in place and secured it. I now have power and control of the camera.
All lights working, transport whirring away let’s put some paper in to give it a try.
PrintingDirty print roller
Well it prints ok, all pictures appear to have a “blue tint” to them, however there are big tramlines across the print as you can see, this indicates a dirty roller. What I’m going to do here is peel half the backing of a sheet of Zink paper as the back is adhesive allowing you to stick photos on whatever takes your fancy. By running a half sheet of exposed adhesive, upside down through the camera with the adhesive being the trailing edge, it should allow any debris and dirt to be collected on its way through. I will do this three or four times and even though I will no doubt get error lights appear I can just reset the camera with no further issues.
Zink adhesive exposed
And that worked. The tramlines have gone.
Tramlines on bottom left picture as a reference. All other pictures now clear.
I’ve also tried the black and white mode as you can see above. I’m very confident, in fact I am positive this camera is now working as it should. I have also put an sd card in the base and all pictures are being recorded as expected. A quick clean and we now have a perfectly good working example of this camera. Let’s move on to camera three.
Camera three:
We have to open up the camera to get to the issue with the button.
The paper pressure pad needs to be dismantled, straightened up and two compatible springs need to be found to keep the required pressure in place on the paper pad. I’ve dismantled the pressure pad and straightened it out, just needs a couple of springs to complete, I’ll sort these out later.
Bent upStraightened out Back in place just awaiting new springs
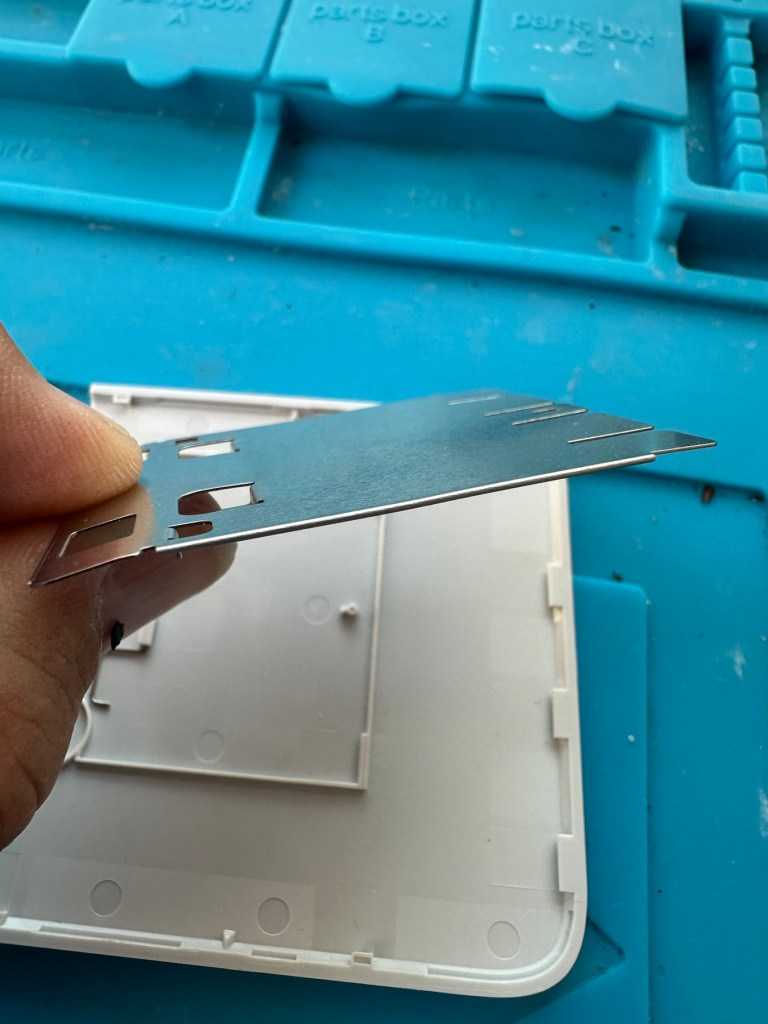
On opening the camera it was as clear as day that the depressed button was as I first thought, the three solder points below it had come loose, no longer making contact.
The working switchThe faulty switch that looks like it’s smiling
It’s plain to see in the pictures above that the button that is damaged has all three points of contact broken. these need re soldering to strengthen them. You can see this issue in the microscope pictures I took below.
Top: Before, Bottom: after
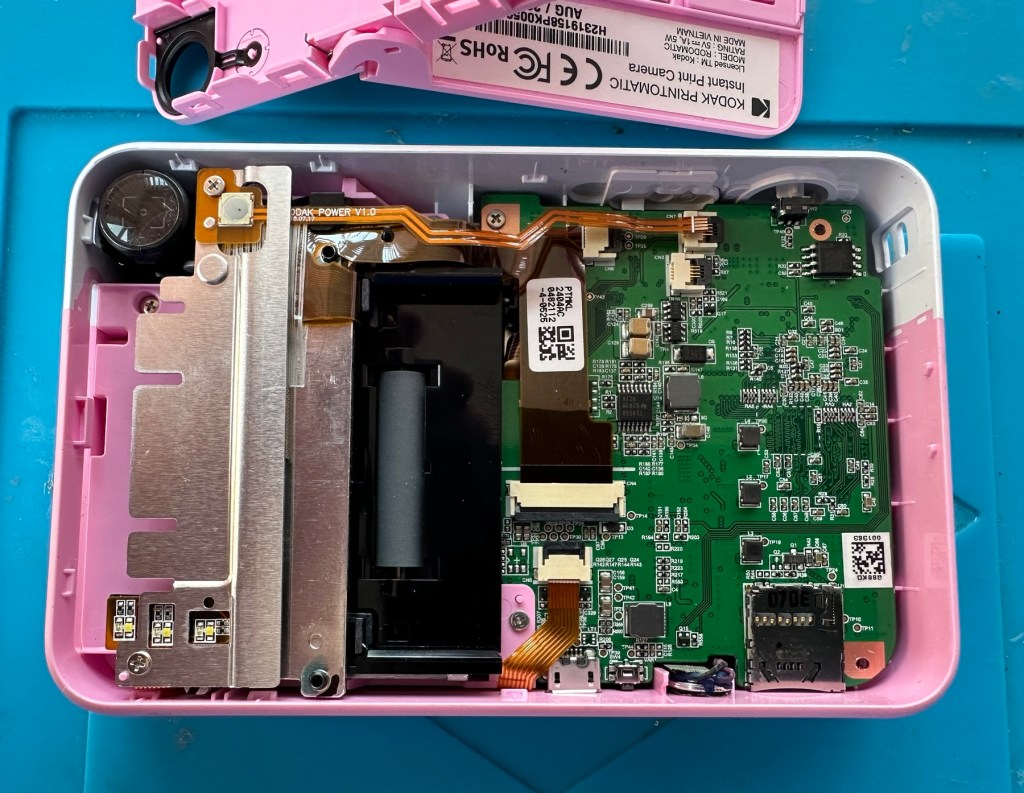
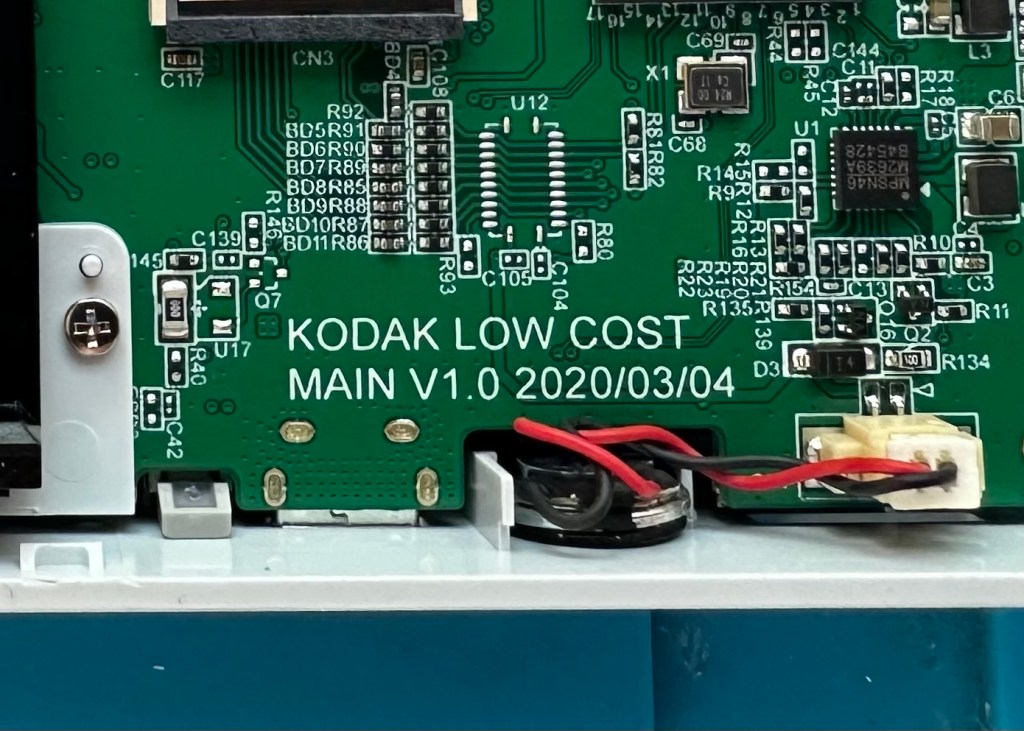
The switch has been tested and it clicks and operates as expected, this is a known weak point with these cameras and a design fault as well, although the manufacturer would probably deny this. It’s a given fact that the manufacturer wants to sell as many as these units cheaply to the throw away consumer, you only have to look at the main board below to see this…
Says it all really….
It really saddens me to see the levels the Kodak name has sunk to, these units are just replicas of the Polaroid touch/snap range, but even at this stage in the repair the Polaroid versions are far superior. Quality control and the cheap design of these Kodak units is borderline awful.
This unit is proving to be a right pain in the ass. The original fault with the exposure button has been repaired and the paper pressure pad is all but repaired, but it seems that being hidden by these two faults is a totally different issue. I have had this camera completely dismantled and have also separated the printer from the motherboard, but this issue of the permanently flashing white light still exists, so the fault is definitely only being carried on the motherboard.
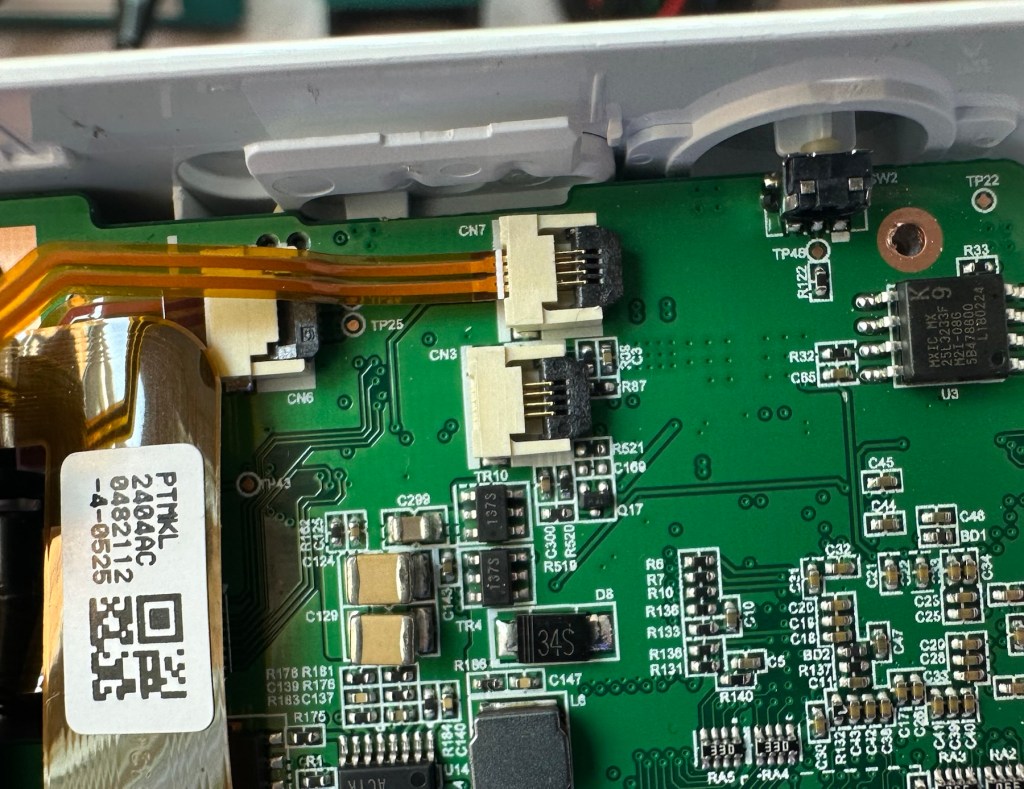
Motherboard under microscope Lens ribbon cable insecureMotherboard separated from printer unit
I’ve checked the motherboard thoroughly using my microscope and there is nothing glaringly obvious at fault. I have checked for shorts on the board of which there are none. The only issue I found was that the lens ribbon cable was sitting off centre, however I corrected this but the flashing light issue still remains.
There are two faults that are connected with this flashing white light. One is that the light occurs whilst printing, this is not the case with this unit as it even occurs as stated with the printer disconnected. The other possibility is that it flashes when doing a firmware update, I have attempted to update with the latest firmware and the only difference is that I cannot turn the lights or camera off at all, I have to crash it by removing the battery.
It’s looking as if this could be the issue. The previous owner has probably bricked the unit by interrupting a firmware update and it has corrupted the system. I’m going to have one more attempt at updating the camera with a clean unused sd card to see if there is any possibility of recovery. If this cannot be done then this unit will become a spares unit that to be honest I’d rather not have as I don’t really want to purchase any more of these cameras. But you never know, someone may want one repairing.
Result:
Well in the wise old words of Meatloaf, I guess “Two out of three ain’t bad”. The grey one is bricked, as after numerous attempts of updating the firmware it just isn’t having it. It is just a brick. However there are numerous spare parts that can be used including a good battery, lens mechanism and a number of other pieces. I just didn’t want that though as i don’t really see myself going out of the way to obtain another one, they are as cheap and nasty as you could possibly find. The Polaroid versions are of a far better quality in my opinion, and they are hardly high class.
2 out of 3 ain’t bad
The positive here is that 3 cameras, quite obviously built for the throwaway generation have been saved from landfill and can be used again. What I’m going to do with the two I have is probably put them both back on to eBay to recover my out goings. If not, I will pass them onto our local hospice to sell on.
Been an interesting fix, but I’m not venturing back to these Kodak models anytime soon.
Yes another one. Anyone that reads what I post will realise that these little cameras have really become popular with the youngsters within our family. I recently posted about a family get together: The garden gathering and in this post I stated that a young member of the family liked these cameras so much, that she went out and purchased a damaged one and asked if I could fix it for her. How could I turn down such an offer?
Another Instax mini 8 and that Iris should be closed
And here it is. Needs a little clean and immediately I can see an issue, what I’ve noticed is that the little iris lens protectors that close when the lens is retracted are missing, or not operating and opening properly. Everything else seems to be doing what it should, motor, film transport system etc, however the initial issue reported with this camera was that it’s exposure was sometimes hit and miss, it most definitely all related to the lens issue. A good clean wouldn’t go amiss with some extra attention paid to the light sensor area.
Anyway, enough chat, let’s crack on.
Assessment:
A nice tidy camera, needs a little clean, flash fires, film transport mechanism inside is working and the motor runs. It gives the impression that it is working fine, however….
Here’s a reminder from the young family member who made the purchase, regarding its issues:
I’ve just remembered, I think the advert said something about the photos coming out dark no matter what setting it is on! x
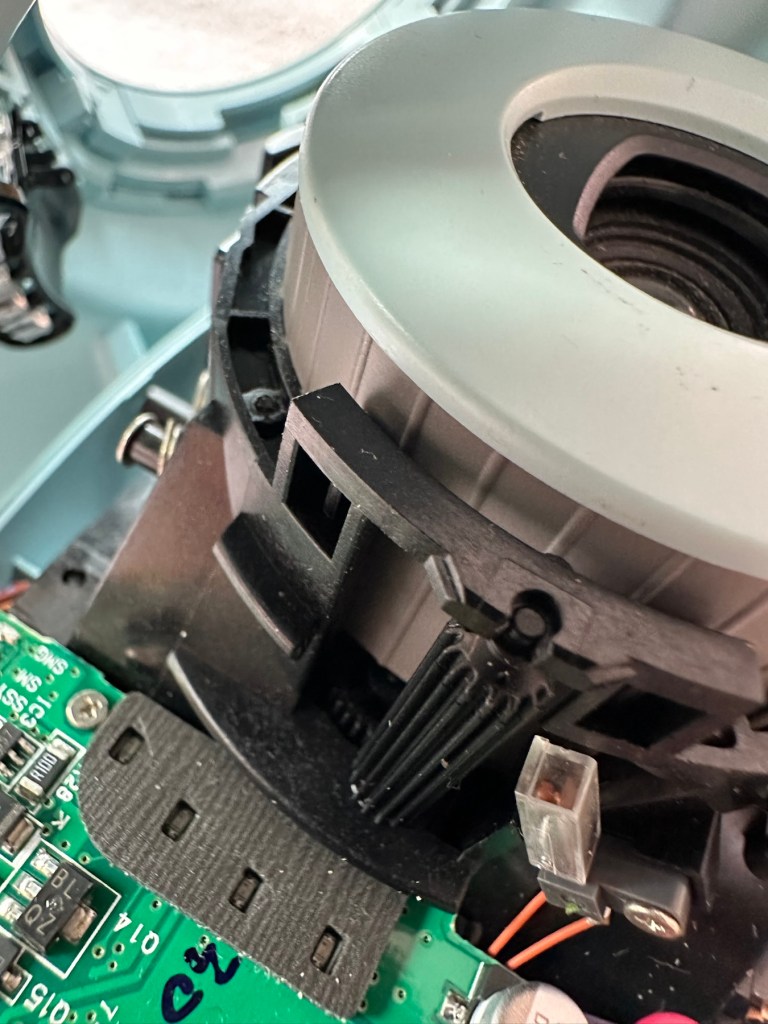
I’d already noticed the little iris mechanism on the front of the lens didn’t open and close when the camera was turned on, so I was going to be looking in this area anyway. But when I looked a little closer and moved the aperture ring on the side of the lens, the relative apertures in the lens were only moving to roughly the half way point, off centre, hence there was no corresponding fully positioned aperture, and in relation to the lighting situation that was presented, they were stuck and blocking the incoming light. In a nutshell there was not a sufficient sized aperture “hole” for any light to get through, resulting in the exposure issue stated above. This needs adjusting. You can see what I mean in the photo below. The lens aperture leaf does not sit central in the lens.
Incorrect aperture settings and positioning in the lens
Apart from the highlighted problems above, i don’t believe there are any other underlying issues. So I’m going to concentrate on the front of the camera solely in the lens turret area.
Let’s get on with the repair.
Repair:
The iris issue is within the lens turret so this will need to be dismantled to access the iris.
Lens top cover removed exposing the iris mechanism below
It was a bit of a head scratcher this one, as I spent a lot of time just staring at the mechanism trying to figure out how it worked. When the iris lids were manually manipulated to the closed position when the turret was retracted all was fine. When the turret was opened up the iris lens did the same, but then if you again retracted the lens the iris remained open exposing the lens. I was thinking it must be missing a spring somewhere and I was about to be proved right.
I found a replacement iris turret in my spares box for instax cameras
I found a replacement iris mount that fits within the lens turret. I had this in a spare box and used this as a reference to compare to the old non operating one. Here is where it was confirmed that there was a spring missing and this is why the iris was not operating.
Spring missingSpring in place The old iris mechanism compared to the working one
I replaced the old mechanism with the new one and this was installed back in the camera, this now works fine. I have however found a suitable spring for the old iris so I do now have another spare ready should another be needed in the future.
Iris mechanism installed and now working
The issue with the aperture positioning has been sorted by ensuring that the aperture ring is correctly positioned in relation to the cog mechanism in the lens turret area. It’s a bit like sorting out the timing belt in a car, it just has to be in the right position to achieve the correct aperture settings.
Springs and levers everywhere, and the “Timing” cog on the right that is in the turret area
This sorted, the last thing to do was to give the viewfinder a little clean. You have to be very careful here as the viewfinder is connected to the camera “ready to shoot” indicating light, and there are very fine wires all around this area. Be just a bit too clumsy here and you’d have a difficult soldering project to also add to the original problems. Anyway, no such issues today, the viewfinder was un clipped and prisms and glass cleaned and reassembled. All looking good.
Viewfinder and lots of little wires
I’m now happy that all the issues have been attended to and I’m just going to reassemble the camera ready for a quick clean. Luckily all the screws that came out went back in with none leftover. Result!
Result:
We now have a nice little unit, all aperture settings are working as they should and the lens iris is operating as it was always supposed to do. The viewfinder has also been cleaned and it’s now a nice clear unobstructed view. It just works.
All cleaned and now working, a lovely little camera
I’m guessing this camera will be coming away with the owner on a family holiday that we are all about to embark on shortly. I’m hoping to run some film through this soon but I am ultra confident it will work as all the issues have now been addressed.
I’ve just got some film and rattled off 4 quick shots, one of them indoors. Exposures are fine so I’m happy this is a perfectly good working camera.
4 quickly produced shots
I’m sure there will be one younger member of the family who will be very happy with her new camera. And may she have many years of capturing good times and fantastic memories. This is what these little cameras are made for after all.
Thanks for passing by, it’s always very much appreciated.
Fujifilm Instax Mini 7+ Instant Film Camera Not Working Spare/Parts. When batteries are inserted into the machine, lots of clicking noises can be heard from the battery compartment. The camera button functions do not work and therefore I am selling this as spares and repairs.
EBay
I enjoyed my last repair on one of these cameras so much that I just had to buy another. You can read about that repair and the issues I encountered here: Instax Mini 8
Nice example. And no battery contamination
Here’s a little about this camera:
With its LED-indicating exposure meter manual exposure controls and automatic flash adjustments the MINI 7+ produces well-lit pocket-sized photographs. Easily shoot in-focus snapshots using the 0.37x real image viewfinder with target spot controls and a 60mm lens with a selfie mirror for in-frame portraits. With a shooting range of 23.6 and beyond the MINI 7+ is ideal for close-up portraits and close environments.
T’internet
I believe this camera was released around 2020 so it’s not that old. This particular unit is also missing the battery cover which is a bit of a pain in the Ass, however cheap replacements are available but not matching the cameras colour. Am I bothered? Of course I’m not, as long as it works I’ll be happy. I could even paint it up, that might be interesting.
This unit has cost me the grand total of £8:69GBP my Mini 8 project cost me £11:45GBP so I’m very happy with this price. The value may rise slightly as I will have to purchase a new battery cover.
Anyway, let’s wait for its arrival.
Assessment:
The camera has arrived and it is in good overall cosmetic condition. A bit of dirt on the back near the film counter, but this should clean off ok. There is a gaping hole where the battery cover should be, a pain yes, but I can always source a new one from somewhere.
Generally clean
The good news is that there is no contamination on the battery contacts, they are absolutely fine. When batteries are inserted the transport runs, but it runs too long, and then a red light shows at the end of it’s movement, and no buttons work, in theory it’s dead at this point.
A little movement of the camera and you can tell that something is rattling around inside, so something has definitely come loose or broken from within.
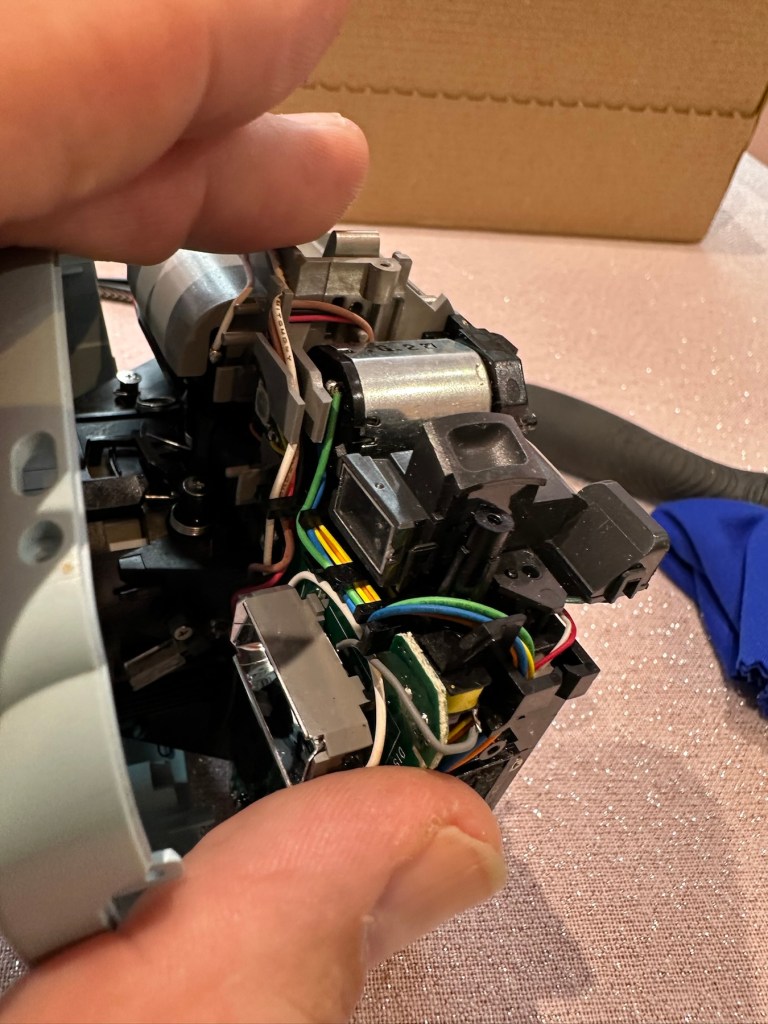
Let’s get it open and have a look.
Repair:
I’ve sourced a replacement battery cover however it’s in China and I’m probably not going to see it any time soon, maybe not even until next month. I’m not going to order just yet until I know if this unit is repairable. But as soon as I get an inkling that it might be repairable I’ll order it.
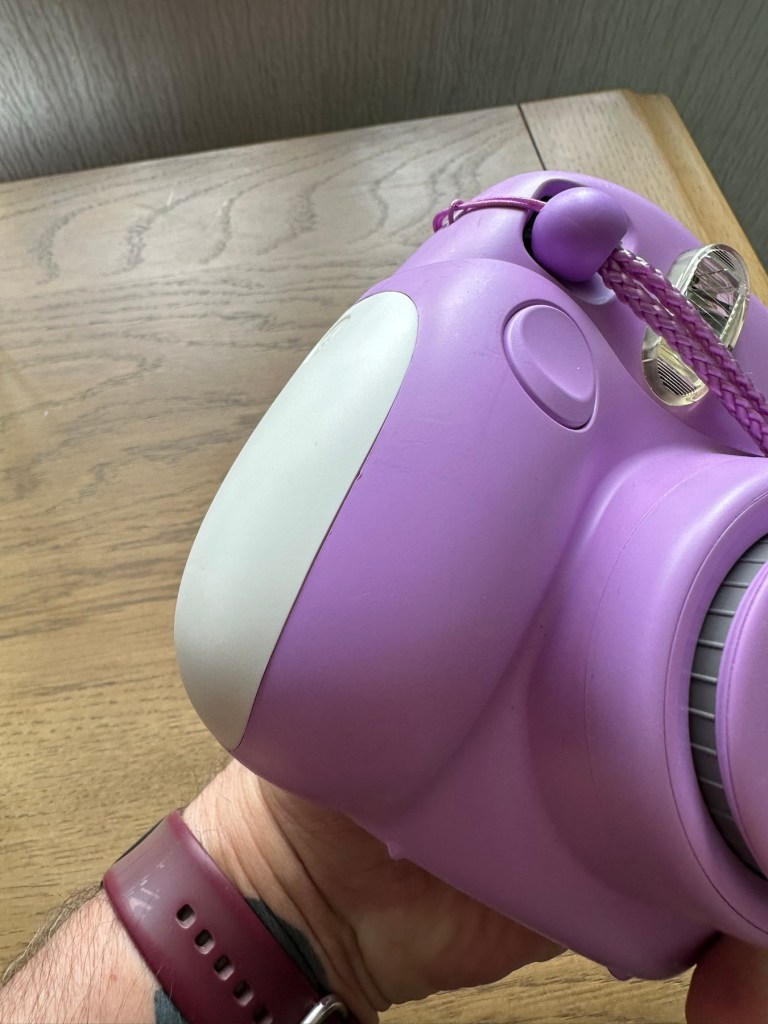
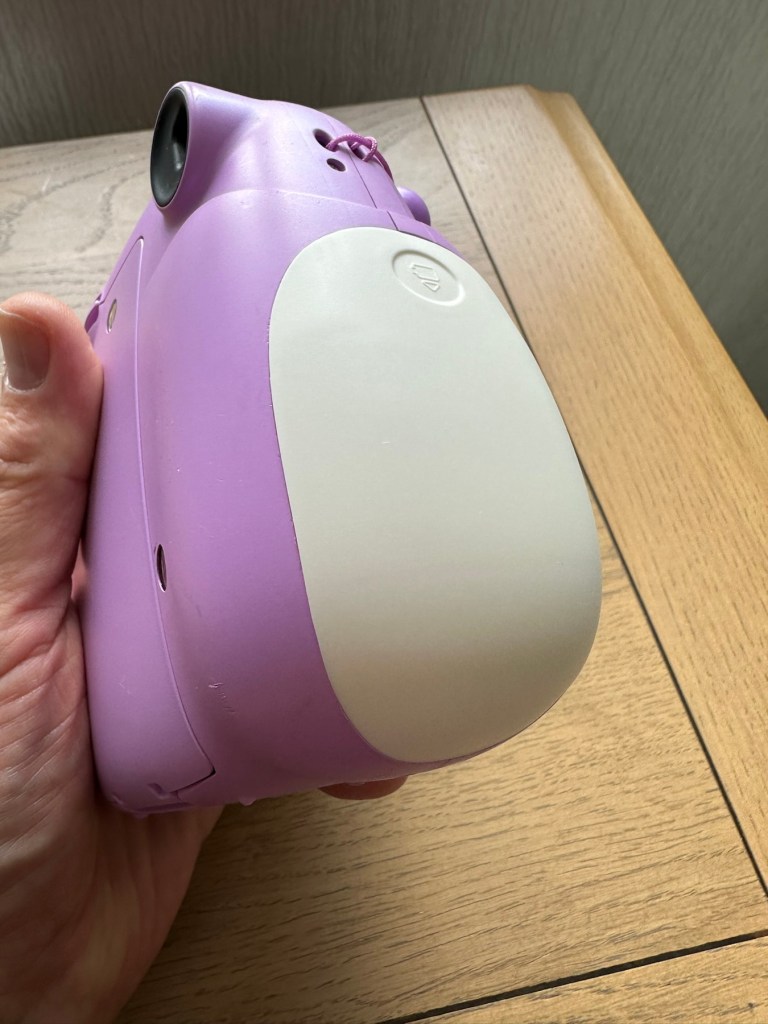
The replacement cover. It’s white. My camera is purple. Time to get creative.
Next I’m going to open the camera up to see what the source of the ratting sound is.
These are the items that are rattling inside once I have opened up.
The rattling suspects
One of the items i recognise is the spring that comes from the operating button, the other part is broken off of something, i will have to look through the mechanism of a donor camera i have to see if i can find a part that matches. And I’ve found it. It appears to be a film transport mechanism buried deep in the workings that had broken and become jammed.
Top, the broken piece and below the replacement partTop the replacement part, and below the found broken part
The part is a right pain in the ass to replace, as it has to be in the absolute perfect position within all the cogs, and there is no reference to how the cogs sit. You have to reassemble most of the camera to test, then open it up again to make fine adjustments.
Capacitor sits underneath this battery housingThe replacement part sits under this cog housing on the top right.
So far I have done this about four times, and I still have to open it and do it again. Once again I’ve managed to twice make contact with the flash charging circuit giving myself a right quick electric wallop.
A nice impression of the two flash test probe points I seem to keep touching
I have learned my lesson though and am now employing capacitor discharge probes every time i remove the batteries, as I say in the website intro pages, don’t do as I do. I’m an idiot. These capacitors maintain about 300v to power the flash, believe me it’s a very quick jolt, but it’s a painful one. You certainly know it has happened, be safe, don’t be like me.
Capacitor discharge probes – use them!
I’m holding back on ordering the battery cover at this moment until I can confirm that the cogs and transport system are working in harmony with each other.
On my sixth attempt at lining up the cogs and transport system I believe I have it set correctly. I’ve compared the transport with another similar camera and it duplicates its workings perfectly. It operates well and there are no fault lights showing. The movement is free and unobstructed. I’m happy that the camera is now repaired so I will now go ahead and order the battery cover. The cover has cost a total of £3:12GBP including postage and that puts the total cost of this project up to £11:81GBP compared to my previous project cost for the Instax 8 of £11:45GBP, so I’m pleased with that, as costs are very similar. Oh, and I best get some more film to test it out as well. It isn’t classed as working in my eyes until I see some photographic proof.
Result:
This is my second repair of a camera in the Instax range and the most challenging to date. It’s been great to work on and as usual I have learned a lot about how these cameras work inside. I’m glad I had an old camera to call on for spares as that has proved invaluable in this case. In the past I think I just would have given up on a full repair and junked the camera as many people seem to do, however these cameras are very repairable, desired by the younger folk, and worth designating some time to as they can be saved. There are a lot of non working examples available out there at a fraction of the cost you’d pay for a new working unit. (Money to be made in my own personal point of view)
The unit has polished up very well and looks lovely.
And it works….
And it works just fine
Pictures as expected
I’m so pleased with this camera, it’s taken a lot of time and head scratching but we got there in the end, and it is as good as new. I’m still awaiting the battery cover, and we have guests coming around today so I’m going to use this for some random photos. Just got to make sure I don’t let the batteries fall out. Once again we’ve saved another unit from landfill and that is the big win here.
Three weeks later the battery cover has arrived from China. Perfect fit.
Camera complete
Many thanks to my lovely missus for allowing me to take photos. Rare because she hates having photos taken.
Thanks for passing by, as always it is very much appreciated.
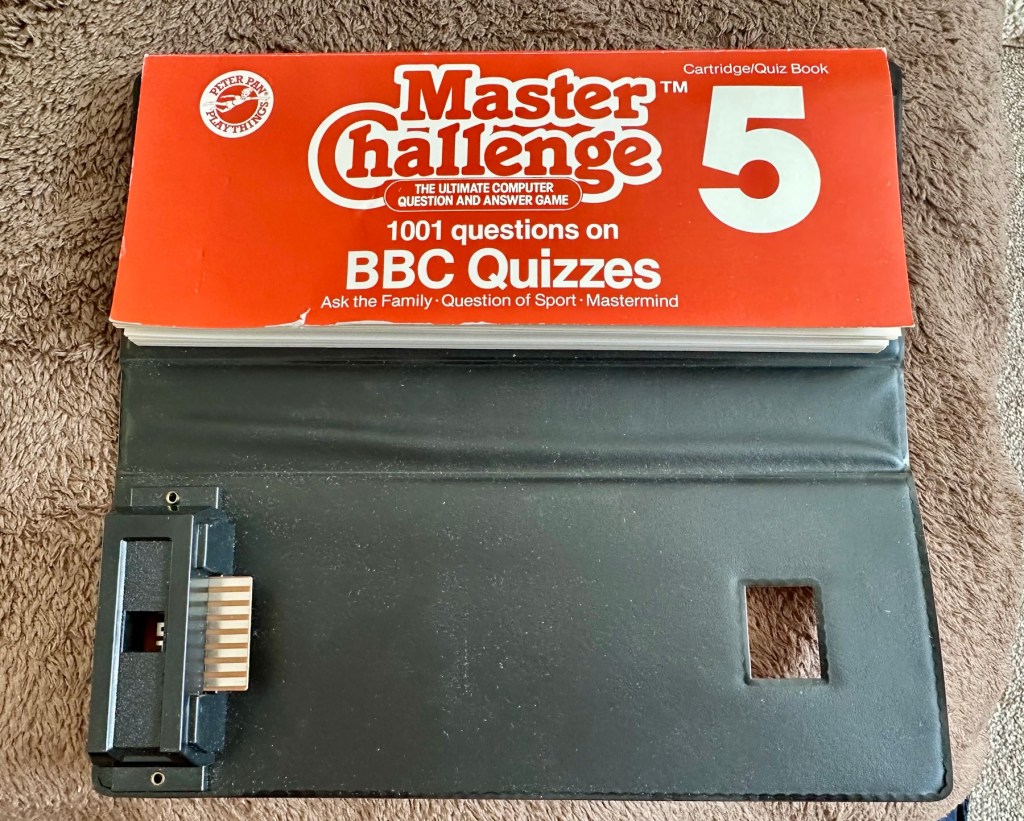
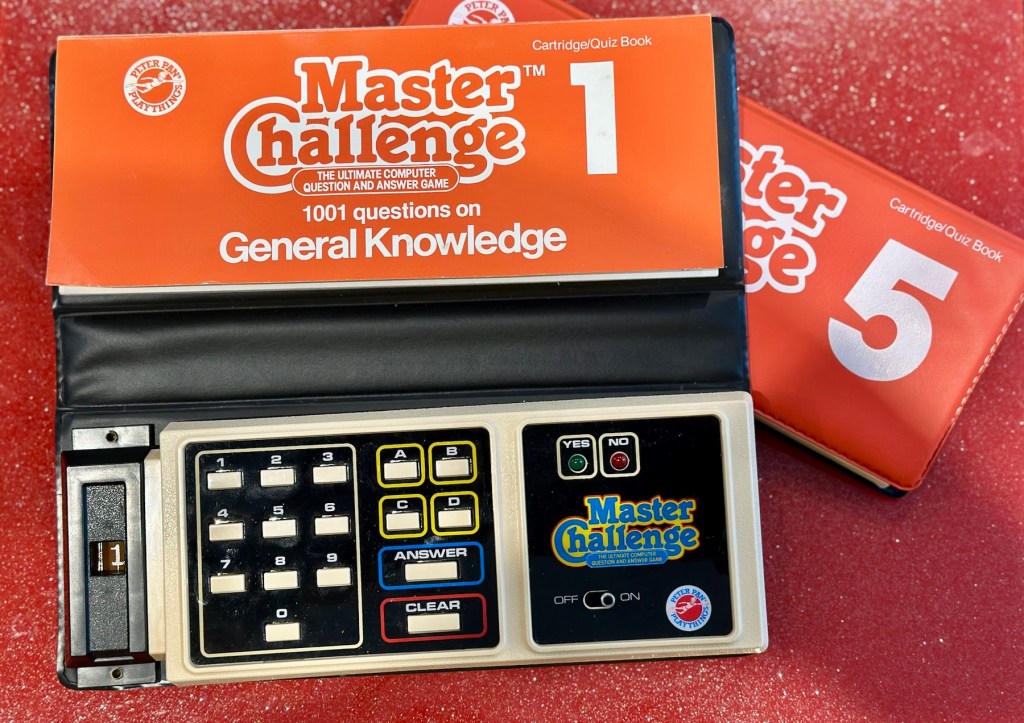
Embark on a journey down memory lane with the vintage Master Challenge Computer Electronic Quiz Game by Peter Pan. This handheld electronic game offers a test of knowledge and skill, making it a splendid addition to any game’s collection. Ideal for enthusiasts of retro gaming, it provides hours of entertainment as you tackle a variety of questions and challenges.
As a sought-after piece amongst collectors, this game is a testament to the era of classic toys and games. Whether you’re looking to complete your set of electronic games or seeking a unique gift for a vintage game aficionado, the Master Challenge game promises to be a talking point at any gathering.
This item is sold as spares and repairs as not working. Please send offers or ask any questions.
EBay
The seller here has obviously used the wonderful AI assistant to write this post as it is so false. The unit is incomplete, it is probably not sought after, as it was not that well received back in the day, and in its current state is probably only fit to be disposed of, also an important part of it is missing. However I’m not for disposing of items such as this and will endeavour to get it back into a working state, it’s just going to take a little time and patience.
I’m missing a fair bit, and it doesn’t work
What my unit looks like
What the unit should look like
Some history:
Peter Pan Playthings Ltd was a British toy company founded in 1963. It bought Salter Science and other assets from the receivers of Thomas Salter Ltd. In 1972 the company reported a £80,000 profit. The following year it was acquired by Berwick Timpo.
The company was sold on to Bluebird Toys in 1987, which continued to use the Peter Pan Playthings brand for several years.
Produced around 1980, the Master Challenge system was licensed from Coleco (Coleco’s Quiz Wiz system), this was released in the U.K. by Peter Pan Playthings. There were 30 different cartridges for Coleco’s version. The unit comes with a question book and the system is used to answer those questions. It is currently unknown how many cartridges were made for the UK version.
T’internet
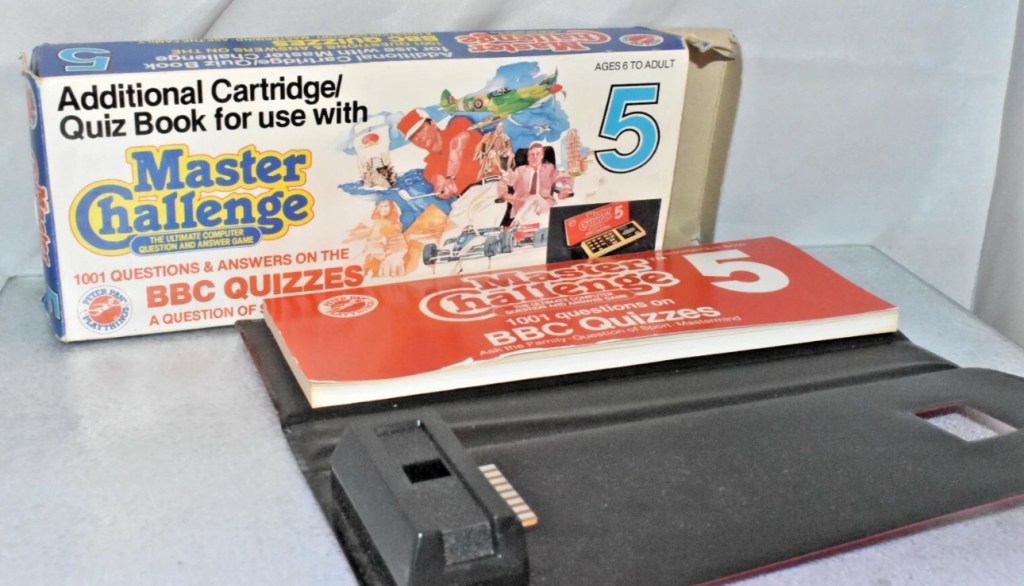
So for some unknown reason I have purchased this 45yr old piece of retro nonsense because I just can’t keep my bidding finger still. That’ll teach me a lesson. I’ve paid the grand total including postage of £5:69GBP, and I think it is missing the most important part, the book of questions that go with the cartridge, usually attached to the binder that encompasses the unit. It’s also broken, so it needs fixing anyway, and I believe extra cartridges can be purchased, so if I can get it working, and I can obtain further cartridges then no problem. If I can’t, then there is a problem. The battery cover is also missing. I’m a fool, honestly I am.
Whereas the Coleco Wiz system had 30 different cartridges available I believe the Uk version only had the 6 as listed below:
1 – General knowledge
2 – World of sport
3 – Music
4 – The bible
5 – BBC quizzes
6 – BBCs Top of the form
And back in the 1980 these additional cartridges and quiz books could be purchased for £6:99 GBP and 50 pence postage! Quite pricey for the time.
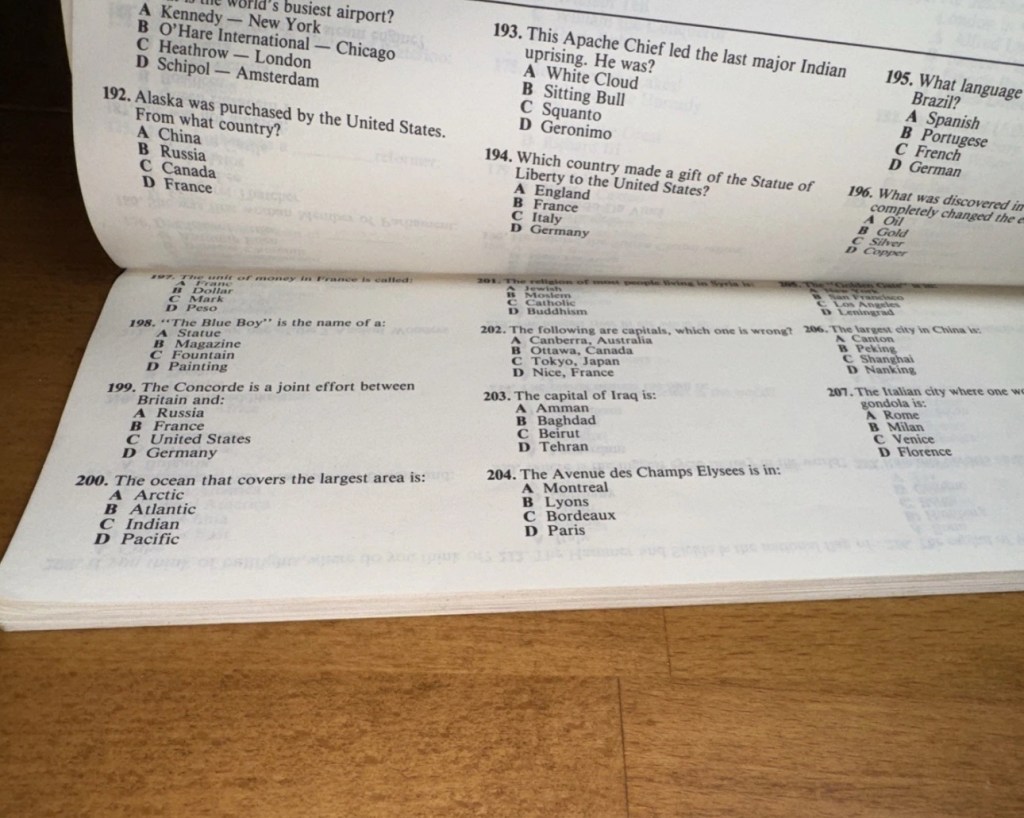
On this particular cartridge or what remains of it are the pre programmed answers to 1001 questions that I’m not in possession of. How novel. I have managed to find a photo on line that has some questions showing on it, these would have been in the original book that would normally be attached to the binder of this unit, so this should be sufficient to at least test the game in its current form.
Some questions to test the unit.
The game works in such a way that you choose a question from the book, you then use the unit to give your answers. If the answer is wrong you hear a corresponding low pitched sound and get a red light. If you are right you hear a high pitch sound and see a green light.
Score sheets in the back of the booklet
So basic in its operation, many thought it was totally pointless back in the day. However this was computerised technology in its earliest and most basic form and was at the dawn of a new era of personal entertainment. It deserves to be preserved.
To cover my apparent foolishness I have found another cartridge that I’m going to purchase to make this unit complete.
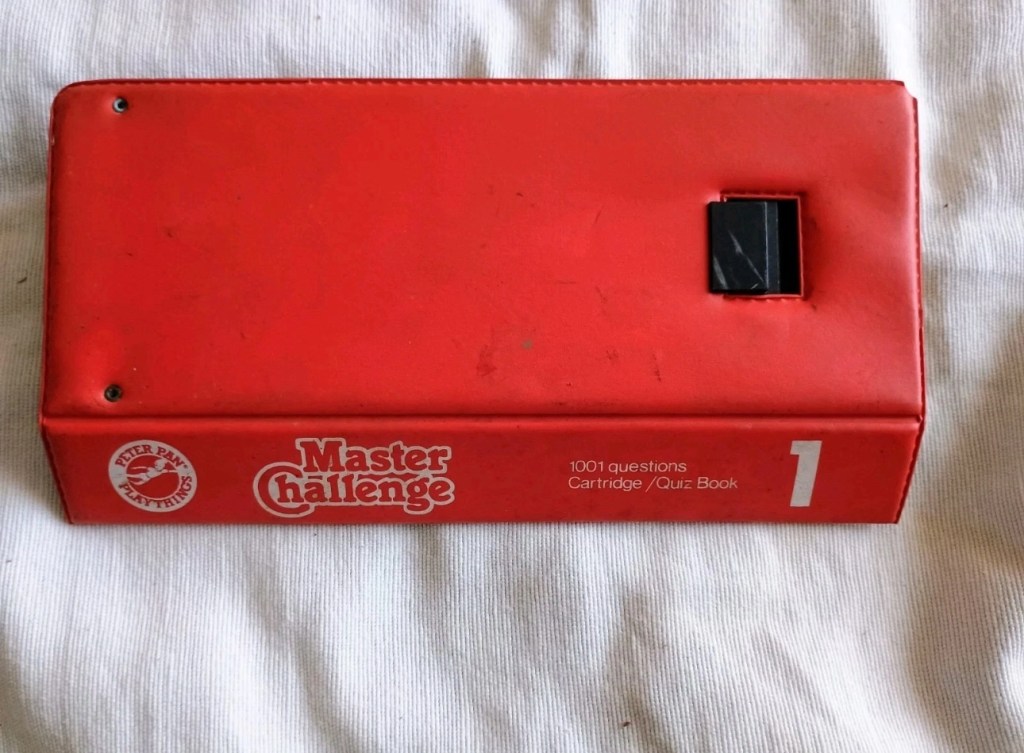
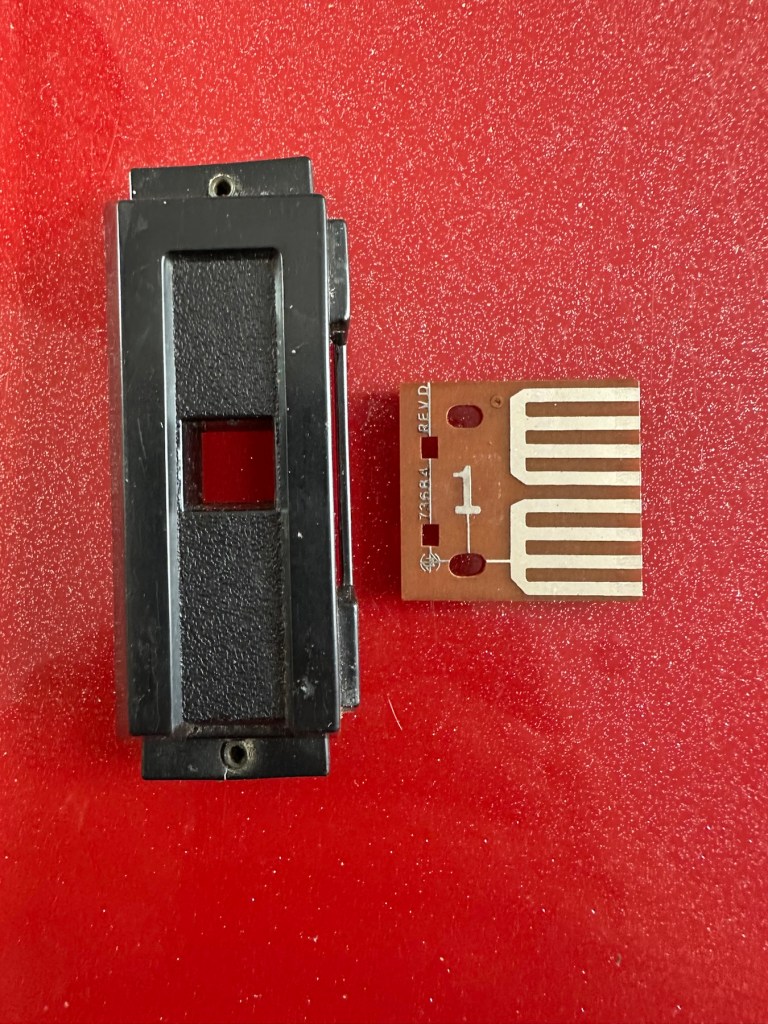
These plug in units come in a binder format with the brains of the game situated in an enclosed plastic block on the base of the binder, i suspect it is something along the lines of an integrated circuit. I can’t open this one as it is sealed, however when the old one arrives i will open it up as that one doesn’t have a quiz book with it. It will be good to see just what is inside. This little unit contains all the answers to the 1001 questions that are provided in the attached quiz book that slots into the top of the binder. The number inside the block indicates the quiz book reference.
Challenge quiz book and questions
The “Brains” and the quiz book reference number
The faulty computer unit I am awaiting, then slots into the binder and block by the pins you see in the photo above. The computer then simply has to decide whether your answer choices are right or wrong. And that’s the crux of the game in a nutshell.
Whilst awaiting this broken units arrival, I’ve purchased the additional set of plug in questions seen in the pictures above. This is an additional 1001 questions set, based on all the old BBC quizzes. It’s complete with answer book and the complete surrounding binder. It has arrived ahead of the faulty unit and is in an exceptionally good condition considering its age. None of the mustiness you’d expect from an item that is 45 years old. It must have been stored with great consideration. It’s cost me more than the broken unit, this cost a total of £8:15GBP, so that makes a running total of £13:84. I do have another game cartridge on order that I picked up for another £7:83GBP but I’m quite happy with this. It will be a nice addition to the games box that comes out when the family or guests come around, and everyone loves an old retro style game. It will certainly be a talking point, that’s for sure.
My additional plug in cartridge
Assessment:
I’ve not even received the unit yet and I’m getting a bit ahead of myself wondering just what could be wrong with it. Its operation is so basic, think it could only be one of five things possibly be at fault.
Pins that read the cartridge are dirty/damaged
Contamination in the battery area
Loose wires
Faulty switch
Cold solder joints
I guess we will just have to await its arrival when we can make an accurate assessment.
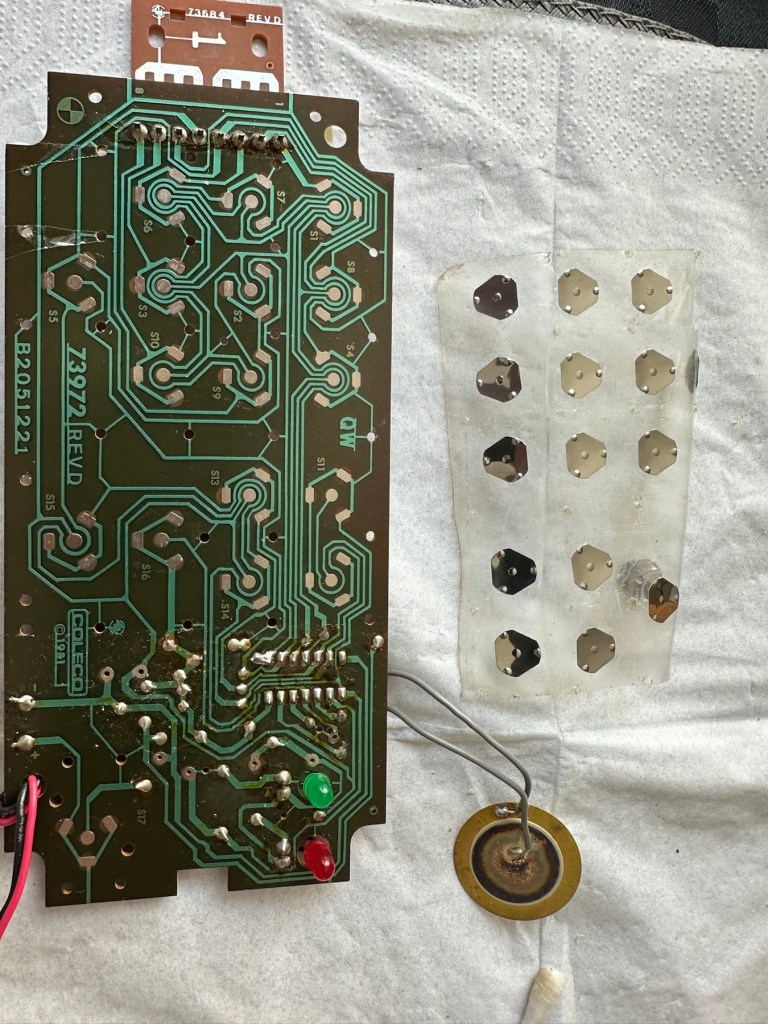
The unit has arrived and it’s a tatty looking piece. Dirty, and only the remains of the binder that used to accompany it.
What has arrived
I’ve put in some batteries and there is very dead. There is the occasional buzz when the switch is slowly moved but nothing else. It could be a faulty switch, it could be the contacts. I’m going to have to open it up and get down to board level.
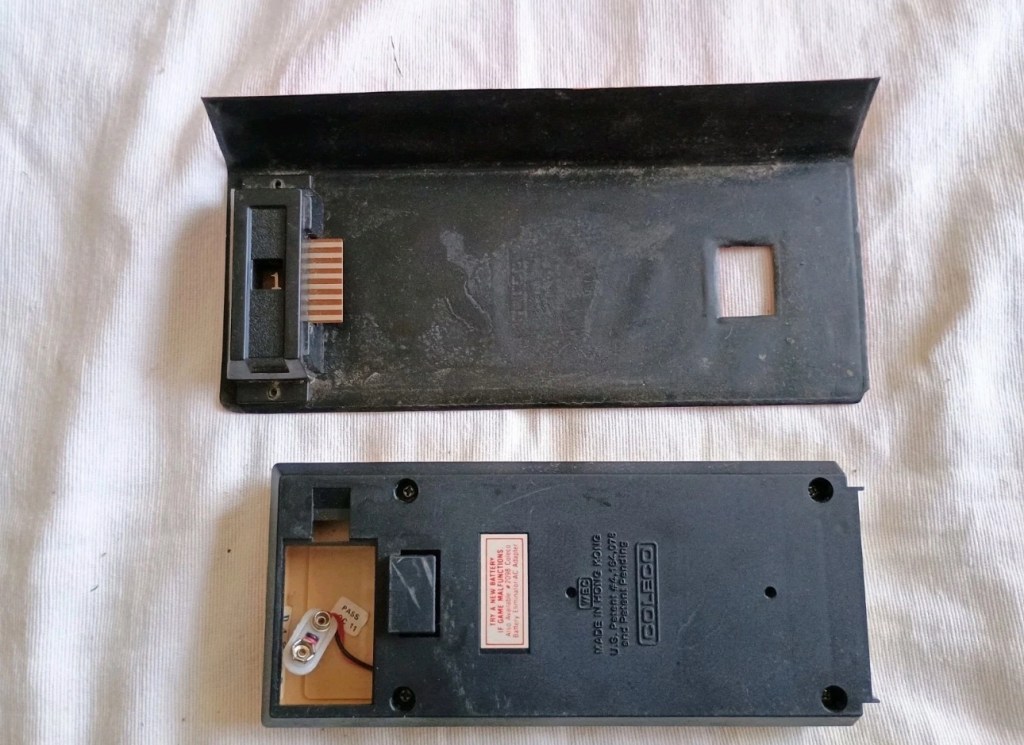
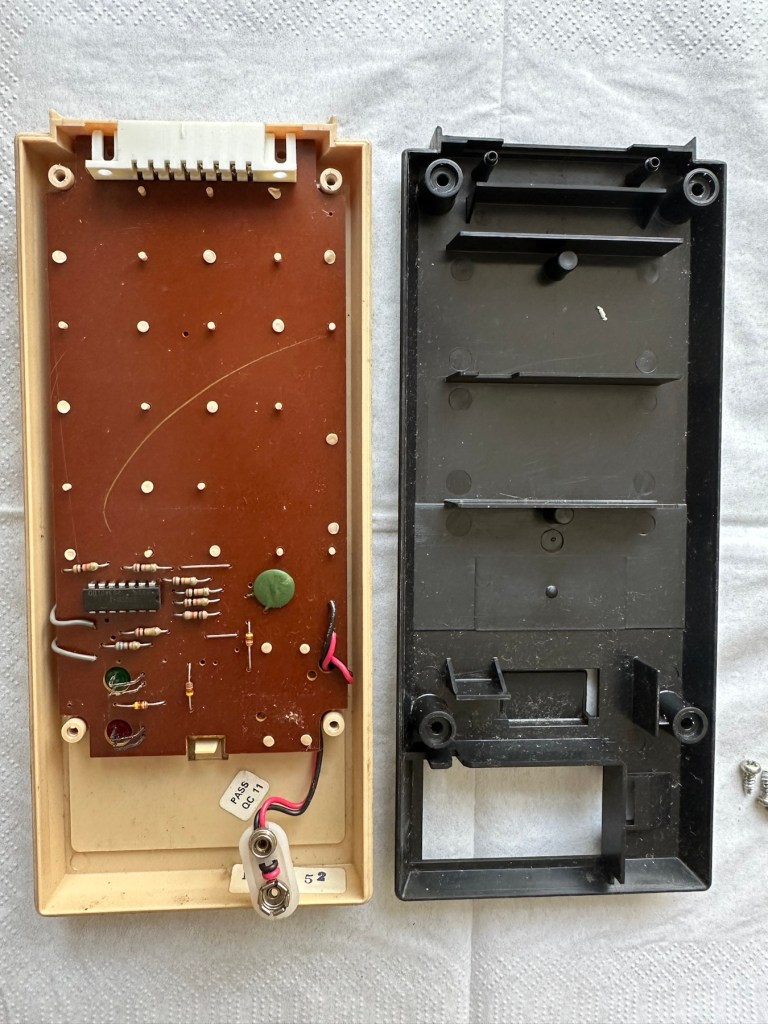
Inside – all posts welded
The problem here is that inside there are no screws attached to the inside support posts. The whole unit has been welded, all plastic posts have had heat applied to moulding the post tops. I’m going to have to break these off and try to re-weld them when we’ve got it all working again….if we can.
In the meantime I’m going to open up the the plug in module that’s attached to what is left of the old binder, i might as well sacrifice that piece as it’s of no use to me and it’s in the name of research.
How the unopened board looksBoard removed front viewBoard removed rear view
Now I thought they’d be some kind of integrated circuit in here but there is not. It appears to be just a board with two sets of comb like traces that would appear to just short together in the unit. Makes you wonder if the questions in the book follow some simple kind of algorithm that the unit just adheres to. Maybe every so many questions, they all have the same answer, there must be some simple and basic way that the unit knows the preprogrammed answers. Maybe I’ll find out more when I look inside the actual “Computer” unit.
Repair:
Inside the unit there is not a great deal of components apart from a single IC a capacitor and a number of diodes and resistors.
I’ve used a very fine emery board I borrowed off of my wife (don’t tell her) to try to get in and clean these contacts, as I believe this is what is causing the issue.
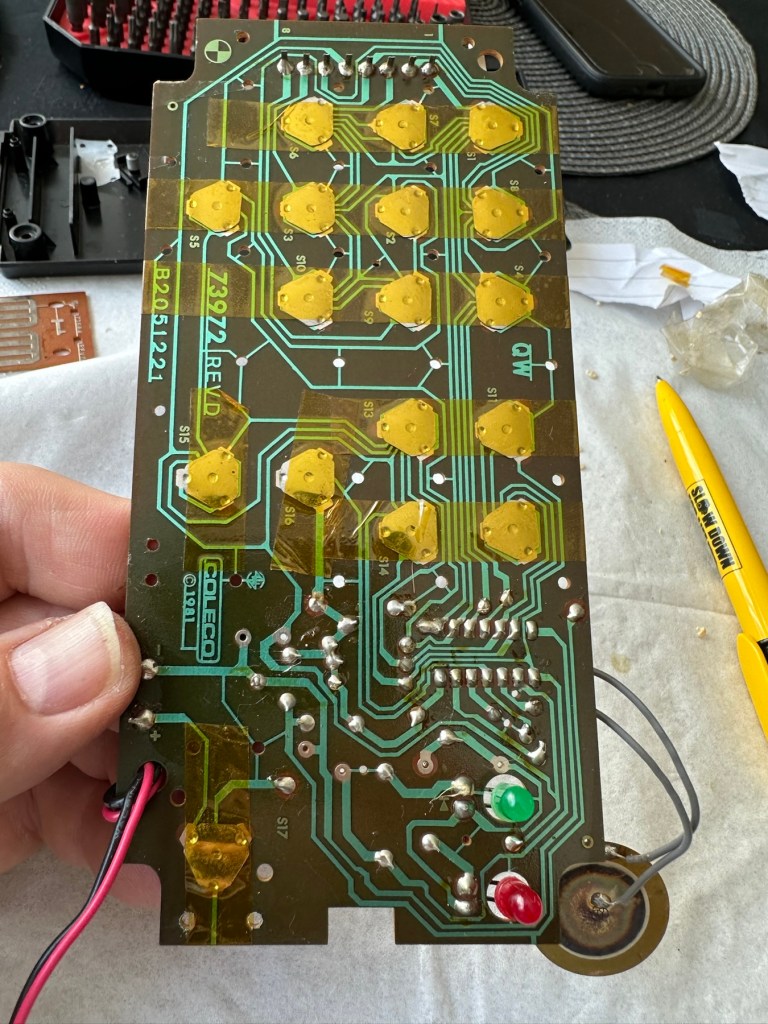
All buttons under a sheet of tape
All buttons are under a sheet of tape. I have removed this tape, cleaned all the contacts with IPA and repositioned them and re taped them using Kapton tape. They are a lot cleaner and are clicking nicely.
Button removalAll buttons removedAll cleaned and sealed down with Kapton tape
The contacts where the game cartridge is inserted are quite contaminated so these also have to be cleaned.
Contacts are contaminated
I’ve used an emery board to clean the contacts up on the unit, and when the cartridge is inserted we have a result. The first ten questions I have input have had correct answers only and no duplicates, so it really does really look as if the contacts were contaminated causing some kind of issue with the two parts of the game communicating.
Result:
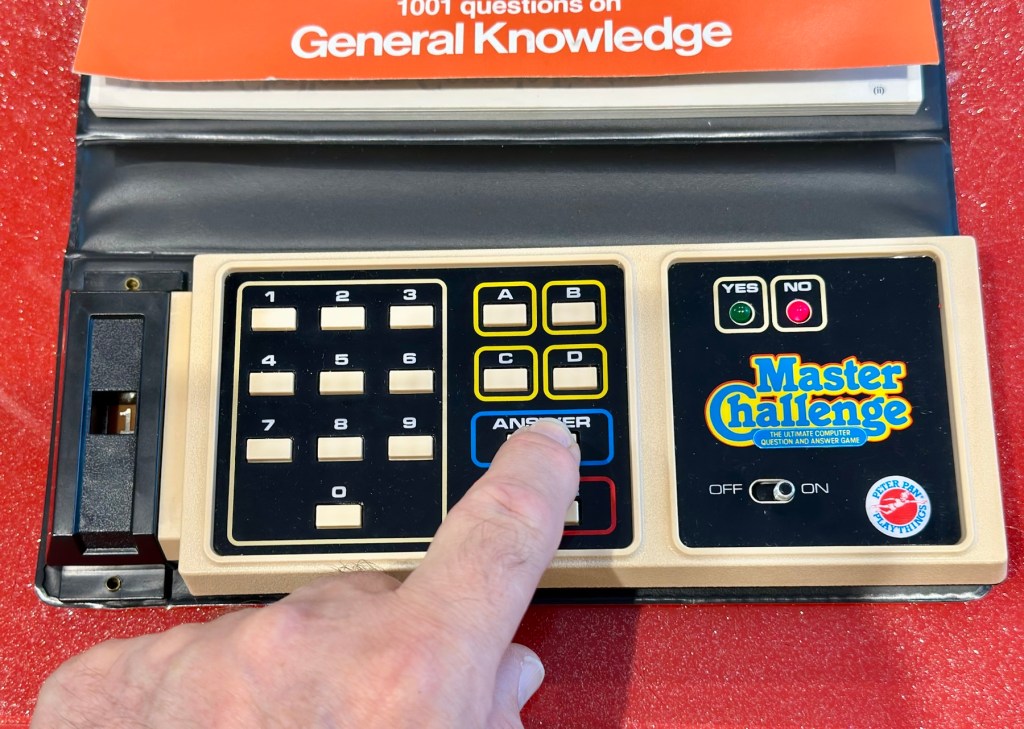
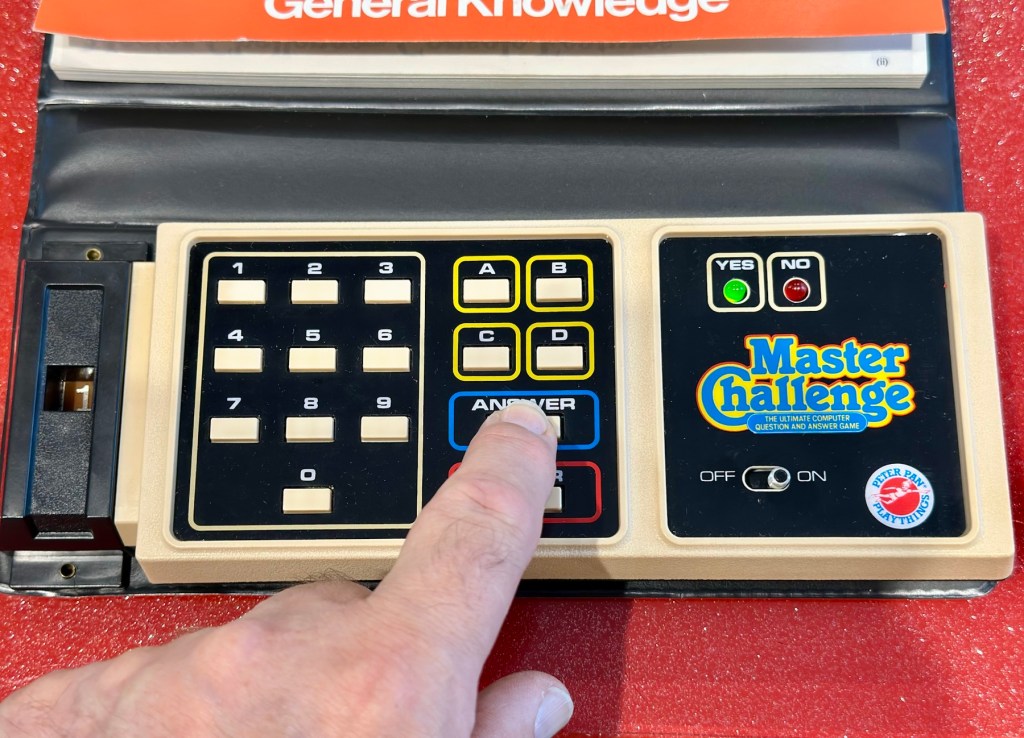
It’s had a good clean both inside and out and a few of the old items inside replaced and given a new lease of life. The unit is now fully working and can be seen doing so in the little video below.
A little test example
I’ve since purchased a new binder for question set 1, so I now have that along with question set number 5. I’ll keep an eye on the auction sites to see if any of the other sets become available, and who knows I may try to get a full set. Now that would be quite rare I’d imagine.
A nice clean and working unit
I love digging around in these 80s units and just wonder at how basic the technology was back then, it’s just amazingly simple and so well put together. Anyway, this one is now working and good to go for a few more years yet. Saved from landfill we have another successful repair under the belt.
Thanks as usual for popping by. It’s most appreciated.


You must be logged in to post a comment.