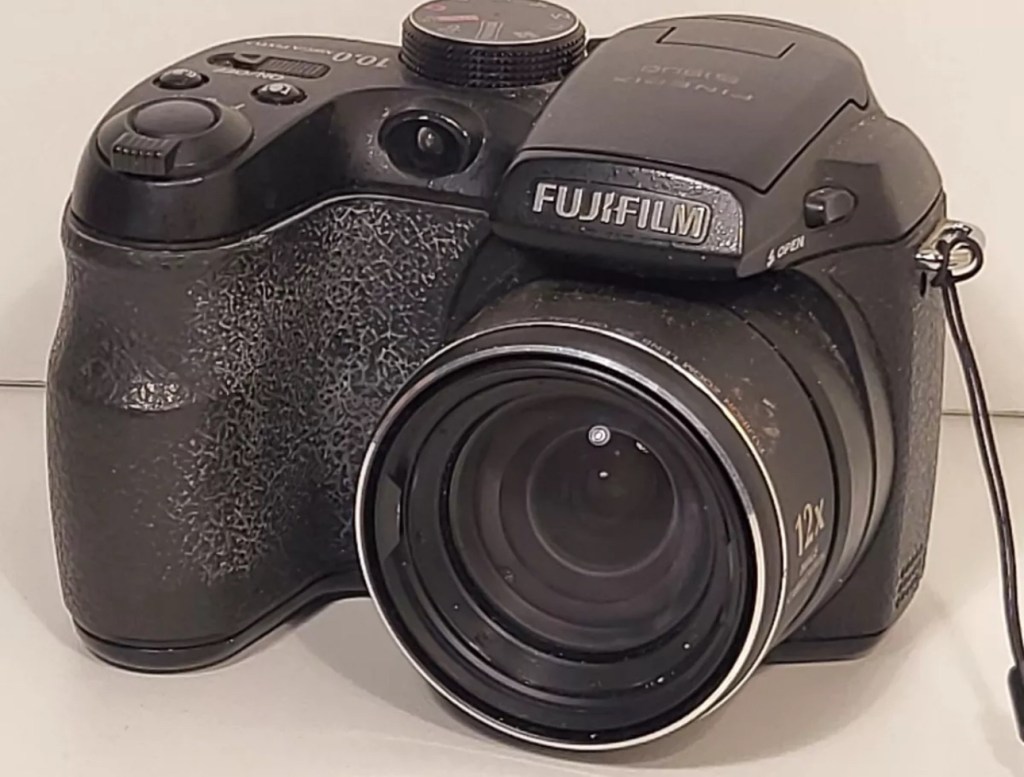
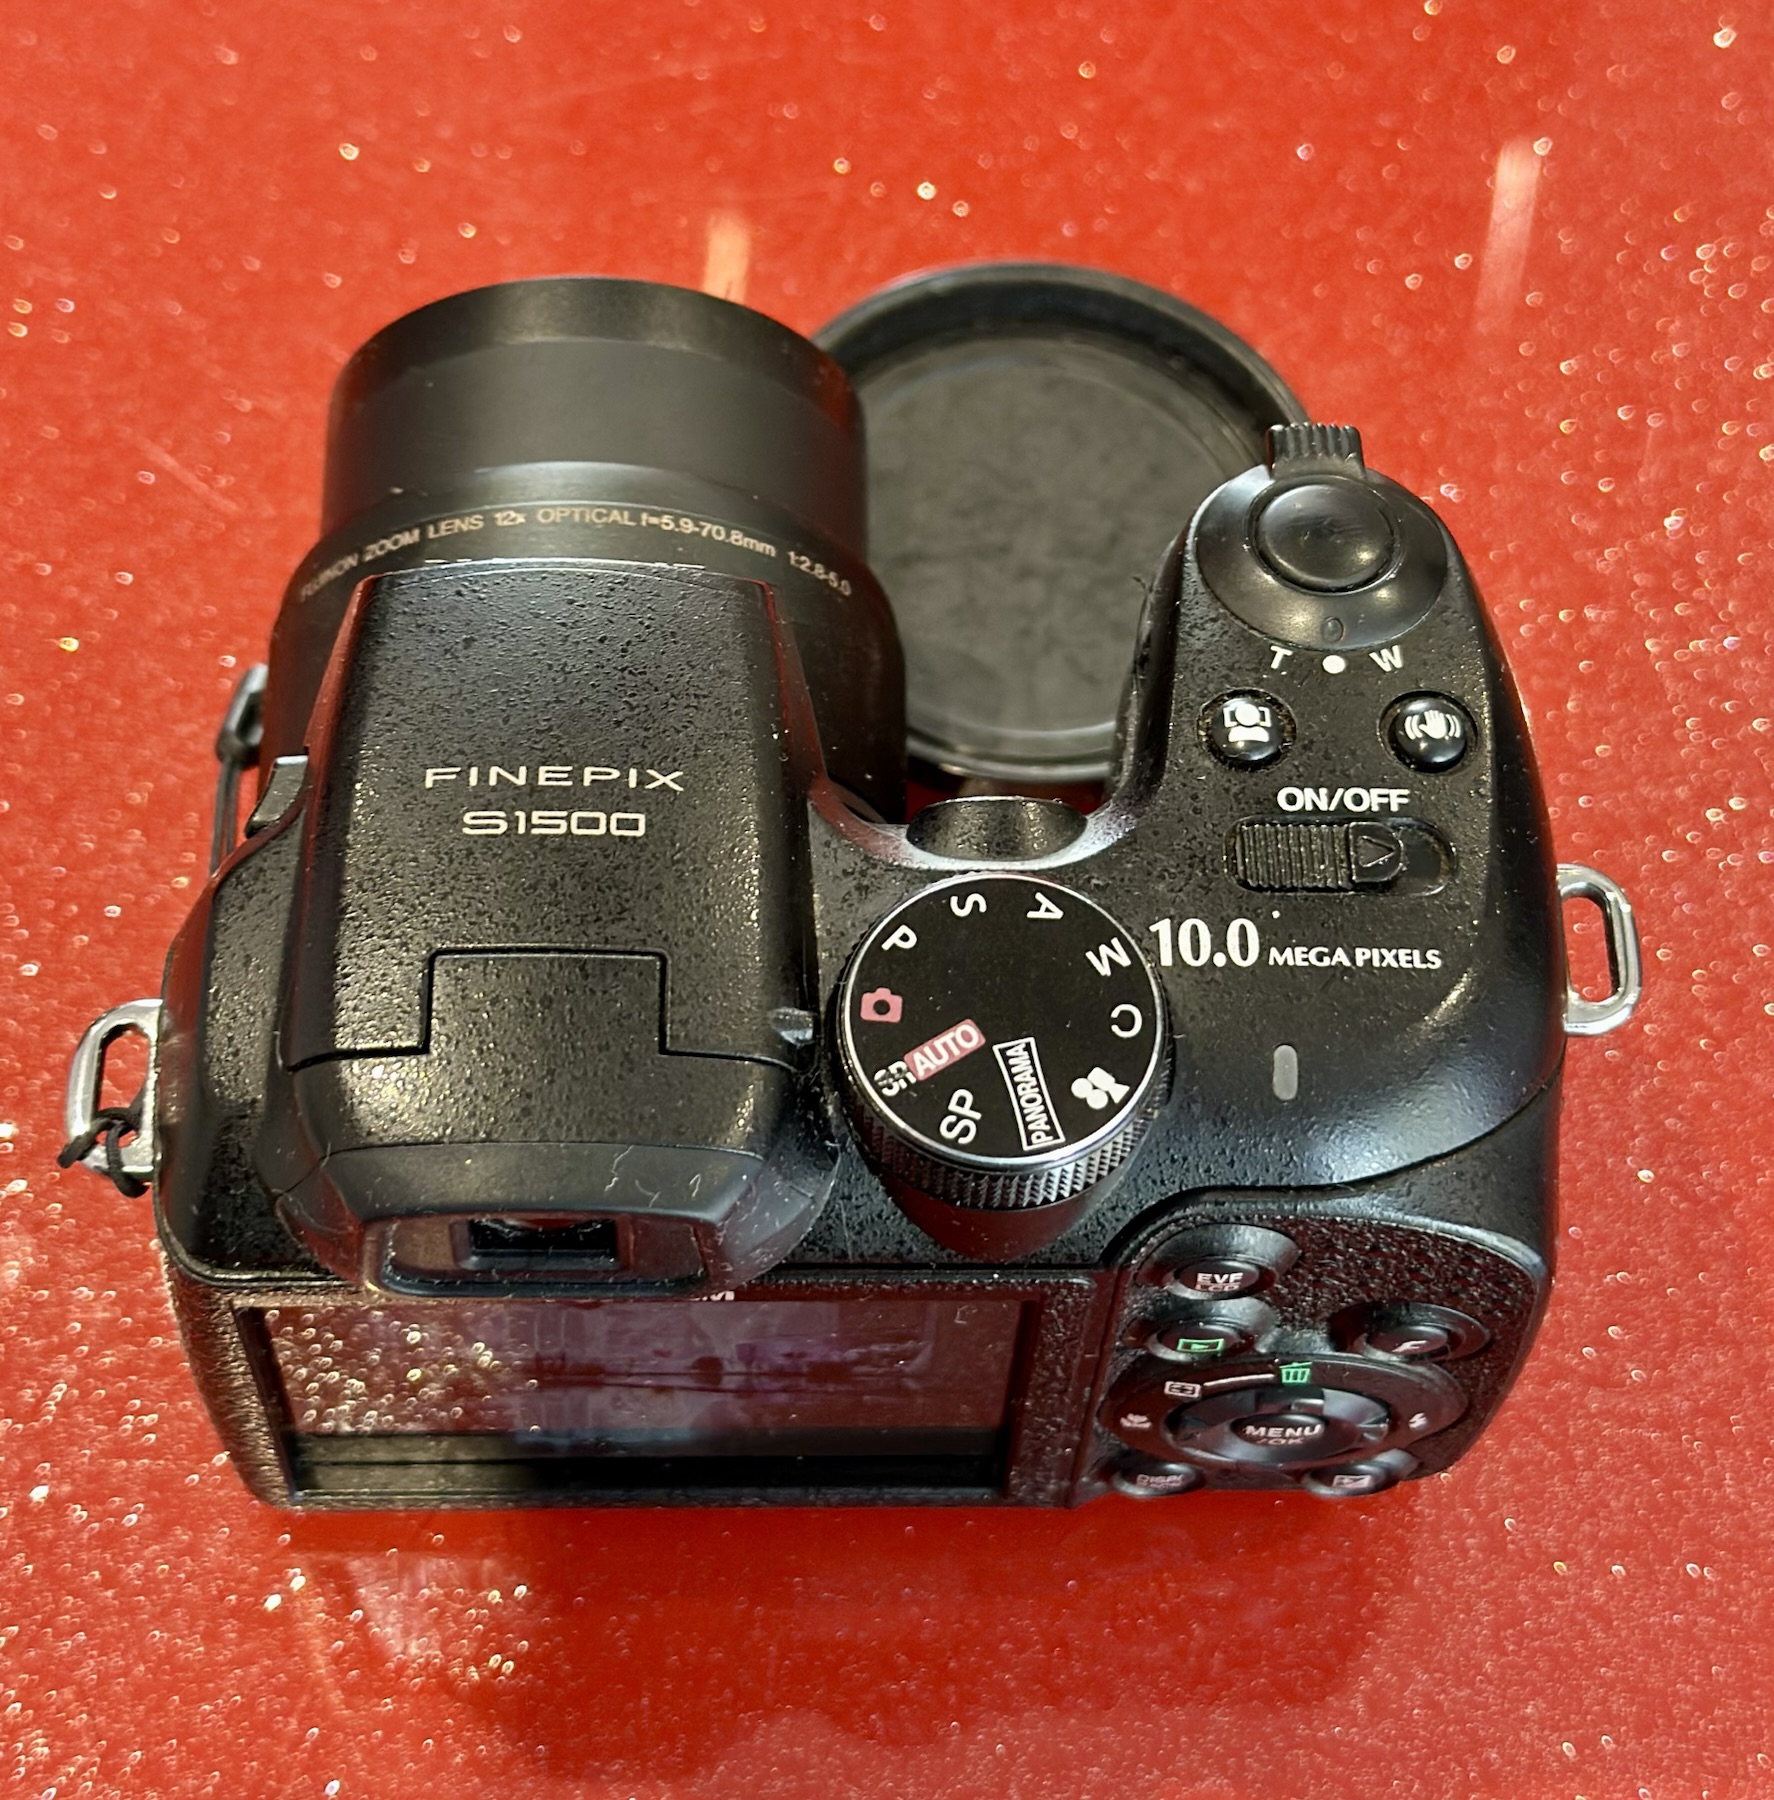
I purchased this item from EBay in April 2024 and have only just got around to finishing what had been a draft post put together all that time ago. I had written about it briefly in this earlier post Fuji Finepix S1500
A little bit about this digital “Bridge” camera
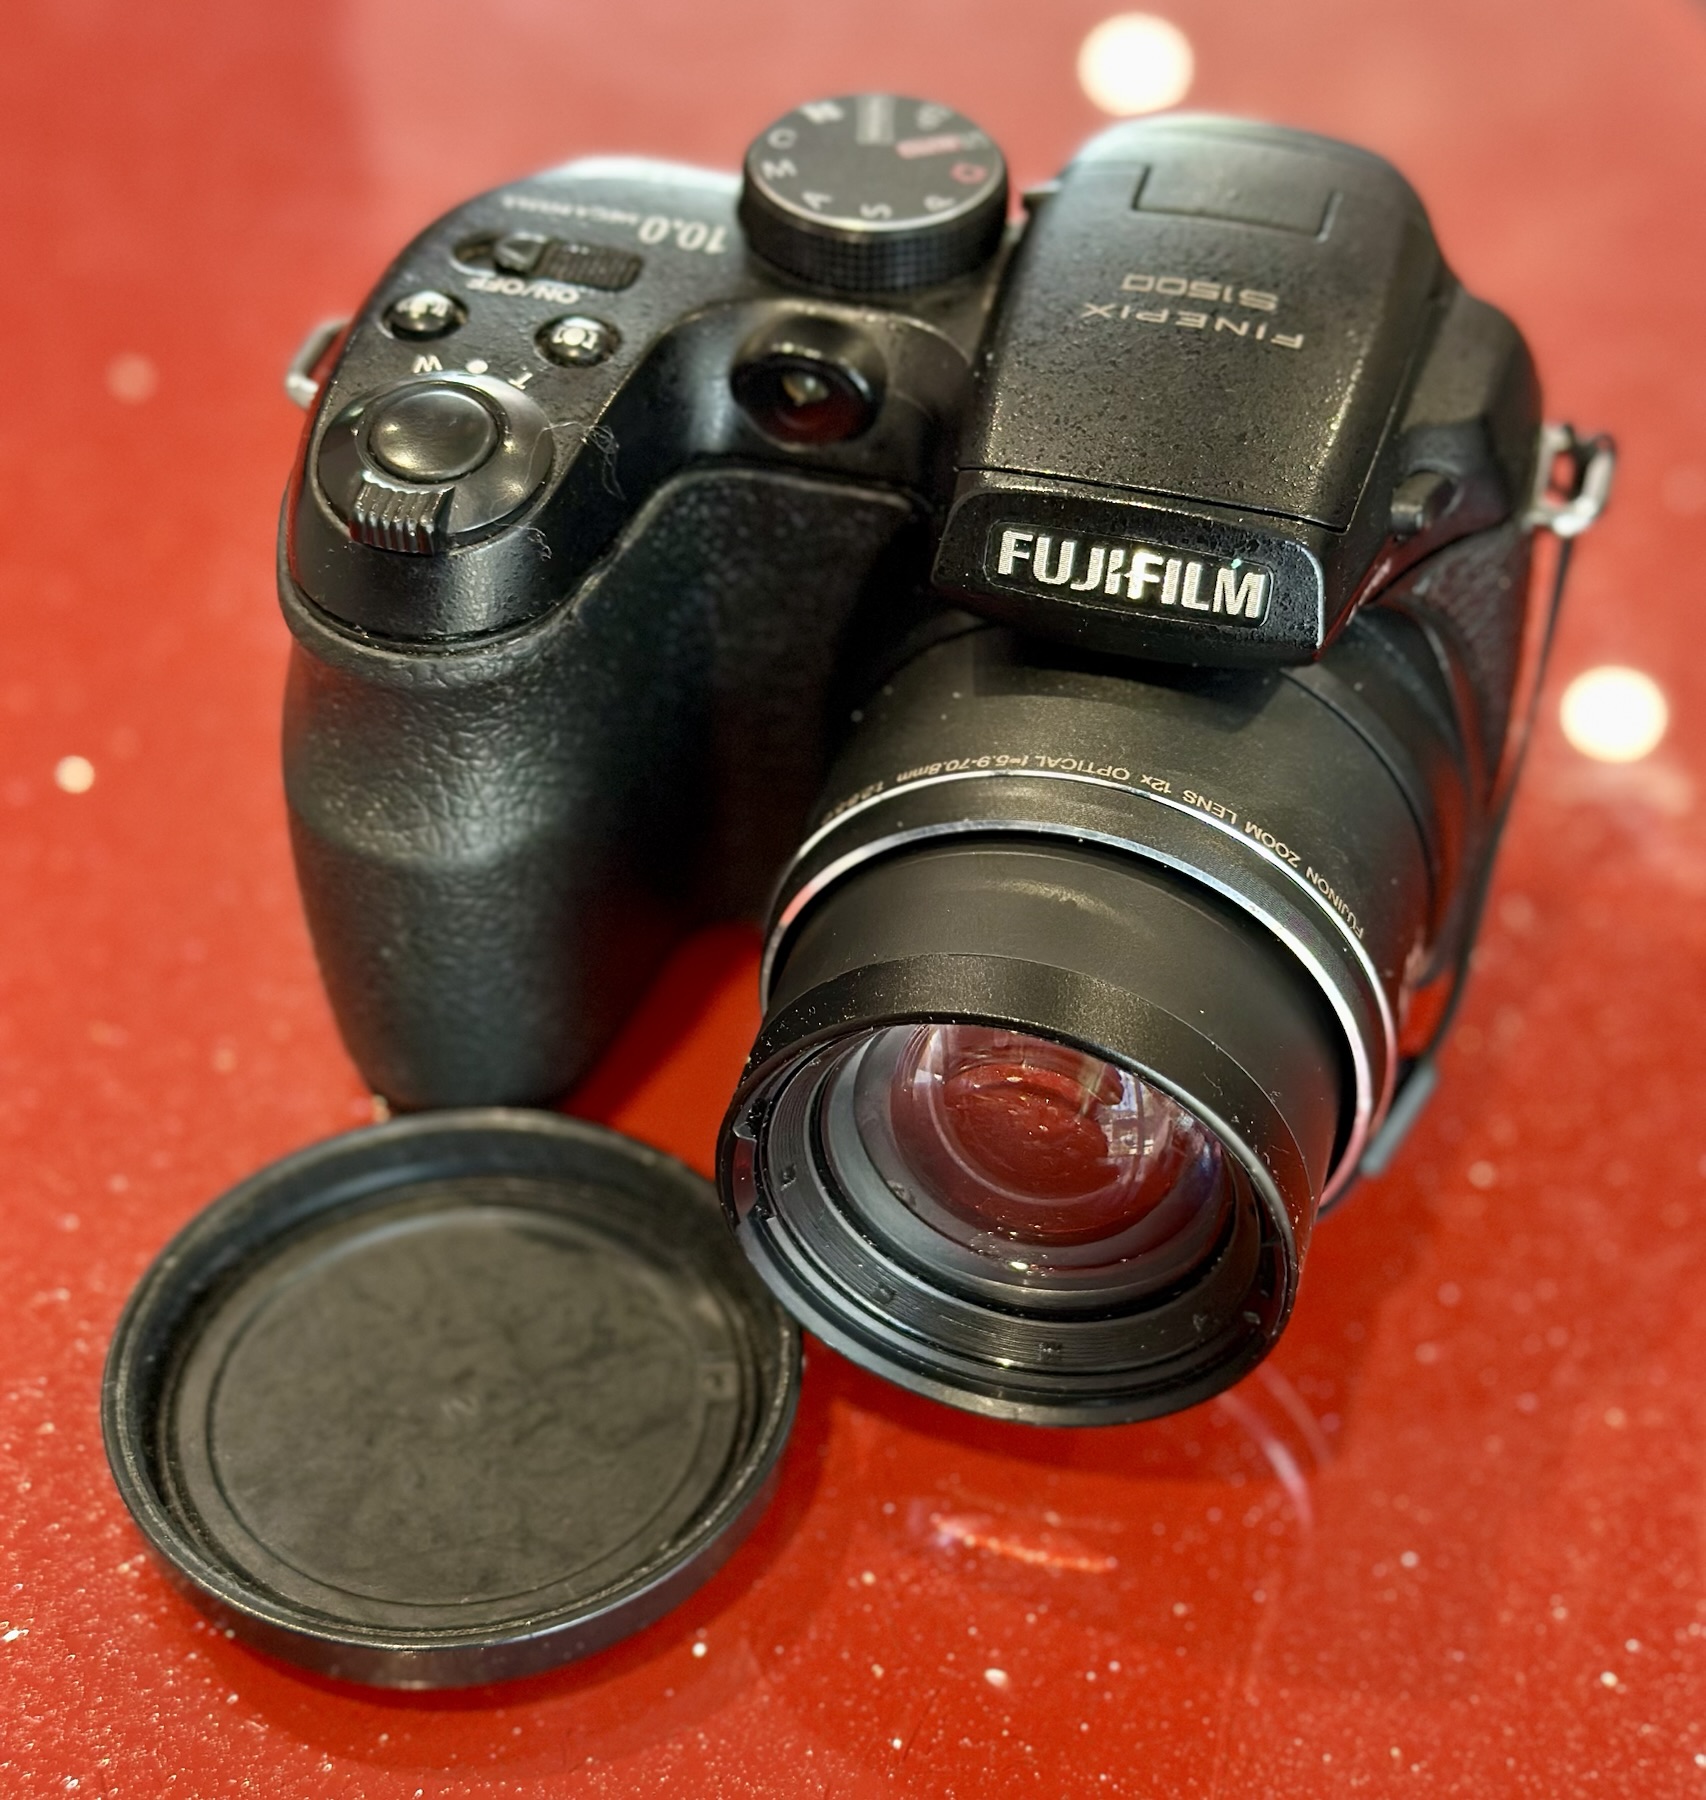
Successor to the S1000FD (at the time the world’s smallest 12x zoom camera), the FinePix S1500 is the latest in a long line of very compact SLR-styled big zoom cameras designed to appeal to those wanting a lot of lens on a tight budget. The big change is the inclusion of optical (CCD shift) image stabilization, making the long zoom a lot more usable in less than perfect light, and for the money you’re getting a lot of features – including full photographic controls and a 7.5fps burst mode (at reduced resolution) – in a lightweight package. Price on the market back in 2009 was £219:00GBP
DP Review
Assessment:
This camera was launched in 2009. The unit has arrived and is cosmetically tidy, however when you open the battery door the issue is obvious, two of the contacts are badly corroded and despite some initial cleaning there is no continuity and no power present. The unit is very much dead and not working.
A tatty and unloved camera
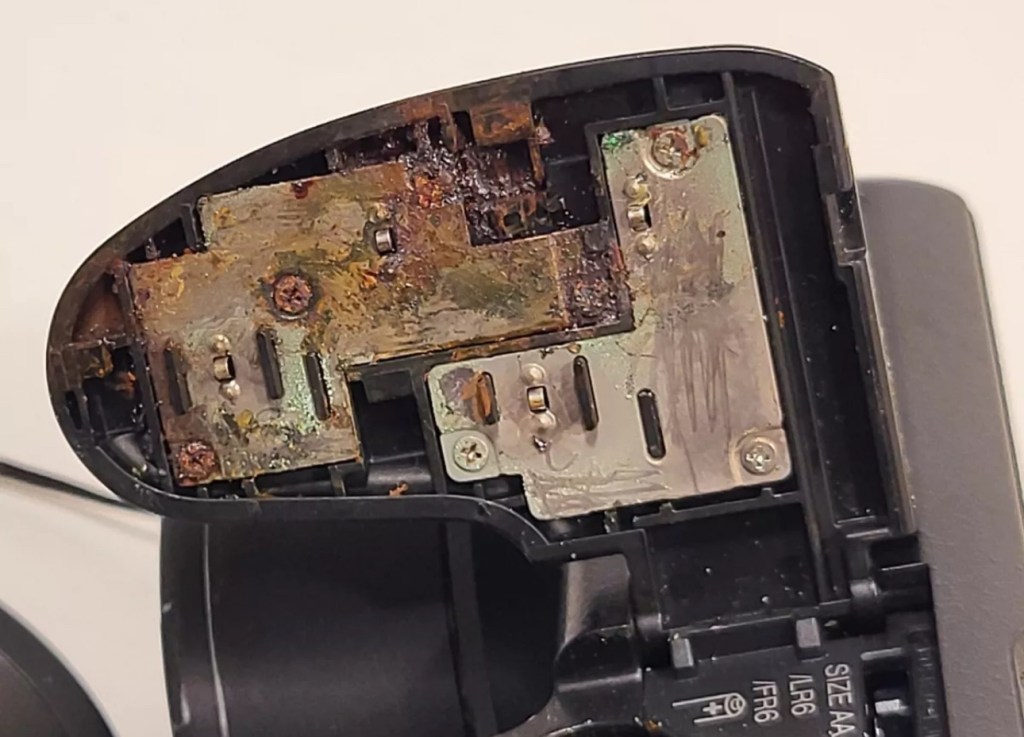
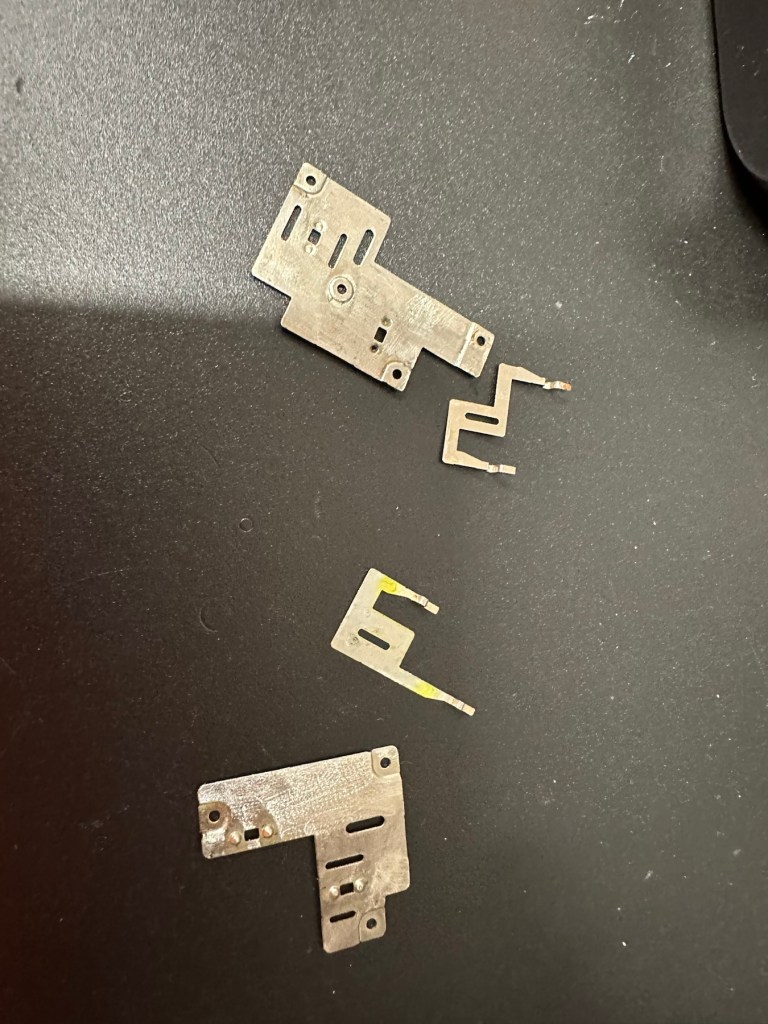
The issue with these units is that the power chambers are hard to access and to get to the point where the battery connectors are, you have to remove the powerboard assembly and this involves de soldering a number of points. There does not however appear to be any major signs of corrosion on the visible side of the board, when it’s removed it may reveal a darker issue hidden below.
Power board assembly
It’s going to be no easy task but I may look at running six volts from the bench power supply to a point on the power board assembly to see if I can breathe life into this camera. I don’t want to waste time in the battery terminal area if there are issues elsewhere on the unit.
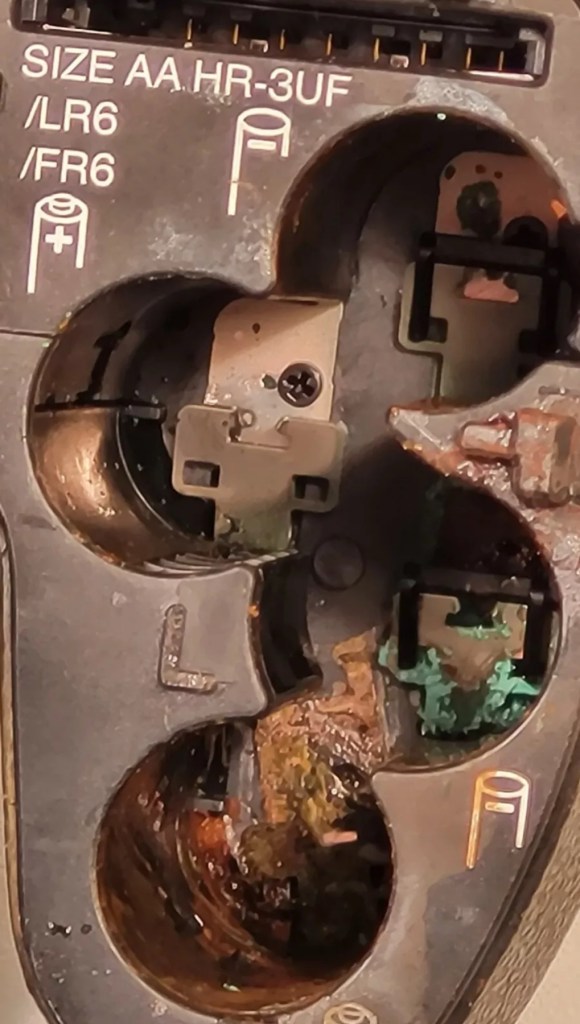
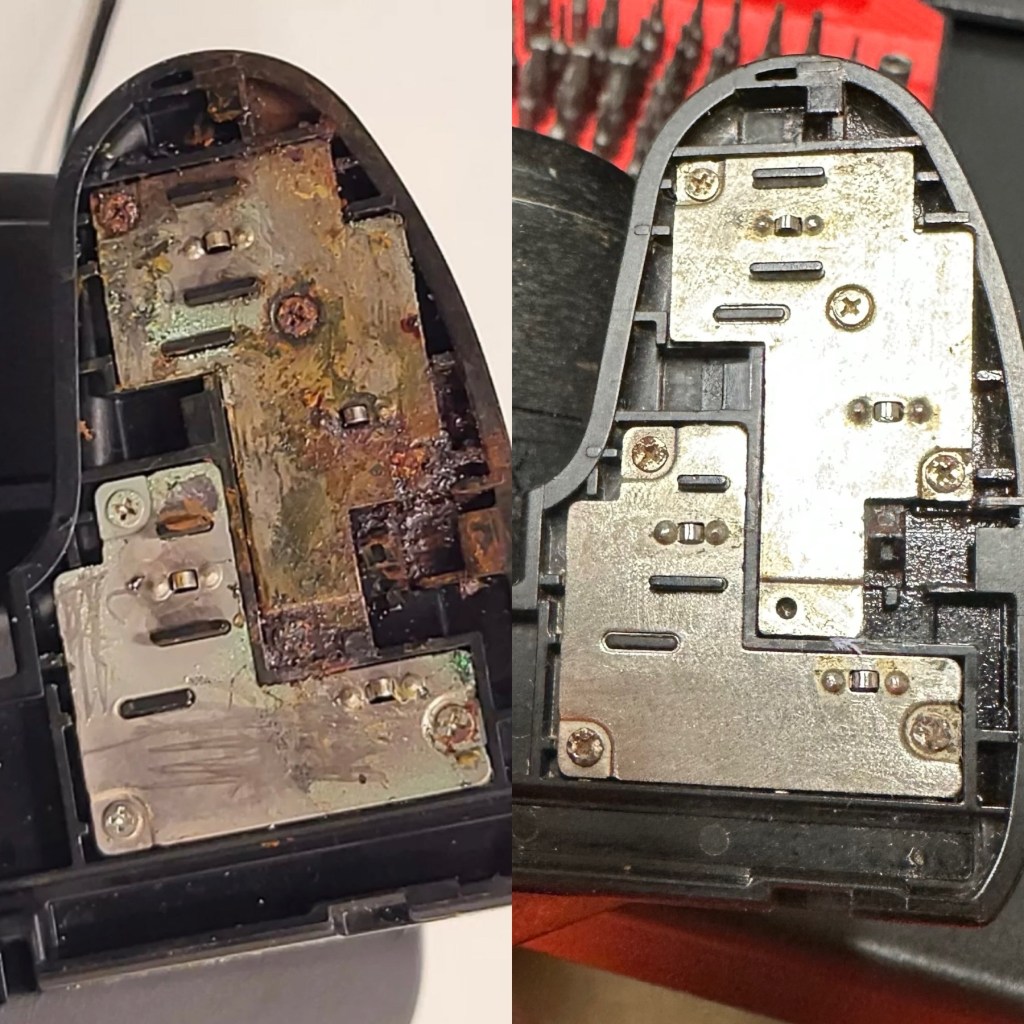
The corrosion on this camera is horrendous
Repair:
Looking at the boards again I am not going to pay them any further attention. The contamination has not reached under them and is isolated to the battery chamber so that’s where I will concentrate on.
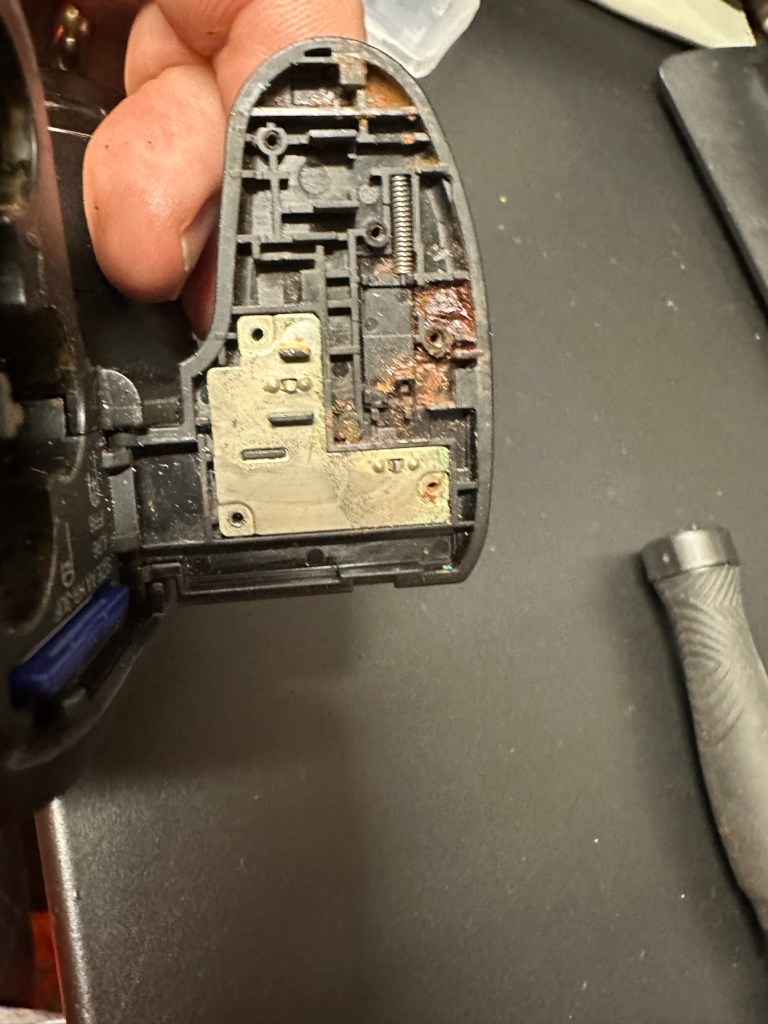
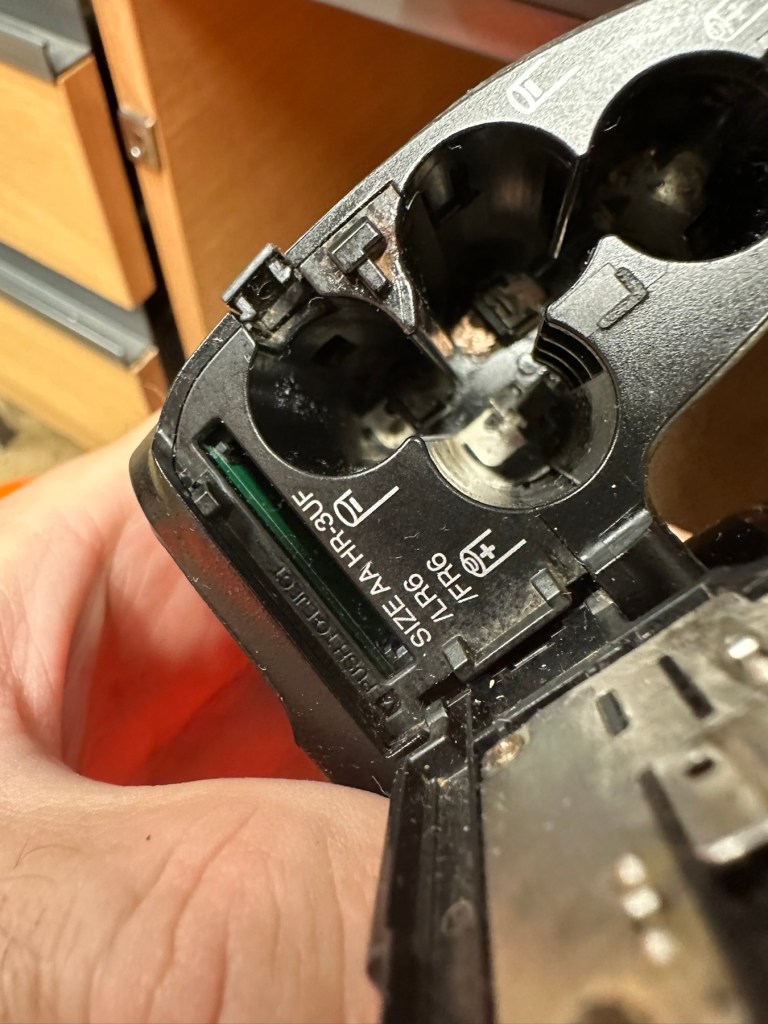
I’ve started with the contacts on the battery door, as you can see above, they are particularly bad and have no continuity through them.
Corroded door Contaminated contactsBadly corroded All clean
When reassembled the door section looks good, it will just need a good clean at the end.
Before and after
Rather than dismantle the whole camera, and because I know there is no contamination on the main board I was able to get down into the battery chambers with a steel braid pen that I have, that allows me to gradually scrape off the contamination. Followed off with a good chamber clean of Isopropyl alcohol, I was able to get the remaining acid contamination out of the camera.
Attacking the contamination in the battery chamber
Result:
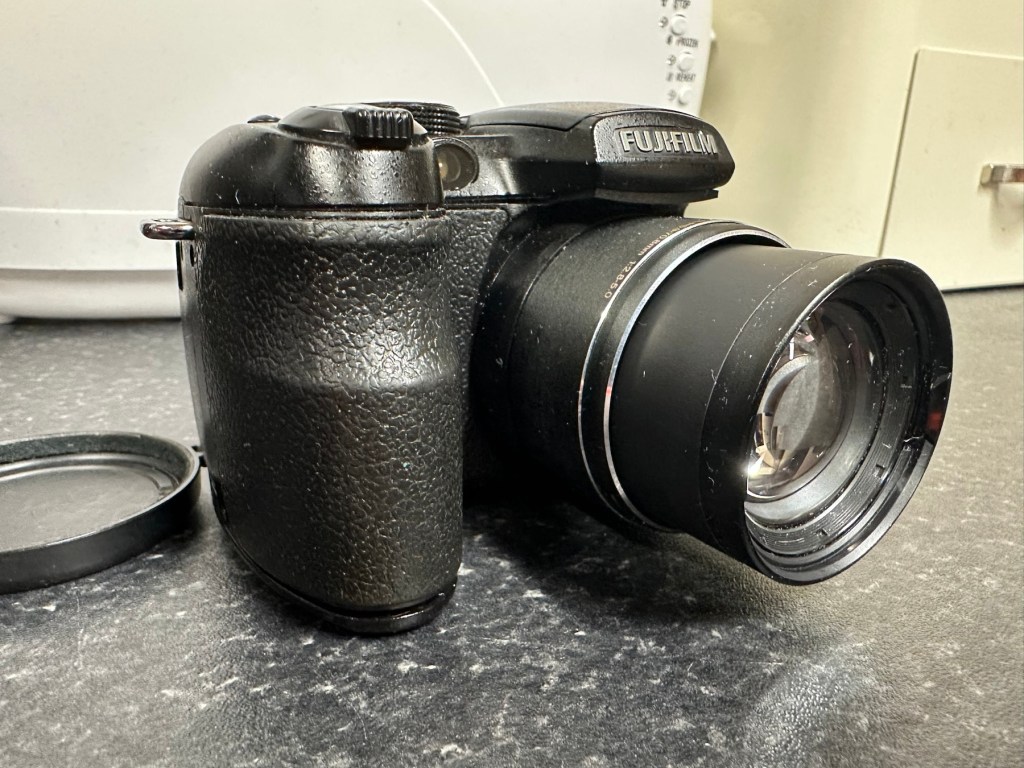
Once I did all of this I paid some more attention to the exterior using some car cockpit polish, this removed those horrid white sweat marks you see on the faux leather coverings of these older cameras, and it came up quite well and had a lovely vanilla smell to it .
Looking mighty good….and clean
Polished
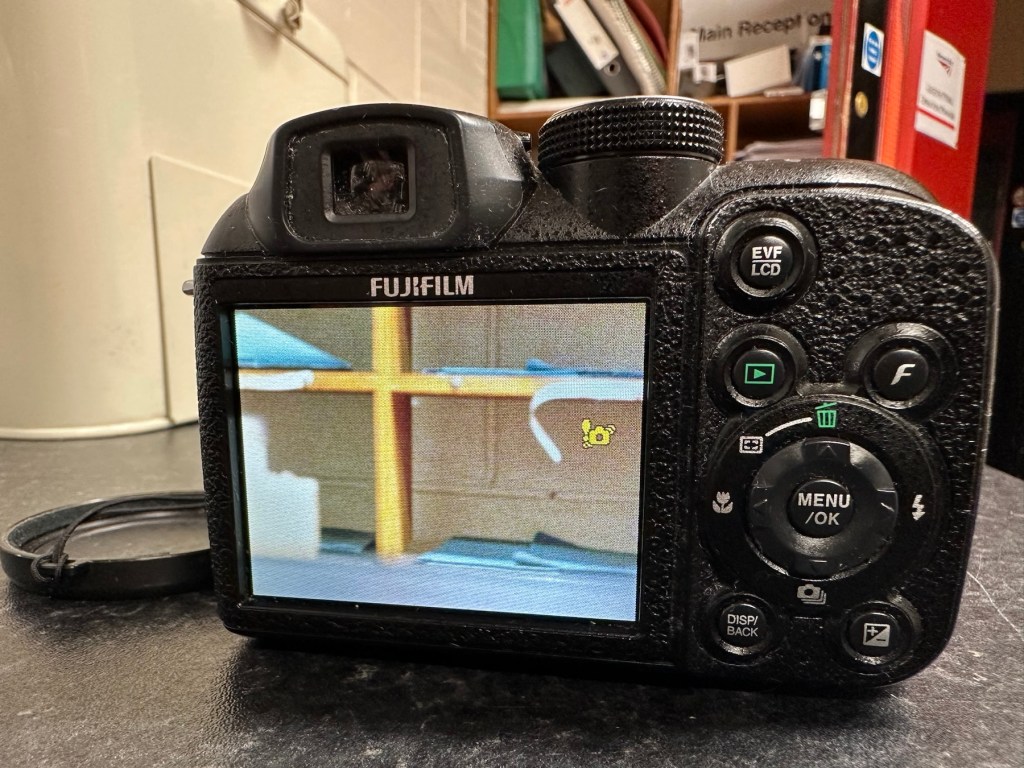
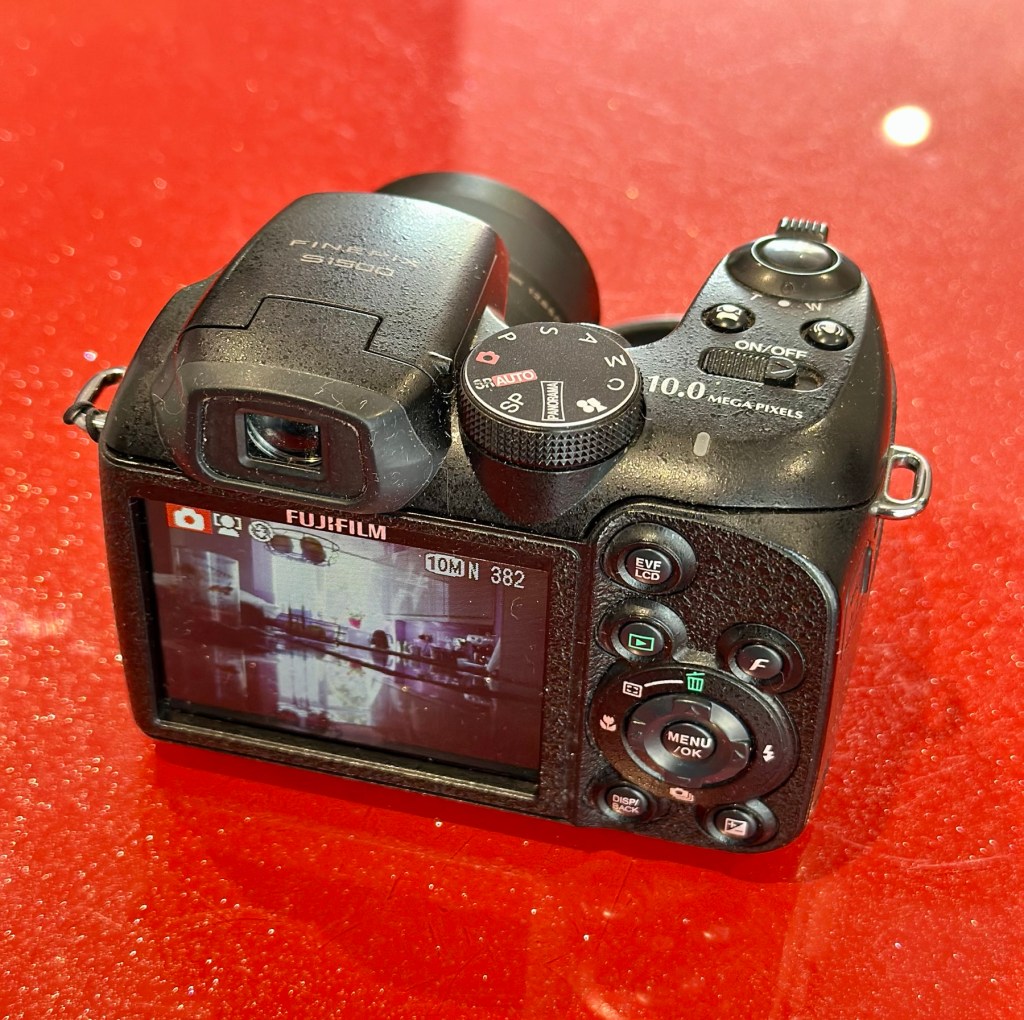
I have turned it on and hey presto we have life. Everything is working as it should. It’s a 10 Megapixel camera and I have a 1Gb Sd card installed and it is taking pictures as expected.
And it works
Nothing more really to say about it, it cost me about £6:00GBP spares and repairs as it was totally dead, thankfully we’ve managed to get it working instead of breaking it up for spares that would more than likely never be used anyway.
Finished item
This unit is of no real use to me, so I will get it up to our local Hospice shop for them to sell on.
Fujifilm Instax Mini 8 Instant Camera Teal Blue Spares & Repairs
Please see photos for condition this will be the item you will be receiving.
The camera will not turn on.
Thank you for looking!
EBay
It’s about time I started to get back to repairing some cameras, I have a mountain of them to get through but they can wait a little longer. These little Fuji units are really popular with the younger generation, and in my view anything that gets youngsters interested in, and involved with photography is a good move. We have some youngsters in our clan, and I have this earmarked for one of them if I can get it working. We had some conversations during our family gathering over Easter, and the subject of photography, and this particular member of our family came out. Seeing this auction today, I acted and purchased as this is a perfect little starter unit for her. My total outlay for this unit was £11:45GBP and considering the current costs are around £30-£40GBP for a working example, this is not too bad an initial outlay.
The Instax Mini 8
Here’s some history on these cameras:
Instax is a brand of instant still cameras and instant films marketed by Fujifilm.
The first camera and accompanying film, the Instax Mini 10 and Instax Mini film, were released on November 10, 1998. The “Wide” film and first accompanying camera were released the following year. The Instax Square film and accompanying camera were released in 2017.
The formats of Instax film give an image size of 46 mm × 62 mm (1.8 in × 2.4 in) for the Mini, 99 mm× 62 mm (3.9 in × 2.4 in) for the Wide and 62 mm× 62 mm (2.4 in × 2.4 in) for the Square. The Instax colour film is available in Mini, Wide, and Square formats and the black and white Instax Monochrome is available in Mini and Wide formats.
Wikipedia
For anyone that was around in the 70s, these cameras are an extension of and an advancement of the then Polaroid instant photography system. Nearly every household back then had access to Polaroid cameras. If you look back at any photo album or collection from that time, you will invariably find some Polaroid photos stored within that collection.
Here is a typically over enthusiastic review produced by a very pleasant chap when it came out about 8 years ago. Sums up in a few minutes just what it can do, and just how easy it is to use.
A very enthusiastic review
This unit looks to be in quite a nice condition but as always we will never truly know until it has arrived and can be assessed, never forget, this is EBay that we are purchasing from 😂
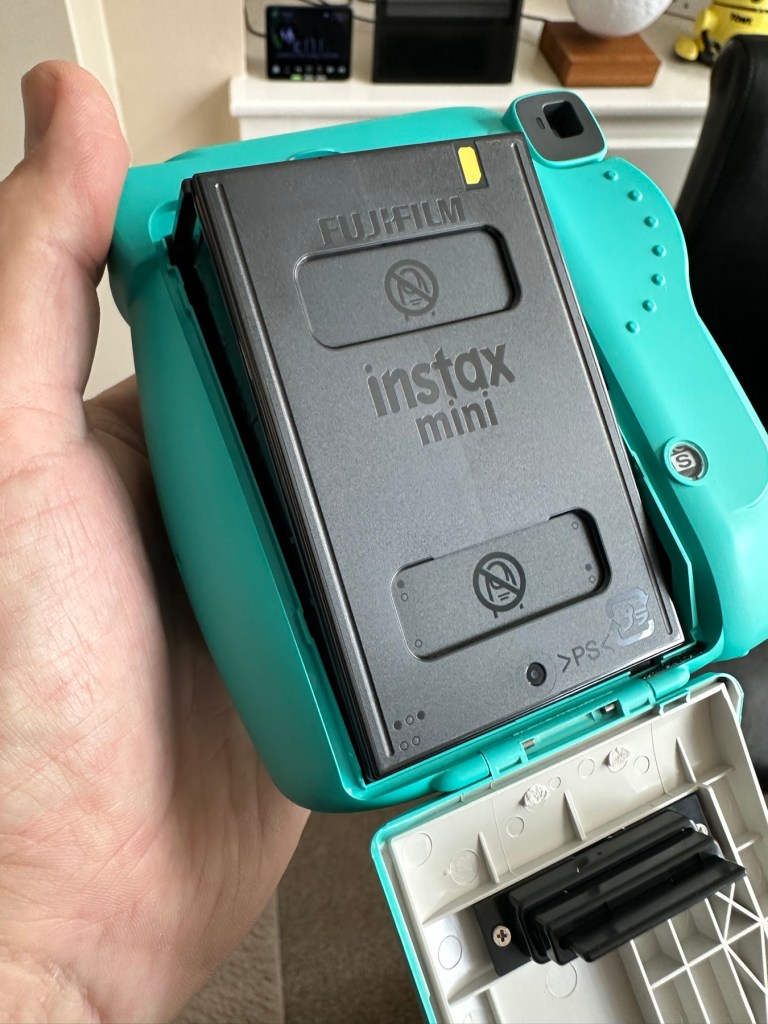
Battery compartment…suspicious!
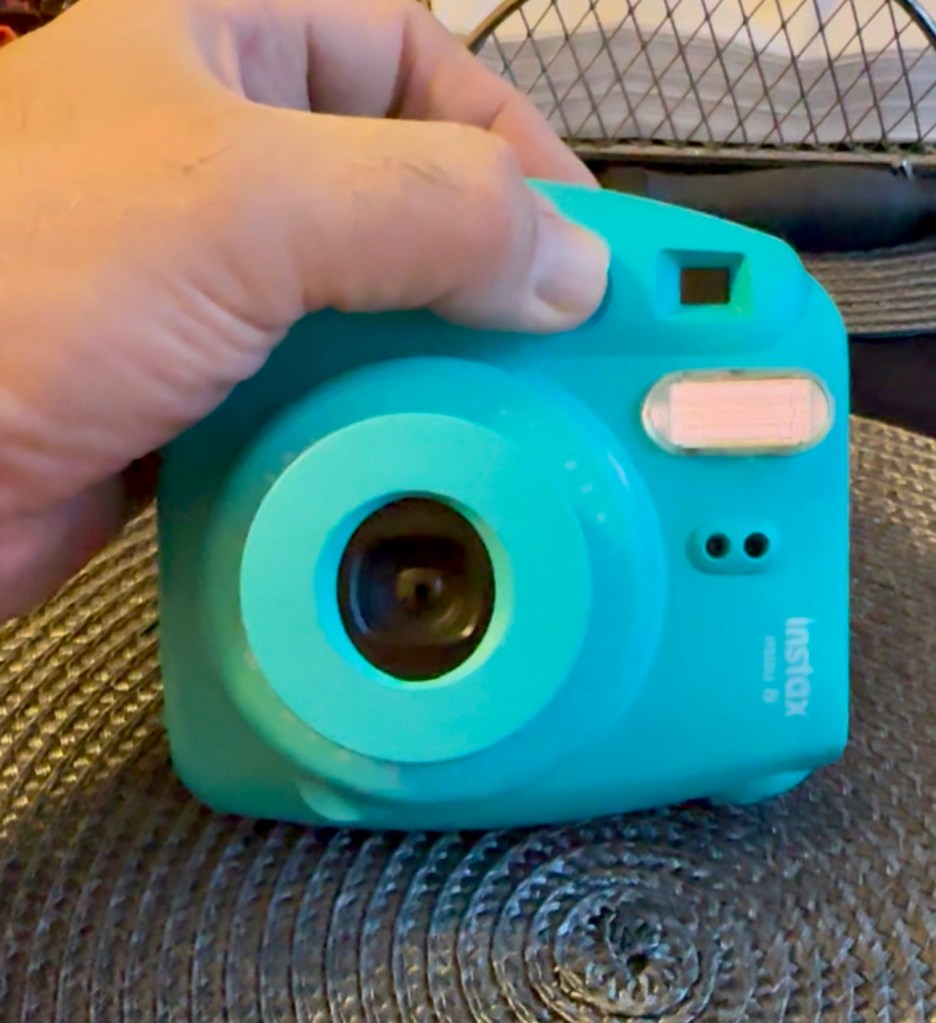
Something looks suspicious in the battery compartment. There seems to be contacts missing, they might be fine I just don’t know. They just don’t look right to me. There may well be some minor signs of corrosion as well. Who knows, I’ll just have to wait until the unit arrives. So let’s just be patient until then.
Come on Mr.Postman!
Assessment:
I’ve downloaded the instructions and they consist of just half of one sheet of A4. To be honest they are about as basic as are needed I guess, but in technical quality they are about as much use as an ashtray on a motorbike! And those contacts I mentioned above, look just as they were from the factory. What a strange design.
On arrival the camera appears to be in a really good cosmetic condition, there is even an old film cartridge still inside that I suspect is well fogged by now. However this will be of use if I can get it working, as it will prove if the film transport works.
The battery connectors are exactly as they were when the unit was assembled, so my earlier suspicions have come to nothing. However there are small indications of battery leakage on the outside that are always concerning, because they can always hide a greater issue occurring inside the camera. When batteries are put in place the unit is totally dead, just as advertised.
Cosmetically tidyBatteries – no powerContacts show evidence of light contaminationlight contamination in evidence
So no more to it, I have to open the unit up and see what I can find inside. Before doing that though I have connected a bench power supply to the contacts and there was still no draw on the power at all. It is definitely dead.
Repair:
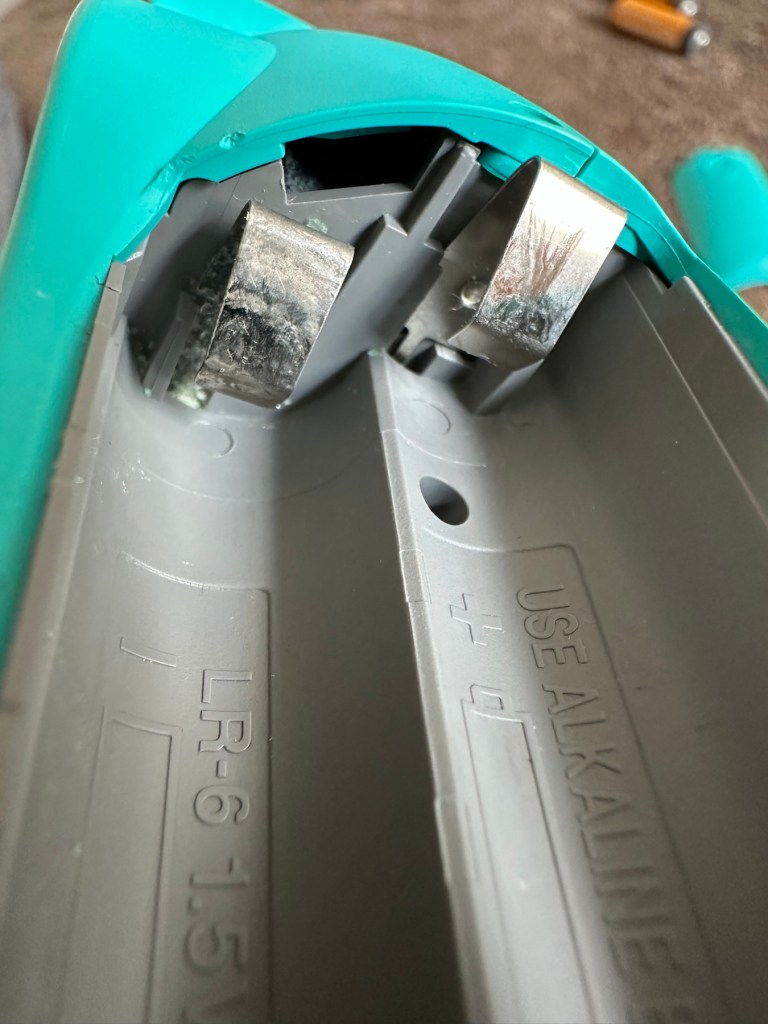
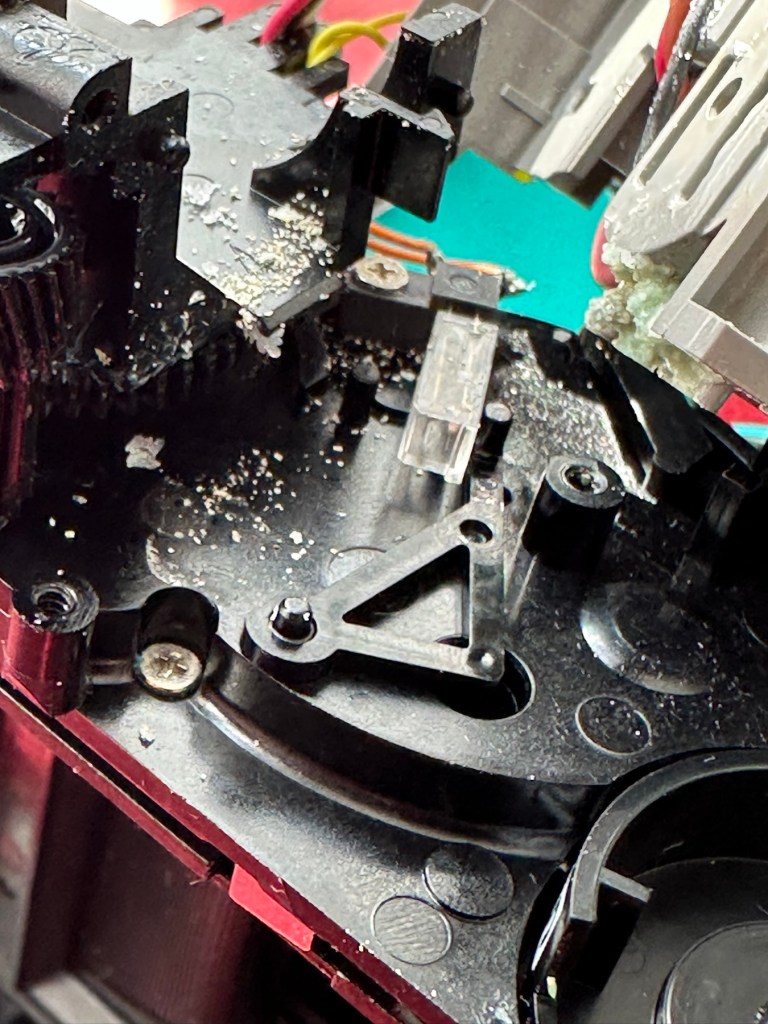
On opening. Oh my word. What the heck is that? I have never seen contamination around a battery terminal like that before, the battery contacts have been totally consumed.
Under that crystallised mess is what is left of a battery terminal, and that thing that looks like a biscuit on the left is the main motor. Totally crusted up
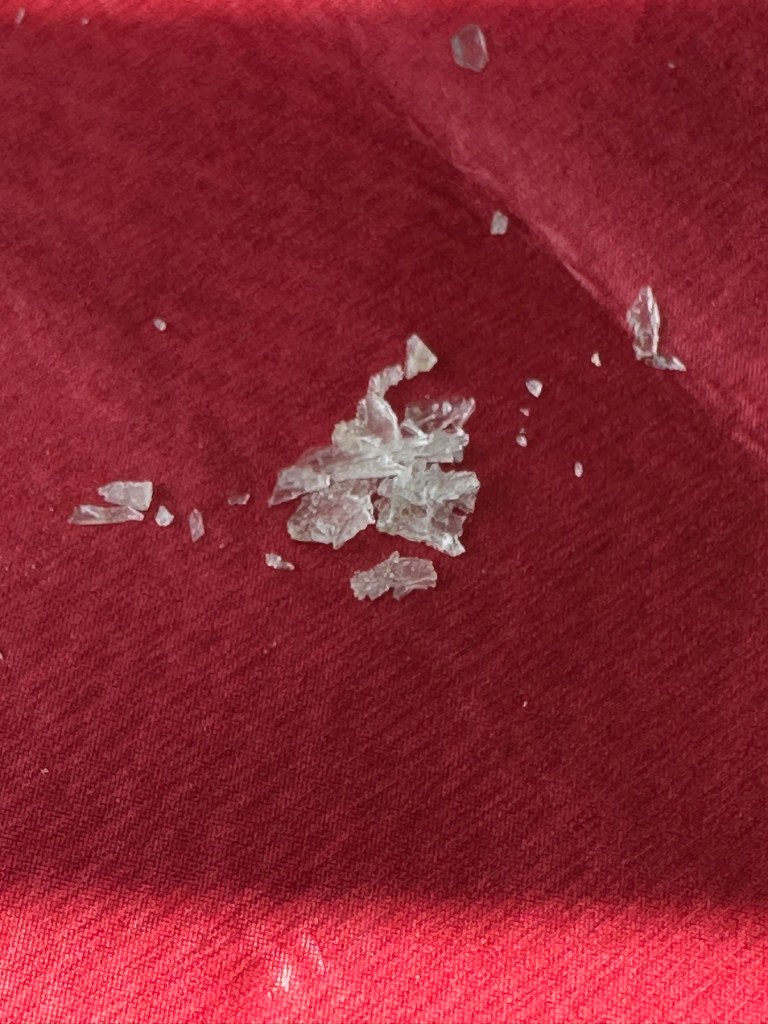
I could hear some rattling around inside the case and thought something had worked itself loose. No. It was what looked like broken glass, but it wasn’t, it was crystals of contamination, this camera has more stalagmites than Wookey Hole! The motor was badly contaminated and every part of the working mechanism had signs of this contamination, it was everywhere.
Contamination crystalsMotor contamination
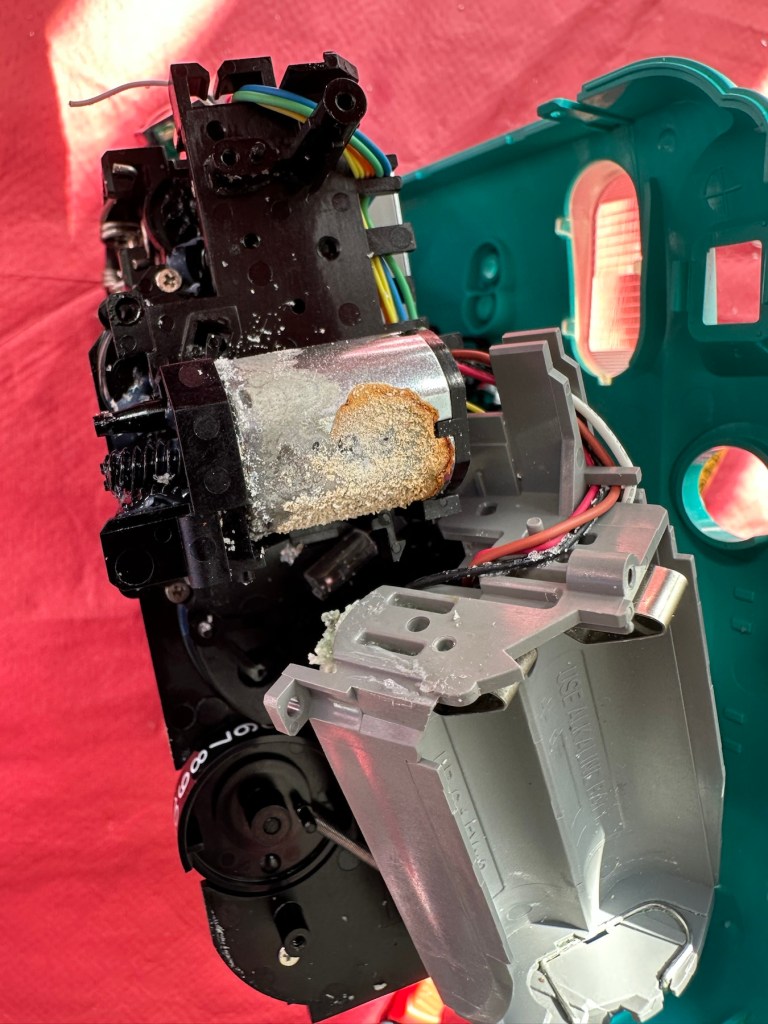
First things first, the issue with the power supply is purely at the point of that big mass of battery contamination on the battery terminal, there is no continuity here and this needs removing and attending to.
What was under that crust of contamination All cleaned and ground down ready for re soldering
Using a combination of alcohol to break down the contamination, and a grinding pen, the offending crust was eventually removed. It had eaten through the wire at the battery terminal and was being held in place by the mass of crust that has built up around it. I was able to cut back the wire and re solder the terminal to make it good. There was contamination everywhere and this all had to be removed, if left in place it would cause more problems in the future. It had to be eliminated completely.
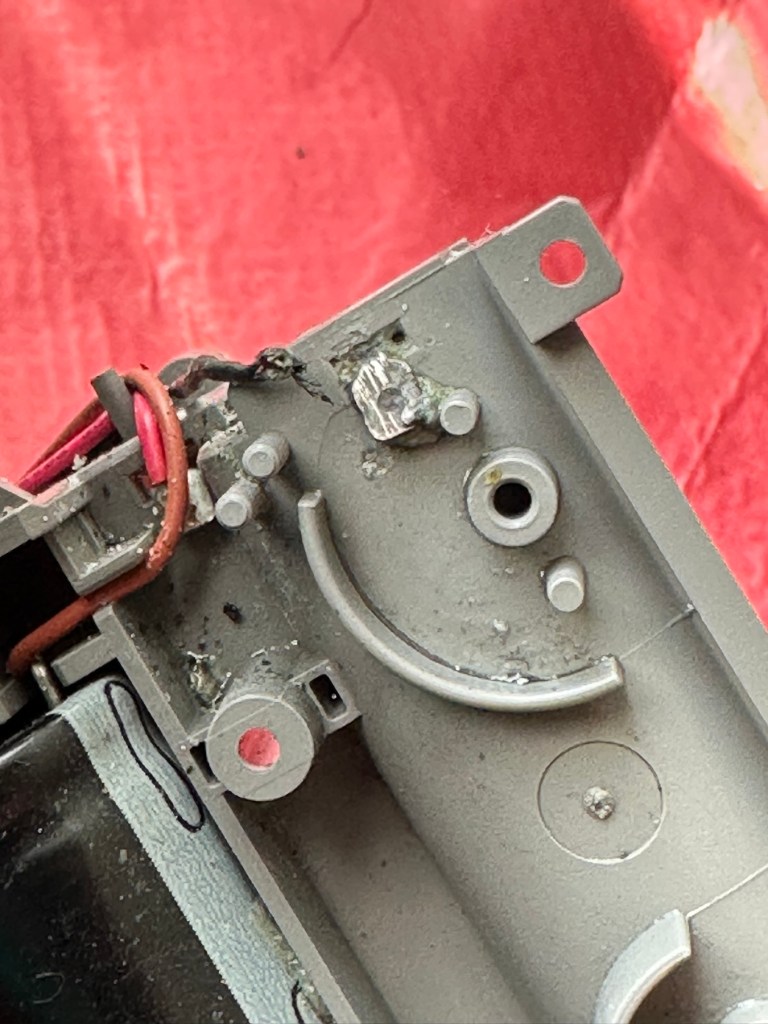
Contamination everywhere, what a mess
I removed the motor, and used a contact cleaner to free up its motion, I constantly turned it back and forth for about 15 minutes and I could gradually feel it freeing up. A wire had broken off from the led light on the viewfinder, this was soldered back into place and we were now ready to test. I put the batteries in and flipped the switch. I could hear the flash capacitor charging and all lights came on, I switched the unit off and began preparing to re assemble the unit, not before accidentally touching the flash circuit and taking a quick 300v shock in the hand. It’s a big capacitor as all flash units usually are. I’m an idiot, it was a school boy error. And I had a capacitor discharge unit sitting right beside me. Fool!
Ok. I’ve stopped cursing myself and the reassembly continues, and I manage to complete this with no further issues.
It seems to be working.
I’ve loaded in that old cartridge it came with and can confirm that it was all fogged film. However it has proved that the film transport system and flash are working as you can see in the video above. I’m now going to have to source some fresh film for a true test. Before that I’m going to open up the unit again and give it a good blast with compressed air and a final check to make sure I’ve got all of that contamination. It’s just the OCD coming out in me.
That said, the flash has now ceased working even though I can hear the capacitor charging up. I suspect the flash bulb has failed, so I need to get back inside anyway. Oh well, here we go again!
Like the idiot I am, I realise I have not been using sufficiently powerful batteries and the flash capacitor and flash unit are both in fine working order. I’m just going to make a small adjustment on the shutter opening switch though, and also the power contacts connected to the lens internal focus ring.
I’ve removed an unnecessary small spring from the aperture ring on the left, and I found some more of the crystal type of contamination on the circuit board near to the flash capacitor.
I’ve removed an unnecessary spring that was on the aperture ring, it was causing the aperture ring to sit in an opposing position to the light indicator on the side. The two of them have to match to ensure the correct exposure. The spring was pulling down on the ring, and moving it to a lower position on the indicator. Thus causing an exposure issue. I’ve removed it, it is not needed and is now working better. I have also cleaned the circuit board as I found another small patch of crystallised contamination. It’s now cleaner than when it departed the factory.
The lens aperture ring, and indicator
And here we have a picture where I’ve captured the flash unit working.
Flash captured working
Now all back fully assembled I’m confident that the camera unit is in as good a condition as it could be. Fully serviced, clean and operational just as it should be. The next real test will be when I get some film inside of it to carry out some realtime tests. I’m hoping I’ll have the film within the next day or two.
Result:
I dont know why but I really love this little camera. I’ve enjoyed the challenge, the issues thrown up by it, and have gained immense satisfaction in getting it back into a working order. I don’t know if it’s the size or just the pure simplicity of having a picture to hand that is fully developed in about 15mins. The excitement of watching a picture form in front of your very eyes and even the fun factor is incredible. It’s what is needed in photography today, a step back to the 70s world of Polaroid, it’s true that back then they really knew they were on to something big, but I bet they didn’t think that it would now be having such a resurgence with the younger generation 50 years later. Instant memories preserved right in front of your eyes. The Japanese photographic industry, are so up there with modern photographic trends and demands. If only some of the now defunct big players such as Kodak who I used to work for, had gleaned such future insight, things may have been very different.
This unit as was stated earlier, is promised to a younger member of the family and that is where it will be going. I think I’m probably going to buy another damaged one to fix for myself, because I just love these little packages of fun and instant memories.
My film arrives within the next 24hrs and I’m really looking forward to getting some pictures taken.
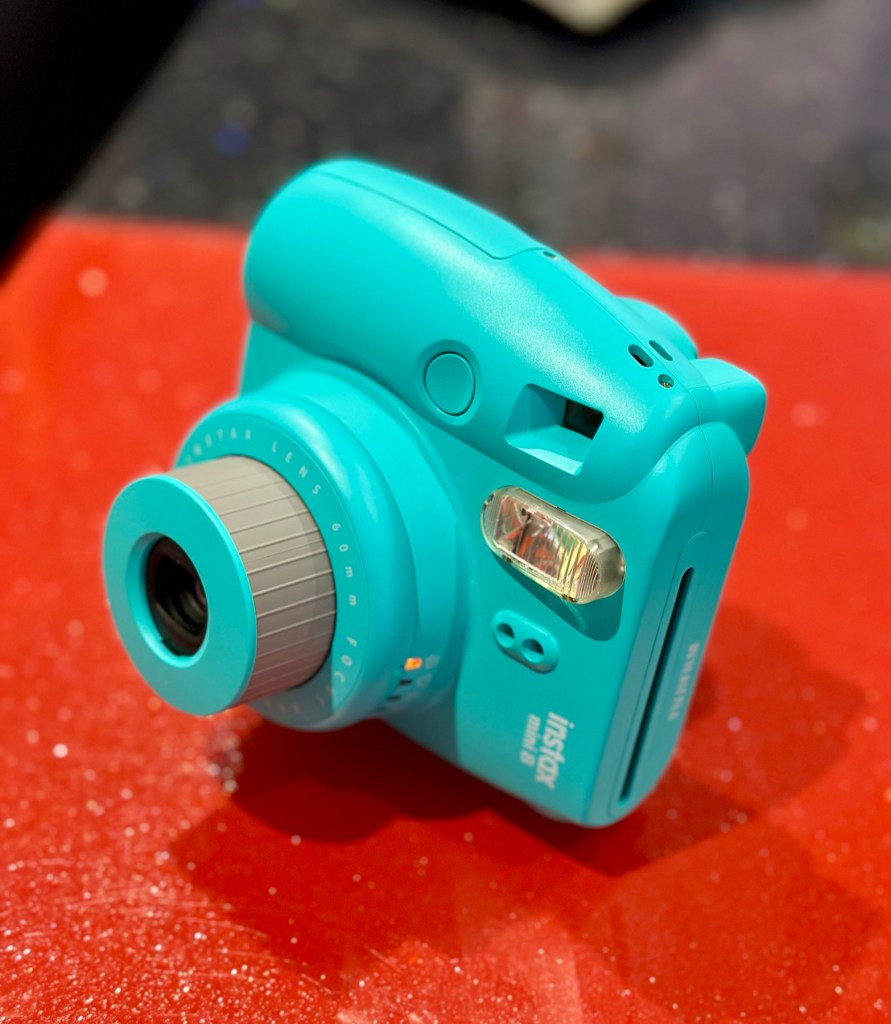
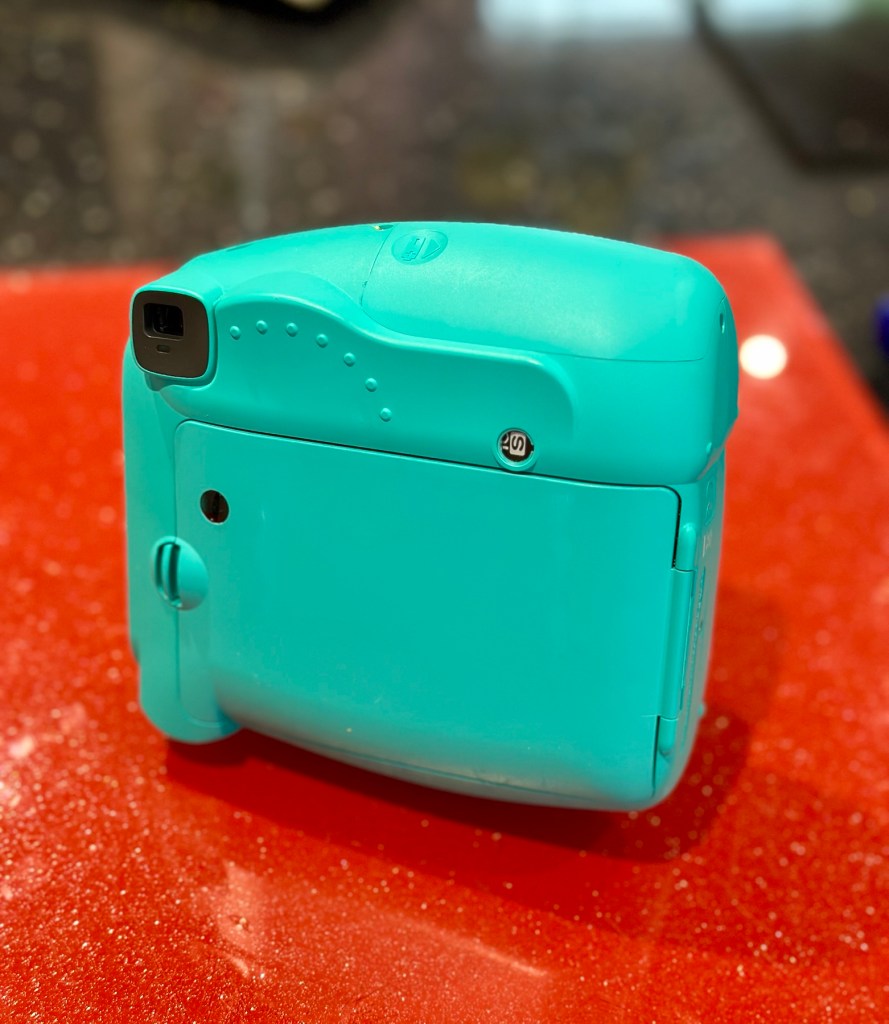
Now all polished and cleaned and looking splendid.
Sparkling, clean and pristine (Inside and Out)
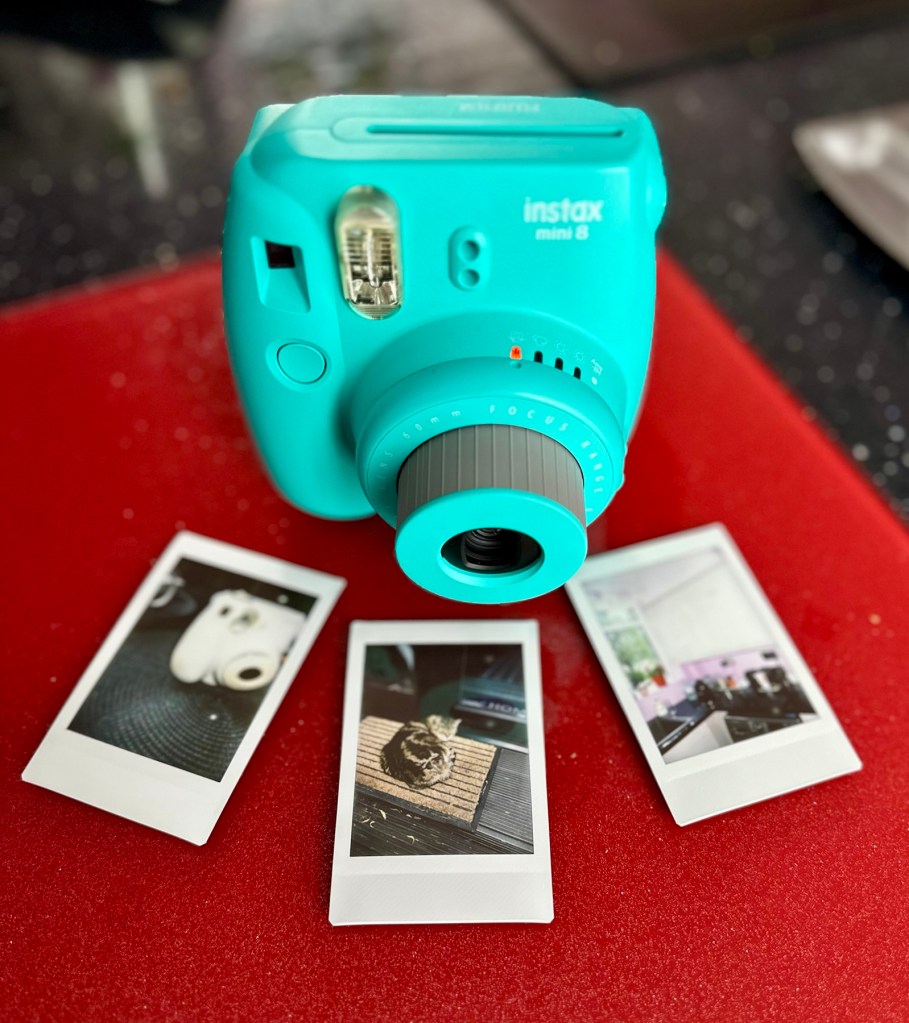
The film is here and I’ve put in new batteries and tested the unit prior to putting the film in. Anyway, film installed let’s take the first picture that will remove the cover off the film cartridge within.
Cartridge inFilm cover out
Now to find some subjects without wasting too much film. Picture one was of another Instax camera i am working on, bit close to be honest but there is at least an image, the camera is working. Second one is in the corner of the kitchen this comes out well. Third one is of the feral cat “Tabs” who owns our garden. She wasn’t too happy that I’d disturbed her sleep but that said it was a good photo.
First three trial photos
Overall I’m exceptionally pleased with the results. Closer examinations shows some repeating white spots up the right side of the photos, no big deal but this probably points to some contamination on the film roller. I can’t clean this now without fogging the remaining film, so I’m happy to leave this until this cartridge has been used. I’m happy that this is the only minor issue after all the other problems this camera had.
Working perfectly and looking great
Been a great little project that I have thoroughly enjoyed working on. These little units are great fun and the little lady that is going to get this camera is going to have a great time with it.
Another one of mass manufacturings victims, revived, and repaired and now facing a much longer and rosier future. Another one successfully kept from landfill. A winner in every sense of the word.
Many thanks for passing by, as always it is very much appreciated.
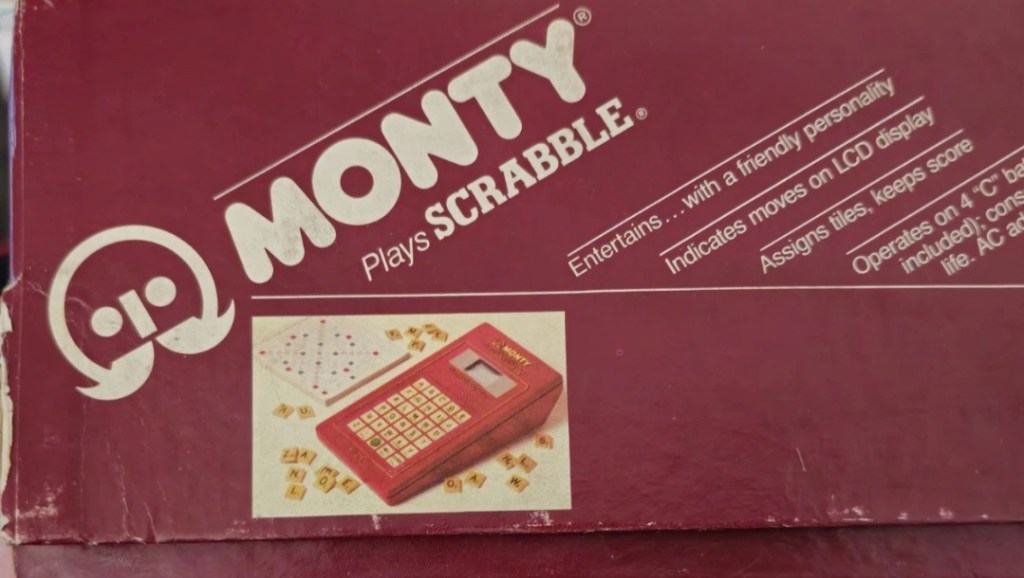
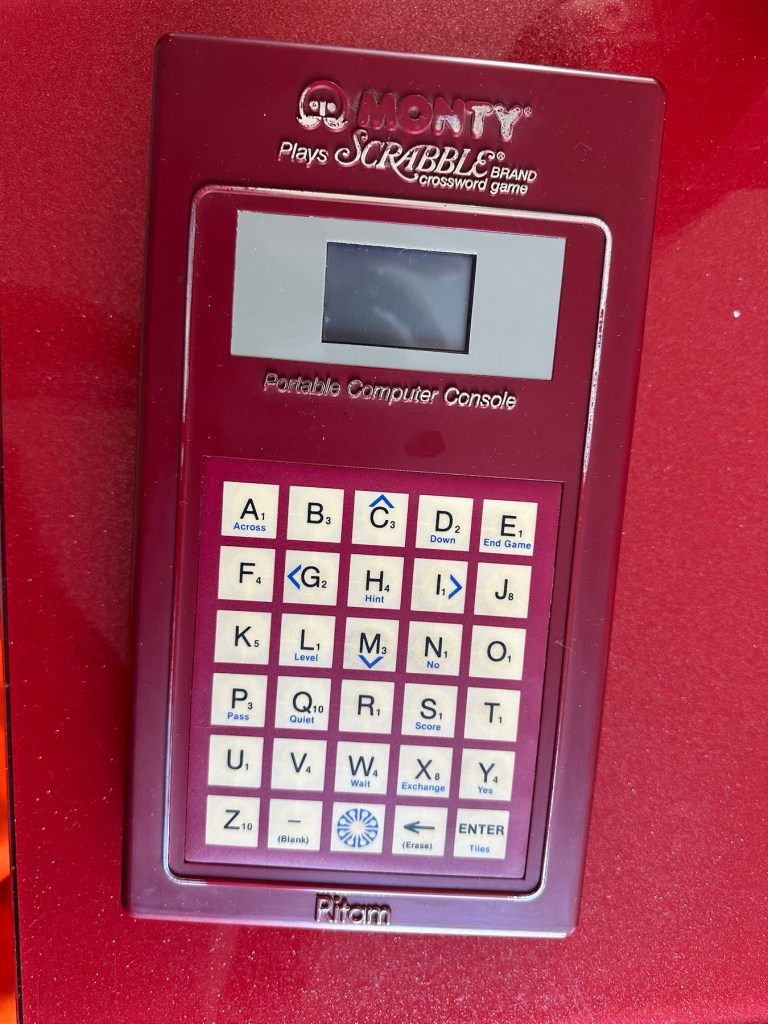
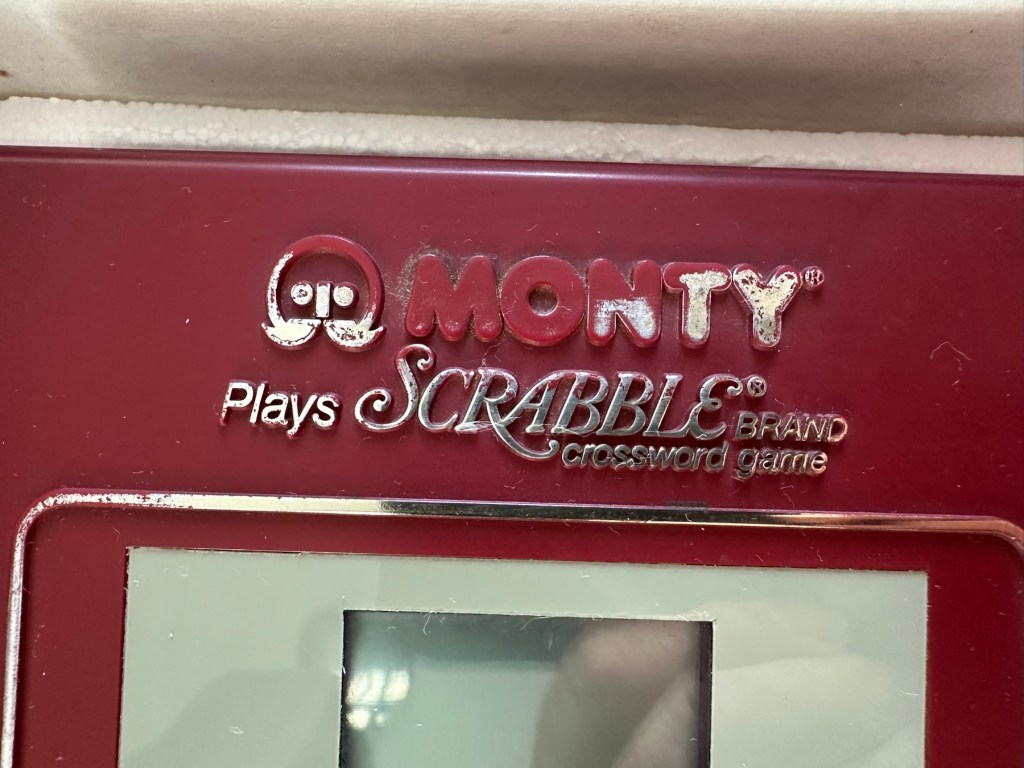
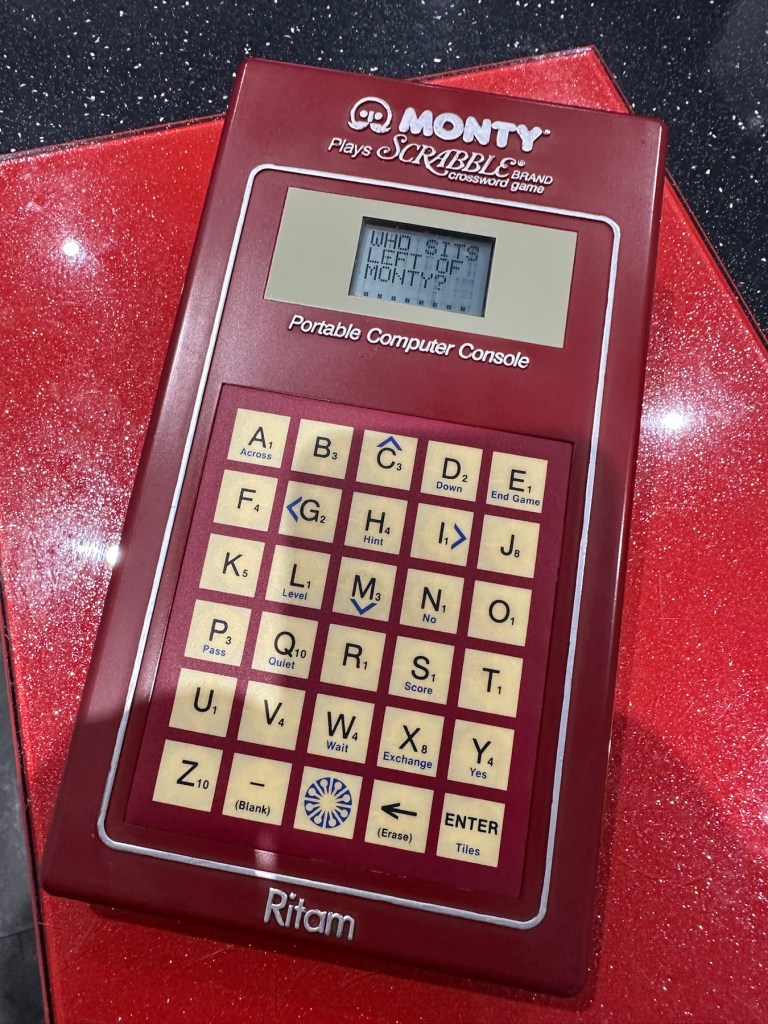
The product is a vintage Scrabble game titled “Monty Plays Scrabble,” released in 1984. It is a rare find and comes in its original boxed packaging. The game is a portable computer console version of the classic Scrabble game, making it unique and collectible. Please note that the functionality of the game is untested.
EBay
Why did i buy? I don’t know, maybe because its from 1984 and fits my modus operandi. To be truthful i looked at it, saw the wear and tear on it and thought to myself that i can make it look better. It also states it’s a rare find….its not. In good old EBay style its “Untested” which probably means they have put some batteries in, it doesn’t work, so let us use the get out clause of selling it as untested. I could however be very wrong, and just be using unnecessary sarcastic commentary, i suspect it’s very much the latter.
And it has a battery cover. Splendid
Here’s a little history:
Manufactured by Ritam Corp, under licence from J.W Spear and sons PLC 1984
A portable electronic device that plays a competent game of Scrabble. Up to three players may challenge the device. Each player enters one’s own name and subsequently the turn order in which they will play. The players can decide to draw their own tiles or let the device do the randomizing. If the device assigns the tiles, the players may ask the device to suggest a play by using the “Hint” option.
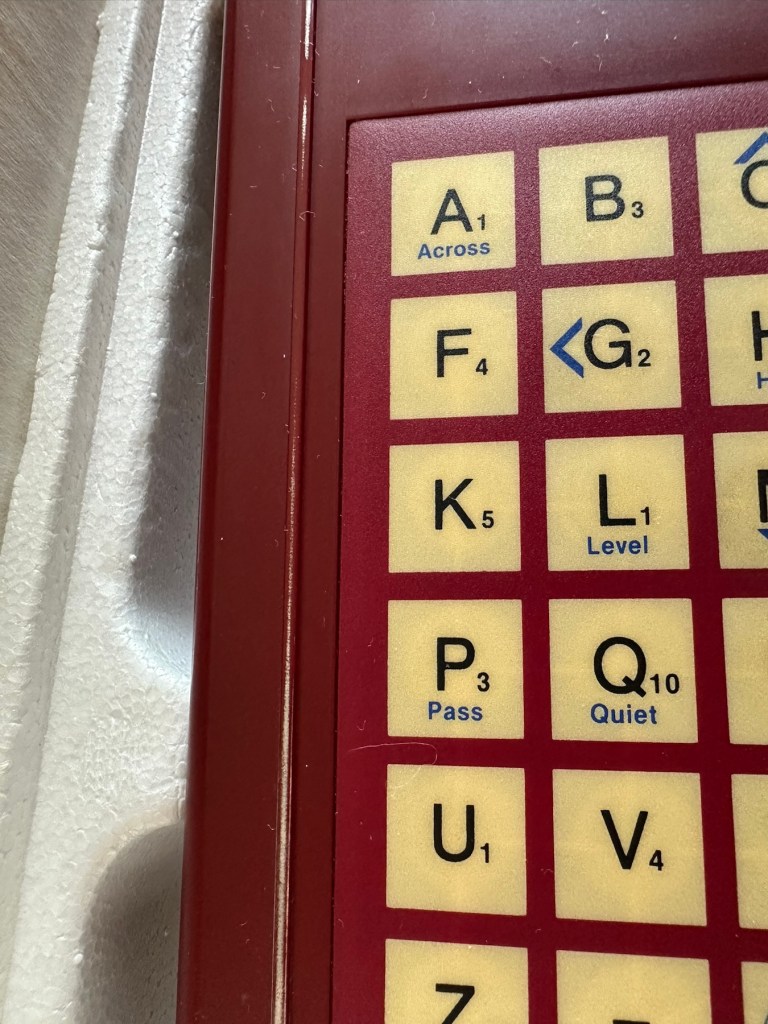
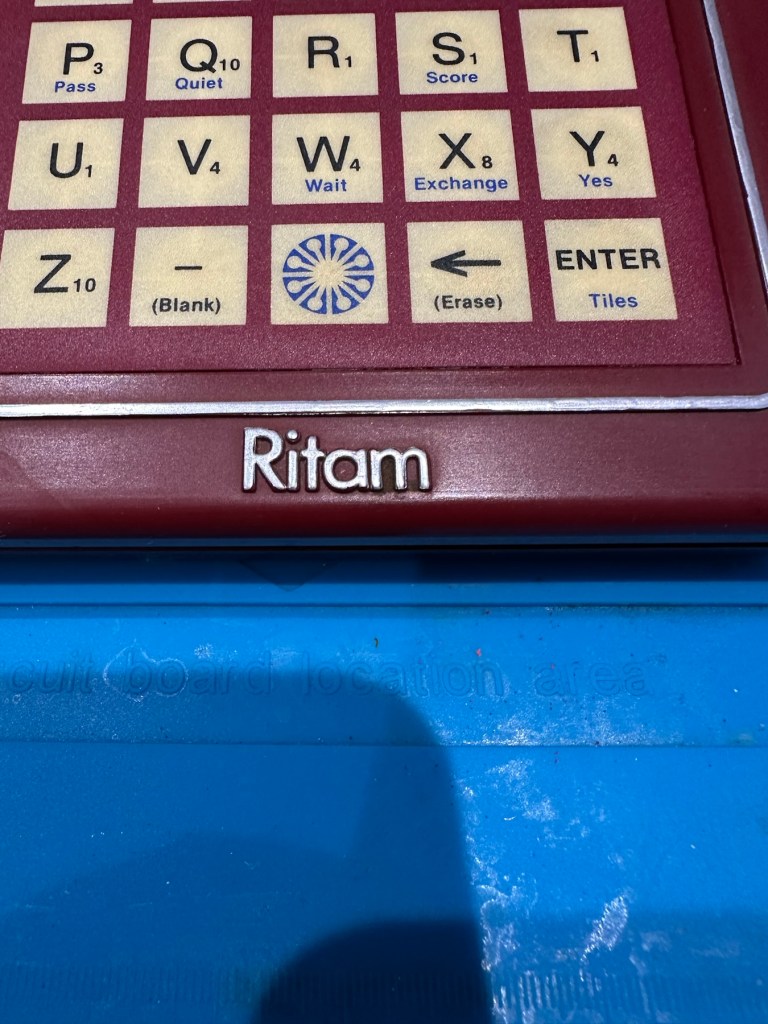
Players keep track of the gameboard using the paper pad provided or use their own gameboard. The device has a LCD readout that is only eight characters by four characters and cannot display the entire board. Players use the arrow keys of the membrane keyboard to scroll around.
All standard Scrabble rules apply. The device will challenge any word played that is not in its 12,000 word vocabulary. The human player is final arbiter however.
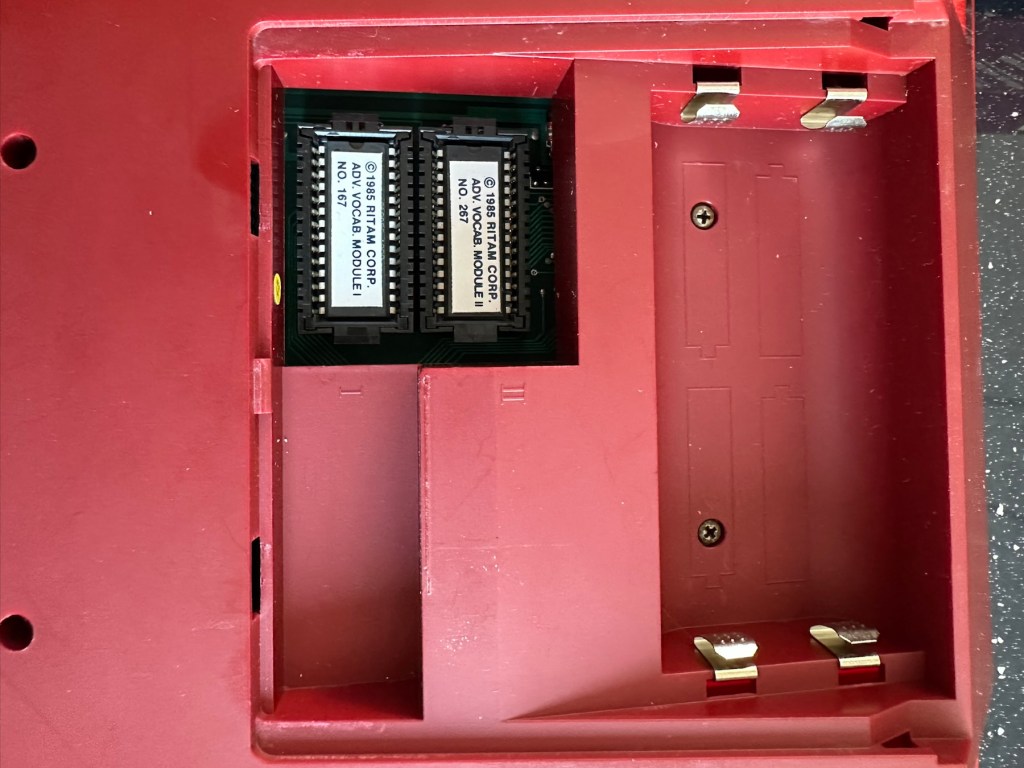
The device is powered by four “C” batteries or an AC adapter. Two Advanced Vocabulary Modules were available. Each module added 16,000 words to the machine’s vocabulary to bring the total to 44,000.
Boardgamesgeek.com
And I’m fortunate to have those two advanced vocabulary modules already installed, so this unit has the full vocabulary range of 44000 words. Lucky me. Apparently the unit is able to do 2 million calculations a second, but can take up to 3 minutes to make a move! With a vocabulary built in of 12,000 words that must mean it does a lot of questioning of itself prior to making a decision. I love a computer system that constantly doubts itself, it’s such a human trait.
Anyway, what’s arrived and how does it look. And is it working?
Assessment:
The parcel has arrived and been unpacked.
Fully boxed All original packaging The unit in its boxFront of unitRear of unit
On taking the unit from the box there is no damage cosmetically, the keyboard is a bit dirty and the silver lettering and edging has worn a little.
Silver lettering and edging worn away
Great news is that the battery contacts are in a perfectly clean condition with no sign of corrosion
Super clean and the two extra vocabulary modulesBatteries added
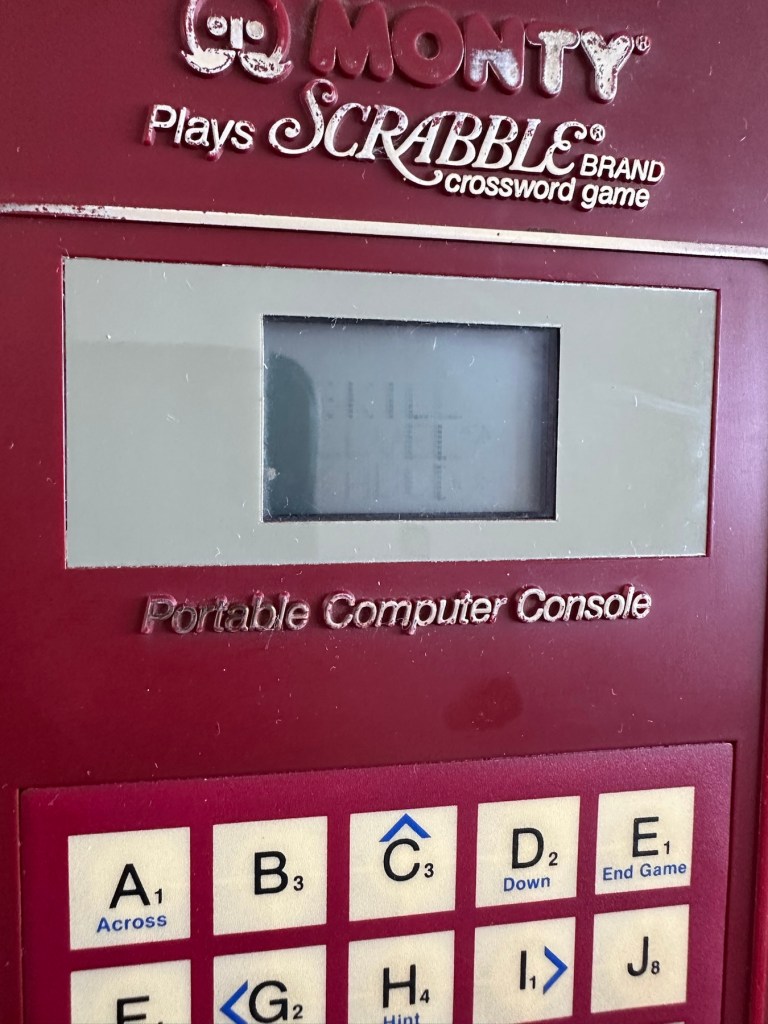
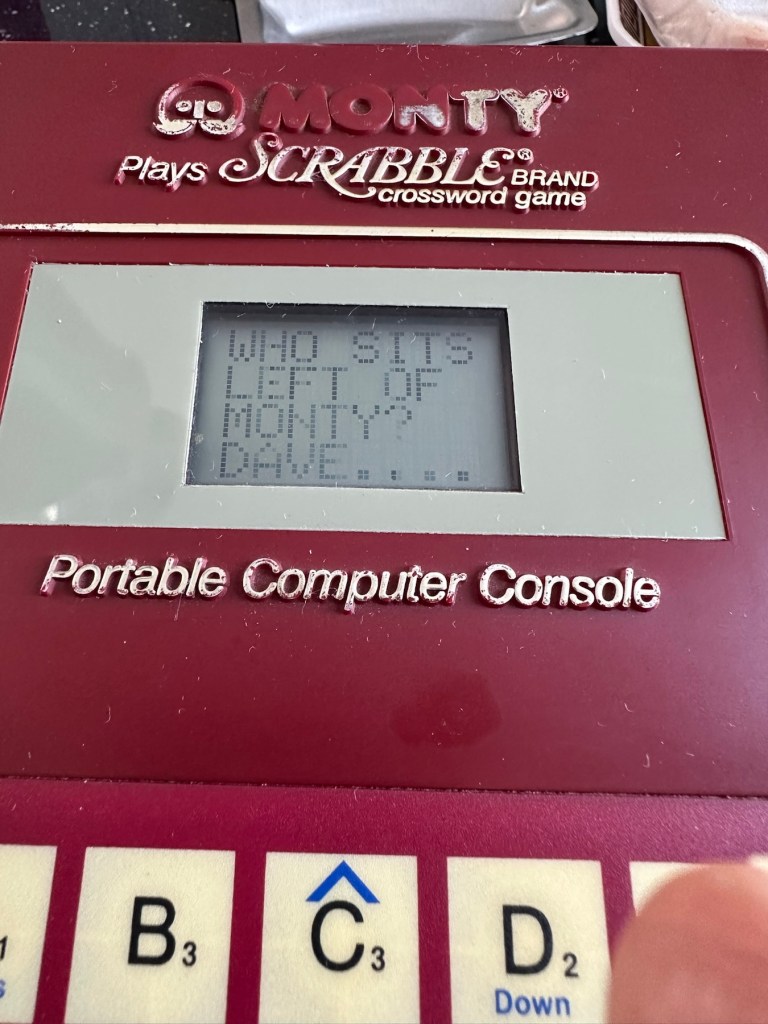
With no corrosion visible, I put some batteries in. I switch the unit on and it makes sound, great. Looking from directly above it looks as if there is some writing on the screen but this doesn’t become visible until you move to about 60 degrees away, a bit closer to the base of the unit.
When viewed from aboveWhen views at about 60 degrees away
So the pleasing thing is that it works. In general it is in a very good condition, coming with instructions and playing sheets. As always with items such as this from this time period, there is the expected smell of age induced mustiness, and there isn’t a great deal I can do about this. But I do seem to have a working unit that just requires a little maintenance and cleaning.
Repair:
I’ve had a quick clean of the front keypad and it was quite dirty.
Bit dirty just after a very brief clean of the keyboard
I’m not sure but I might open up the unit and give it a proper wash, I’ve got to have a look at the screen inside as I suspect the screen quality might be improved by replacing some old electrolytic capacitors that I suspect may be around that area. I could however be wrong. Let’s get it opened up then.
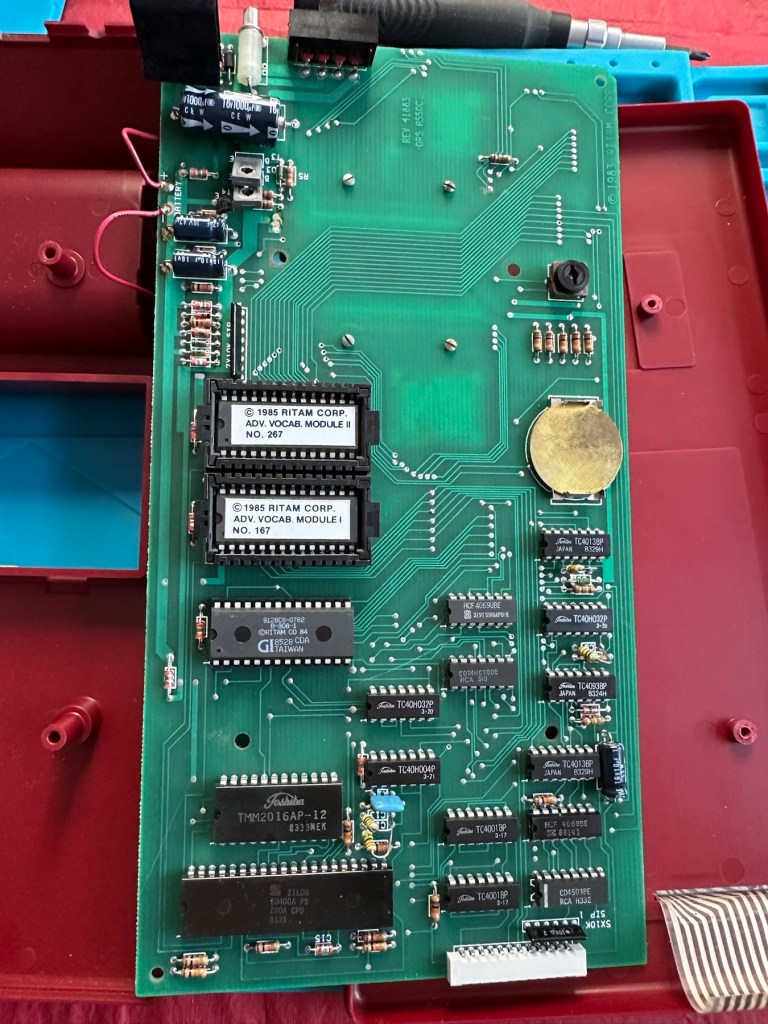
The board looks really clean on both sides, all capacitors (and there were only three of note) look good.
FrontRear
I have taken all three capacitors in the immediate screen area off, I’ve measured them out of circuit and they are all within the 10% tolerance of their indicated ratings so in my eyes there is no issues here. They are working fine.
All capacitors tested and within tolerance
On the rear of the board behind the display is a small variable capacitor. I turned this slightly to the left whilst under power and the screen quality has improved sufficiently be able to view the display from a more natural position. It can’t be adjusted any more though so it is now at its limits, probably a result of its age and limits of performance being reached for that particular component.
The variable capacitor Improved display performance
To be honest I’m satisfied everything inside the unit is fine, and the slight improvement to the display is more than adequate, I’m now going to close the unit back up and will concentrate on the exterior.
I’ve given the exterior a good polish, and then in my art box I have a silver permanent marker that will be great for touching up the worn out lettering and surrounds, so I will use this just to make the unit look a little more aesthetically pleasing.
Silver penAll lettering retouchedManufacturers name now visibleFinished unit
And boy has that made it look better
BeforeAfter
Looking good as new, and with that result we can say the repair is complete.
Result:
We now have a good looking fully restored and fully working unit. It looks as good as the day it was sold and still does what it was made to do. The screen is at its limits but should last a good while yet. A smart looking 41 year old unit that has been saved from the scrap heap and will be around for a good time yet.
All clean, look at the restored lettering
Here we have a small video of its basic operation
Easy to operate even without instructions
All in all another satisfying repair, and yet another item saved from landfill. If it’s damaged, 9 times out of ten it can be repaired and reused. We don’t need to be so wasteful.
Thanks for following the repair, it’s always very much appreciated.
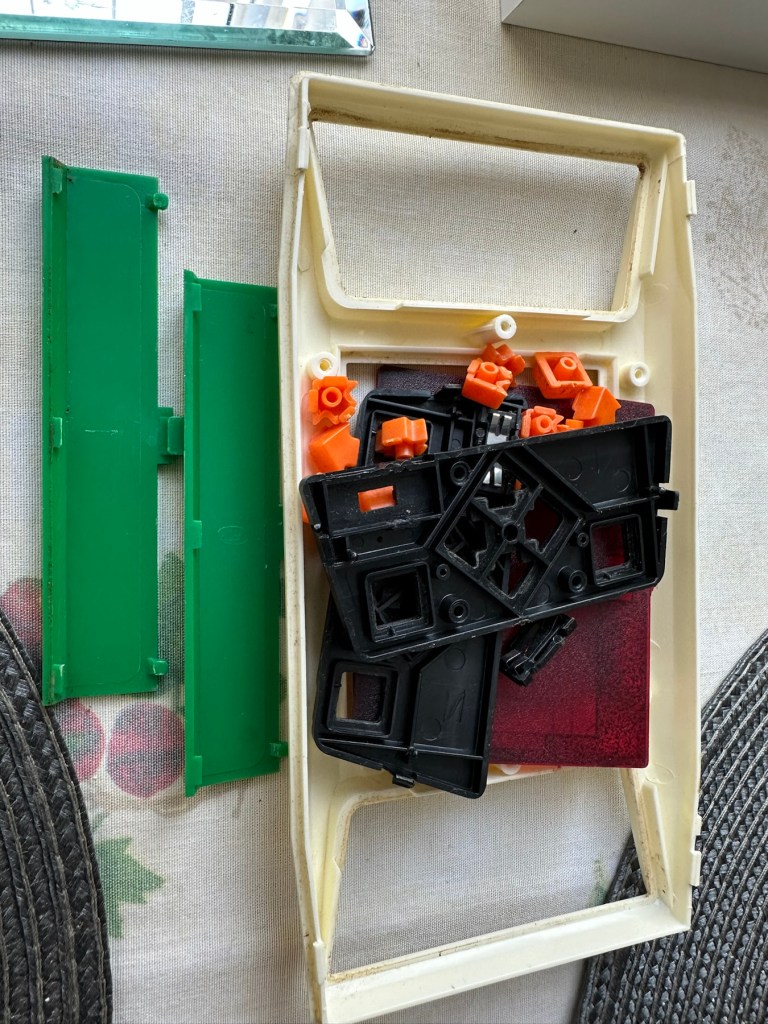
Item is for spares repair only. Powers on but appears to be stuck on game.
Please view photos for details of listing
Any questions please message me
EBay
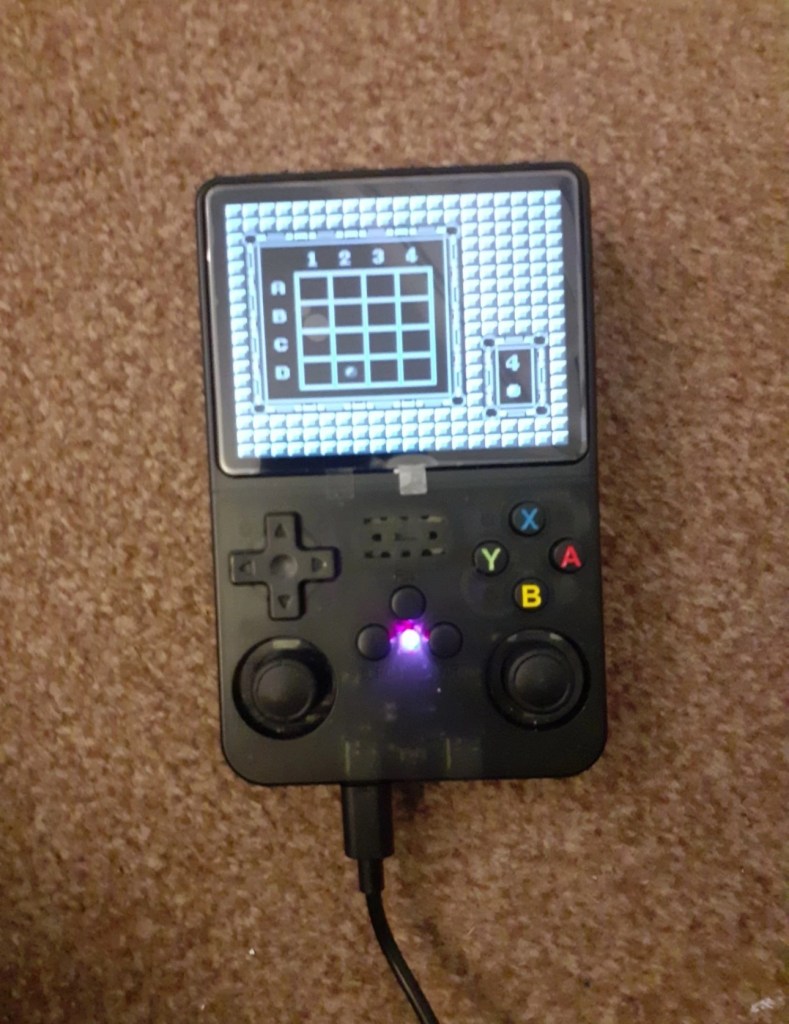
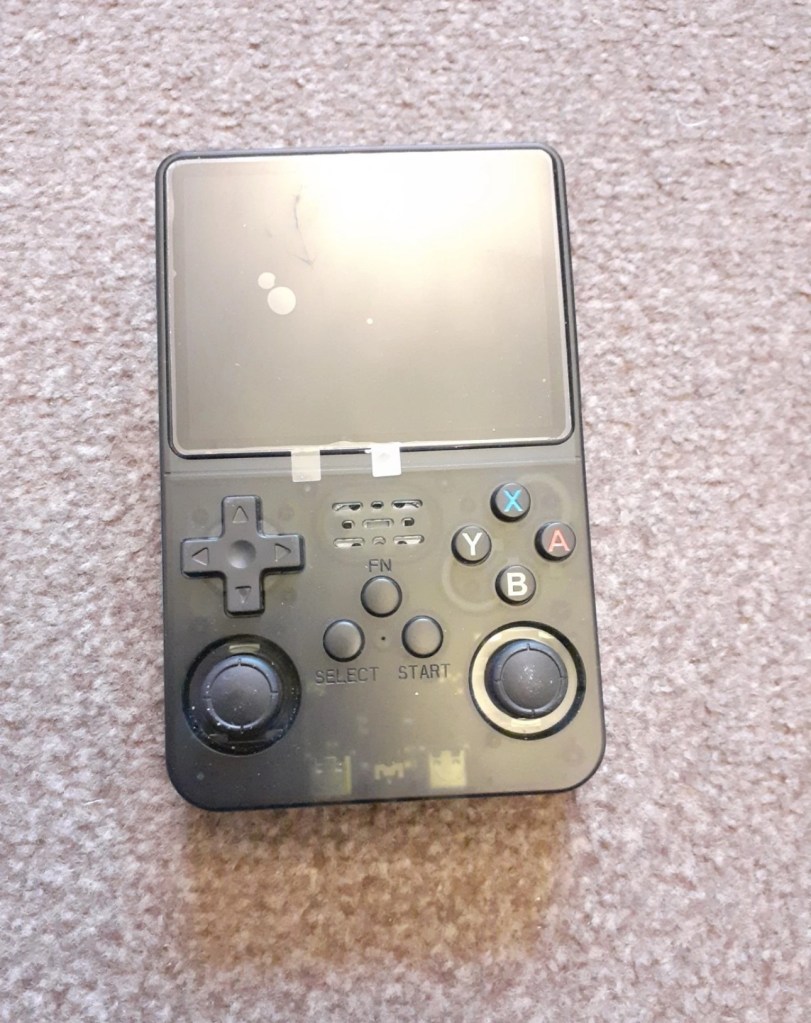
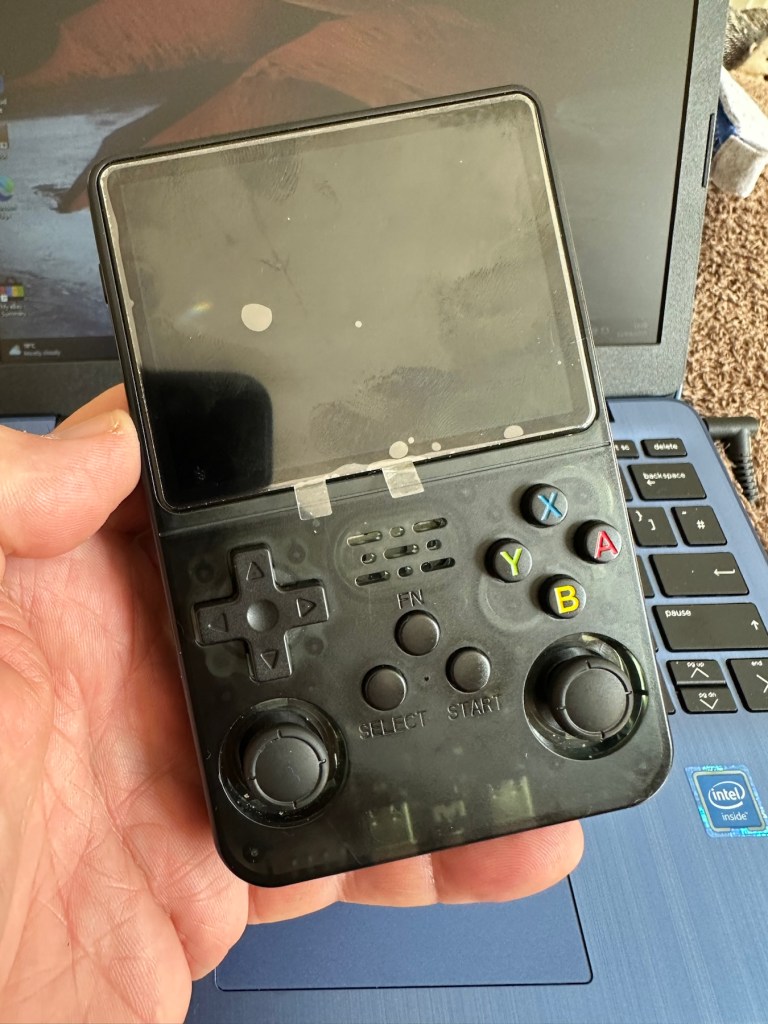
R36S game console. Boxed. Good condition externally
Here’s the info:
Whether you missed out on the gaming golden age of the 2000s or want to introduce your kids to those unforgettable classics, the R36S Retro Handheld Video Game Console supports 15,000 iconic games, making it your gateway to reliving the magic. It’s the perfect way to take a nostalgic trip back and rediscover the joy of childhood favorites.
Revisit your childhood memories with the R36S. Whether you’re rediscovering the excitement of Super Mario, the thrill of Pokémon, or the challenge of Zelda, the R36S brings your favorite games back to life.
Perfect for those who want to experience the magic of the 80s and 90s games all over again.
Equipped with dual joysticks, L/R bumpers, and a vibrant 3.5″ HD IPS display at 640×480 resolution, the R36S Retro Handheld Video Game Console delivers precise control over gameplay mechanics and stunning visual clarity. Enjoy enhanced color accuracy and fine details for a gaming experience that perfectly blends nostalgia with modern innovation.
r36s.co.uk
I’ve managed to secure this item for an all in price of £16:25GBP and thats including the postage. The seller had a number of these selling, I suspect they are customer returns as they still have screen protection, they are in original boxes with stickers on them, and that makes me suspect they are returns.
I think I may have paid over the odds for this unit.
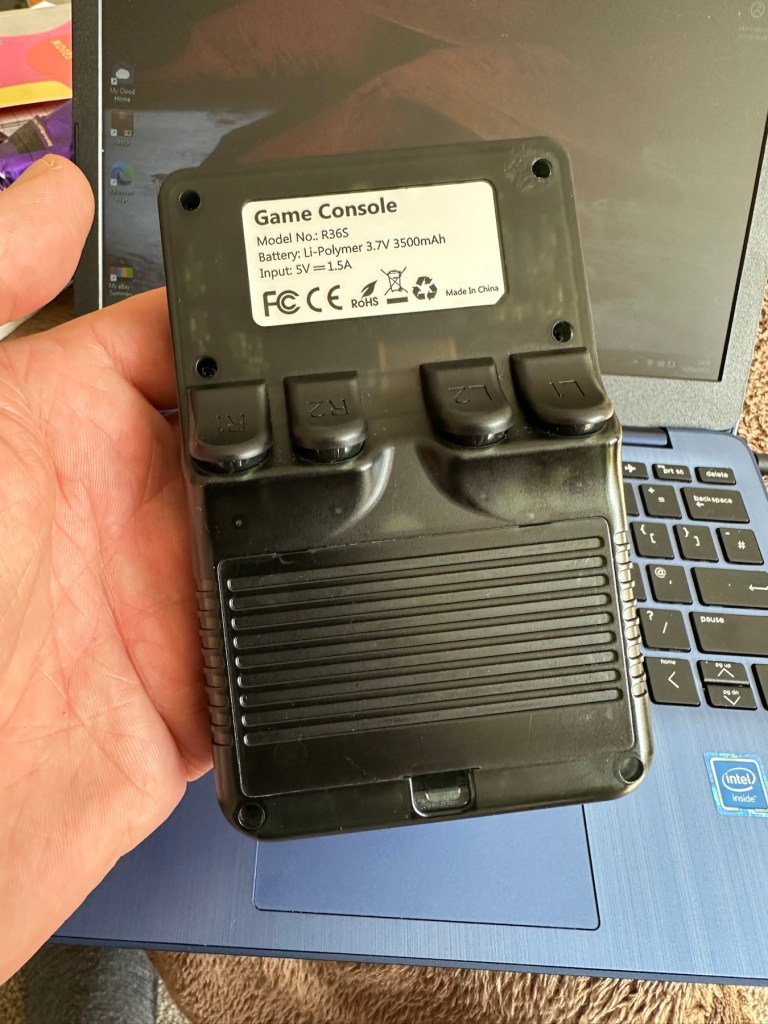
The fact that as soon as this batch were purchased, another set had taken their place on the selling platform confirms this. On the r36s.co.uk site, these consoles retail at around £65:00GBP, you can get similar items from other Chinese outlets that are considerably cheaper. This is an emulator unit that runs via the Linux operating system, and is supplied ready installed with around 15,000 games already on the unit utilising a number of gaming system platforms. As the operating system is open source, you can also add additional games should you wish to do so. The one I have purchased is stuck on just the one particular game i believe. I think I have some work to do.
I very much suspect the issues with this unit lays solely with the software and are not in anyway hardware related. I could however be very wrong. My knowledge on these systems is very limited so I’m going to be very reliant on information and tutorials that i can find on line.
And i may as well download some operating instructions prior to its arrival, just to be a step ahead and furnished with the most basic knowledge of its operation, maybe then i won’t come across as a totally clueless clown.
Assessment:
It’s arrived and cosmetically it’s fine. It just doesn’t work. It doesn’t even do what is stated in the listing. More EBay untruths.
Looks nice. Just doesn’t work
Powers on, charges ok and that’s about it. Box looks nice. Finding it hard to talk of anything else positive. Oh, and it’s not an original it’s a clone machine… cheapo copy. Any way, let’s have a look at getting it to work.
Repair:
So first thing was to download a new OS for the unit, unzip it, and download it to the removable sd card, easier said than done. I think I’ve probably lost all the games that were installed, but without a system to run it all, what’s the point. I can always download games later, I have however backed up a number of files as suggested so let’s just wait and see.
Trying to prepare the new volumes on the drive
The first operating system downloaded did not work, because now I’ve been informed that this machine is one of many clones out there, it’s not original. Lovely. Not a problem, we can still get another operating system, it’s just going to take a bit more of my time to do so, and god knows how long it will take to download the games. This is the biggest pain in the ass with these systems, the sourcing of the programs to ensure the system runs smoothly.
But it will be repaired. And I’m in no rush. I’m off out for a while.
I have had to download an alternative operating system ArKos_K36_v2.0 to my computer. It then has to be run through a disc imager programme to prepare the disc and install the correct partitions and system information, onto the micro SD card used by the unit.
That all done, time to plug the card into the unit and see if it turns on.
Hallelujah! It works.
The operating system successfully installed
Having to format the original card obviously erased all the games that were originally on the card. There were around 15000 games on this unit, but let’s be honest most of them would have been games that were either inferior, similar to others, or just used to bloat the card out. I’m now in a position where I can be choosy about the games I load on the system, and this will allow me to not have it so cluttered.
This is where it gets a little more tricky.
There are a number of people and sites I have spoken with or looked to, to find out the information required to carry out these tasks. And for someone who hasn’t messed about with computer and program files and structures for many a year it is quite daunting to say the least.
I have downloaded a file that is recommended and contains many of the 15000 games originally on the card but with a lot of the bloatware removed to make it a more structurally pleasing and easier to handle package. It’s called the Tiny best set go package and is downloaded from GitHub.
These games are broken down into Rom packages and have to be removed from the download and placed into the easyrom folder on your operating system, it’s a little more complex that that but that is the crux of the task. I won’t go into finite detail as it will bore your asses off and there is plenty of information on how to do it already out there.
I will recommend this one guy as having a superb little site regarding hand held consoles such as this and their issues: Handheld database
Anyway the task has been completed. I’m probably not going to get involved with such time consuming repairs as this again. It’s been a learning curve, but just too time consuming for me. I’ll leave these issues for the younger generation.
Result:
It works. It’s been saved from landfill and there is no better outcome than that. To be honest it’s unbelievable that so many games and so much information can be held on such a small memory card.
Space invaders….im now content
In general the game quality is really good, only let down sometimes by the way that the emulator software interprets the program in question. There is more than enough on here to keep anyone occupied during some downtime. There are many classic old school games on here that will also keep the old farts like me amused as well.
Overall it’s been a tough repair, I pretty much knew from the start what the issue would be and went into this repair totally blinkered. I have learned a lot from it, but will I be working on these again? I doubt it unless one of the younger members wants one then I might have another go. But until then it’s job done, another bit of throwaway hardware saved from the scrap heap.
Edit: I couldn’t keep away could i? I found a chap local to me who works on these units, and he has kindly offered to assist me if I should ever need anything clearing up. Well I couldn’t resist that offer and in two emails he has shown me just how to get these games downloaded, it’s simple when you know how.
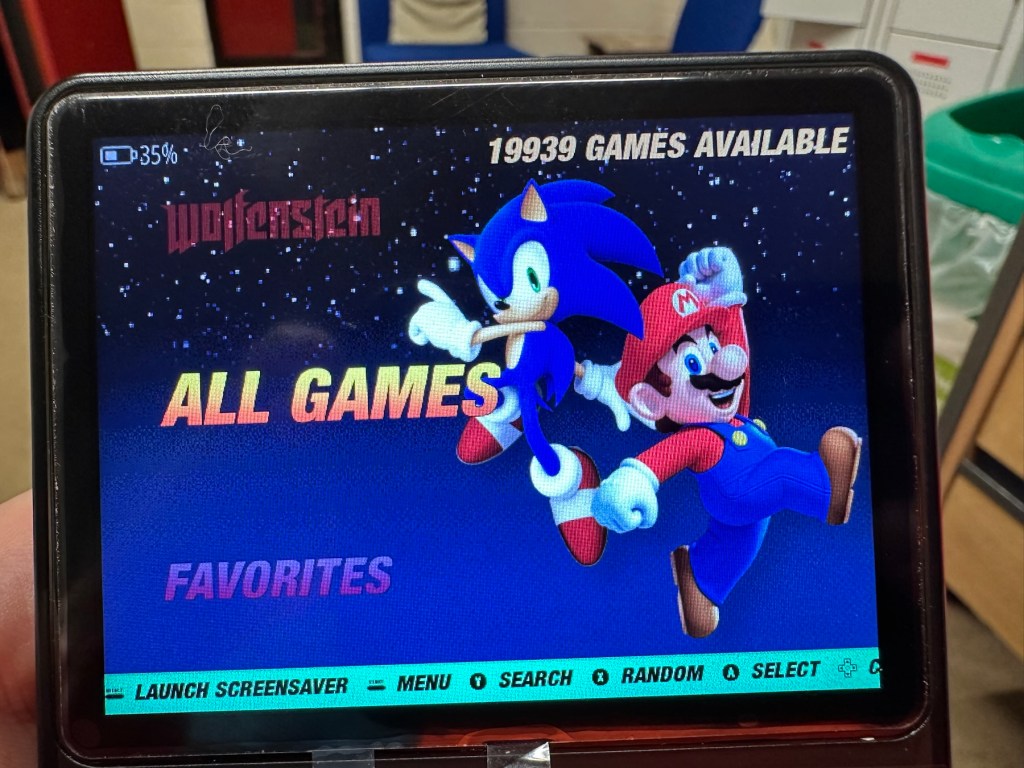
19939 games now. Blimey.
So simple that rather than download a few games I’ve gone a tad over the top and now have 19939 of them. That should see me right beyond my natural existence and into the afterlife. What a lovely fellow. There are still lots of nice and helpful souls around.
I’m currently deep into a repair project that I will be posting about on here shortly. However the shell of this project has aged so badly it has earned the right to be my Guinea pig for my first attempt at Retrobrighting, it deserves a separate post of its own, so it’s getting one. I have explained what Retrobrighting is in a previous post: Retr0bright – What’s that then?
The unit is a recently purchased and damaged Nintendo Gameboy printer from around 1998, it isn’t working and looks right ugly. It needs some attention to its fascia and battery base, so let’s get on to it.
TopSideRearSideThe unit has not aged well and looks awful with this discolouration
I have taken the entire unit apart, separated the parts that need to be treated, removed all labels, and given the offending items a thorough wash in detergent before drying them off.
All stickers and other items removed. Shell thoroughly washed.
Next I’m just putting a 40 Volume 12% Peroxide cream solution into a small bowl, and I will then place the shells on a piece of cling film where I will liberally coat the offending items, using a brush, with the solution. When I’m happy with how this has gone, the treated surfaces will then be wrapped in cling film and placed in a sunny position for around 12hrs to allow the sun to do its thing. (UV lamps are sufficient if you have one available). I must reiterate it is important to wear protective gloves and eye protection when using this solution.
I’ve given a good coating of peroxide formula to all surfaces, but is it enough? I won’t know for at least a further 10-12 hrs, time will tell.
All wrapped and ready for some Sun ☀️
With the peroxide now applied, the fascia’s are now all wrapped in cling film and ready for 10-12 hrs or so of intense sunbathing. (Sounds just like me on one of our visits to Cyprus!). So let’s wait a while.
Patience
I’ve checked in and looked at the pieces outside, and after just 4hrs the results so far look amazing. I’m going to give it the full time though, so I’ll be back in around 6-8 hrs to check results. Hopefully we will have sufficient sunlight until then.
I’ve terminated the process at 9hrs as I have to go out and I’m impatient. Boy am I impressed at how it has turned out, it looks like a new shell.
Wow I’m impressed
Well I can honestly say that this treatment does work. I’m so impressed at the outcome, I just wish I’d attempted it earlier on some of my other products.
Before & After – Impressive improvement
Anything I’d do differently? I’d probably slap on a little more solution or maybe even reapply about half way through the process, the only reason for this is that there is the most minute tiny tinge of a yellowing on the side that had the heaviest contamination, possibly if I hadn’t been so impatient and left it for 3 more hours it would have been sorted, but then again it might not have! I do think a further application at the halfway point, especially when an item is so heavily stained as this unit was, would have done the job and made it look even more perfect.
Am I coming across as disappointed? Well I can assure you I am not. It’s my first attempt and I am so impressed. The total outlay for this process was £1:85GBP and that was just for the 75ml bottle of peroxide from a local supermarket, and I have enough left for another 3 applications, an absolute bargain. We only learn and improve from being persistent, and I’ve already learnt from what I have attempted today. And i am already a better, and more knowledgeable person than I was only a few hours earlier. You certainly can teach an old dog new tricks.
Edit: some 12hrs later I have decided to give a second treatment to see if this can improve on that slight yellowing I mentioned earlier. The results have greatly improved the look and there is now no visible sign of yellowing. I’d certainly recommend a second treatment for heavily stained items. It works, extremely well.
Watch out for my next post regarding the repair of this printer and its reconstruction: Nintendo Gameboy printer
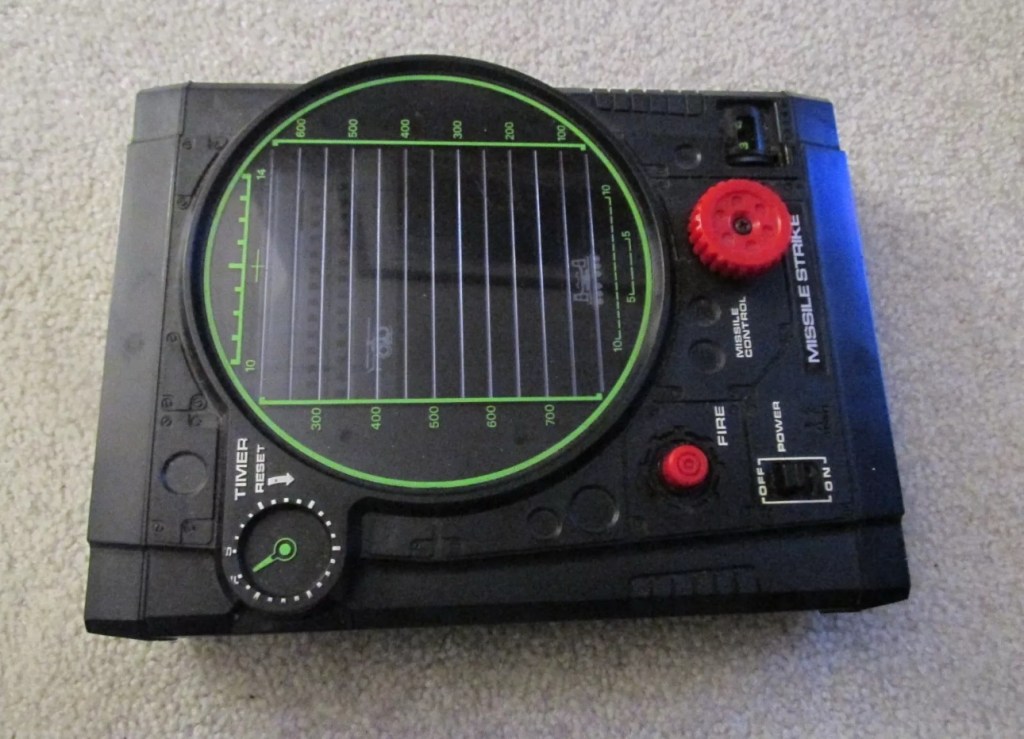
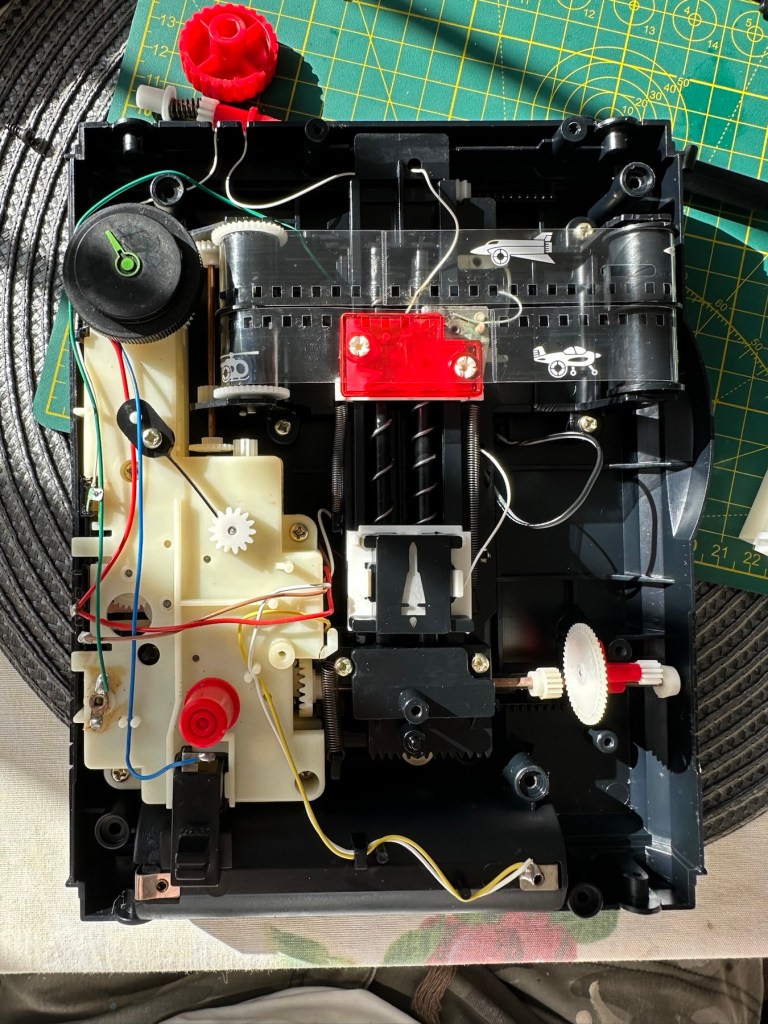
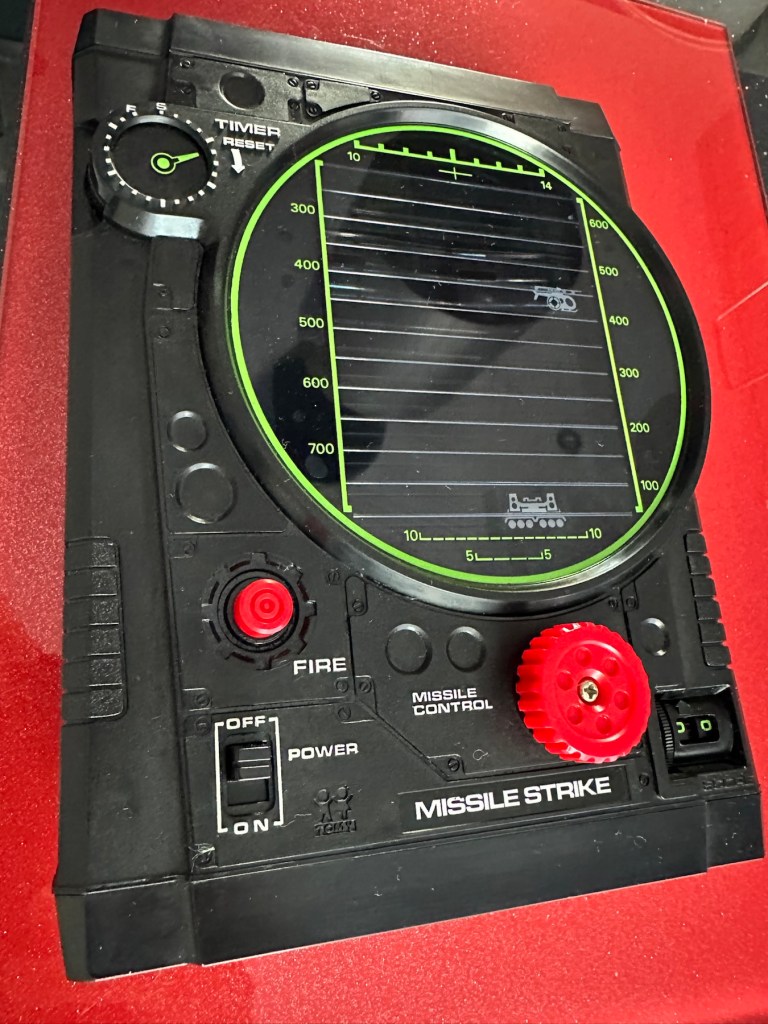
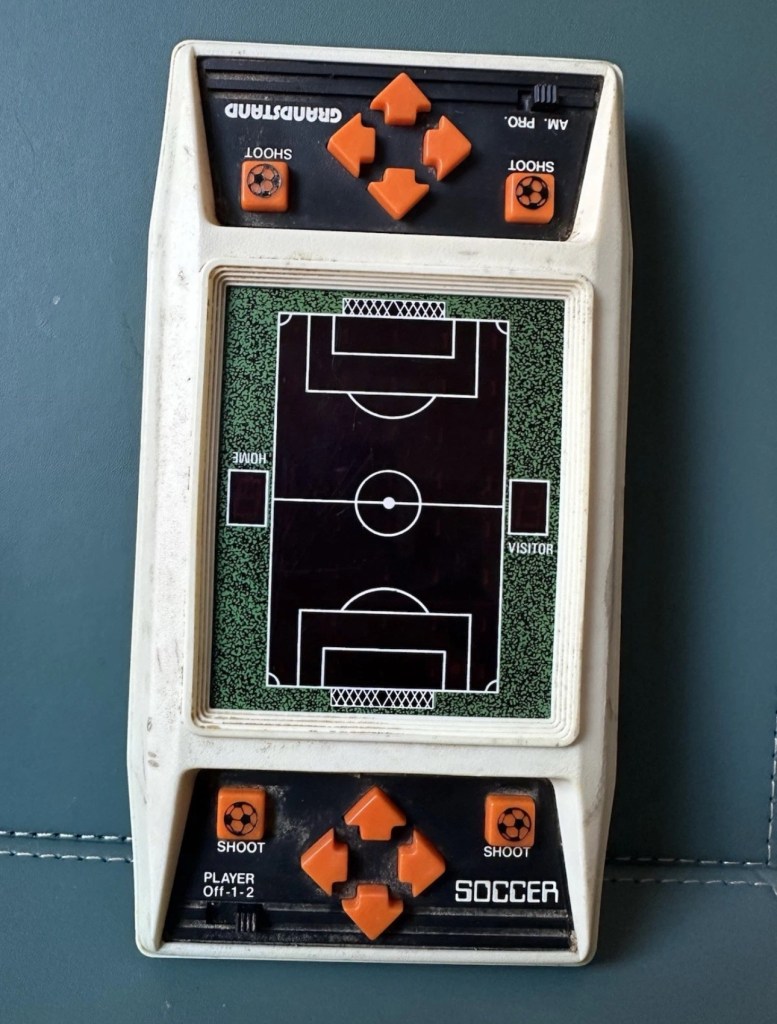
This is a nice example of a Tomy ‘Missile Strike’ electro/ mechanical handheld game. It was made circa 1979 and is battery operated. It appears clean for age and works, apart from the missile light not illuminating. Battery terminals very good. This is a nice genuine item that is shown as I found it. NOTE – NO BATTERIES ARE ENCLOSED. Nice example for any collector.
EBay
Missile strike
On first seeing the listing for this item, my thoughts are that it looks quite clean and tidy. The usual state of these units are quite tatty with scratched screens. This looks good, however pictures, especially from EBay can be greatly misleading so I’ll guess I will just have to be patient and wait.
This units only issue seems to be with the LED missile light, so hopefully it will be a quick fix. These units are currently selling between £52-£79GBP as per the picture below. I managed to secure my unit for a total including postage of £24GBP so I think I’ve done well in that aspect. I’m quite happy with this.
Current sale prices on EBay
A little history:
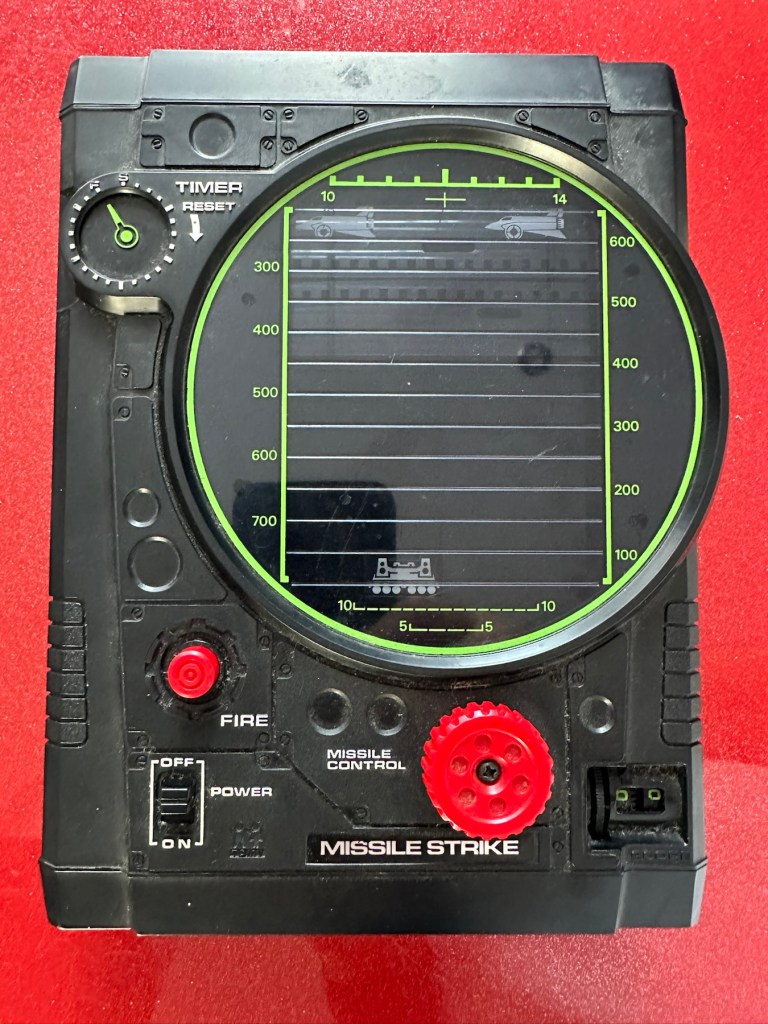
Tomy released Missile strike in 1979 in its international line of electro/mechanical handheld games. Known under different titles in other regions such as Terra-Hit (UK), Missile Strike (UK), and Space Attack (Japan). One of TOMY’s electro-mechanical handheld games, Missile strike is a Space Invaders-like shooter game, the units small motor winds strips of aircraft across the screen, which the player attempts to hit in order to earn points. There is a mechanical wind up timer that controls the action, and the purpose is to score as many hits on aircraft as possible with in the time it takes the winder to stop. The game includes one small, flashing LED light as the exploding missile.
So it’s another game that has reached its 46th year, and for the only issue to be its one light source, I think that’s acceptable. Let’s wait to see what arrives.
Assessment:
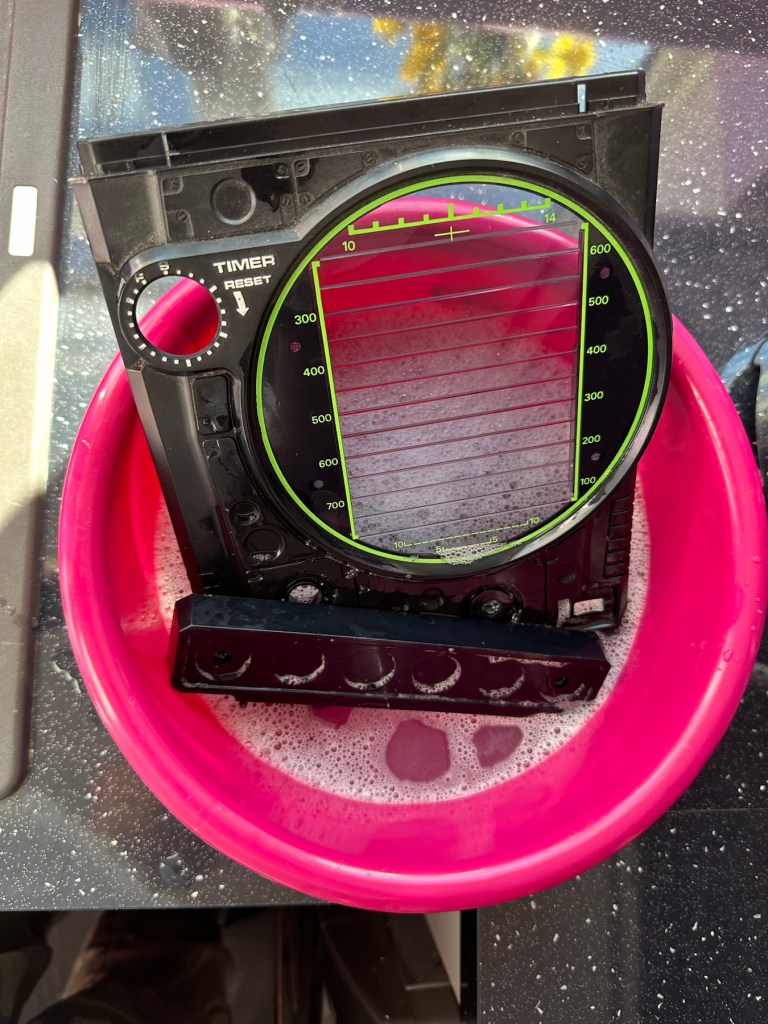
On arrival the first thing that hits you is that this is yet another filthy item. I seem to attract these kind of sales, so it will require a deep clean. Cosmetically the game is in good shape with no deep scarring and only minimal fine scratches on the screen lens commensurate with its 46 year old age.
Tidy cosmetically but filthy
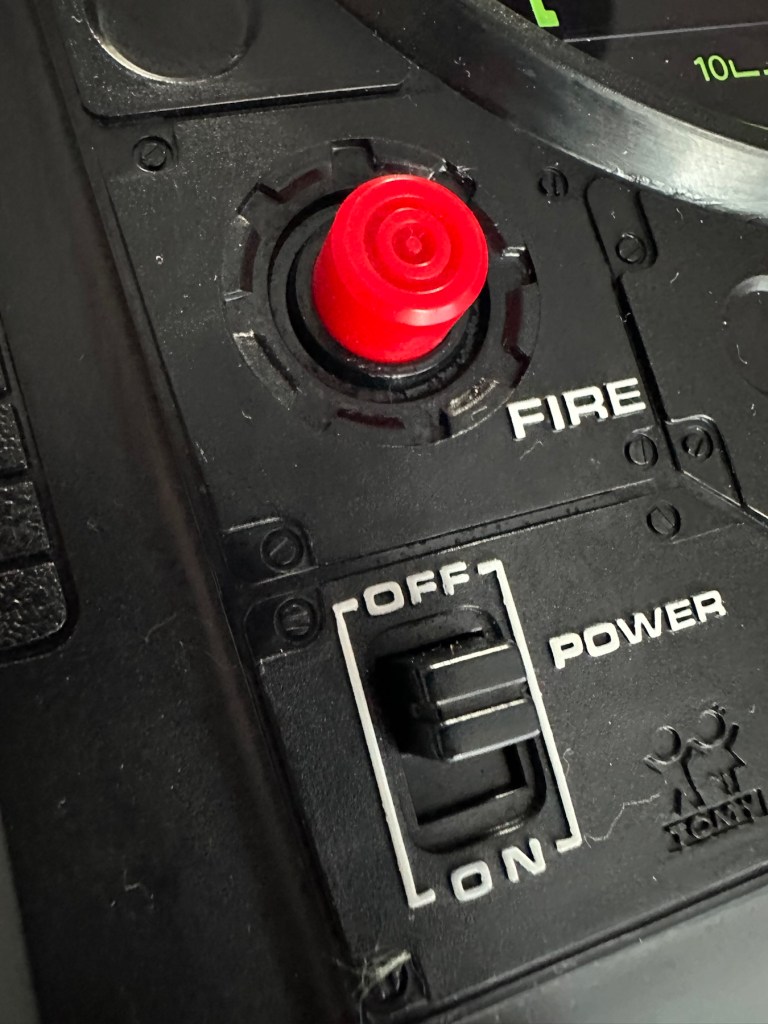
It was sold as the missile light not working, this is partially right as it is an intermittent fault, I suspect this is down to dirty contacts.
Filthy, and counter not workingMissile light is intermittent
This game has two bands of film that run across the top of the screen displaying aircraft, the top band is intermittent and needs attention. The score counter will also need attention as it is not turning smoothly, again I suspect this to be as a result of the build up of dirt.
Repair:
First thing to do is dismantle the unit and to get some cleaning done. The small video below shows the issue with the top band aircraft not moving.
Film transport fault
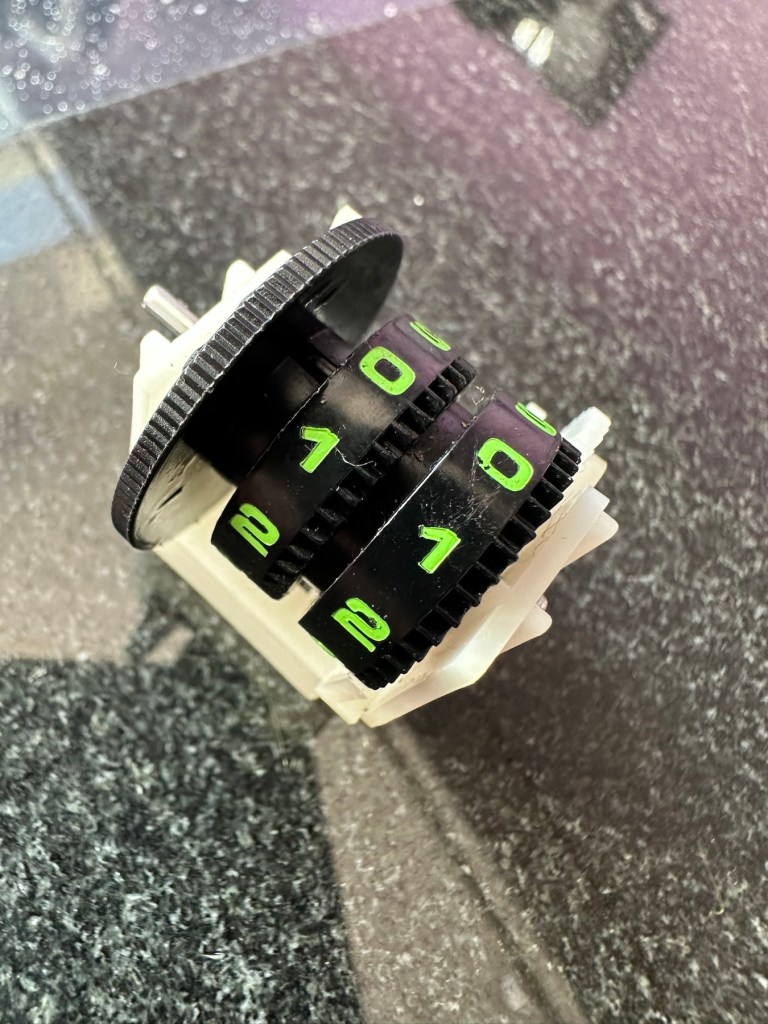
I’ve taken the counter out after removing the case and all exposed buttons and switches.
Dismantling
Off to the kitchen sink. let’s get these items washed.
To be cleaned Getting washedDrying down
Whilst I’m waiting for the washed items to dry I clean the counter mechanism of old dirt and fluff.
I’ve slightly greased the counter with silicon grease and it’s behaving well and doing what it should. This will go back in place when we do the final reassembly.
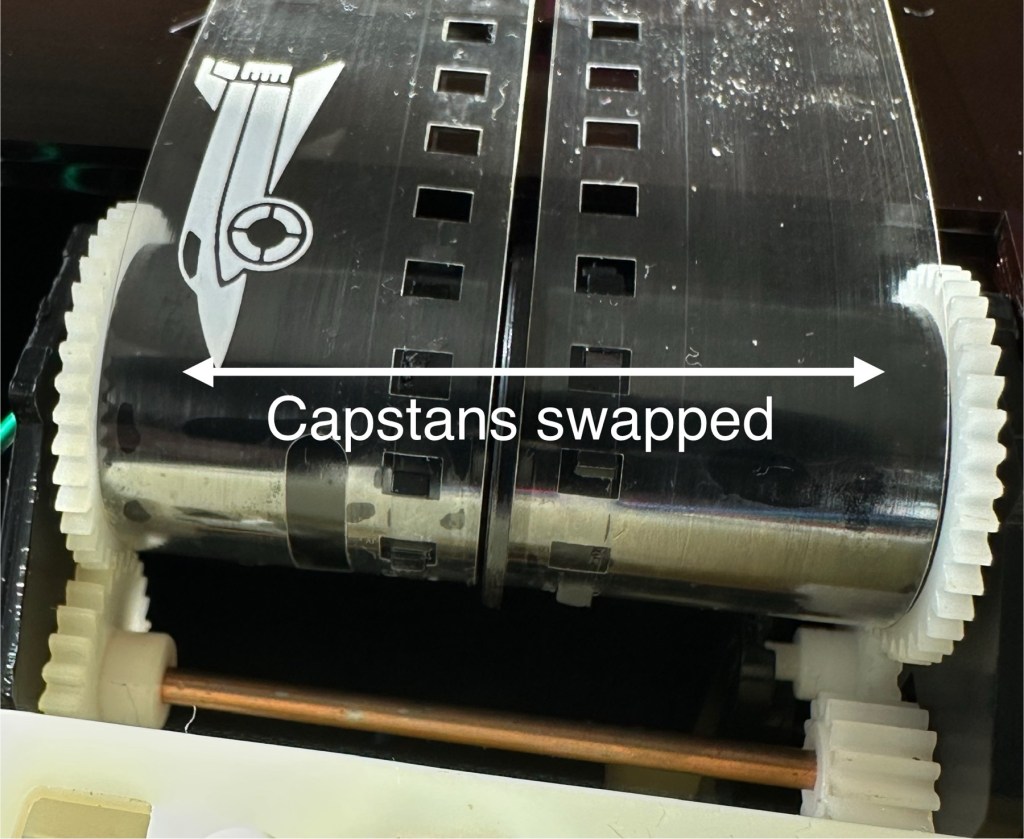
The issue with the film movement was a strange one. There was no way to tension the two capstans that the film roll over and there were no teeth missing off the capstans. One capstan pulls whilst the other pushes, all I’ve done is swap these around and the issue has disappeared. About as simple a fix as you can get.
Just swapped the capstans around
I’ve put a little before and after video here that shows the effect of swapping the capstans around.
How swapping capstans worked
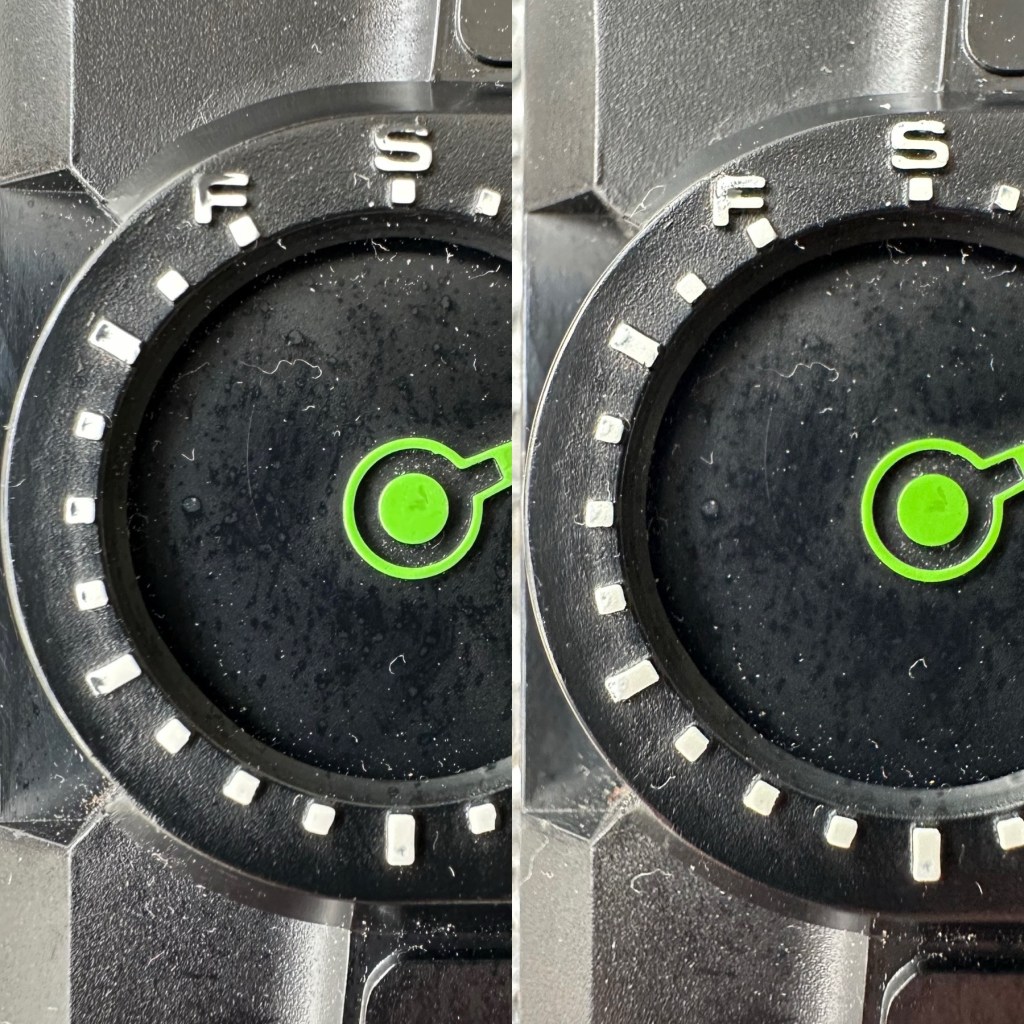
The issue with the intermittent light was easy as expected. This is the only electrical piece on this game and it was down to contaminated battery contacts that just needed a bit of a clean with my grinding pen and a wipe over with IPA.
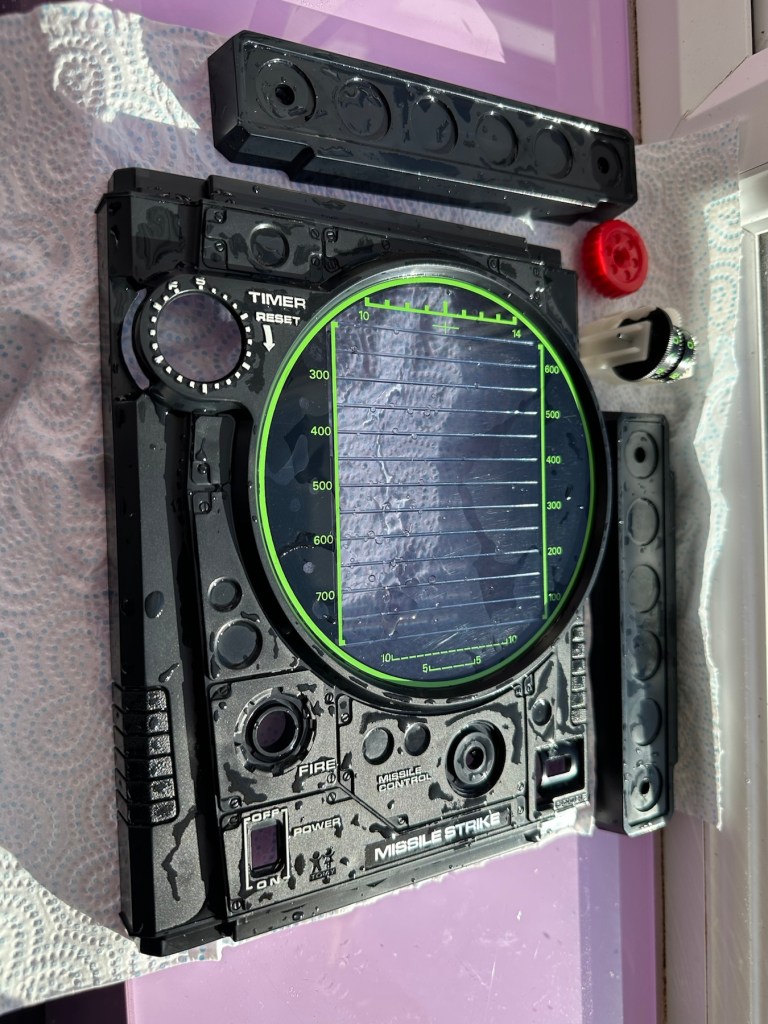
Final little touch was just to accentuate some of the old lettering by the timer. This was just with a white paint pen.
Before and after
Now we can reassemble and test again.
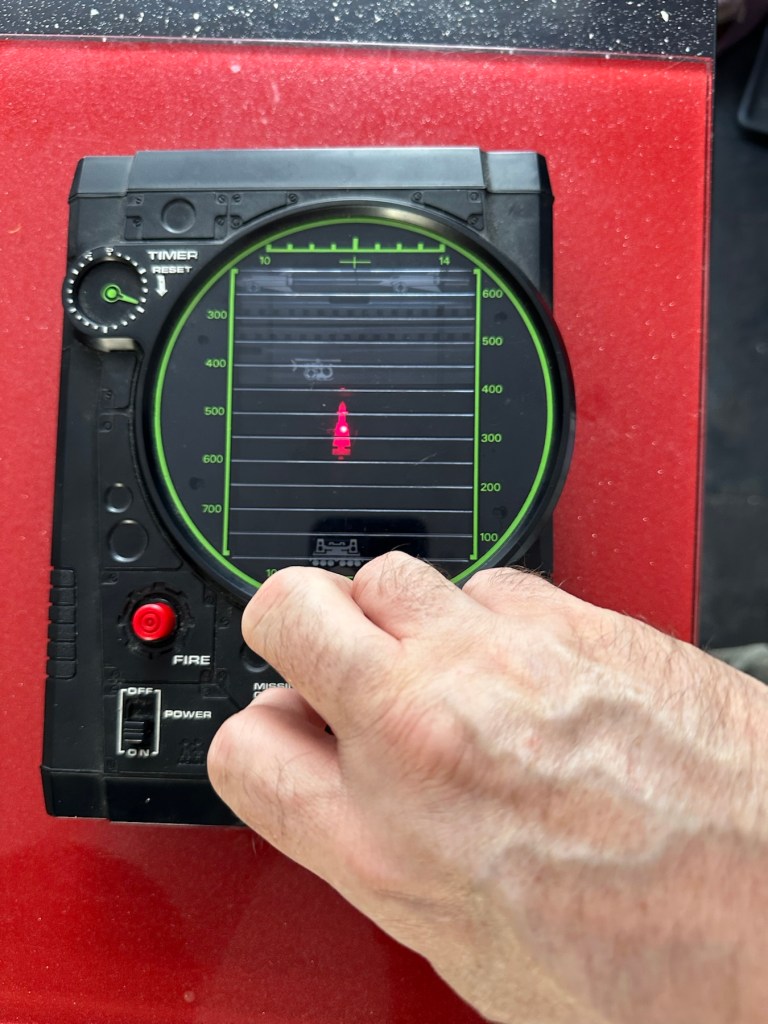
Result:
The game has been reassembled and tested and is now working fine. All intermittent issues have gone and it has now been polished and now looks superb.
I’ve attached this small video that shows the game working as it should, with no film slipping and lights and counter now working.
Working perfectly
It’s really pleased me this repair, as it’s another one of those mainly mechanical games. Dirt featured big time, and age issues have been overcome and the game given a new lease of life. Another one for my personal collection, it will go on now for many more years to come.
The best outcome that was possible, we have another superb seventies product that has been saved from the scrap heap.
Fair overall condition some cosmetic damage as expected for a 56 year old item
Very rare well worth restoration if you know how
EBay
This guy sells retro games on EBay at exceptionally inflated, ridiculous prices. I suspect he doesn’t get involved with repair or renovation as he had this one advertised at over £30GBP but when I put in a cheeky bid for £12GBP he bit my hand off… I wasn’t expecting that! The usual mistakes in the listing such as stating it’s 56 years old when its actually 46, and stating it’s Very rare – it’s not, there were a few hundred thousand churned out and to be honest and they come up quite often on the sale sites. But I do agree it’s worth restoring and will pair up nicely with another retro football game from 1979 that i repaired a few months ago Bambino kick the goal football game. And what makes this unit even more appealing is that it is complete with both of its battery covers – now that is rare!
The game I have purchased Absolutely filthy
This game was made by Grandstand in 1979. Here’s the original advert that appeared on UK TV promoting the game back in the late 70’s.
European footballer of the year 1978/1979 Kevin Keegan – questionable late 70’s advert
This particular unit is listed as Not working, it looks filthy from what I can see, but having experience with these games in the past the biggest issue is age related problems such as old components, track decay and battery corrosion. No doubt the first thing I will do will be to dismantle it, give it a thorough inspection and then a good cleanup both inside and out. And then we can look at the issues around why it’s not operating.
Assessment:
The unit has arrived today and it sure is filthy cosmetically. Like someone who has grown up throughout those 46 years it has its scars. It looks as if it has been placed against something hot, and shows a burn mark up one side.
How it looks on arrival
Caked in filth
Battle scars and burns
I have put batteries in and the good news is that there is life of sorts. By that I mean there is a distorted noise from the speaker and a flash of life on the screen and then it dies. Wiggle the start button and there are more flashes of life but that’s it. No other buttons seem to be working. I’m not tempting fate but this could be a case of the unit being just as filthy inside as well as out. But knowing my luck this will not be the case. Let’s have a look inside.
Repair:
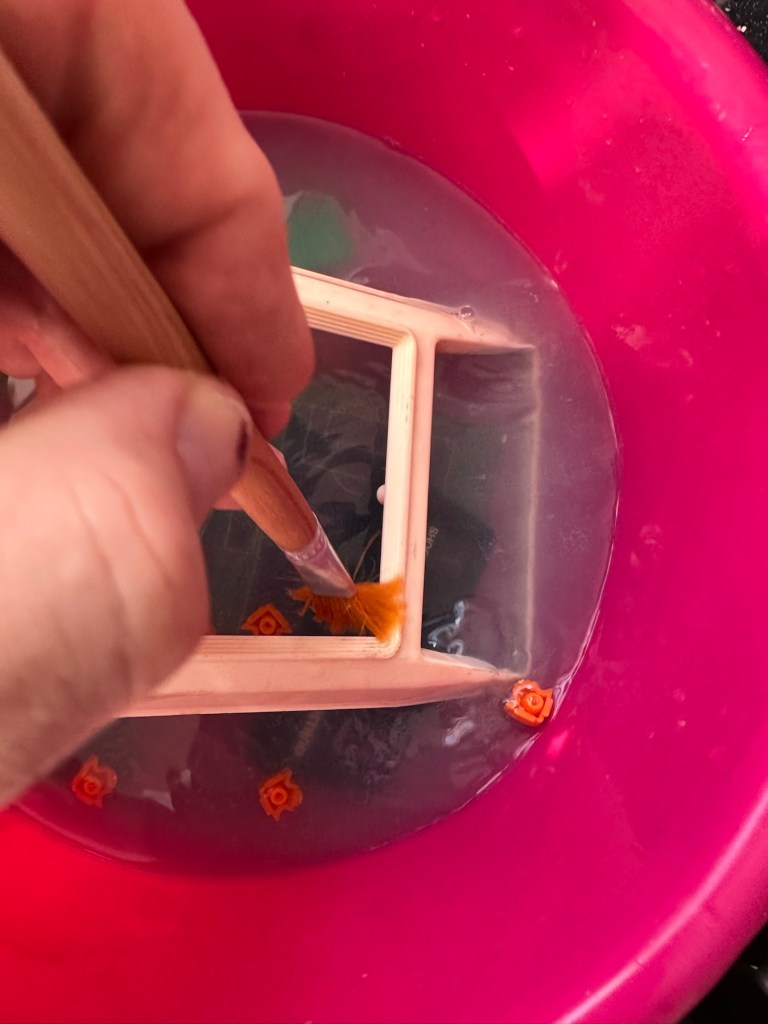
First of all we need to get the unit open, remove the circuit board and get the thing clean. So let’s do that.
Utter filthCircuit board Push buttons to be cleaned, the rest is off to be washed. Even a dead bug inside 😧
As you can see in the pictures above, the inside hid a lot of accumulated dirt and grime, there were even dead bugs inside. Everything that could be washed was taken to the kitchen given a good soak, brush and rinse.
Off to the basinGood clean and scrubDrying on the window cill
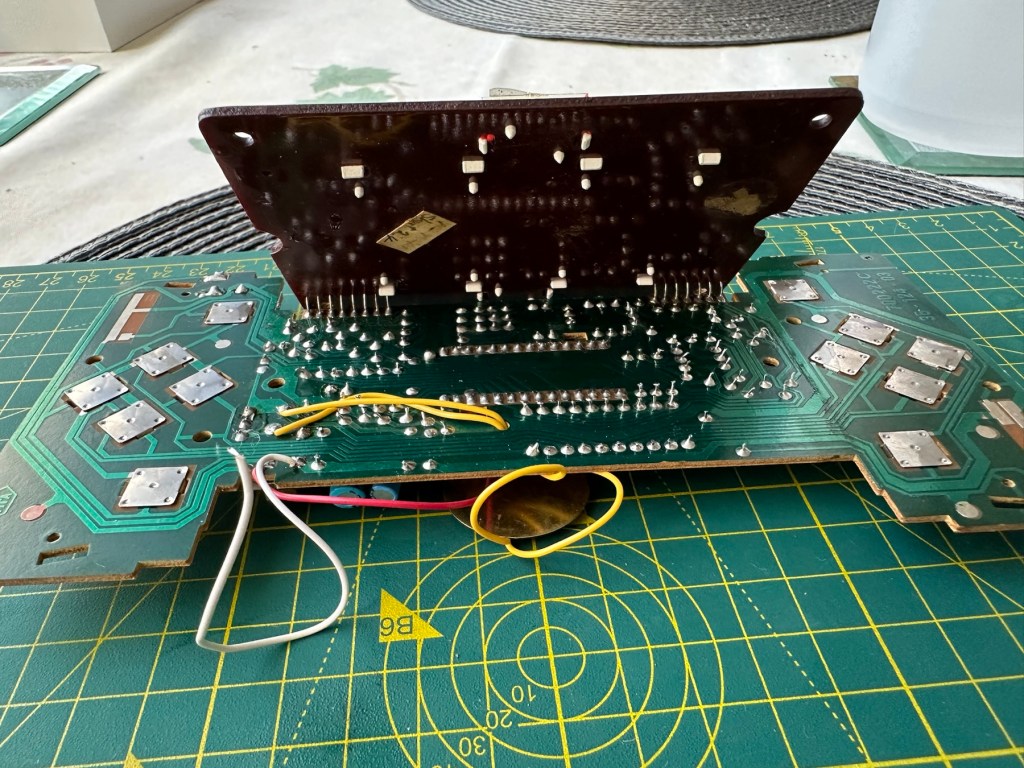
Whilst I’m waiting for everything to dry my attention turns to the board. A quick inspection reveals that all tracks are in a fair condition and we don’t need to rescue anything there. The buttons on either end have been taken apart and all cleaned with IPA, I’ve also used the same method to clean the switches and the board and after checking continuity all contacts are working as they should.
Board before cleaningChecking tracksNote found under upper portion of main board
Now everything is clean, I resolder the battery contacts, check the buttons and all appears well, I attach my bench power supply, give it 6v, turn on the switch and we have life. No intermittent issues and a very loud sounding speaker. I turn this off and look at getting it all reassembled.
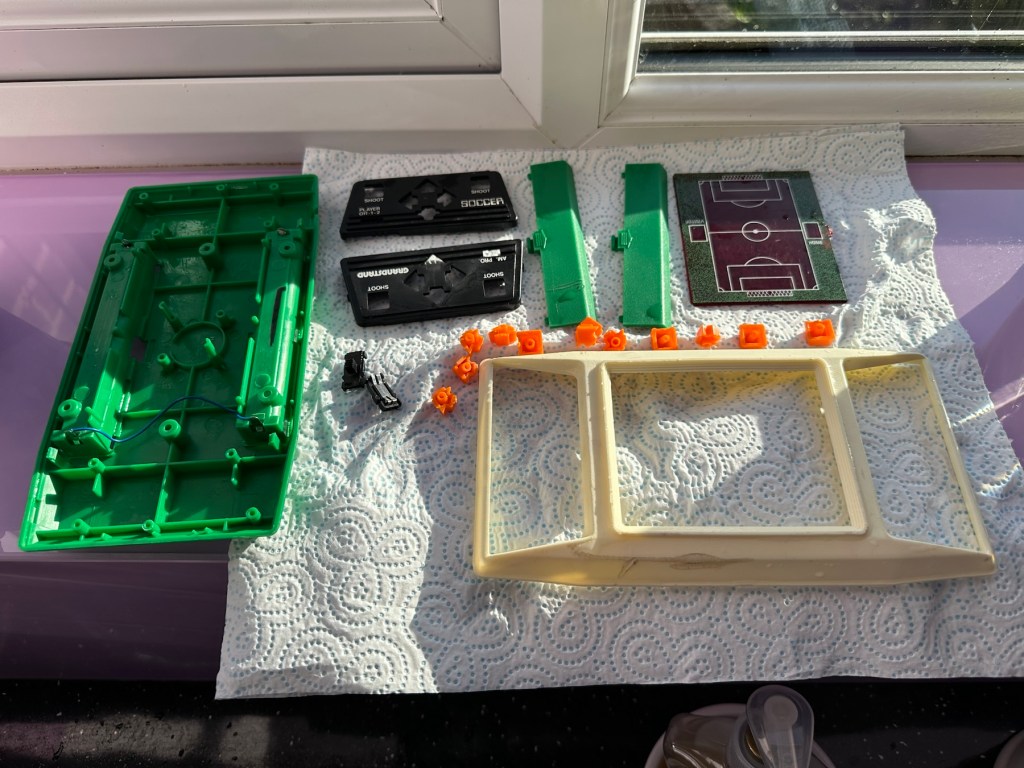
Unit now fully assembled, it is looking a whole lot healthier and apart from its burn scar is looking pretty good.
Where’s the dirt?TransformedLooking good
And when turned on it’s working just as well as it did back in 1979.
Result:
Sometimes these units just need some care and attention, and as I stated at the beginning all this really needed was a deep clean and service. Not a thing wrong with the electrical circuits apart from contamination on the contacts and switches.
All working. Job done
I’m now in possession of a lovely example of 70’s technology with slight battle scars. It’s had a tough life but now it has had a new lease of life and is good to go for many more years yet. It will take a place in my “Retirement home” collection of old discarded retro game units.
As always, it’s a win as we have prevented another unit being heaved into landfill.
Being one of those from the Ham radio community there was always a fascination with putting a Morse code transmitter into a disused Altoids tin (Other tins are available). Here and now though we have a gaming device that can fit in the same tin. Worth visiting Git hub via the link to see the actual boards and the plans for making this a kit version. I’ve signed up, let’s wait and see what happens.
Can’t get to turn on unfortunately. No battery cover. Any questions please ask
EBay
Dirty unit No battery cover
I know, there is no battery cover, however I have already sourced a seller of one if needed. This item looks quite dirty so a good soak might be the order of the day to get started. I’ll wait for its arrival before I jump to order any other bits for it.
Now as I’ve said in the past these units fall into that crazy price category on the selling platforms as the “New Antiques” of today. For an item that was low cost, somewhere between £25-40GBP when it came on the market, they can certainly command a wide range of crazy prices, here is an example of price ranges from today:
The massive range in prices for these units
This one I purchased today only came up for sale about 3 hrs ago and I thought it would have been snapped up by now, it hadn’t so I didn’t hang around any longer and purchased it for a total of £16:38GBP including its delivery. I’m not going to get too smug yet, as for all I know I may have just purchased an empty shell. Let’s wait until it arrives.
Here’s a little history of this unit:
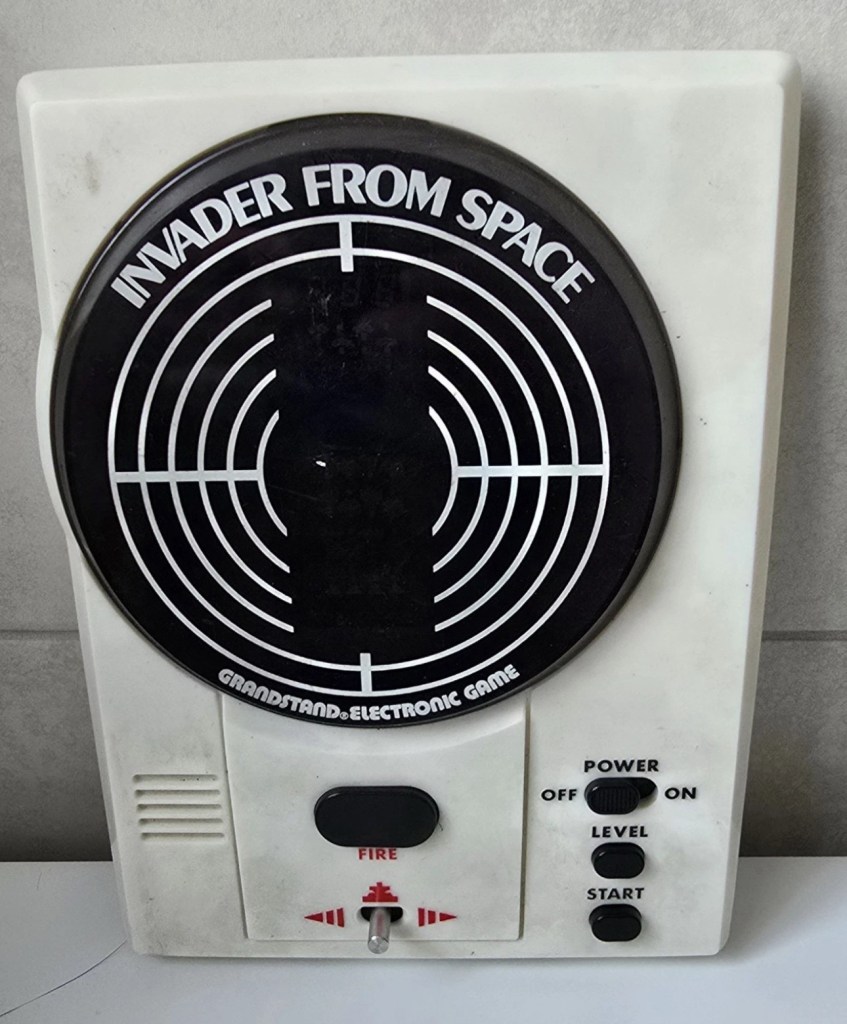
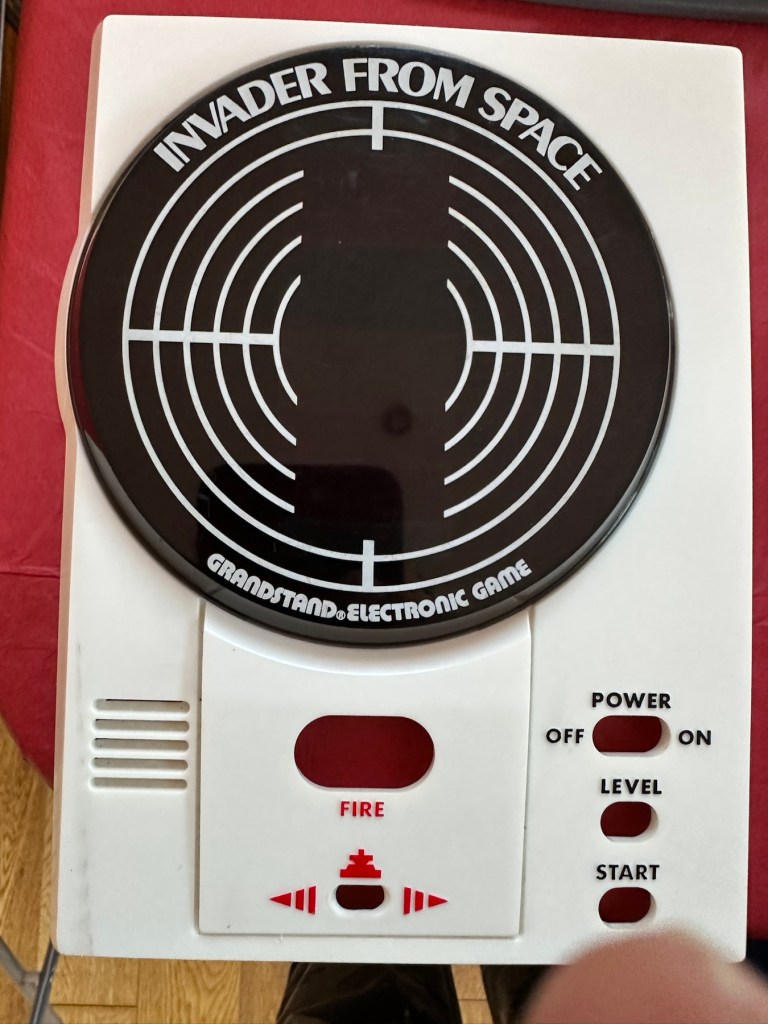
Grandstand “Invader from Space” is a tabletop LED game dating back 45 years to 1980. Four ‘AA’ batteries power the unit or, alternatively, the Grandstand 5.5V@300mA power adapter (or an equivalent power pack) sold separately. The game, licensed to Grandstand, is a copy of Epoch’s “Invader from Space”
The company initially behind the “Grandstand” label was Adam Imports Ltd., (from 1980 Adam Leisure Group Ltd. and by 1983 Adam Leisure Group PLC) founded in 1973 by Chris Rycroft and Les Kenyon of Harrogate, UK. The company initially started as a mail order company and was the single largest supplier of calculators in the UK by 1974. By August 1978, George Bassett had acquired a 75% holding in the capital of Adam Imports for £750,000 cash, plus 60p in the pound of profits before tax in excess of £500,000 for year to December 31, 1978. Adam Imports was re-acquired from George Bassett by Chris Rycroft in 1980. It chiefly imported electronic products from other manufacturers such as VTech, Epoch, Tomy & Entex, selling them in the UK re-branded under the Grandstand name.
Wikipedia and others
So that’s the history
There is a good link to a similar repair on YouTube from a guy I follow named Stez Stix Fix, it’s very much worth a look and he has a great if not sometimes crazy way of diagnosing and repairing items. A cool guy though.
The Grandstand invaders from space game
Anyway back to my own purchase.
Assessment:
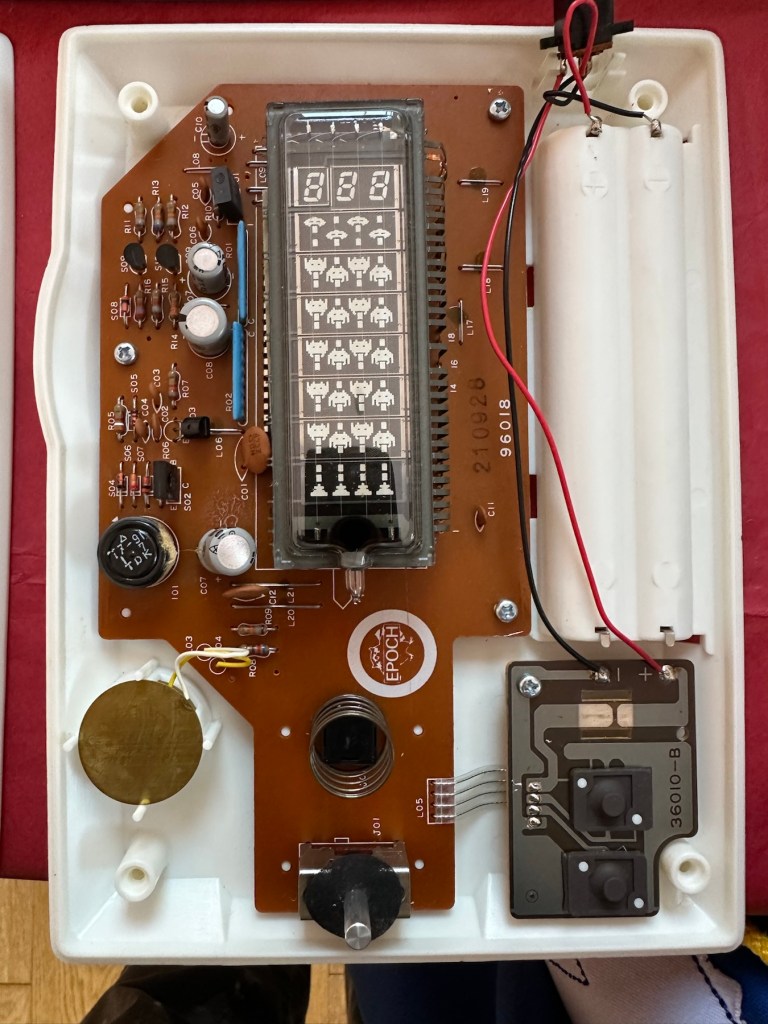
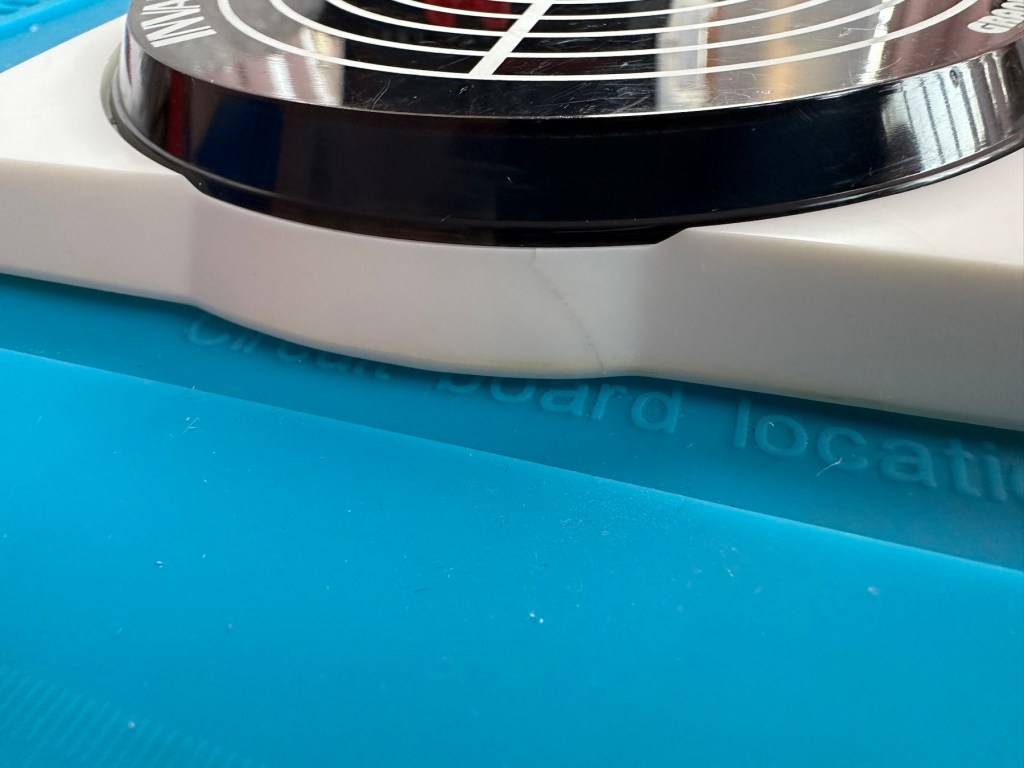
I must admit the unit doesn’t look as dirty as in the original pictures. The battery cover is missing and there is a crack in the side and a deep scar at the bottom, this won’t be too much of an issue if I can weld it all back together. I will still give it a good soak to clean it all up though. I’ve put four batteries in place, and the unit is definitely dead. There are no loose wires, voltages are getting around the board according to the multimeter and nothing is getting hot. There appears to be no short circuits, and then I notice this, capacitor CO7, slight bulge on top and what looks like leakage from the bottom. We have a candidate as to why this unit is not working.
CO7 looking unhealthy to me, you can see the component to the left that looks like it’s covered in a fur ball. The result of the old capacitor “coughing”
I’ll whip this out and see what we have but I suspect this old capacitor has failed and is causing an issue, heres hoping I have a suitable replacement.
Repair:
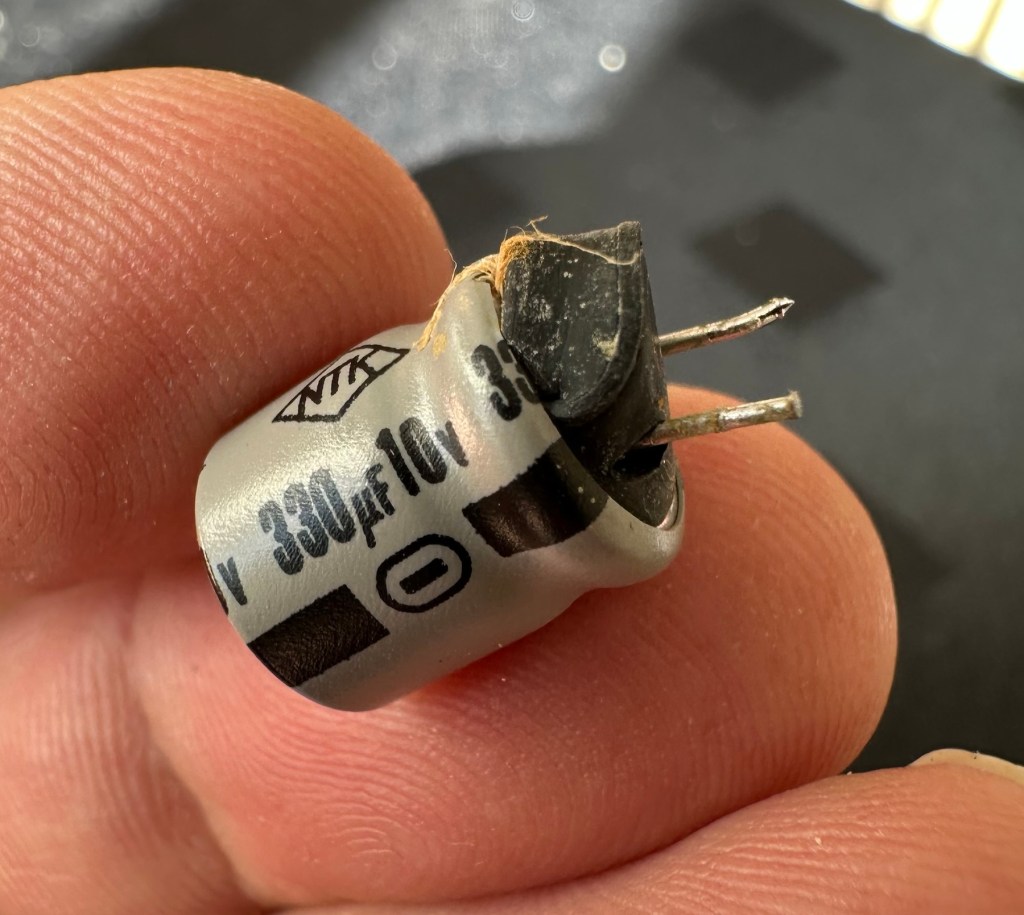
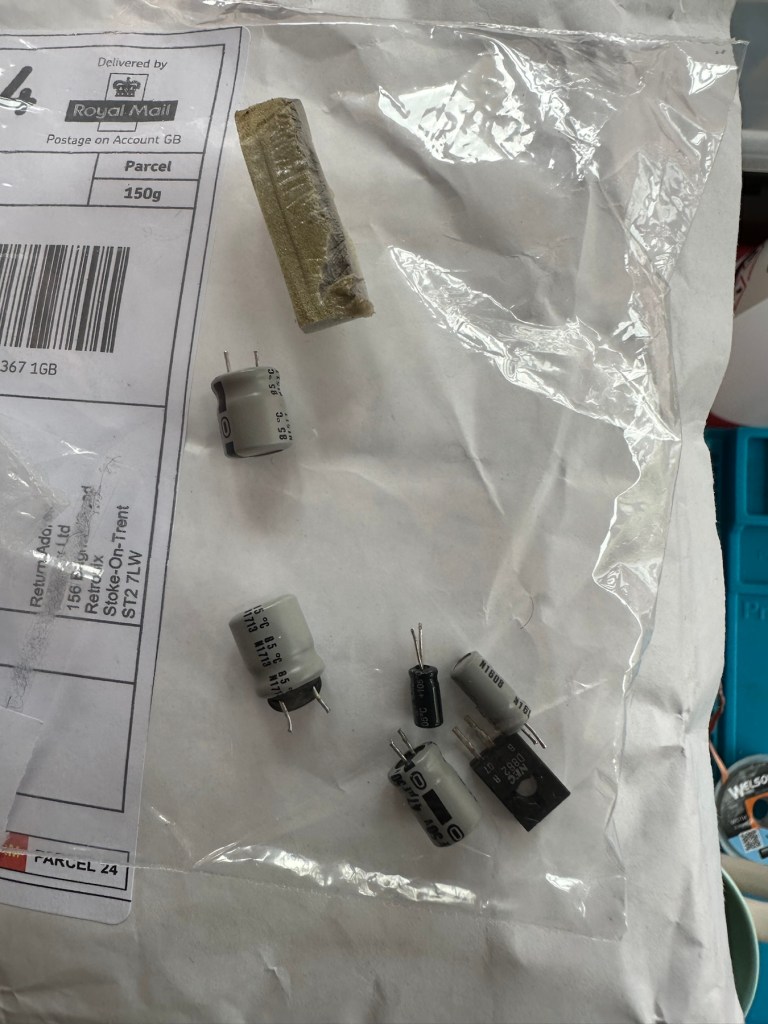
This little beast is a 330uf 10v electrolytic capacitor. I have none available so have had to purchase a pack of ten. These should be here in the next few days. There are three other old electrolytic capacitors that I will also change whilst I’m in there, as these are all likely to fail at some point soon. These components are now all around 45 years old, it’s a wise move to change them out.
One very dead capacitor removed.
I’ve ordered a 3D printed battery cover to replace the one that is missing. This should be here in a couple of weeks.
Whilst waiting I have cleaned the inside and outside of the casing as best I can. I still have a piece of broken surround to repair, however this is just a simple glue and a little bit of support job.
Case inside and out cleaned
Broken surround repaired
The surround that was broken has been repaired and secured with some nylon soaked in a superglue compound inside the casing. It’s rock solid. Outside the break is hardly noticeable. The break is secure and much stronger now.
New capacitor here
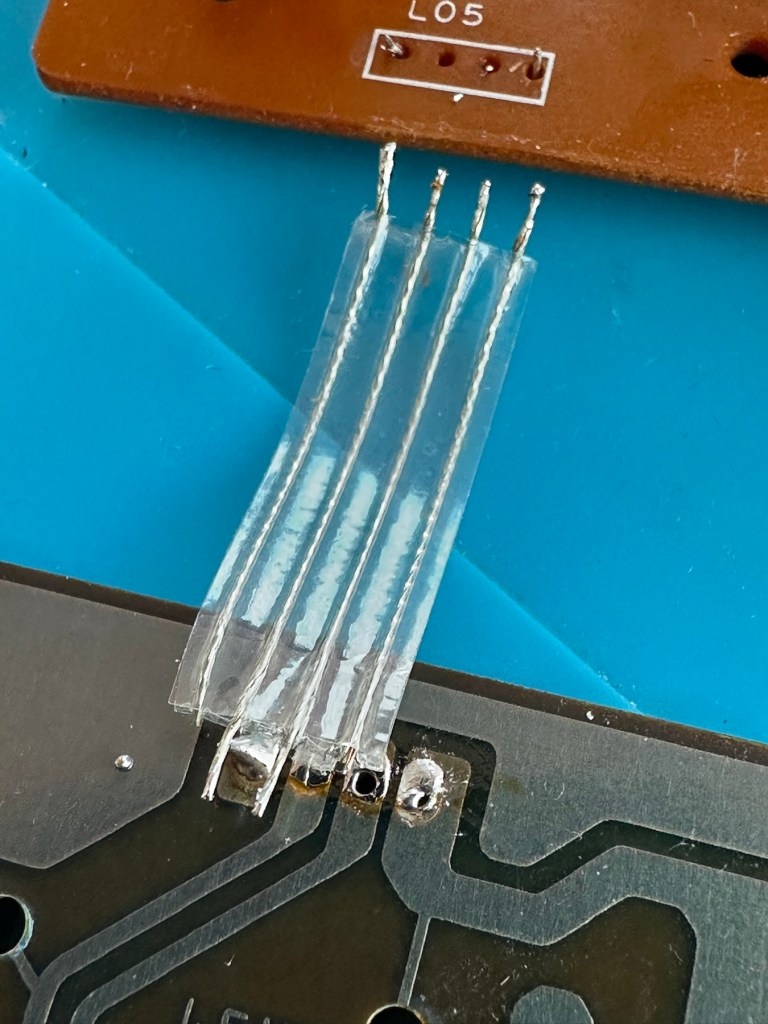
I’ve replaced all the offending capacitors and the unit remains dead. I’ve reflowed most of the board as there were some dry solder joints. I’ve also rewired the bridge from the control panel to the main board as one of the wires here had broken.
Bridge required resoldering
After using the multimeter to check some traces and components it’s now pointing to this component (a power transistor D882) being the cause of this catastrophic breakdown as its readings are all over the place. I suspect this item has overheated, the capacitor has blown and then it’s just died itself. I’m probably wrong, but I know what I mean. Probably just a catastrophic chain of events that all contributed to the units demise.
D882 transistor – power regulator
And as usual I have none available so will have to send for some new ones. The new components have arrived and the new power transistor has taken its place on the board. Now reassembled I place some new batteries in and the unit comes to life. It was the power transistor at fault, I should have really checked here first after seeing that damaged capacitor at the beginning.
All old components removed and replaced in this unit
Not to worry though as it’s had a good overhaul and has been totally recapped as a precaution. I’ve used some conformal coating on a few tracks that had some copper exposed after a good clean, to ensure they don’t deteriorate any further.
It has life
The unit is looking really good and these items were traditionally very loud and this certainly is. It’s working well just as it should do and I’m exceptionally happy with this repair. I’m still awaiting the battery cover that I have had 3D printed and this should be here in the next week to complete the fix.
No scoreHere we go3D printed cover arrived. Minor adjustments needed but in all a good purchase
So with that I will bring this build to a conclusion. It has been a fun project, I’ve learned a number of things about this circuit board and gained valuable knowledge.
But best of all we have rescued another item and saved it from landfill.
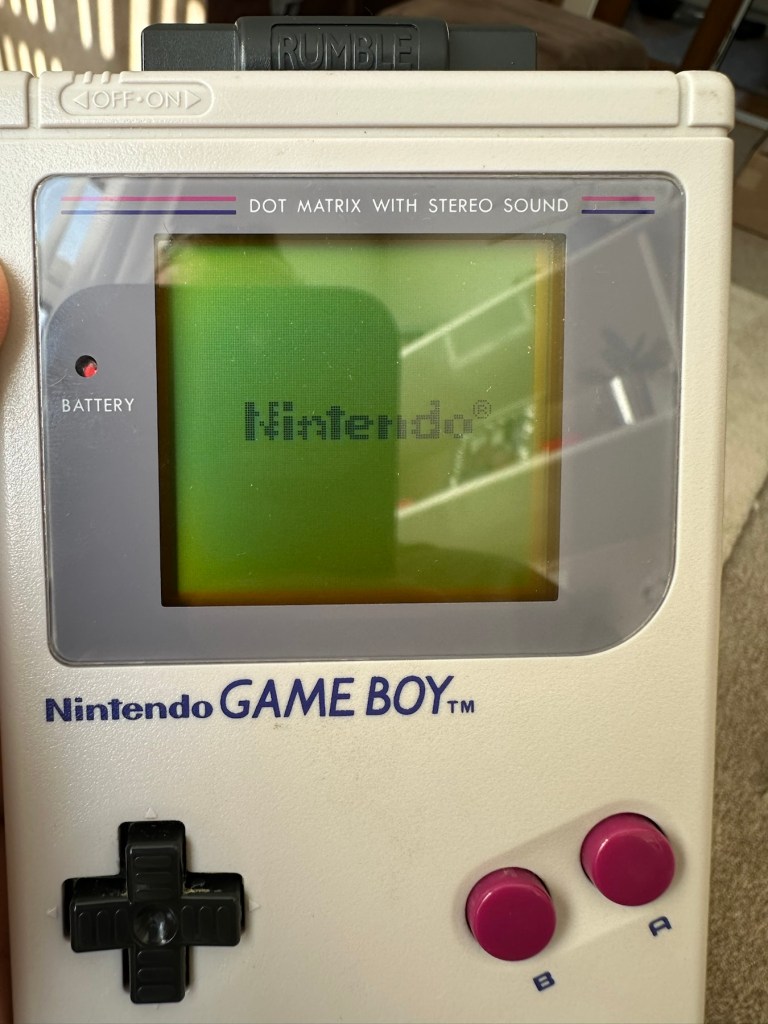
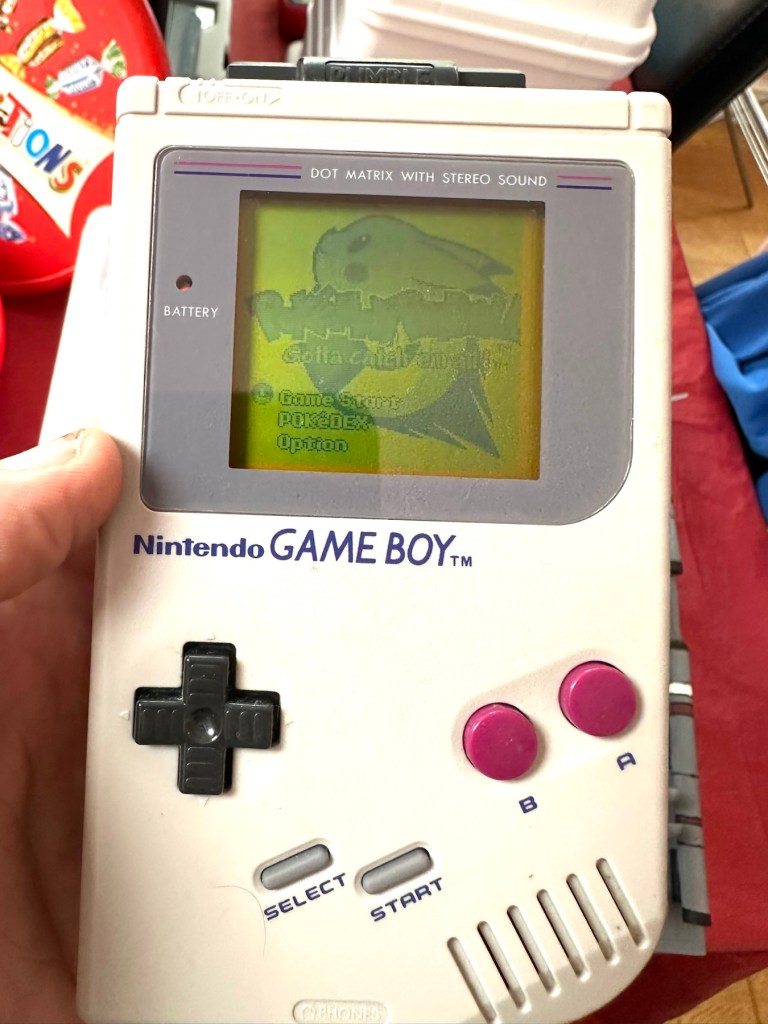
You will receive what you see in the photos, please look at the photos as this is part of my description to show you what you would be receiving. Please note the game comes up with the main Game Boy & Nintendo screen & then won’t go any further, as you can see👀in the photo.
Any questions please feel free to ask.
EBay
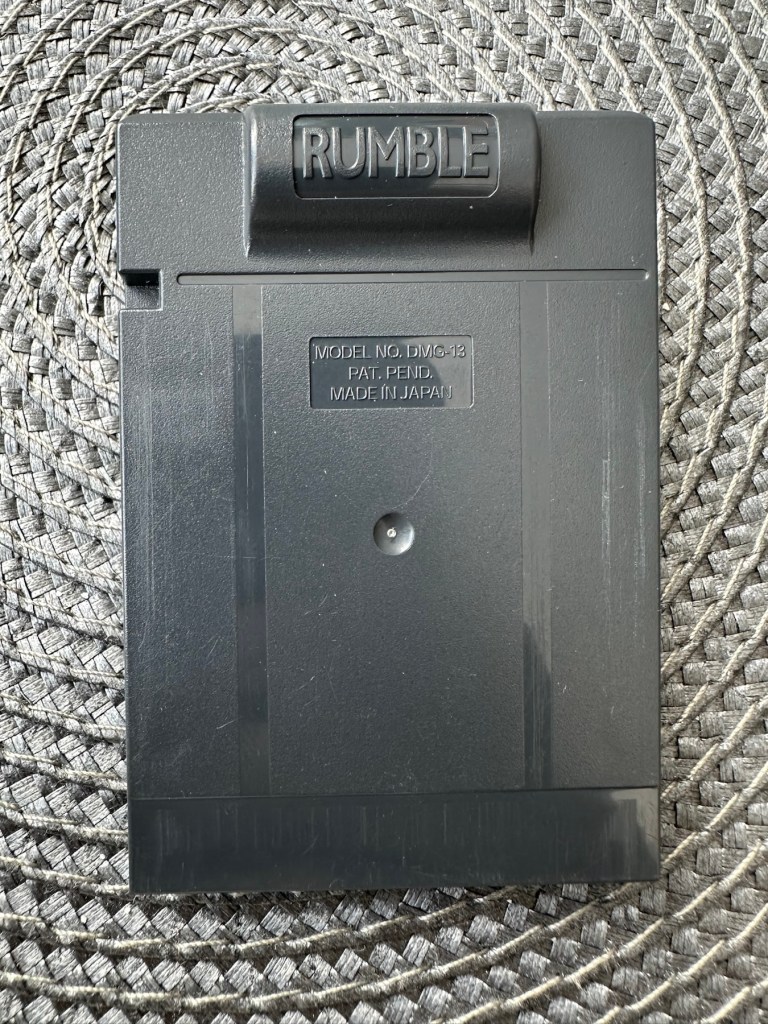
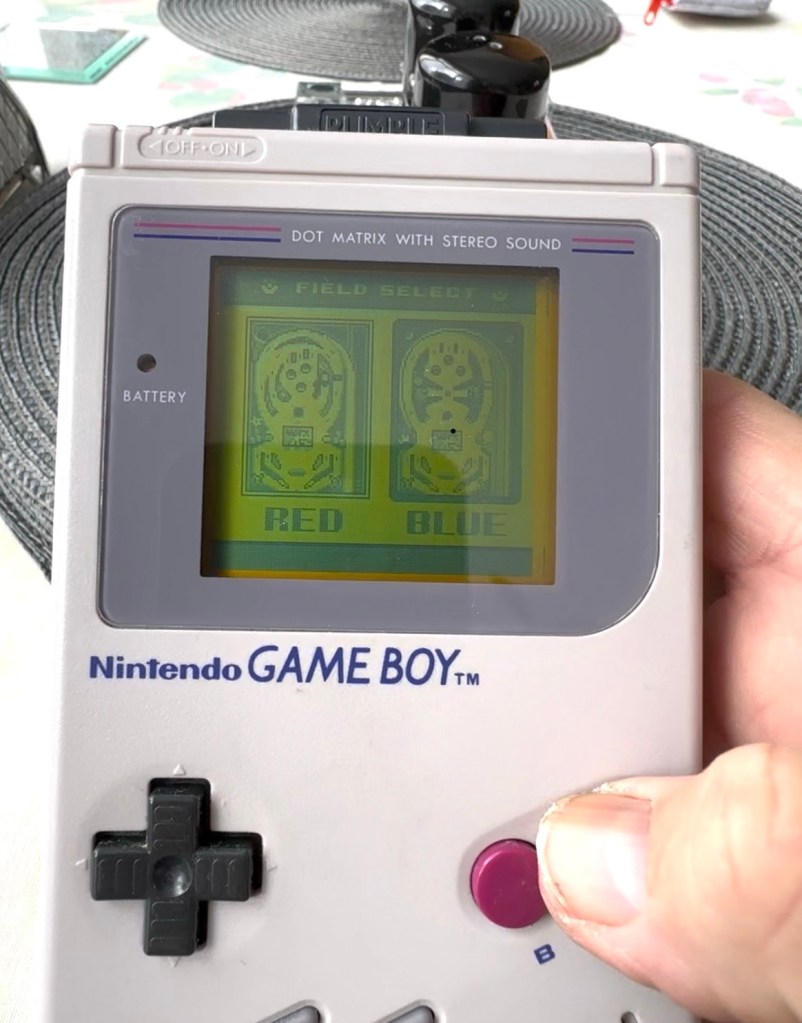
No getting past this pointOriginal Nintendo pinball game – Non operational
Hopefully this will be a simple repair, but who knows it might just be a little more technical.
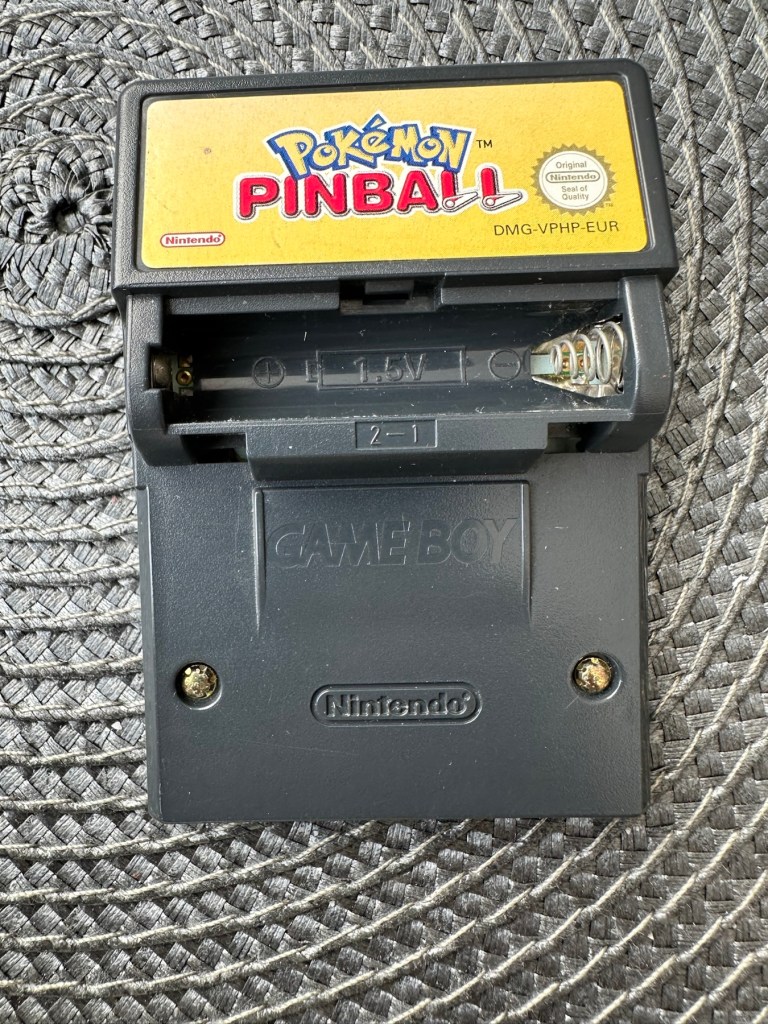
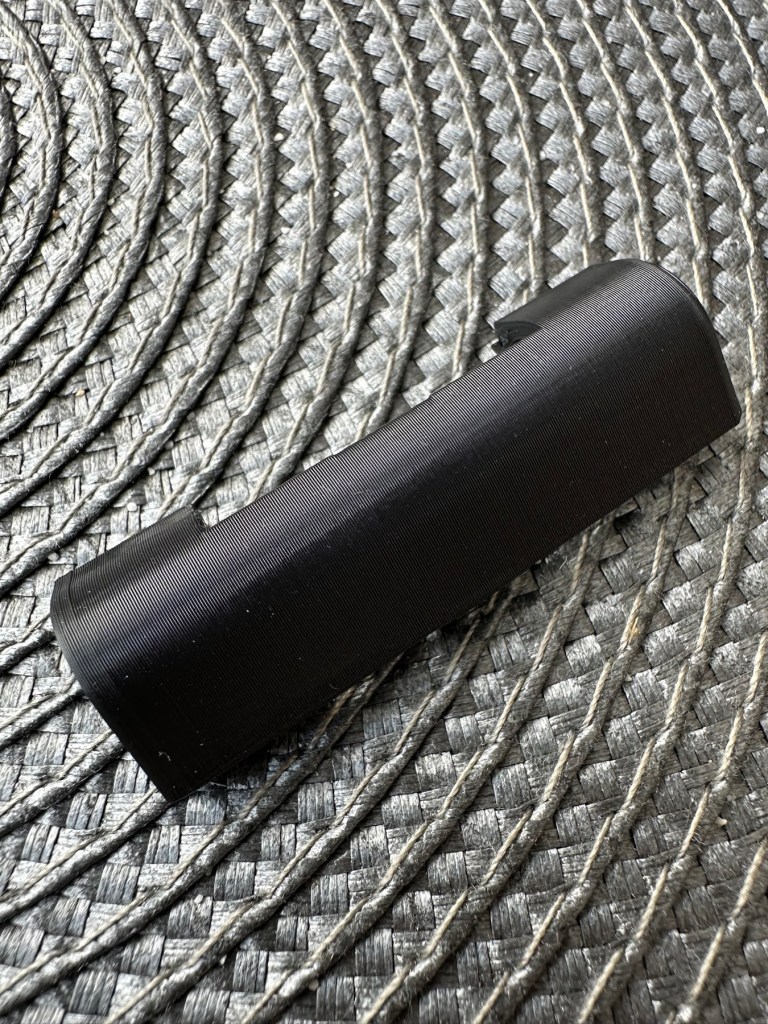
This game is built for the game boy colour console and is an original Nintendo product, it is the Pokémon pinball game. I’ve purchased something I never normally buy and usually detest buying, an item with the battery cover missing. Damn it, there is a fortune waiting to be made by anyone who owns a decent 3D printer, with the amount of missing battery covers that are waiting to be reproduced out there. Edit: ( Just looked on line and it seems the gaming community are already on the case, loads of options available, great to see) Anyway I’ve brought this unit as it can either be kept to await a suitable battery cover or passed straight on. Edit#2: I have, in anticipation of its arrival already ordered a suitable 3D replacement cover from a UK company. It was probably the best priced and best looking print to be honest, some of the others looked a little rough and postage was excessive to say the least. These guys at Cool spot gaming were the best in my opinion.
Released in Japan in 1999 this game made it to European shores in 2000.
These games came with a rumble pack at the top of the cartridge that simulates the vibrations of a normal pinball machine, and I believe this is what the single cell AAA battery is for. And as it is a black cartridge this indicates it can be used on the GameBoy colour and original versions. I have purchased this for about half the price that a good working one with battery cover sells for, now that I’ve had to pay for a 3D replacement battery cover I now move into the higher end price of the cartridge valuation, however I do have a few pounds worth of wriggle room should I decide to sell, considering most of the ones on sale at the moment are missing the battery cover and commanding horrendously high prices. I’m comfortable with that. That said it will go into my personal GameBoy collection anyway. Let’s get it working.
Here’s a link to the actual 3D print program for the battery cover on Thingiverse, if you should ever wish to print one yourself. I have absolutely no idea about 3D printing so this is just like brain surgery to me: 3D print program
Assessment
A nice tidy little package has arrived clean, battery cover missing as stated and exterior looks nice and clean. Original label is intact.
Repair:
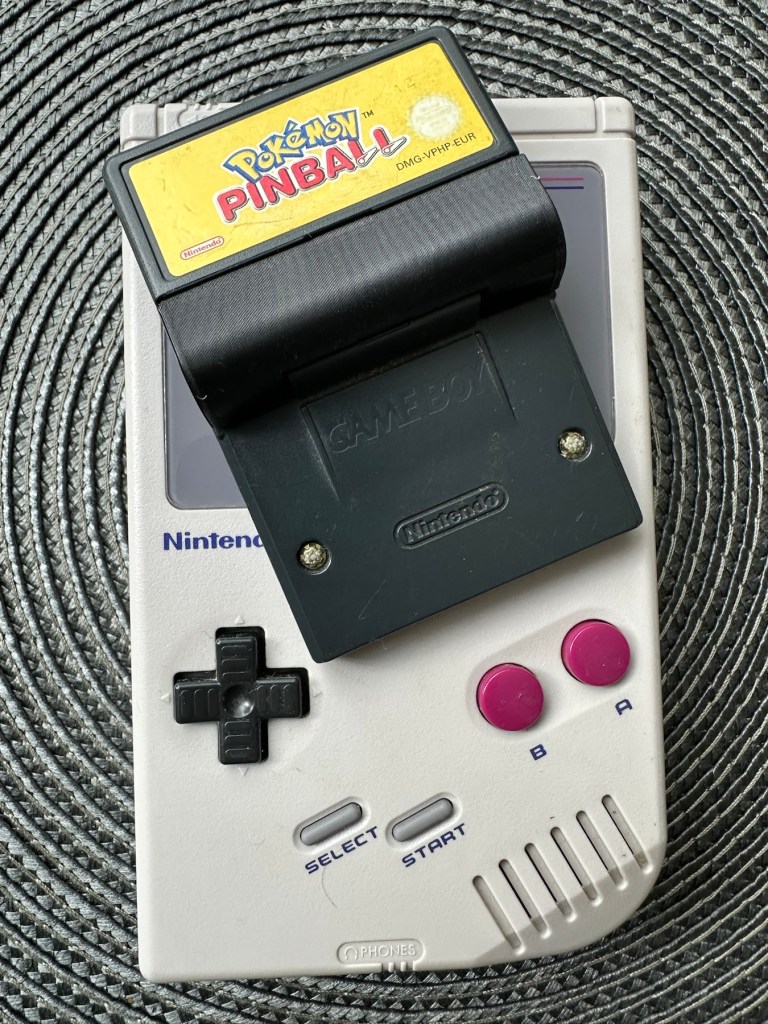
New 3D battery cover has arrived and this fits perfectly, no issues here.
Missing battery cover Clean and tidyNew 3D printed battery cover
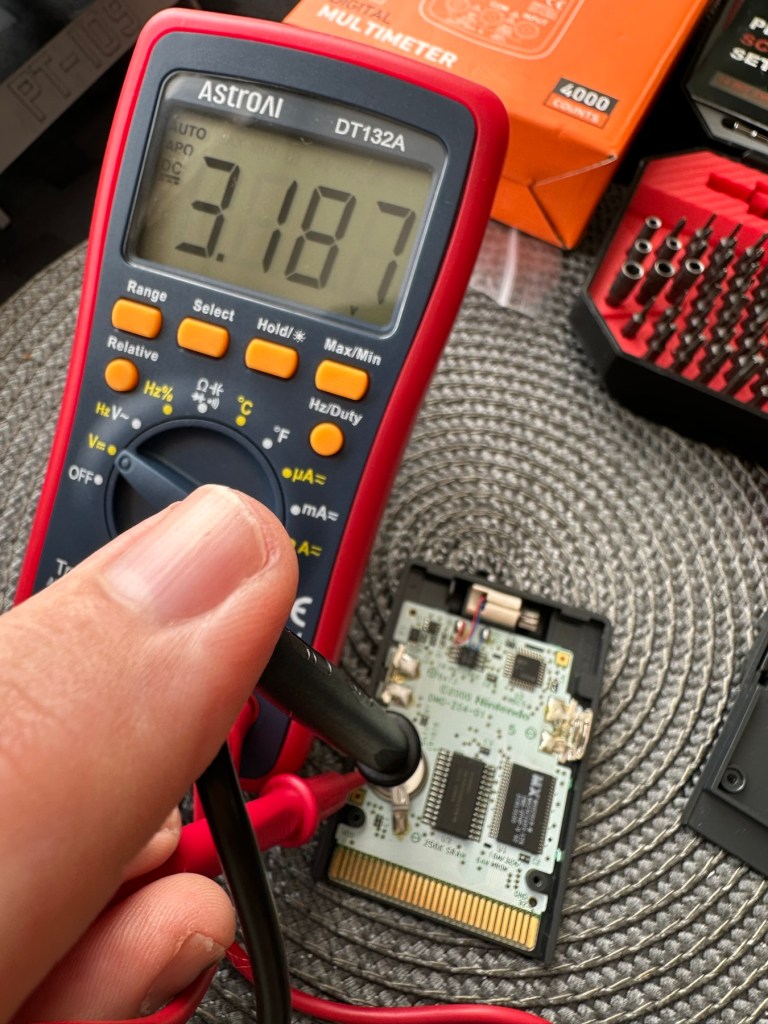
I’ve placed the unit into my GameBoy to check what occurs, and just as posted it does not progress beyond the Nintendo start up screen. I’ve opened the cartridge to do some basic checks and cleaning, the cartridge contacts have been cleaned using an eraser and some IPA, but in all honesty they were already pretty clean. I’ve checked the onboard battery and this is healthy at 3v as it should be. Cleaning competed, I recheck the game and the results are the same.
Game stops at this pointBoard levelBattery testedContacts cleaned
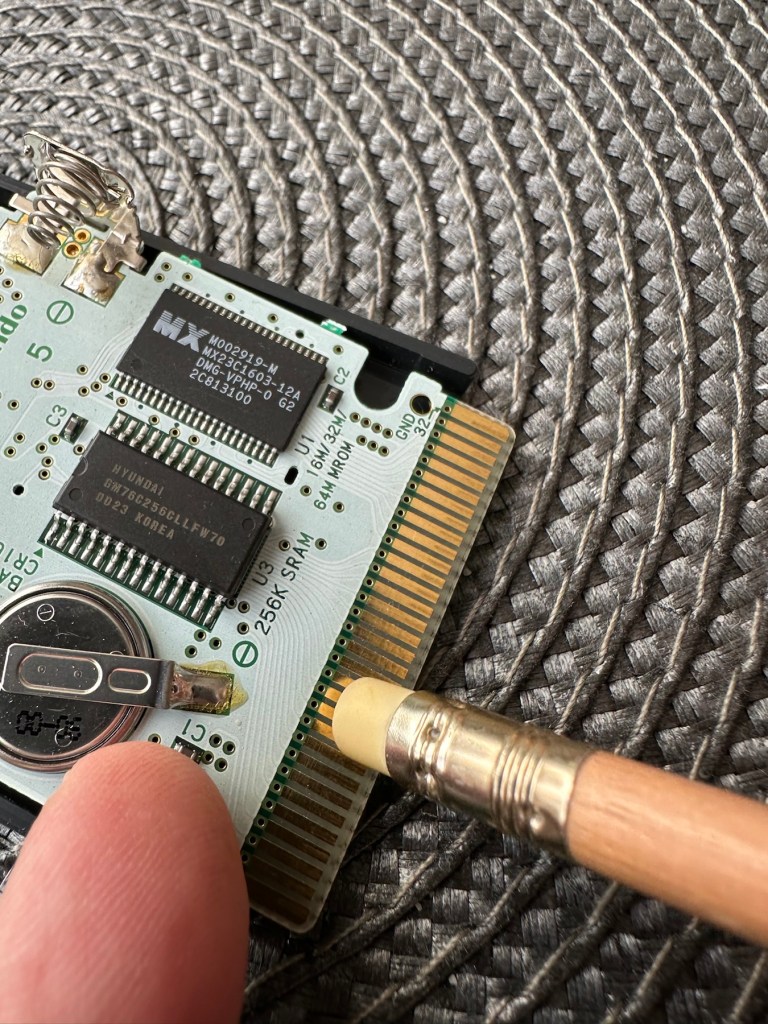
Next I’m going to reflow the joints on the ROM chip on the right hand side of the board, the one that has the letters MX on it. These pins or the ones on the RAM chip directly beside it are well known for having bad contacts and often need reflowing/tacking down. It’s something that seems to occur over a period of time on these game cartridges, just plain bad contacts.
ROM chip on the right with the RAM chip on the left, both are notorious for developing loose contacts
All items on the board have been reflowed using hot air, with extra attention being paid to the two chips described in the picture above. I removed the battery prior to doing this as the last thing you want is exploding batteries. With the battery back in place and the game now reassembled it’s now time to test.
And it works including the rumble pack feature.
Pokémon Working
I can only presume the hot air reflow has fixed an issue with joint continuity on one of these chips as expected. Excellent, another item has been saved from the bin and can now be added to my collection.
Game workingComplete with new 3D printed battery cover
Another little project to put to bed, there always seems to be an issue with these games after a good number of years where the solder joints just become unstable. I don’t know if it was the solder quality they used all those years ago or the heavy use and abuse the games endured during their hey day. At least we can fix them and ensure they are still good to go and enjoy for a few more years yet.


You must be logged in to post a comment.