Canon EOS 10

An old EOS 10 was in need of attention. And I was able to lend a helping hand

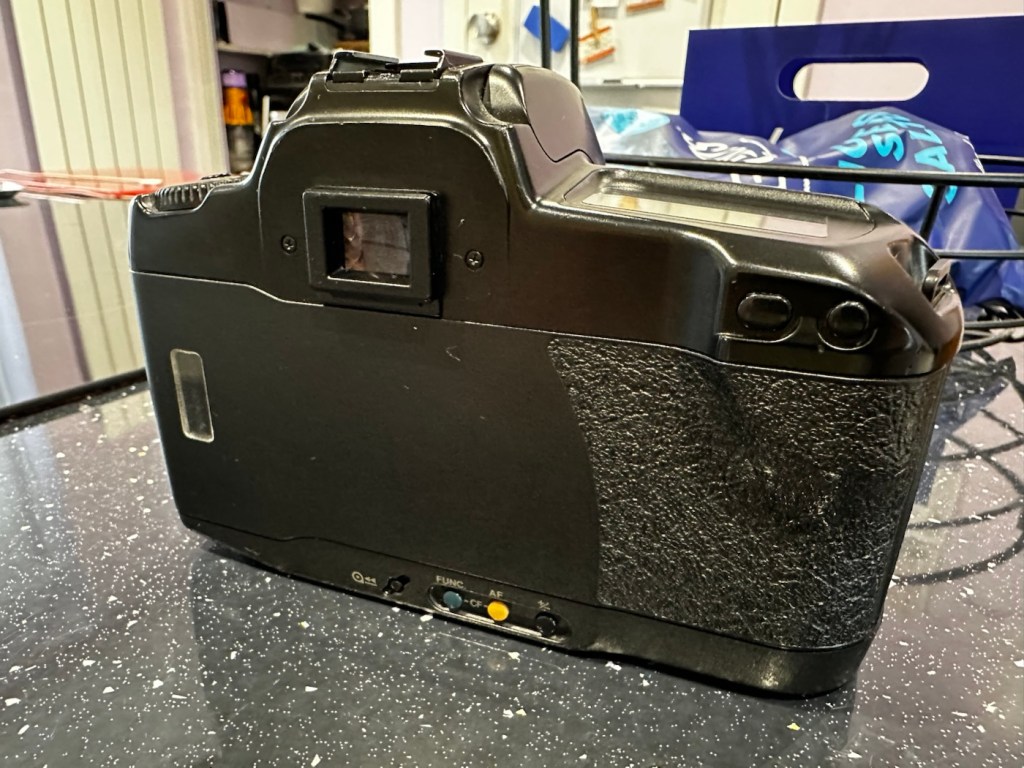
Here I have a Canon EOS 10, a quite superb little camera. The date code within the film barrel is HE1213, indicating that this camera was manufactured in December 1990. At the time of manufacture this camera sat firmly at the top of Canons camera tree only surpassed by the EOS1 professional camera that had been released the year earlier in 1989.

My EOS 10 35mm SLR

This camera was amongst a selection of cameras and equipment passed on to me by a good friend and professional photographer as can be seen here: Cameras…i need more!

Here is a little history regarding the EOS 10

The Canon EOS 10 is an autofocus 35mm SLR introduced in 1990. The model name was EOS 10S in the Americas, and EOS 10QD in Japan. There was a commemorative metallic-silver version introduced in 1991 to mark Canon’s 60 millionth 35mm camera sold.

The improvements over the original EOS cameras are a newly improved autofocus sensor. Focus modes include One-Shot AF for non moving subjects and AI Servo AF for moving subjects. It is able to detect and switch automatically between the autofocus modes. Shutter ranges from 30 sec. to 1/4000 sec., with B. X-sync at 1/125 sec. Similar to the EOS 750, is has a built-in flash with a guide number 12 (at ISO 100). It uses one 2CR5 lithium battery and weighs approx 625g for the body without battery.

Camera wiki.org

Assessment:

One of the nuances introduced on this camera was the barcode option. Introduced at a time where barcodes were starting to creep into our life, in a knock at Minolta and their use of specific expansion cards for specific scene settings, Canon thought it would be good to utilise barcodes that you could scan, to automatically set your camera with these options without expansion cards. Needless to say it didn’t take off and was soon dropped from later camera production. It was a sign that the development teams were looking for advancement opportunities.

That barcode mode – soon forgotten

These cameras are available at fairly reasonable prices now partly due to the dreaded sticky rubber grip issue that tends to send buyers running for the hills, god knows why, it’s an easily remedied issue that just takes a little time and patience. I did a previous post about cleaning these cameras here: Sticky, Rubber camera grips it’s all down to the polymers in the Vulcanised rubber breaking down and reacting with hand sweat and other stuff. Have a read, and never throw away a camera just because it’s sticky.

This camera has some stickiness but it is not an advanced case. It will still be cleaned in the same manner, to prevent it developing any further.

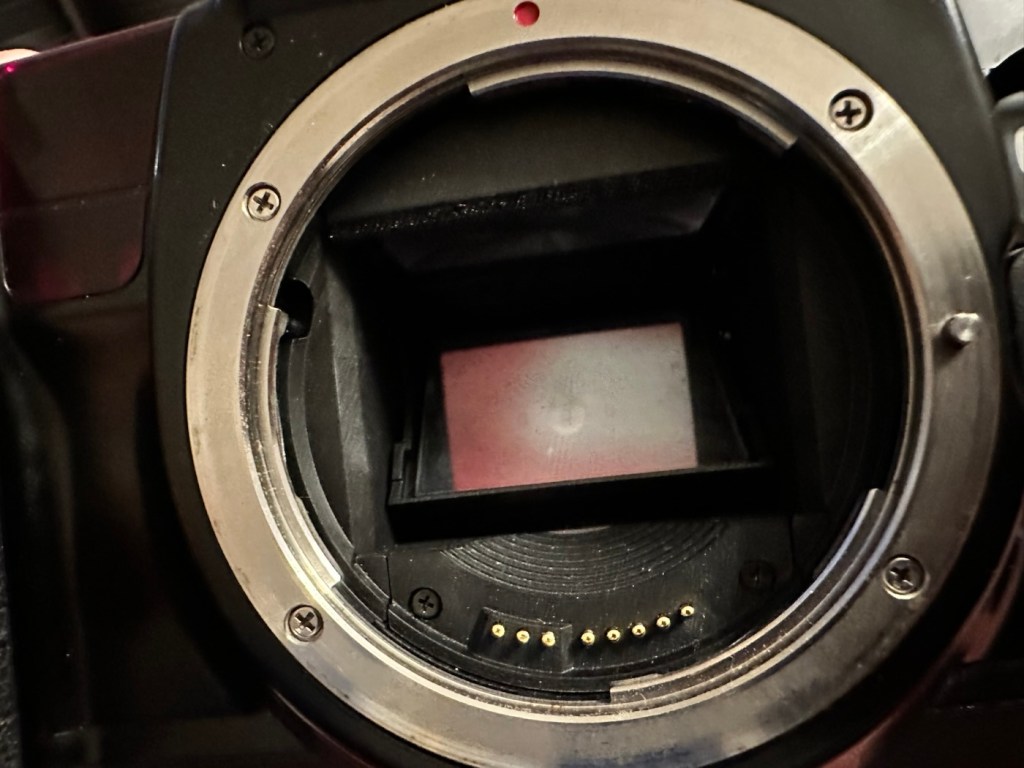
The camera is just a bit dusty and in need of a good clean. The mirror is dusty and needs cleaning, a blow out of the interior should suffice as the shutter blades are opening and closing with no issue.
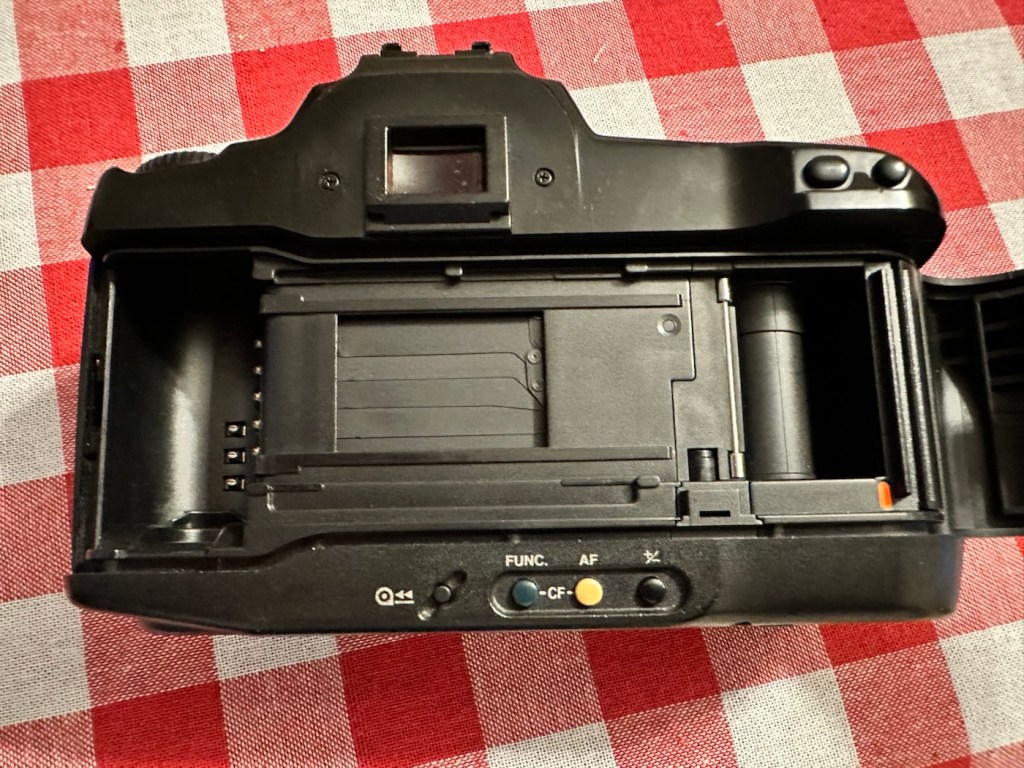
The battery is a lithium 2CR5 cell. The battery chamber is clean with no signs of battery contamination, this is a very good sign. When placed into the camera the screen comes on, is clear with no damage. A lens put on the front confirms that auto focus can be achieved and the camera fires and winds as expected.
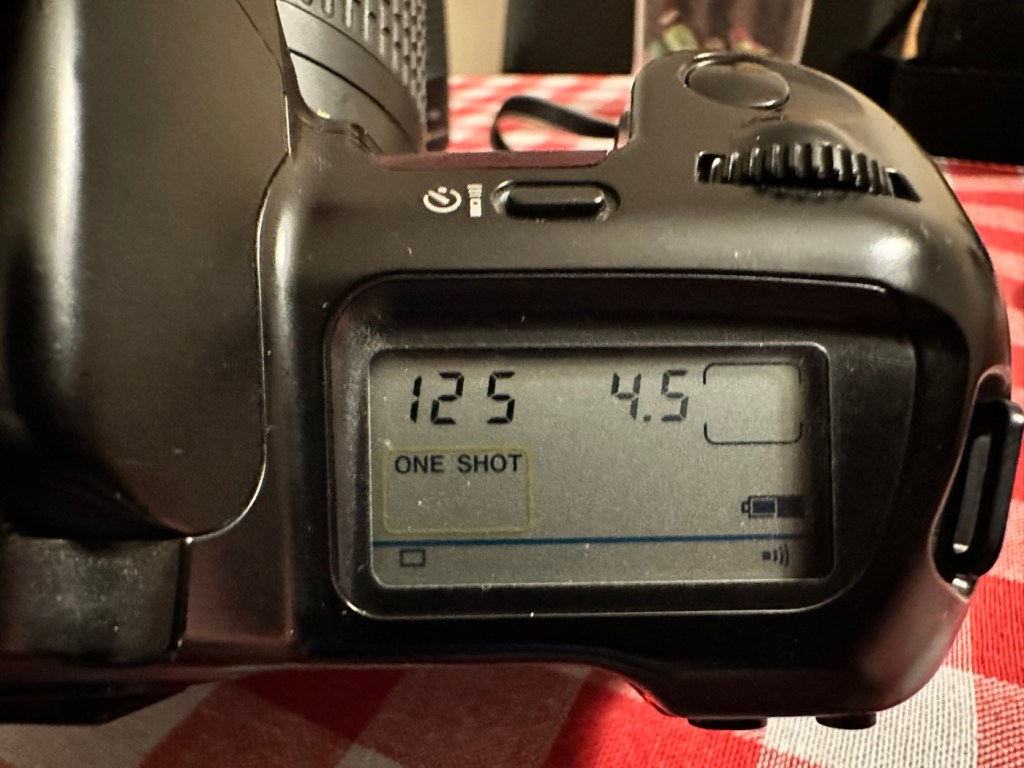
To be quite honest, there doesn’t seem to be a lot wrong with the camera. It really seems to be just a clean and maintenance issue. I’m going to give the camera a thorough look over, dust and clean, a thorough clean of the external rubber and finish it all of with a good exterior body treatment. I will then run a roll of used film through to check the DX reader is working, as well as the transport system. Fingers crossed nothing major raises its head during the repair process.

Repair:

Straight in and at the cleaning, and to be honest the rubber wasn’t too bad. I only used two applications and not a lot of dirt came off on either. After it has dried, it does feel a great deal better.
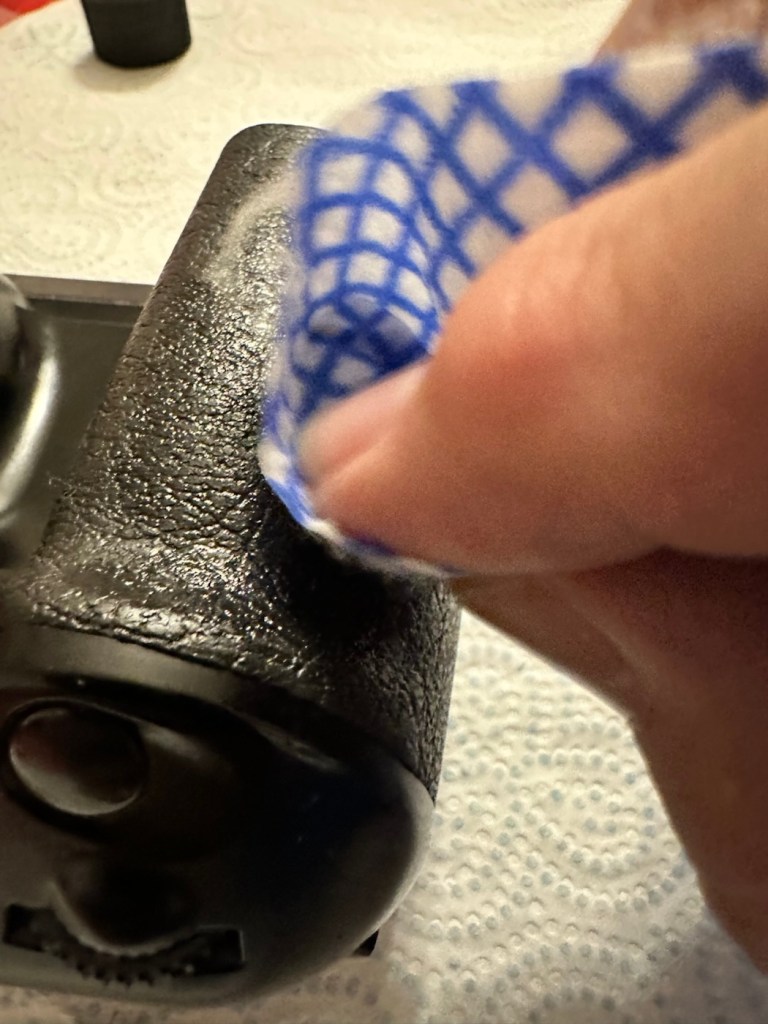
Heavy cleaning, wasn’t that heavy

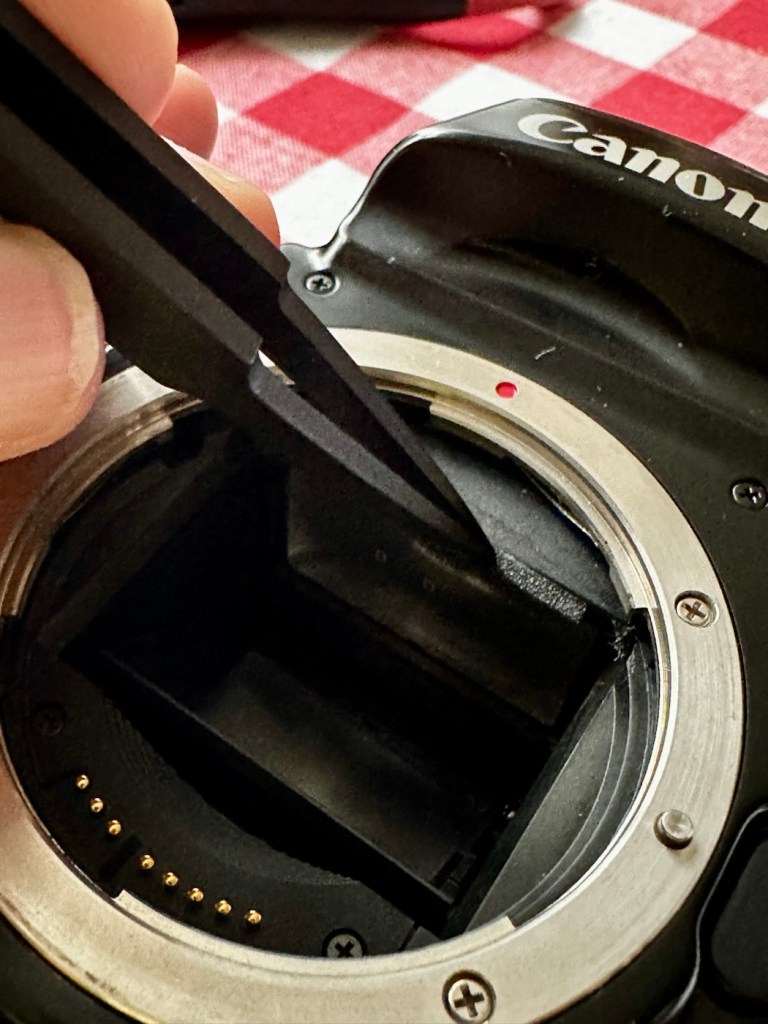
The mirror has cleaned up nicely, so has the prism above it, however whilst in there I noticed that the mirror damper felt was failing, so this I have now removed and will have to replace prior to using as I don’t want to cause any further damage.
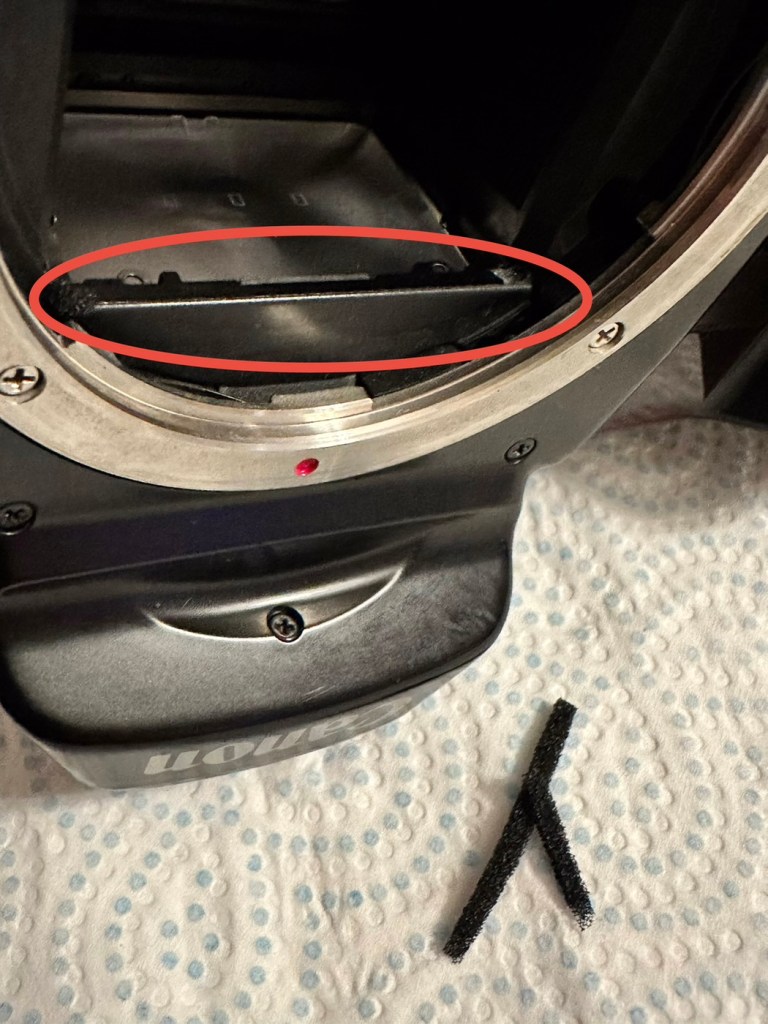
The missing damper felt area, highlighted in red

I’ve had to order some new material that will hopefully be here shortly, as my supply, as is always the problem lately, is in storage with all my other gear pending this house move that will probably never occur. it’s a real pain in the butt not being able to access your most required kit. Hey ho.

The light seal has arrived, and so I start by getting the damper felt put in place. First I cut it to size, remove the sticky back paper and just wipe the sticky bit with some water, this allows me a little more time to reposition it before the adhesive does its work.
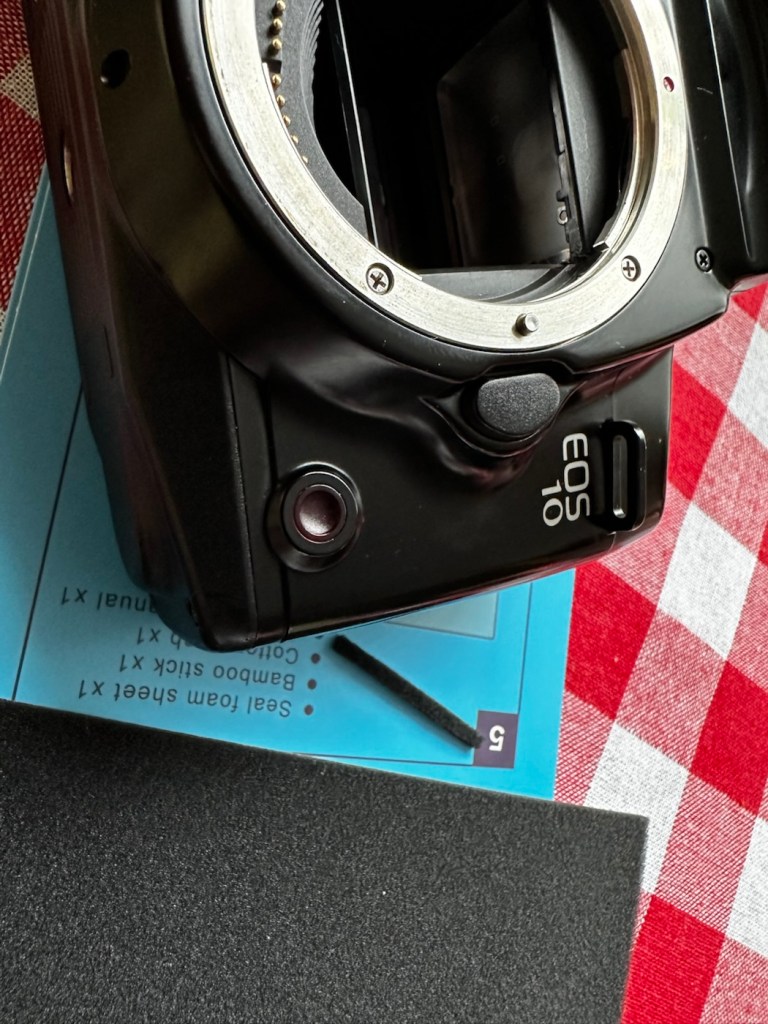
Below is a very small video with me putting the camera into manual mode on a single exposure setting to test the actual worth of the damper foam.

All working fine

I’m happy with what has been done so far.

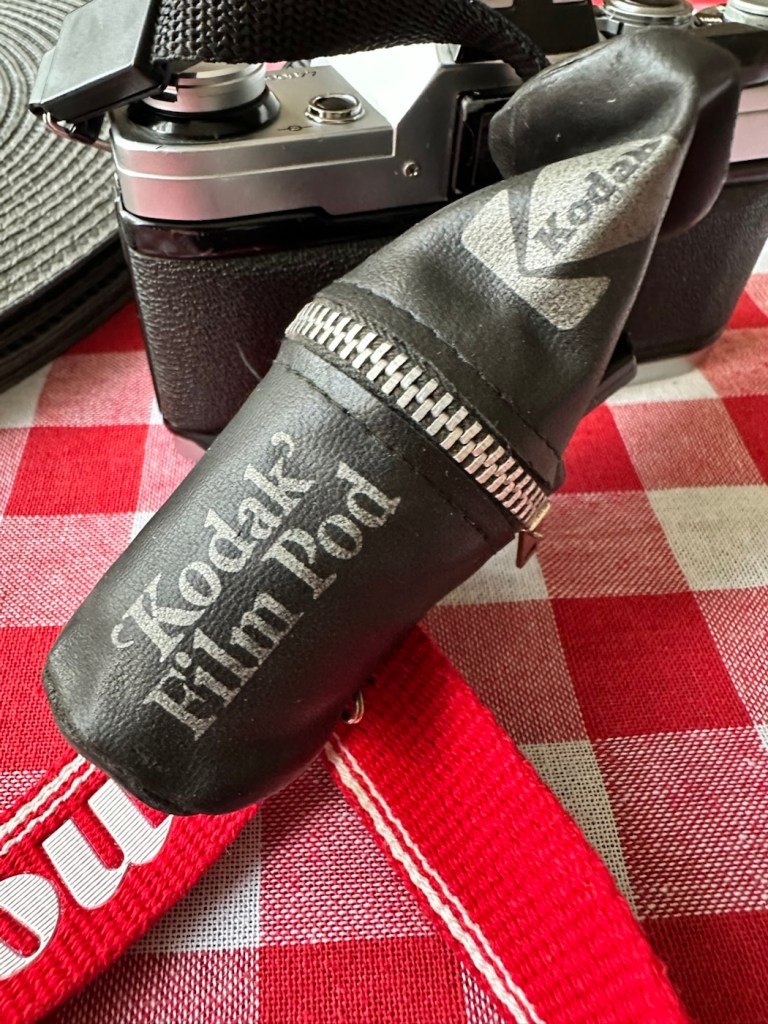
Strap cleaned and restored

I’ve even given the neck strap a good buff up, the rubber on it was almost white rather than black, a bit of a clean and a polish and it’s now been restored to it’s original glory.

With the new damper in place it’s now time to run a film through it, I have an old test film I use for this purpose, I’m going to set the camera to its highest shutter setting and just run the whole roll through in quick succession to check the transport and rewind.

And here is that test, it went super fine and the full roll rewound at the end.

Transport works just fine

I’ve tested all settings, shutter speeds and functions including the flash and all is as it should be. I’m happy to say that this camera appears to be in full working order.

Now for the final clean and presentation.

Result:

Well, a little bit of car cockpit cleaner has done wonders. It looks beautiful and has a nice aromatic smell as well. I know I’m biased when it comes to cameras but I think this is an absolute beauty.

All polished and looking fine

I’m really pleased with this camera, I’m heading out later today to watch a relative play football and I’m going to take this along to grab some snaps with an expired film from 20 years ago. It will be a good final test of the capabilities of this camera, and should finalise its renovation. It’s been a great camera to work on and is yet another worthy addition to my collection. I will post the photos here when they are finalised. Canon Eos 10 test shots

Thank you all for passing by, it’s always most appreciated.
20yr old Kodak Gold

How did the old film trial go? Come in and take a peek.

I posted earlier today Well, that was most enjoyable! Regarding popping out for a morning stroll and taking a 48 year old camera with me to shoot a roll of film that had expired 20 years since.

The camera

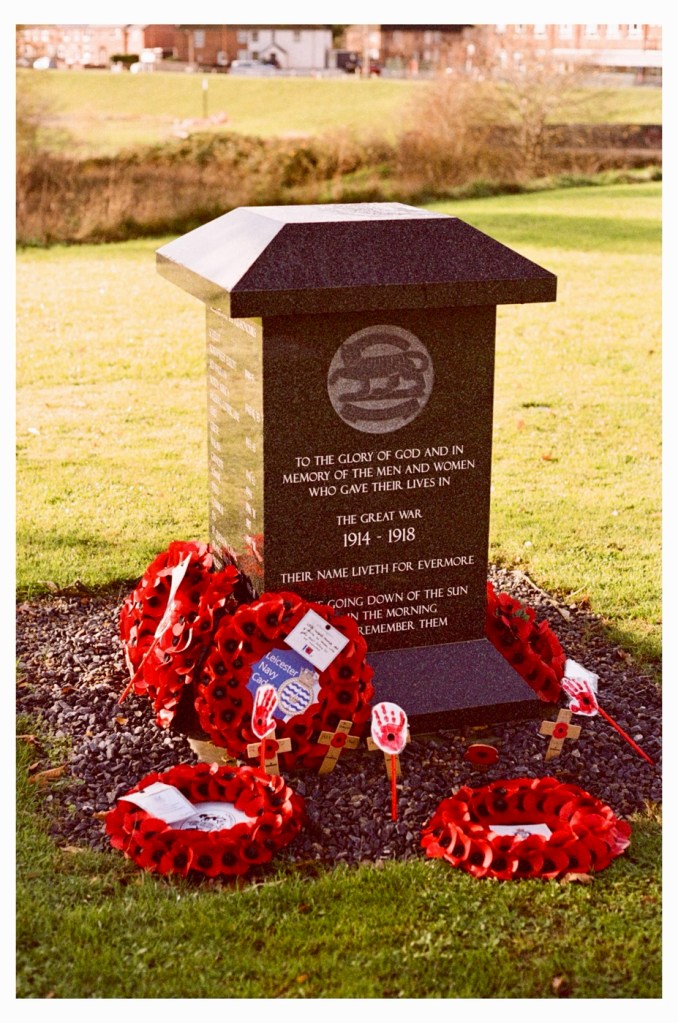
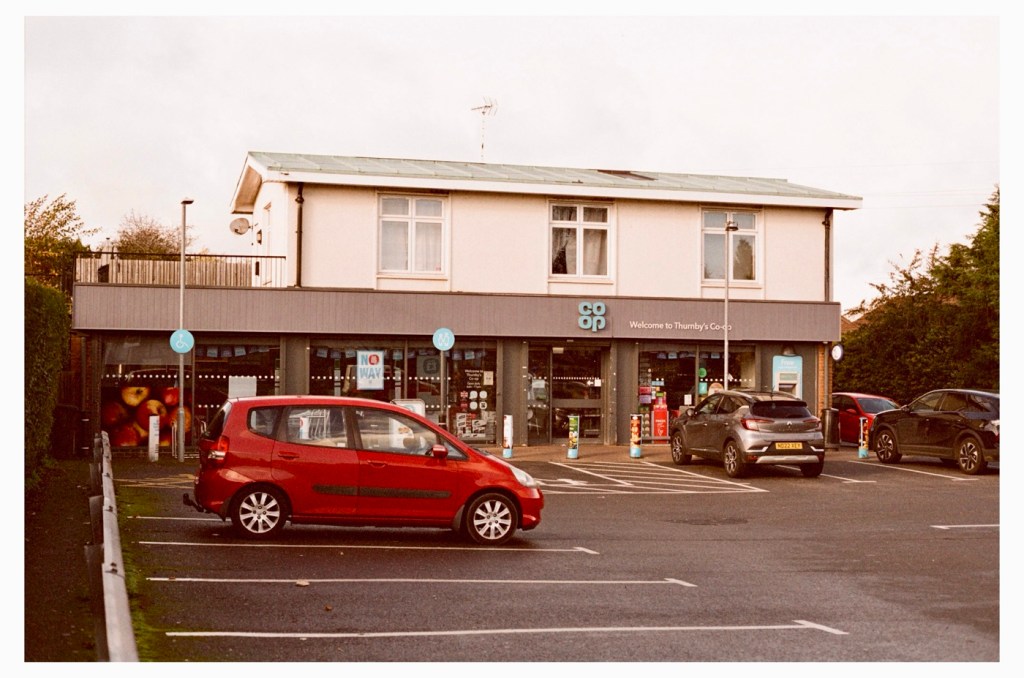
At 20 years old, the roll was an experiment where i exposed at normal settings, +1 stop overexposed and +2 stops overexposed. I obtained 39 exposures, always possible from a 36 exposure roll, I won’t bother you with them all, just 2 from each exposure range with a brief description. Don’t expect fine art here, it was a snap session to test a number of factors and to see how the film has deteriorated over time.

These pictures have not been retouched apart from having a frame put around them. They are as scanned, for authentic representation.

200ASA

The advertised, original roll ASA rating. Very low expectations and it didn’t disappoint.

Extremely underexposed
Again under exposure, and a brown hint

At 200ASA the shots were certainly under exposed. The pictures have a cast over them and after development there is a lot of curl on the emulsion (Age) and the base of the film also has a darker tone, creating that yellow brown cast.

100ASA (+1 stop overexposed)

The best two exposures represent the first overexposure of one stop from 200ASA to 100ASA.

Pretty nice overall exposure
Again nice exposure and highlights very prominent

At 100ASA everything seems quite acceptable. There is that hue over the film still, and highlights seem quite prominent. Grain is present but not too distracting.

50ASA (+2 stops overexposed)

If you work by the suggested standard of one stop of exposure for every 10 years then this should be the standard. However I’m not so sure.

Nice colour, highlight prominent and quite a bit of a yellow hue, would need adjustment post processing
Could have been taken in the late 70s or early 80s

So with the exposure at 50ASA we have now introduced quite a bit of grain, a yellow hue and quite prominent highlights. I’m sure all of these pictures would post process fine if run through photo shop or light room. But to be quite honest I love that retro look that they have.

For me i’d probably aim at the 100ASA +1 stop of overexposure on the remaining rolls I have, I believe that would be quite enough, however even the 50ASA option is not too bad though you would require a lot of post working and you’d have quite a noticeable size grain.

Horses for courses as they say, but I’m going down the +1 stop overexposure route for the next film.

I found a little local photo store here in Leicestershire called Classic photo supplies, who specialise in all film processing, supply, printing and Sundry items. The owner Brett invited me in and we just chatted classic photography whilst my film was developing. He’s a super guy, and I’m all for supporting small businesses, so this is my new go to lab. The scans were done and over to me by email within an hour, super quick service. I’ll pick the negatives up in the week when I drop off another film to be developed and scanned.

Thanks for passing by. As always I am honoured by your presence.

Thanks. For your time.

Well, that was most enjoyable!

An enjoyable stroll with a 48 year old camera

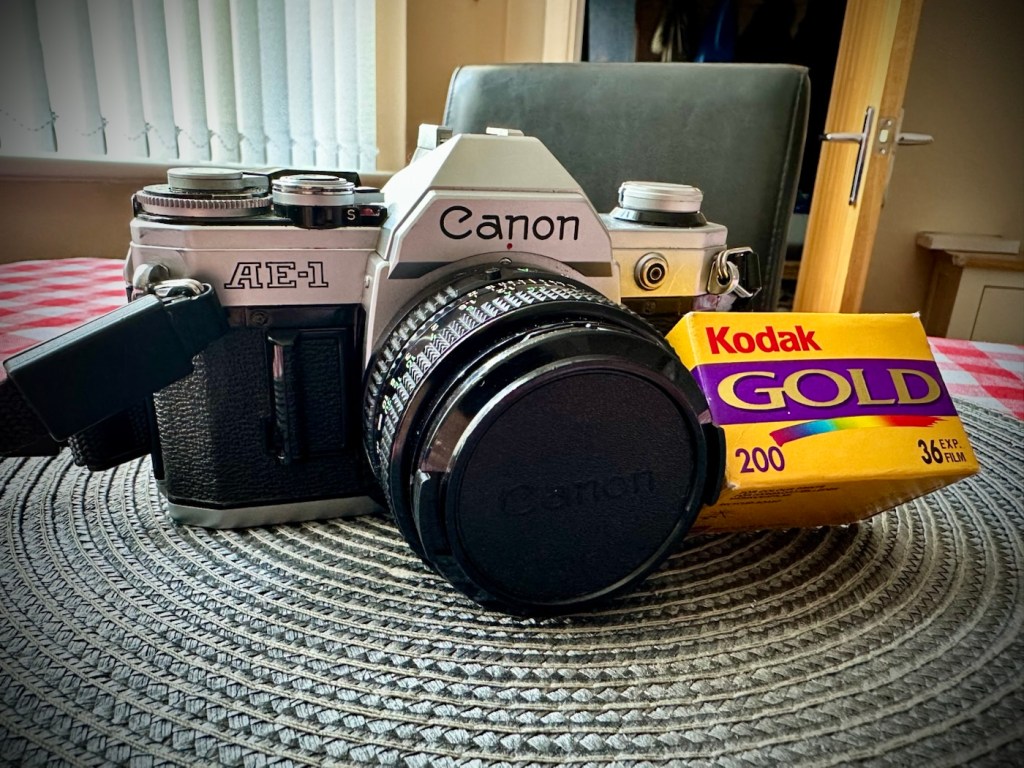
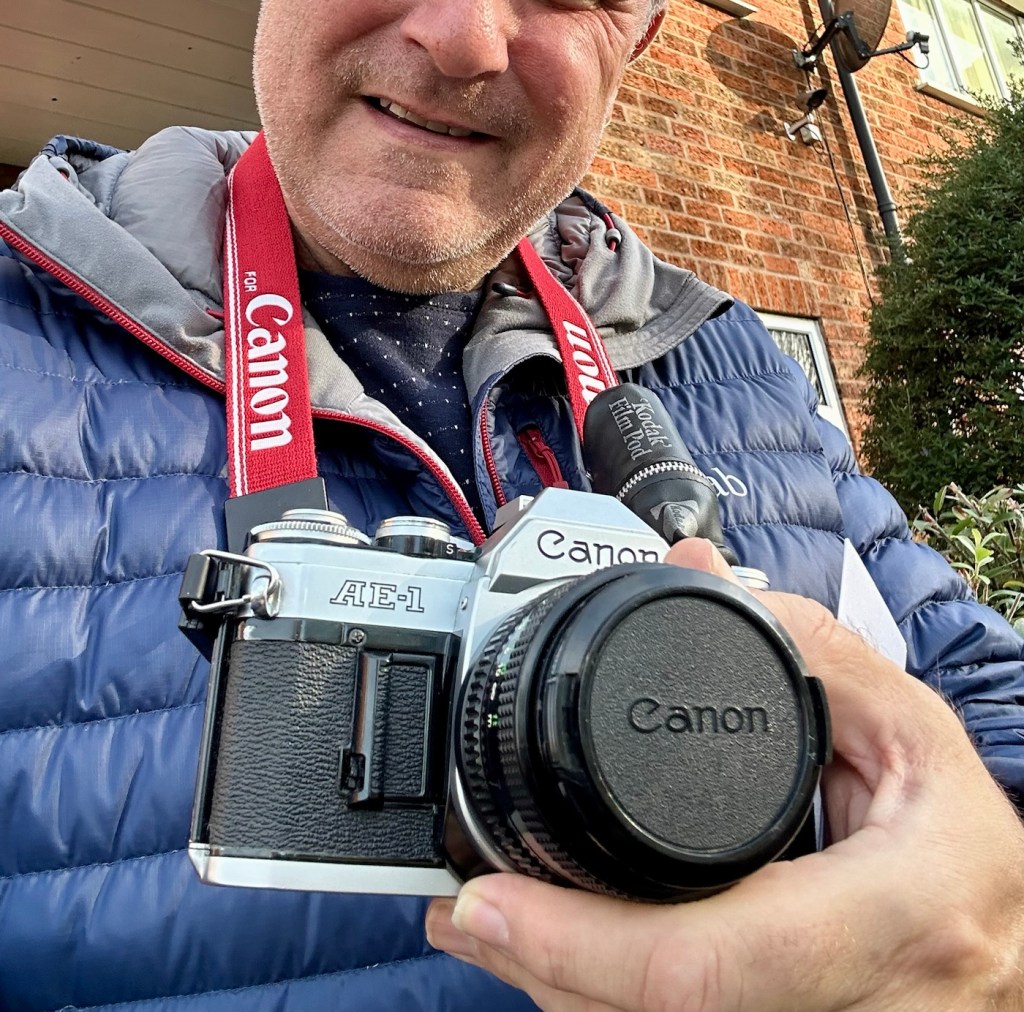
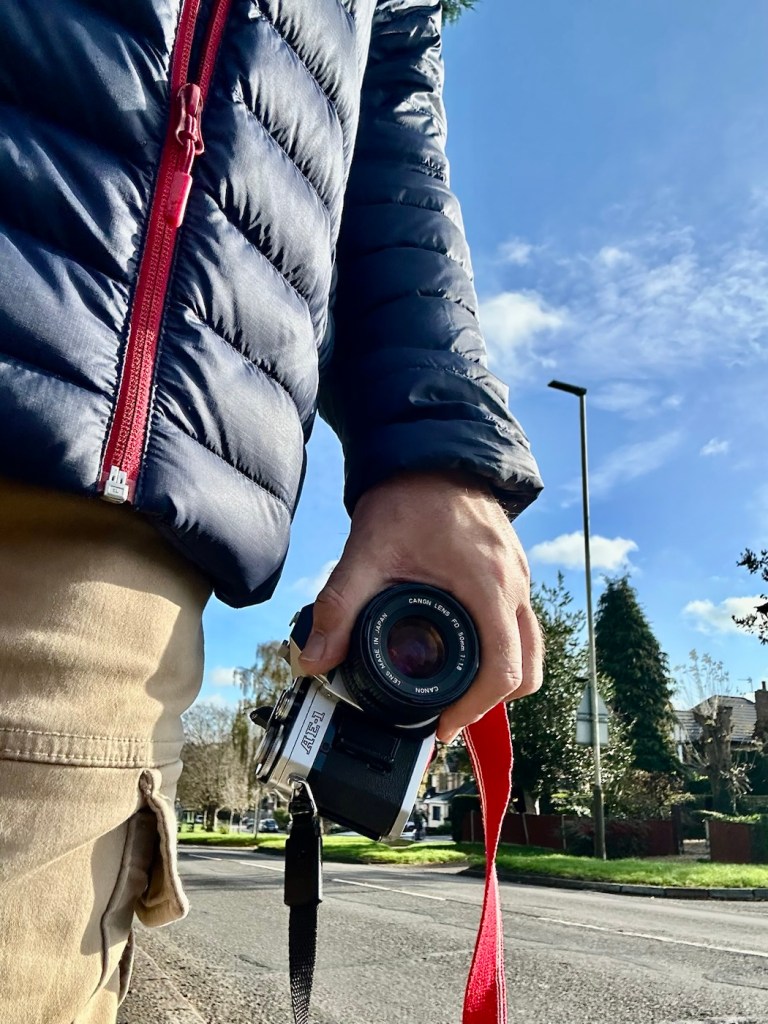
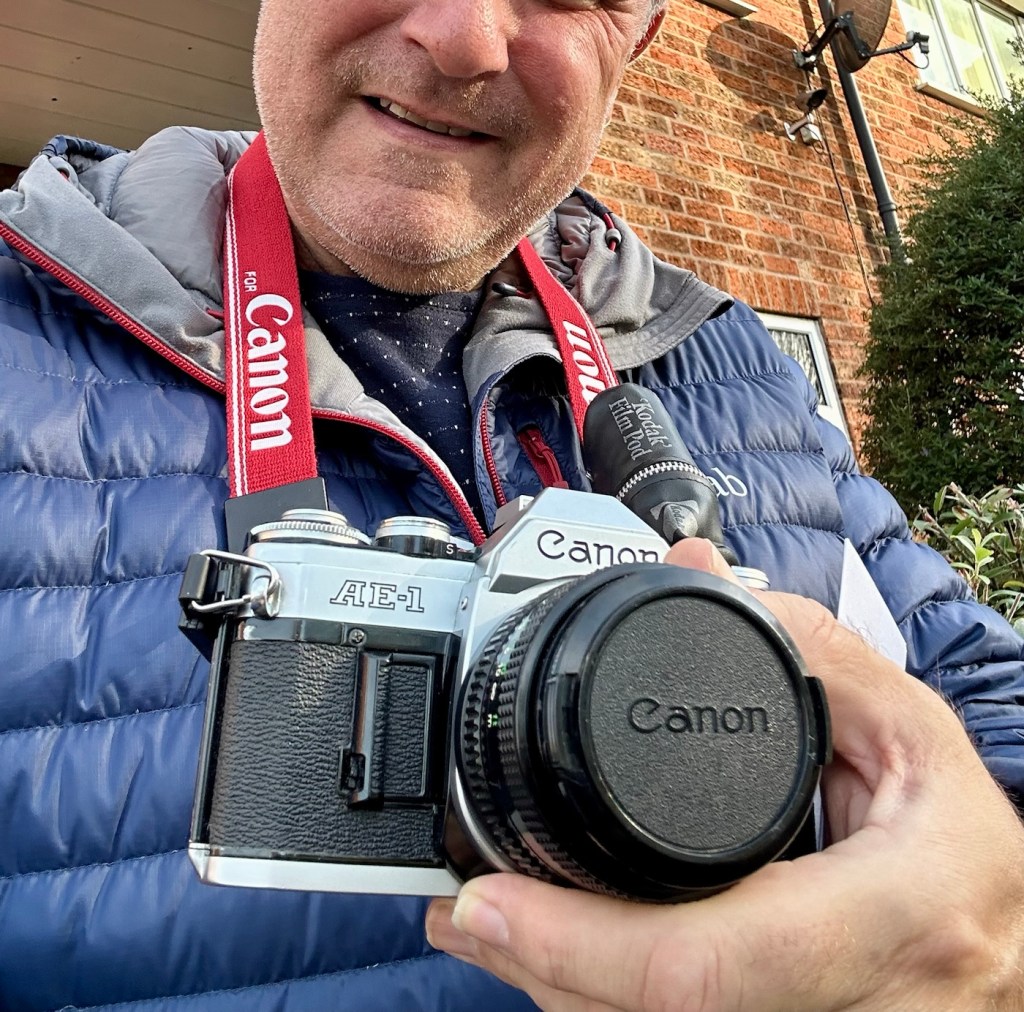
The wife told me this morning that she was going out shopping with her sister. Nothing sinister in that, in fact it means two things really. One, I’m going to be a bit lighter in pocket and two, I’m going to have to occupy myself for a while. I have work later this afternoon, so with a couple of hours spare what better time to get out for a walk and to take a 48 year old camera with you that needs testing. This one to be precise: Canon AE1 35mm SLR

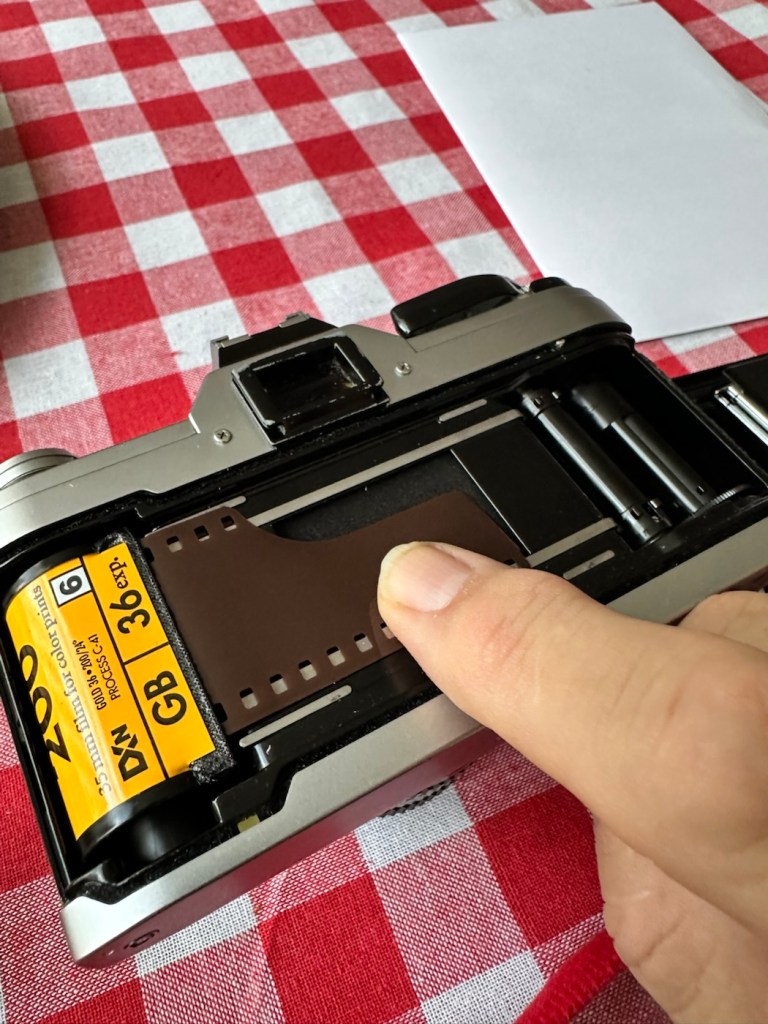
I dashed down to take a film out of the fridge, left it sitting for an hour and loaded the camera up, stage one achieved and everything as expected.

Today’s walking companion

Now the film I have been given is one of 8 rolls I have been gifted that are all out of date. This one is a mere 20 years out of date expiring in 2005. This roll of film is older than 21.8% of the Uk population according to the office of national statistics 2024. It’s that old.

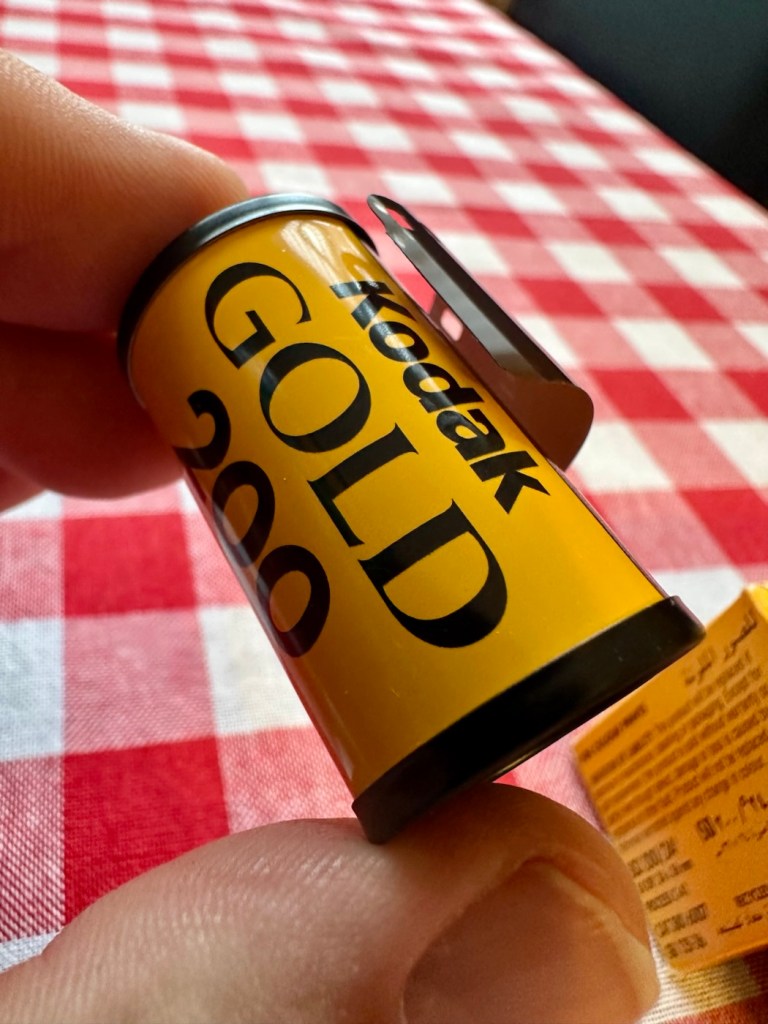
Today’s film is a Kodak Gold 200ASA film. There is a general rule of thumb out there that for every ten years the film is out of date you should over expose the film by one stop. So on this film, as it is a further 10 years past that, and if I follow that recommendation then I have to over expose this film by 2 stops. This means in theory that this 200ASA film should be exposed at 50ASA that equates to two stops of overexposure.

I’m not going to do that, I’m going to experiment here. I don’t know how this film has been stored over the years, I don’t even know that it will work at all, it could be fogged or just so deteriorated that it just doesn’t work.

It’s a 36 exposure film so here’s the plan. Exposures 1-12 at std setting of 200ASA. Exposures 13-24 at 100ASA setting and finally the last 12 exposures at 50ASA. Here I cover all bases and should hopefully get a reference roll for the other seven that I have in cold storage at present.

Needless to say I’m not going to be too fussy with what I photograph, scenery, shades, over and under exposure and bright colours, everything that can be used as a reference to check saturation, contrast, grain and film deterioration.

Let’s go.

So as stated, I’ve exposed and over exposed equally throughout the roll, so this should cover all bases.

12 exposures of each

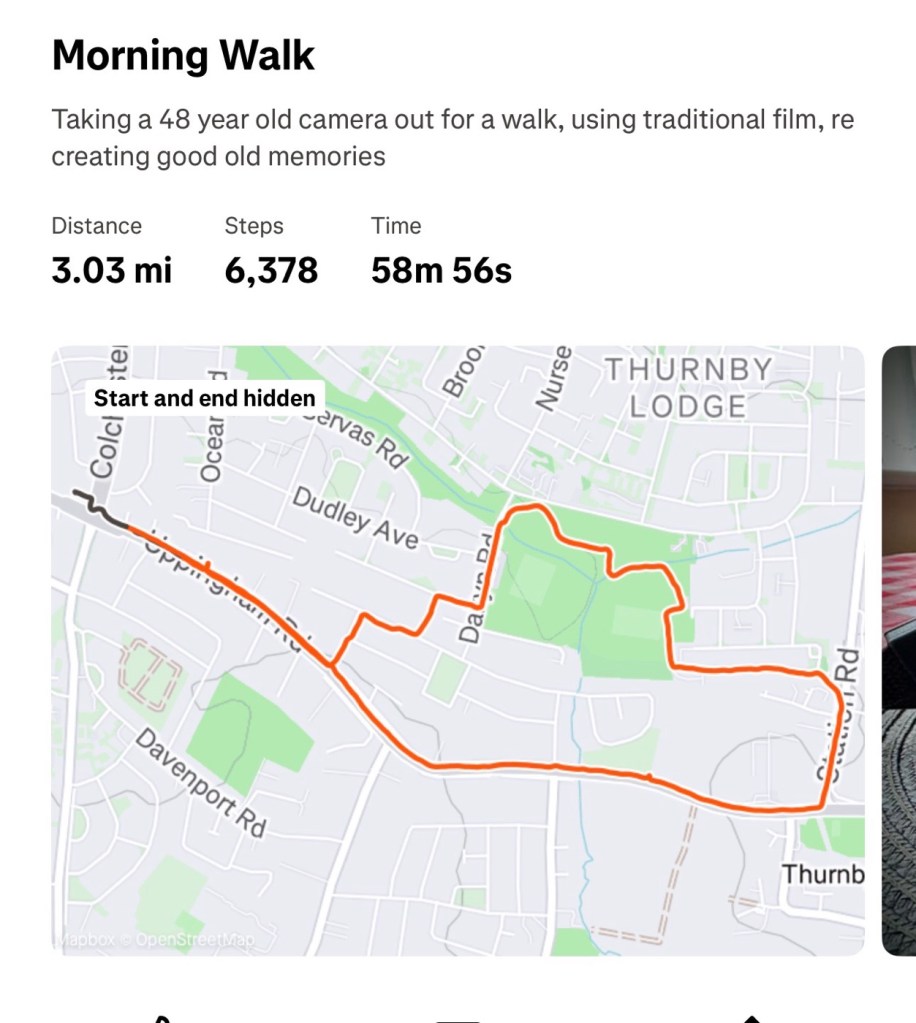
Right from the start I have thoroughly enjoyed this little exercise, I spoke to two elder gents who were quite excited at what I was doing and shared their own experiences with traditional film with me, it was lovely, i was even offered an old camera but i politely declined as the wife wouldn’t have been happy with that. I walked 3 miles, I went through some of the less salubrious areas, but these areas had some of the best subject matter.

3 joyous miles of walking

When you are using an old camera, you seem to scan the area more intensely, you see stuff you haven’t seen or noticed before, it’s amazing what you pass and ignore. I think you are less selective with phones and digital media, with film, you are limited so have to be picky.

I bloody loved it. I’d forgot just how good it is to get out there and use good old fashioned equipment.

And that camera behaved just beautifully, everything worked as it should, it is as good as it has ever been, I’m so pleased with how it has behaved so far. See the results here: 20yr old Kodak Gold

I guess the proof is in the pudding as they say. Time to get it processed and to check the results. Needless to say I will feed that back on this blog as soon as it becomes available.

Don’t give up on the past, there is a lot of good tunes played on an old fiddle.

Thanks for passing by, always appreciated.

Expired camera film

What shall I do with all these expired rolls of 35mm film? I know, let’s take some pictures

I’ve recently inherited 8 rolls of life expired 35mm film. In other hands I guess these would just be discarded, and thrown away, however this is me writing, you know, that fool who collects old knackered cameras. That’s me that is.

Well I’m going to use them.

What could possibly go wrong.

8 rolls of film 20 years old

A number of things to be precise, let me enlighten you. As these rolls of films all expired back in 2005 this means they expired 20 years ago, that’s a third of my life span, phew! Film loses its sensitivity over time and we will have to compensate for that when we get to use the film. Colours and dyes fade, and the finished product (if there is one) is likely to look washed out. Add to that the issue of not knowing how the film has been stored over the last 20 years, and this could be the difference between there being an image and just being blank film. If the film has been kept cool, and in a darker environment, there is more of a chance of getting a result than one that has been stored in light and heat. You get the picture….or not.

These rolls are colour negative film all using the C41 chemical development process. And for this type of film and process, the line drawn in the sand says that it’s wise to overexpose the film by 1 stop, for every 10 years (Decade) of expiry. Since the rolls i have are now twenty years out of date, following these guidelines I would be advised to overexpose these films by 2 stops.

Black and white film is more forgiving and might not require adjusting at all, whilst transparency film is totally unforgiving, and personally i wouldn’t touch it with a barge pole.

The higher the ASA setting on the film, means that it requires less light, a lower settings means that more light is required. Therefore, as an example, if these films were originally rated at 400 asa i would now be advised to expose them at 100 asa therefore allowing more light in to expose the deteriorating film accordingly. But remember, when you process the films they must be processed at standard normal development times, if you push or pull the development times you will not achieve the result you require. Develop as normal.

The unknown factor here really is how the film was stored. Chances are that if it was stored in perfect conditions, then we could probably get away with using its original asa setting. But we just don’t know and will just have to suck it and see as they say. We won’t really know how things are going to turnout until we’ve developed the film.

Old film is good for experimental purposes, you don’t really want to trust old film to a photo shoot as you could be wasting time and money. Unless you really want that old washed out retro 70s look.

The film stock I have is listed below:

I have 4 rolls of Kodak Gold 200ASA colour film.

Gold 200 ASA

I also have 4 rolls of Kodak Gold Ultra 400ASA film.

Gold Ultra 400 ASA

All expiry dates are circa 2005, so they are exactly 20 years out of date. I’ve put them all in to cold storage for now but it could well be 20 years too late. Typical for me, always late to the party!

As an aside to these films, I’ve also found a Canon EOS 30 body that I have also been given to get working again, it just so happens to have a partially exposed film inside it. Now this roll I will have to expose as per normal as it has a dx code reader inside, and I can’t override it from what I can tell initially. It will be interesting to see what it returns.

So. When I get around to exposing these films, the 400ASA will be exposed at 100ASA and the 200ASA ones will be exposed at 50ASA. To be honest, I will probably expose half a roll of each at the original setting and then half at the modified setting. It will be good to see the difference, the deterioration and the grain quality. I have a number of old 35mm cameras still to test, so these rolls will be a welcome opportunity to test and experiment, and you don’t often get the opportunity to do this, so I’m going to make the most of it and have some fun.

I’ll let you know how it goes 🤞

Ooh that’s a struggle…

What are your top ten favorite movies?

As I’ve probably stated many times previously, I don’t watch a great deal of television or cinema. The last time I went to a cinema was on my 50th and that’s getting on for ten years ago now.

Most of the films I rate were what I viewed in my childhood and a number were influenced by what my parents liked to watch. As a sixties child a lot of those films were “War” based films as the 2nd World war had only ceased some 19 yrs before my arrival on the scene.

So here are 10 films (I may struggle to get that many) that feature in my top ten but in no particular order:

  • The Dam Busters
  • The great escape
  • The Glenn Miller story
  • Robin and the seven hoods
  • Priscilla Queen of the desert
  • The exorcist
  • American werewolf in London
  • Jaws
  • Close encounters of the third kind
  • Saturday night fever

Quite a range I’d say, and pretty much nothing falling within the last 20 years or so reflecting the fall from personal grace of this entertainment medium, in my personal point of view.

Now… make that a question about radio and I can go on, and on, and on….you get it 😂

Have a great day.

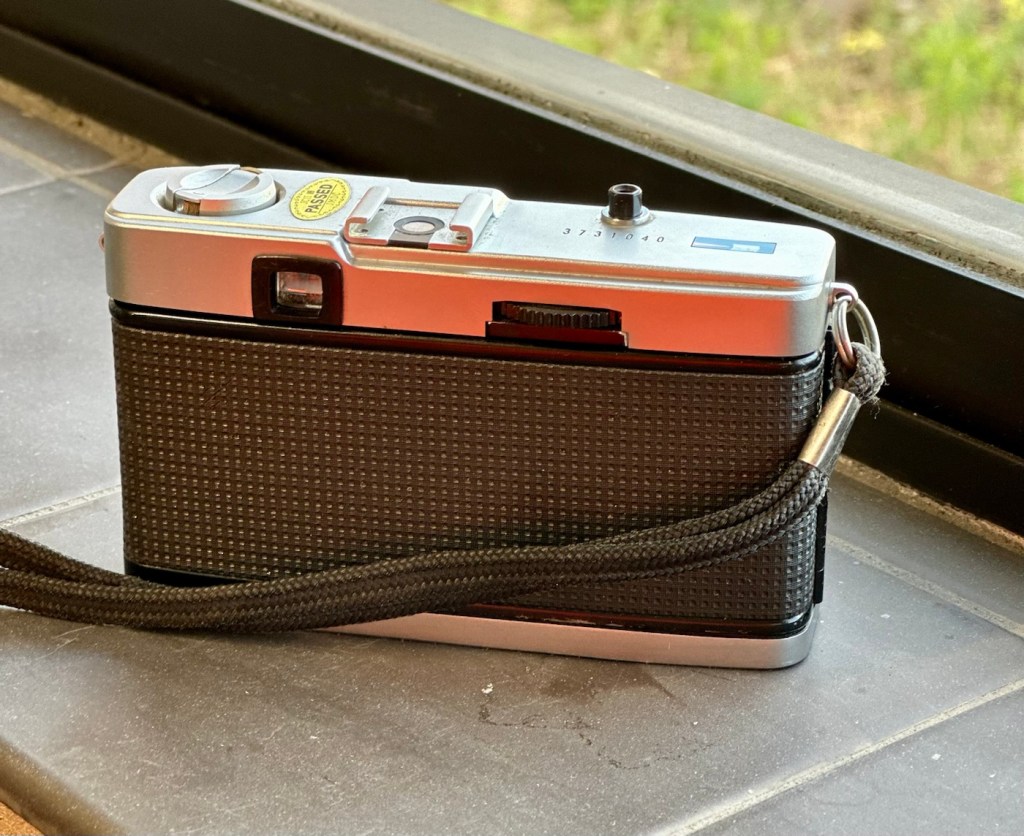
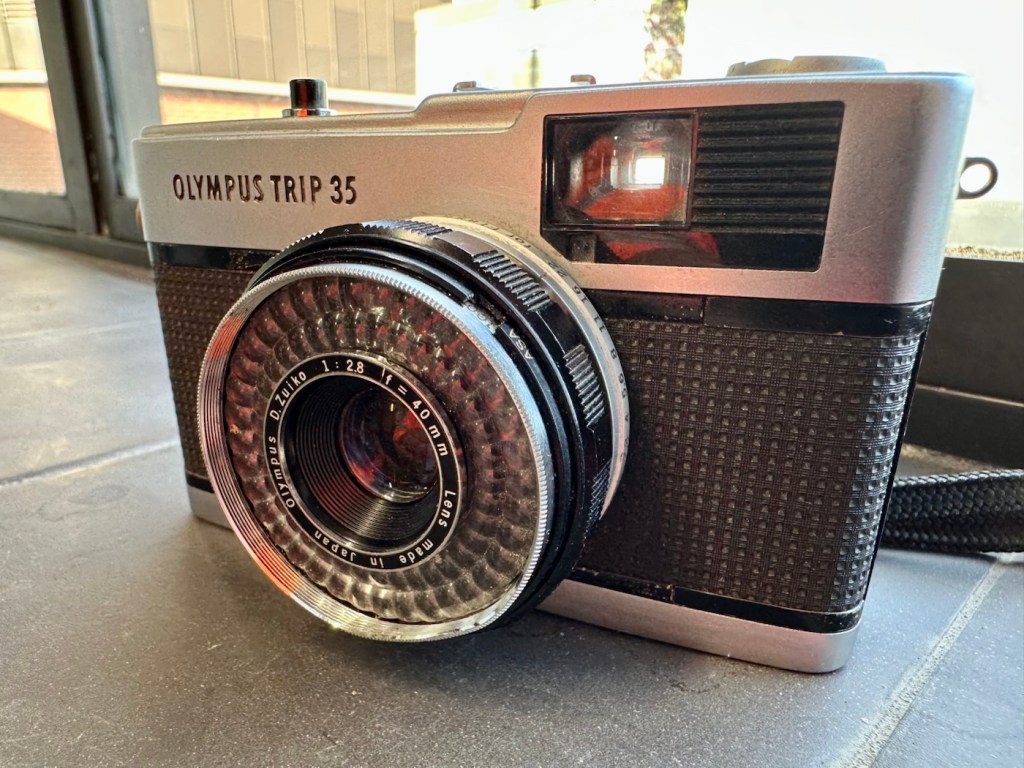
Olympus Trip 35

What the listing stated:

This lot is being sold for PARTS / REPAIRS, it is currently NOT in a working condition

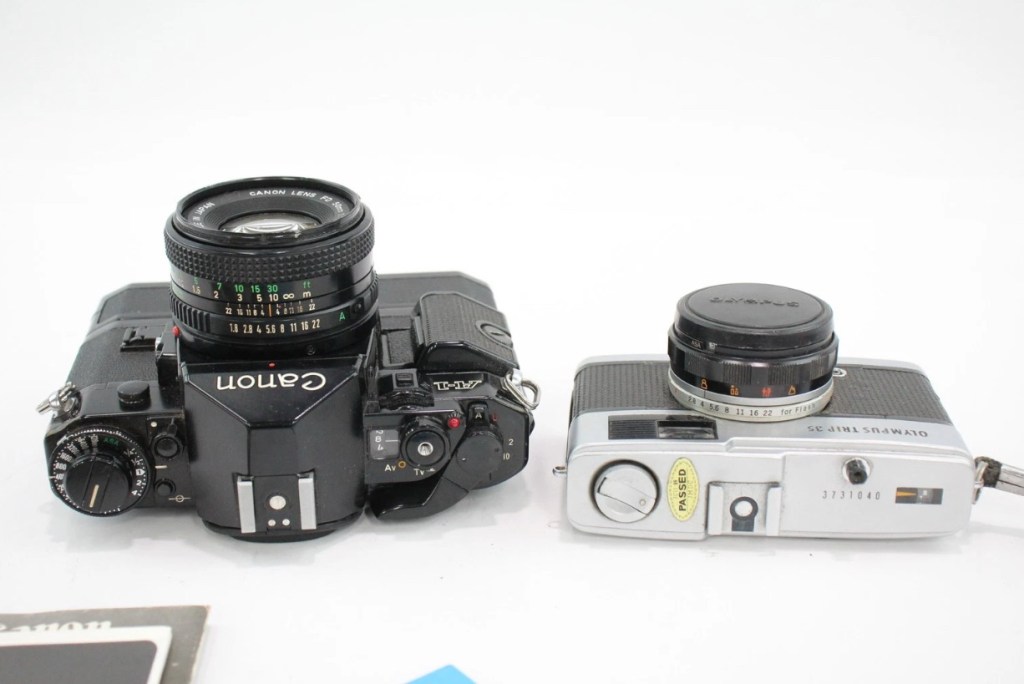
Olympus Trip 35 w/ D. Zuiko 40mm F/2.8 Lens
& Original Lens Cap

EBay

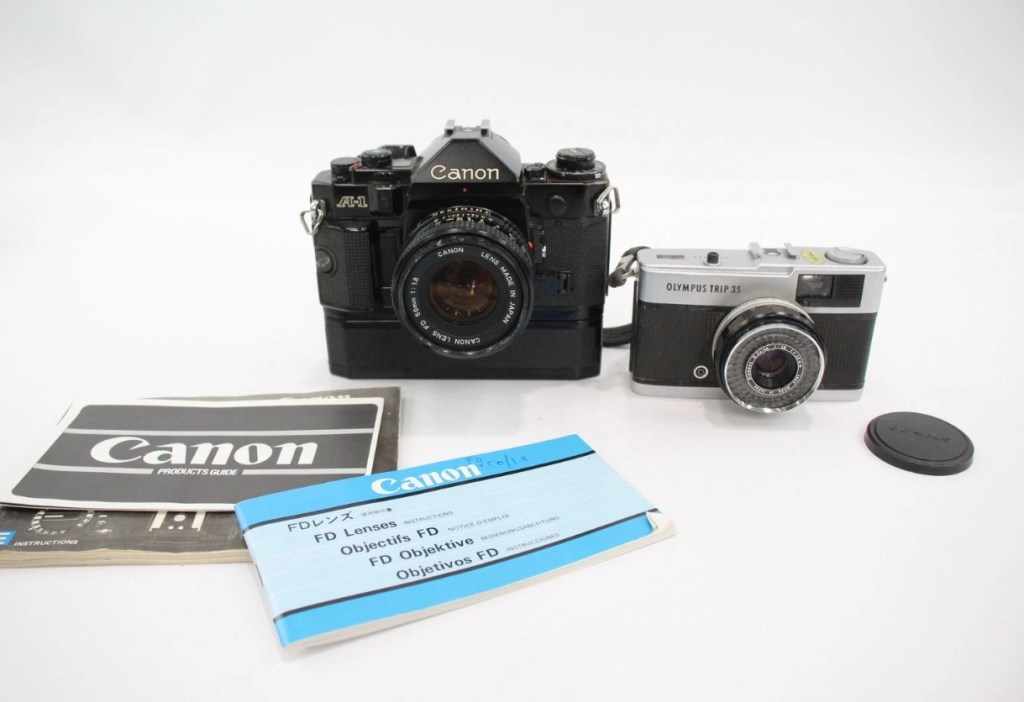
I brought this item along with a Canon A1 as a job lot. The full detail of what was in the auction and how it progressed can be found here: Not the lottery, but for me – just as good

The page regarding the repair of the A1 can be found here: (Still in draft – coming soon)

Meanwhile here is a little history about the Olympus trip:

The Olympus Trip 35 is a 35mmcompact camera, manufactured by Olympus. It was introduced in 1967 and discontinued, after a lengthy production run, in 1984. The Trip name is a reference to its intended market—people who wanted a compact, functional camera for holidays. During the 1970s, it was the subject of an advertising campaign that featured popular British photographer David Bailey. Over ten million units were sold.

The Trip 35 was a point and shoot model with a 40 mm ƒ/2.8 lens, solar-powered selenium light meter, and just two shutter speeds. In ‘A’ mode, the camera operates as a Program automatic, choosing either 1/40 s or 1/200 s. The camera could also sync with flash, and has a range of aperture settings, from ƒ/2.8 to ƒ/22. In flash sync mode, the shutter is set at 1/40 s. Apart from a simple four-position zone focus system, and an ISO setting from 25 to 400,[2]the camera has no other photographic controls. The camera has a Prontor-Compur sync connector and a hot shoe. Its lens was a coated Zuiko 40 mm ƒ/2.8, with four elements in three groups.

The camera has an ISO range of 25–400, as films faster than 400 were uncommon at the time and delivered reduced image quality. 25 speed allowed the use of Kodachrome, while 400 speed allowed use of Kodak Tri-X and similar fast materials under low light. Earlier models, from the first few years of production, have a maximum ISO speed of 200.

The use of a selenium photocell to select the shutter speeds and aperture let novices use the camera as a “point & shoot”. No batteries are needed to power the camera.

The lack of more than two shutter speeds was not a problem. At 1/200 s and ƒ/22 with 400-speed film, the camera could deliver correct exposure in full sunlight, while at 1/40 s and ƒ/2.8, correct exposure could be obtained under bright fluorescent light, without a flash.

Wikipedia

And who could ever forget the series of star studded television adverts, featuring the photographer David Bailey, put together to promote this camera.

David Bailey

I never really got to use one, I admired one from a distance instead. My brother in law, Jim had one around about the mid to late 70s and he took some fantastic snaps with it. I wasn’t into photography at that time as I was still more interested in LEGO and Tonka trucks. However he did let me try it a couple of times, it really was that easy to use.

I’m not really sure what the problem is with this one, as the listing was not really clear on its issues. I just really wish sellers would just take a few seconds to describe the problems, it really could be an instant decision for the buyer – is it repairable or not? I’ll just have to wait until it’s arrived, and then i can do an assessment of its condition.

Assessment:

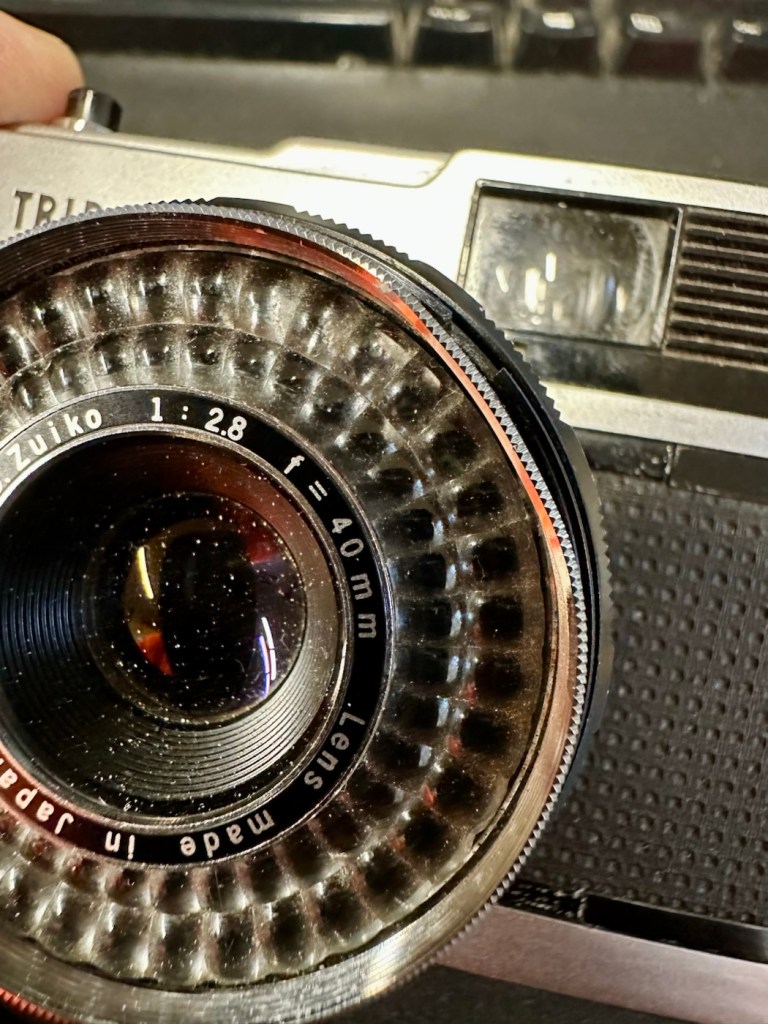
Well, it’s arrived and cosmetically it looks fine. However, zoom in a tad and the issues become apparent. It’s been dropped at some time, the lens has a little bit of wobble and you can see the outer ring of the lens has an obvious dent in it.

Drop damage

It does wind so that’s a bonus. The exposure button works and it clicks as it should, and the old selenium exposure meter appears to be responding, the red flag appears in low light and thus the exposure button will not depress. This is good.

Exposure indicator in viewfinder

When you half press the exposure button you would expect to see the relevant shutter leaf aperture close down, to the corresponding f- stop reading, this occasionally happens. If you move the lens barrel slightly it does have an effect, but it looks as if there is also some contamination on one of the shutter leafs, all of this is probably as a result of that tumble that has occurred sometime in the past.

Obvious lens wobble

I will definitely have to remove the whole lens housing from the camera to see if I can do anything regarding that wobble. This is going to be quite some task, and I’m not confident I will succeed, but who knows.

Let’s attempt to get inside.

Repair:

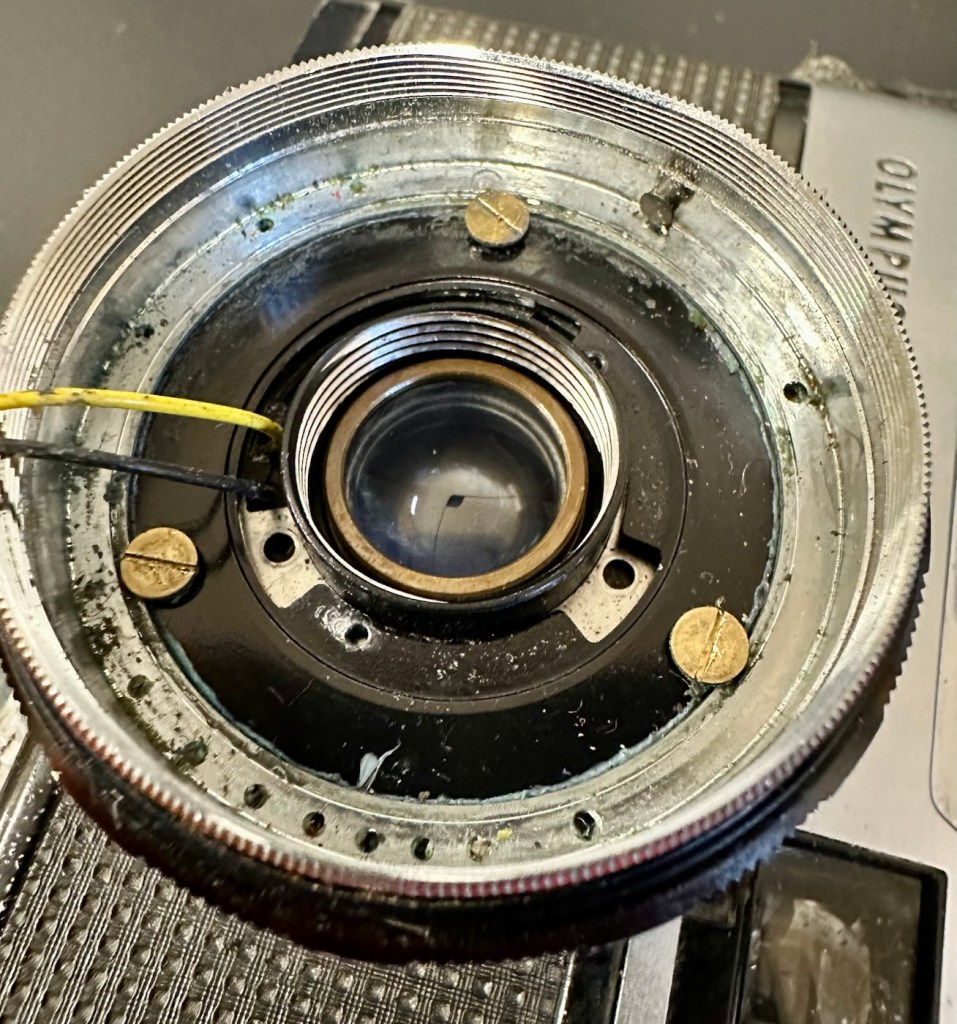
To get into the lens there are three tiny screws on the inner turret bezel that have to be removed that sit around the edge of it. This then pulls out and the lens optics can then be unscrewed.

Here are then two more screws that allow you to remove the selenium light sensor. Below this are three brass screws that hold the body to the lens. One of these screws were loose, hence the wobbly lens, this must have occurred when it was dropped.

I’ve pretty much had a cleanup here, applied a tiny drop of camera grease to the ring mechanisms, and tightened all these screws, and now the turret is nice and tight. I’ve just given the shutter blades a wipe with a soft brush and that is all it really needs. I’ve reassessed the camera, and tested its operation and it’s all good, working just as expected.

Result:

The dent in the ring remains as it’s causing no issues and is a subtle reminder of its past. The lens issue and its movement has been repaired and this in turn has cured the issue with the sticky aperture blades.

I haven’t touched the inner workings in the top of the camera such as the light metering, as it’s working fine and what’s the point in fixing what’s not damaged?

I’ve still to run a film through it, and this will be done shortly as I have quite a backlog of film cameras to be tested. As soon as I have photos available I will link through this posting.

Really pleased with how this has gone, a nice easy fix but I can’t believe just how small those screws are around the lens bezel. I need my eyes testing that’s for sure.

Thanks for passing by, as always it’s very much appreciated.
Mamiya M Autofocus – 35mm point and shoot camera – Part two

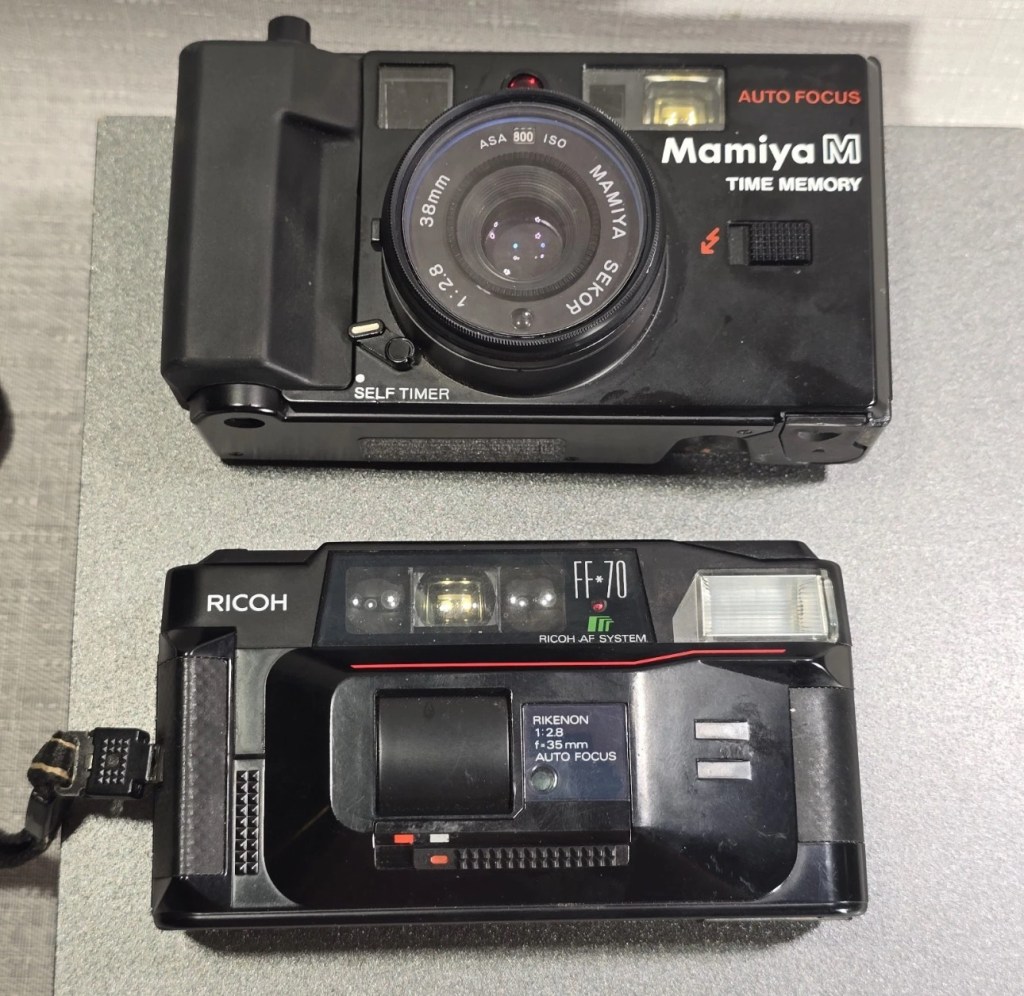
Here we are again. I recently wrote of my failed attempt to get this 80s camera operating here: Mamiya M Autofocus – 35mm point and shoot camera.

Not one to give up on a project I have looked at a suitable donor camera and believe I have found one as detailed below. Only difference is that I had to buy two cameras as they came as a bundle. Not a problem as I can always do a separate post on the other one, the two have cost me a total of £15:00GBP bartered down from the original price of £30:00GBP. A bargain! So let’s just call it £7:50GBP per camera.

What the listing stated:

mamiya shutter button is stuck. red light on the right comes on. some external corrosion pictured

ricoh no power at all

EBay

Assessment:

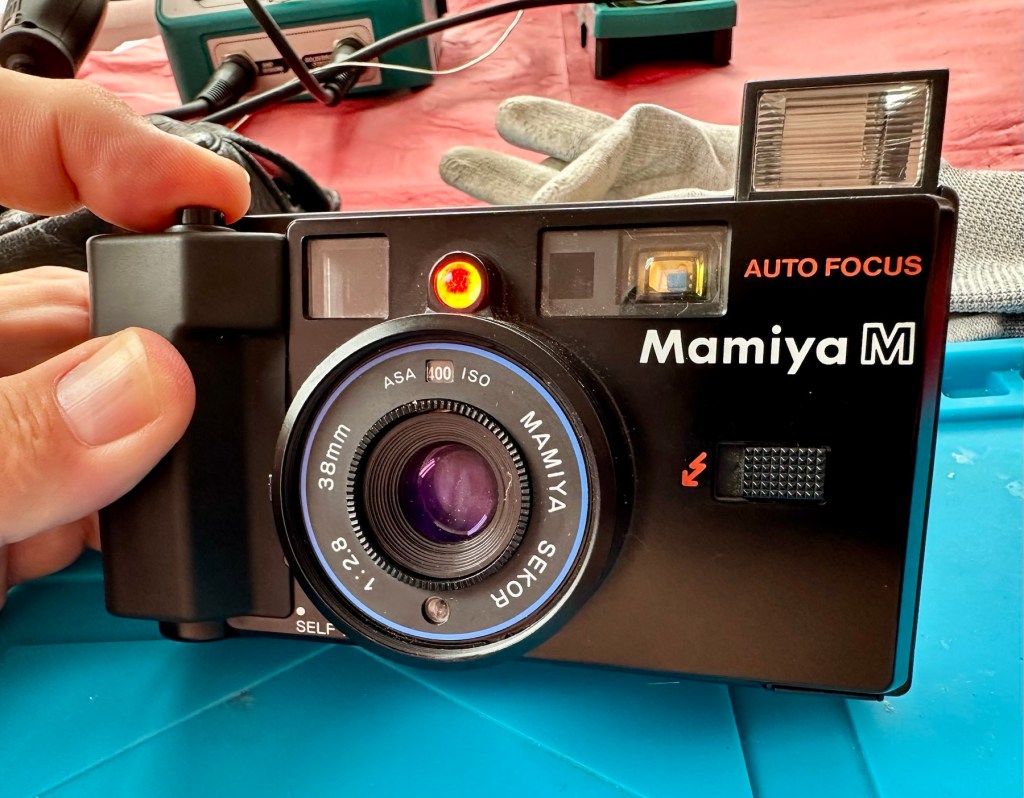
The Mamiya is in quite a poor state, and is the Time Memory version that differs very slightly from the version I originally worked on, it’s essentially the same camera as the Mamiya M, but with an added quartz dating mechanism for imprinting time and date information on the film. This model was the last 35mm camera Mamiya produced before focusing solely on medium format. However the back seems to be a bit rusty whereas mine is in excellent condition, so I will be using a mix of the two units to make the one good one.

Repair:

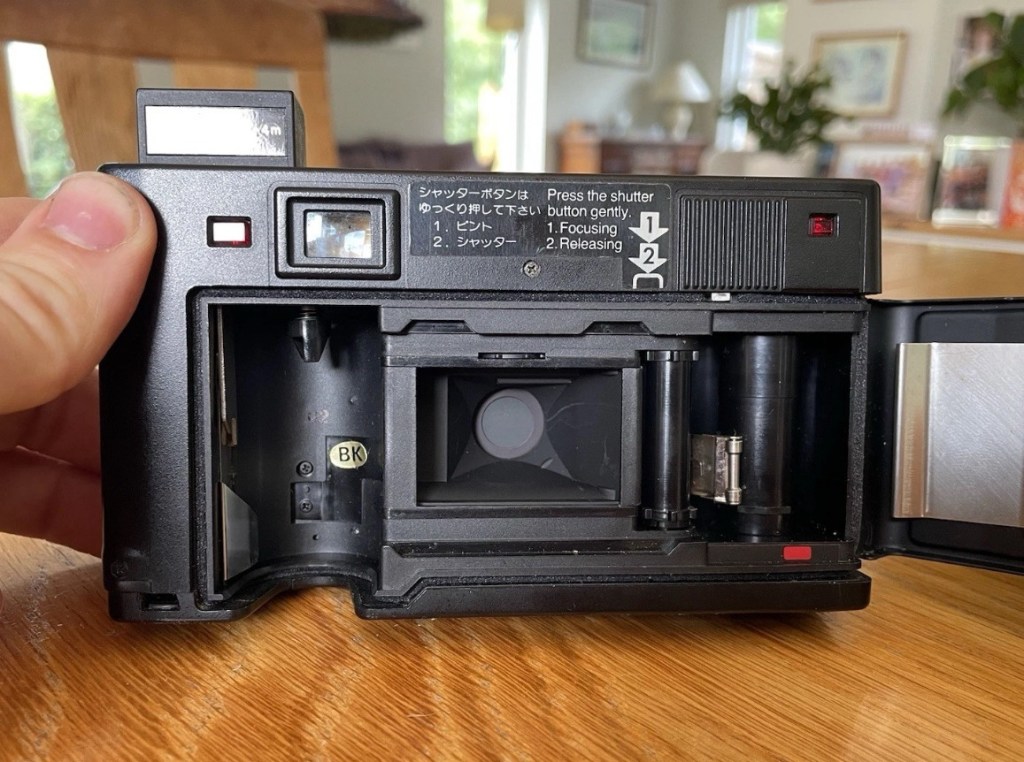
The Mamiya looks good cosmetically until you open the rear and see the rust around the door, not a problem as I won’t be using this part of the camera. The red light does not come on at all and the shutter button is stuck, that’s for sure. The whole camera is dead.

Let’s get into it.

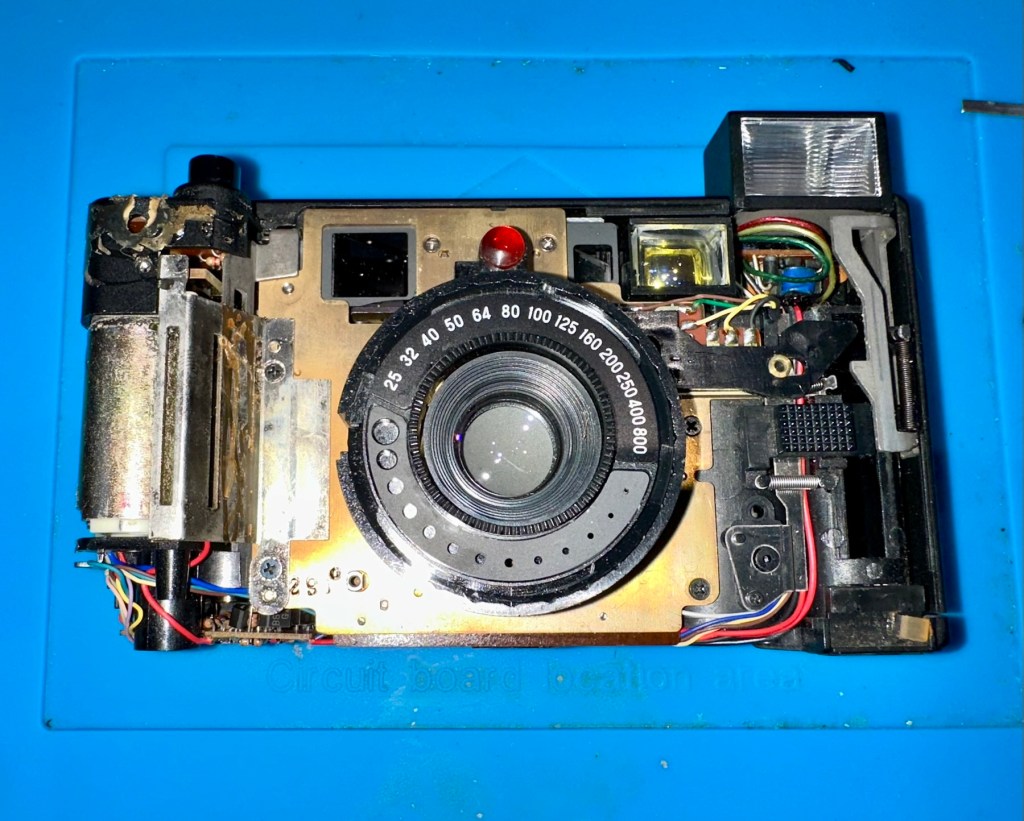
Once opened all looks ok so I decide to have a search around with the multimeter checking the basic operation. Am I getting 3 volts at the top of the battery barrel? No I’m not. It appears that one of the traces on the positive side of the power input board has lost continuity. For some reason the traces has been damaged, this could be either from corrosion or rubbing on something. The area affected is in the photo with the red ring around it.

I’ve fixed this immediately using some solder to bridge the gap, I have checked continuity and all seems ok. I put some batteries in and the motor squeals like a banshee and then stops. You can hear the screaming motor below in the short video from its first screaming session through to its proper 80s sounding drone.

The screaming motor through to its repair

I don’t think this motor has run for years and it does not run consistently. I have sprayed it with some contact cleaner and let it soak. I have left it overnight and checked the operation in the morning and it seems to have improved.

I’ve used the original fascia, rear door, focussing beam and flash capacitor from the first failed unit, and apart from a few bits of soldering, plenty of contact cleaner and some silicone grease, I’ve revitalised a failing motor and it is now working as it should. I forgot to mention I used some graphite on the shutter leafs to “lubricate” them. All optics cleaned and camera has been tested without film and is working just fine.

View finder indications are good with light meter operational, motor rewind works, flash and exposure is fine, and the motor advances as well.

Result:

I’m really pleased with this little camera and am pleased I didn’t give up on it. It’s taken two broken cameras to make one good one, and I have a good few spare parts left over to be used at a later date.

The unit looks so smart, the only real issue is the battery door that is notoriously flimsy and lots of references to its poor design can be found on line. A temporary way around this is just to put some tape across it to keep it closed.

Beyond that issue, the camera is a really good looking unit that has cleaned up really well.

I can’t wait to run some film through it to see how it performs. I have a few cameras like this to test so I’m looking for some decent priced film to use, as i do need quite a bit.

As soon as I have some photographs availability I will link to this post accordingly.

Many thanks for following the repair, it’s always very much appreciated.

Not the lottery, but for me – just as good

I’ve been after a couple of cameras for quite a while now that hold a great deal of sentimental meaning to me. This will become apparent when i publish the individual posts for them, but for now i just want to share the result of an auction i participated in on the 31st July 2025.

Today I’ve probably made the best purchase off of an auction site that I have ever made previous. I’ve been following a number of Canon A1s lately and they have all been going in the £120+GBP bracket, some even higher than that. Today I have lost out on two that sold for £93 for a damaged body and one for £121 that was just a body but of a much better quality. This particular auction I was watching was for an untested duo of cameras, a Canon A1 as well as an Olympus Trip 35mm. The Olympus alone normally commands the high £80GBP range and both of these were in this particular auction. I was just watching as this was going to sky rocket in my opinion, two good cameras from a respected seller who I have used before. Two minutes from the auction end, bidding was sat at £39GBP and I thought that any second now the price was going to go crazy, especially in the last 30 seconds. I put in a max bid of £55GBP for the lot, as I pretty much knew it would sail past that amount and go for a price in the £150-£200 price range. I hit the bid button with 20 seconds left on the auction….

You have won – congratulations!

I thought you’re having a laugh, no way. And then it came up with the winning bid being £39:00GBP no one else was bidding, crazy.

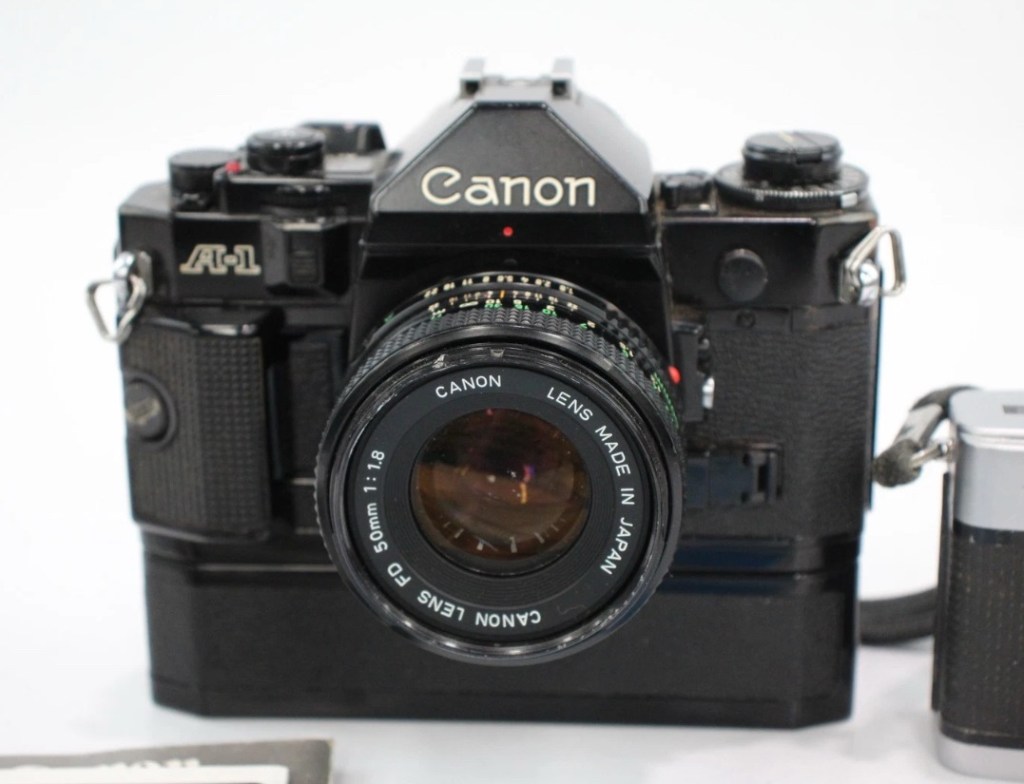
The A1 camera consists of the body, a winder, an FD 50 1:1.8 lens, a camera manual as well as a lens manual.

Postage was the grand total of £4:99 so my total for these two cameras was £43:99GBP. That is nuts, and to say I’m pleased about this is the understatement of the century. I have two of the cameras I wish for the most, and I have just landed the bargain of the day, I was in the right place at the right time. Wow. It’s unusual to catch other auction bidders sleeping, it will probably never happen again for me, it’s a very rare occurrence. Two cameras of this magnitude for £22:00GBP each! That’s unheard of.

I don’t know for what reason they are not working, as they both appear to be quite tidy examples. I have used this seller before and the posting above could also be worded such as to imply that the units may well not have been tested. But, that’s what this site is about, repairing old cameras and getting them working again. There’s no fun in talking about a good functional camera, that’s boring. We want the meat and potatoes as they say, we want to see things being fixed, or broken further….you never know with me.

Thanks for sharing my excitement at this purchase. It will all make sense once i’ve assessed the cameras and carried out any repairs.

Thank you for passing by. It’s always appreciated.
Mamiya M Autofocus – 35mm point and shoot camera

What the listing stated:

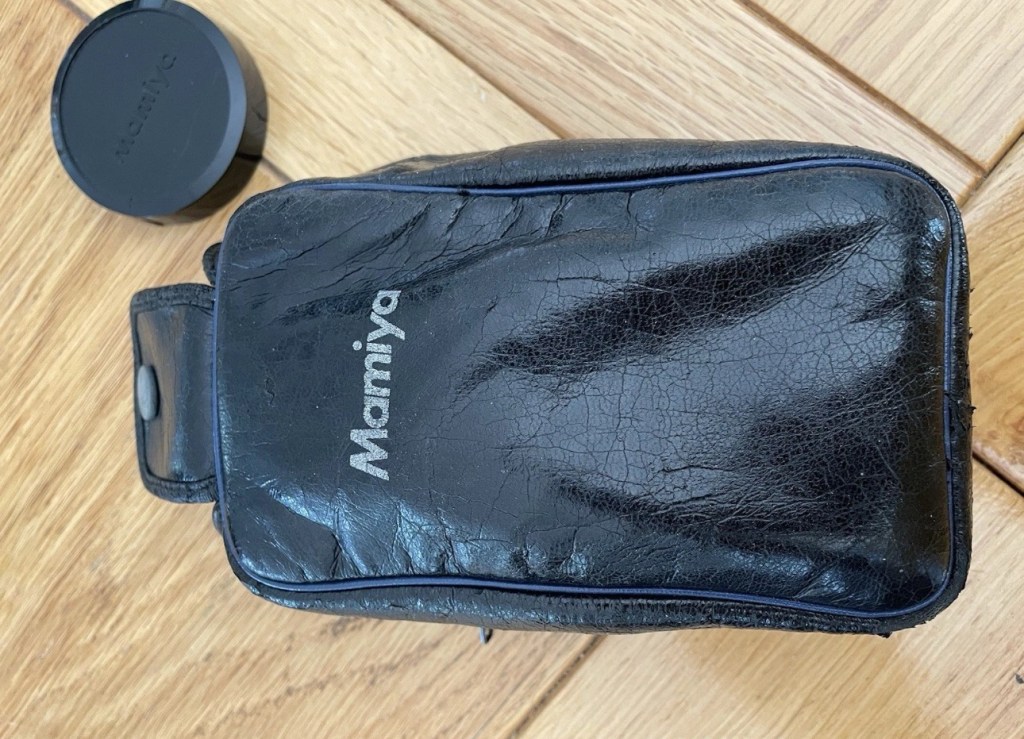
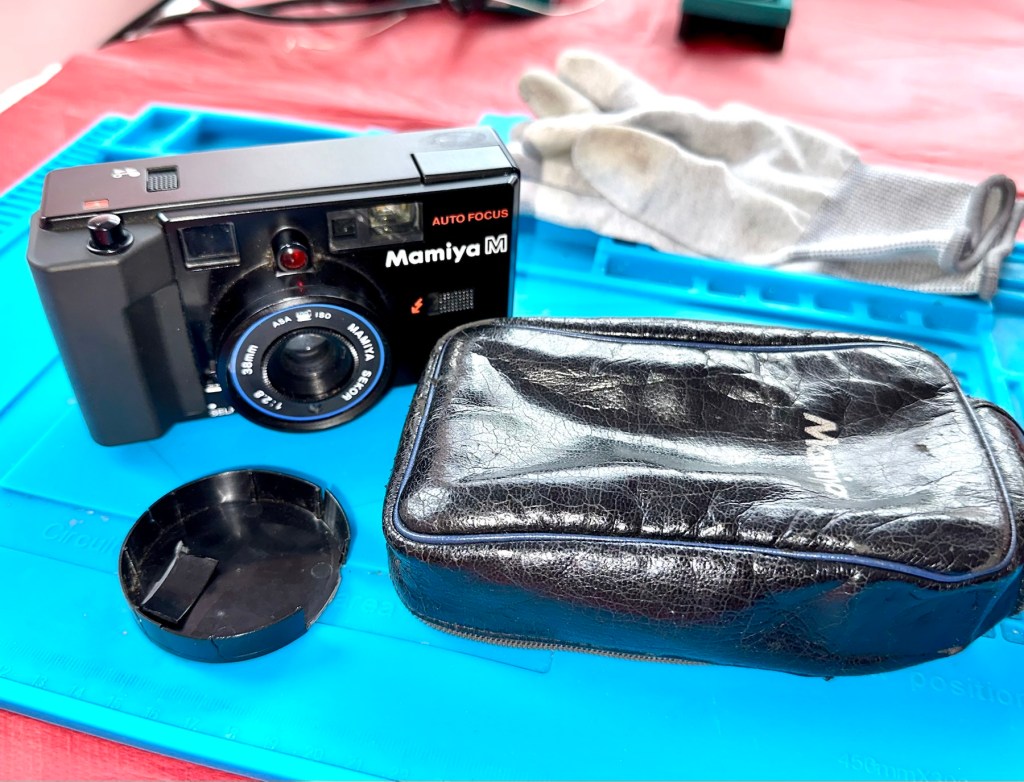
Mamiya M point and shoot camera. It’s in fantastic original condition and is cosmetically excellent with original case and lens cap included. The lens appears to be bright and clear from the front. 
HOWEVER…when batteries are inserted the shutter does not fire and I suspect it is jammed somewhere. The lights come on and it goes “click” but the aperture does not open, nor does the film winding do anything. 
For spares or repairs only, I’m sure somebody with the know how could get it up and running again. 
Priced super low as I want it shifted and can’t bring myself to bin it! 
No returns please

EBay

Here’s a little bit about it:

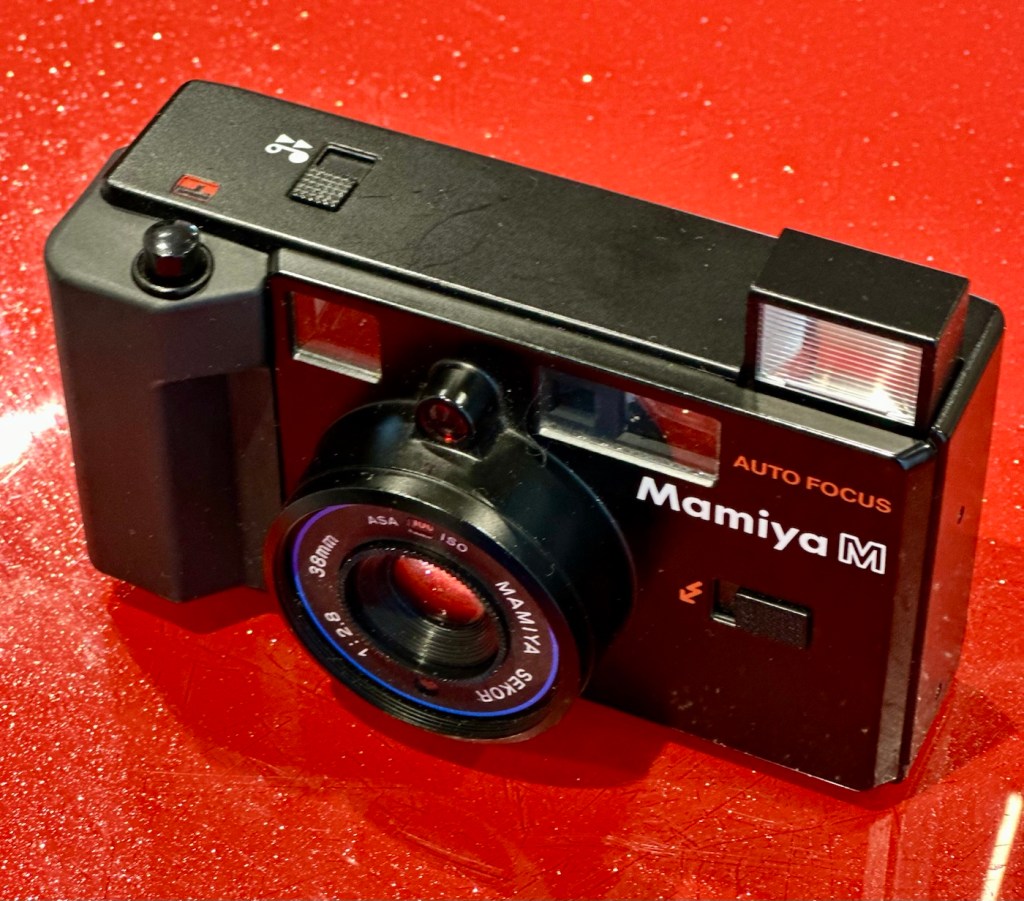
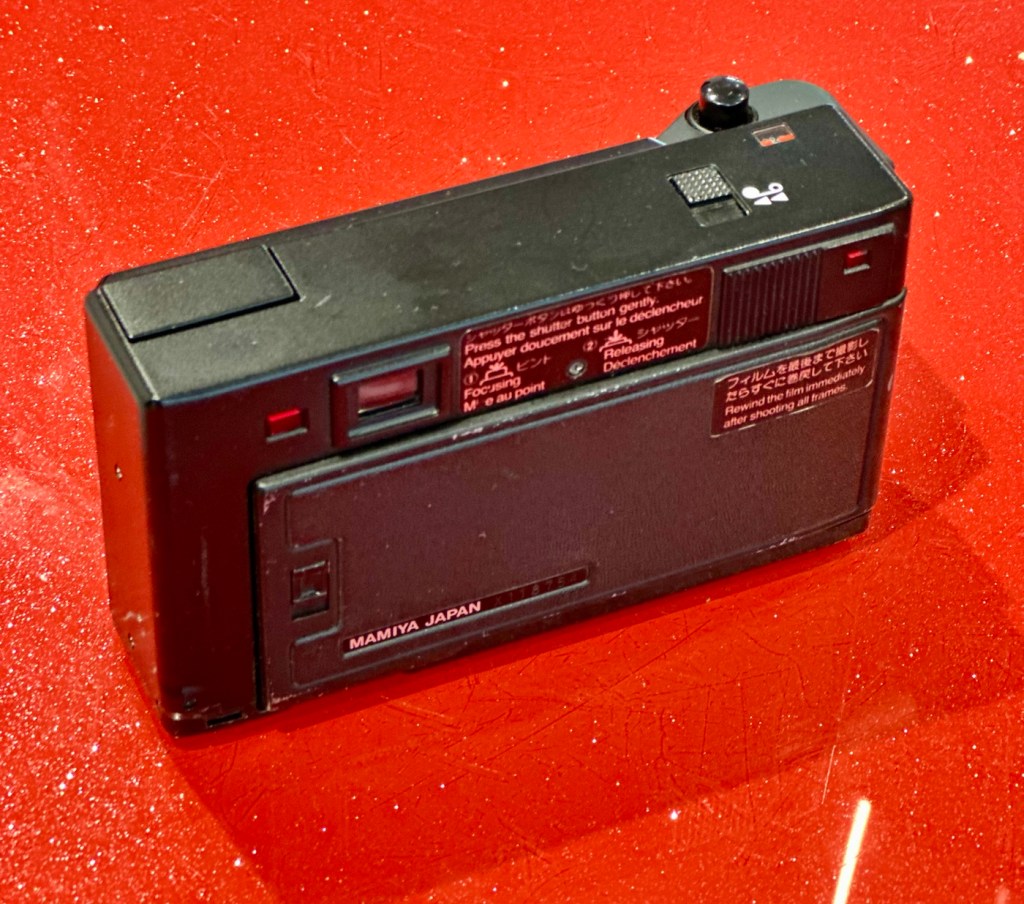
The Mamiya M is a 35mm autofocus compact from 1982.  It has a boxy plastic shape, with a fixed Mamiya Sekor 38mm f/2.8 lens.  The lens is four elements in three groups.  Exposure is fully automatic, based on the film speed, where the ISO is selected via a dial around the lens. Film speed available is 25 – 800 ISO.  

The metering cell is located just under the lens, but within the lens ring.  This allows for the metering to take into account any 46mm filter screwed onto the lens.  That is assuming it is not a graduated filter.  Fastest shutter speed is 1/500thsecond with the slowest at 1/8th.  The camera is always on, except when fitted with a specially designed lens cap, which triggers the off state.  There is a strategically placed switch it pushes against on the right side of the lens.  Most of these caps are lost, including mine.

Photothinking.com

I don’t know what attracted me to this camera, but the fact the seller just wanted rid of it at a cheap price was a starting point. It was advertised as £4:36 GBP and £2:45 delivery, a total of £6:81GBP. I bartered a bit and got it all in for £5:44GBP so I got it a little bit cheaper, a bargain if you like.

Mamiya has a great reputation for building high quality lenses. They were only in the 35mm autofocus point and shoot sector for a short while before immersing themselves totally into the medium format camera market. This 35mm camera was only in production for about a year or so, even though quite a few were produced, we are looking at the low hundreds of thousands, not the many millions, so the camera itself was not a major mass produced and marketed unit. It is a plastic preformed body unit. Known in polite society back in the day as “A plastic fantastic”.

If a Mamiya camera had a blue ring around the lens, specifically on its other models, it denoted a higher quality lens type, it was never confirmed this was the case with these small autofocus 35mm cameras, though many believe it is still the case. Photo quality with these little units was generally of a very high quality.

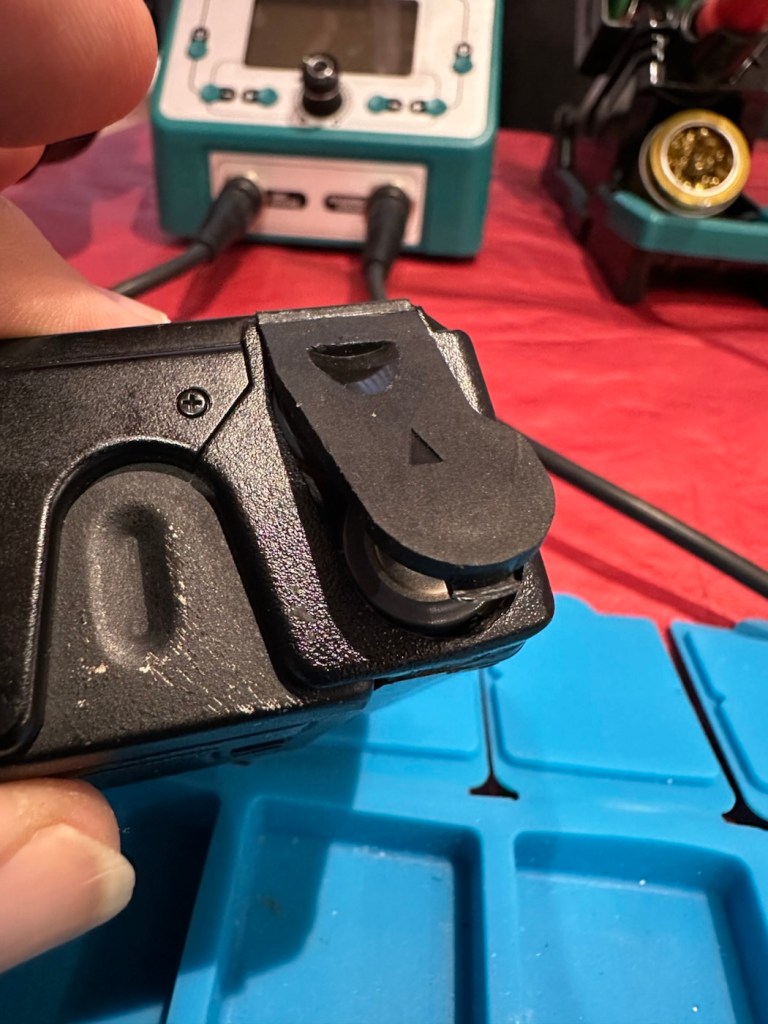
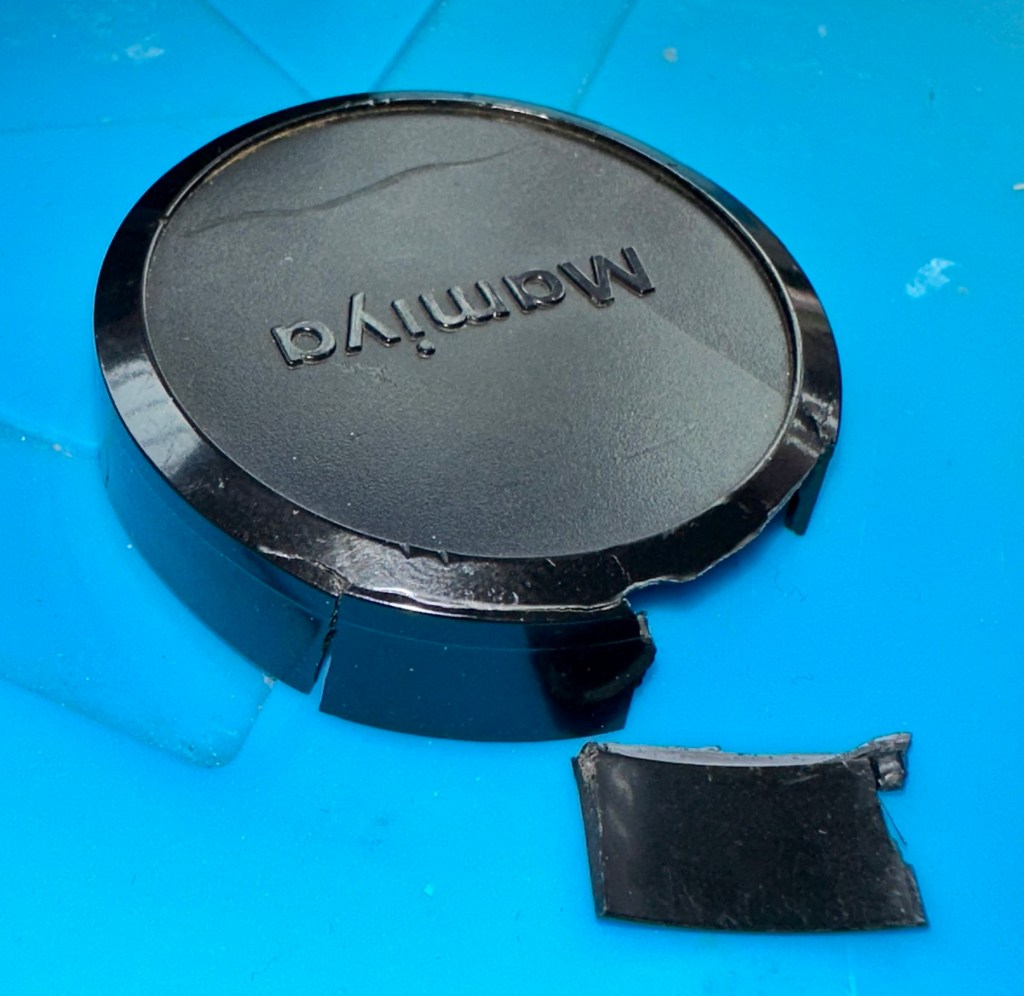
Lens caps with these cameras are very rare, this one has one and it is the original, and i suspect (from what I see in the picture) that there may be a small crack on the side of this one, but that is not an issue. This lens cap is integral to this cameras operation, as when it is placed over the lens, it turns off the camera, without it the camera remains live at all times, and would soon lose its power. It is an early power conserving device if you like. The camera looks to be in overall good condition, probably down to being stored in its original case.

You can view a lot more than I could ever tell you, just by watching this review by Mr.50mm that was posted earlier this year.

Excellent recent review

Since reading up a little on these cameras it appears that I may well have bagged a bargain, if it ever works. And I also believe the seller may well again be unaware of the operation of this camera and it may in fact be working just fine? Who knows? I have my suspicions but we will just have to wait until it gets here for assessment.

Below are some sale prices relative to this camera model that are currently selling on EBay, some extremely high prices compared to what I have paid today:

Current selling prices for this model

It’s plastic and so 80’s. And people obviously loved it. I’d like to be able to get this camera working again, and would love to run a roll of film through it to give it a test run. But first I have to assess it and see just what is wrong with it. I have a roll of old film available to test its “faulty” rewind system, and I have all my tools ready to crack it open and get inside, if I have to. So let’s get at it….

Assessment:

It’s arrived and I must say it is in an excellent cosmetic condition, probably down to being kept in its original Mamiya soft case. The lens cap I thought had a crack in, is actually broken, probably beyond reasonable repair, but at the moment that is not important. Let’s put that to one side for now.

The actual camera is partially alive. When batteries are installed there is a red light that appears on the right rear side of the camera, this is the film transport light and should extinguish when transport is complete. The flash switch sticks a little, and when the flash is clicked into position the distance sensor light on the lens activates however the flash does not charge. The winding system is inoperative and does not auto wind at all. The shutter does not operate, despite the shutter leaves being able to move when gently coaxed.

There seems to be partial electricity throughout, this could very well be the issue. There just doesn’t seem to be a uniform continuity throughout the camera. This will need to be looked at. Something very weird is going on inside.

Repair:

I’m really annoyed, closer inspection shows there are 6 screws missing and someone has been inside this camera prior to me. Again I think I’ve been stung by the EBay curse of “Spares and repairs- no returns” will I ever learn?

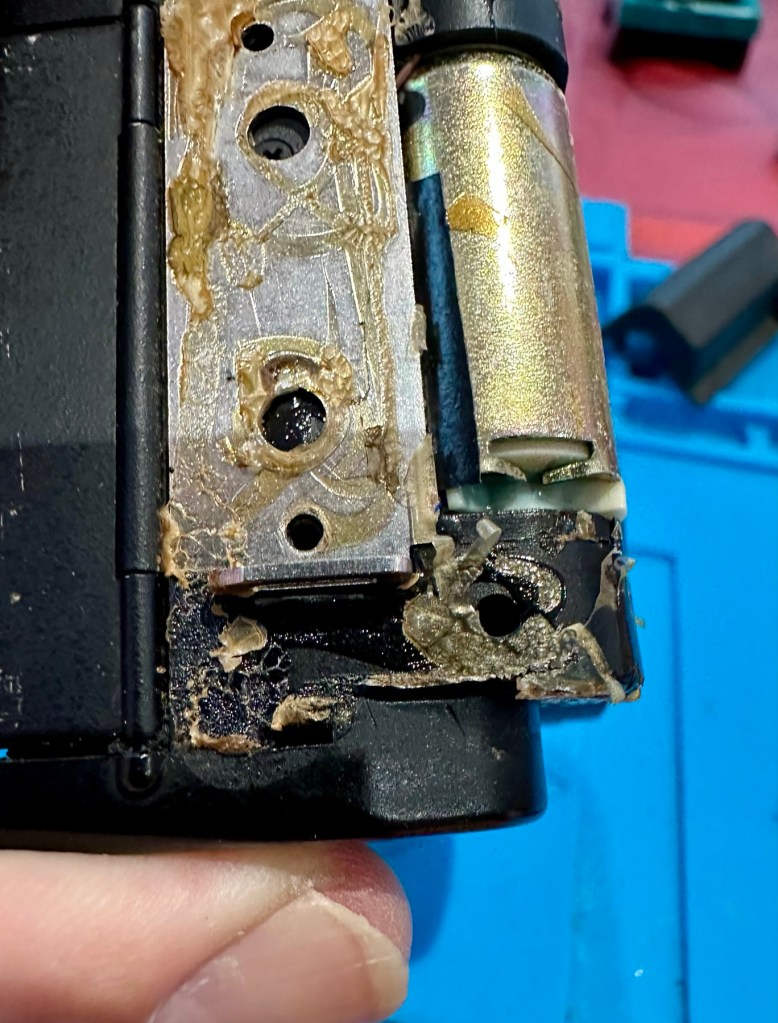
I’ve removed the remaining screws, and had to peel off the rubber grip to access and expose the motor and associated component board in this area. There will need to be a lot of cleaning here before gluing it all back in place.

I’ve managed to get the flash charging light illuminated, and a current of 214v in the flash confirms that the Flash capacitor is holding a charge and more importantly, receiving a charge from the battery circuit. But I cannot get it to fire. There seems to be an issue with the shutter mechanism and the related electrical circuit in this area. The motor is not working, it’s either dead or not receiving power. I need to look in this area a little more thoroughly.

Front fascia removed

I’ve now removed the front fascia and now have a good view of the overall workings inside the camera.

Ive taken out the lens and the leaf shutter, these seem ok and are working freely when operated. To me it looks as if the mechanism that triggers the leaf shutter is either seized or the variable capacitance system located at the top of the camera, that is basically just a needle on a circuit board connected to the focus light, could be at fault, it does not freely move on each camera actuation as it should, and this is not a readily available part.

That faulty part of the board
Misfiring- faulty

It seems the deeper I delve into this camera that I am finding more issues, and I’ve just found two parts that are incorrectly installed that are on a cog system connected to the motor. I’m fighting a losing battle as it appears the person who has been here before has probably added to the issues of this camera in their attempt to fix the original issue.

On top of the missing screws I’ve now found a missing capstan cog related to the leaf mechanism that would help explain a certain lack of movement in areas. The motor is dead, I’ve taken it out and used the bench power supply and it is non responsive. Even after spraying with some contact cleaning fluid and sitting there spinning the axis to get the solution absorbed, there is still no response. It’s totally dead and will require replacement.

Result:

Well. Once again I have been mislead by incorrect descriptions on the auction sites. It’s a shame really as this is a lovely camera and if it had not been tampered with inside, I’d probably be posting a different review today, one that would be more positive. With screws, cams and cogs missing I was pretty much set up to fail here.

I’ve reassembled the camera and it is now back in its pouch. The positives are that I have learned a lot about how this camera operates, and just dismantling and reassembling the camera allows you to learn a lot about it, and the technology used during that period in time. All the screws that I removed have gone back into place with none leftover, yet another positive.

So it’s a failure I’m afraid, but it will be kept and either used as spares or I will obtain a suitable donor to get this one up and running, it will not be disposed of in any way. It will be reused. I’ve only paid a small amount for this, it’s worth it for the spares alone.

I have already set up a notification on the auction sites for when another suitable camera becomes available. I will update this post or post a new one that incorporates either the repair of this unit or its use as a spare parts donor, when that time comes.

Thanks for passing by. Its appreciated.

Ensign Ful-Vue II

I’ve had this camera sitting around since March 2023, when I first wrote about its purchase along with a couple of other cameras here: New old stock 📸

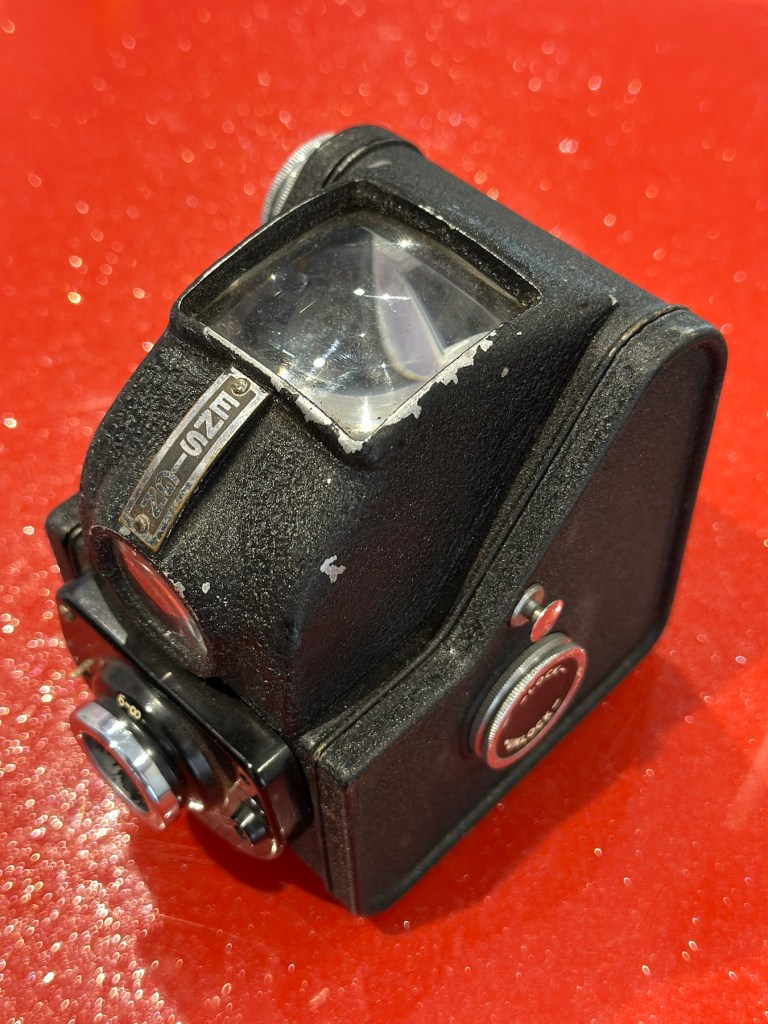
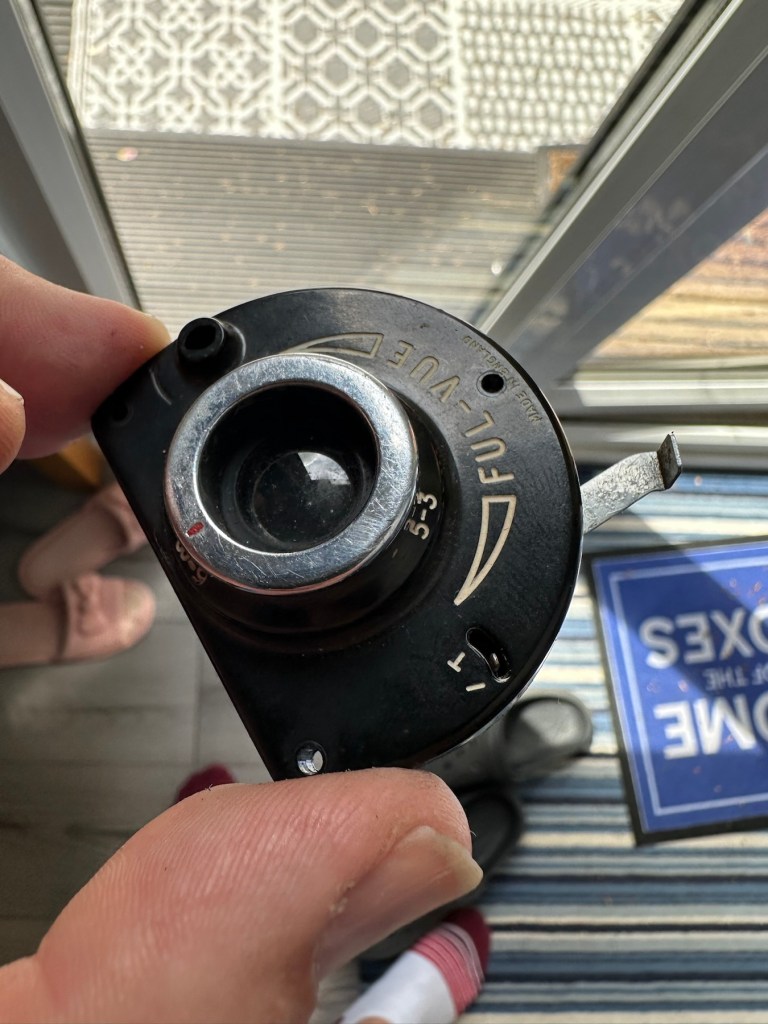
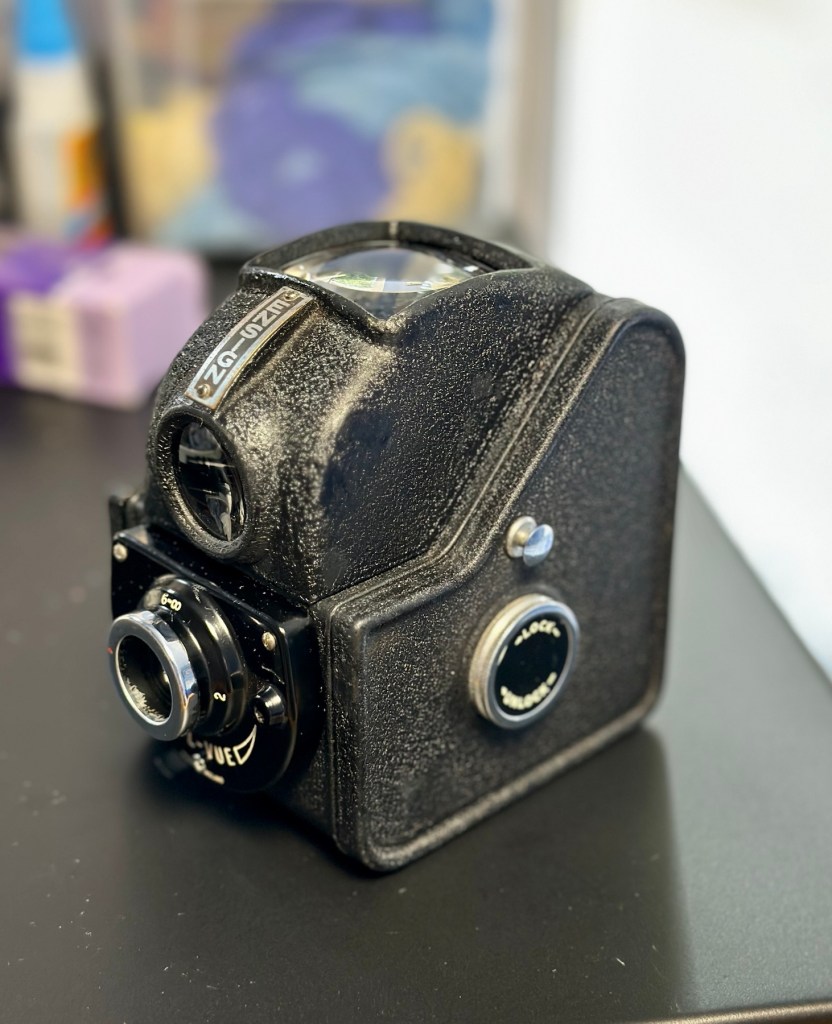
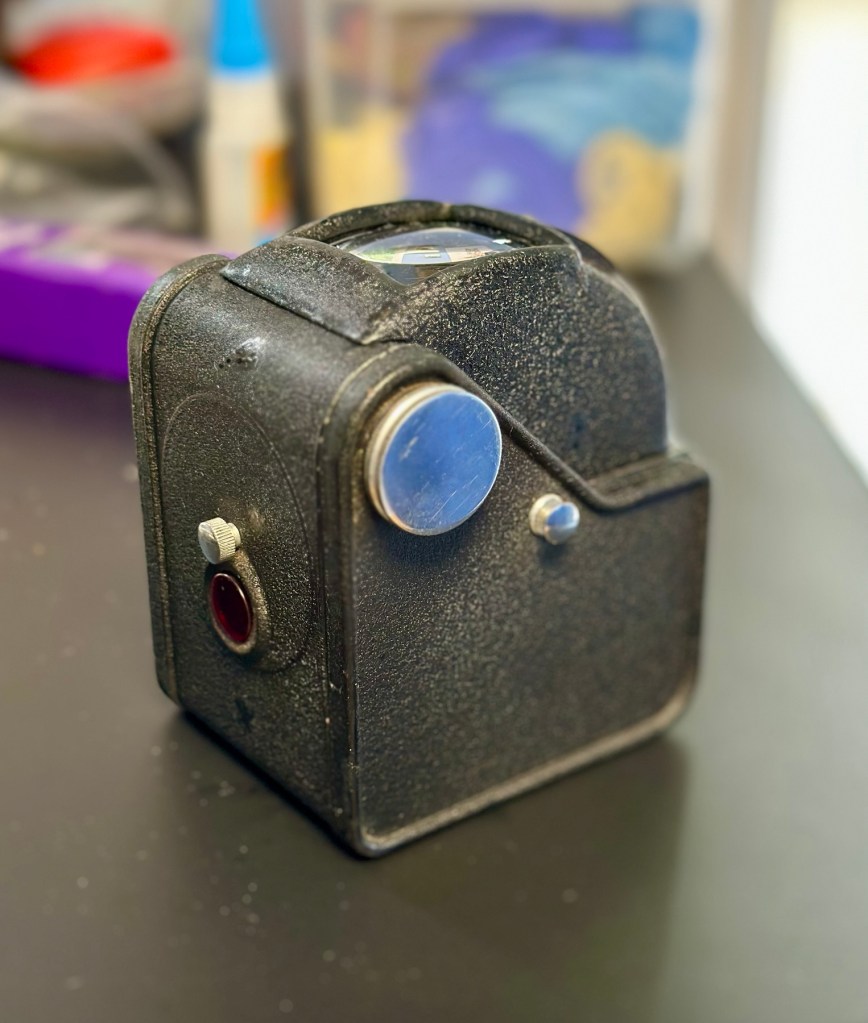
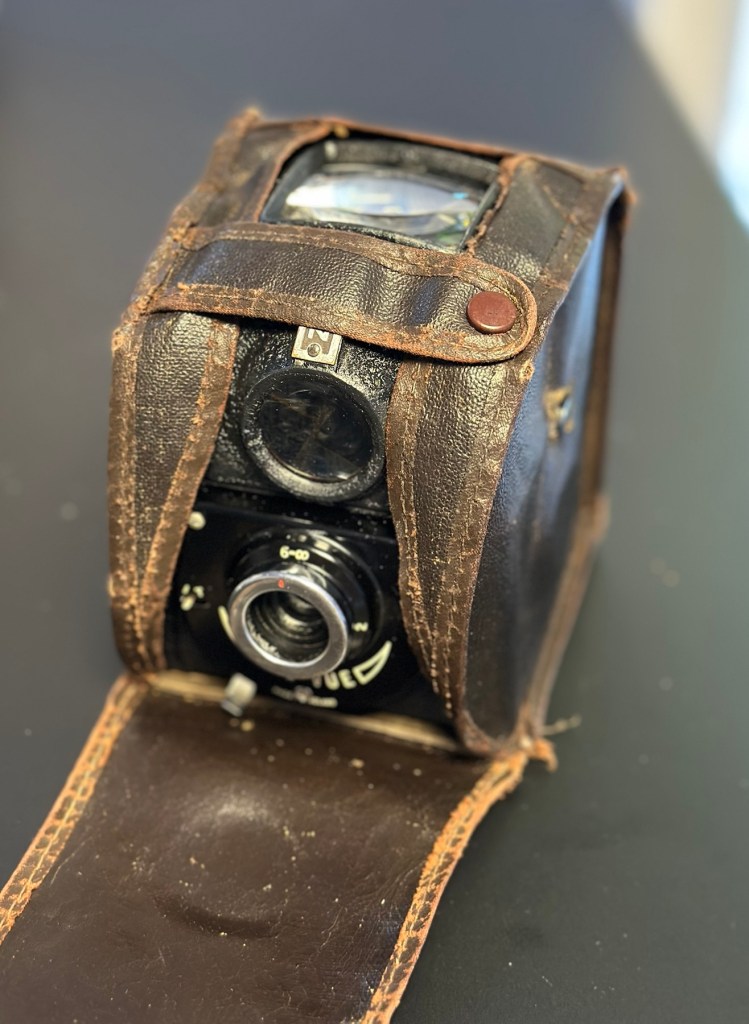
Barnet Ensign Ful-Vue II

I’m not sure what I paid for these cameras but it wouldn’t have been a great deal. I love the Ful-Vue due to its looks and the kind of Art Nouveau feel it has about it. It’s a very basic mass produced camera of its time and It is an old 120 film camera, and the bonus is that this film type is still readily available, in fact I still have a few rolls in my fridge at home today.

The shutter is an all mechanical, spring loaded system which swings a piece of metal over a hole to create the exposure. The approximate timing is 1/30th of a second and that’s slow. It is understandable when taking in to account that ISO 400 wasn’t that common in the 50s and would have produced very noisy results. It was far more common to use ISO 50-100 film and that would’ve required a slower shutter speed at the approximate f11 of the lens of this unit.

I obviously want to get it back into full working order. And want to do as sympathetic a restoration as possible. It’s a 120 roll film camera with a 6cm x 6cm frame inside, it was a cheap and cheerful camera of its day, sold as, “Easy, even for a child to use.”

In the meantime, here’s some history about this little camera:


Barnet Ensign Ross Ful-Vue II

Originally released in its initial form in 1939, this version was introduced in 1950 after further improvements were made. The new flash synchronised shutter, the turn-able lens barrel allowing three different distance settings instead of two, an all-plastic front panel, and an optional flashgun. The improved version was called Ful-Vue II. Pictures were 6×6cm on 120 film. It has been stated that colored models (red, white and blue) were sold in 1952-3, to celebrate the coronation of Queen Elizabeth II; However, no other evidence for these cameras has been seen: in particular, the Ful-Vue is not mentioned in a coronation advertising supplement to the BJP Almanac of 1953. Colored Ful-Vues were advertised as ‘Ful-Vue à la Mode’ in late 1952. Examples of the regular Ful-Vue II, repainted and presented as the colored model, have been seen in online auctions.

Camera wiki.org

So I estimate this camera to have been produced sometime between 1950-54 when this particular model had its production run, just prior to yet another version becoming available. Making this particular camera approx 70+ years old. Let’s have a look at the unit that I am now in possession of.

Assessment:

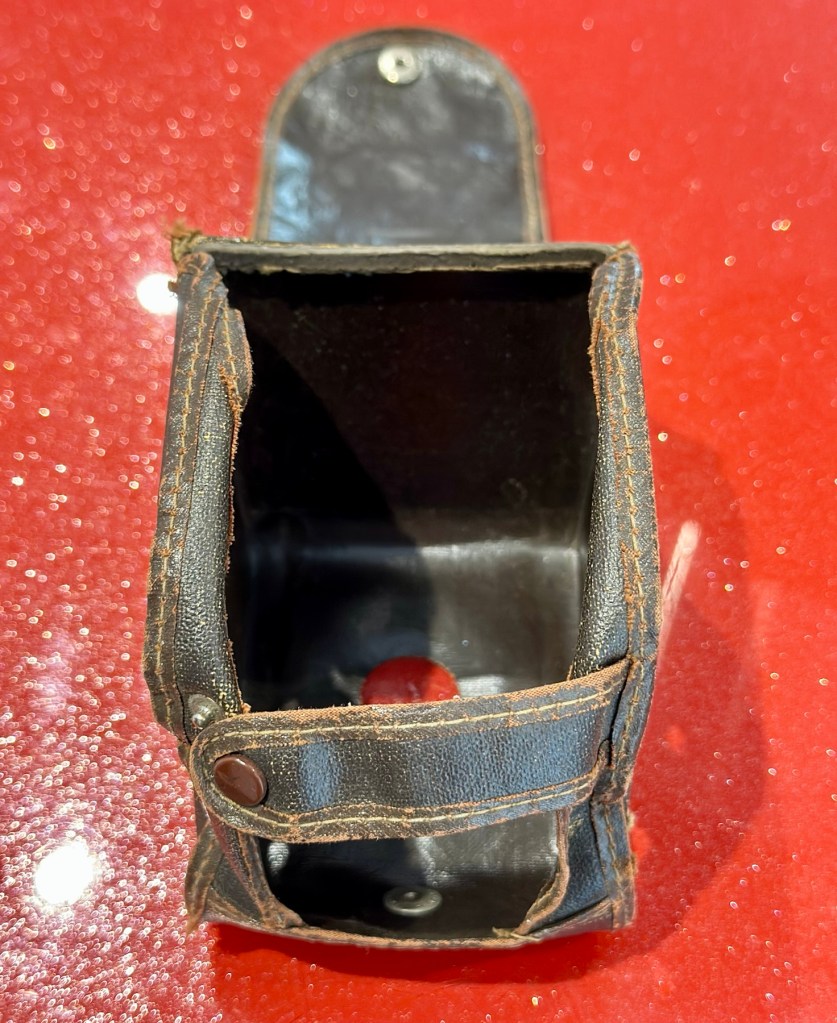
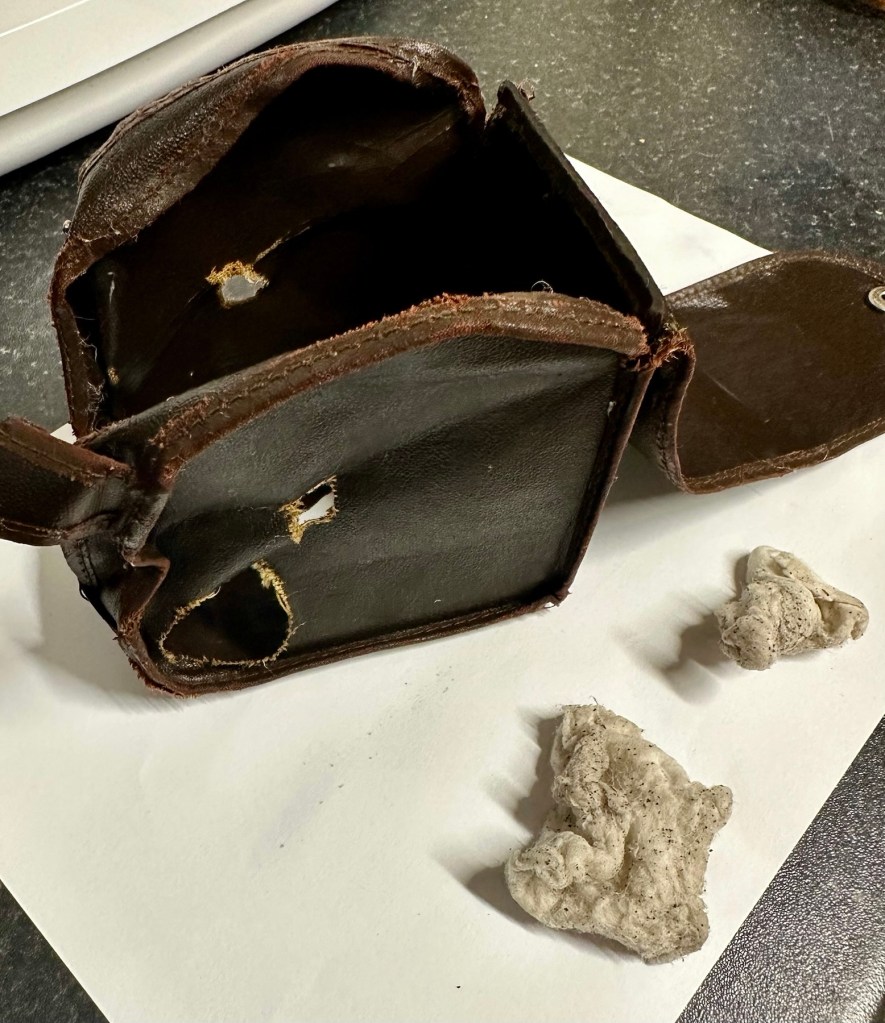
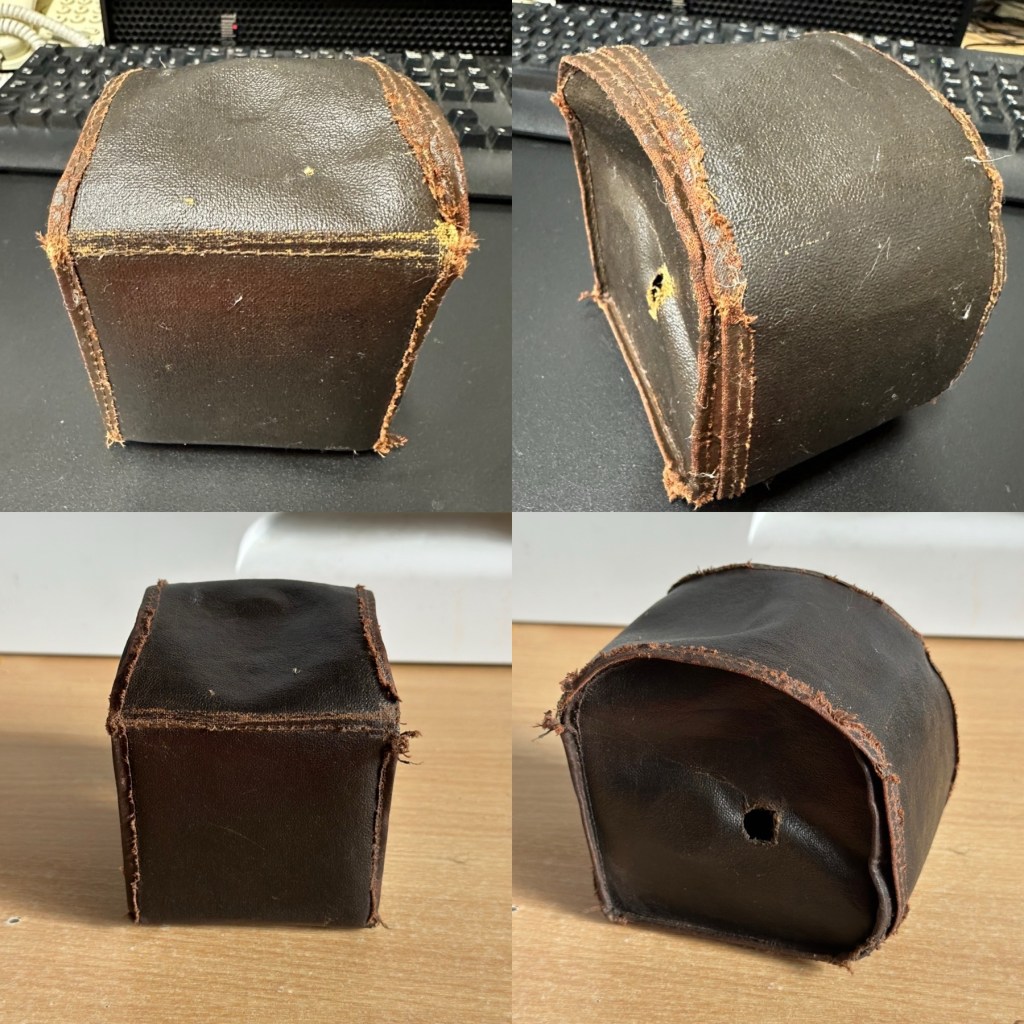
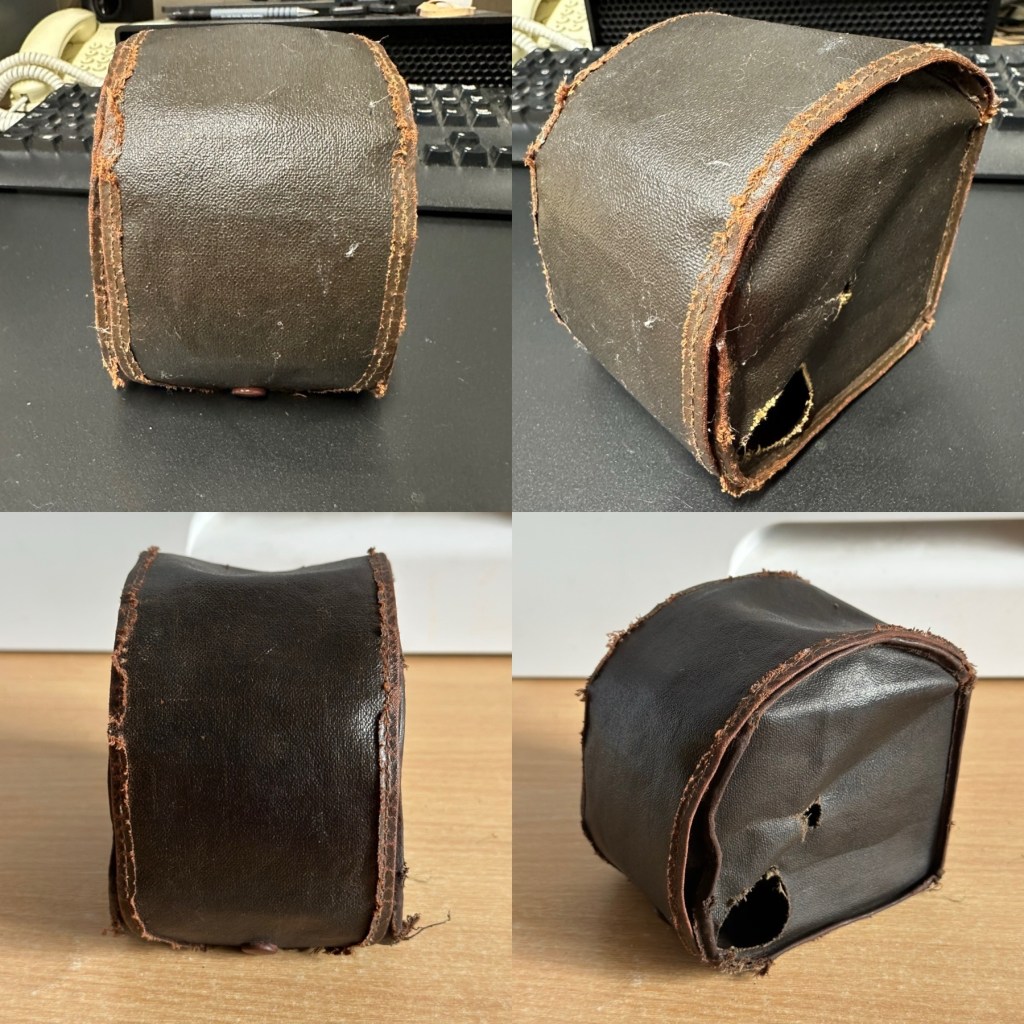
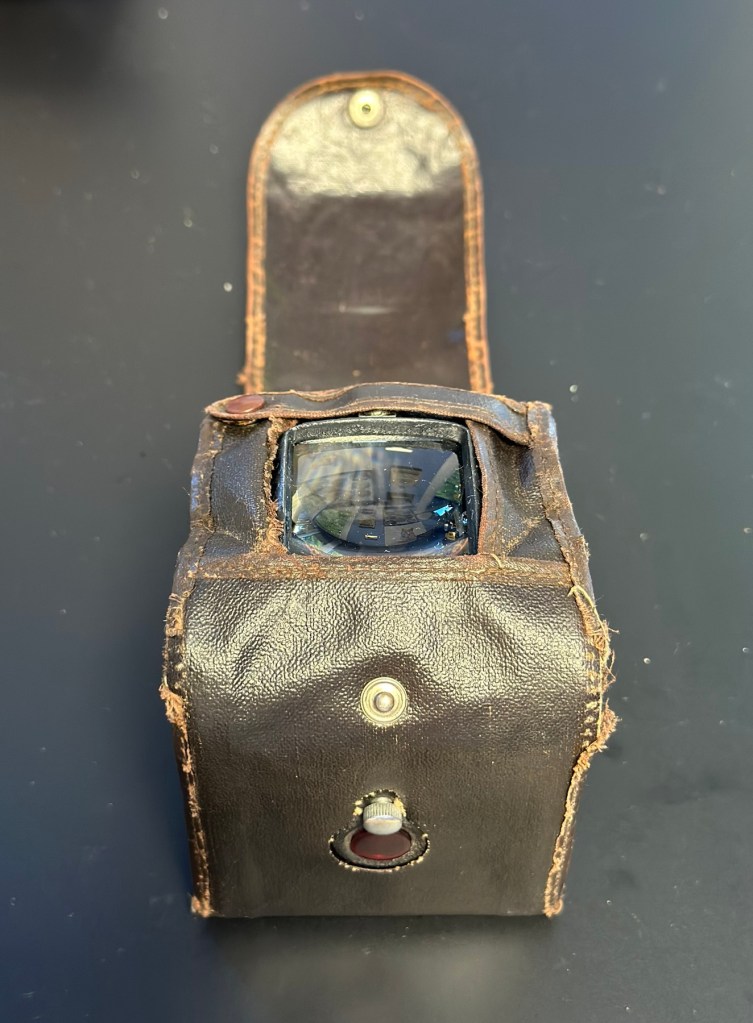
The case is leather and is very dry and brittle, it’s complete, so I may well look at revitalising this one just as I did to an old Kodak camera in this old post: Kodak Brownie reflex. If I do, I will cover its repair in the following section.

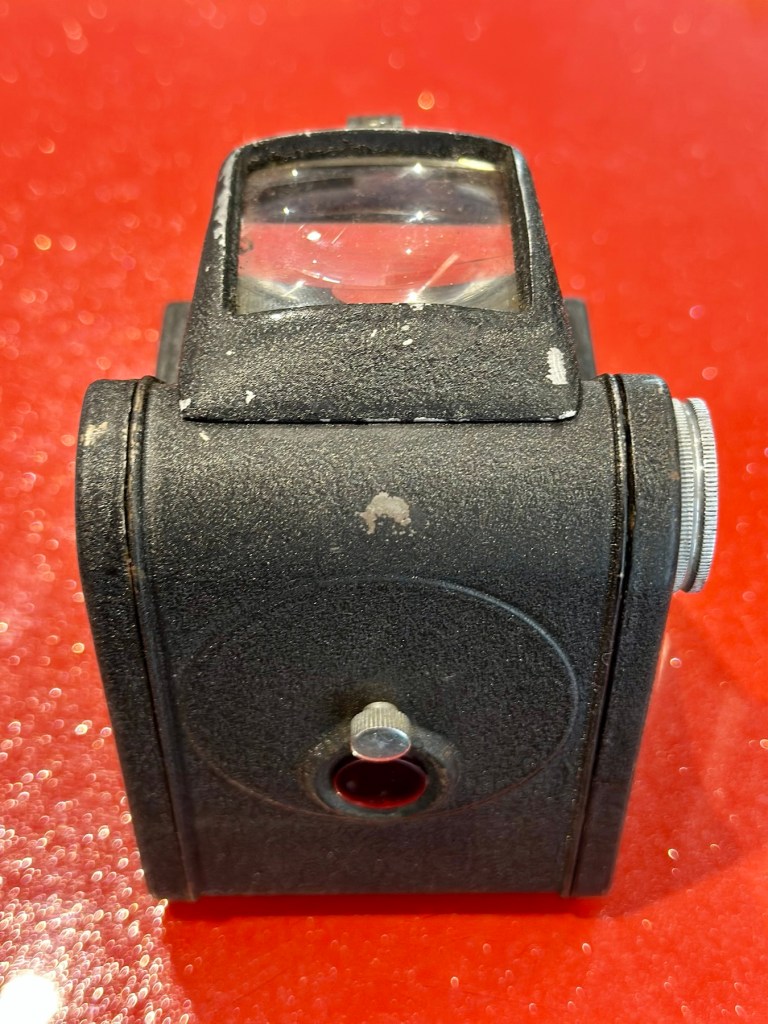
The camera itself is in quite a good condition cosmetically, it has chips off the paint and a little wear and tear that will require some attention. There appears to be a screw missing on the front plate, this will be replaced.

The mirror inside the viewfinder seems to have moved and will need reseating, all glass and mirrors appear quite foggy and need a good clean, all workings within the camera inside appear ok. Light seals appear ok but may well need replacing purely due to their age.

The lens barrel and shutter mechanism will be checked over to check correct operation, however at first glance, all seems to be ok. There is a little red window on the rear panel where you can see the film exposure numbers. A little thumbscrew can be turned to blacken this window out, this will be very handy for when we try to install a colour film to prevent any fogging issues.

Repair:

I want this to be a sympathetic restoration, so I will endeavour to keep the look and feel of the unit as original as possible.

The case:

I’m starting with the case as this is probably going to be the most time consuming and will require numerous periods of drying and moisturising, it’s probably about 70 years old now and to be honest has probably had no care taken of it during that time.

Using some mild detergent, but just the soap suds on a cotton pad I have gently wiped all over the case, paying special attention to any old folds in the material. This has had a dual purpose of removing ing a lot of age related dirt (As you can see in the photos above, that show the dirty cotton pads) as well as adding a little bit of moisture but not too much. I want to do this in stages to minimise any more damage. I will now let this dry for 24 hrs and I will then do the same again.

24hrs later I have cleaned the case again, in exactly the same manner. let’s leave it another 24hrs and then apply a little polish to give it back some colour and a little bit more moisture. I’m keeping it as low cost as I can, no doubt a brown shoe polish will suffice for the result I’m looking for.

I’ve treated the leather and polished it twice using a black shoe polish. The third coat I have given is a tan regimental high gloss polish. I’m leaving this for a few hours and then I will buff the case up. I’m not repairing stitching or holes as I want it to retain age and it’s old look. I just want the leather to look healthier, last a while longer and to get some moisture back into what was a very brittle leather case.

I have today buffed the case up after all the treatments of the last couple of days. The case feels lovely and soft and much more pliable than when I first started on it. I’m now going to bring this part of the repair to an end as that’s as far as I wish to take it at this time. I want it to still carry its signs of age. Without further a do, let’s move on to the camera.

The camera:

I have decided to totally dismantle the camera and work on it bit by bit. In this case there is not a great deal to dismantle.

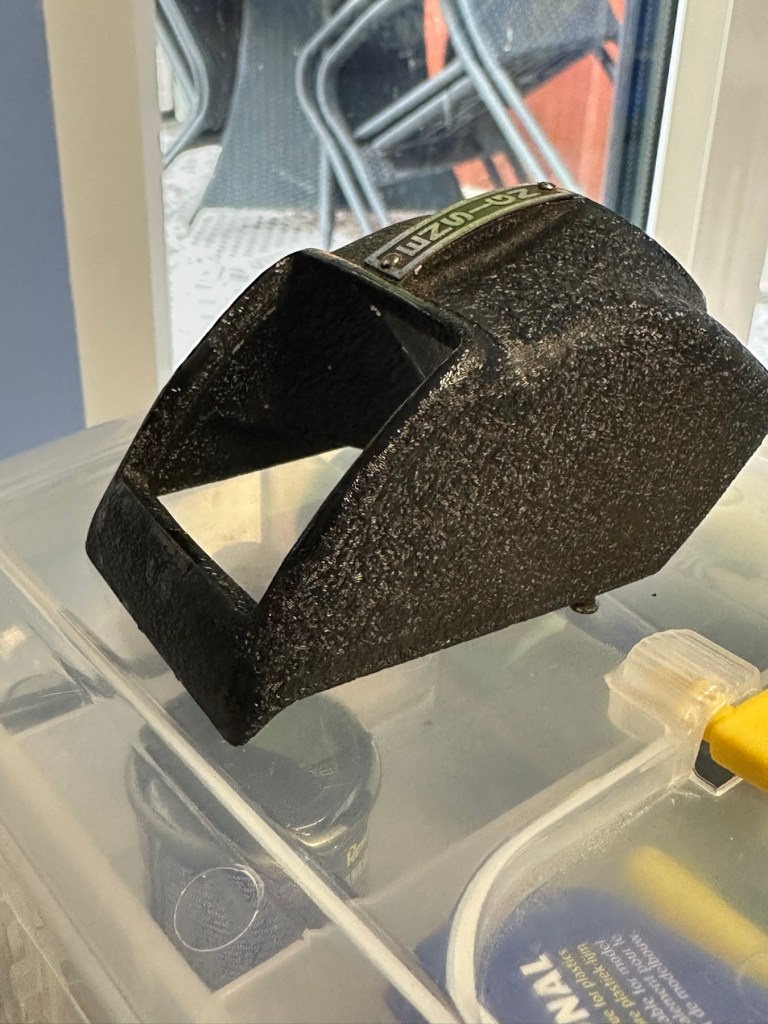
Firstly I release a retaining clip inside of the main body and this releases the “Viewing head” on top of the camera. This part of the camera contains the mirror that has become detached, and two glass optics that complete the viewer section of the camera. There is a single spring structure that holds both pieces of glass in place, release this and they just fall out. Easy.

I’ve started by placing the three optical items above in a mild warm detergent soak. I will leave these there for about an hour, in hope that a soak will help in cleaning that muck off the back of the mirror. The two other optics are in great condition and I’m sure the soak and then a final rinse will be all that they require. This treatment worked just fine, and now onto the next part.

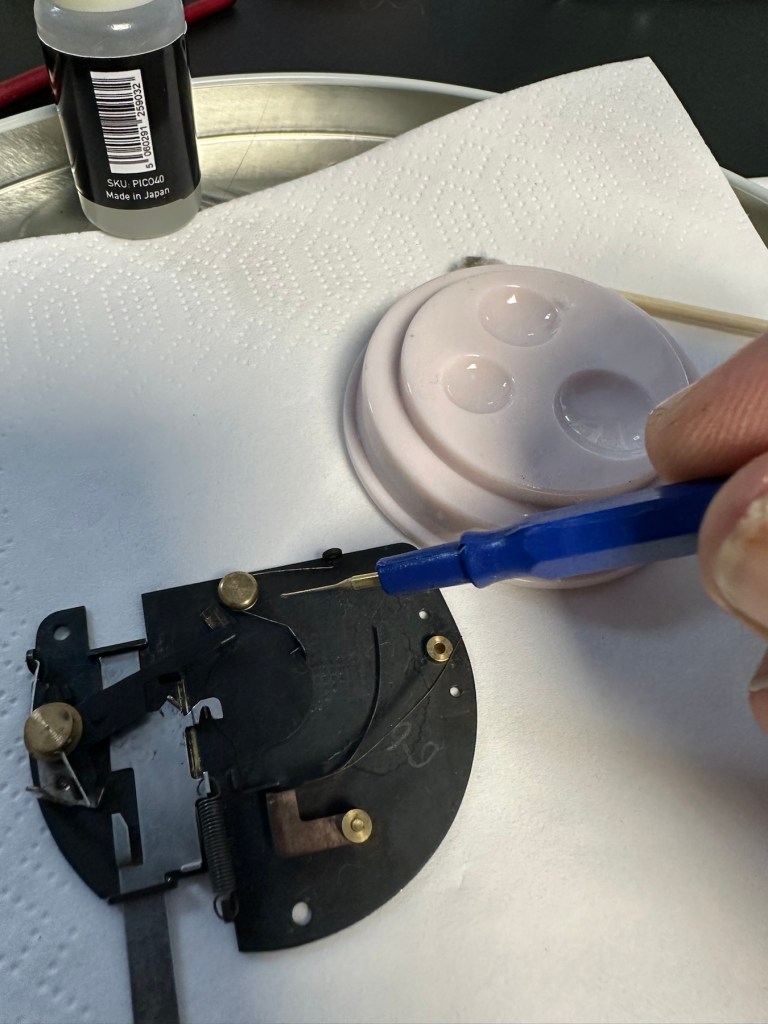
Next I’ve removed the shutter mechanism from the camera body.

Here is a very small video showing the simplicity of this shutter mechanism

A The mechanism is beautifully simple and is such a lovely piece of work to look at. To think im probably the first person to look in here in the last 70 years is special. All I’m going to do here is very carefully get rid of as much old ingrained dirt as possible and very gently clean the shutter leaf. I will use a minuscule amount of clock oil on the mechanism only, I will use some fine graphite dust on the actual leaf part of the shutter.

The lens and mechanism have been cleaned now and reassembled, all tested, and working as expected.

The body work is fine apart from some small chips and paint flakiness. I’m going to retouch these missing areas with some enamel paint and a bit of thickener to enable me to obtain the stipple effect of the original paint job. Then I will finish with a nice black polish.

Let’s now get the mirror back in place and the head back on the camera unit.

And that’s it. Apart from a little polish we are now done here

Before and after

Result:

I’ve put quite a bit of work into this little camera. Some people will ask why bother as it was only a cheap mass produced camera? Well, I like it, it’s a lovely little camera and it deserves to be displayed. Now, as it’s also working it’s a big bonus. It gives me something to do, and it’s how I relax, as I’ve been shoulders deep in DIY at home recently and doing my shifts at work, so this is a welcome distraction for me.

So that’s another one saved from scrap. This camera will now go into storage where I will vacuum pack it with some silica packets to prevent it from getting damp. I’m surprised just how good this camera “smells” considering its age, there is no mustiness at all compared to some cameras I get from this era.

Many thanks for popping by, you know it is always very much appreciated.

Have a super day.