What I really love about technology is that there are some damned clever people out there prepared to push the boundaries. This guy on the Skill Make site took on the challenge to build a NASA inspired IONIC plasma thruster as a DIY experiment.
DIY at its finest
These guys are just way out there when it comes to tinkering. There is no way I’d even consider or even know what the hell i’d do in these situations. But I’m so glad there are people out there doing these really random way out there things that impress the hell out of me.
Being one of those from the Ham radio community there was always a fascination with putting a Morse code transmitter into a disused Altoids tin (Other tins are available). Here and now though we have a gaming device that can fit in the same tin. Worth visiting Git hub via the link to see the actual boards and the plans for making this a kit version. I’ve signed up, let’s wait and see what happens.
I follow a number of channels on YouTube. It’s the only social media site apart from this one that I do get involved in. I have absolutely no intention of ever making a living on these platforms as to be honest I couldn’t really be arsed to.
Hugh tells you how it is
However a lot of individuals nowadays want to do just that and make their livings on line.
Now Hugh has a very interesting site for someone like me that likes anything from the retro era. He’s been without a smartphone for over a year and his progress without one has been really interesting to follow.
Hugh does earn from his online presence but to be honest it isn’t a living. He goes through the figures in this video that show all the hoops you have to jump through to earn a living from having an online presence.
To build a usable, basic issue, medium format camera (Bronica SQ/SQ-A) from damaged items and spare parts, for as little outlay as possible and shoot one black and white, and one colour roll of film as proof of its successful completion.
Getting started:
Building a camera from damaged parts is no easy task when the name happens to be a high end brand and any parts that are available, are being snapped up by others to service their own stock or to break up for sellable parts. I’m going to keep a running total to try and build this as cheaply as possible, and to keep track of this total I’m going to use my trusty Psion Organiser II LZ from 1989 to keep a tally.
First purchase:
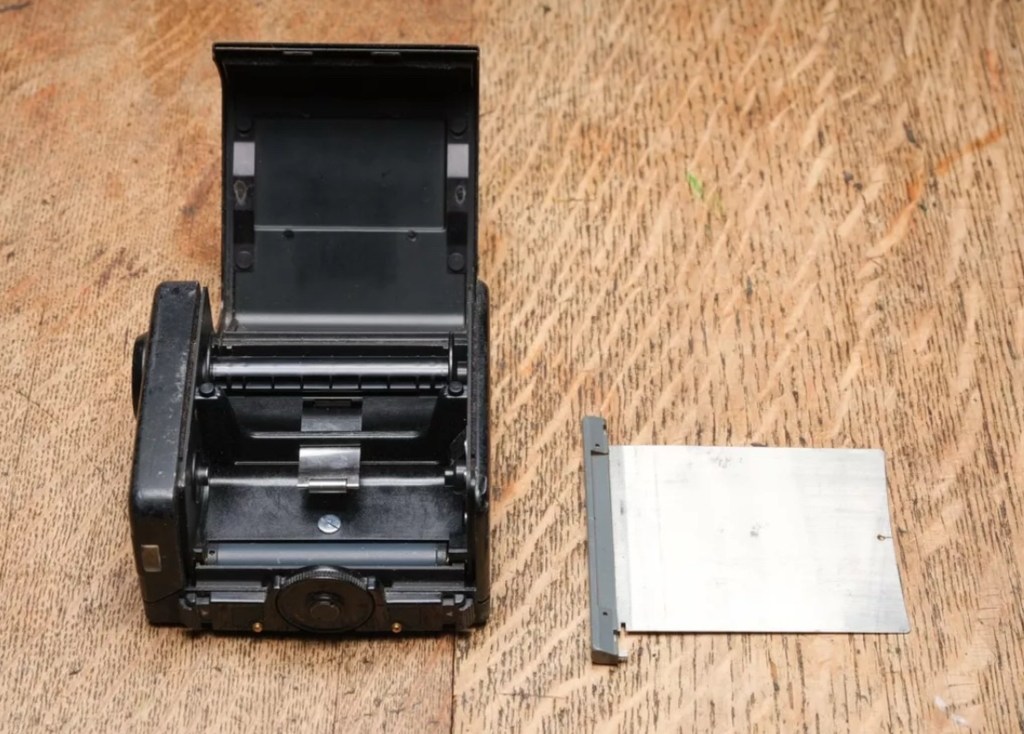
The first purchase has been made and it is for a 6×6 120 roll film back unit with dark slide. I think I’ve paid quite a good price for this item. This is the back piece that fits on the rear of the camera. Here is what the listing stated:
ZENZA BRONICA SQ 6X6 120 ROLL FILM BACK WITH DARK SLIDE Signs of wear, untested. Uk Buyers Only Please
EBay
First purchase, the film back.
And the total paid including all postage is £20:94GBP. Let’s now start the running total in the Psion II LZ.
Running total
All I can really check at the moment is cosmetic condition and this looks a little beat up, however I don’t really care how it looks externally, as long as it’s light tight, that is all that matters and I won’t even be able to check that until later on in the build. Cosmetically I will attend to it, if I feel so inclined at the end of the project, for now it’s ability to be light tight will be my major concern.
Assessment:
The unit has arrived and yes it has seen use, but not in a few years I suspect. The old smell hit me the second the package was opened, it’s kind of a reminiscent pong from the past, however I’ve got to see beyond this.
The light slide seems fine, however the surrounding frame has been bashed and a small bit of frame has gone missing. There is also a screw missing and I suspect the area that is missing the screw may well have been glued down. there are some slight rust spots on the exterior framework, however everything inside appears to be fine apart from some light seals that will probably need replacing. The rollers inside are grubby so a good overall clean is in order.
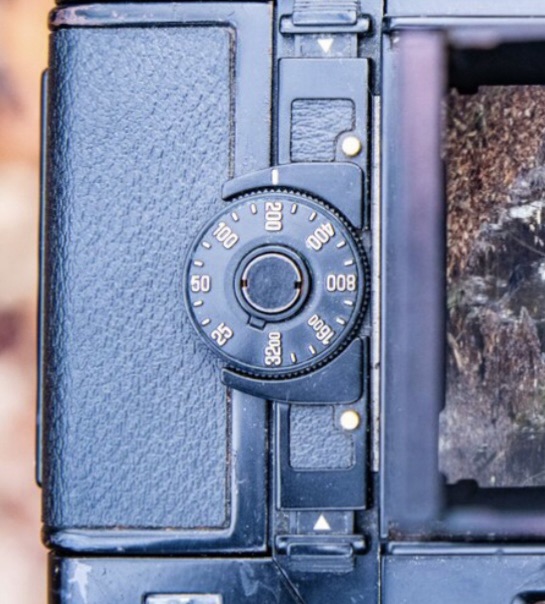
Annoyingly the ASA markings on the dial atop of the roll holder are missing. I will make something basic up to remedy this issue. Again it’s an exterior issue and I’m not too fussed at the moment.
Yes there is some work required, but there is no rush. And thankfully I don’t see anything that really scares me about it. I won’t really know how it stands mechanically until I find a suitable body to attach it to. I have that to look forward to in a future post.
Repairs:
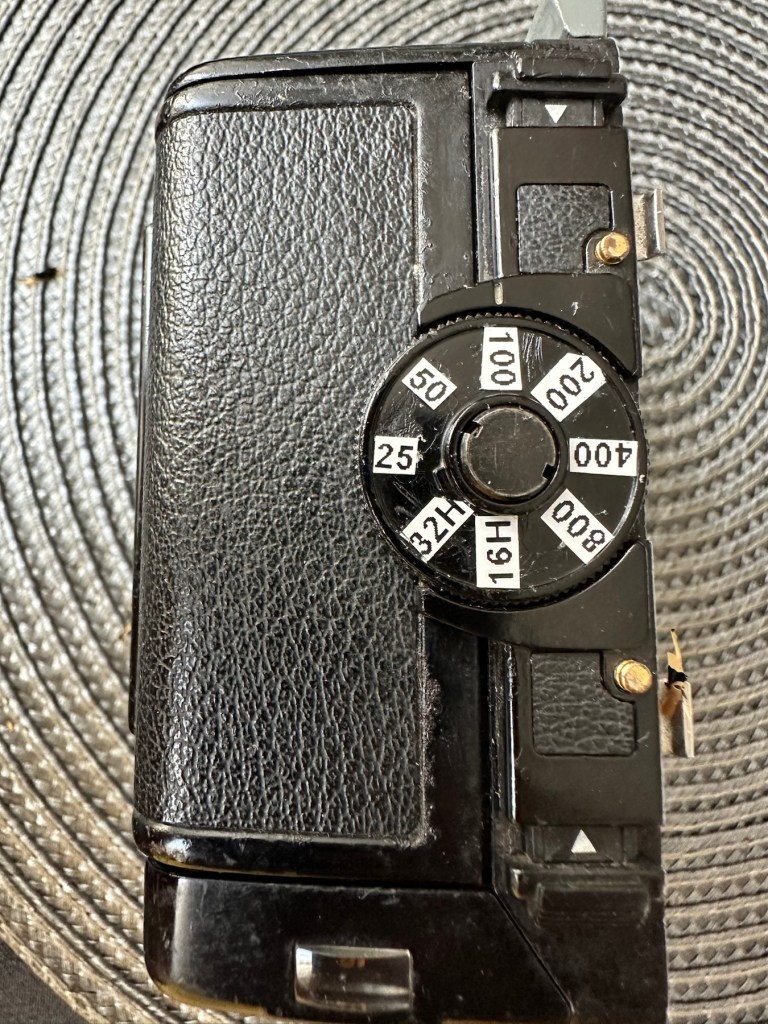
The ASA dial. Simple solution here, until one becomes available sometime in the distant future, is to use some very small dymo labels I have printed. I will cut these down to size and put them in place where they should be on the dial. Quick and temporary solution a’la Frankenstein. No need to over manufacture things, this will do fine.
Size 9 dymo labelsHow it should lookHow mine currently looksAfter I’ve added some ASA numbers- temporarily
The old asa wheel has been cleaned to remove the original glue, and temporary stickers have now been applied. This completes this fix for the ASA dial, for now.
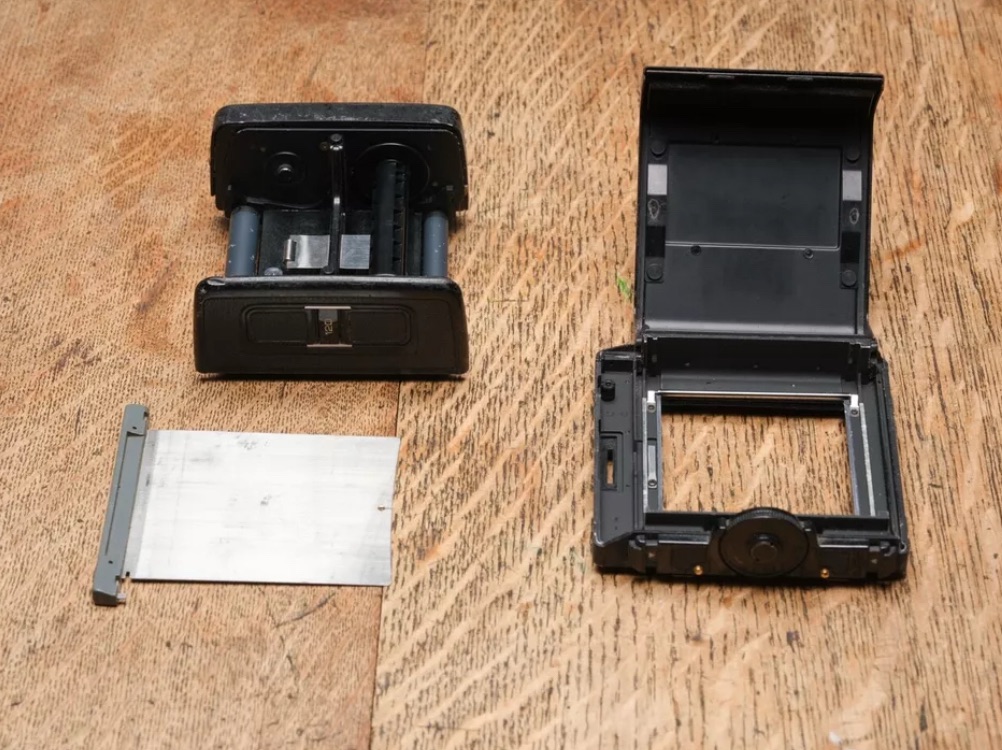
Two items to make one good unit
Edit: I’ve managed to obtain a damaged roll back for a grand total of £5:76GBP, absolute bargain and it also has a working ASA dial. So I’m hoping I’ll be able to use this donor to help in the repair of this item. I’ve used a combination of parts from this and the earlier roll back and I’m happy I have a good working unit. We now have a proper ASA dial off of the spare unit transplanted onto the old unit.
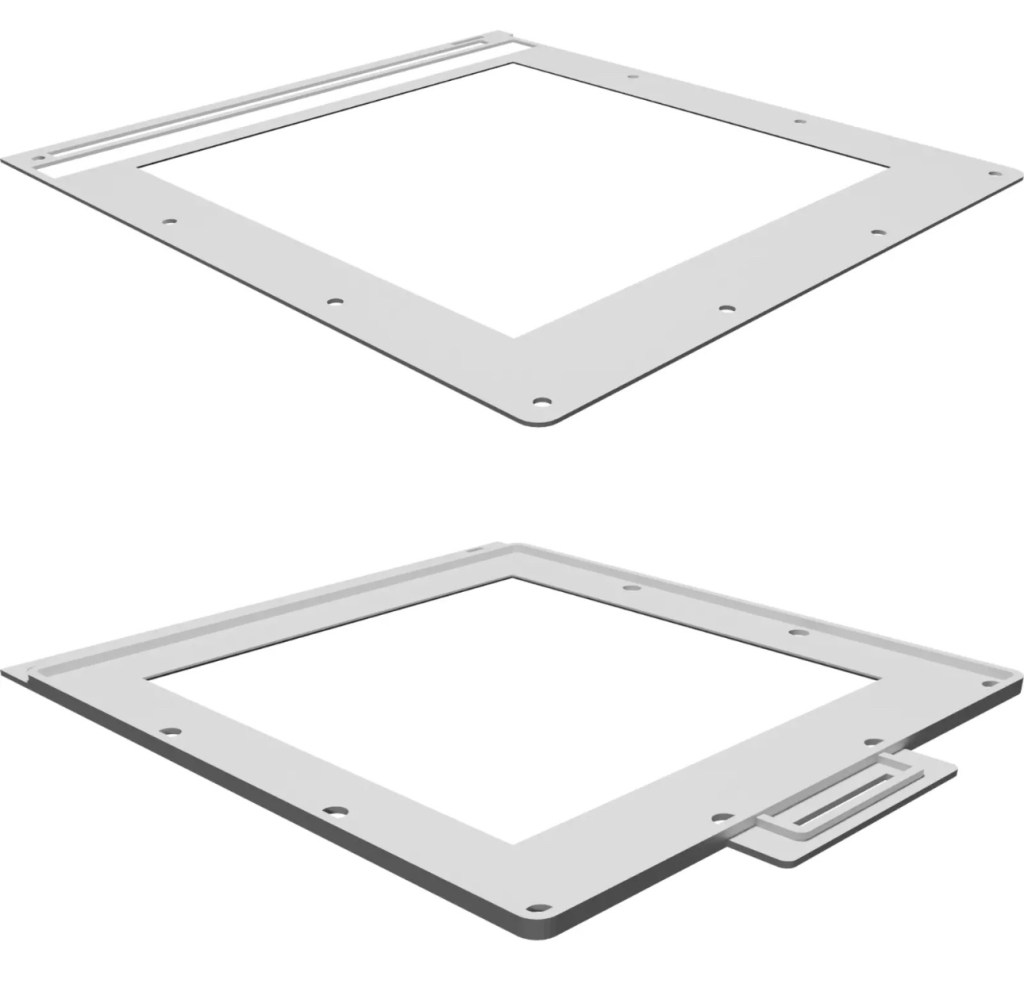
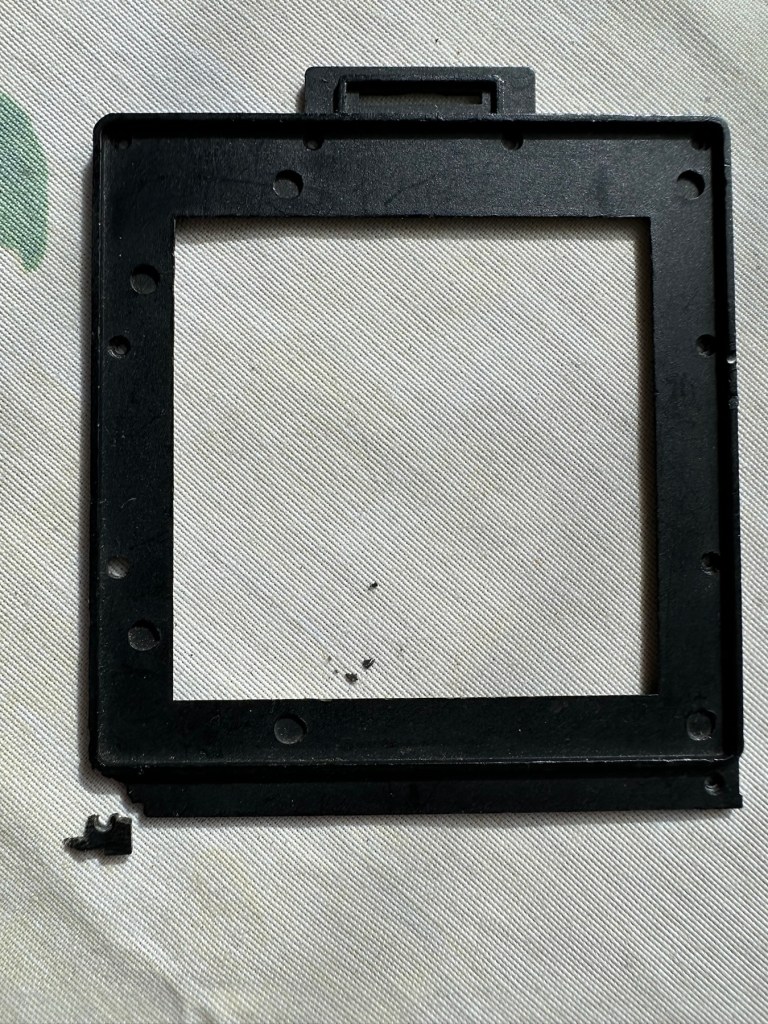
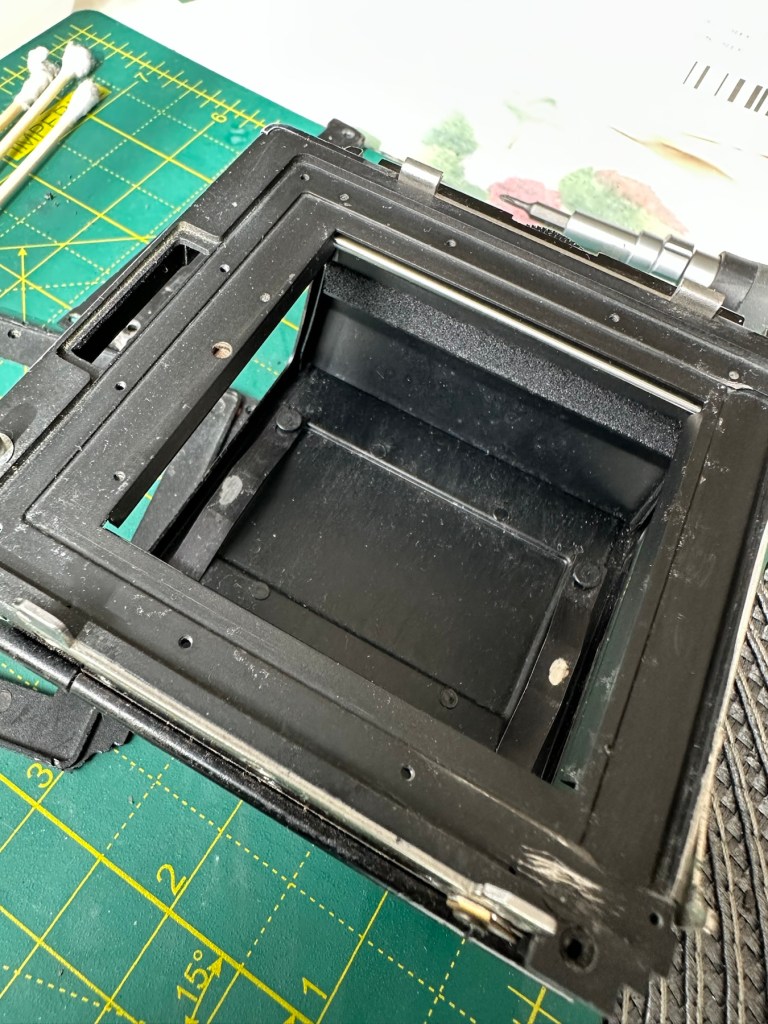
Front frame:
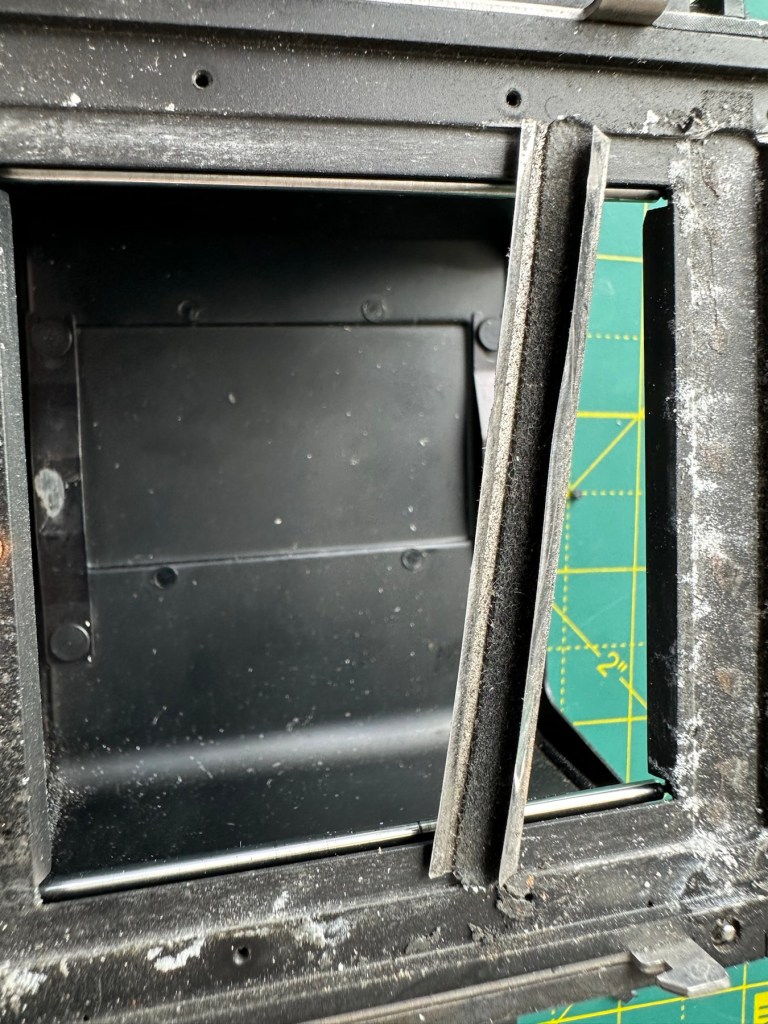
I’m taking this off to give the whole area underneath it a good clean. There are some film guides under this frame that are contaminated and that could cause a scratch on the film, I’m going to clean this whole area under the frame and will then reassemble. The cartridge slide is in a good condition and has just required a polish. Apparently this front frame is prone to breaking and the screw holes splitting, as it gets quite brittle. This has happened to this unit, and I’ve found a guy that 3D print’s replacement front frames and I have ordered one of these to ensure that the whole frame is secure and light tight, as currently one corner can be lifted and this could cause a fogging issue. At a cost include postage of £12:75GBP it’s a small price to pay seeing the only way to get one nowadays is by purchasing a donor unit at cost far exceeding what I have paid here.
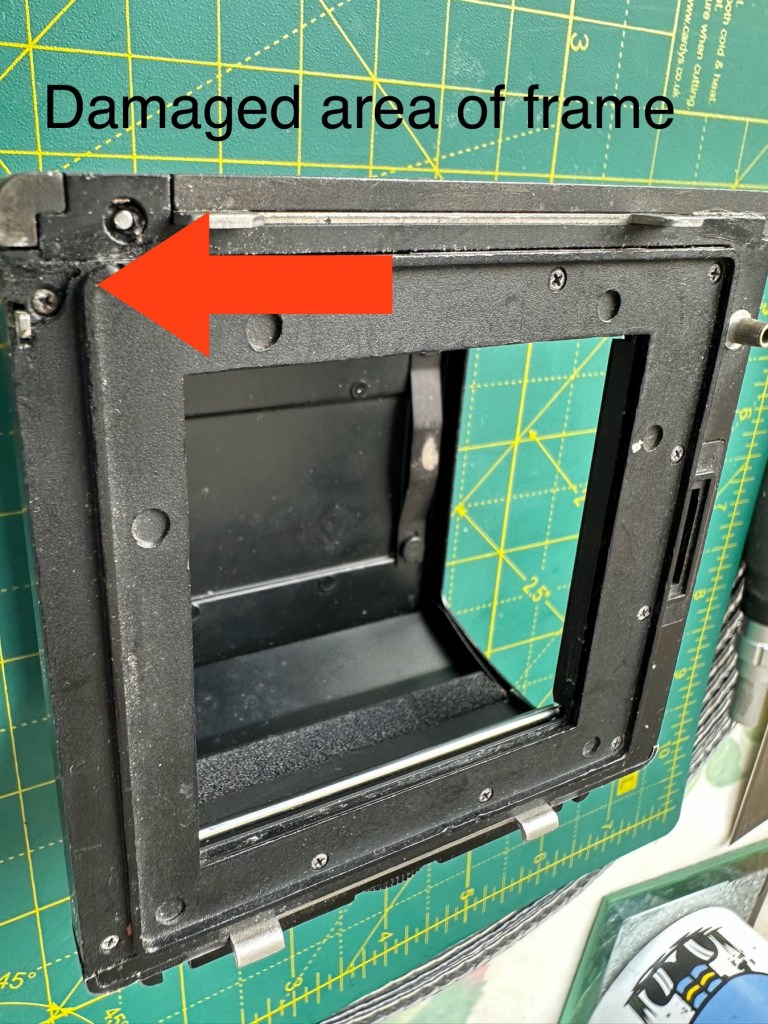
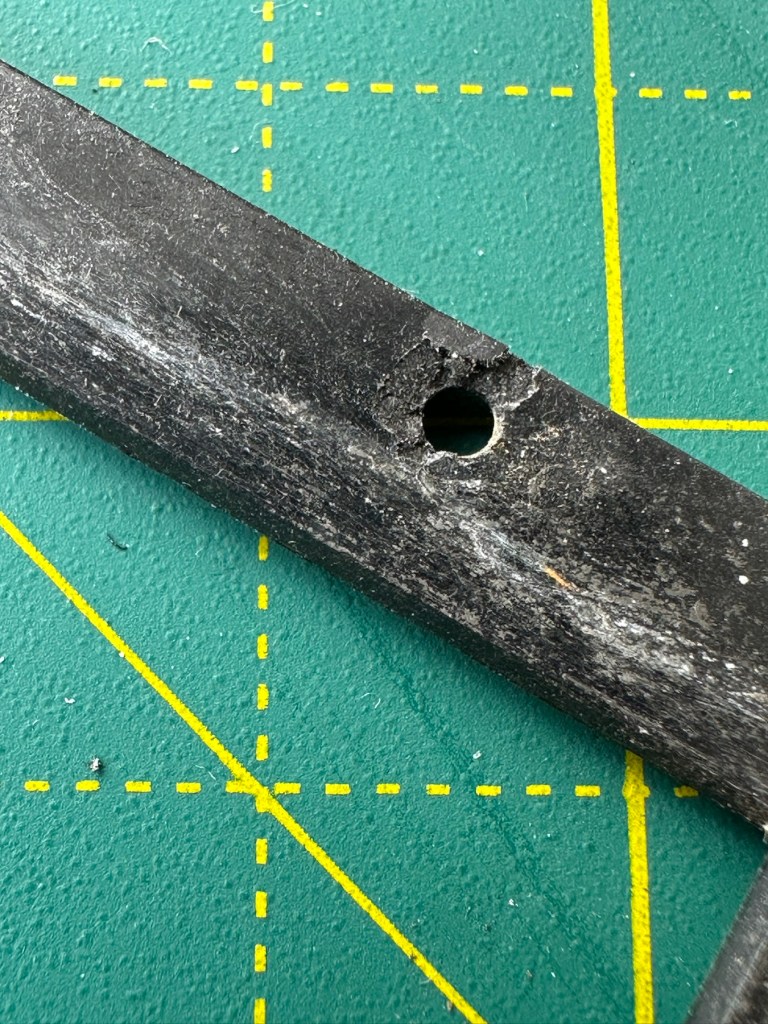
The new frame, will be blackThe old frame with broken corner and damaged screw holesDamaged area of frame in situ on the roll back
There are a couple of screws missing of which I have plenty of spares so these will be simply replaced. I’m happy now that this portion of the camera is in a good condition and will soon be ready to be put to use.
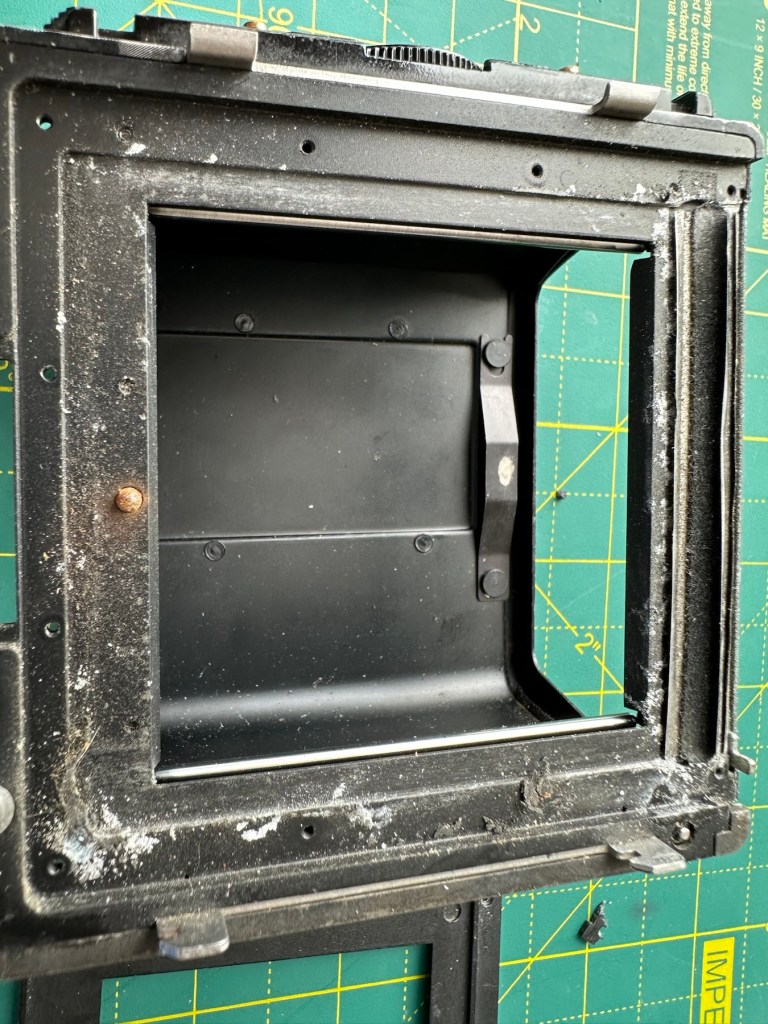
Before AfterDirty seals Damaged frameworkRemoval of the frame presented years of debris and filth that needed cleaning as well as a requirement for some replacement parts
There was a lot of contamination under the plate when it was removed, I was quite amazed just how bad it was. This has since been cleaned prior to the new frame and seals being put back into place. When everything is re assembled there will be another clean, I will also be using compressed air to finally clear any remaining debris from the roll back. Edit: the 3D printed frame has arrived and to be totally truthful it’s not much good. The part where the slide goes in is not usable and I’m not confident this will be as light tight as first thought.
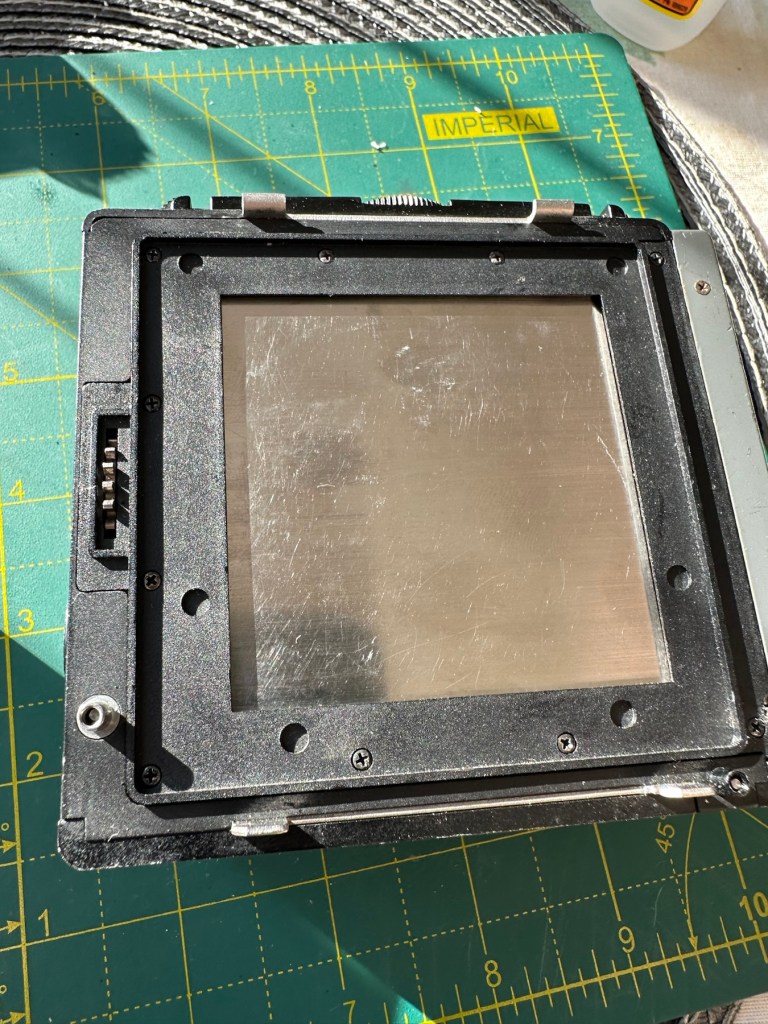
Good front frame from the donor spare unit
However the spare unit I purchased has a good front frame that just needed a tiny bit of adjustment to work, I’m now confident the roll unit will work as it should.
Light seals:
To be honest there are only two immediate areas of concern that I can see. All other light seals seem to be sufficient. I already have plenty of light seals material from where I fix other cameras so this should be simple enough to replace.
New and old light seals replaced
There were only two pieces that needed replacing, these were both on the roll film back. All other light seals were fine.
Rust spots:
These are purely external and there are no issues inside the cartridge. However I may just give them a very fine rub down and a quick spray with a black gloss to just make them look better. Then again I may not, and then I’ll attend to the cosmetics once I have completed the project. Edit: I’ve decided to leave this for the moment and will attend to this sometime in the future as it is not affecting anything at this stage.
Film cartridge:
Again this has just been cleaned and some contamination has been removed from all rollers and guides within. I have adjusted the back plate pressure pad for the film and also given this a good clean to remove any contaminants. I’m happy the internal cartridge is in a good condition and only requires a light clean. This cartridge is superior to the one I have obtained as a spare so this will be the one i work with. I have replaced all the exterior screws to replace the original ones as they were all a little crusty and contaminated.
New screws. I will touch the heads up with black dye
The whole roll section has been cleaned with tack cloths and compressed air to ensure all contaminants have been removed.
I’m going to store the whole roll film back, in a sealed plastic bag with some Silica gel packs to try and remedy the mustiness that I mentioned at the beginning of this post, though I must admit after all the cleaning and replacement of parts, the issue has reduced immensely. Some exposure to sunlight on a window seal usually helps immensely. That’s where it’s sitting for the moment. It’ll go in the bag with some silica gel, during the more inclement weather.
Outcome:
This part has been the most demanding part of this project so far. I’ve looked into the possibility of using 3D made parts, but I must admit defeat here. The items are about 80% ok, there are holes missing that should be there and as it’s a two piece fix you are then introducing glues, and potentially increasing the chances of light accessing the one area you want dark. Maybe in time they may perfect it. I was exceptionally lucky to obtain a spares unit for literally one pence. Yes one whole pence. It cost £5:75 to post making a total of £5:76GBP, but in many aspects some of its parts were far superior to what I already had. I am happy that this part of the build is now complete.
All good to go. Please keep an eye on the other blog posts that are coming regarding this project.
Can’t get to turn on unfortunately. No battery cover. Any questions please ask
EBay
Dirty unit No battery cover
I know, there is no battery cover, however I have already sourced a seller of one if needed. This item looks quite dirty so a good soak might be the order of the day to get started. I’ll wait for its arrival before I jump to order any other bits for it.
Now as I’ve said in the past these units fall into that crazy price category on the selling platforms as the “New Antiques” of today. For an item that was low cost, somewhere between £25-40GBP when it came on the market, they can certainly command a wide range of crazy prices, here is an example of price ranges from today:
The massive range in prices for these units
This one I purchased today only came up for sale about 3 hrs ago and I thought it would have been snapped up by now, it hadn’t so I didn’t hang around any longer and purchased it for a total of £16:38GBP including its delivery. I’m not going to get too smug yet, as for all I know I may have just purchased an empty shell. Let’s wait until it arrives.
Here’s a little history of this unit:
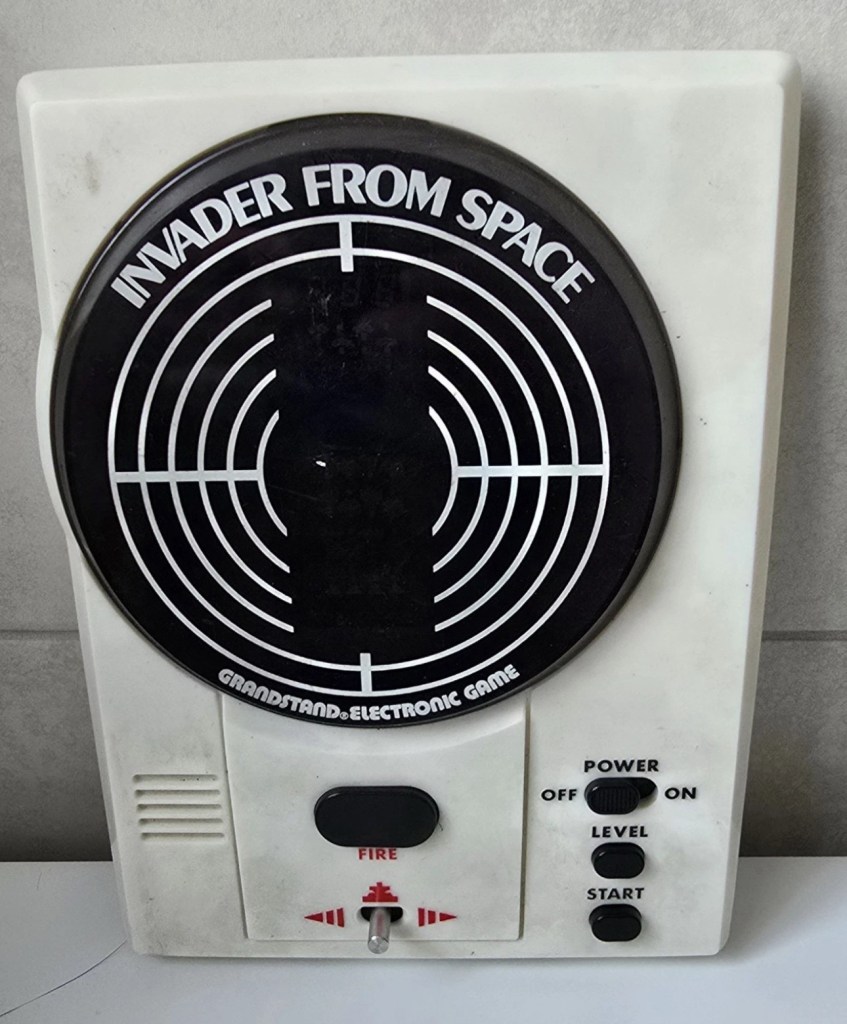
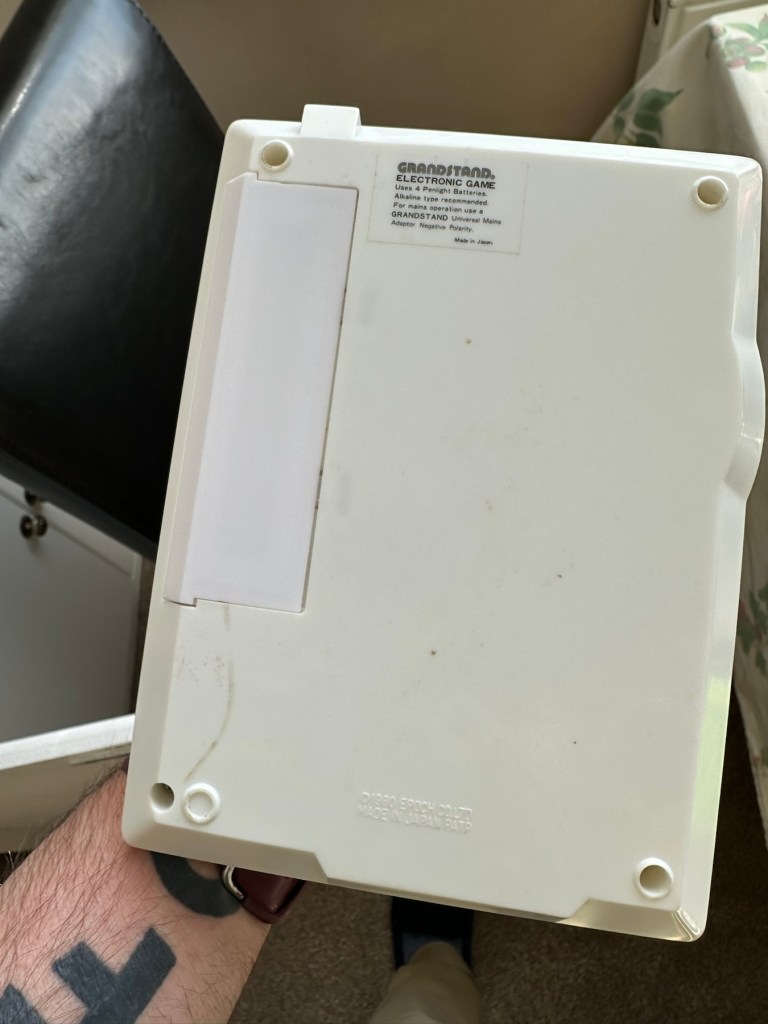
Grandstand “Invader from Space” is a tabletop LED game dating back 45 years to 1980. Four ‘AA’ batteries power the unit or, alternatively, the Grandstand 5.5V@300mA power adapter (or an equivalent power pack) sold separately. The game, licensed to Grandstand, is a copy of Epoch’s “Invader from Space”
The company initially behind the “Grandstand” label was Adam Imports Ltd., (from 1980 Adam Leisure Group Ltd. and by 1983 Adam Leisure Group PLC) founded in 1973 by Chris Rycroft and Les Kenyon of Harrogate, UK. The company initially started as a mail order company and was the single largest supplier of calculators in the UK by 1974. By August 1978, George Bassett had acquired a 75% holding in the capital of Adam Imports for £750,000 cash, plus 60p in the pound of profits before tax in excess of £500,000 for year to December 31, 1978. Adam Imports was re-acquired from George Bassett by Chris Rycroft in 1980. It chiefly imported electronic products from other manufacturers such as VTech, Epoch, Tomy & Entex, selling them in the UK re-branded under the Grandstand name.
Wikipedia and others
So that’s the history
There is a good link to a similar repair on YouTube from a guy I follow named Stez Stix Fix, it’s very much worth a look and he has a great if not sometimes crazy way of diagnosing and repairing items. A cool guy though.
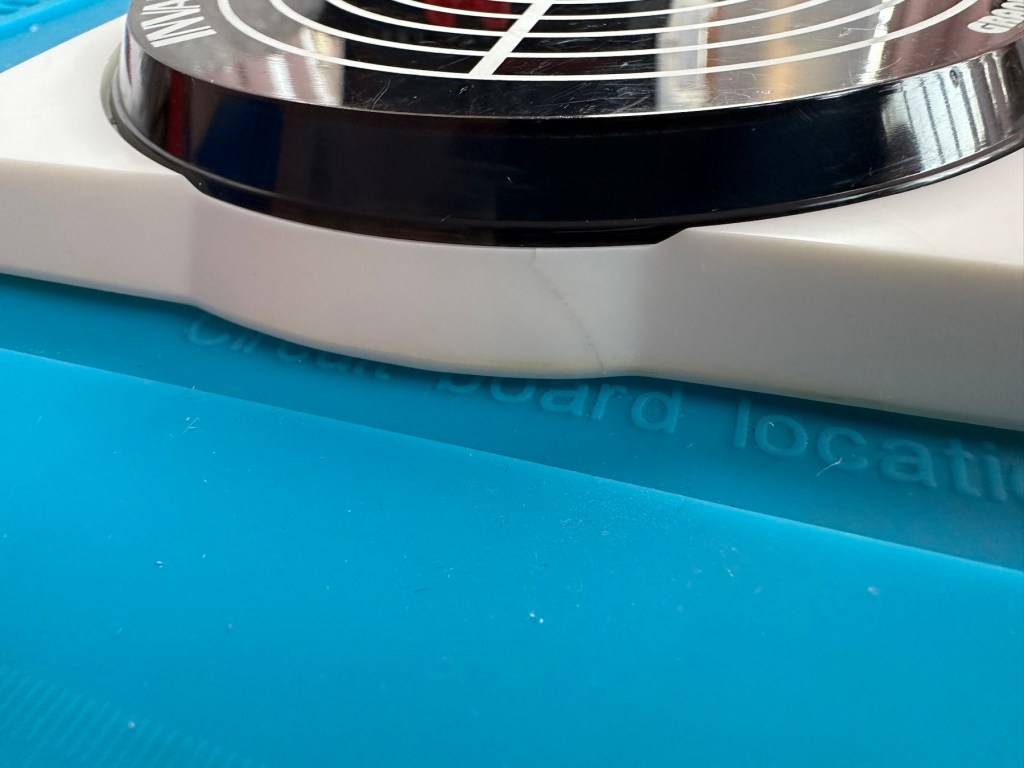
The Grandstand invaders from space game
Anyway back to my own purchase.
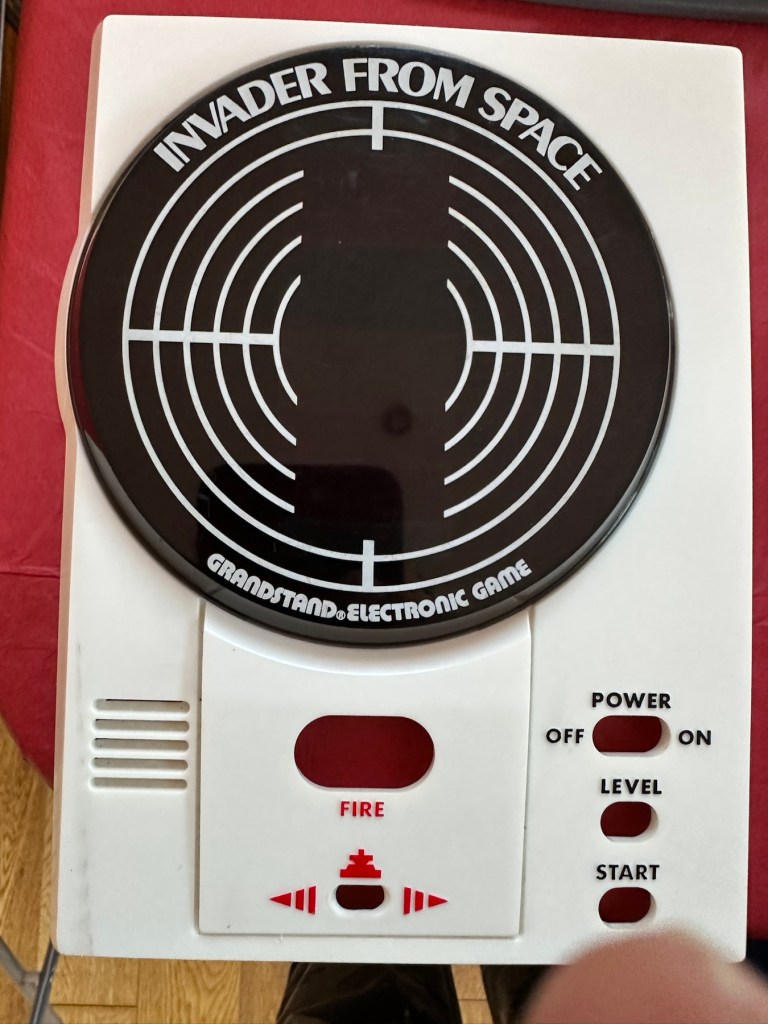
Assessment:
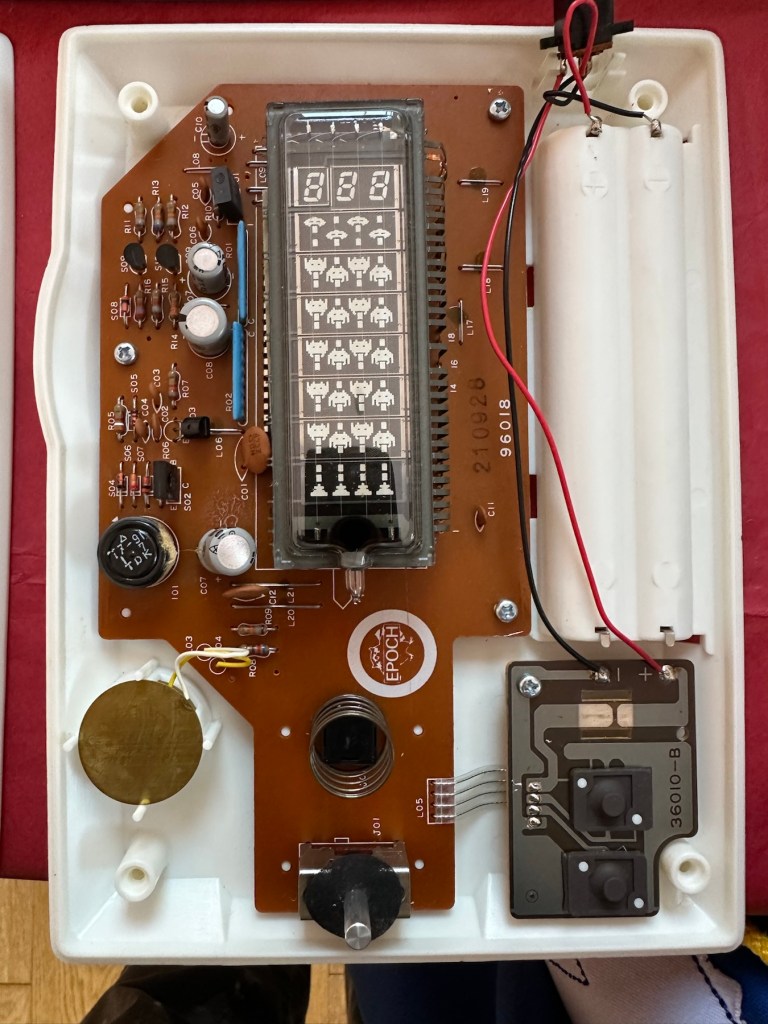
I must admit the unit doesn’t look as dirty as in the original pictures. The battery cover is missing and there is a crack in the side and a deep scar at the bottom, this won’t be too much of an issue if I can weld it all back together. I will still give it a good soak to clean it all up though. I’ve put four batteries in place, and the unit is definitely dead. There are no loose wires, voltages are getting around the board according to the multimeter and nothing is getting hot. There appears to be no short circuits, and then I notice this, capacitor CO7, slight bulge on top and what looks like leakage from the bottom. We have a candidate as to why this unit is not working.
CO7 looking unhealthy to me, you can see the component to the left that looks like it’s covered in a fur ball. The result of the old capacitor “coughing”
I’ll whip this out and see what we have but I suspect this old capacitor has failed and is causing an issue, heres hoping I have a suitable replacement.
Repair:
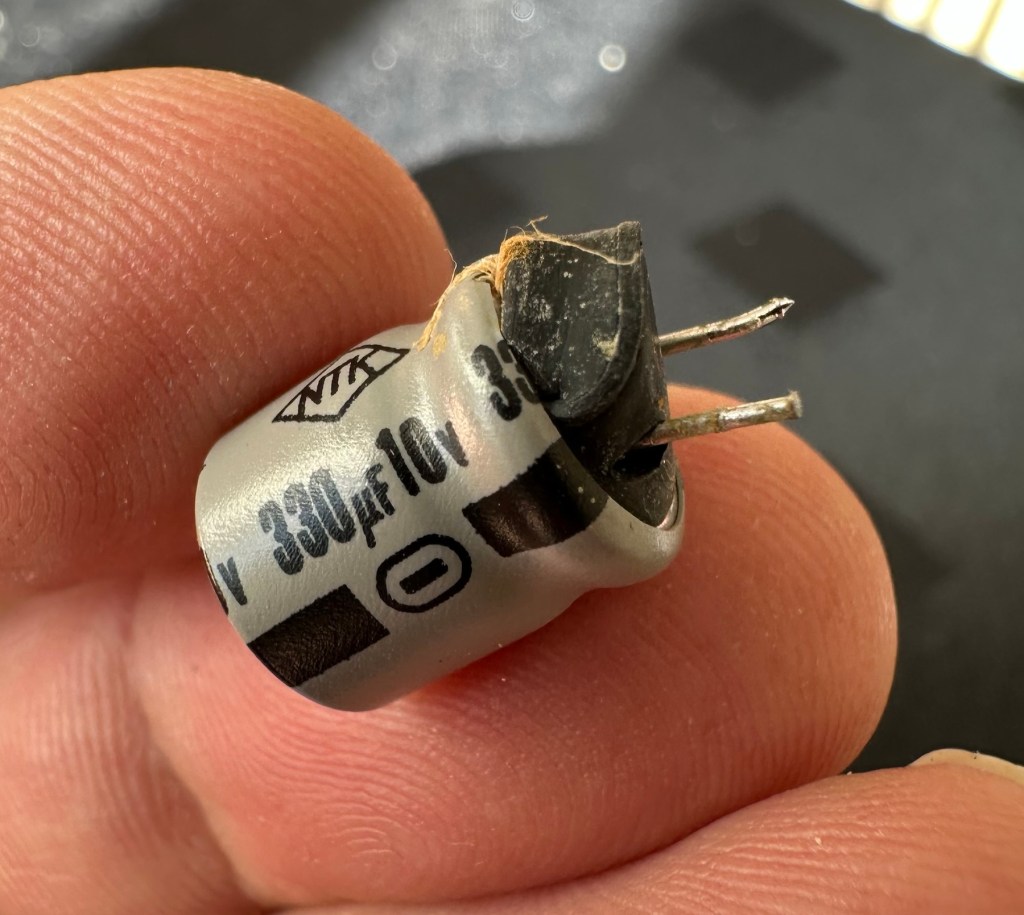
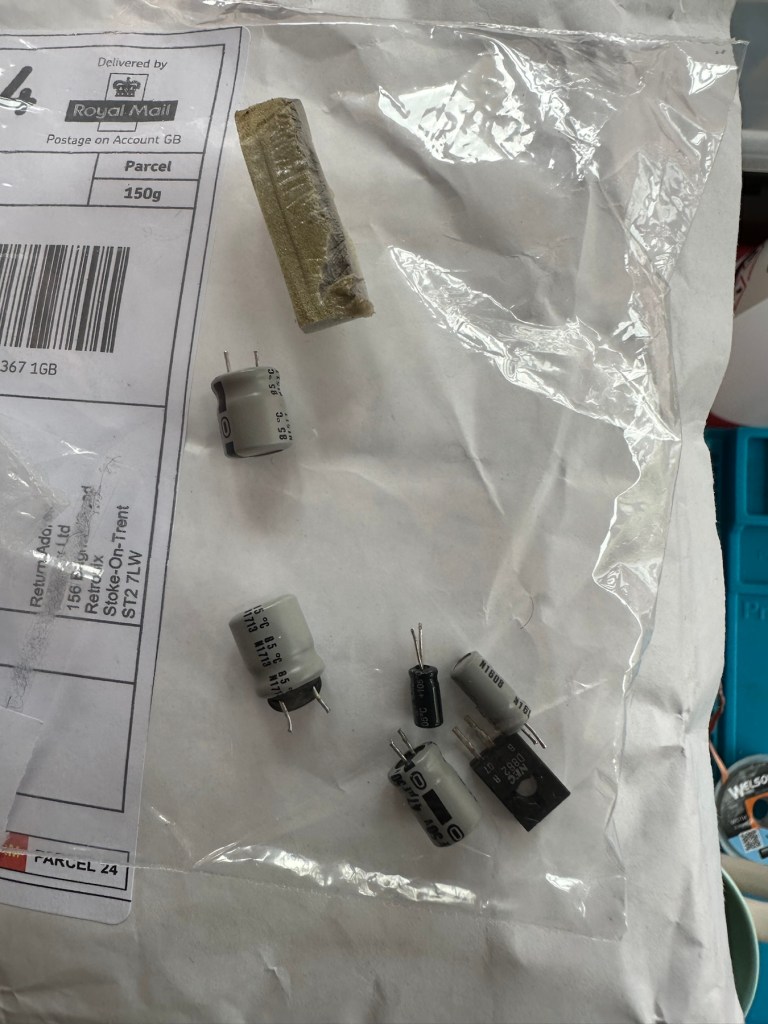
This little beast is a 330uf 10v electrolytic capacitor. I have none available so have had to purchase a pack of ten. These should be here in the next few days. There are three other old electrolytic capacitors that I will also change whilst I’m in there, as these are all likely to fail at some point soon. These components are now all around 45 years old, it’s a wise move to change them out.
One very dead capacitor removed.
I’ve ordered a 3D printed battery cover to replace the one that is missing. This should be here in a couple of weeks.
Whilst waiting I have cleaned the inside and outside of the casing as best I can. I still have a piece of broken surround to repair, however this is just a simple glue and a little bit of support job.
Case inside and out cleaned
Broken surround repaired
The surround that was broken has been repaired and secured with some nylon soaked in a superglue compound inside the casing. It’s rock solid. Outside the break is hardly noticeable. The break is secure and much stronger now.
New capacitor here
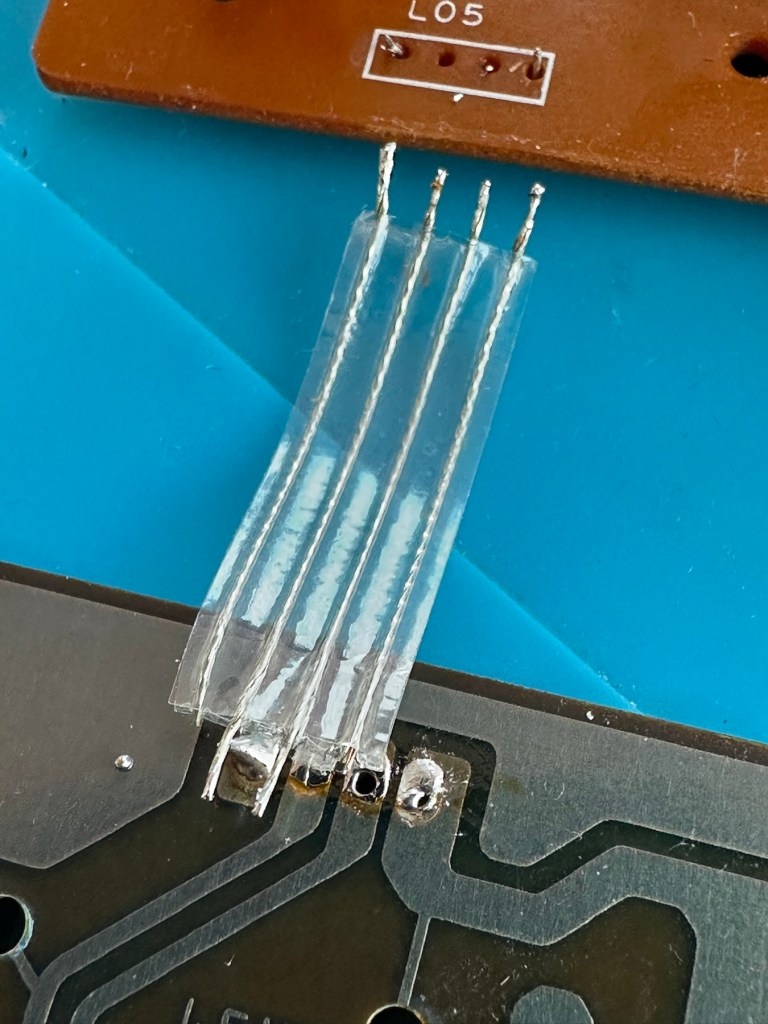
I’ve replaced all the offending capacitors and the unit remains dead. I’ve reflowed most of the board as there were some dry solder joints. I’ve also rewired the bridge from the control panel to the main board as one of the wires here had broken.
Bridge required resoldering
After using the multimeter to check some traces and components it’s now pointing to this component (a power transistor D882) being the cause of this catastrophic breakdown as its readings are all over the place. I suspect this item has overheated, the capacitor has blown and then it’s just died itself. I’m probably wrong, but I know what I mean. Probably just a catastrophic chain of events that all contributed to the units demise.
D882 transistor – power regulator
And as usual I have none available so will have to send for some new ones. The new components have arrived and the new power transistor has taken its place on the board. Now reassembled I place some new batteries in and the unit comes to life. It was the power transistor at fault, I should have really checked here first after seeing that damaged capacitor at the beginning.
All old components removed and replaced in this unit
Not to worry though as it’s had a good overhaul and has been totally recapped as a precaution. I’ve used some conformal coating on a few tracks that had some copper exposed after a good clean, to ensure they don’t deteriorate any further.
It has life
The unit is looking really good and these items were traditionally very loud and this certainly is. It’s working well just as it should do and I’m exceptionally happy with this repair. I’m still awaiting the battery cover that I have had 3D printed and this should be here in the next week to complete the fix.
No scoreHere we go3D printed cover arrived. Minor adjustments needed but in all a good purchase
So with that I will bring this build to a conclusion. It has been a fun project, I’ve learned a number of things about this circuit board and gained valuable knowledge.
But best of all we have rescued another item and saved it from landfill.
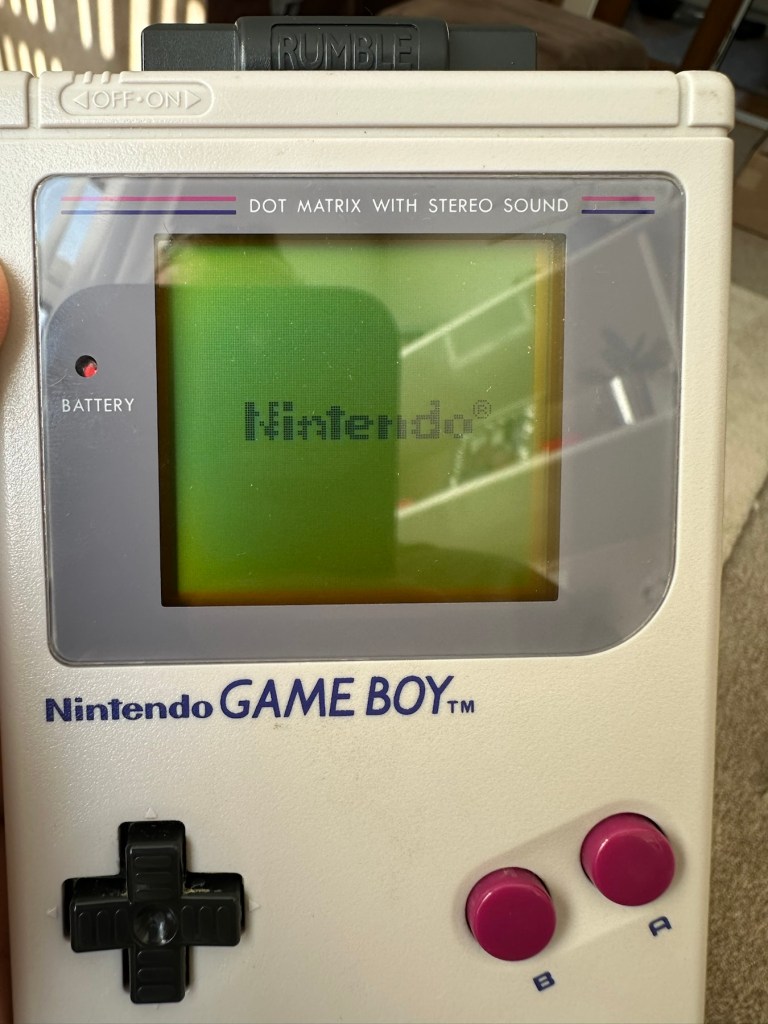
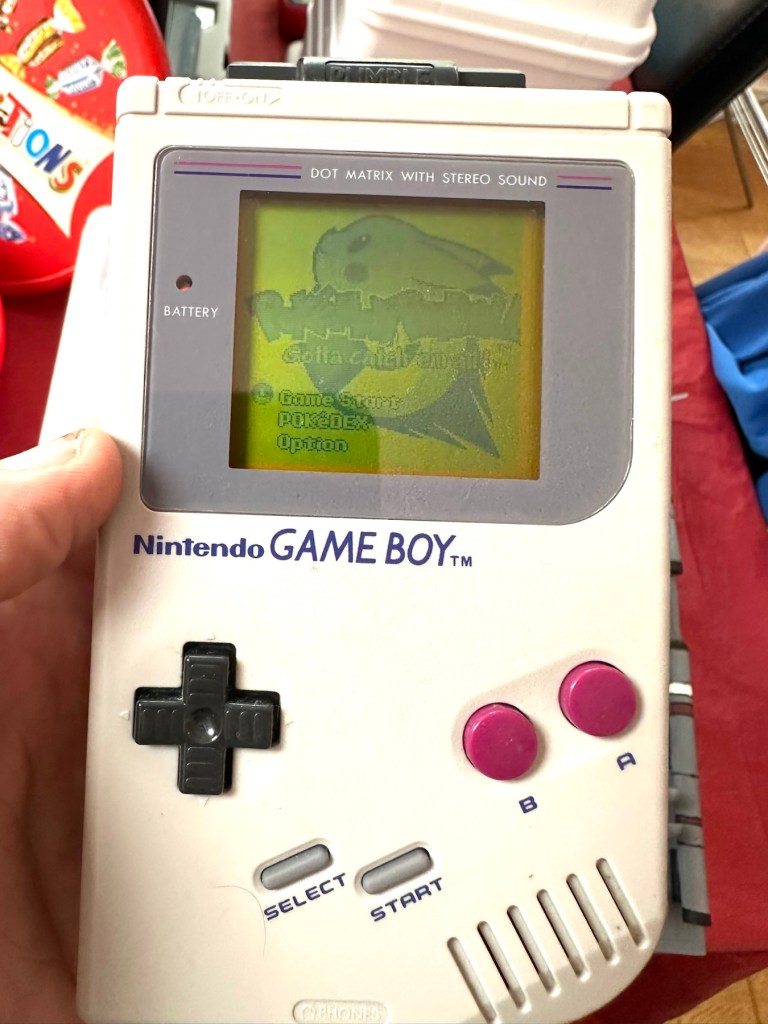
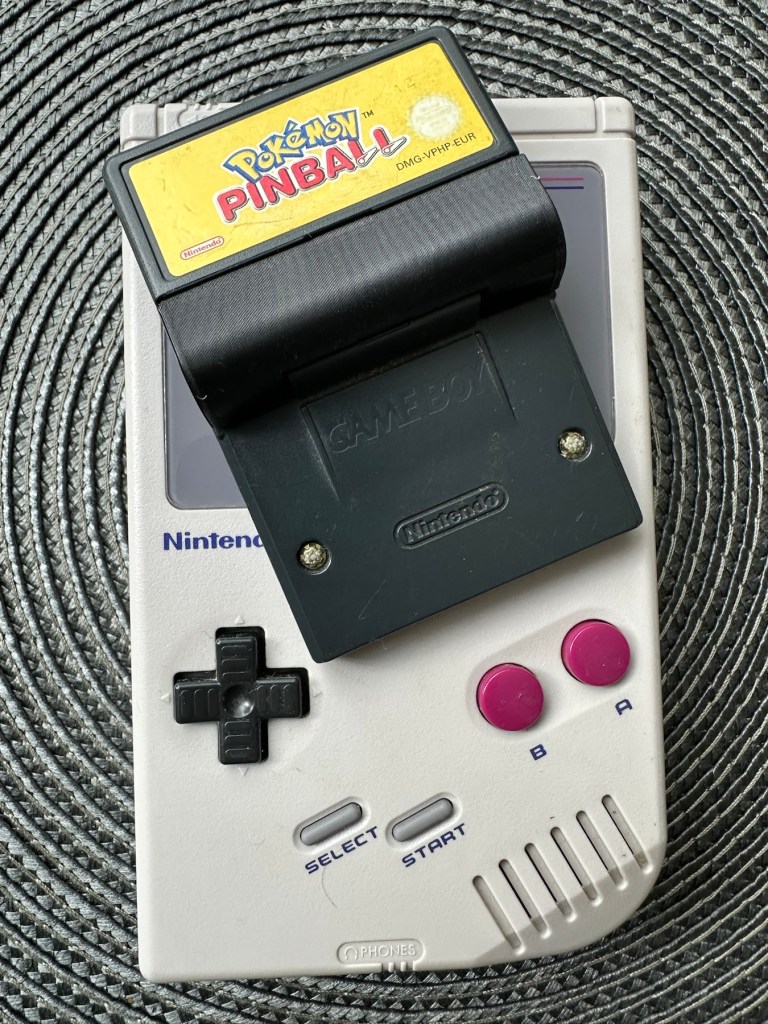
You will receive what you see in the photos, please look at the photos as this is part of my description to show you what you would be receiving. Please note the game comes up with the main Game Boy & Nintendo screen & then won’t go any further, as you can see👀in the photo.
Any questions please feel free to ask.
EBay
No getting past this pointOriginal Nintendo pinball game – Non operational
Hopefully this will be a simple repair, but who knows it might just be a little more technical.
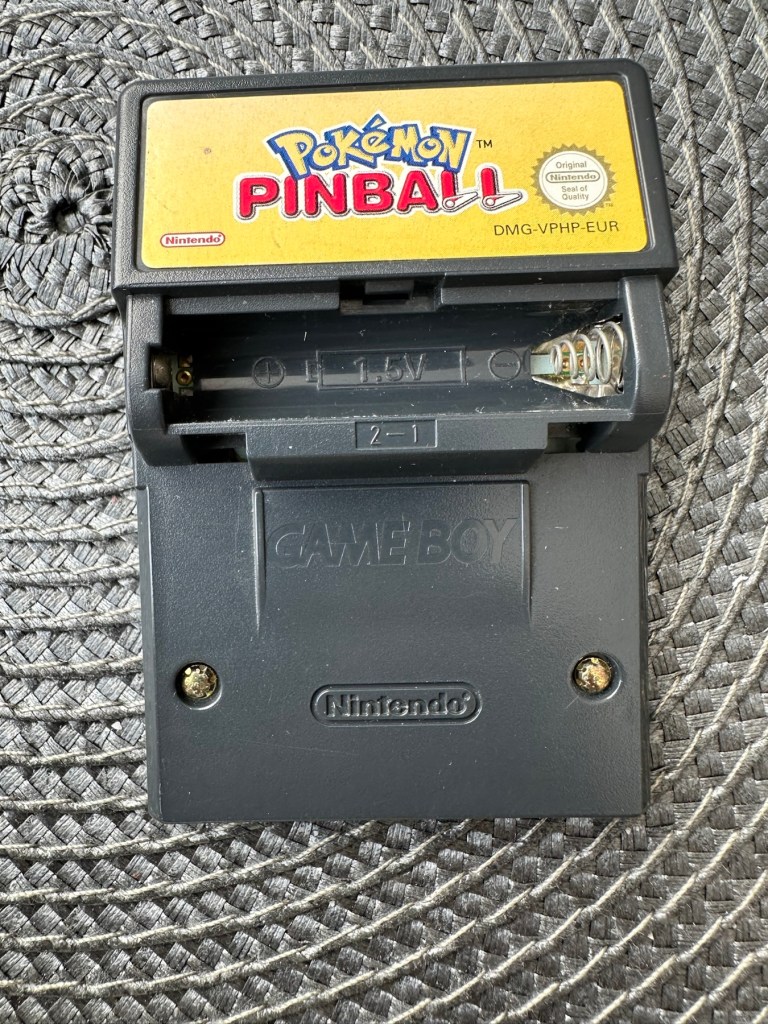
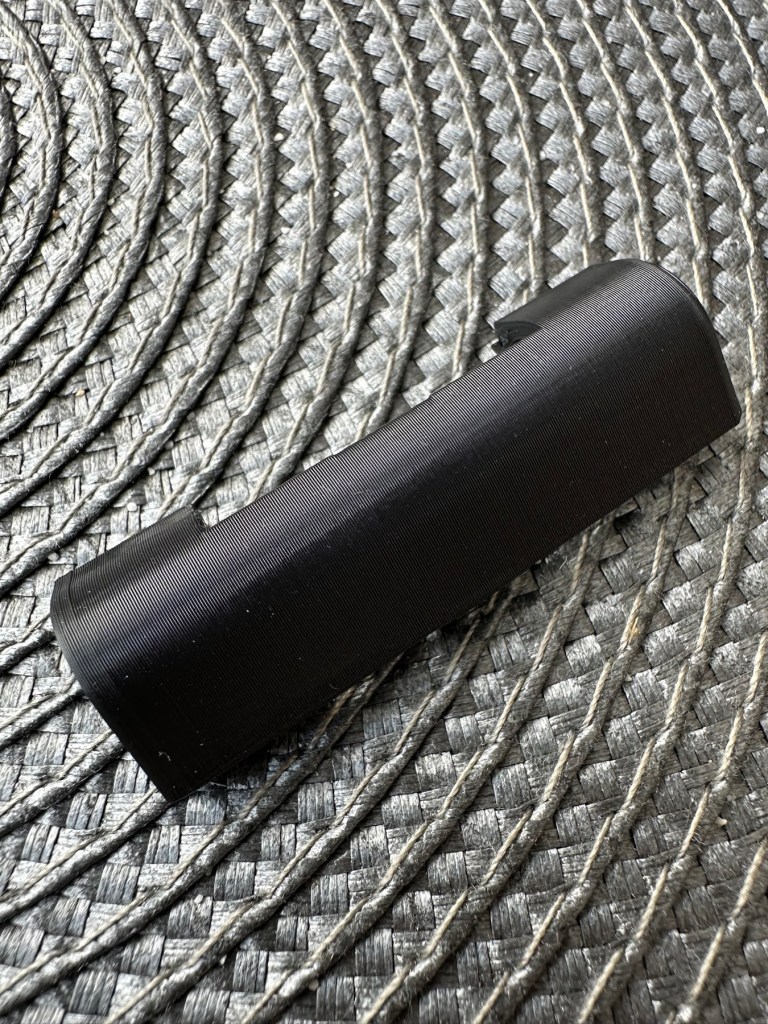
This game is built for the game boy colour console and is an original Nintendo product, it is the Pokémon pinball game. I’ve purchased something I never normally buy and usually detest buying, an item with the battery cover missing. Damn it, there is a fortune waiting to be made by anyone who owns a decent 3D printer, with the amount of missing battery covers that are waiting to be reproduced out there. Edit: ( Just looked on line and it seems the gaming community are already on the case, loads of options available, great to see) Anyway I’ve brought this unit as it can either be kept to await a suitable battery cover or passed straight on. Edit#2: I have, in anticipation of its arrival already ordered a suitable 3D replacement cover from a UK company. It was probably the best priced and best looking print to be honest, some of the others looked a little rough and postage was excessive to say the least. These guys at Cool spot gaming were the best in my opinion.
Released in Japan in 1999 this game made it to European shores in 2000.
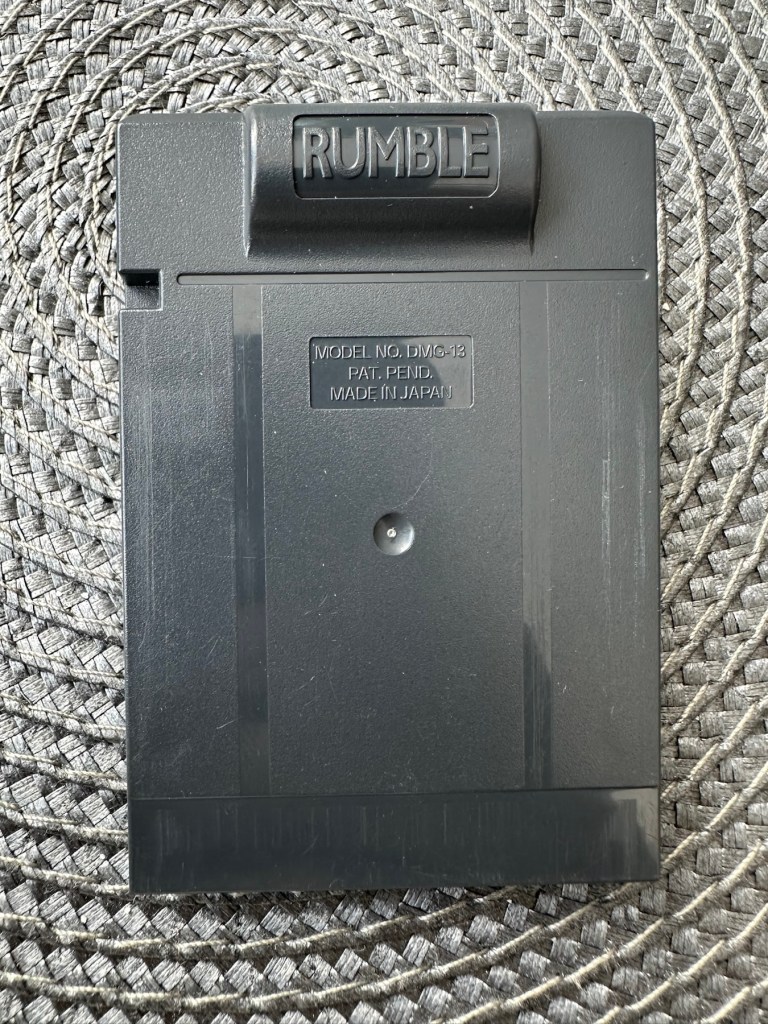
These games came with a rumble pack at the top of the cartridge that simulates the vibrations of a normal pinball machine, and I believe this is what the single cell AAA battery is for. And as it is a black cartridge this indicates it can be used on the GameBoy colour and original versions. I have purchased this for about half the price that a good working one with battery cover sells for, now that I’ve had to pay for a 3D replacement battery cover I now move into the higher end price of the cartridge valuation, however I do have a few pounds worth of wriggle room should I decide to sell, considering most of the ones on sale at the moment are missing the battery cover and commanding horrendously high prices. I’m comfortable with that. That said it will go into my personal GameBoy collection anyway. Let’s get it working.
Here’s a link to the actual 3D print program for the battery cover on Thingiverse, if you should ever wish to print one yourself. I have absolutely no idea about 3D printing so this is just like brain surgery to me: 3D print program
Assessment
A nice tidy little package has arrived clean, battery cover missing as stated and exterior looks nice and clean. Original label is intact.
Repair:
New 3D battery cover has arrived and this fits perfectly, no issues here.
Missing battery cover Clean and tidyNew 3D printed battery cover
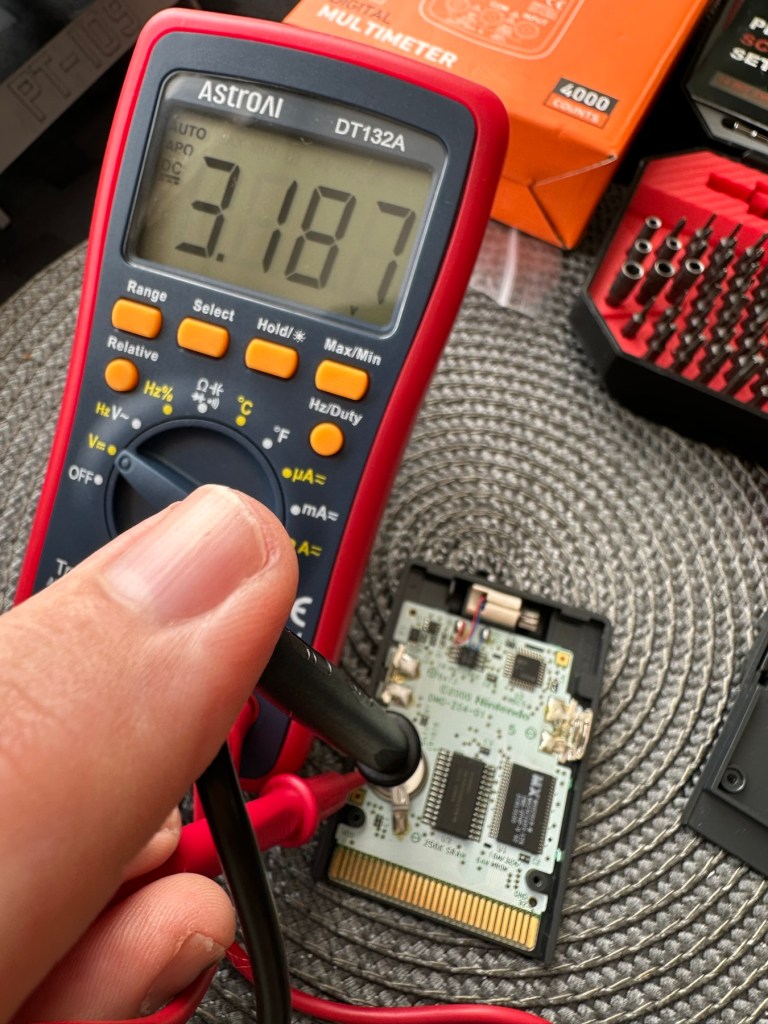
I’ve placed the unit into my GameBoy to check what occurs, and just as posted it does not progress beyond the Nintendo start up screen. I’ve opened the cartridge to do some basic checks and cleaning, the cartridge contacts have been cleaned using an eraser and some IPA, but in all honesty they were already pretty clean. I’ve checked the onboard battery and this is healthy at 3v as it should be. Cleaning competed, I recheck the game and the results are the same.
Game stops at this pointBoard levelBattery testedContacts cleaned
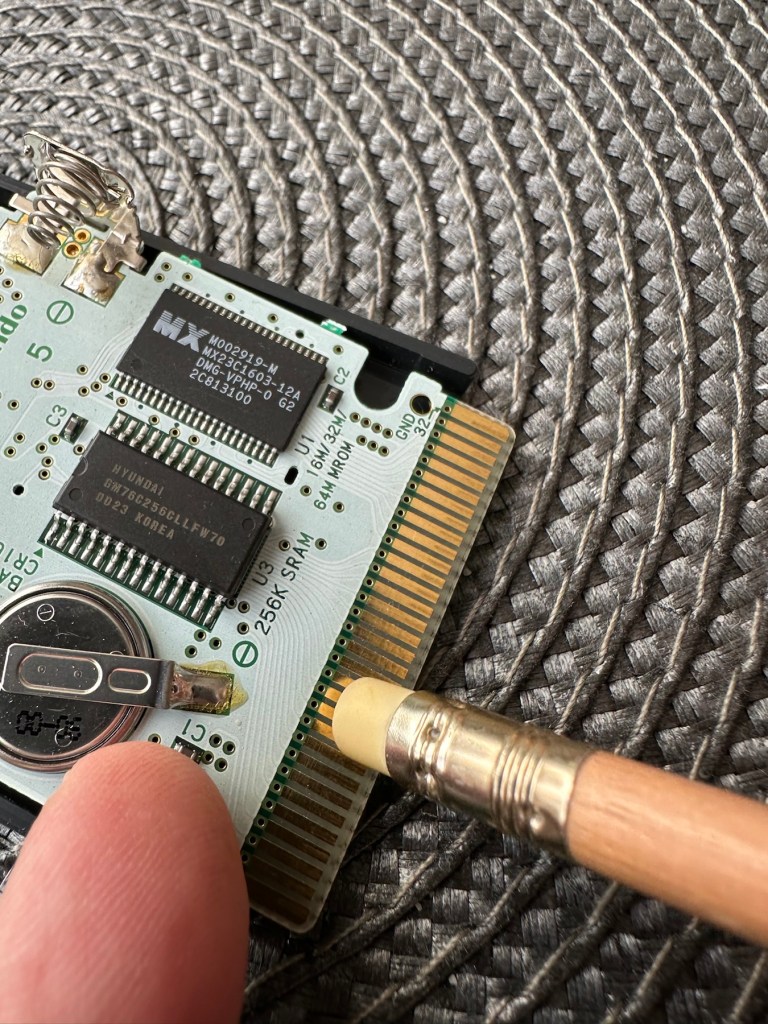
Next I’m going to reflow the joints on the ROM chip on the right hand side of the board, the one that has the letters MX on it. These pins or the ones on the RAM chip directly beside it are well known for having bad contacts and often need reflowing/tacking down. It’s something that seems to occur over a period of time on these game cartridges, just plain bad contacts.
ROM chip on the right with the RAM chip on the left, both are notorious for developing loose contacts
All items on the board have been reflowed using hot air, with extra attention being paid to the two chips described in the picture above. I removed the battery prior to doing this as the last thing you want is exploding batteries. With the battery back in place and the game now reassembled it’s now time to test.
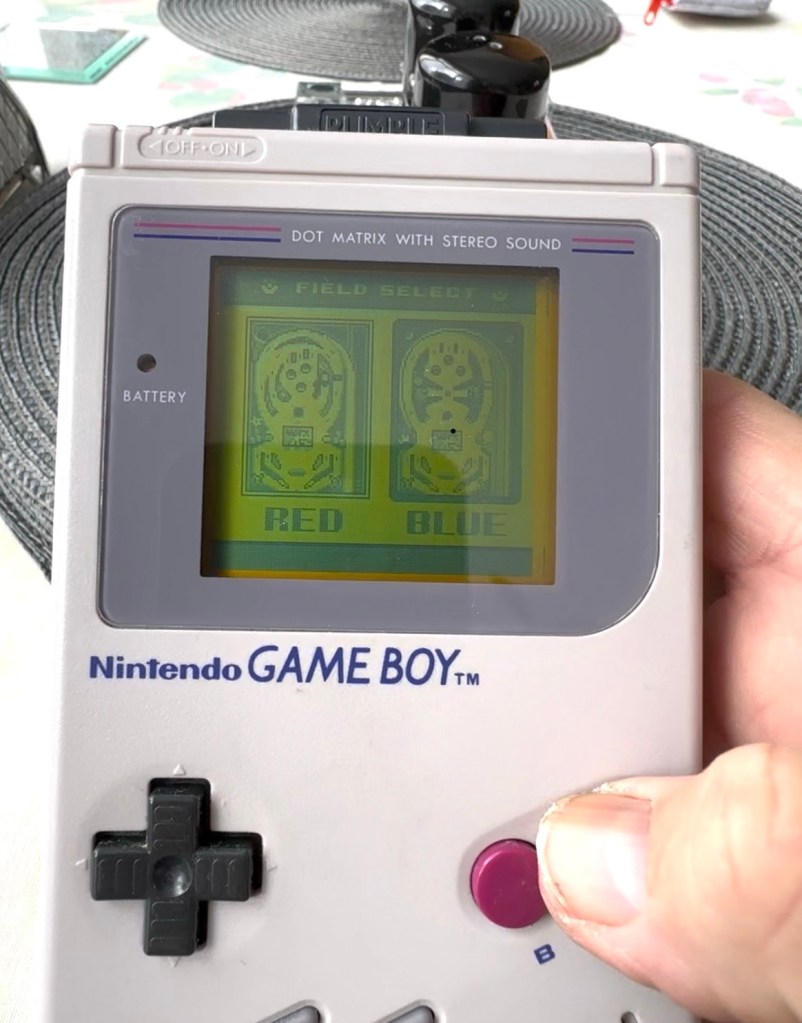
And it works including the rumble pack feature.
Pokémon Working
I can only presume the hot air reflow has fixed an issue with joint continuity on one of these chips as expected. Excellent, another item has been saved from the bin and can now be added to my collection.
Game workingComplete with new 3D printed battery cover
Another little project to put to bed, there always seems to be an issue with these games after a good number of years where the solder joints just become unstable. I don’t know if it was the solder quality they used all those years ago or the heavy use and abuse the games endured during their hey day. At least we can fix them and ensure they are still good to go and enjoy for a few more years yet.
To build a usable, basic issue, medium format camera (Bronica SQ-A) from damaged items and spare parts, for as little outlay as possible and shoot one black and white, and one colour roll of film as proof of its successful completion.
Getting started:
Building a camera from damaged parts is no easy task when the name happens to be a high end brand and any parts that are available, are being snapped up by others to service their own stock or to break up for sellable parts. I’m going to keep a running total to try and build this as cheaply as possible, and to keep track of this total I’m going to use my trusty Psion Organiser II LZ from 1989 to keep a tally.
This may be a strange situation where Pt:2 and Pt:3 of this project gets published before Pt:1, quite simply Pt:1, the film back. needs a fair bit of work still doing to it.
Third purchase:
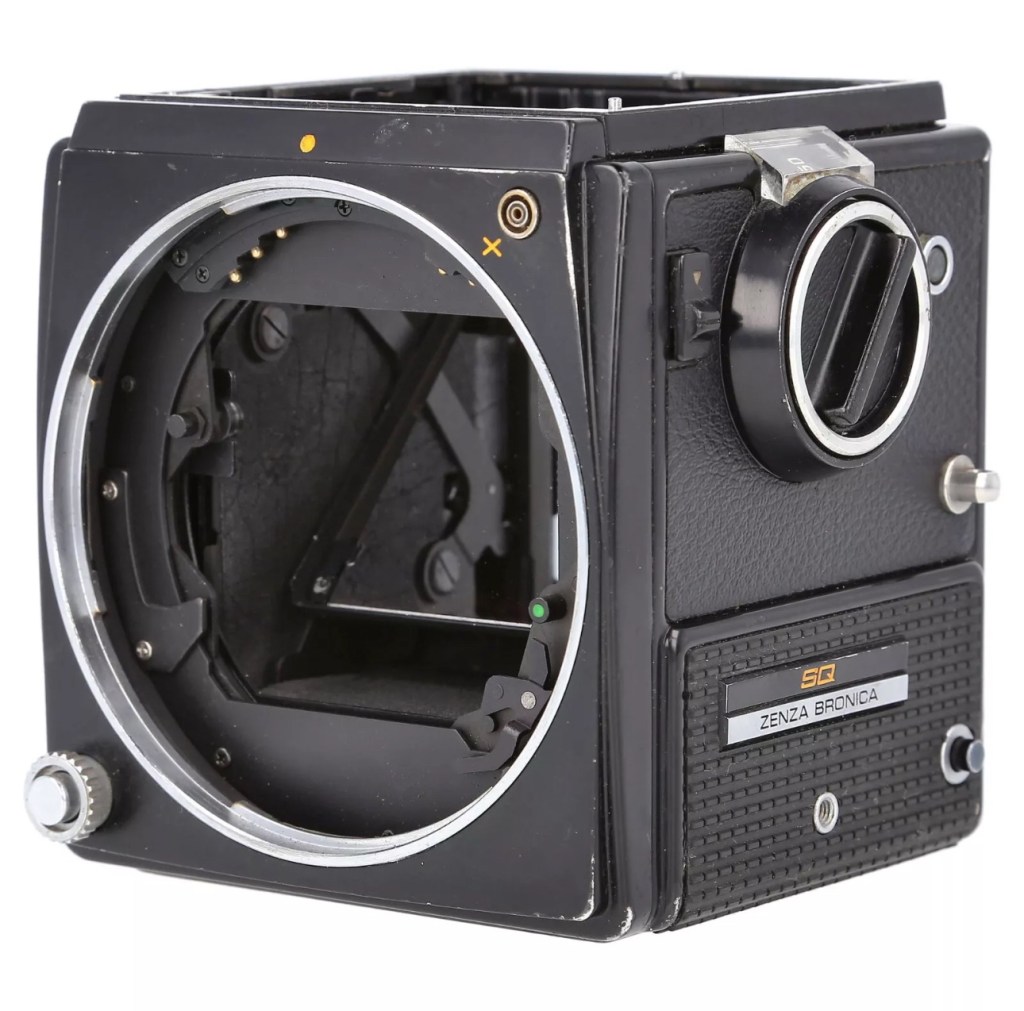
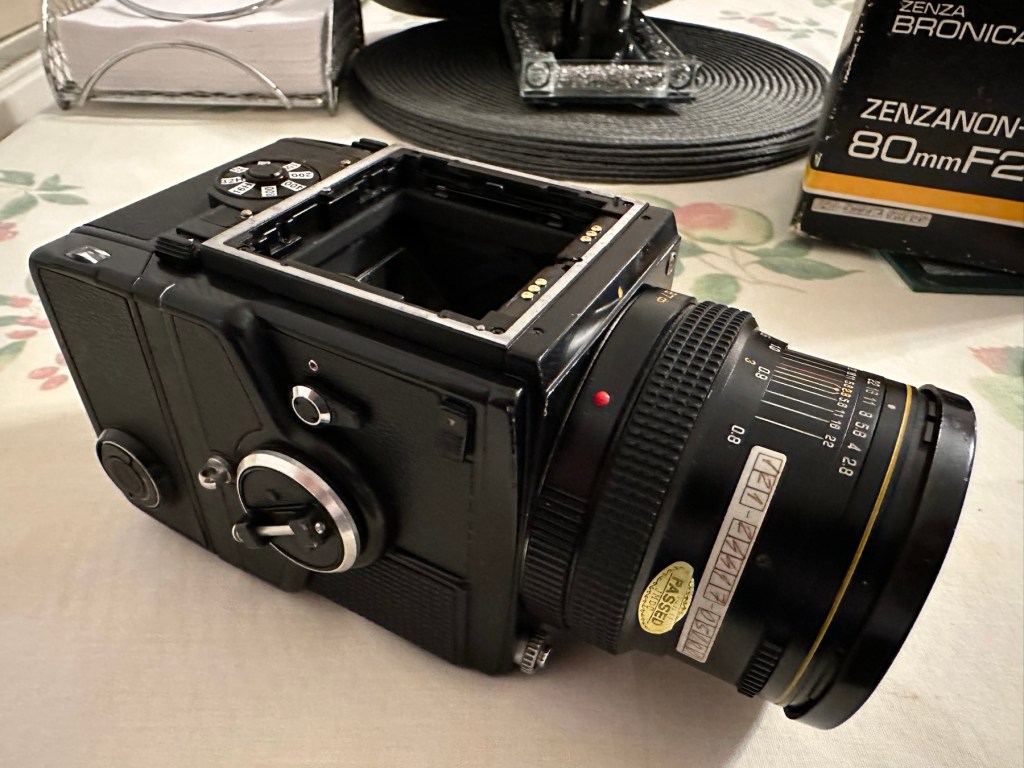
And the third purchase is for an SQ body. This appears to be well used, but appears to be in a working condition. Here’s what the listing stated:
Zenza Bronica SQ Body Only / Medium Format 6×6 Camera
Condition:
Used but still in good usable condition with usual signs of use – see photos for details please. Fully tested and in perfect working order. Supplied with: Camera body as pictured.
EBay
Now I’m happy with this purchase as well. Not quite the SQ-A I wanted but to be honest the only difference is mirror lock up and metering that I don’t really need so I can live with that, we all managed prior to the metering being done for us, I’m sure we will all survive now . (Oh how we have been pandered over the years)
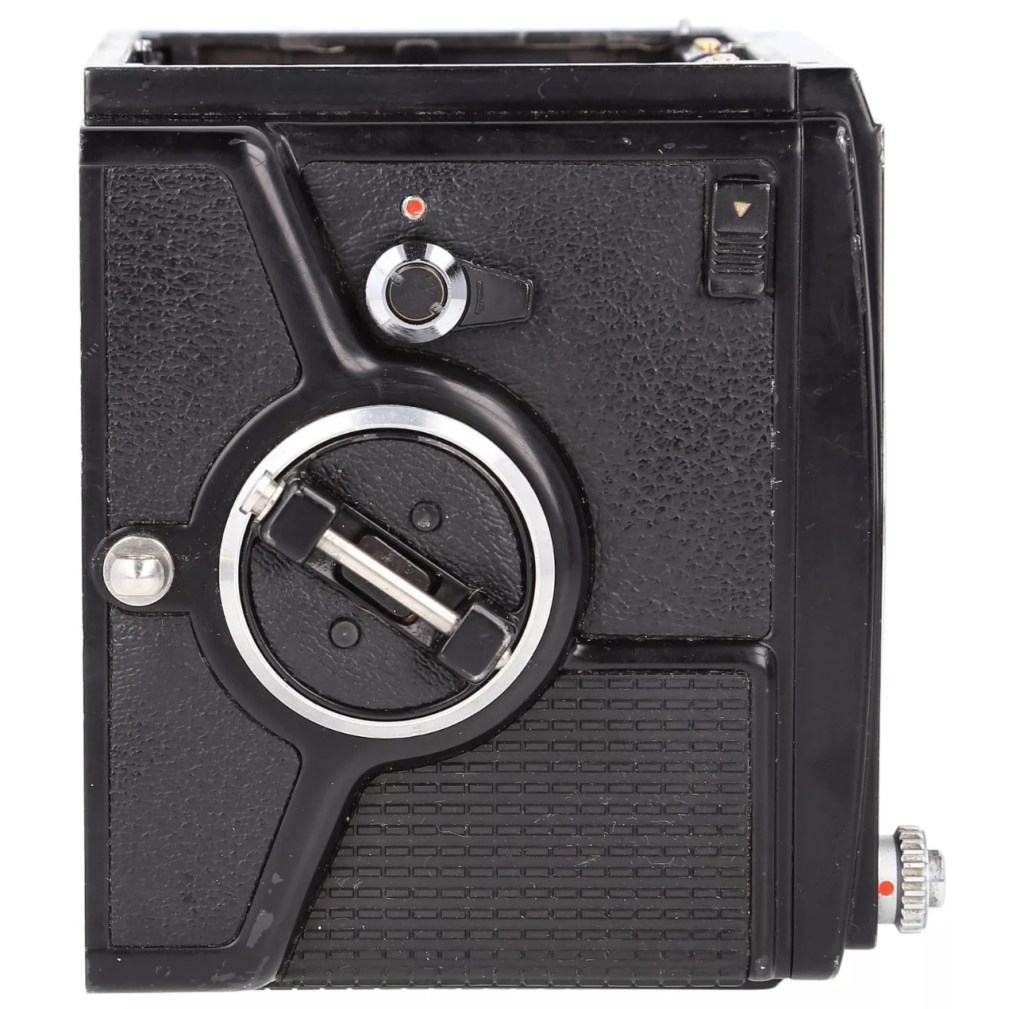
The Bronica SQ body I have purchased
I’ve paid the grand total if £73:75GBP for this body including the postage. There are some bits I will require to complete the body, namely a focus screen and waist level finder that could be a bit pricey, and a winder for the body. Now, the winders are pathetically expensive at around £60 for a bit of plastic. I know a guy who 3D prints a good alternative for a fraction of the price. And that will be the route that I take.
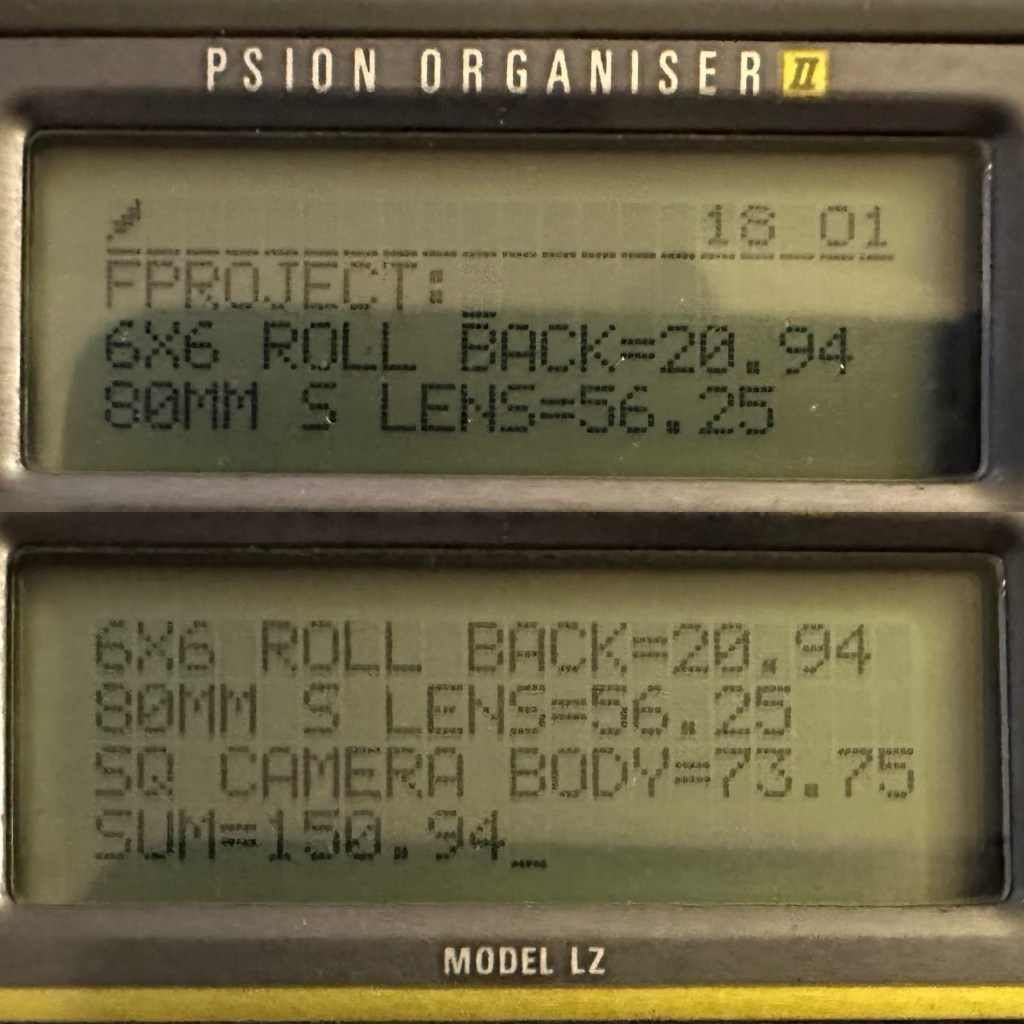
So over to my trusty old Psion II LZ for the running total for these first three items.
Current running total
So the total for these three items comes in at a total of £150:94GBP, and in Bronica terms this is extremely reasonable!
Assessment:
The parcel has arrived and yet again I’m really happy with this purchase. Very well packaged, a very faint age related mustiness that I guess should only be expected on an item that is now 45 years old. It seems to work just fine. I have connected the lens and that seems to be working ok, I just need to verify the shutter speeds are all correct. There is no battery in the base and this needs replacing as this is what controls the shutter speeds. Without the battery the mechanical shutter works, but only at a speed of 1/500 of a second. (Edit: the battery has arrived and after testing i can confirm that all speeds are operating as expected). The film back fits fine but I still have some work to do on that before I can say that this part is working ok. Overall I’m satisfied with what I have for the price I have paid.
No batteryNo winder A selection of covers for the sides, top and bottom are required
Repairs:
Not so much repairs but additions that are required, such as a crank winder arm and a focus screen, a new battery and a selection of covers to protect the central unit in transport. All horrendously over priced and i will deal with these items in Pt:4 of this project.
Outcome:
Current situation, looking good, smelling old. Not me, the camera 😂
We are almost there. The lens is fine, the main body is fine and just needs some final testing. The film cartridge is the item that needs the most attention and this will hopefully be finished when I have the new front plate that is being 3D printed. The next instalment will be just a tidy up with all the little bits I need to complete the build. These small pieces in Bronica terms are so bloody expensive, or should I say extortionate, can be obtained at a fraction of the cost elsewhere, you just need to shop around, if you are happy to have a non named spare part as a stand in. I’m happy with that as these parts have absolutely no effect on how the camera performs, and what we want to achieve at the end of this project, that being a well exposed two rolls of negatives that will produce a number of well presented photographs.
All good to go. Please keep an eye on the other blog posts that are coming regarding this project.
My favourite space mission and one I have followed for many years. I even have models and posters around the house. I even have an orchid impersonating the model (see post picture)
It will be a sad day when it all shuts down, here’s hoping we get to see their 50th anniversary’s.
Great post from Hackaday, read some of the comments as well, some excellent conversations taking place…
Saying farewell is hard, and in the case of the Voyager 1 & 2 spacecraft doubly so, seeing as how they have been with us for more than 47 years. ……


You must be logged in to post a comment.