Retr0bright – What’s that then?

It’s a process used to restore old Yellowed plastic back to its original state. Or at least it’s a way to try to. Read on and I’ll explain.

(Here is my understanding of the ABS plastic Yellowing process. There may be slight inaccuracies for which i apologise. Please do your own research on the subject. Further enquiries may be needed to satisfy your curious minds!)

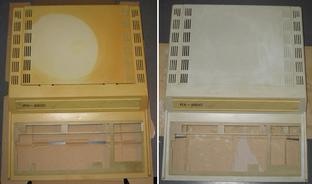
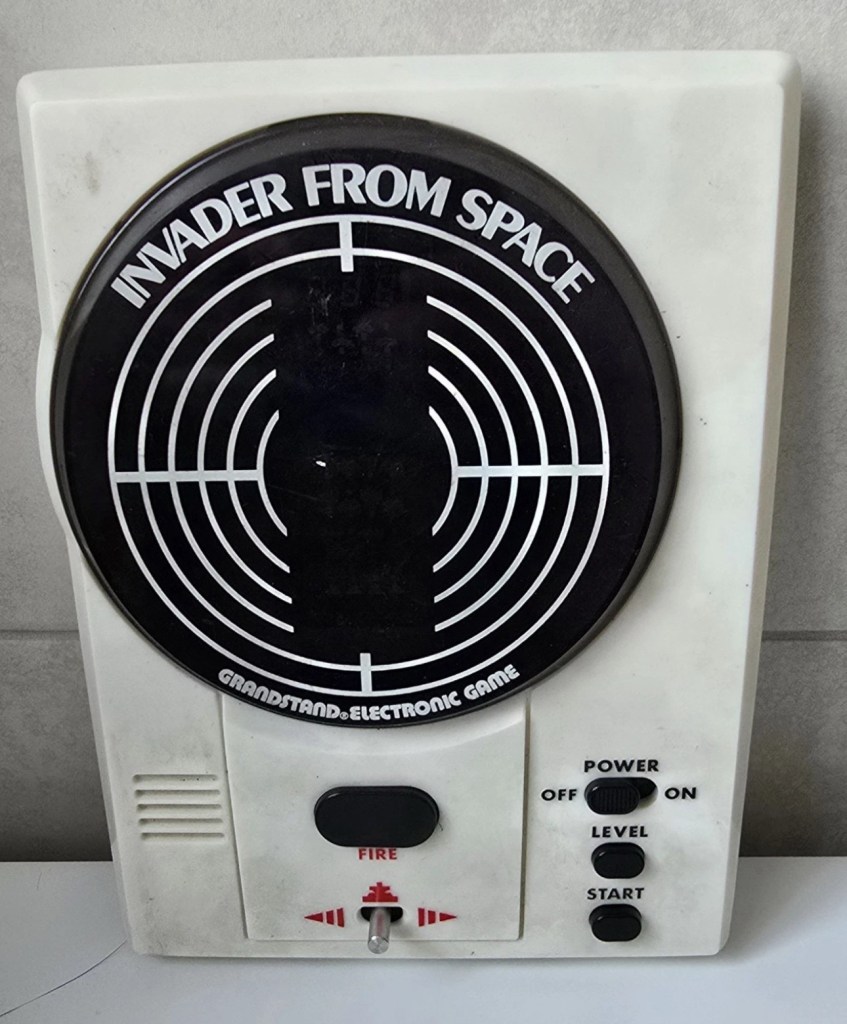
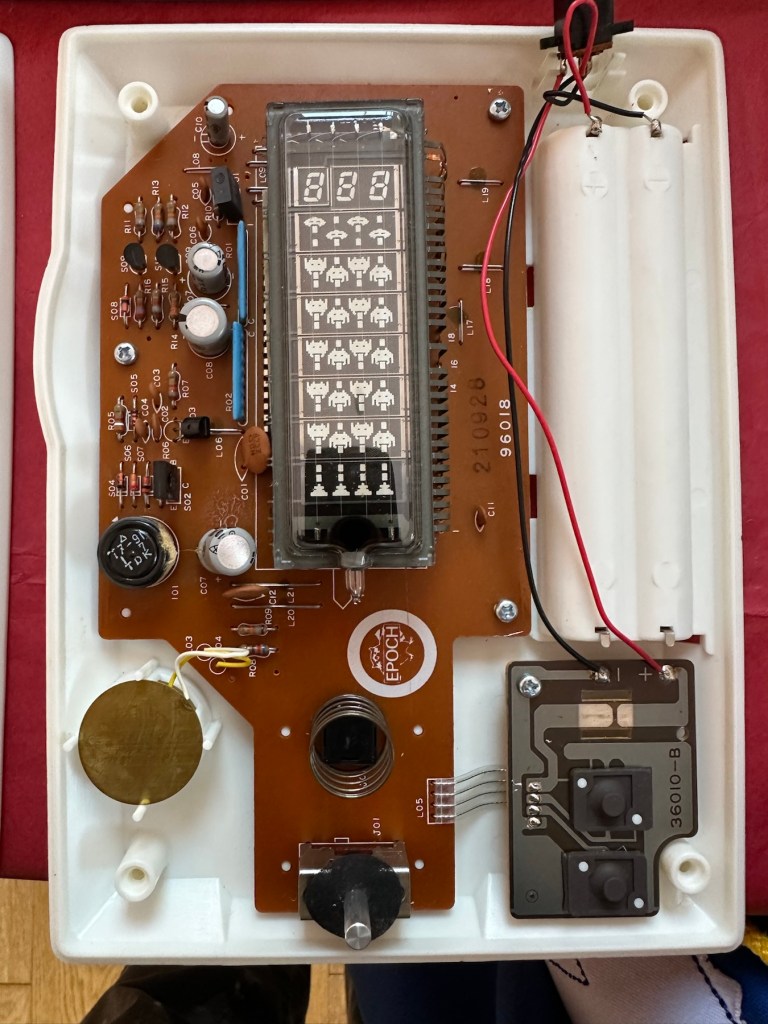
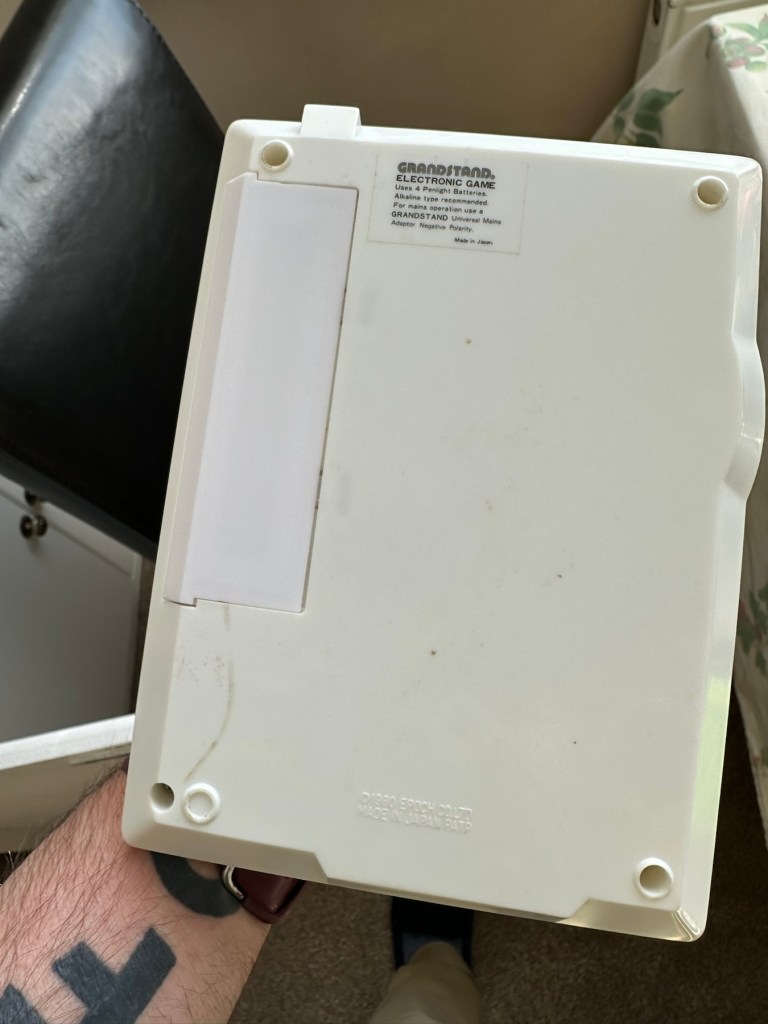
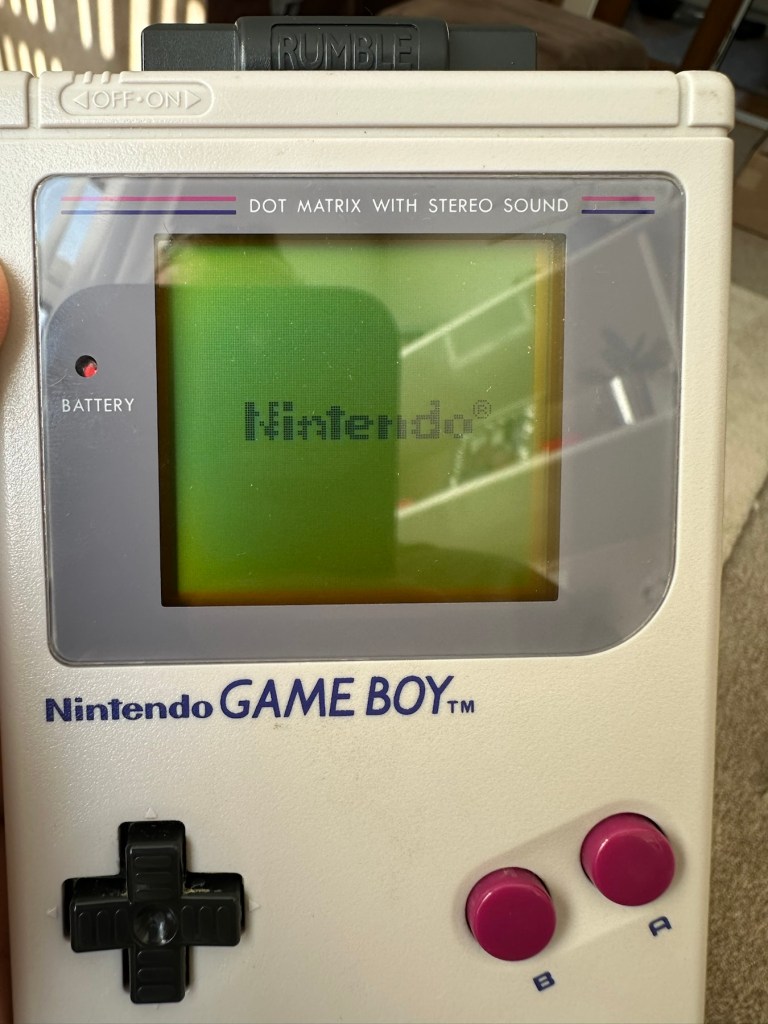
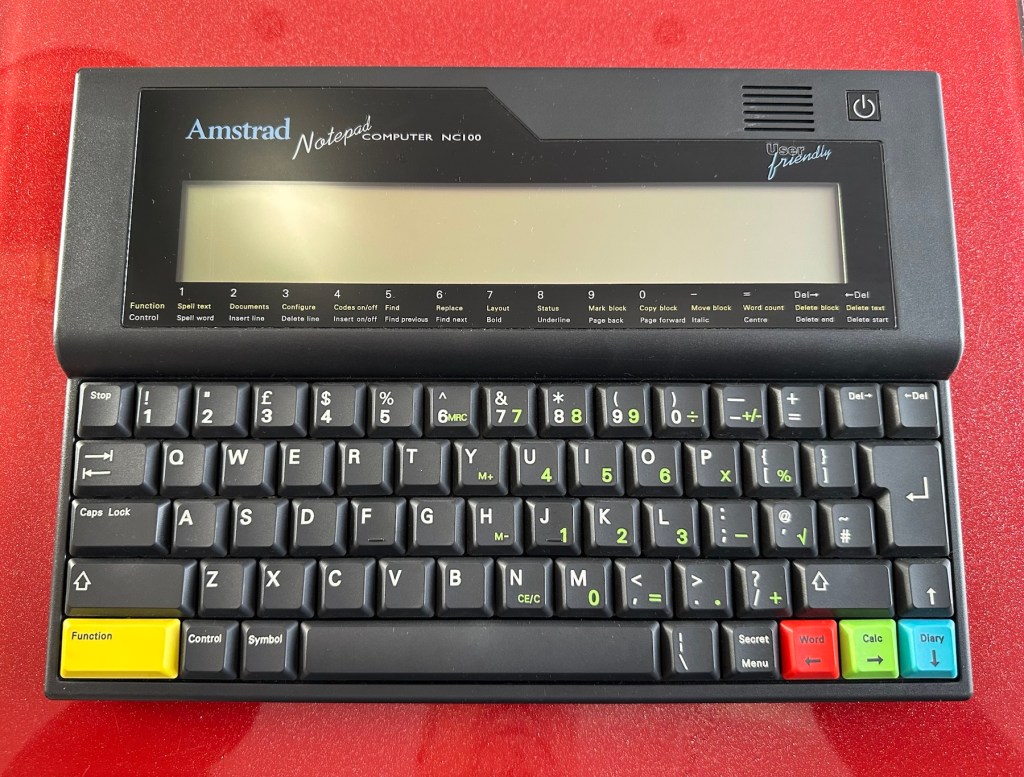
Anyone who has any dealings with items built in the 80s/90s such as me will have come across an issue, especially related to anything built with ABS Plastic, and that would be the common phenomena of “Yellowing”.

If you own a game console or toy with white ABS there is the good chance that all or at least some of it will have turned a shade of yellow,

ABS plastic – otherwise technically known by its scientific name of “Acrylonitrile butadiene styrene” is a thermoplastic polymer. This means that it becomes pliable at an elevated temperature and solidifies on cooling. ABS was a flame retardant material that was regularly used as a casing for computers, gaming consoles and similar items just in case they were to overheat and catch fire. It was also used in Lego bricks for some reason, god knows how these were meant to catch fire though!

The yellowing issue lay with a chemical used in the manufacturing process called Bromine. When exposed to UV light or excessive heat this caused the photo oxidation of polymers within the chemical to break polymer chains causing the plastic to yellow and become brittle.

Come on then, tell us what retrobrighting is..

Retrobright or retr0brite as it is stylised by the guys who discovered the process, is an approach to removing yellowing from these ABS plastics, a kind of bleaching process if you like. The original recipe for Rerobright was discovered purely by chance by the CBM Museum at Wuppertal in Germany in March of 2008. I’m not going to go into the finite detail in this post, however you can read all about it here at the original Retr0brite project site: The Retr0brite Project.

The process can be a little hit and miss, however there are a lot of documented cases of it working very well. There is a downside that the yellowing can overtime return, as this process only really whitens the surface problem whilst those old polymers are still breaking down deep inside the plastic where this treatment doesn’t reach.

The process

I’m only going to touch on the process here, there are many other detailed explanations available on line, that explain the process far better than i could, here is one for example from the “How to Geek” site. How to clean old yellowed plastic on retro computers and game systems.

I will explain the process briefly below, but in no way do i accept responsibility for the way you approach the process. That is down to you entirely and i suggest you read up deeply on the subject prior to attempting this process. You have been warned!

What you need

  • The offending piece of plastic
  • Clingfilm
  • Paint brush or suitable application brush
  • Protective gloves
  • Eye protection
  • 40 volume oxidising cream (Hydrogen peroxide, salon hairdresser strength.
  • Sunshine (Hard to find here in the UK) or a UV lamp

For starters make sure the item you want to brighten is clean. Make sure you have eye protection and gloves on as the peroxide can cause skin burns and the last place you want it is in your eyes, believe me.

Lay down some cling film. Place your subject matter on the clingfilm. Apply some cream onto the object you want to lighten and smear it around ensuring the whole item is covered in the peroxide solution, failure to do this can cause blushing and streaking. When you are happy that the subject matter is fully treated, cover the whole item in the clingfilm ensuring there are no holes where the solution can evaporate from.

Next place the item where the whitening can take place. Out in direct sunlight and leave it there for the entire day. Indoors a UV light lamp can also be used. The UV rays that originally caused the yellowing will now react with the Peroxide to reverse the process. This does take time though and in some cases where the yellowing is particularly bad a second or third treatment may be required.

Remove the clingfilm after a sufficient UV exposure and ensure the subject matter is washed thoroughly to remove all traces of the peroxide developer. Again, ensure you have gloves on until all traces of the chemical are removed.

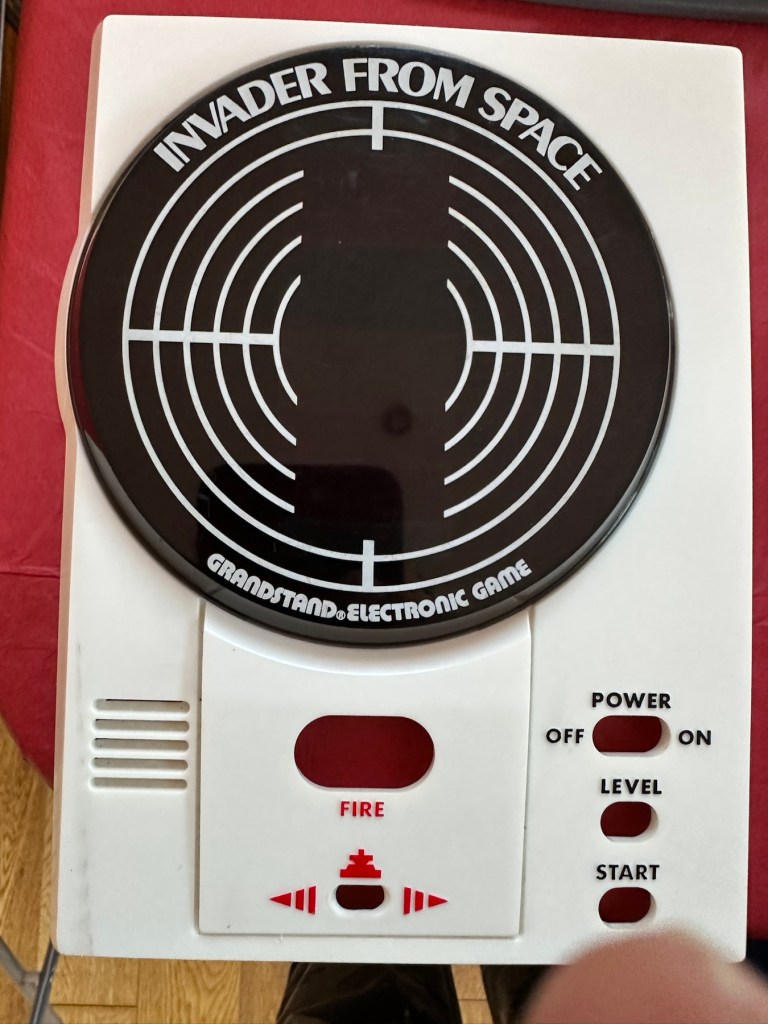
Dry the subject matter or allow it to dry naturally. Hey presto! Job done. And thats basically it.

I’ve covered this subject, as it is something i will be attempting over the coming months. I will address the process in individual posts relative to the item i will be working on at the time.

Thanks for passing by, it’s always appreciated.

A gaming device in a tin. How quaint…

Being one of those from the Ham radio community there was always a fascination with putting a Morse code transmitter into a disused Altoids tin (Other tins are available). Here and now though we have a gaming device that can fit in the same tin. Worth visiting Git hub via the link to see the actual boards and the plans for making this a kit version. I’ve signed up, let’s wait and see what happens.

Grandstand Invaders from space game

What the listing stated:

Can’t get to turn on unfortunately. No battery cover. Any questions please ask

EBay

I know, there is no battery cover, however I have already sourced a seller of one if needed. This item looks quite dirty so a good soak might be the order of the day to get started. I’ll wait for its arrival before I jump to order any other bits for it.

Now as I’ve said in the past these units fall into that crazy price category on the selling platforms as the “New Antiques” of today. For an item that was low cost, somewhere between £25-40GBP when it came on the market, they can certainly command a wide range of crazy prices, here is an example of price ranges from today:

The massive range in prices for these units

This one I purchased today only came up for sale about 3 hrs ago and I thought it would have been snapped up by now, it hadn’t so I didn’t hang around any longer and purchased it for a total of £16:38GBP including its delivery. I’m not going to get too smug yet, as for all I know I may have just purchased an empty shell. Let’s wait until it arrives.

Here’s a little history of this unit:

Grandstand “Invader from Space” is a tabletop LED game dating back 45 years to 1980. Four ‘AA’ batteries power the unit or, alternatively, the Grandstand 5.5V@300mA power adapter (or an equivalent power pack) sold separately. The game, licensed to Grandstand, is a copy of Epoch’s “Invader from Space”

The company initially behind the “Grandstand” label was Adam Imports Ltd., (from 1980 Adam Leisure Group Ltd. and by 1983 Adam Leisure Group PLC) founded in 1973 by Chris Rycroft and Les Kenyon of Harrogate, UK. The company initially started as a mail order company and was the single largest supplier of calculators in the UK by 1974. By August 1978, George Bassett had acquired a 75% holding in the capital of Adam Imports for £750,000 cash, plus 60p in the pound of profits before tax in excess of £500,000 for year to December 31, 1978. Adam Imports was re-acquired from George Bassett by Chris Rycroft in 1980. It chiefly imported electronic products from other manufacturers such as VTech, Epoch, Tomy & Entex, selling them in the UK re-branded under the Grandstand name.

Wikipedia and others

So that’s the history

There is a good link to a similar repair on YouTube from a guy I follow named Stez Stix Fix, it’s very much worth a look and he has a great if not sometimes crazy way of diagnosing and repairing items. A cool guy though.

The Grandstand invaders from space game

Anyway back to my own purchase.

Assessment:

I must admit the unit doesn’t look as dirty as in the original pictures. The battery cover is missing and there is a crack in the side and a deep scar at the bottom, this won’t be too much of an issue if I can weld it all back together. I will still give it a good soak to clean it all up though. I’ve put four batteries in place, and the unit is definitely dead. There are no loose wires, voltages are getting around the board according to the multimeter and nothing is getting hot. There appears to be no short circuits, and then I notice this, capacitor CO7, slight bulge on top and what looks like leakage from the bottom. We have a candidate as to why this unit is not working.

CO7 looking unhealthy to me, you can see the component to the left that looks like it’s covered in a fur ball. The result of the old capacitor “coughing”

I’ll whip this out and see what we have but I suspect this old capacitor has failed and is causing an issue, heres hoping I have a suitable replacement.

Repair:

This little beast is a 330uf 10v electrolytic capacitor. I have none available so have had to purchase a pack of ten. These should be here in the next few days. There are three other old electrolytic capacitors that I will also change whilst I’m in there, as these are all likely to fail at some point soon. These components are now all around 45 years old, it’s a wise move to change them out.

One very dead capacitor removed.

I’ve ordered a 3D printed battery cover to replace the one that is missing. This should be here in a couple of weeks.

Whilst waiting I have cleaned the inside and outside of the casing as best I can. I still have a piece of broken surround to repair, however this is just a simple glue and a little bit of support job.

Broken surround repaired

The surround that was broken has been repaired and secured with some nylon soaked in a superglue compound inside the casing. It’s rock solid. Outside the break is hardly noticeable. The break is secure and much stronger now.

New capacitor here

I’ve replaced all the offending capacitors and the unit remains dead. I’ve reflowed most of the board as there were some dry solder joints. I’ve also rewired the bridge from the control panel to the main board as one of the wires here had broken.

Bridge required resoldering

After using the multimeter to check some traces and components it’s now pointing to this component (a power transistor D882) being the cause of this catastrophic breakdown as its readings are all over the place. I suspect this item has overheated, the capacitor has blown and then it’s just died itself. I’m probably wrong, but I know what I mean. Probably just a catastrophic chain of events that all contributed to the units demise.

D882 transistor – power regulator

And as usual I have none available so will have to send for some new ones. The new components have arrived and the new power transistor has taken its place on the board. Now reassembled I place some new batteries in and the unit comes to life. It was the power transistor at fault, I should have really checked here first after seeing that damaged capacitor at the beginning.

All old components removed and replaced in this unit

Not to worry though as it’s had a good overhaul and has been totally recapped as a precaution. I’ve used some conformal coating on a few tracks that had some copper exposed after a good clean, to ensure they don’t deteriorate any further.

It has life

The unit is looking really good and these items were traditionally very loud and this certainly is. It’s working well just as it should do and I’m exceptionally happy with this repair. I’m still awaiting the battery cover that I have had 3D printed and this should be here in the next week to complete the fix.

So with that I will bring this build to a conclusion. It has been a fun project, I’ve learned a number of things about this circuit board and gained valuable knowledge.

But best of all we have rescued another item and saved it from landfill.

Winner 🥇 👍

Thanks for passing by

Nintendo Game Boy Pokémon pinball game

What the listing stated:

You will receive what you see in the photos, please look at the photos as this is part of my description to show you what you would be receiving. Please note the game comes up with the main Game Boy & Nintendo screen & then won’t go any further, as you can see👀in the photo. 

Any questions please feel free to ask. 

EBay

Hopefully this will be a simple repair, but who knows it might just be a little more technical.

This game is built for the game boy colour console and is an original Nintendo product, it is the Pokémon pinball game. I’ve purchased something I never normally buy and usually detest buying, an item with the battery cover missing. Damn it, there is a fortune waiting to be made by anyone who owns a decent 3D printer, with the amount of missing battery covers that are waiting to be reproduced out there. Edit: ( Just looked on line and it seems the gaming community are already on the case, loads of options available, great to see) Anyway I’ve brought this unit as it can either be kept to await a suitable battery cover or passed straight on. Edit#2: I have, in anticipation of its arrival already ordered a suitable 3D replacement cover from a UK company. It was probably the best priced and best looking print to be honest, some of the others looked a little rough and postage was excessive to say the least. These guys at Cool spot gaming were the best in my opinion.

Released in Japan in 1999 this game made it to European shores in 2000.

These games came with a rumble pack at the top of the cartridge that simulates the vibrations of a normal pinball machine, and I believe this is what the single cell AAA battery is for. And as it is a black cartridge this indicates it can be used on the GameBoy colour and original versions. I have purchased this for about half the price that a good working one with battery cover sells for, now that I’ve had to pay for a 3D replacement battery cover I now move into the higher end price of the cartridge valuation, however I do have a few pounds worth of wriggle room should I decide to sell, considering most of the ones on sale at the moment are missing the battery cover and commanding horrendously high prices. I’m comfortable with that. That said it will go into my personal GameBoy collection anyway. Let’s get it working.

Here’s a link to the actual 3D print program for the battery cover on Thingiverse, if you should ever wish to print one yourself. I have absolutely no idea about 3D printing so this is just like brain surgery to me: 3D print program

Assessment

A nice tidy little package has arrived clean, battery cover missing as stated and exterior looks nice and clean. Original label is intact.

Repair:

New 3D battery cover has arrived and this fits perfectly, no issues here.

I’ve placed the unit into my GameBoy to check what occurs, and just as posted it does not progress beyond the Nintendo start up screen. I’ve opened the cartridge to do some basic checks and cleaning, the cartridge contacts have been cleaned using an eraser and some IPA, but in all honesty they were already pretty clean. I’ve checked the onboard battery and this is healthy at 3v as it should be. Cleaning competed, I recheck the game and the results are the same.

Next I’m going to reflow the joints on the ROM chip on the right hand side of the board, the one that has the letters MX on it. These pins or the ones on the RAM chip directly beside it are well known for having bad contacts and often need reflowing/tacking down. It’s something that seems to occur over a period of time on these game cartridges, just plain bad contacts.

ROM chip on the right with the RAM chip on the left, both are notorious for developing loose contacts

All items on the board have been reflowed using hot air, with extra attention being paid to the two chips described in the picture above. I removed the battery prior to doing this as the last thing you want is exploding batteries. With the battery back in place and the game now reassembled it’s now time to test.

And it works including the rumble pack feature.

I can only presume the hot air reflow has fixed an issue with joint continuity on one of these chips as expected. Excellent, another item has been saved from the bin and can now be added to my collection.

Another little project to put to bed, there always seems to be an issue with these games after a good number of years where the solder joints just become unstable. I don’t know if it was the solder quality they used all those years ago or the heavy use and abuse the games endured during their hey day. At least we can fix them and ensure they are still good to go and enjoy for a few more years yet.

Thanks for passing by.

The Long Goodbye: More Instruments Shut Down on the Voyagers as End Nears

My favourite space mission and one I have followed for many years. I even have models and posters around the house. I even have an orchid impersonating the model (see post picture)

It will be a sad day when it all shuts down, here’s hoping we get to see their 50th anniversary’s.

Great post from Hackaday, read some of the comments as well, some excellent conversations taking place…

Saying farewell is hard, and in the case of the Voyager 1 & 2 spacecraft doubly so, seeing as how they have been with us for more than 47 years. ……

The Long Goodbye: More Instruments Shut Down on the Voyagers as End Nears

Amstrad Notepad NC100

What the listing said:

Amstrad Notepad NC100+ Vinyl Case 

Not working not powering on, the vinyl case has some marks and scratches.

EBay

I’ve been after one of these for a little while, I’ve just been awaiting one at a good price and this one became available, post included at £30GBP, they retailed for £199Gbp back in 1992. It says it is not working but that’s good in my eyes as it makes these posts more appealing, as it gives me something to repair. I don’t know what the issue is off hand as the post didn’t state that, but I do know these items have suffered with capacitor problems over time, but that is not necessarily the case here. We will just have to wait until we do the assessment on its arrival. And as it comes from around the early 90s it fits right in with my modus operandi. And this little cutie dates from 1992.

Here’s a little history behind this unit courtesy of Wikipedia:

The Amstrad NC100 Notepad is an A4-size, portable Z80-based notebook computer, released by Amstrad in July 1992. It featured 64 KB of RAM, 256KB of Rom, the Protextword processor, various organiser-like facilities (diary, address book and time manager), a simple calculator, and a version of the BBC BASIC interpreter. The computer’s design, evocative of the TRS-80 Model 100, features a screen with 80 character columns by eight rows, and not backlit, but this let the NC100 run for up to 20 hours on four standard AA cellbatteries. There was an RS-232serial port, a parallel port for connecting a printer, and a PC card socket, by means of which the computer’s memory could be expanded up to 1 MB.

Assessment

The unit has arrived and cosmetically it is in very good condition apart from the peeling plastic screen cover. A little bit of dust and grime, all keys in good order and no dinks or dents. the vinyl bag is a little tatty but that’s not a problem, it’s obviously done it’s job over the years due to the good condition of the unit.

So down to testing. First thing I’ve done is check the power supply is giving a 6.5 v output and this is ok.

Power supply doing what it should.

Secondly I’ve put 4 AA batteries in place and turned the unit on but then it abruptly stops, displaying a lithium battery issue.

Lithium battery warning

The lithium battery is an old CMOS type battery, a CR2032 coin battery. This is the battery that keeps the info in the system when you turn it off. I thought I’d run this through the multimeter and was surprised with the voltage I saw, the battery seemed fine to me at 2.8v, so I replaced it with a new one measuring 3.4v. And the issue came up again…..head scratching time!

Looking on line it seems there is an issue with the lithium cell battery contacts on these units when they are being resurrected to modern day usage, time has not been good to them. The coin contacts have now been cleaned and slightly bent to ensure a better contact and hey presto it’s operational with no further issues.

Battery contacts needed cleaning and repositioning

The main AA battery contacts are fine and the external supply is doing what it should. Now let’s look at sorting that screen issue.

Quite simply there were two options, use a bit of heat to try and stick the plastic down, but I decided against this as it would not lay flat, it had too many kinks in it. So the only other option was to remove it and this is what I did, it peeled off with no issues. In time I will see if I can get a suitable replacement but to be honest it isn’t really required as I’m not going to be using it that often.

Let’s get that screen cover off

I’ve tried every function and keystroke of the board and all is good there are no issues and I now have a perfectly acceptable unit for my collection. It looks like i have had a second win against the “Untested” brigade who sell on EBay. This was the simplest of repairs and the issues are readily available to research on line. There is no excuse for not looking into the issues, when a good unit like this can now sell for up to three times the amount that I paid for it.

Your loss my win. Another one kept from landfill.

I’ve given the unit a good polish and I think you’ll agree that the project has come up good.

Now to just go and read the user manual on line to see if I’ve missed anything. Thanks for passing by, as always it’s most appreciated.

Psion organiser series 3a

What the listing stated:

It fires up and turns on, then get a black screen. Every time I press a key on the keyboard it makes a beeping sound, so it is registering something.

EBay

From a distance, and in my opinion, the fault could be a simple one such as adjusting the contrast by using the Psion key and either of the <> keys. This was often an issue when first turning on the Psion II, you had to turn the contrast wheel. However it could be a terminal one requiring a donor unit. In layman’s terms it could be knackered, (to coin a phrase). But hey, what do I know 🤦‍♂️

Psion 3a – Faulty

Fingers crossed 🤞 as usual.

I have a what looks like a nice tidy little unit here obtained for a very reasonable price £17:69Gbp including postage. These units retailed between £179-£249 when they first appeared back in 1993. However, there is only the one picture in the advert so the rear, sides and hinges could be wrecked. “Caveat emptor” as they say. It does have a problem that will need some investigation. It runs off of two AA batteries and a CR1620 coin battery as a backup, and these will be the first items to be changed, I’ll also check the voltage of that coin battery and replace that if necessary. This is an early version with 256KB of internal Ram. 3a versions from 1995 either had 1Mb or 2Mb of ram. You can also use an external power supply if required, but the batteries in these units have an excellent long life span, so external power is rarely necessary. I’m looking forward to this project. I’ll make a more detailed analysis when the unit arrives shortly.

The Psion Series 3 range of personal digital assistants were made by Psion PLC. The four main variants are the Psion Series 3 (1991), the Psion Series 3a (1993), the Psion Series 3c (1996), and the Psion Series 3mx (1998), all sized 165 by 85 by 22 millimetres (6.50 in × 3.35 in × 0.87 in). Further, a Psion Series 3a variant with factory installed software for the Russian language was called a Psion Series 3aR, and Acorn Computers sold renamed versions of the Psion Series 3 and 3a marketed as the Acorn Pocket Book and Acorn Pocket Book II.

Wikipedia

A little history:

This particular unit dates from 1993 and was the next in the series of Psion organisers that succeeded the extremely successful Series 2 models. It was a massive step forward in design as the whole PDA market was kicking in big time in the early to mid nineties. More info regarding the series 3 organisers can be found here: Psion series 3

And the strange fact for today is this:

Manufacture of Psion 3s was discontinued in 1998 shortly after the launch of the Psion Series 5 (a Psion Series 4 does not exist, due to Psion’s concern of Tetraphobia in their Asian markets)

Wikipedia

What is Tetraphobia?

The fear of the number four: Tetraphobia is mainly suffered in China, Vietnam, Korea, Japan, because the word for the number four is similar to the word for death in their languages. Tetraphobia results in many people avoiding referring to 4 in phone numbers and so on.

Cambridge dictionary

There you go, question answered and that was why there was no Psion 4.

Onwards…

What has arrived, and what’s the diagnosis?

The unit has arrived and despite my suspicions it is in an excellent cosmetic condition. Just some very light signs of usage, needs a light clean, all hinges are in place and solid. Everything is as it was all those years ago and all the warranty labels are in place, this unit has never been opened.

I placed the new AA batteries in and it came up with the black screen as the seller had stated. Using the contrast adjustment at this stage had no effect but the buttons were sounding so something was happening. Whilst looking in the memory card doors I could see one glaring issue, there was no backup CR1620 battery, so I dropped one in place . When I started the unit up again the screen went from black to clear, over a few seconds and then I operated the contrast buttons, and hey presto it worked. Watch this little video to see what happens.

We have life

I can only surmise that not having the correct batteries in for god knows how long, and then livening up the circuitry must just be like giving Frankenstein a fresh transfusion of blood. “It’s alive!” Well, that’s all I can think it would be.

I’ve run every function on the unit and it all works fine apart from the voice recorder function that seems to have a lot of feedback on the recording. I suspect this might be as I’m using the already full internal memory. It’s not a real problem, I’m just going to have to read up on it, as I could be doing it all wrong. (I have since done a hard reset and deleted old files from the system and this has cured the feedback issue, the voice recorder works fine). However it would still probably work better using an additional drive in the unit, and not the low internal memory.

Just as you could on the Psion II you can write your own programs using OPL language. And it is a lot easier on this unit as you have a full Qwerty keyboard and a much bigger display. There are more applications on this unit than the series II, including word, spreadsheets, DTMF dialler, calculator and others that can be purchased as plug in additions.

I’m really happy with this, if the seller would have just taken a little time to run the unit and have some patience he’d have realised there really is nothing wrong with this unit. Big negative for him, big bonus for me. He could have charged more than double the price for this item, or more, considering current prices on the selling platforms.

Another strange thing i have noticed is that when I’ve left it overnight and started it up the following day it takes a minute or so for the screen icons to appear, just like putting on an old valve radio. So it maybe that a repair is necessary, I’ll have to ask around and see if any else has had this issue.

Valve powered Psion3A

Edit: A few days later and I’ve looked into this a little more. For some unknown reason, probably my rank stupidity, I’ve checked the coin battery and I’ve installed a CR2032 instead of the required CR1620 and have tonight corrected this and installed the CR1620 coin battery. I don’t know if, or why this would have an effect, but after putting the correct battery in place the unit started up in a couple of seconds even after sitting unused for at least a couple of days, instead of the usual 2 minutes as per the video. I can only think it must be something more related to the capacity rather than the size, unless for some reason the contacts were not sitting true. (There is a slight difference of 4mm in width) I remain puzzled as I thought the battery was just for backup purposes, maybe it does perform more as a computer CMOS battery does, but I’m pleased it’s now operating as it should. I can now stop monitoring the sale sites for units to use as spares.

Sometimes your suspicions pay off, and on this occasion I was spot on. EBay untested items can swing either way and most of the time the sellers use it as an easy get out for not accepting any responsibility. But this time I win, and that makes me happy as I have a very good item for my retro collection.

Thanks for passing by.

Old iPad To New Screen

This is a great blog from Hackaday that shows how old iPads that are no longer usable can have their screens used as standalone monitors. Since Apple are openly criticised for their throw away culture it’s a reasonable way of keeping these old units out of landfill, and saving you some money as well. I love the example of using an old screen as an additional screen for an iMac.

Turning surplus LCD panels into stand-alone monitors with the help of a driver board is an established hack, and a search of eBay or AliExpress will …

Old iPad To New Screen

Psion organiser II LZ64

I am now in possession of my fourth Psion II organiser, in an attempt to complete my collection of these devices. This one is the LZ64 model from 1989. All my examples are of a good quality with only some slight markings on the device. They all work as they should do with no issues. This particular example comes with a British Telecom branded holder, as a number of different companies branded their own units like this back in the late 80s early 90’s. It has 64KB Ram and a 64KB Rom that is expandable.

My units marked with an asterisk
The LZ range

Here is some information from Psion regarding this model.

The Psion Organiser II Models LZ and LZ64 come with a powerful set of utilities including:

  • A database which allows you to store items of information and retrieve them again instantly.
  • A diary to keep track of personal appointments.
  • Alarms to remind you of your diary entries, or to use as an alarm clock.
  • A sophisticated calculator, for simple or complex calculations involving mathematical functions.
  • A clock, with a stopwatch and timer.
  • Notepads with calculation, for information such as things- to-do or expenses lists.
  • International time and dialling codes.
  • A month-at-a-view calendar.
  • Password protection.
  • A multi-file database.
  • A choice of European languages.

The Organiser also has its own built-in programming language called OPL. The language is designed to exploit all the machine’s facilities to the full and to let you tailor the Organiser to your own specific needs.

The Organiser has an internal memory and two external devices which are the equivalent of disc drives on a desk-top computer. Each one can hold a Datapak for you to store information on, or a program pack containing a program such as the Pocket Spreadsheet.

The internal memory of the Model LZ64 holds around 64,000 characters. In addition, one or more Datapaks can boost the storage capacity considerably – by up to 128,000 characters per DatapaK.

Courtesy of Psion PLC1989

As I’ve stated before I will be using these units to learn the OPL programming language and to try and get these units connected to other retro units that I have if this age group. I am also looking at getting these units to connect via usb to a computer. It can be done and that is a project for me at a later date.

Thanks for passing by 👋

A 3D printed Camera You Can Now Download, Shutter and All

This is a reblog post:

Wow, from our friends at Hackaday, who would have thought the time would come when you could downland and print a camera. Even the shutter.

A nice read for those interested in photography and some good links to follow regarding the build. Don’t think I’ll be starting one as I’ve only just mastered the standard paper printer 😂

A couple of years ago we were excited to read news of an entirely 3D printed camera, right down to the shutter. We wrote it up back then but sadly …

A 3D printed Camera You Can Now Download, Shutter and All