Fujifilm Instax 100 Instant Film Camera – Faulty Untested See Lens Shutter
Otherwise clean,
battery compartment is clean,
unable to test so selling for spares or repair considering the lens shutter
EBay
Instax 100 Instant film camera
I’m a tad annoyed at myself here as I had arranged a good price with the seller but because I was too eager I pushed the wrong button and purchased at the original advertised price. The seller must think I am a right plum, and I’d be inclined to agree with him. That said I’ve secured this for a good all in price, and it will be a nice addition to my collection. It’s a 26 year old camera, and i’ve been looking for one of these particular cameras that use the wider format of Instax film for quite a while, but even the damaged ones command hefty prices. I’ve paid an all in price of £28:55GBP here when I should have paid £23:55GBP. Never mind, lesson learned and don’t be so hasty in the future. They can command a good price as can be seen in the photo below:
Some recent sale prices
Here’s some info about this camera:
The Fujifilm Instax 100 was released on May 1st, 1999. It has been replaced by the newer Instax 200, which is very similar except the flash is on one side rather than directly above the lens.
Focusing: Motor-driven 2-range switching (0.9 to 3m/3m to infinity)
Power supply: 4 LR6/AA-size 1.5V alkaline batteries for around 10 film packs.
Dimensions: 171.5 x 91.5 x 119.5 mm
Weight: 650 gr (without batteries, strap and film pack).
Camera-wiki.org
Now this one is being sold with what looks like only one fault that the seller is concerned with and that being a shutter problem. From experience and as can be seen in this recent post of mine: Another Fujifilm Instax mini 8 I know that this is not a “Lens” issue it is in fact an issue with the iris that protects the lens, and is probably as a result of a small spring being disturbed in that area. It’s quite a simple fix and if it is the only fault then that would be quite some result. However, this is EBay that we are talking about and there could be a number of further faults we haven’t been informed of. Now I will just have to be patient until it arrives, there is no other choice.
Assessment:
It’s a big one. Compared to the other Instax mini cameras this one is very big. It’s probably 1.5 times bigger than your standard SLR. It’s big. And weighty!
It’s clean…ish. And there seems to be a strip of plastic, a gate as such missing from the top of the camera near the exit slot. This wasn’t mentioned and I’m quite annoyed about that. When batteries are put inside it makes all the noises, but the action isn’t smooth in the lens extension range. This probably ties in with the advertised issue of the lens iris operation. I’m thinking I paid well over the odds for this particular camera, I’ve been conned here, lesson learned.
There could well be multiple problems here, and if that missing piece on the top is anything to do with light proofing, then we could have an issue. Anyway we will cross that bridge when we come to it. Initially I’m going to stick with the original fault, so let’s attack that and worry about any other issues if and when they crop up.
Repair:
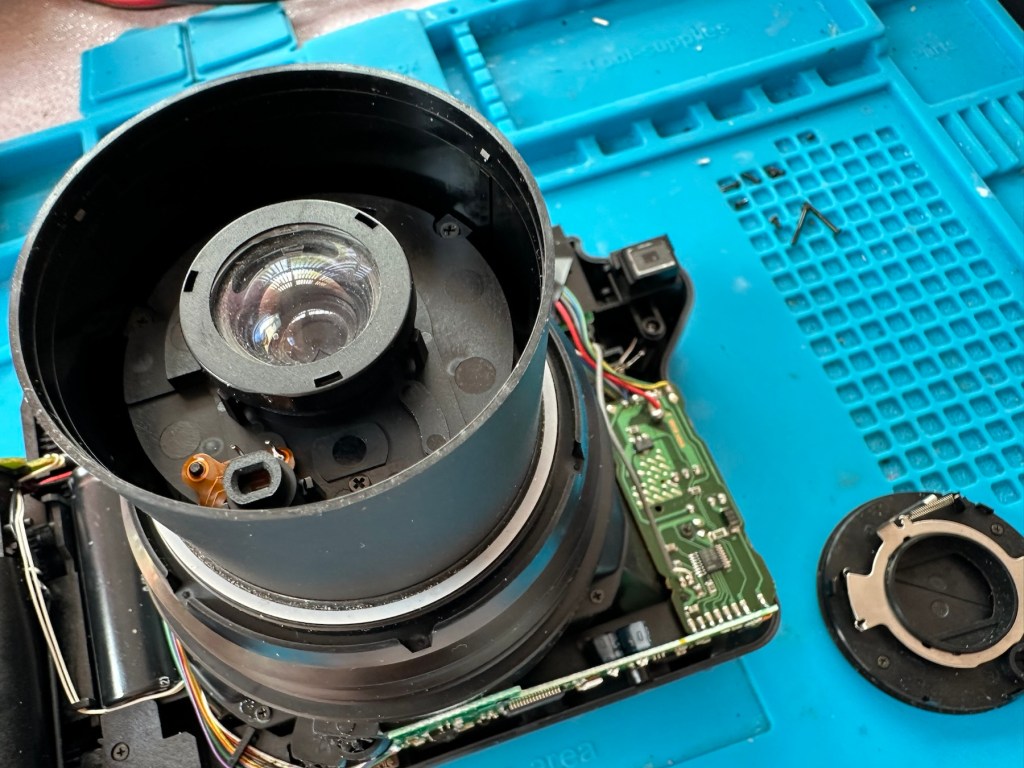
The more I get into this camera the more I find wrong with it. The main issue of the faulty lens iris is a fiddly one. You prise off the last section of the lens turret and the iris mechanism comes away fairly easy.
Mechanism removed from lens turret3 tiny springs all disconnected from the mechanism
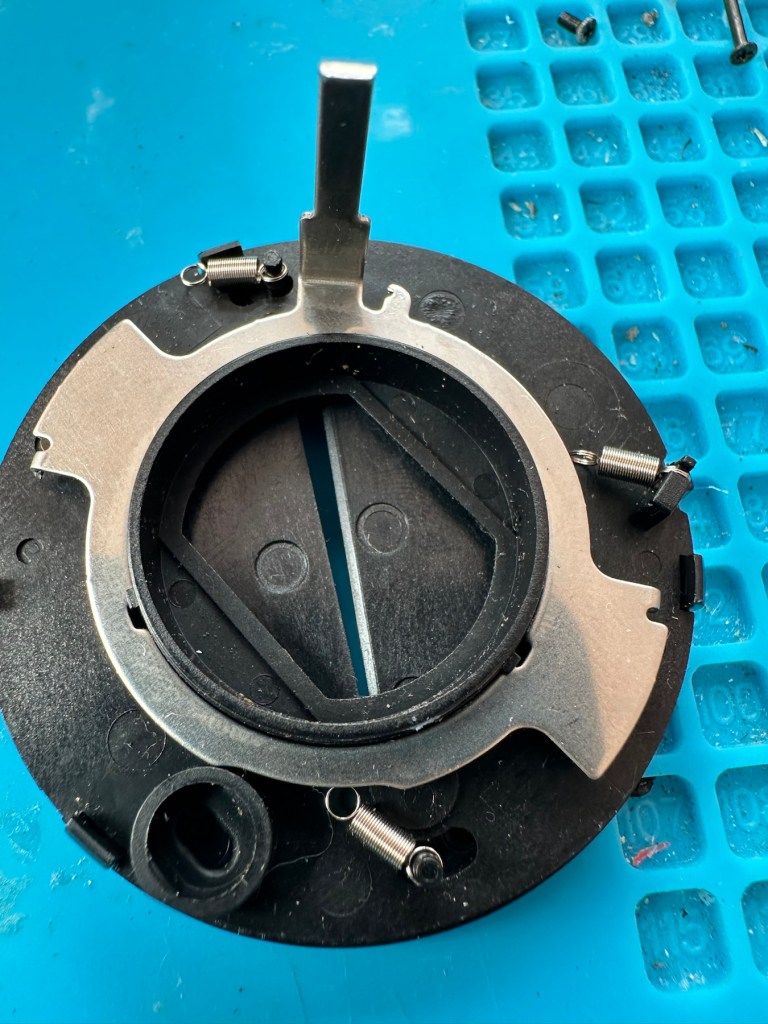
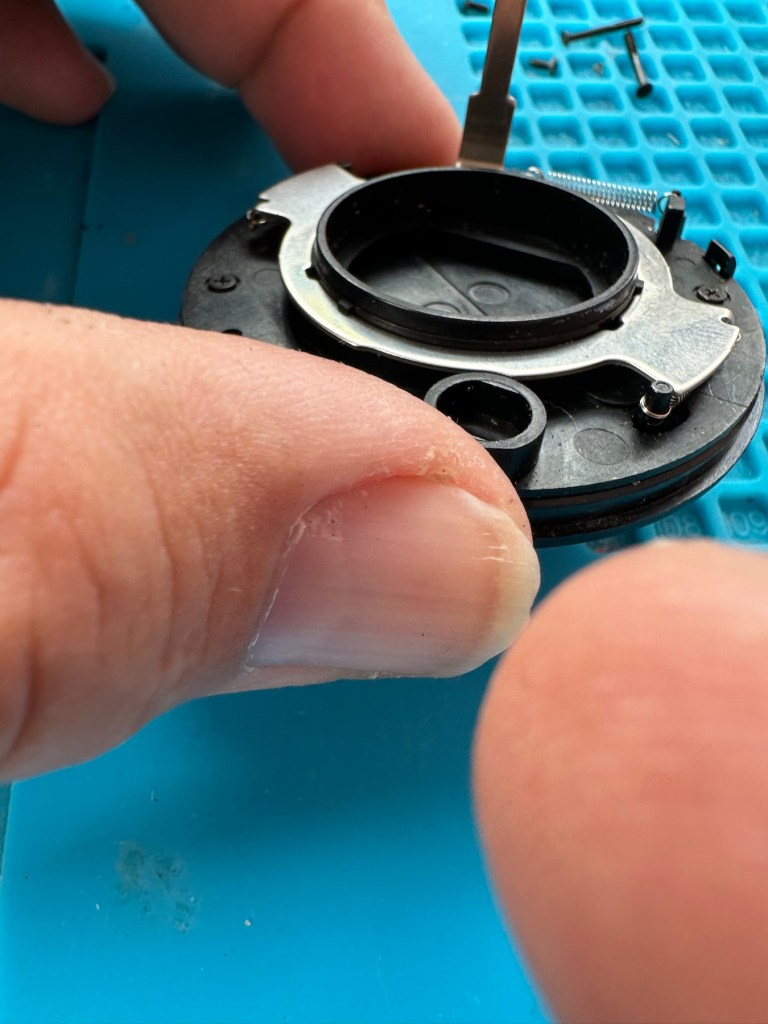
But then three tiny springs just fall out and this is why the iris didn’t work. Trying to get them in place is a puzzle itself, as no sooner do you have one connected then another drops off. It’s a fine balancing act to get them all back into place. When they are all reconnected it’s a very delicate operation to get them back into place. And even then you have to go to the inside of the camera to ensure that the lever inside that operates the iris, is aligned to the iris mechanism that is being installed back in the lens turret. It’s a fiddly time consuming job.
All springs attachedThe lever on the inside that has to be in the correct position when the iris is attached
Iris now working
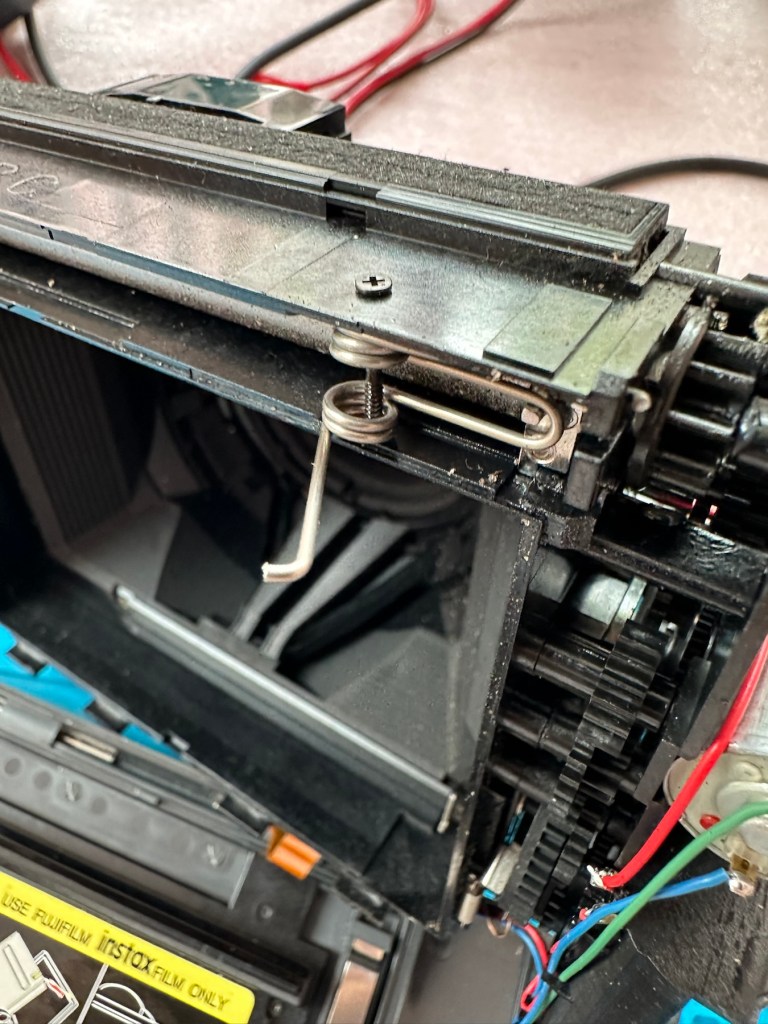
At this point the rear fascia and associated ribbon cable need to be removed to facilitate this repair. That’s when a piece of broken plastic falls out, it just so happens that one of the posts putting tension on the print rollers has broken. Great. Another problem. I’ve quickly fixed this by using some wire to act as a retention point. Bodge? Yes, but there really is nothing else that can be done here as the plastic case is thin and brittle. I have used some silicone grease to lubricate the cogs and the whole movement is now a lot smoother. It Will work. of that I am confident.
Broken plastic post, spring out.Wire bodge, spring now back giving tension
Result:
Well it works but it remains one of my most disappointing fixes due to the dishonesty of the seller. I know, if you buy off auctions it’s Caveat Emptor as they say, I preach it enough but this time I was caught off guard. Lesson learned. But I remain disappointed. Multiple faults, sold as just the one when in fact it also had bits missing that were not declared, very misleading in my opinion. Maybe in future I need to look deeply into these purchases before I give any feedback, i need to change my operation as I was truly shafted here.
Polishes up nice
It does everything that it should, the motor and transport system work, the iris now works, shutter is good, and flash operates. I’m confident that the camera is working fine but I haven’t tried any film through it yet as it uses a bigger format film and is quite expensive, and I’m not forking out for any just yet. Maybe when I get another wider format model to look at I will pay out. Just not yet though. When I do get some film through it I will amend this post accordingly.
I’m off to calm down a bit now, thanks for passing by, I really do appreciate it. Have a great day.
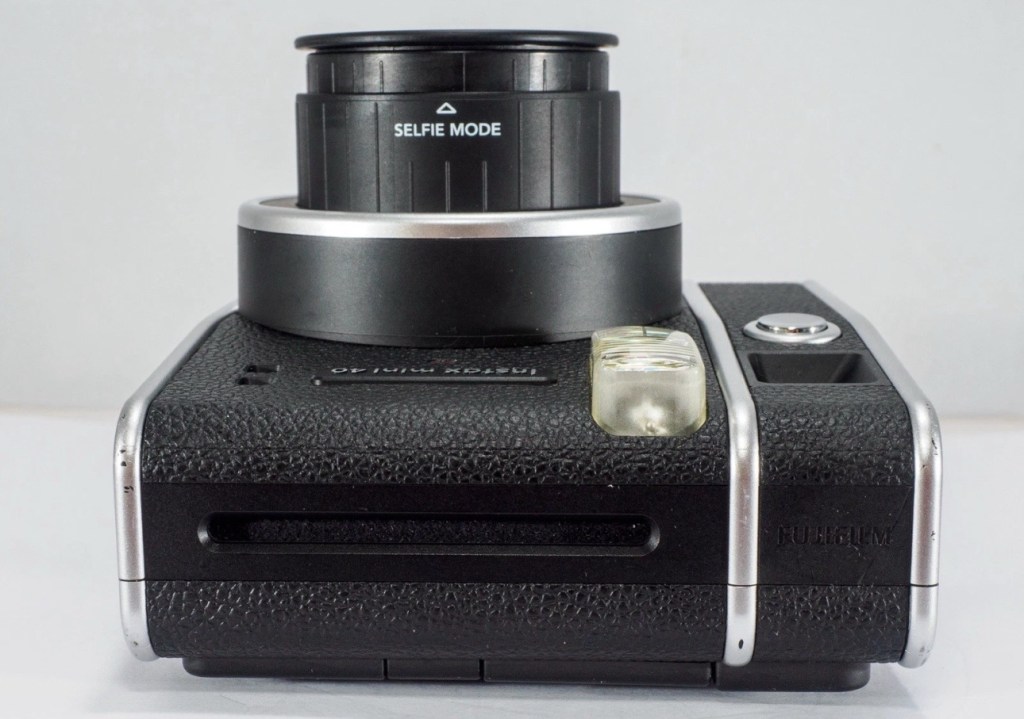
Fujifilm Fuji instax mini 40 instant camera . Functional, but flash NOT working .
LISTED REPAIR OR SPARES . NO RETURN .
THE CAMERA IS TESTED AND WILL,POWER UP AND TAKE A SHOT AND EJECT A SLIDE CORRECTLY. Please watch uploaded video .
HOWEVER THE CAMERAS FLASH IS NOT WORKING . This is the reason I have listed the cameras as repairs or spares.
Hopefully someone knows about these cameras and knows whether the flash unit just needs replacing or if it is an electronic fault that needs sorting out can fix it . Otherwise the parts will be useful to someone who repairs these .
No batteries or film is included .
The camera body is in very good cosmetic condition. There are only light surface marks in terms of signs of use . . Please see images as they are part of the description.
The red light to show the camera has powered up lites up when the button is pressed to extend the lens and turns the camera on .
When you close the lens down it locks securely into place .
The frame counter is working .
The film compartment is clean and the rear door shut correctly and securely.
Battery compartment is clean and the battery cover locked into place securely.
The camera is powered by to easily available AA batteries ( not included) .
EBay
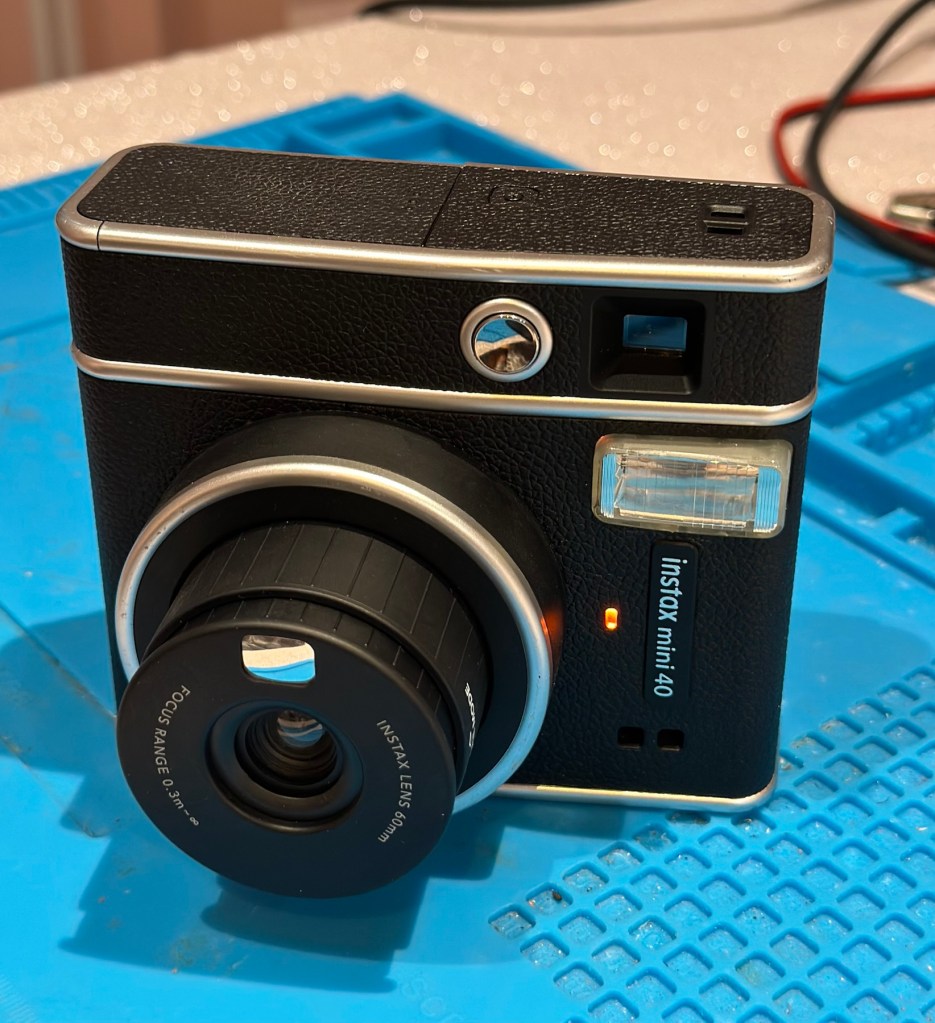
The Instax mini 40
Now that’s what I call a great descriptive sales pitch. And that’s because the guy is a professional seller of photographic equipment. I’ve seen the video he posted and all the above is true, it really is just a problem around the flash. Maybe it’s an easy fix? I suspect not but either way it will be an interesting project.
Here’s a little info on this camera:
Hitting the market in April 2021, the Fujifilm Instax Mini 40 takes the updates the Fujifilm Instax Mini 11 introduced but wraps them up in a cooler, more retro-styled instant camera body. Instant film fans will probably love it and with its improved design, there’s a chance that those who aren’t instantly drawn to this form of photography may just want to have a play around with the Fujifilm Instax Mini 40, too. It does cost more than the Fujifilm Instax Mini 11, though, so you’ll have to decide if the cooler design is worth an extra £20.
+ Pros
It’s fun
Great party camera
Easy to use
Looks cool
– Cons
Film is expensive
Viewfinder could be better
Powered by AA-batteries
Ephotozine.com
I first of all went in with a cheeky bid of £15:00GBP that the seller originally turned down, so I then put in a high bid of £18:00 and as no one else was wanting it, it actually sold for £16:00, just £1:00 more than I’d originally offered. All in all the cost with the postage was £19:45GBP and I’m really pleased with this. Im surprised though that there are flash issues in a unit that is only just four years old. As you can see in the photo below recent sale prices have been strong and a great deal higher priced than what I have just paid. These are certainly popular little camera’s with the younger generation.
Recent sale prices have been strong
I guess we will just have to await its arrival to assess the flash issue. I’m very confident that I will be able to get this camera up and running again.
Assessment:
Out of all the Instax cameras I have dealt with lately, this has got to be one of the best ones I have had my hands on. This is a mid range instax camera that is more sober in colour aimed at those who enjoy their lomography or better quality instant photography. It certainly looks good, and to be honest I’d rather carry this one around rather than a bright pink one.
Looking nice and sober
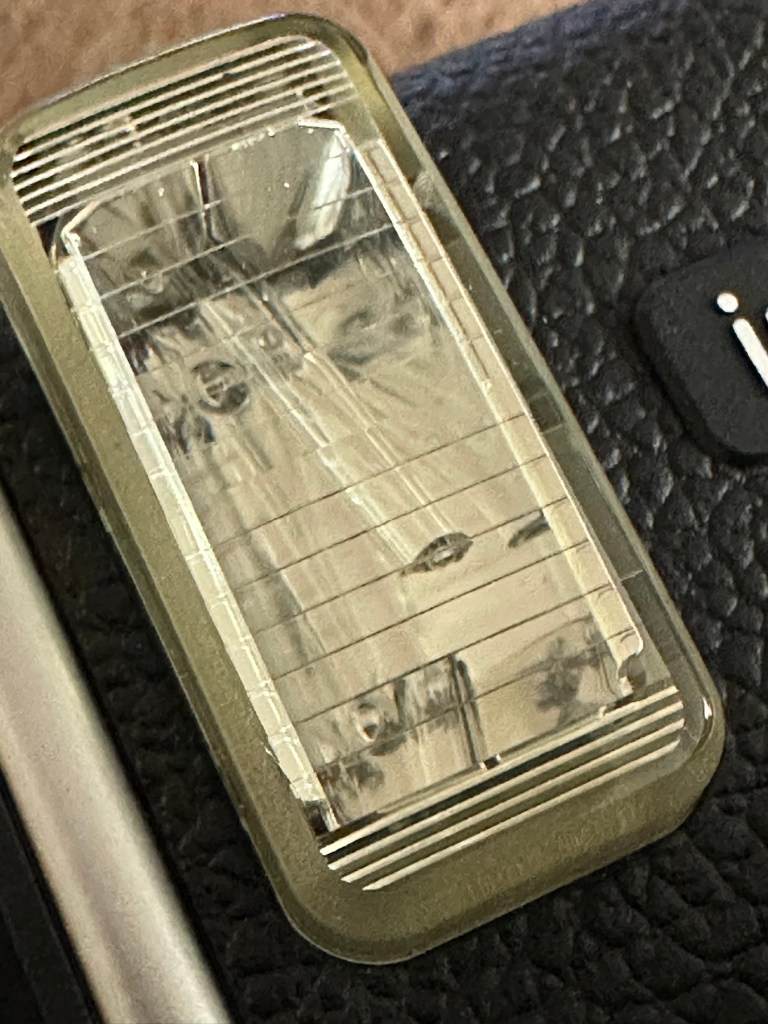
As posted in the description above it is in near perfect condition and a quick Look at the flash head shows that the flash bar within the unit is broken.
Flash bar brokenConfirmed broken when removed
Let’s get on with replacing this damaged flash unit.
Repair:
Let’s get it opened up.
Dismantling
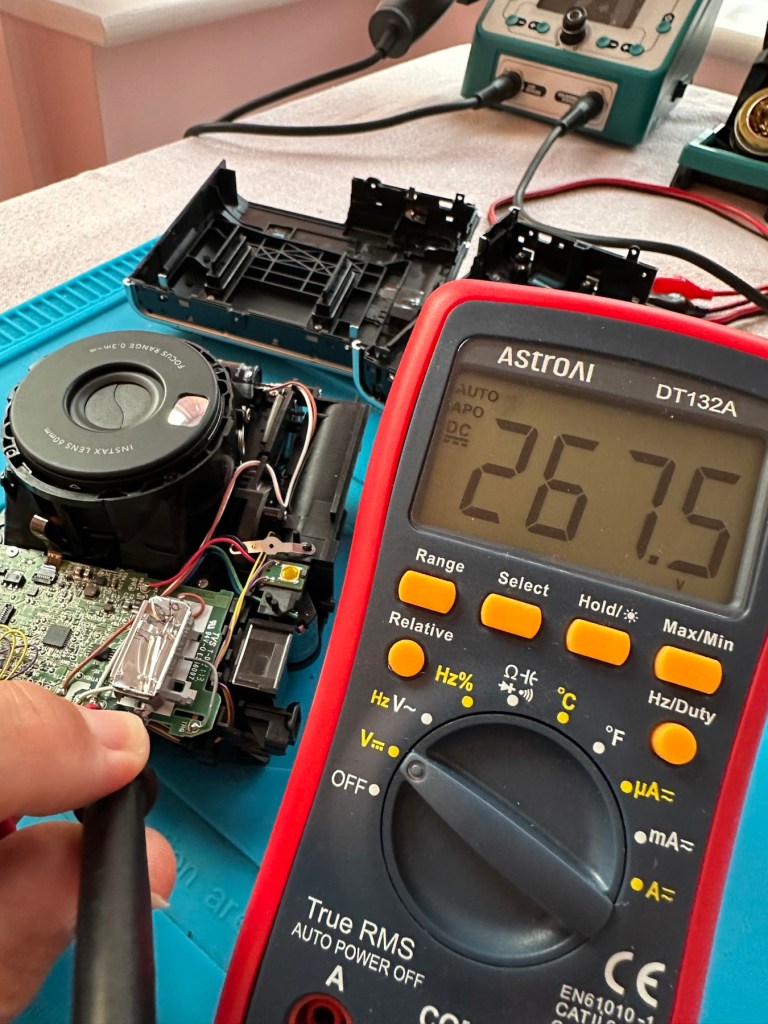
People laugh at me when i tell them that playing around inside these units could kill you. I can understand the contempt aimed at me for such a statement, when I’m carrying a bright pink camera that hardly looks dangerous. Just look at the voltage still in the flash capacitor though once I have opened it. Savage.
Residual voltage of 267v still in the flash capacitor
270v would quite easily send you across the room, if you had a heart condition it would probably be game over. I’ve learned my lesson in the past so I ensure I use a capacitor bleed probe before I go anywhere near one of these flash capacitors. The capacitor on this camera is rated at 320v, not to be messed with. Beware. What’s more impressive is that all this energy is supplied from two 1.5v AA batteries. Clever stuff.
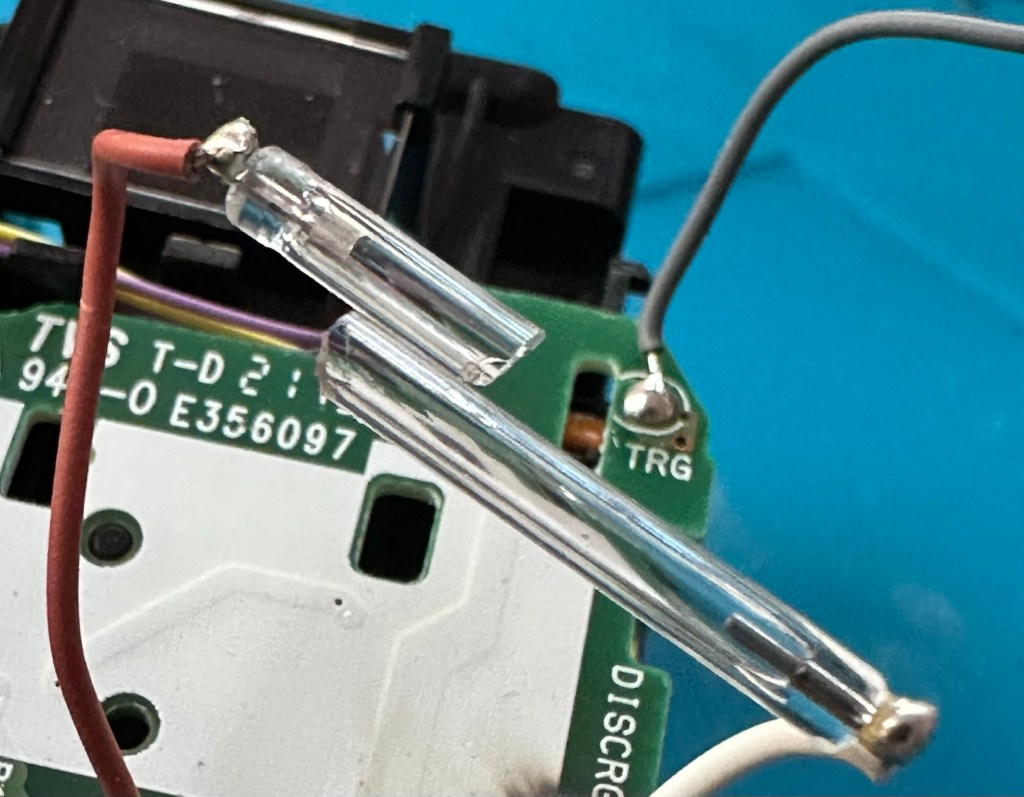
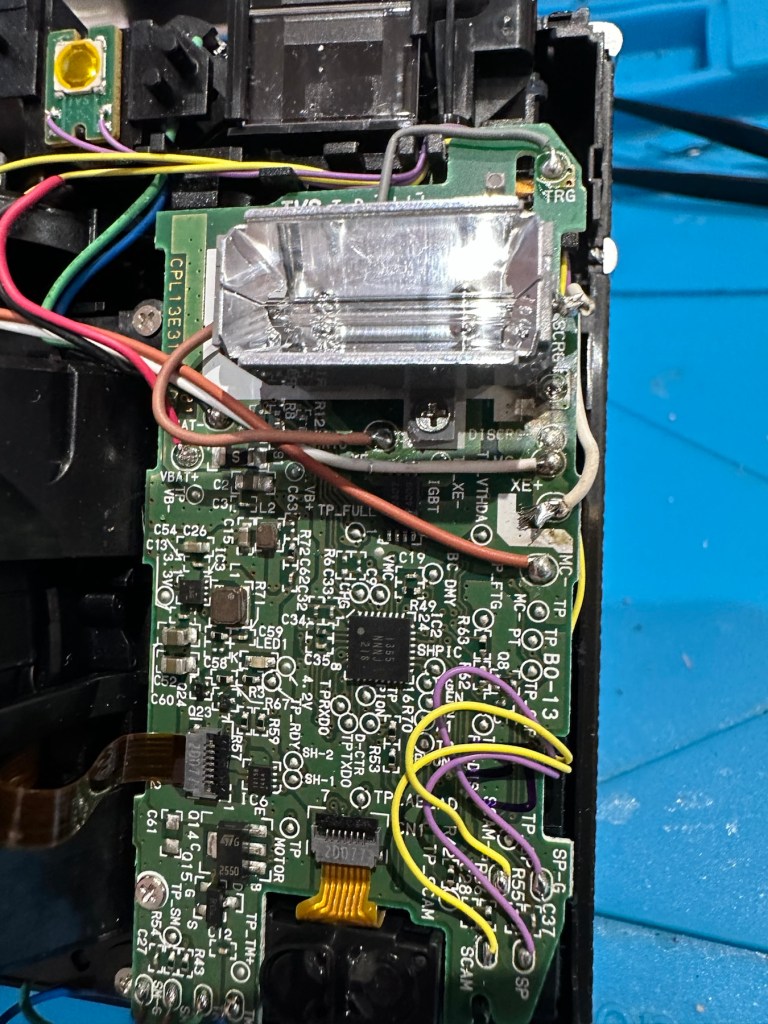
I have a donor flash bar in an old spare unit. I have carefully unsoldered its connections and gently removed the very thin glass tube from the donor unit and placed this in the one situated on the new camera.
The donor unitIn place and soldered onto the board of the repaired camera
Carefully, once inserted into the flash reflector, i have soldered it back onto the board. All looking good. However I need to test the flash so I temporarily put the case on, bung in two batteries and turn the camera on. Press the exposure button and the flash fires perfectly. Happy days. I now can confidently reassemble the camera back together, and I’m pleased that when this is done there are no screws left over. All small wins.
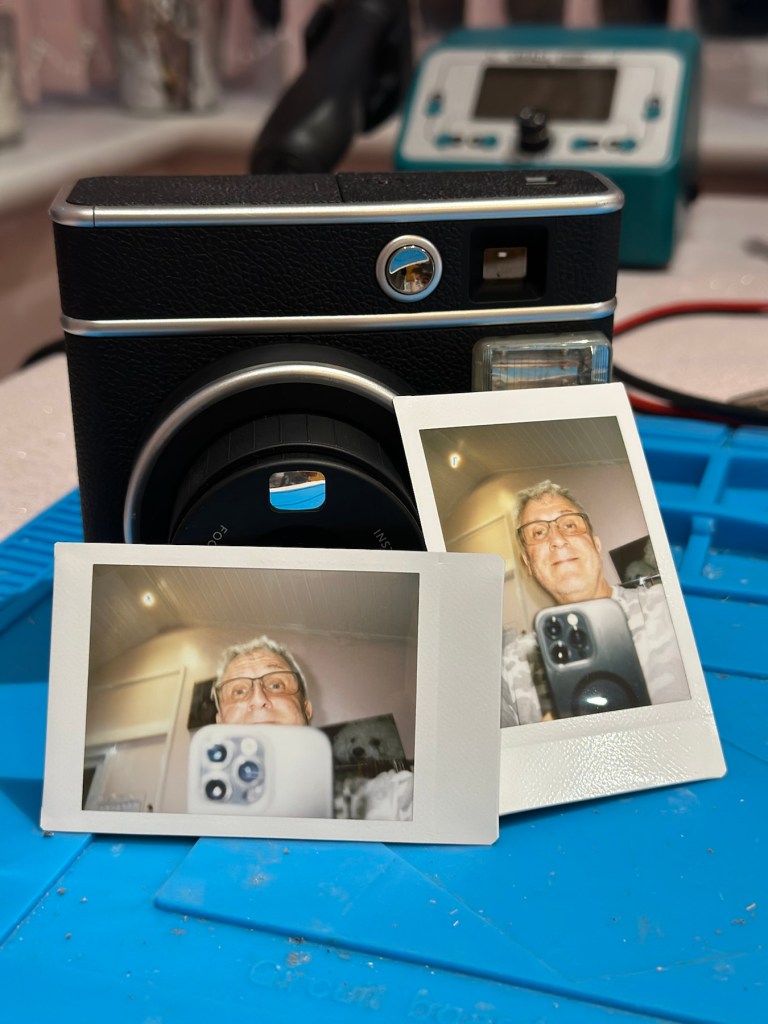
I have some film available so there is no better time than the present to give it a try.
Result:
Nice flash – working Working perfectly
I’ve loved doing this repair, this is a good quality, great condition, and now in perfect working order camera, brought back to life with many more years of use left in it.
But it could have been just chucked in the waste. I’m keeping this one for my collection as it’s a fantastic example acquired at a very good price. Thirty minutes of attention is all it took.
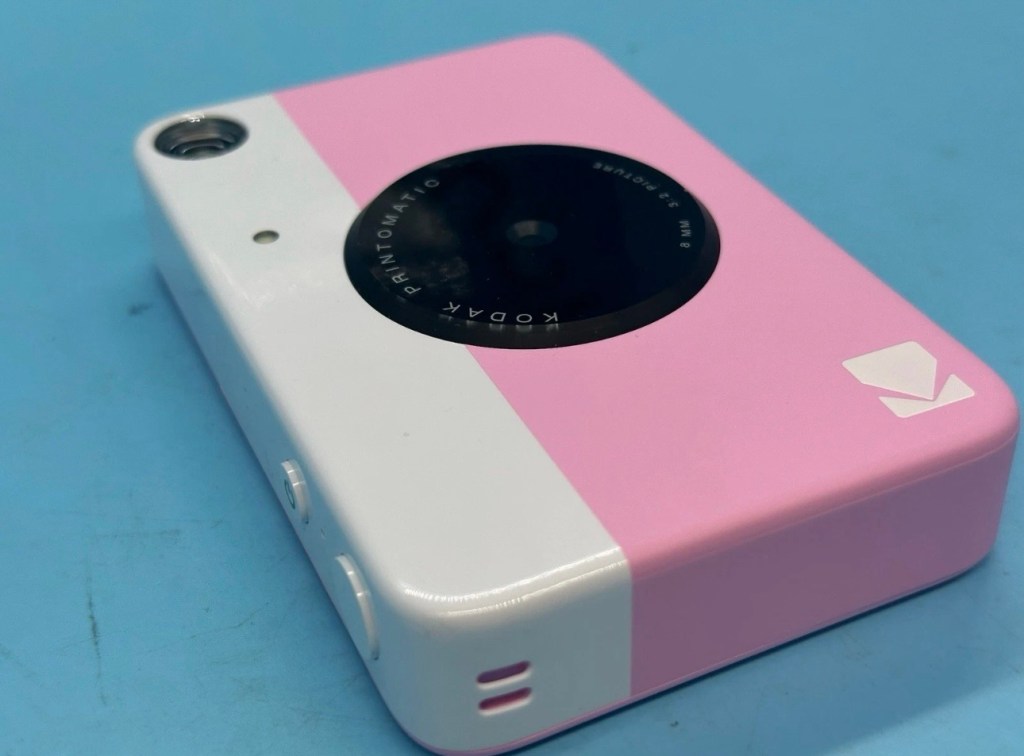
I’ve just purchased three of these cameras for a total of £24:98GBP. All non working of course but when healthy they normally command a price around £35:00GBP each. Here is what the listing said for each one:
Camera one:
Camera one
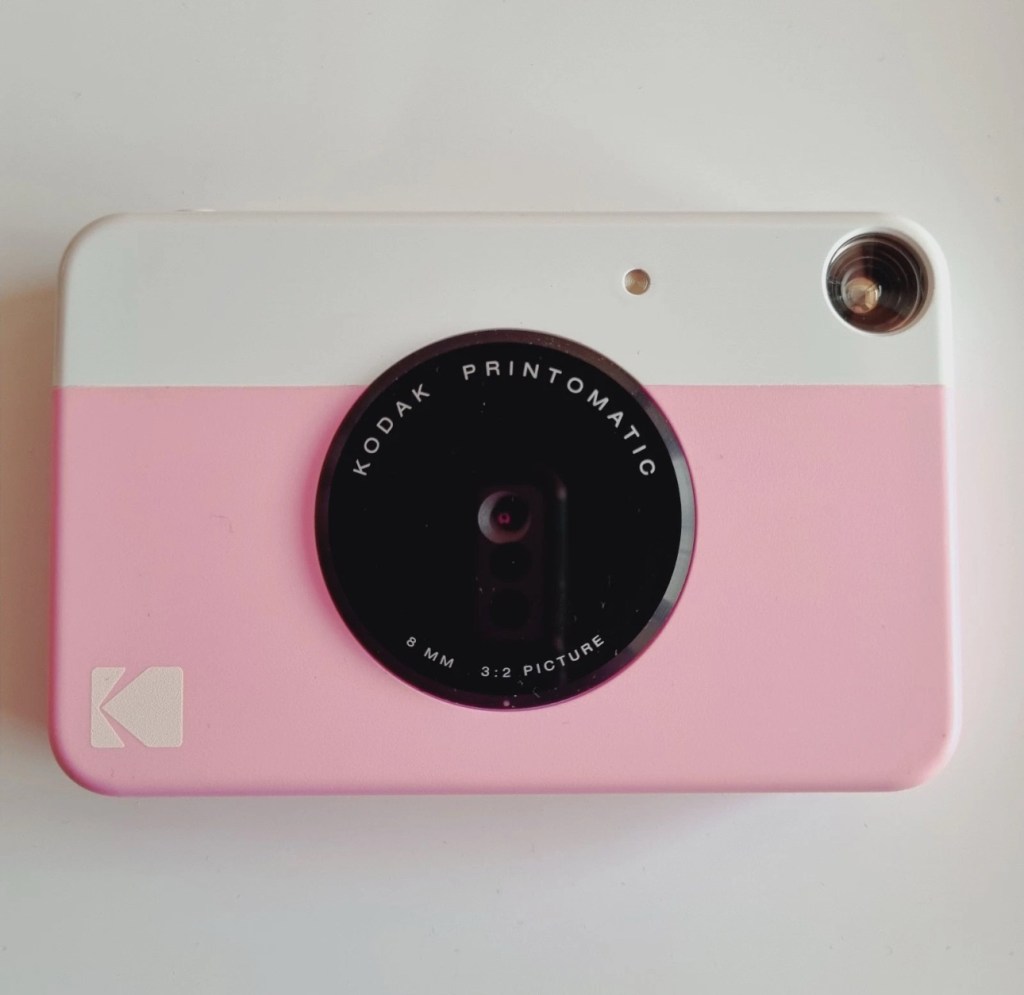
Kodak Printomatic Digital Instant Print Camera
Camera does not print
Can be repaired or used for parts
EBay
Camera two:
Camera two
Camera is in good cosmetic condition.
Camera doesn’t charge. Battery charging light flashes but it doesn’t hold battery.
It hasn’t been tested further.
EBay
Camera three:
Camera three
Please look at the photos carefully, as they make up the majority of the description.
It has two faults
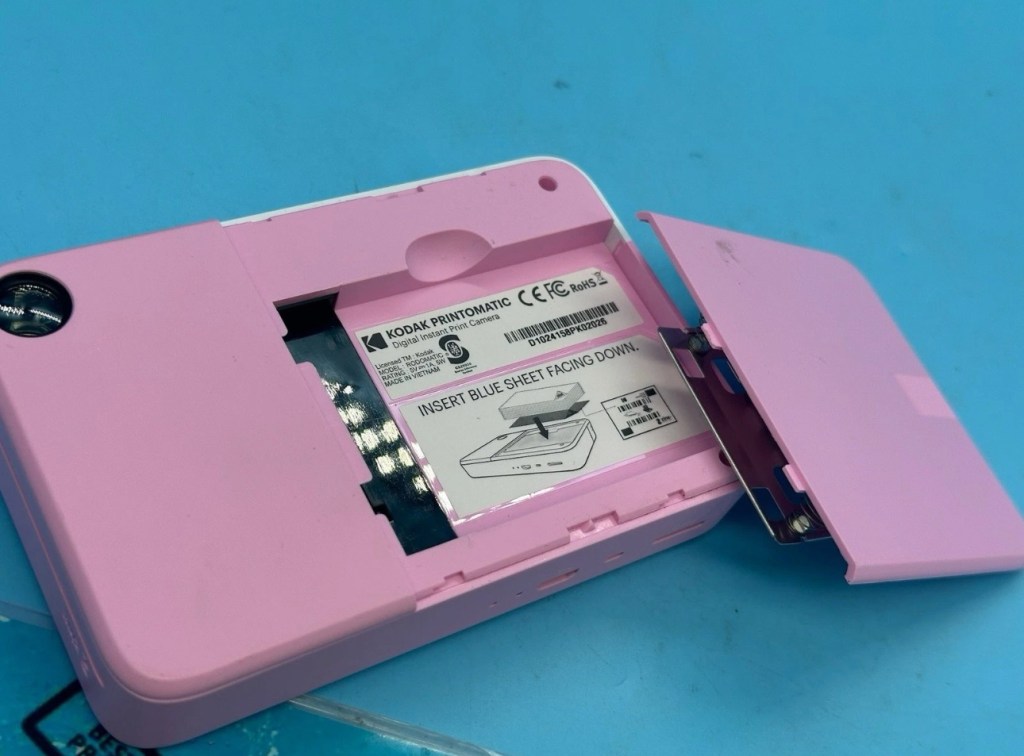
The springs on the back are broken, meaning the rear metal plate is bent , and it often doesn’t push photo paper through correctly.
The shutter button is also depressed.
EBay
This third one might be a longer term repair as I’ve never known a quick fix for a depressed button, that requires a psychiatrist… (That’s me just trying to be humorous, I’ll grab my coat and leave now 😂🤦♂️)
To be honest the issue with the third camera seems to be a regular problem based around the design of this camera. Too much pressure on the button normally results in the switch inside detaching from the main board, it’s poorly positioned at an angle and usually not soldered in place too well. The springs should be an easy fix.
I’ve brought these cameras from three different sellers. if I’m lucky I’ll be able to get all three up and running, worst case scenario is that I use one for spares and have two good working examples.
Anyway I’ll just have to wait for their arrival to assess them all, and decide what repairs are required. In the meantime here’s a little bit about these cameras that are again very similar to the Polaroid “Snap” camera range, that also use zink paper. And seeing what is quoted below, the Polaroid “Snap” and this Kodak Printomatic are in all aspects one and the same camera.
Well, since Kodak doesn’t really make its own consumer cameras anymore, the Printomatic is actually being produced by a company called C+A Global, which is just licensing the Kodak name and branding. C+A also licenses Polaroid, and was behind the two-year-old Snap. Both cameras were designed by Silicon Valley firm Ammunition Group, which confirmed to The Verge that the Printomatic is basically the same camera as the Snap, though simplified and rebadged. (The cherry on top of this corporate synergy sundae is that C+A also works with Zink.)
Released 2017
The PRINTOMATIC camera instantly and automatically prints high-quality, full color photos with point-and-shoot ease. It uses KODAK ZINK Photo Paper, so no ink cartridges or toners are needed. The photo prints are durable, water resistant, and adhesive backed for extra fun. The camera’s speed allows you to shoot a new photo while printing the previous shot. The KODAK PRINTOMATIC is fast, fun, and easy to use.
Features
5MP image sensor
Prints automatically when image is captured
Vibrant 2″ x 3″ photo prints are durable, water resistant, and adhesive backed
Built-in flash
Optical viewfinder
microSD™ card slot
Kodak Ltd & The Verge
The reviews all vary, from very good to downright diabolical, I’m not really surprised since Kodak “Hoared” out its brand name to the lowest bidder many years ago. Am I bitter? A little, as I used to work for Kodak in the days when they were a world leader, the mistakes they made, the decisions and leadership were absolutely awful. And the fact that their demise has lowered my pension pot by about 40% due to their financial mismanagement is another axe that I regularly grind. Yes I am bitter, and since I’ve recently repaired and reviewed their competitors cameras I thought I’d give these a try. Will I be impressed or disappointed? Who knows but I do have an inkling on which way this may swing. But for what I’ve paid for three cameras I’m not really that fussed, it’s just pocket money.
Assessment:
Camera one:
Apparently doesn’t print. Well I’ve put a couple of sheets of Zink paper inside and two pictures were produced. The sd card slot is fine, the charging port is in good condition. Transport is working perfectly. It certainly does print. Just needs a bit of a clean. To be totally honest there is nothing wrong with this camera and for an outlay of £8:00GBP in total I have a working bargain. Kerching – a rare EBay win.
Printer works, camera works
Charges fine Looking nice after a light clean – no marking
Nothing more to do on this one. So on to camera two.
Camera two:
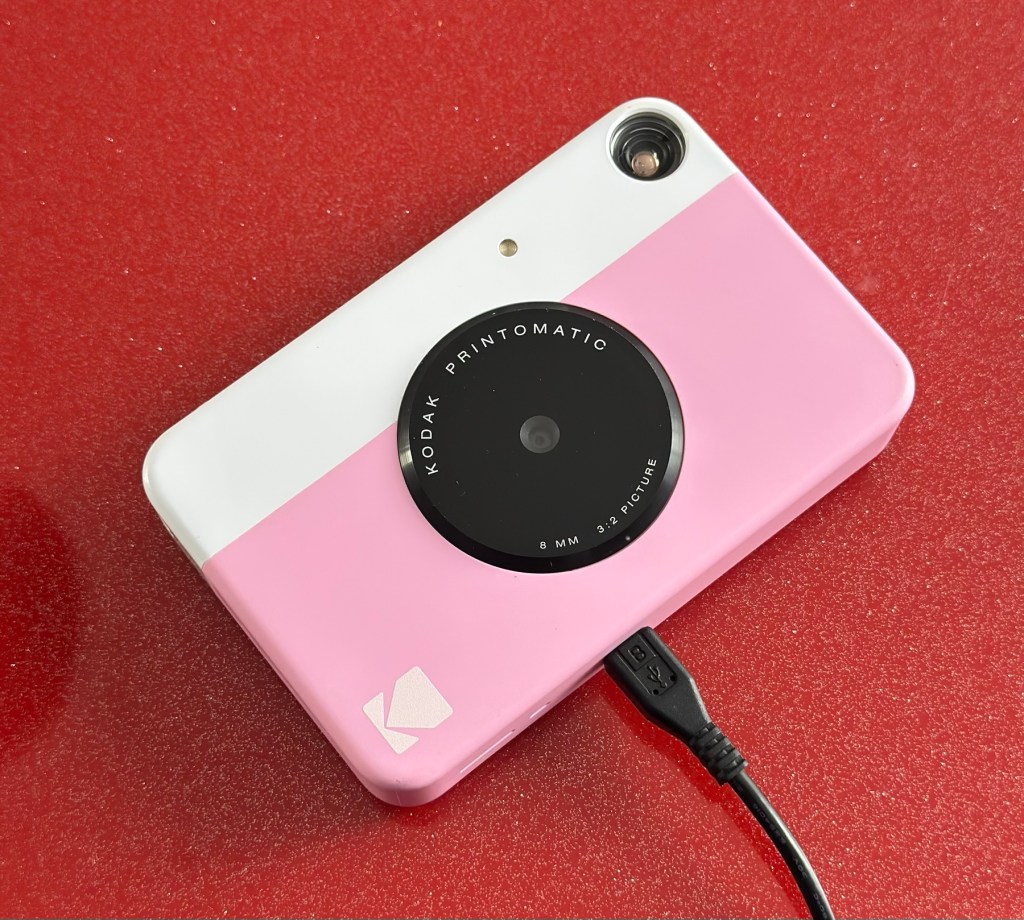
It’s a bit grubby cosmetically but nothing that a light clean wouldn’t sort. This particular one cost £8:99GBP all in. It was dead on arrival so I’ve checked that the charging port was ok, and then put it straight on charge.
On charge
I’ve also given it a light clean whilst charging and the overall appearance has greatly improved. I must just be patient and wait and see if the unit does take a charge, or the original fault appears.
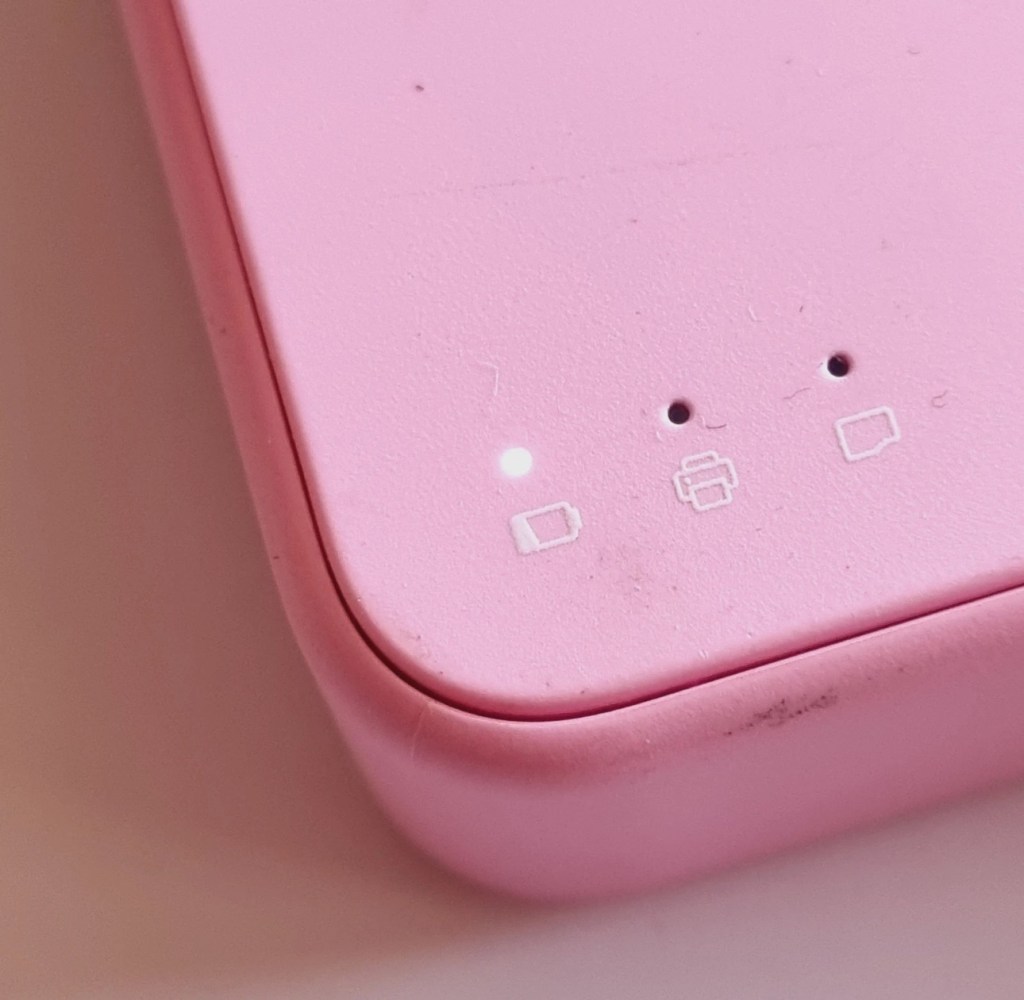
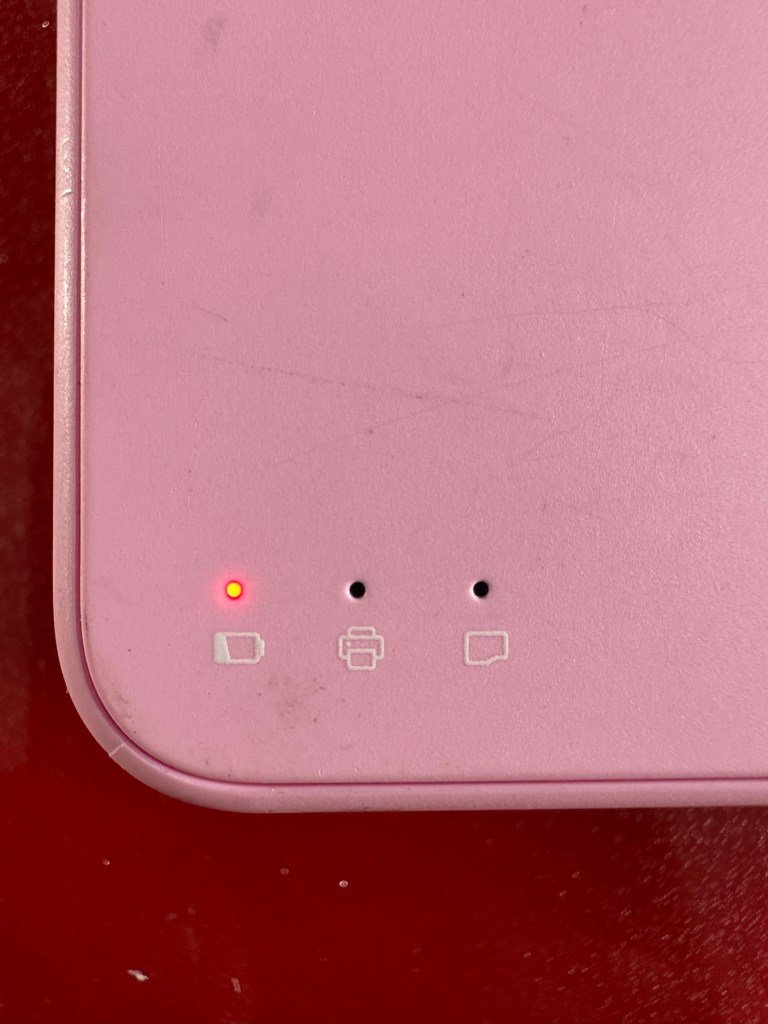
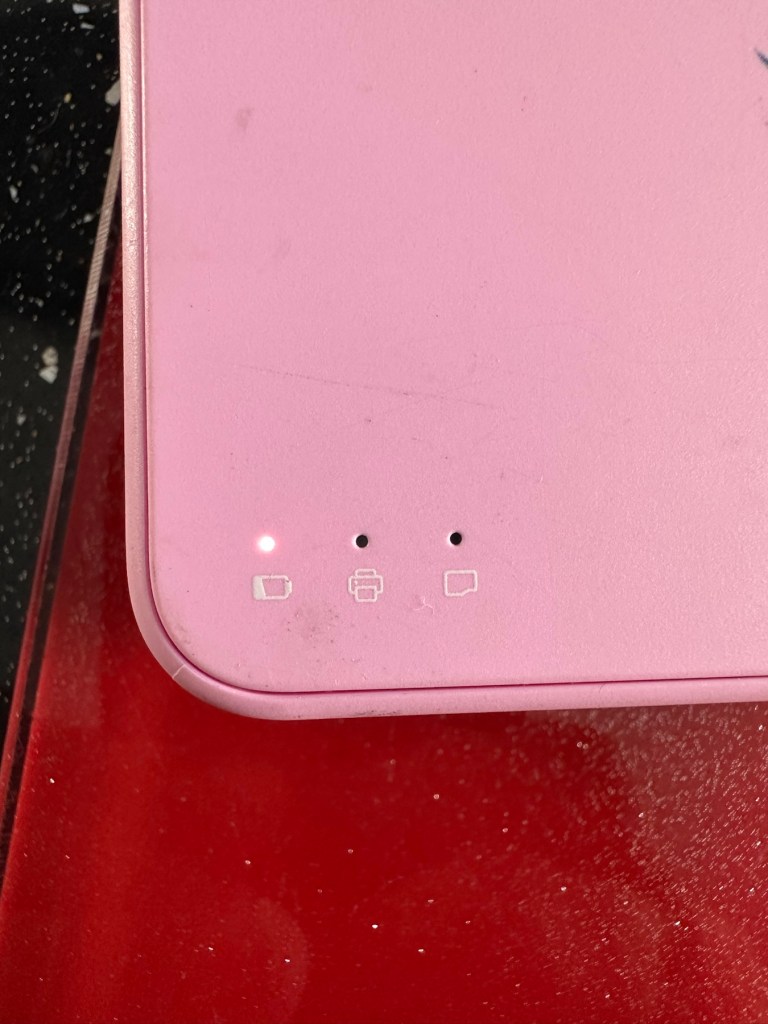
Initial red indicationNow a rapid flashing white indication
Whilst on charge the originally mentioned fault appears. The charging light was showing a steady red, it is now a rapidly flashing white light with the occasional steady red indication for all of a few seconds and then it’s back to the rapid white indication and it then all repeats. I’ll leave it for a while to see if there is an improvement, the battery just might be so dead that the inbuilt battery management system may just well be refusing to cooperate.the on/off button on the front doesn’t work as well, this might be also related to the battery issue.
Camera three:
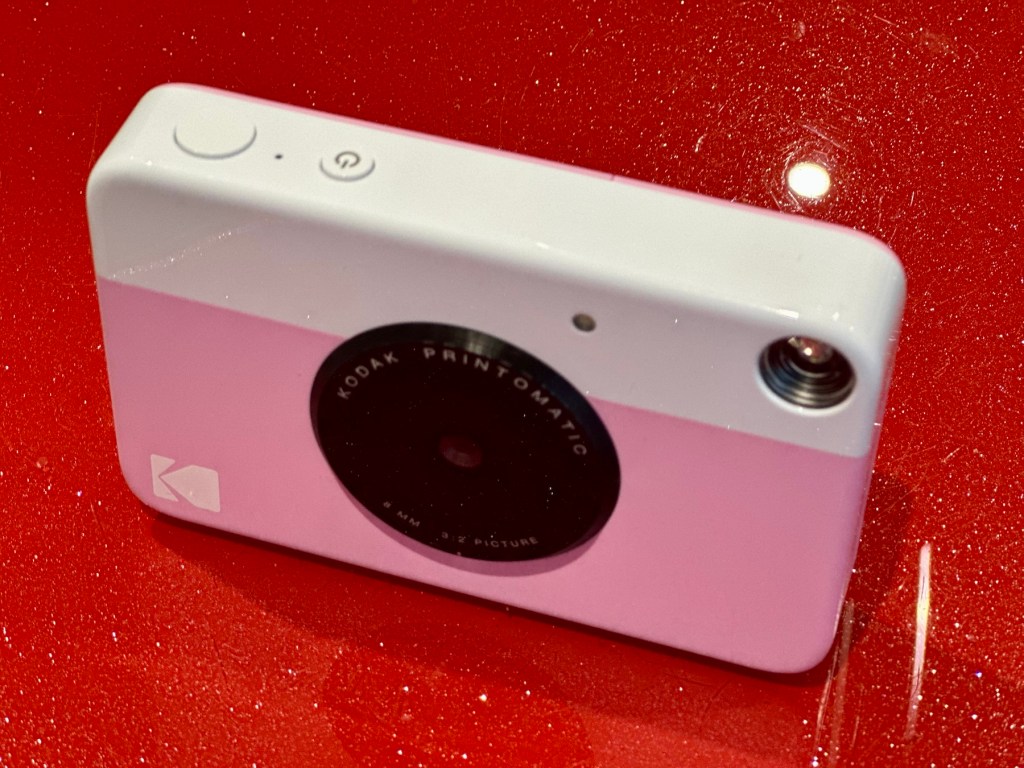
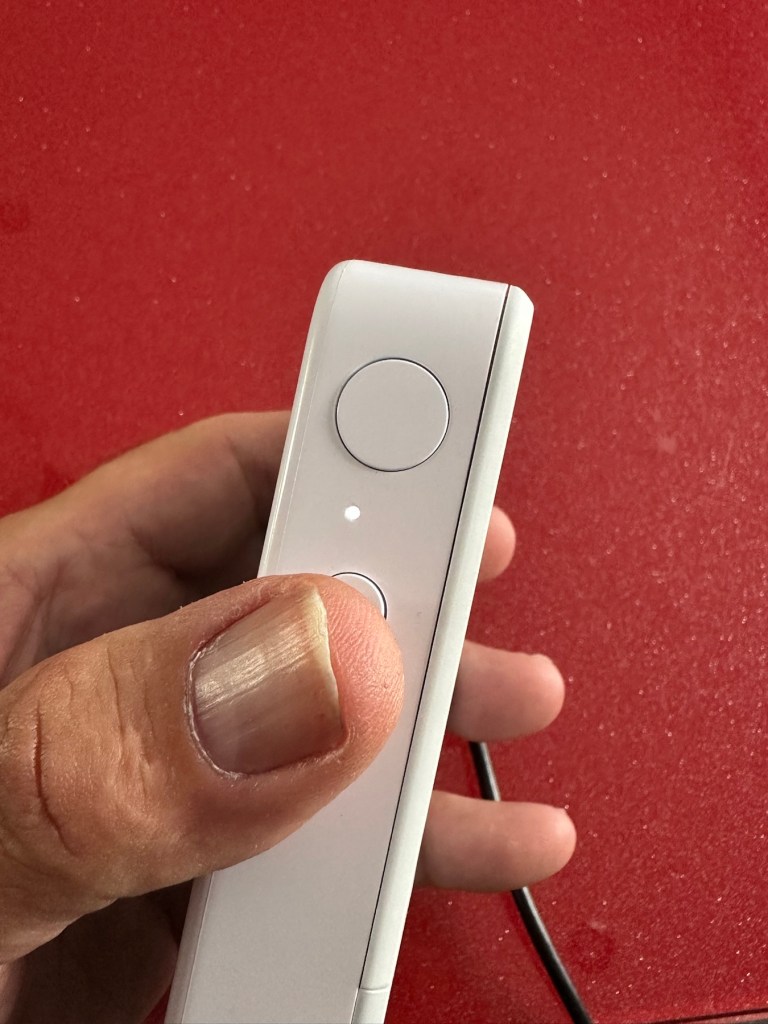
Looking very nice and cosmetically very clean.
Nice camera
This one cost £7:99GBP all in. This one is reported to have two issues, a damaged paper pressure pad and a button stuck in the depressed position.
Paper pressure pad is bent and missing two springs Exposure button stuck in, white light flashing as a result
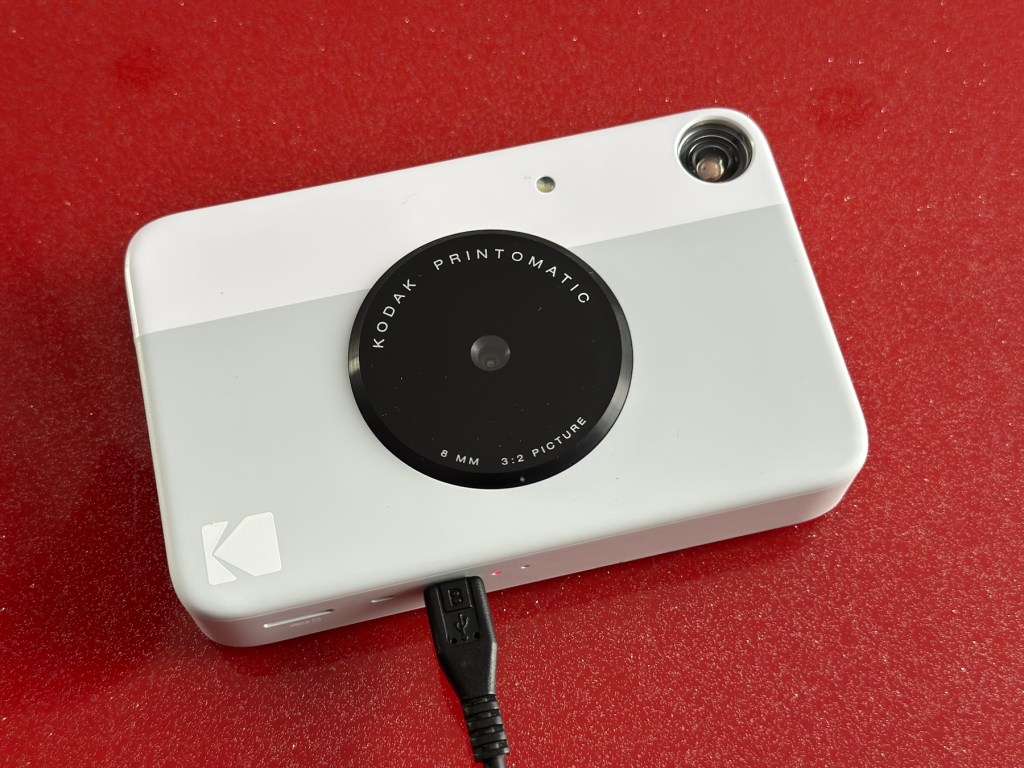
But first I’ve put it on charge to see that it charges, I’m pleased to report that everything is alright in that aspect, and I’m pleased to say it charged fully with the correct lights illuminated. The white light on the top by the exposure button is flashing as a result of the button being stuck in the depressed position, I believe.
Camera has charged fine
This one will need the paper pressure pad repairing as well as the button that is stuck in the depressed position.
Repair:
Camera one:
See above. No repair required. Just a light clean and some TLC. Why did they sell it as damaged? Who knows just what goes on, in the mind of an EBay seller.
Camera two:
This will need to be opened to get near the battery. We may well be able to get the battery to accept a small charge and this may be just enough to fool the battery management system in the camera to take over and continue charging.
Cover off and the confusing lights
Cover off I’ve checked the battery readings and it’s reading a healthy 6.5v and as it’s a 7.5v rated battery I believe this to be healthy, it holds a steady charge the battery is fine. Looking at the led lights they are capable of two indications, red or white and that’s it. I believe the charging light flashes when it’s charged as it cannot possibly show a green light as there isn’t one. This is confusing as normally a flashing white/red light normally indicates that the battery needs charging. Everything that is happening goes against what the producer has published regarding the led indications. But I am convinced the battery is good despite it not turning on. Hold on, I think I’ve found out the problem here…..
Cable disconnectedCable now connected On off button ribbon connector was not in place
It appears that someone has been here before me or that the on/off button ribbon connector has disconnected itself over time. Either way it’s not where it should be. I’ve put the connector back in place and secured it. I now have power and control of the camera.
All lights working, transport whirring away let’s put some paper in to give it a try.
PrintingDirty print roller
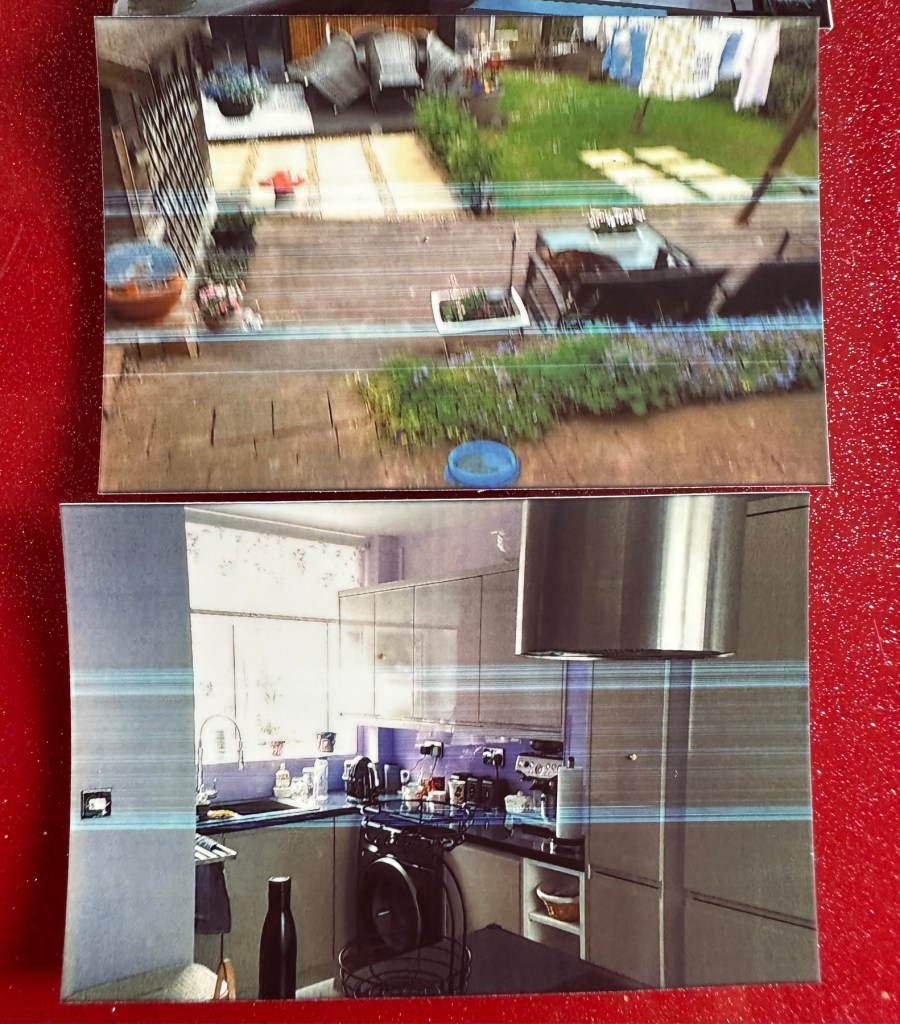
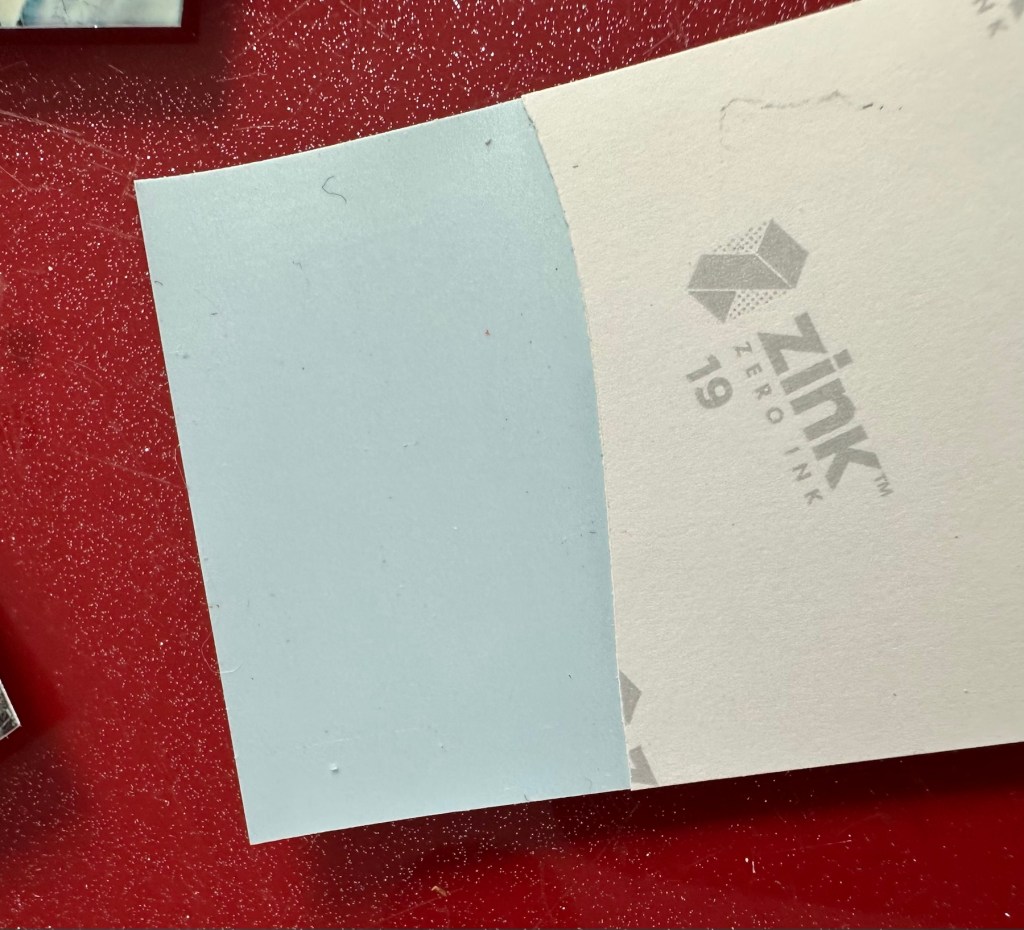
Well it prints ok, all pictures appear to have a “blue tint” to them, however there are big tramlines across the print as you can see, this indicates a dirty roller. What I’m going to do here is peel half the backing of a sheet of Zink paper as the back is adhesive allowing you to stick photos on whatever takes your fancy. By running a half sheet of exposed adhesive, upside down through the camera with the adhesive being the trailing edge, it should allow any debris and dirt to be collected on its way through. I will do this three or four times and even though I will no doubt get error lights appear I can just reset the camera with no further issues.
Zink adhesive exposed
And that worked. The tramlines have gone.
Tramlines on bottom left picture as a reference. All other pictures now clear.
I’ve also tried the black and white mode as you can see above. I’m very confident, in fact I am positive this camera is now working as it should. I have also put an sd card in the base and all pictures are being recorded as expected. A quick clean and we now have a perfectly good working example of this camera. Let’s move on to camera three.
Camera three:
We have to open up the camera to get to the issue with the button.
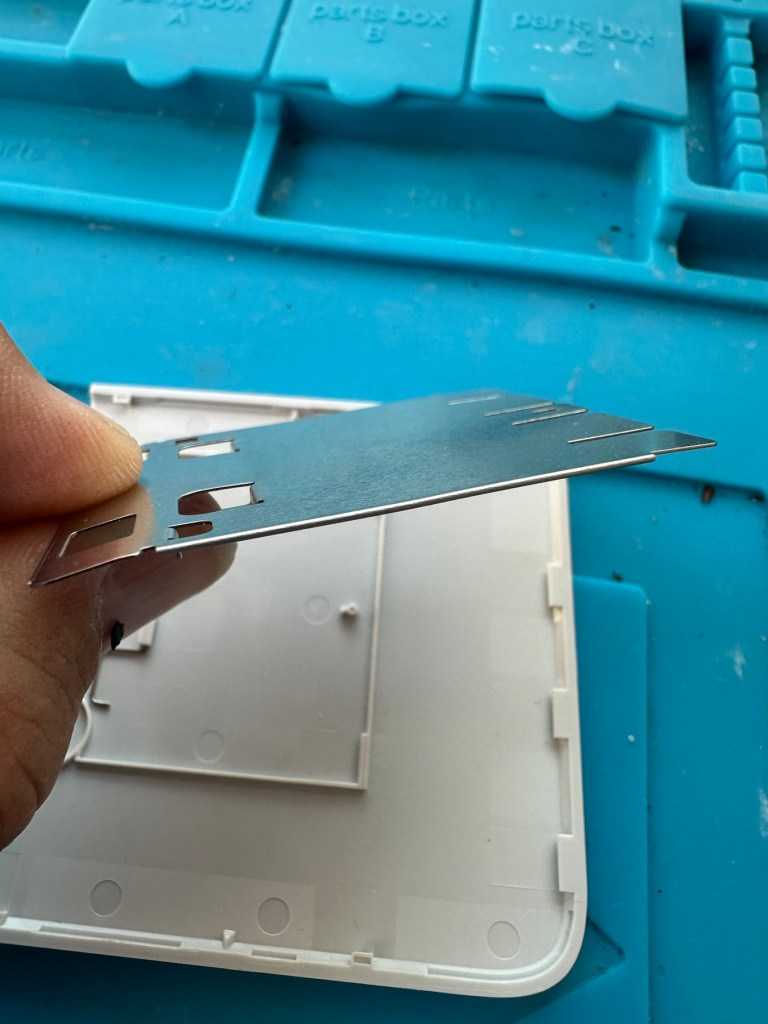
The paper pressure pad needs to be dismantled, straightened up and two compatible springs need to be found to keep the required pressure in place on the paper pad. I’ve dismantled the pressure pad and straightened it out, just needs a couple of springs to complete, I’ll sort these out later.
Bent upStraightened out Back in place just awaiting new springs
On opening the camera it was as clear as day that the depressed button was as I first thought, the three solder points below it had come loose, no longer making contact.
The working switchThe faulty switch that looks like it’s smiling
It’s plain to see in the pictures above that the button that is damaged has all three points of contact broken. these need re soldering to strengthen them. You can see this issue in the microscope pictures I took below.
Top: Before, Bottom: after
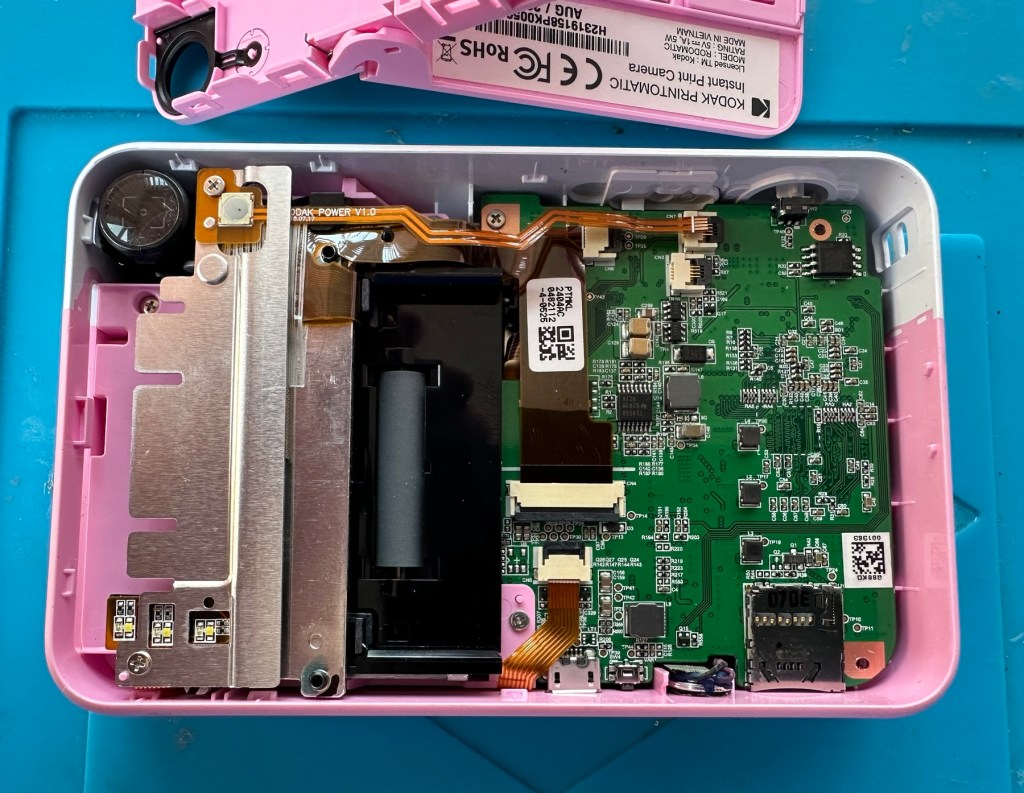
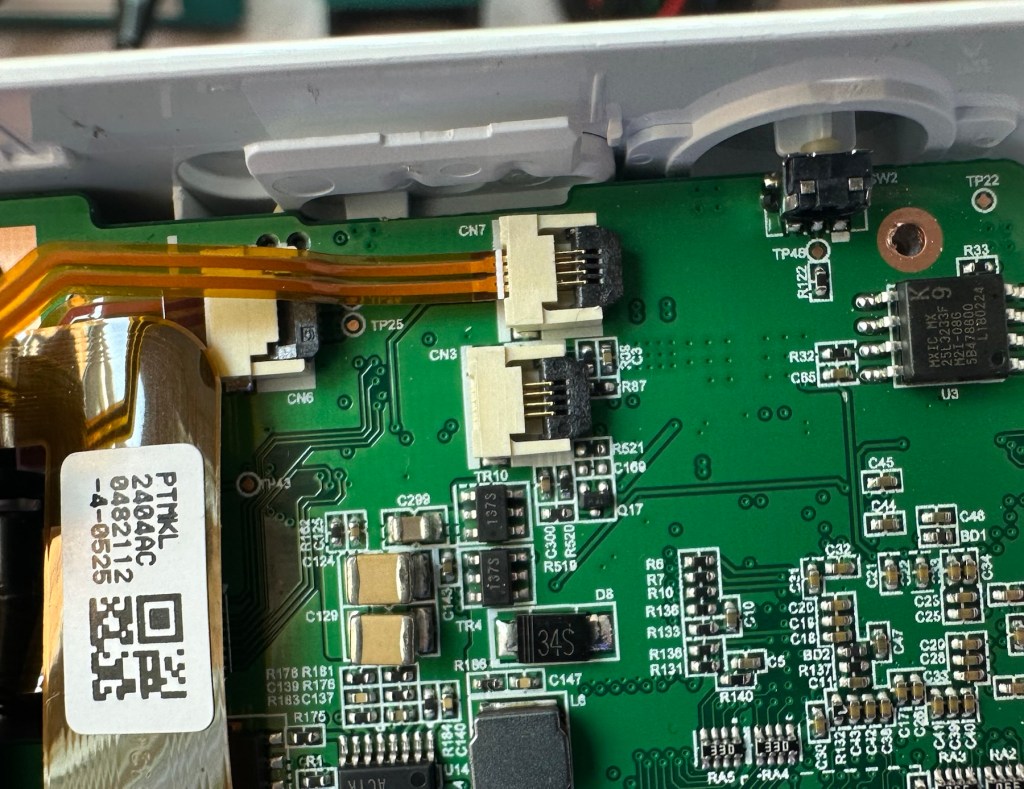
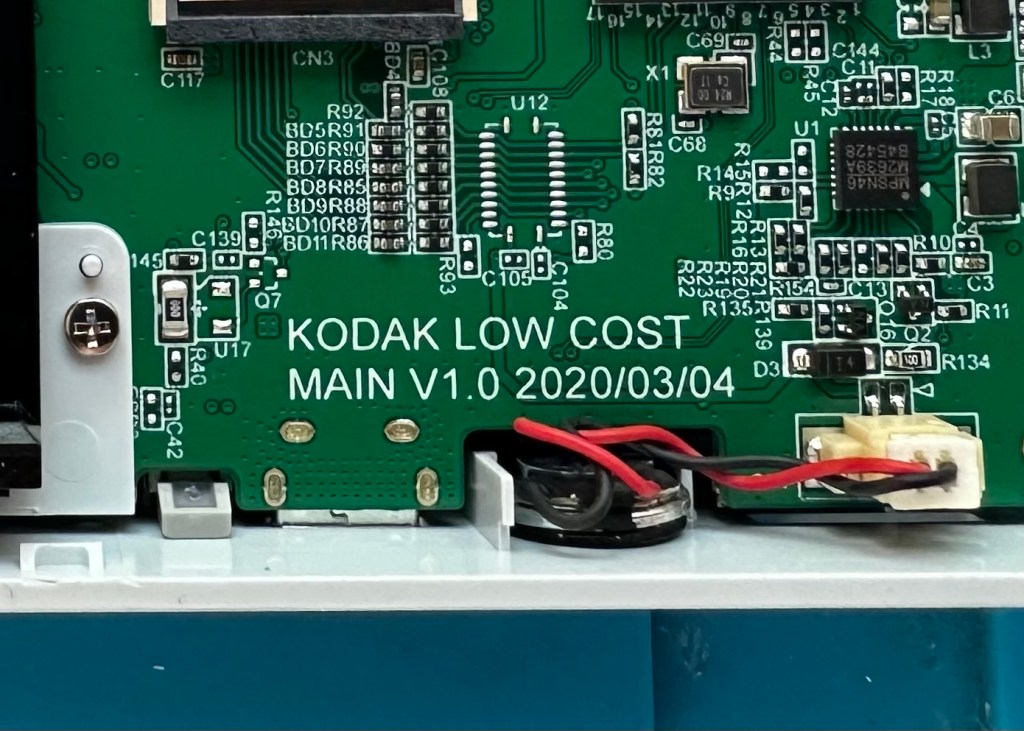
The switch has been tested and it clicks and operates as expected, this is a known weak point with these cameras and a design fault as well, although the manufacturer would probably deny this. It’s a given fact that the manufacturer wants to sell as many as these units cheaply to the throw away consumer, you only have to look at the main board below to see this…
Says it all really….
It really saddens me to see the levels the Kodak name has sunk to, these units are just replicas of the Polaroid touch/snap range, but even at this stage in the repair the Polaroid versions are far superior. Quality control and the cheap design of these Kodak units is borderline awful.
This unit is proving to be a right pain in the ass. The original fault with the exposure button has been repaired and the paper pressure pad is all but repaired, but it seems that being hidden by these two faults is a totally different issue. I have had this camera completely dismantled and have also separated the printer from the motherboard, but this issue of the permanently flashing white light still exists, so the fault is definitely only being carried on the motherboard.
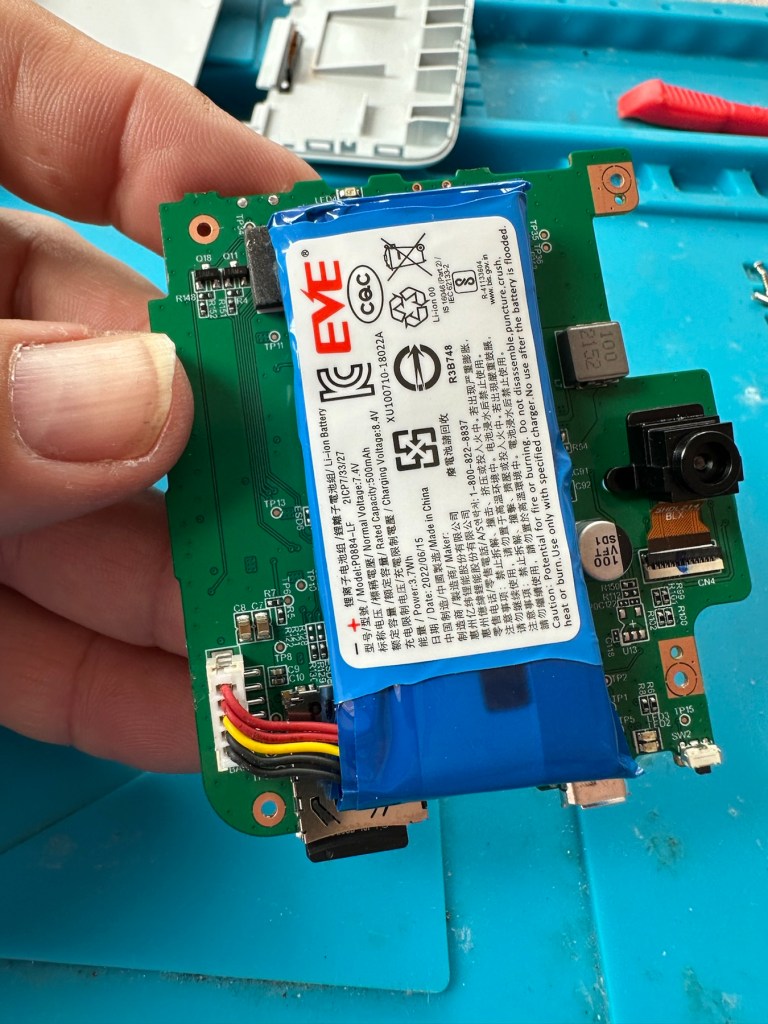
Motherboard under microscope Lens ribbon cable insecureMotherboard separated from printer unit
I’ve checked the motherboard thoroughly using my microscope and there is nothing glaringly obvious at fault. I have checked for shorts on the board of which there are none. The only issue I found was that the lens ribbon cable was sitting off centre, however I corrected this but the flashing light issue still remains.
There are two faults that are connected with this flashing white light. One is that the light occurs whilst printing, this is not the case with this unit as it even occurs as stated with the printer disconnected. The other possibility is that it flashes when doing a firmware update, I have attempted to update with the latest firmware and the only difference is that I cannot turn the lights or camera off at all, I have to crash it by removing the battery.
It’s looking as if this could be the issue. The previous owner has probably bricked the unit by interrupting a firmware update and it has corrupted the system. I’m going to have one more attempt at updating the camera with a clean unused sd card to see if there is any possibility of recovery. If this cannot be done then this unit will become a spares unit that to be honest I’d rather not have as I don’t really want to purchase any more of these cameras. But you never know, someone may want one repairing.
Result:
Well in the wise old words of Meatloaf, I guess “Two out of three ain’t bad”. The grey one is bricked, as after numerous attempts of updating the firmware it just isn’t having it. It is just a brick. However there are numerous spare parts that can be used including a good battery, lens mechanism and a number of other pieces. I just didn’t want that though as i don’t really see myself going out of the way to obtain another one, they are as cheap and nasty as you could possibly find. The Polaroid versions are of a far better quality in my opinion, and they are hardly high class.
2 out of 3 ain’t bad
The positive here is that 3 cameras, quite obviously built for the throwaway generation have been saved from landfill and can be used again. What I’m going to do with the two I have is probably put them both back on to eBay to recover my out goings. If not, I will pass them onto our local hospice to sell on.
Been an interesting fix, but I’m not venturing back to these Kodak models anytime soon.
Well this is a first. I thought I’d answered all of the WordPress daily prompts but I’ve either missed this one in the past or barring that they’ve actually added some new prompts. I personally think it’s the former and I’ve just not been paying attention, however they wish for an answer and who am I not to see that through. Here we go.
Self care
I’m not being pedantic when I post a title such as this, but I must admit that probably just like a lot of others out there, self care is not anywhere near the top of my agenda and sits quite low in the pecking order of things for me to do.
To be honest the feral cat that resides in our garden gets fed before I even think about feeding myself or taking my daily meds, to think of it even the plants in the garden get fed before i attend to myself, and my wife’s needs also come before any needs that I have that may need attention. I’ve always been a person that deals with others first, and get great comfort in seeing other individuals looking happy and comfortable, yes, being looked after.
I know people will start chuntering “Ooh you have to look after yourself “ and maybe they do need to do that, but to be honest I’ve managed almost 60 years without it and I’m doing just fine thank you. I’m not the sort of person always at the doctors door , expressing every ache and pain, I know when something seriously isn’t right and even then I question myself whether it’s even worth bothering anyone about.
My self care really is limited to my walking, my hobbies and occasional quiet time, all of which are just fleeting activities that are grabbed at, once every one else is catered for.
I know that there will come a time where I just can’t do anymore, and that will be the time when I will have no alternative but to stop, and look after what I have left. Yep, it maybe too late, but at least I will have great comfort in knowing I have put everyone else first.
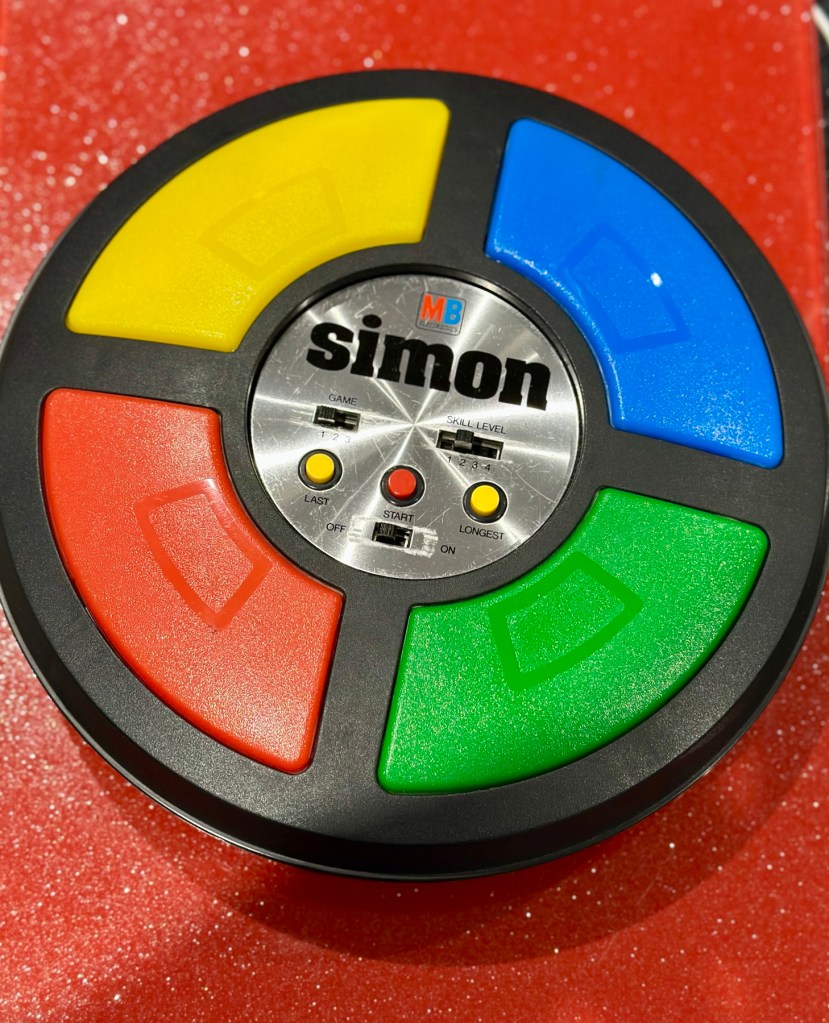
Remember this? Everyone had one around 1978 apart from me that is. Well, now I’ve got one, only 47 yrs late and it doesn’t work. But hey that’s what this site is all about, and that’s how I roll. Always late to the party, and even then you’ll probably find me in the kitchen 🥳
What the listing said:
Cosmetically in very good condition but does not work. Please see attached pictures to judge condition for yourself.
EBay
Another one with all battery covers! I’m shocked. And what’s that screwdriver there for?
The guy was after £17:00GBP and that included postage, but I put in a cheeky bid and managed to get it with postage for £9:80GBP. Anything under a tenner is good in my eyes.
Here’s some history:
Simon is an electronic game of short-term memory skill invented by Ralph H. Baer and Howard J. Morrison, working for toy design firm Marvin Glass and Associates, with software programming by Lenny Cope. The device creates a series of tones and lights and requires a user to repeat the sequence. If the user succeeds, the series becomes progressively longer and more complex. Once the user fails or the time limit runs out, the game is over. The original version was manufactured and distributed by Milton Bradley and later by Hasbro after it took over Milton Bradley. Much of the assembly language code was written by Charles Kapps, who taught computer science at Temple University and also wrote one of the first books on the theory of computer programming. Simon was launched in 1978 at Studio 54 in New York City and was an immediate success, becoming a pop culture symbol of the 1970s and 1980s.
Wikipedia
From what i can see in the pictures the item seems good, cosmetically. I may be able to see just a little contamination around the battery contacts but I can’t be sure. It worries me when i see a picture that shows a screwdriver alongside the item you are buying, it just screams at me that the seller has been in side and is not being truly honest about its issues. Let’s just wait until it arrives to do a full assessment. I’m genuinely excited about getting this working, as my age veers ever closer to the higher numbers. I need something to stimulate my mind, what’s left of it. 😂
Assessment:
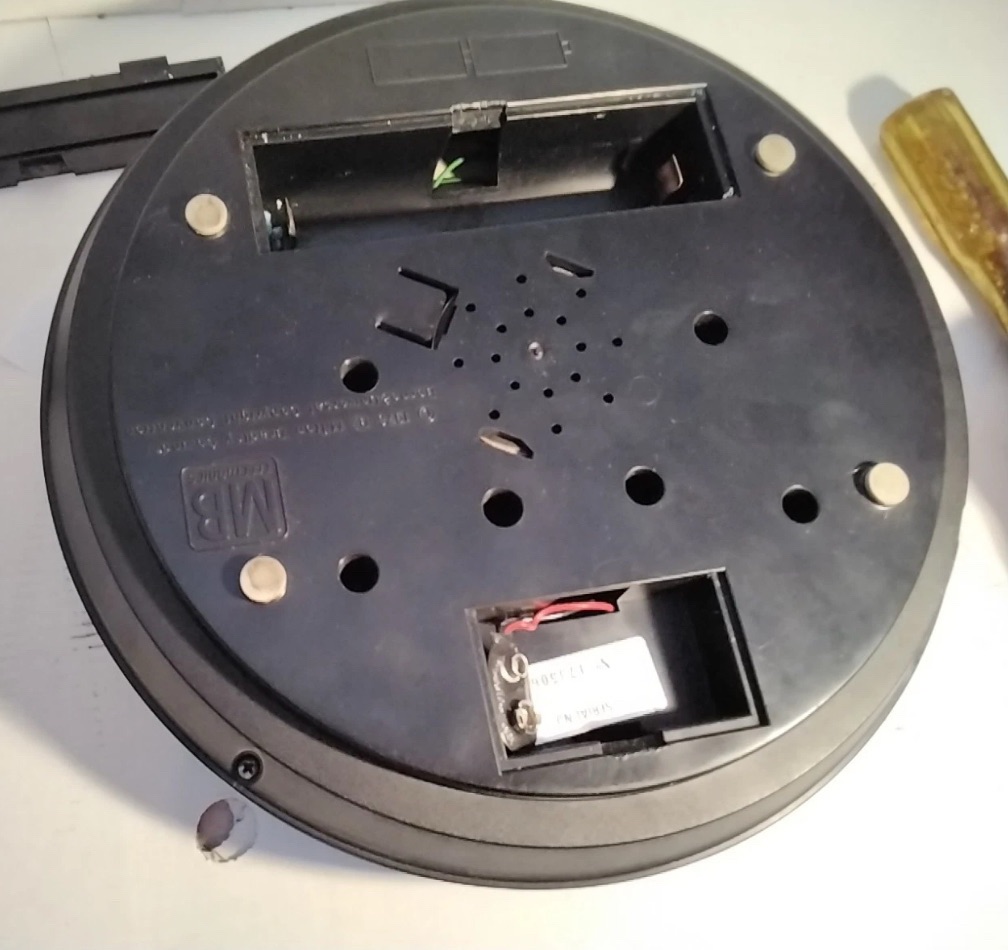
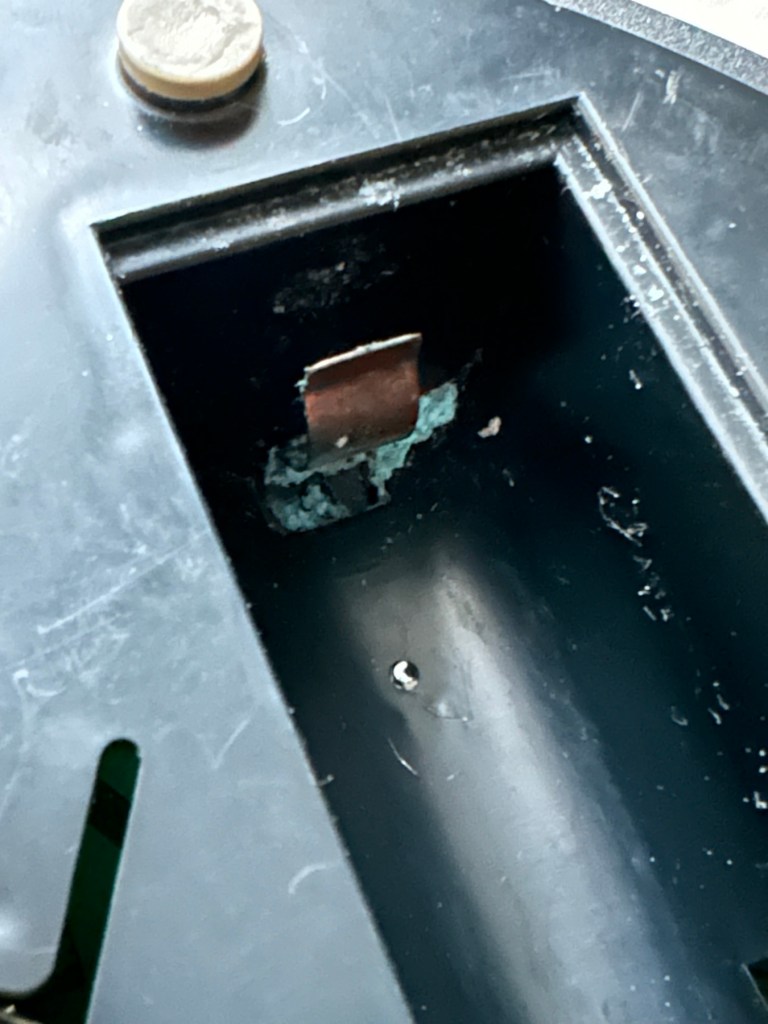
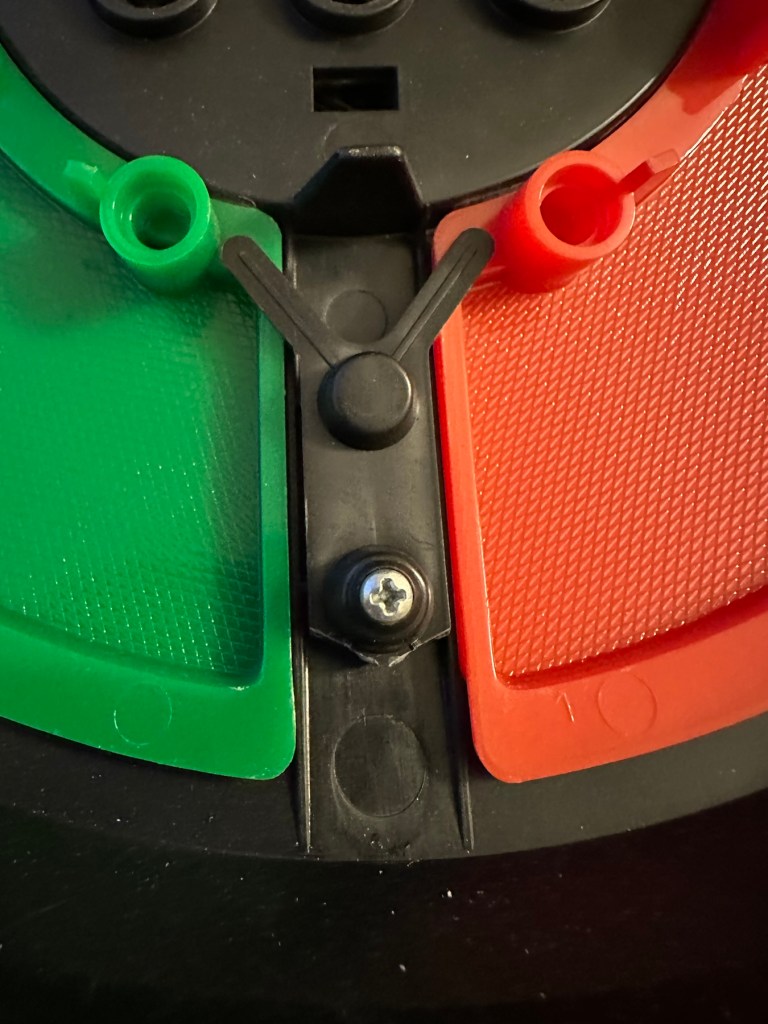
The unit has arrived and on first impressions looks clean and tidy cosmetically. The pads are not very responsive and the battery contacts are seriously corroded. The unit is a power hungry beast, taking two ”D” cell 1.5v batteries and one PP9 9v battery. The unit does not work with its batteries in place, and i’m not surprised really, and to round it all off two screws are missing from the case, and one screw mount is broken. All four plastic springs that sit under the coloured pads are broken, and just to clarify someone has already been in here and it doesn’t bode well. My previous concerns of a screwdriver being in the original photos have been confirmed. It’s been tampered with.
Broken screw mounts and contamination Bad contacts – contaminated Pads unresponsive due to broken plastic spring mounts
The board is a typical of many circuit boards from this era that were produced for MB. I had a similar circuit board on this item here: MB – Computer Battleship
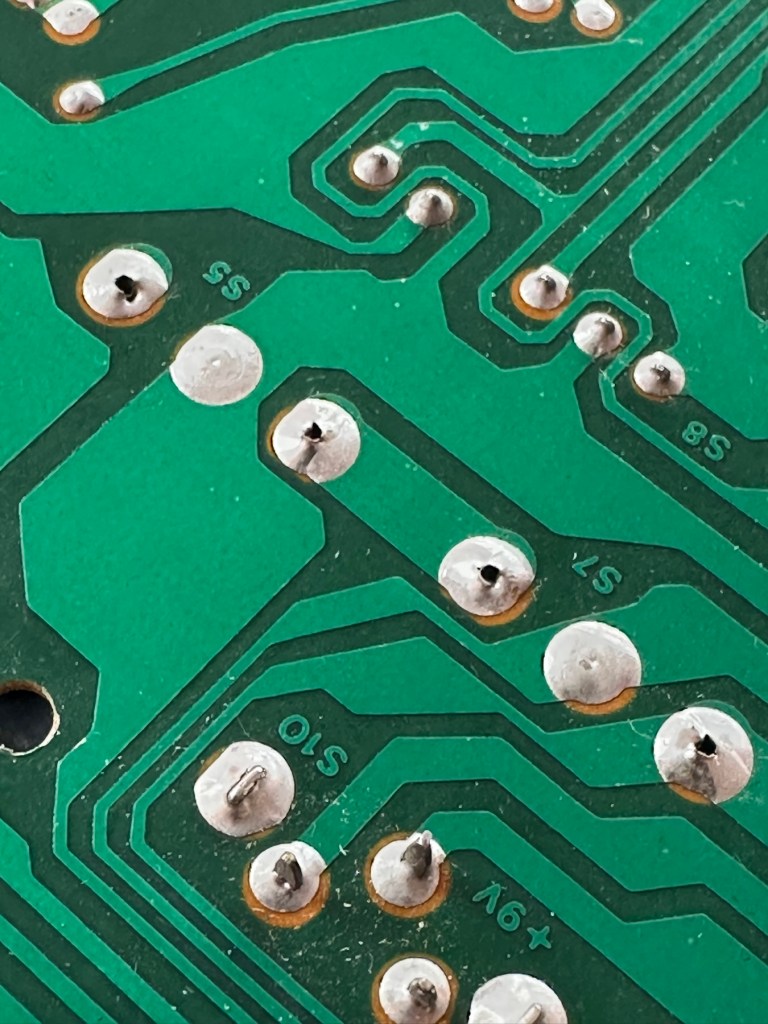
Top of boardUnderneath the boardYou can see the board structure that is typical for this era. The contact points are indicated by the red arrow marks.
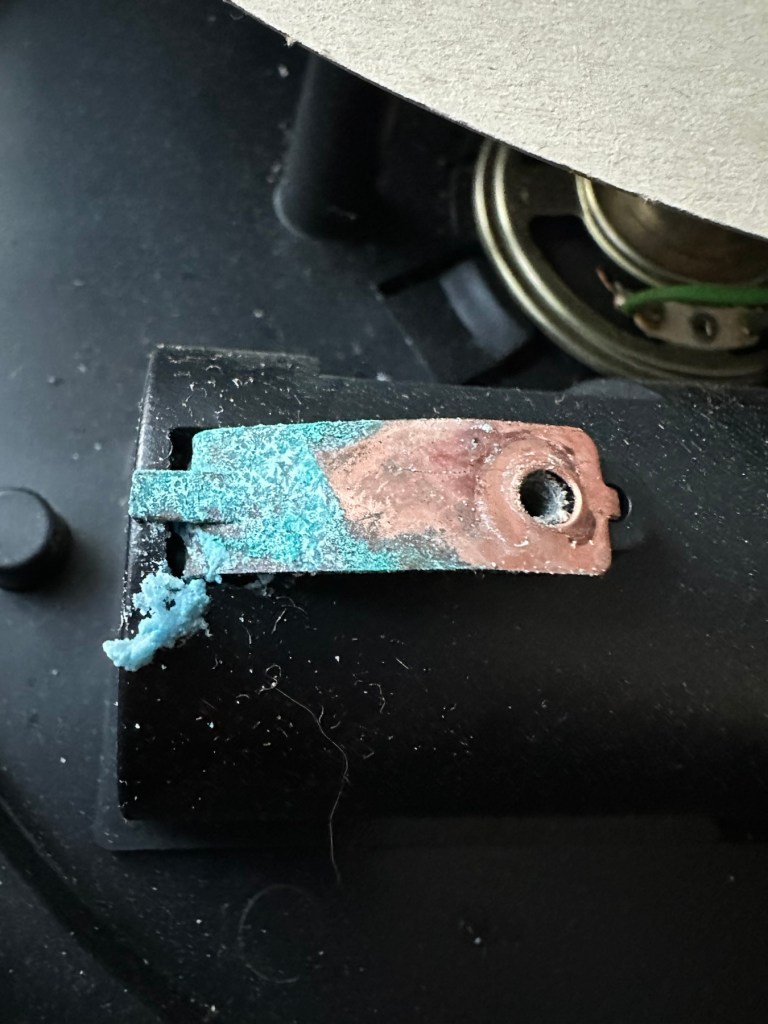
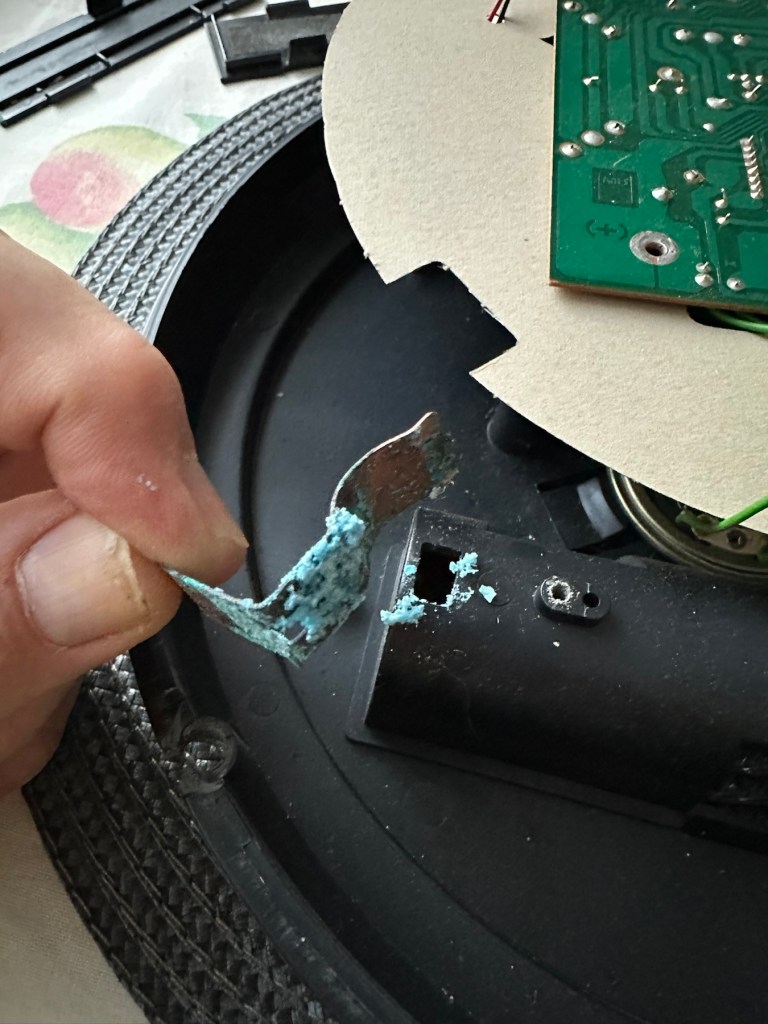
In the picture above you will see two arrowed points. These points are the power contacts that make contact with the two seriously corroded battery contacts you can also see above. No wonder there is no power getting to the board. I suspect this might be the cause of our electrical problem.
Repair:
First thing to do is to get those battery contacts cleaned, as well as having a good clean of the main board. This has now been done. I’ve repaired the broken screw post by simply using a rubber washer that has been sufficient for this repair.
Contacts before and after
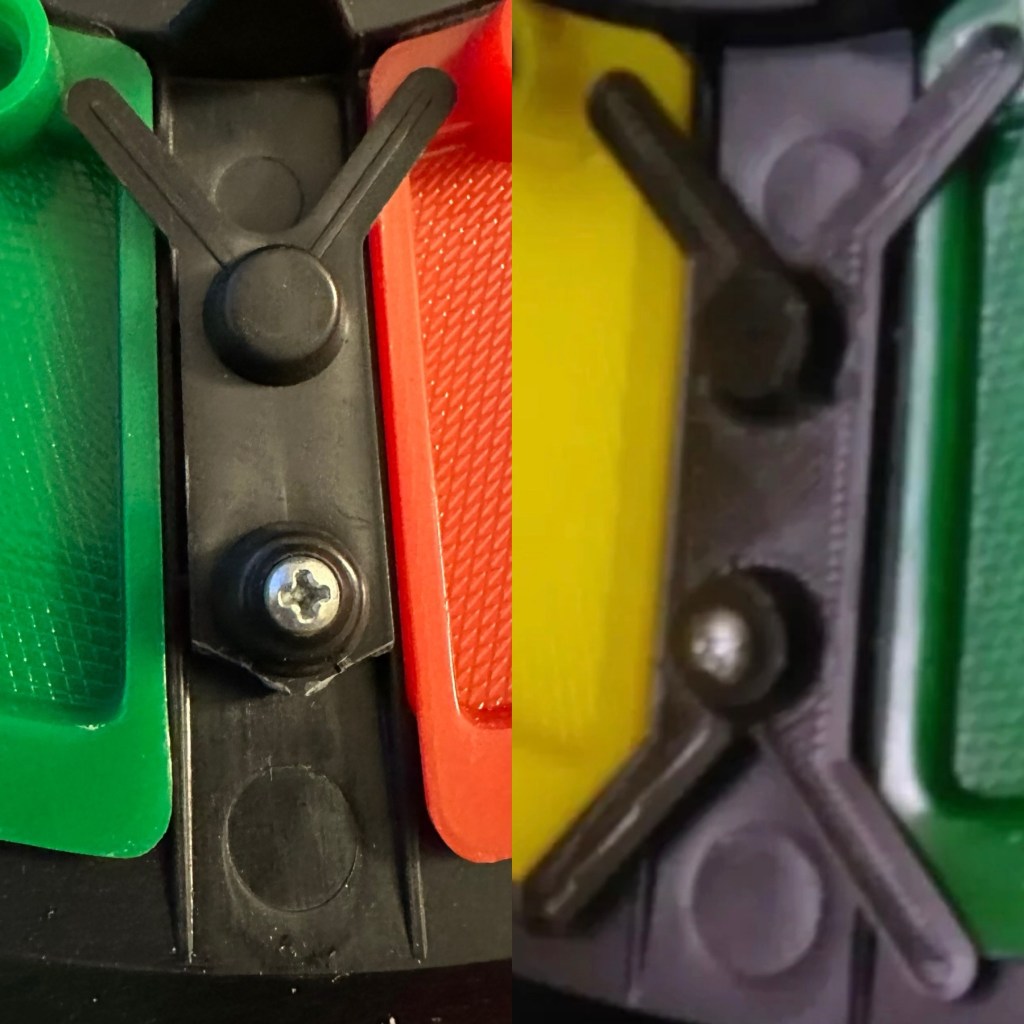
A friend of mine has kindly offered to print me off four of the “Double Y” springs to replace the ones that are already in place and broken. He owes me a favour or three and needs some subject matter to run through his new 3D printer so I’m very pleased to help him, as pending the outcome I may well buy one myself, as I have been threatening to do so for a while now. This should sort out the issue of the unresponsive pads, first found in the assessment of the item. He’s panicking that they might not be smooth and beautiful, I’ve told him not to worry as they are hidden inside anyway.
What I currently have on the left, what I’m expecting on the right
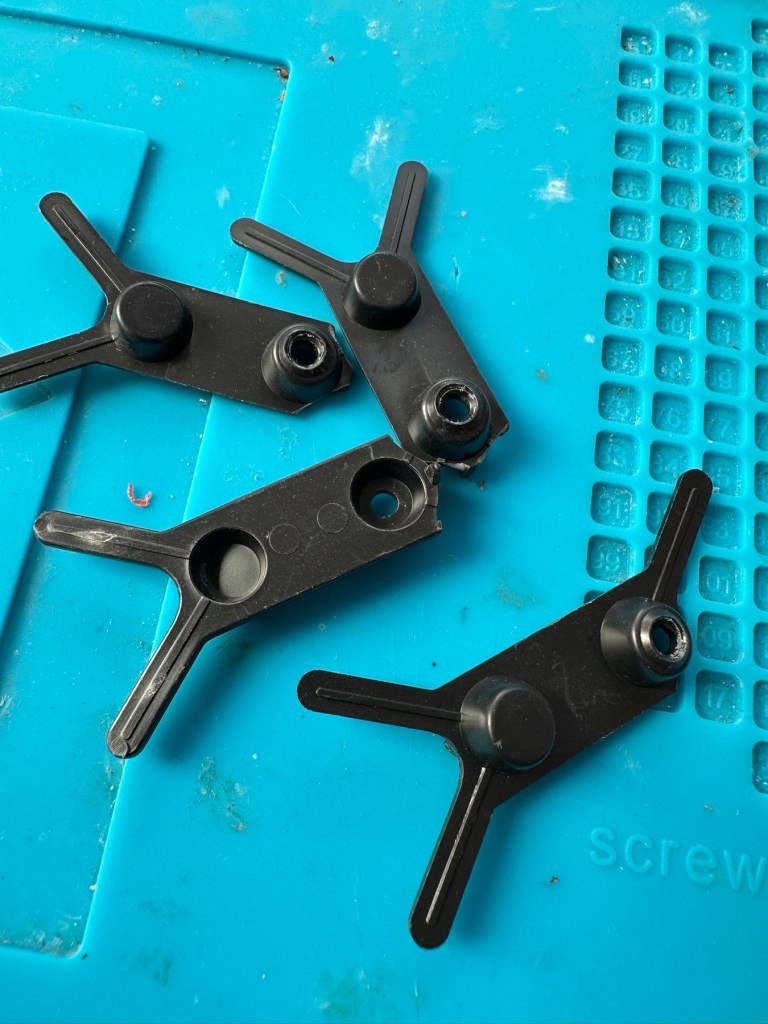
He’s just supplied me with five double “Y” pieces just in case one is damaged in some way. Let’s get these put in place to see the difference these make.
Out with the oldIn with the new
With the new springs in place the pads are working as they were originally designed to, now with some springiness in their operation. The battery contacts have now also been put back in place.
Cleaned contacts back in place
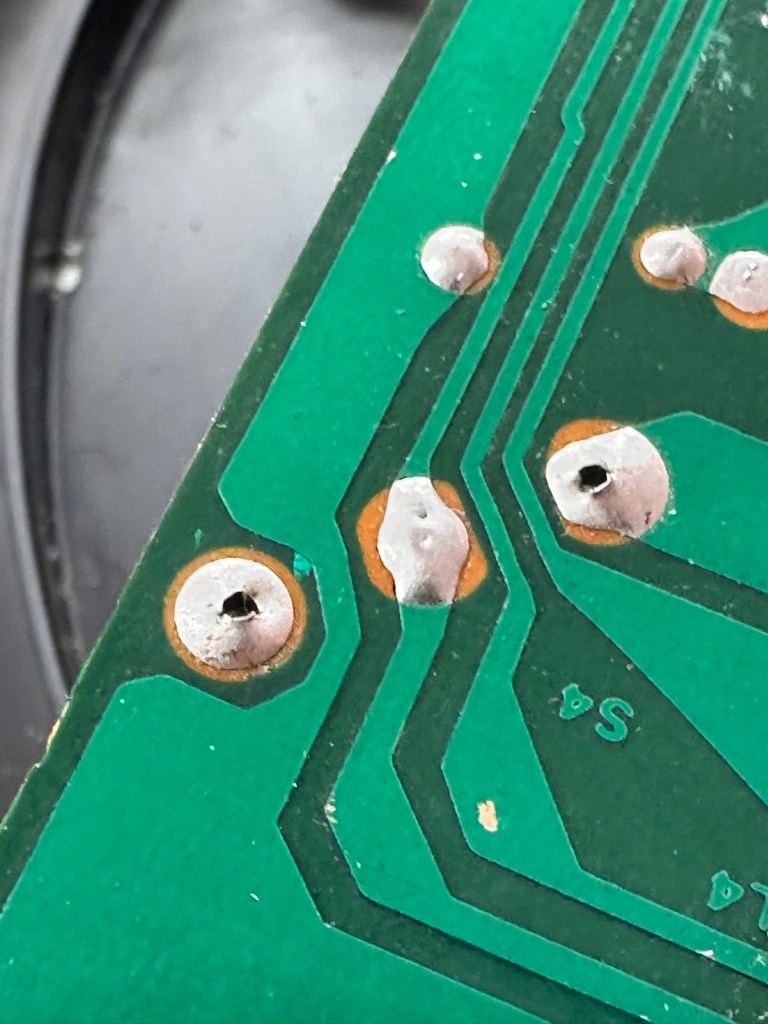
When assembled, the buttons are a little erratic and not always responsive so I decide to look into this further. A quick Look at the board shows that the solder contacts on the board for all of the button connections are worn, the solder has failed so I decide to reflow all these solder joints to improve the contacts. This appears to have worked as the unit when reassembled, now has uninterrupted operation. This is an age related issue. A simple fix.
Old solder joints that have failed and needed re-flowing
Result:
Another 47 year old saved from the scrap heap, it’s been an interesting and sometimes confusing repair and I thank my friend who stepped in to save the day by utilising his 3D printer to make some parts. Without his assistance this repair would not have been achievable.
Looking smart after a quick clean
It’s just another old piece of retro history to add to my ever growing collection and much to my wife’s dismay. Bless her.
Now working
Thanks for passing by, as always it’s very much appreciated.
Just back from our break away and some of us are still in the holiday mode, itchy feet the decision was made to take a short train ride out to one of the areas I patrol at work – Barrow upon Soar, a small town between Leicester and Loughborough.
Barrow-upon-Soar is a parish and large village, which gives its name to a Poor Law Union district, and a county court district. It has for ages been celebrated for its excellent limestone, and is pleasantly situated on the east side of the navigable River Soar, and on both sides of the Midland Railway on which it has a station 2 miles N. of Mount Sorrel, 3 miles S.E. of Loughborough, and 9 miles N. of Leicester. Barrow township comprises about 2510 acres of land and had 1099 inhabitants in 1801, 1638 in 1831, 1800 in 1861, and 1973 in 1871, the increase of the last ten years being ‘attributed to the opening of the limeworks.’ It is in East Goscote Hundred, but its parish comprises also the townships of Mount Sorrel North-end, Quorndon, and Woodhouse, all of which are in West Goscote Hundred. The area of the whole parish is about 9160 acres, and it had 5857 inhabitants in 1871.
Wikipedia
On the train we soon arrived after a 17 minute ride, and as always the difference between city and town is so noticeable, life is a lot more serene and uncomplicated in these small towns surrounding the city.
We tried four different pubs, had a lovely meal in one, took a nice walk on the canal, and ended up sitting beside the river soar to complete the evening. It was lovely and finished off the break away just fine. We now have the joy of a new working week to look forward to. Roll on next holiday….
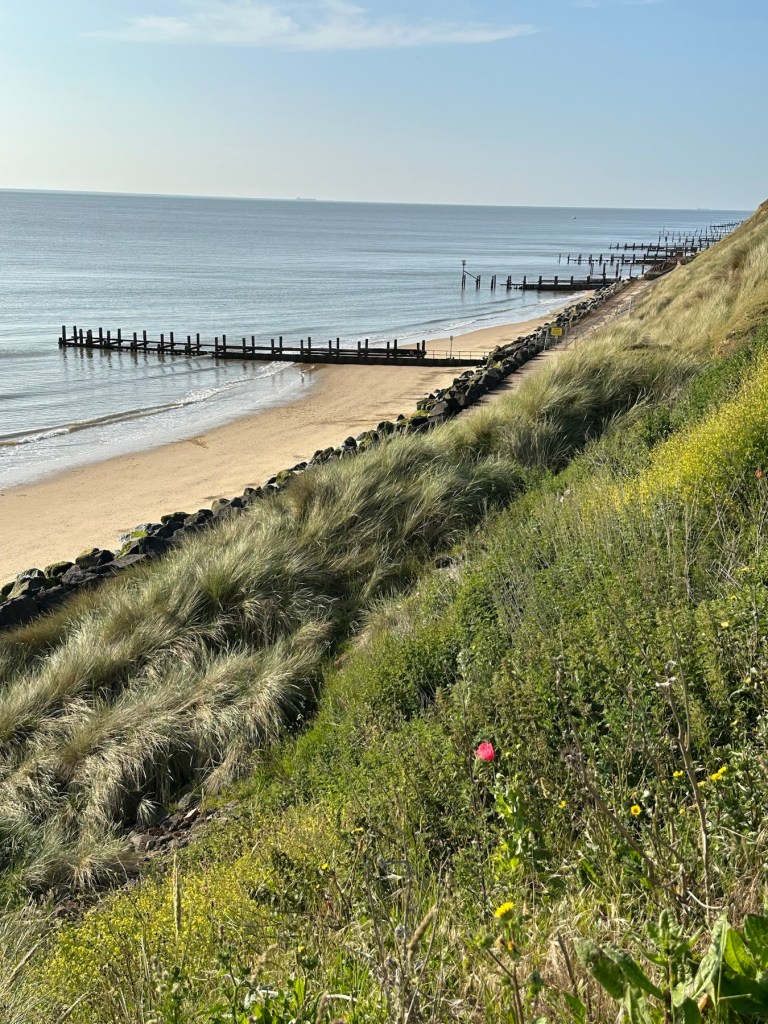
No words or trying to speak “Proper” here. 13 of us have just arrived back from four most beautiful days on the east coast at Norfolk. Temperatures up into the high twenties, a phenomenon not often experienced on this coast in the UK. It made for a wonderful break away, and this family bond remains as strong as ever as a result. Here are some photos to chew on, all taken with my trusty iPhone 14.
All taken in and around Gorleston and Hopton on sea- Norfolk
Have a super day, stay safe and enjoy this wonderful weather.
Today 16th June 2025 and this boat that I was gifted for my last Birthday back in Nov 2024, finally underwent proper trials on water, and thankfully after all the issues experienced during the building process it came through them with flying colours. There are a few little tweaks to do as a result of the maiden voyage, but this will only go towards making it a far better and less stressful task on future excursions. Boy was i nervy about today, what with all my family watching.
A nervous owner placing his boat on the lake…
And off we go…slowly
I only have the one battery for the boat so time was limited, and I probably managed about 15 minutes with it nutting about, before it stopped and had to be rescued by my Brother in laws boat that just happens to be a tug, a seaborne version of the RAC.
Luckily the seaborne version of the RAC were on hand
Anyway prior to that minor mishap the boat performed quite well, the motor is hellishly powerful and I thought it would go either of two ways. Either it would launch itself out of the water like a missile or it would go nose first into a deep dive towards the bottom of the lake. Luckily it did neither, however I did learn that turning at speed is liable to capsize the boat, so care needed to be taken when performing turns under power.
And she works…..
As usual I have learned a lot. It needs some minor tweaks such as a better centralisation of the radio gear in the hull, it needs some Baffles to be put in around the front deck where the hull and the superstructure join, to prevent water ingress at speed. The front does sit low in the water but at speed the contours on the hull do create lift, and this does work very well, so I am particularly happy with this.
A great day out, at the start of the holiday, and the fact I didn’t have to go wading to rescue a failed boat is also an added bonus. Really looking forward to showing the videos and pictures to the elderly friend who purchased this fantastic gift for me. They will be as pleased as punch, as they know about all the hard work and care that has gone into getting this project finished.
Thanks for following the journey with this project. As always it is very much appreciated.
I have just finished a run of night shifts, as we are heading out to the coast for a few days with 12 others from the wife’s side of her family. I’ve kind of been in that frame of mind for a few days when people get closer to a vacation or break away when they just slip into “Holiday mode” at work, you know that feeling when the not so important stuff gets shoved to one side in the hope that one of your colleagues will pick it up, when in fact it will probably still be waiting for you to complete on your return. Yep I’ve been in that frame of mind for a few days now. I need a break, no matter how brief.
It’s going to involve an early start tomorrow as we head out to the east coast, first stop Gorleston in Norfolk where us old farts in the family gather at the local boating pond for a break, before moving on to our destination further up the coast. Gorleston is a beautiful part of the UK with one of the finest beaches you will ever see, it just seems to go on forever.
Gorleston beach
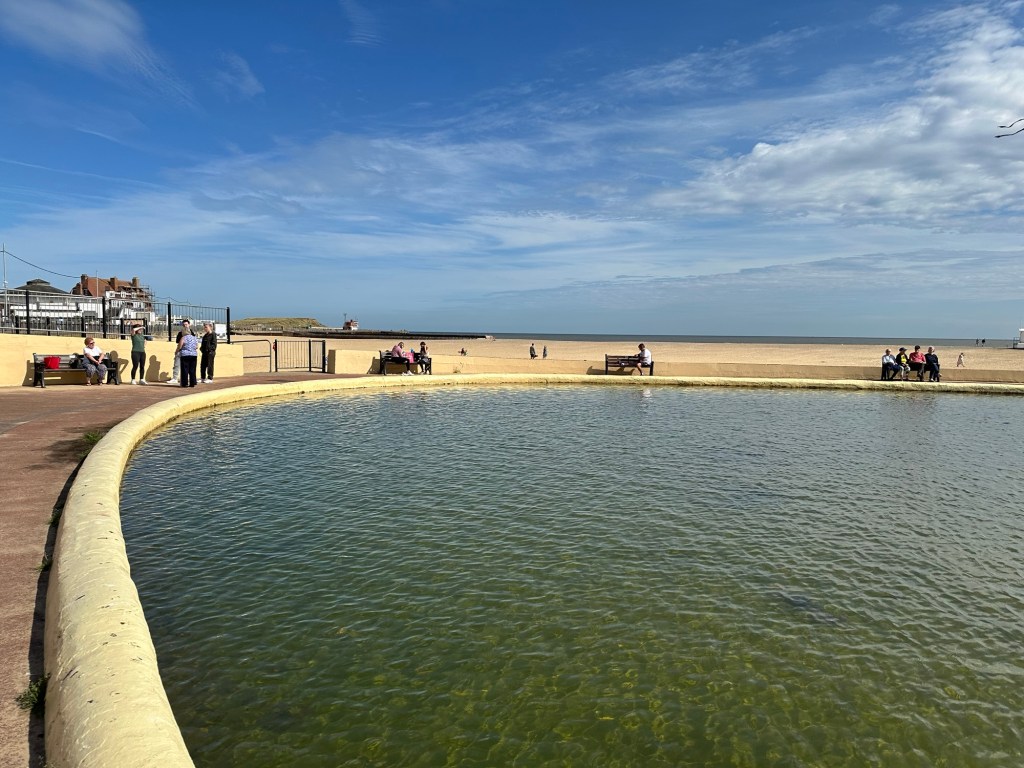
At Gorleston as I’ve previously mentioned, there is a very large boating pond. Here the older specimens of the clan take a break from driving to float their model boats. I’ve been watching them do this for years and have always threatened to build a model warship to jokingly blow them out of the water.
Gorleston boating lake
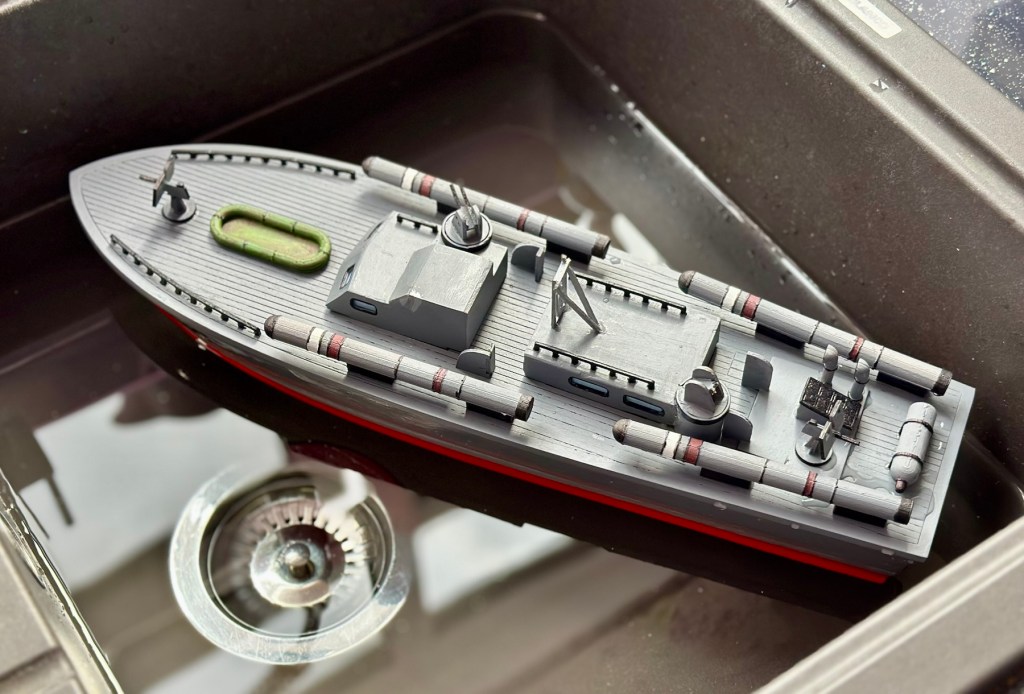
This year I have built a model boat, it is a torpedo boat, I know it floats but this will be its first true test of operation, it could go either way, it’s so damned fast that it could either just take off or dive into the depths of the lake. I hope it doesn’t though. You can read about the build of this boat in the two posts I created about its construction: PT109 wooden torpedo boat kit – construction and the last part: PT109 wooden torpedo boat kit – finishing. I hope to post a video of the actual “Sea trial” pending its maiden voyage or ritual sinking.
The boat
Anyway that’s tomorrow and to be totally honest I’m really looking forward to it.
Yesterday was a busy one, I rose fairly early considering I was working nights as there was a special event taking place. One of the younger members of the family, Jude who is only 14 was going to have his first flying lesson, purchased for him by his parents as a Christmas gift from last year. Luckily we have an airport close by that used to be a base for American forces back in the day, that was visited by Dwight D Eisenhower, and was also the home to a squadron of old Stirling bombers. Today it is a local aerodrome, but keeps the title of Leicester airport.
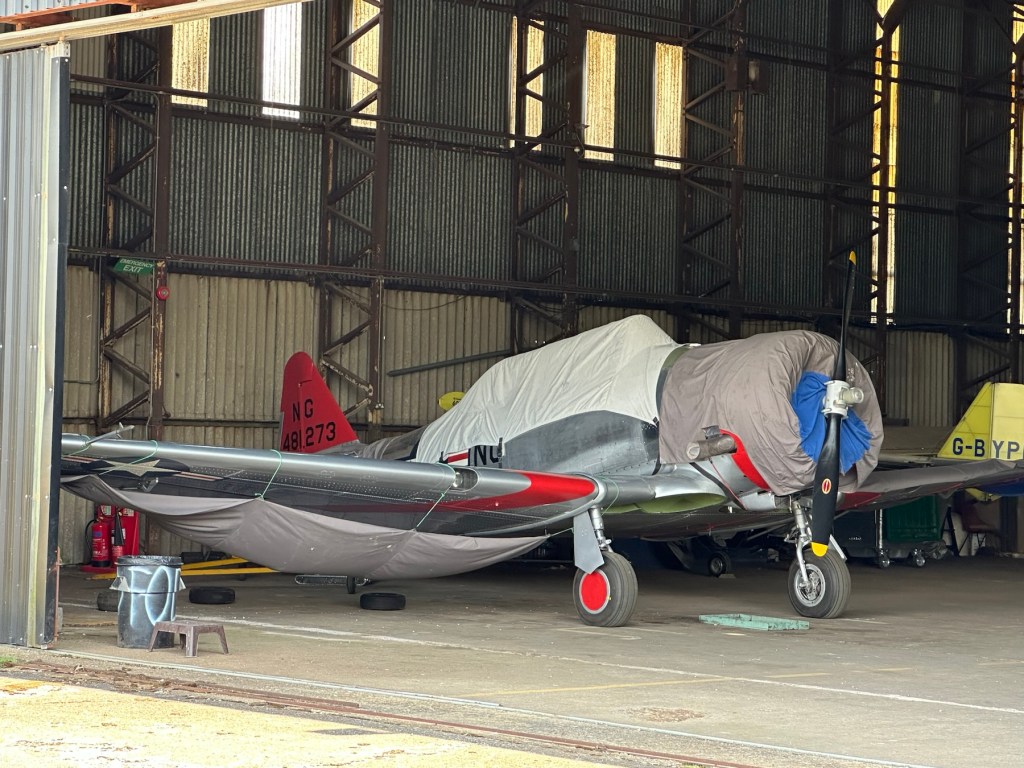
I love having a wander around old airports and in one hangar I found a beautiful old plane tucked away under tarpaulins, a MkIV Harvard built in 1952 for the Canadian Airforce but currently wearing the colours of the California ANG. Registered as G-CJWE (NG481273) known as “Dazzling Debs”.
Pic courtesy of Steve CoeSitting in a corner of the hangar
Jude was going to be heading off from Leicester up over Oakham and the Burleigh estate and Rutland water on a flight that was to be approximately 45 minutes in duration. His parents had paid for two passengers to accompany him, and I was asked if I’d like to be one of those passengers. I politely declined, as much as I love aircraft I’m not a good passenger and don’t really want to fly if there is not really the need to. This refusal worked out quite well as it now allowed both of his grandfathers to be those two accompanying passengers. How lovely is that, I never even got to meet either of my grandfathers, now Jude, has both of his grandfathers sitting proudly behind him.
A walk around with both Grandfathers “J” just about to get airborne
First flight ✈️
Needless to say, he created some lasting memories this day and was full of smiles on his return, in fact they all were. And to top it all it was a gorgeous day, with some cracking food and fun company.
Blog wise I’ve got the backlog down to ten posts in draft now, and by the end of next week that should be reduced by another couple as two older posts come to fruition. It’s been a busy week, no more estate agent tours as yet, we’ve requested a strict viewing criteria with them now, to deter the time wasters who most definitely have spare time in bucket loads.
Have a great weekend everyone, stay safe and try to stay happy.
Morning all, I hope I find you all well. I must admit I’m only dipping in here at the moment to see what’s going on and to update some old posts. I currently have 16 posts in draft and that’s down from 21 a couple of months back, so I am actually starting to clear the backlog if not at an exceptionally slow pace.
About right….
Failure: I deleted one project last night that had been in draft since May of last year, it was a work in progress and I was hoping to complete it last night when I confirmed the issue was terminal and there was no way it could ever be fixed. It’s a shame as it was a big post and I had learned a lot from it but it just wasn’t to be. I’m not happy at spending so much time on a project just for it to be a failure, and you good people don’t need to see that either. So I’ve just put it down to experience and chalked it off. Today the whole project will be dismantled and parts will be salvaged with the absolute minimum going to scrap.
Time wasting: I don’t know if anyone else out there has experienced the estate agent tourist phenomenon. We’ve had our house up for sale about two weeks now and have so far had a number of people allegedly showing interest. I say allegedly as I think the whole estate agent “thing” is farcical. There used to be a time when you had to prove to the estate agent that you had the funds, or your own property was itself on sale before viewing a property on their books.
Well one of those people who “Viewed” opened up to me by saying he had no intention of buying our house, he didn’t want to buy any house, he and his wife have days out where they just pick an area and go and have a nose around other peoples property. Yes, for them it’s a bloody day out, just like you’d visit a stately home or a pub, they just go to nosey around peoples homes, with absolutely no intention of buying.
To say this kind of boiled my piss is an understatement. The estate agents really got it that day. The bloody cheeky sods. I suggested they sell tickets and maybe we could sell ice creams as the clients came through the door. I don’t think he understood my sarcasm…
Apart from all of this things have just been so busy that unfortunately word press has had to take a back seat. I still get notifications, some very annoying, considering some of my posts have taken weeks, even months to put together someone manages to read about 15 of them in about 30 seconds, serial likers, the one thing I find incessantly annoying about this platform.
Hey ho, I need to go now as you can probably tell I’ve not had a lot of sleep and I’m acting a little out of character. Time to go before I become bitter and twisted.


















































 Foxes Den
You must be logged in to post a comment.