Did you know Arsenic used to be used as a green pigment back in the day? This is an interesting read by the guys at Hackaday. Thousands of books have been quarantined over concerns of the amount of poison in the pigment, this post covers what they are doing to separate the good books from the bad. Do you have any of these green stained books on your shelves? Don’t worry if you do, just refrain from licking them for too long…
You probably do not need us to tell you that Arsenic is not healthy stuff. This wasn’t always such common knowledge, as for a time in the 19th …
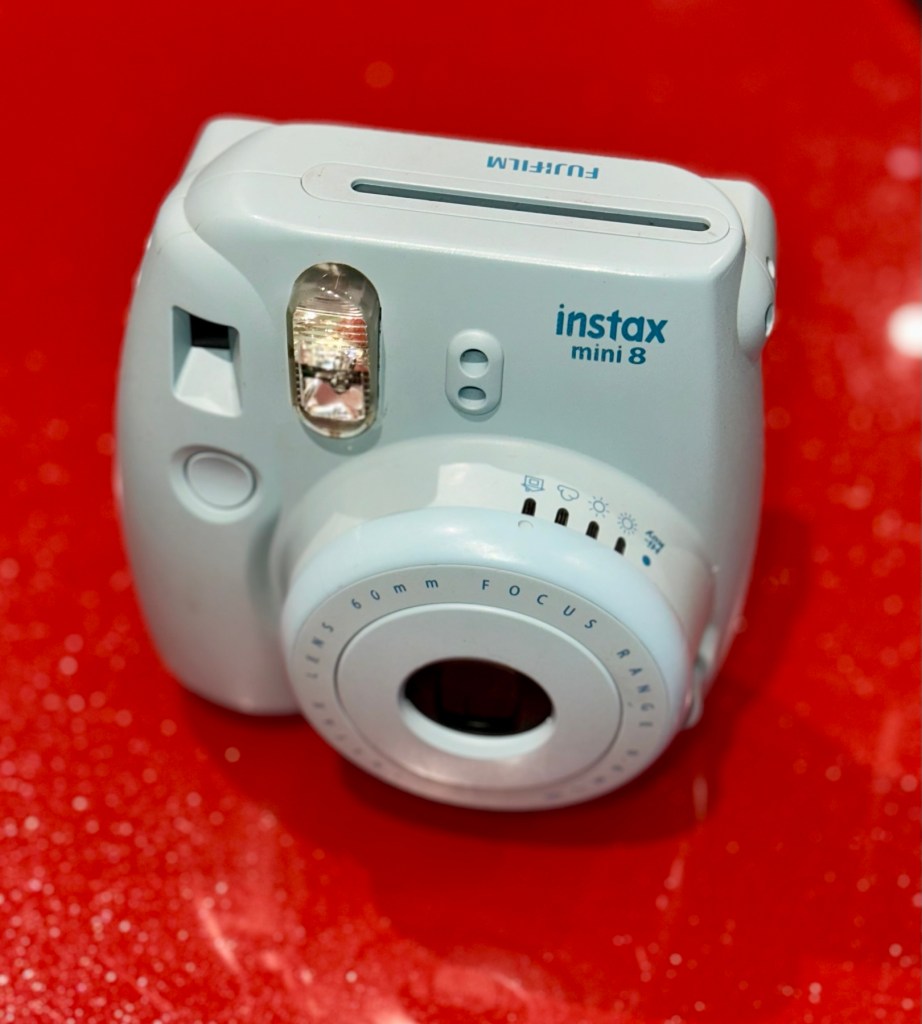
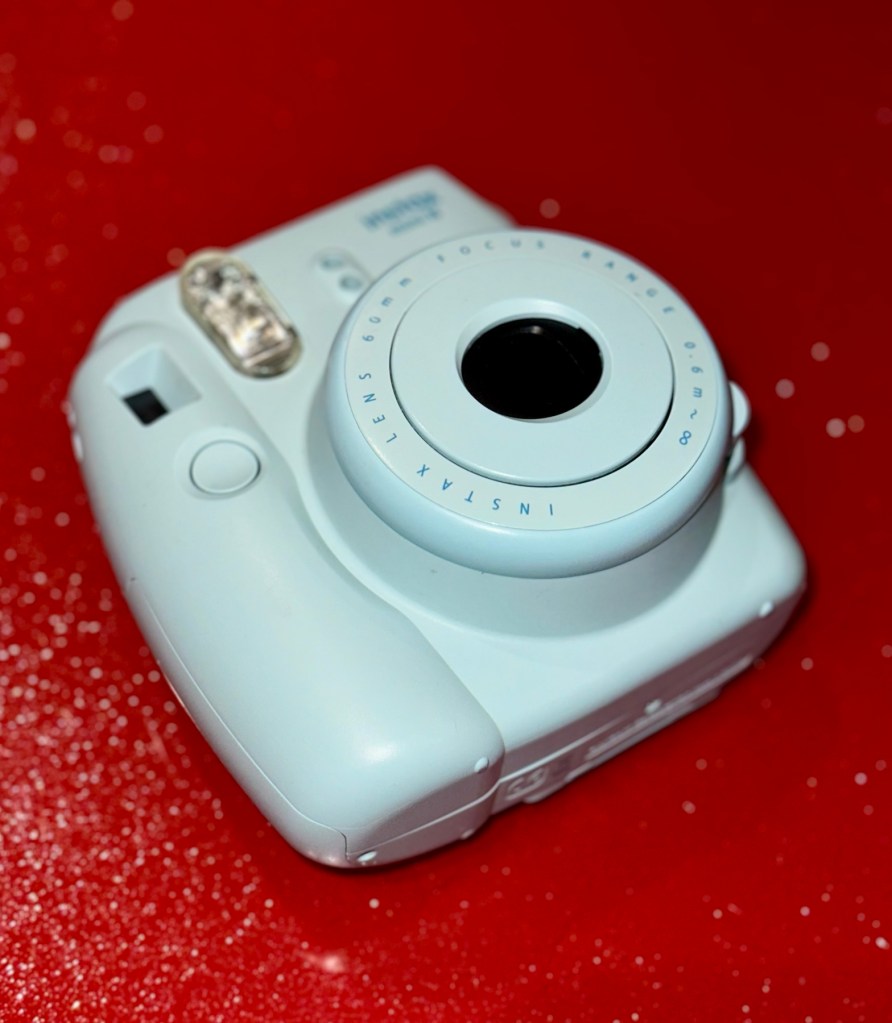
Yes another one. Anyone that reads what I post will realise that these little cameras have really become popular with the youngsters within our family. I recently posted about a family get together: The garden gathering and in this post I stated that a young member of the family liked these cameras so much, that she went out and purchased a damaged one and asked if I could fix it for her. How could I turn down such an offer?
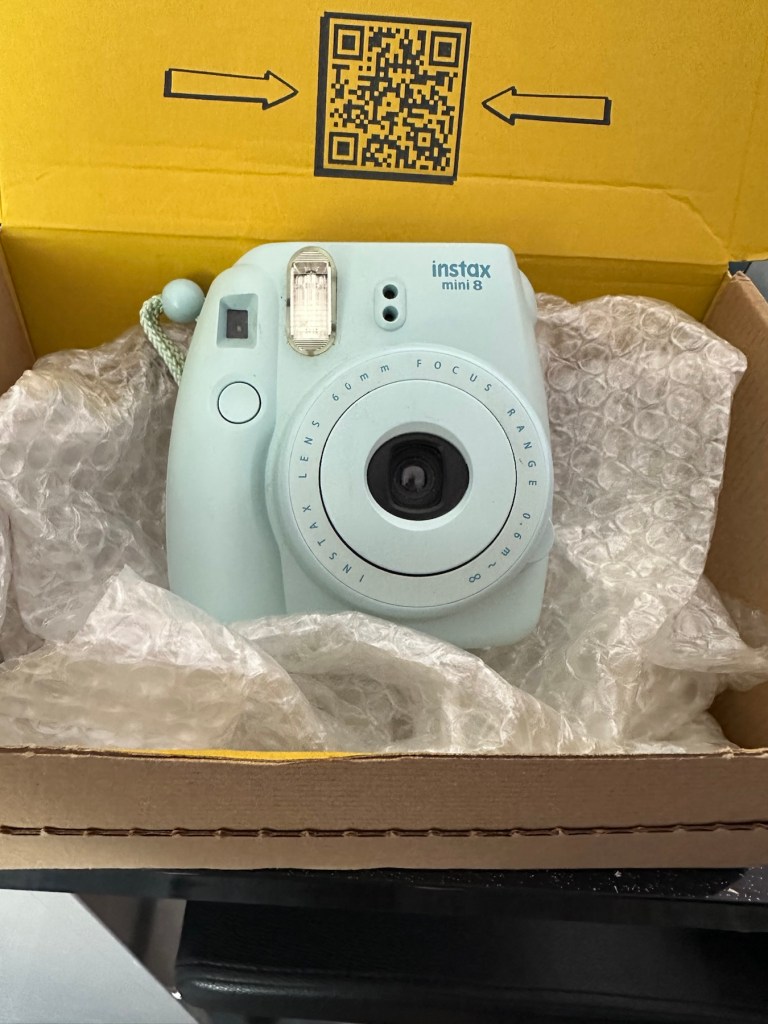
Another Instax mini 8 and that Iris should be closed
And here it is. Needs a little clean and immediately I can see an issue, what I’ve noticed is that the little iris lens protectors that close when the lens is retracted are missing, or not operating and opening properly. Everything else seems to be doing what it should, motor, film transport system etc, however the initial issue reported with this camera was that it’s exposure was sometimes hit and miss, it most definitely all related to the lens issue. A good clean wouldn’t go amiss with some extra attention paid to the light sensor area.
Anyway, enough chat, let’s crack on.
Assessment:
A nice tidy camera, needs a little clean, flash fires, film transport mechanism inside is working and the motor runs. It gives the impression that it is working fine, however….
Here’s a reminder from the young family member who made the purchase, regarding its issues:
I’ve just remembered, I think the advert said something about the photos coming out dark no matter what setting it is on! x
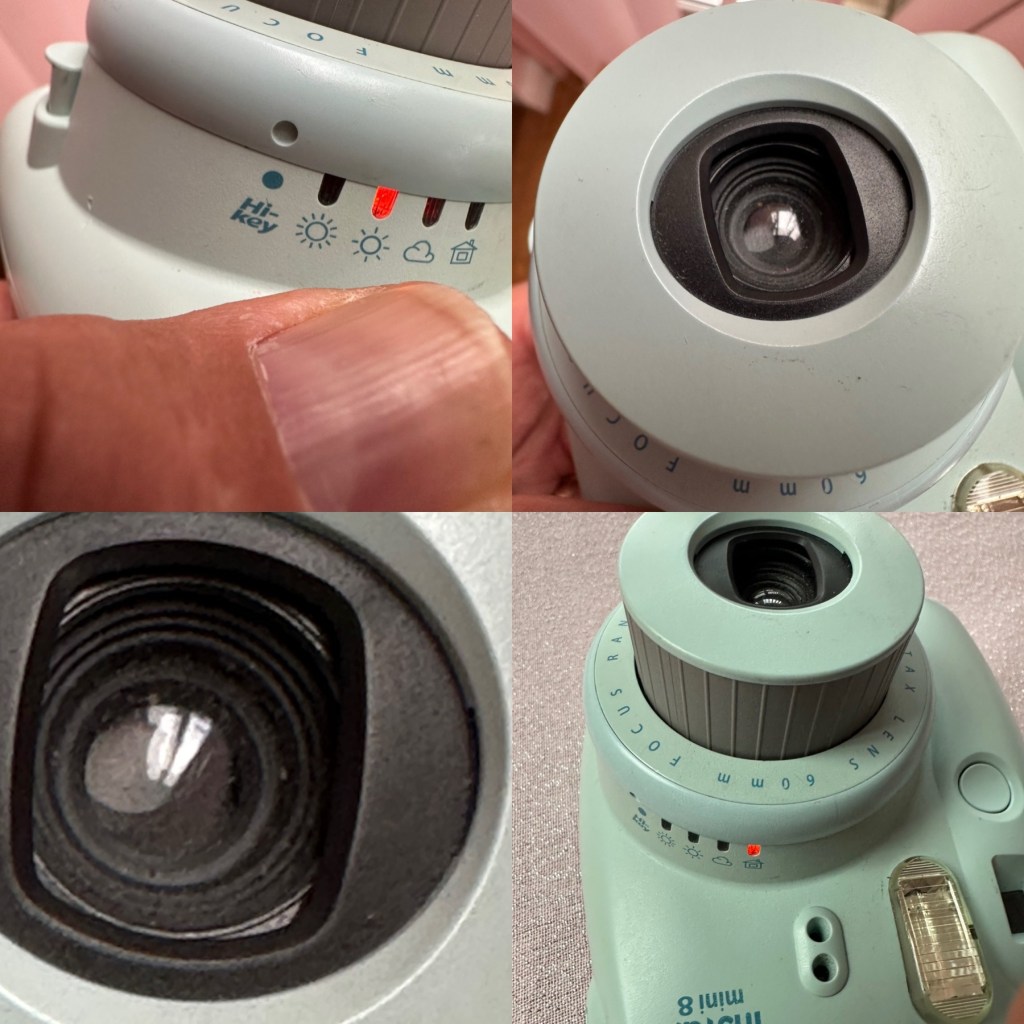
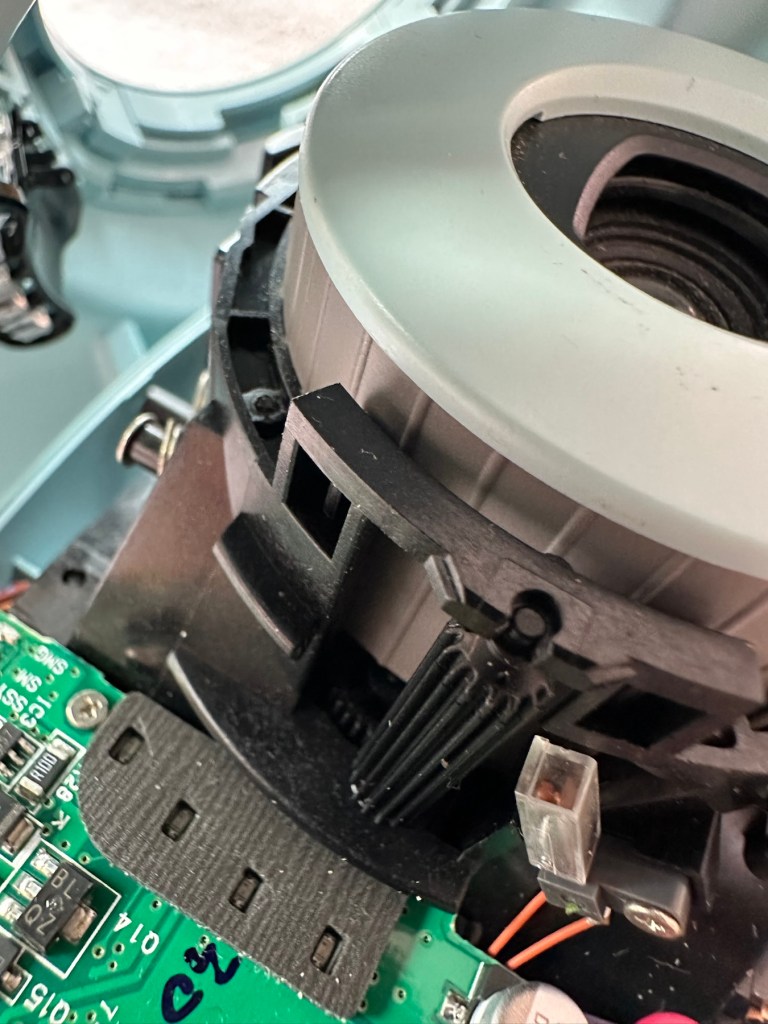
I’d already noticed the little iris mechanism on the front of the lens didn’t open and close when the camera was turned on, so I was going to be looking in this area anyway. But when I looked a little closer and moved the aperture ring on the side of the lens, the relative apertures in the lens were only moving to roughly the half way point, off centre, hence there was no corresponding fully positioned aperture, and in relation to the lighting situation that was presented, they were stuck and blocking the incoming light. In a nutshell there was not a sufficient sized aperture “hole” for any light to get through, resulting in the exposure issue stated above. This needs adjusting. You can see what I mean in the photo below. The lens aperture leaf does not sit central in the lens.
Incorrect aperture settings and positioning in the lens
Apart from the highlighted problems above, i don’t believe there are any other underlying issues. So I’m going to concentrate on the front of the camera solely in the lens turret area.
Let’s get on with the repair.
Repair:
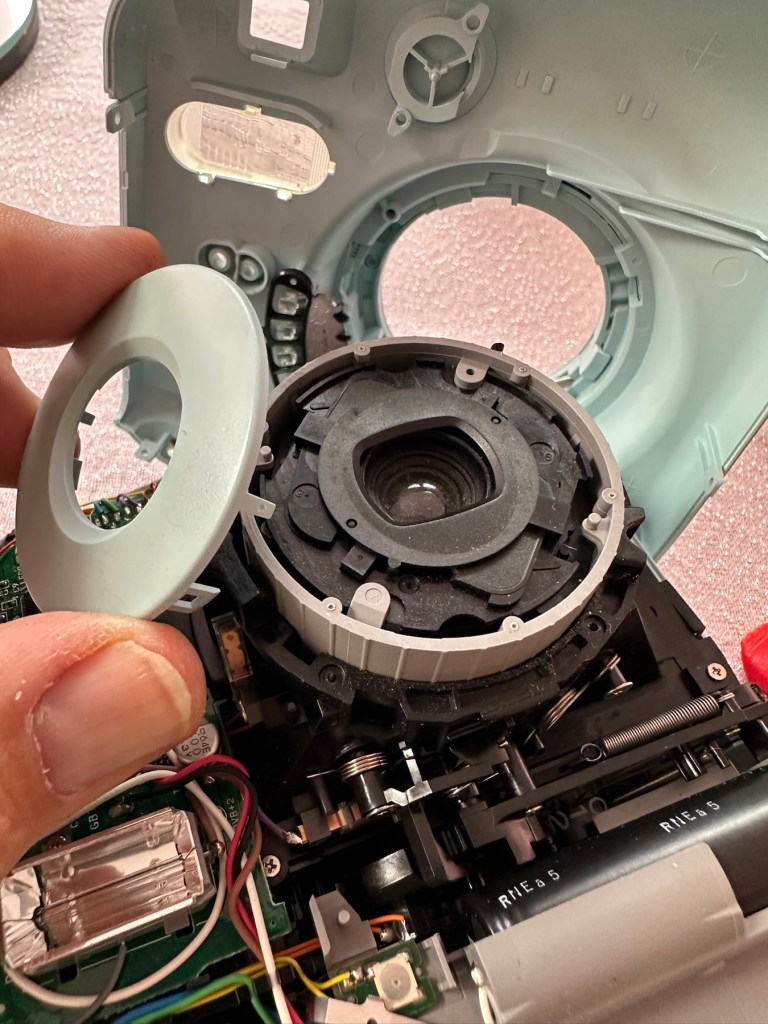
The iris issue is within the lens turret so this will need to be dismantled to access the iris.
Lens top cover removed exposing the iris mechanism below
It was a bit of a head scratcher this one, as I spent a lot of time just staring at the mechanism trying to figure out how it worked. When the iris lids were manually manipulated to the closed position when the turret was retracted all was fine. When the turret was opened up the iris lens did the same, but then if you again retracted the lens the iris remained open exposing the lens. I was thinking it must be missing a spring somewhere and I was about to be proved right.
I found a replacement iris turret in my spares box for instax cameras
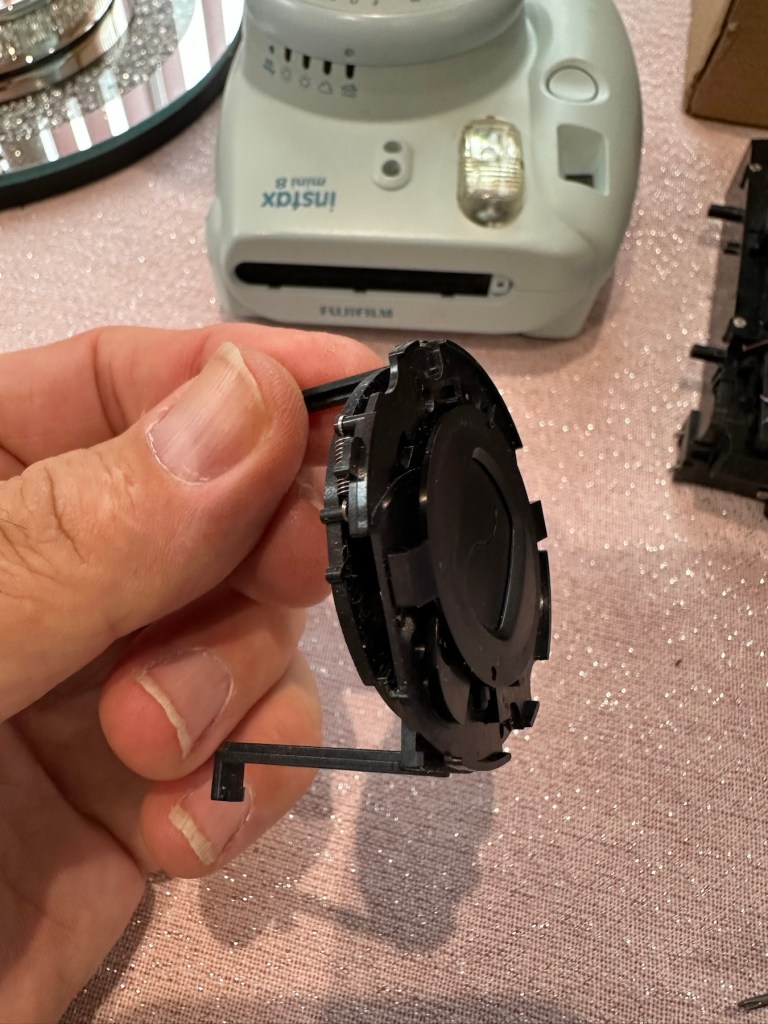
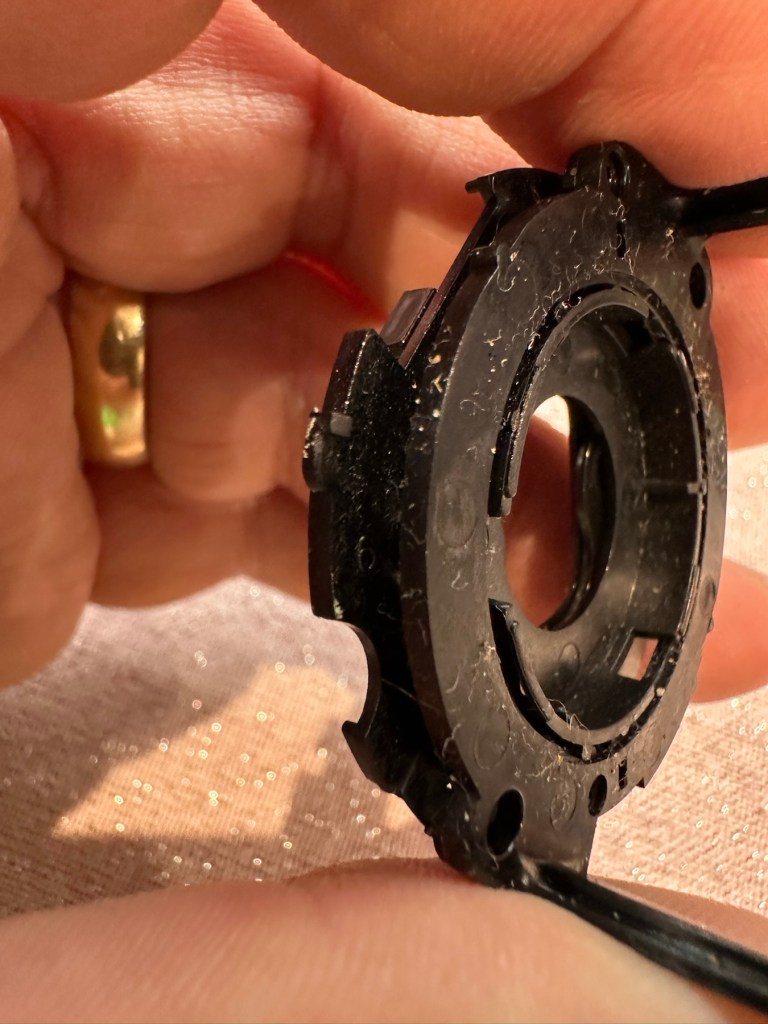
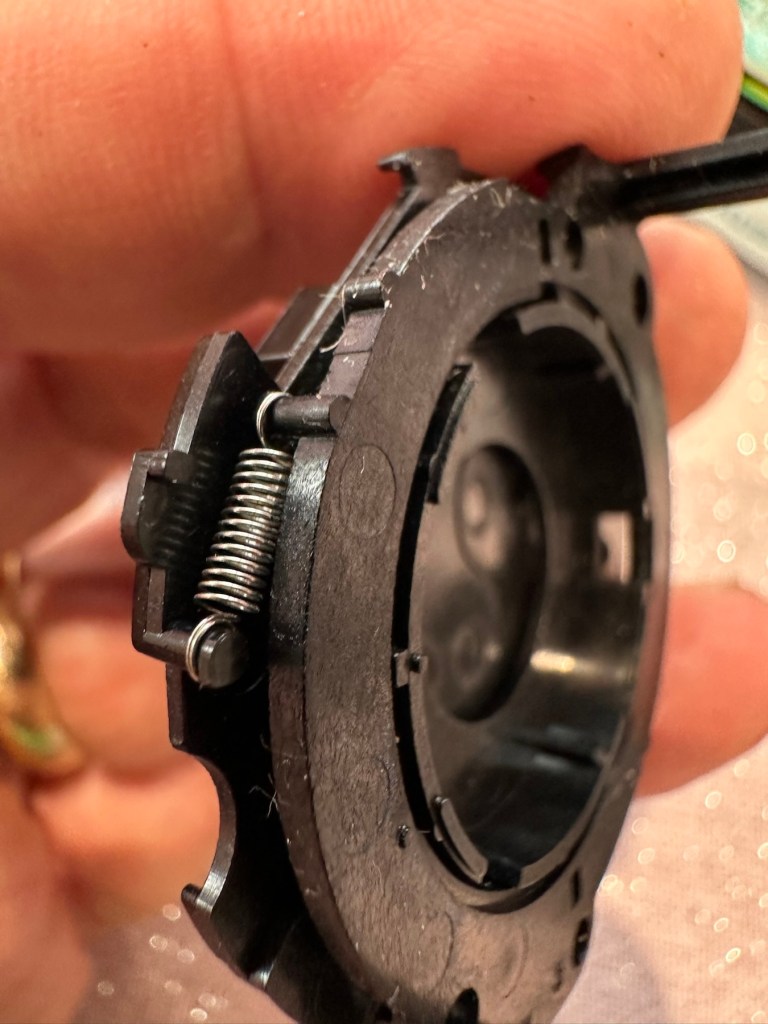
I found a replacement iris mount that fits within the lens turret. I had this in a spare box and used this as a reference to compare to the old non operating one. Here is where it was confirmed that there was a spring missing and this is why the iris was not operating.
Spring missingSpring in place The old iris mechanism compared to the working one
I replaced the old mechanism with the new one and this was installed back in the camera, this now works fine. I have however found a suitable spring for the old iris so I do now have another spare ready should another be needed in the future.
Iris mechanism installed and now working
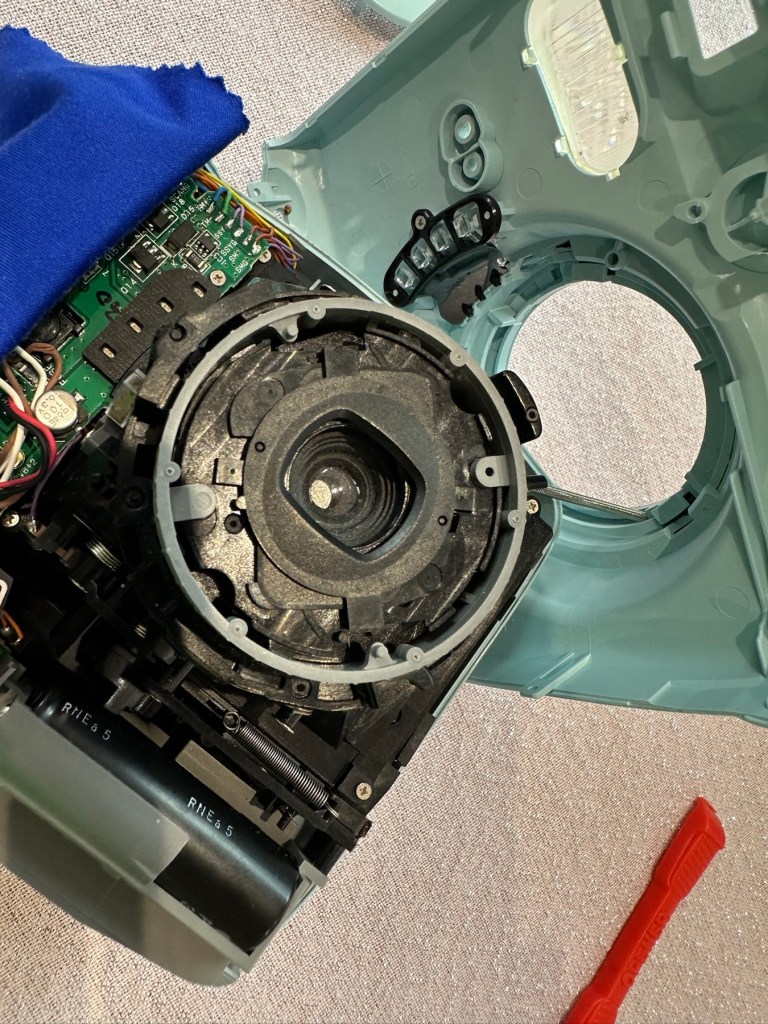
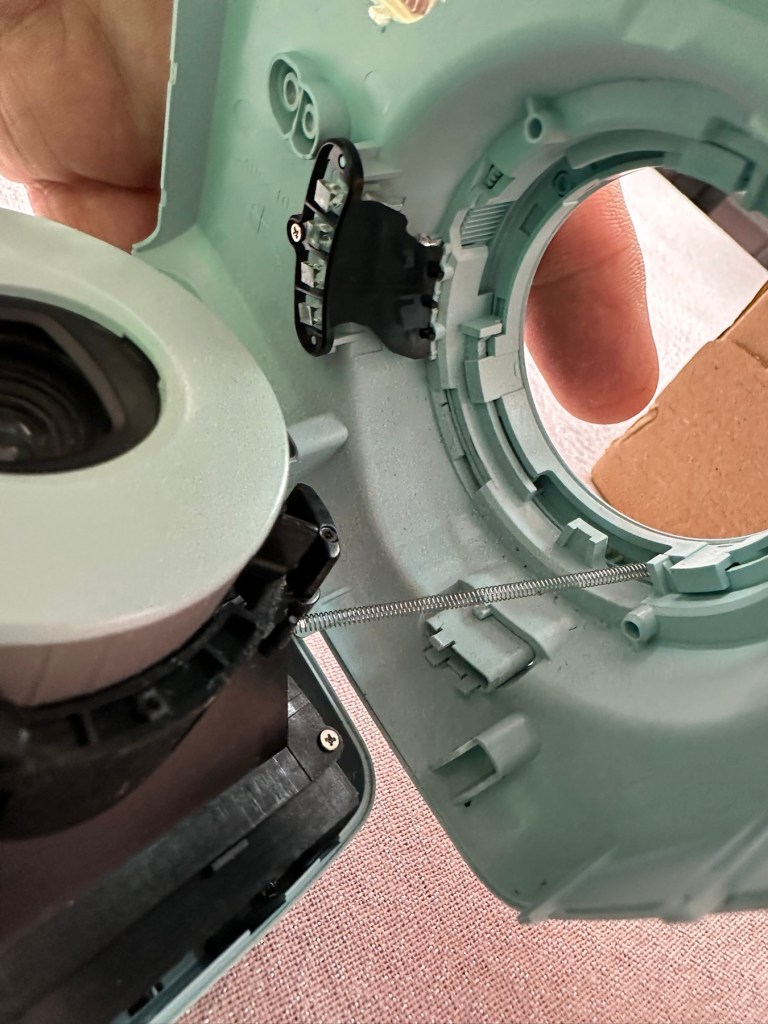
The issue with the aperture positioning has been sorted by ensuring that the aperture ring is correctly positioned in relation to the cog mechanism in the lens turret area. It’s a bit like sorting out the timing belt in a car, it just has to be in the right position to achieve the correct aperture settings.
Springs and levers everywhere, and the “Timing” cog on the right that is in the turret area
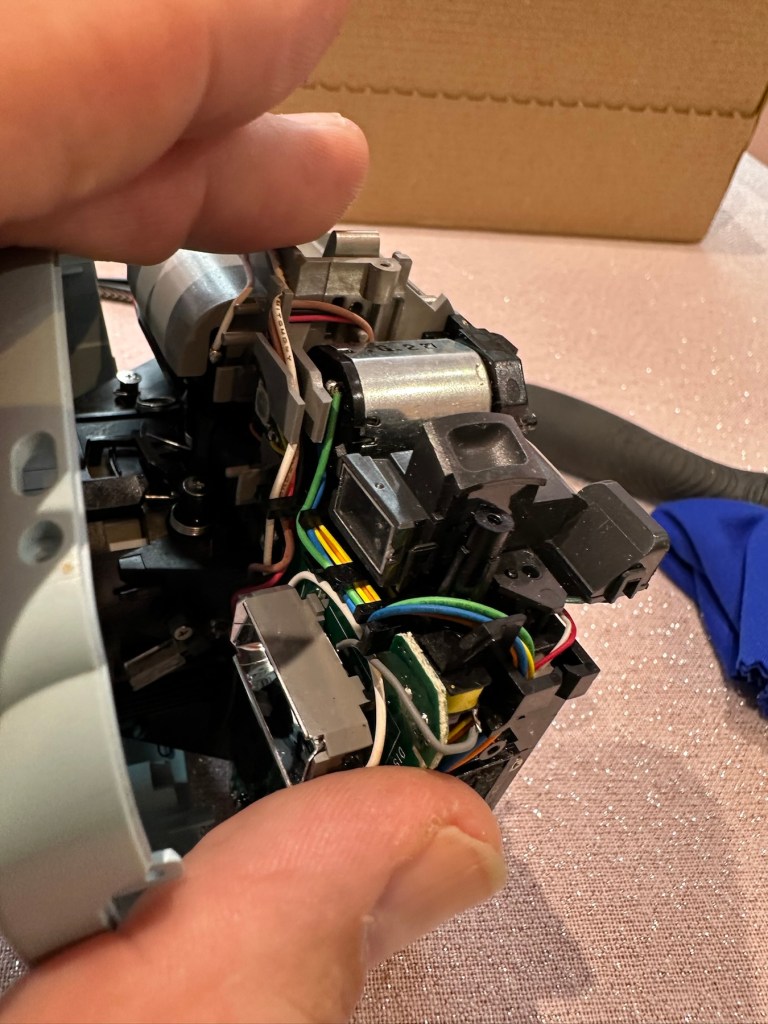
This sorted, the last thing to do was to give the viewfinder a little clean. You have to be very careful here as the viewfinder is connected to the camera “ready to shoot” indicating light, and there are very fine wires all around this area. Be just a bit too clumsy here and you’d have a difficult soldering project to also add to the original problems. Anyway, no such issues today, the viewfinder was un clipped and prisms and glass cleaned and reassembled. All looking good.
Viewfinder and lots of little wires
I’m now happy that all the issues have been attended to and I’m just going to reassemble the camera ready for a quick clean. Luckily all the screws that came out went back in with none leftover. Result!
Result:
We now have a nice little unit, all aperture settings are working as they should and the lens iris is operating as it was always supposed to do. The viewfinder has also been cleaned and it’s now a nice clear unobstructed view. It just works.
All cleaned and now working, a lovely little camera
I’m guessing this camera will be coming away with the owner on a family holiday that we are all about to embark on shortly. I’m hoping to run some film through this soon but I am ultra confident it will work as all the issues have now been addressed.
I’ve just got some film and rattled off 4 quick shots, one of them indoors. Exposures are fine so I’m happy this is a perfectly good working camera.
4 quickly produced shots
I’m sure there will be one younger member of the family who will be very happy with her new camera. And may she have many years of capturing good times and fantastic memories. This is what these little cameras are made for after all.
Thanks for passing by, it’s always very much appreciated.
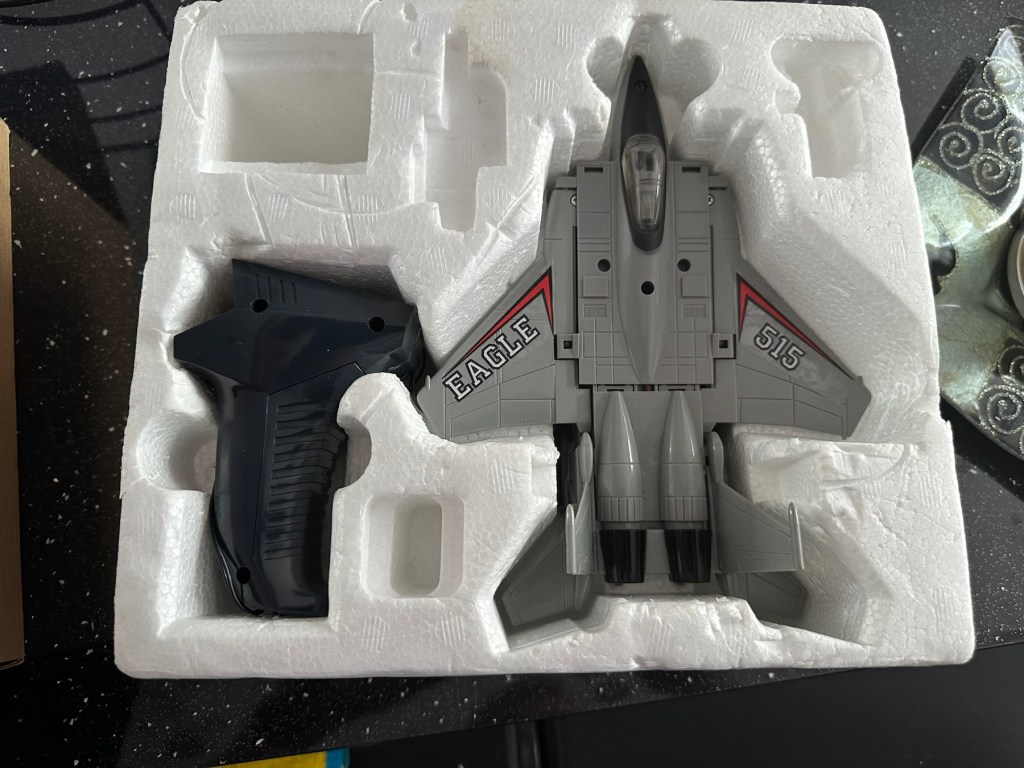
I arrived home from work last evening to find my nephew at home. He’d been looking around his mum and dad’s attic to find his old star wars toy collection he had from the 80s-90s. Whilst in the loft he found this old toy from 1985 by a company called Yonezawa being sold under the Grandstand branding, and it isn’t working. Here is where it passes over to uncle Dave.
Uncle Dave, it’s not working
There’s no real value to these toys as they were produced in massive quantities off the back of all the transformer type toys that were available at the time. There are some accessories missing from this one that are obtainable via the auction sites, he may well ask me to source these, but at the moment he just wants me to get it working to pass onto his boys. The video below shows just what it does….and that’s not a lot. But the one I have here is totally dead and needs reviving just like Frankenstein.
Deltatron what it should do
So here we go…
Assessment:
My overriding surprise is that this has been in a loft space for close to 30 yrs and does not have that expected damp mustiness that usually comes with such an item. I must say, my brother in laws loft space is an exception, it’s obviously free from excessive moisture, mind you it’s only about 40 yrs old so building standards had probably advanced somewhat from when ours was built about 90 yrs ago.
It’s in a good condition and all its parts are there minus a few little additions that originally came with the toy. But as I have stated earlier these parts can be obtained on line if required.
Right, let’s have a look at what is or isn’t happening here…
Repair:
When batteries are installed and the remote control is operated, all that happens is that a light comes on in the toy. The motion that is required is non existent.
The motor unitMotor removed, there is a cog mechanism to move the unitThe motor unit removed
When examined closer you can see there is a lot of surface rust on the side of the motor where the contacts go into the unit.
Really rustyQuick clean later
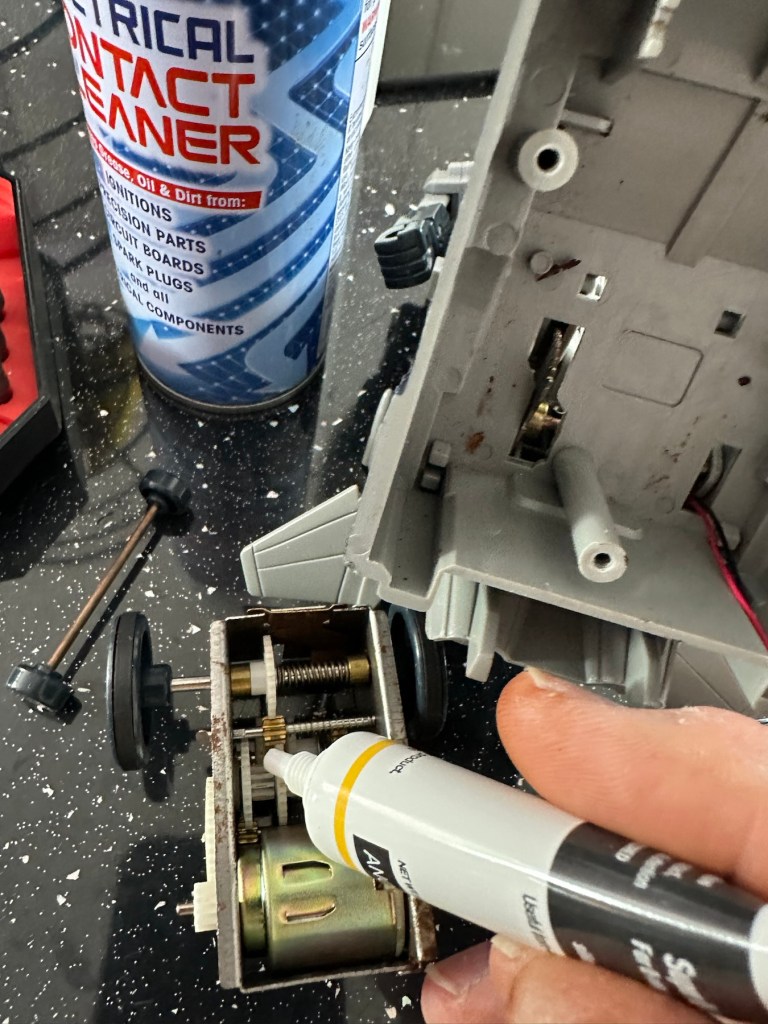
The contacts were so rusty inside the motor unit that you’d get an intermittent running of the motor if you moved them. I’ve checked continuity and solder joints and they were fine. I’ve injected some contact cleaning spray into the motor and sat there manipulating the motor in both directions for about 5 minutes, this was sufficient to get the motor running freely once power was reapplied. The contacts were dirty and restricting the flow of power to the motor. I decided to use some IPA around the area to give it all a good clean and once again sprayed more contact cleaner through the motor.
Contact cleaner and silicone grease
Once I’d run the motor for a few minutes in both directions I then applied some silicone grease to the cogs and moving parts to allow a smoother operation. It’s worked. A nice simple fix.
Result:
It’s working and here’s a small video to prove it.
It’s now working
I’ve already handed it back and it’s a joy to see the smiles on my nephew and his dad’s face when they watched it working. Such a simple thing, bringing back treasured memories and laughs. Another old toy saved for another generation and best of all another item not going to a landfill.
Thanks for passing by, as always it is very much appreciated.
How it looked in the last blog post prior to finishing
This post covers the finishing, that is the priming, painting and installation of the radio gear to complete the build of this wooden model boat.
I have to give a couple of coats of high build primer to the hull and deck sections, and for this task I will be using Guild lane high build primer.
This will seal the already sand sealed wood and give it a good foundation for the final paint application. I will give a good initial coat, lightly sand and fill any imperfections and then give a final second coat prior to choosing the colour scheme I’d like for this boat.
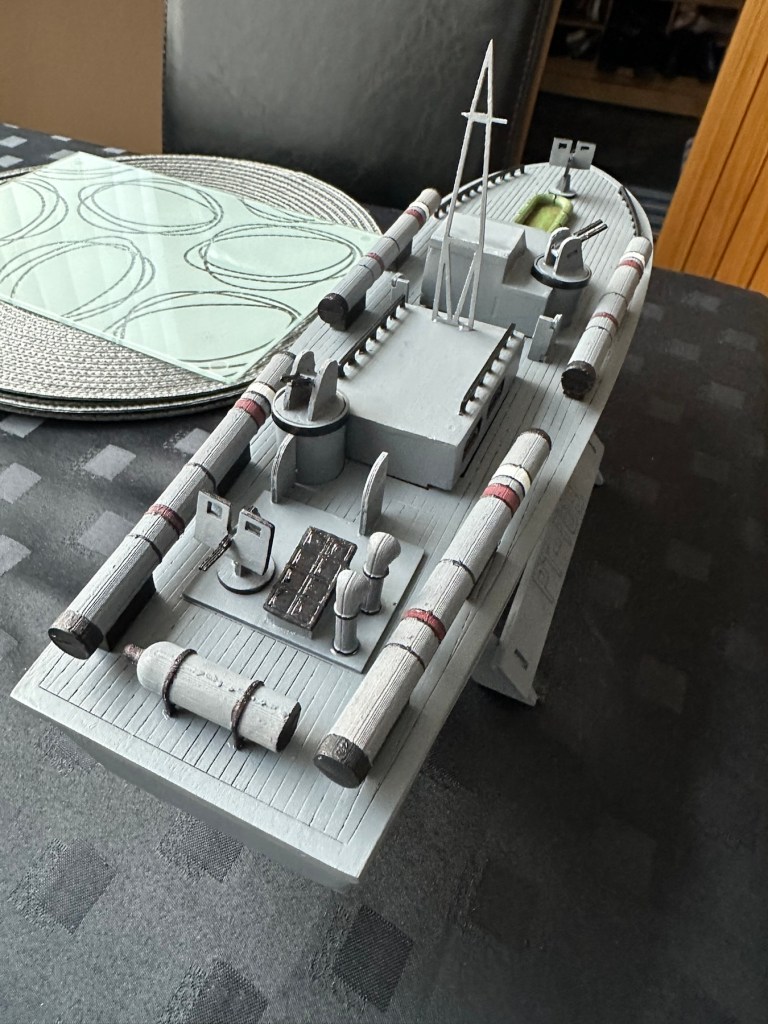
Today I have given the first two coats of primer to the hull and deck, and I’ve primed all of the cabins and guns and torpedos in preparation of individually painting them. I need to do a light sand on the hull and I believe a third coat will then suffice.
All deck weapons primed and painted
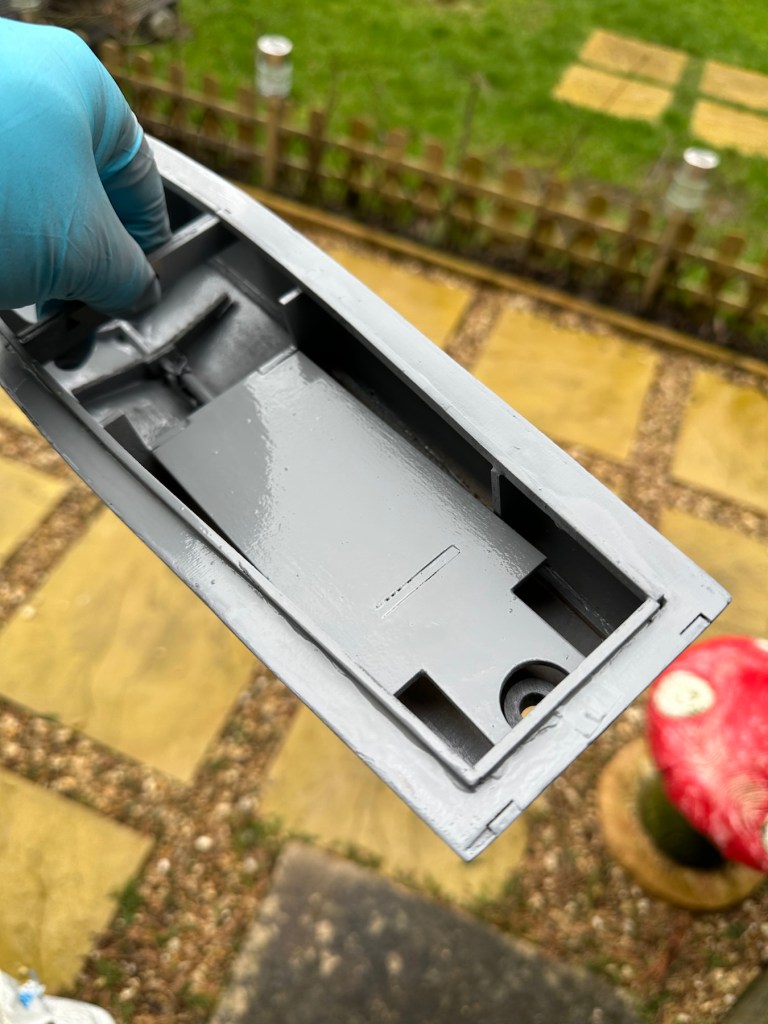
HullInner battery plateInside hull
I’ve given a light sanding to a couple of spots on the hull, I’ve filled a couple of tiny holes, sanded again then re sprayed the hull. I’m happy with how it looks at present. I’m not following a traditional paint scheme, so there will be no comparison to its original appearance. I’ve hand painted some of the deck fittings, put in the cabin windows and started to fix these items into place.
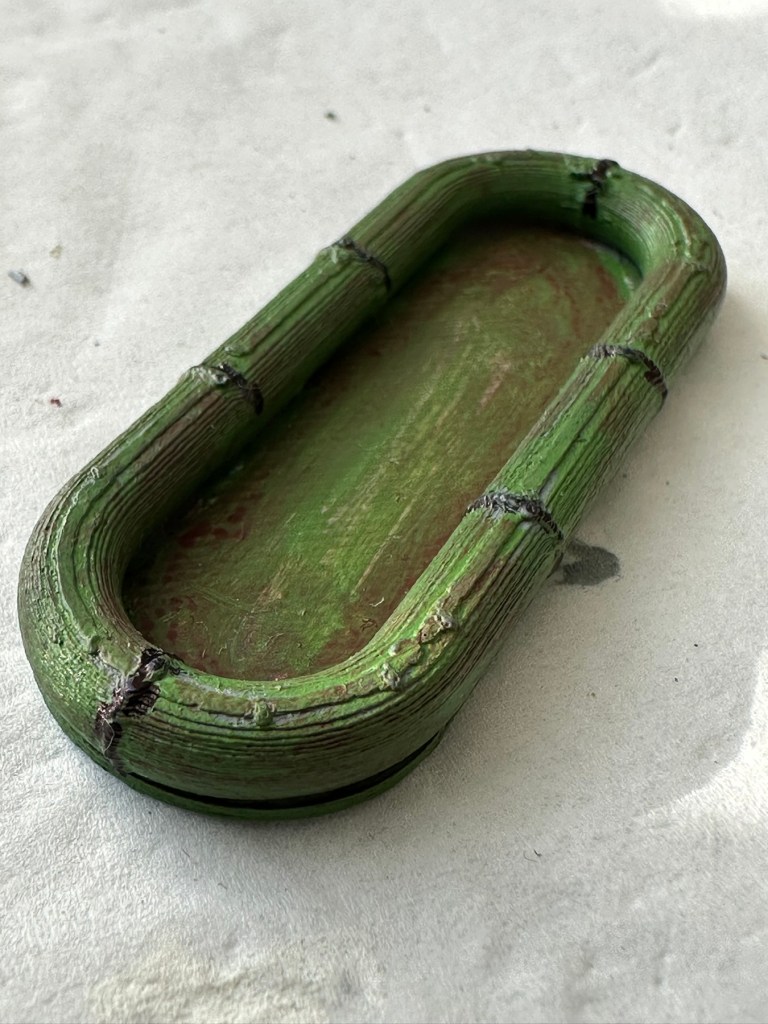
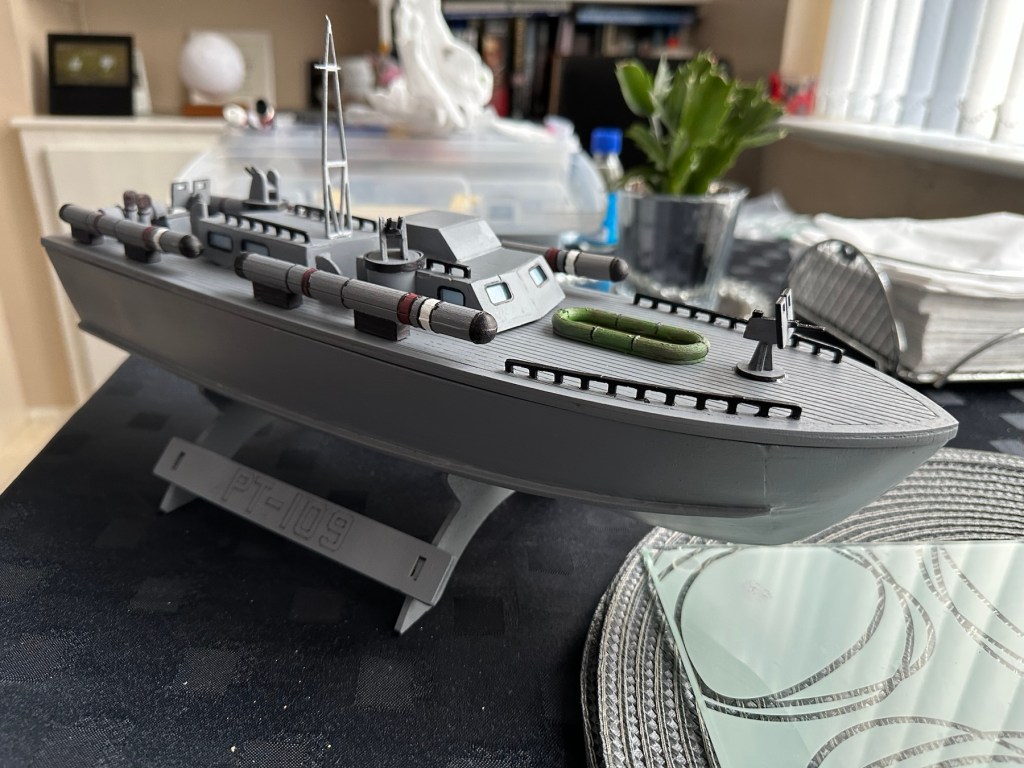
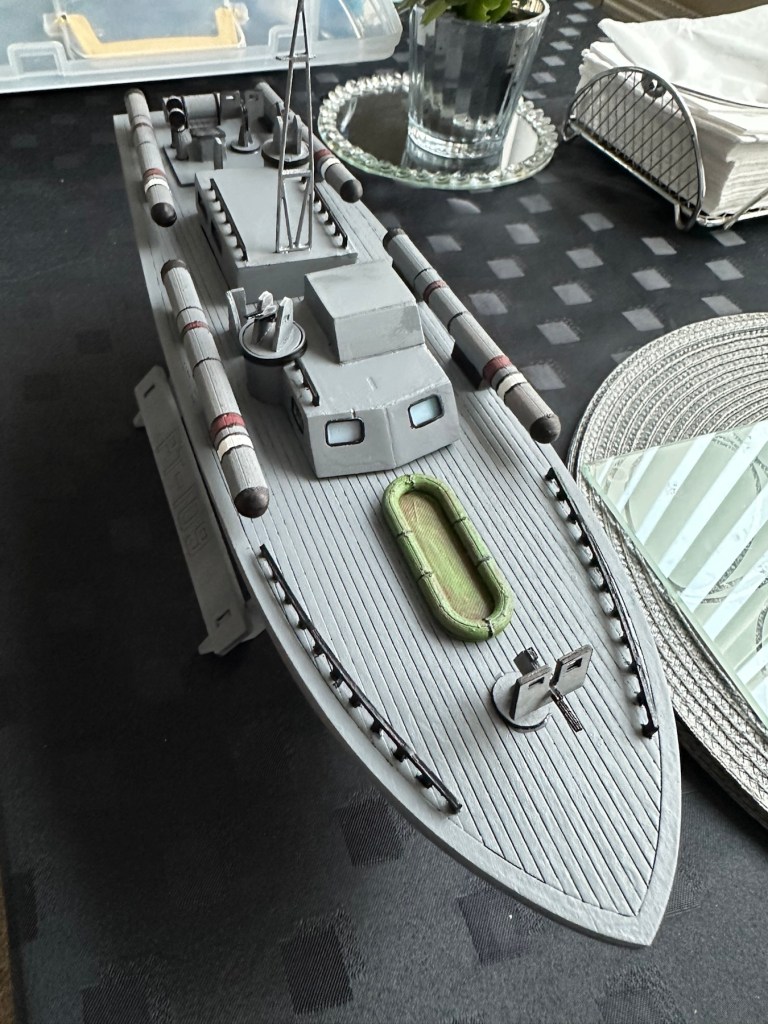
Hull painted deck fittings to be put in place. Deck dinghy painted and weathered Super structure addedDinghy placed Weaponry attached
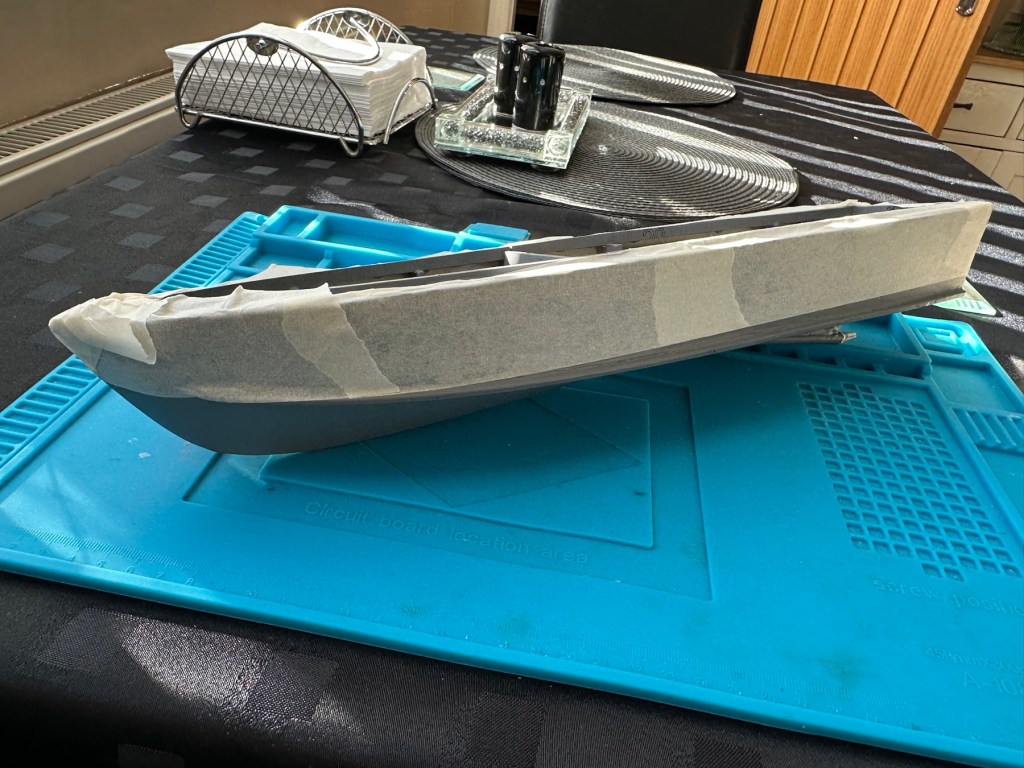
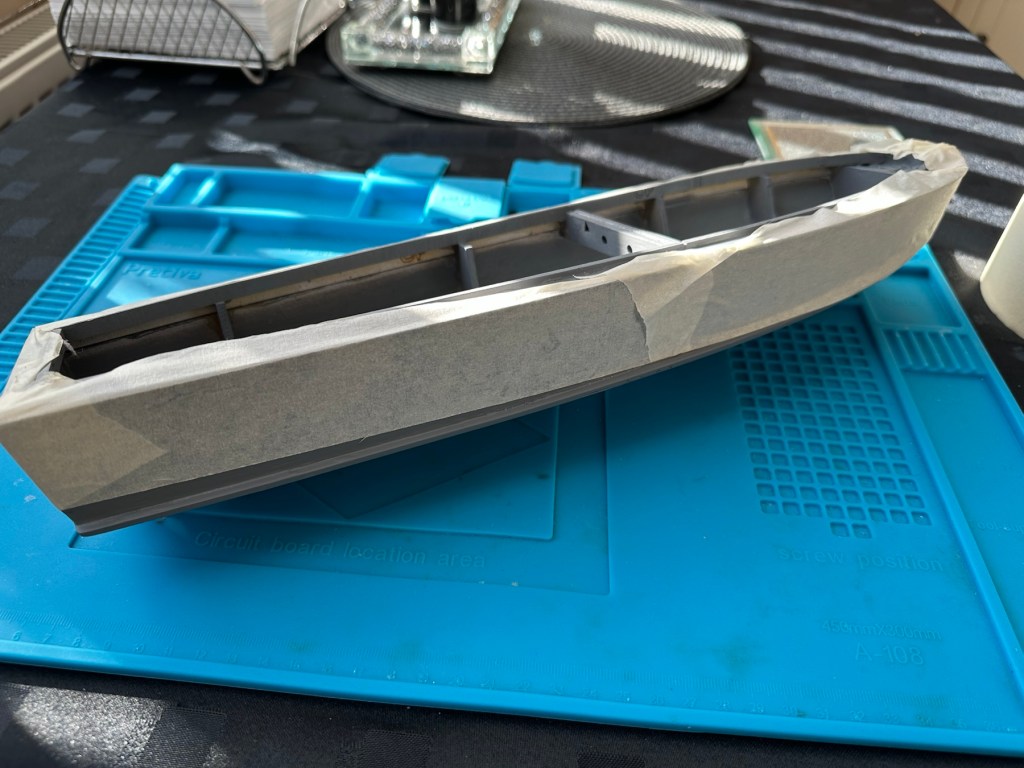
I’m just awaiting some red paint to finish the hull, then I can get some decals in place. Then I can seal it all to finish the exterior of the model and then I can concentrate on setting the motor and the internal electrical elements up. Next I have to mask the area of the hull that I will paint red, I’ll do this now before the paint arrives as it just has to be right first time. I don’t want to be touching up too much if I can help it.
Masking of the upper deck in preparation for a red belly
I’ve made a pair of support struts out of balsa that sit behind the aerial, I’ve changed this area completely as it was too delicate and would have been a nightmare to transport. I’ve built a modern style array for a radar, I know it’s not going with tradition but again it makes for easier transport and reduces the need for repairs on the go.
First coat with mask in place
I’ve done the first three coats of red paint for the waterline, I’m going to leave this 24hrs now before I peel back the masking to reveal what mess I have underneath. Fingers crossed on this 🤞
Masking tape all removed
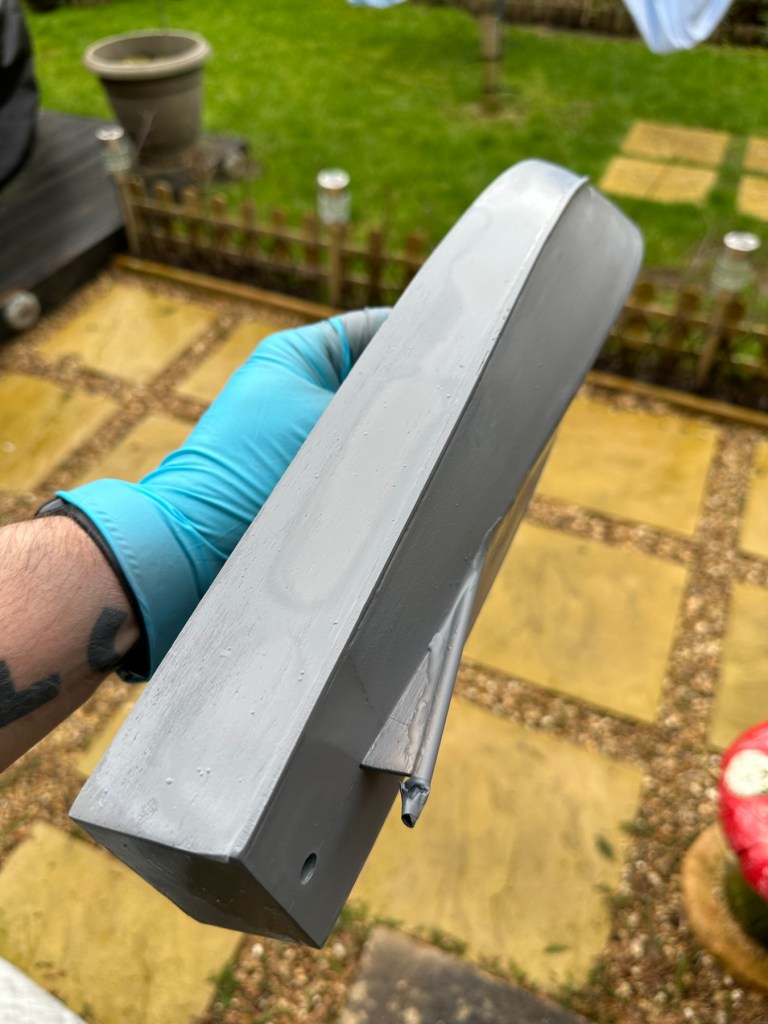
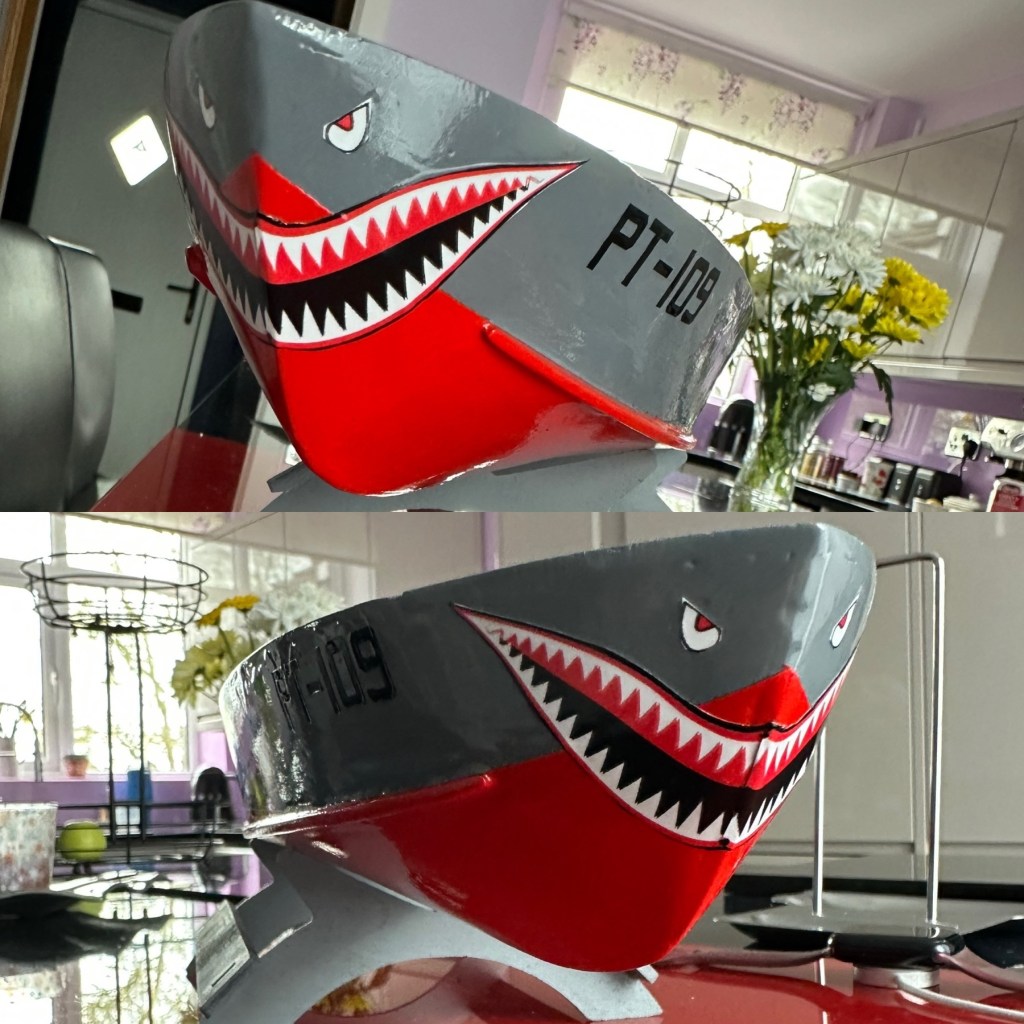
Fingers now uncrossed I’m really pleased with the outcome. The masking tape has been all removed and we now have a nice crisp line around where the red joins the grey. There’s some like marking up by the front end that believe it or not are finger nail marks when I was applying the mask. I’m not worried about this though as I have some sharks teeth decals coming that should cover this area. One of the little additions I wanted to make, to put my own mark on the build. Once all the decals are placed I will then give a final coat of a yacht varnish to seal all this work. I’m going to test a small area first as the last thing I want is for all this hard work to run into a gooey mess.
I have done the tests and commenced with coat one of the varnish. It looks gorgeous. Im probably going to do a further two light coats and that will be the hull complete. I haven’t put the decals on yet, I will probably do that prior to putting on the finishing coat.
All decals placedVarnished
All decals applied and final varnish completed. I can now look at getting the rudder and electronics installed. I’m happy with how the whole hull area looks.
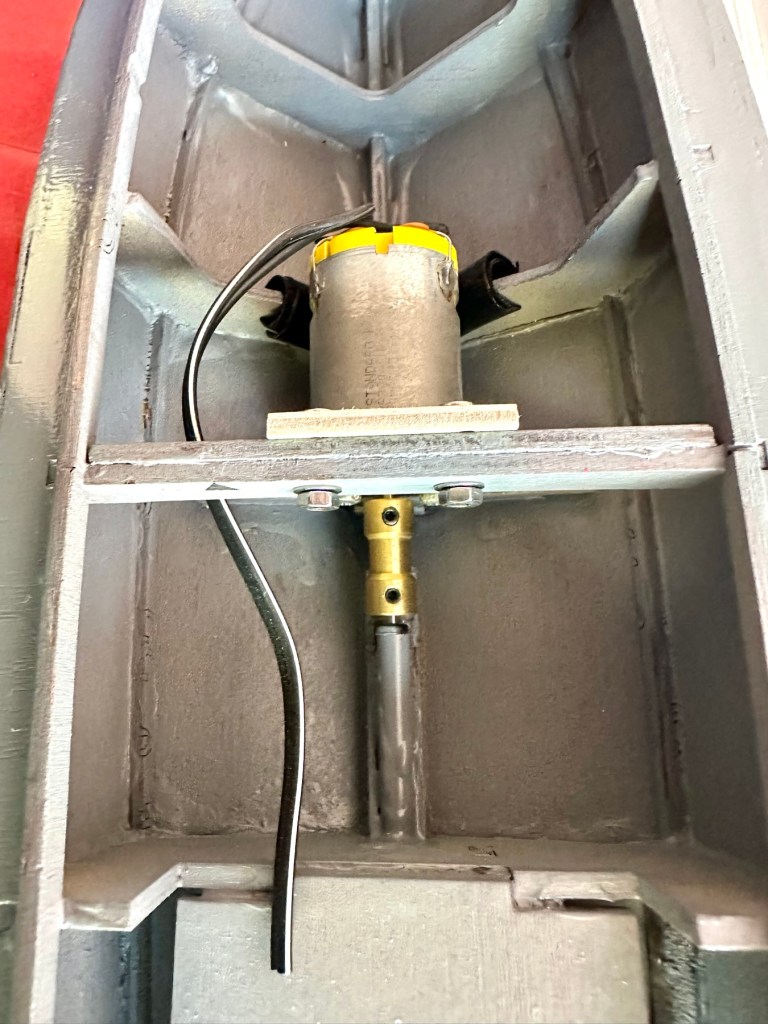
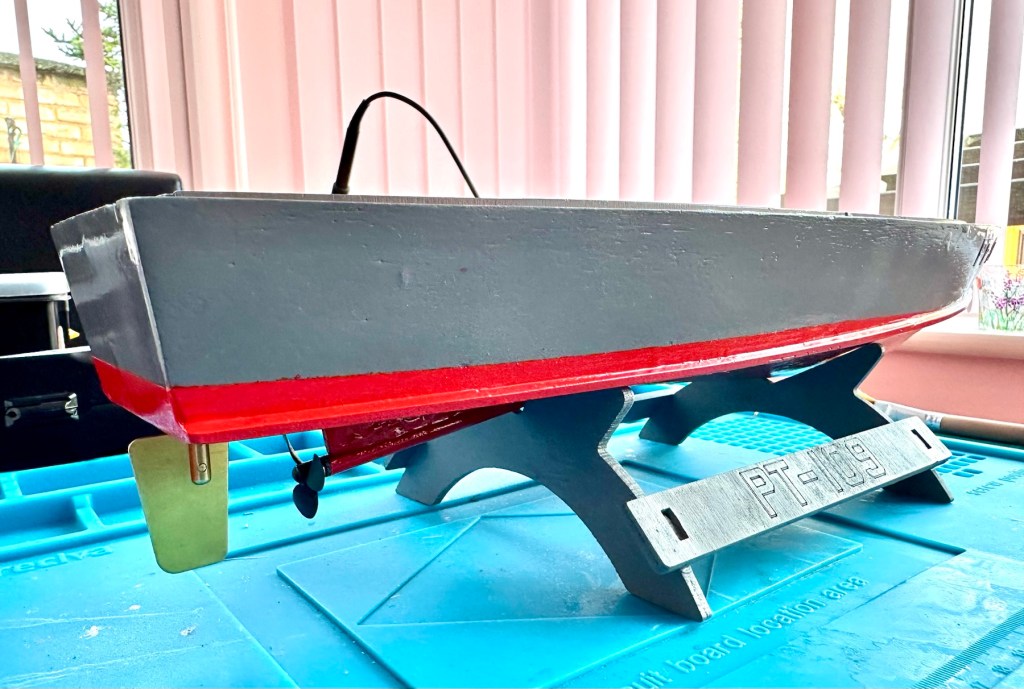
Motor, prop shaft and rudder now in placeLooking good on her stand with prop and rudder in place
All that is needed now is to place the battery, receiver and ESC in place. I have quite a strict time on this build and I must have it ready for “Lake” trials when we go to Norfolk in June.
I will also be borrowing my brother in laws pond for 30 mins or so to do a balance and water tightness test.
Let’s get the electrics installed.
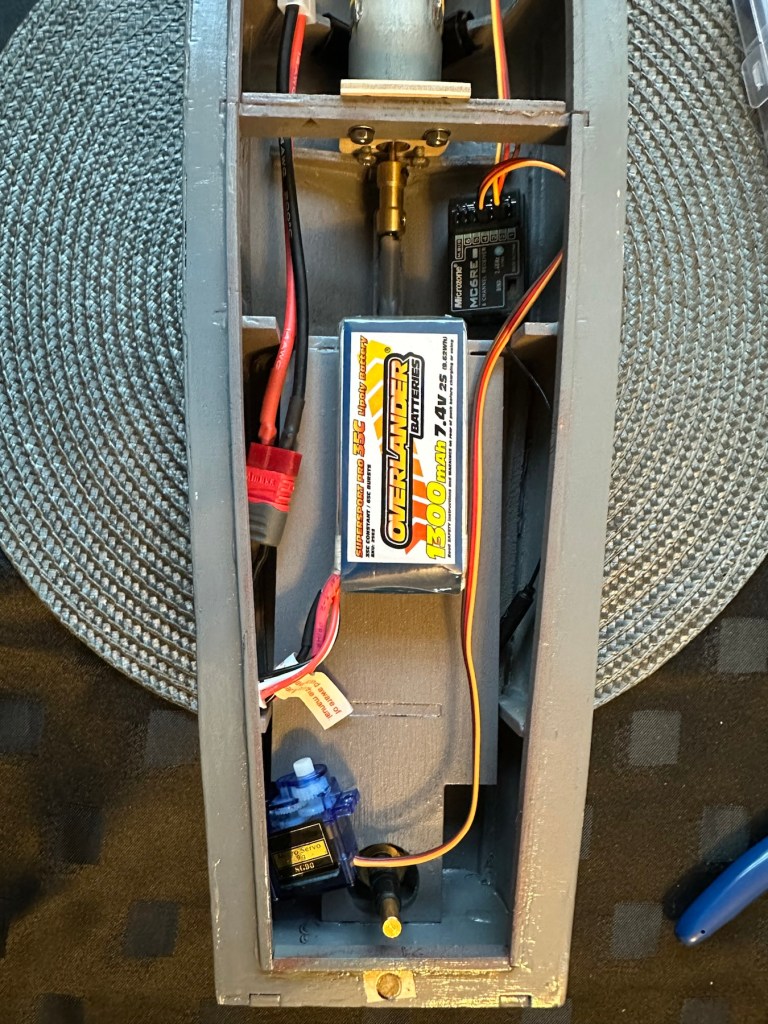
Having never really done this before, I’m quite amazed by the amount of gear I have to fit into such a small area.
All this has to go in there….i need a bigger boat
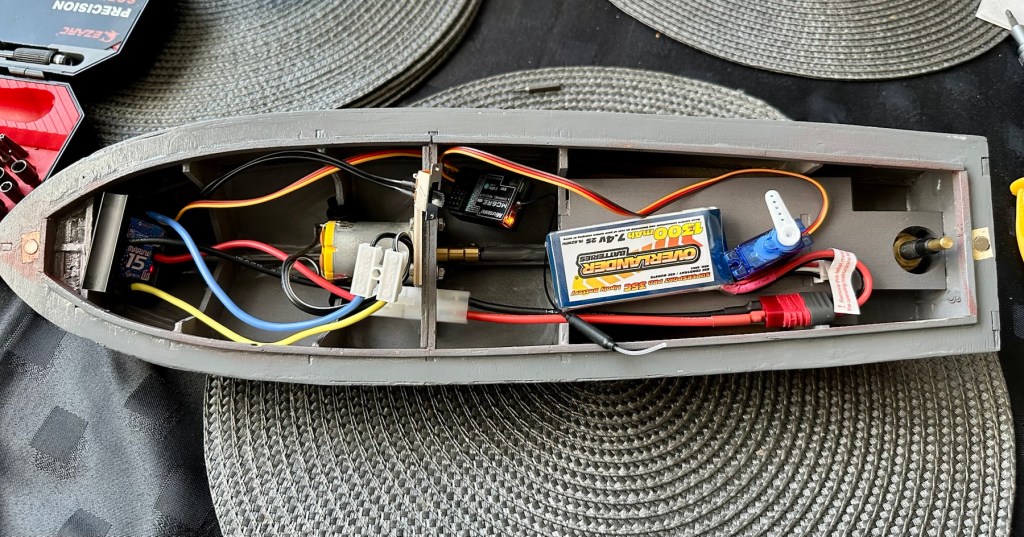
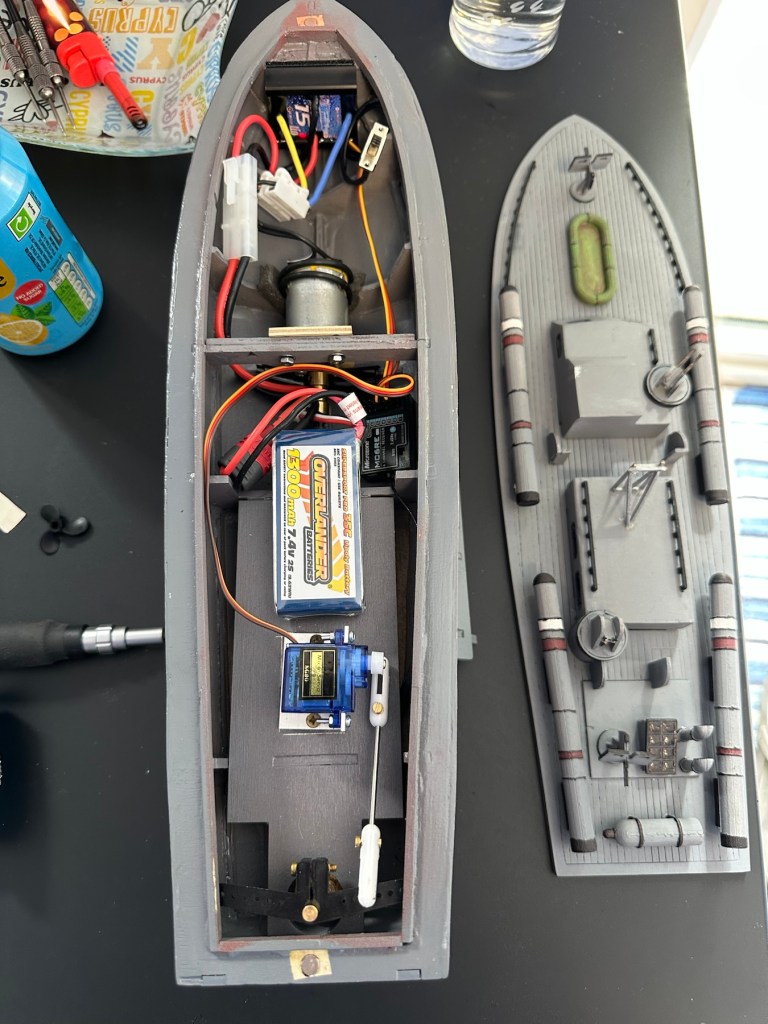
It’s in – just needs sorting
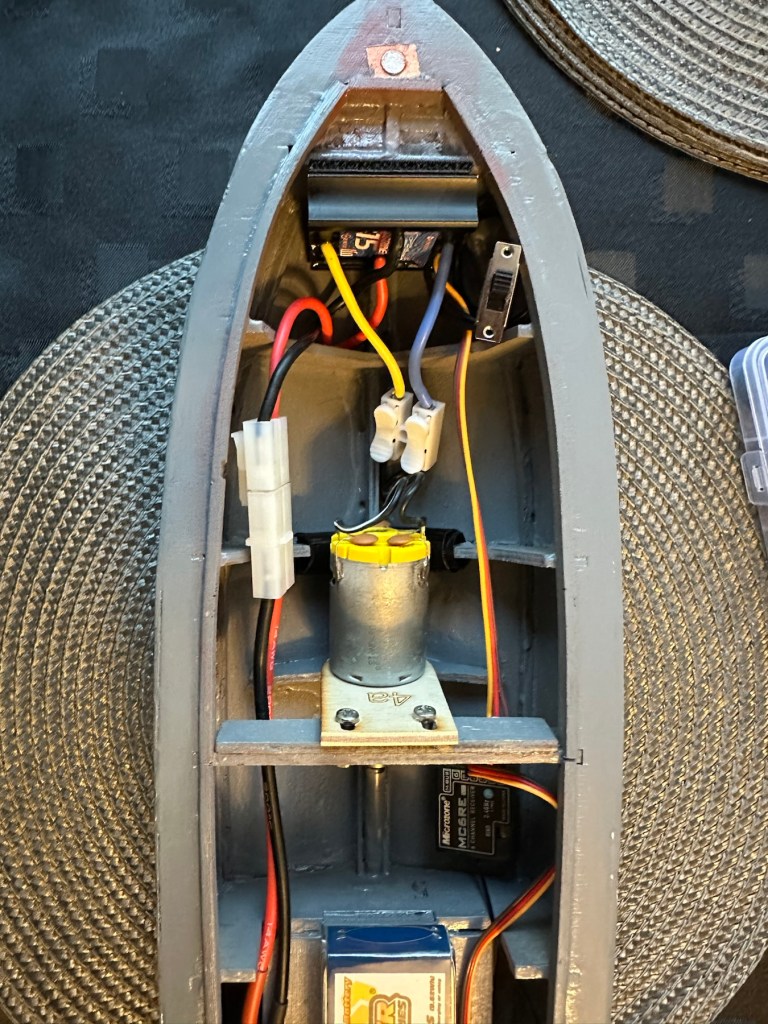
I’ve managed to put these items in-situ, in a rough position inside the hull. I need to shorten some cables, I need to somehow position the rudder servo, but I’m sure that will not be an issue. I’ve already tested the centre of balance and I’m happy with that. Later today I shall start to really tidy the layout by working from the front to the rear of the hull.
Front RearThank the Lord for Velcro tape. All complete apart from the rudder connection. I’m still working on that.
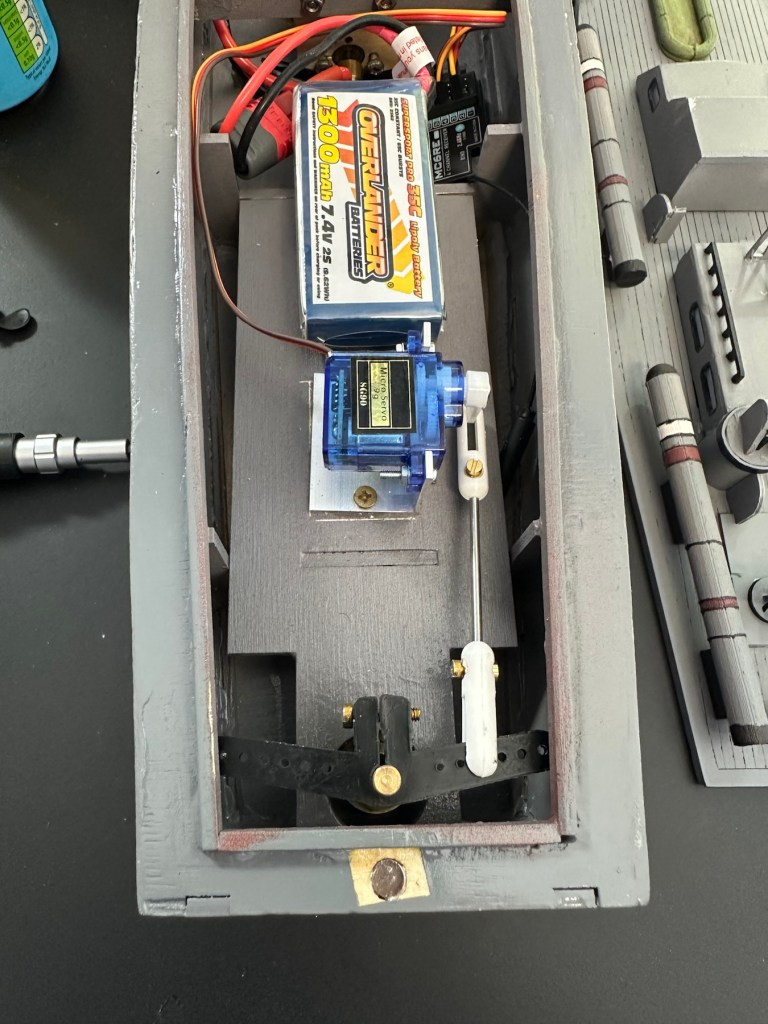
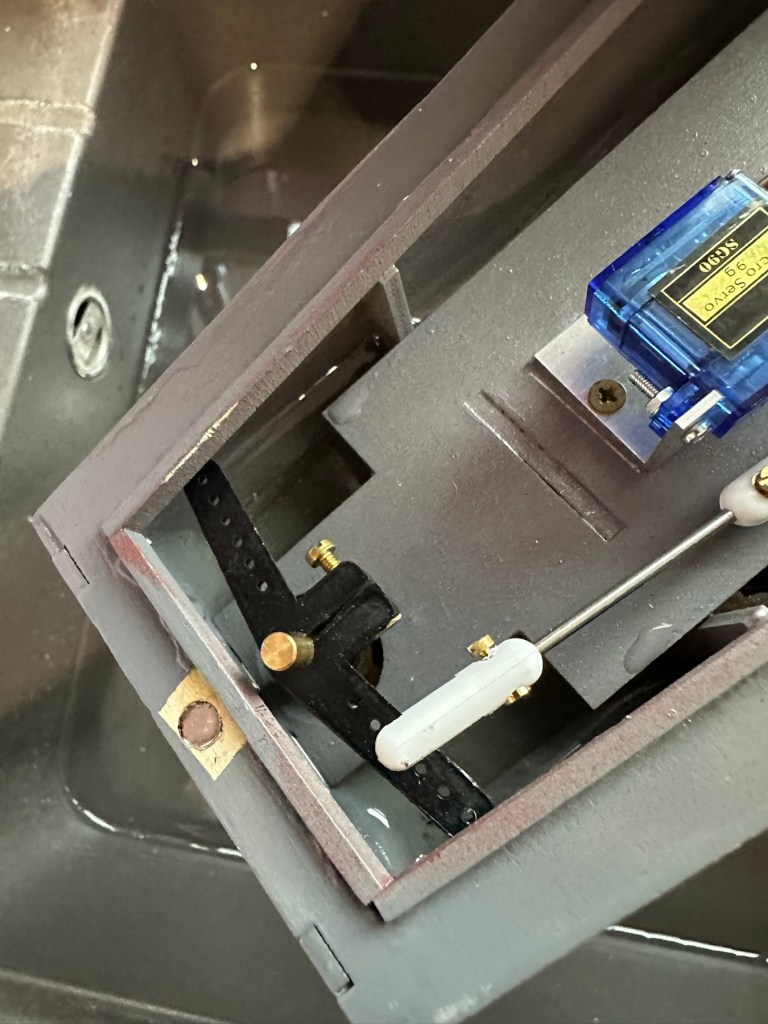
I’ve had to purchase a small bracket for the rudder servo along with a couple of connecting rods. Hopefully we can now complete the electrical connections within the hull and get the rudder operational, then I can get it water tested to check for leaks and balance.
Rudder linkage in place, just needs shortening
Rudder linkage now adjusted and in place
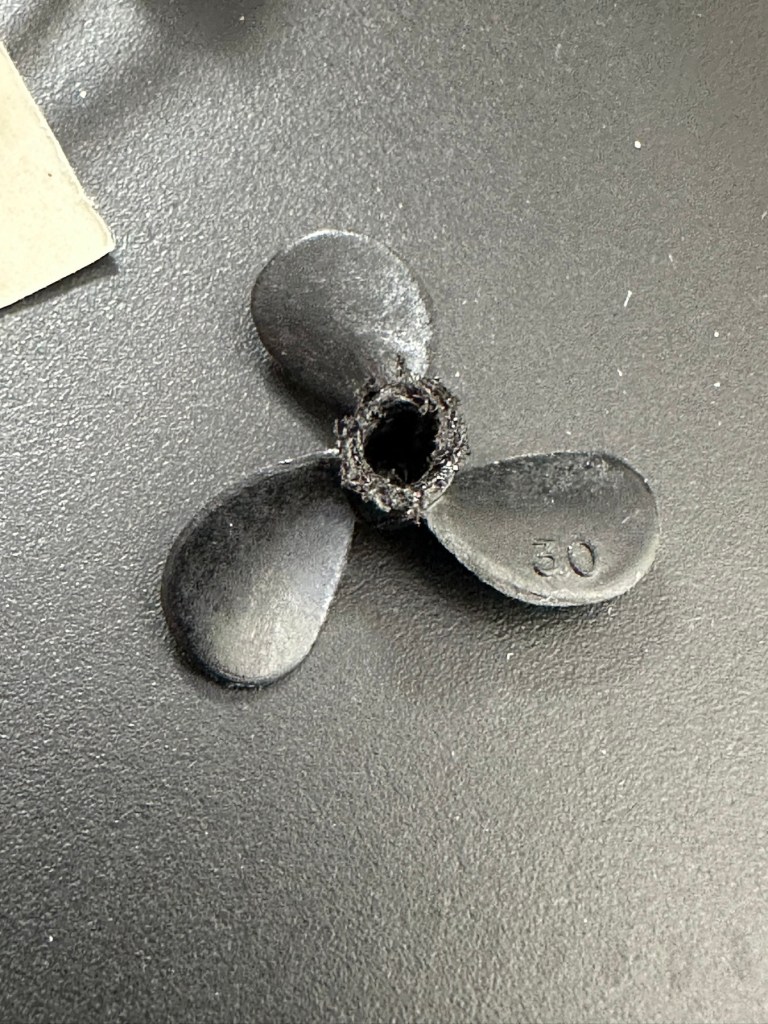
I’ve just had quite an annoying and inconvenient moment. The rudder linkage is all now in place and working fine, however the issue lies with the propeller shaft. I’ve rather foolishly connected it all up but left the propellor flush with the shaft end so when I put on full power to test, there was a burning smell as the propeller wizzed past my ear across the room and the shaft seized up. There was such a build up of friction between the propellor and shaft that the propeller melted and bent the 2mm prop shaft out of place. A stupid mistake, caused by my rushing to get this completed.
A melted propeller with the screw mechanism missing
A small video that shows the rudder mechanism working
I’ve now had to order a new prop shaft and propeller, hopefully these will arrive in the next few days and I can then get the build finished.
New prop shaft in place, and all electrics and functions are now operational with the motor purring away nicely. I’ve adjusted the distance from the prop to the shaft to reduce Friction and this appears to be working fine.
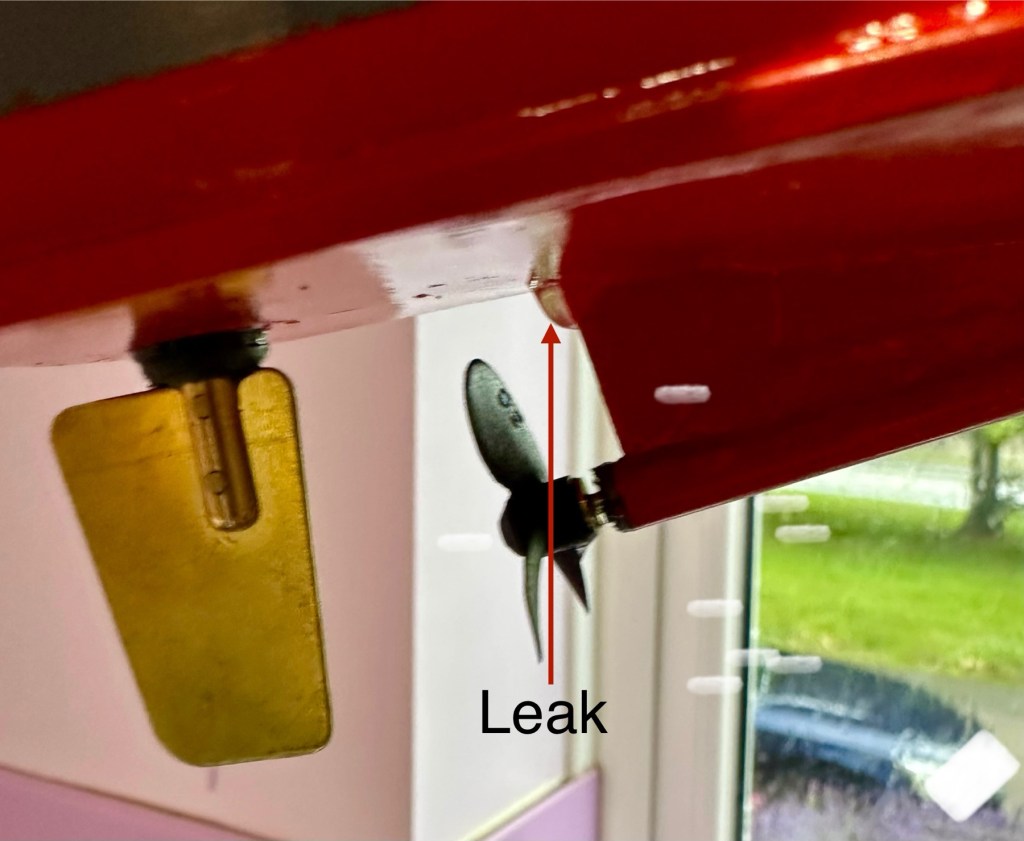
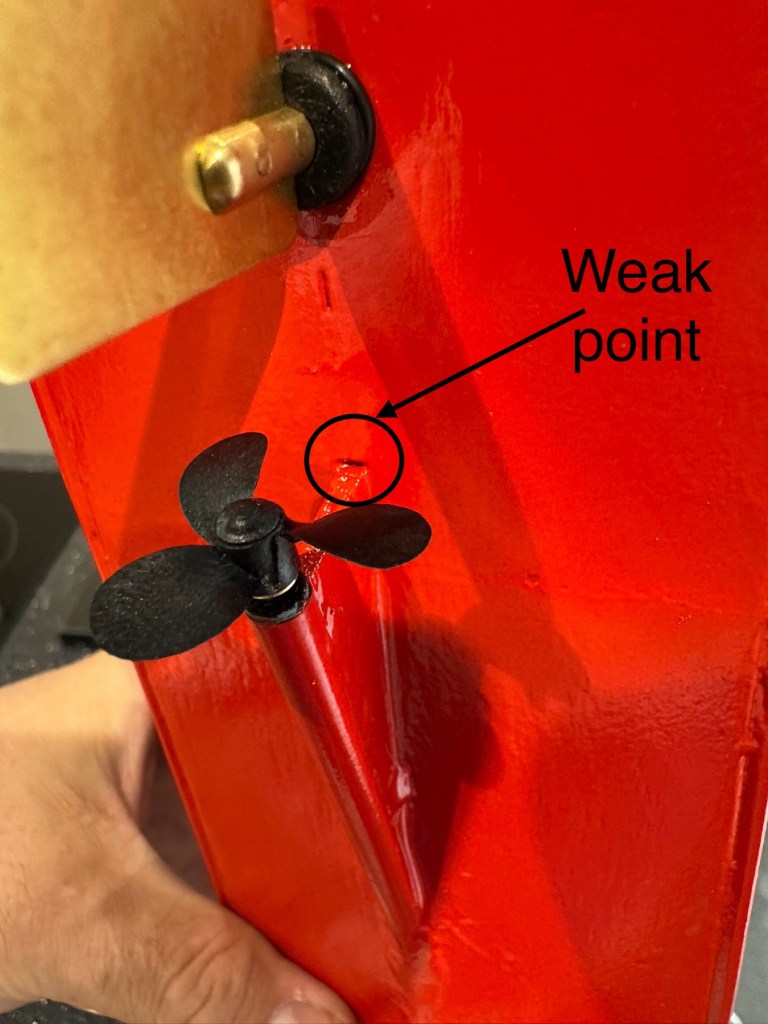
All functions working nicelyLeak can be seenWeak point found
Now to sit her in some water for leak test.
Floating nicely After 30 minutes we have water ingress
The leak test was going so well, all functions worked well and she was sitting nicely in the water.
Water test
The positive here, is that there is no leak in the front end there was no water present here. All the water was in the rear, however it was not entering via the rudder mechanism or the drive shaft.
I removed the hull from the water, tilted it in such a way for the water to gather at the rear, and dried the underside of the hull. After a few seconds you could see a drip starting to gather at the top of the mount that holds the drive shaft in place. I knew it must have been a slow leak as this took almost 30 minutes to build up, I’ve caught it just before it impeded on any of the electronics.
I’ve now emptied the hull of remaining water, it’s now drying off naturally and I have a plan in place to repair the issue once the hull has fully dried. I’m probably going to use some epoxy resin to seal around the whole drive shaft fin, and then I’ll paint and seal this part again. We will then repeat the trial.
Back in the water the following morning at 07:50 after being sealed with epoxy resin on the hull, let’s leave her alone bobbing around for 30 minutes to see what occurs. It’s not good news….again.
Timelapse over 15 minutes
As I’m impatient, I set up my camera in time lapse mode to see if I could pinpoint where the water was accessing. My suspicions were that the water was coming up the drive shaft however I’m quite pleased that the timelapse shows this is not the case. the water appears to be accessing again from the very base of the hull. This area was sanded to quite a thin tolerance so i suspect, that even with all the sealing, two coats of paint and a coat of varnish there must be tiny holes along the hull. The previous sealing I did cured the issue at the rear, it now appears that I will have to carry on with the resin coating or something similar, along the length of the hull. To make things entirely water tight I’m going to remove what I can internally and also seal inside the hull as well.
One good soaking of polyurethane varnish later…
Three days after all this varnish has dried, I have done another float test and this one was with all equipment on board for an hour…and it was successful. We seem to be dry. I’m now putting the whole boat back together now ready for its maiden voyage at Gorleston boating lake in a weeks time.
Ready to go…
I will do a separate post regarding the maiden voyage and its outcome whether positive or negative shortly after.
Thanks for passing by, as always it’s very much appreciated.
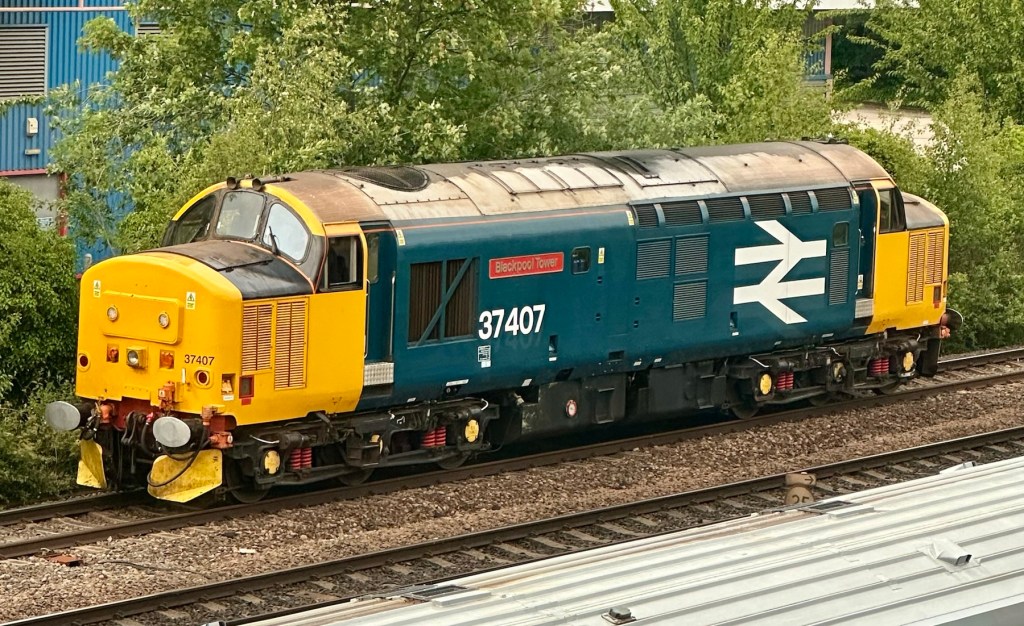
It’s all been work, work lately and yesterday this old lady arrived at our depot to have some work done.
Class 37 Diesel- 37407 (Blackpool tower)
I’m not a train spotter, no way, but there is something special about these elderly beasts. No concern for clean air as they spew smoke and clag into the atmosphere, they are true old workhorses of the rail network and it’s always nice to see a well presented example arrive on site. this one was built in October of 1965 so it’s older than me (and better looking) here’s a little bit about it:
May 2019 – One of DRS’ most famous locomotives has been renamed ‘Blackpool Tower’ as part of the 125th anniversary celebrations for the North West’s most famous landmark.
The vintage ‘Class 37’ loco’ (37407) first carried the name back in the 1990s, when it became part of a fleet of locomotives running ‘seaside specials’ taking thousands of holiday makers and day trippers from Manchester Victoria Station to the seaside town known as the ‘Las Vegas of the North’.
Rail enthusiasts will be delighted to know that 37407 is one of several DRS locomotives that has been re-painted in the distinctive yellow and blue British Rail ‘large logo’ livery.
The locomotive will continue operating on the national rail network working on a range of DRS services, from freight and passenger services through to supporting the work to decommission and clean up the UK’s earliest nuclear sites.
Gov.uk
I spent the day yesterday ensuring “enthusiasts” behaved themselves and didn’t wander onto railway infrastructure, it’s fair to say it attracted a lot of attention.
Meaning just where the hell have the last six months gone. Sit back and blink and that’s half the year already gone. It’s amazing that once the better weather kicks in just how quick it just all seems to cascade by, if only you could put the brakes on time and just enjoy it a little bit longer.
The garden has bulked up after the perfect mix of rain and sunlight, and is about to abruptly burst into colour, some of them are impatiently exploding already and it’s starting to look lovely. But it will all be over too soon and that barren, bleak lack of colour will soon be on us. Oh for year round colour, if only.
Butterfly in my garden
The house is warming up, and as we are in quite an old house it’s the one time of the year when the environment isn’t controlled by the heating system, allowing a welcome break from the claws of the energy production companies. We now have the windows open.
That’s another issue. Opening windows. If like us you currently live near the intersection of two major road arteries then you will know what I’m on about. Opening the windows means you let every speeding, inconsiderate motoring manifestation into your home, like it or not. And the dirt and dust produced by vehicles throttling past your door 24hrs a day means no matter how much you dust, there will be more for you in a few minutes to remove. Maybe time goes so fast as the amount of toxicity we must be inhaling is controlling just how long we have left? Who knows?
Digitalis in the garden
Well the windows can’t stay open forever as you’d never get a good nights sleep if you wanted to, because of the boy racers and bike demons who constantly insist on revving their two and four wheeled steeds as they race off into the distant night.
We have a lovely family getaway coming up this month when about 18 of us are heading off to the East coast for a few days. The nice thing is that there is a great mix of ages from about 21 right up to the late 70s and that is wonderful, it’s great to know the youngsters want to spend time with us old farts, to be honest it’s pretty much down to them that this holiday is being arranged, oh and the usual organisational craft work of my dear wife.
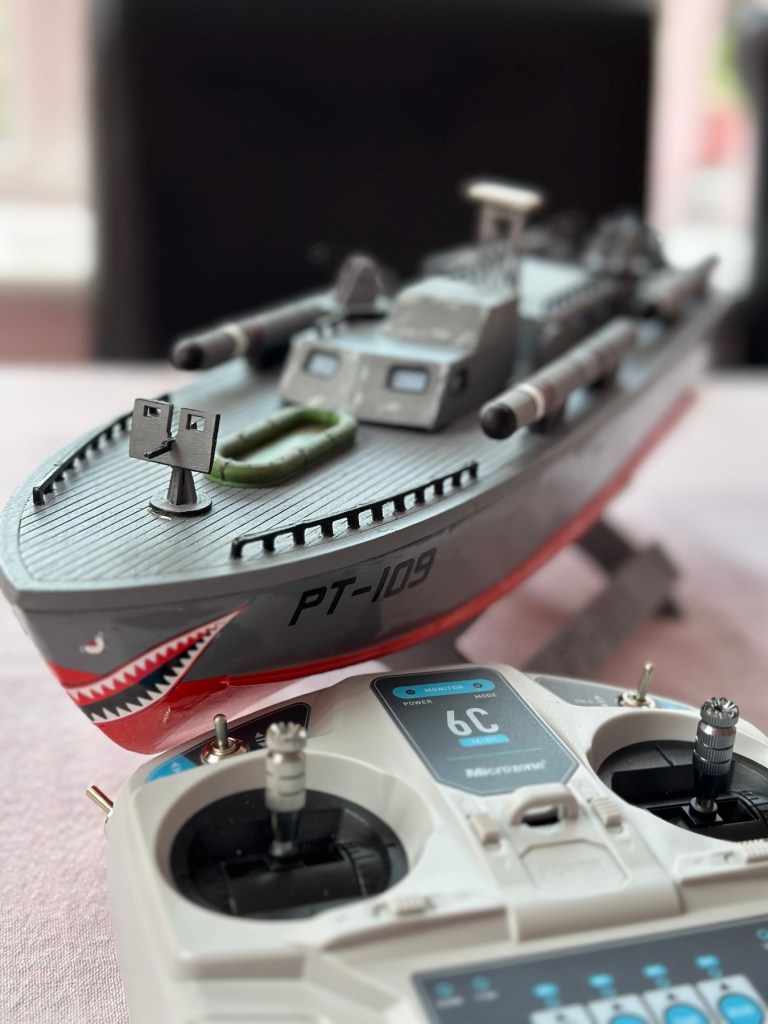
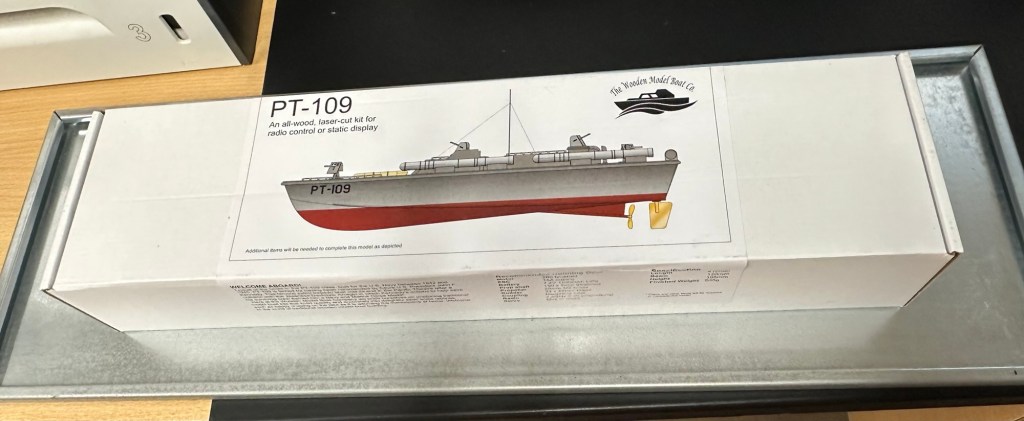
On this holiday all the old fellahs, take a boat to float on the boating lake at Gorleston on the east coast. On the day we travel up, it’s always been a quick stopover and a tradition for two of the older members to float their radio controlled boats they have spent a lot of time and patience on. I’ve always jokingly threatened them that one day I’d build a submarine or military boat that would blow theirs out of the water. This year that veiled threat has been achieved and I will hopefully be joining the ranks of the family boating fraternity when I let my torpedo destroyer loose on the good folk of Gorleston. I’ve been building this boat since it was brought as a present for me by a very good family friend on my last birthday. Its construction has already been touched on, through my blog : PT109 wooden torpedo boat kit – construction and I’m hoping the build and testing of the boat will be completed and published within the next few days. It was always my goal to have it ready for this break. Let’s see what happens.
Pt109 boat kit
About now, is probably my favourite part of the year as I have discussed on here before, May & June, that period when spring kicks in and is a precursor to the oncoming summer. But as I’ve said earlier it is all over too soon.
And what a perfect canvas is currently in place for the ongoing sale of this property, yes that is in full swing now and the footprints of strangers should start being witnessed around this property very shortly….but in a way I’m not really bothered if it sells or not. I love this place apart from the negatives I’ve stated above, and as you can see they are few.
No doubt the Christmas stock is already sailing the oceans of the world to be in all our supermarkets very shortly. As if summer is not already short enough.
Whatever the season is wherever you are on this little ball of rock floating around in space, enjoy it, have fun and always spare a friendly outlook to those looking in. It doesn’t last long, so enjoy it whilst you can.
I’ve had this camera sitting around since March 2023, when I first wrote about its purchase along with a couple of other cameras here: New old stock 📸
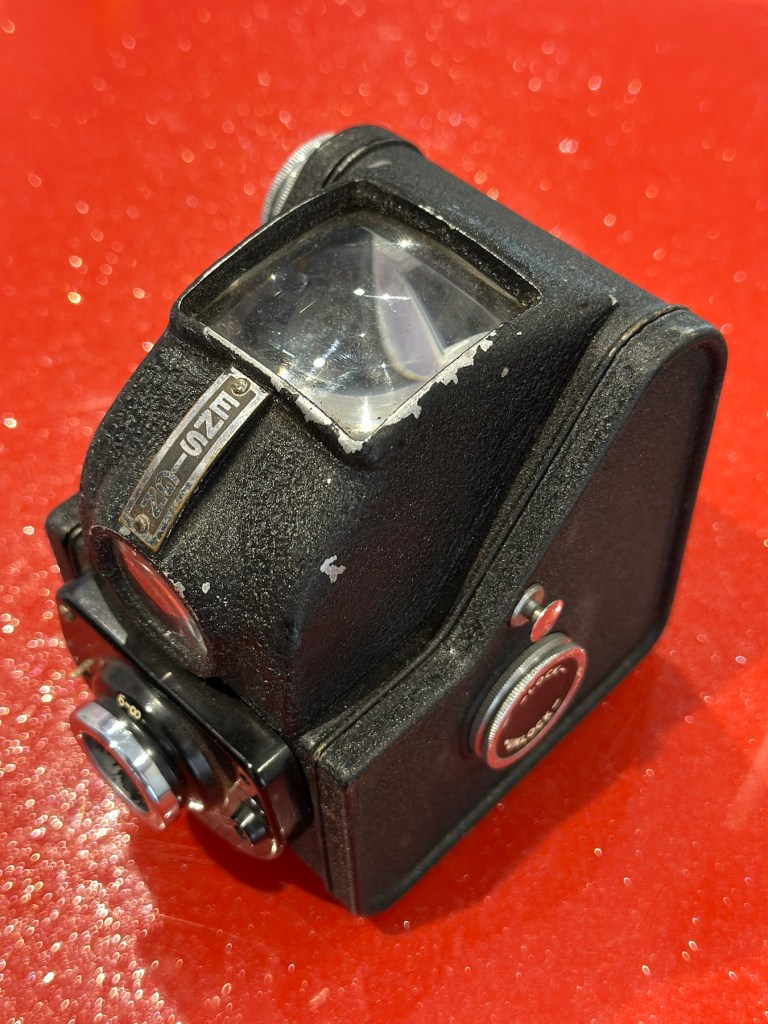
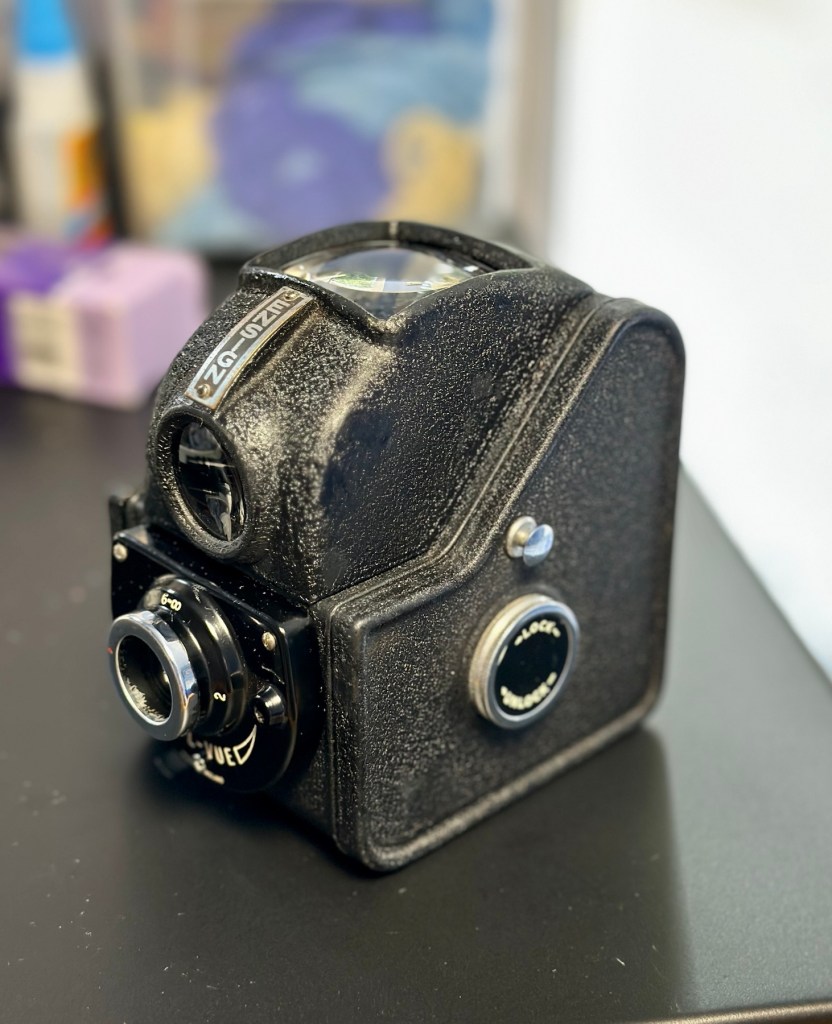
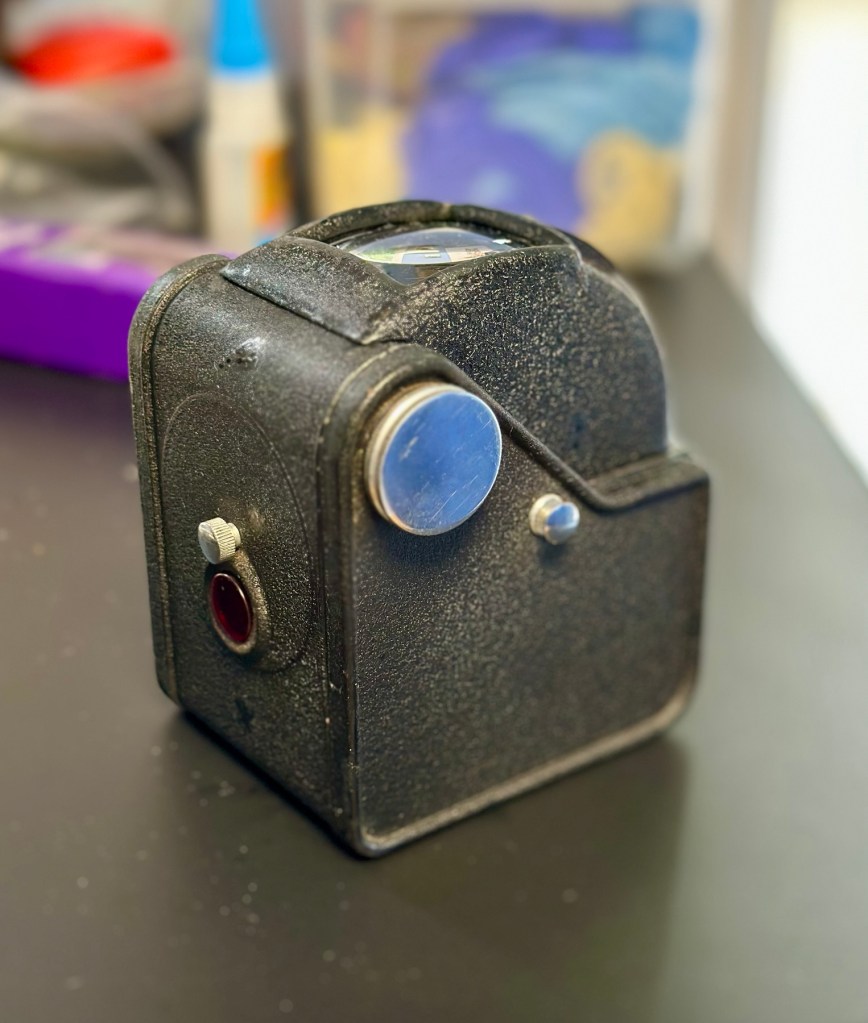
Barnet Ensign Ful-Vue II
I’m not sure what I paid for these cameras but it wouldn’t have been a great deal. I love the Ful-Vue due to its looks and the kind of Art Nouveau feel it has about it. It’s a very basic mass produced camera of its time and It is an old 120 film camera, and the bonus is that this film type is still readily available, in fact I still have a few rolls in my fridge at home today.
The shutter is an all mechanical, spring loaded system which swings a piece of metal over a hole to create the exposure. The approximate timing is 1/30th of a second and that’s slow. It is understandable when taking in to account that ISO 400 wasn’t that common in the 50s and would have produced very noisy results. It was far more common to use ISO 50-100 film and that would’ve required a slower shutter speed at the approximate f11 of the lens of this unit.
I obviously want to get it back into full working order. And want to do as sympathetic a restoration as possible. It’s a 120 roll film camera with a 6cm x 6cm frame inside, it was a cheap and cheerful camera of its day, sold as, “Easy, even for a child to use.”
In the meantime, here’s some history about this little camera:
Barnet Ensign Ross Ful-Vue II
Originally released in its initial form in 1939, this version was introduced in 1950 after further improvements were made. The new flash synchronised shutter, the turn-able lens barrel allowing three different distance settings instead of two, an all-plastic front panel, and an optional flashgun. The improved version was called Ful-Vue II. Pictures were 6×6cm on 120 film. It has been stated that colored models (red, white and blue) were sold in 1952-3, to celebrate the coronation of Queen Elizabeth II; However, no other evidence for these cameras has been seen: in particular, the Ful-Vue is not mentioned in a coronation advertising supplement to the BJP Almanac of 1953. Colored Ful-Vues were advertised as ‘Ful-Vue à la Mode’ in late 1952. Examples of the regular Ful-Vue II, repainted and presented as the colored model, have been seen in online auctions.
Camera wiki.org
So I estimate this camera to have been produced sometime between 1950-54 when this particular model had its production run, just prior to yet another version becoming available. Making this particular camera approx 70+ years old. Let’s have a look at the unit that I am now in possession of.
Assessment:
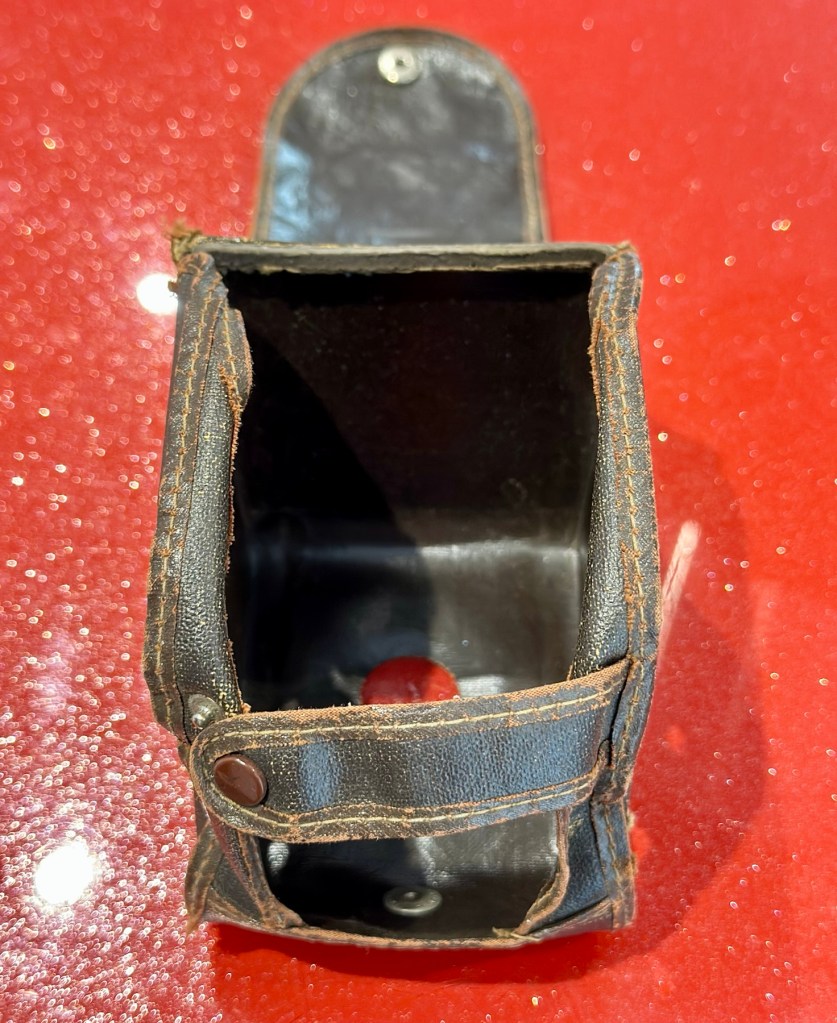
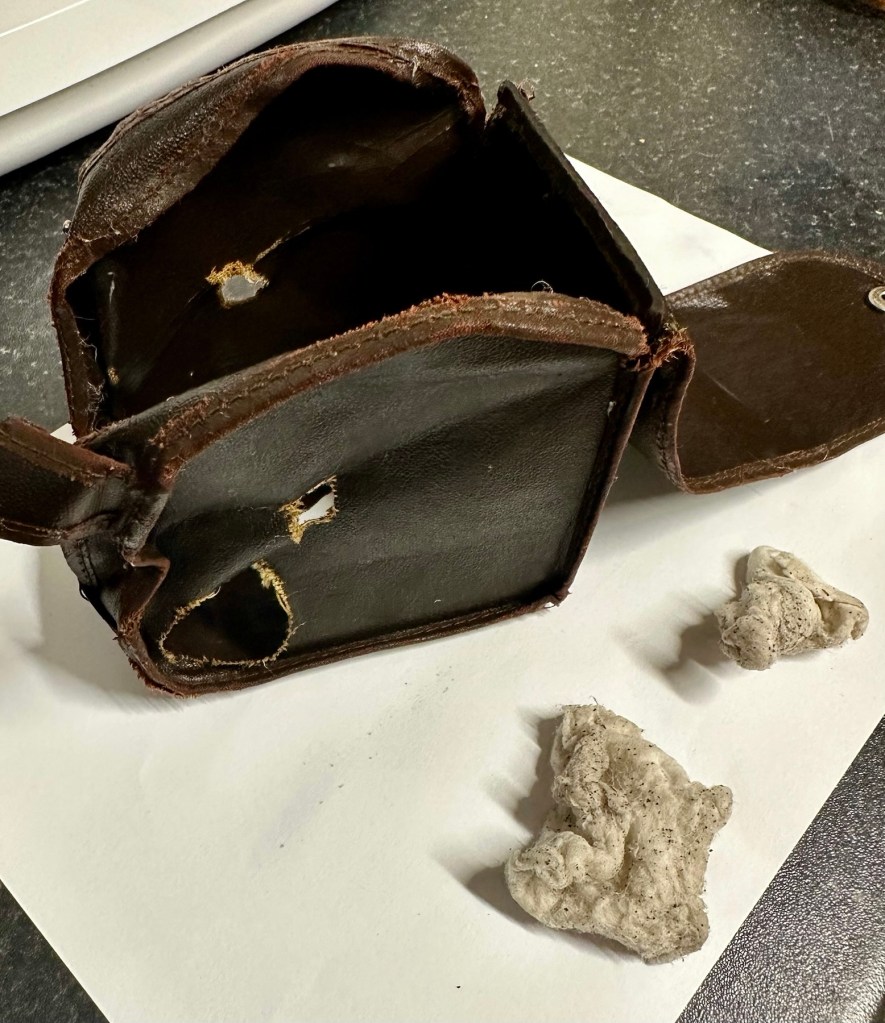
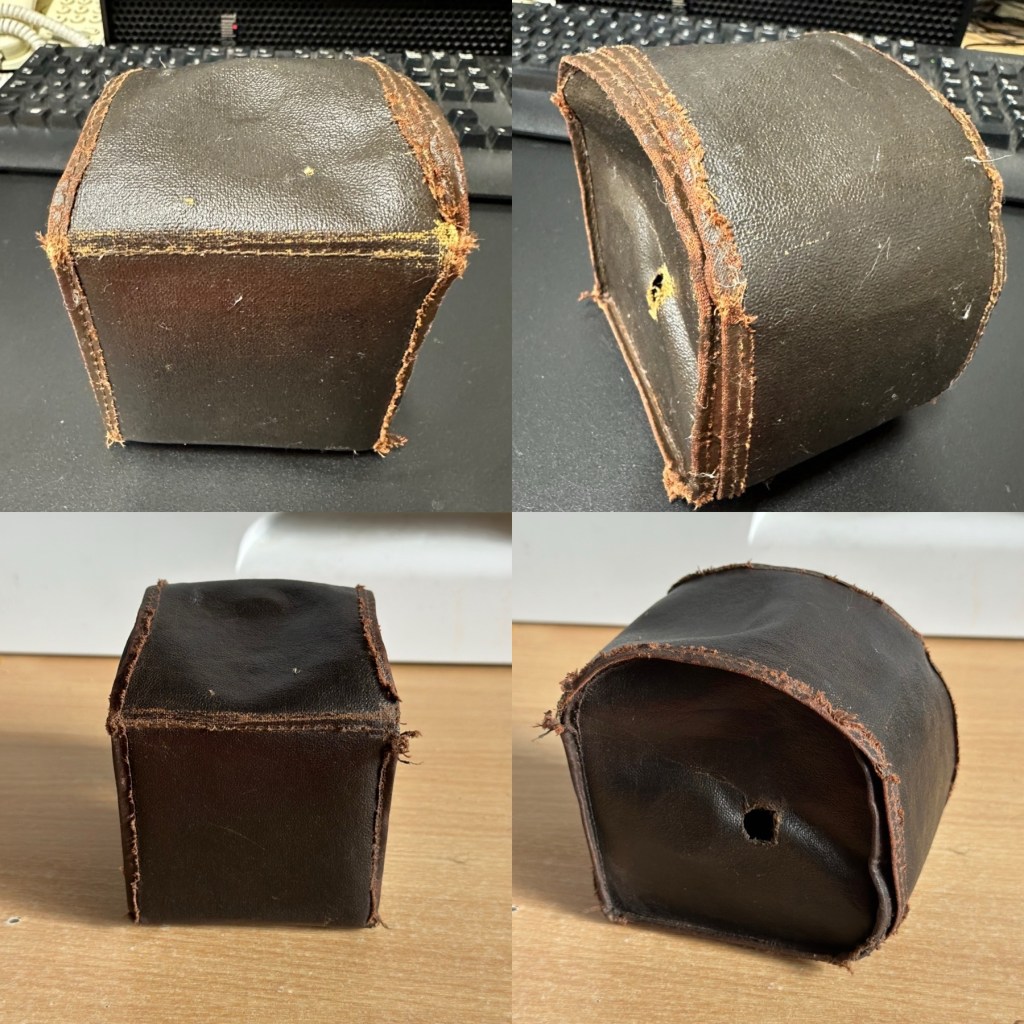
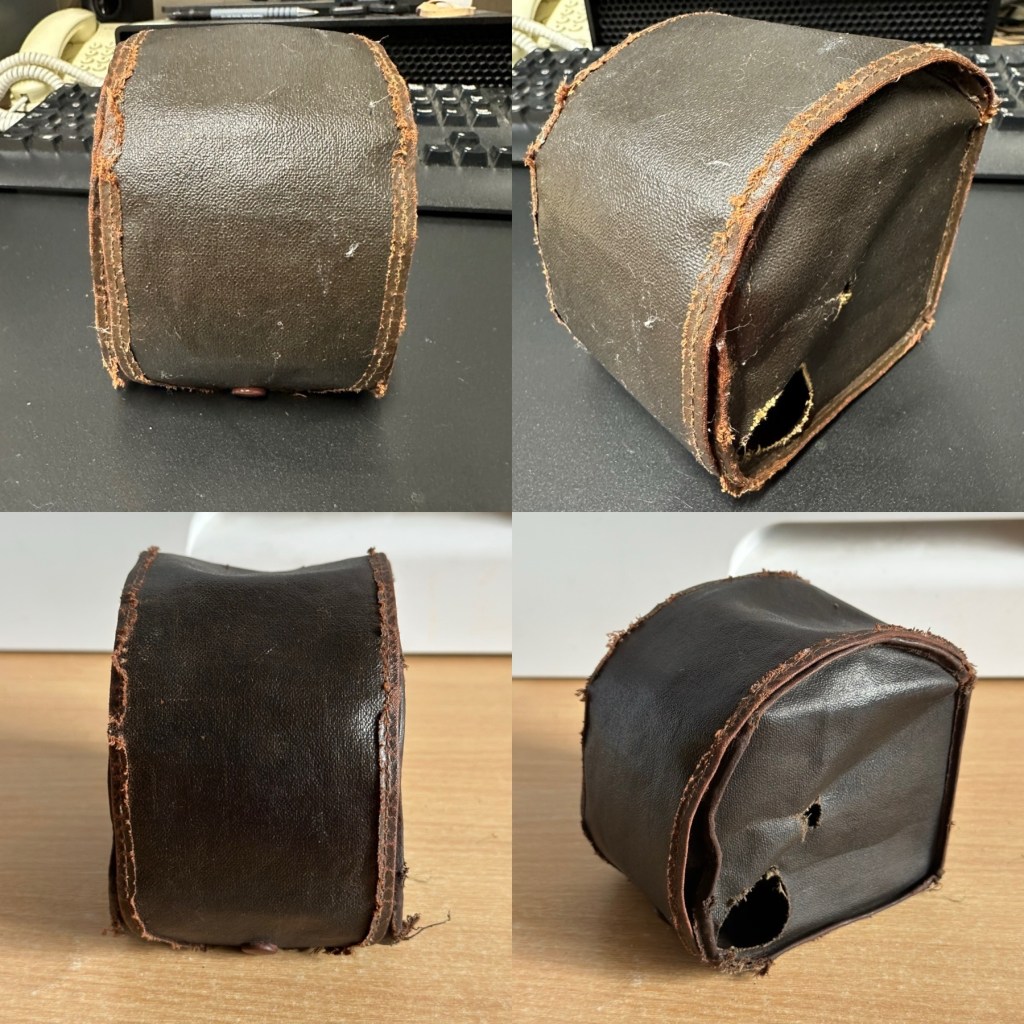
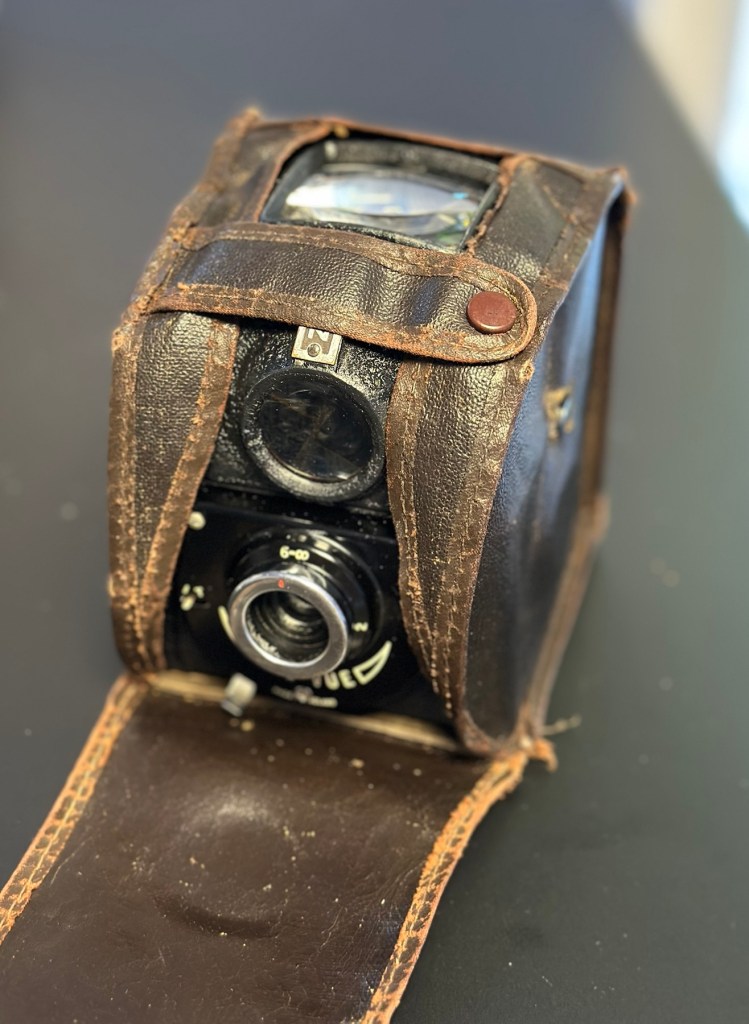
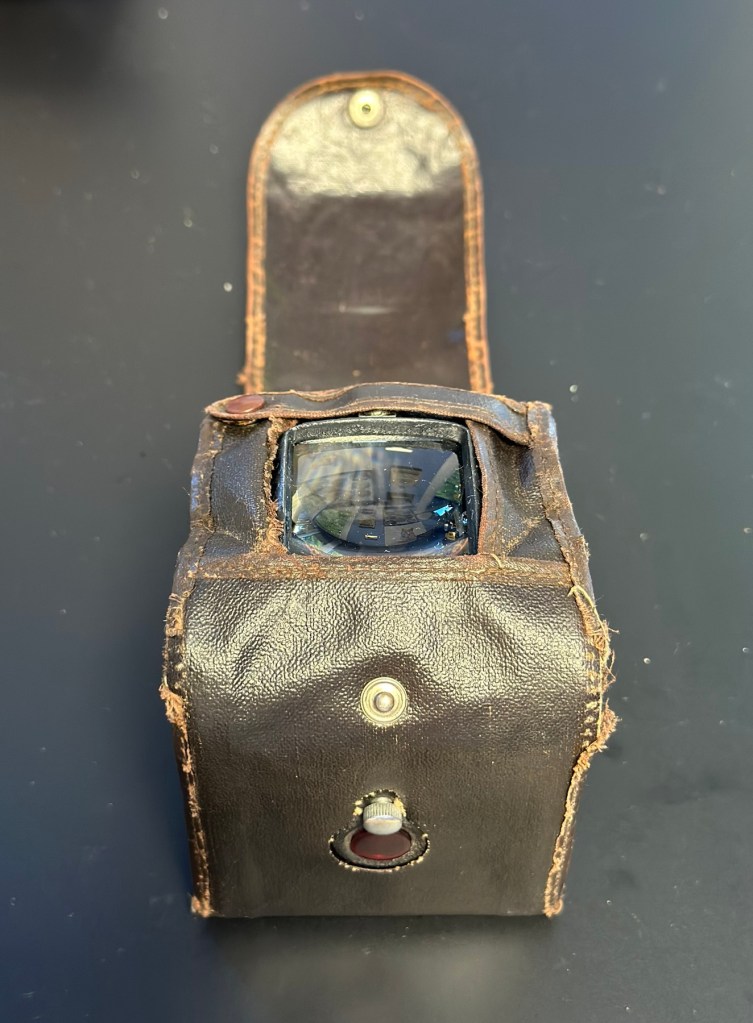
The case is leather and is very dry and brittle, it’s complete, so I may well look at revitalising this one just as I did to an old Kodak camera in this old post: Kodak Brownie reflex. If I do, I will cover its repair in the following section.
The old leather case, very dry and brittle
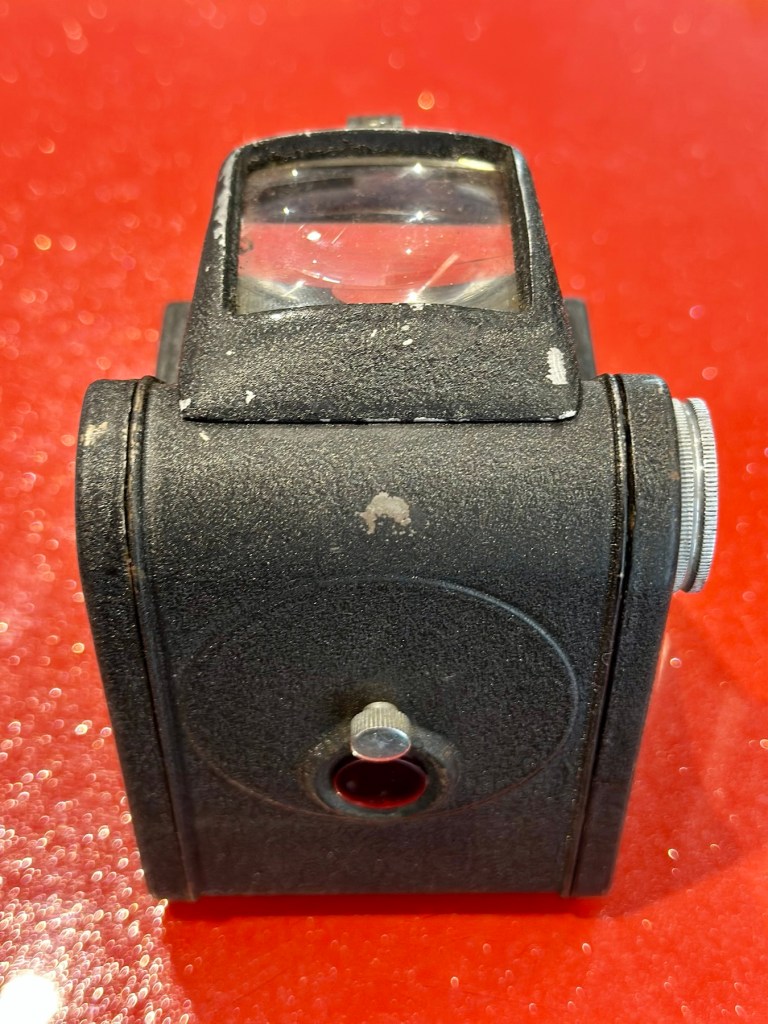
The camera itself is in quite a good condition cosmetically, it has chips off the paint and a little wear and tear that will require some attention. There appears to be a screw missing on the front plate, this will be replaced.
A little wear and tear, nothing too worrying
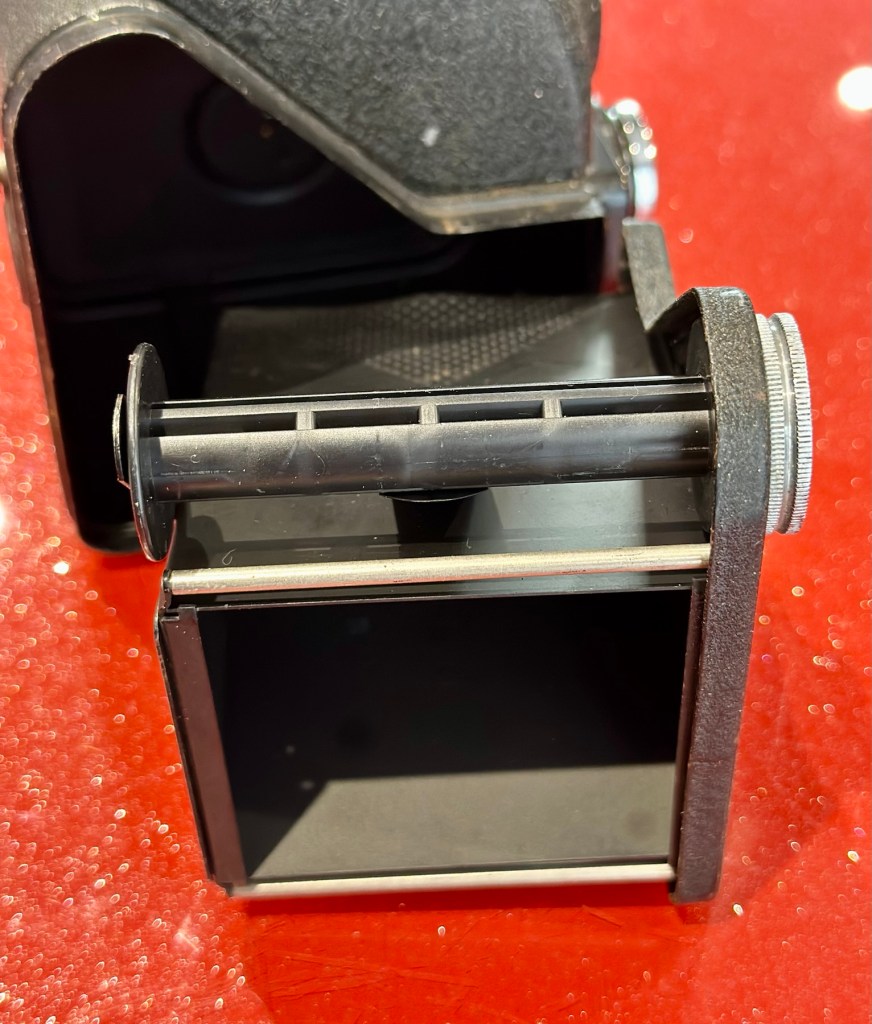
The mirror inside the viewfinder seems to have moved and will need reseating, all glass and mirrors appear quite foggy and need a good clean, all workings within the camera inside appear ok. Light seals appear ok but may well need replacing purely due to their age.
Glass dirty and mirror has movedInternals all okNo issues on the winding mechanism
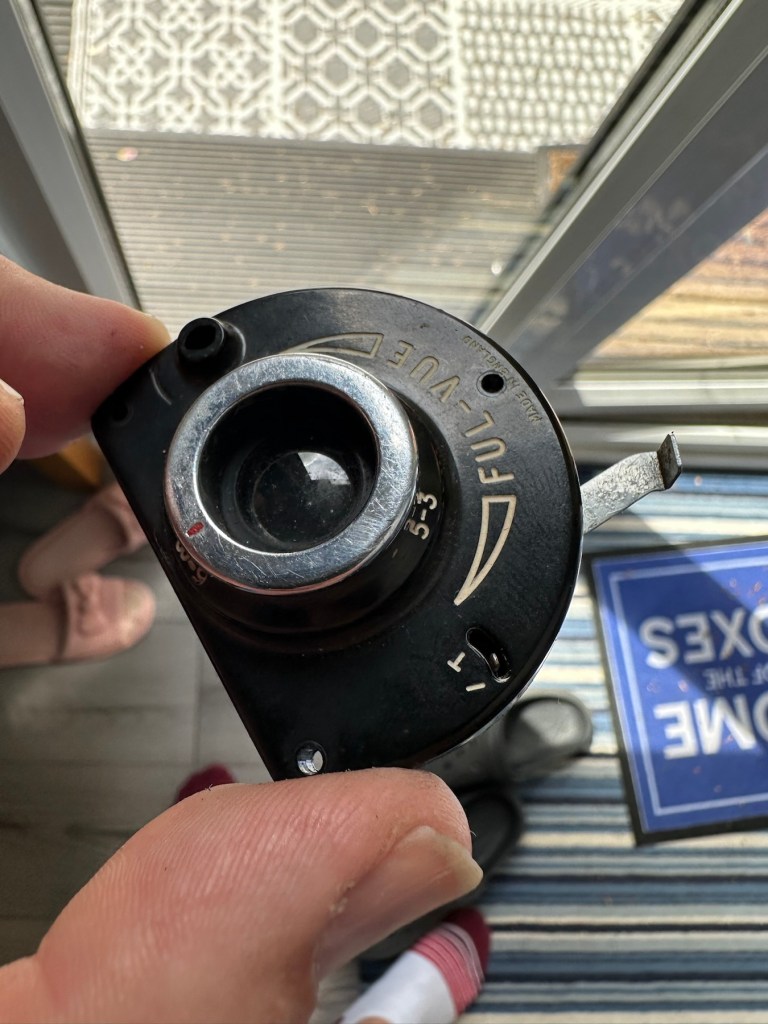
The lens barrel and shutter mechanism will be checked over to check correct operation, however at first glance, all seems to be ok. There is a little red window on the rear panel where you can see the film exposure numbers. A little thumbscrew can be turned to blacken this window out, this will be very handy for when we try to install a colour film to prevent any fogging issues.
Repair:
I want this to be a sympathetic restoration, so I will endeavour to keep the look and feel of the unit as original as possible.
The case:
I’m starting with the case as this is probably going to be the most time consuming and will require numerous periods of drying and moisturising, it’s probably about 70 years old now and to be honest has probably had no care taken of it during that time.
Mild soap sud wash to clean and introduce some moisture – see the dirt on the used cotton pads
Using some mild detergent, but just the soap suds on a cotton pad I have gently wiped all over the case, paying special attention to any old folds in the material. This has had a dual purpose of removing ing a lot of age related dirt (As you can see in the photos above, that show the dirty cotton pads) as well as adding a little bit of moisture but not too much. I want to do this in stages to minimise any more damage. I will now let this dry for 24 hrs and I will then do the same again.
24hrs later I have cleaned the case again, in exactly the same manner. let’s leave it another 24hrs and then apply a little polish to give it back some colour and a little bit more moisture. I’m keeping it as low cost as I can, no doubt a brown shoe polish will suffice for the result I’m looking for.
I’ve treated the leather and polished it twice using a black shoe polish. The third coat I have given is a tan regimental high gloss polish. I’m leaving this for a few hours and then I will buff the case up. I’m not repairing stitching or holes as I want it to retain age and it’s old look. I just want the leather to look healthier, last a while longer and to get some moisture back into what was a very brittle leather case.
Before and after treatment
I have today buffed the case up after all the treatments of the last couple of days. The case feels lovely and soft and much more pliable than when I first started on it. I’m now going to bring this part of the repair to an end as that’s as far as I wish to take it at this time. I want it to still carry its signs of age. Without further a do, let’s move on to the camera.
The camera:
I have decided to totally dismantle the camera and work on it bit by bit. In this case there is not a great deal to dismantle.
Unclip this spring inside the body Off pops the entire mirror and optics headLoosen the spring to release both optics
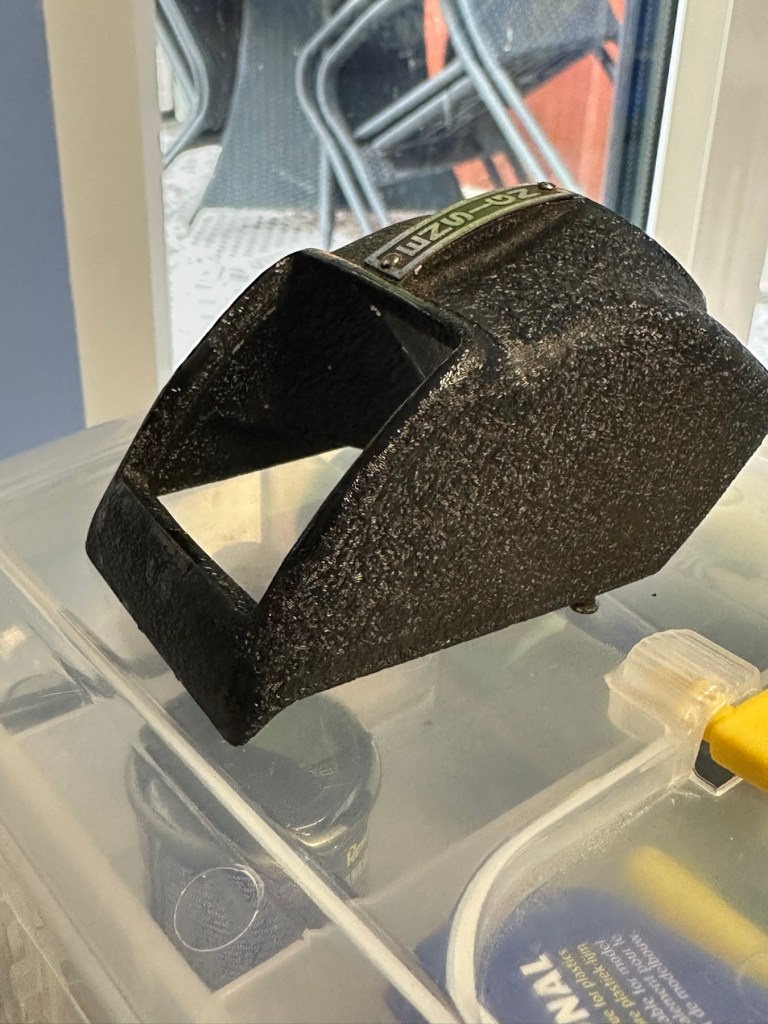
Firstly I release a retaining clip inside of the main body and this releases the “Viewing head” on top of the camera. This part of the camera contains the mirror that has become detached, and two glass optics that complete the viewer section of the camera. There is a single spring structure that holds both pieces of glass in place, release this and they just fall out. Easy.
All the glass and mirror removed Rear of the mirror, caked in muckRear of mirror has cleaned up nicely
I’ve started by placing the three optical items above in a mild warm detergent soak. I will leave these there for about an hour, in hope that a soak will help in cleaning that muck off the back of the mirror. The two other optics are in great condition and I’m sure the soak and then a final rinse will be all that they require. This treatment worked just fine, and now onto the next part.
Next I’ve removed the shutter mechanism from the camera body.
Front viewRear viewTaken apart The camera has a beautifully simple mechanism that is a work of art to look at
Here is a very small video showing the simplicity of this shutter mechanism
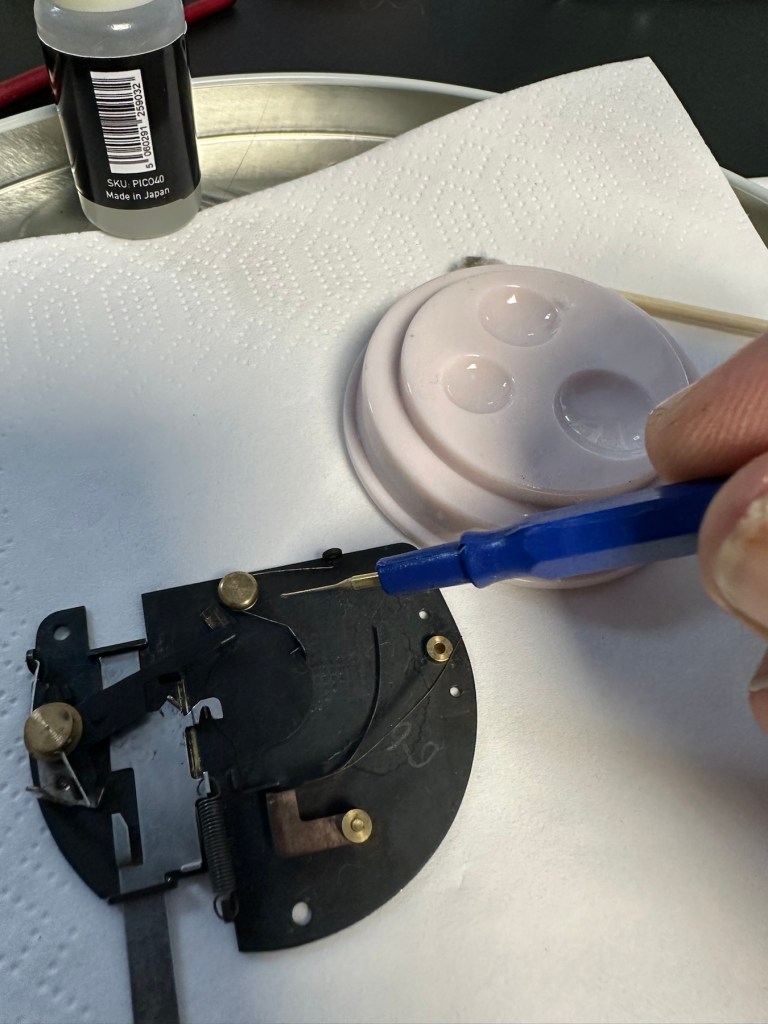
A The mechanism is beautifully simple and is such a lovely piece of work to look at. To think im probably the first person to look in here in the last 70 years is special. All I’m going to do here is very carefully get rid of as much old ingrained dirt as possible and very gently clean the shutter leaf. I will use a minuscule amount of clock oil on the mechanism only, I will use some fine graphite dust on the actual leaf part of the shutter.
Gently does it, in minute quantities
The lens and mechanism have been cleaned now and reassembled, all tested, and working as expected.
The body work is fine apart from some small chips and paint flakiness. I’m going to retouch these missing areas with some enamel paint and a bit of thickener to enable me to obtain the stipple effect of the original paint job. Then I will finish with a nice black polish.
Touching up missing paintwork, mechanism now attached to body
Let’s now get the mirror back in place and the head back on the camera unit.
Mirror and optics all in place
And that’s it. Apart from a little polish we are now done here
Before and after
Result:
I’ve put quite a bit of work into this little camera. Some people will ask why bother as it was only a cheap mass produced camera? Well, I like it, it’s a lovely little camera and it deserves to be displayed. Now, as it’s also working it’s a big bonus. It gives me something to do, and it’s how I relax, as I’ve been shoulders deep in DIY at home recently and doing my shifts at work, so this is a welcome distraction for me.
All done, just needs a polish once the paint is dryIn its 70 year old leather jacket – nice
So that’s another one saved from scrap. This camera will now go into storage where I will vacuum pack it with some silica packets to prevent it from getting damp. I’m surprised just how good this camera “smells” considering its age, there is no mustiness at all compared to some cameras I get from this era.
Many thanks for popping by, you know it is always very much appreciated.
I thought this was a very good post from the guys at Hackaday. Most of us who use the Windows platform will have probably come across this issue in the last year or so. Being told your perfectly good computer is not up to running Windows 11 when in fact it is probably more than capable.
Is it no wonder people are moving over to “The dark side” (Linux) in droves….
Until the release of Windows 11, the upgrade proposition for Windows operating systems was rather straightforward: you considered whether the current…
In a post I put up a few days ago I did mention that the wife had decided to invite some friends and family around for a gathering we usually have at the end of the football season, (Time goes so fast….) to either celebrate our success or to drown our sorrows. This year it was the latter as we were miserably incapable of putting on a decent show as a competitive team this season.
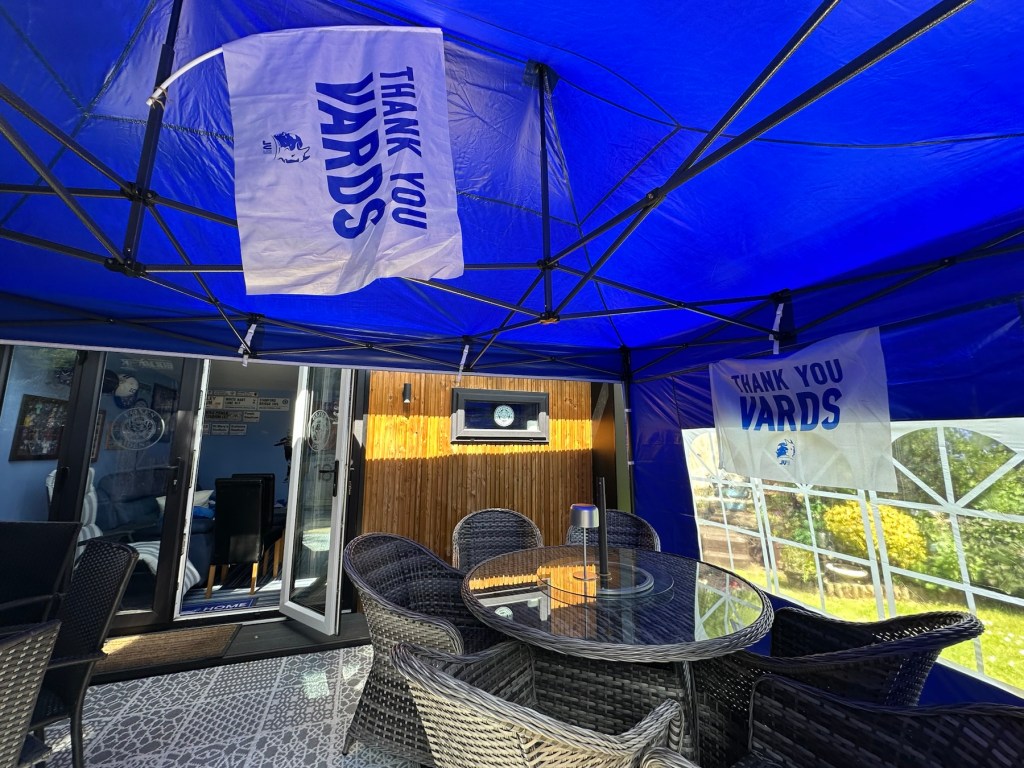
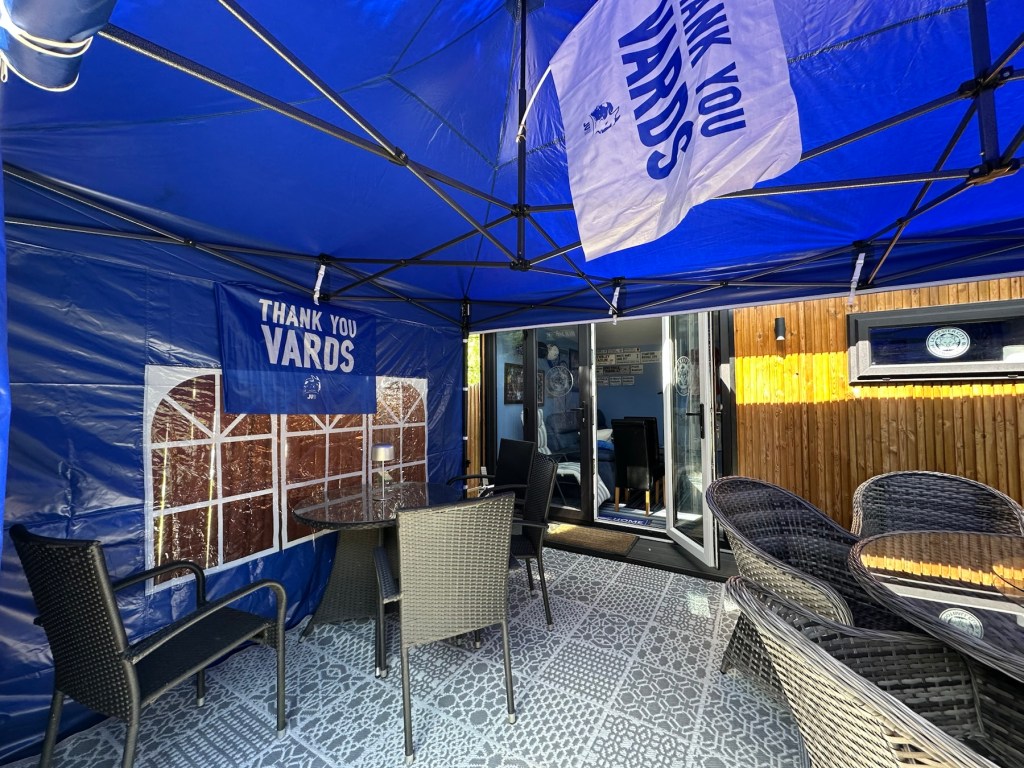
I stated that I had to put up the gazebo, due to the forecast saying there would be rain. I should have known better, as we are in a Bank holiday weekend it was bound to rain, I wasn’t wrong. Everyone had been invited around to help us celebrate/commiserate and to have a drink and something to eat, we also decided to incorporate a darts competition into the evening for a bit of fun.
Gazebo up and connected to the garden pub, bring on the rain!
The gazebo was suitably decorated with some football banners, food was in good supply in the house and a list of people who wanted to take part in the darts competition was drawn up.
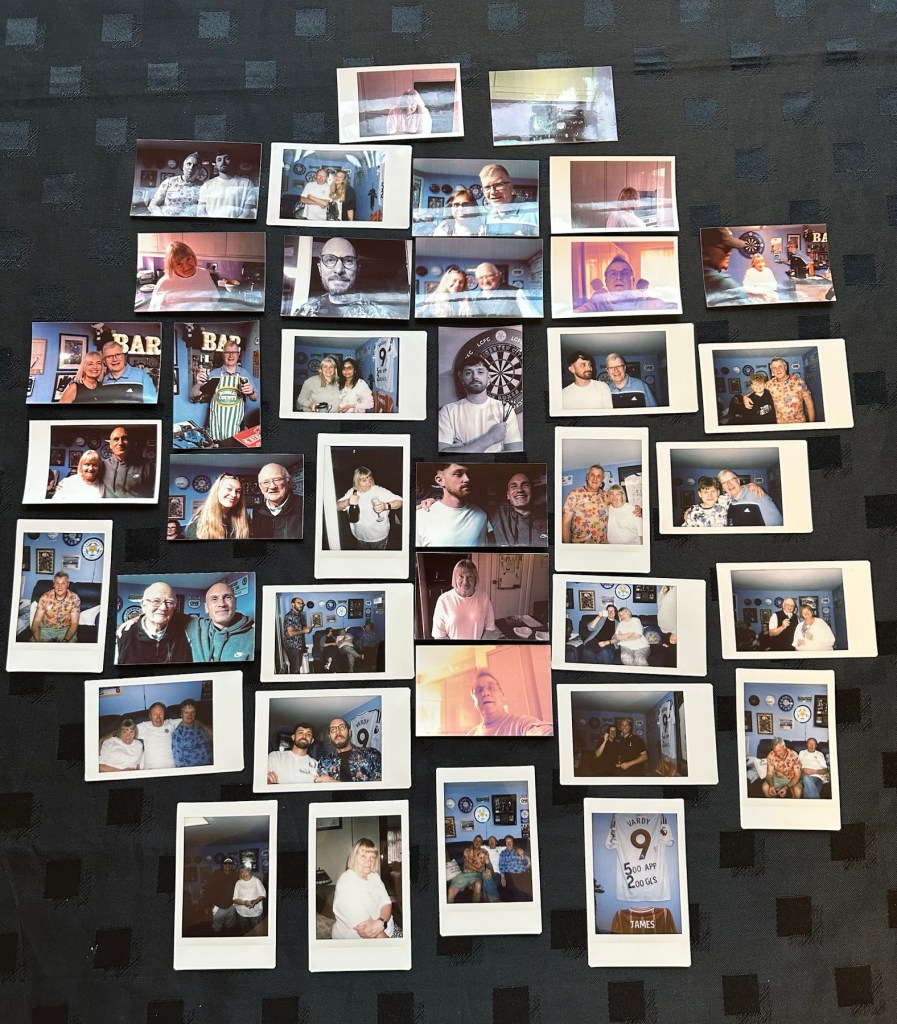
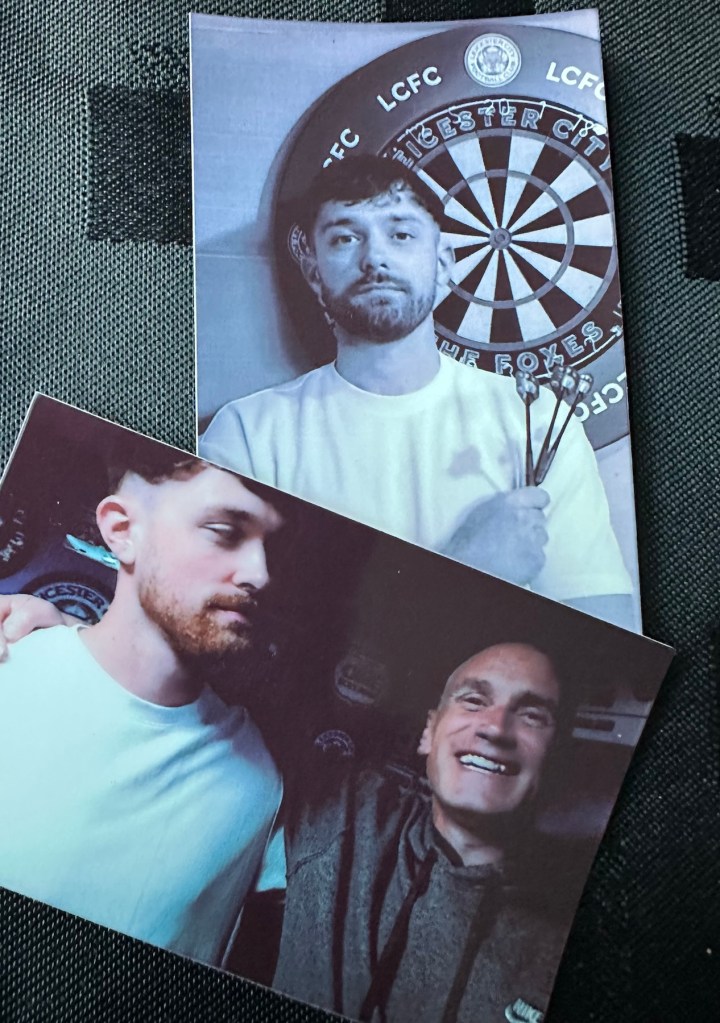
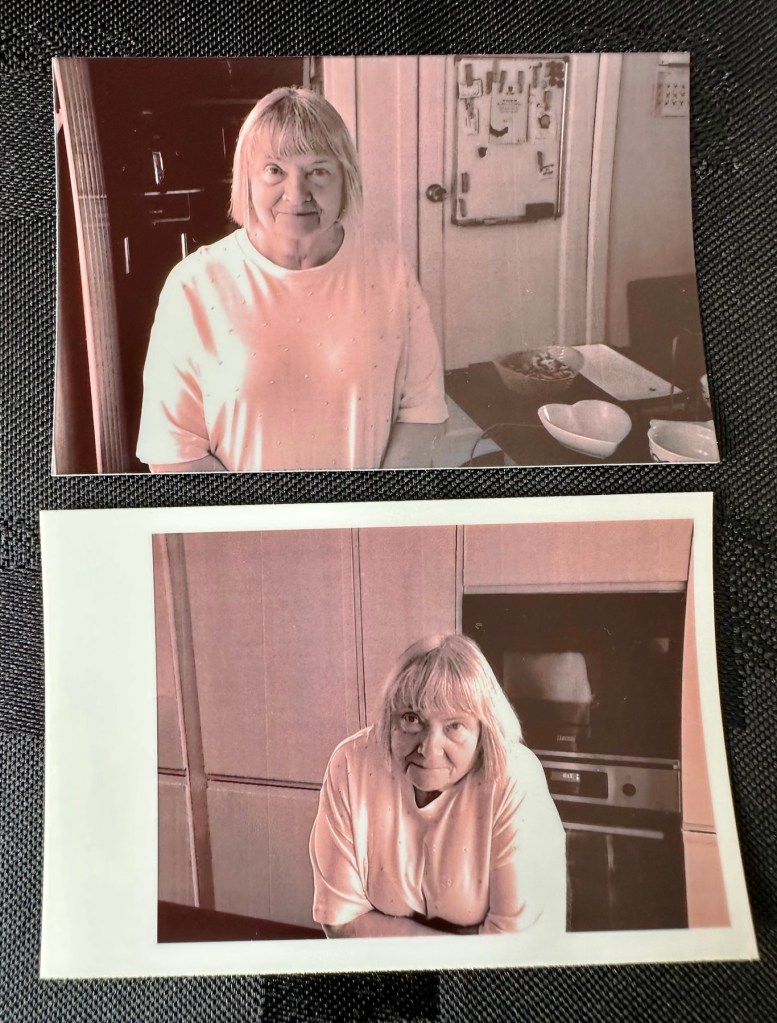
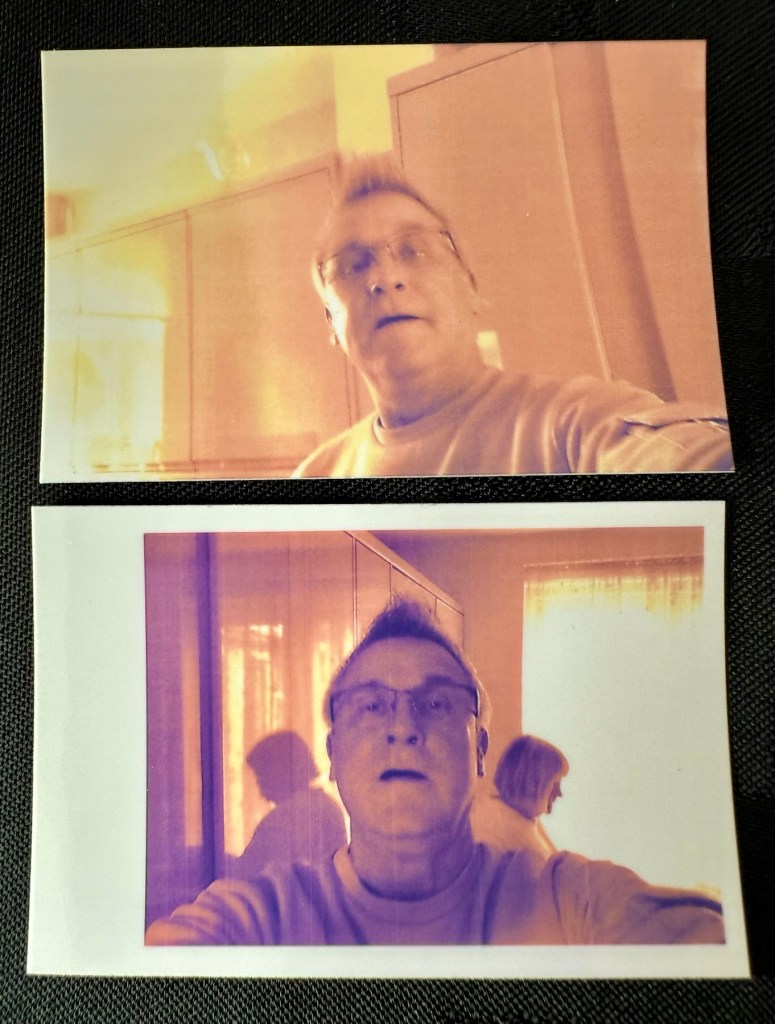
The actual competition was a knockout format, and to add a little bit of extra fun I told everyone they had to have their photos taken in the pairs that they would be playing in, for this I had decided to use two of the “instant” Polaroid type cameras that I had recently repaired. My niece that I passed the first one I fixed on to, was more than happy to assist here.
The nights activity in miniature Polaroids
Pictures taken, lots of laughter and a lot of raised voices and joking about the competition began, 18 people took part and it was chaotic to say the least.
Games underway.
We eventually made it to the final with my nephew and cousin in the final, the younger talent shone through and young “J” won the competition.
Final pairing and the overall winner
I now have 38 fantastic little photos that really show the fun and spontaneity of the evening. We are going to get these into either an old style album or put them up on a board displayed somewhere around the house. Good old physical photos, on show just as they should be, not tucked away unseen on someone’s smartphone never to be seen by anyone else. At least people can look at these and say, “that group of people know how to enjoy themselves.”
I fallen in love again with this style of photo.
An interesting aside came from using these cameras. One other young family member loved these cameras so much she went onto a sale site and brought a broken one before approaching me and asking if i could fix it when it arrives. How could I turn that offer down so I had to agree. My brother in law who was there back in the day of the original Polaroid, wants me to get and fix an original one for him, it’s amazing just how young and old alike were totally impressed by this mode of photography, memories were rekindled, and memories were made….and I’ve got myself some work to do so I’m happy.
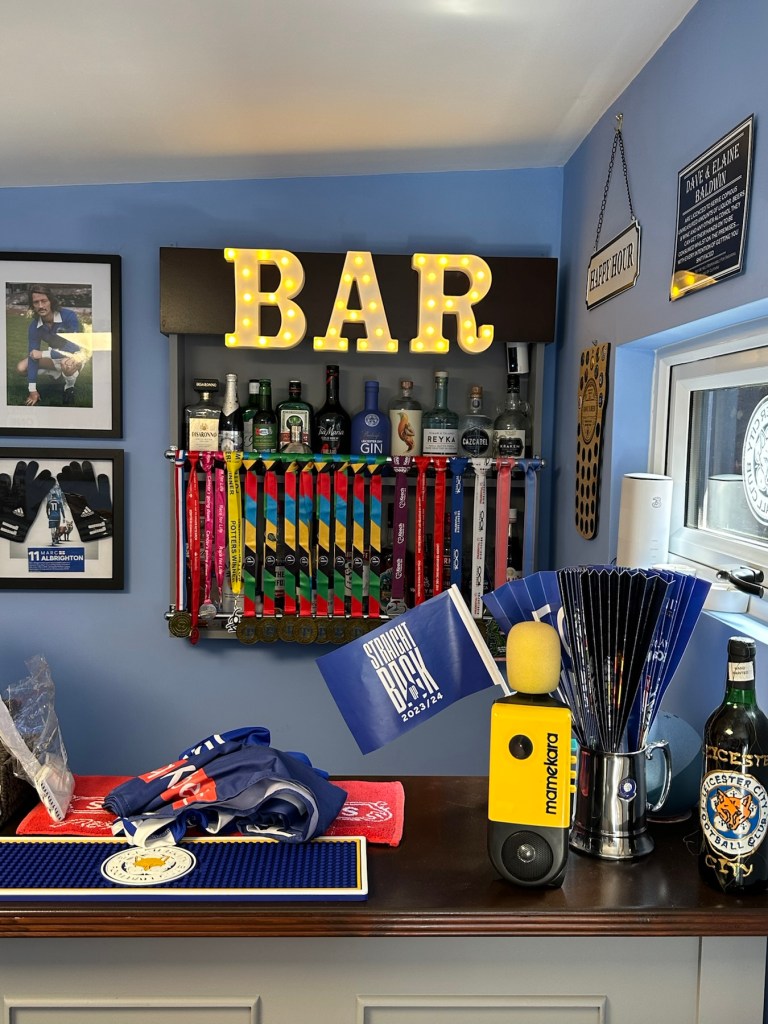
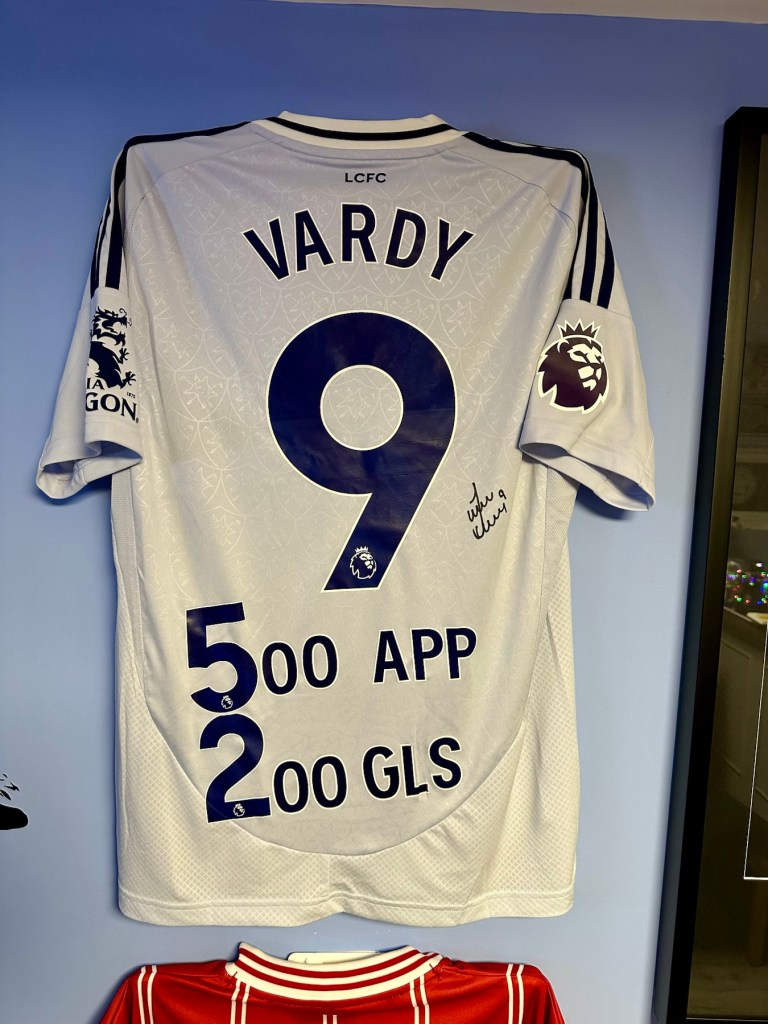
Another thing that made the wife and I extremely happy, is when one of the guests, our neighbours to be precise, brought us a gift for our pub which is totally Leicester city football club themed.
Our very generous gift from our neighbours
Last week i wrote of our captain and greatest player playing his last game for us : Jamie Vardy’s having his final party they brought us a shirt they had got signed by him and labelled up with the numbers he had achieved. I guess it helps that our neighbour actually works for the club, either way it was a superb gift that is very much appreciated.
So why are we looking at leaving this area, I don’t know 🤷♂️ our neighbours are just superb people. It’s going to be hard to match them anywhere else.
It’s been quiet in the vicinity today as I suspect there are a few sore heads as the last couple didn’t leave until about 3am this morning, we’ve spent most of the day cleaning up and had to get the gazebo and extra bits down and put away as they are coming to take the photos on Tuesday. I’m working late shifts so I’m not going to be around so I’ve got to do as much as I can to help prior to the full estate agent process kicking in.
Anyway, a great night was had by all, we have some super memories and meeting up with family and friends is always an enjoyable experience at gatherings such as this.
Hmm….EBay untested, the number one way to try and flog knackered crap without accepting any responsibility. Caveat emptor as they say “Buyer beware”. Hey, I’m a rebel it might even work…who knows?
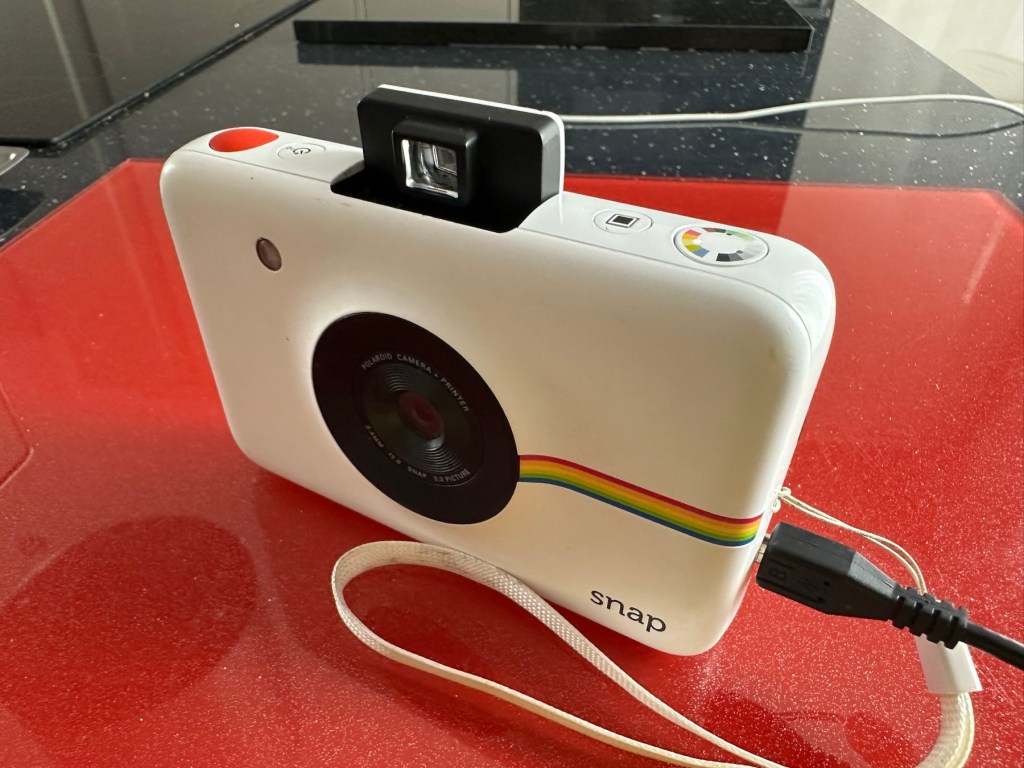
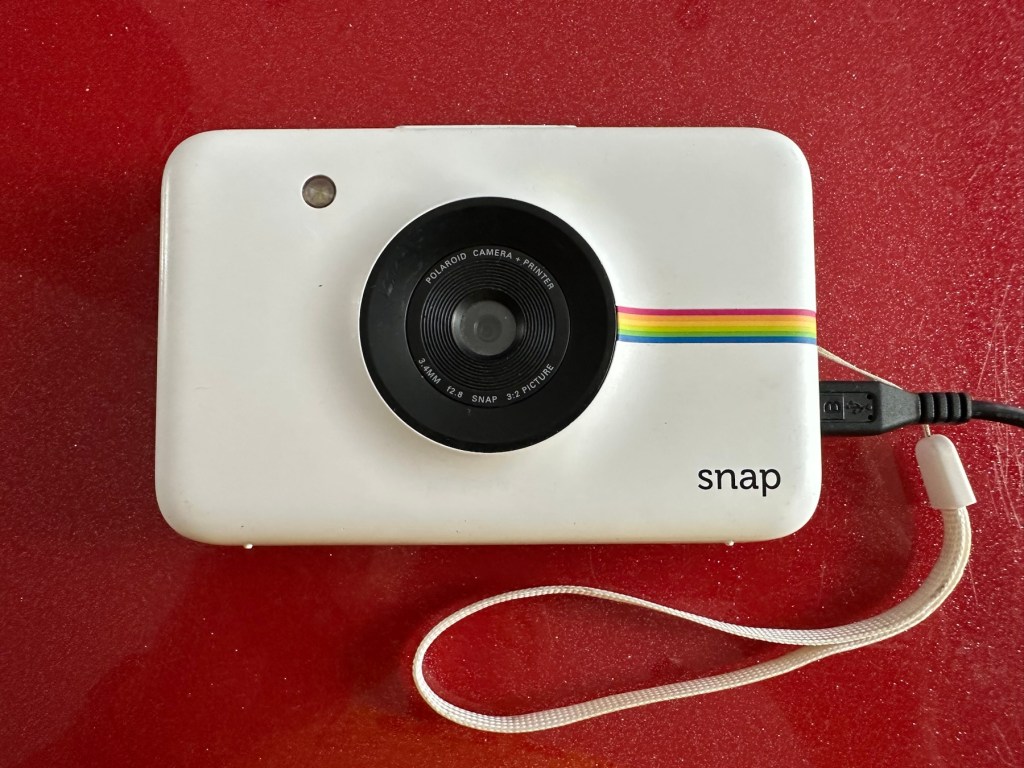
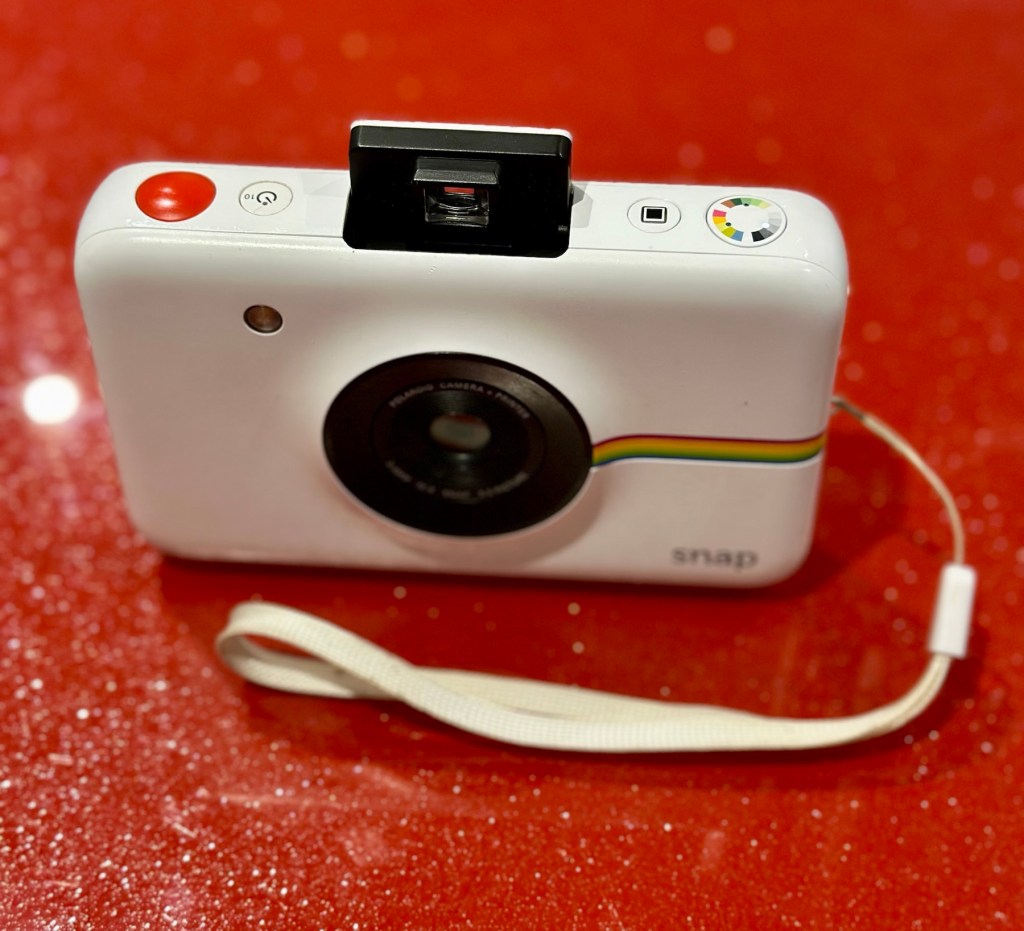
The camera I have purchased
About this camera:
The new Polaroid Snap camera attempts to recapture the fun of instant photography, but with a modern, digital twist.
The Polaroid Snap prints out 2×3 inch photos straightaway using ZINK (Zero Ink) technology, and can even store a back up of the photo you’ve just printed on a memory card. The ZINK paper also has an adhesive backing so you can also use each print as a sticker if you wish.
You don’t however get a rear screen, or an electronic viewfinder. There’s also relatively few changes you can make to settings. The Polaroid Snap is available in four different colours, with one of its unique selling points being a relatively low price (£89 in the UK).
This cost doesn’t take into account the price of supplying it with the paper which you need to print your, er, prints though.
The Polaroid Snap has a 10 million pixel sensor, and a fixed length lens. It was designed by the Ammunition firm, which has made its name working with the likes of Beats by Dre, Square, Lyft and other big brands.
Amy Davies – photography blog
The fact this camera has gone at such a low price speaks volumes to me. I suspect it has numerous issues. I have recently been working on a number of these “Instant” cameras namely the Fujifilm Instax range that are quite good to be honest on a similar photo output size of 3×2 inches. I’ve decided to have a look at the original Polaroid-range and this Snap camera became available. I believe these cameras came out circa 2016. The difference between this and original Polaroid cameras is that this one uses a 10mp camera and uses an additional SD card. With this camera you can also frame your shot using a number of different add ins and print using Polaroids Zink paper. The paper is a thermal type, and the picture quality is not all that brilliant if what I have read is to be believed. This camera is a bit more “advanced” than the basic Polaroid of the 70s, hence there is a bit more that can go wrong with it.
It originally retailed at £89GBP and is now discontinued. Current prices are between £20-£40GBP and I’ve purchased this one with postage for a total outlay of £10:94GBP. Film prices are similar to that of the Instax range.
Now we can do an assessment of what has arrived.
Assessment:
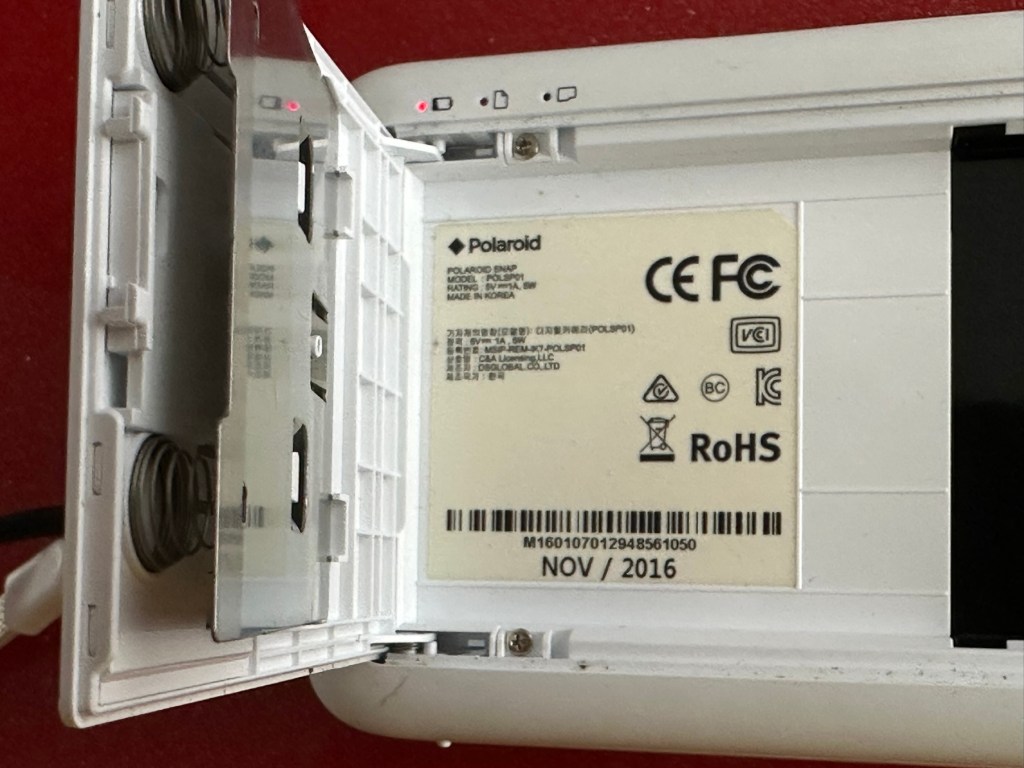
This camera is dated inside as November 2016, so it is currently a youngster at only 8.5 years of age.
It’s arrived and it’s a nice little unit. A little unclean but this will buff up ok. The battery is dead, but once I plug in a micro USB it’s charging ok.
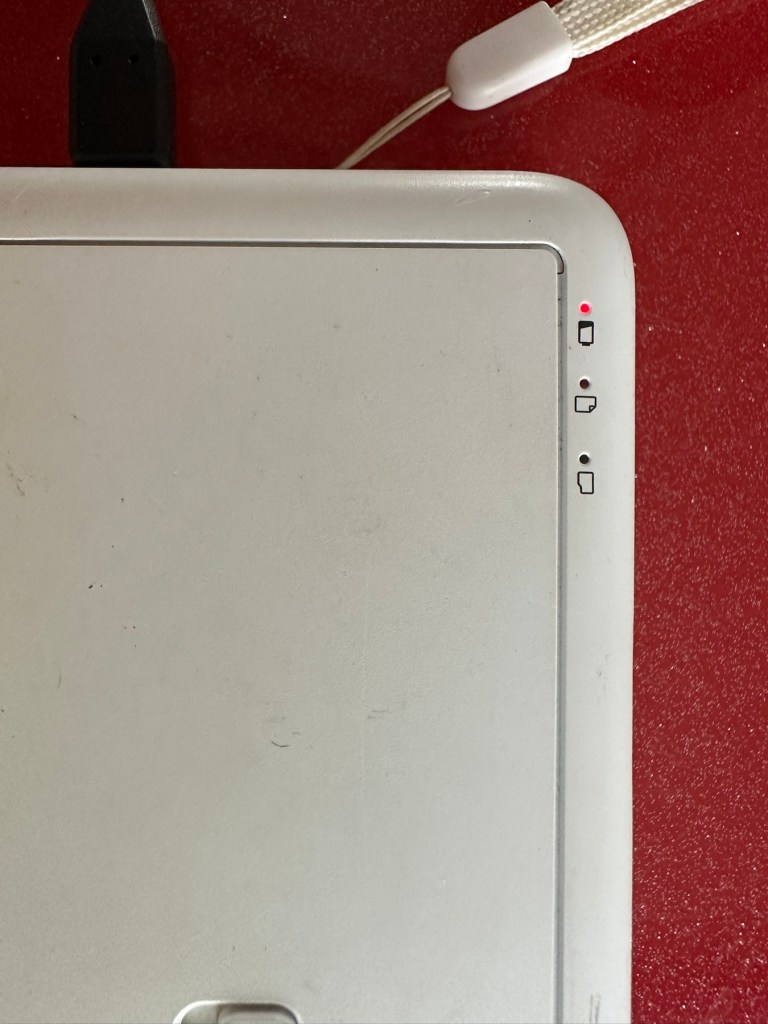
Charging indicator
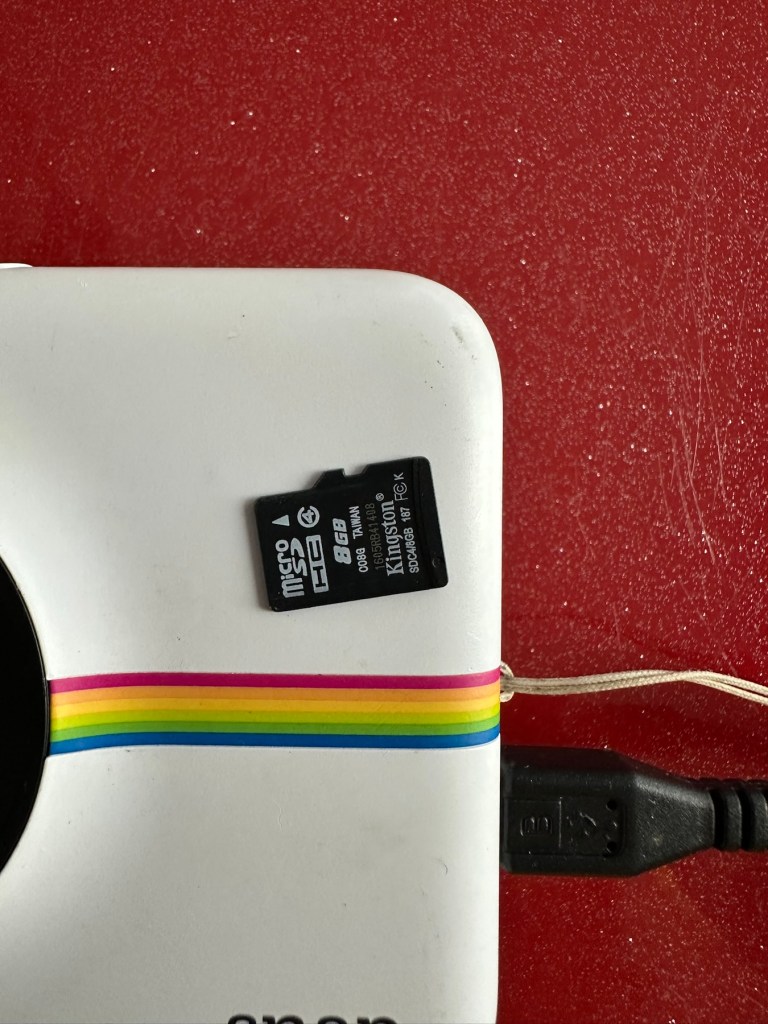
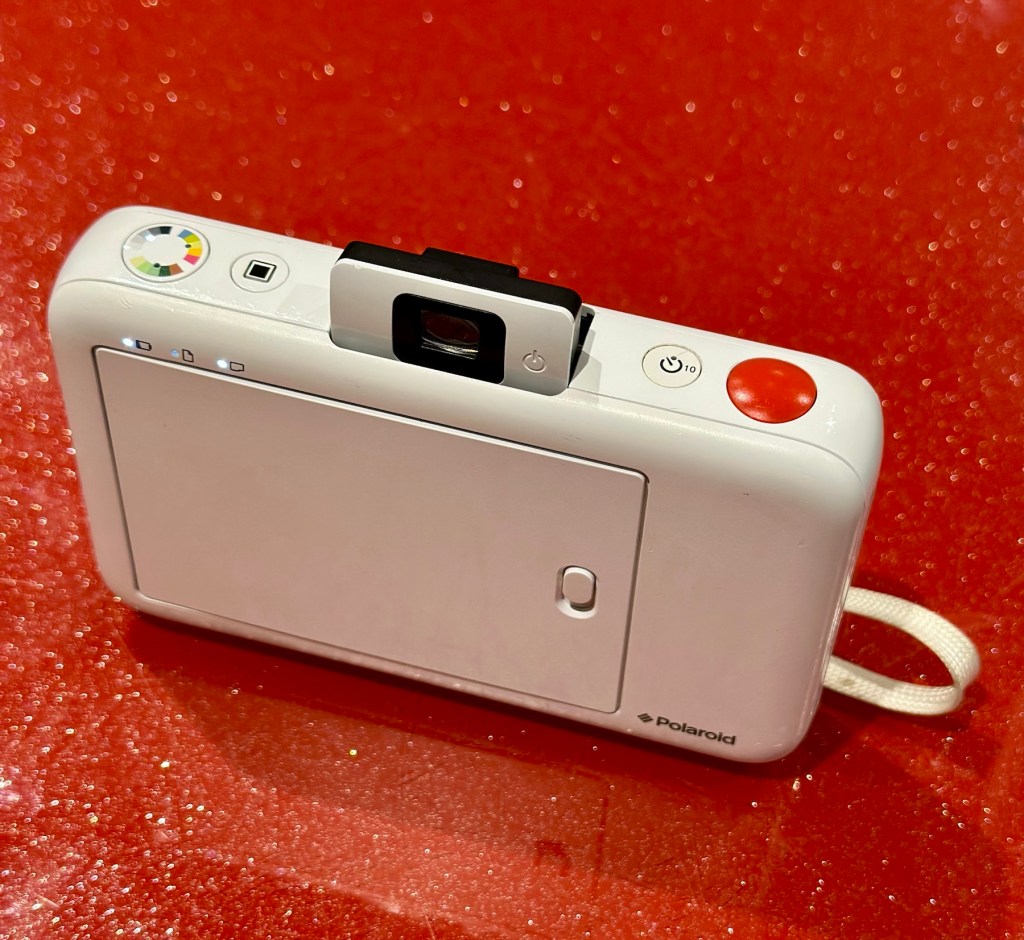
The port looks fine so there is no issue here. I open the back and whoops! There is some film inside but I hope this doesn’t fog! This is a film that uses a thermal printing process, but does still have its sensitivities. And in the SD card slot is an 8GB card, so for the price I’ve paid for this unit the card is a superb bonus.
All lights upSmart look8Gb Sd card – Bonus8.5 yrs old
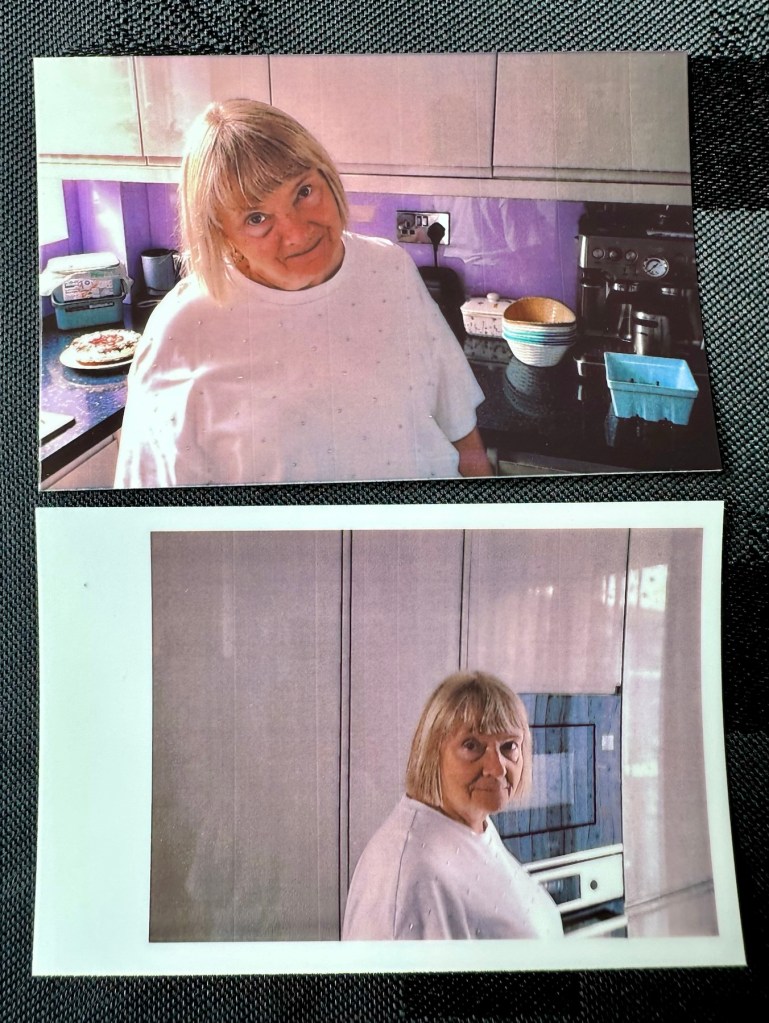
And as I’m impatient, I switch the camera on after a short charge and I take a photo, after adjusting a few settings the printer kicks into life and a picture starts to appear.
We have a picture
There were only two film pieces inside and I suspect they have been in there a few years as they are yellowed through age and this is noticeable on the rear where they are very yellow. I’ll have to get some new film to test for real.
So, at the moment it’s all looking very promising, the picture isn’t brilliant quality but that has always been an issue with these units, however I believe a copy is saved to the SD card so you’d always have a reference. The printer is a bonus I guess, for printing out those special moments that you want to see instantly just like good old Polaroids. As for repairs I suggest at this point there is very little wrong with this unit. I do though have to explore its functionality and settings and do some reading up on the basics. When I’ve done that I’ll have a better idea.
I’ve checked the SD card and can confirm it is taking pictures without the need for paper and saving to the SD card as it should. It did also contain 110 pictures of what looked like holiday photos from the original owner. I have contacted the previous owner and they have stated the photos aren’t required so i have reformatted the card. There lies the security issues with selling such items and not checking prior to sending off to strangers, it really is basic security folks, delete and format before selling anything to anyone.
The only items that seem to be missing from this unit are the charging/transfer cable of which I have quite a few, and a magnetic lens cover that really isn’t necessary. Other than that it’s a complete unit.
Repair:
The battery has been left to charge, and this has been achieved with no issues at all. All indications are as expected.
All charged – no issues there
The unit has been cleaned and this has come up lovely, I know the actual camera works as viewing the results on the SD card confirms this, and for a 10mp camera the results aren’t all that bad.
I now just need to get some film to check out all the features that are available, only then can I really say the camera is working.
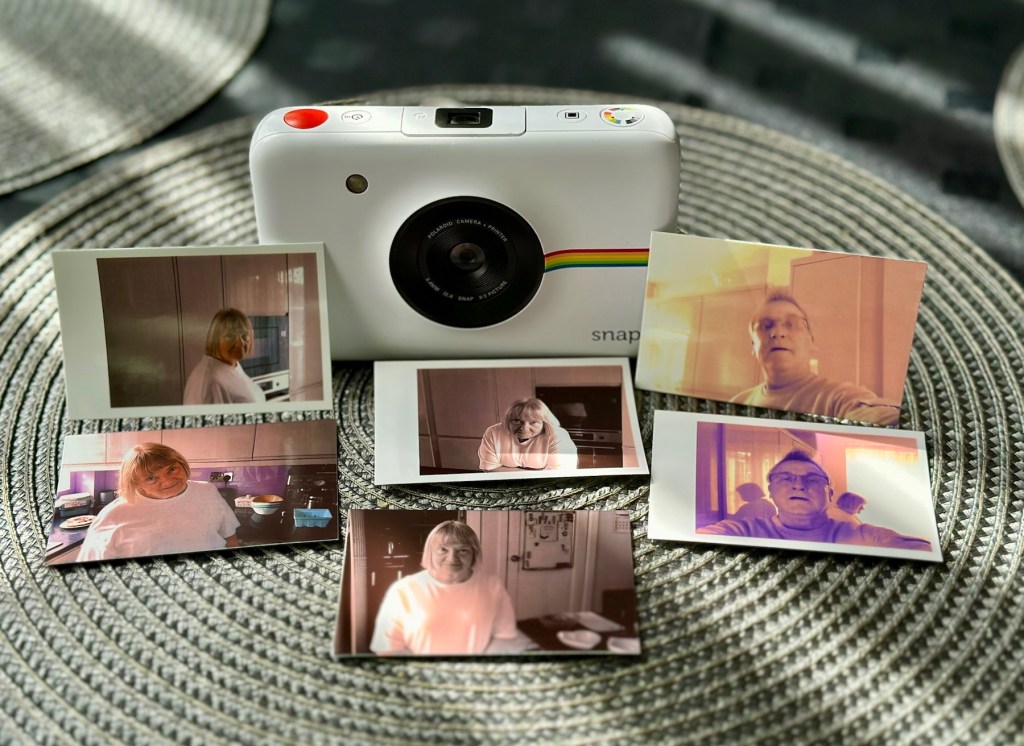
There are only really six options available here on the camera, via the dial on the top you have the choice of black and white, sepia effect or full colour, and on the next button you have a choice of with or without the Polaroid type frame, hence that is your six possible options. I’ll show some examples of each below.
Colour – frameless and Polaroid frameBlack & White – frameless and Polaroid frameSepia – frameless and Polaroid frame
Result:
What a cracking little unit.
And it’s working
Looking pristine and clean
As basic as basic can be but a great fun item all the same. Nothing technically wrong with it and sold as untested just because the owner couldn’t be bothered to charge it and check it over. Their loss is my gain to be honest, and I inherited an 8GB Sd card as well, one of those rare occasions that you buy such an item and it falls in your favour. I deserve one of those moments to be honest, most of my purchases are faulty junk. This makes a pleasant change.
Im keeping this, for the while. There may be another youngster in the family interested in this one. I’m looking at obtaining the next one up in this range to see the differences, and the advancements that they have incorporated. (It must be broken of course 🙂)
Thanks for passing by, as always much appreciated.














































 Foxes Den
You must be logged in to post a comment.